- By Design Bundles
- 18 Mins
- Photoshop Tutorials
Gold Candle Text in Photoshop
Create a Gold Candle Text Effect in Photoshop using the layers panel in this easy tutorial.
Today, we will learn how to make your text look like a gold candle in Photoshop. This can be achieved rather simply using layer styles. We will also add other details, like the candlelight and reflections, to produce a more realistic finished look. You can later use the resulting text to turn your birthday or season's greeting cards into something cool and special!
Also, you can easily use other colors for the candles by slightly tweaking the color settings used throughout the tutorial.

For this tutorial, we will use a classy serif font called Vintage Culture, but you can choose from our other beautiful serif fonts if you prefer.
We will start by creating a new document with a black background. A dark-colored background will help your gold candle text stand out a lot more than on a light-colored background.
Step 1 - Add the Text and Center It
Select the Type tool (T), choose your font, and type your text using white as the foreground color. The size will depend on the word you are typing.
You can check out our guide on how to access extra glyphs and swashes if your font has them and you want to know how to use them inside your artwork.
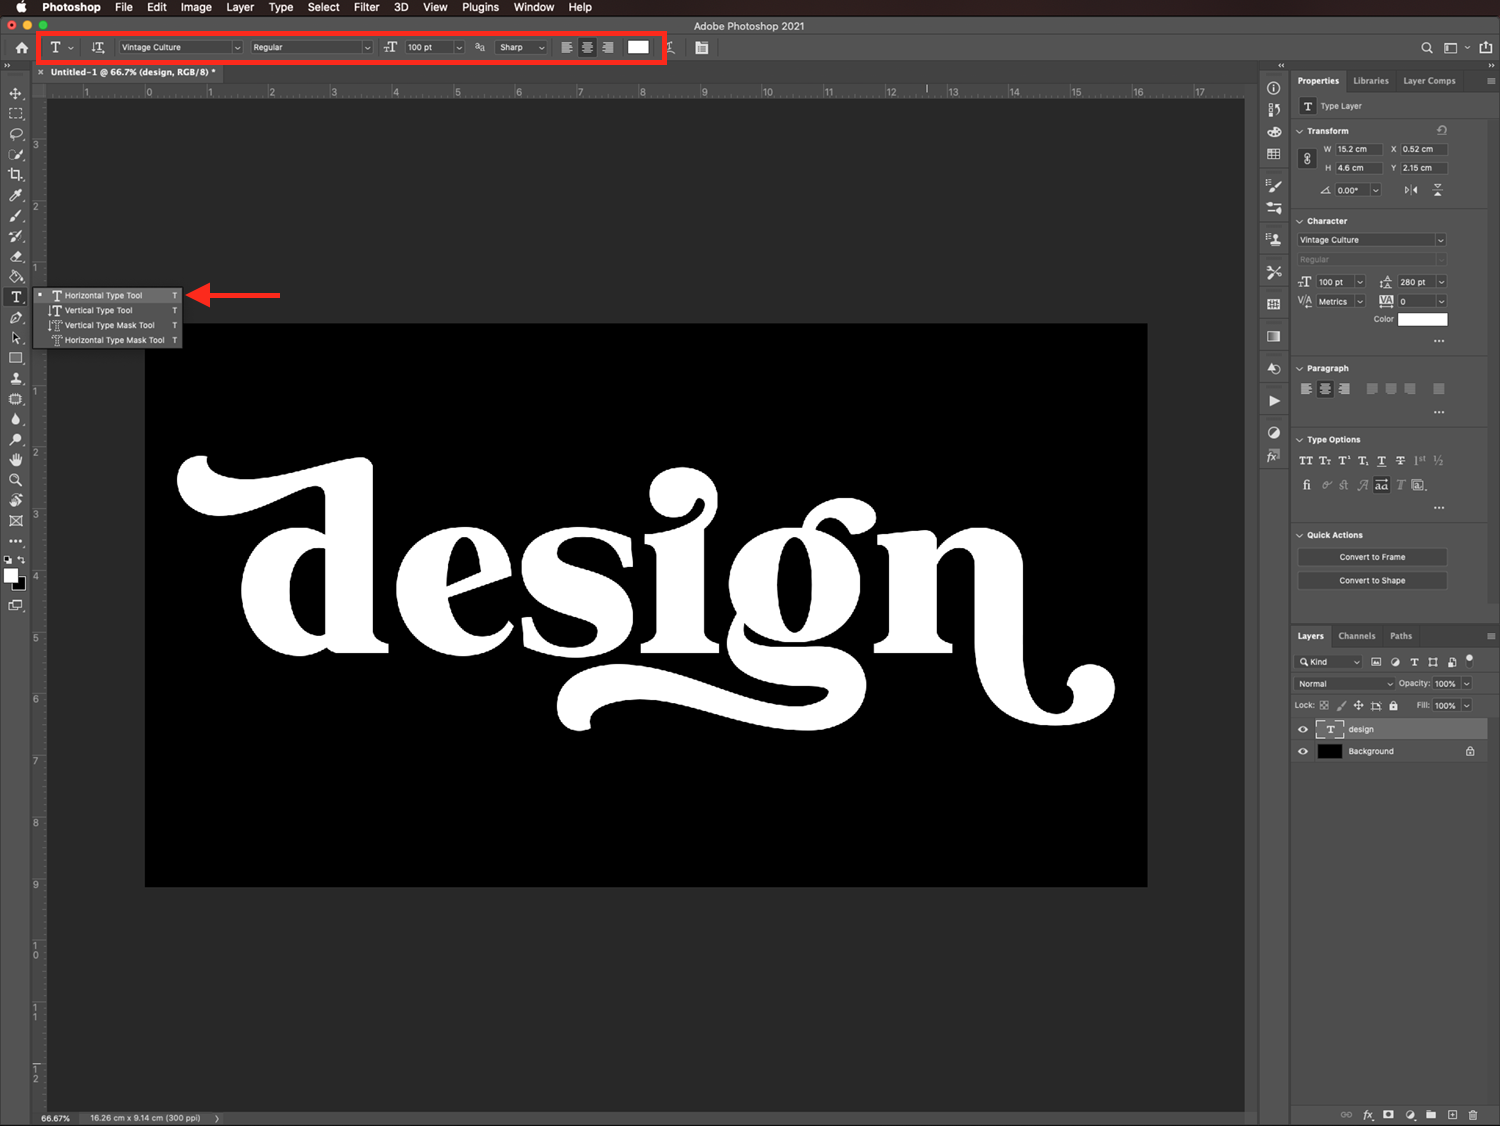
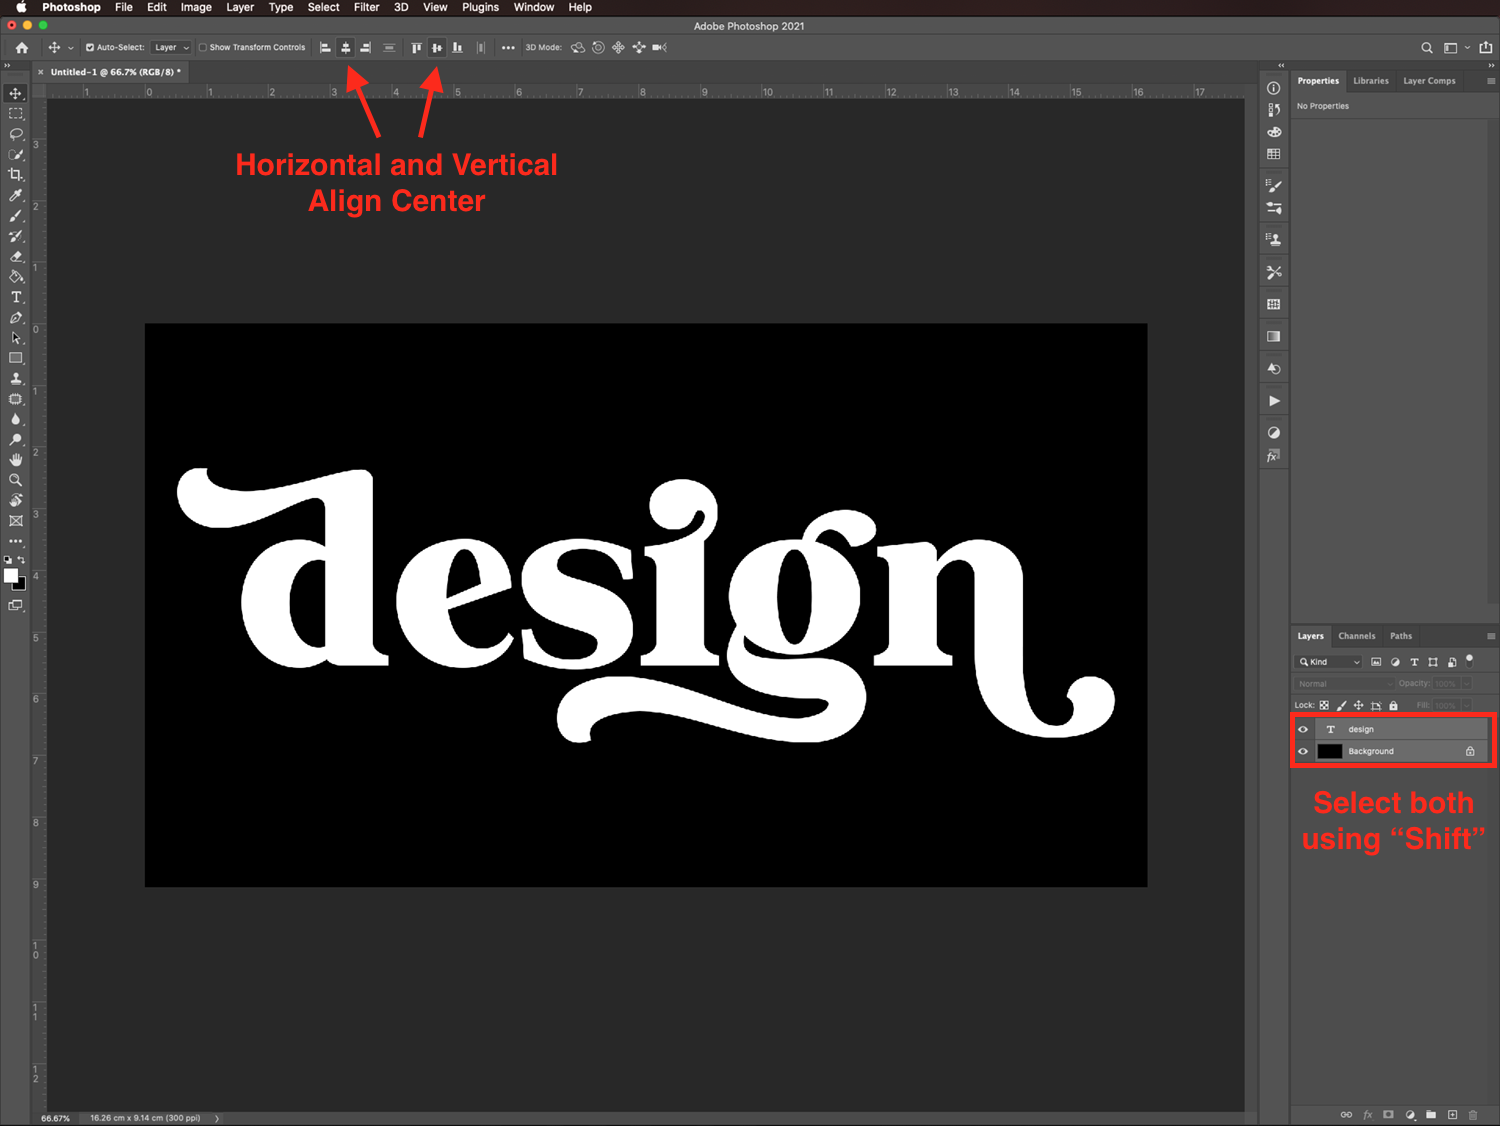
Select both layers by holding down the Shift key and clicking on their thumbnails in the Layers panel. Then, click Align Vertical Centers and Align Horizontal Centers in the top toolbar to center the text.
Step 2 - Create a Black Filled Duplicate of the Text
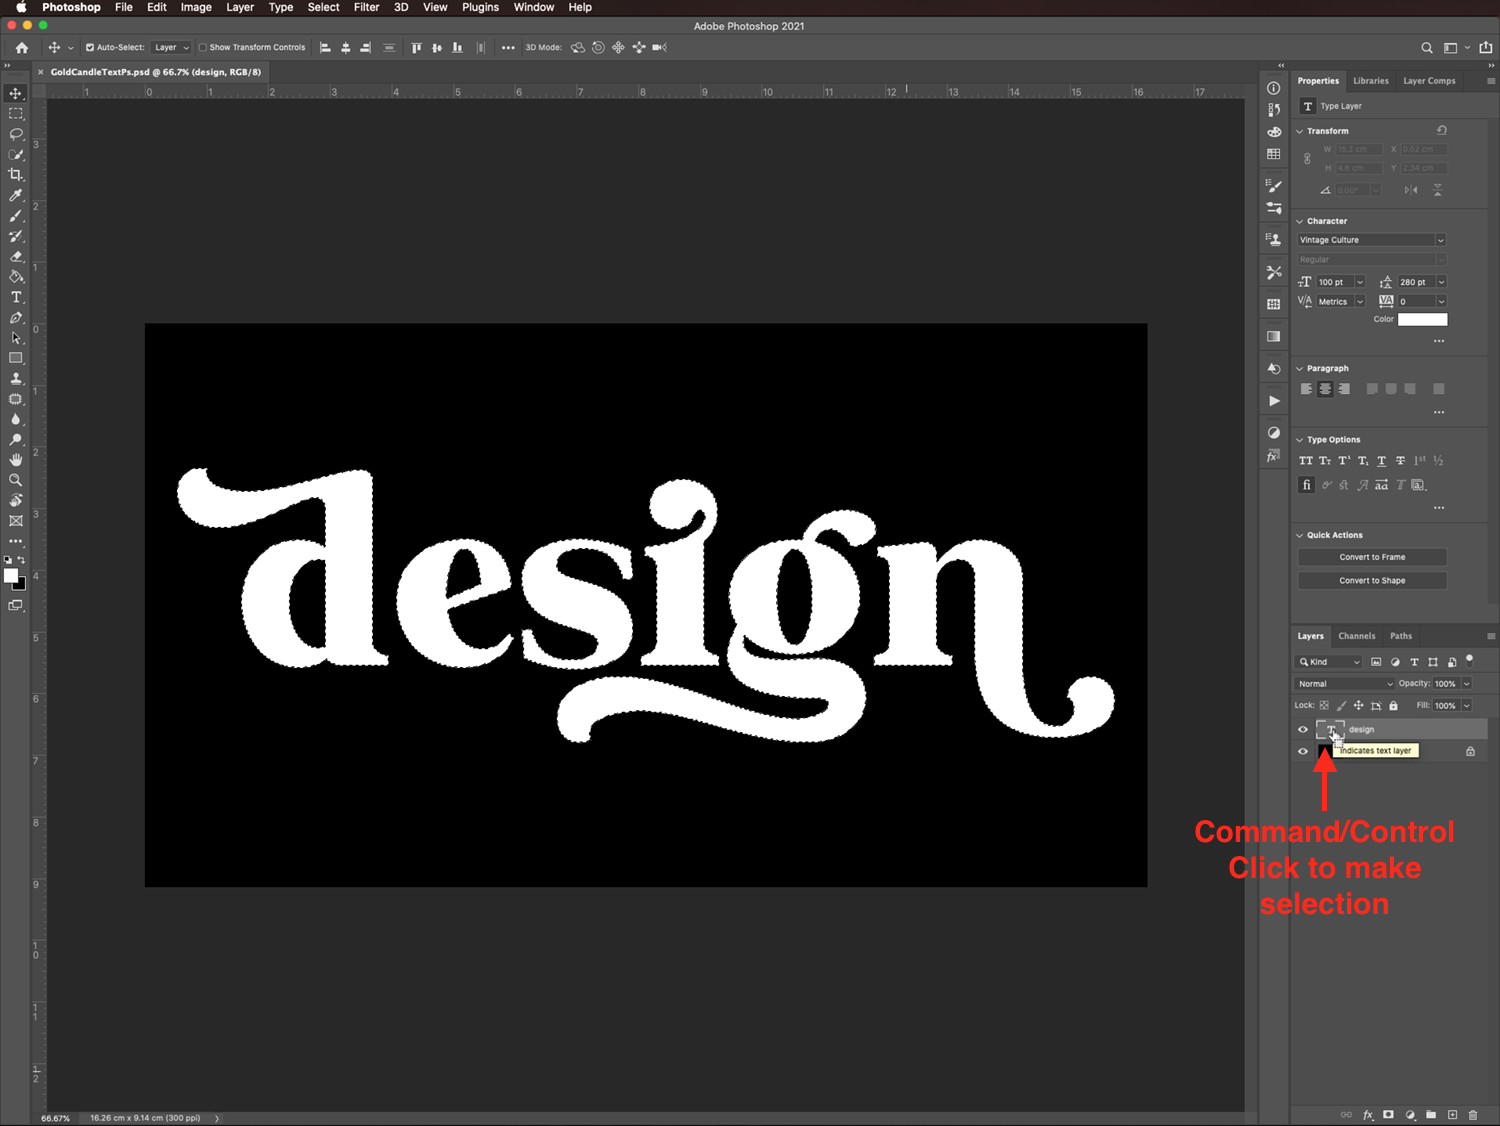
We are going to apply some effects to a duplicate of the text, so click the text layer’s thumbnail while holding the Command/Control key to make a selection of the text.
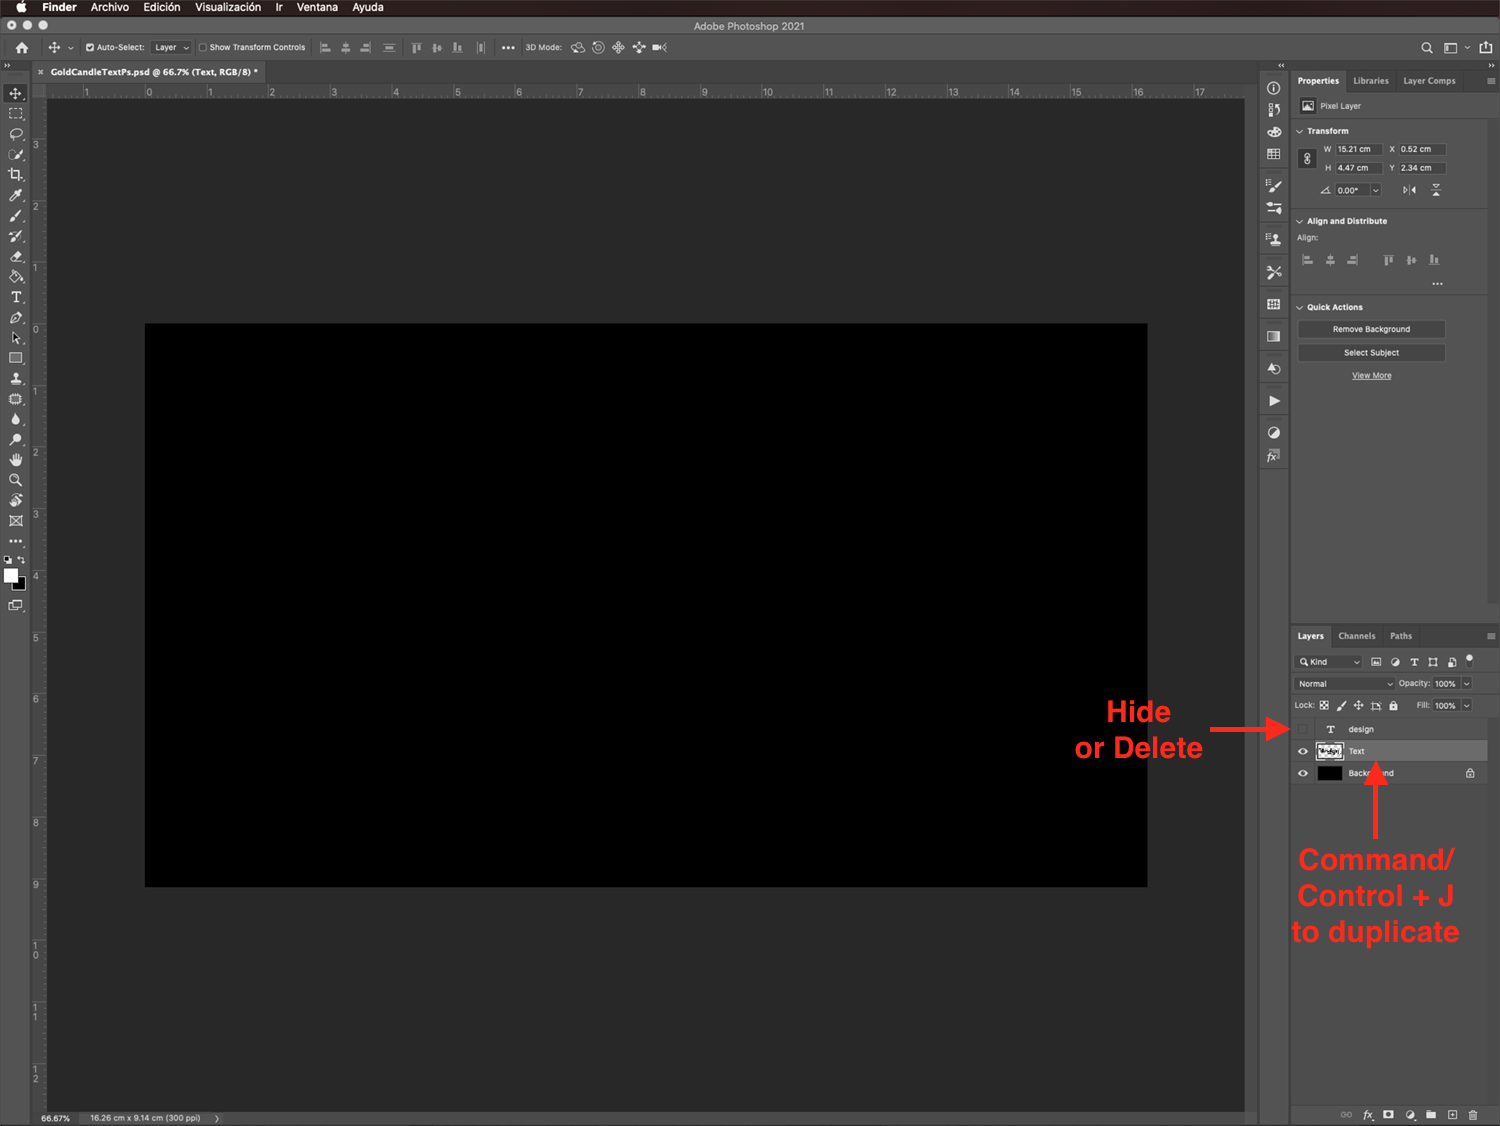
Select the Background layer thumbnail and duplicate it (Cmd/Ctrl + J). The newly created layer should have a copy of the text selection filled with black.
Hide the text layer by clicking on the small eye icon on the left side of its thumbnail, or delete it by clicking and dragging the layer to the Trash at the bottom of the Layers panel.
Step 3 - Apply a Liquify Filter to the Text
We are going to add some indentations for the wicks using the liquify filter and make the text look like it's melting.
First, name the duplicate layer Text, select it and go to Filter > Liquify.
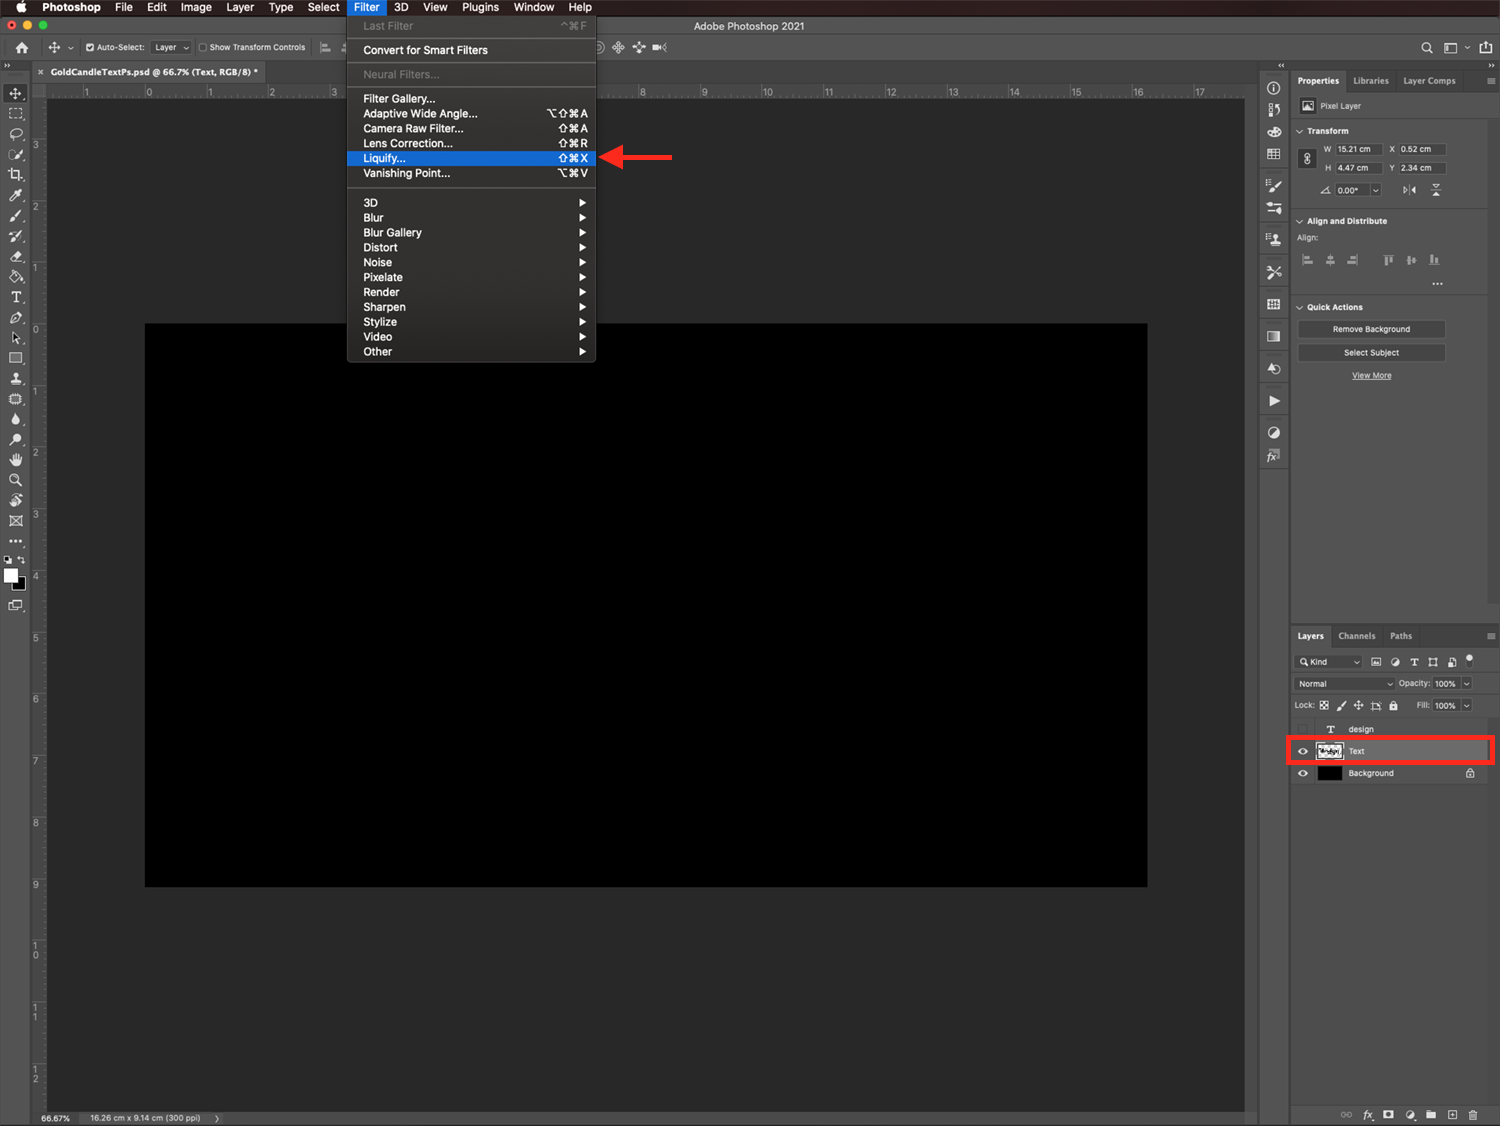
Create Indentations for the Candle Wicks
Use the Forward WarpTool (W) with a size of 70, a density of 50, and a pressure of 100 to create some indentations on the tops of the letters where the wicks should come out from.
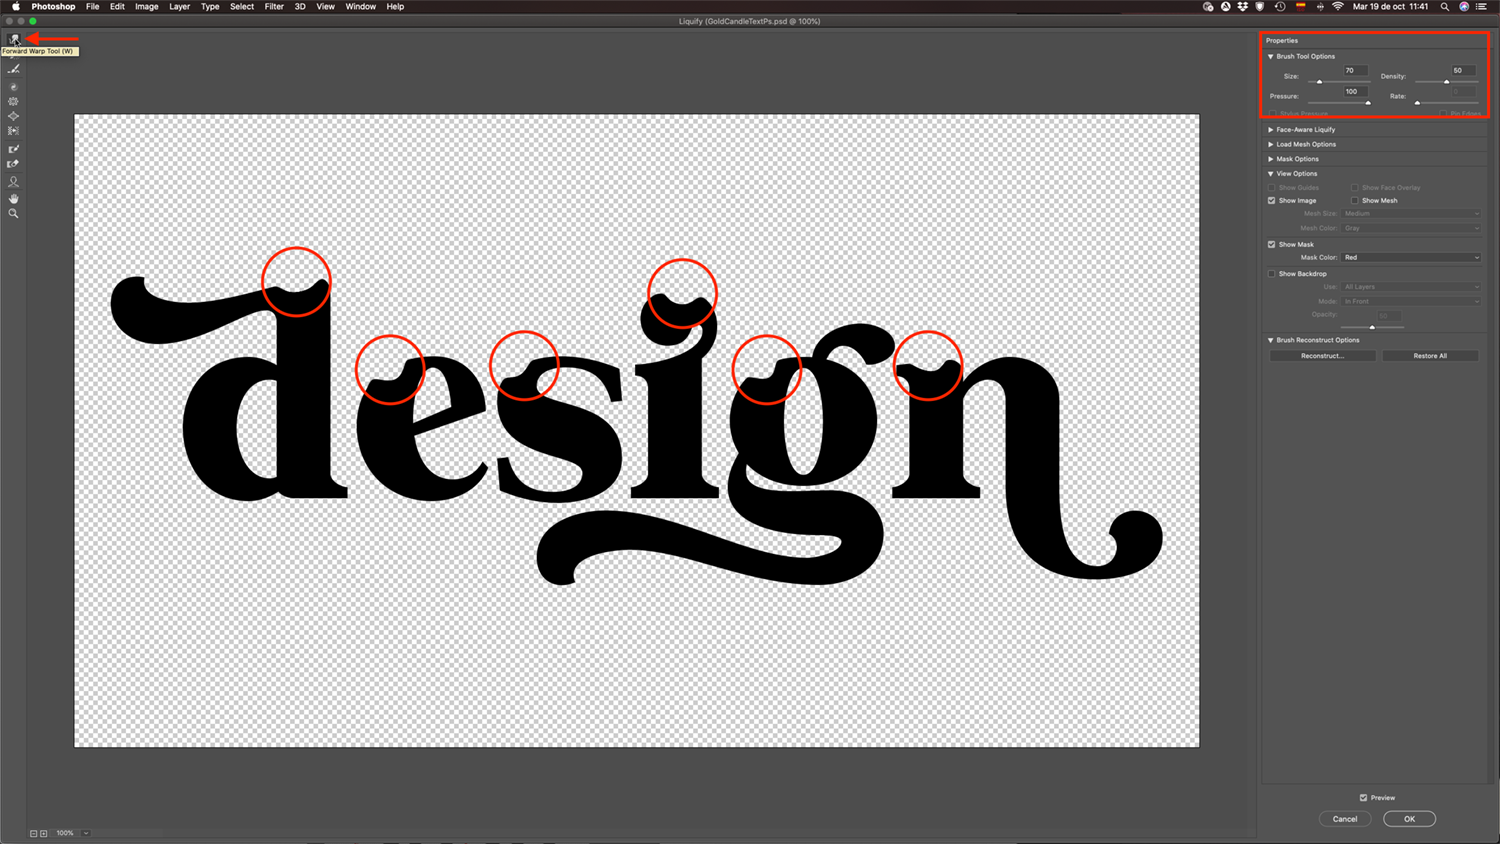
Add Melting Wax Drips to Your Text
In the Liquify filter panel, decrease the brush size to 30. Then click and drag on the bottom edges of the letters to create the look of melting wax. Once you are done, click Ok.
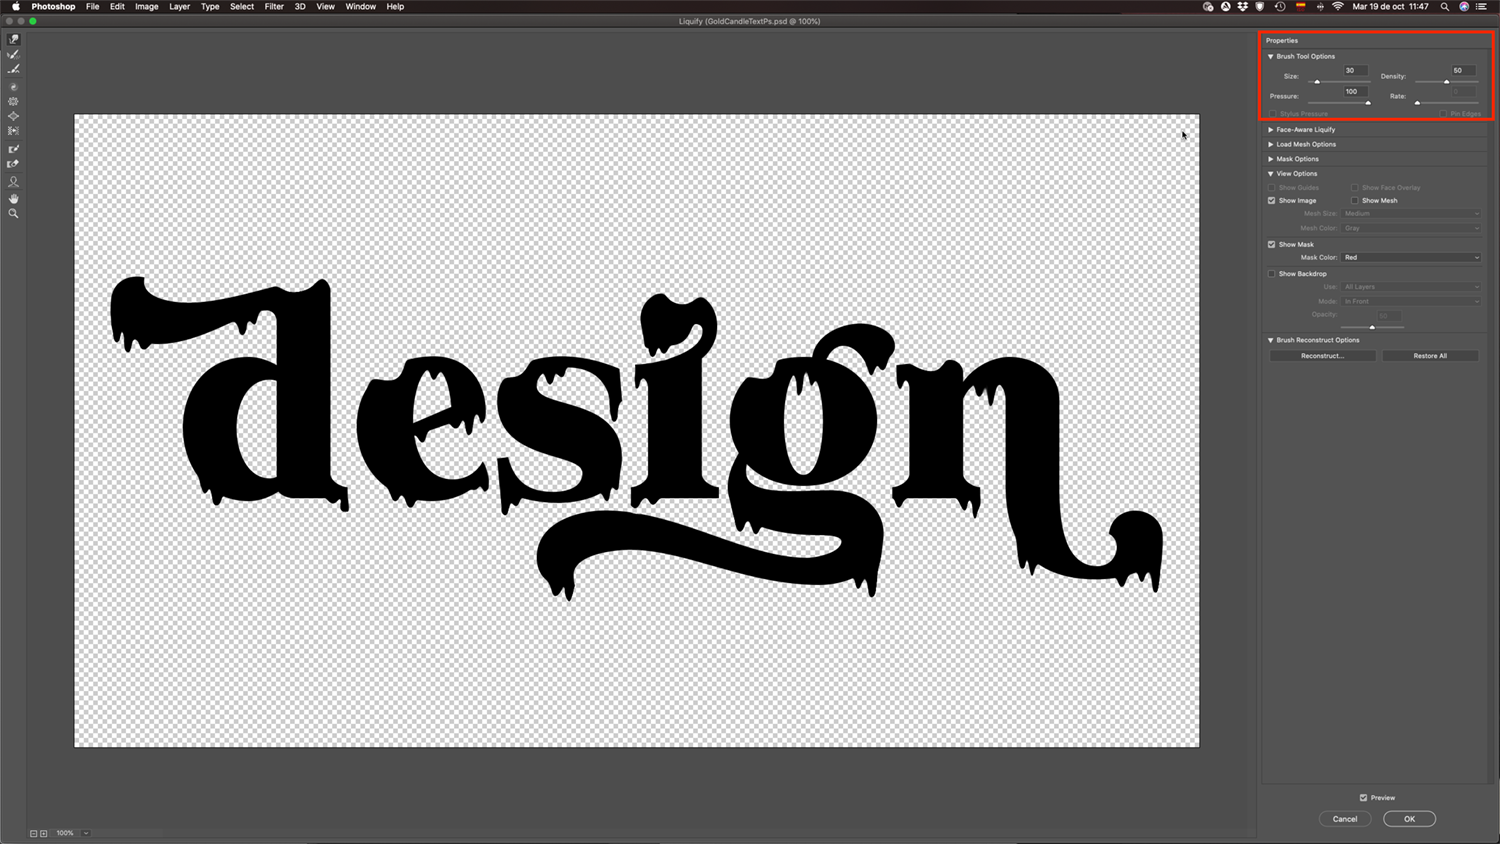
To check out how your text looks, you can hide the background layer by clicking on the small eye icon on the left side of its thumbnail.
Step 4 - Create a New Masked Layer Containing Your Text
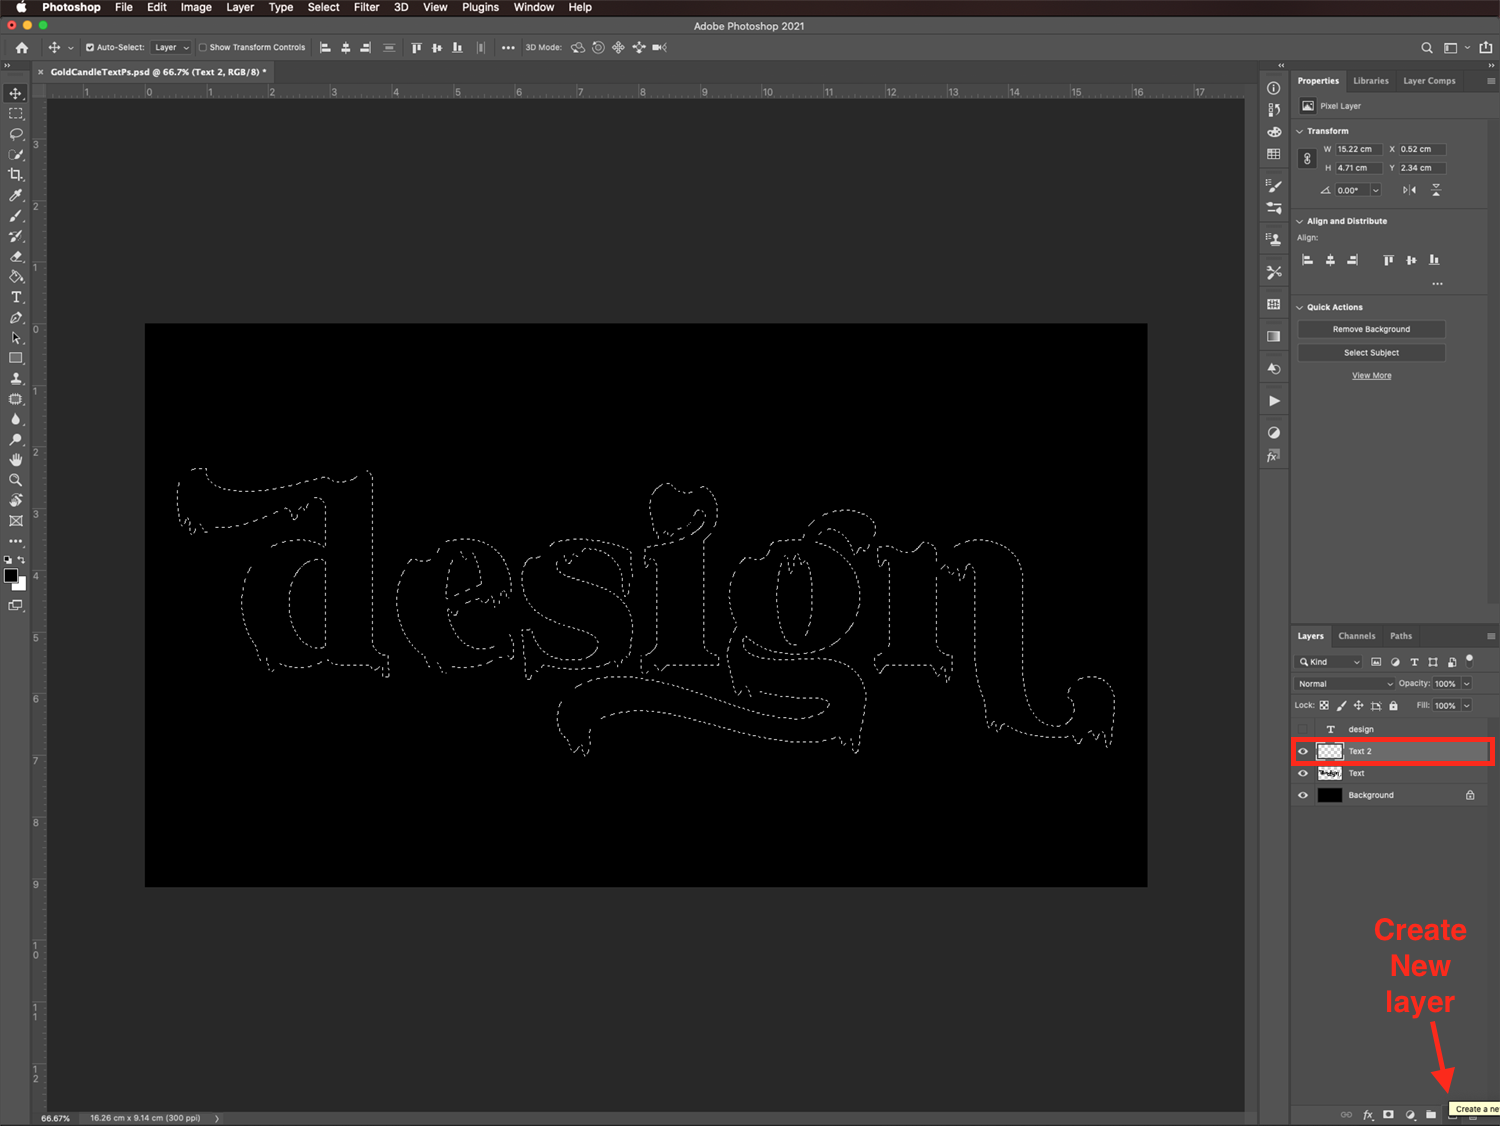
Press and hold the Command/Control key and click on the Text layer thumbnail to make another selection.
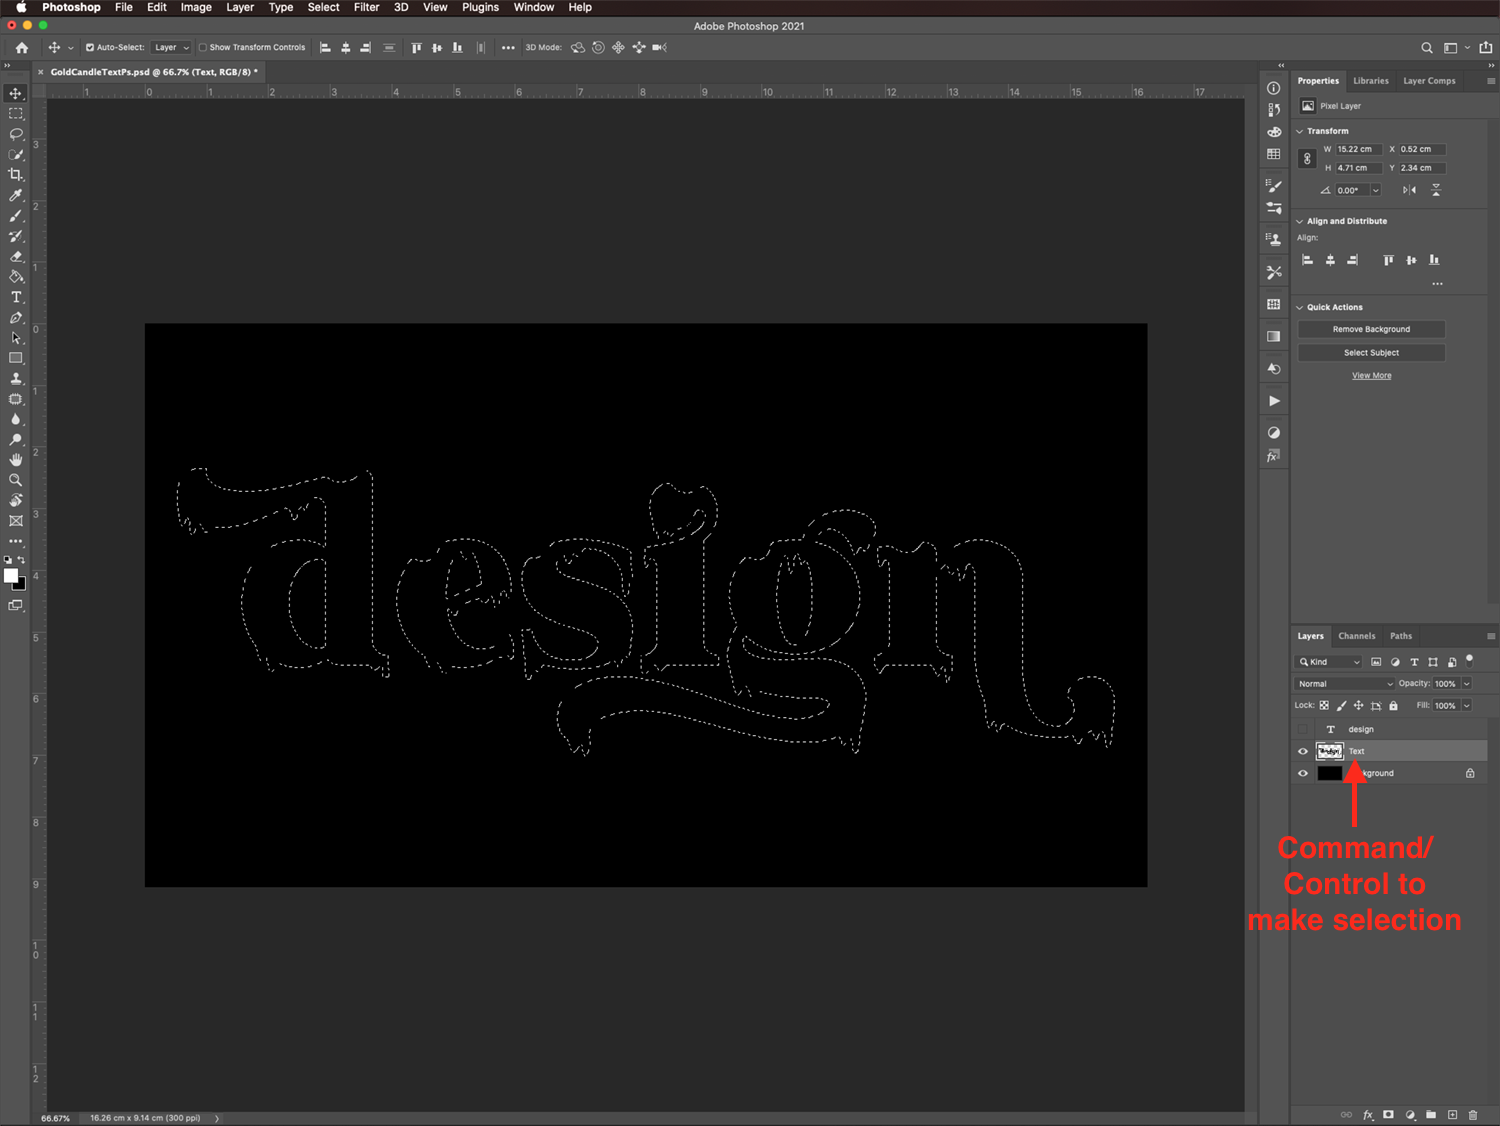
Then, create a new layer by clicking the Create New Layer button at the bottom of the Layers panel.
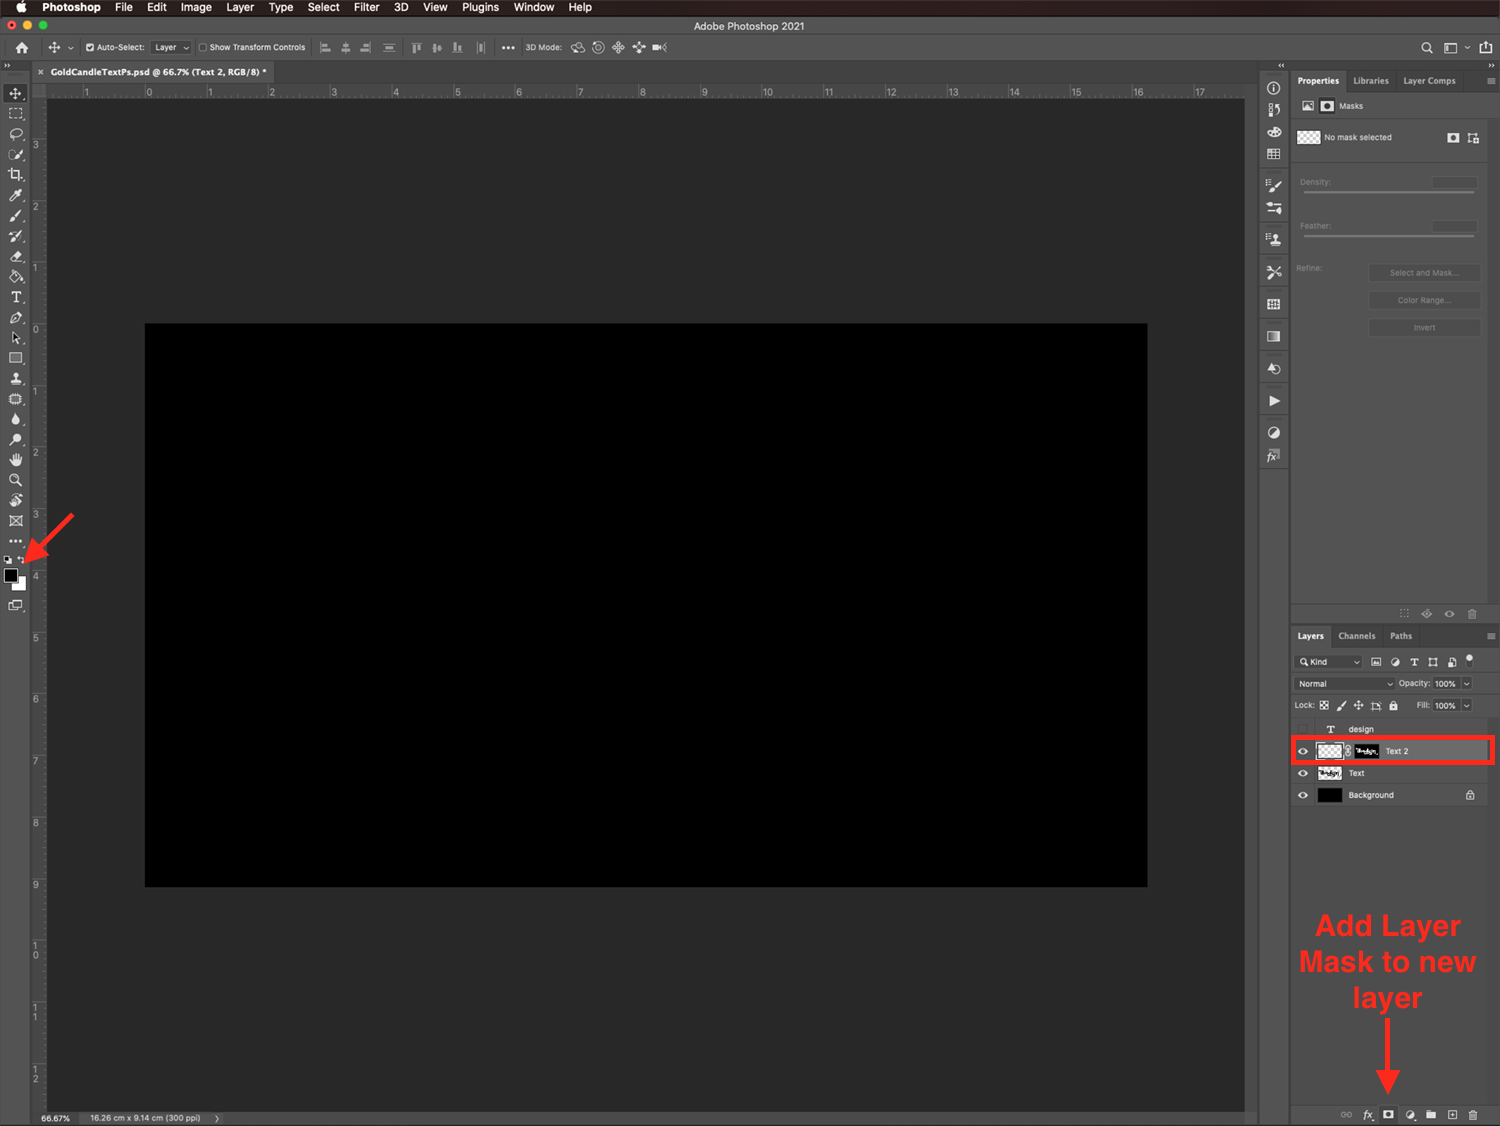
With the selection still active, and after making sure black and white are selected as the foreground and background colors, click on the Create Layer Mask button at the bottom of the panel to add a mask to your new layer.
Your mask should have the same shape as the selection.
Step 5 - Fill the Masked Layer with Yellow
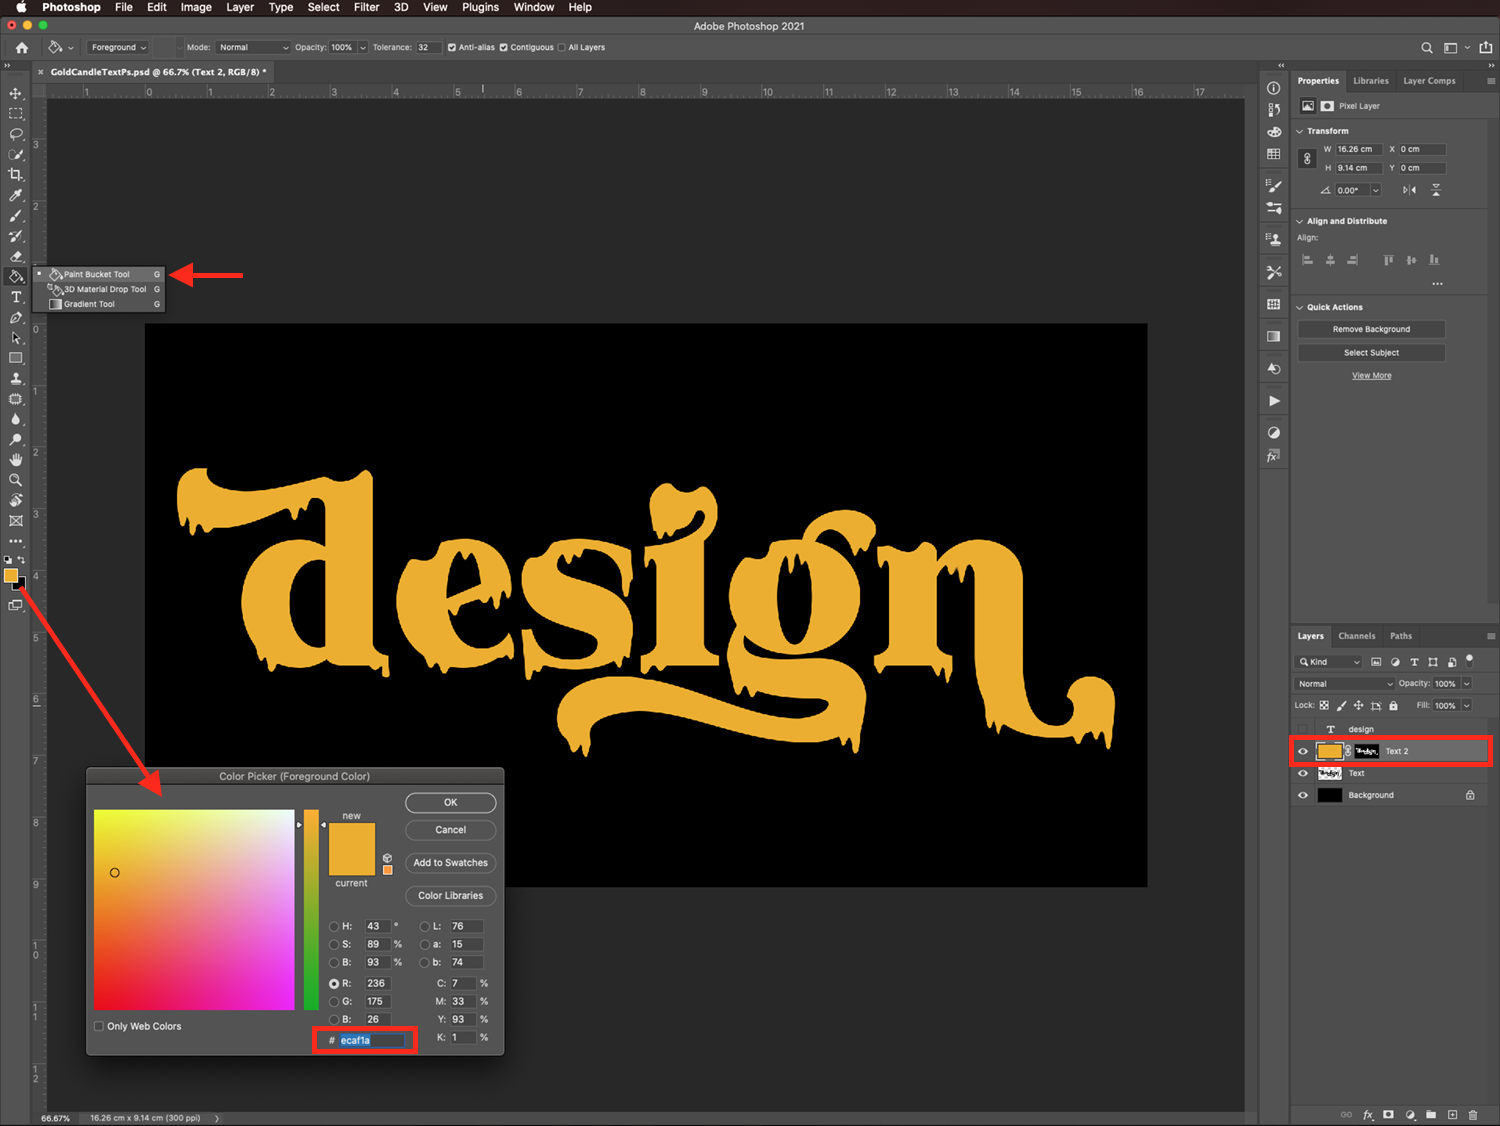
Change the foreground color to a medium yellow. We used #ecaf1a. Click the new layer’s thumbnail in the Layers panel, and with the Paint Bucket tool (G), click inside the canvas to fill the selection with the medium yellow.
Step 6 - Apply Layer Styles to Create the Wax Effect
Next, we are going to create the wax candle look on the text using some layer styles.
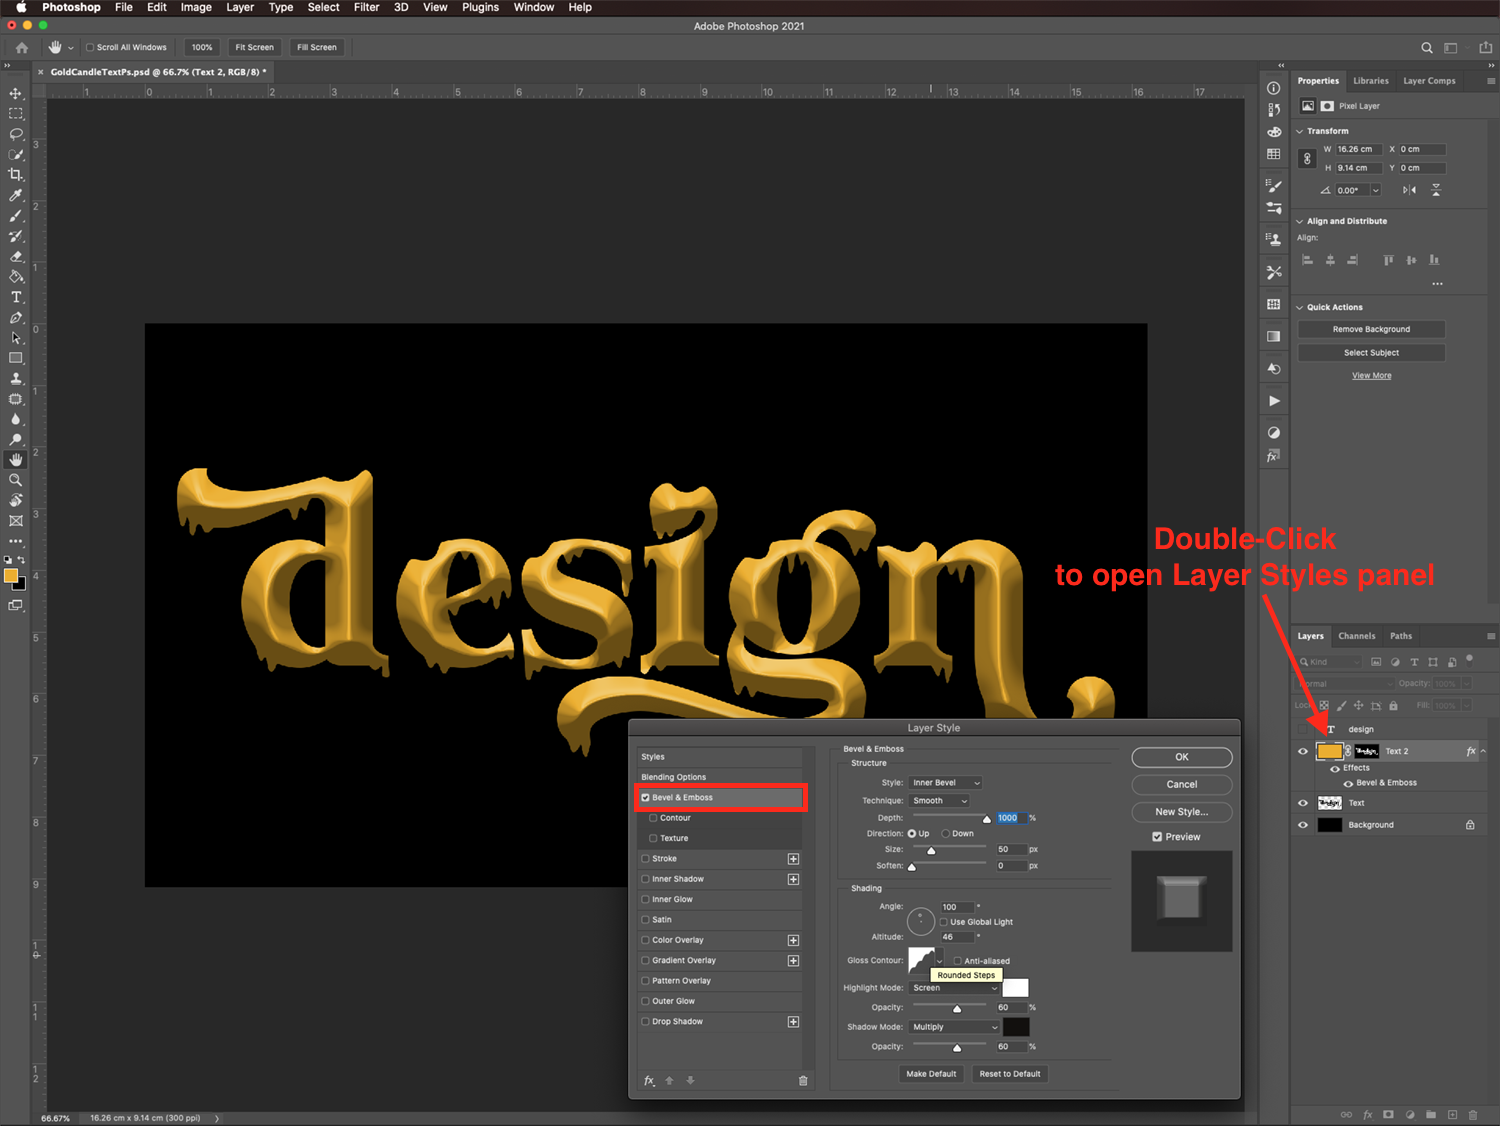
Double-click on top of the Text layer thumbnail to open the Layer Style panel.
In the Bevel & Emboss tab, use:
- Style: Inner Bevel
- Technique: Smooth
- Depth: 1000%
- Direction: Up
- Size: 50 px
- Soften: 0 px
- Shading Angle: 100º
- Use Global Light: Unchecked
- Shading Altitude: 46º
- Gloss Contour: Rounded Steps
- Highlight Mode: Screen
- Highlight Color: #ffffff
- Highlight Opacity: 60%
- Shadow Mode: Multiply
- Shadow Color: #000000
- Shadow Opacity: 60%
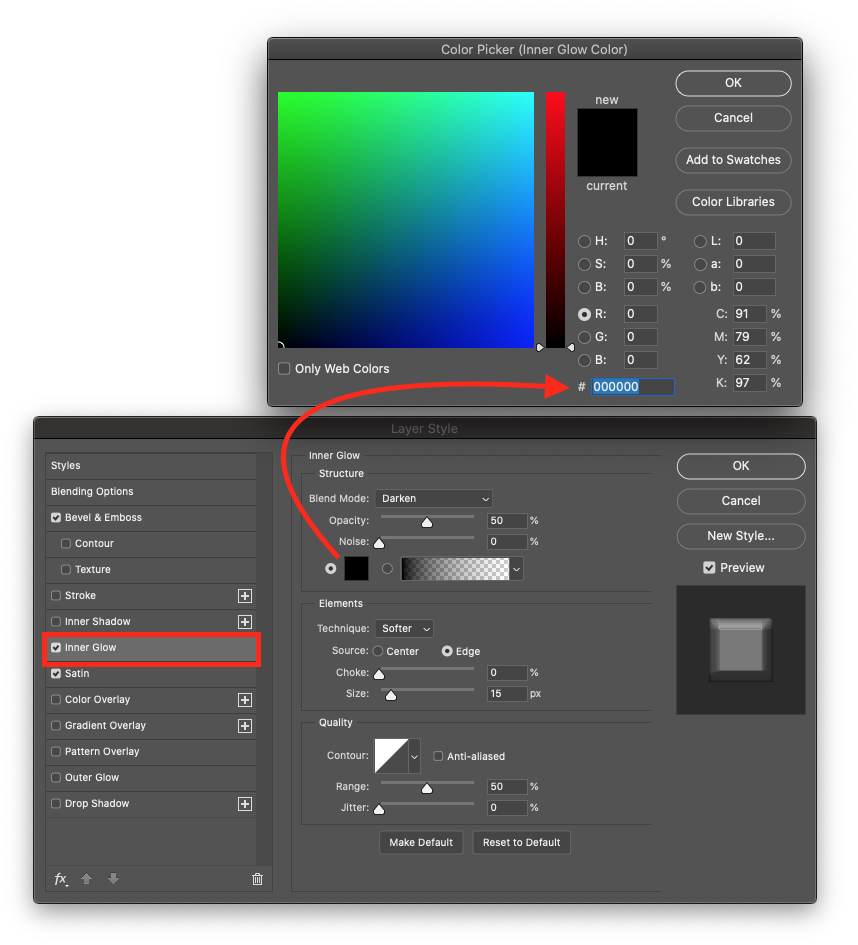
In the Inner Glow tab, use:
- Blend Mode: Darken
- Opacity: 50%
- Noise: 0%
- Color: #000000
- Technique: Softer
- Source: Edge
- Choke: 0%
- Size: 15 px
- Contour: Linear
- Anti-aliased: Unchecked
- Range: 50%
- Jitter: 0%
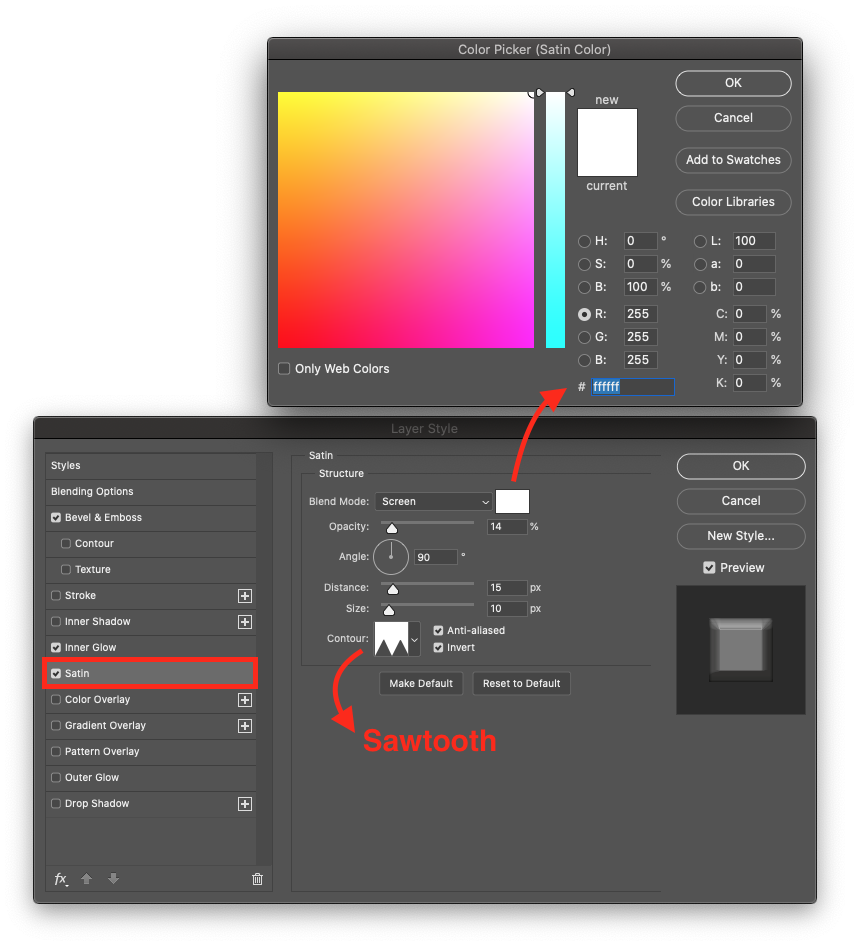
In the Satin tab, use:
- Blend Mode: Screen
- Color: #ffffff
- Opacity: 14%
- Angle: 90º
- Distance: 15 px
- Size: 10 px
- Contour: Sawtooth
- Anti-aliased and Invert boxes: Checked
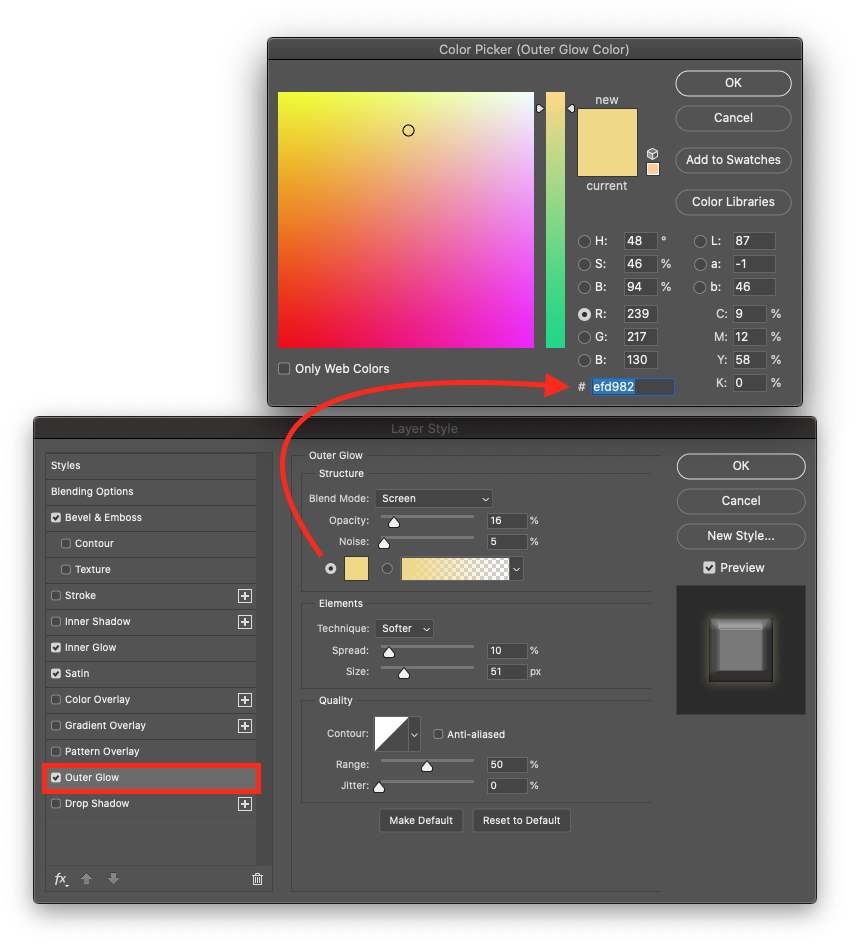
And finally, in the Outer Glow tab, use:
- Blend Mode: Screen
- Opacity: 16%
- Noise: 5%
- Color: #efd982
- Technique: Softer
- Spread: 10%
- Size: 51 px
- Contour: Linear
- Anti-aliased: Unchecked
- Range: 50%
- Jitter: 0%
Step 7 - Add Flames to the Candle Text
Next, we are going to add the flames to the candle text.
Create a New Layer
First, create a new layer and make sure it is on top of everything. Name this layer Flame.
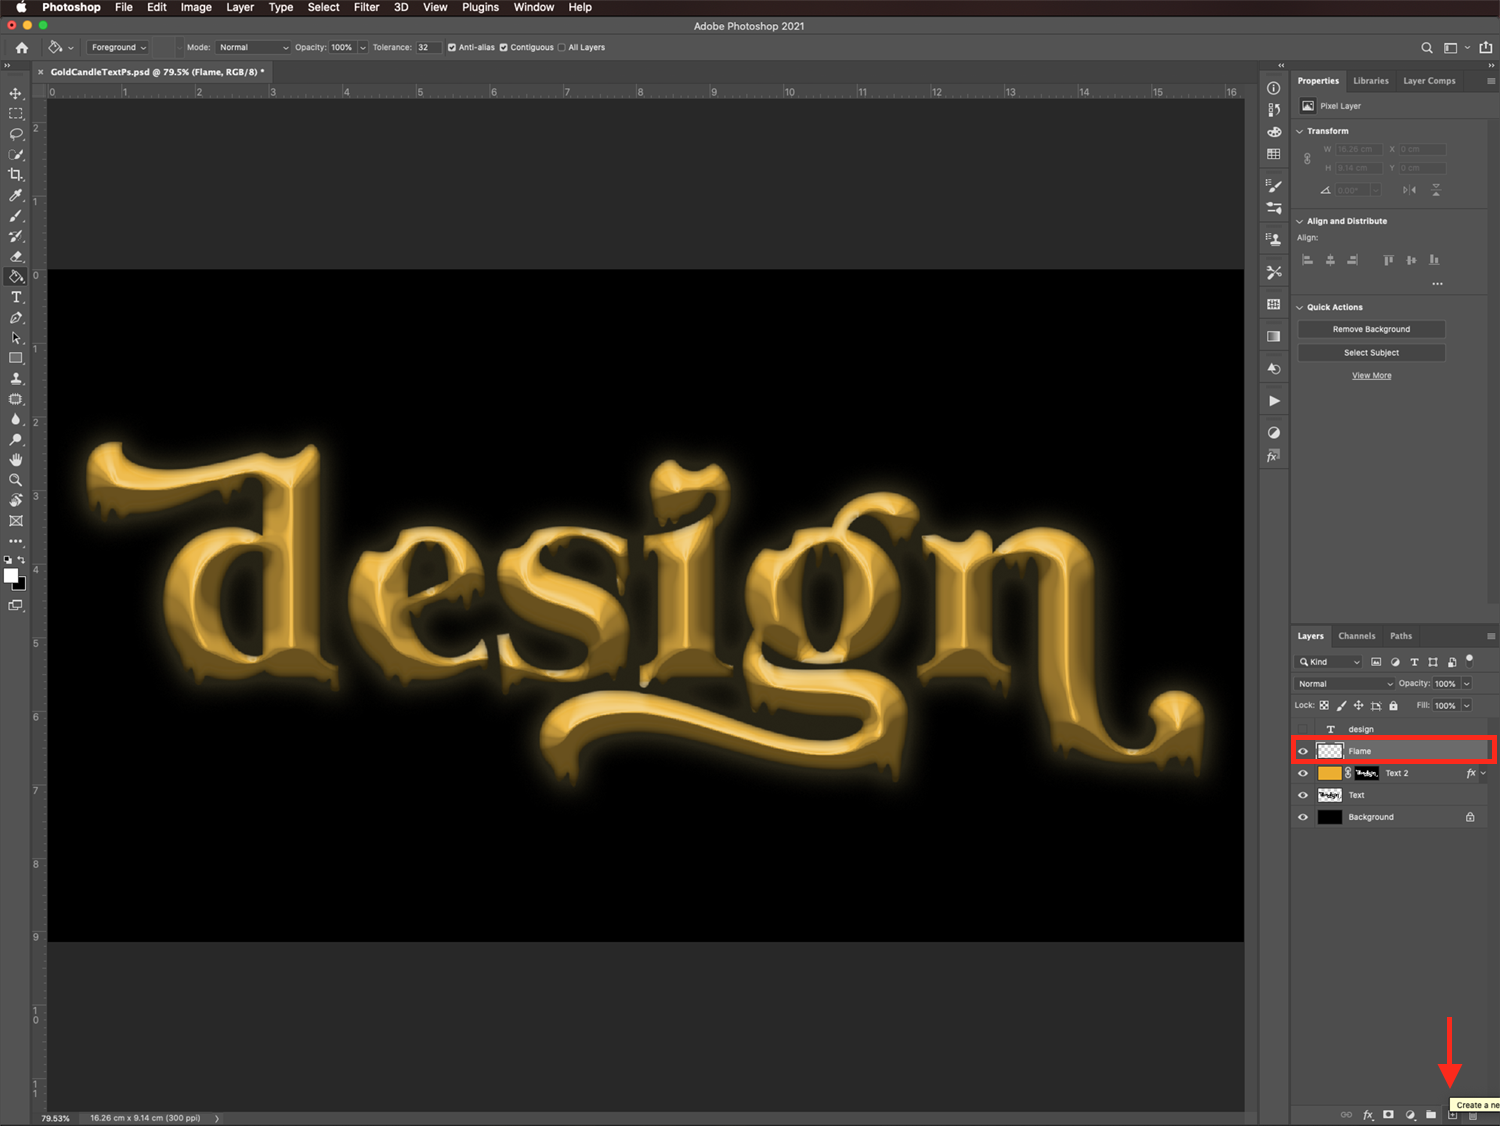
Use the Brush Tool to Paint the Flame Base
Set white as the foreground color and black as the background color.
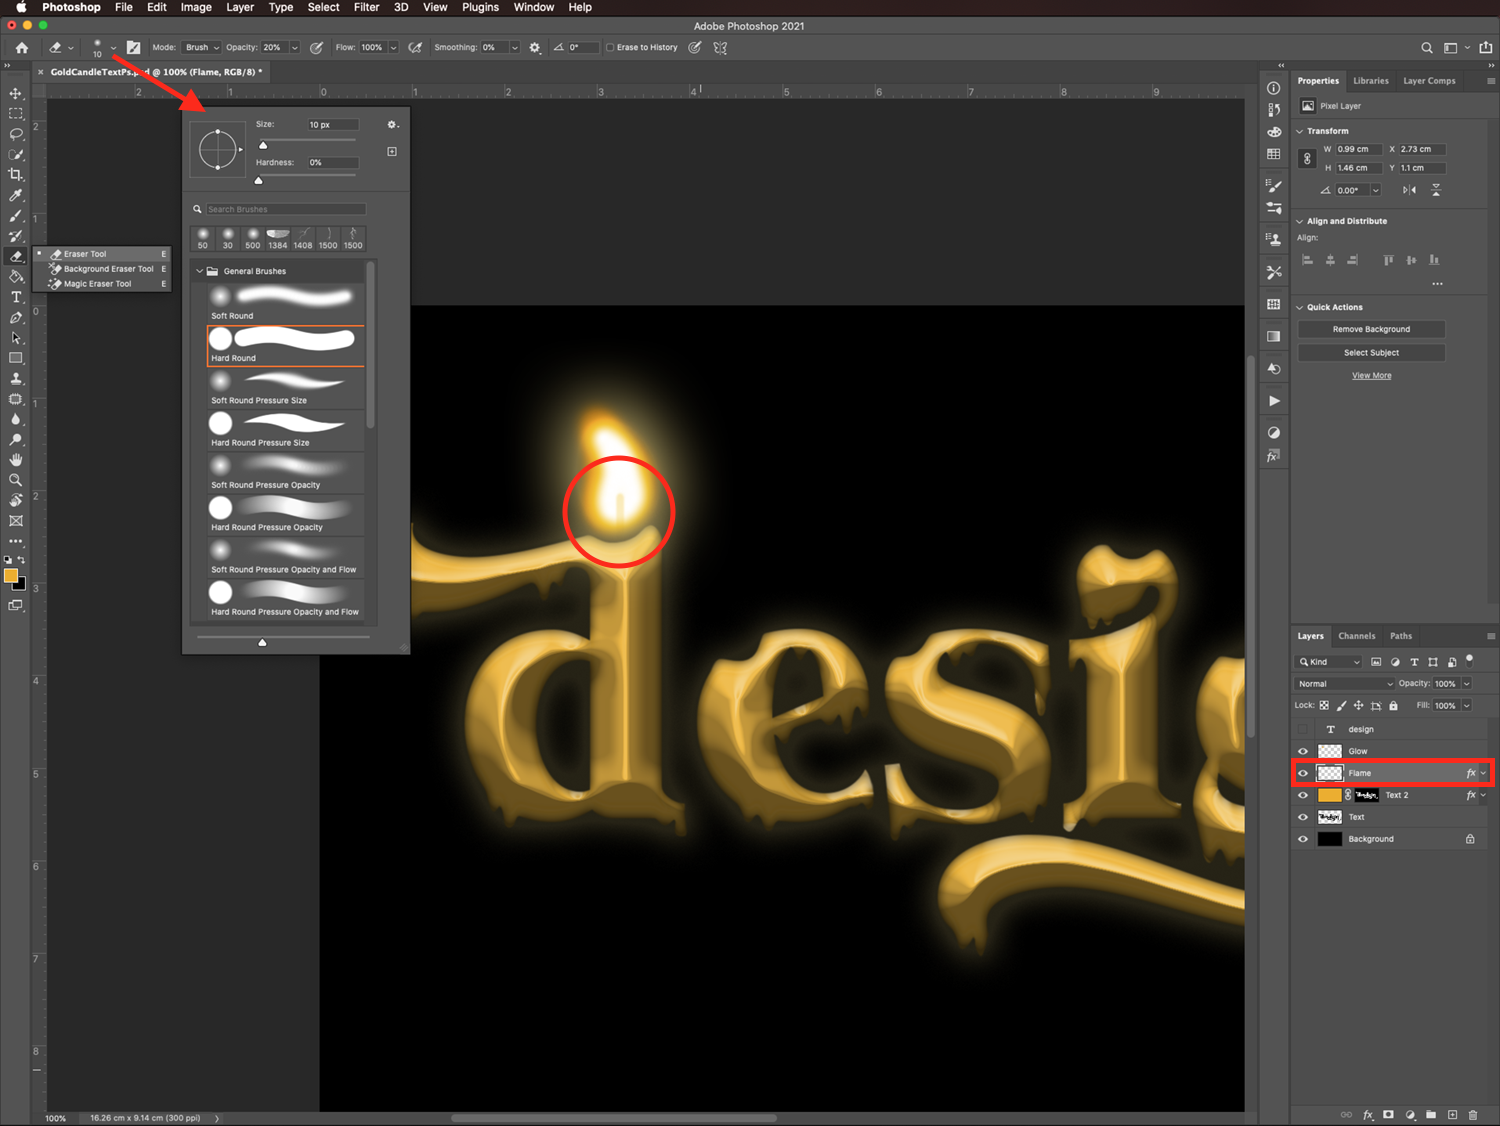
Select the Brush tool (B). With a medium soft brush (50 px and 0% hardness), paint a flame above one of the indentations on your text.
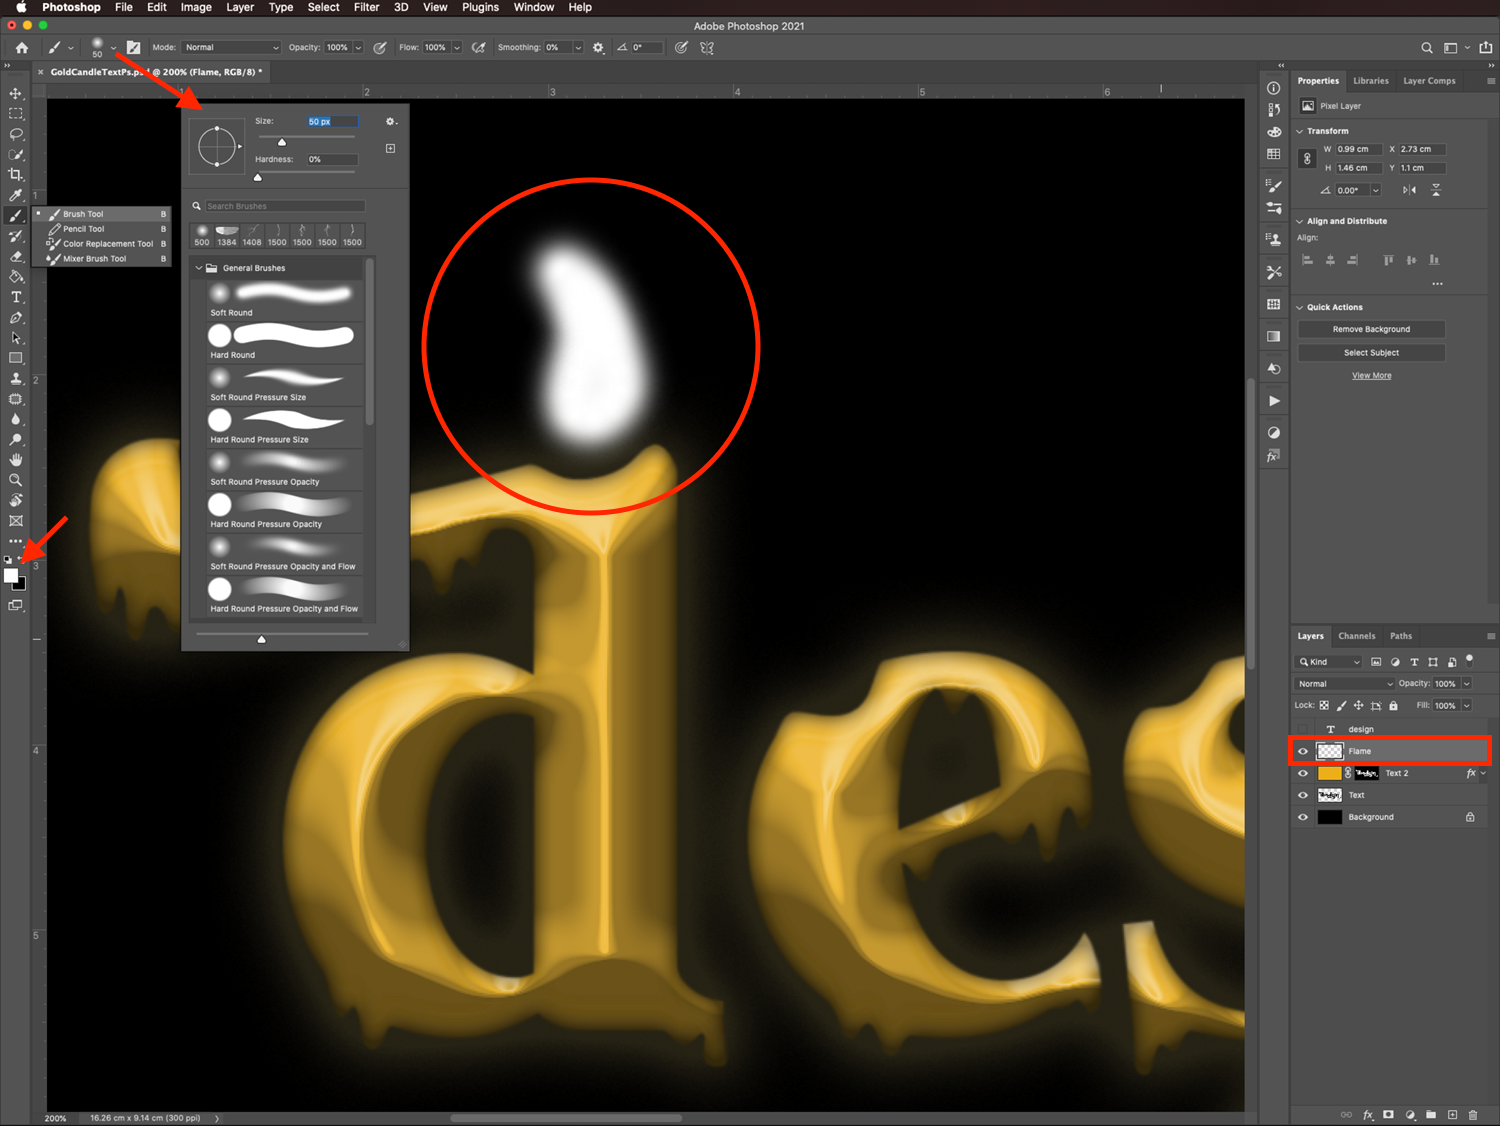
If you want, you can use the Eraser tool (E) to trim the top of the shape or any other portions of the flame to make it look more realistic.
Add Some Glow to the Flame
Double-click on top of the Flame layer thumbnail to open the Layer Style panel, and use the following values in the Outer Glow tab:
- Blend Mode: Screen
- Opacity: 50%
- Noise: 0%
- Color: #efd982
- Technique: Softer
- Spread: 6%
- Size: 100 px
- Contour: Linear
- Anti-aliased: Unchecked
- Range: 50%
- Jitter: 0%
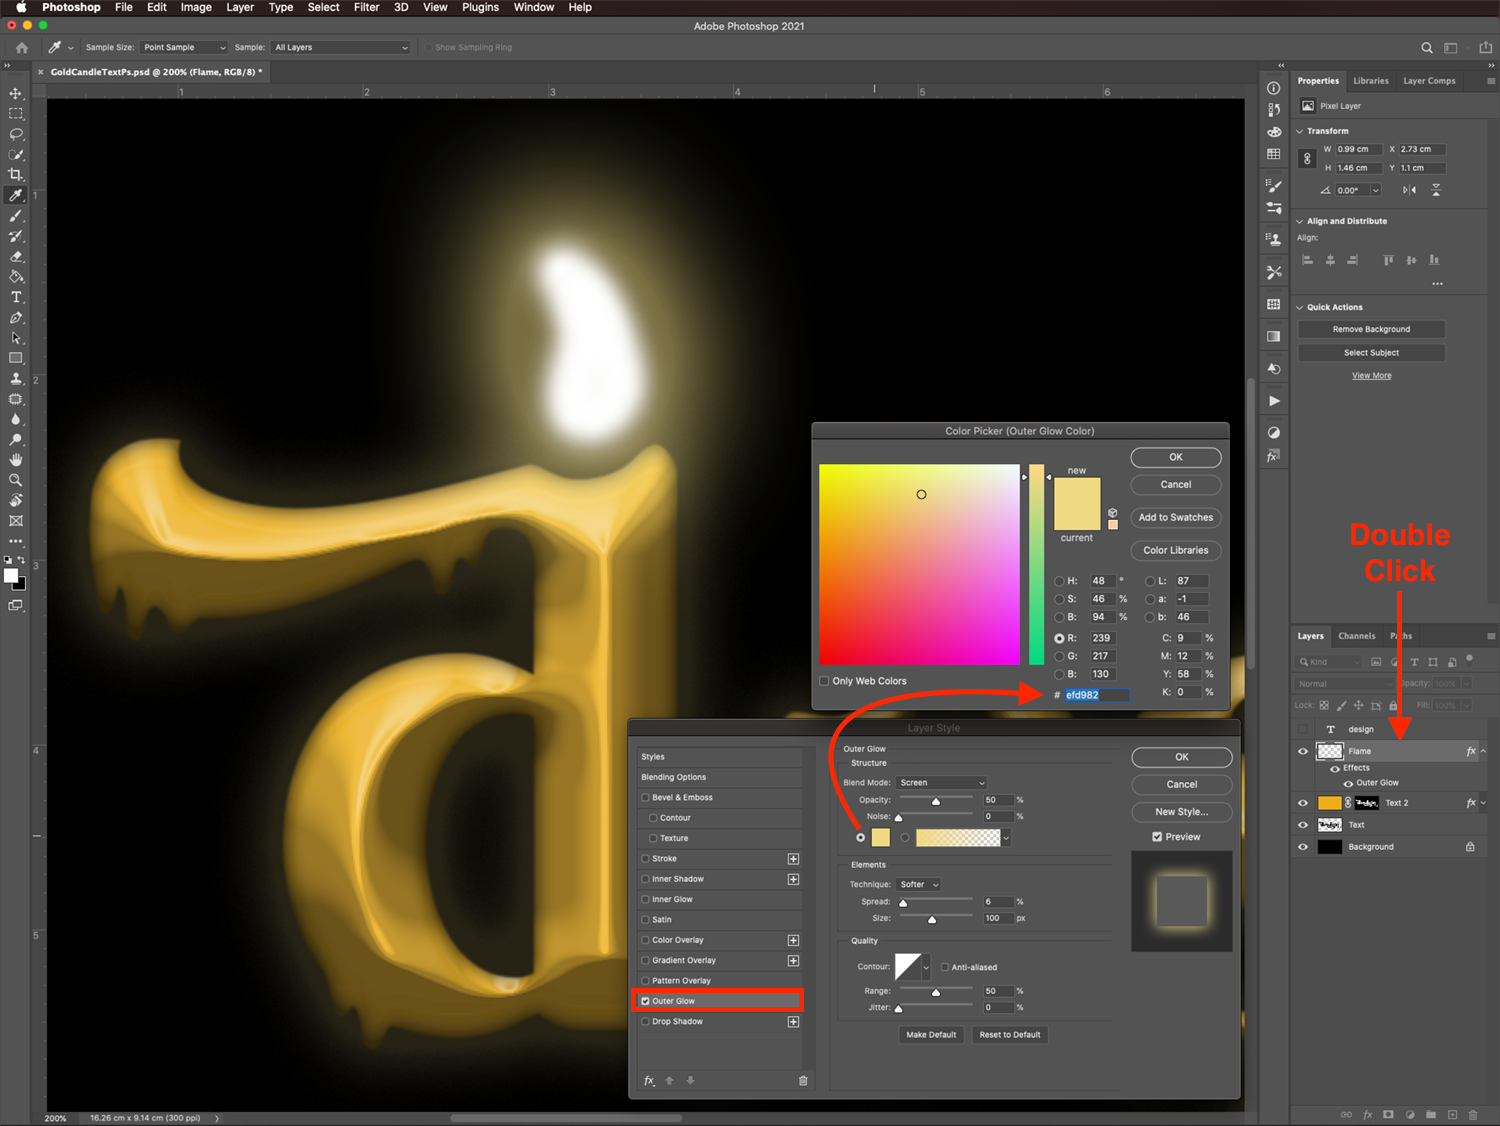
Add a Yellow Sheen to the Flame
Create a new layer on top of everything and name it Glow.
Set the foreground color to the same medium yellow (#ecaf1a).
Then, use the Brush tool (B) to paint with the yellow on top of the flame.
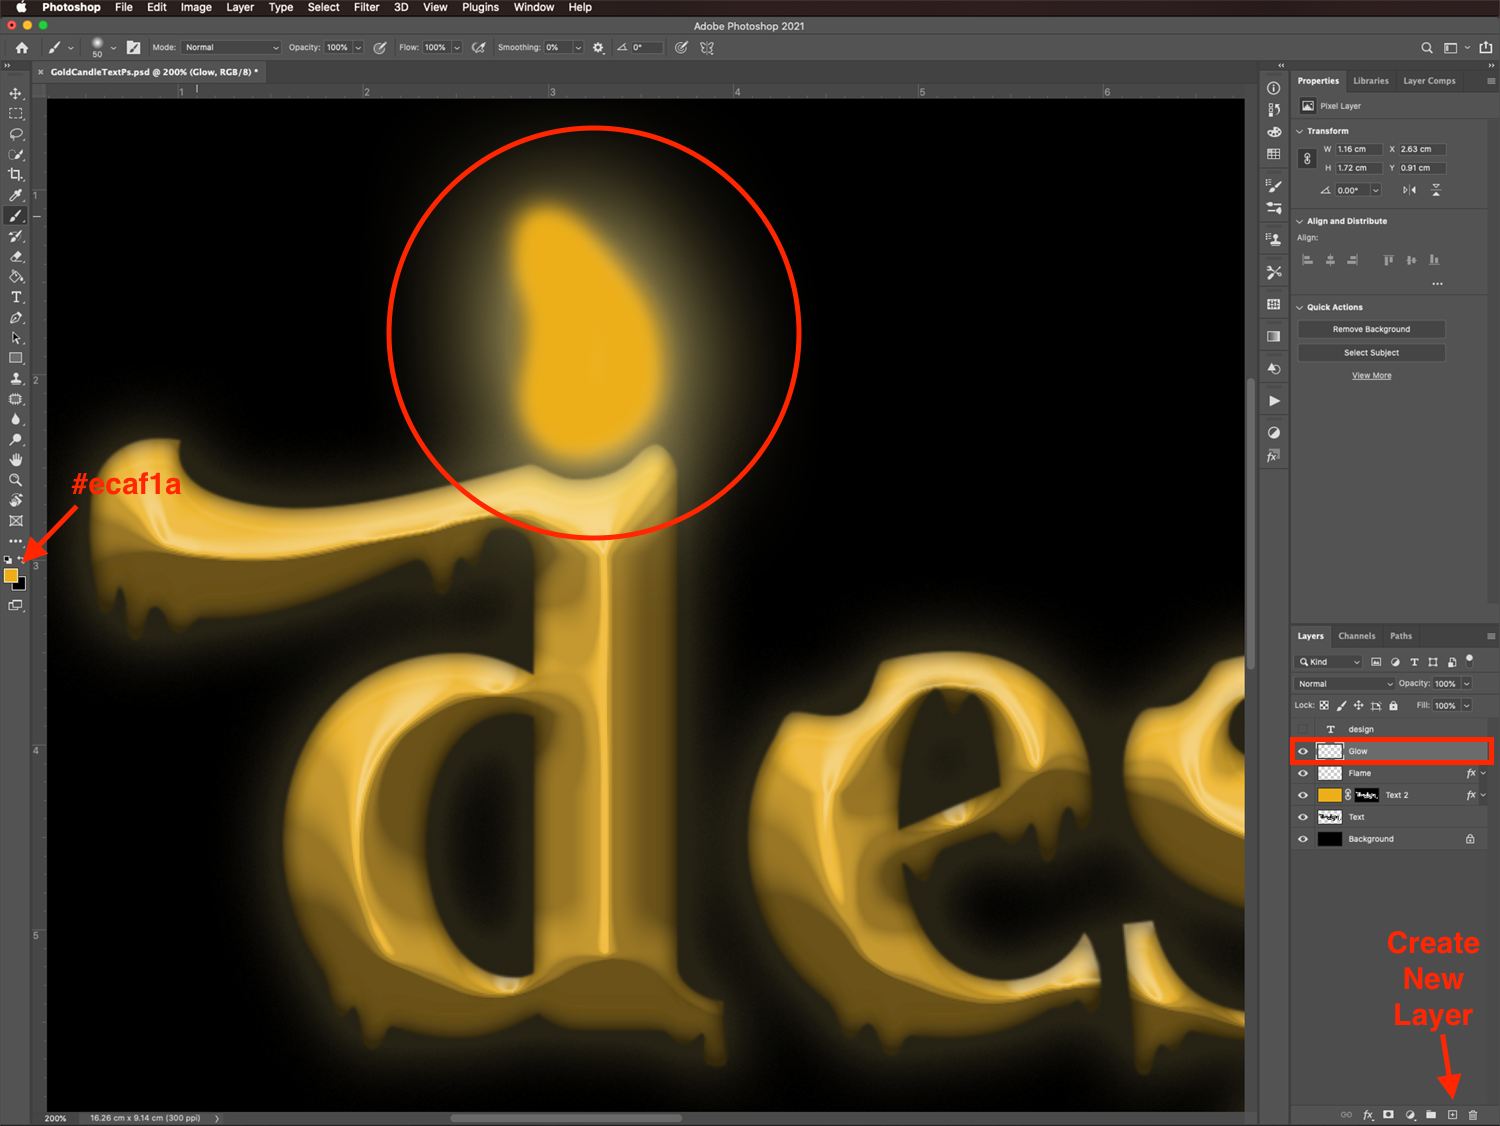
Finally, change the Blending Mode of the Glow layer to Overlay.
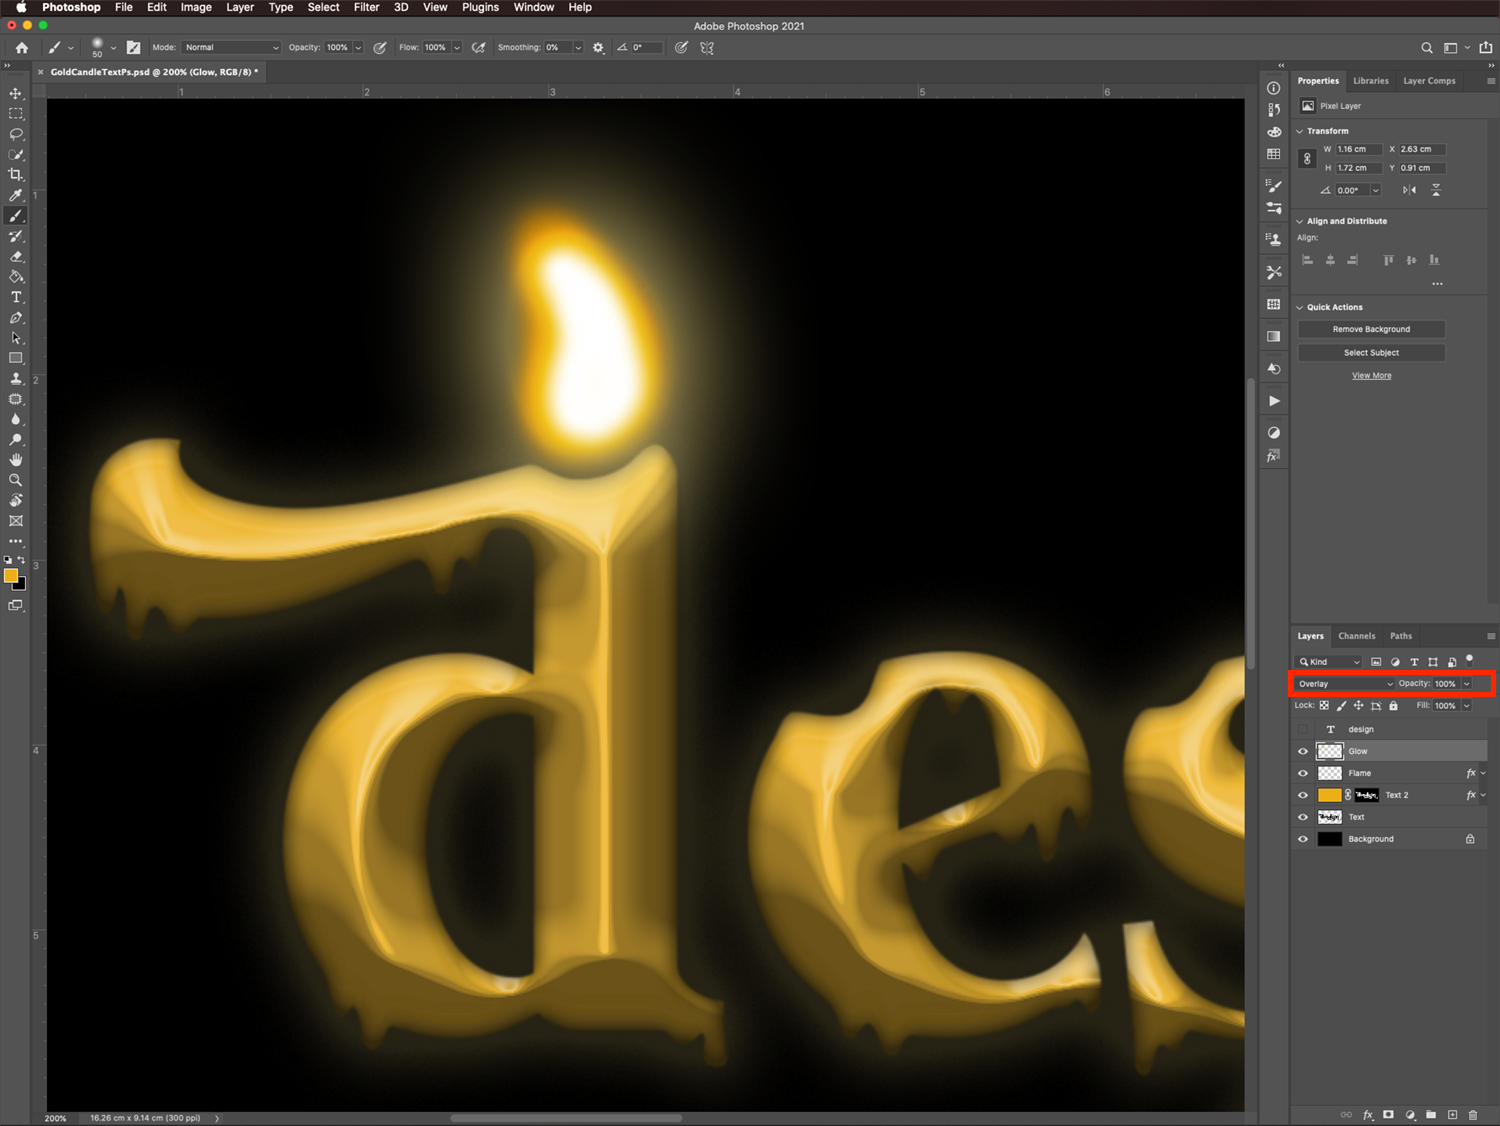
Add a Wick to the Flame
Make sure you are on the Flame layer and select the Eraser tool (E). With a small soft brush (10 px and 0% hardness) and 20% opacity, erase a line at the bottom of the flame to create the illusion of a wick.
Group the Flame and Glow Layers Together
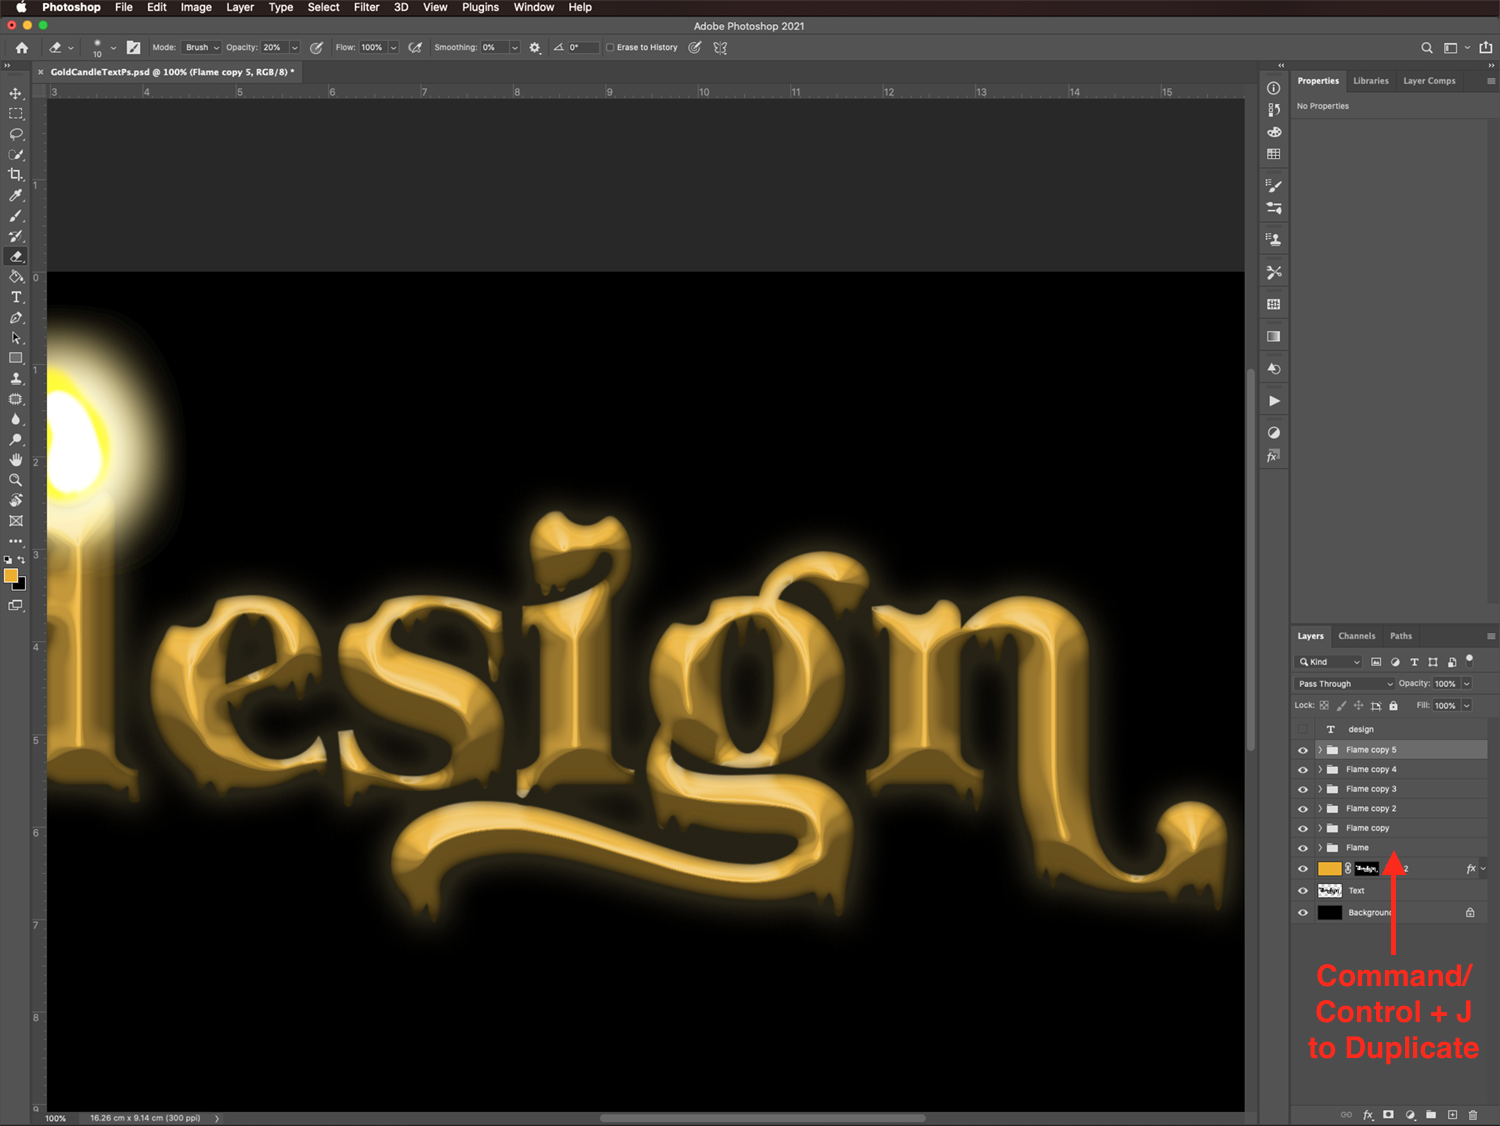
Select both the Flame and Glow layers while holding Shift. Group them together by dragging their thumbnails to the small folder icon on the bottom of the Layers panel. Name the group Flame.

Duplicate the Flame Group as Many Times as Needed to Add Flames to All the Indentations
To add a flame to each letter of your text, duplicate the Flame folder as many times as needed (Cmd/Ctrl + J).
Reposition the Other Flames and Modify Some of Them
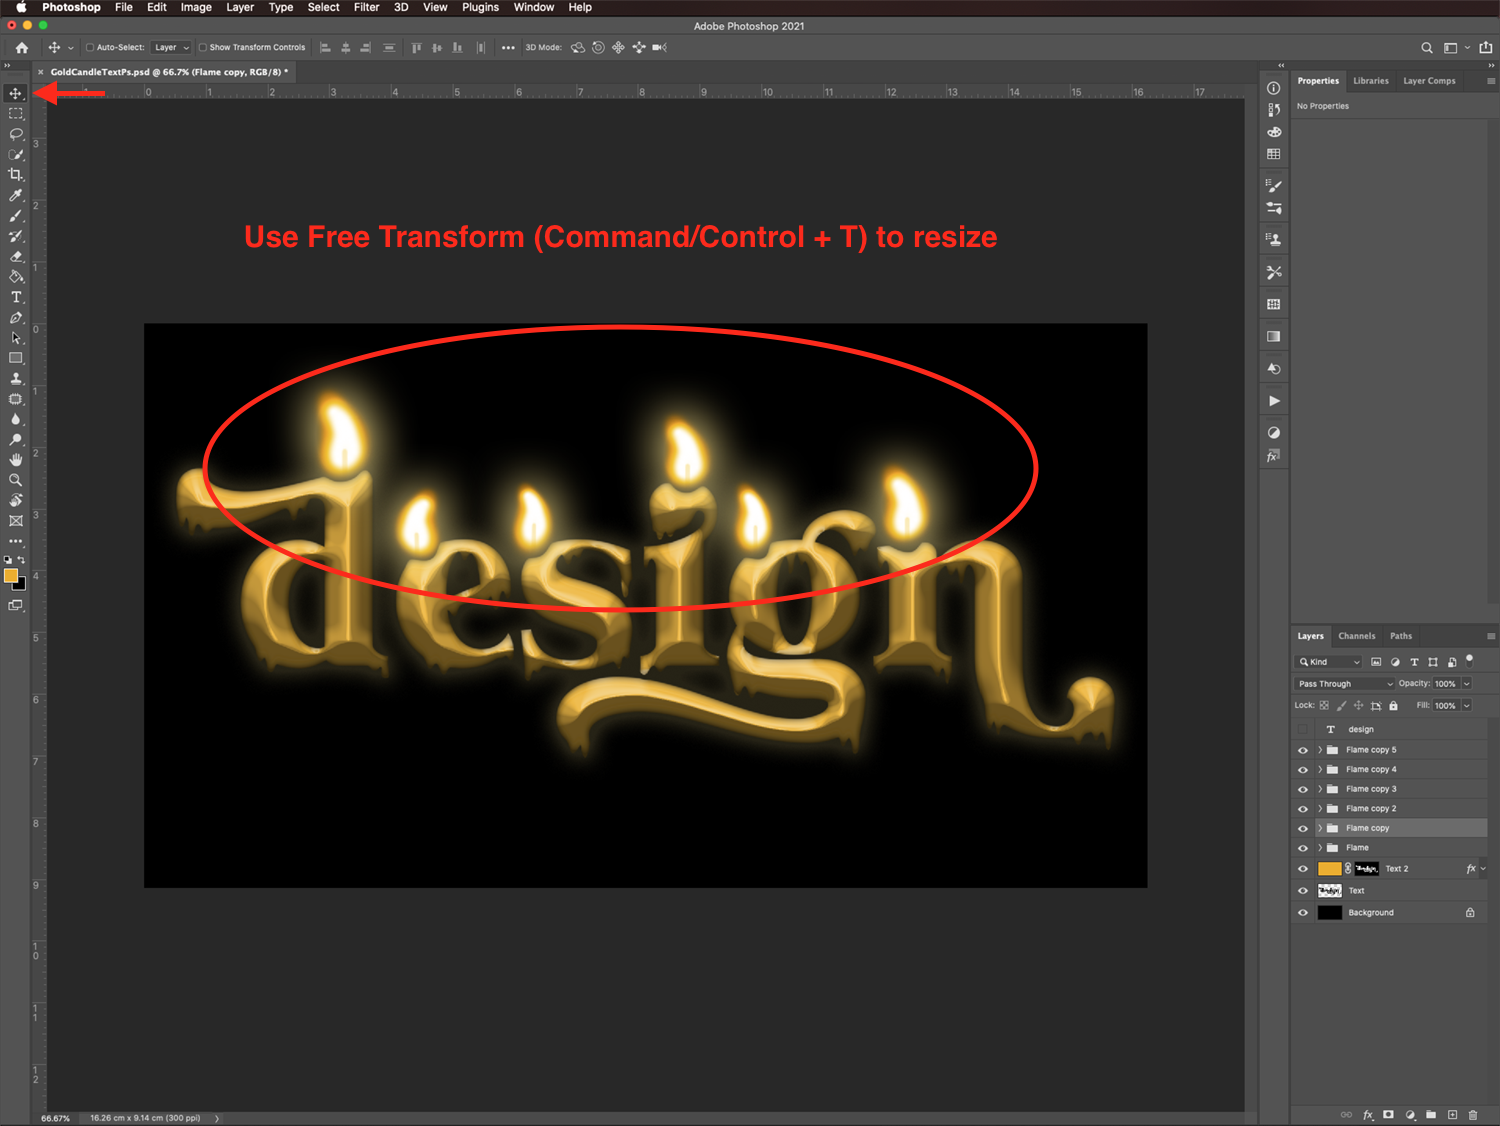
Position the duplicate flames on top of the indentations created before on each letter.
To make each flame unique, select its folder and use Free Transform (Cmd/Ctrl + T) or go to Edit > Transform > Distort to modify it.
Step 8 - Add a Reflection of the Candle Text
Finally, we are going to place a rotated duplicate of the text layer under it to create a reflection.
Group the Layers Together and Duplicate them
Select all the Flame folders and the Text layer and group them together (Cmd/Ctrl + G). Name the group Candle Text.
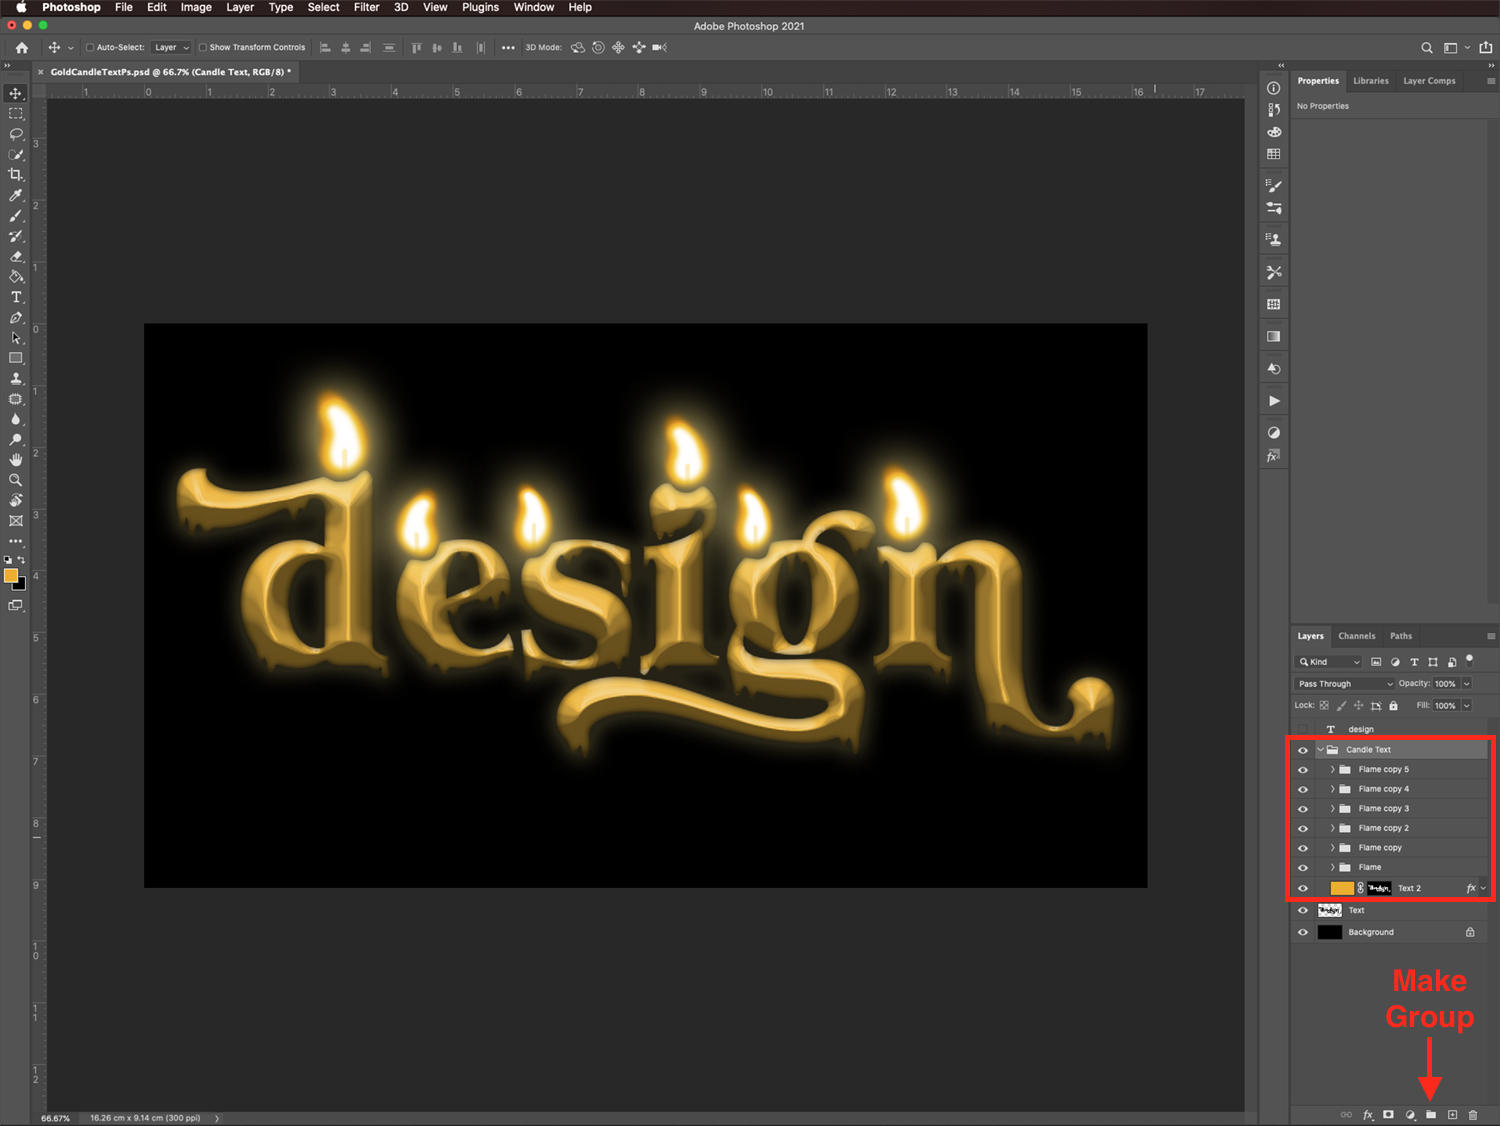
Next, make a duplicate of the Candle Text group (Cmd/Ctrl + J).
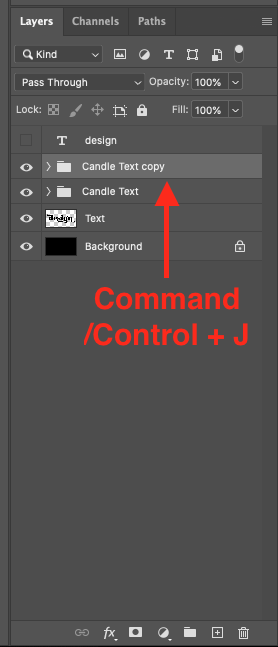
Merge the Duplicate Group Together, Flip it Upside Down, and Deform it
Right-click on top of the duplicate group thumbnail and choose Merge Group.
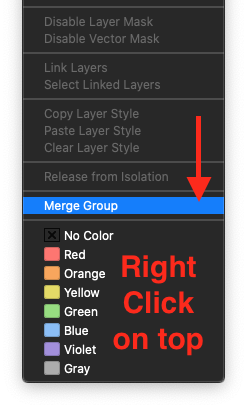
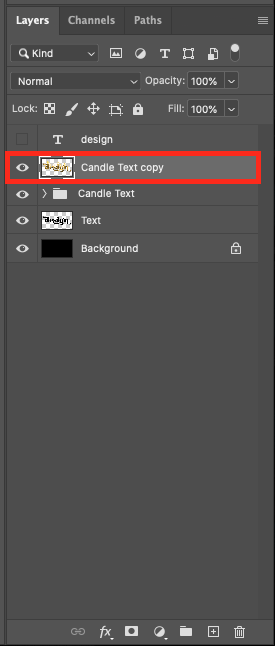
All the contents of the folder should now be merged together in a single layer.
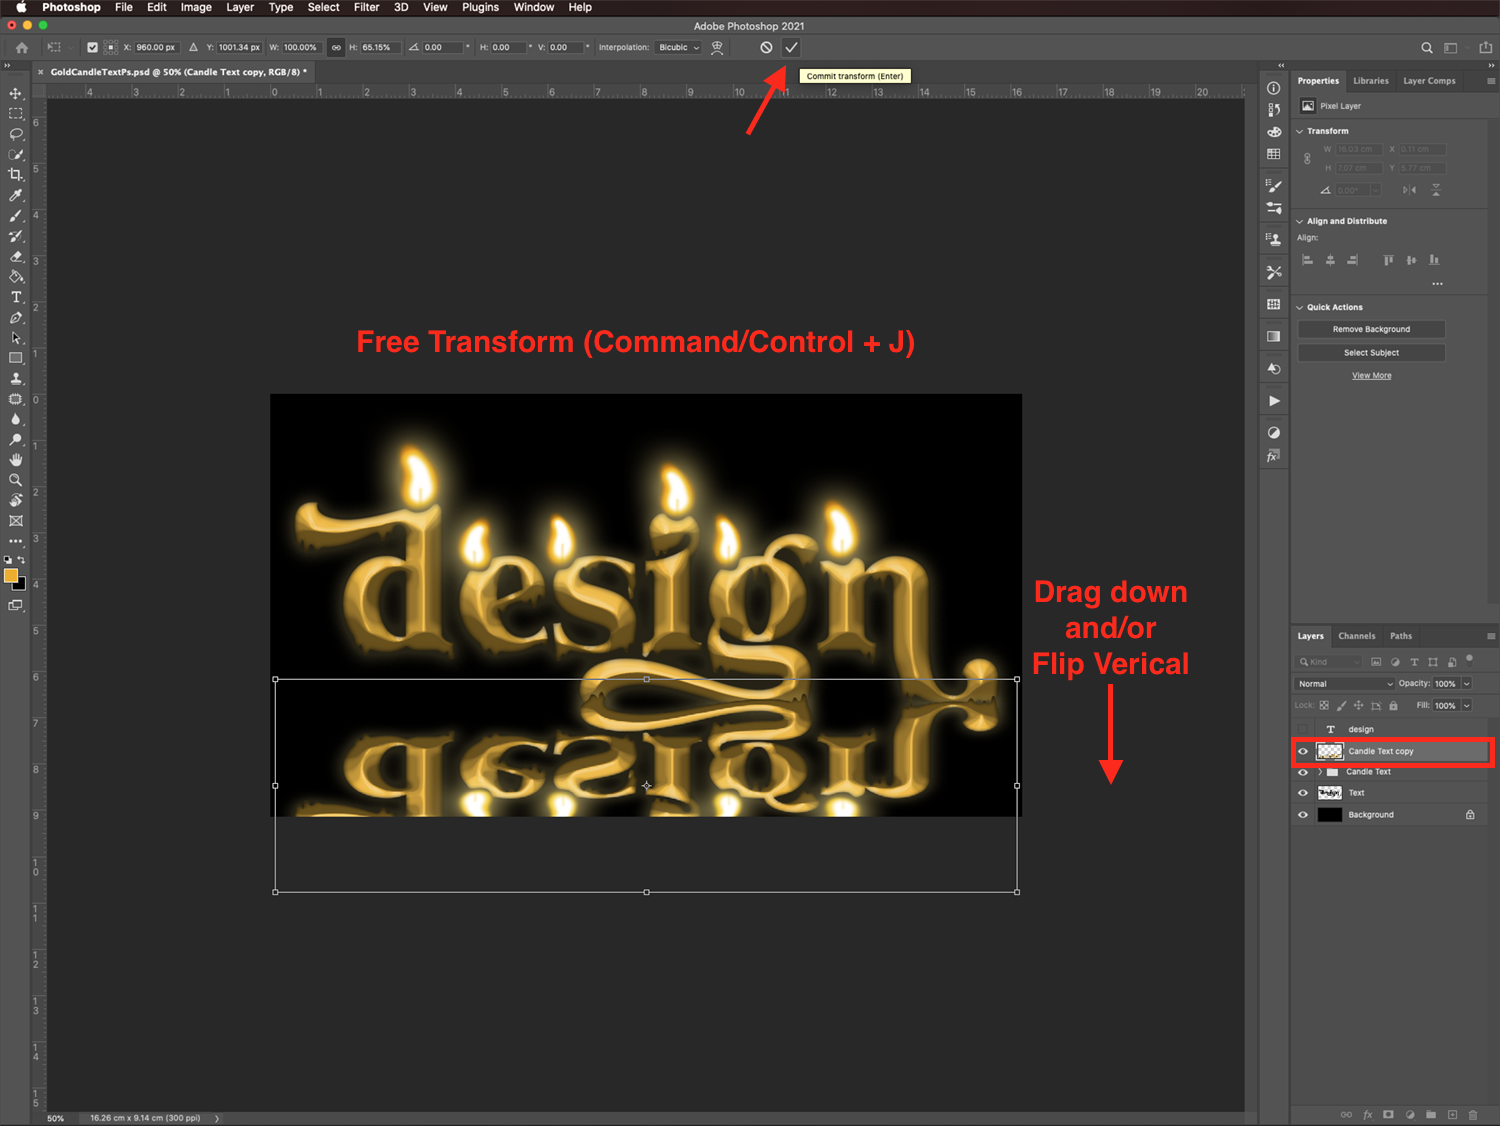
Use Free Transform (Cmd/Ctrl + T) to flip the text upside down, position it where the reflection should be, and deform it a bit to create a realistic reflection.
Fade the Reflection to Make it More Realistic
We want to erase some portions of the reflection to fade it a bit and make it more realistic.
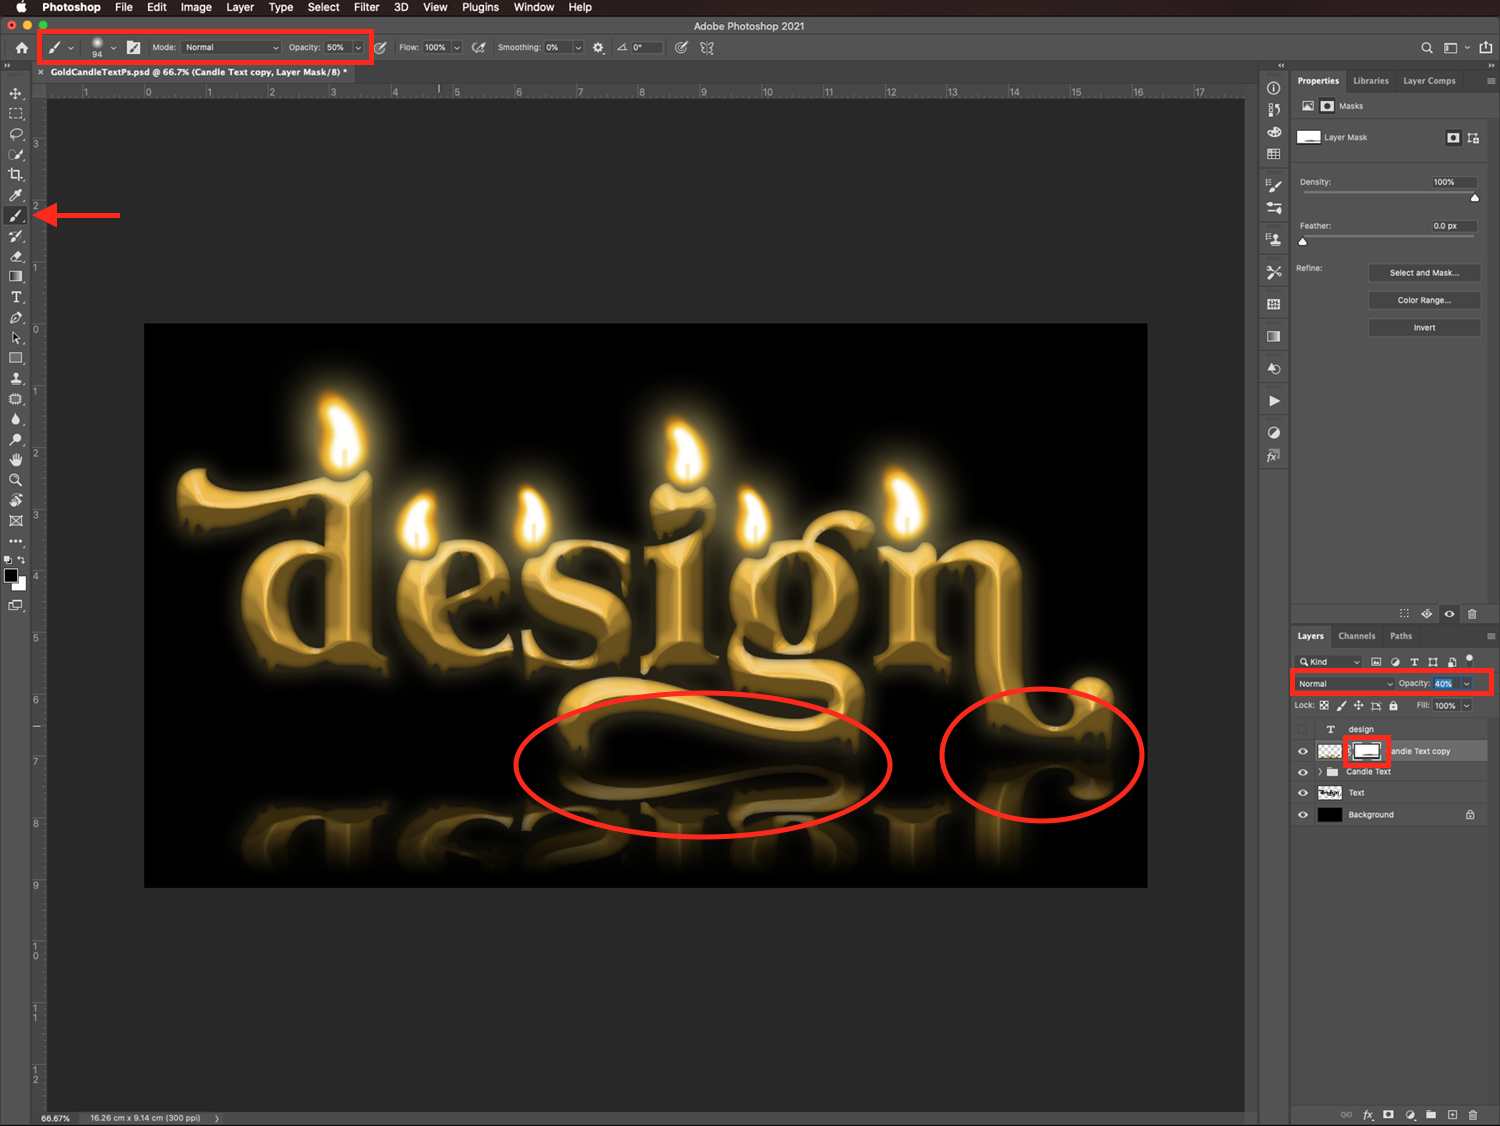
First, reduce the Opacity of the duplicate layer to about 45 - 50%. Next, click on the Layer Mask button at the bottom of the Layers panel to add a mask to the reflection layer.
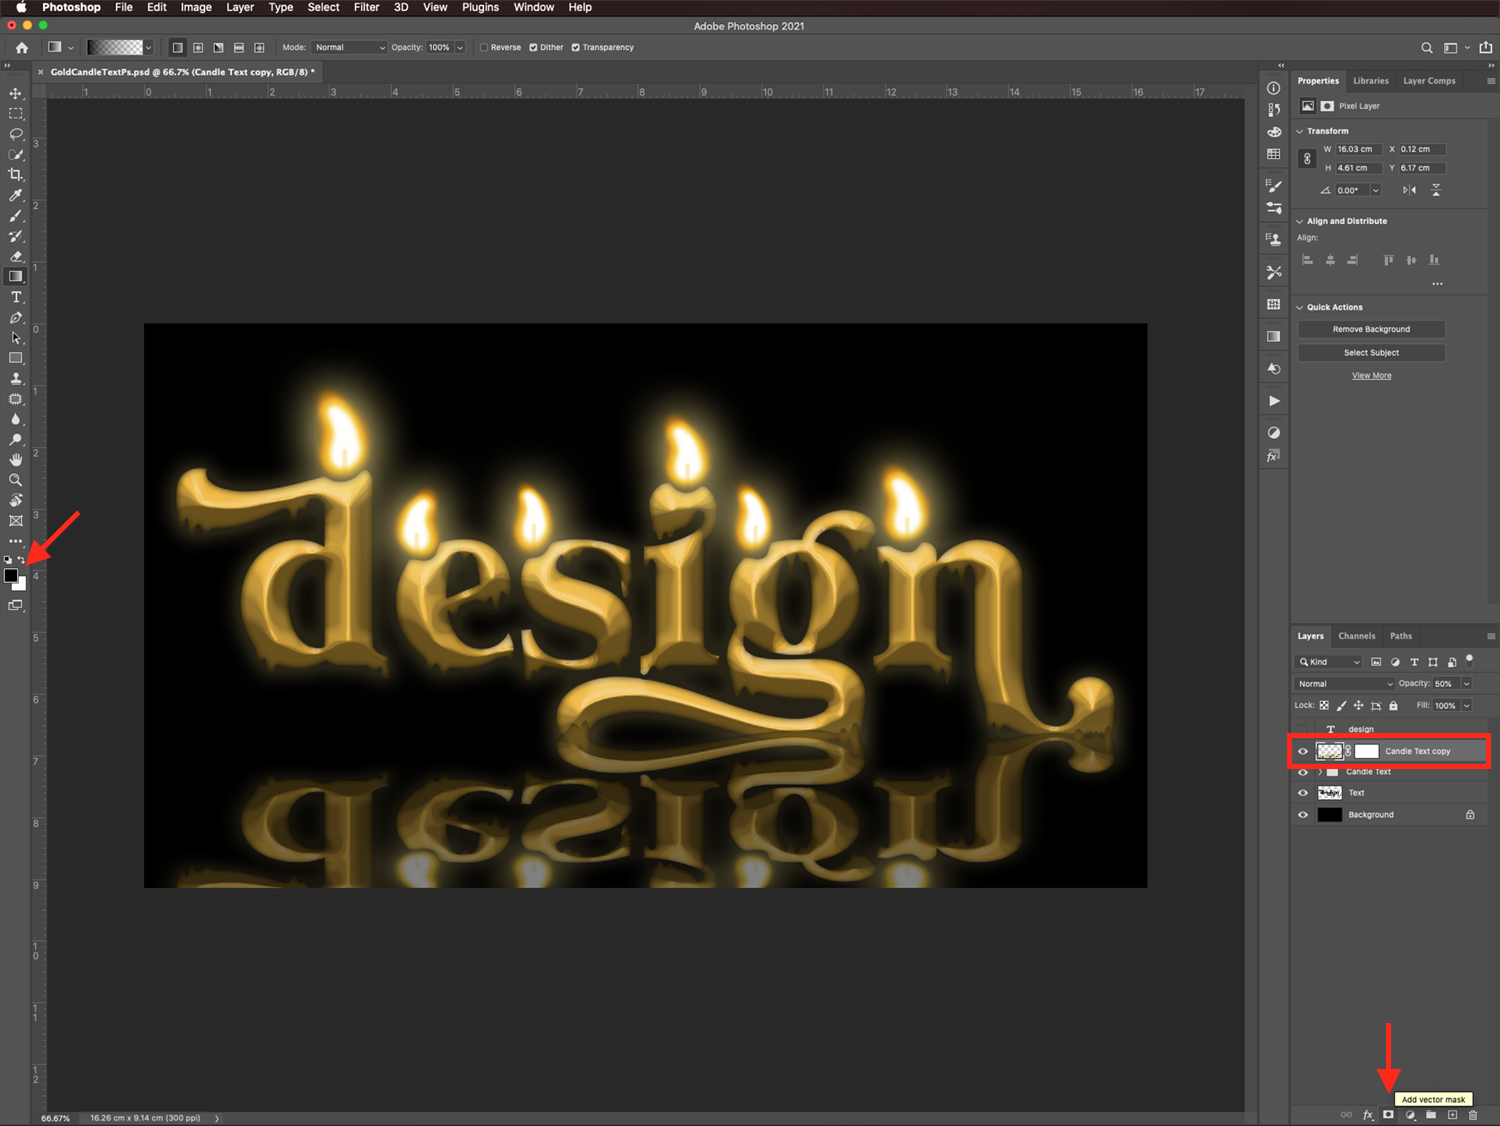
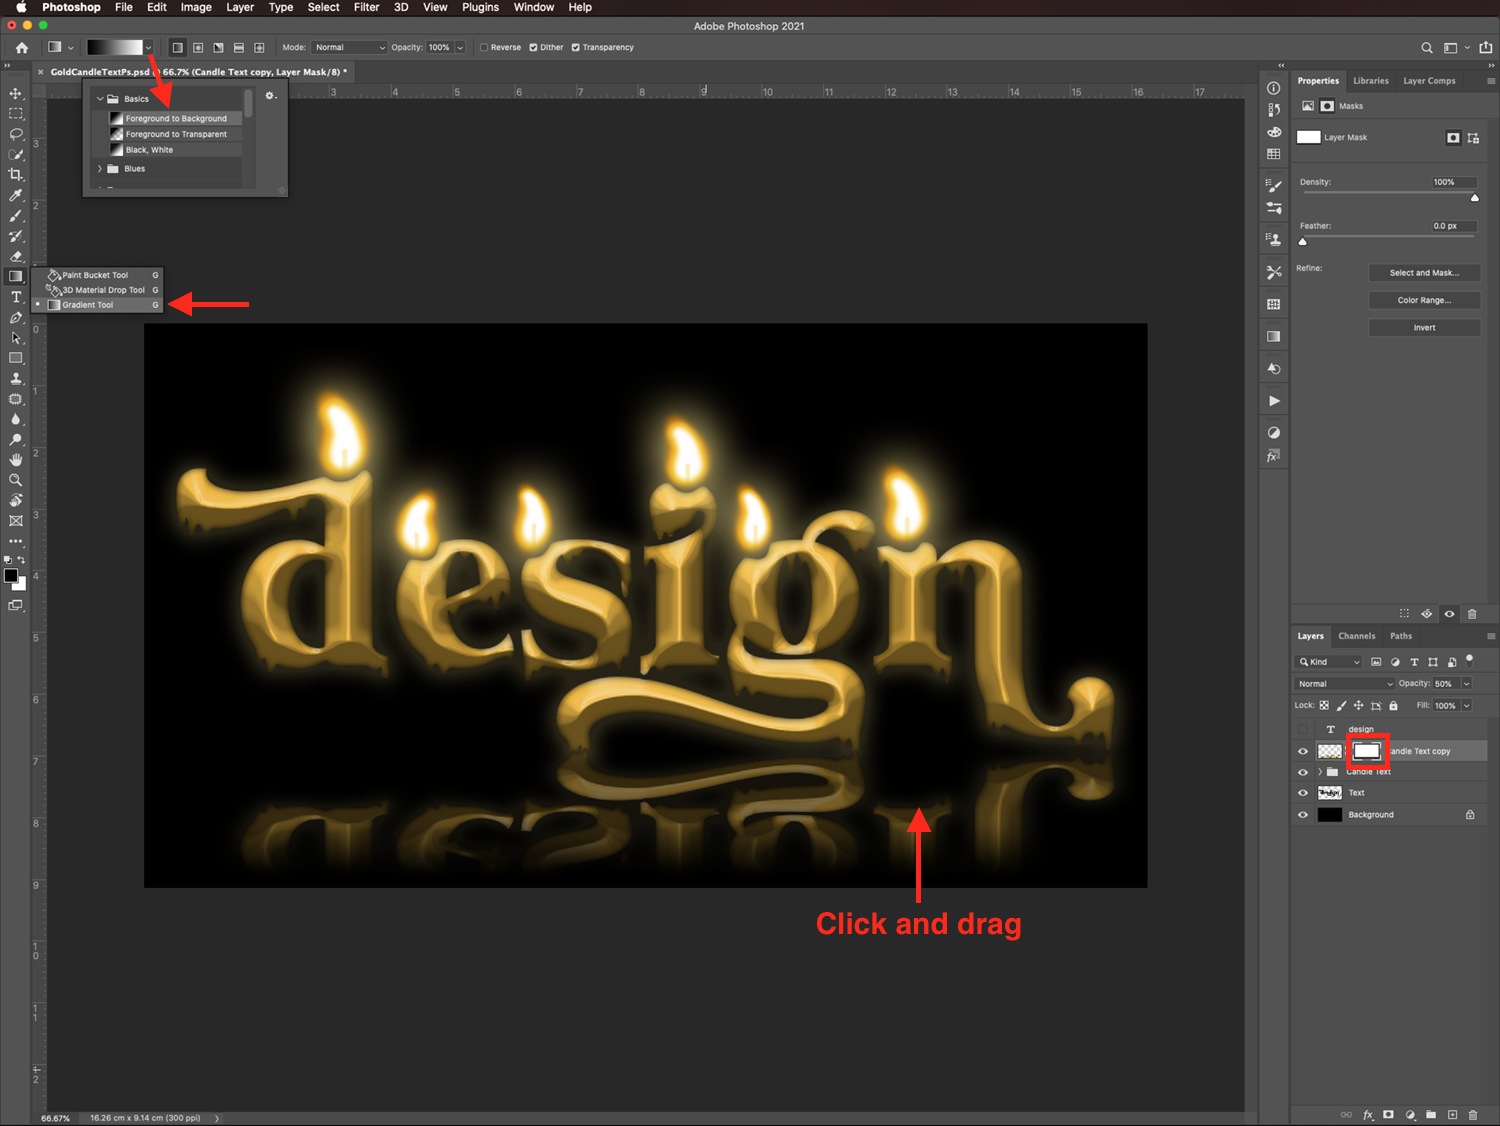
Make sure that black and white are selected as the foreground and background colors. Select the Gradient tool (G) with the Foreground to Background option.
Then, hold Shift, click at the bottom of the canvas and drag up towards the middle of the text reflection. The idea is to erase some of the bottom areas of the reflection to make it look like it's fading away.
Erase Some of the Overlapping Areas
Finally, use the Brush tool (B) with a medium soft brush (94 px and 0% hardness) and 50% opacity to fade some of the areas of the reflection that overlap with the candle text and smooth them out.
Well, that’s it! You can now check out how amazing your text looks with this gold candle effect applied to it!

We have more excellent text effect tutorials for you to try, such as creating a 3D comic text effect, making an embossed text effect, and turning any font into a chalk text effect in Photoshop.
6 Related Photoshop Tutorials
For this tutorial, you will use the free Font “GENUINE” from Ari Riadi and some free “Gold” gradients.1 - In Photoshop, create a “New” 3000 by 1999 Pixels @300 dpi document.2 - Create a “New Gradient Fill Layer” by clicking on the small Black and White icon at the bottom of the “Layers ...
For this tutorial, we will need a background image with a with a contrasting color, and we are using the free font “Metal Curve” from Matt Smith.1 - In Photoshop, open the image you chose as background.2 - Select the “Type Tool” (T), choose the font you want, and type ...
For this tutorial we are using a canvas or paper background and Titin Script from Font Bundles.1 – Create a new “Gradient Layer” under your “Texture” layer. Use a “Transparent to Fill Color” gradient with #d3d1d1 and #918f8f as colors, the Style as Radial and a 250% Scale. Hit ...
Effects can be added to text in Inkscape to give the appearance of a shiny gold surface. The text can then be used in projects such as logos, web design, crafting projects and much more. Text effects add impact to draw the reader’s attention to your product or design. ...
You will need two images to create this effect. A gold and a canvas or fabric backgrounds. Make sure they are large enough to fit your document and with a good resolution.1 – In Photoshop open your Gold background. Go to Edit > Define Pattern and name your pattern “Gold”.2 – Create ...
For this tutorial, we are using “Bukhari Script” from Fontbundles.net (https://fontbundles.net/mikrojihad/33277-bukhari-script), some cake textures (there are some web pages that have free images that you can useas textures) and a plate and table background images.We are going to divide this tutorial in two sections. ...

 All your Font Needs


