Eraser in Photoshop
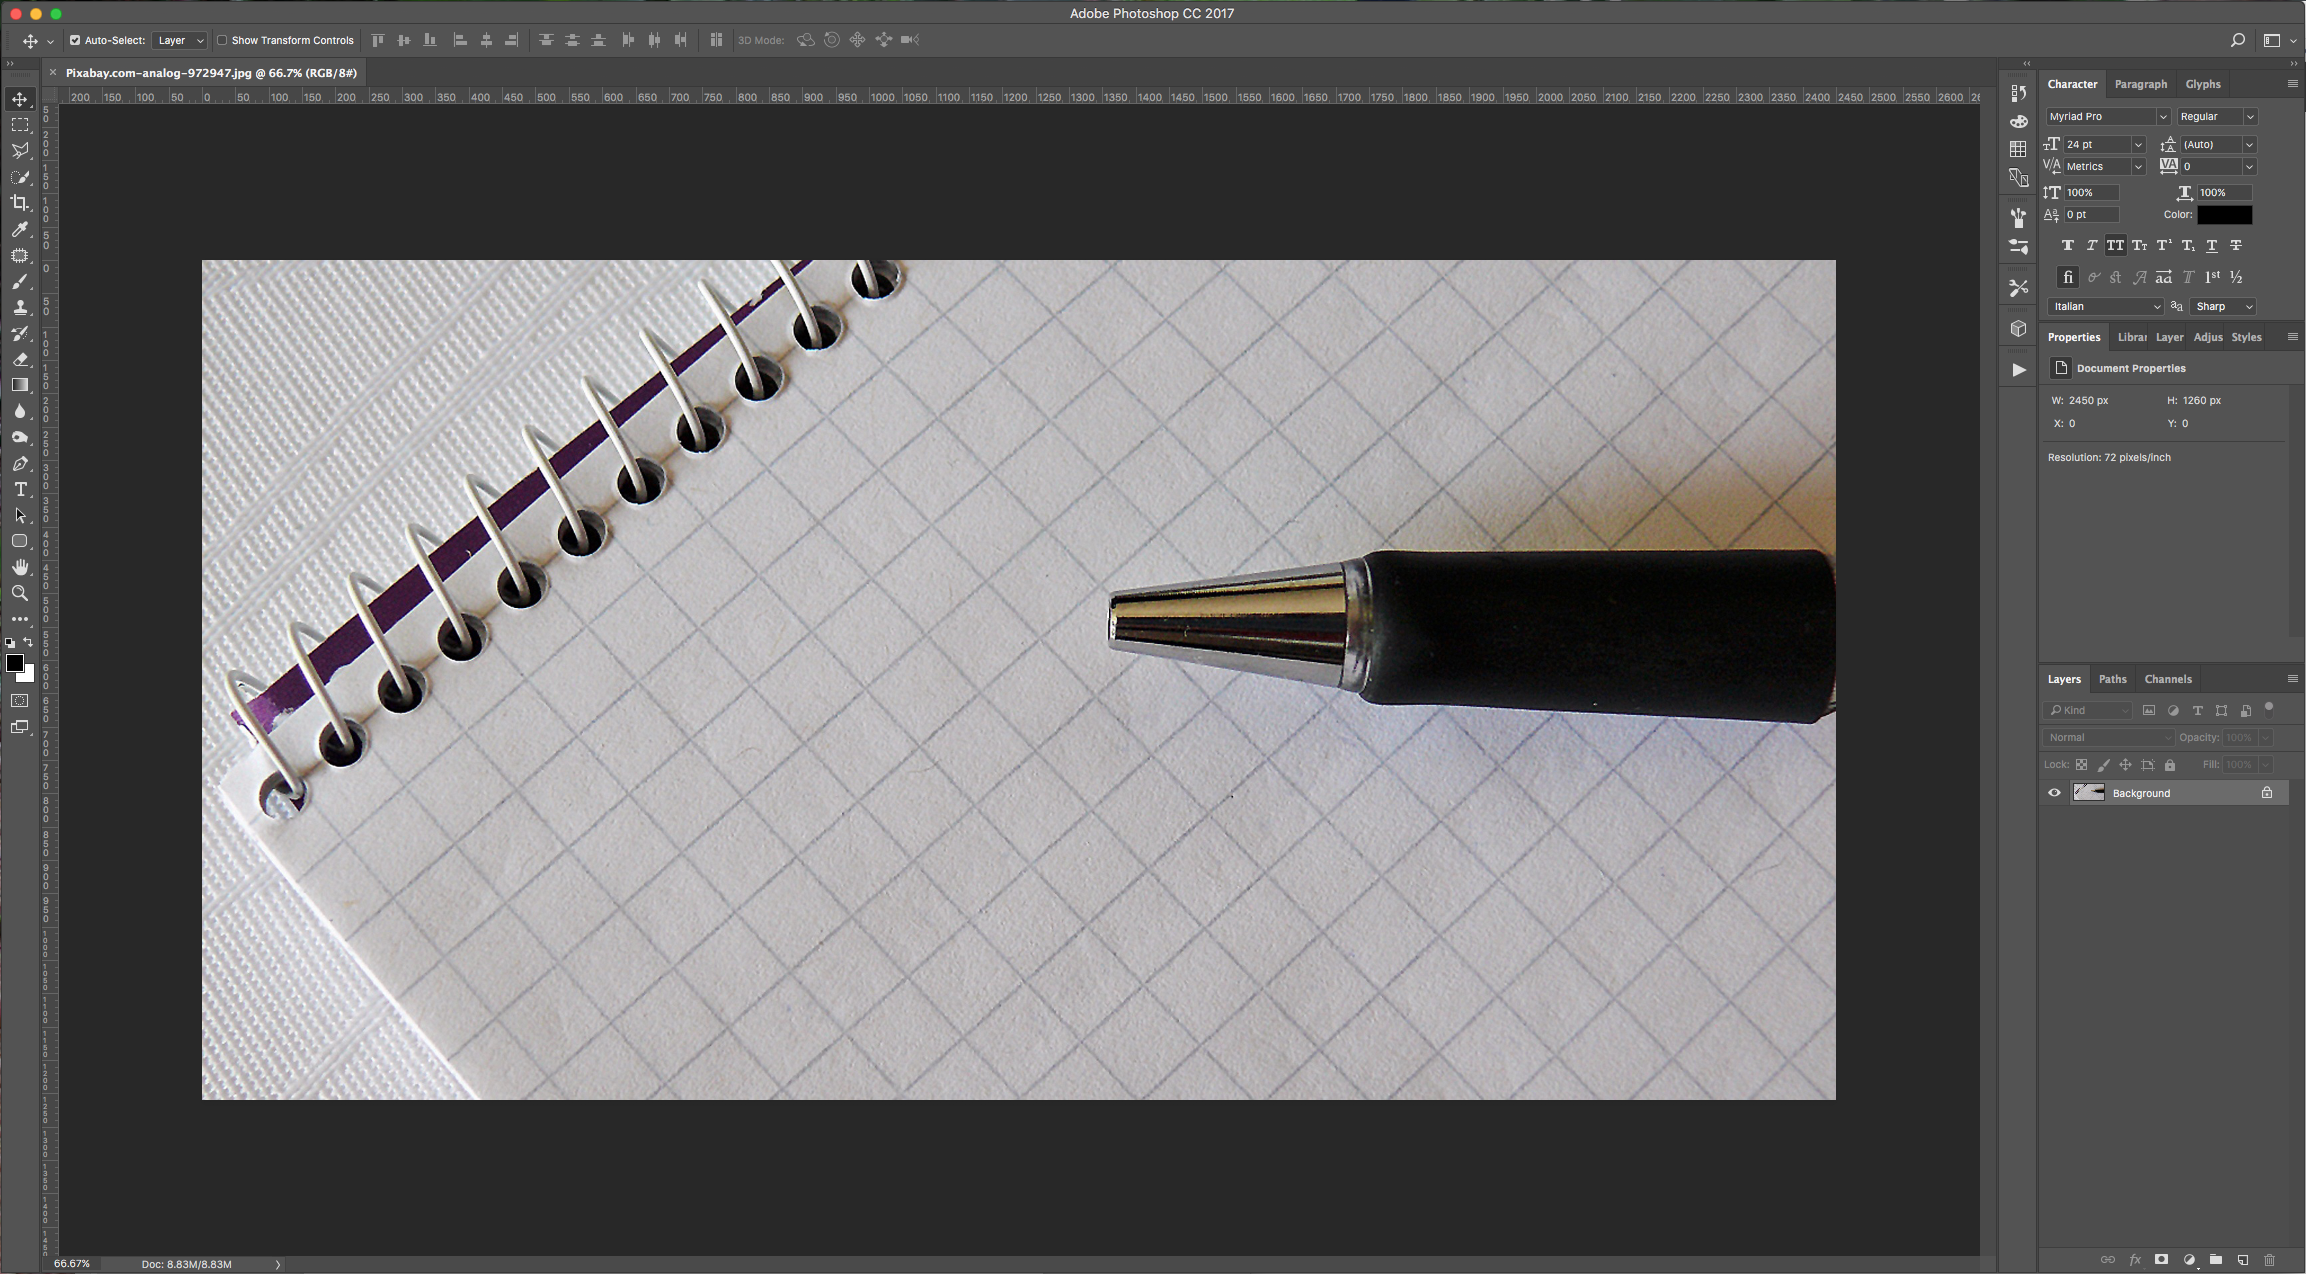
For this tutorial, we will use a background image of paper or a desk.
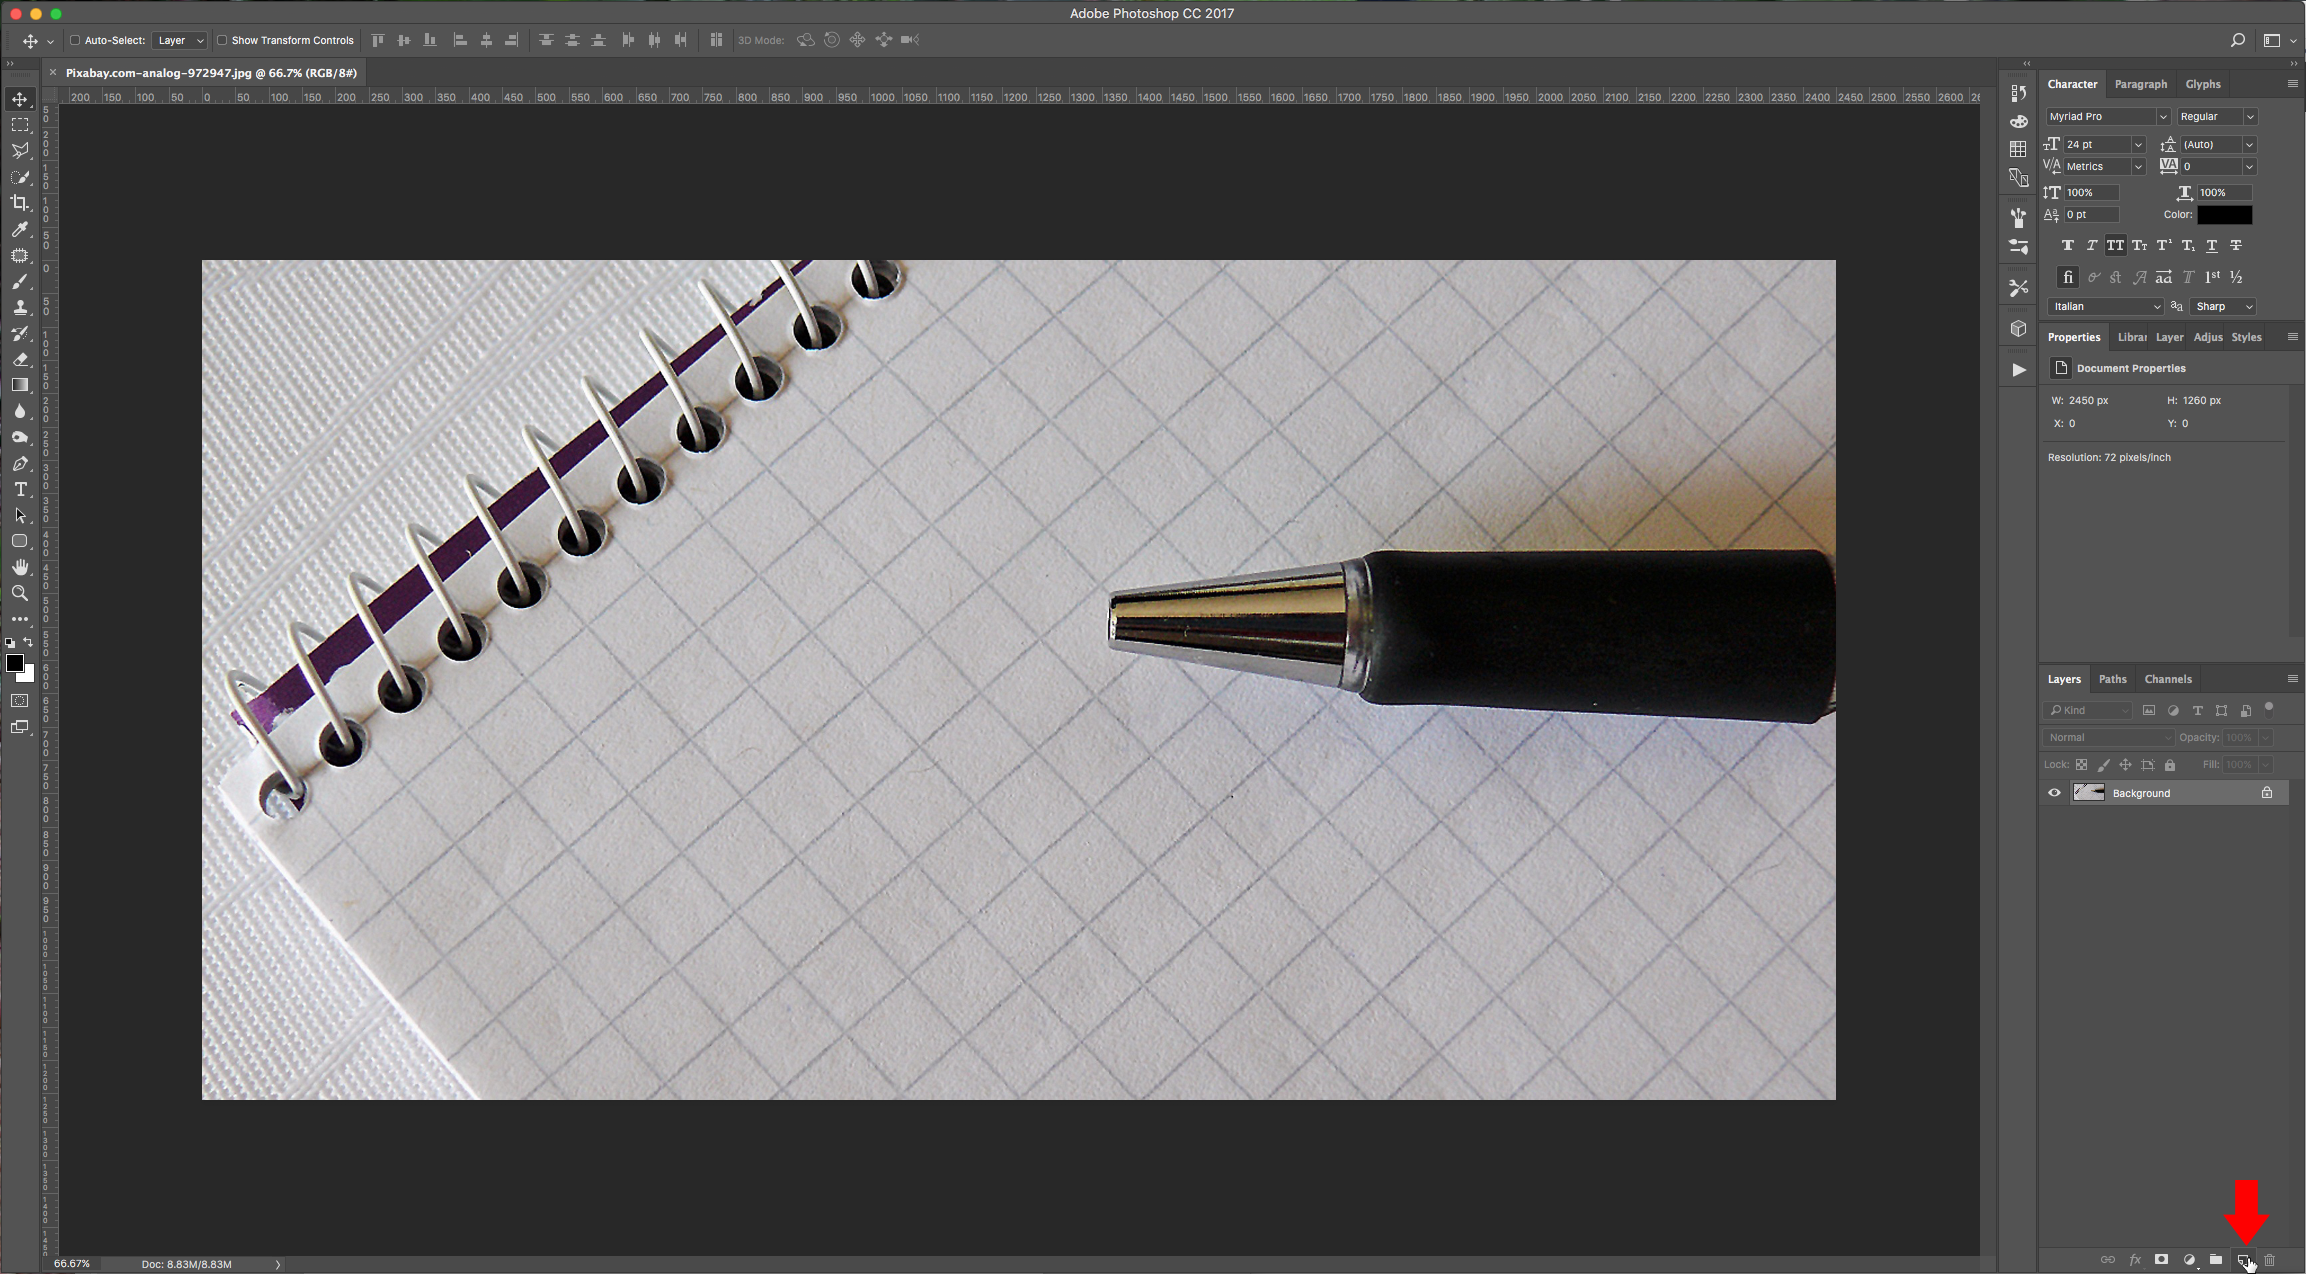
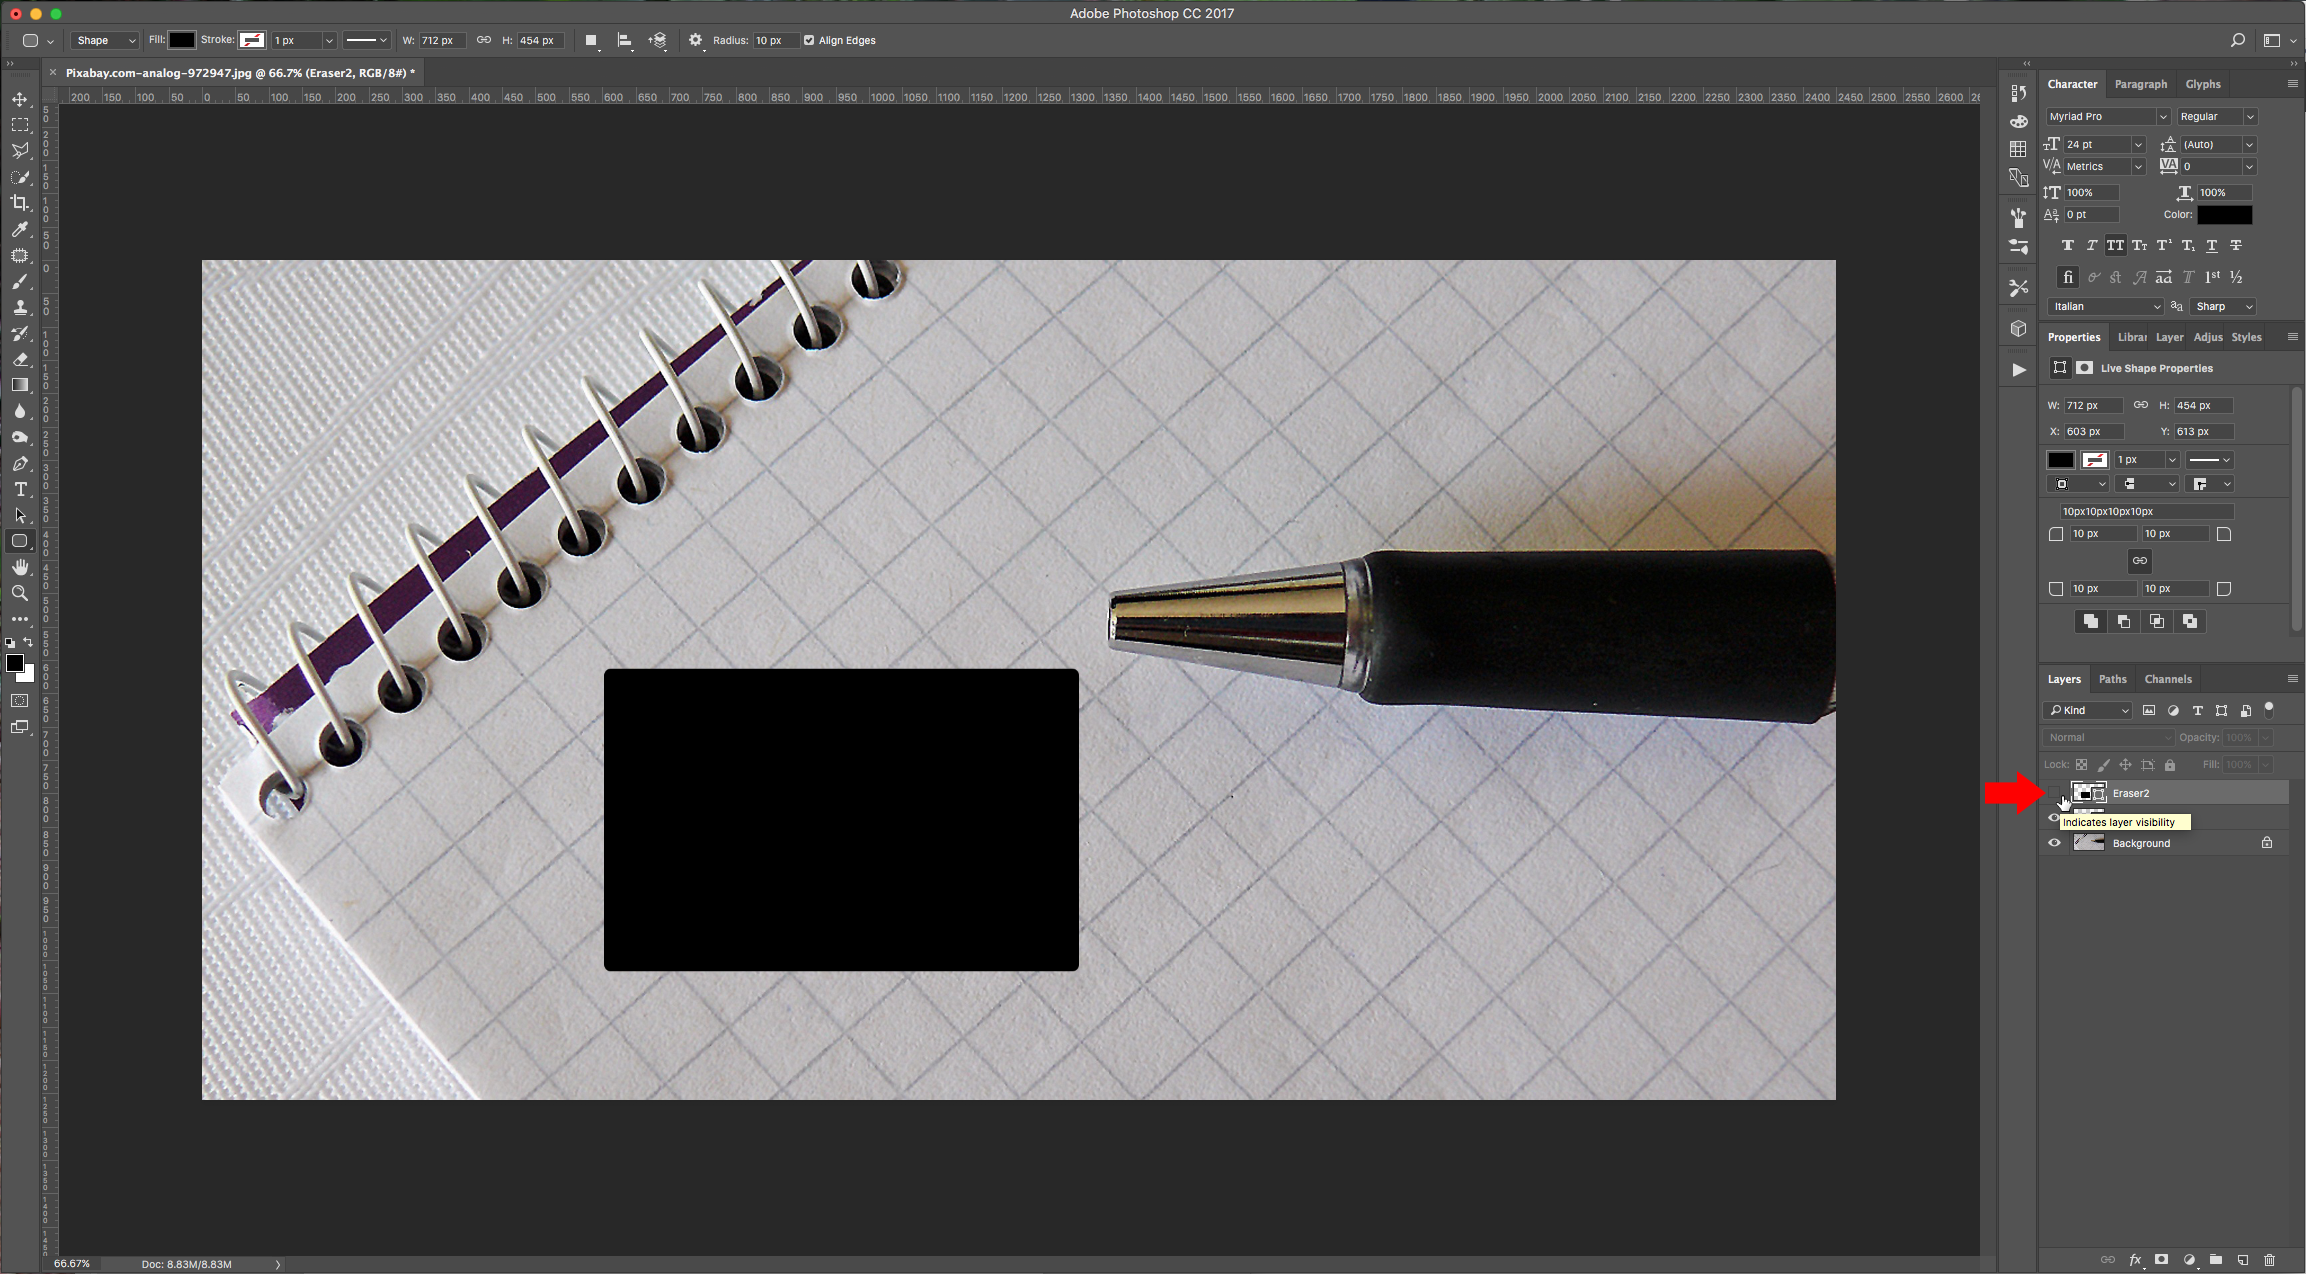
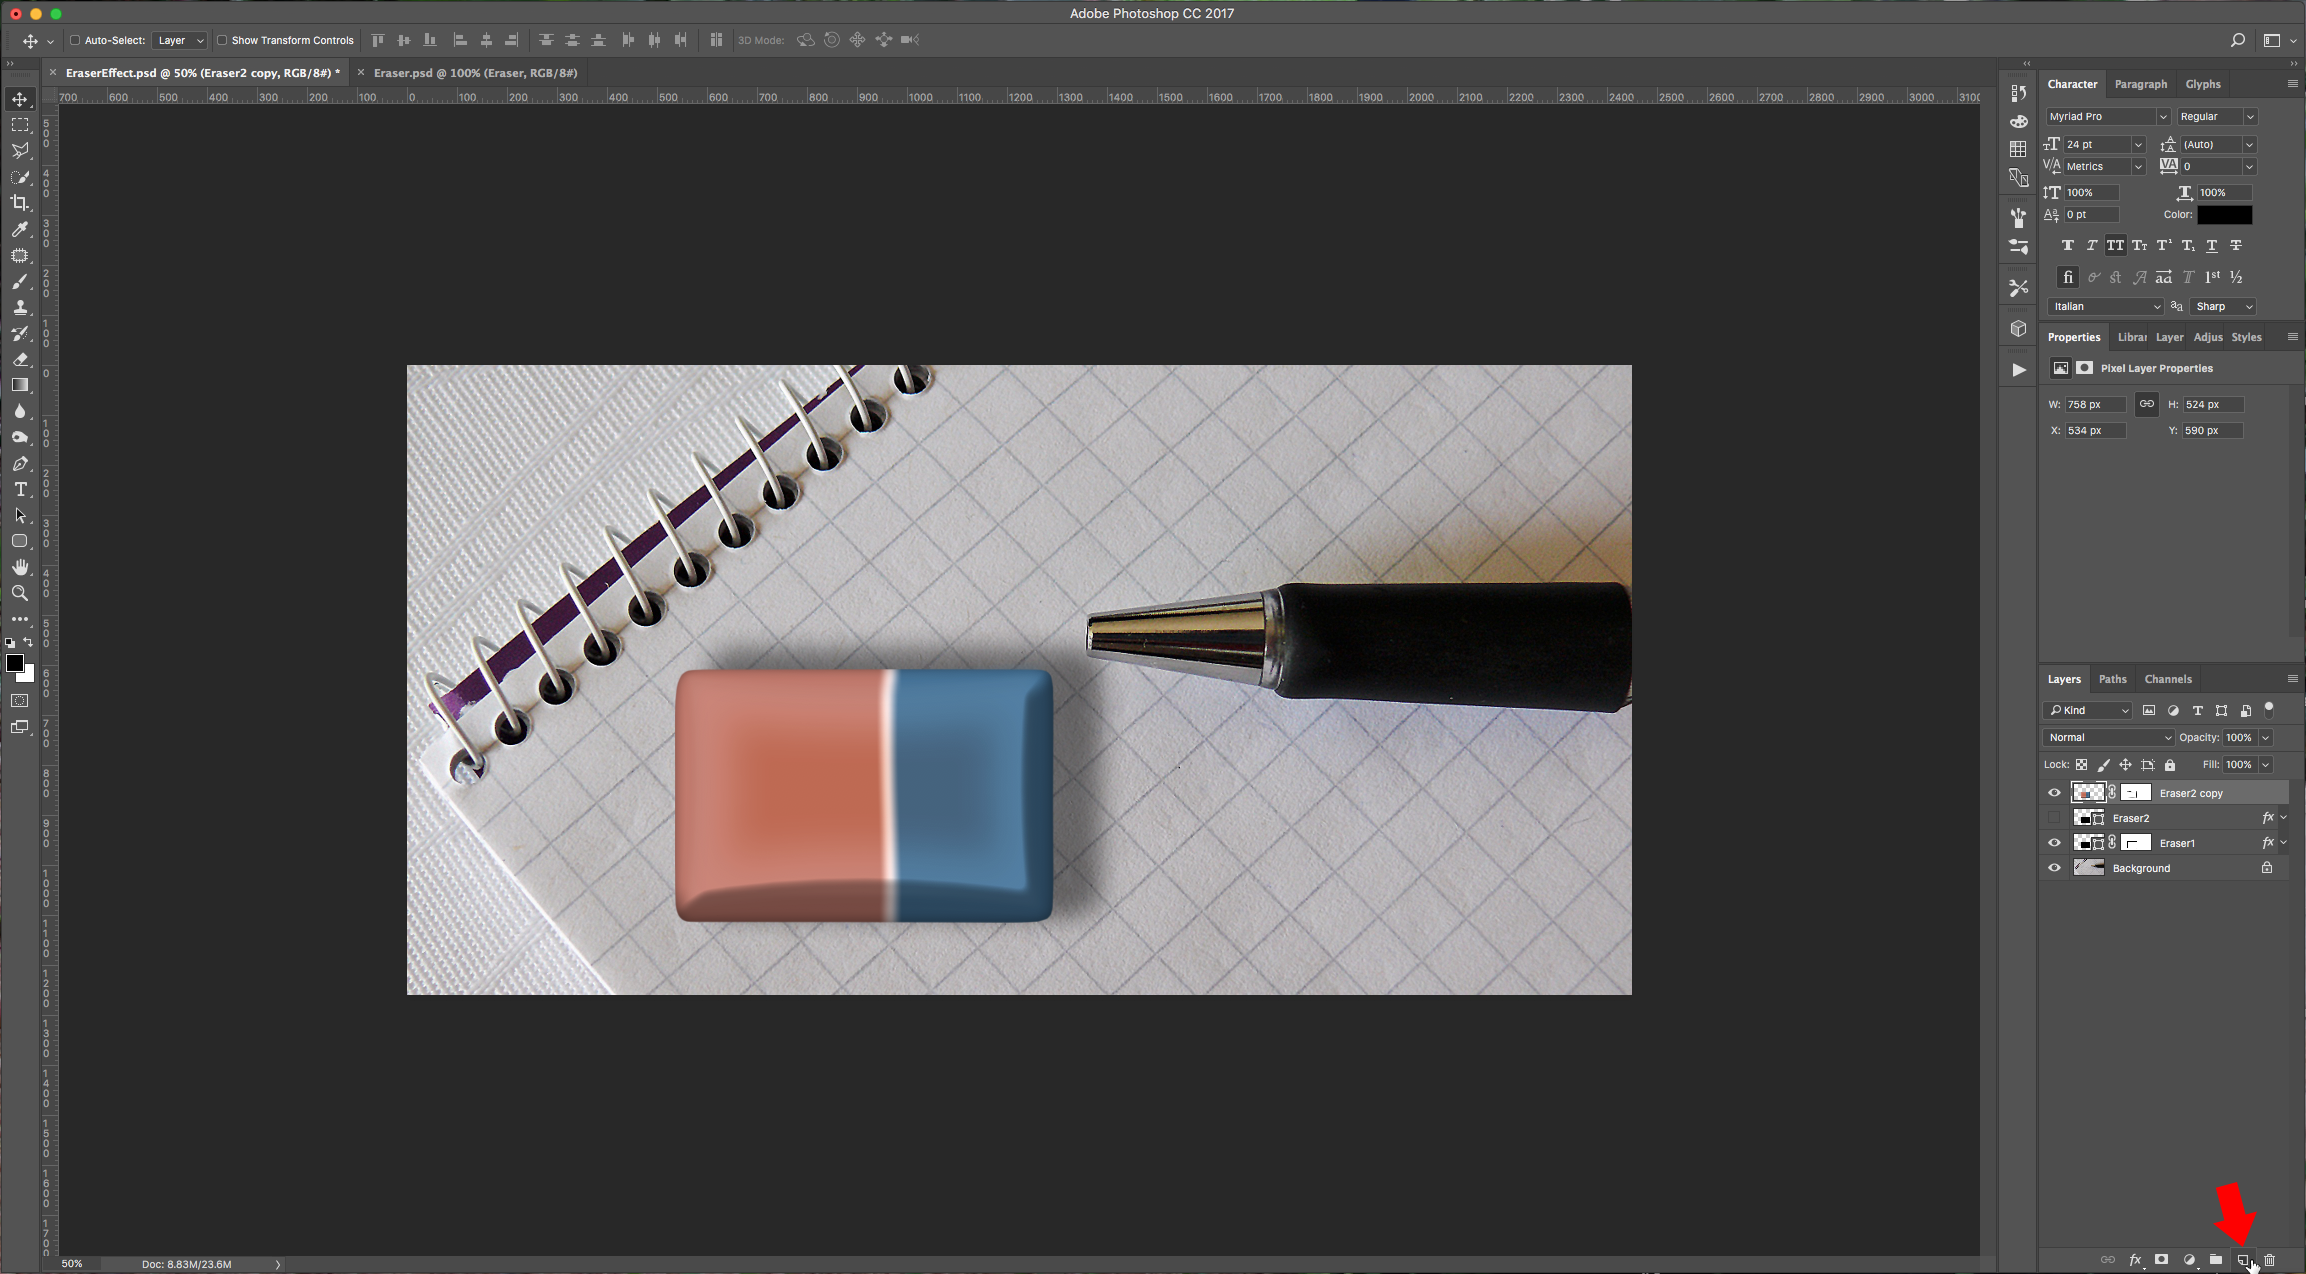
1 - In Photoshop, open the image you chose as “Background”, then create a “New Layer” by clicking on the button at the bottom of the “Layers” Panel.
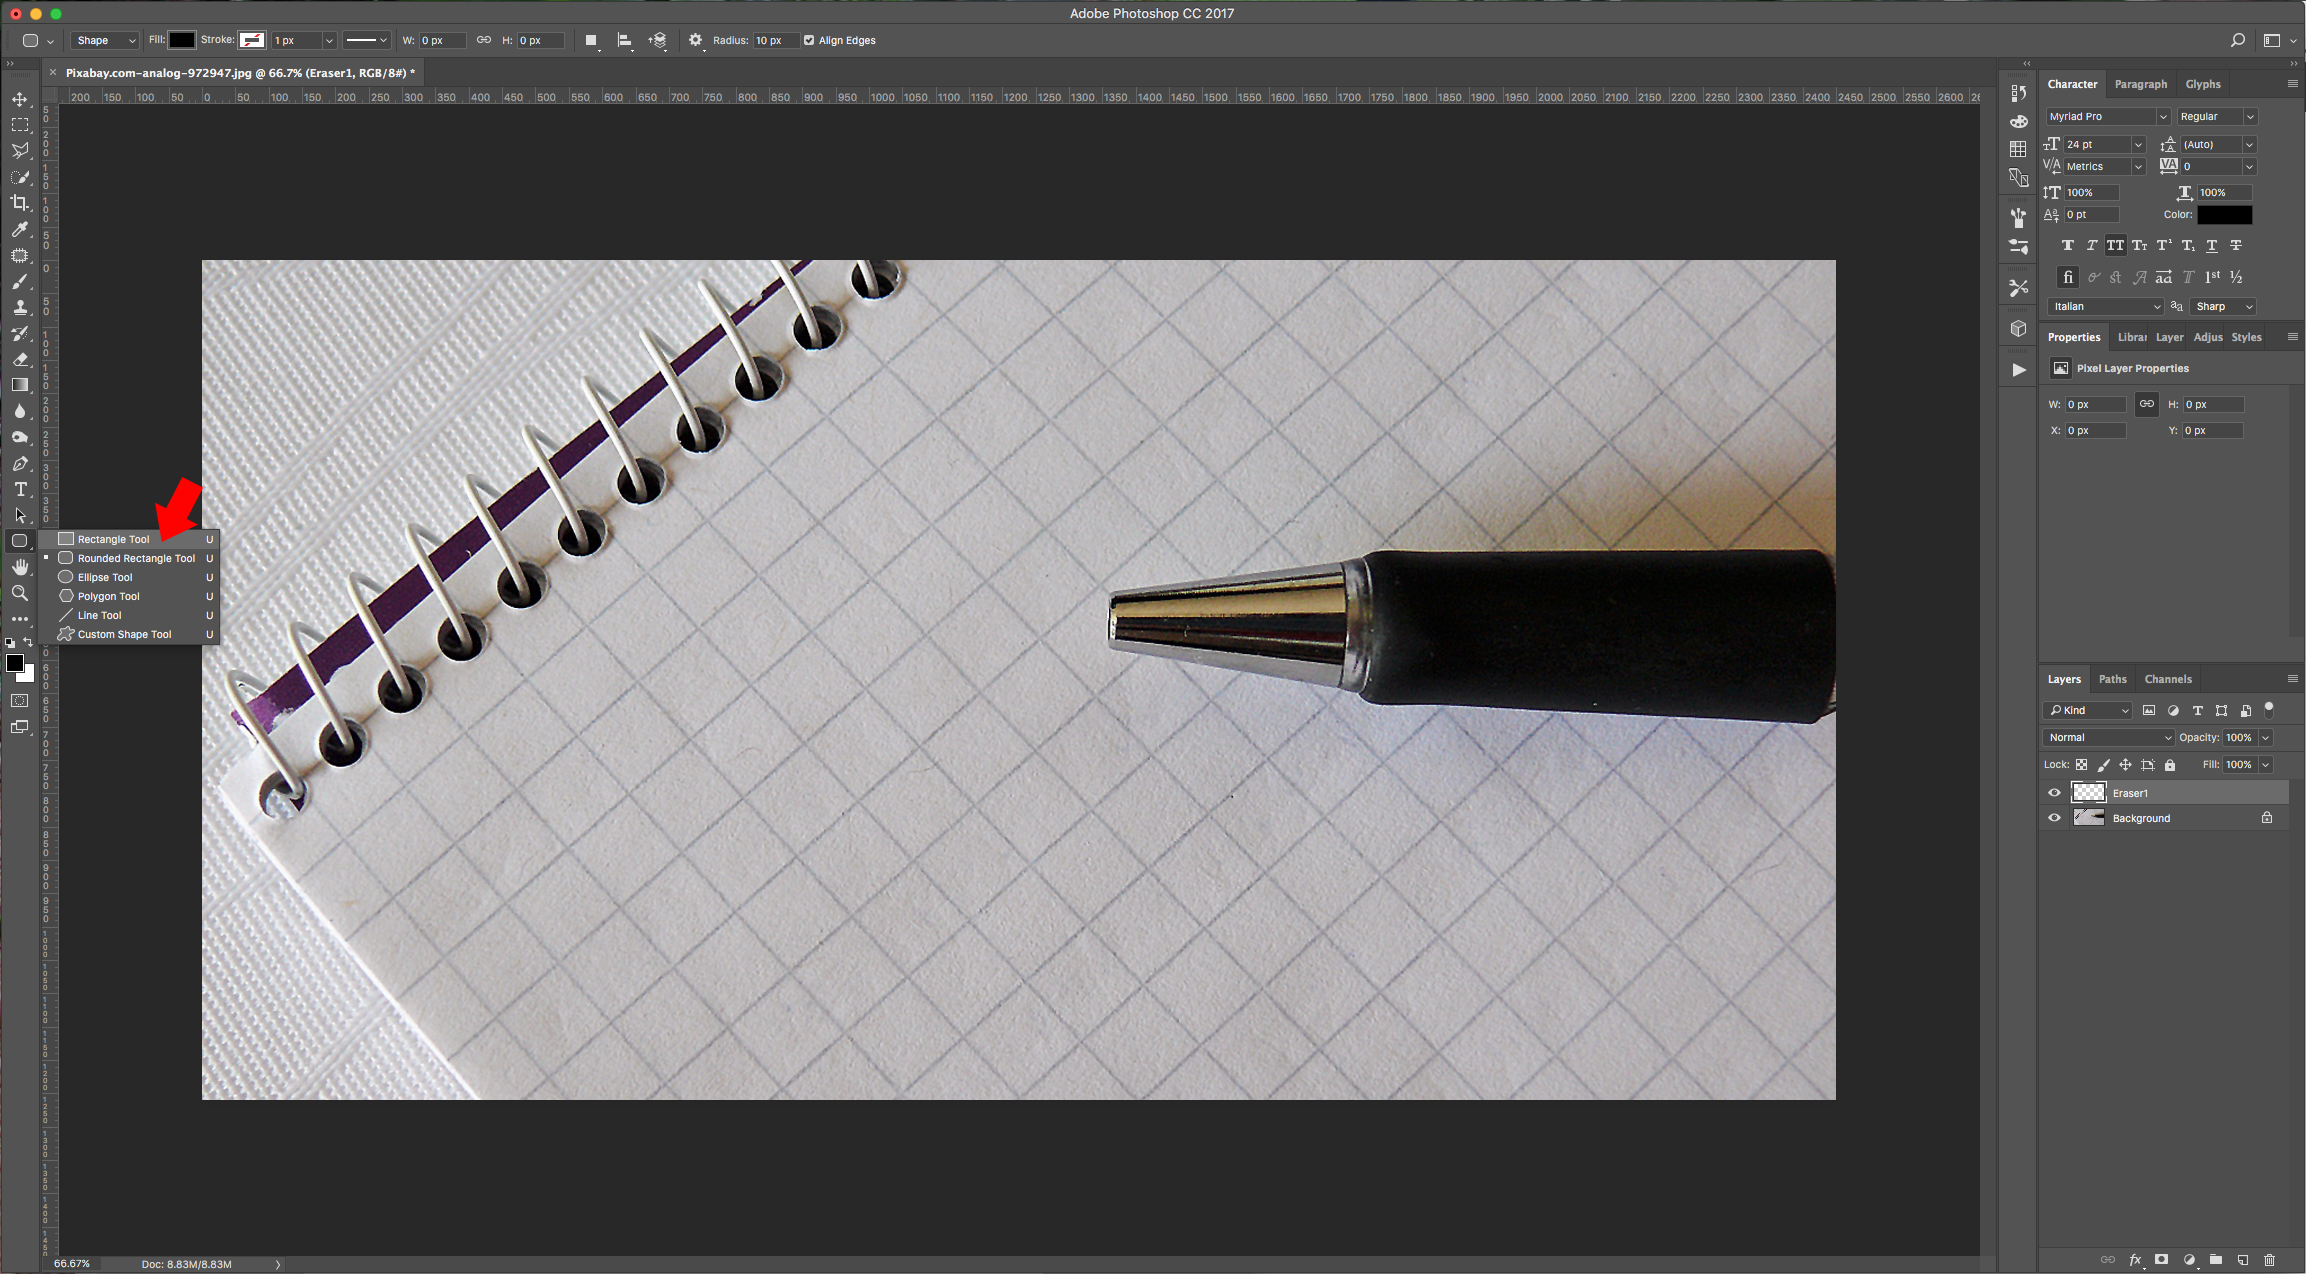
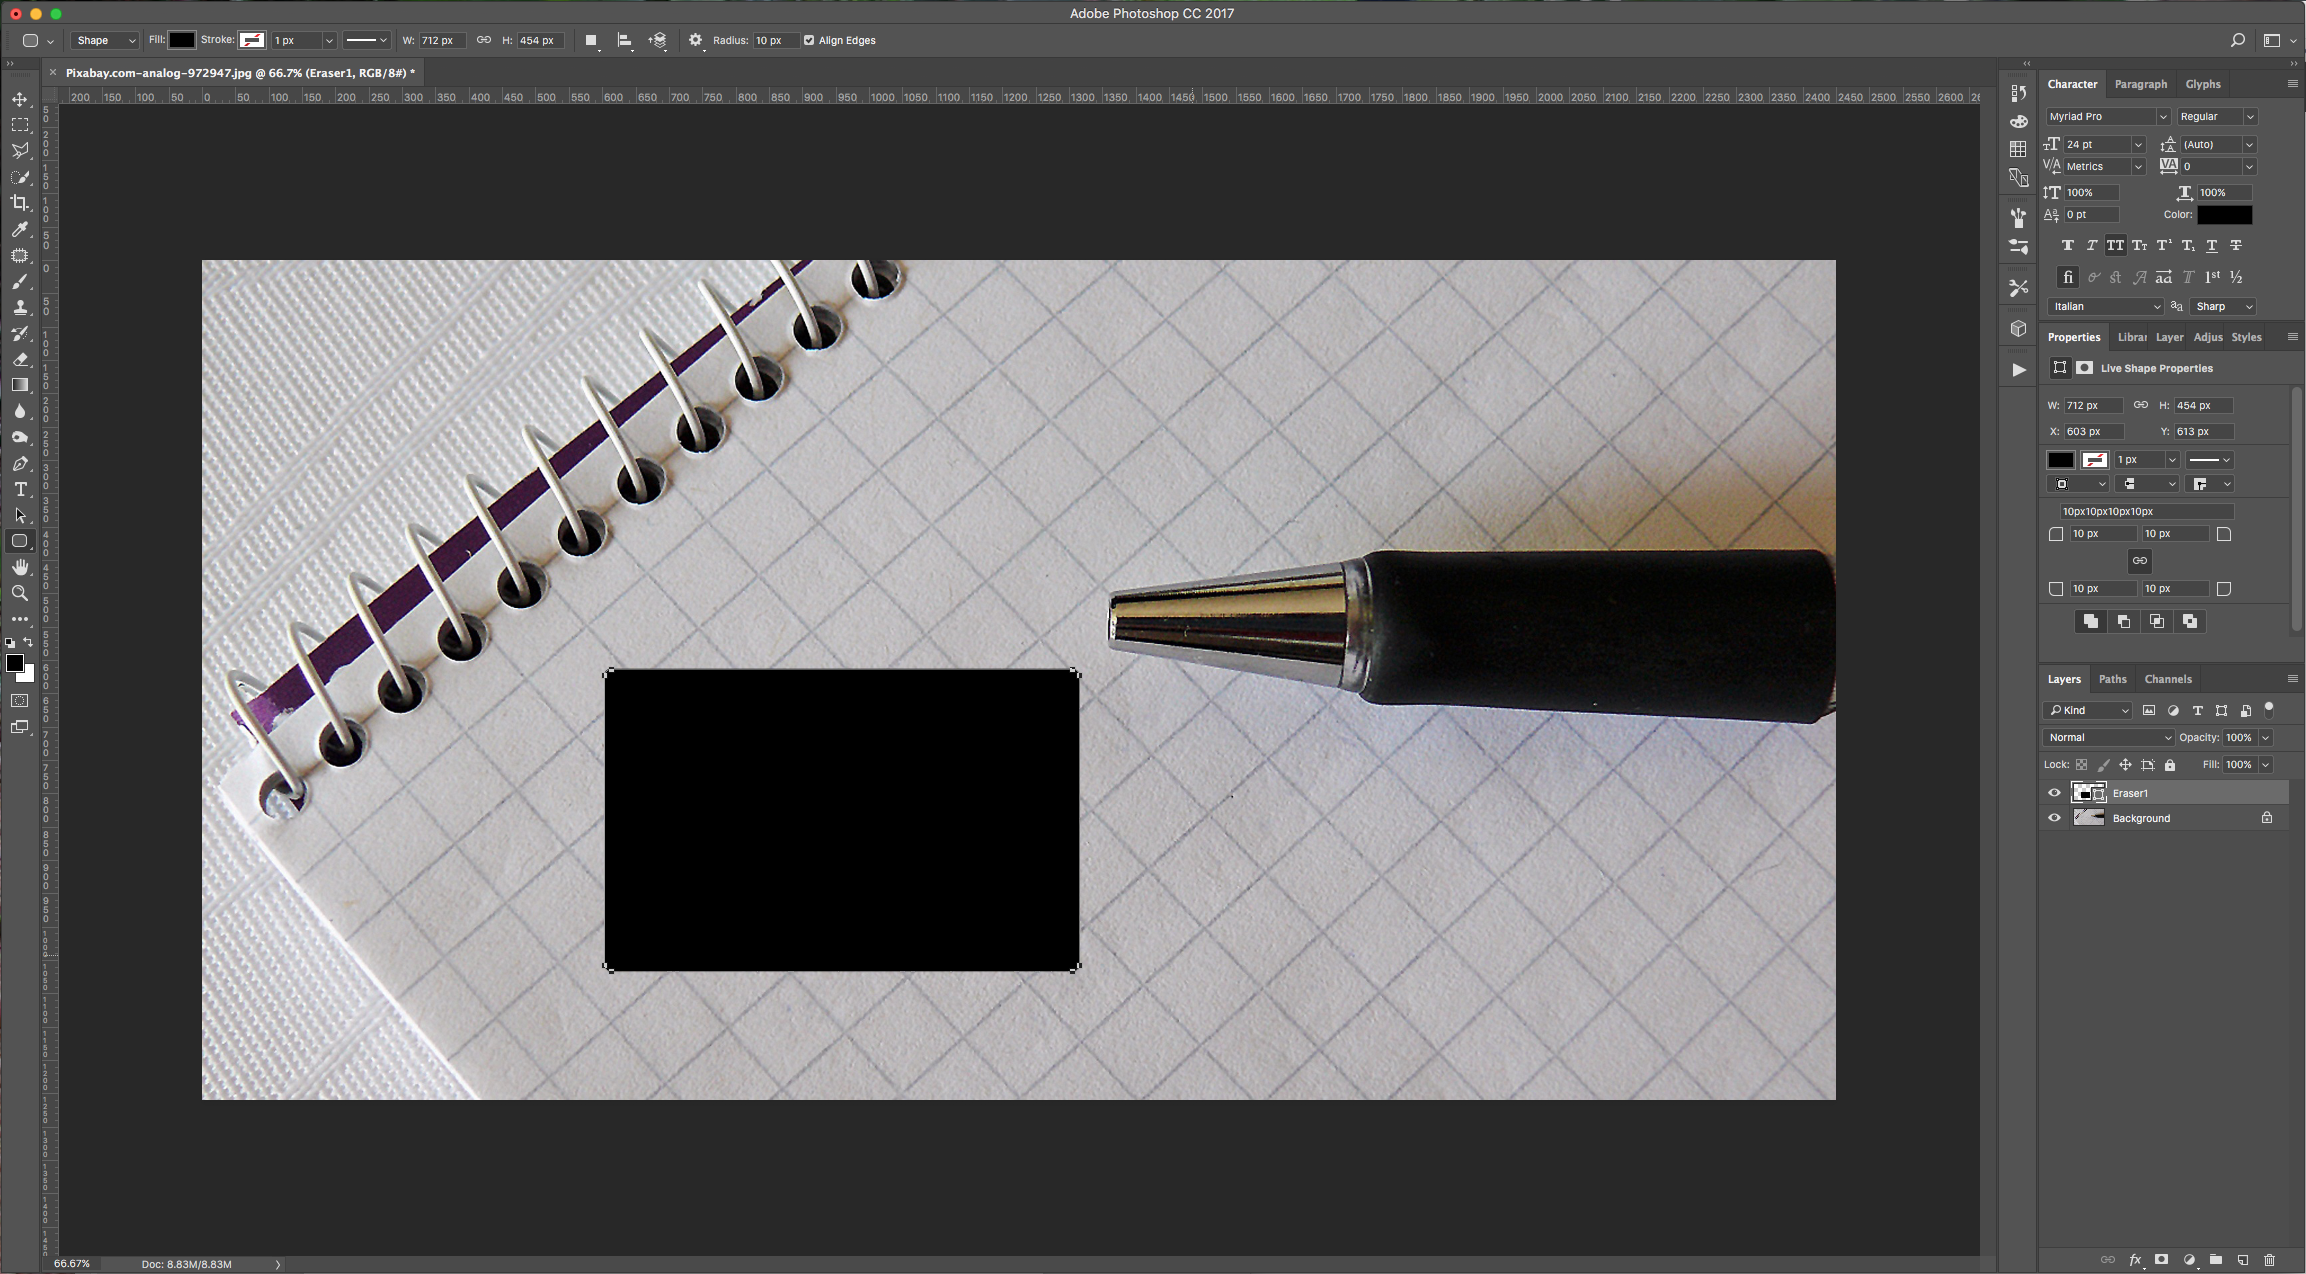
2 - Select the “Rectangle Tool” (U) and draw a rectangle of the size and proportions you wish your eraser to be. You can use any other shape or text if you want.
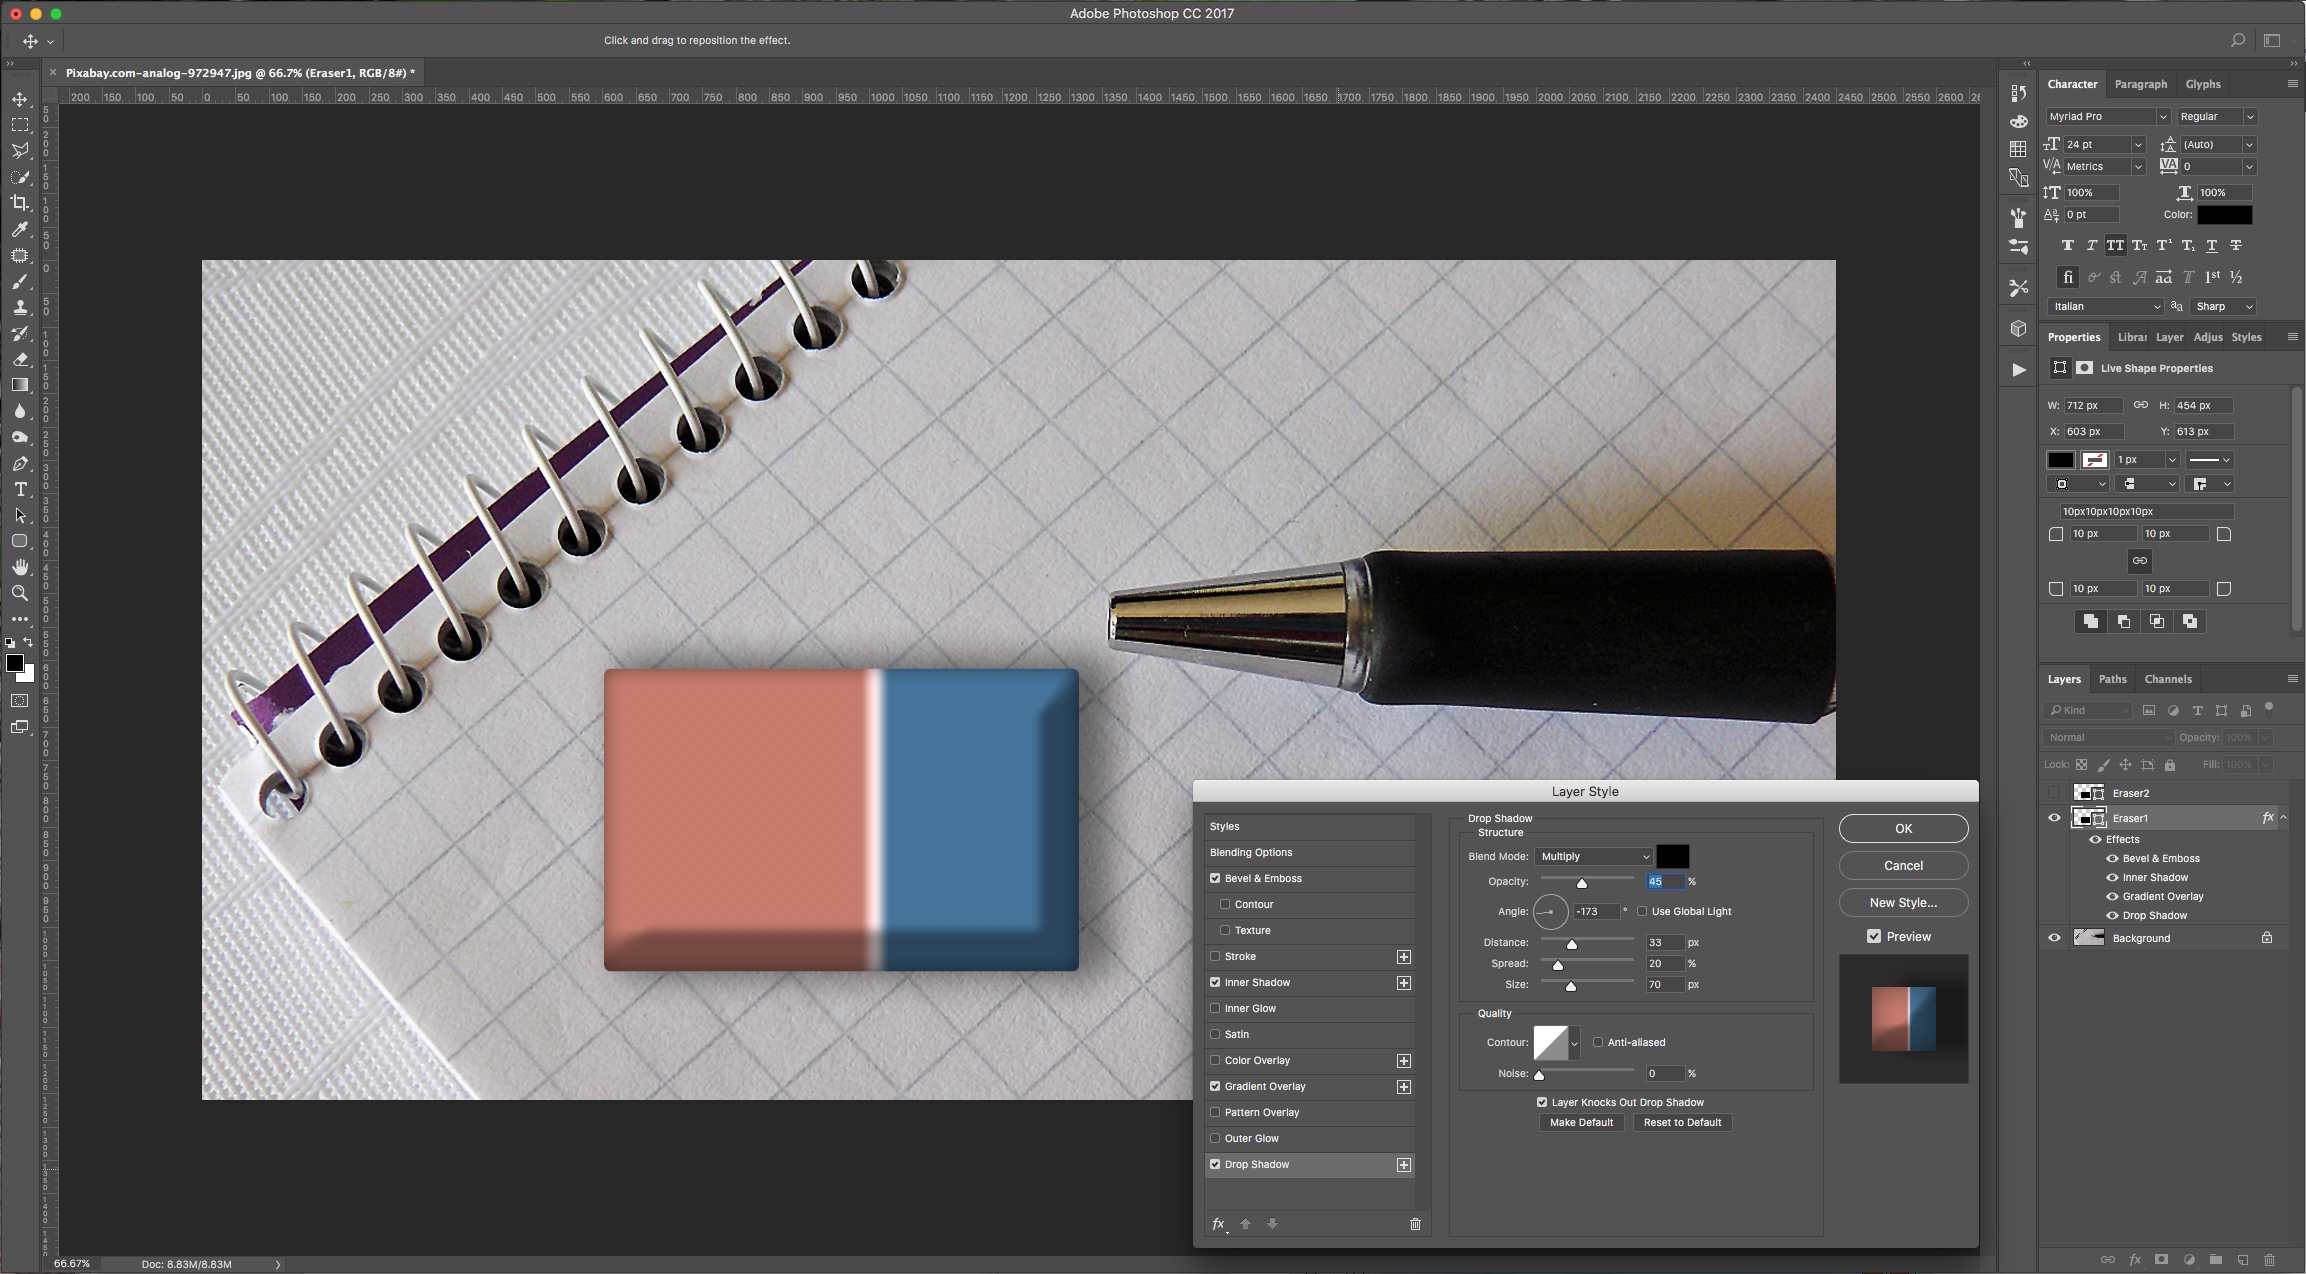
3 - Duplicate your layer (Command/Control + J), hide your duplicate by clicking on the small eye button on the left side of the thumbnail, and then double-click on the original shape layer to apply the following “Layer Styles”:
Bevel & Emboss:

Inner Shadow:

Gradient Overlay: (color 1: #c77b6c, color 2: # fbe6e6, color 3: # 44749d. Location 1: 54%, Location 2: 57%, Location 3: 60%)

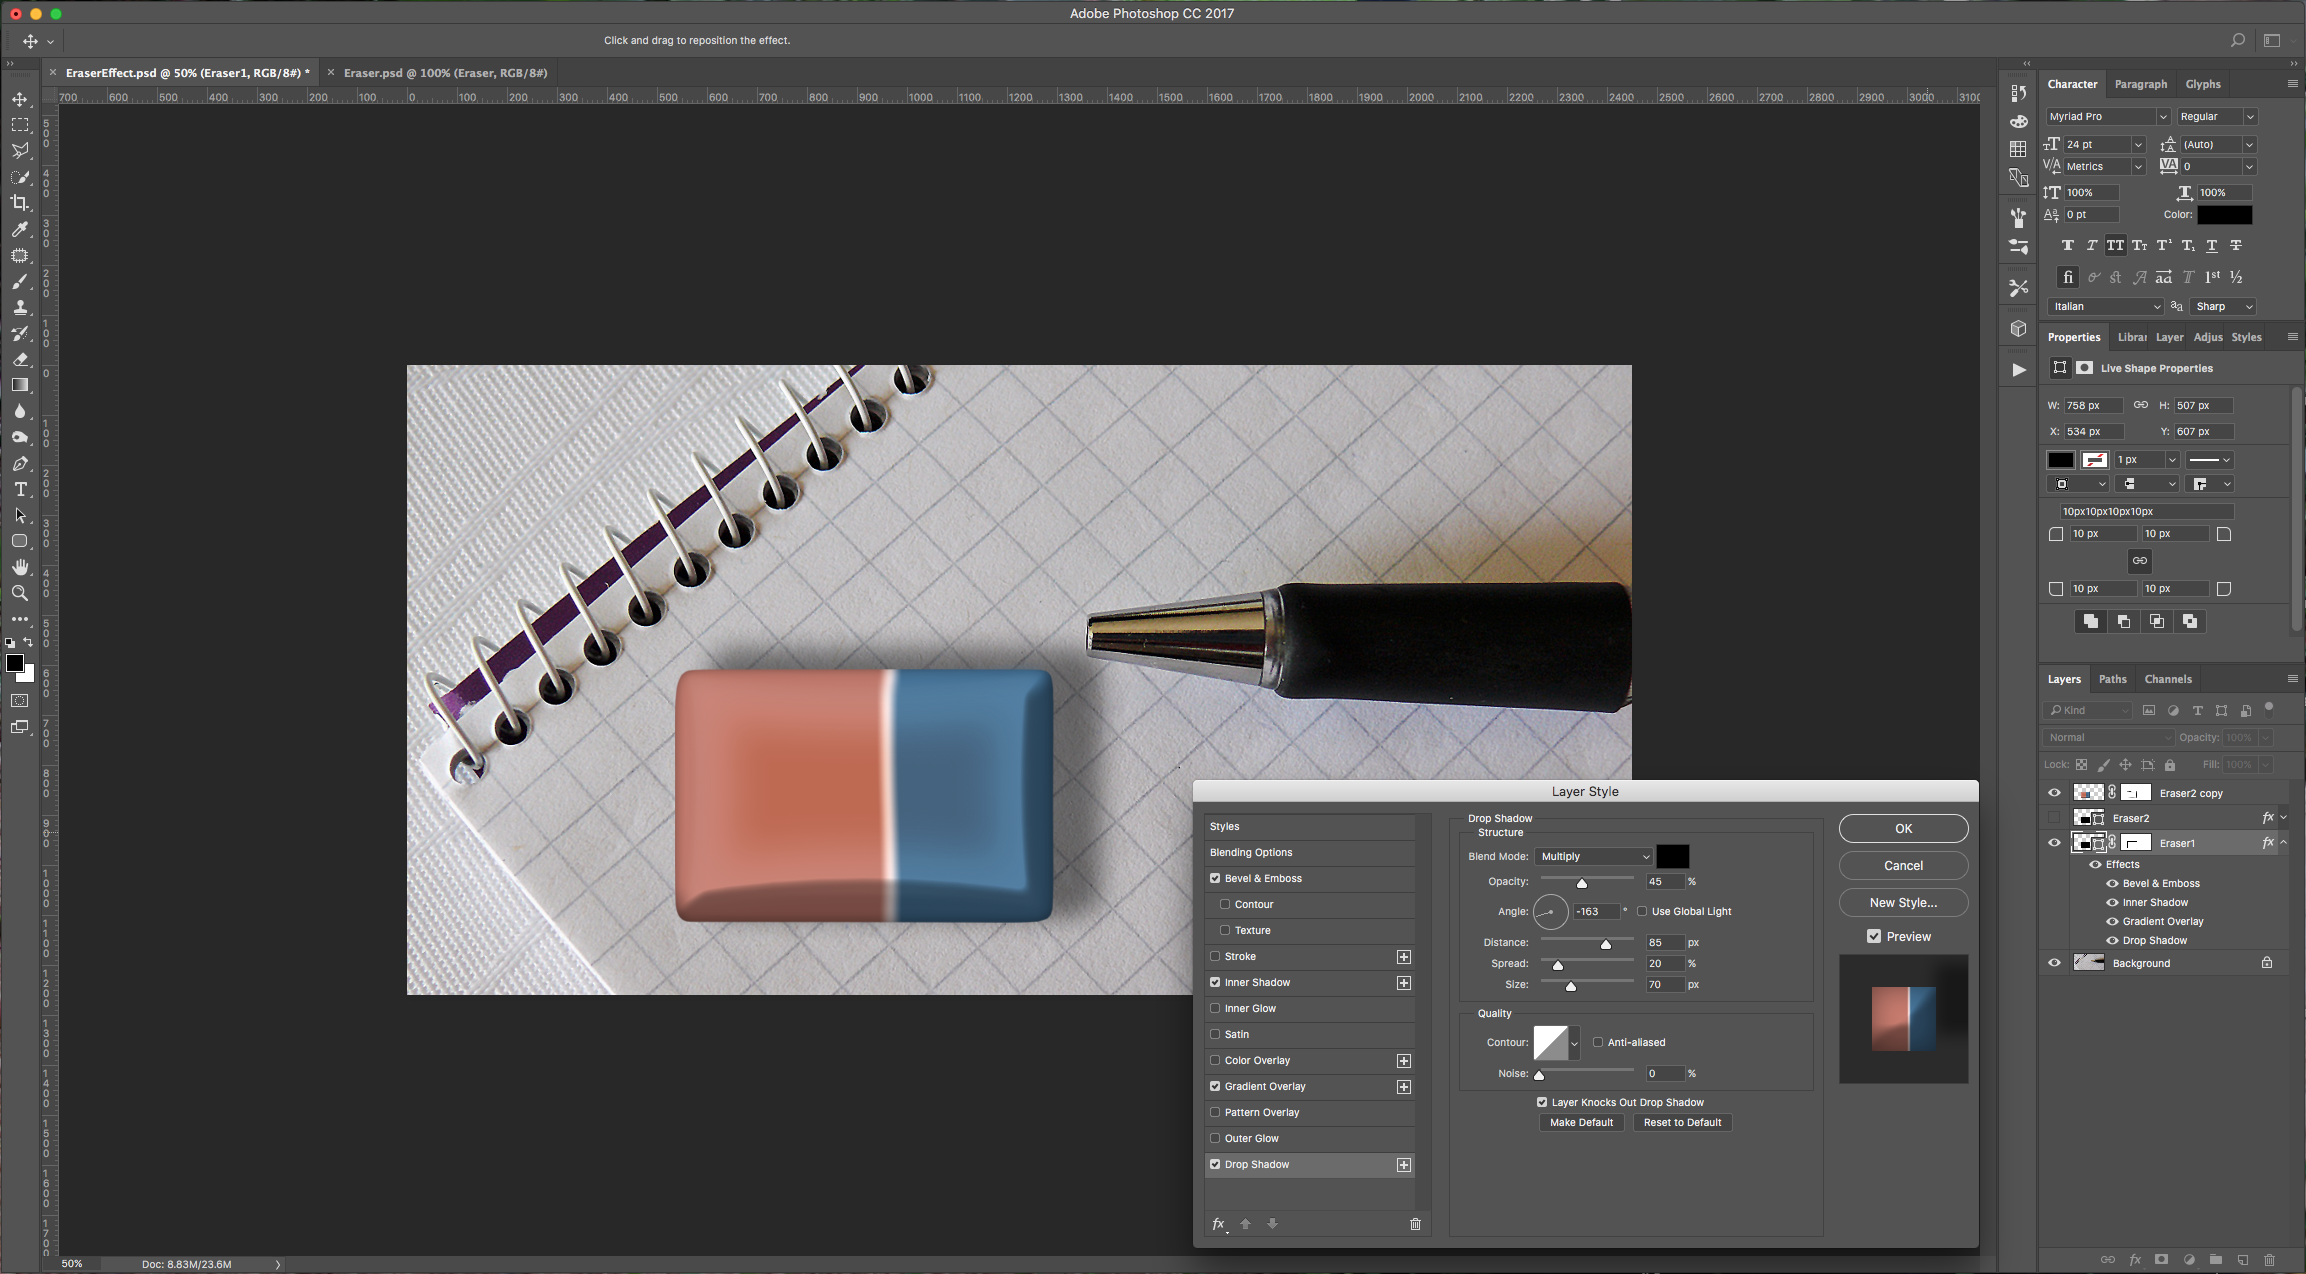
Drop Shadow:
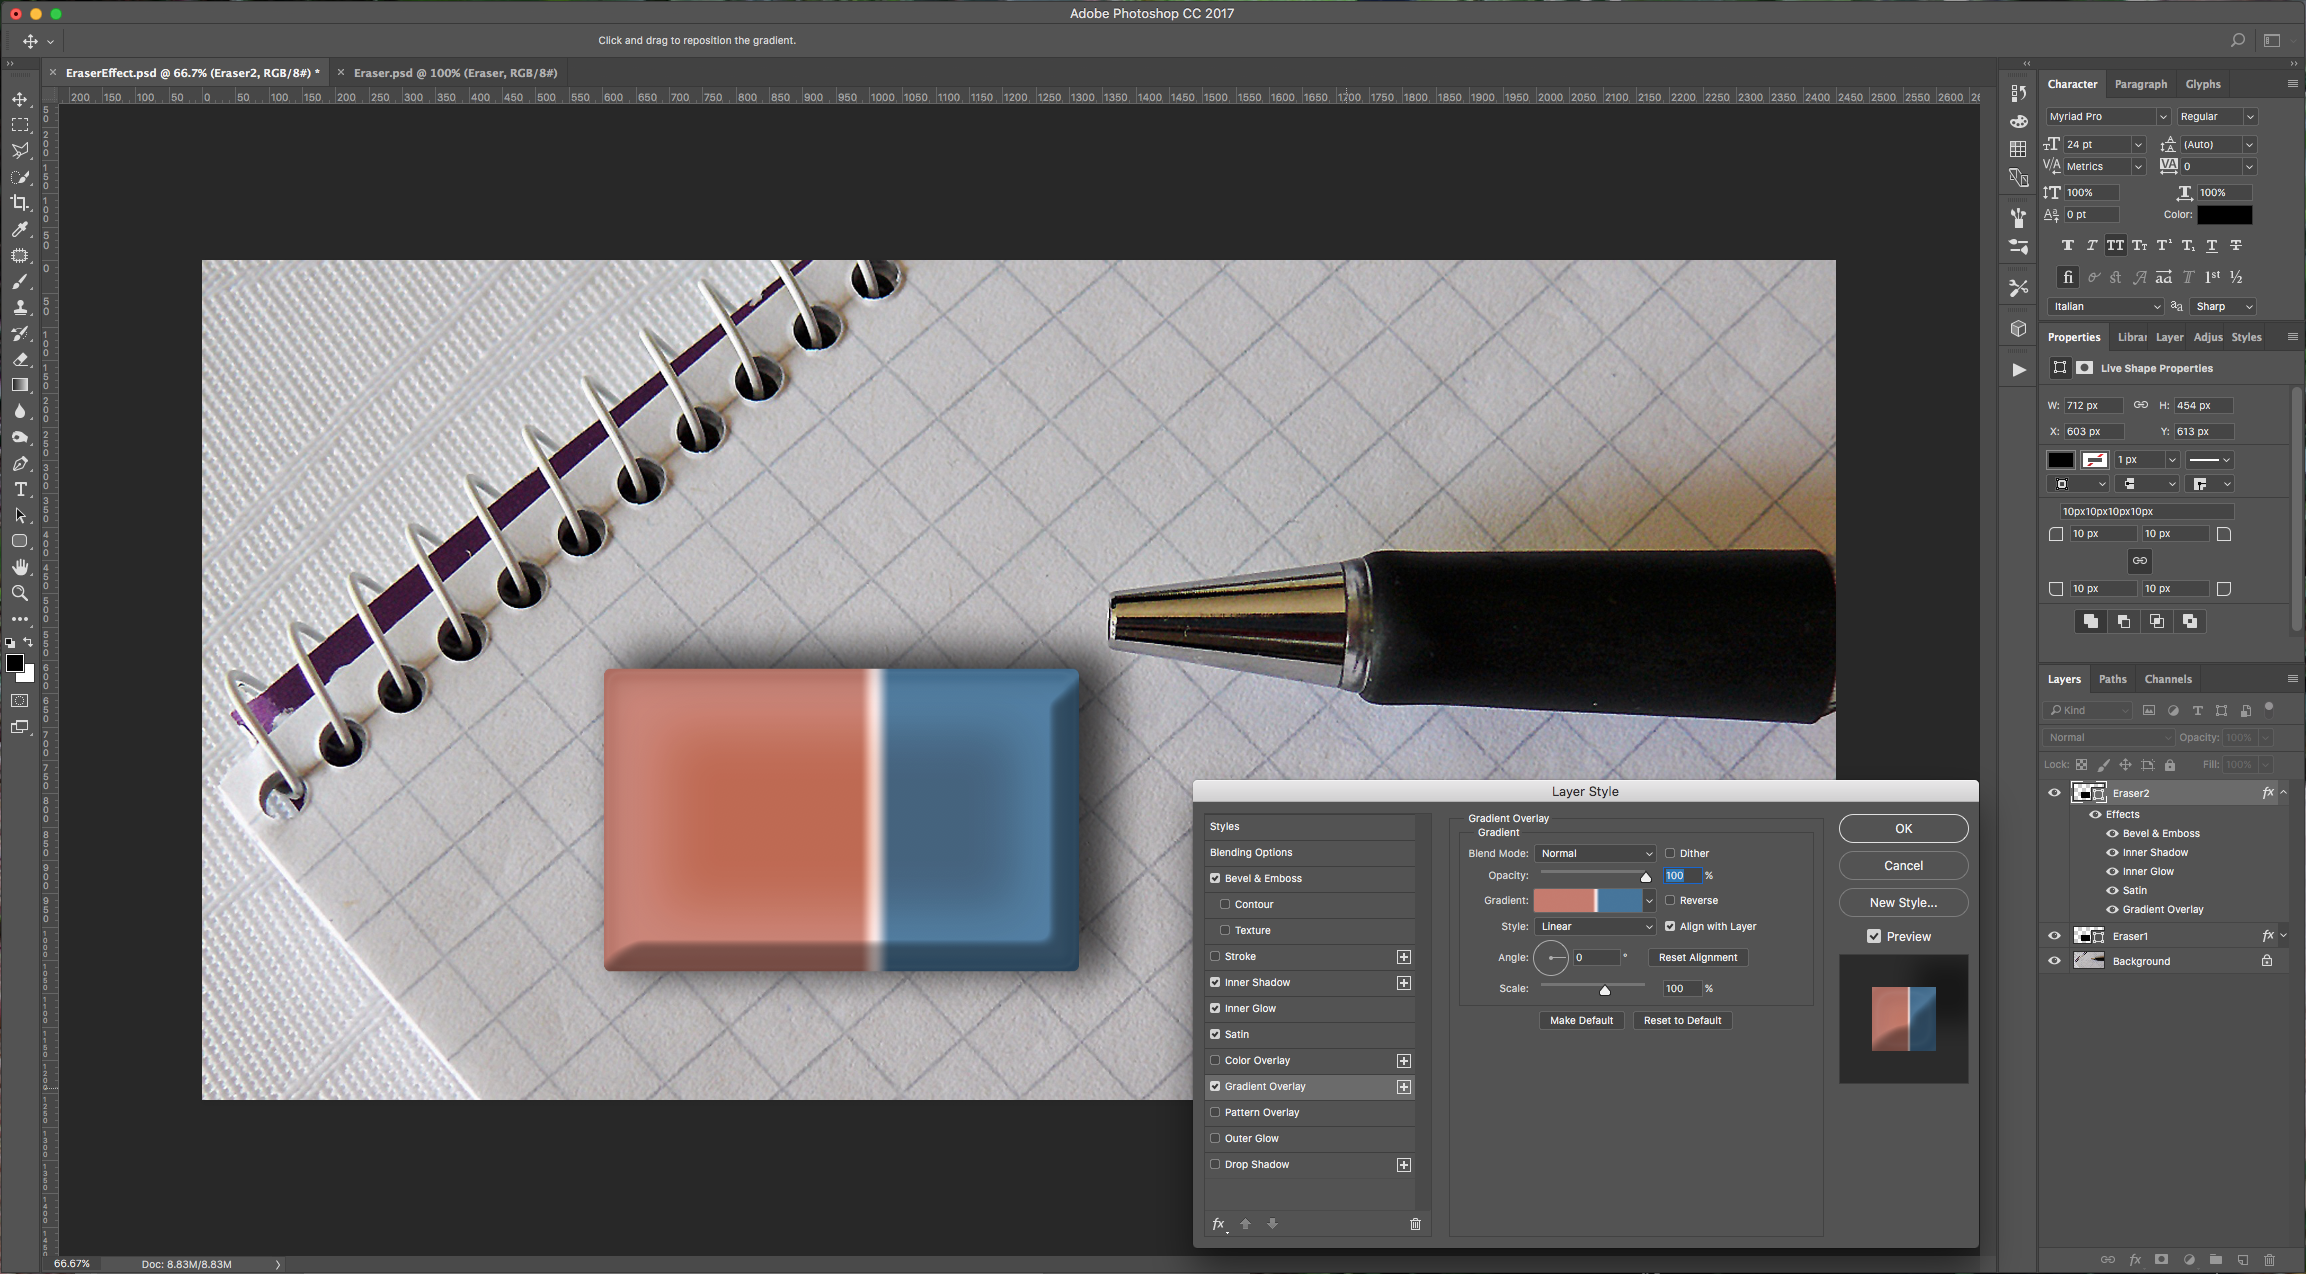
4 - Now, turn back on the visibility for your “Eraser 2” Layer and apply the following “Layer Styles”:
Bevel & Emboss:

Inner Shadow:
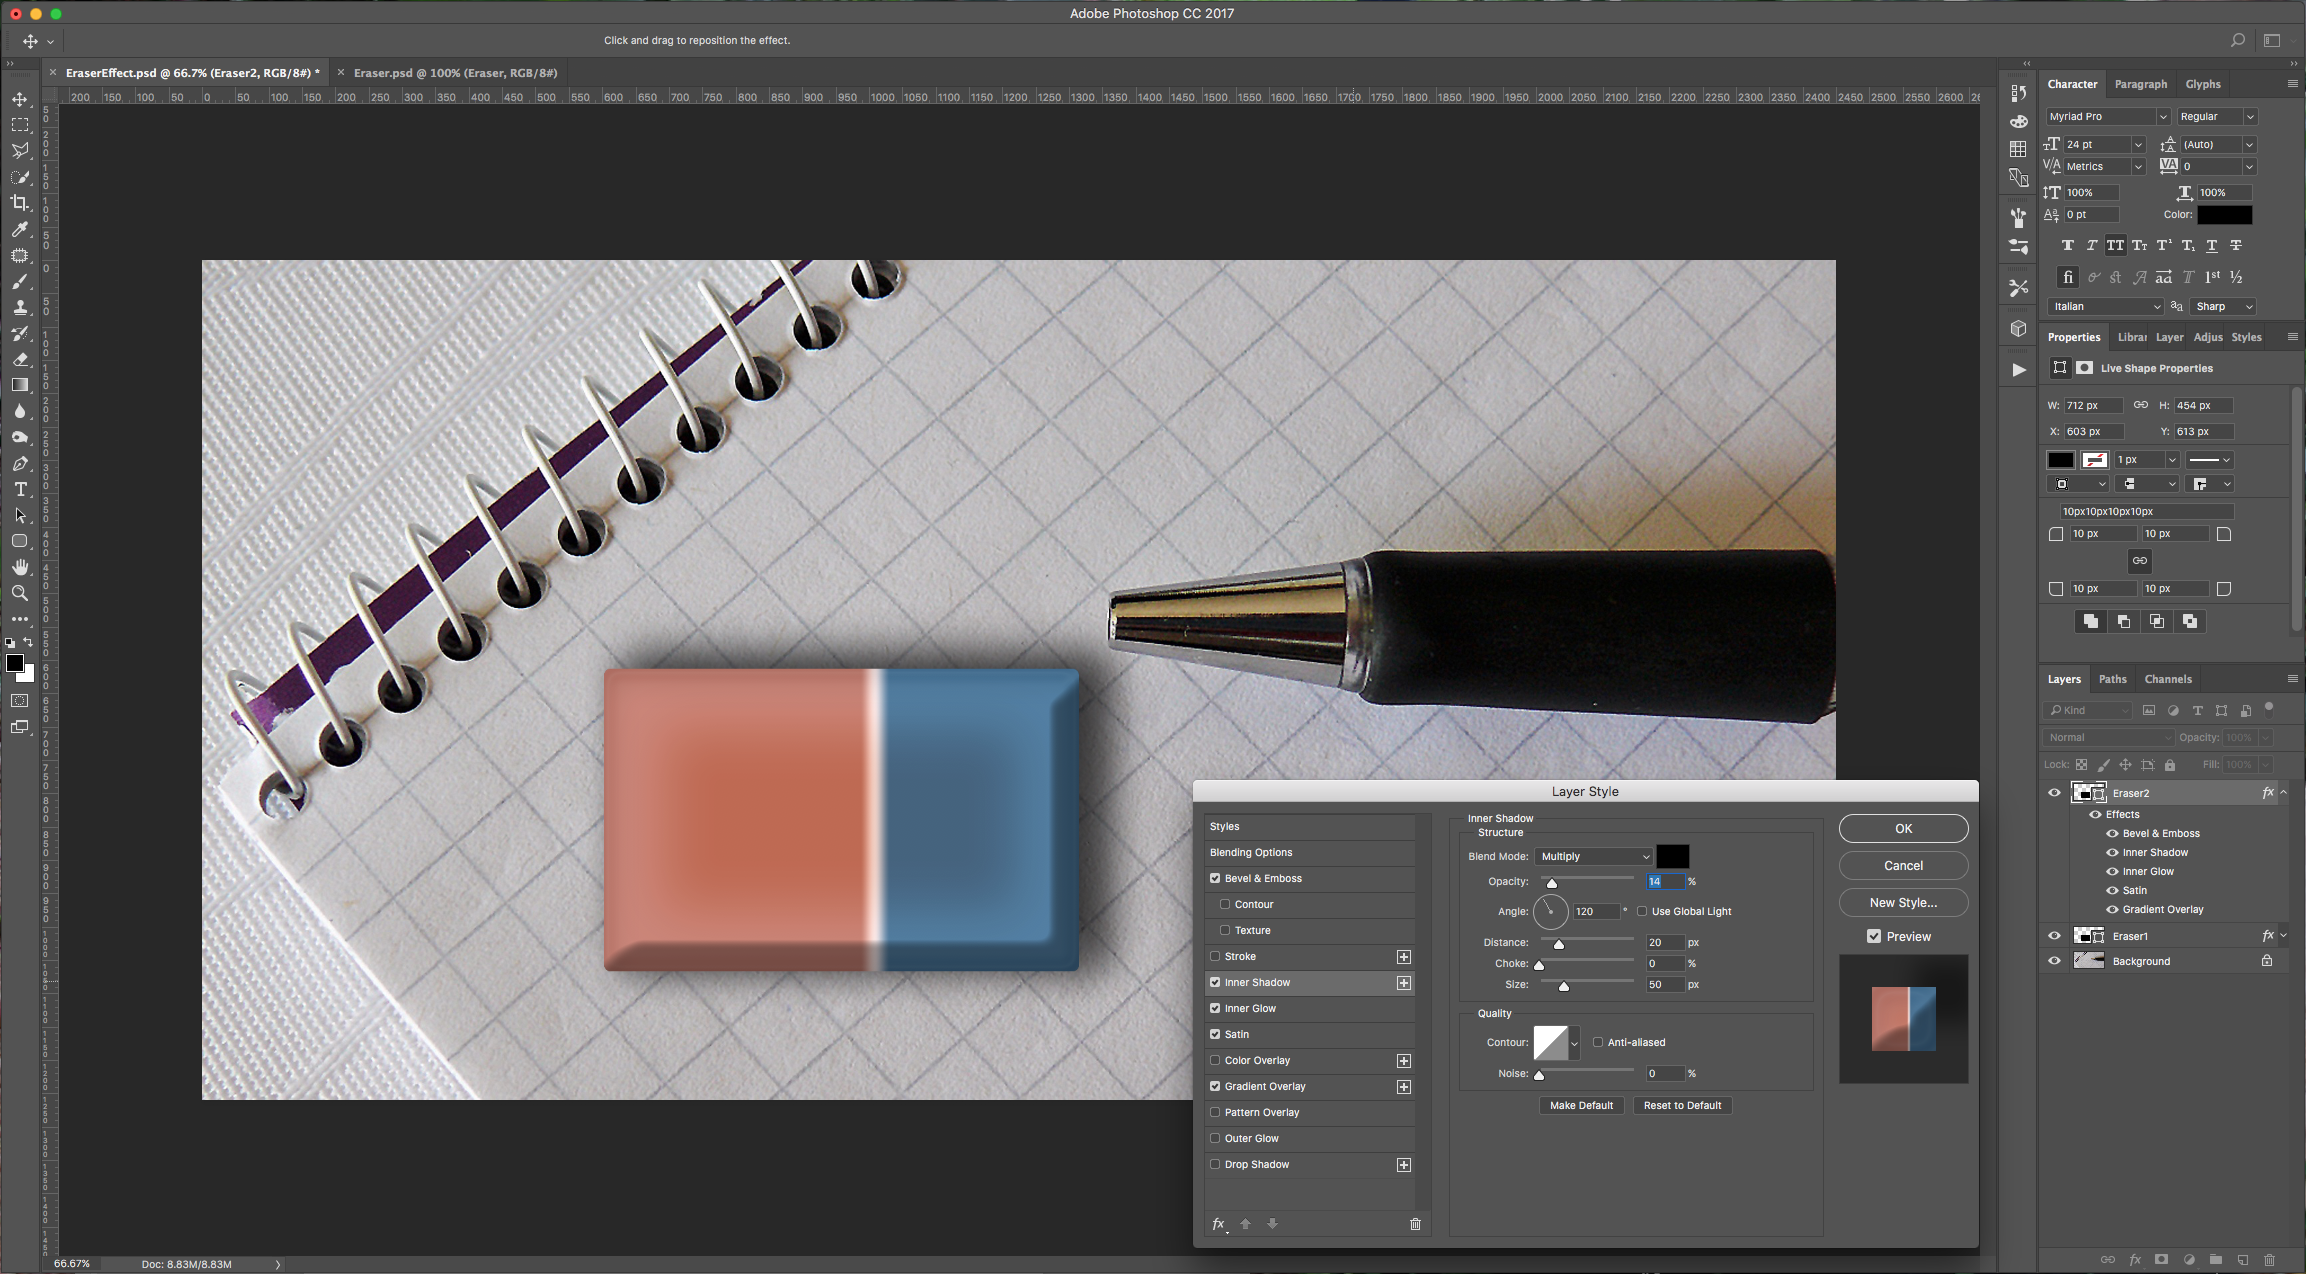
Inner Glow: (#3f92cc)

Satin:

Gradient Overlay: (same as before)
5 - Select your “Eraser1” Layer and using the “Transform” command (Command/Control + T) to enlarge your shape until it looks right.

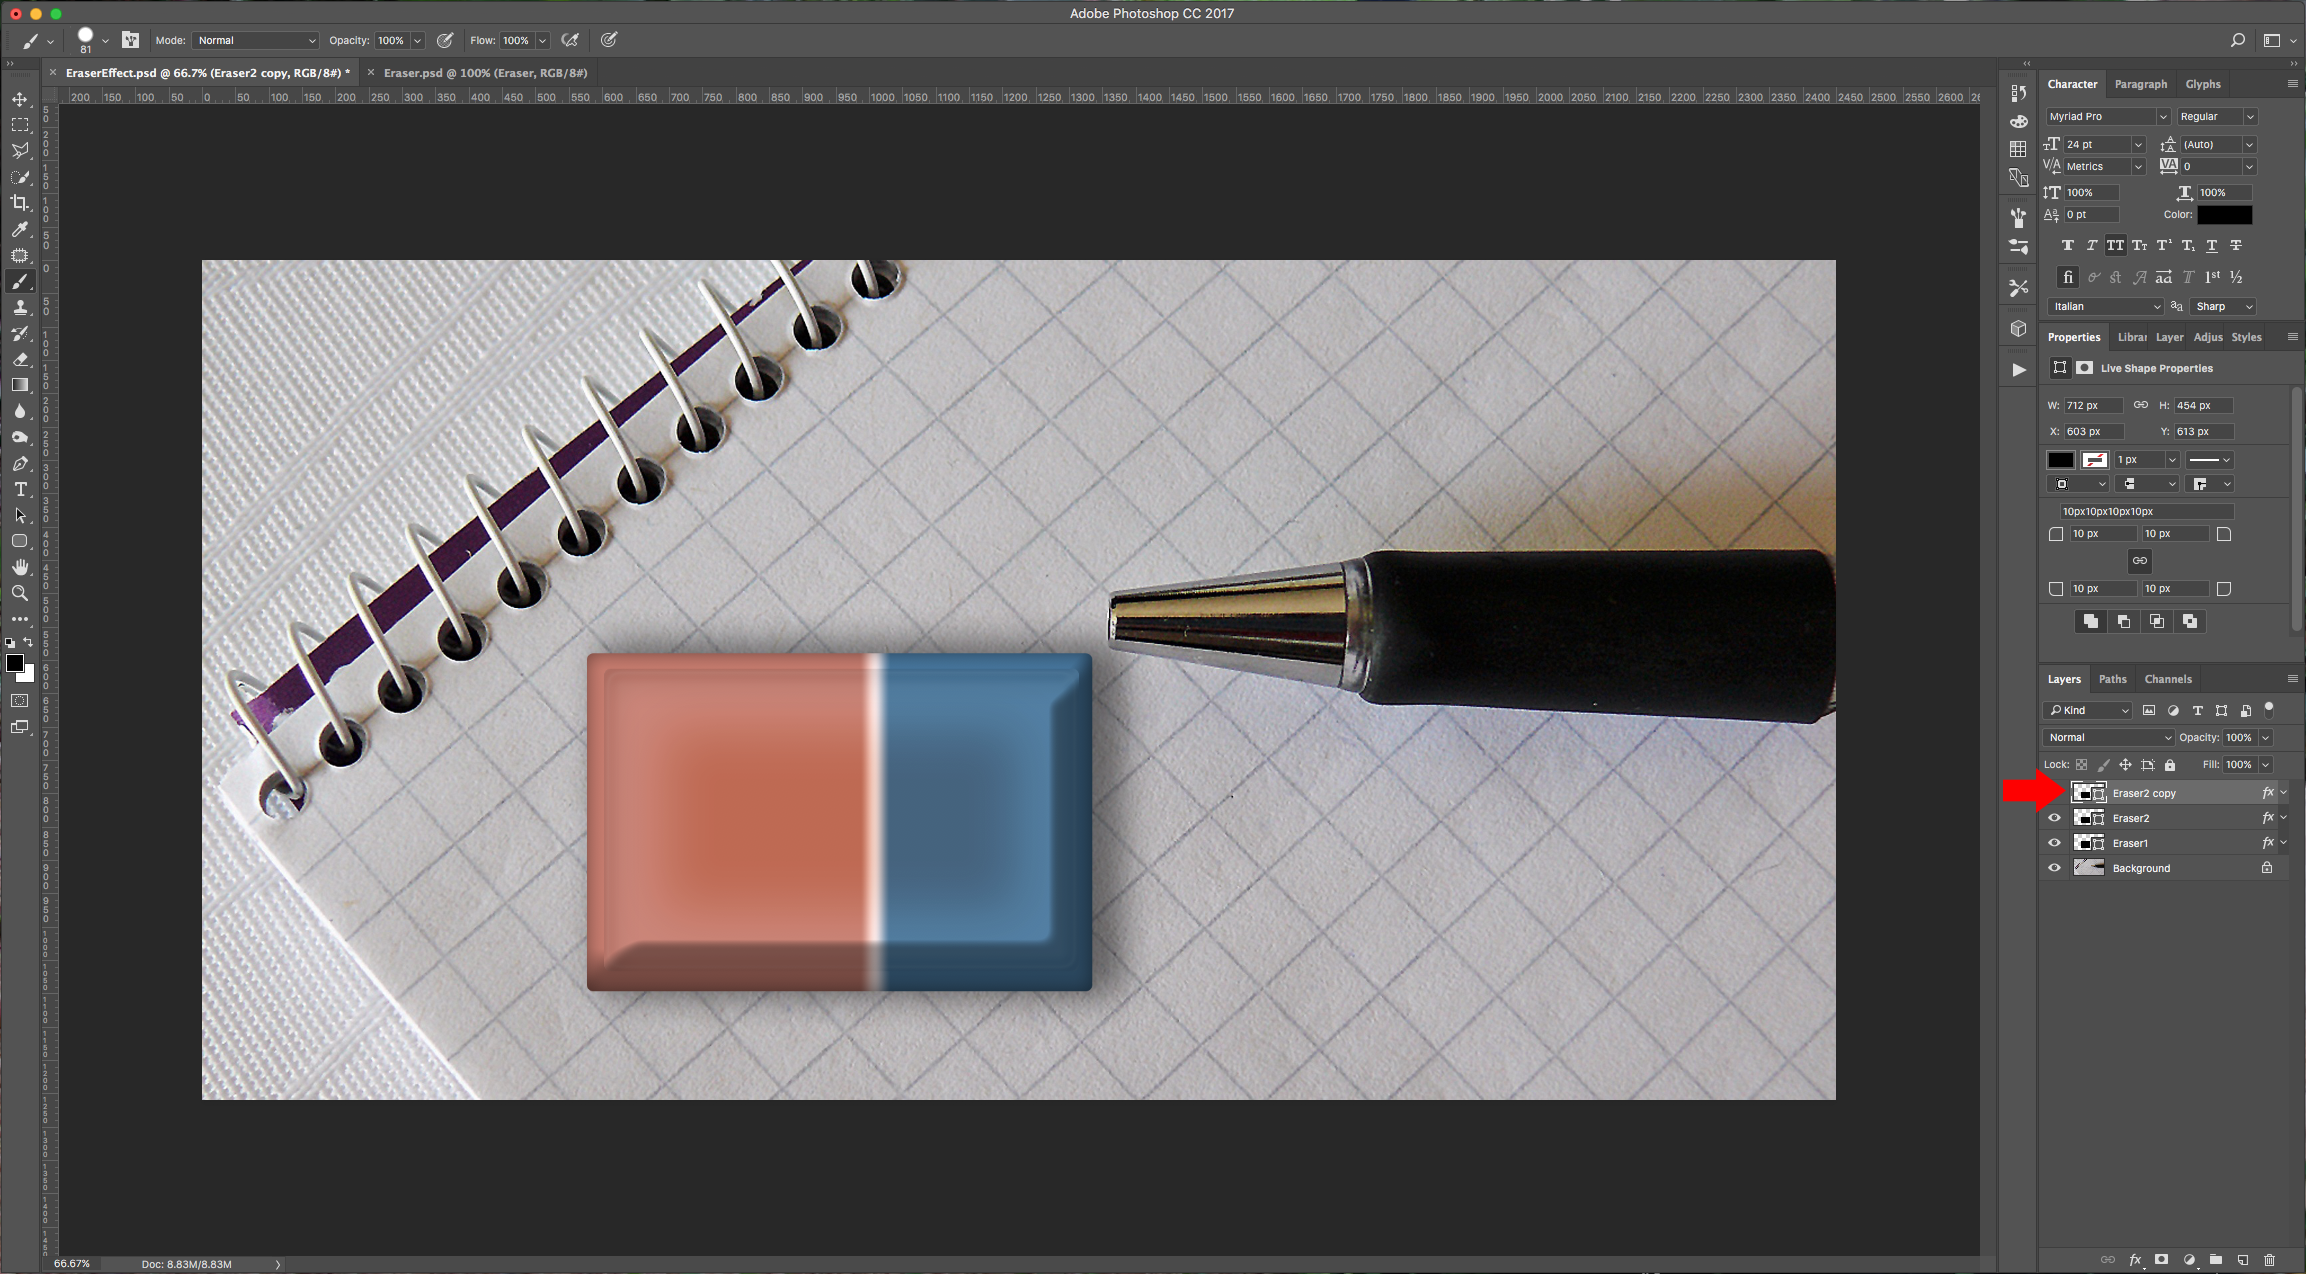
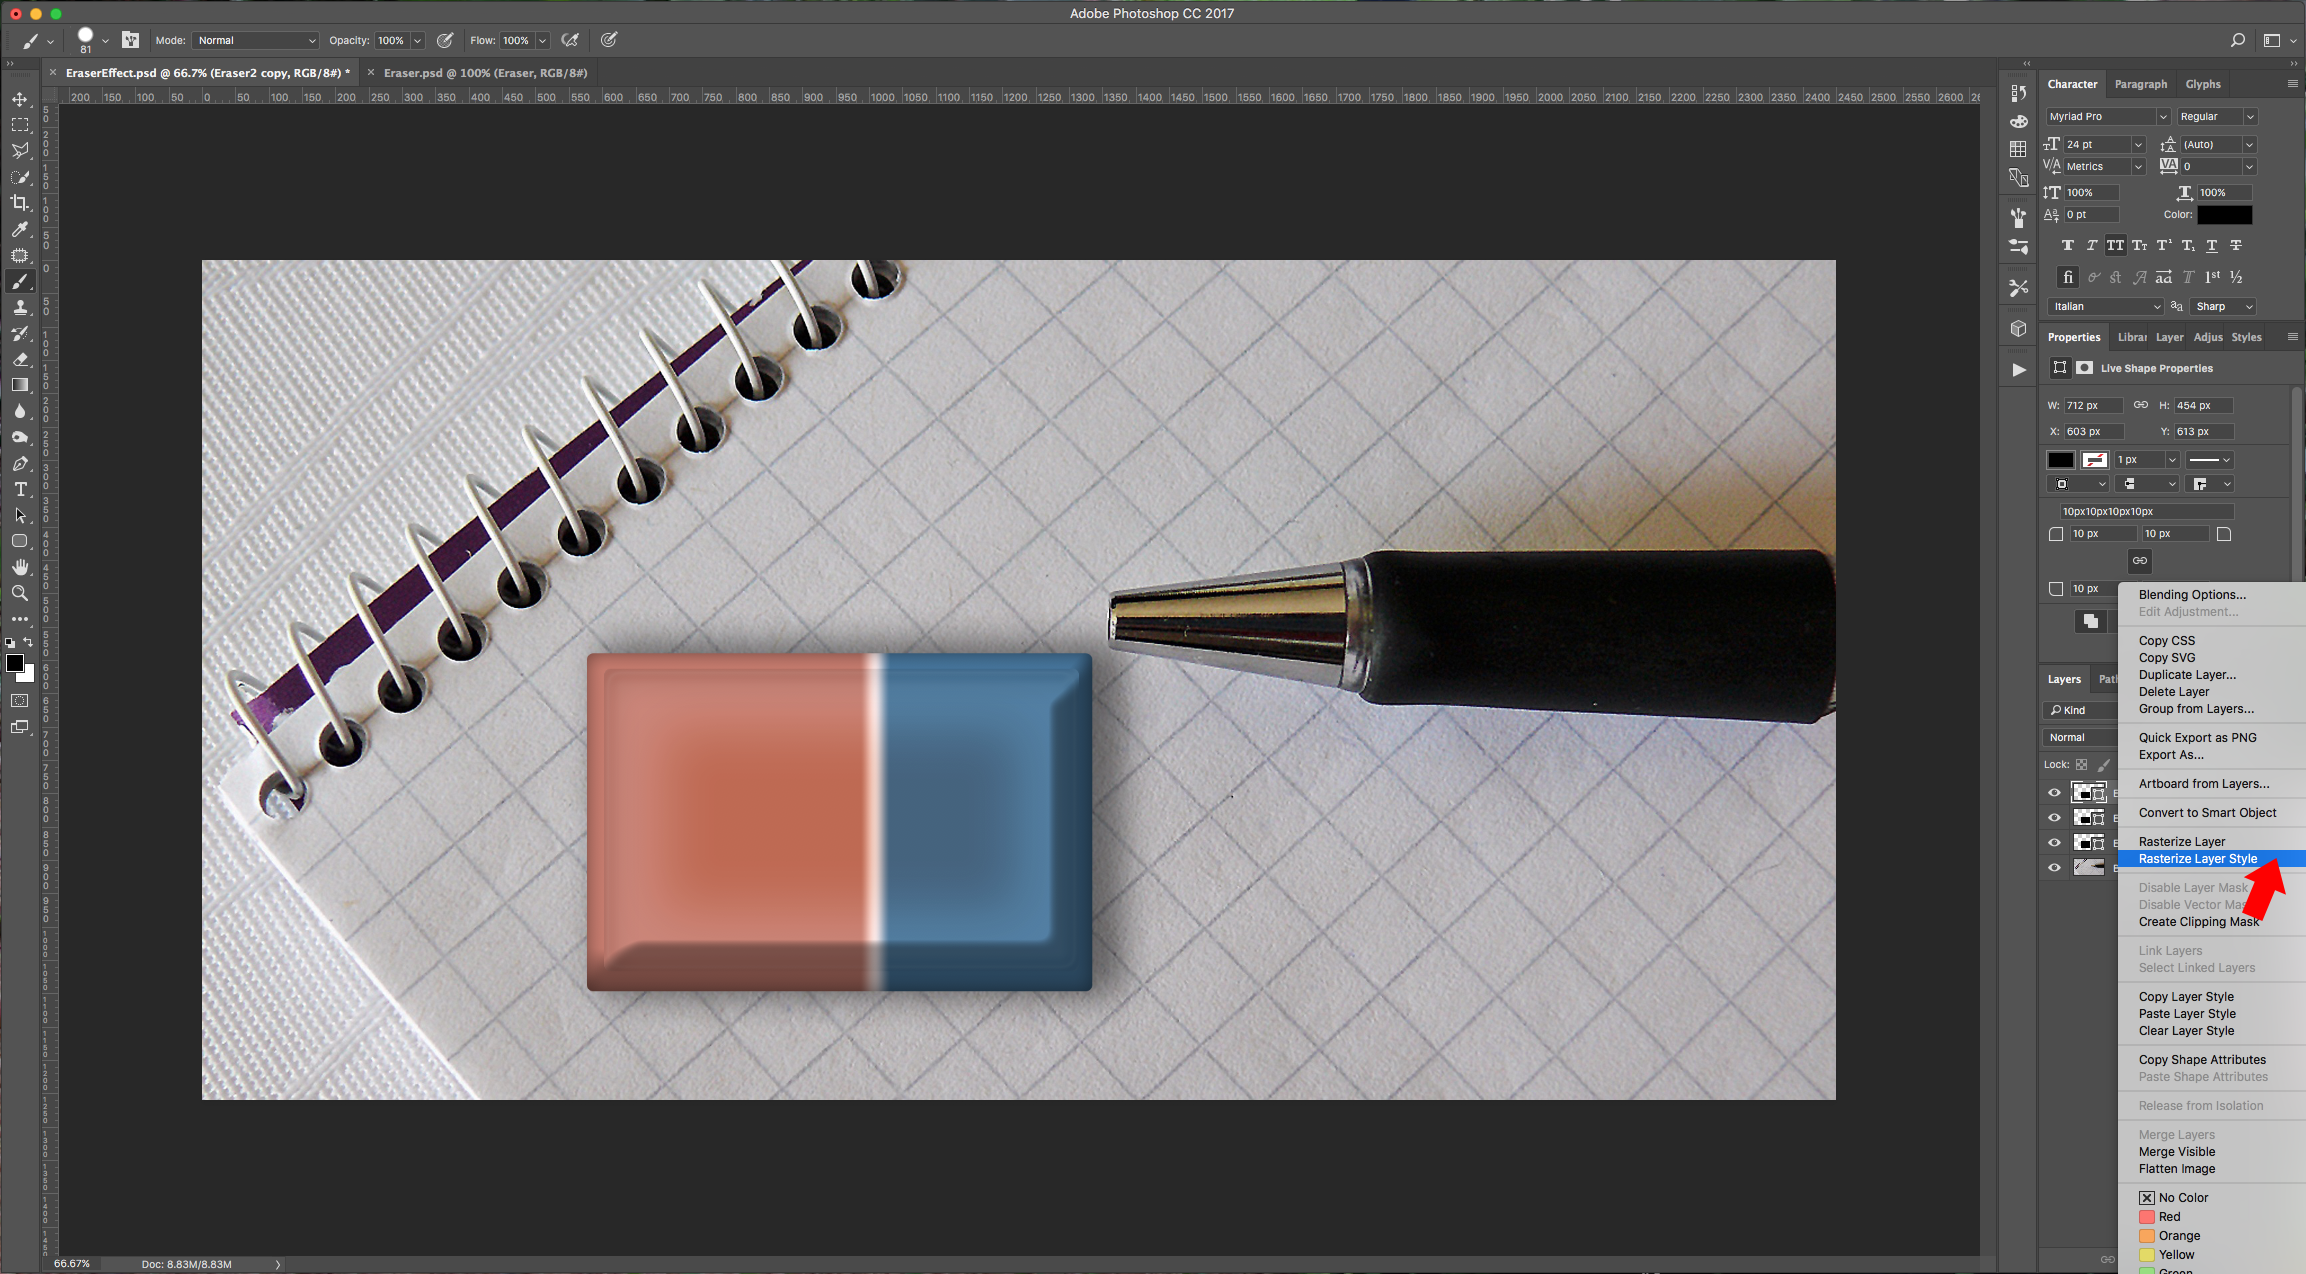
6 - Duplicate the “Eraser2” Layer, right-click on it and choose “Rasterize Layer Styles”. Hide or delete your original “Eraser2” Layer.
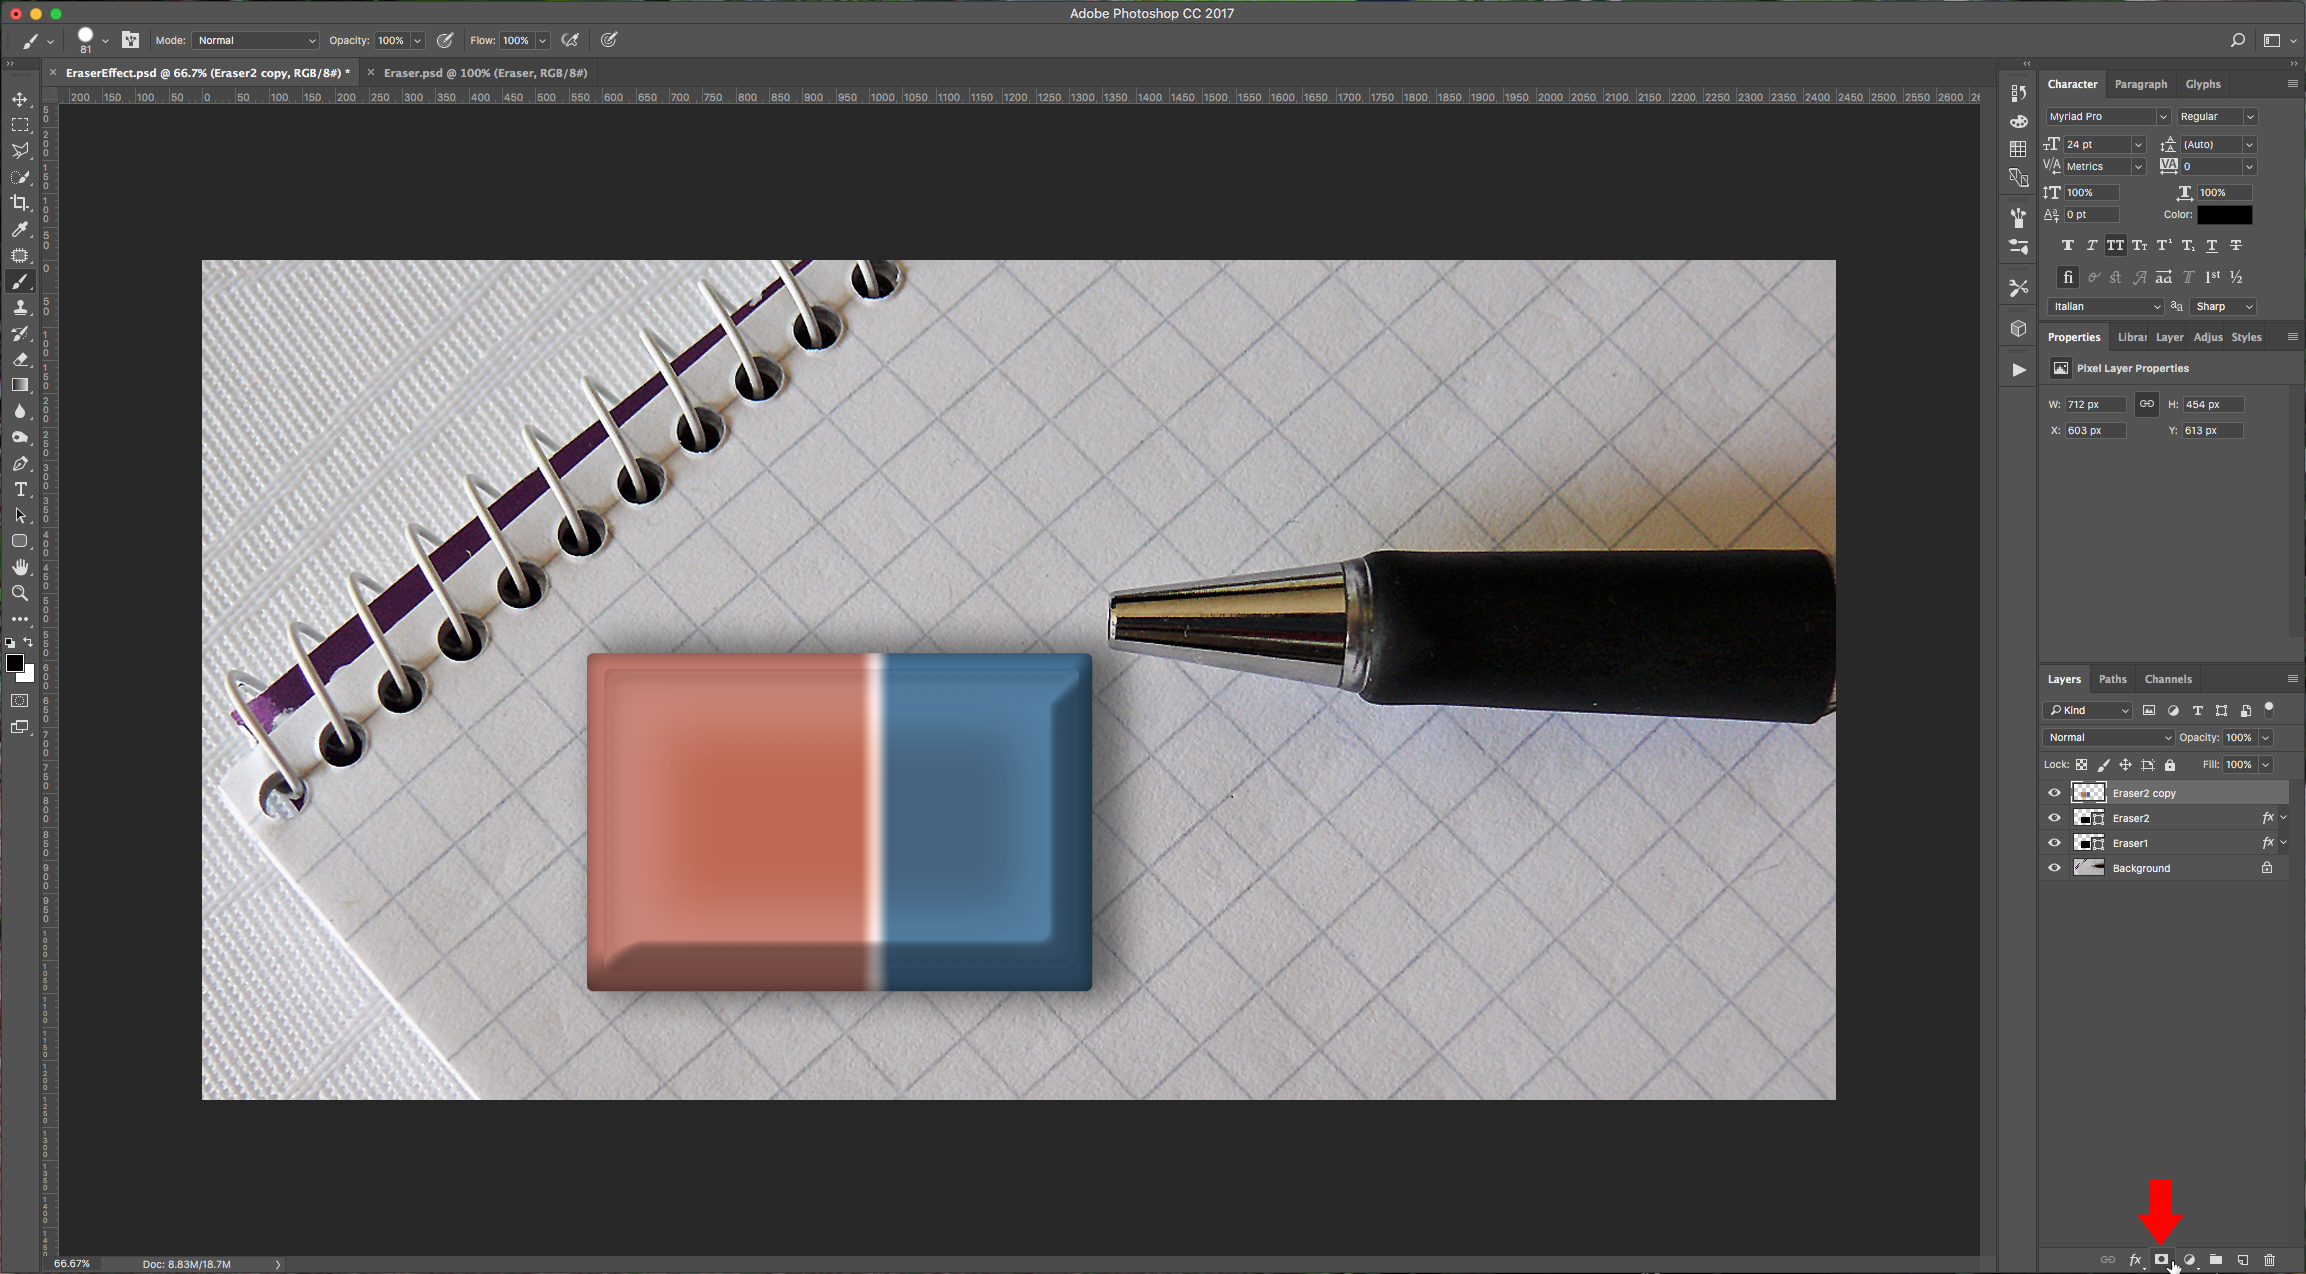
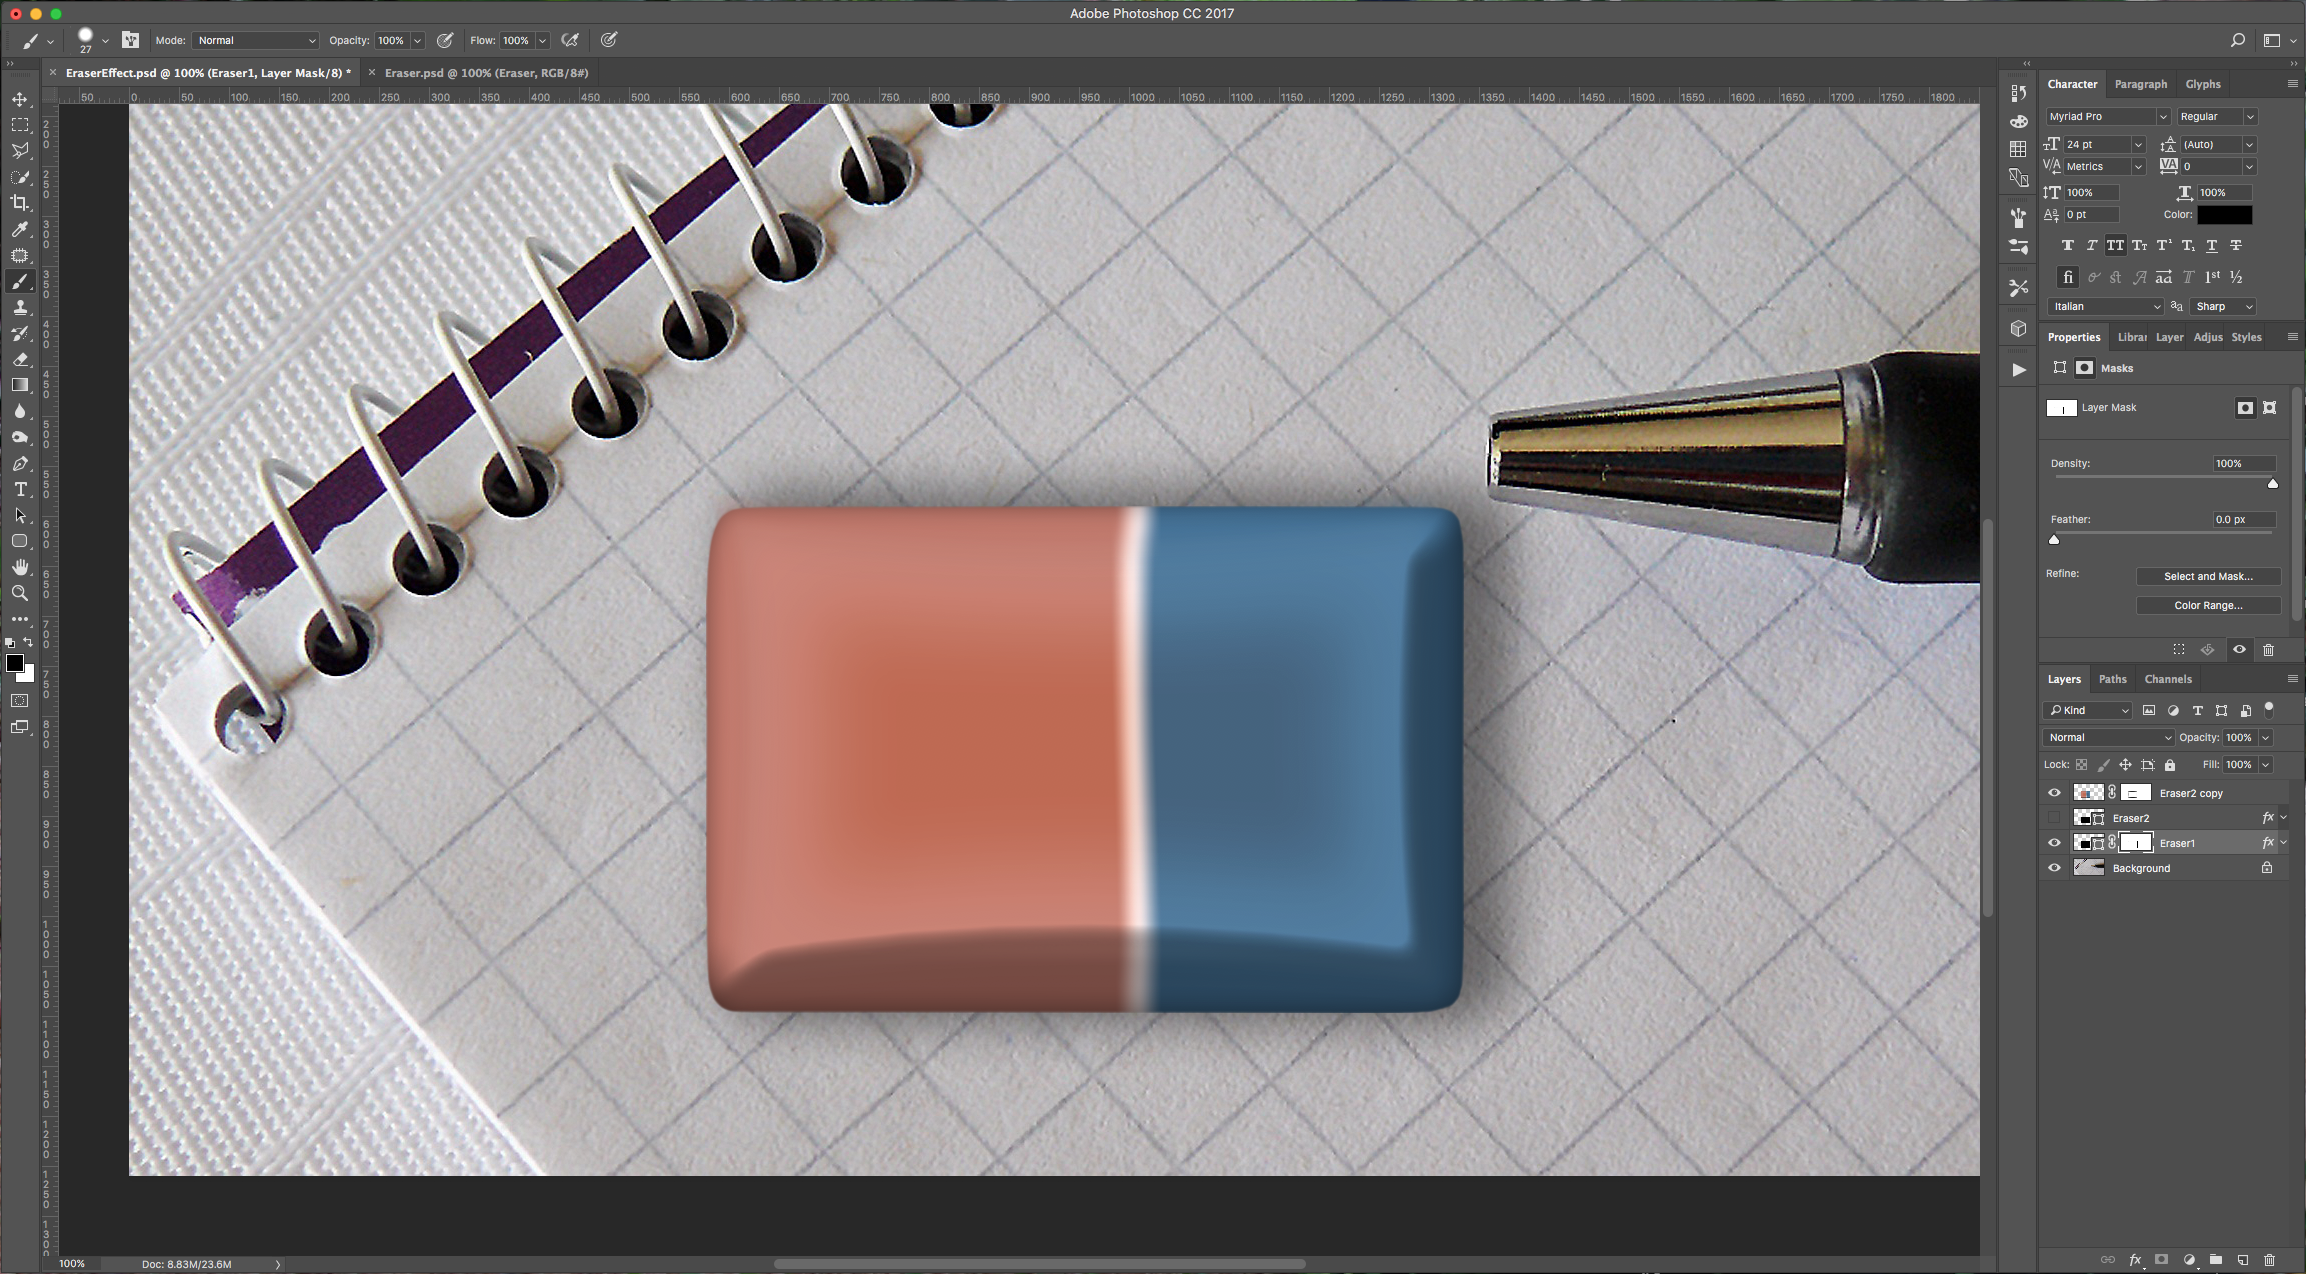
7 - Click on the “Add Layer Mask” button at the bottom of the “Layers” Panel, select the “Brush Tool” (B) and with a “Soft” brush (0% Hardness) erase the edges of your image to smooth it out.

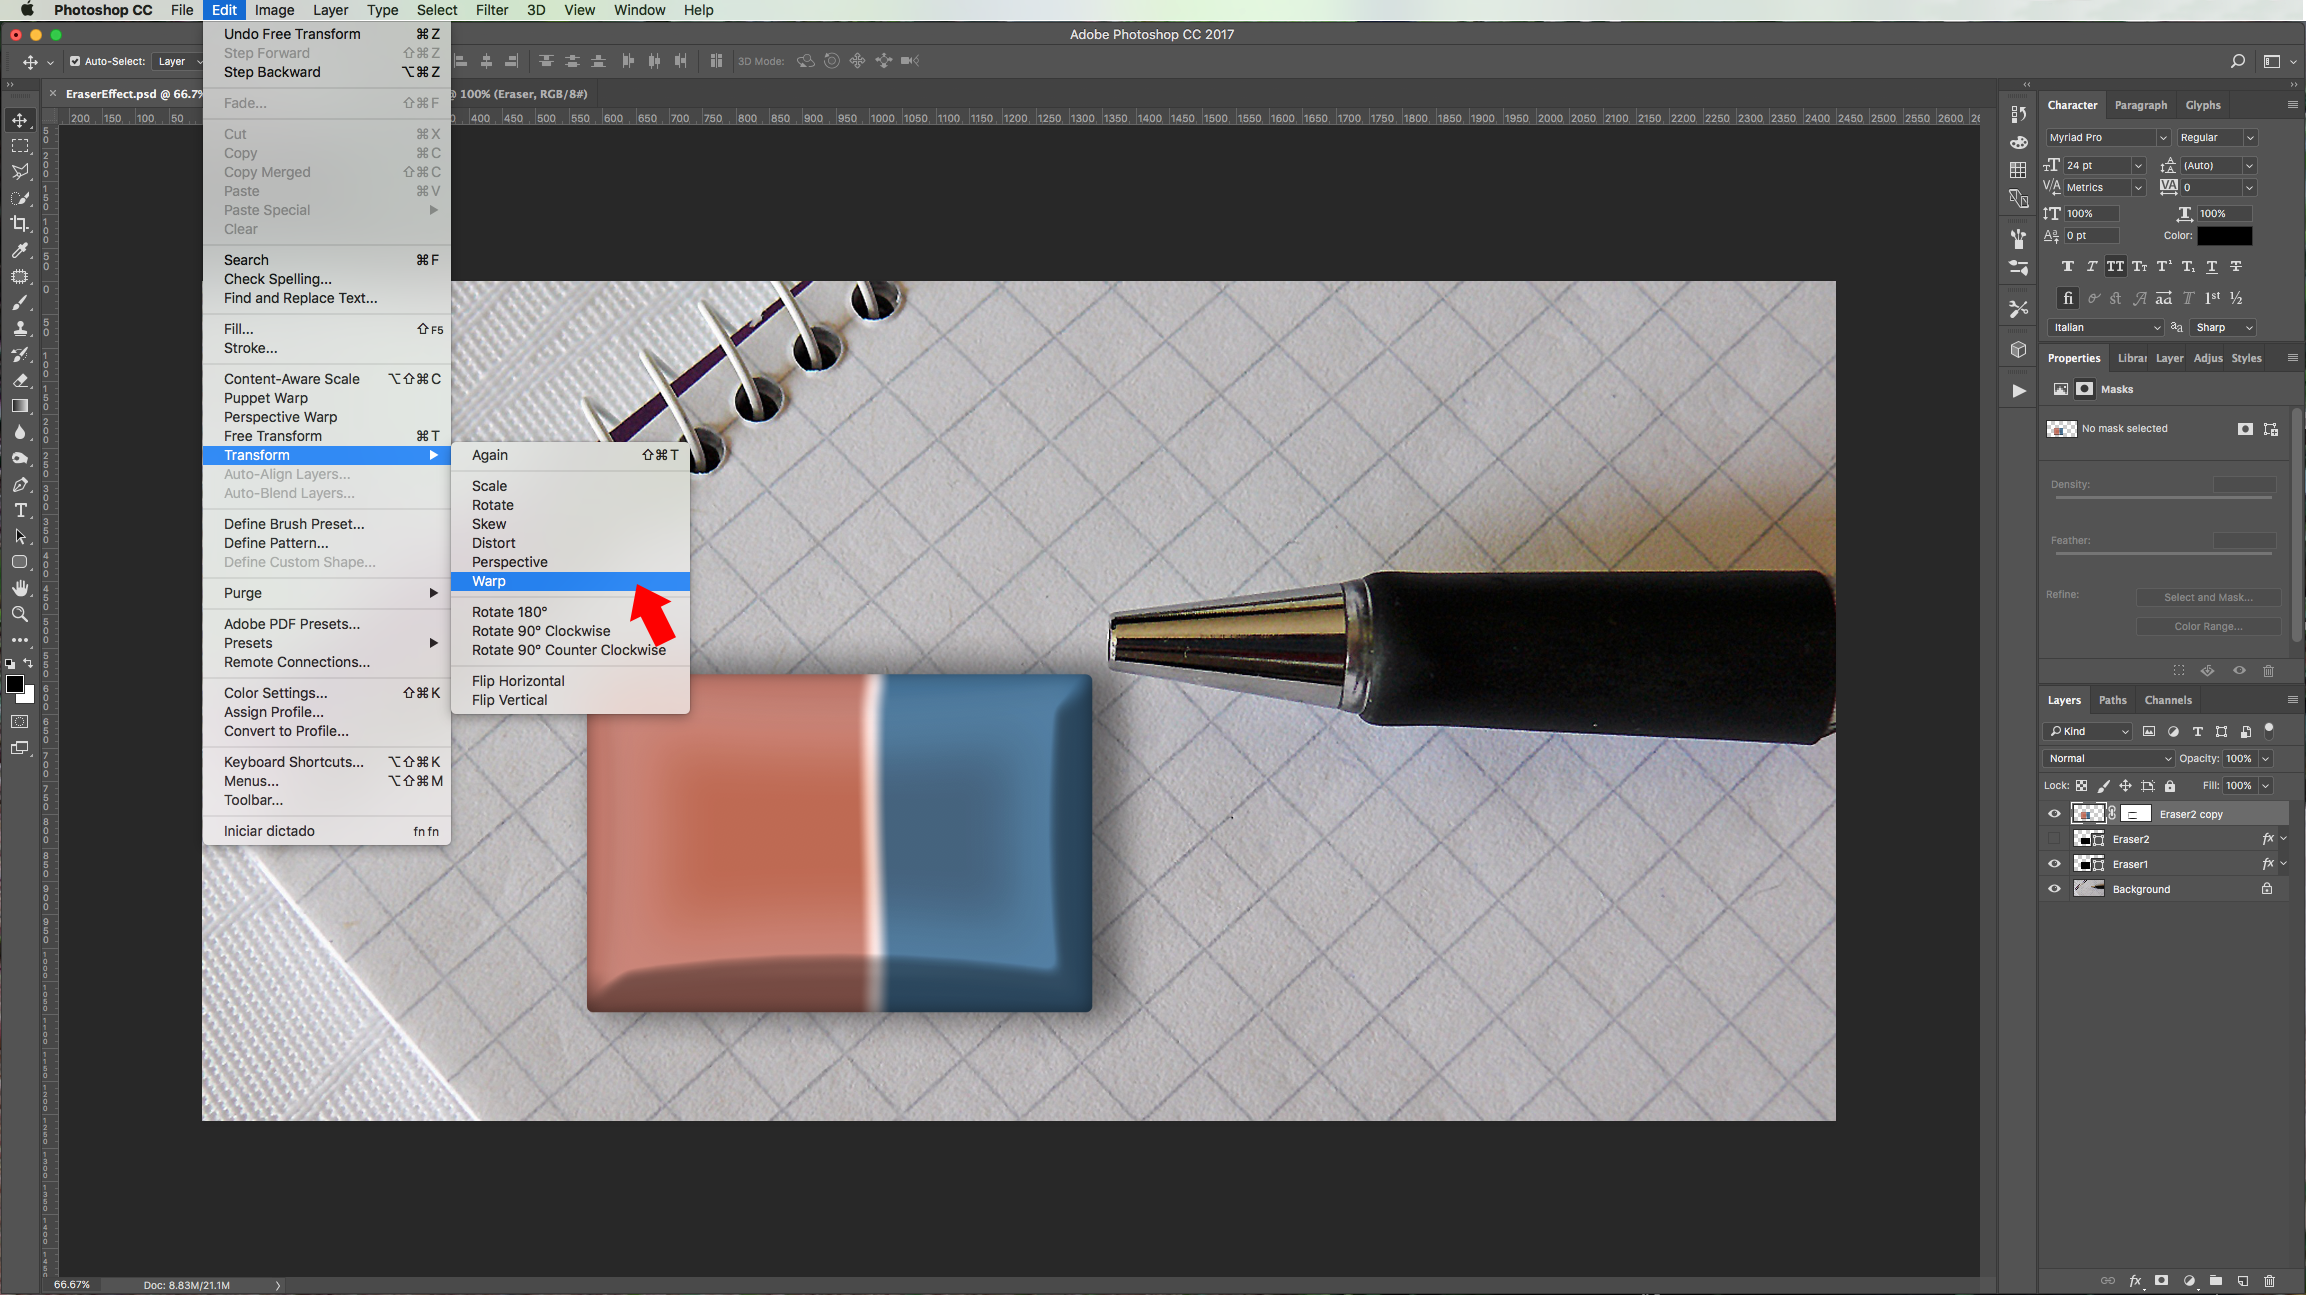
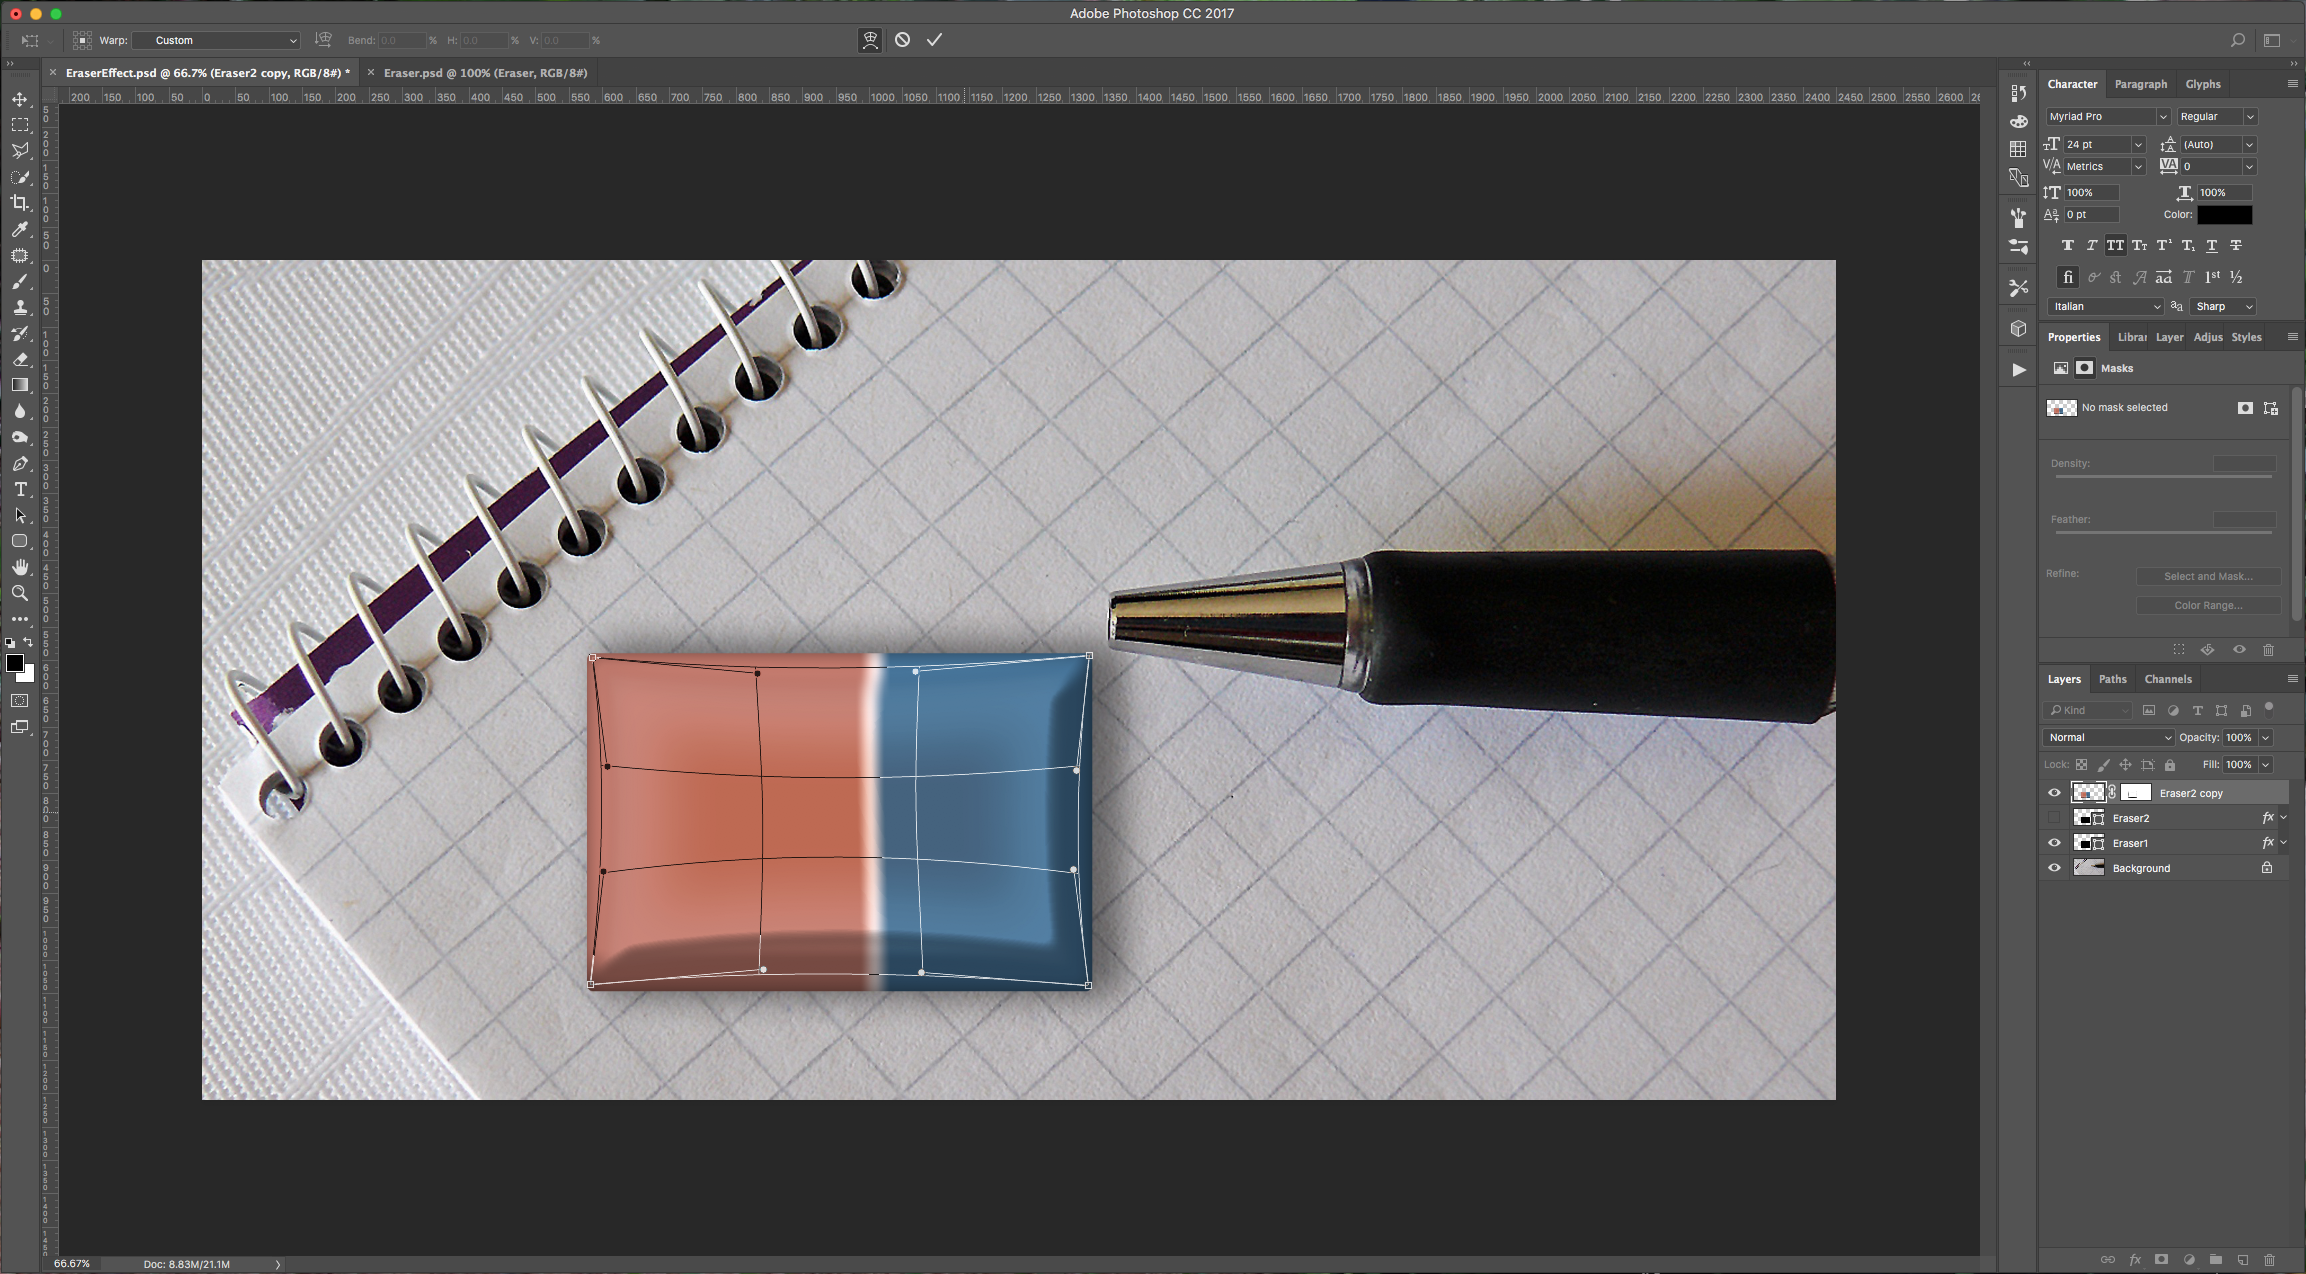
8 - Go to Edit > Transform > Warp and play around with your image until you get a more tridimensional look. Once you are happy, click “Enter” or on the little check mark button on the top menu.
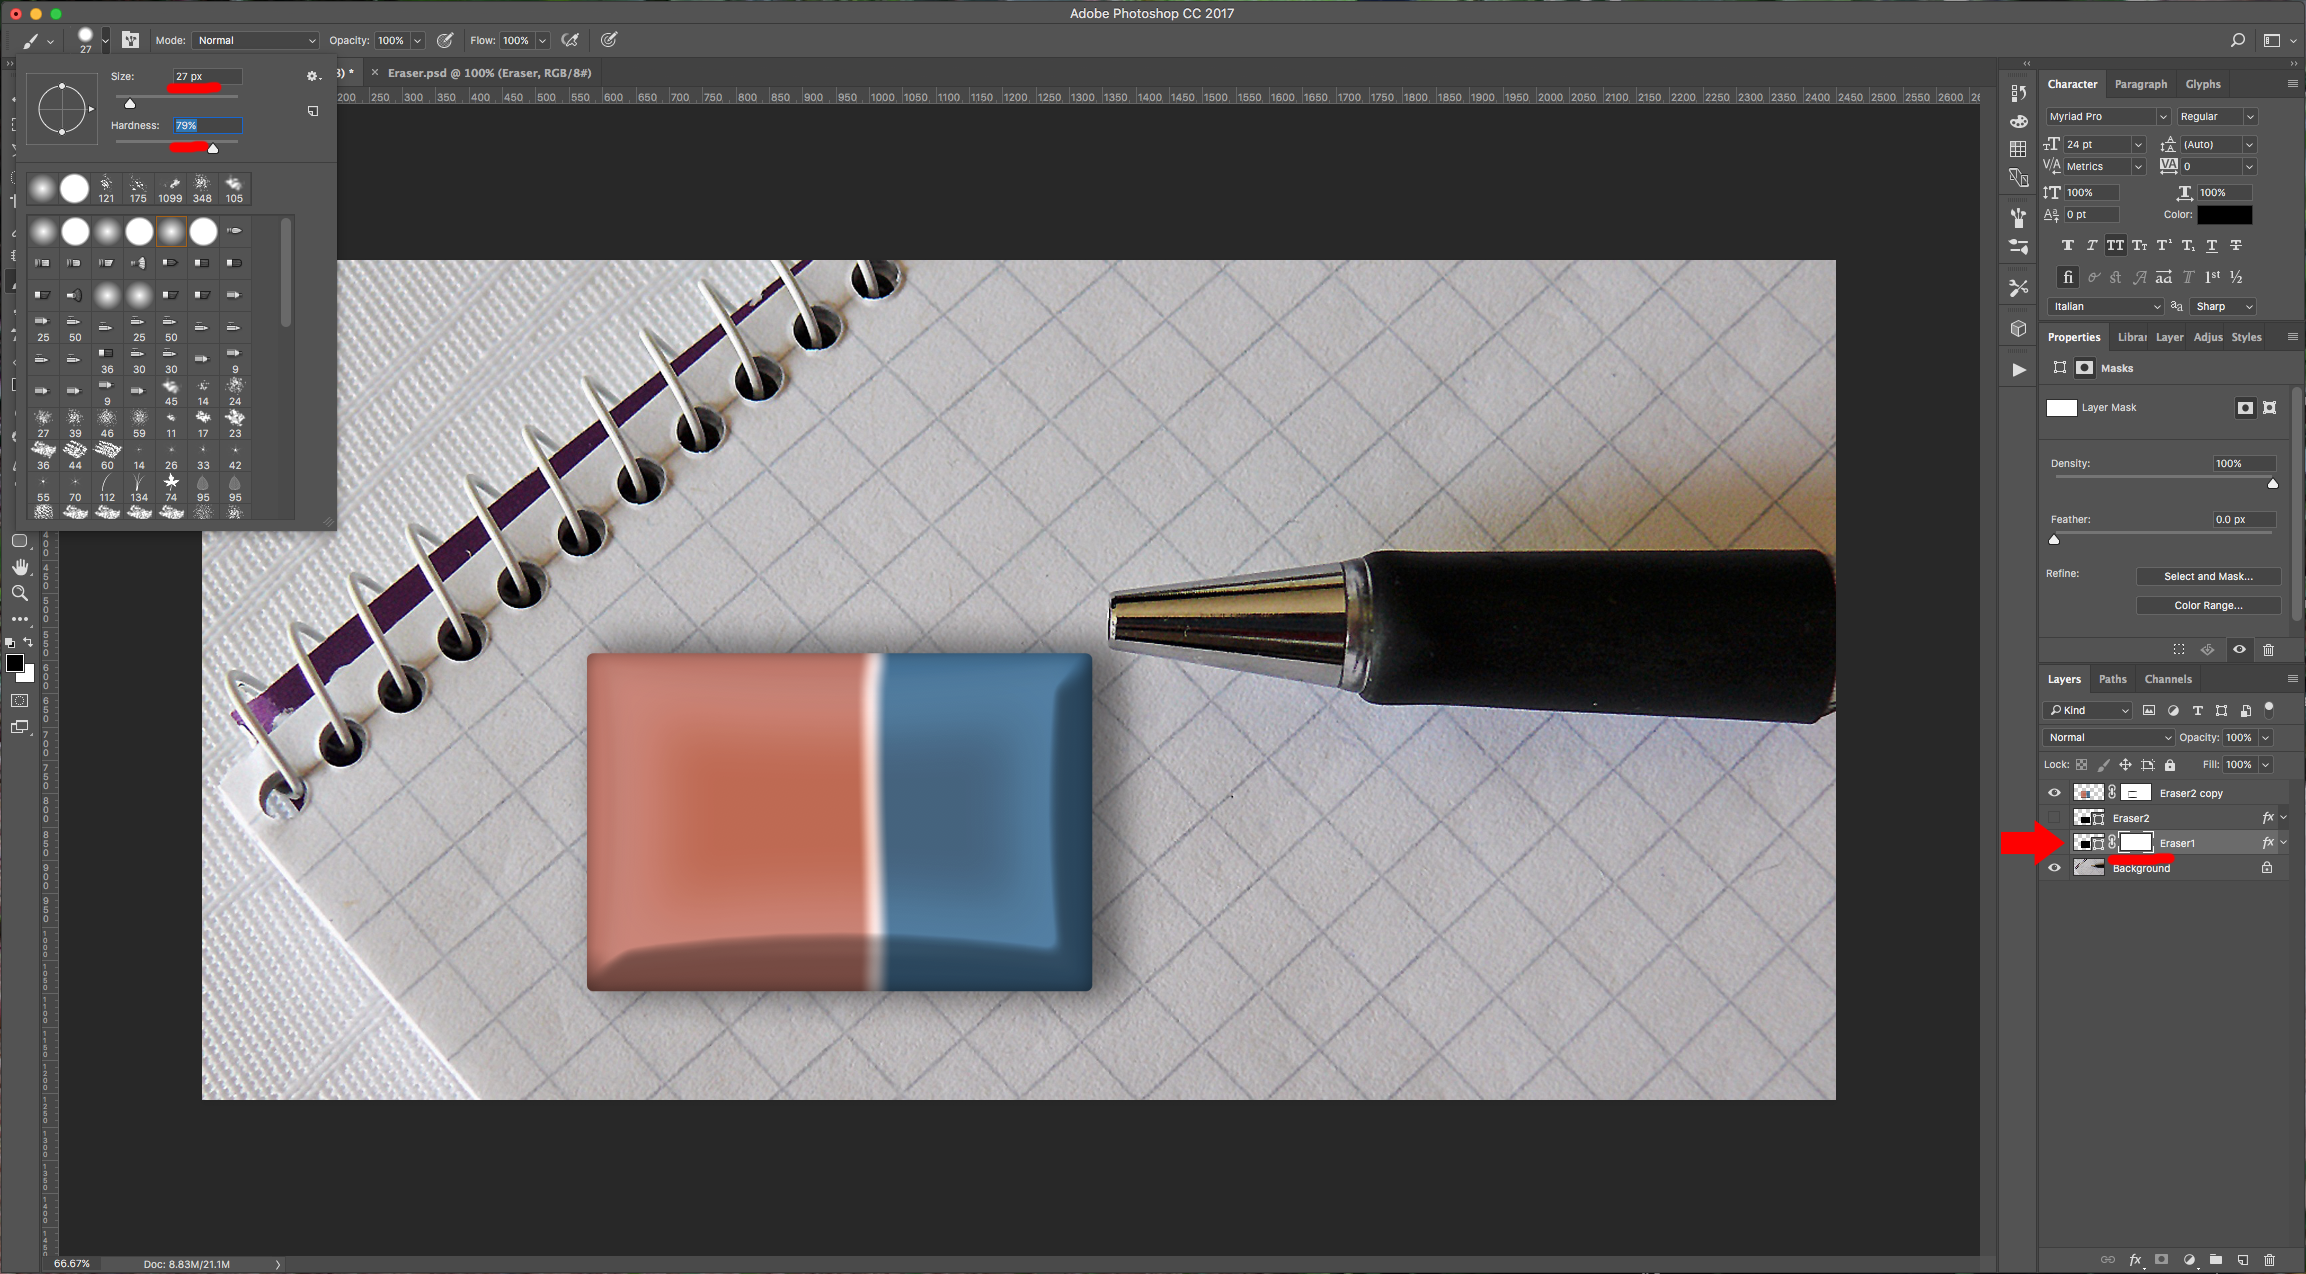
9 - Select your “Eraser1” Layer and add a “Layer Mask”. This time use a smaller brush with an intermediate “Hardness” (we used one with 27 Pixels in Size and 79% in “Hardness”). Fix the corners of your eraser to make more realistic. Double-click on the “Eraser1” Layer and change the “Drop Shadow” if needed.
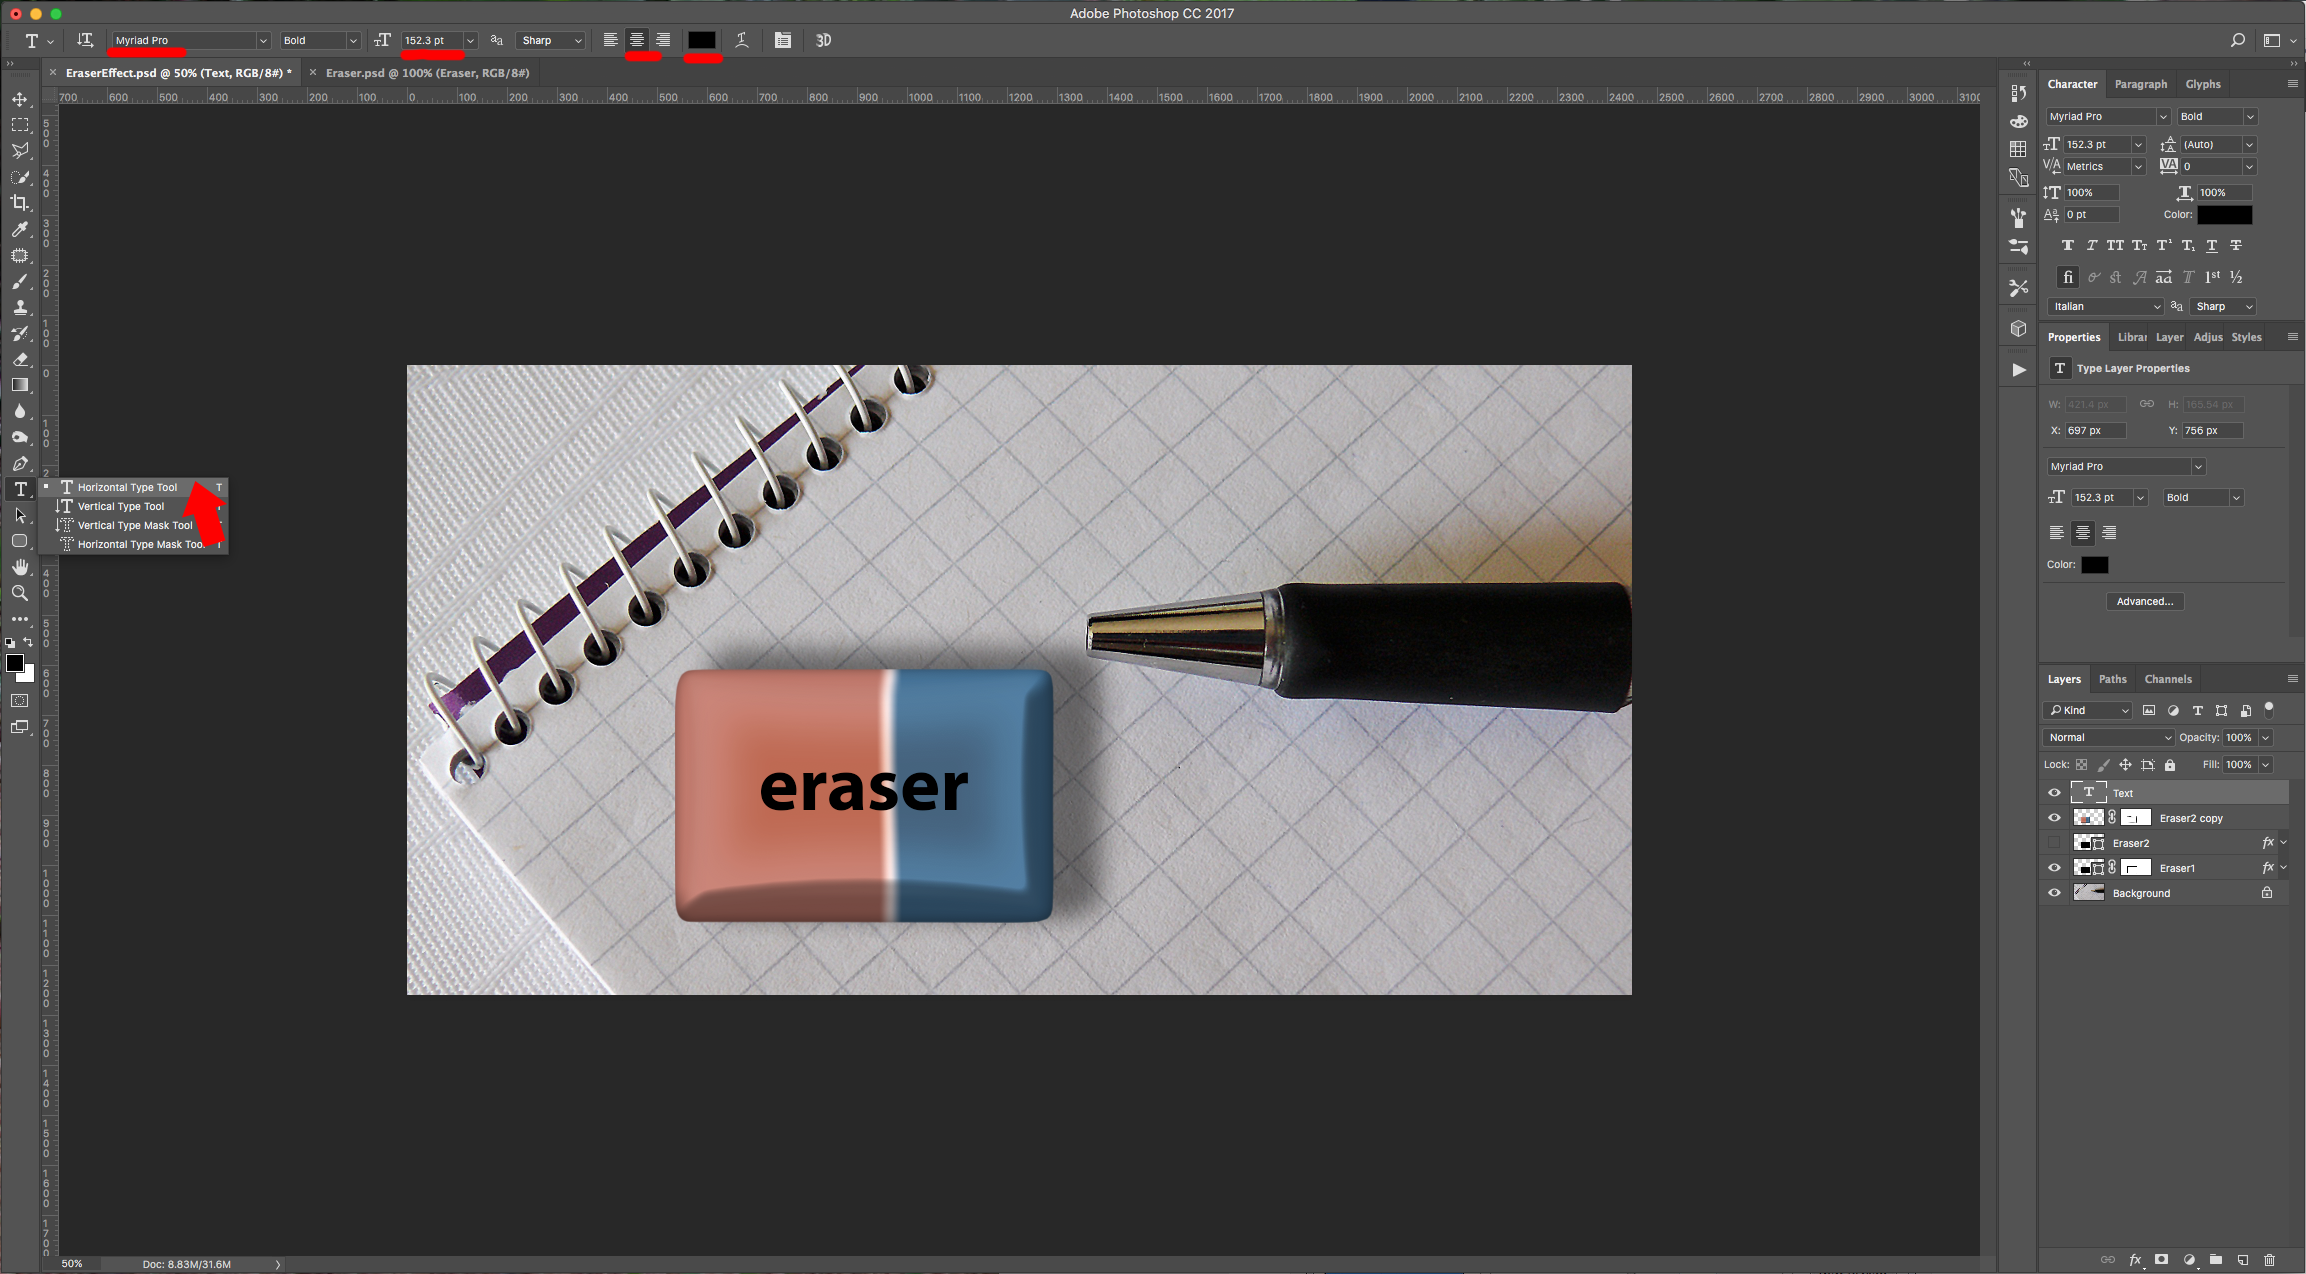
10 - Create a “New Layer” by clicking the button at the bottom of the “Layers” Panel. Select the “Type Tool” (T), choose a font (we used Myriad Pro Bold) and type some text using black as “Fill” color.
11 - Double-click on your Text Layer and apply the following “Layer Styles:
Stroke: (#393838 y #797878)
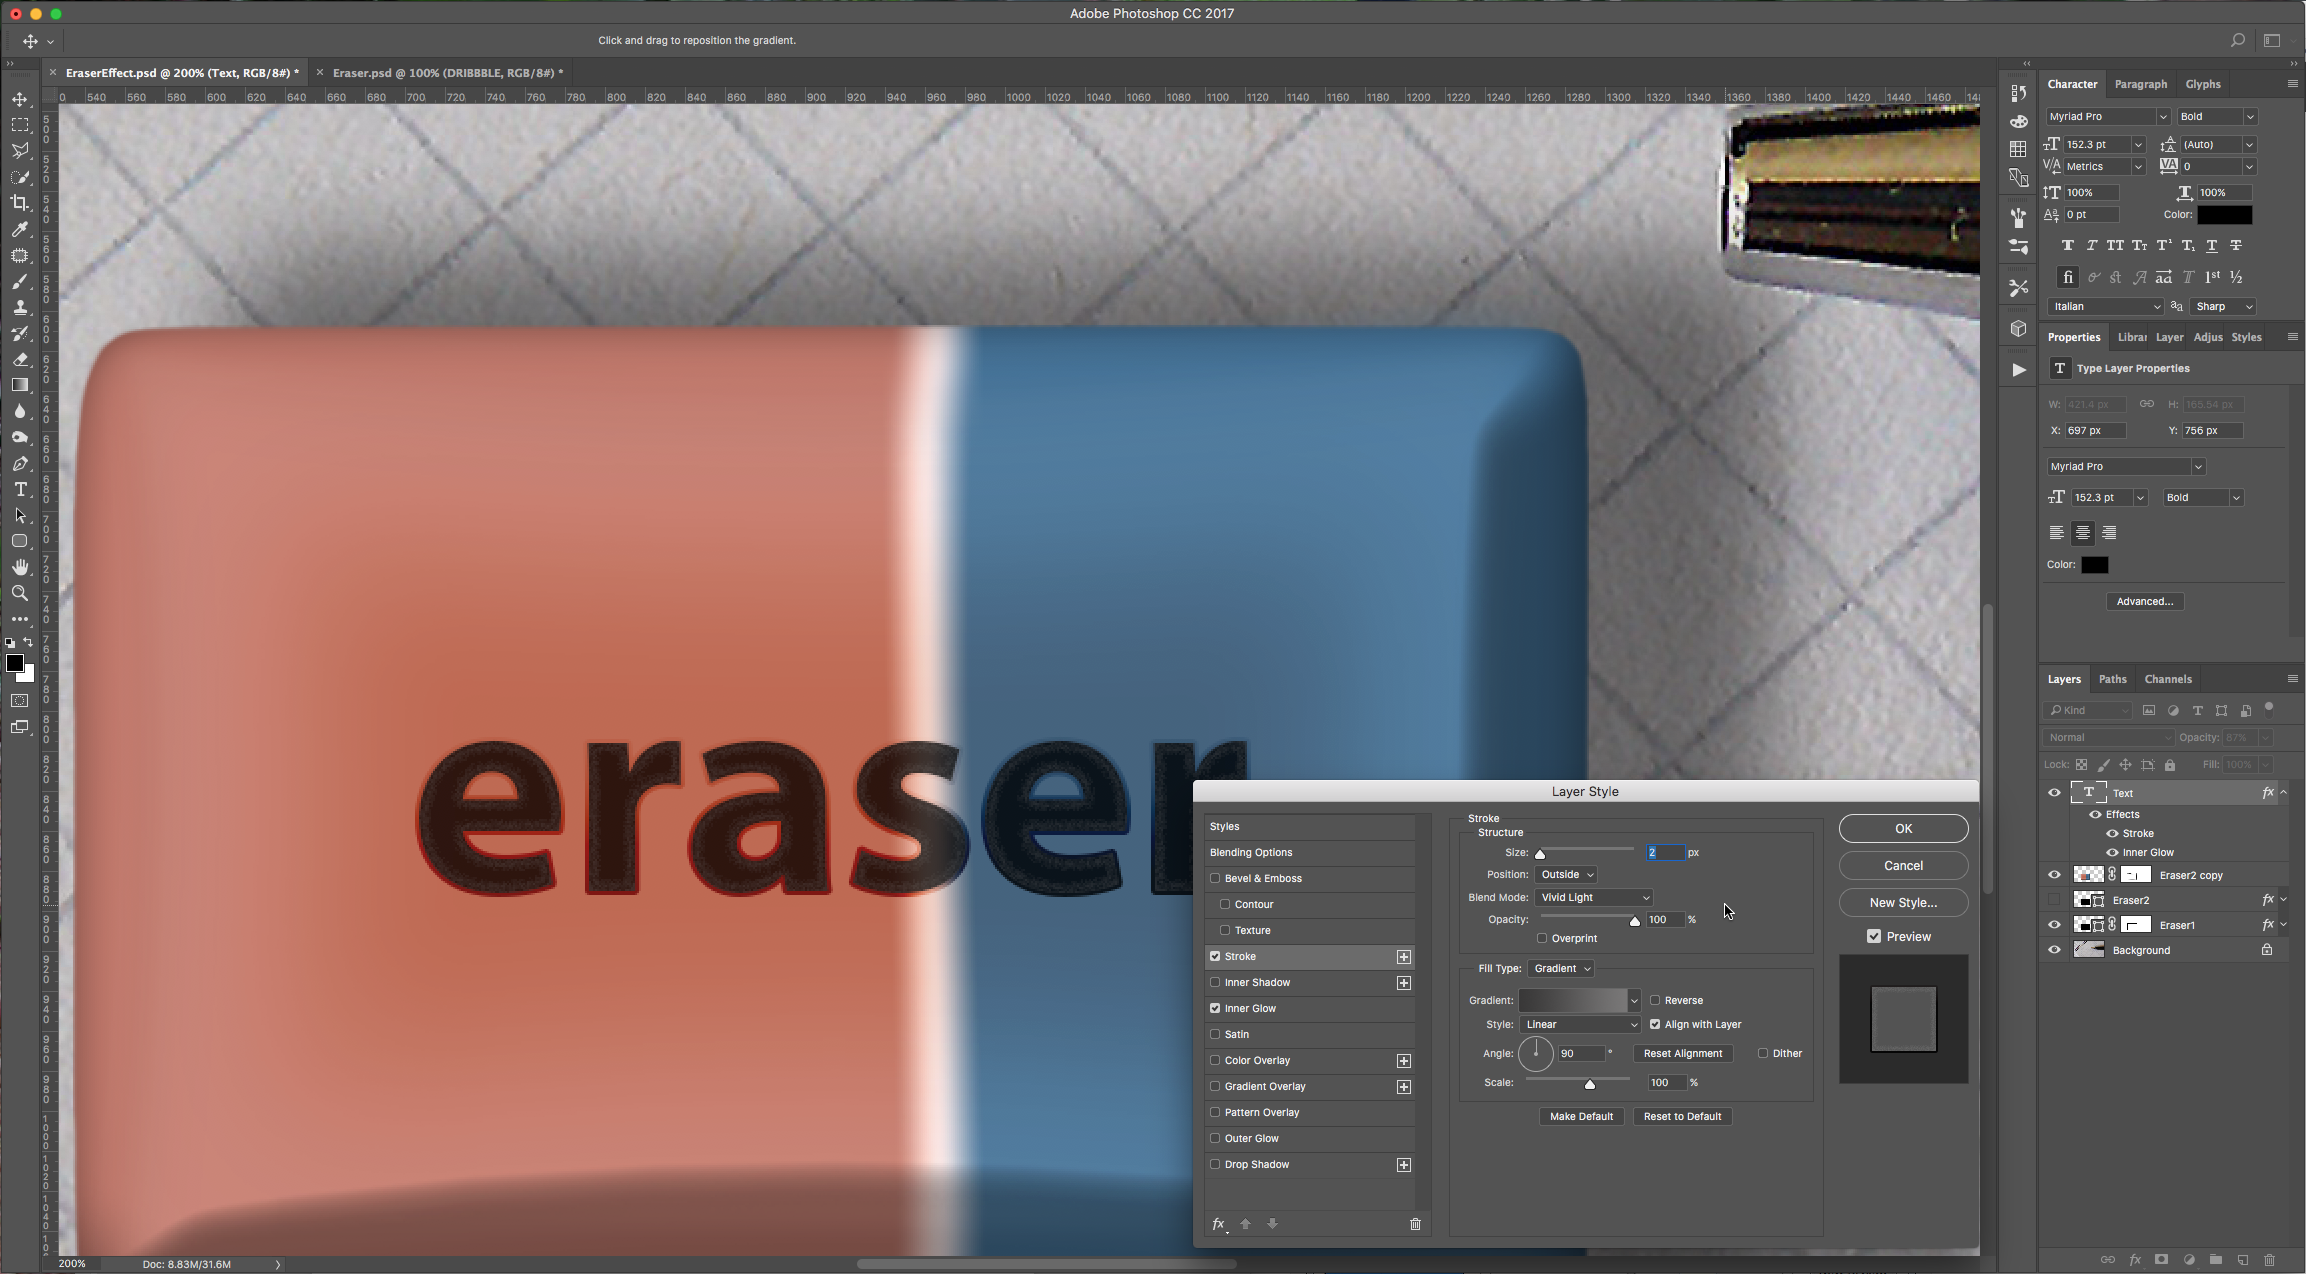
Inner Glow:

Lower the “Opacity” to 87%.
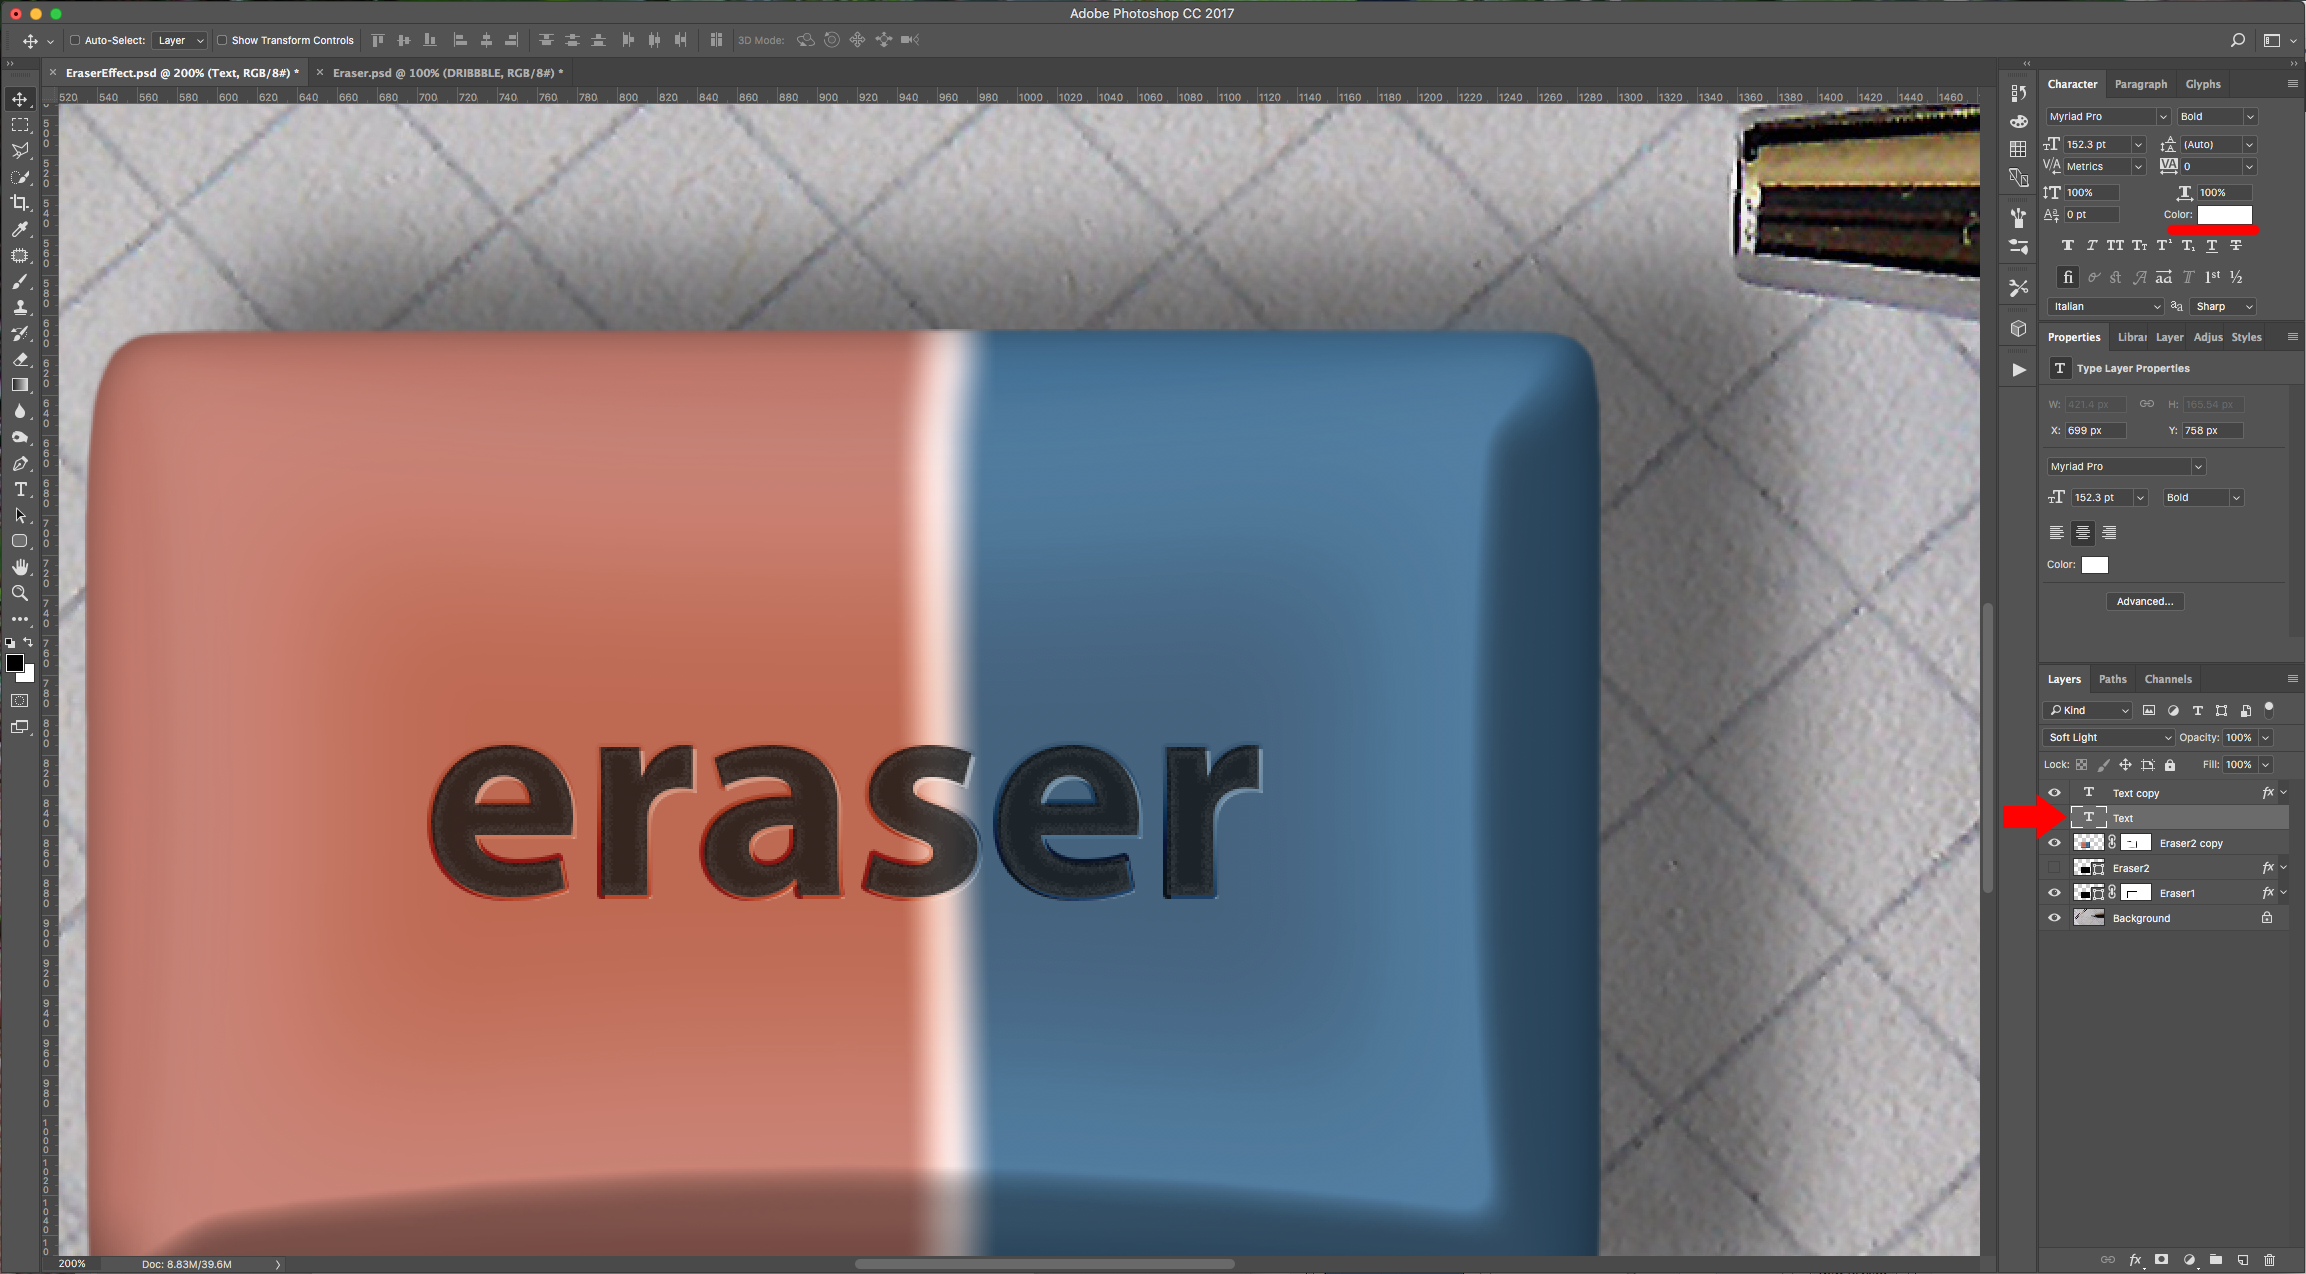
12 - Duplicate your Text Layer, erase the “Layer Styles” of your original “Text” layer and change the “Fill” color to white. Change the “Blending Mode” to “Soft Light” and move it a few clicks down and right.
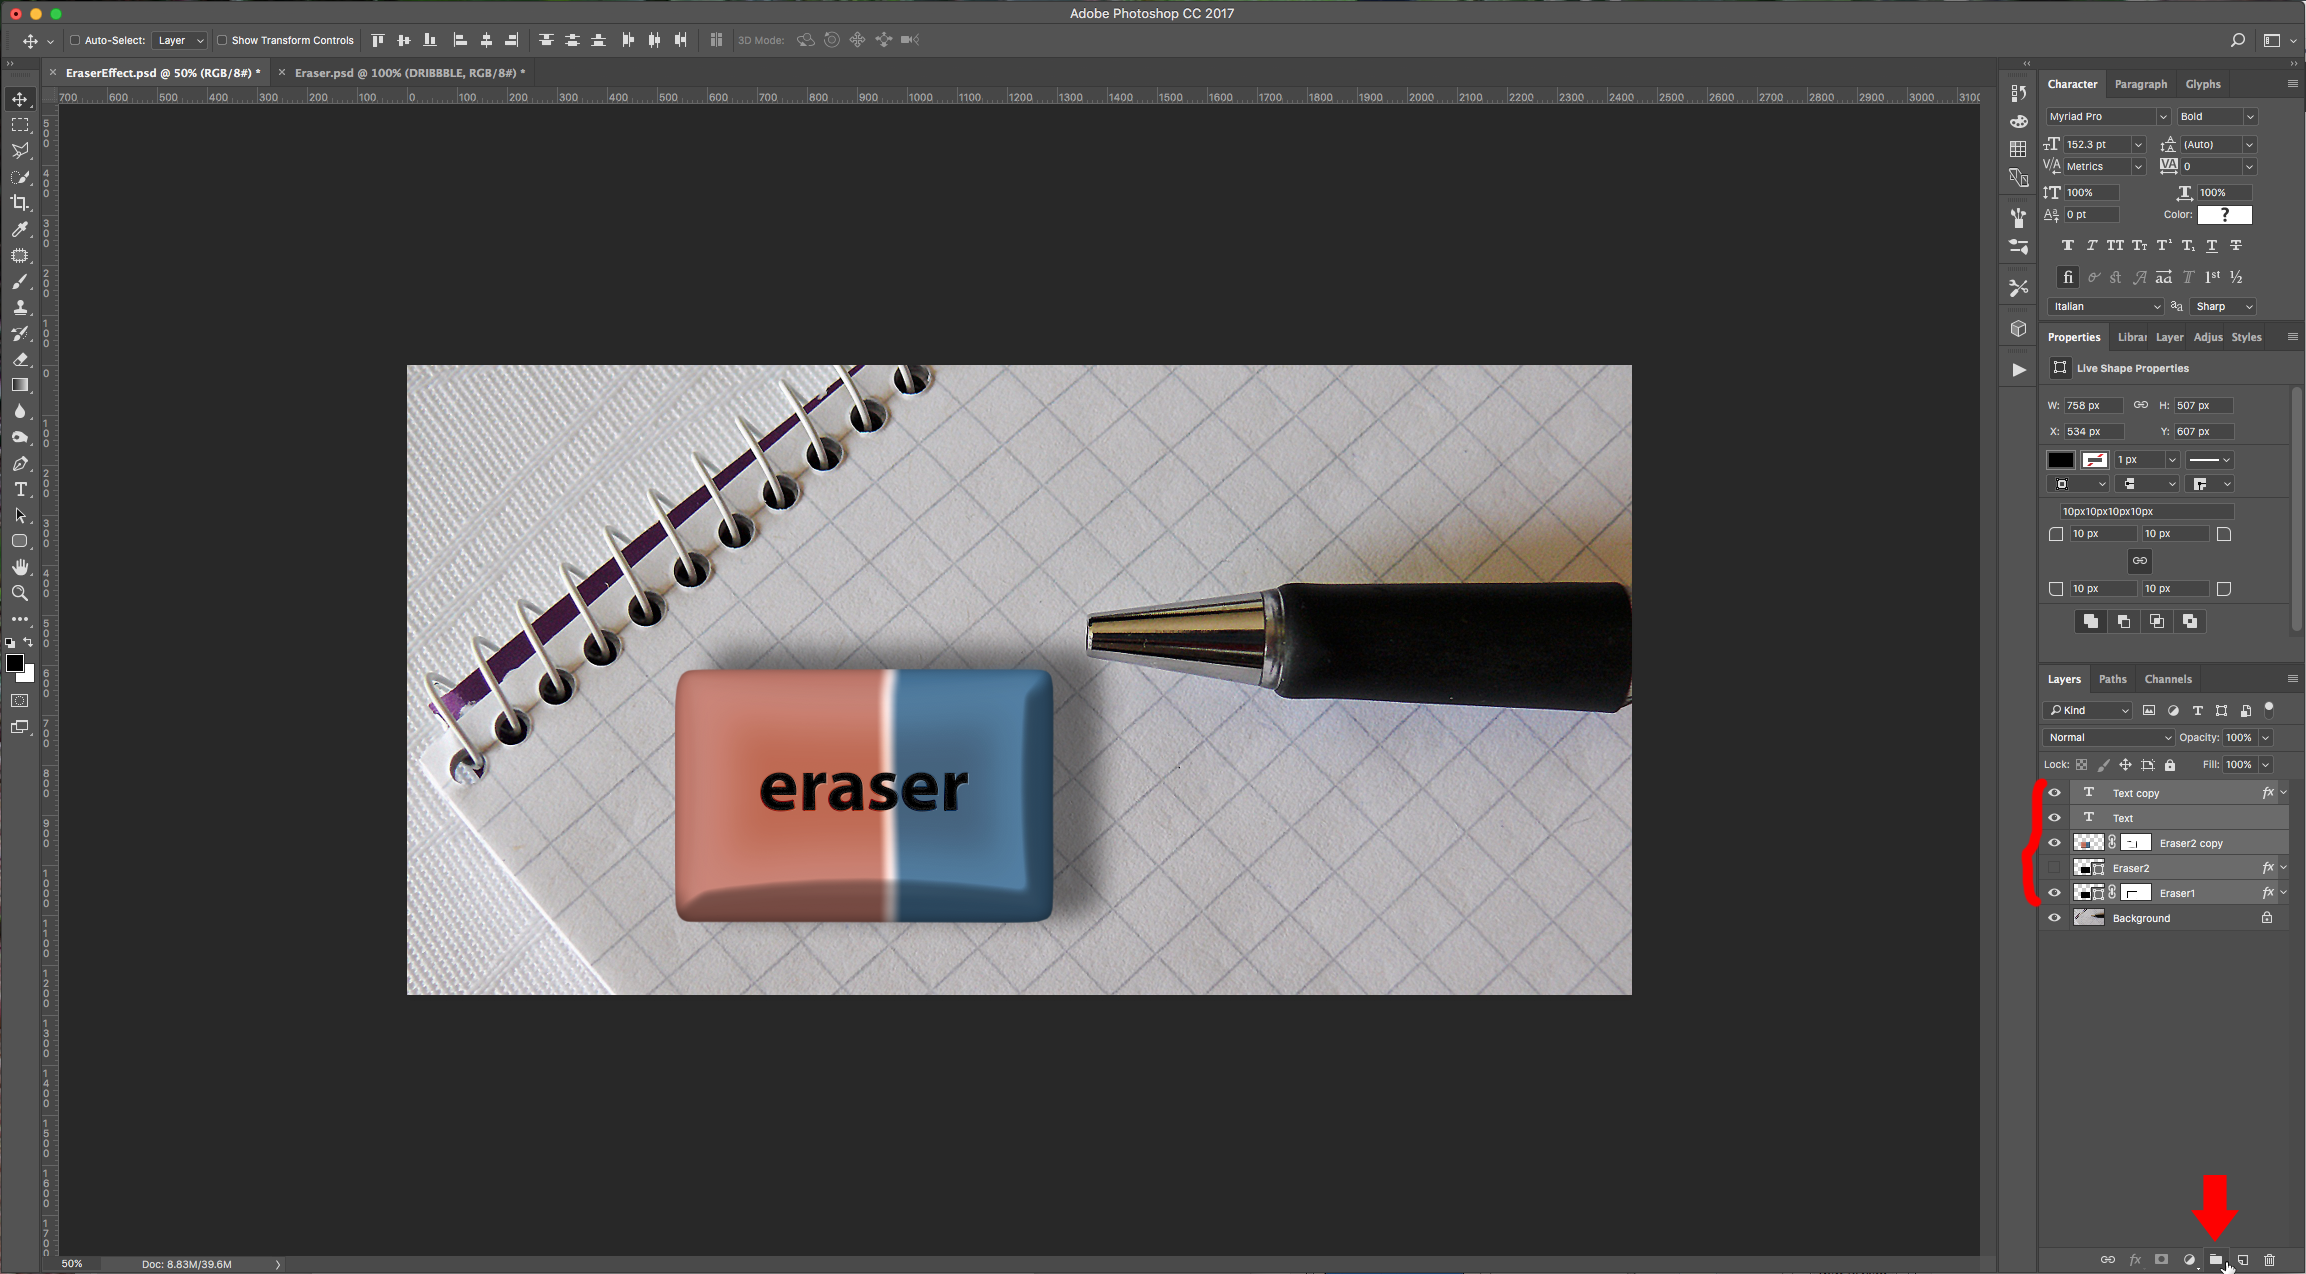
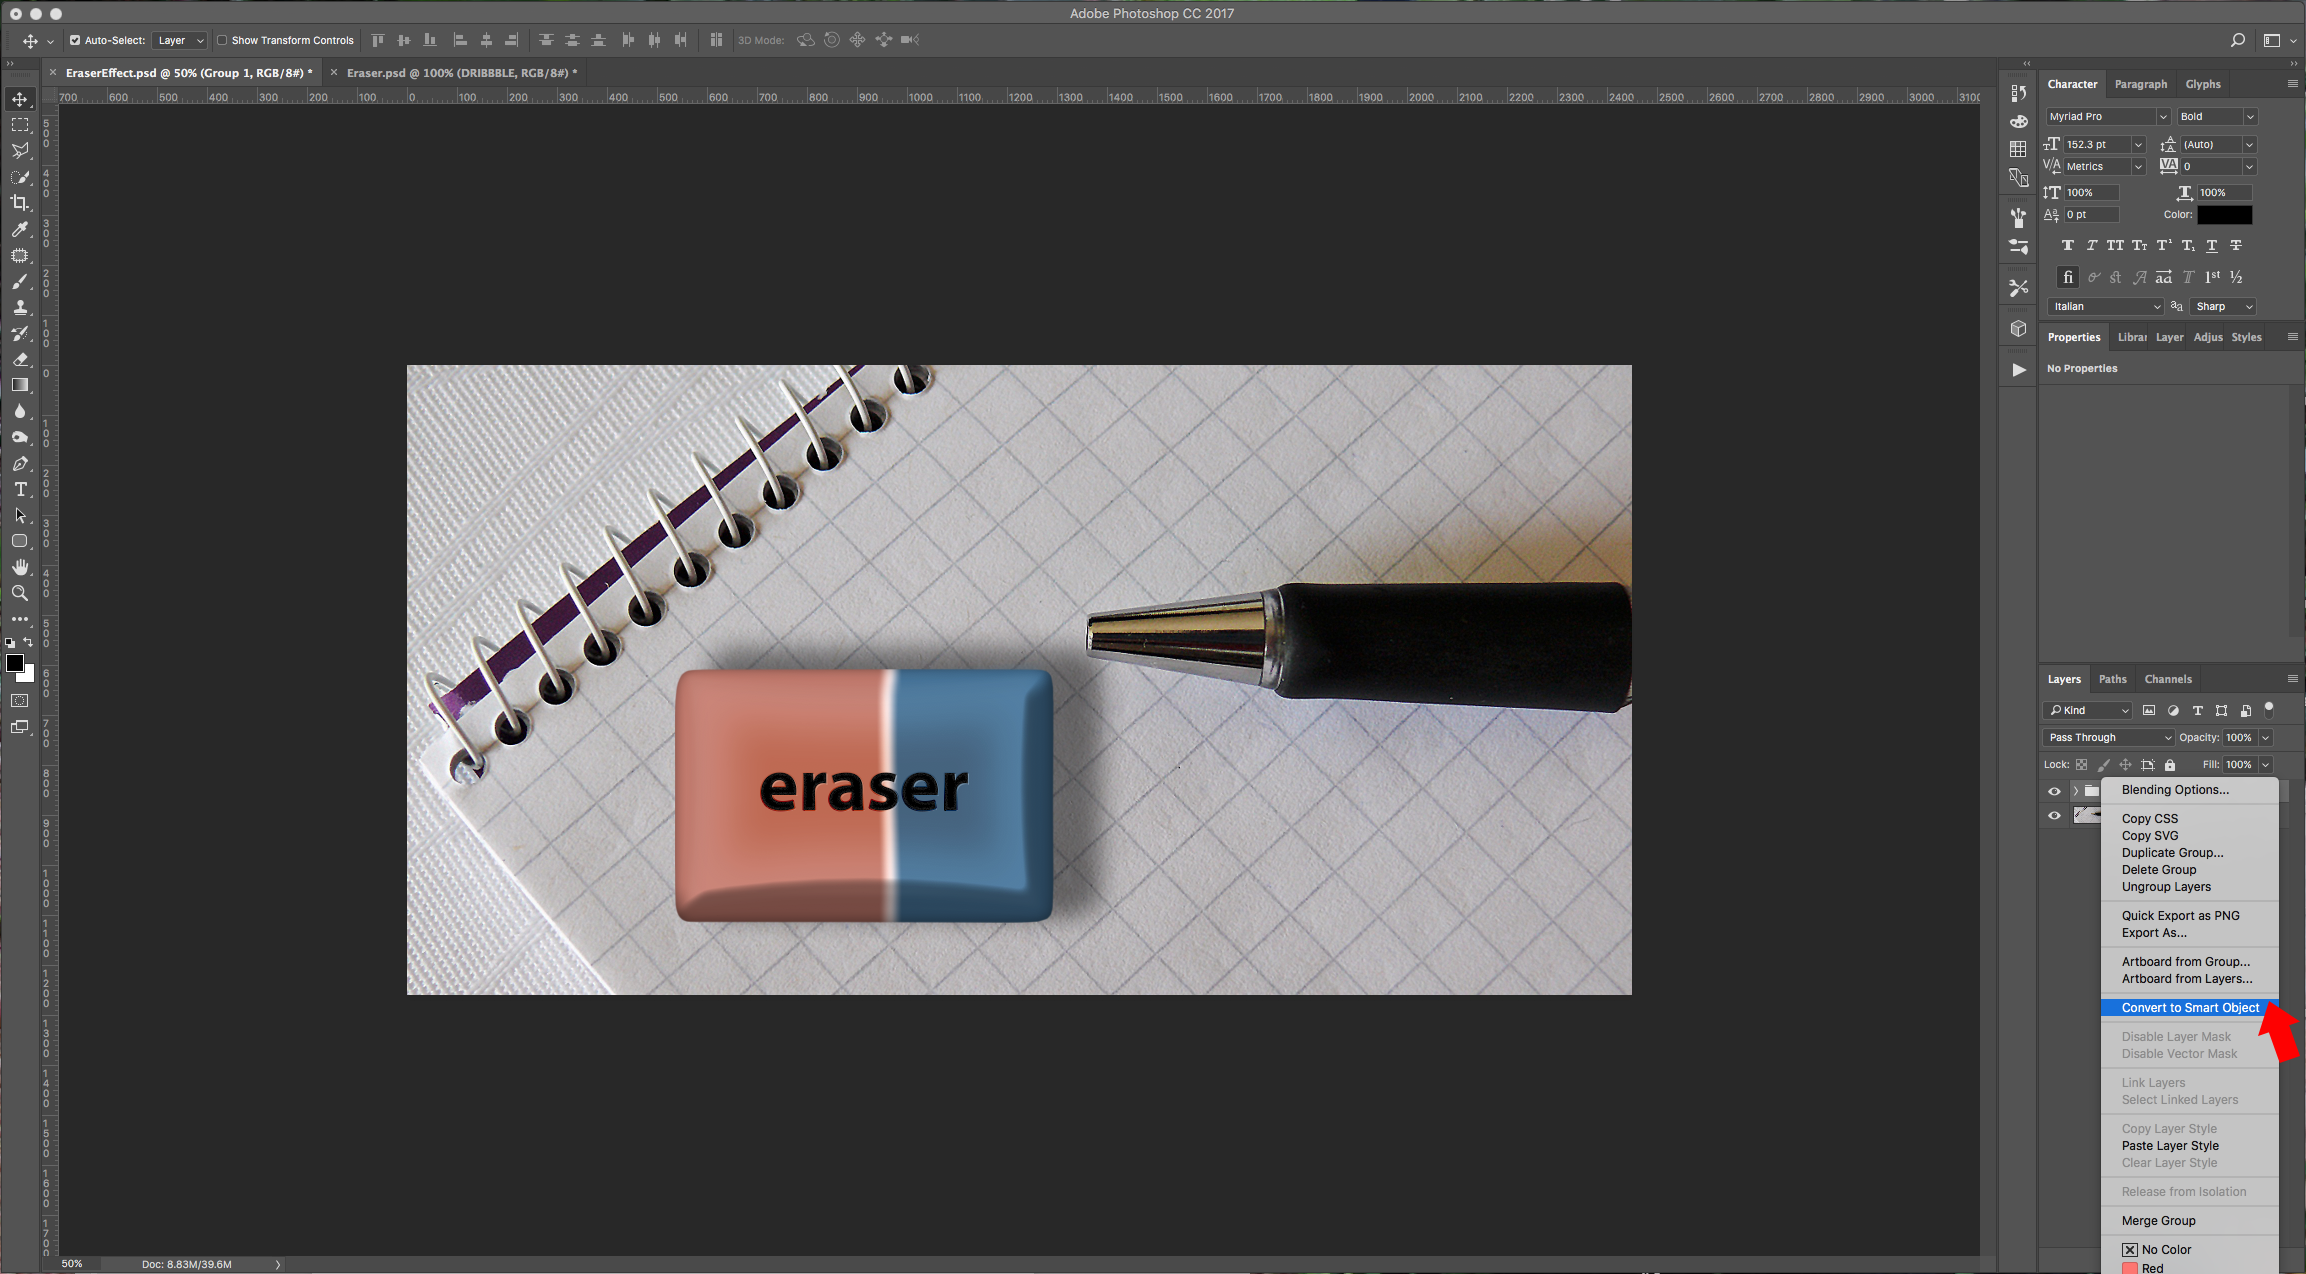
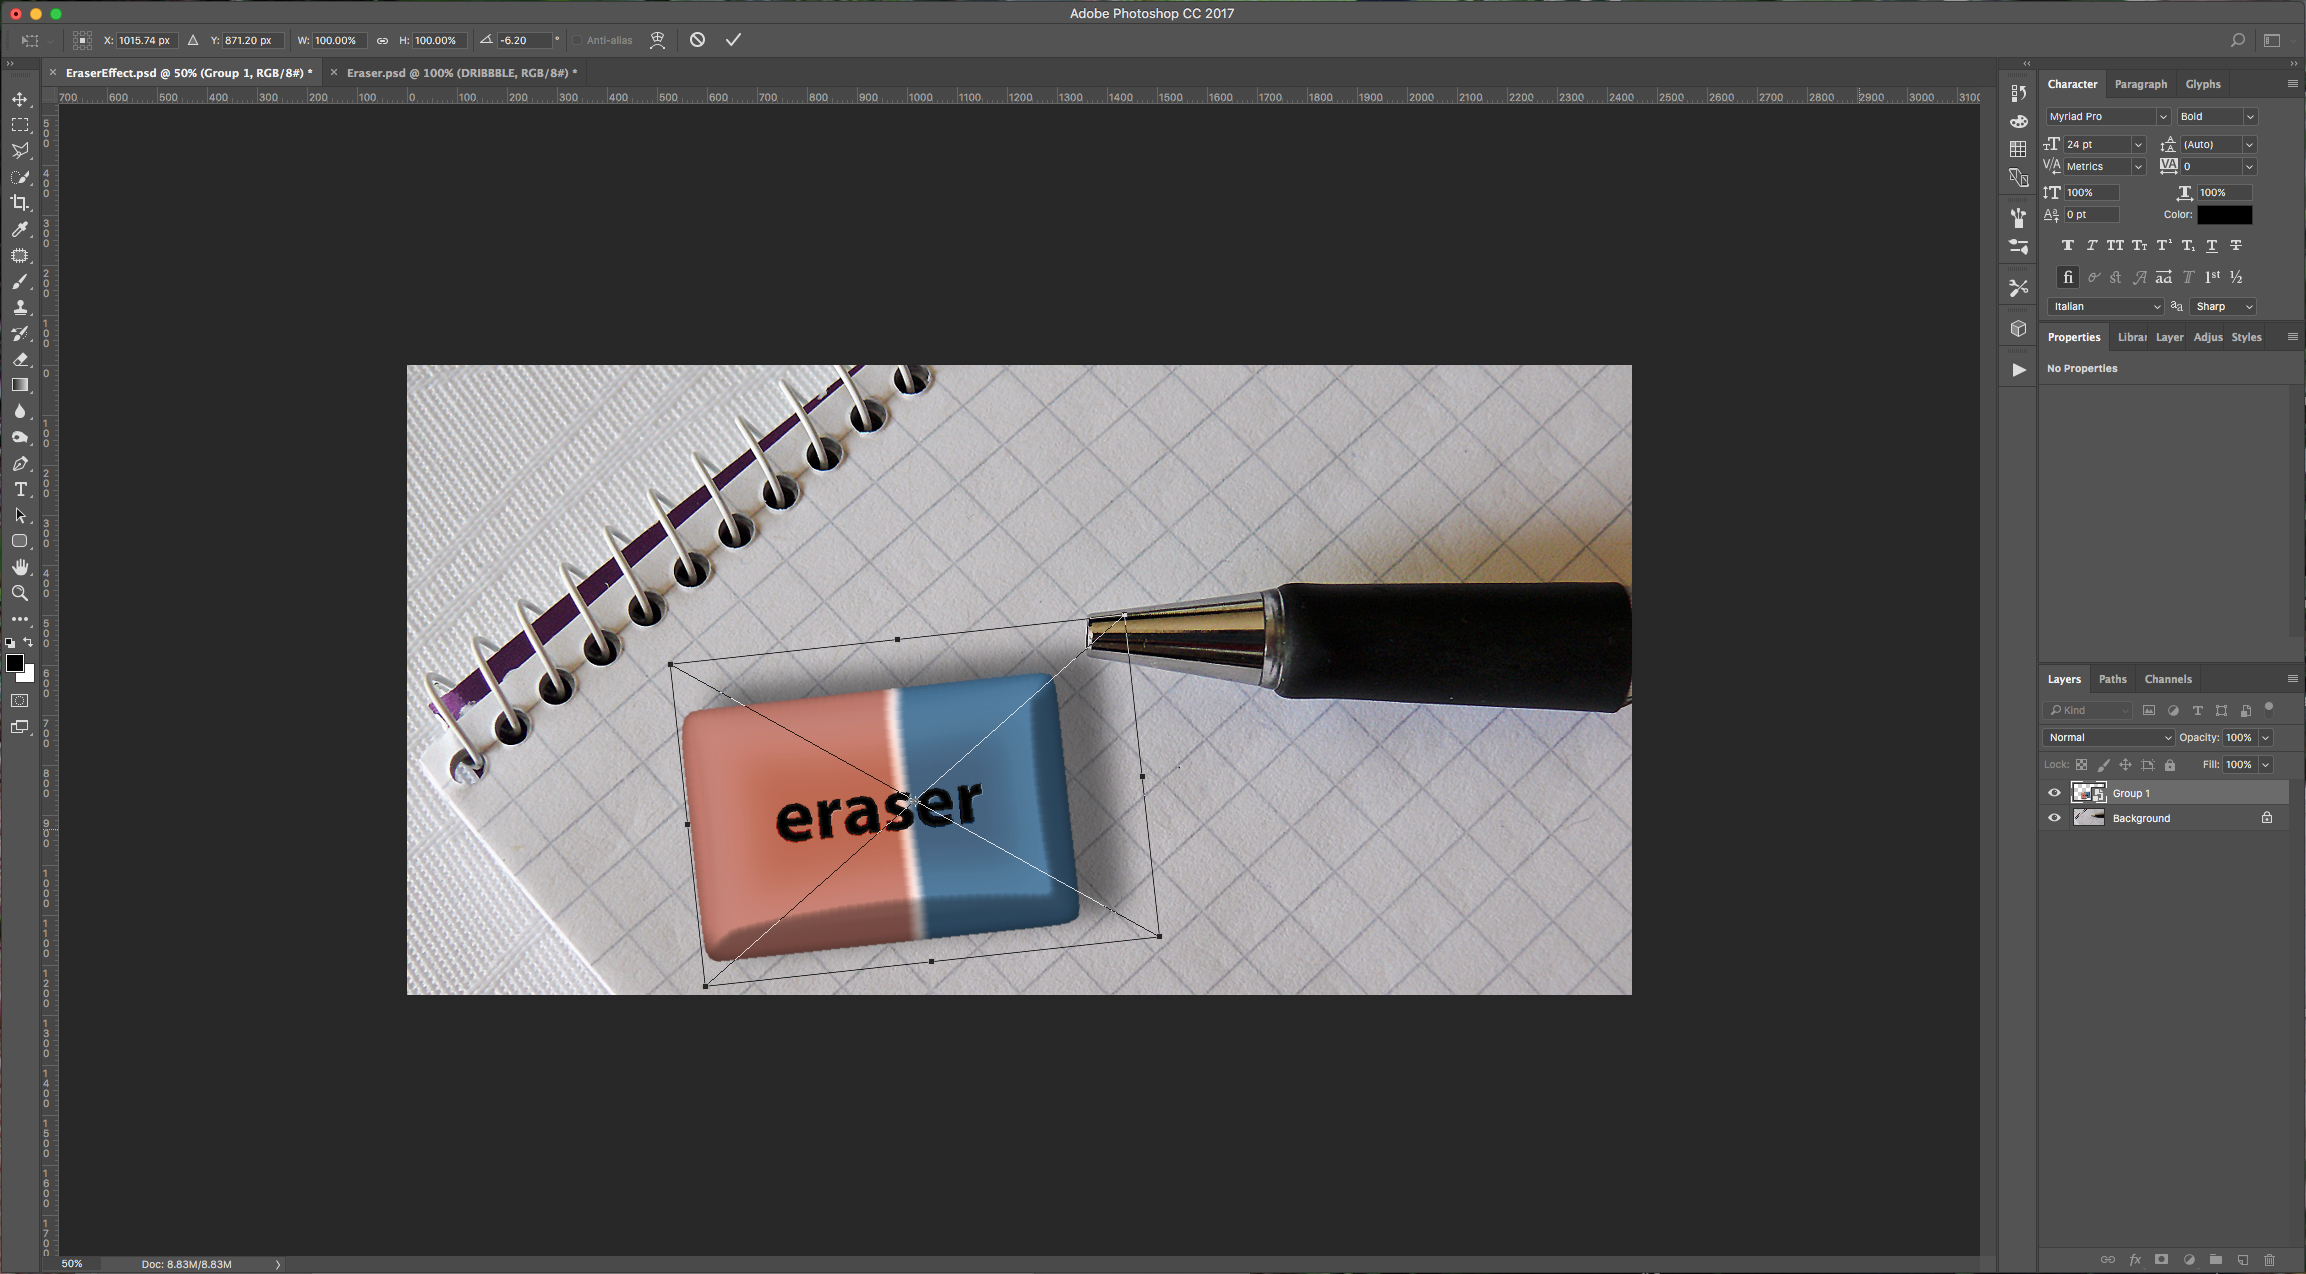
13 - Select all your layers except for the “Background” and click on the small folder icon at the bottom of the “Layers” Panel to create a “Group”. Then right-click on top of the thumbnail and choose “Convert to Smart Object”. Now you can rotate, scale or move around your eraser without messing up your “Layer Styles”.
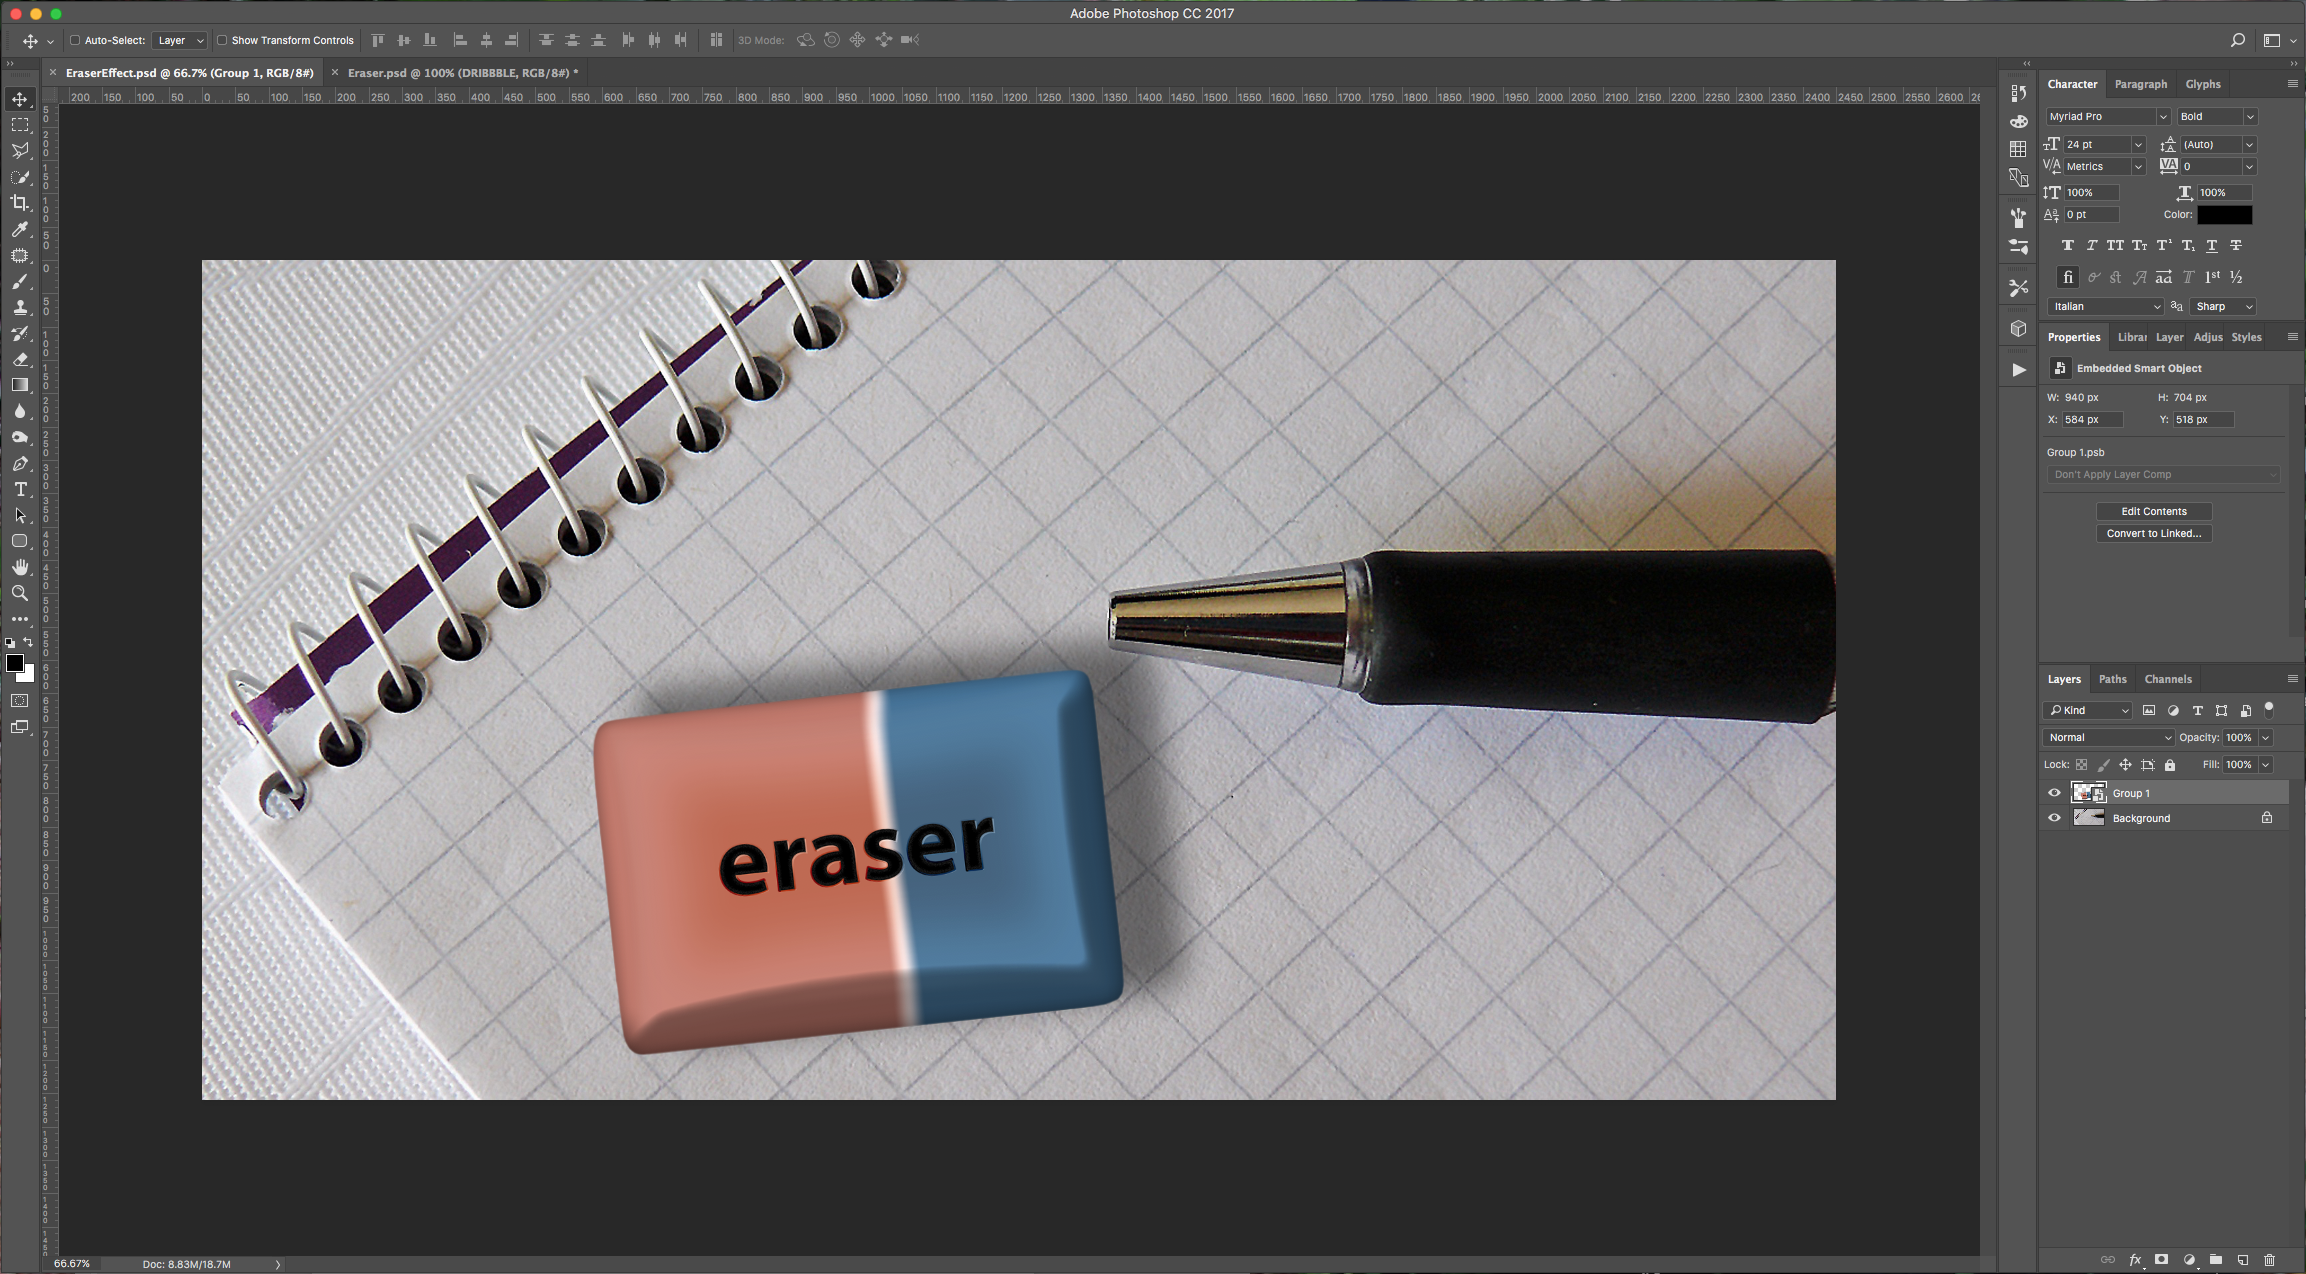
14: It should look something like this:
1 - In Photoshop, open the image you chose as “Background”, then create a “New Layer” by clicking on the button at the bottom of the “Layers” Panel.
2 - Select the “Rectangle Tool” (U) and draw a rectangle of the size and proportions you wish your eraser to be. You can use any other shape or text if you want.
3 - Duplicate your layer (Command/Control + J), hide your duplicate by clicking on the small eye button on the left side of the thumbnail, and then double-click on the original shape layer to apply the following “Layer Styles”:
Bevel & Emboss:
Inner Shadow:
Gradient Overlay: (color 1: #c77b6c, color 2: # fbe6e6, color 3: # 44749d. Location 1: 54%, Location 2: 57%, Location 3: 60%)
Drop Shadow:
4 - Now, turn back on the visibility for your “Eraser 2” Layer and apply the following “Layer Styles”:
Bevel & Emboss:
Inner Shadow:
Inner Glow: (#3f92cc)
Satin:
Gradient Overlay: (same as before)
5 - Select your “Eraser1” Layer and using the “Transform” command (Command/Control + T) to enlarge your shape until it looks right.
6 - Duplicate the “Eraser2” Layer, right-click on it and choose “Rasterize Layer Styles”. Hide or delete your original “Eraser2” Layer.
7 - Click on the “Add Layer Mask” button at the bottom of the “Layers” Panel, select the “Brush Tool” (B) and with a “Soft” brush (0% Hardness) erase the edges of your image to smooth it out.
8 - Go to Edit > Transform > Warp and play around with your image until you get a more tridimensional look. Once you are happy, click “Enter” or on the little check mark button on the top menu.
9 - Select your “Eraser1” Layer and add a “Layer Mask”. This time use a smaller brush with an intermediate “Hardness” (we used one with 27 Pixels in Size and 79% in “Hardness”). Fix the corners of your eraser to make more realistic. Double-click on the “Eraser1” Layer and change the “Drop Shadow” if needed.
10 - Create a “New Layer” by clicking the button at the bottom of the “Layers” Panel. Select the “Type Tool” (T), choose a font (we used Myriad Pro Bold) and type some text using black as “Fill” color.
11 - Double-click on your Text Layer and apply the following “Layer Styles:
Stroke: (#393838 y #797878)
Inner Glow:
Lower the “Opacity” to 87%.
12 - Duplicate your Text Layer, erase the “Layer Styles” of your original “Text” layer and change the “Fill” color to white. Change the “Blending Mode” to “Soft Light” and move it a few clicks down and right.
13 - Select all your layers except for the “Background” and click on the small folder icon at the bottom of the “Layers” Panel to create a “Group”. Then right-click on top of the thumbnail and choose “Convert to Smart Object”. Now you can rotate, scale or move around your eraser without messing up your “Layer Styles”.
14: It should look something like this:
by @lornacane


