
Grass Text Effect in Illustrator
For this Tutorial, we are going to use the Free Font “Soft Vintage Bold”.
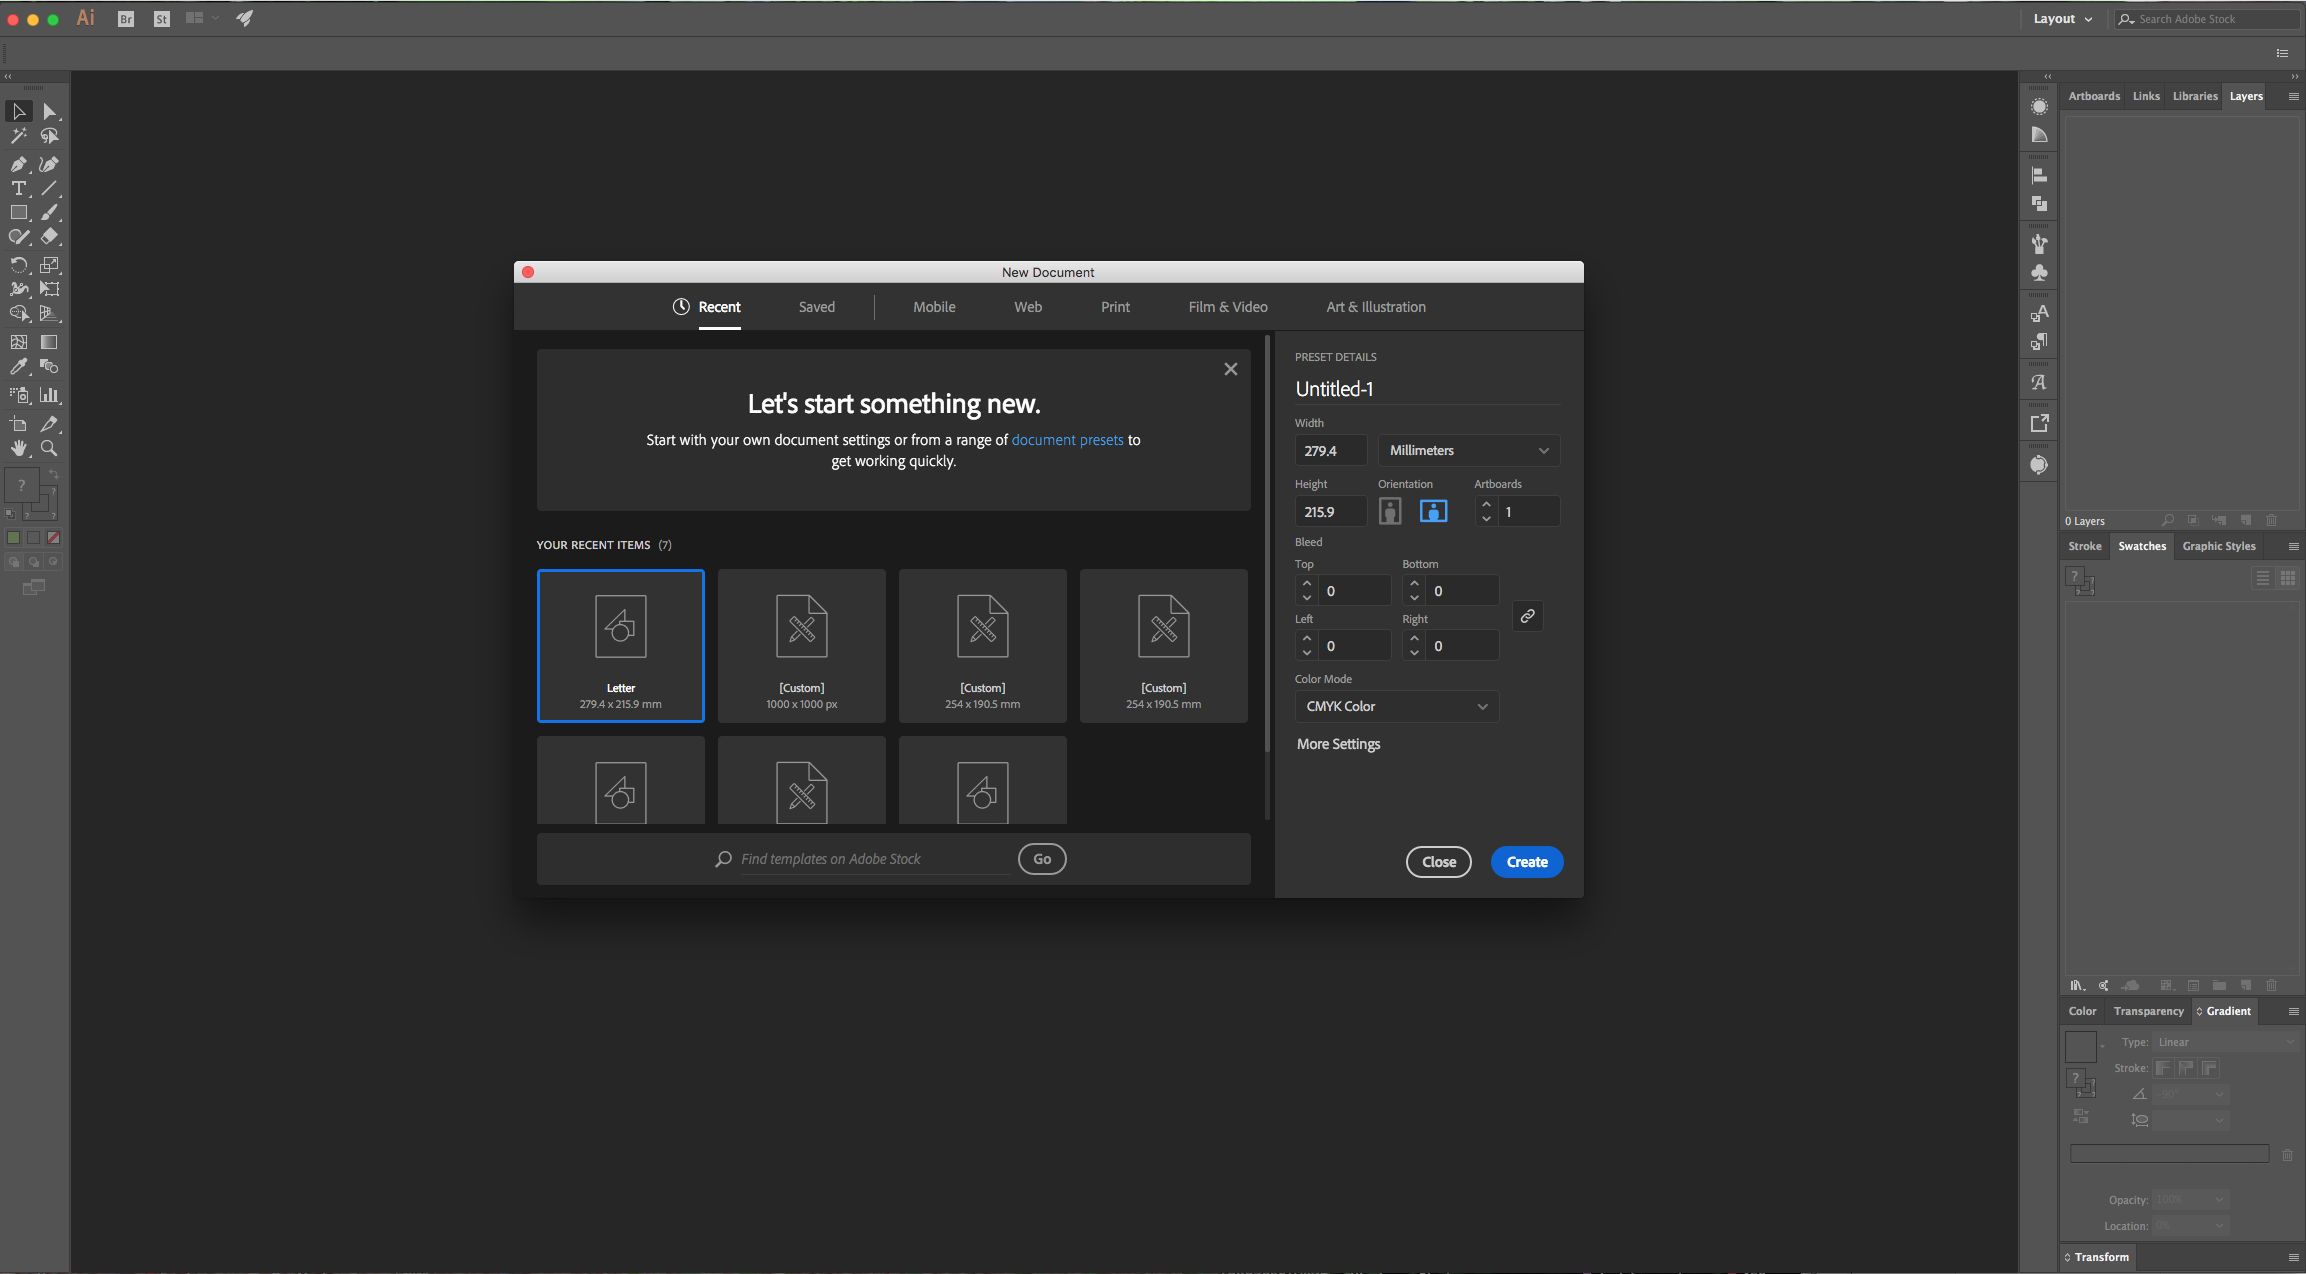
1 - In Illustrator, create a “New Document”.
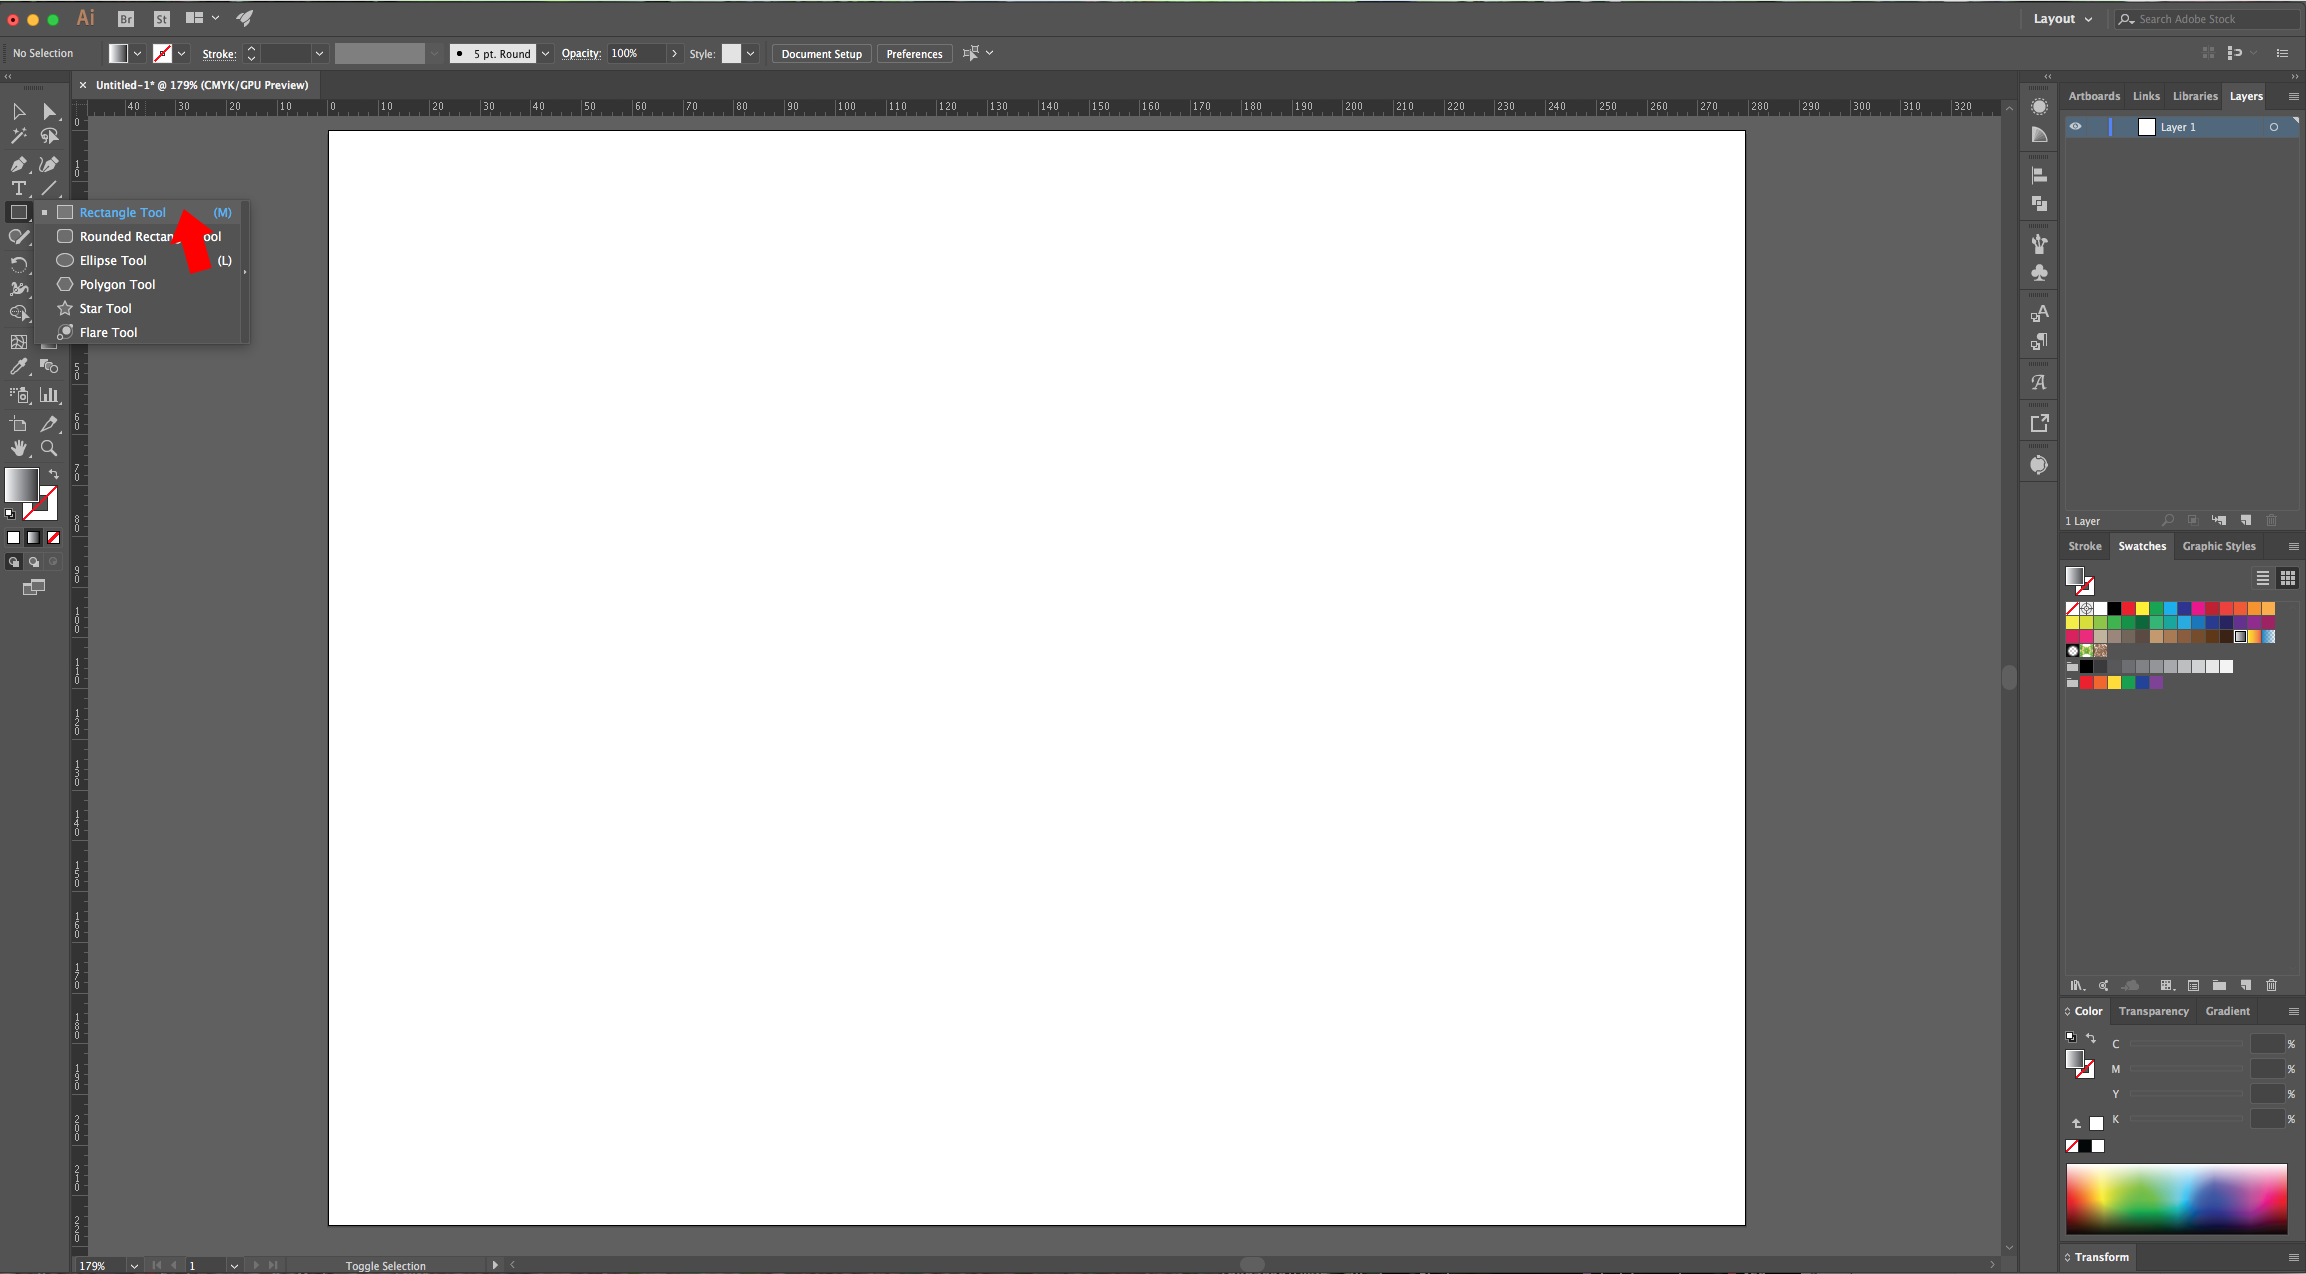
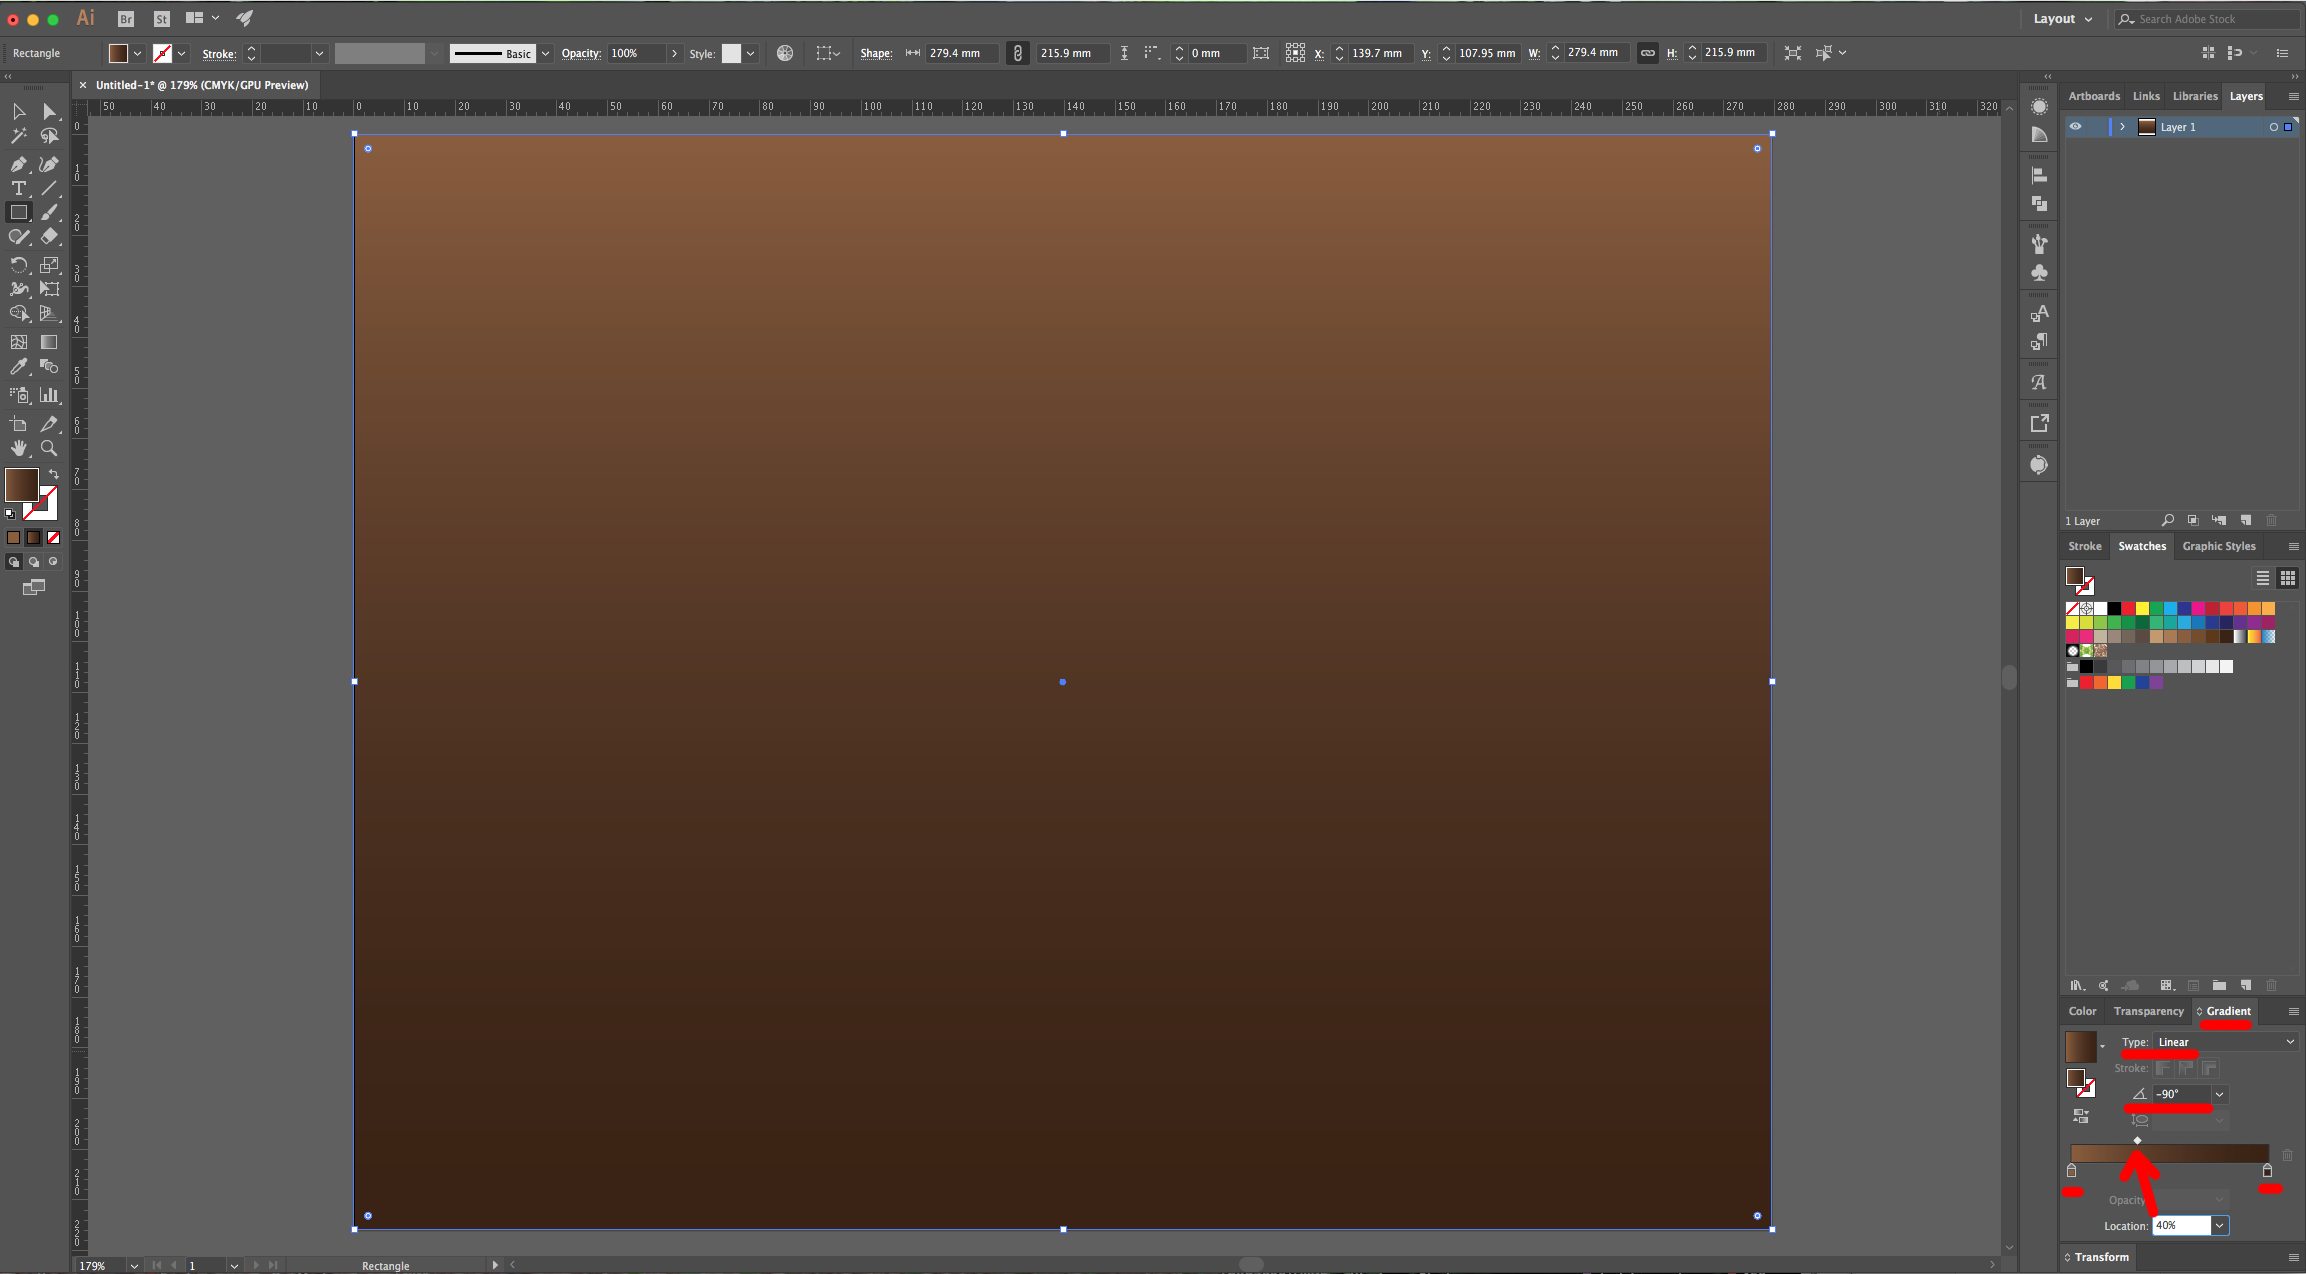
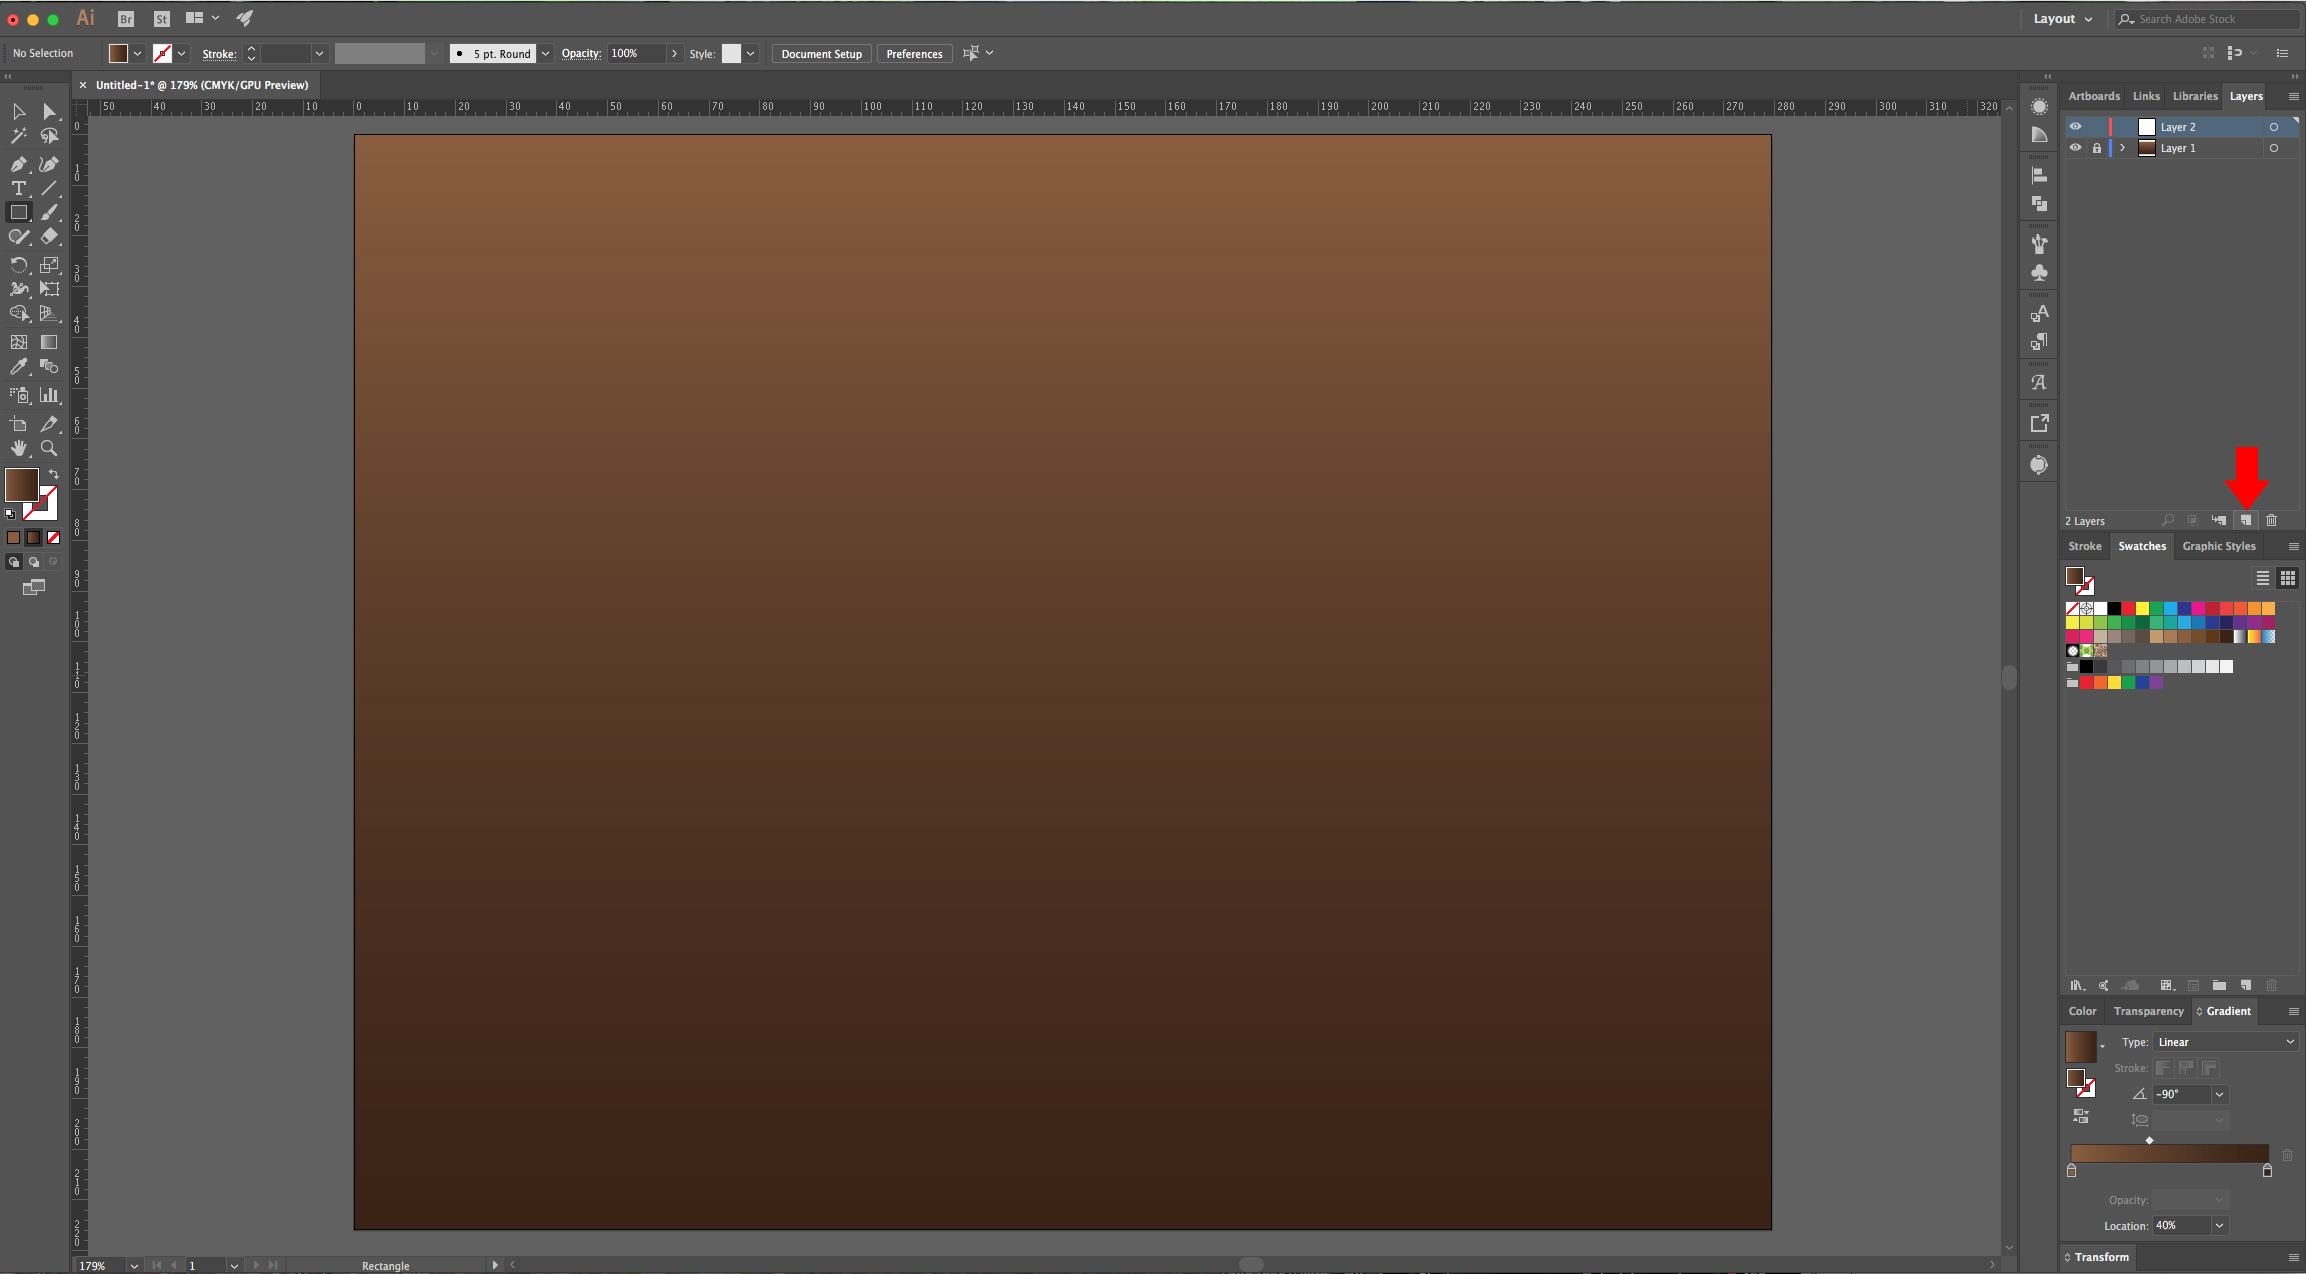
2 - Select the “Rectangle Tool” (M), draw a rectangle covering your entire canvas and fill it with a “Linear Gradient” going from a light/medium to a dark brown with a -90° Angle.
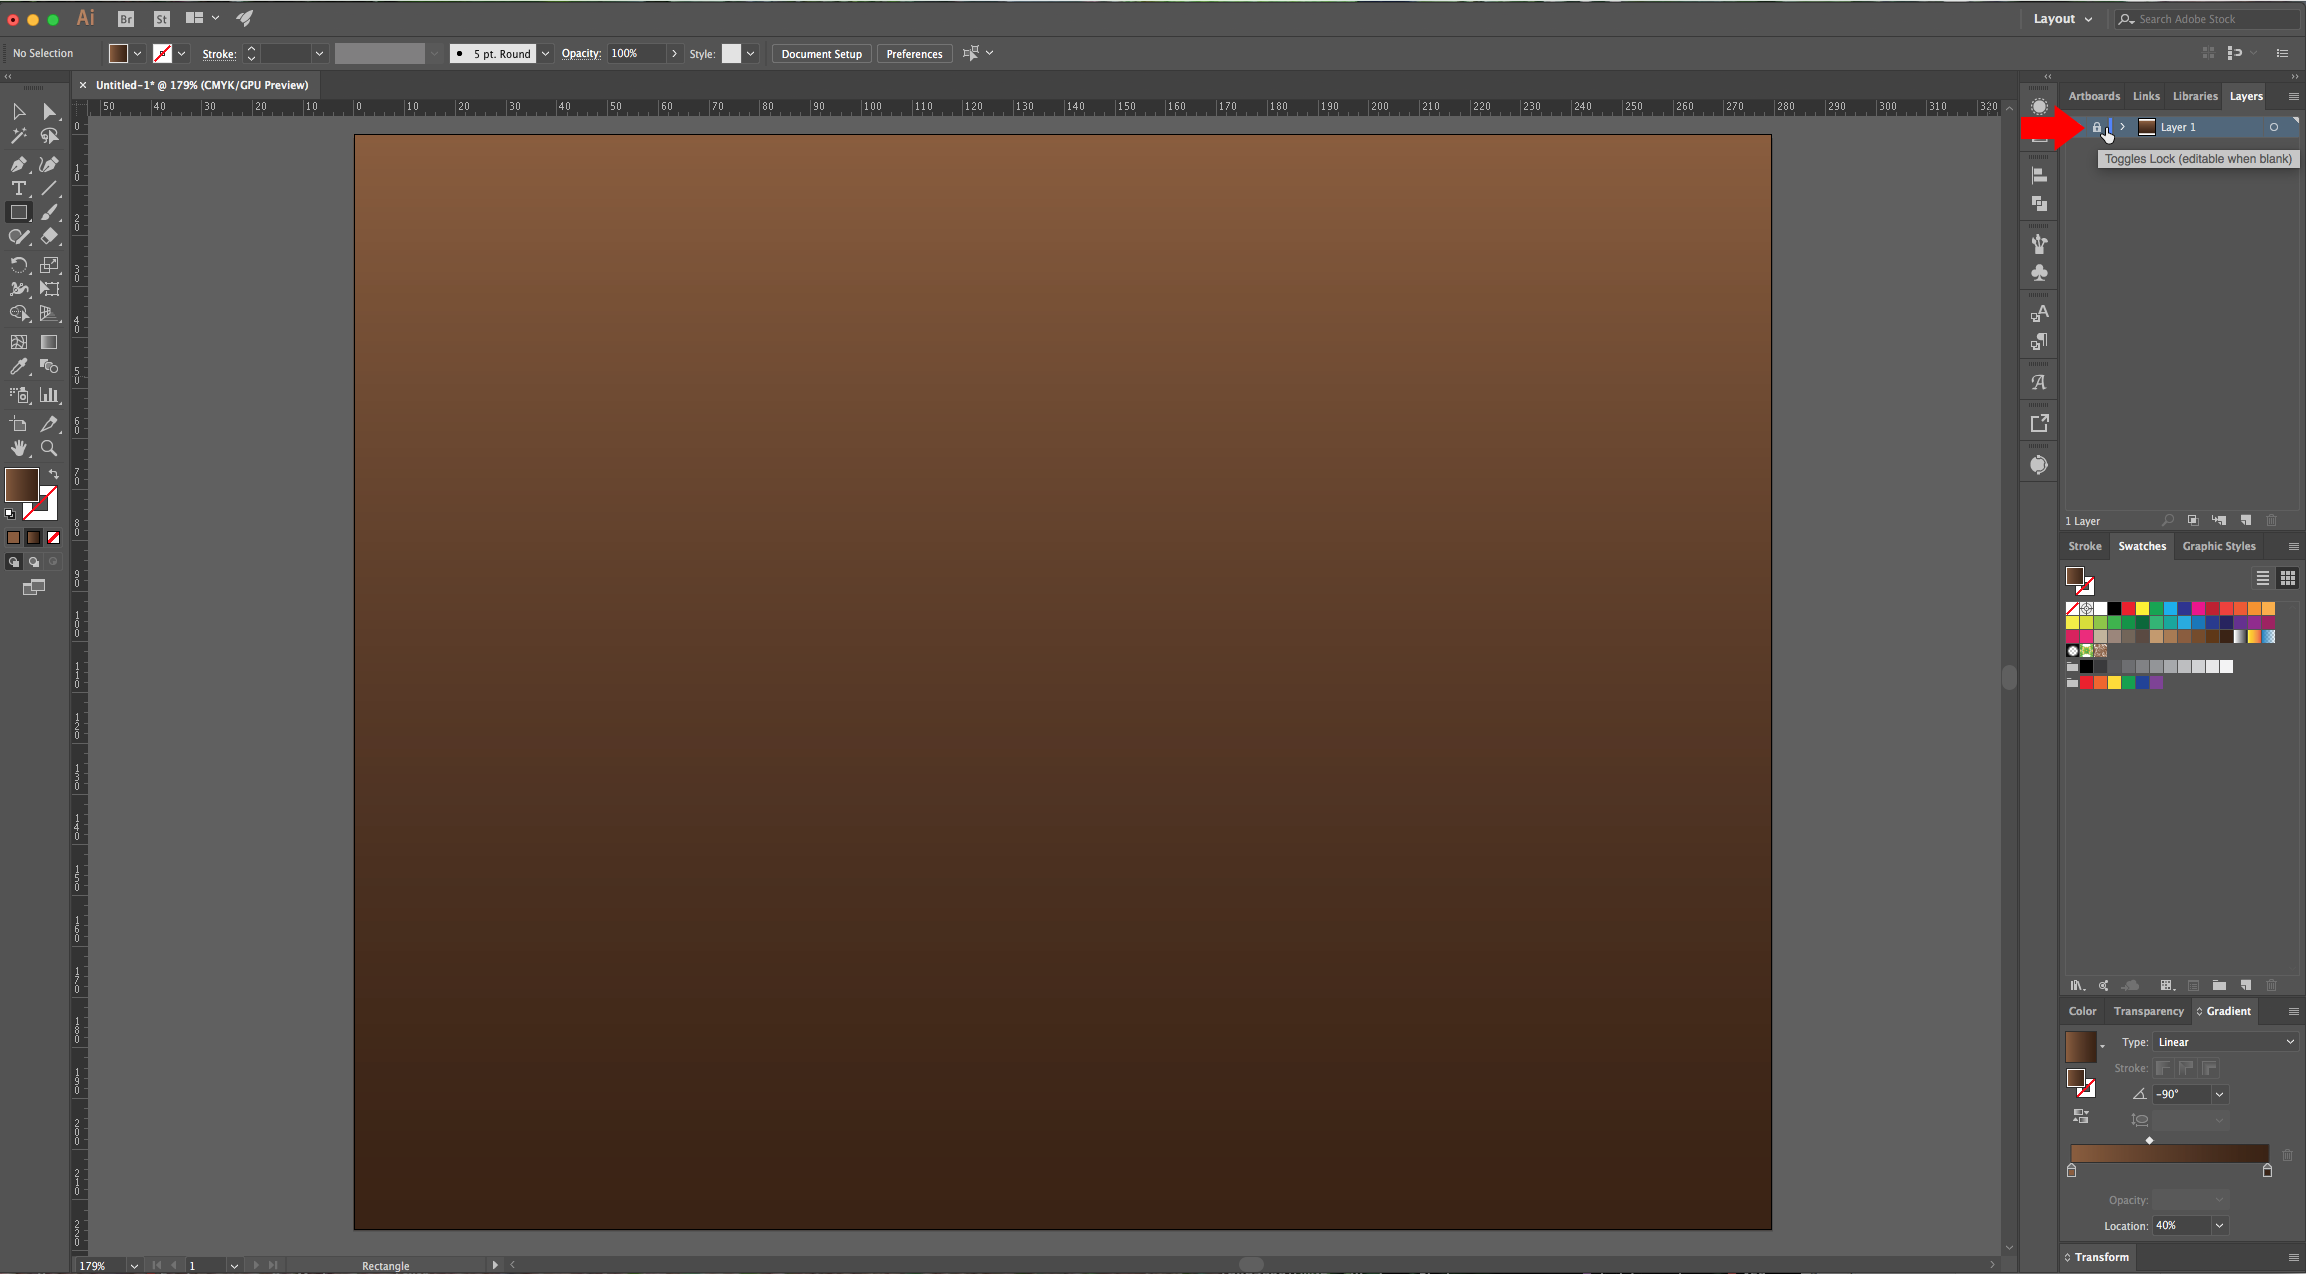
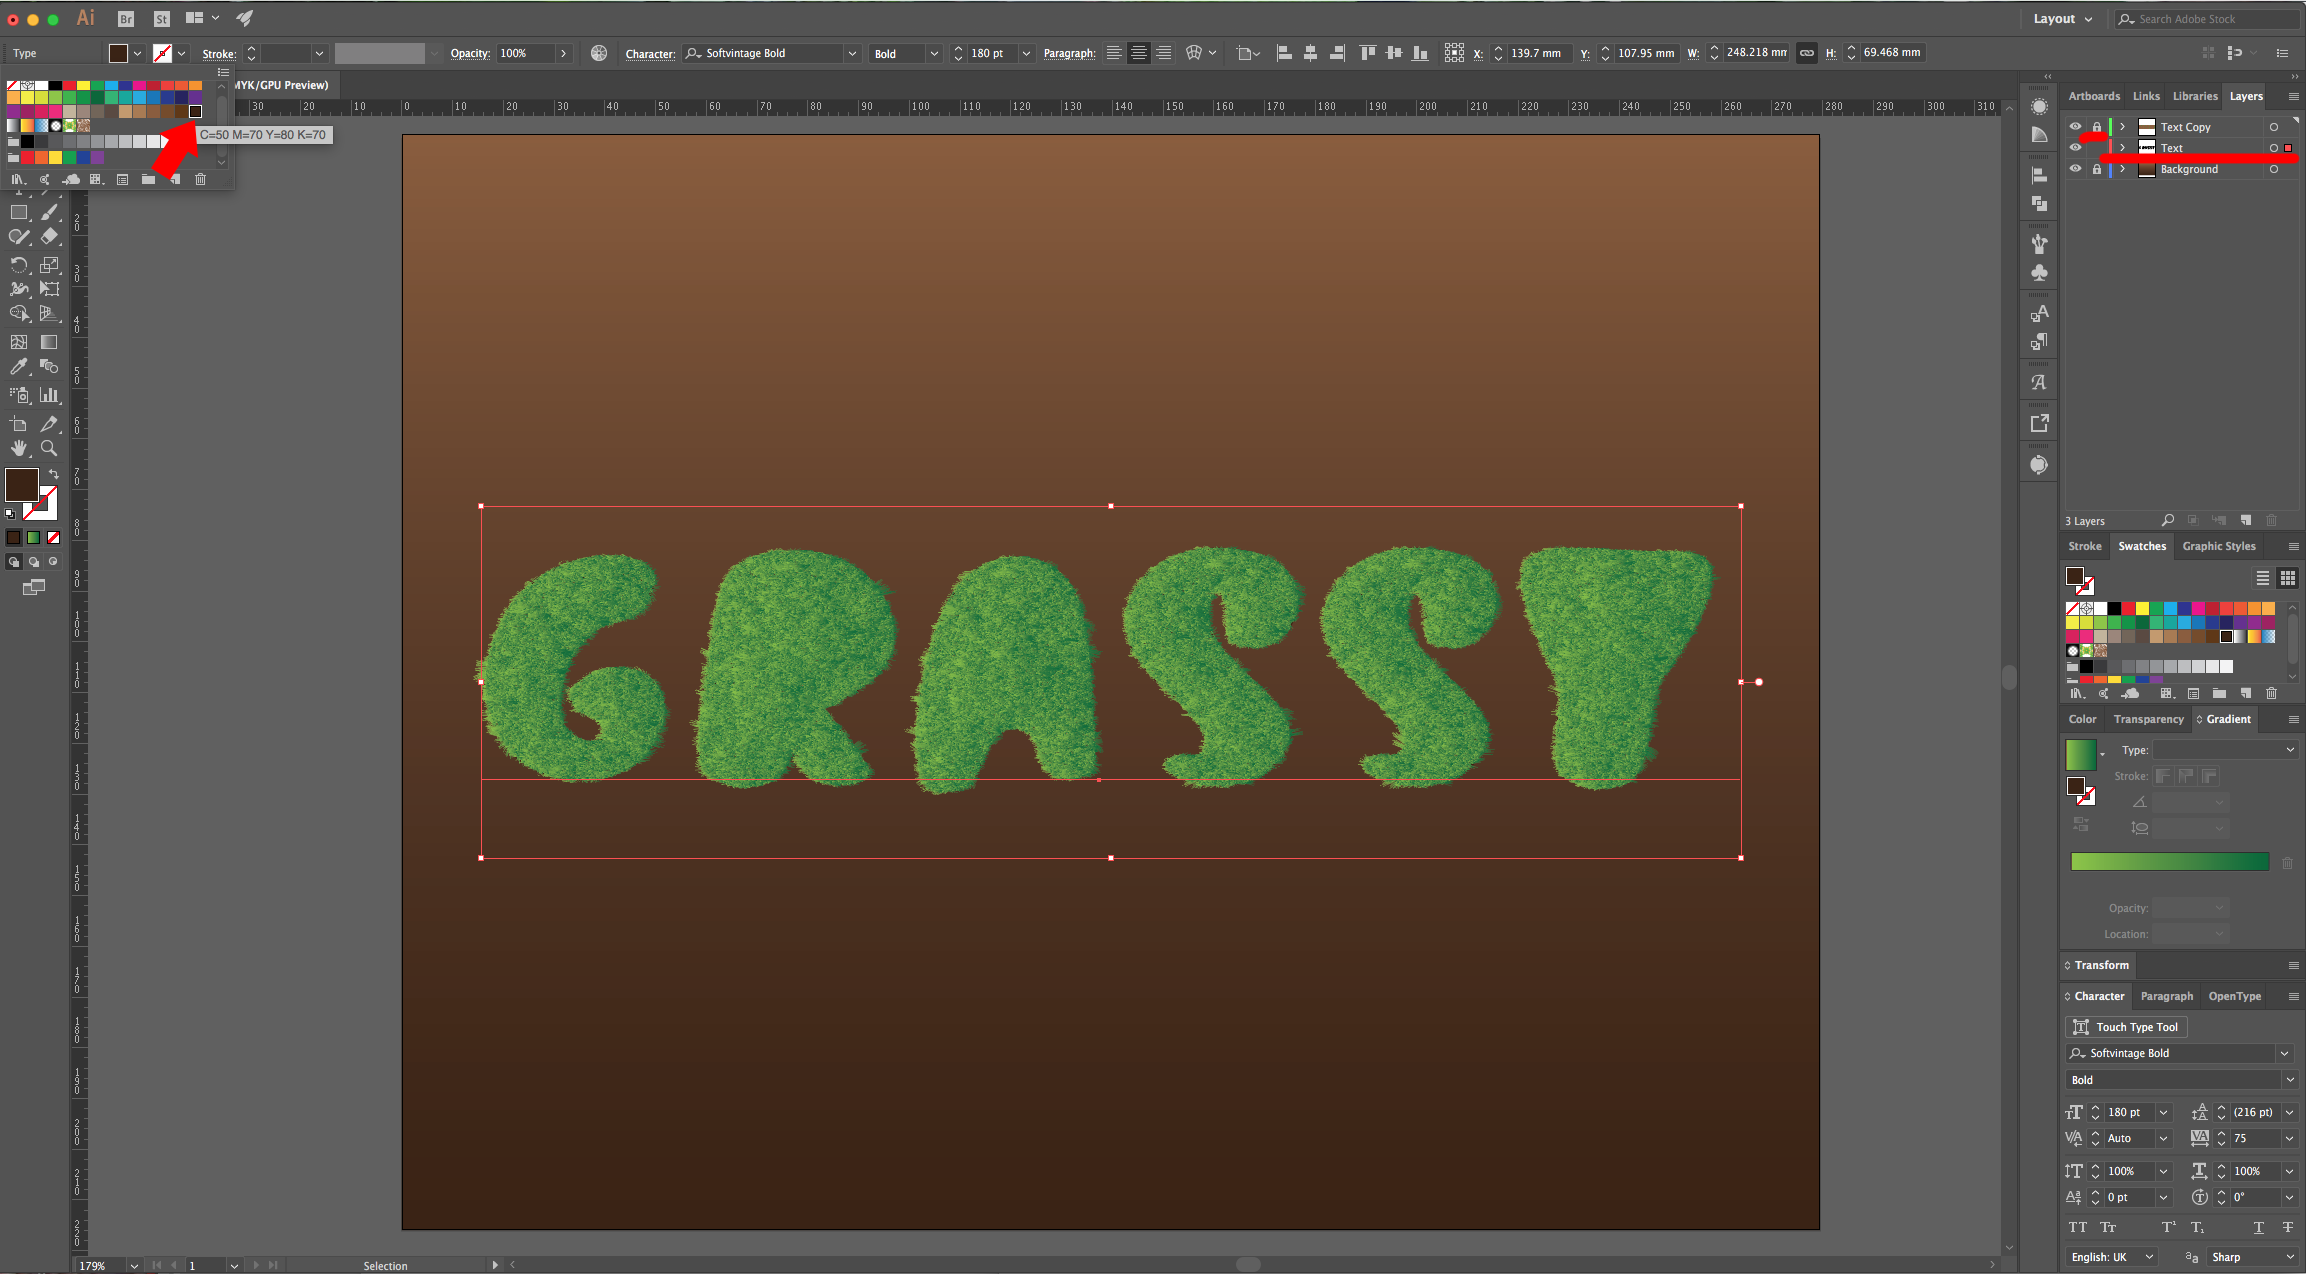
3 - Lock your Layer by clicking on the left side of its Thumbnail and bring out the small padlock. Then, click on the small “Create New Layer” button at the bottom to create a “New Layer”.
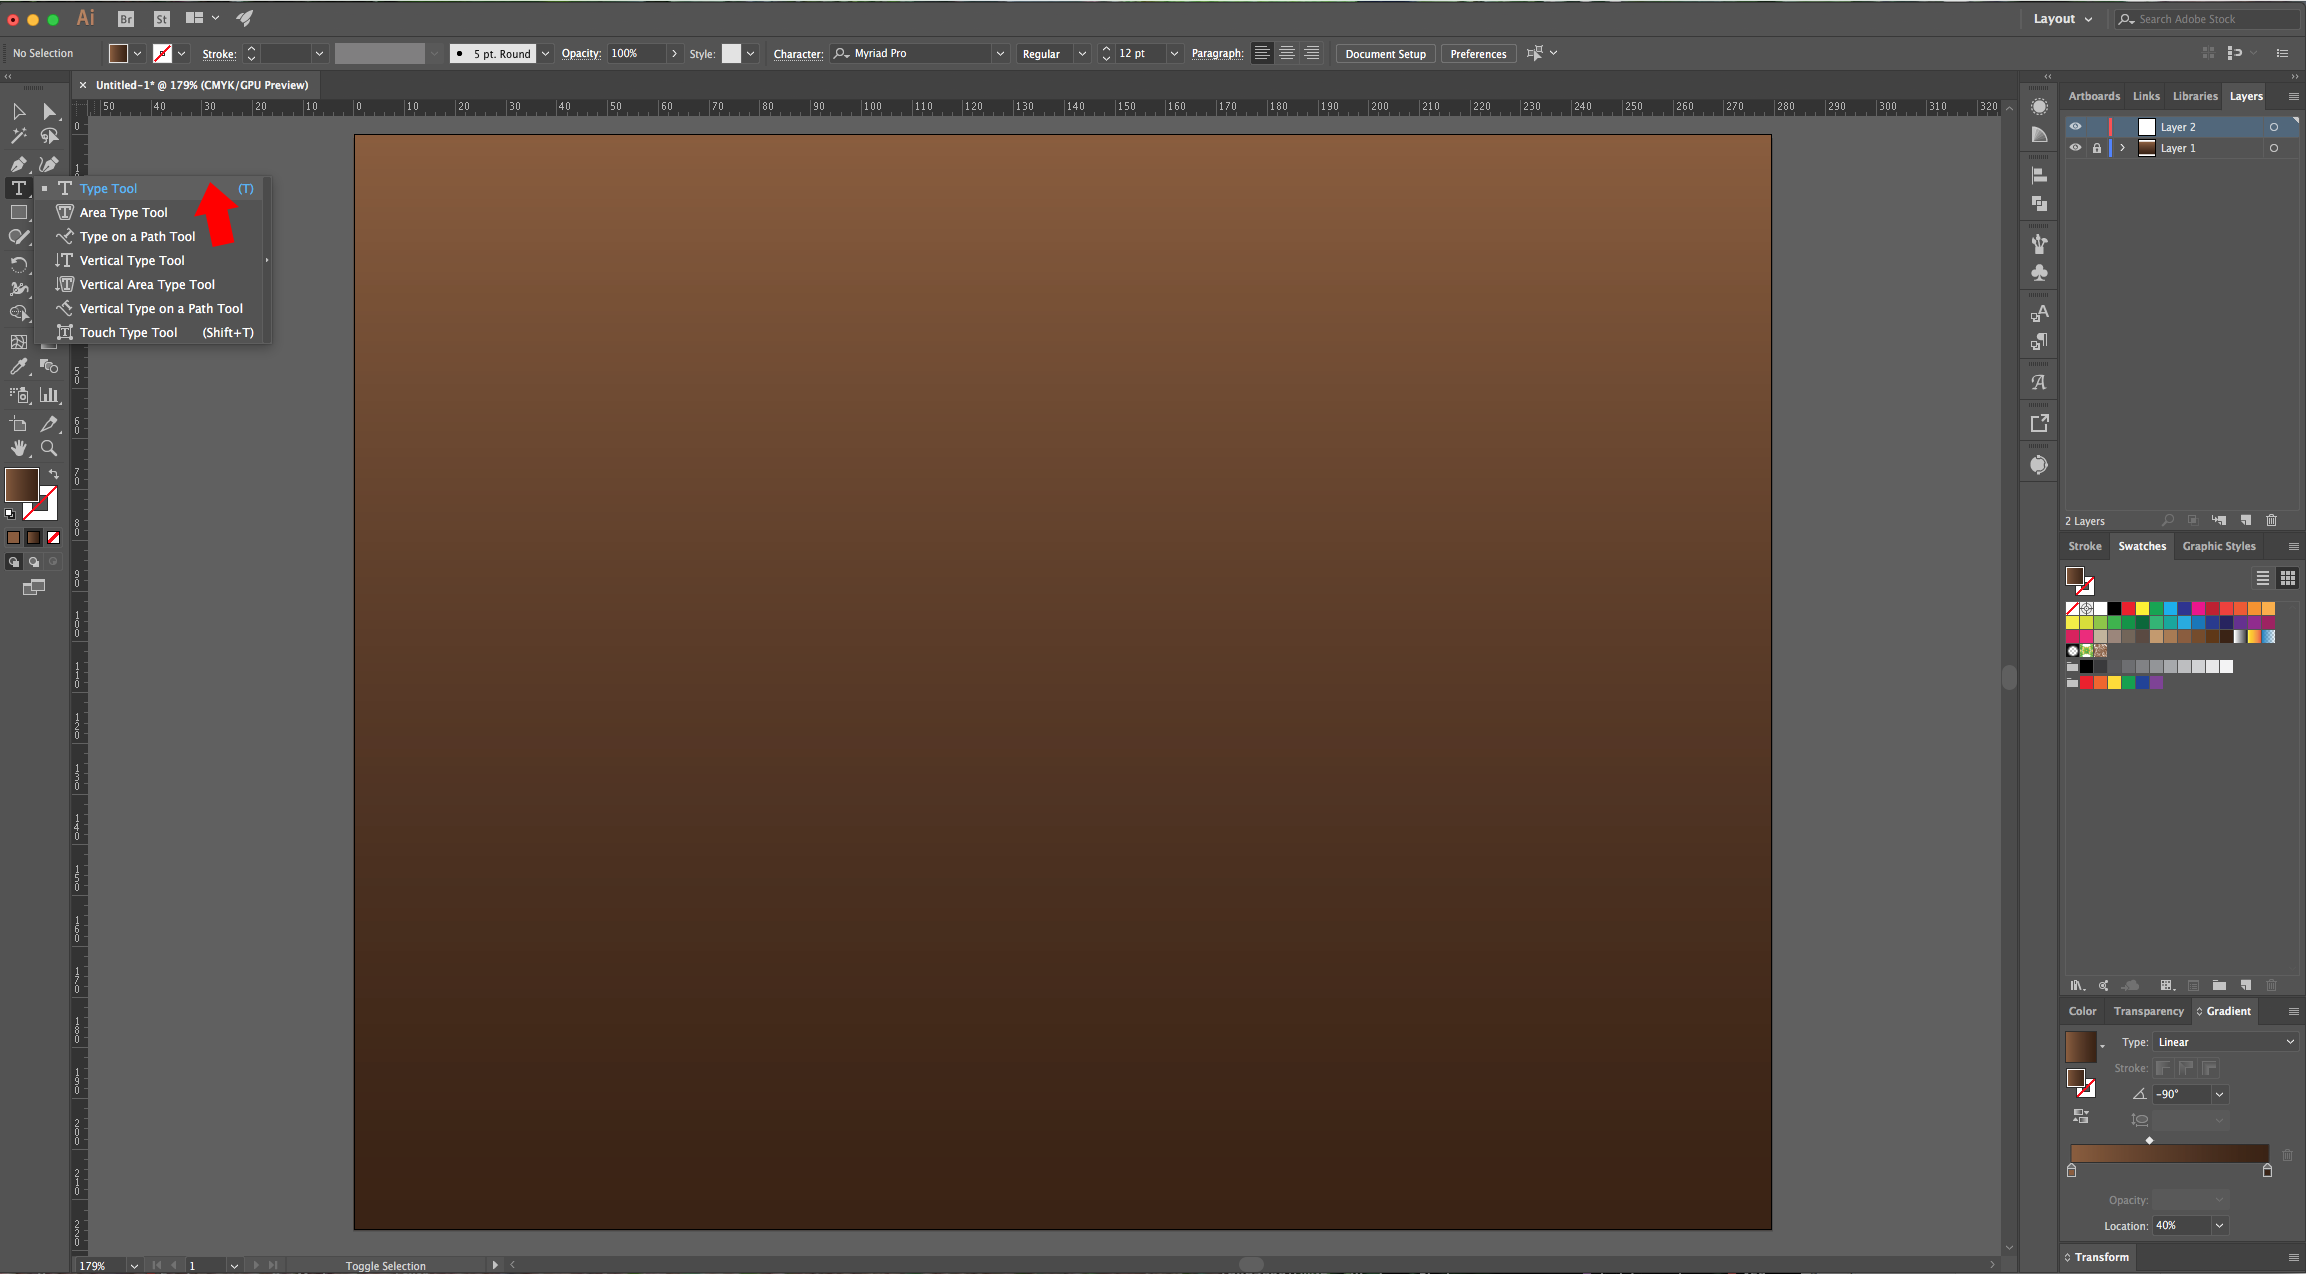
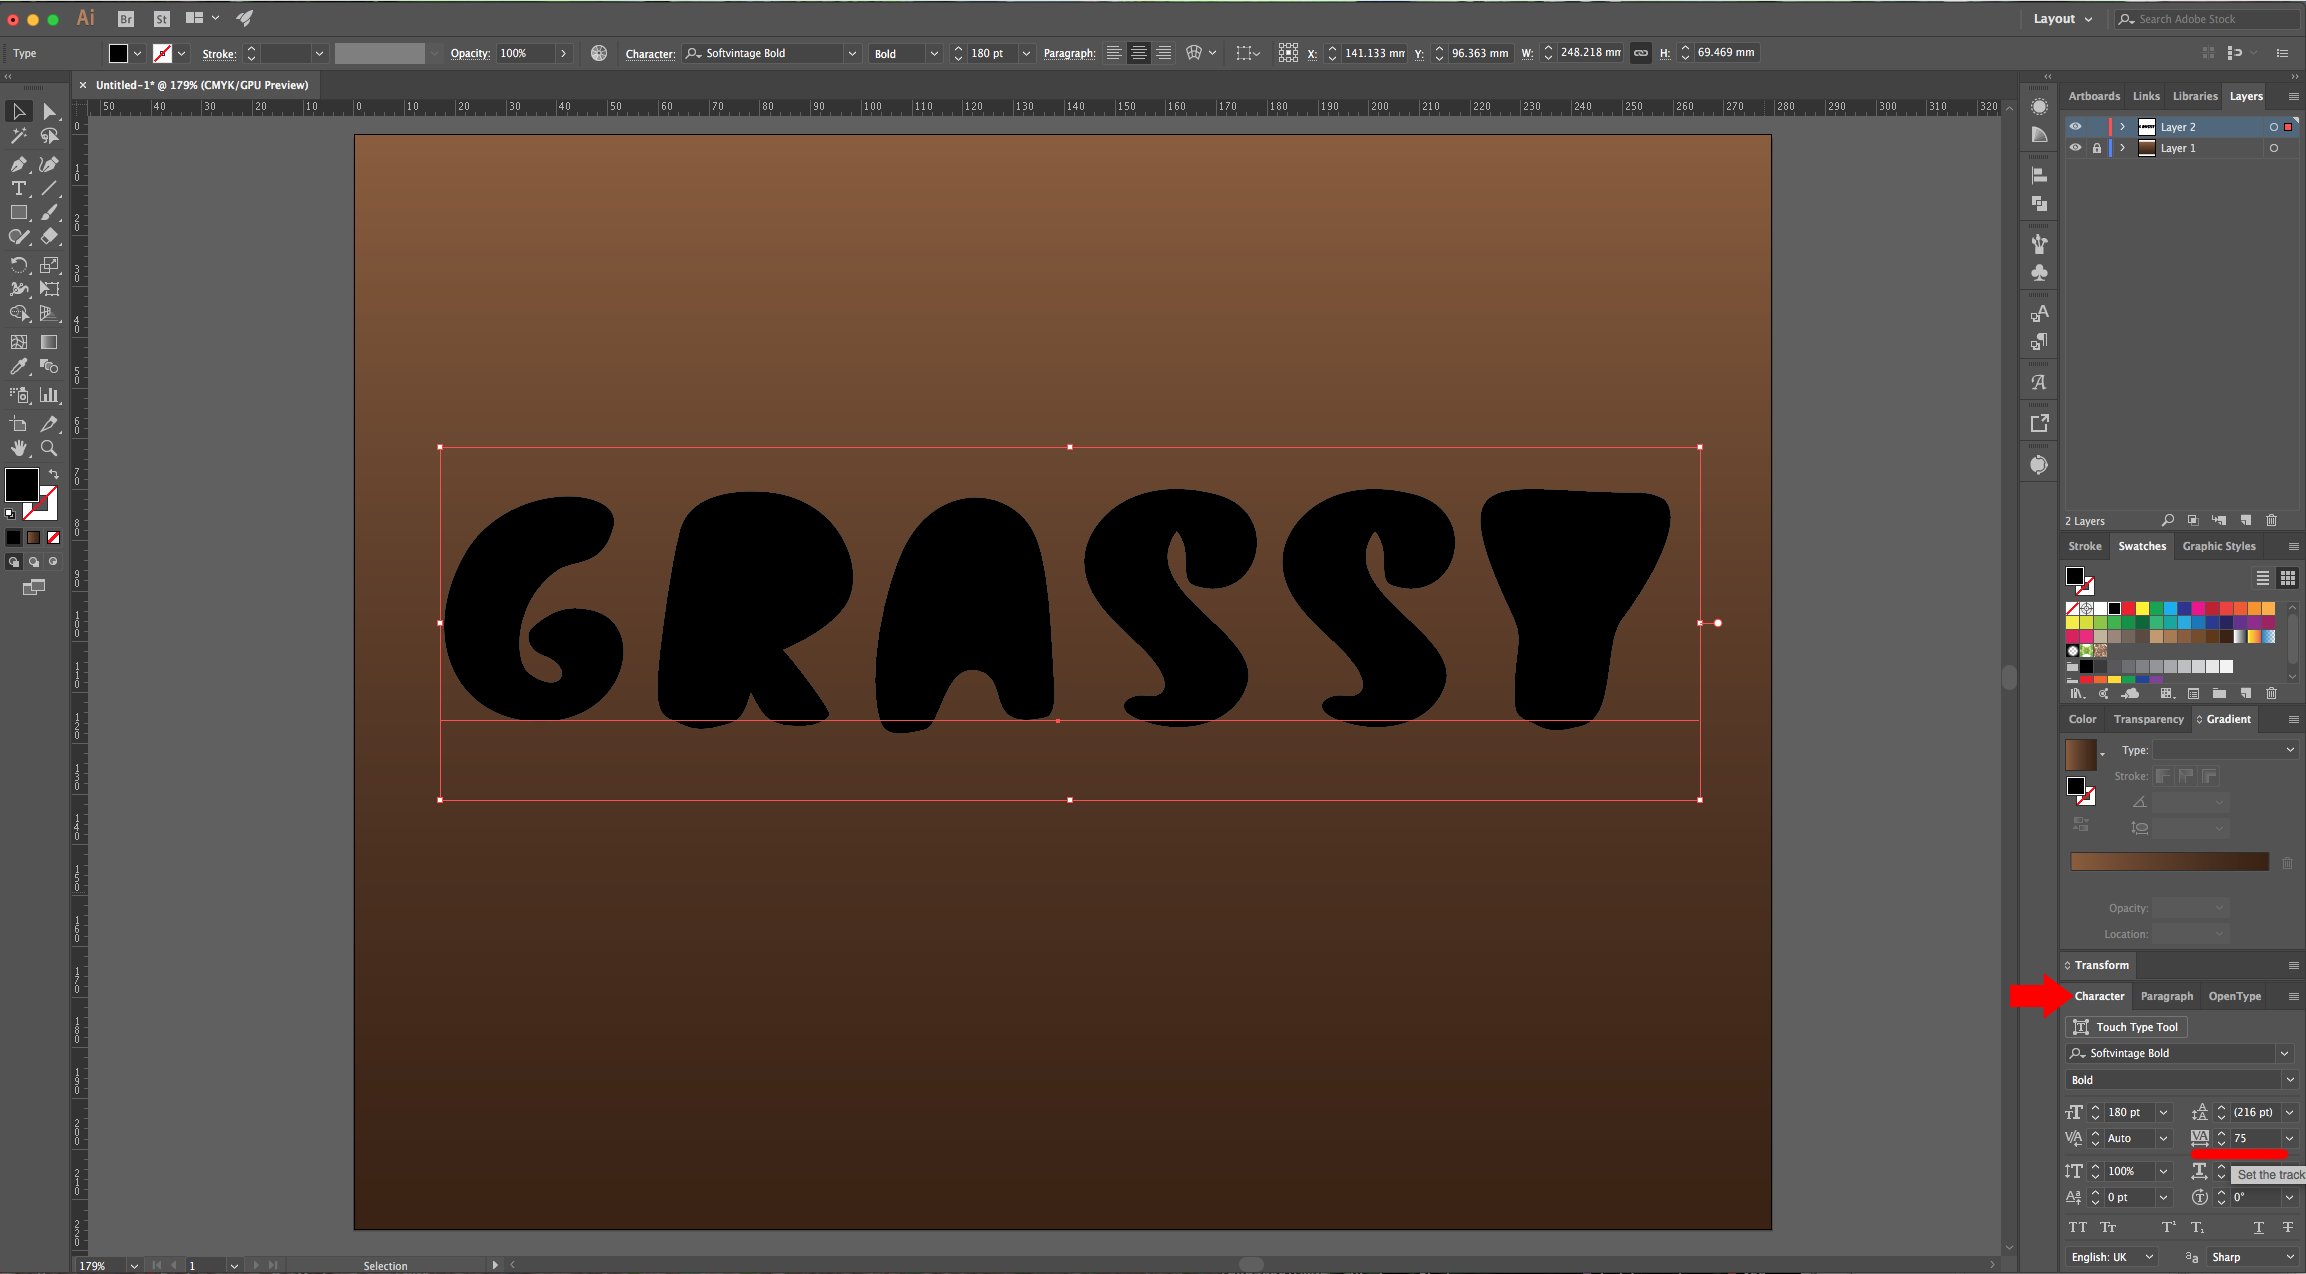
4 - Select the “Type Tool” (T), choose your font (we used “Soft Vintage Bold”). Set the “Tracking” to about 75 to separate your letters a bit (in the “Character Panel”). Then, center the text and create a copy by dragging its Thumbnail onto the “Create New Layer” button at the bottom of the “Layers Panel”.
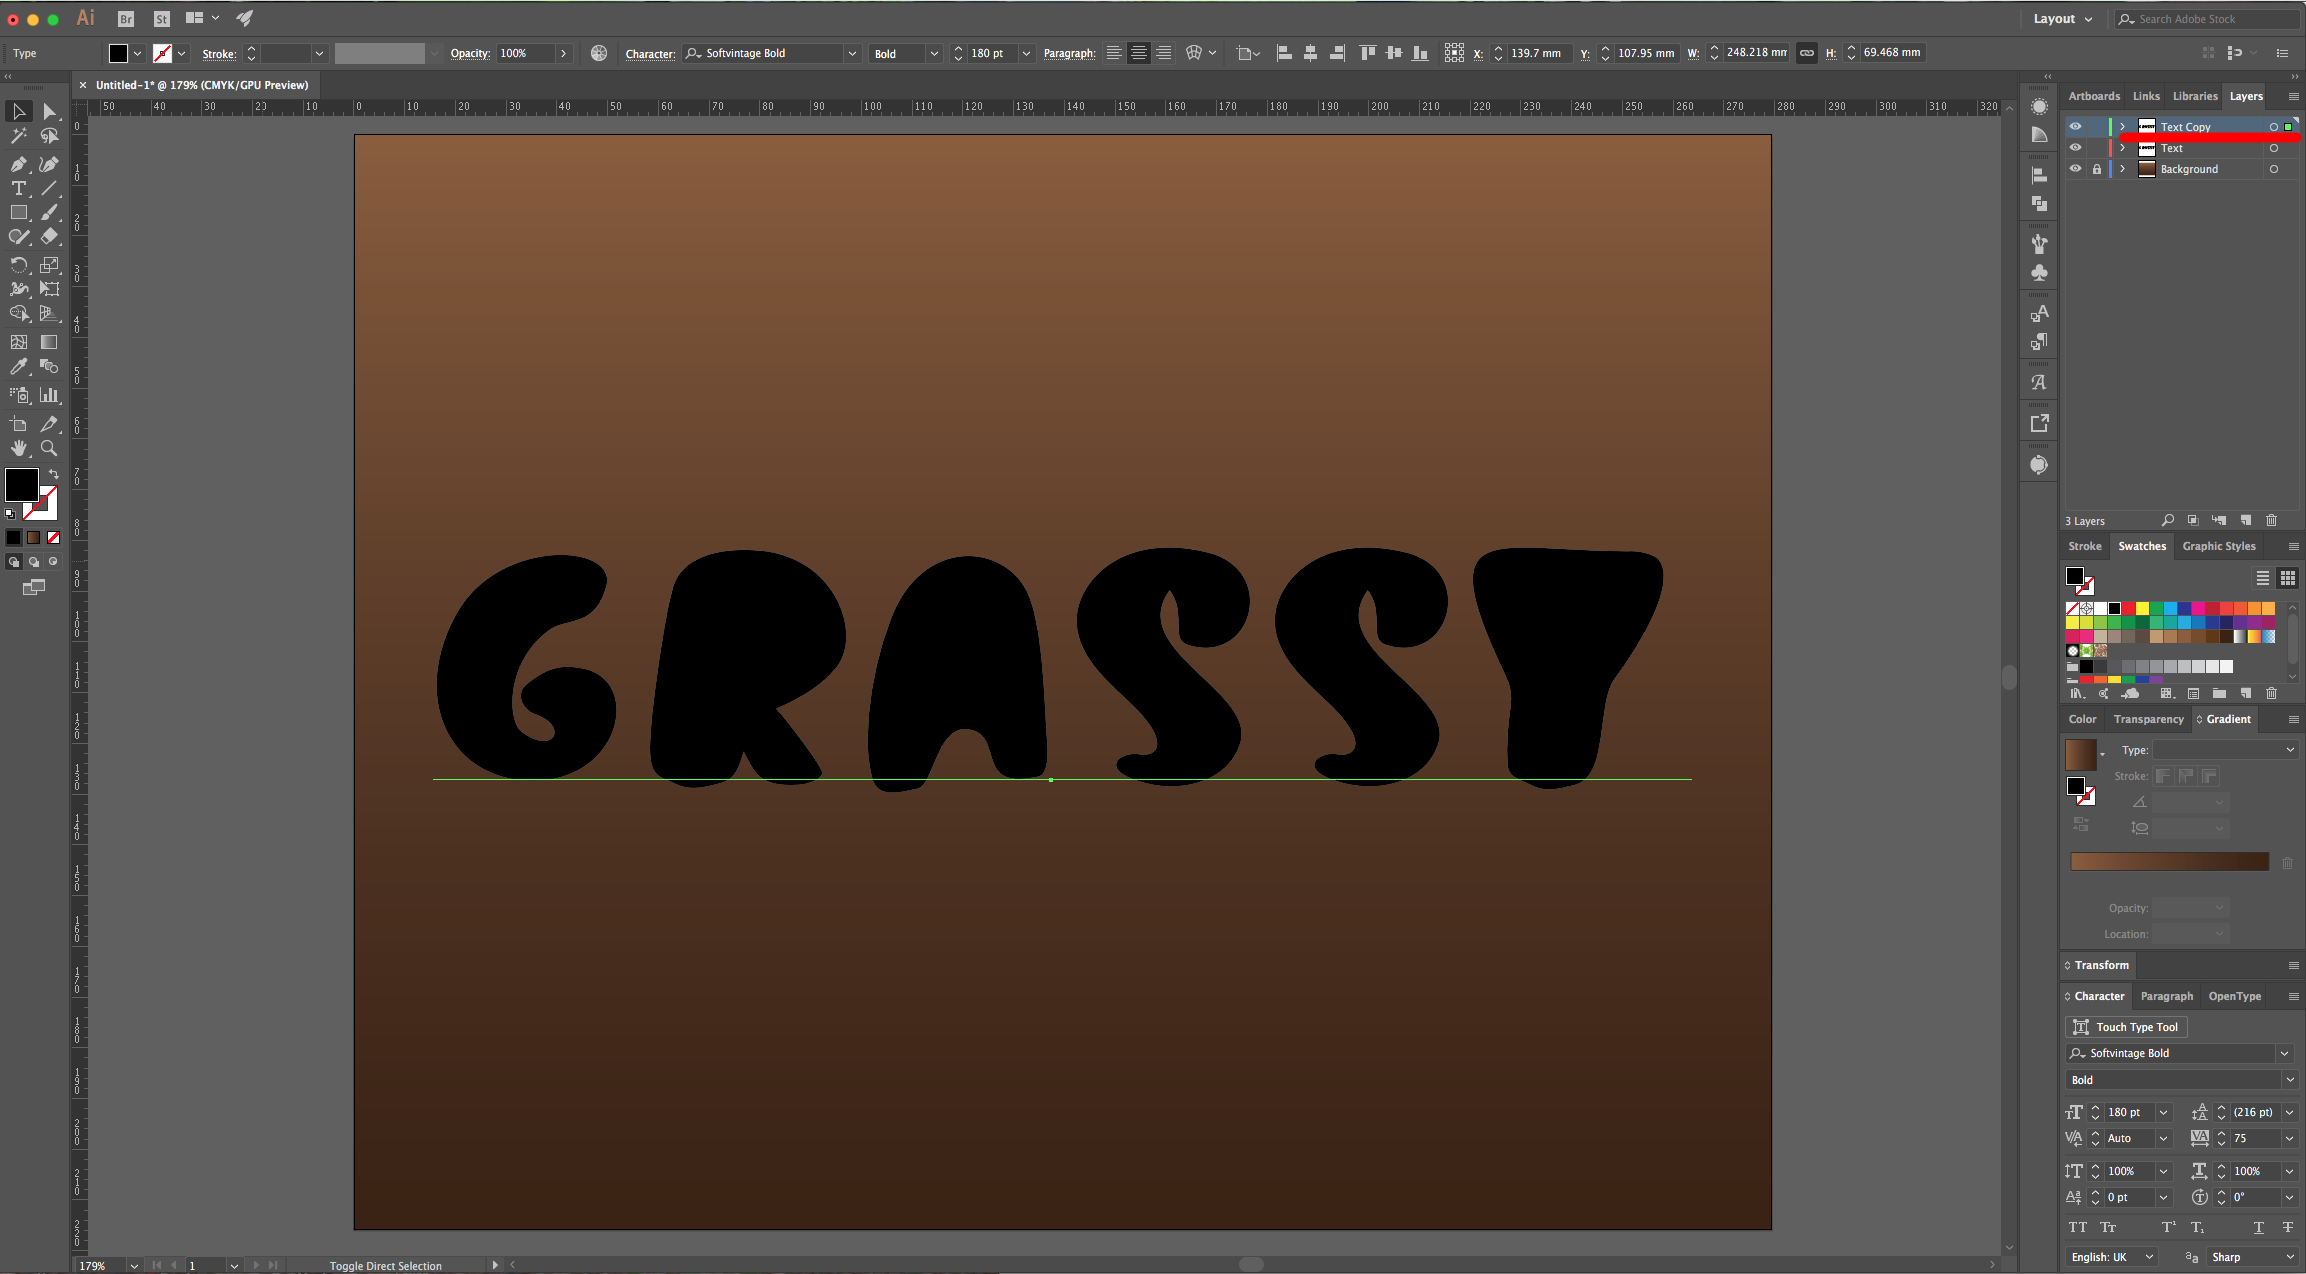
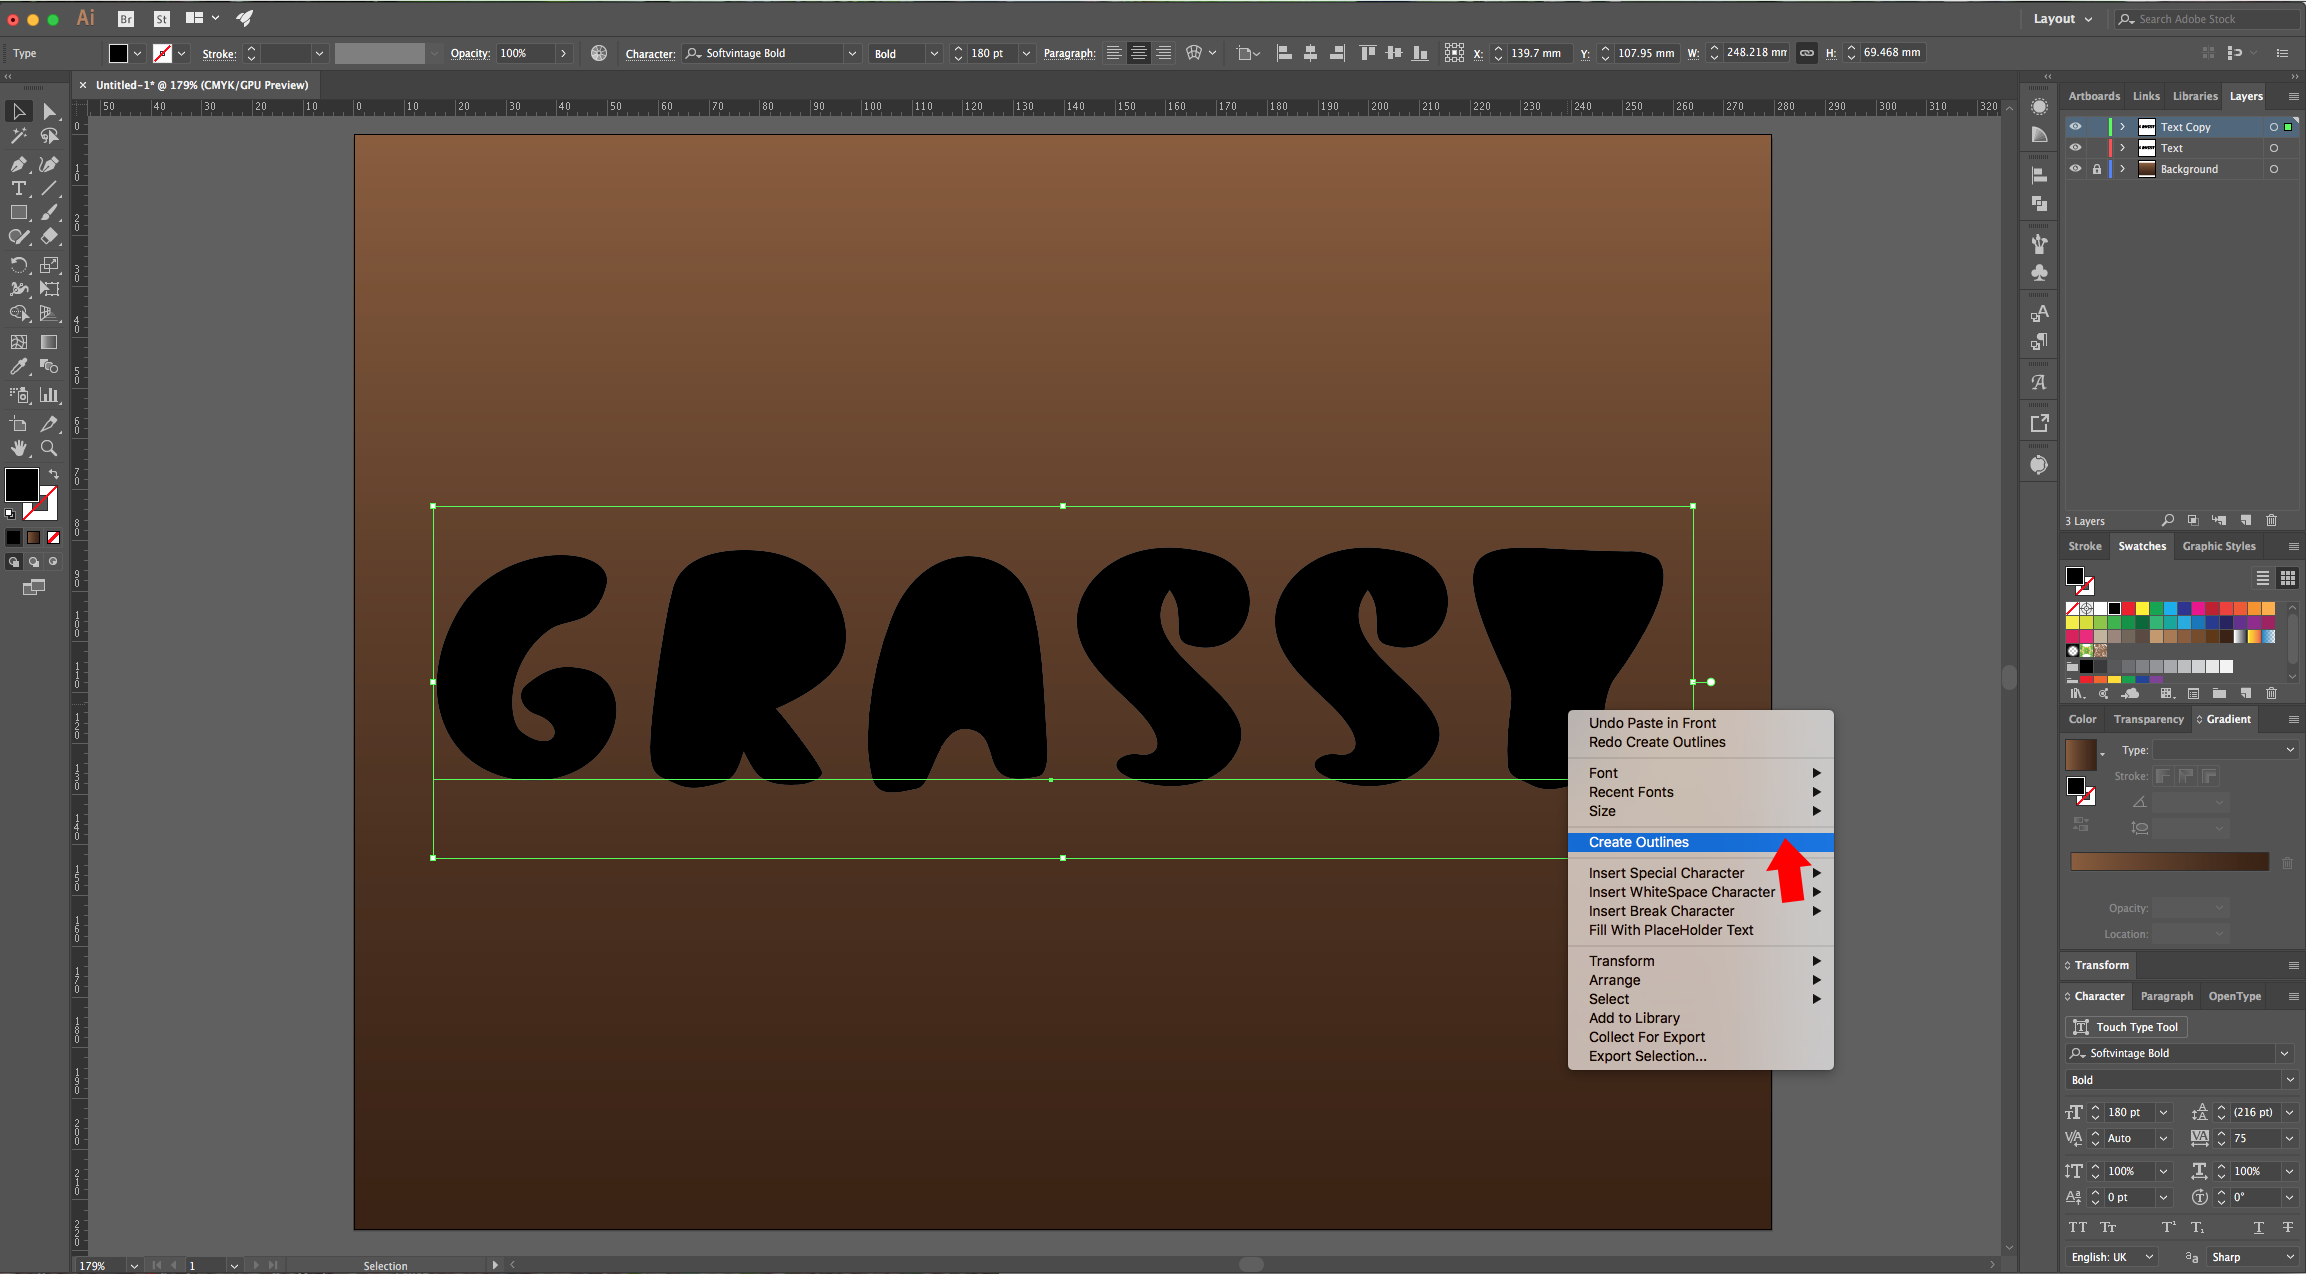
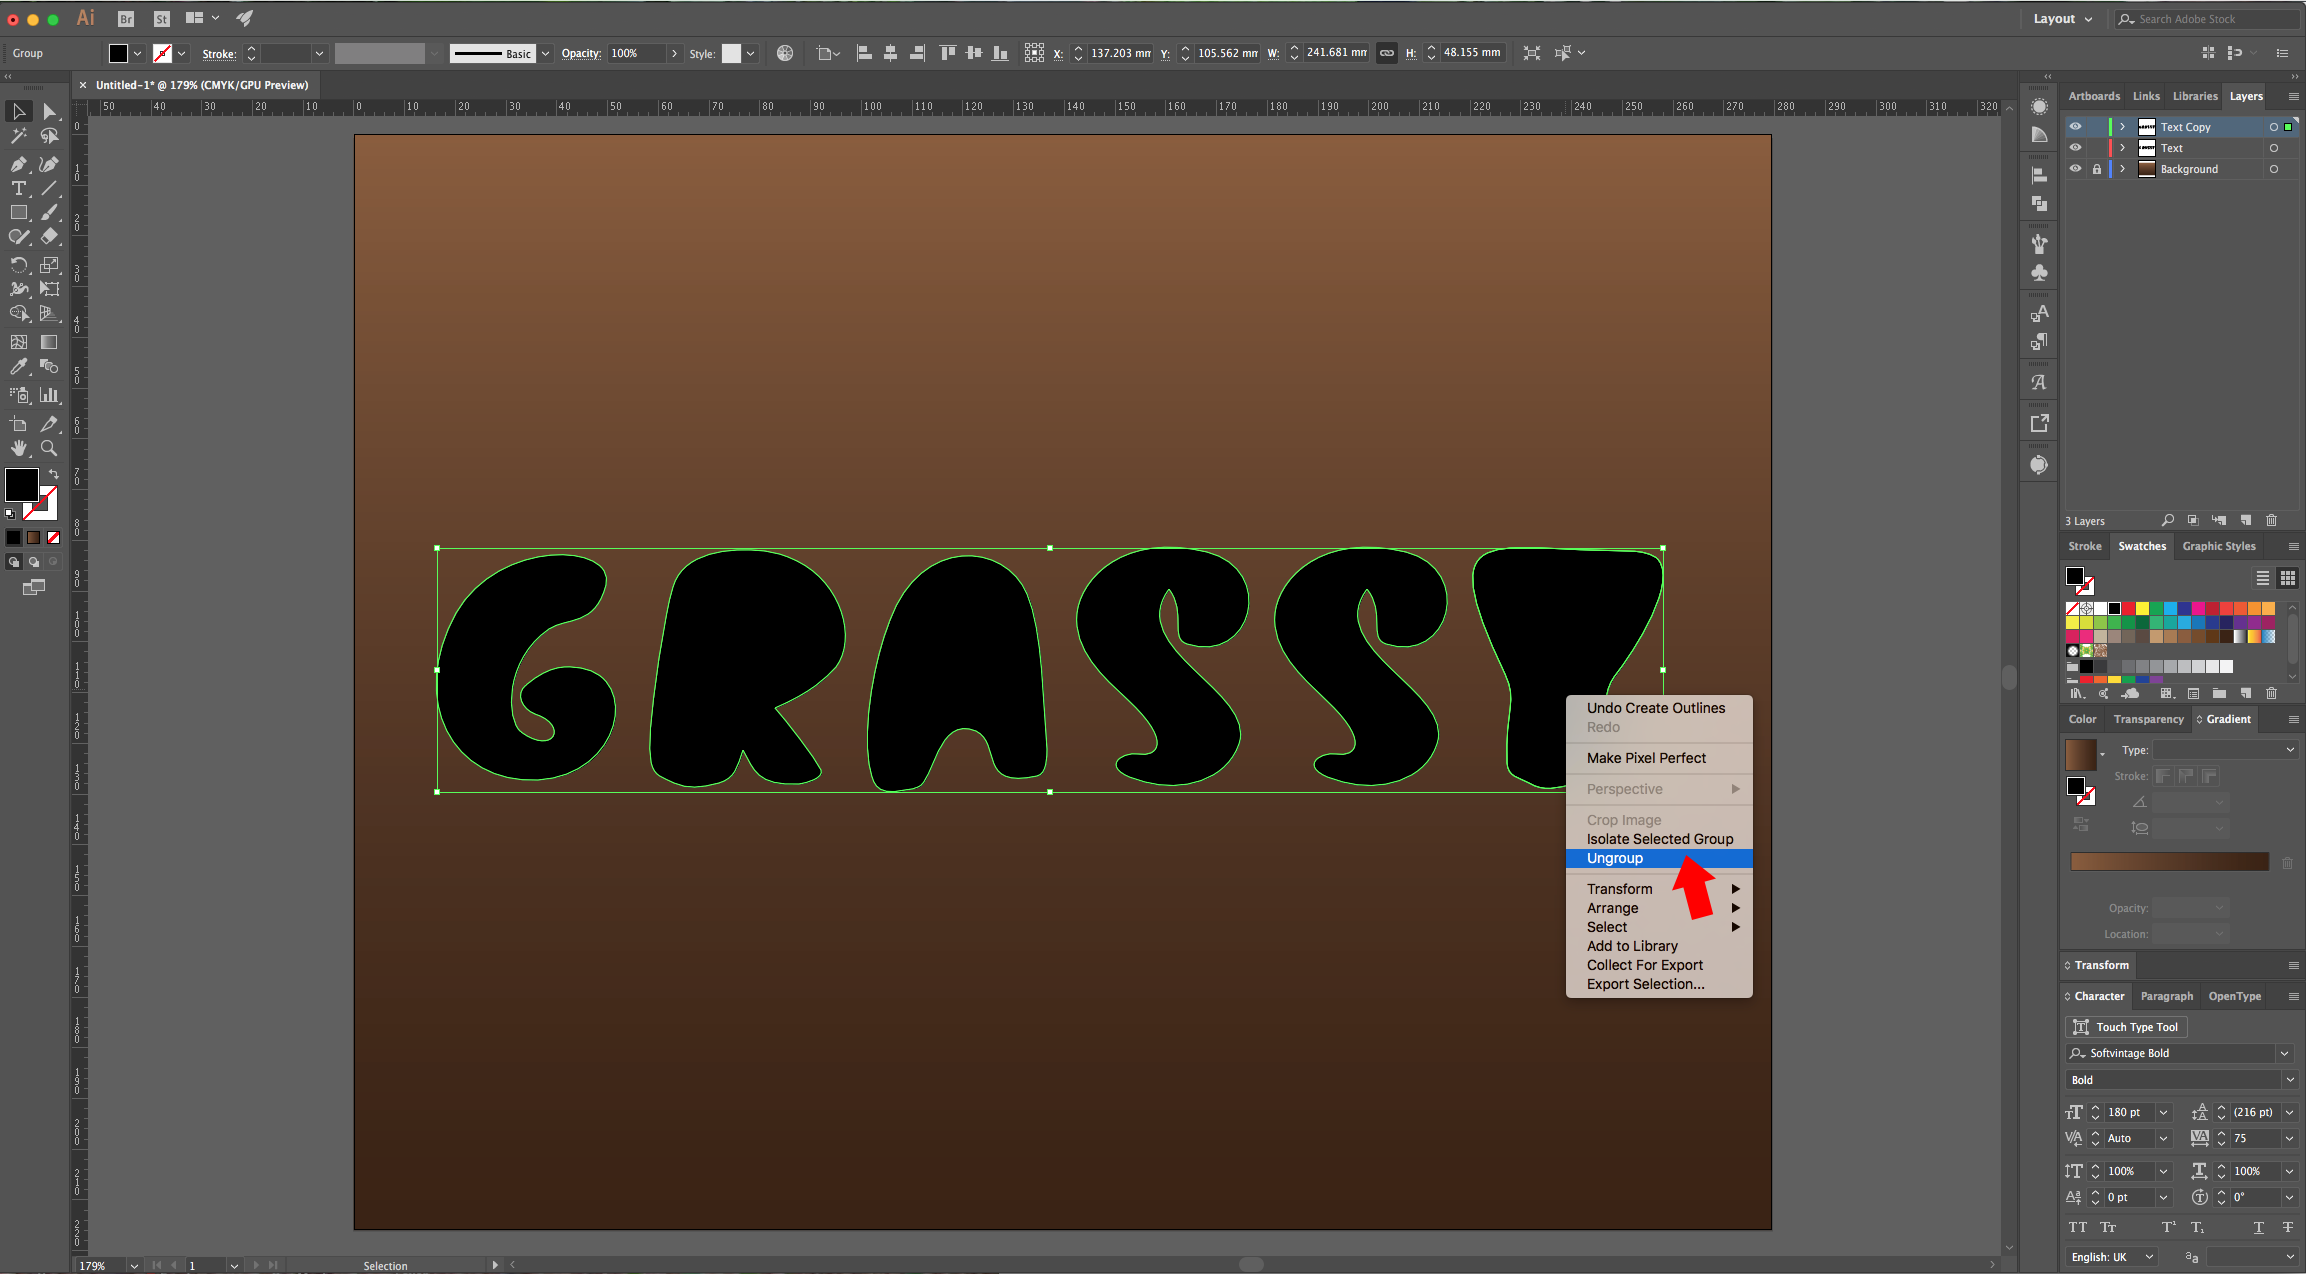
5 - Right-click on top of your duplicate and choose “Create Outlines”, then, right-click again and choose “Ungroup”.
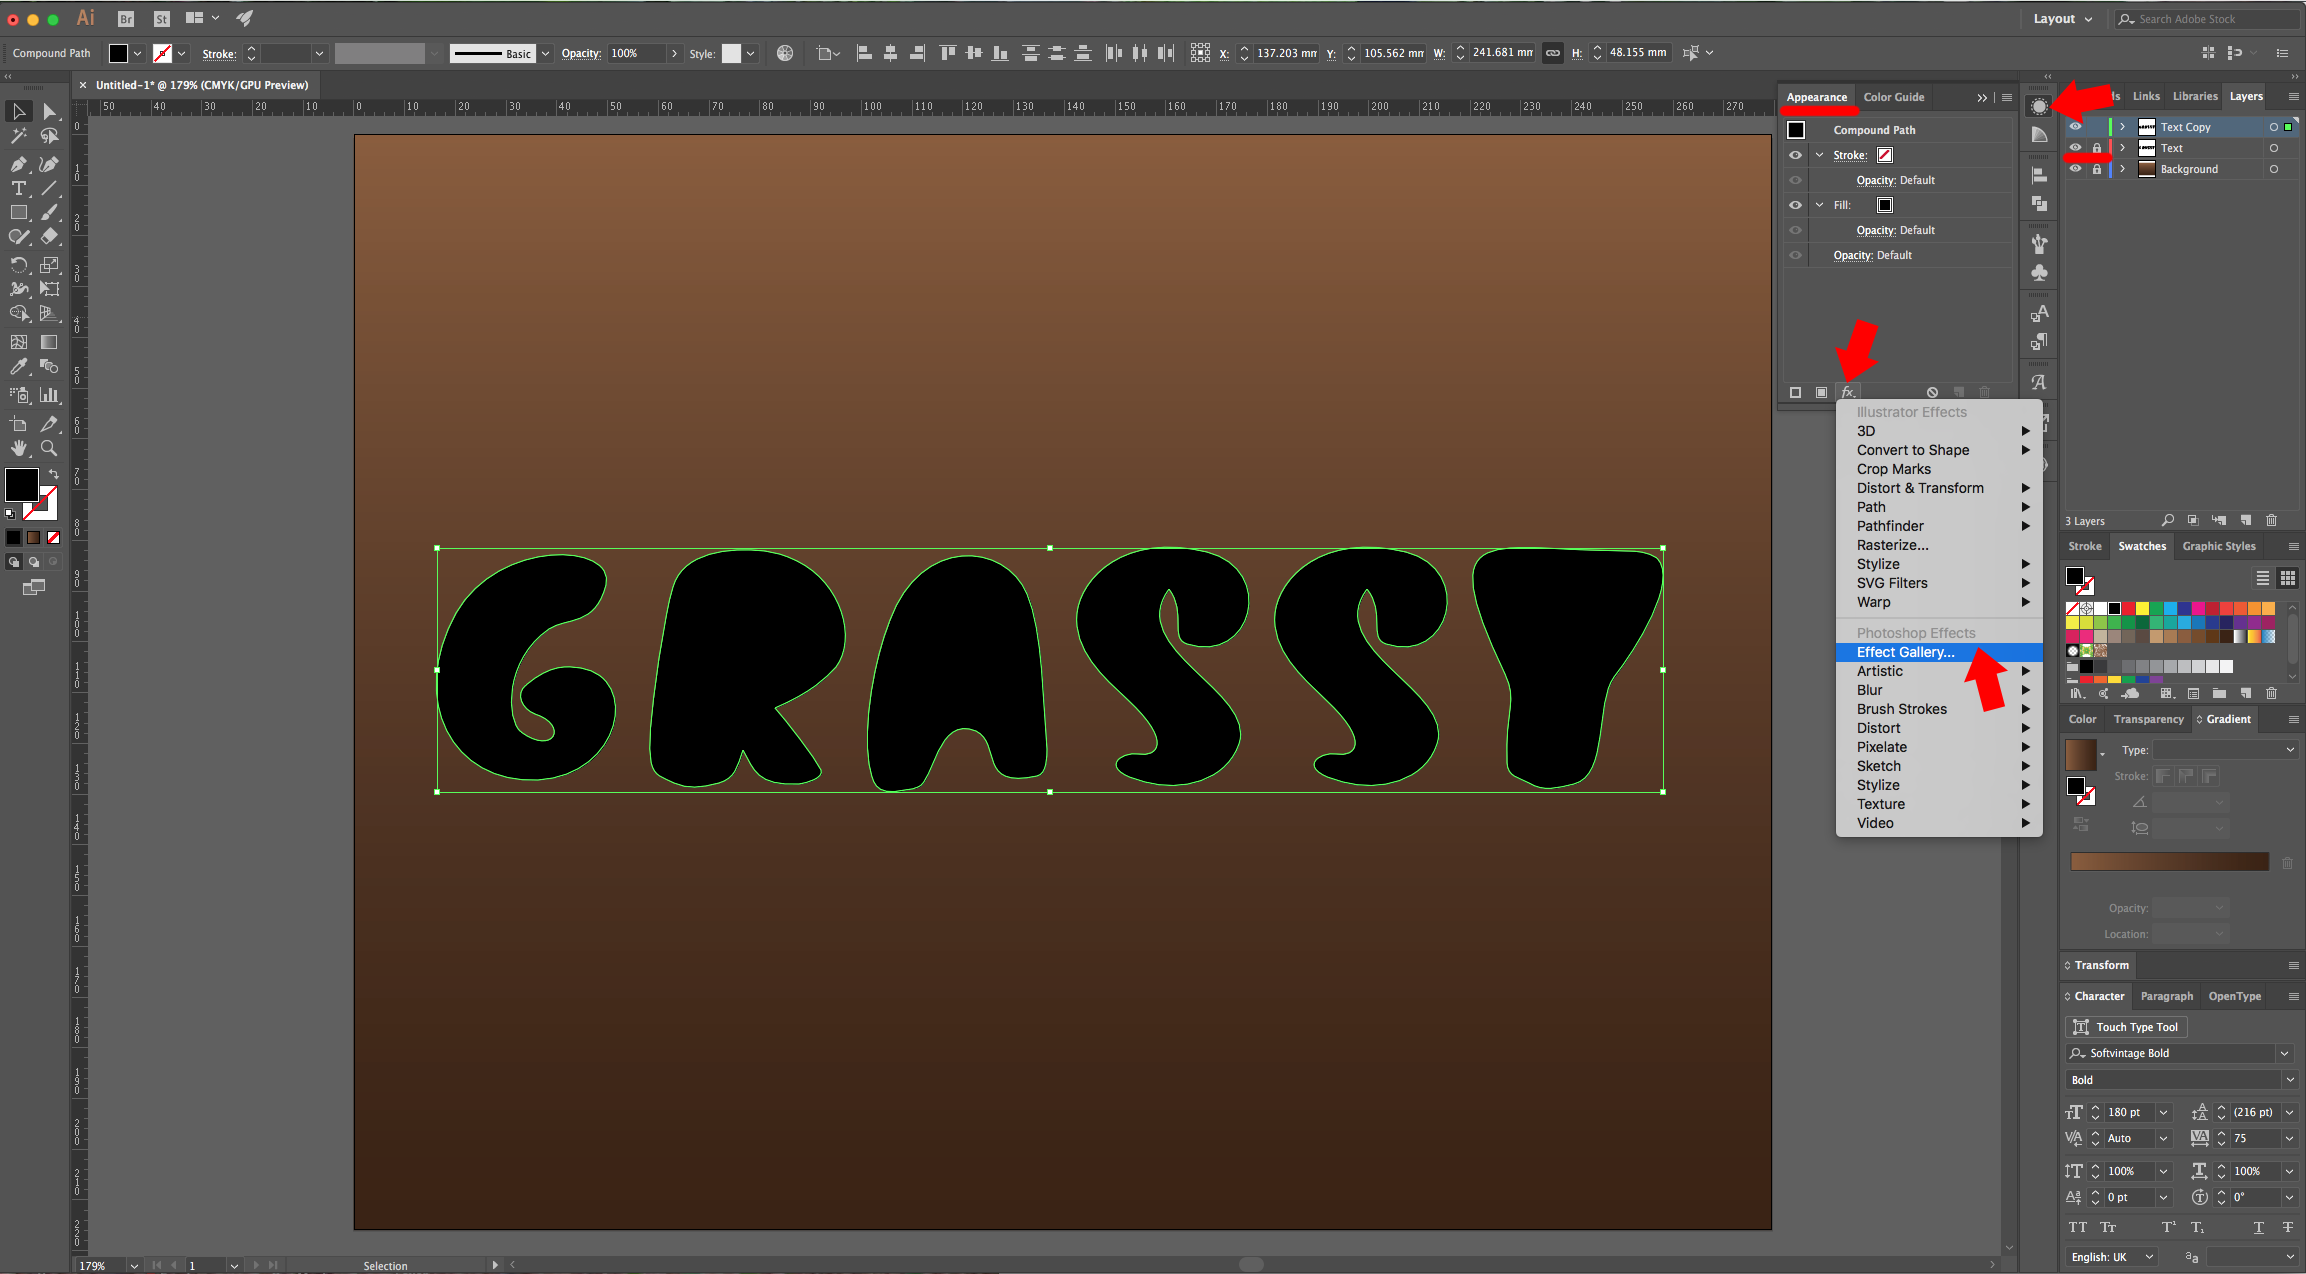
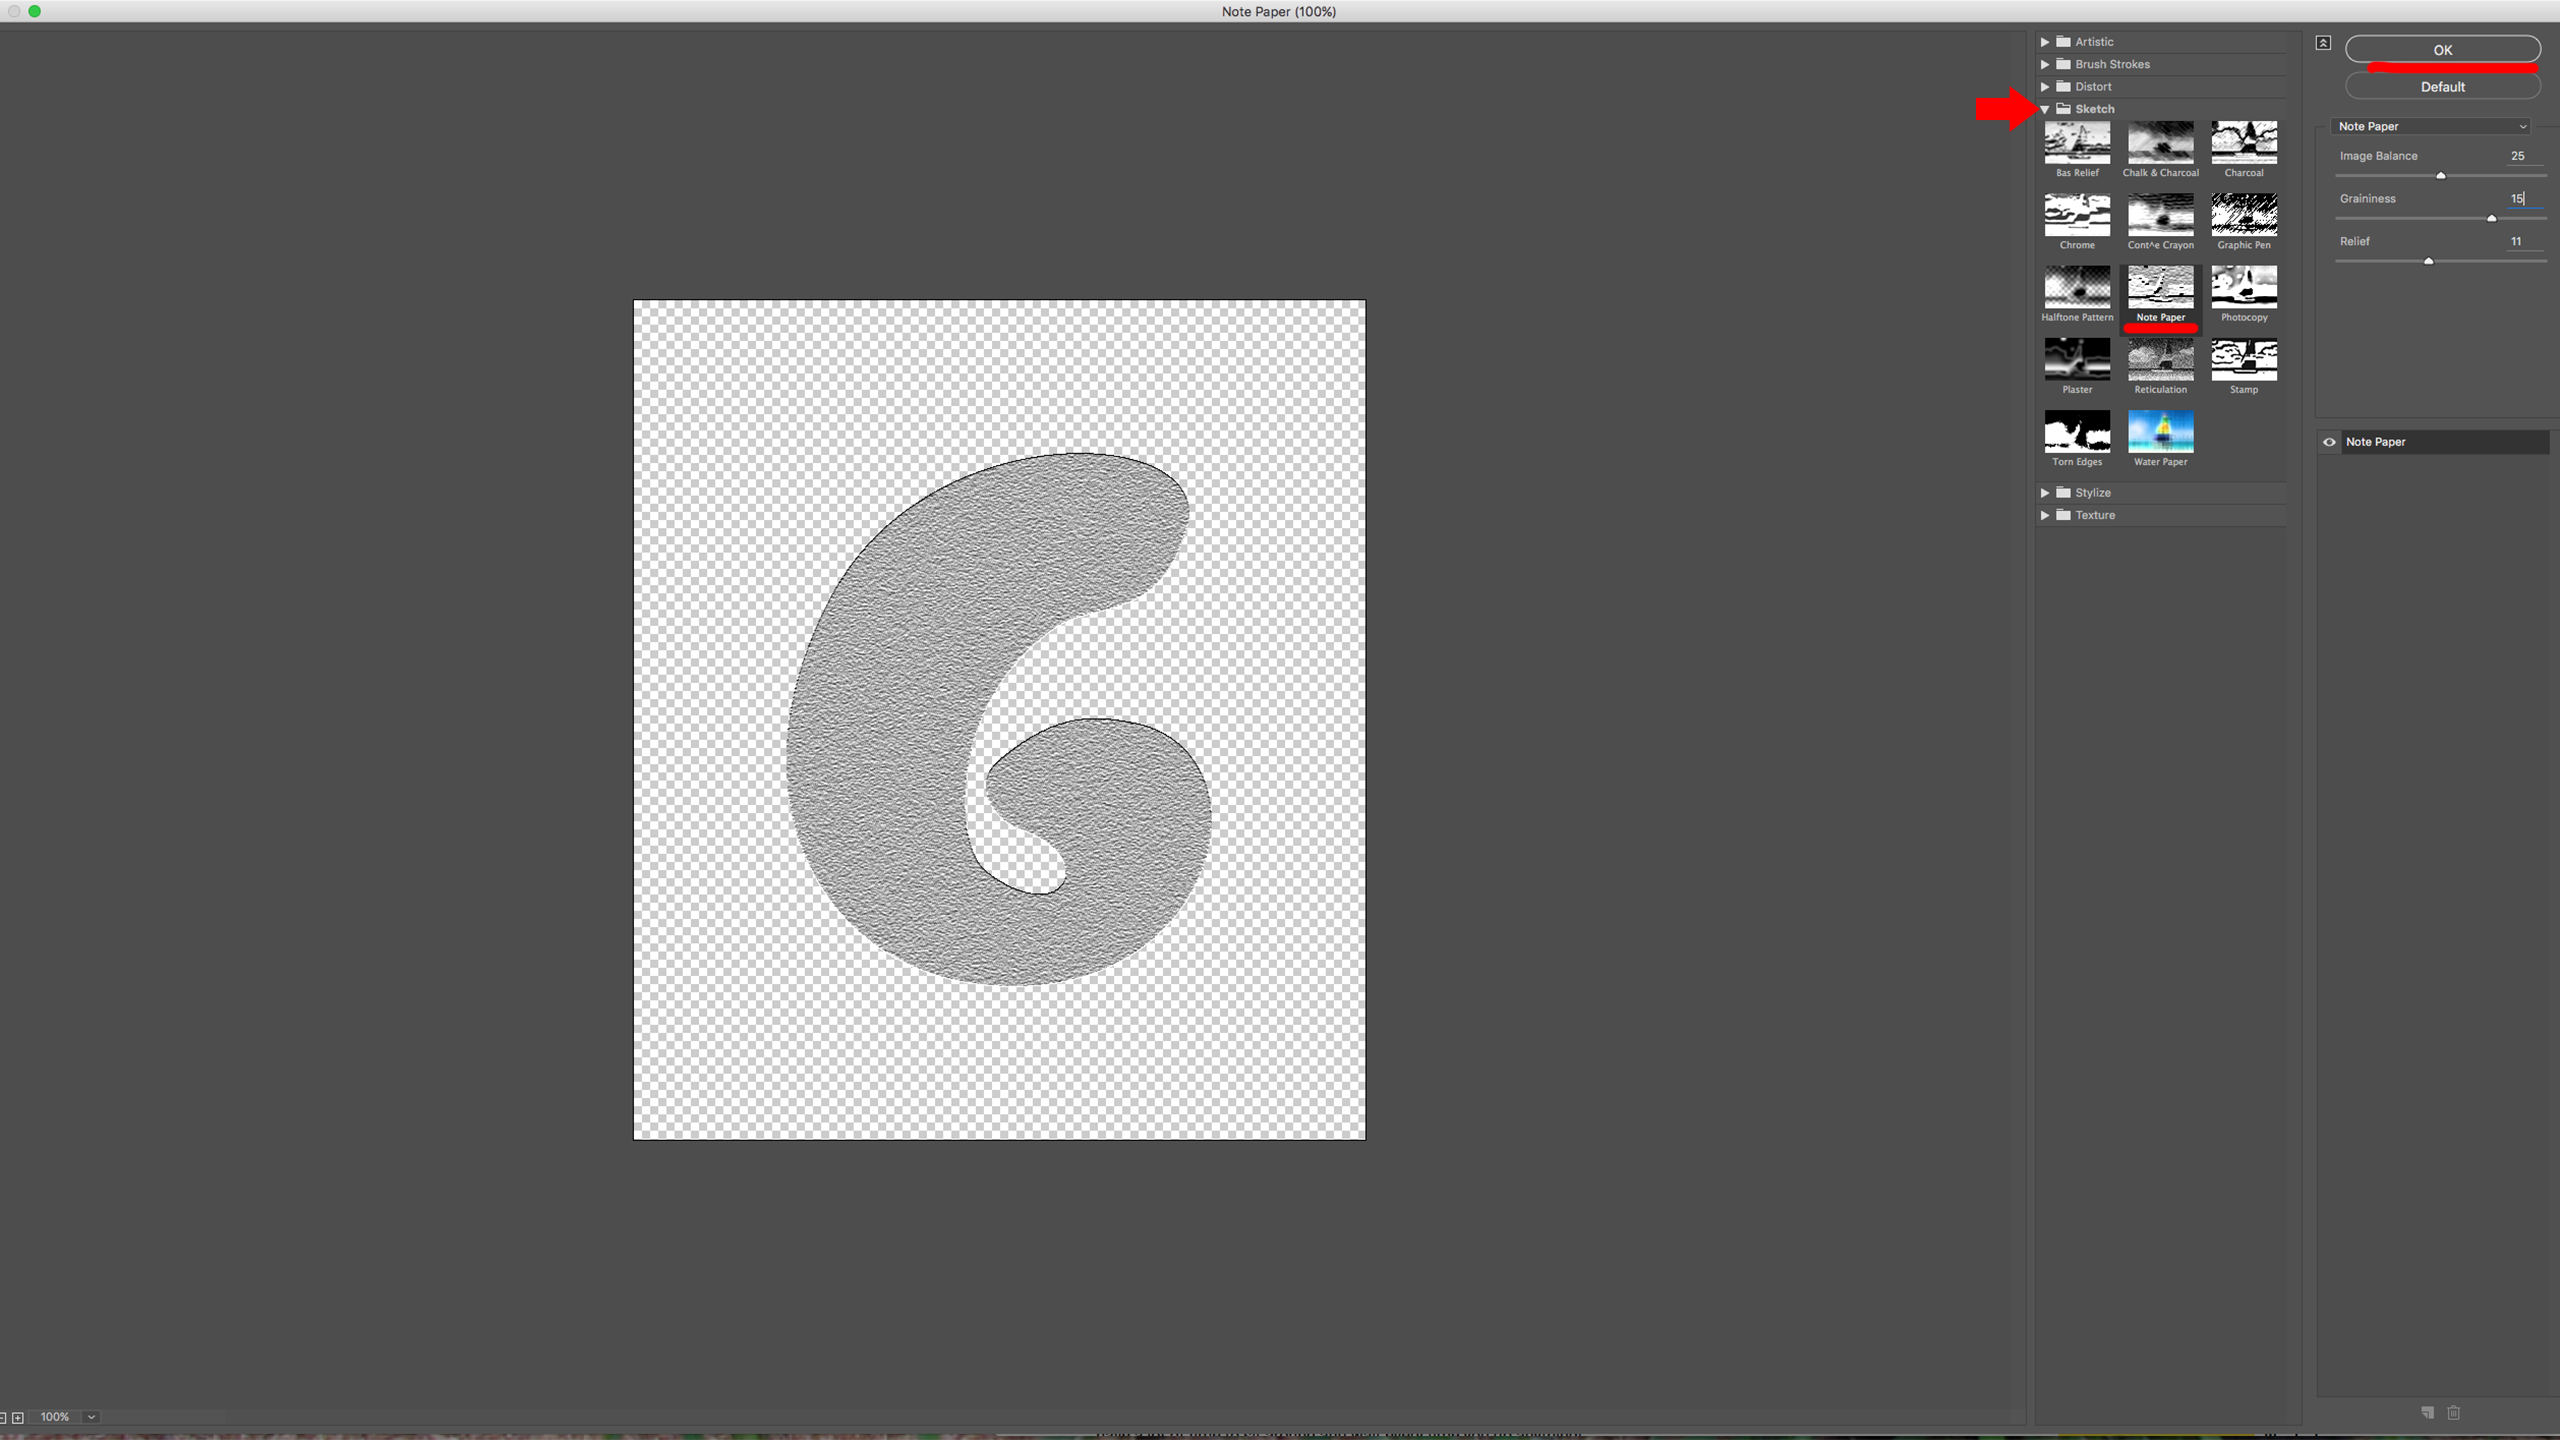
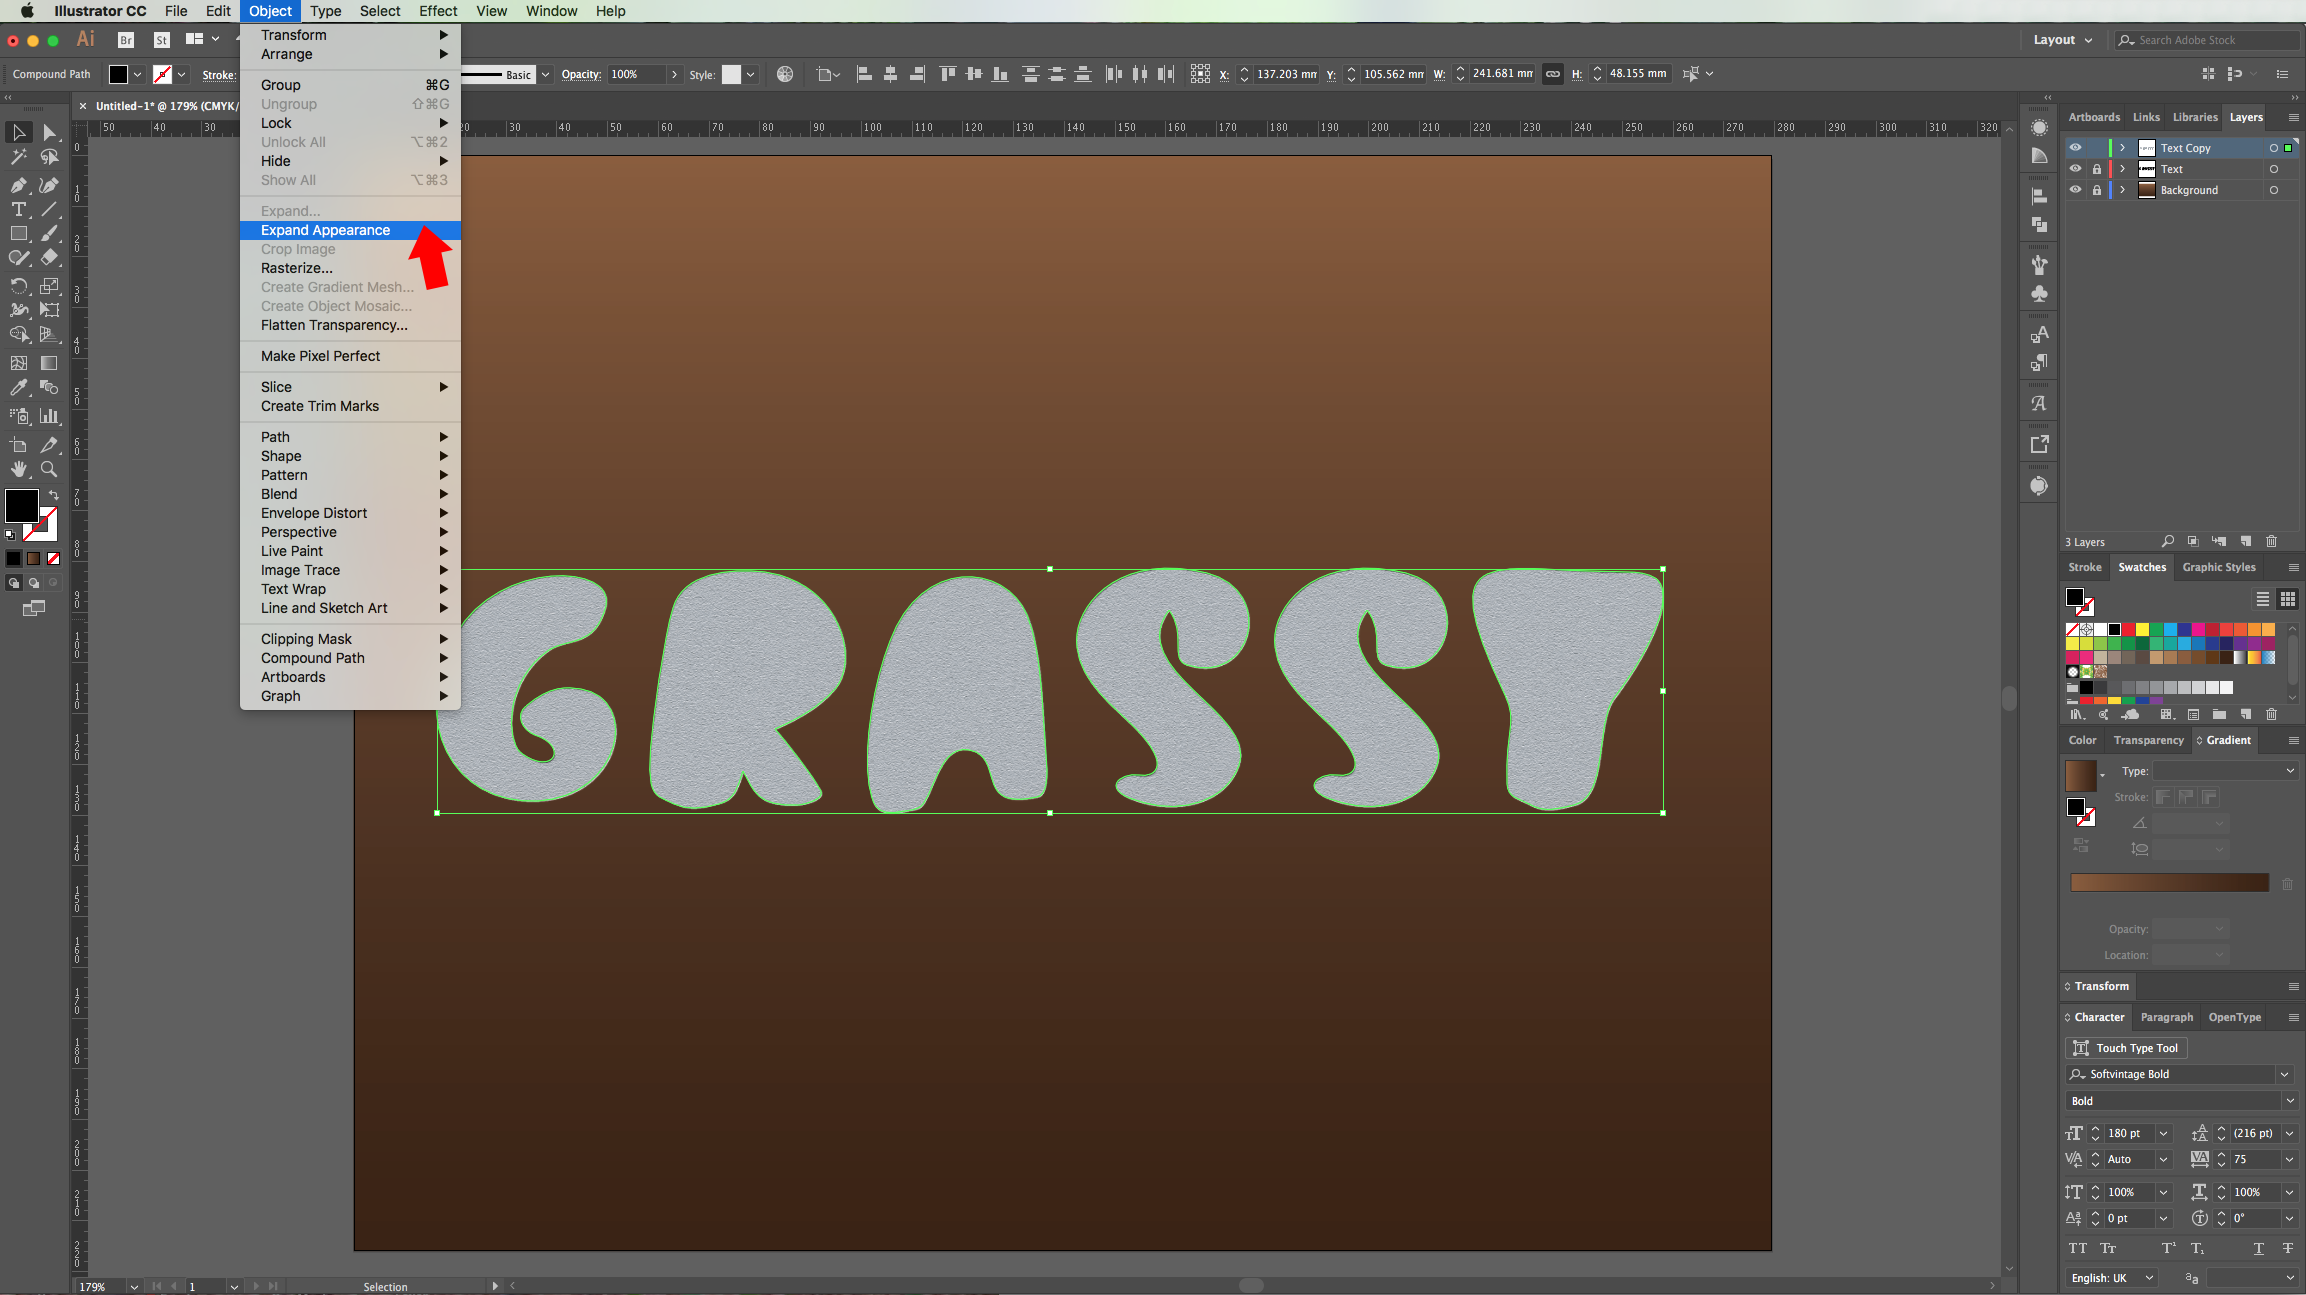
6 - Lock the original Text Layer, select the duplicate and in the “Appearance Panel” click on the “Effects Menu” at the bottom and navigate to the “Effect Gallery”. There, go to Sketch > Note Paper and use the following values: 25, 15 and 11 (in this order), then, click “OK”. Finally, go to Object > Expand Appearance.
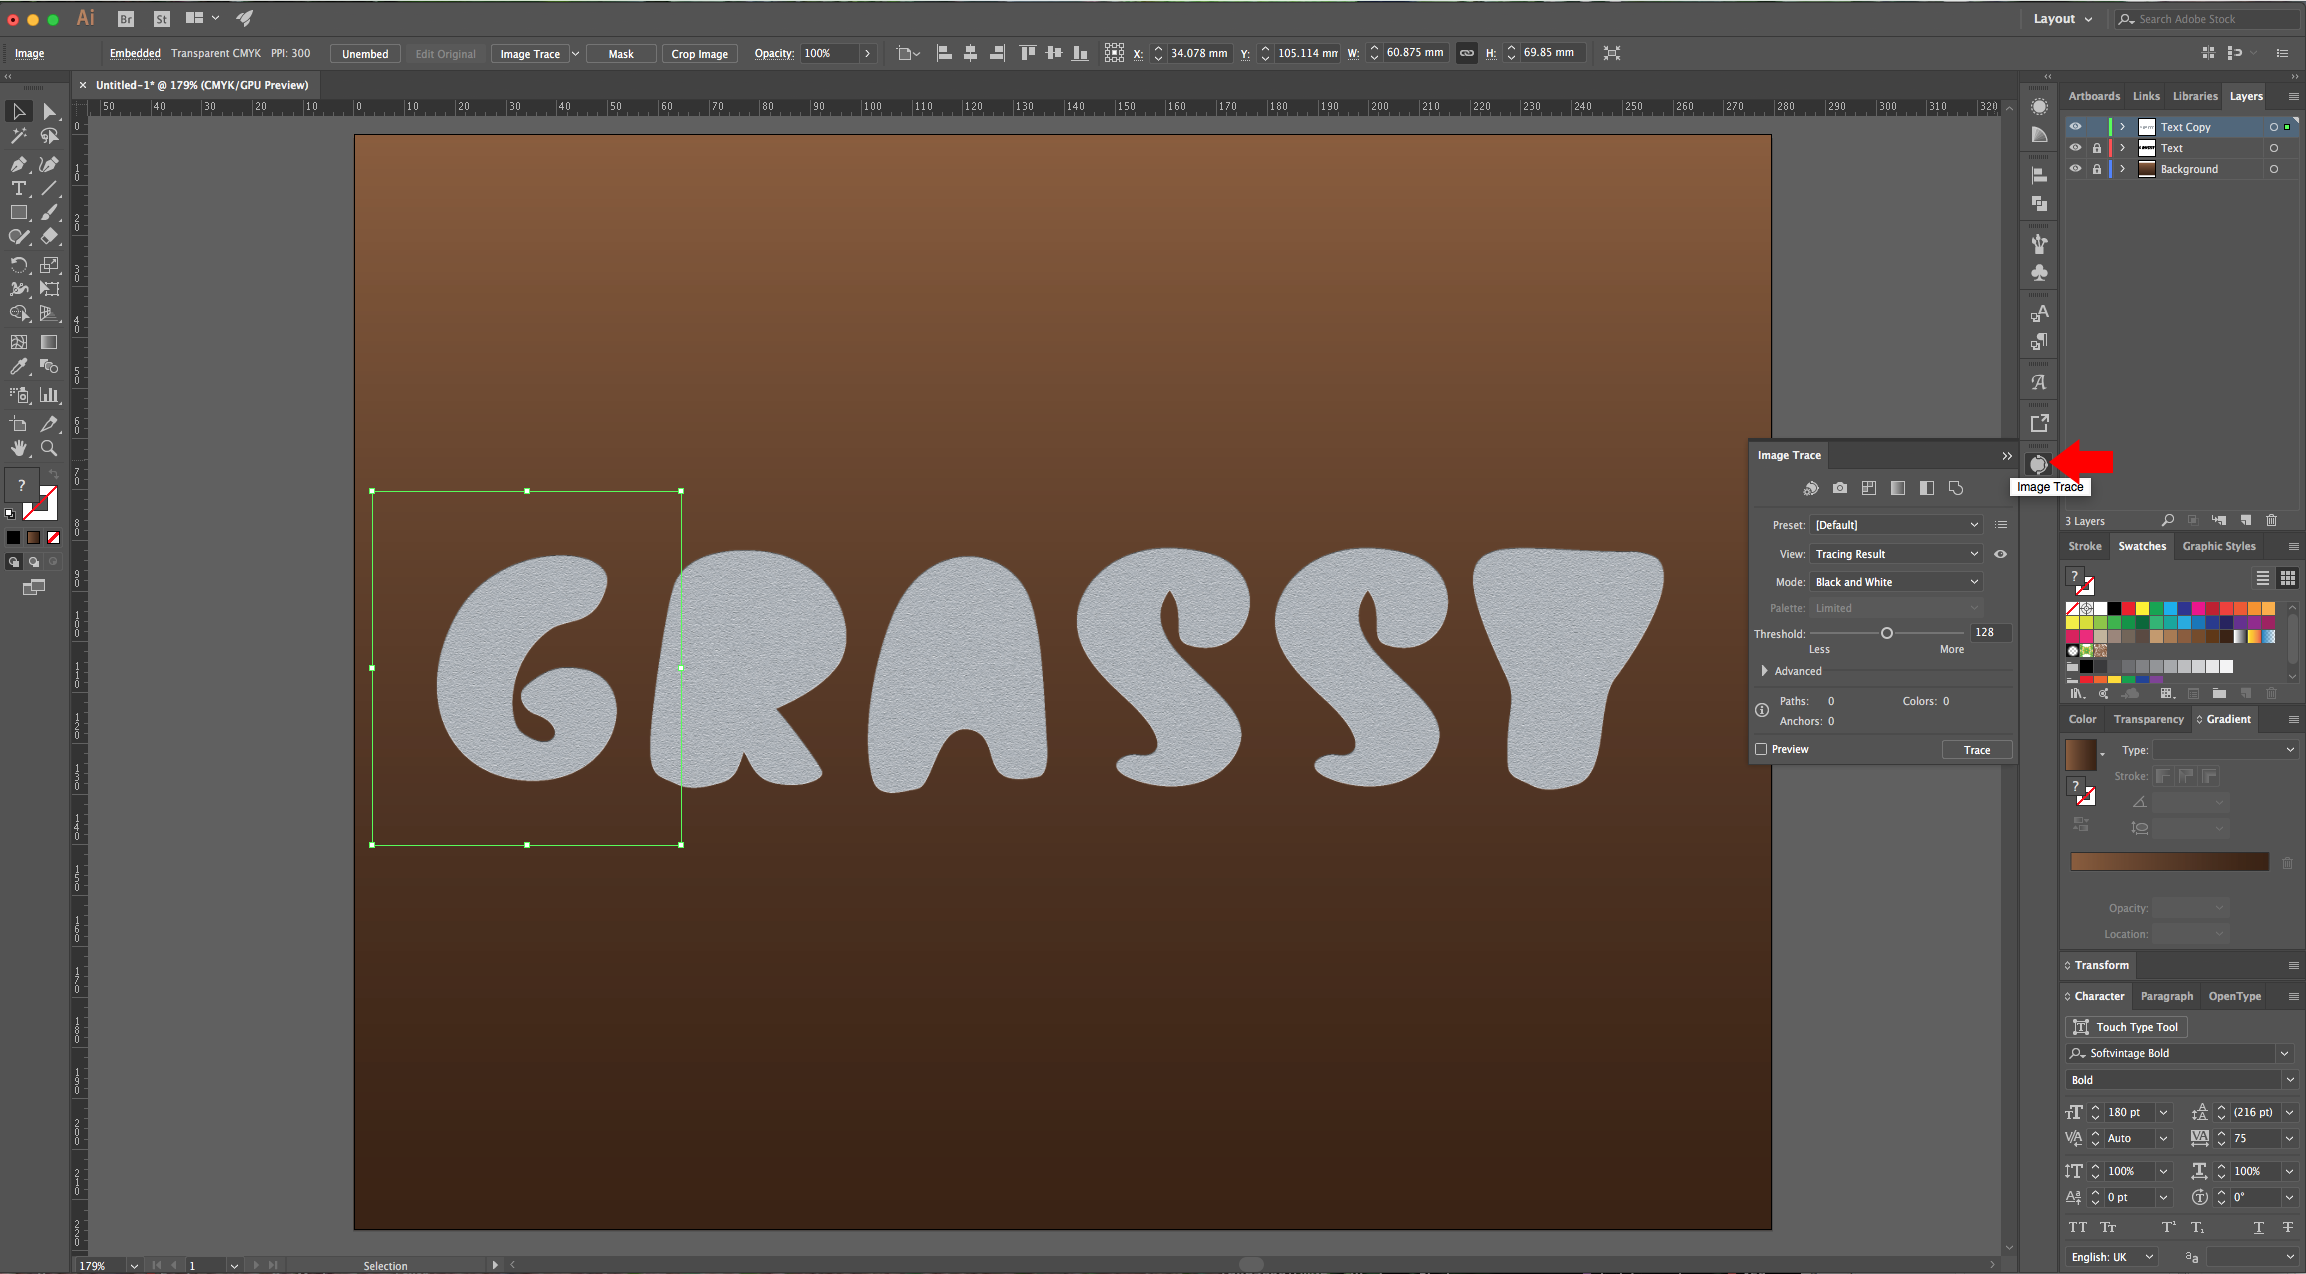
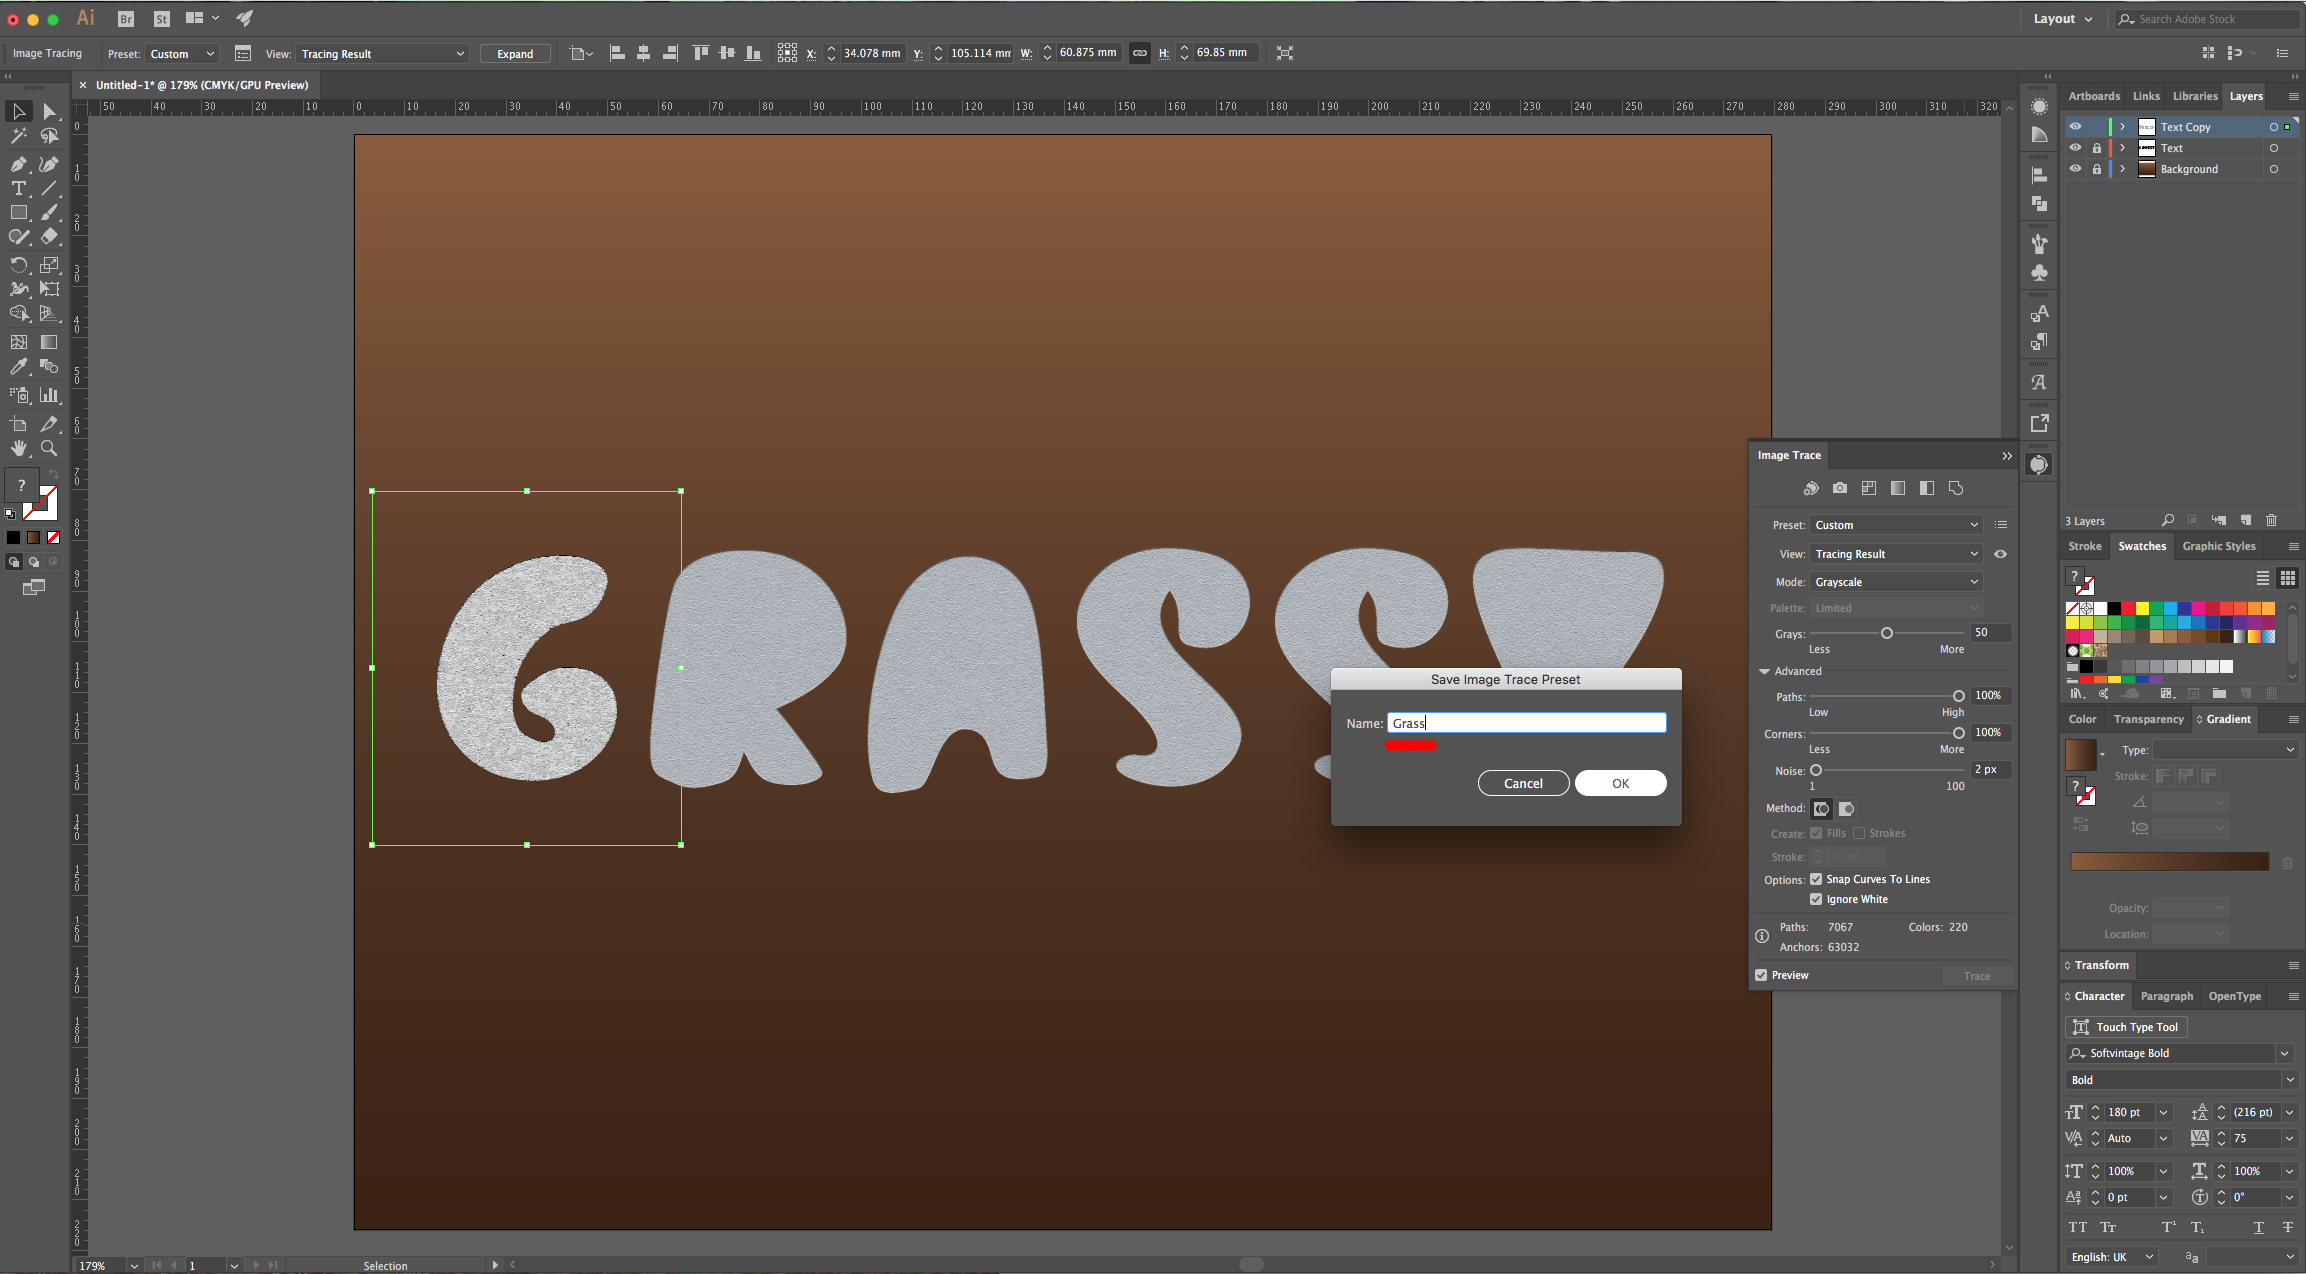
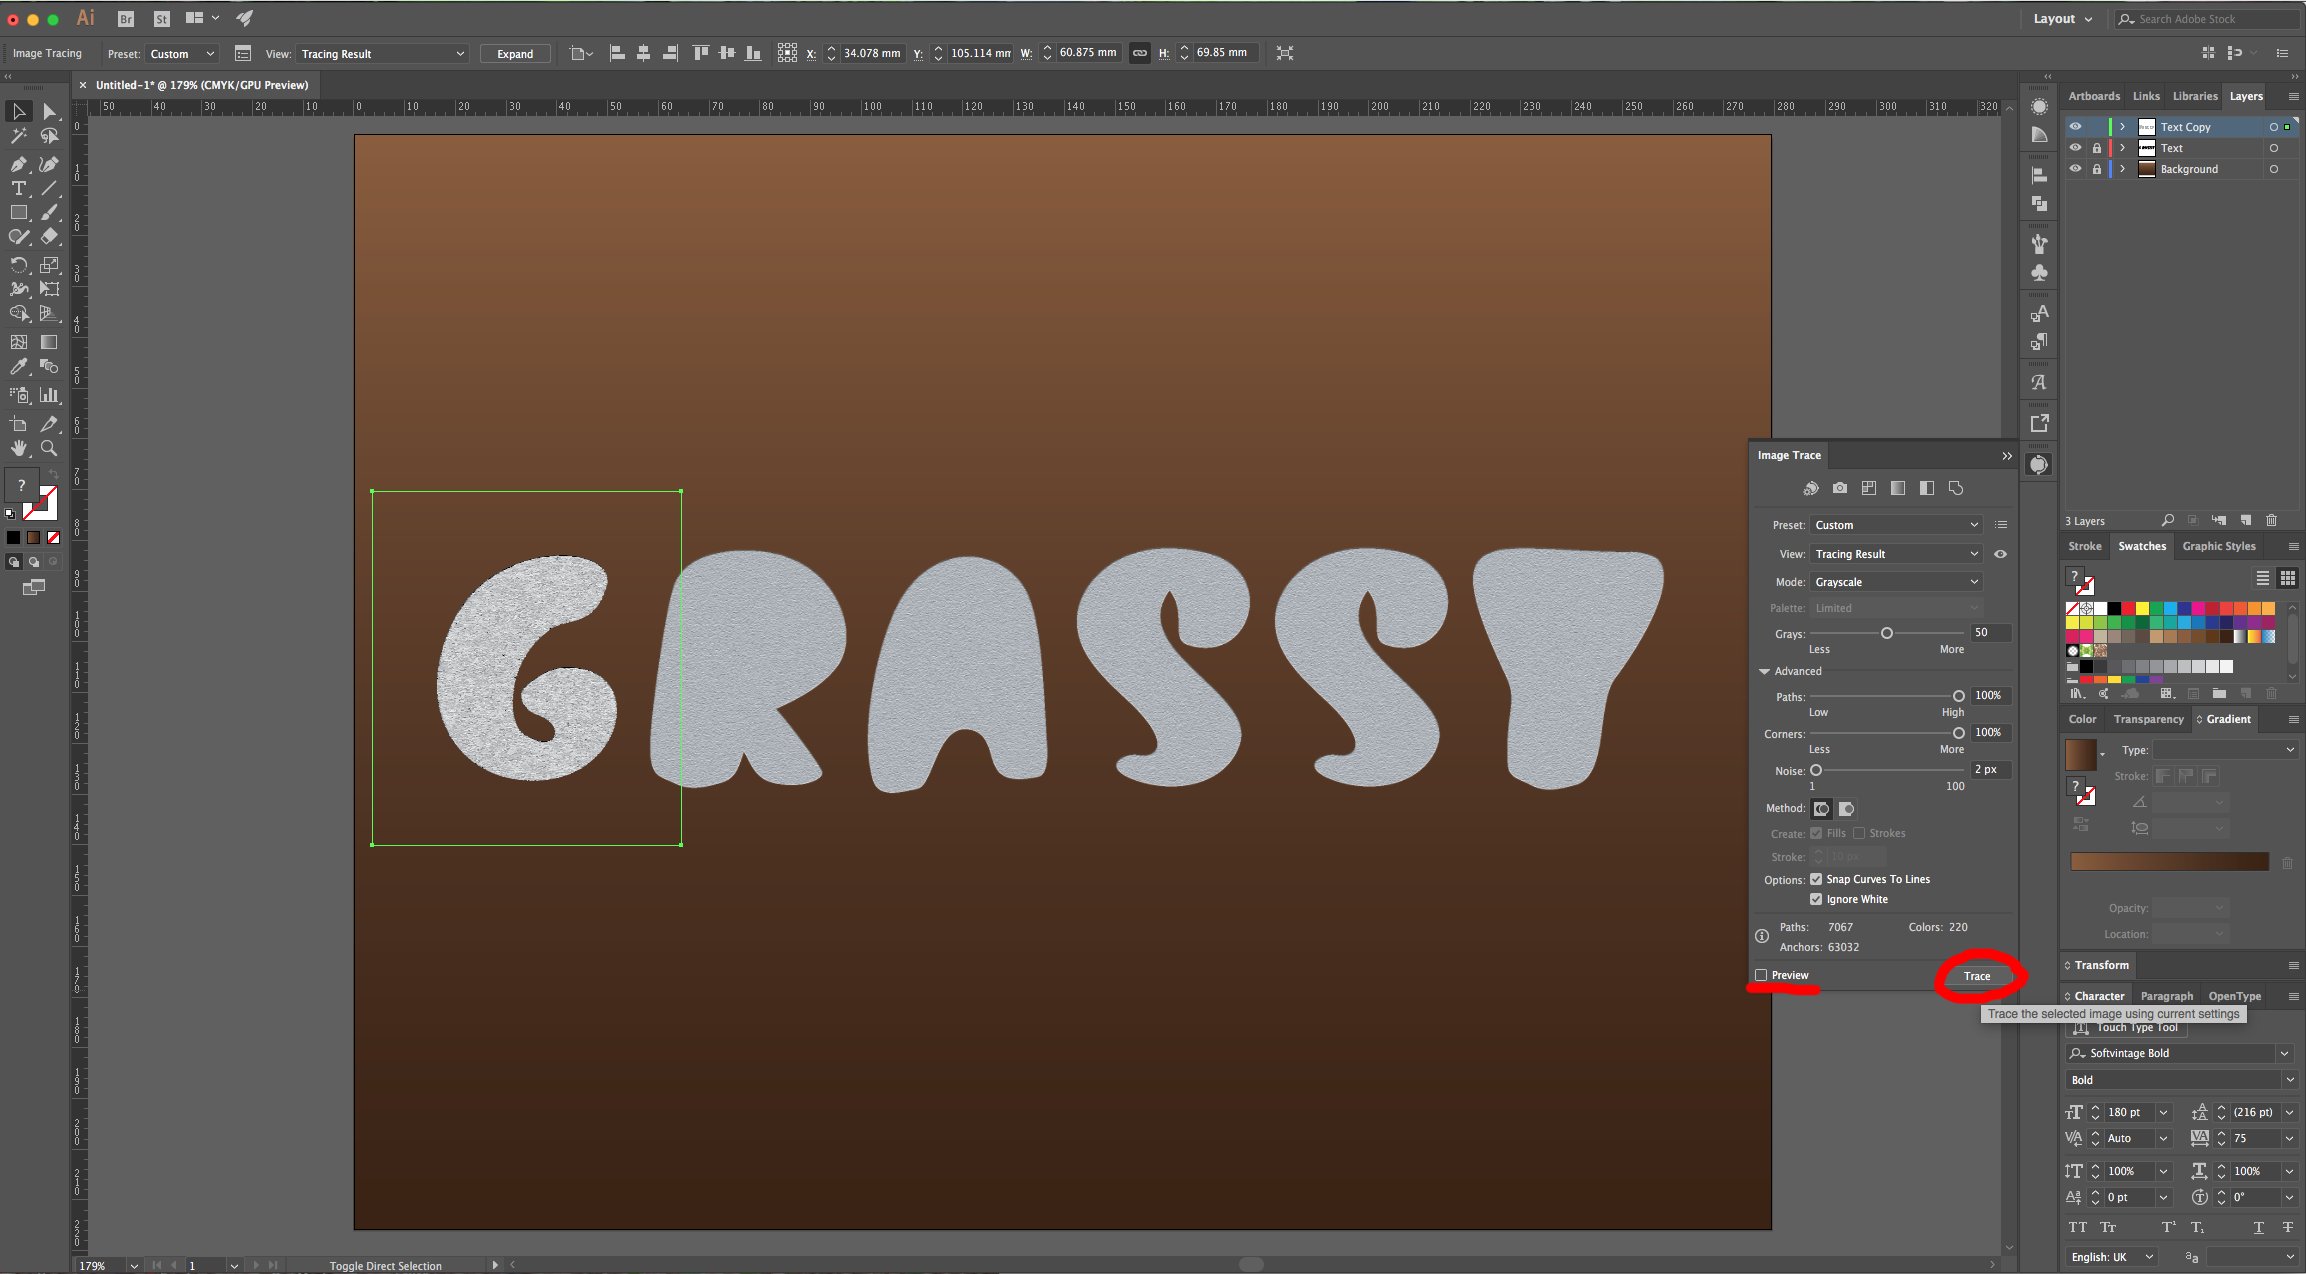
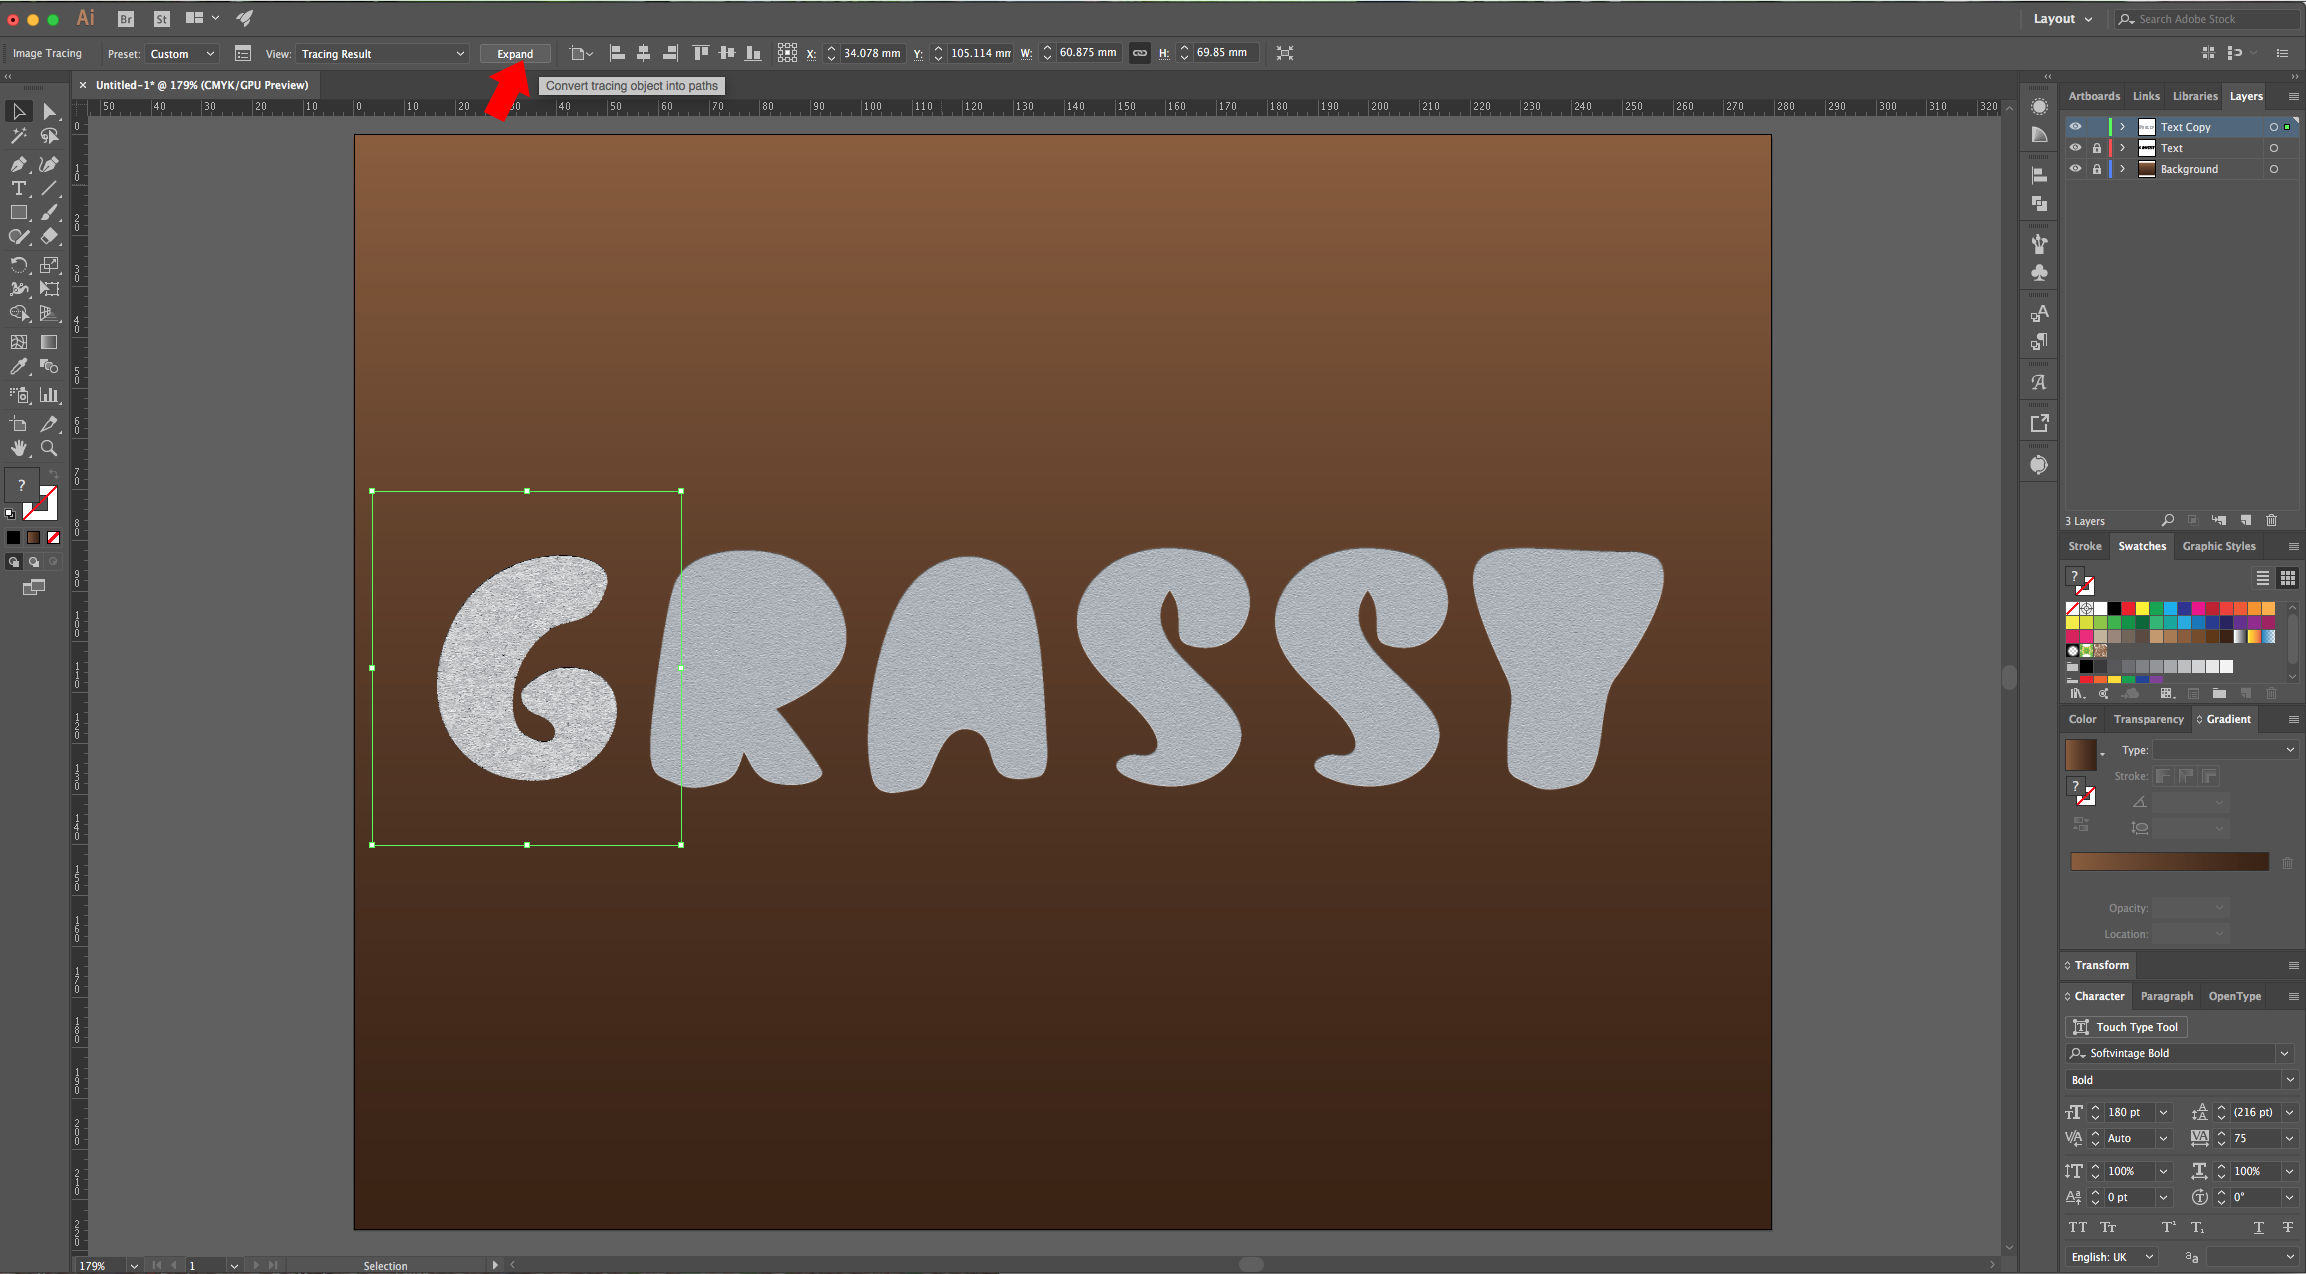
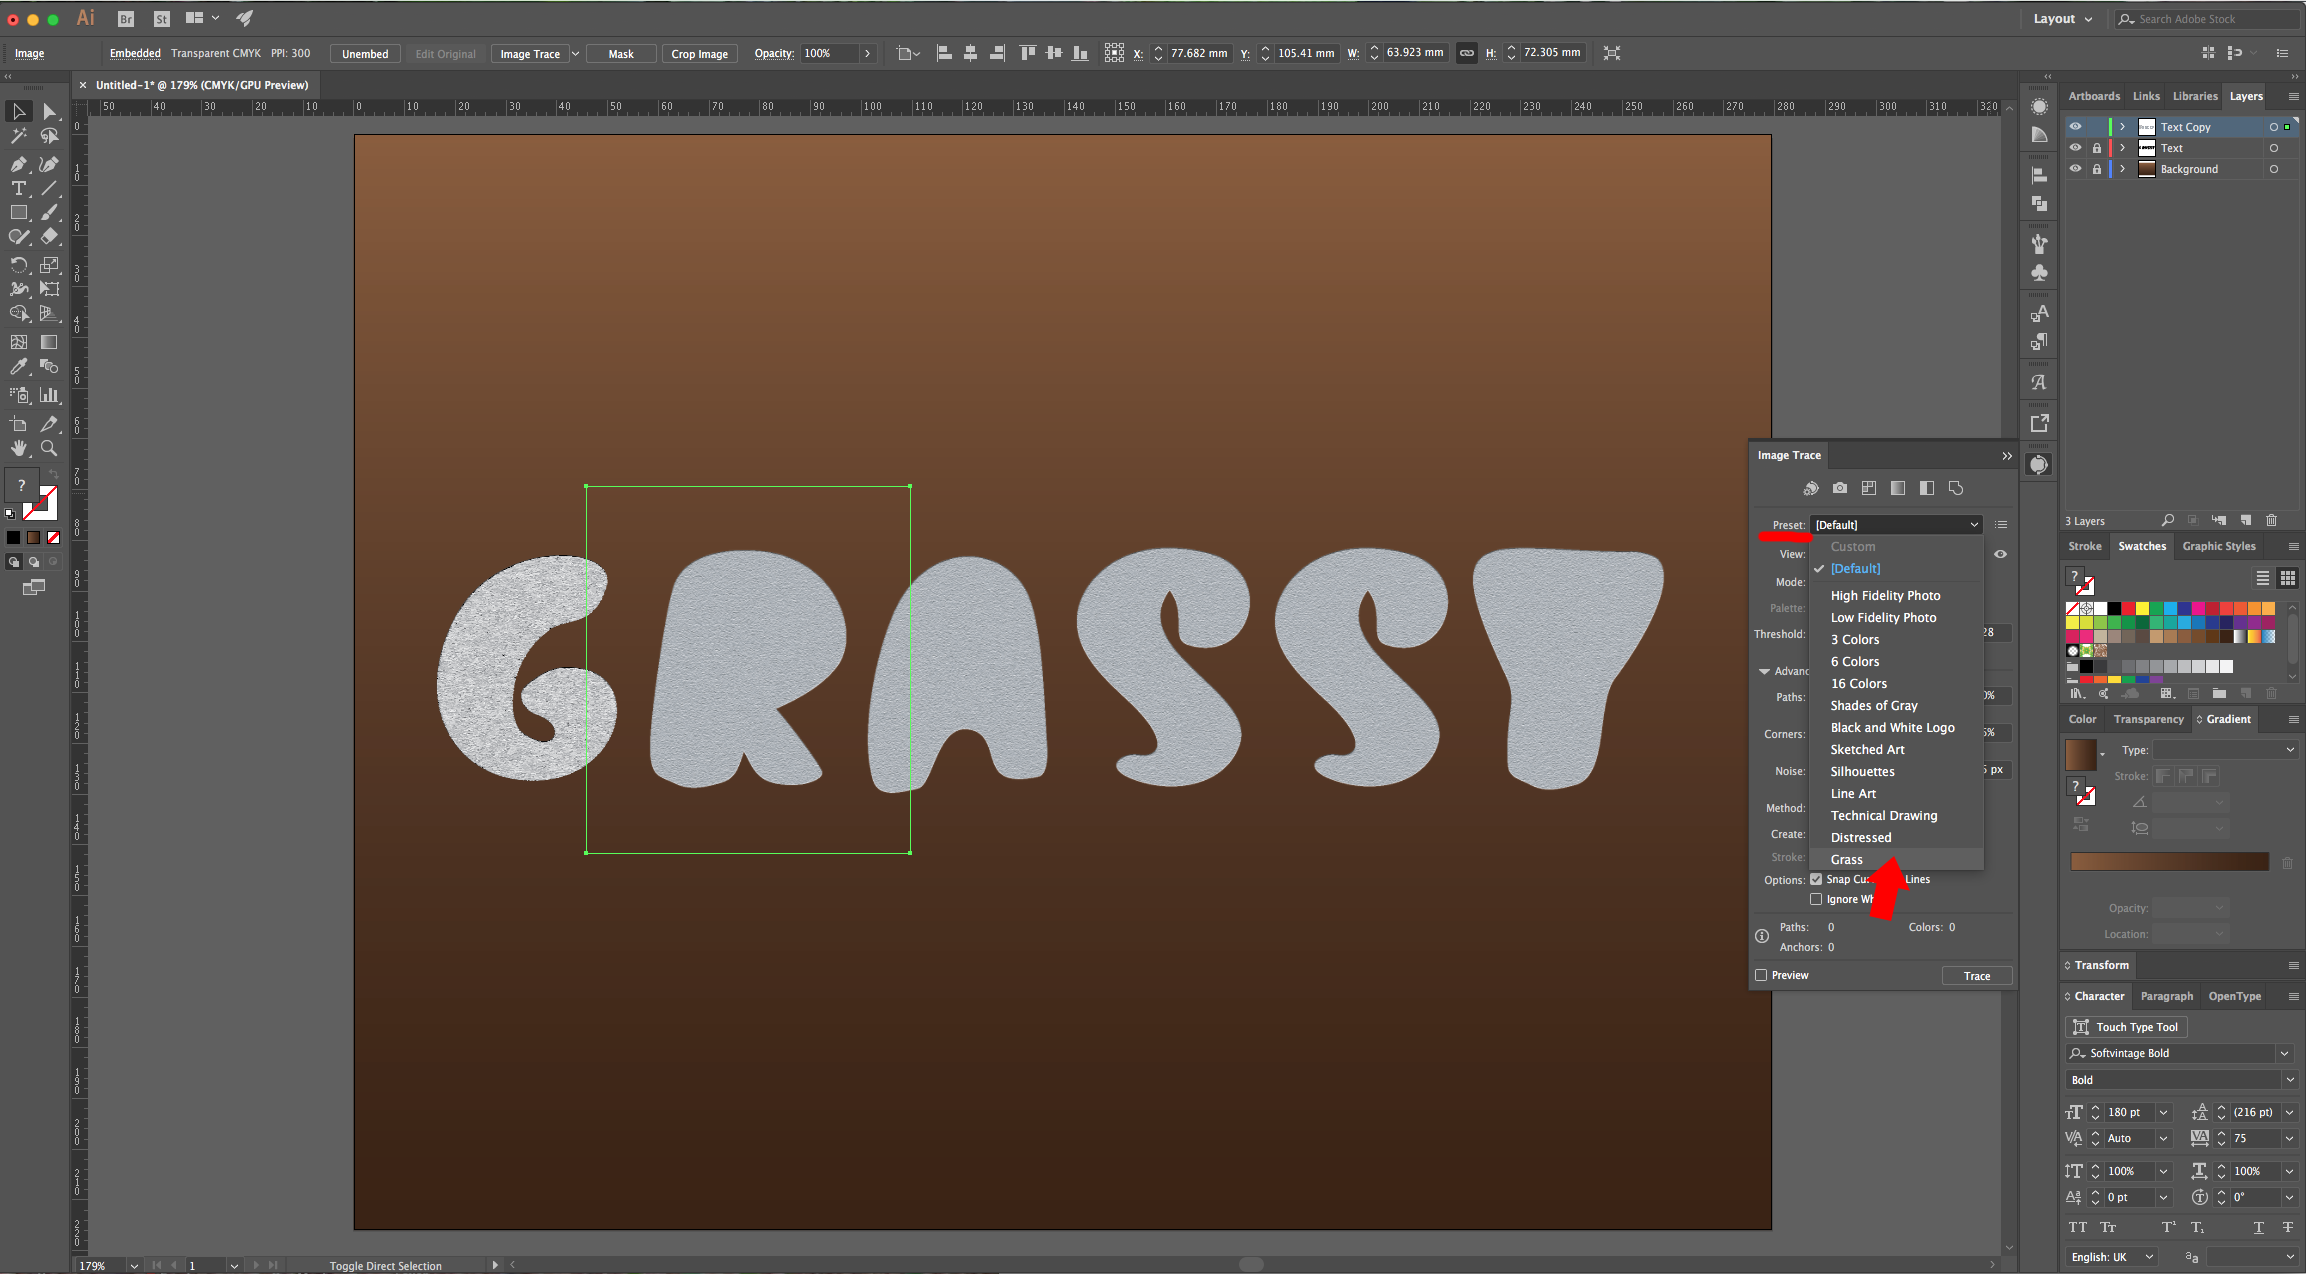
7 - Select your first letter and open the “Image Trace Panel” and click on the “Advanced” arrow to open the advanced options. Use “Greyscale” for “Mode”, make “Paths” and “Corners” 100%, “Noise” 2 px and make sure the “Ignore White” box is checked. Click on the small Menu icon on the Top-right and choose “Save as New Preset”, name it “Grass” and click “Trace” (you need to un-check “Preview” to make the “Trace” button clickable). Then, click on the “Expand” button on the Top Menu.


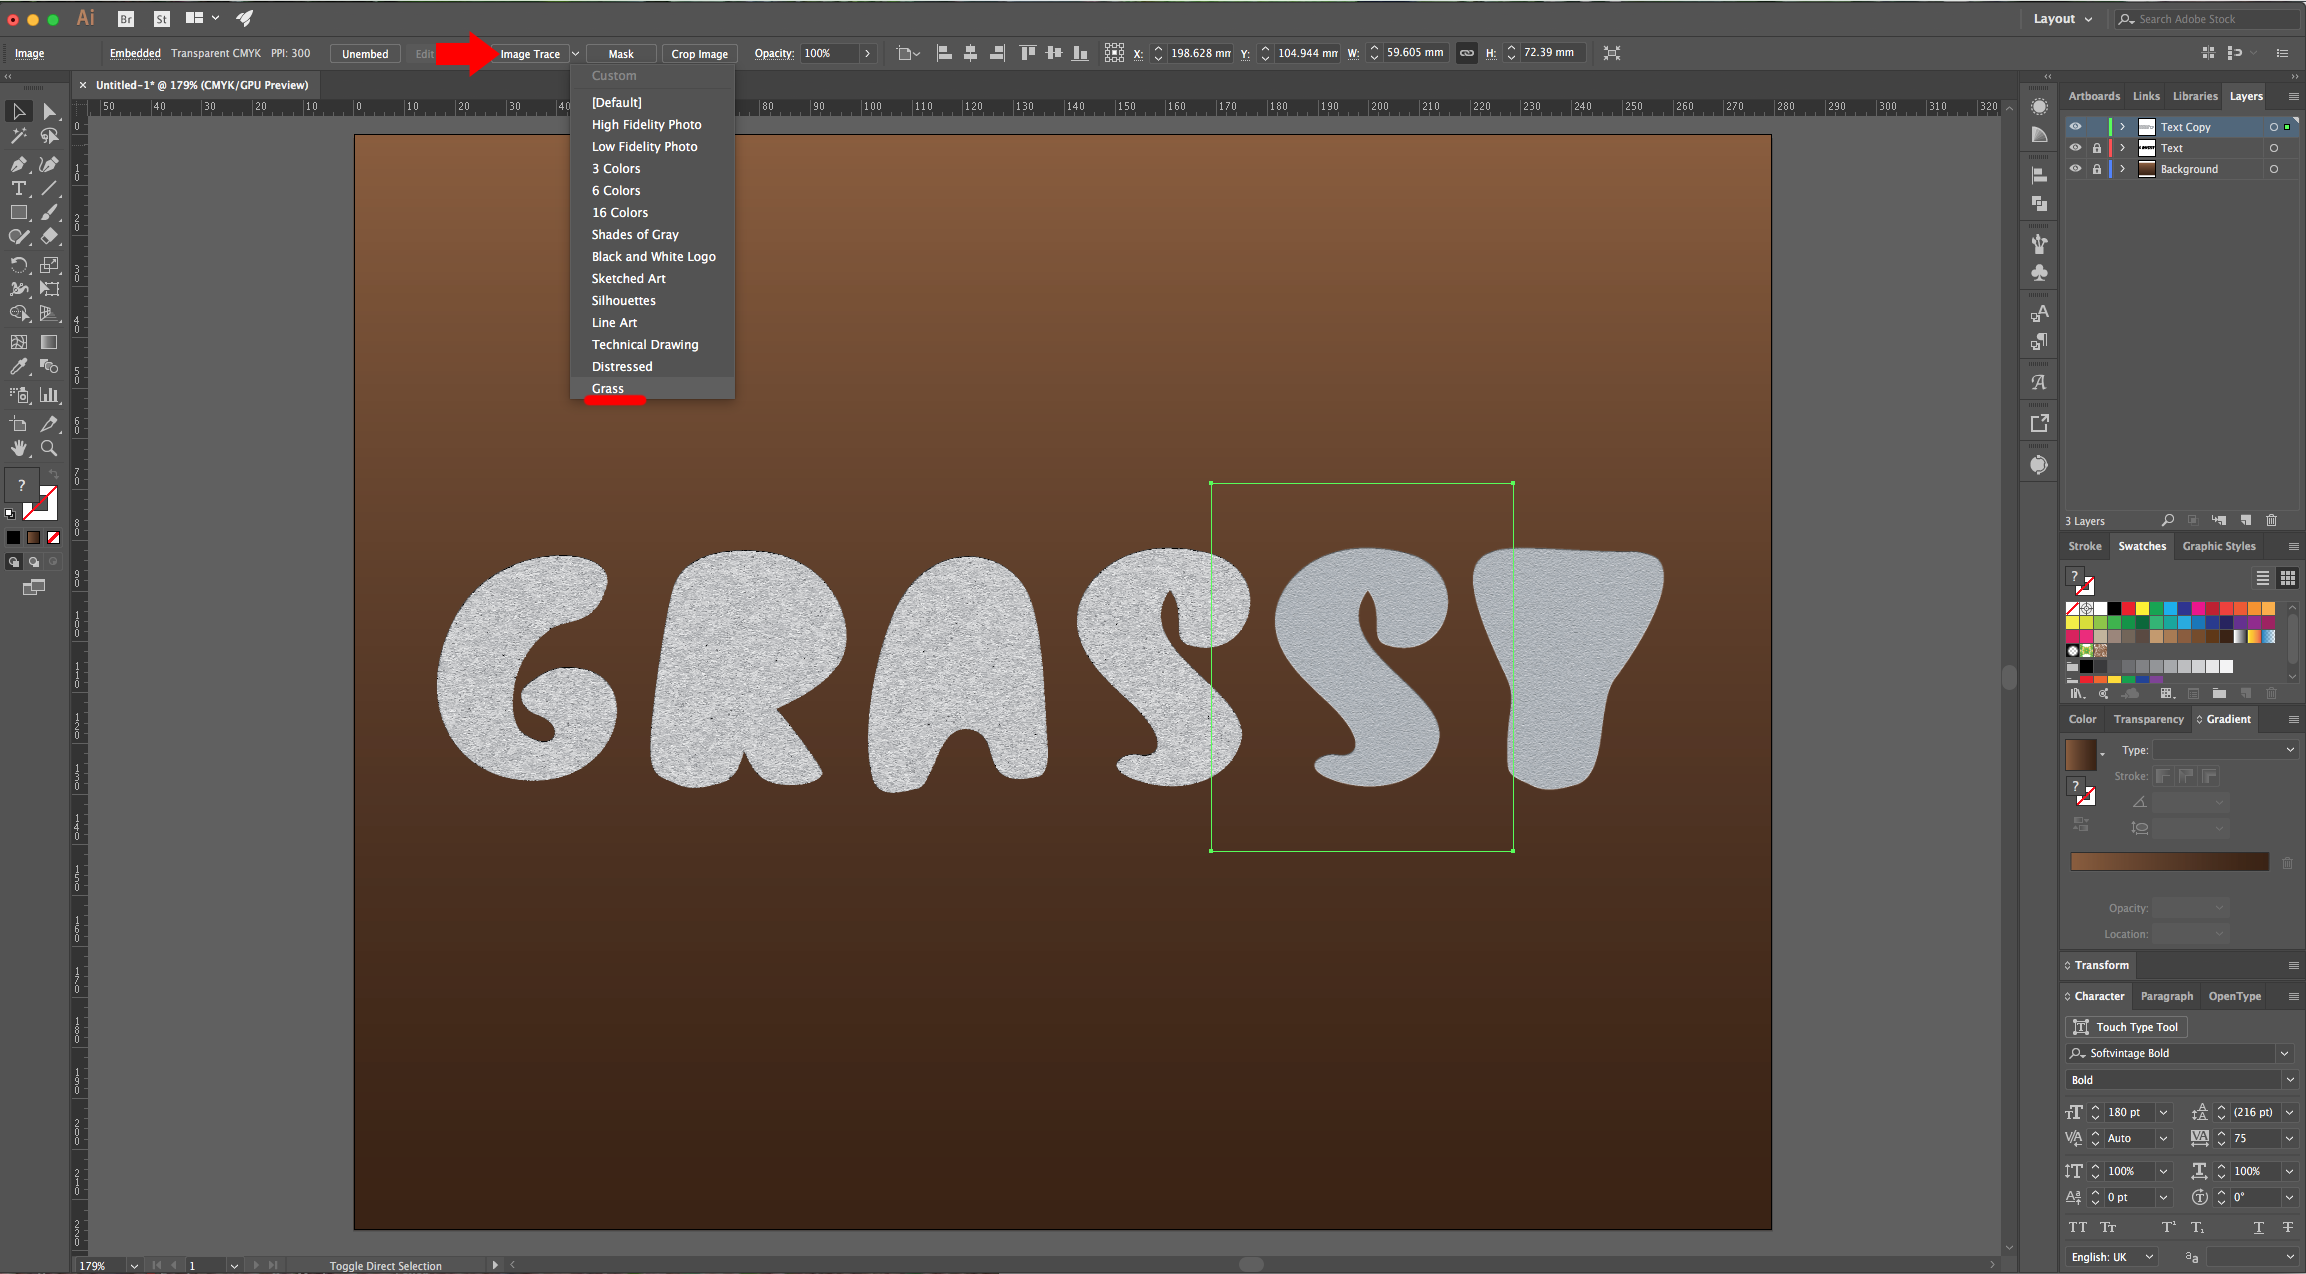
8 - Repeat the “Trace” with all your letters, but just select “Grass” from the “Presets” Menu in your Panel or in the Top Menu. Don’t forget to “Expand” the letter afterwards. This process may slow down your computer because you are creating a lot of paths. If it’s too much, try doing just one letter.
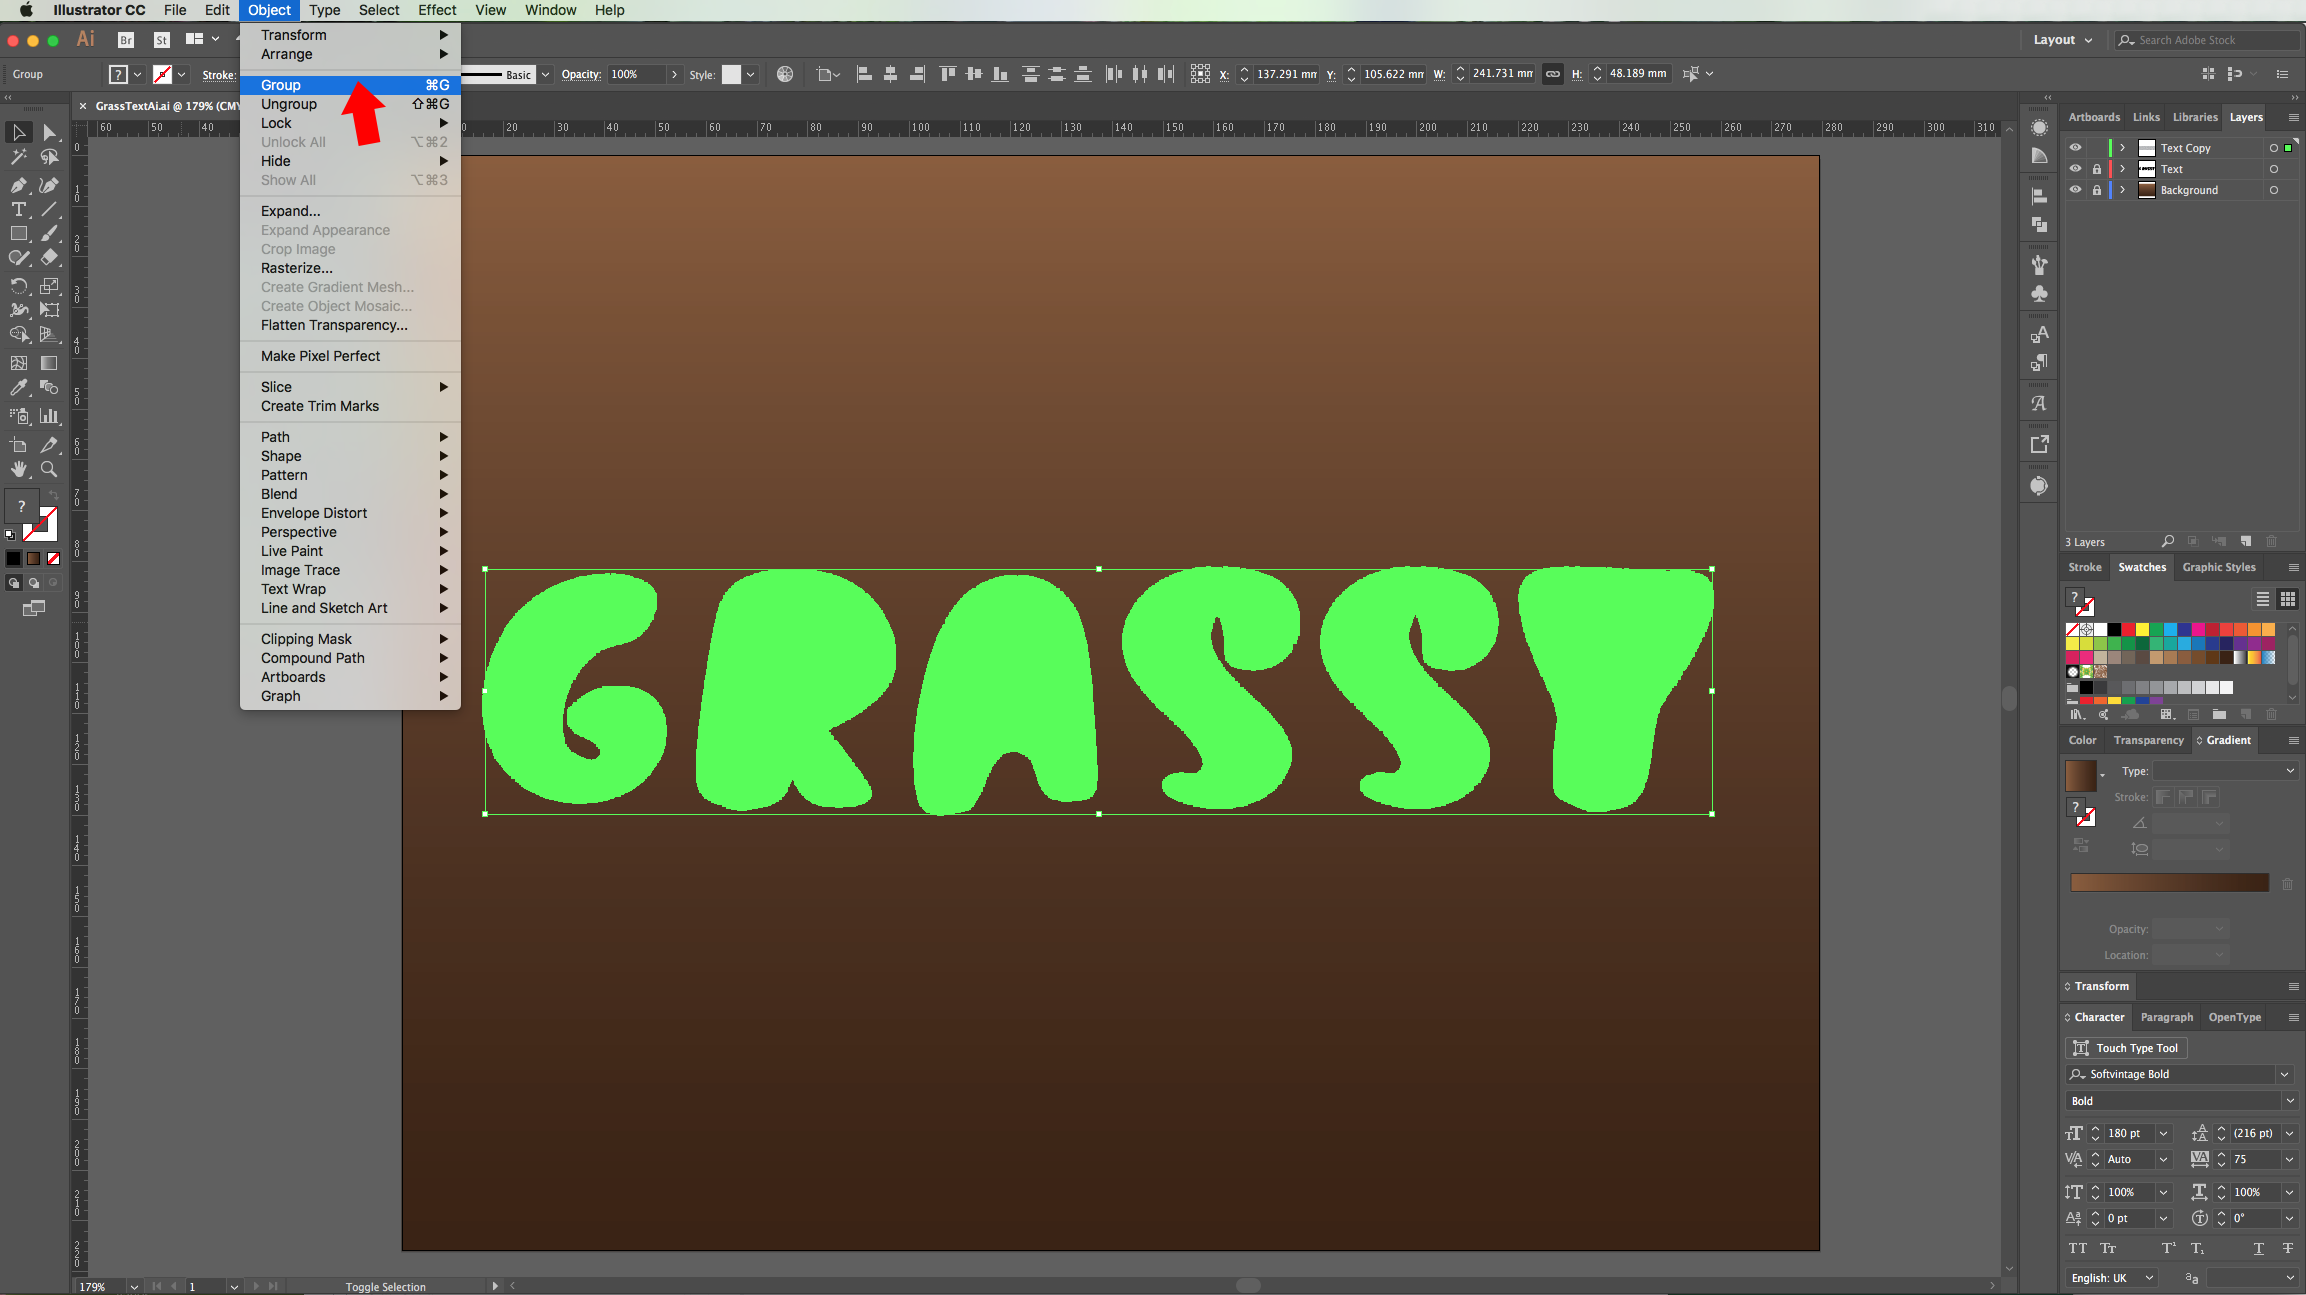
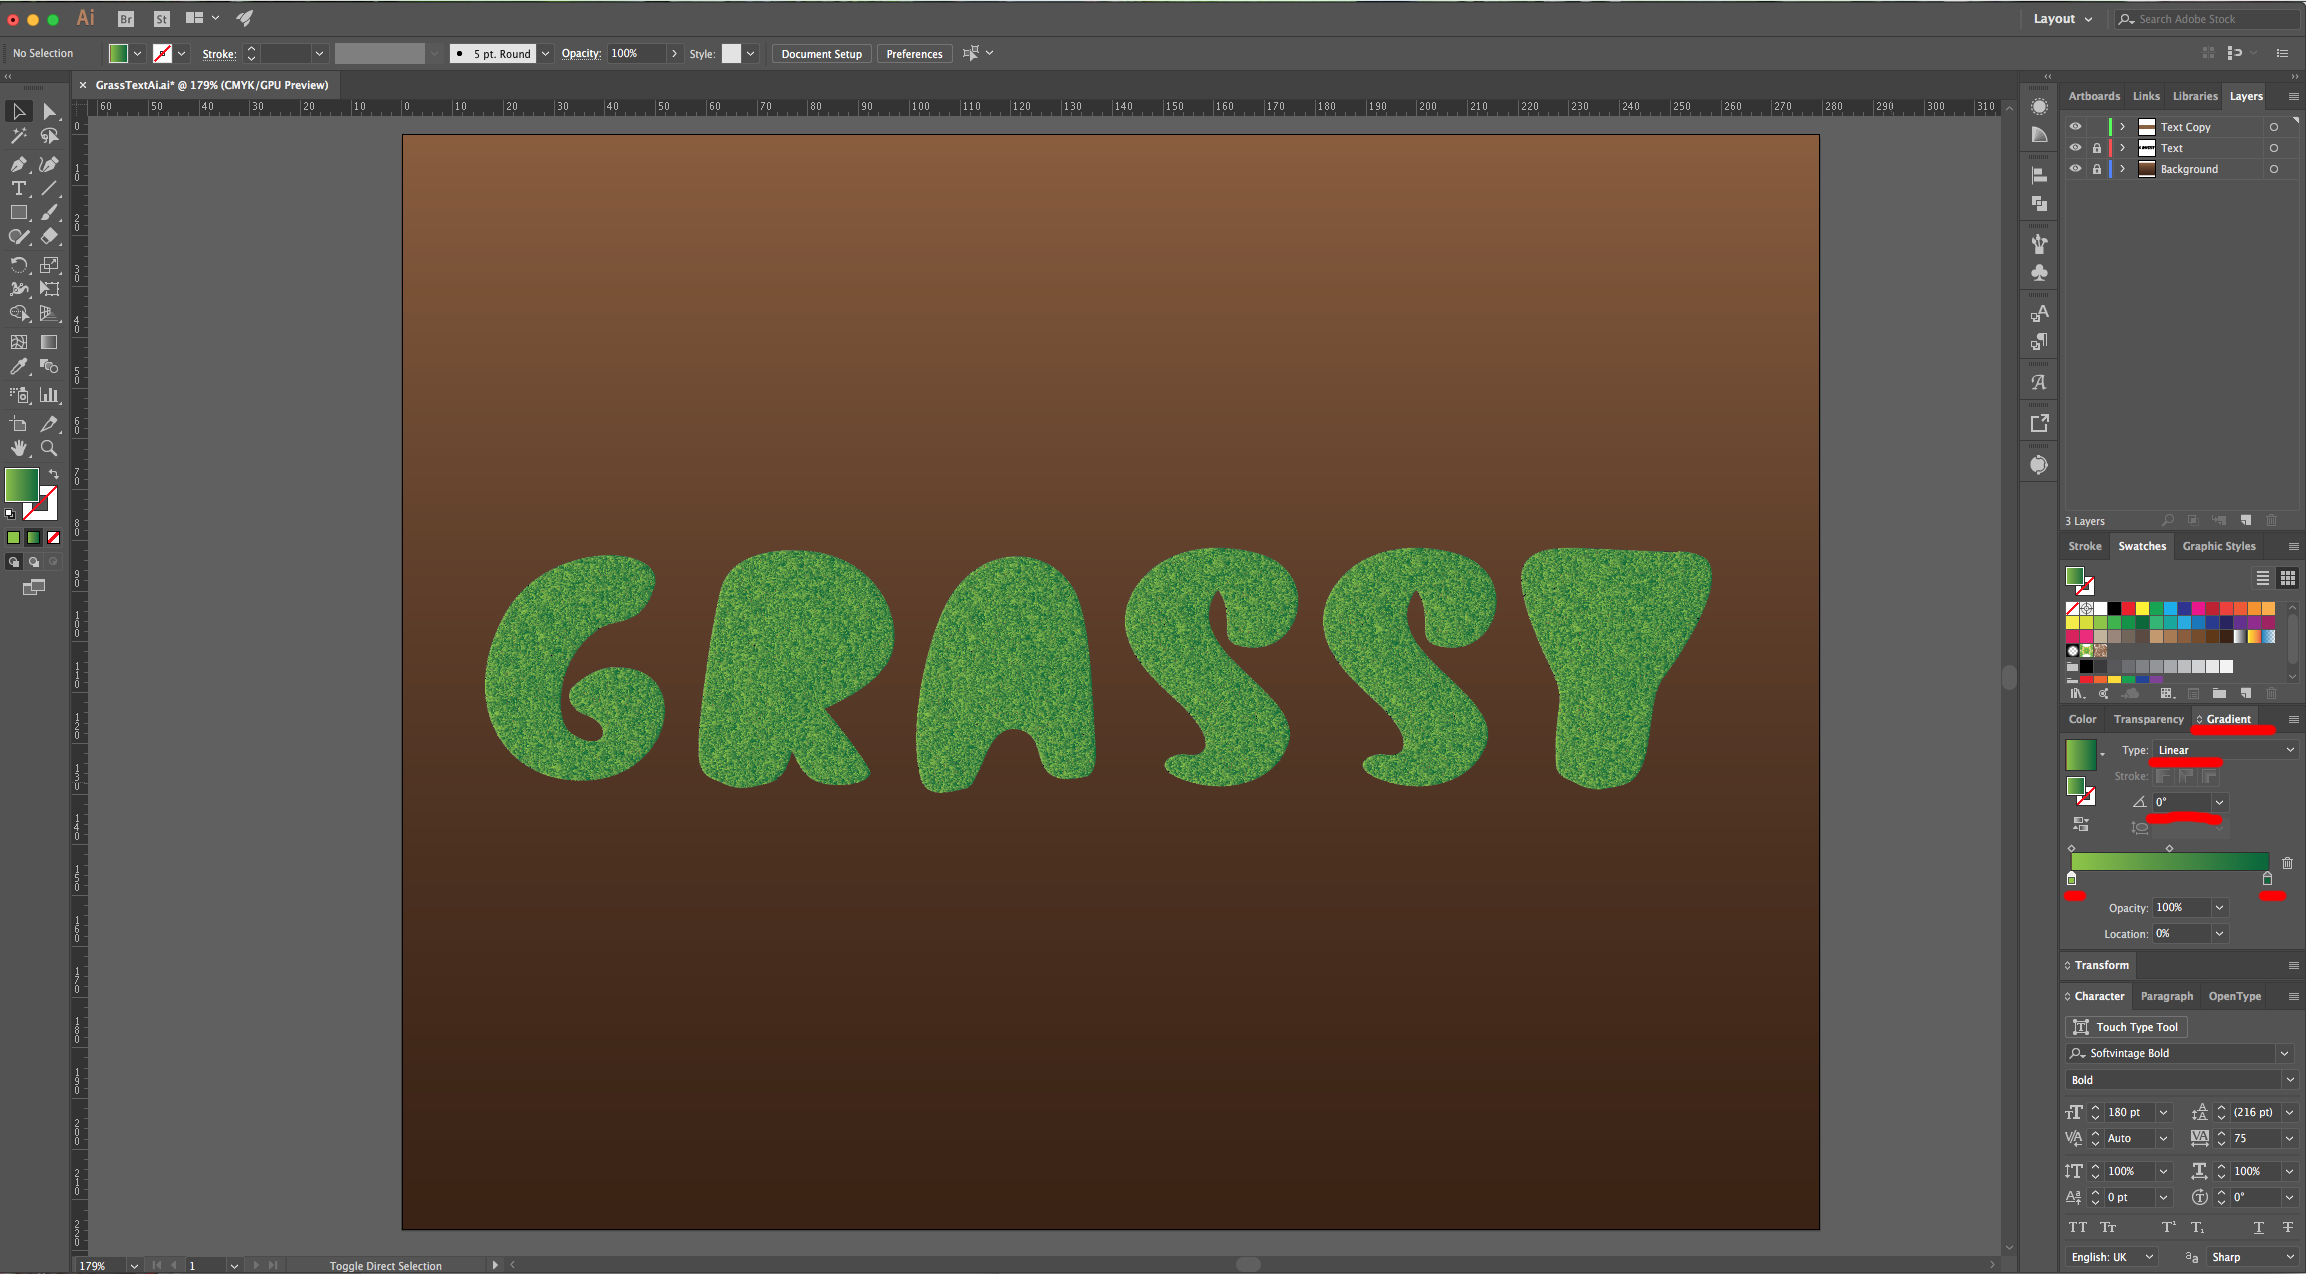
9 - Select all your letters, “Group” them together (Command/Control + G) and apply a “Radial Gradient” Fill, going from a light/medium green to a darker one with a 0° Angle.
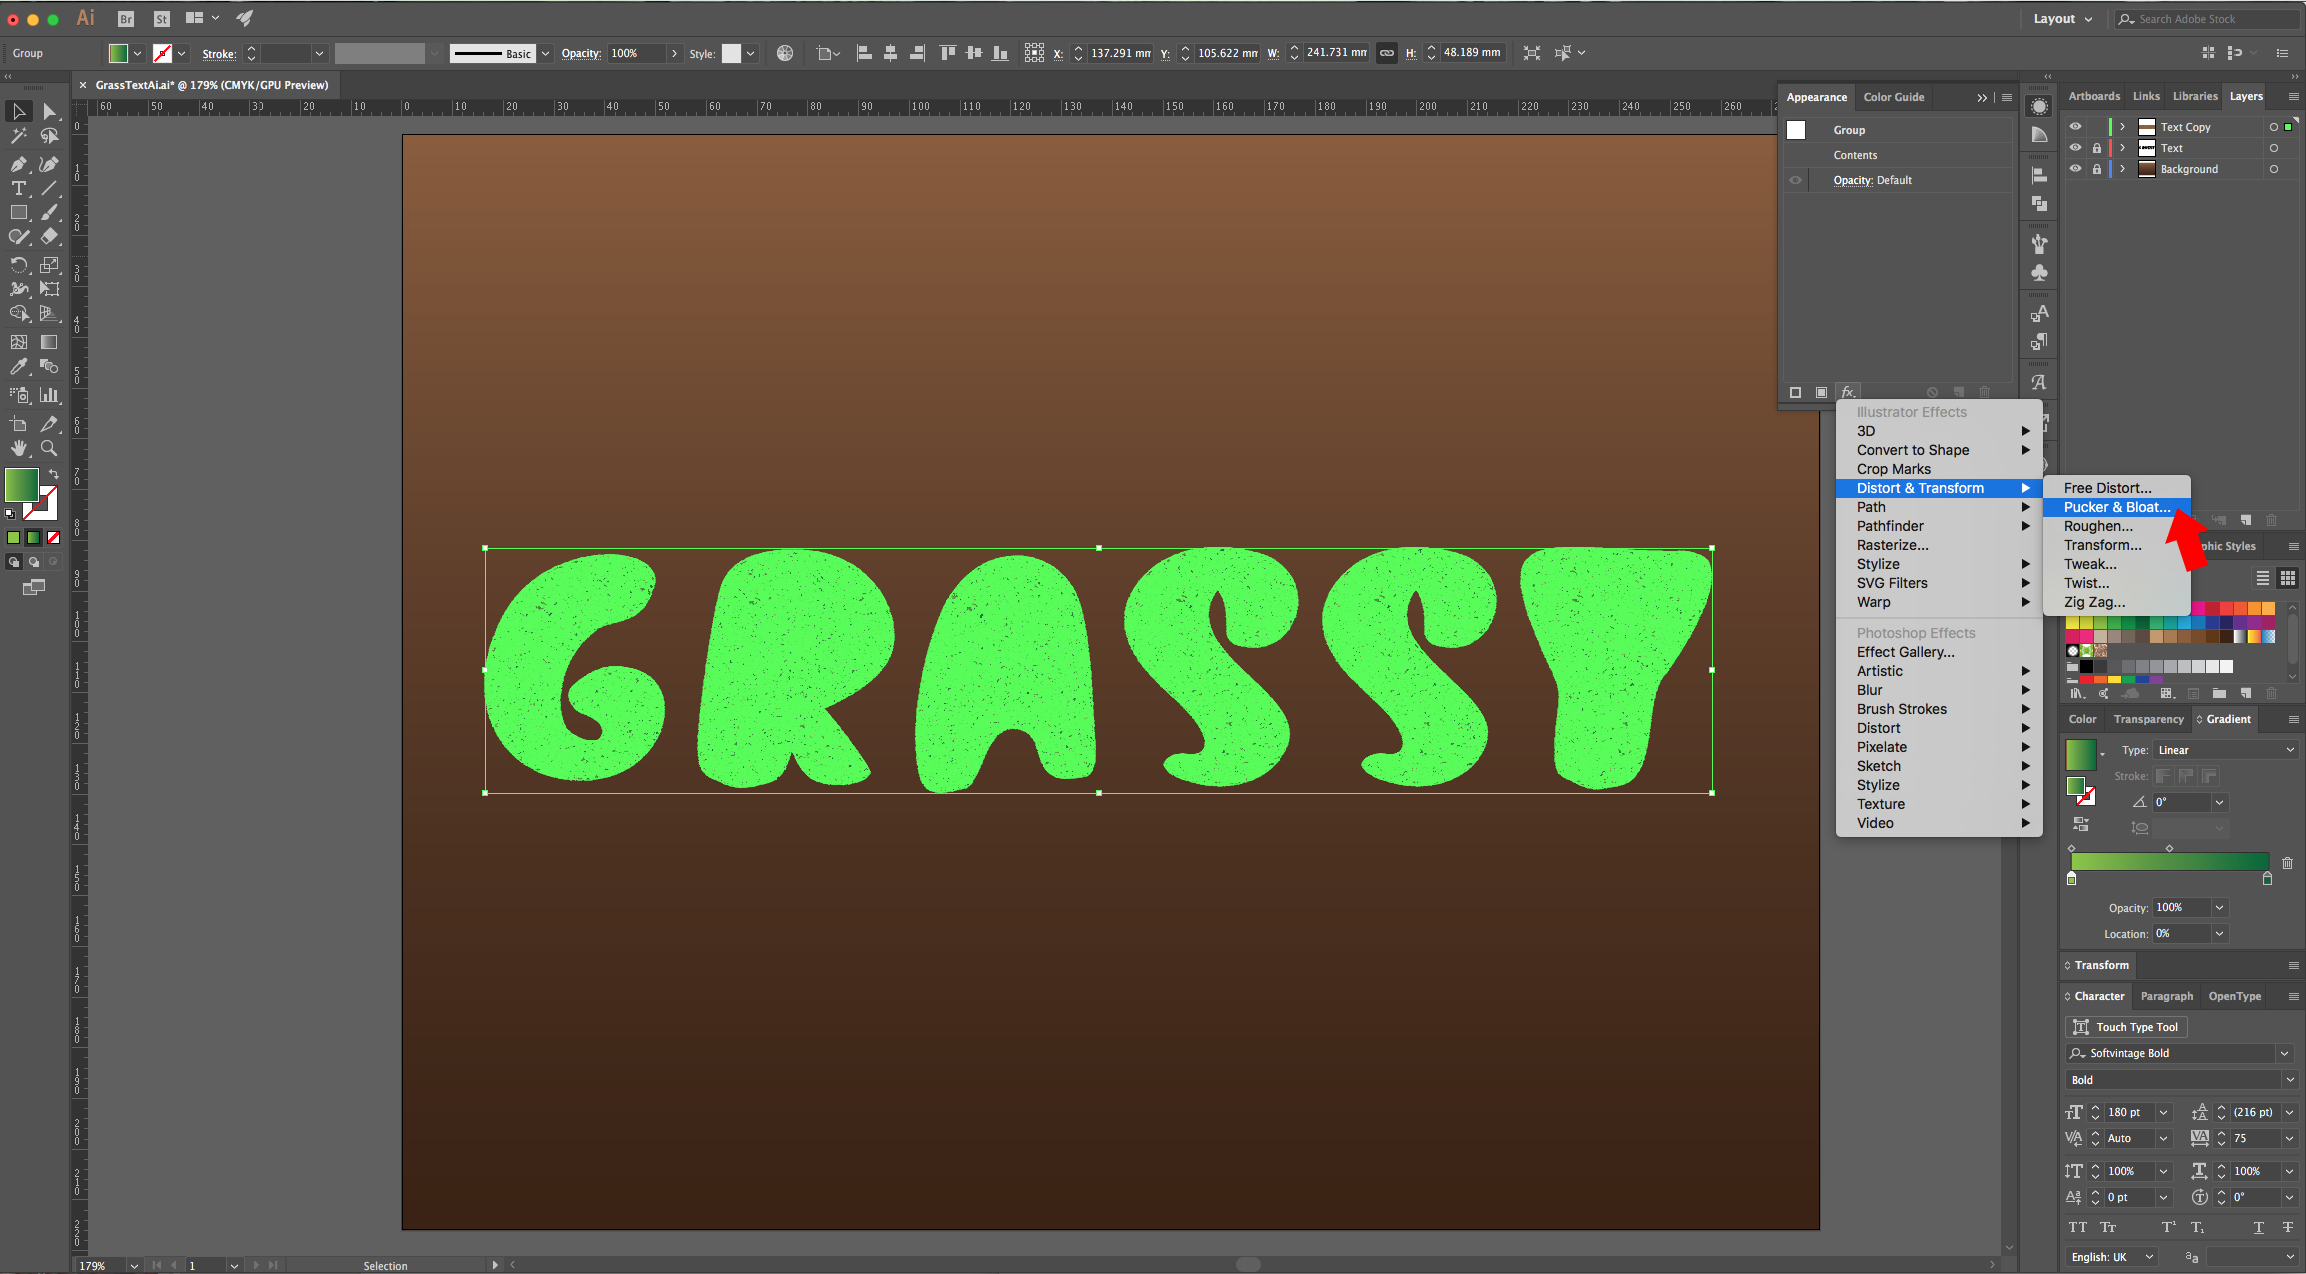
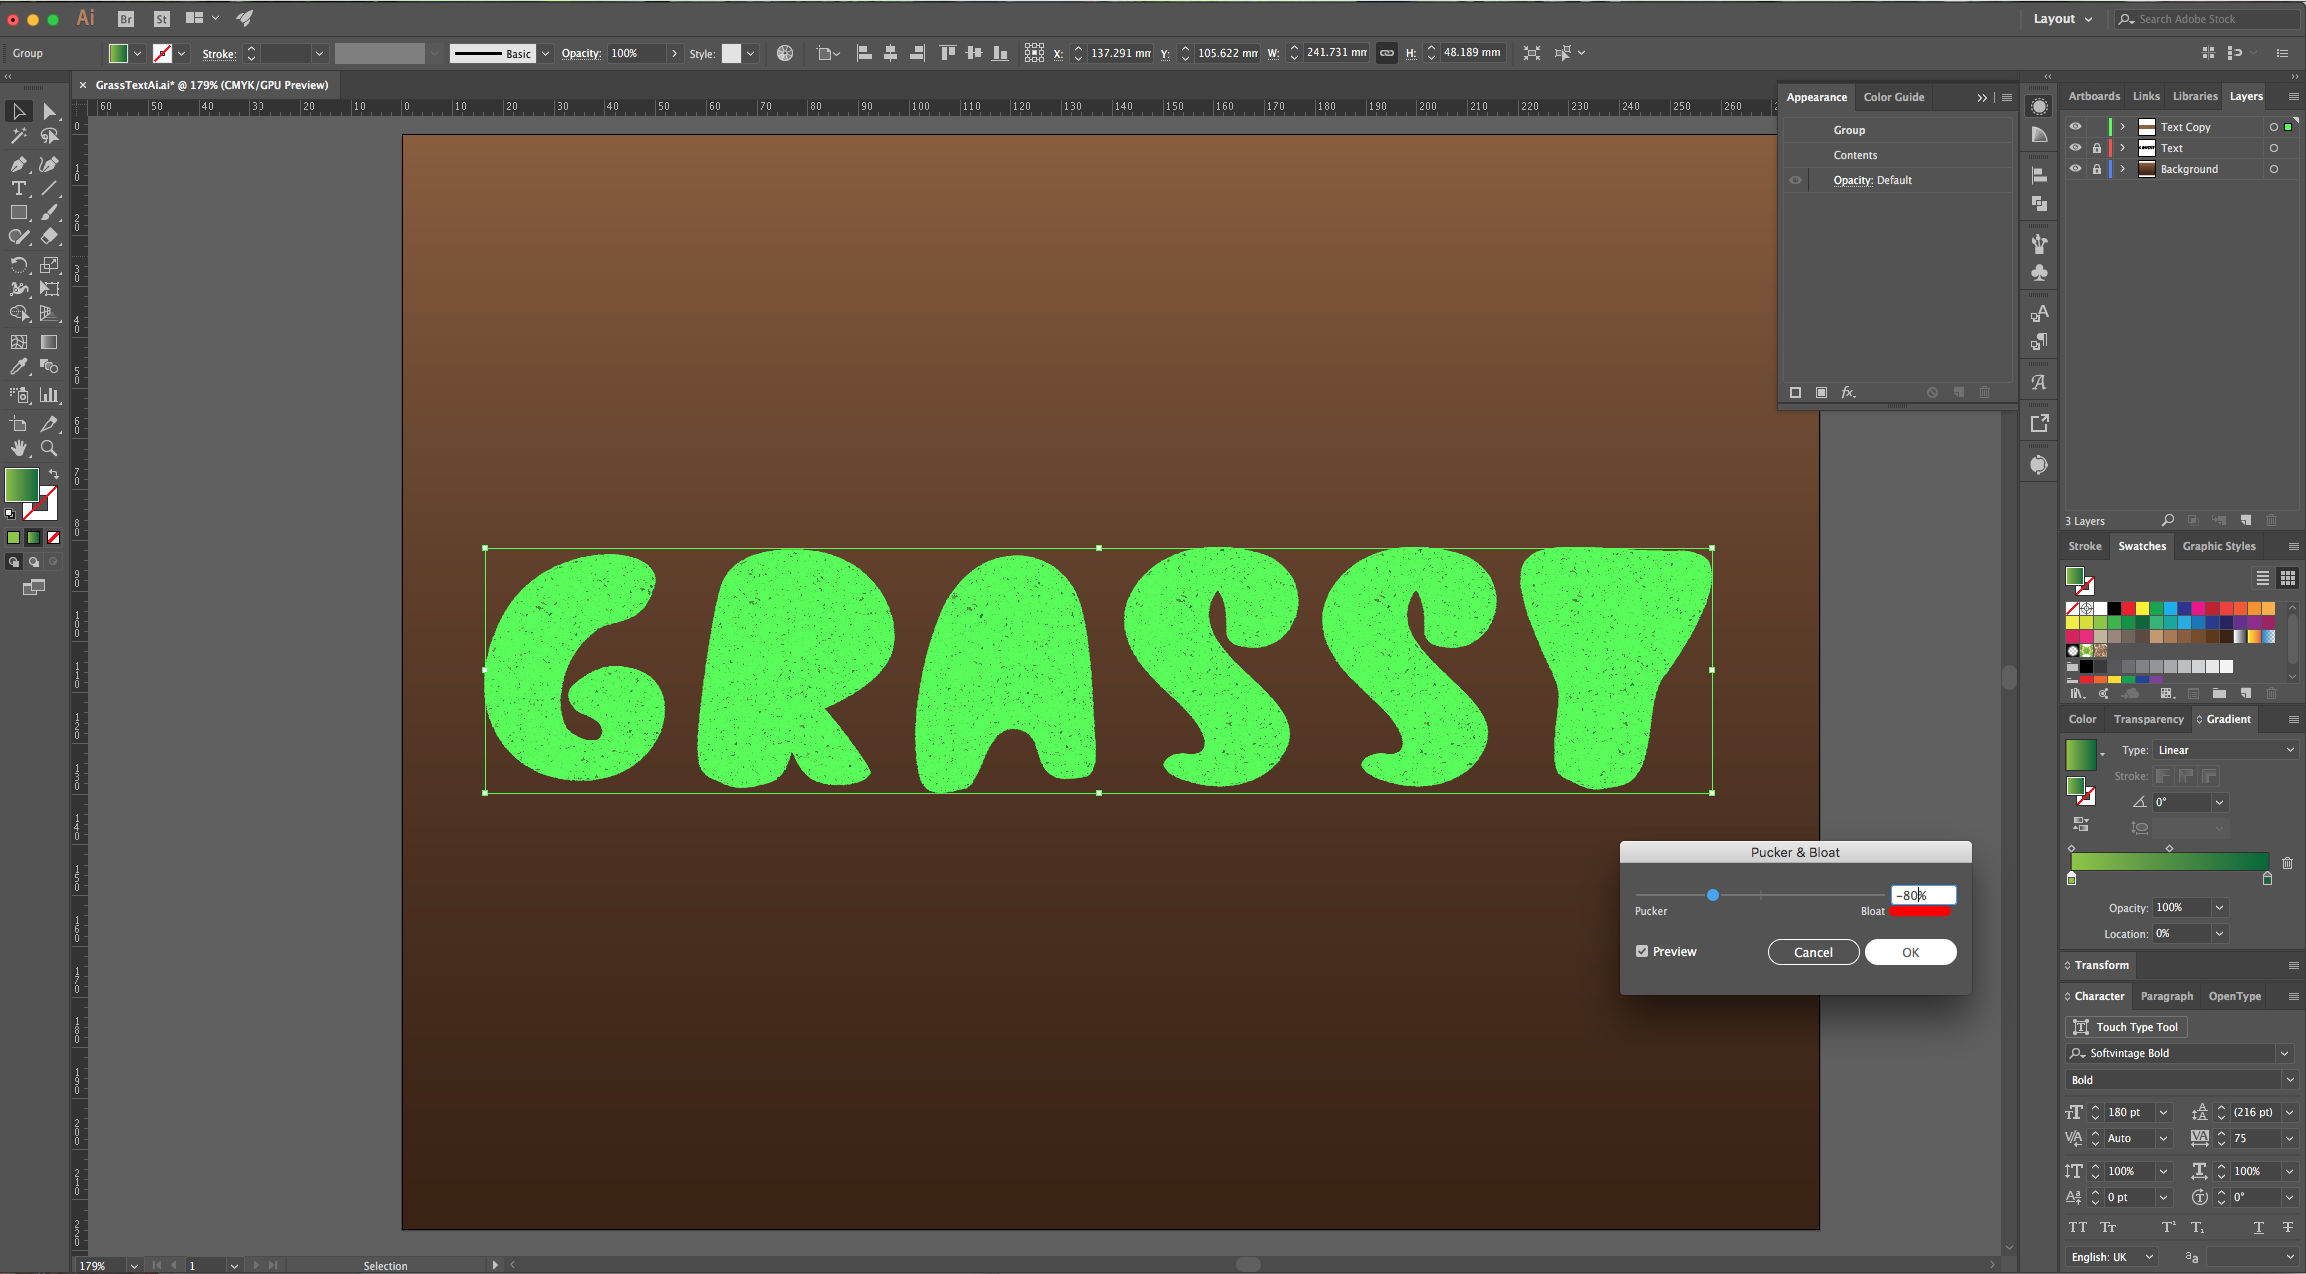
10 - Go to the “Appearance Panel” click on the “Effects Menu” at the bottom, navigate to the Distort & Transform > Pucker & Bloat and use a -80% value.
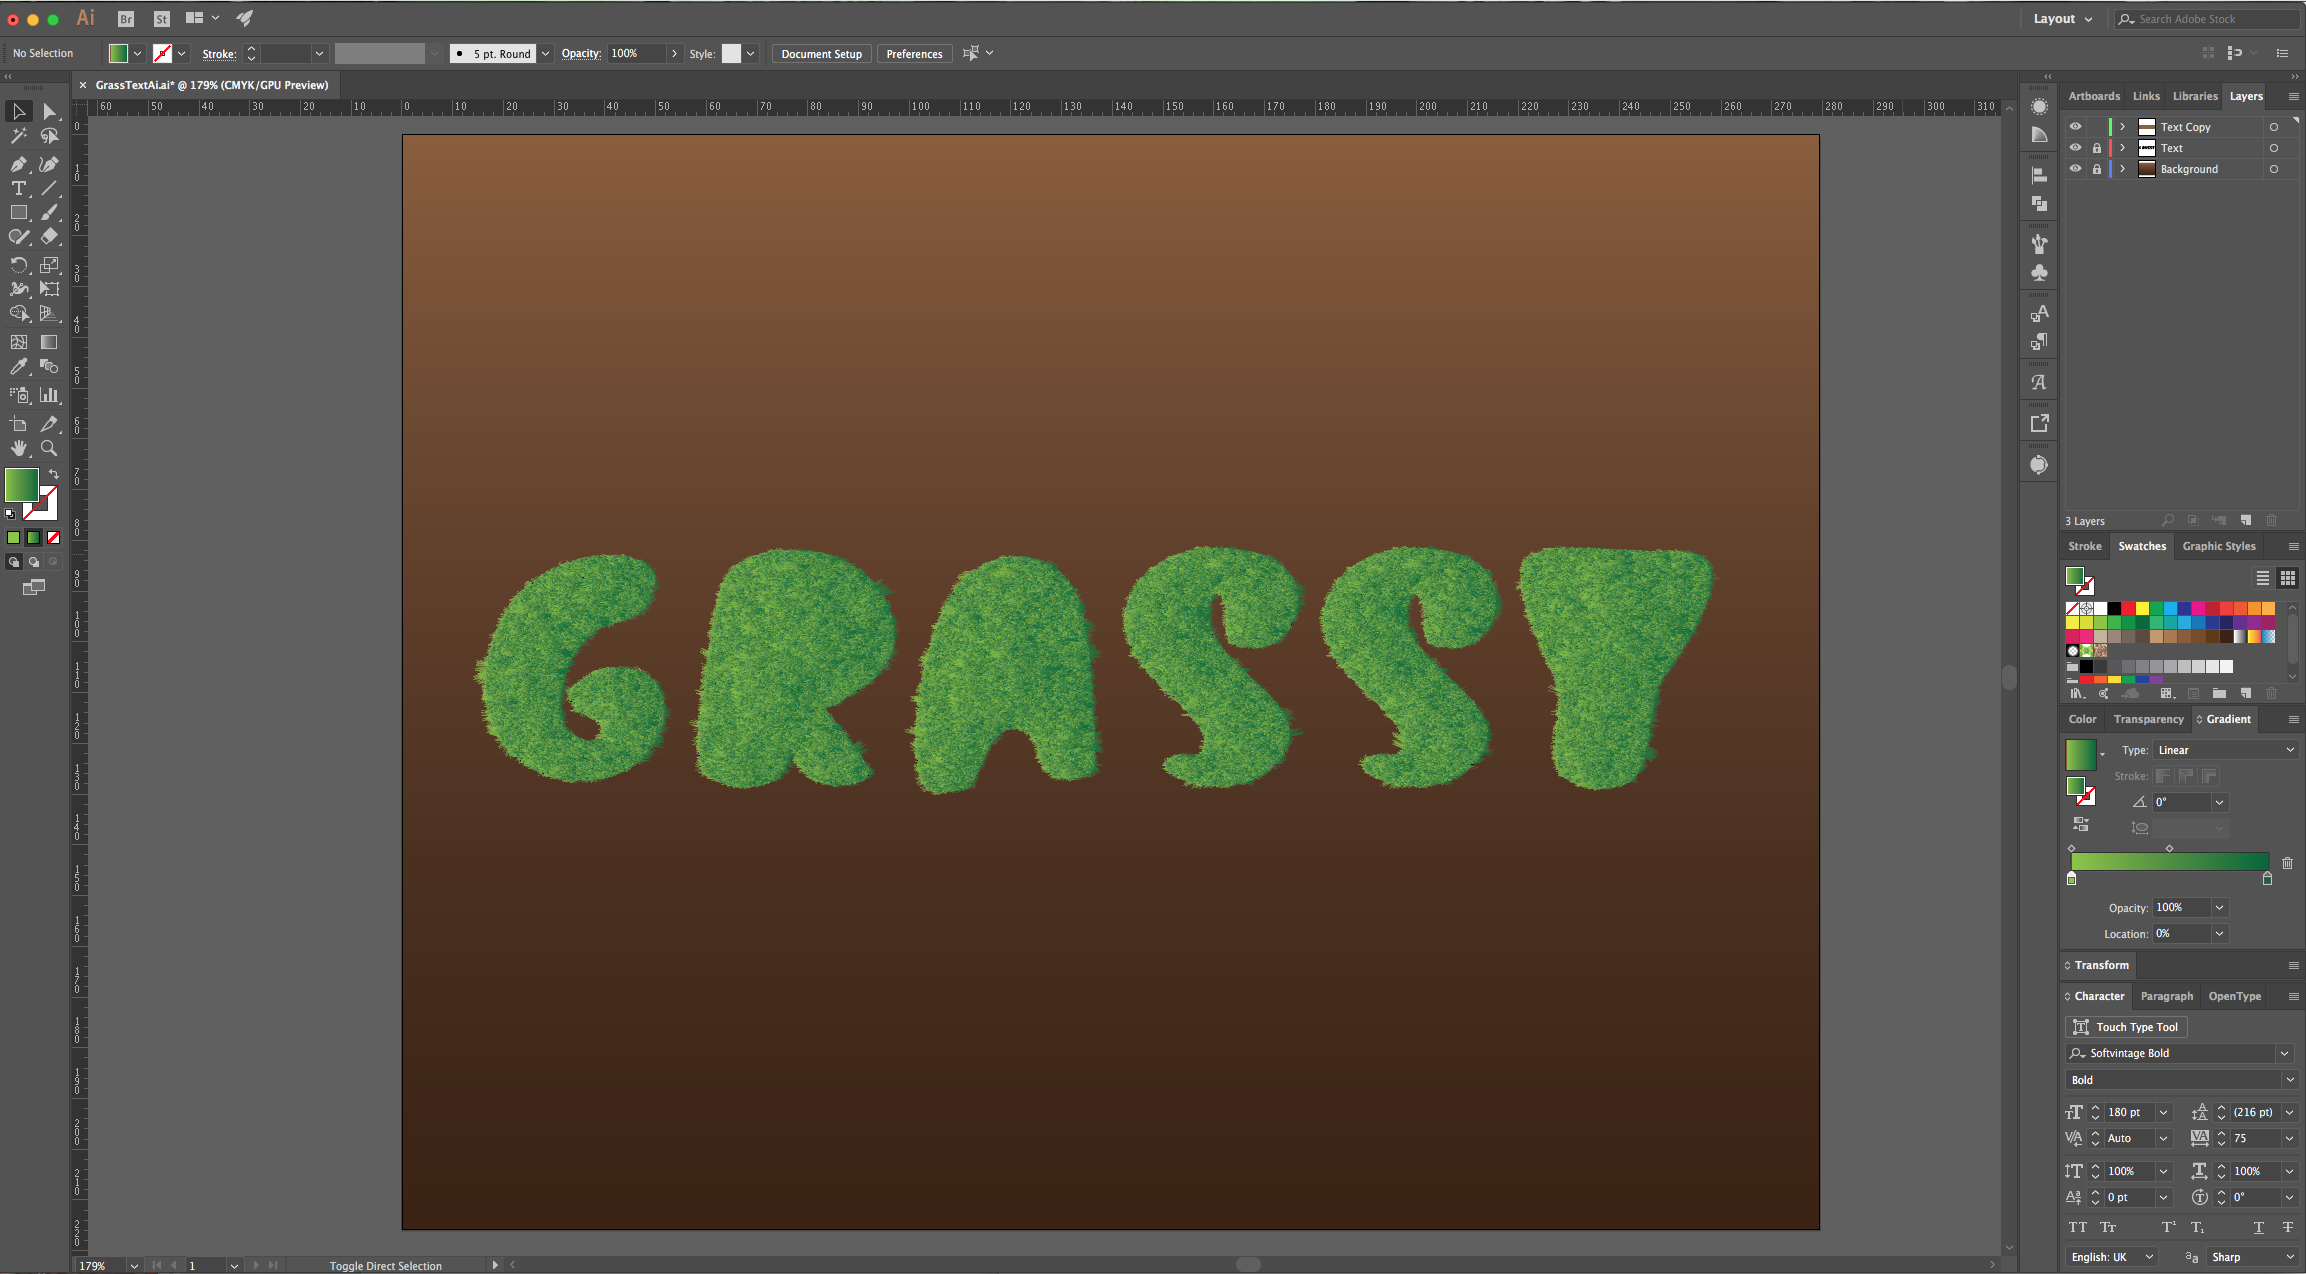
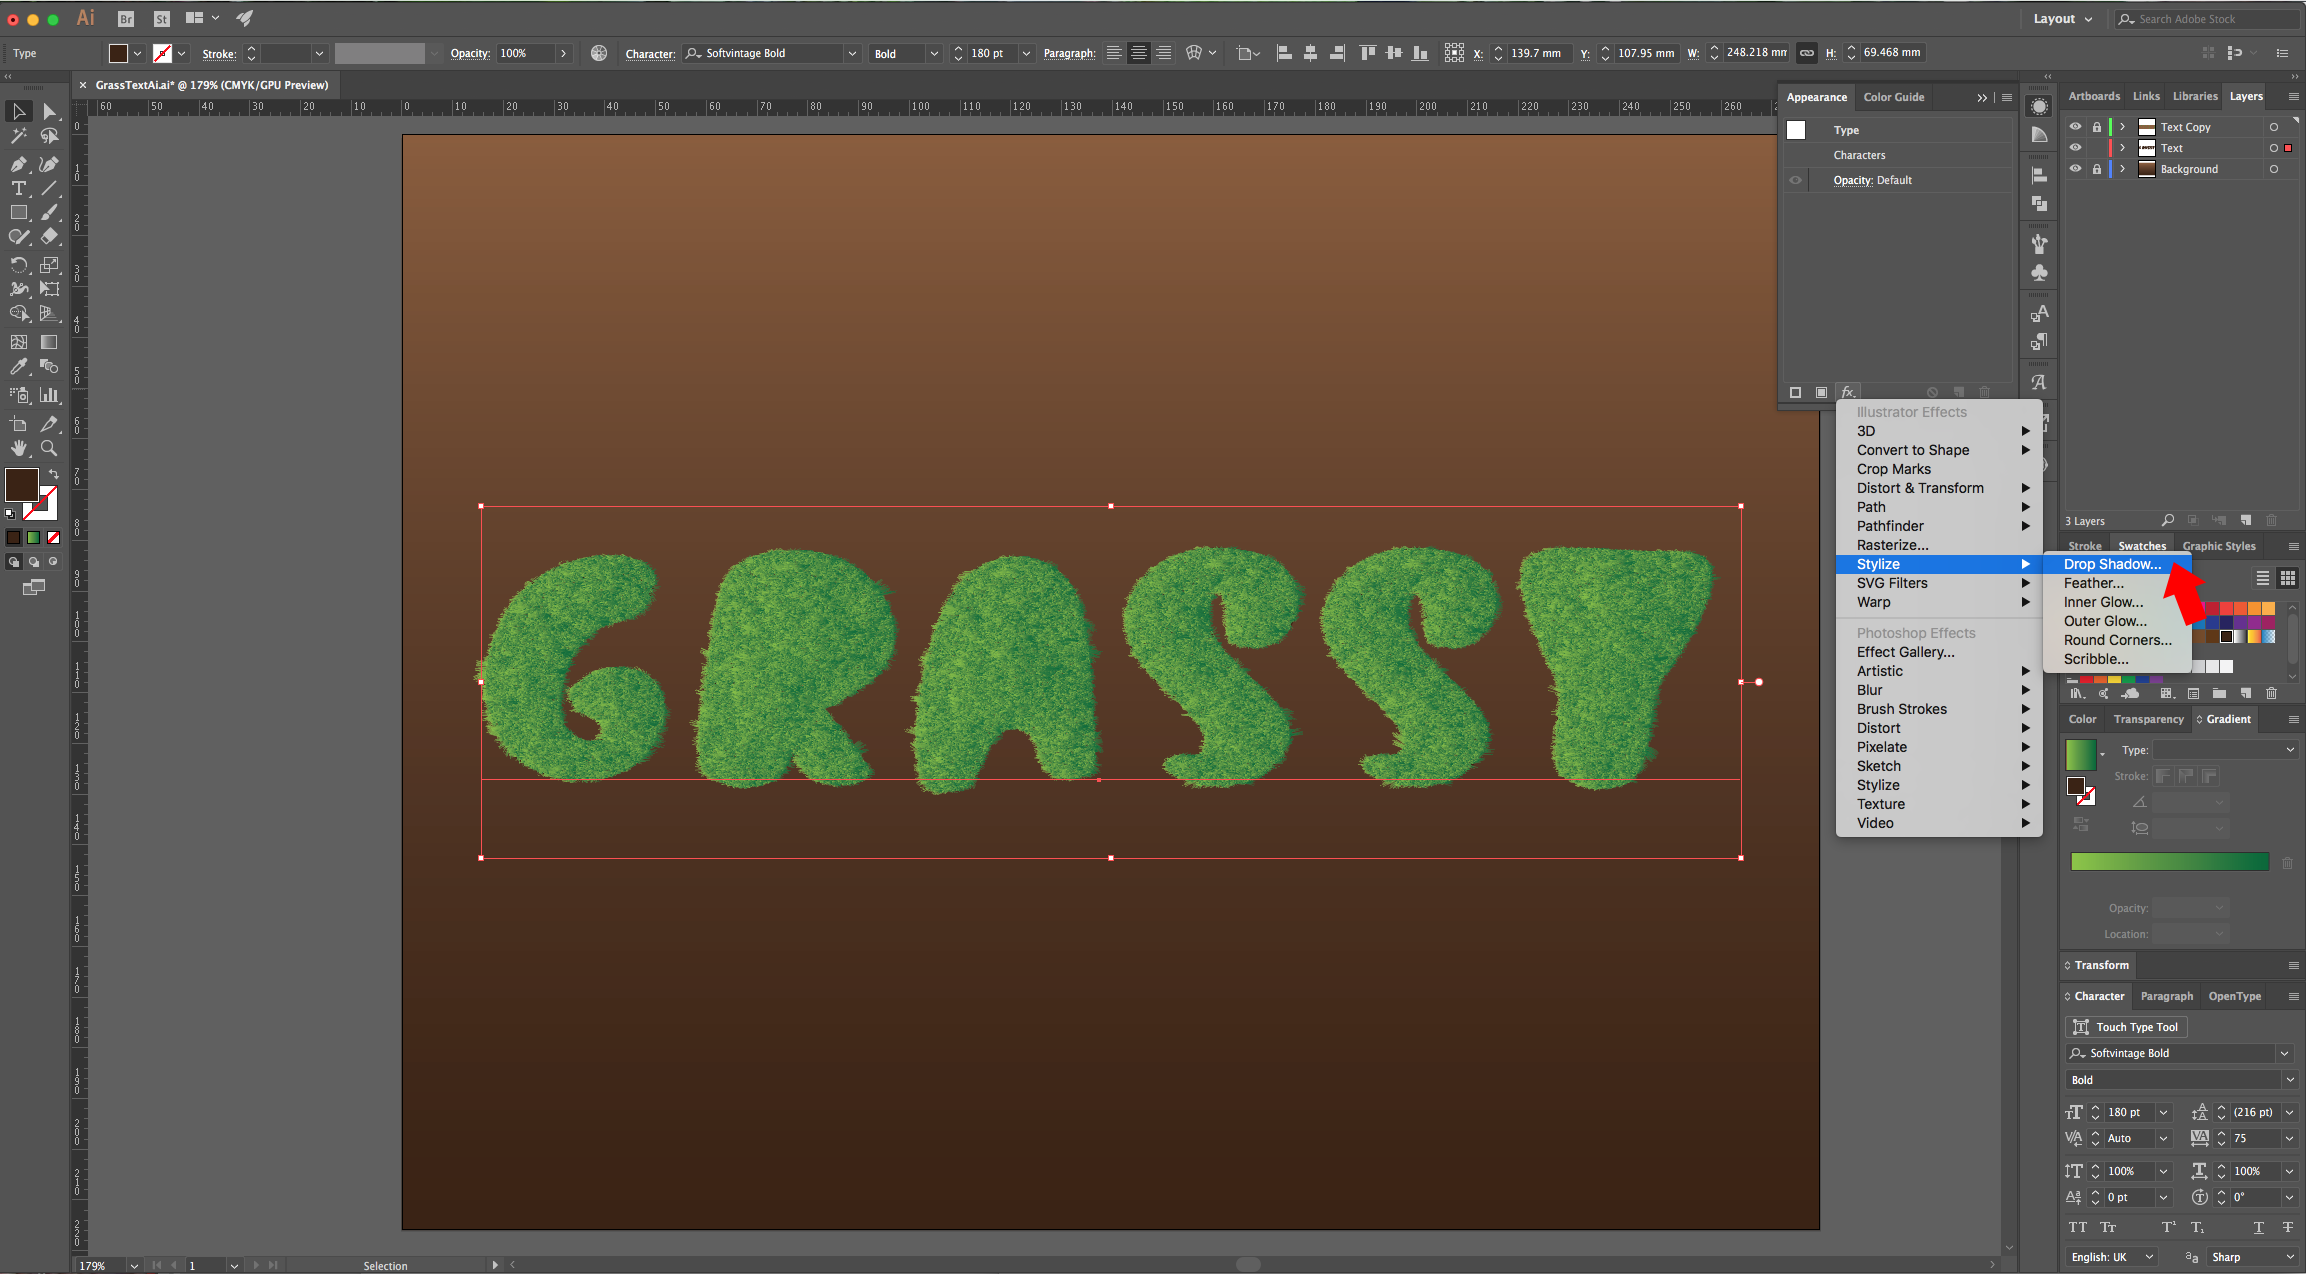
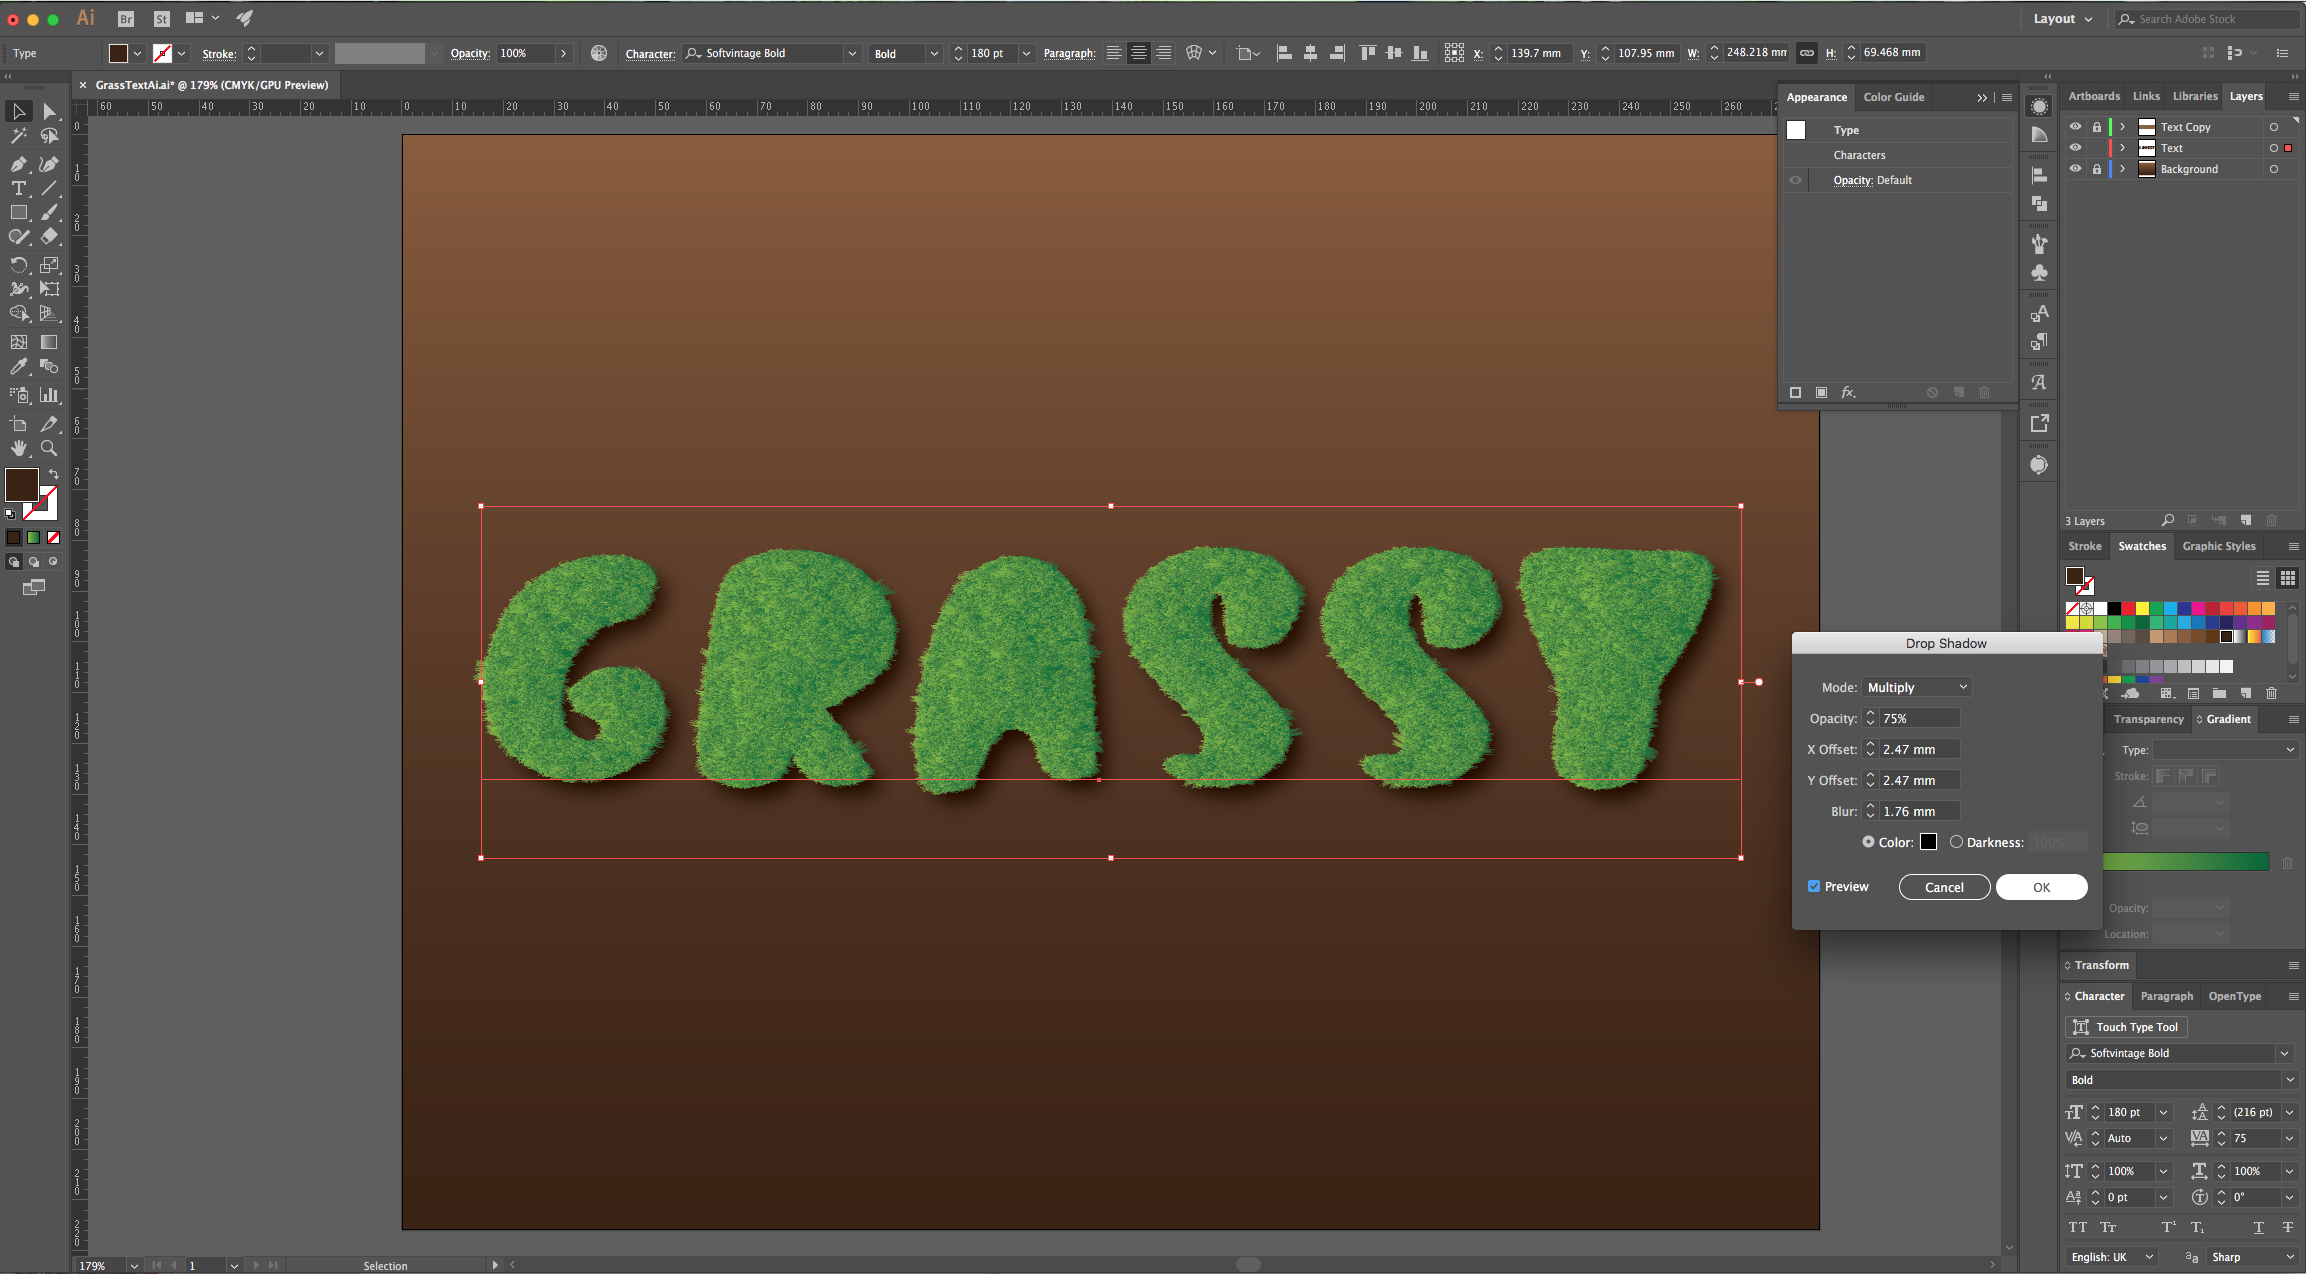
11 - Lock the Top Text Layer (the one with you have been working on) and unlock the other one. Fill it with a dark brown, go to the “Appearance Panel”, click on the “Effects” Menu button, and navigate to Stylize > Drop Shadow. Use the default settings and click “OK”.
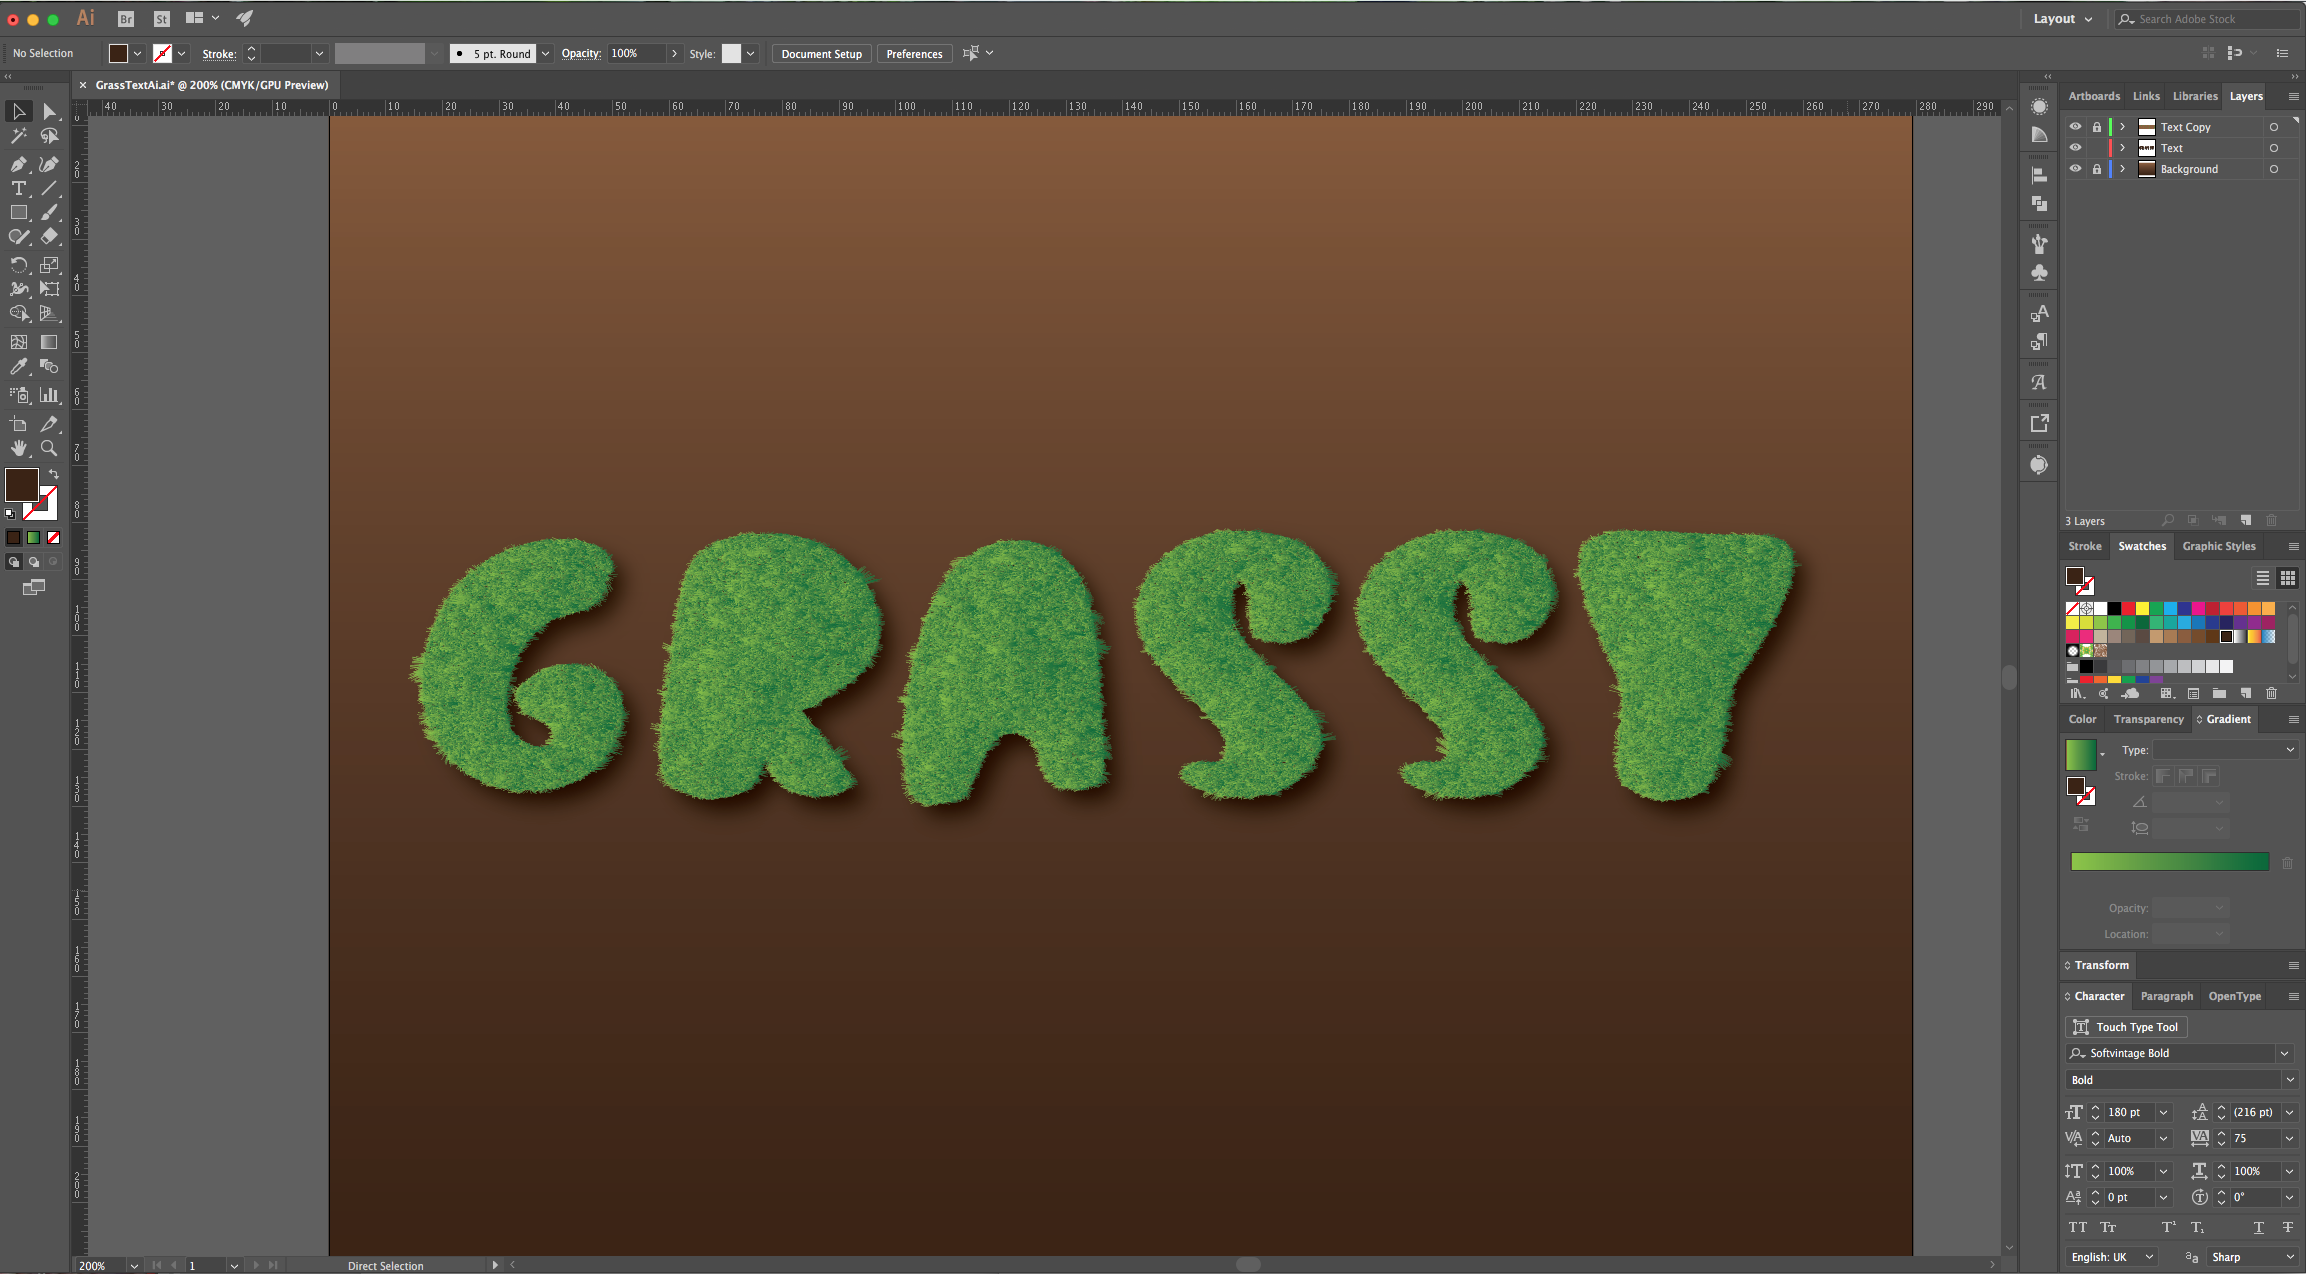
12 - Your text should look like this.
1 - In Illustrator, create a “New Document”.
2 - Select the “Rectangle Tool” (M), draw a rectangle covering your entire canvas and fill it with a “Linear Gradient” going from a light/medium to a dark brown with a -90° Angle.
3 - Lock your Layer by clicking on the left side of its Thumbnail and bring out the small padlock. Then, click on the small “Create New Layer” button at the bottom to create a “New Layer”.
4 - Select the “Type Tool” (T), choose your font (we used “Soft Vintage Bold”). Set the “Tracking” to about 75 to separate your letters a bit (in the “Character Panel”). Then, center the text and create a copy by dragging its Thumbnail onto the “Create New Layer” button at the bottom of the “Layers Panel”.
5 - Right-click on top of your duplicate and choose “Create Outlines”, then, right-click again and choose “Ungroup”.
6 - Lock the original Text Layer, select the duplicate and in the “Appearance Panel” click on the “Effects Menu” at the bottom and navigate to the “Effect Gallery”. There, go to Sketch > Note Paper and use the following values: 25, 15 and 11 (in this order), then, click “OK”. Finally, go to Object > Expand Appearance.
7 - Select your first letter and open the “Image Trace Panel” and click on the “Advanced” arrow to open the advanced options. Use “Greyscale” for “Mode”, make “Paths” and “Corners” 100%, “Noise” 2 px and make sure the “Ignore White” box is checked. Click on the small Menu icon on the Top-right and choose “Save as New Preset”, name it “Grass” and click “Trace” (you need to un-check “Preview” to make the “Trace” button clickable). Then, click on the “Expand” button on the Top Menu.
8 - Repeat the “Trace” with all your letters, but just select “Grass” from the “Presets” Menu in your Panel or in the Top Menu. Don’t forget to “Expand” the letter afterwards. This process may slow down your computer because you are creating a lot of paths. If it’s too much, try doing just one letter.
9 - Select all your letters, “Group” them together (Command/Control + G) and apply a “Radial Gradient” Fill, going from a light/medium green to a darker one with a 0° Angle.
10 - Go to the “Appearance Panel” click on the “Effects Menu” at the bottom, navigate to the Distort & Transform > Pucker & Bloat and use a -80% value.
11 - Lock the Top Text Layer (the one with you have been working on) and unlock the other one. Fill it with a dark brown, go to the “Appearance Panel”, click on the “Effects” Menu button, and navigate to Stylize > Drop Shadow. Use the default settings and click “OK”.
12 - Your text should look like this.
by @lornacane


