
How to add foil accents to your designs using the foil quill in silhouette studio
1- Open silhouette studio. Click on the file drop down box.
2- In file files click open.
3- Select your image.
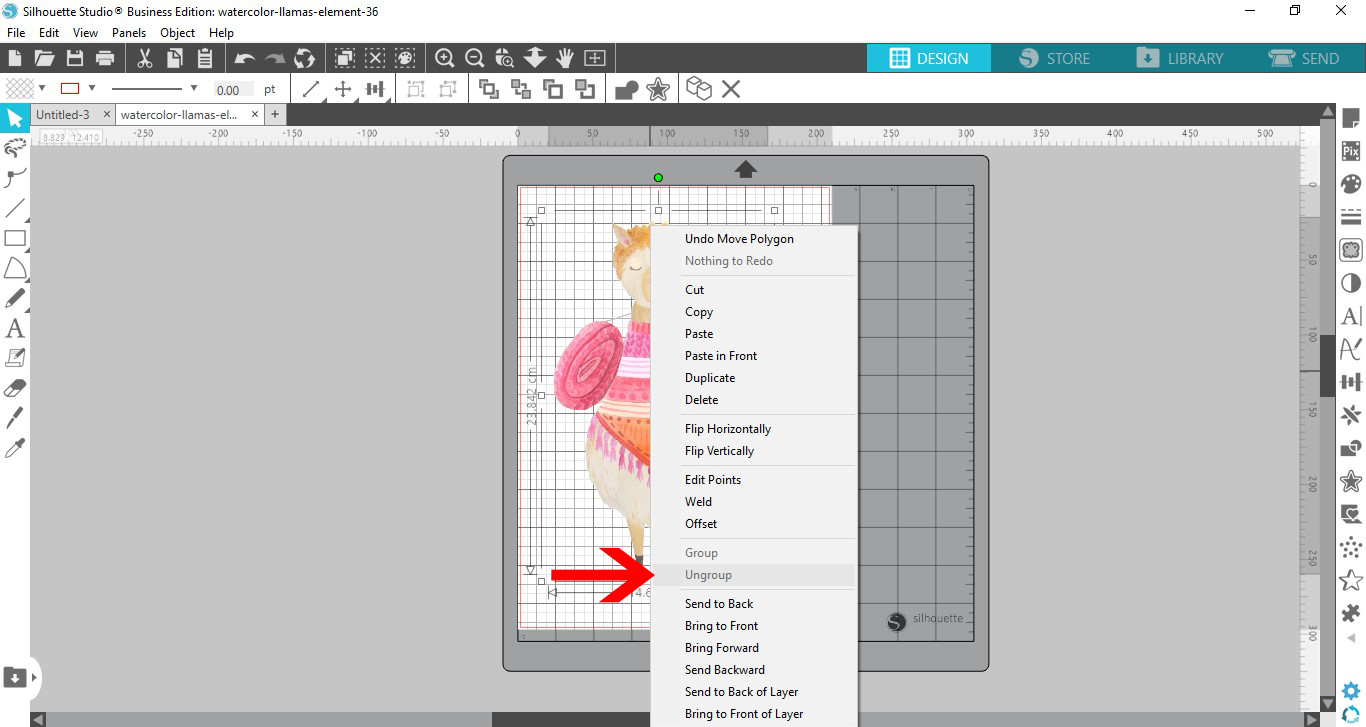
4- Some images will be in different parts (usually by color). Check to see if they are. Right click and see if you can ungroup. If this is possible to add accents it will just be a matter of using these cut lines as foil lines.
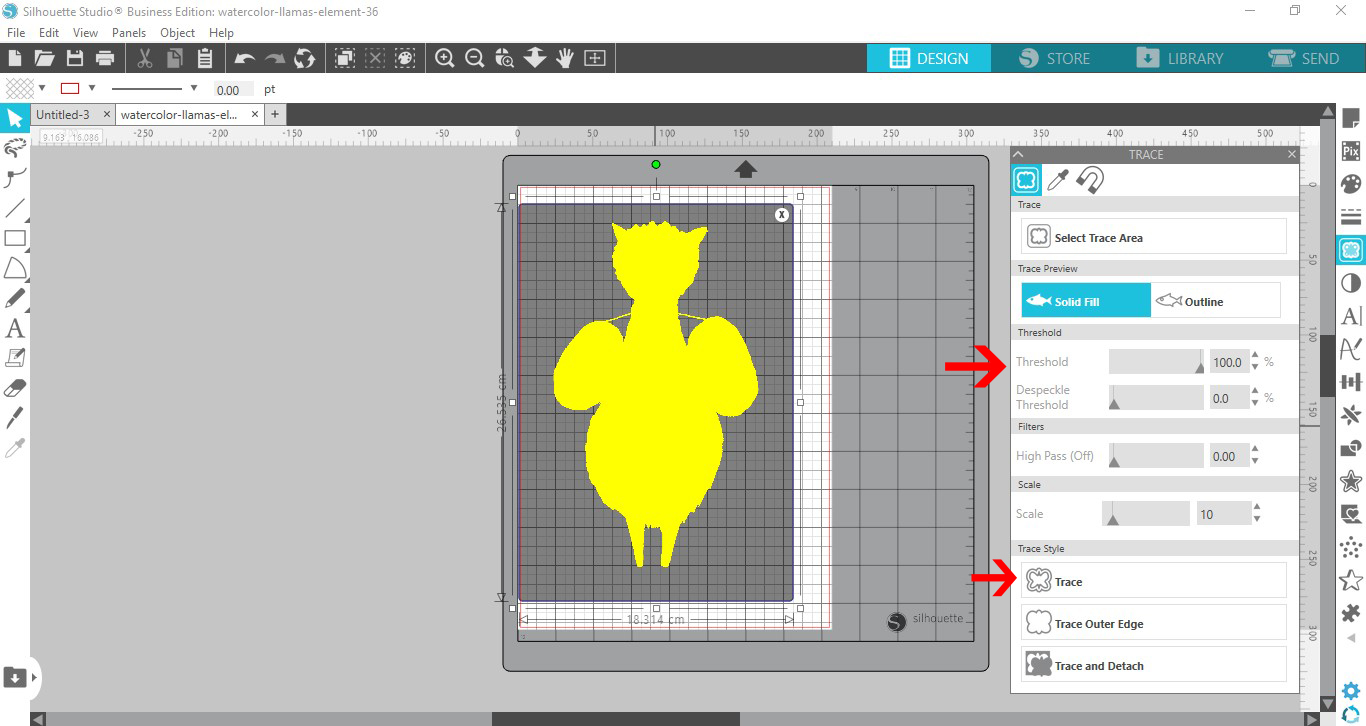
5- If the image cannot be separated you will need to manually add the accents to foil. The first way is to use the trace tool. You can trace by color or regular trace. I am using regular trace as my image is a watercolor image.
6- Adjust the threshold so your whole image is selected. click trace.
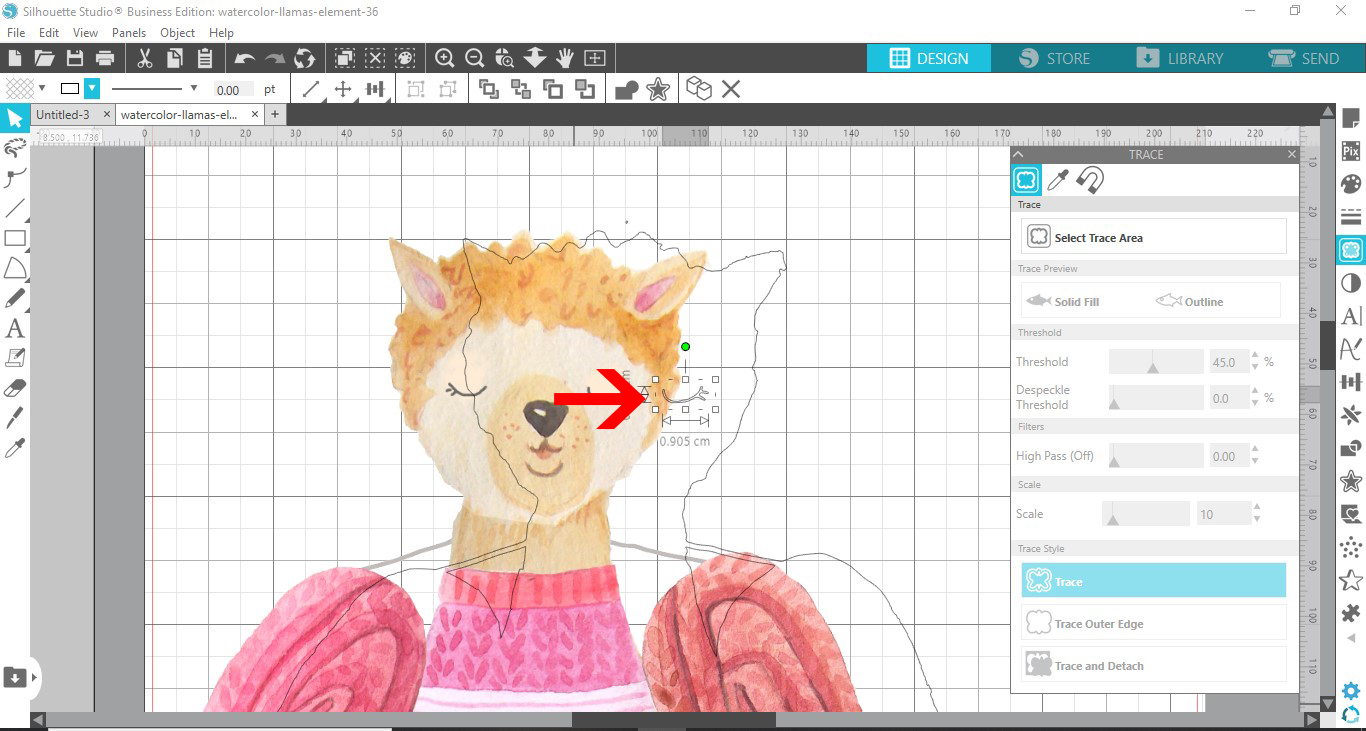
7- With the trace line selected click on line color and change the line color to something easier to see on your design. I chose black.
8- When your image is hard to trace, try to trace smaller parts.
9- As you can see smaller traces are more effective to get finer details for foiling.
10- Repeat the tracing until all of the parts you want foiled have sketch lines.(cut lines)
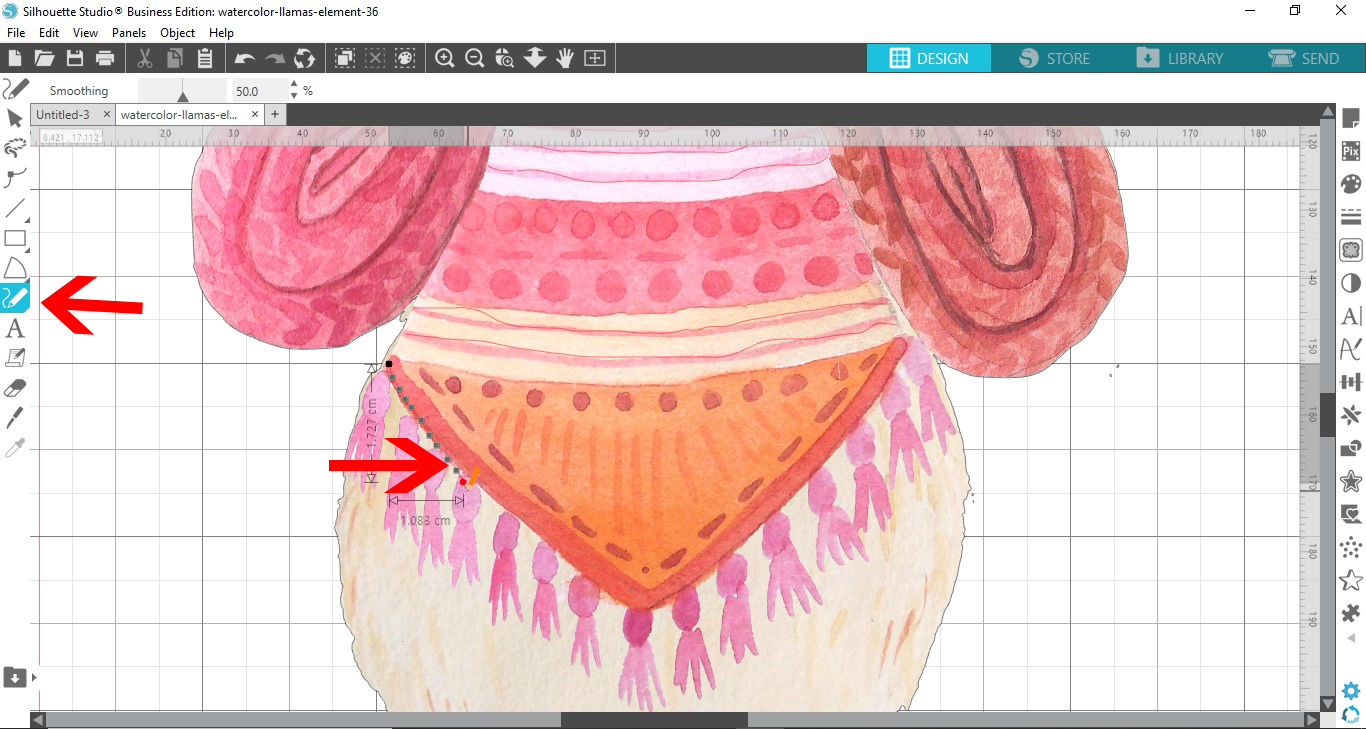
11- Another way to create the sketch line to foil is to use the freehand tools to draw your lines.
12- Click on send. You can see where the sketch lines are. You can toggle between the send screen and the design screen to add or remove any of your sketch lines.
13- Once you are ready, select all of your sketch lines and image. Right click and group.
14- To accurately get the foil lines in the right place, the best way is to use the print and cut function. go to the properties panel and turn on the registration marks.
15- Print your image.
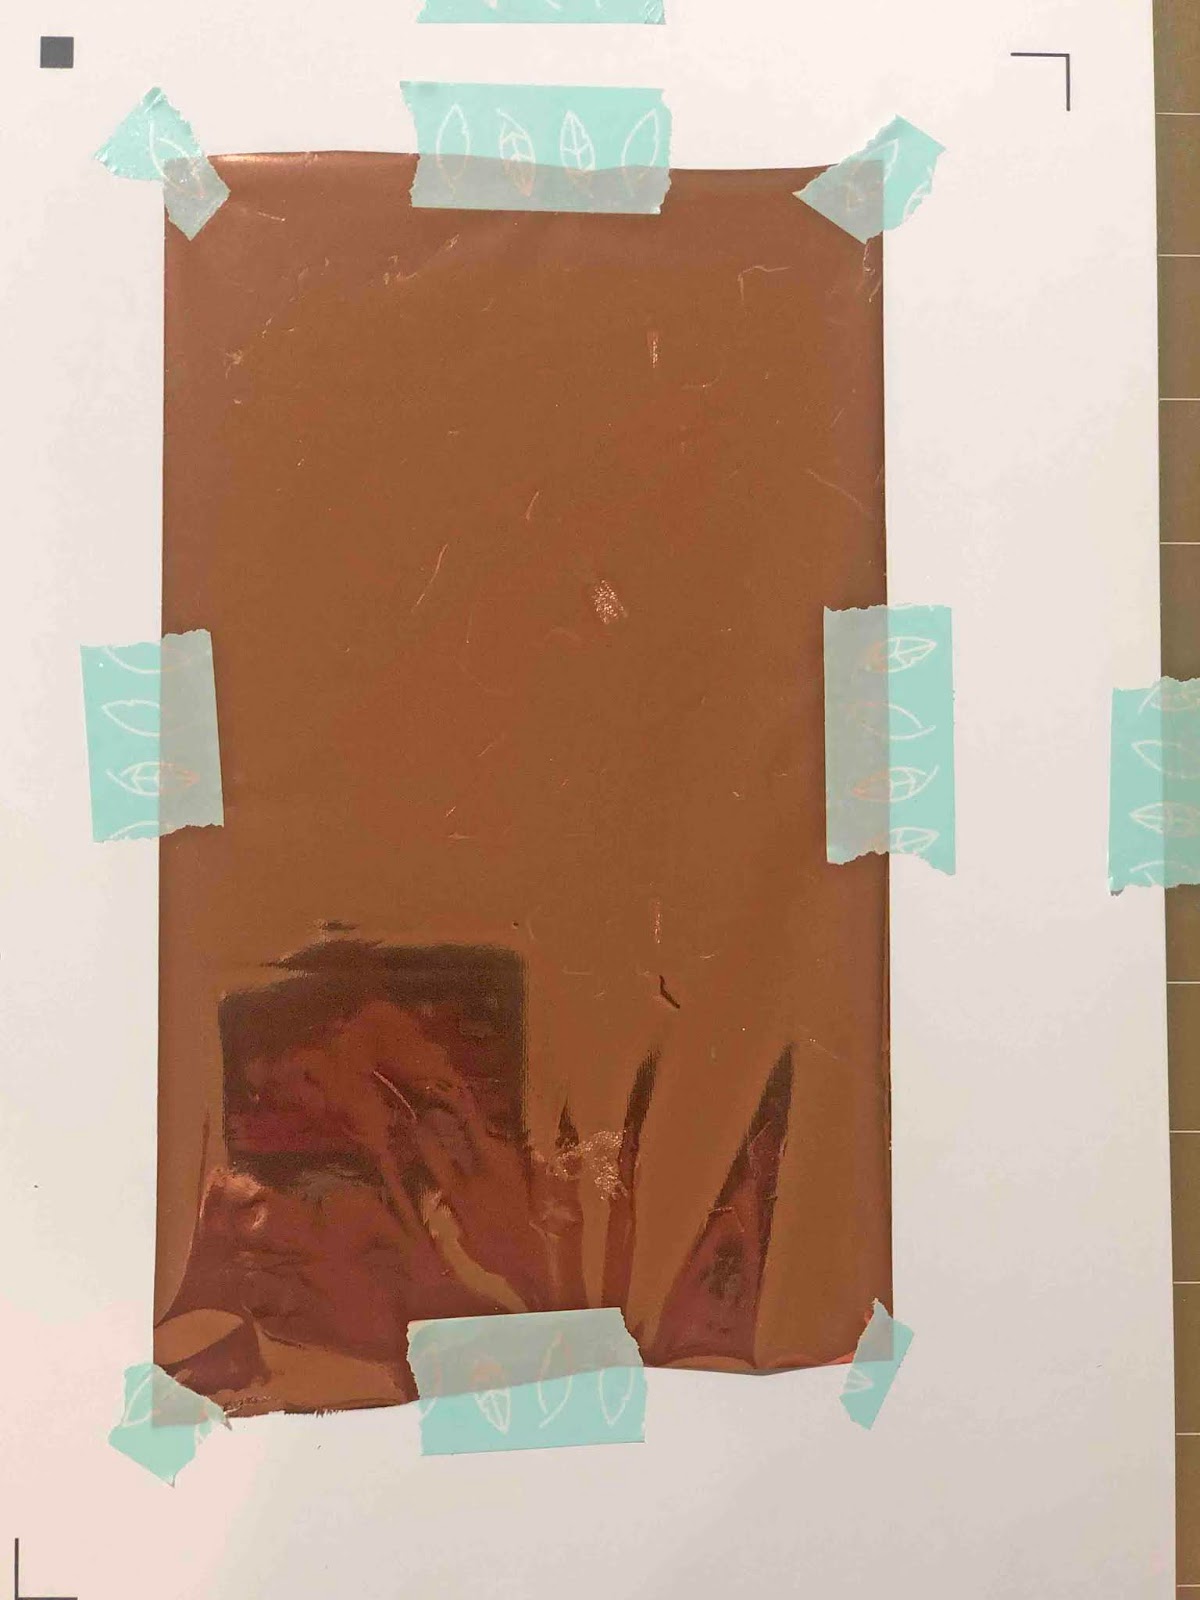
16- Place the foil over your design. Make sure you do not cover the registration marks.

2- In file files click open.

3- Select your image.

4- Some images will be in different parts (usually by color). Check to see if they are. Right click and see if you can ungroup. If this is possible to add accents it will just be a matter of using these cut lines as foil lines.
5- If the image cannot be separated you will need to manually add the accents to foil. The first way is to use the trace tool. You can trace by color or regular trace. I am using regular trace as my image is a watercolor image.

6- Adjust the threshold so your whole image is selected. click trace.
7- With the trace line selected click on line color and change the line color to something easier to see on your design. I chose black.

8- When your image is hard to trace, try to trace smaller parts.

9- As you can see smaller traces are more effective to get finer details for foiling.
10- Repeat the tracing until all of the parts you want foiled have sketch lines.(cut lines)

11- Another way to create the sketch line to foil is to use the freehand tools to draw your lines.
12- Click on send. You can see where the sketch lines are. You can toggle between the send screen and the design screen to add or remove any of your sketch lines.

13- Once you are ready, select all of your sketch lines and image. Right click and group.

14- To accurately get the foil lines in the right place, the best way is to use the print and cut function. go to the properties panel and turn on the registration marks.

15- Print your image.

16- Place the foil over your design. Make sure you do not cover the registration marks.
17- Using the cameo and your foil quill you can now use the registration marks to foil the accents.


