How to fill text with a cuttable pattern in silhouette studio
1- Open Silhouette studio software.
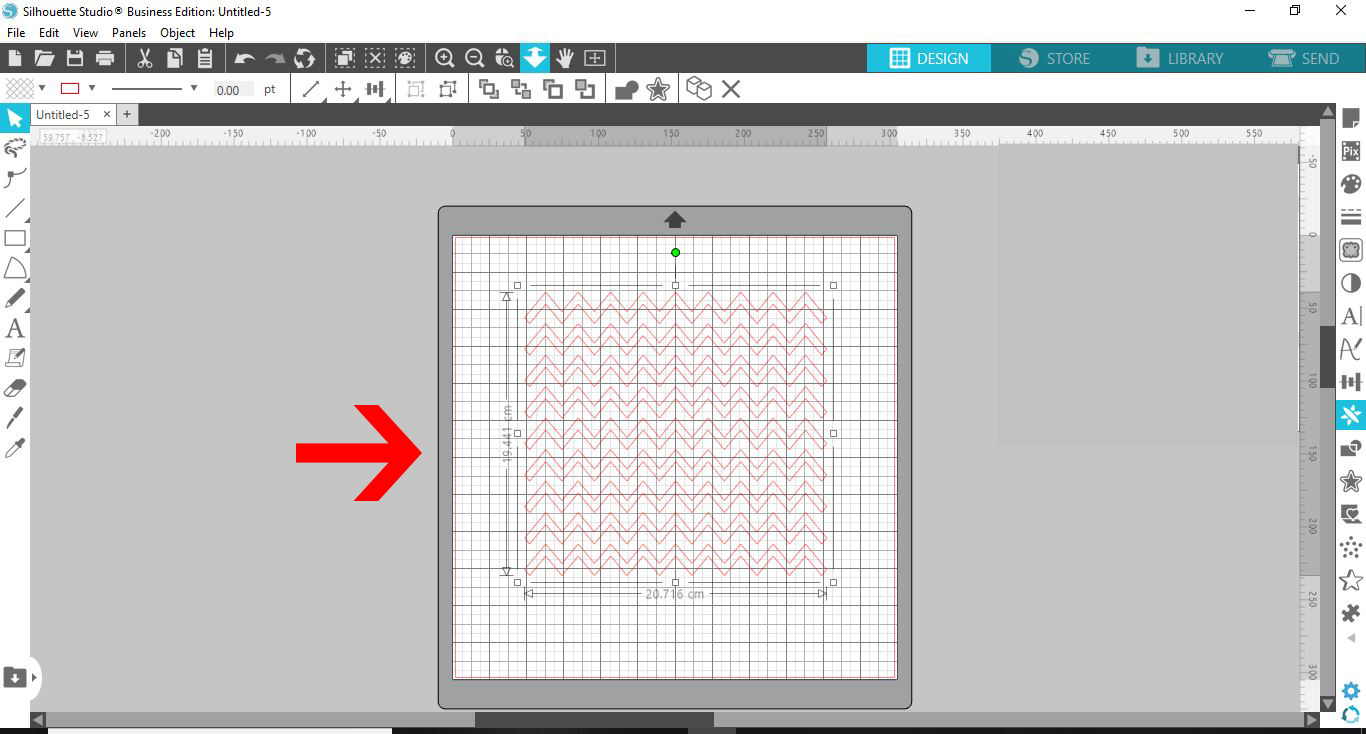
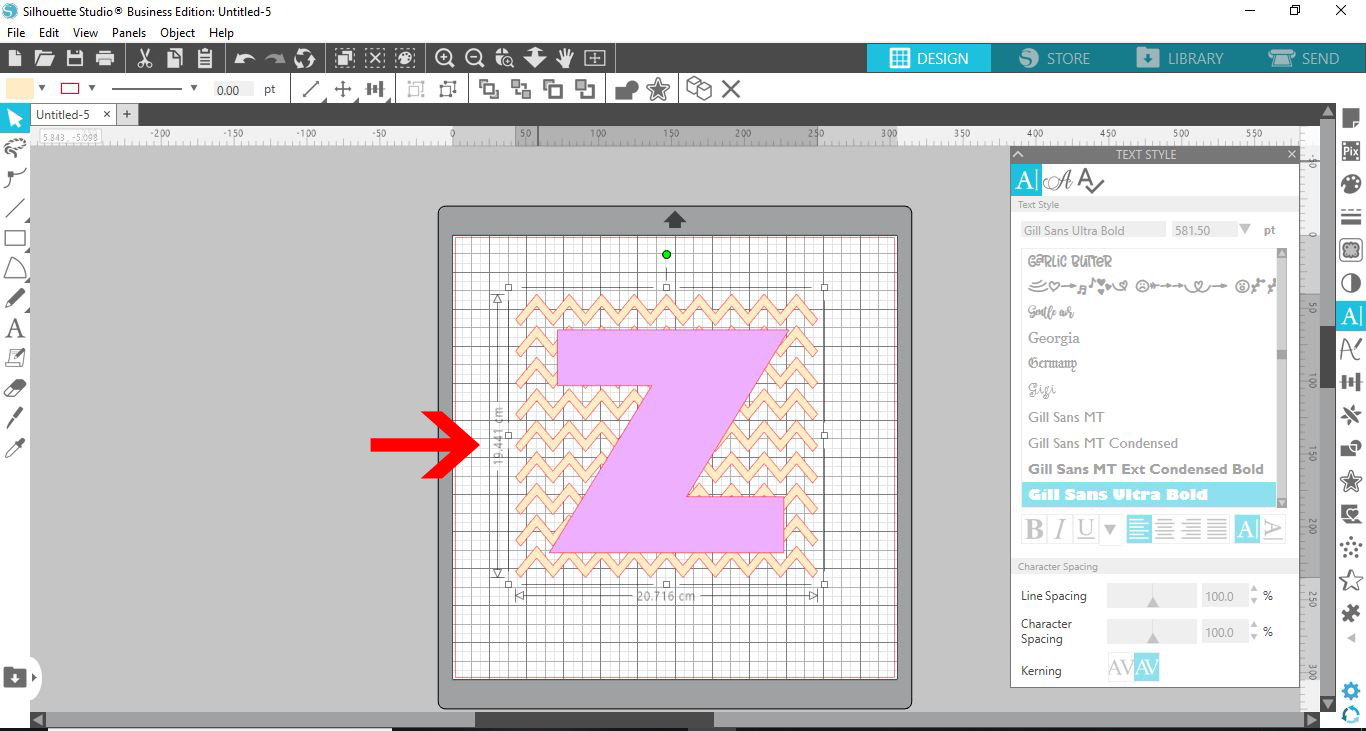
2- Insert your cut file. this can be one your designed yourself or purchased from a 3rd party shop. I am using basic chevron background file I made.
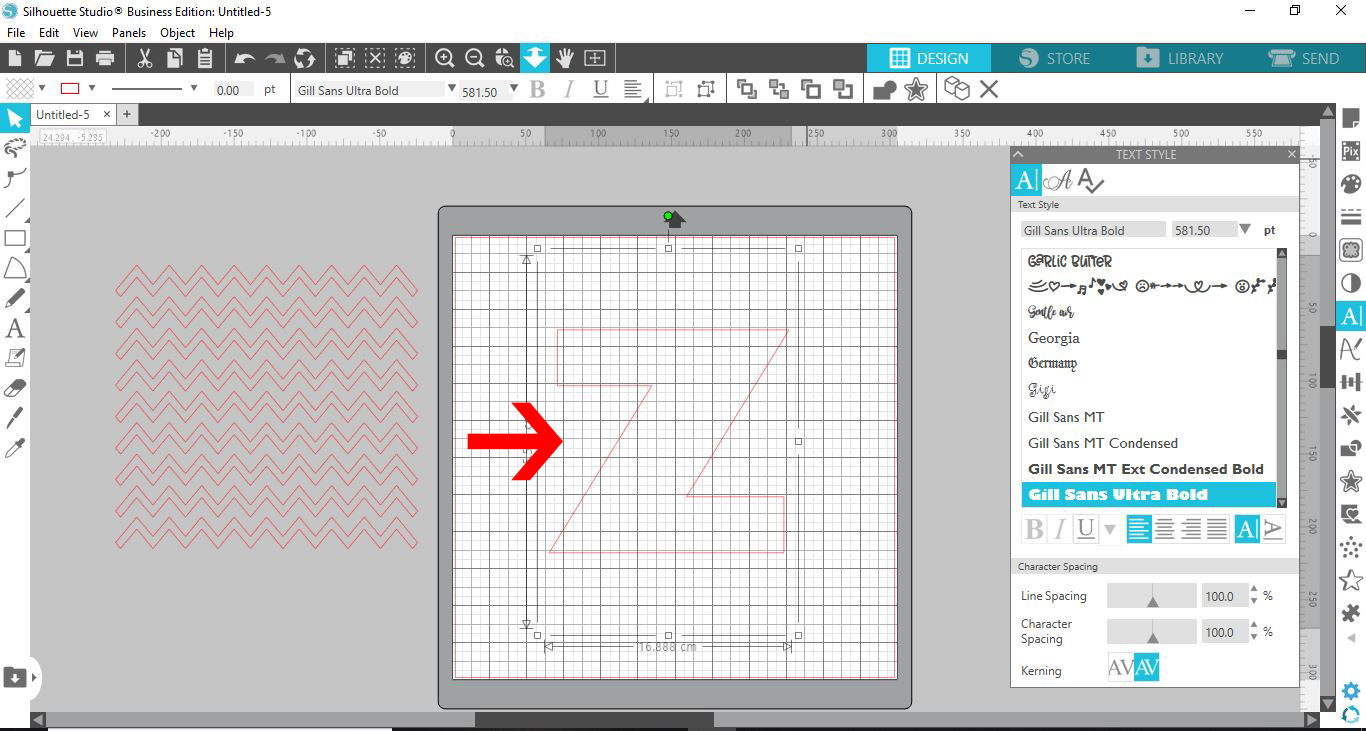
3- Type the first letter of the text you would like to add a cuttable file in.
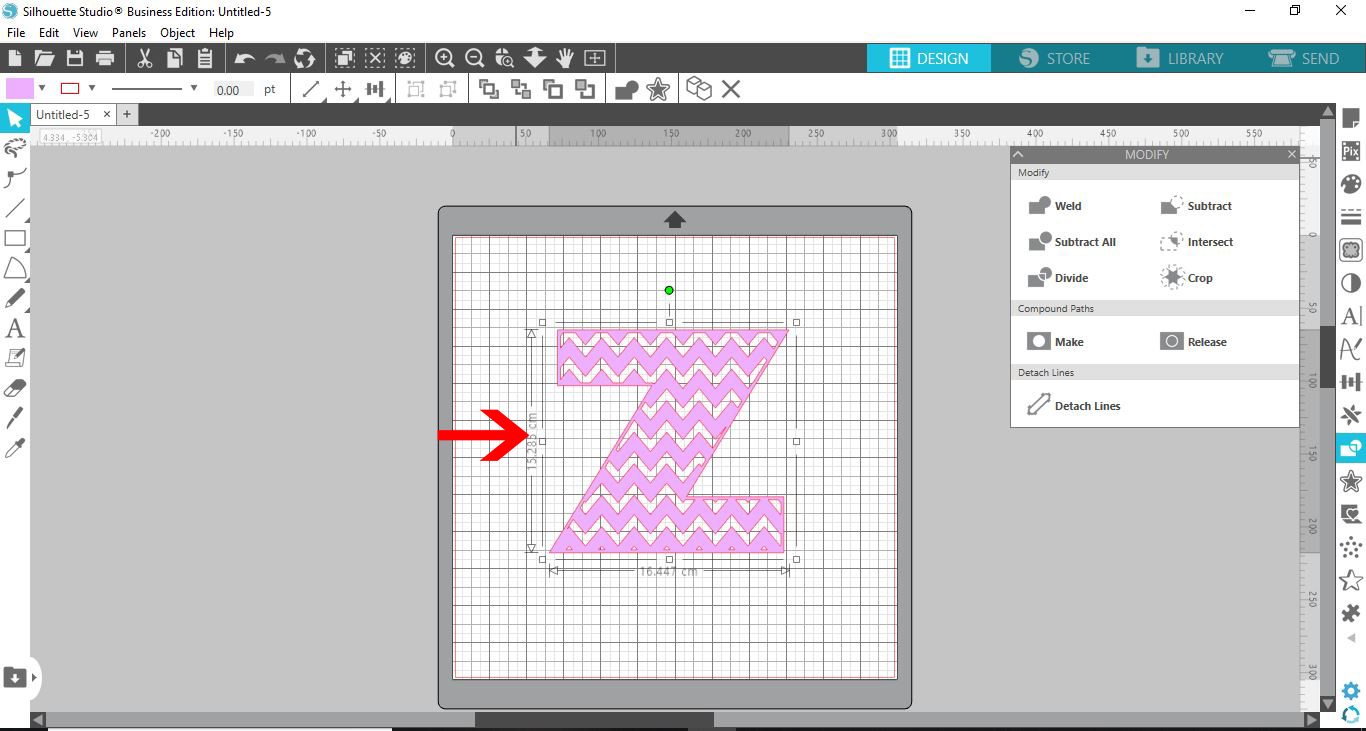
4- Place the letter over the chevron cut file.(make sure the letter is the top layer)
(Note-I have filled the chevron and letter in to see the technique easier. you do not need to do this.)
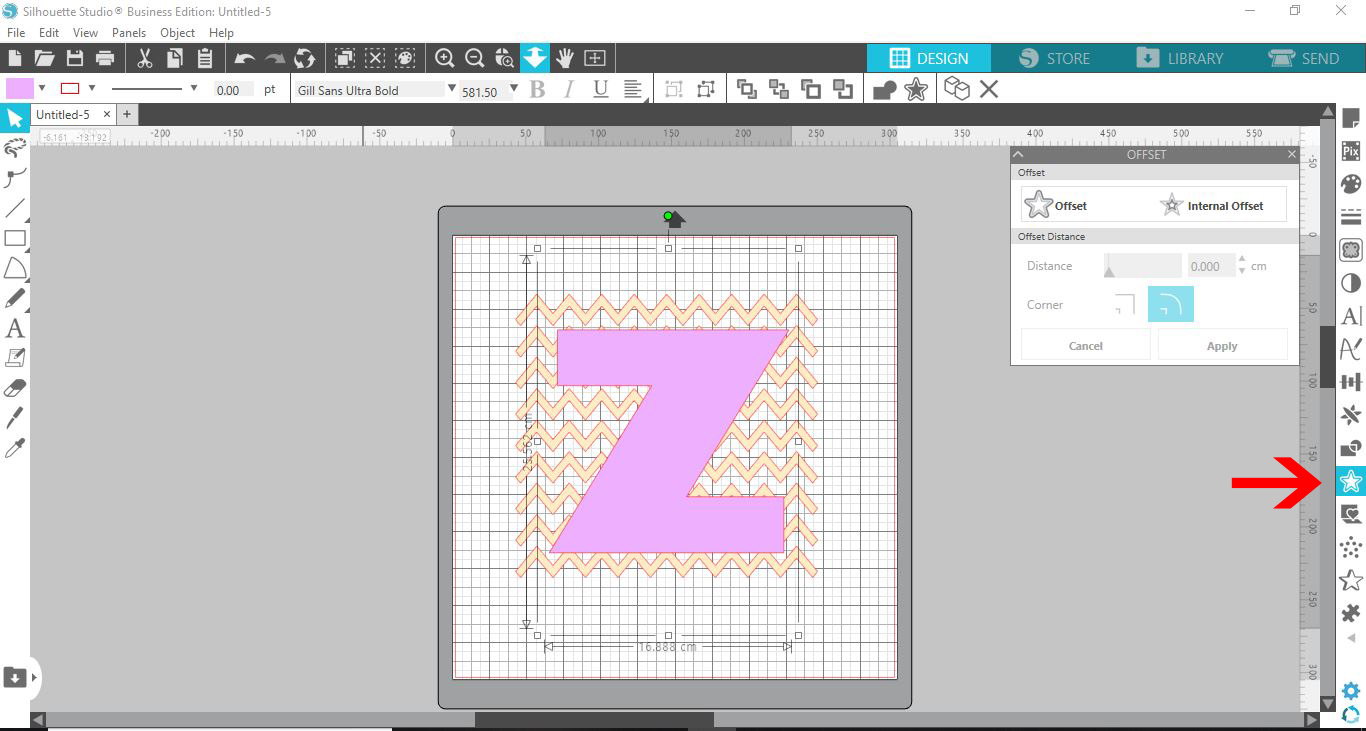
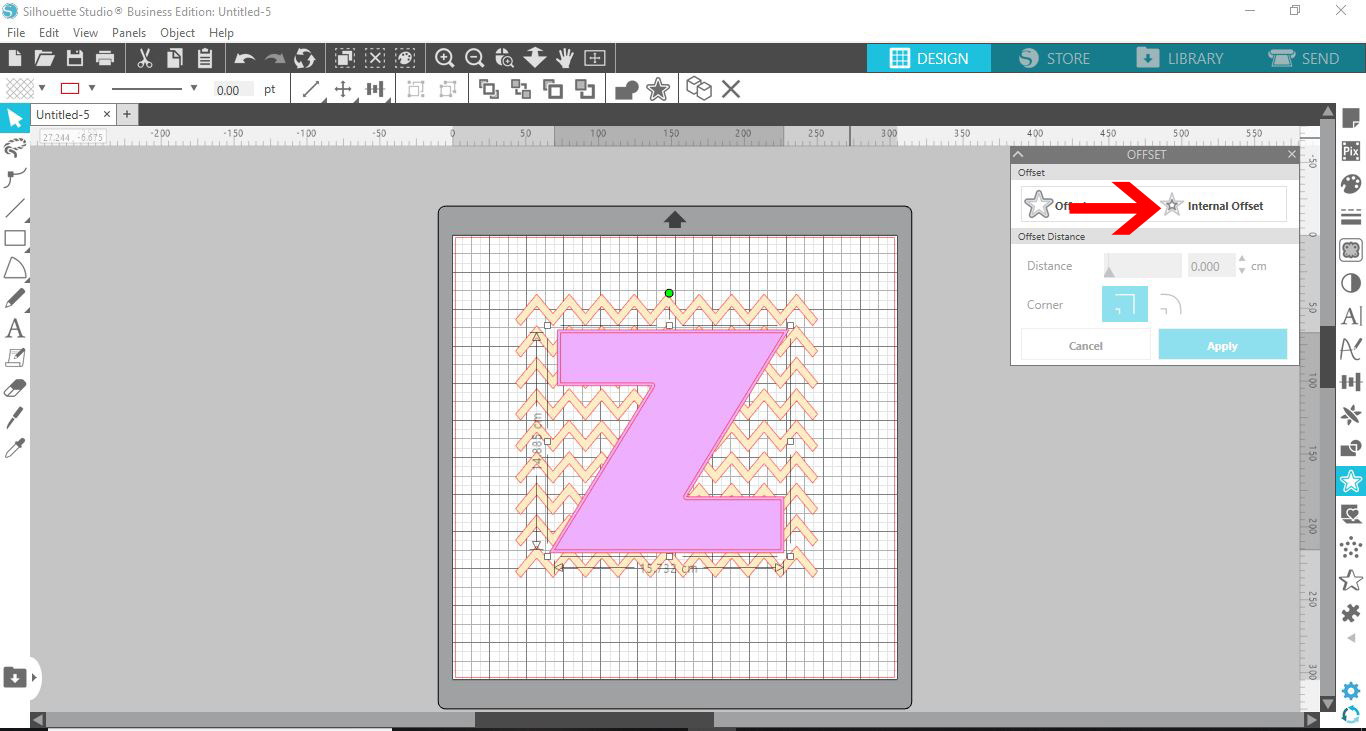
5- We now need to create an internal offset in the letter. Select the offset panel.
6- Select your letter then select the internal offset option and with the size left at the default size (0.200cm) Apply the offset.
7- We now need to hide the original letter so only the offset is seen. Select the original letter (not the offset or background) To do this select Ctrl + X. the original letter will disappear.
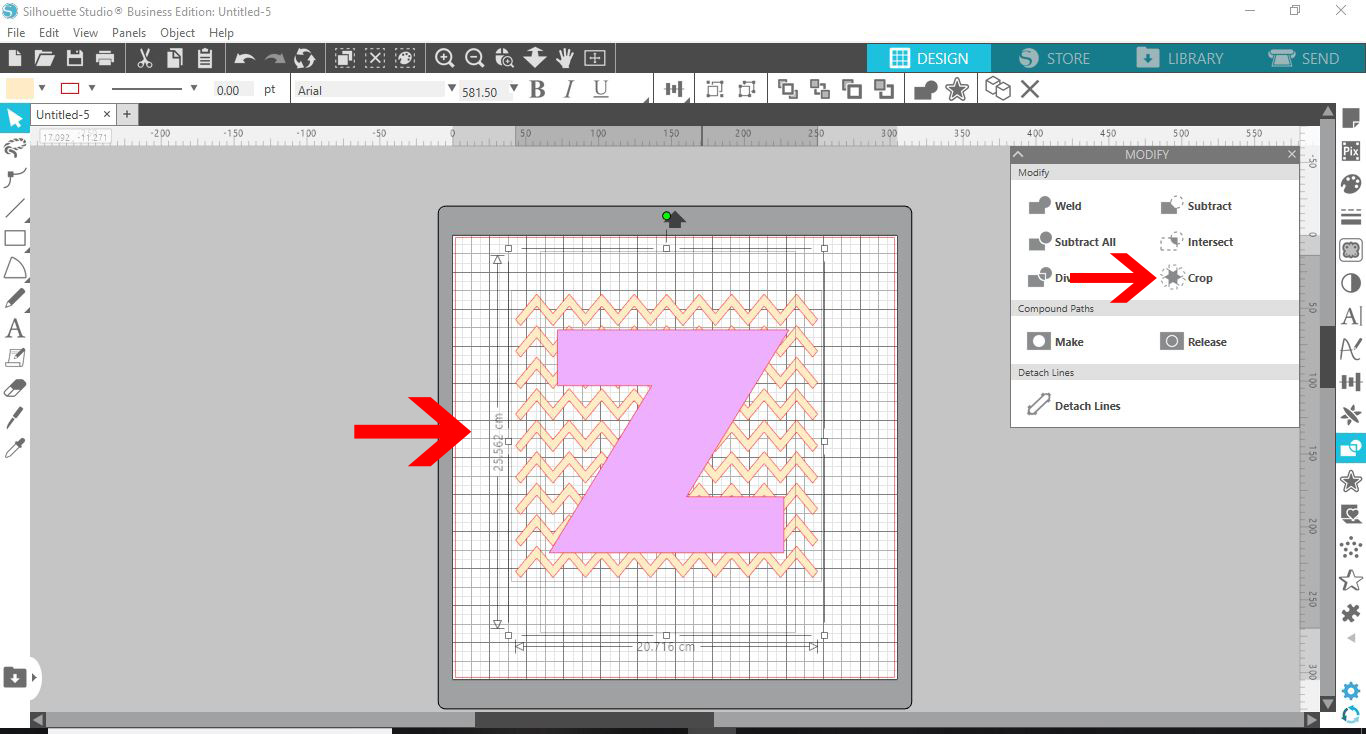
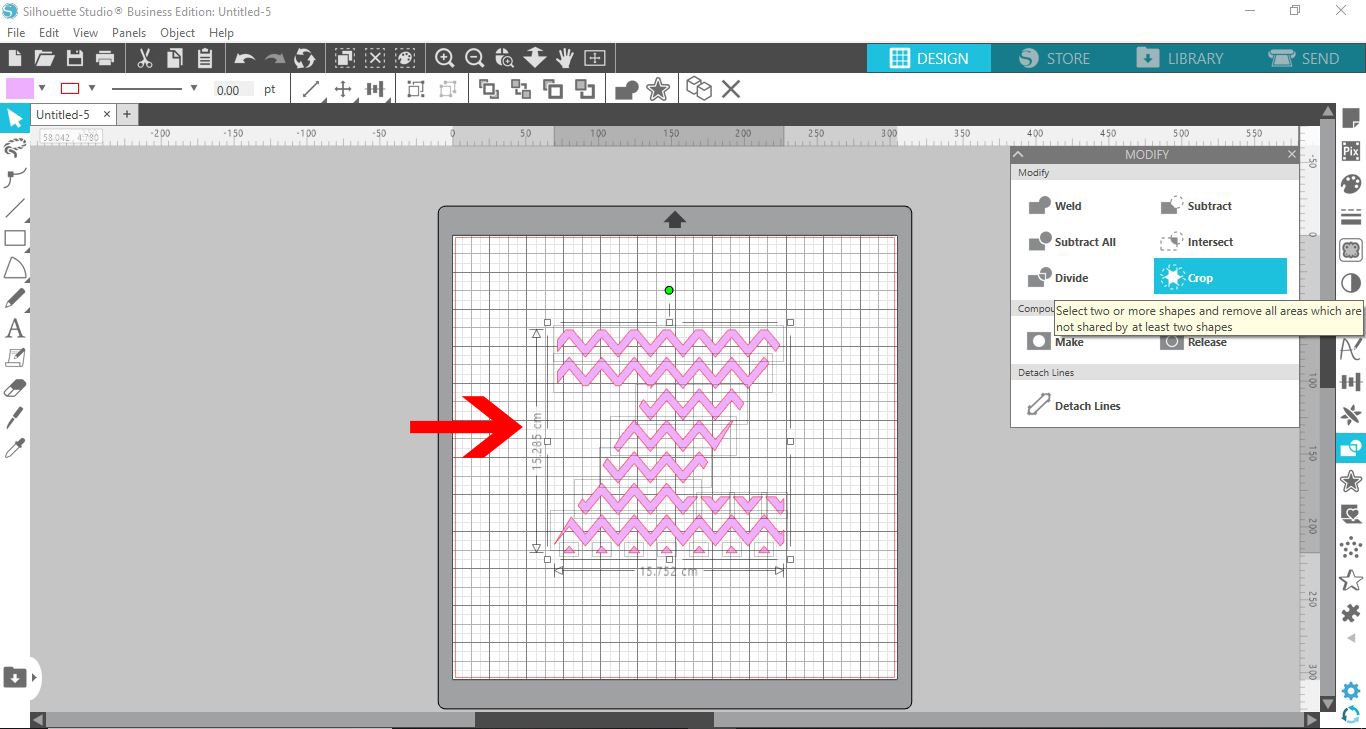
8- We now need to crop the excess cut file. Select Modify (1) then with both the cutable file and the offset of letter selected, click on Crop.
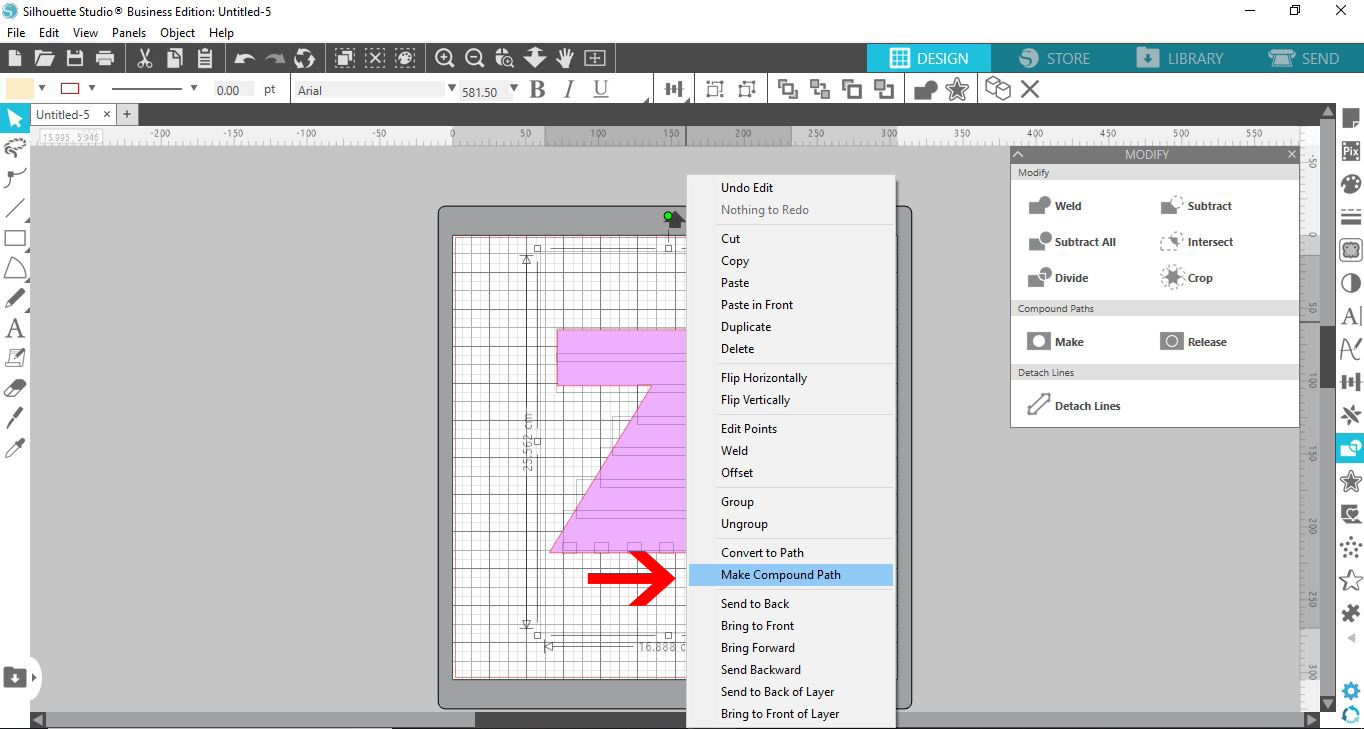
9- We now need to bring back the original letter. select Ctrl + F to bring it back. With everything selected right click and select Make Compound Path.
10 - This now produces the edge of your letter so when you cut the file it will stay in one piece.
2- Insert your cut file. this can be one your designed yourself or purchased from a 3rd party shop. I am using basic chevron background file I made.
3- Type the first letter of the text you would like to add a cuttable file in.
4- Place the letter over the chevron cut file.(make sure the letter is the top layer)
(Note-I have filled the chevron and letter in to see the technique easier. you do not need to do this.)
5- We now need to create an internal offset in the letter. Select the offset panel.
6- Select your letter then select the internal offset option and with the size left at the default size (0.200cm) Apply the offset.
7- We now need to hide the original letter so only the offset is seen. Select the original letter (not the offset or background) To do this select Ctrl + X. the original letter will disappear.
8- We now need to crop the excess cut file. Select Modify (1) then with both the cutable file and the offset of letter selected, click on Crop.
9- We now need to bring back the original letter. select Ctrl + F to bring it back. With everything selected right click and select Make Compound Path.
10 - This now produces the edge of your letter so when you cut the file it will stay in one piece.