How to foil on clear stickers using brother scan and cut with the foil quill
*CM900 model used.
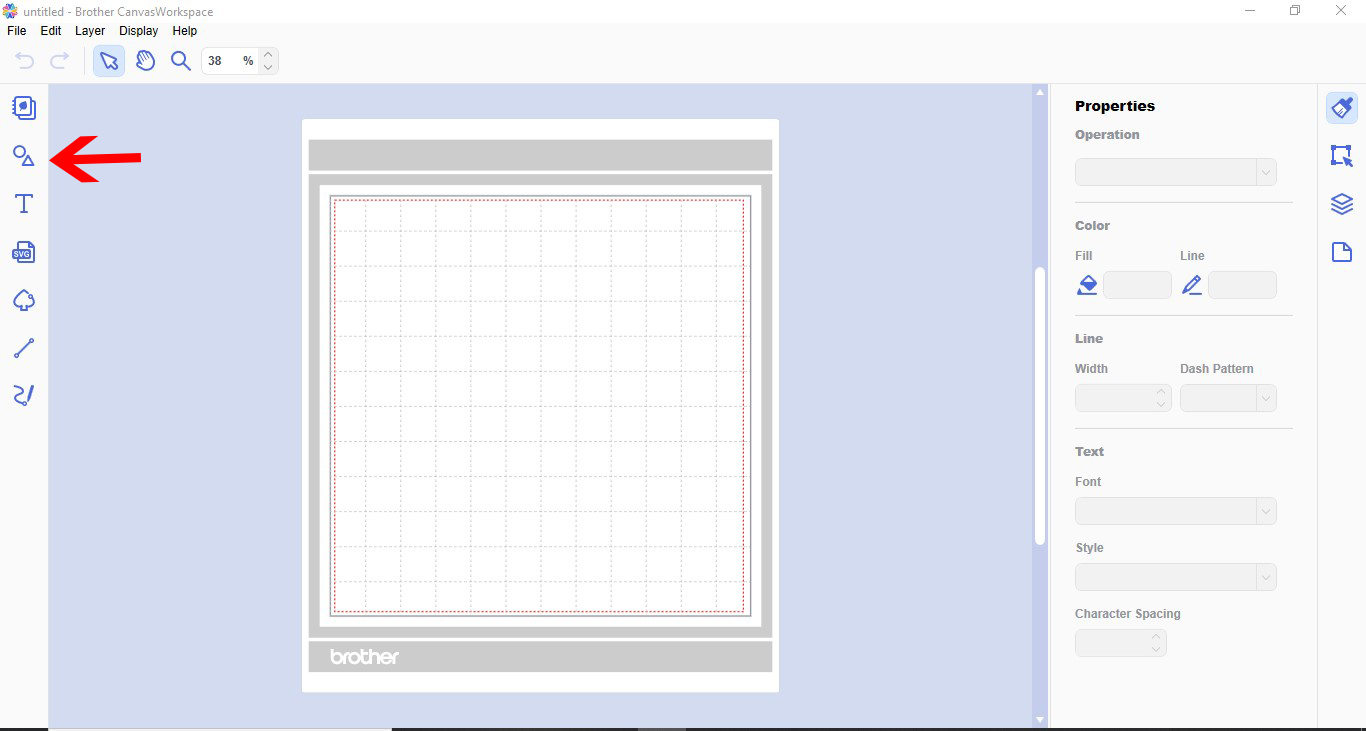
1- Open canvas workspace. click on the shape tool.
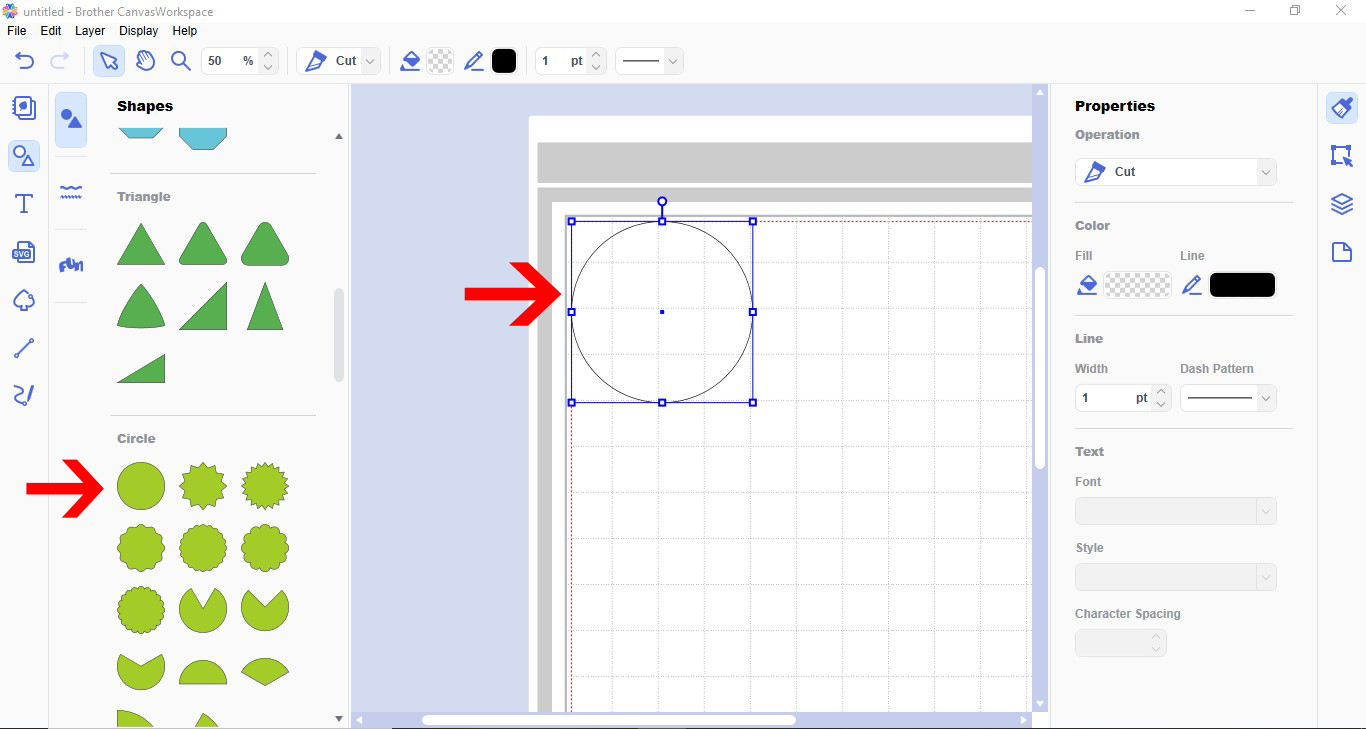
2- Click and create a circle. This will be the outside of your sticker which will cut.
3- Find a design to place inside your sticker that you can foil. I have used a pre designed one form the scan and cut menu.
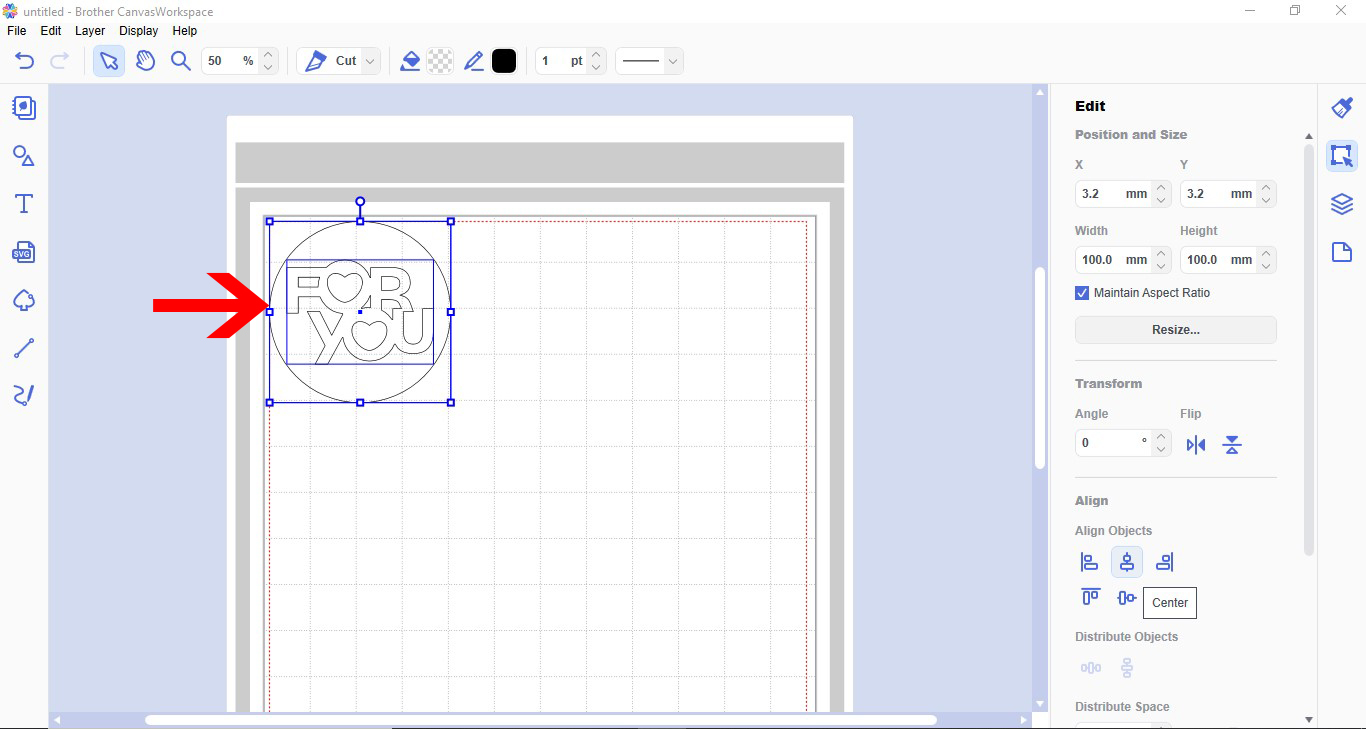
4- Place the design inside the circle.
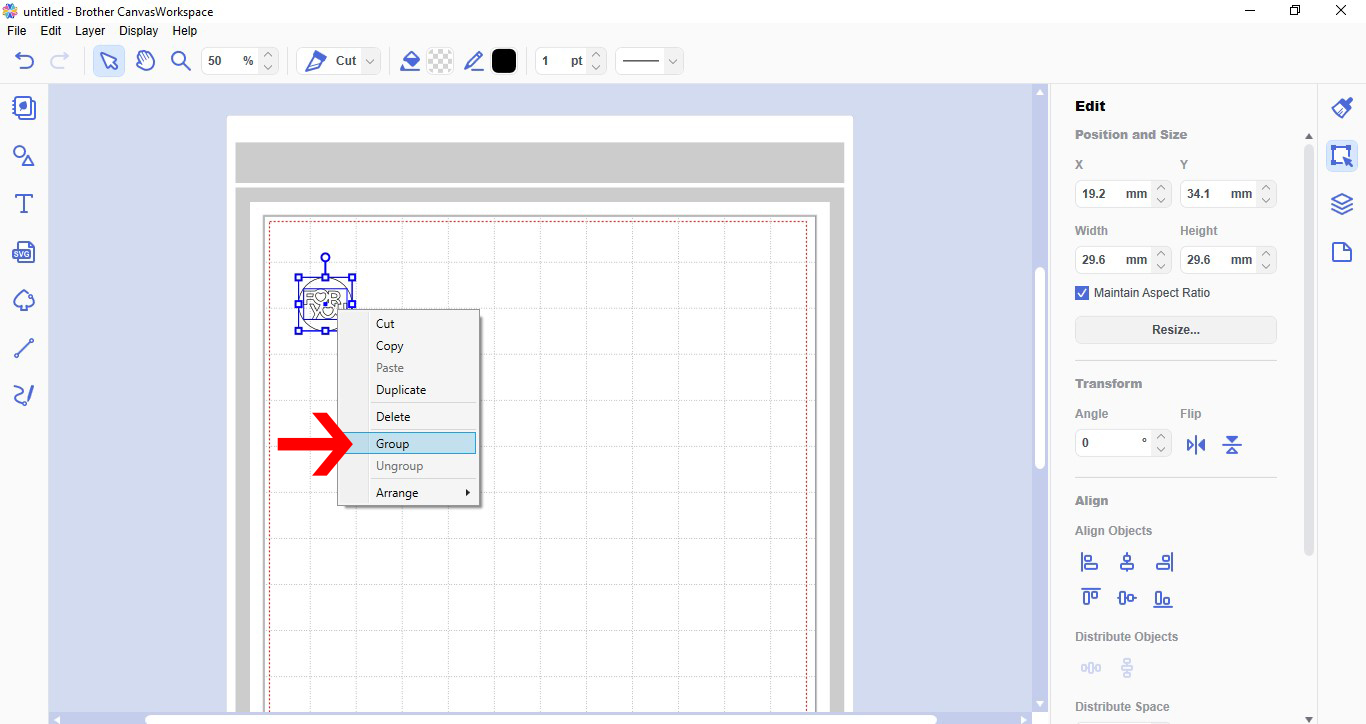
5- Right click and group your circle and design.
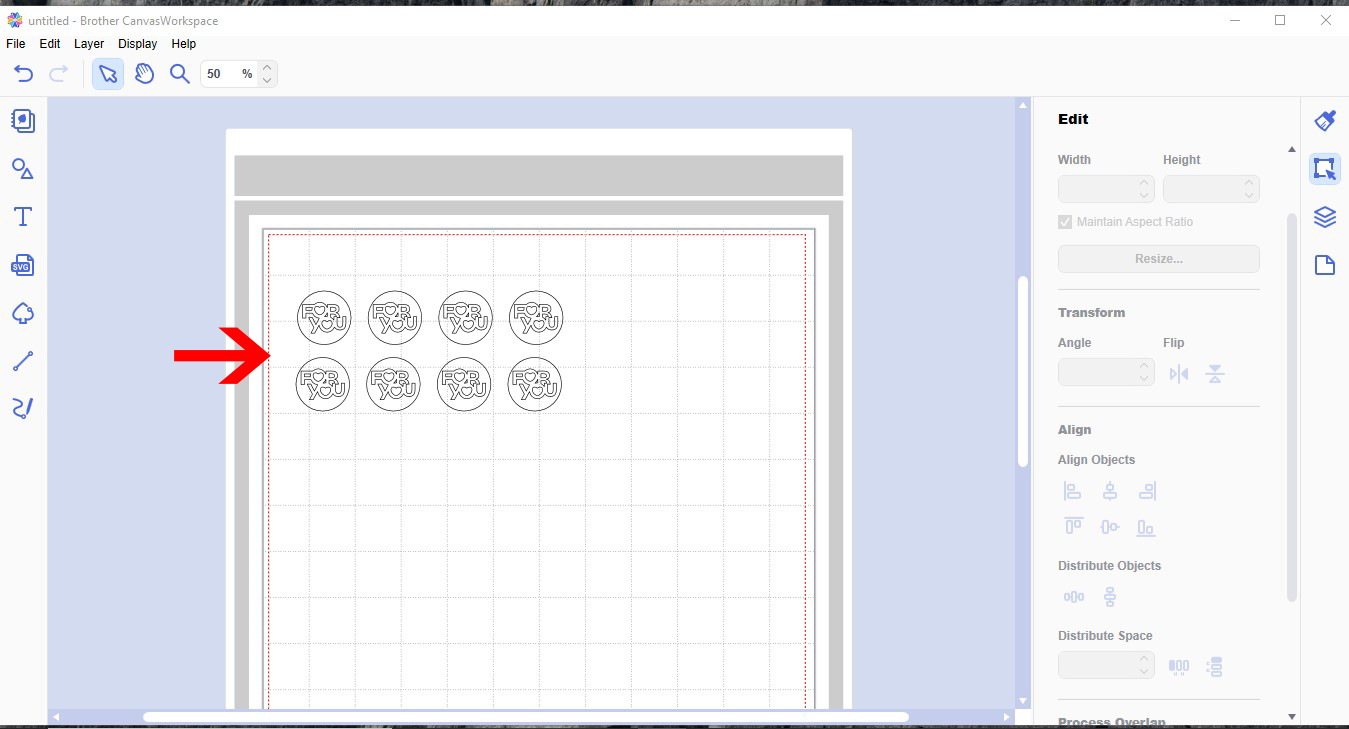
6- Duplicate you design. then align them and distribute them evenly.
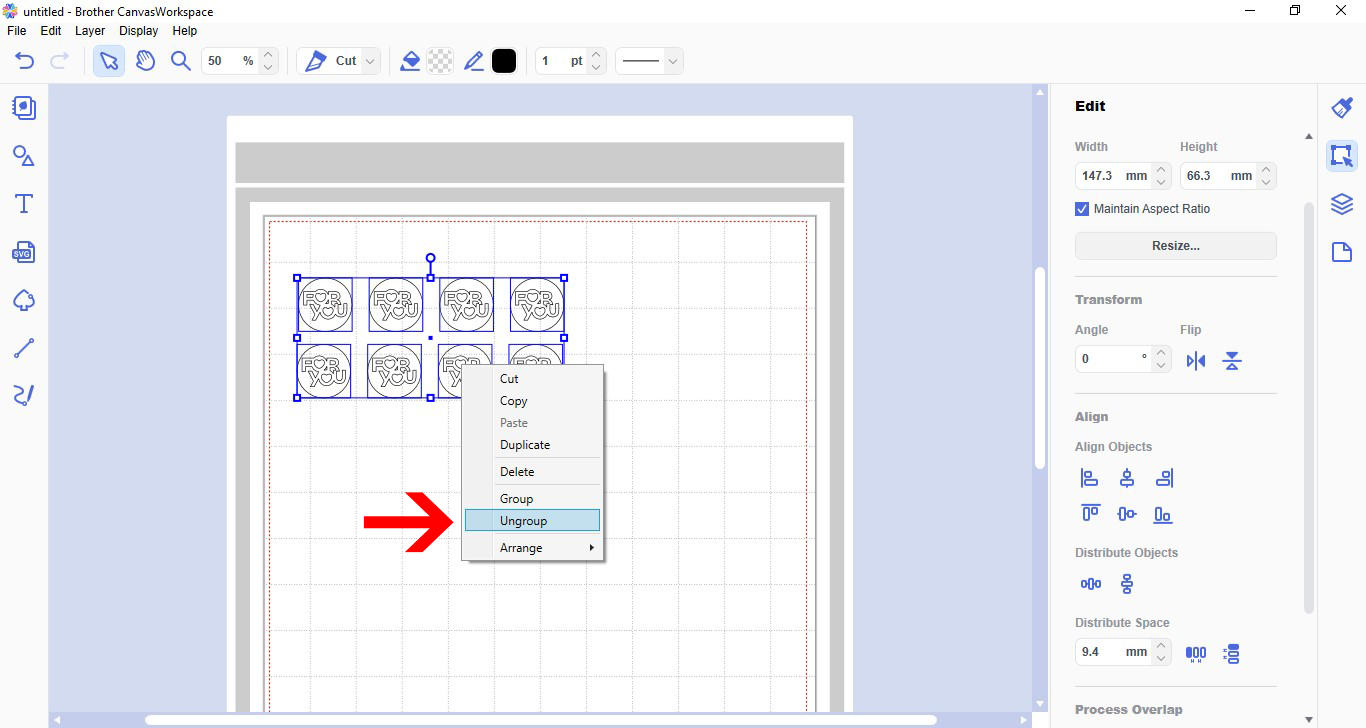
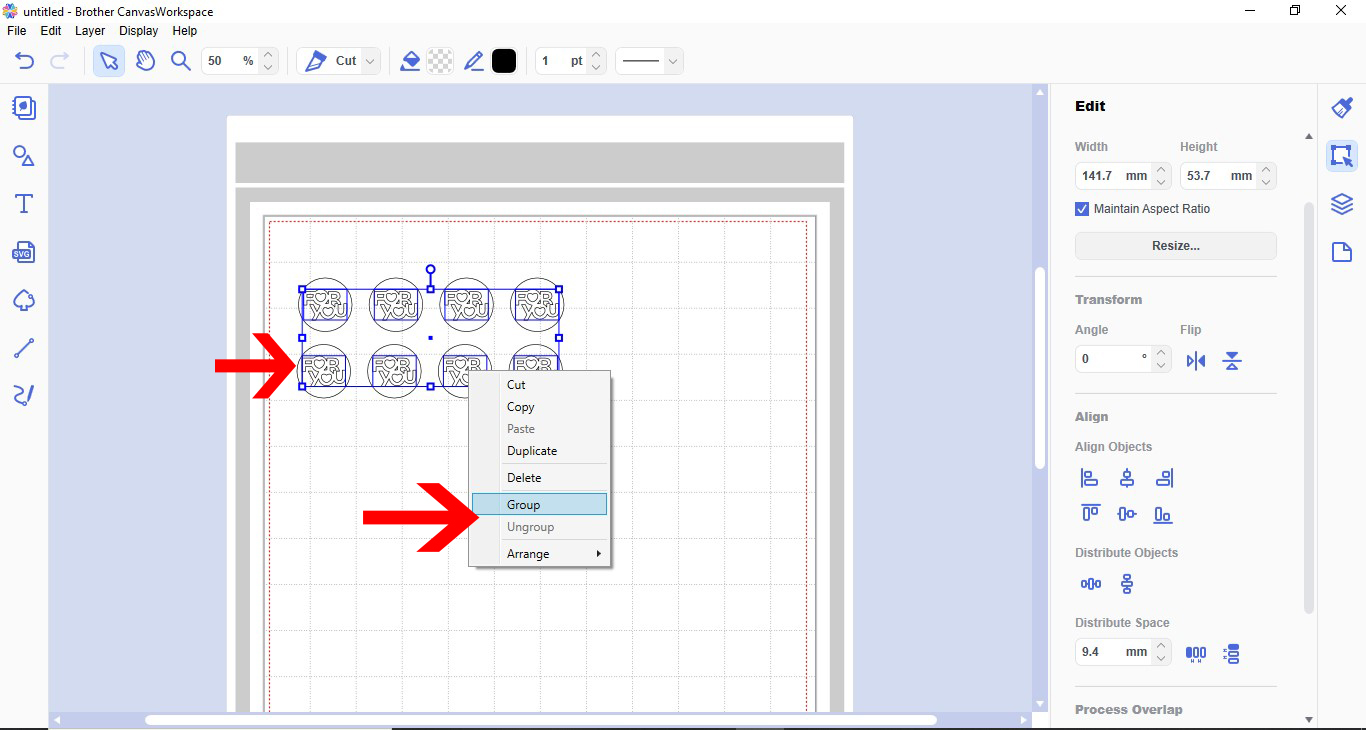
7- Select all the images and right click and ungroup.
8- Select only the design not the circles and group together.
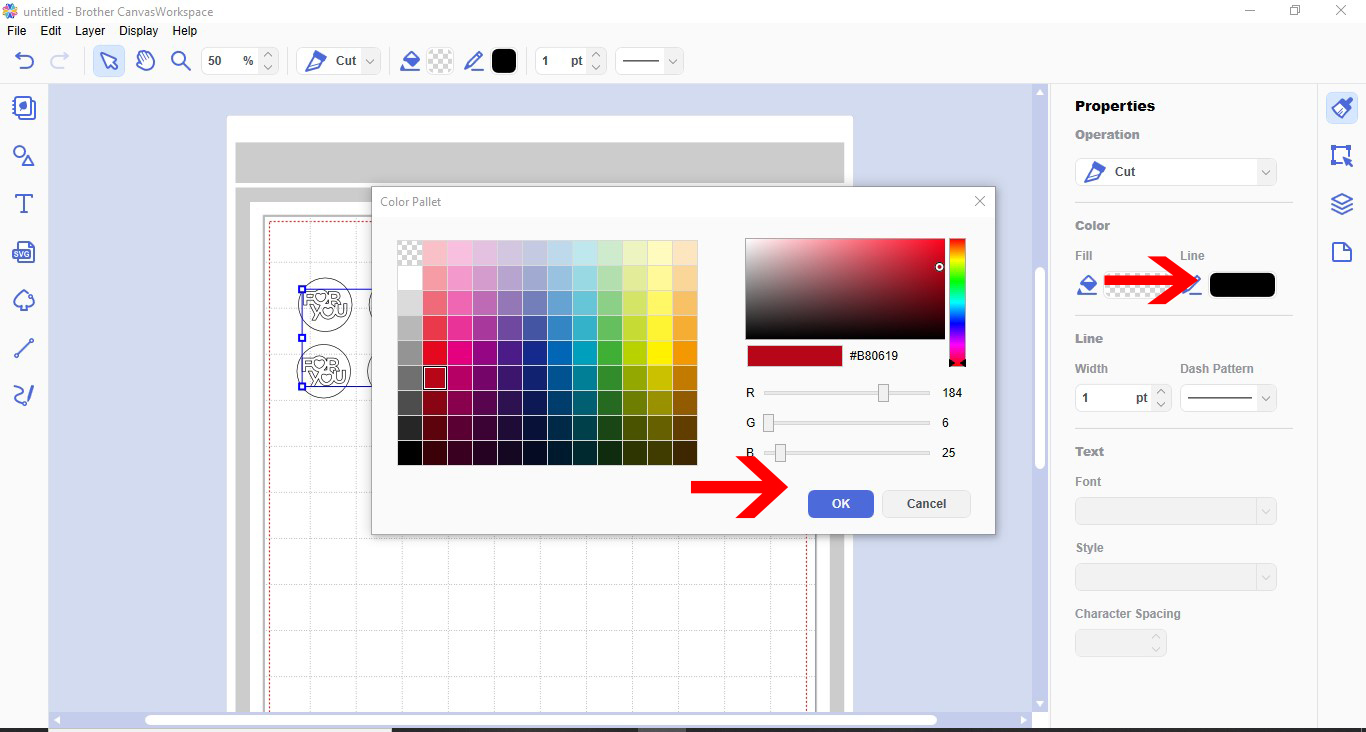
9- change the color of the designs lines.
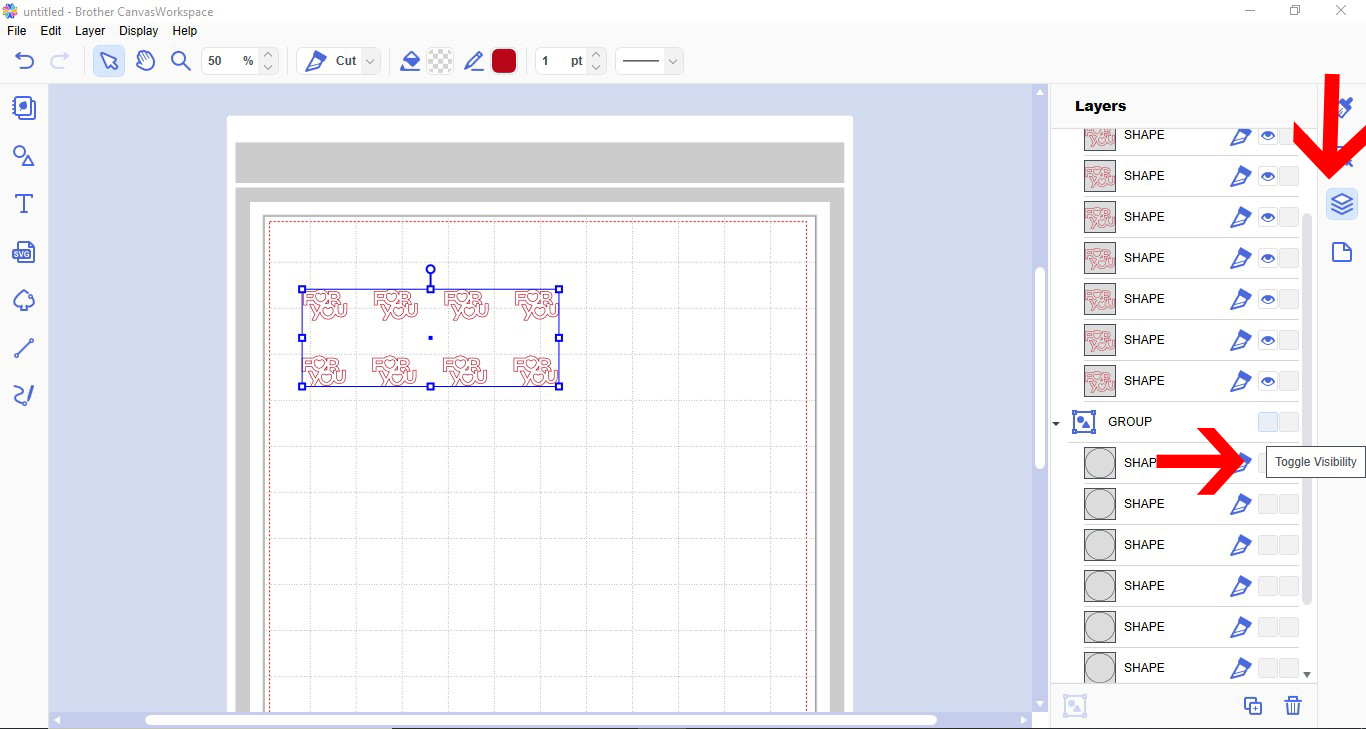
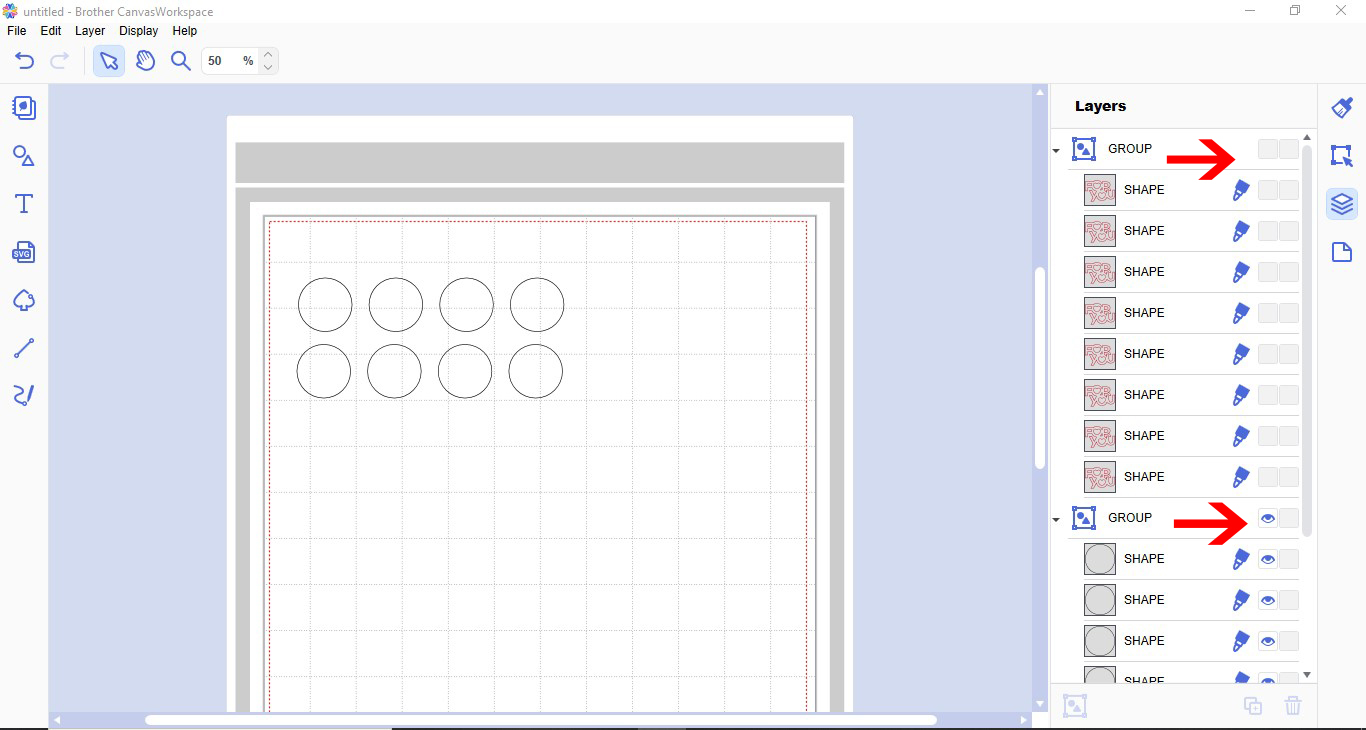
10- Click on the layers tab. Using the toggle visibility , toggle off the circle layers that are grouped.
This will leave just the design.
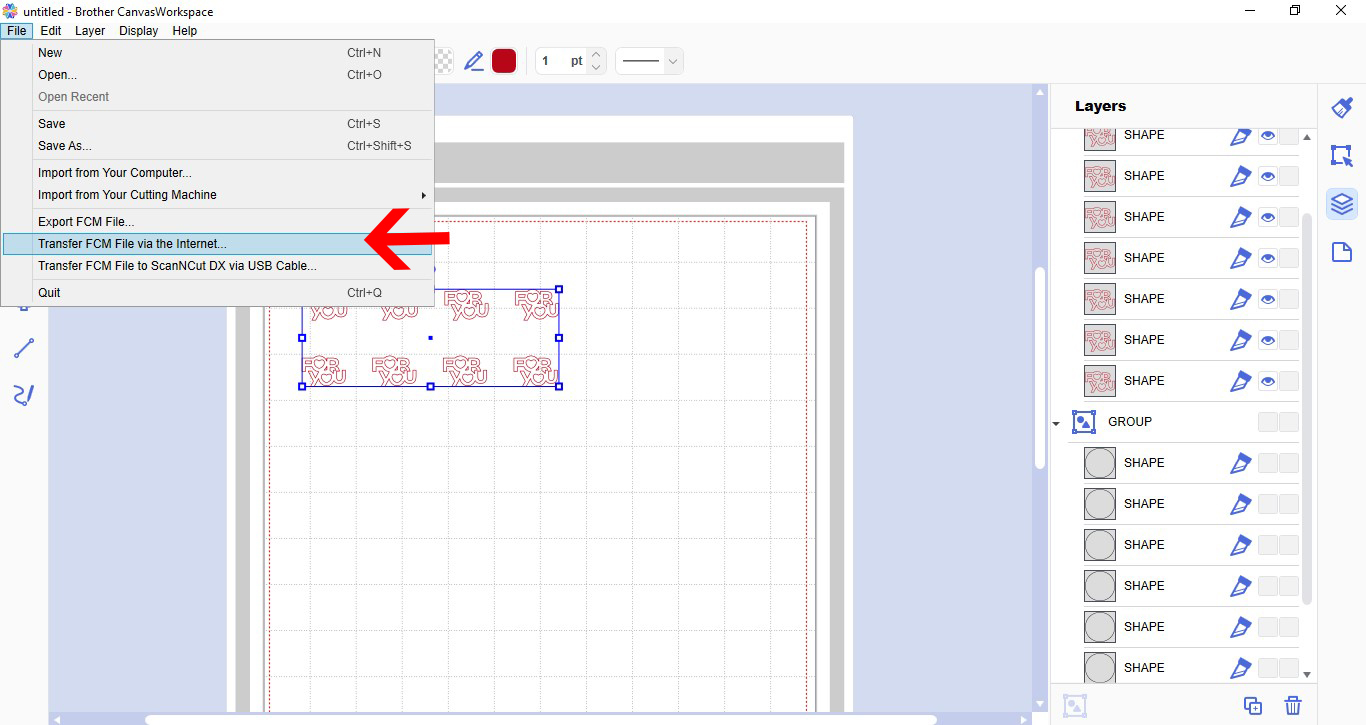
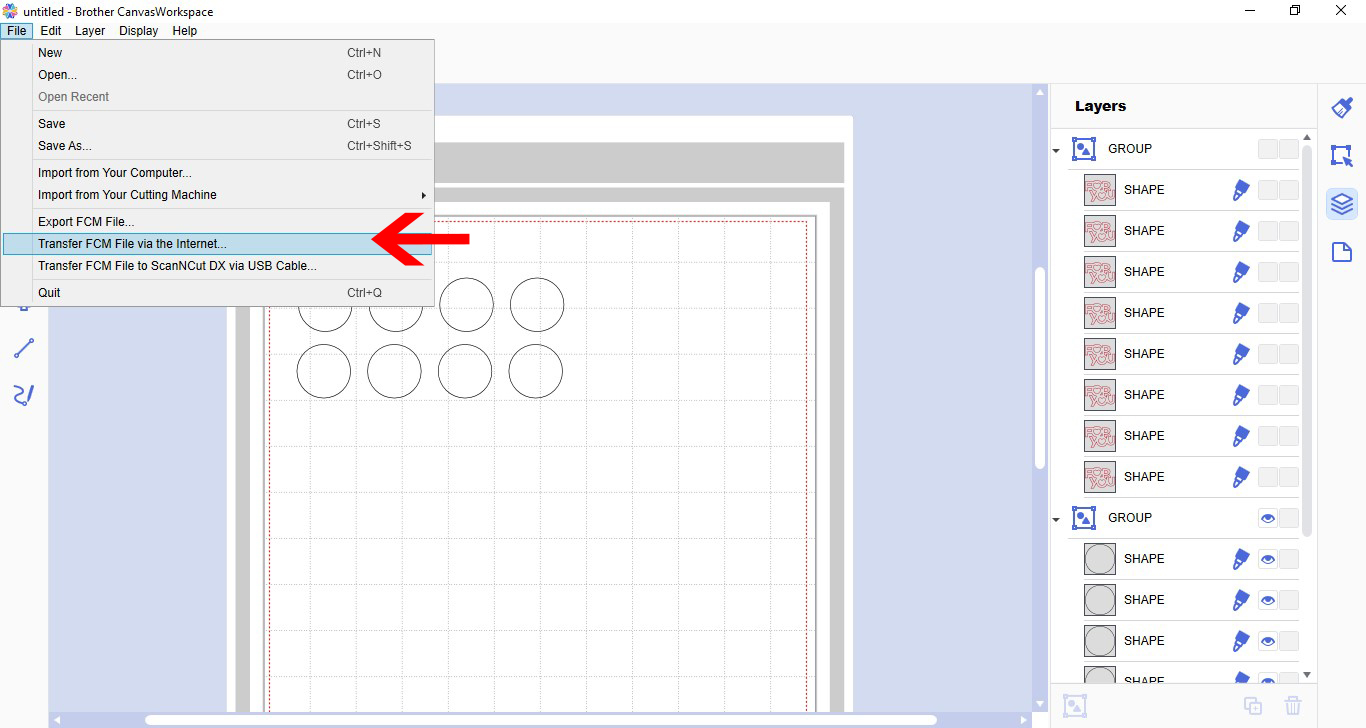
11- Click on file and then transfer FCM file in the internet. (if you do not have a wifi model, you can save to a USB or use a cable to transfer to the machine)
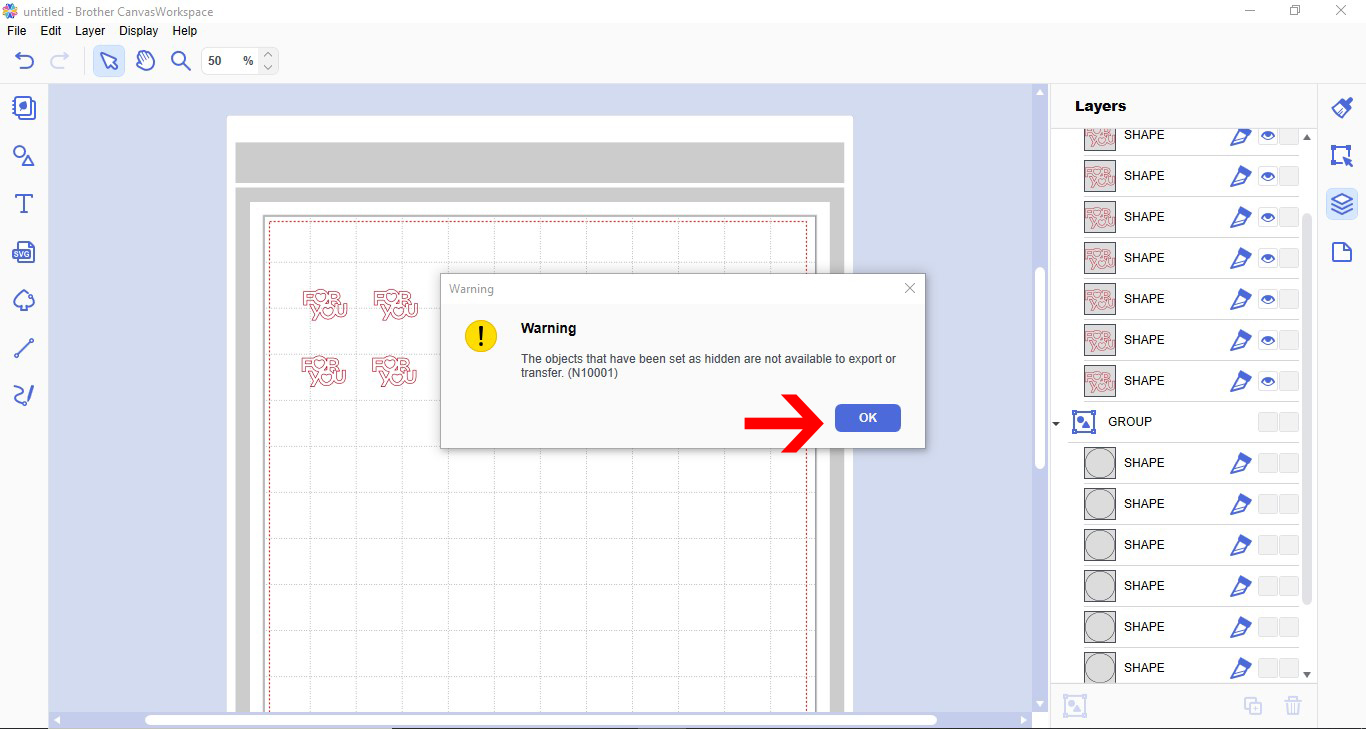
12- A pop up will appear to let you now only the visible images will transfer. Click OK.
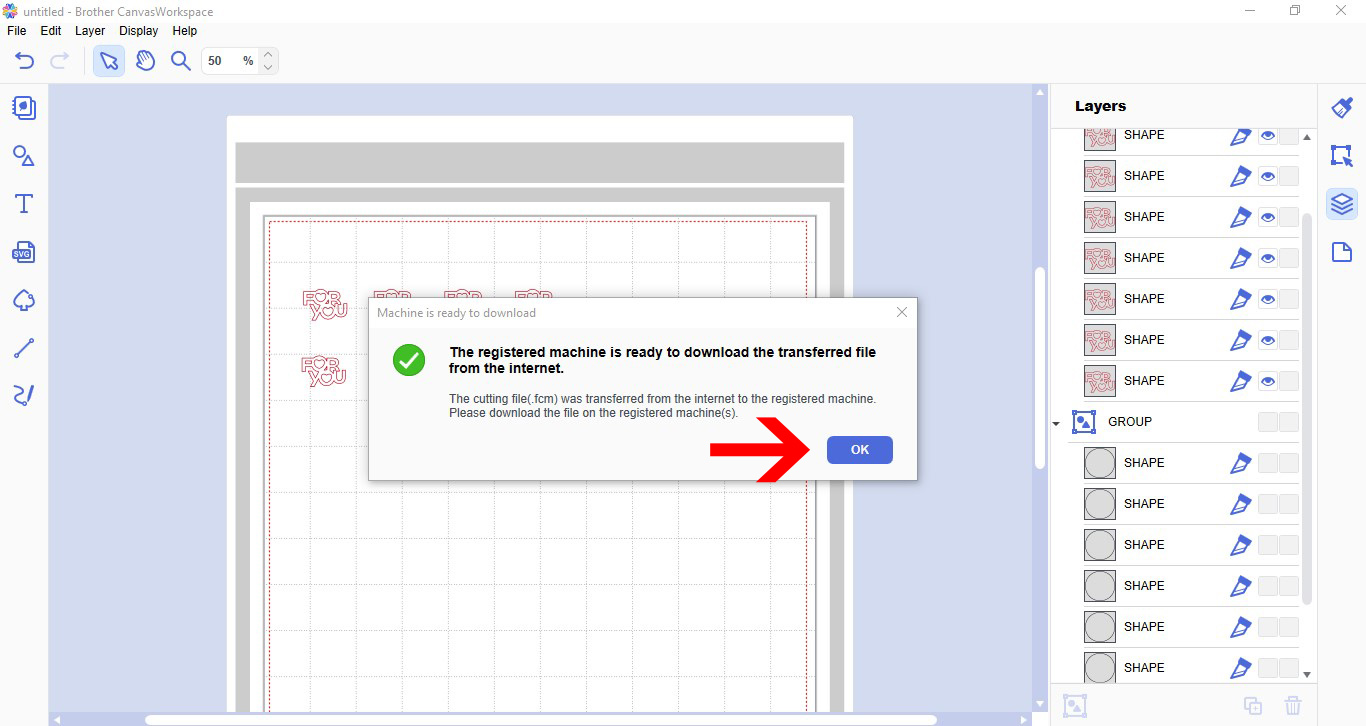
13- The next pop up will inform you that the file has transferred. Click OK.
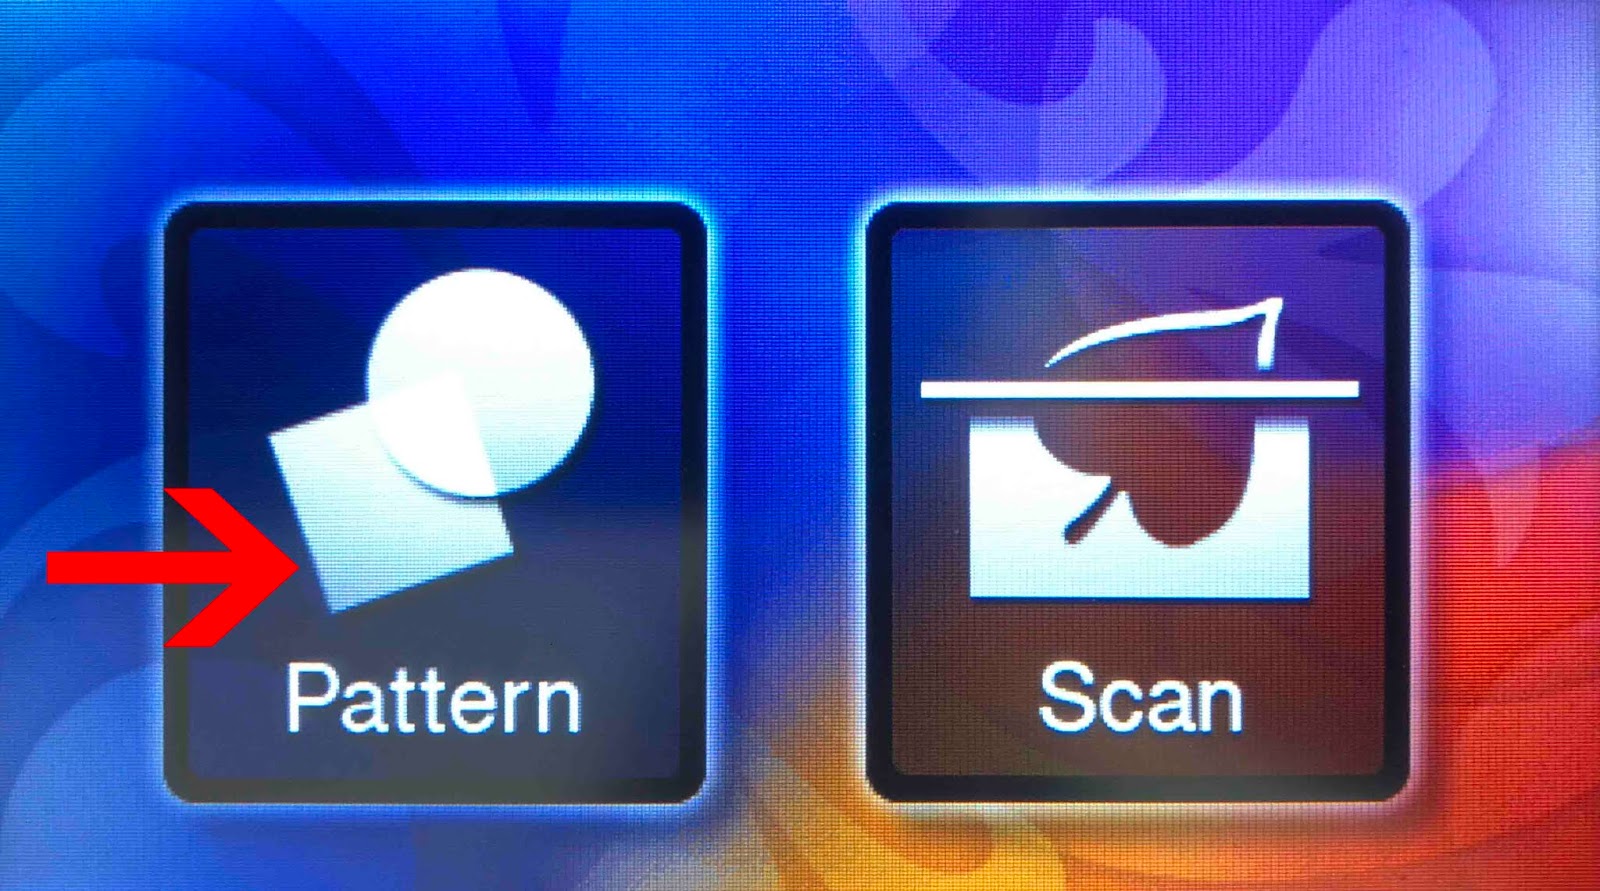
14- Click pattern on the machines screen.
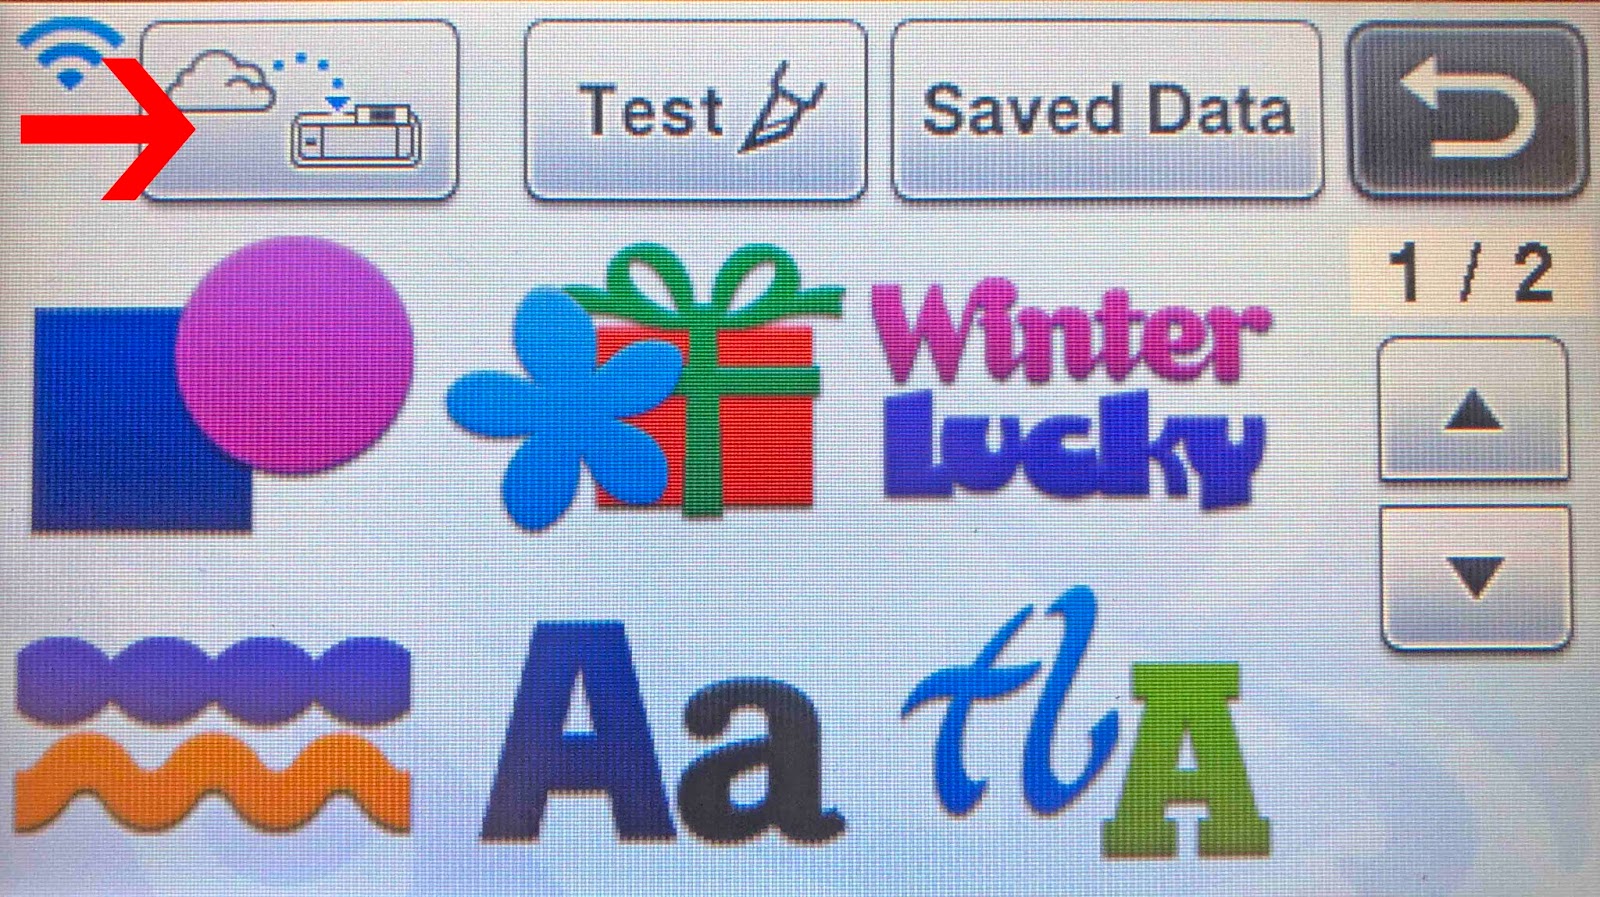
15- Click on the transfer icon.
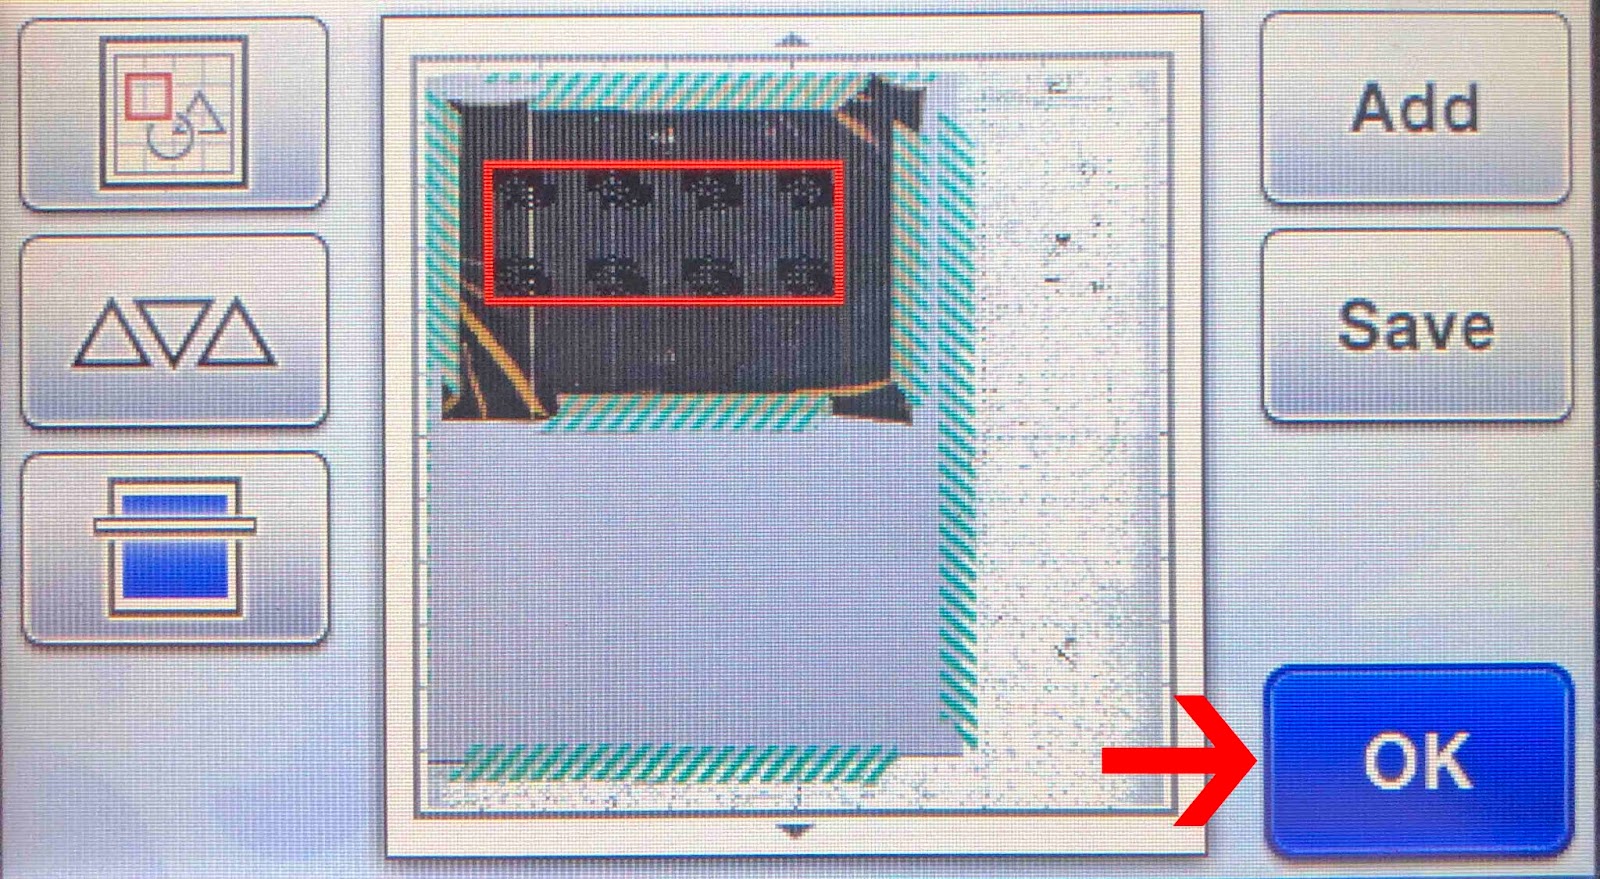
16- scan the mat and then make sure the design is over the media and foil. Click OK.
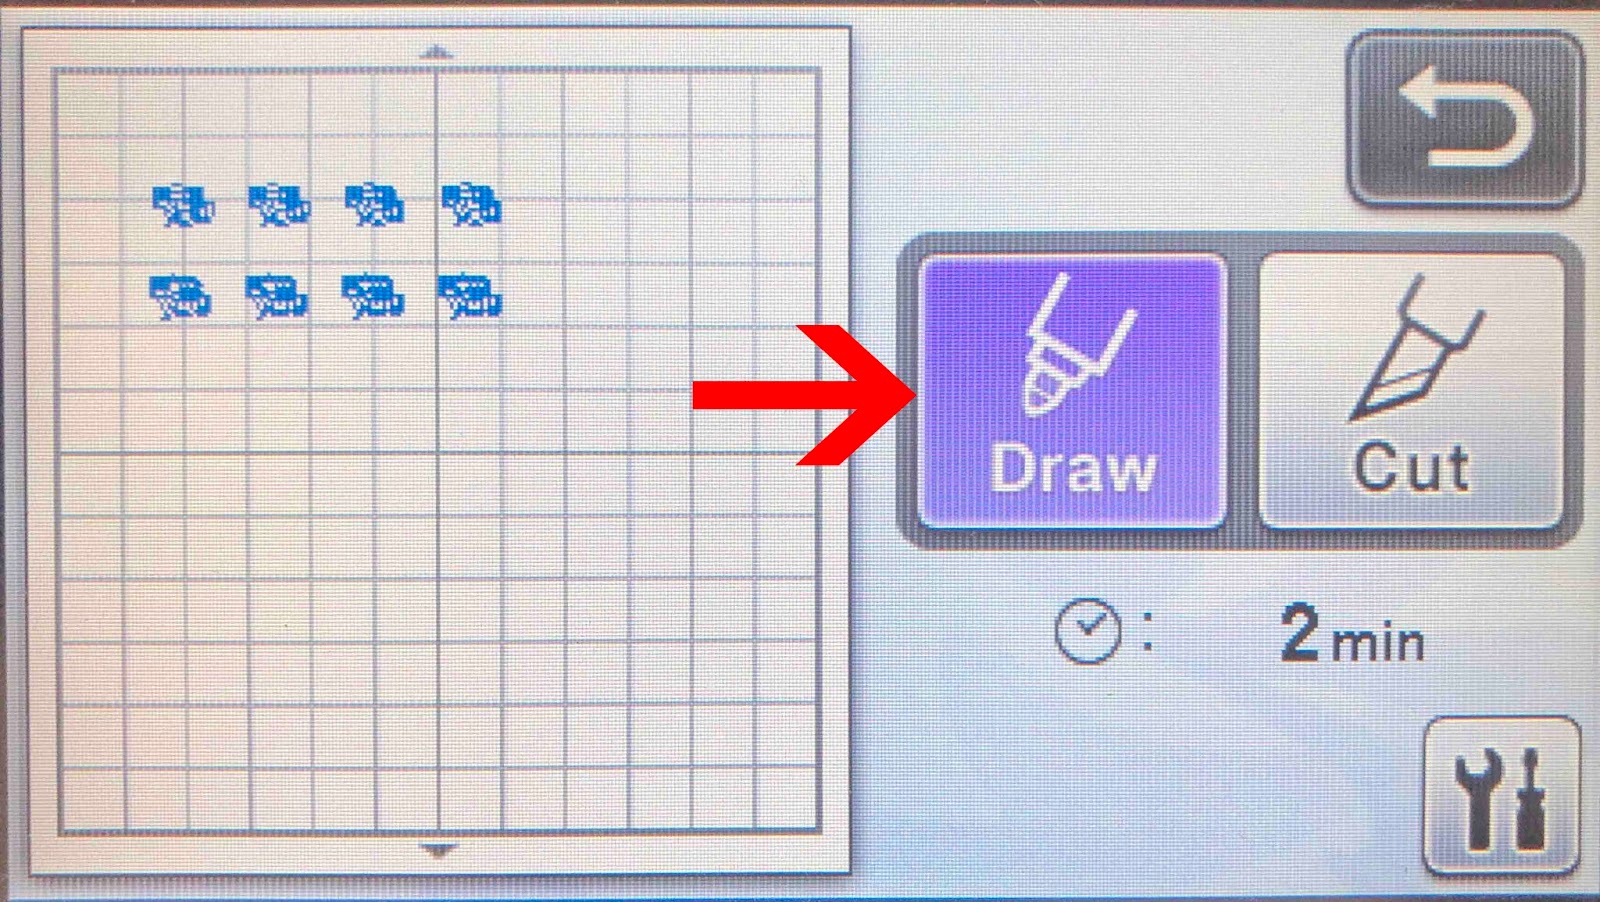
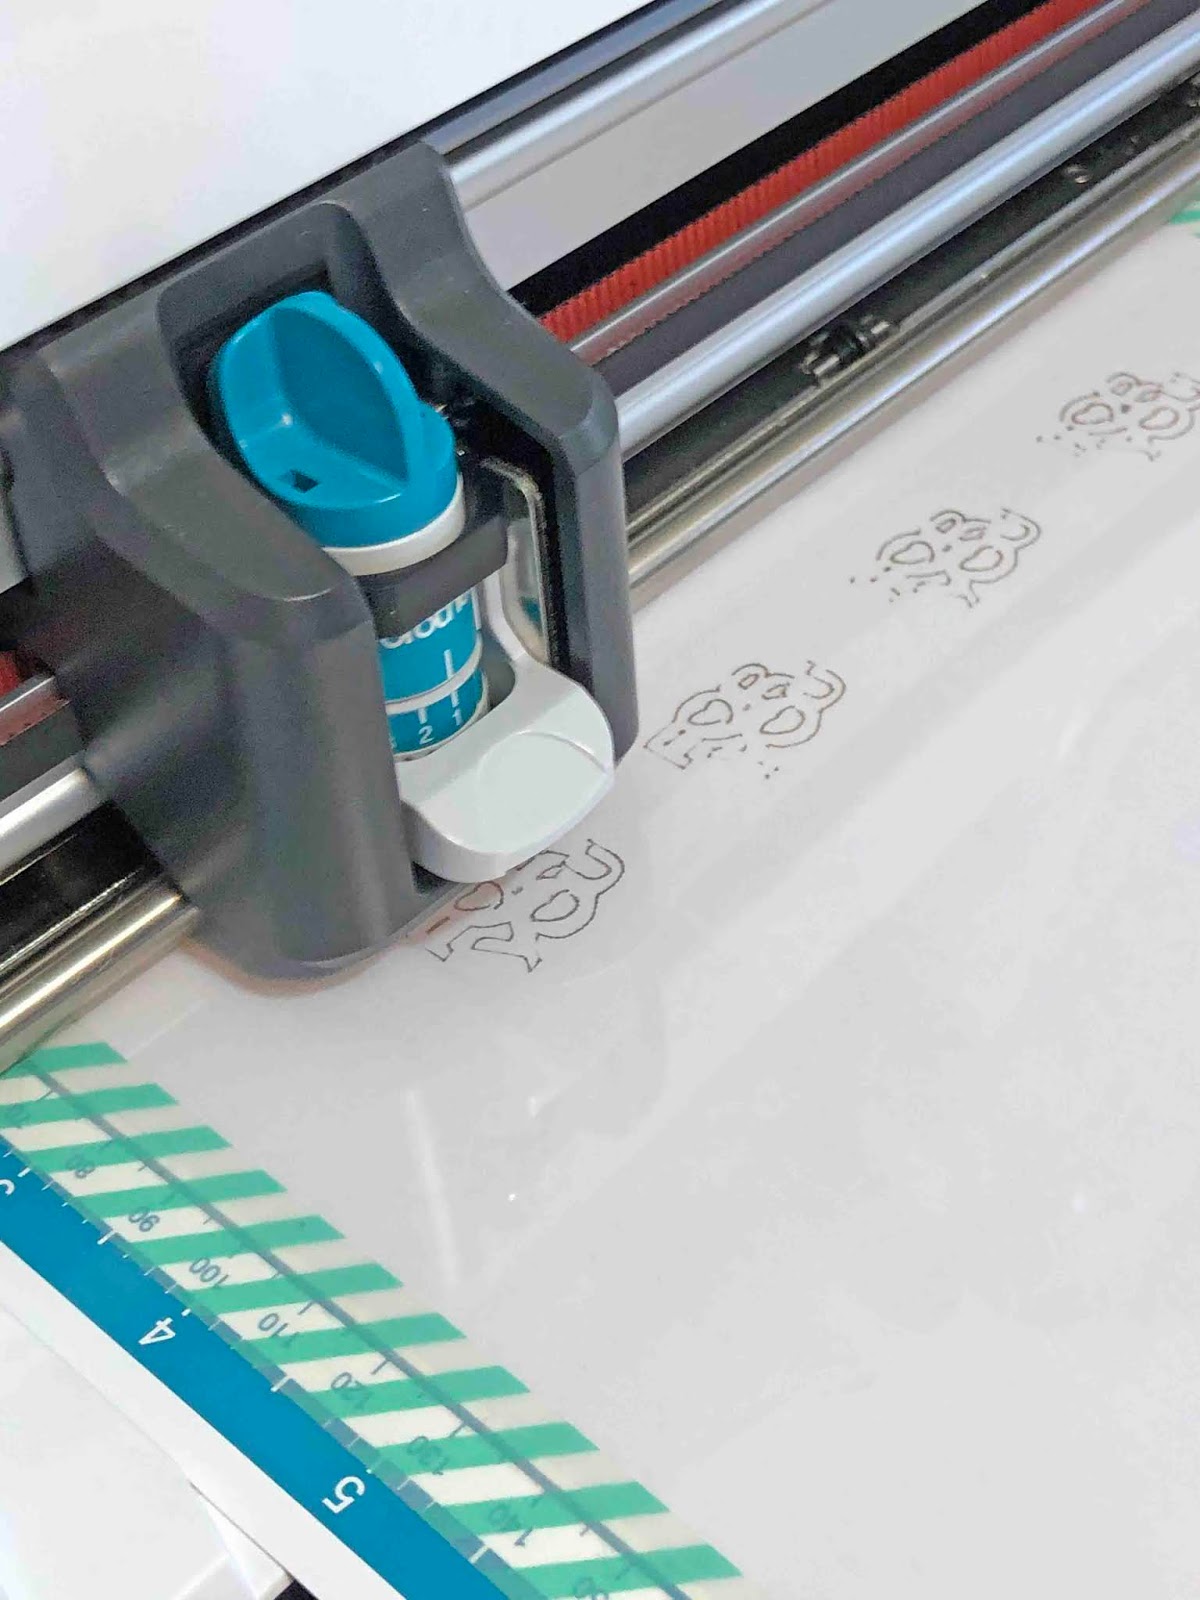
17- Click on draw. I am using the setting speed 2 pressure 1. Then click on the start icon.
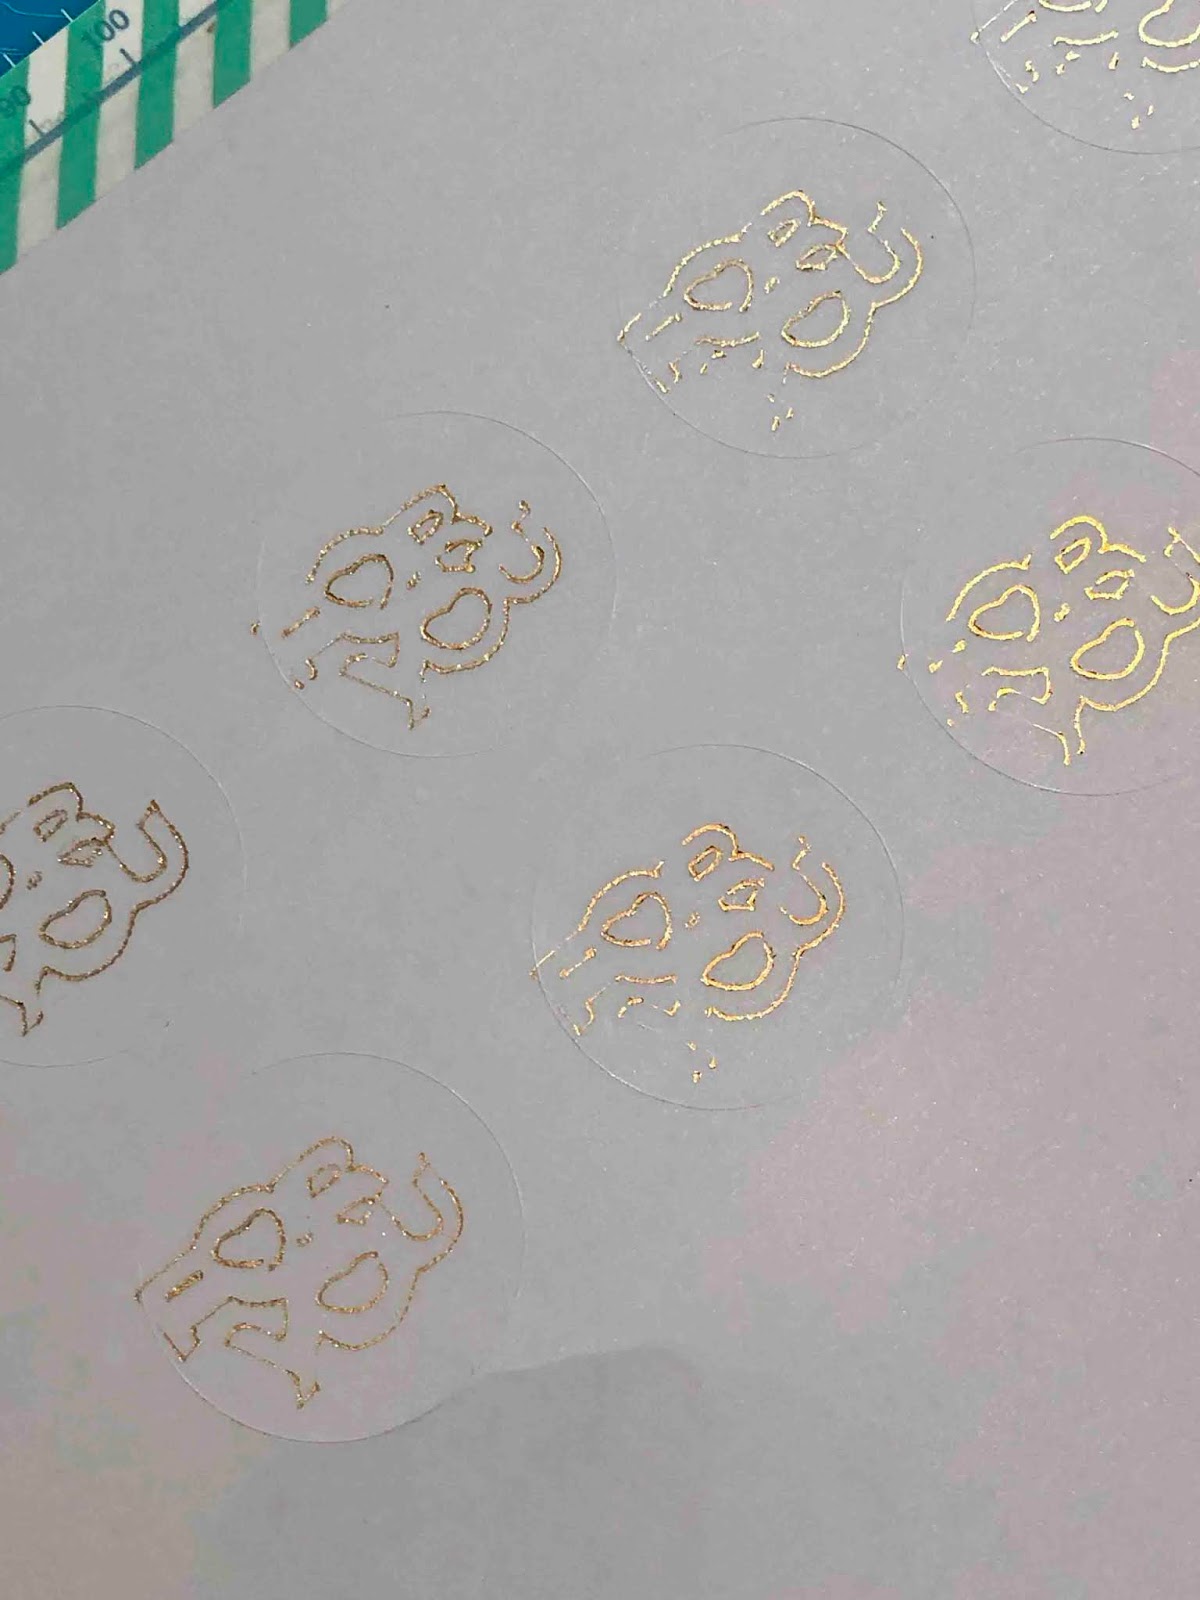
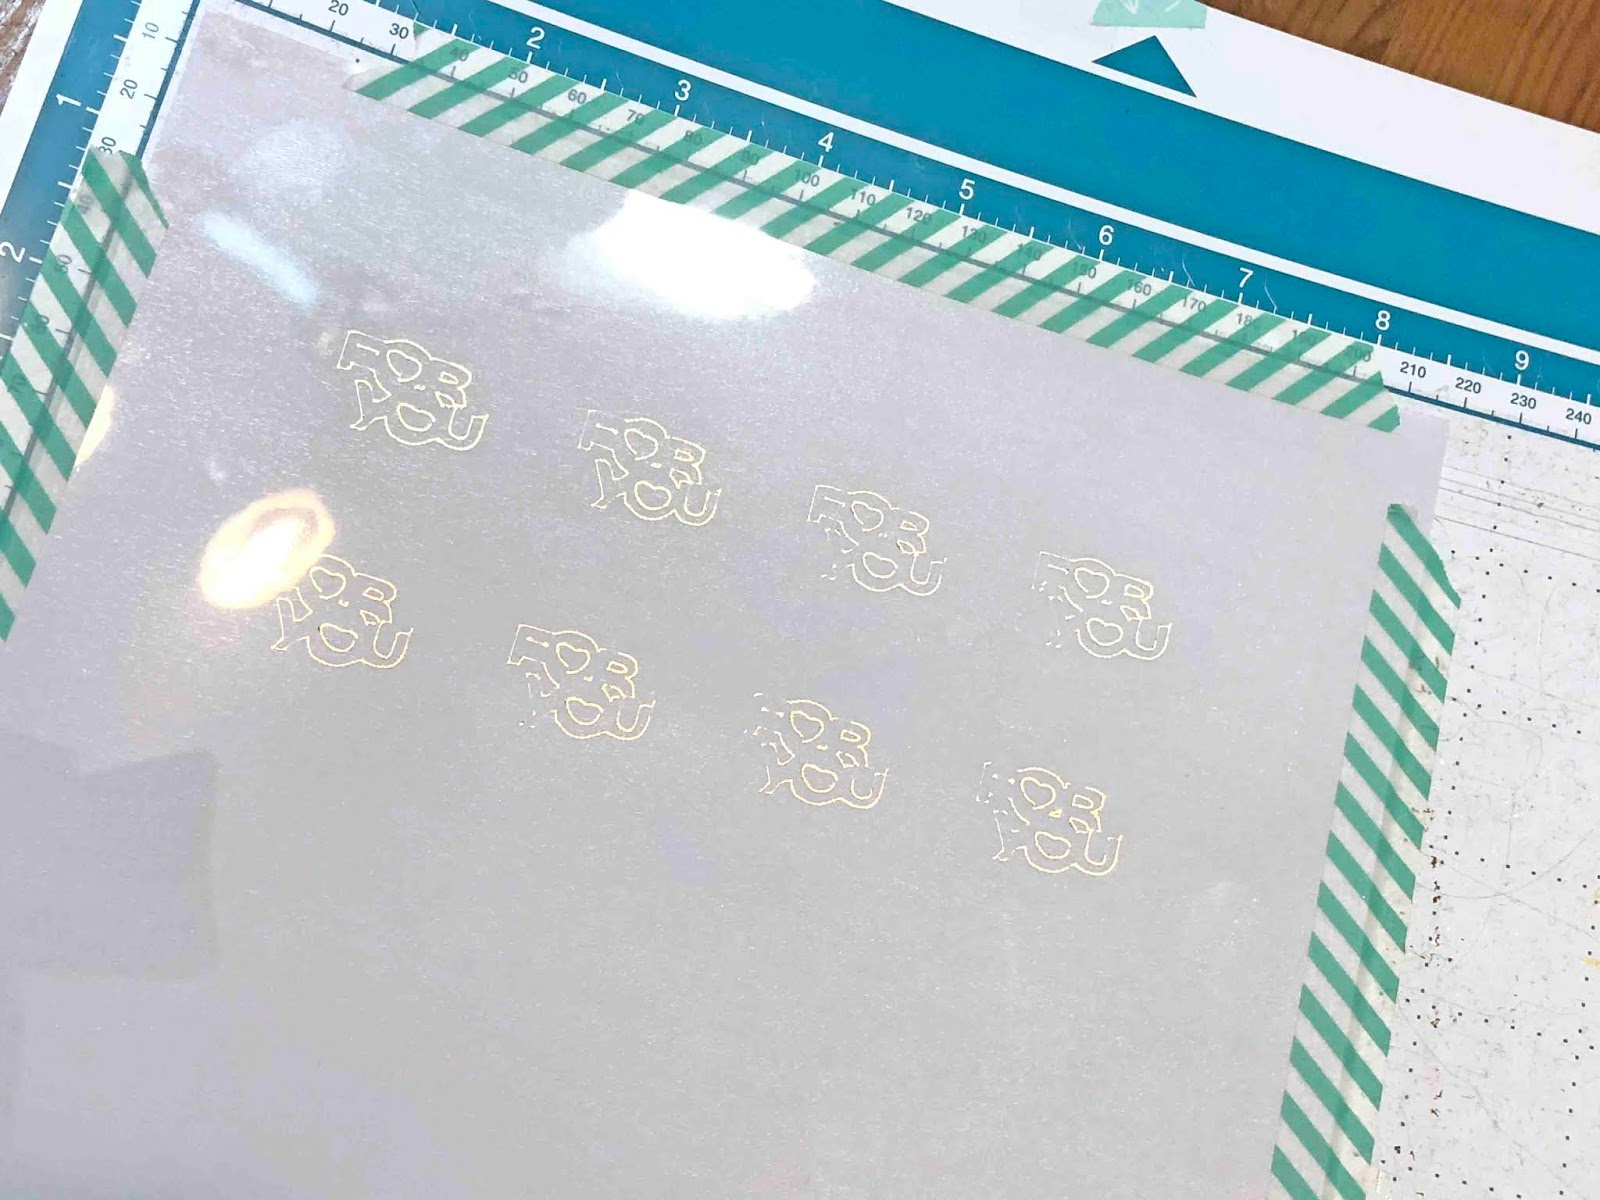
18- You foiling is complete.
19- Go back to canvas workspace. On the layer tab, toggle the visibility so the design is hidden and the circle is seen.
20- Send to your machine.
21- Go through the above steps on your scan and cut machine. this time place the cutting tool in the holder and use the cut setting instead of the draw setting. I put setting speed 3 and pressure 1.
22- Your design will now be cut out as stickers.
1- Open canvas workspace. click on the shape tool.
2- Click and create a circle. This will be the outside of your sticker which will cut.
3- Find a design to place inside your sticker that you can foil. I have used a pre designed one form the scan and cut menu.
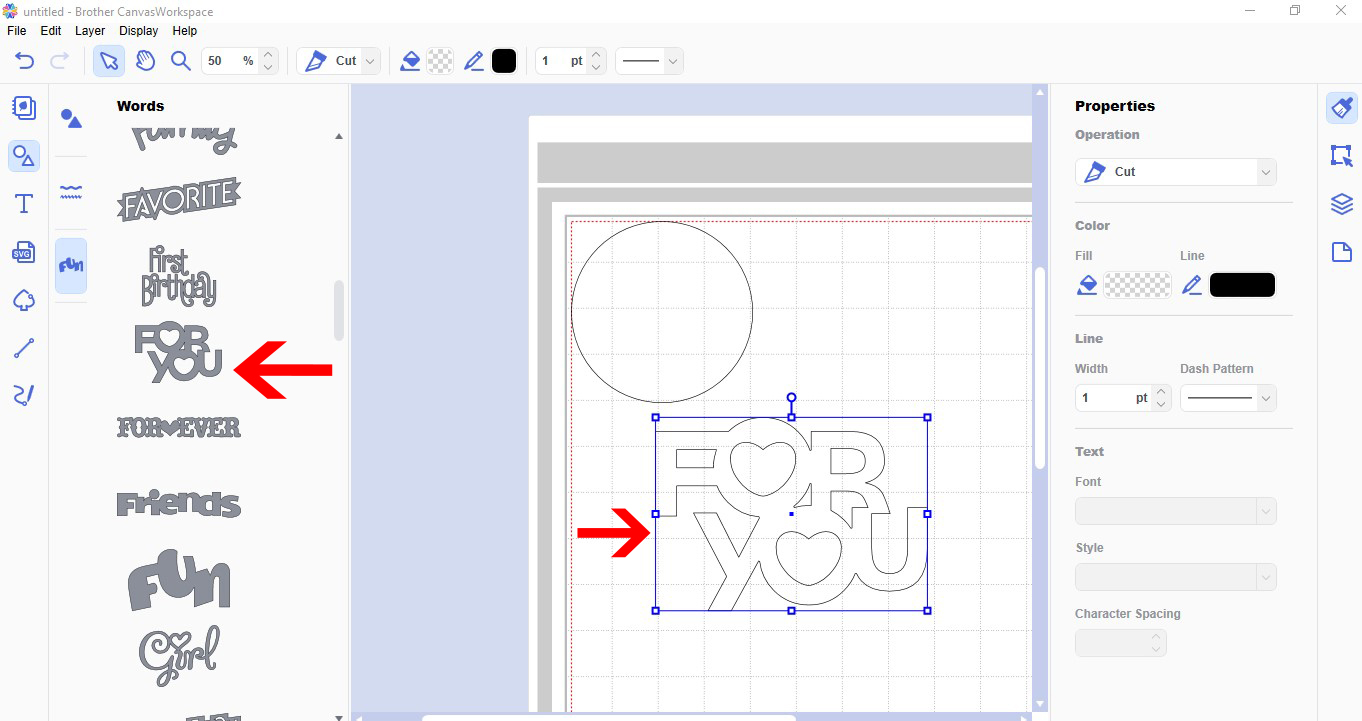
4- Place the design inside the circle.
5- Right click and group your circle and design.
6- Duplicate you design. then align them and distribute them evenly.
7- Select all the images and right click and ungroup.
8- Select only the design not the circles and group together.
9- change the color of the designs lines.
10- Click on the layers tab. Using the toggle visibility , toggle off the circle layers that are grouped.
This will leave just the design.
11- Click on file and then transfer FCM file in the internet. (if you do not have a wifi model, you can save to a USB or use a cable to transfer to the machine)
12- A pop up will appear to let you now only the visible images will transfer. Click OK.
13- The next pop up will inform you that the file has transferred. Click OK.
14- Click pattern on the machines screen.
15- Click on the transfer icon.
16- scan the mat and then make sure the design is over the media and foil. Click OK.
17- Click on draw. I am using the setting speed 2 pressure 1. Then click on the start icon.
18- You foiling is complete.
19- Go back to canvas workspace. On the layer tab, toggle the visibility so the design is hidden and the circle is seen.
20- Send to your machine.
21- Go through the above steps on your scan and cut machine. this time place the cutting tool in the holder and use the cut setting instead of the draw setting. I put setting speed 3 and pressure 1.
22- Your design will now be cut out as stickers.