
How to Make A Flat Character in Photoshop
In this tutorial, we will be creating a flat character in Photoshop. This style may also be referred to as cartooning yourself. If you're interested in learning how to make flat characters in other programs, check out our guides for Illustrator, Procreate, and Affinity Designer.
To get started with our Photoshop tutorial, I'm going to be using this woman stock photo I've selected from Design Bundles as a reference photo.
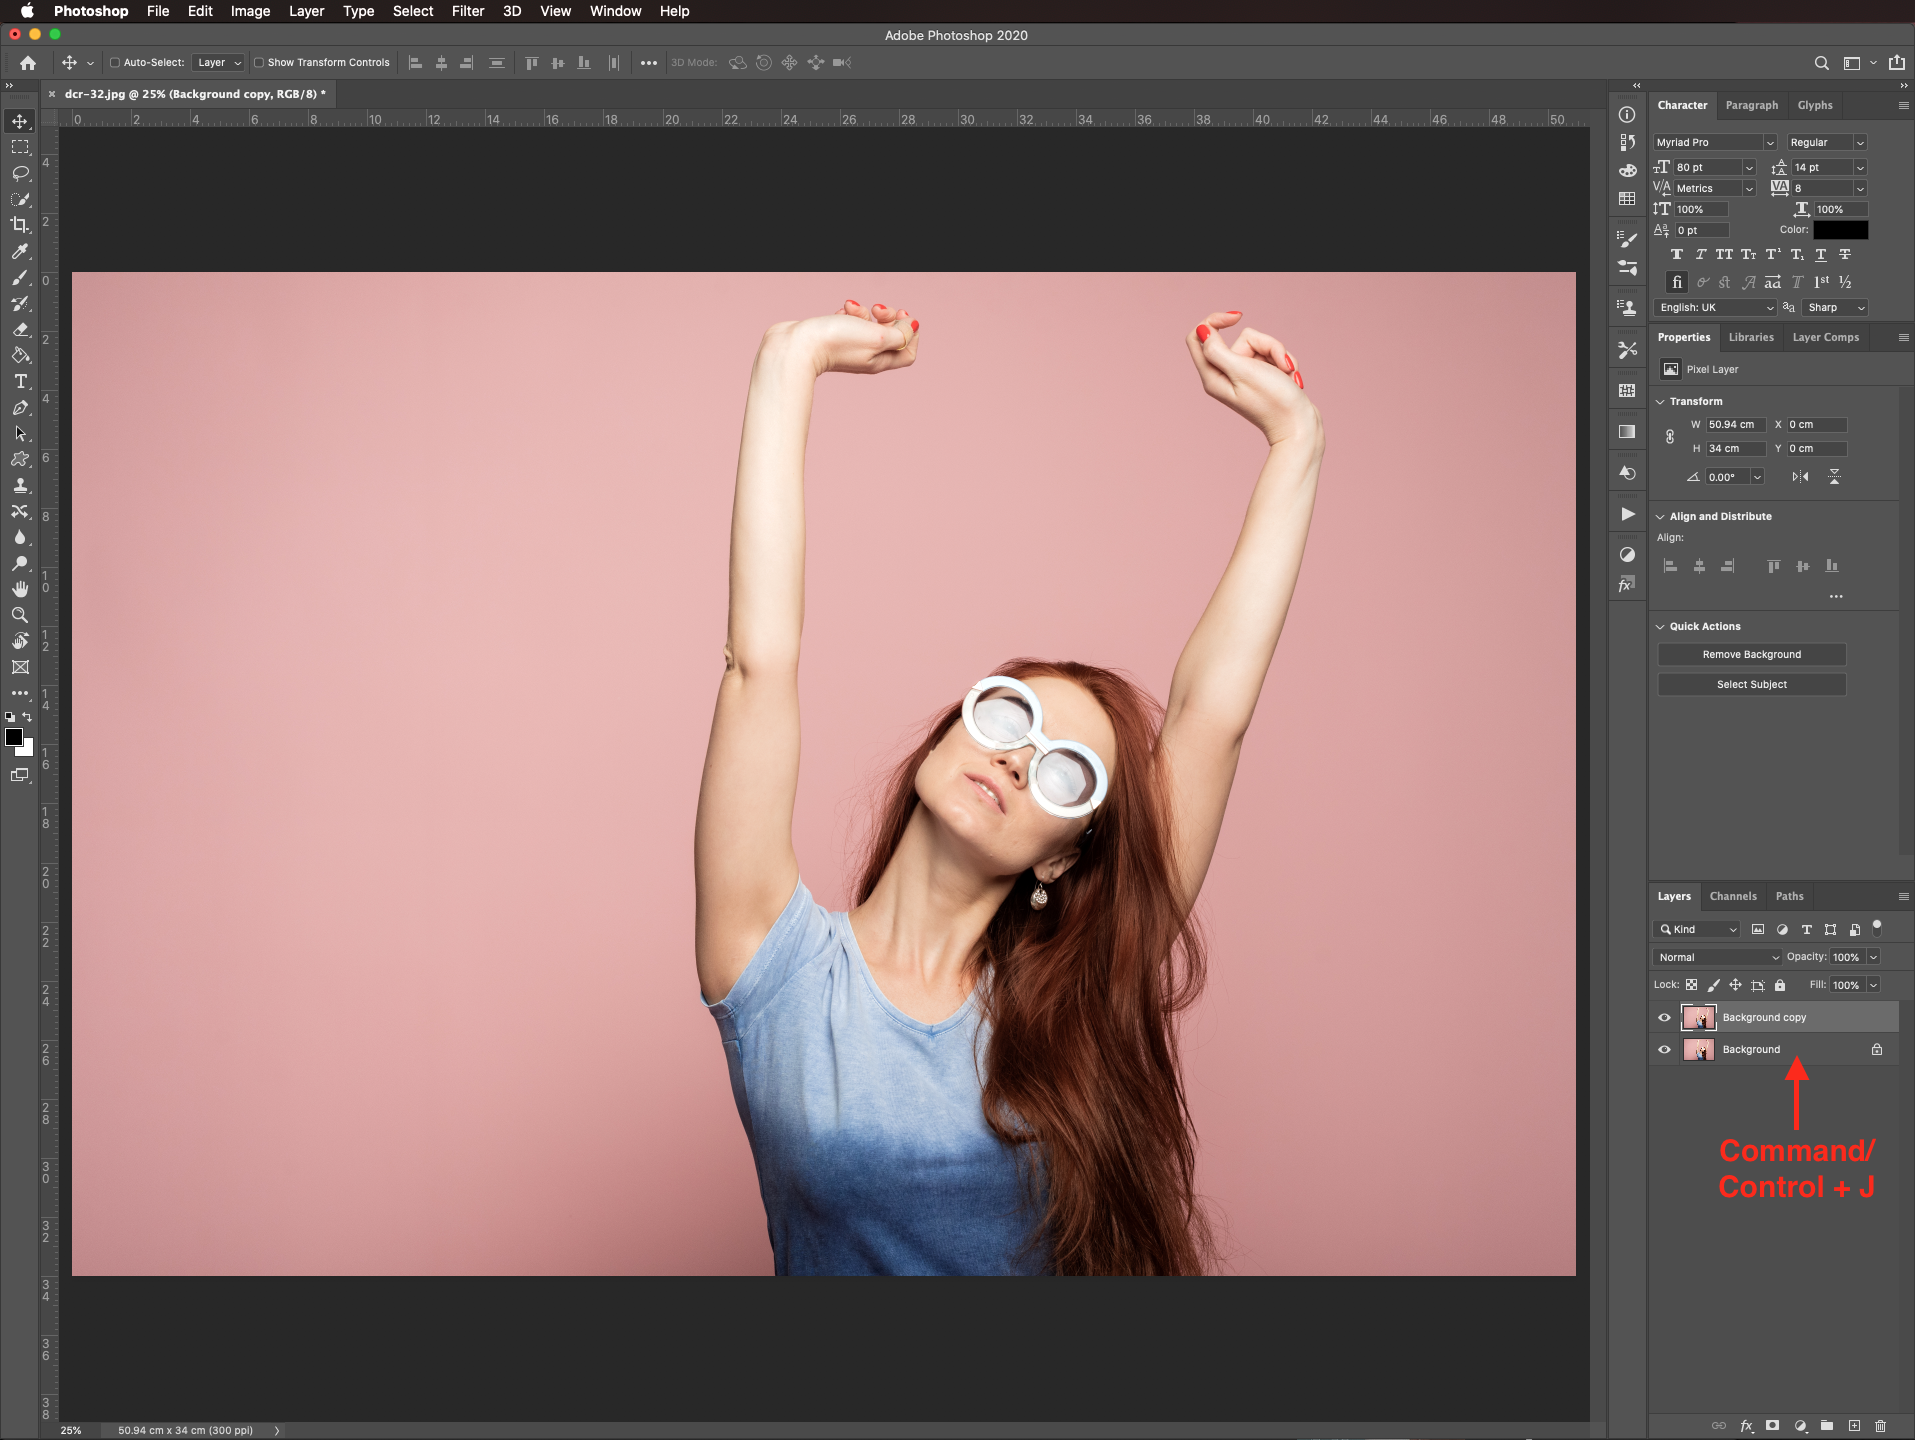
Create a duplicate of the image you chose (Command/Control + J).
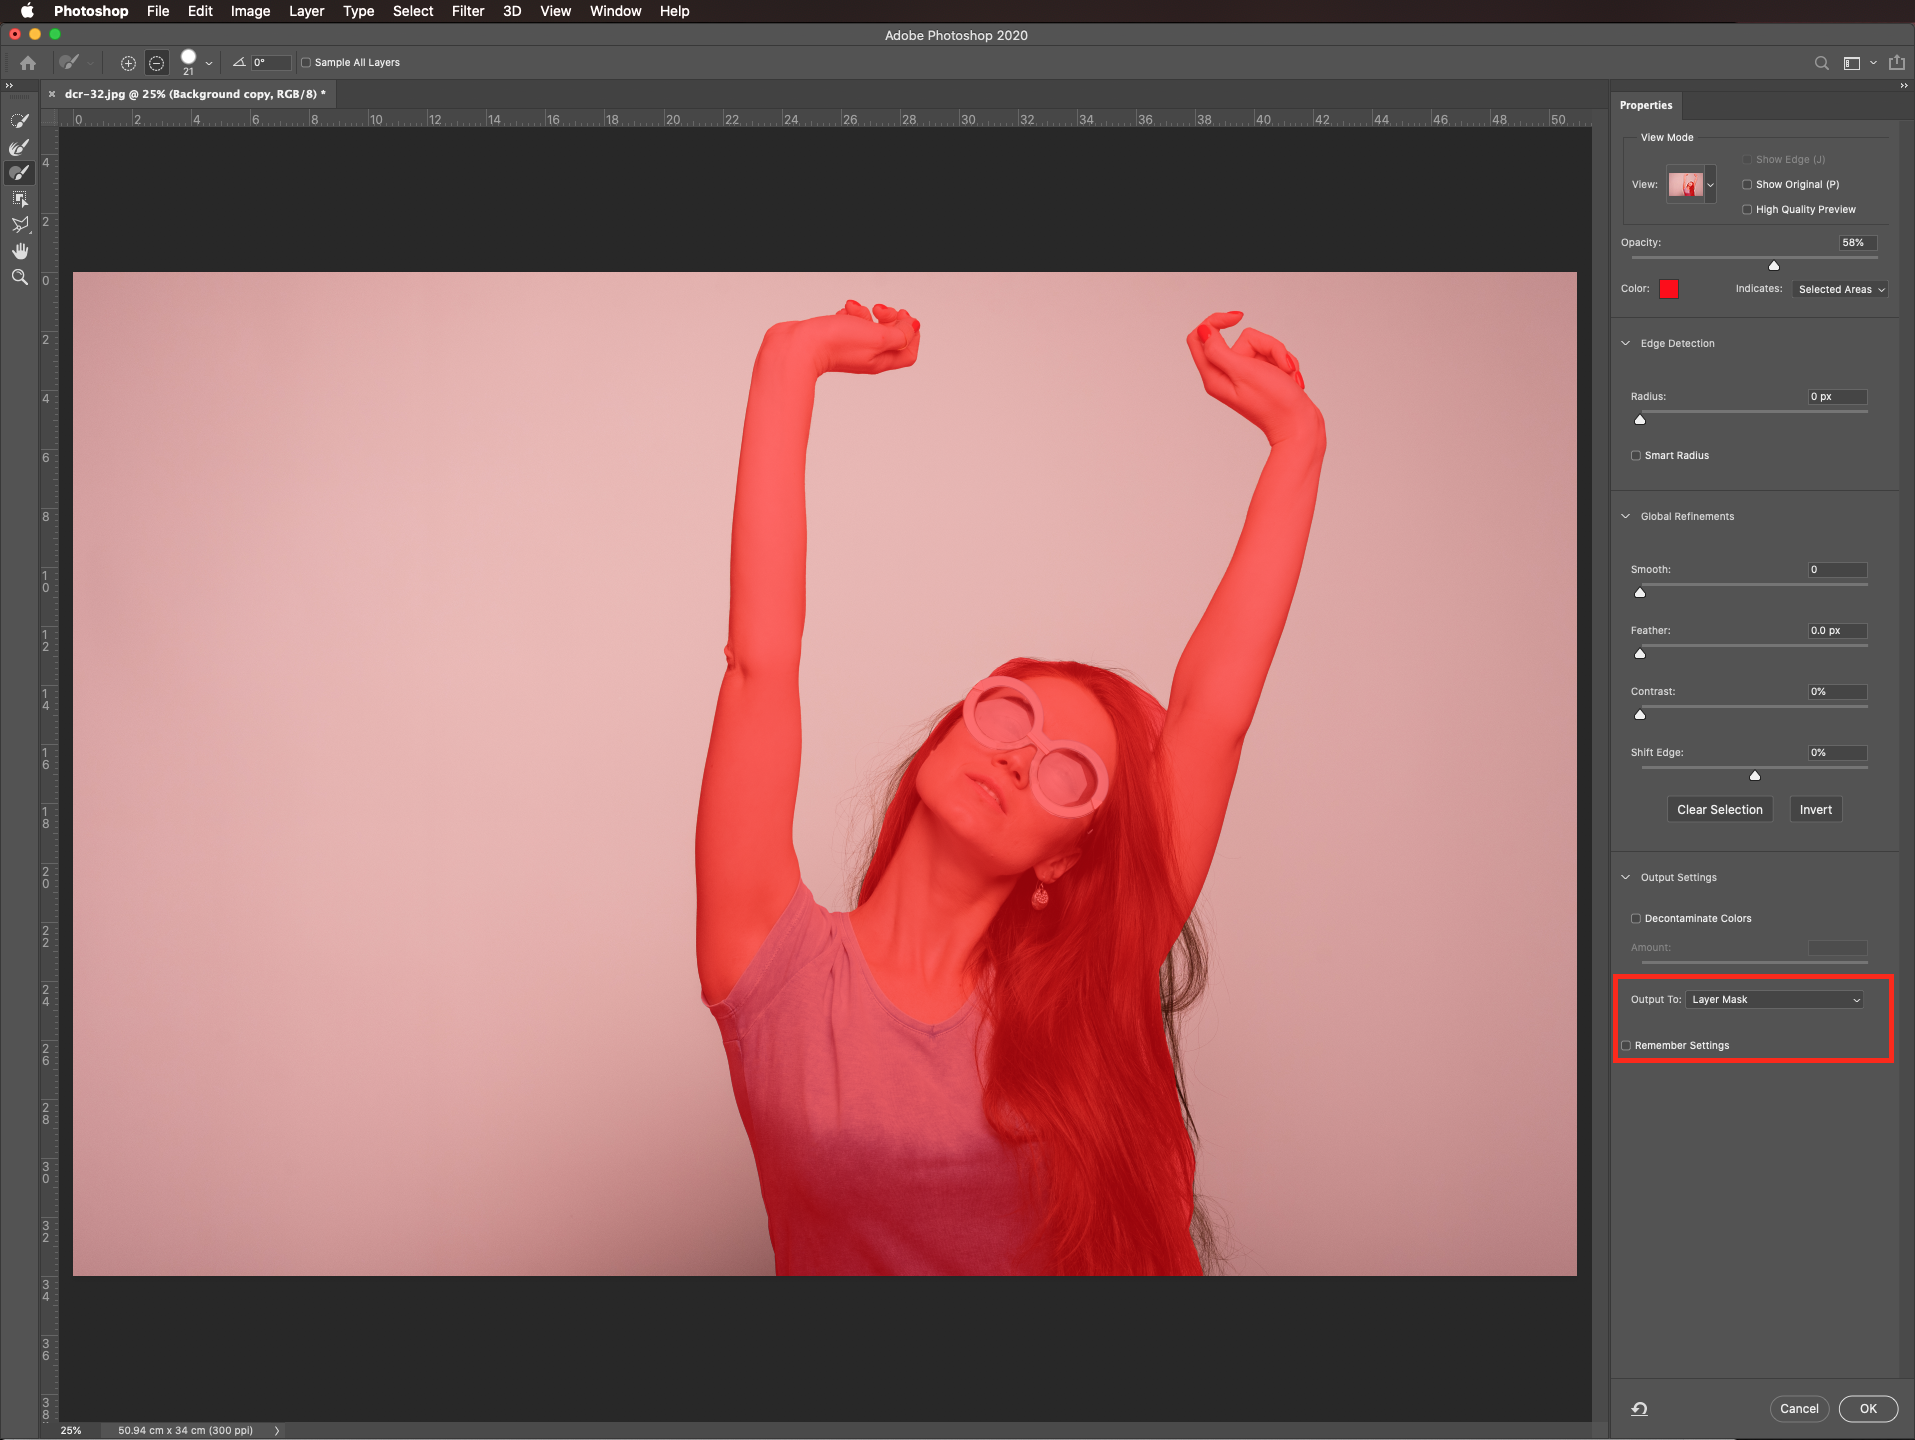
Select your subject using the quick selection tool or the magic wand tool (W). You may use the select subject button on the top menu to help you out. When your selection is roughly done, click select and mask.

If you need more details about this topic, you can check out our how to smooth mask edges tutorial.
Choose output to layer mask when saving your mask options.
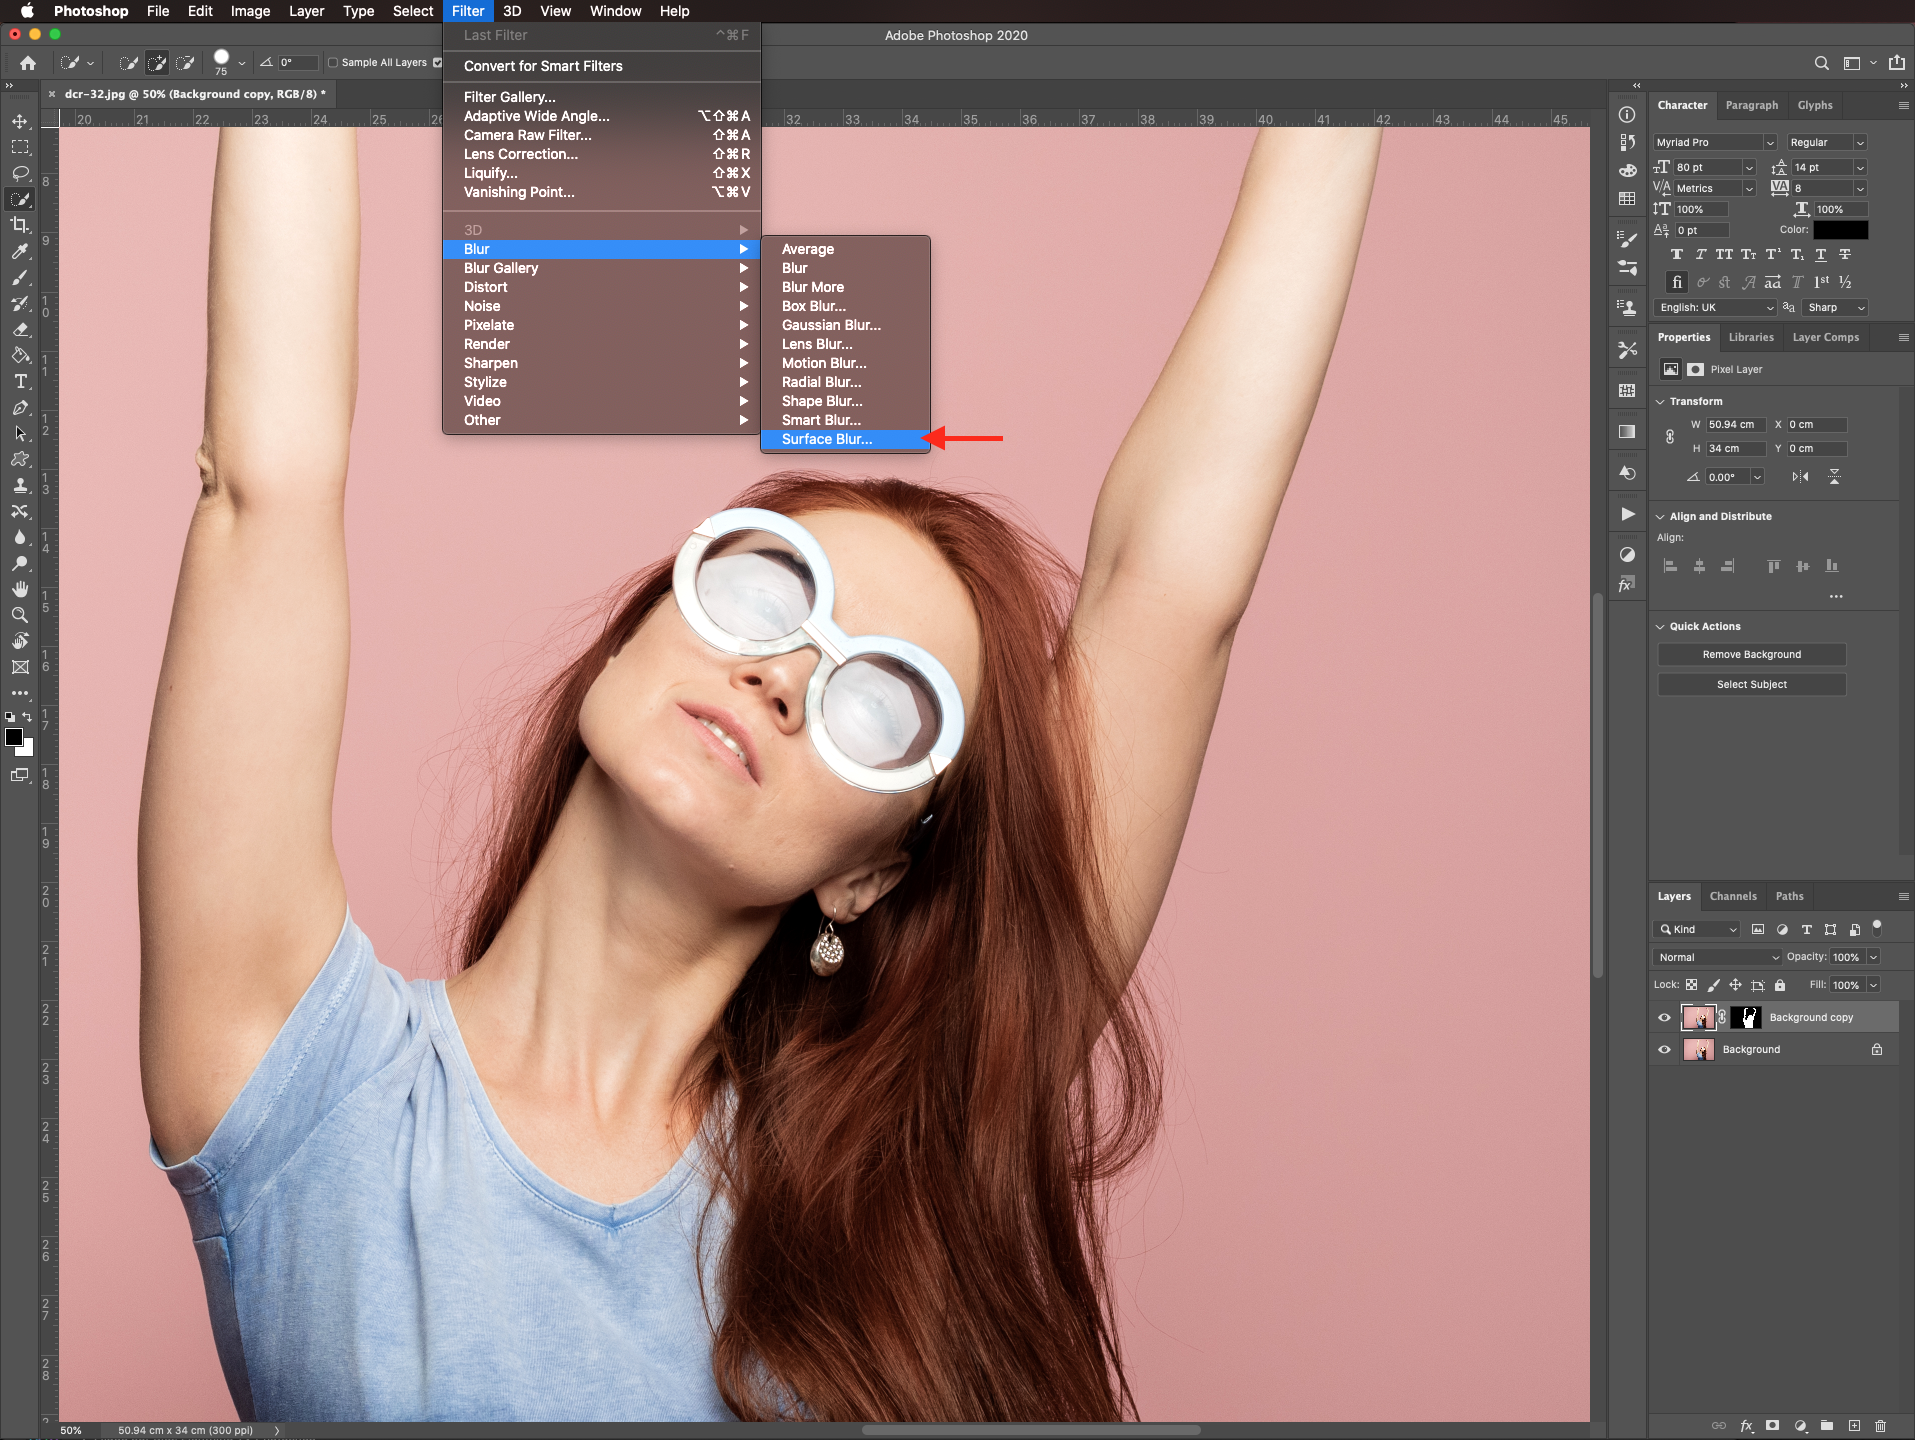
Making sure that the masked image is selected, go to filter > blur > surface blur.
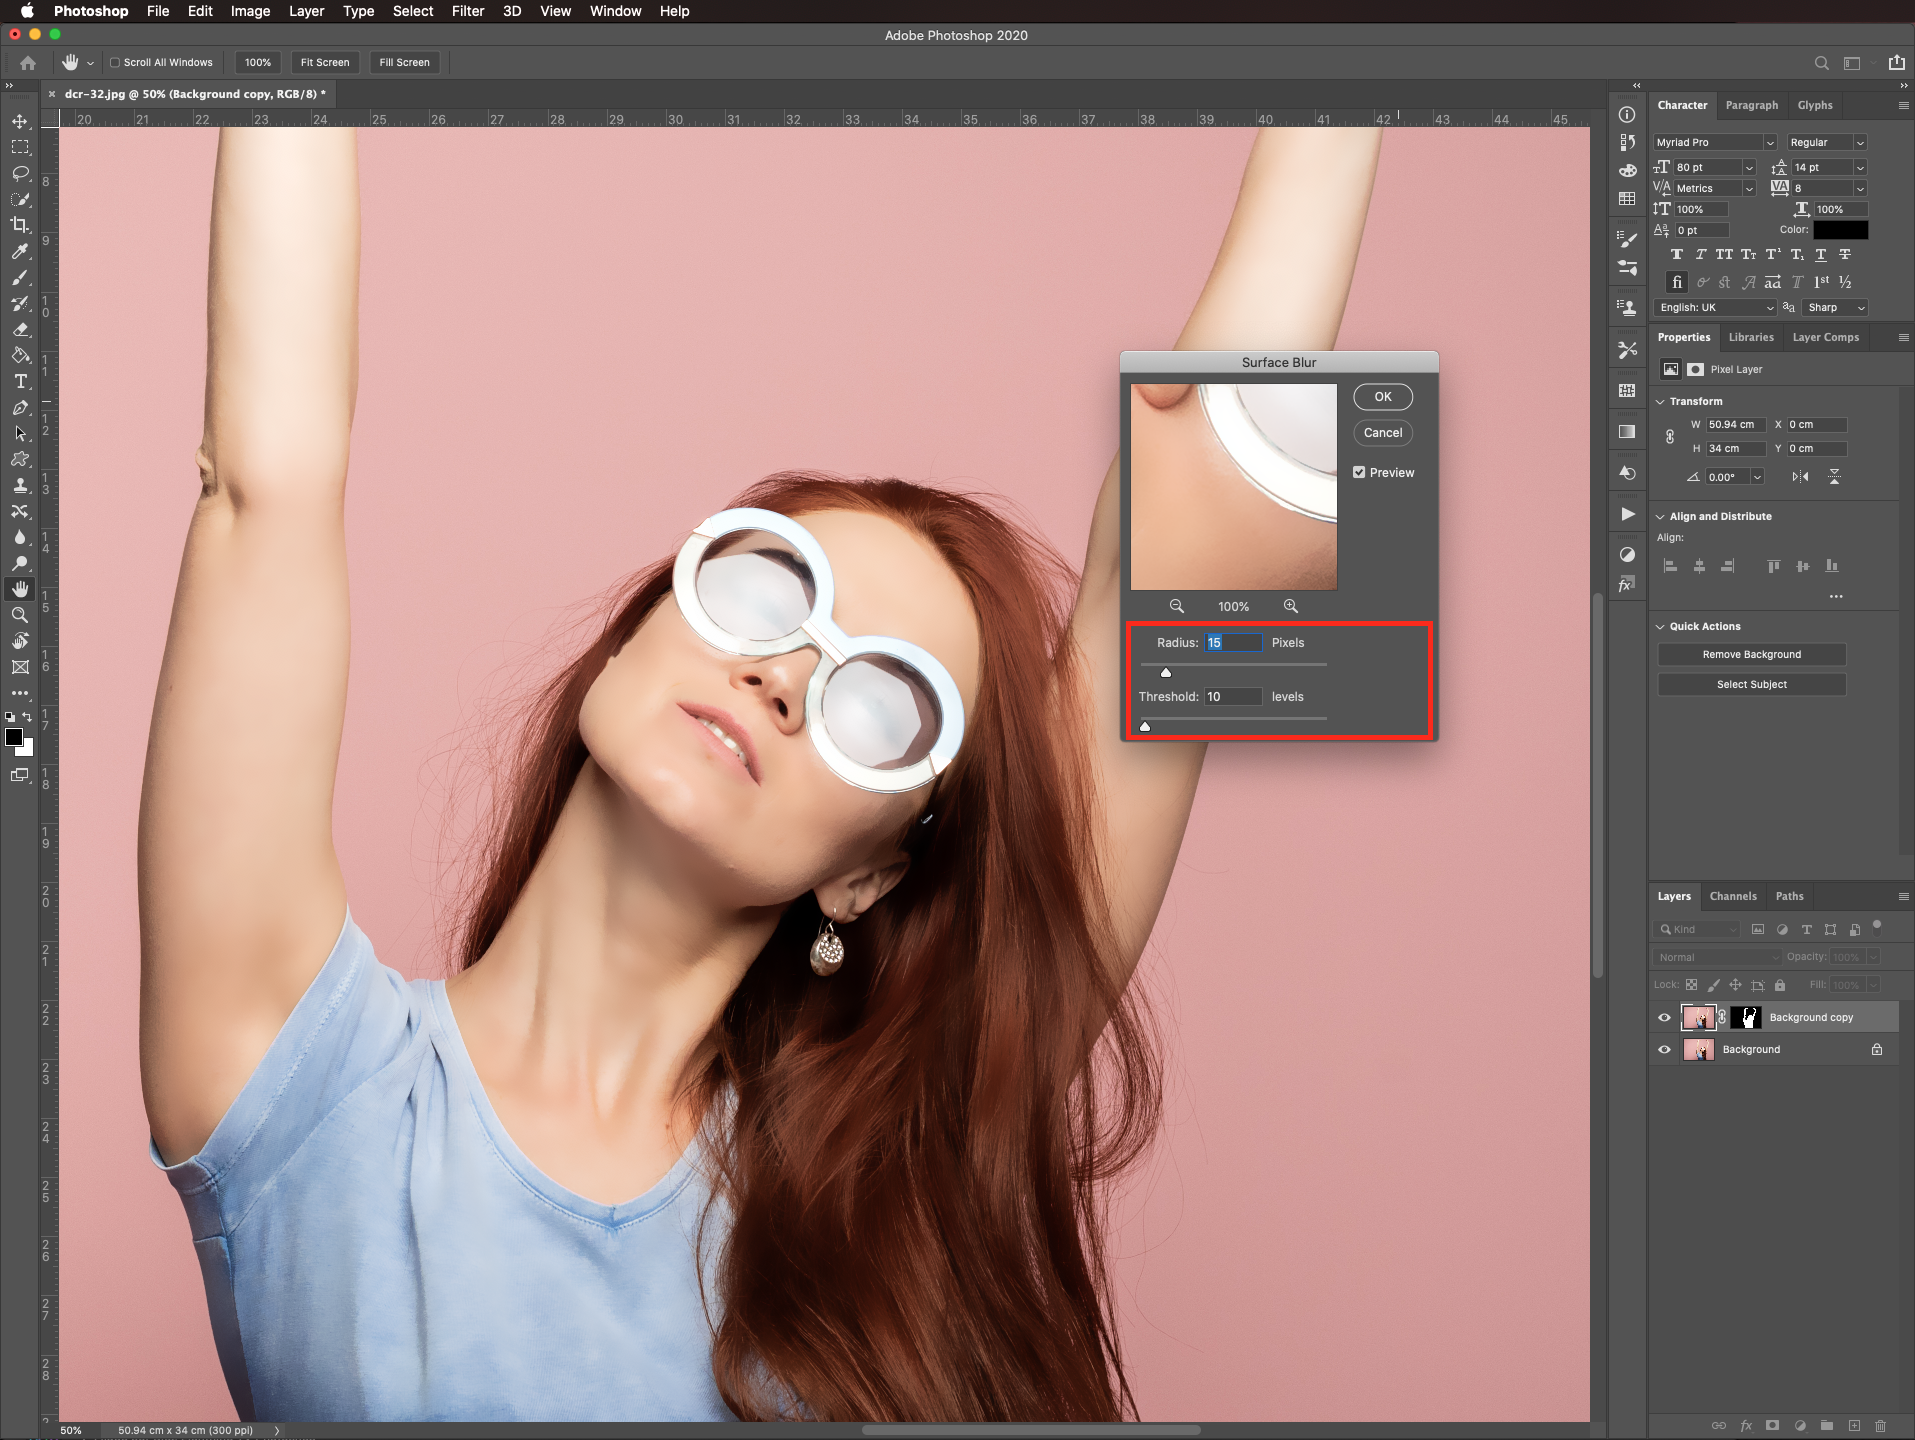
We used a radius of 15 pixels and a threshold of 10 pixels, but the values to use may vary depending on your image.
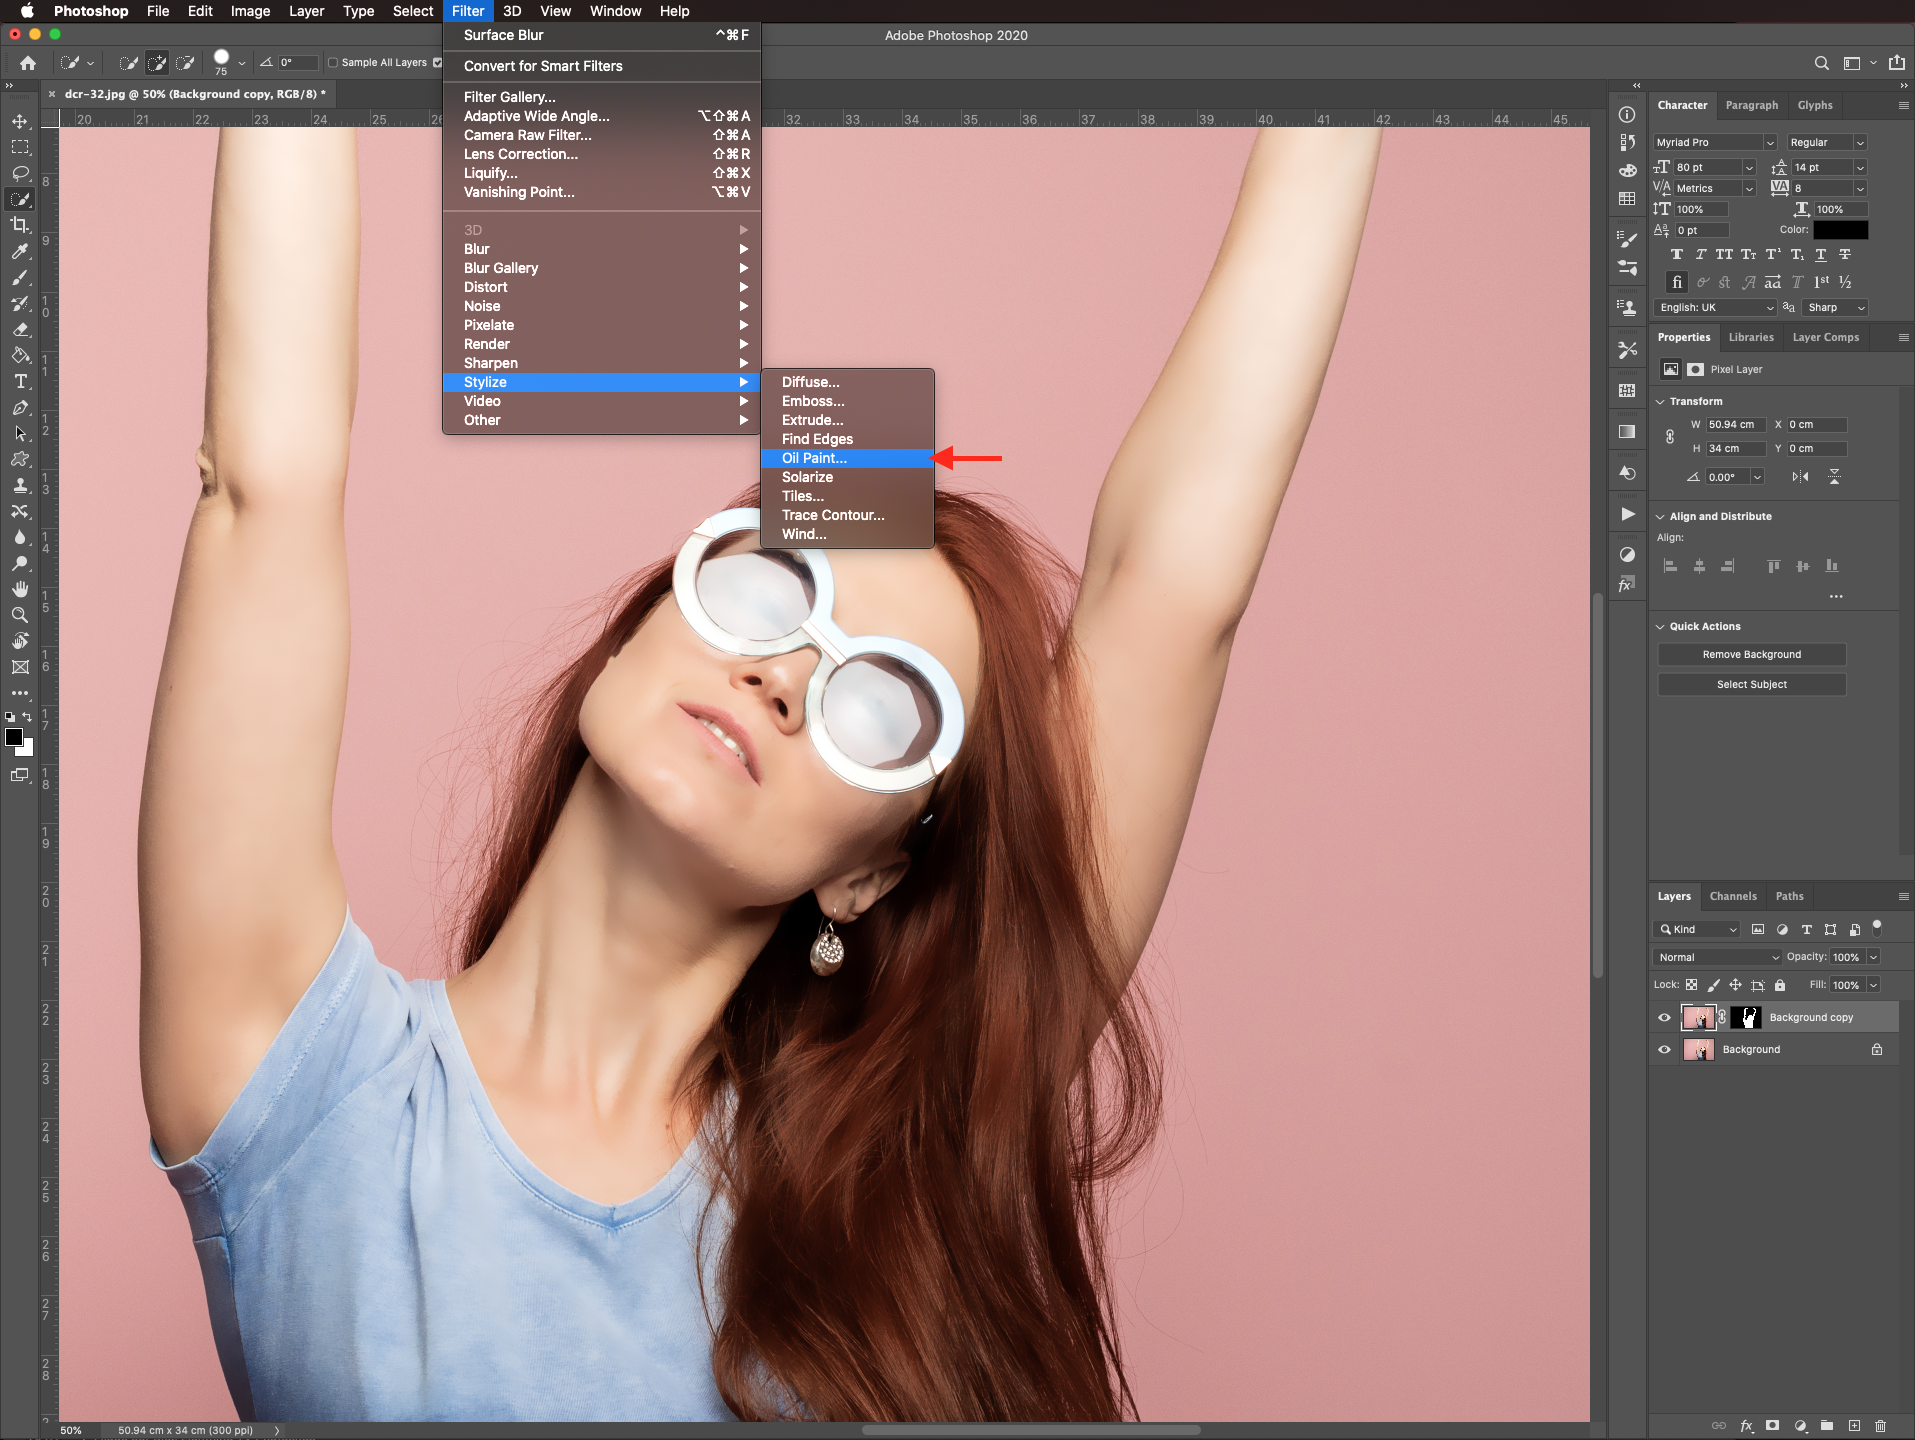
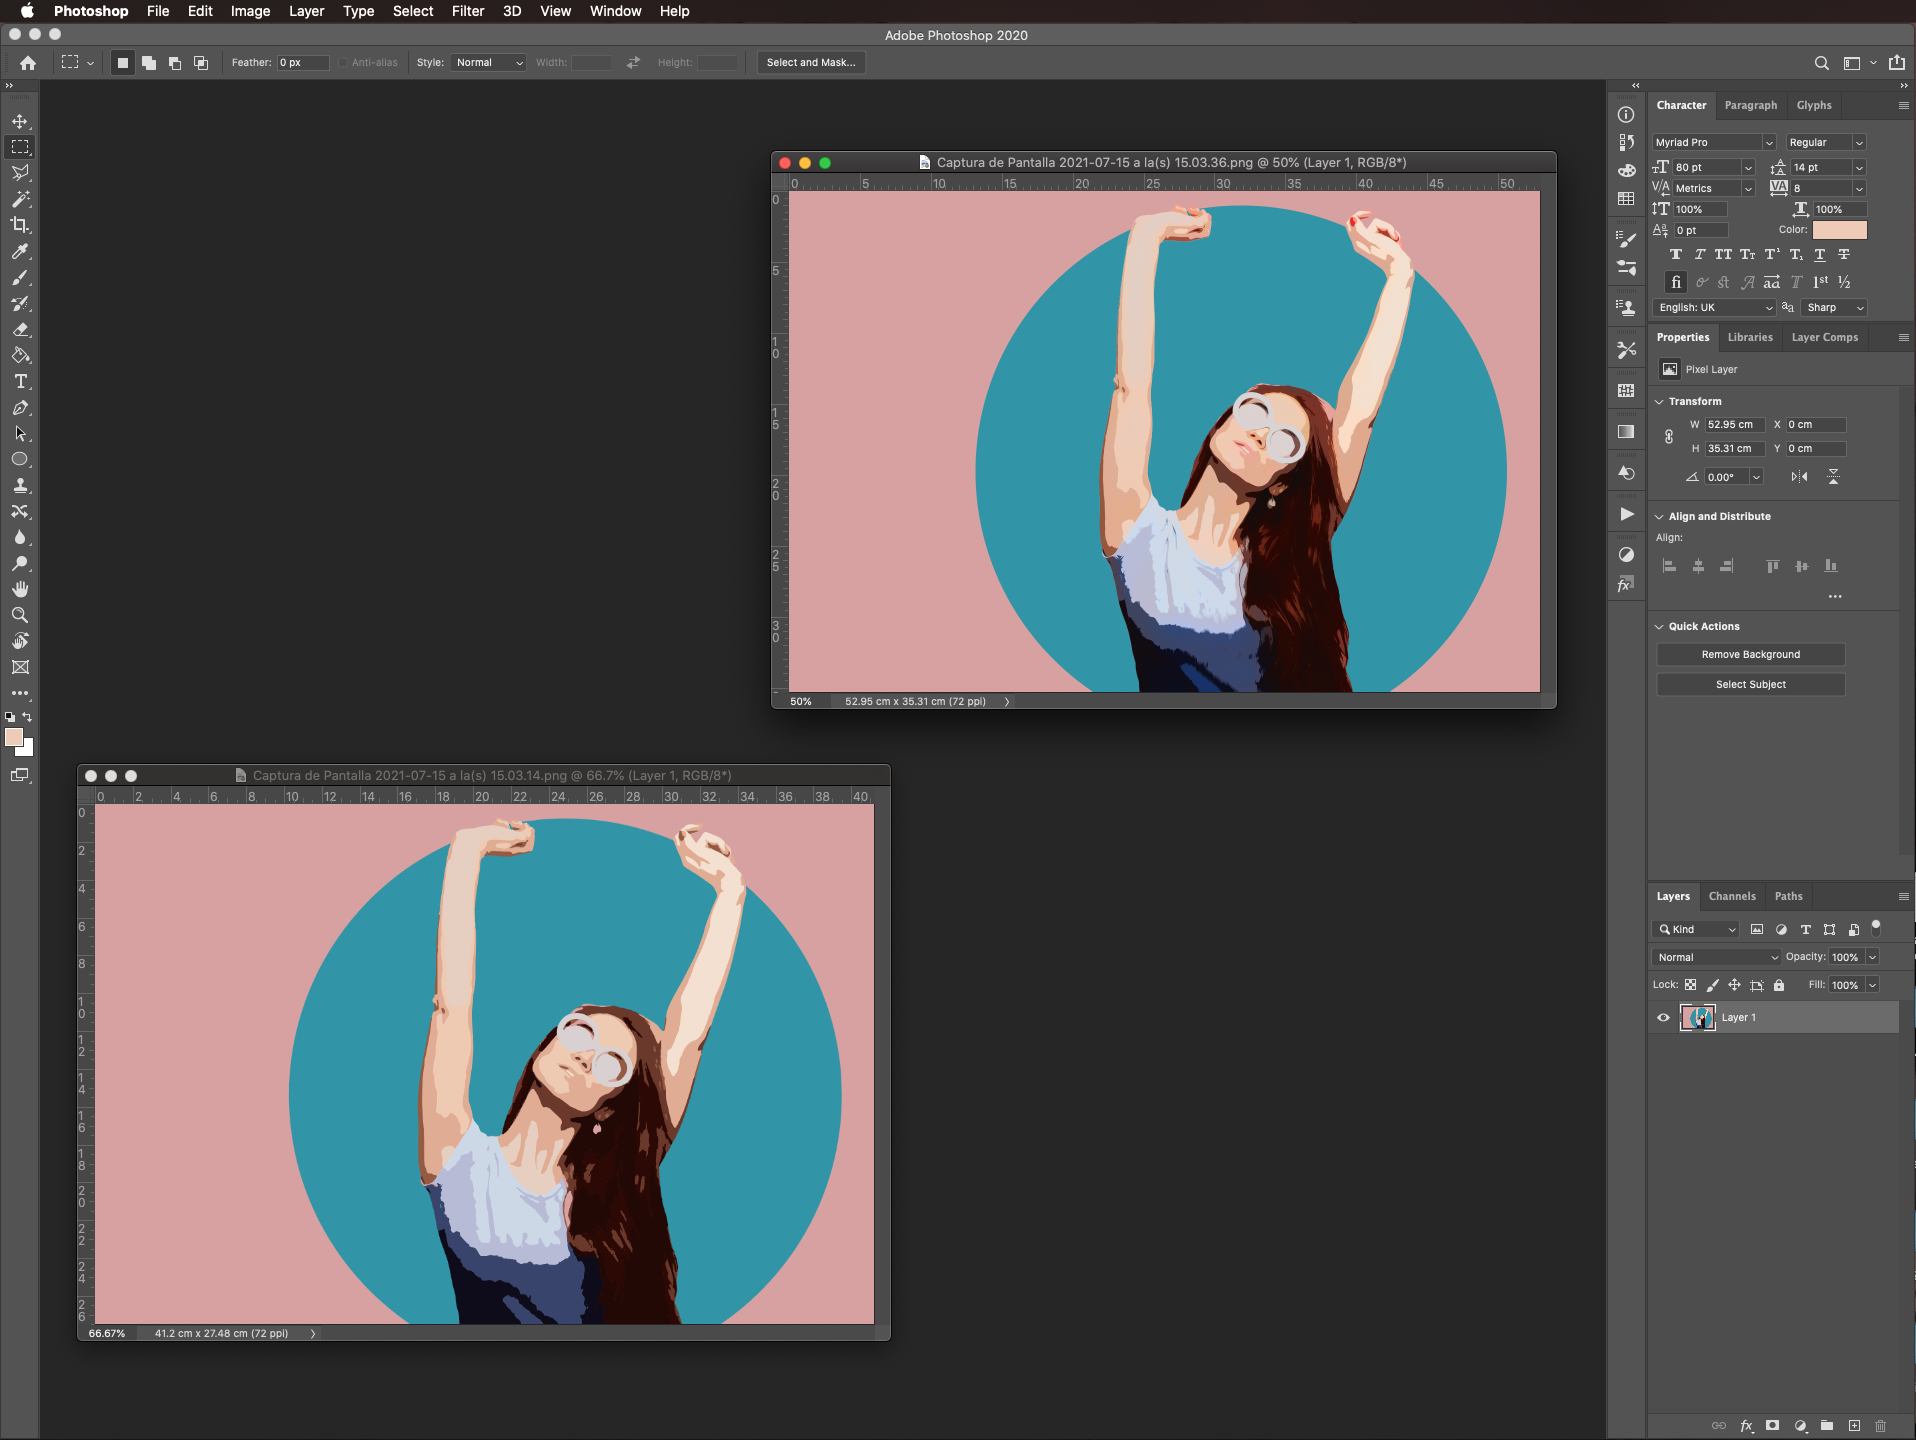
Now, go to filter > stylize > oil paint.
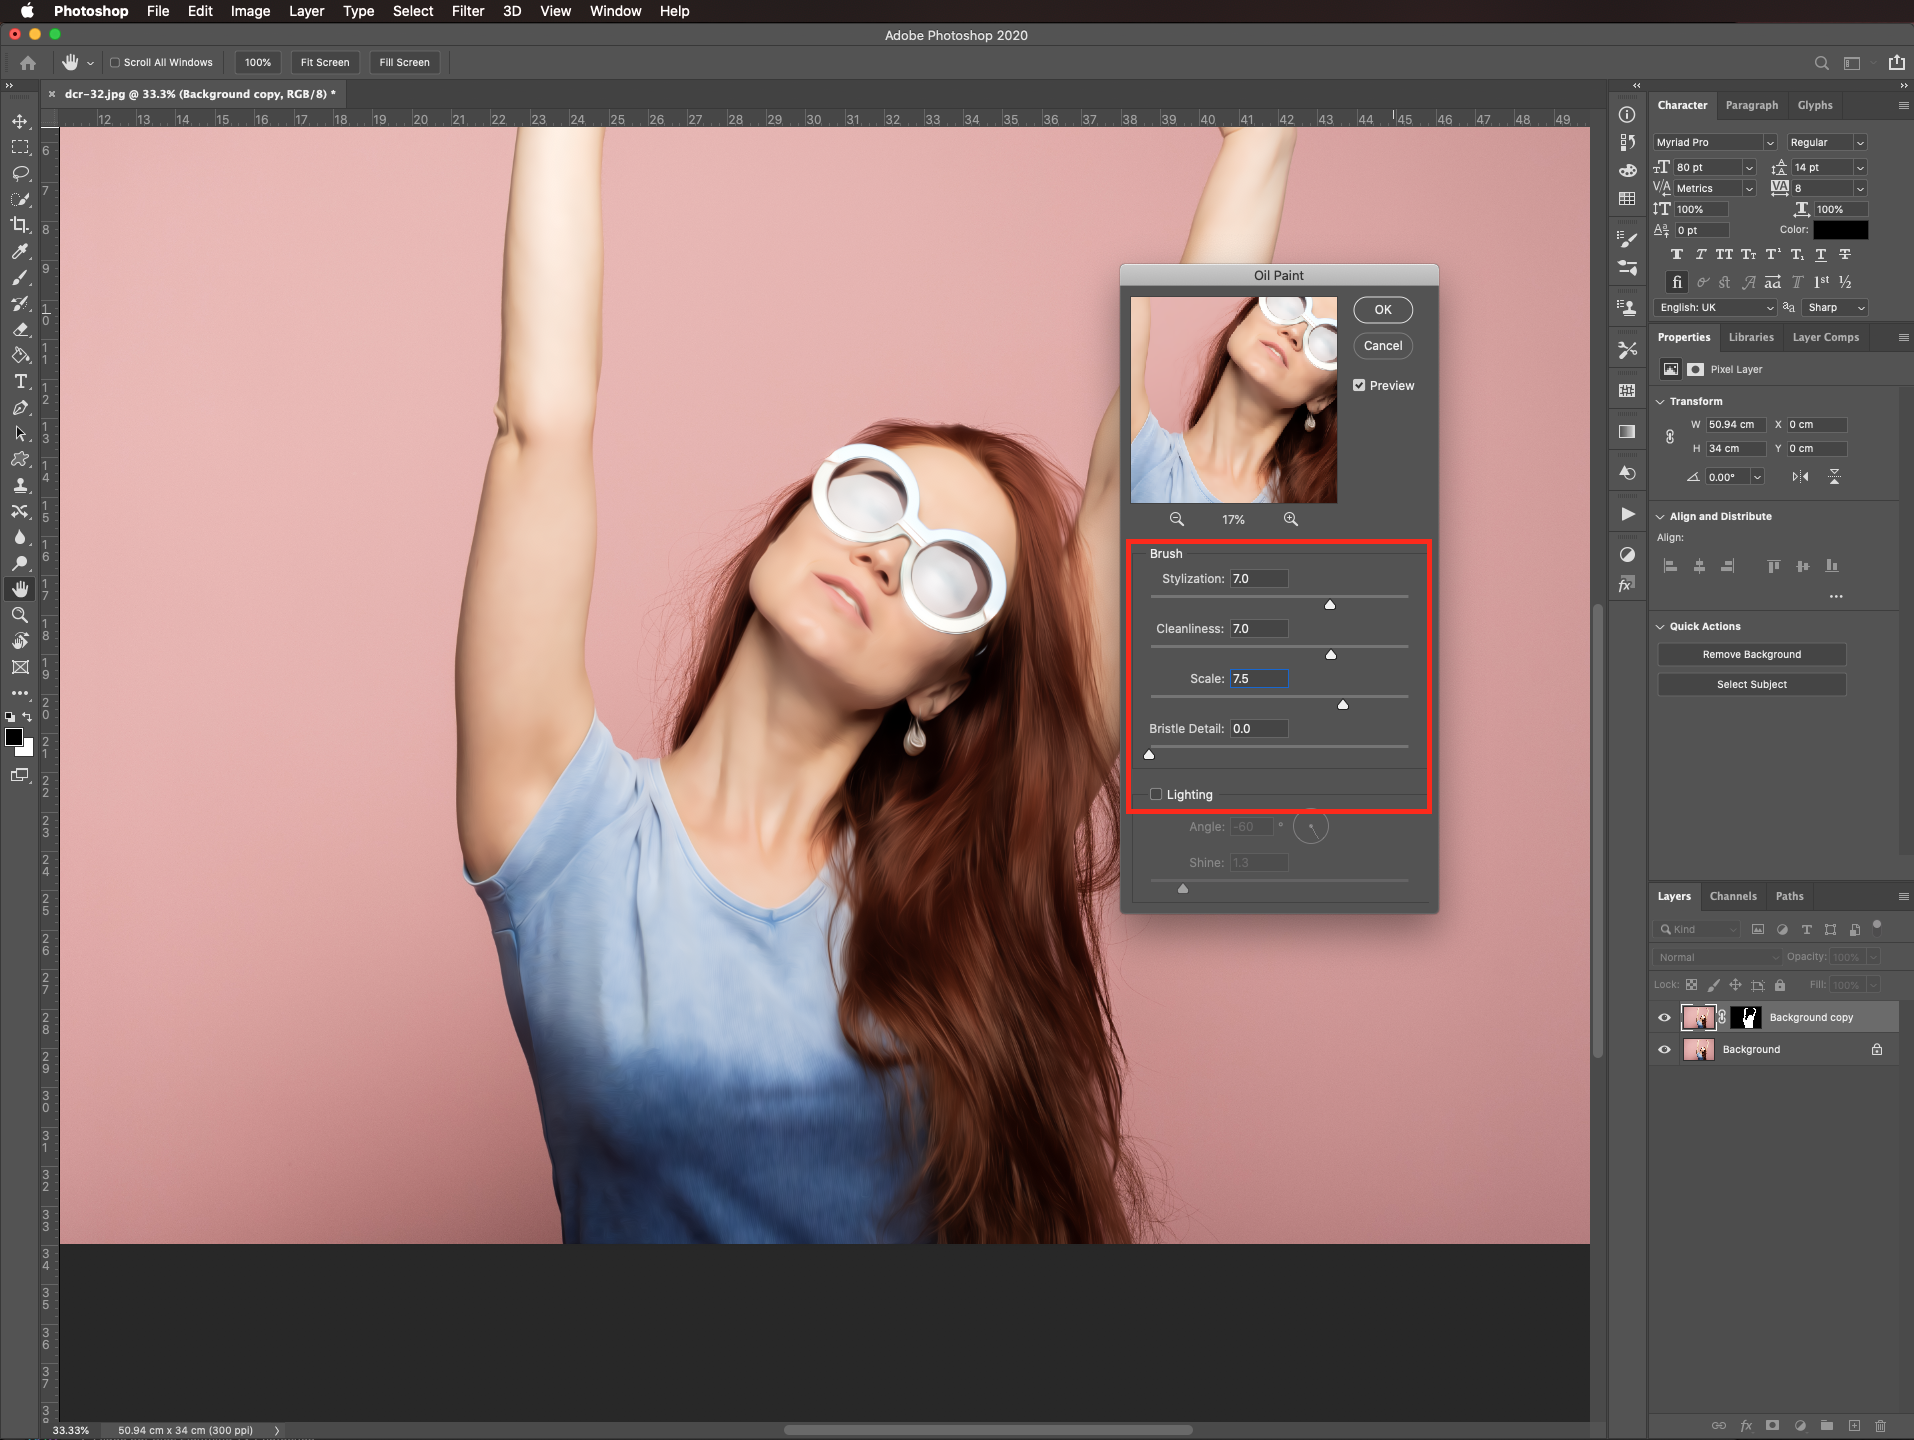
And use the following values: stylization 7.0, cleanliness 7.0, scale 7.5, bristle detail 0.0, and uncheck the lighting box. As before, the values to use may vary depending on your image.
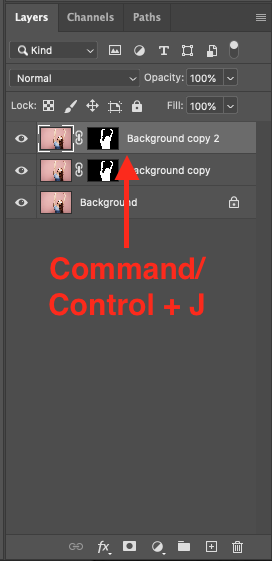
Create a duplicate of the isolated image (command/control + J).
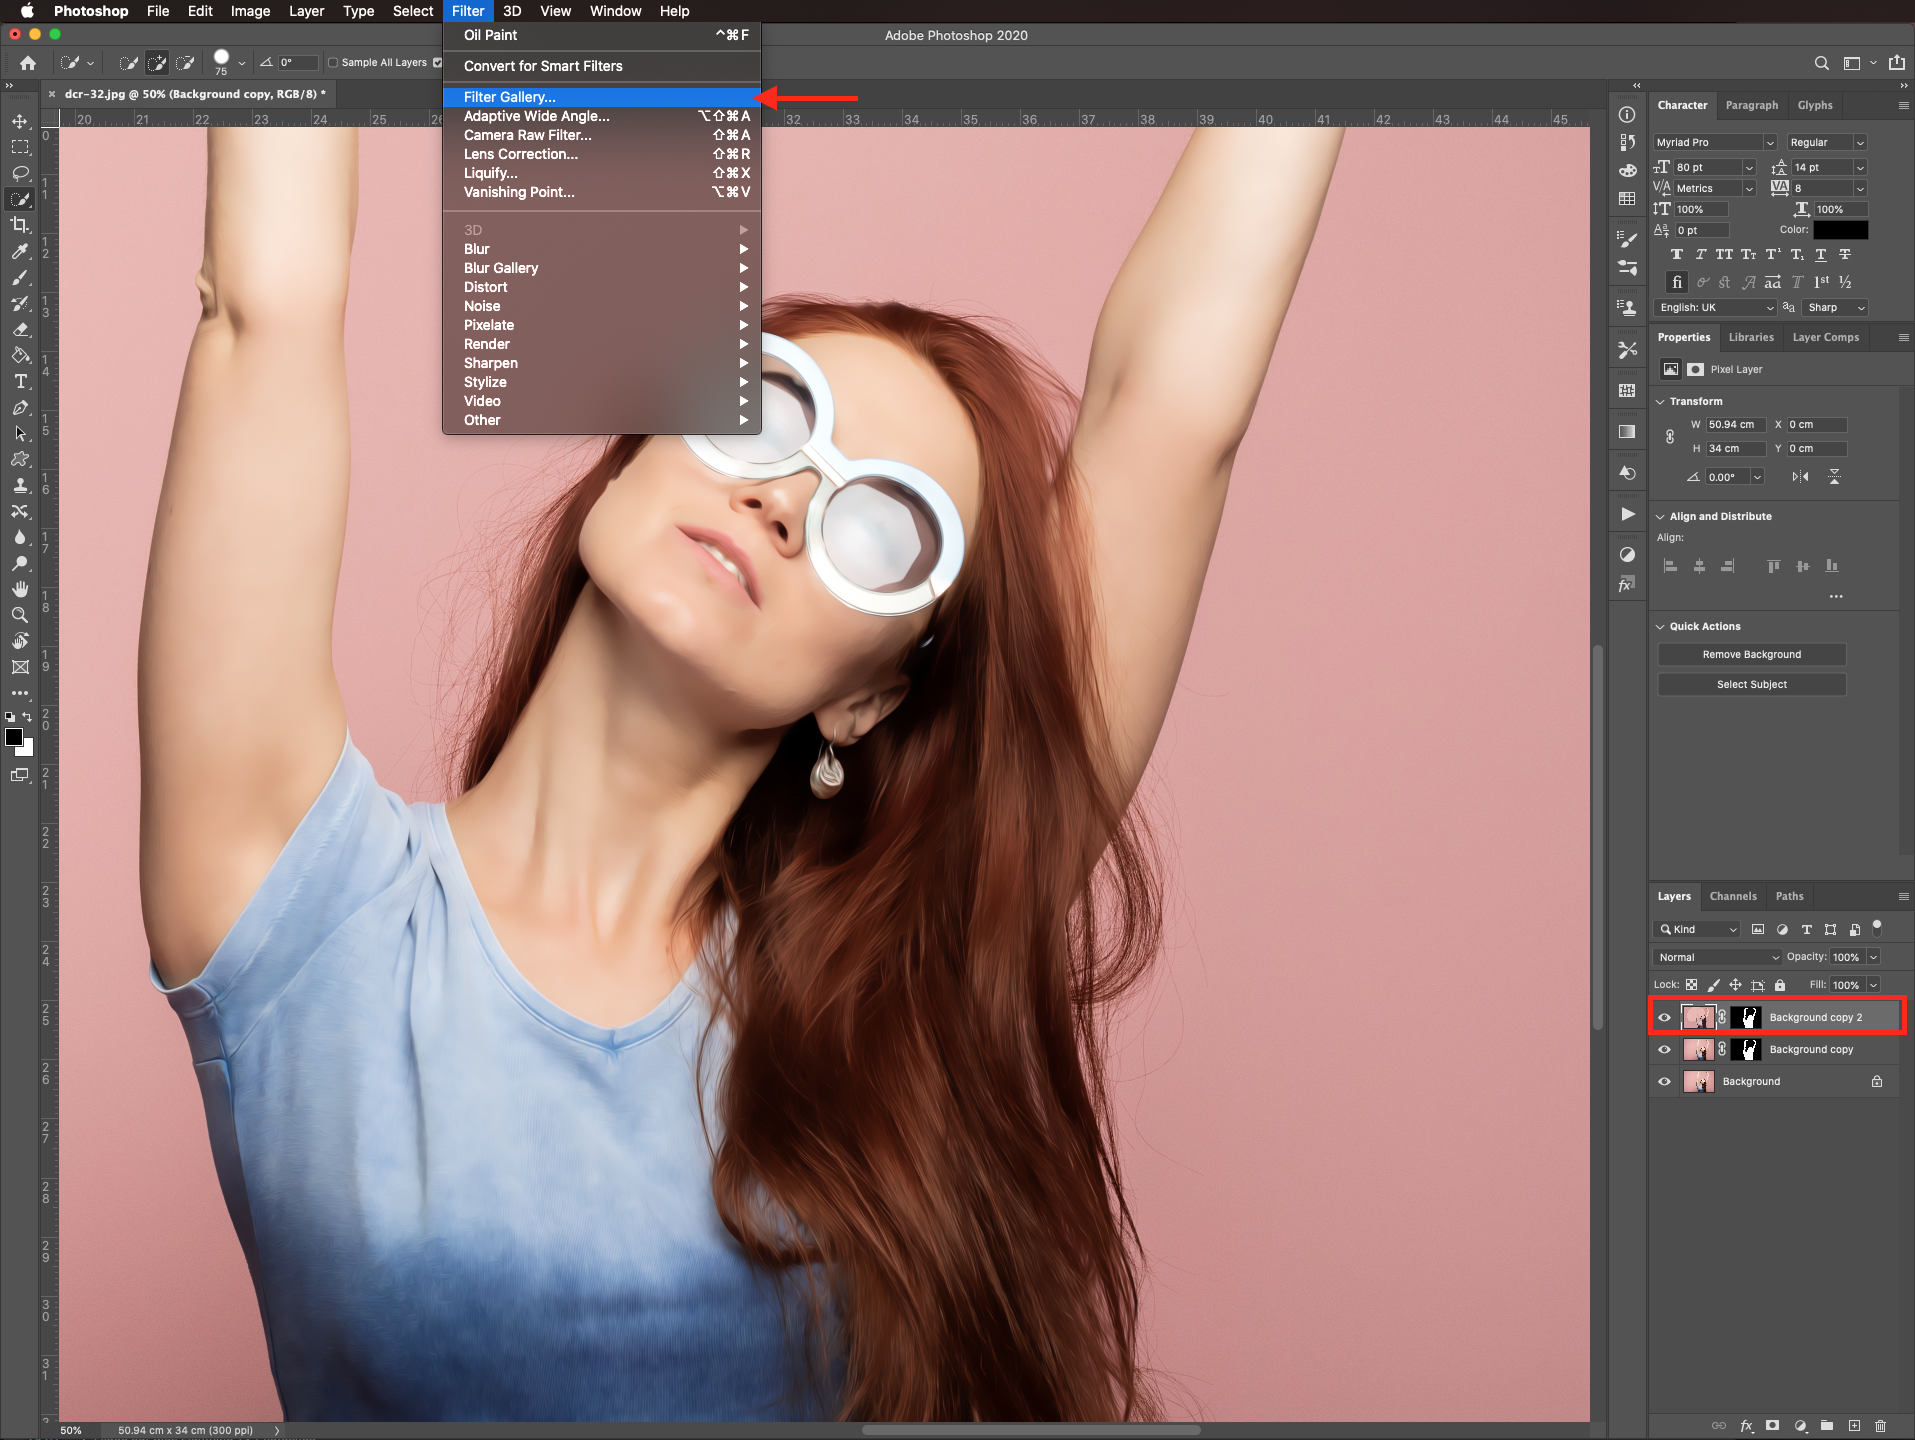
With the new duplicate selected, head to filter > filter gallery.
Select cutout from the artistic tab, and use the following values: number of levels 4, edge simplicity 4, and edge fidelity 3.
Change the blending mode of the top layer to luminosity.

Duplicate that layer and change the blending mode to soft light.
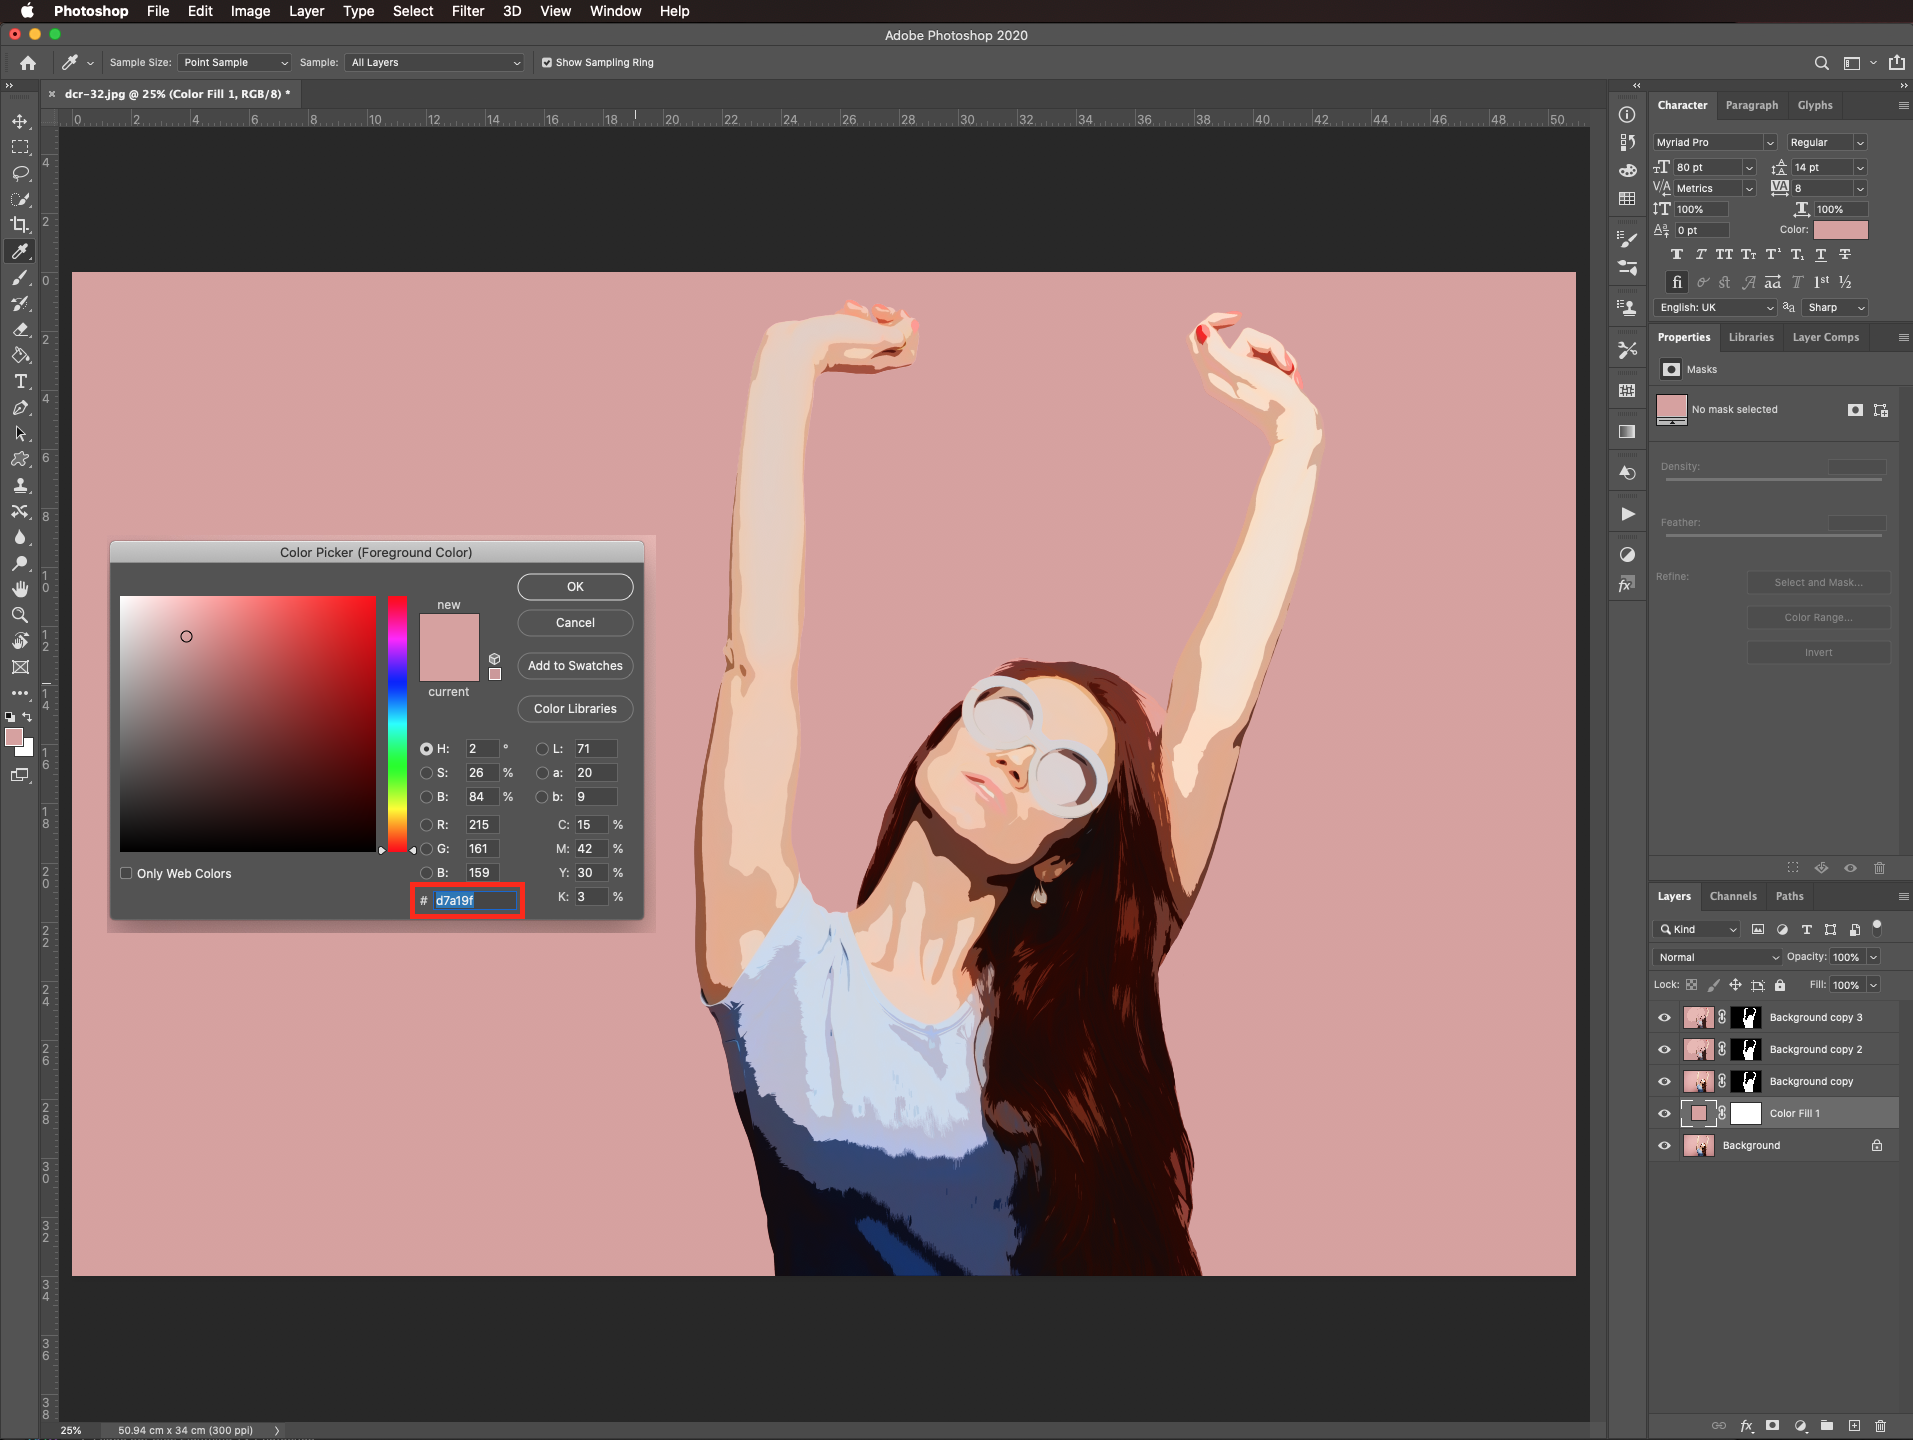
Use the eyedropper tool (I) to select the background color.
Make sure that the background layer is selected and create a new solid color adjustment layer by clicking on the small black and white circle at the bottom of the layers panel.
Use the foreground color you picked before. Ours was #D7A19F.
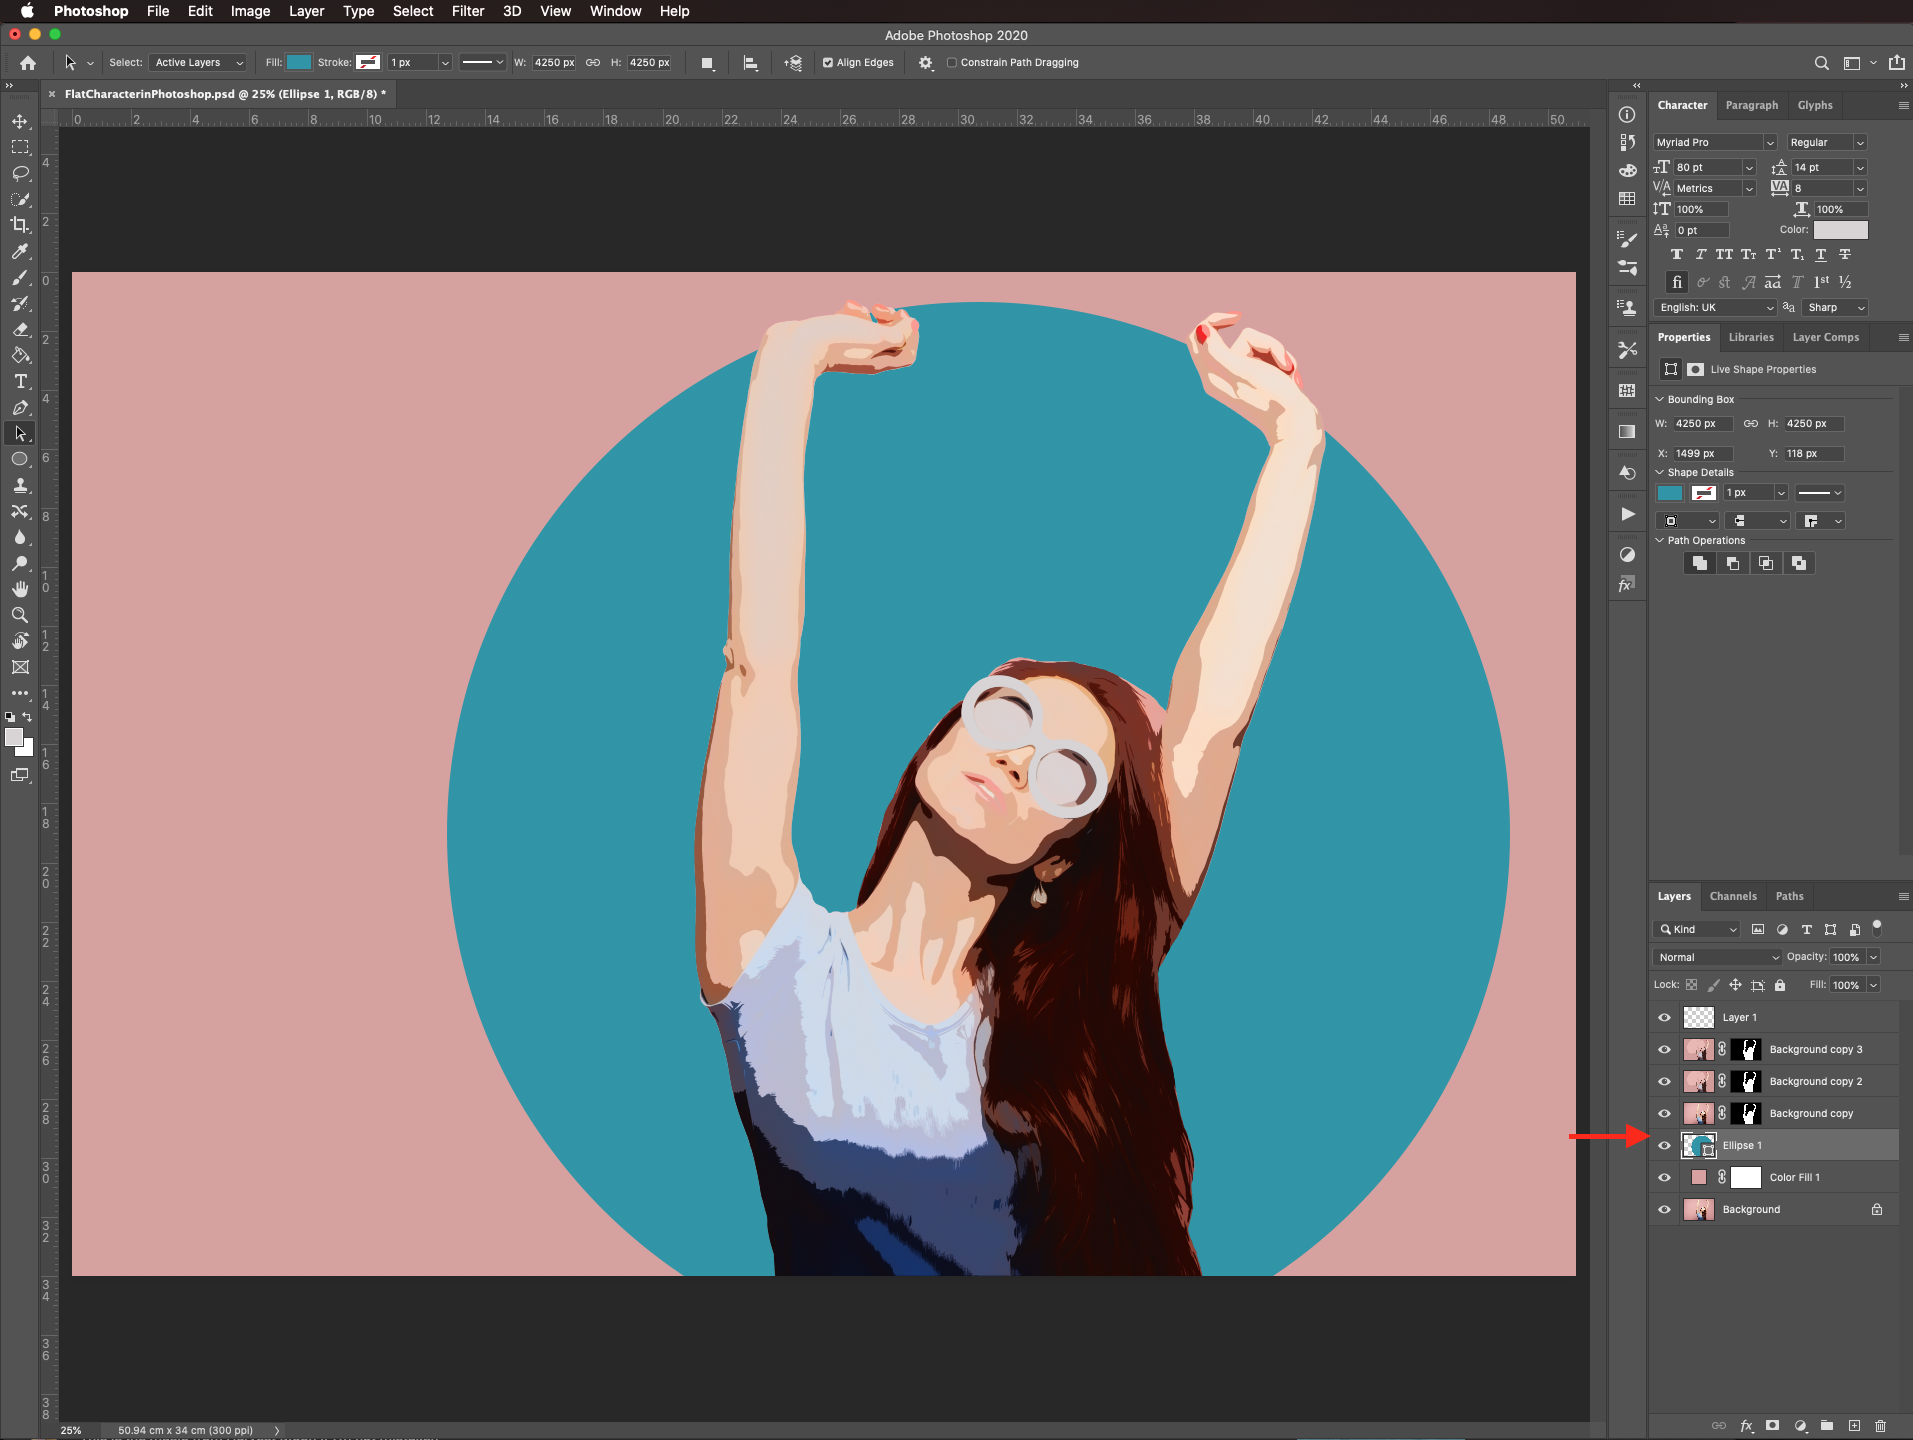
You can also add some shapes behind the subject to enhance your artwork.
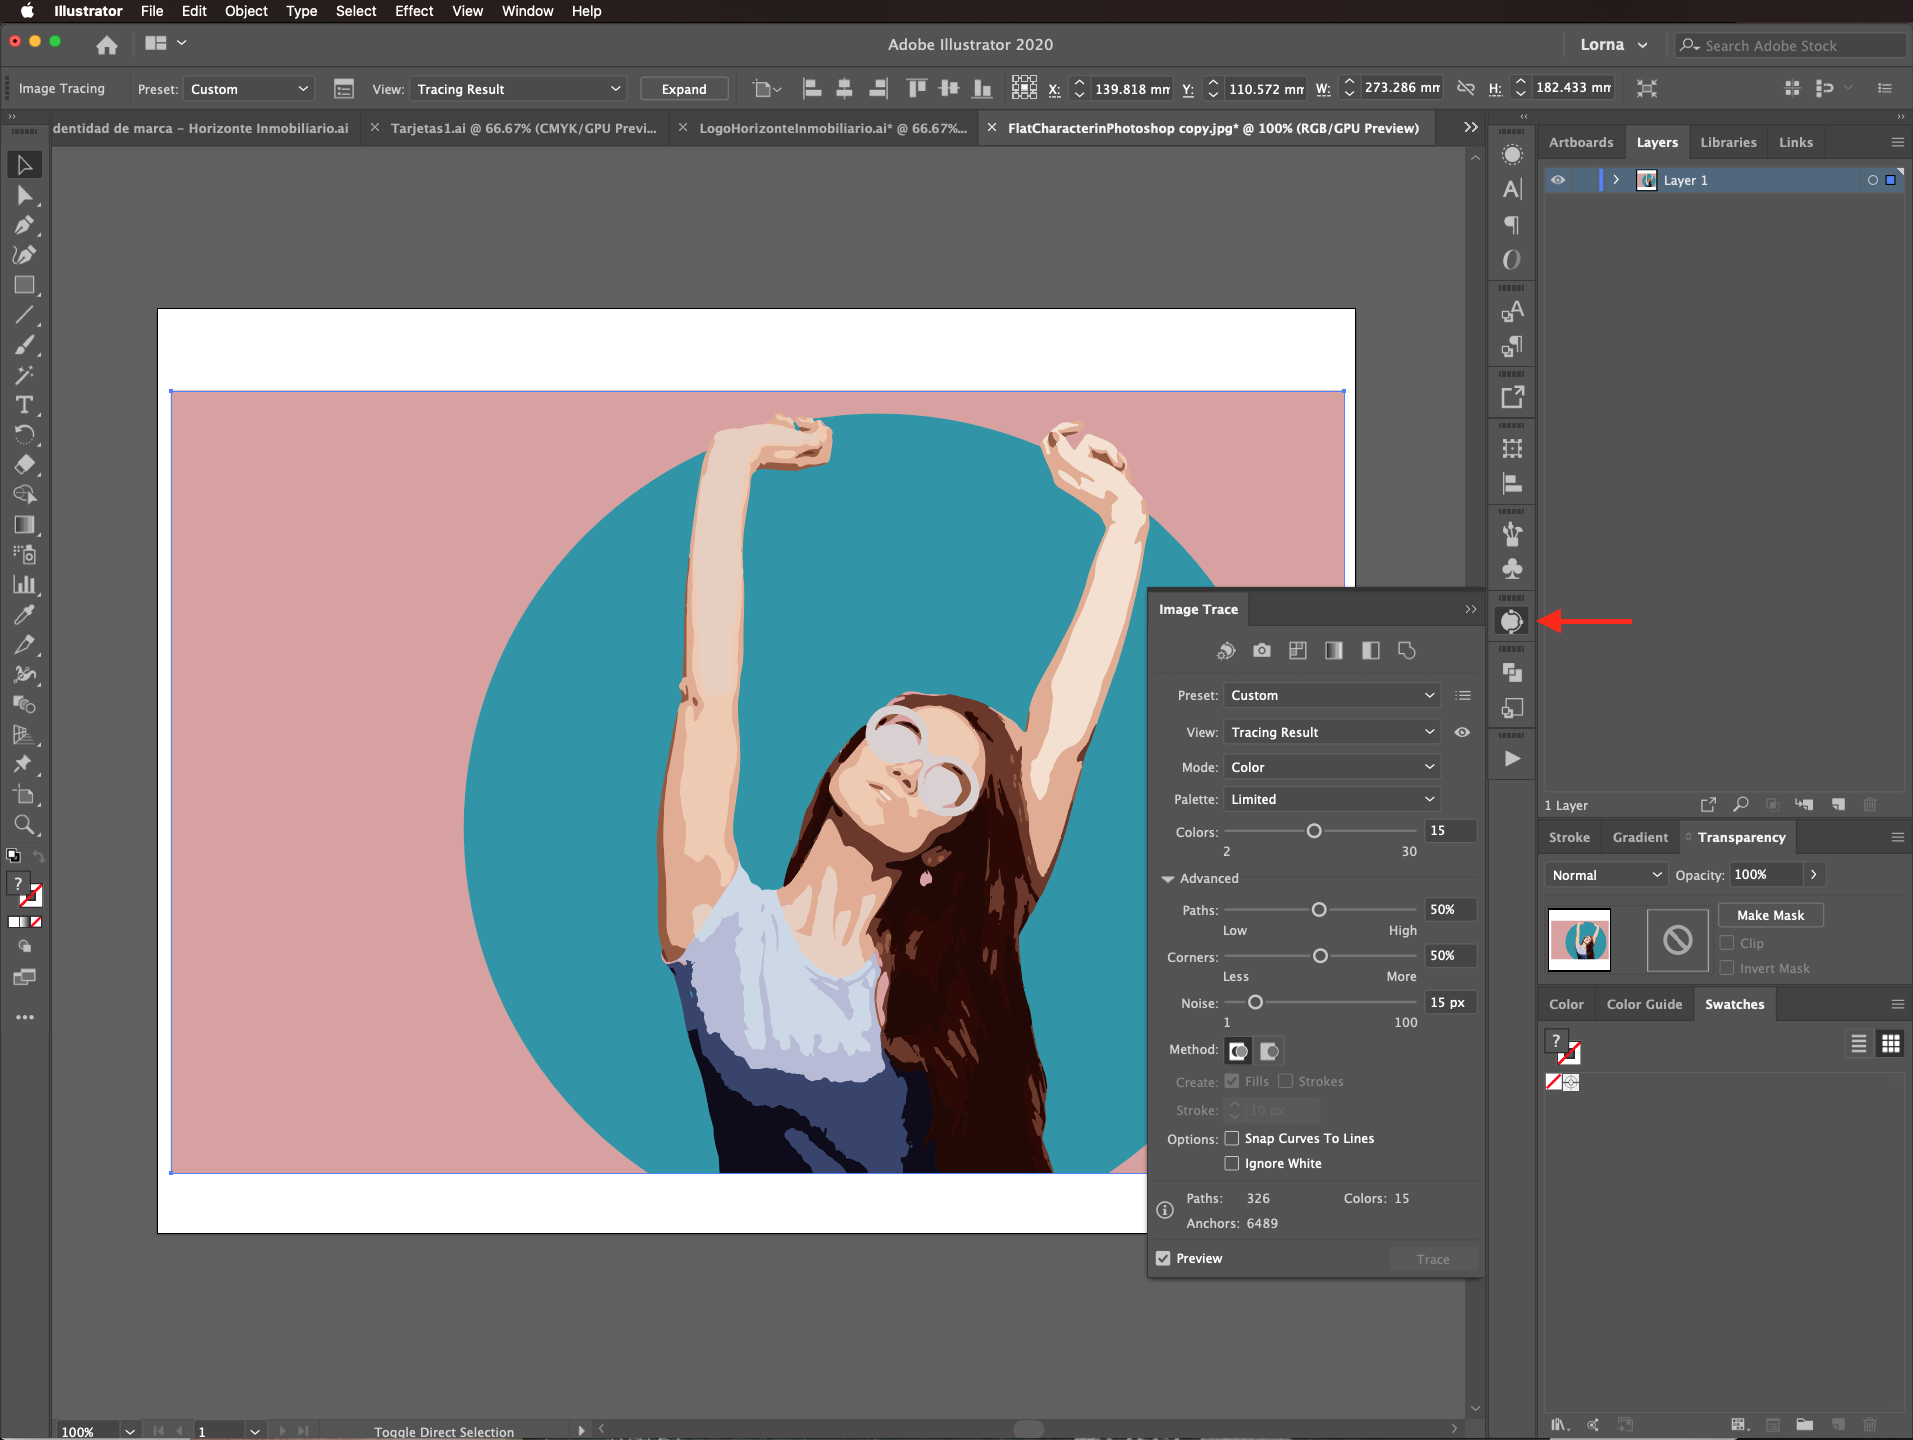
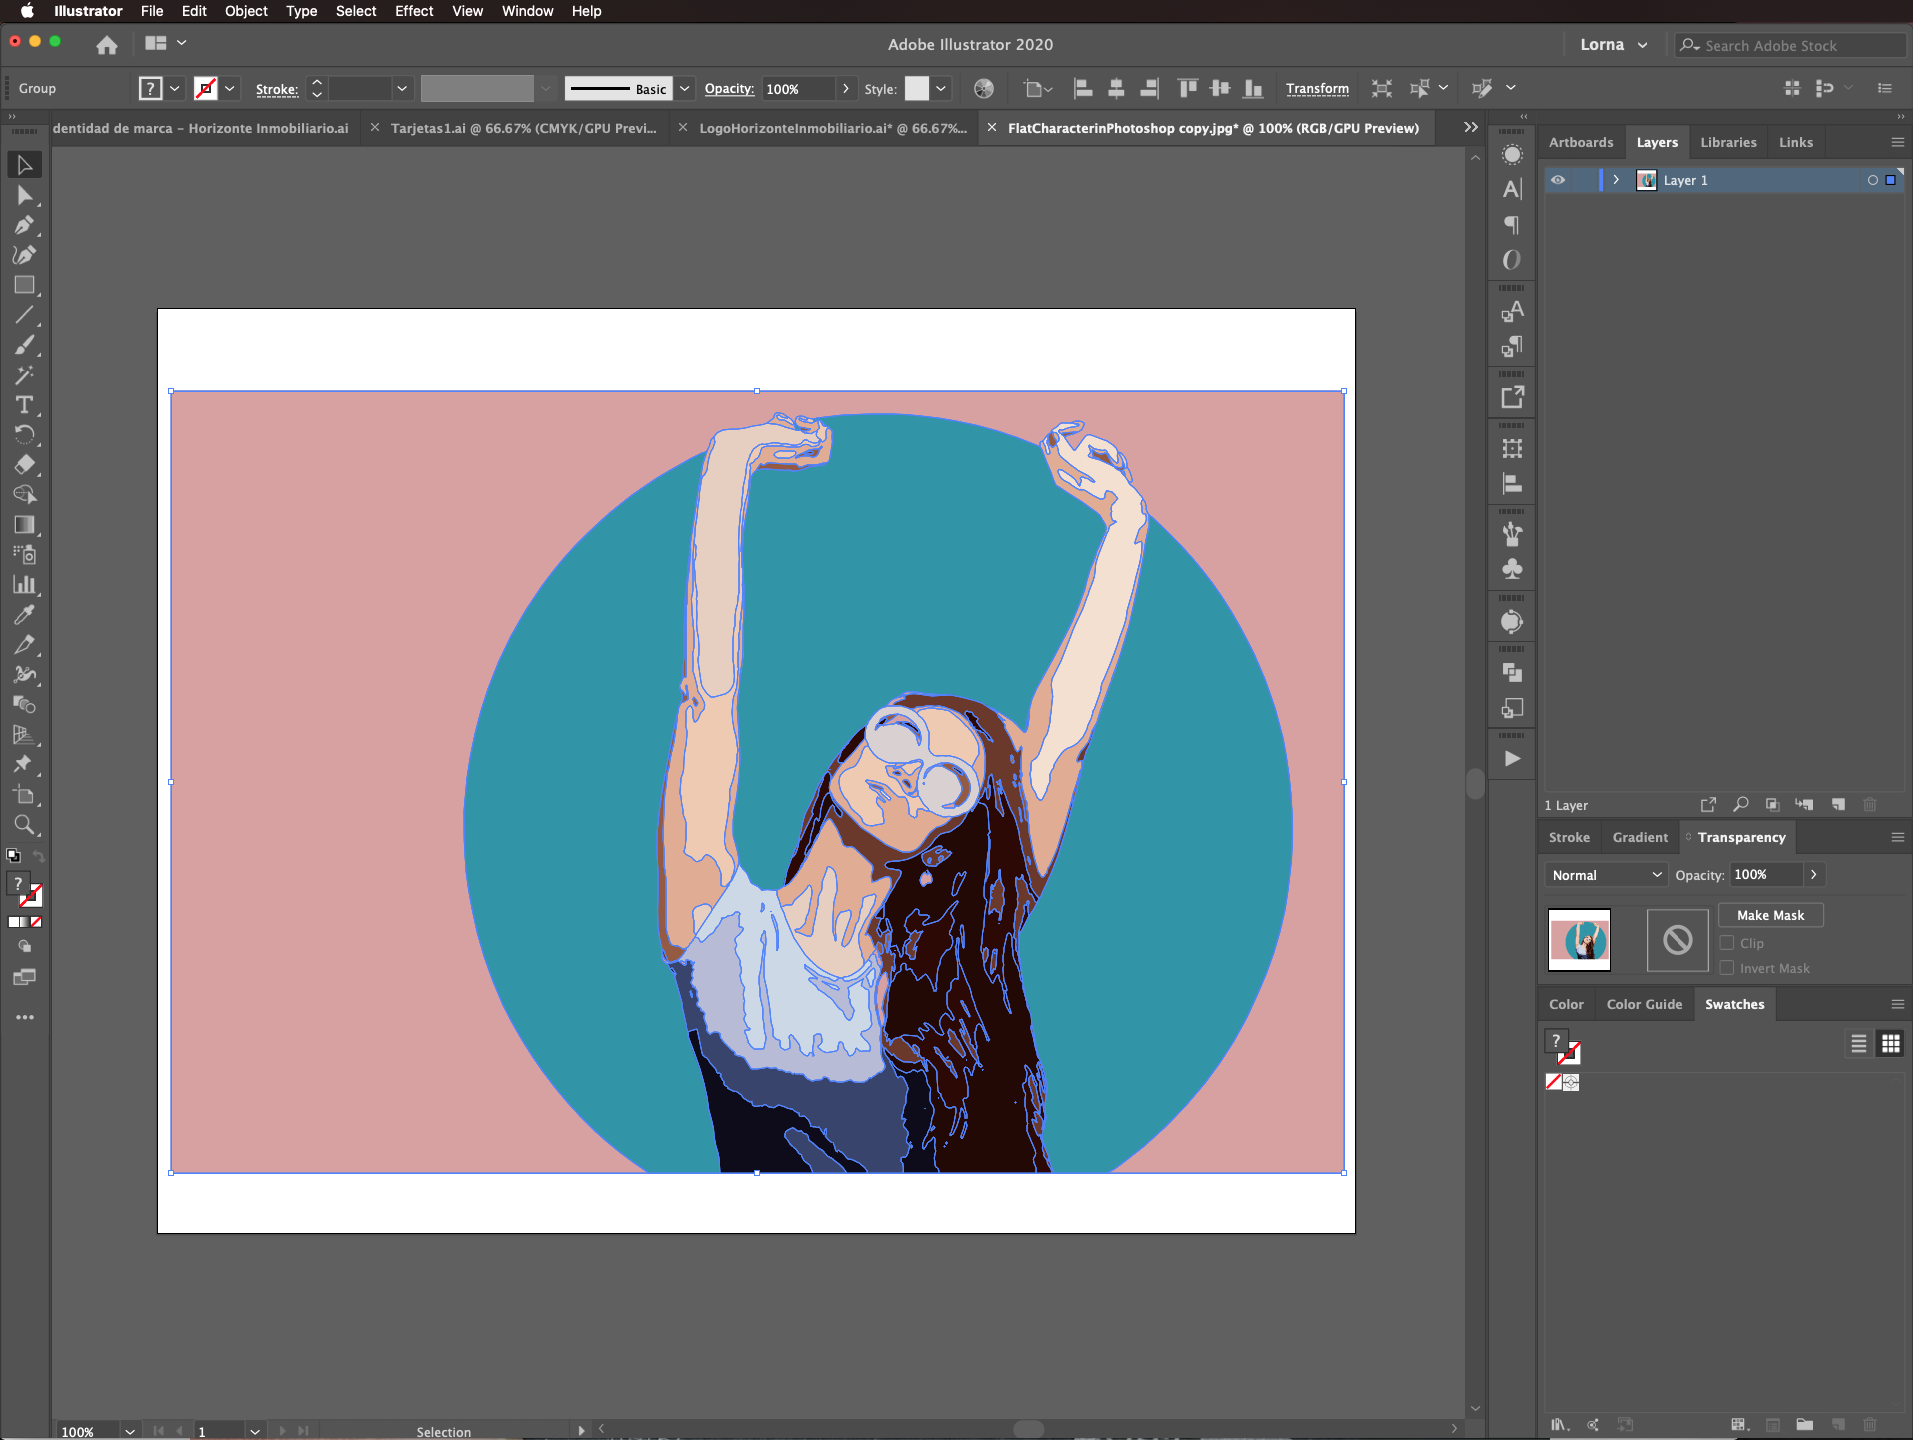
If you want, you can convert your artwork to vectors by importing it to Illustrator and using image trace. If you need, here’s a good tutorial on how to use image trace.
Check it out.
In case you want to use the pen tool to trace your artwork in photoshop, we have a great in-depth guide on using the pen tool in Illustrator, which will be similar to the pen tool in Photoshop.
To get started with our Photoshop tutorial, I'm going to be using this woman stock photo I've selected from Design Bundles as a reference photo.
Step 1: Duplicate Your Image
Create a duplicate of the image you chose (Command/Control + J).
Step 2: Isolate Your Subject From the Background
Select your subject using the quick selection tool or the magic wand tool (W). You may use the select subject button on the top menu to help you out. When your selection is roughly done, click select and mask.
If you need more details about this topic, you can check out our how to smooth mask edges tutorial.
Choose output to layer mask when saving your mask options.
Step 3: Apply a Surface Blur
Making sure that the masked image is selected, go to filter > blur > surface blur.
We used a radius of 15 pixels and a threshold of 10 pixels, but the values to use may vary depending on your image.
Step 4: Apply an Oil Paint Filter
Now, go to filter > stylize > oil paint.
And use the following values: stylization 7.0, cleanliness 7.0, scale 7.5, bristle detail 0.0, and uncheck the lighting box. As before, the values to use may vary depending on your image.
Step 5: Duplicate Your Subject
Create a duplicate of the isolated image (command/control + J).
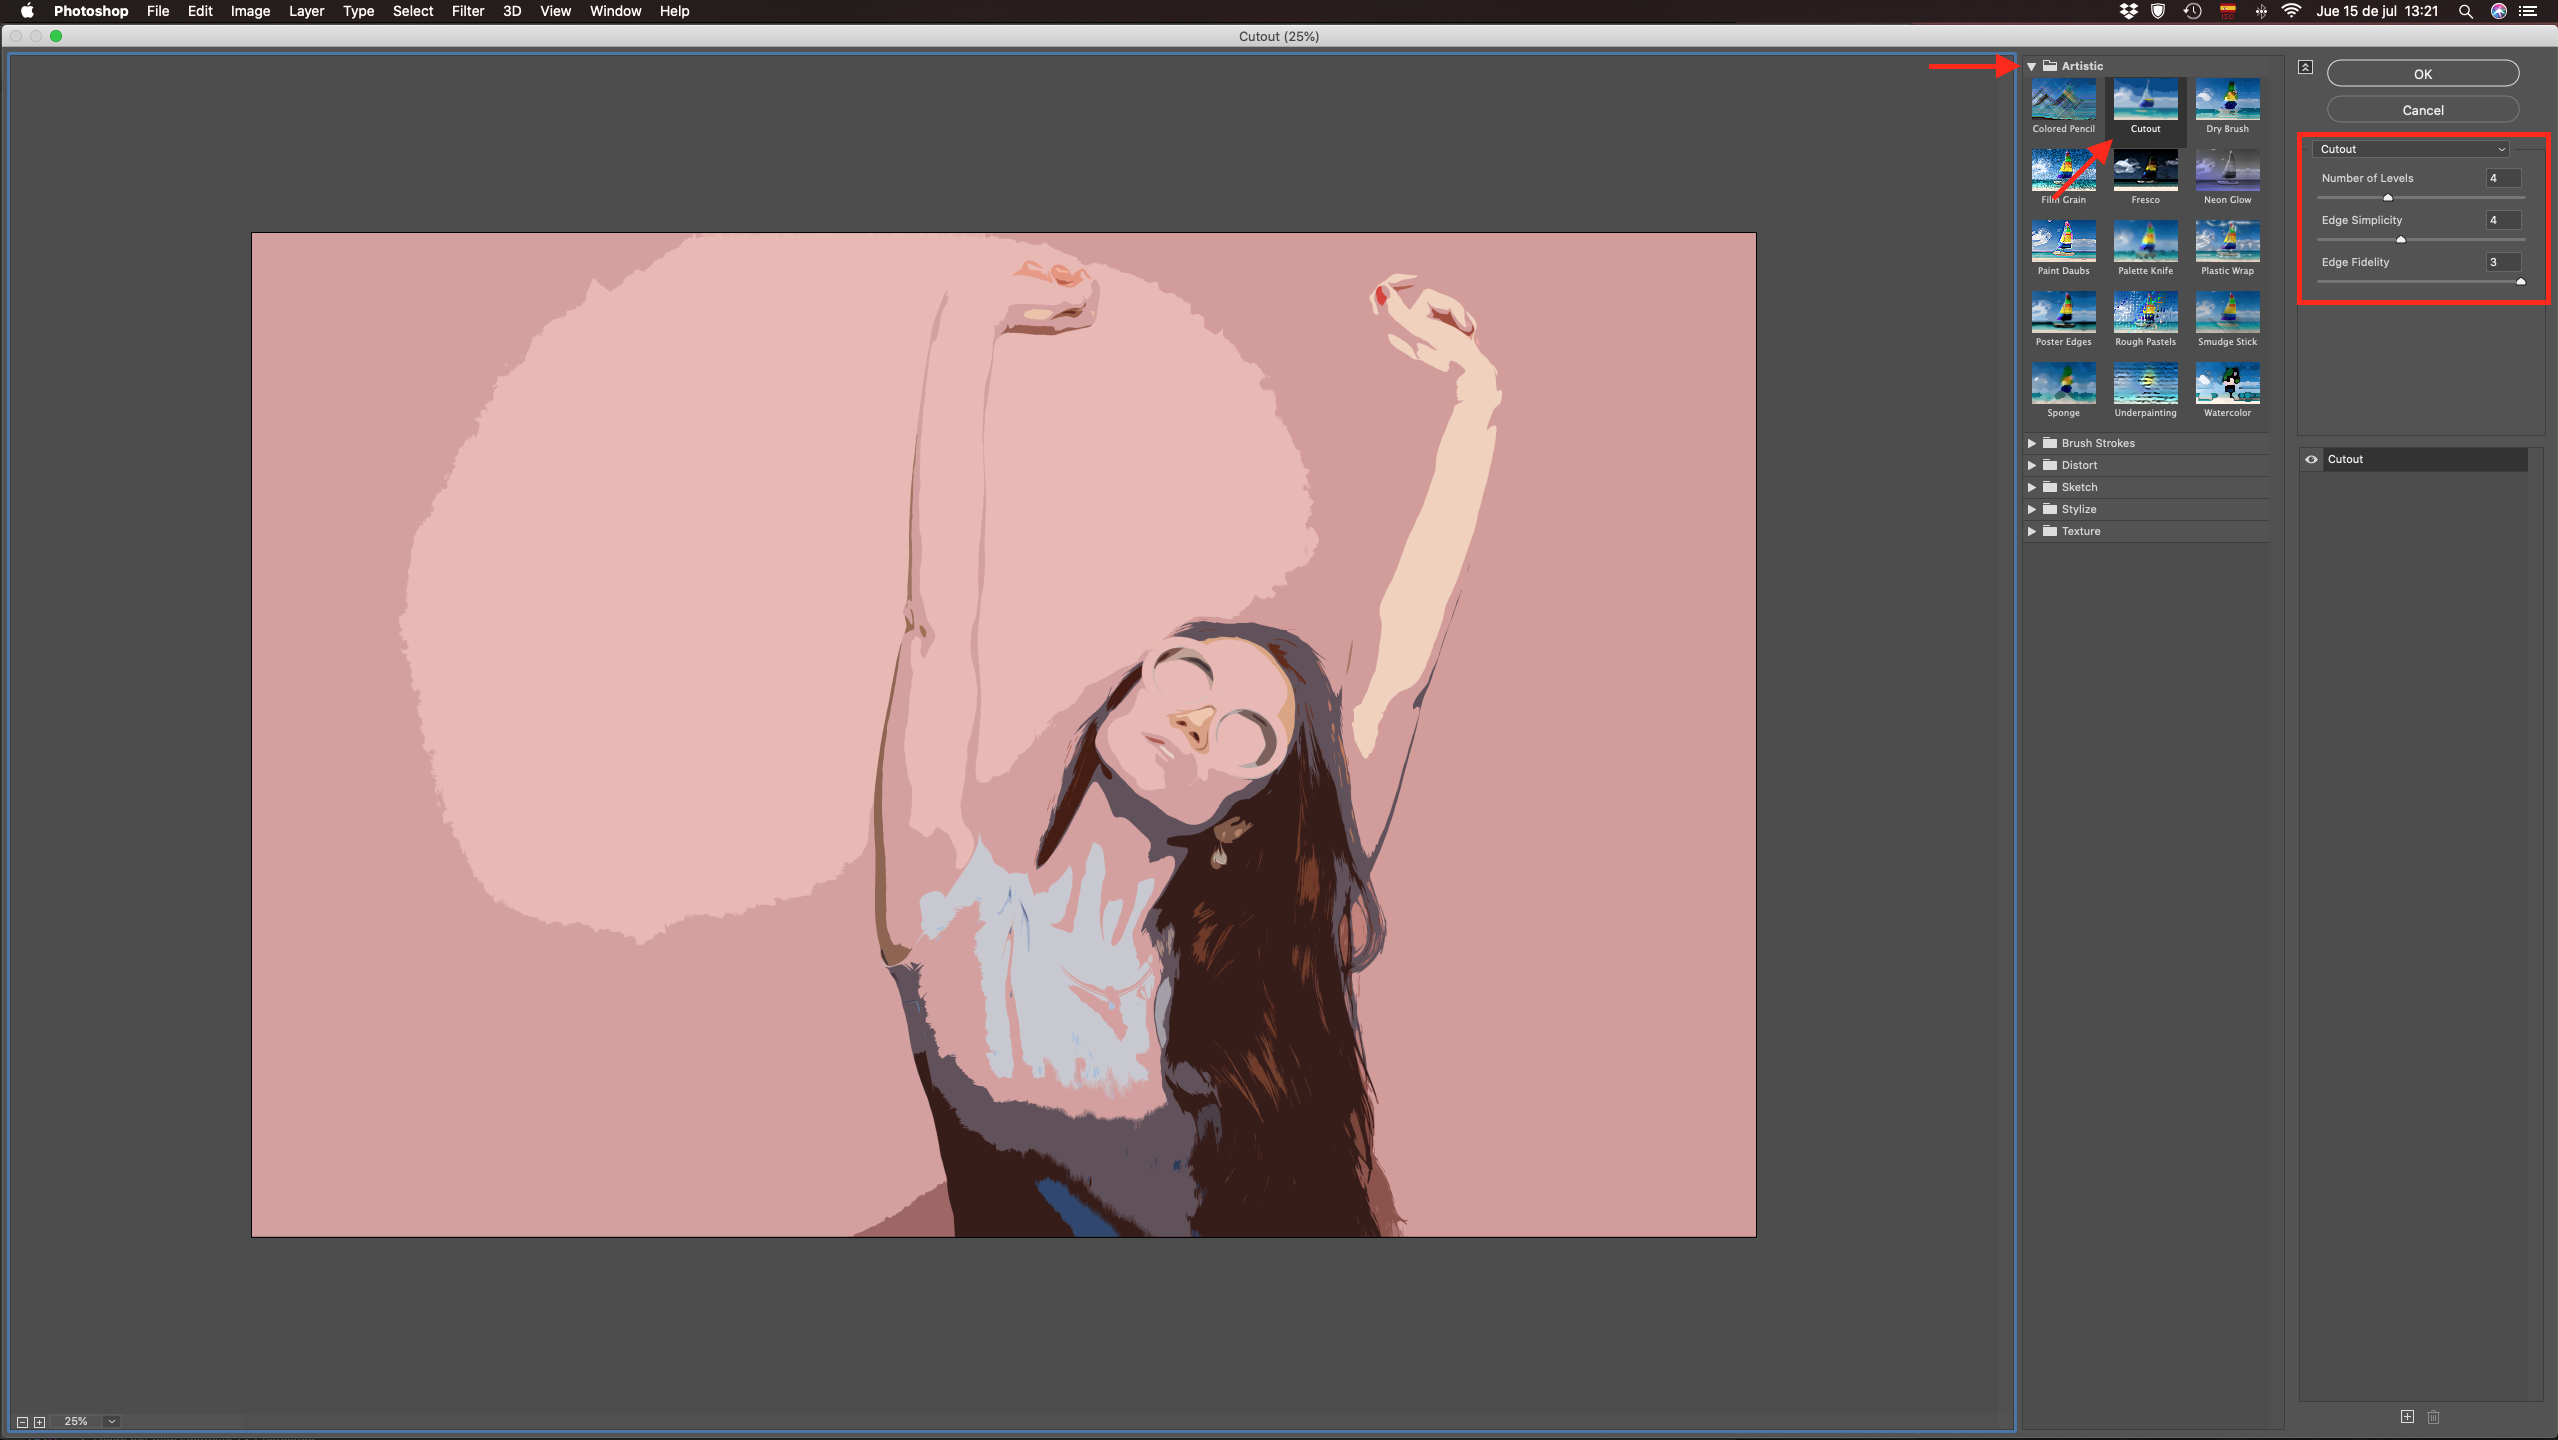
Step 6: Apply a Cutout Filter
With the new duplicate selected, head to filter > filter gallery.
Select cutout from the artistic tab, and use the following values: number of levels 4, edge simplicity 4, and edge fidelity 3.
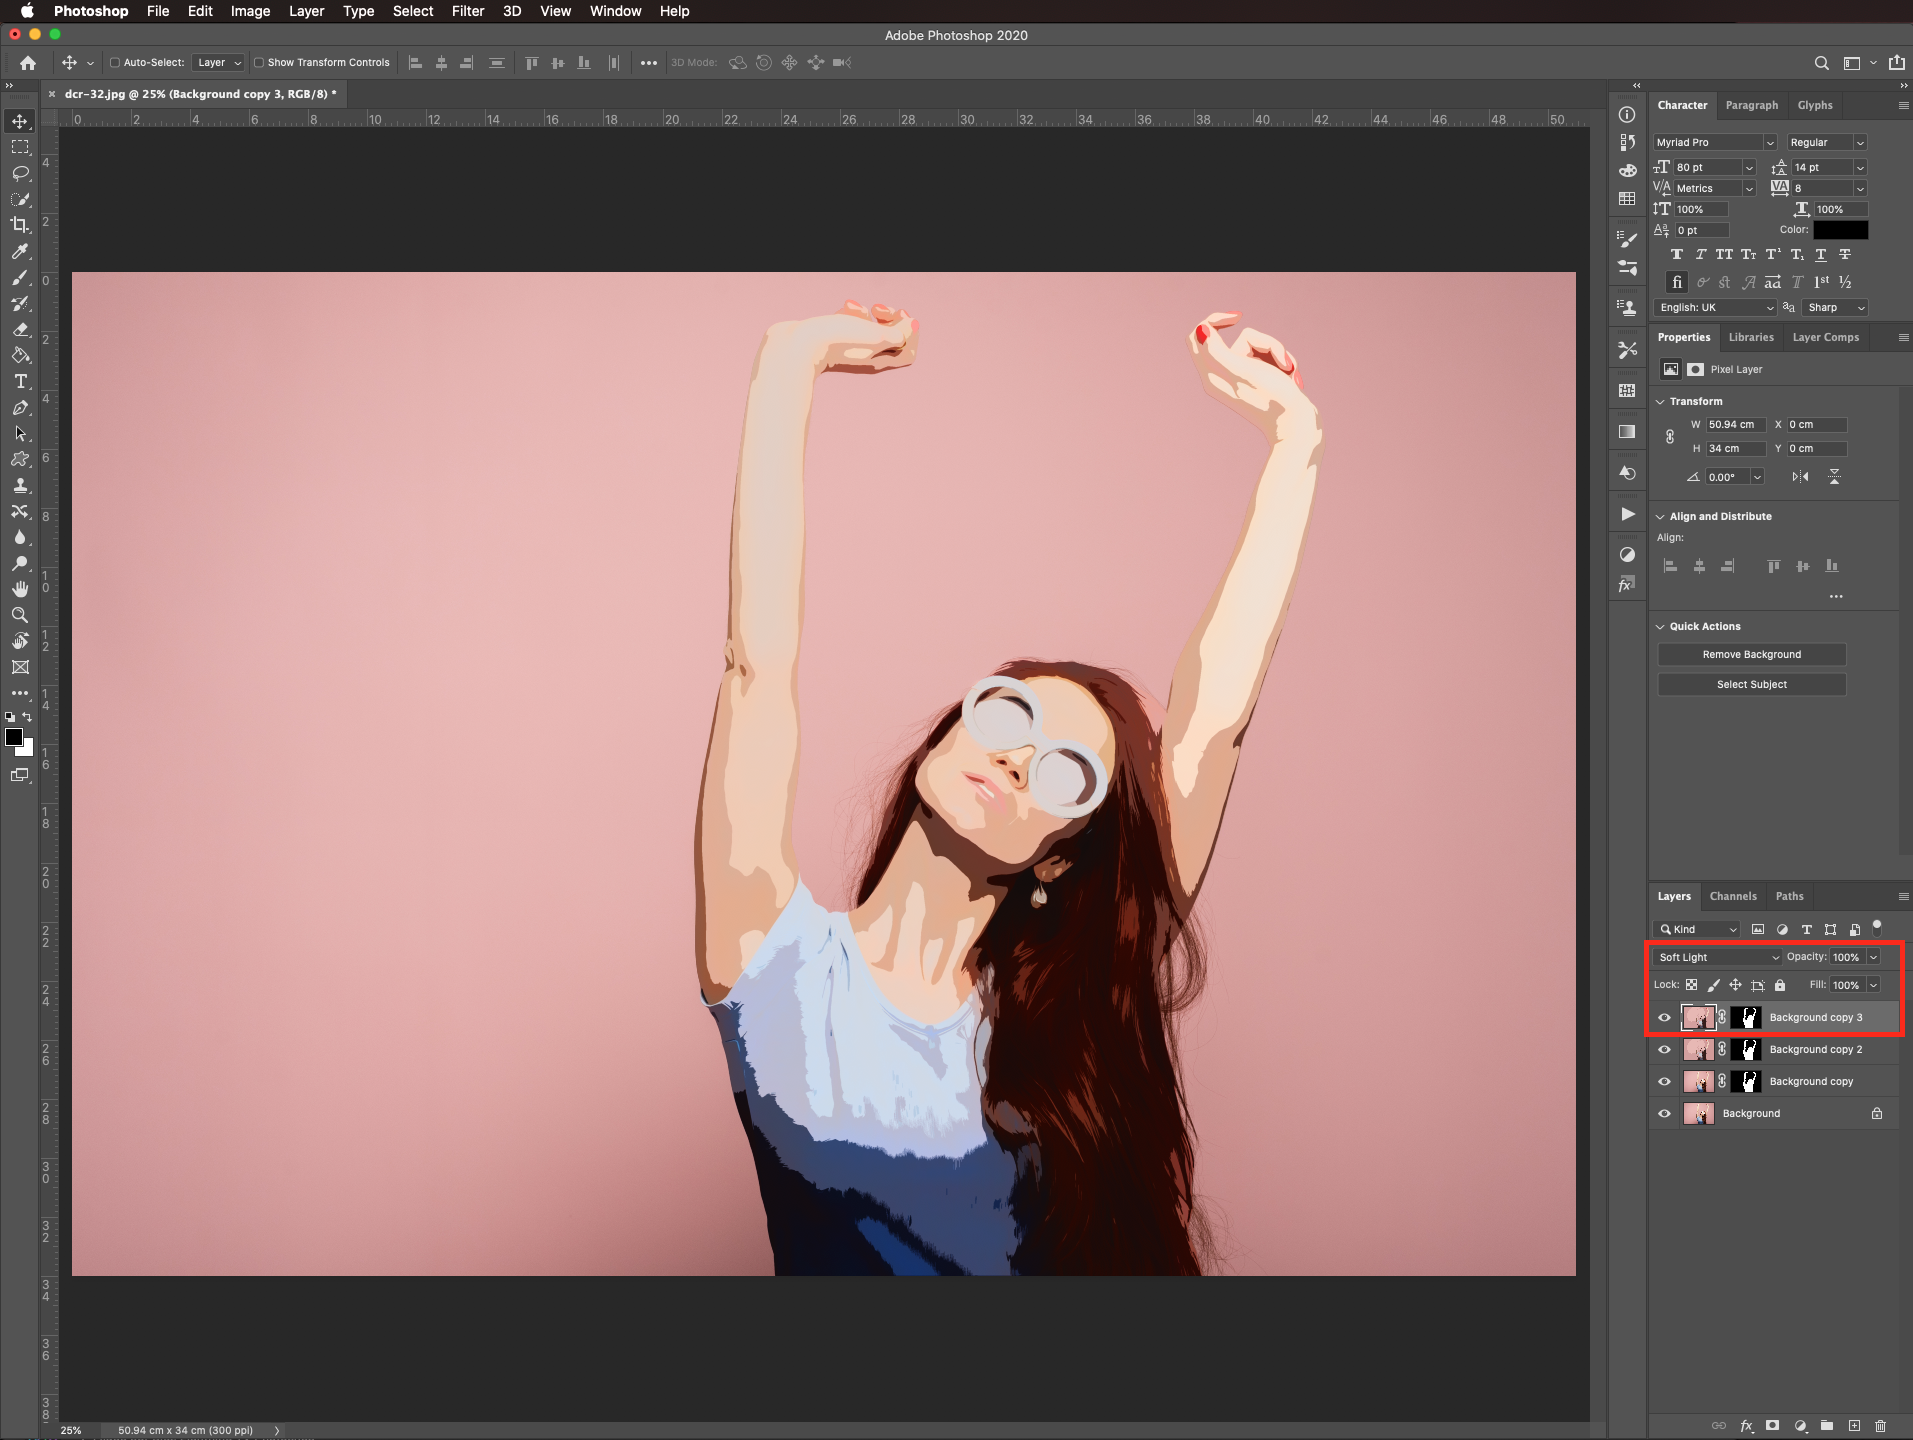
Step 7: Adjust the Color with Layers and Blending Modes
Change the blending mode of the top layer to luminosity.
Duplicate that layer and change the blending mode to soft light.
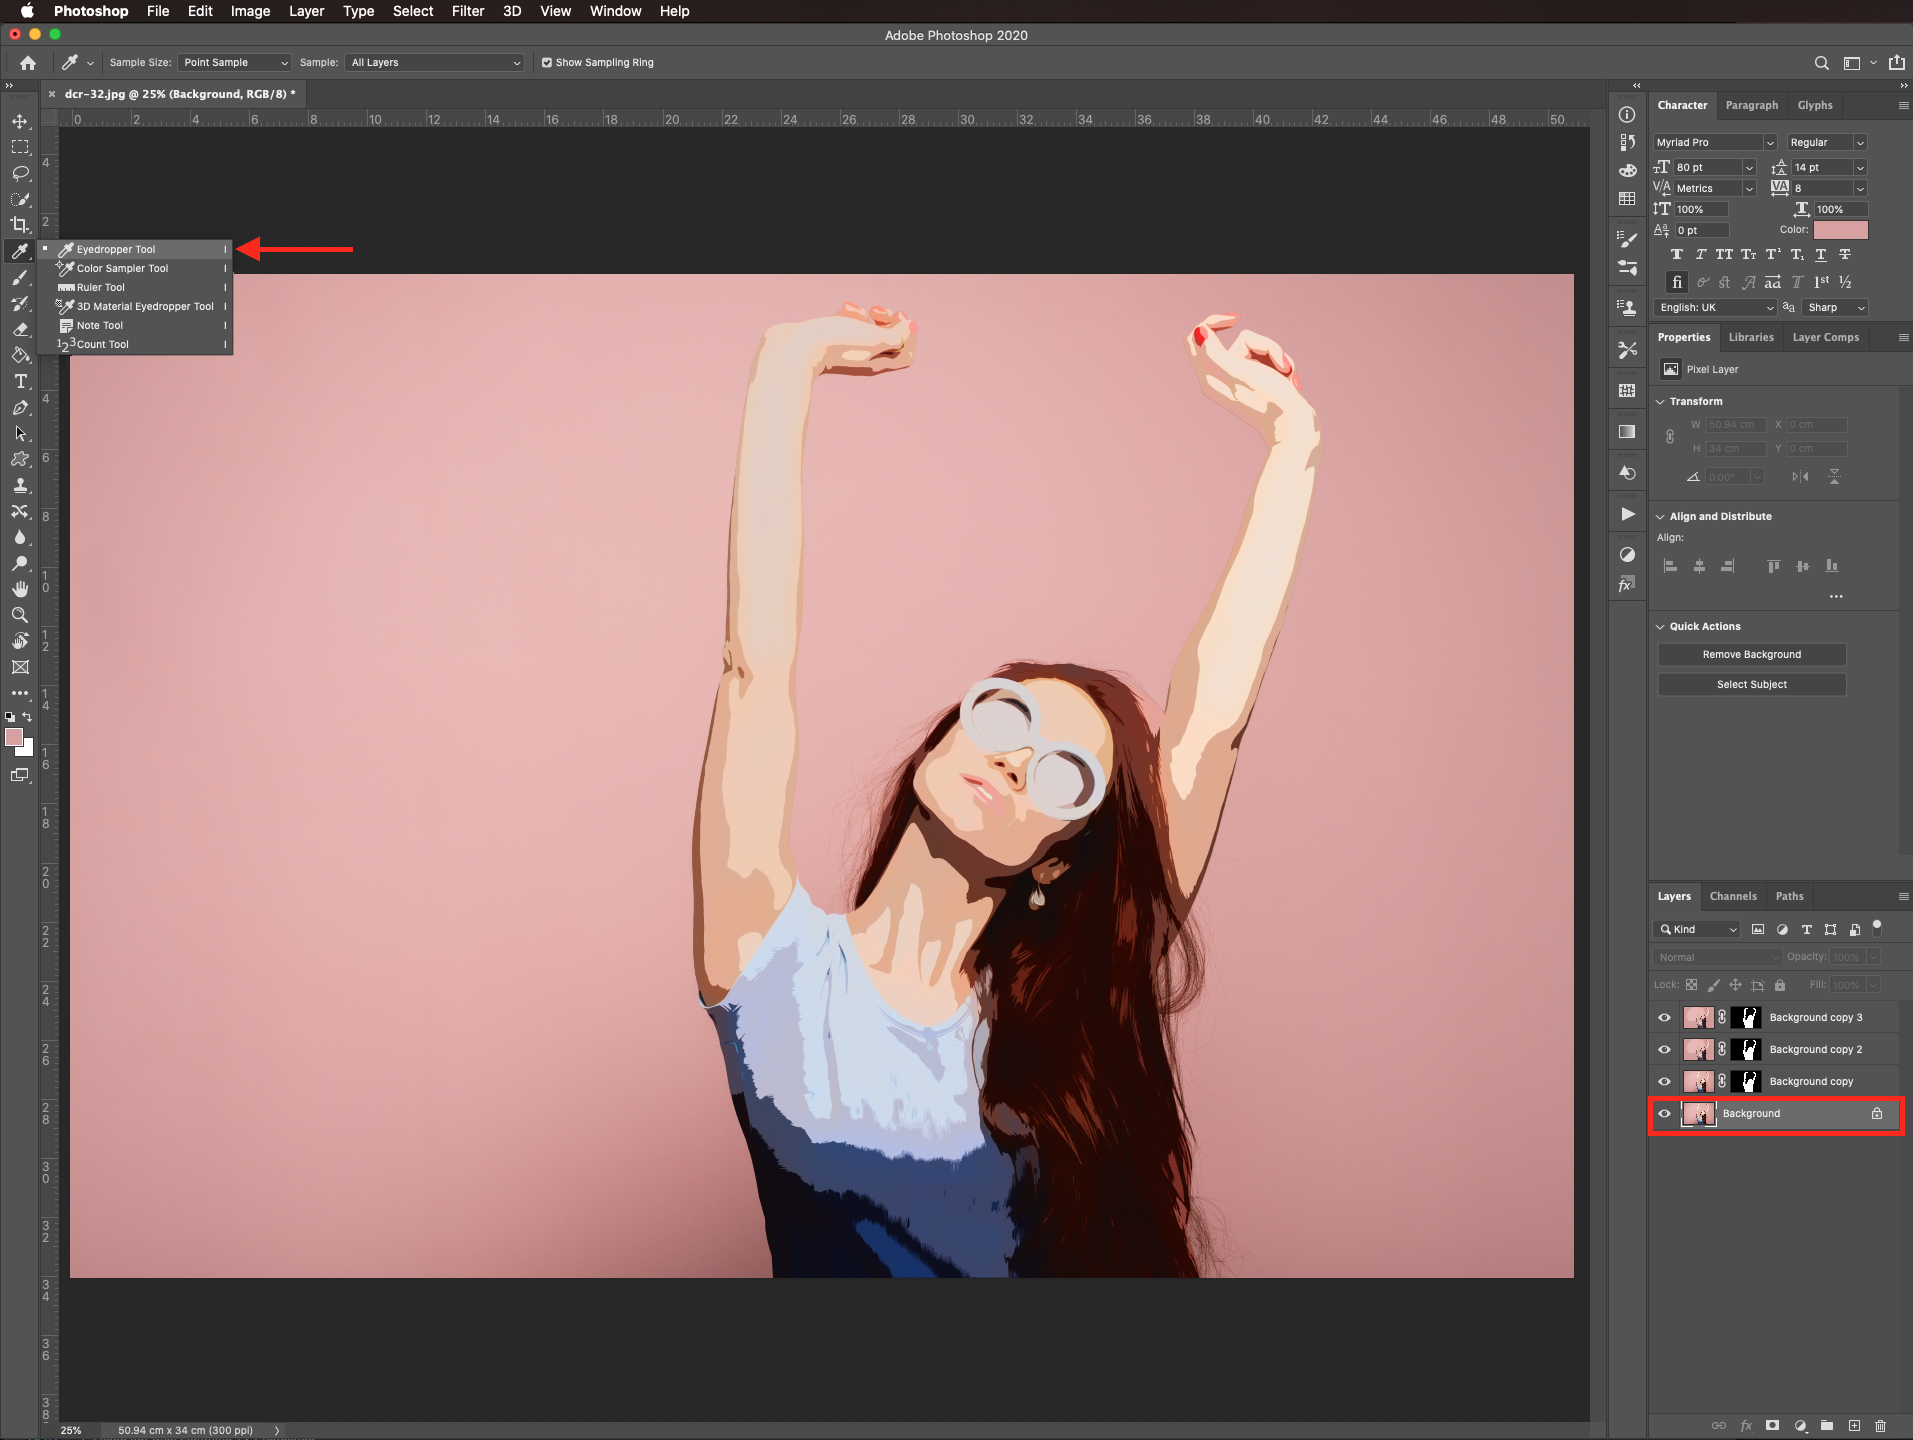
Step 8: Add a Color Background and Other Details
Use the eyedropper tool (I) to select the background color.
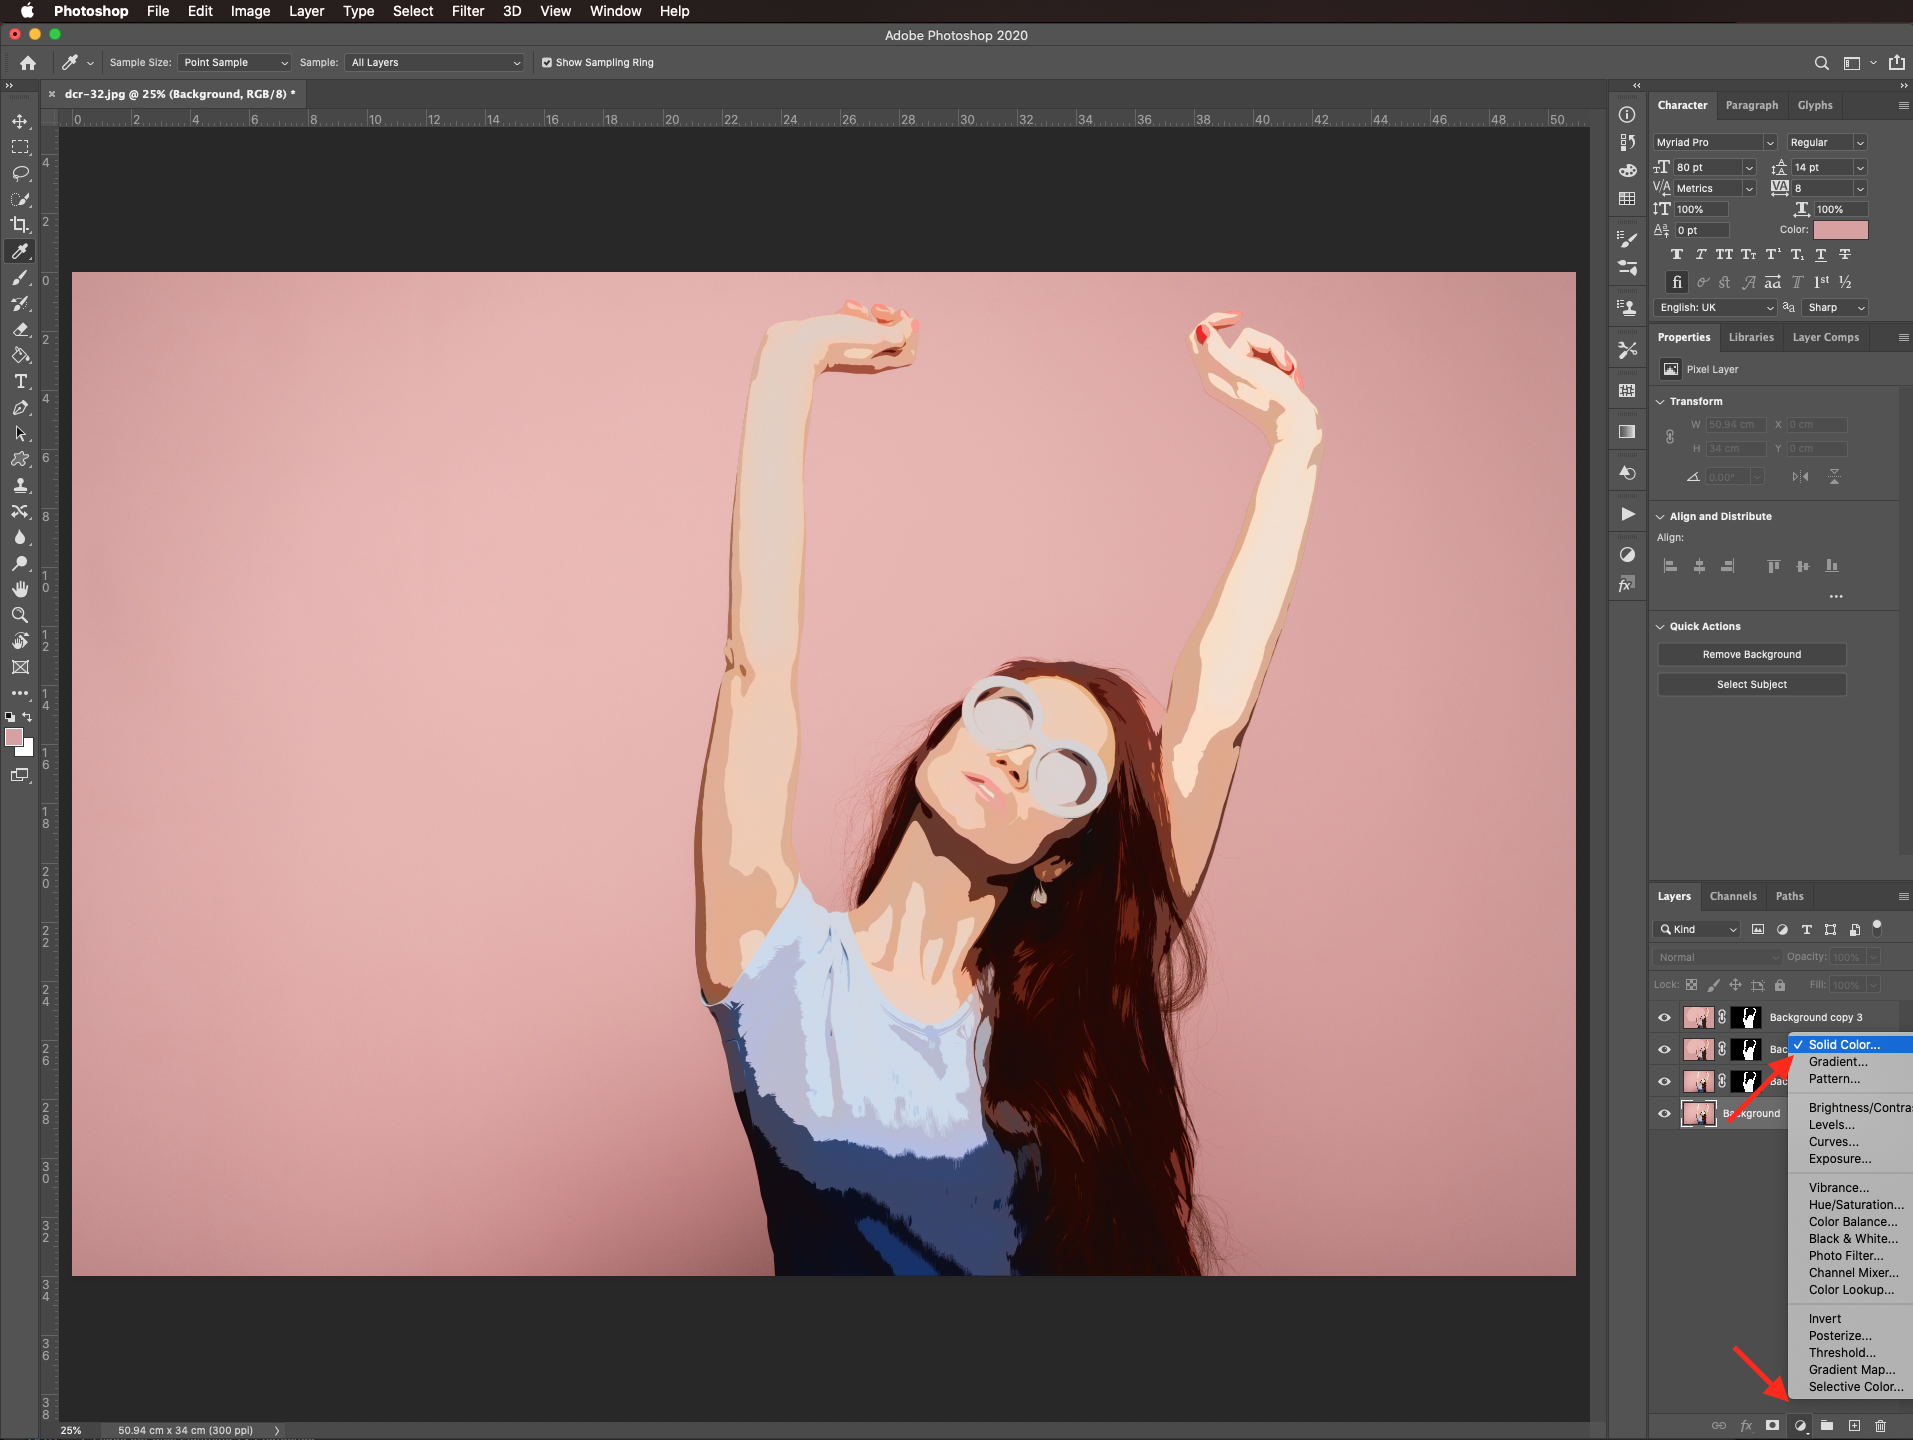
Make sure that the background layer is selected and create a new solid color adjustment layer by clicking on the small black and white circle at the bottom of the layers panel.
Use the foreground color you picked before. Ours was #D7A19F.
You can also add some shapes behind the subject to enhance your artwork.
Step 9: Optional, Convert to Paths in Illustrator
If you want, you can convert your artwork to vectors by importing it to Illustrator and using image trace. If you need, here’s a good tutorial on how to use image trace.
Check it out.
In case you want to use the pen tool to trace your artwork in photoshop, we have a great in-depth guide on using the pen tool in Illustrator, which will be similar to the pen tool in Photoshop.


