How to Trace in Silhouette Studio
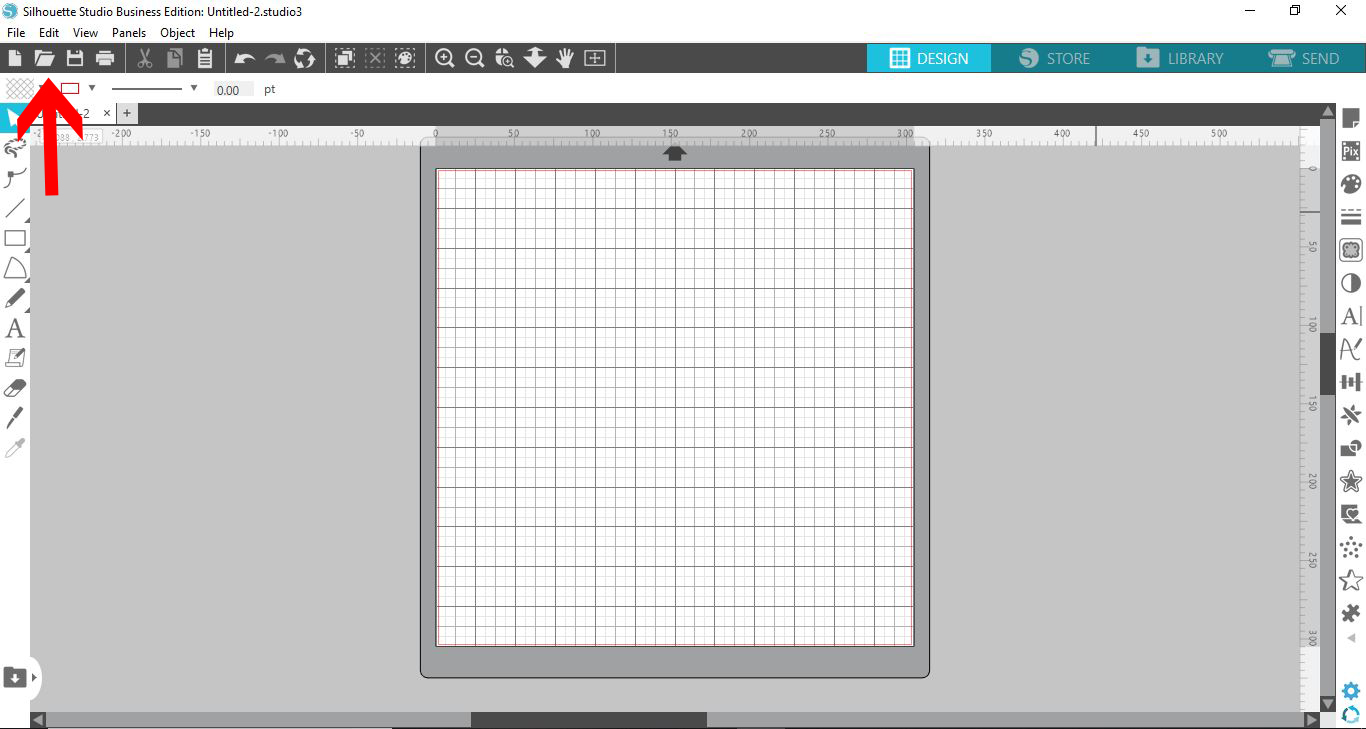
1- Open silhouette studio. Click on the file to open your design.
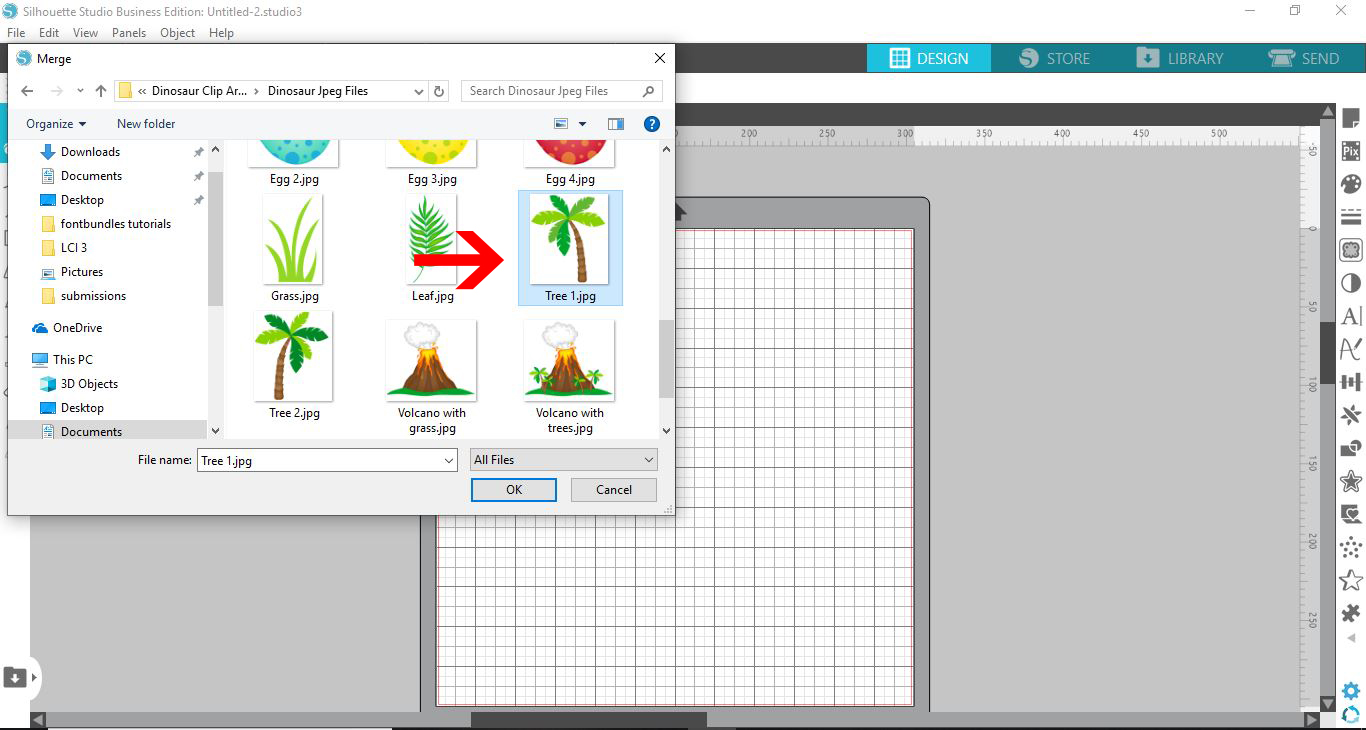
2- Select the image you need to trace. it can be color or black.
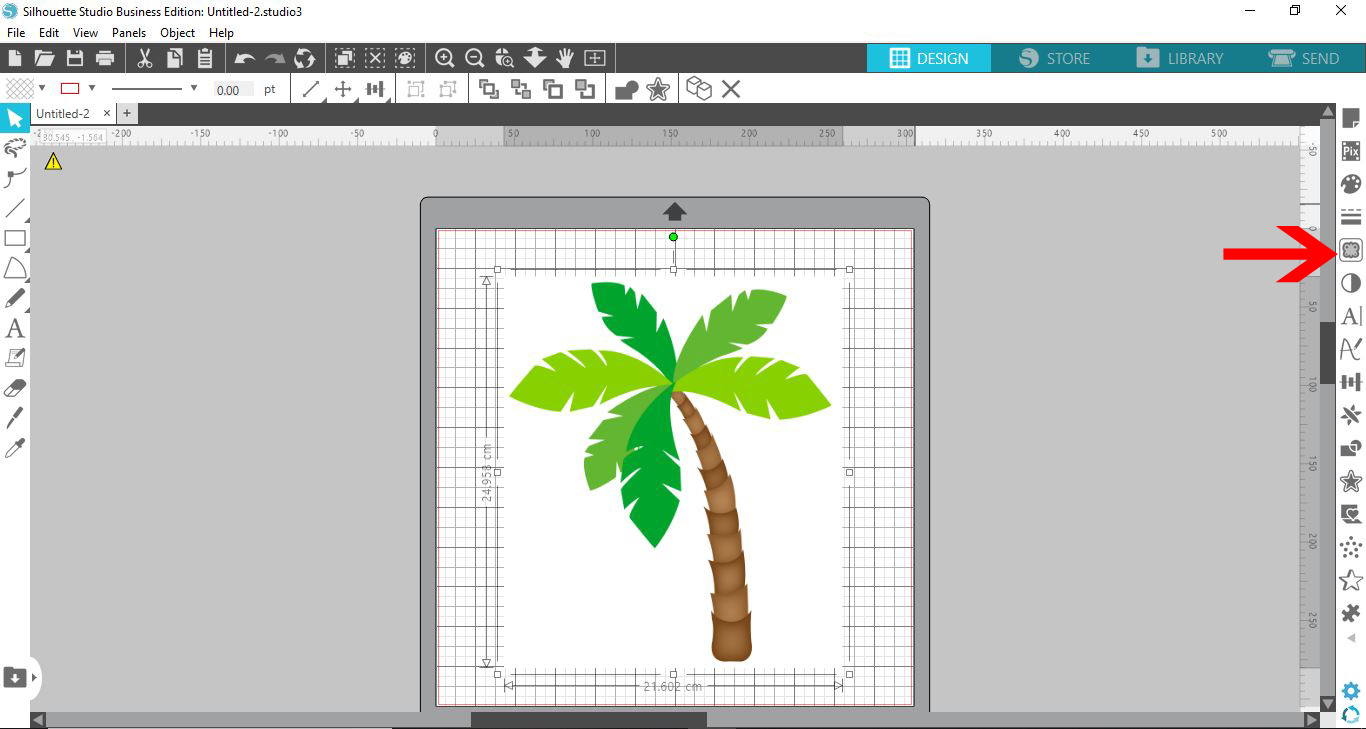
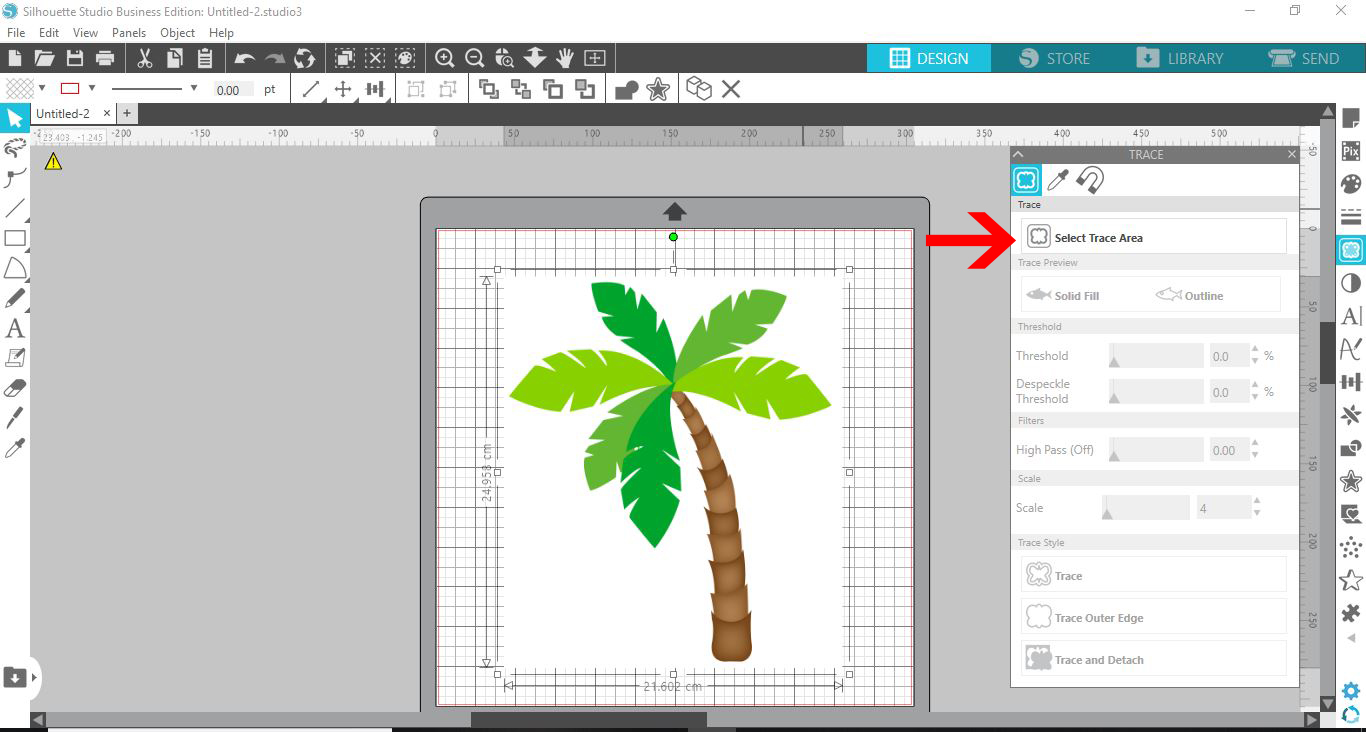
3- Click on the trace icon.
4- Click on the select trace area.
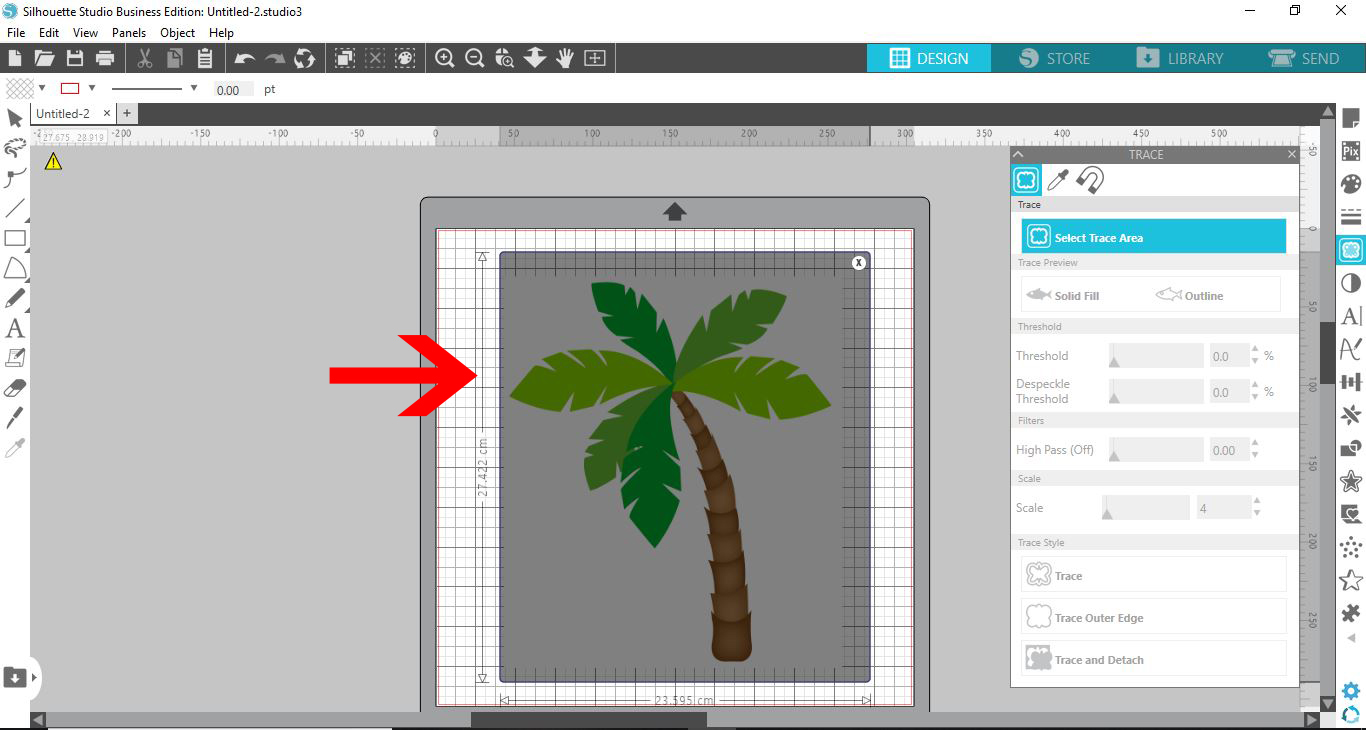
5- Select the whole image.
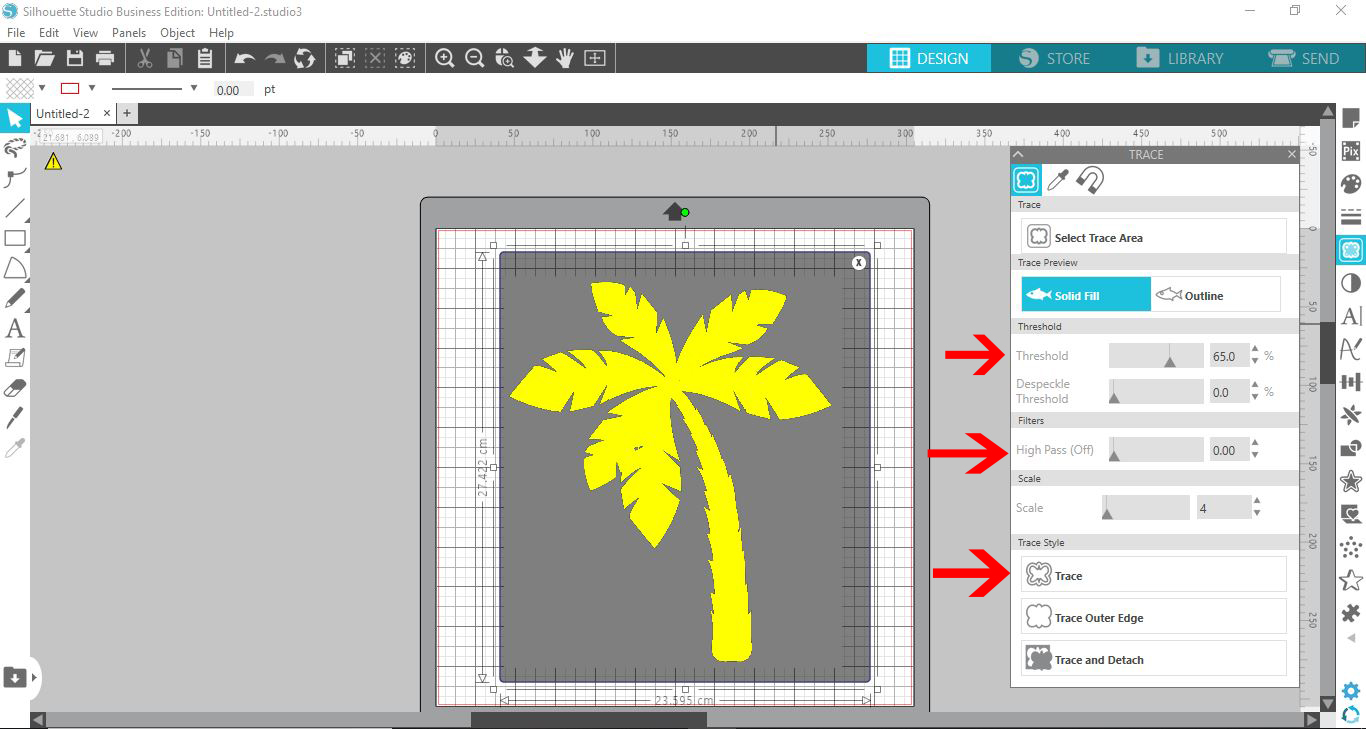
6- The trace area will appear yellow. You may need to adjust the threshold to increase or decrease the yellow area. This yellow edge/area is where the cut lines will appear. You may also need to adjust the scale and filters to refine the trace area. Once you are happy click trace.
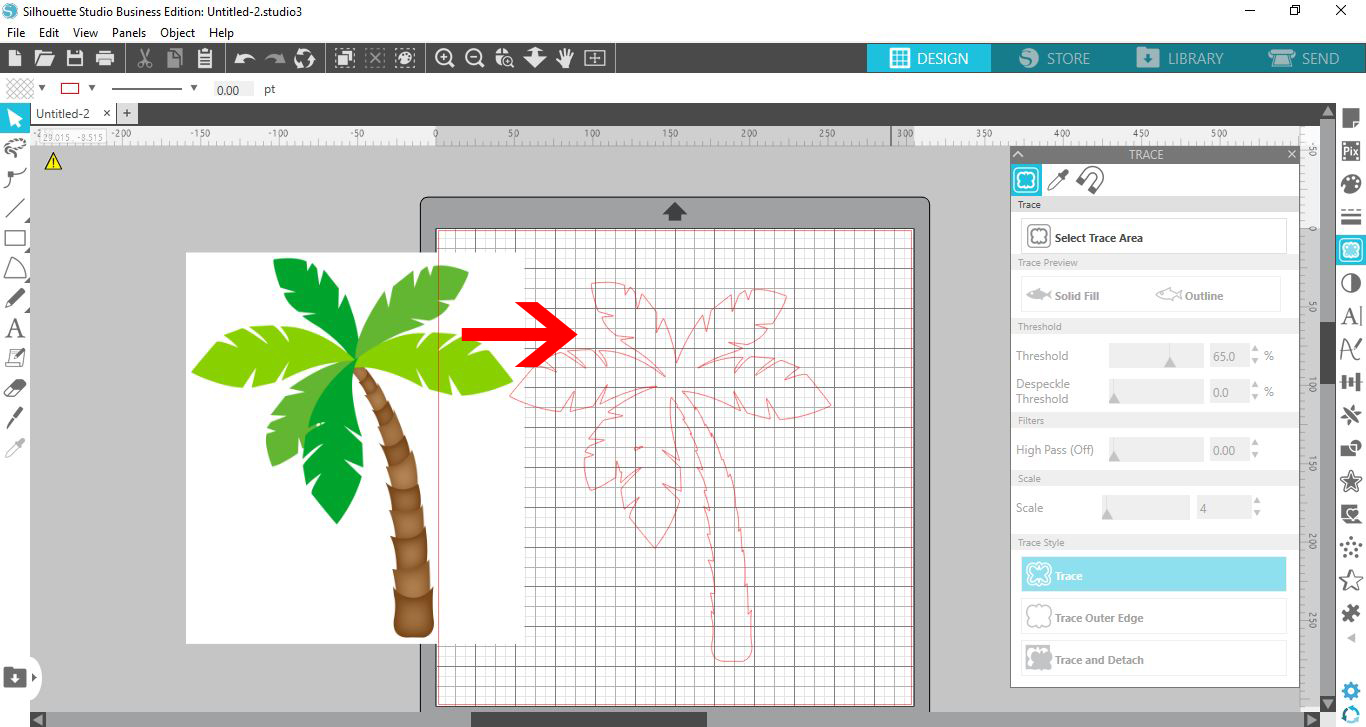
7- When you pull away the image the trace outline will appear as red cut lines.
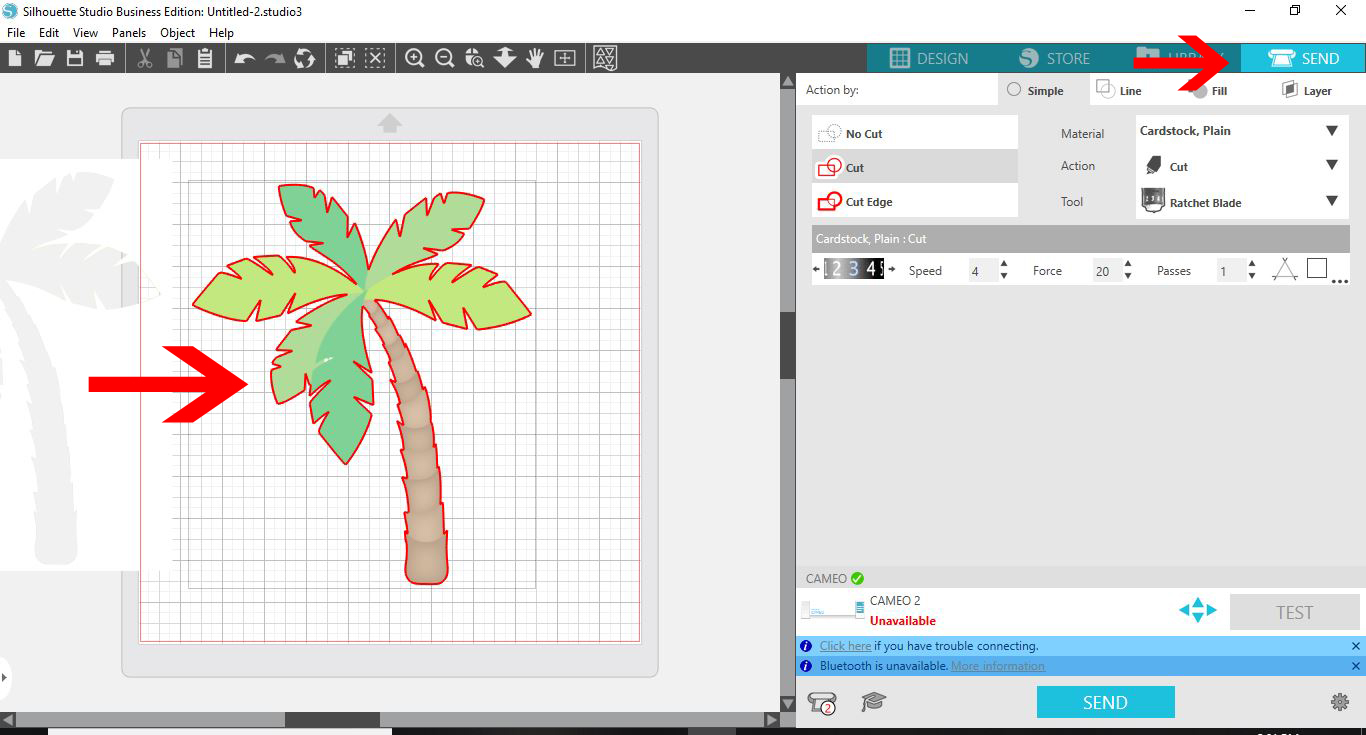
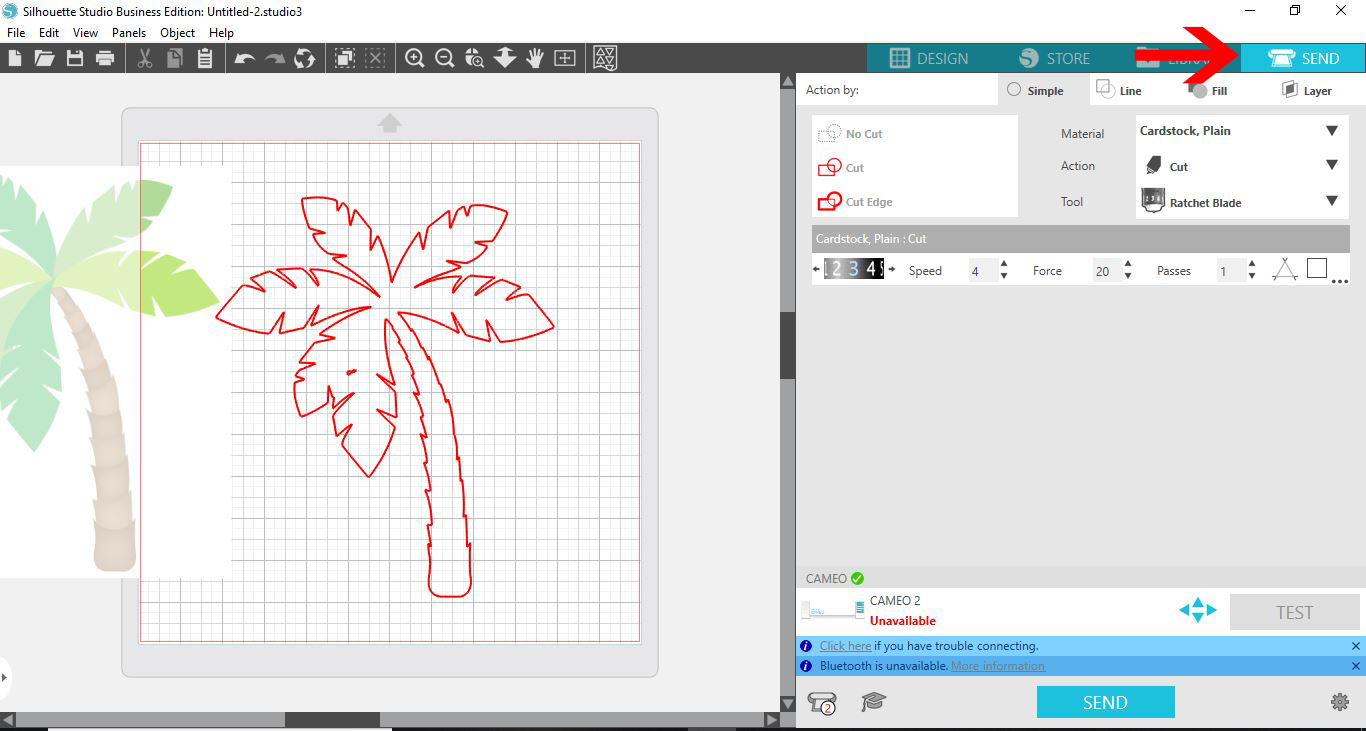
8- You can now go to the send screen. the cut lines will highlight red ready to cut.
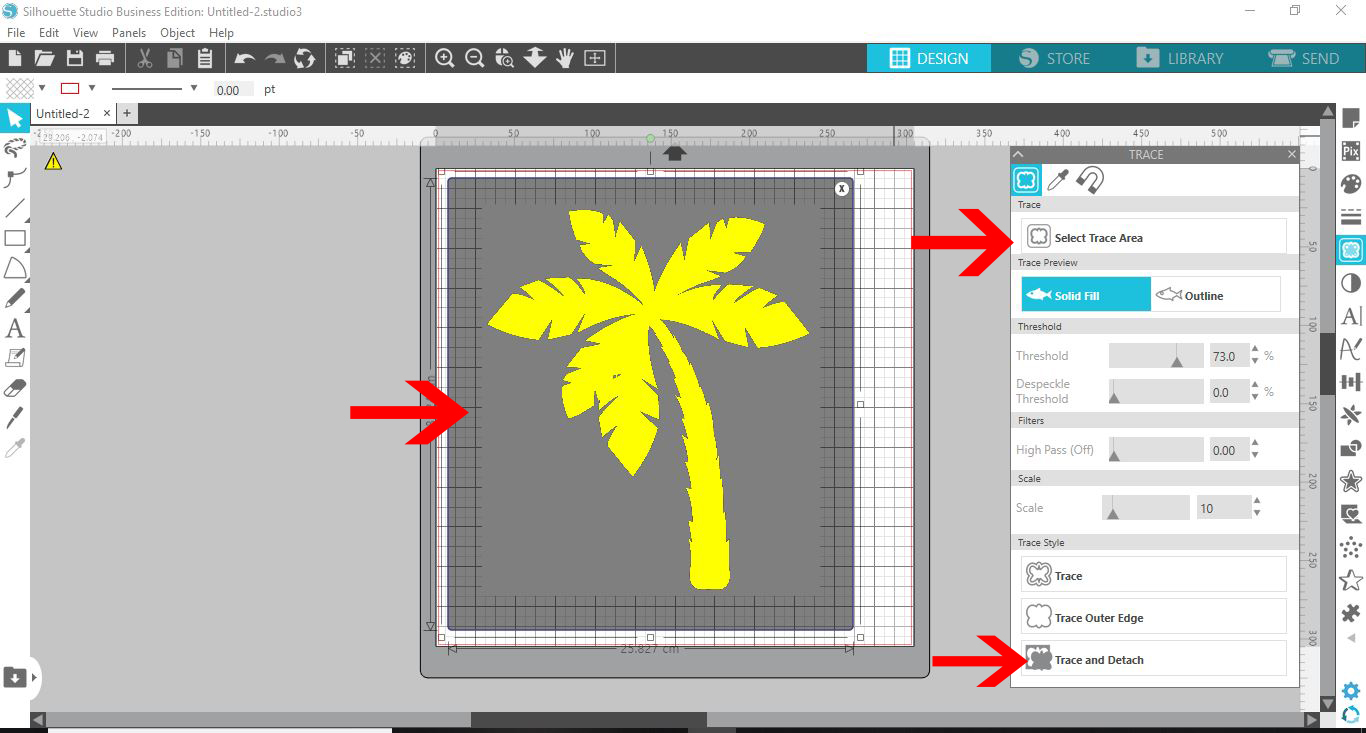
9- Another option of tracing is to add the cut lines but keep the image This is good for print and cut options. Select the trace tool and select the image. Once you have the image highlighted with yellow, click on trace and detach. By using this option you can remove the unwanted background and keep the image with cut lines.
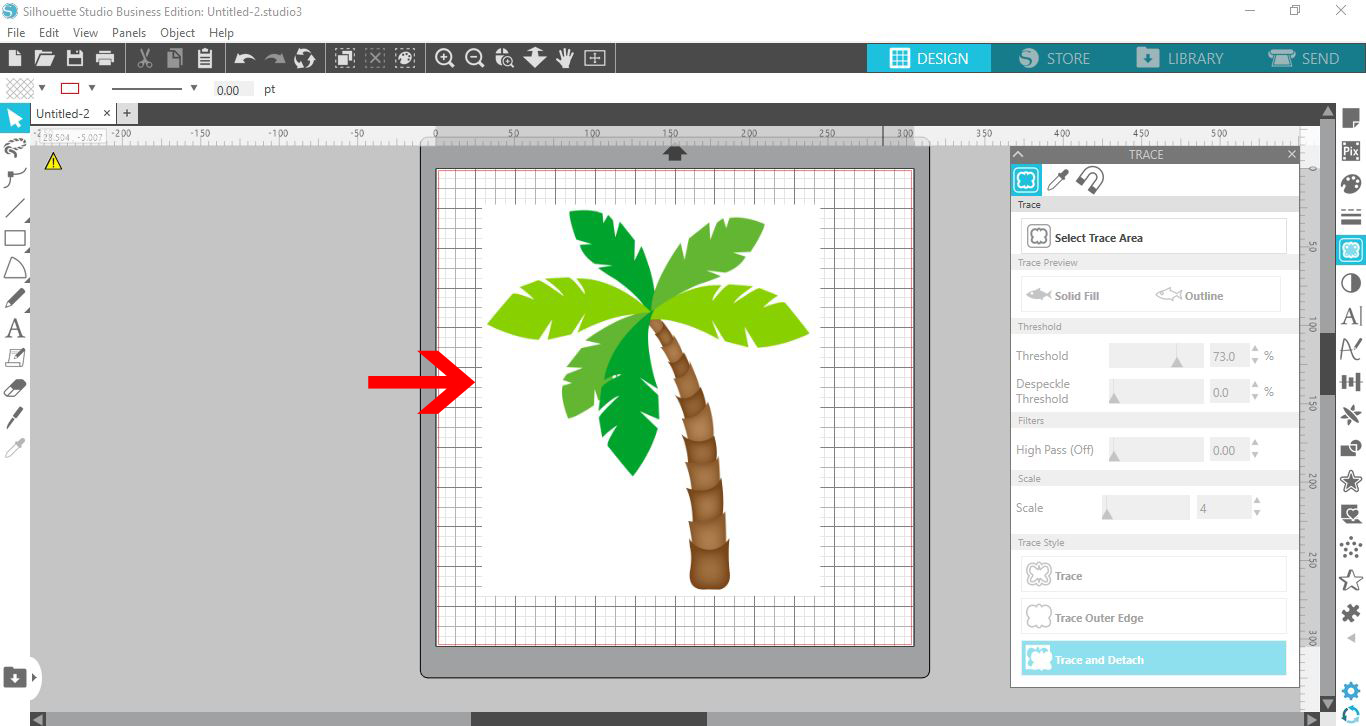
10- The design will now be detached from your image. Select the part you do not want.
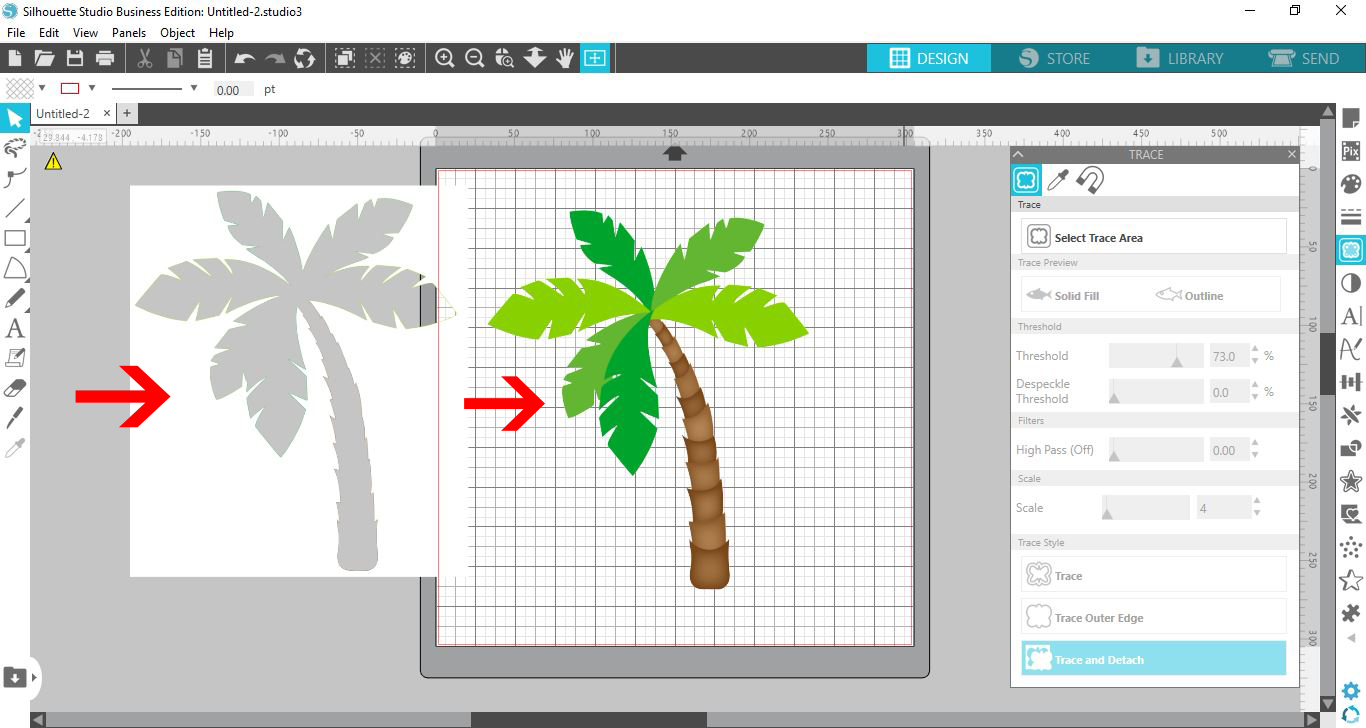
11- You can now delete the background.
12- In the cut screen the image will have cut lines ready to send.
2- Select the image you need to trace. it can be color or black.
3- Click on the trace icon.
4- Click on the select trace area.
5- Select the whole image.
6- The trace area will appear yellow. You may need to adjust the threshold to increase or decrease the yellow area. This yellow edge/area is where the cut lines will appear. You may also need to adjust the scale and filters to refine the trace area. Once you are happy click trace.
7- When you pull away the image the trace outline will appear as red cut lines.
8- You can now go to the send screen. the cut lines will highlight red ready to cut.
9- Another option of tracing is to add the cut lines but keep the image This is good for print and cut options. Select the trace tool and select the image. Once you have the image highlighted with yellow, click on trace and detach. By using this option you can remove the unwanted background and keep the image with cut lines.
10- The design will now be detached from your image. Select the part you do not want.
11- You can now delete the background.
12- In the cut screen the image will have cut lines ready to send.