


By Design Bundles
Silhouette Tutorials5 min
How to Use Digital Papers in Silhouette Studio
Watch this video on YouTube
*Business Edition used.
1- Open Silhouette Studio.
2- Go to file - merge.
3- Select the digital paper you would like to use.
4- Your digital paper will appear in your design space.
5- Click on the transform icon and then select the resize option. resize the digital paper so it will fit on your screen for easy use.
6- Select the digital paper and resize to fit onto your workspace ready to print.
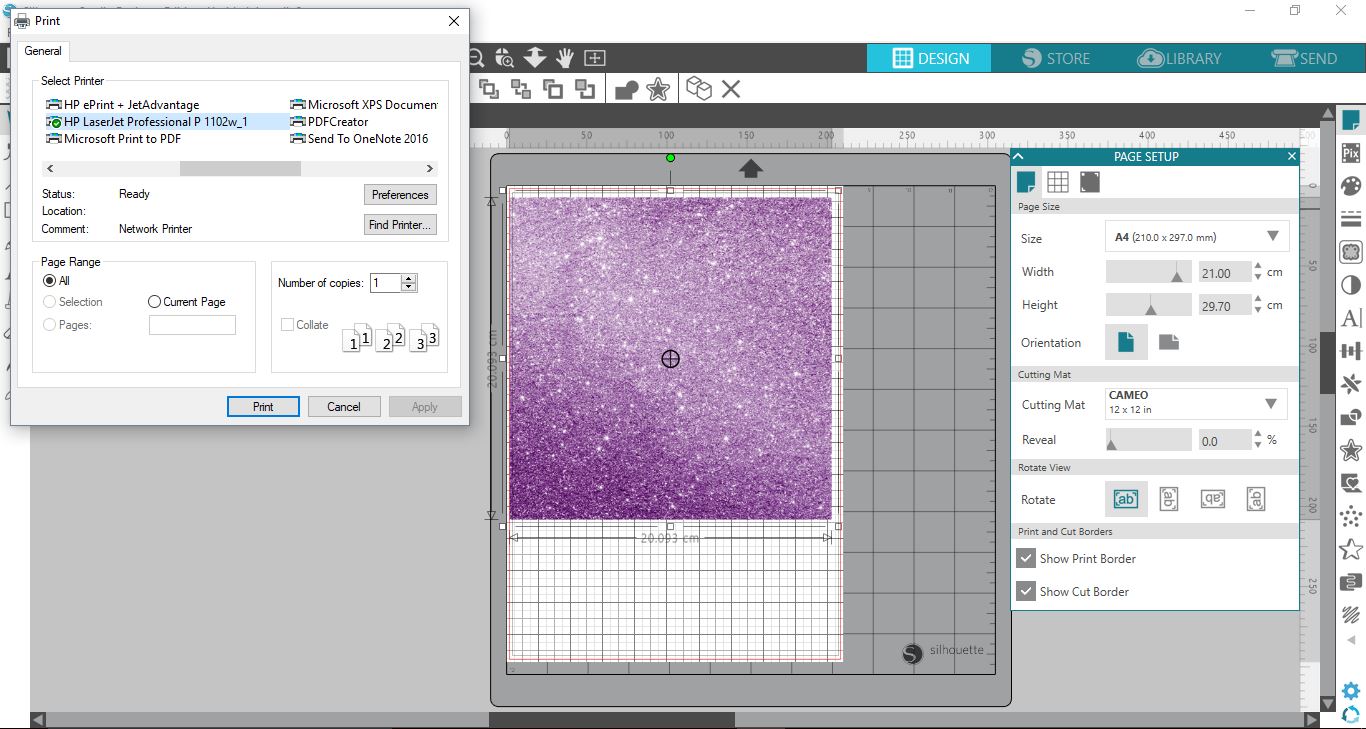
7- When printing the digital paper you will need to ensure it is within the guidelines.( eg if you are using an A4 printer you will need to keep your digital paper A4 or smaller.
8- Click on print. Print the digital paper.
9- This is what the digital paper will look like once printed. I used a regular inkjet printer and standard white cardstock.
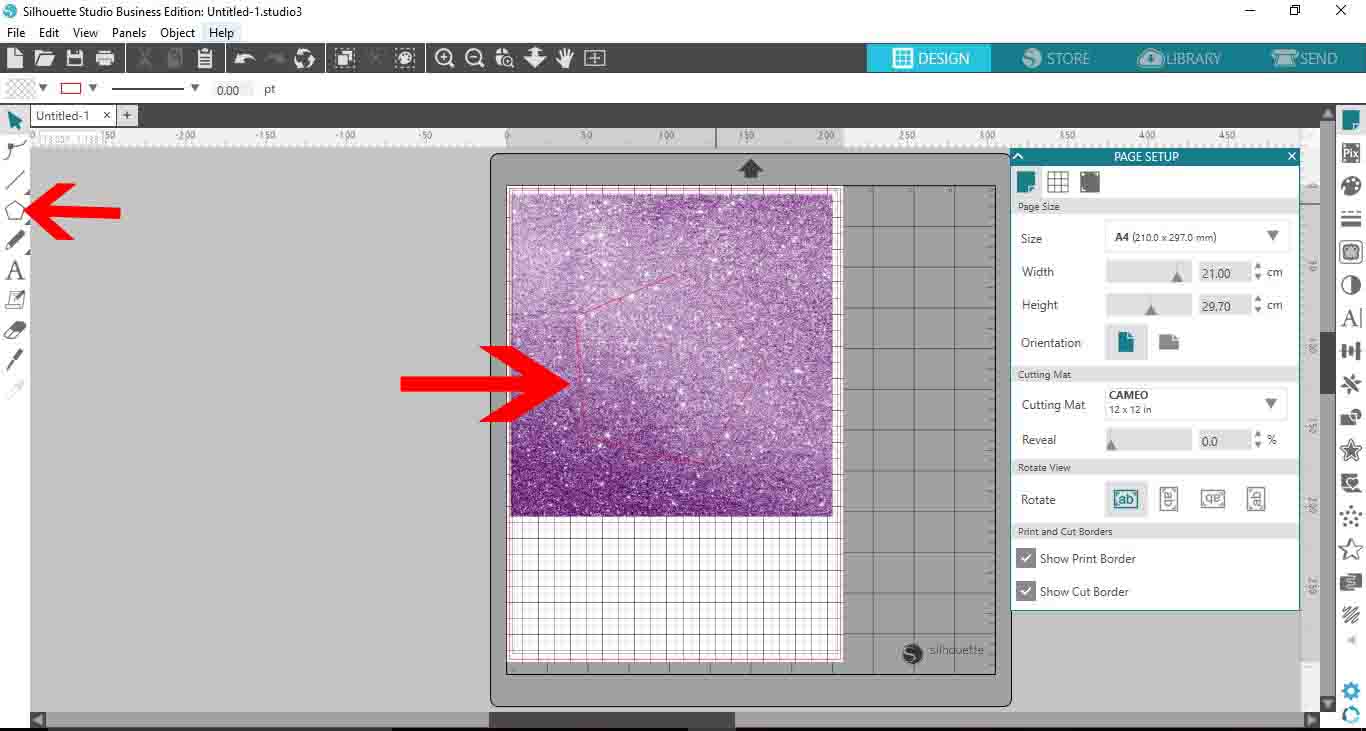
10- You can also draw shapes and add the digital paper inside it then print and cut.
First create your shape.
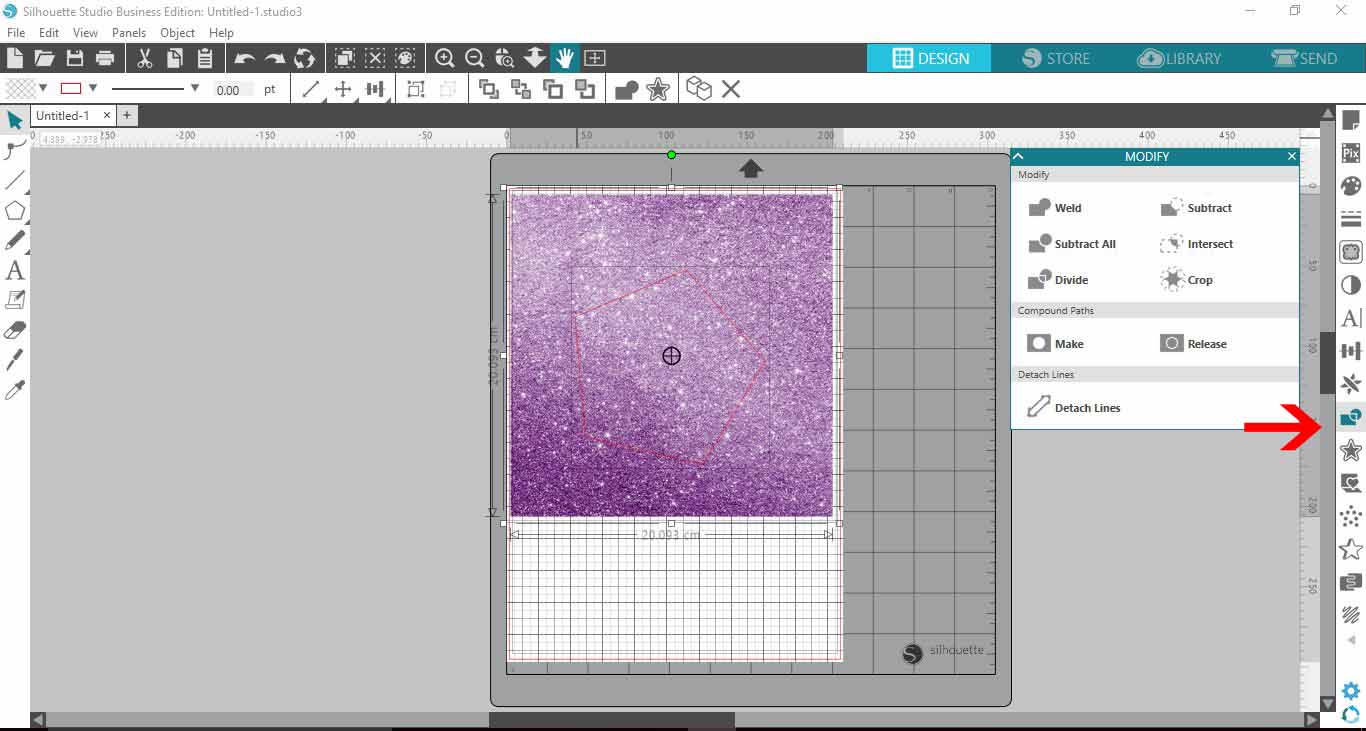
11- Place the shape over your digital paper. Click the modify icon to bring up the modify tool
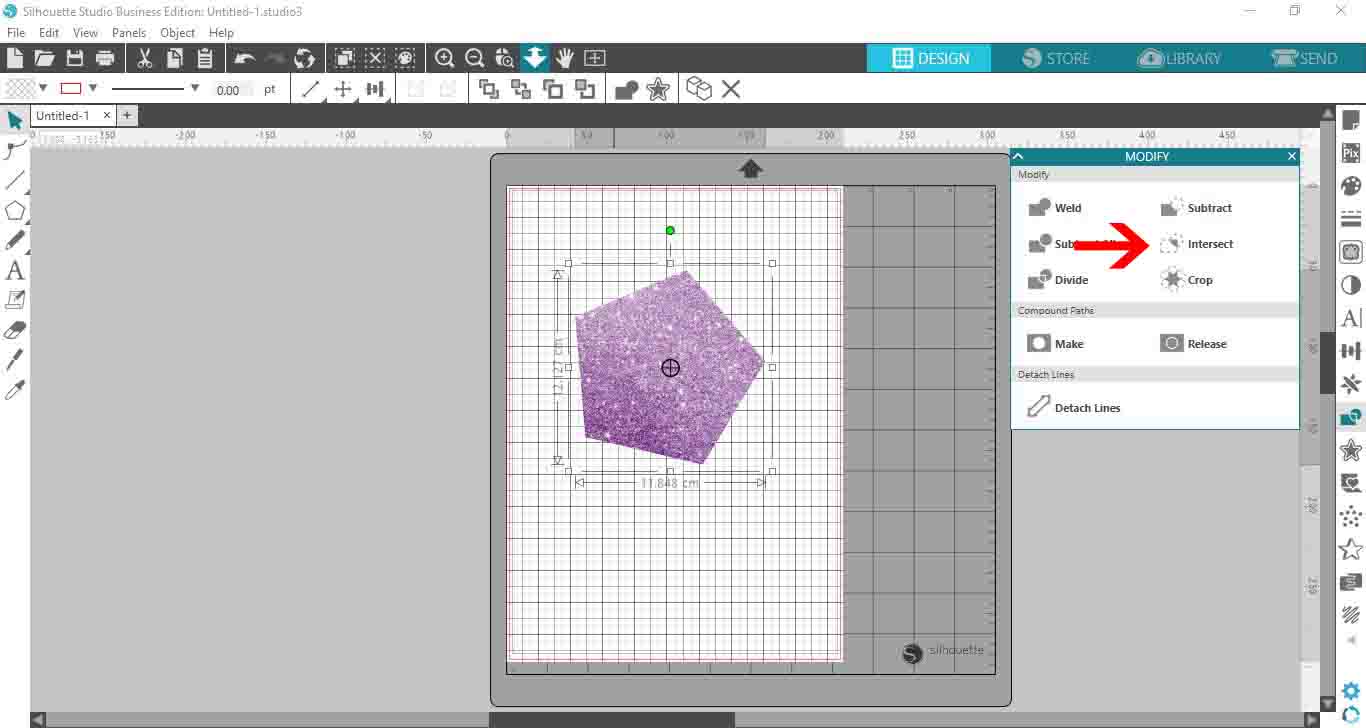
12- Select both shape and digital paper then click on intersect. This will cut out the shape from the digital paper, ready for you to print and cut.
13- You can also do this with text. Insert your digital paper as the steps above. Next type your text and select your font. I am using Black heat by Dirtyline Studio.
14- Place the text over the digital paper.
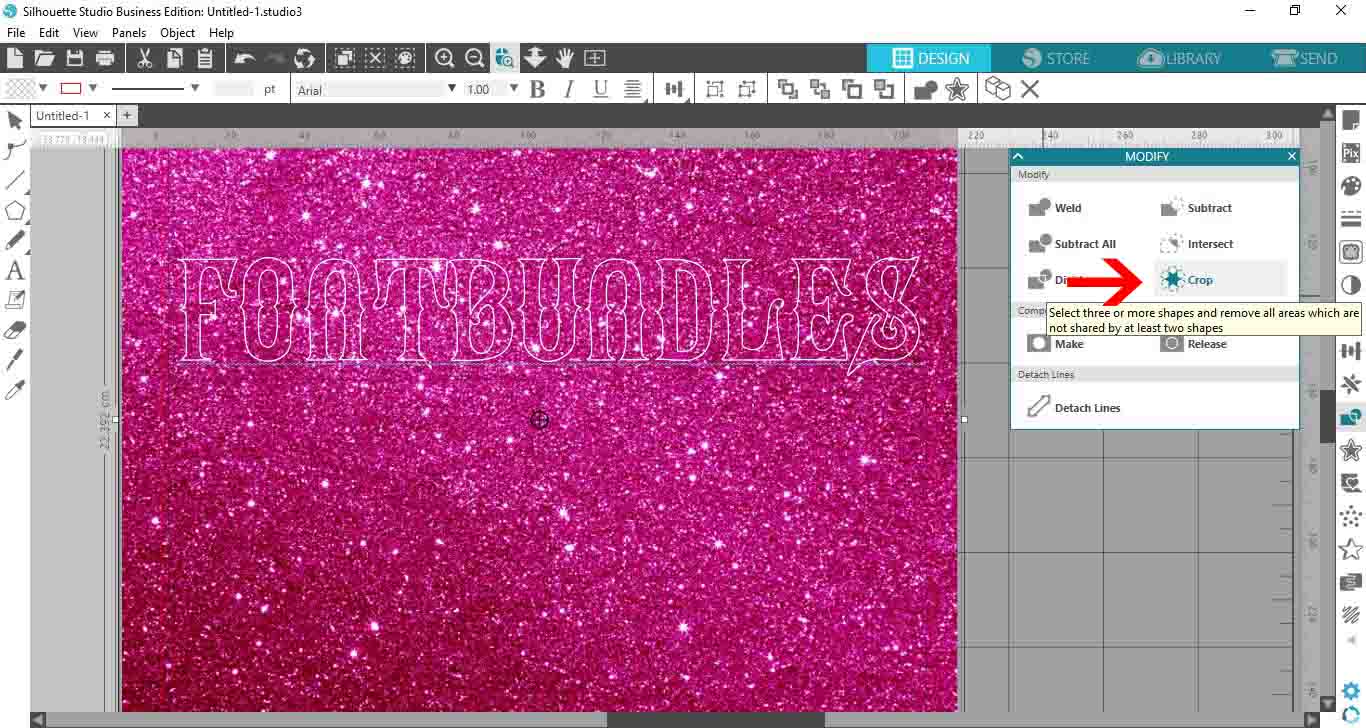
15- Select the modify tool and then with both digital paper and text selected click on crop.
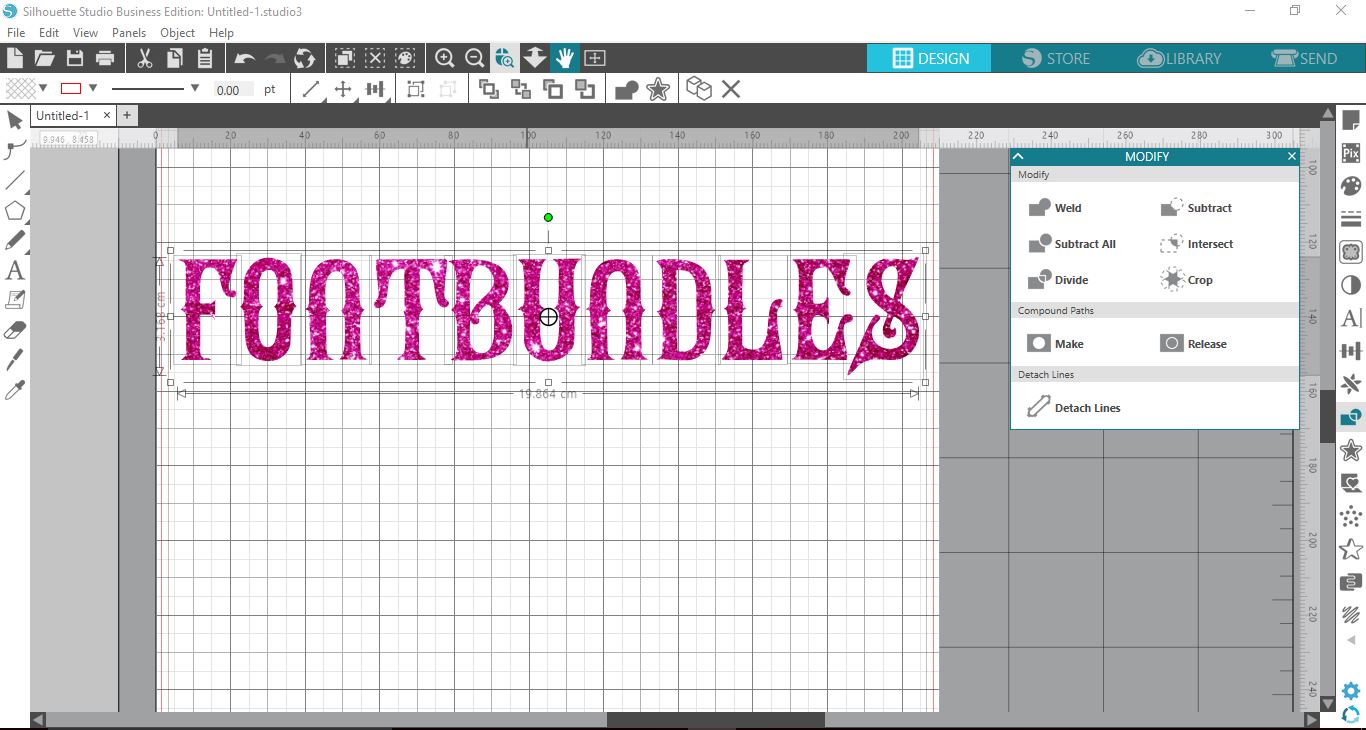
16- The text will be cropped out of your digital paper.
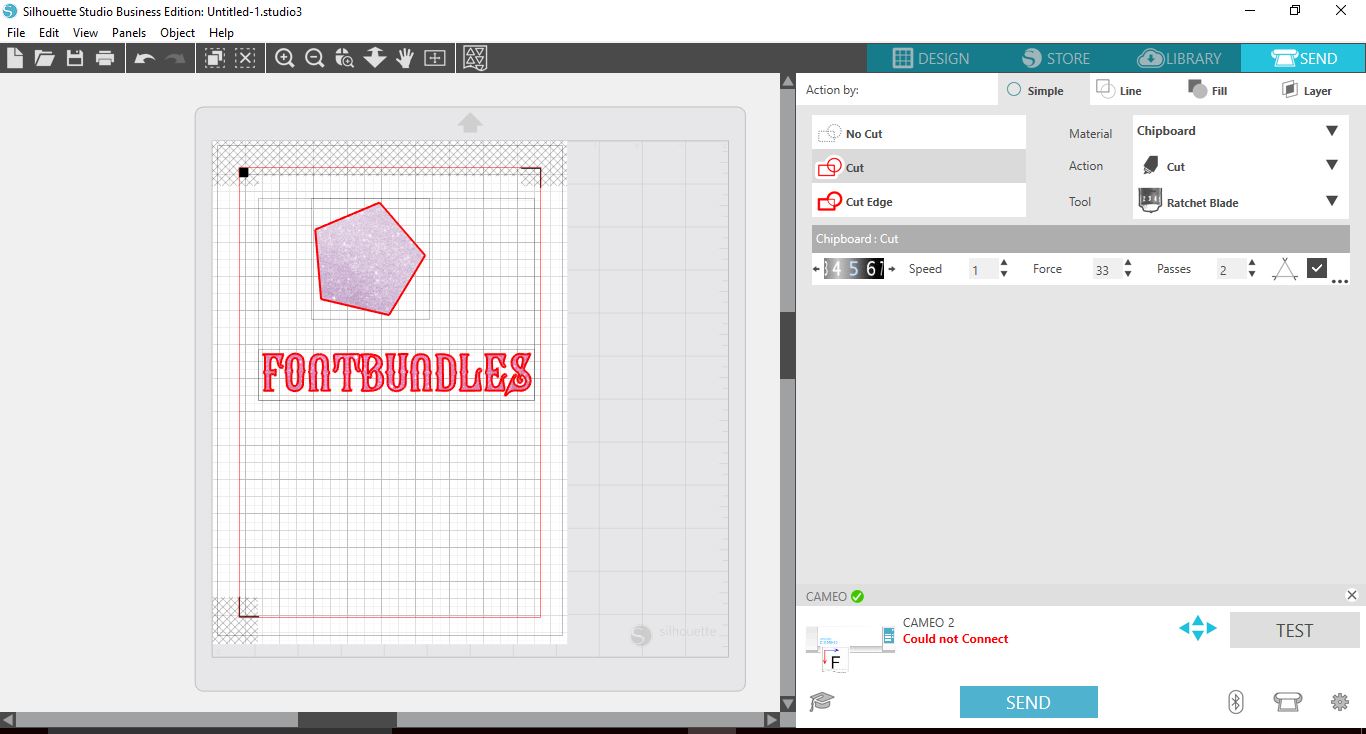
17- Once your shapes/text have been filled with your digital paper you can click on send and print and cut your designs.
*Business Edition used.
1- Open Silhouette Studio.
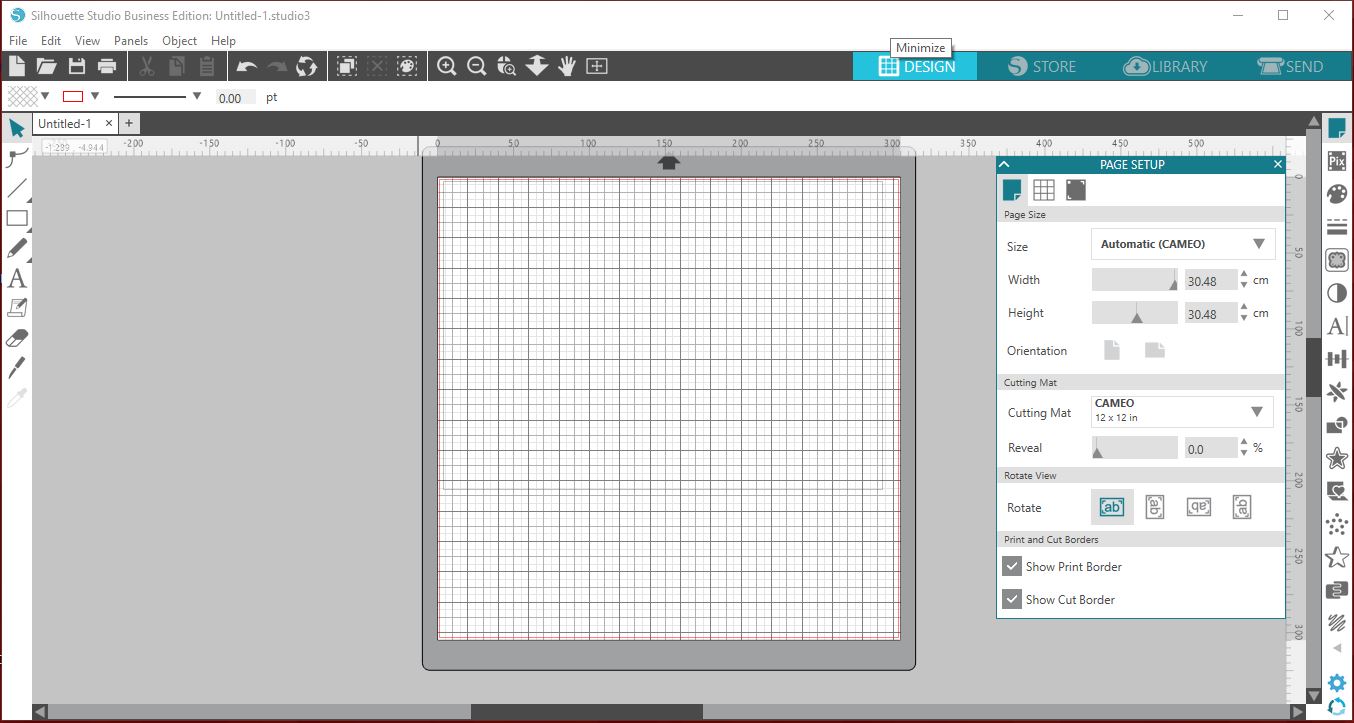
2- Go to file - merge.

3- Select the digital paper you would like to use.

4- Your digital paper will appear in your design space.
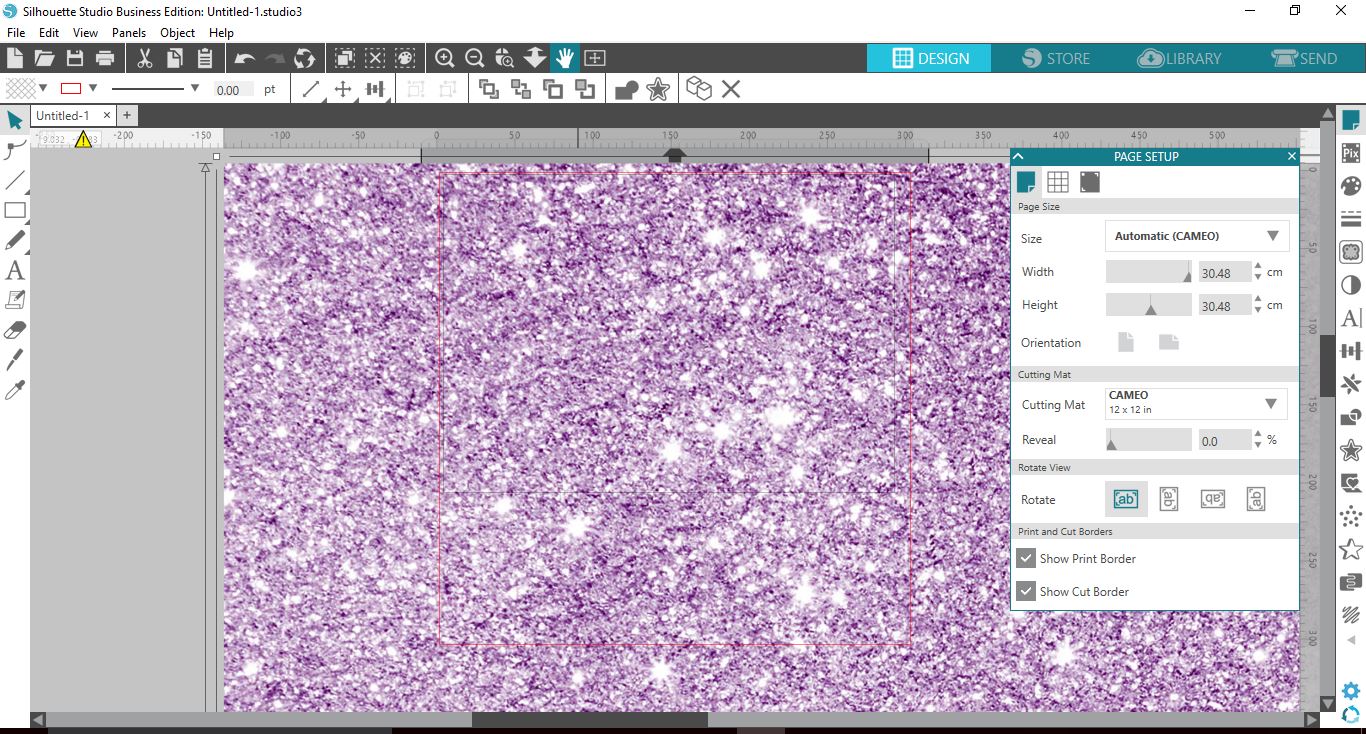
5- Click on the transform icon and then select the resize option. resize the digital paper so it will fit on your screen for easy use.

6- Select the digital paper and resize to fit onto your workspace ready to print.
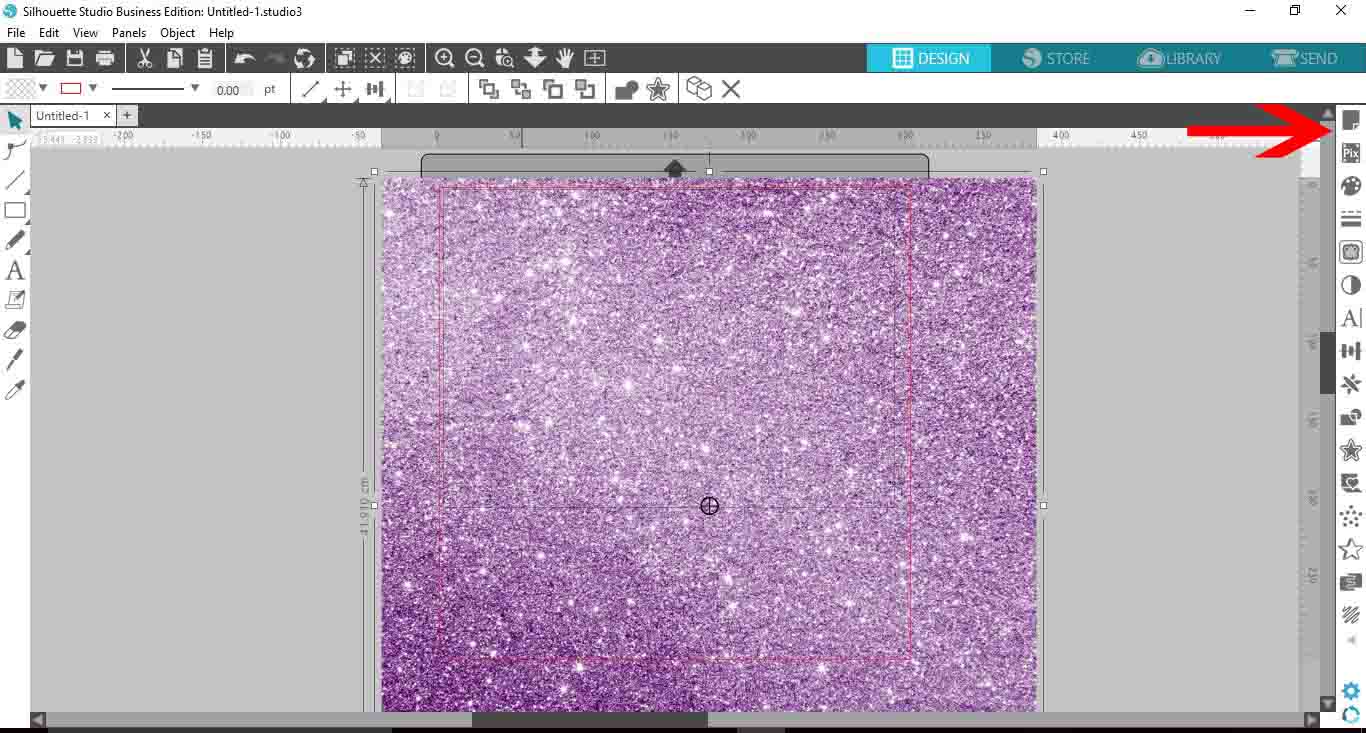
7- When printing the digital paper you will need to ensure it is within the guidelines.( eg if you are using an A4 printer you will need to keep your digital paper A4 or smaller.
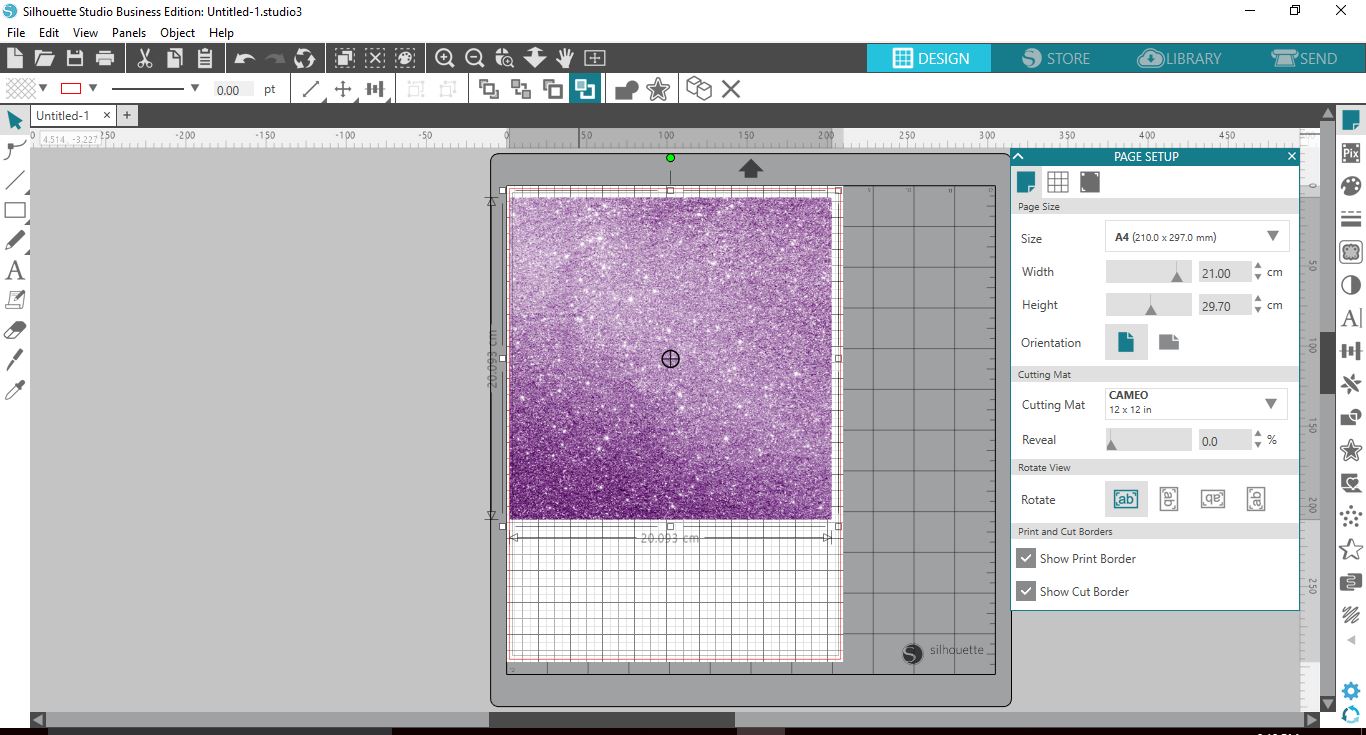
8- Click on print. Print the digital paper.
9- This is what the digital paper will look like once printed. I used a regular inkjet printer and standard white cardstock.

10- You can also draw shapes and add the digital paper inside it then print and cut.
First create your shape.
11- Place the shape over your digital paper. Click the modify icon to bring up the modify tool
12- Select both shape and digital paper then click on intersect. This will cut out the shape from the digital paper, ready for you to print and cut.
13- You can also do this with text. Insert your digital paper as the steps above. Next type your text and select your font. I am using Black heat by Dirtyline Studio.
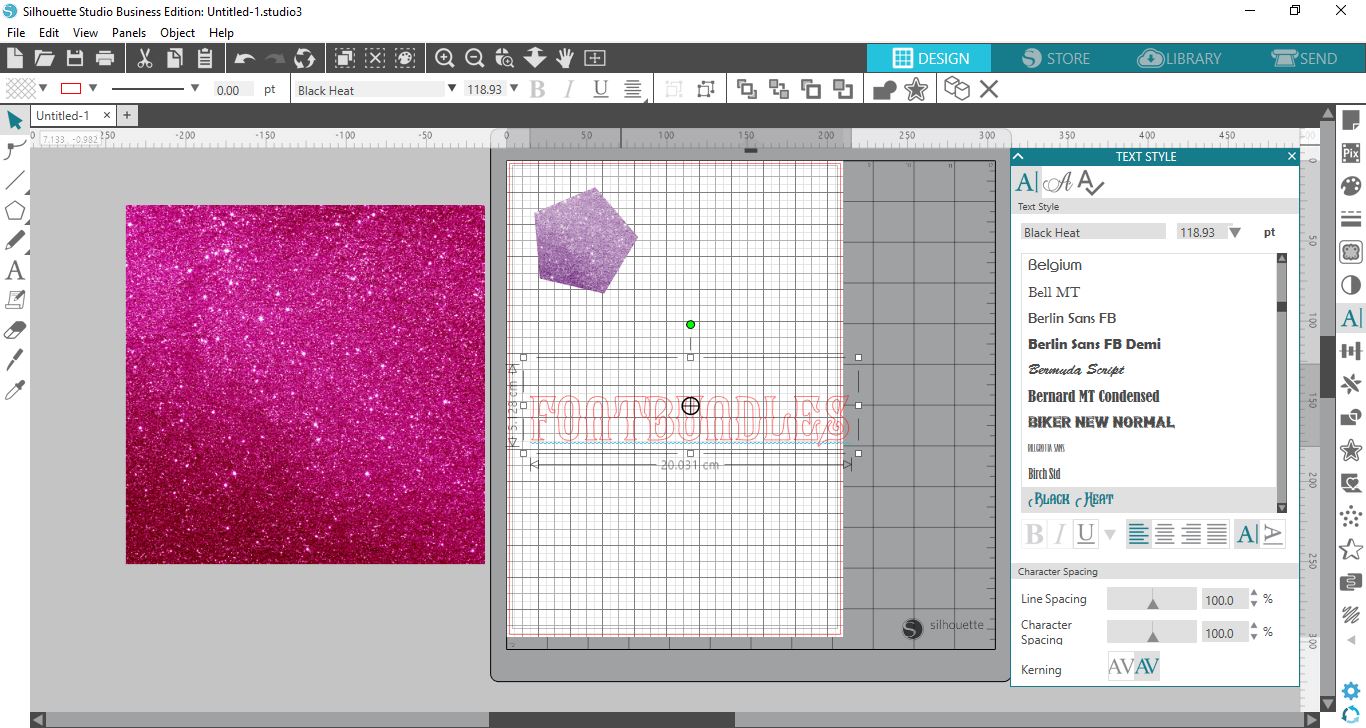
14- Place the text over the digital paper.
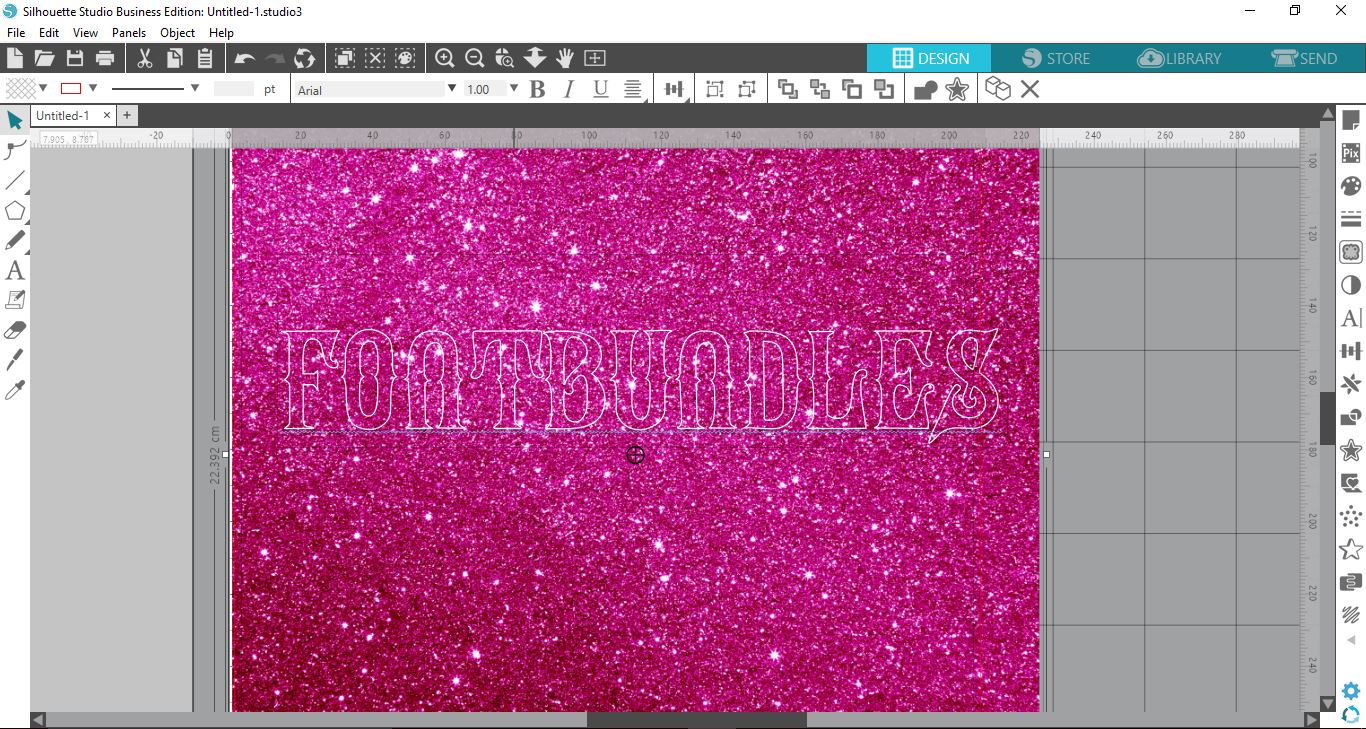
15- Select the modify tool and then with both digital paper and text selected click on crop.
16- The text will be cropped out of your digital paper.
17- Once your shapes/text have been filled with your digital paper you can click on send and print and cut your designs.
Related Tutorials
Silhouette Tutorials
Filling Text with Digital Patterns and Papers in Silhouette Studio
Filling text with digital patterns and papers in Silhouette Studio is so easy with our tutorial.
Silhouette Tutorials
Importing digital papers into Silhouette Studio
Silhouette Tutorials
How to Use Advanced Color Settings in Silhouette Studio
Discover the Advanced Color Settings in Silhouette Studio!
Silhouette Tutorials
How to Use Your Silhouette Studio Library on More Than One Computer
Learn how to access your Silhouette Studio Design Edition library on up to 3 different devices!
Silhouette Tutorials
How to Use Point Editing in Silhouette Studio
Silhouette Tutorials


