
How to use SVG Files in Silhouette Studio
In this tutorial, learn how to upload and use SVG file in Silhouette Studio.
Today we will show you how to use a SVG in Silhouette Studio. SVG stands for Scalable Vector Graphic. The format is a favorite for cut files as designs can be resized without losing detail. These files are widely used with Silhouette Studio and other cutting machines. You can edit the individual elements in SVG files, making them versatile for personalizing projects. Please note, you need Designer Edition and up to open and use SVG files in Silhouette Studio.
We will be using a pumpkin spice svg, but you can use any fall SVG from Design Bundles if you want.
**Using SVG files requires a Business or Designer Edition Upgrade.
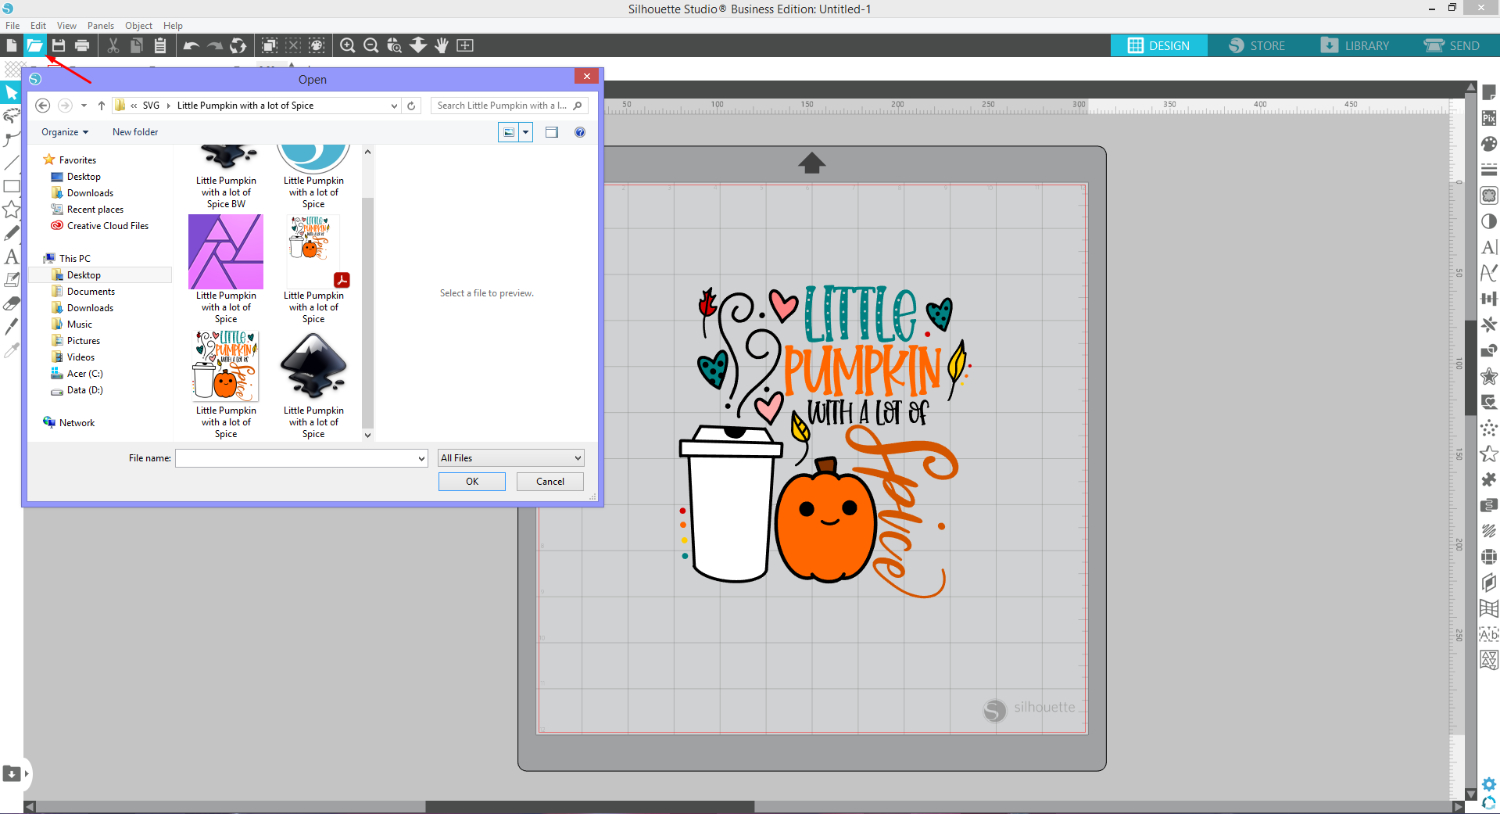
Step 1 - Open your SVG file
Some SVG files may not open the same as others. To make certain that our file opens in the center of our canvas, we need to change a setting first. On the lower right of the screen is a cogwheel. Click this to open the Preferences panel then select Import. Under SVG, click on the drop down menu and select Centered.

Once you have opened Silhouette Studio, you can import your SVG design. You can do this by going to File > Open or drag and drop the SVG onto your canvas. Alternatively, click on the File icon at the top left of the screen as shown in the image below.
At the top left of the toolbar change the line thickness to 0.00 to prevent any cutting issues.

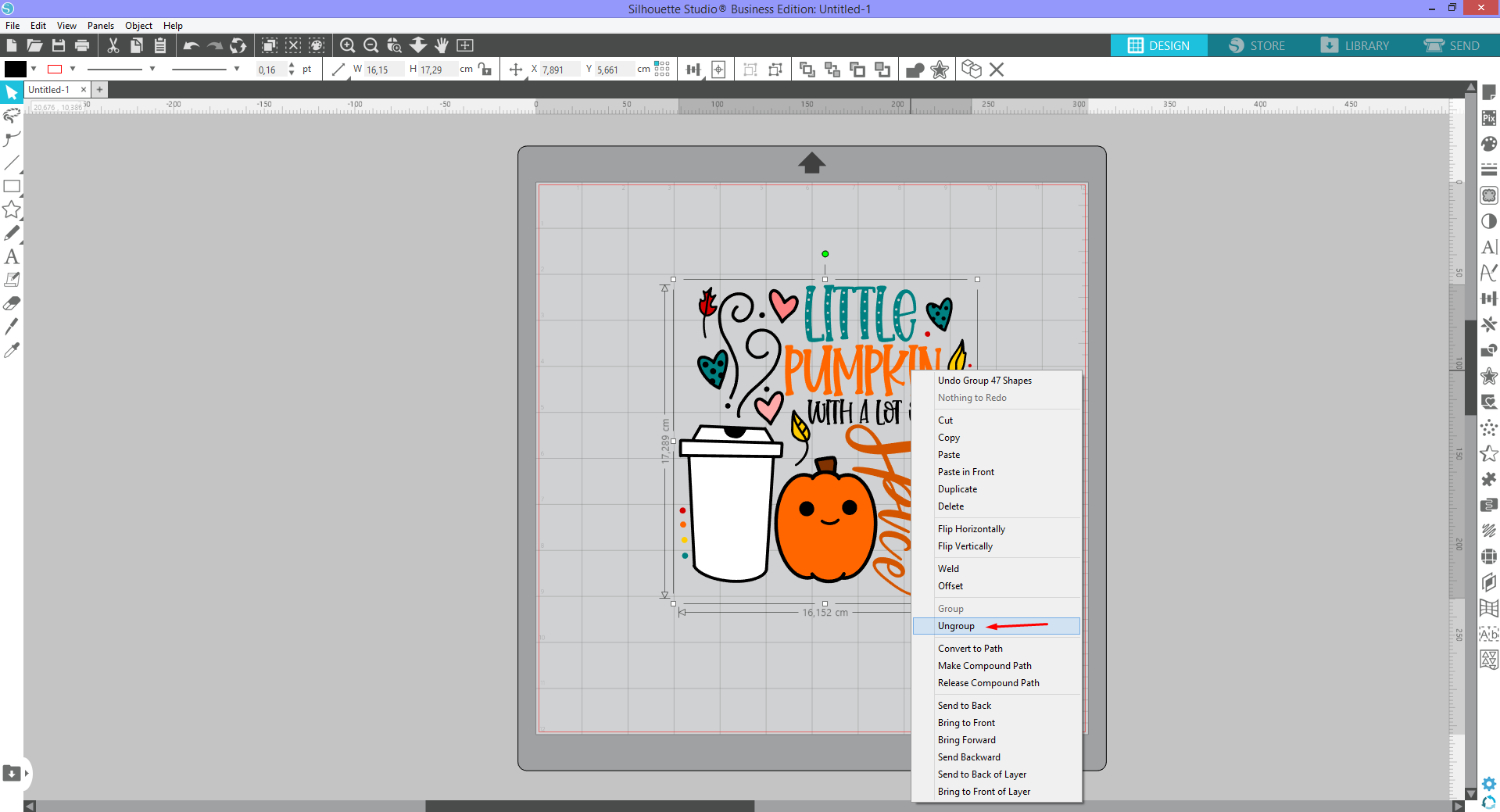
Step 2 - Edit the SVG file
In order to edit the individual elements of the SVG file, we need to ungroup them. With the design selected, right click > Ungroup. You may need to ungroup a few times depending on how the elements were initially grouped.
If you find that ungrouping is not working, you may need to release the compound path. Do this by right clicking > Release Compound Path. If the design can no longer be broken apart, both Ungroup and Release Compound Path will not be available.
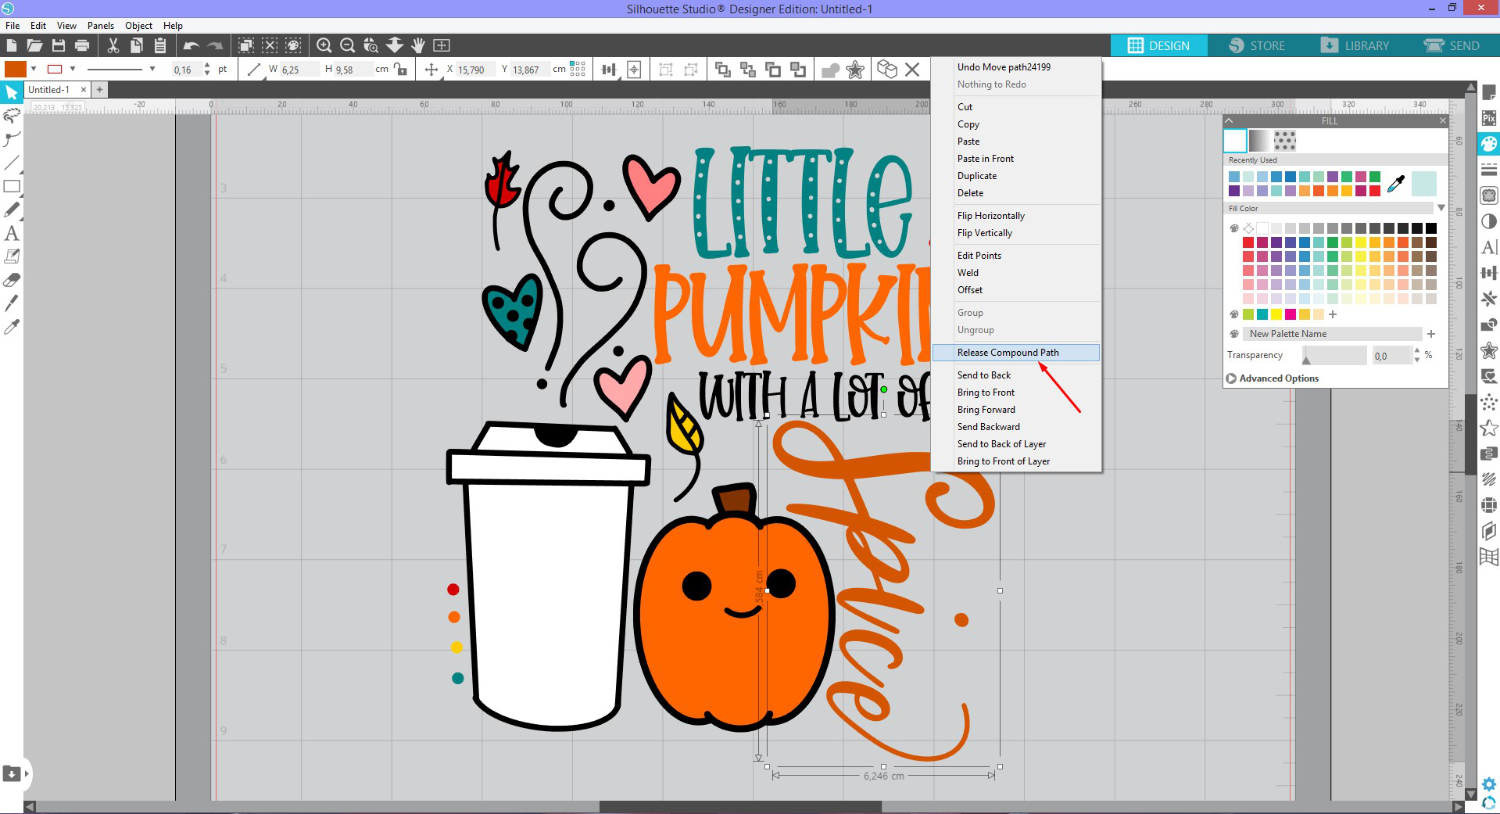
Each part of the design is now a separate element that can be changed however you choose. You can change the colors with the Fill Panel on the right side toolbar. You can also adjust the Stroke color with the Line Style Panel.
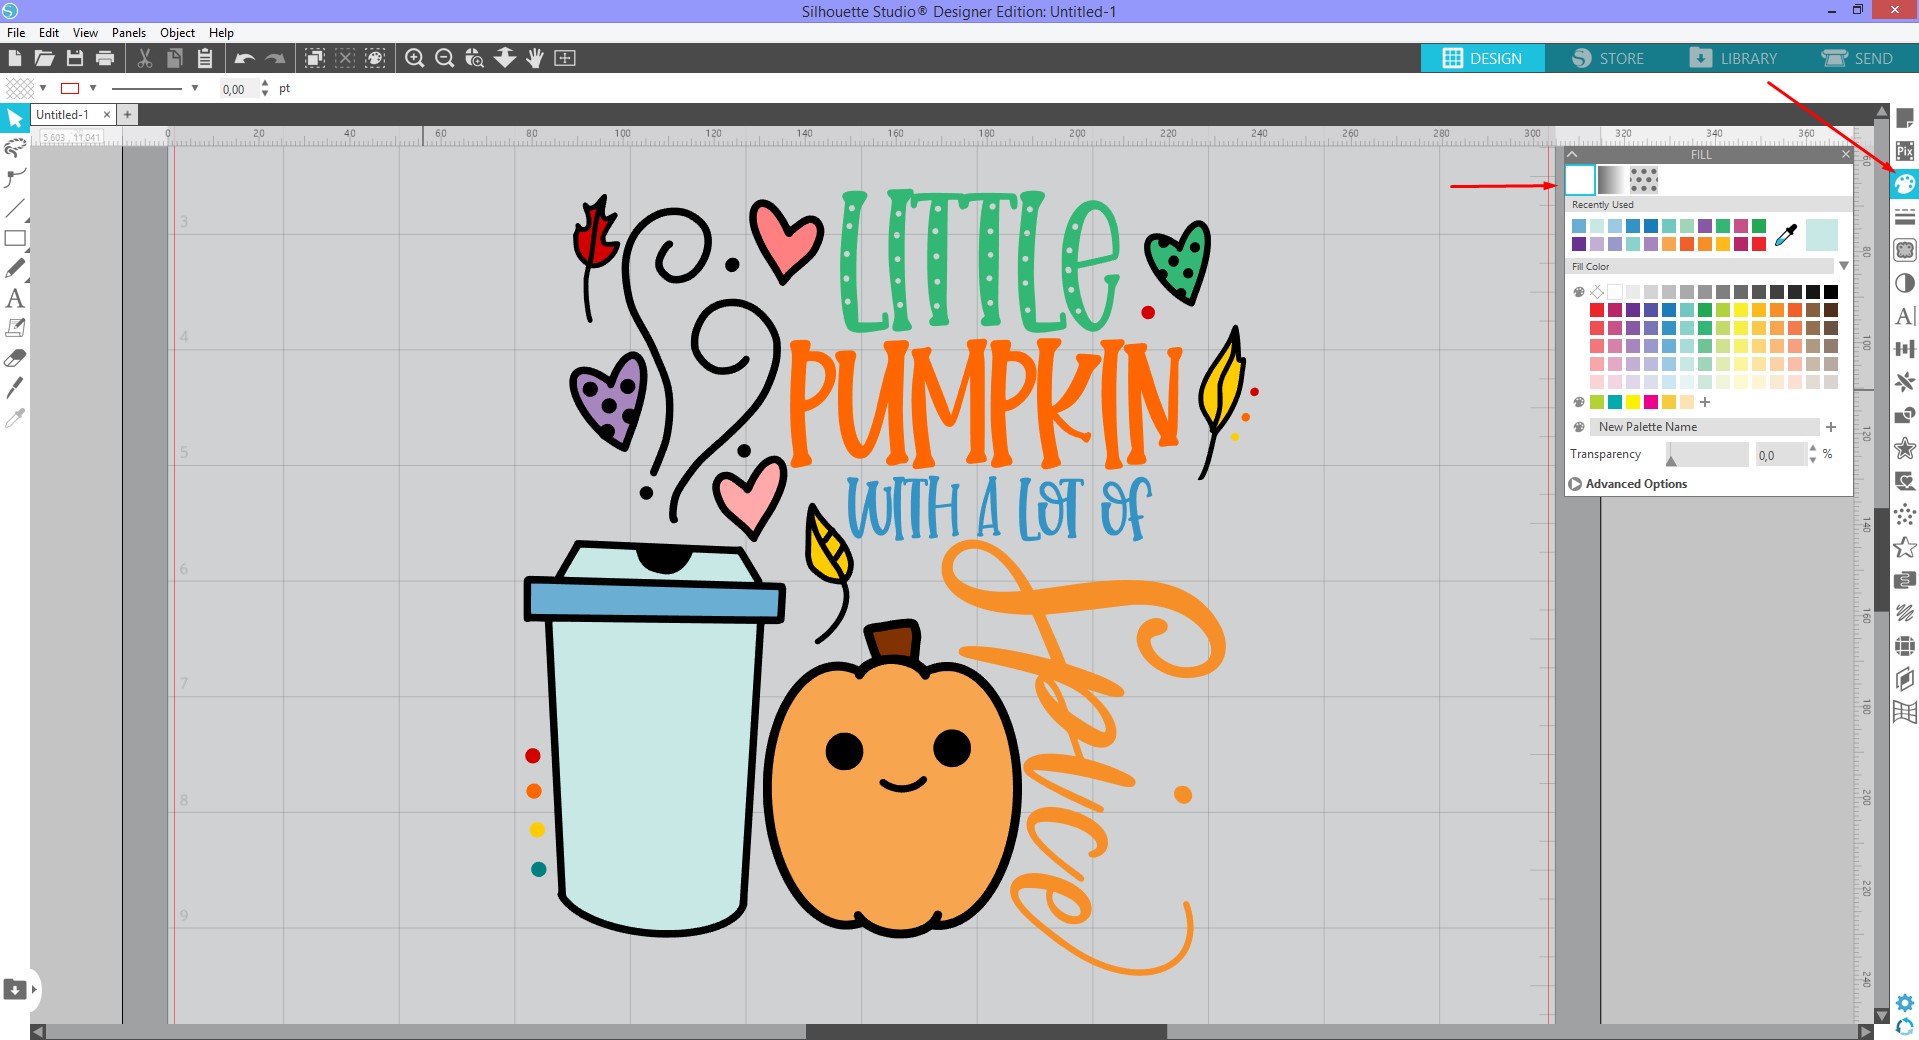
The elements can also be resized, duplicated and moved around. To resize, click on the element to activate the resizing handles. You can duplicate by right clicking > Duplicate. Here we resized the cup and duplicated some extra elements. Those duplicates were then repositioned.

When moving your elements, you need to select all the individual parts that make up that element. In other words, the cup was composed of a bottom, top, middle and a black background.
Step 3 - Send the SVG file to cut
When you are happy with the edits, you can move on to cut your design. Click on the Send button top right to be taken to the cut settings. You will automatically be taken to the Simple settings where you will see the cut lines.

Silhouette Studio gives you the option to cut by fill color. Click on the Fill option to open a list of all colors in the design. This is a very useful feature that makes cutting more efficient. For example, if we select the green box, all the pieces containing a green fill will be cut together.
We de-selected all of the boxes then ticked the green color. Zoomed in, you can see that the text “Little” and a green heart are outlined in green. The ticked box will tell the software to only cut those green pieces.

Adjust your cut settings as needed and click on the Send button at the bottom. Once the color has been cut, deselect the green box and tick another color. Then Send to cut. Carry on to do this for each color until your design pieces have all been cut.
Using SVG files in Silhouette Studio is a great way to quickly and efficiently create personalized projects. We hope that you enjoyed following this tutorial and learned something new.
If you would like to learn more, be sure to check out using SVG files in Cricut Design Space, converting JPEG to SVG in Inkscape and importing patterns in Silhouette Studio.


