
How to use Fonts In Cricut Design Space
Learn how to successfully use Fonts in Cricut Design Space with this step-by-step tutorial.
Cricut offers hundreds of beautiful fonts that you can find within the Design Space program itself. Not only do they provide hundreds of fonts, but they also allow you to use fonts that you install directly to your computer. This gives you so much more freedom to create beautiful artwork. Today we’ll learn how to work with fonts in Cricut Design Space. We’ll go over new font features and spend time learning about our fonts toolbar.
Step 1 - Install Fonts
Before using your Free Cricut Fonts in Cricut Design Space, you must install them on your device. We have an easy to follow guide on installing fonts to Mac or PC.
In this tutorial, we will be using the Bonefish Script font. There are tons of great script font duos available on Font Bundles to check out.
Step 2 - Create New Project and type out your text
Now that you have installed your font, open Cricut Design Space and create a new project. You can do this by clicking the green rectangle box that is labeled New Project.

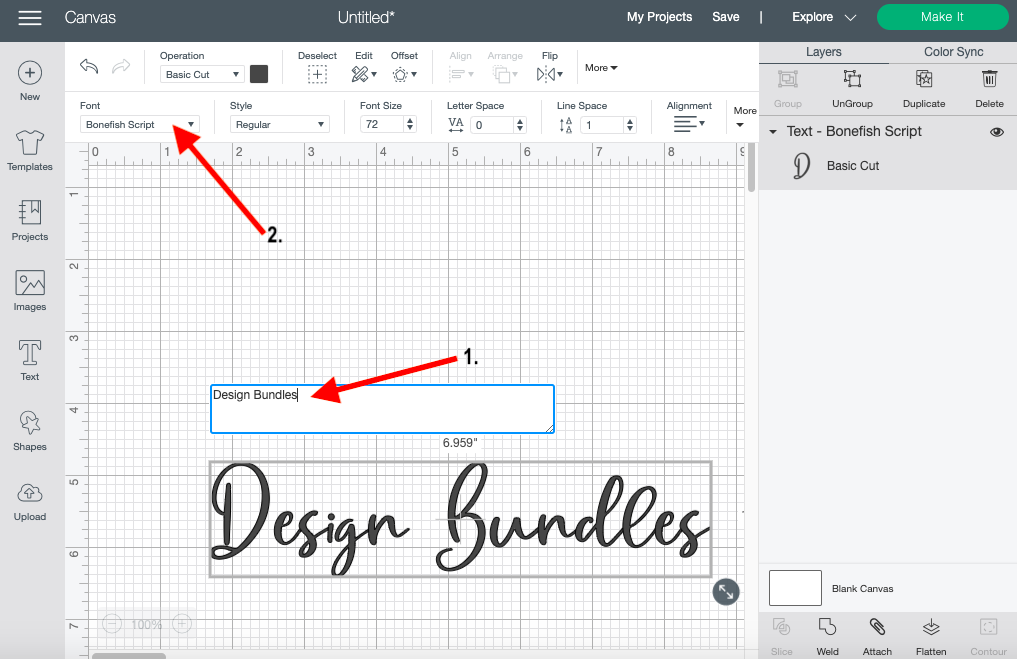
Open your text tool by clicking on the big “T” icon on the left side of your canvas screen. When you do this a rectangle box will appear where you will be able to type in your text. You will also notice another toolbar on the top of your canvas screen. This is known as your Text Toolbar. These two items will only appear when you are working with your text tool. Next, type your text in the rectangle box.

Step 3 - Fonts Toolbar or Text Edit Panel
After typing out your text, navigate to the text toolbar on the top of your screen. This will allow you to modify your text, such as changing the font to adjusting the spacing between each letter. We have a full tutorial on how to edit text in Cricut, if needed. For this tutorial I’ll be changing my font to Bonefish using the font tab.
Using Script fonts in Cricut Design Space is now much easier than before. With the new automatic kerning feature for desktop we will no longer spend time adjusting each letter to kern our font. Unfortunately this is just for desktop, but you can still manually kern letters on the iPad.

Step 4 - Ungrouping and Grouping Fonts
Even though we can automatically kern fonts in Design Space, we may still want to make a few changes to our script font. To make changes, select your font and then click the Ungroup icon on the top of your layers panel. Doing this will allow you to make changes to each letter.
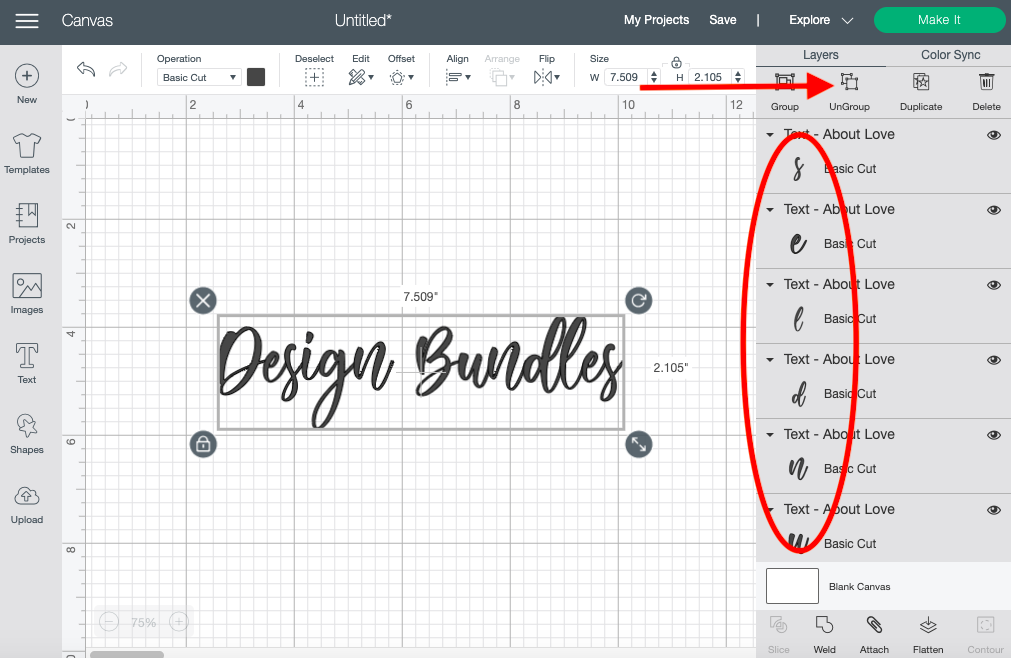
To demonstrate I’ll change the capital letters of each word and use a new heart script font called About Love. Easily change the letters once they are ungrouped by clicking on the letter and using the text edit panel.

Group all your items together by clicking the Group Icon on the top of your layer panel.

Please note that when you make any changes to your fonts after kerning you will have to weld your text. Only do this once you believe you will no longer be making any more adjustments. You can weld your text by clicking the weld button on the bottom right-hand corner of your screen.
Next up, check out our guide on using glyphs in Cricut Design Space.


