- By Nadine Spires
- 10 Mins
- DesignScape Tutorials
How to Use Pinterest Templates in DesignScape
Discover how to use Pinterest templates in DesignScape.
If Pinterest is your favorite social platform, then this tutorial on using Pinterest templates in DesignScape is just for you. You can quickly edit Pinterest templates and share with your followers in no time. DesignScape is an online editing software available to Gold Plus Members. If you are not a member yet, have a look at our free 30 Day Trial of the Gold Plus Membership. Why not give this awesome alternative to Photoshop and Illustrator a try?
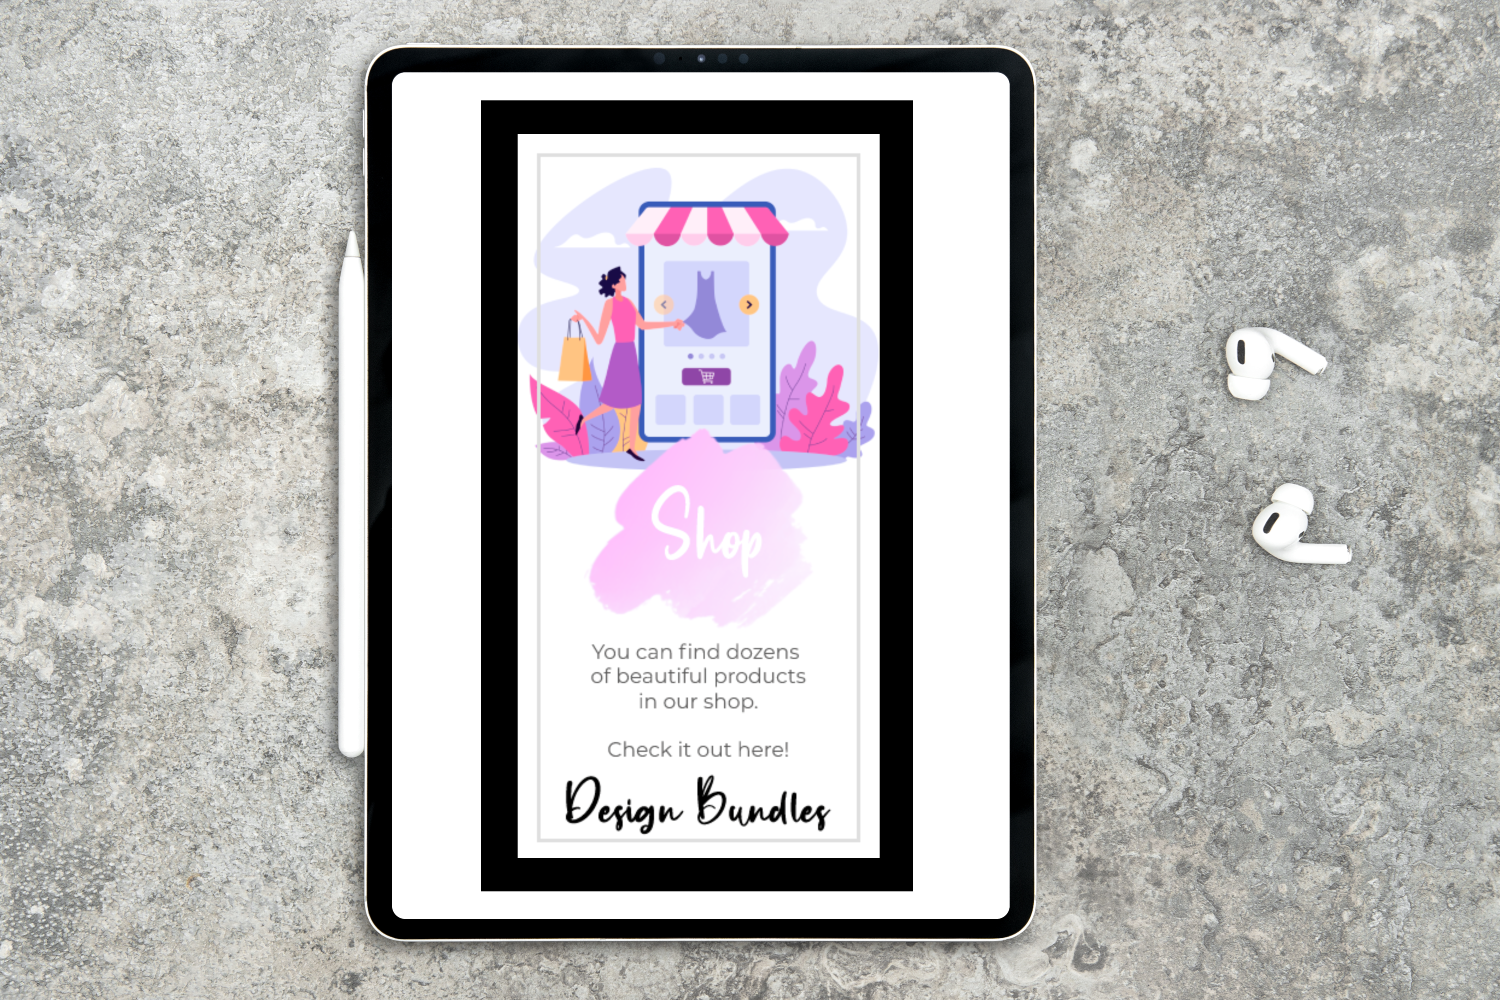
Pinterest templates are a super quick and easy way to customize a layout without actually creating one. They save time and help to create efficient posts for your followers.
During this tutorial we will be using an elegant banner design and a shopping illustration. For our text we have chosen a handwritten script font called Botanist.
Step 1 - Add an Image to Pinterest Template
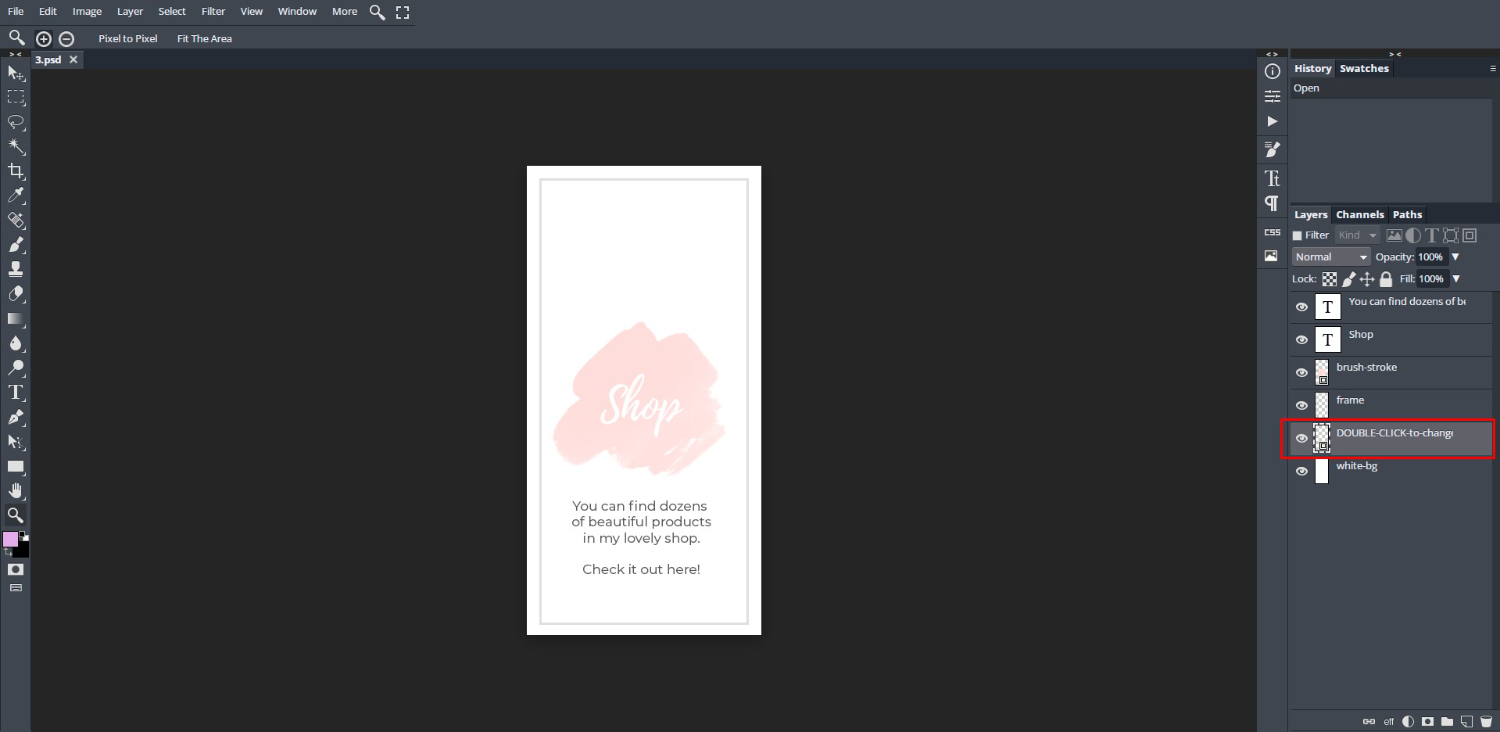
First, let us open our template in DesignScape. You will notice that the template doesn’t contain a background image. This is because we will be adding our own. Go to the Layers Panel on the right hand side. Then double click on the thumbnail of the layer DOUBLE-CLICK-to-change.
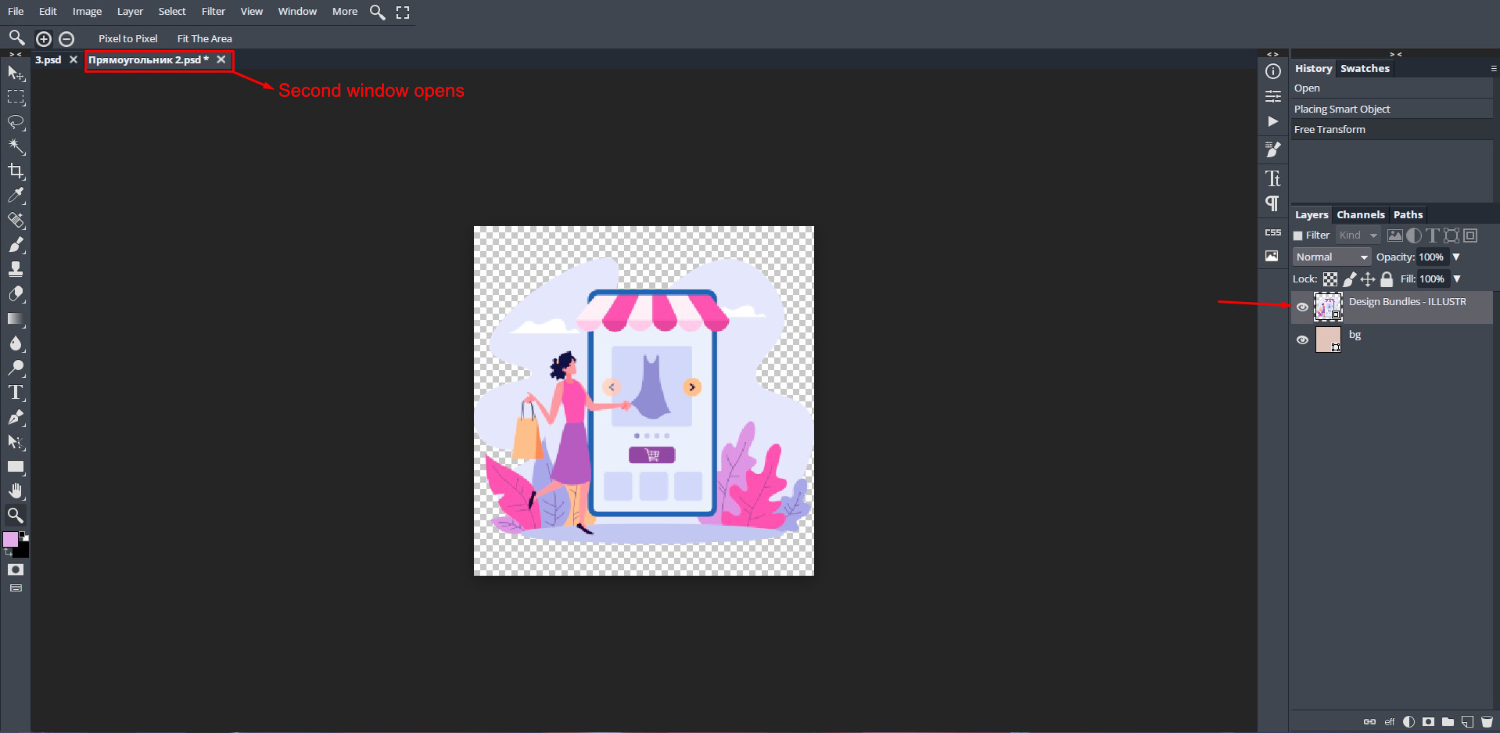
A new window will open. This is your placeholder and where you will upload your image. Now, locate your image then drag + drop it into DesignScape. For this tutorial we used the PNG image file.
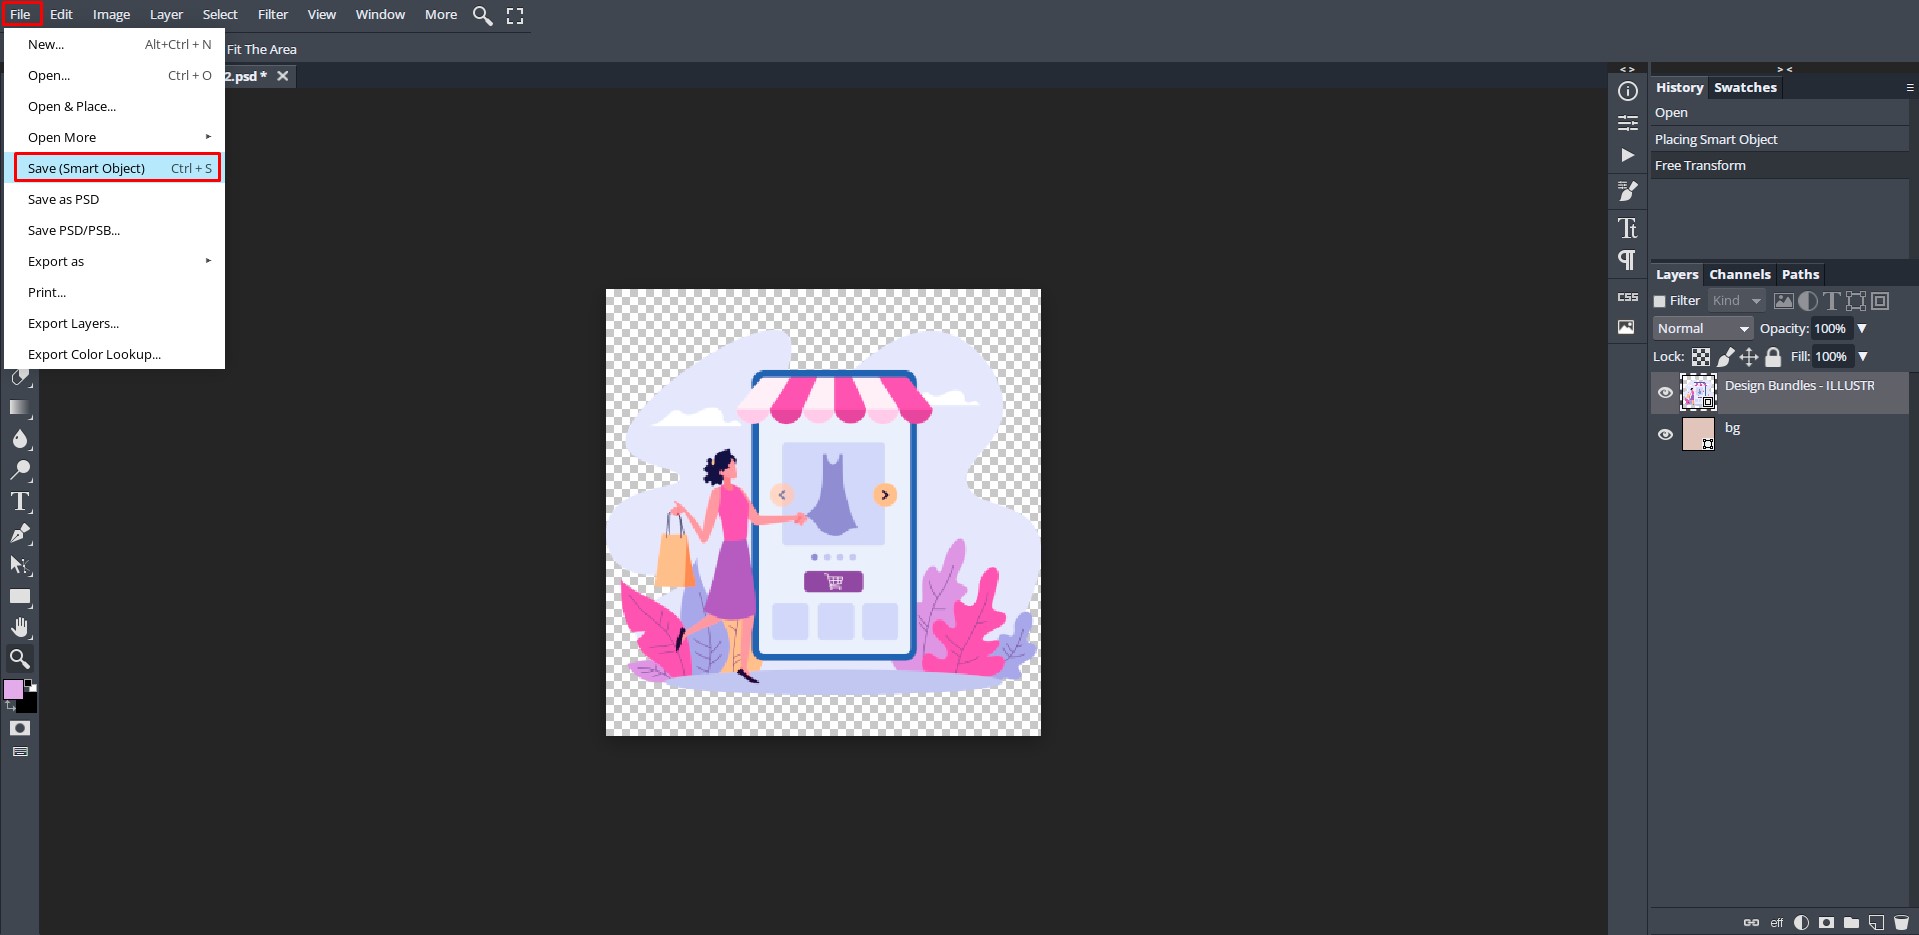
We now need to save this image so that it reflects on the original file. Go to File > Save (Smart Object) use the shortcut Ctrl + S.
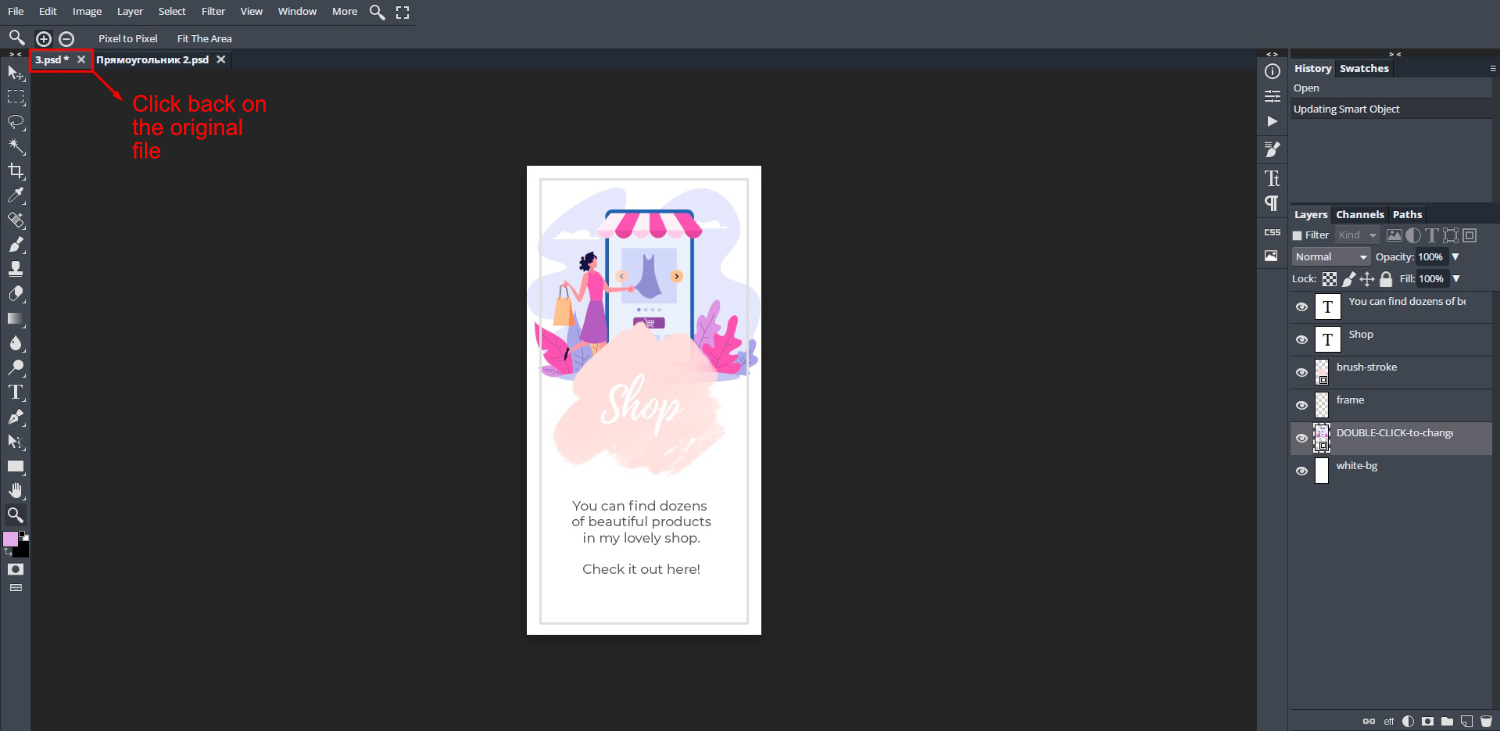
Click back on the original PSD and just like that the image has been added. To edit the image further such as resizing or adding another image, click back on the second window and adjust. But, remember to click Save (Smart Object) each time you edit to update the file.
Step 2 - Change the Font on Template
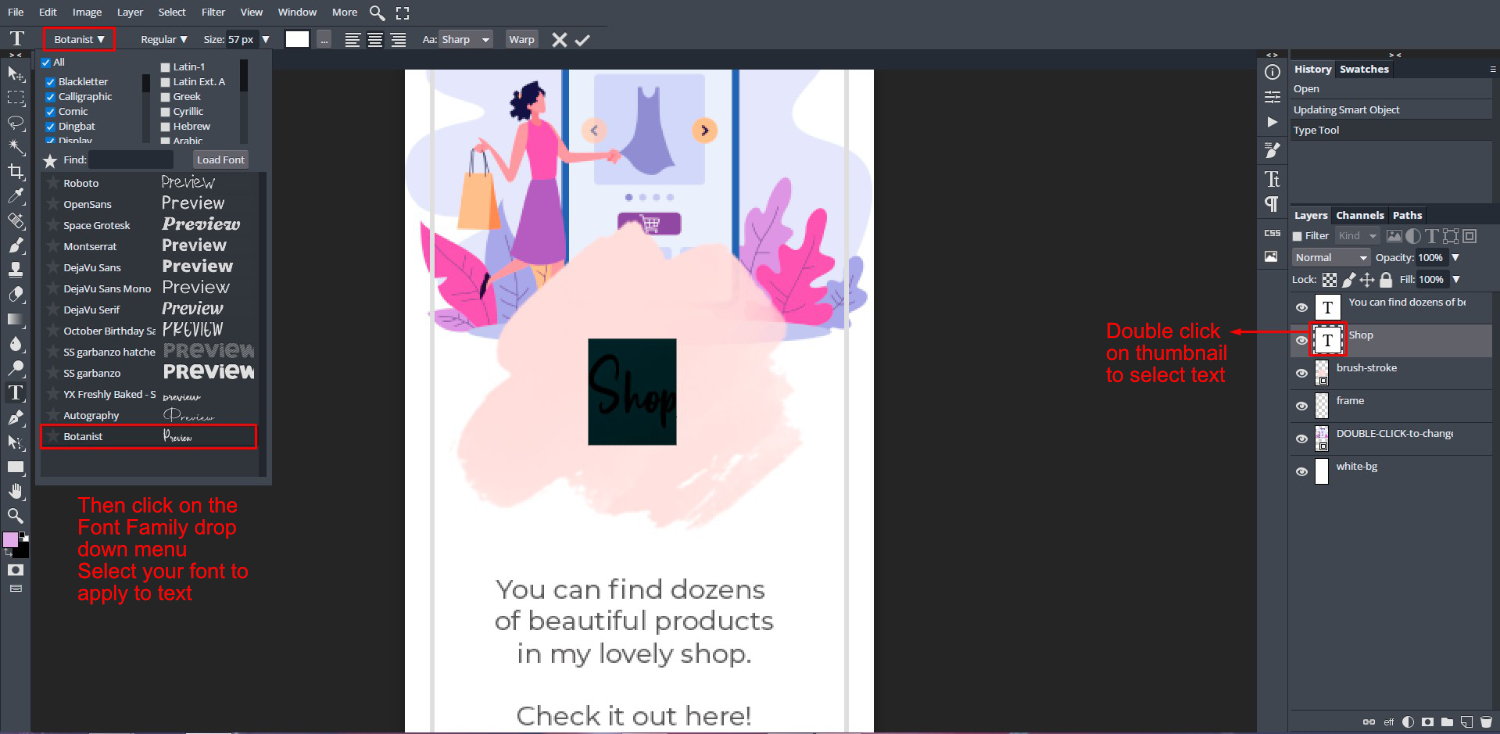
Let’s move onto the text in the Pinterest template. Double click on the Shop text layer thumbnail, not the text, under the Layers Panel. The first thing you will notice is that the font will change to something else. You most likely won’t have the font loaded that was used in the PSD file.
Not to worry. You can use any font that you like. We have already added our font to DesignScape. With the text still selected, click on the Font Family drop down menu and select your font to apply.
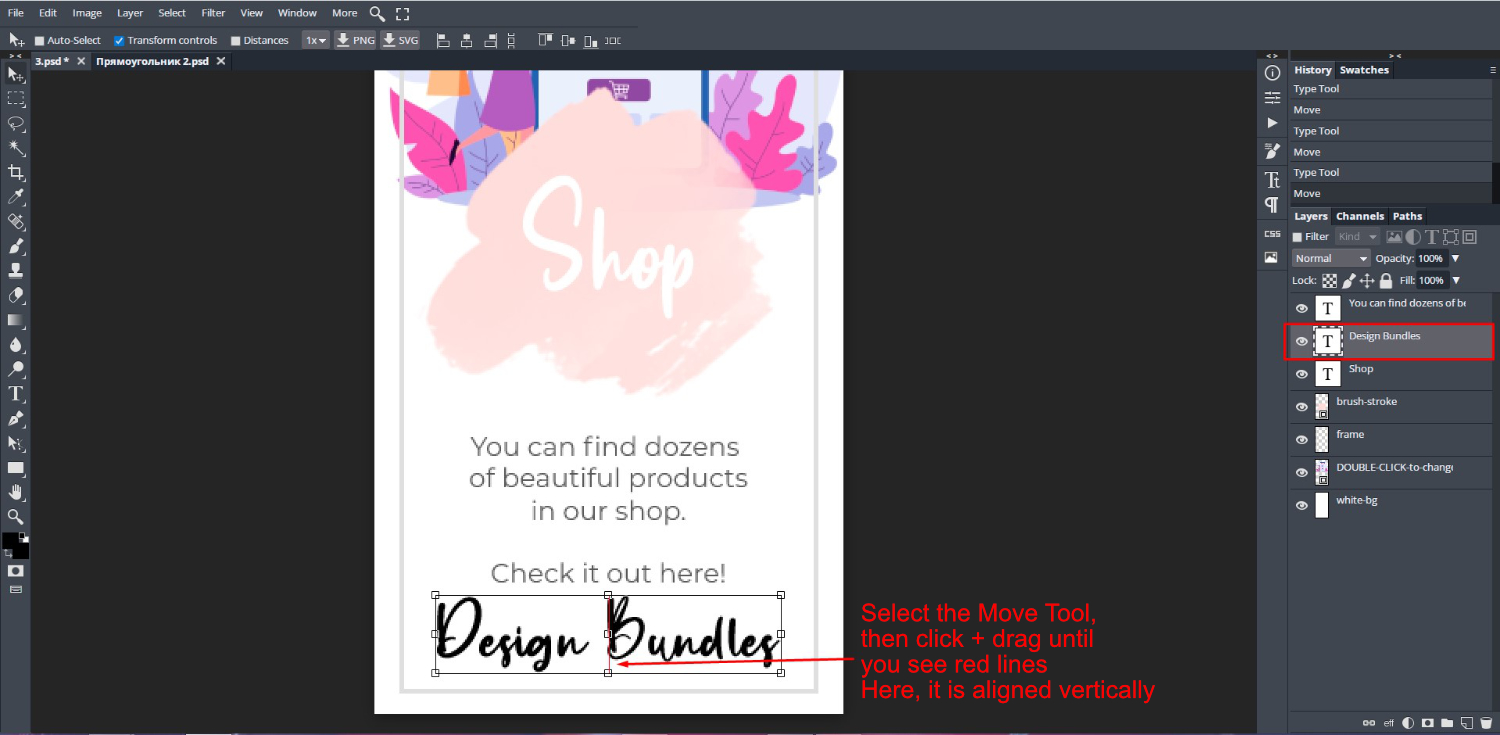
To resize the text, click on the Move Tool top left side, and make sure the box for Transform controls is ticked. You will see the sizing handles appear. Now hold Shift, then click + drag one of the corner handles in or out depending on the size you want.

Do this for all text in the template. We changed the body of the text to the pre-loaded Montserrat. We also duplicated the Shop layer by right clicking > Duplicate Layer. This was then changed to “Design Bundles”, resized and positioned at the bottom of the template.
To reposition elements, click on the Move Tool, then click + drag. As you move the element around you will see red lines appear vertically and horizontally. These are your guide lines and tell you when everything is centered.
Step 3 - Edit the Other Template Elements
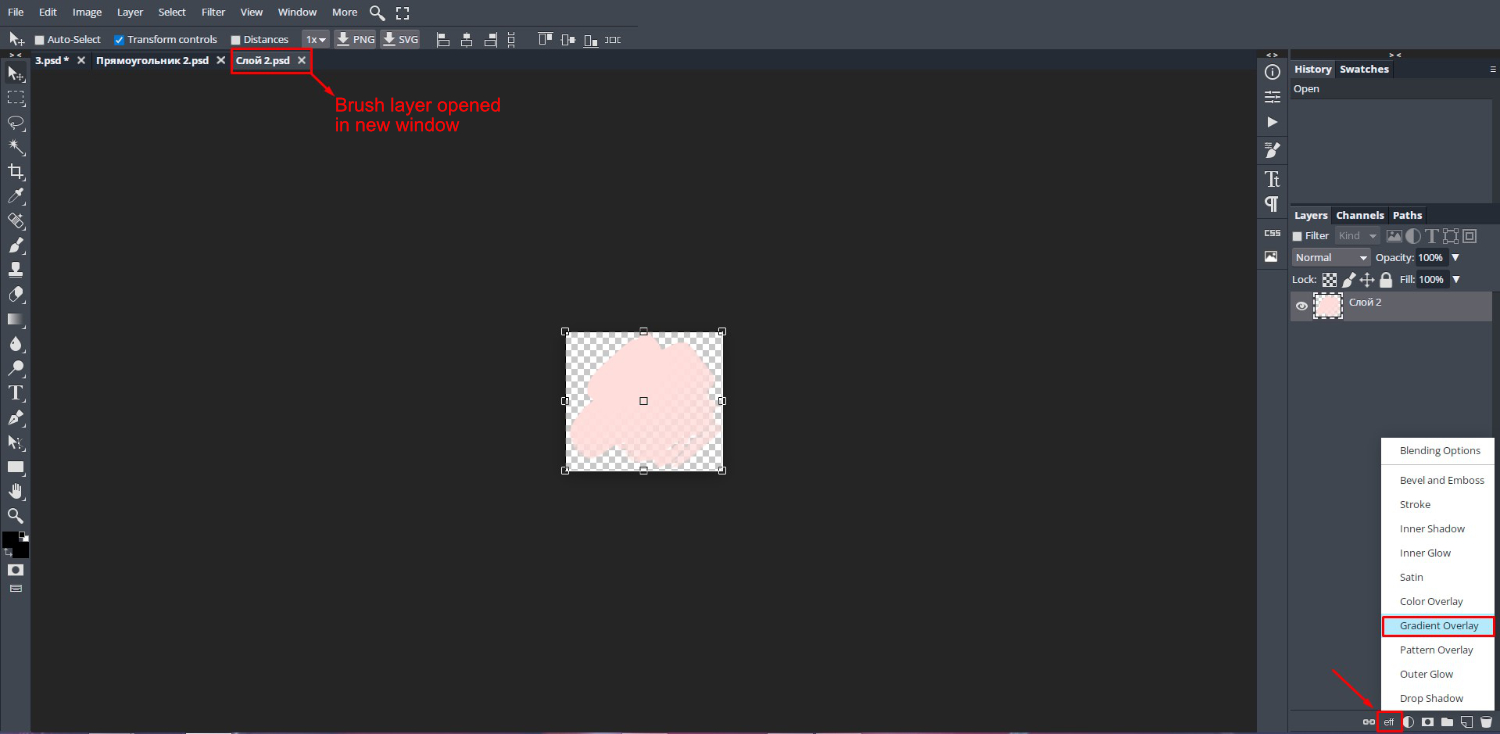
We want to change the color of the pink brush stroke. Then move the Shop and brush-stroke layer down a bit. To do this, first double click on the brush-stroke layer to open in a new window.
Change Brush Stroke Color
Next, go to the bottom of the Layers Panel and click on the eff icon. From there, select Gradient Overlay.
In the Layer Style panel you will see the Gradient Overlay options. Click on the gradient itself and double click on the color box. We only want to change the pink to another shade.
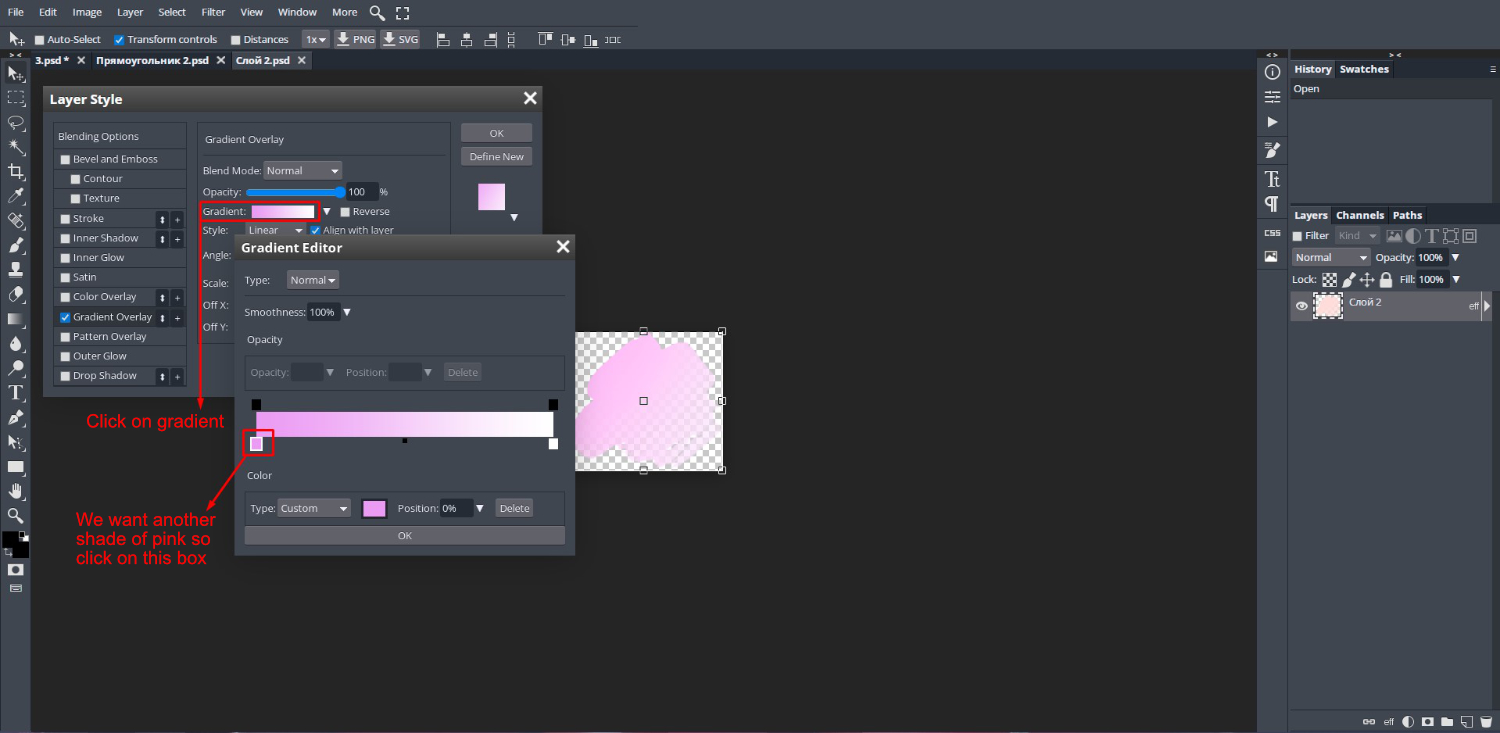
The Color Picker will now open where you can choose a new color or shade according to your needs.
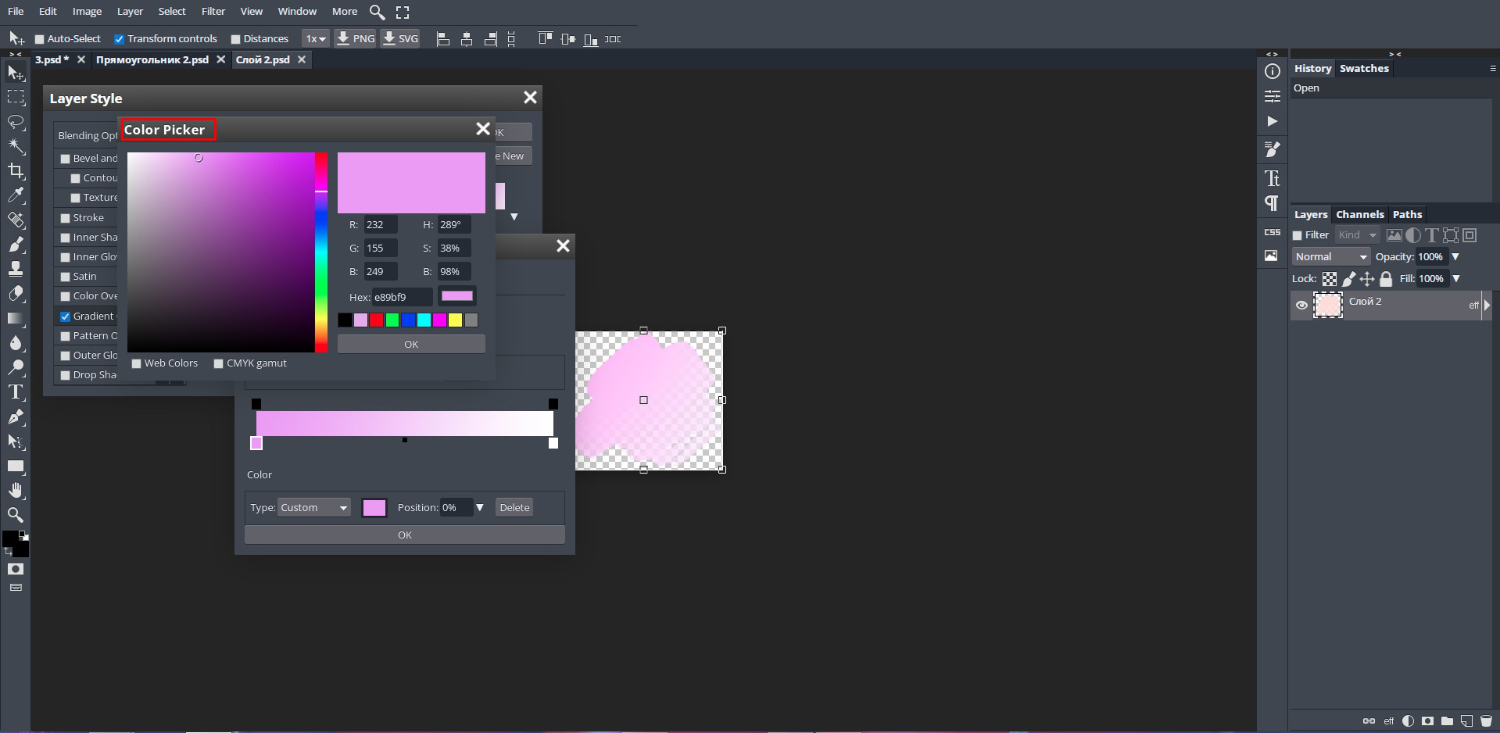
Then click Ok to close out the Color Picker. Click Ok to close the Gradient Editor and click Ok one more time to close the Layer Style Panel. Now go to File > Save (Smart Object) to save the changes. Go back to the original PSD file and the changes will be updated.
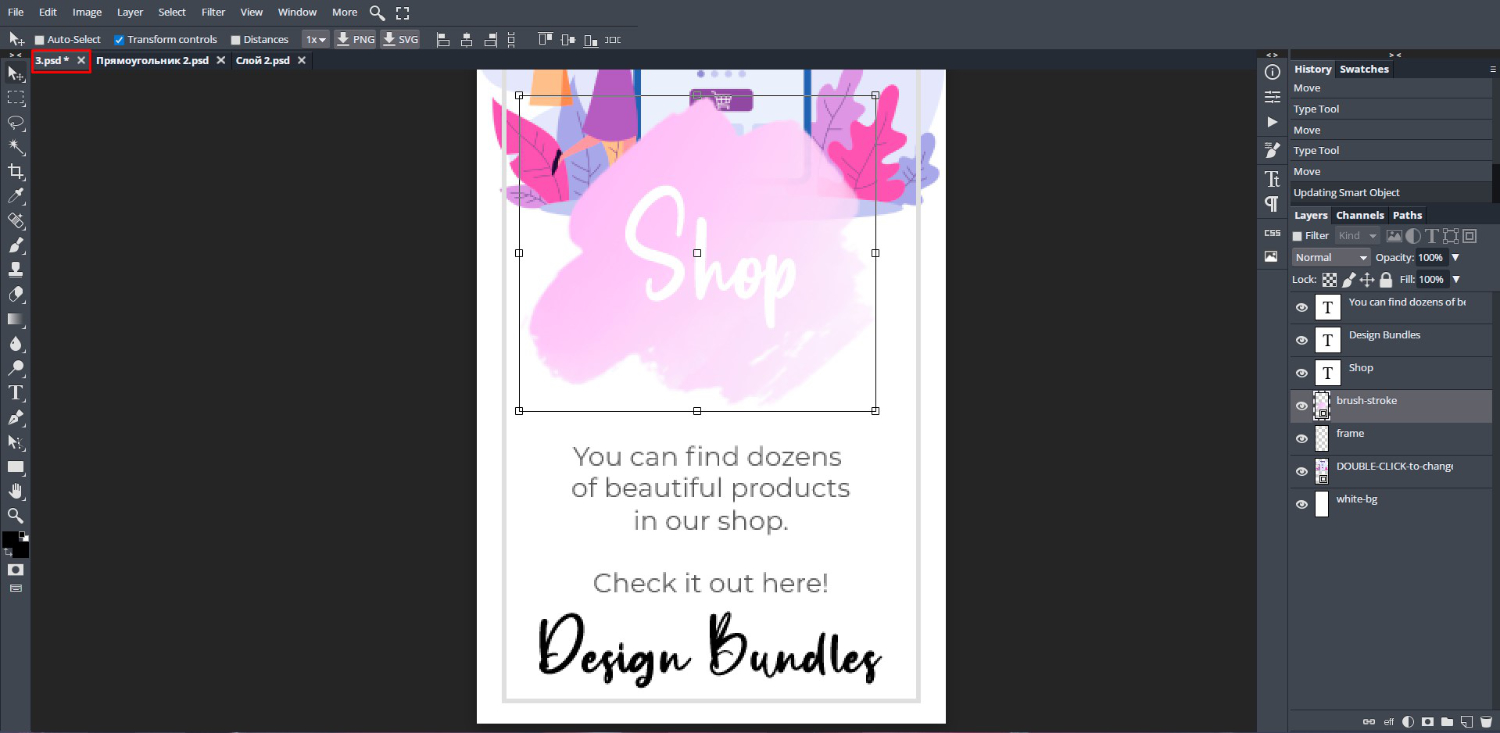
Adjust Brush Stroke and Shop Layer
The Shop and brush-stroke layers are a bit too big so we want to decrease the size.
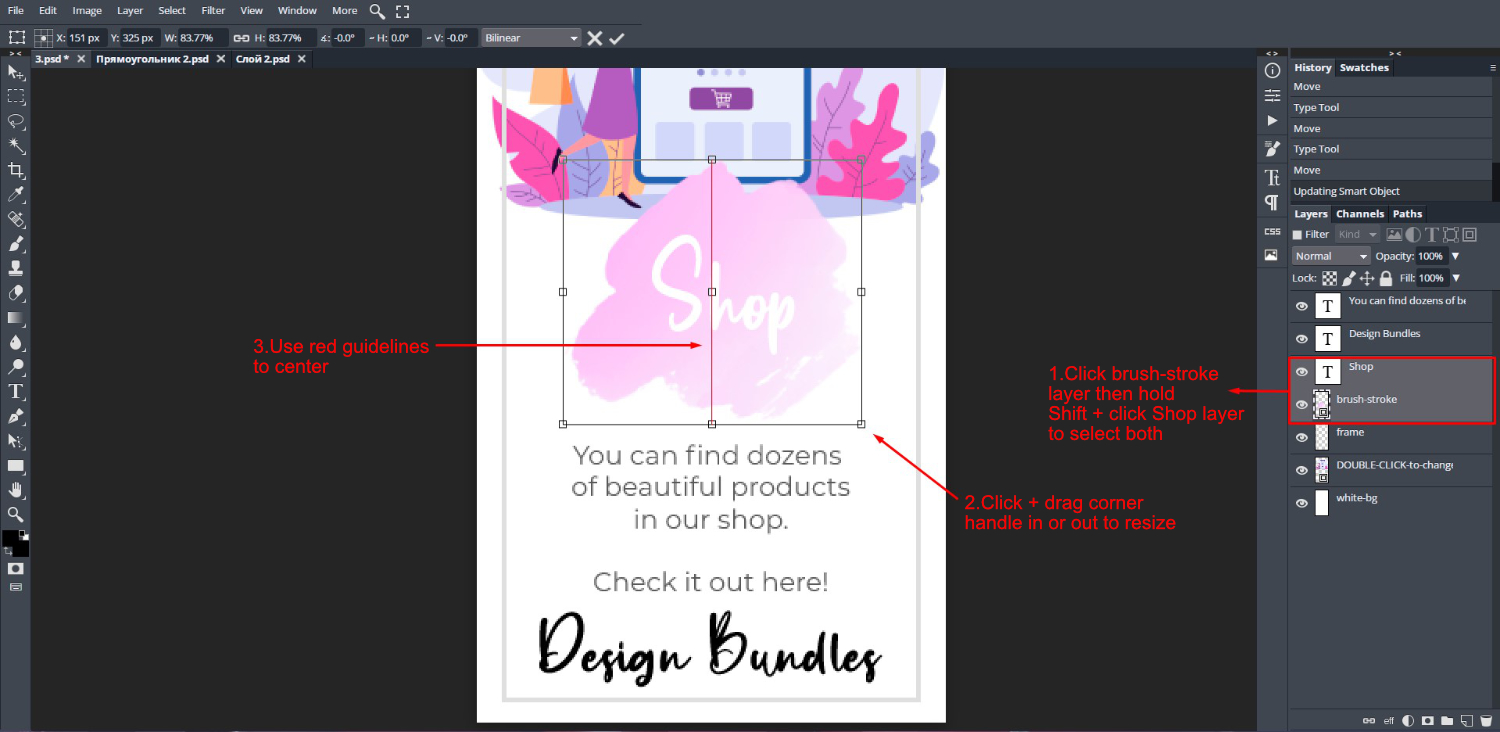
Click on the brush-stroke layer to select then hold Shift + click on the Shop layer. Now, hold down Shift then click + drag one of the corner handles in or out. Holding Shift will constrain the size.
With both layers still selected, click + drag to reposition if needed. Use the red guidelines to help you center the elements.
There we go, we have successfully edited a Pinterest Template in DesignScape. We can now save the design by going to File > Export as > PNG.
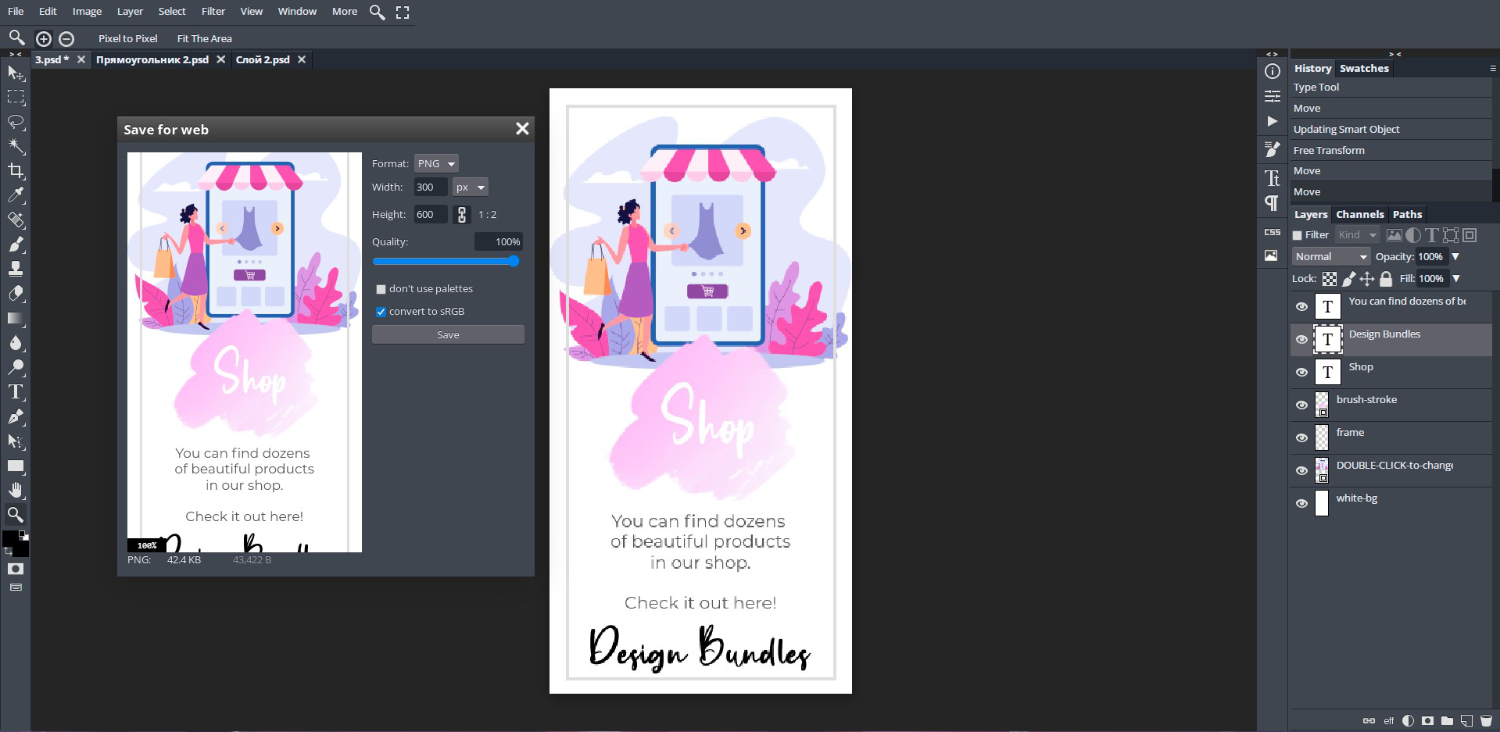
Below is the final result.
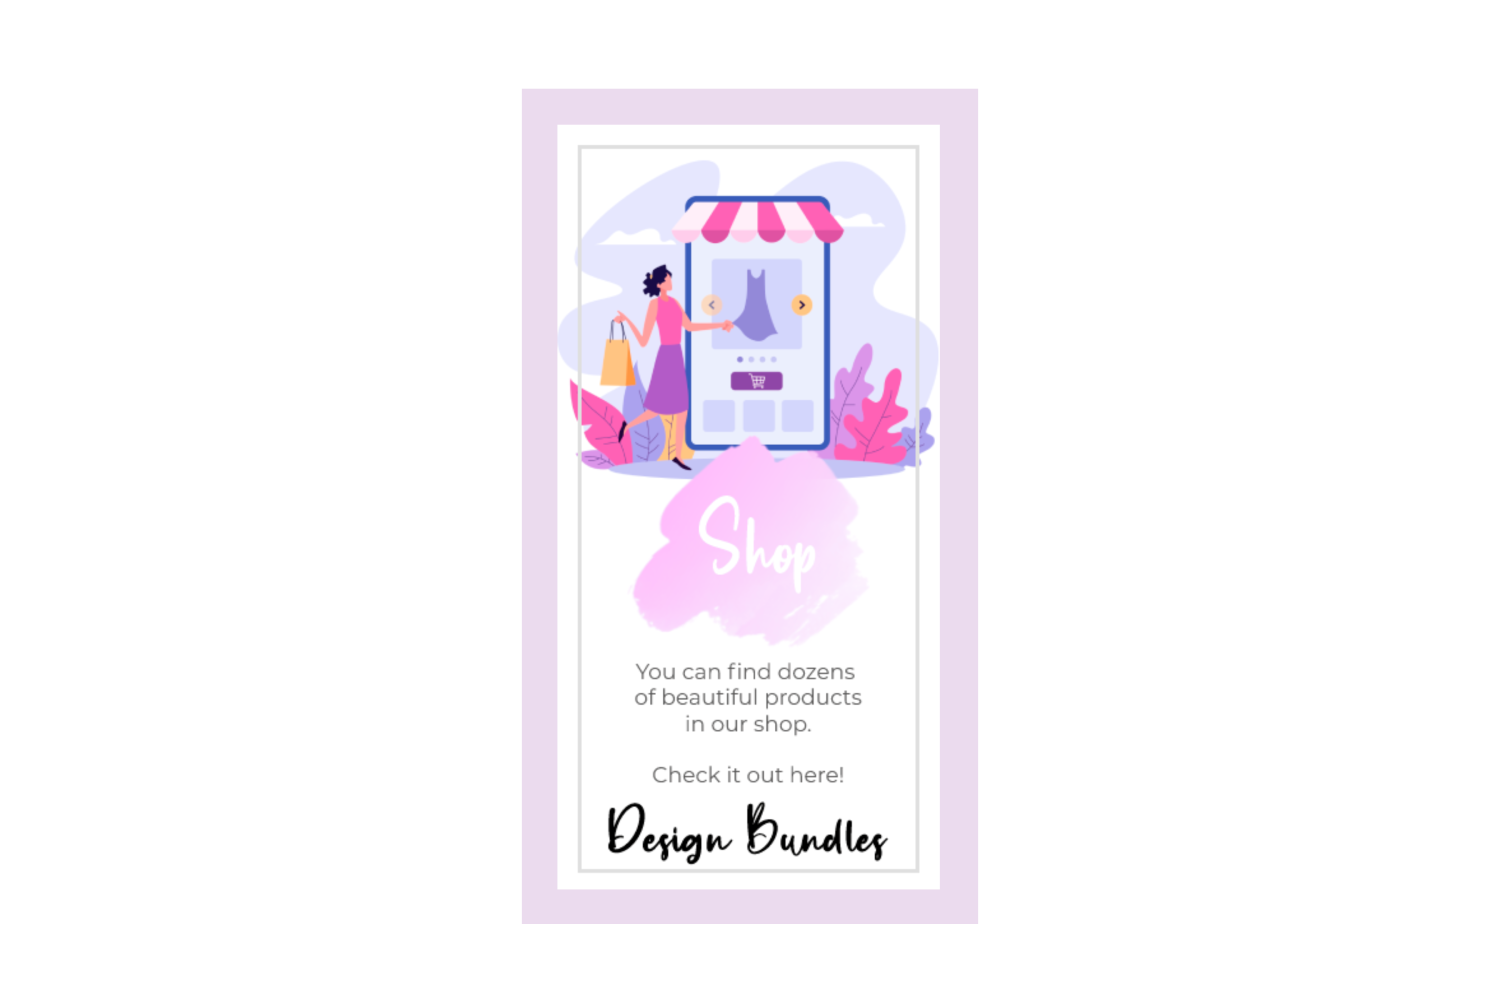
We are now done with our Pinterest Template in DesignScape. You can share with your family and friends, inspire your followers or draw attention to your shop. There is so much to learn about DesignScape and all that it can do.
6 Related DesignScape Tutorials
Did you know that you can use digital scrapbook templates in DesignScape? We are going to show you how to do this with our step by step guide. Scrapbook templates are a quick and easy way to create memories with your photos. With so many design options available, you can ...
Did you know that you can use digital scrapbook templates in Canva? Canva is an amazing browser based platform for creating engaging social media content. Digital content paired with scrapbooking is a fun and easy way of sharing memories with everyone.For this tutorial we will be using a digital ...
Using scrapbook templates in Photoshop makes scrapbooking easy and fun! When compared to traditional scrapbooking, it's much quicker and still looks incredible! Scrapbook templates make it easy to get started. They can be used as is, or you can use elements from them to create your own scrapbook pages.Before ...
Knowing how to use templates in Illustrator is essential as there are templates for so many different things, such as business cards, invitations, planners, presentations, etc. It’s great to be able to grab a template and quickly edit it to fit your style.The template we’ll be using ...
It’s great knowing how to use templates in Affinity Designer if you’re stuck on coming up with your own design and because it can help you save some time. Whether you’re looking for a template to create a brochure for an event, a card for a special ...
Ensure that your file has been downloaded and unzipped to use. 1- Open Ps. Click on File > Open. 2-The Open windowwill appear. Select the Photoshop template you would like to use andclick Open. 3- You may get a new box appear stating that the file is using fonts that ...

 All your Font Needs


