- By Lorna Cana
- 6 Mins
- Illustrator Tutorials
How to Use Text Effects in Illustrator
Learn how to use Illustrator Text Effects in 1 click!
Illustrator Text Effects are a great way to add personality to your artwork. You can easily apply them to your text with a single click to produce a great variety of colorful designs.
In this tutorial, we will show you how to use pre-made text effects in Illustrator.

We will use the Pop Pastel Text Effect and Awesome Groovy Font from Barcelona Design Shop.
Step 1 - Open or Import the Text Effect in Illustrator
First, we need to bring the text effect into Illustrator to apply it to your text. There are a couple of ways of doing this. You can open the file directly into Illustrator, or load it through the Graphic Styles panel.
Open the Text Effect File In Illustrator
Just click Open in Illustrator and navigate to where your file is saved and select it.

If you want, select the example text on the document and head to the Graphic Styles panel to save it as a new style for future use by clicking on the small icon at the bottom of the panel.

You can now modify the example text and/or change the font to the one you want to work with.

Import the Text Effect Through the Graphic Styles Panel
You can also add your text effects by going to the Graphic Styles panel and clicking on the small menu on the top right. Navigate to Open Graphic Styles Library > Other Library and then to where your file is saved to open it.

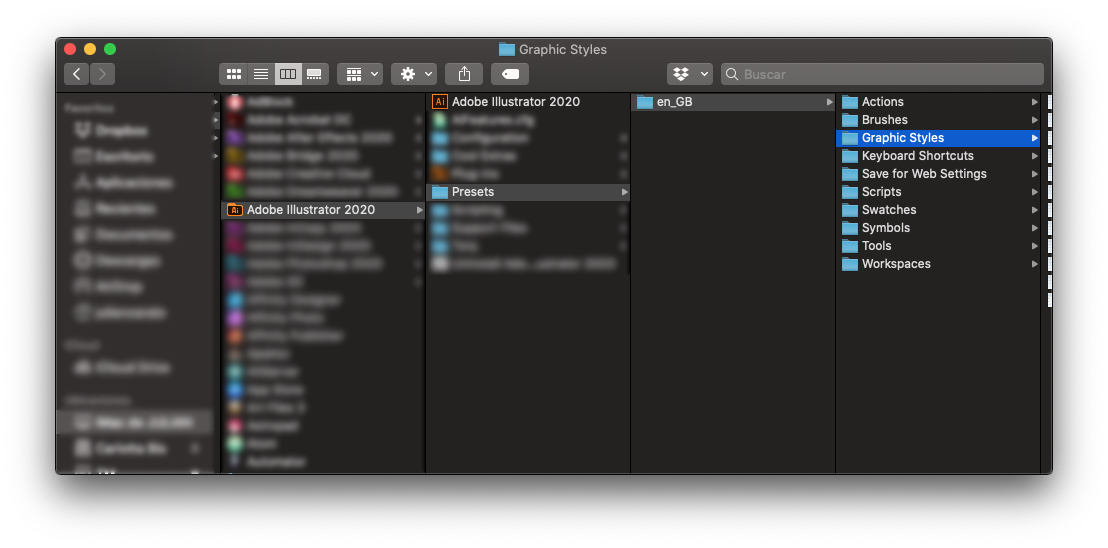
Or, place it in Illustrator’s Graphics Style folder, so you can open the file from within that palette directly. You can find the folder going to Applications > Adobe Illustrator > Presets > en_US (or other language) > Graphic Styles.

Then, with your text selected, head to the Graphic Styles panel and click on the new style to use it on your text.

Step 2 - Modify the Text Effect
You can also see the contents of the layer if needed.
To do this click on the small arrow on the left side of the layer thumbnail in the Layers panel. This will show its content and maybe hide or get rid of some elements.
Now, you can leave your text as it is, or maybe change some details and adapt it to your needs.
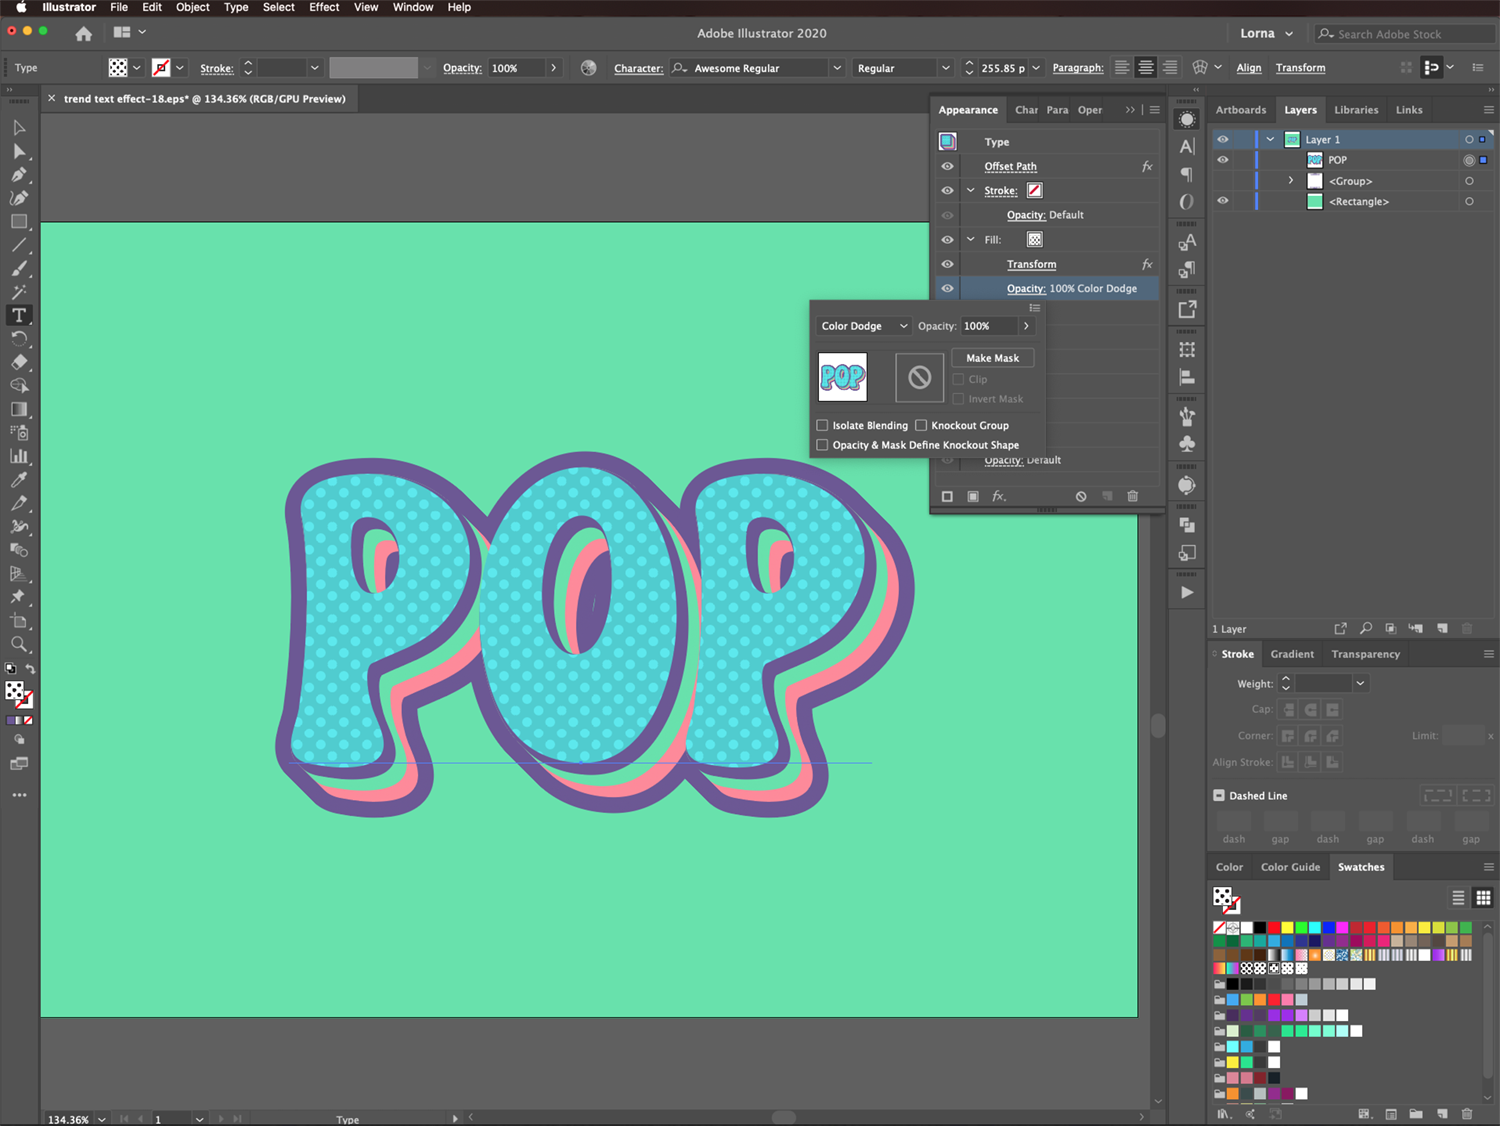
To do it, make sure it is selected, and head to the Appearance panel where you will see all the different text effect elements.
You may also check the Swatches panel. Some text effects files include different colors, patterns, etc. that you can use on your design.

You can double-click on any of the text effect elements to open the settings windows and modify them if needed.

Like for example here, where we changed the Blending Mode on the pattern.

And, here’s some text with color and pattern variations.

You have now successfully applied a text effect in Illustrator!
If you prefer to make your own text effects from scratch, we have some great tutorials on making a neon text effect, a sketch text effect, and a bevel text effect all in Adobe Illustrator.
6 Related Illustrator Tutorials
In Affinity Designer text can be enhanced using the Layer Effects panel. The panel is loaded with options for blurring, bevel, 3D and more. The Layer Effects panel works non-destructively and can be edited at any point. We will show you how to apply Layer Effects to text in Affinity ...
With Photoshop Text Effects, you can create text with impact in just a few steps. Creating text that stands out is an important factor in logo design, product display and more. Text Effects not only saves you time, but allows you to create unique design ideas. In this tutorial, we ...
This tutorial is going to take you step-by-step on how to utilize the blend tool with text, this is a great technique to create ‘tube-like’ 3D text. The blend tool is a great tool to use within your designs to create unique styles and finishes. You can also find out ...
Canva being an amazing online graphic design tool has finally rolled out its cool text effects feature. Text effects change the appearance of your text from boring to fabulous. All the effects are just in one spot so it’s super easy to try in just one click. In this ...
Text Styles are presets that can be applied quickly and efficiently to a large amount of text. This is essential for projects that use text and require the ability to update across the platform. In this tutorial we will give a brief overview of how to use Affinity Designer Text ...
1- Open Silhouette Studio. Click on the cutting mat options and change to Curio. Change the size of the cut area to fit the curio mat.2- With the cutting mat and the size changed, you will see the curio mat appears on the design space.3- Type your text.4...

 All your Font Needs
 All your Design Needs


