Stitched Denim in Photoshop
For this tutorial, you will need the Image/Texture of “Denim”.
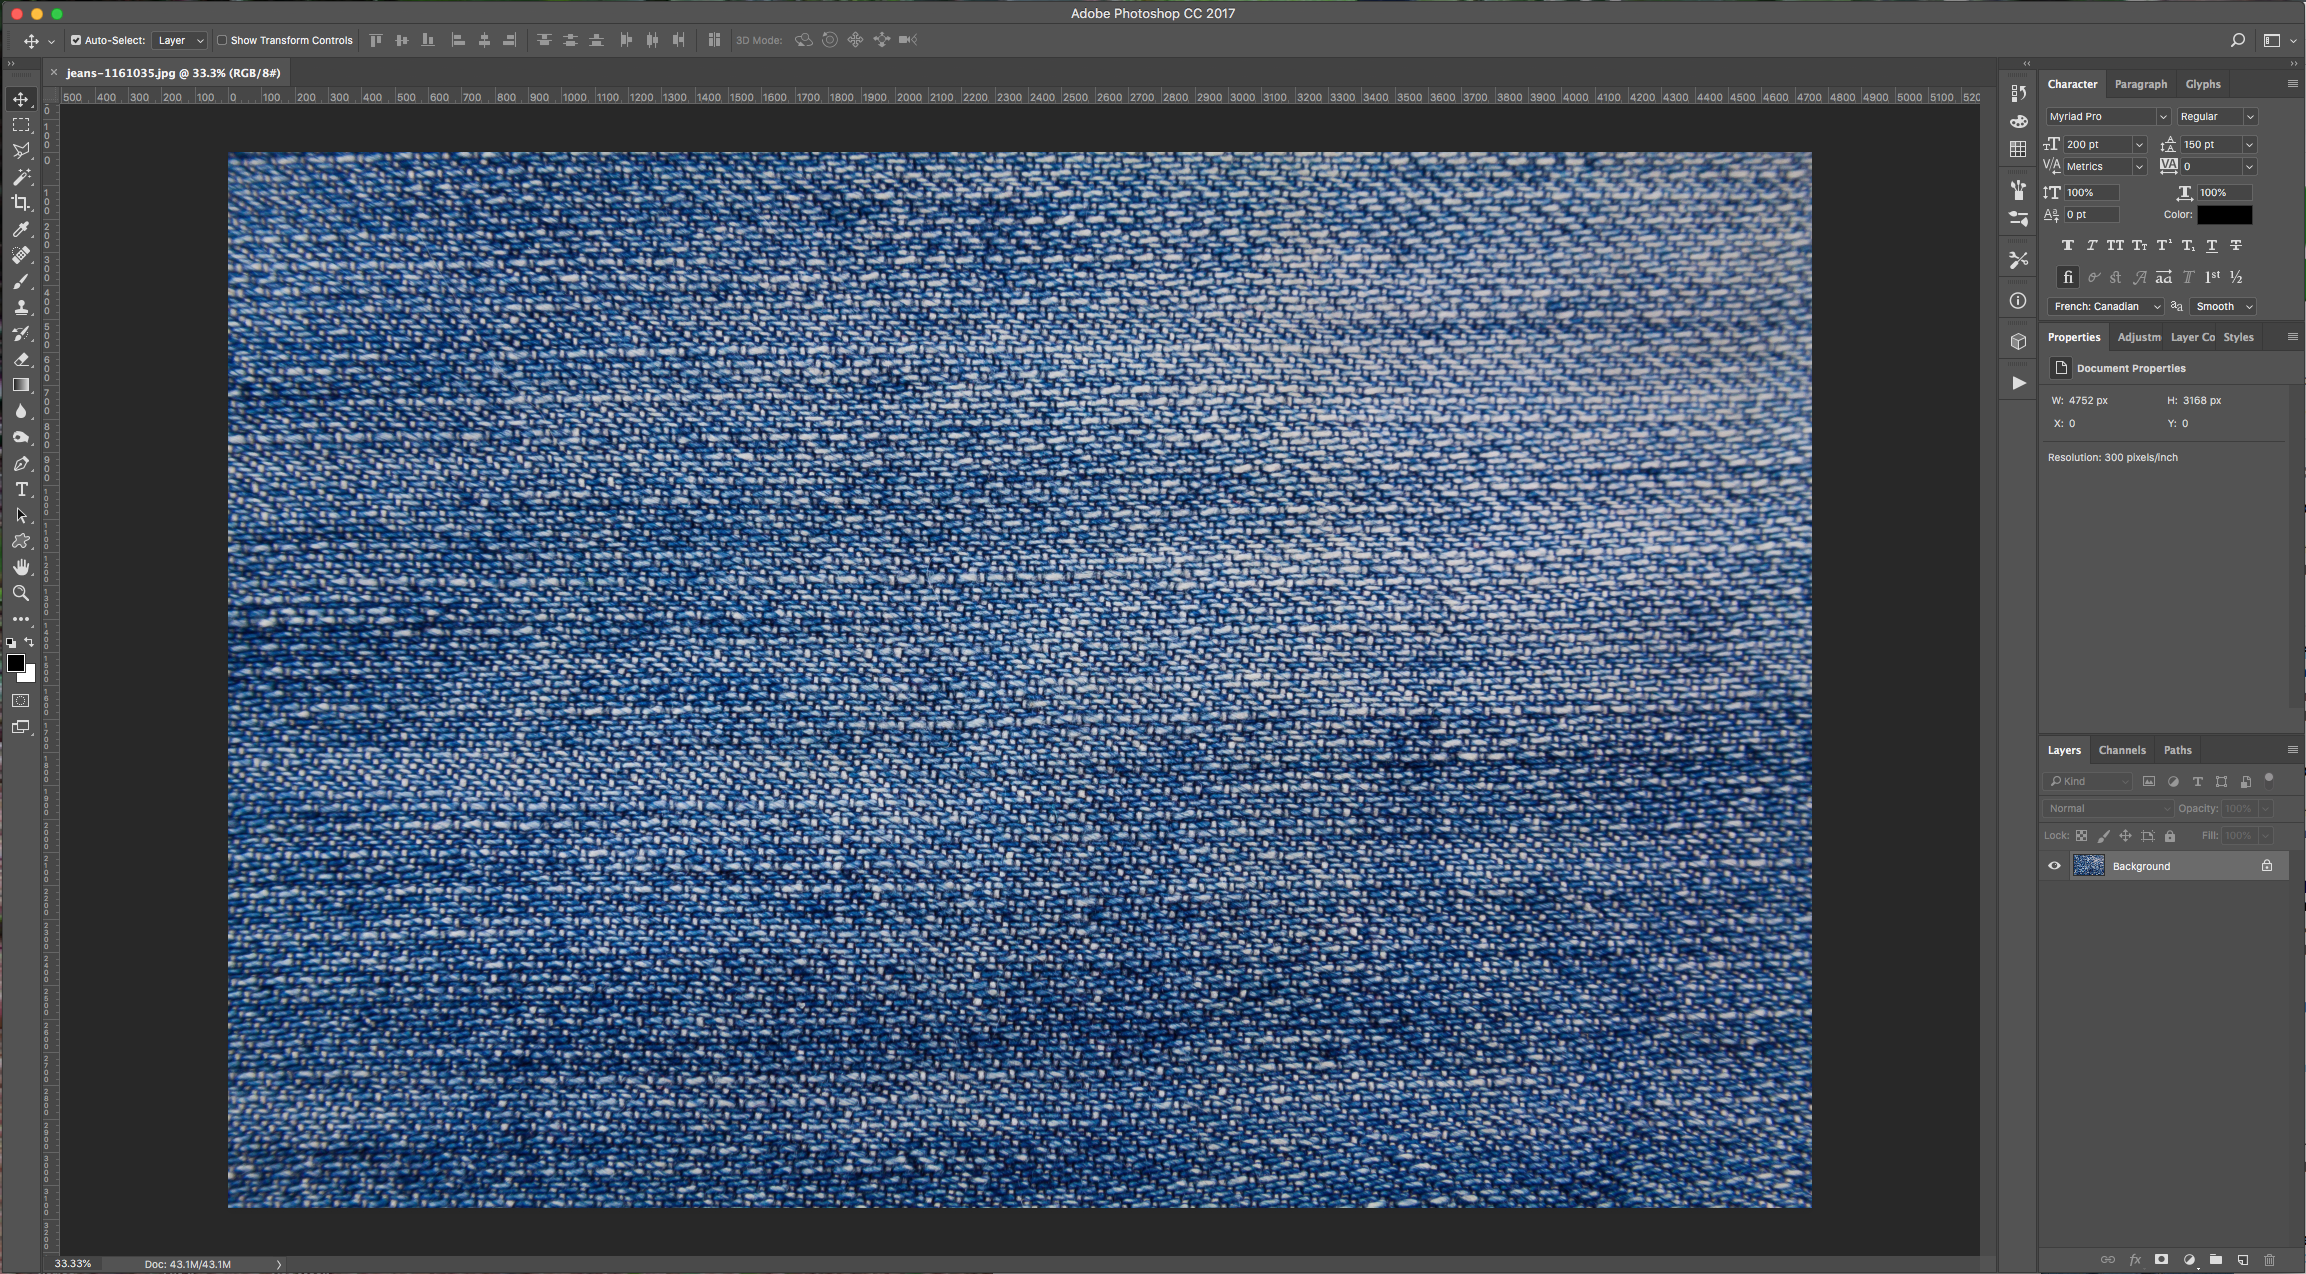
1 - In Photoshop, open the “Denim Texture” you chose.
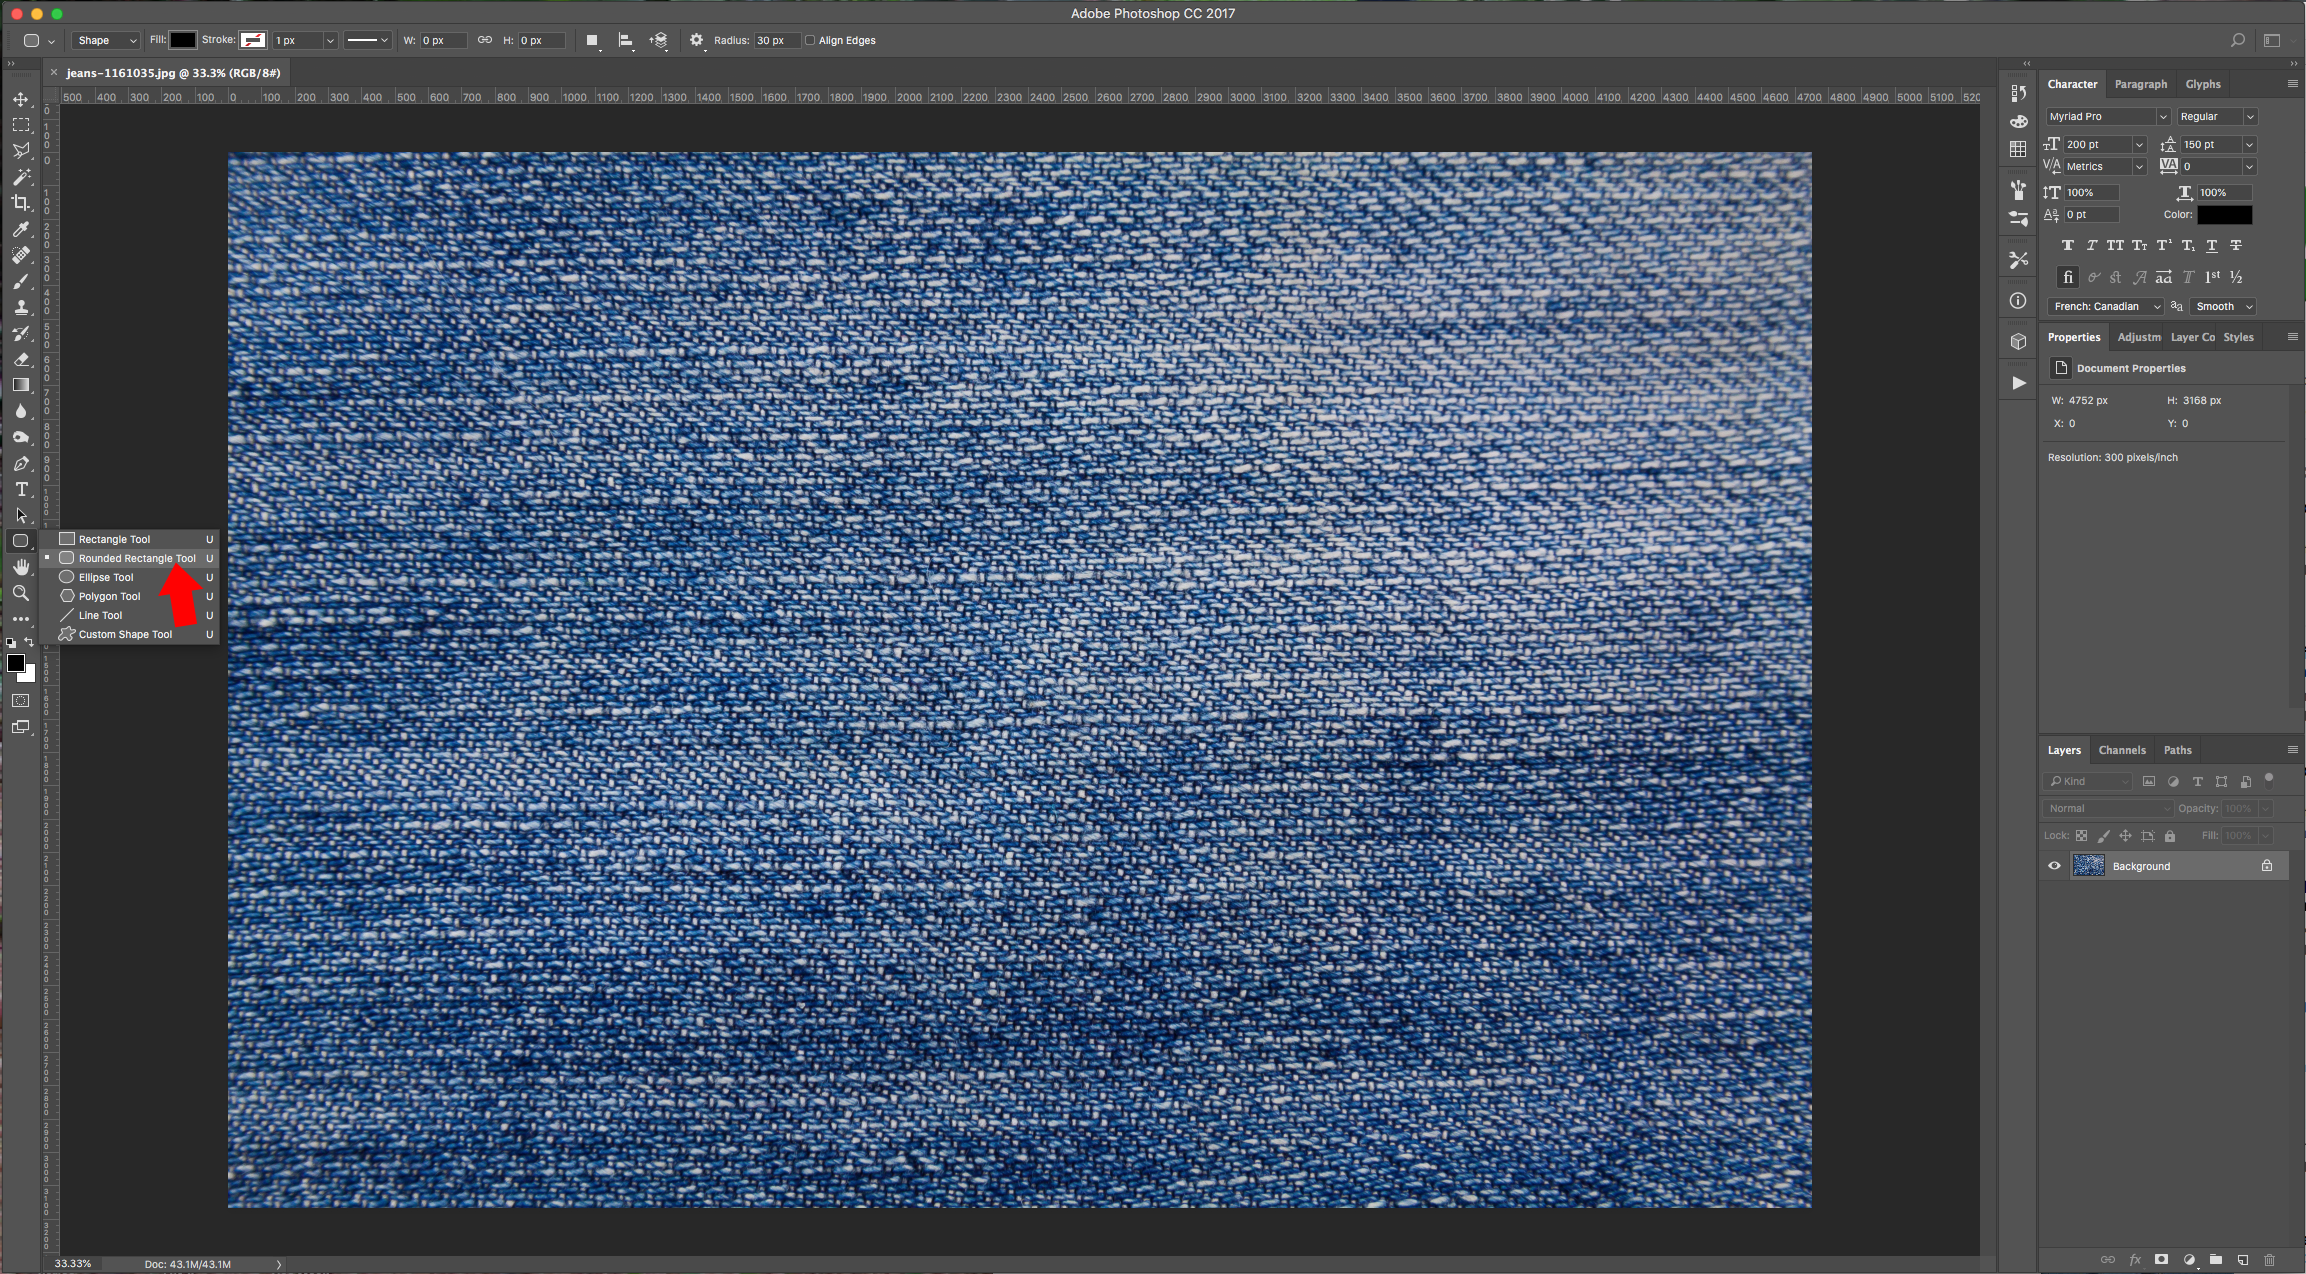
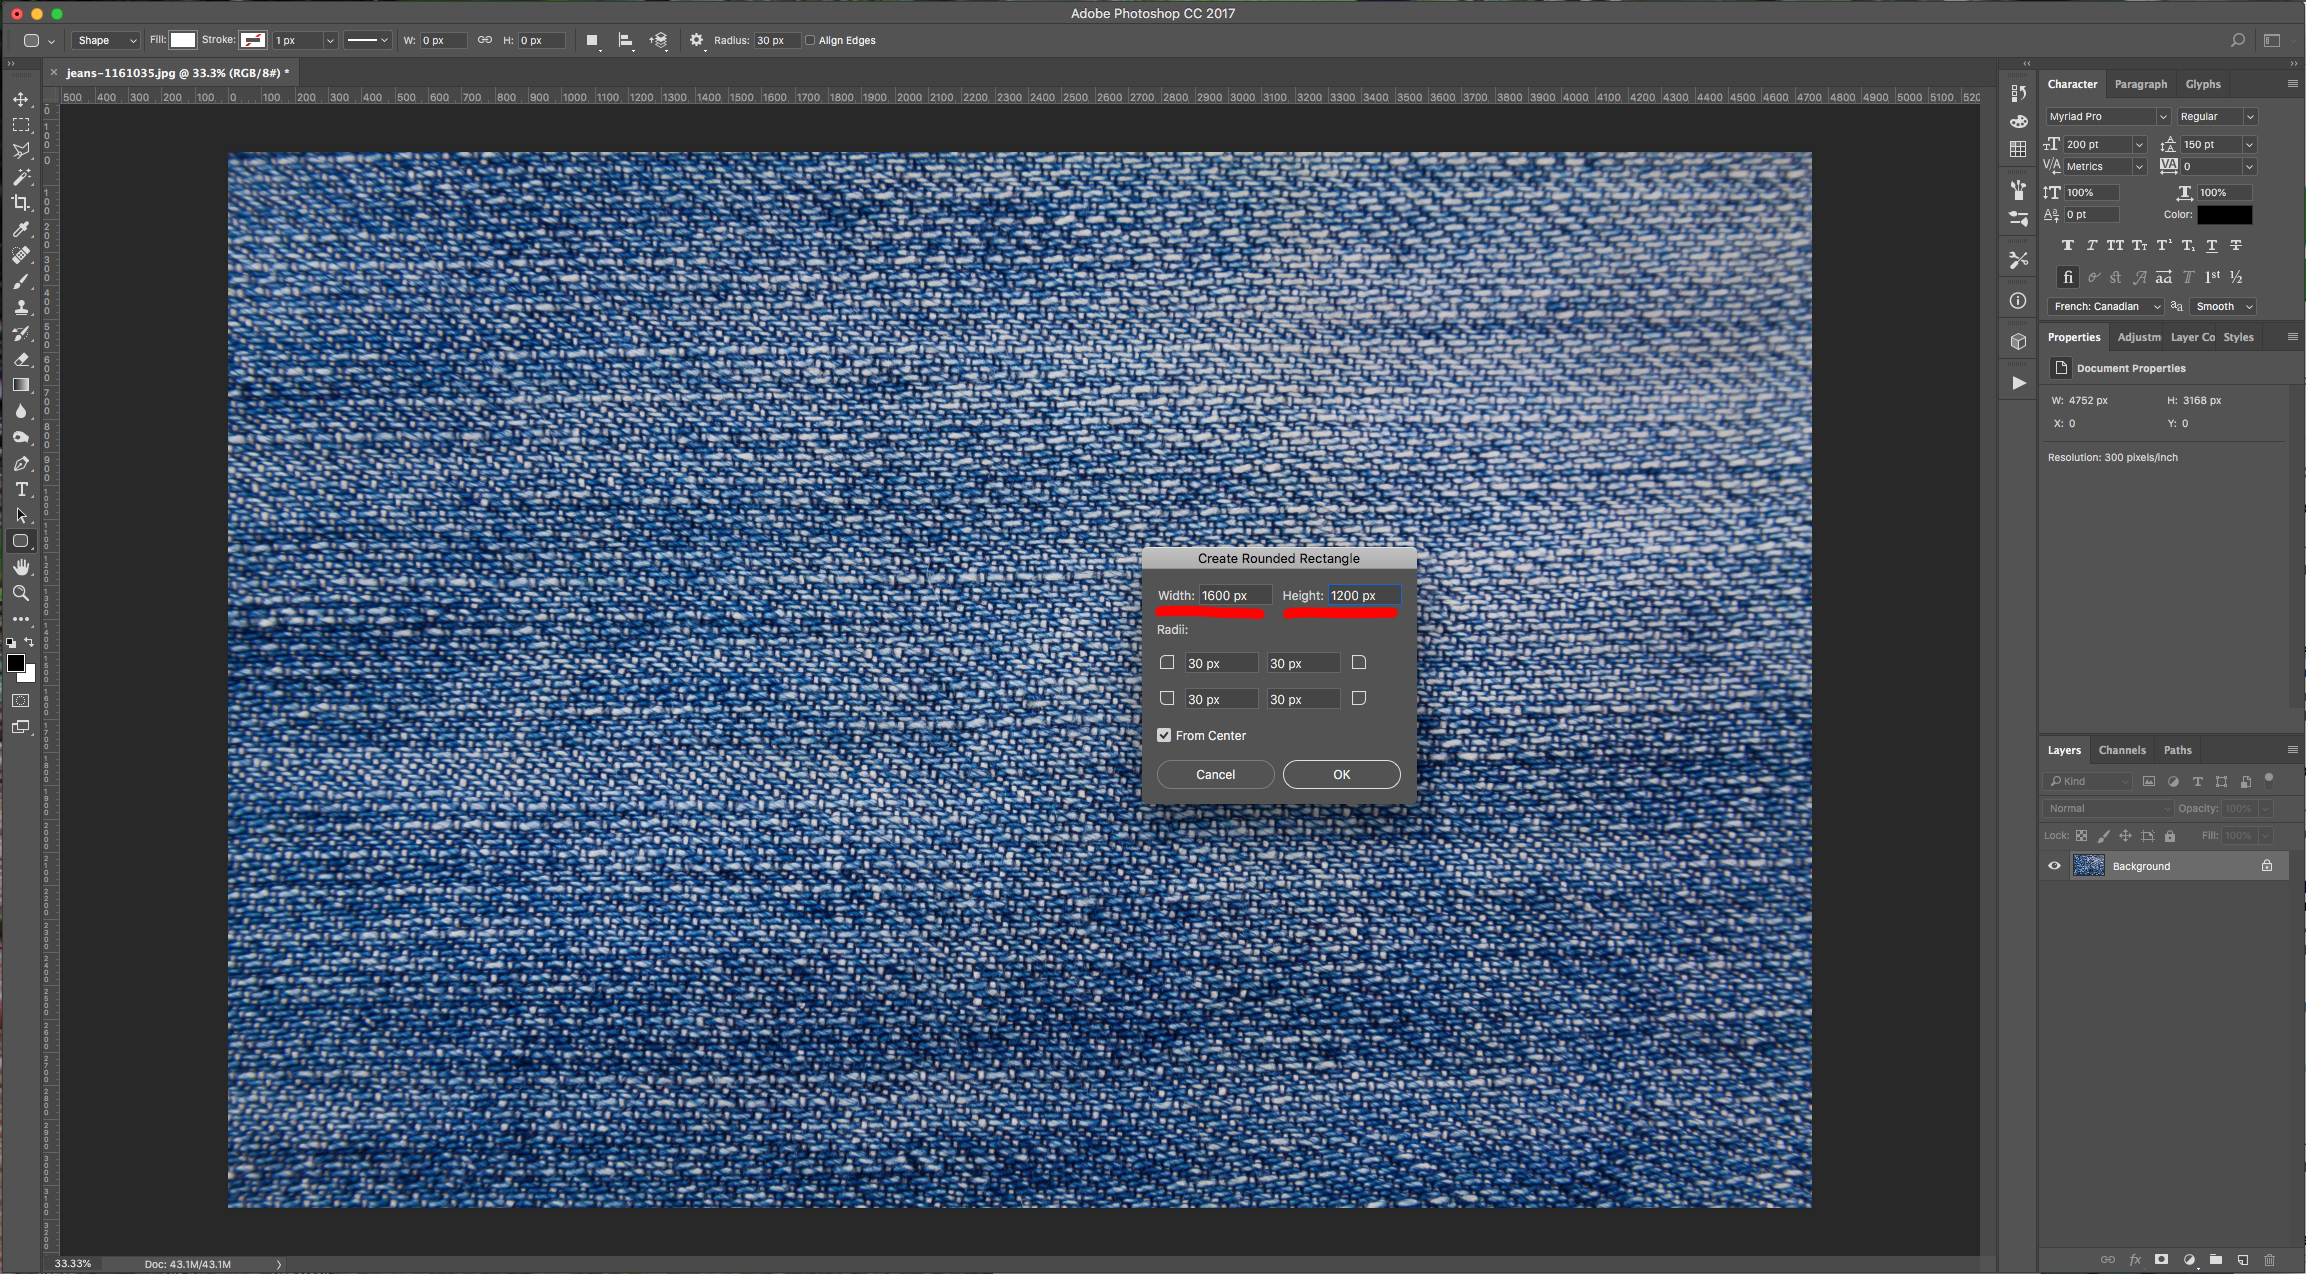
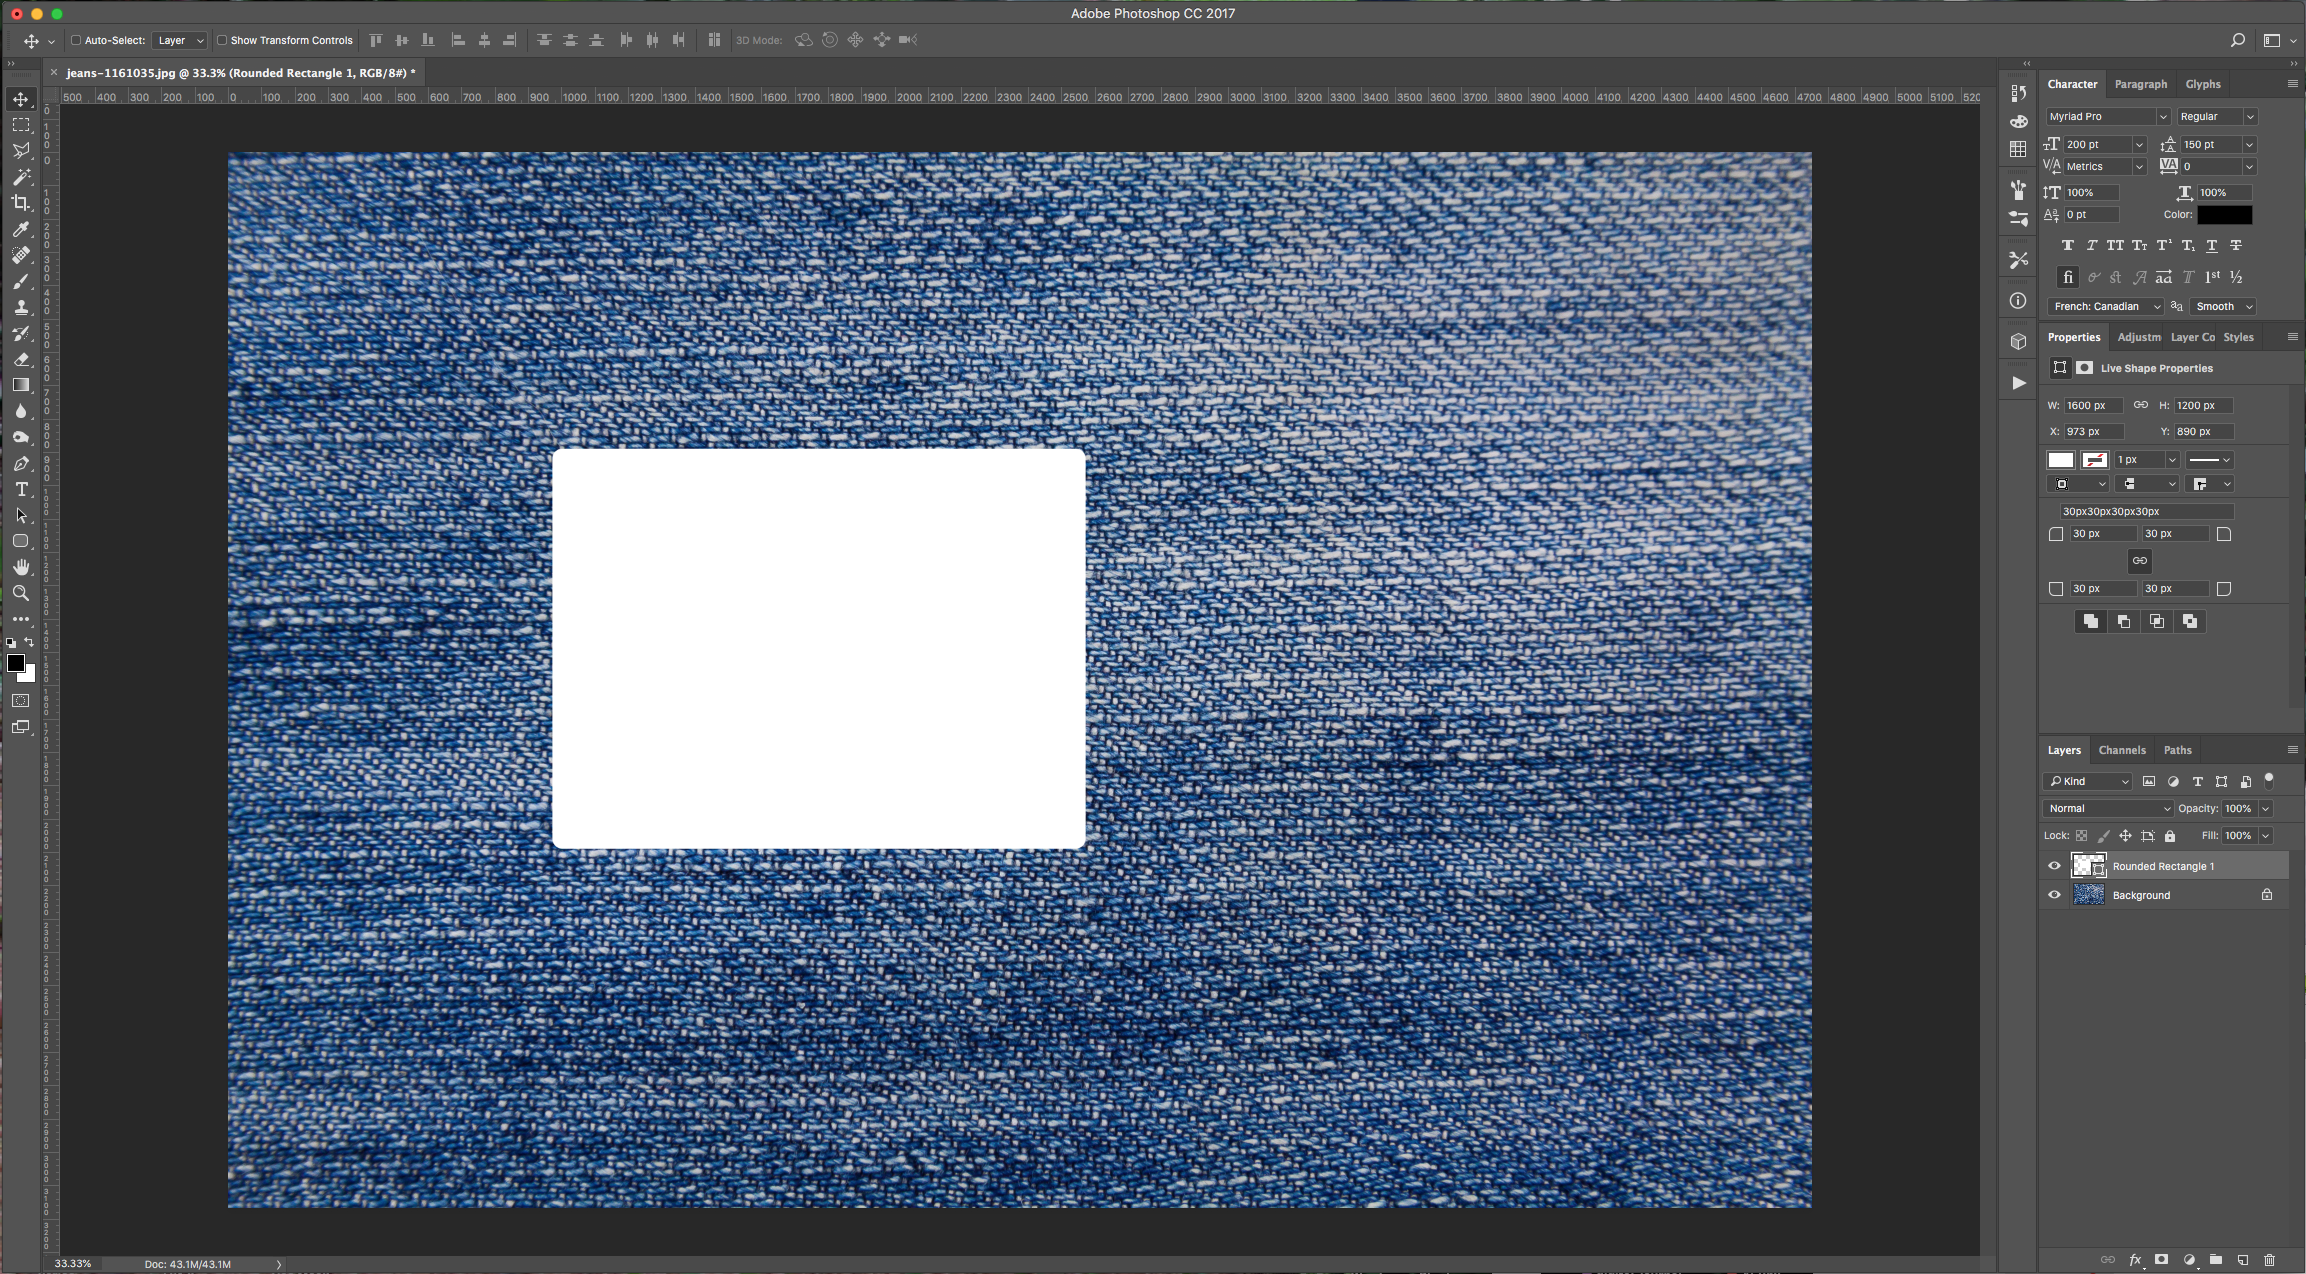
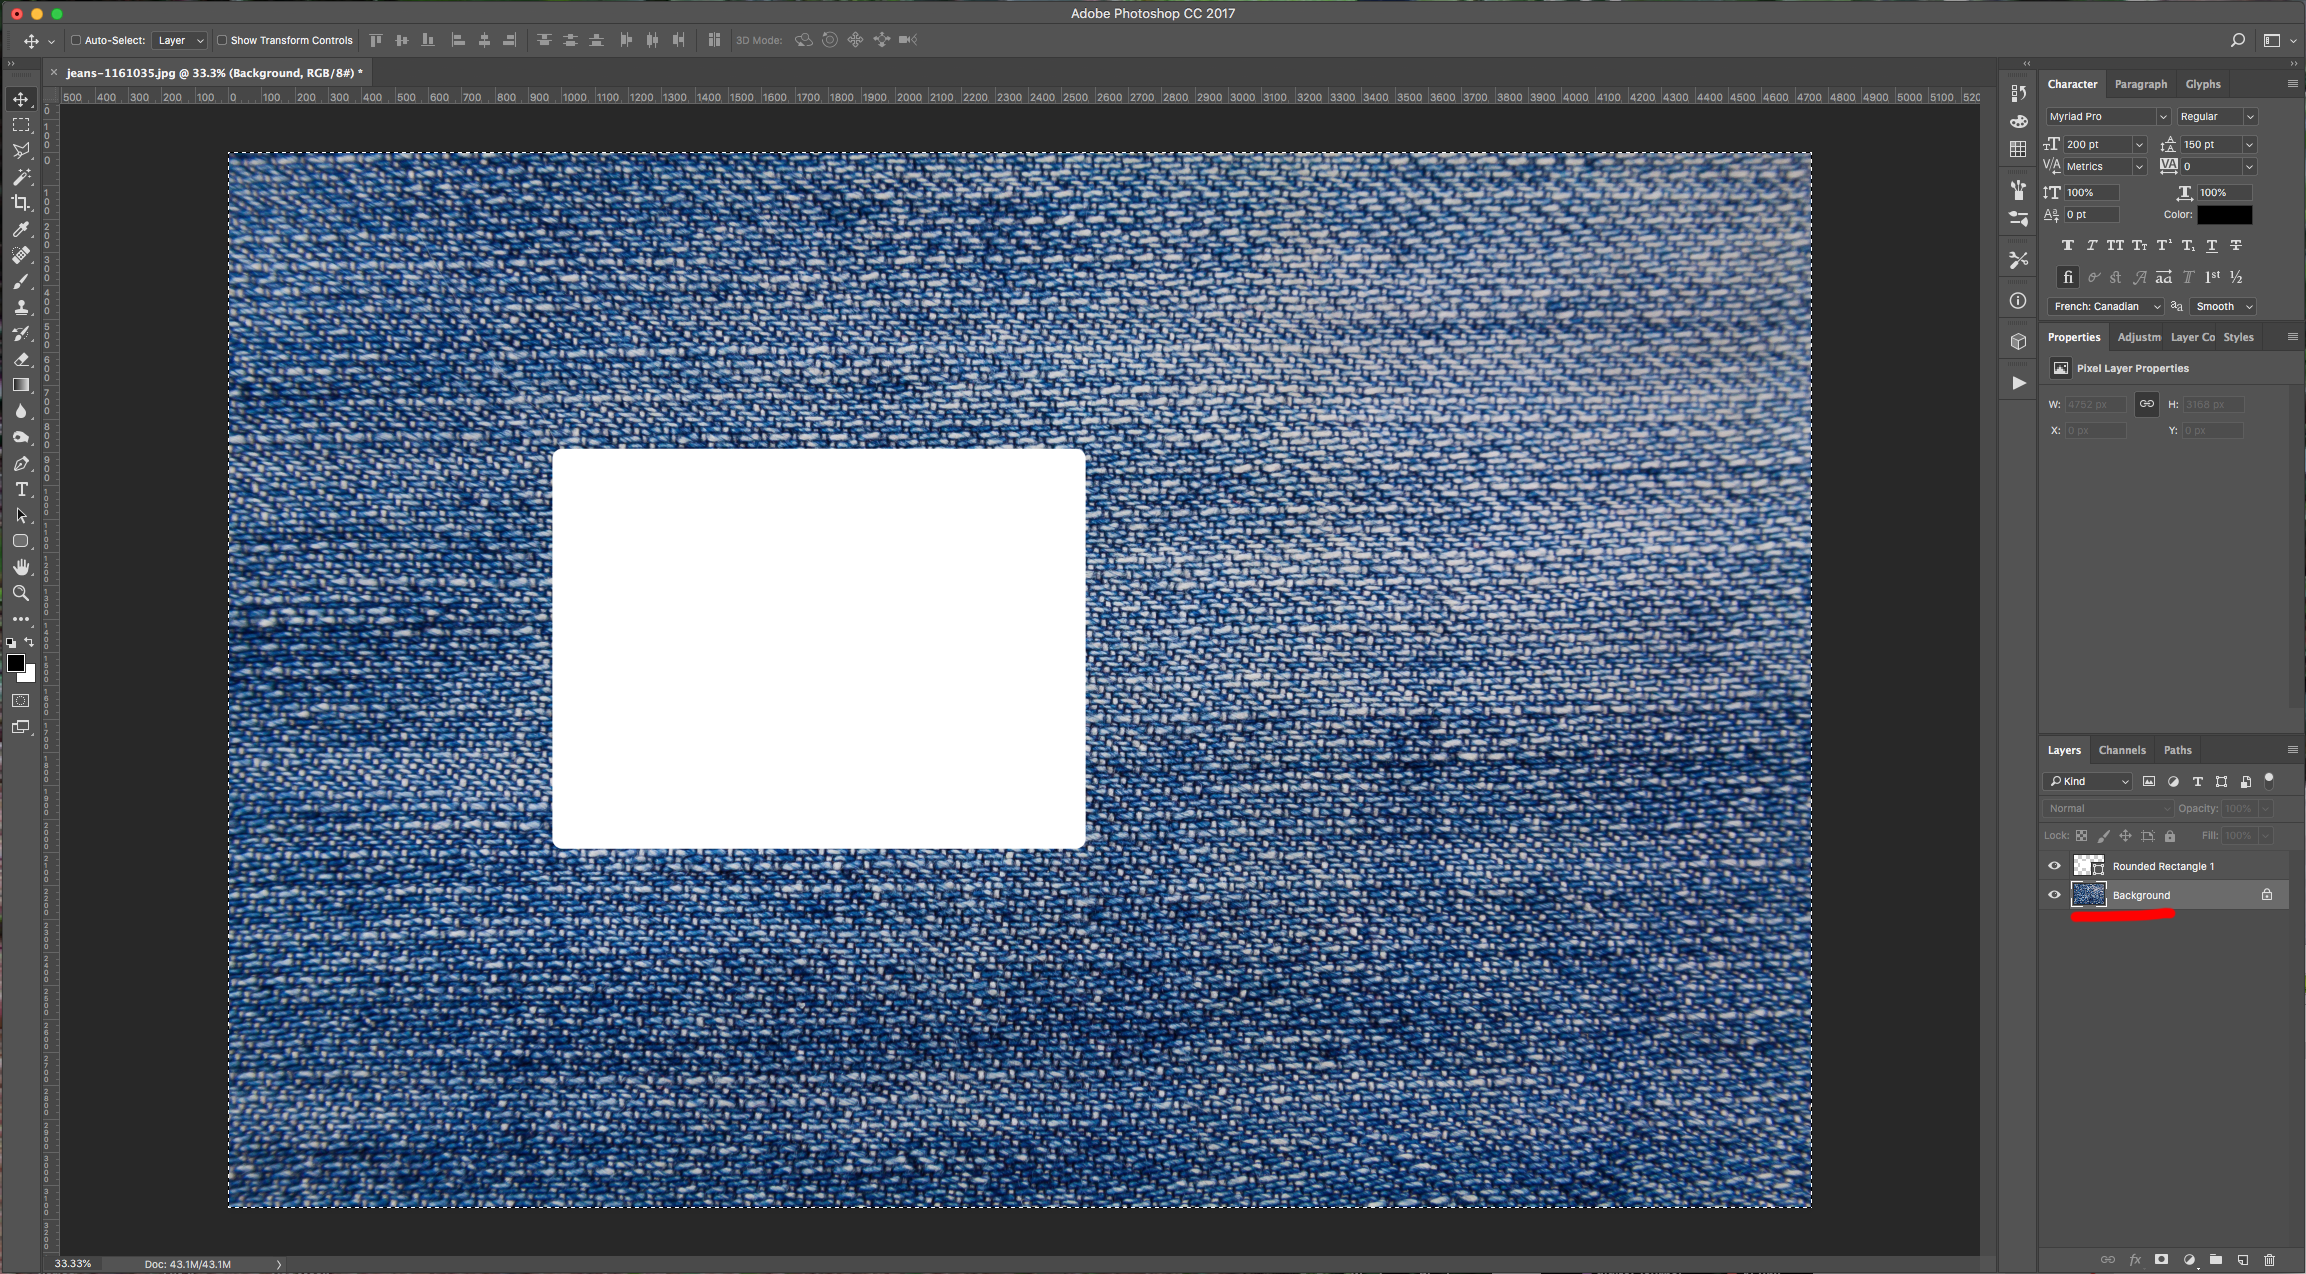
2 - Select the “Rounded Rectangle Tool” (U), make sure “Shape” is selected in the Top Menu, click inside your Canvas and input 1600 pixels for “Width” and 1200 pixels for “Height”. Leave the default “Radii” (30 px). Use White as fill color.
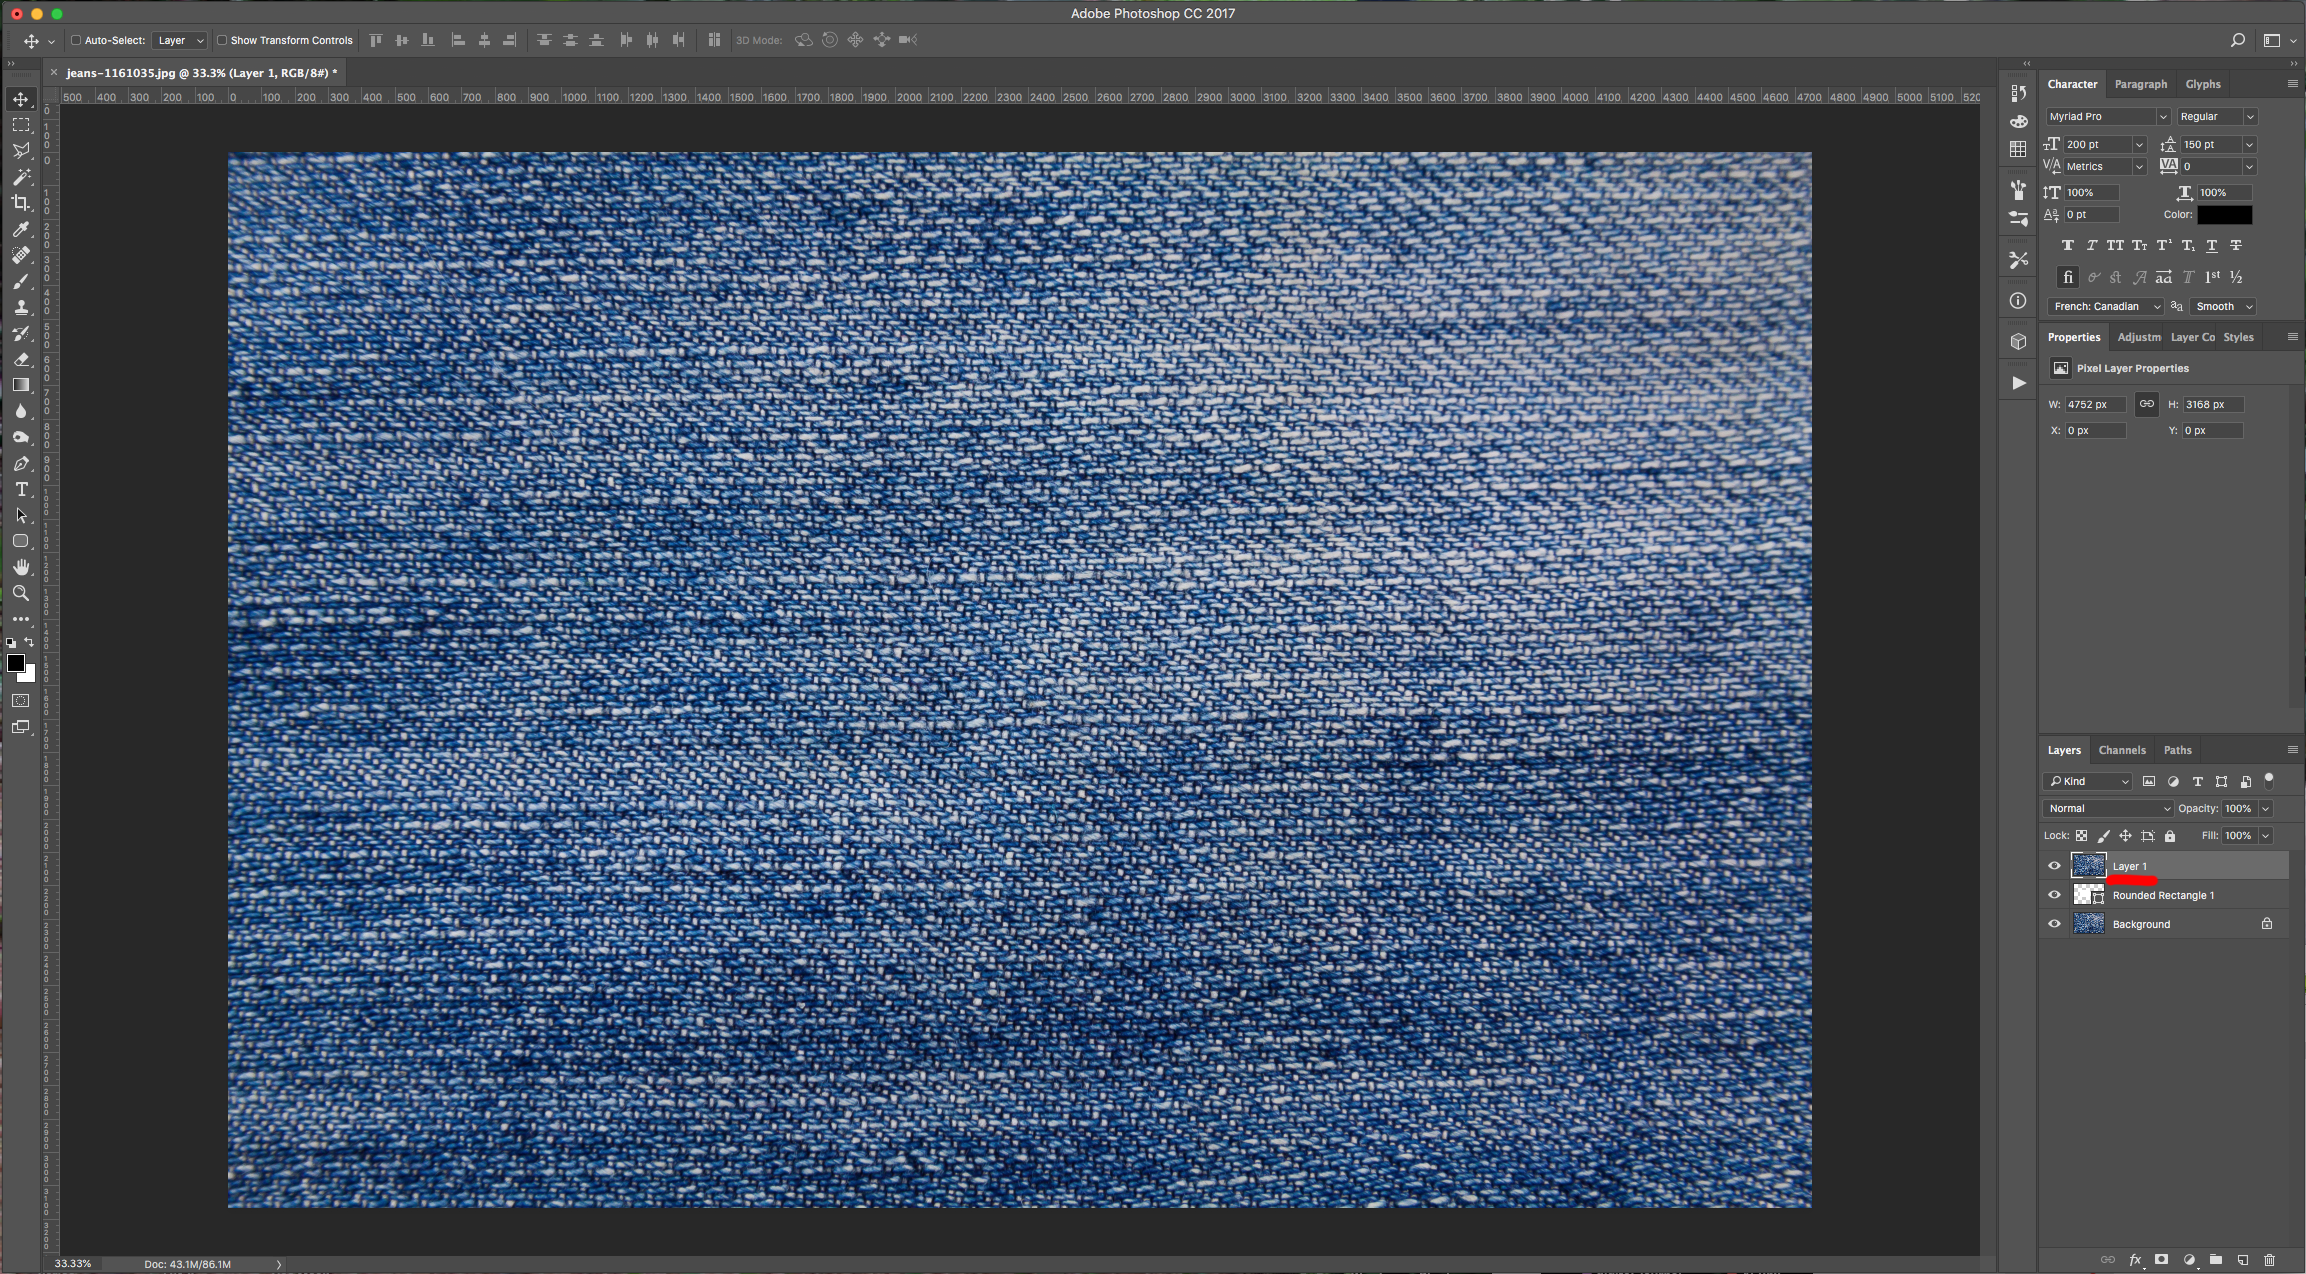
3 - Make sure you are in your “Background” Layer and “Select All” (Command/Control + A). “Copy” (Command/Control + A) and “Paste” (Command/Control + V) the Texture and move the resulting Layer to the Top.
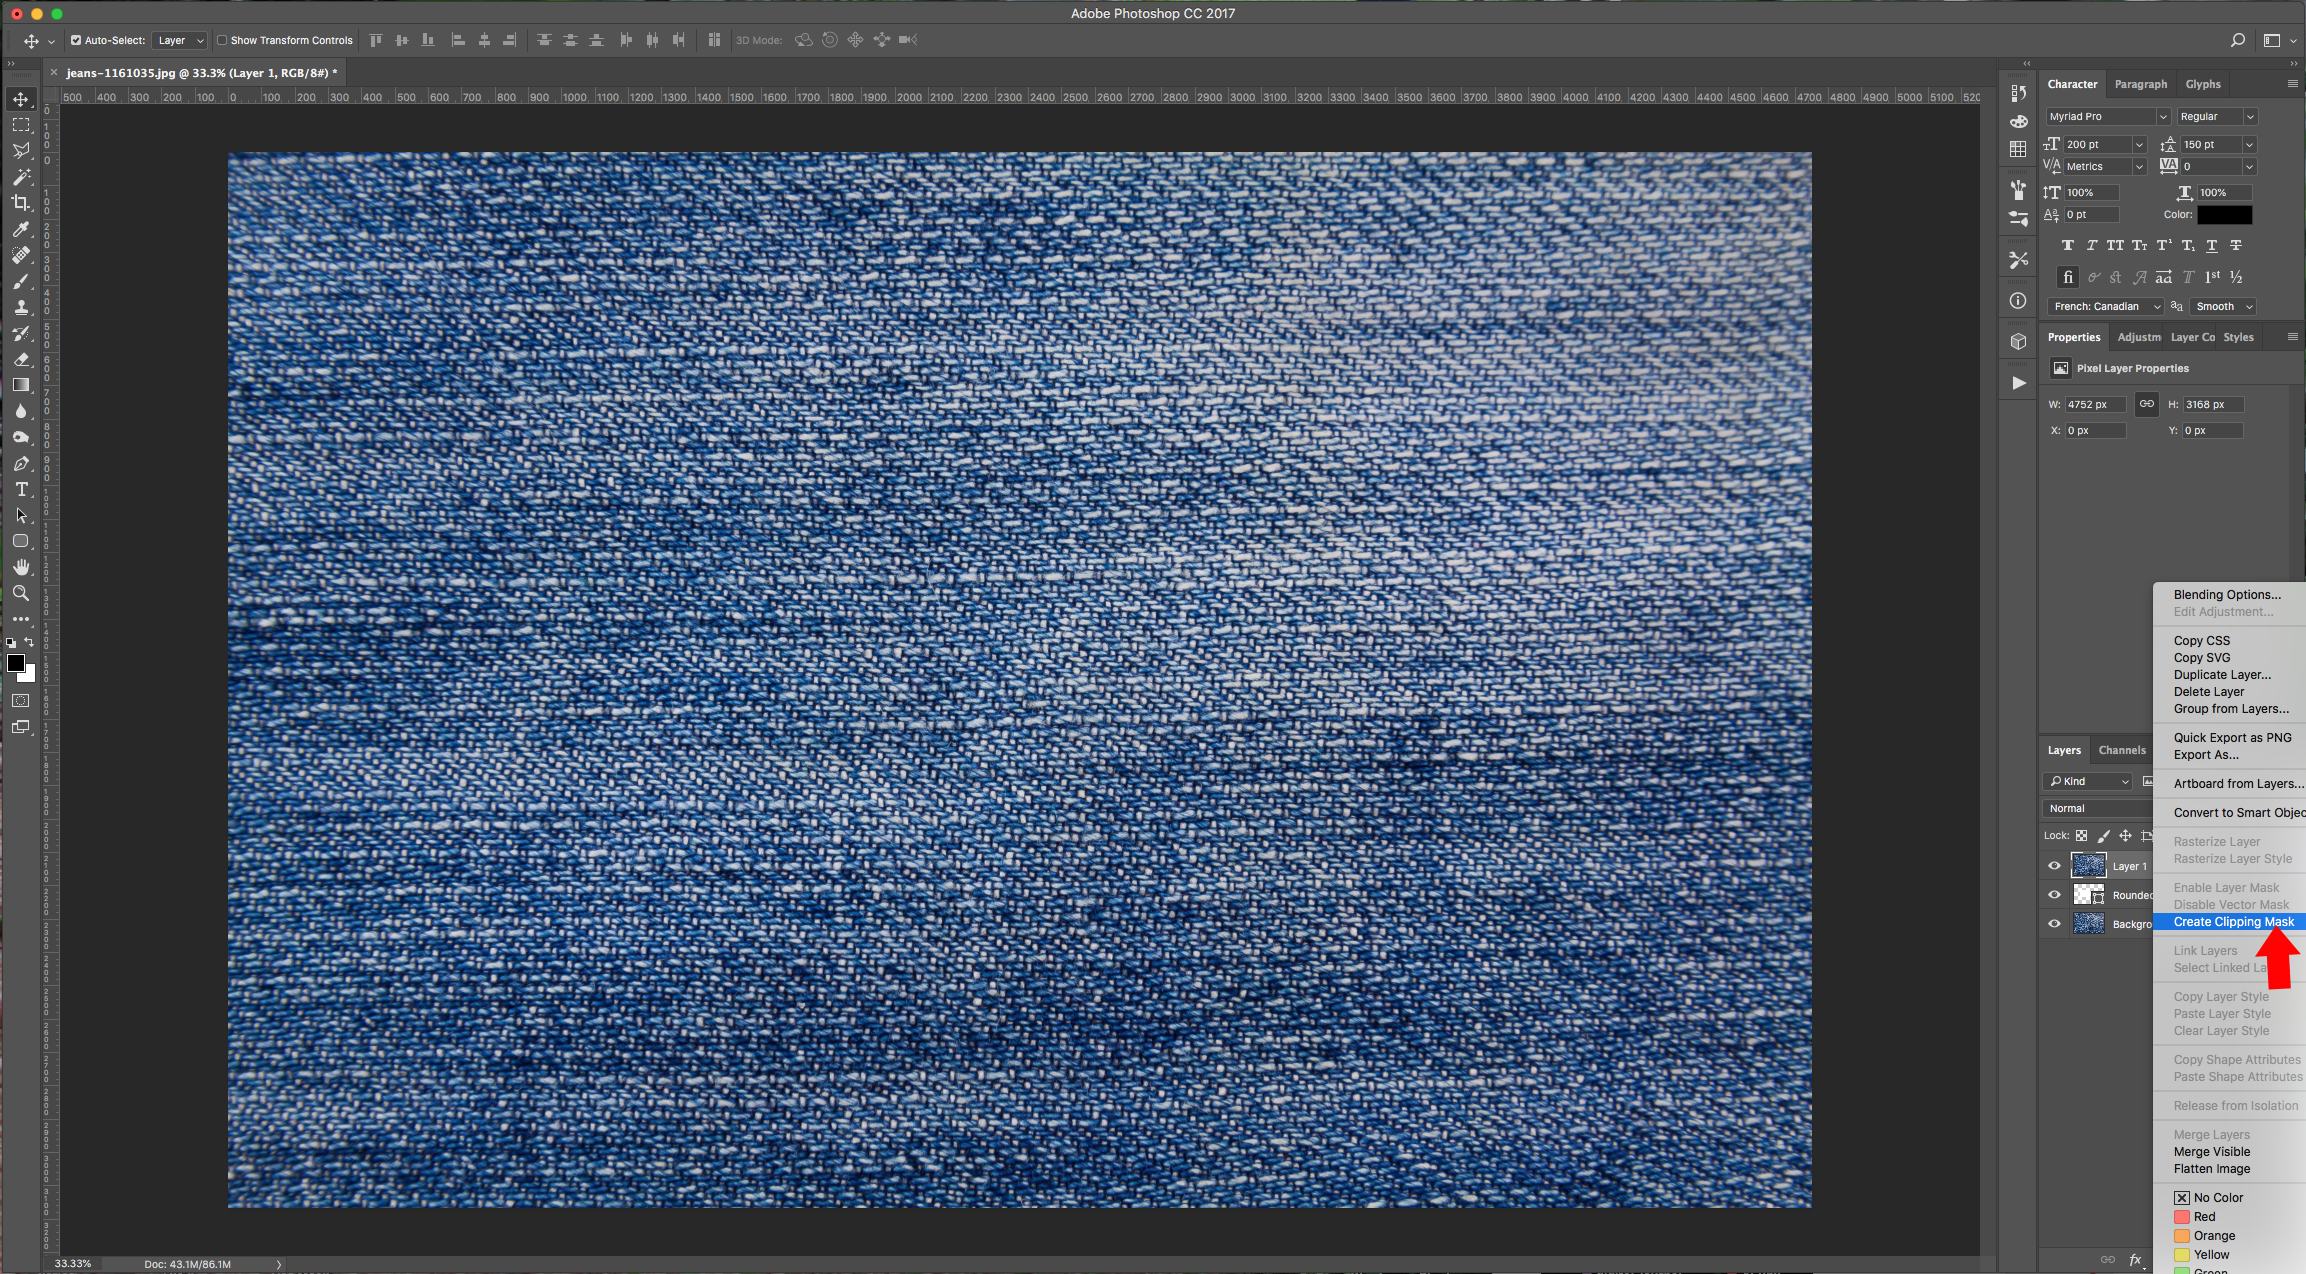
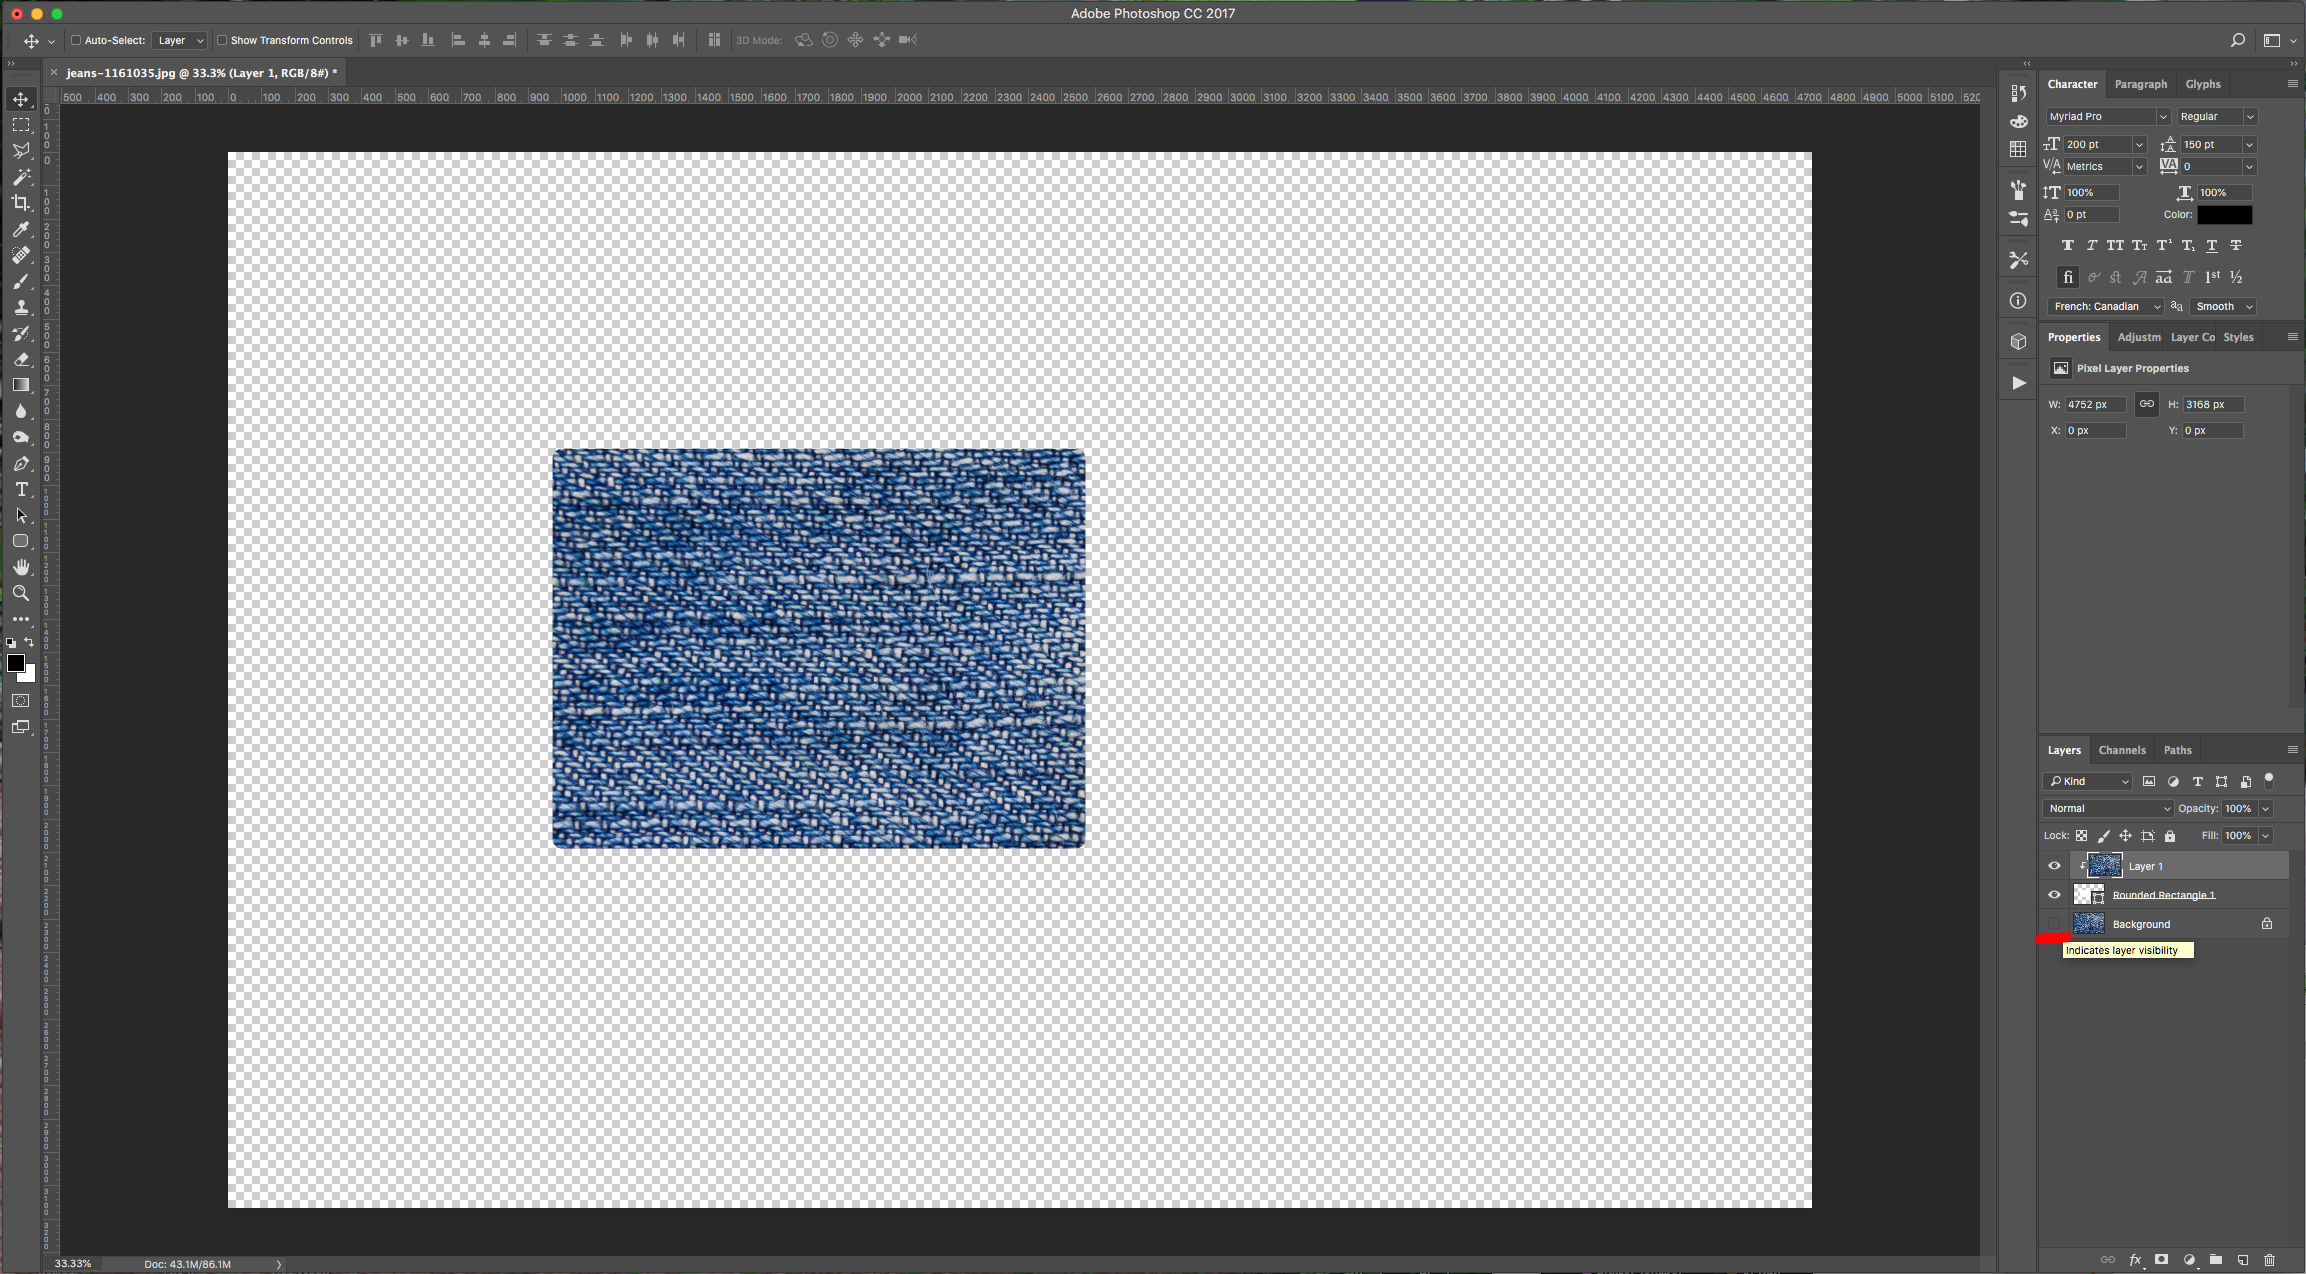
4 - Right-click on top of its Thumbnail and choose “Create Clipping Mask”. Hide the “Background” Layer temporarily to check if everything is ok.
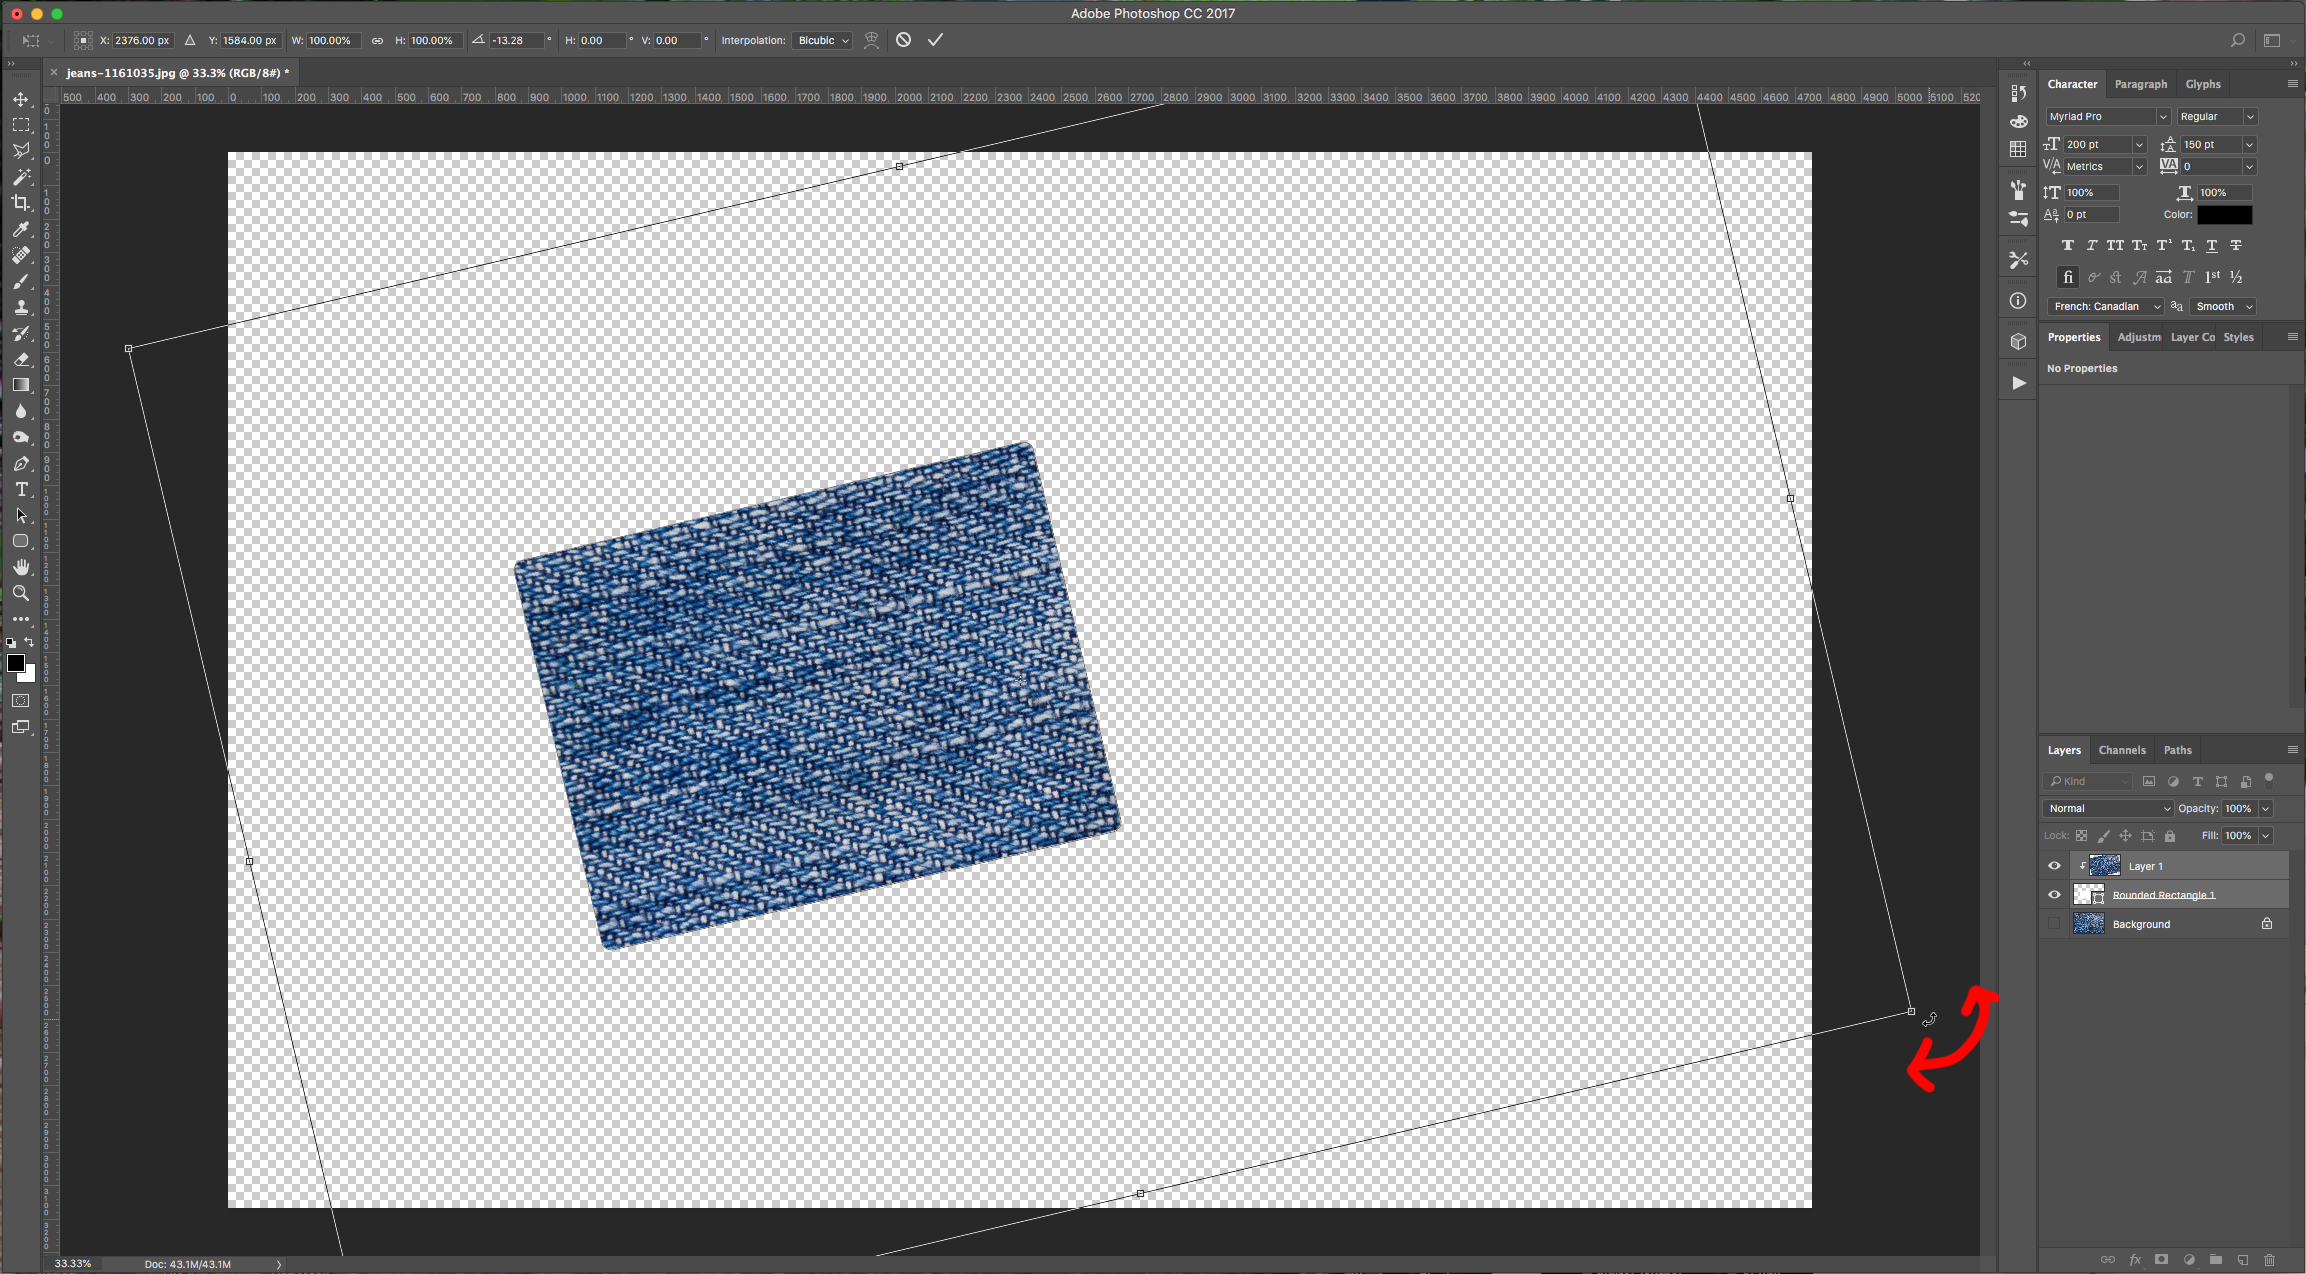
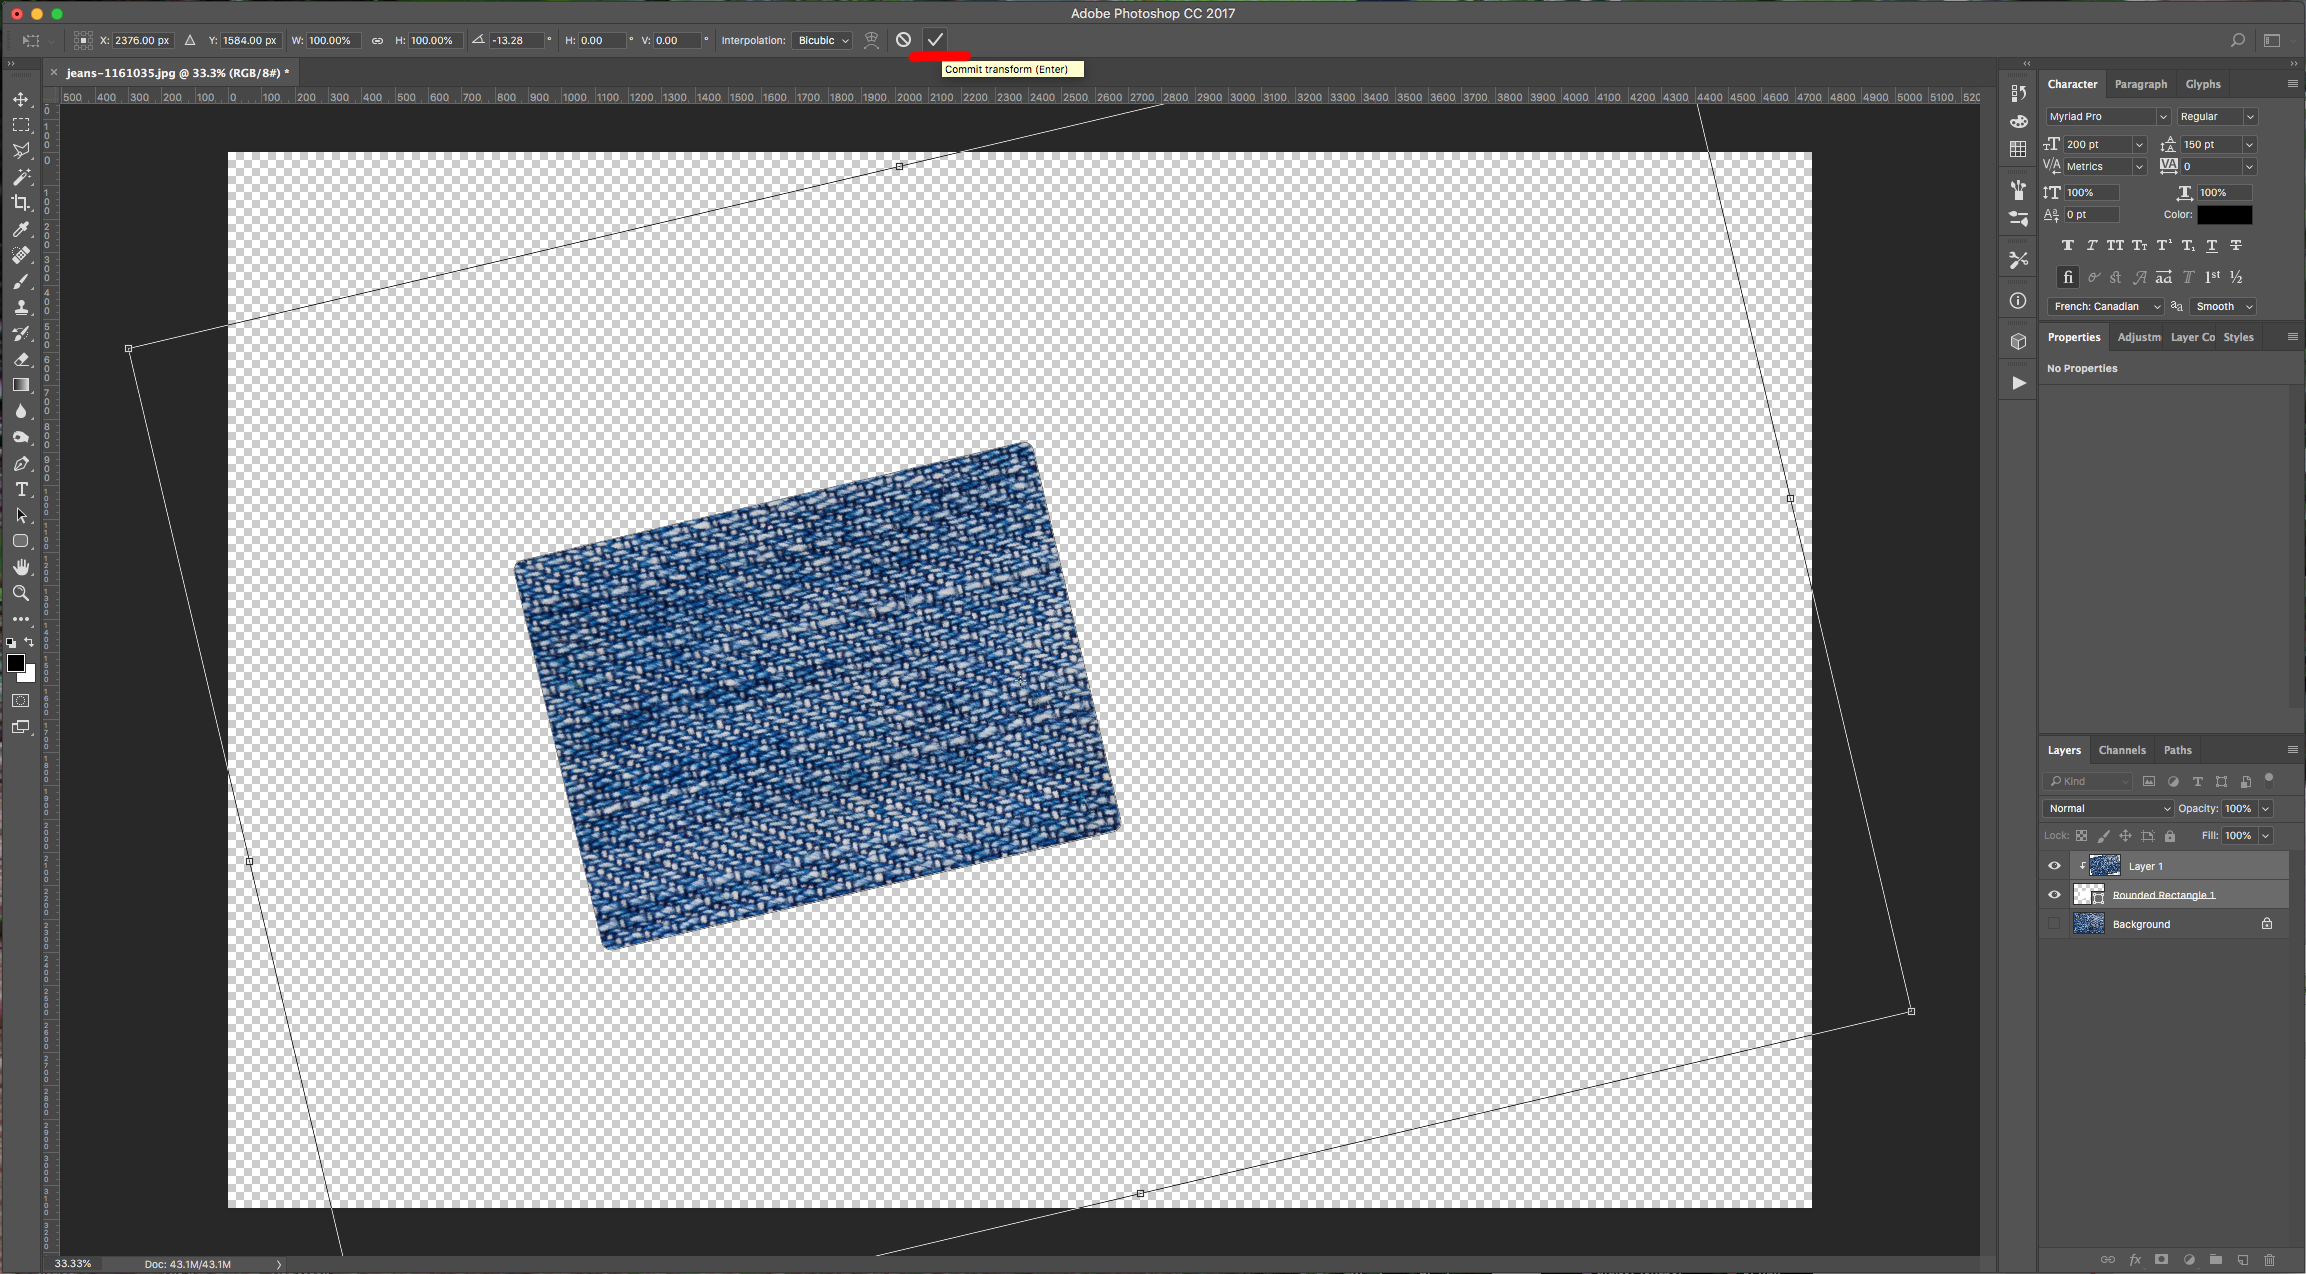
5 - Select both Top Layers (Shift key) and use “Free Transform” (Command/Control + T) to Rotate the Rectangle a bit. Click on the small Check Mark on the Top Menu to “Commit” the changes.
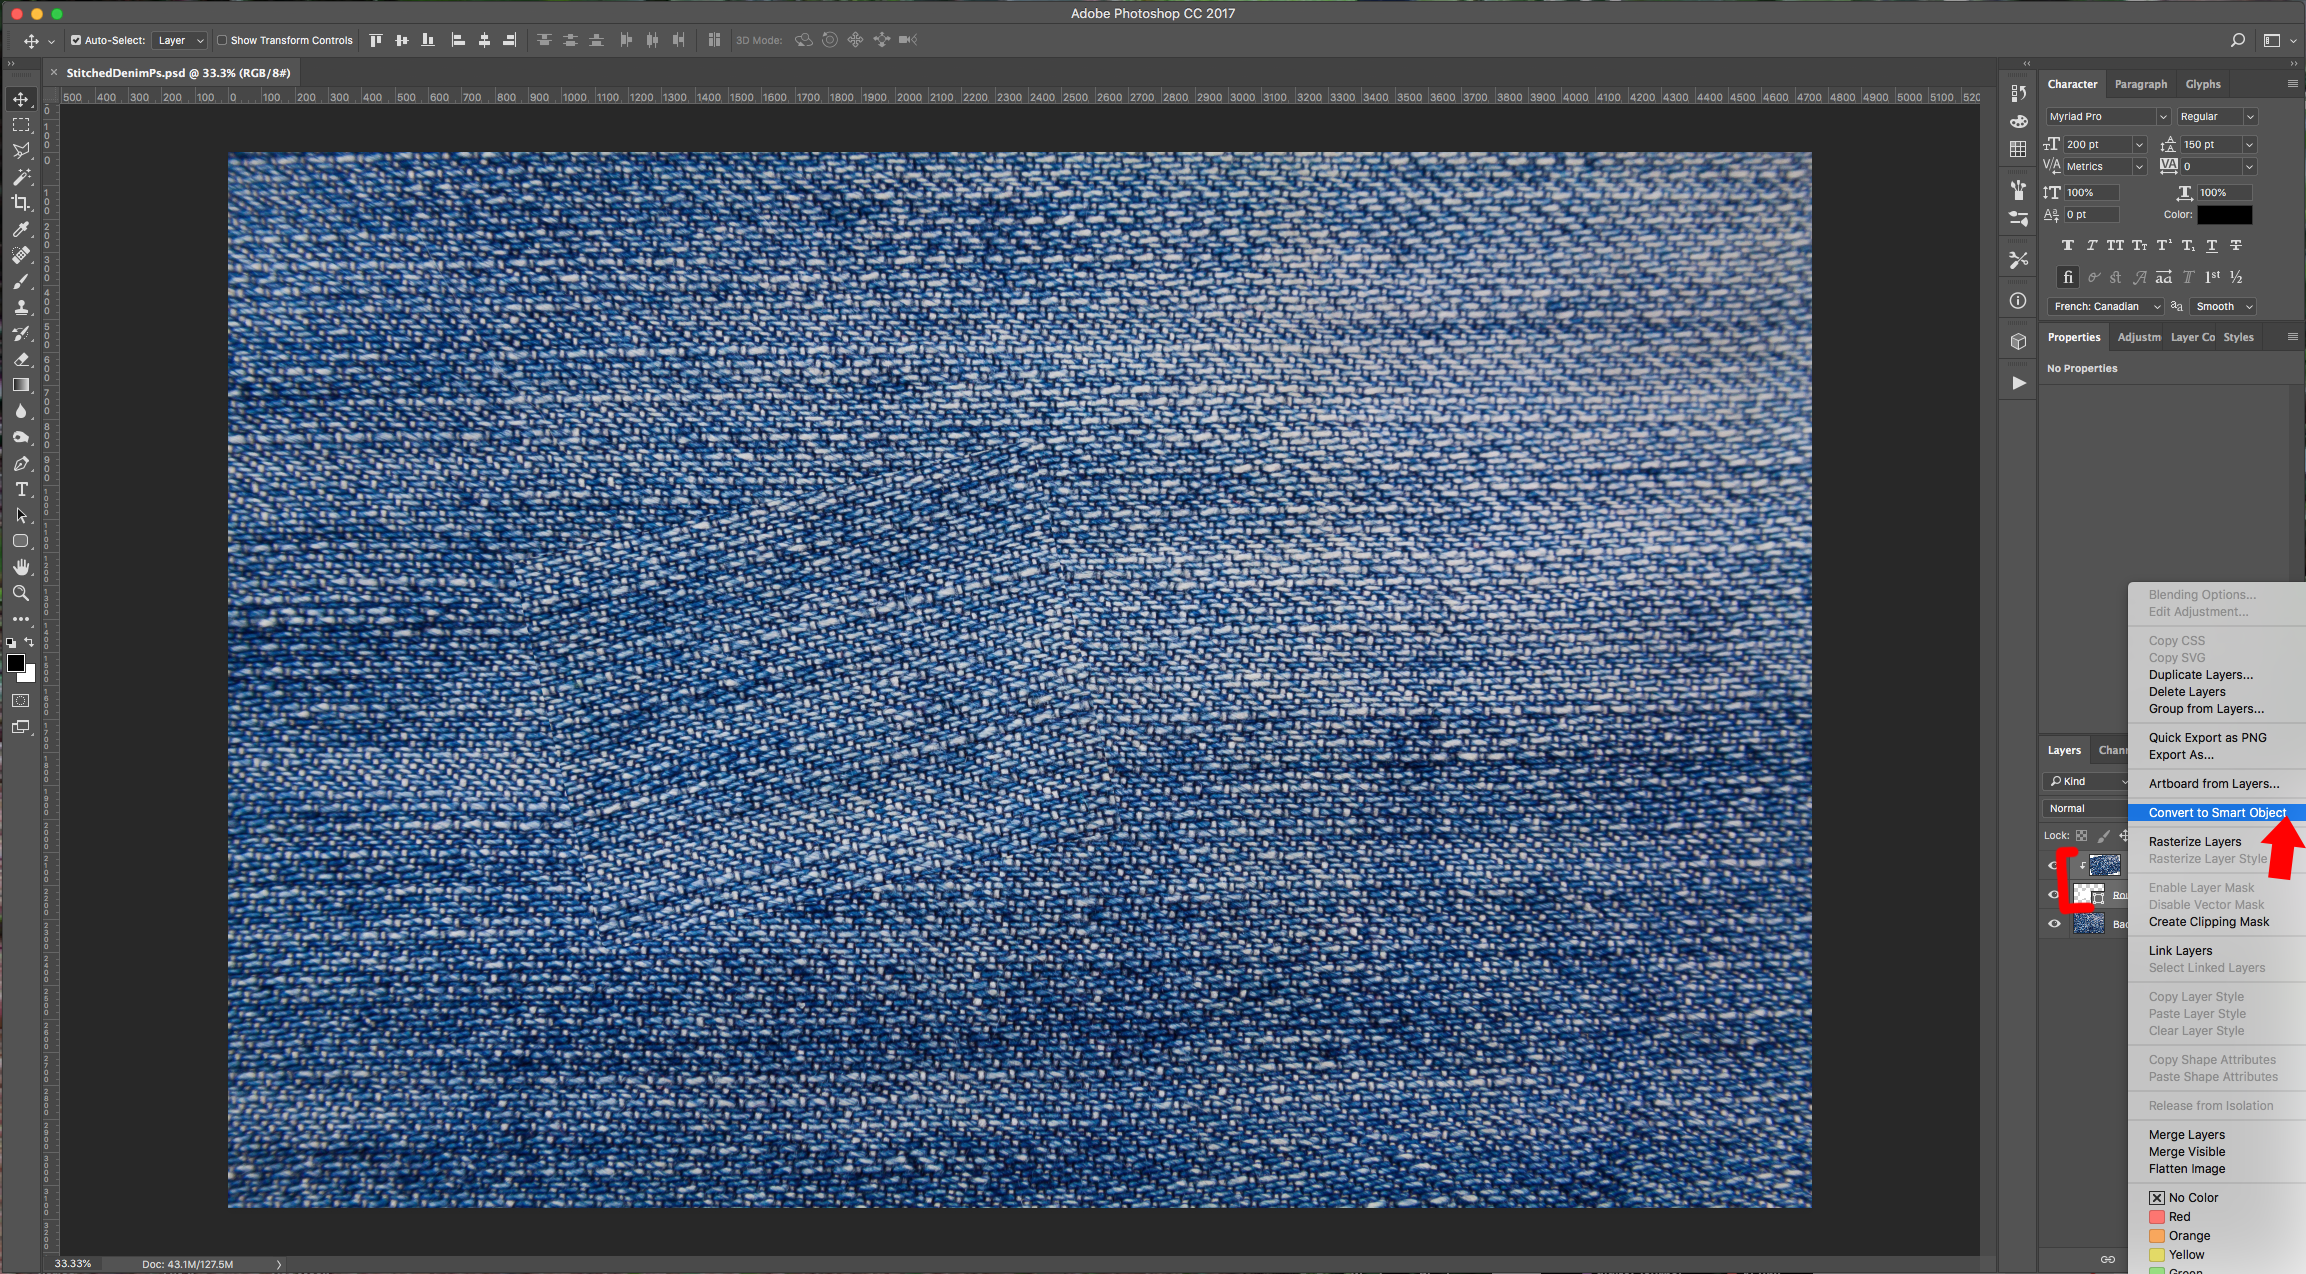
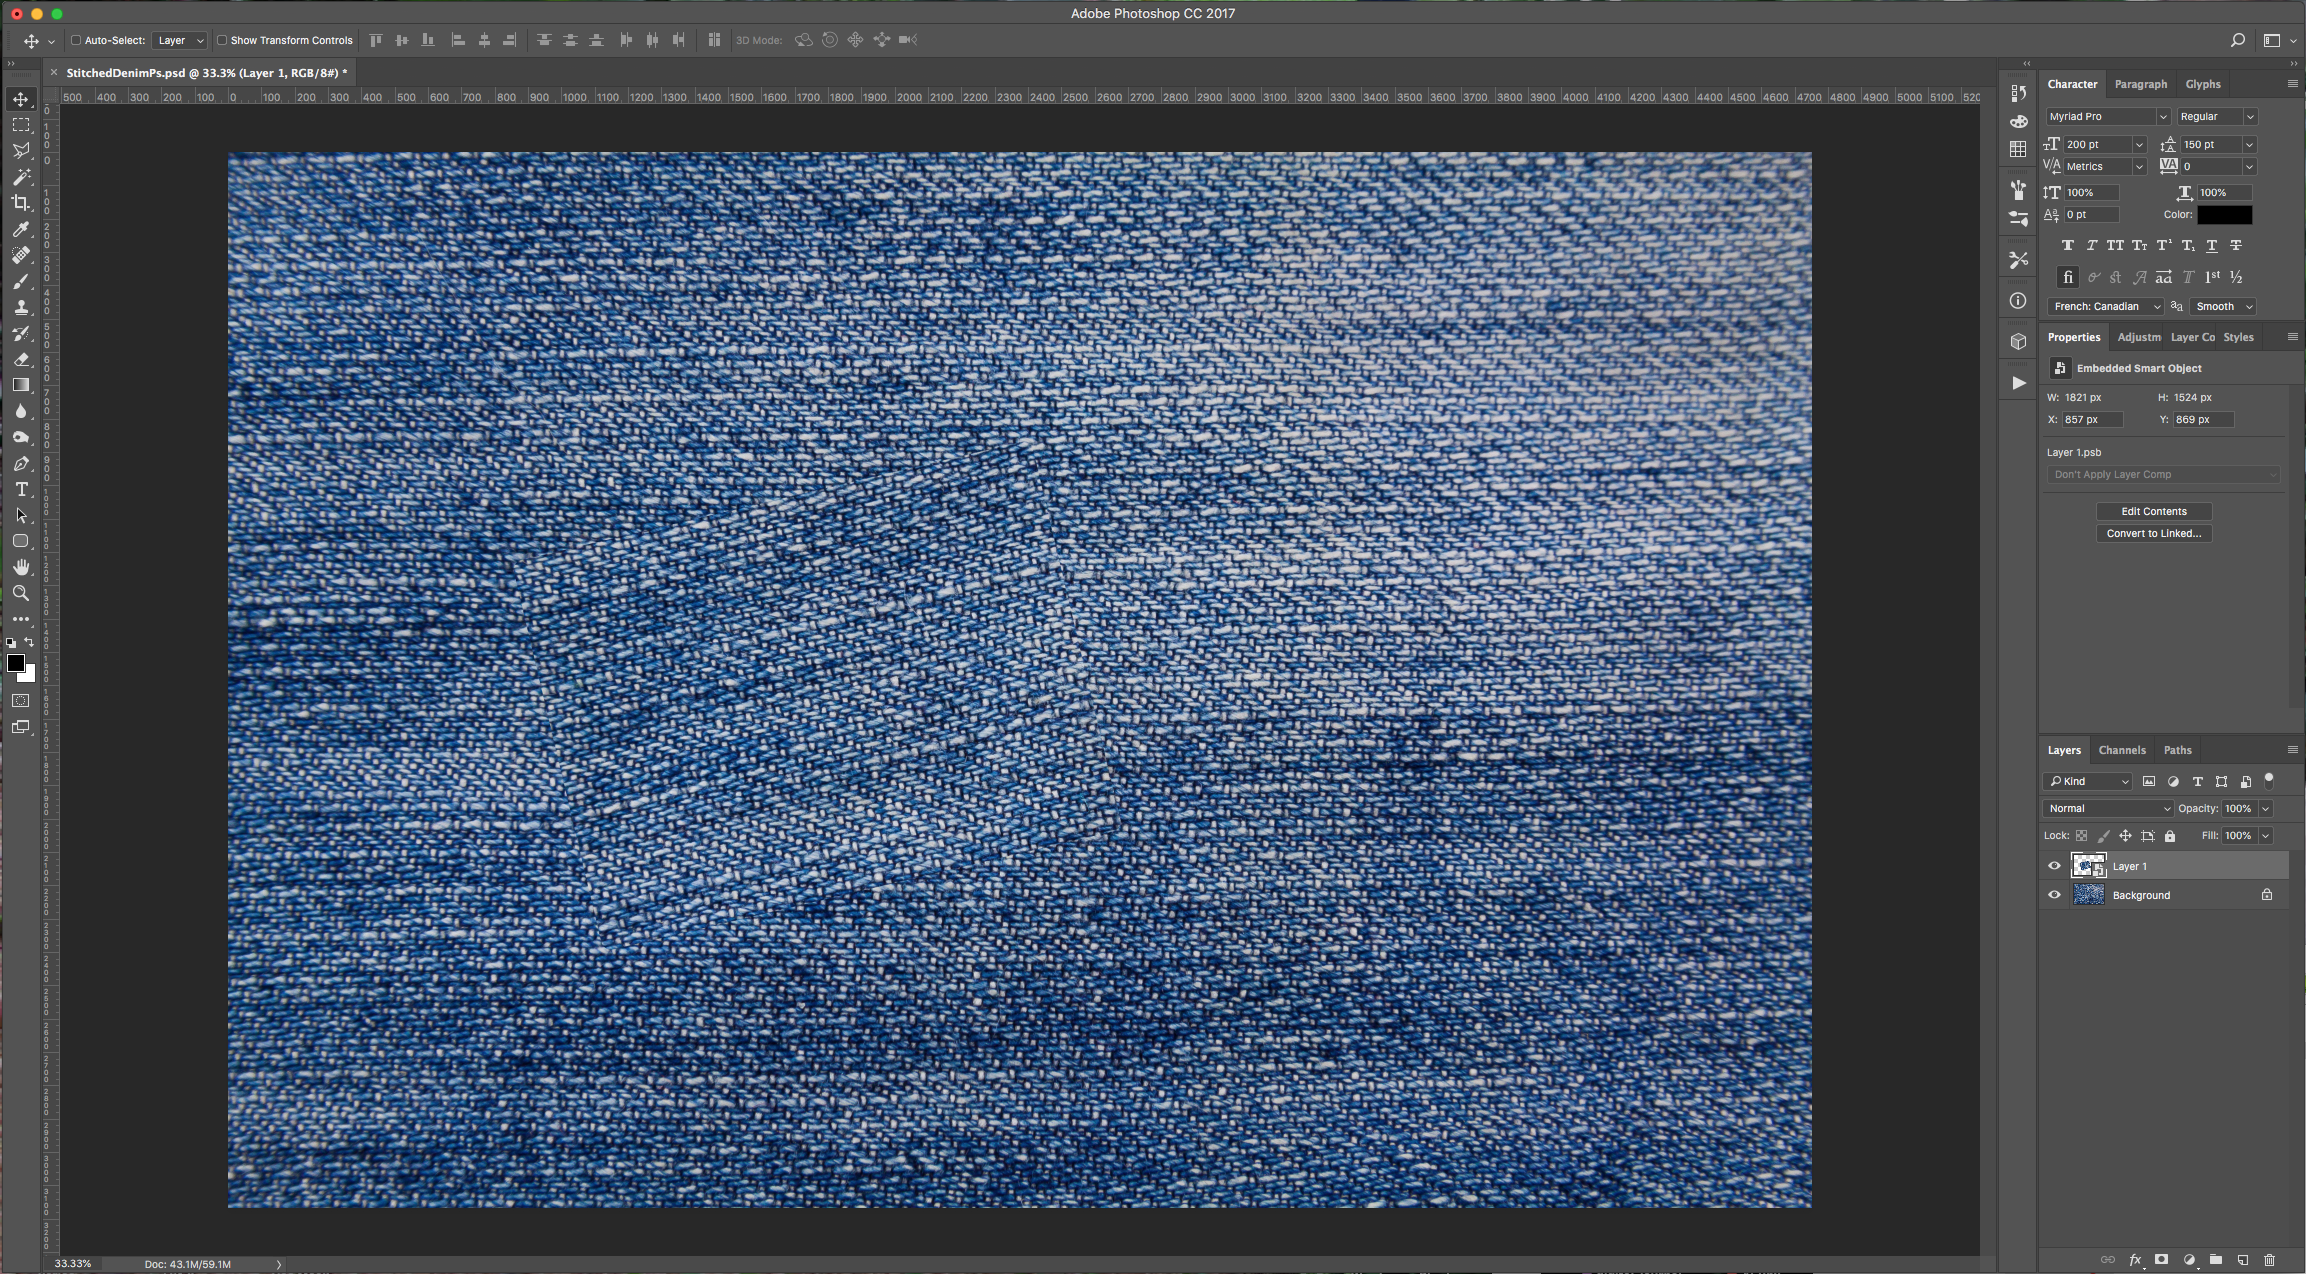
6 - With the two Layers still selected, right-click on top of their Thumbnails and choose “Convert to Smart Object”.
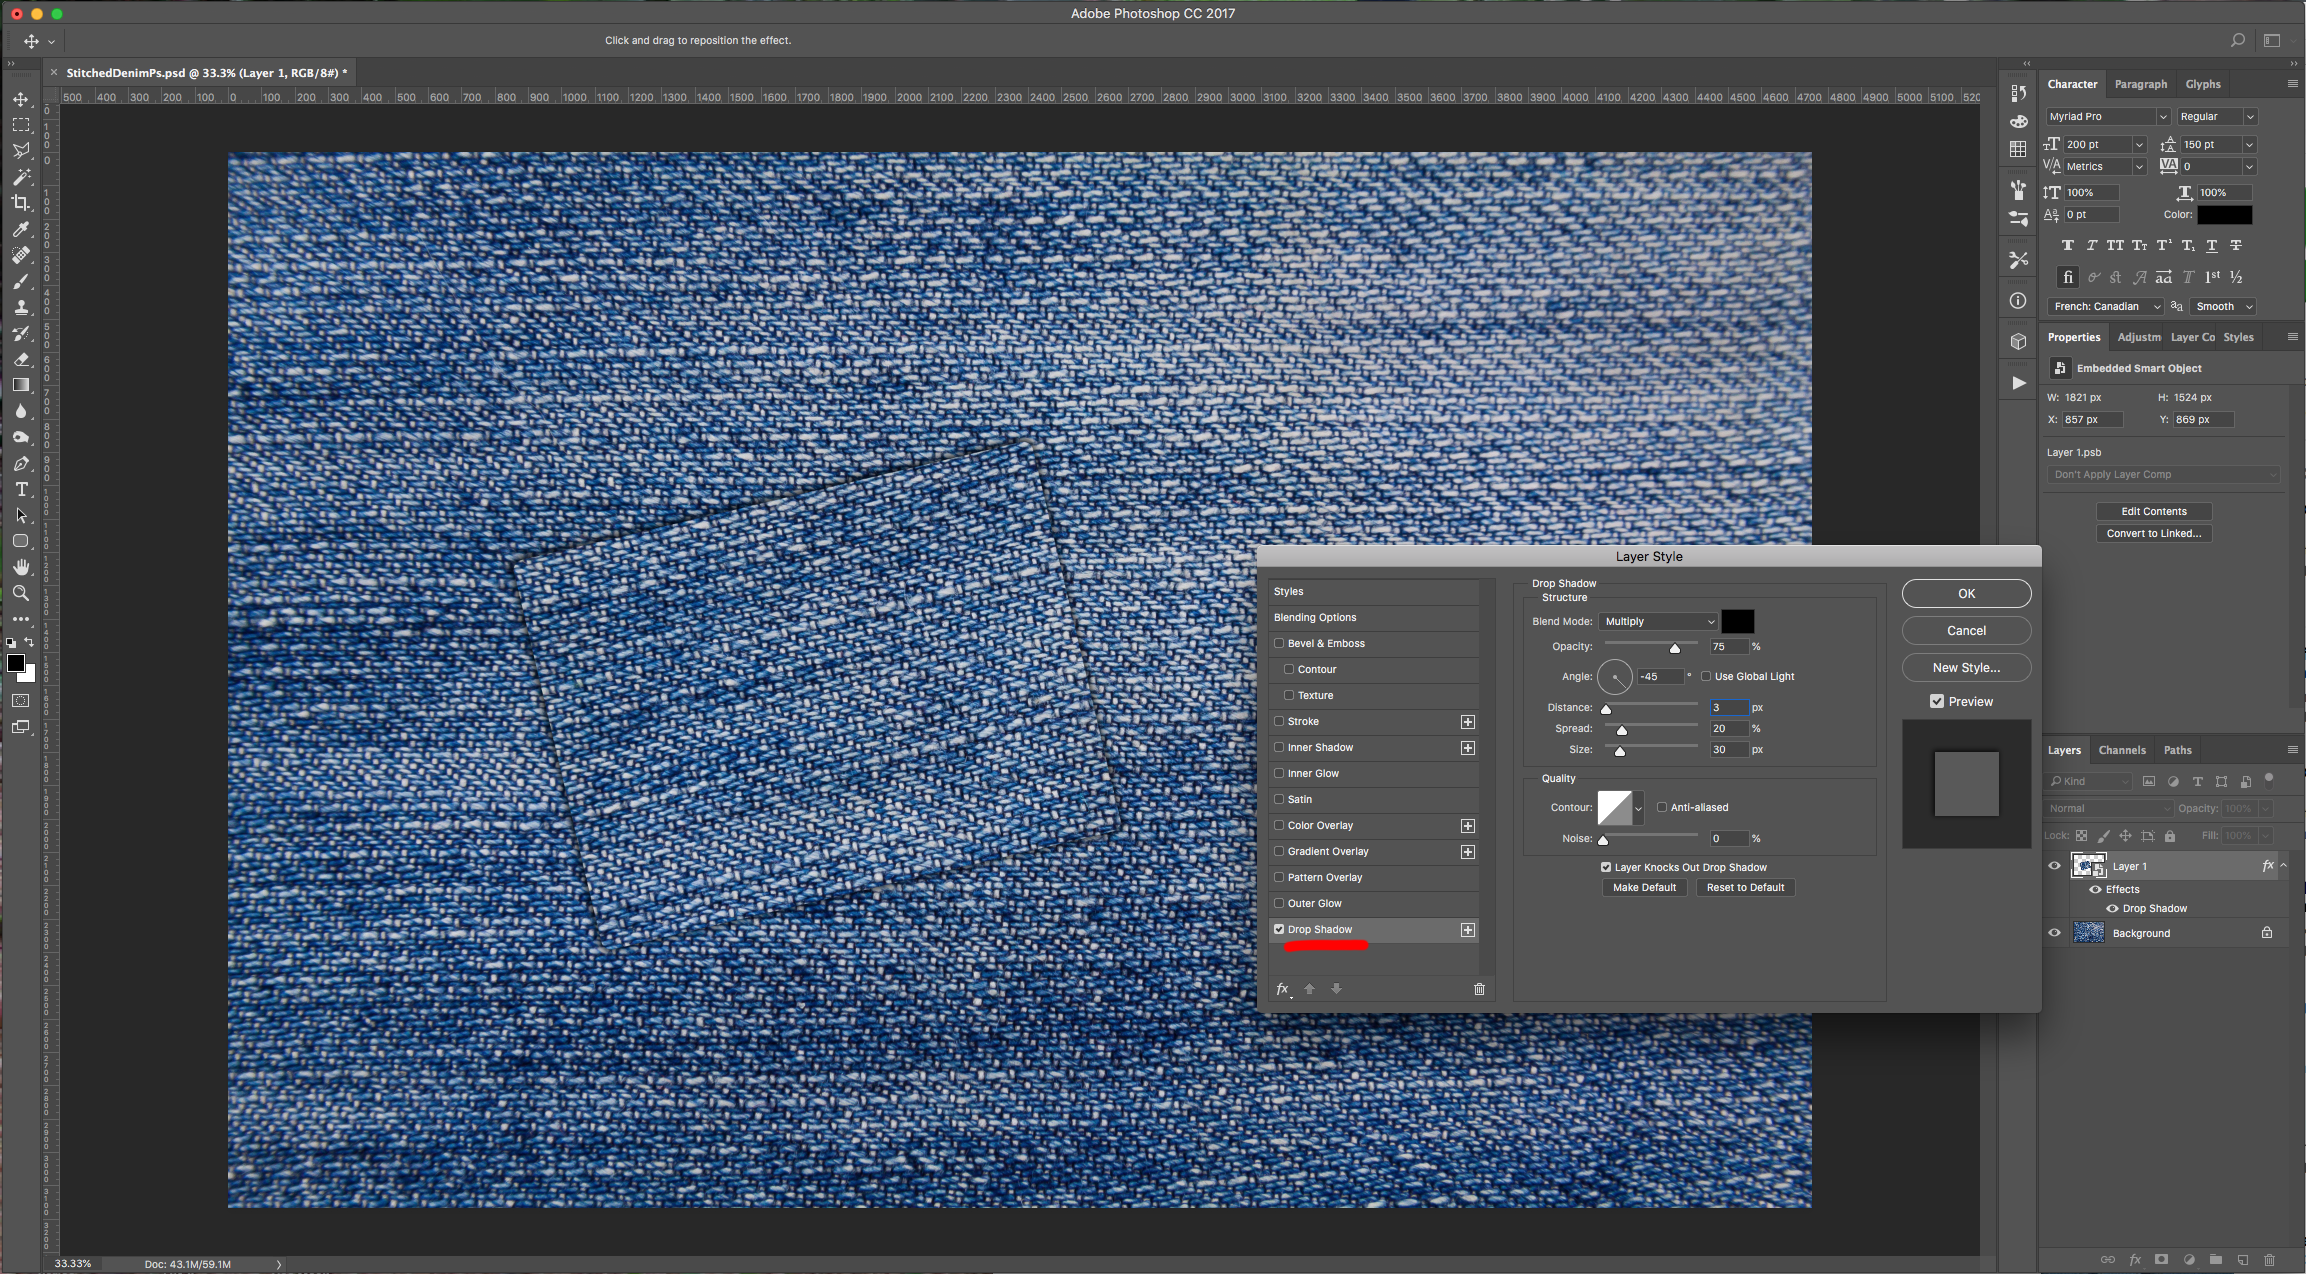
7 - Double-click on top of its Thumbnail and apply the following “Layer Styles”:
Drop Shadow:
Bevel and Emboss:

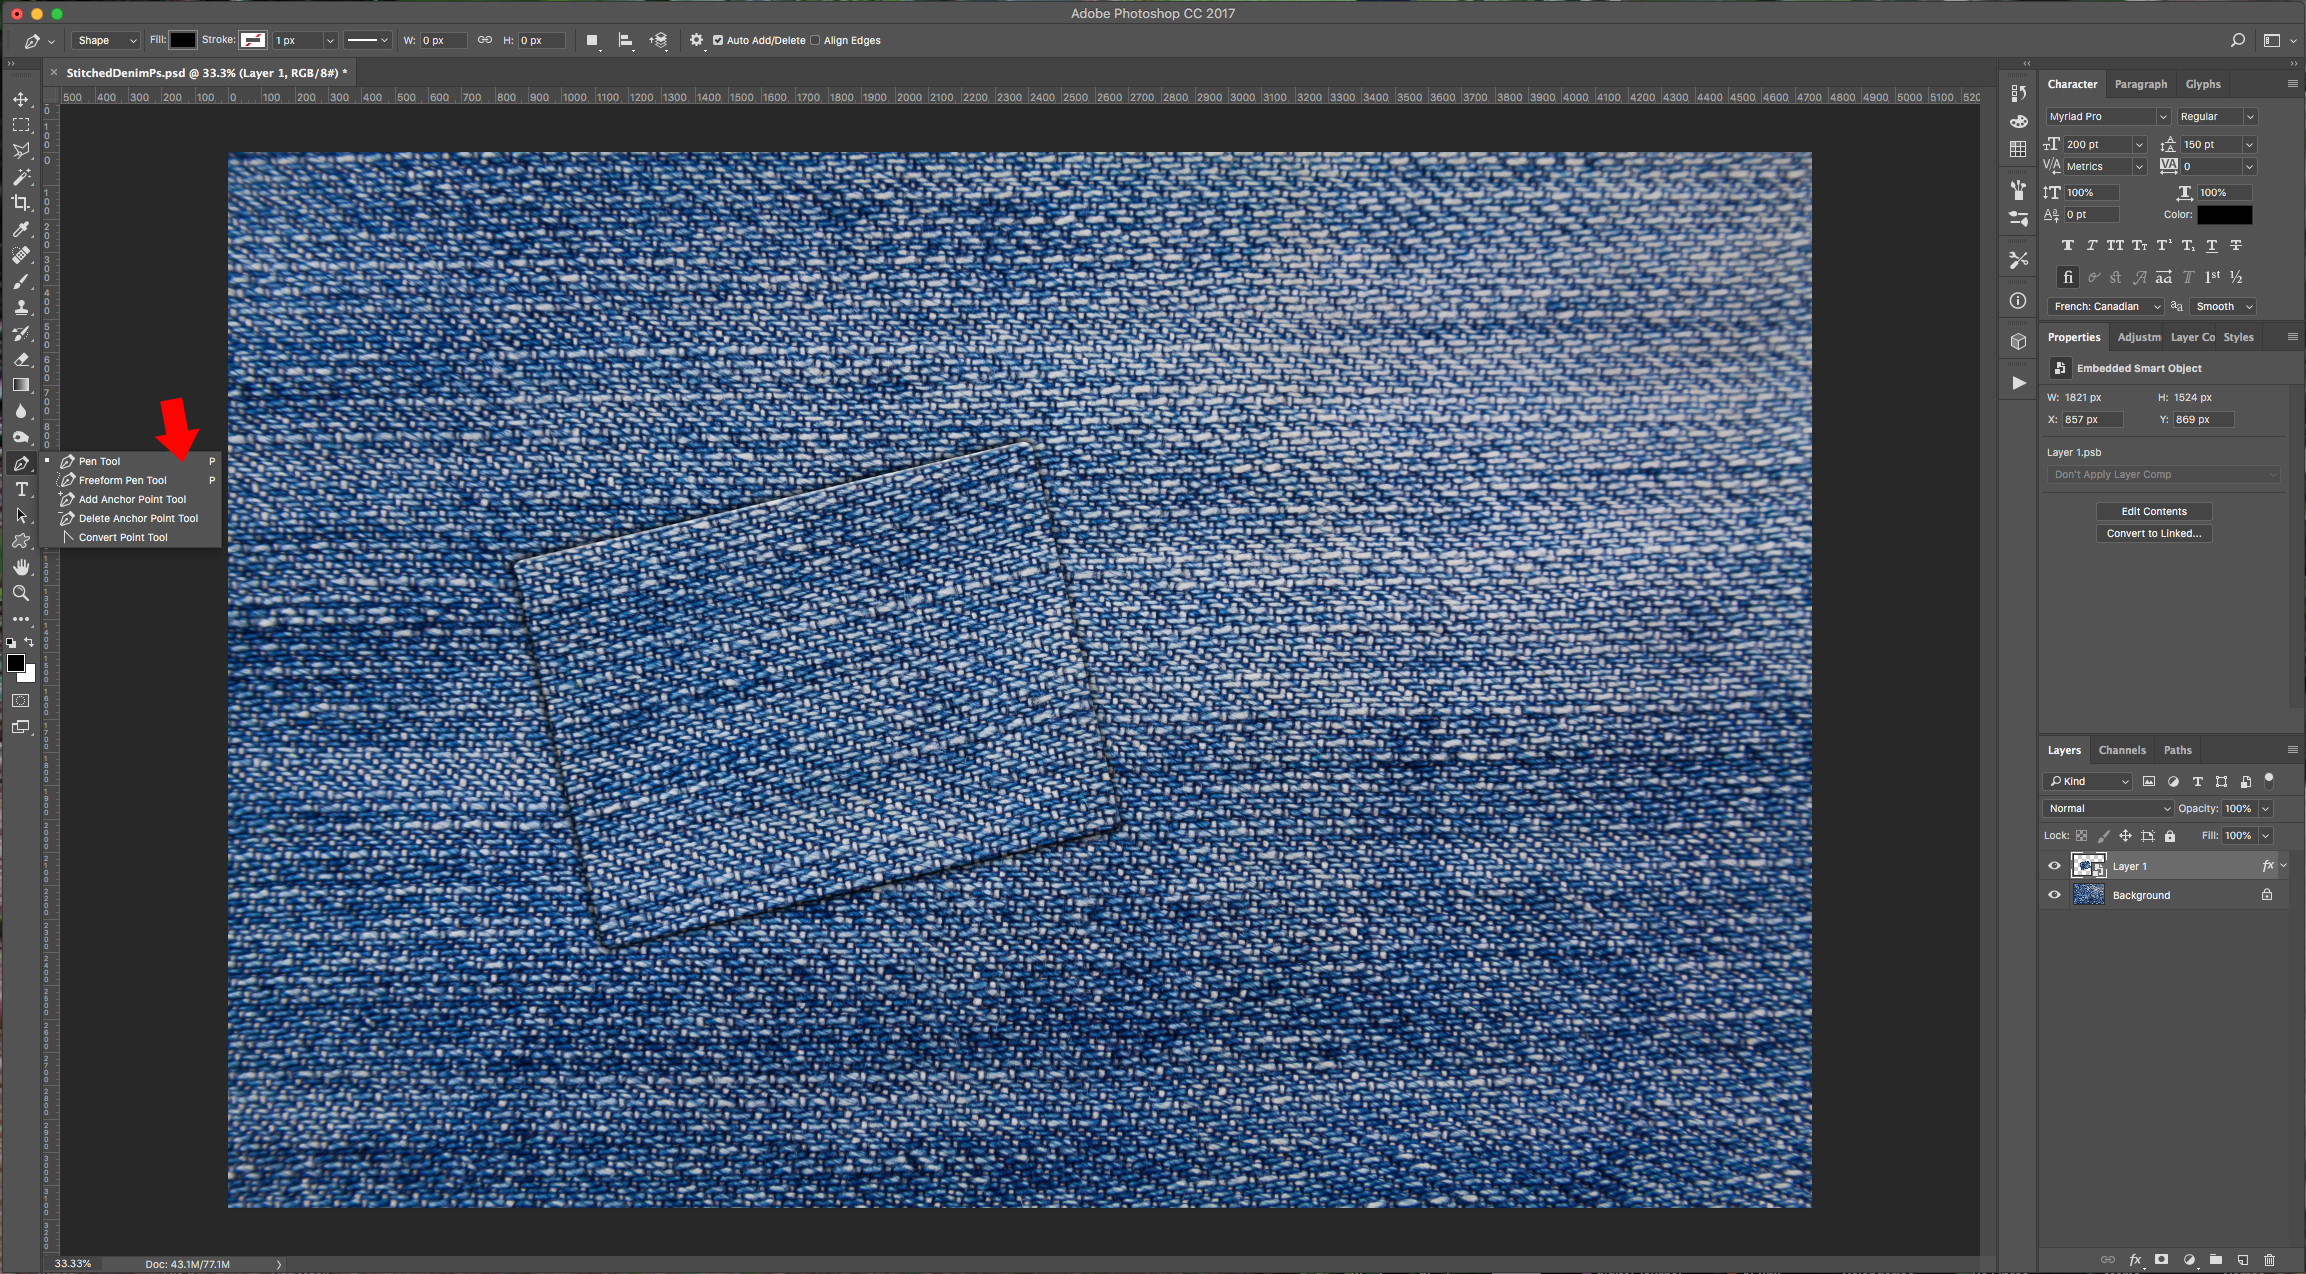
8 - Select the “Pen Tool” (P), make sure “Shape” is selected in the Top Menu and create a second shape all around inside your Rectangle.
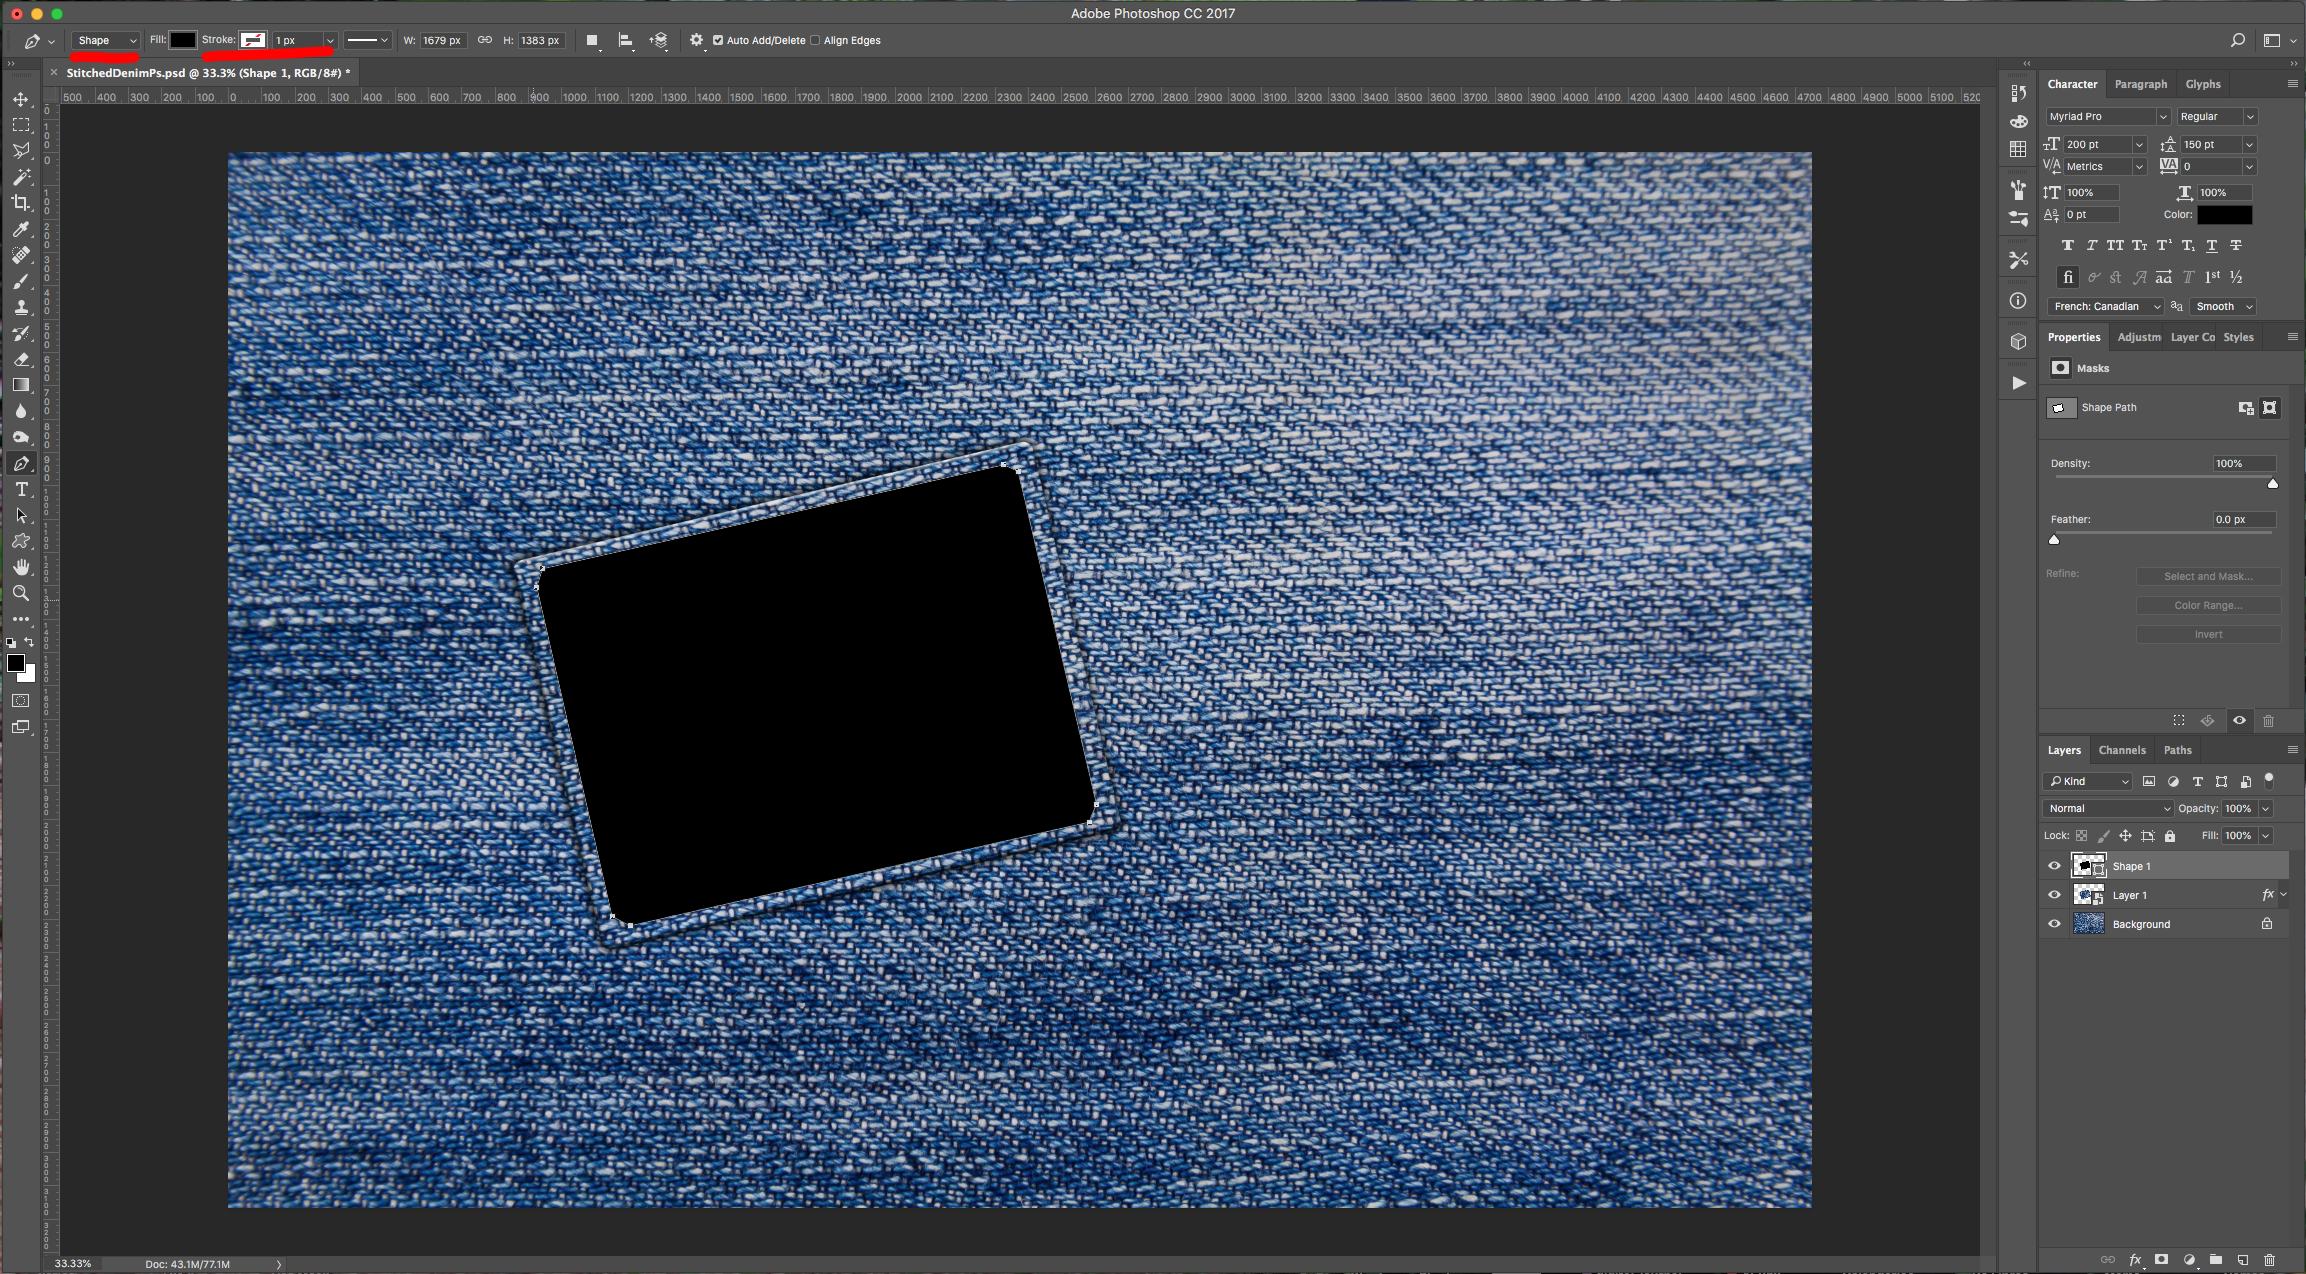
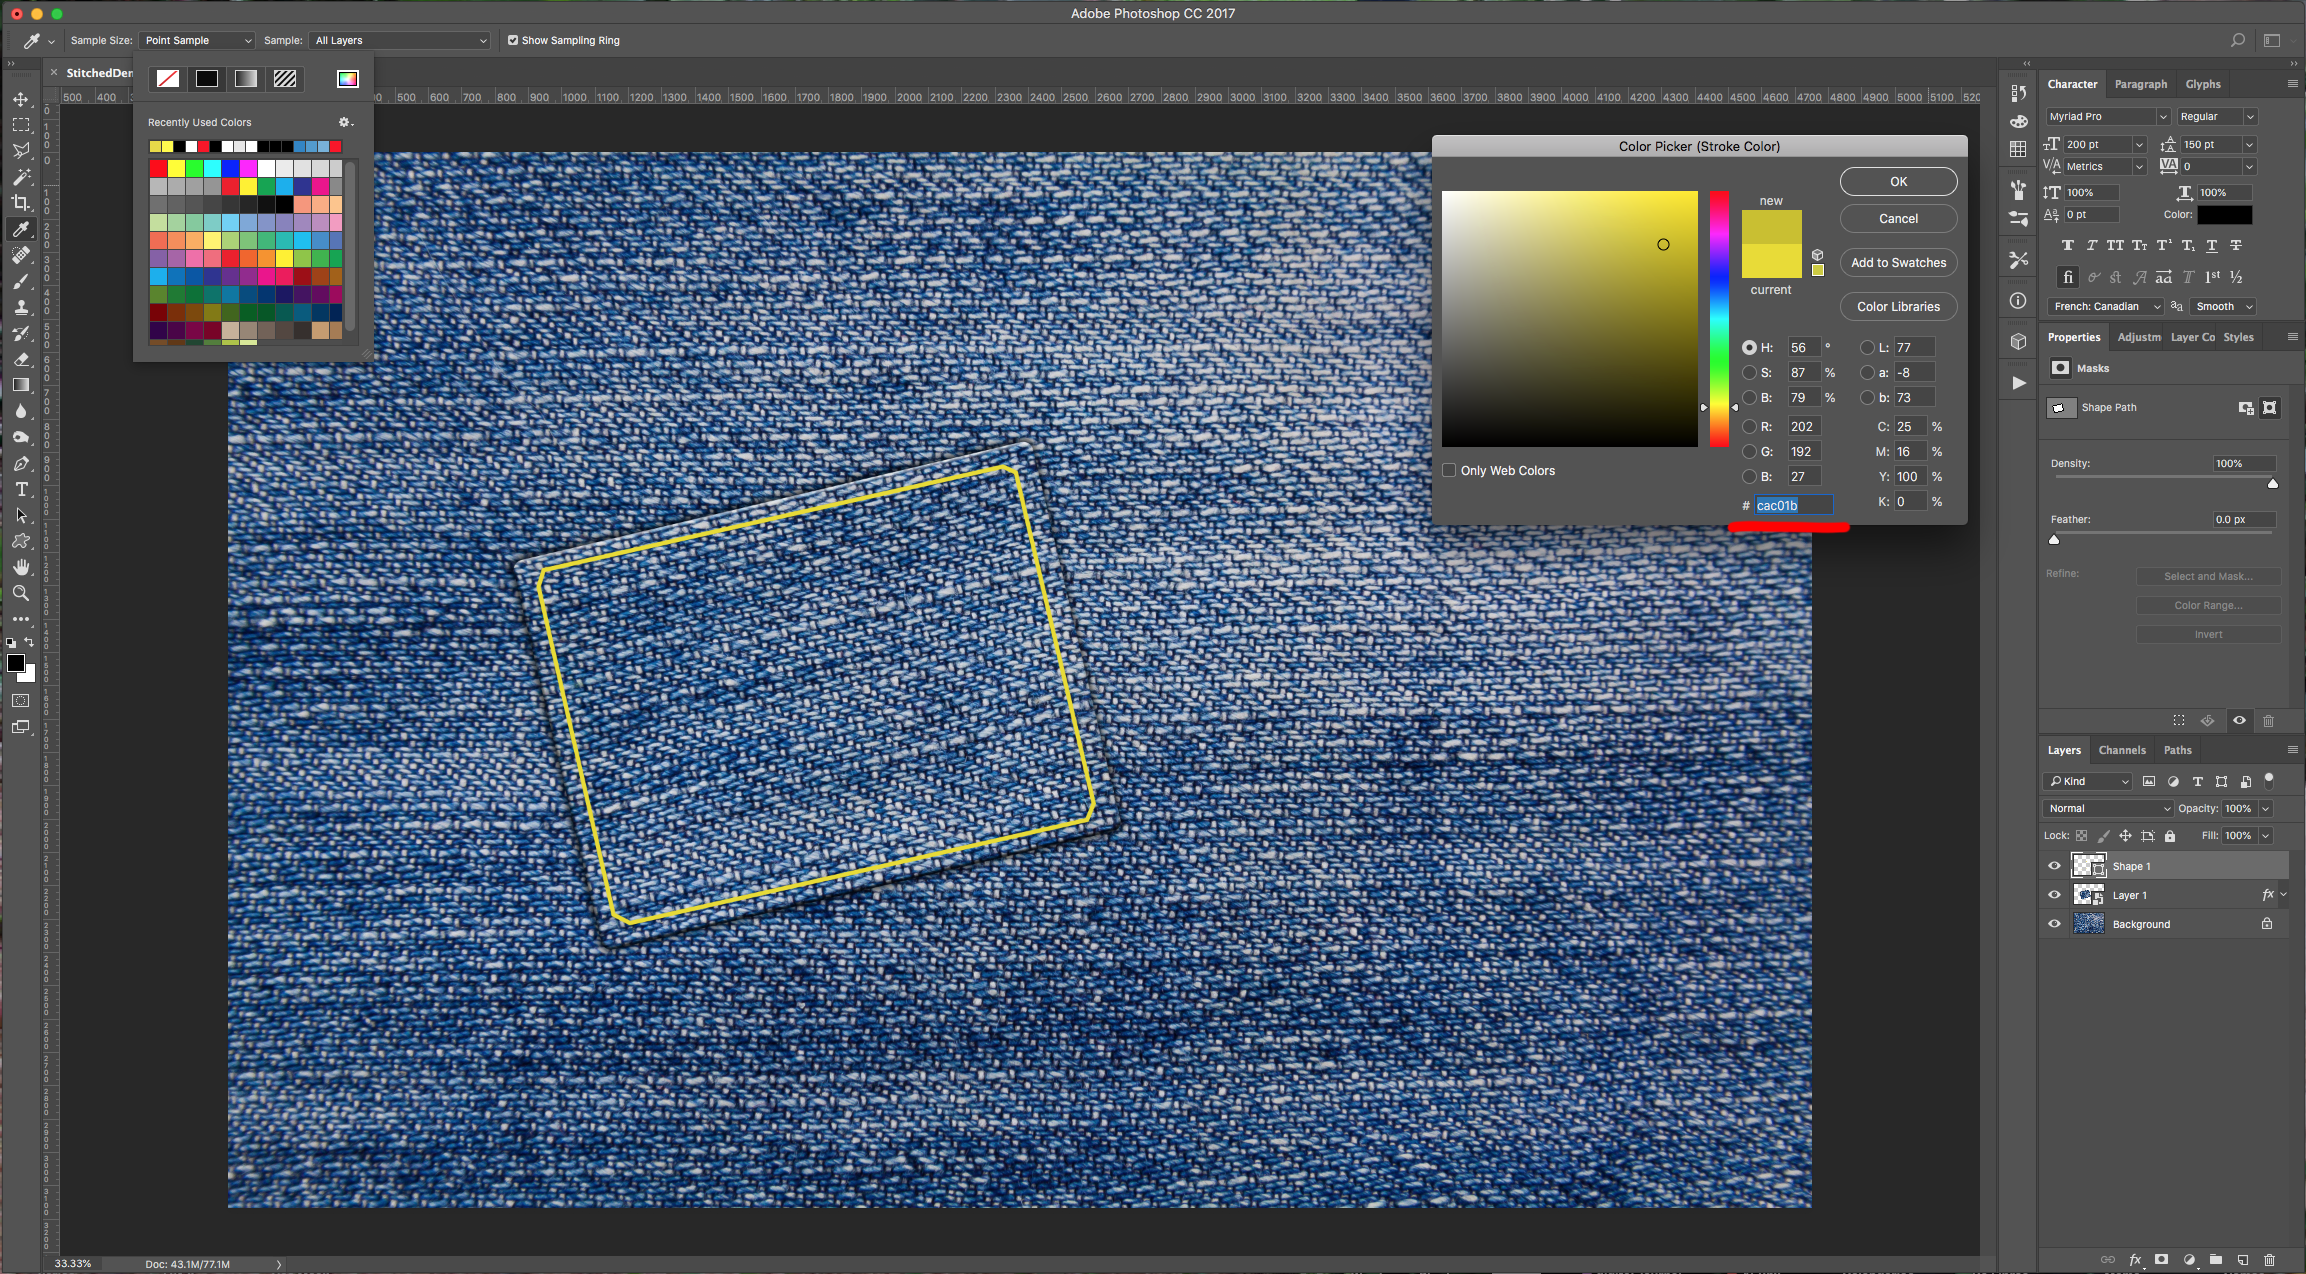
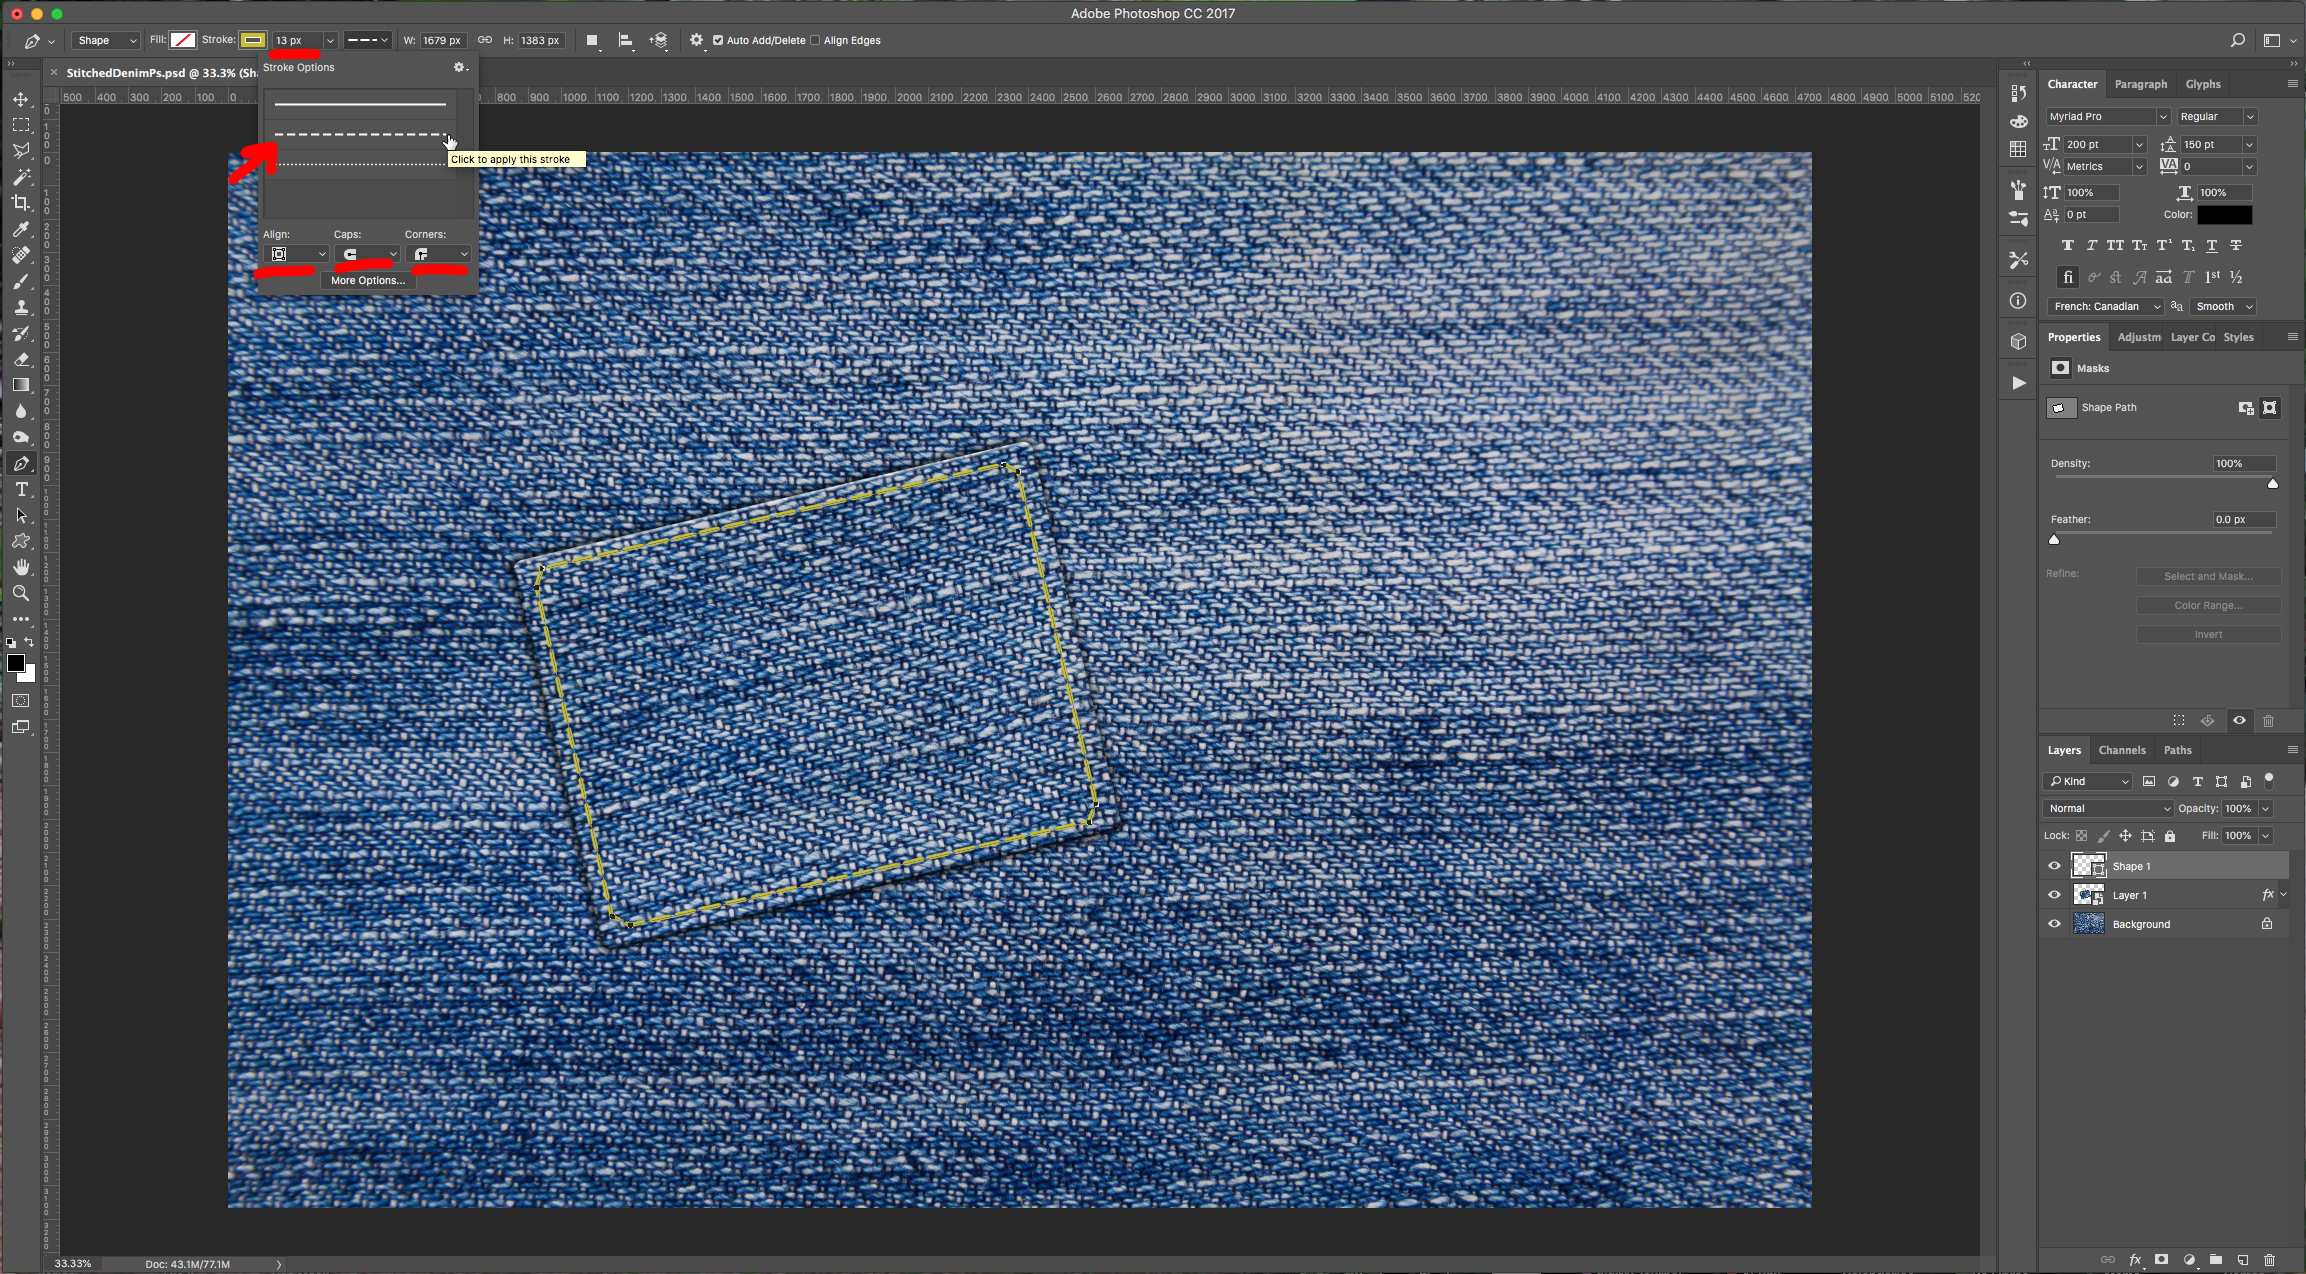
9 - Set the “Fill” to “None” and give the “Stroke” a 13 px “Weight” and color it Yellow (we used #cac01b). Choose “Dashed” in “Stroke Options”, give it “Rounded Caps and Corners” and “Align Center”.
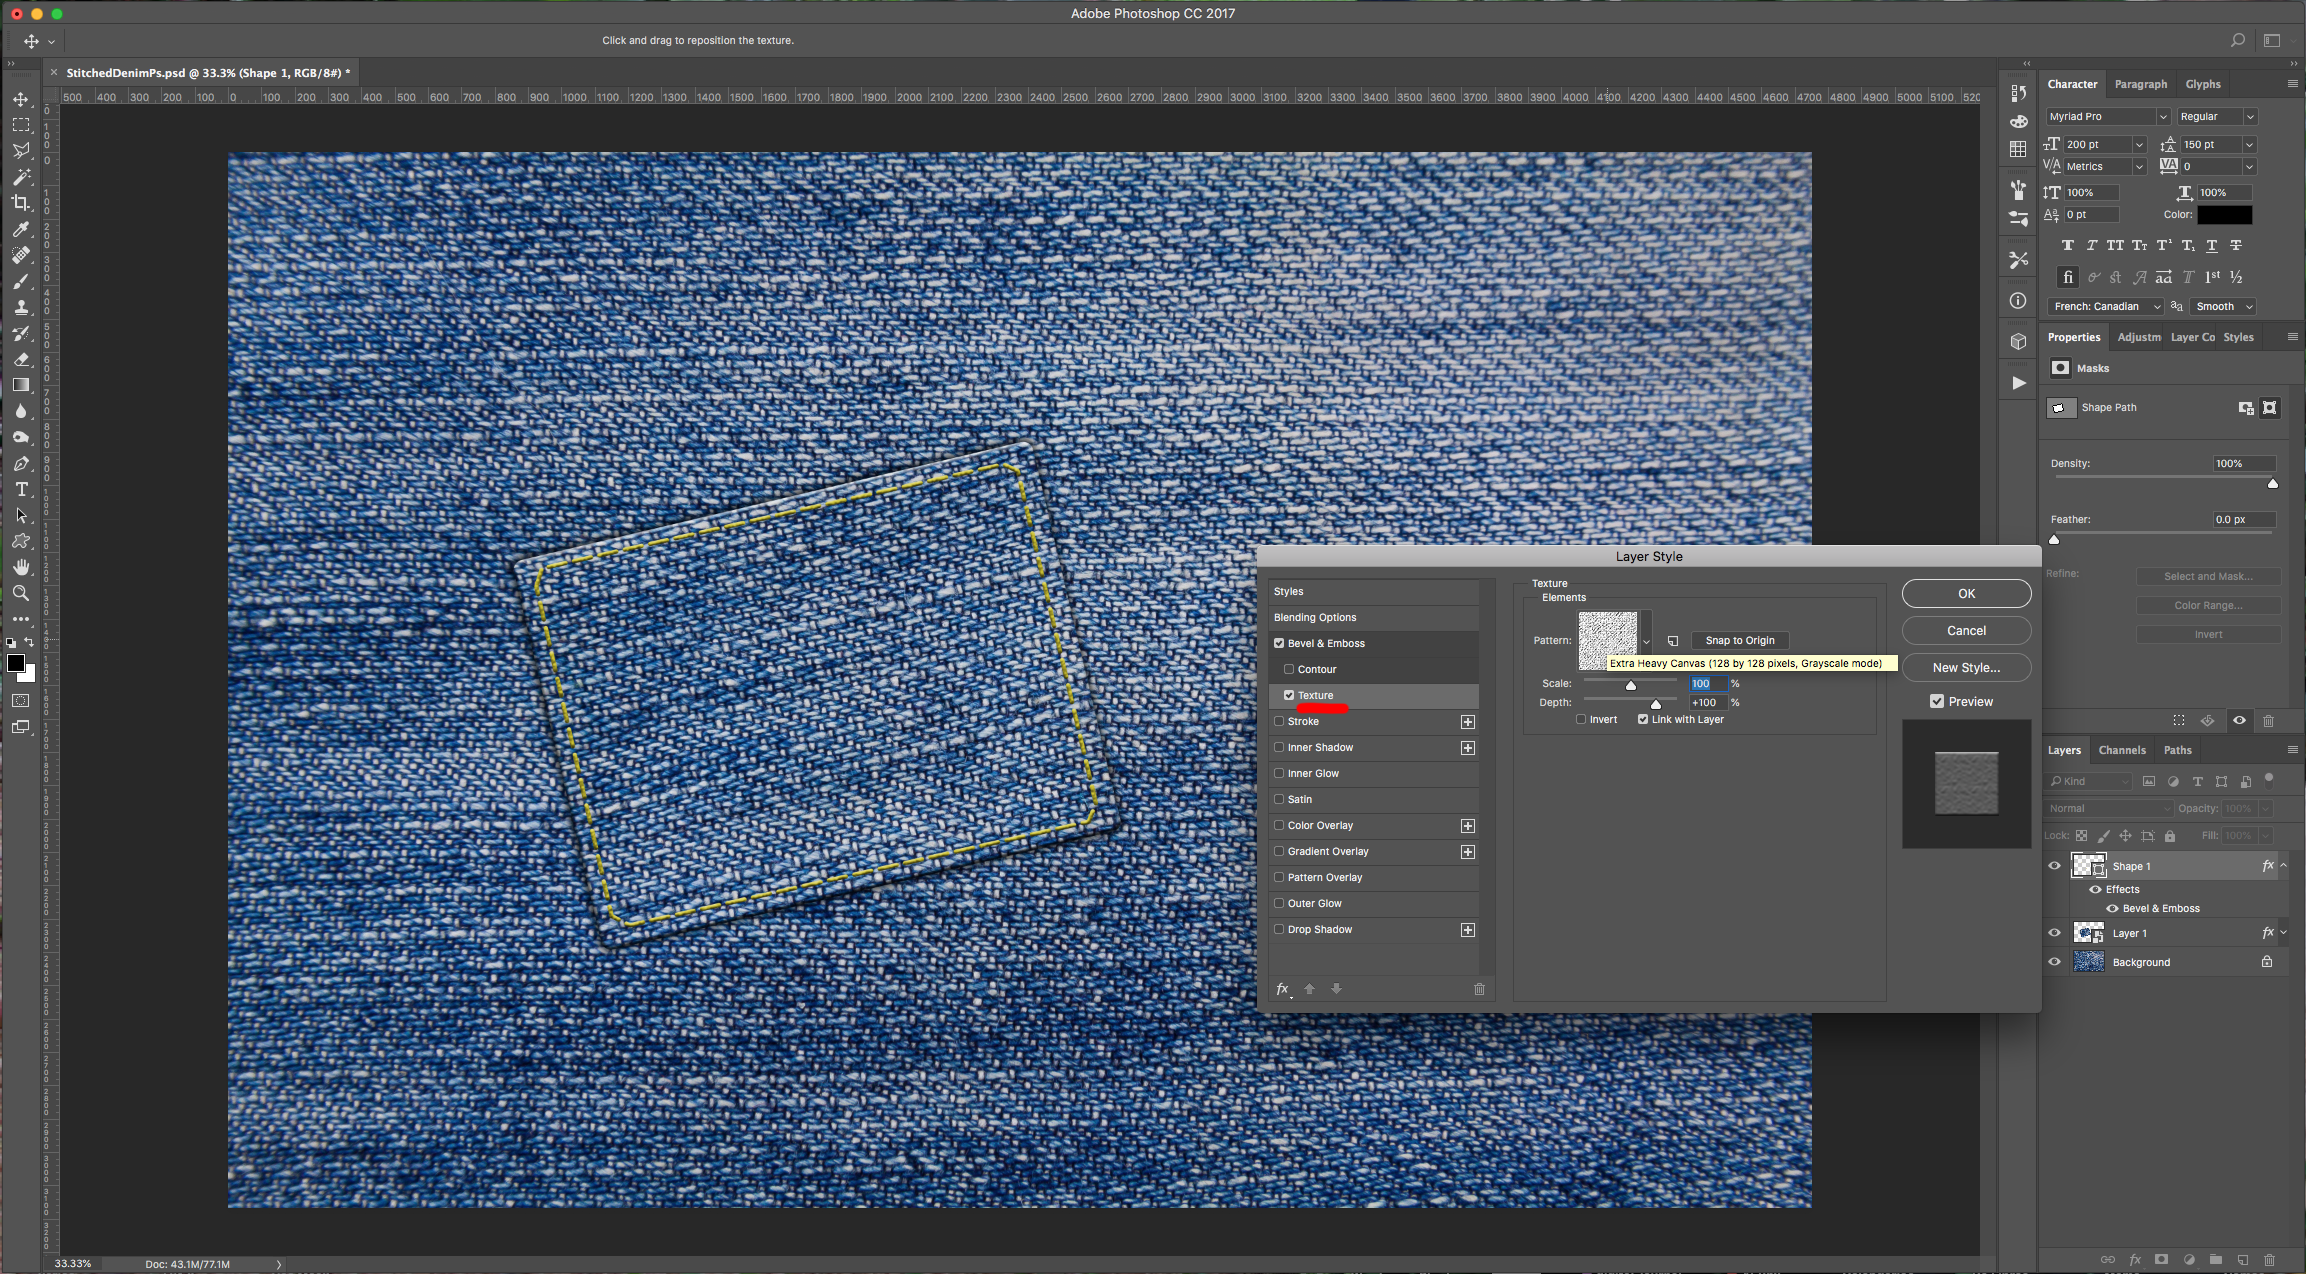
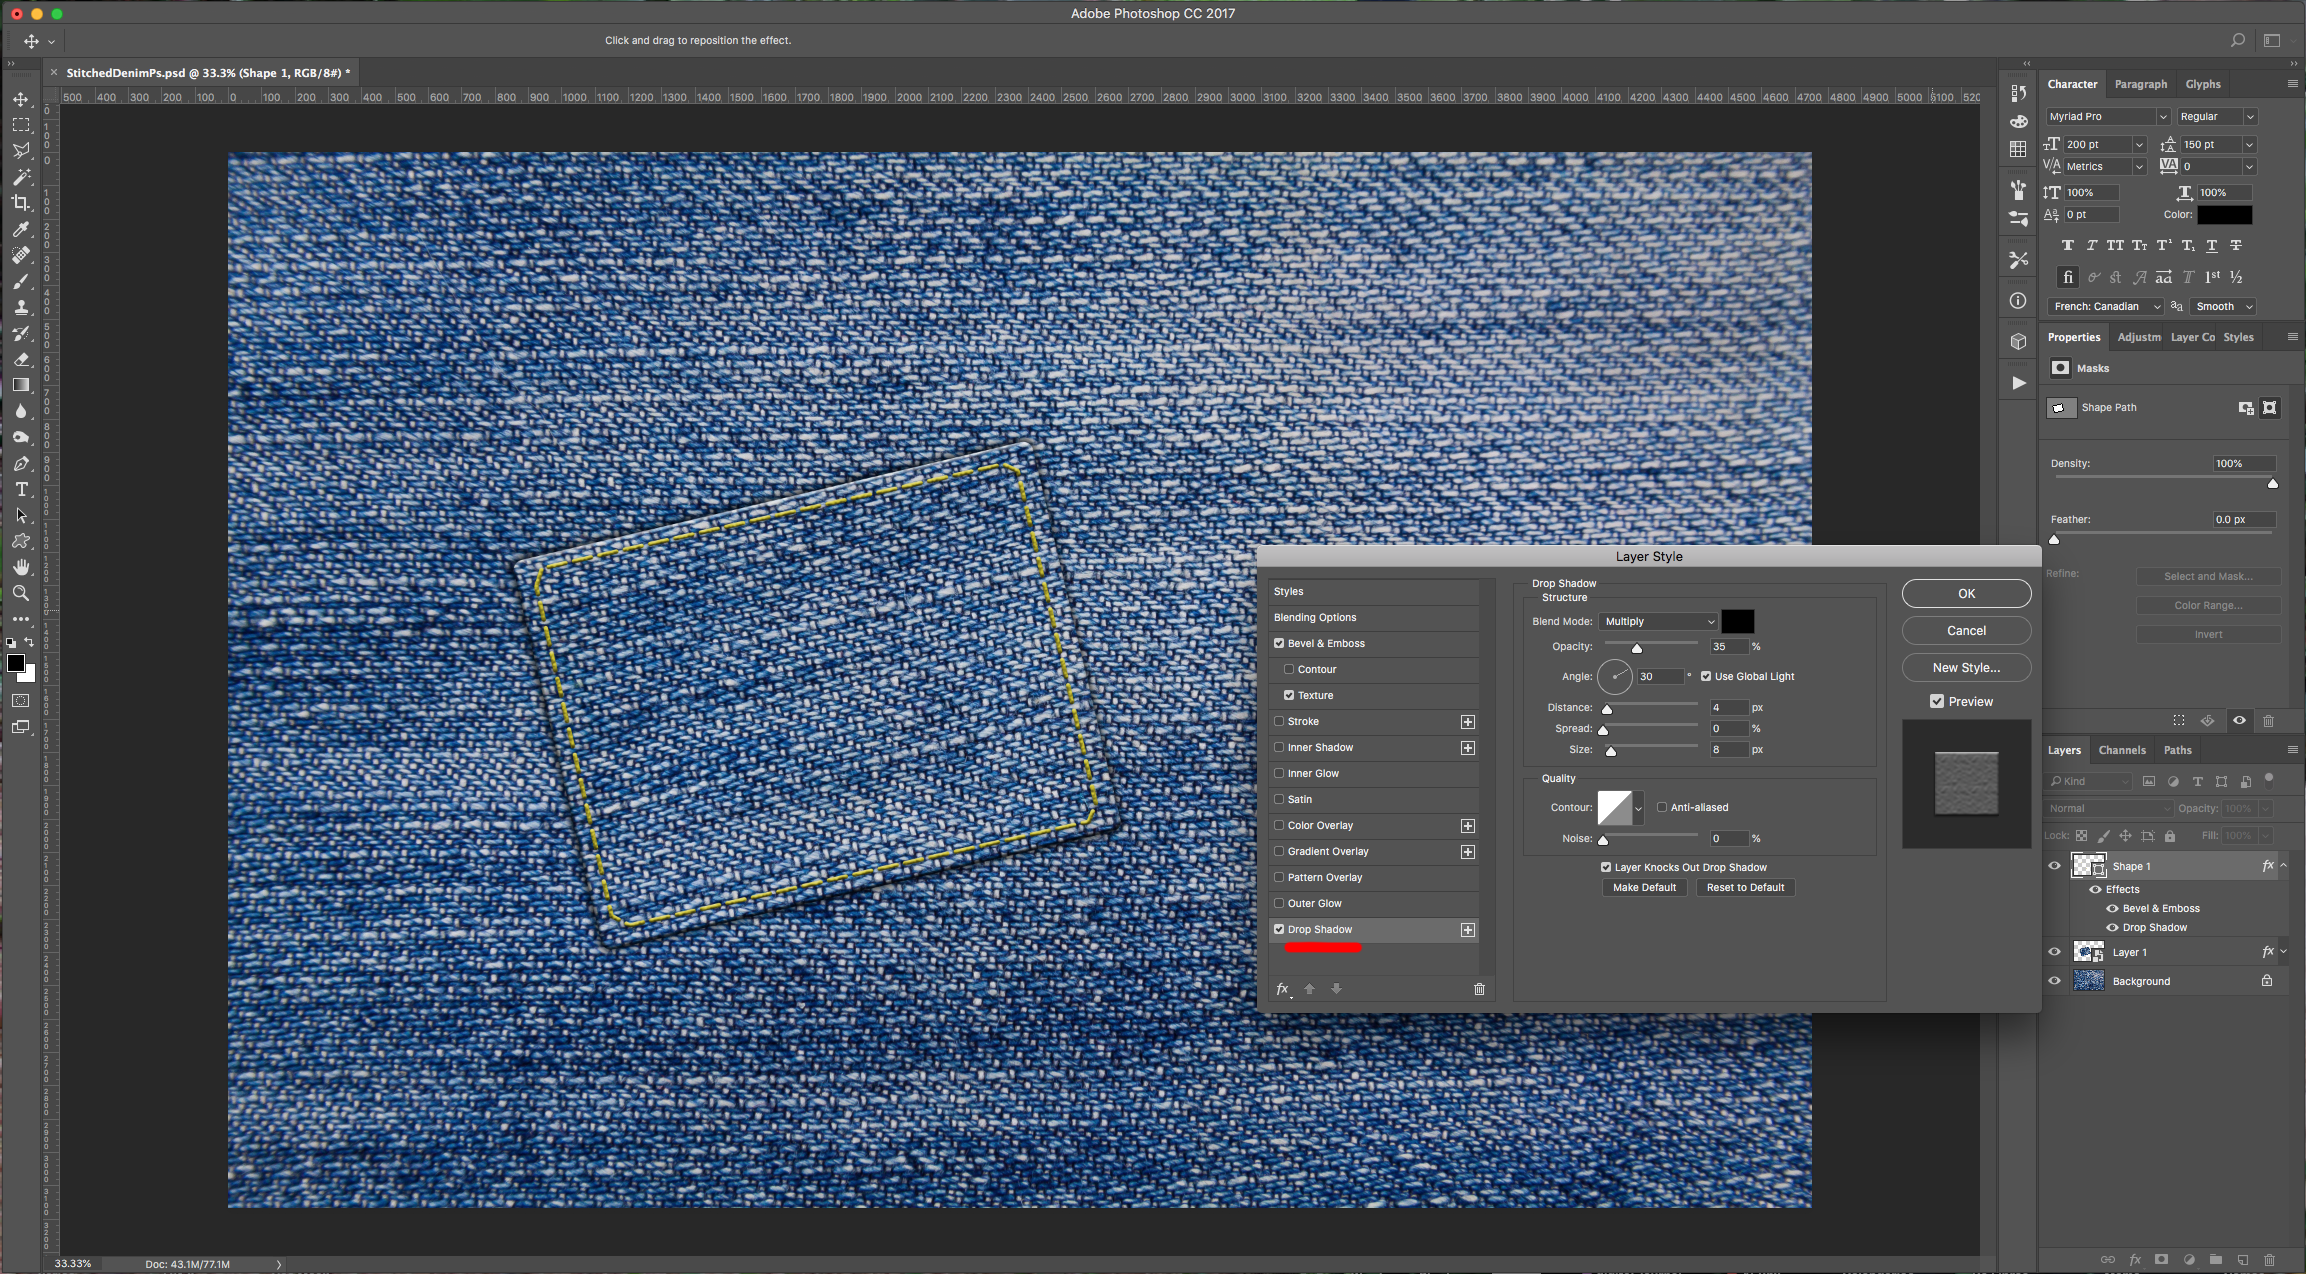
10 - Double-click on top of its Thumbnail and apply the following “Layer Styles”:
Texture: (Extra Heavy Canvas 128 x 128 pixels, Grayscale mode)
Drop Shadow:
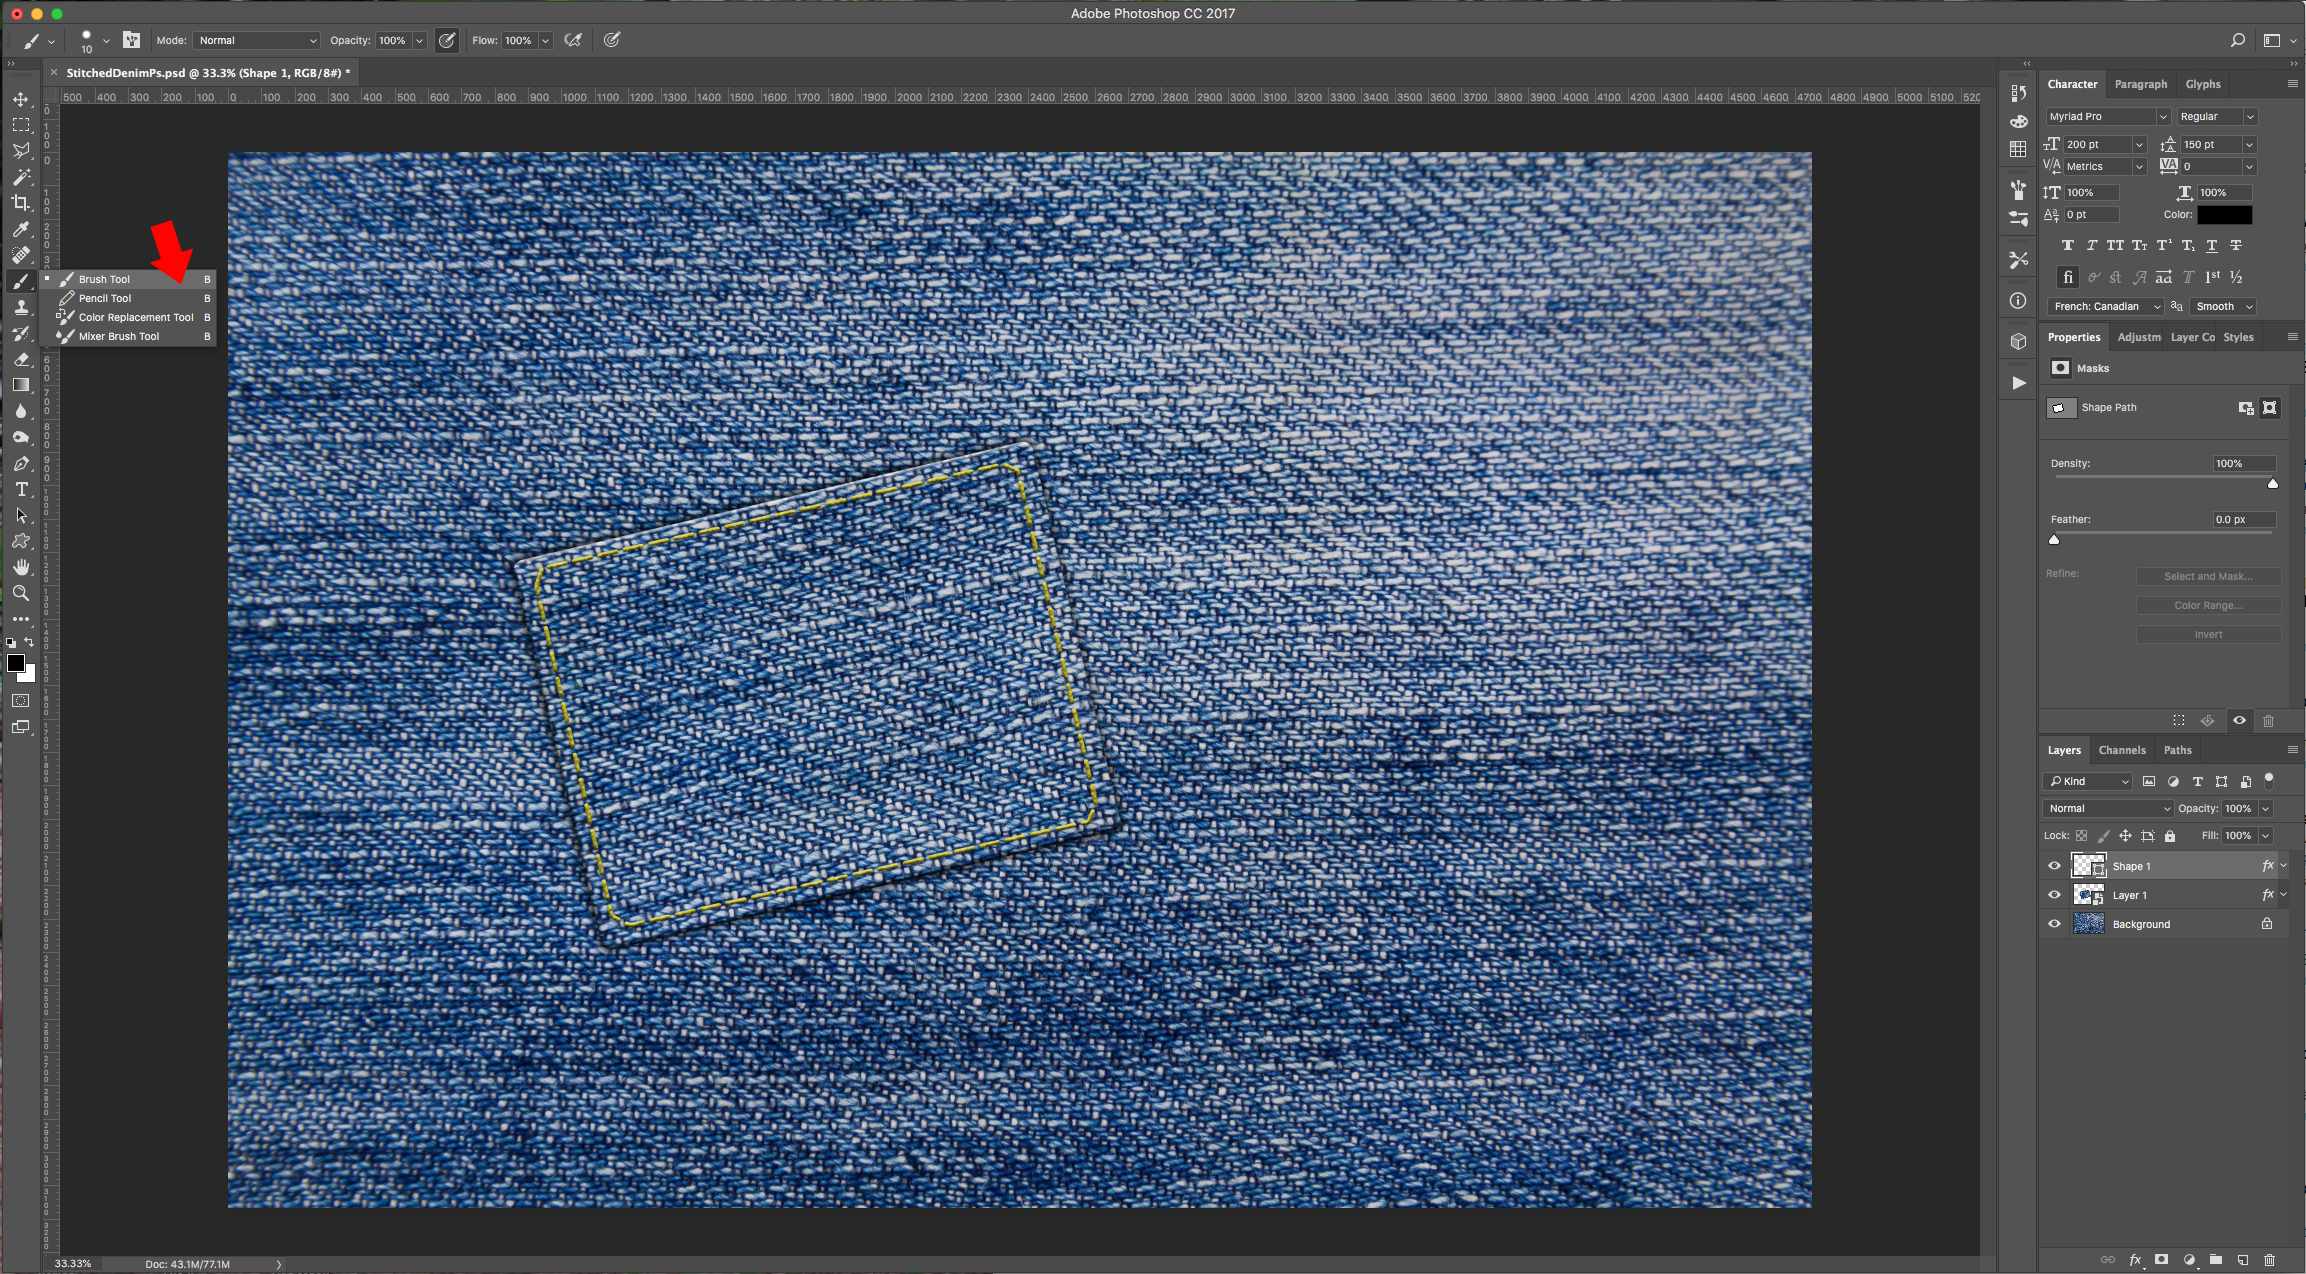
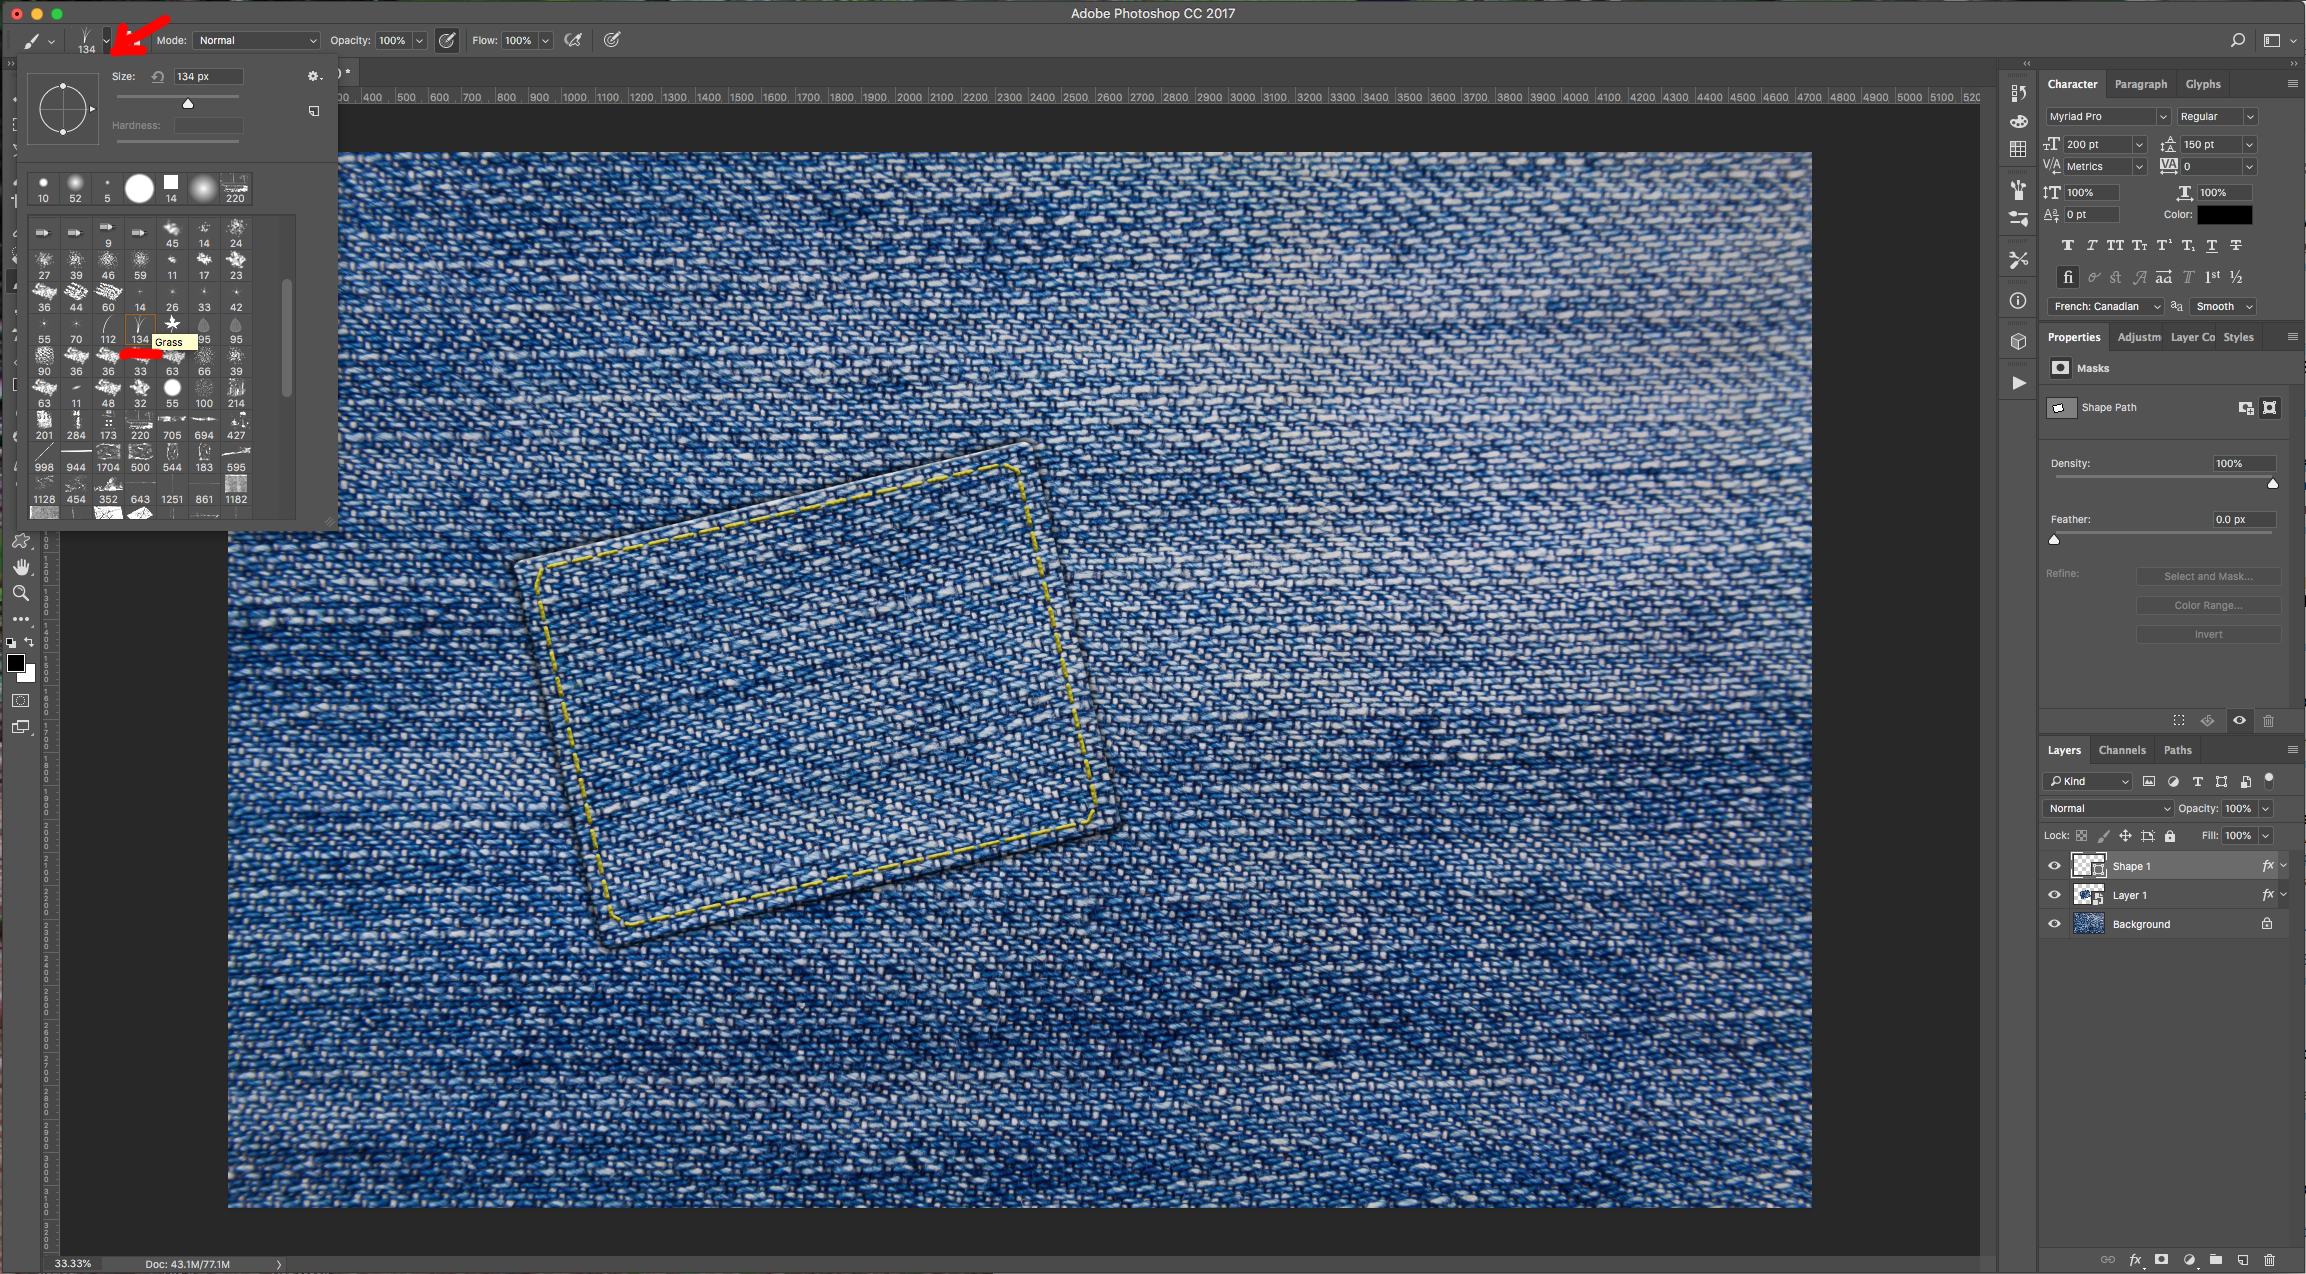
11 - Select the “Brush Tool” (B) and choose “Grass” from the “Assorted Brushes” default to Photoshop.
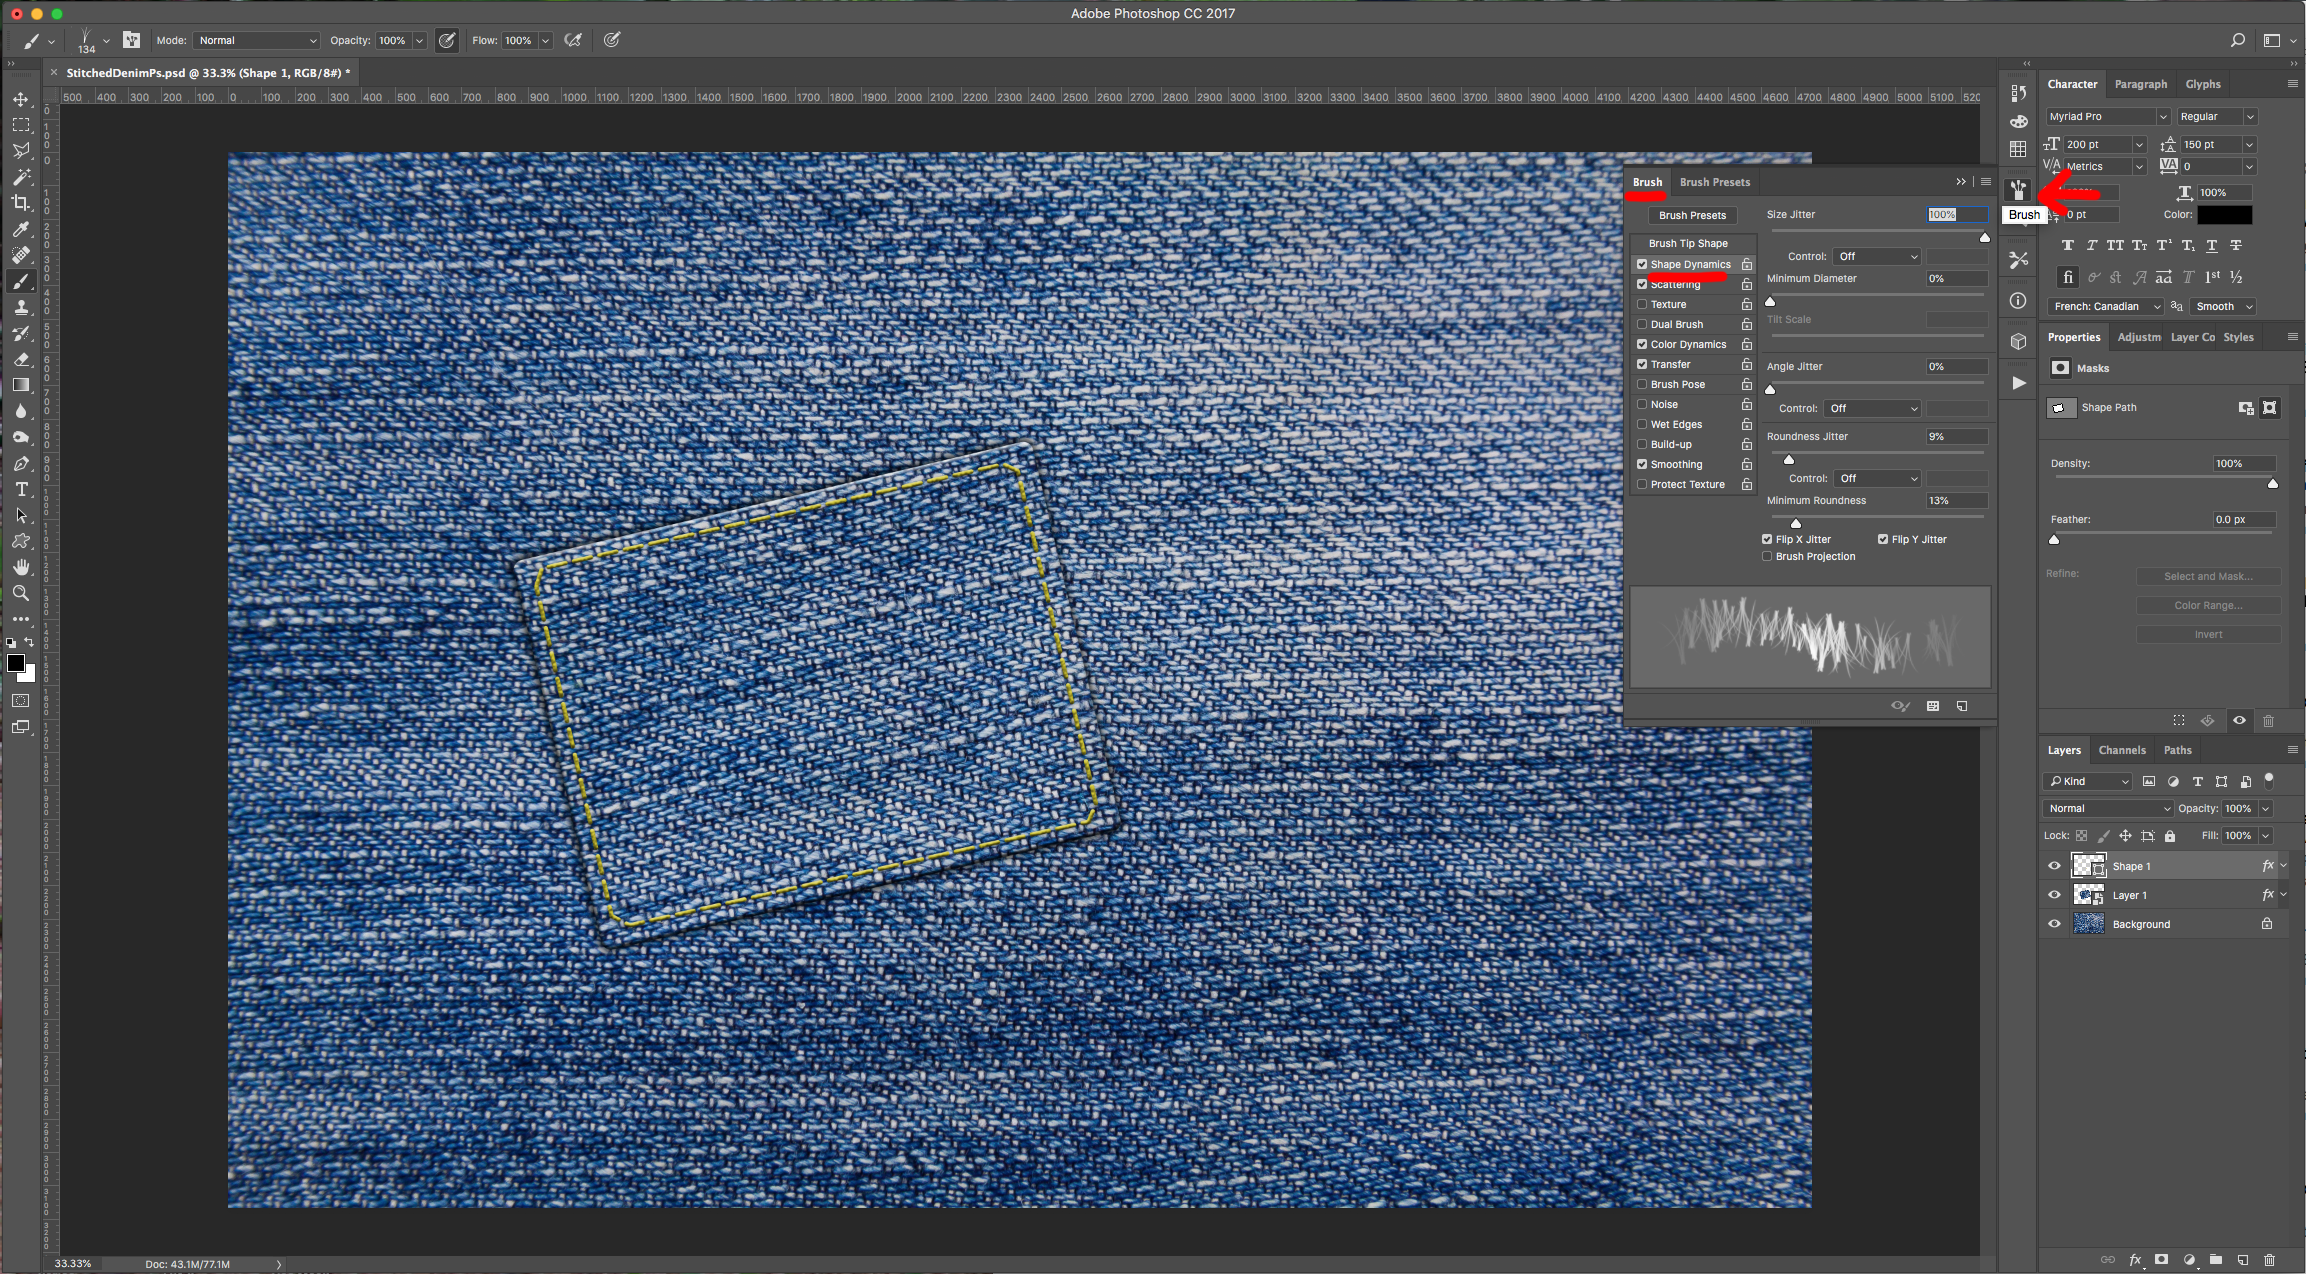
12 - Head to the “Brush Panel” and apply the following values:
Shape Dynamics:
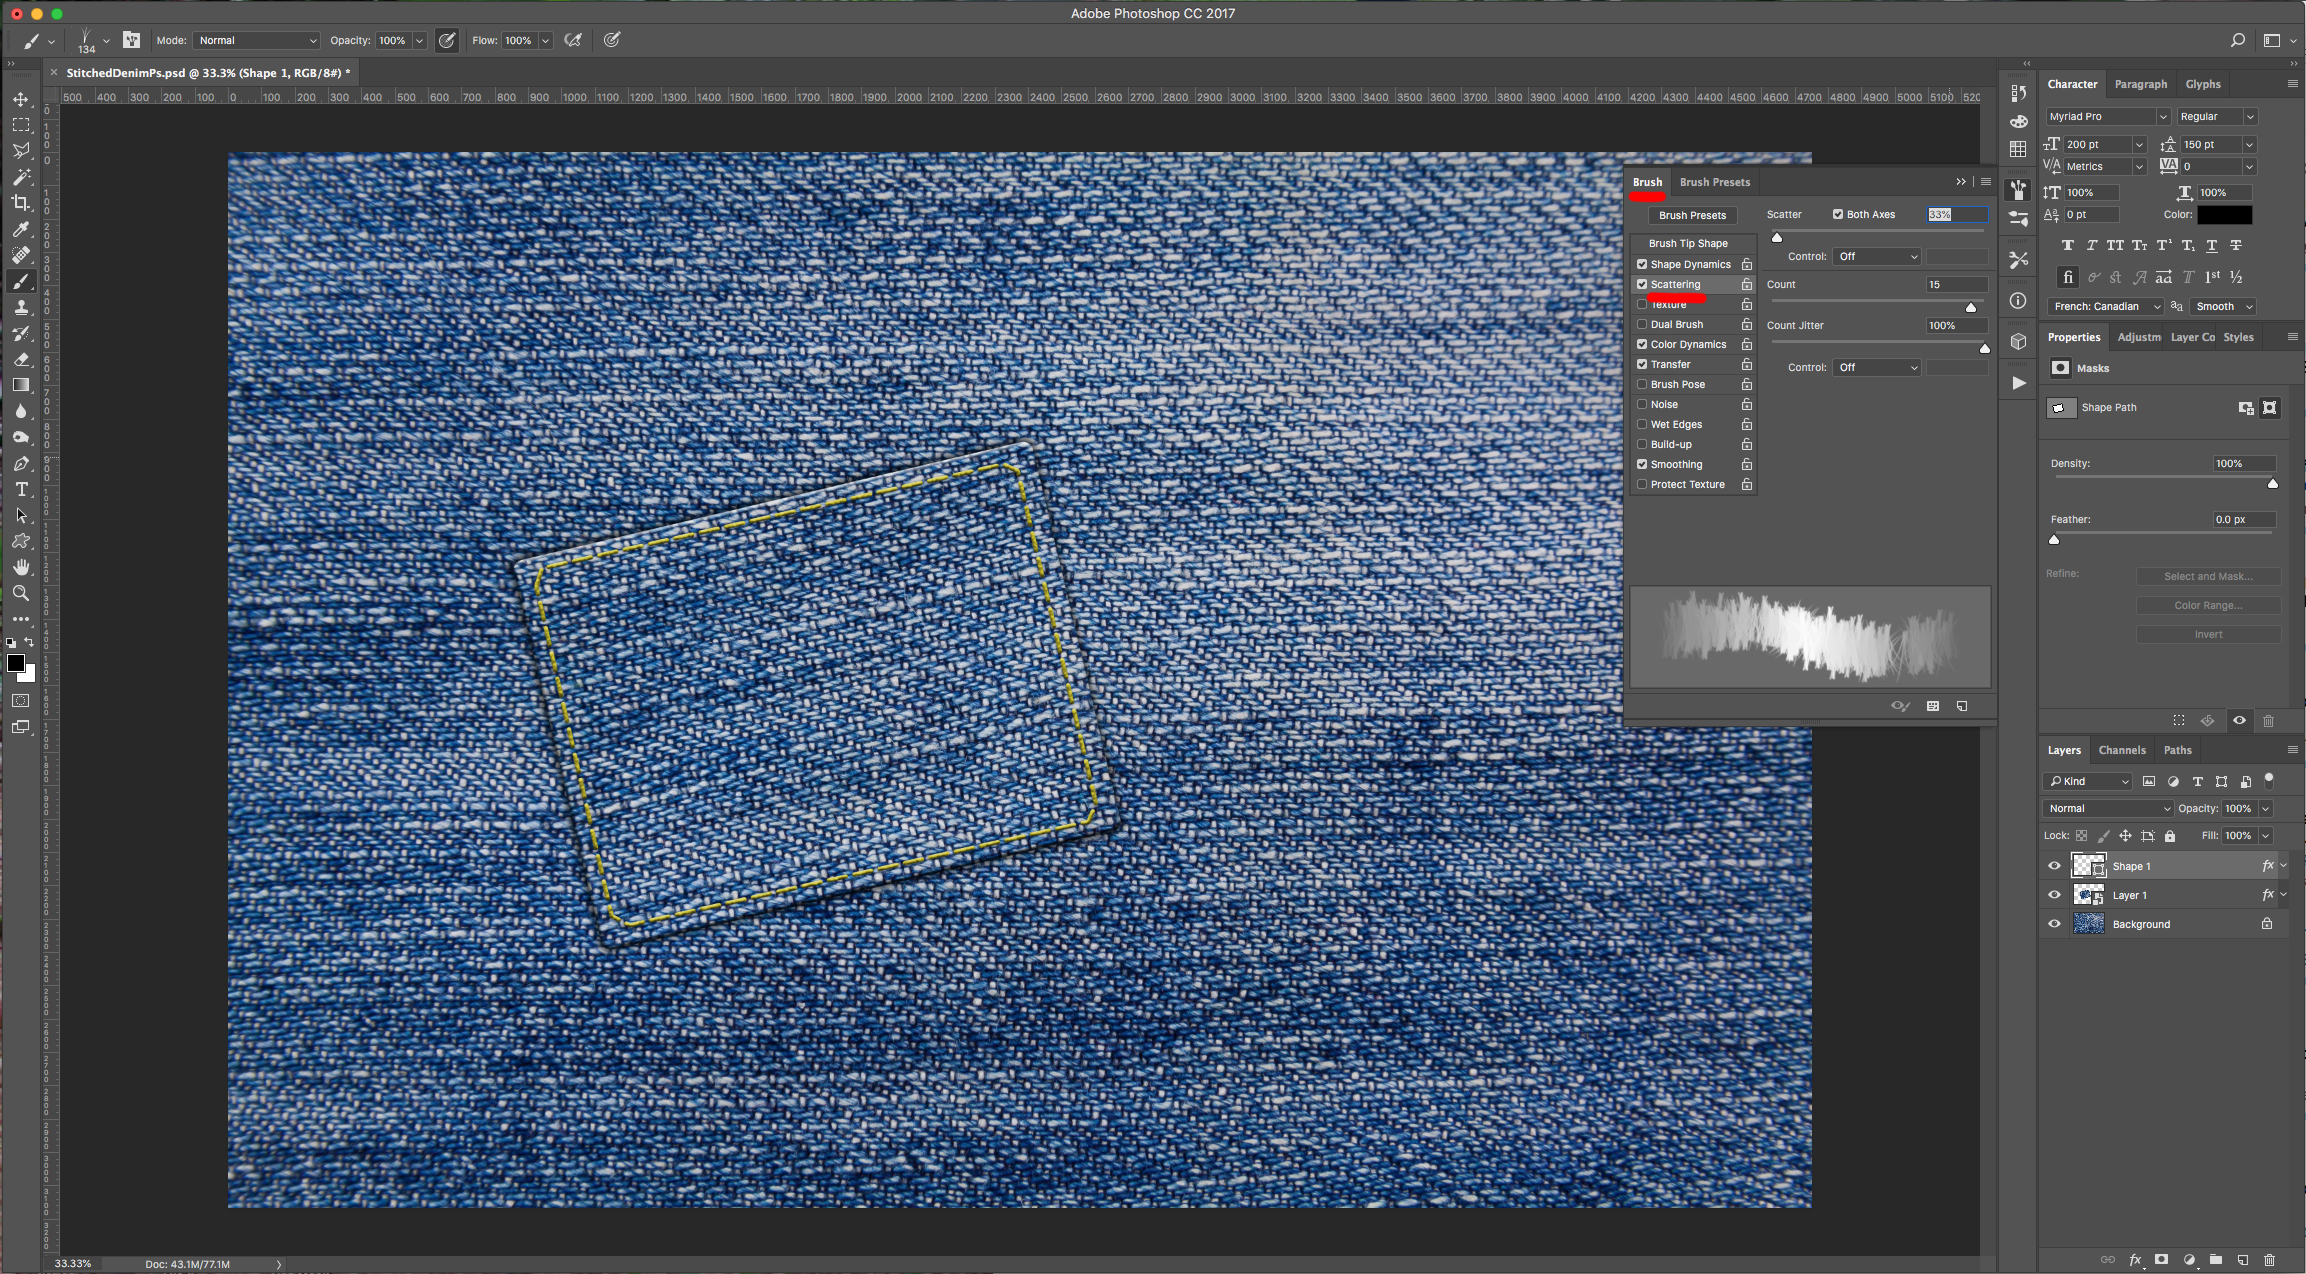
Scattering:
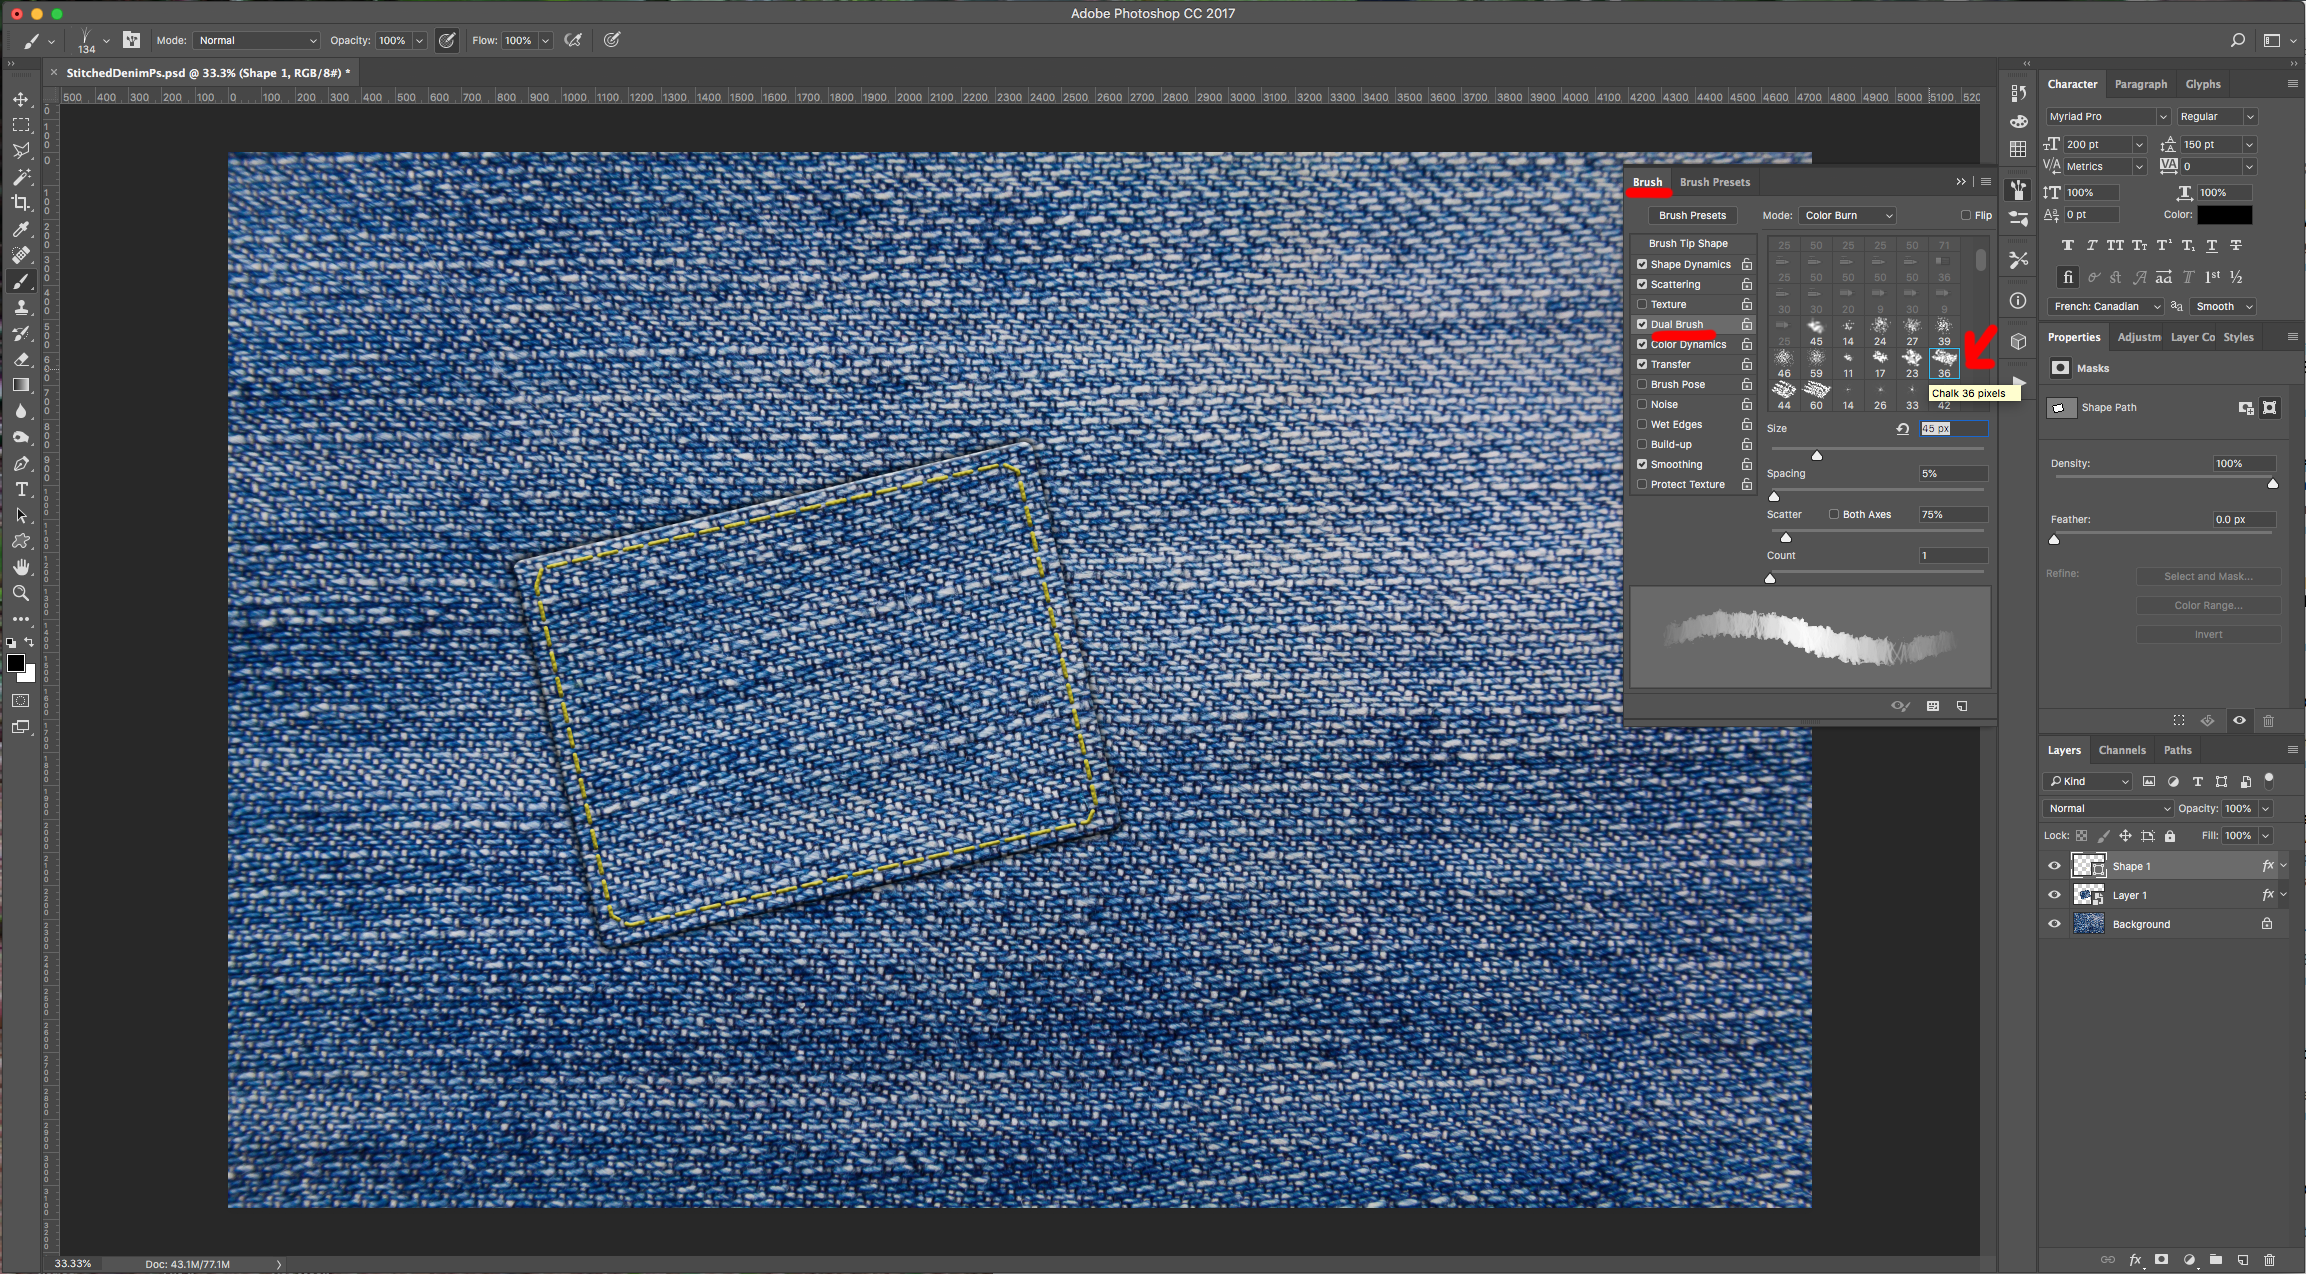
Dual Brush: (Chalk 36 pixels)
Color Dynamics:

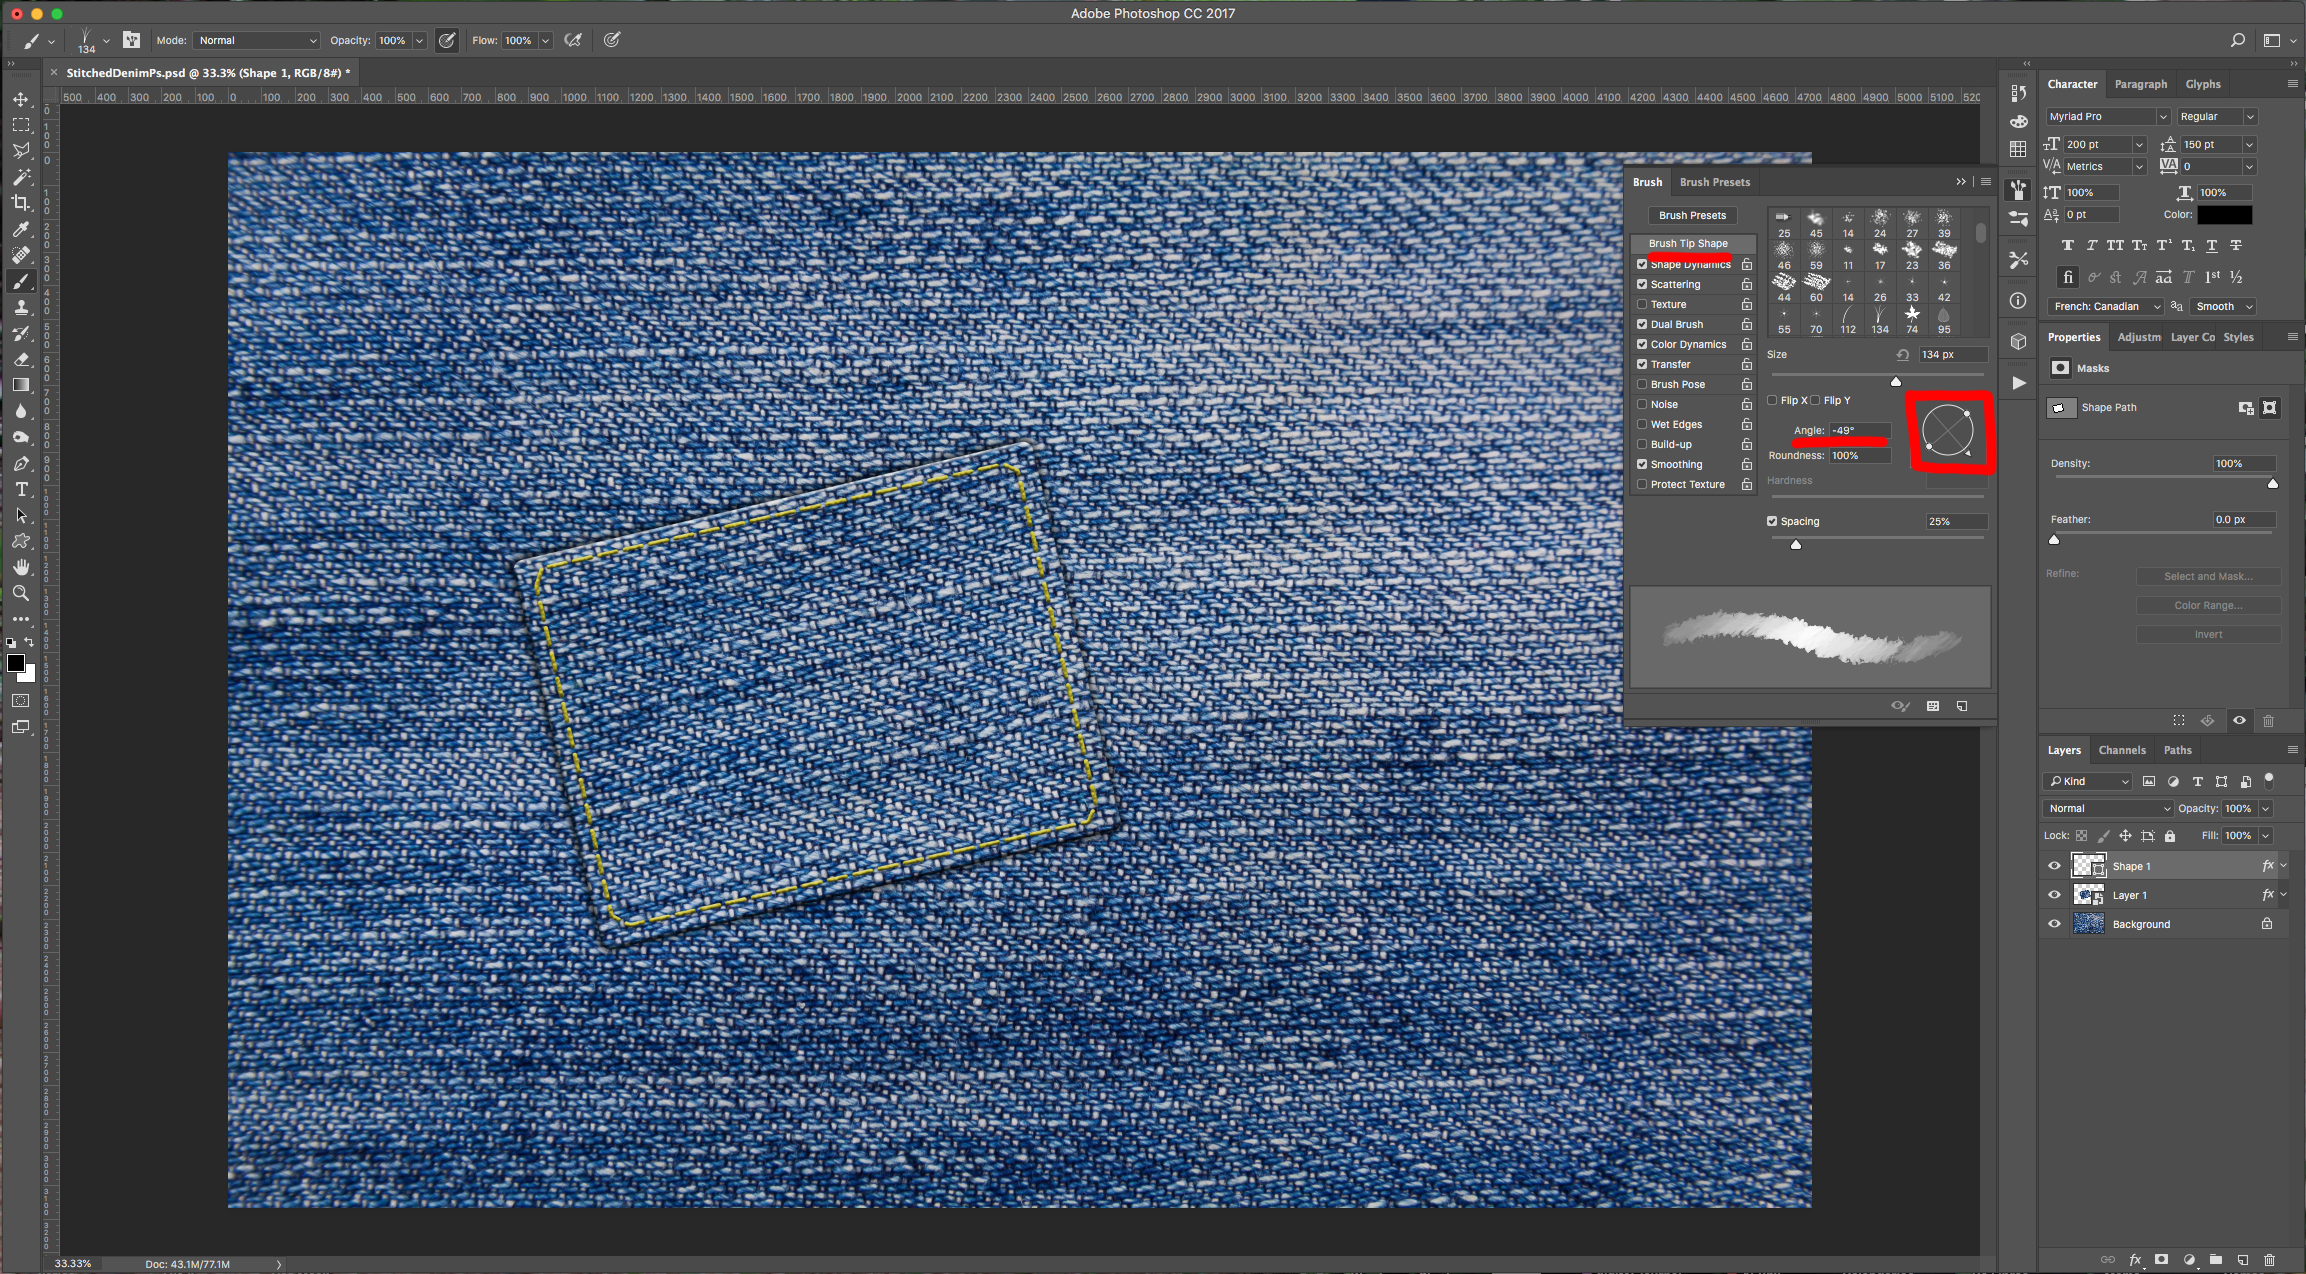
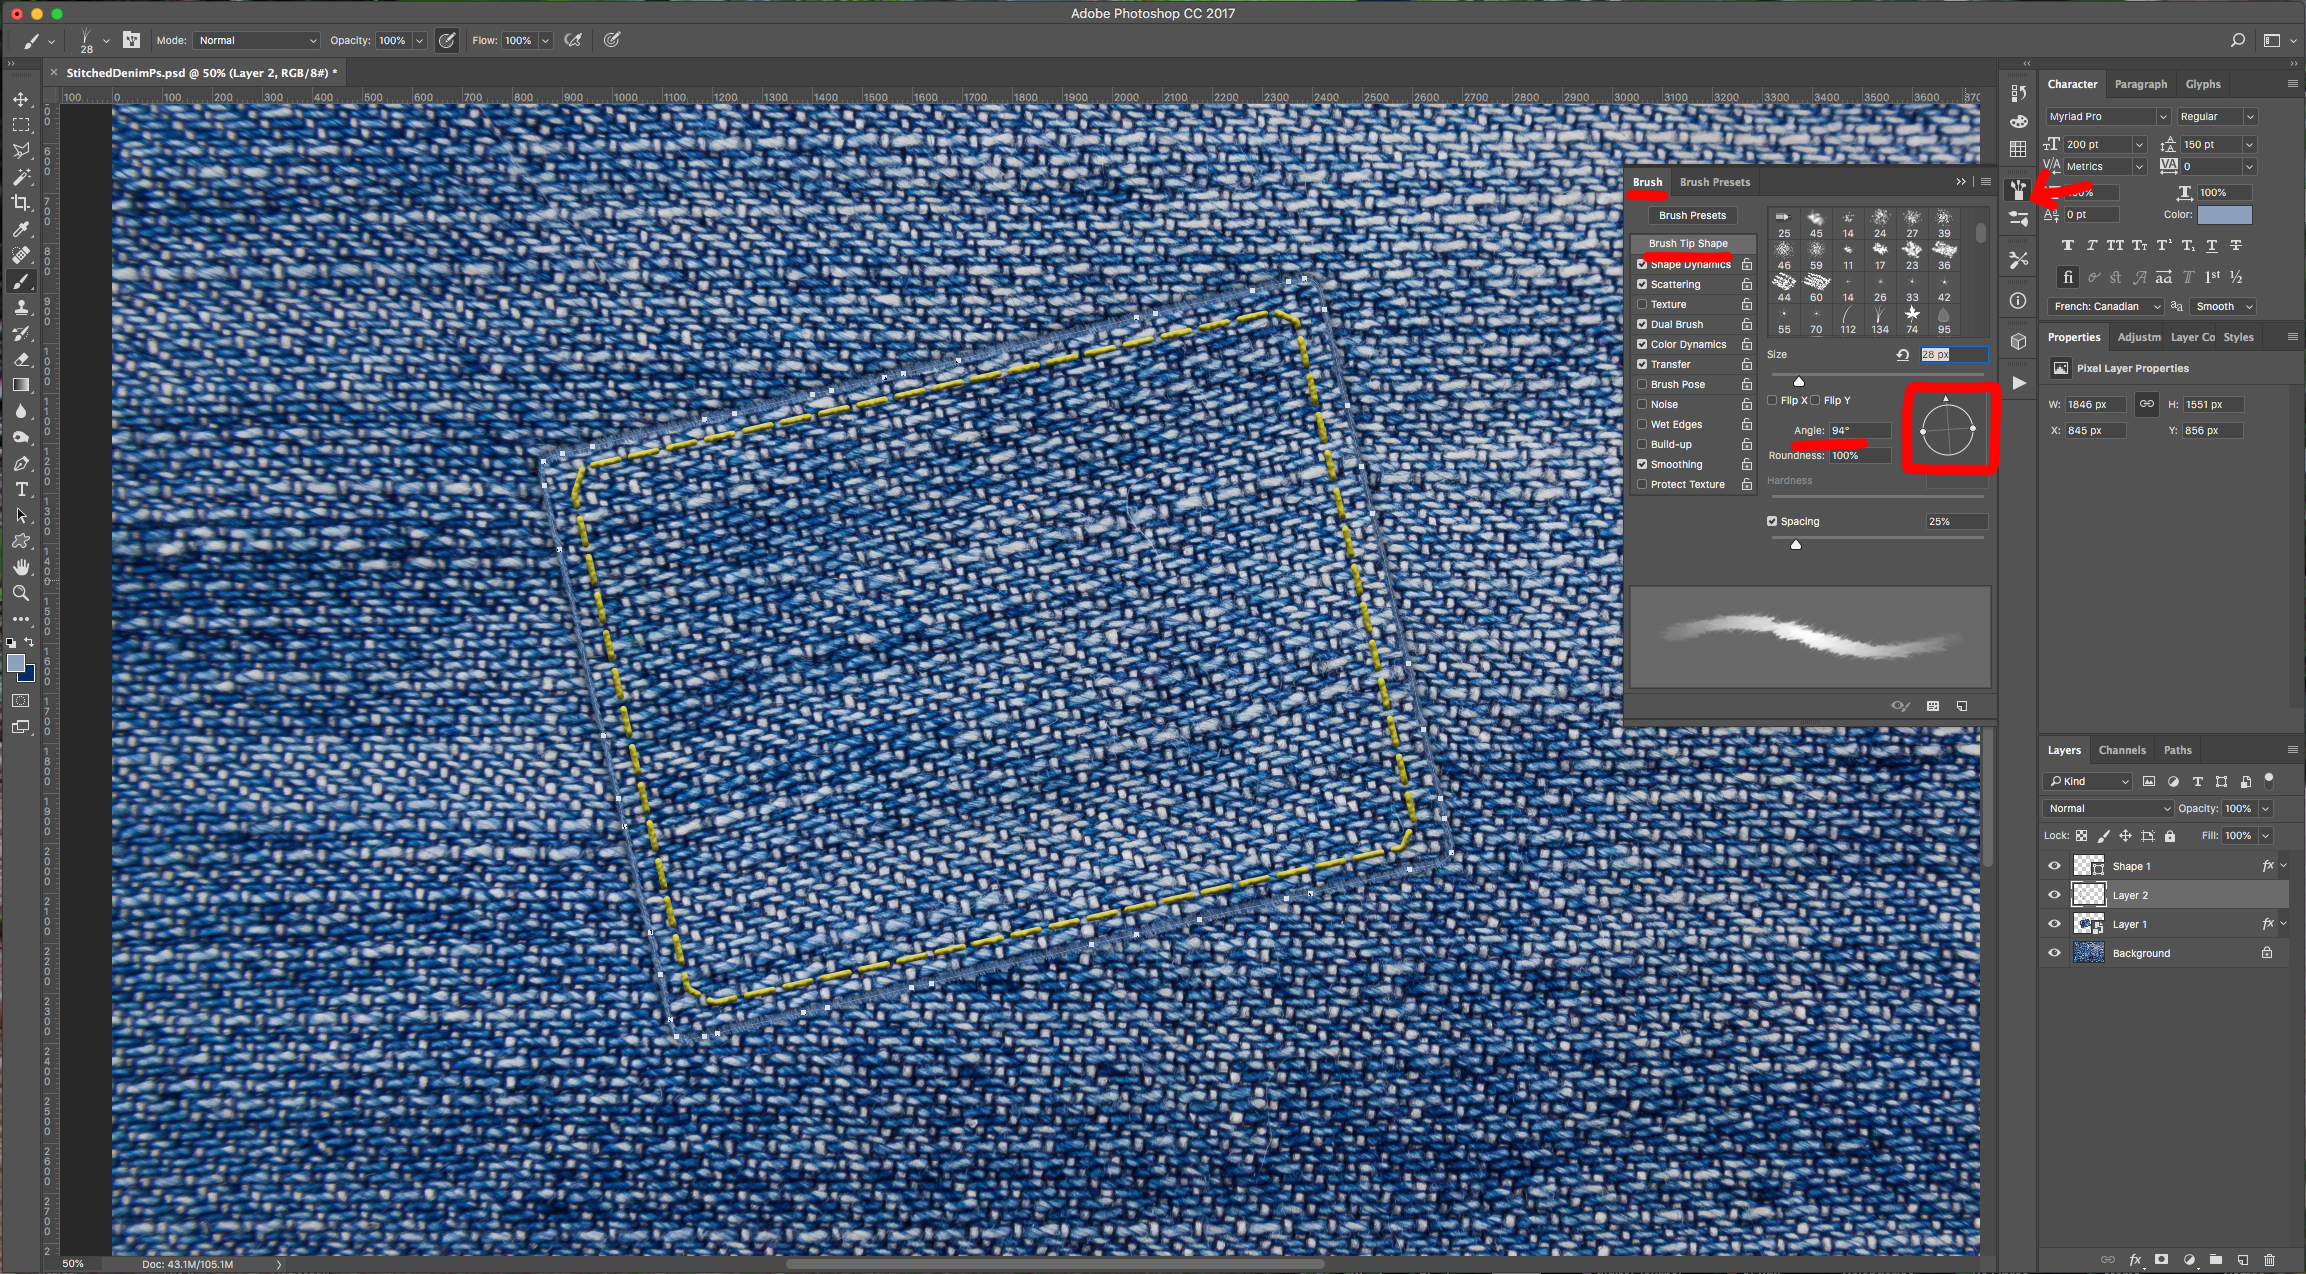
13 - In the “Brush Tip Size” Tab move the “Angle” to change the direction of the brush and make it look more realistic.
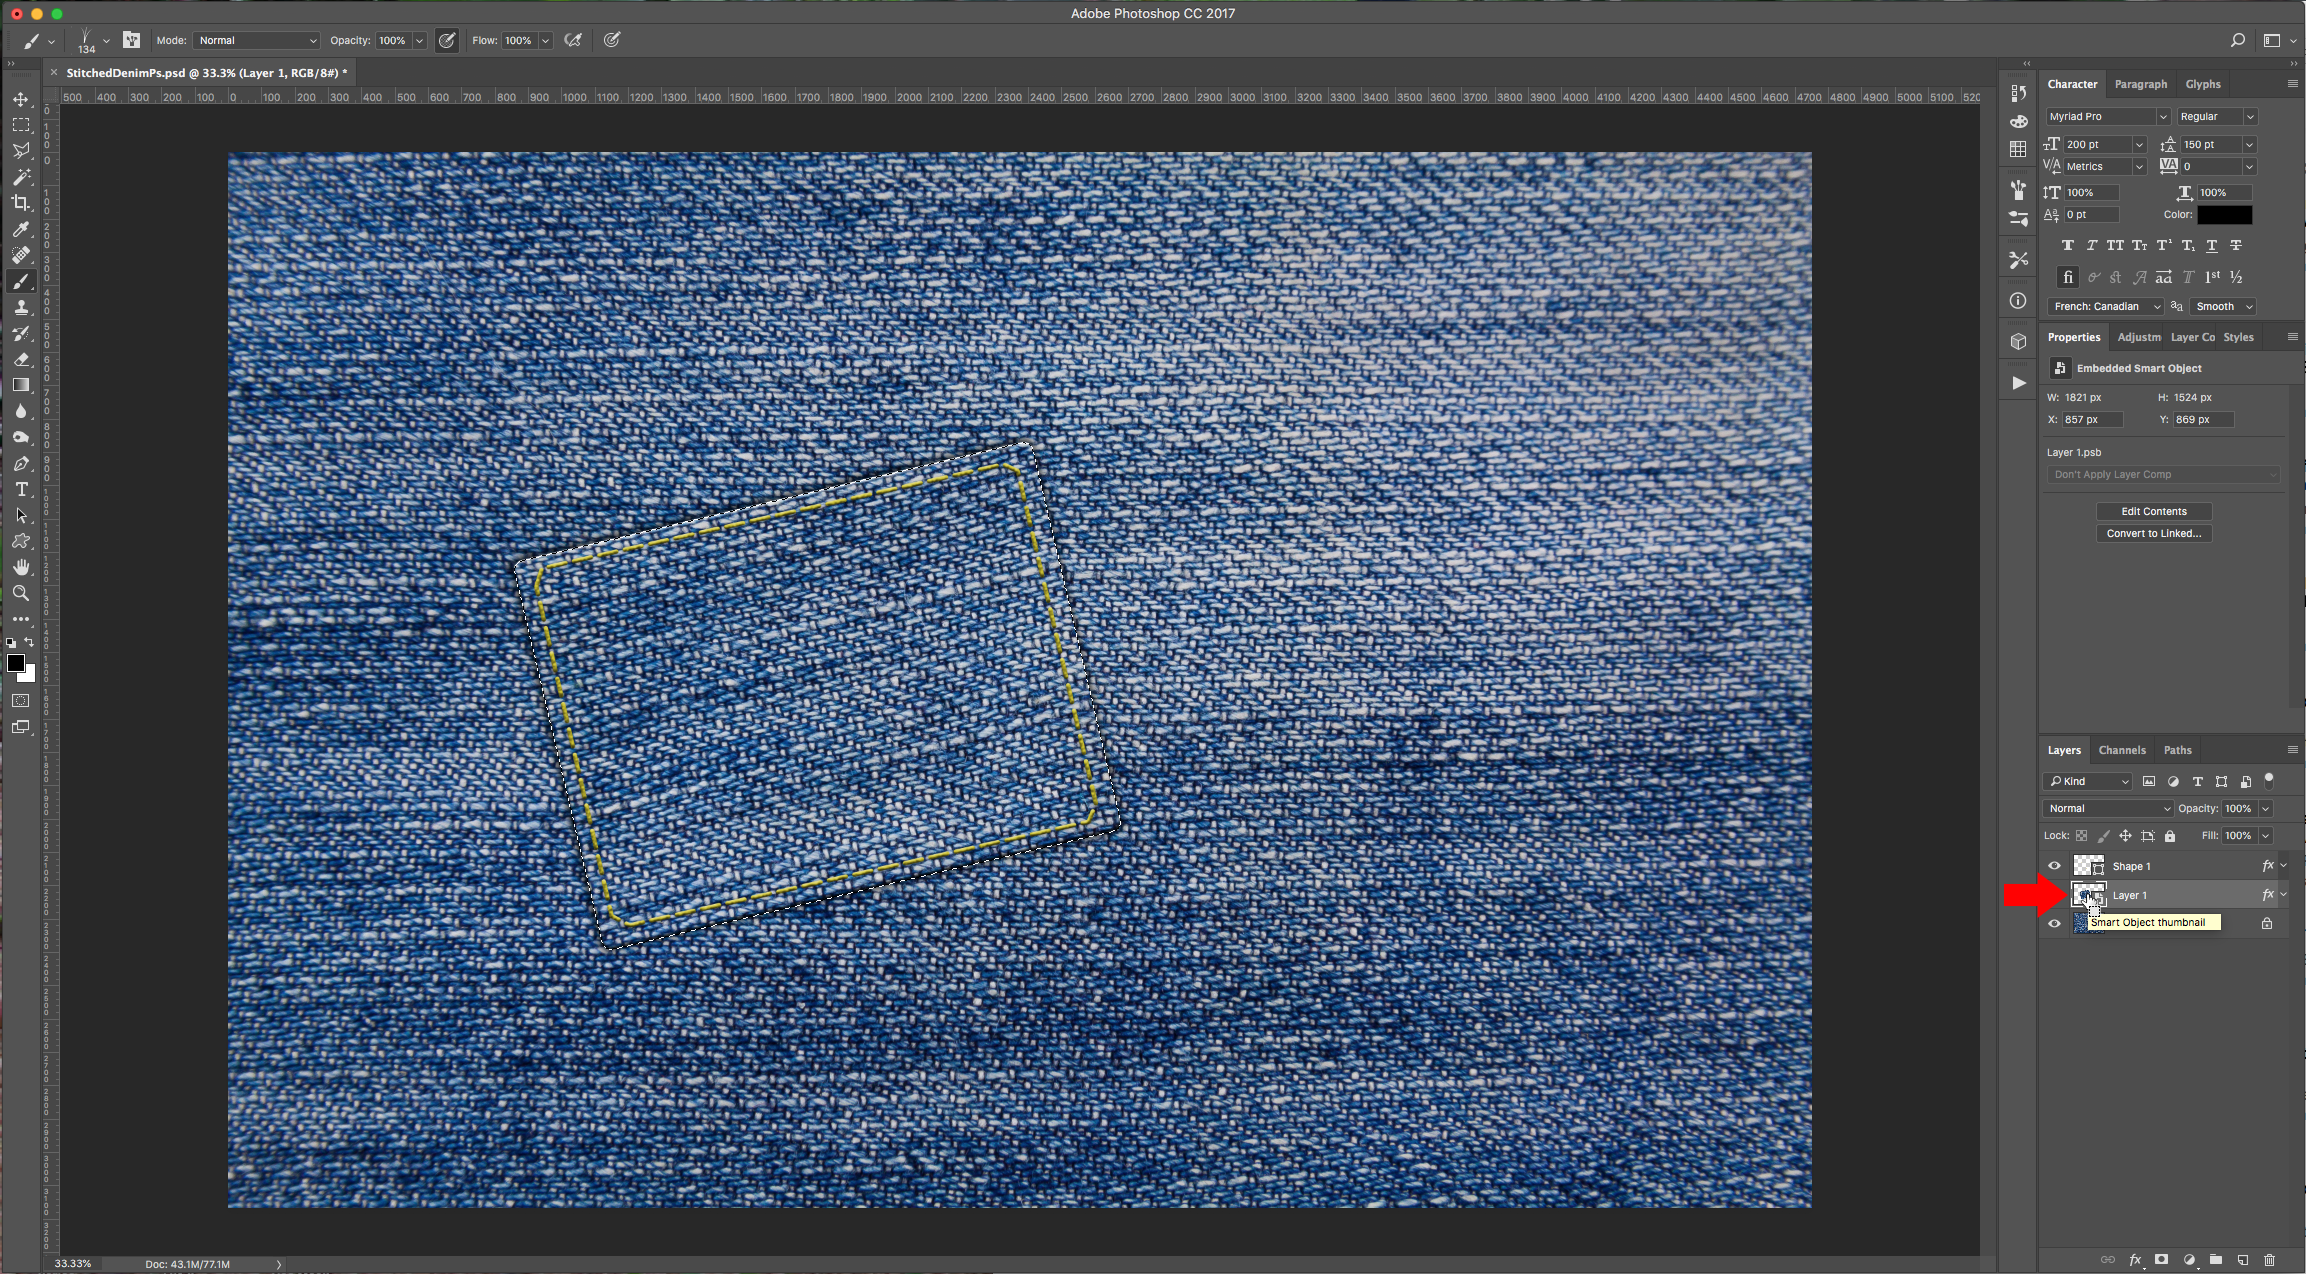
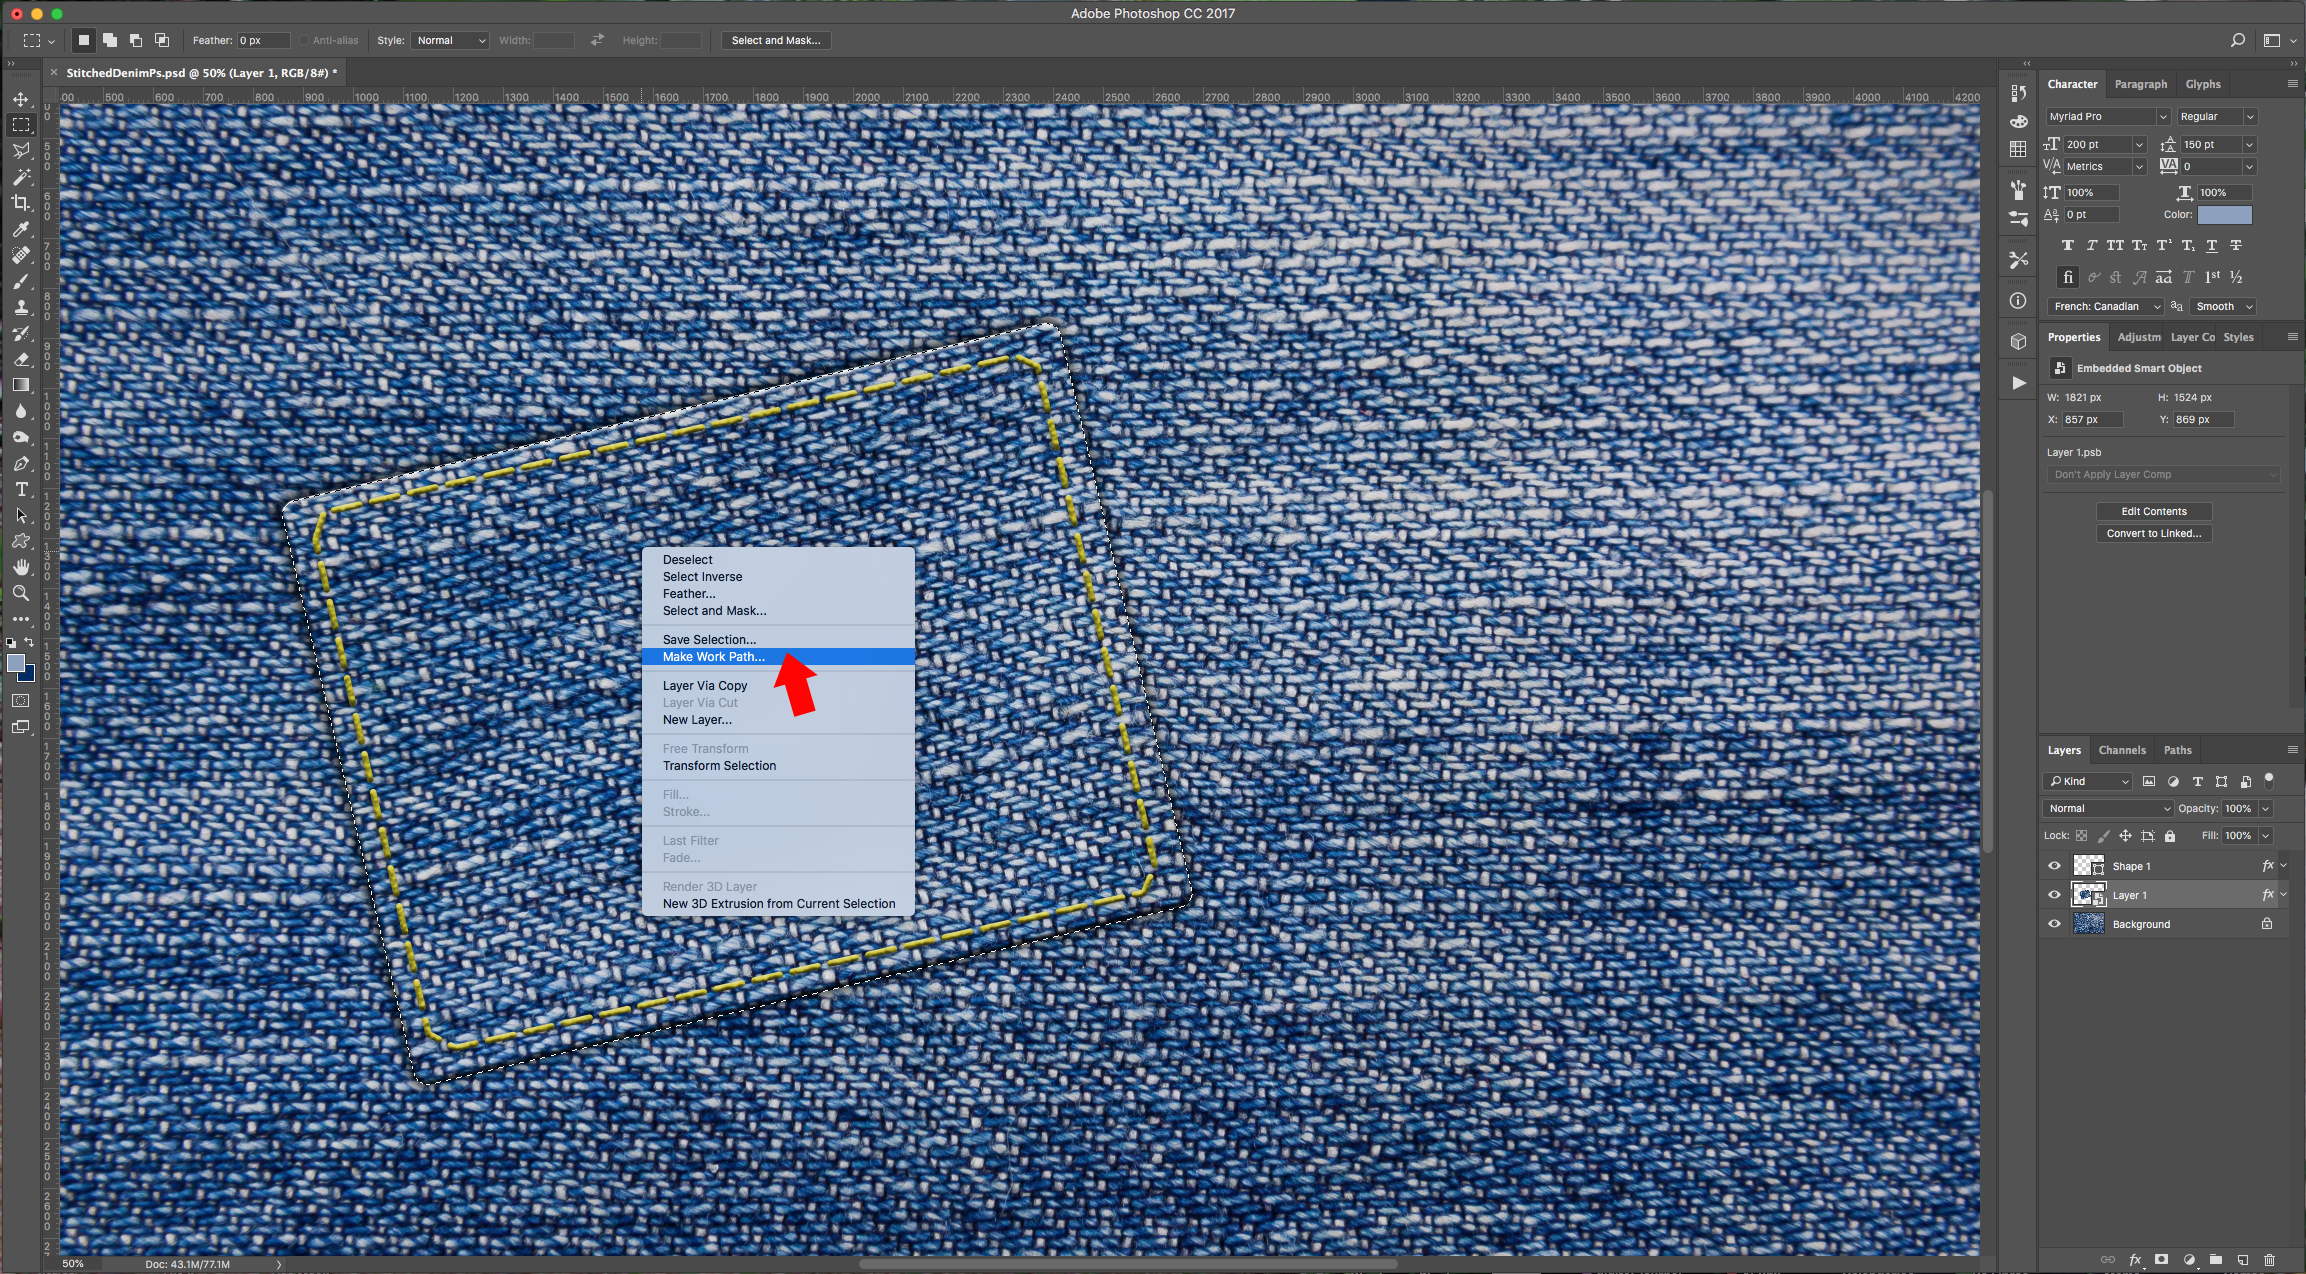
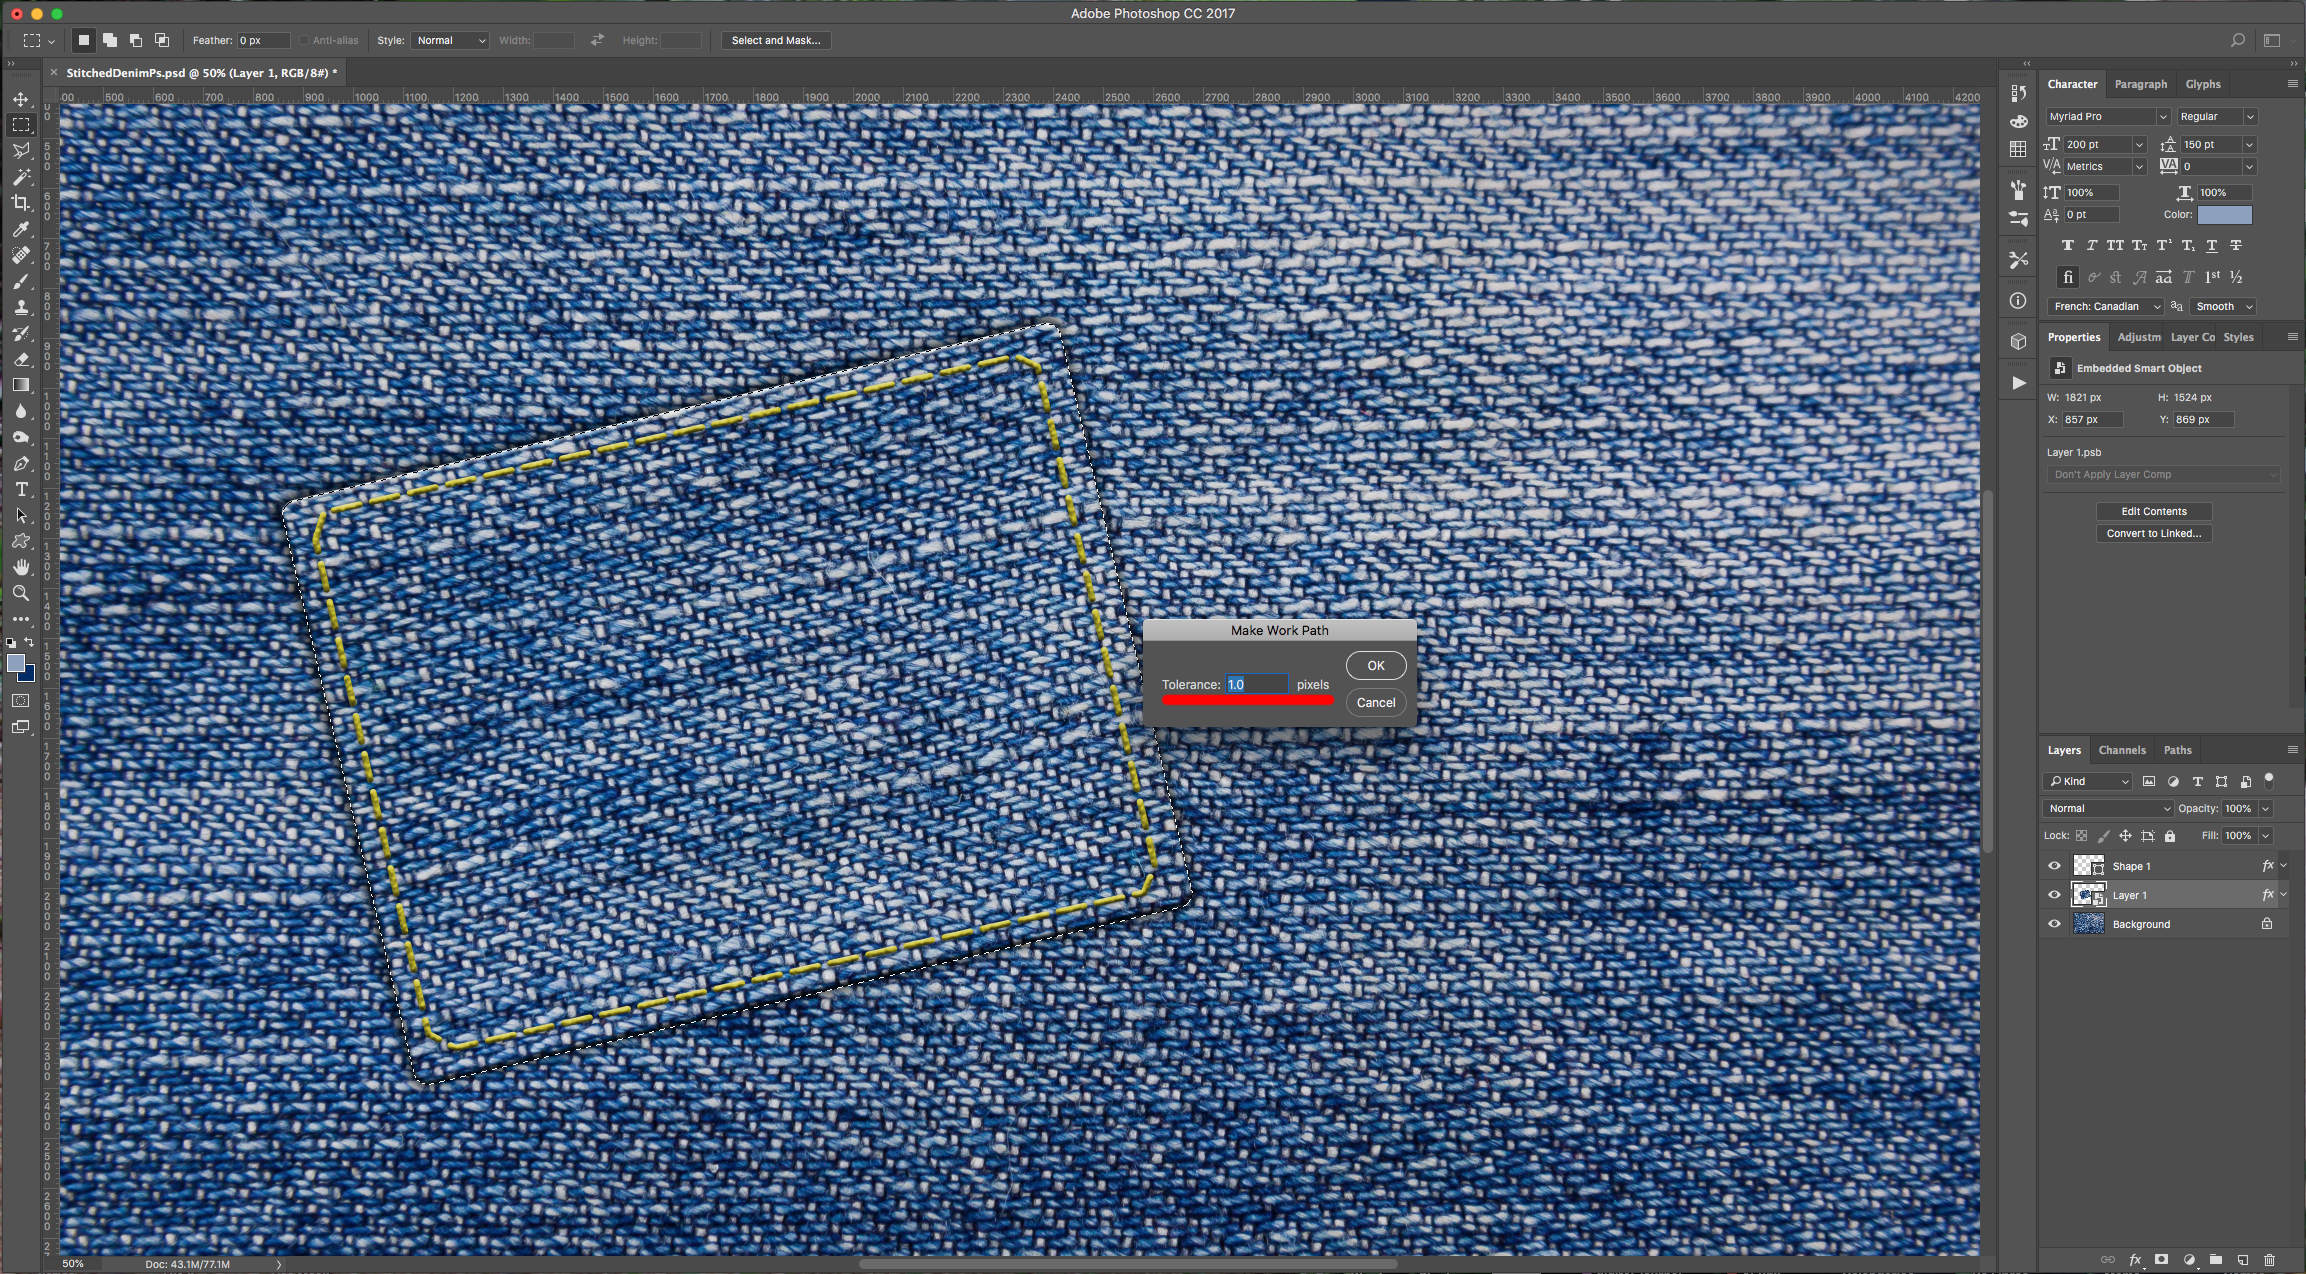
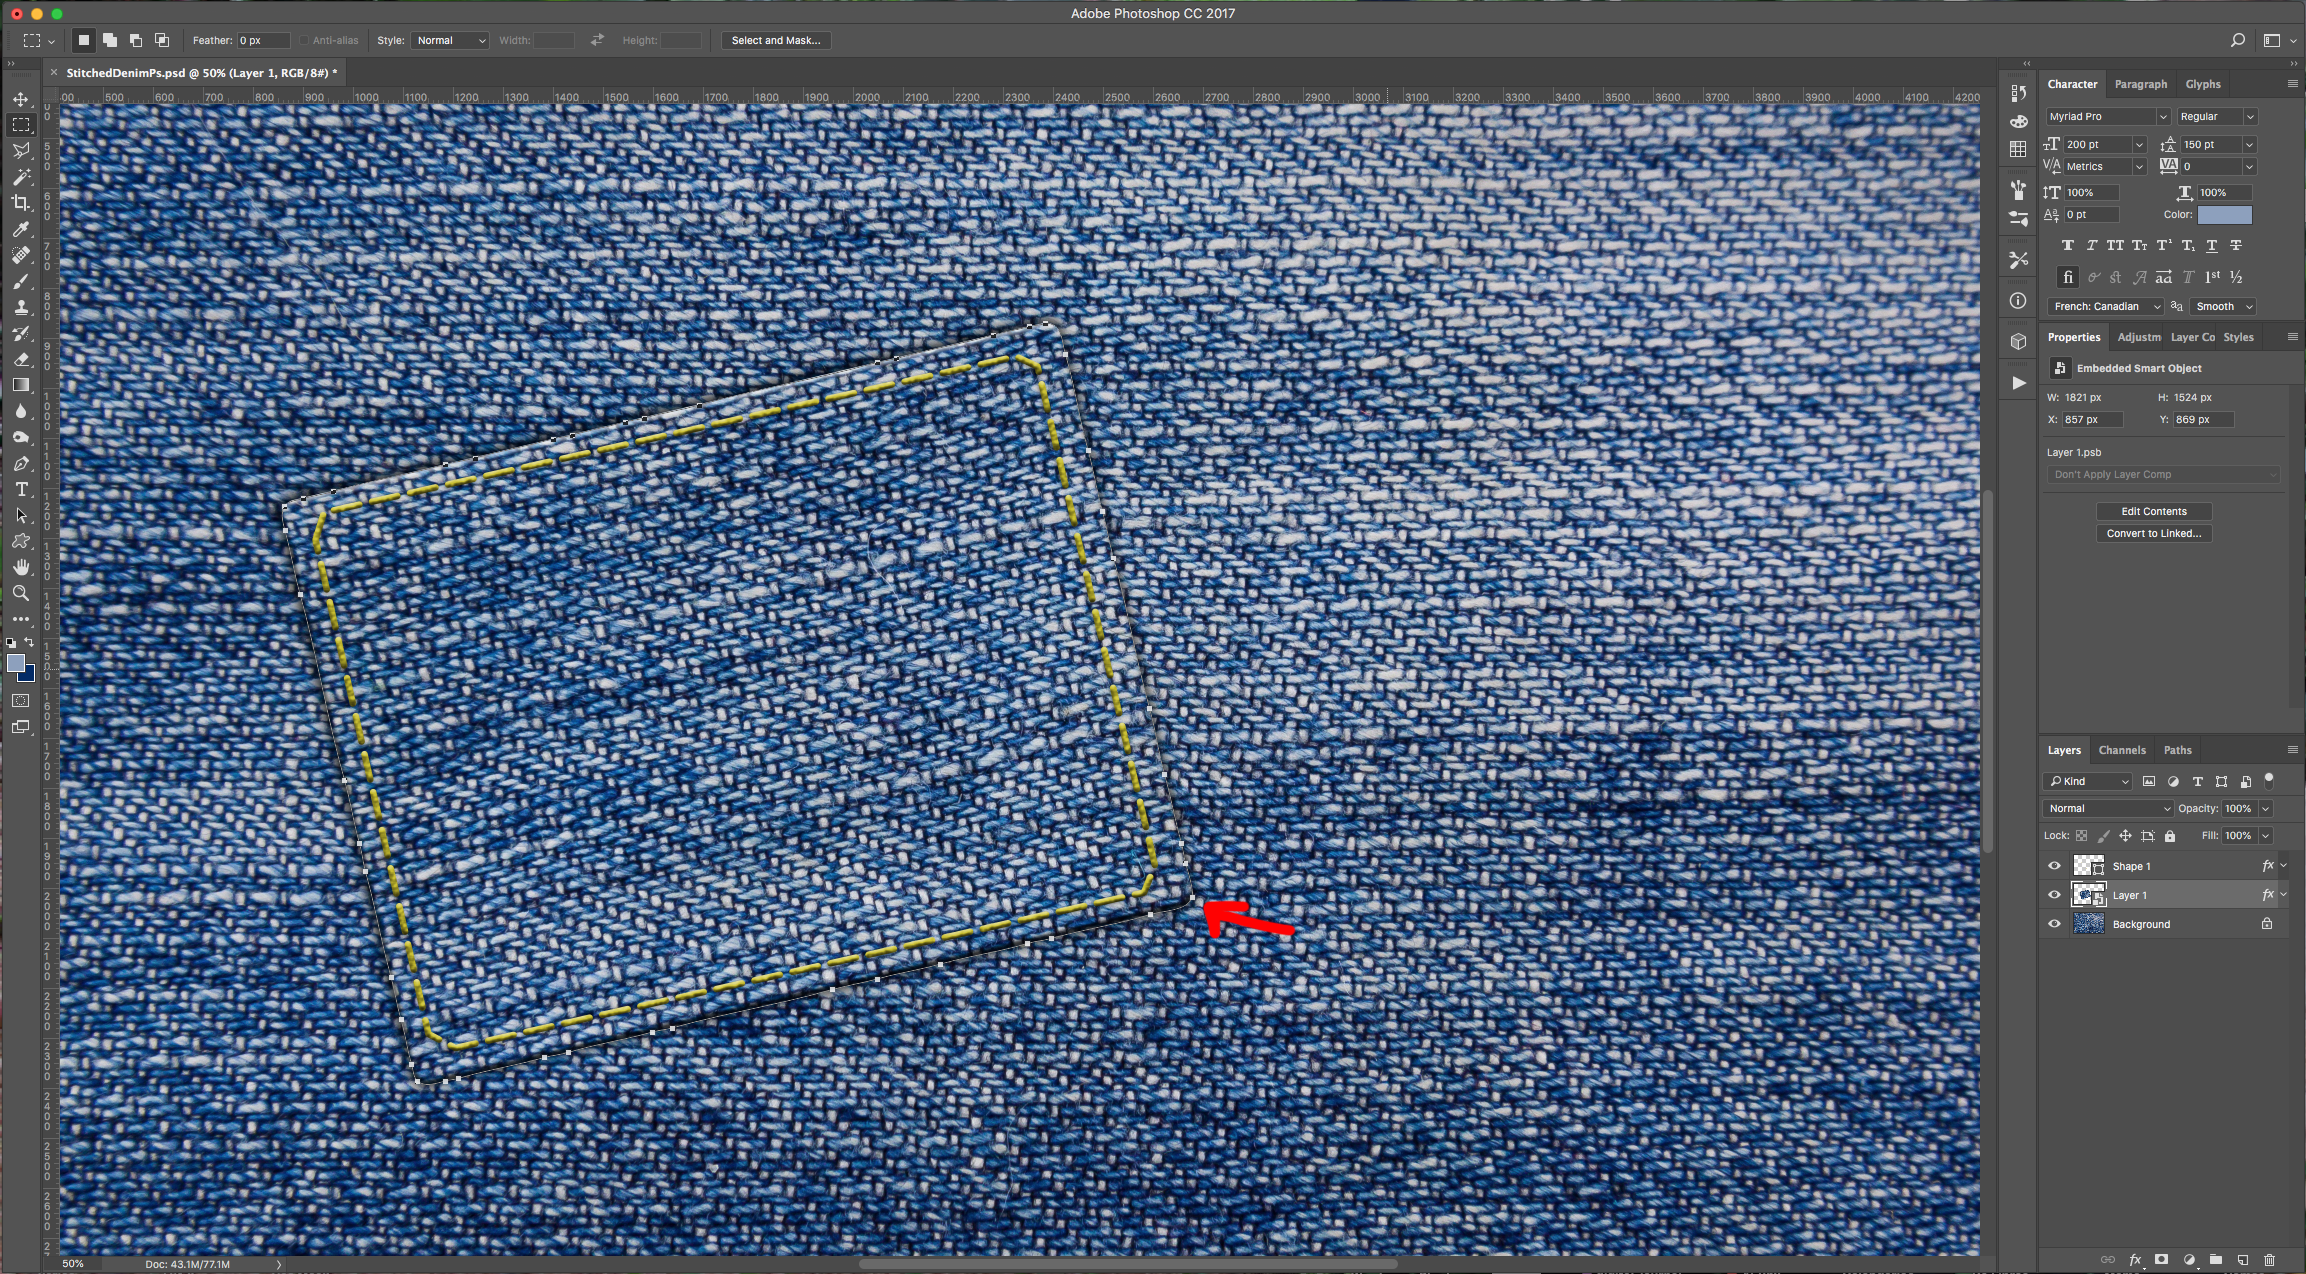
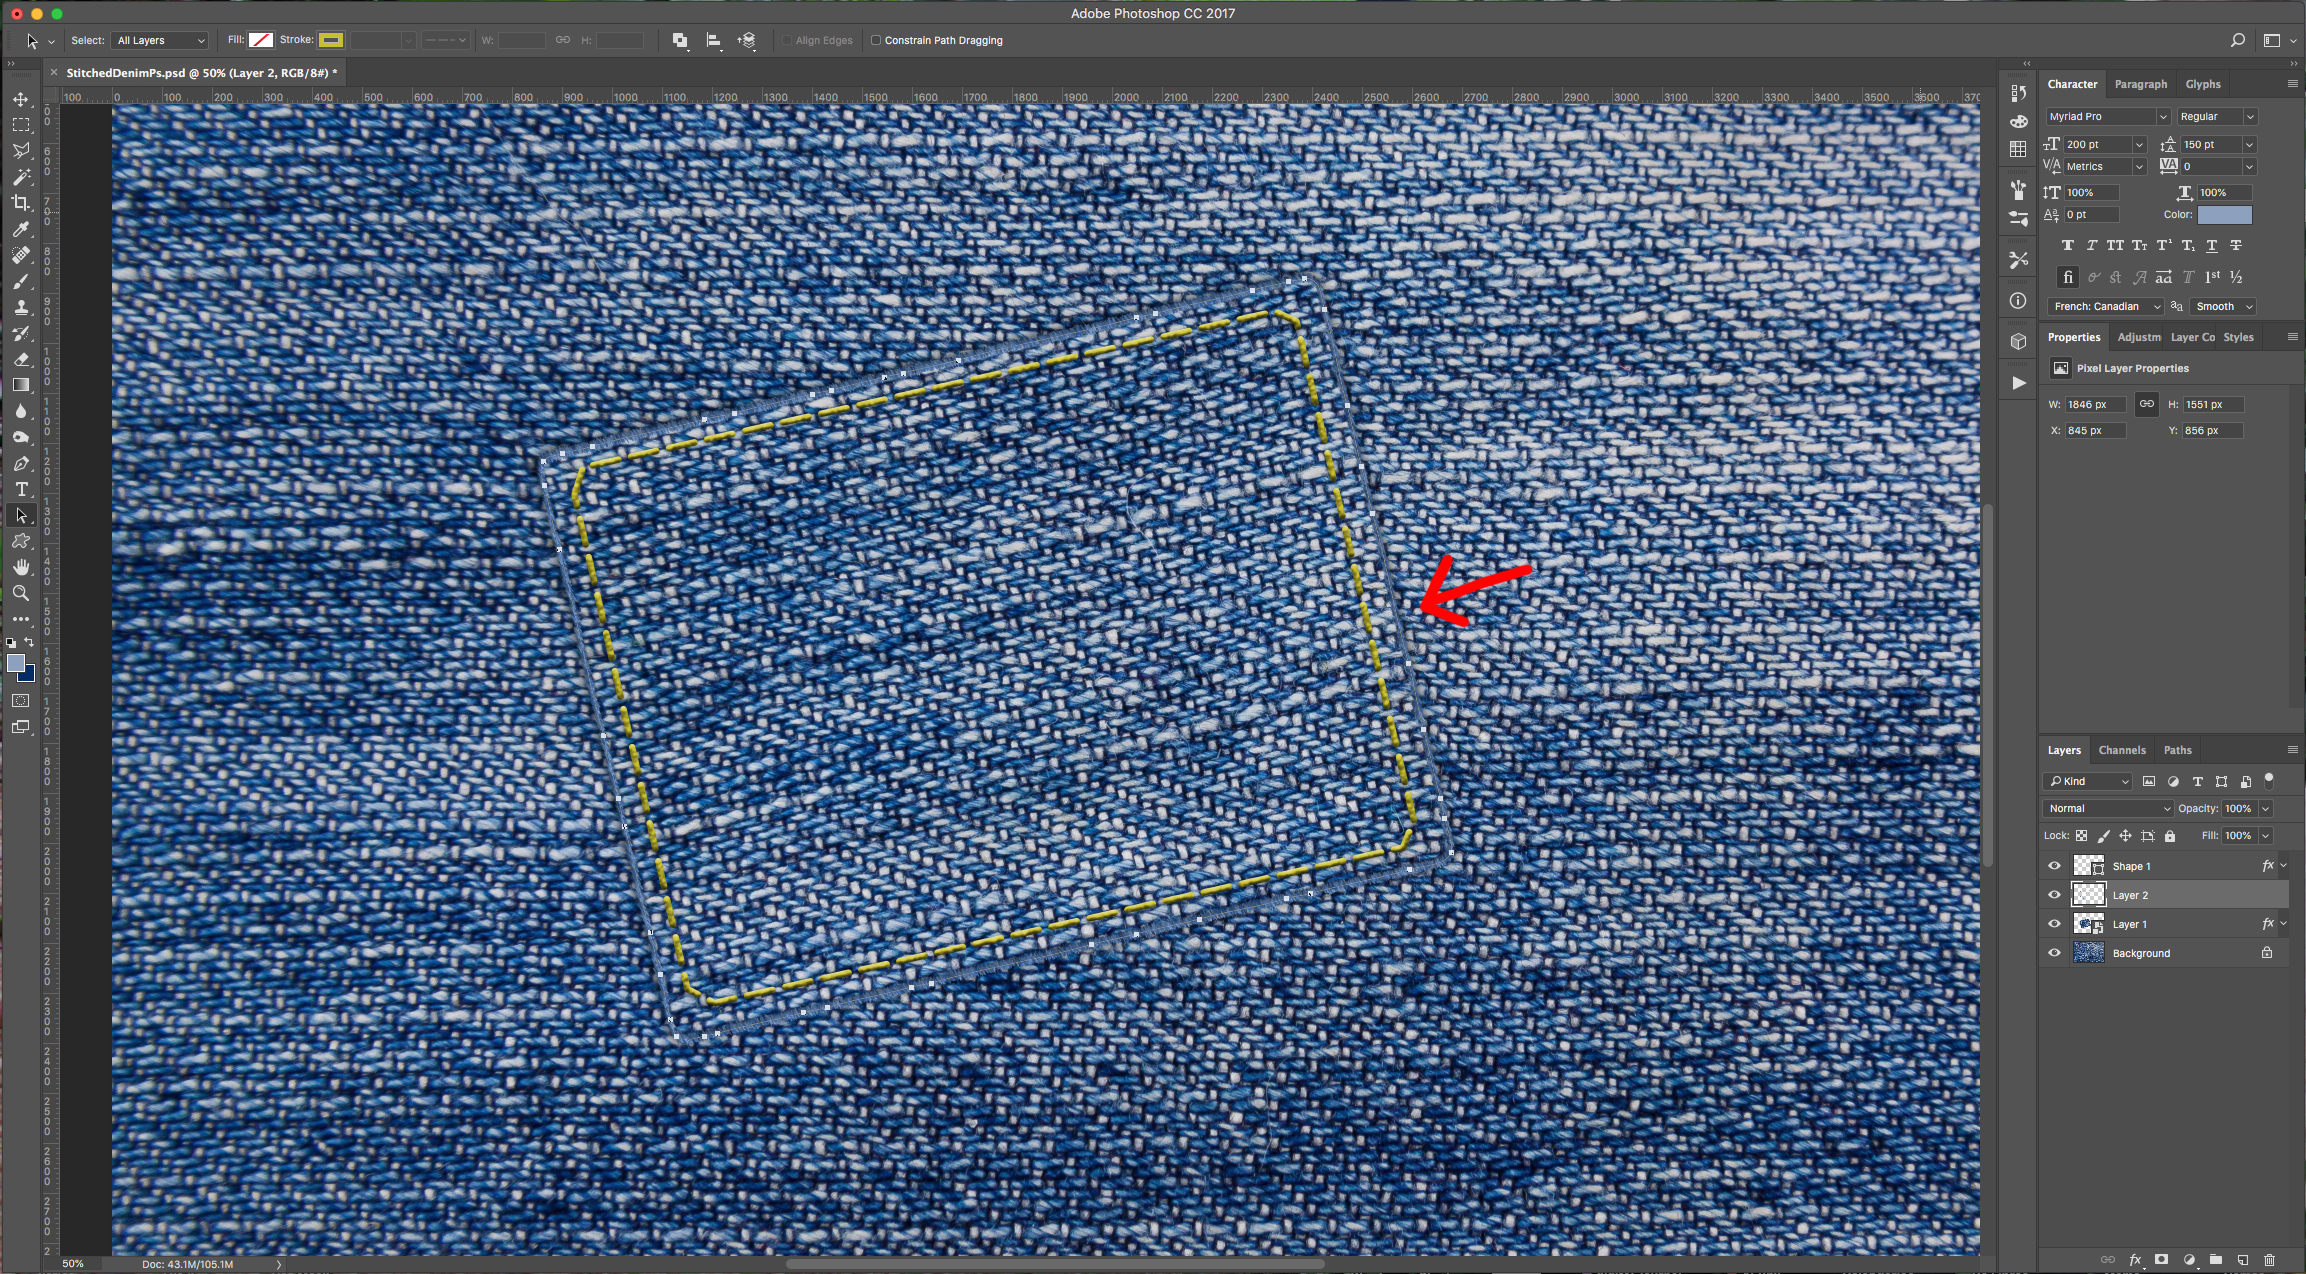
14 - Control-click on top of the “Smart Object” Thumbnail to make a selection, right-click on top of it and choose “Make Work Path”. Use a 1.0 Pixel “Tolerance” and click “OK”.
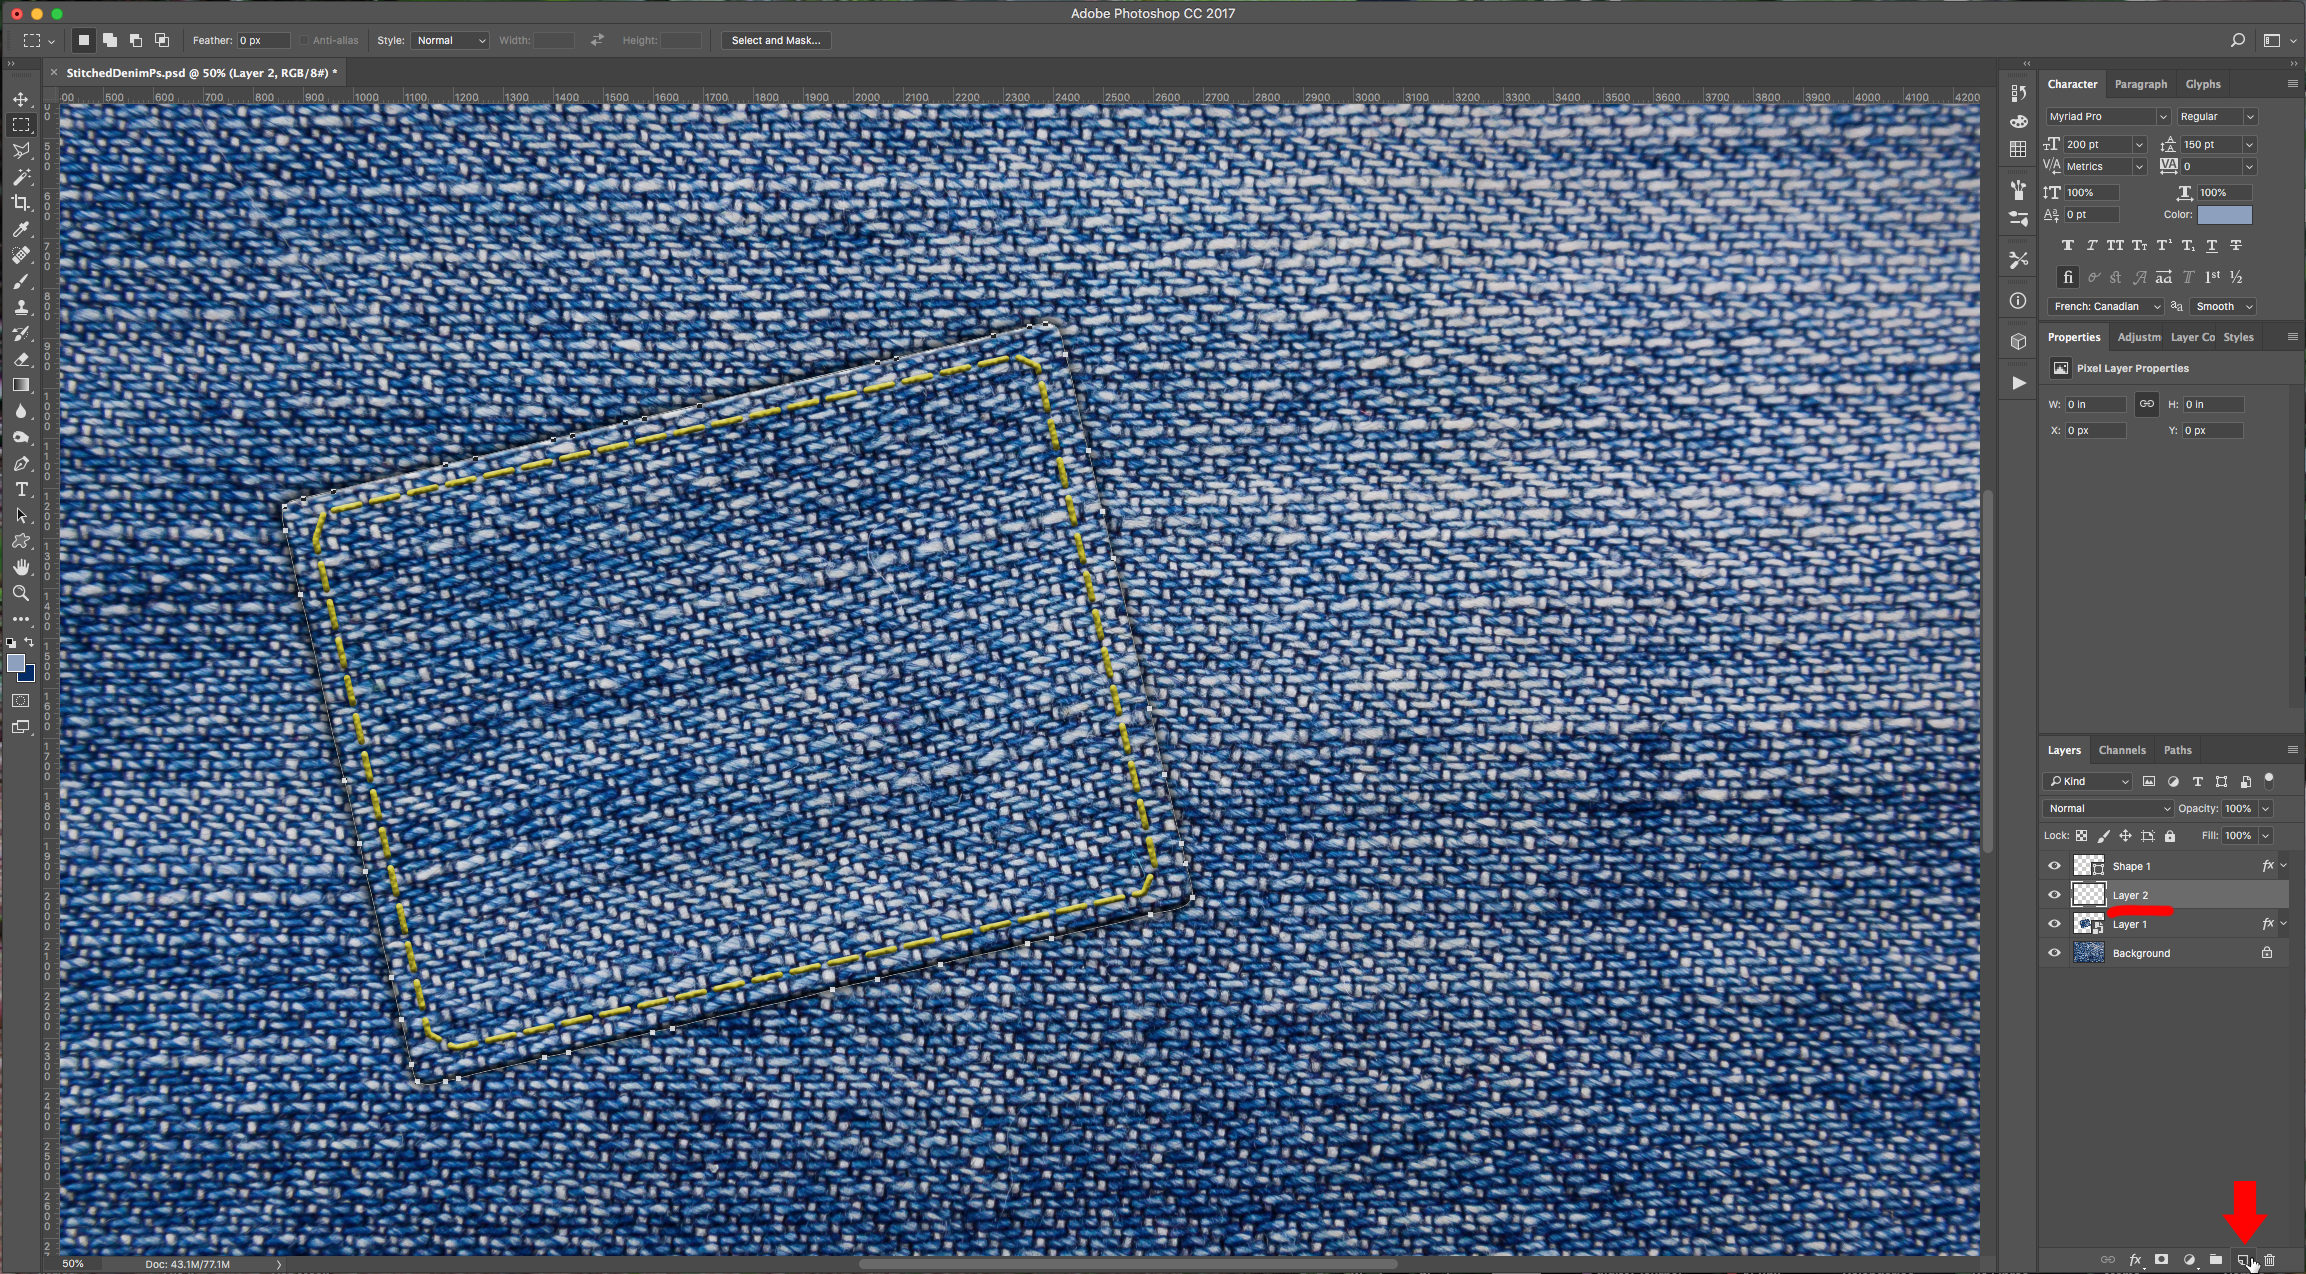
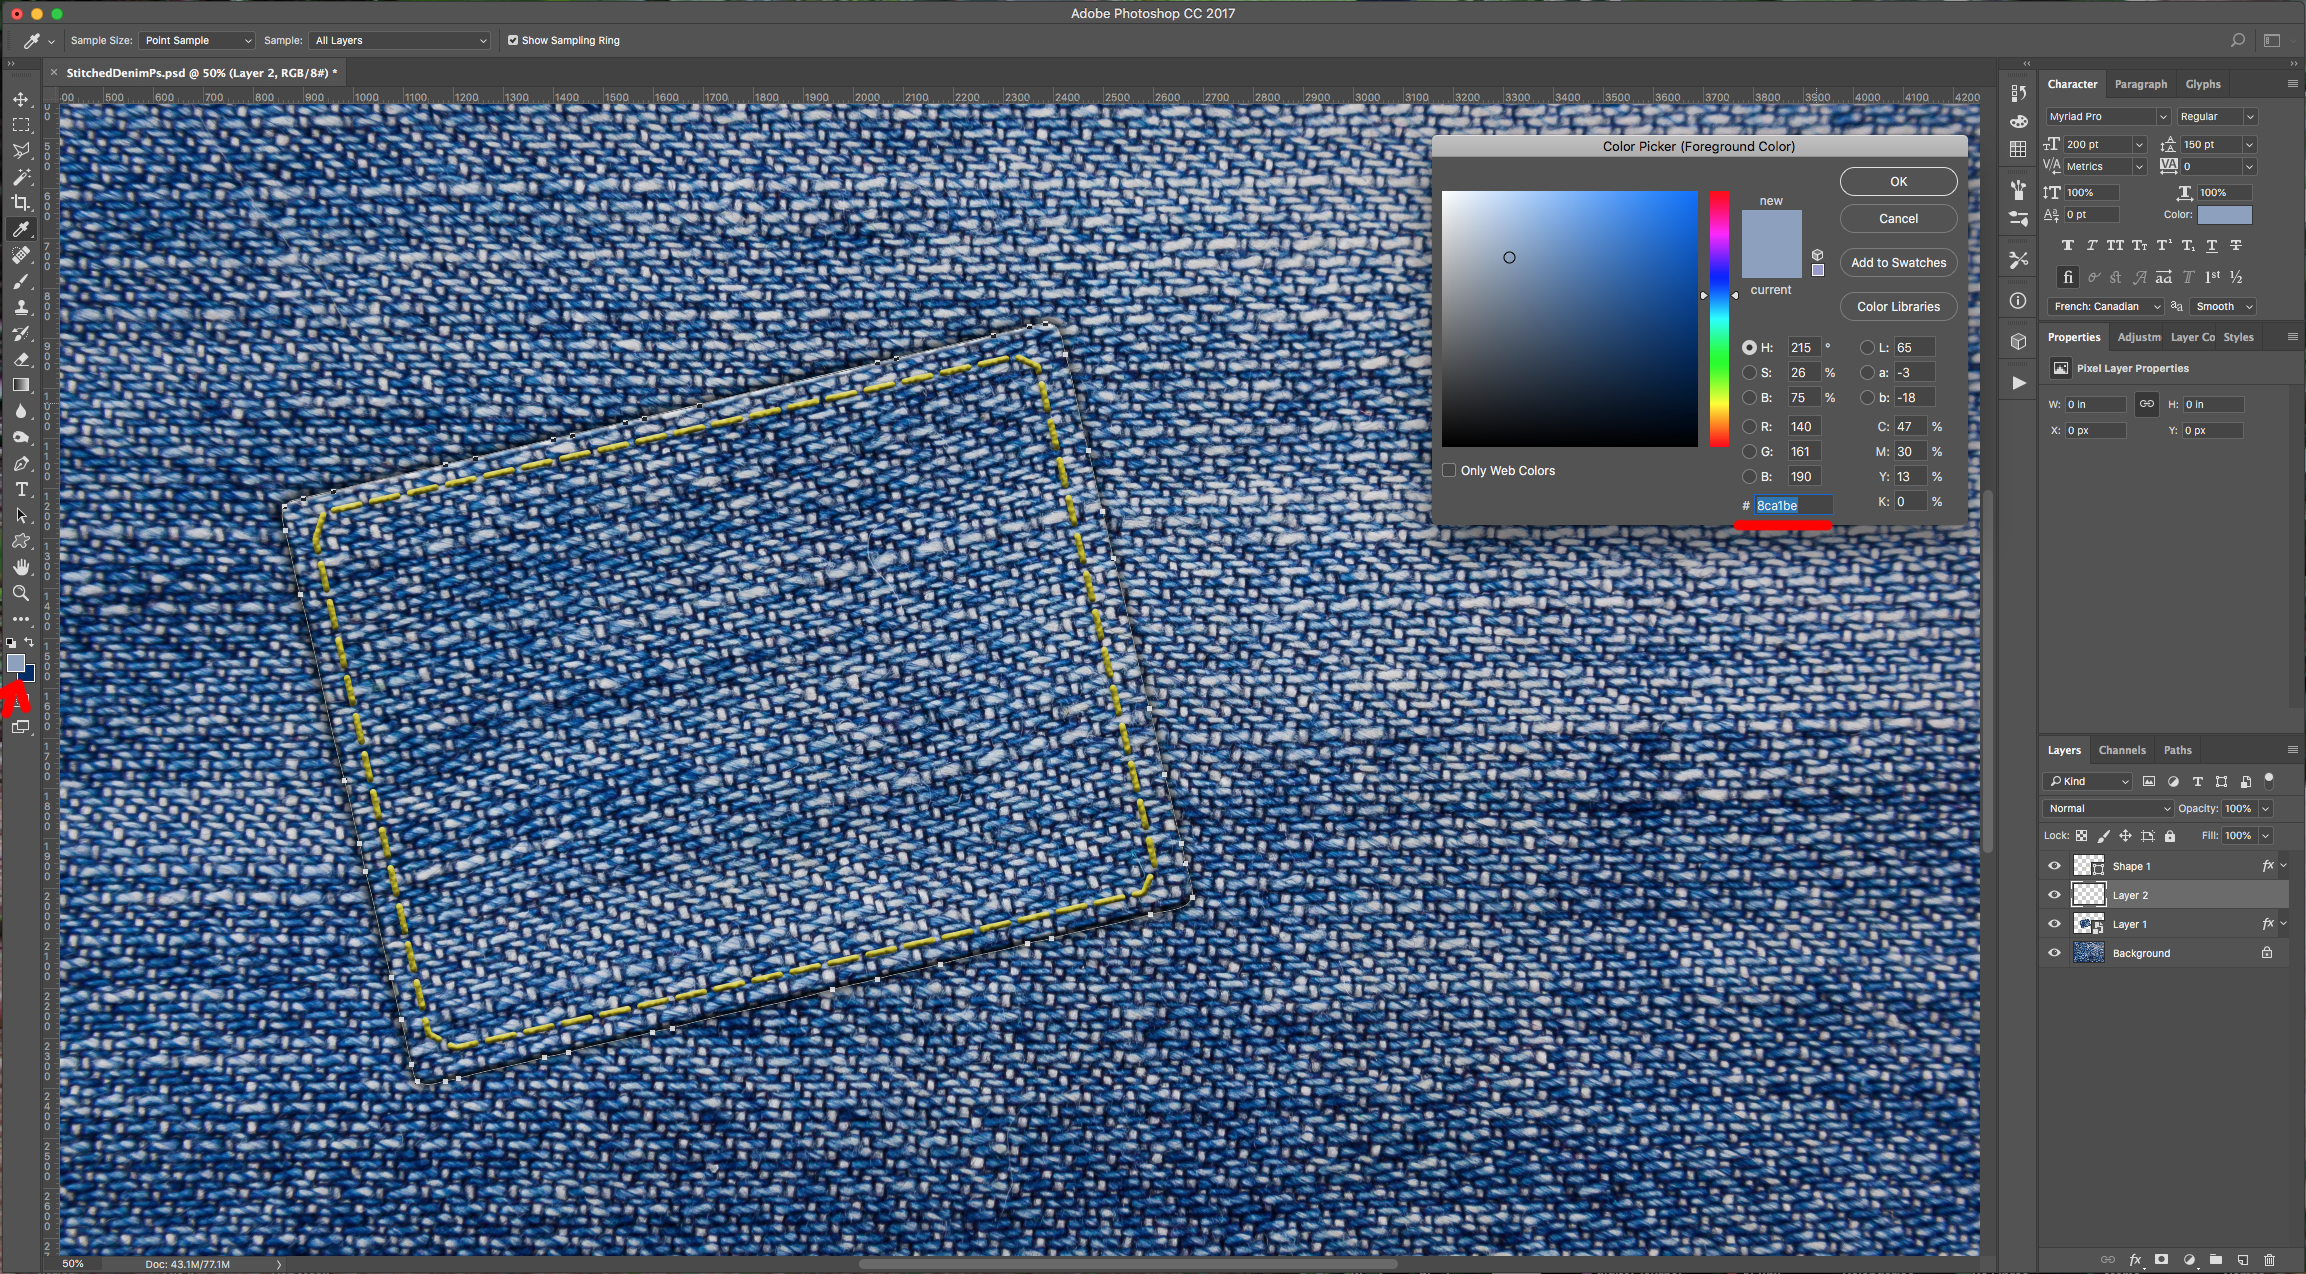
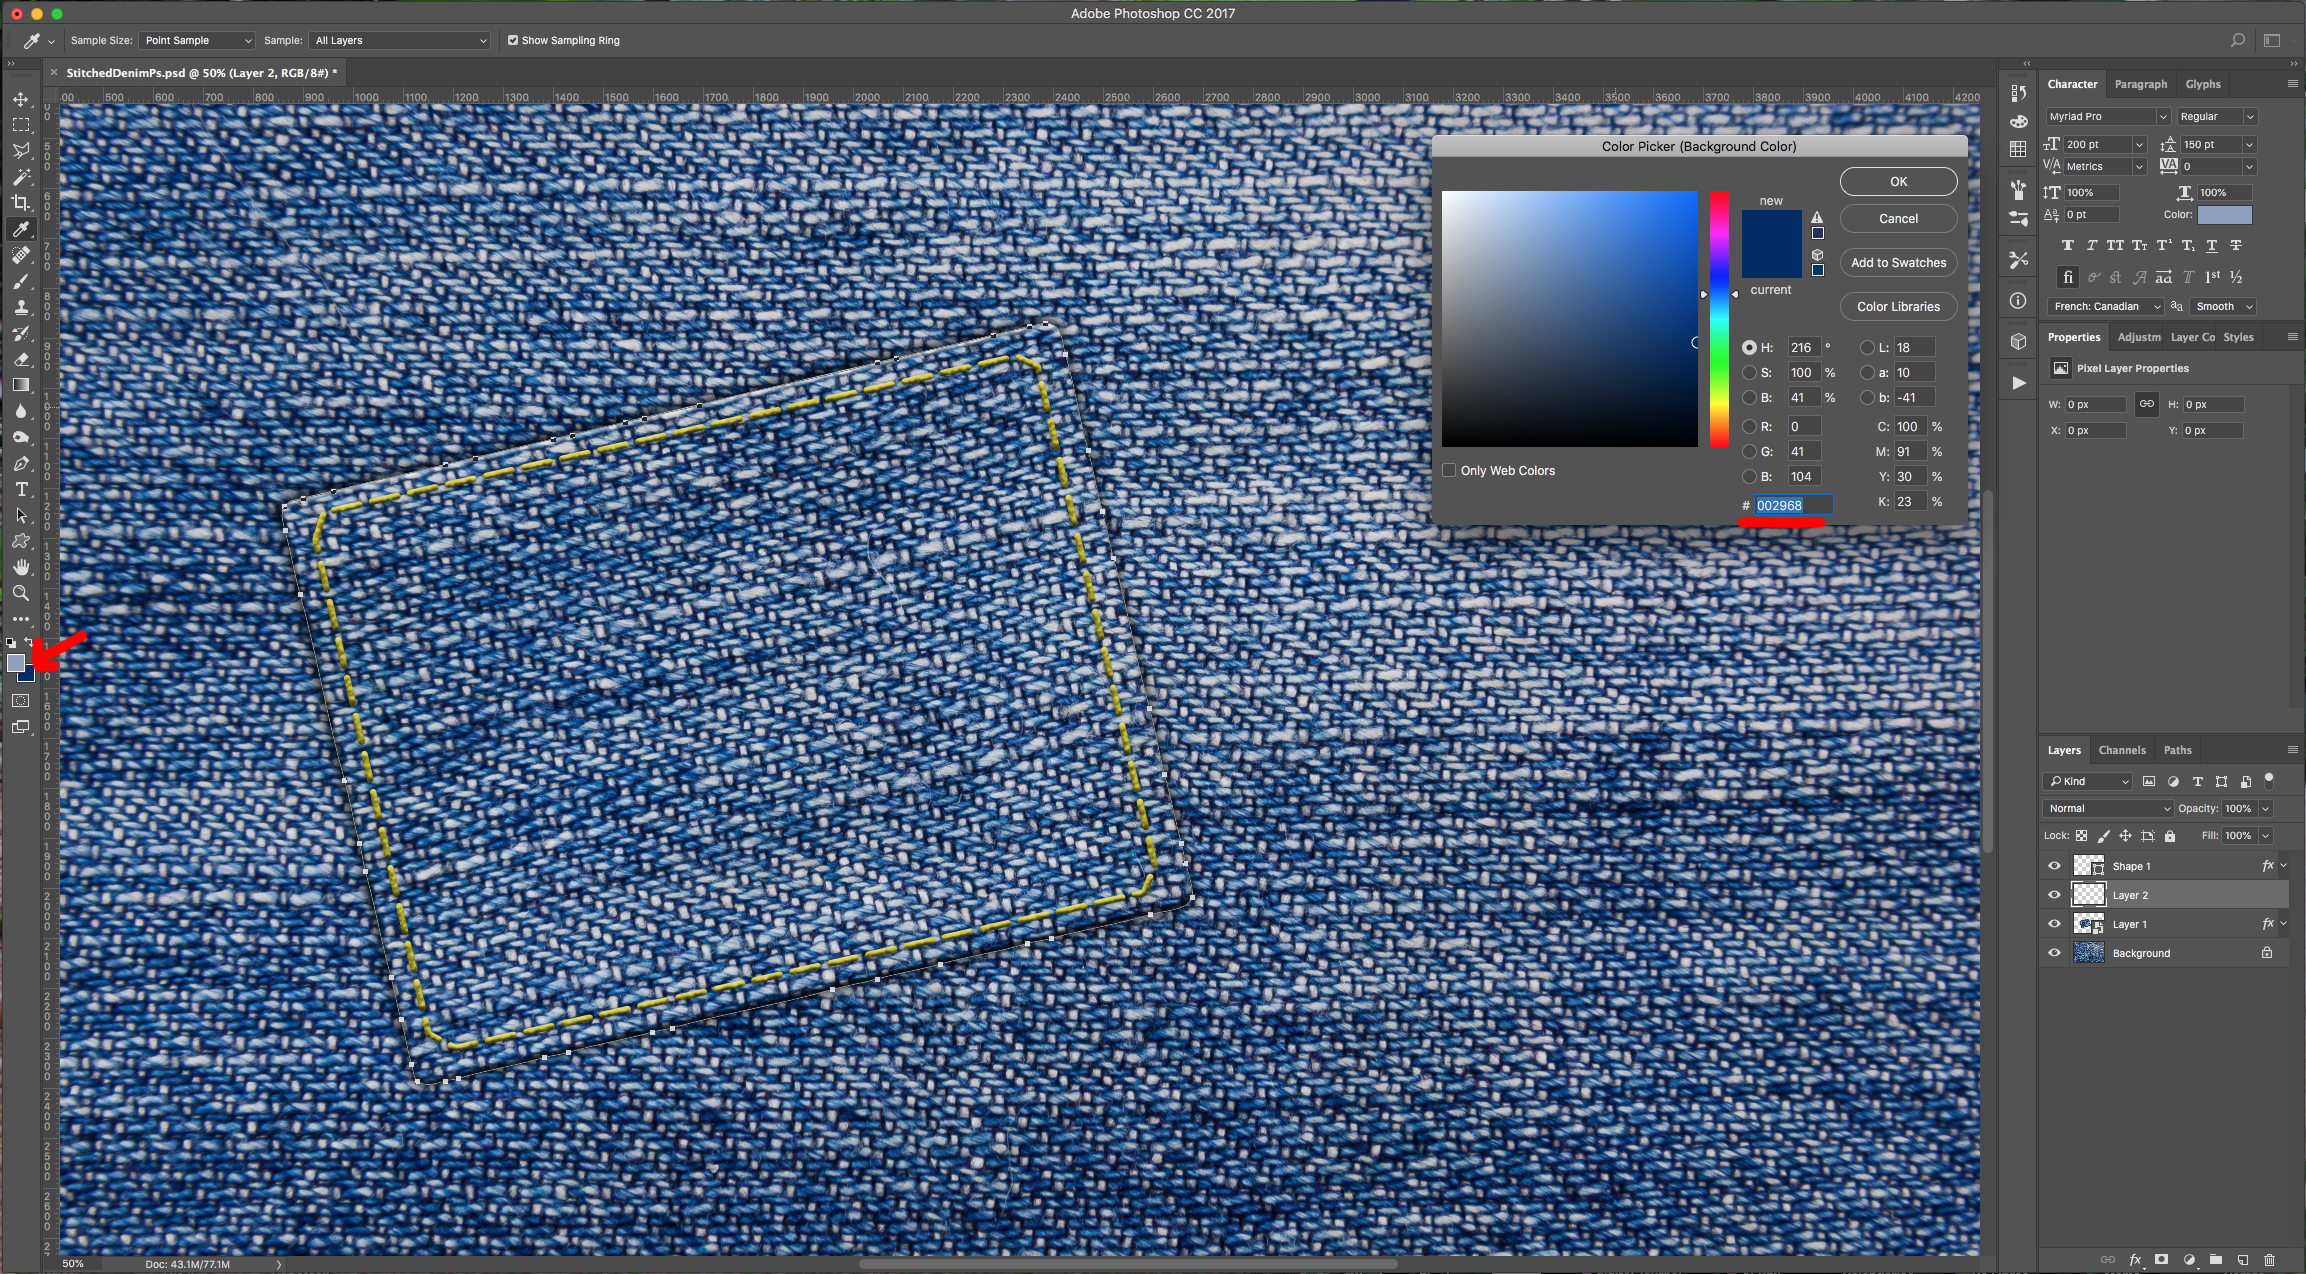
15 - Create a “New Layer” by clicking on the small button at the bottom of the “Layers Panel” and make sure it sits on top of the “Smart Object” Layer. Double-click on top of the “Foreground Color” swatch and select a light shade of blue from the Texture (we used #8ca1be). Do the same for the “Background Color” swatch but choose a dark shade of blue (we used #002968).
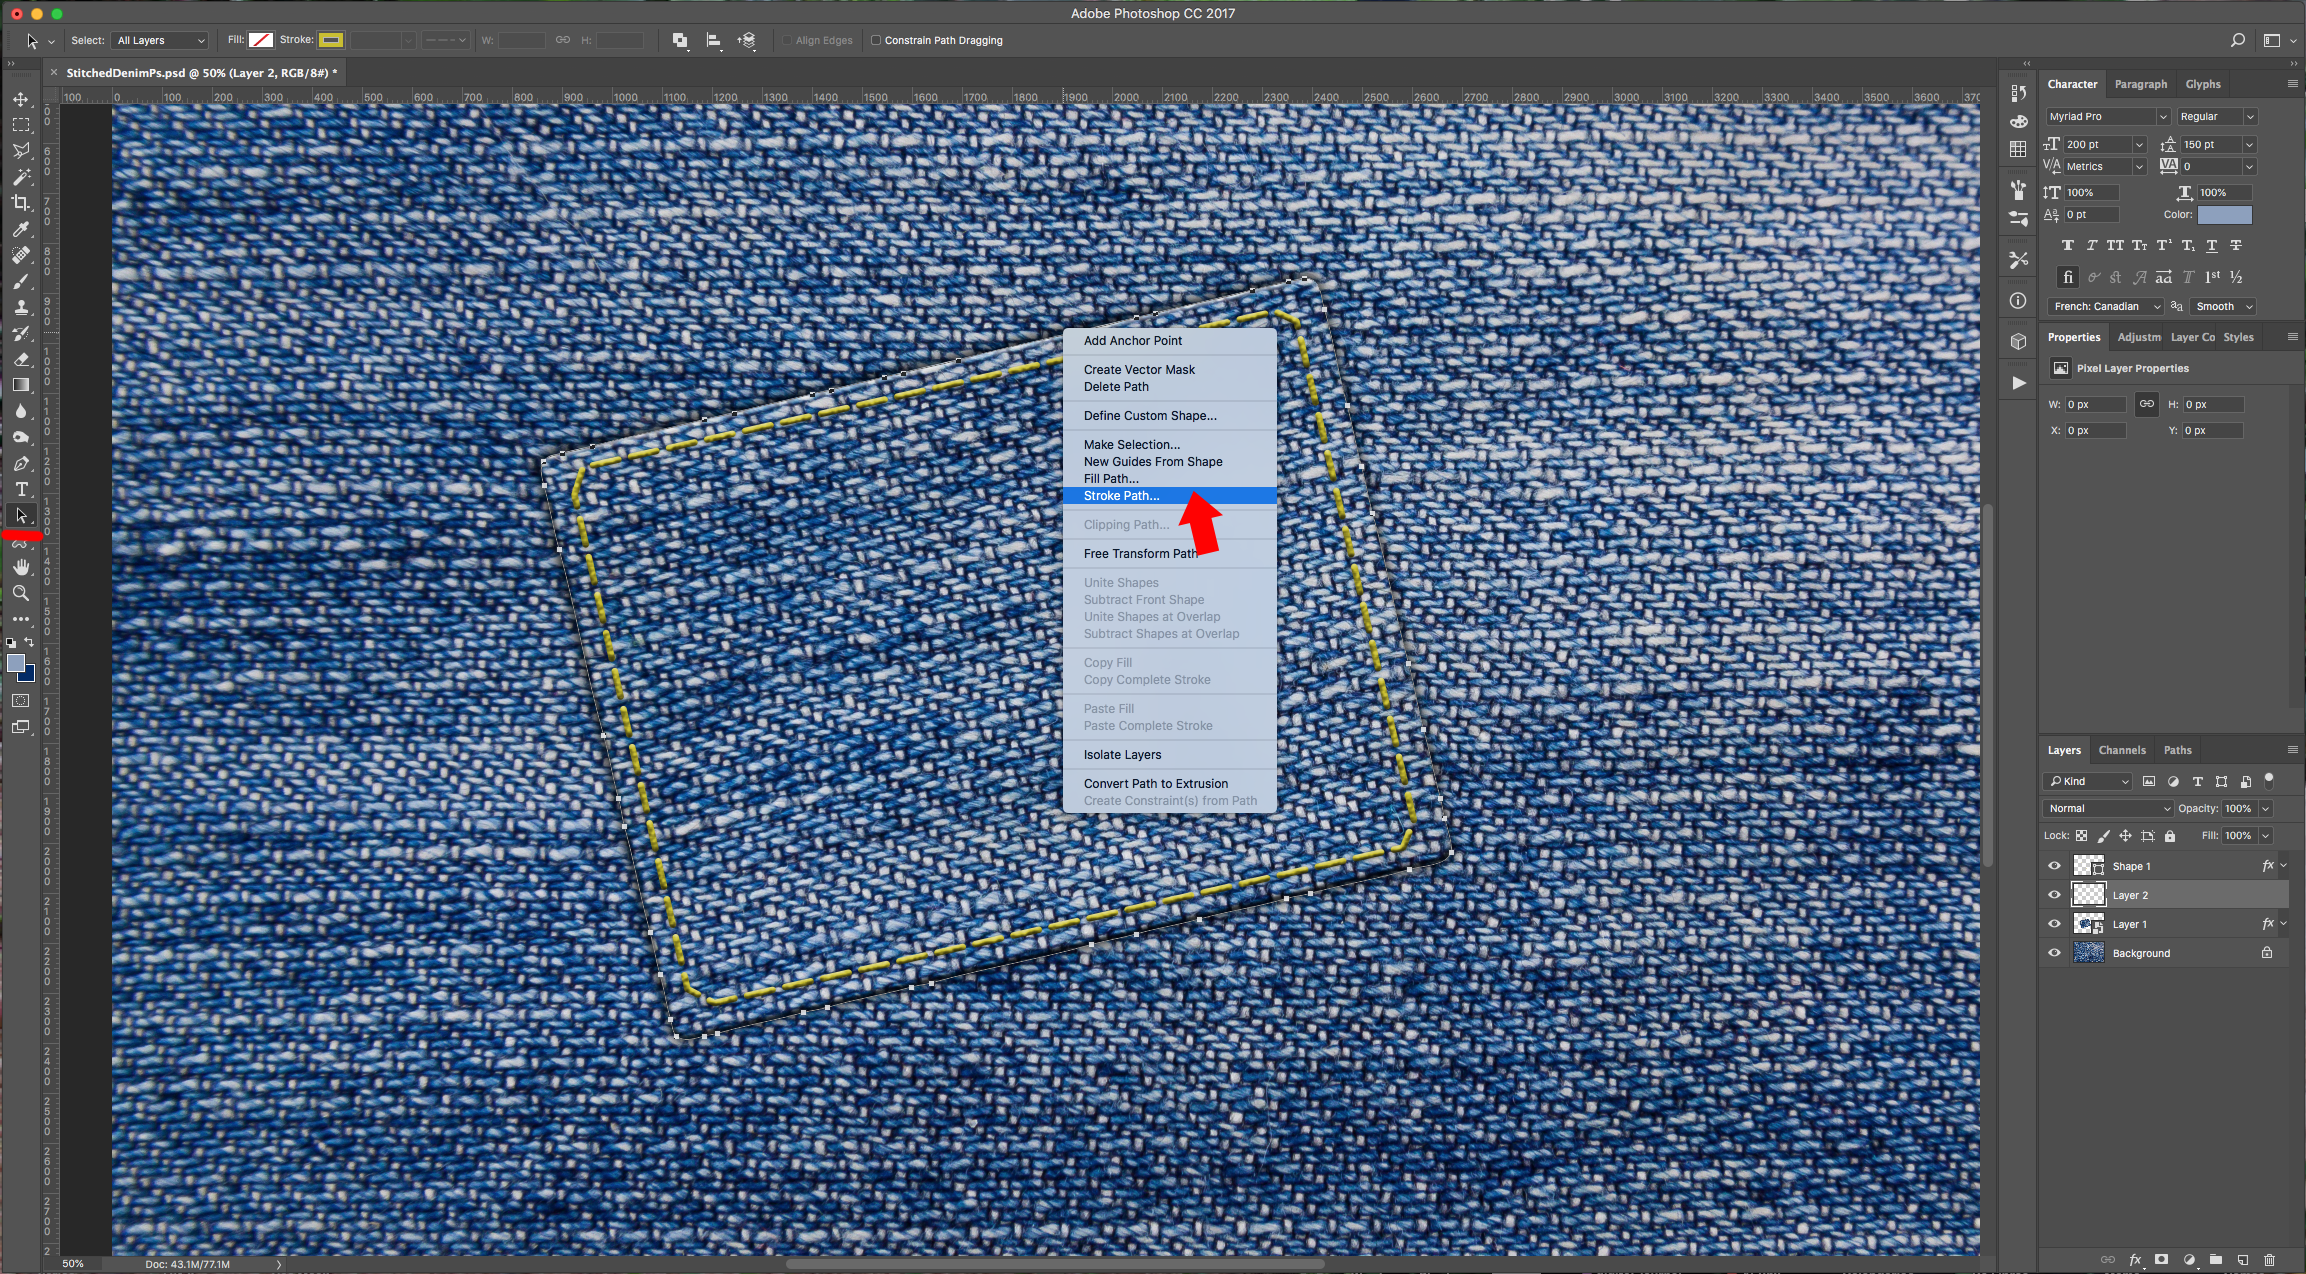
16 - Use the “Path Selection Tool”, right-click on top of the Path and choose “Stroke Path”. Choose “Brush” from the drop-down menu and click “OK”.

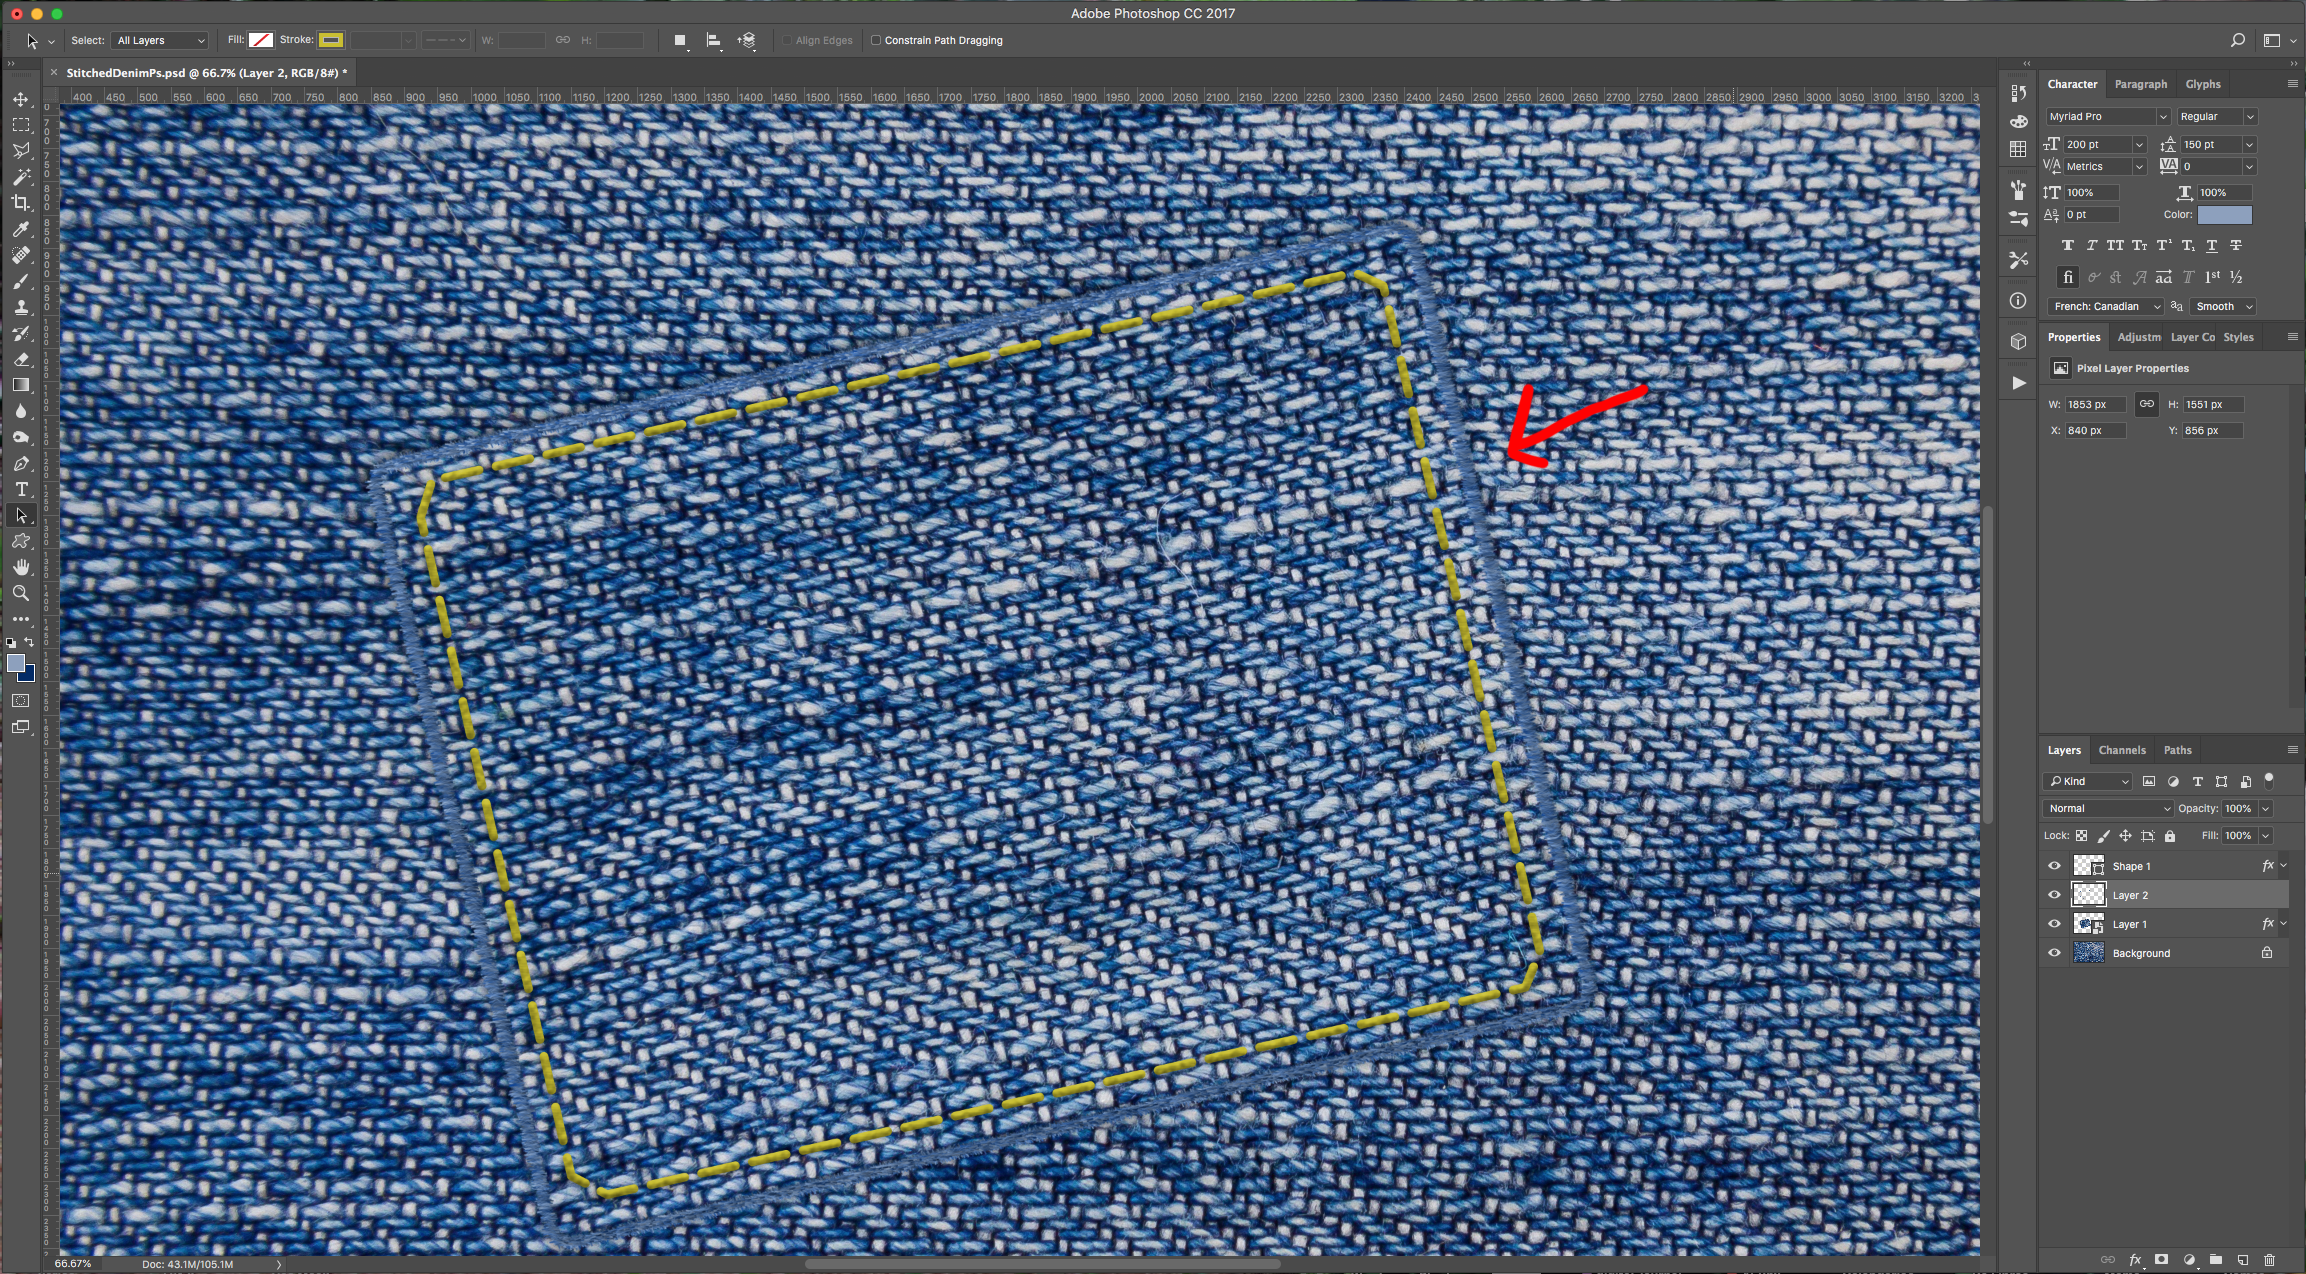
17 - Without deselecting, change the Brush Angle and reduce the “Size” in the “Brush Panel” and then “Stroke Path” again. Lower the “Opacity” of the Layer to 90%.

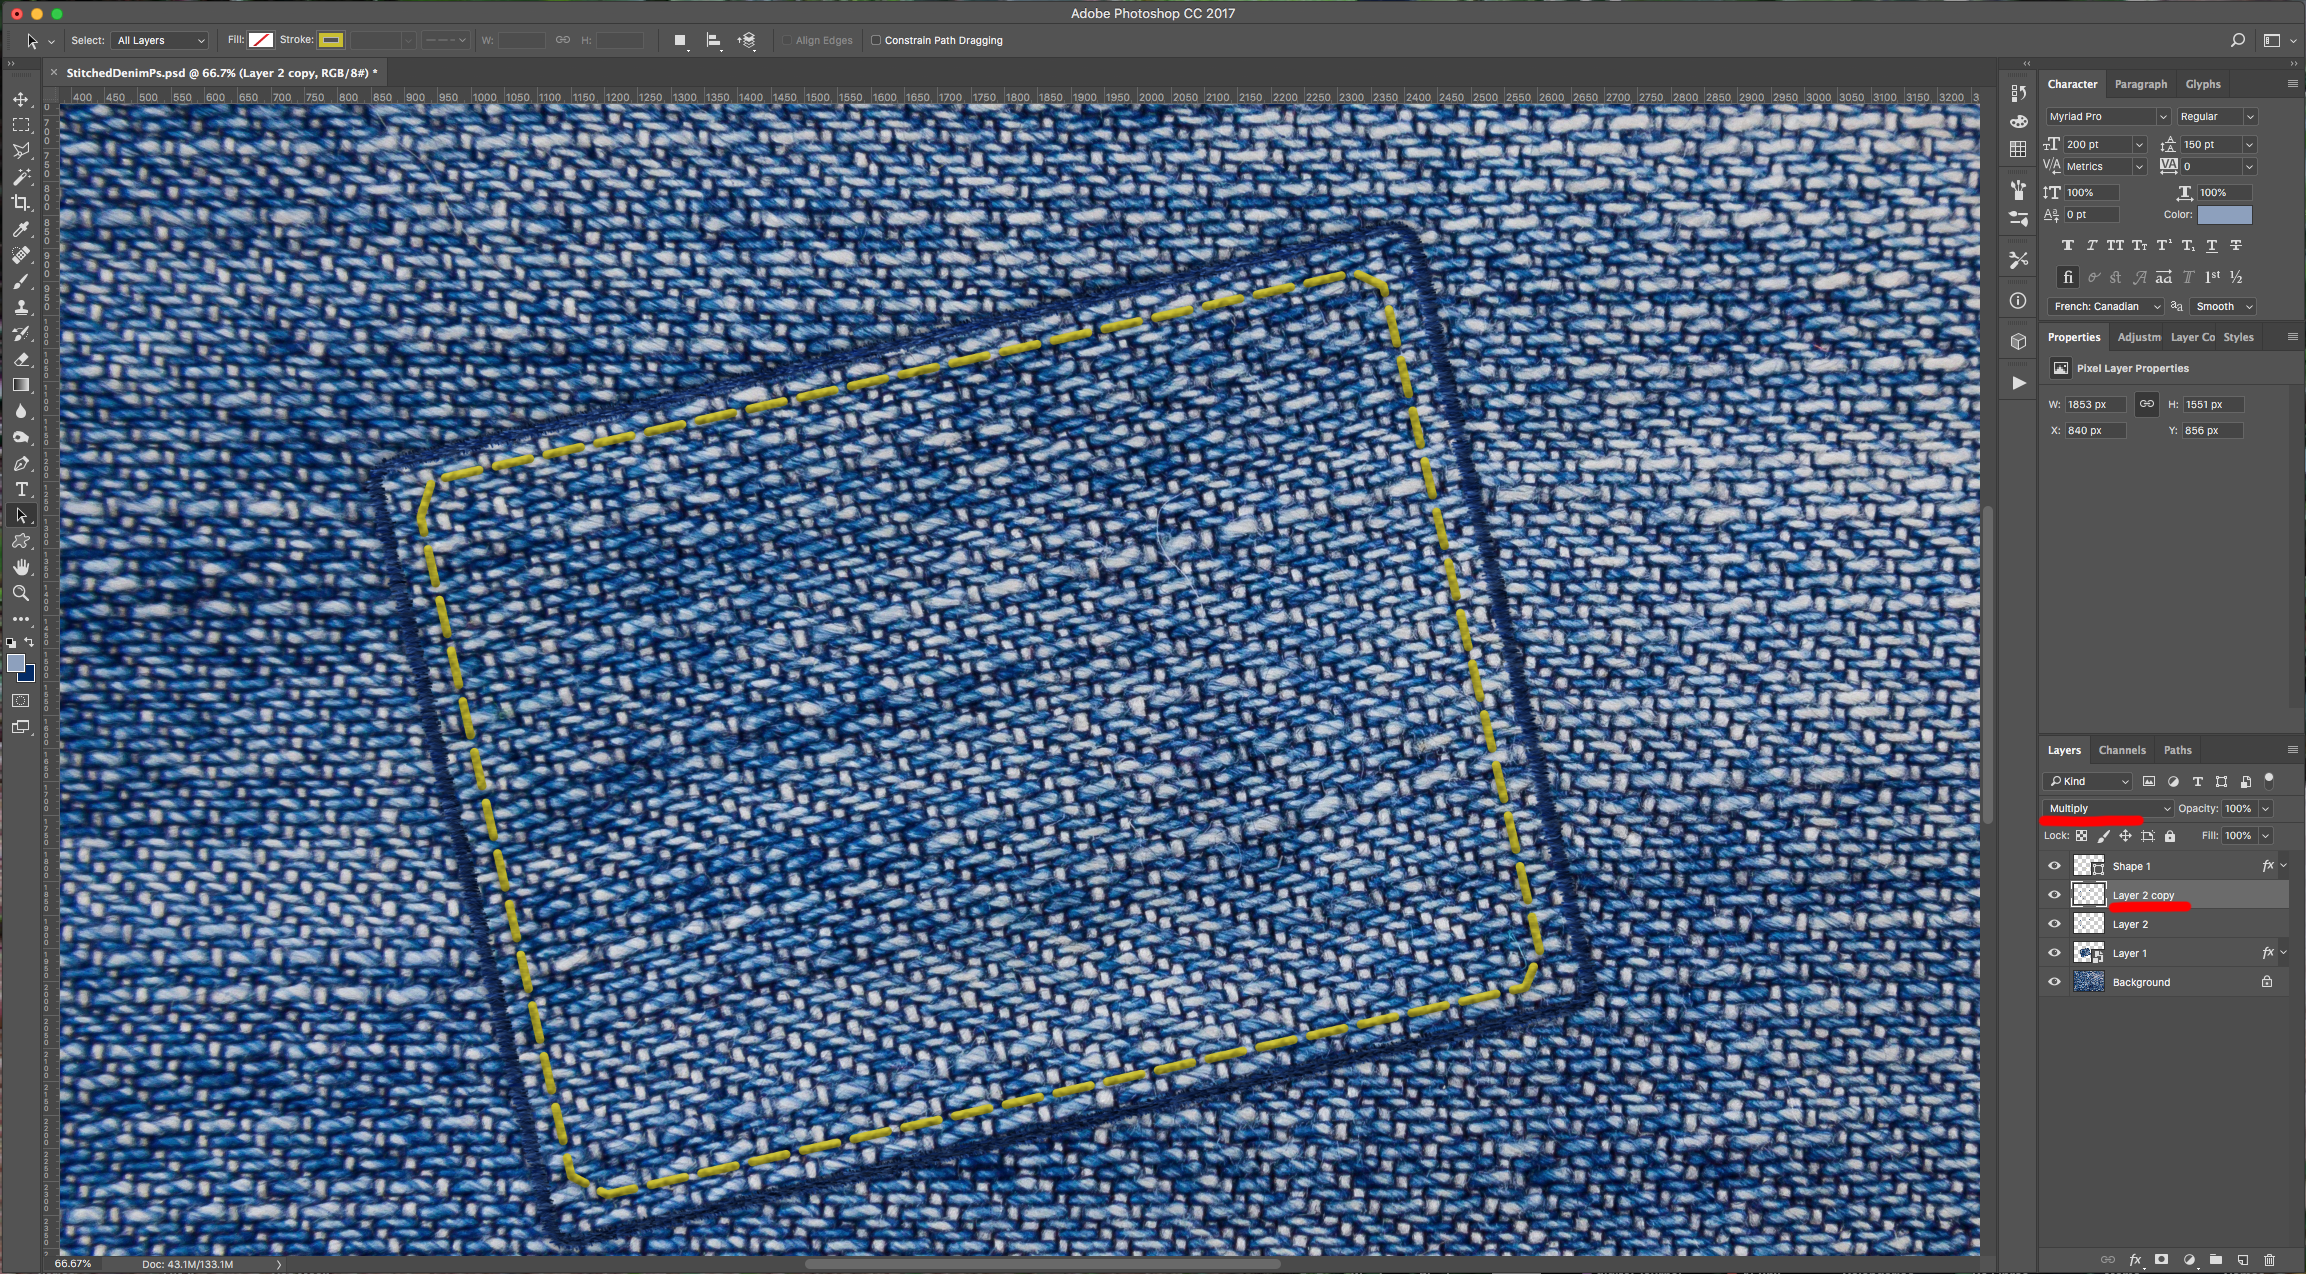
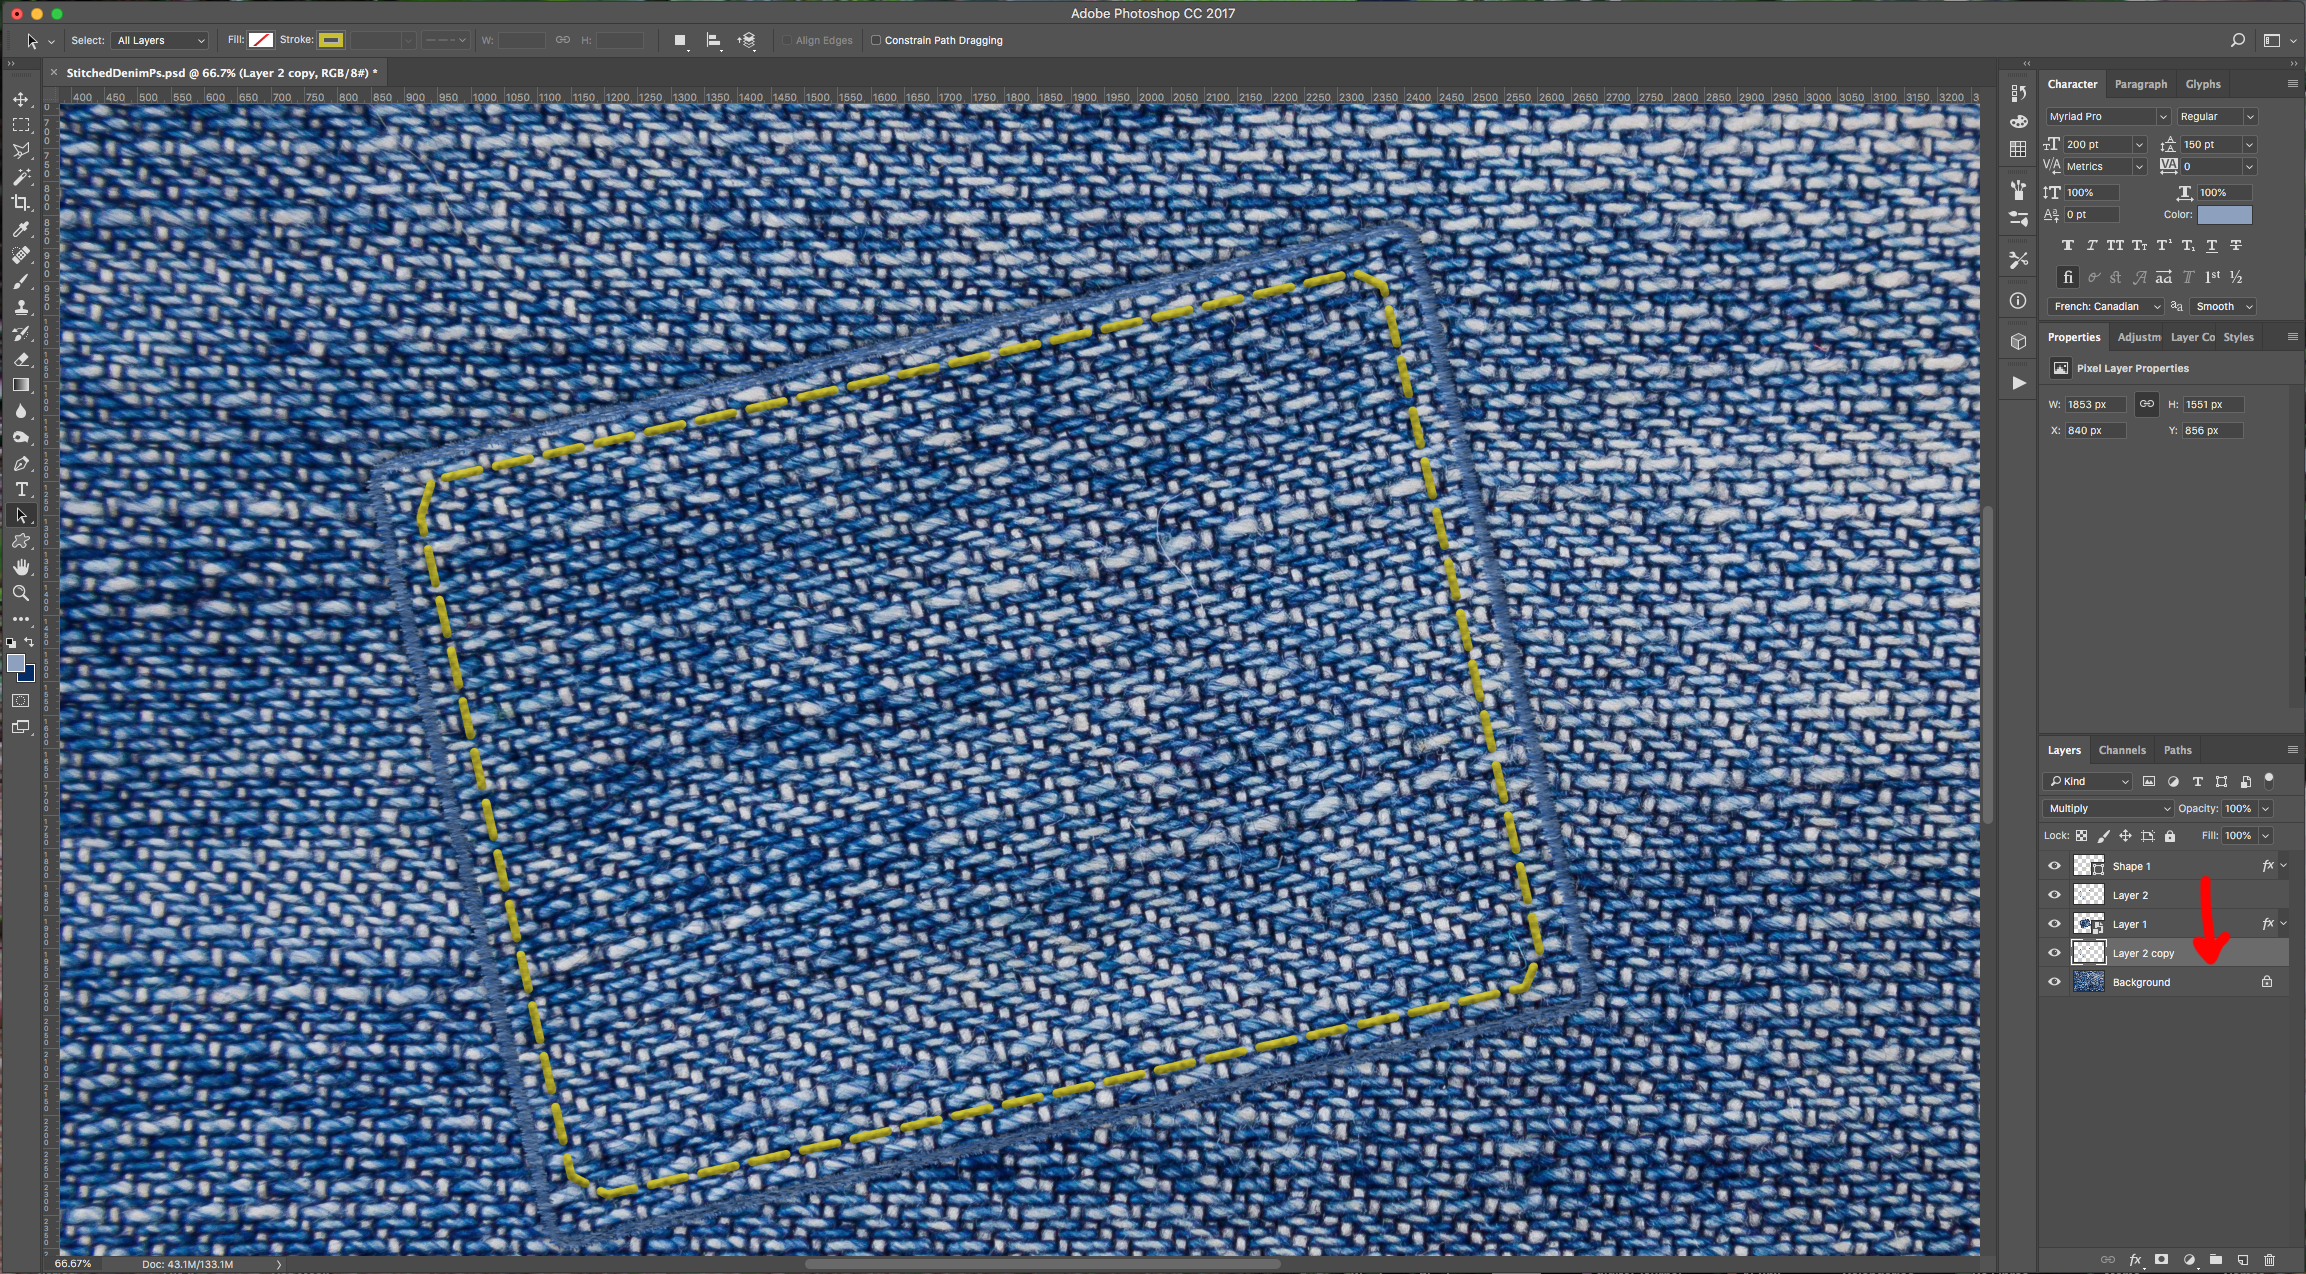
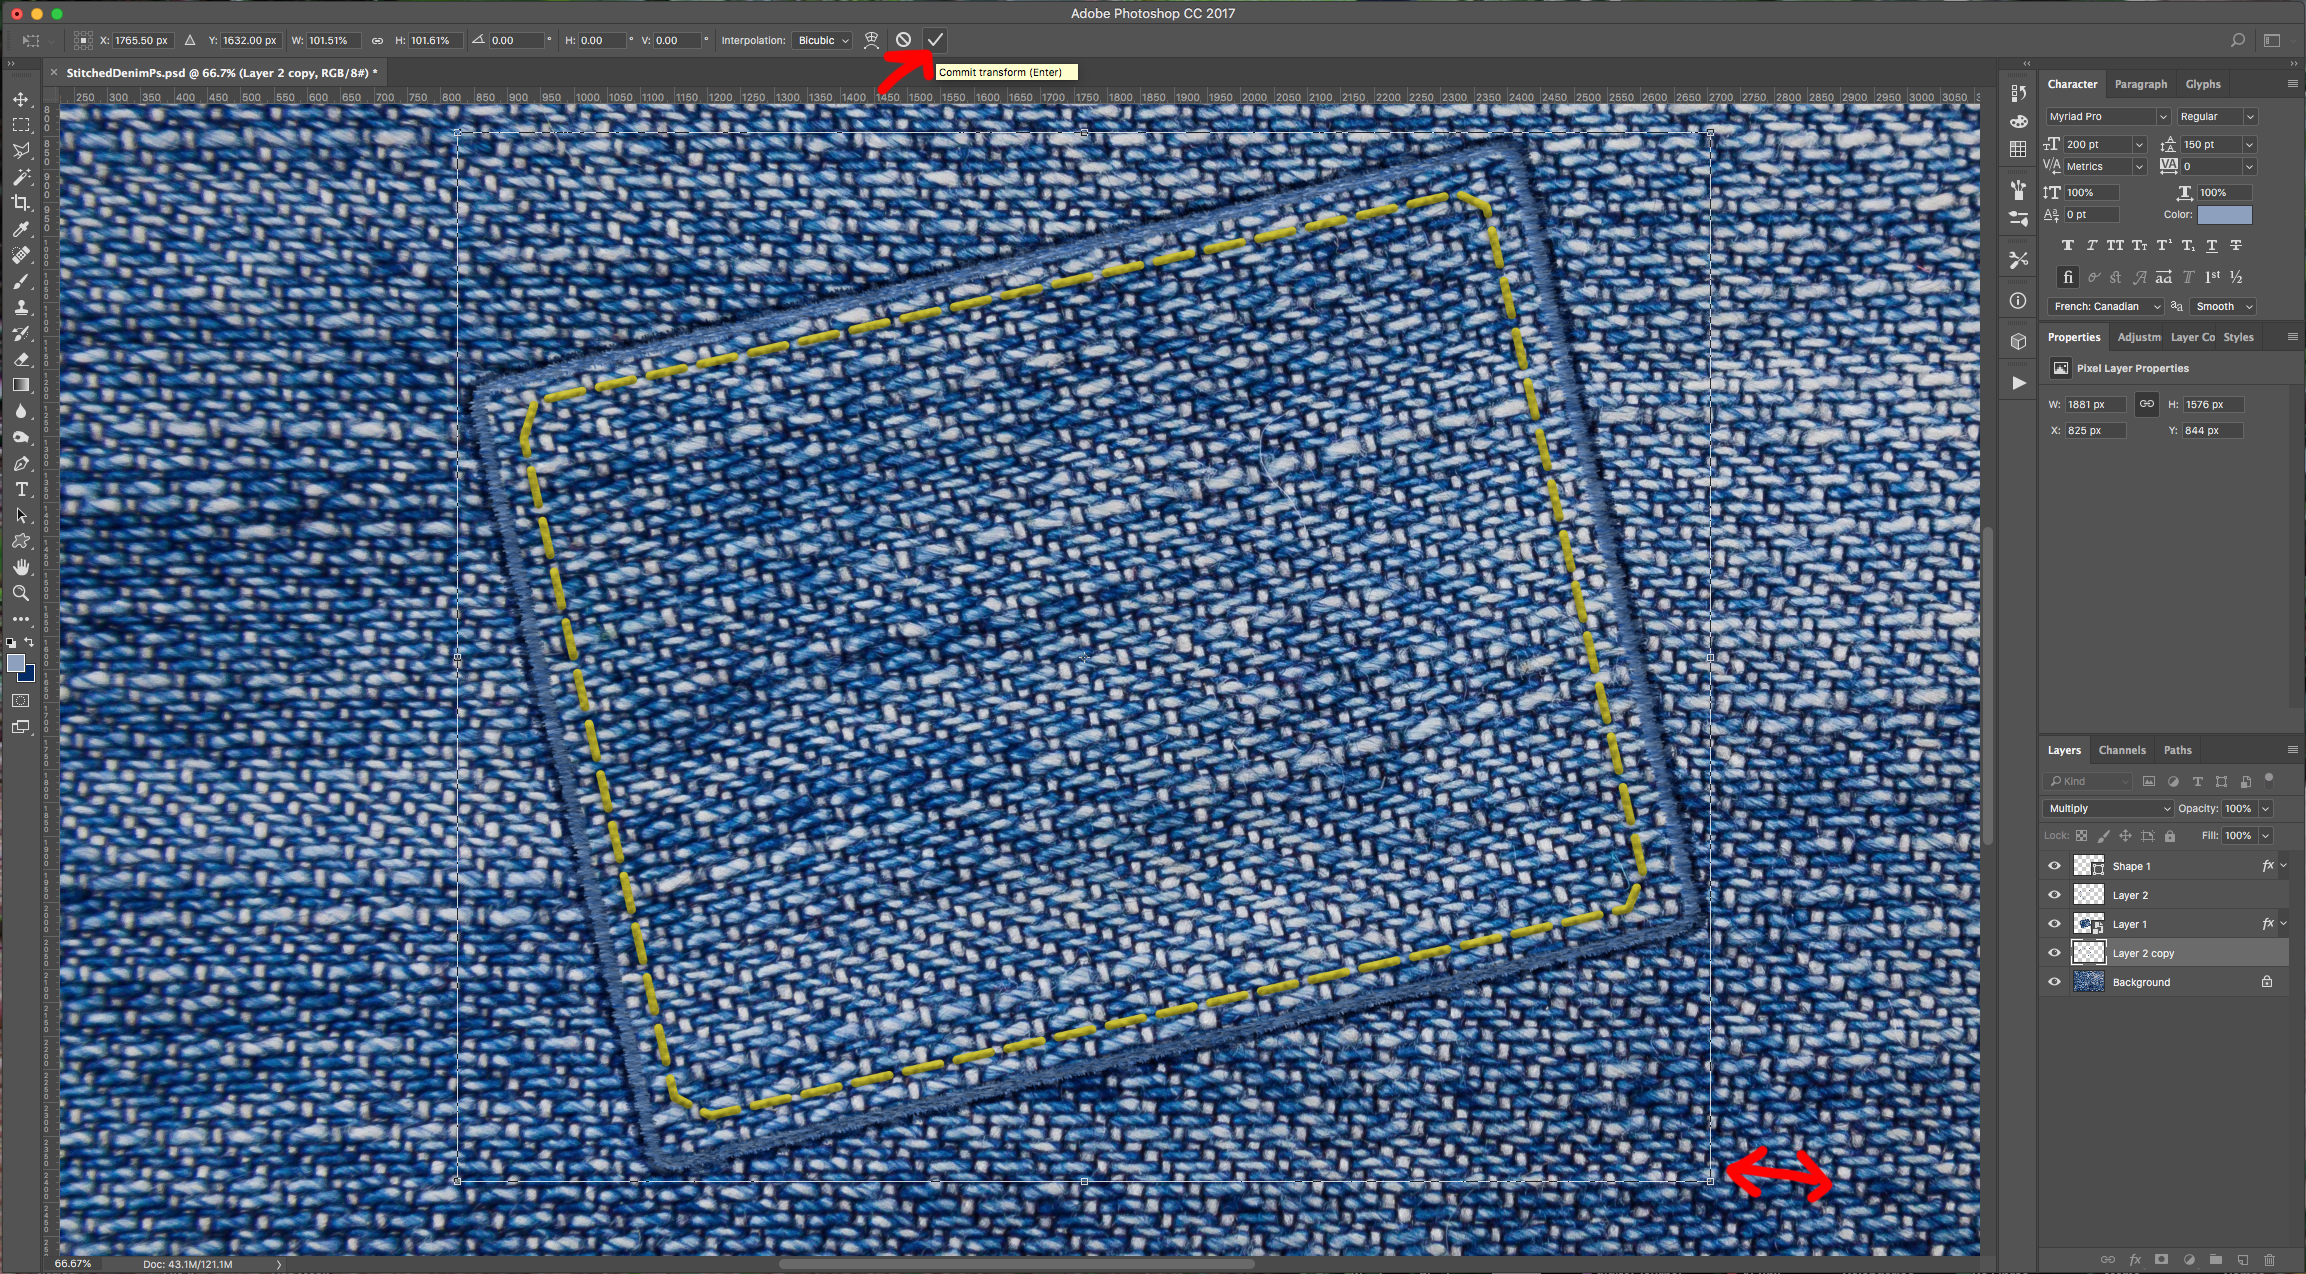
18 - Duplicate your Layer (Command/Control + J) and change the “Blending Mode” of the duplicate to “Multiply” with 100% “Opacity”. Drag your Duplicate Layer to place it under the “Smart Object” Layer but on top of the “Background” layer. Use “Free Transform” (Command/Control + T) to make it slightly bigger and make it look like a shadow.
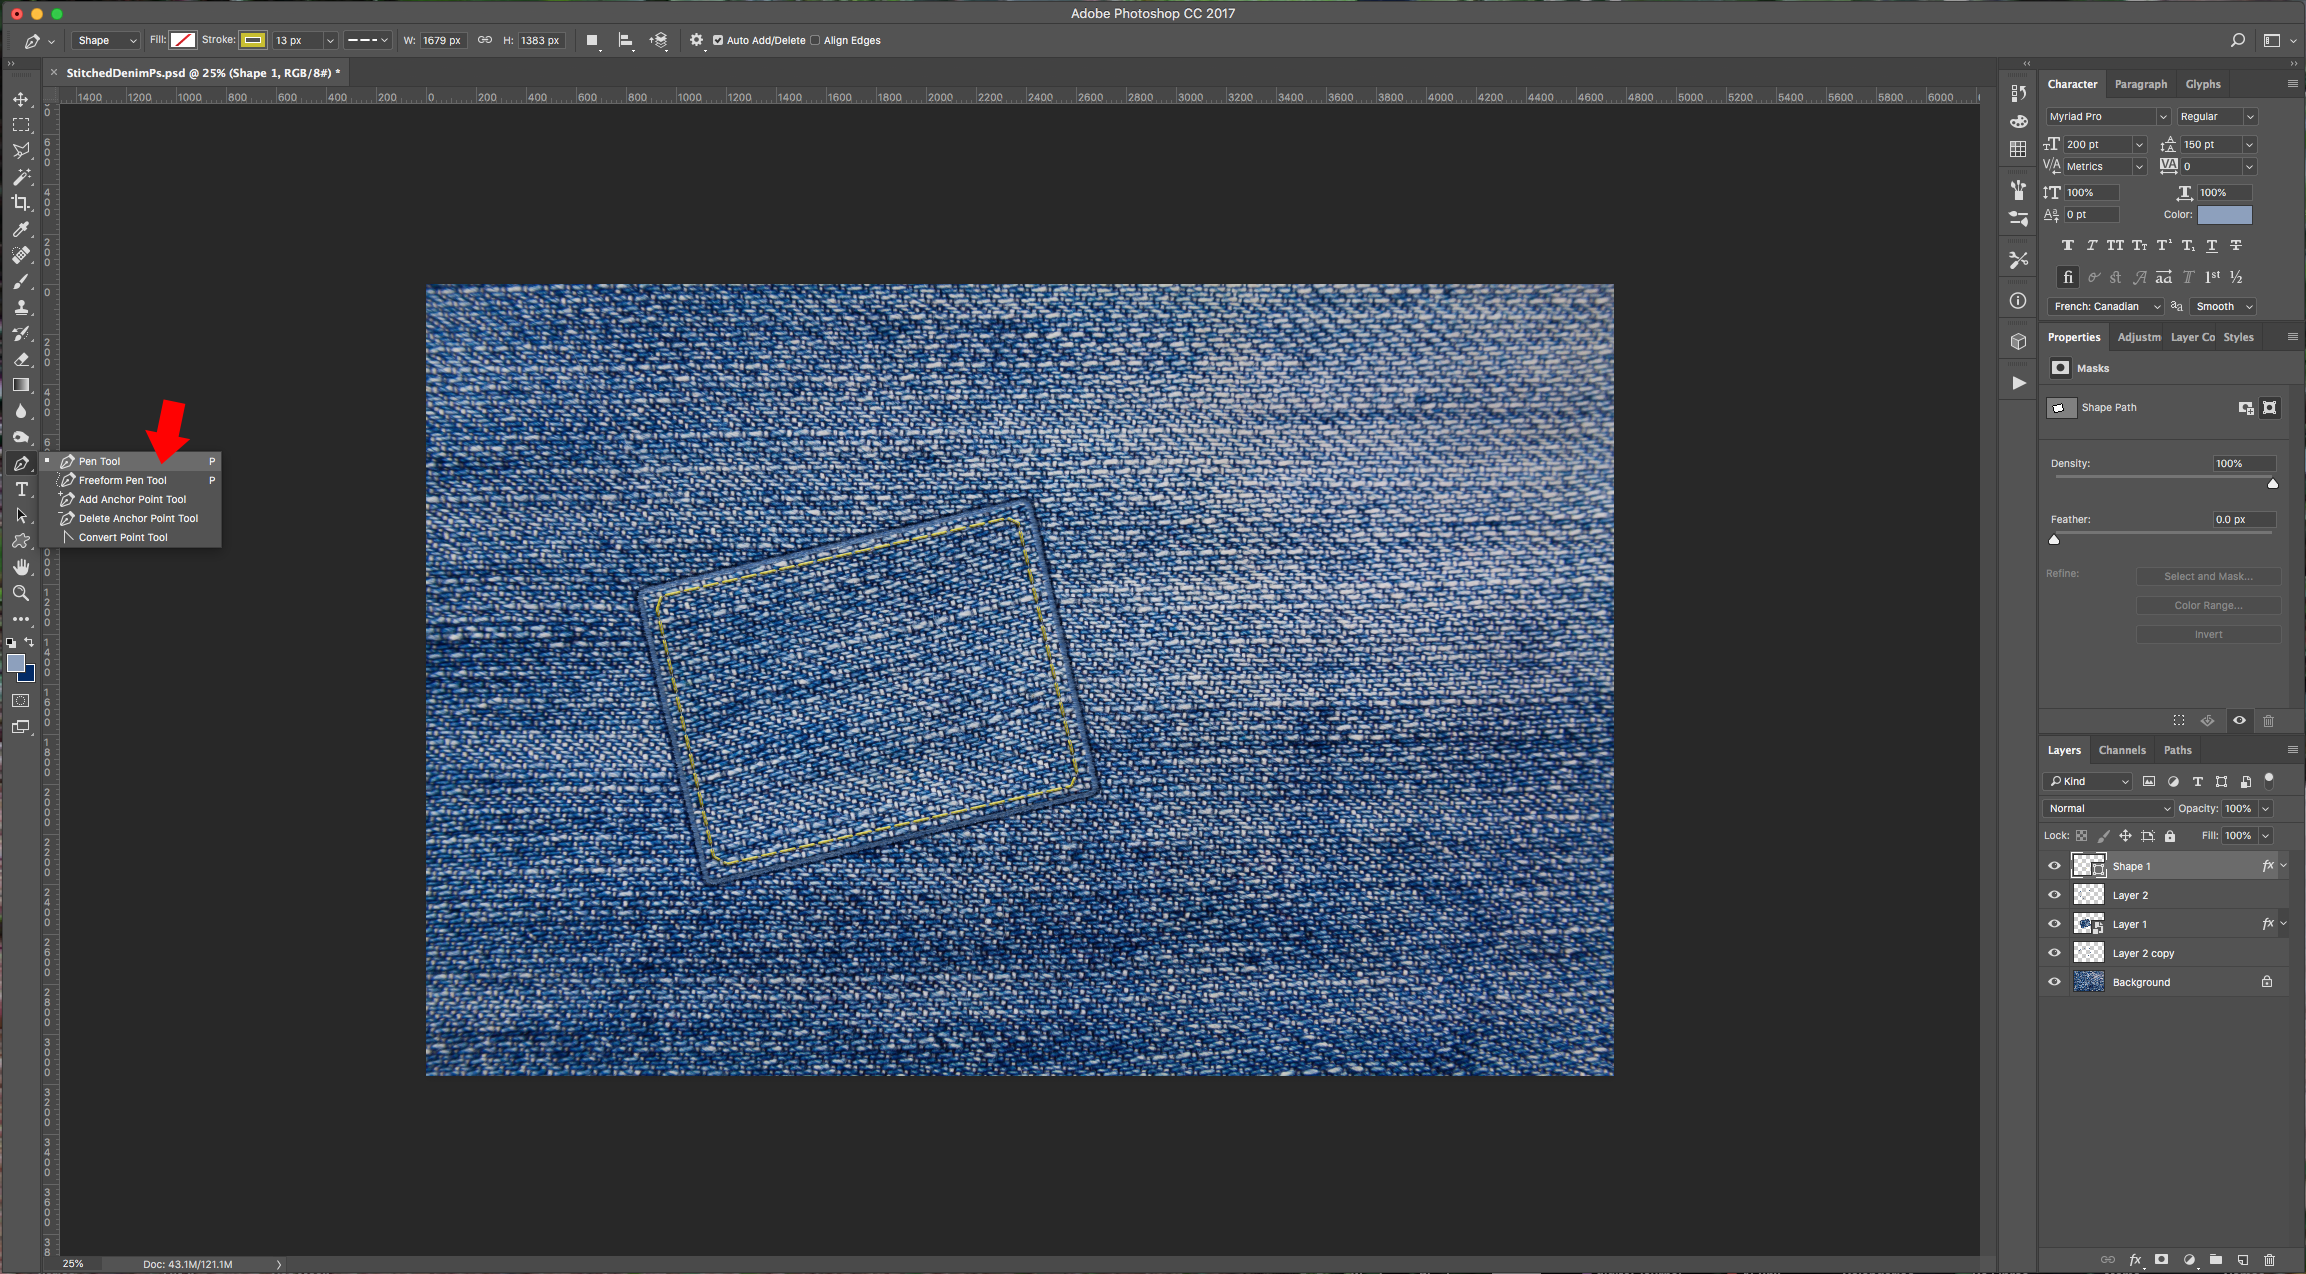
19 - Select the “Pen Tool” (P) again and draw a Zig Zag from side to side inside your Rectangle. Make sure the same settings you used before are still selected.
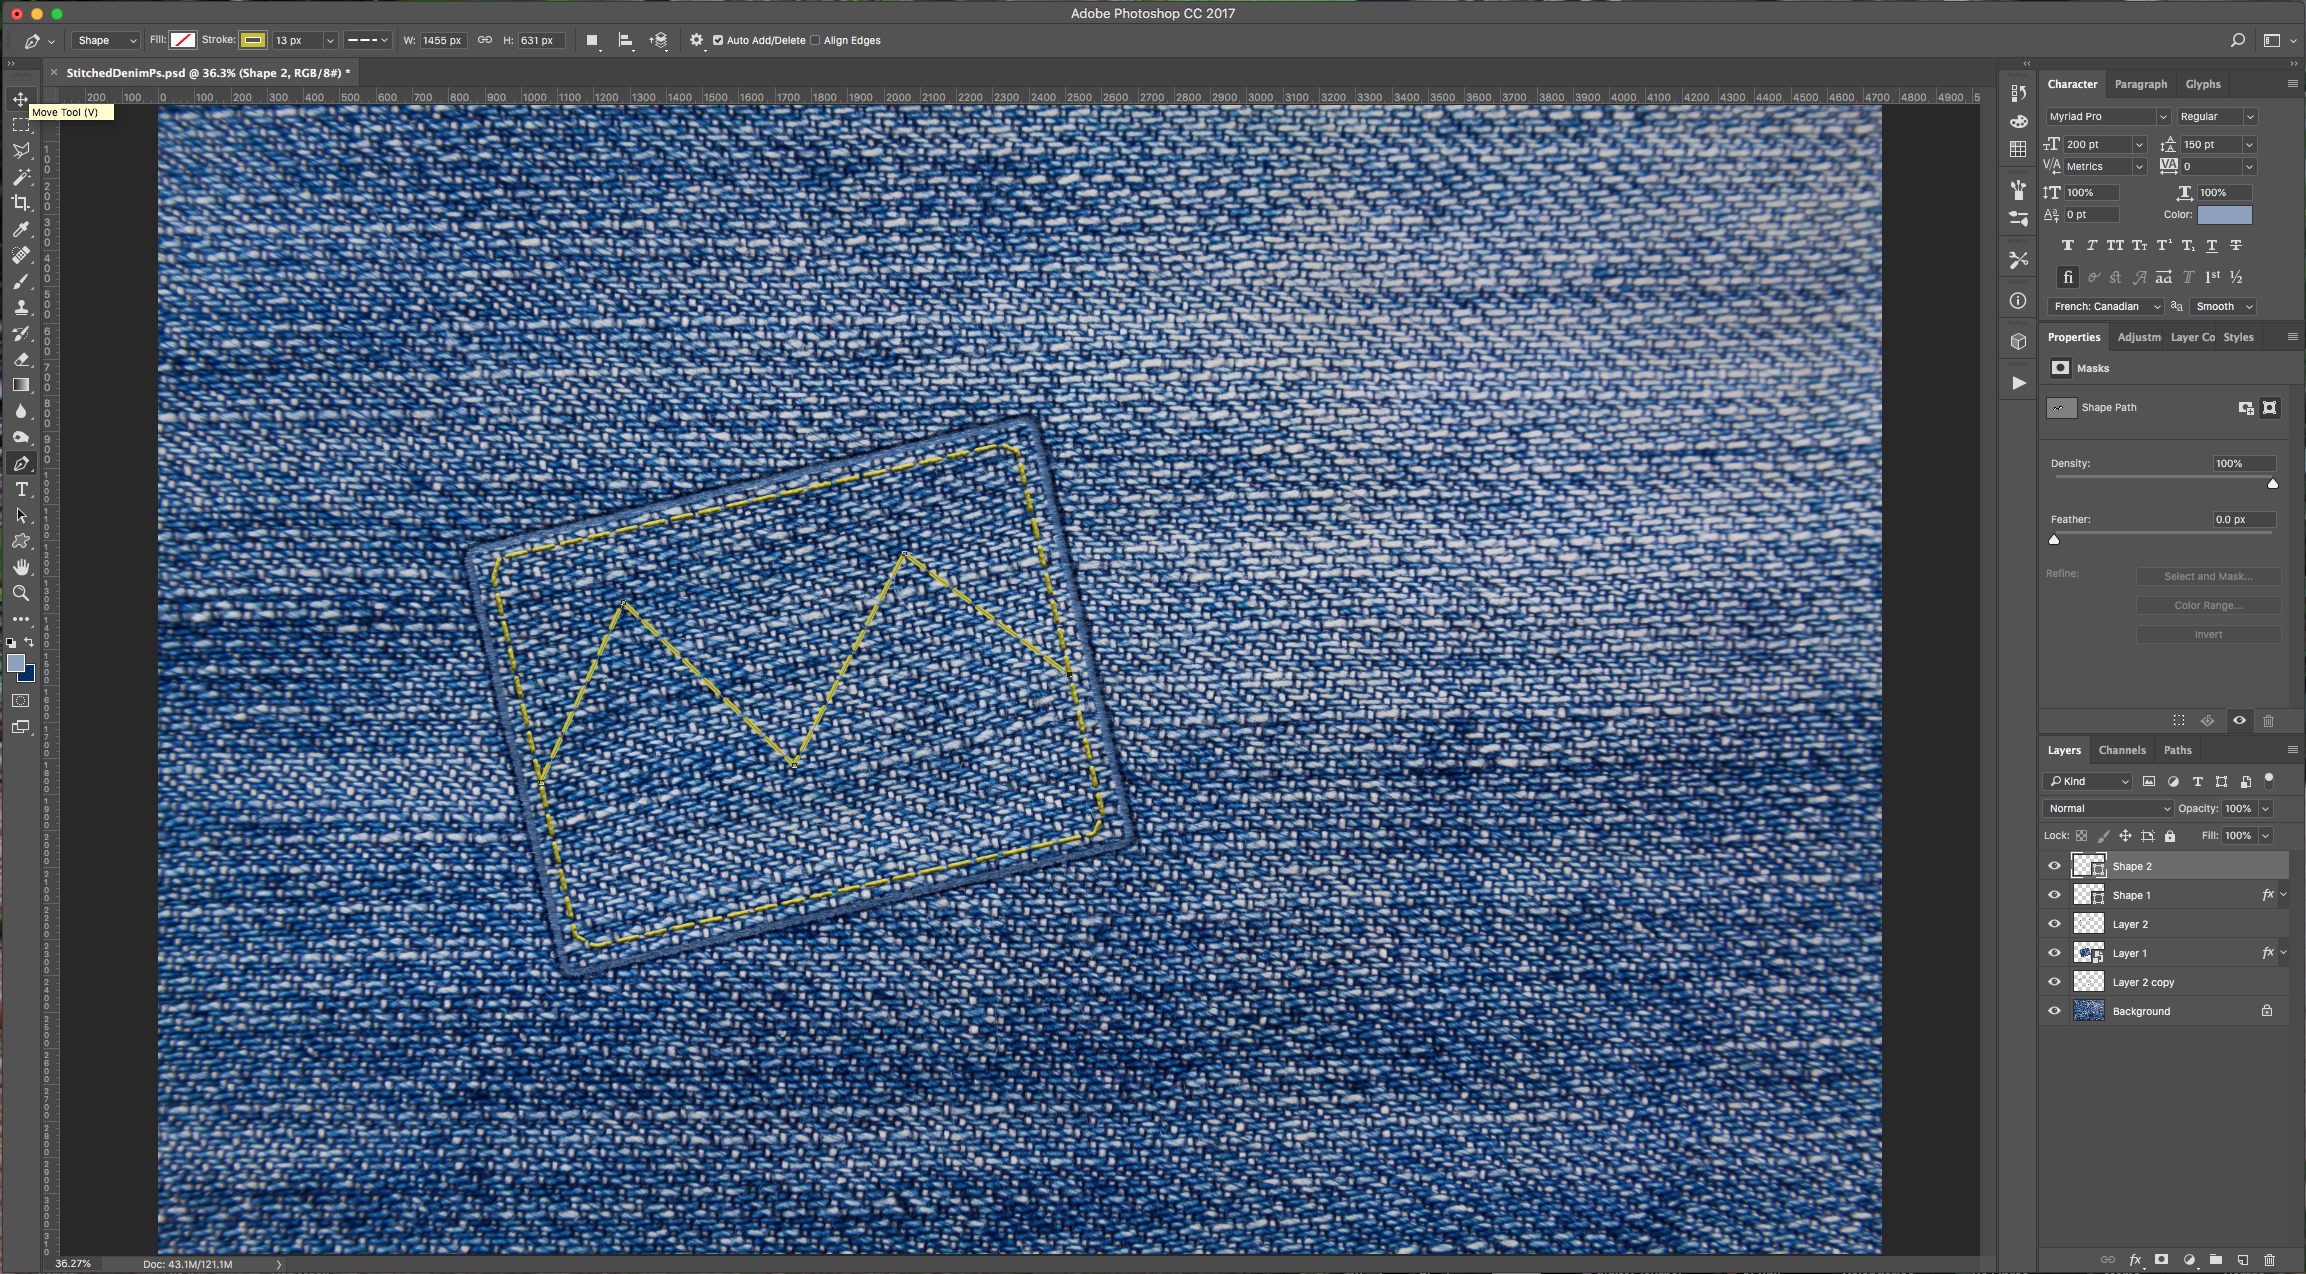
20 - Right-click on top of the first Stroke Path thumbnail and choose “Copy Layer Style” then, right-click on top of the Zig Zag thumbnail and choose “Paste Layer Style”.


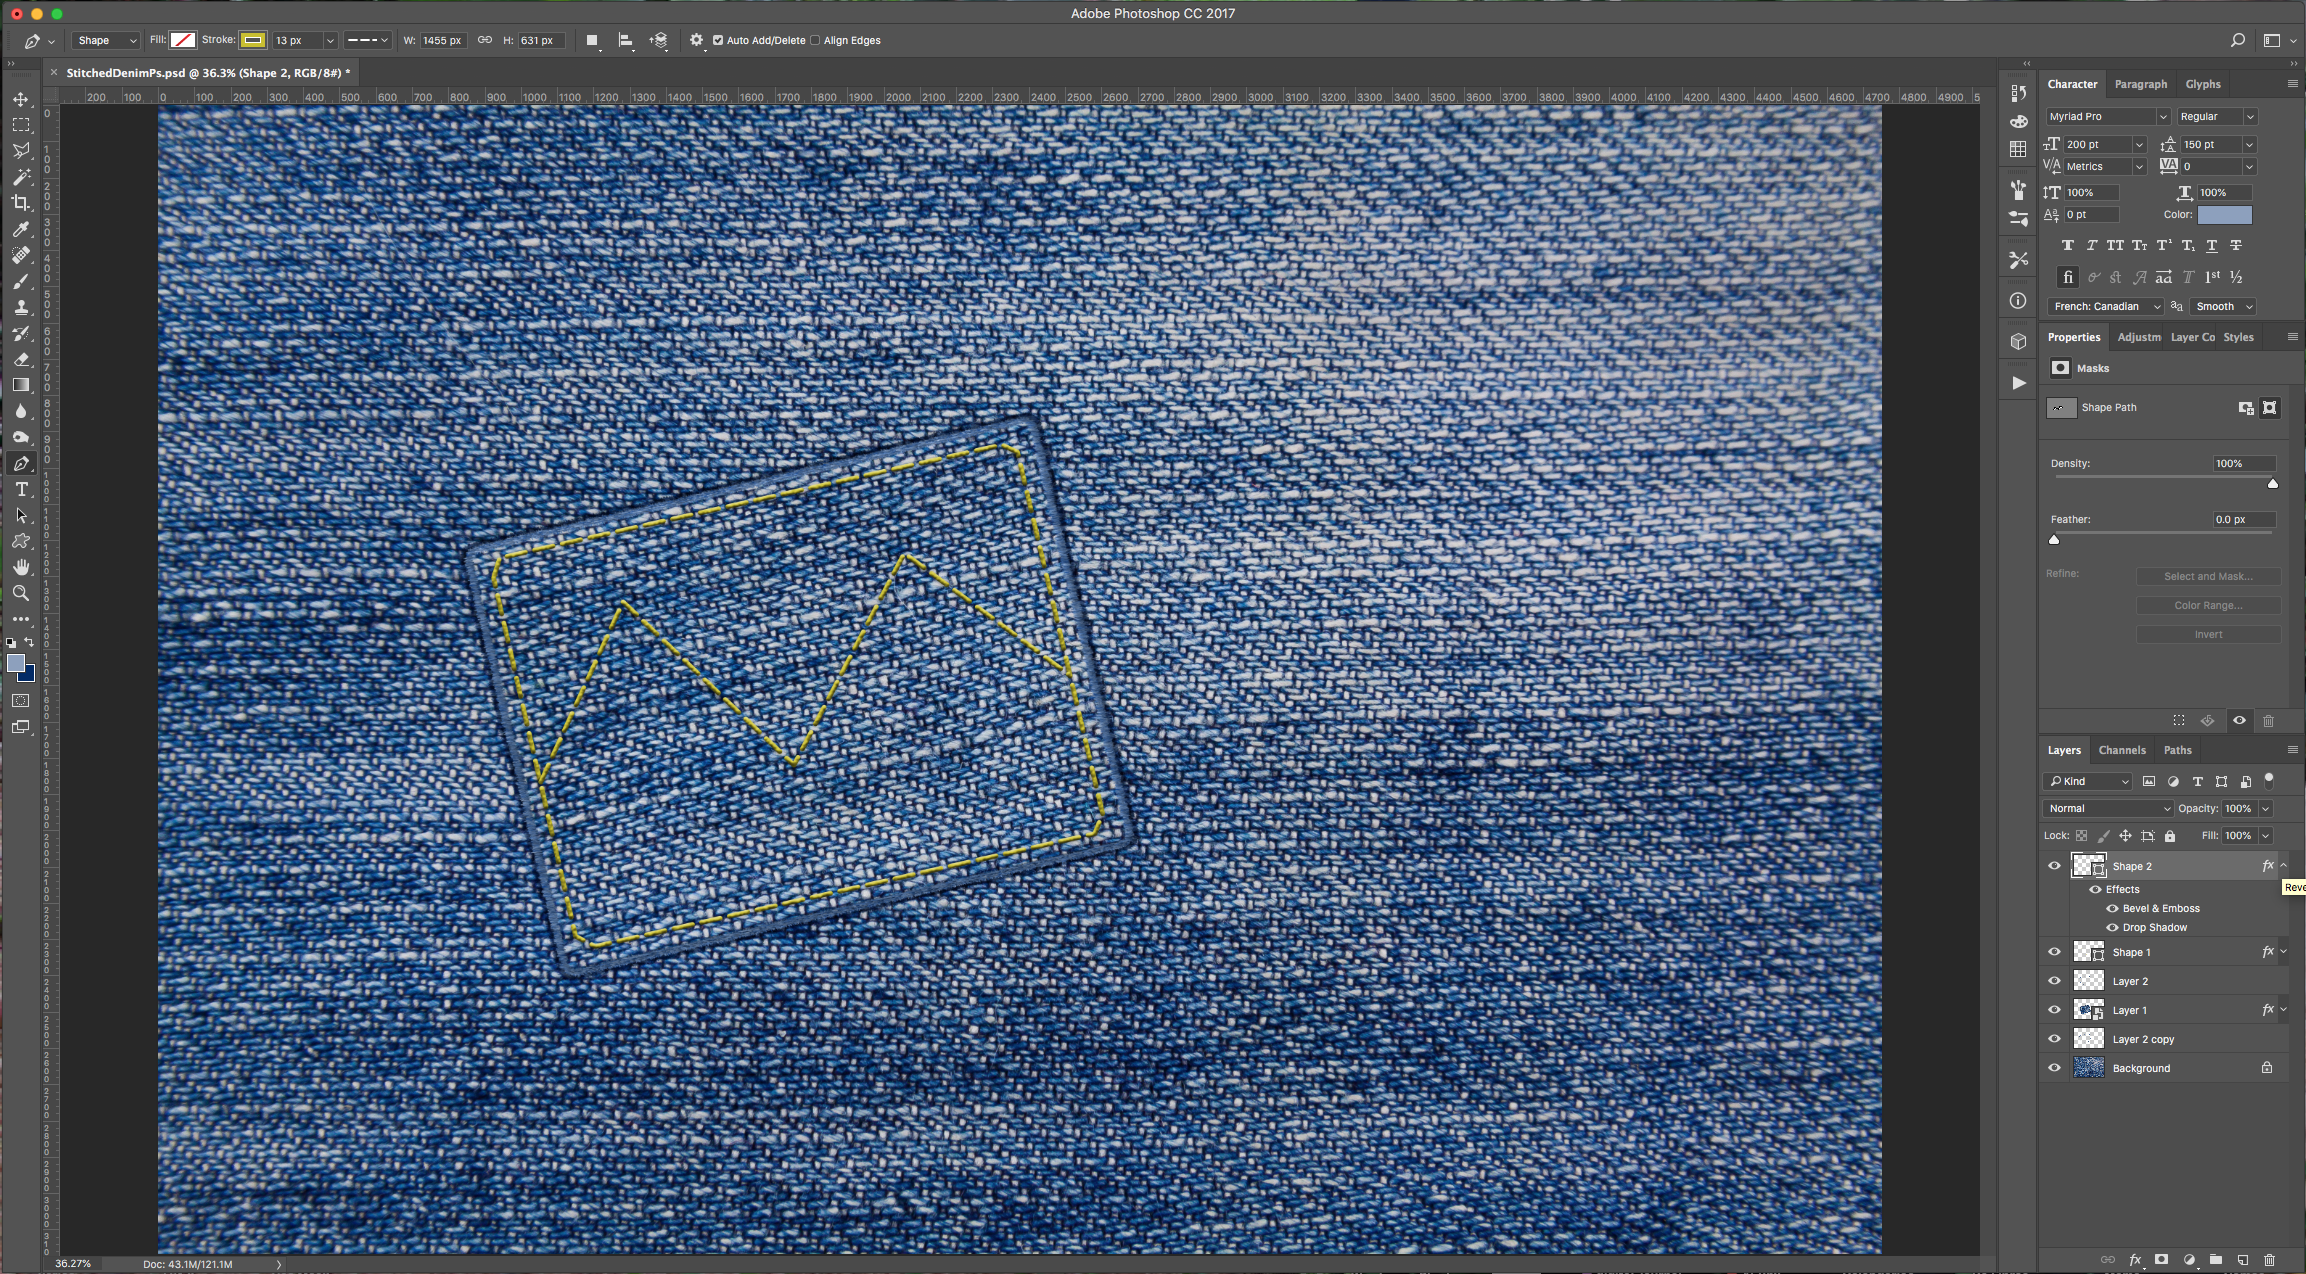
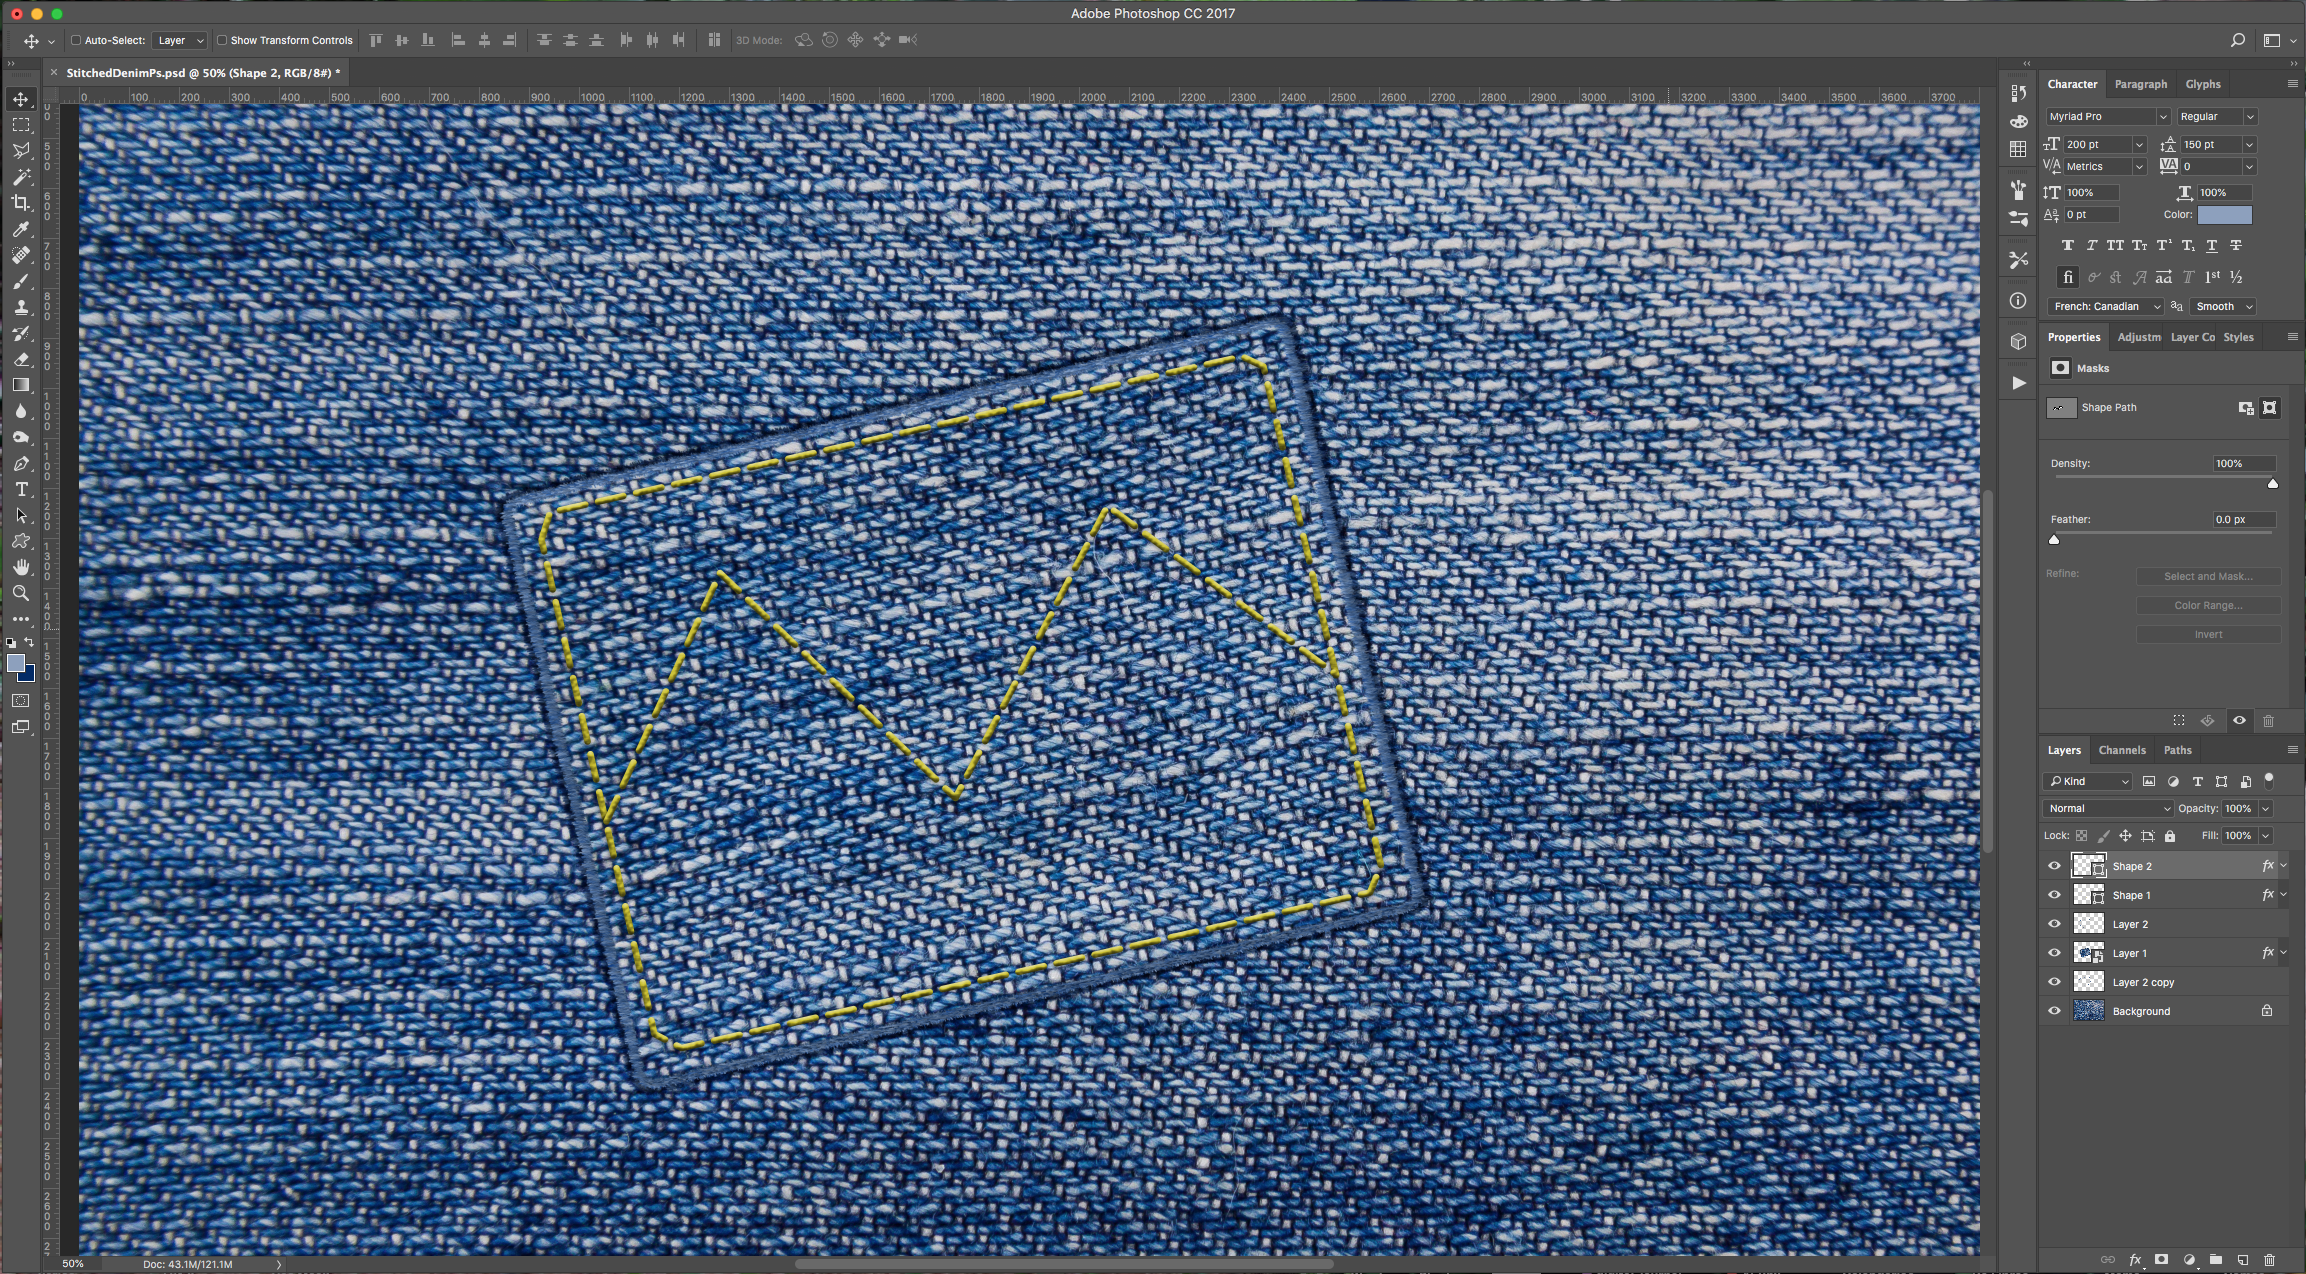
21 - Your Artworks should be similar to this.
1 - In Photoshop, open the “Denim Texture” you chose.
2 - Select the “Rounded Rectangle Tool” (U), make sure “Shape” is selected in the Top Menu, click inside your Canvas and input 1600 pixels for “Width” and 1200 pixels for “Height”. Leave the default “Radii” (30 px). Use White as fill color.
3 - Make sure you are in your “Background” Layer and “Select All” (Command/Control + A). “Copy” (Command/Control + A) and “Paste” (Command/Control + V) the Texture and move the resulting Layer to the Top.
4 - Right-click on top of its Thumbnail and choose “Create Clipping Mask”. Hide the “Background” Layer temporarily to check if everything is ok.
5 - Select both Top Layers (Shift key) and use “Free Transform” (Command/Control + T) to Rotate the Rectangle a bit. Click on the small Check Mark on the Top Menu to “Commit” the changes.
6 - With the two Layers still selected, right-click on top of their Thumbnails and choose “Convert to Smart Object”.
7 - Double-click on top of its Thumbnail and apply the following “Layer Styles”:
Drop Shadow:
Bevel and Emboss:
8 - Select the “Pen Tool” (P), make sure “Shape” is selected in the Top Menu and create a second shape all around inside your Rectangle.
9 - Set the “Fill” to “None” and give the “Stroke” a 13 px “Weight” and color it Yellow (we used #cac01b). Choose “Dashed” in “Stroke Options”, give it “Rounded Caps and Corners” and “Align Center”.
10 - Double-click on top of its Thumbnail and apply the following “Layer Styles”:
Texture: (Extra Heavy Canvas 128 x 128 pixels, Grayscale mode)
Drop Shadow:
11 - Select the “Brush Tool” (B) and choose “Grass” from the “Assorted Brushes” default to Photoshop.
12 - Head to the “Brush Panel” and apply the following values:
Shape Dynamics:
Scattering:
Dual Brush: (Chalk 36 pixels)
Color Dynamics:
13 - In the “Brush Tip Size” Tab move the “Angle” to change the direction of the brush and make it look more realistic.
14 - Control-click on top of the “Smart Object” Thumbnail to make a selection, right-click on top of it and choose “Make Work Path”. Use a 1.0 Pixel “Tolerance” and click “OK”.
15 - Create a “New Layer” by clicking on the small button at the bottom of the “Layers Panel” and make sure it sits on top of the “Smart Object” Layer. Double-click on top of the “Foreground Color” swatch and select a light shade of blue from the Texture (we used #8ca1be). Do the same for the “Background Color” swatch but choose a dark shade of blue (we used #002968).
16 - Use the “Path Selection Tool”, right-click on top of the Path and choose “Stroke Path”. Choose “Brush” from the drop-down menu and click “OK”.
17 - Without deselecting, change the Brush Angle and reduce the “Size” in the “Brush Panel” and then “Stroke Path” again. Lower the “Opacity” of the Layer to 90%.
18 - Duplicate your Layer (Command/Control + J) and change the “Blending Mode” of the duplicate to “Multiply” with 100% “Opacity”. Drag your Duplicate Layer to place it under the “Smart Object” Layer but on top of the “Background” layer. Use “Free Transform” (Command/Control + T) to make it slightly bigger and make it look like a shadow.
19 - Select the “Pen Tool” (P) again and draw a Zig Zag from side to side inside your Rectangle. Make sure the same settings you used before are still selected.
20 - Right-click on top of the first Stroke Path thumbnail and choose “Copy Layer Style” then, right-click on top of the Zig Zag thumbnail and choose “Paste Layer Style”.
21 - Your Artworks should be similar to this.
by @lornacane


