Using Fonts in Affinity Designer
Learn how to use fonts in Affinity Designer with this tutorial.

Learn how to use fonts in Affinity Designer with this tutorial.
In this Affinity Designer font tutorial, we will show you how to use the fonts installed on your system. This even includes glyphs that come with your fonts. Fonts are an essential tool for creating a visually informative way of communicating with viewers. In today’s tutorial, we will give you a quick guide on how to use fonts in Affinity Designer.
For this super easy tutorial we will be using the Toddler Tantrums font. We have more hand lettering fonts to choose from if you want something a little different.
We need to download and install our fonts before opening Affinity Designer. Once done, open Affinity Designer and create a new document.
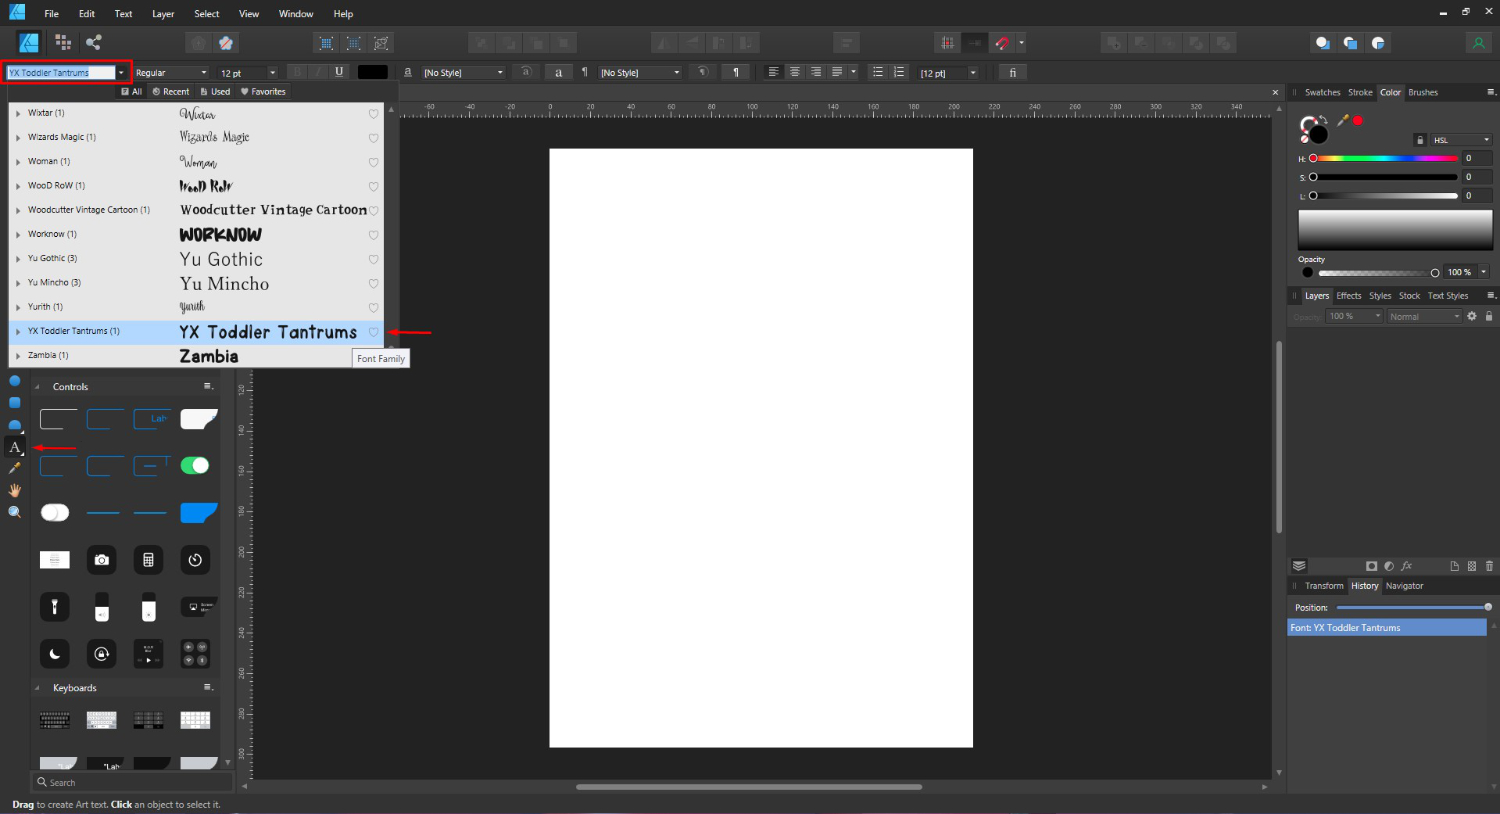
To add text you will need to either use the Artistic or Frame text tool, found on the left side toolbar. We chose to use the Artistic Text tool. Once you have chosen the text tool, go to the Font Family top left to select your font.
You can click on the drop down arrow and choose from the selection of fonts. You can also type in the name of the font to be taken straight to it.

With the font selected, click + drag out your mouse anywhere on the document. Clicking + dragging will size the text when using the Artistic Text tool. Now start typing out your text.
The font size can be adjusted by changing the size on the top toolbar.

If your font contains a set of styles like Bold and Italics, you will find it under the Font Style option on the top toolbar.

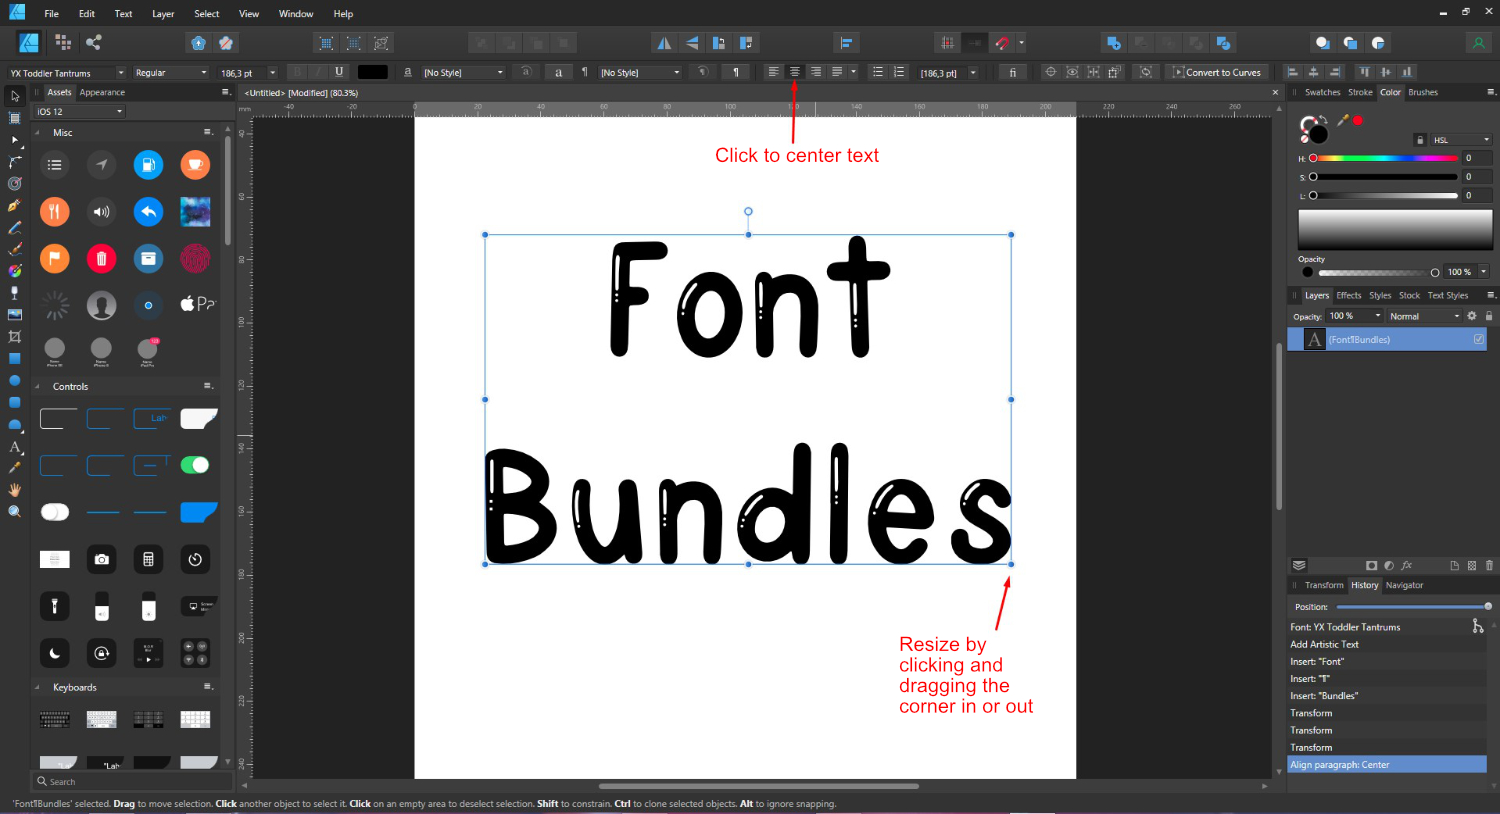
Here we chose to resize the text by clicking + dragging a corner handle out. We also centered our text.

Why not take your text a step further by adding glyphs if your font contains them?
A font that is easy to read is best suited when using the Frame Text tool. A fancy and fun font works great for headings when using the Artistic Text tool. We have a great in depth tutorial on text basics in Affinity Designer if you would like to learn more.
In order to really maximize your design capabilities with Affinity Designer, you will really need to use some installed fonts. The pre-installed fonts are great but limited. Purchasing fonts from Font Bundles will give you premium quality fonts with a commercial license. Choosing the perfect font can enhance your design ...
Discover how to make SVG files to sell using Affinity Designer and add variety to your digital store. Extremely popular with crafters, SVG cut files can be used with Cricut and Silhouette cutting machines. Knowing how to create a good SVG cut file is key to successful sales and happy ...
We have an awesome tutorial for you today creating animated GIFs using Affinity Designer. You will learn how to create a series of images in Affinity Designer. Then combine those images into a GIF using a third party site. For this tutorial we will be creating a simple yet fun ...
In this tutorial, you’ll be learning how you can make brushes in Affinity Designer based on your own designs and custom shapes.Vector brushes in Affinity Designer are basically png files stretched along a path. So the overall process involves the creation of a design, exporting it as a ...
Text Styles are presets that can be applied quickly and efficiently to a large amount of text. This is essential for projects that use text and require the ability to update across the platform. In this tutorial we will give a brief overview of how to use Affinity Designer Text ...
1- Open SCAL4. Click on the text type tool.2- Type your text.3- Using the text tool change the font to the one you need to make slightly thicker. I am using the font flawless fairytale from designbundles.net4- Resize the text. Hold the shift key to keep ...
By using our website you consent to all cookies in accordance with our cookie policy.


