
Watercolor brushes and paint effect in Photoshop
For this tutorial you will need a canvas or paper background image, a photograph or image you wish to use the effect with.
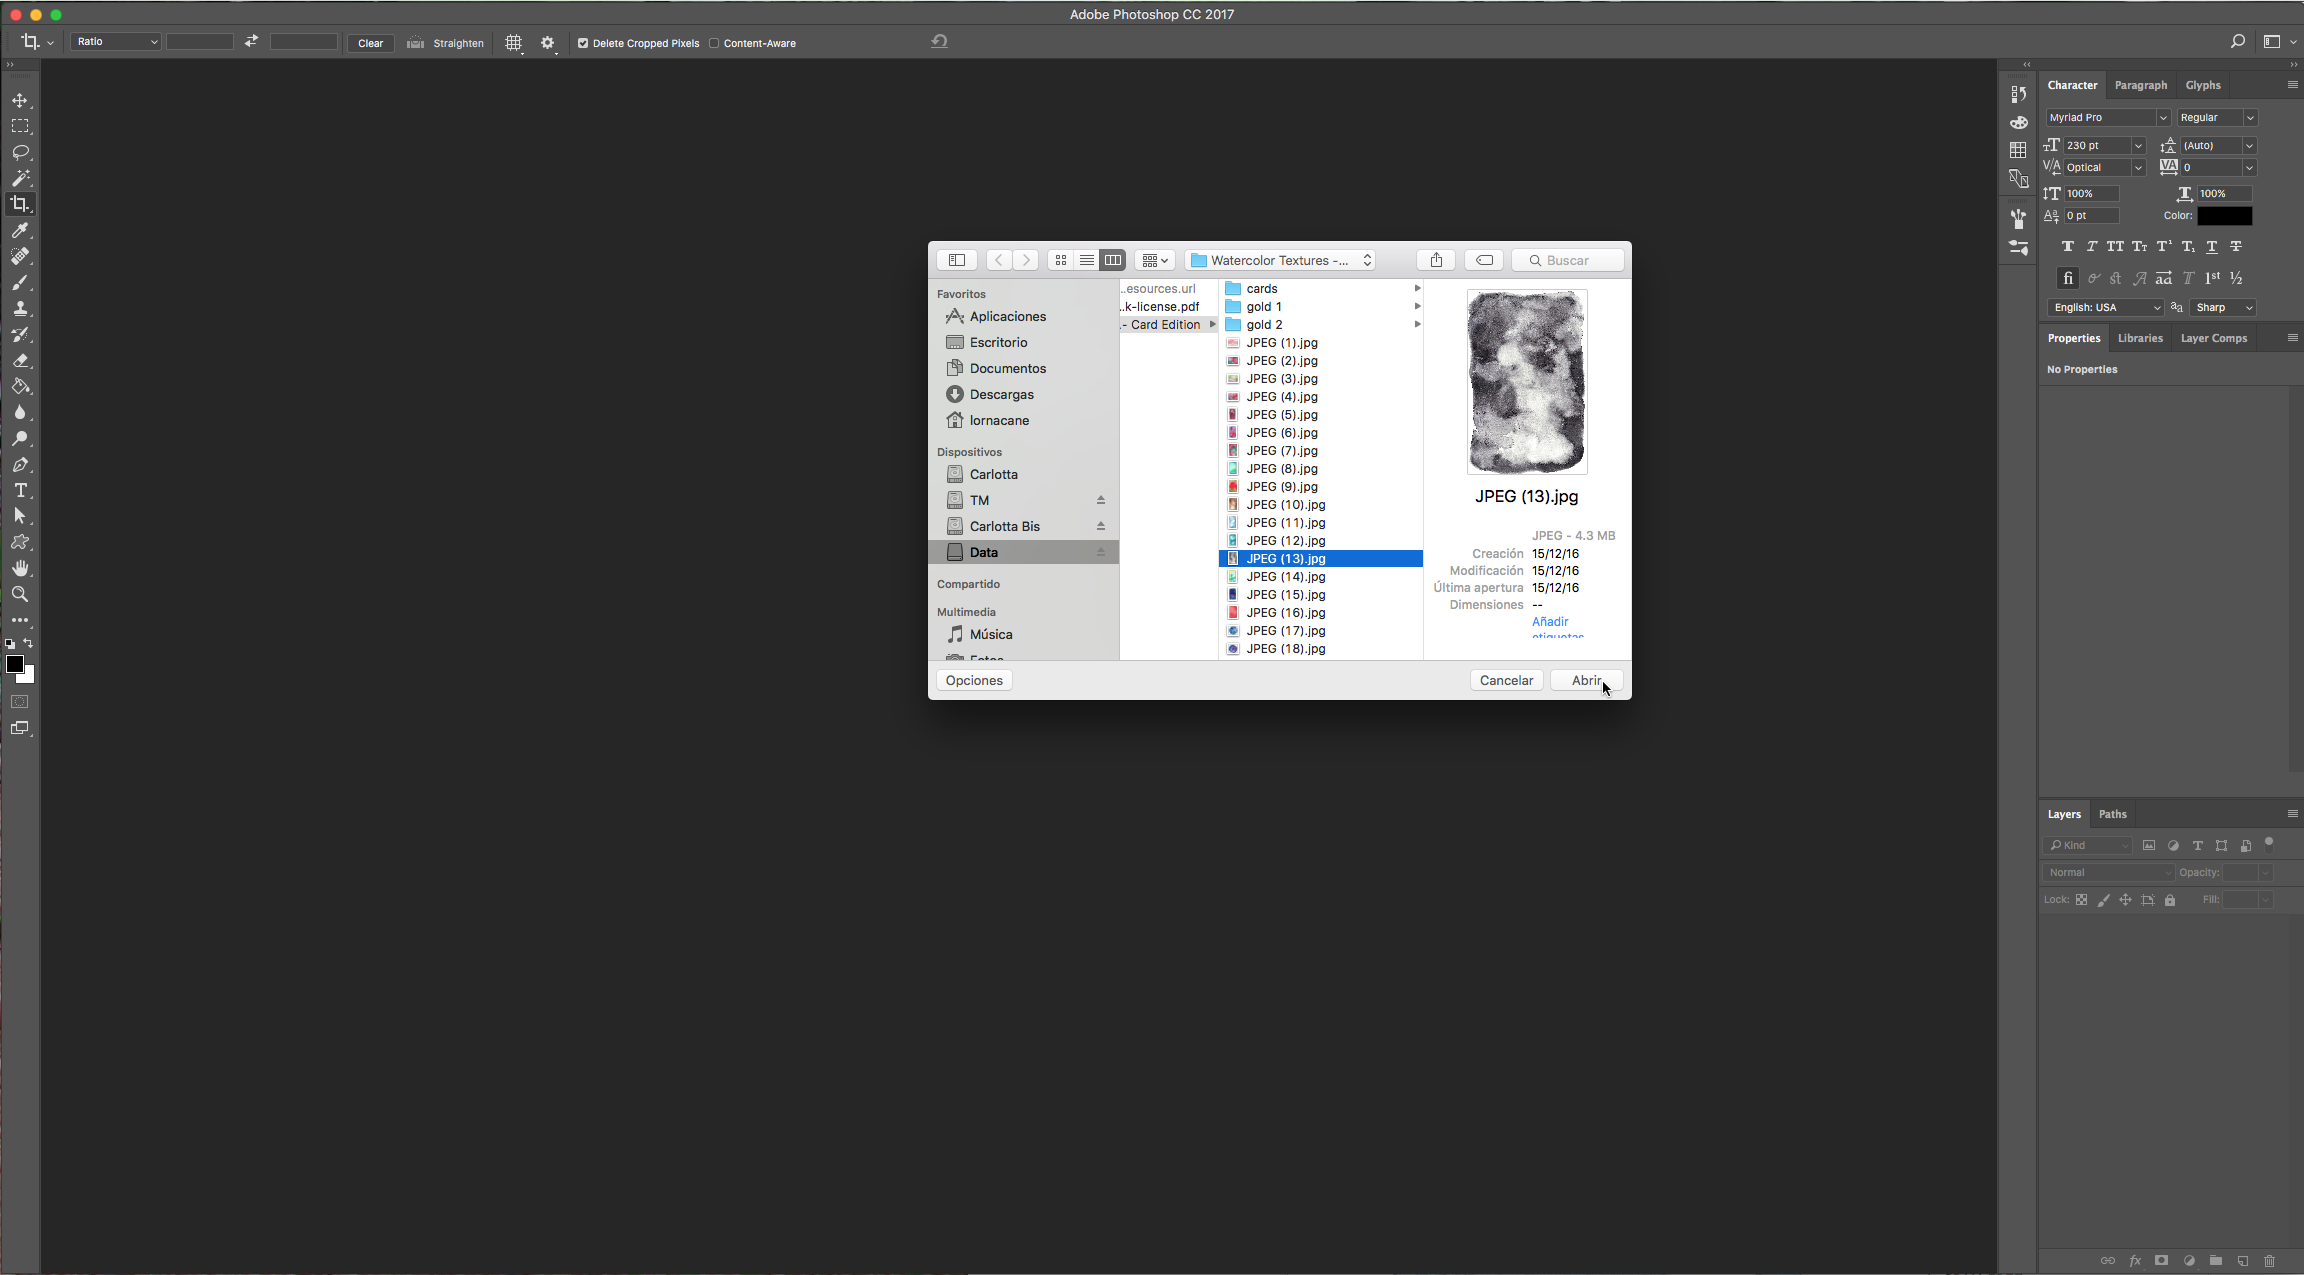
1 – First, let’s make some watercolor brushes for to use in this tutorial. Open the image of the texture you want to convert into a brush. In this case is better to use some textures that have a great contrast between colors.
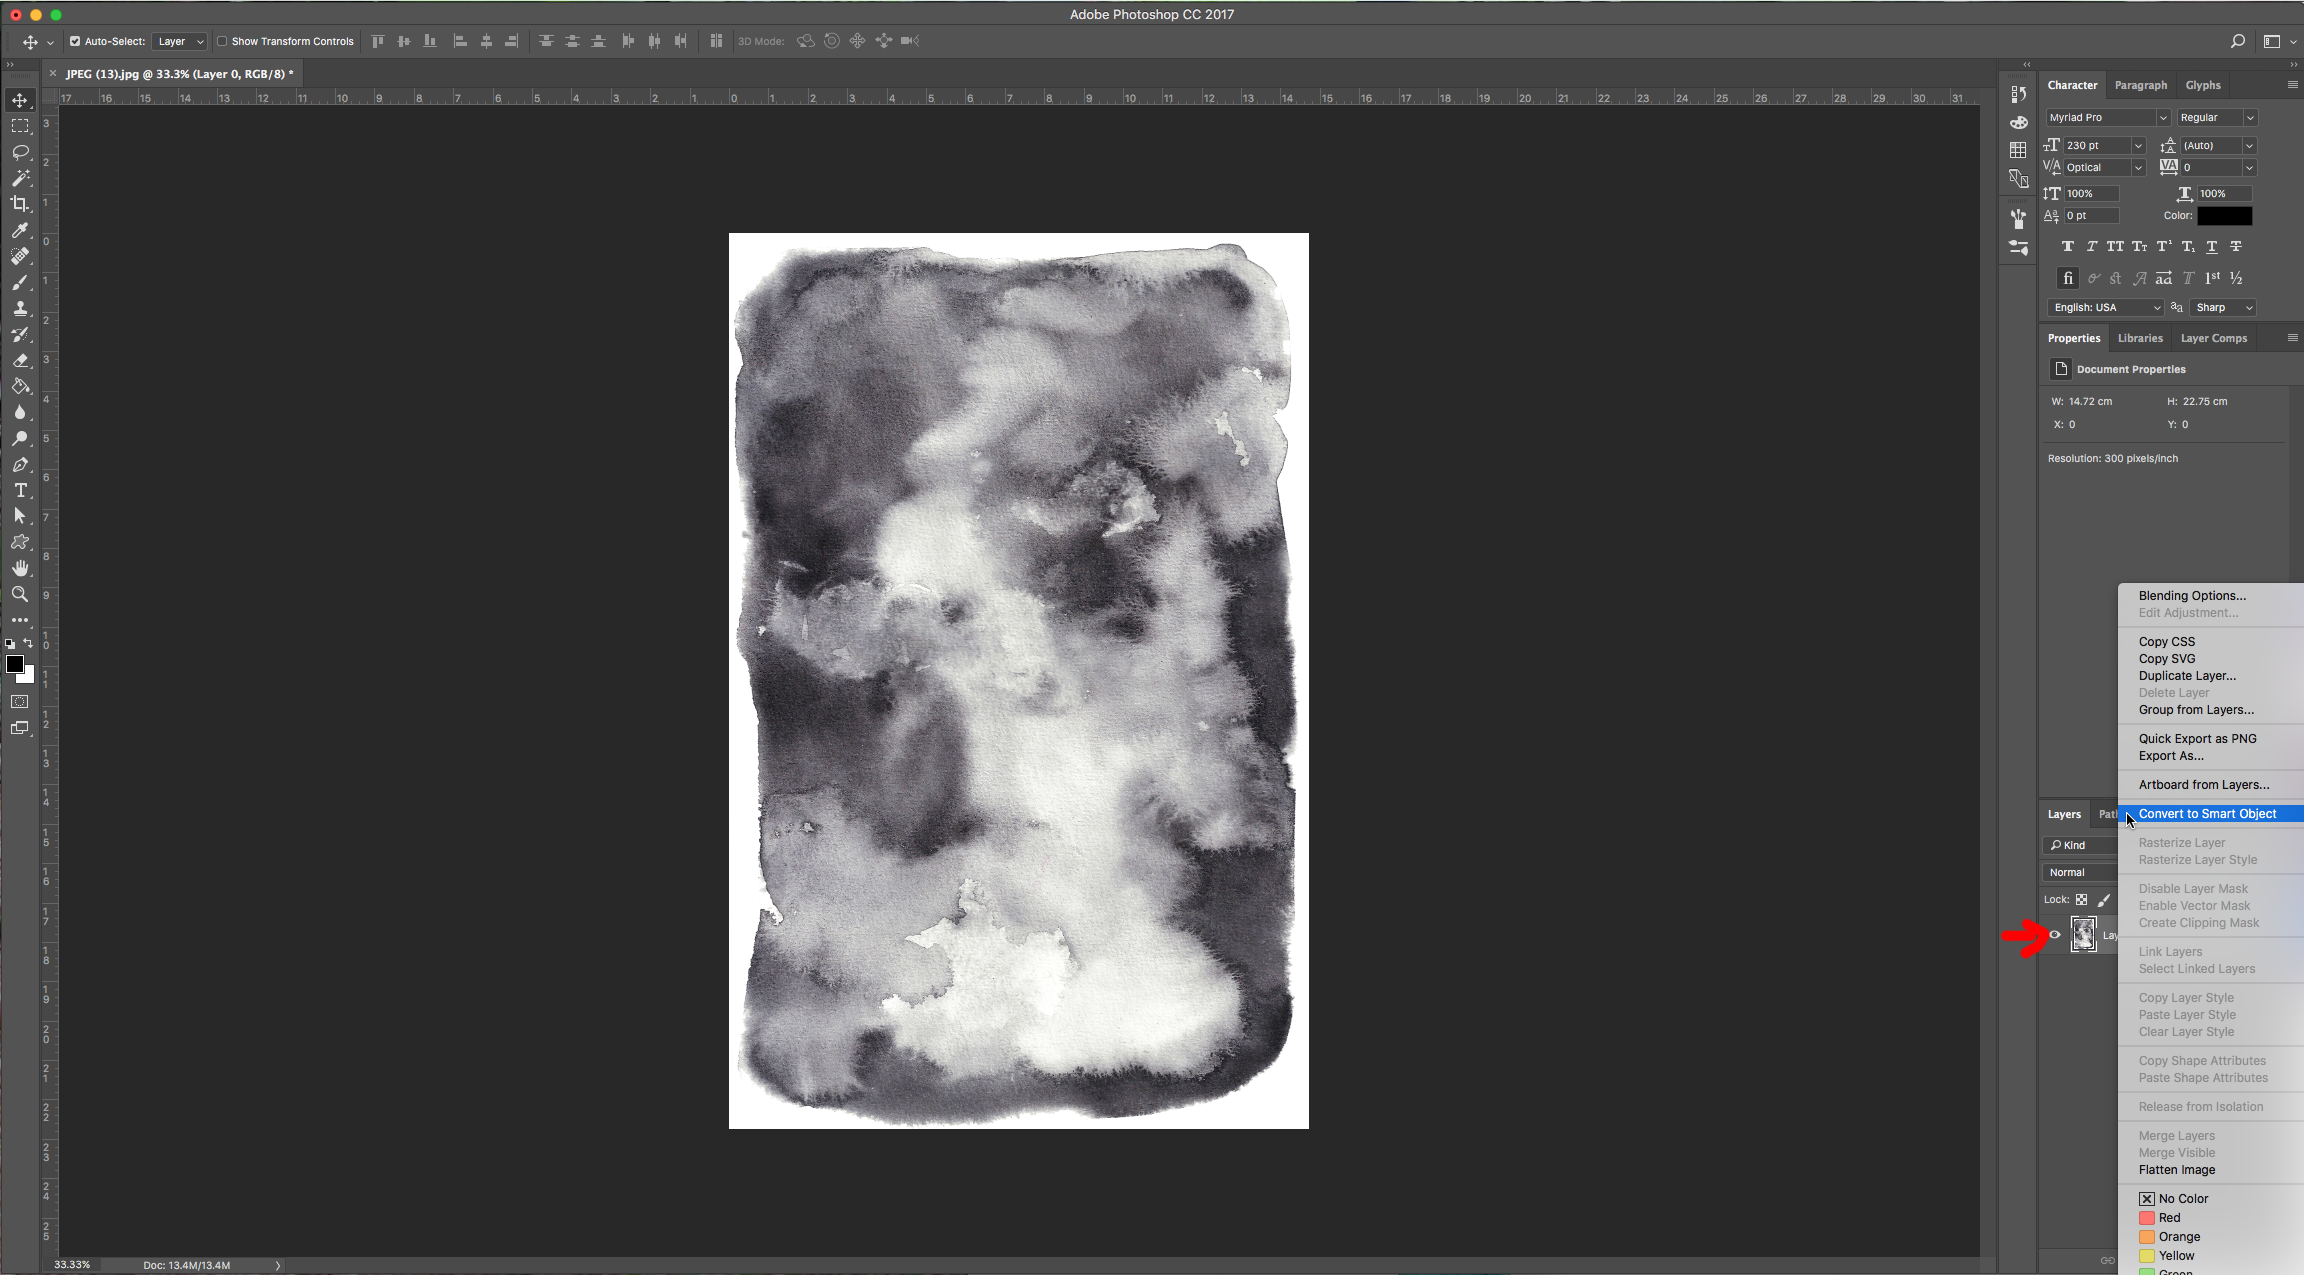
2 – Double-click on your Background to unlock it and then transform it into a Smart Object.
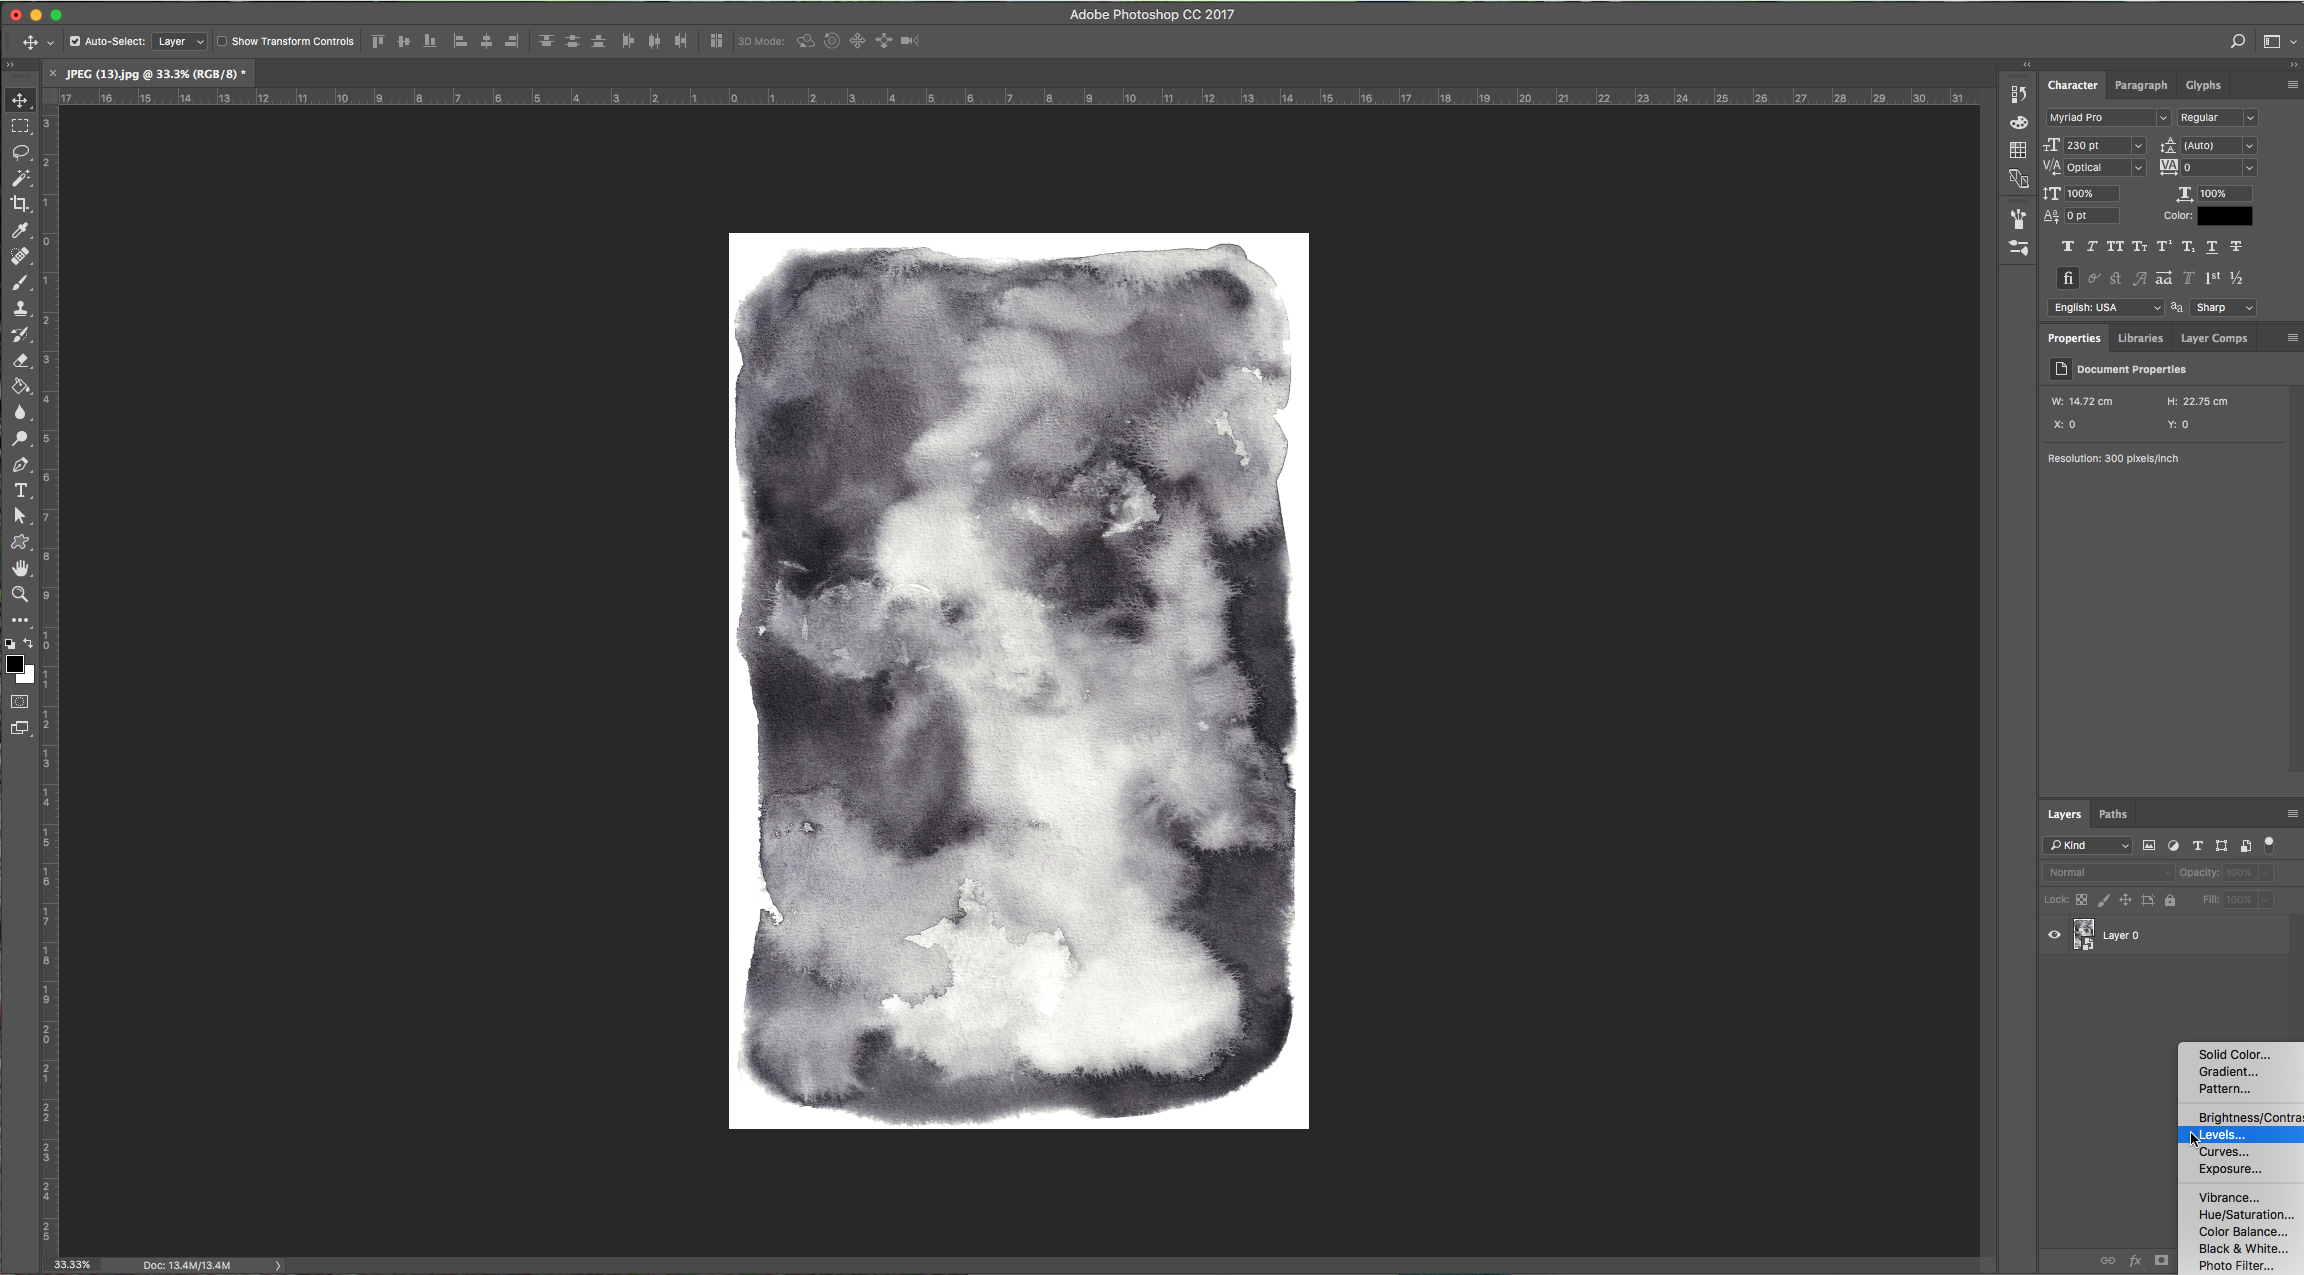
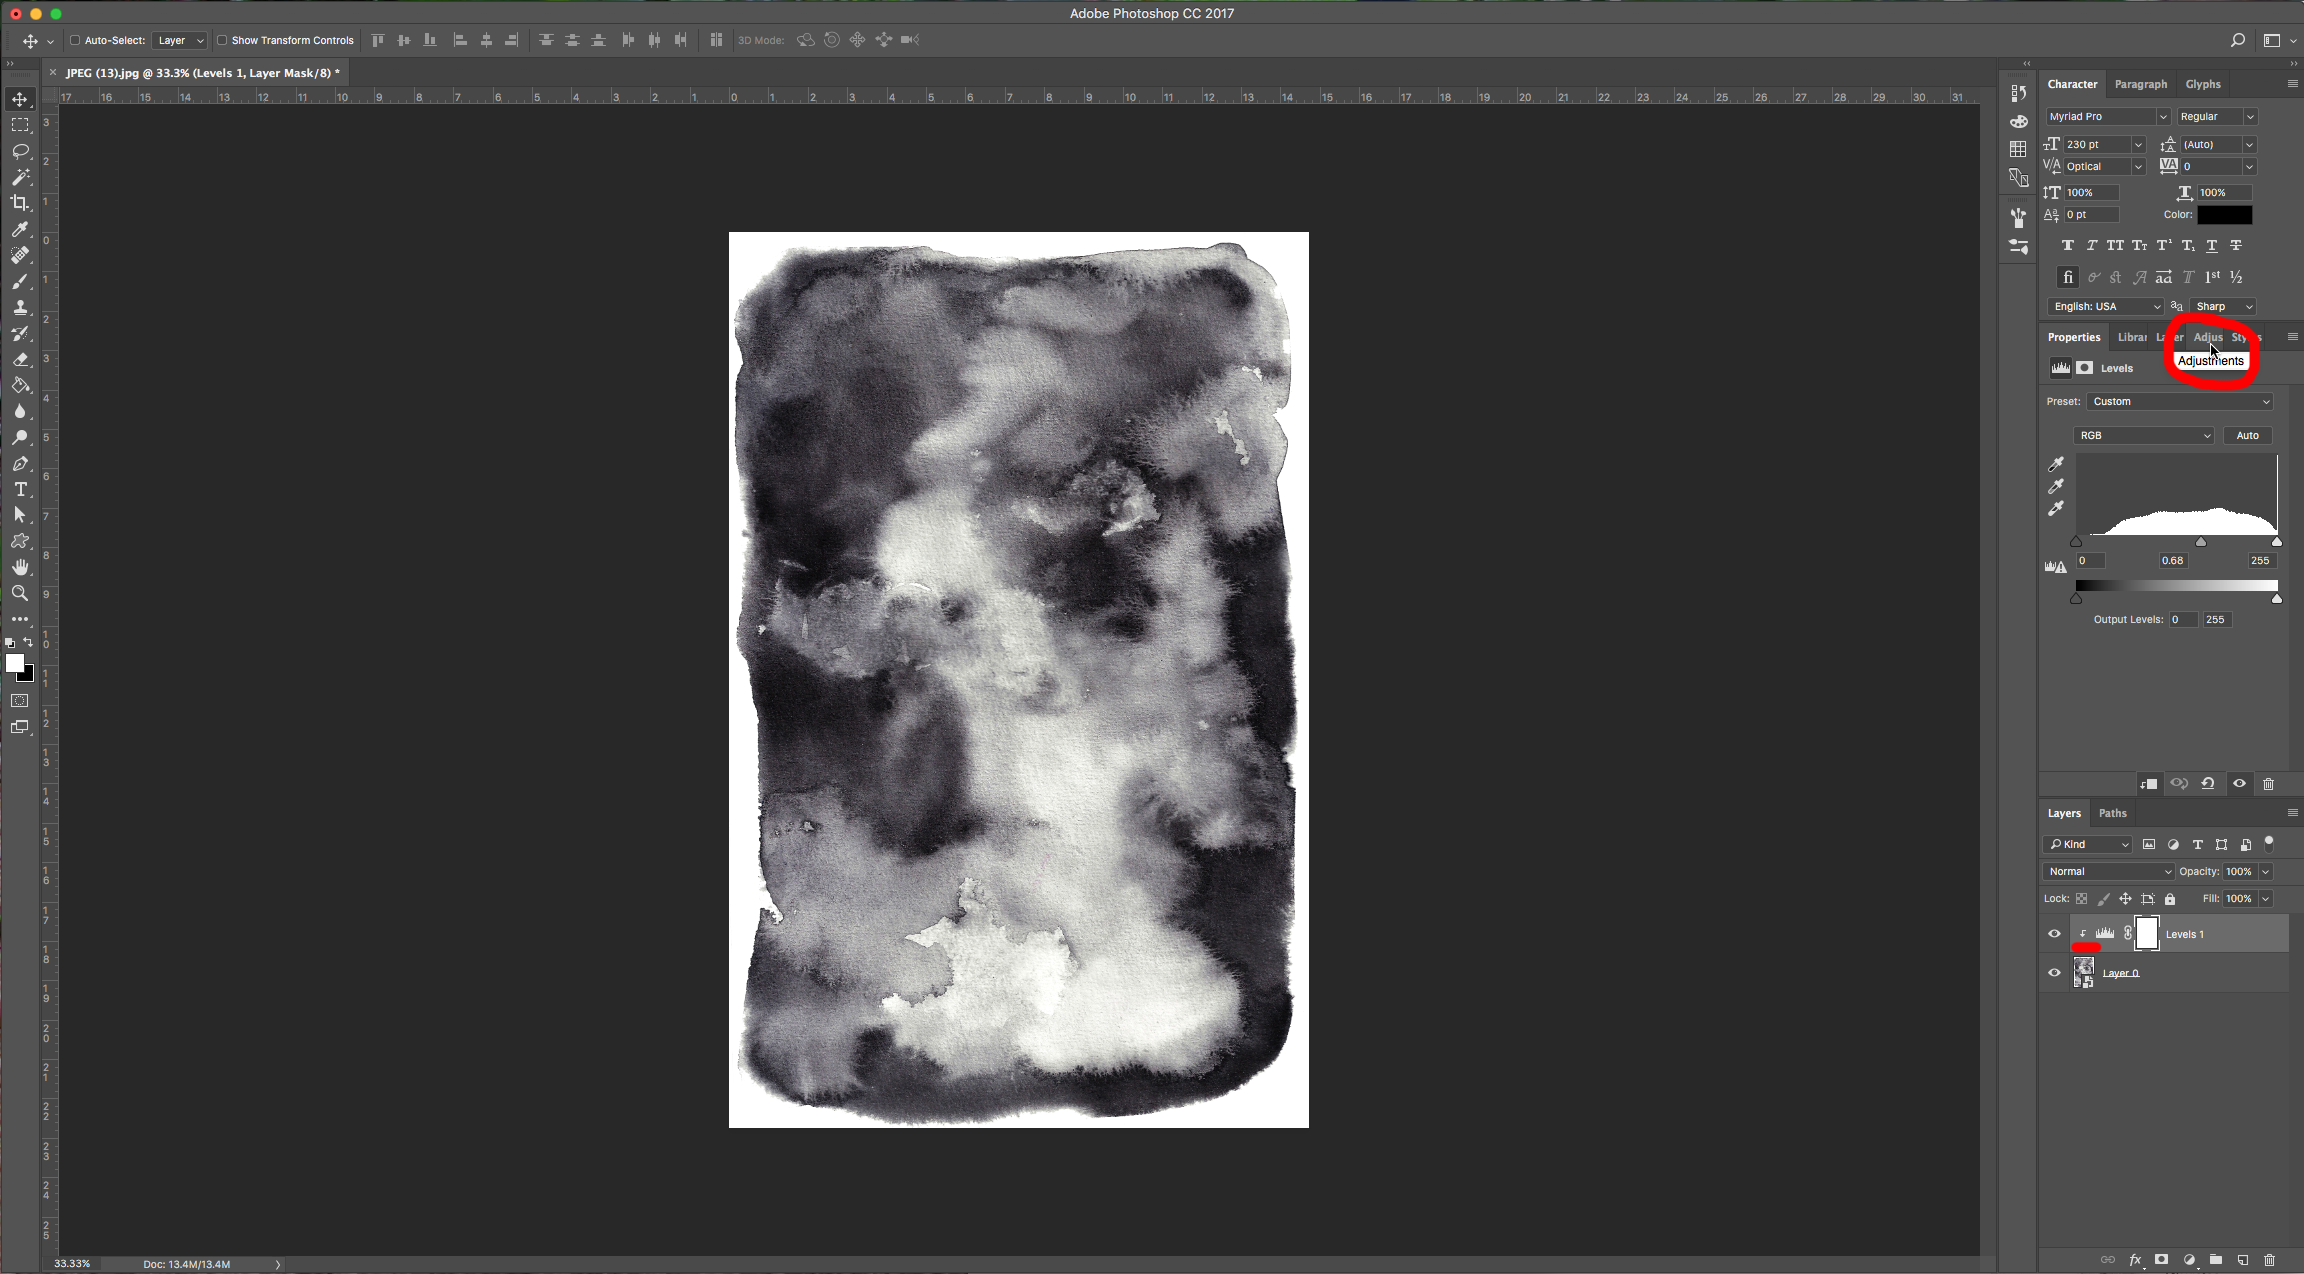
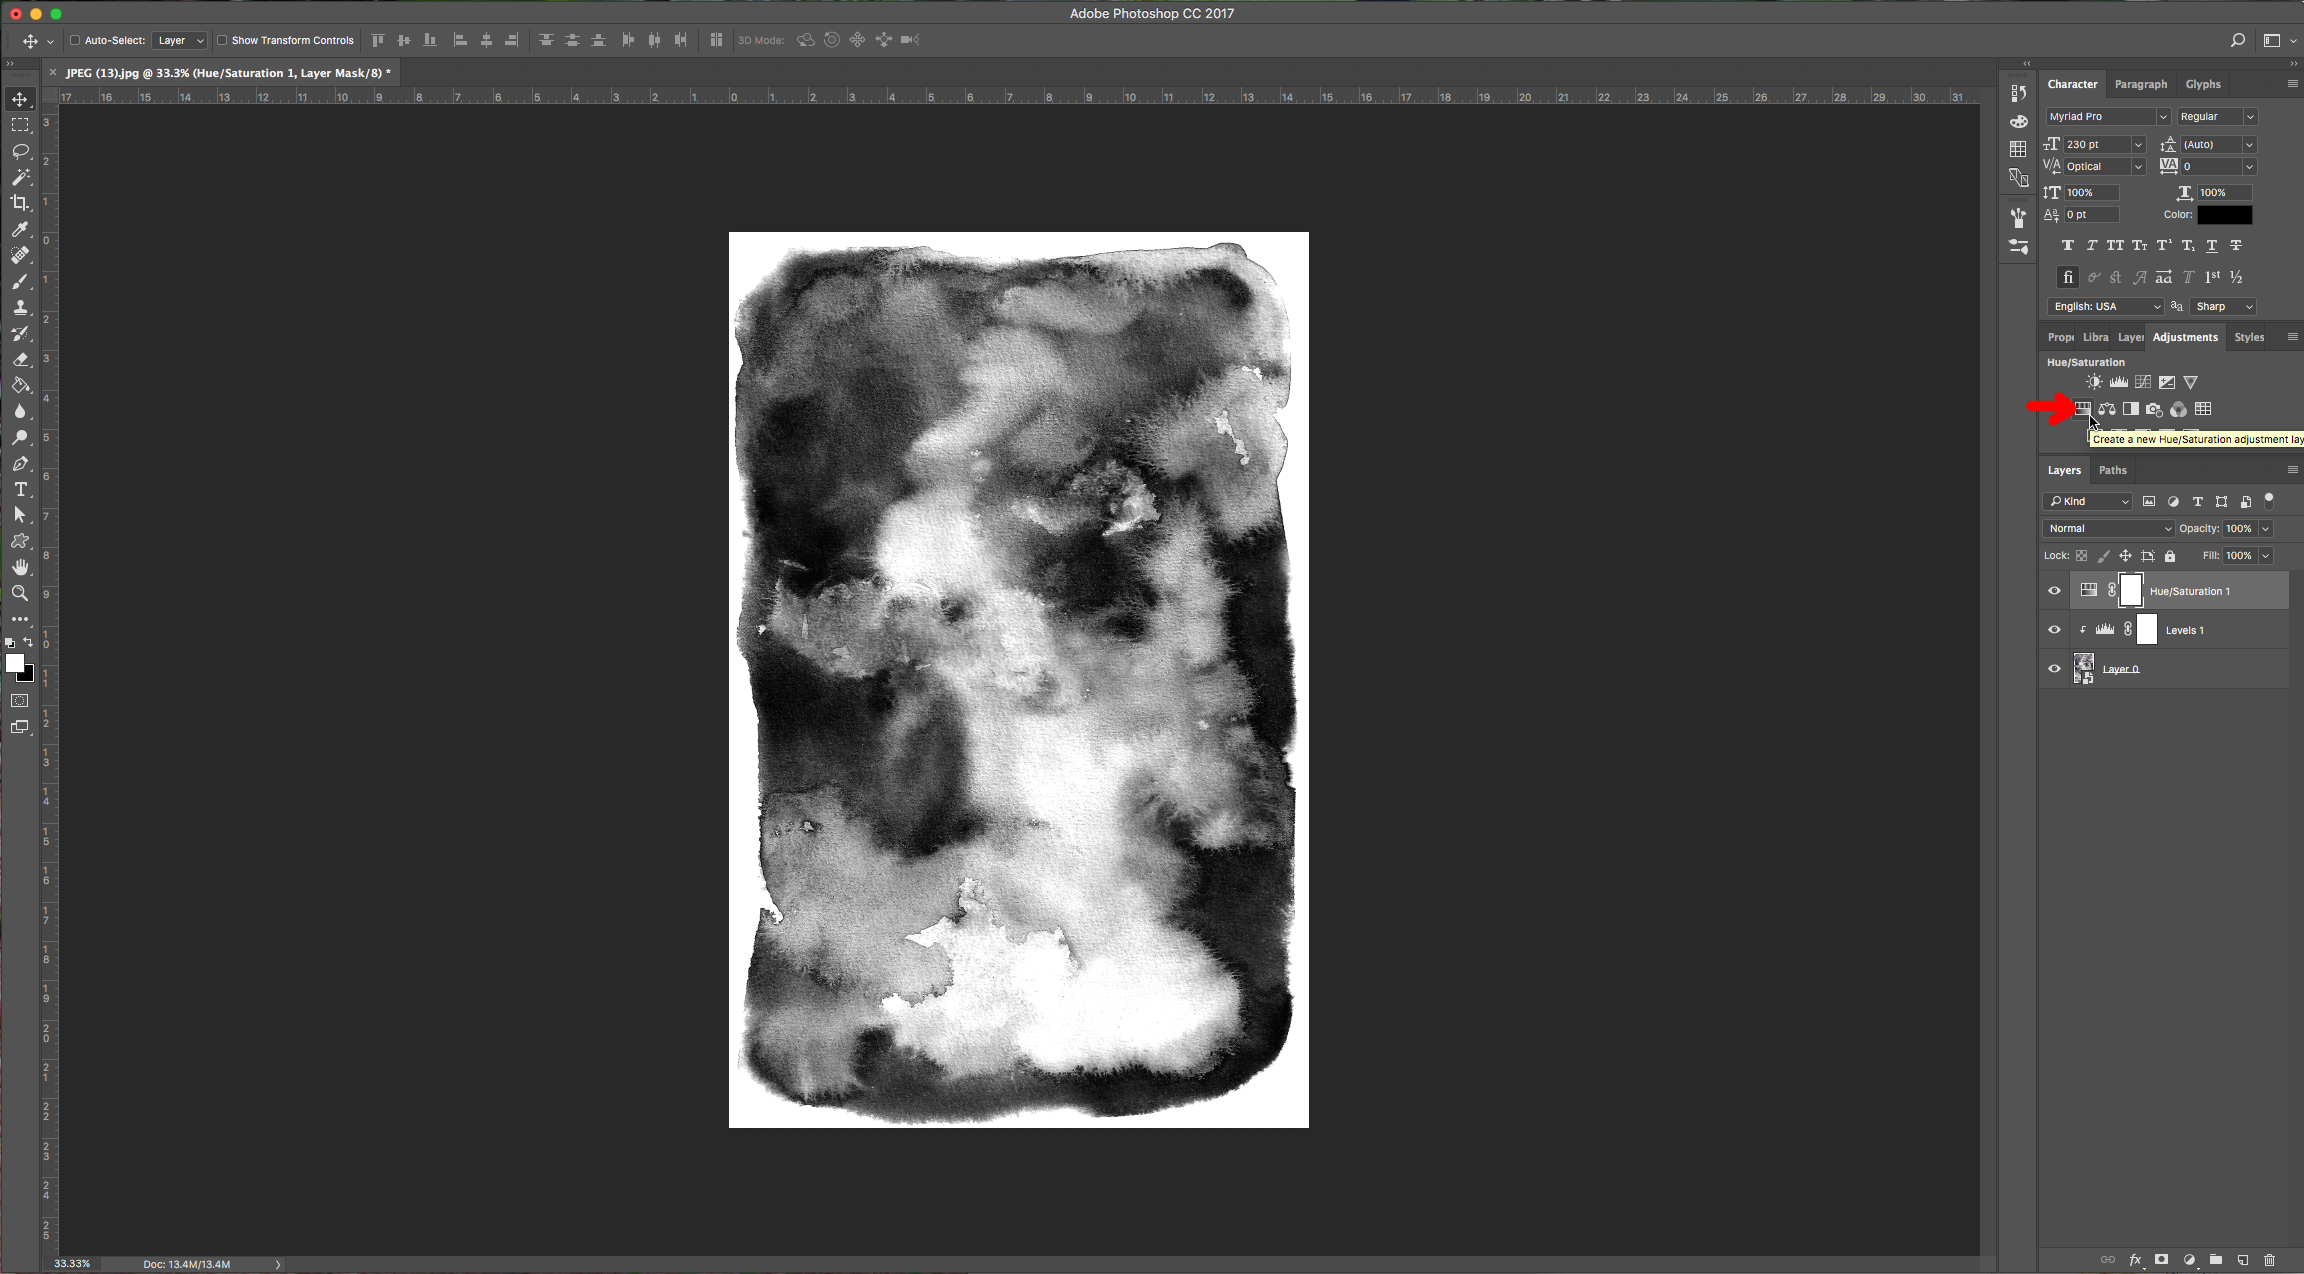
3 – Create an adjustment layer by clicking on the button at the bottom of your Layers Palette and choose levels or go to Window > Adjustments and select Levels in the menu (This will create a new adjustment layer). Then clip the layer to your texture. Move the middle lever to the right to make the dark colors darker and the background and light colors lighter. Depending on your texture you will have to move the other sliders as well to create the contrast you want.
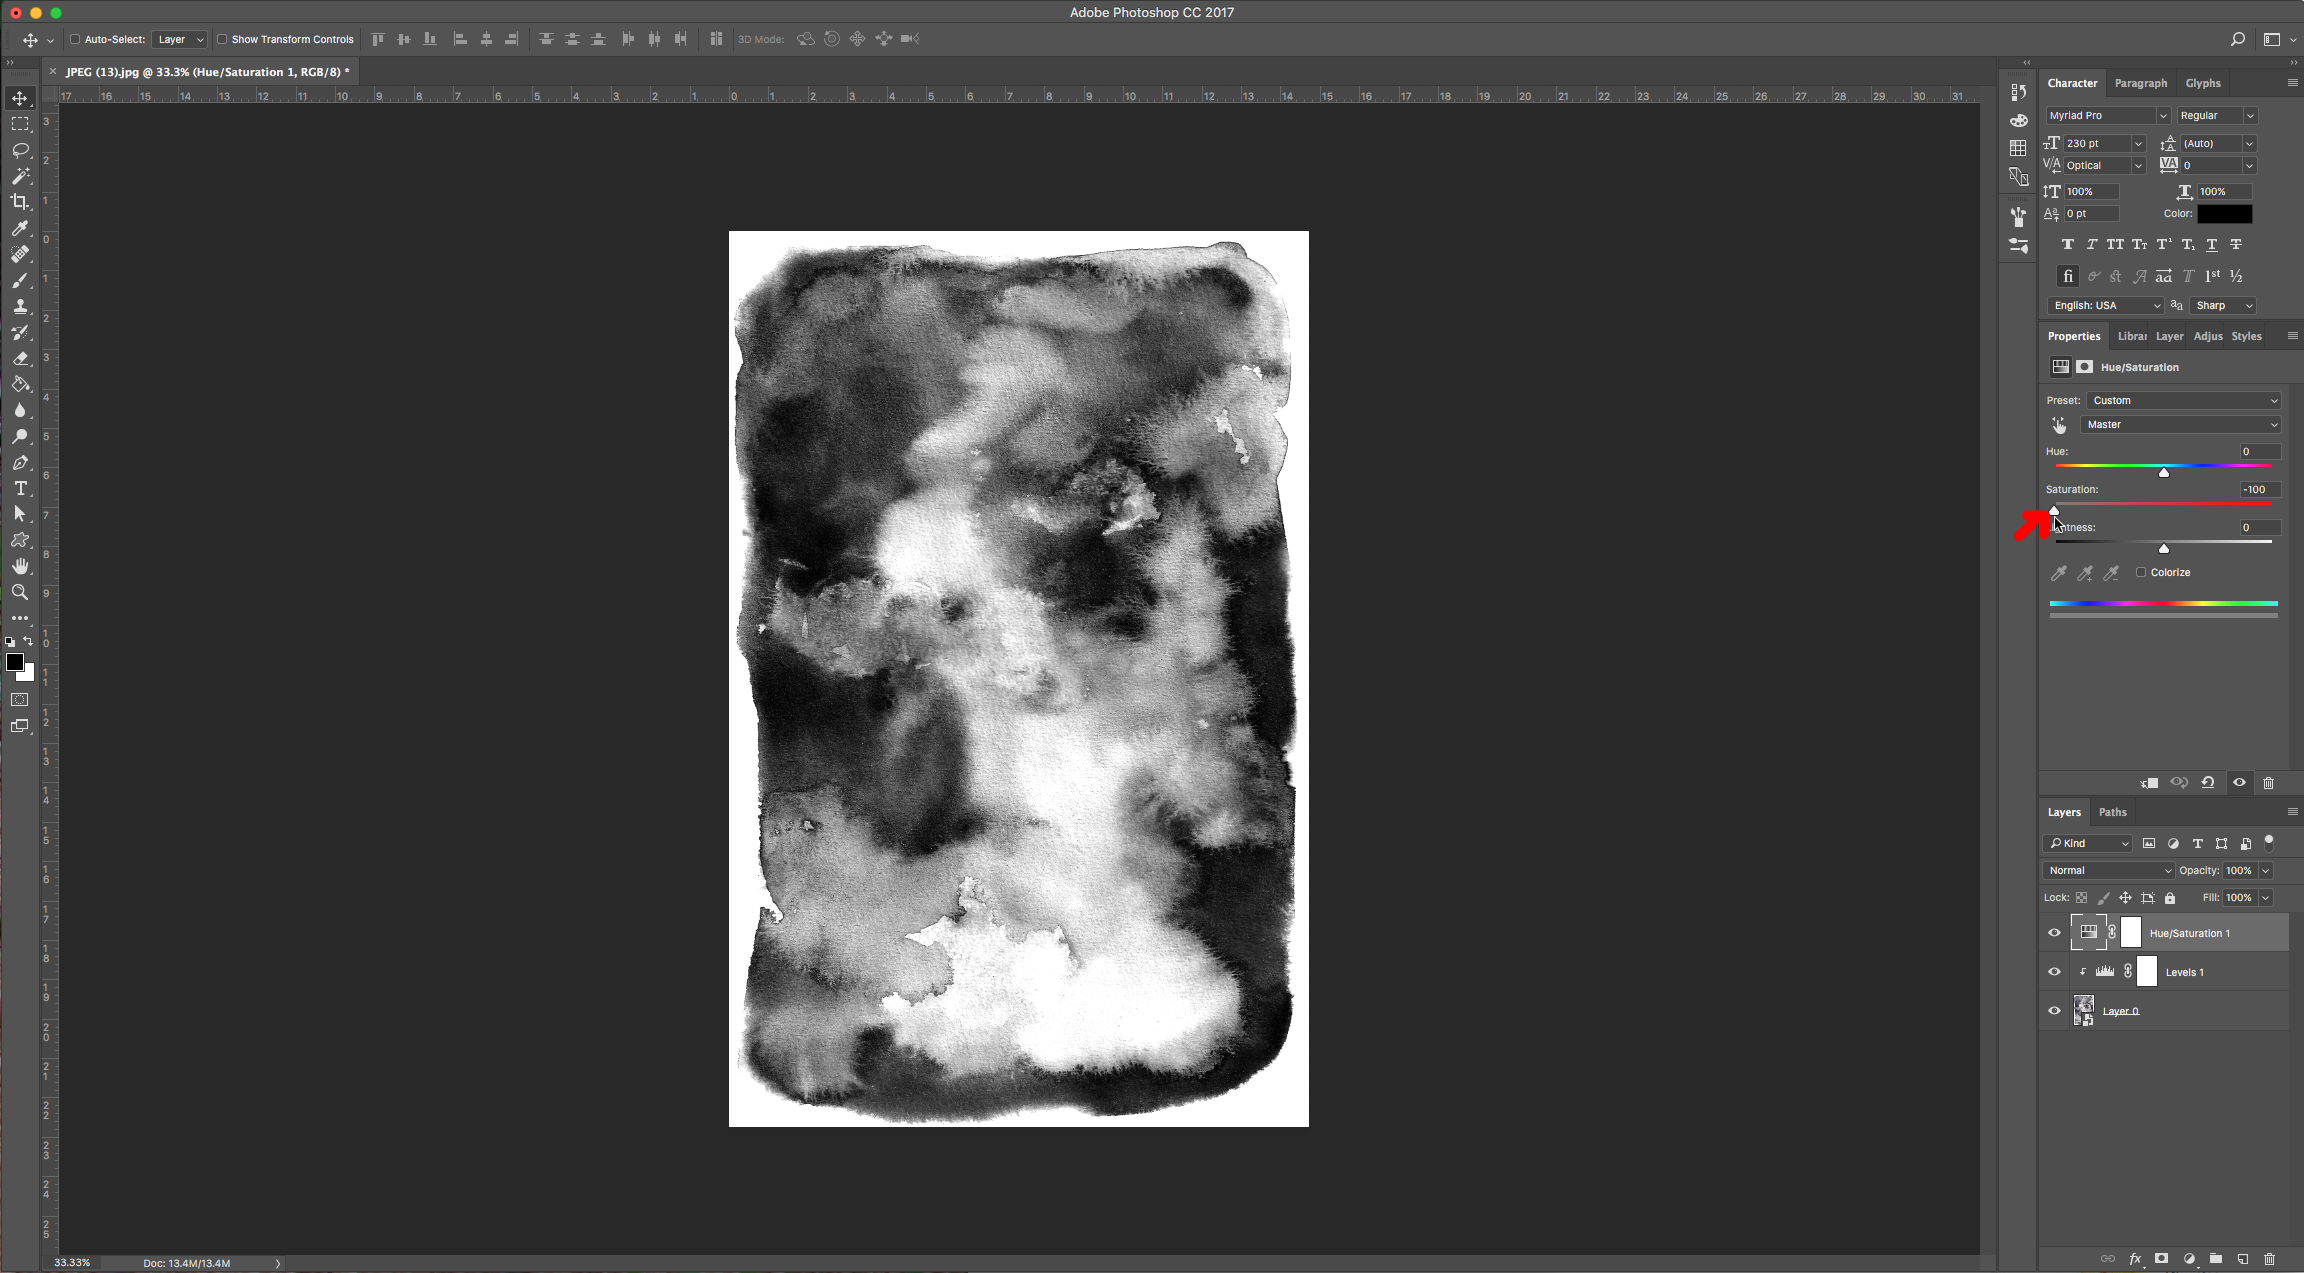
4 – Create a Hue/Saturation adjustment layer and turn the saturation to -100. Clip this layer to the texture too.
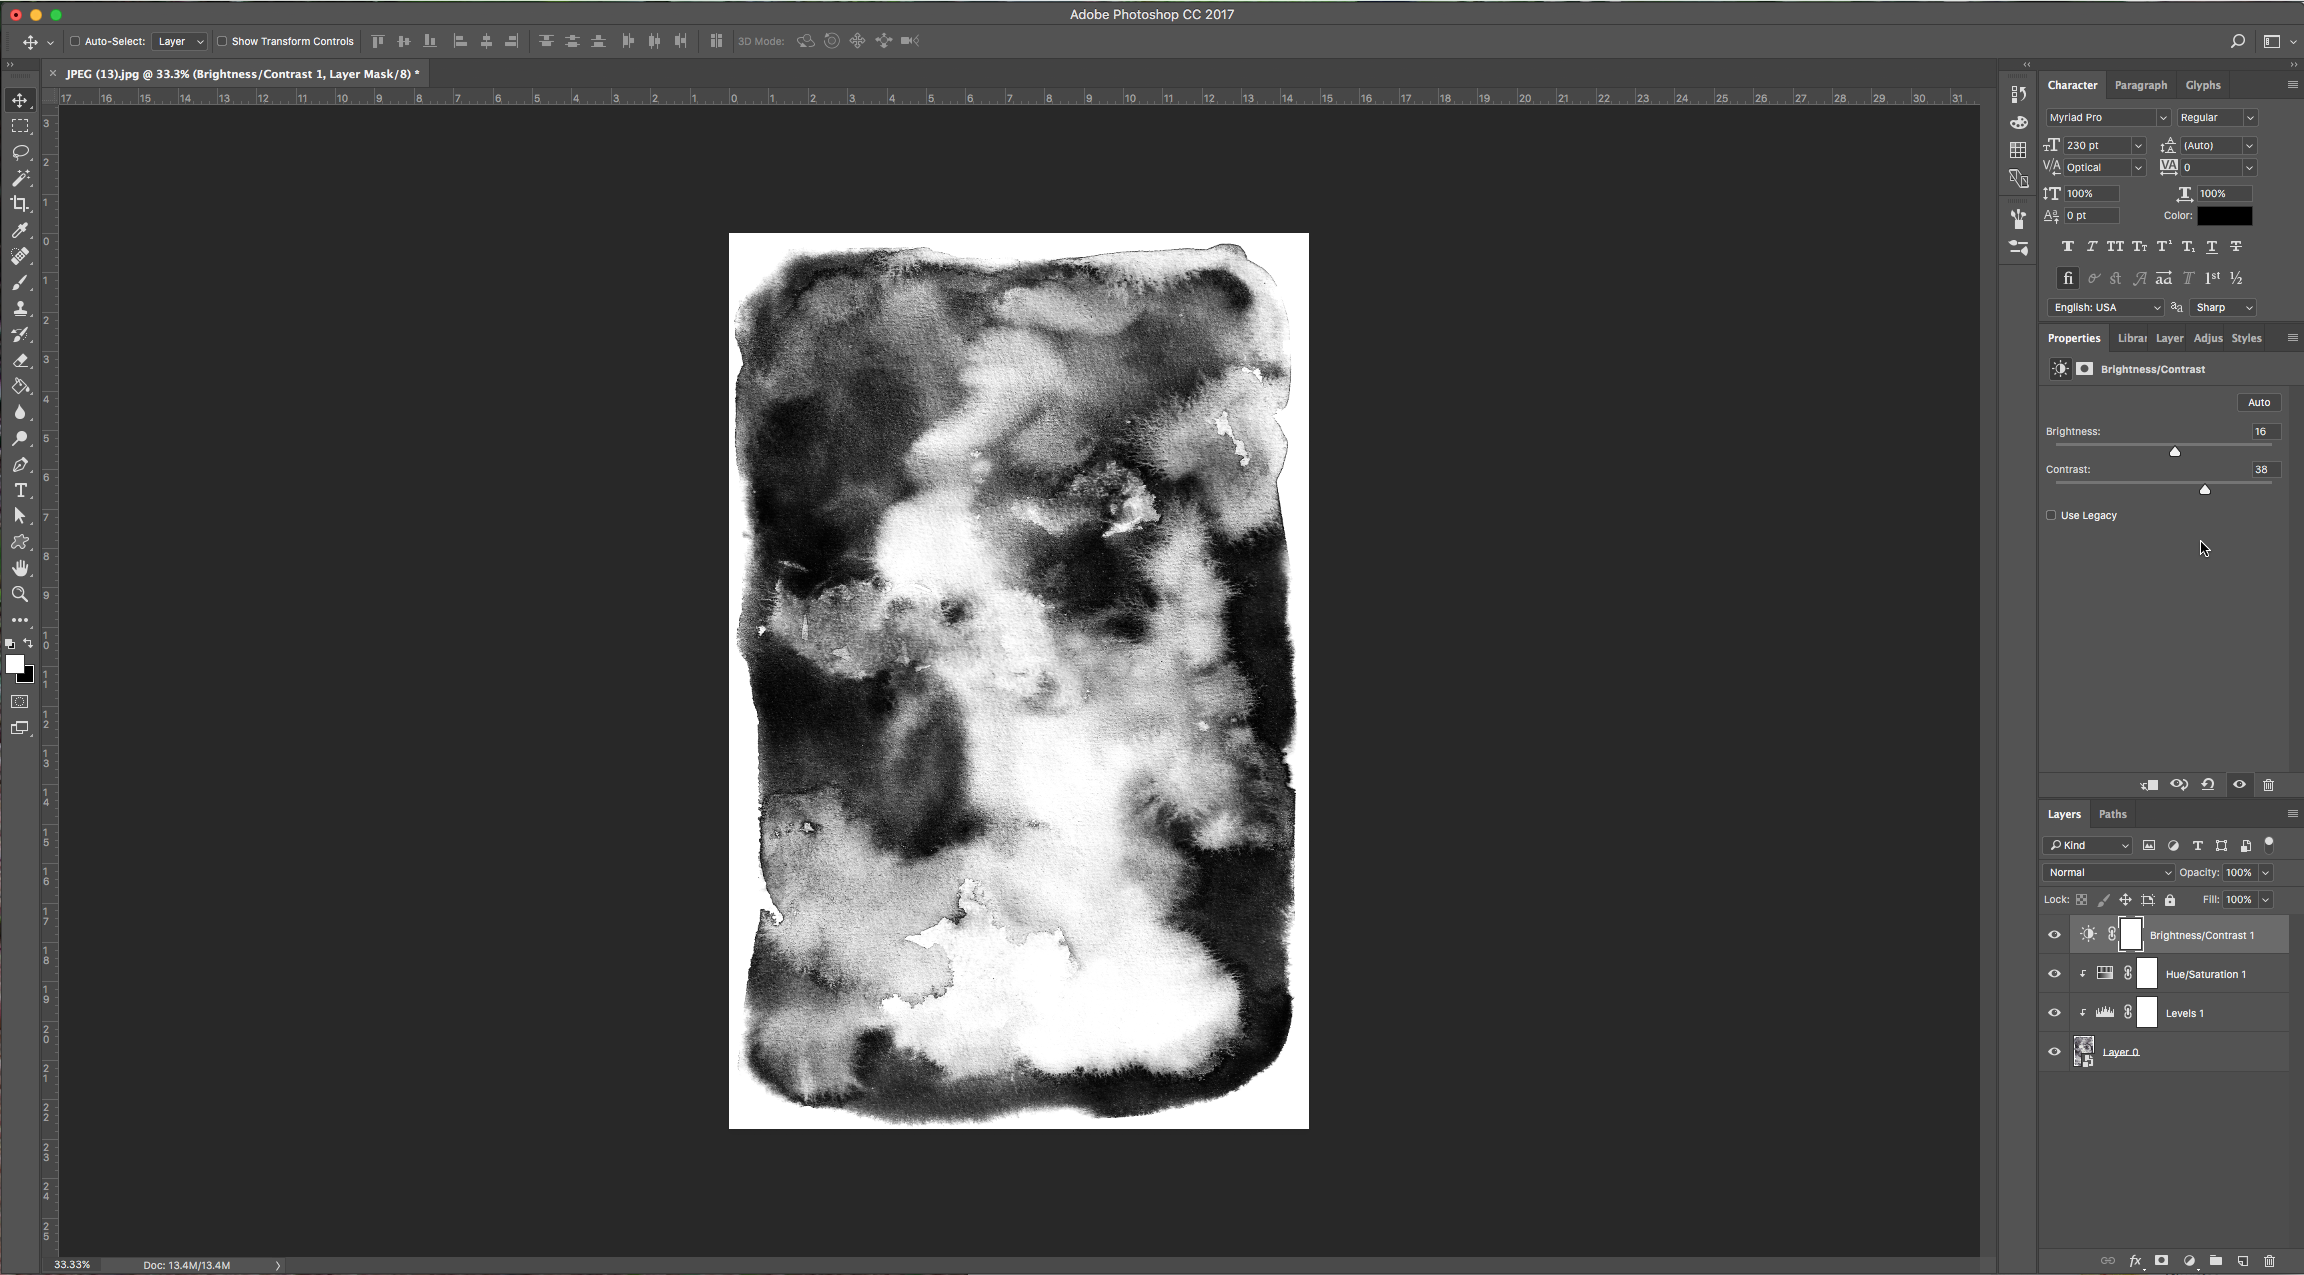
5 – Then make a Brightness and Contrast adjustment layer and tweak that one too. Clip it to your texture. You can save this file and apply this presets to other textures or change some values to tweak your brush.

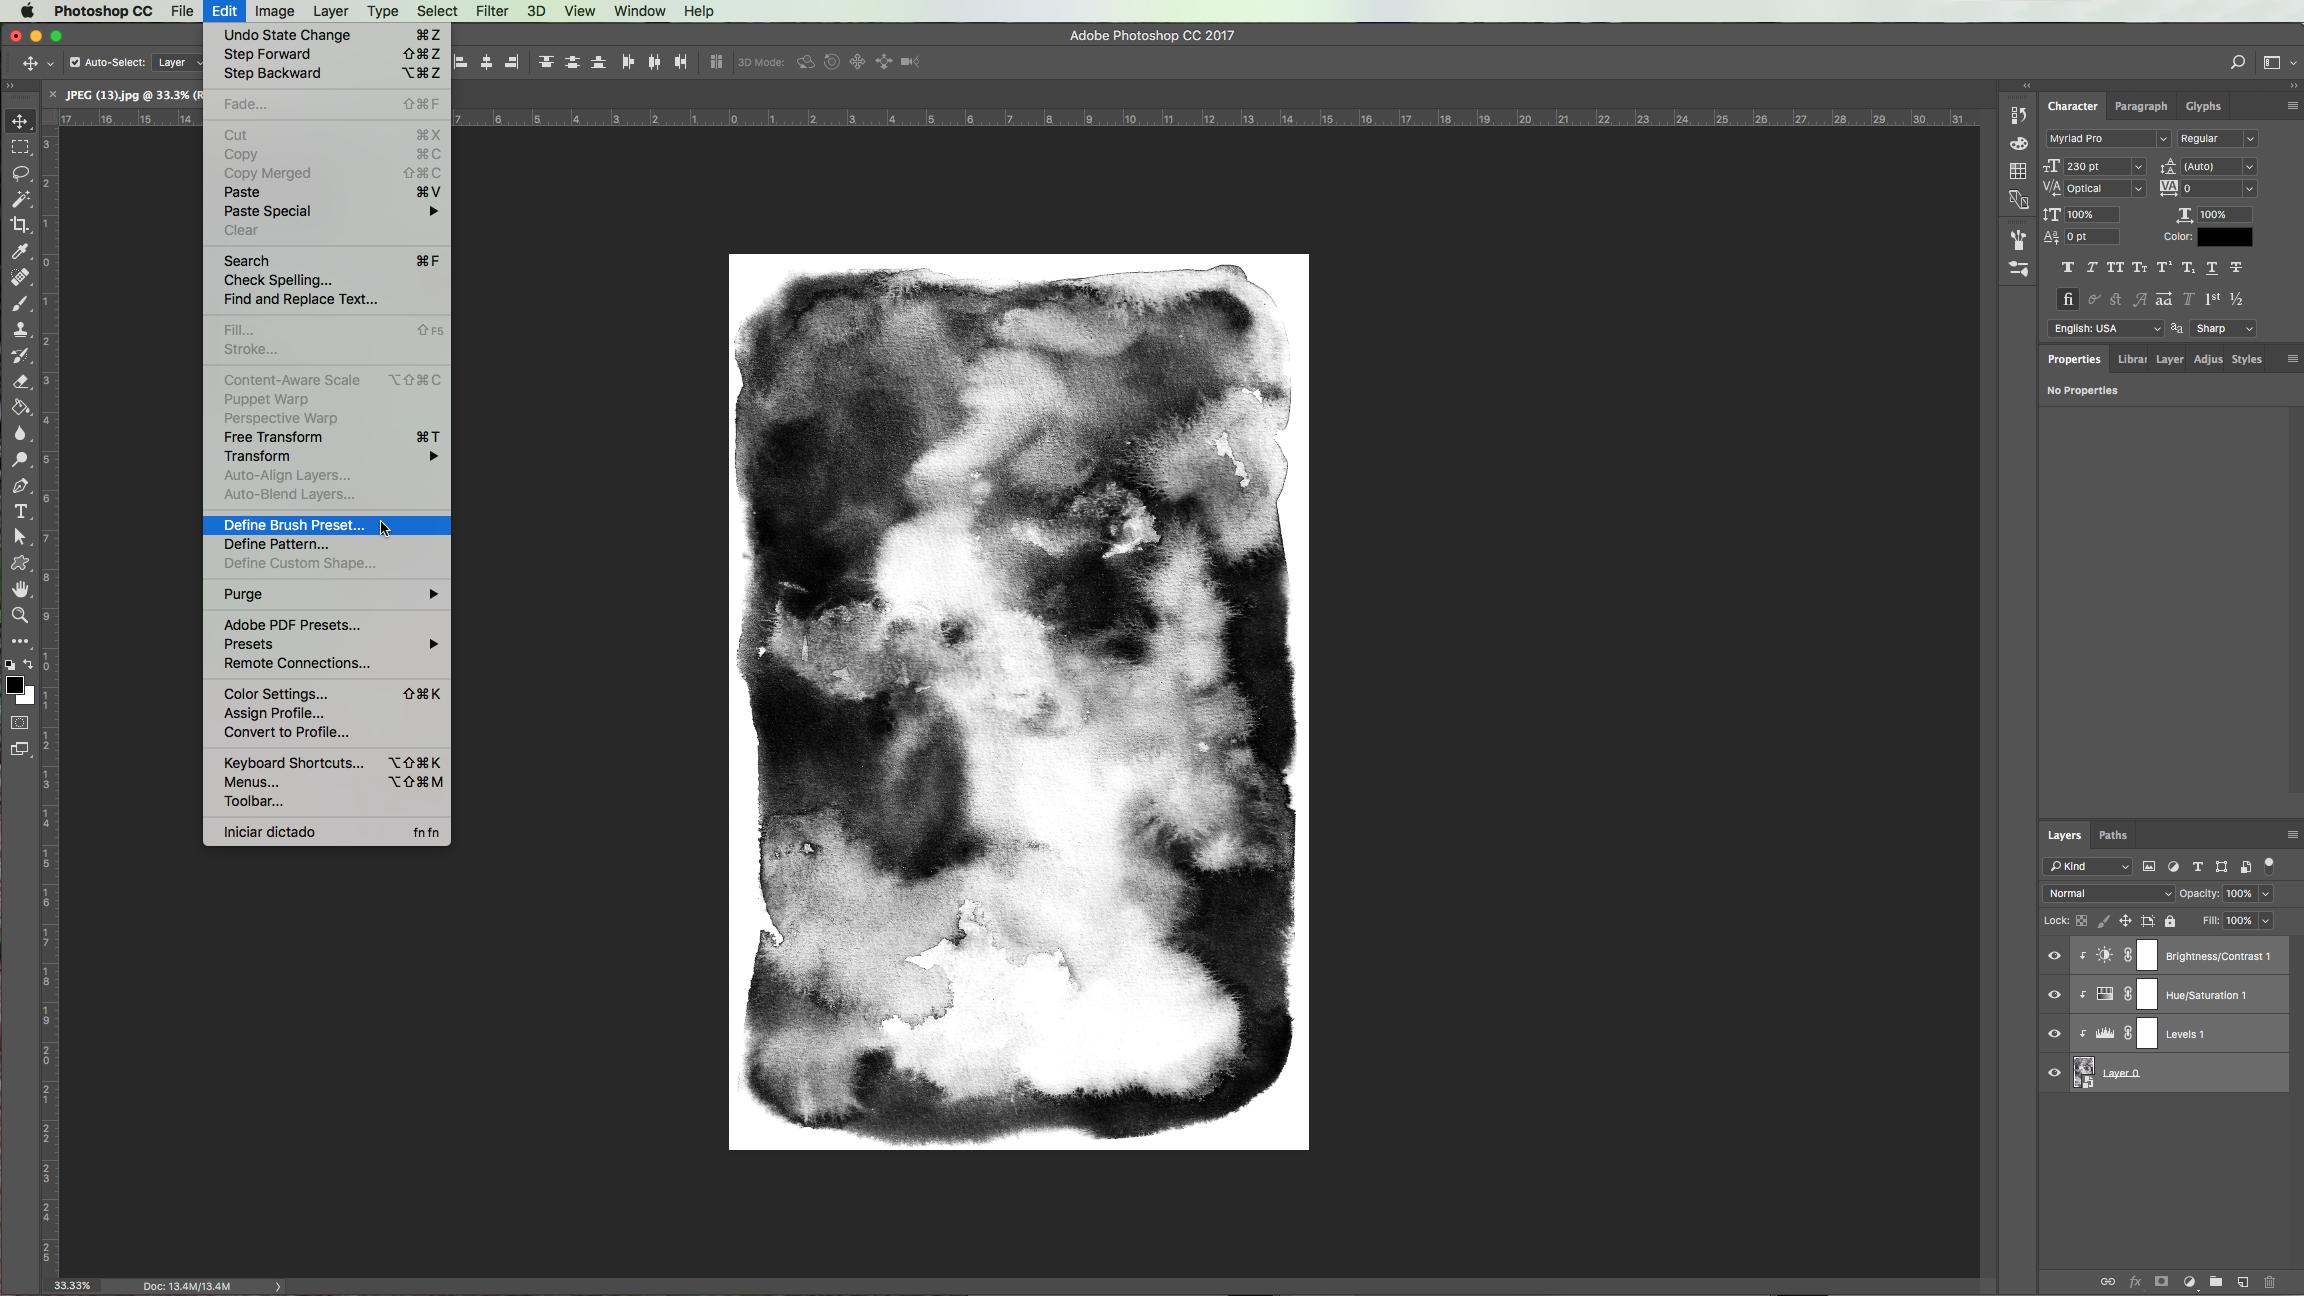
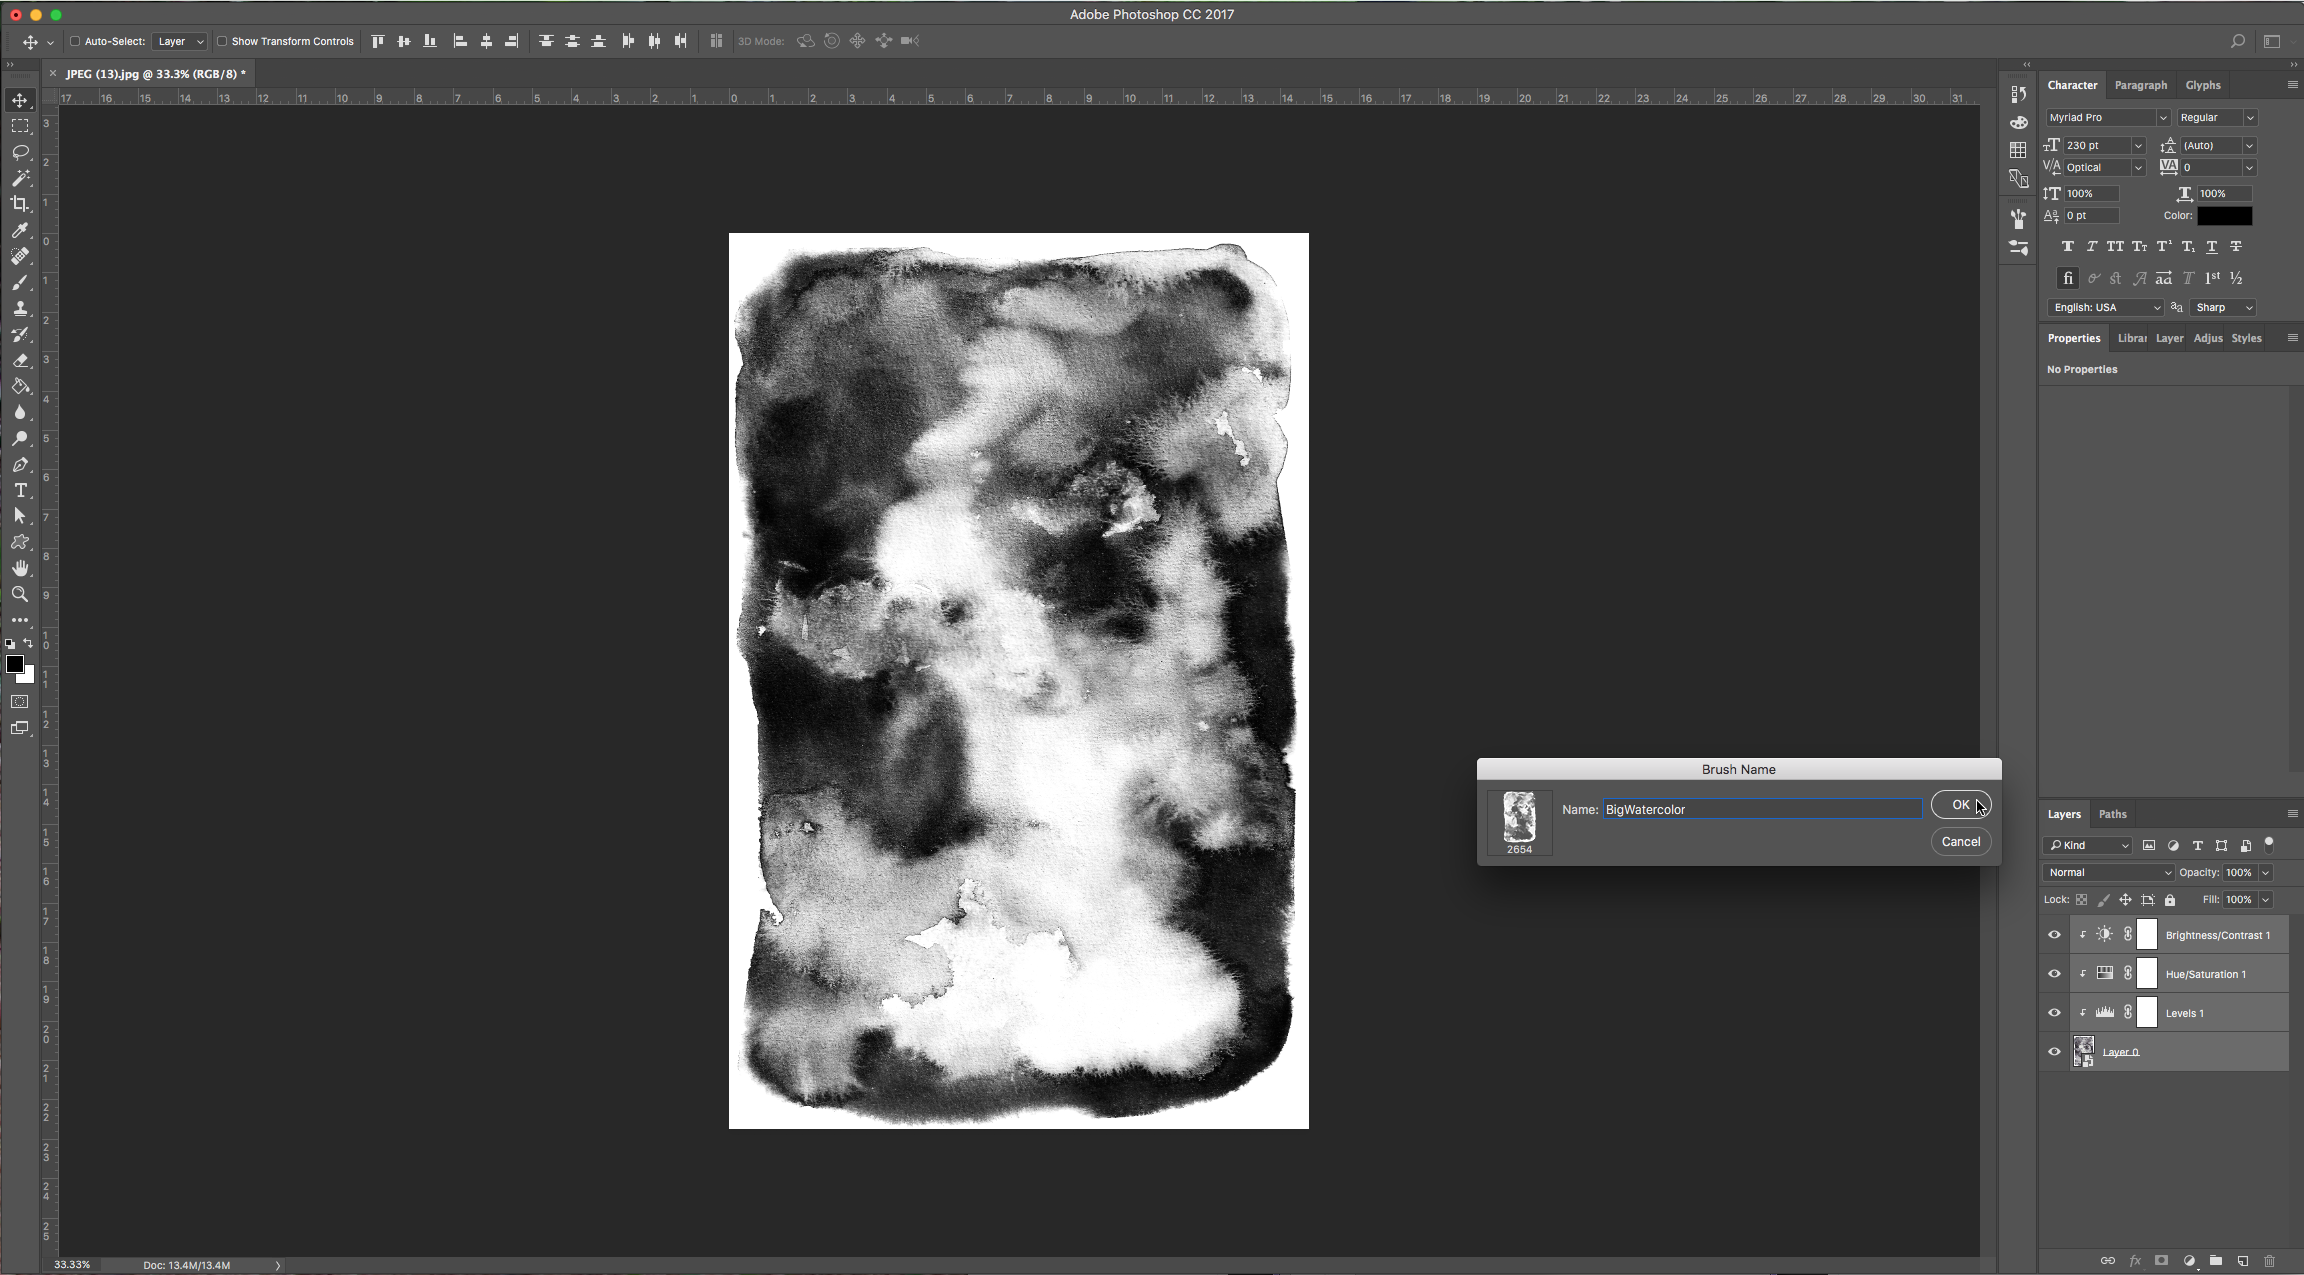
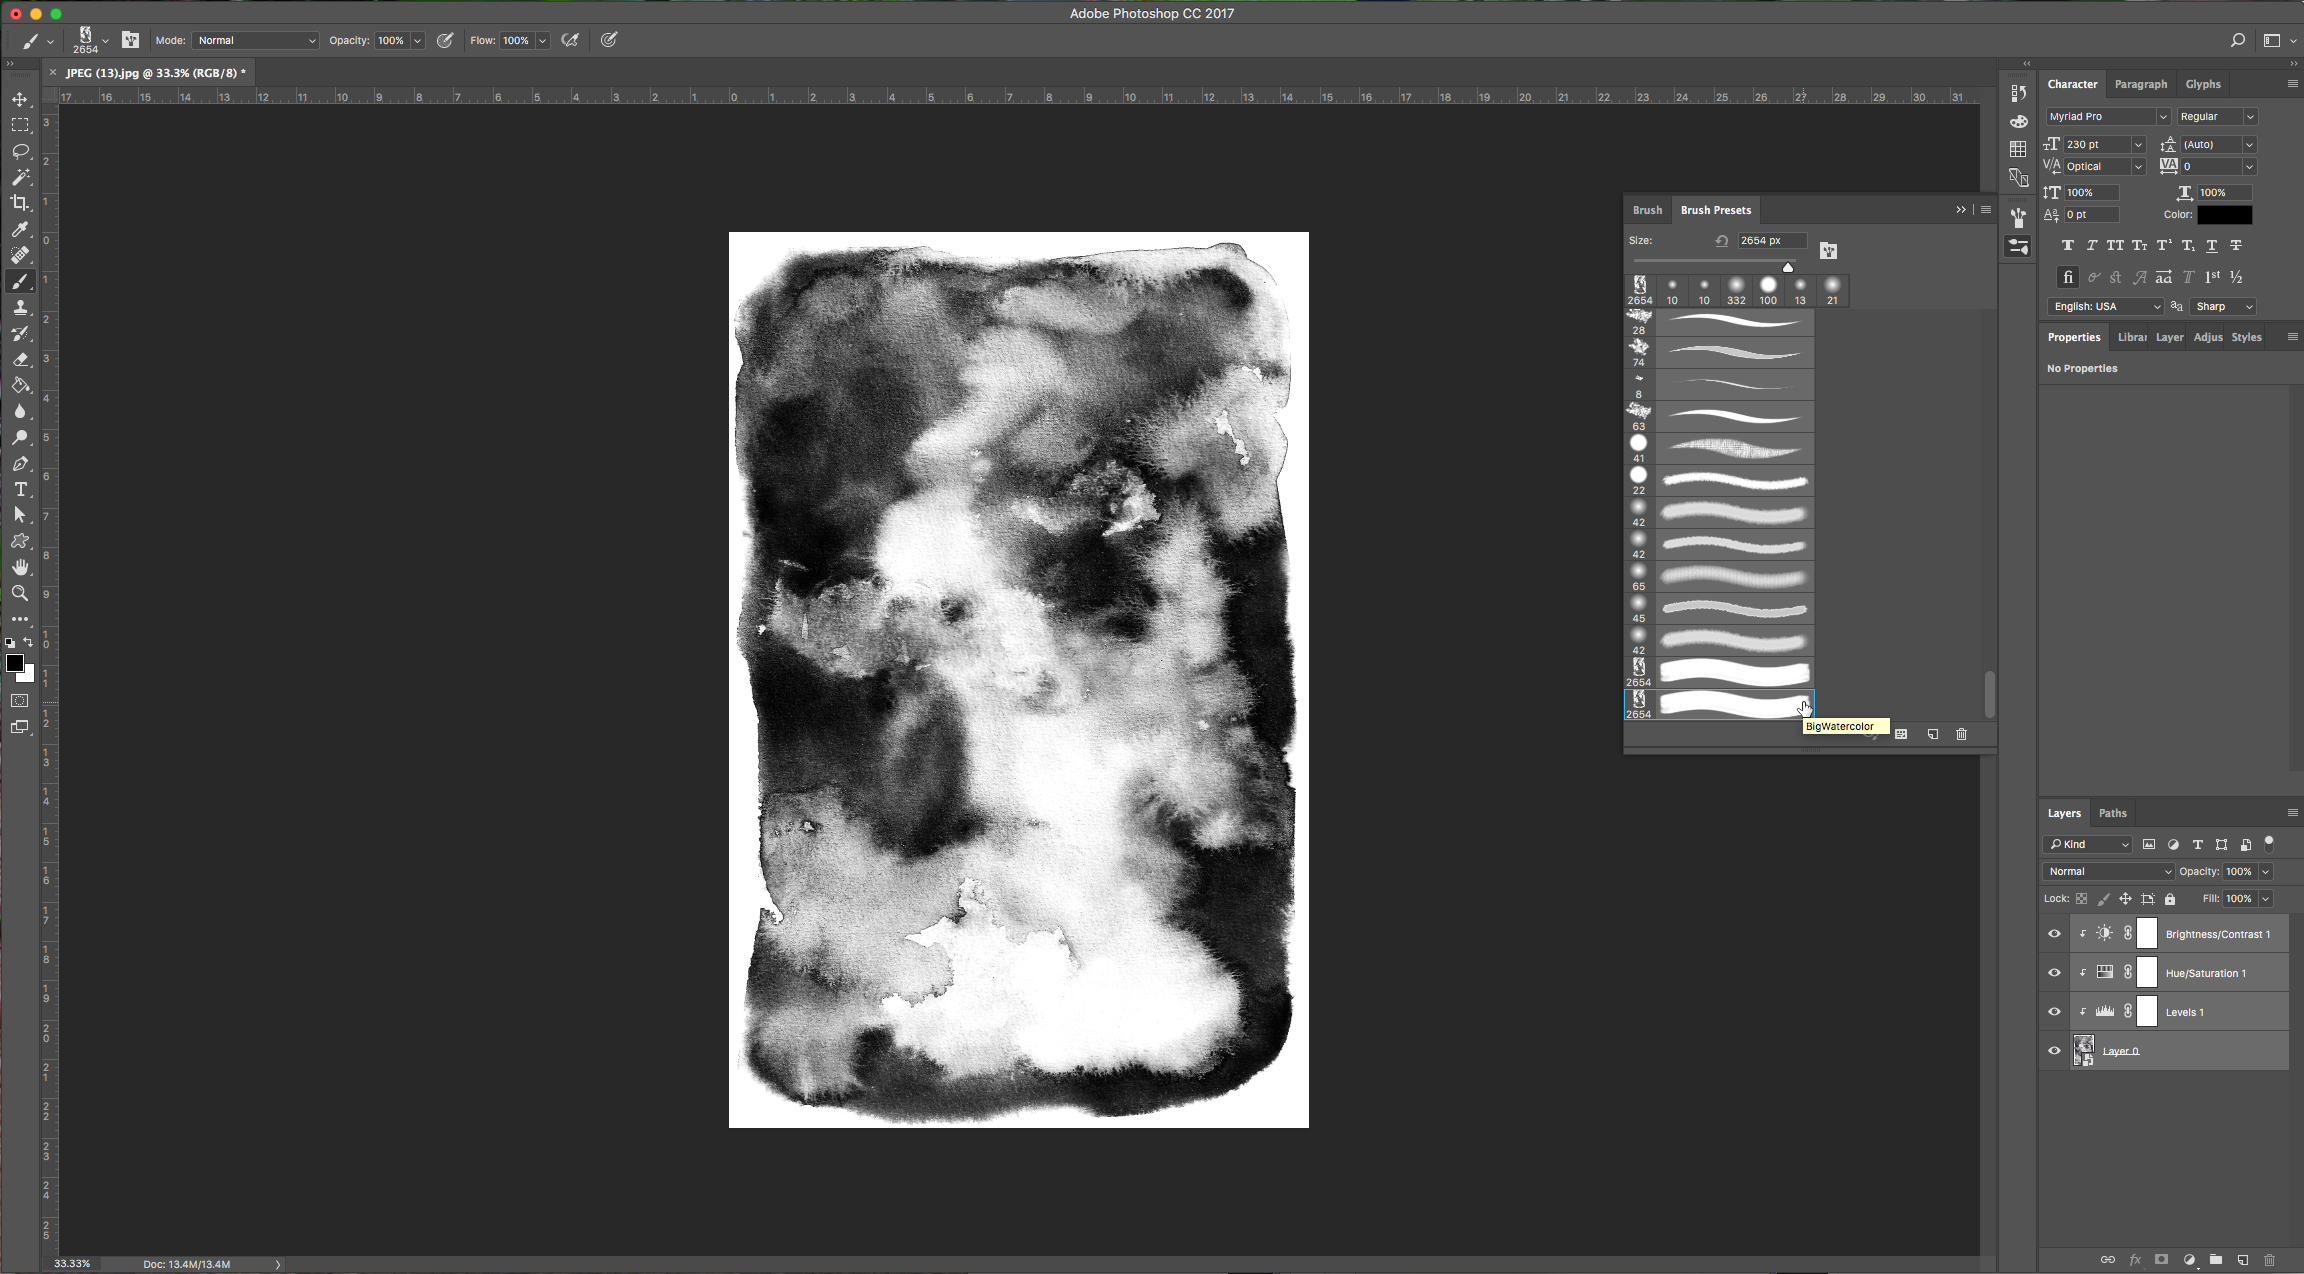
6 – Select your layers and go to Edit > Define Brush Preset, give it a name and save it. Now if you choose your “Brush Tool” your new brush would be the last one at the bottom of the list. Create many brushes in different shapes and sizes. There are also many free and paid brushes available to download and import into Photoshop, you can use some of them together with the ones you created and for the next portion of this tutorial.
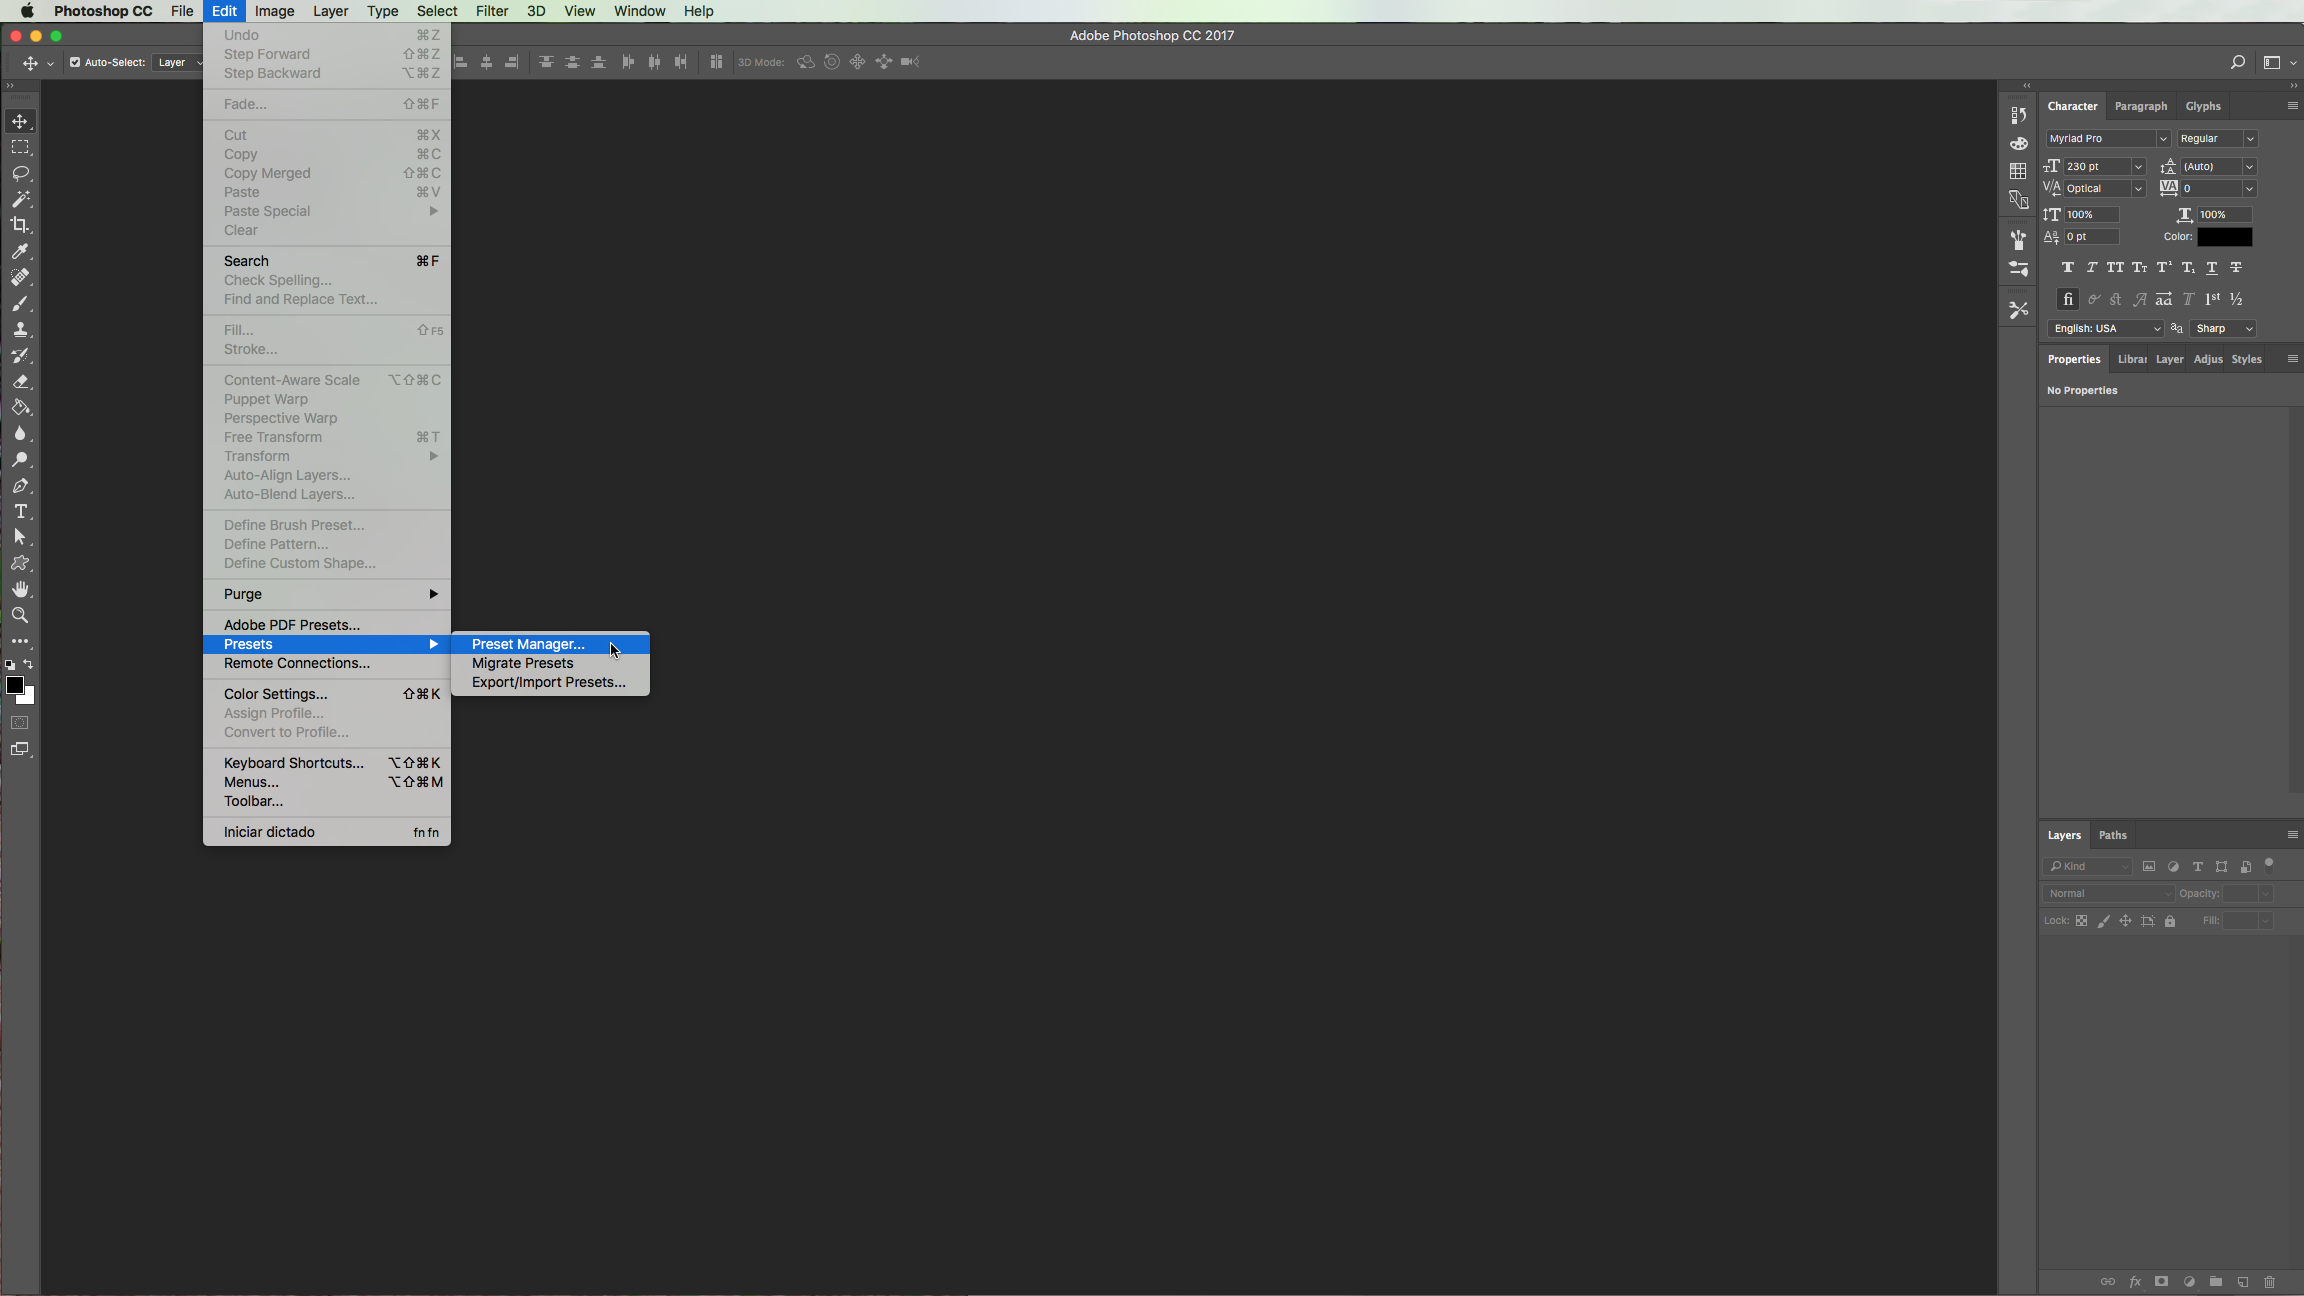
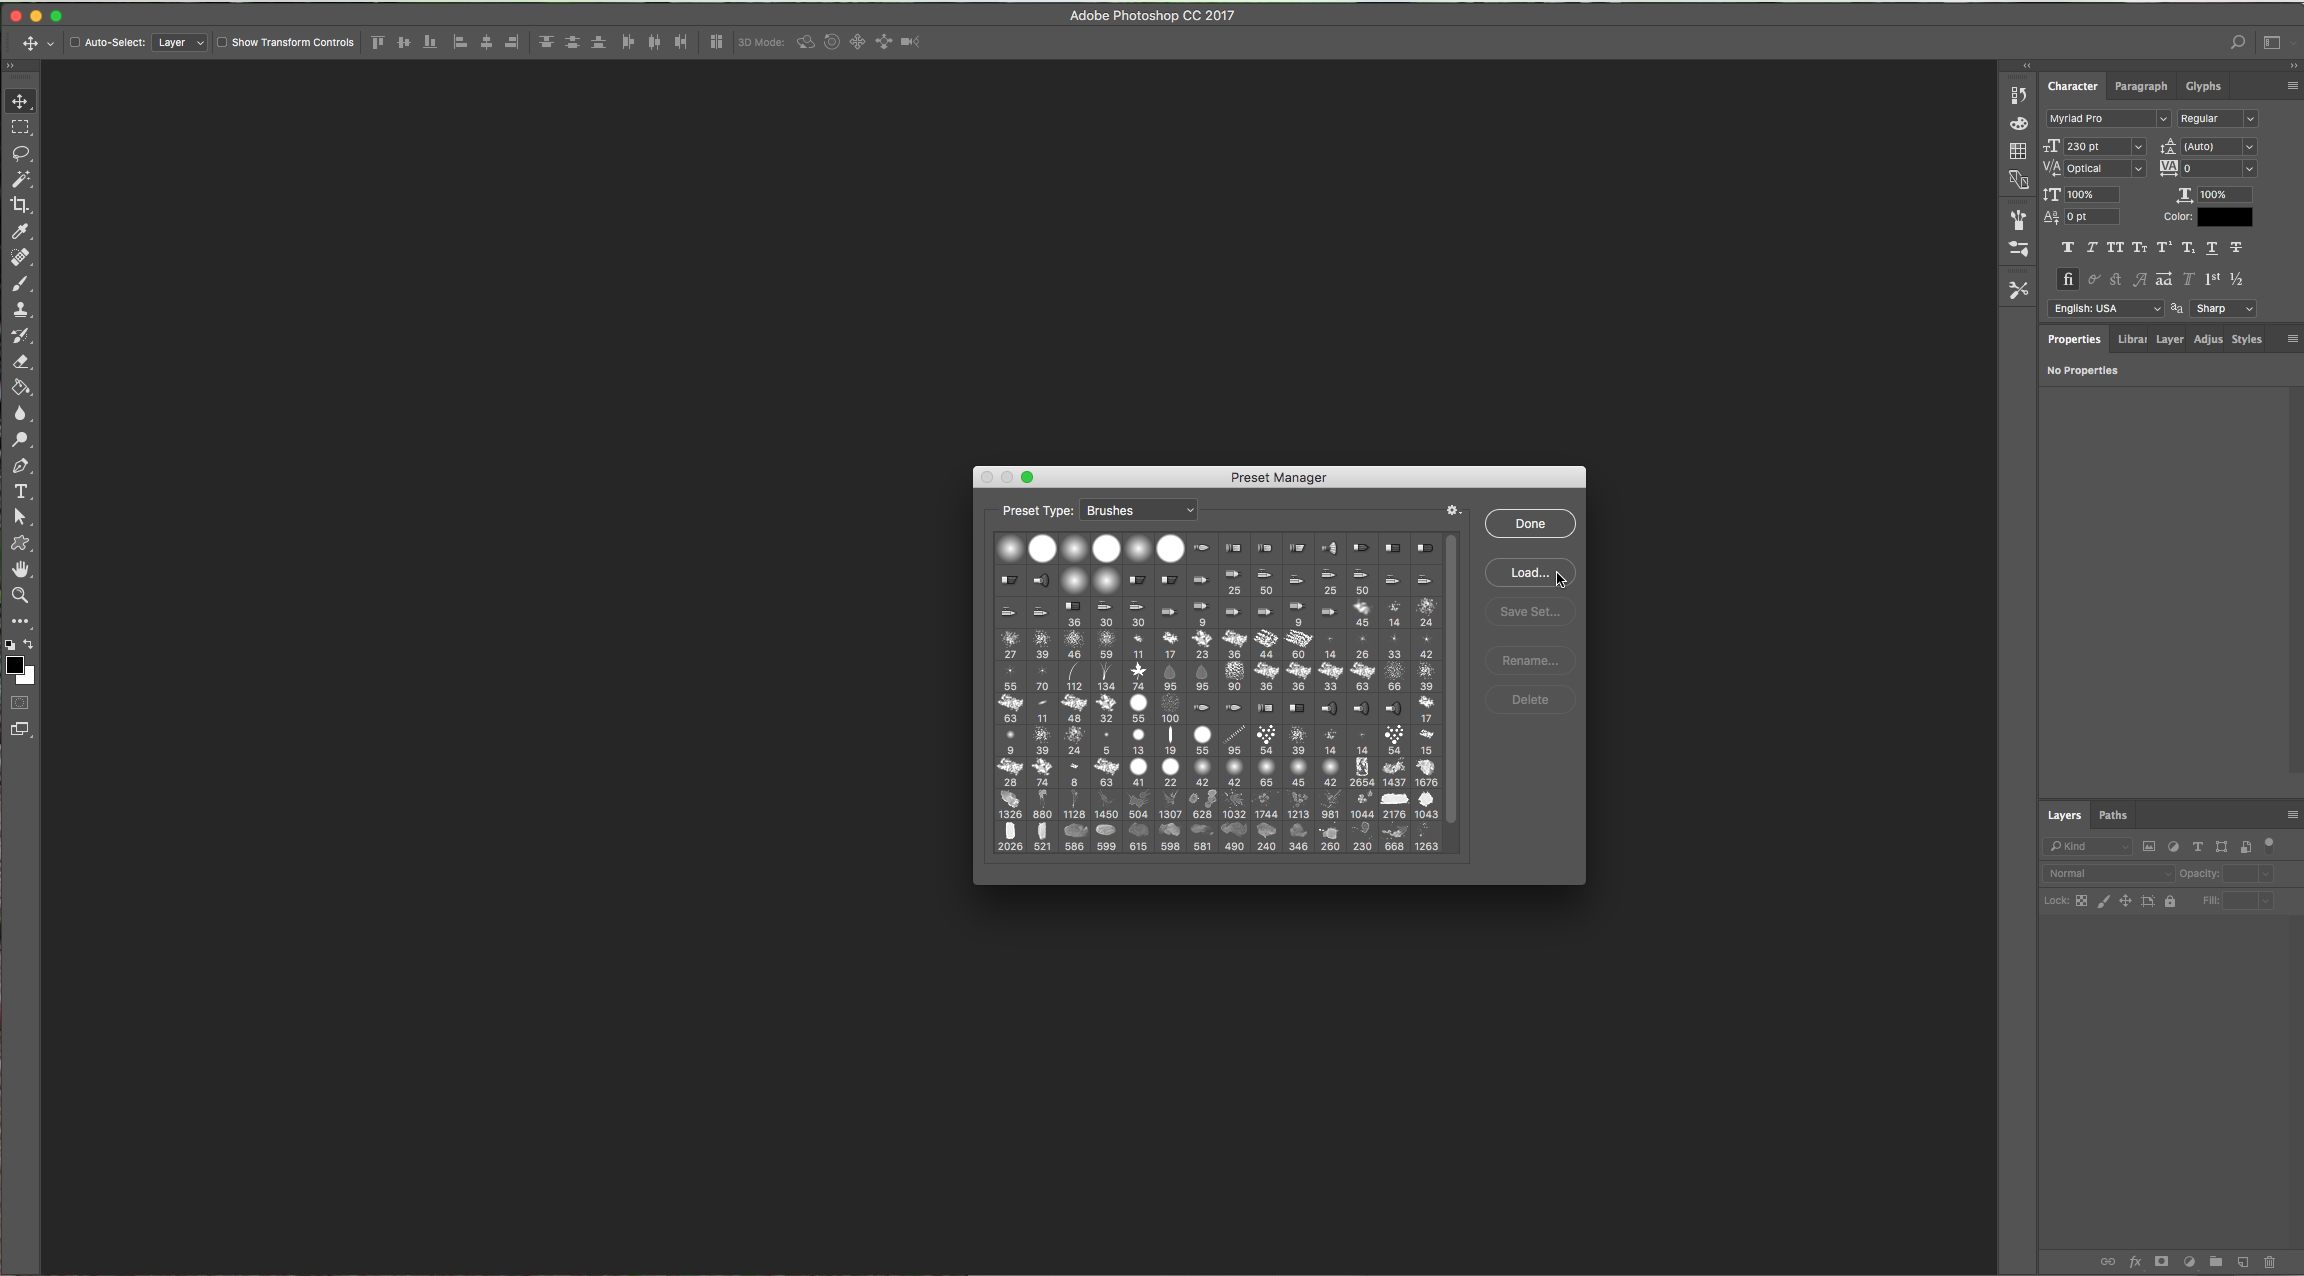
7 – To import brushes and other assets into Photoshop go to Edit > Presets > Preset Manager, choose “Brushes” from the menu and click “Load”. Then you can navigate to your brushes and load them.
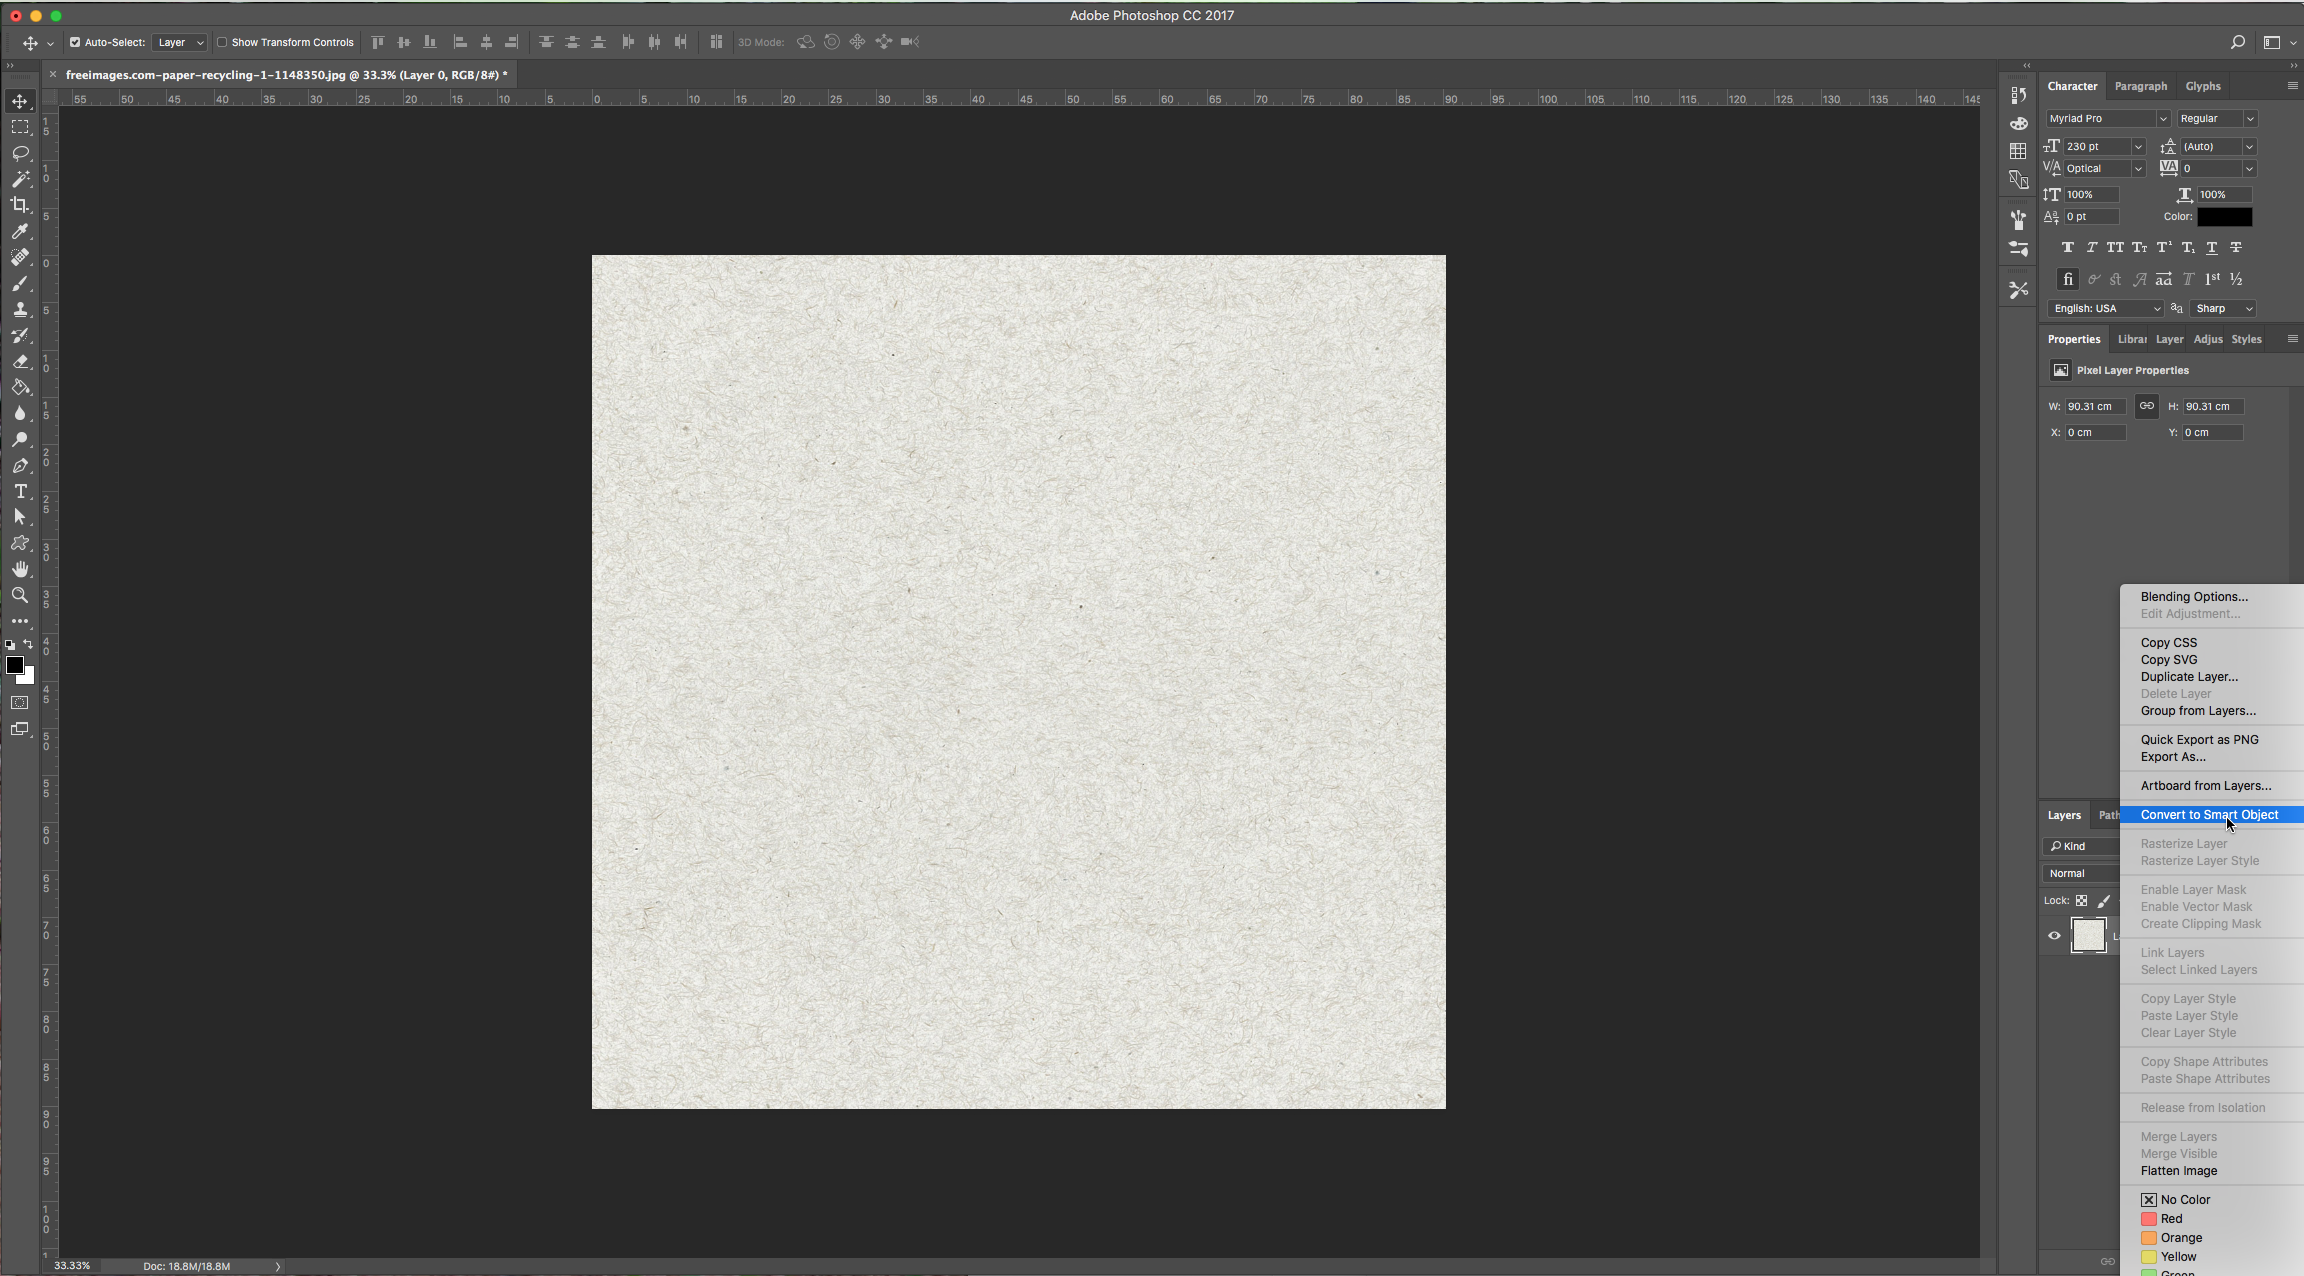
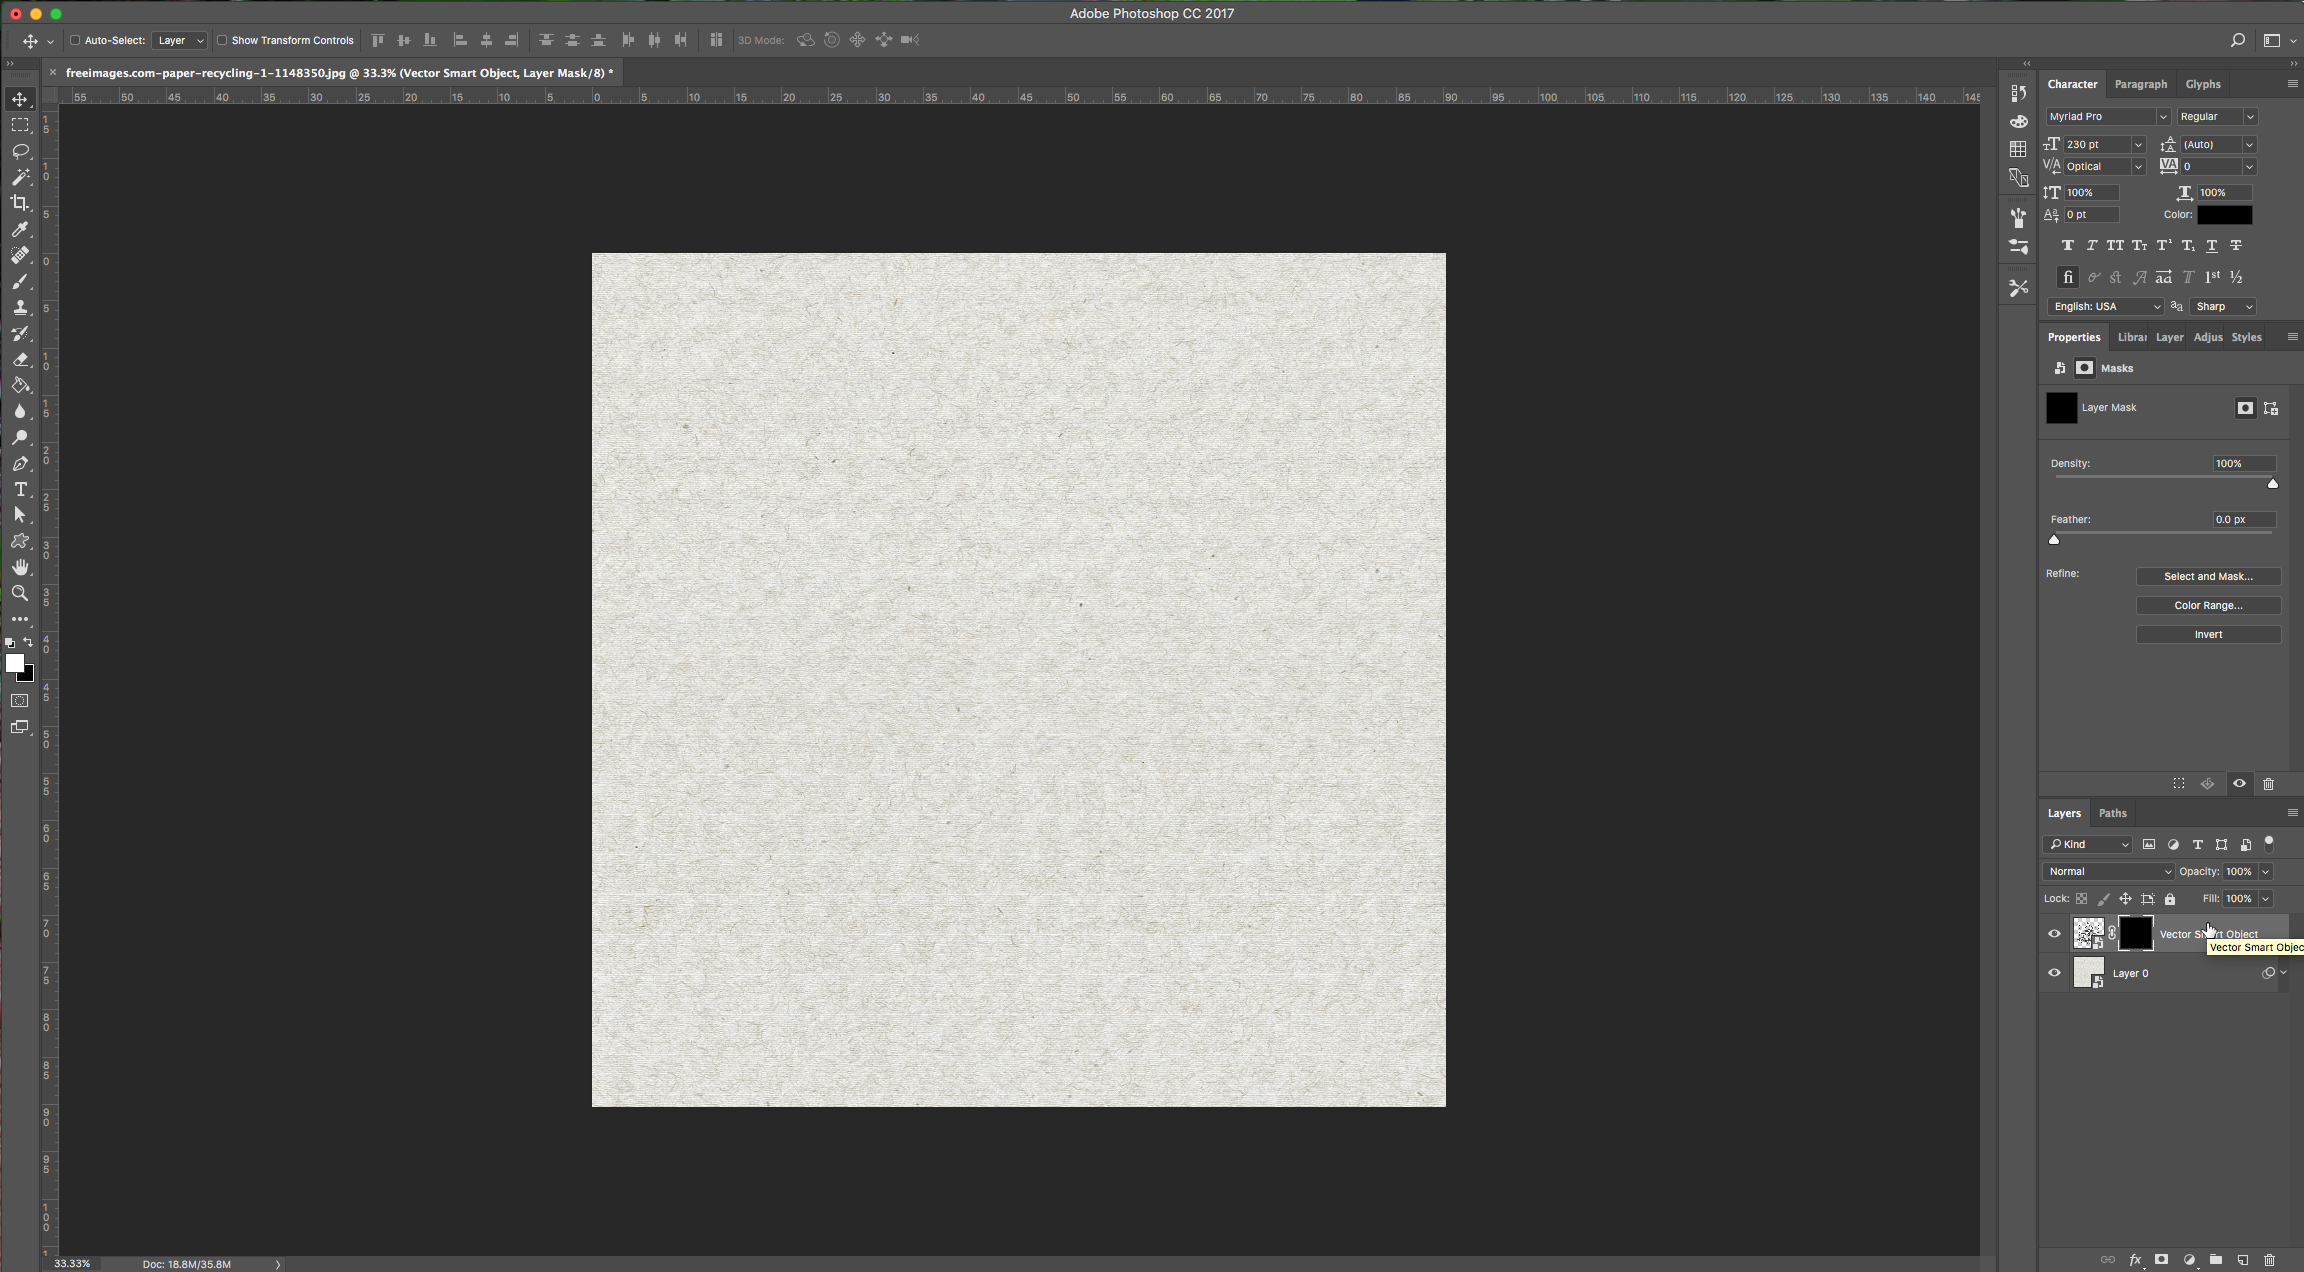
8 – Now, create a new document and ad your canvas/paper background to it or open your background directly and double-click on it to unlock it and then convert it to a “Smart Object”.
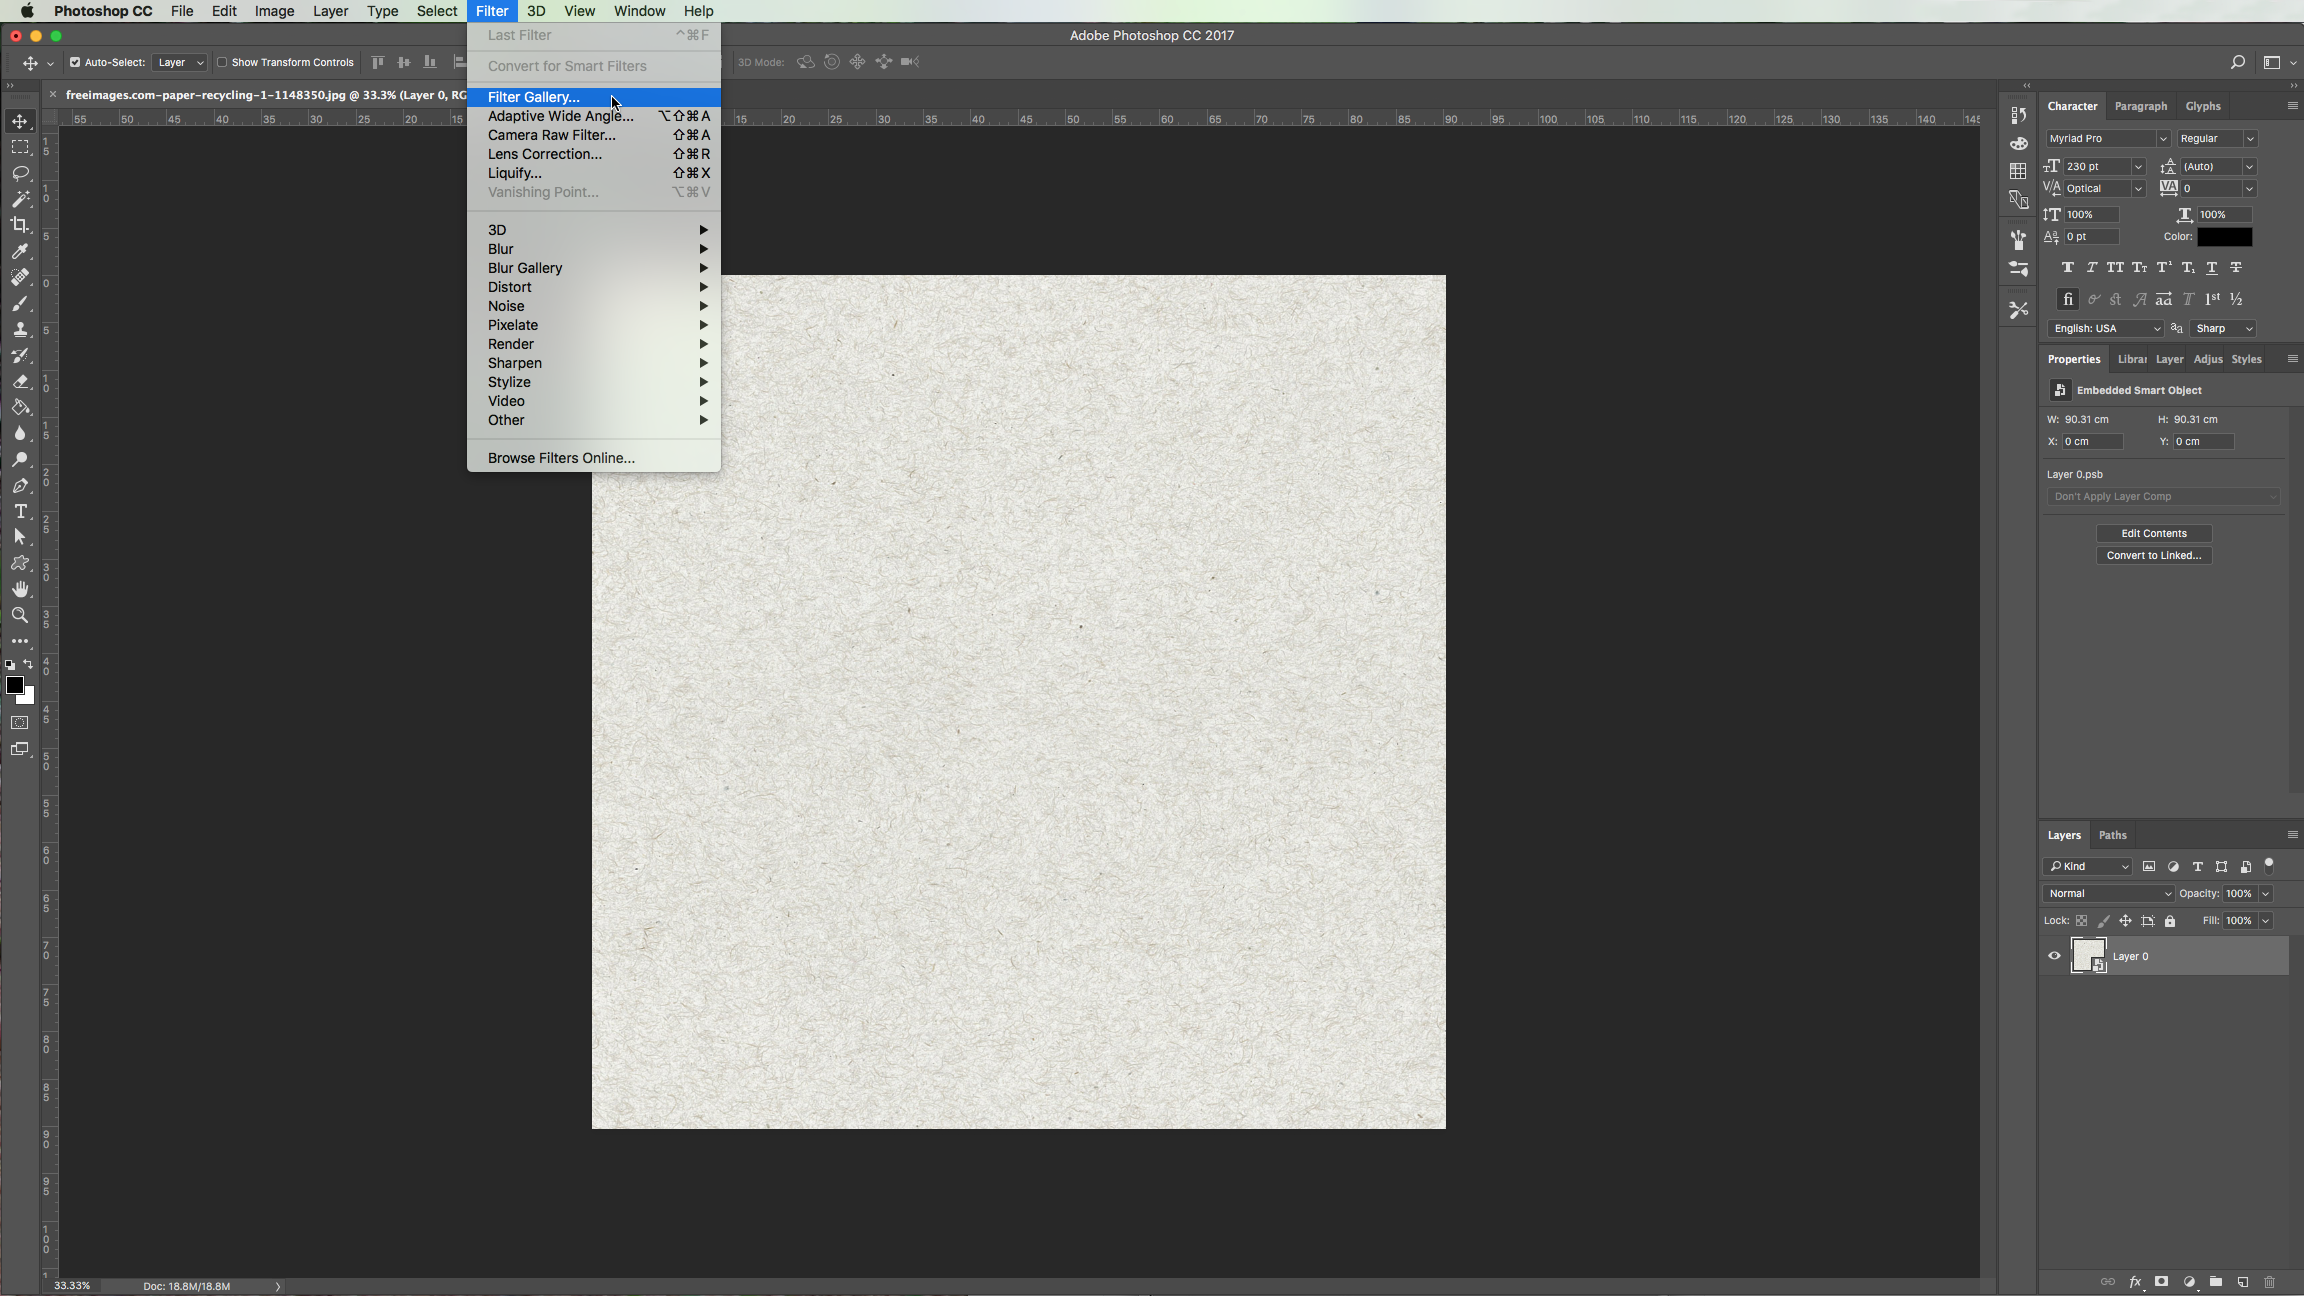
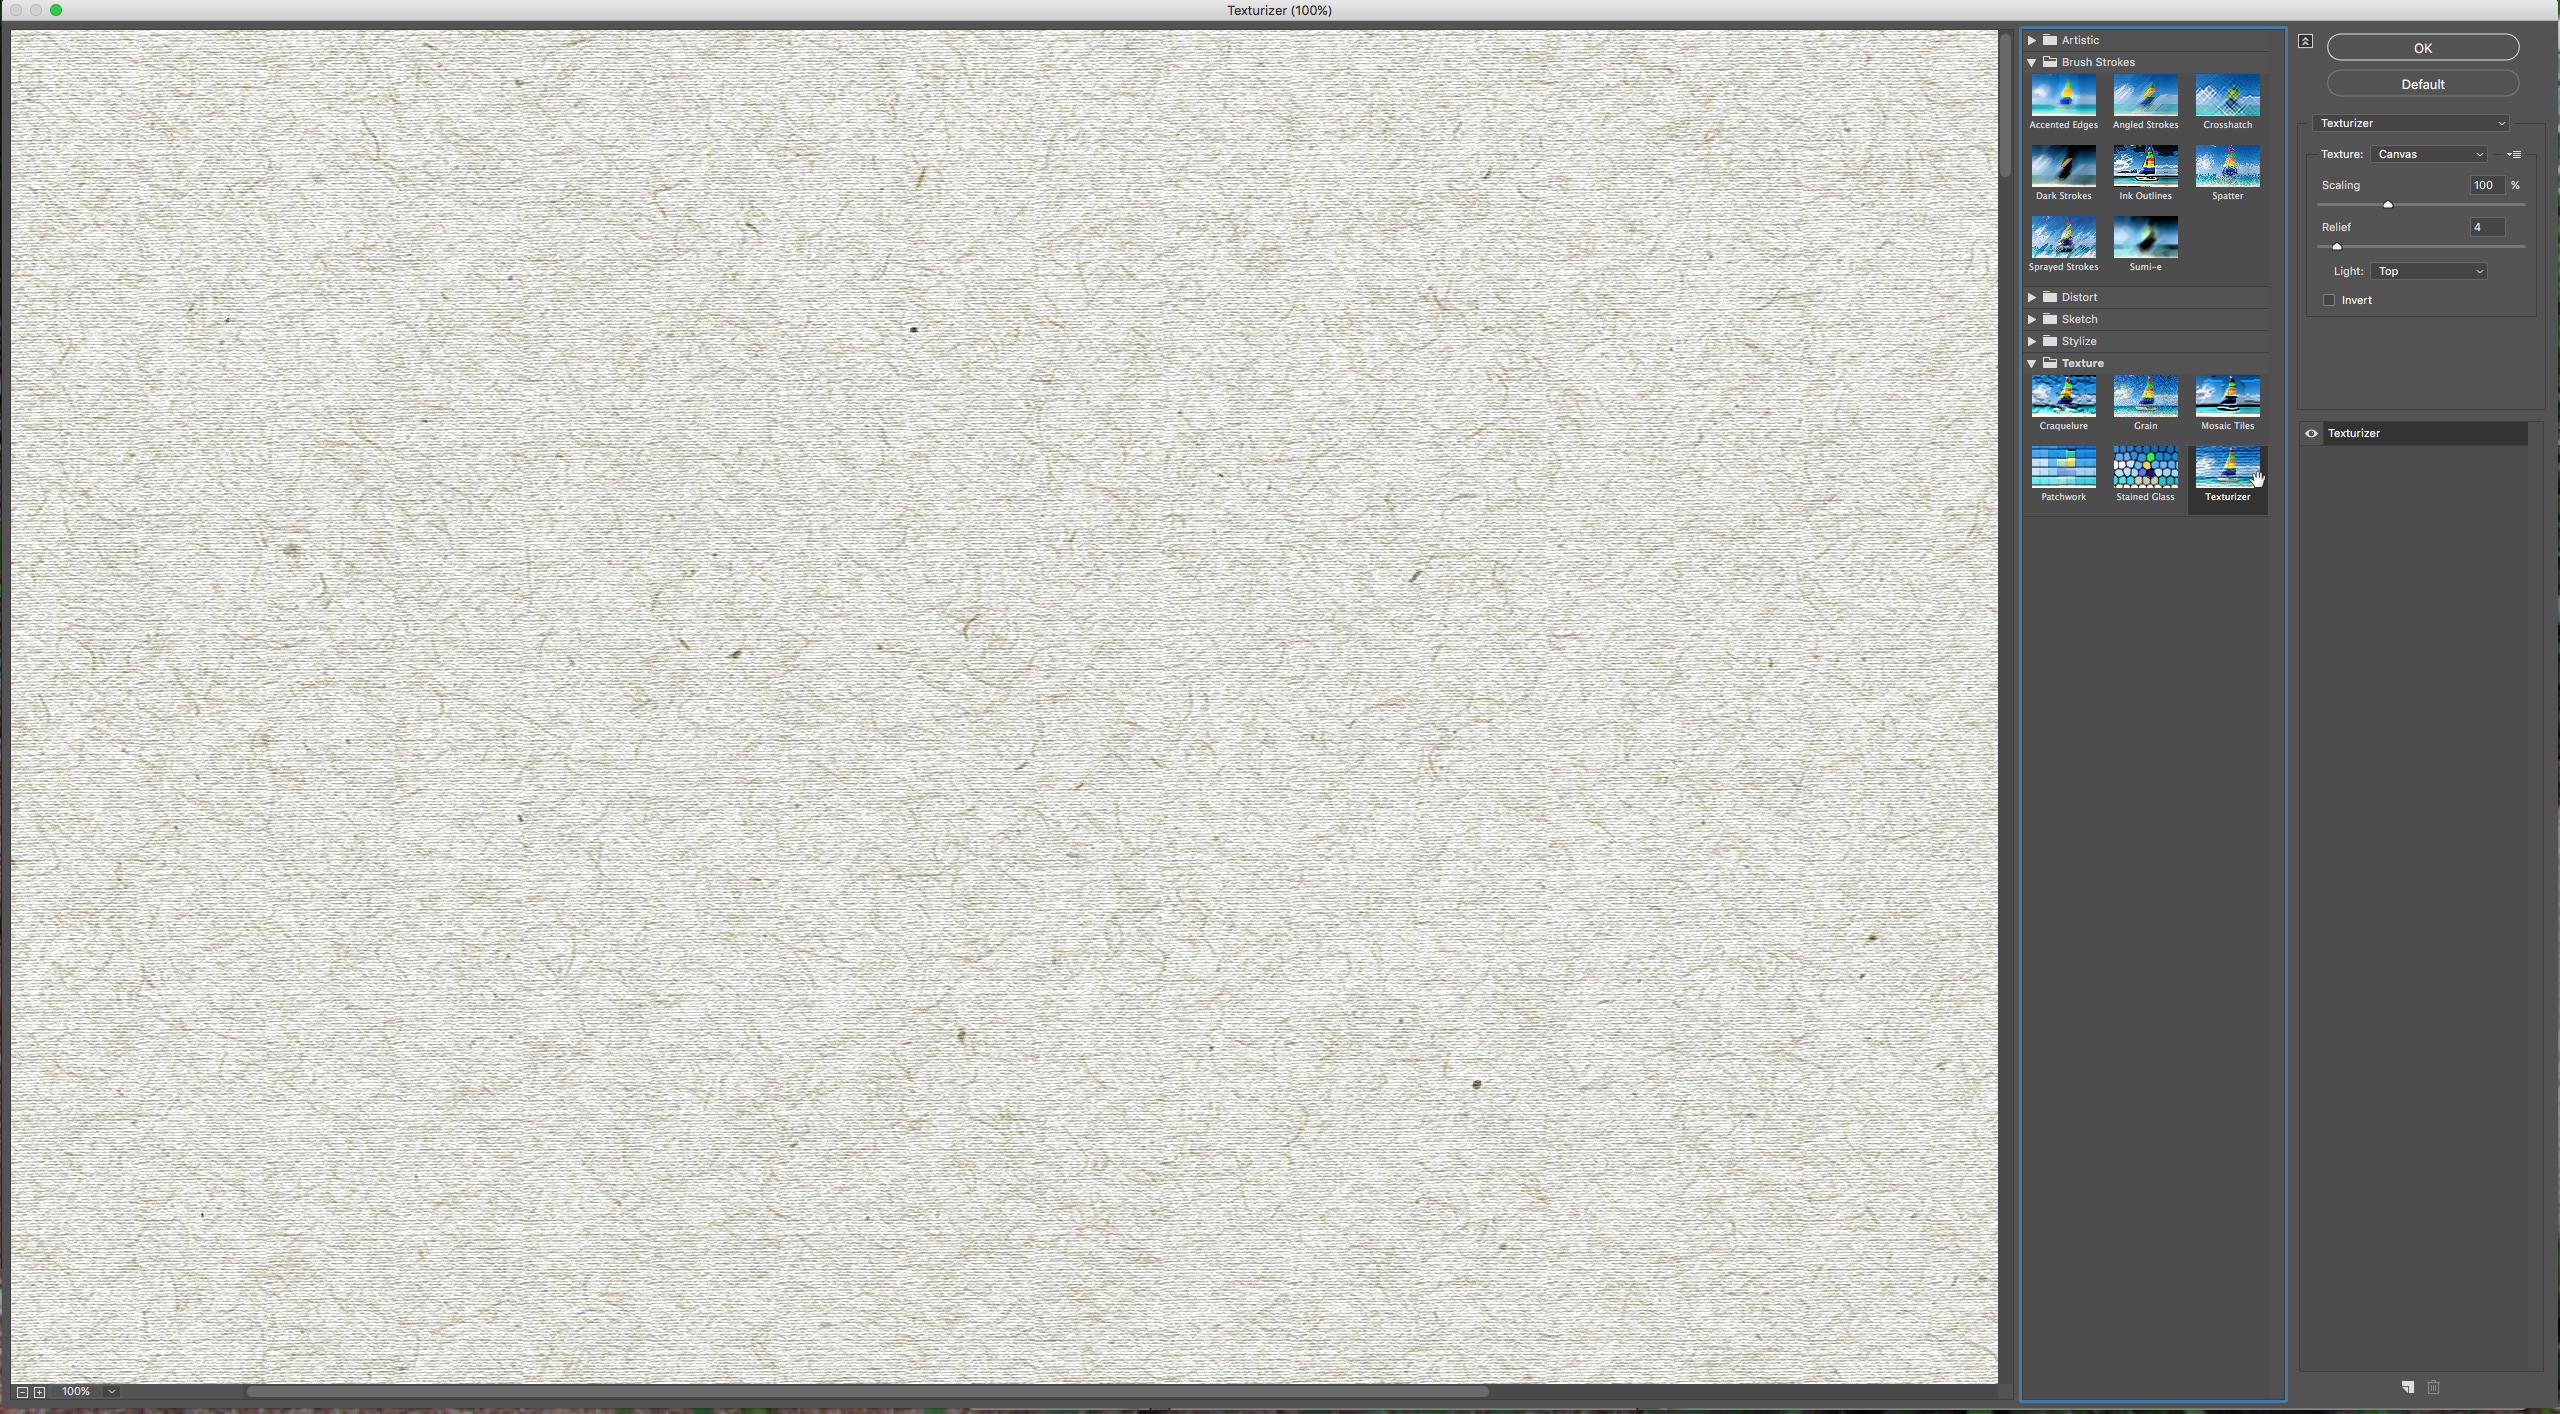
9 – Go to Filter > Filter Gallery > Texture > Texturizer and apply the following values:
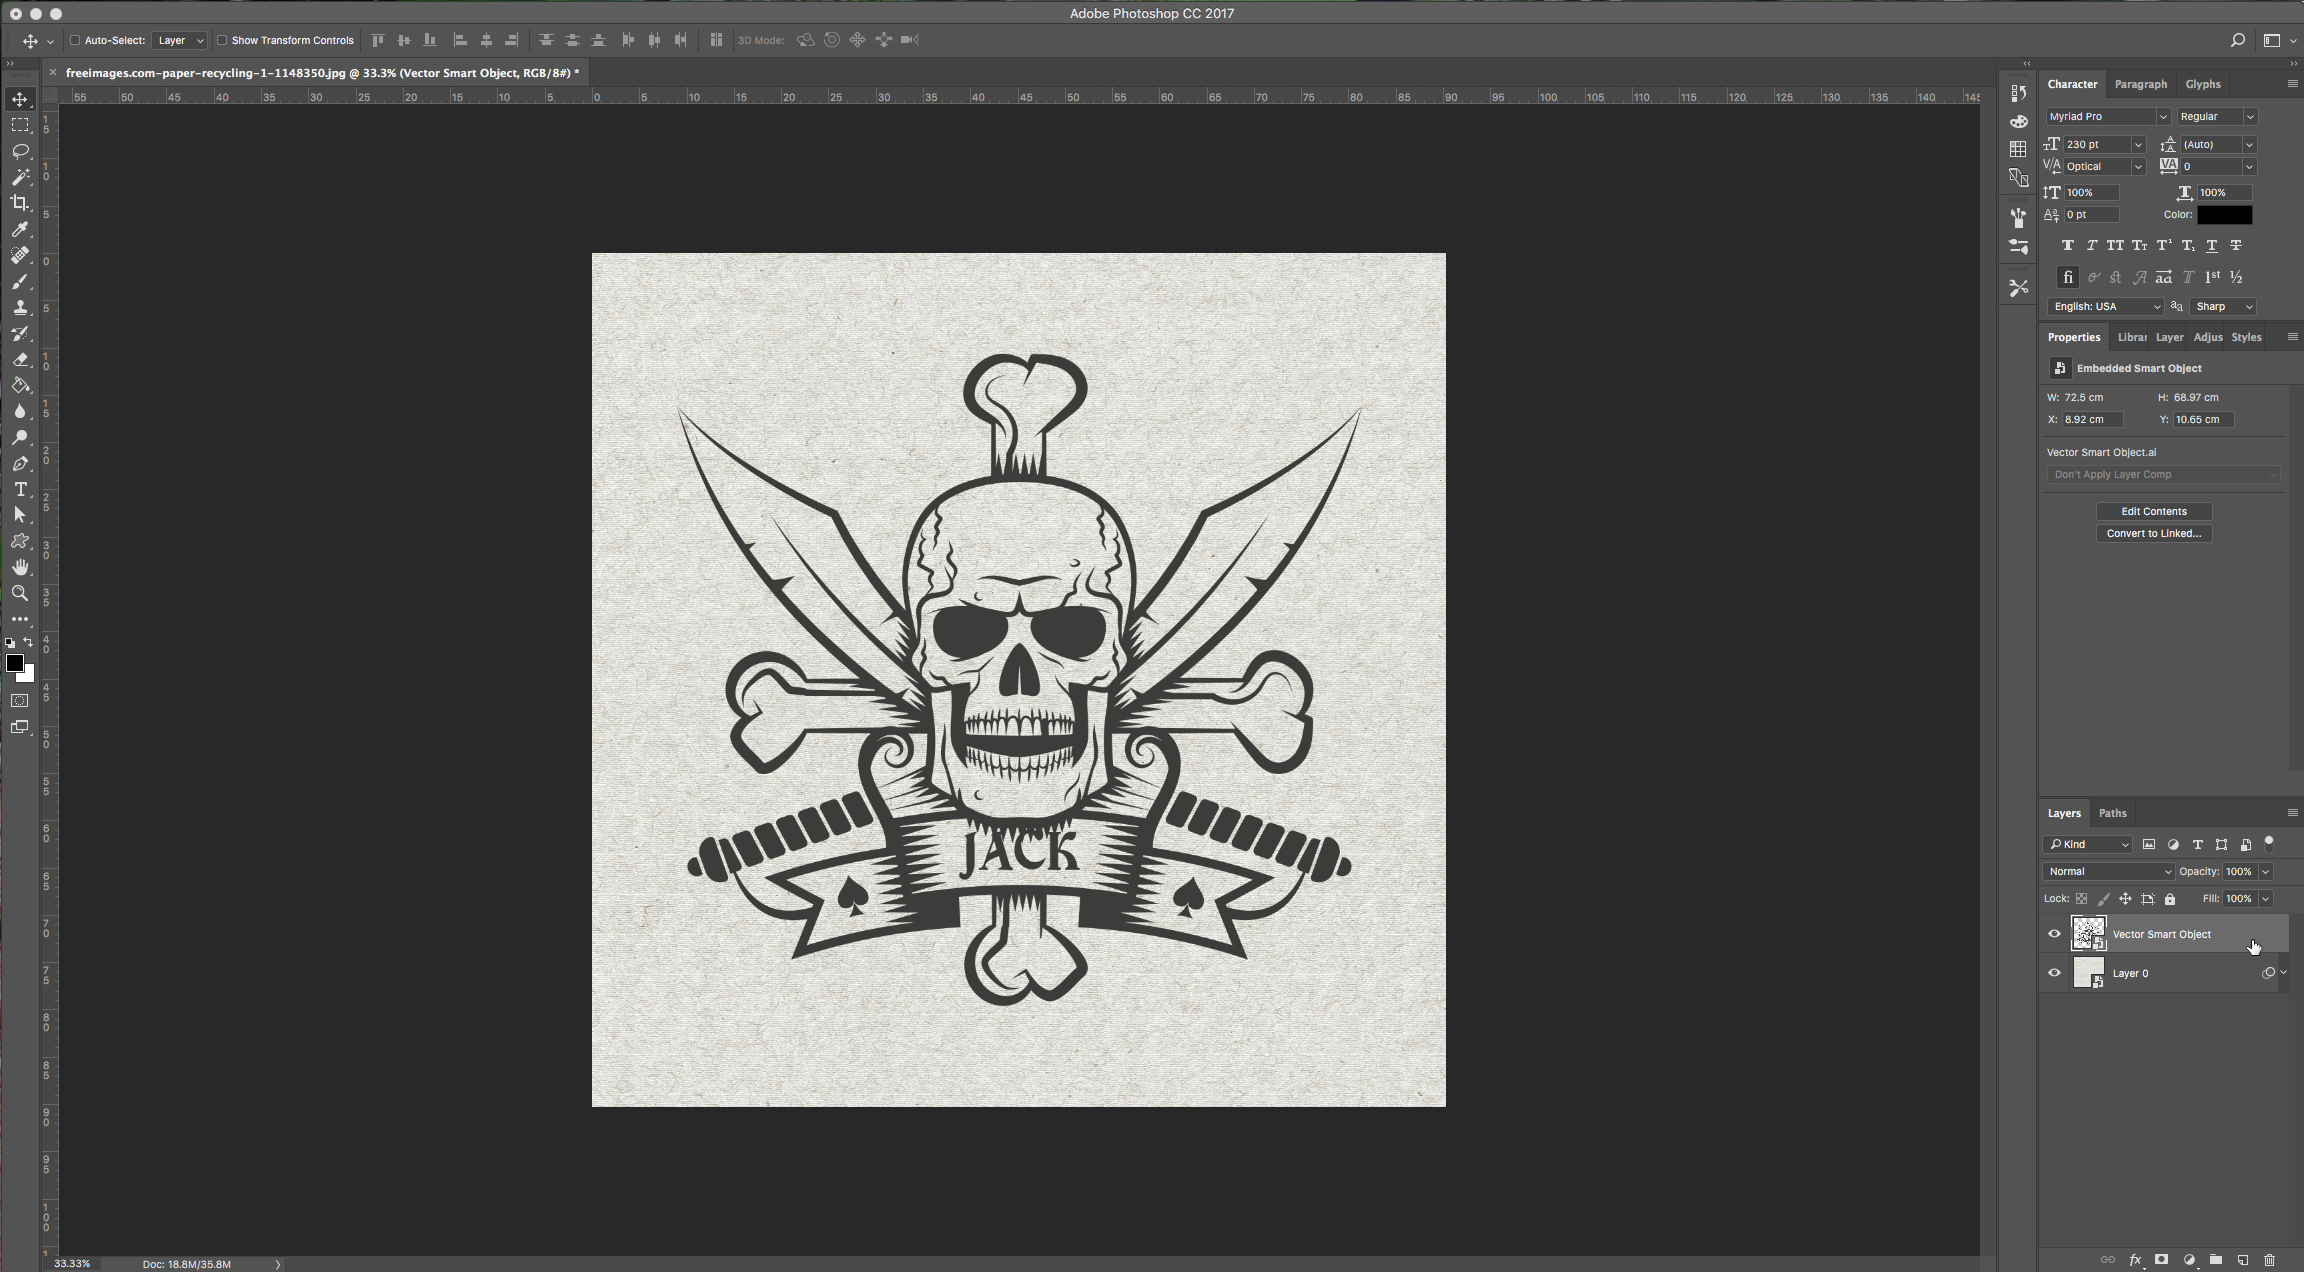
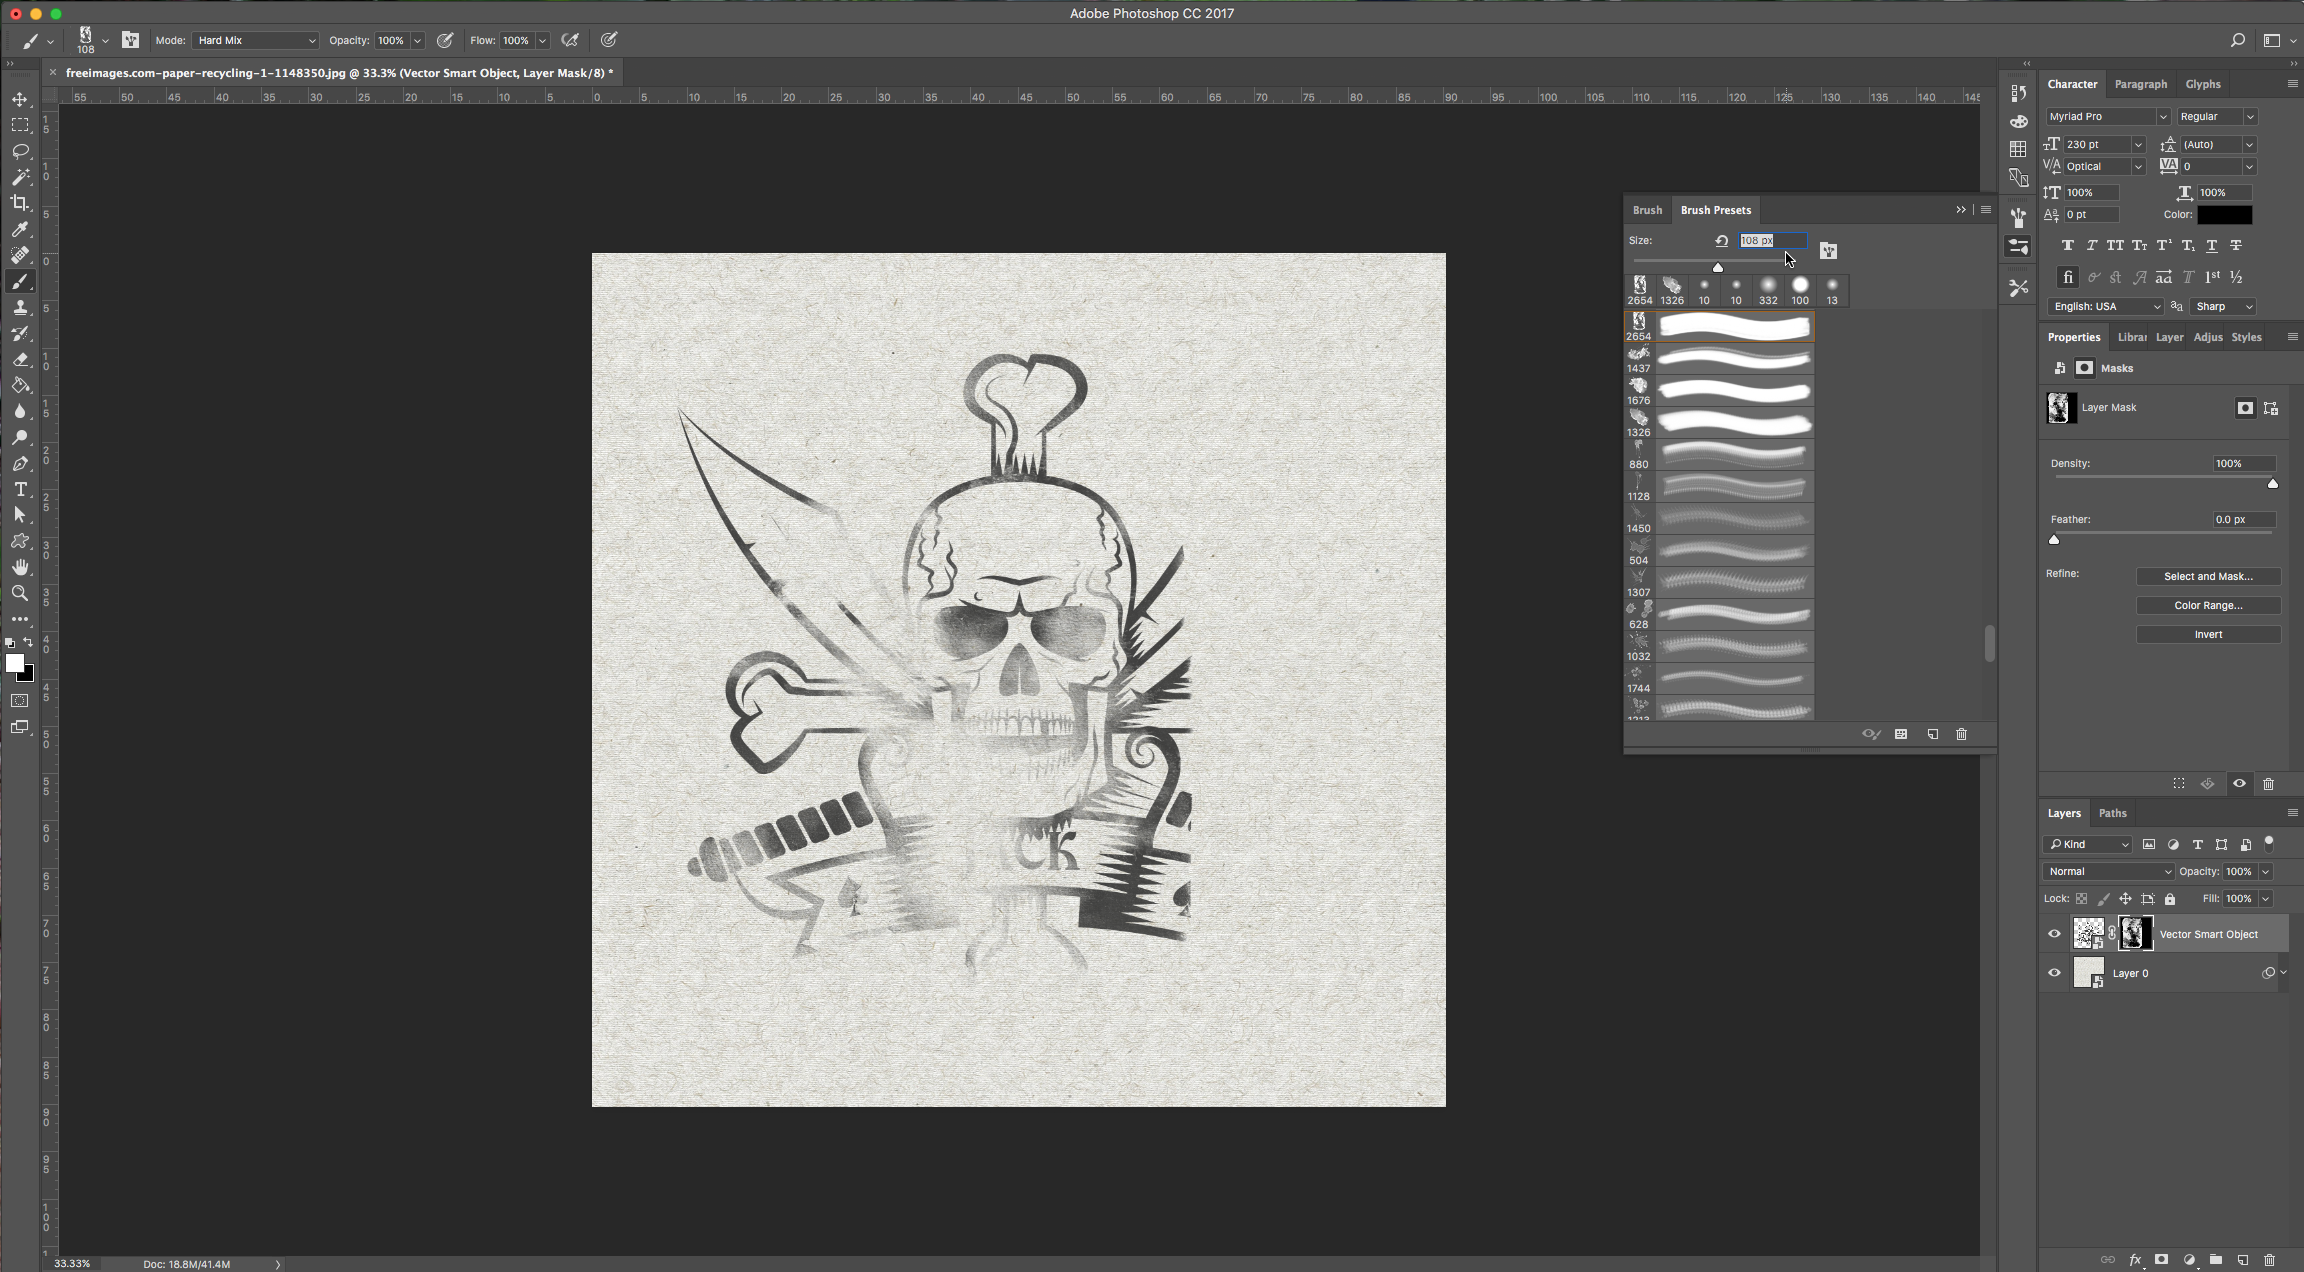
10 – Import the image you want to use into the document. In this case we are using a black and white image, but if you are using a photo It needs to have a very high contrast. You can fix that by adjusting the contrast and saturation to increase the whites and darken the other colors.
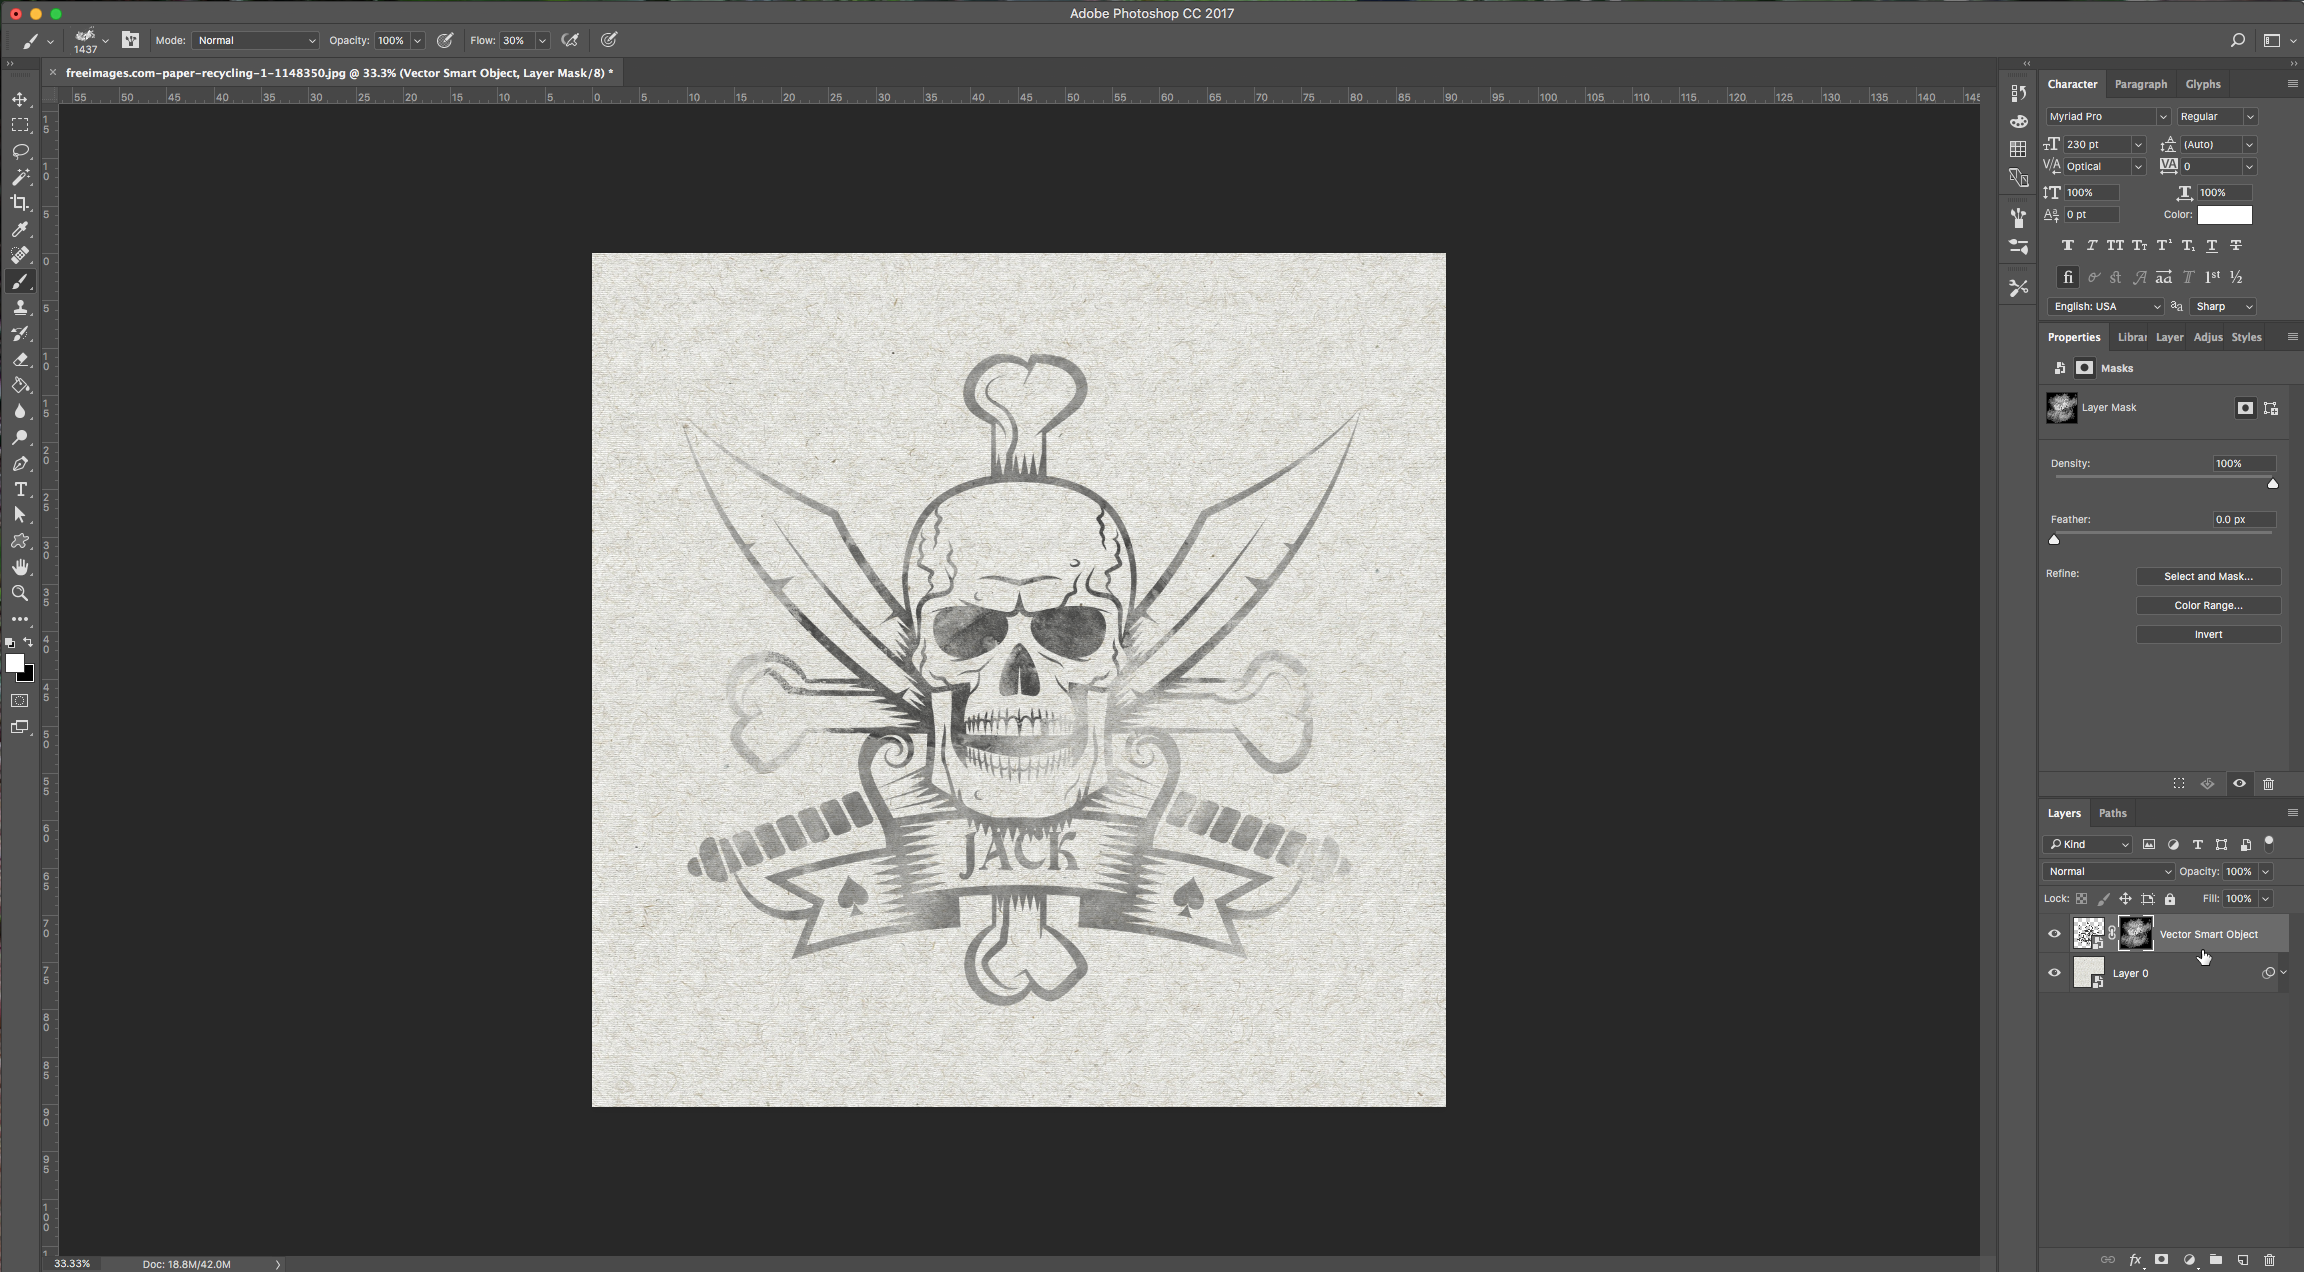
11 – Make a Layer Mask on your image layer and fill it with black. Your image should disappear. With your mask selected use the “Brush Tool” (B) with one of your watercolor brushes and paint on your canvas, you will notice that your image starts to appear. If your brushes are too big, you can change its size in the “Brushes Palette”. Use different “Opacity” and “Flow” settings.
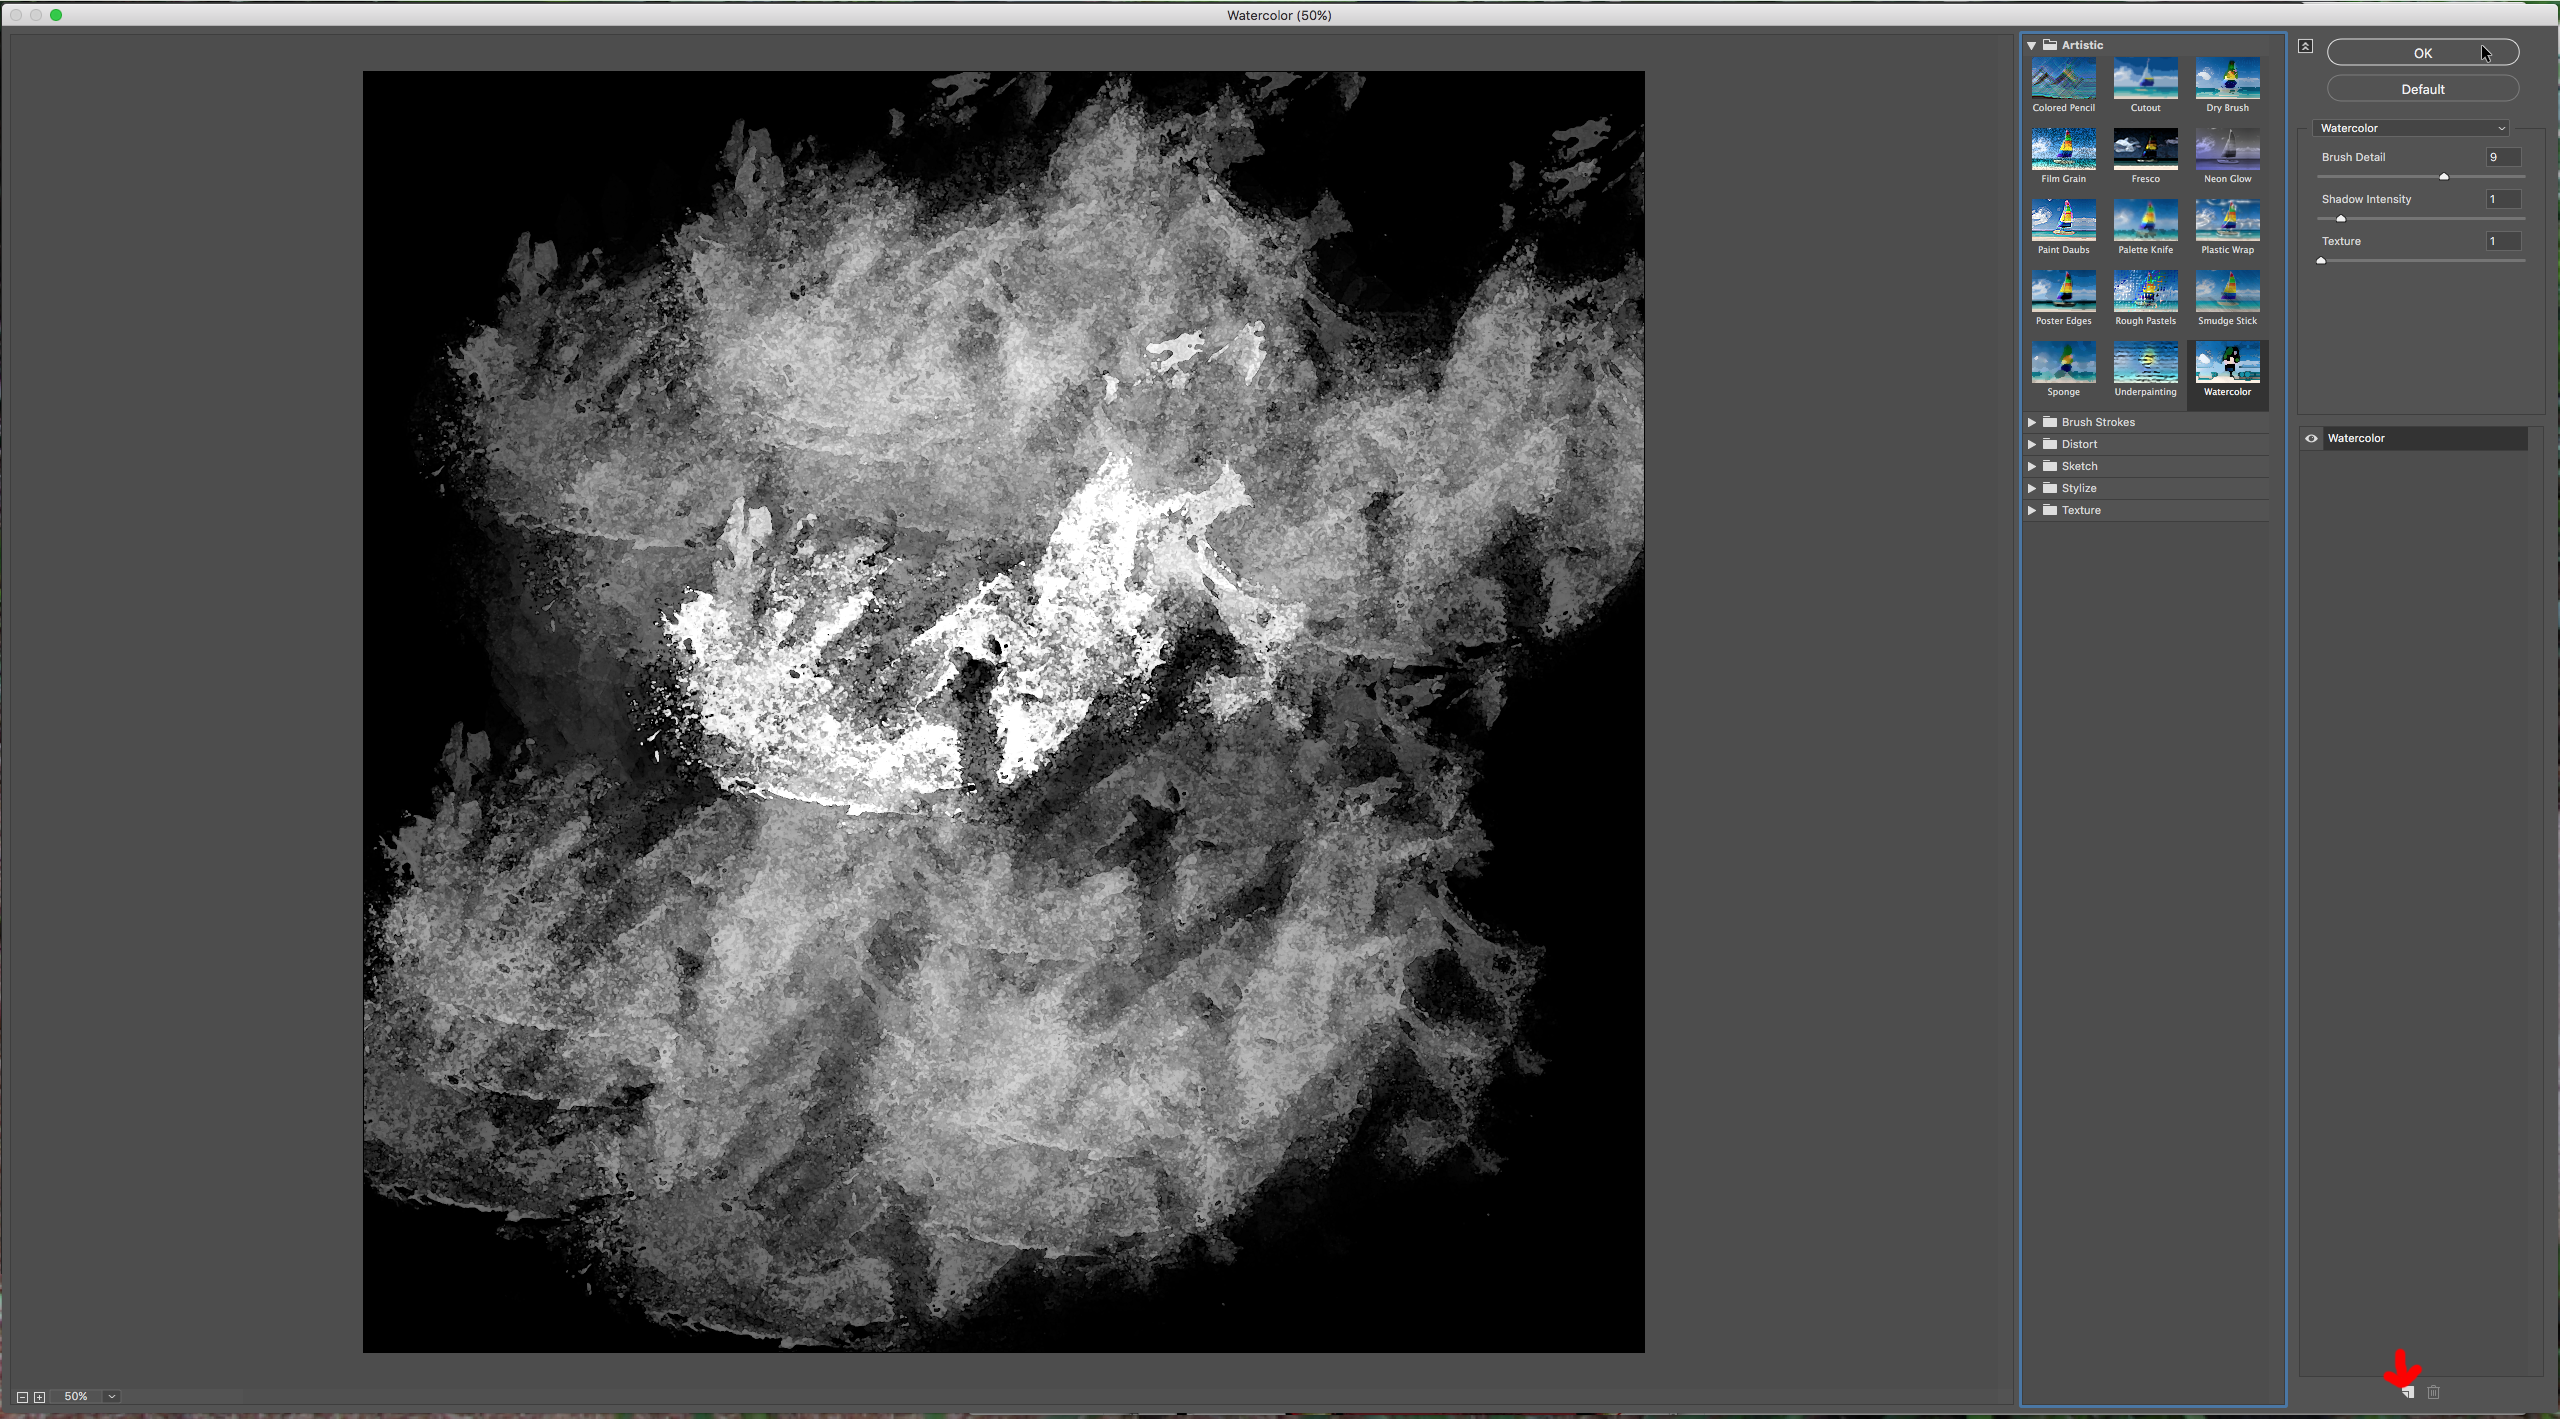
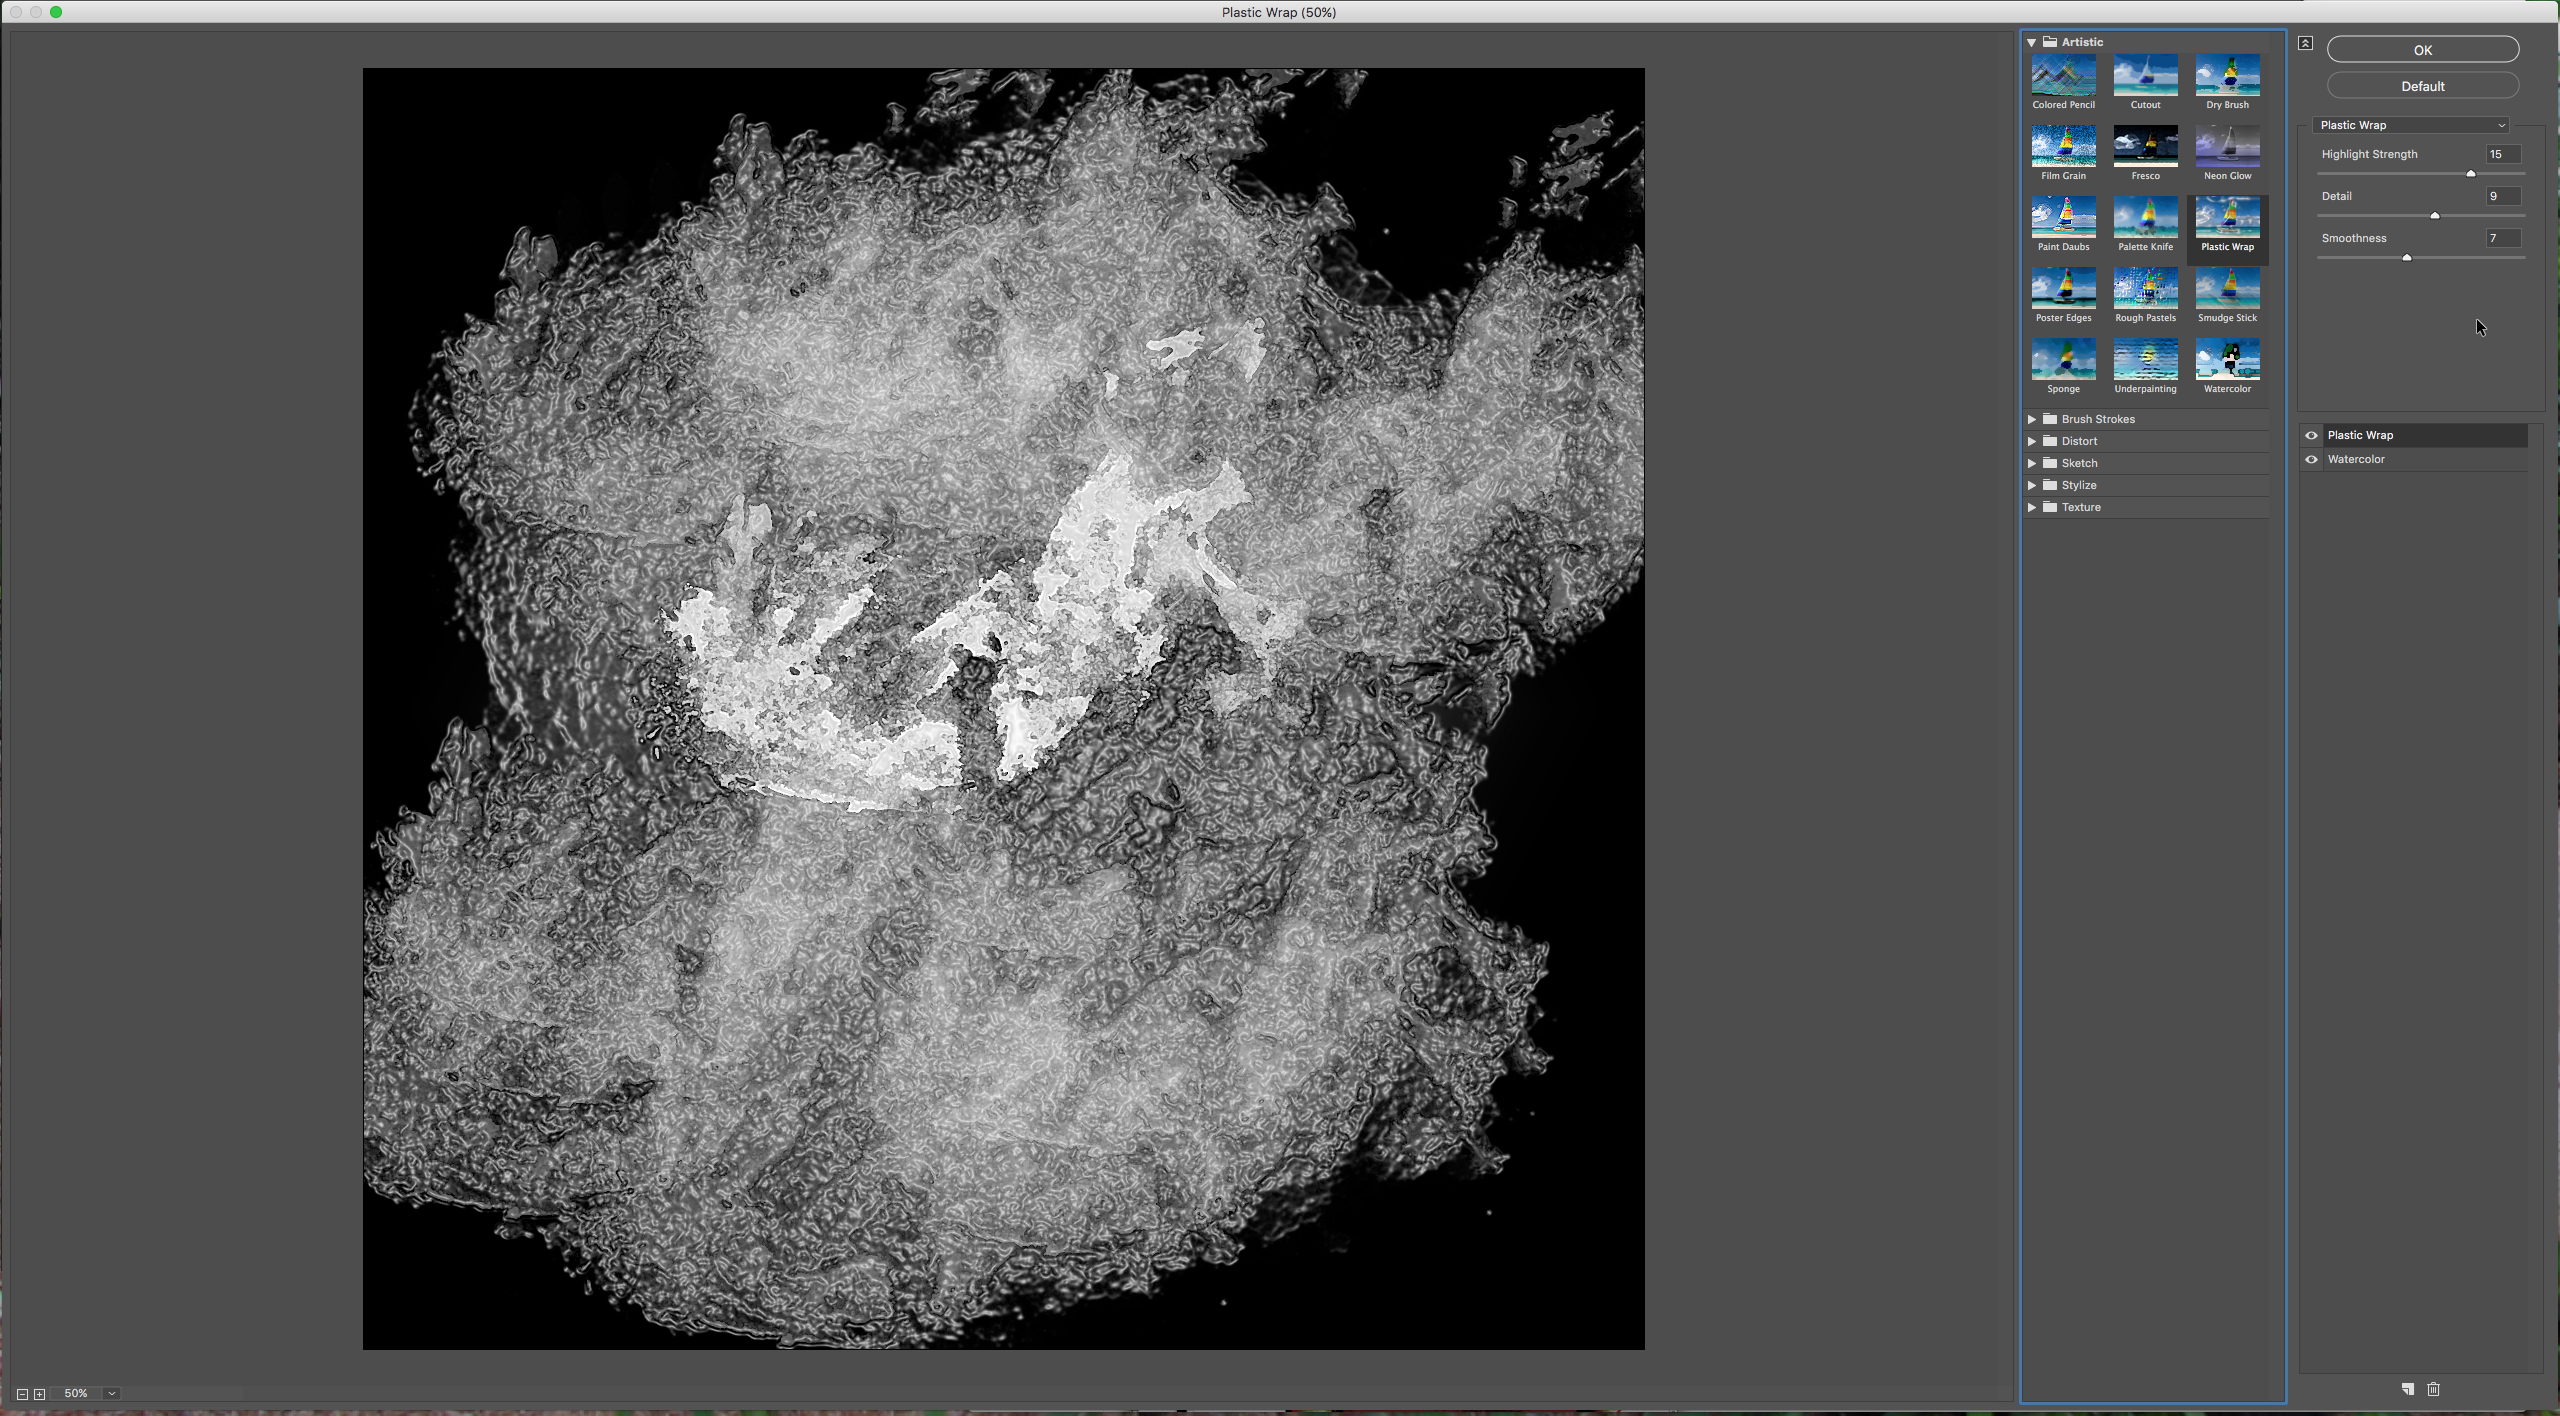
12 – Select your “Layer Mask” and in “Filter Gallery” apply the following filters:
Make sure to create a “New Filter” layer for the second one. Then use “Color Burn” as blending option for your layer.
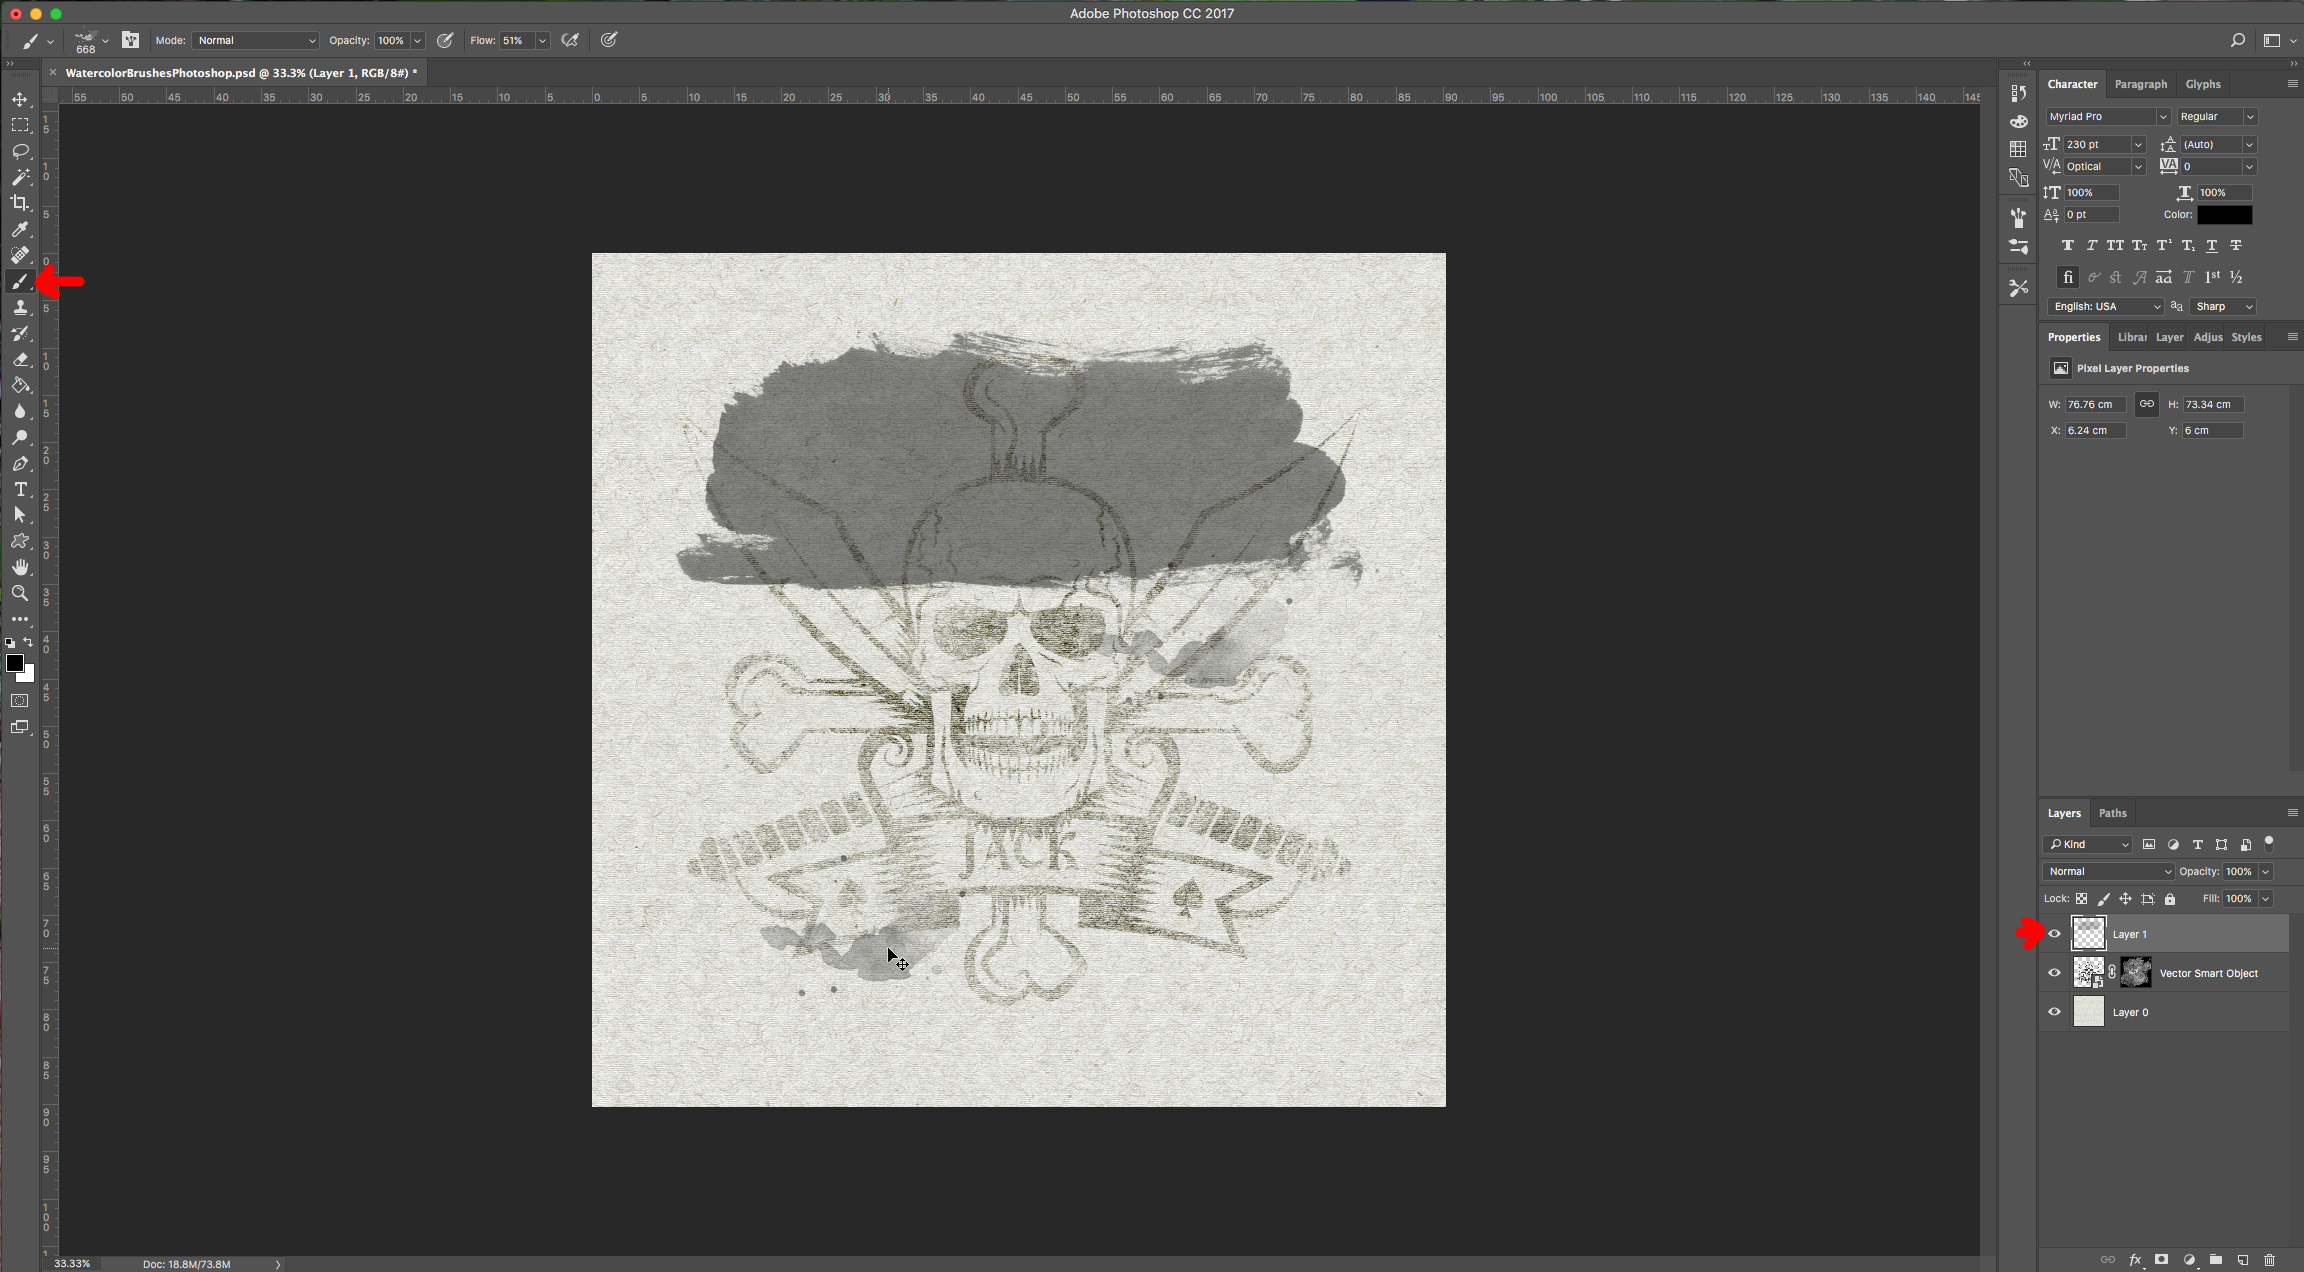
13 – Create another layer and using different brushes paint some splatter and detail. Use a black fill color and make it’s Blending Mode “Lighten”. Then double-click on this layer and apply the following blending options:
Gradient Overlay:
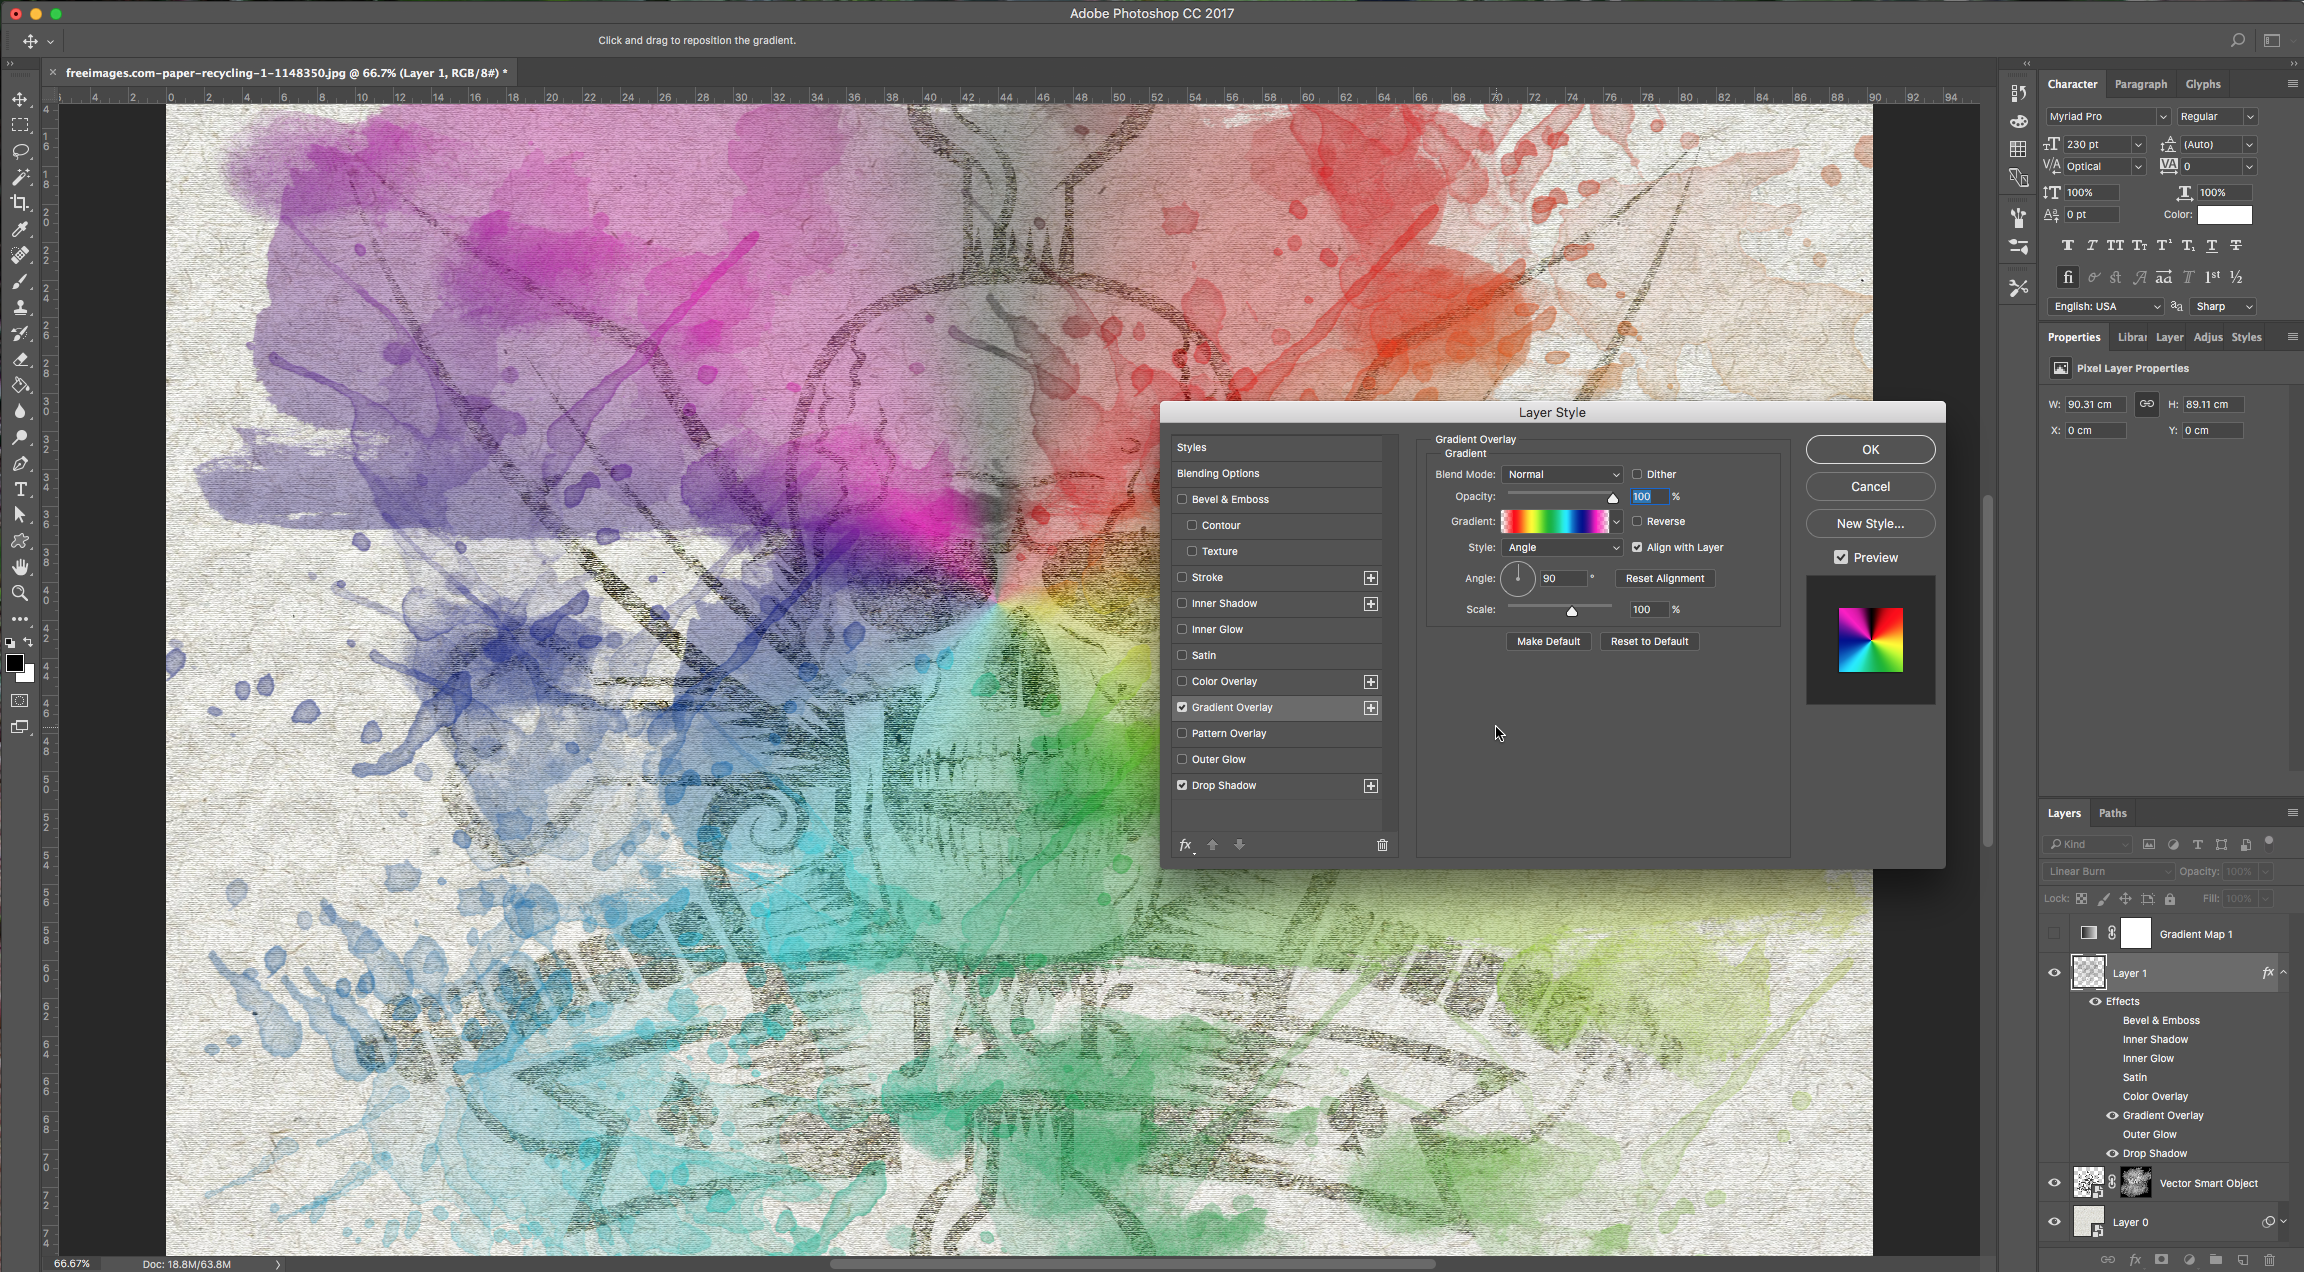
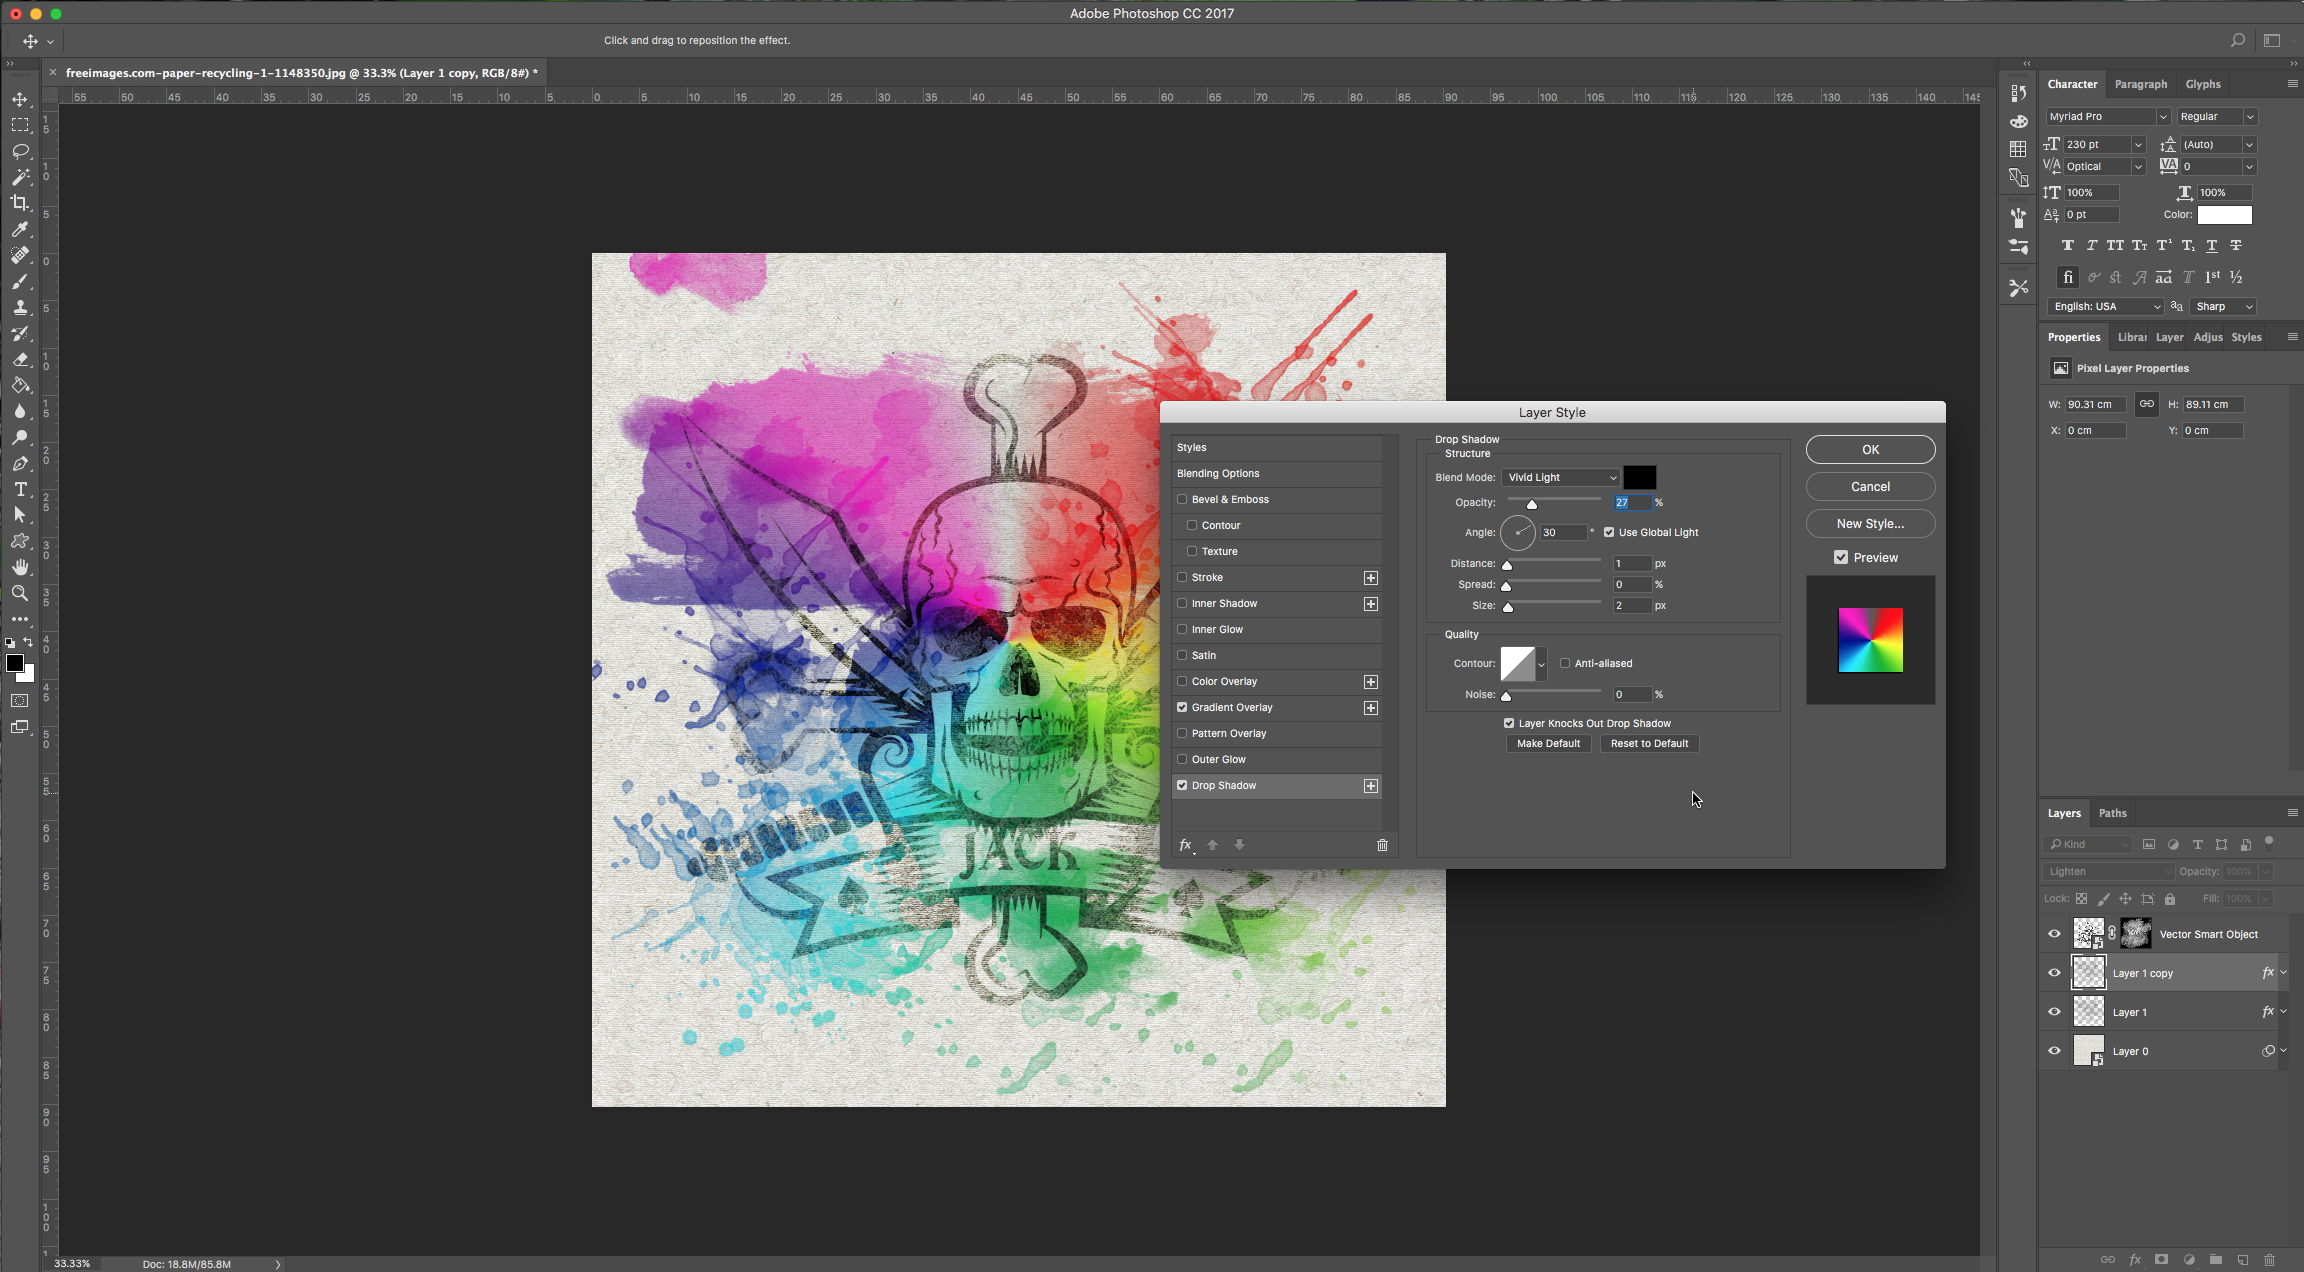
Drop Shadow:

Move this layer under your image in the “Layers” Palette.
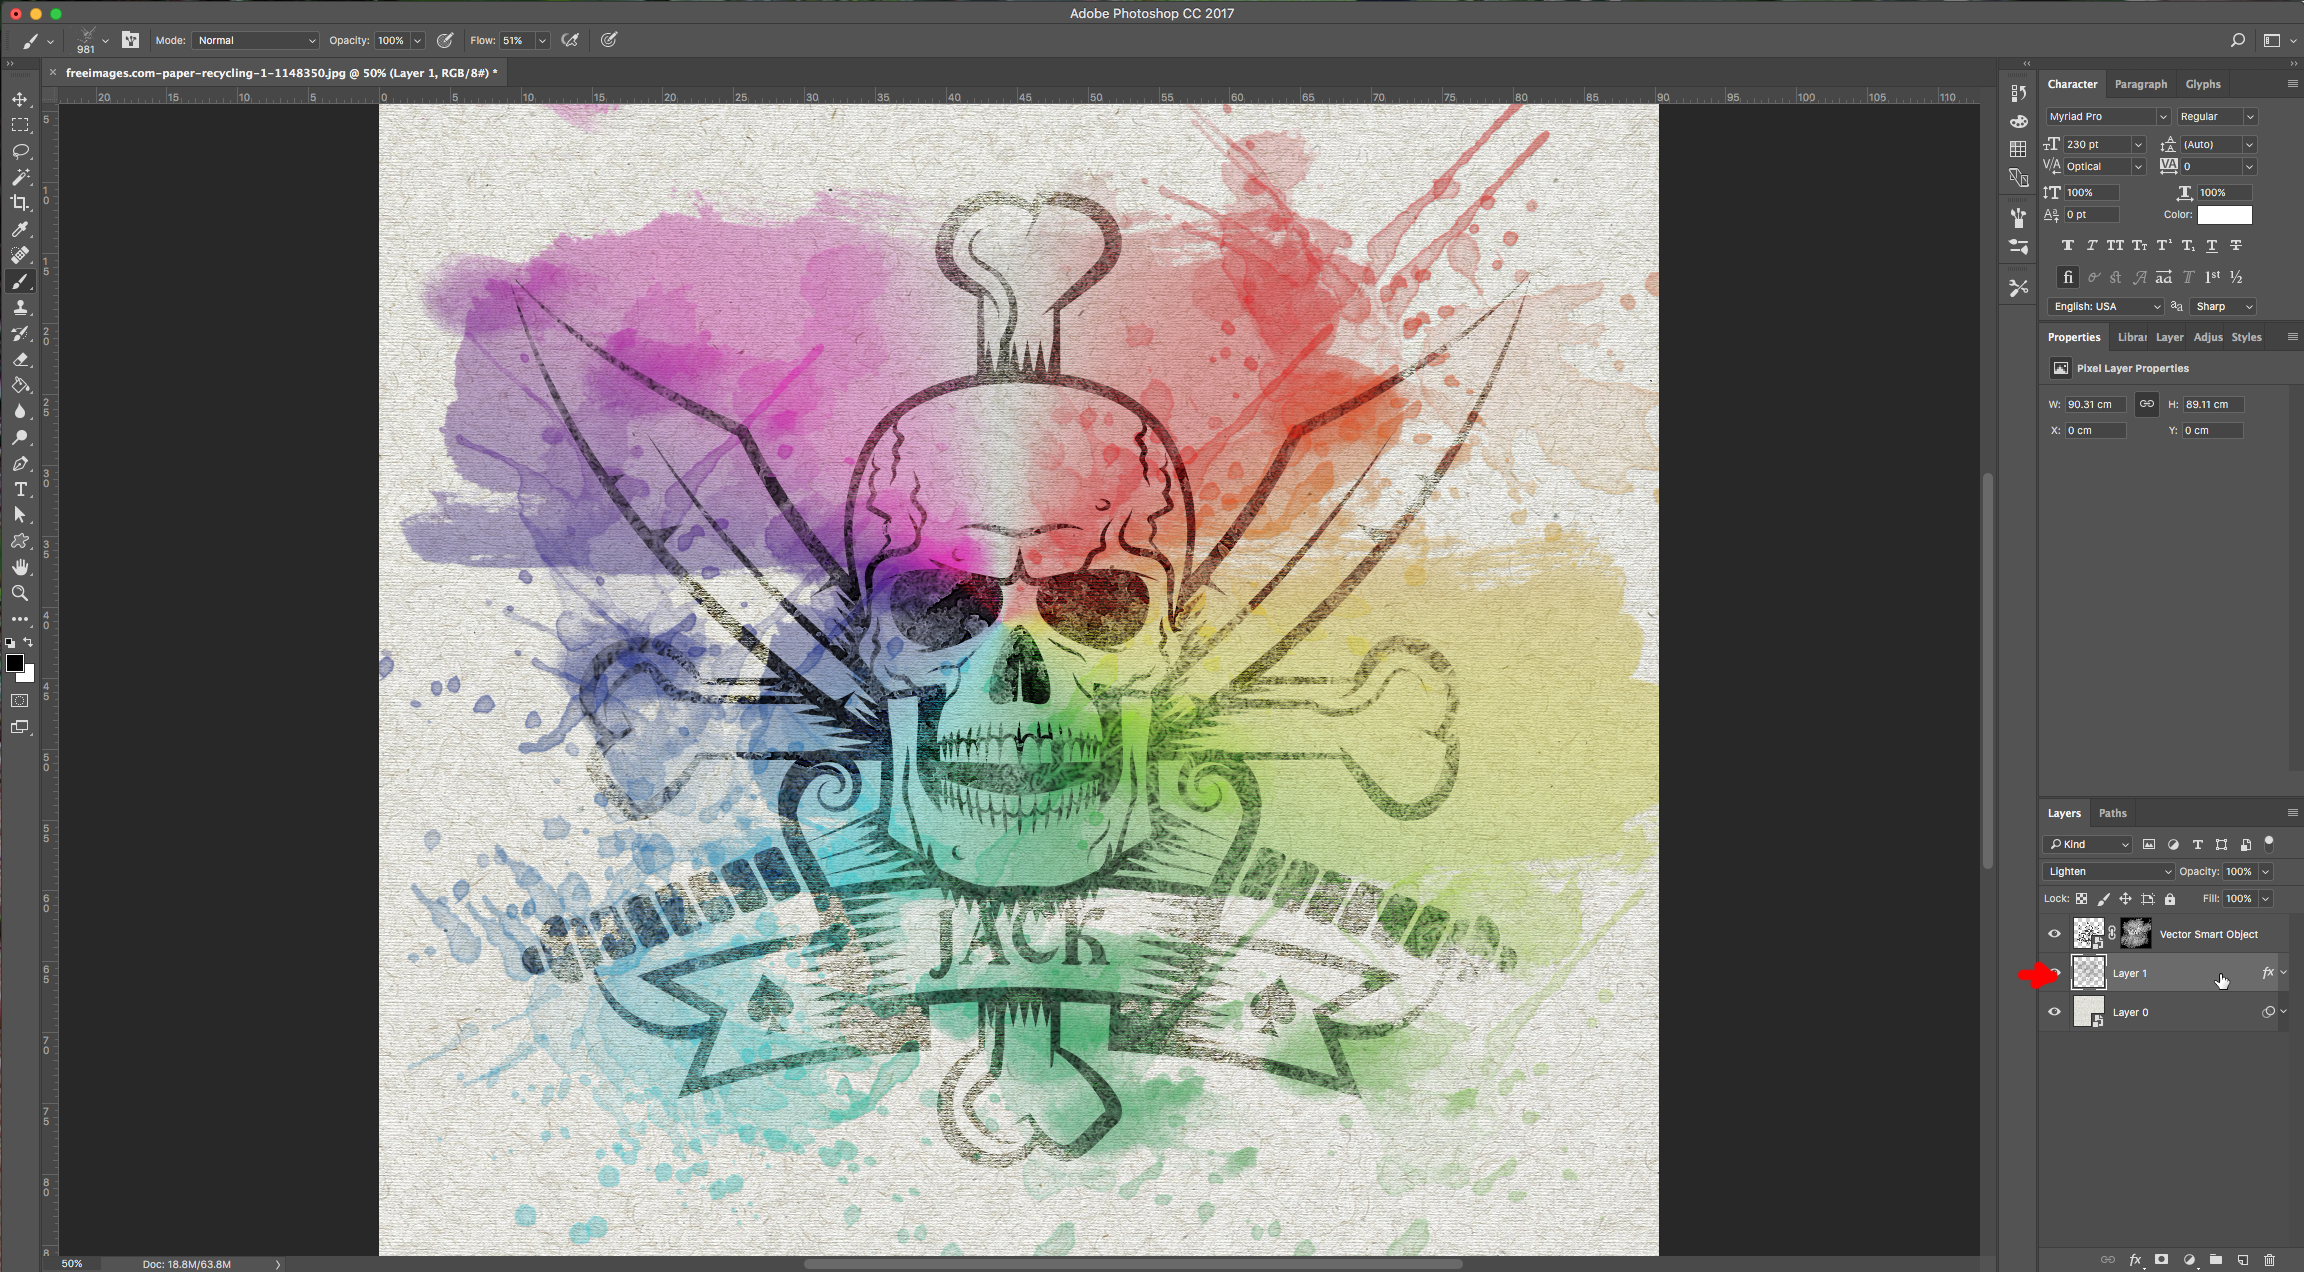
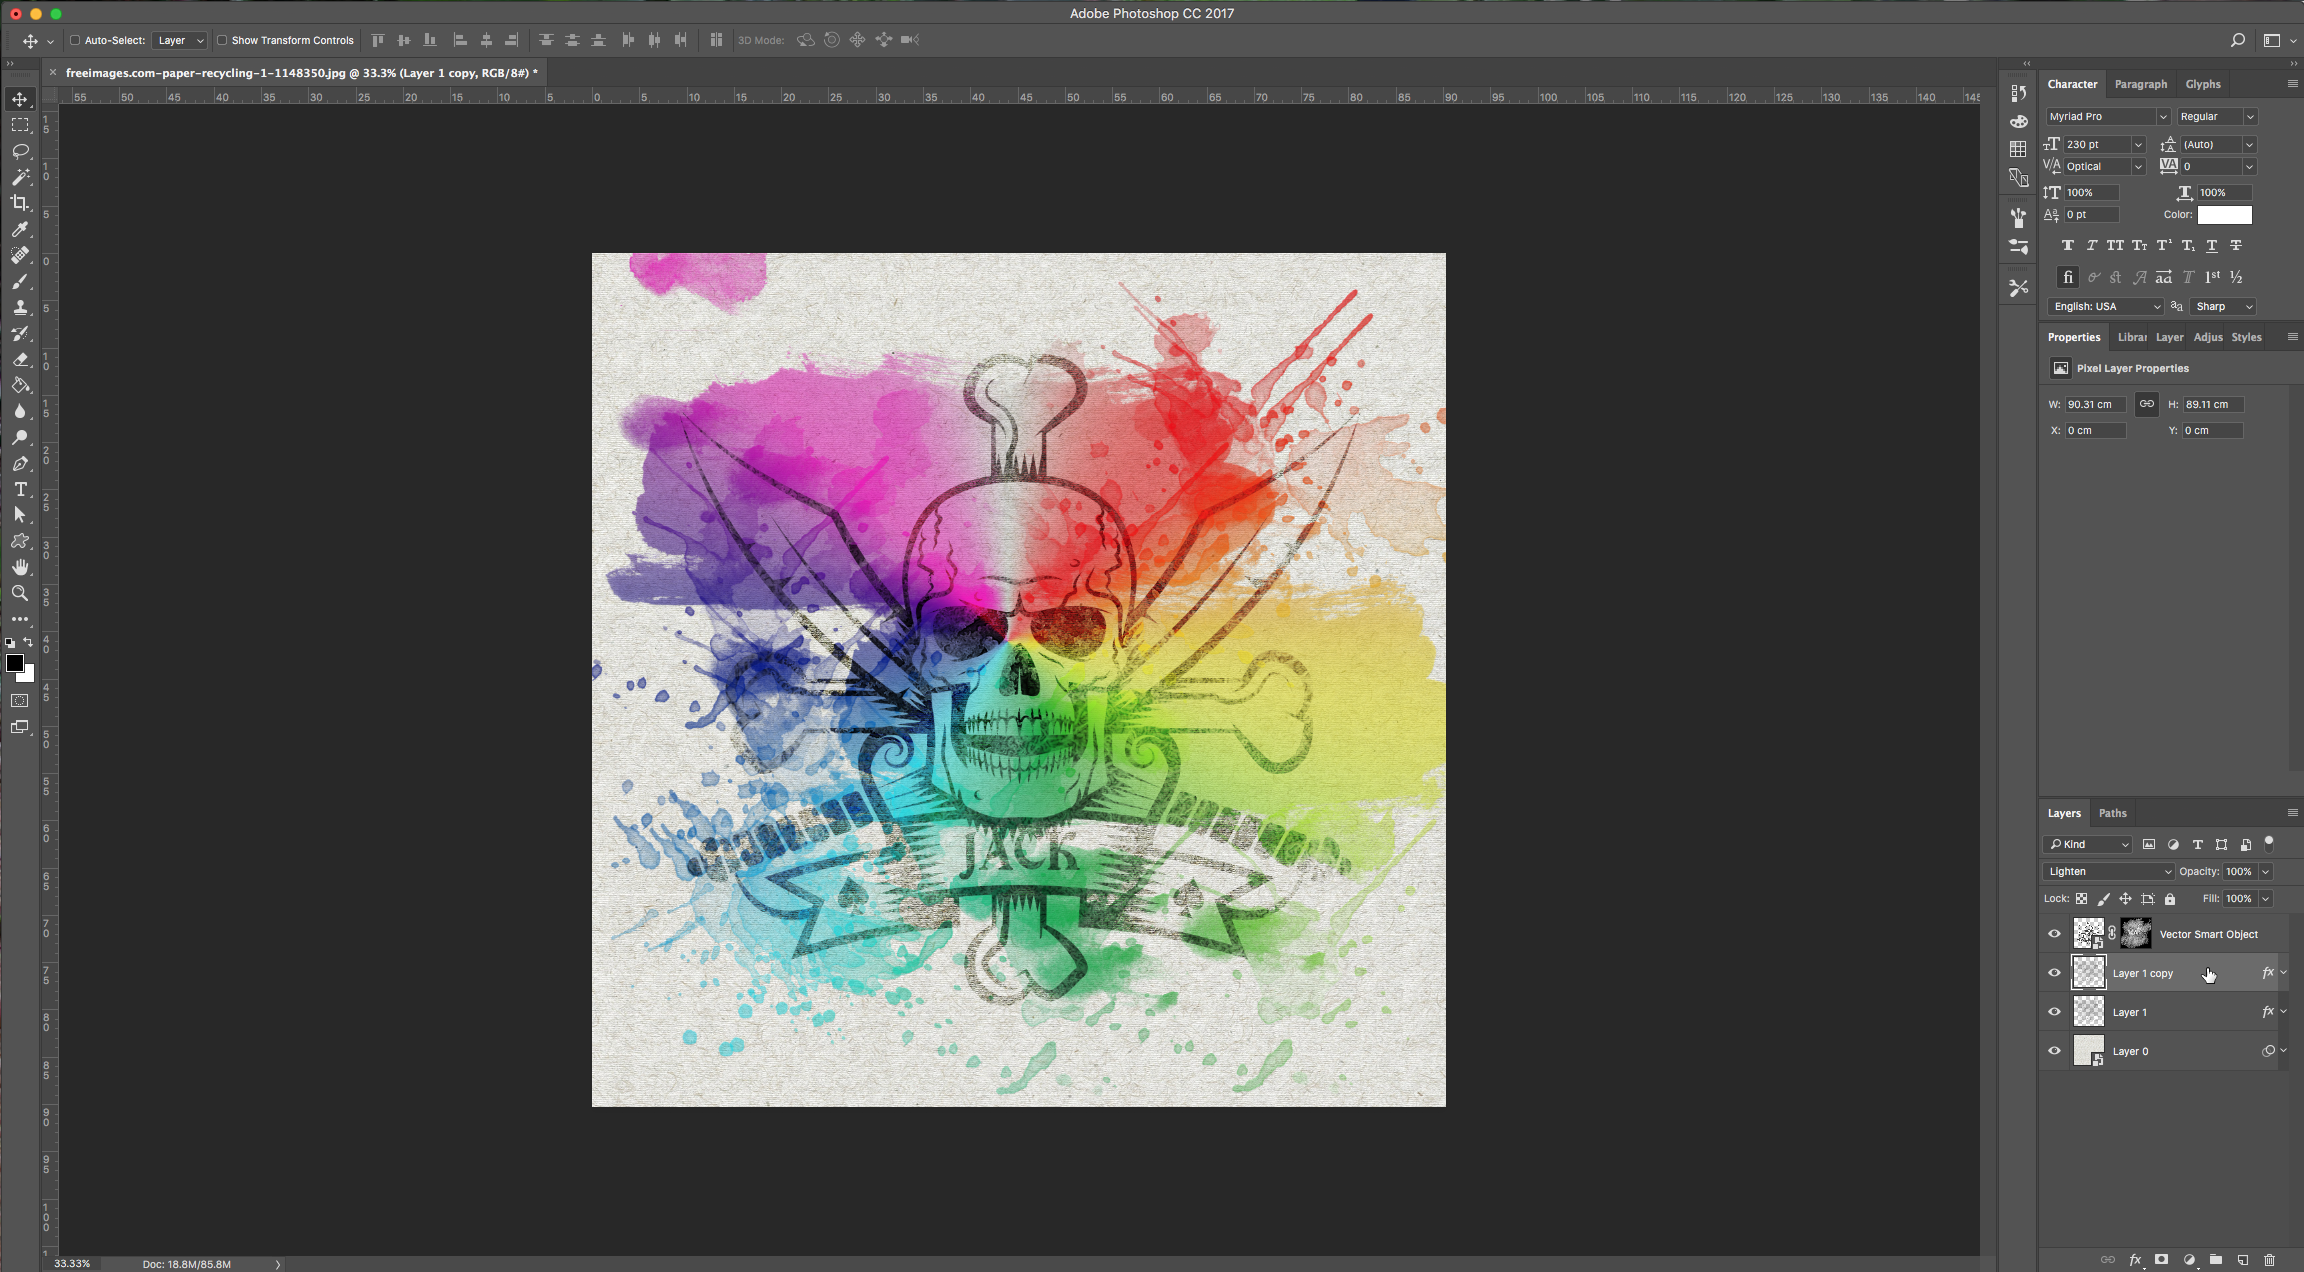
14 – Duplicate your image layer and change the values in your “Drop Shadow” setting to:
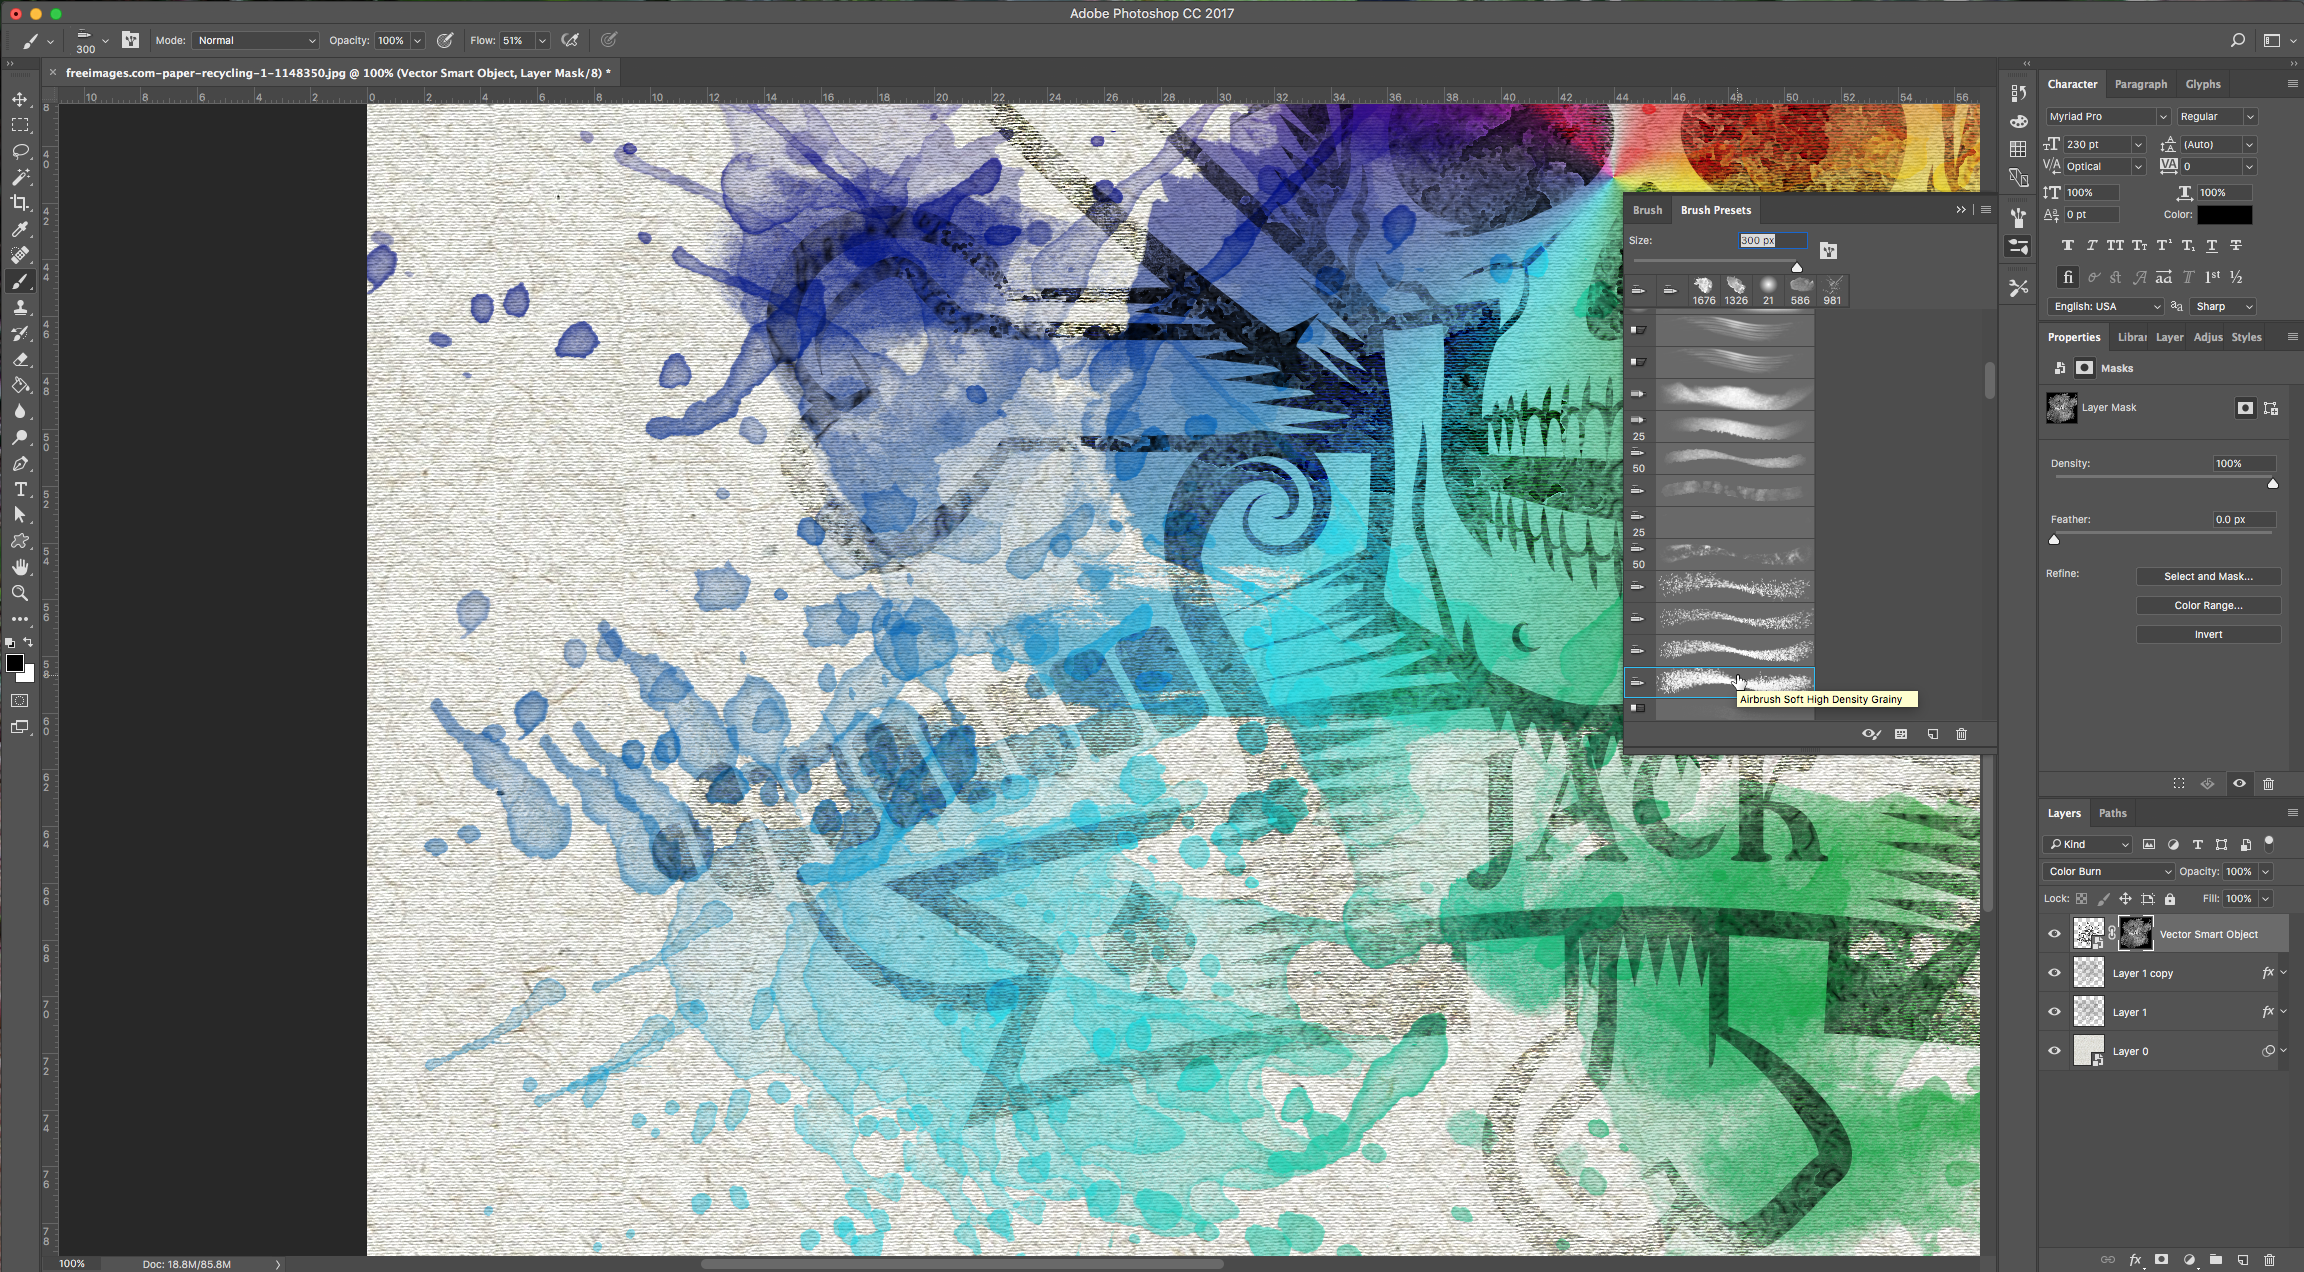
15 – To make the edges of your image a little bit less crisp, select the “Brush Tool” and change the foreground color too black. Click on your image mask and use your brushes to take off some of the color of your image. For example, we used some of the Airbrush presets to distress the image.

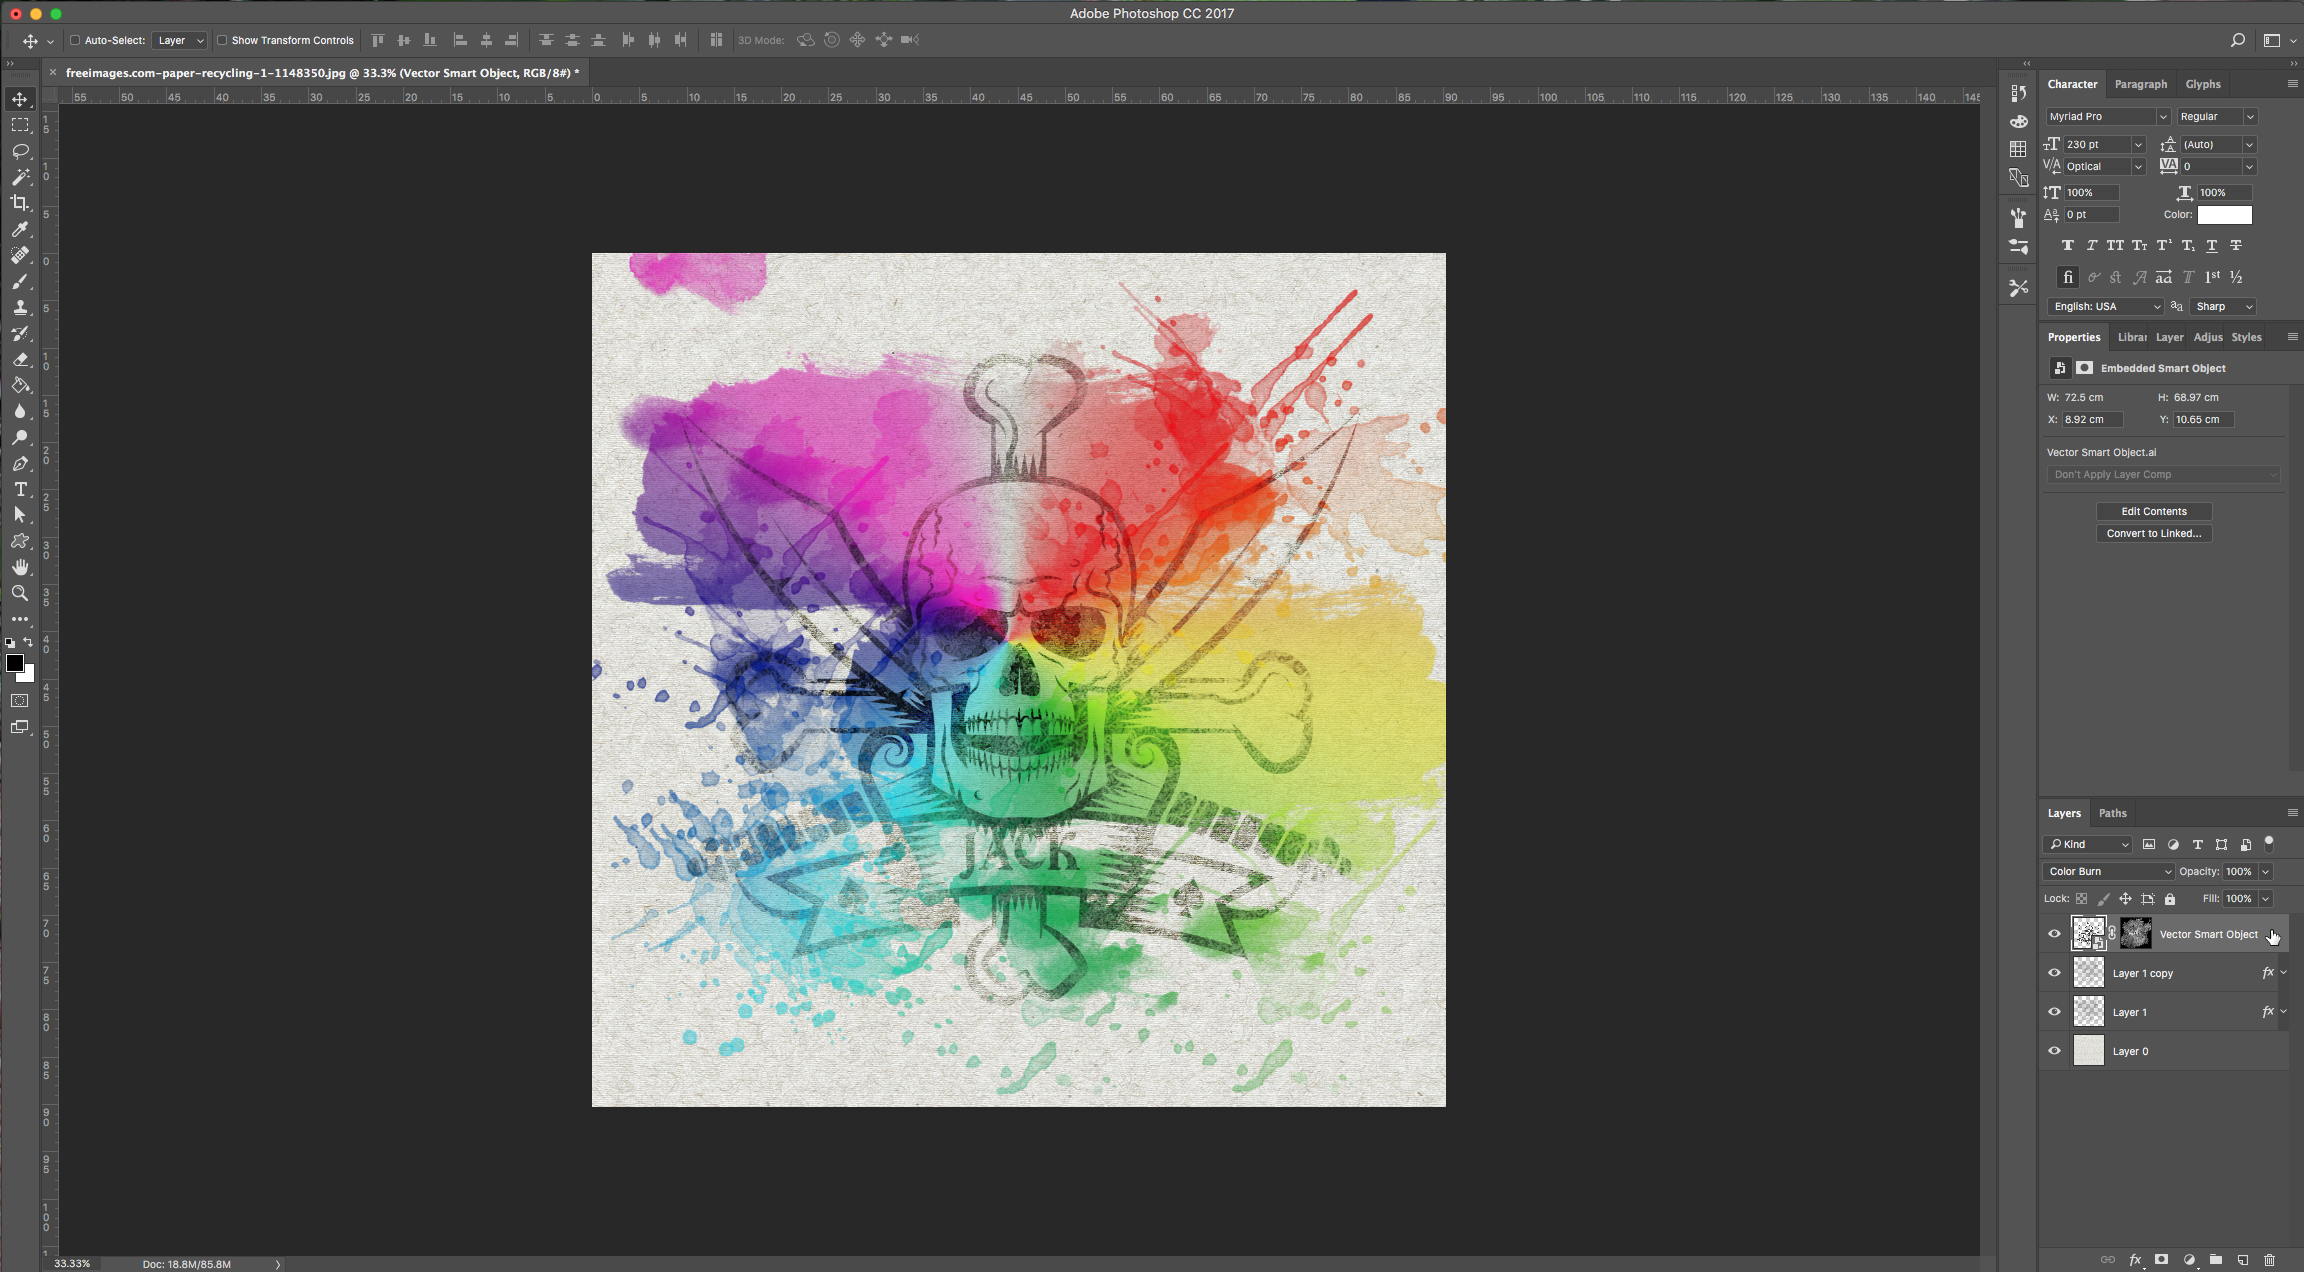
16 – Here’s our final result.
1 – First, let’s make some watercolor brushes for to use in this tutorial. Open the image of the texture you want to convert into a brush. In this case is better to use some textures that have a great contrast between colors.
2 – Double-click on your Background to unlock it and then transform it into a Smart Object.
3 – Create an adjustment layer by clicking on the button at the bottom of your Layers Palette and choose levels or go to Window > Adjustments and select Levels in the menu (This will create a new adjustment layer). Then clip the layer to your texture. Move the middle lever to the right to make the dark colors darker and the background and light colors lighter. Depending on your texture you will have to move the other sliders as well to create the contrast you want.
4 – Create a Hue/Saturation adjustment layer and turn the saturation to -100. Clip this layer to the texture too.
5 – Then make a Brightness and Contrast adjustment layer and tweak that one too. Clip it to your texture. You can save this file and apply this presets to other textures or change some values to tweak your brush.
6 – Select your layers and go to Edit > Define Brush Preset, give it a name and save it. Now if you choose your “Brush Tool” your new brush would be the last one at the bottom of the list. Create many brushes in different shapes and sizes. There are also many free and paid brushes available to download and import into Photoshop, you can use some of them together with the ones you created and for the next portion of this tutorial.
7 – To import brushes and other assets into Photoshop go to Edit > Presets > Preset Manager, choose “Brushes” from the menu and click “Load”. Then you can navigate to your brushes and load them.
8 – Now, create a new document and ad your canvas/paper background to it or open your background directly and double-click on it to unlock it and then convert it to a “Smart Object”.
9 – Go to Filter > Filter Gallery > Texture > Texturizer and apply the following values:
10 – Import the image you want to use into the document. In this case we are using a black and white image, but if you are using a photo It needs to have a very high contrast. You can fix that by adjusting the contrast and saturation to increase the whites and darken the other colors.
11 – Make a Layer Mask on your image layer and fill it with black. Your image should disappear. With your mask selected use the “Brush Tool” (B) with one of your watercolor brushes and paint on your canvas, you will notice that your image starts to appear. If your brushes are too big, you can change its size in the “Brushes Palette”. Use different “Opacity” and “Flow” settings.
12 – Select your “Layer Mask” and in “Filter Gallery” apply the following filters:
Make sure to create a “New Filter” layer for the second one. Then use “Color Burn” as blending option for your layer.
13 – Create another layer and using different brushes paint some splatter and detail. Use a black fill color and make it’s Blending Mode “Lighten”. Then double-click on this layer and apply the following blending options:
Gradient Overlay:
Drop Shadow:
Move this layer under your image in the “Layers” Palette.
14 – Duplicate your image layer and change the values in your “Drop Shadow” setting to:
15 – To make the edges of your image a little bit less crisp, select the “Brush Tool” and change the foreground color too black. Click on your image mask and use your brushes to take off some of the color of your image. For example, we used some of the Airbrush presets to distress the image.
16 – Here’s our final result.
by @lornacane


