3D Grassy Text in Photoshop
For this tutorial, we will use the combined images of Cracked Soil and Grass for our “Background”, some free Soil or Dirt “Patterns” and the font “Soft Vintage Bold” from Font Bundles (https://fontbundles.net/happy-letters/72057-soft-vintage-scandinavian-decor-font#gtmList=5>mPos=1). We will expand a “Text Effect” we used in a previous Tutorial (Grass Text in Photoshop)
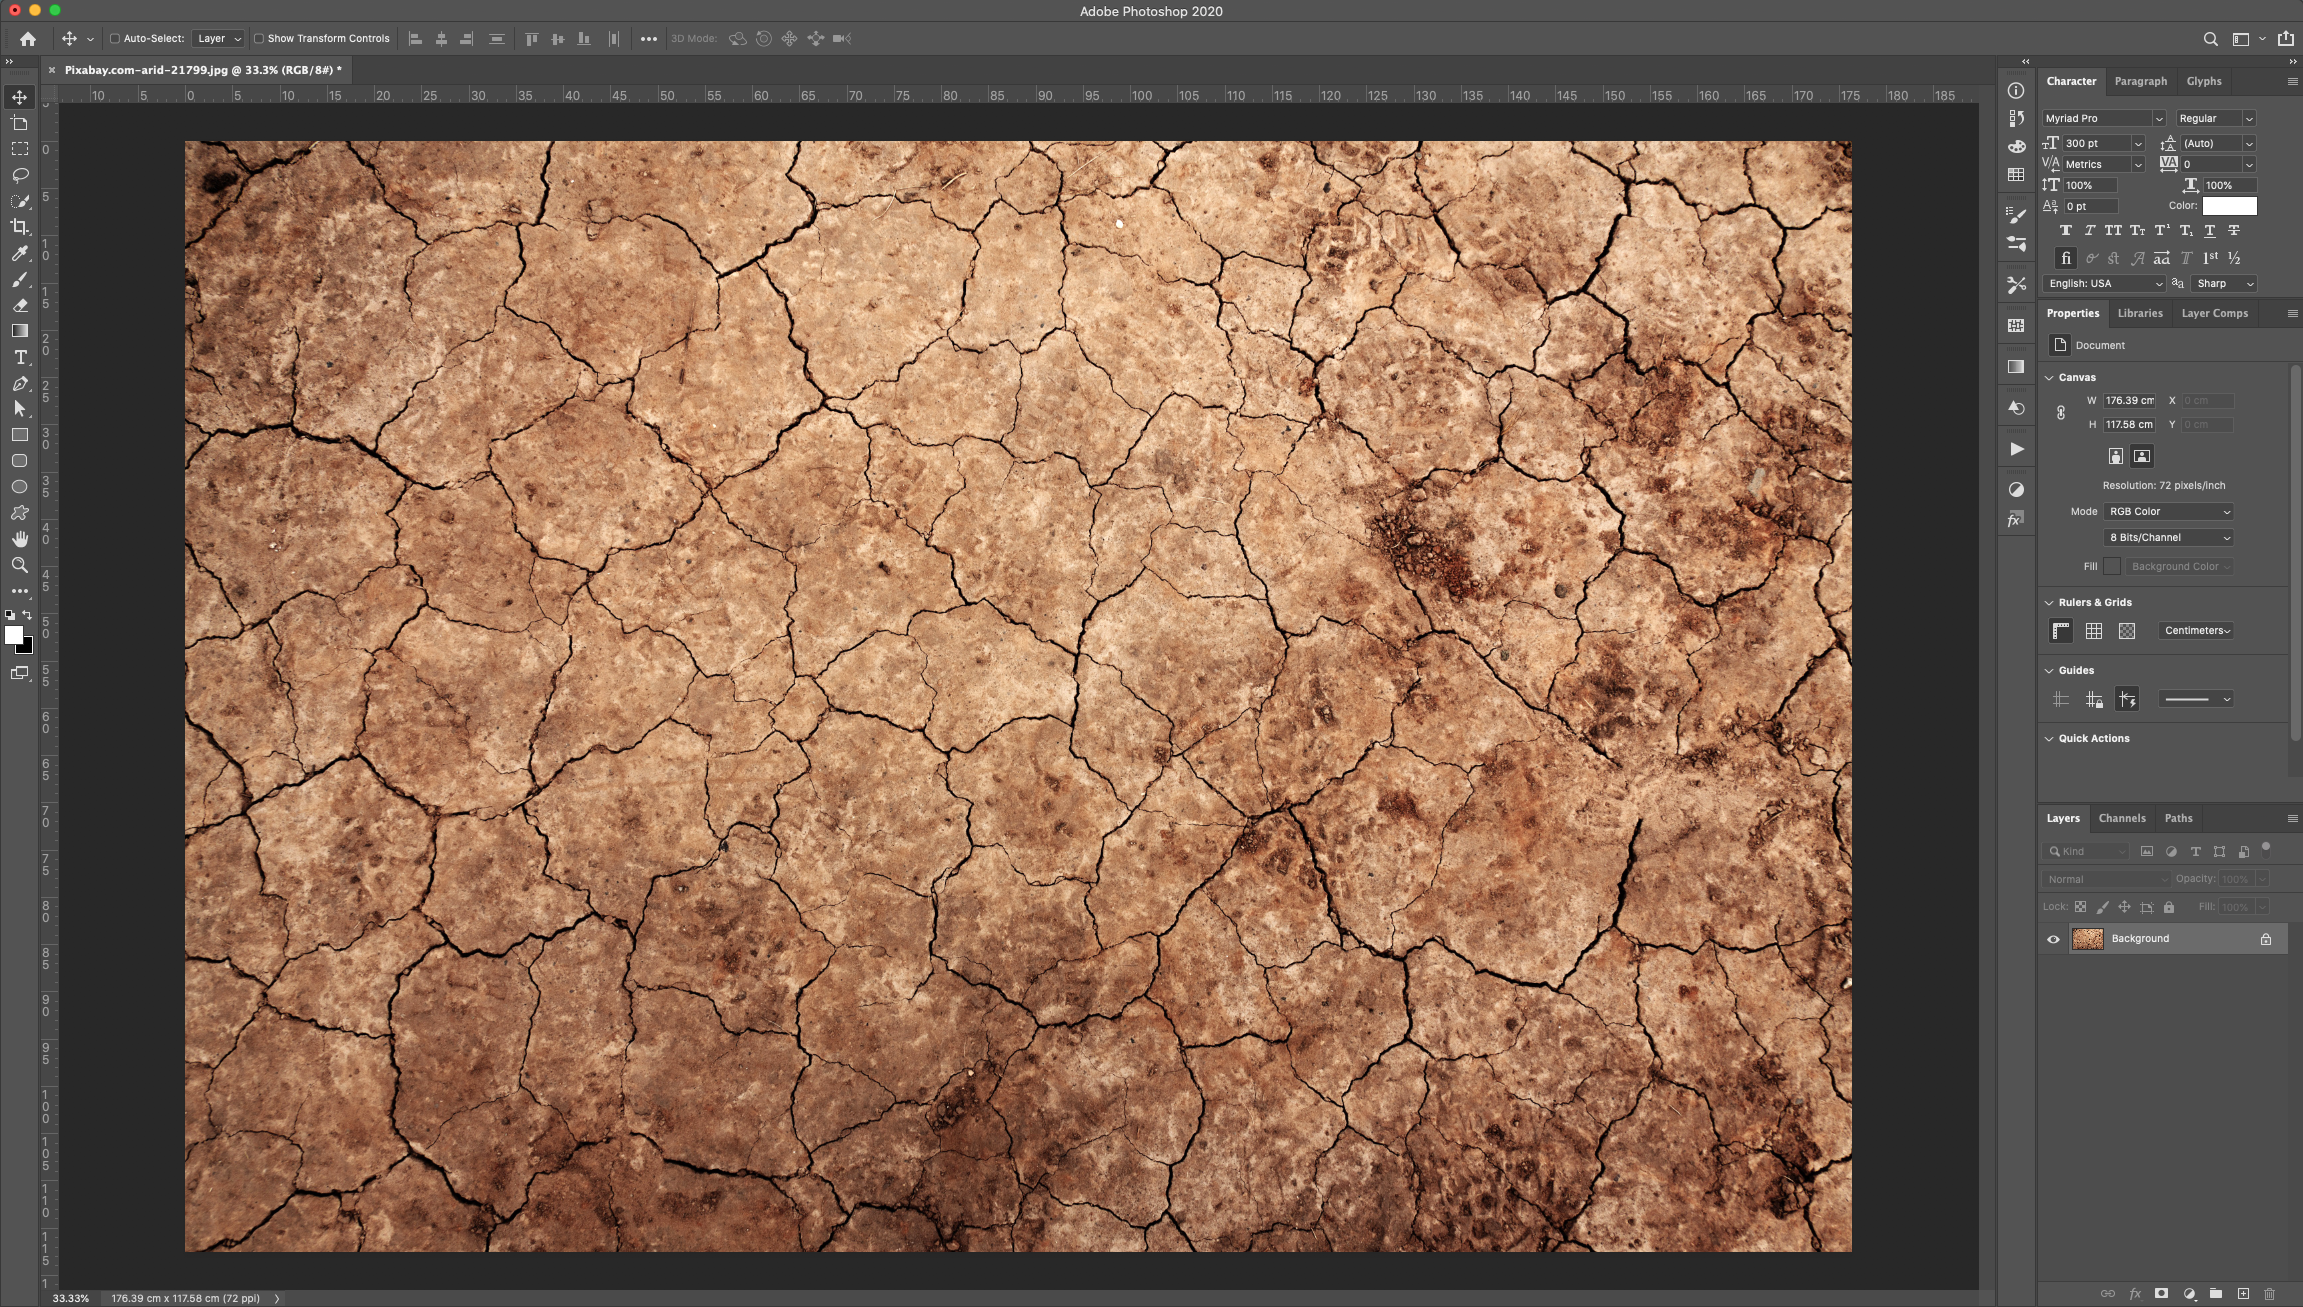
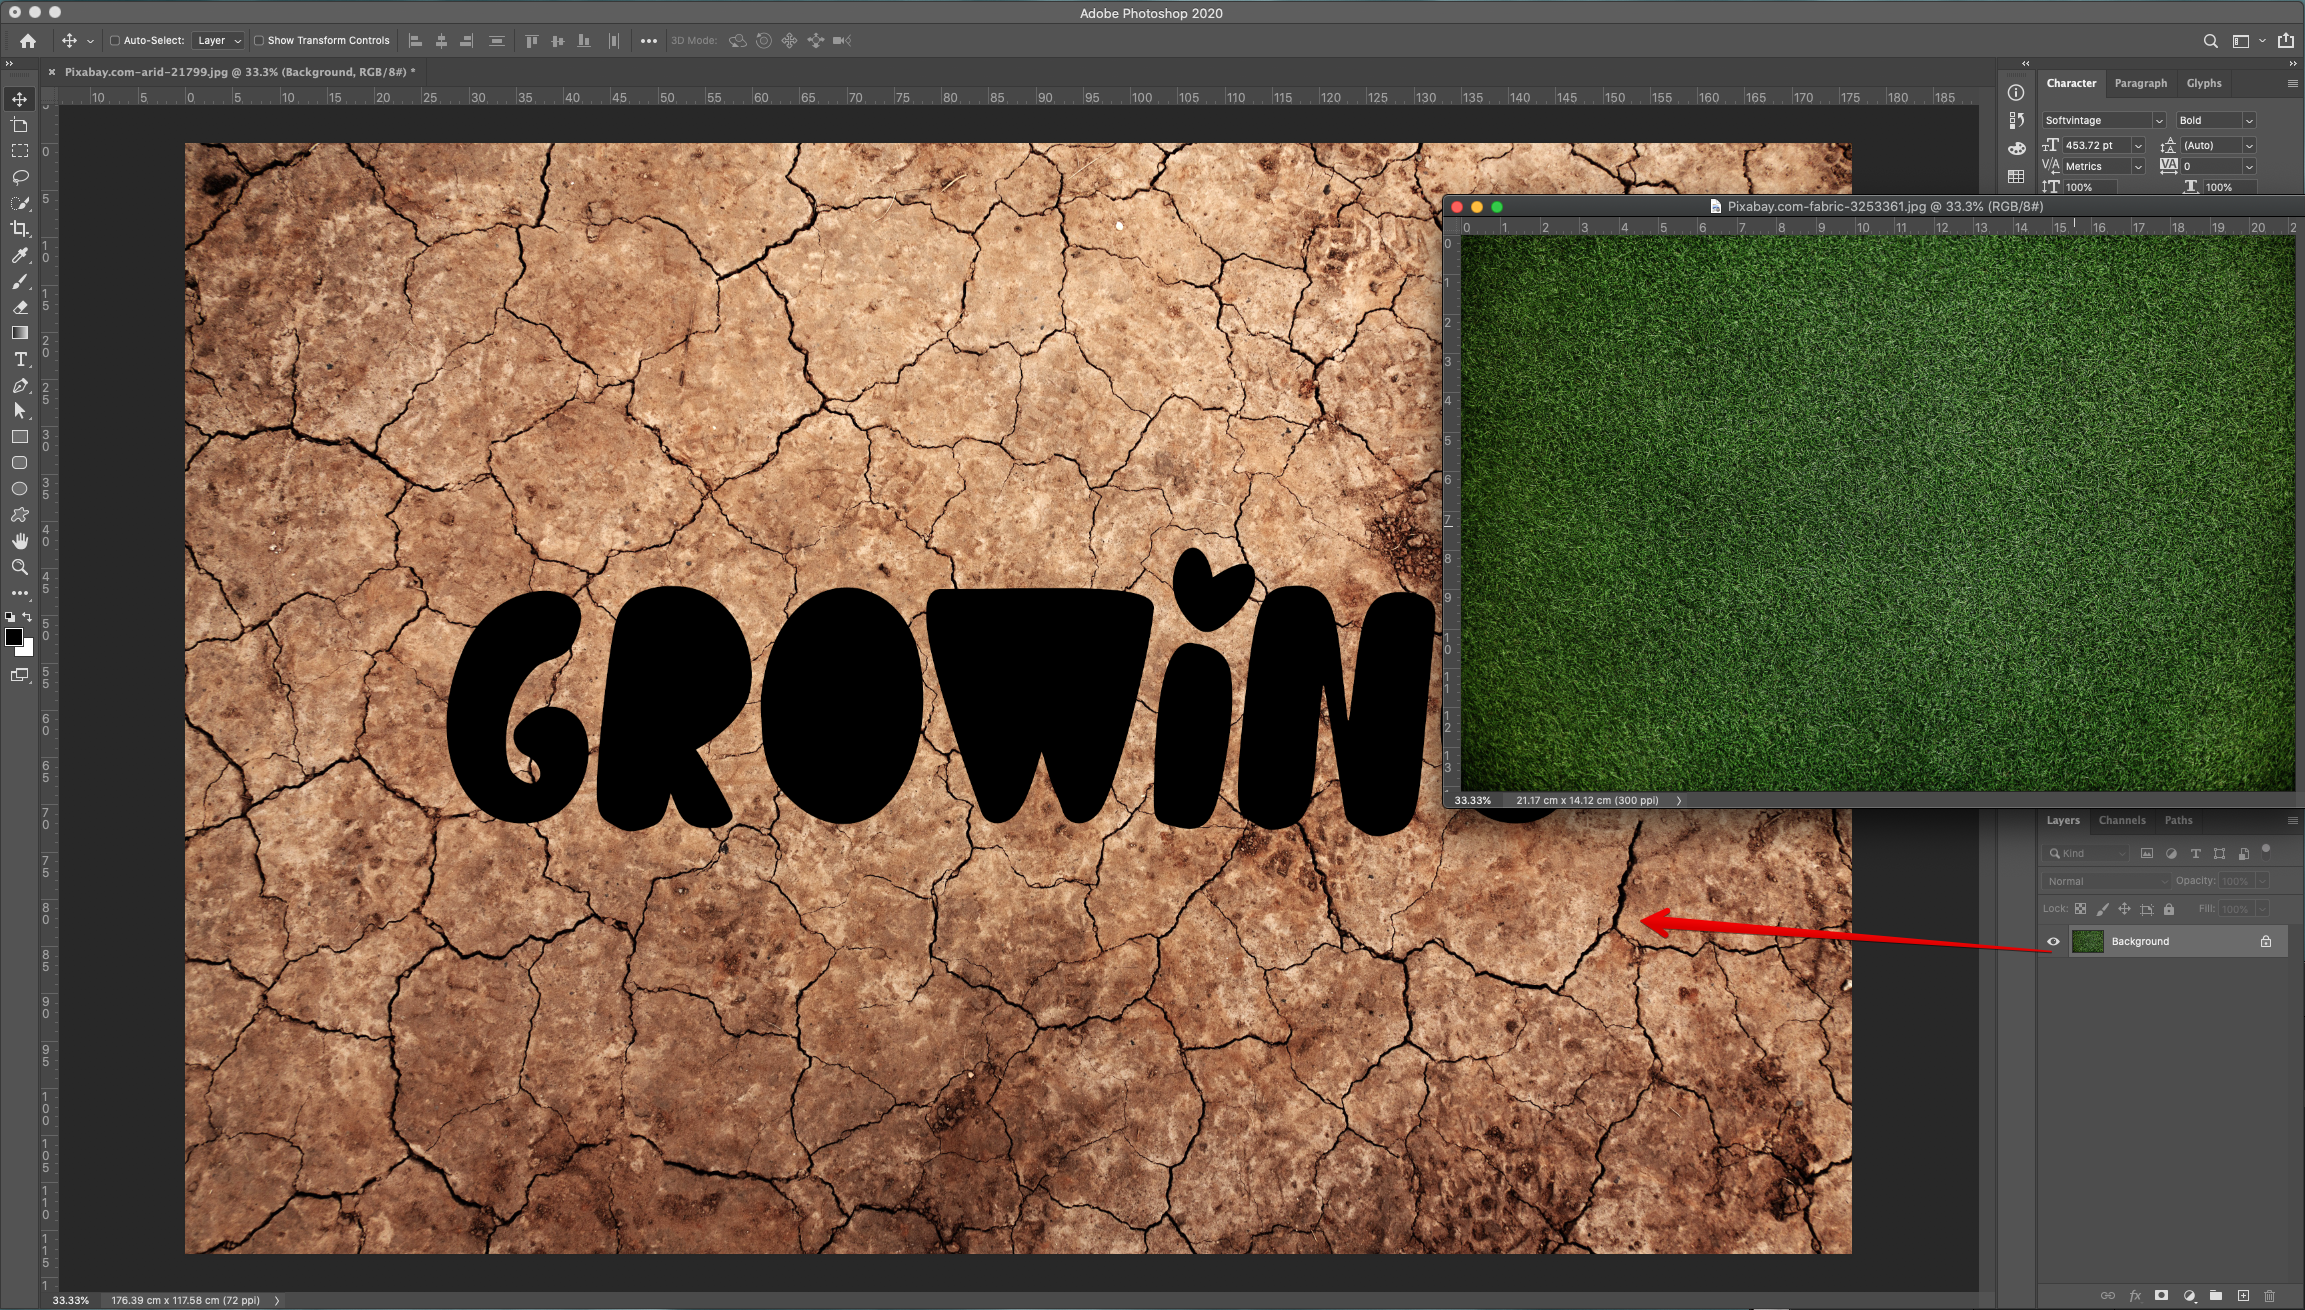
1 - In Photoshop, open the image you chose as “Background”.
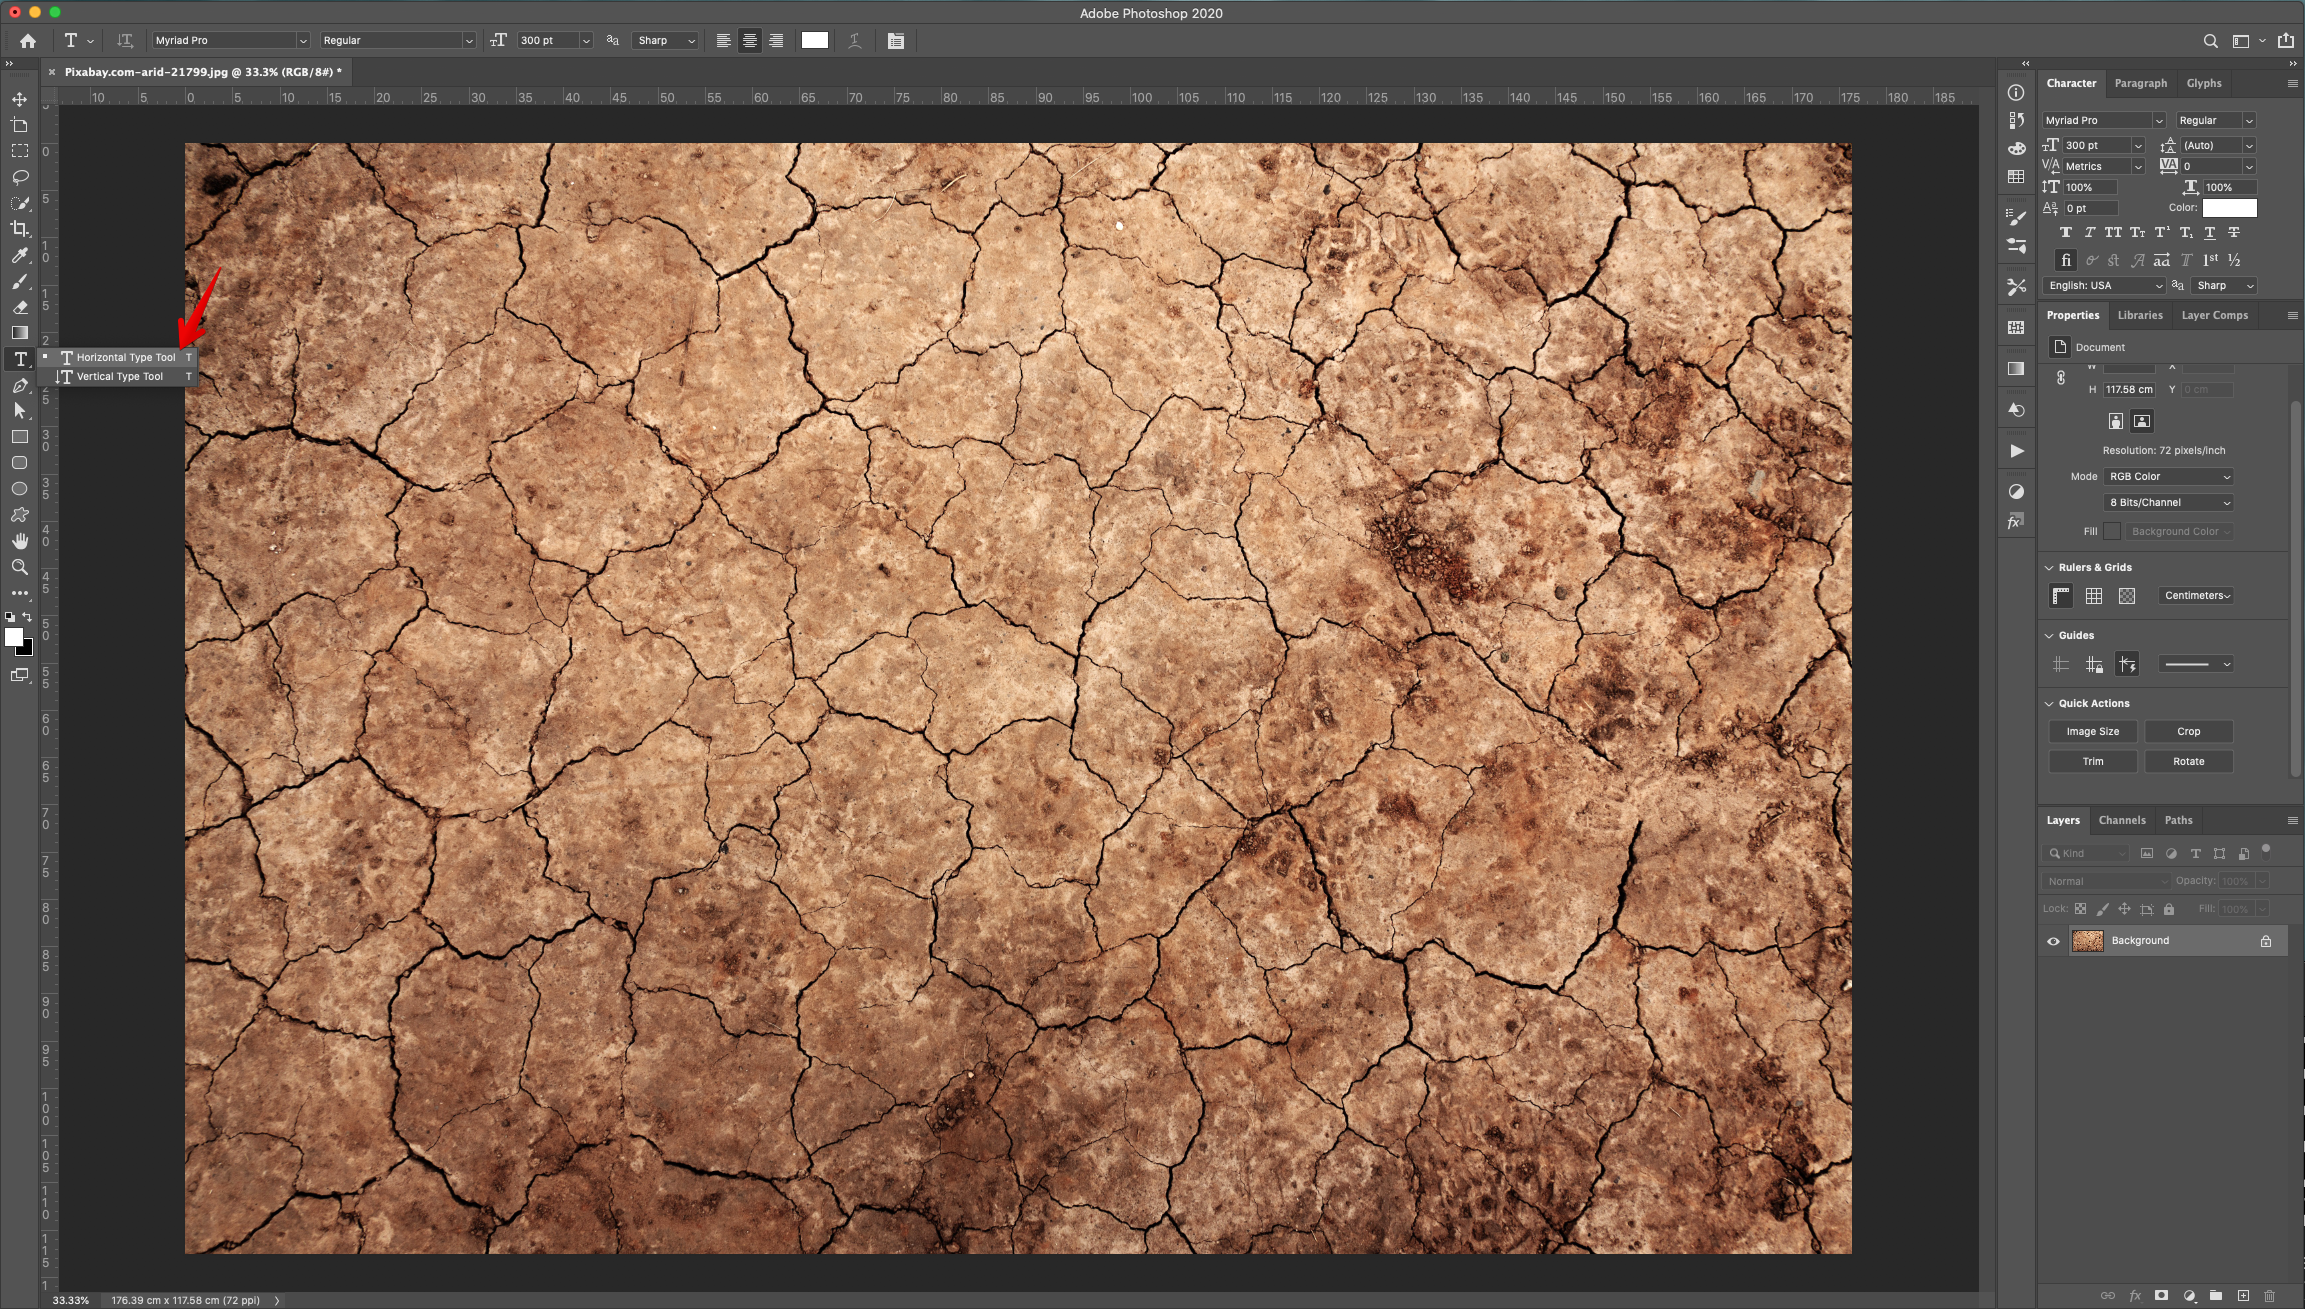
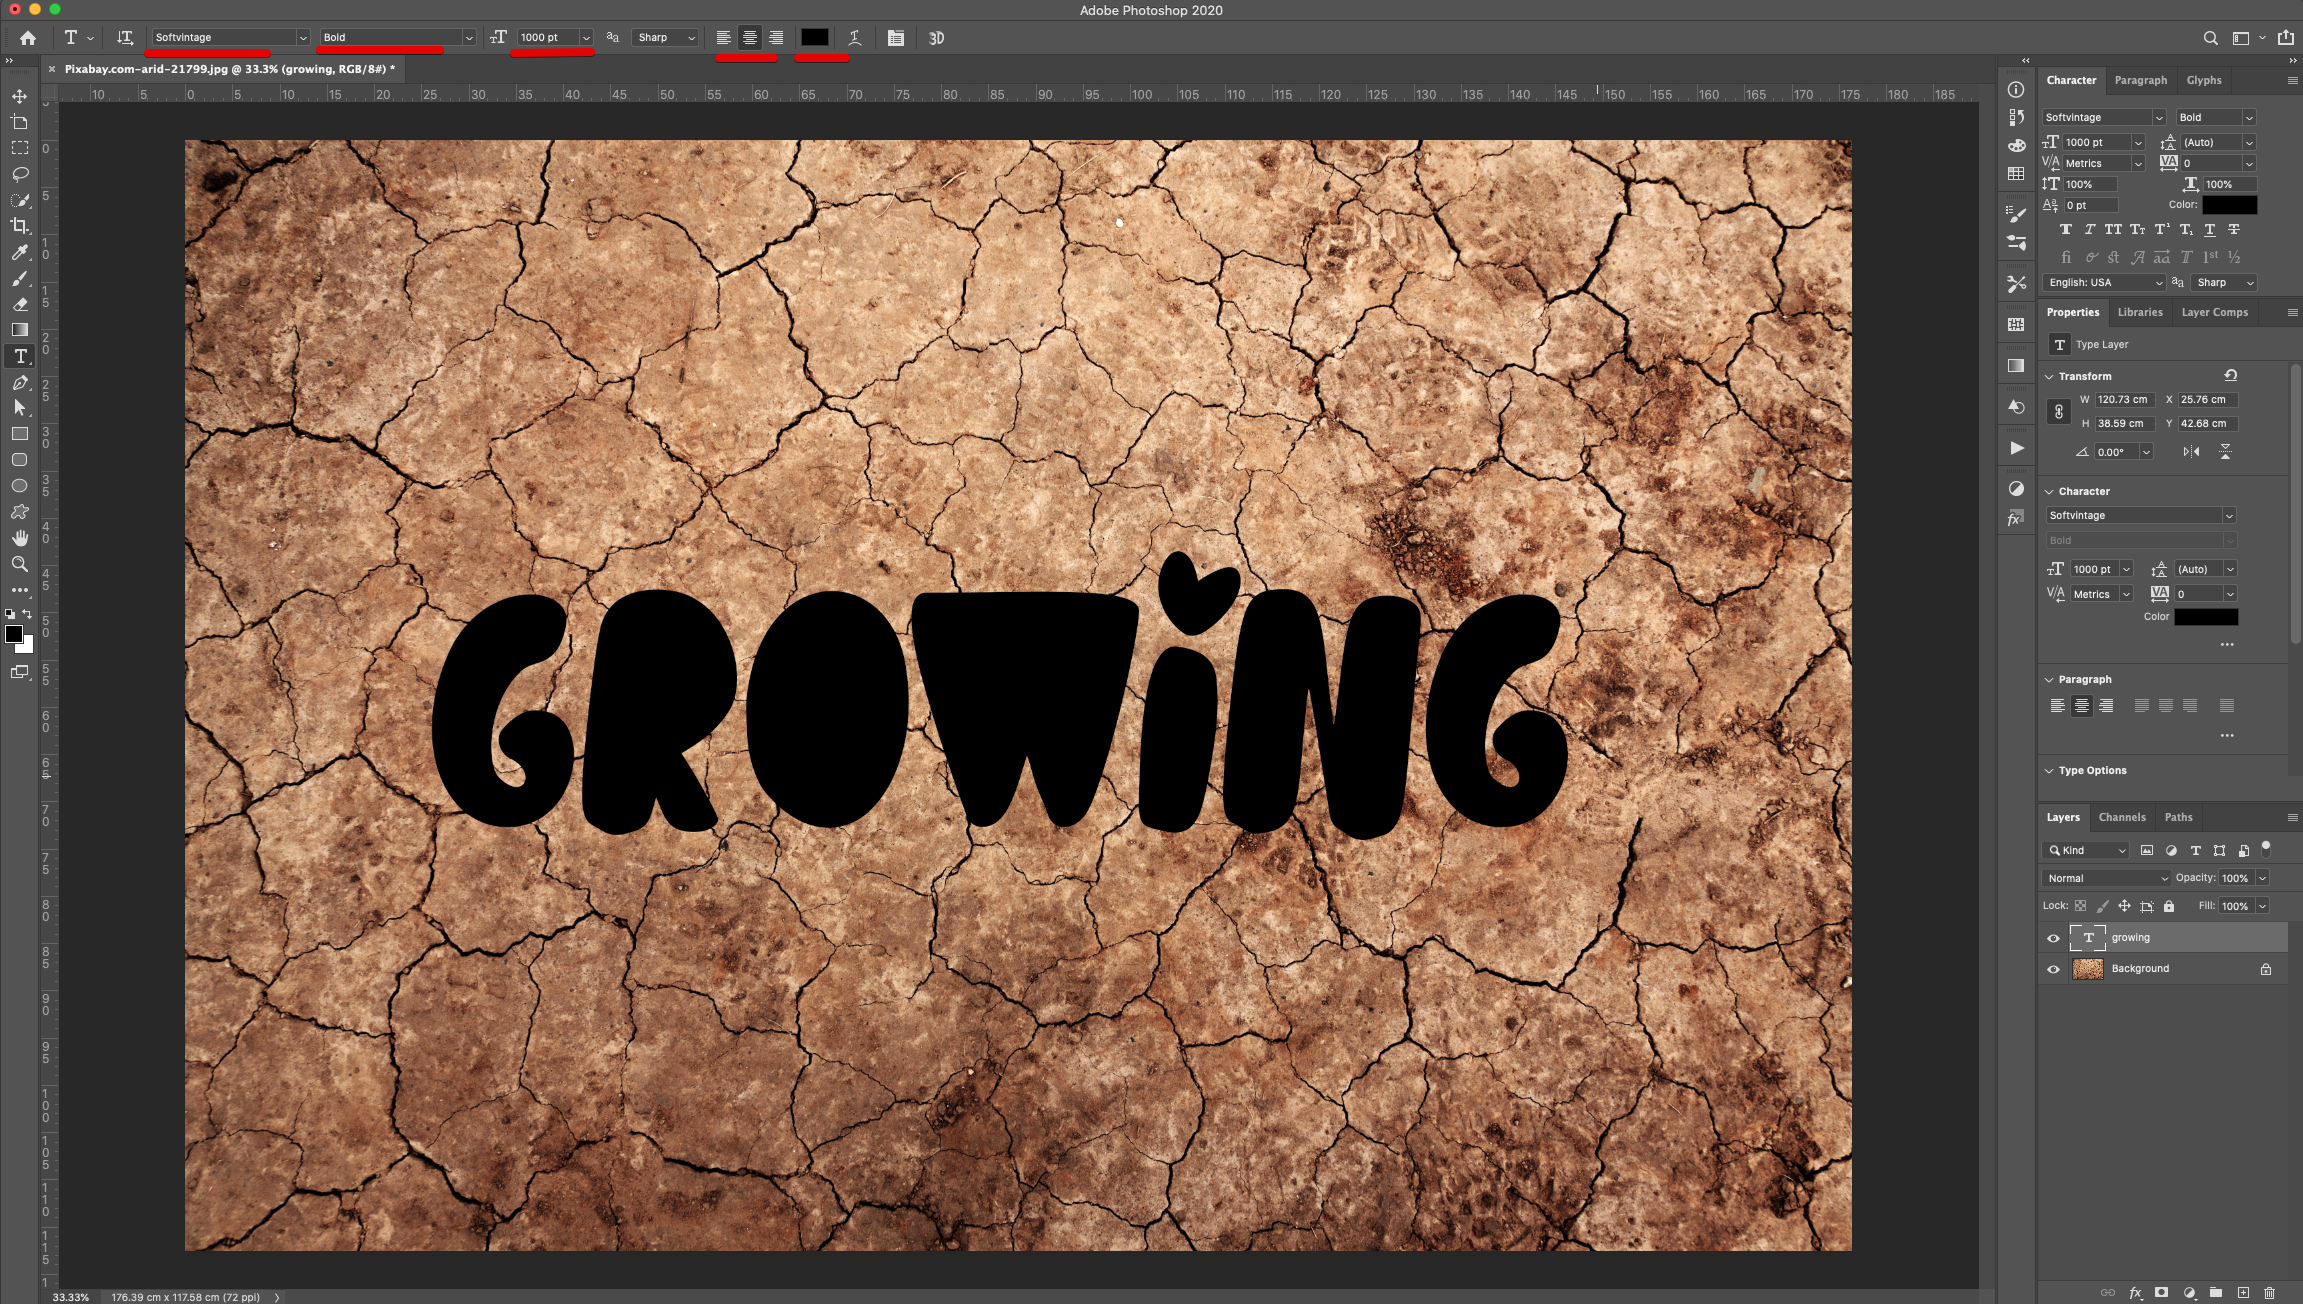
2 - Select the “Type Tool” (T), select your font (we used “Soft Vintage Bold”) and type your text. The size will depend on the word/s you choose.
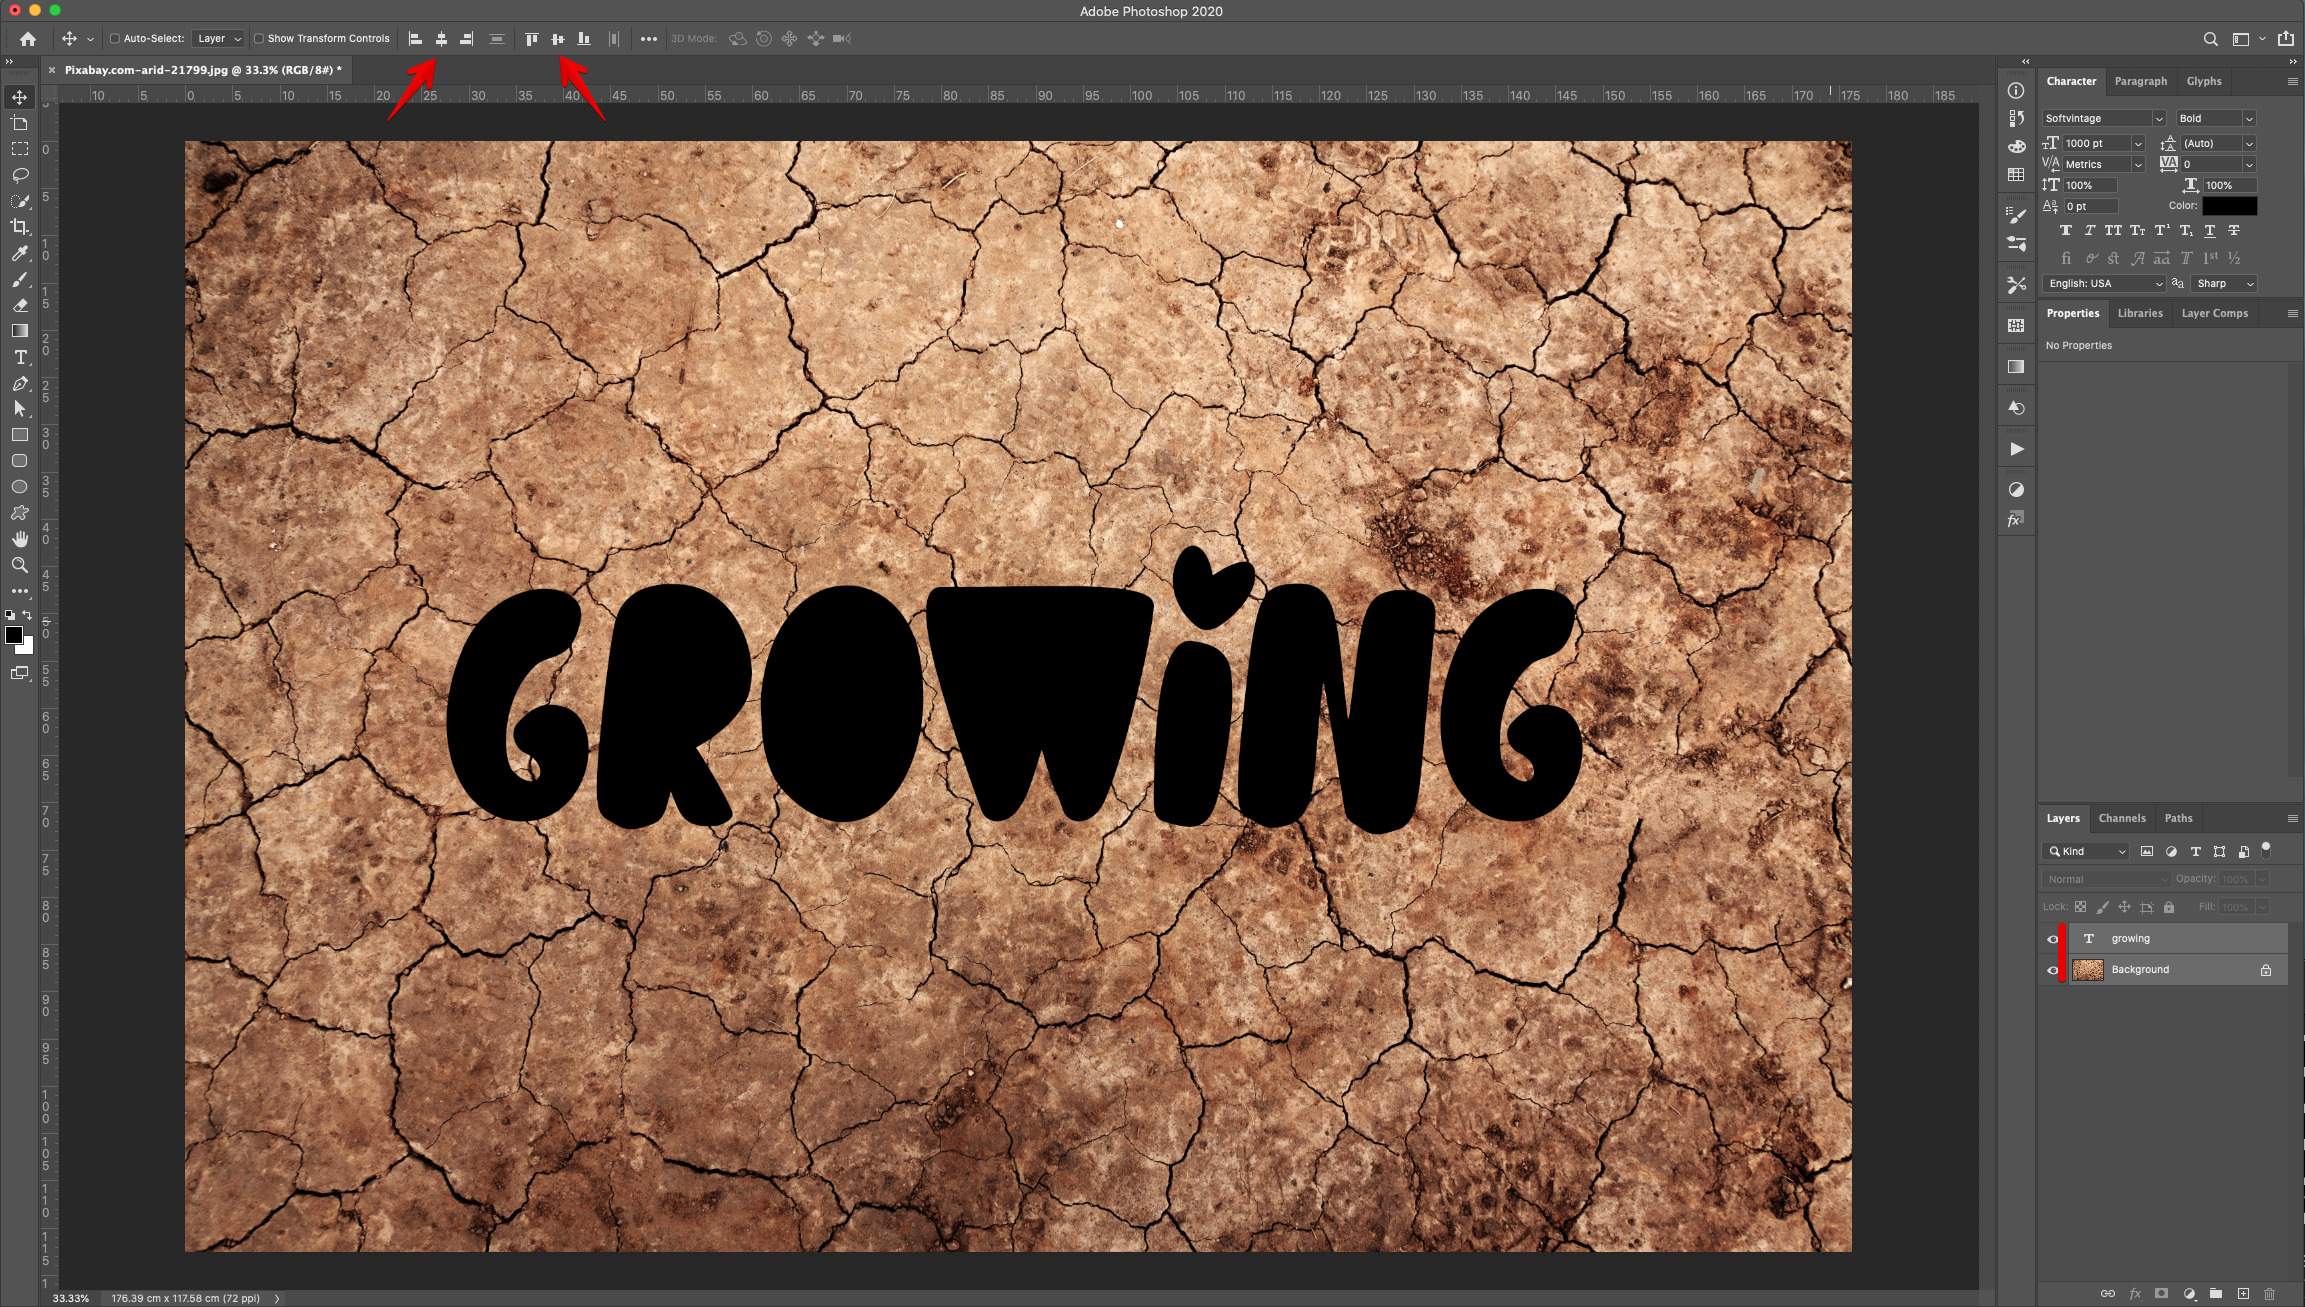
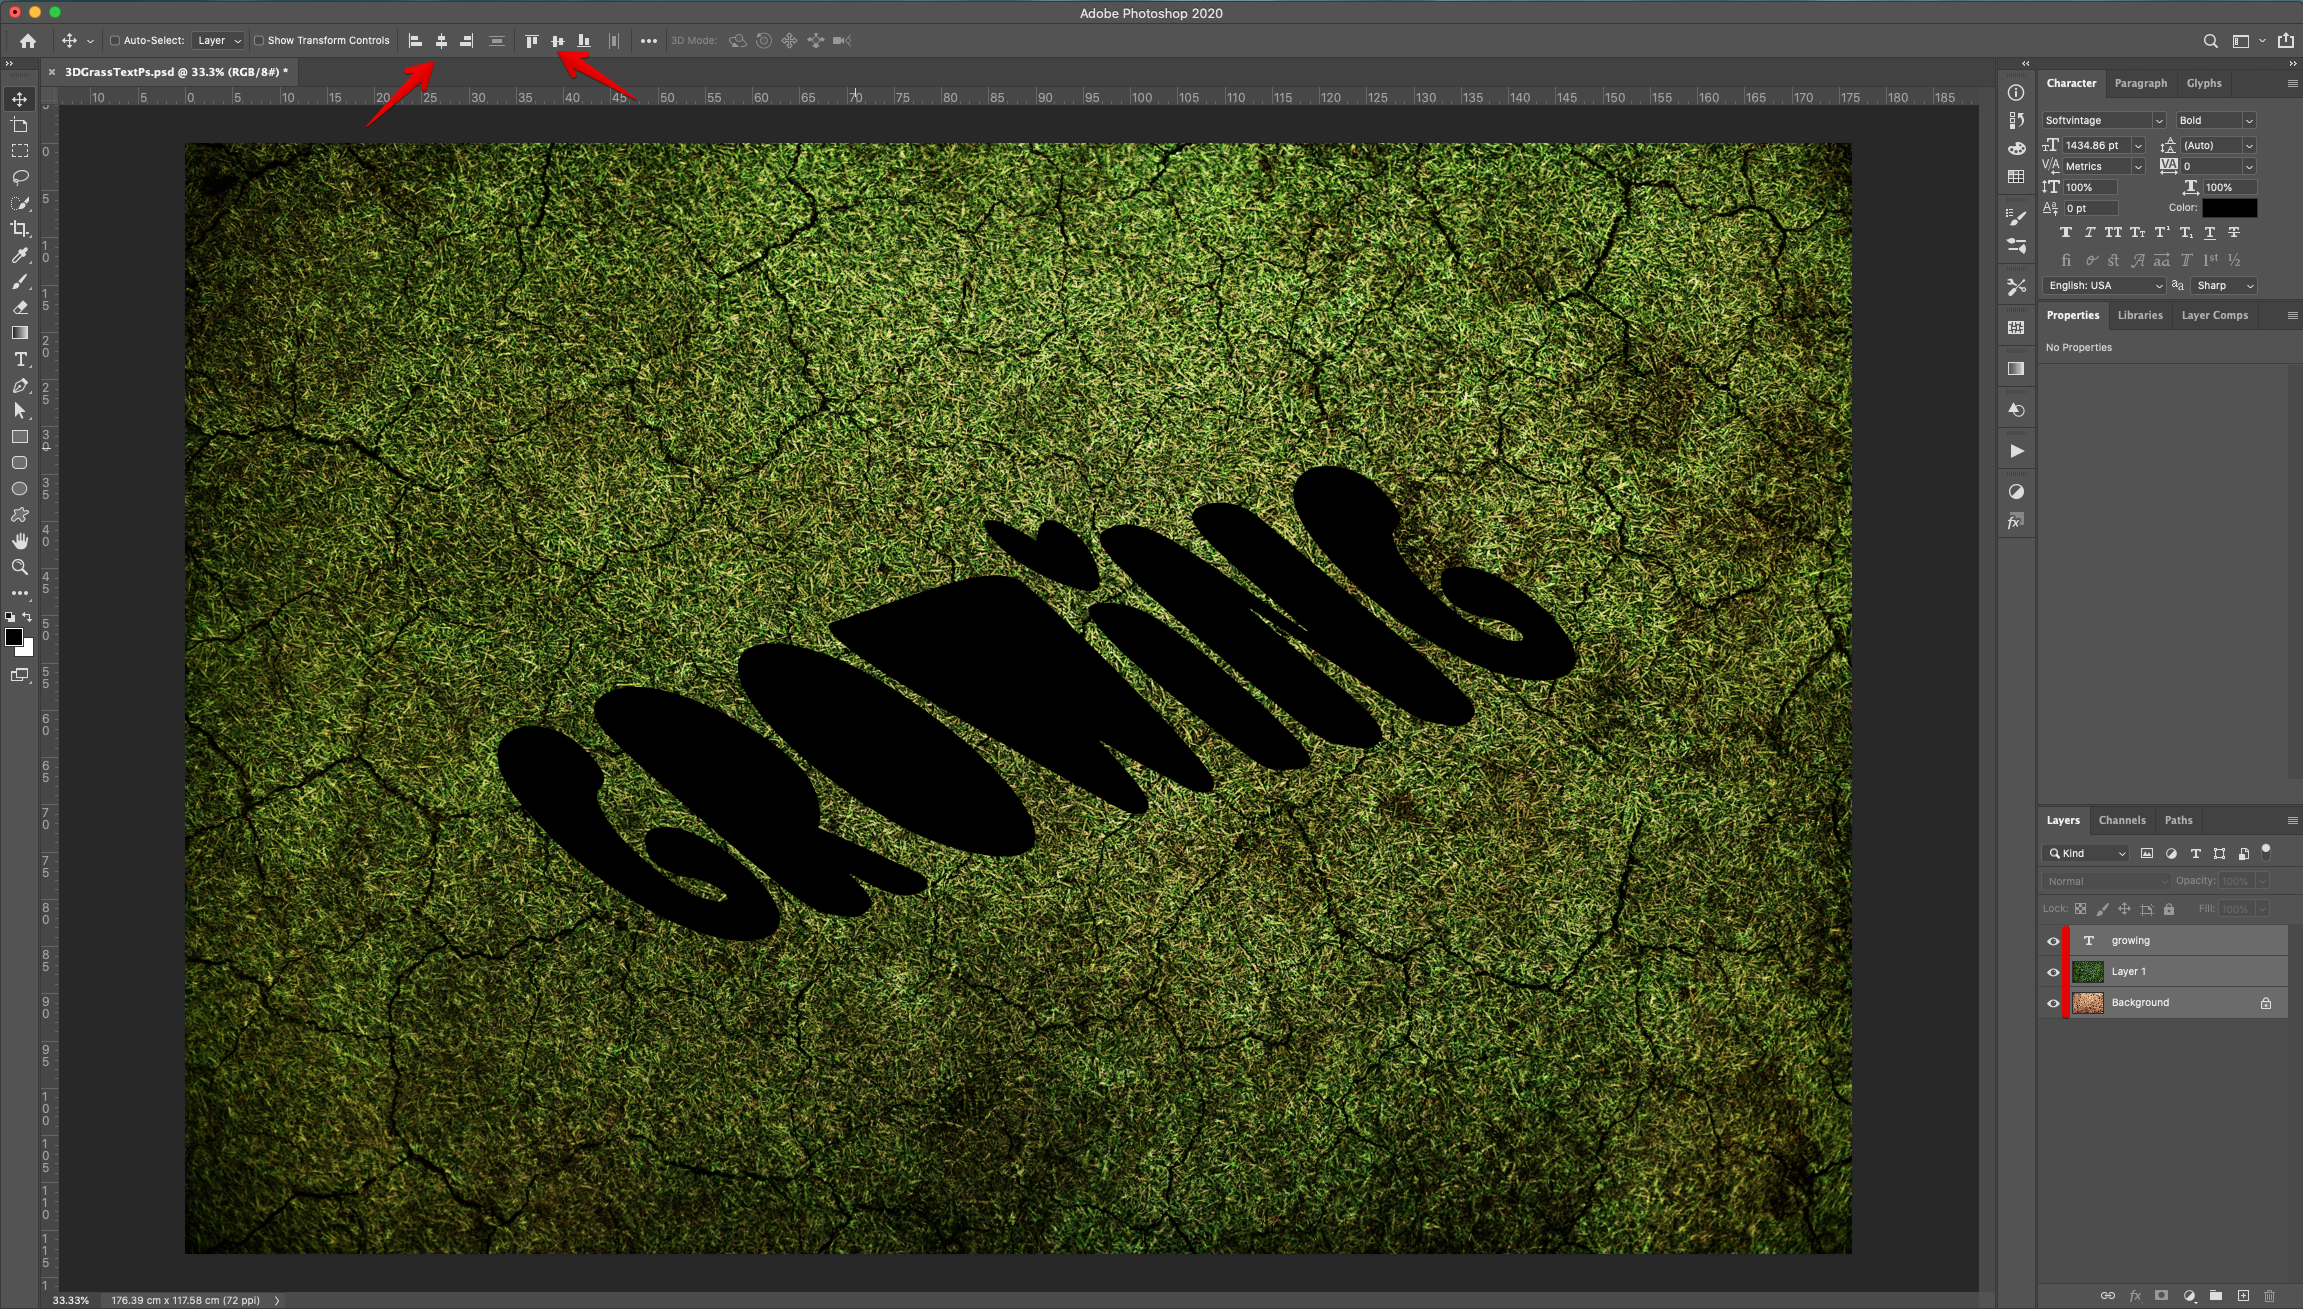
3 - Center the text by selecting both Layers (“Shift” key) and clicking the “Align Vertical and Horizontal Centers” buttons on the Top Menu.
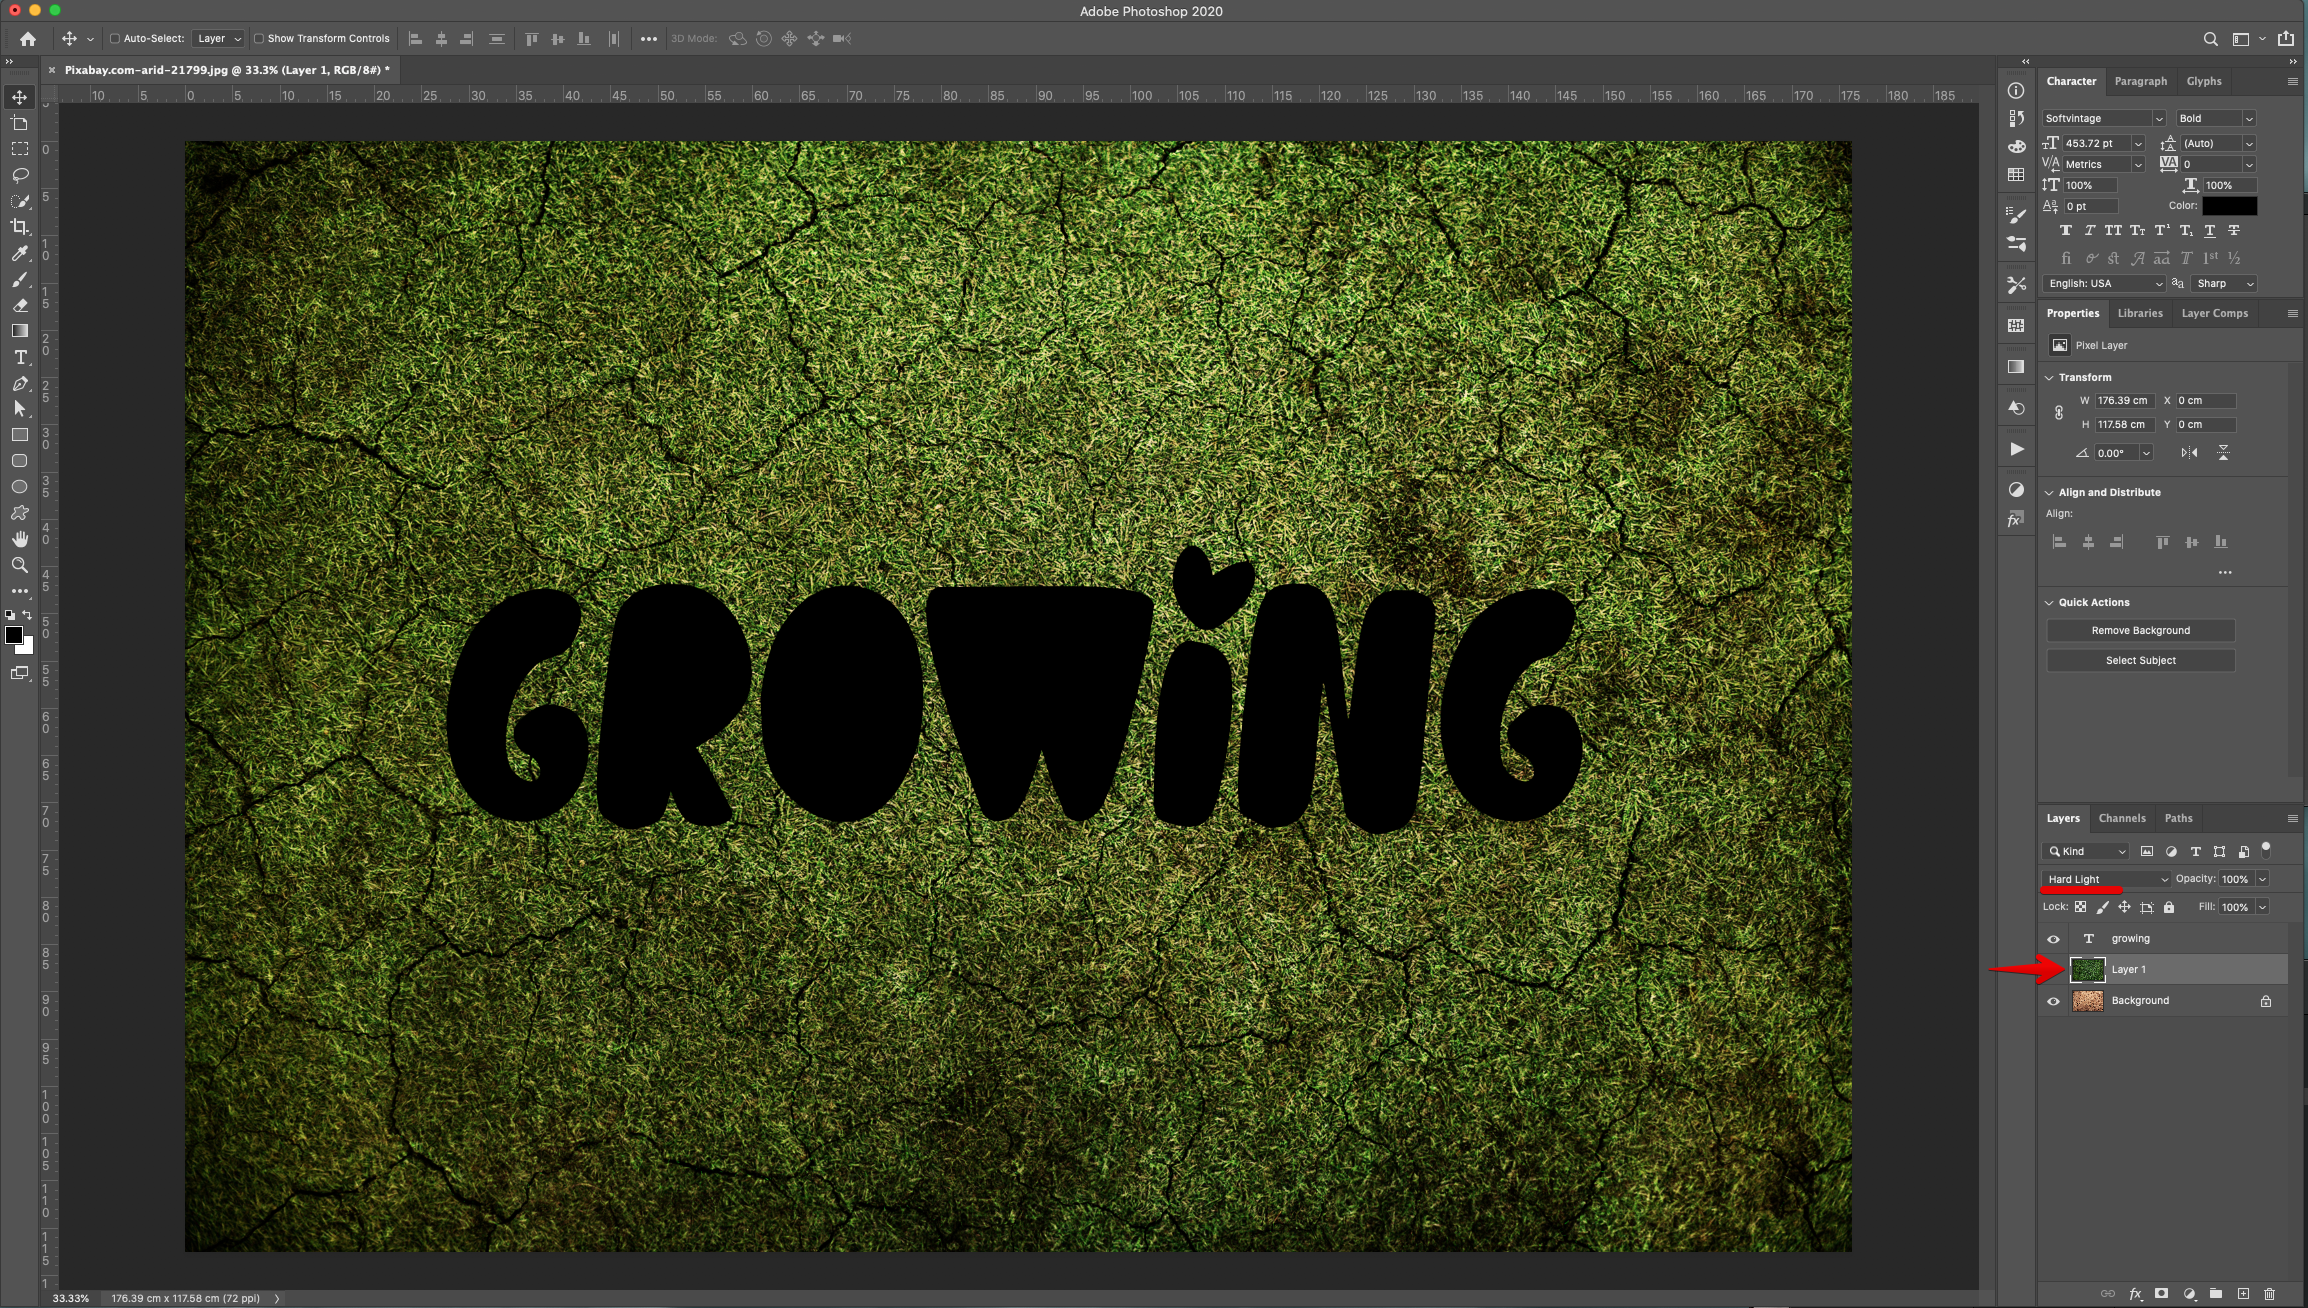
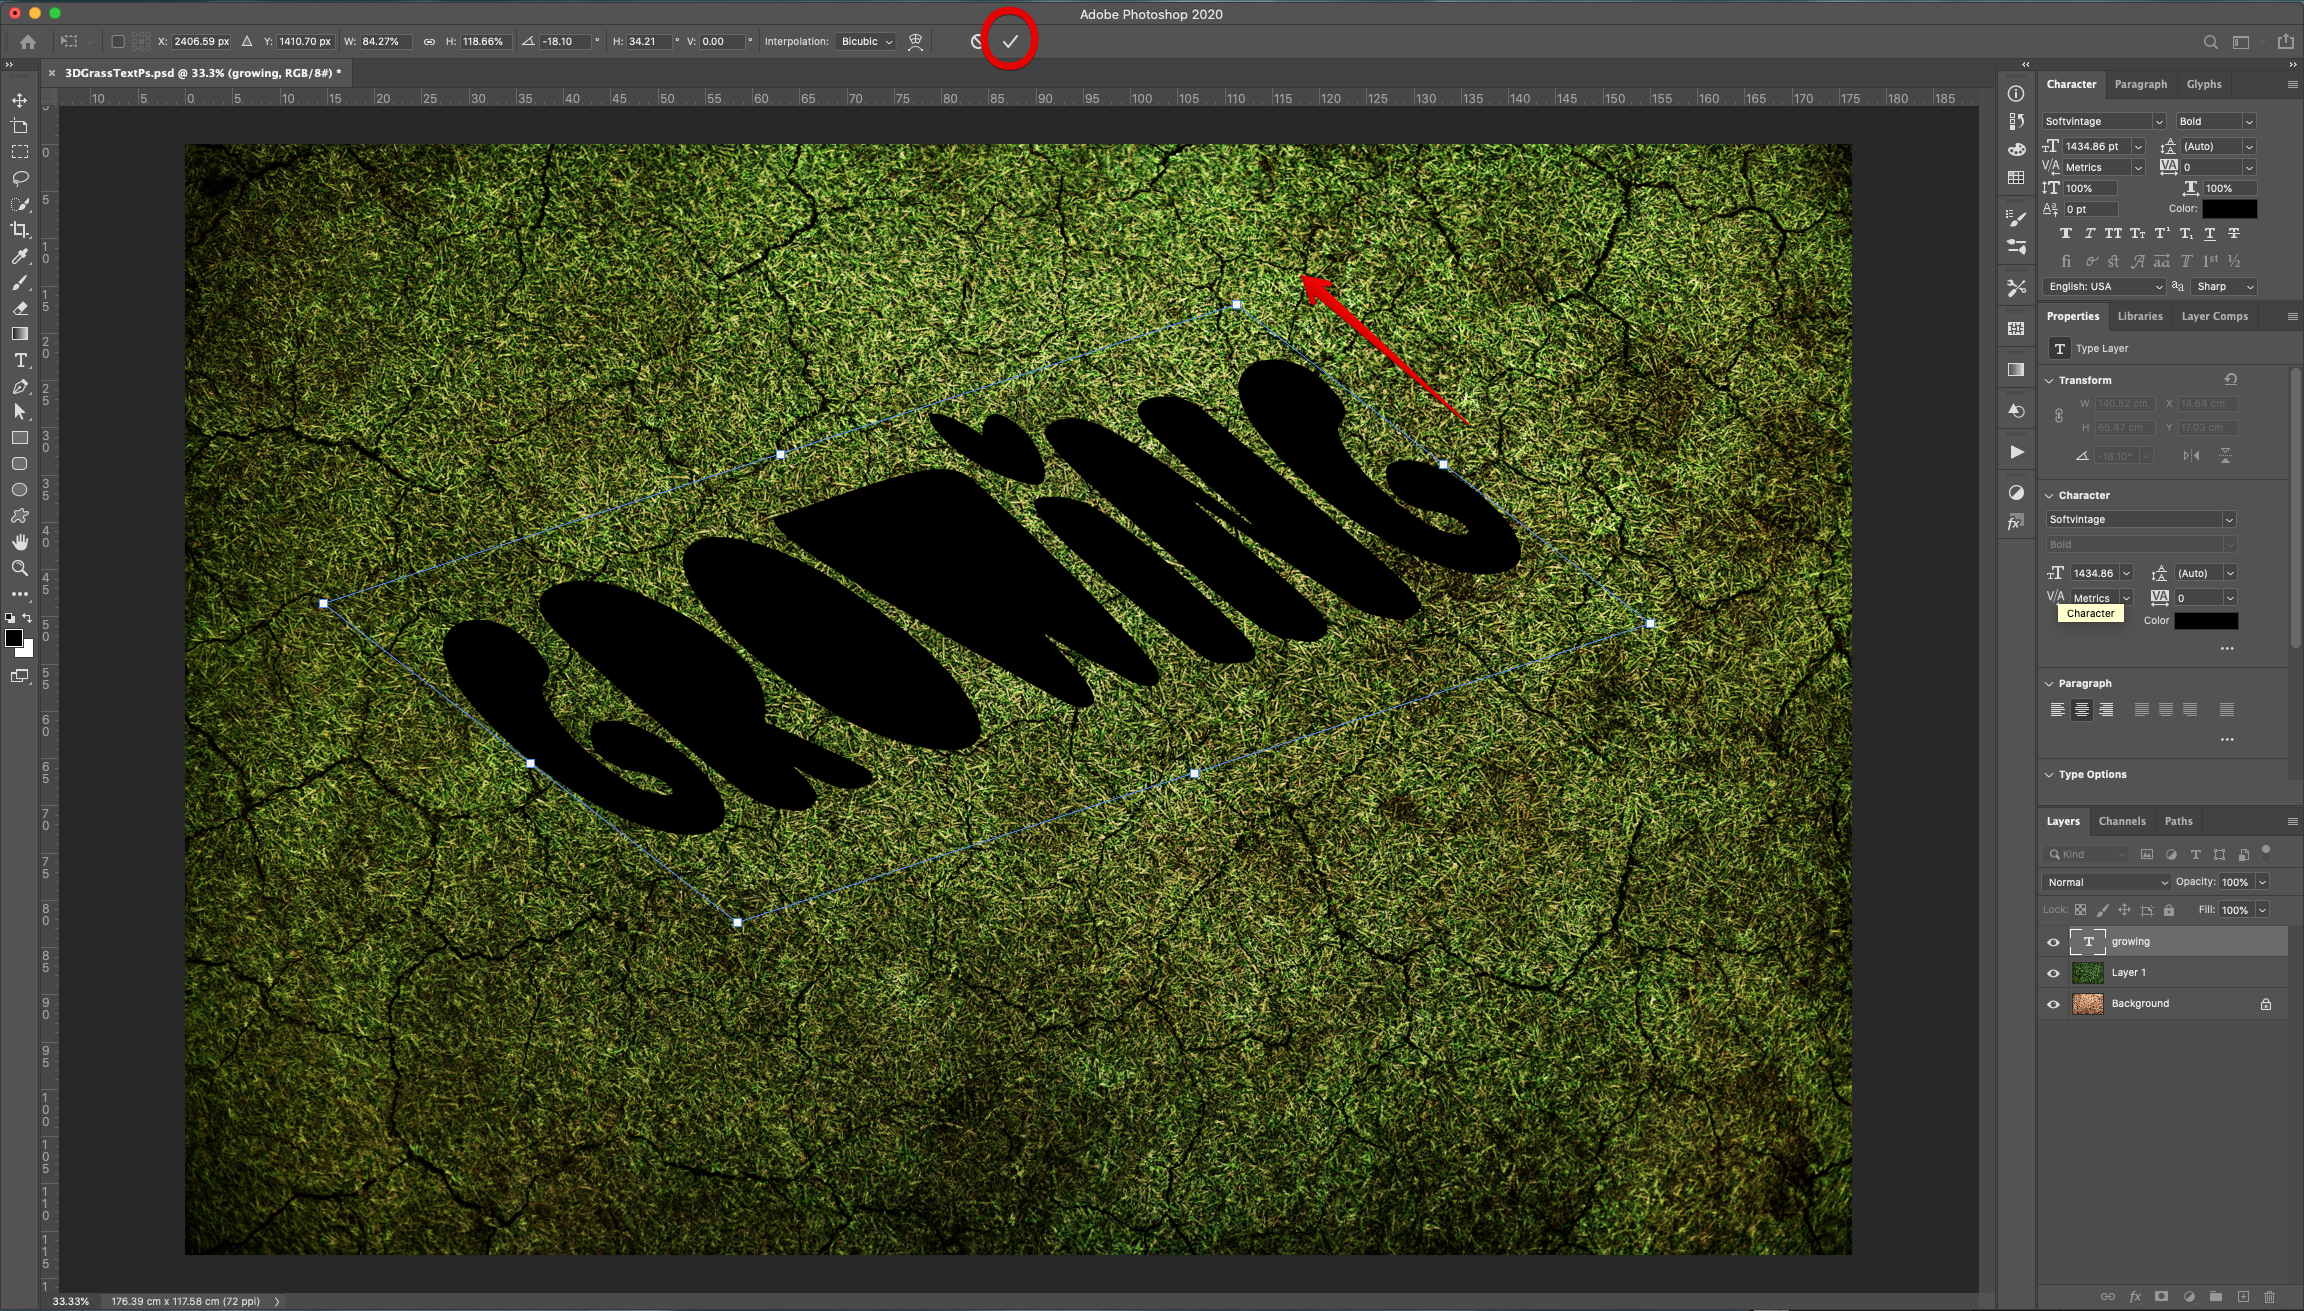
4 - Open the “Grass” image and bring it into the first one. Resize and/or Rotate it using “Free Transform” (Command/Control + T). Once you are done, hit “Enter” or click the “Check Mark” on the Top Menu. Make sure it is placed between the “Text” and the “Dirt” layers.

5 - Change the “Blending Mode” to “Hard Light”.
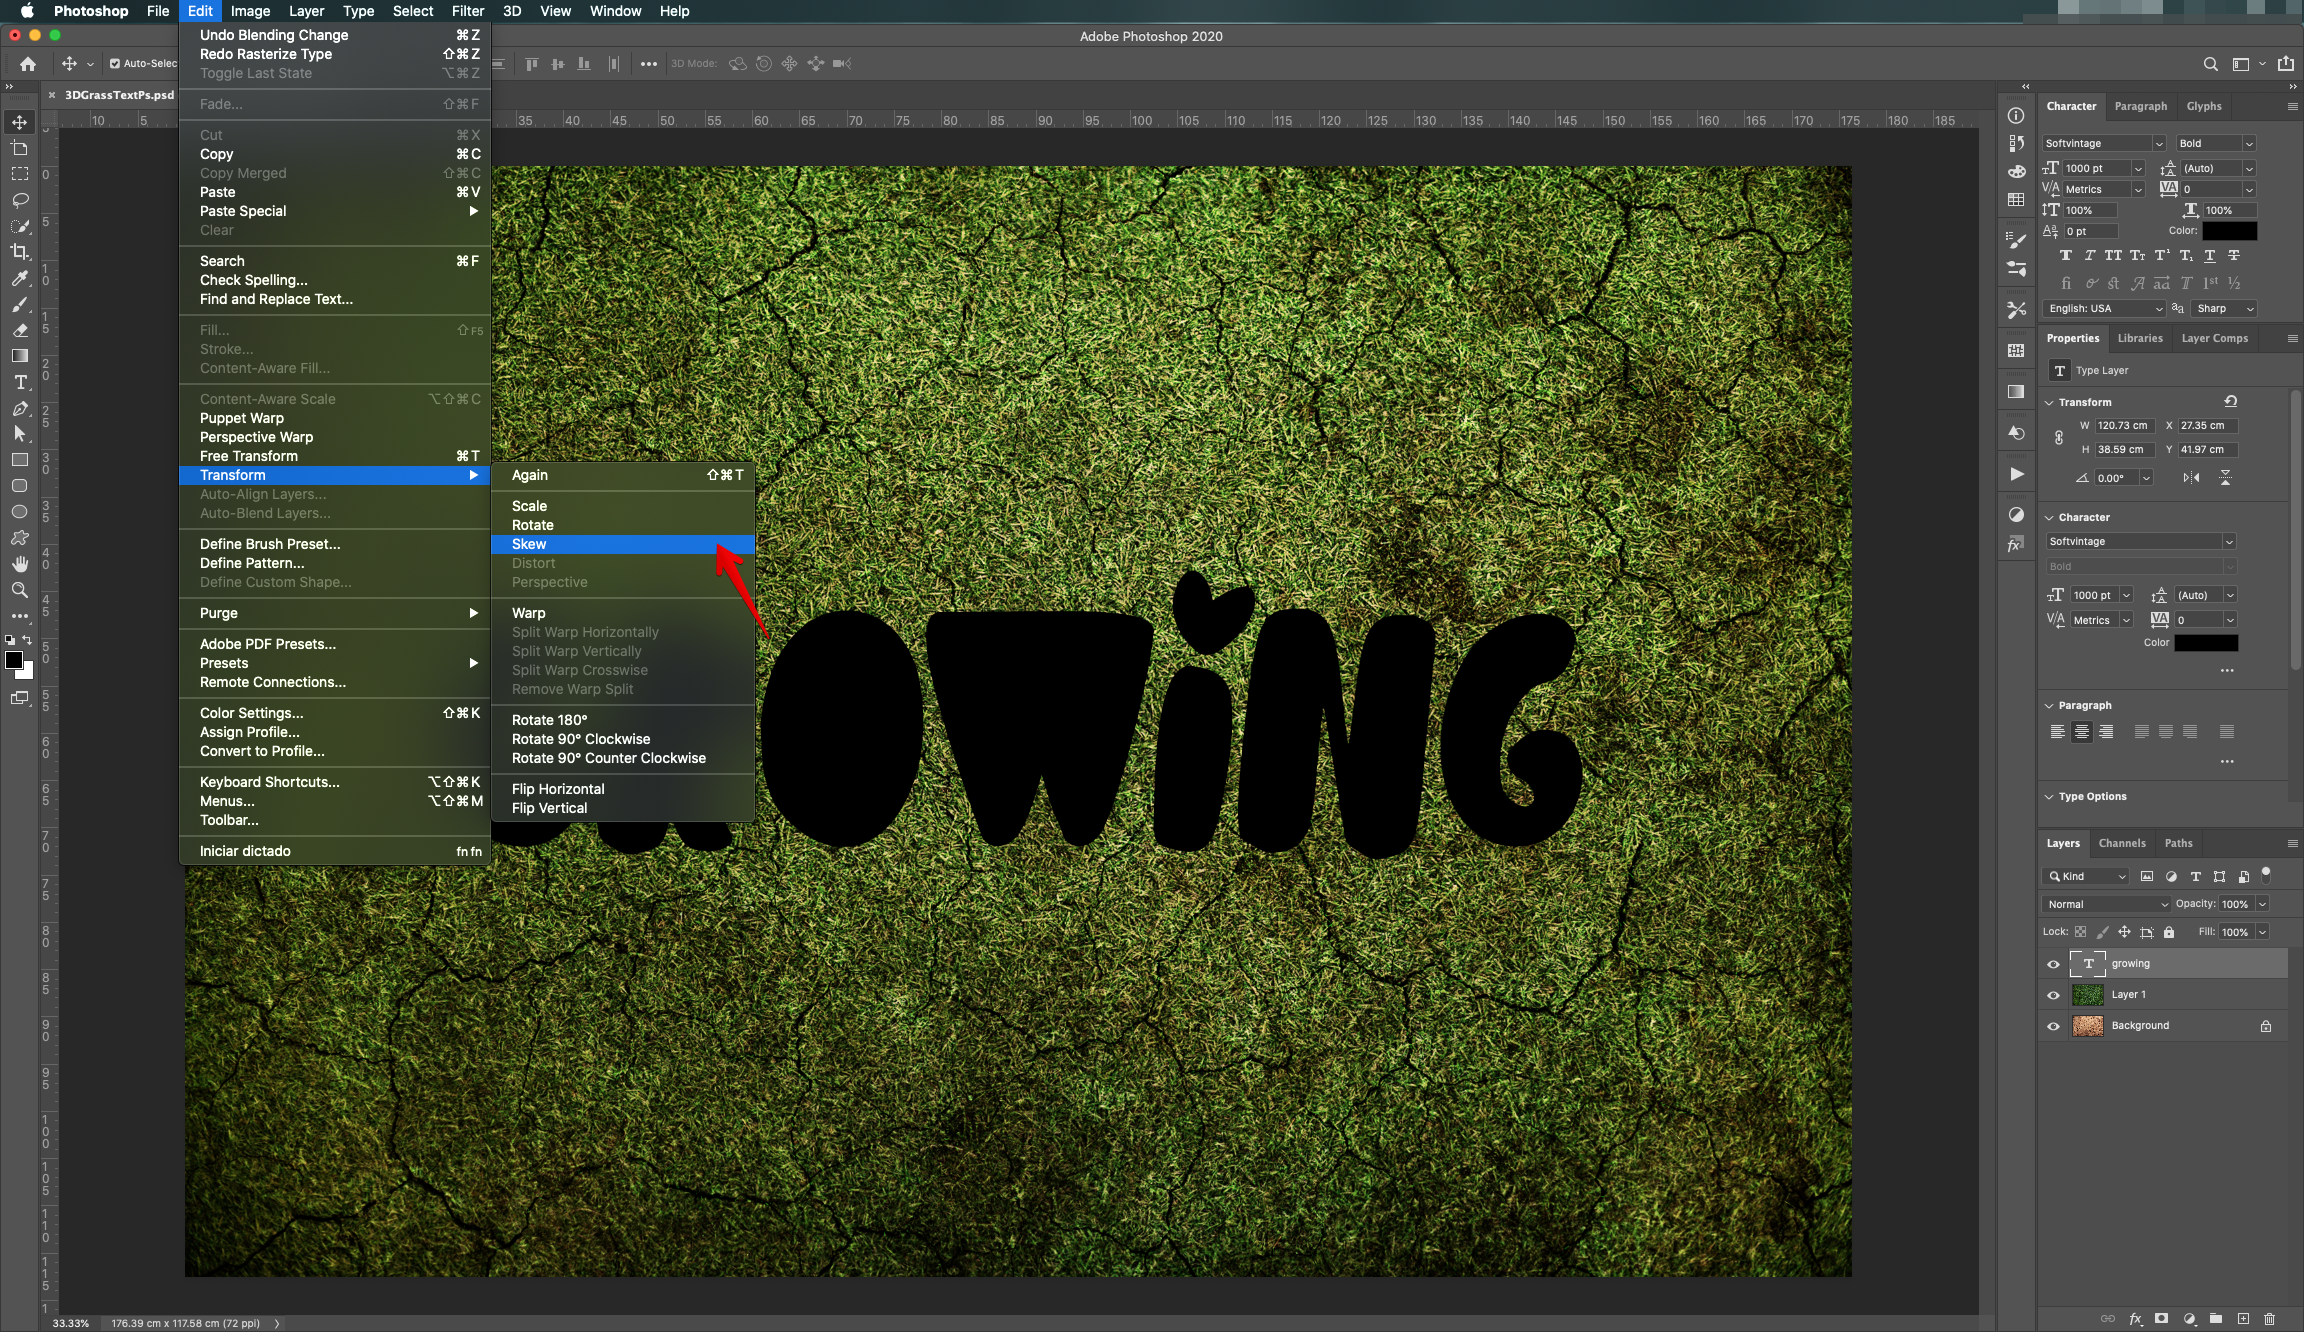
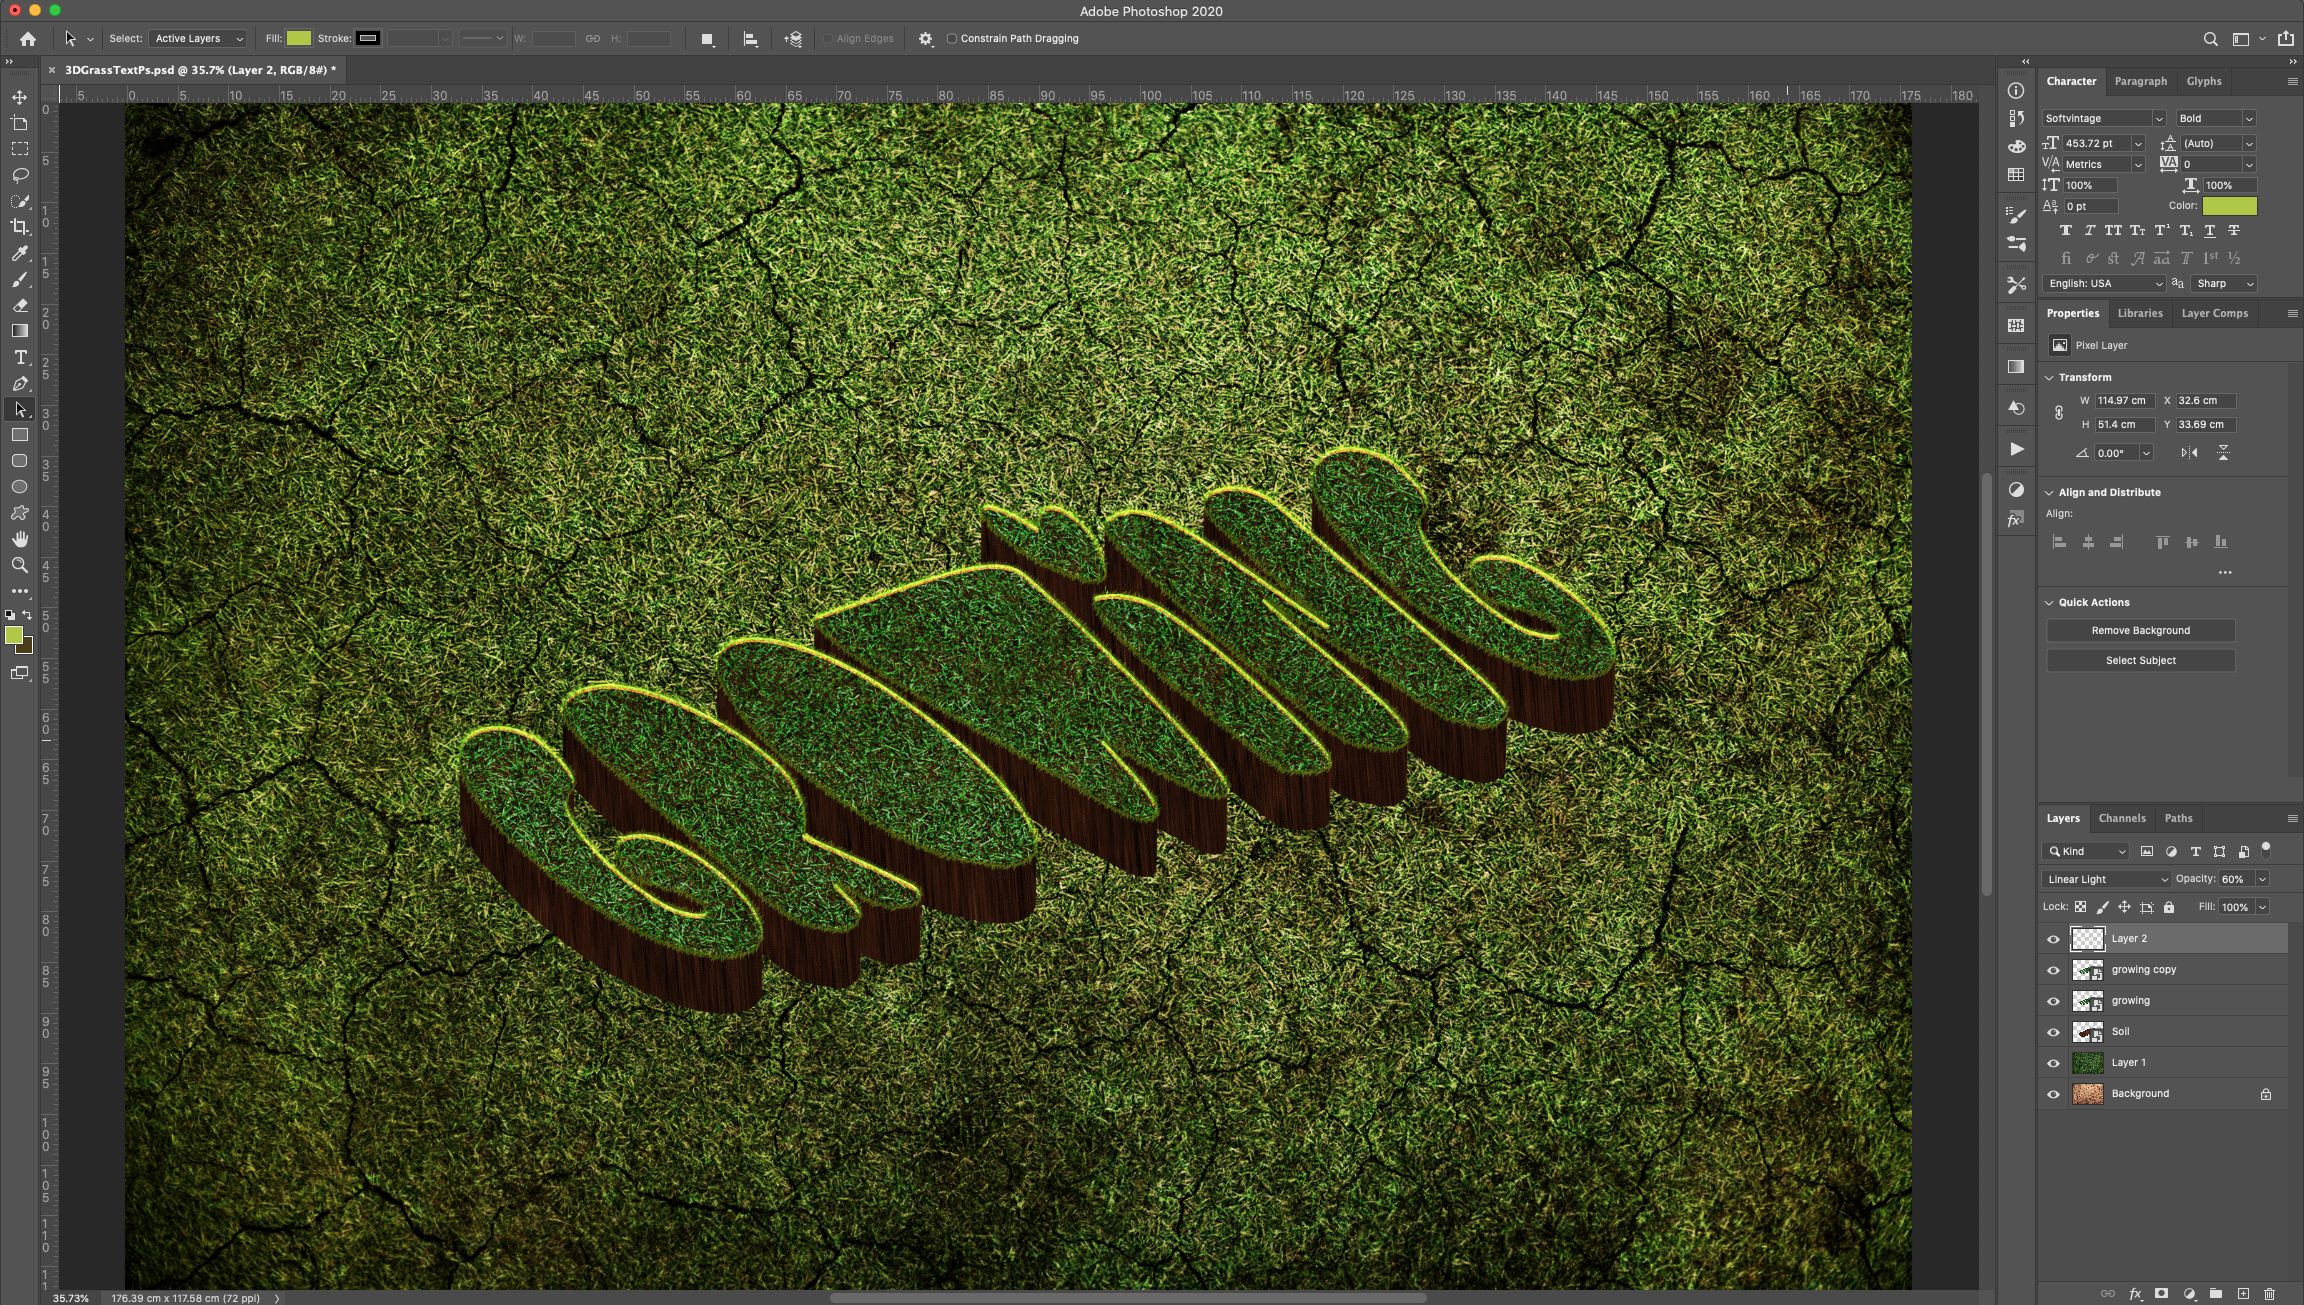
6 - Go to Edit > Transform > Skew and grab one of the Top handles to move the upper part to the Left. Use the side handles to skew the text. Once you are done, hit “Enter” or click the “Check Mark” on the Top Menu.
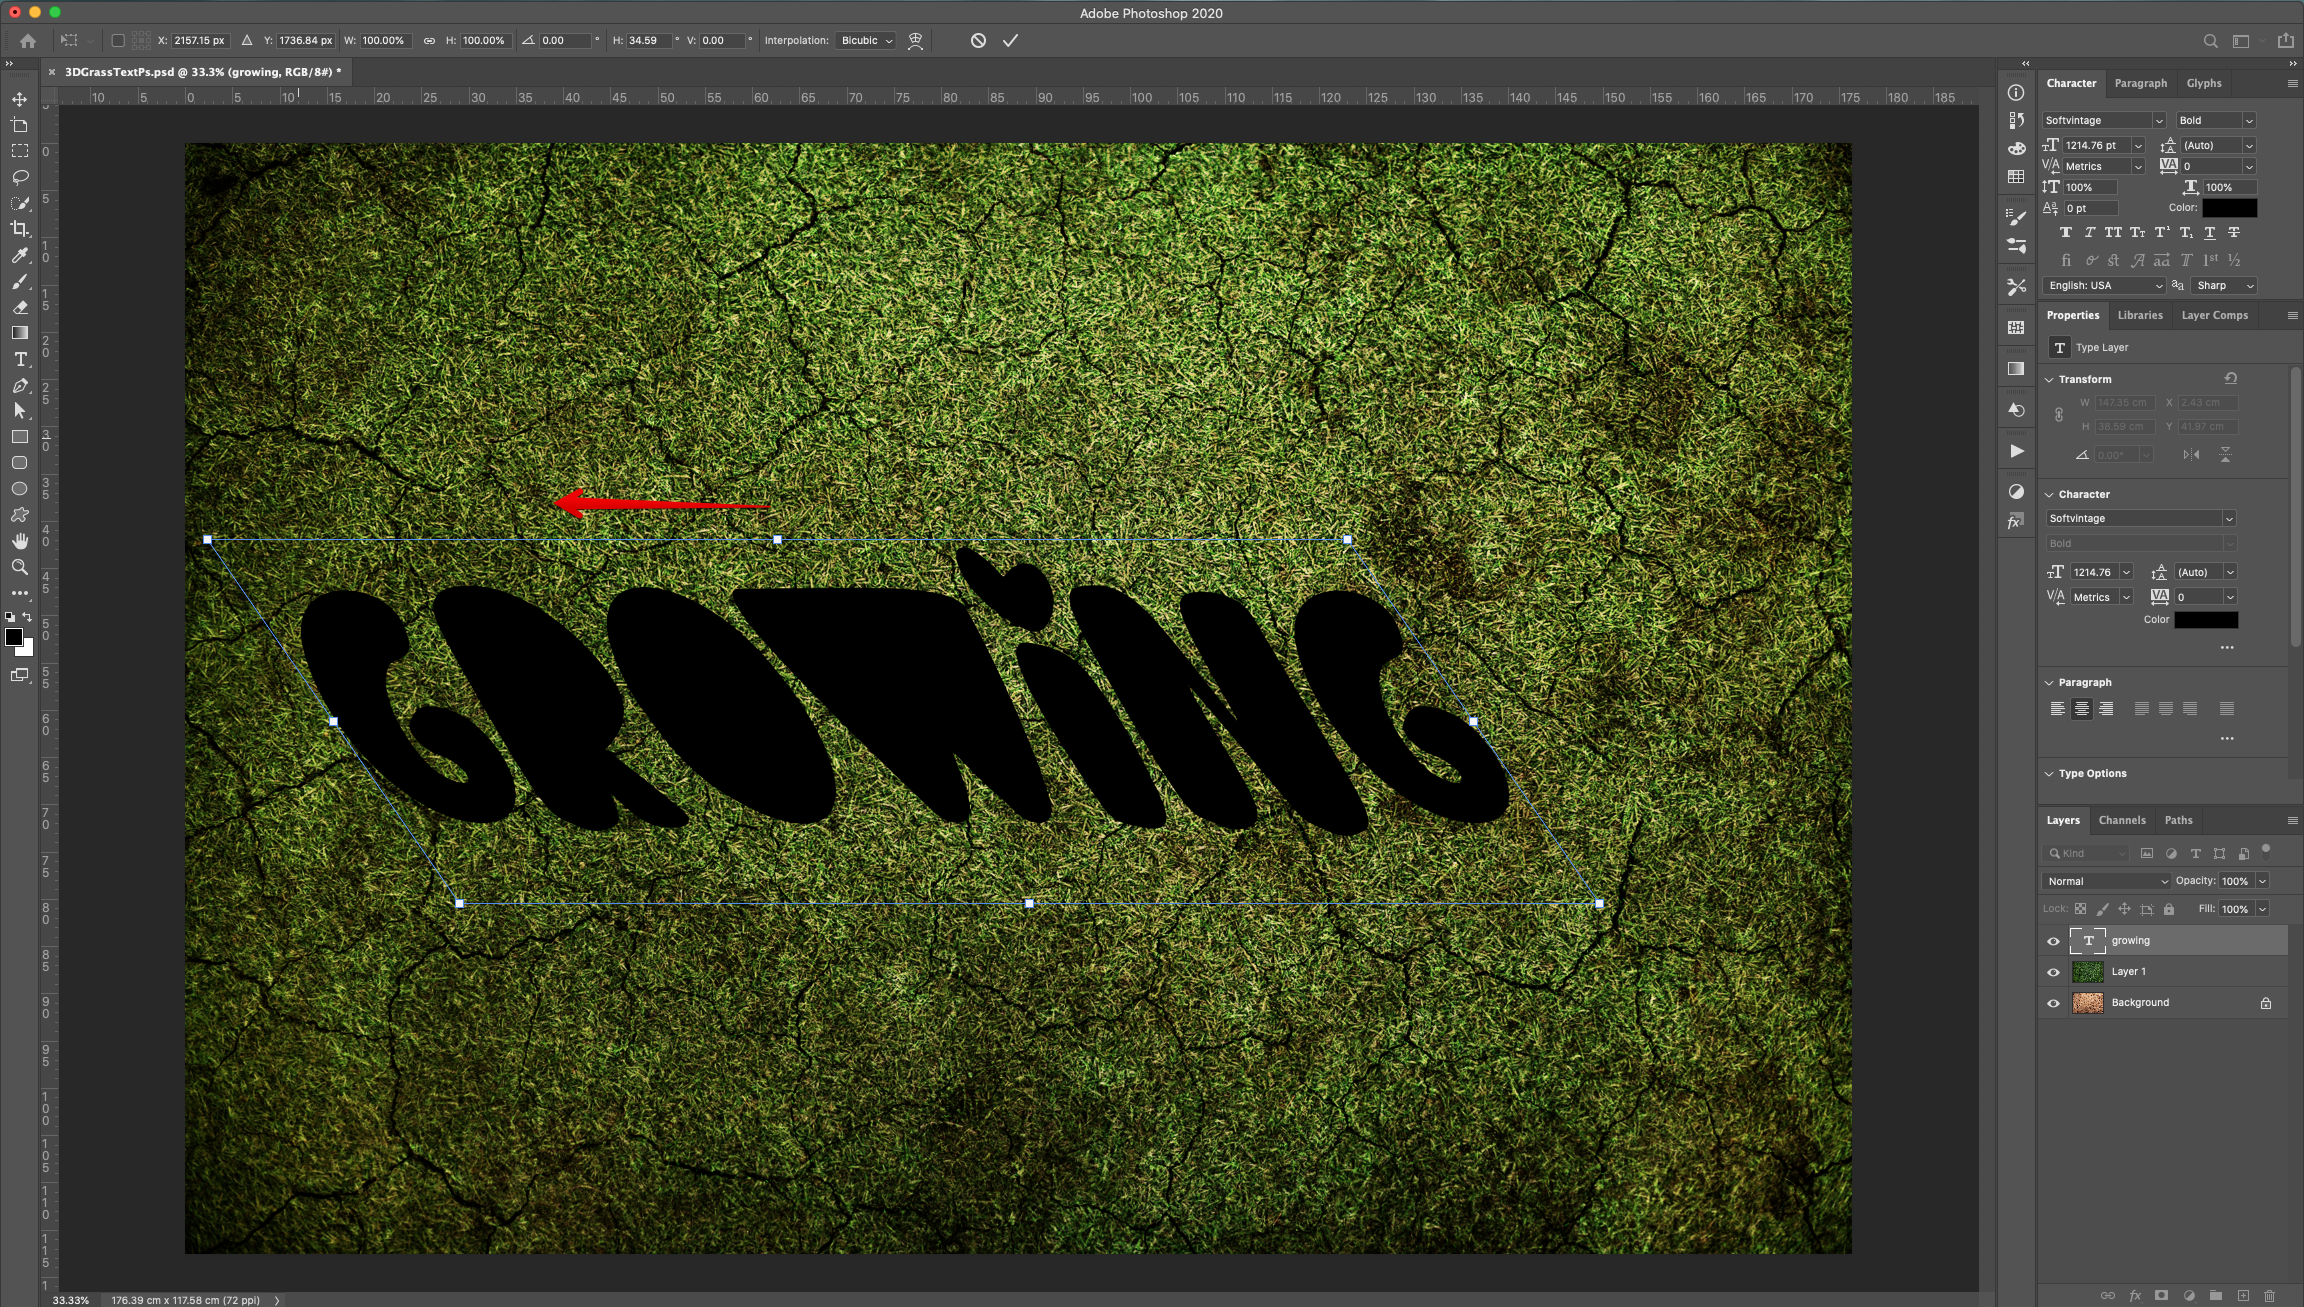
7 - Enter “Free Transform” (Command/Control + T) and move the “Text” 1 click “Down” and 1 click “Left” using the “Arrow” keys. Hit “Enter” or click the “Check Mark” on the Top Menu.

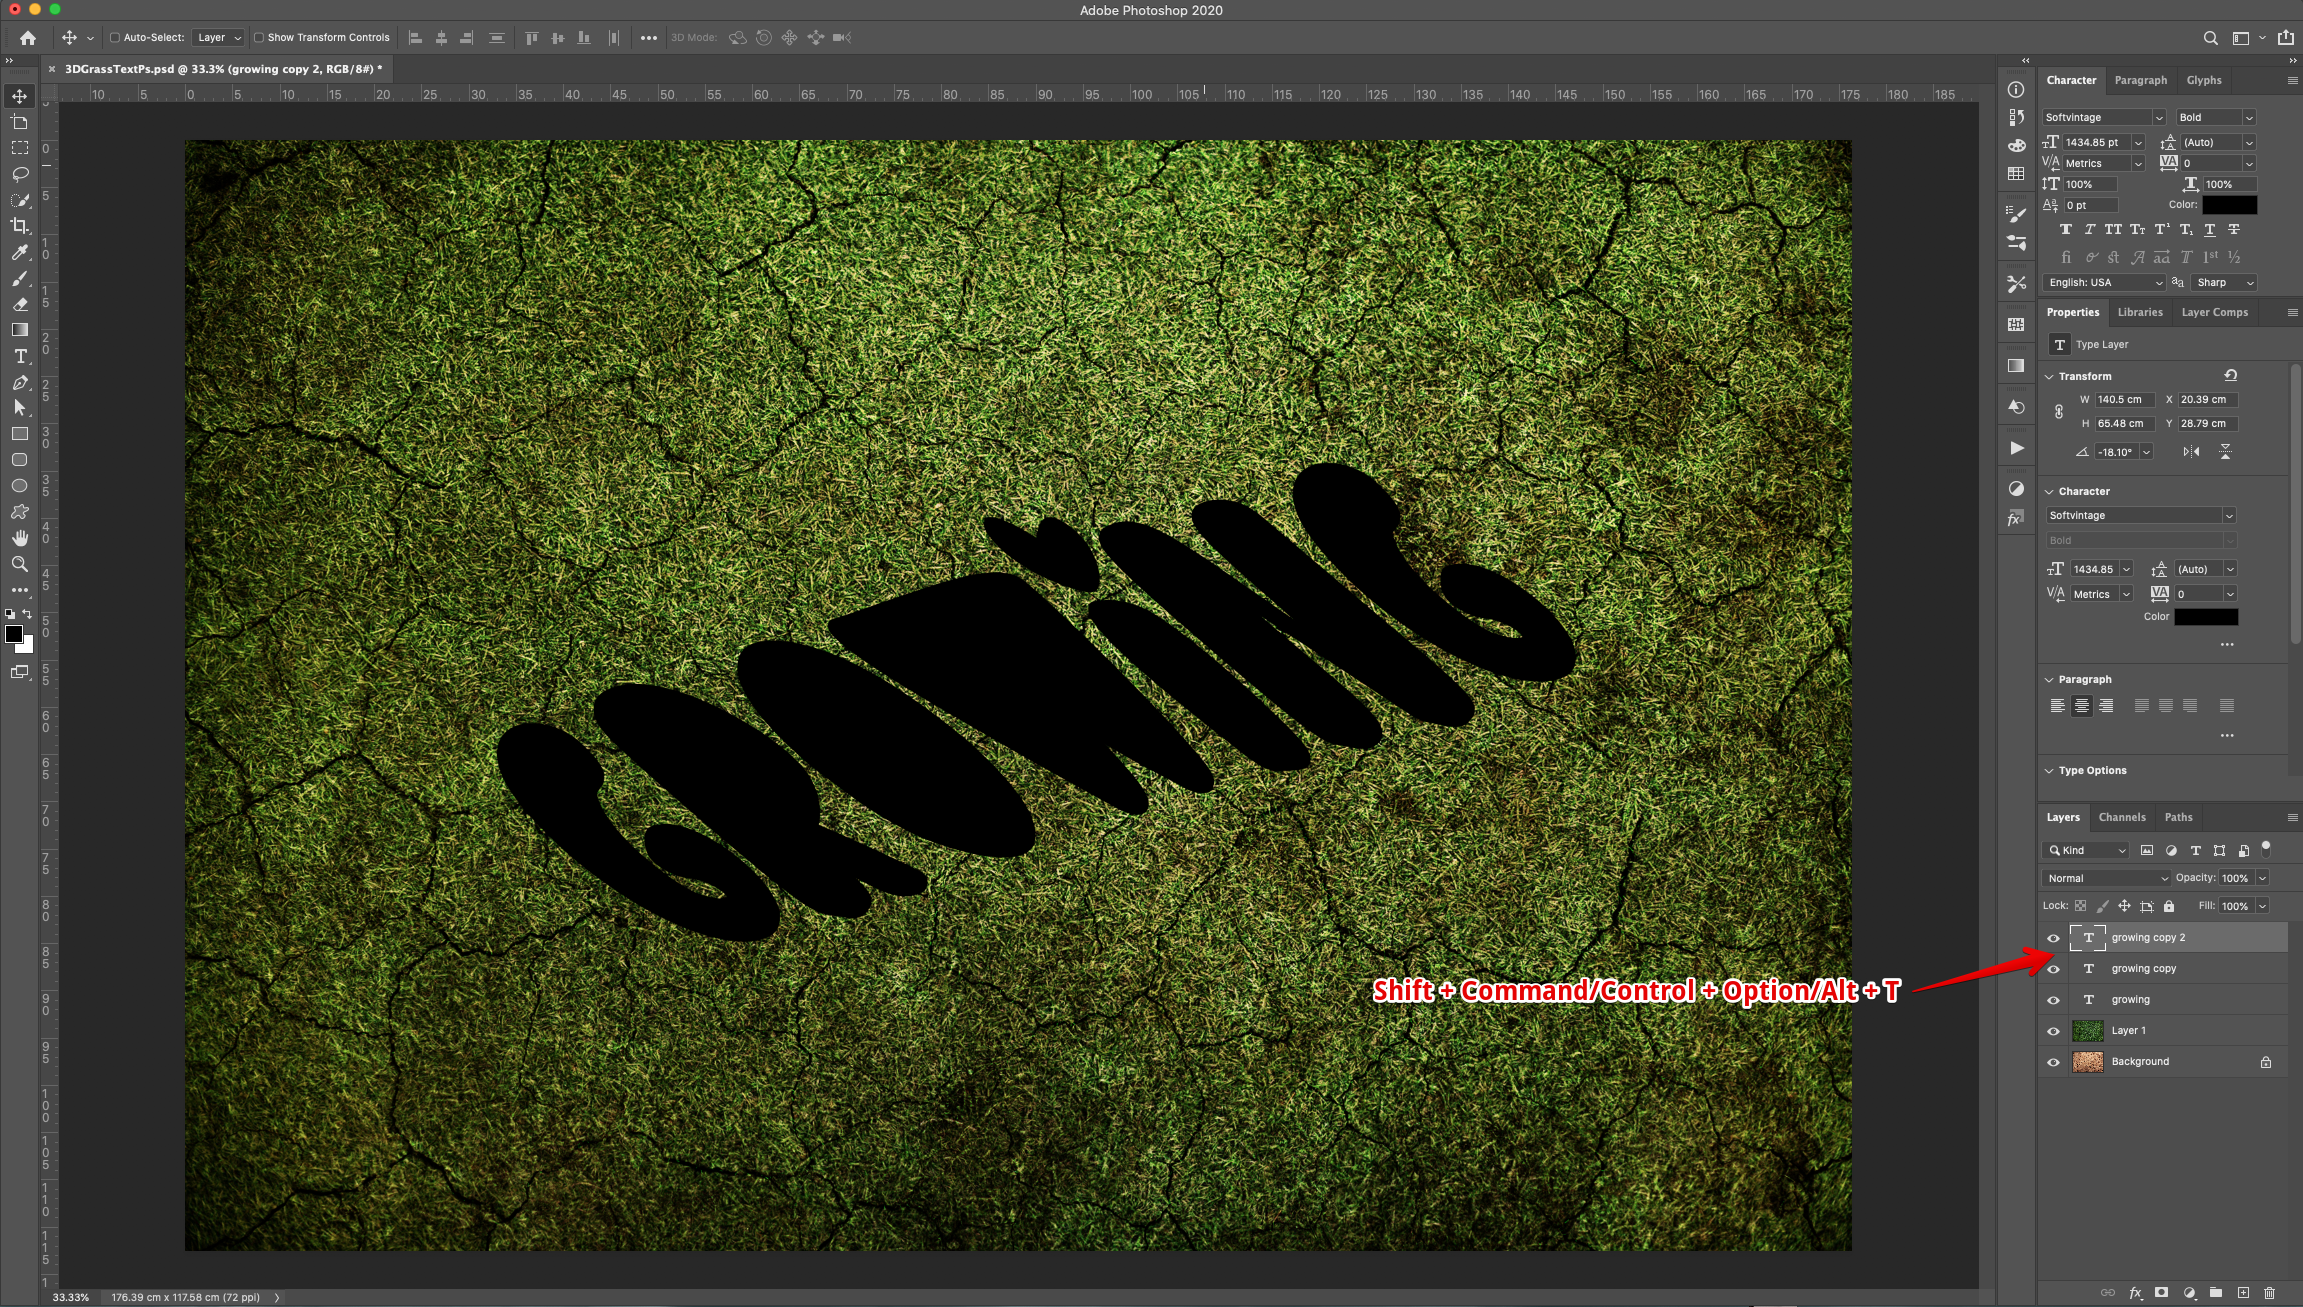
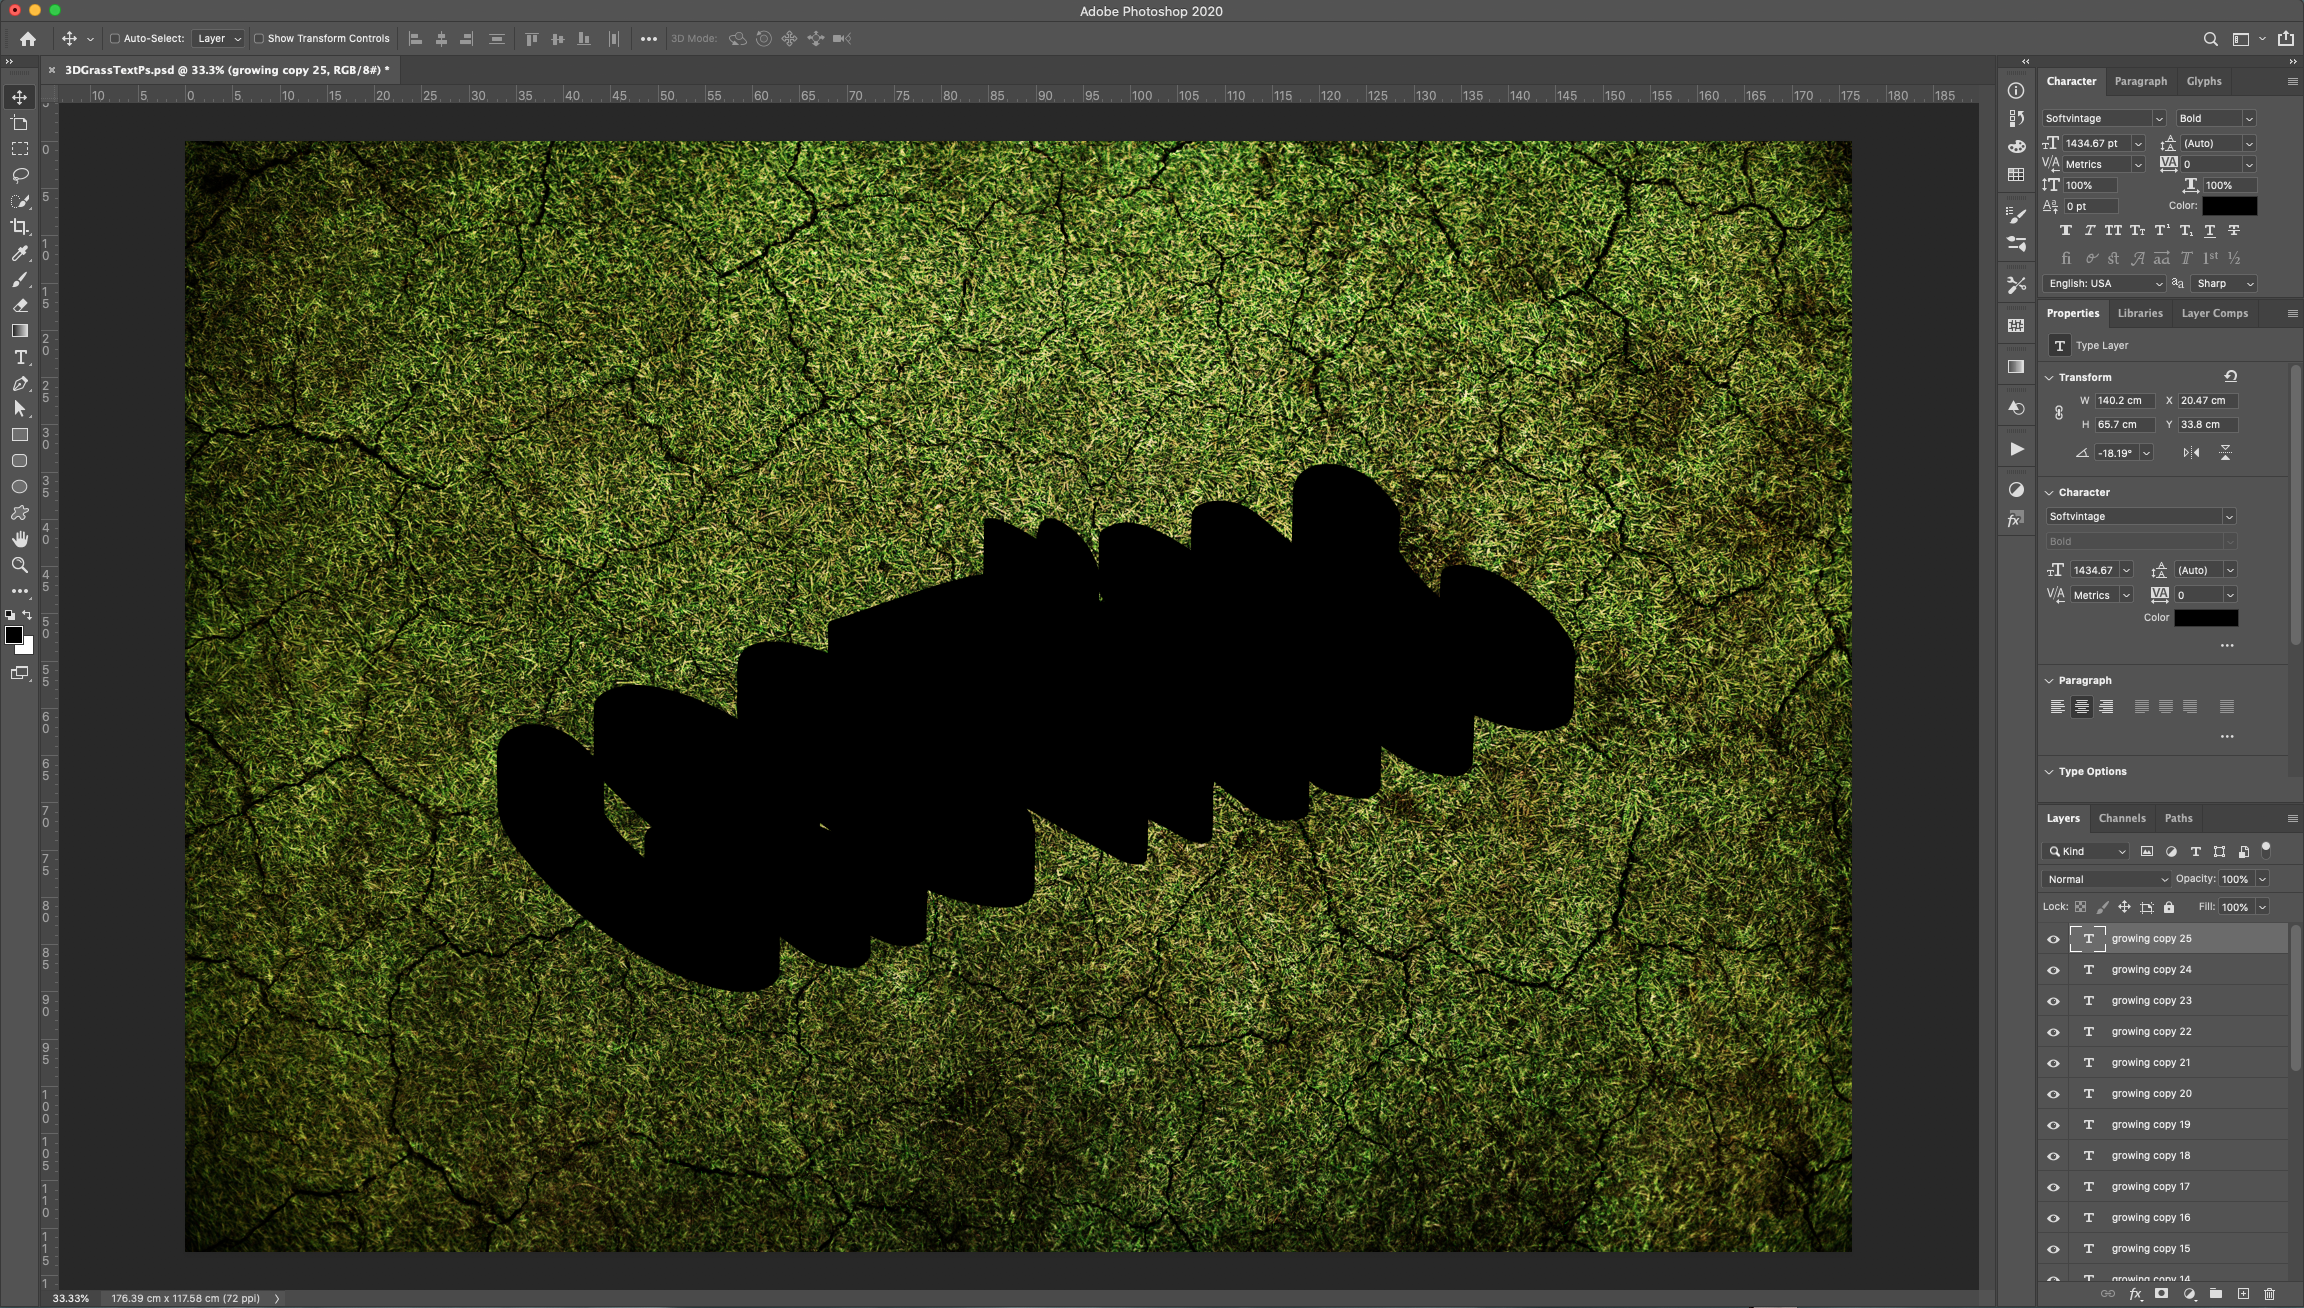
8 - Hold the Shift + Command/Control + Option/Alt + T keys to “Repeat Transform” and “Duplicate” the Layer. Repeat until you create 25 copies of the original “Text”.
9 - Drag the original “Text” and position it on top of everything.

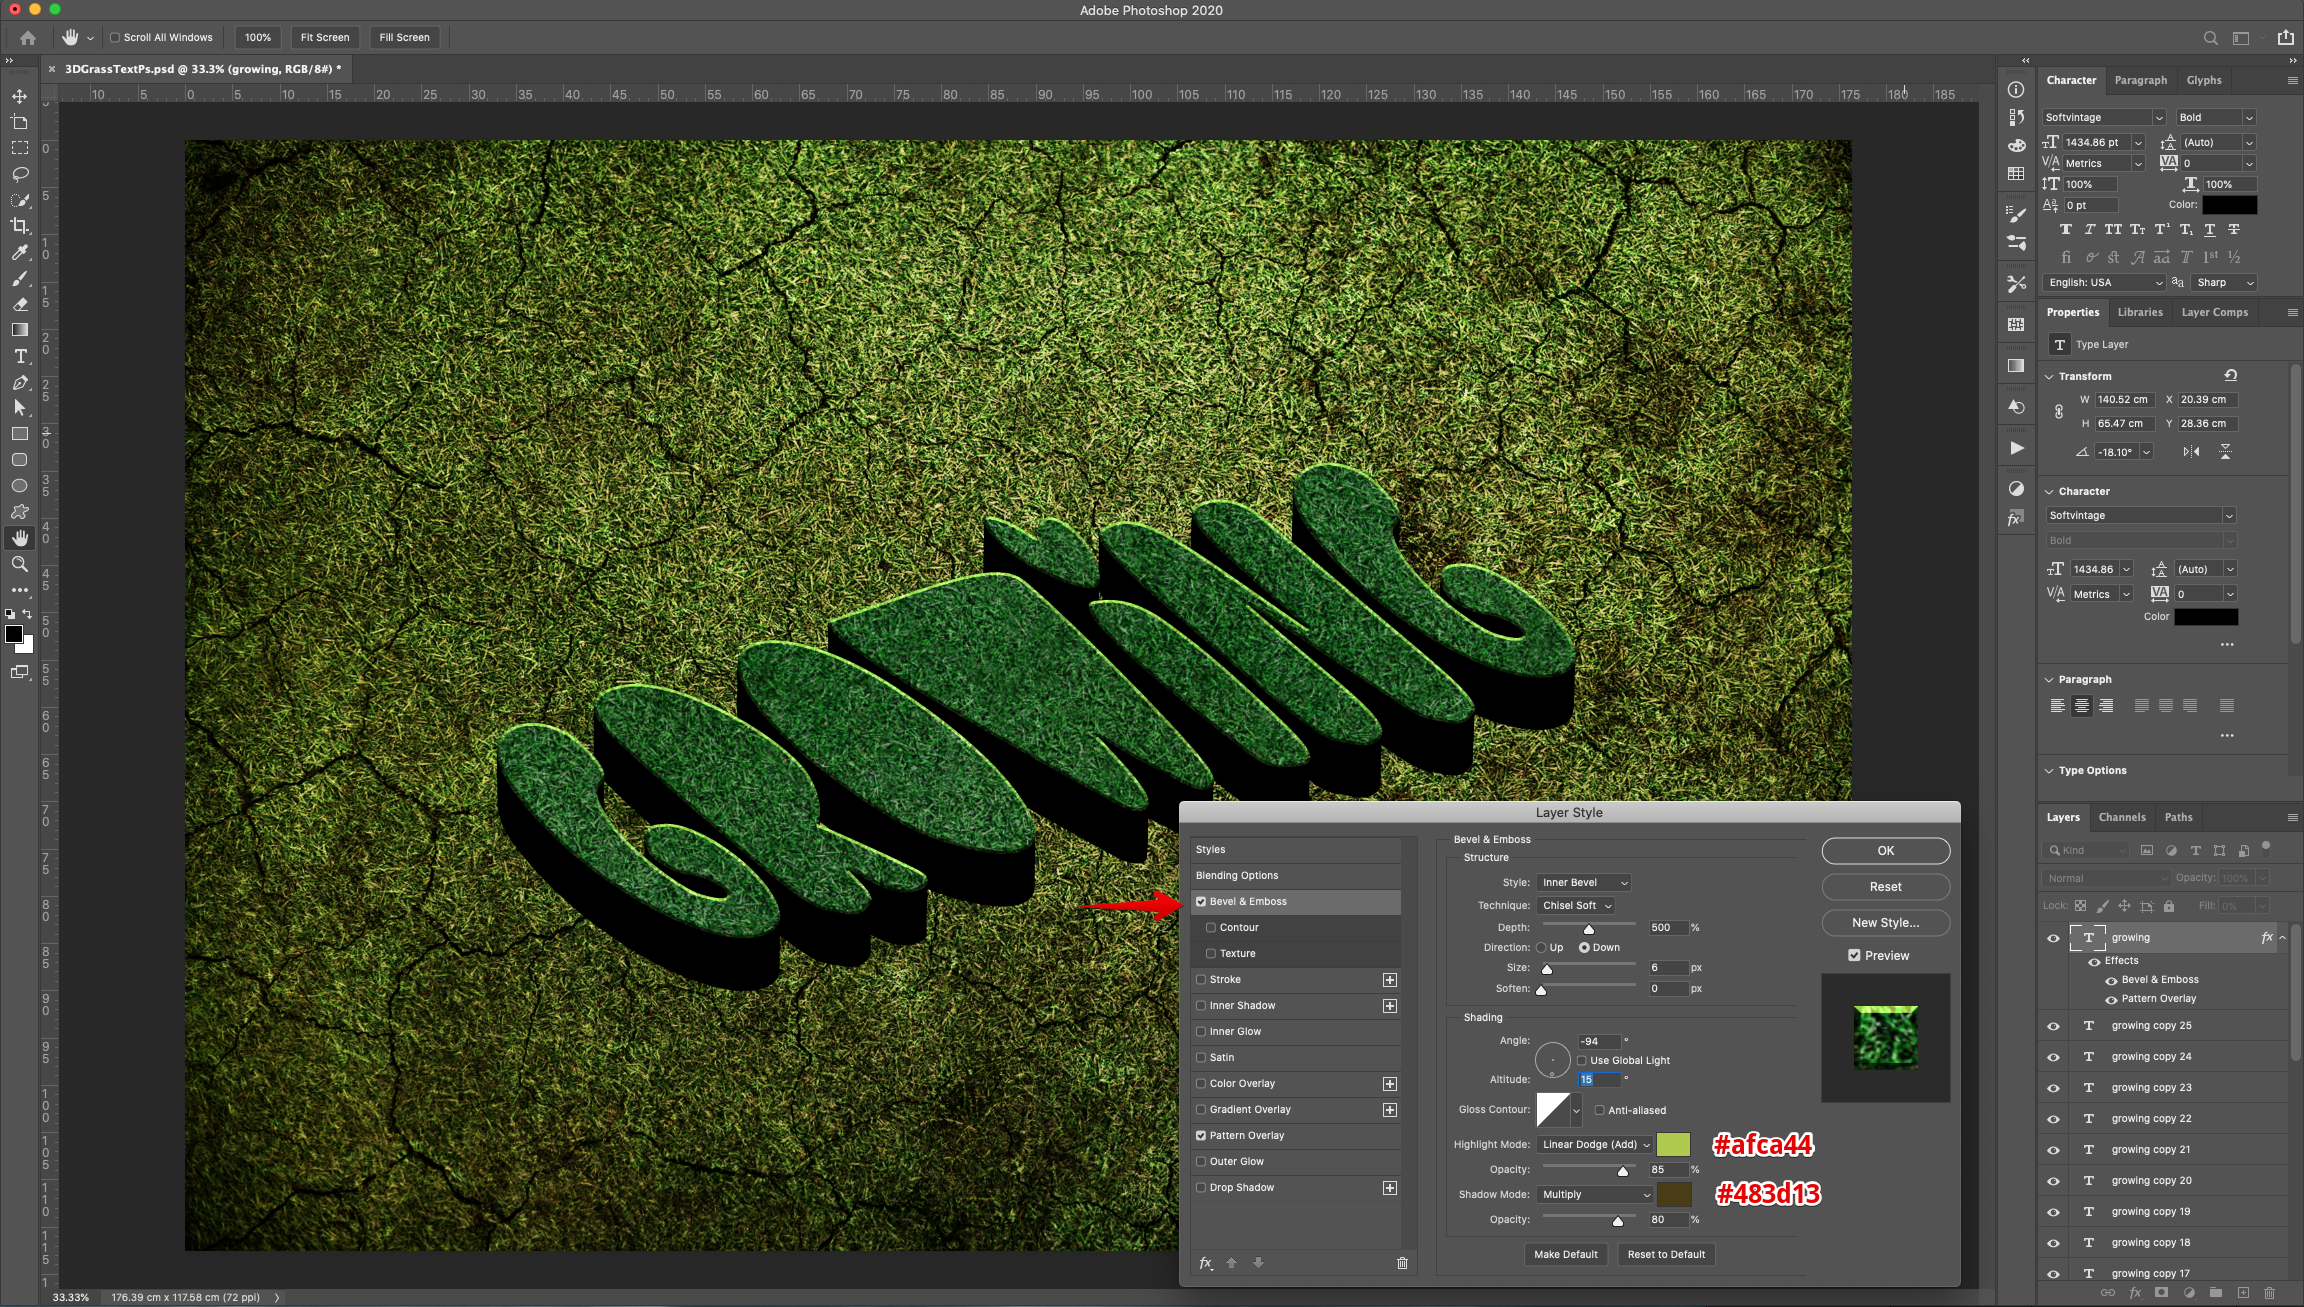
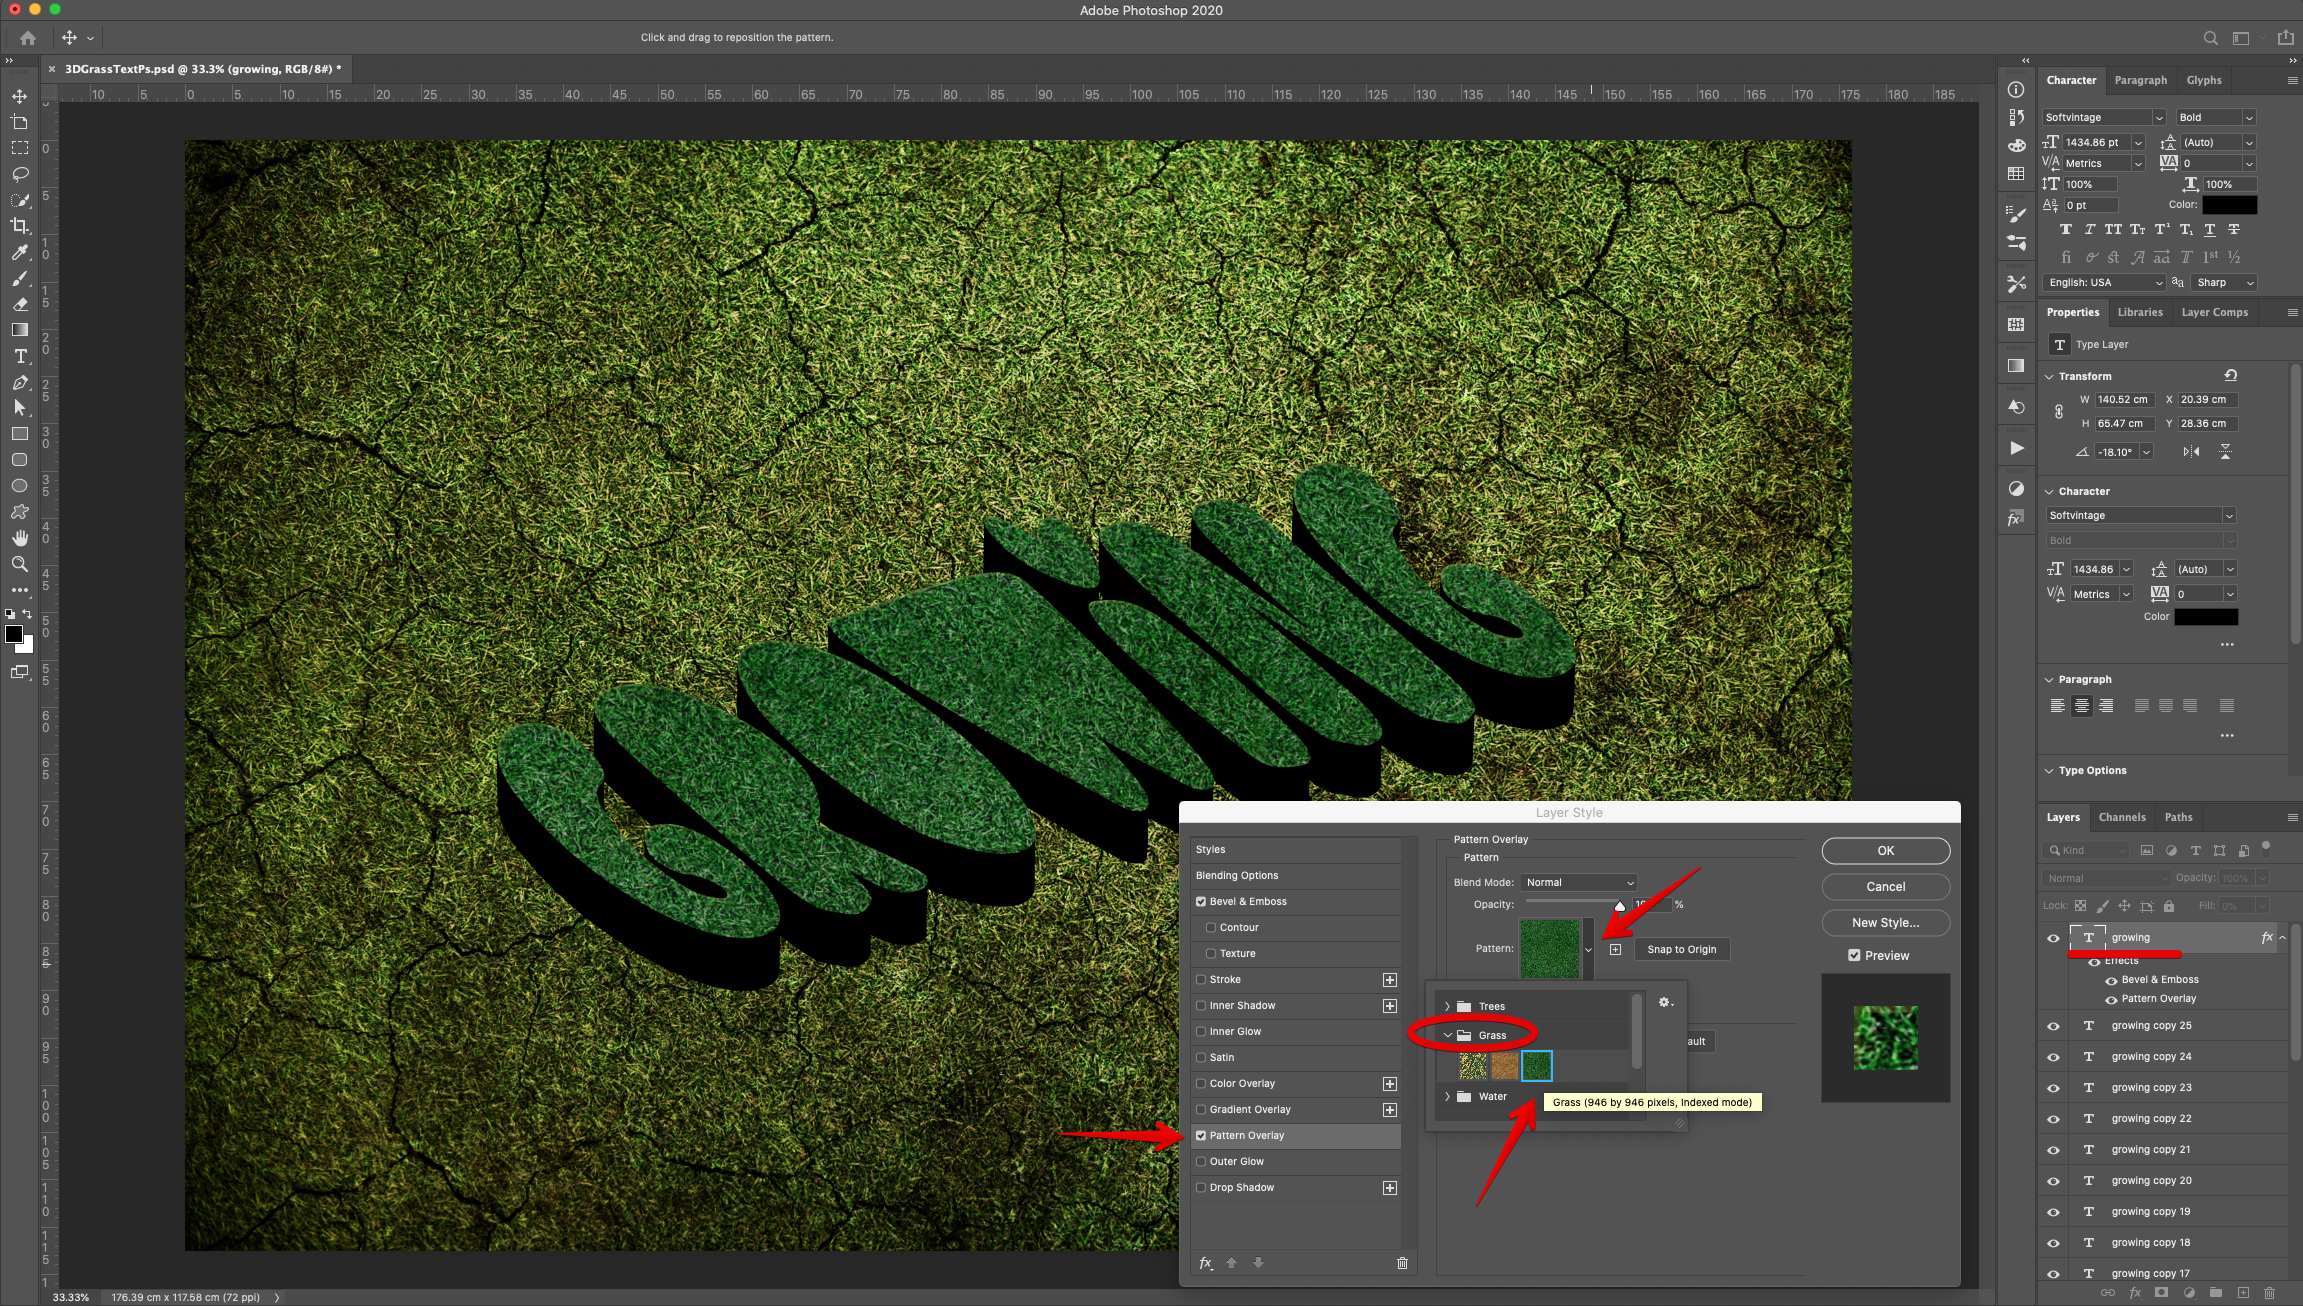
10 - Double-click on top of the “Text” thumbnail and apply the following “Layer Styles”:
Blending Options: (Fill: 0%)
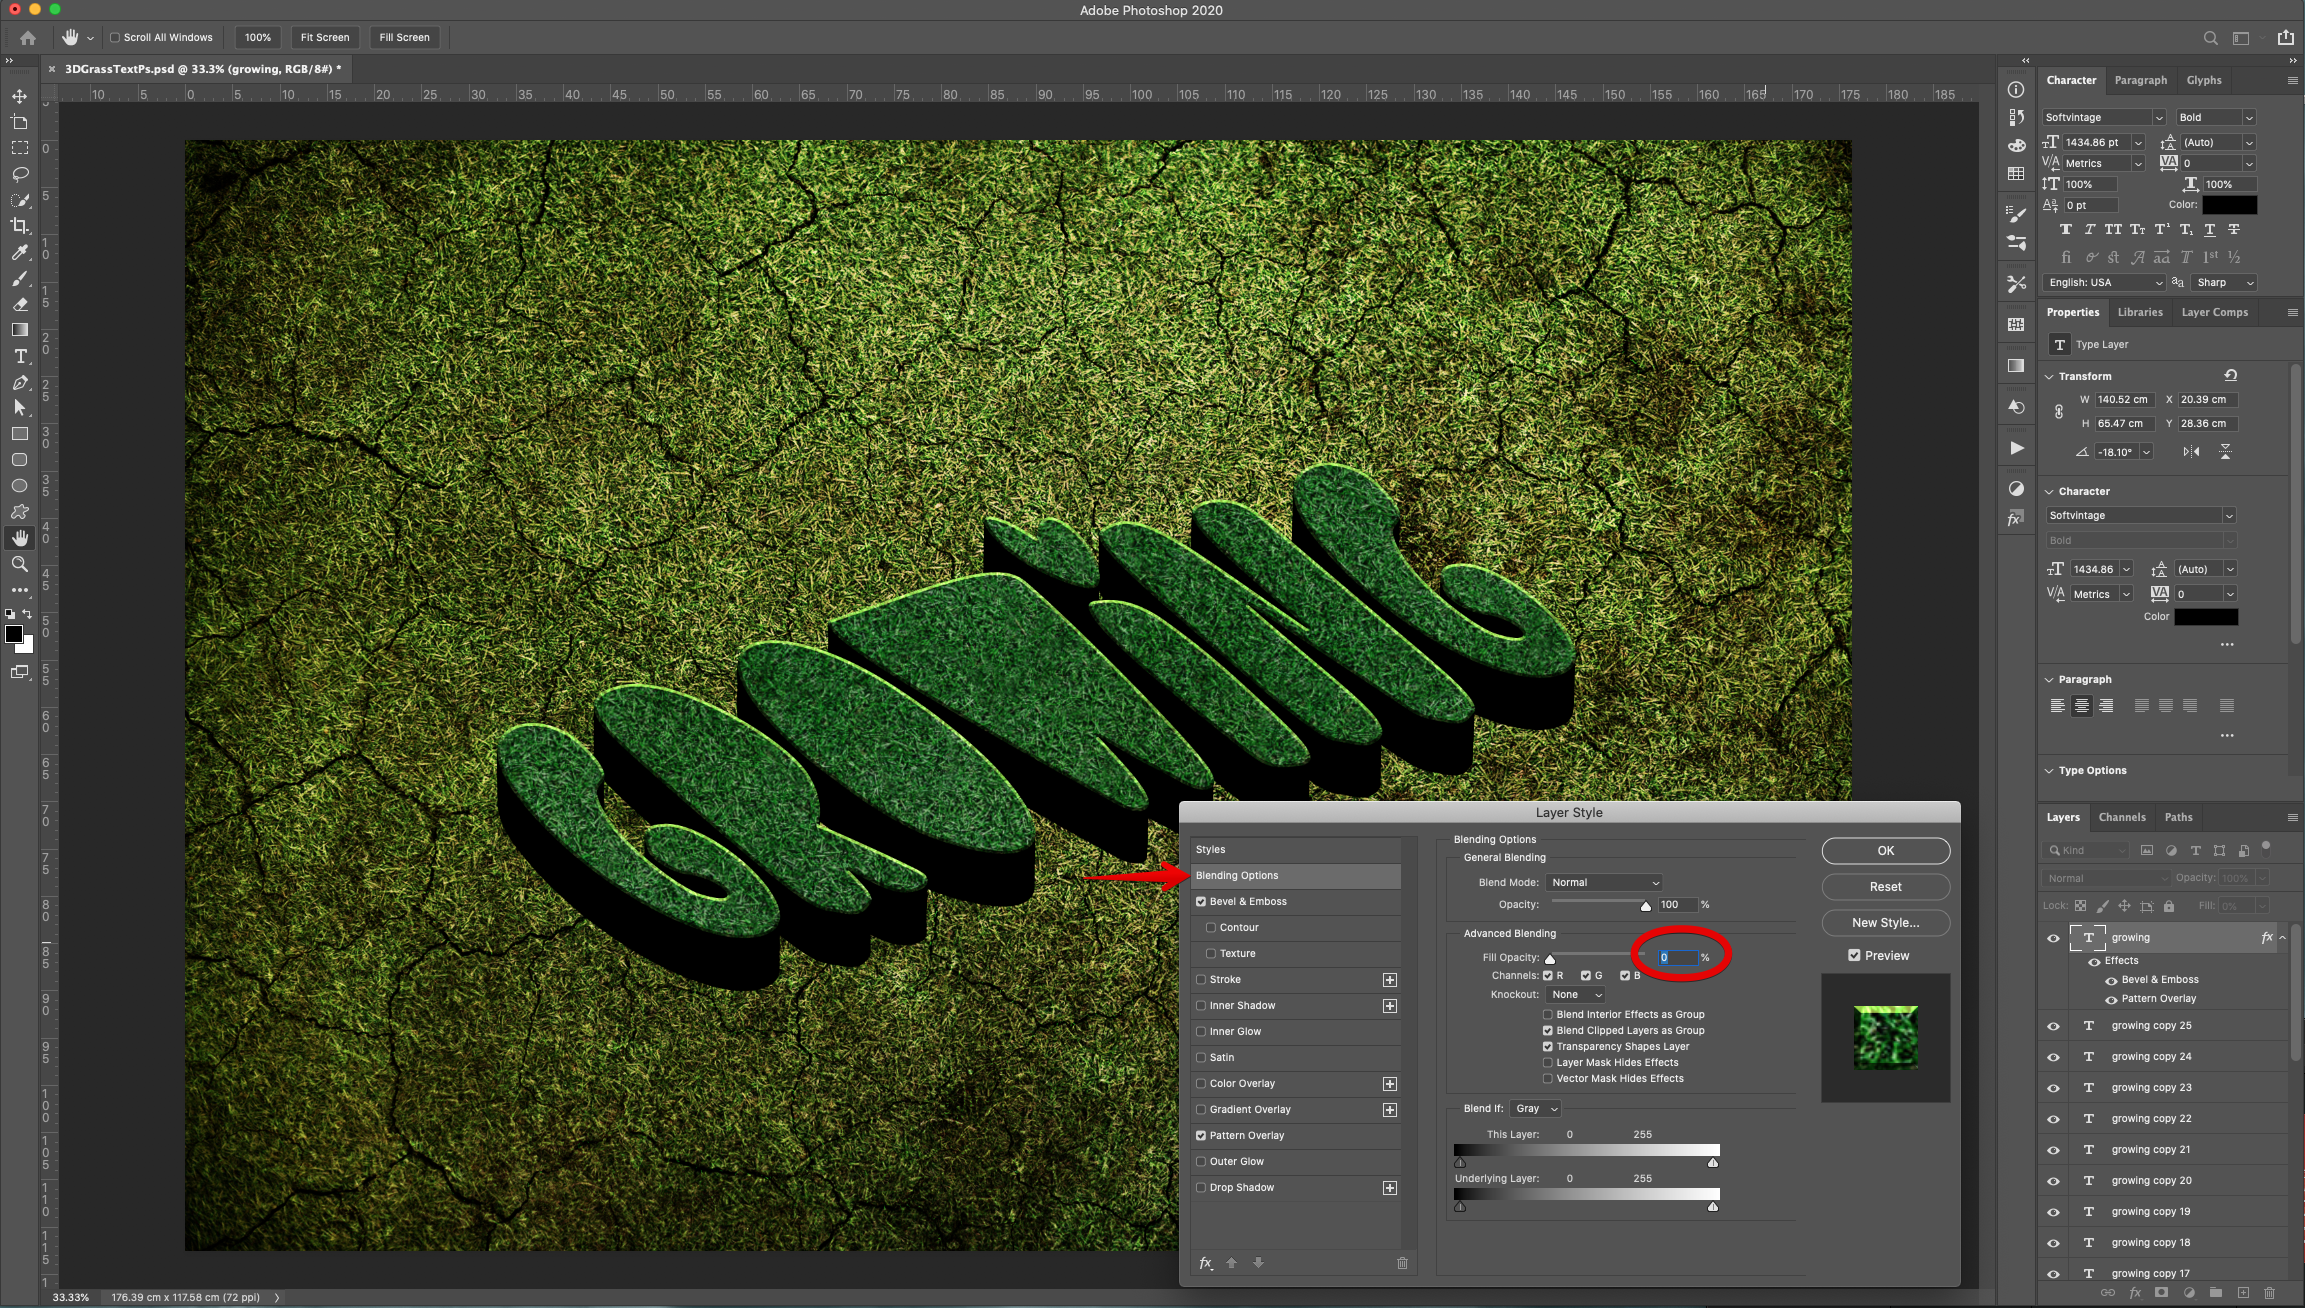
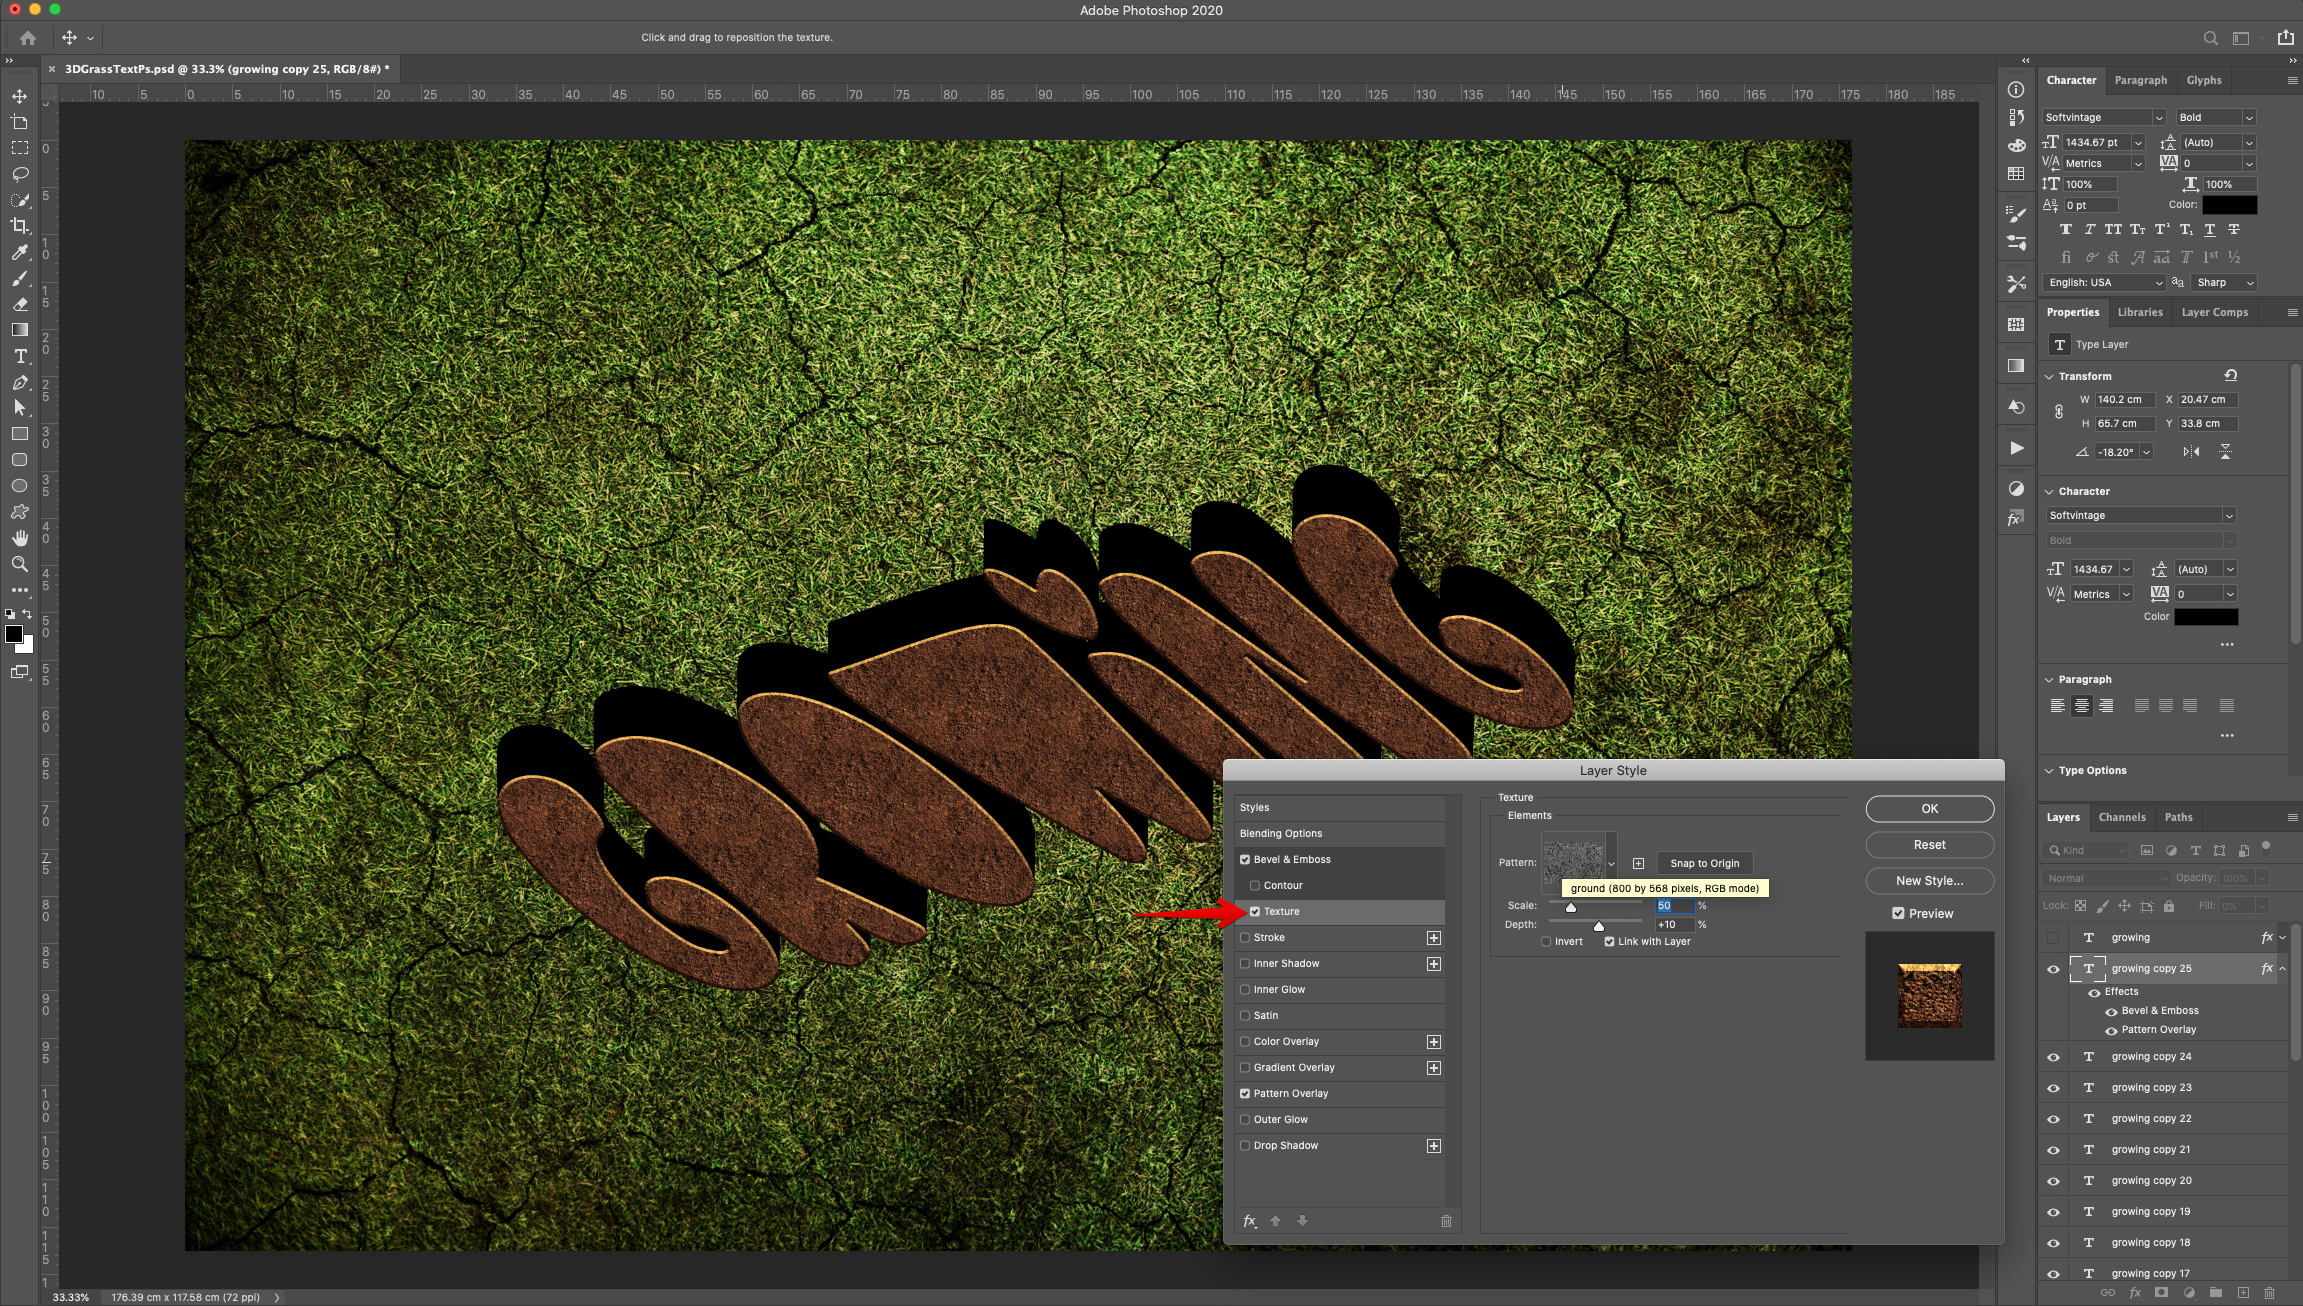
Bevel & Emboss: (Highlight Mode: #afca44, Shadow Mode: #483d13)
Pattern Overlay: (Grass - Photoshop CC 2020)
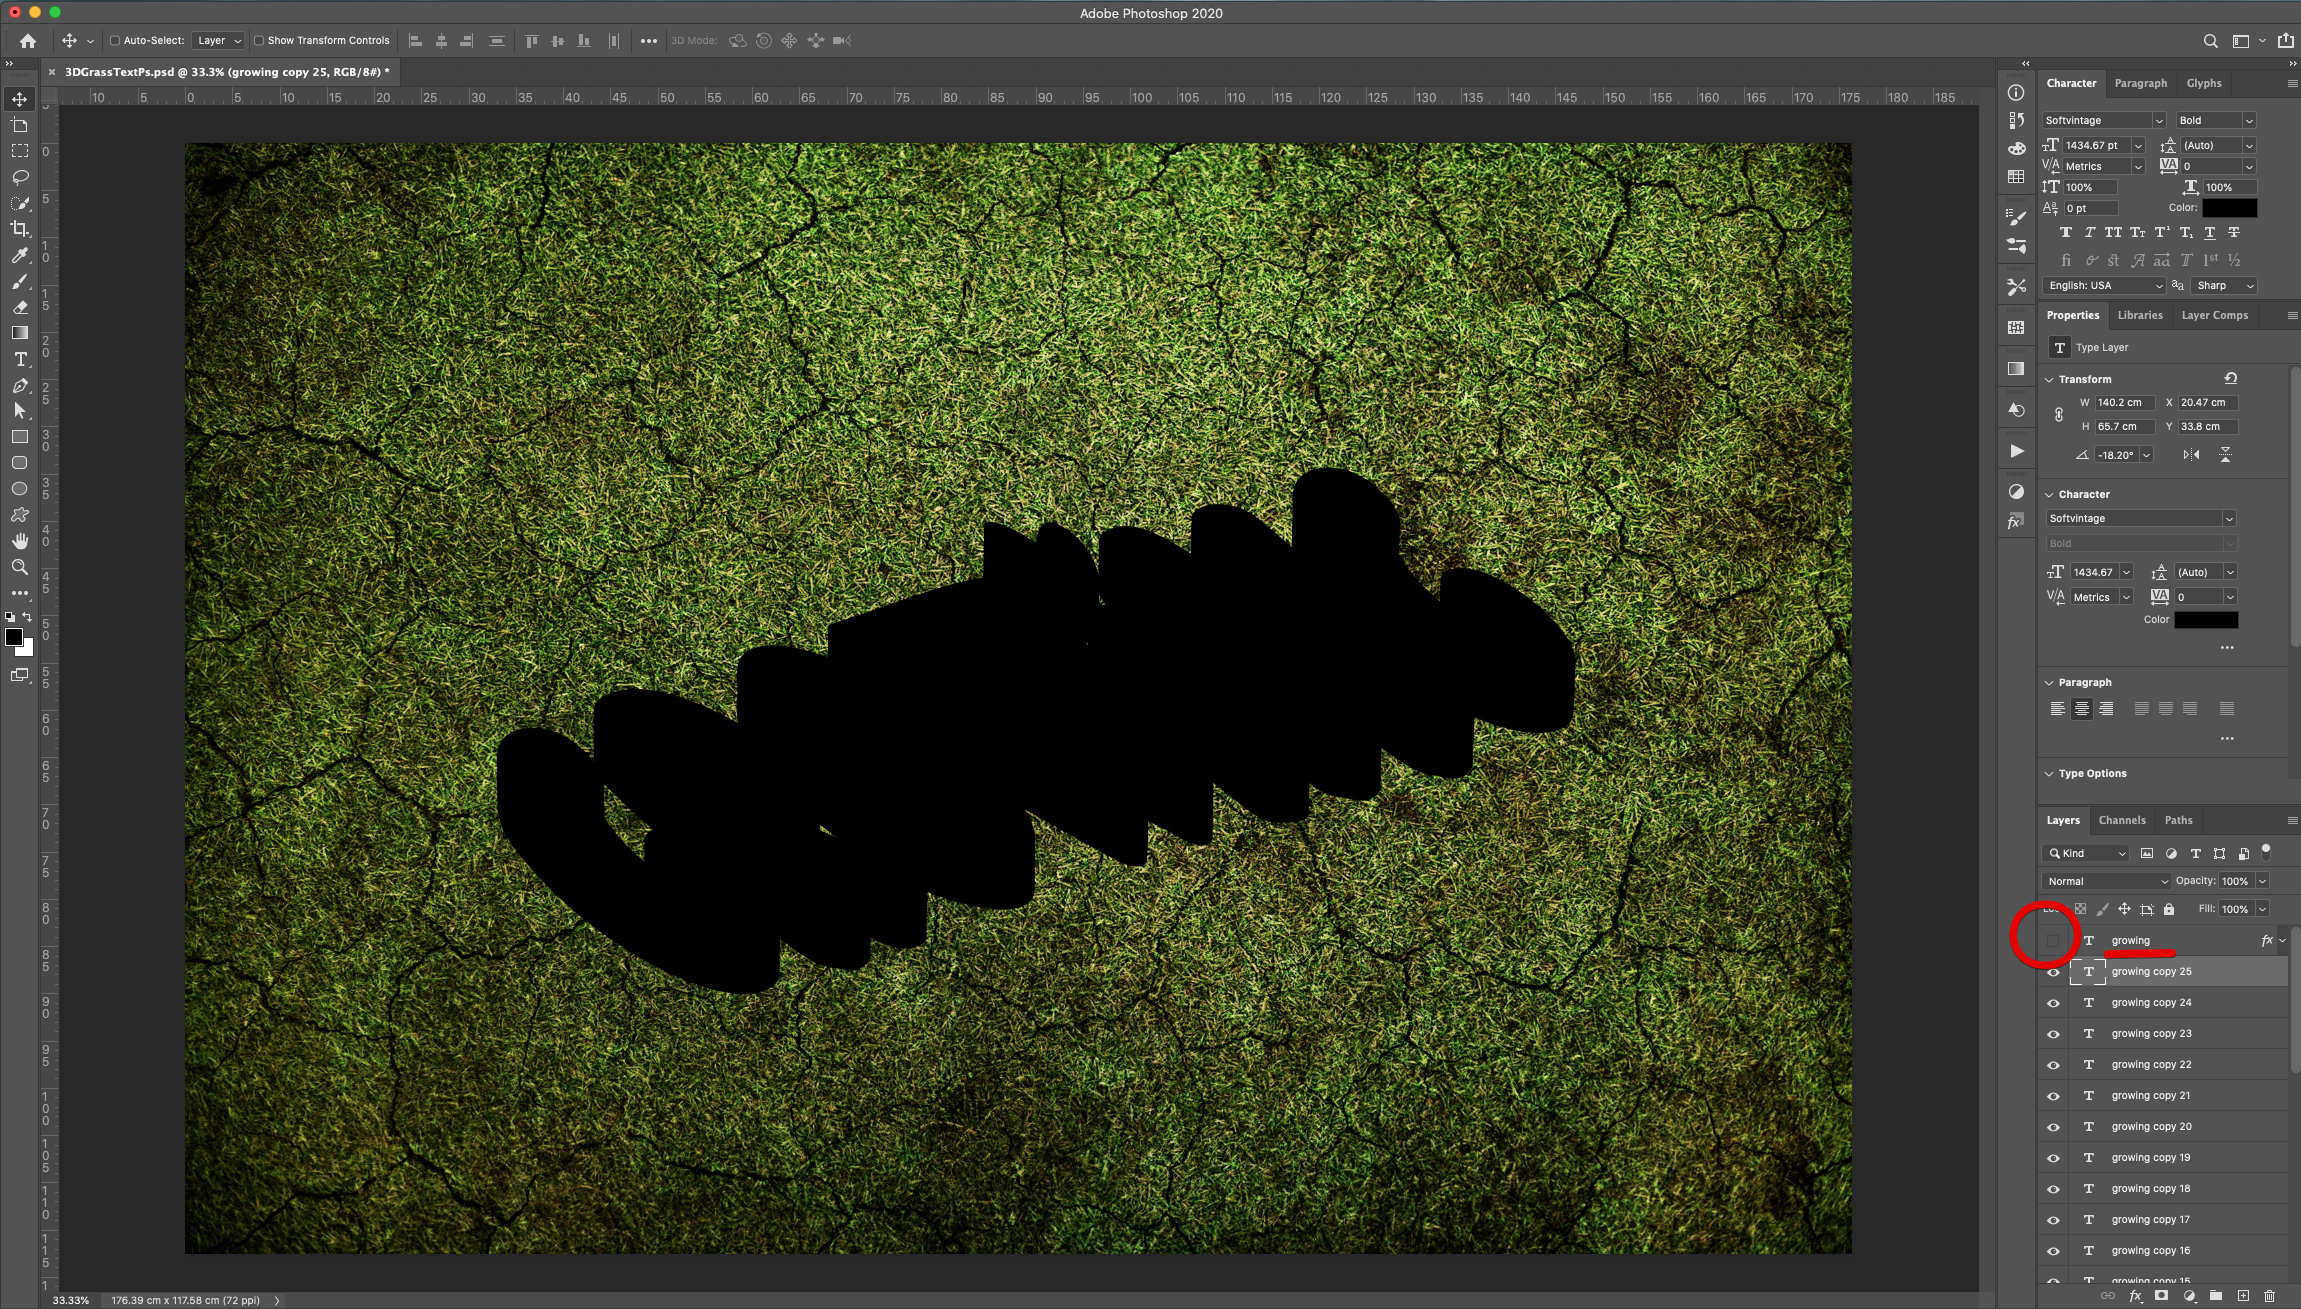
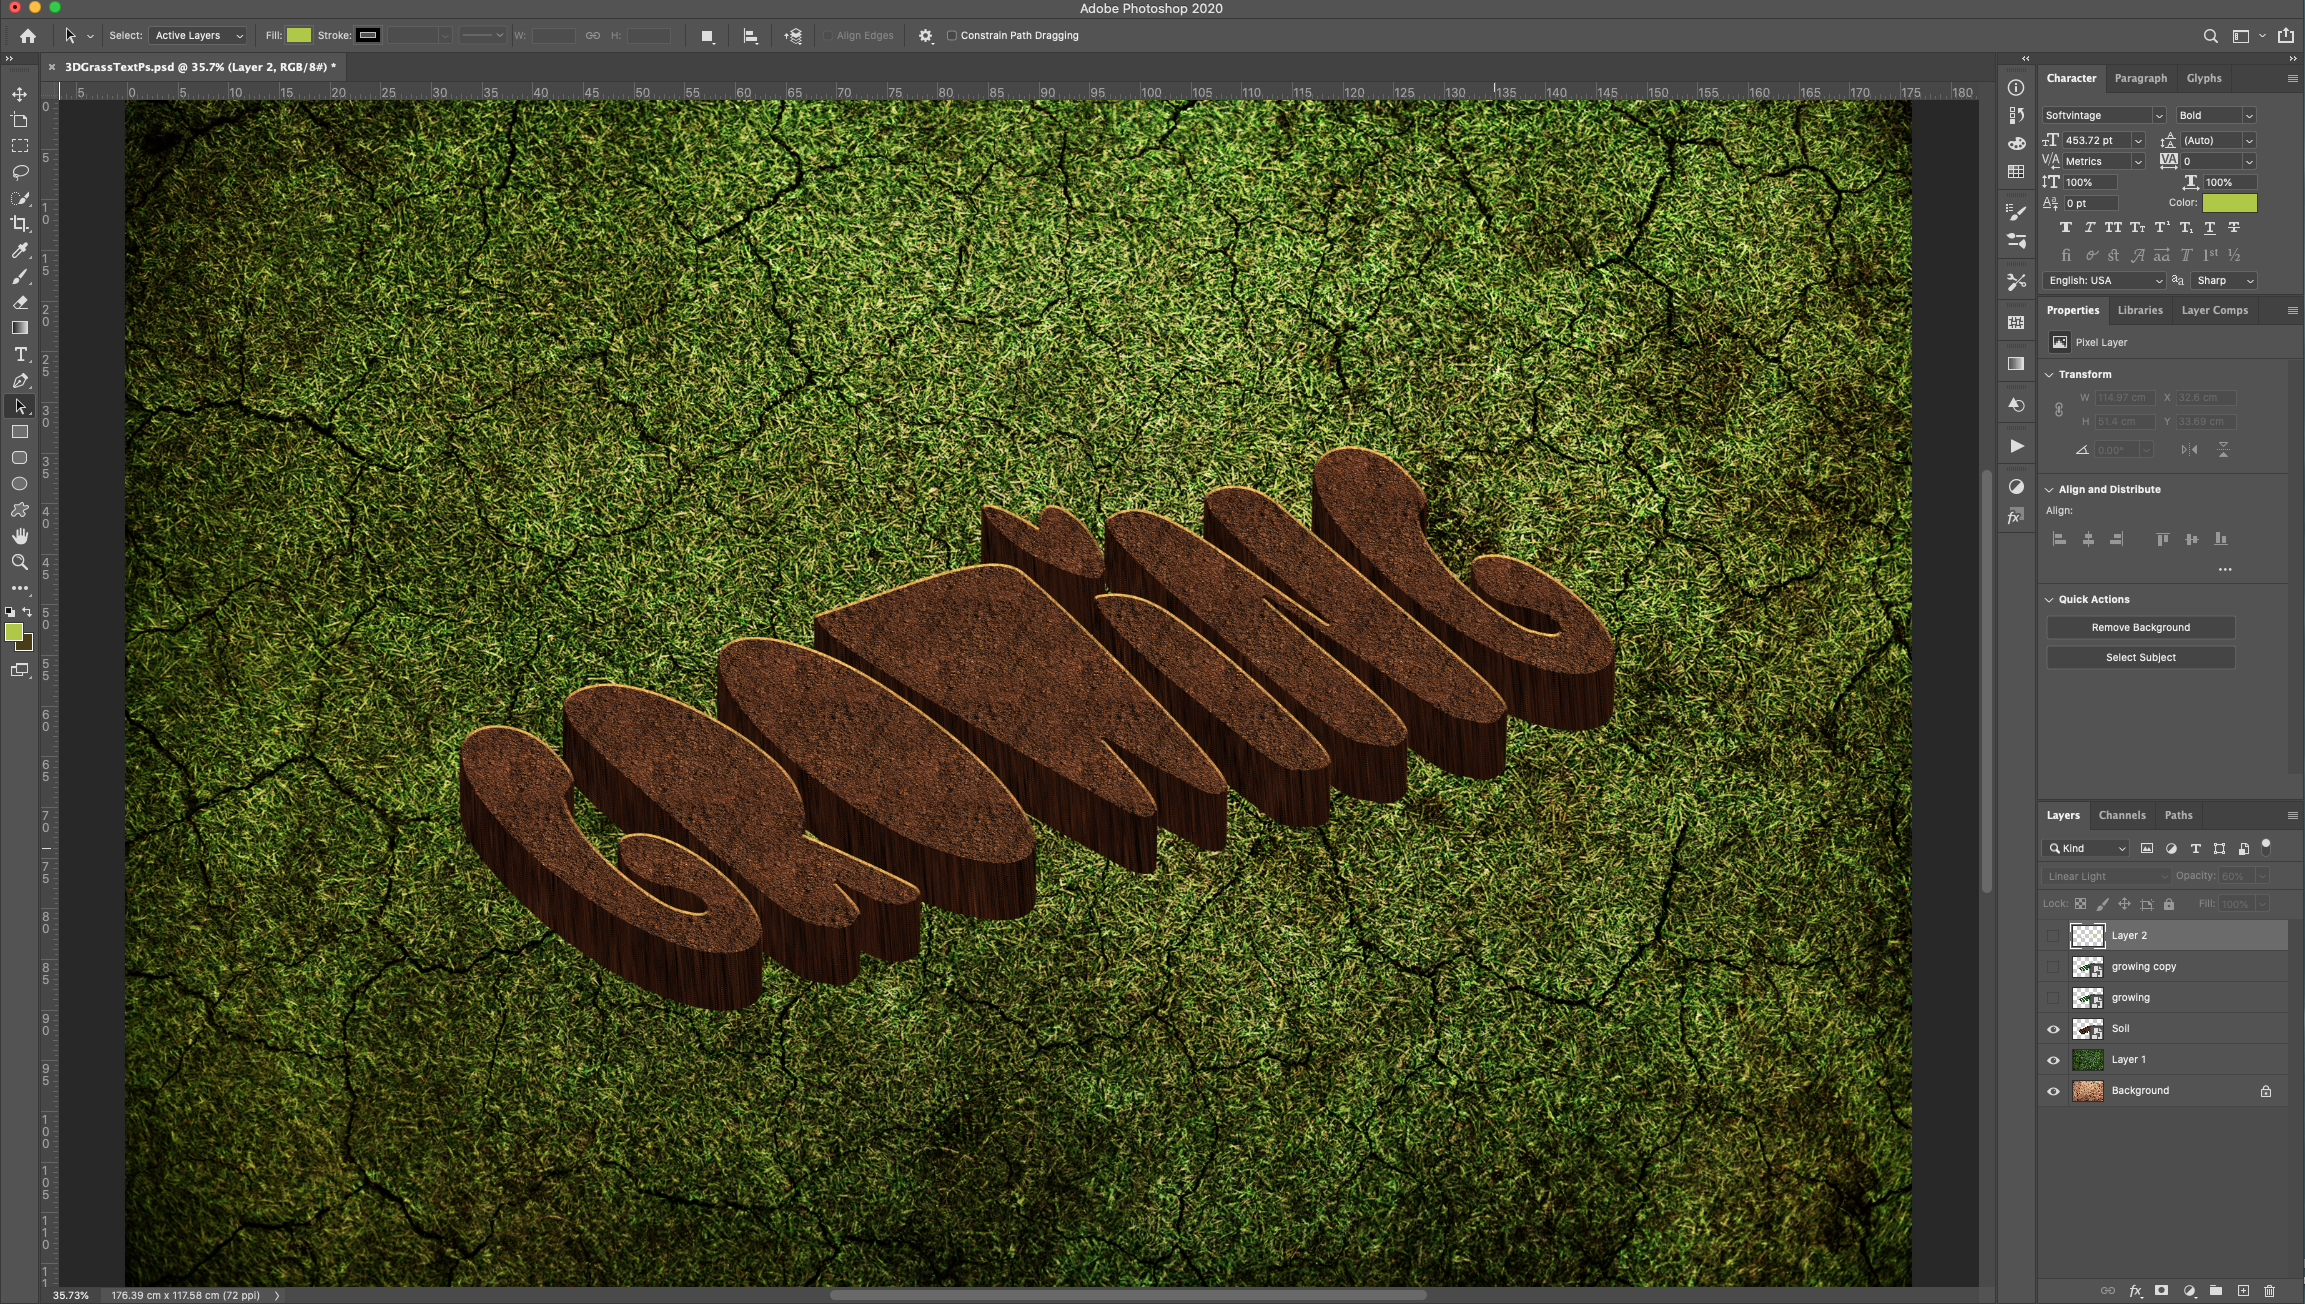
11 - Hide the “Text” layer by clicking on the Small Eye icon on the left side of its Thumbnail.
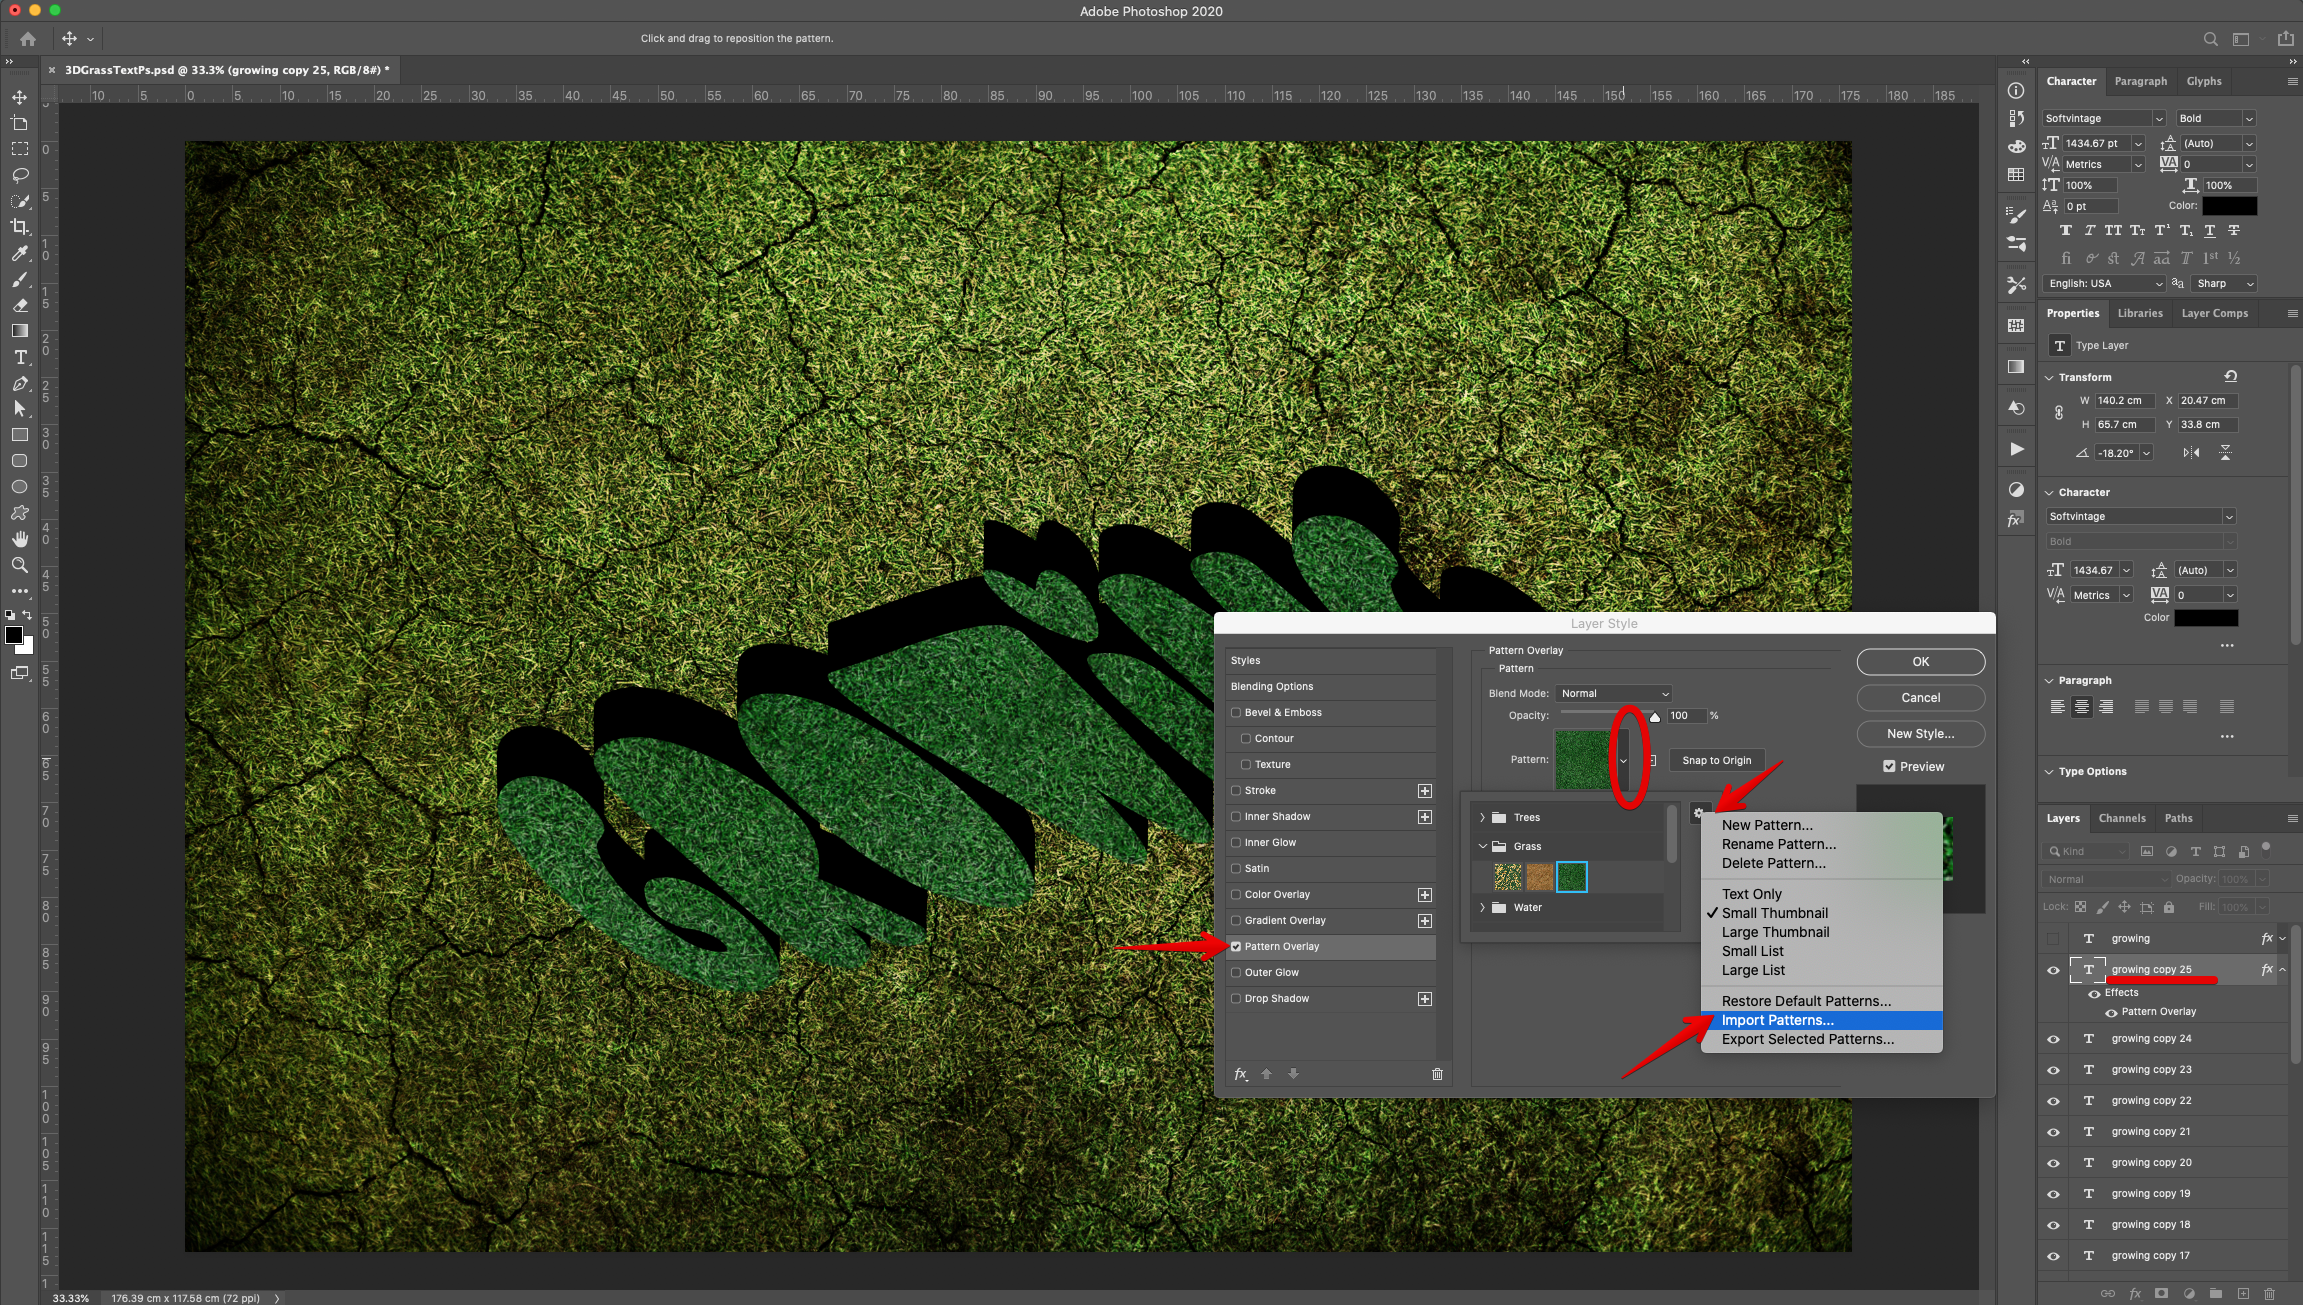
12 - Select one of the “Duplicates”, double-click on top of its thumbnail and in “Pattern Overlay”, click on the small “Gear” icon and navigate to “Import Patterns”, head to where you saved the ones you downloaded and select them. Click “OK”. Select the one you plan to use for the “Text Effect”.
Pattern Overlay:
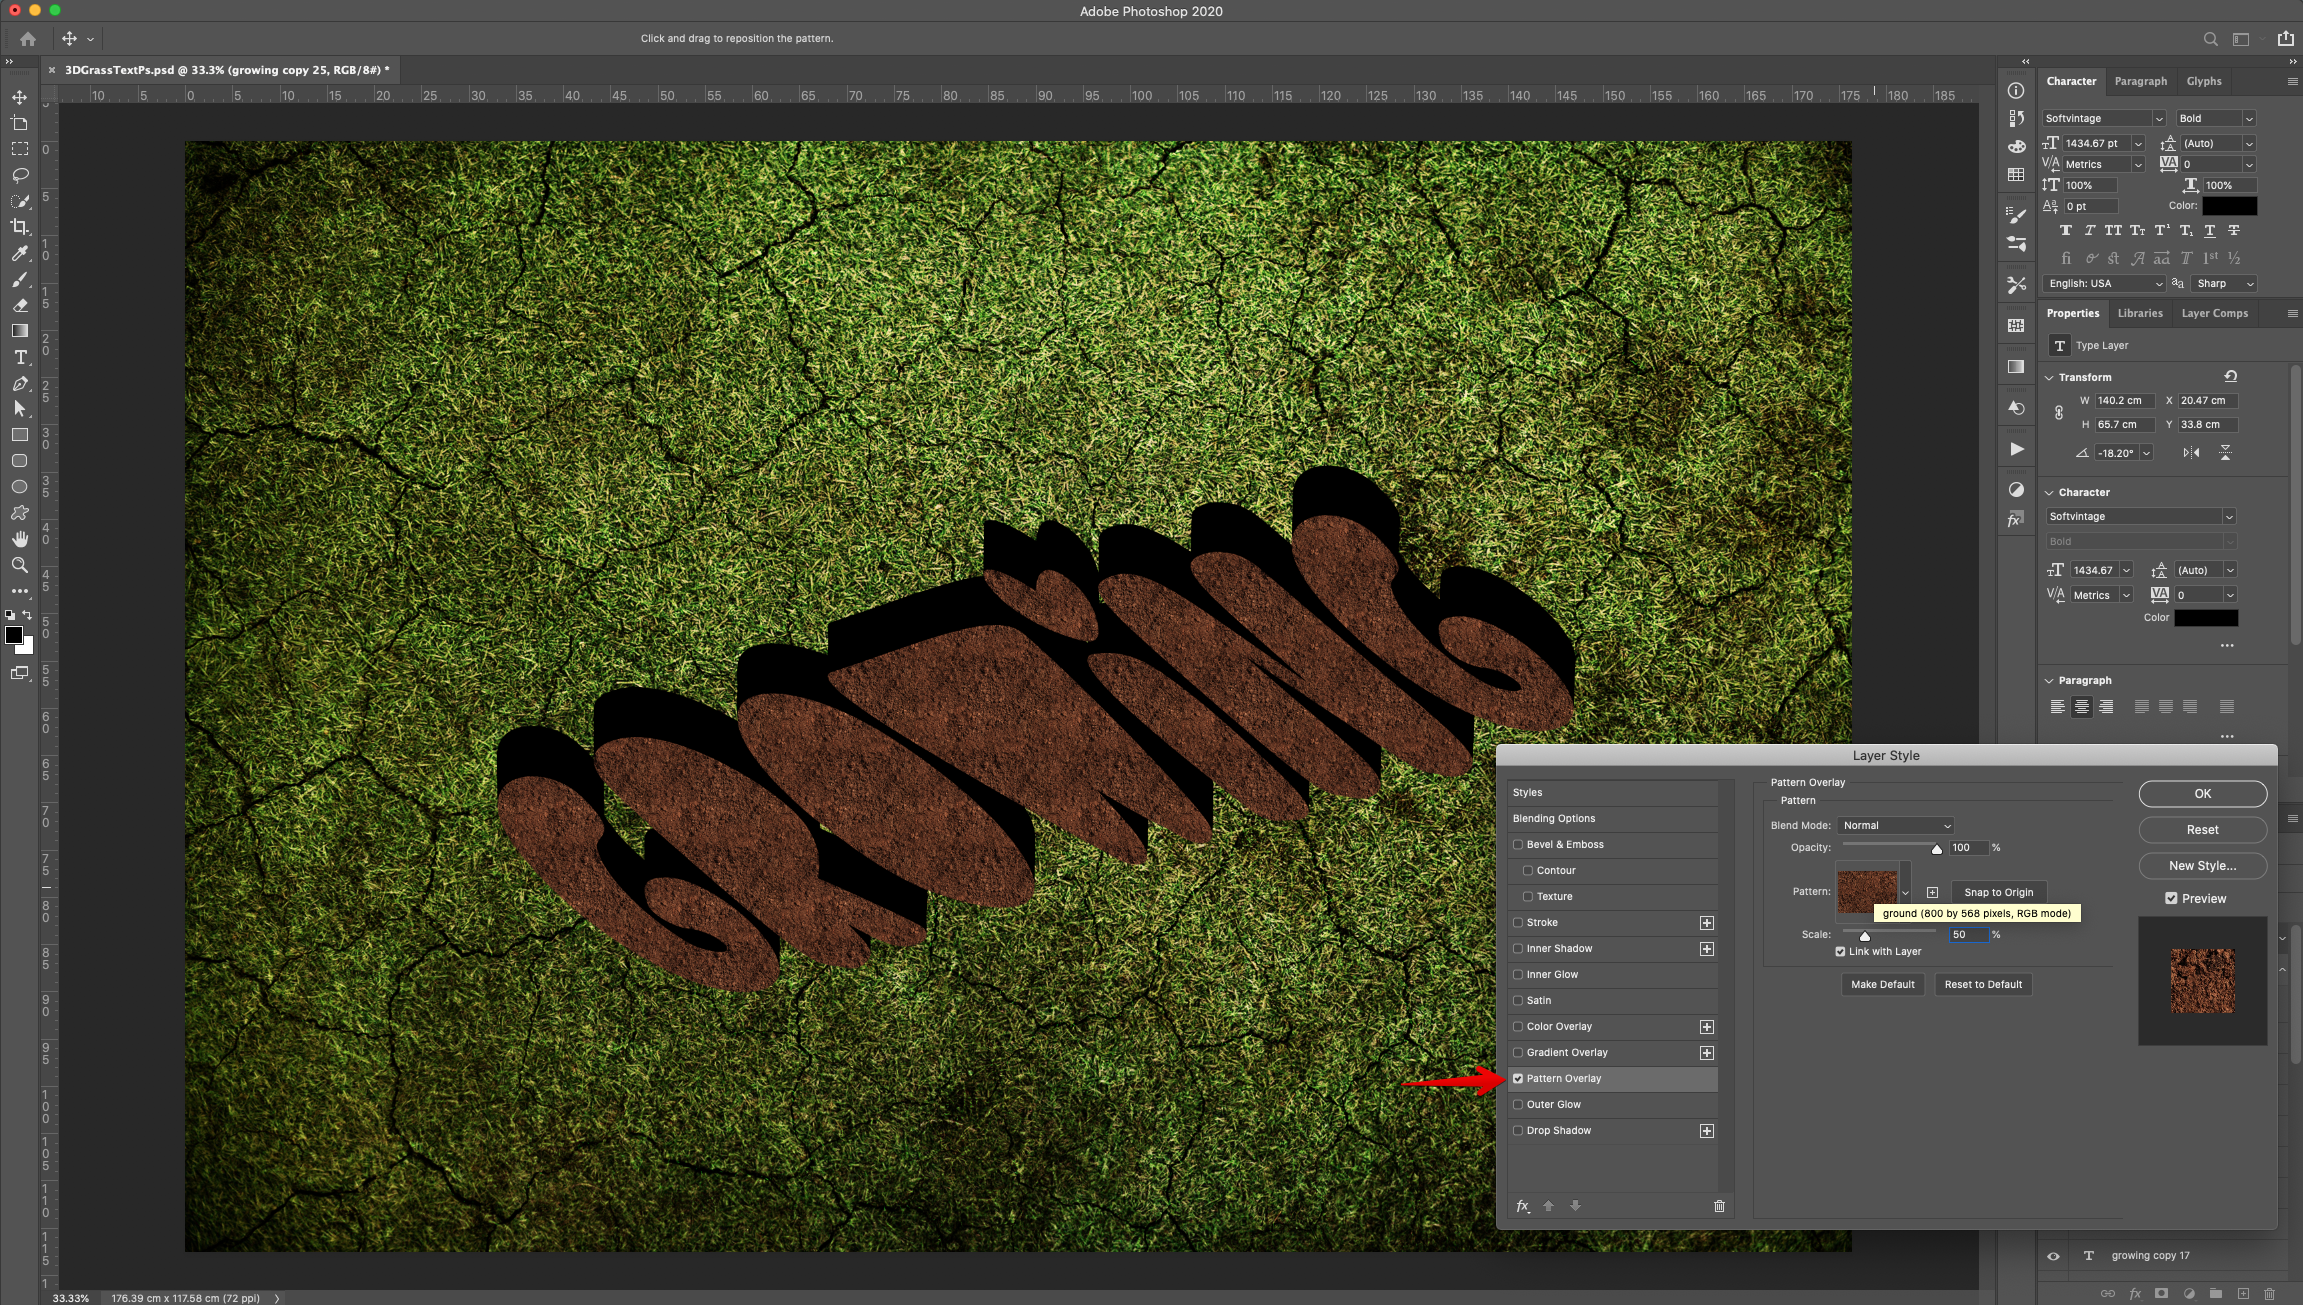
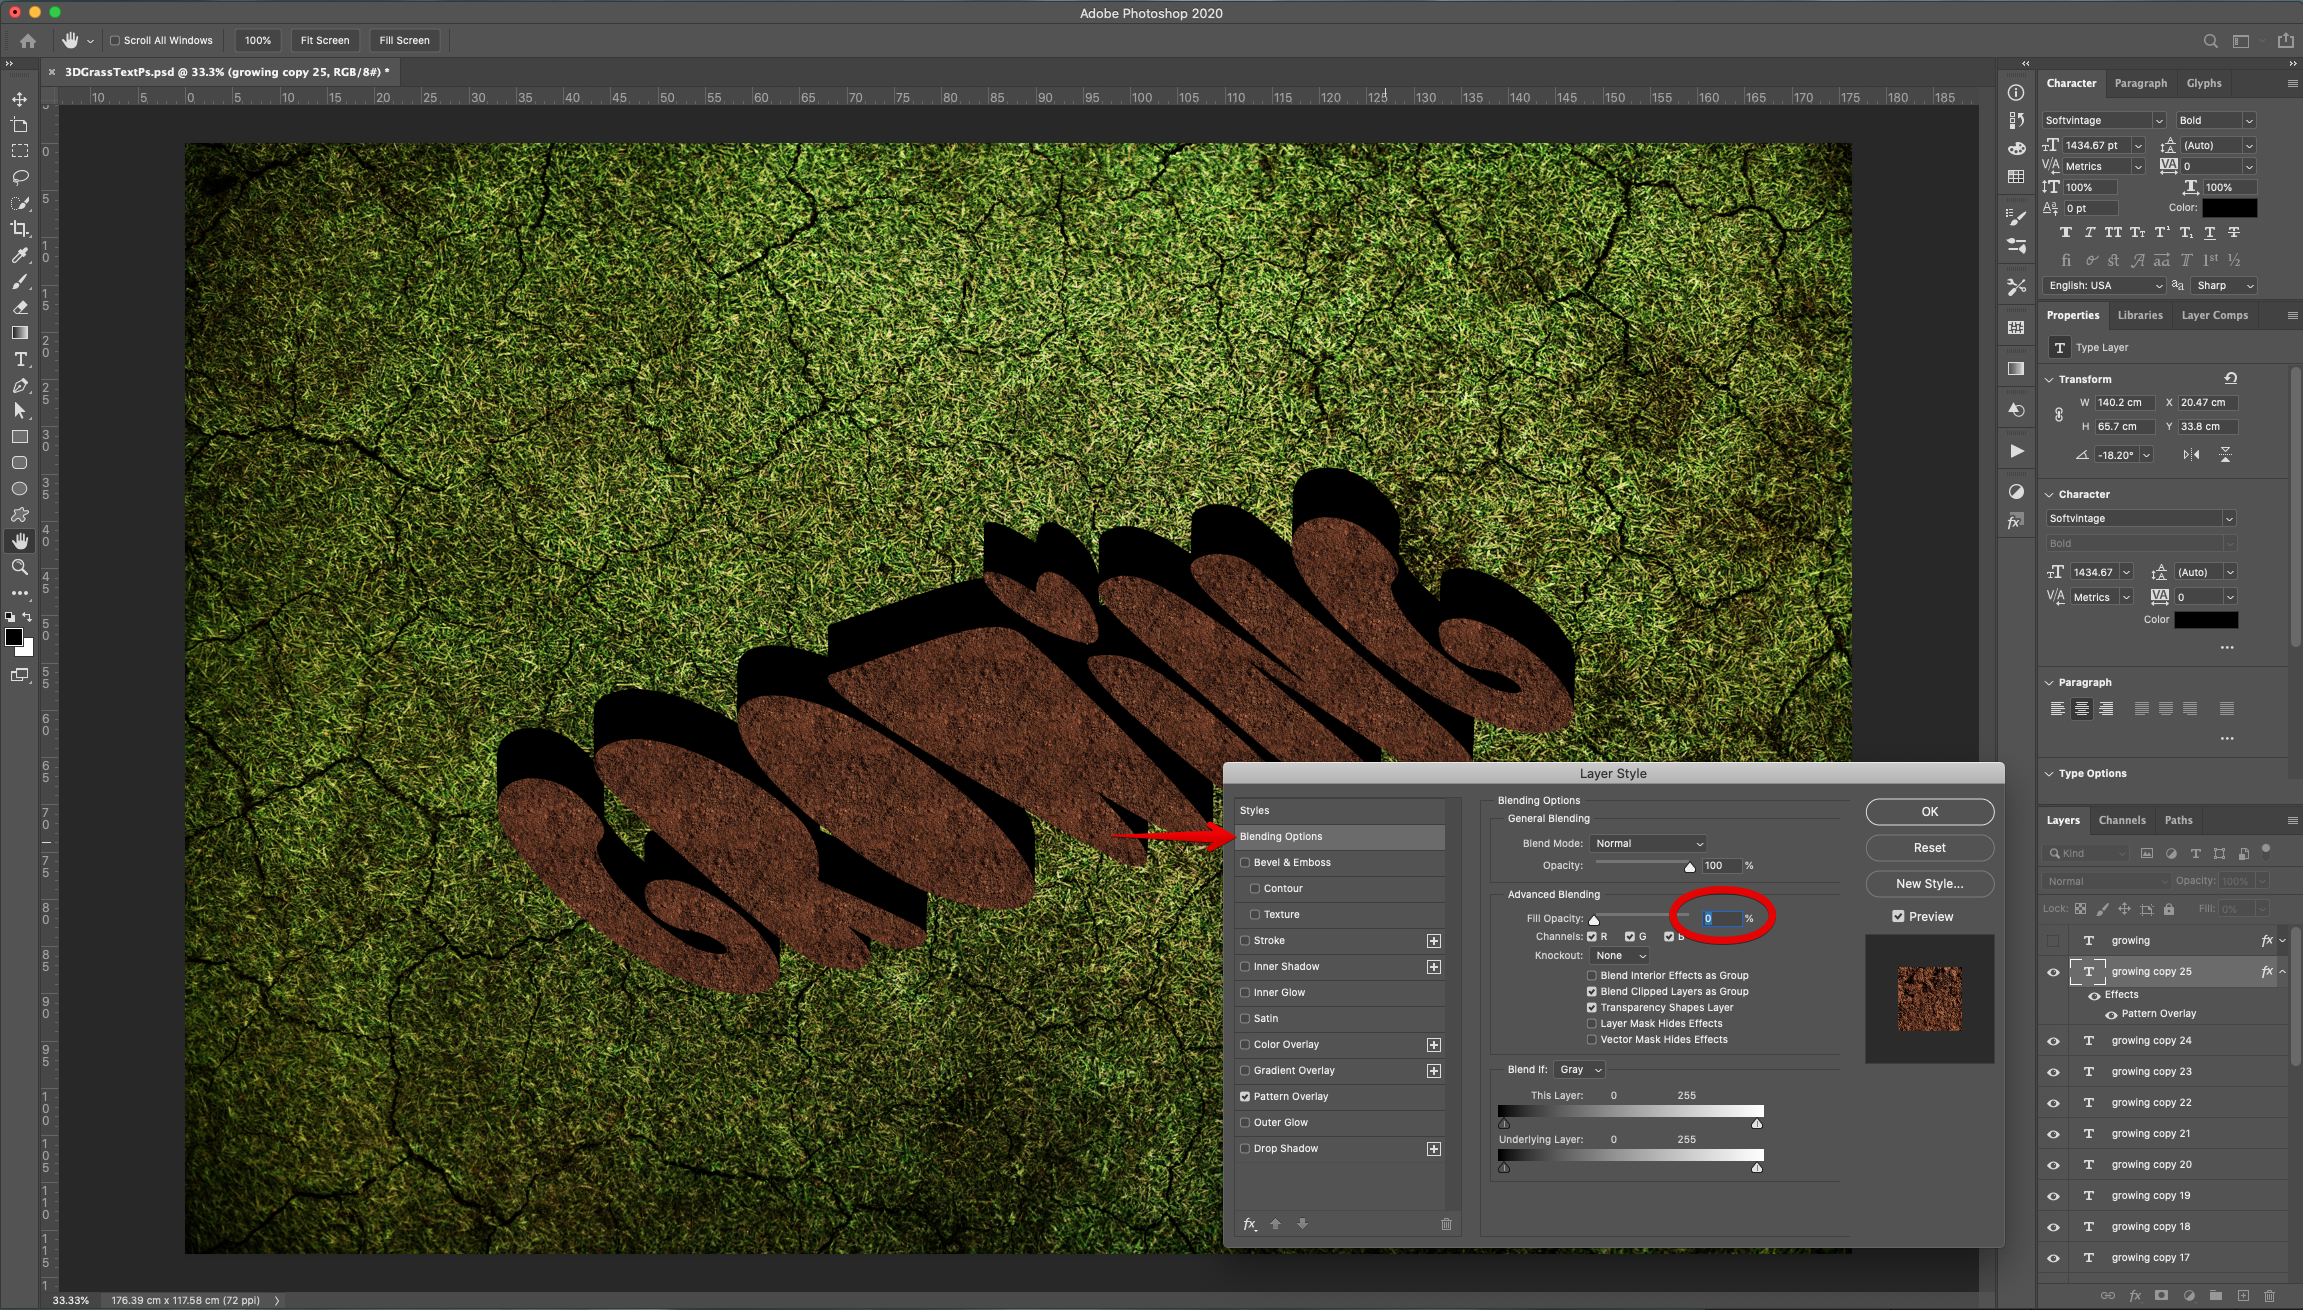
13 - After applying the “Pattern” apply the following “Layer Styles”:
Blending Options: (Fill: 0%)
Bevel & Emboss: (Highlight Mode: #caa944, Shadow Mode: #483113)
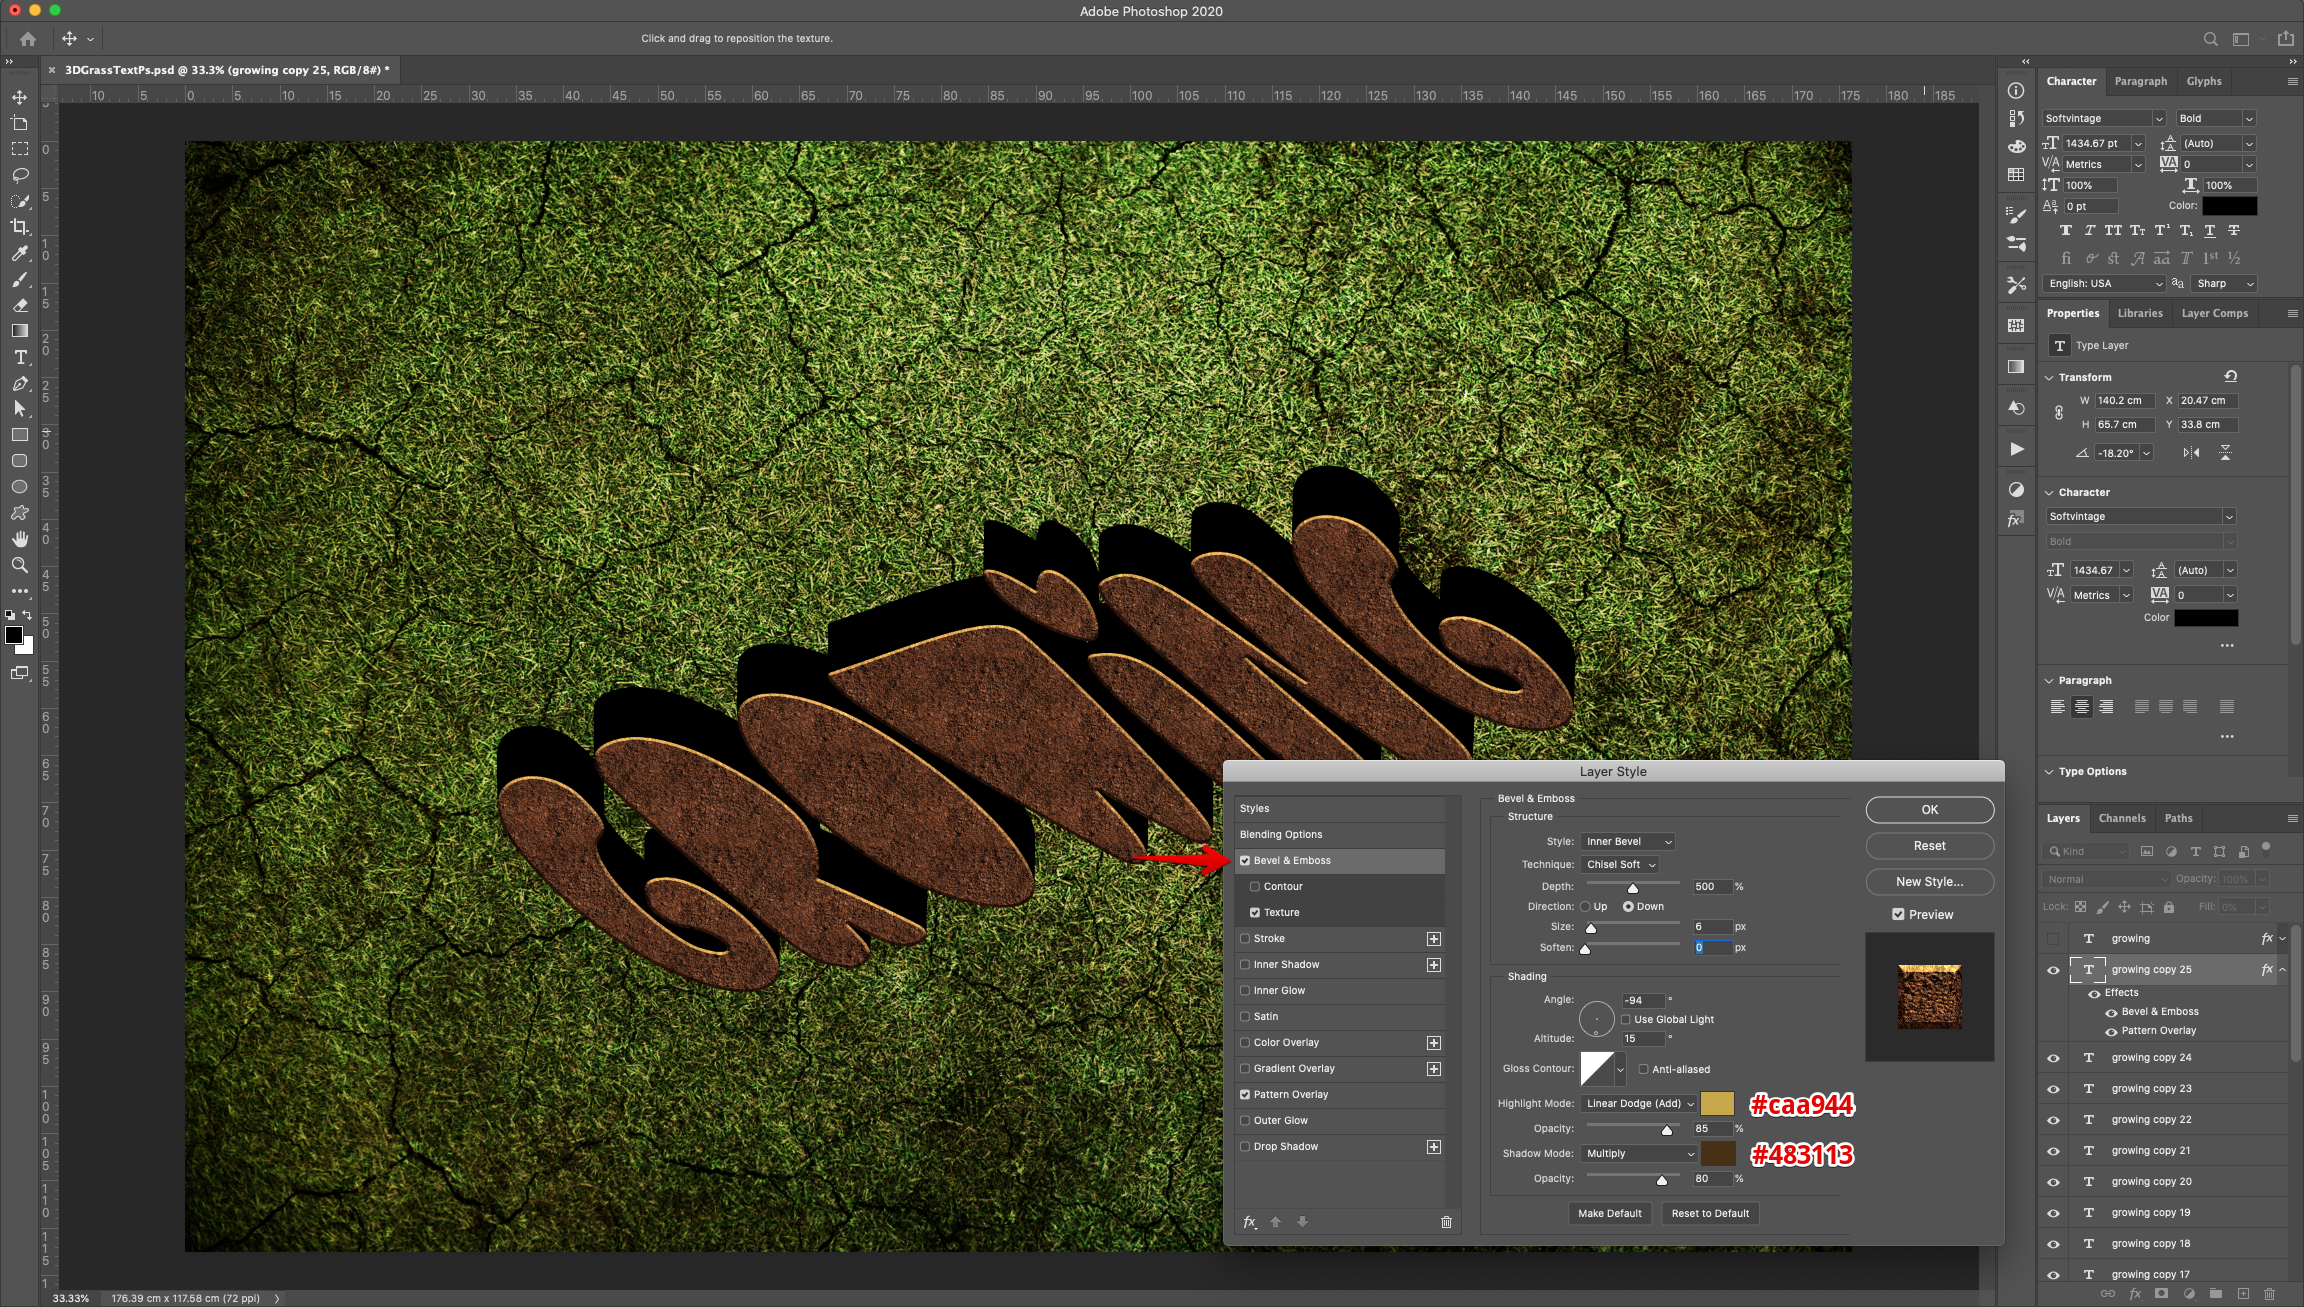
Texture: (Same as “Pattern”)
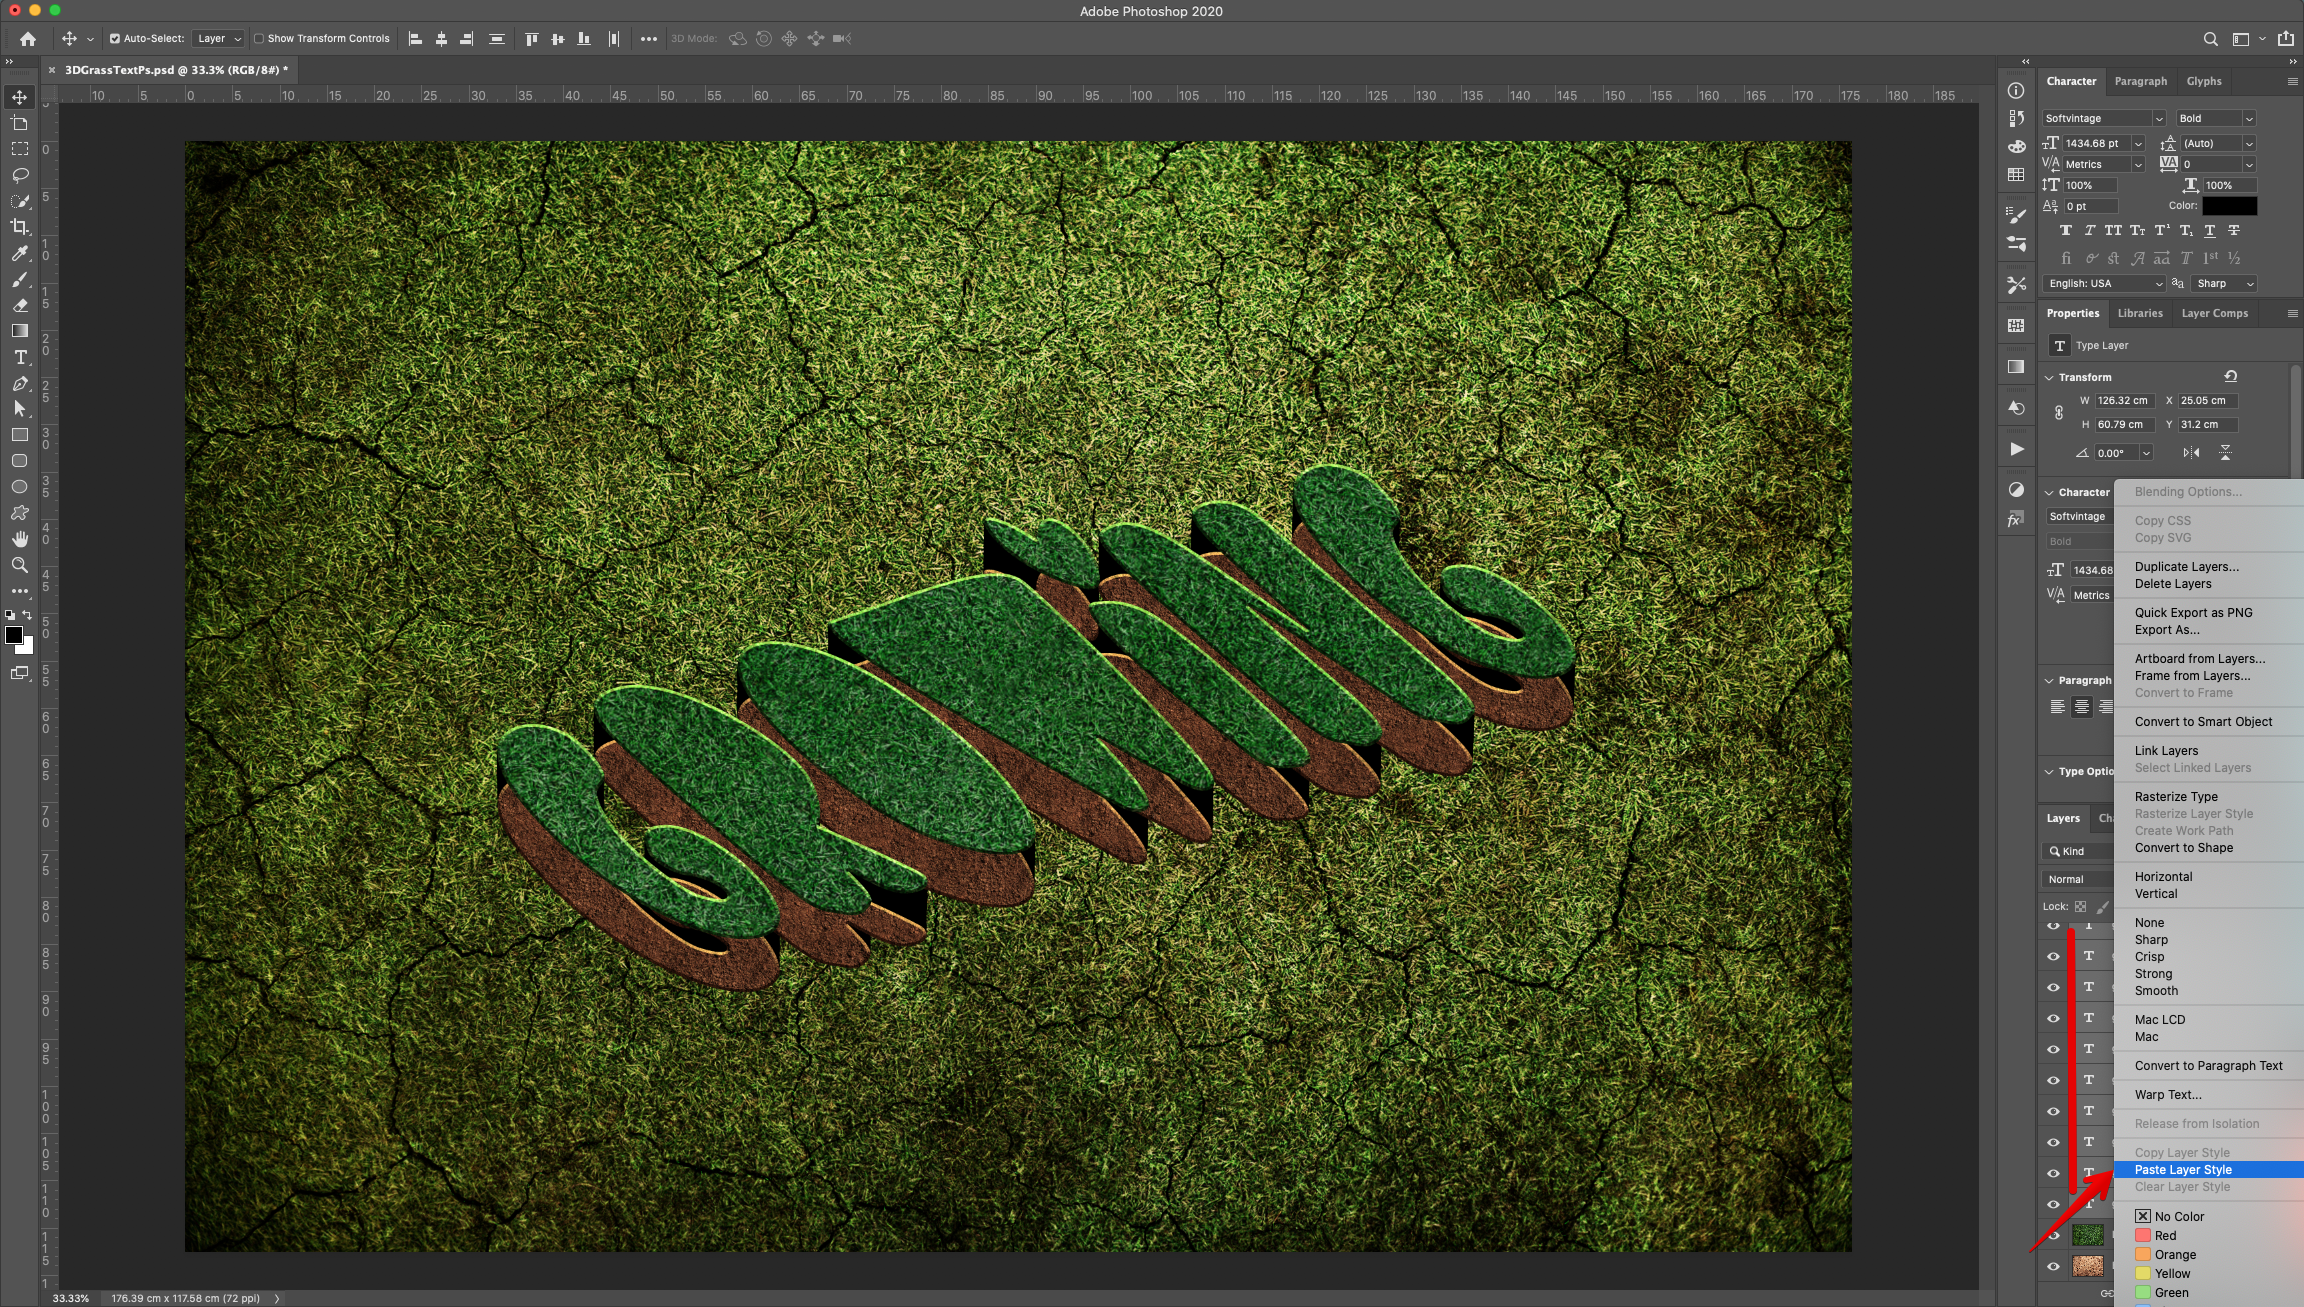
14 - Right-click on top of its Thumbnail and “Copy Layer Style”, then select all the “Duplicates” (“Shift” key), but leave out the original “Text”, right-click on top of their thumbnails and “Paste Layer Style”. “Un-hide” the original “Text”.

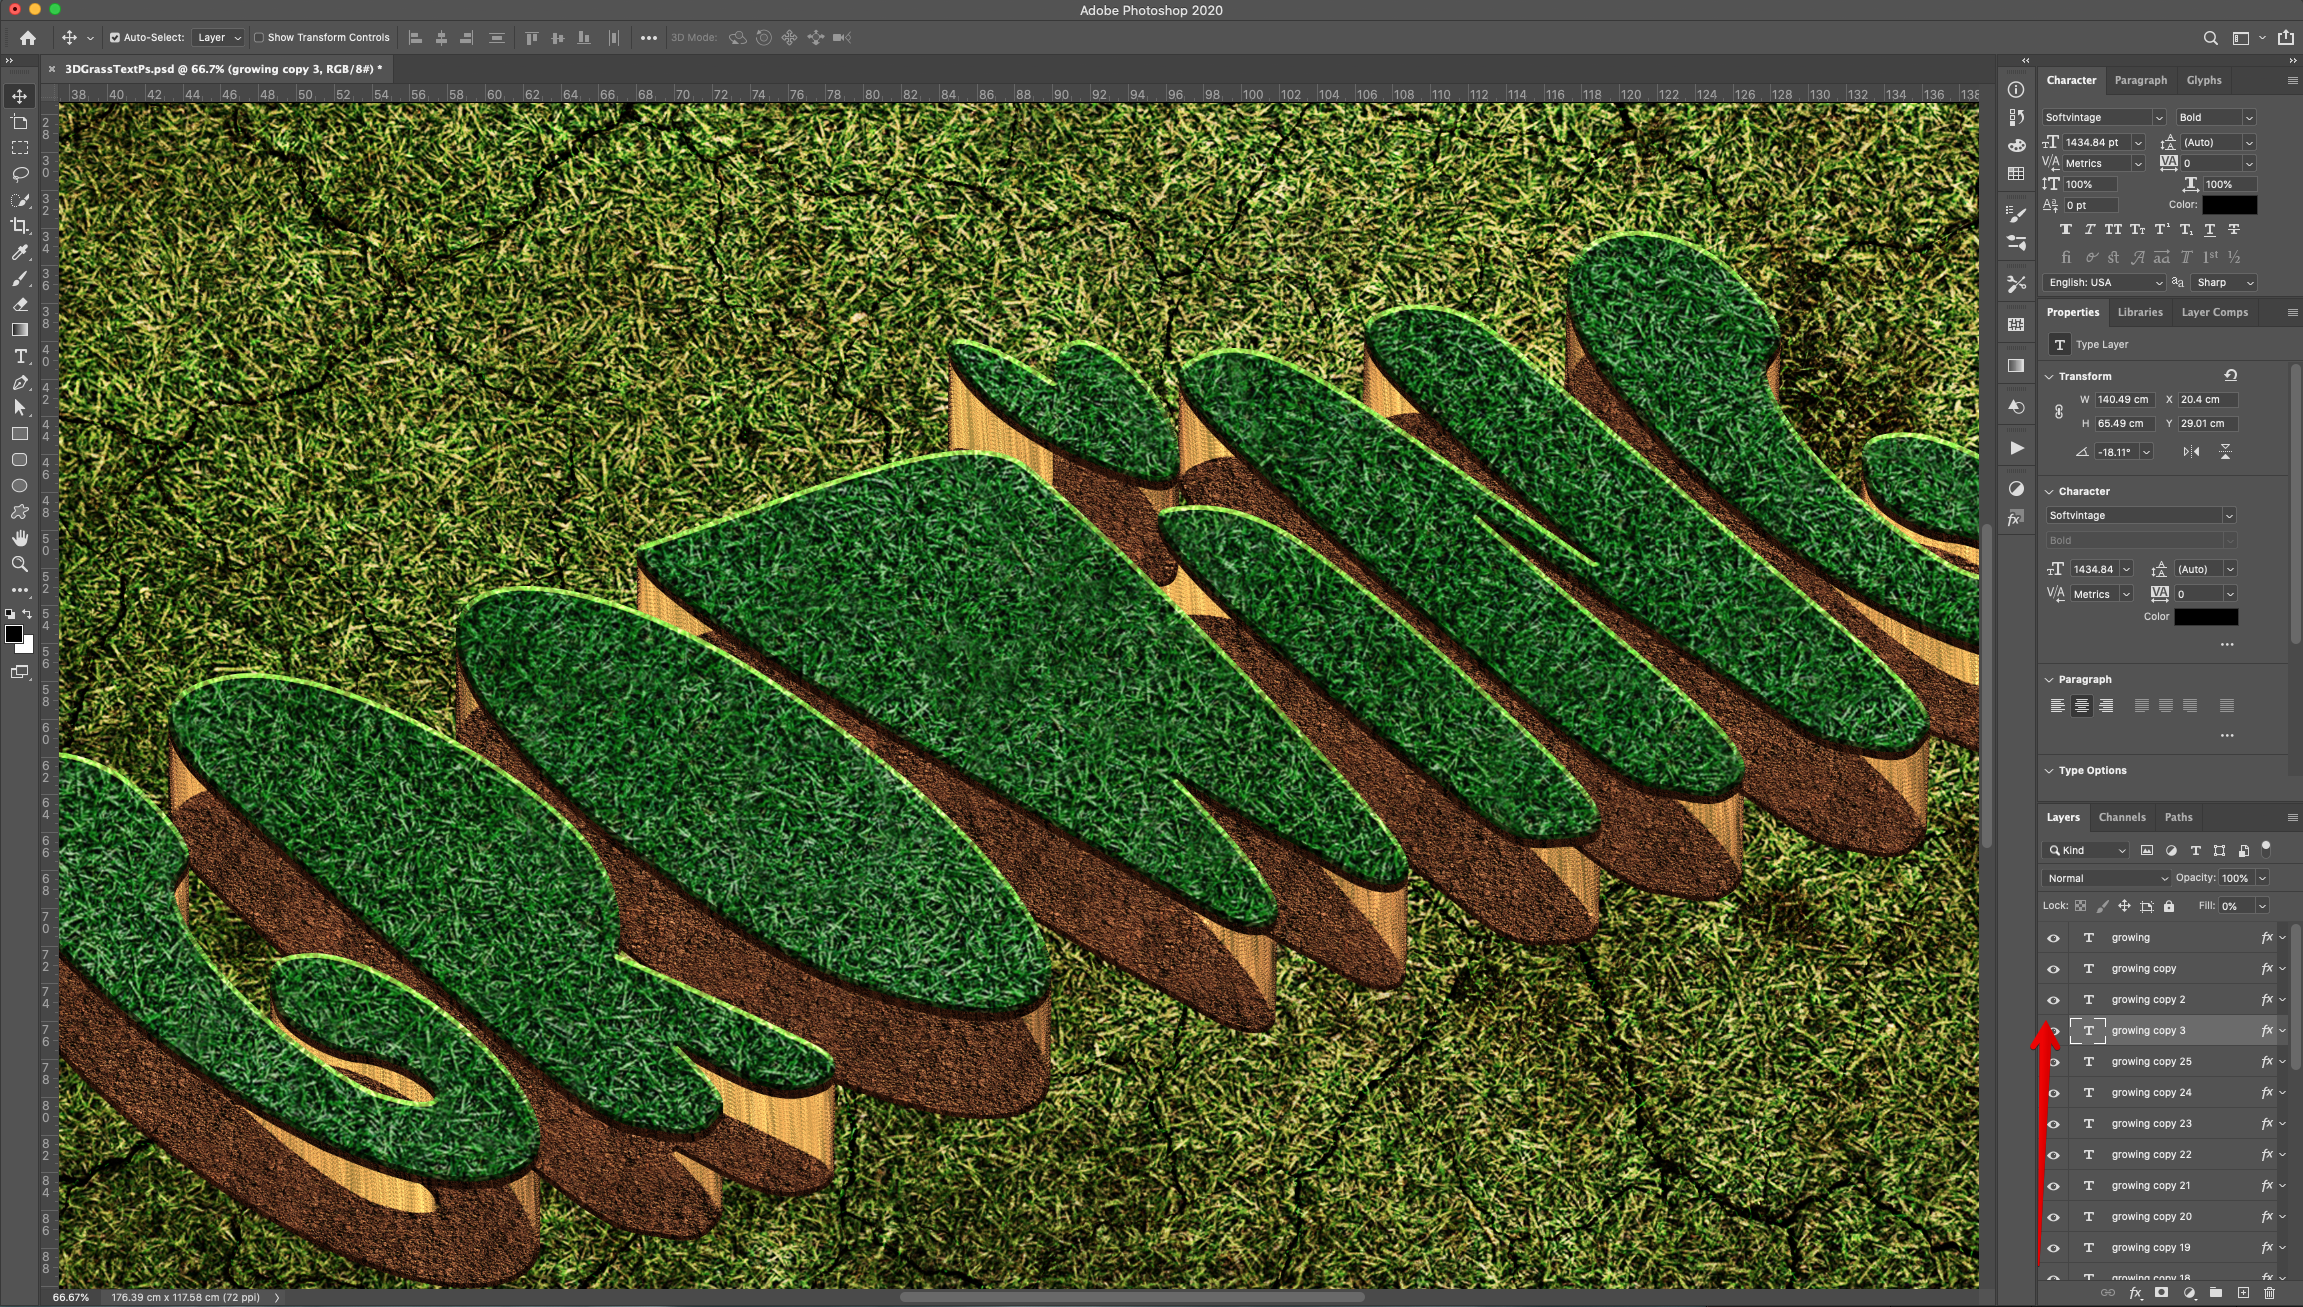
15 - Reposition the “Duplicates” so the one named “Copy” is right under the original “Text” and “Copy 25” is at the bottom.

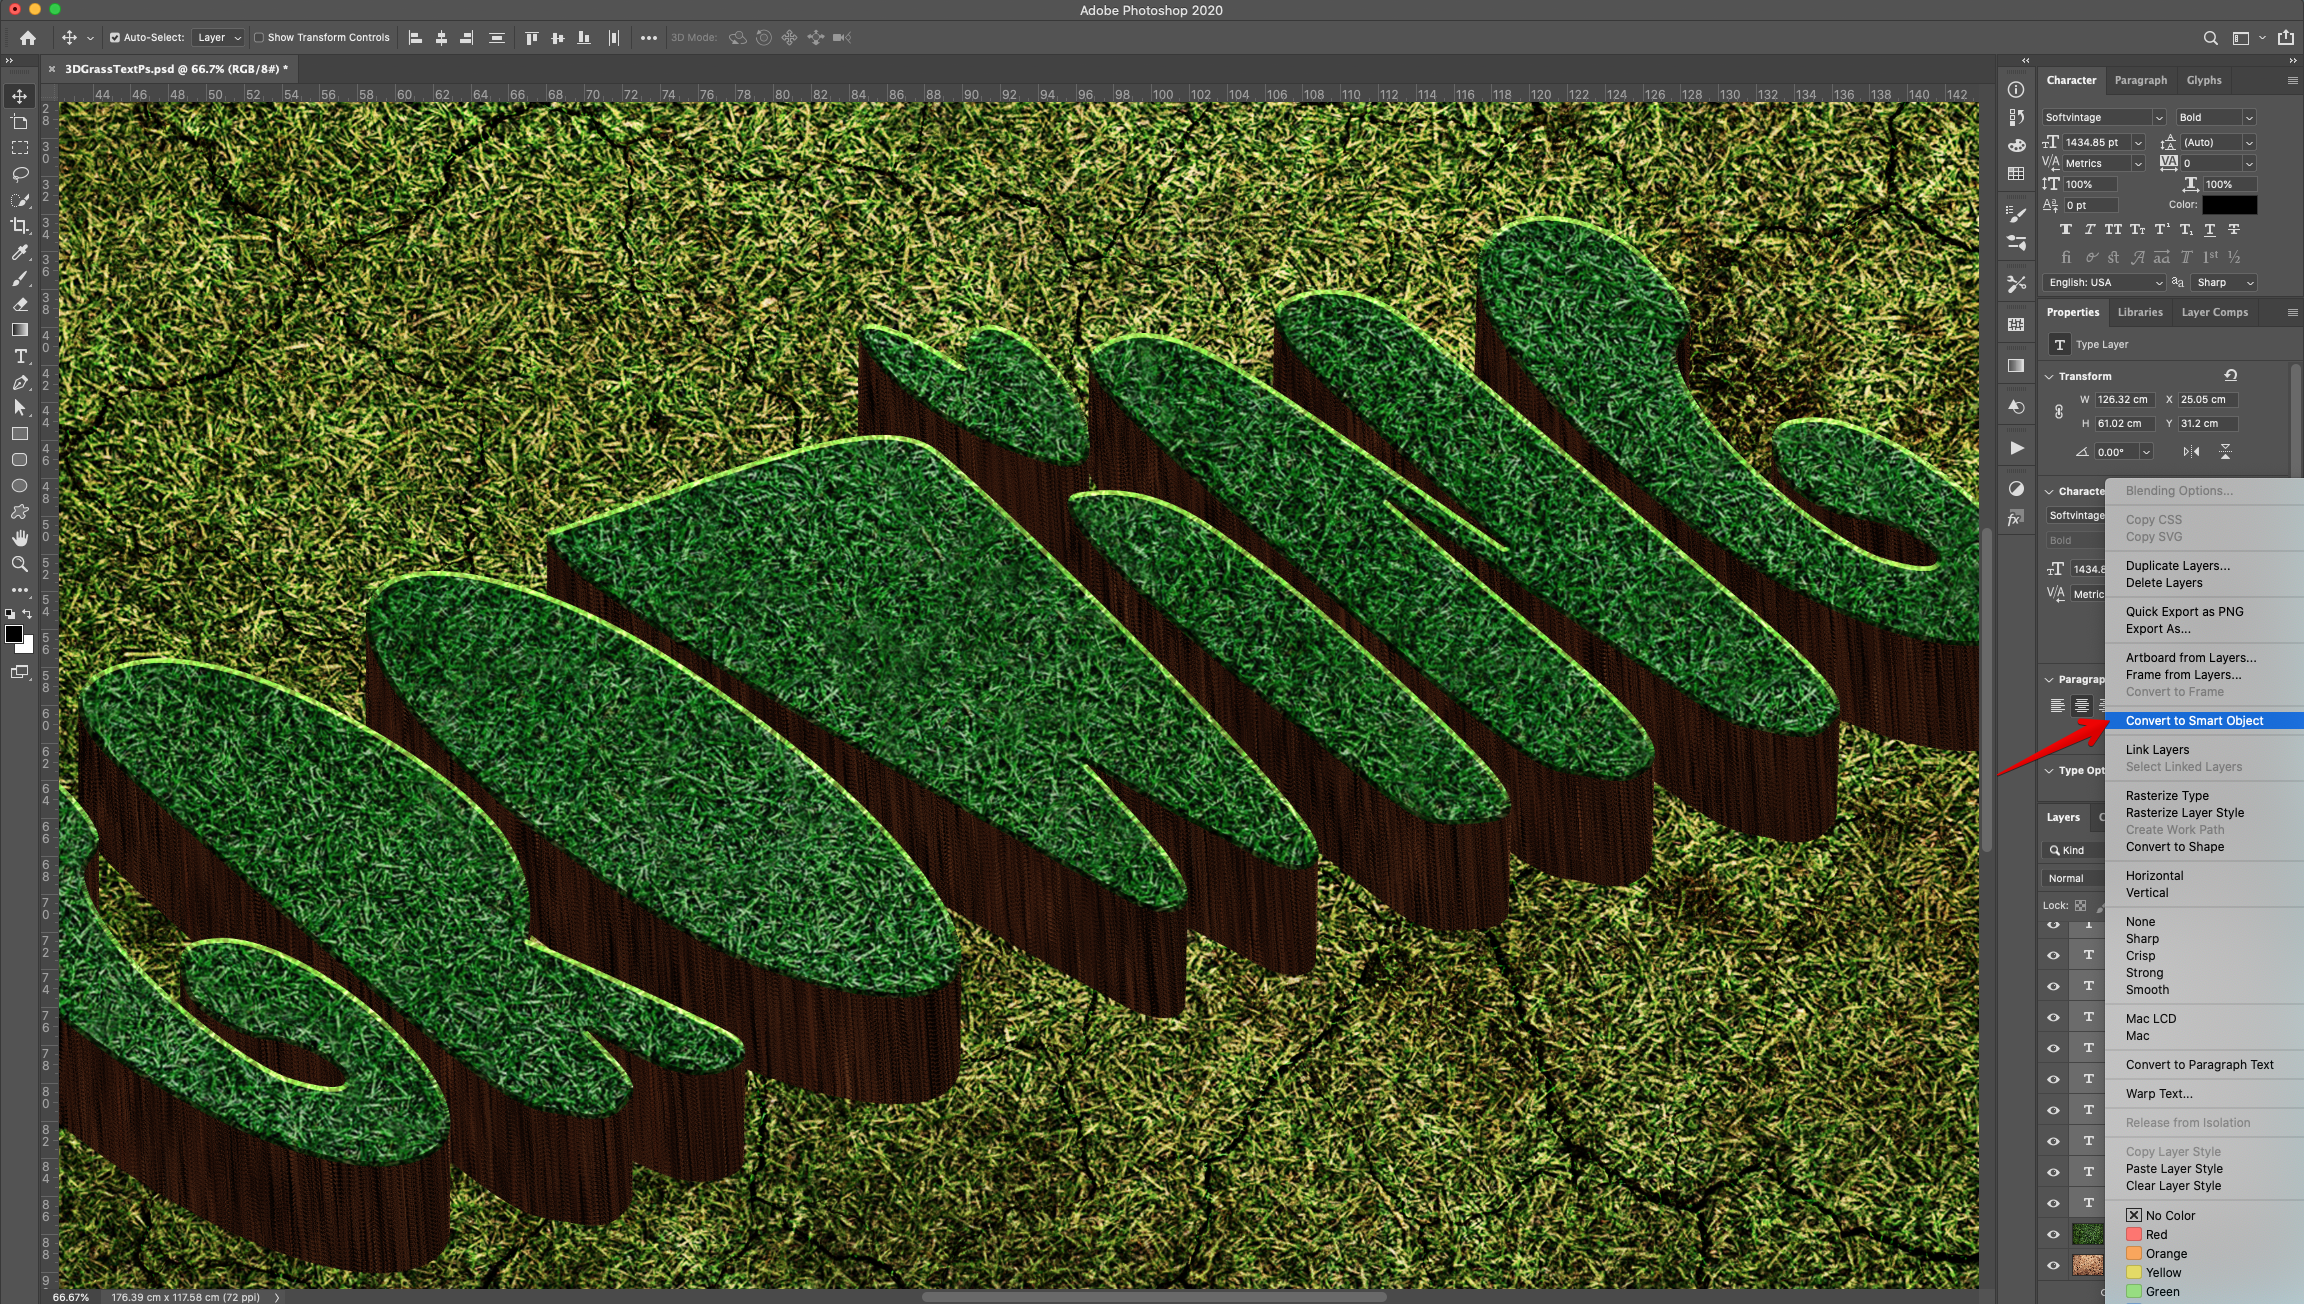
16 - Select all the “Duplicates” (“Shift” key), but leave out the original “Text”, right-click on top of their thumbnails and “Convert to Smart Object”. Name it “Soil”.
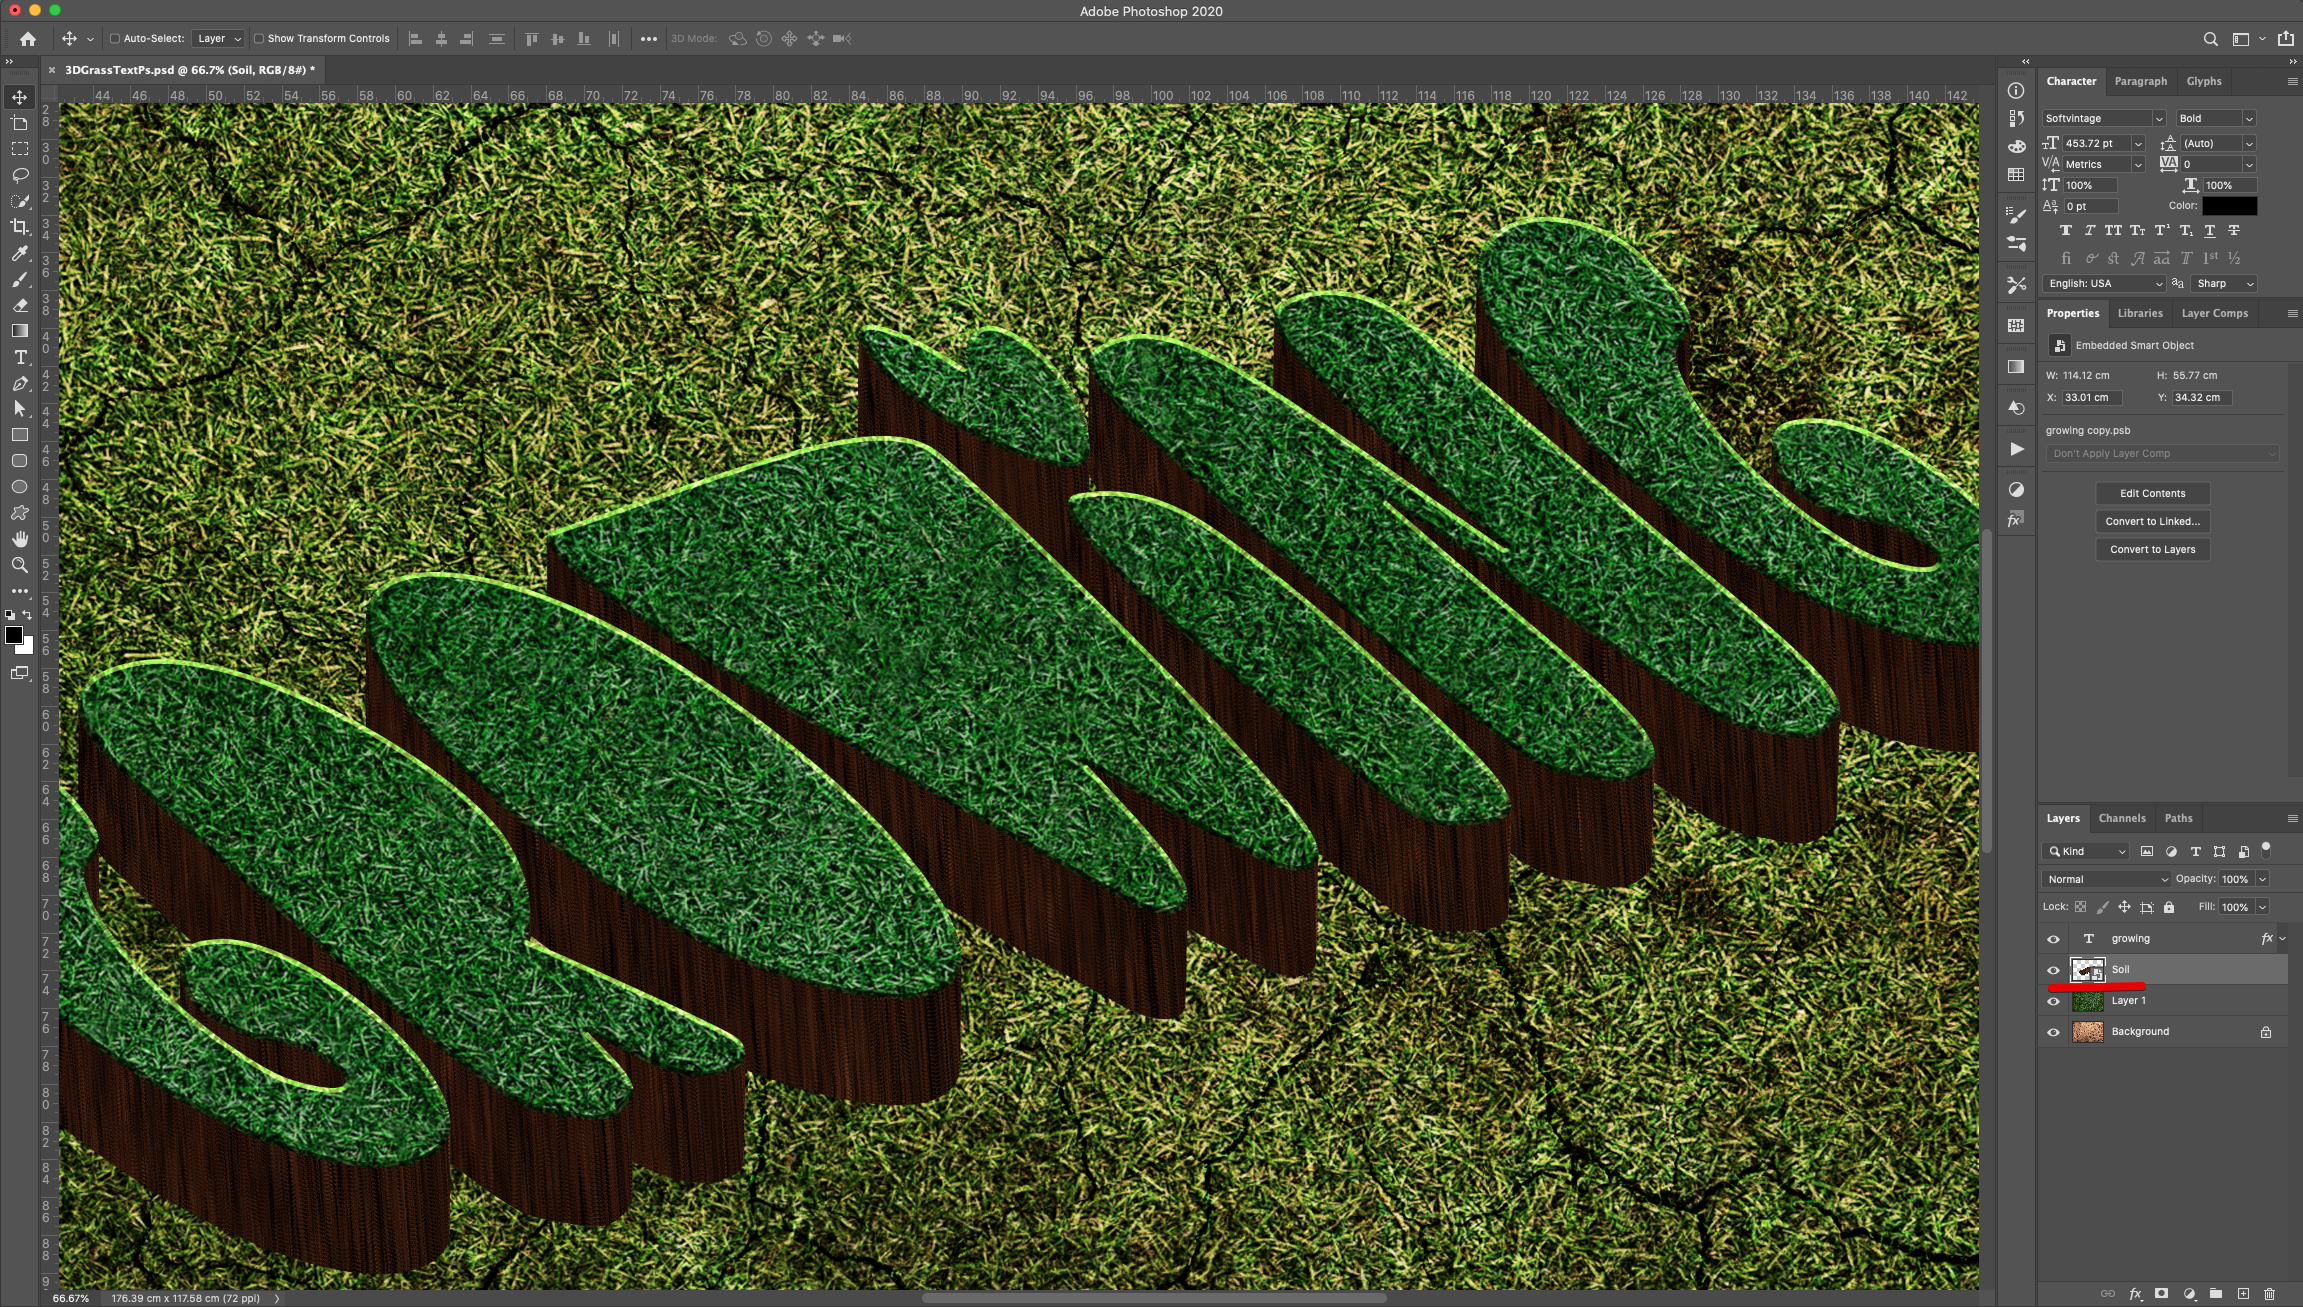
17 - Select the original “Text” right-click on top of its thumbnail and use “Convert to Smart Object”.
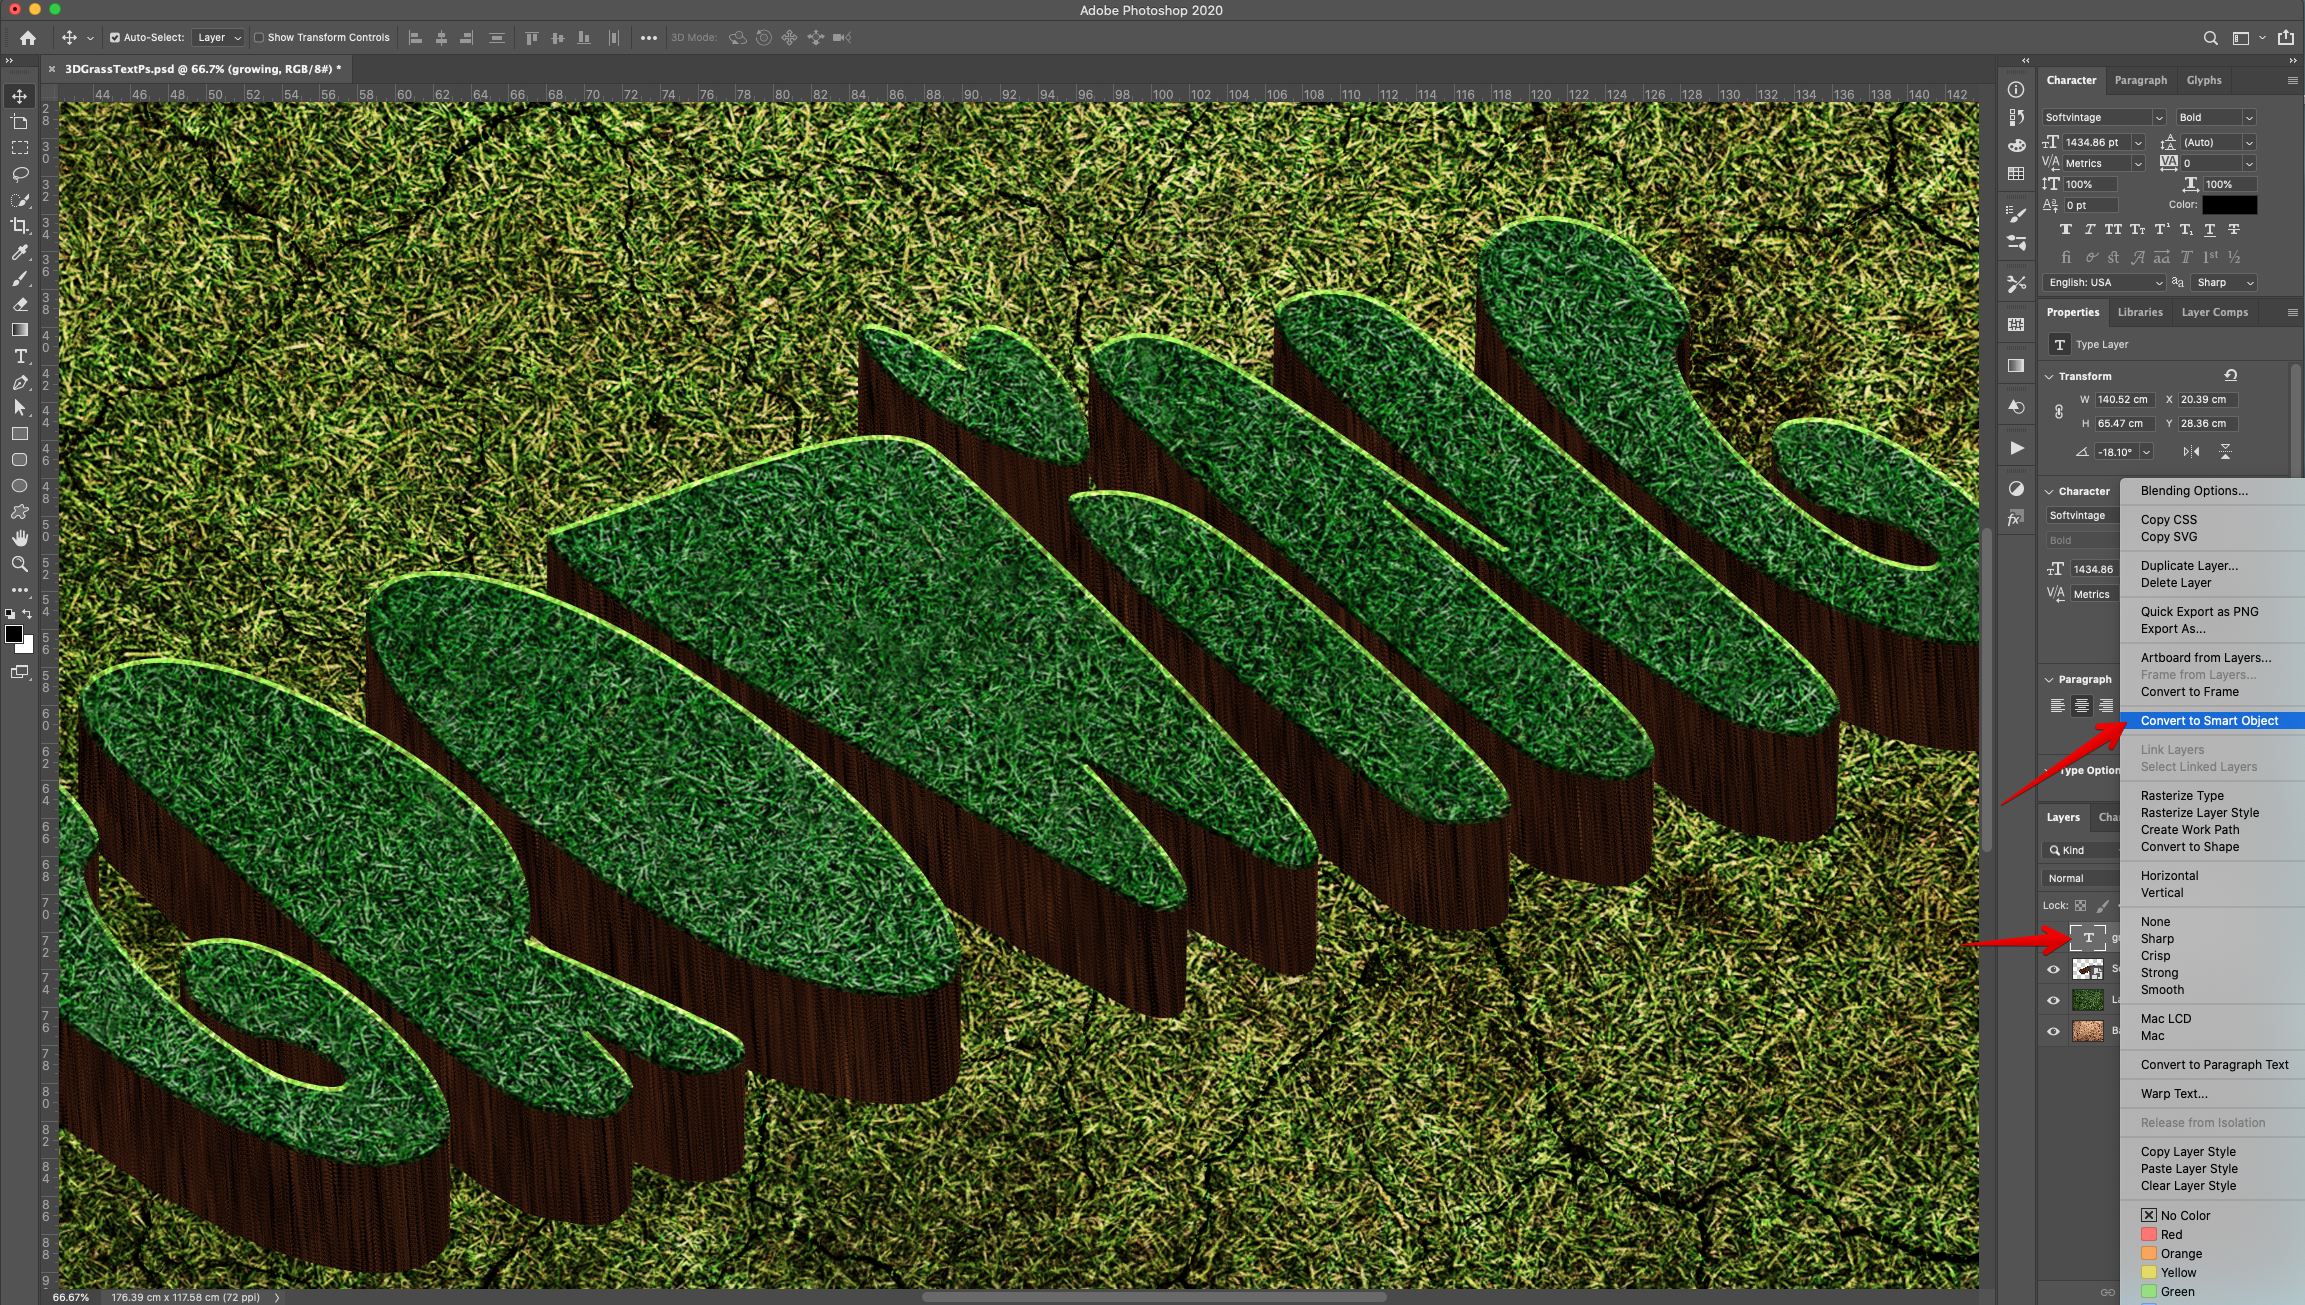
18 - Change the “Blending Mode” to “Lighten”.

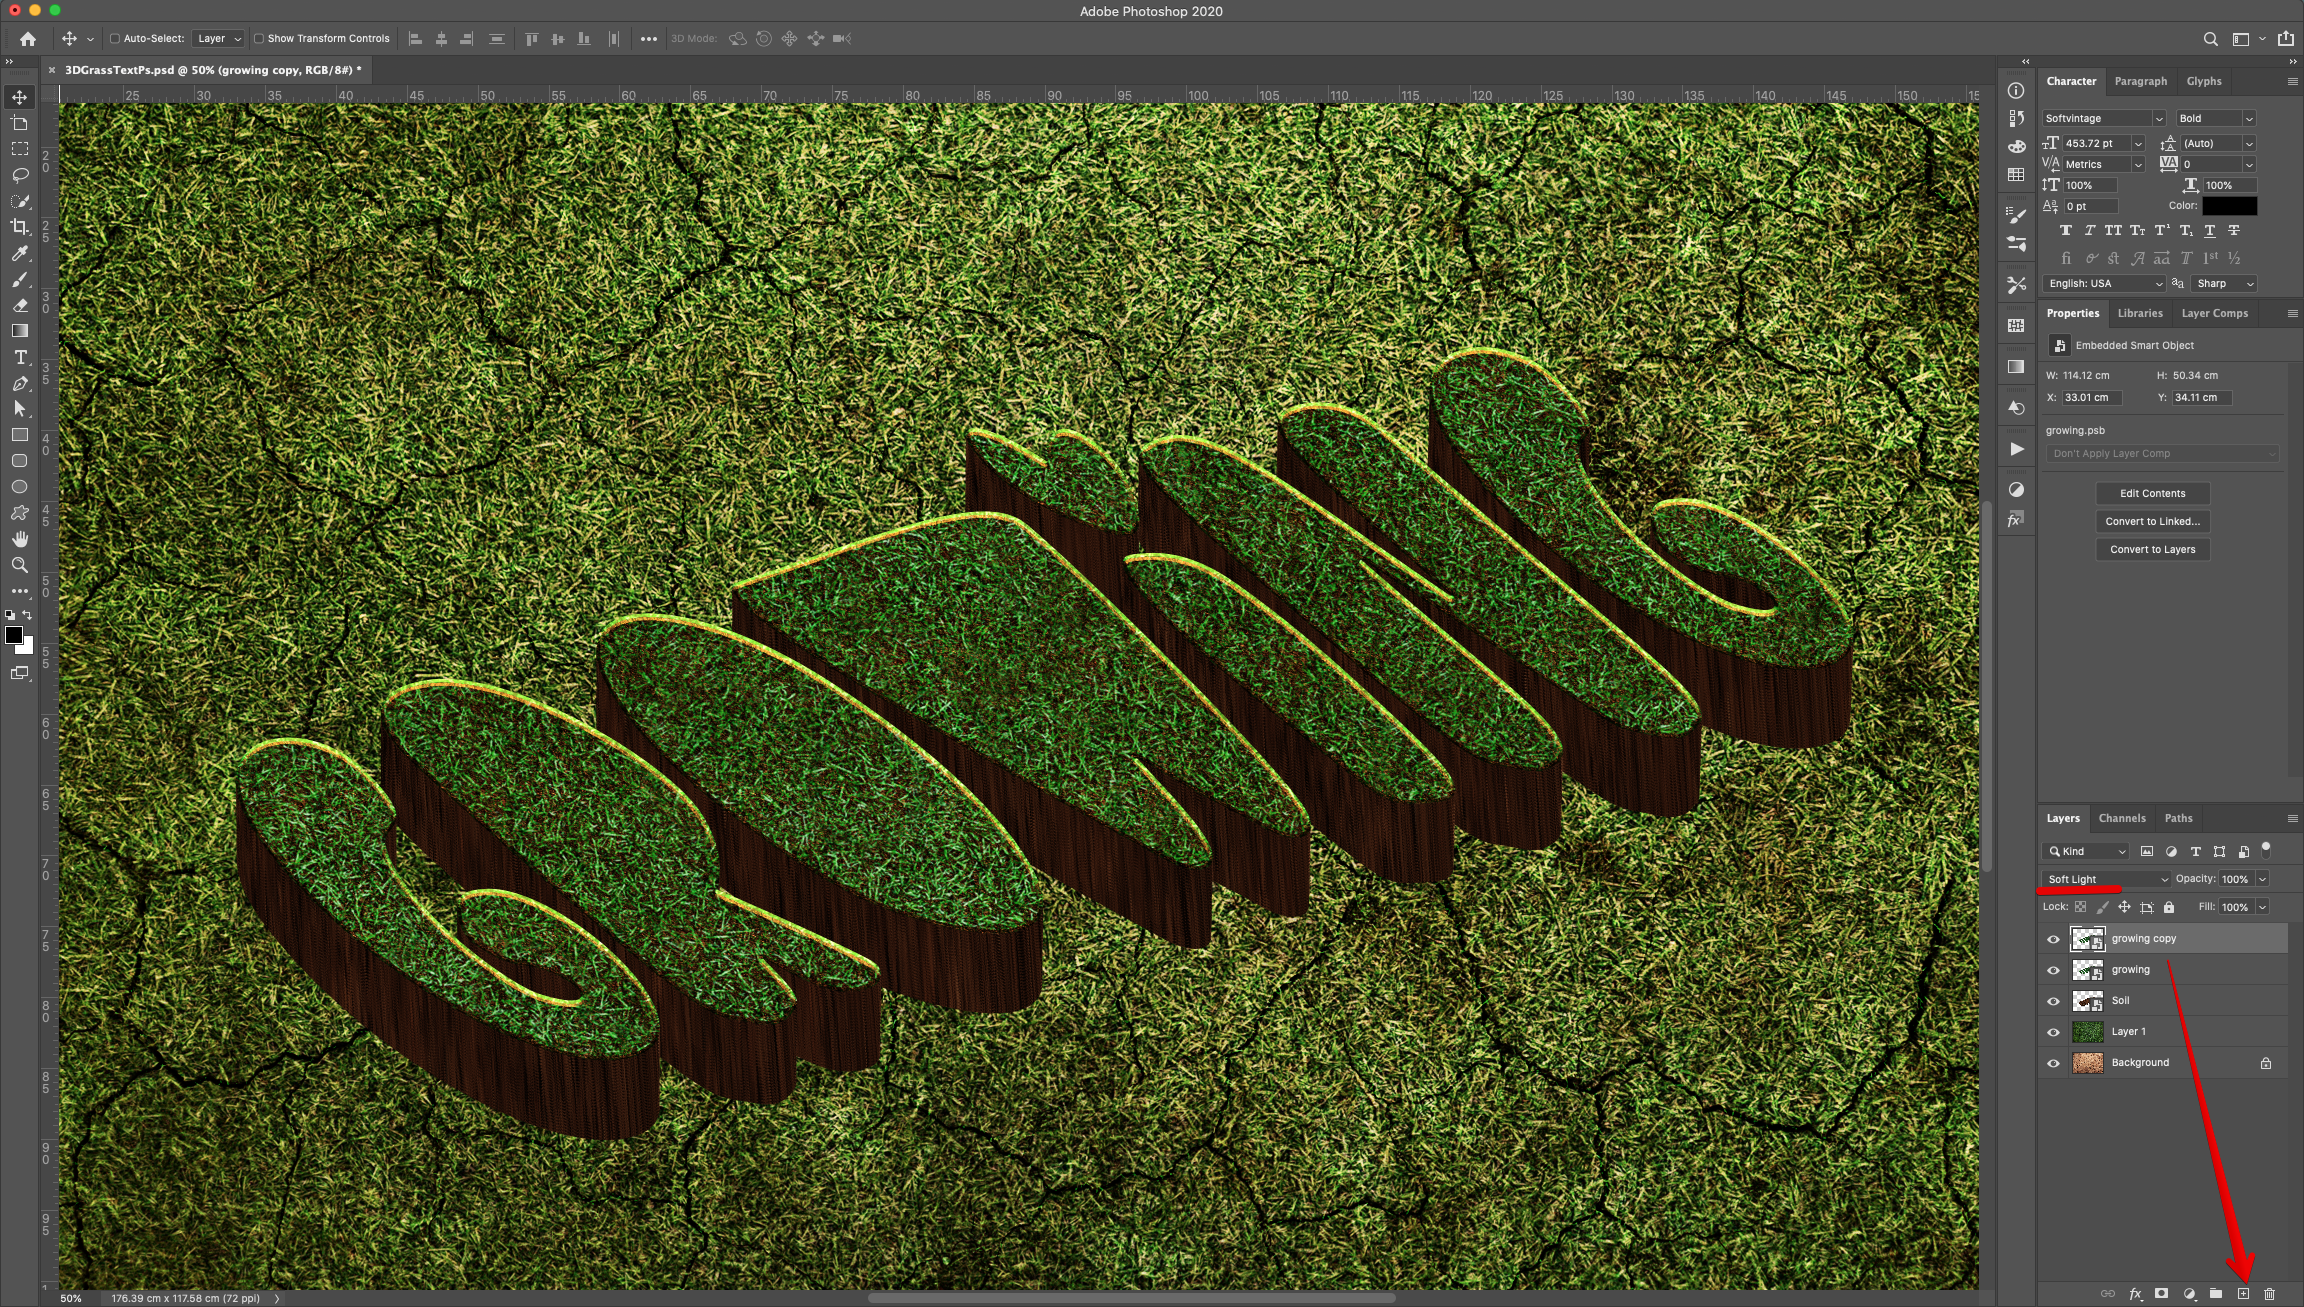
19 - Duplicate the “Smart Object” by dragging it to the “Create New Layer” icon at the bottom of the Panel. Change the “Blending Mode” to “Soft Light”.
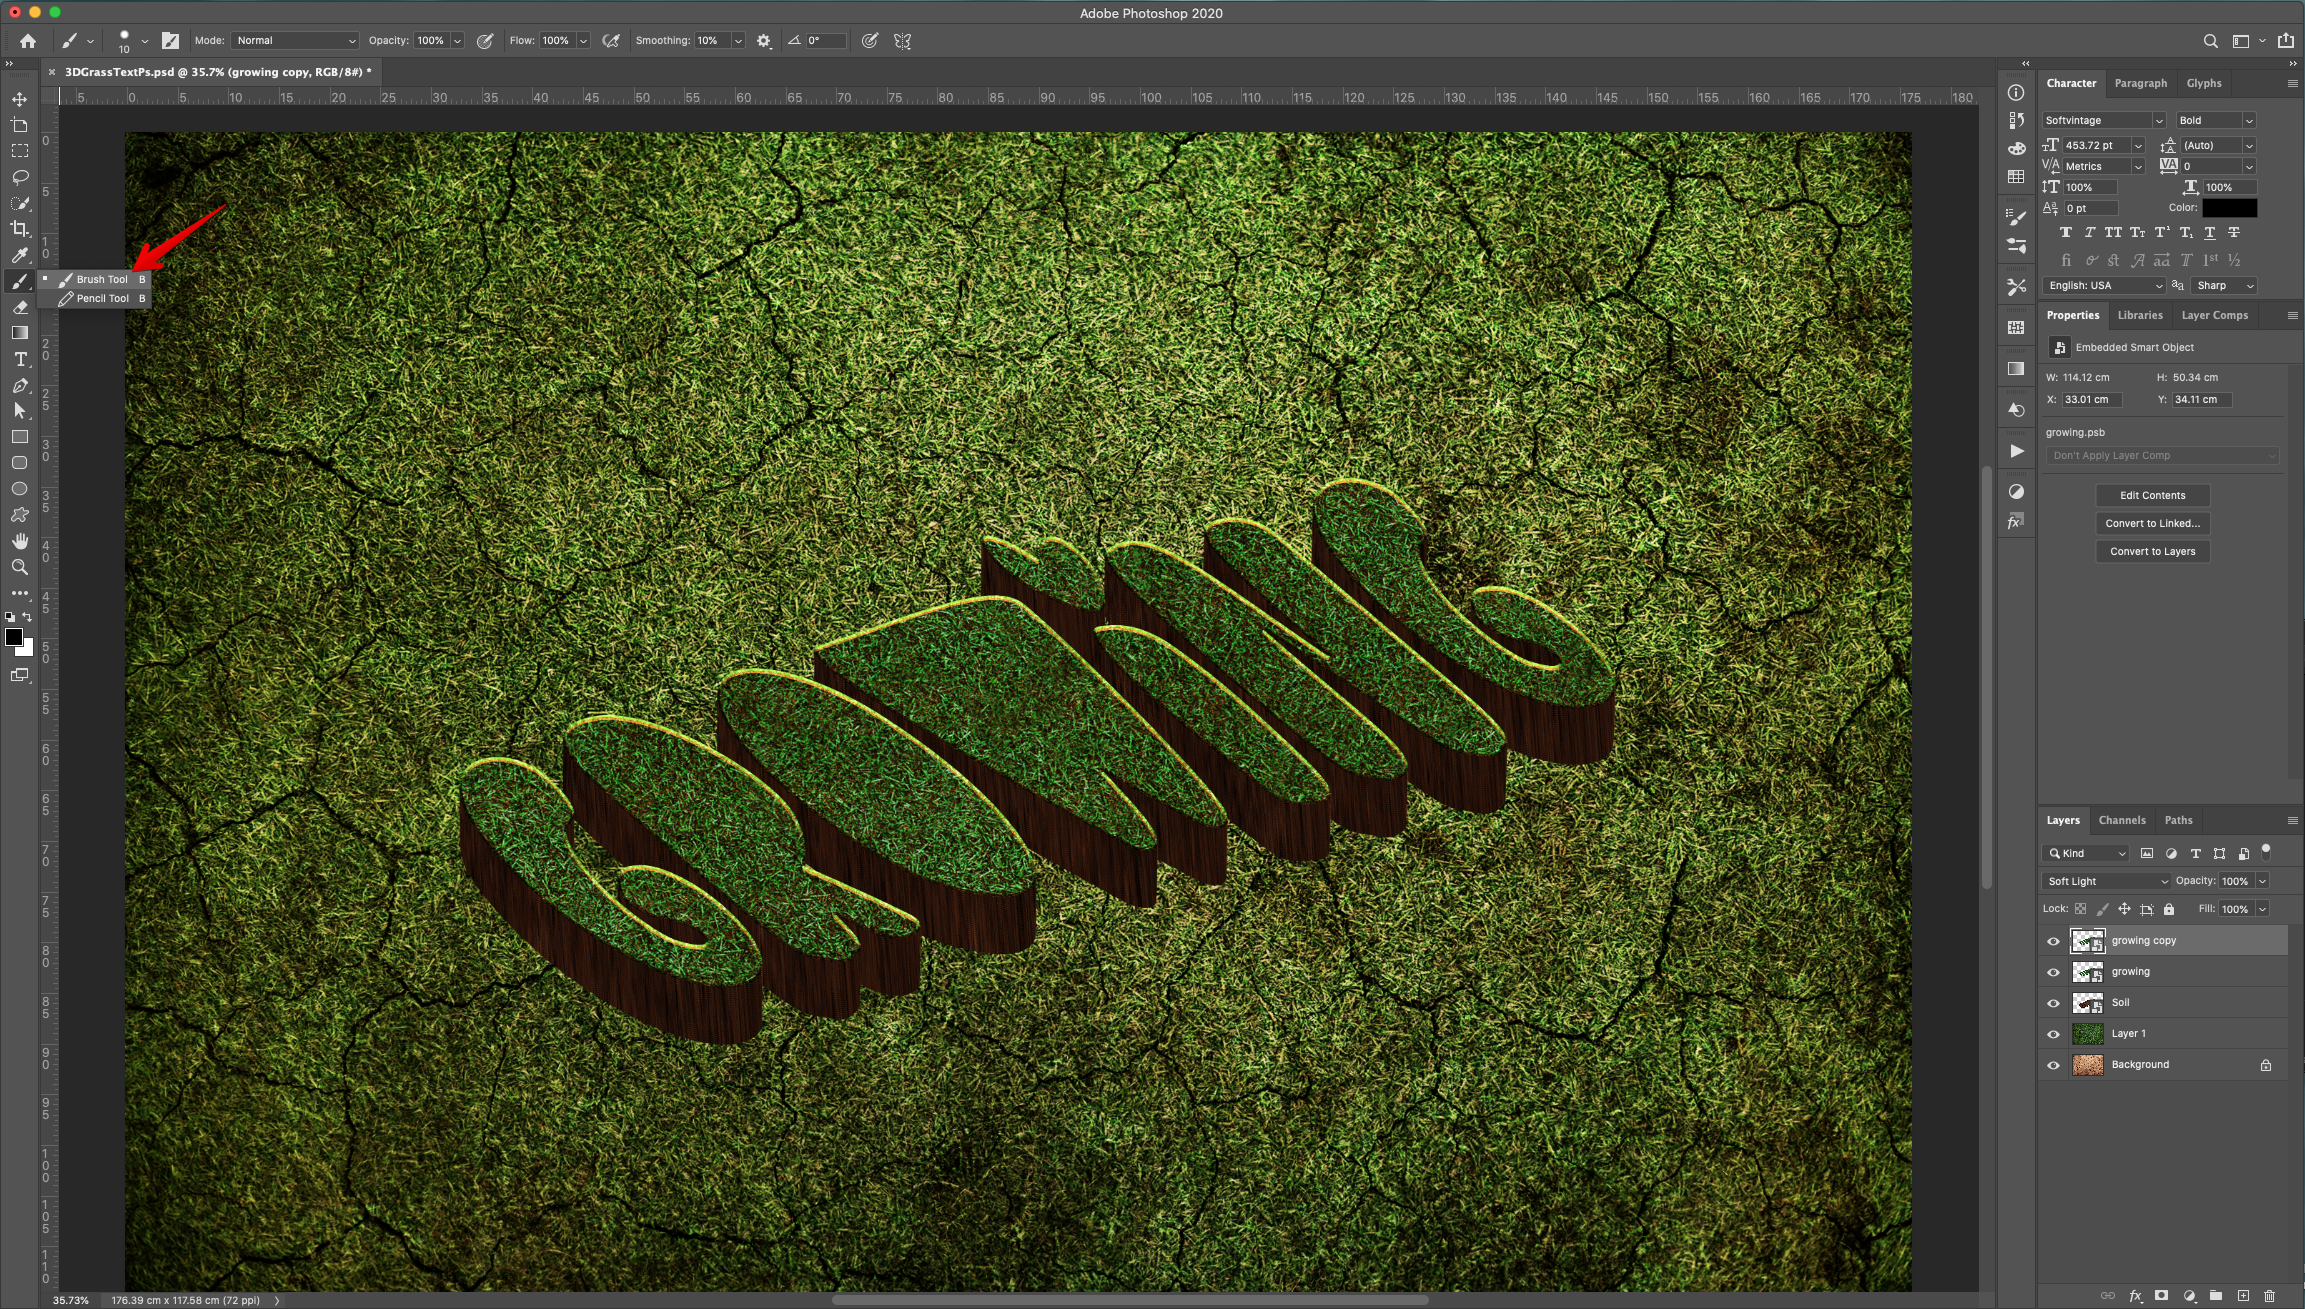
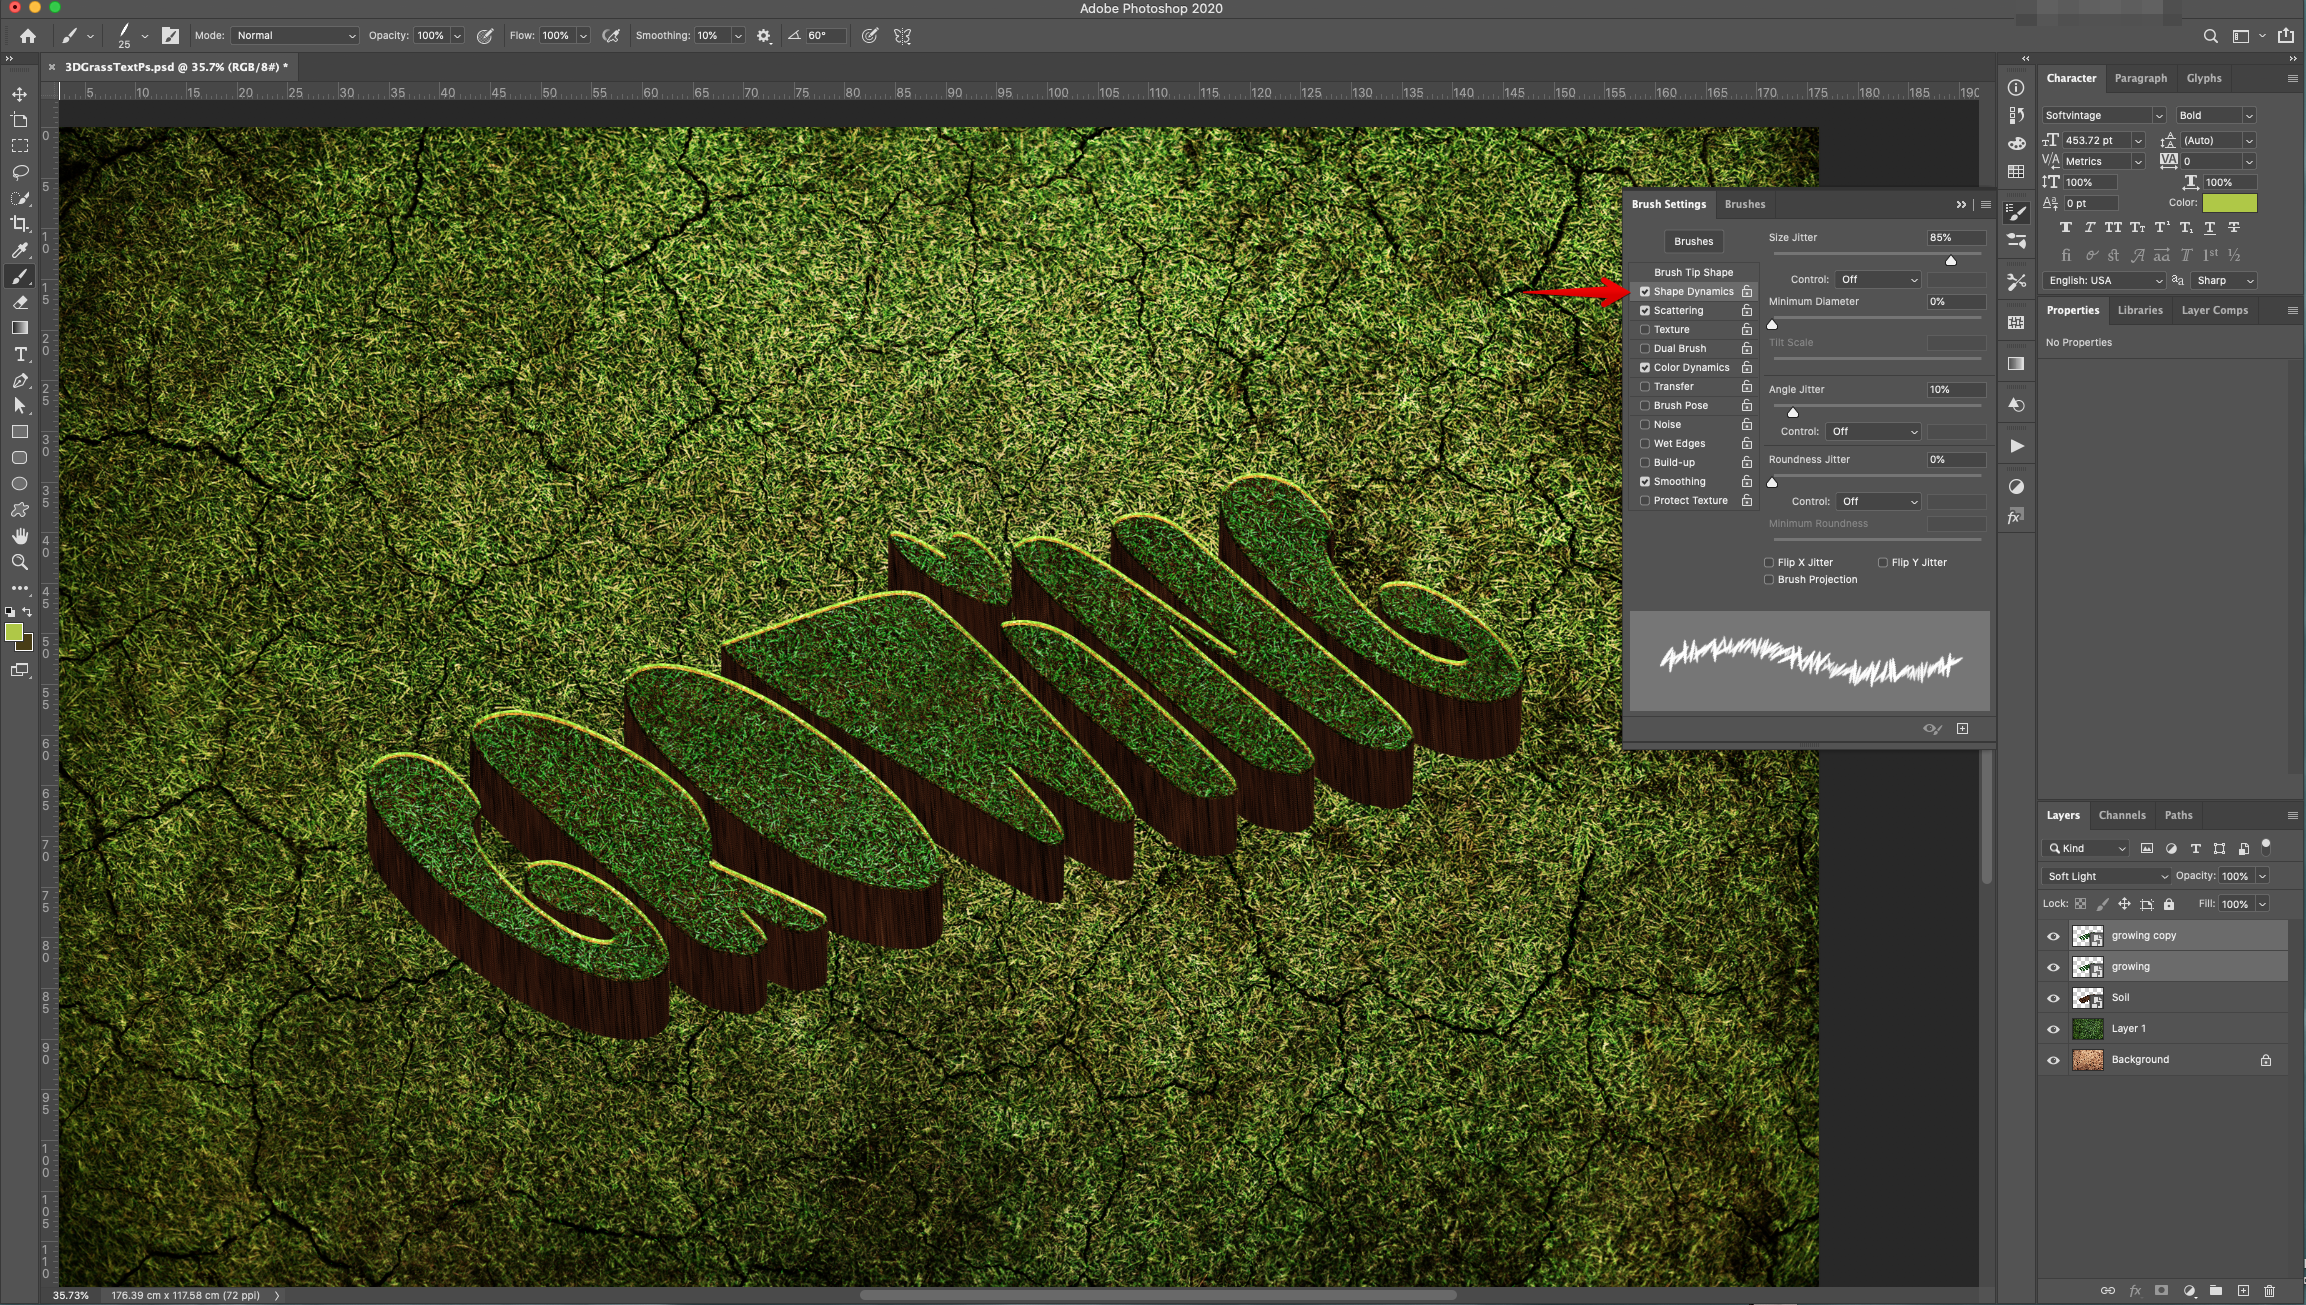
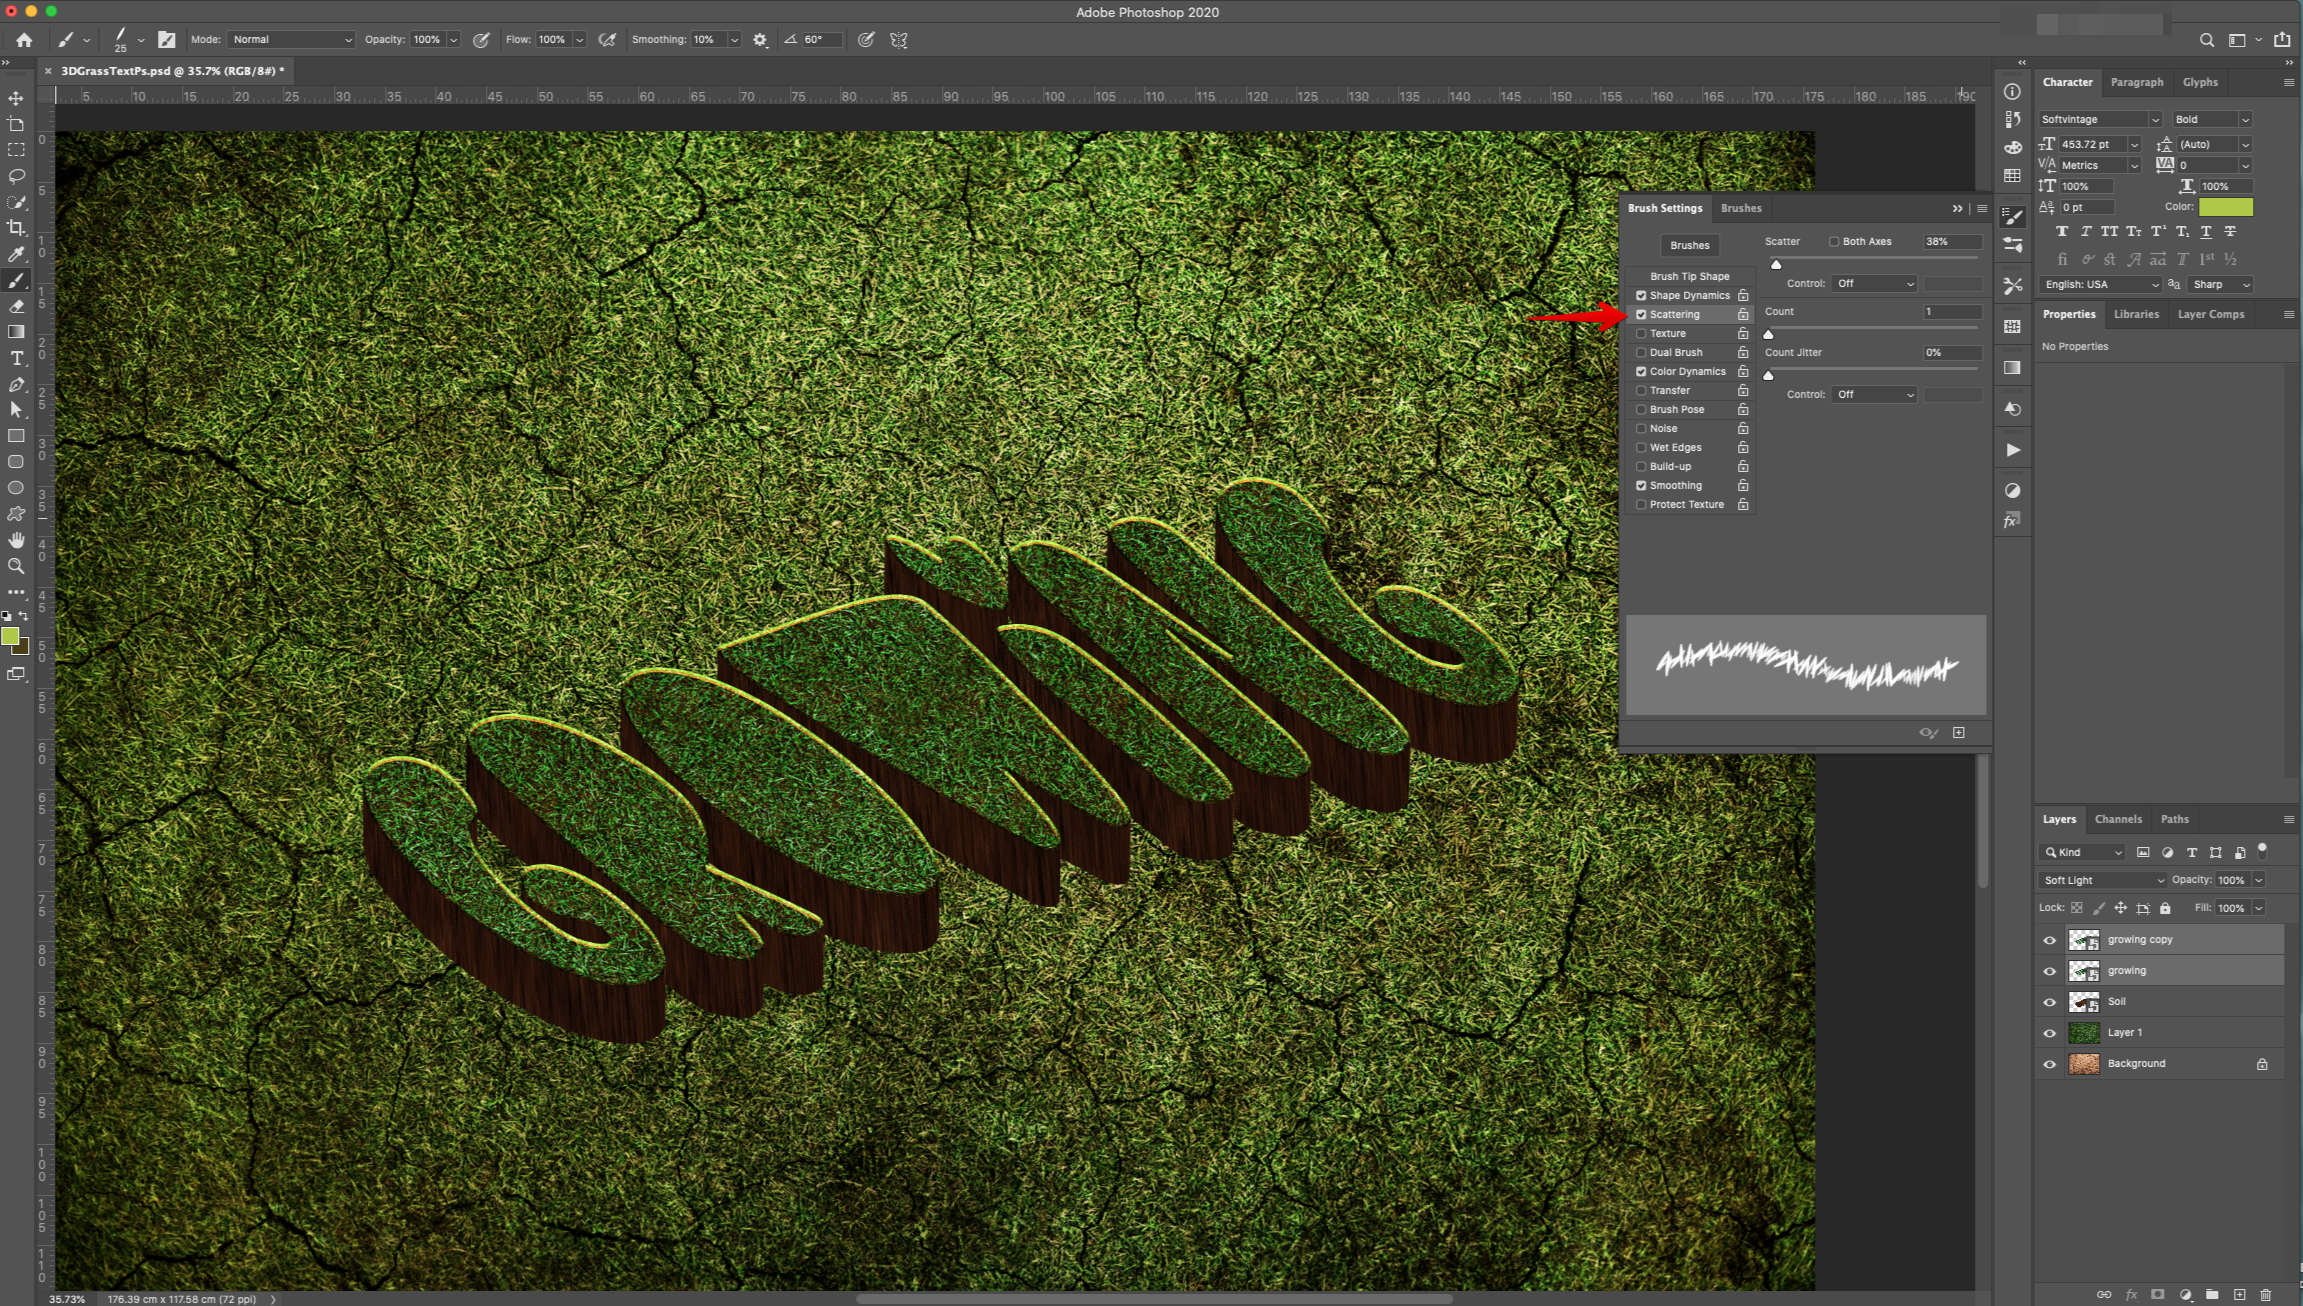
20 - Select the “Brush Tool” (B). Head to the “Brush Settings Panel” and use the following values:
Brush Tip Shape:

Shape Dynamics:
Scattering:
Color Dynamics:

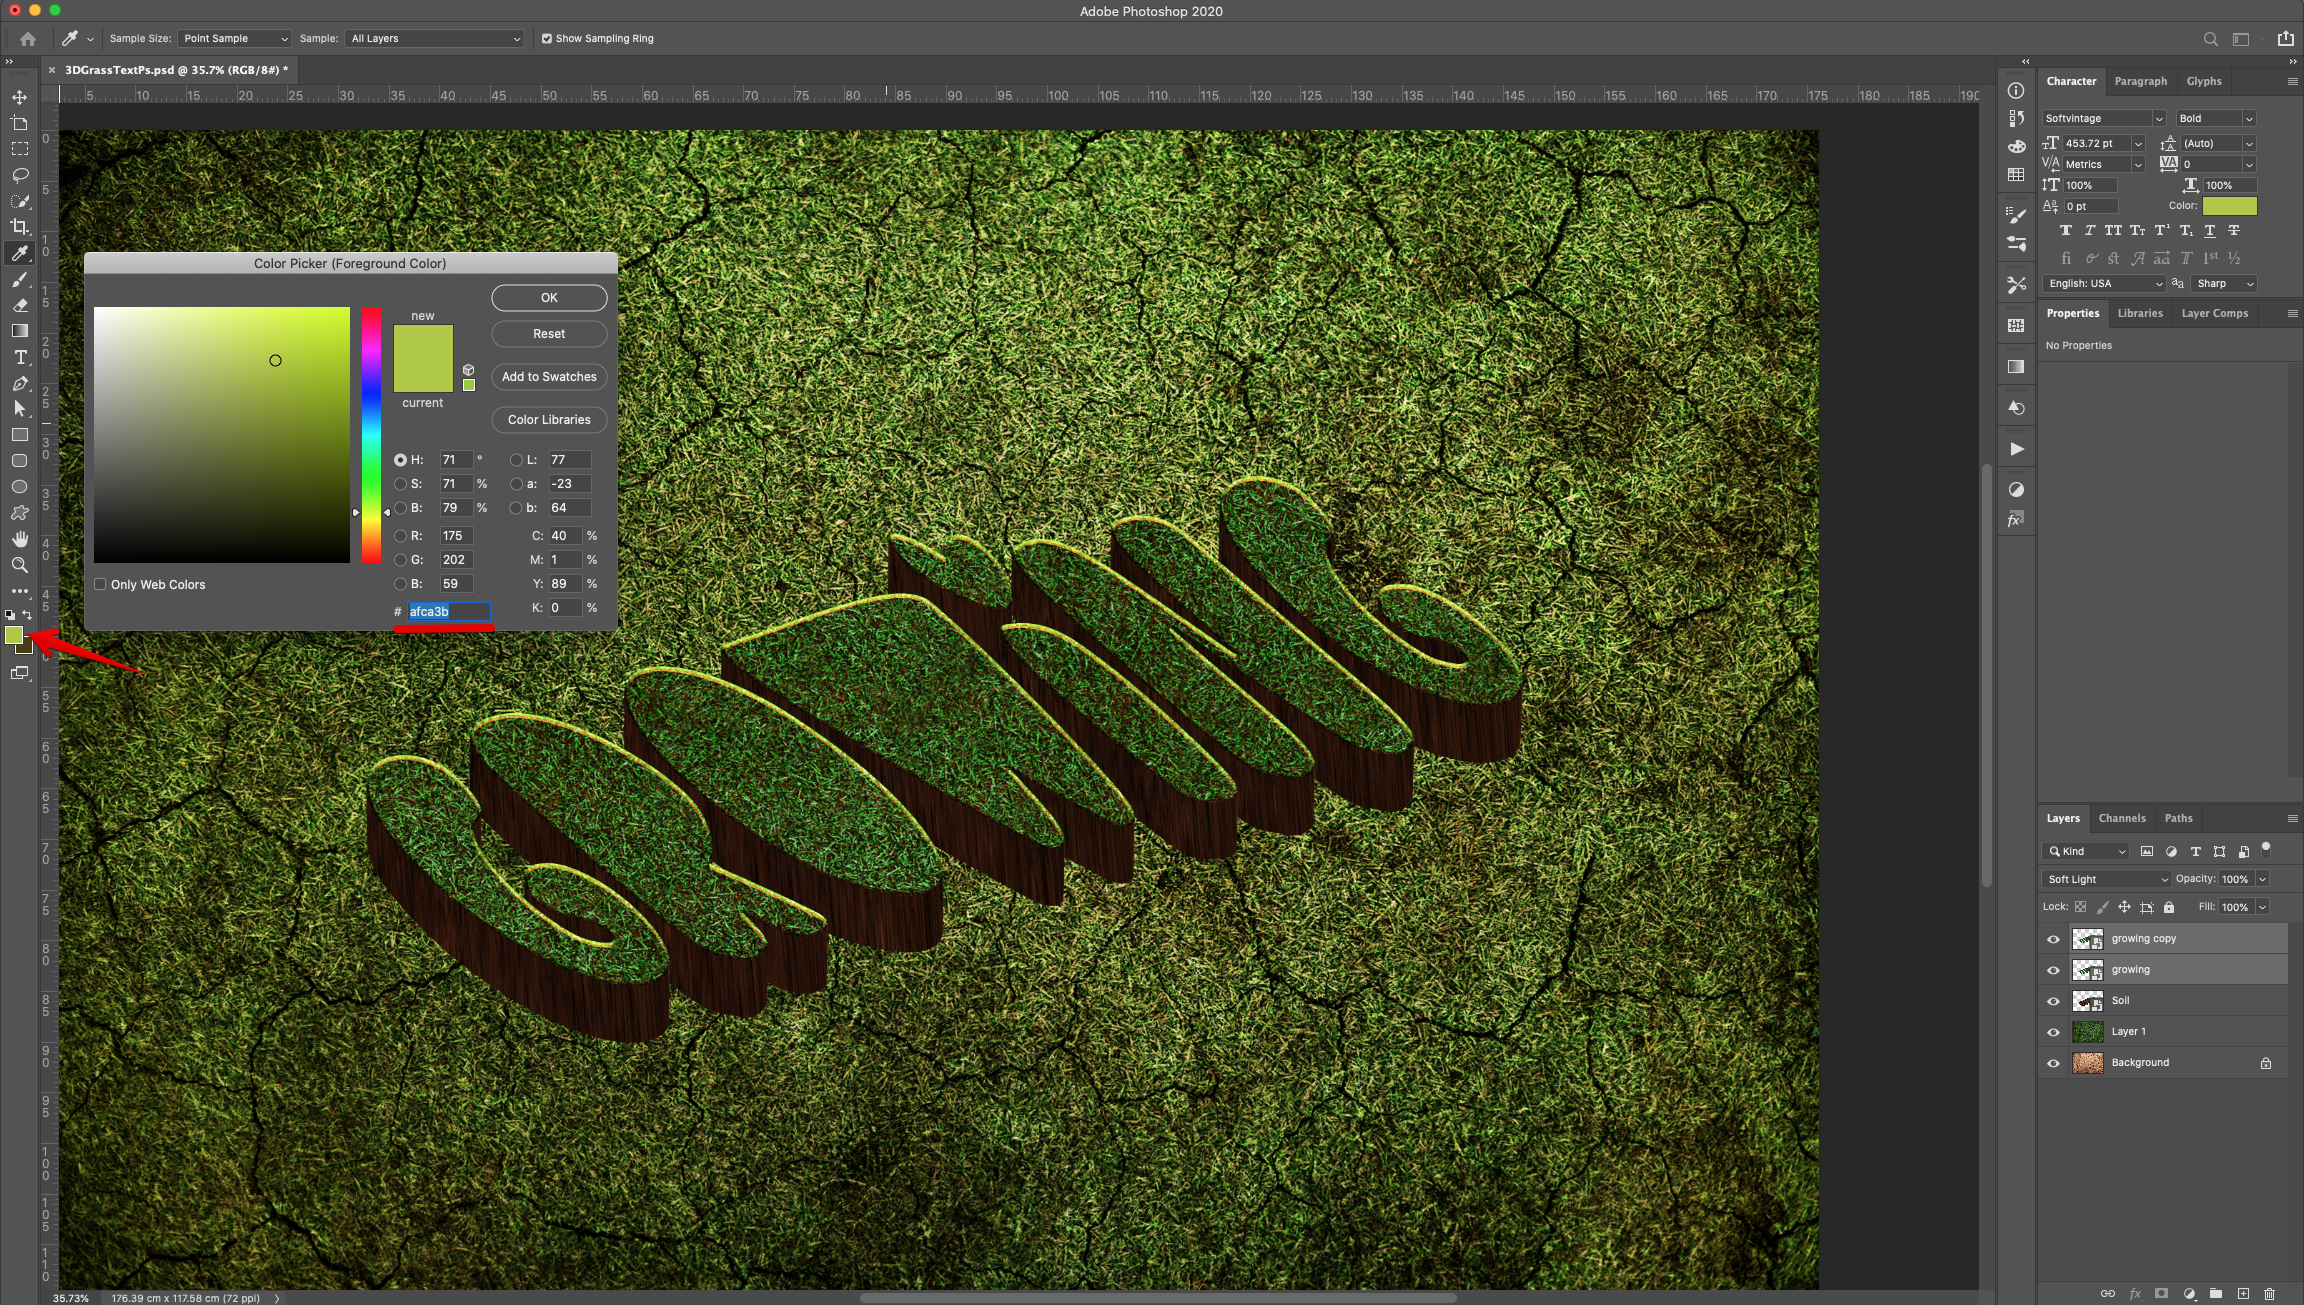
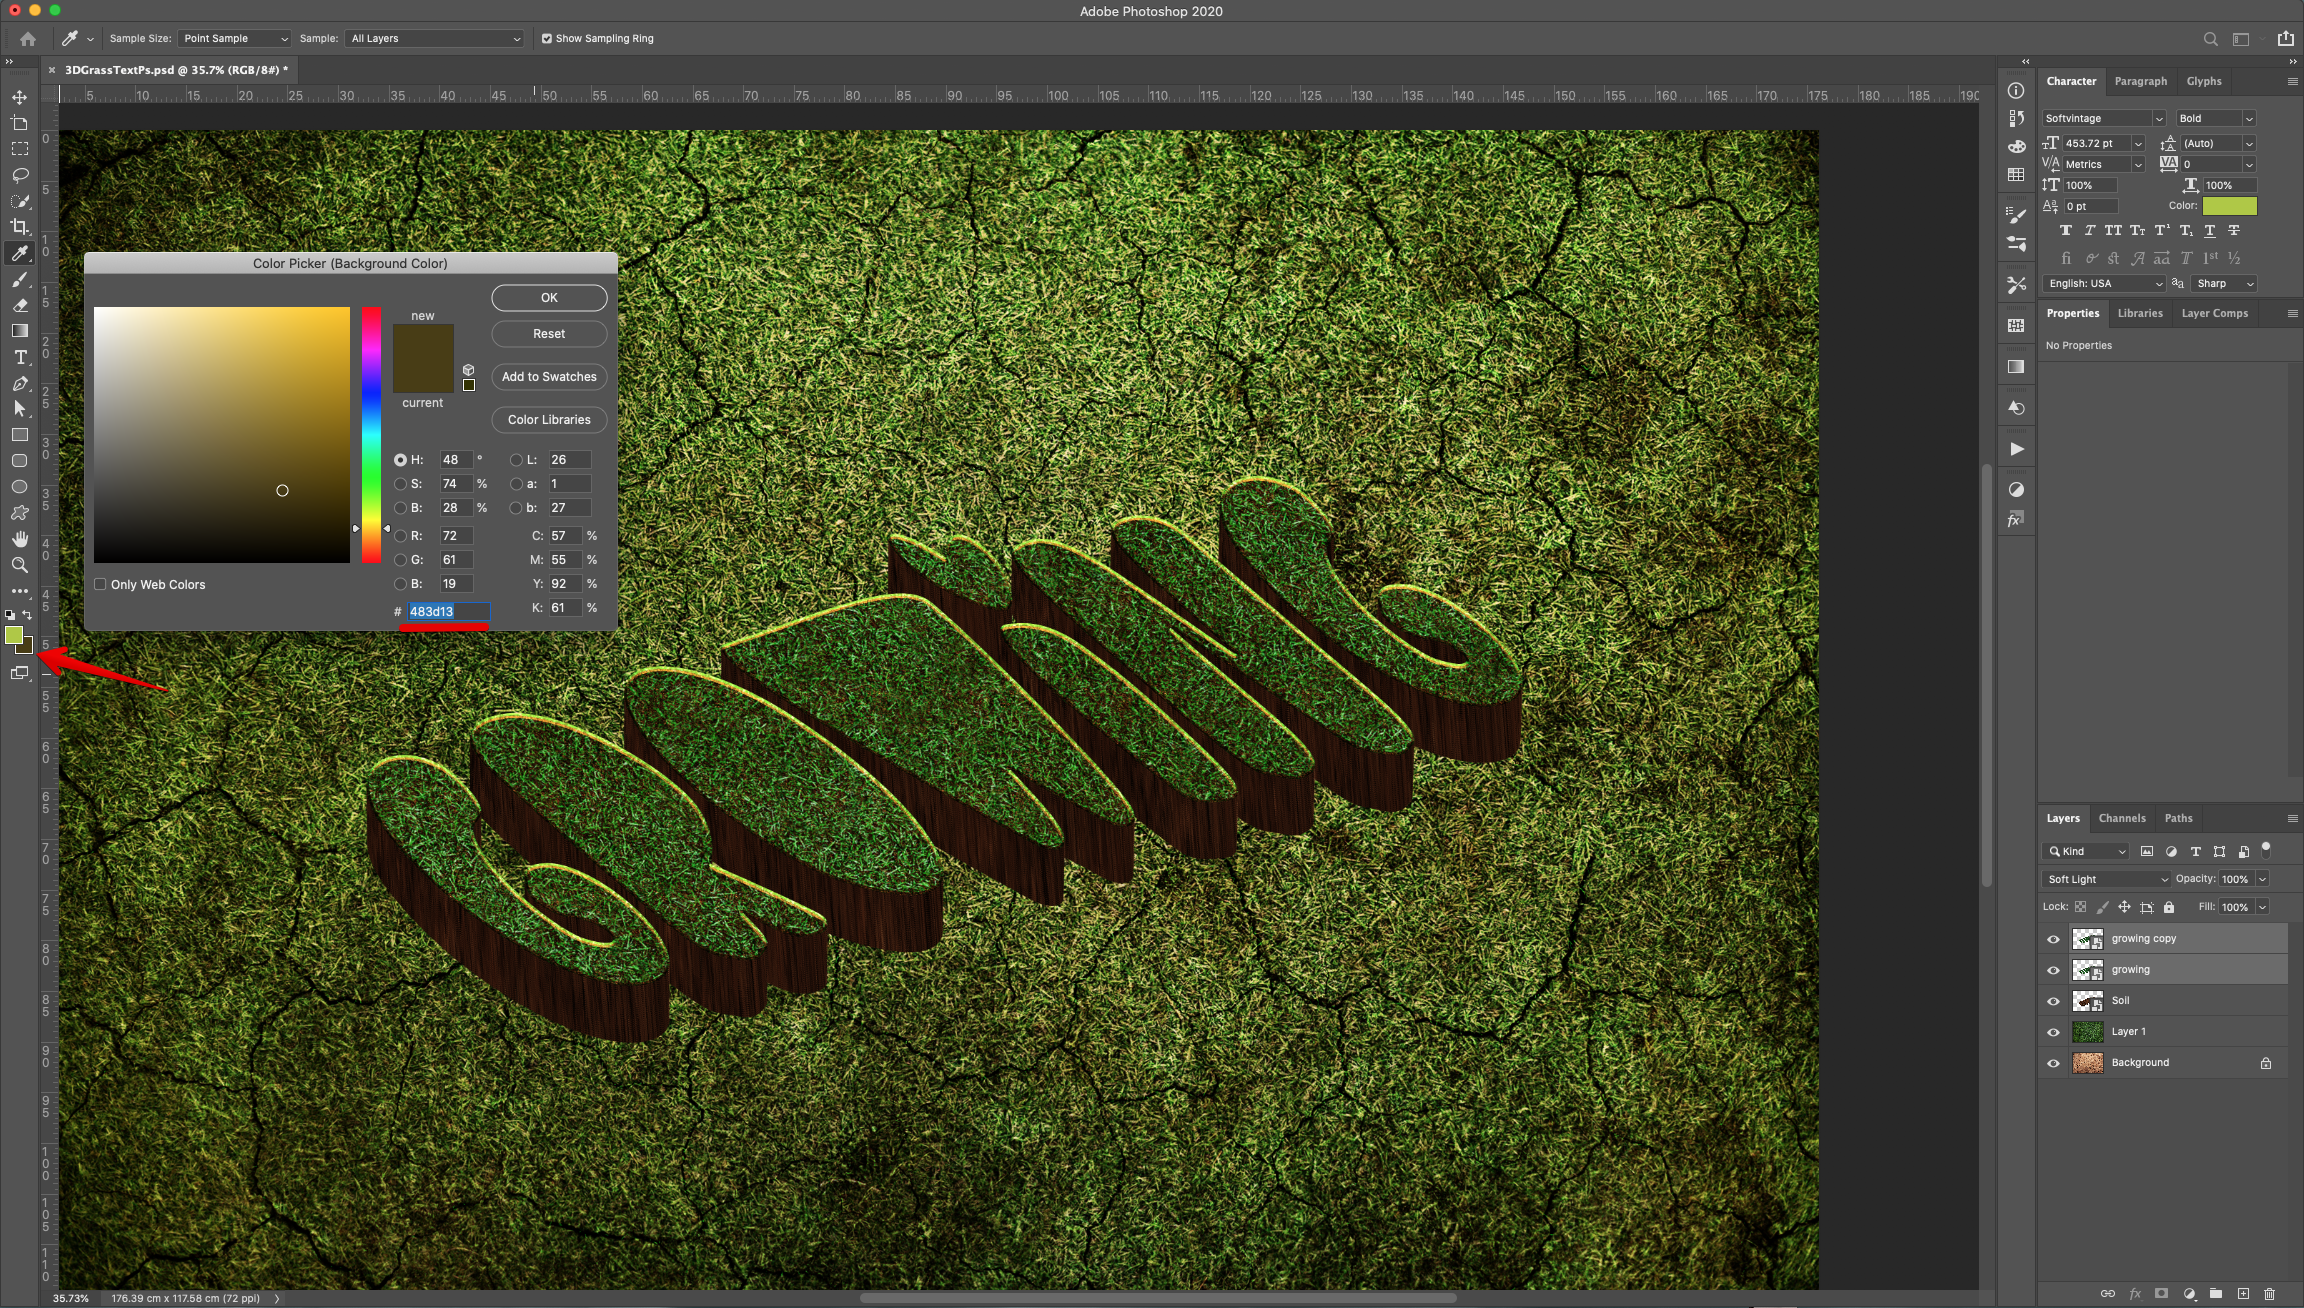
21 - Replace the “Foreground” color with #afca3b and the “Background” color with #483d13.
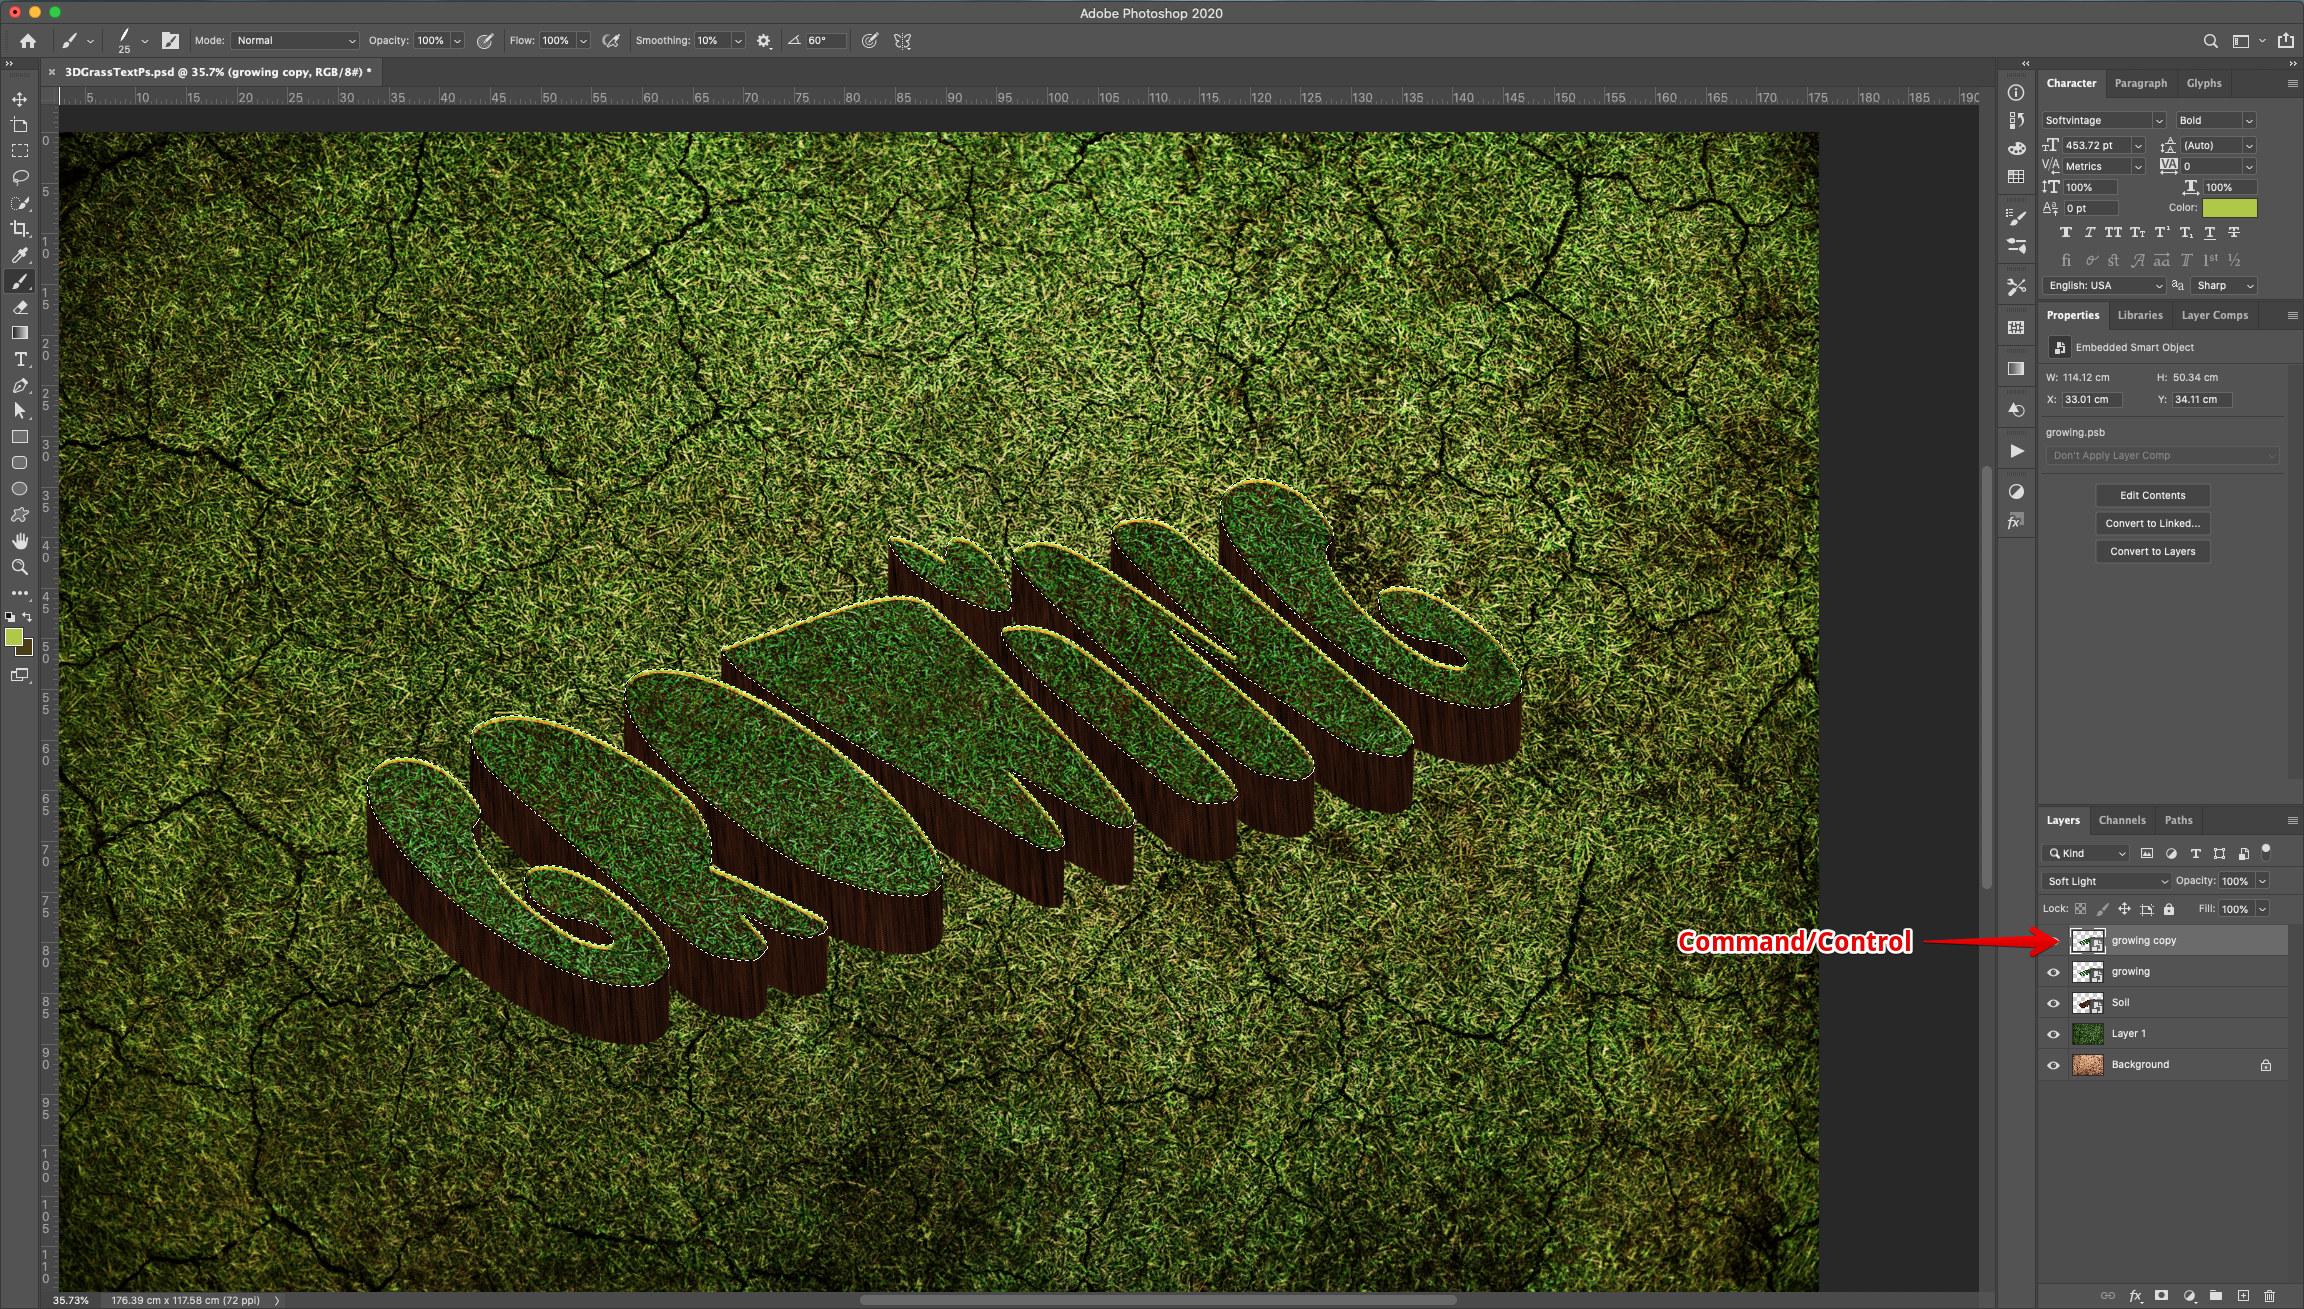
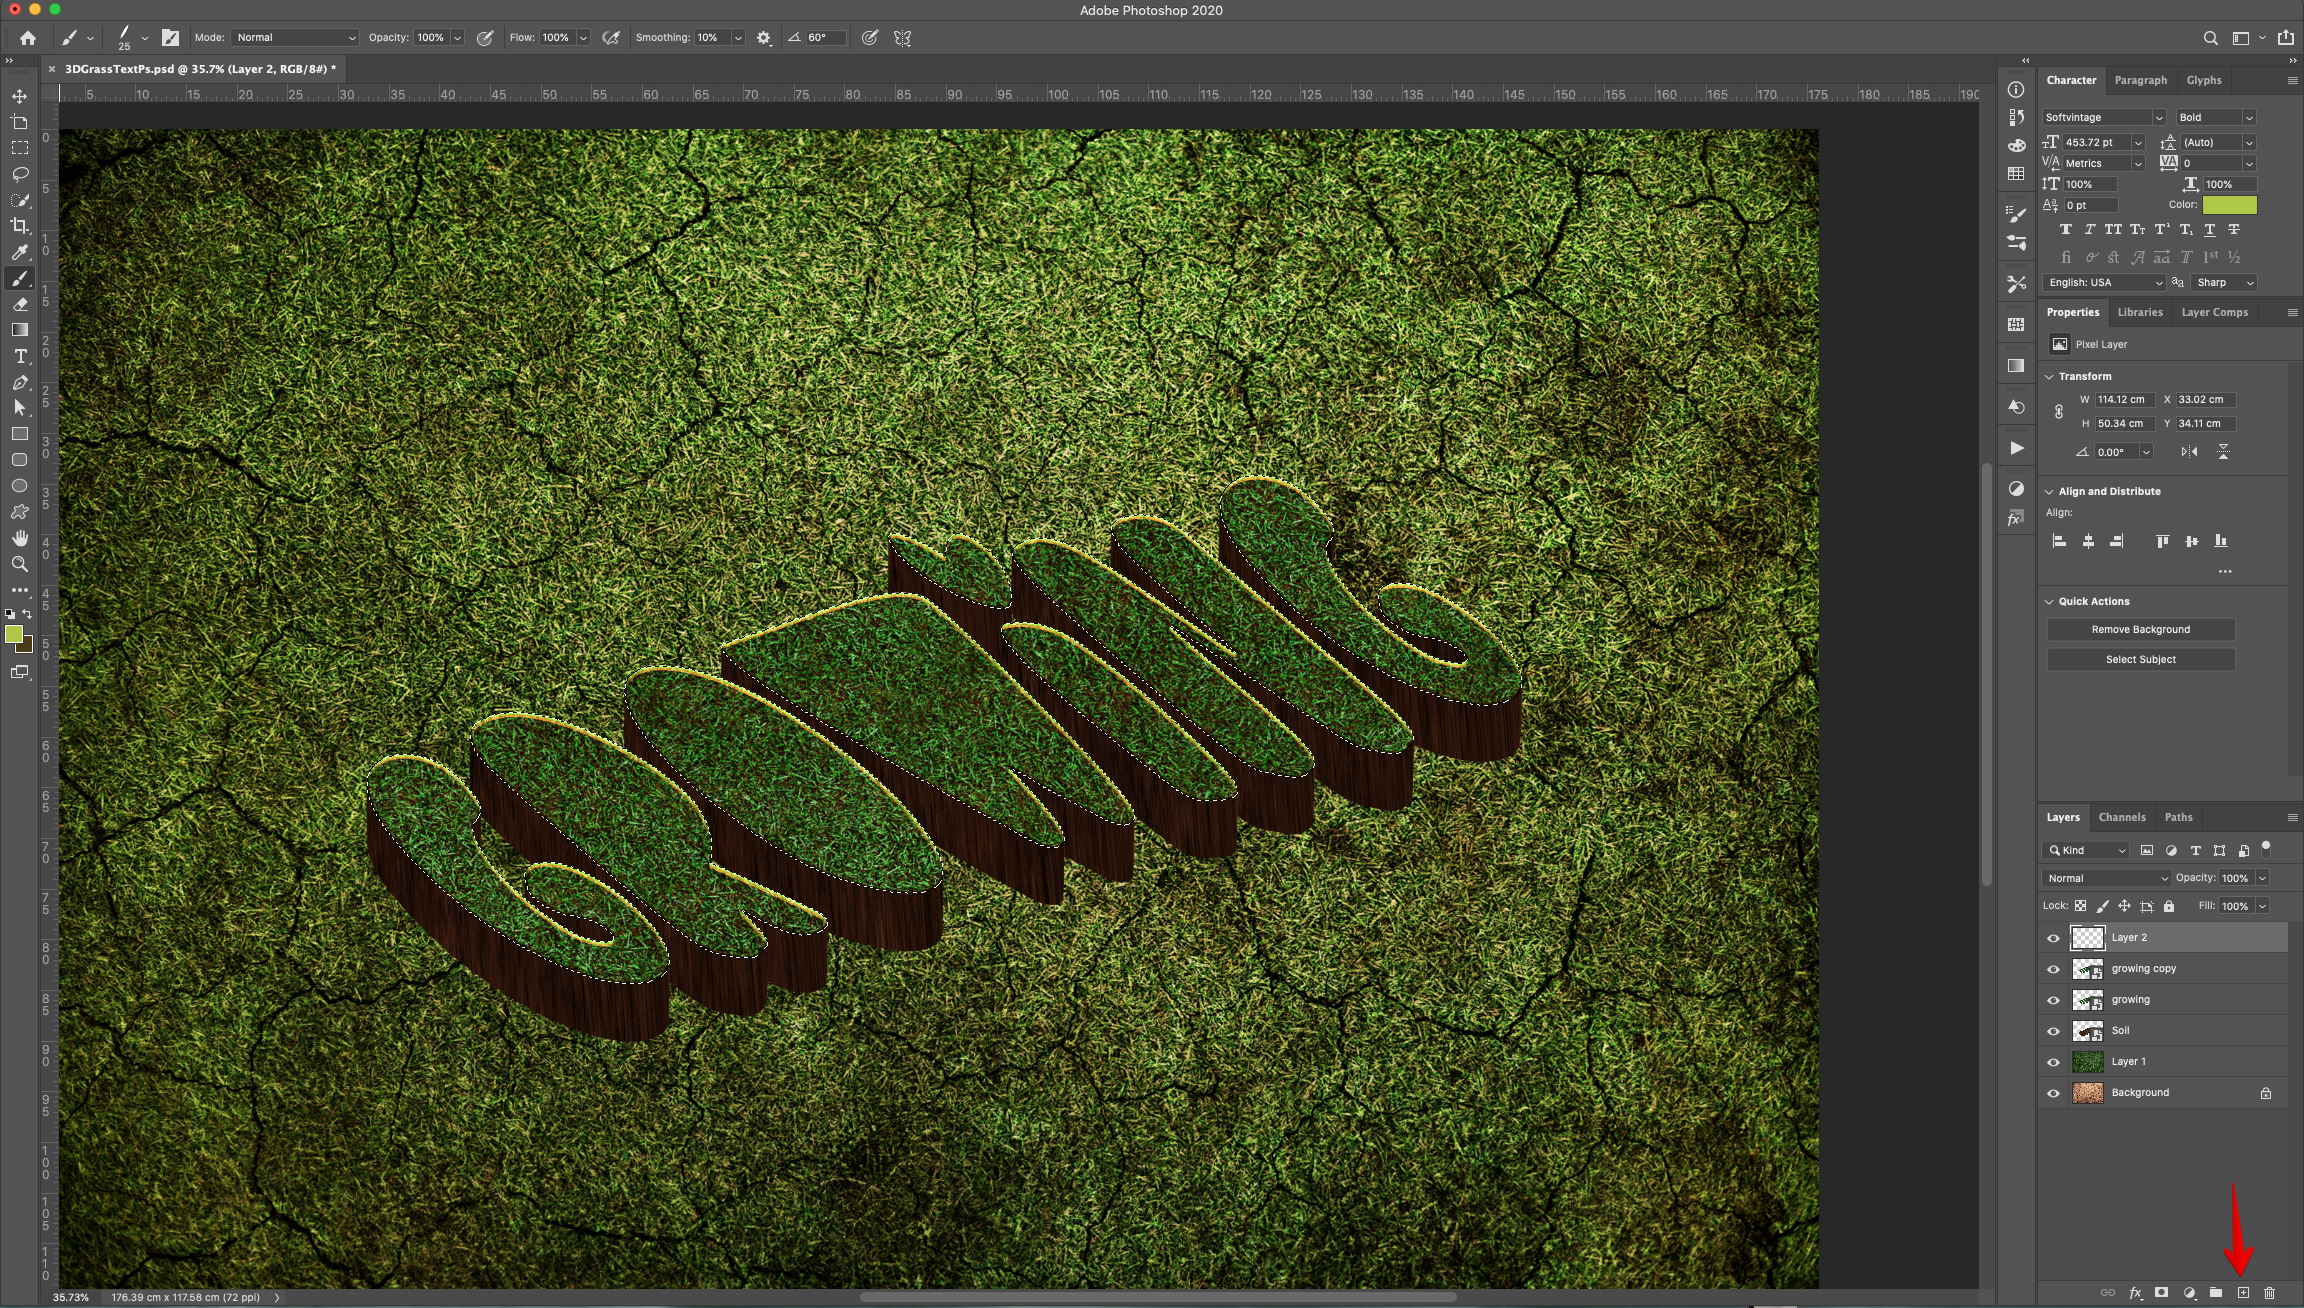
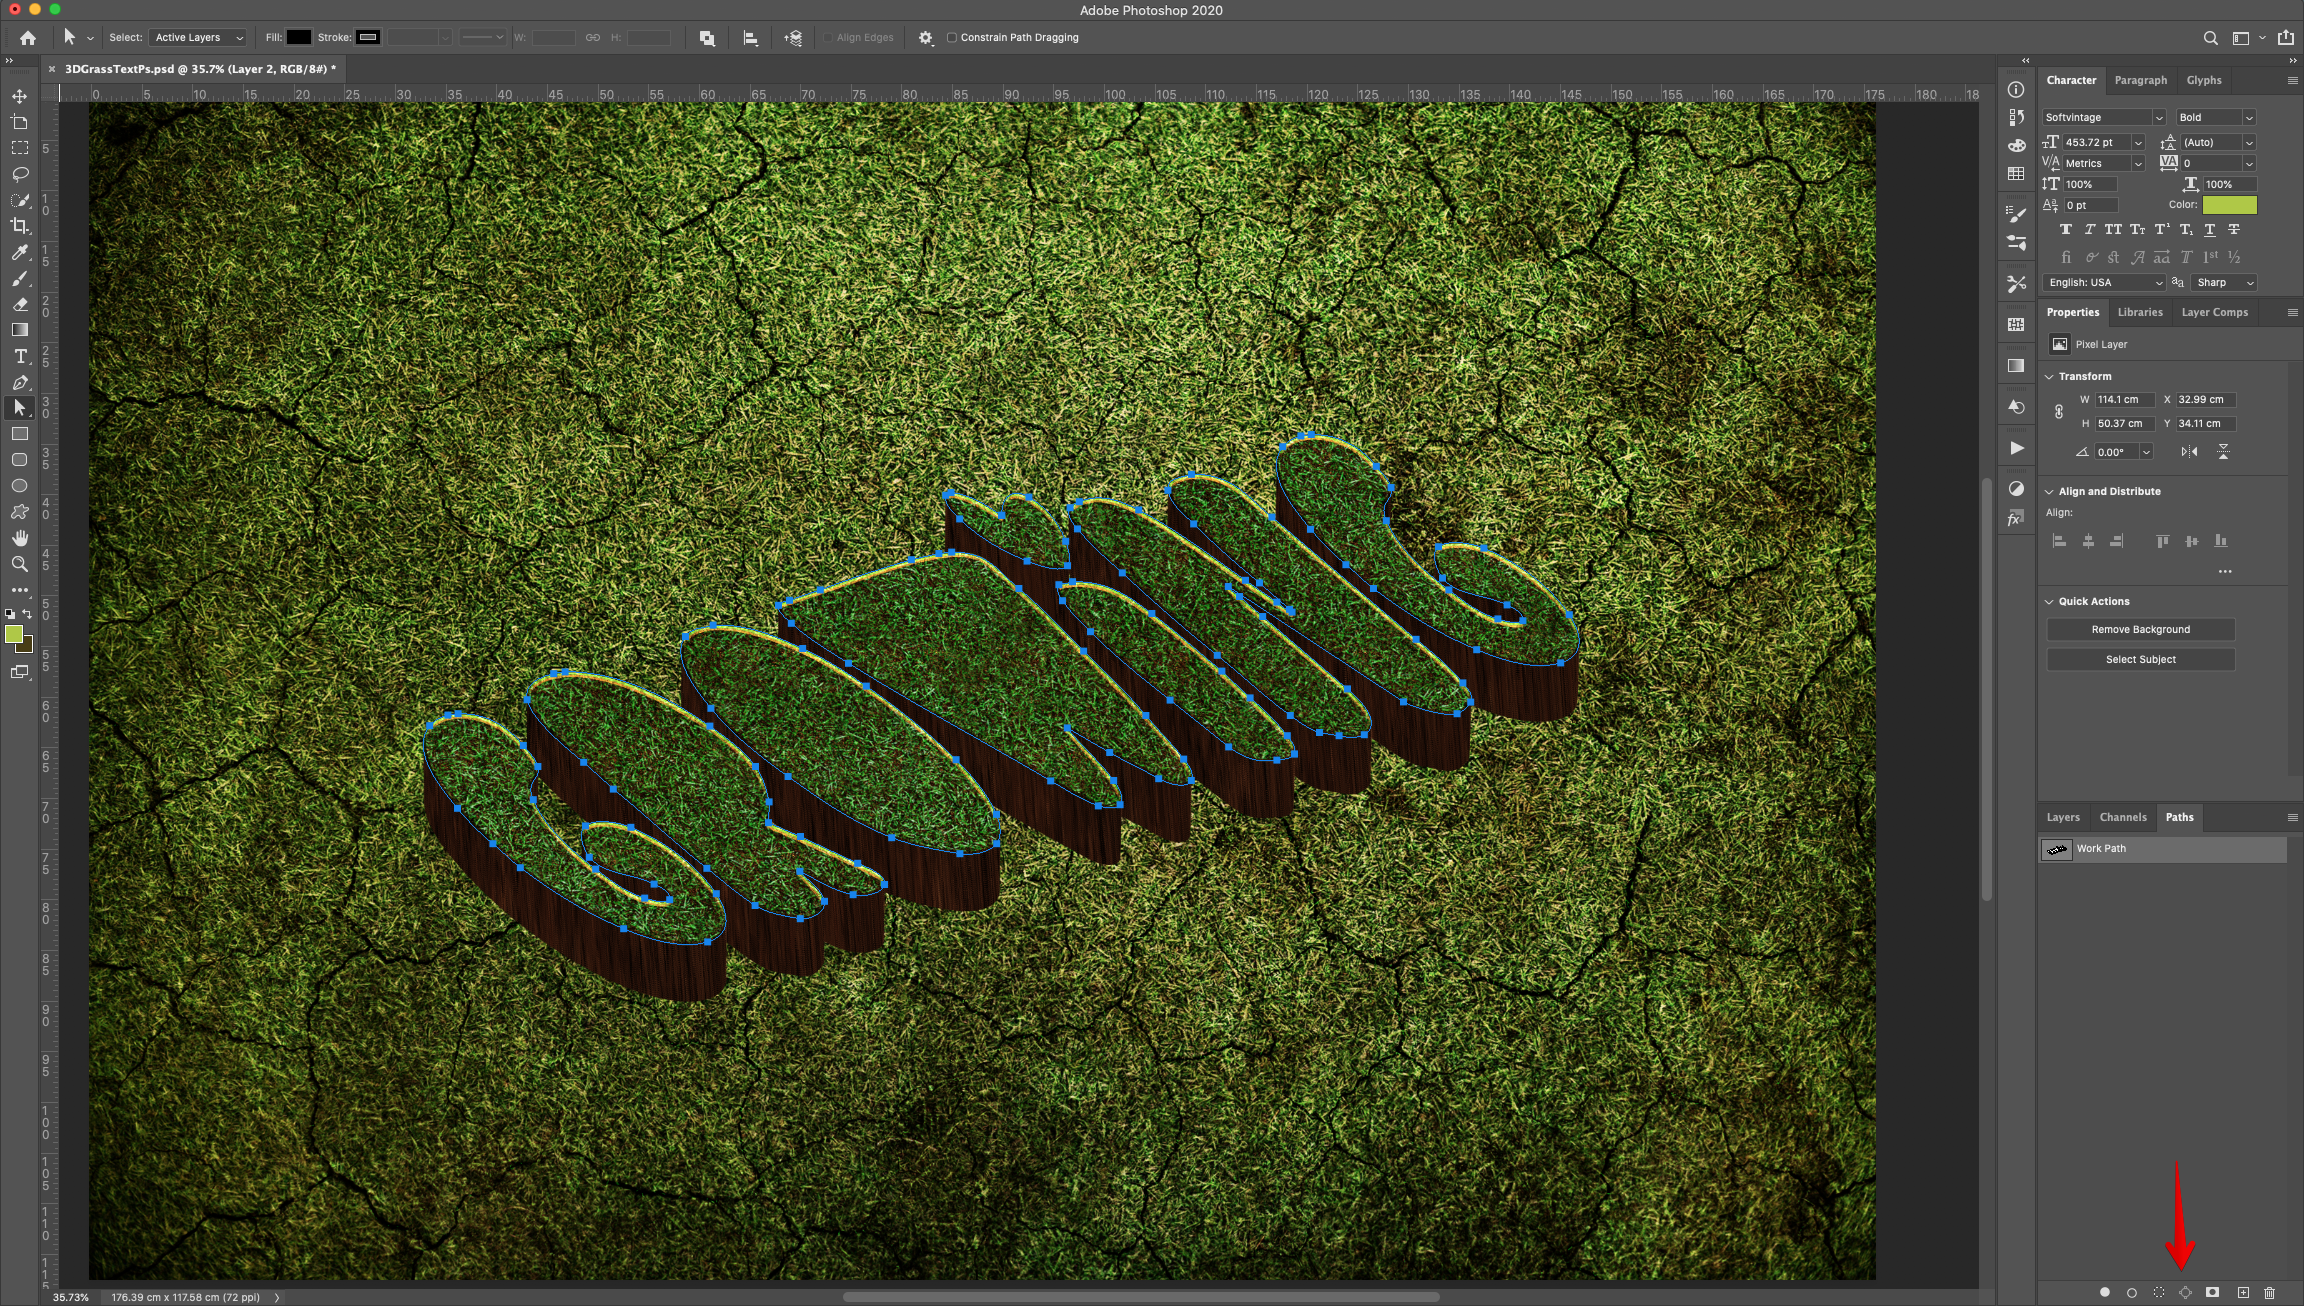
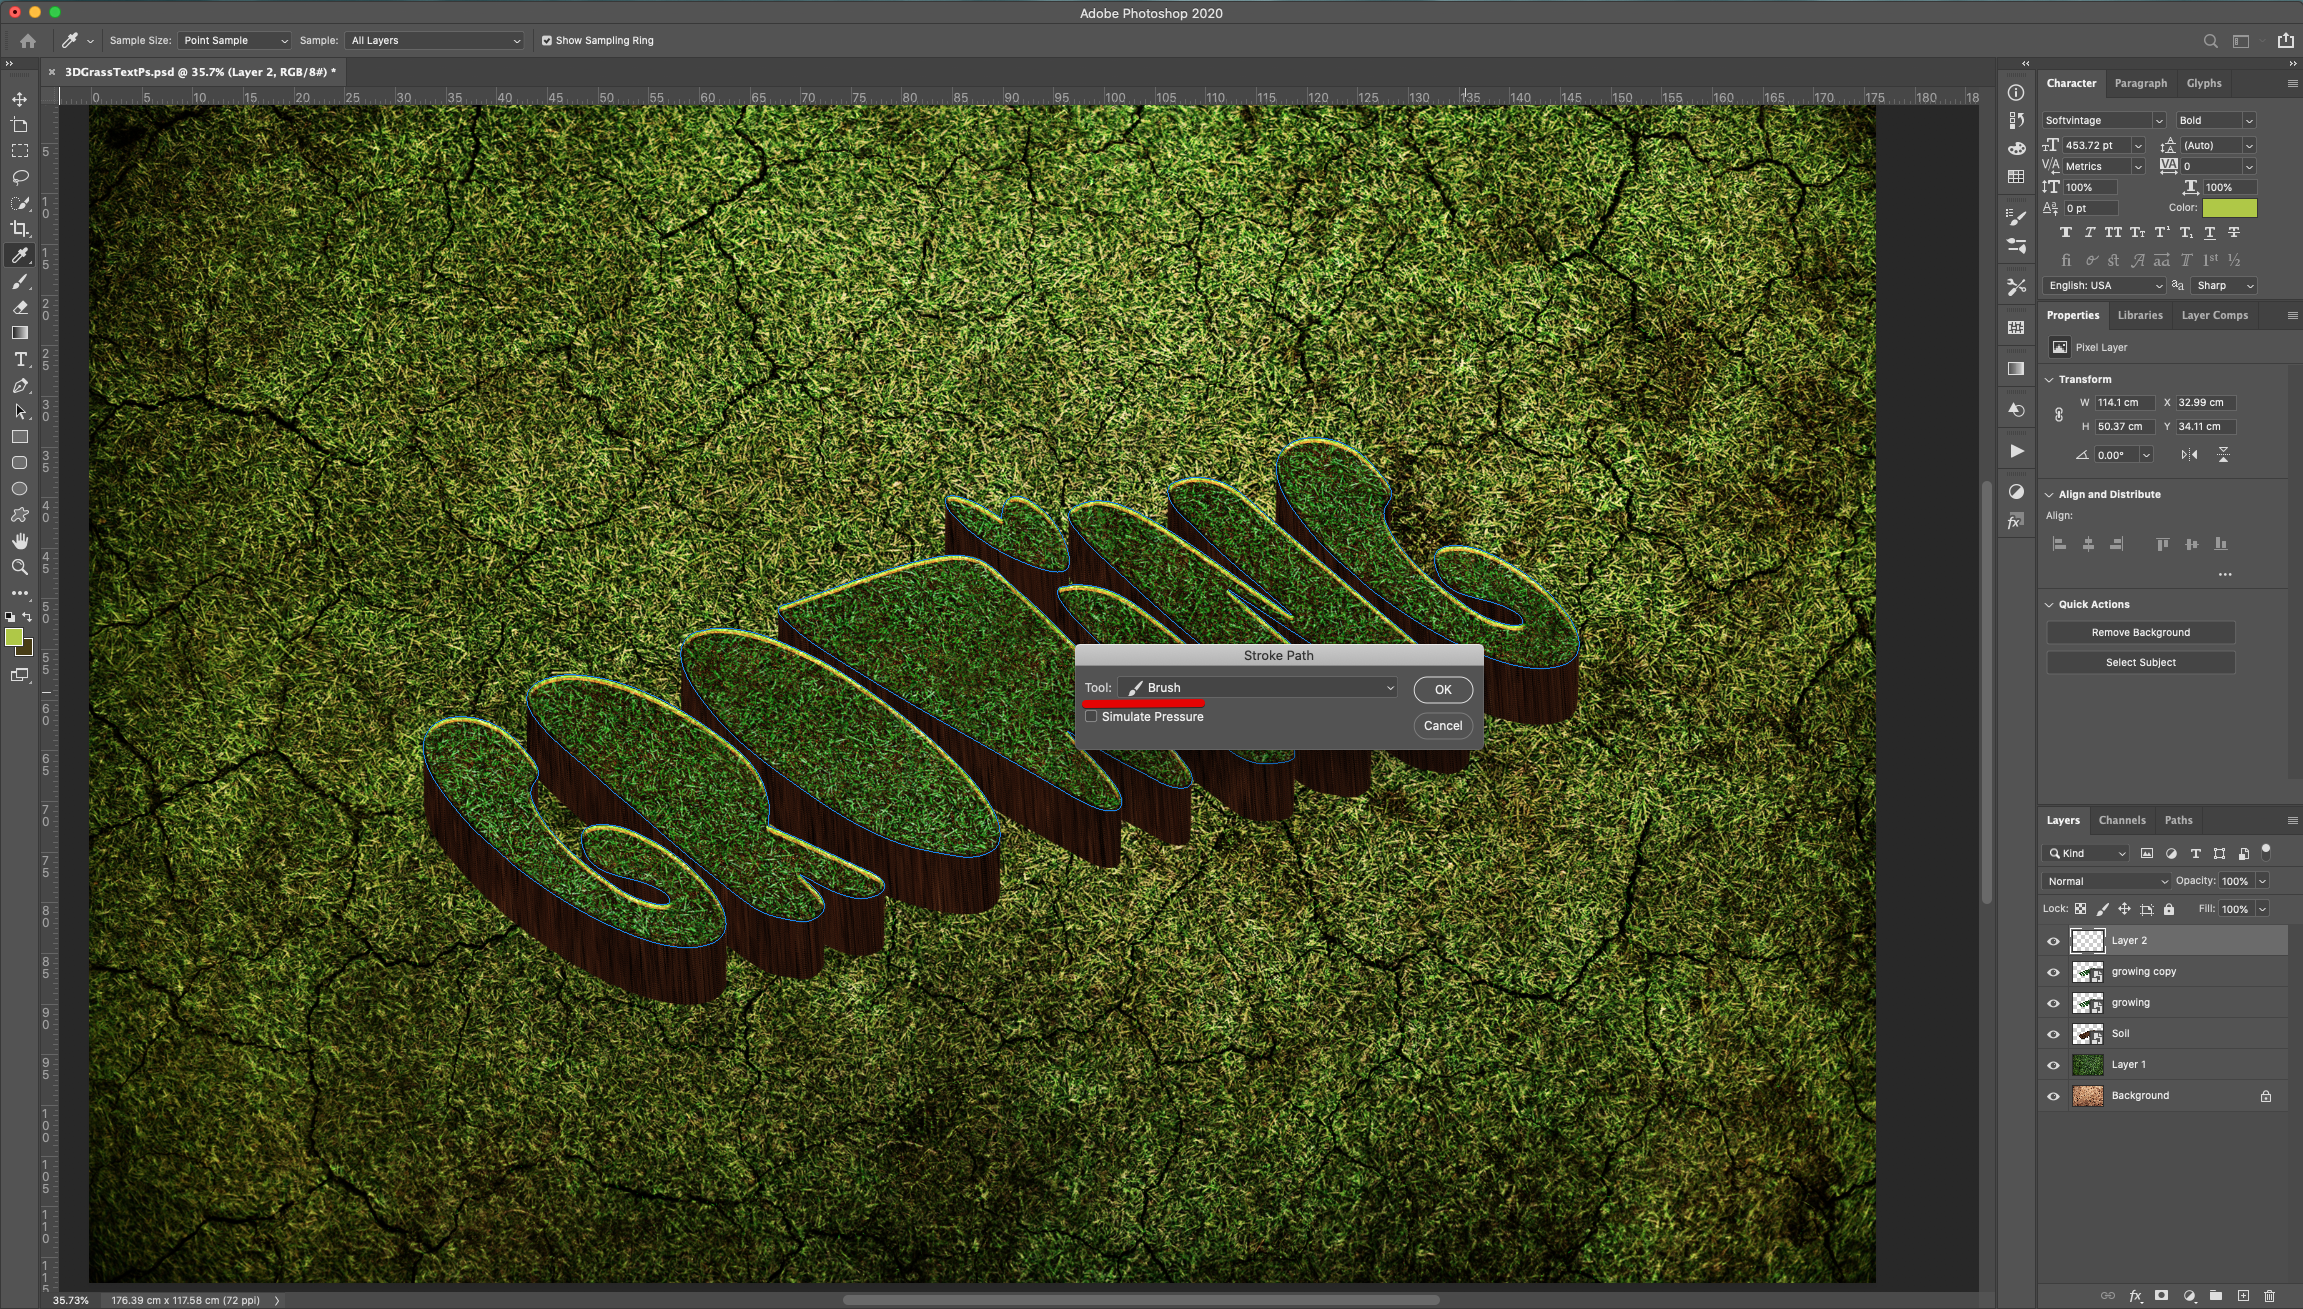
22 - Click on top of the “Text Smart Object” while holding the “Command/Control” key to make a selection. Create a “New Layer” on top of everything (use the “Create New Layer” button at the bottom of the “Layers Panel”). Head to the “Paths Panel” and use the “Create New Work Path” button at the bottom of the Panel to turn your selection into a “Work Path”.
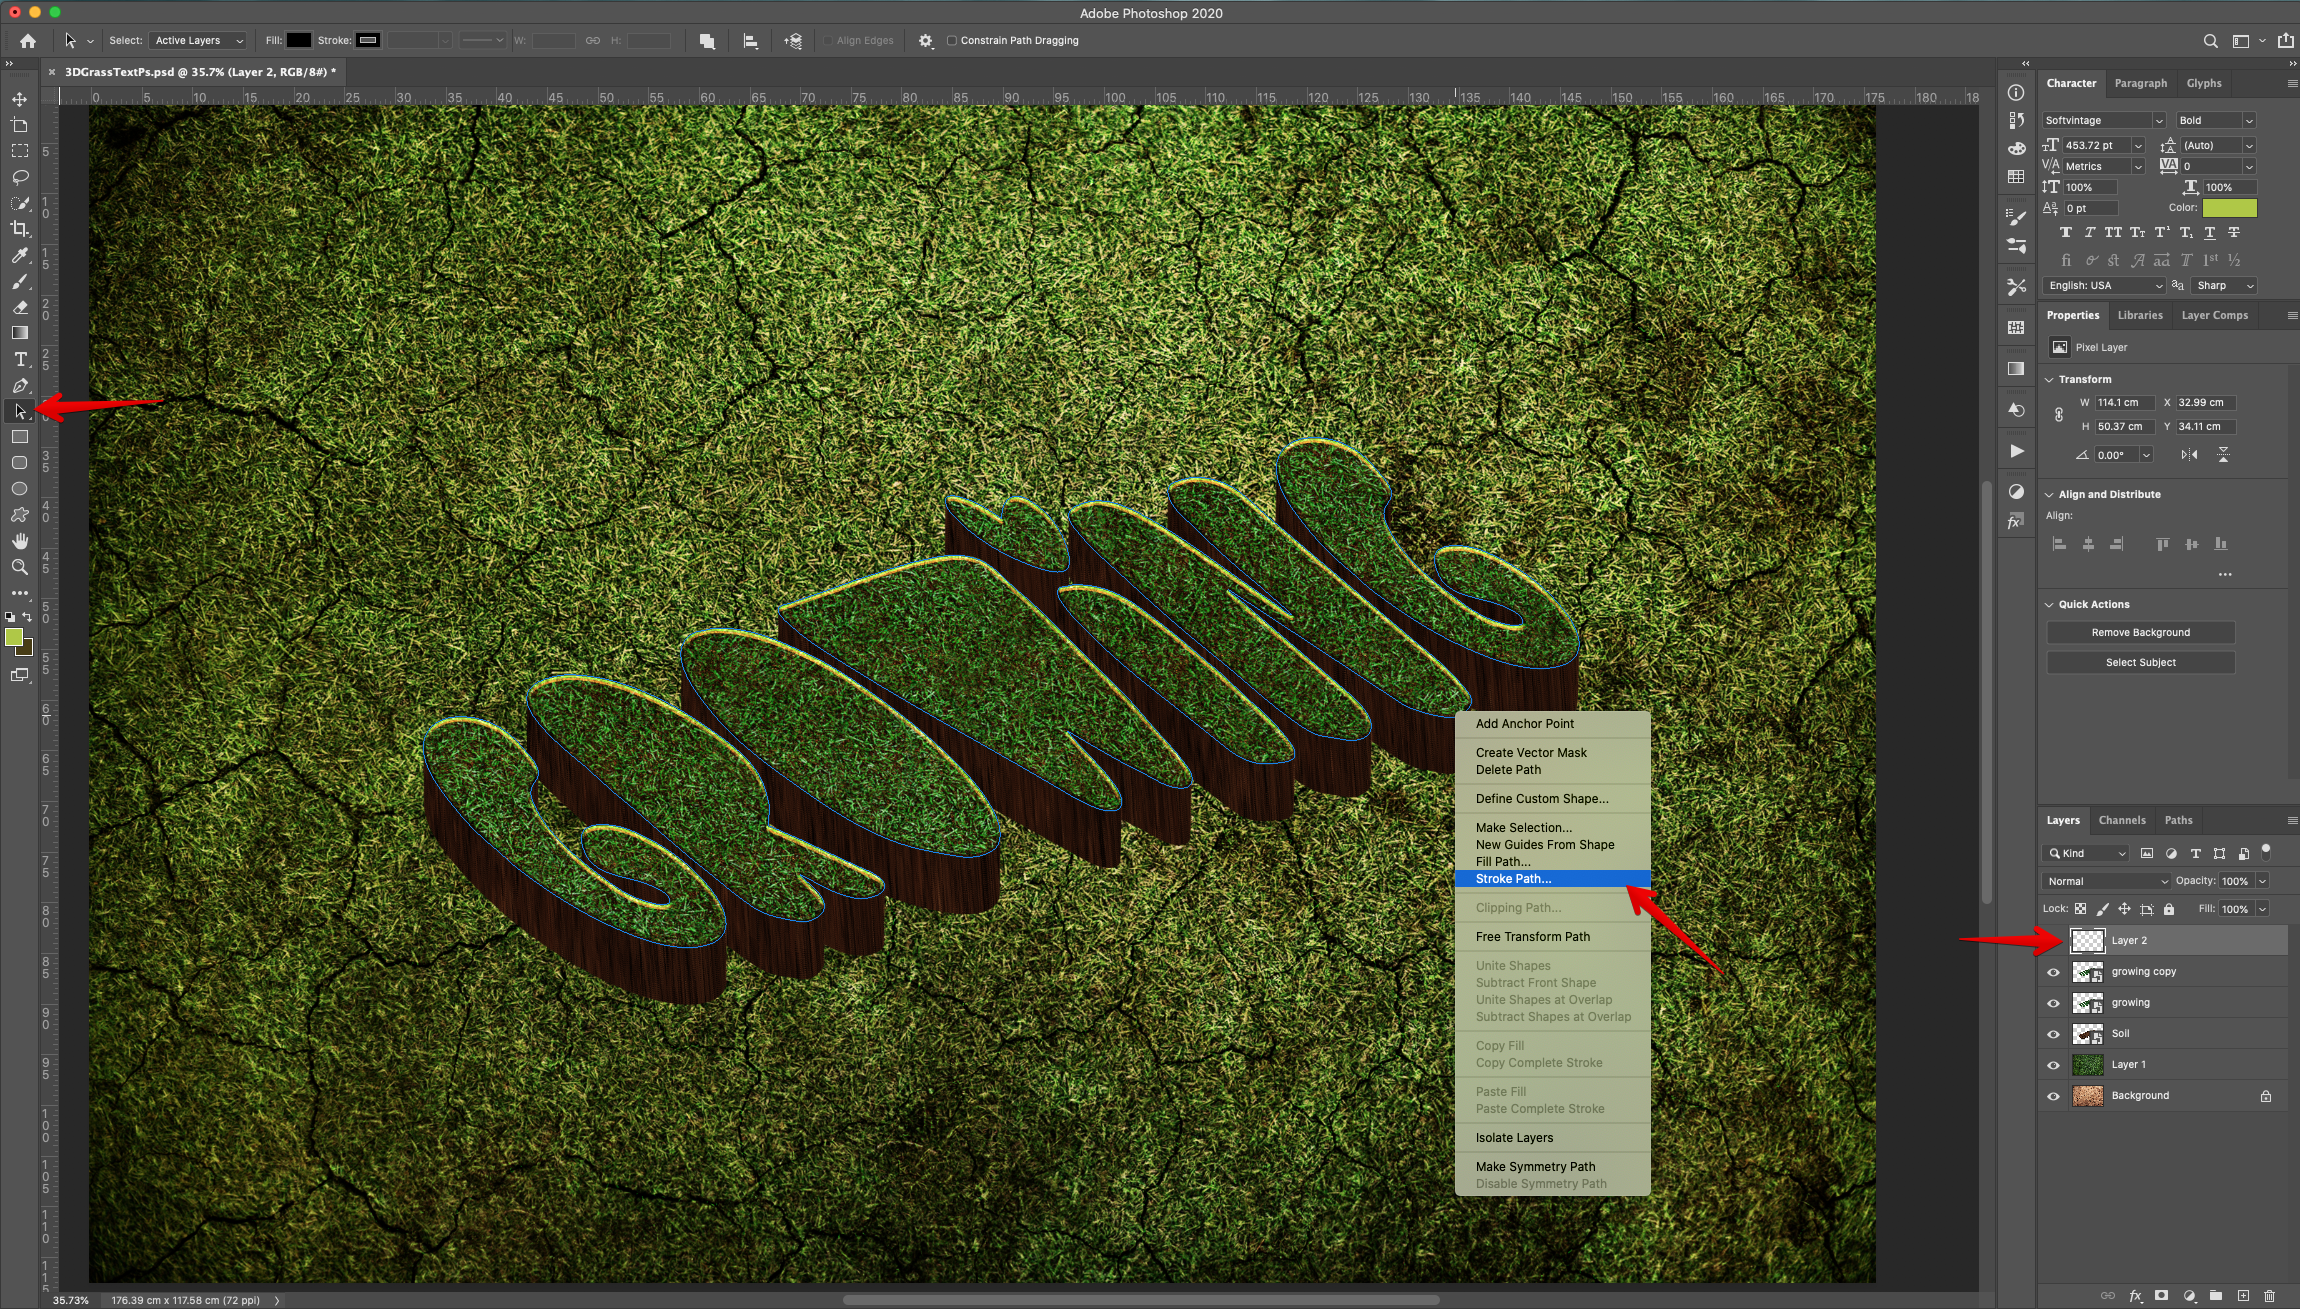
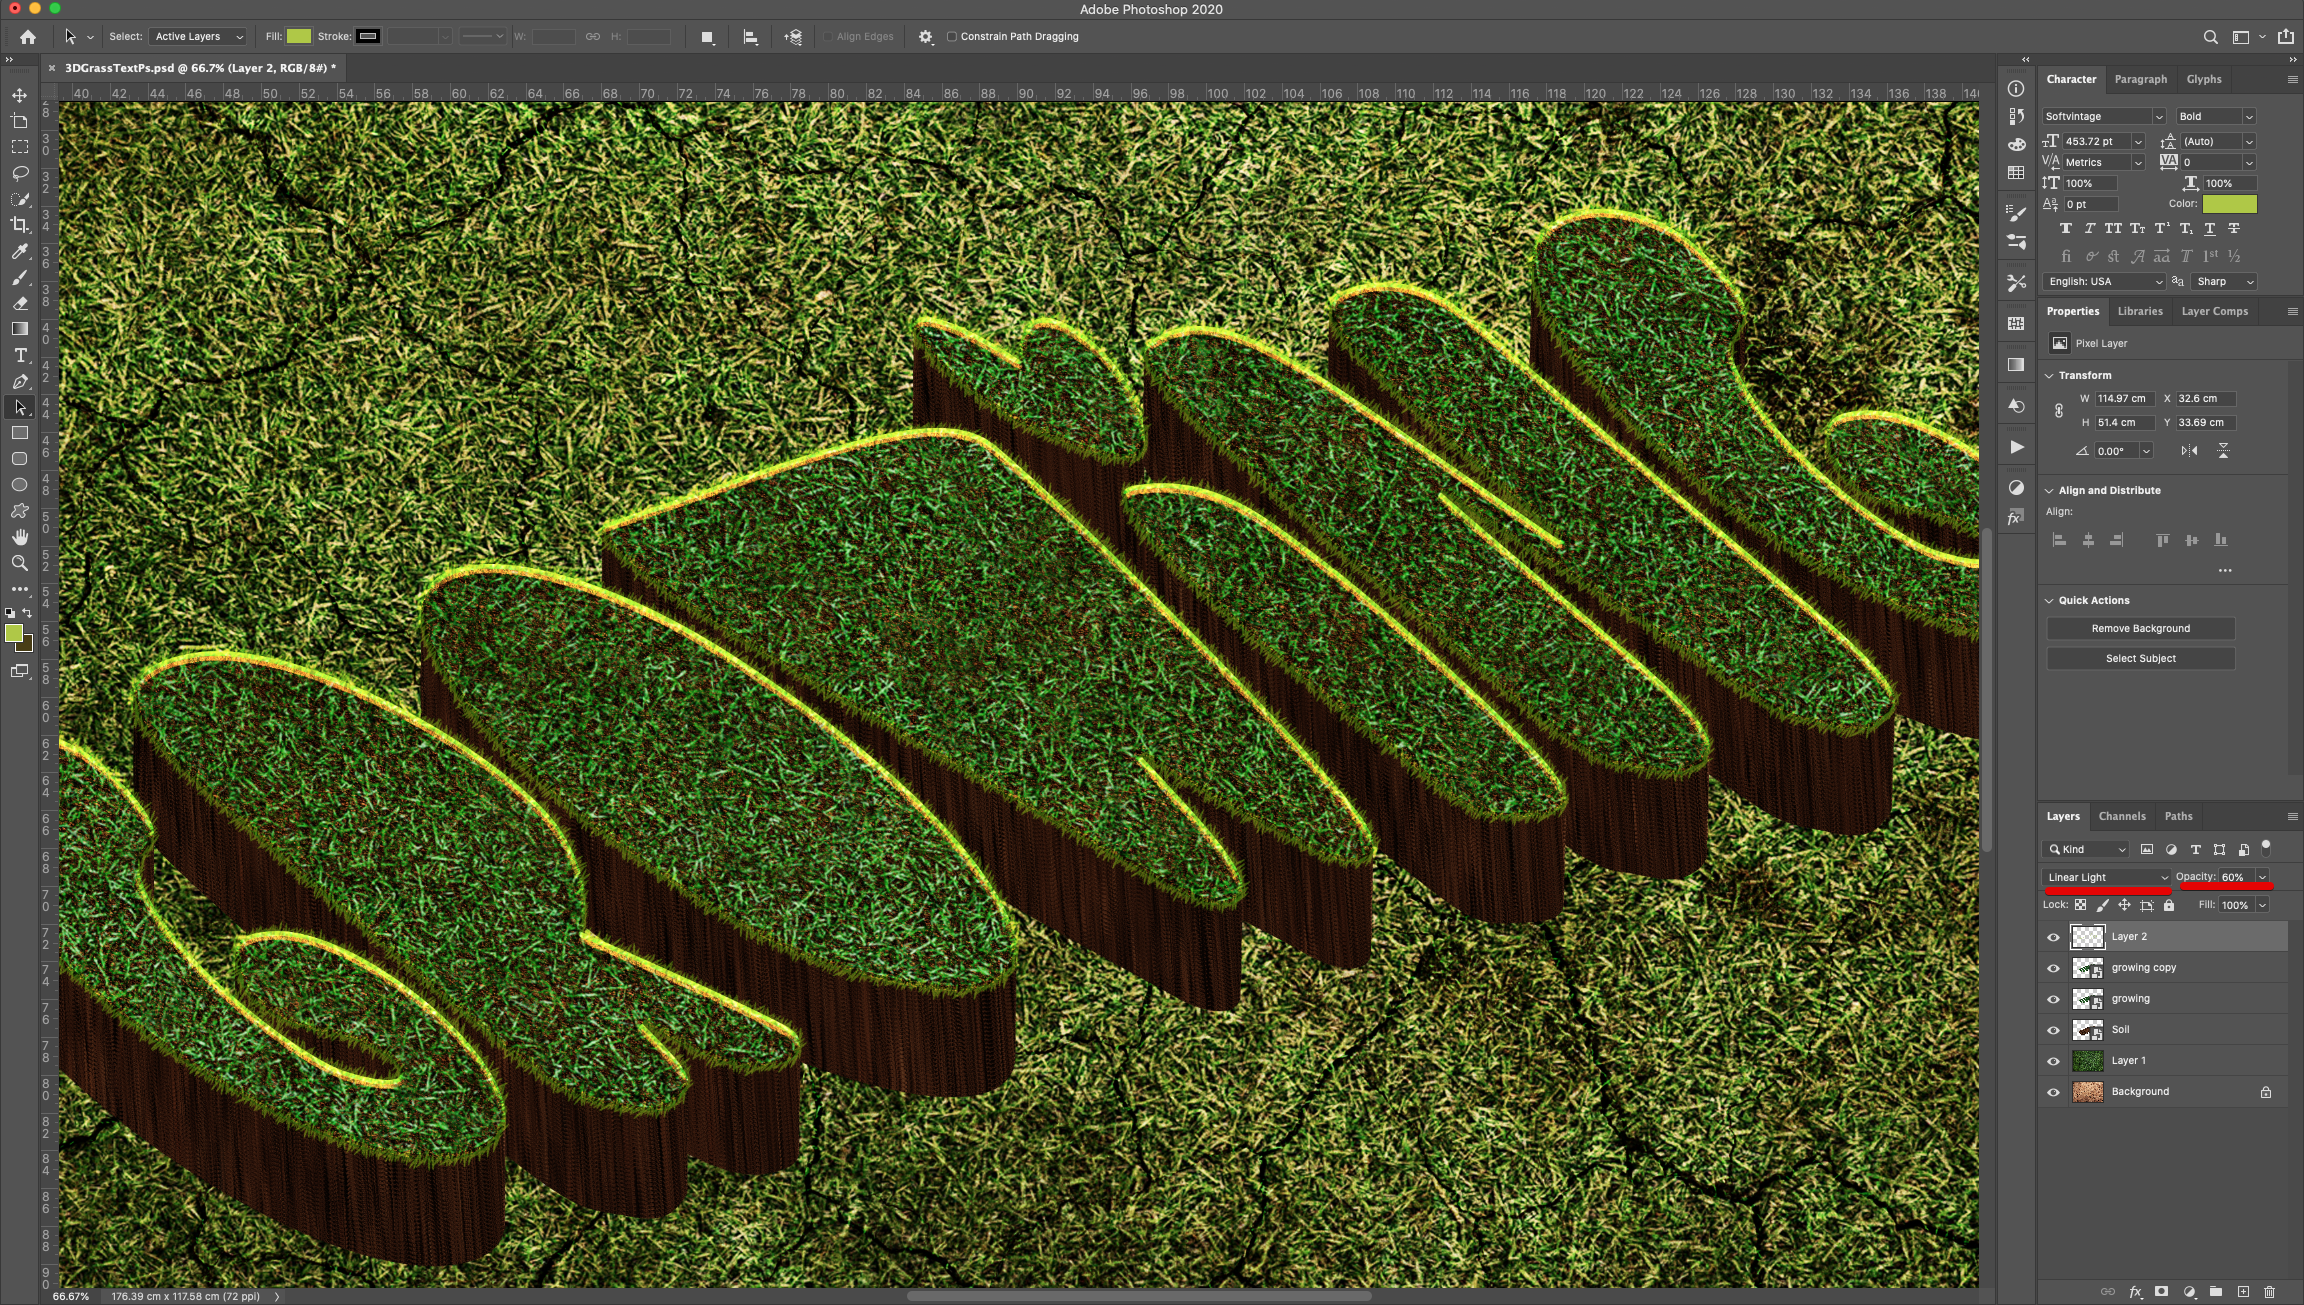
23 - Head back to the “Layers Panel” and make sure the you are on the “New Layer”. Use the “Selection Tool” to right-click on top of the “Work Path” and choose “Stroke Path”. Select “Brush” as “Tool” from the Pop-Up. Change the “layer Style” to “Linear Light” and the “Opacity” to 60%.
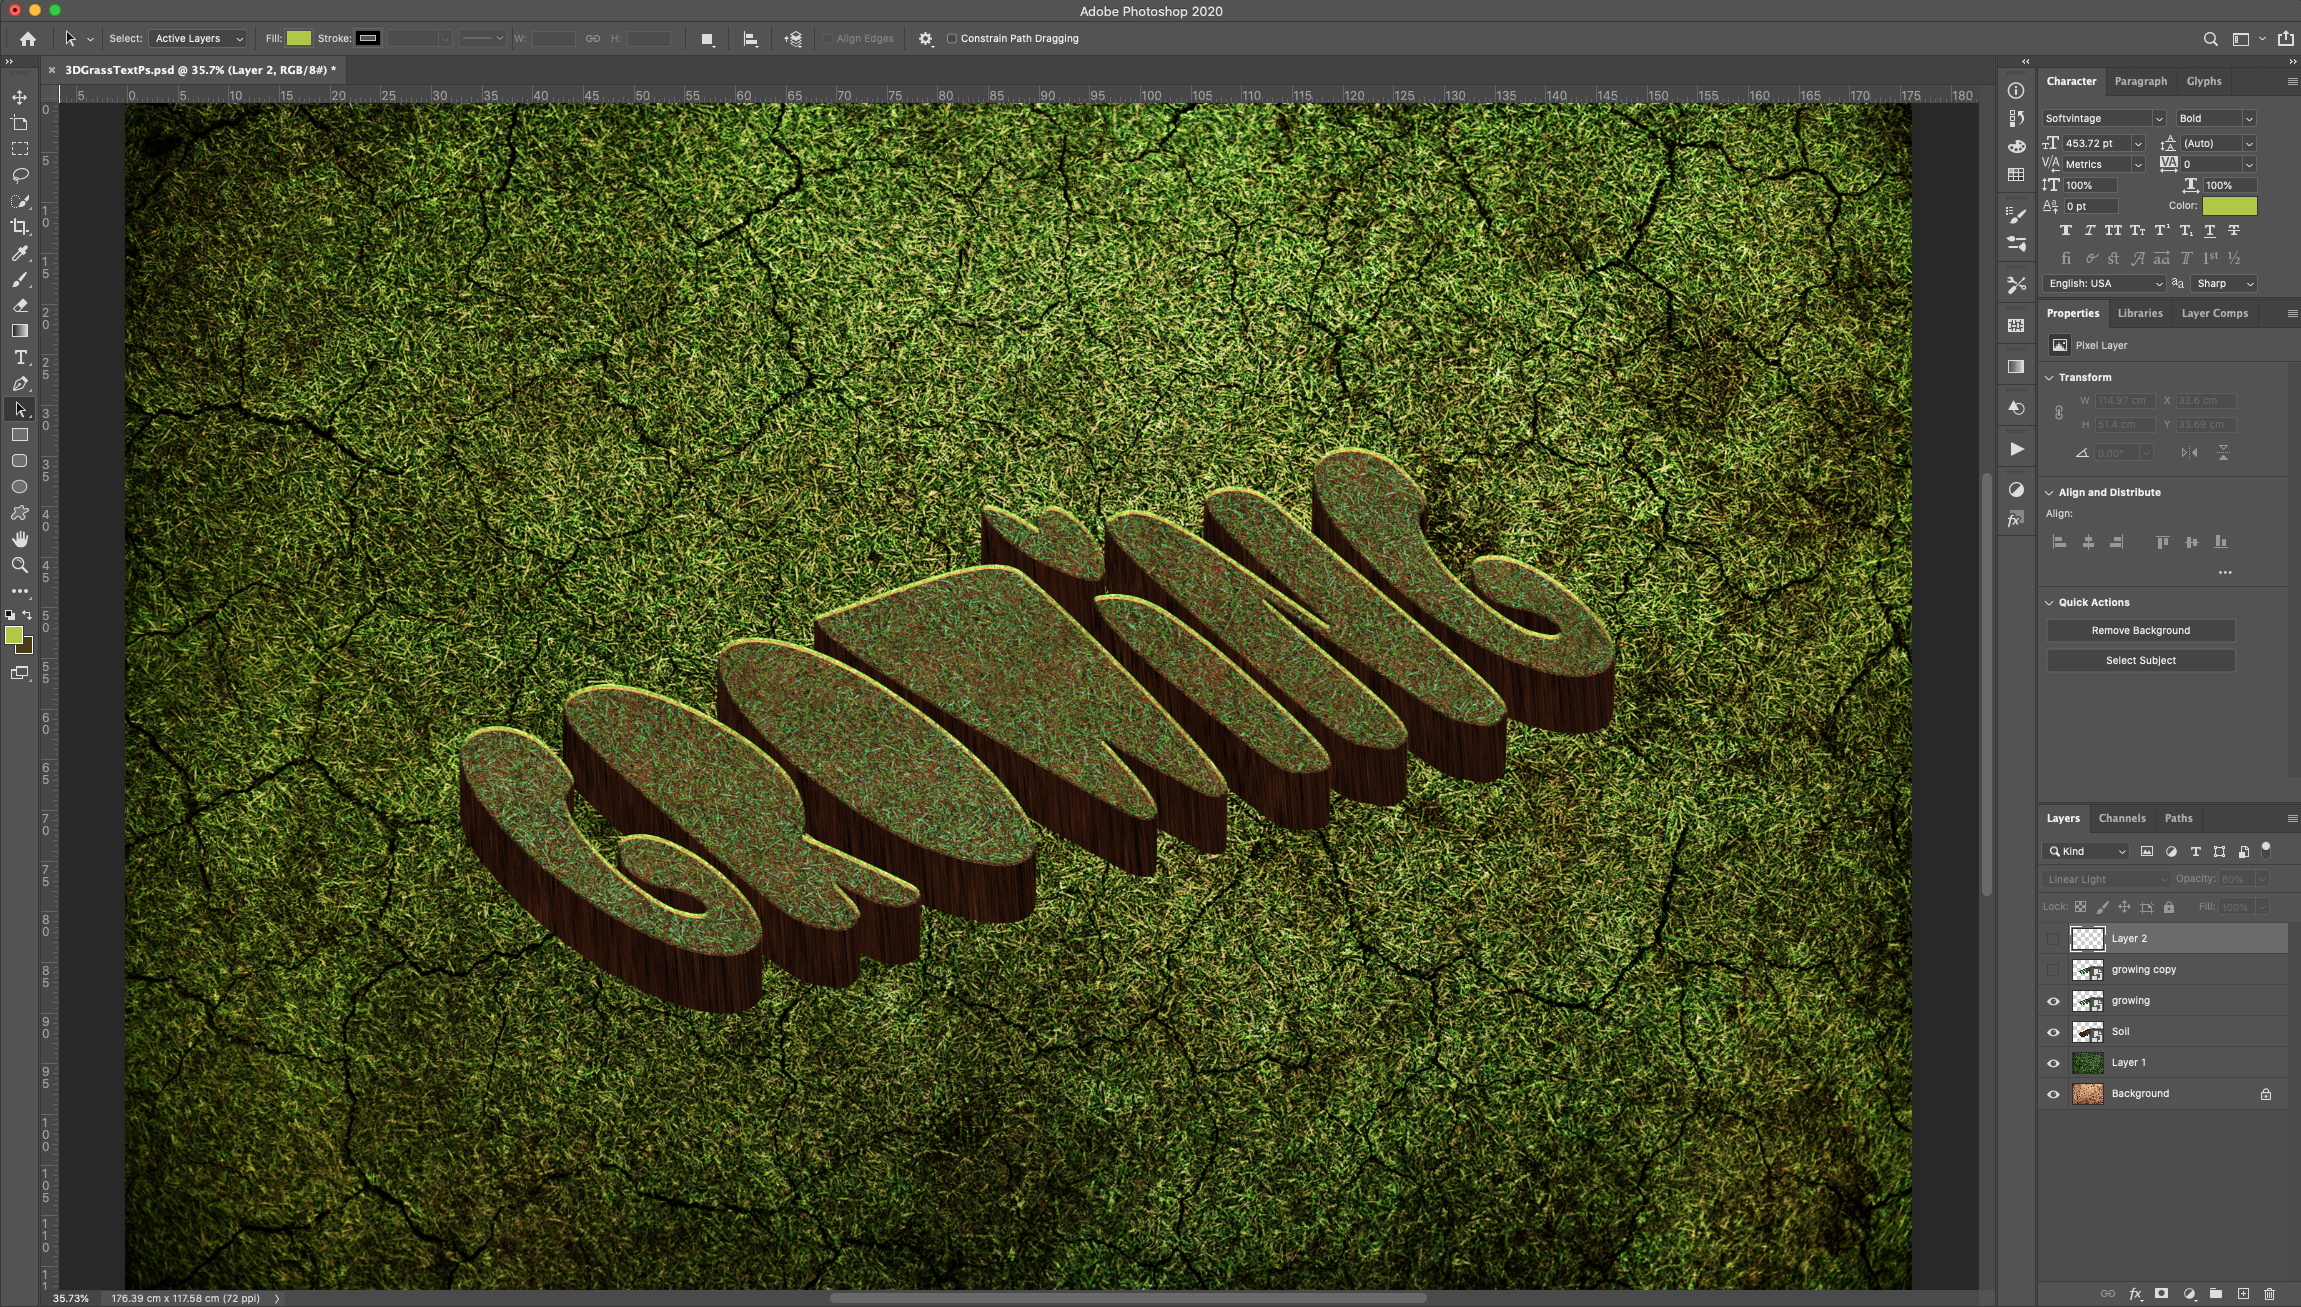
24 - You can achieve different effects by Turning “ON” and “OFF” some of the layers. Check it out!
1 - In Photoshop, open the image you chose as “Background”.
2 - Select the “Type Tool” (T), select your font (we used “Soft Vintage Bold”) and type your text. The size will depend on the word/s you choose.
3 - Center the text by selecting both Layers (“Shift” key) and clicking the “Align Vertical and Horizontal Centers” buttons on the Top Menu.
4 - Open the “Grass” image and bring it into the first one. Resize and/or Rotate it using “Free Transform” (Command/Control + T). Once you are done, hit “Enter” or click the “Check Mark” on the Top Menu. Make sure it is placed between the “Text” and the “Dirt” layers.
5 - Change the “Blending Mode” to “Hard Light”.
6 - Go to Edit > Transform > Skew and grab one of the Top handles to move the upper part to the Left. Use the side handles to skew the text. Once you are done, hit “Enter” or click the “Check Mark” on the Top Menu.
7 - Enter “Free Transform” (Command/Control + T) and move the “Text” 1 click “Down” and 1 click “Left” using the “Arrow” keys. Hit “Enter” or click the “Check Mark” on the Top Menu.
8 - Hold the Shift + Command/Control + Option/Alt + T keys to “Repeat Transform” and “Duplicate” the Layer. Repeat until you create 25 copies of the original “Text”.
9 - Drag the original “Text” and position it on top of everything.
10 - Double-click on top of the “Text” thumbnail and apply the following “Layer Styles”:
Blending Options: (Fill: 0%)
Bevel & Emboss: (Highlight Mode: #afca44, Shadow Mode: #483d13)
Pattern Overlay: (Grass - Photoshop CC 2020)
11 - Hide the “Text” layer by clicking on the Small Eye icon on the left side of its Thumbnail.
12 - Select one of the “Duplicates”, double-click on top of its thumbnail and in “Pattern Overlay”, click on the small “Gear” icon and navigate to “Import Patterns”, head to where you saved the ones you downloaded and select them. Click “OK”. Select the one you plan to use for the “Text Effect”.
Pattern Overlay:
13 - After applying the “Pattern” apply the following “Layer Styles”:
Blending Options: (Fill: 0%)
Bevel & Emboss: (Highlight Mode: #caa944, Shadow Mode: #483113)
Texture: (Same as “Pattern”)
14 - Right-click on top of its Thumbnail and “Copy Layer Style”, then select all the “Duplicates” (“Shift” key), but leave out the original “Text”, right-click on top of their thumbnails and “Paste Layer Style”. “Un-hide” the original “Text”.
15 - Reposition the “Duplicates” so the one named “Copy” is right under the original “Text” and “Copy 25” is at the bottom.
16 - Select all the “Duplicates” (“Shift” key), but leave out the original “Text”, right-click on top of their thumbnails and “Convert to Smart Object”. Name it “Soil”.
17 - Select the original “Text” right-click on top of its thumbnail and use “Convert to Smart Object”.
18 - Change the “Blending Mode” to “Lighten”.
19 - Duplicate the “Smart Object” by dragging it to the “Create New Layer” icon at the bottom of the Panel. Change the “Blending Mode” to “Soft Light”.
20 - Select the “Brush Tool” (B). Head to the “Brush Settings Panel” and use the following values:
Brush Tip Shape:
Shape Dynamics:
Scattering:
Color Dynamics:
21 - Replace the “Foreground” color with #afca3b and the “Background” color with #483d13.
22 - Click on top of the “Text Smart Object” while holding the “Command/Control” key to make a selection. Create a “New Layer” on top of everything (use the “Create New Layer” button at the bottom of the “Layers Panel”). Head to the “Paths Panel” and use the “Create New Work Path” button at the bottom of the Panel to turn your selection into a “Work Path”.
23 - Head back to the “Layers Panel” and make sure the you are on the “New Layer”. Use the “Selection Tool” to right-click on top of the “Work Path” and choose “Stroke Path”. Select “Brush” as “Tool” from the Pop-Up. Change the “layer Style” to “Linear Light” and the “Opacity” to 60%.
24 - You can achieve different effects by Turning “ON” and “OFF” some of the layers. Check it out!
by @lornacane


