
3D Heart with Mesh Tool in Illustrator
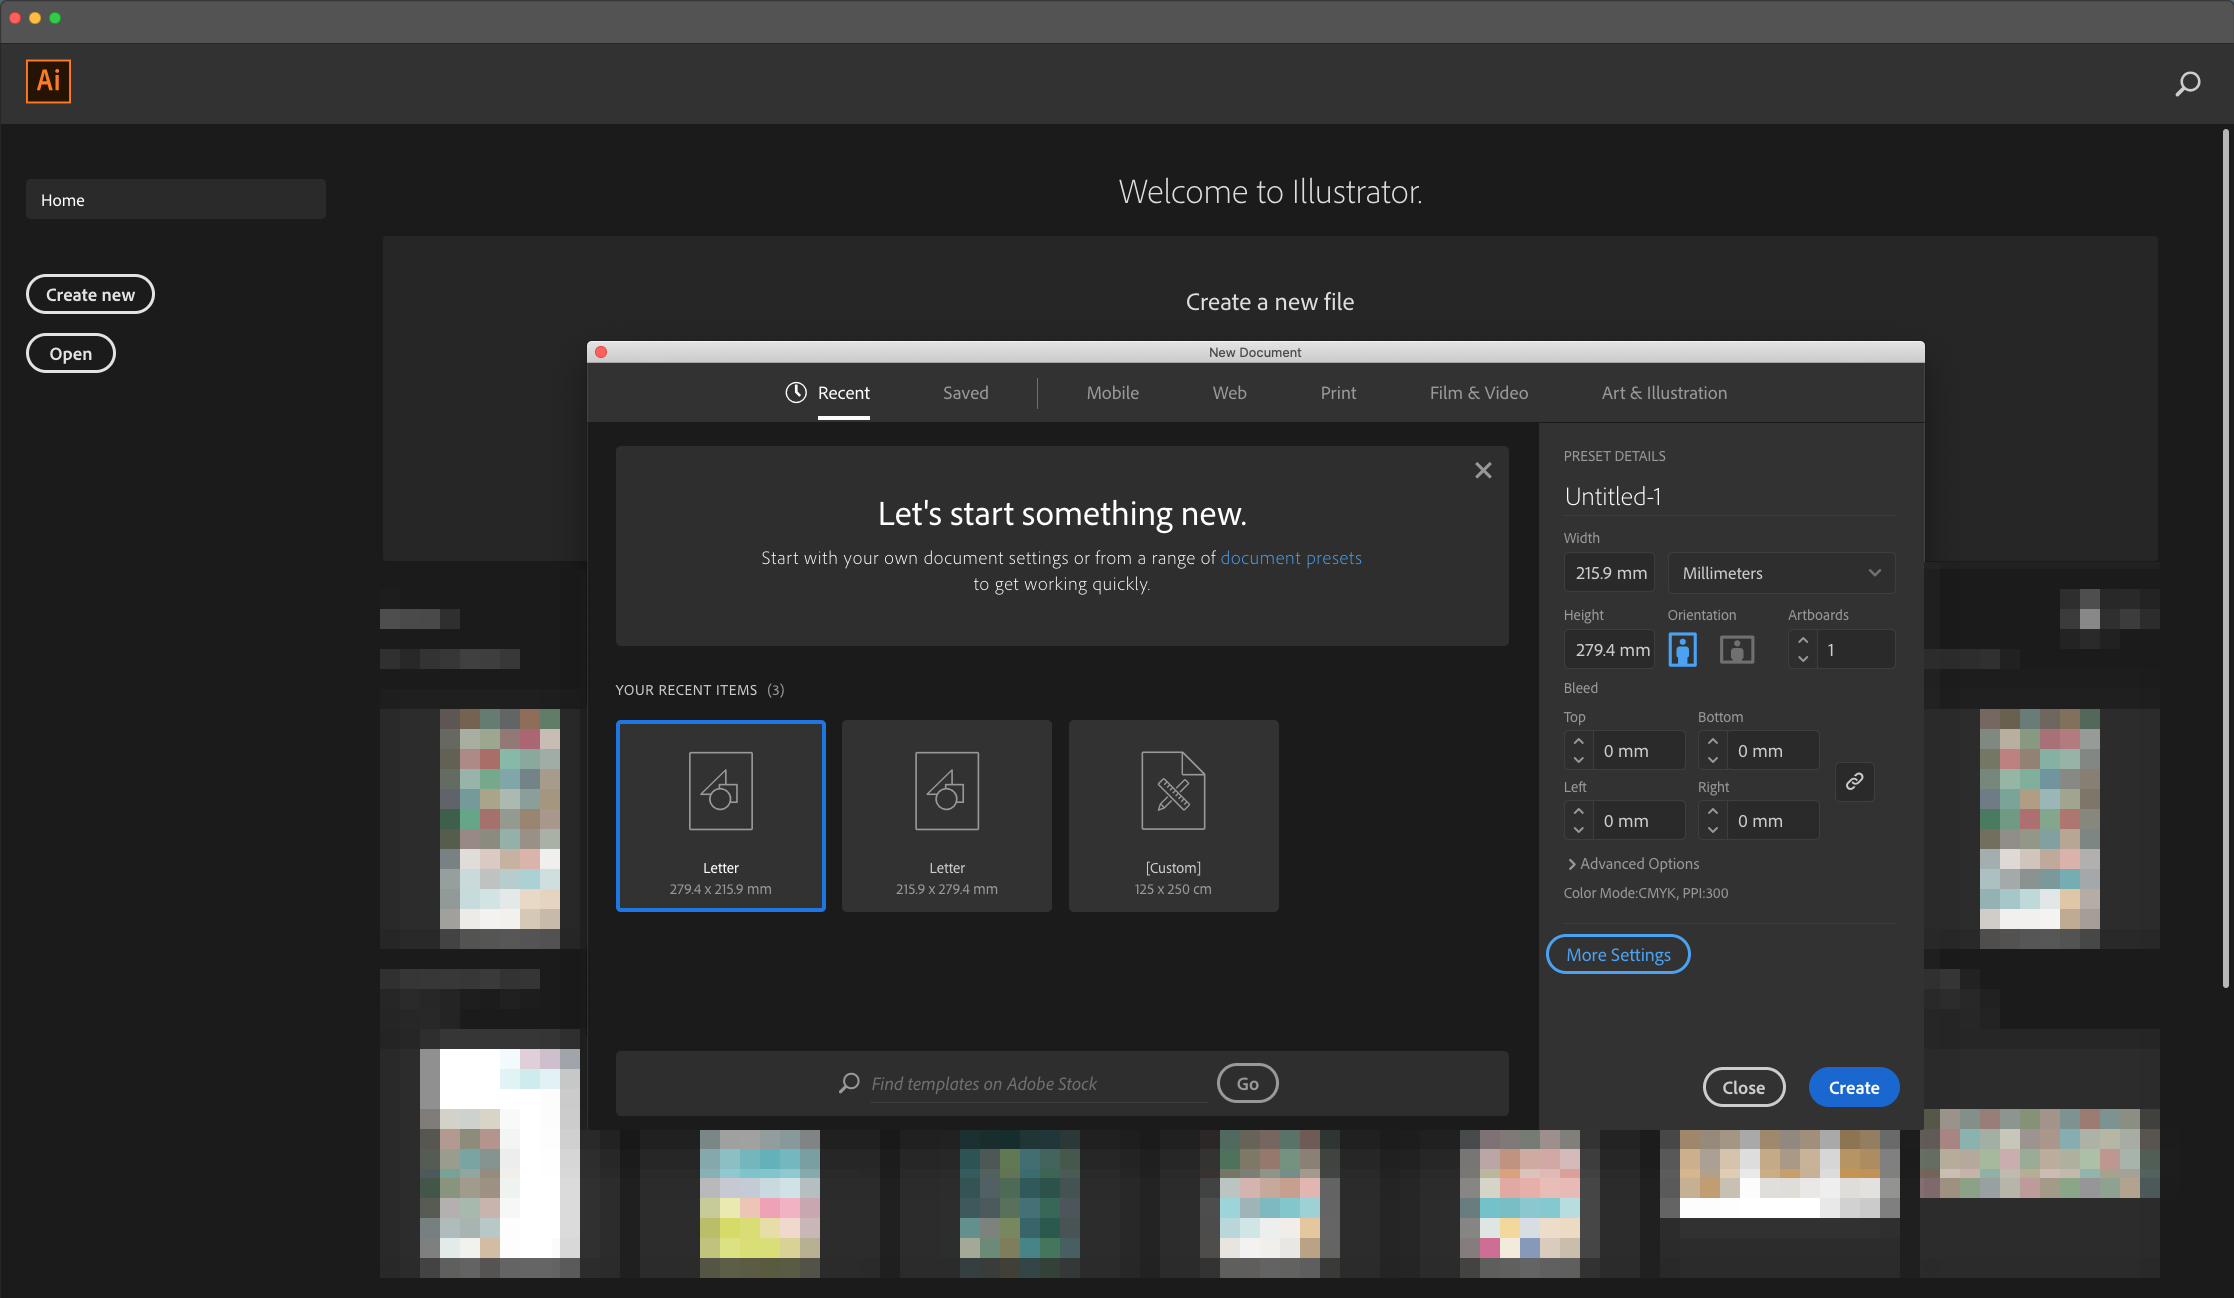
1 - In Illustrator, create a “New Document”. If the “Rulers” are not enabled, go to View > Rulers > Show Rulers (Command/Control + R) to turn them ON.
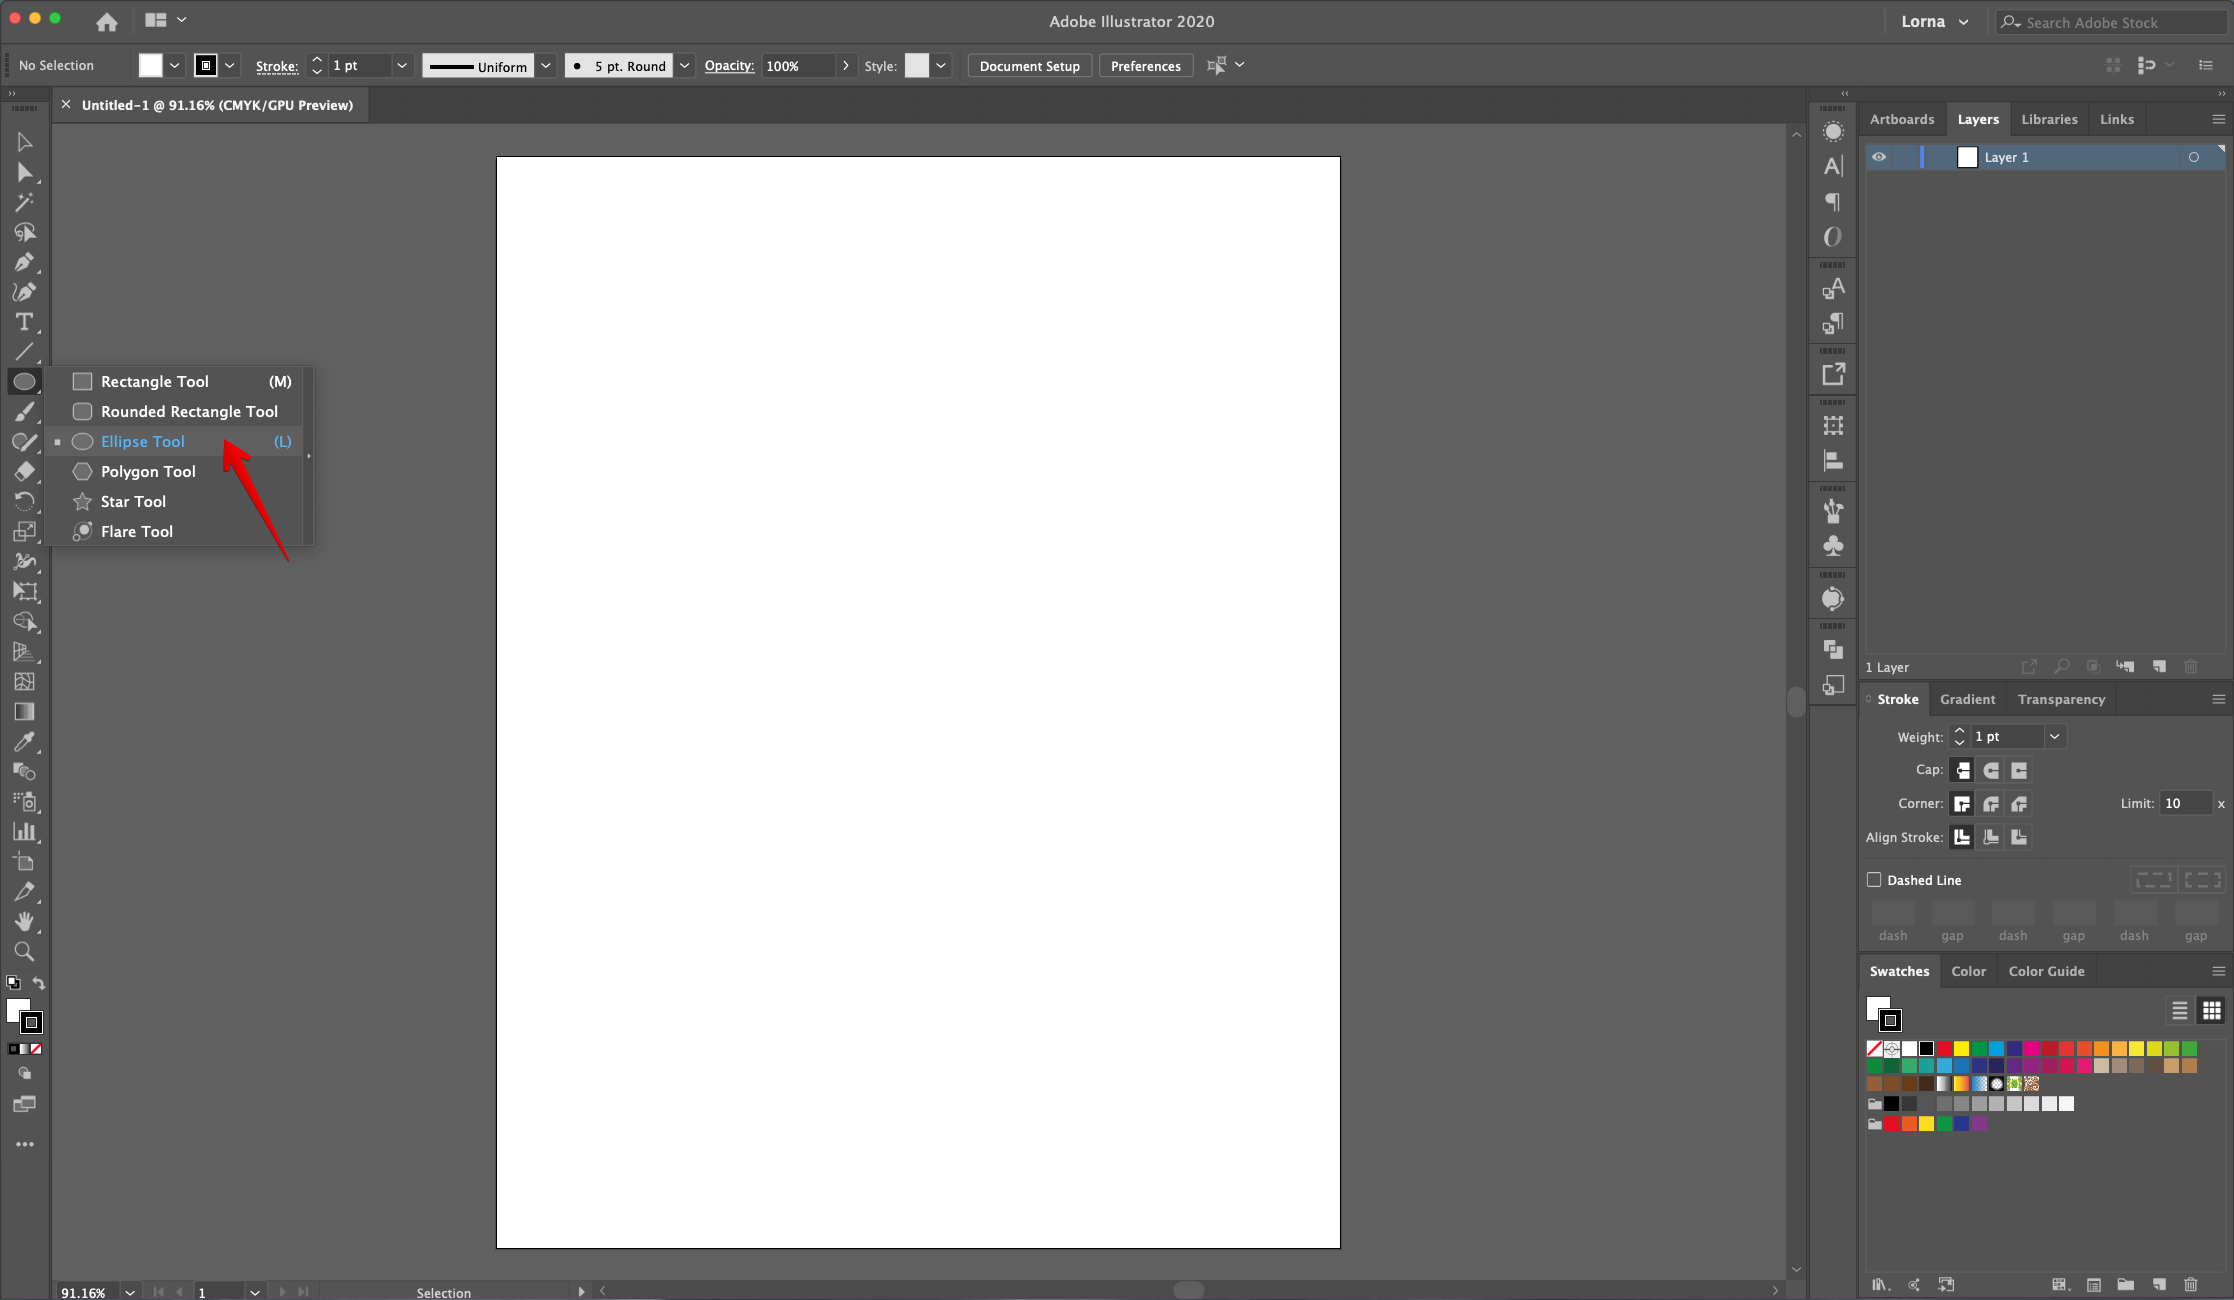
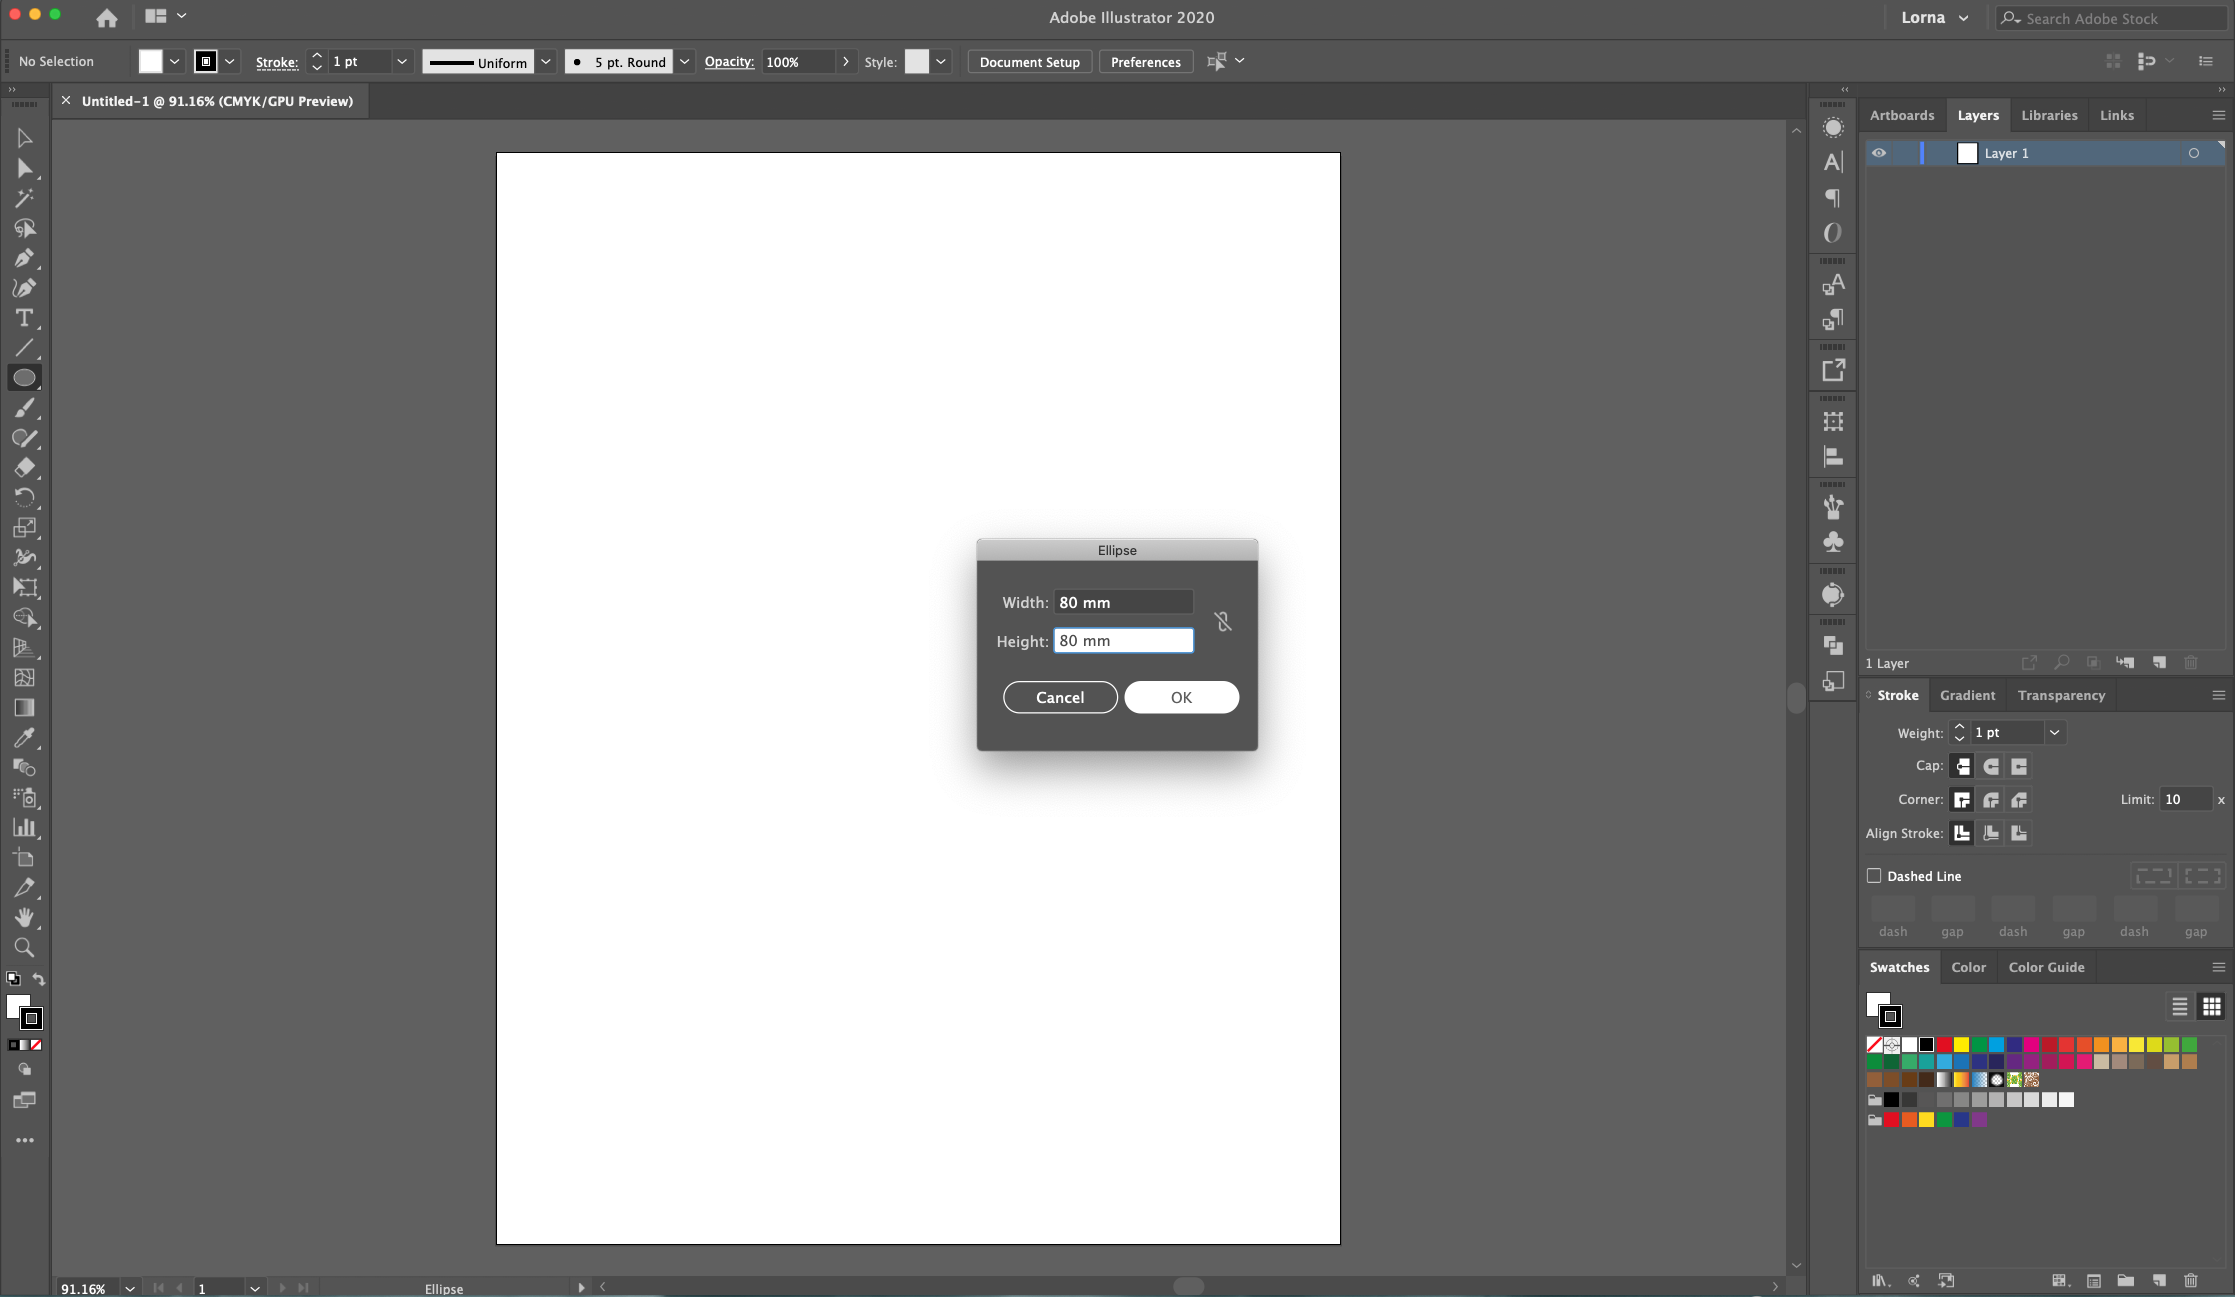
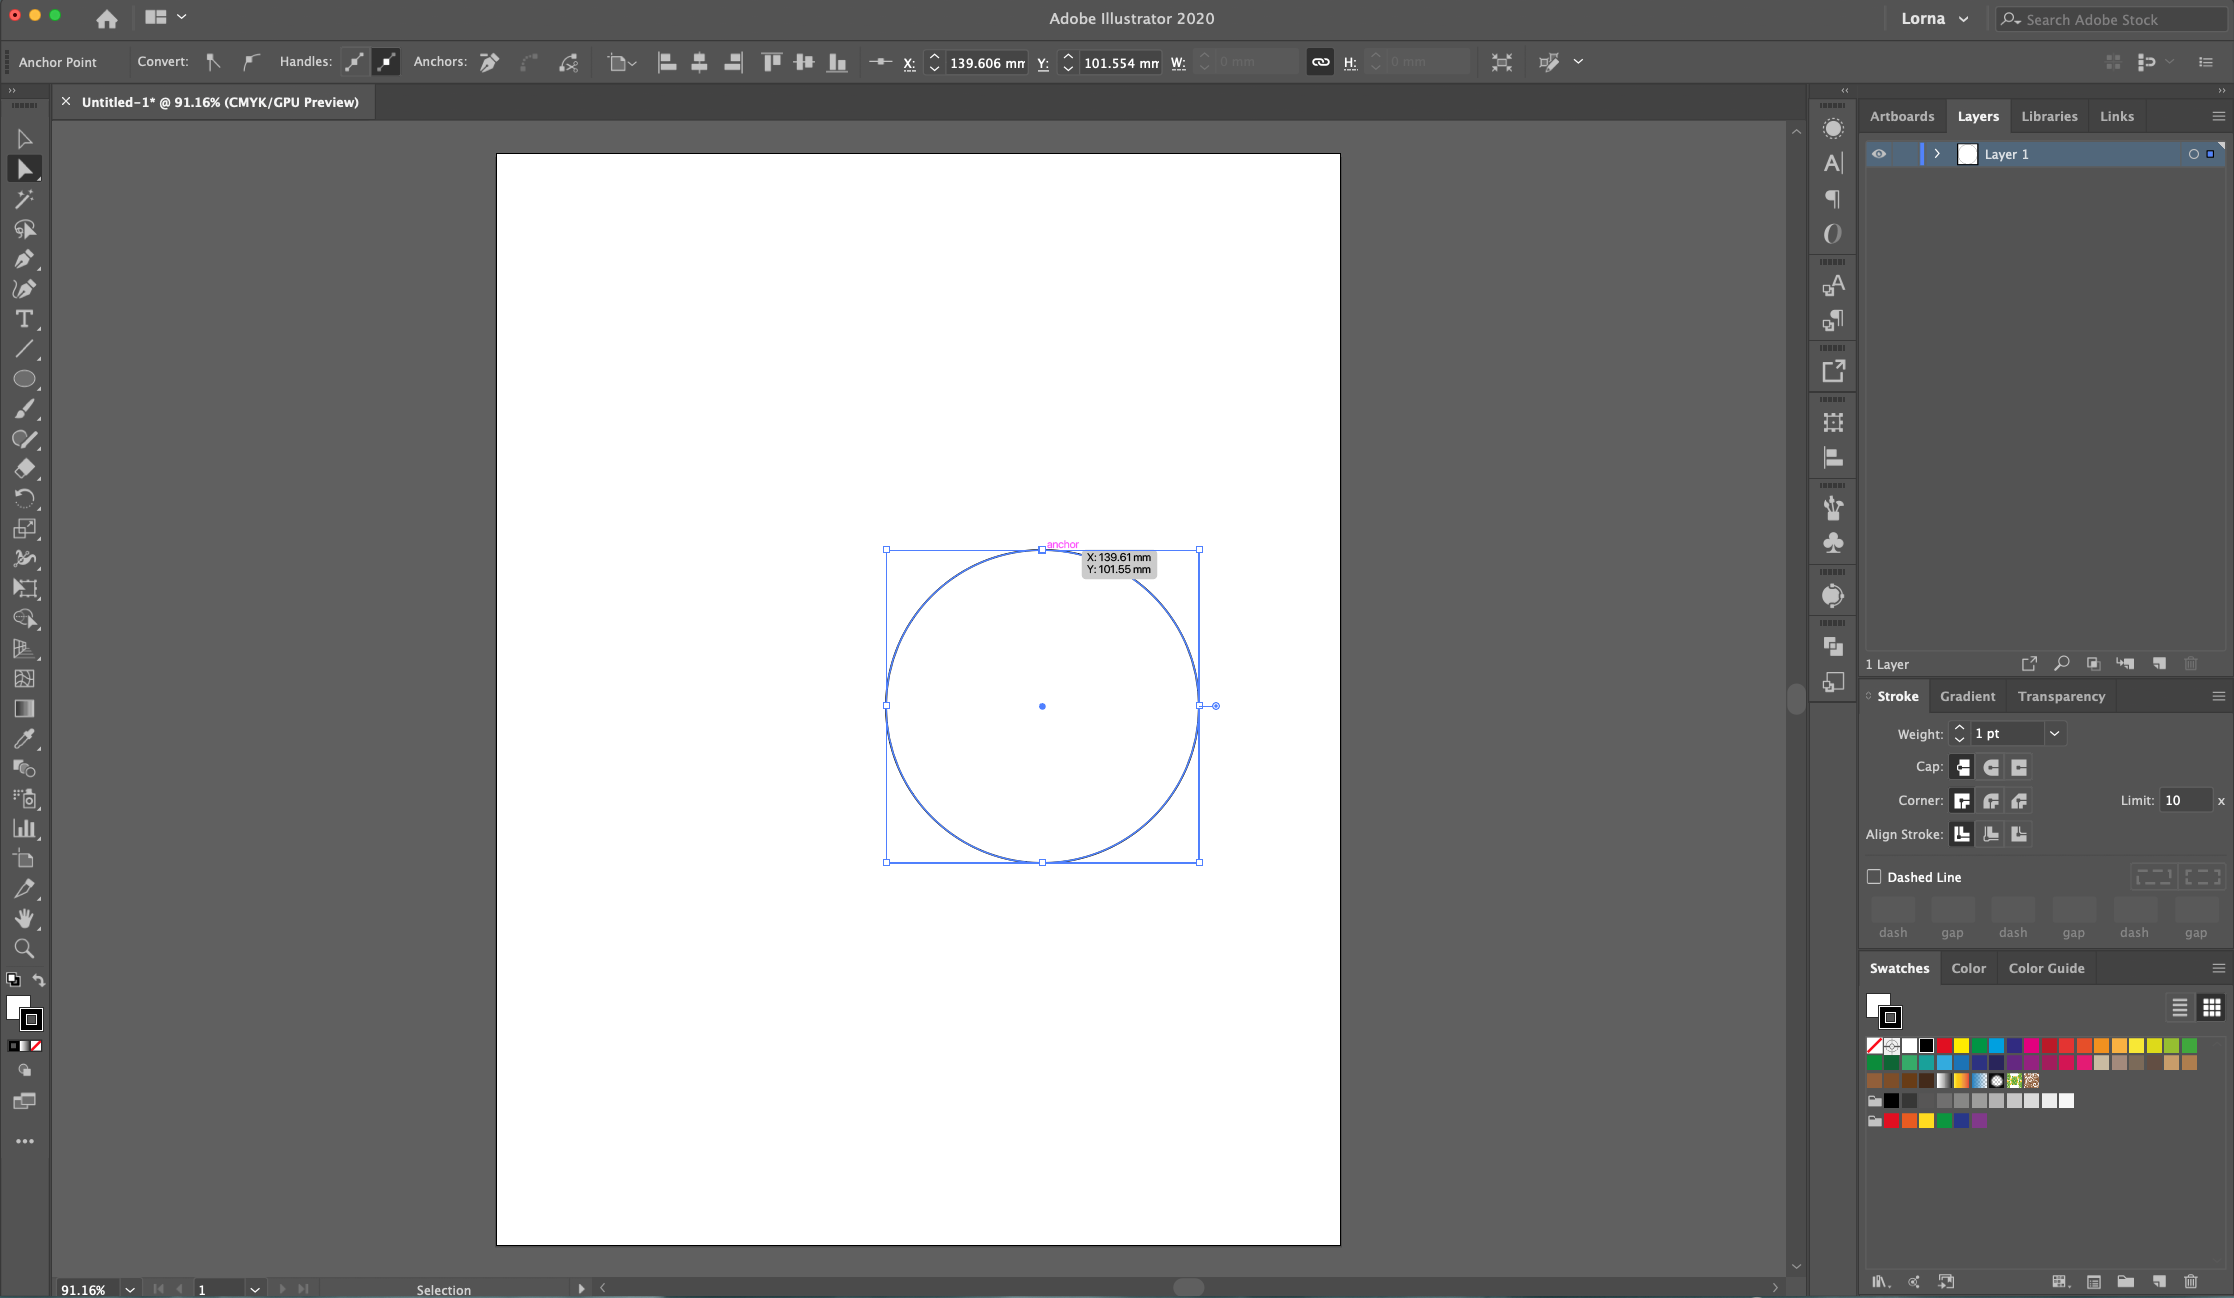
2 - Select the “Ellipse Tool” (E), click inside the “Canvas” and input a “Width” and “Height” of 80 mm. Click “OK”.
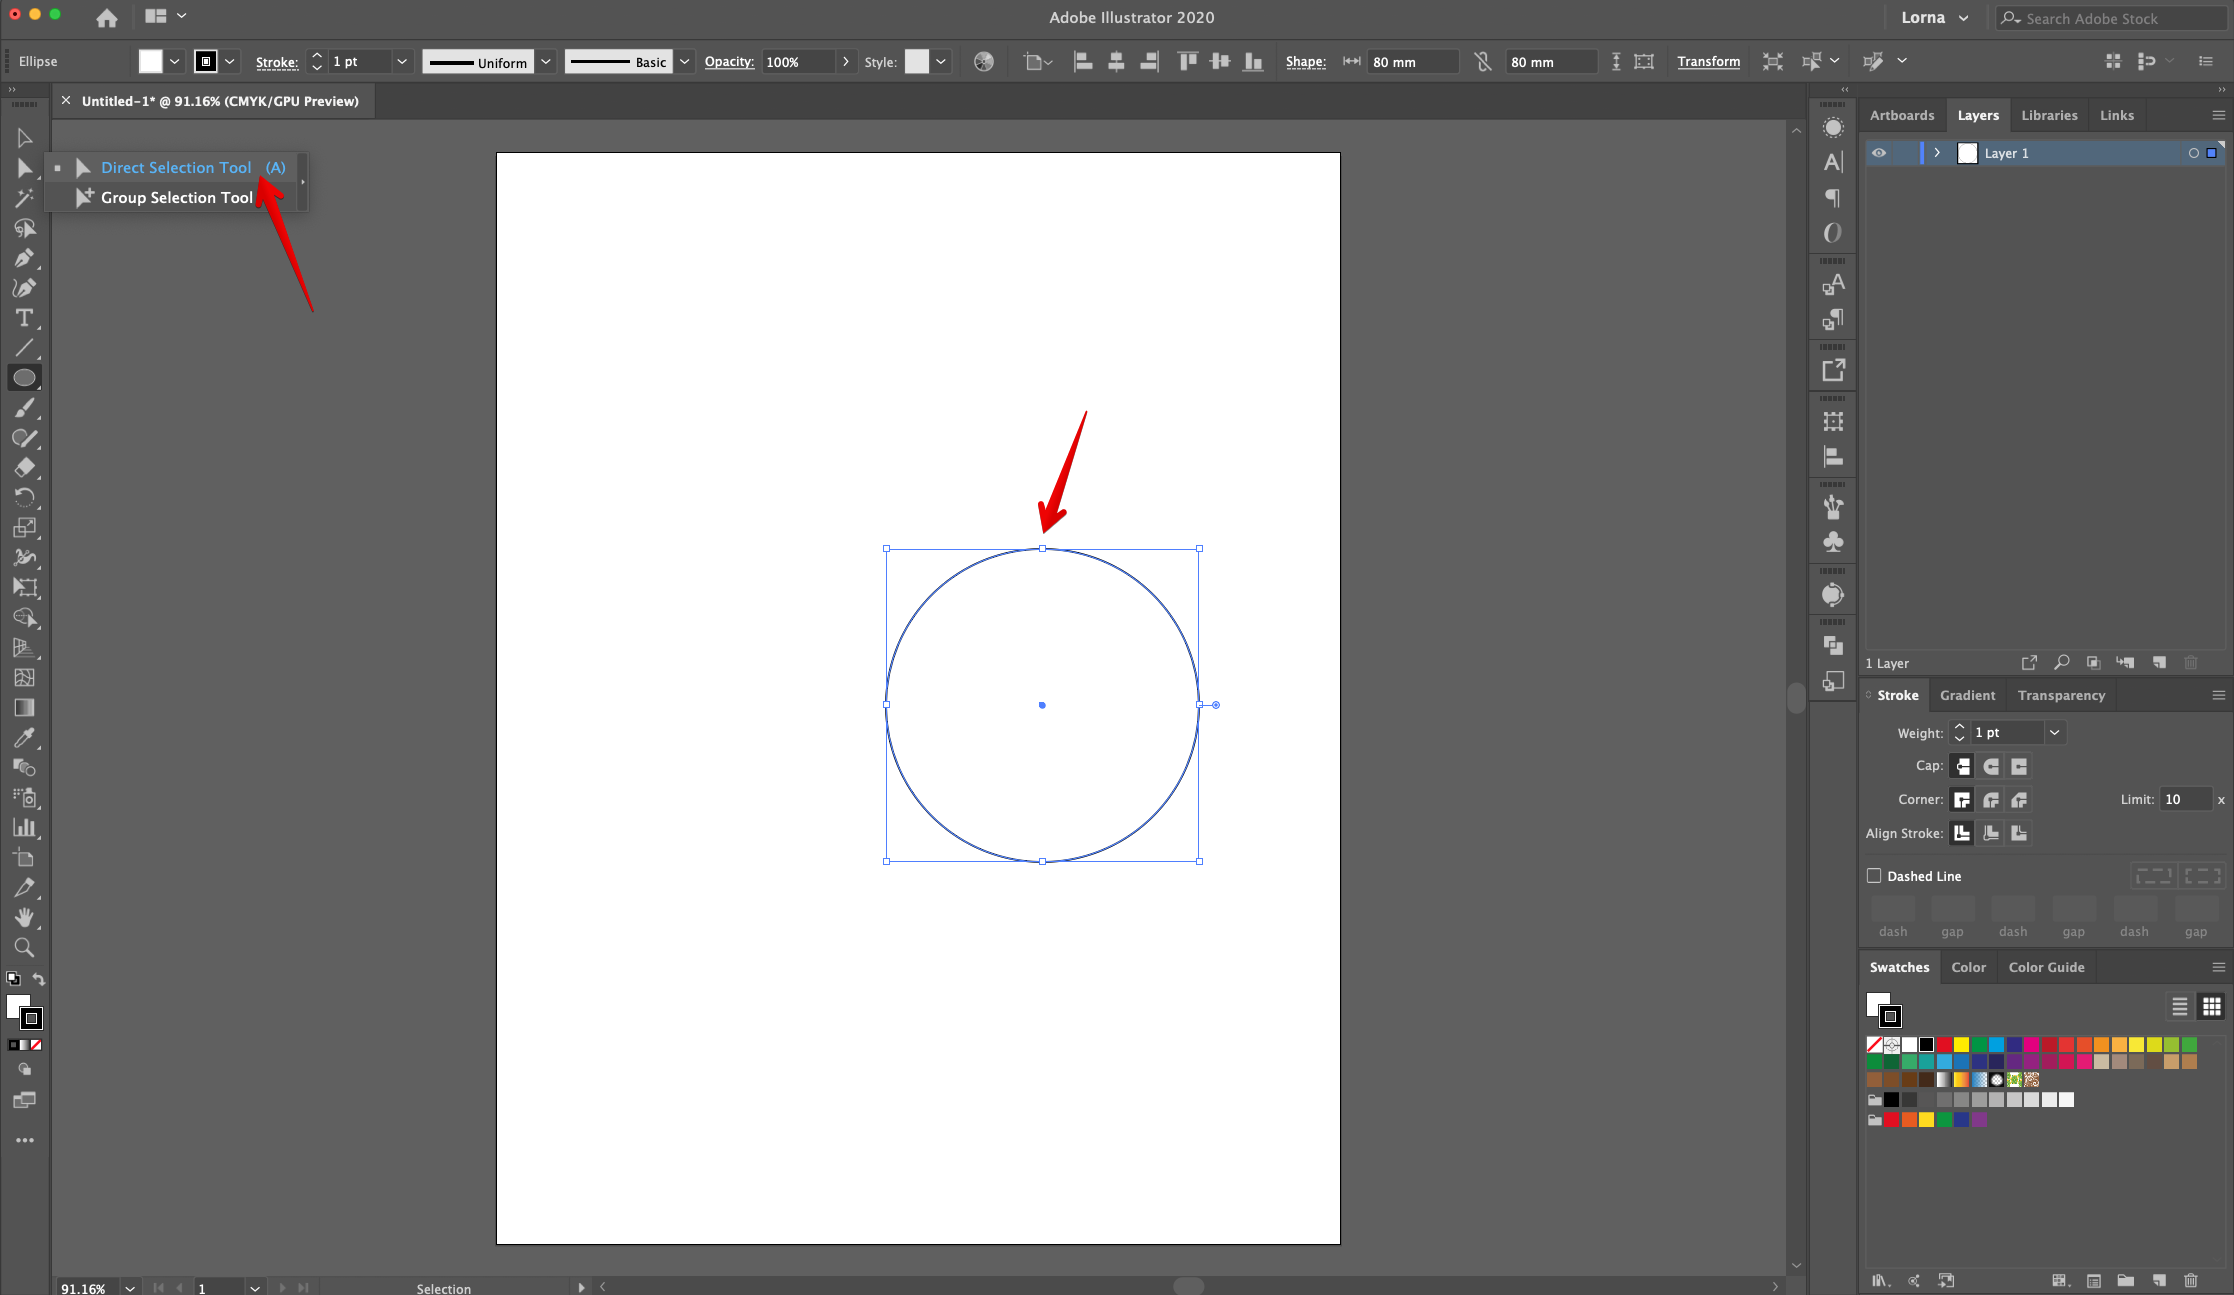
3 - Use the “Direct Selection Tool” (A) to click on the top “Anchor Point”.
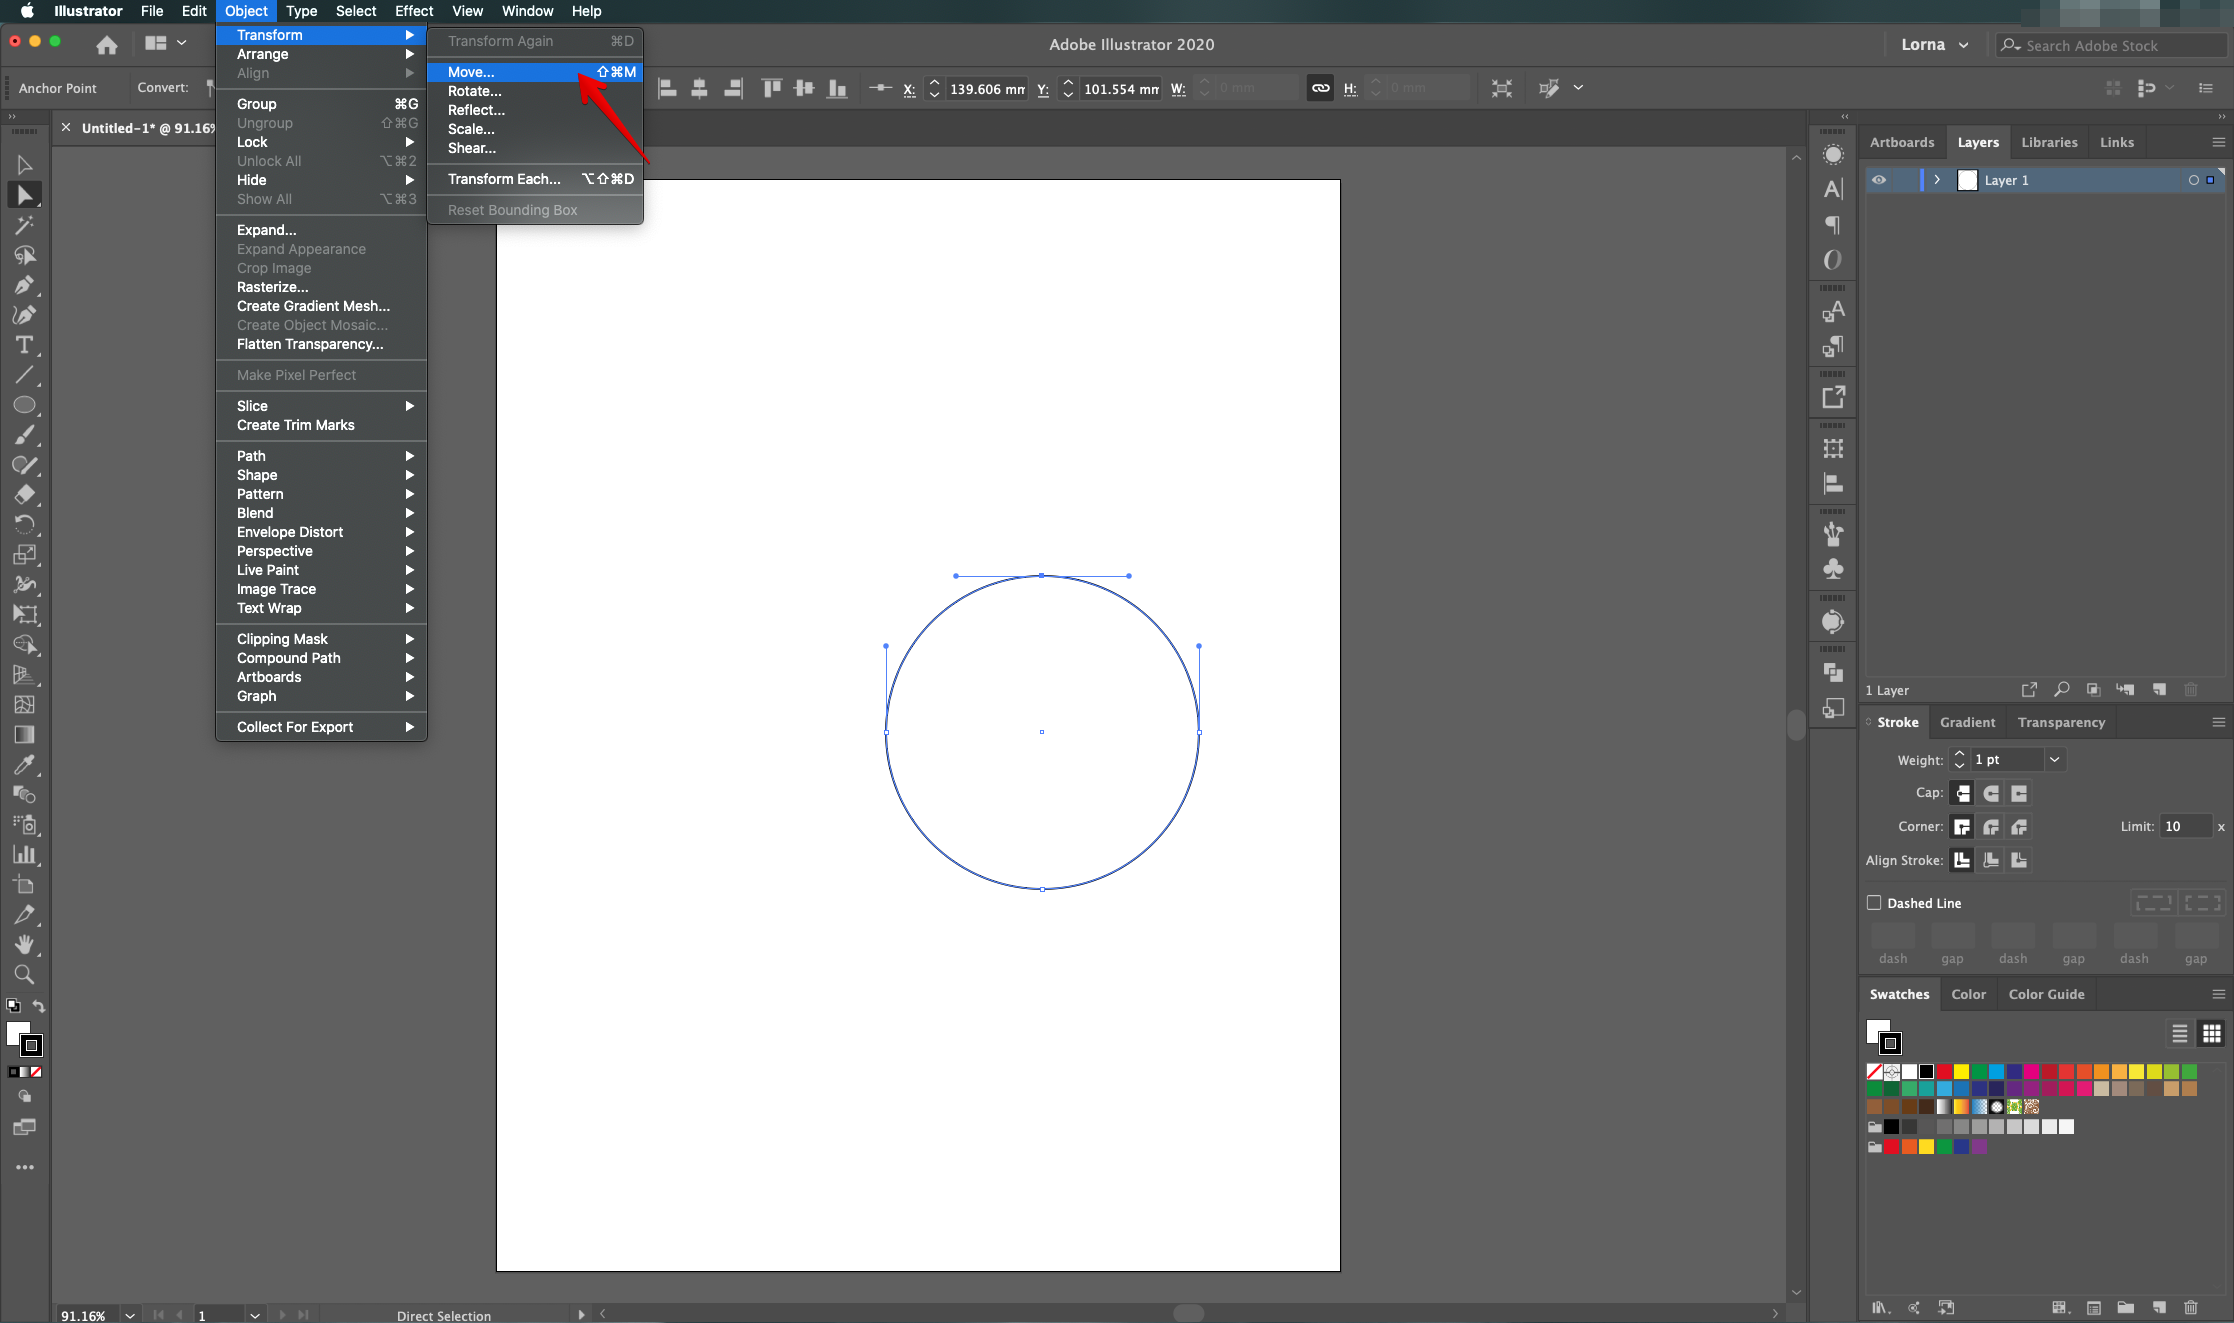
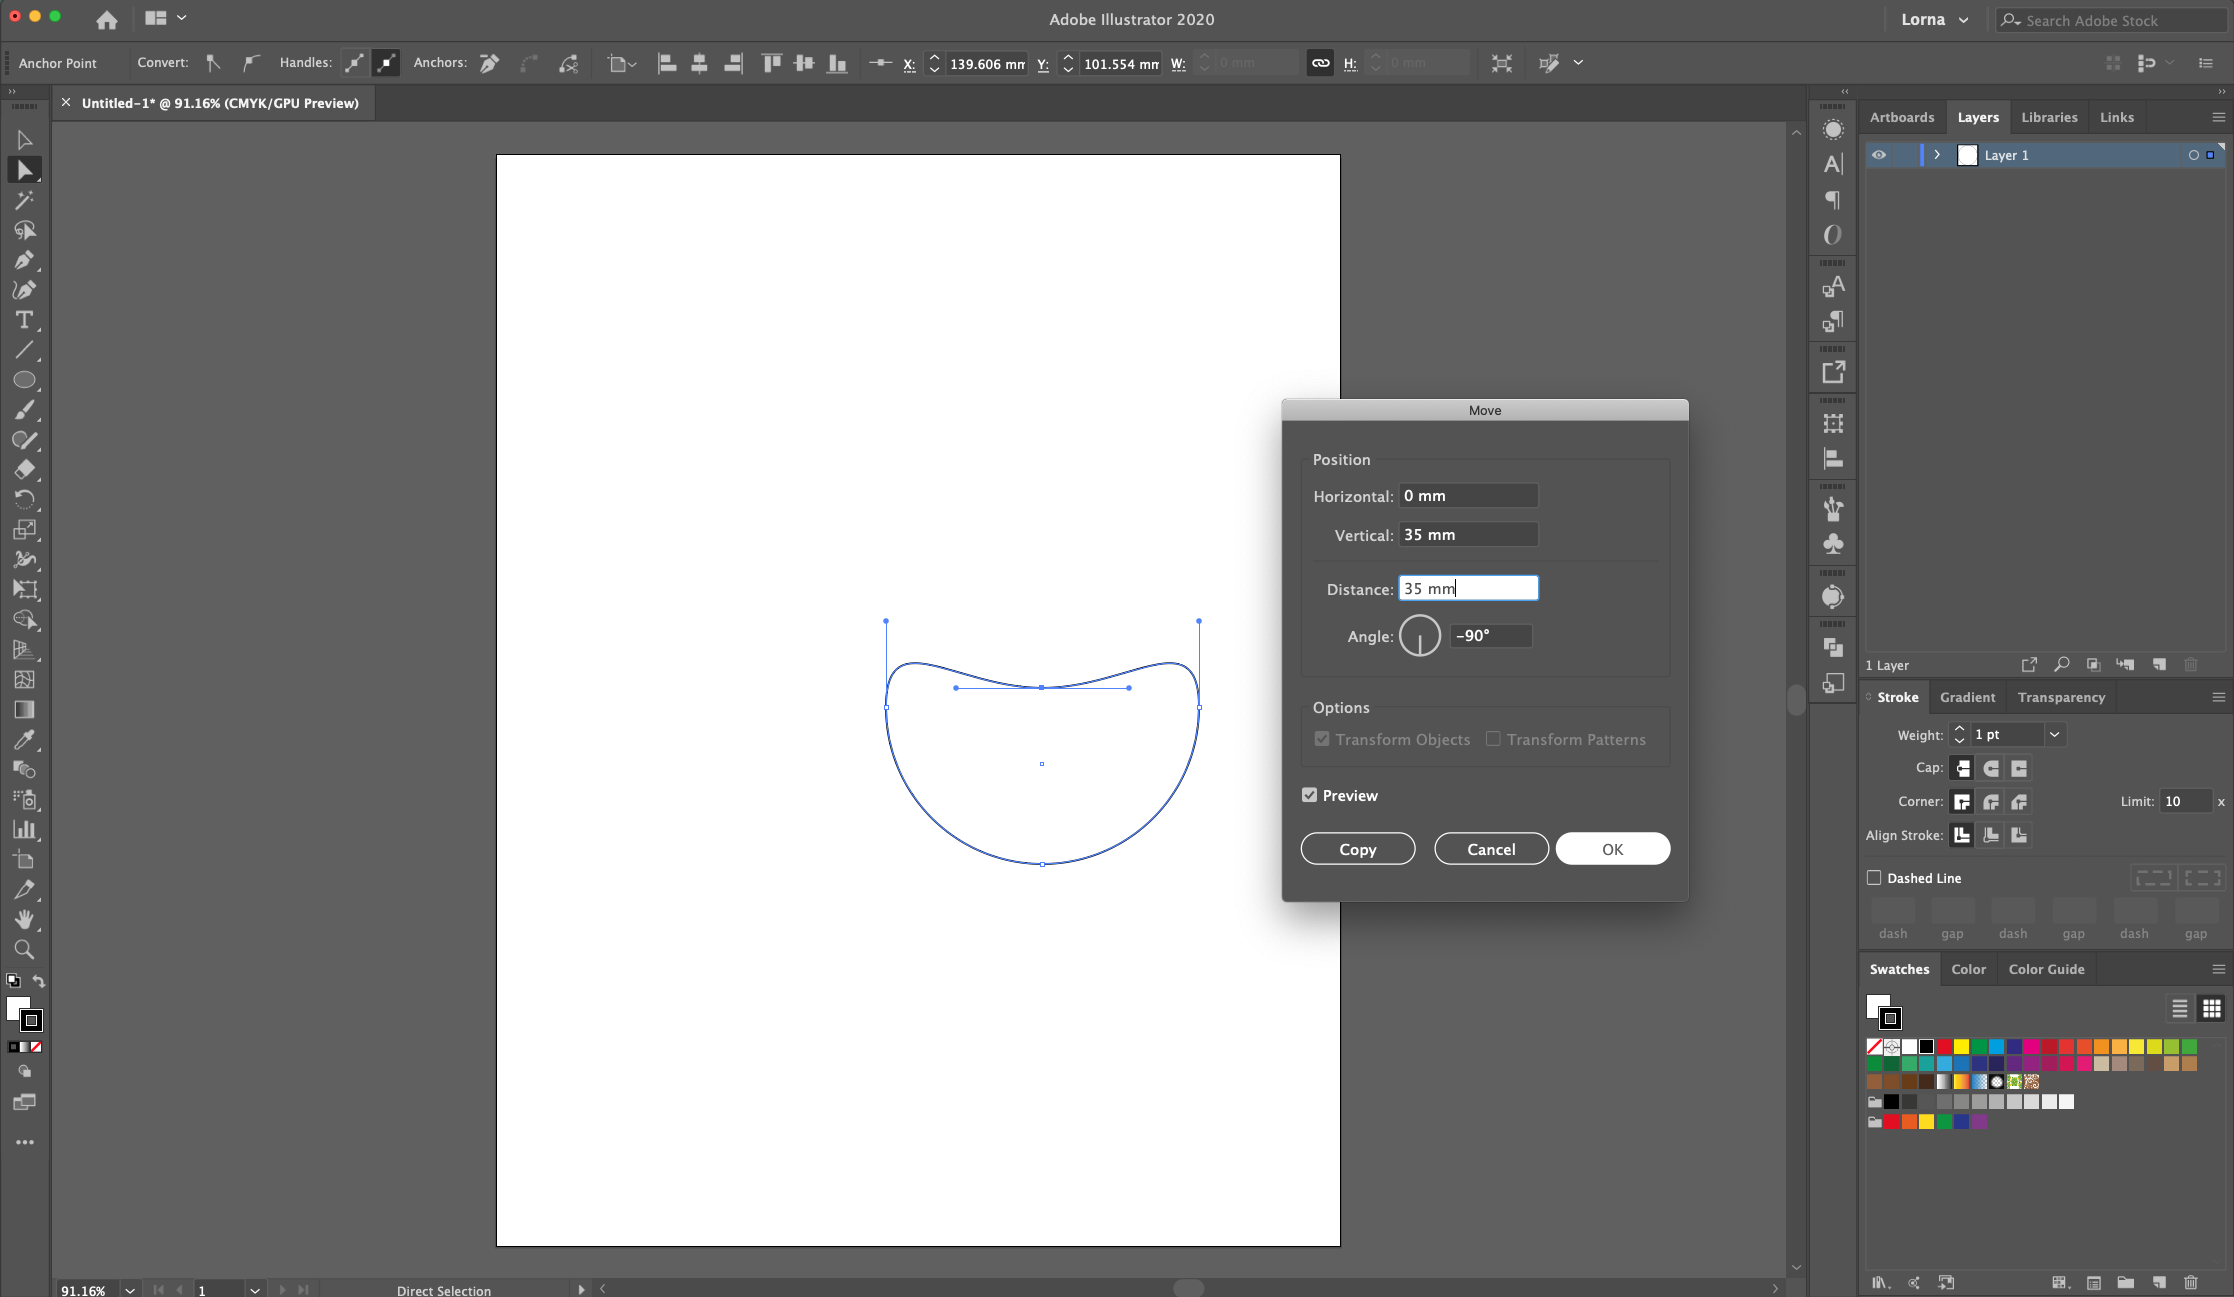
4 - Go to Object > Transform > Move (Shift + Command/Control + M) and use a “Vertical” distance of 35 mm with a -90° “Angle”. Click “OK”.
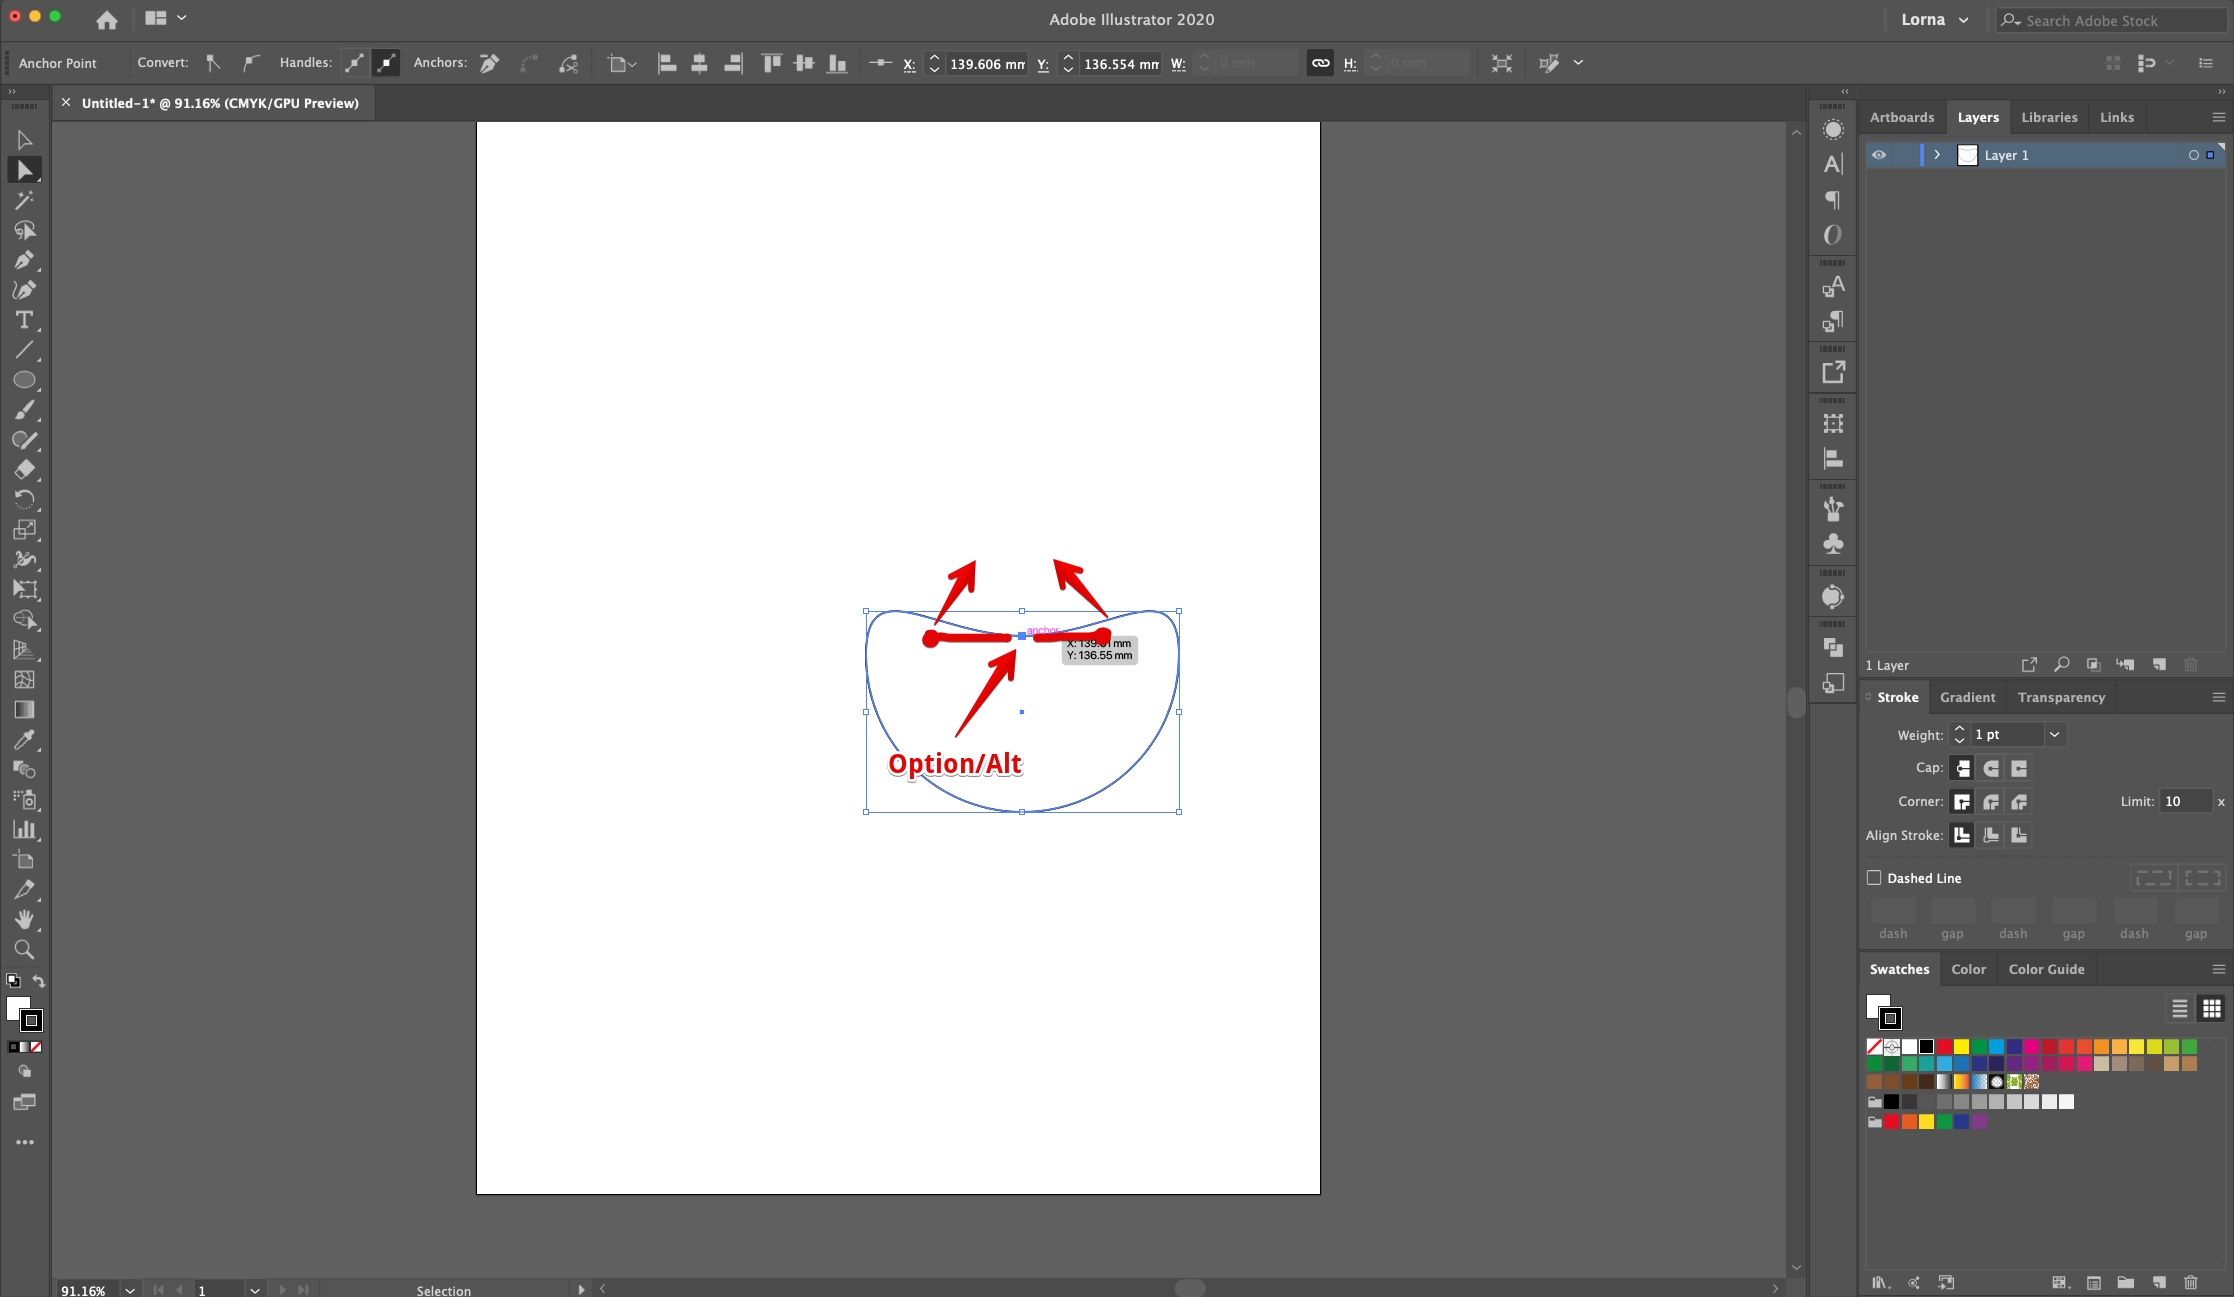
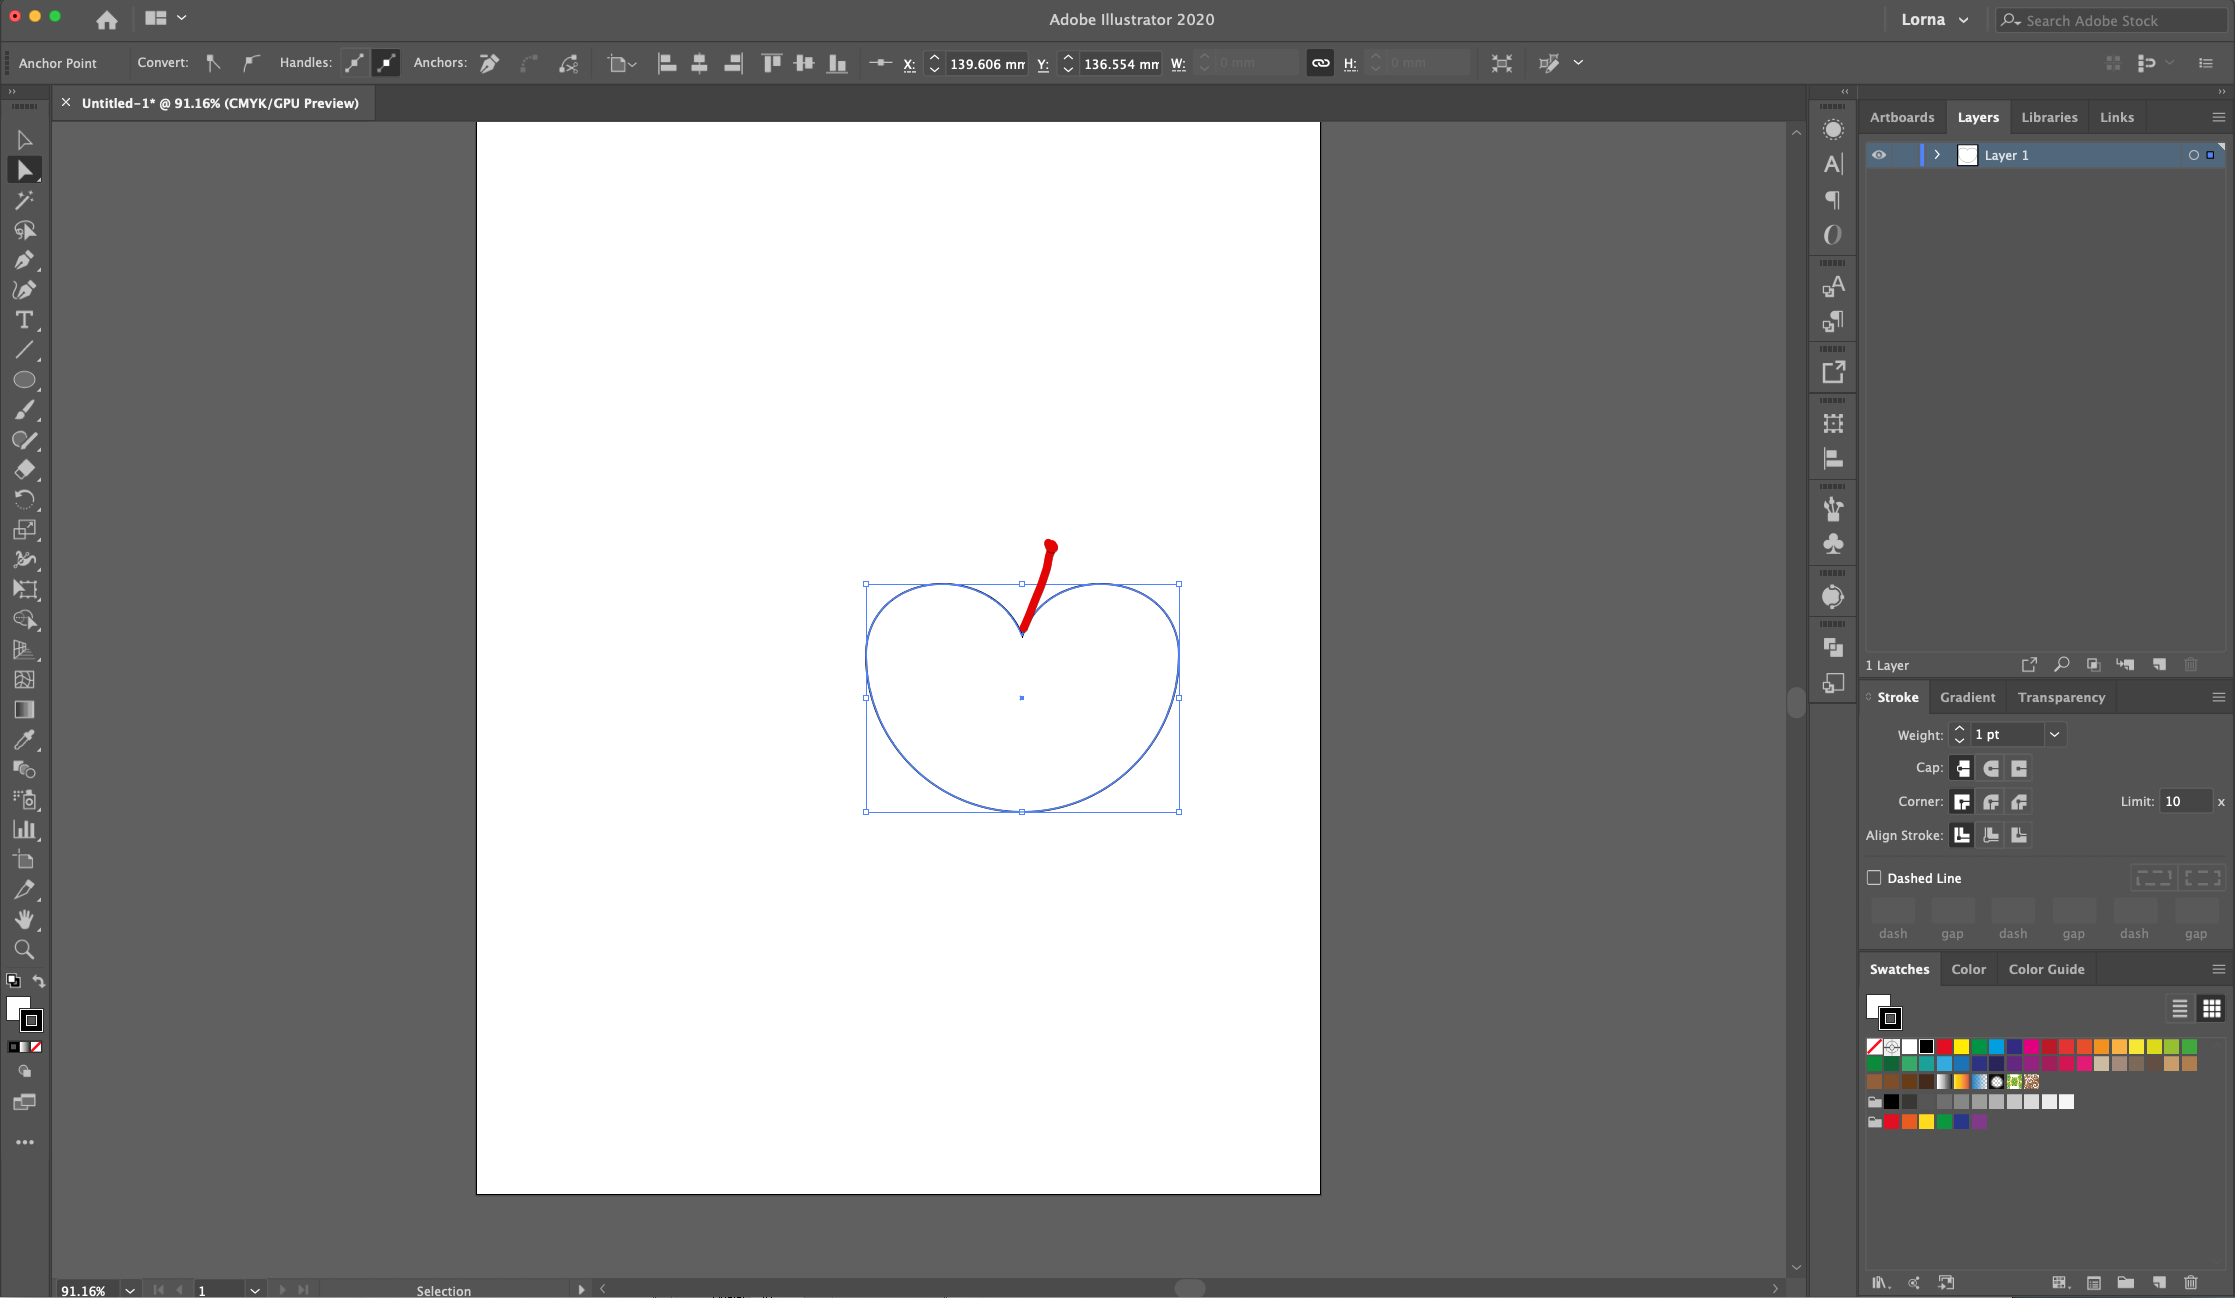
5 - Still using the Direct Selection Tool” (A)and while holding the “Option/Alt”, key select the “Handles” and drag them “Up” one by one to create the top curves of the “Heart”.

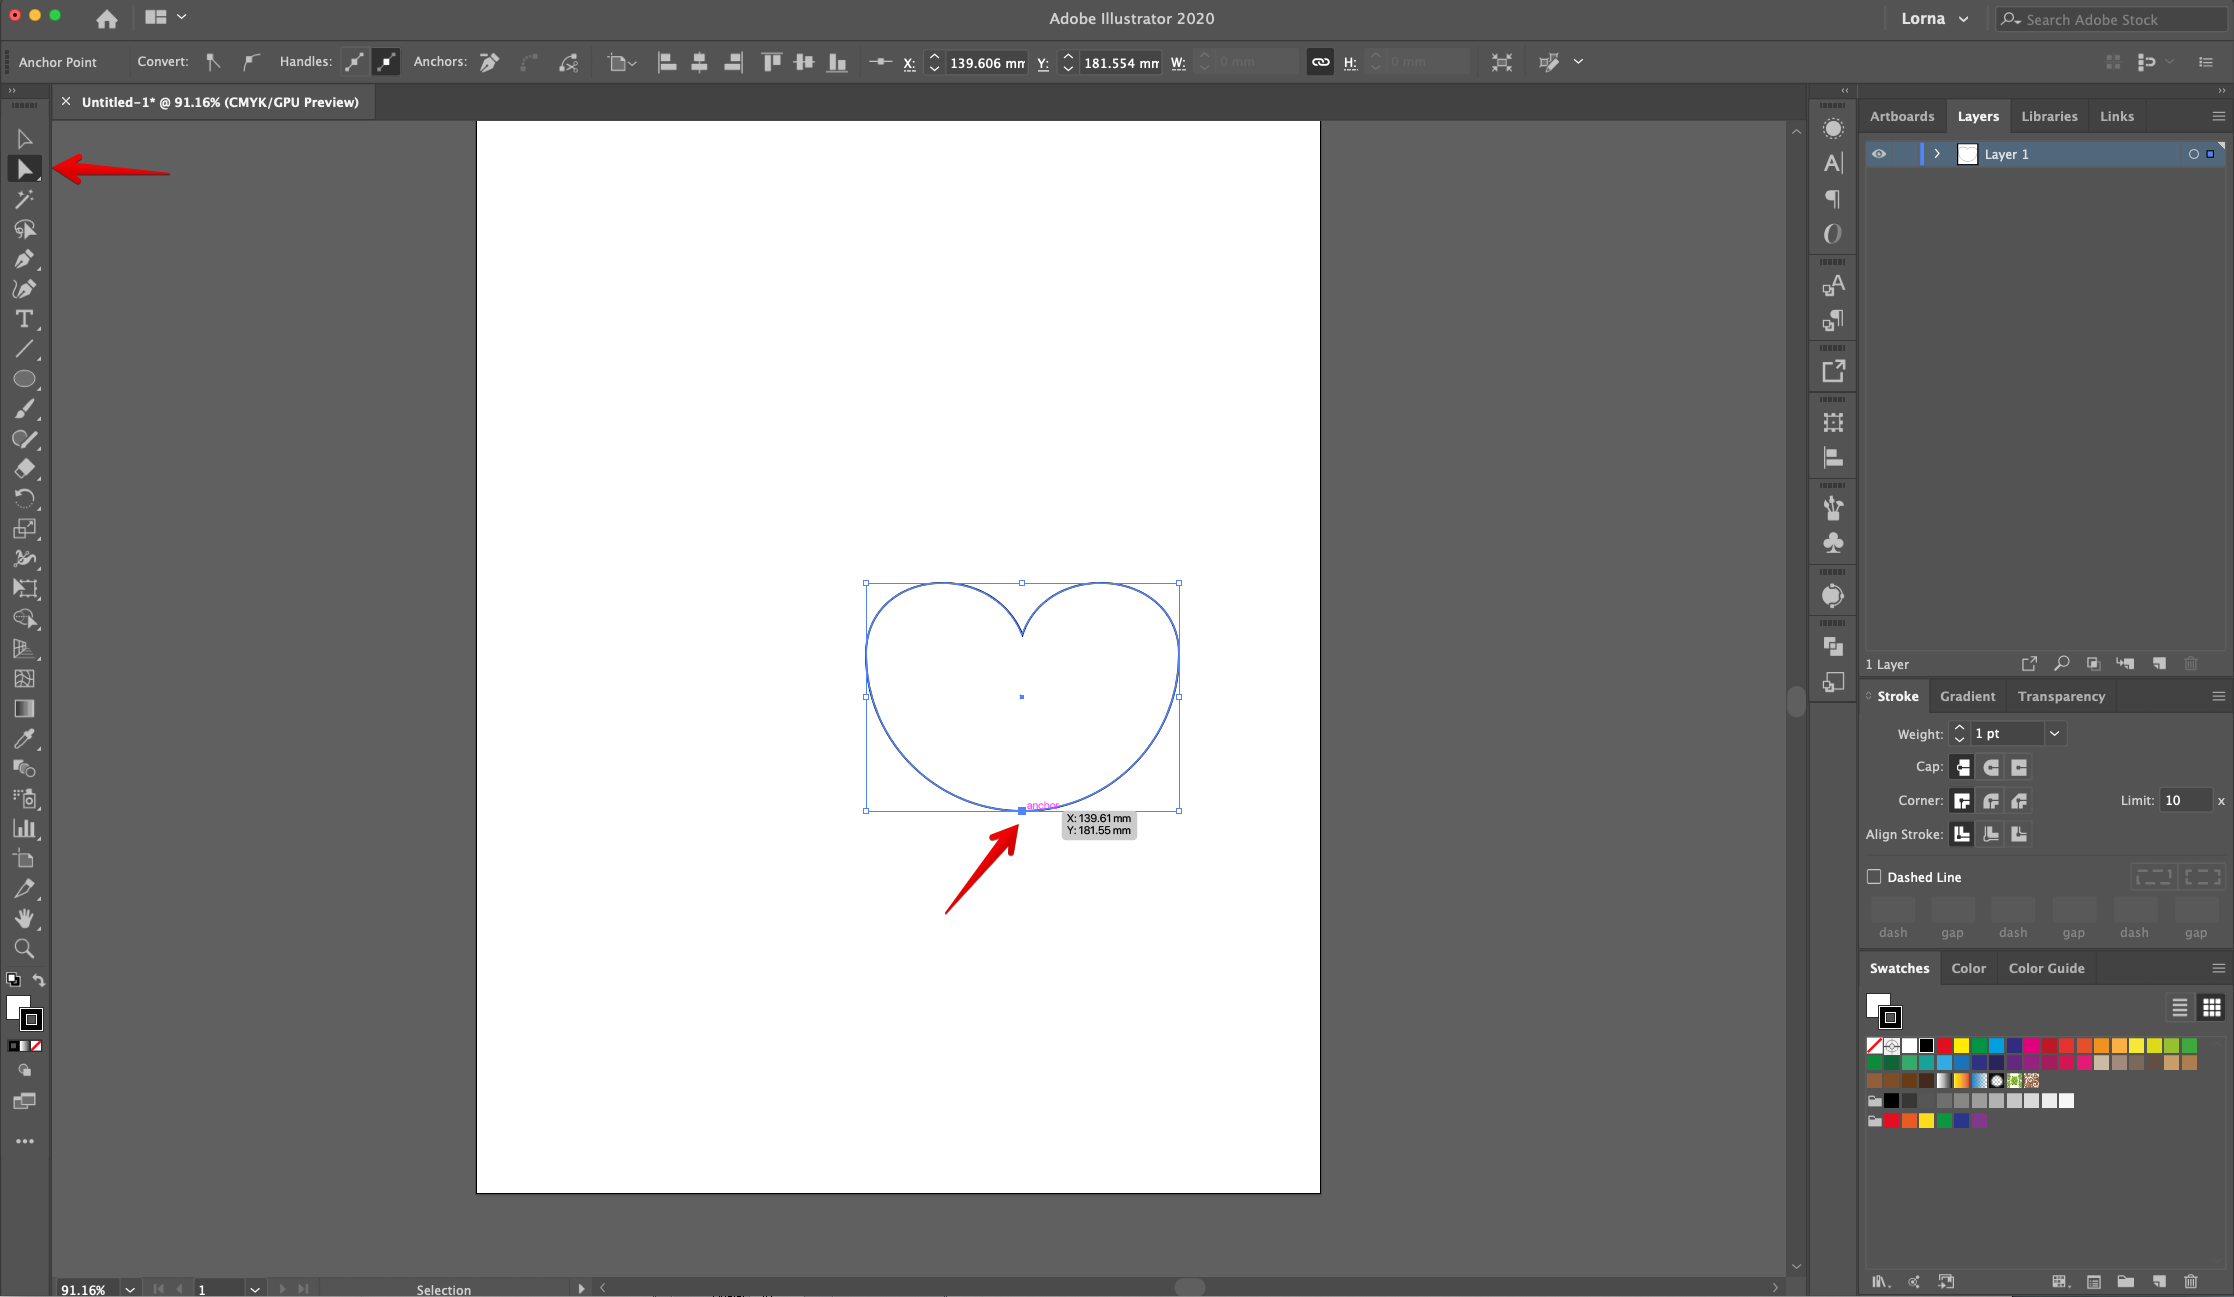
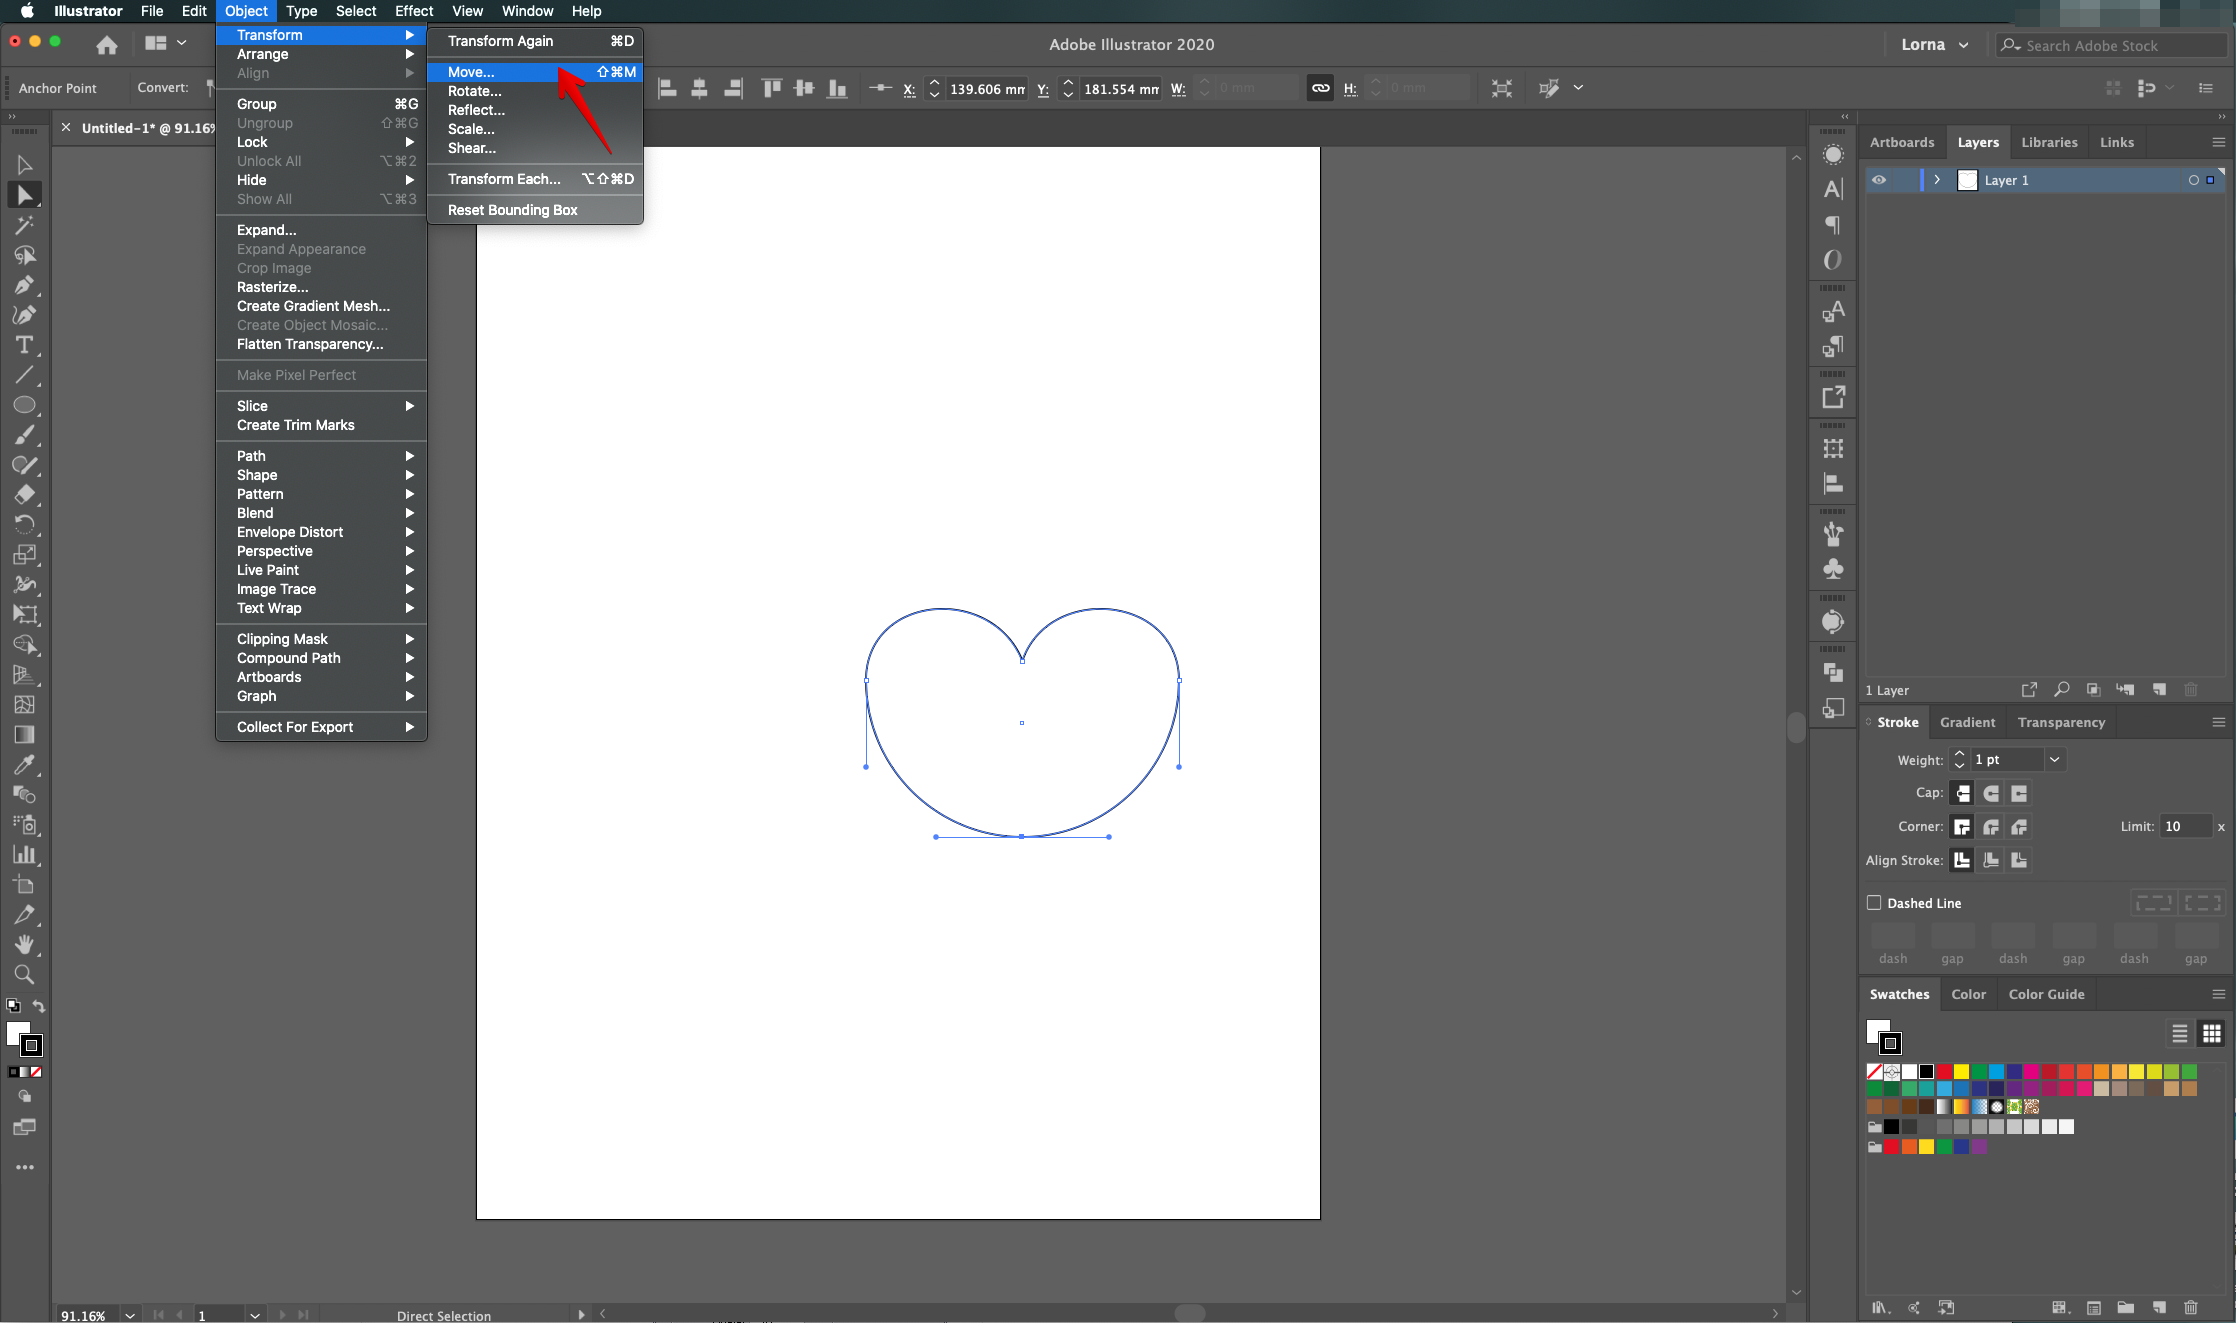
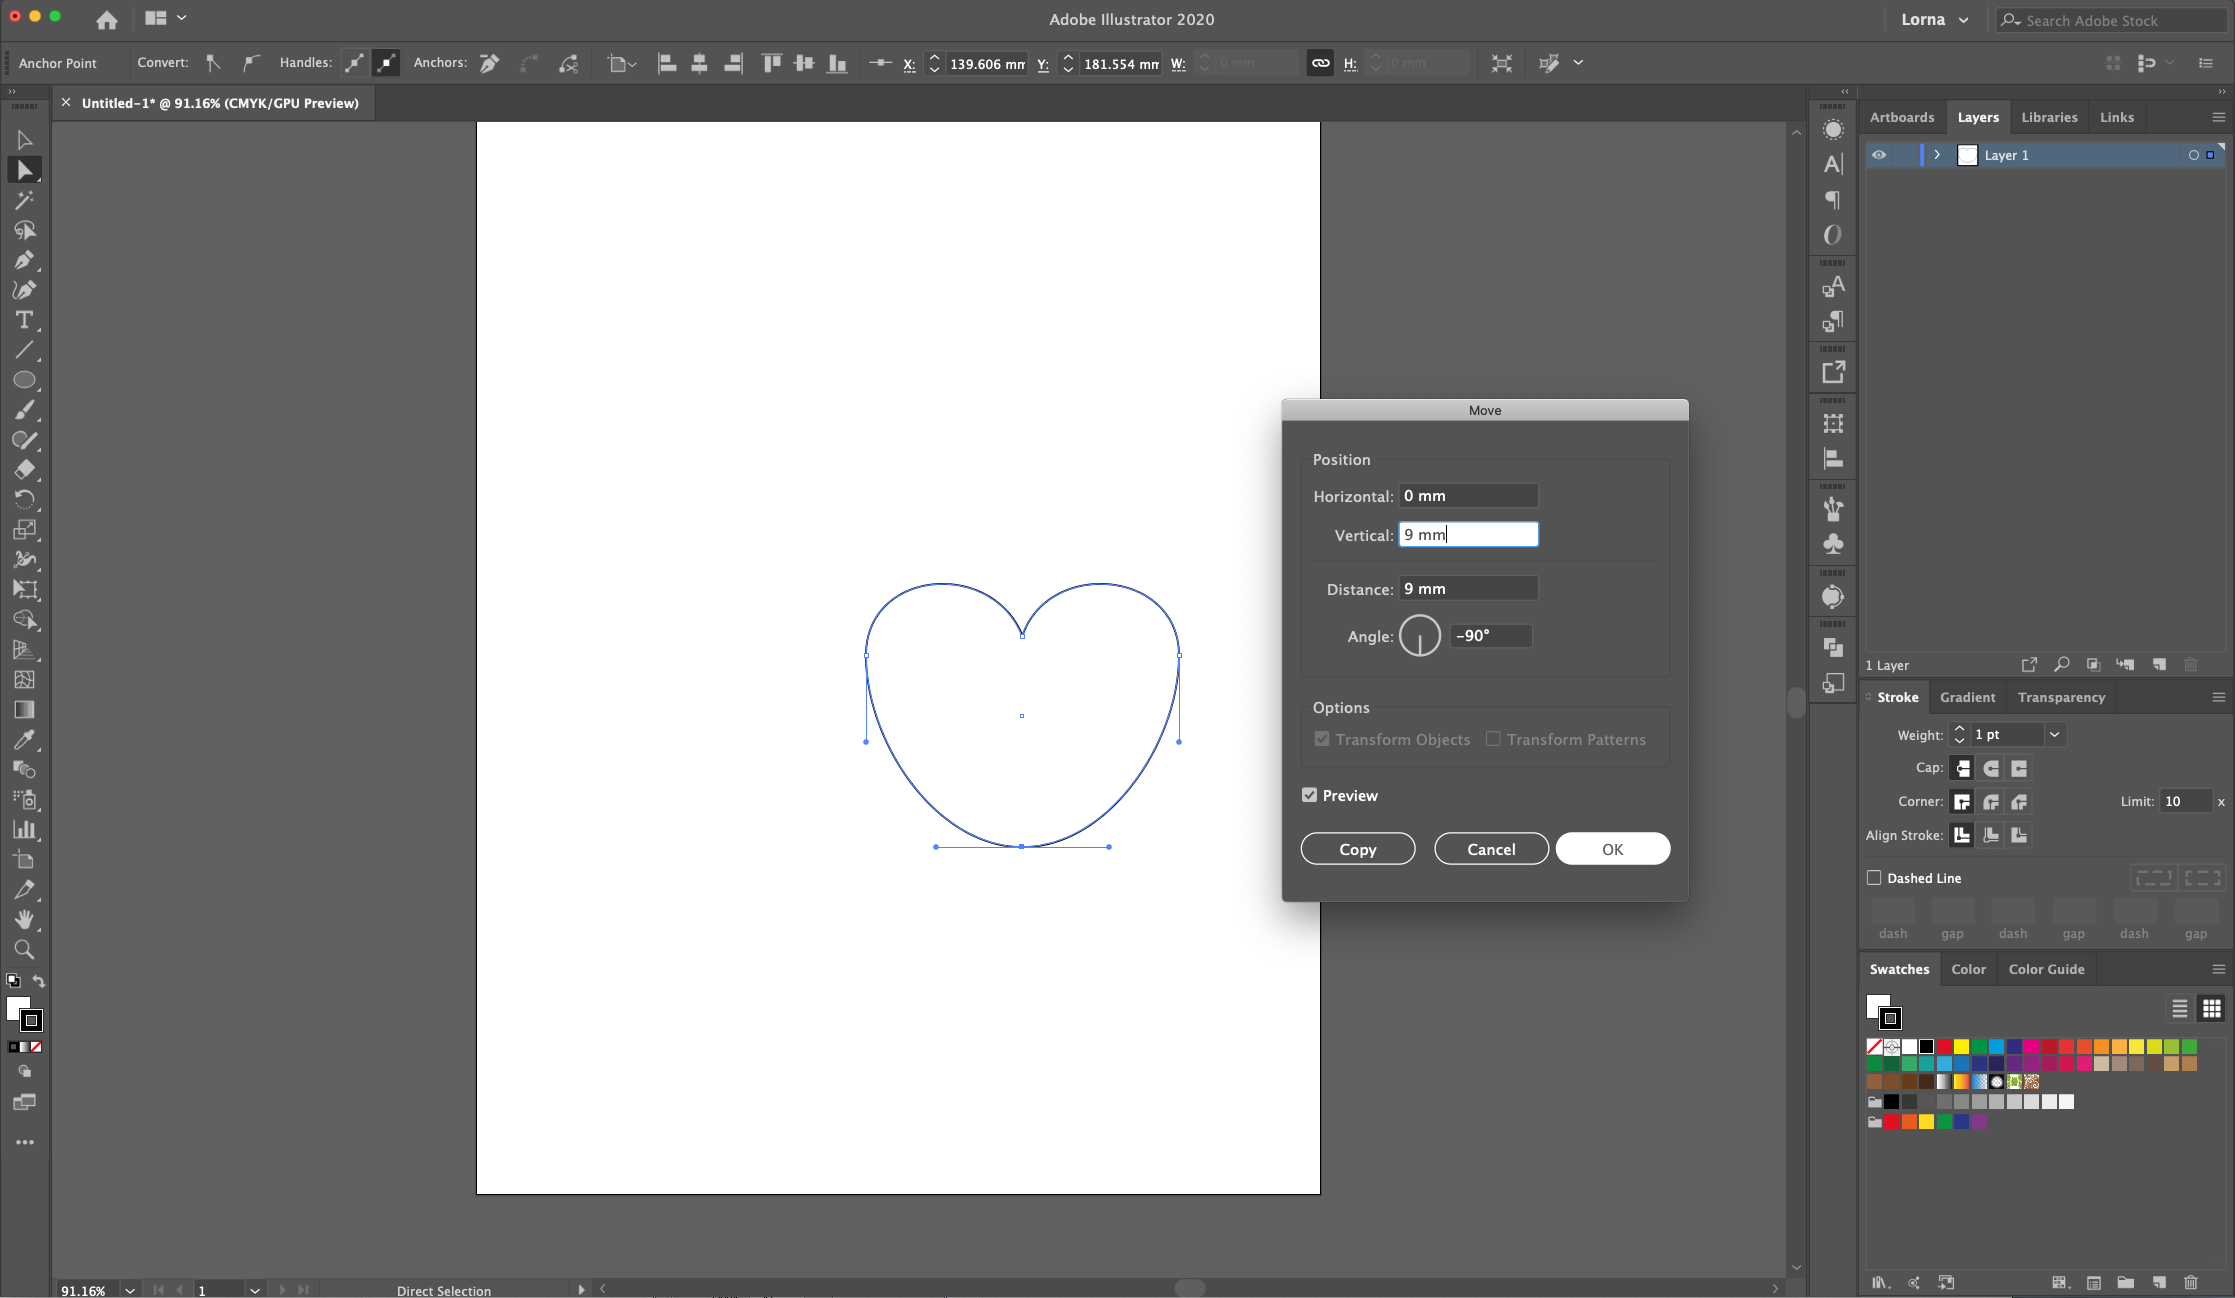
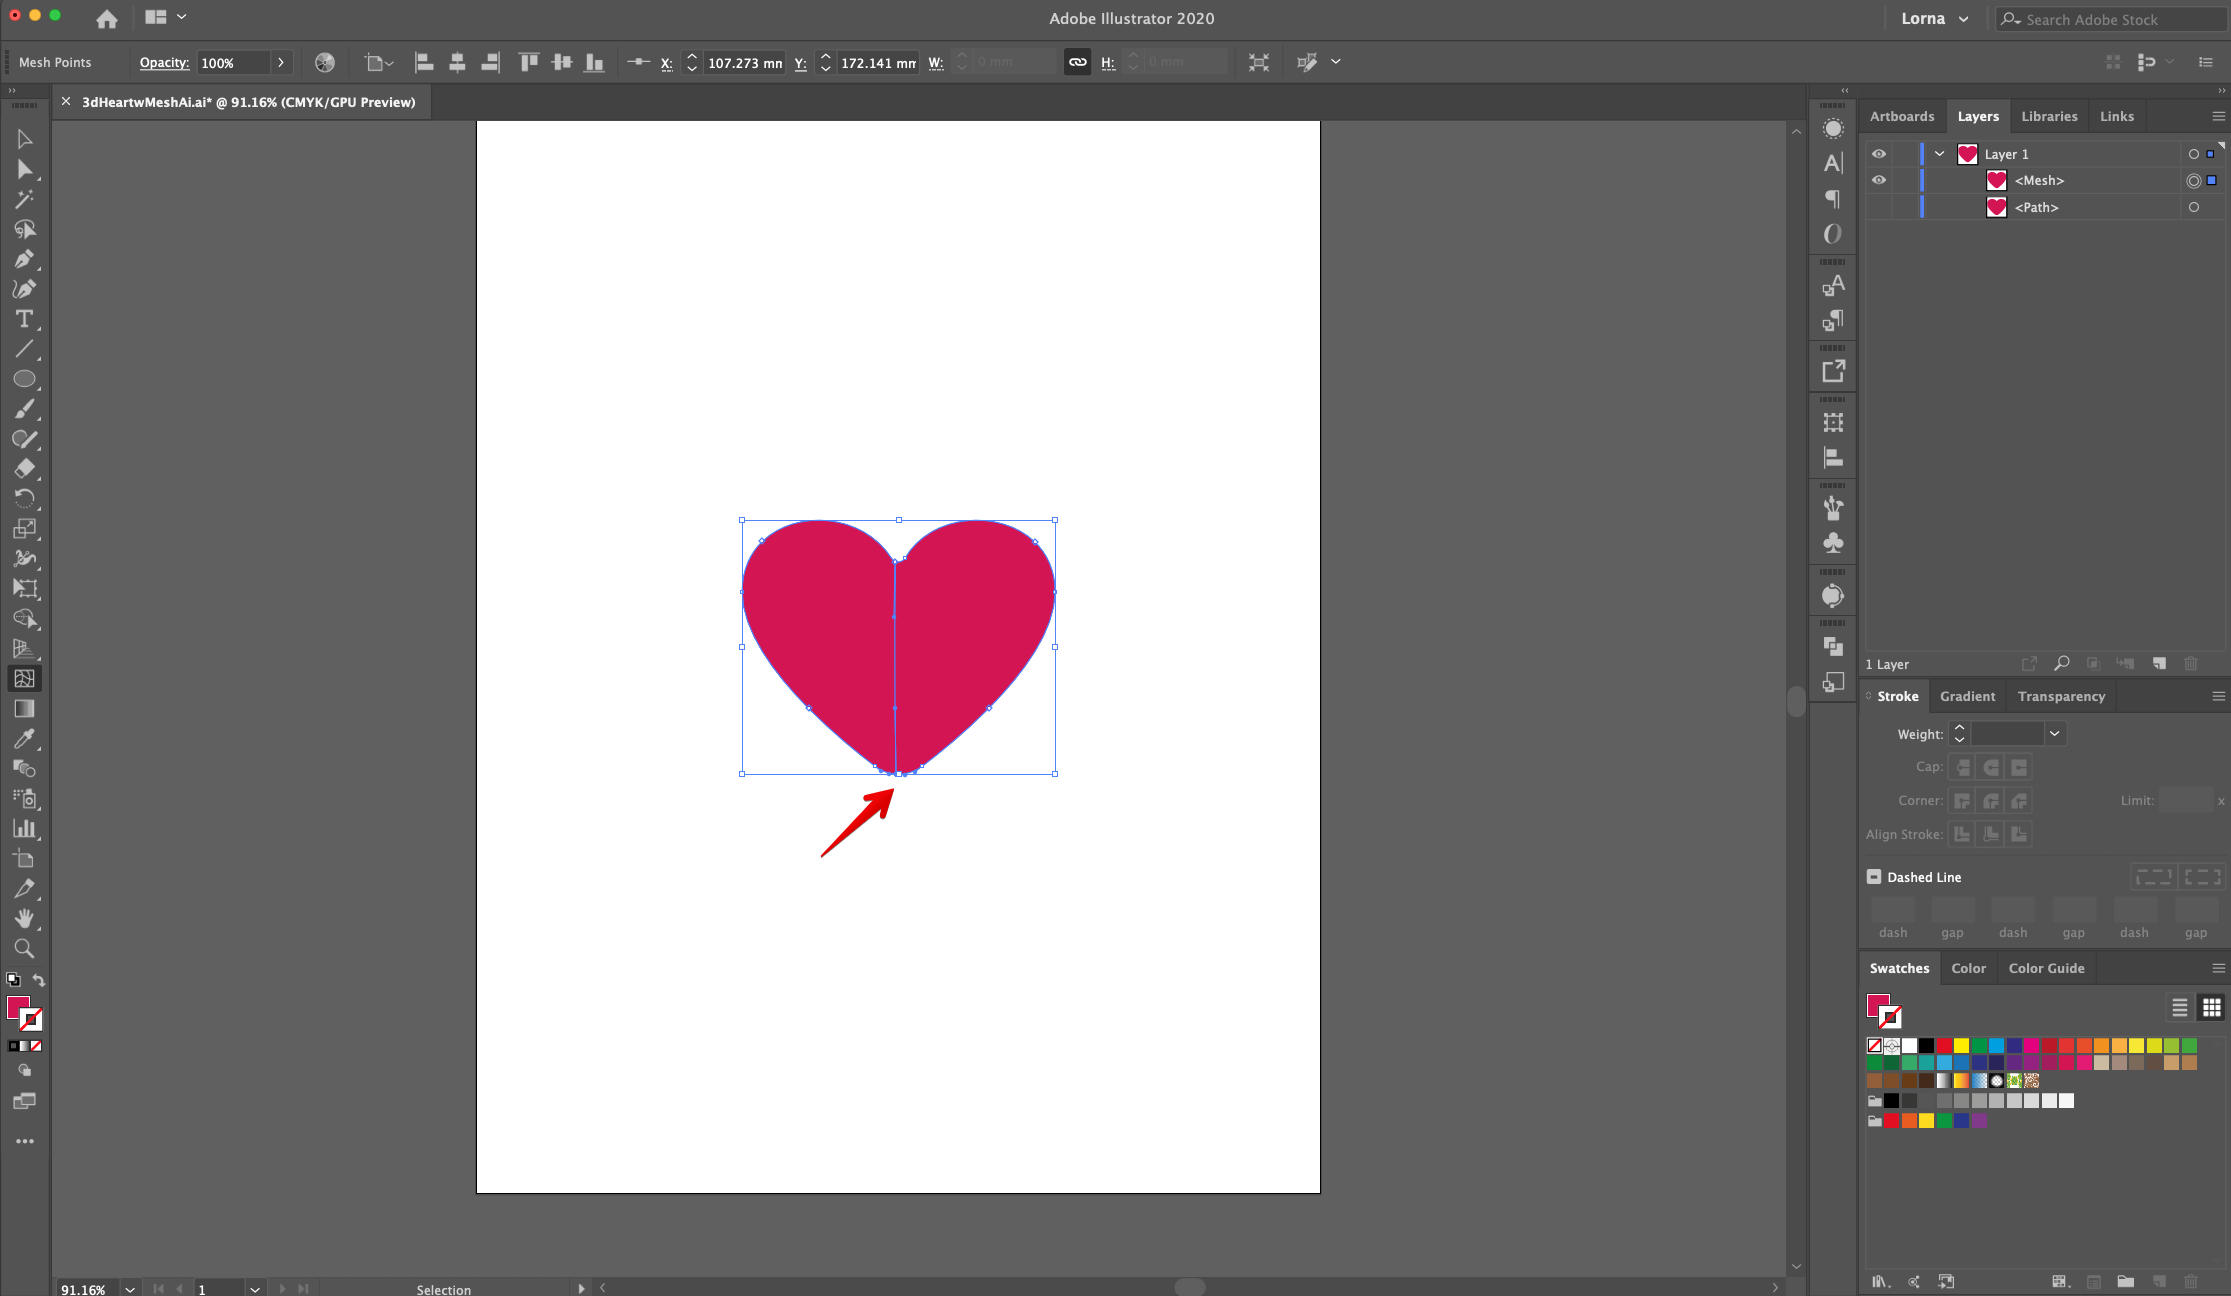
6 - Now, use the “Direct Selection Tool” (A) to click on the bottom “Anchor Point”. Go to Object > Transform > Move (Shift + Command/Control + M) and use a “Vertical” distance of 9 mm with a -90° “Angle”. Click “OK”.
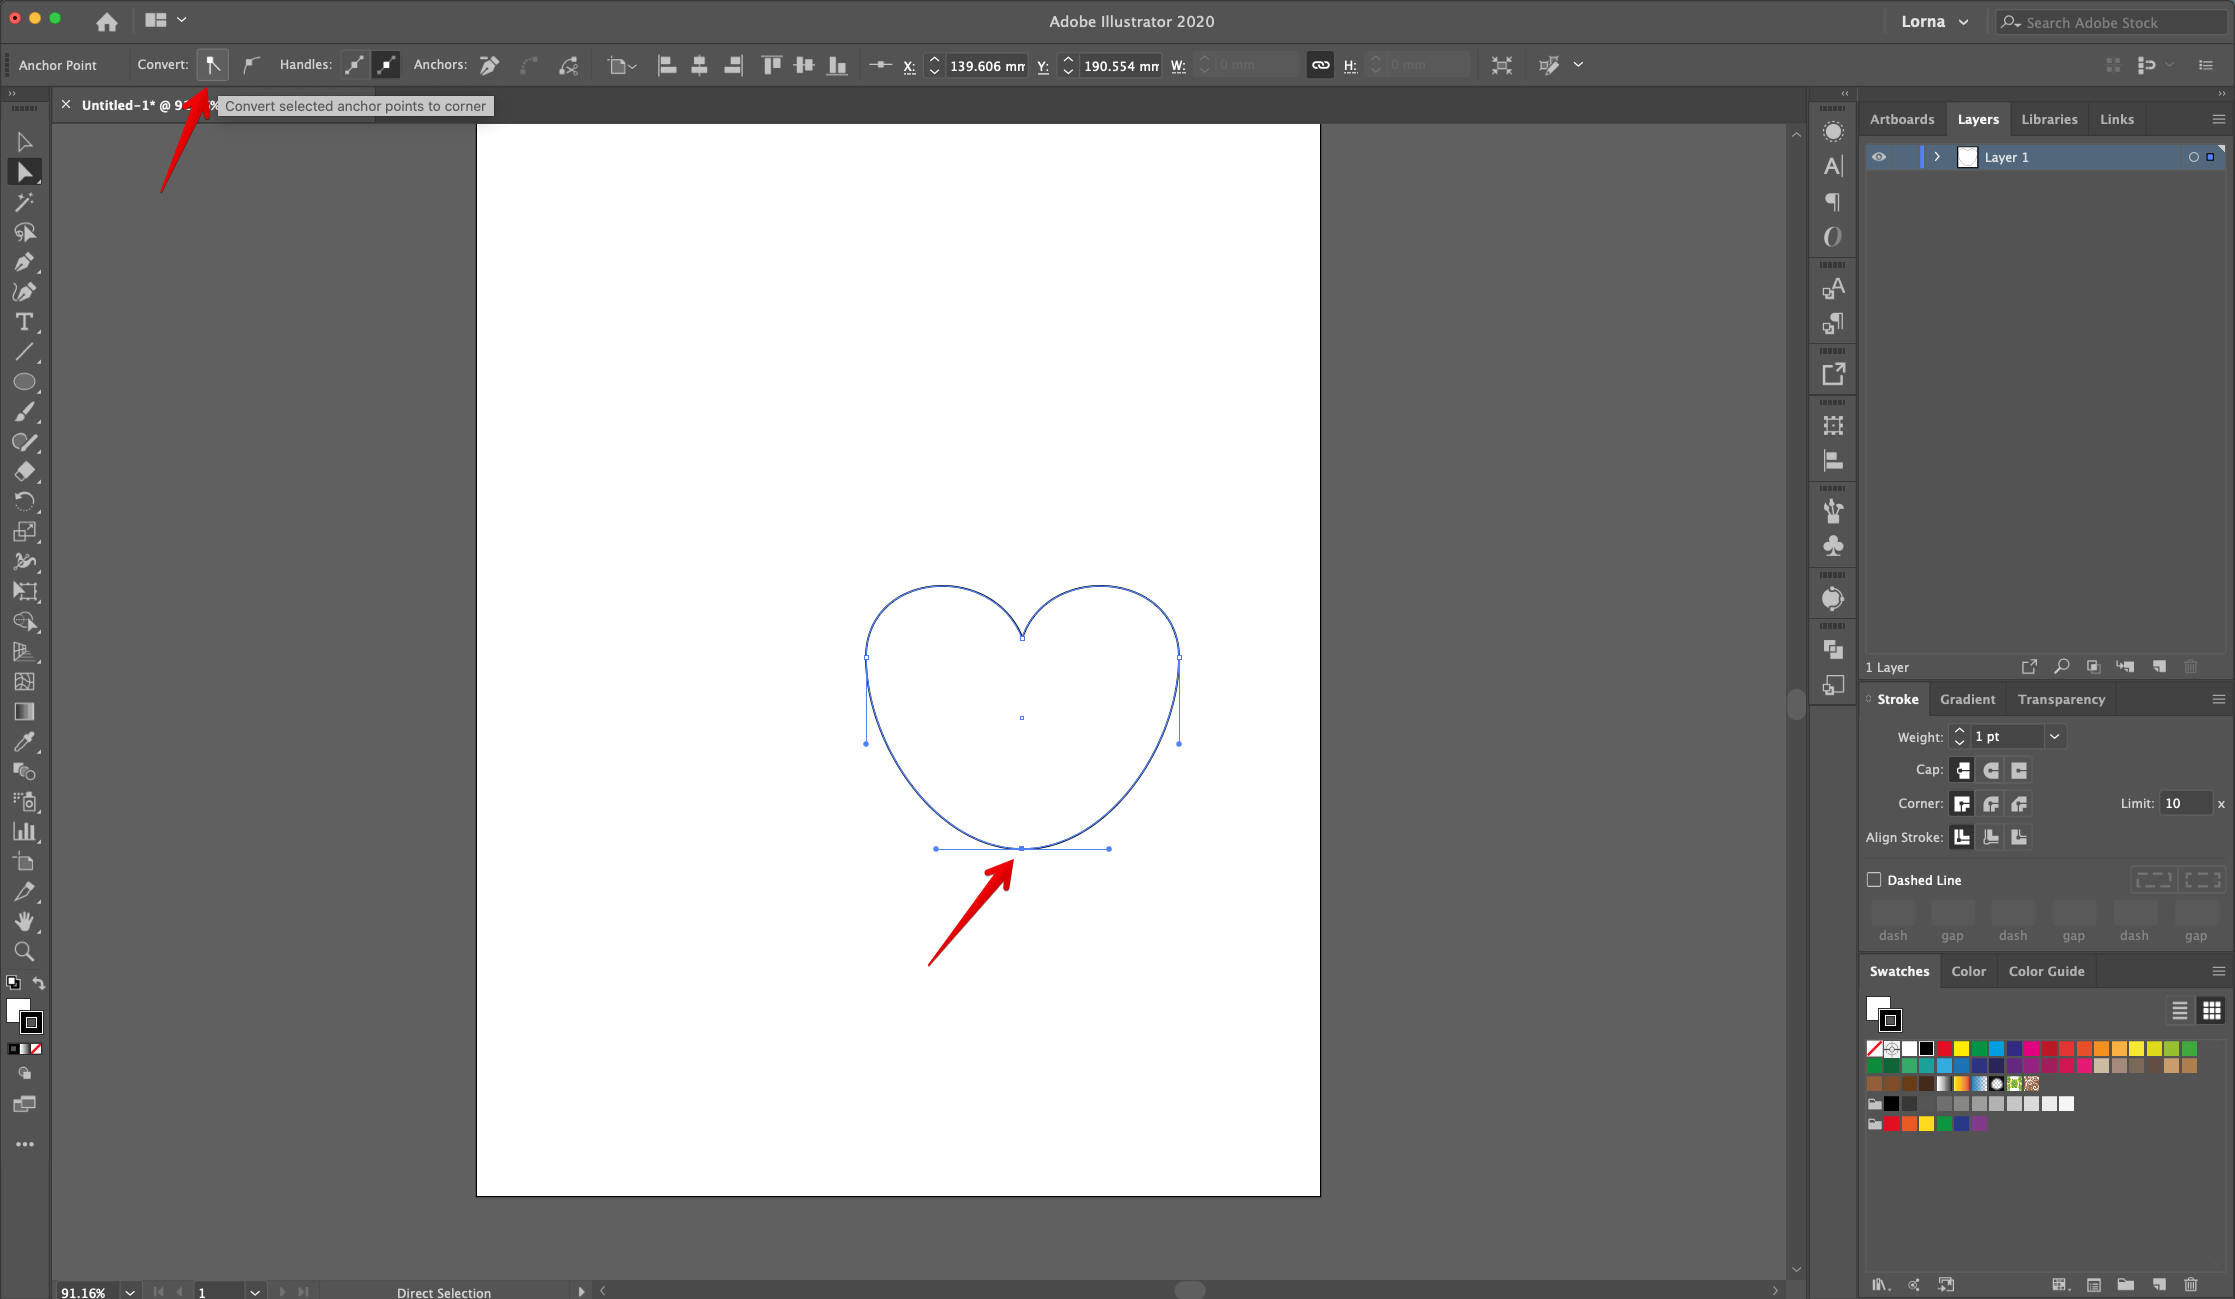
7 - With it still selected, click on “Convert selected anchor points to corner” in the Top Menu to make the lines straight.
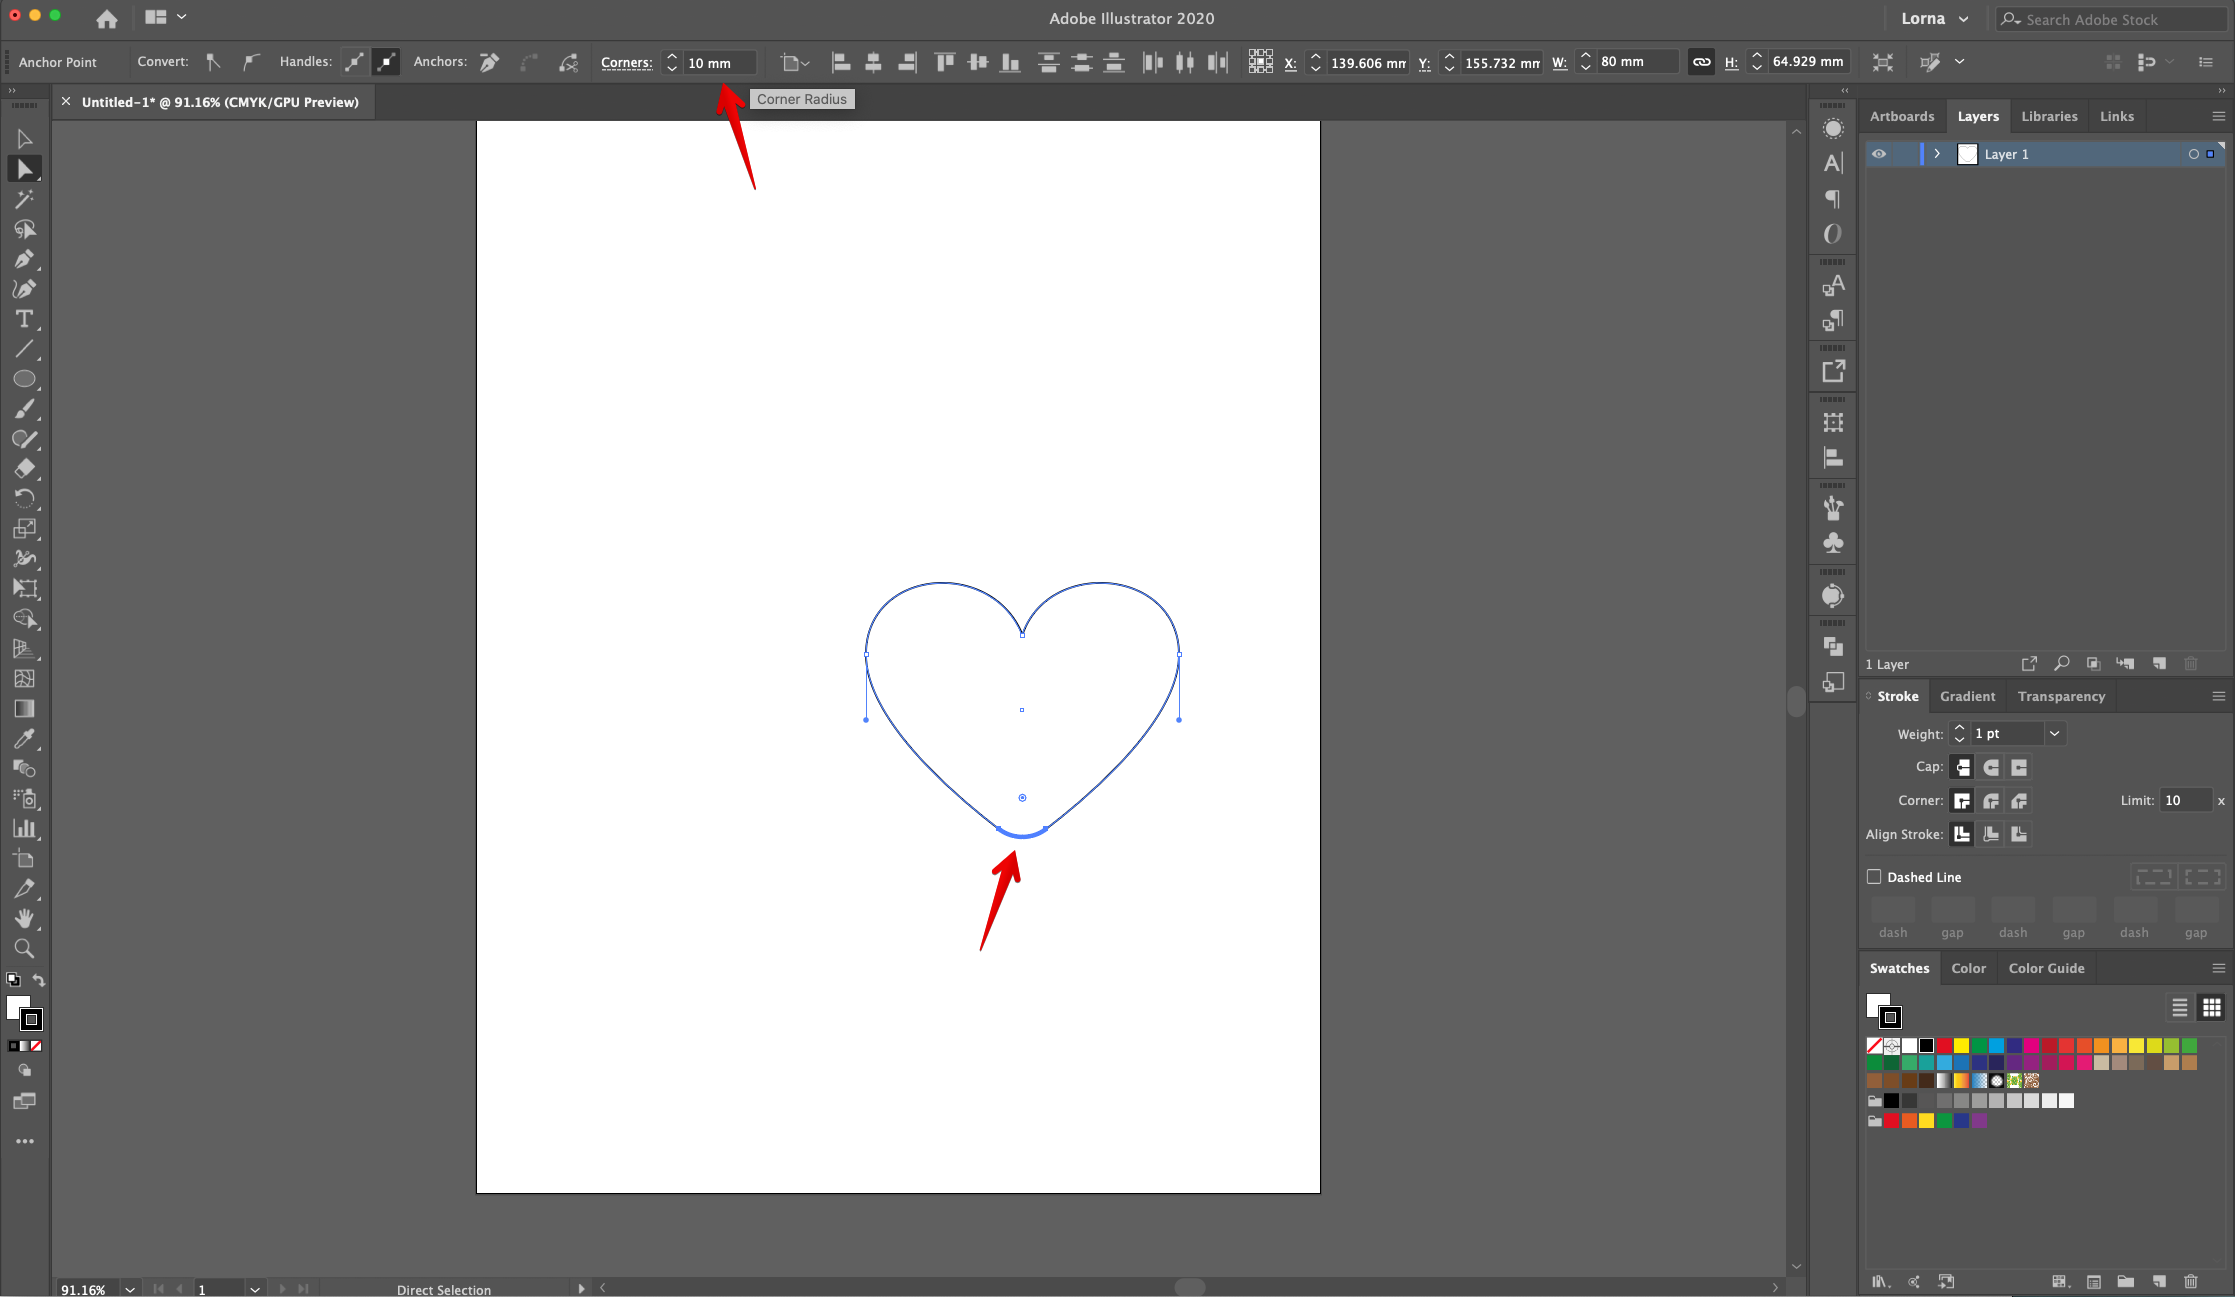
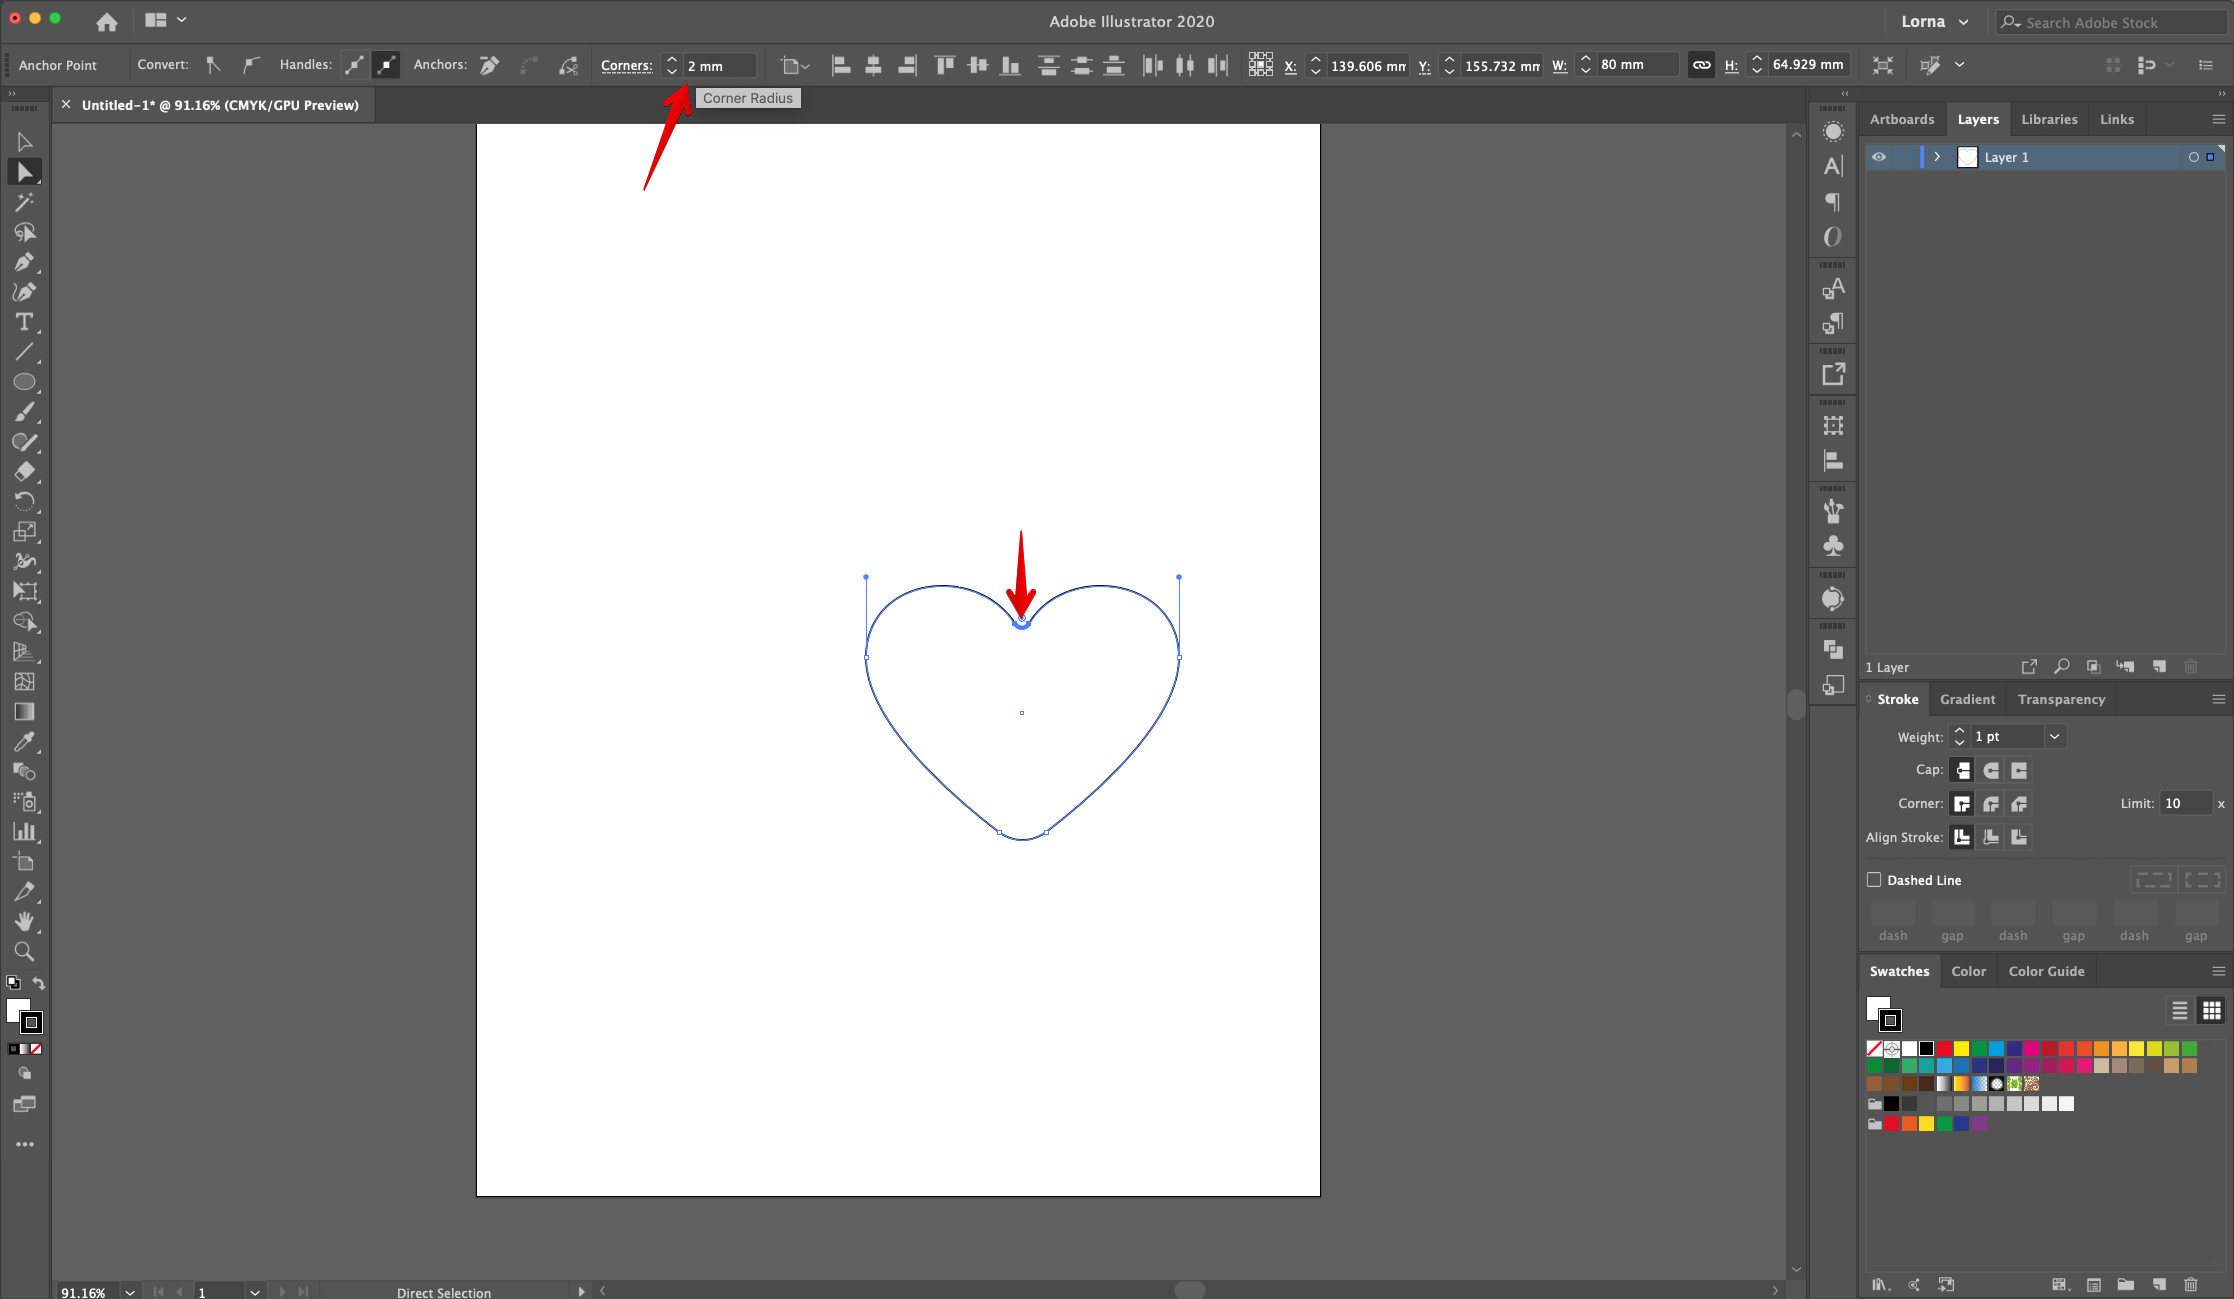
8 - Give it a 10 mm “Corner Radius” in the Top Menu. Then, select the Top “Anchor Point” and give it a 2 mm “Corner Radius”.
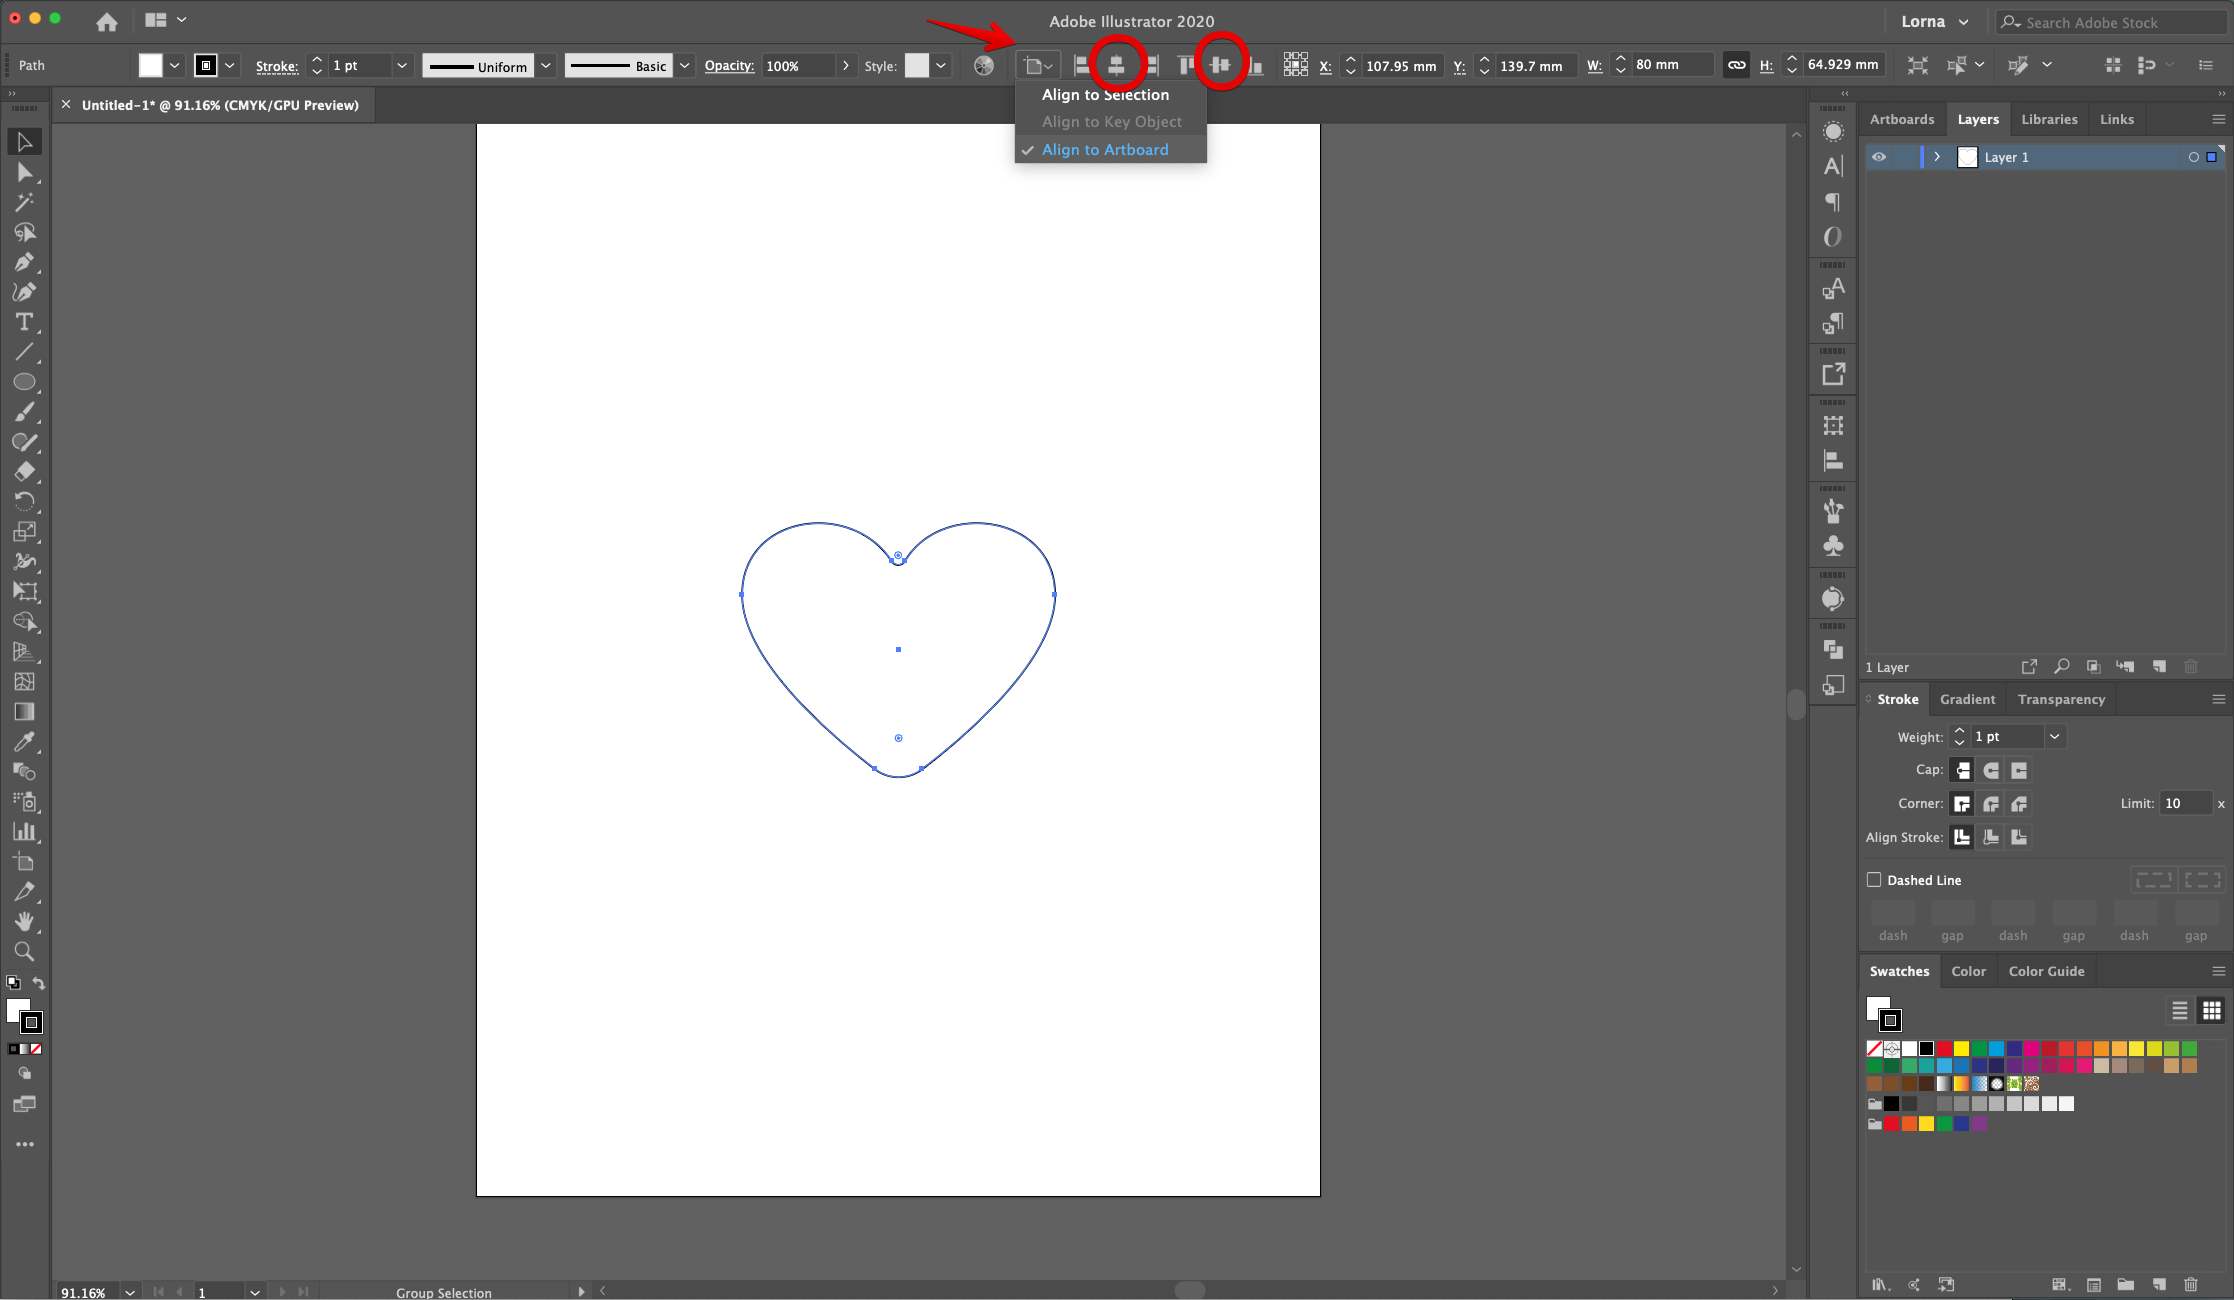
9 - Center the shape using the “Horizontal and Vertical Align Center” options on your Top Menu and make sure that “Align to Artboard” is selected. Or use the same options in the “Align Panel”.
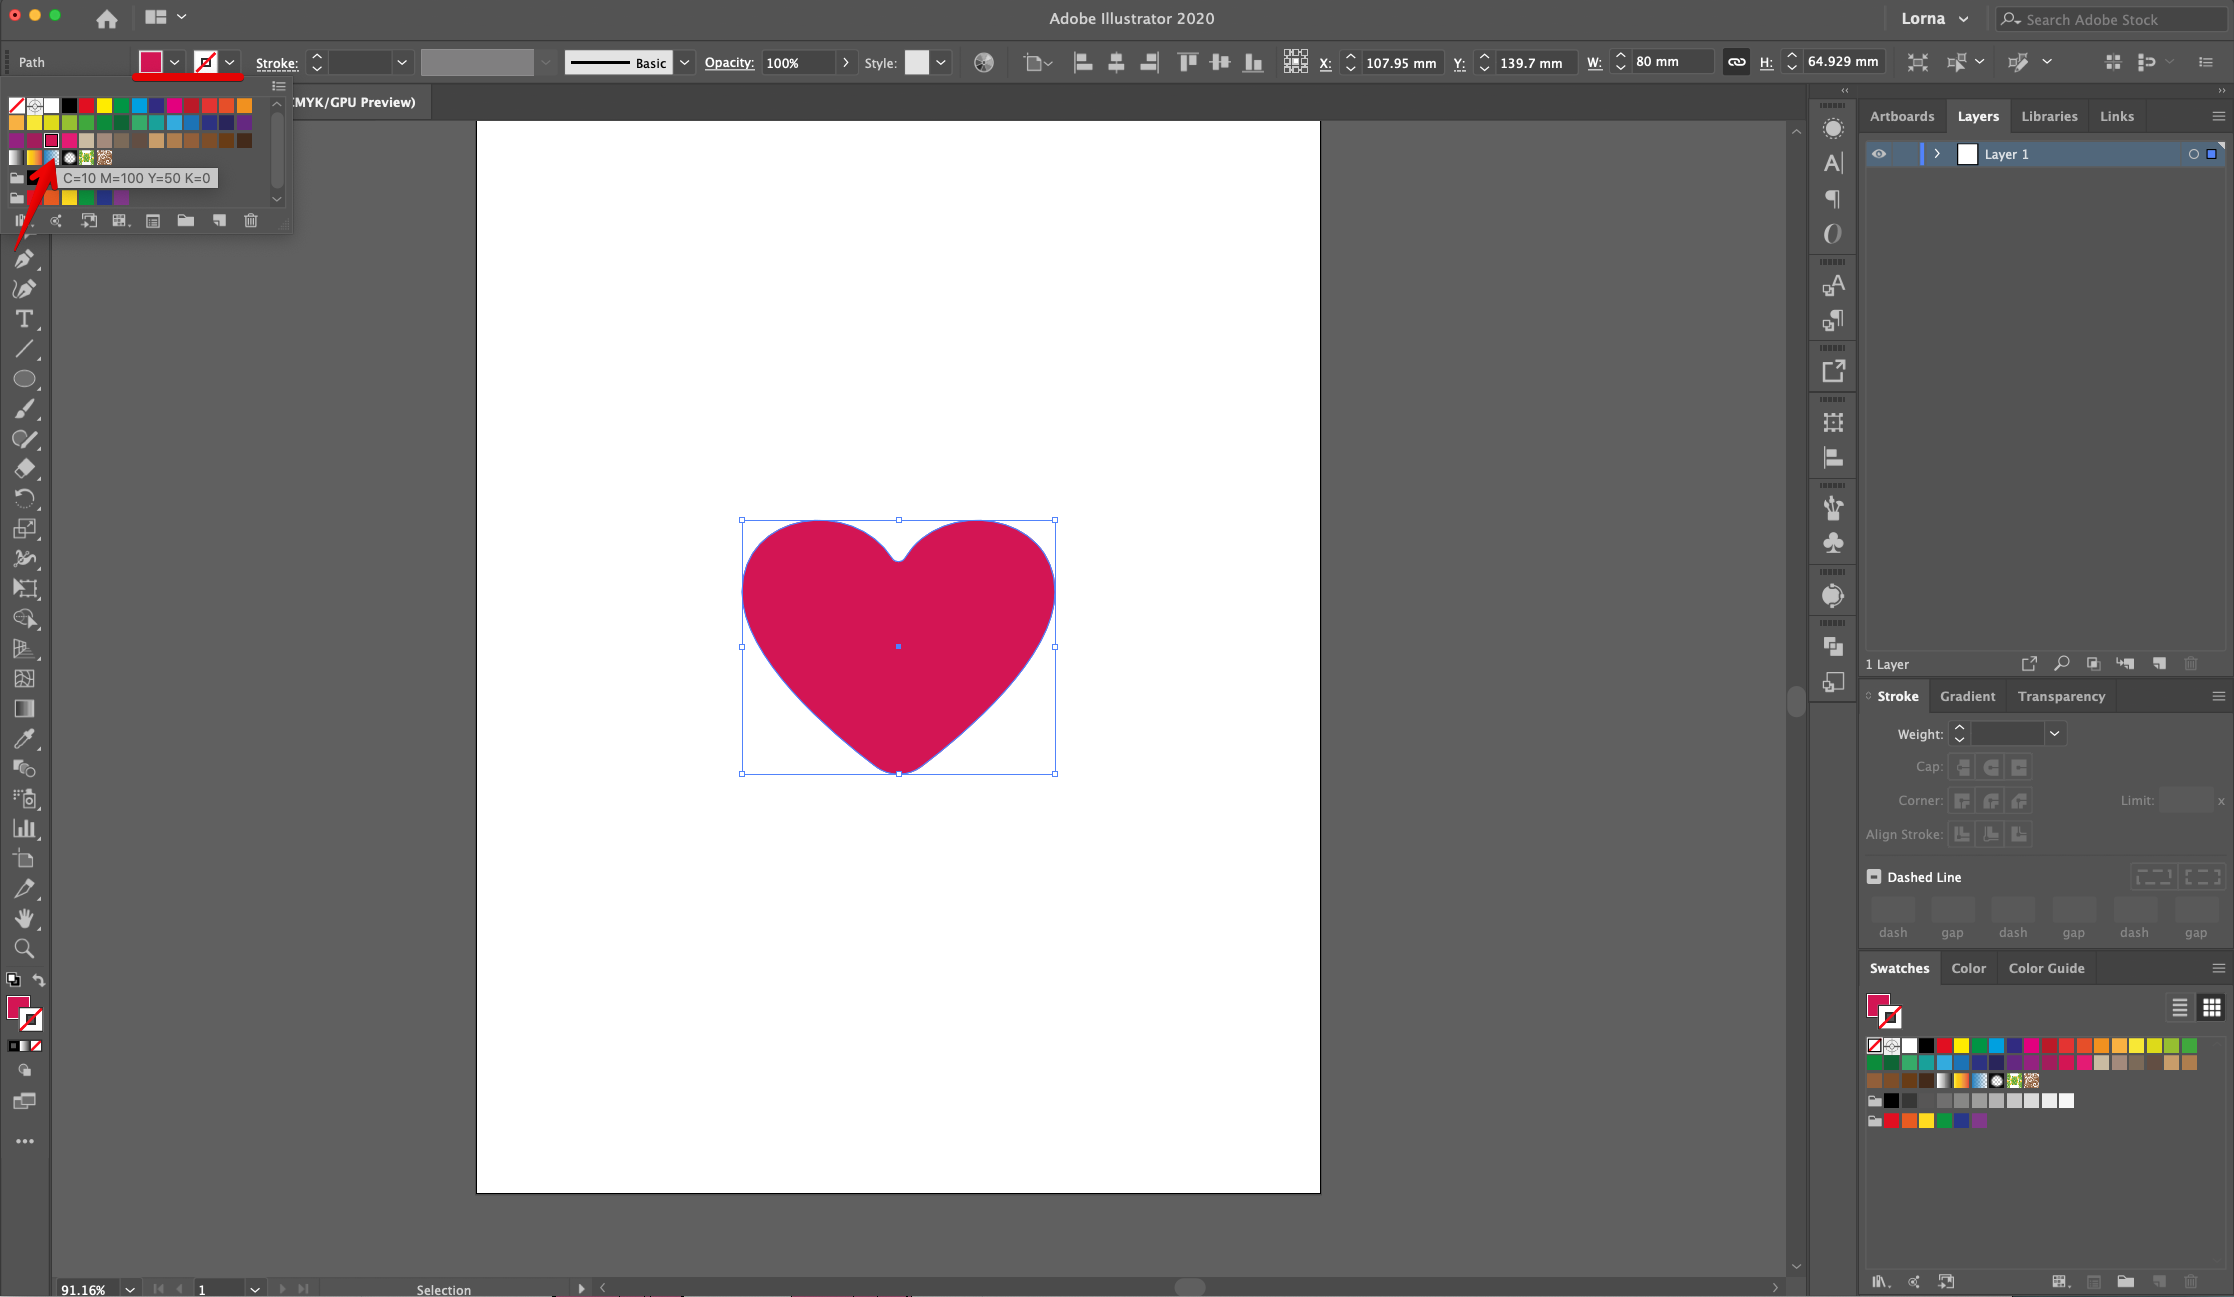
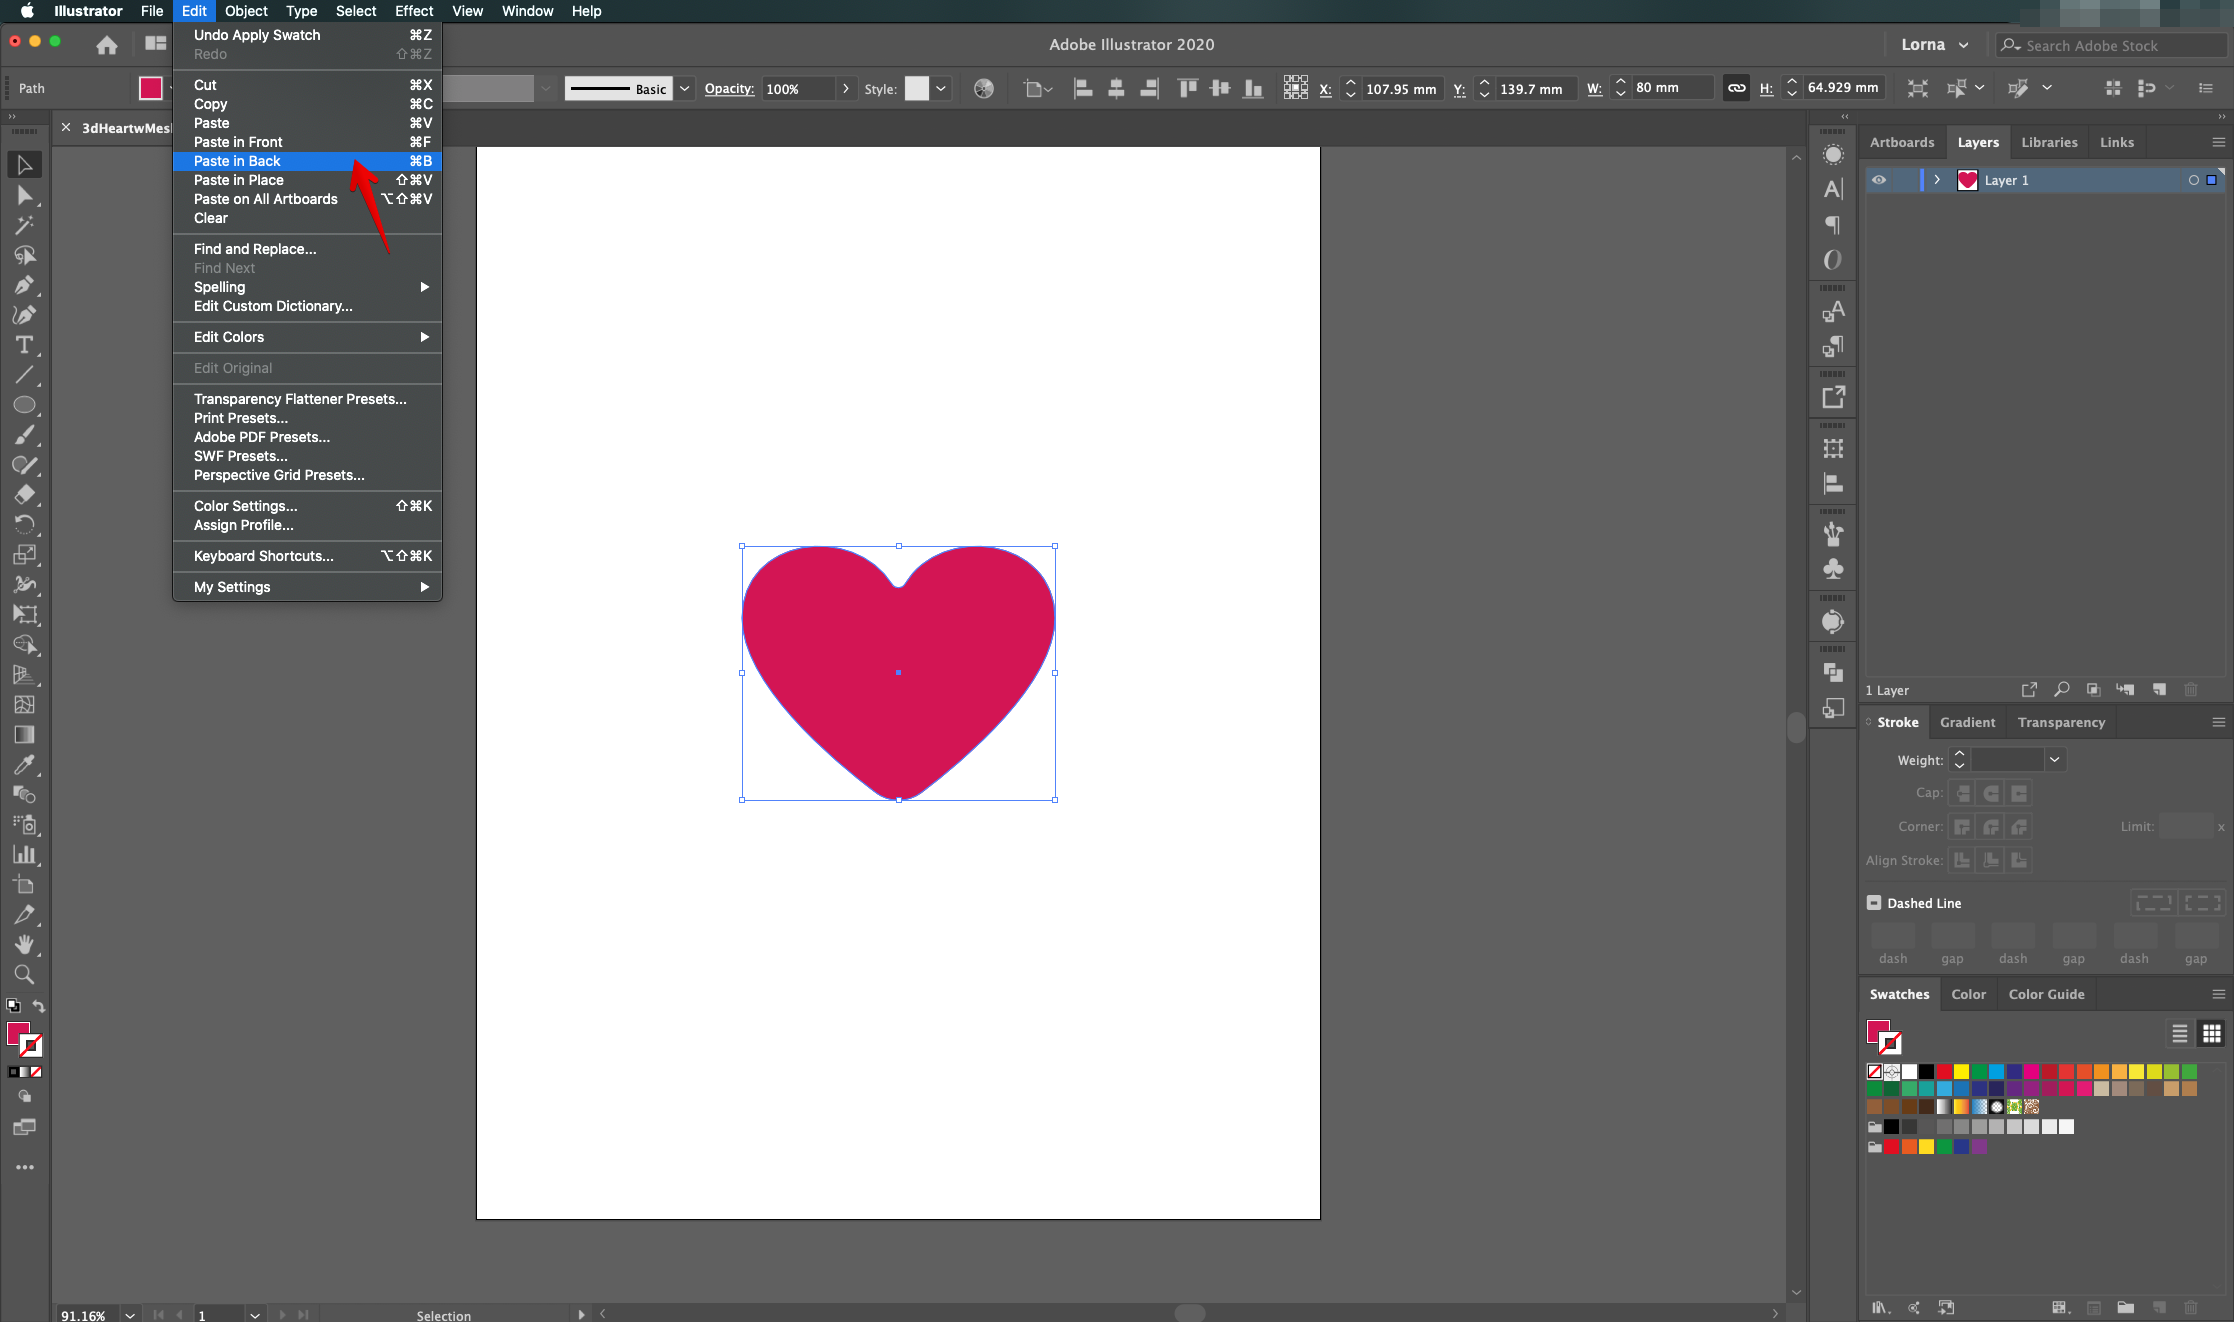
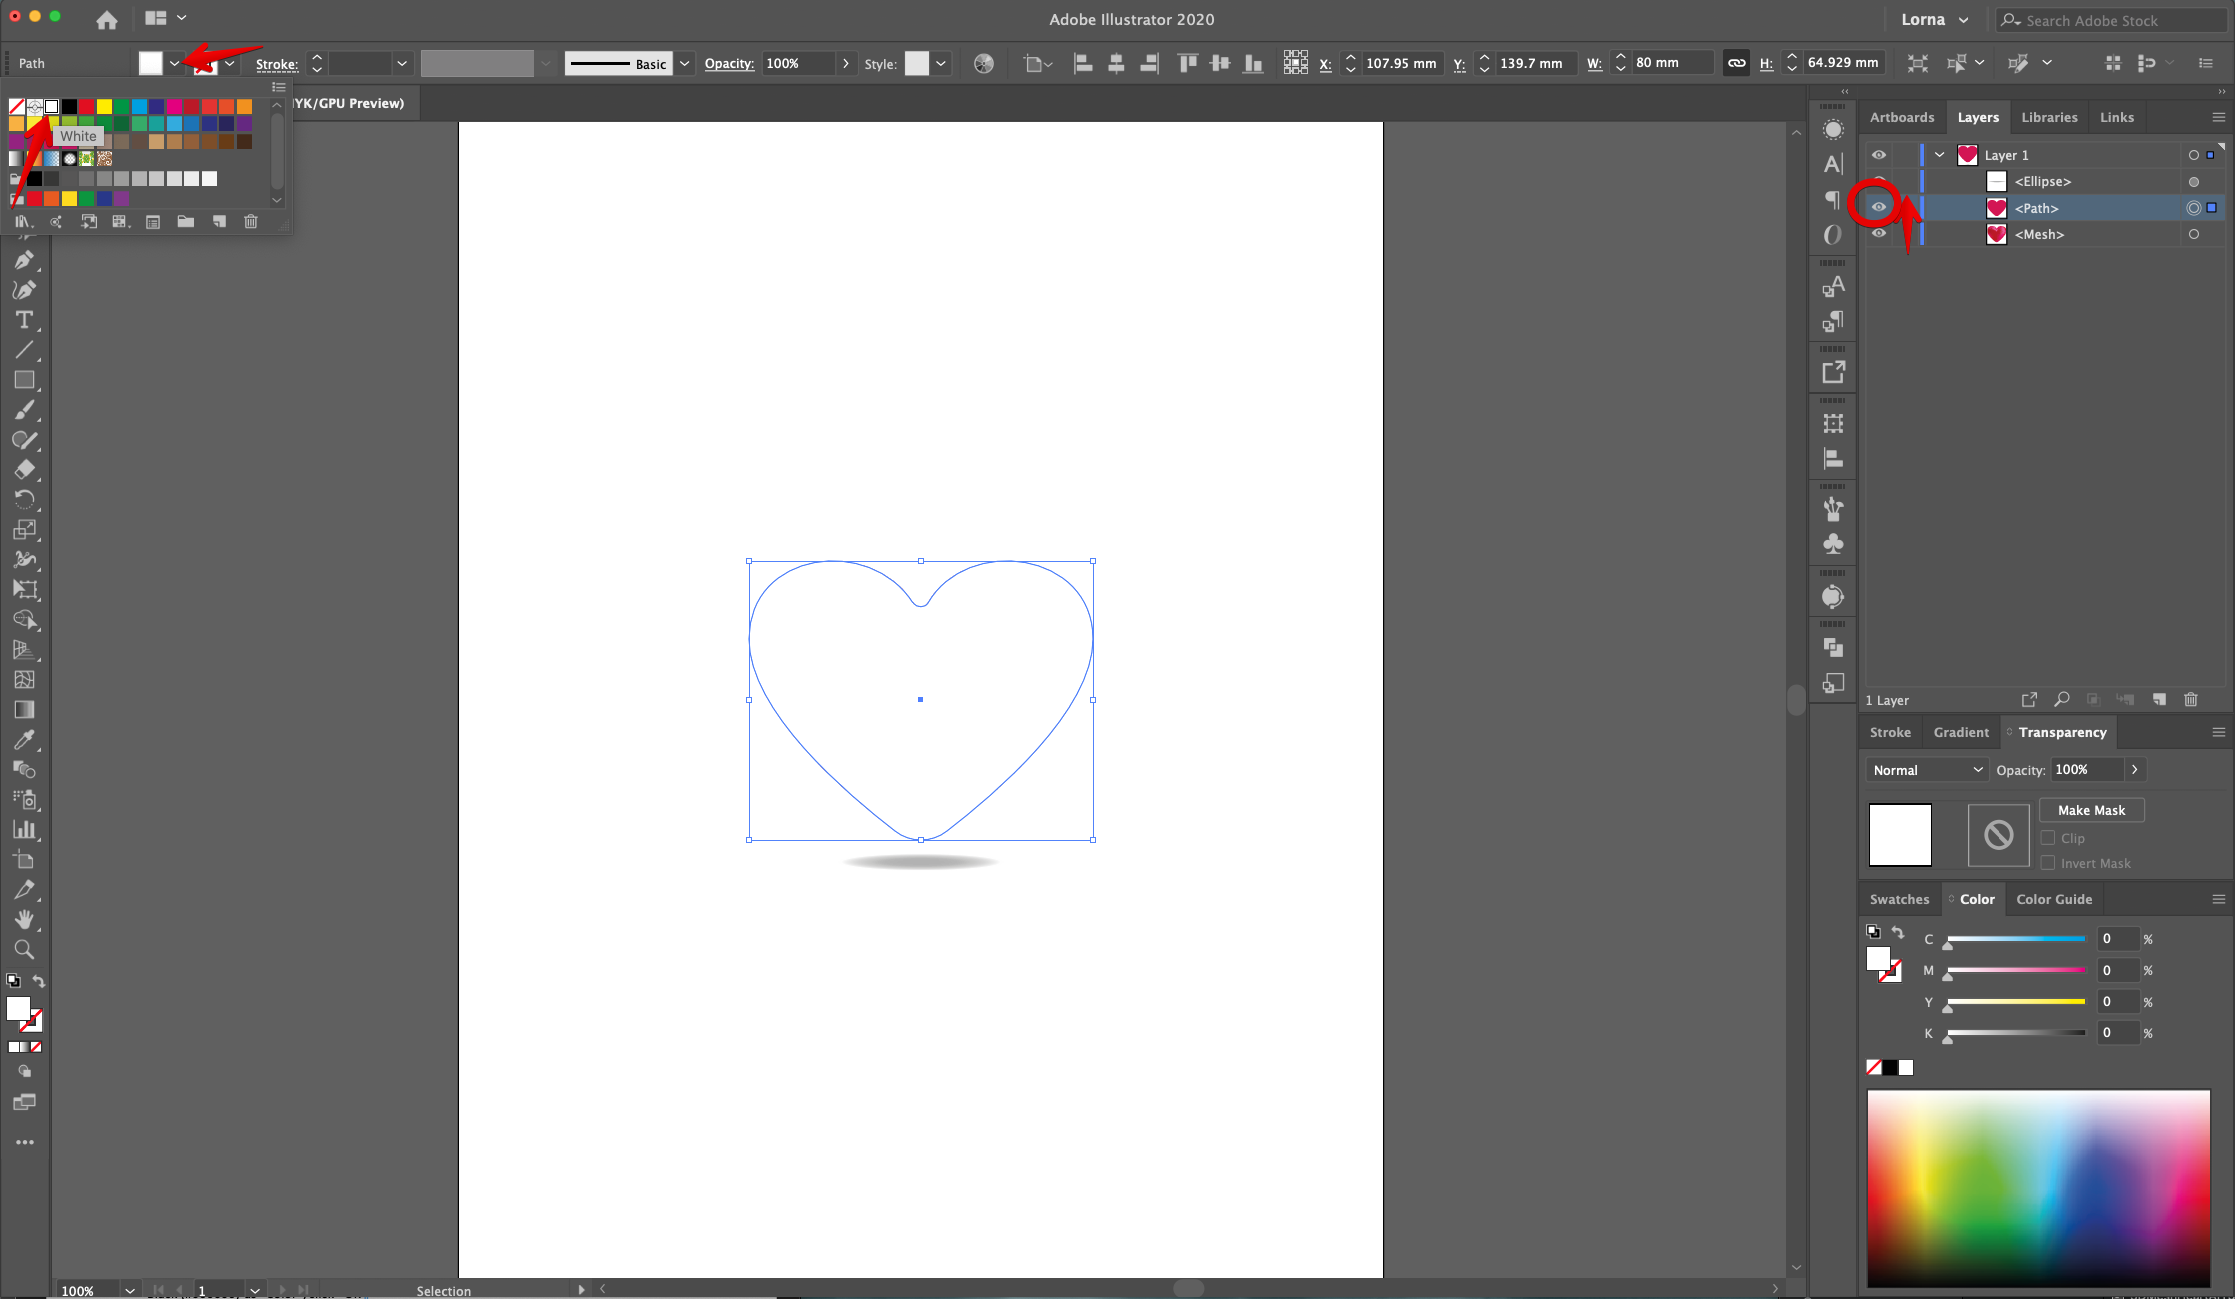
10 - Fill the “Heart” with a medium pink shade (we used one from the “Swatches Panel”, make a “Copy” (Command/Control + C) and “Paste in Back” (Command/Control + B).

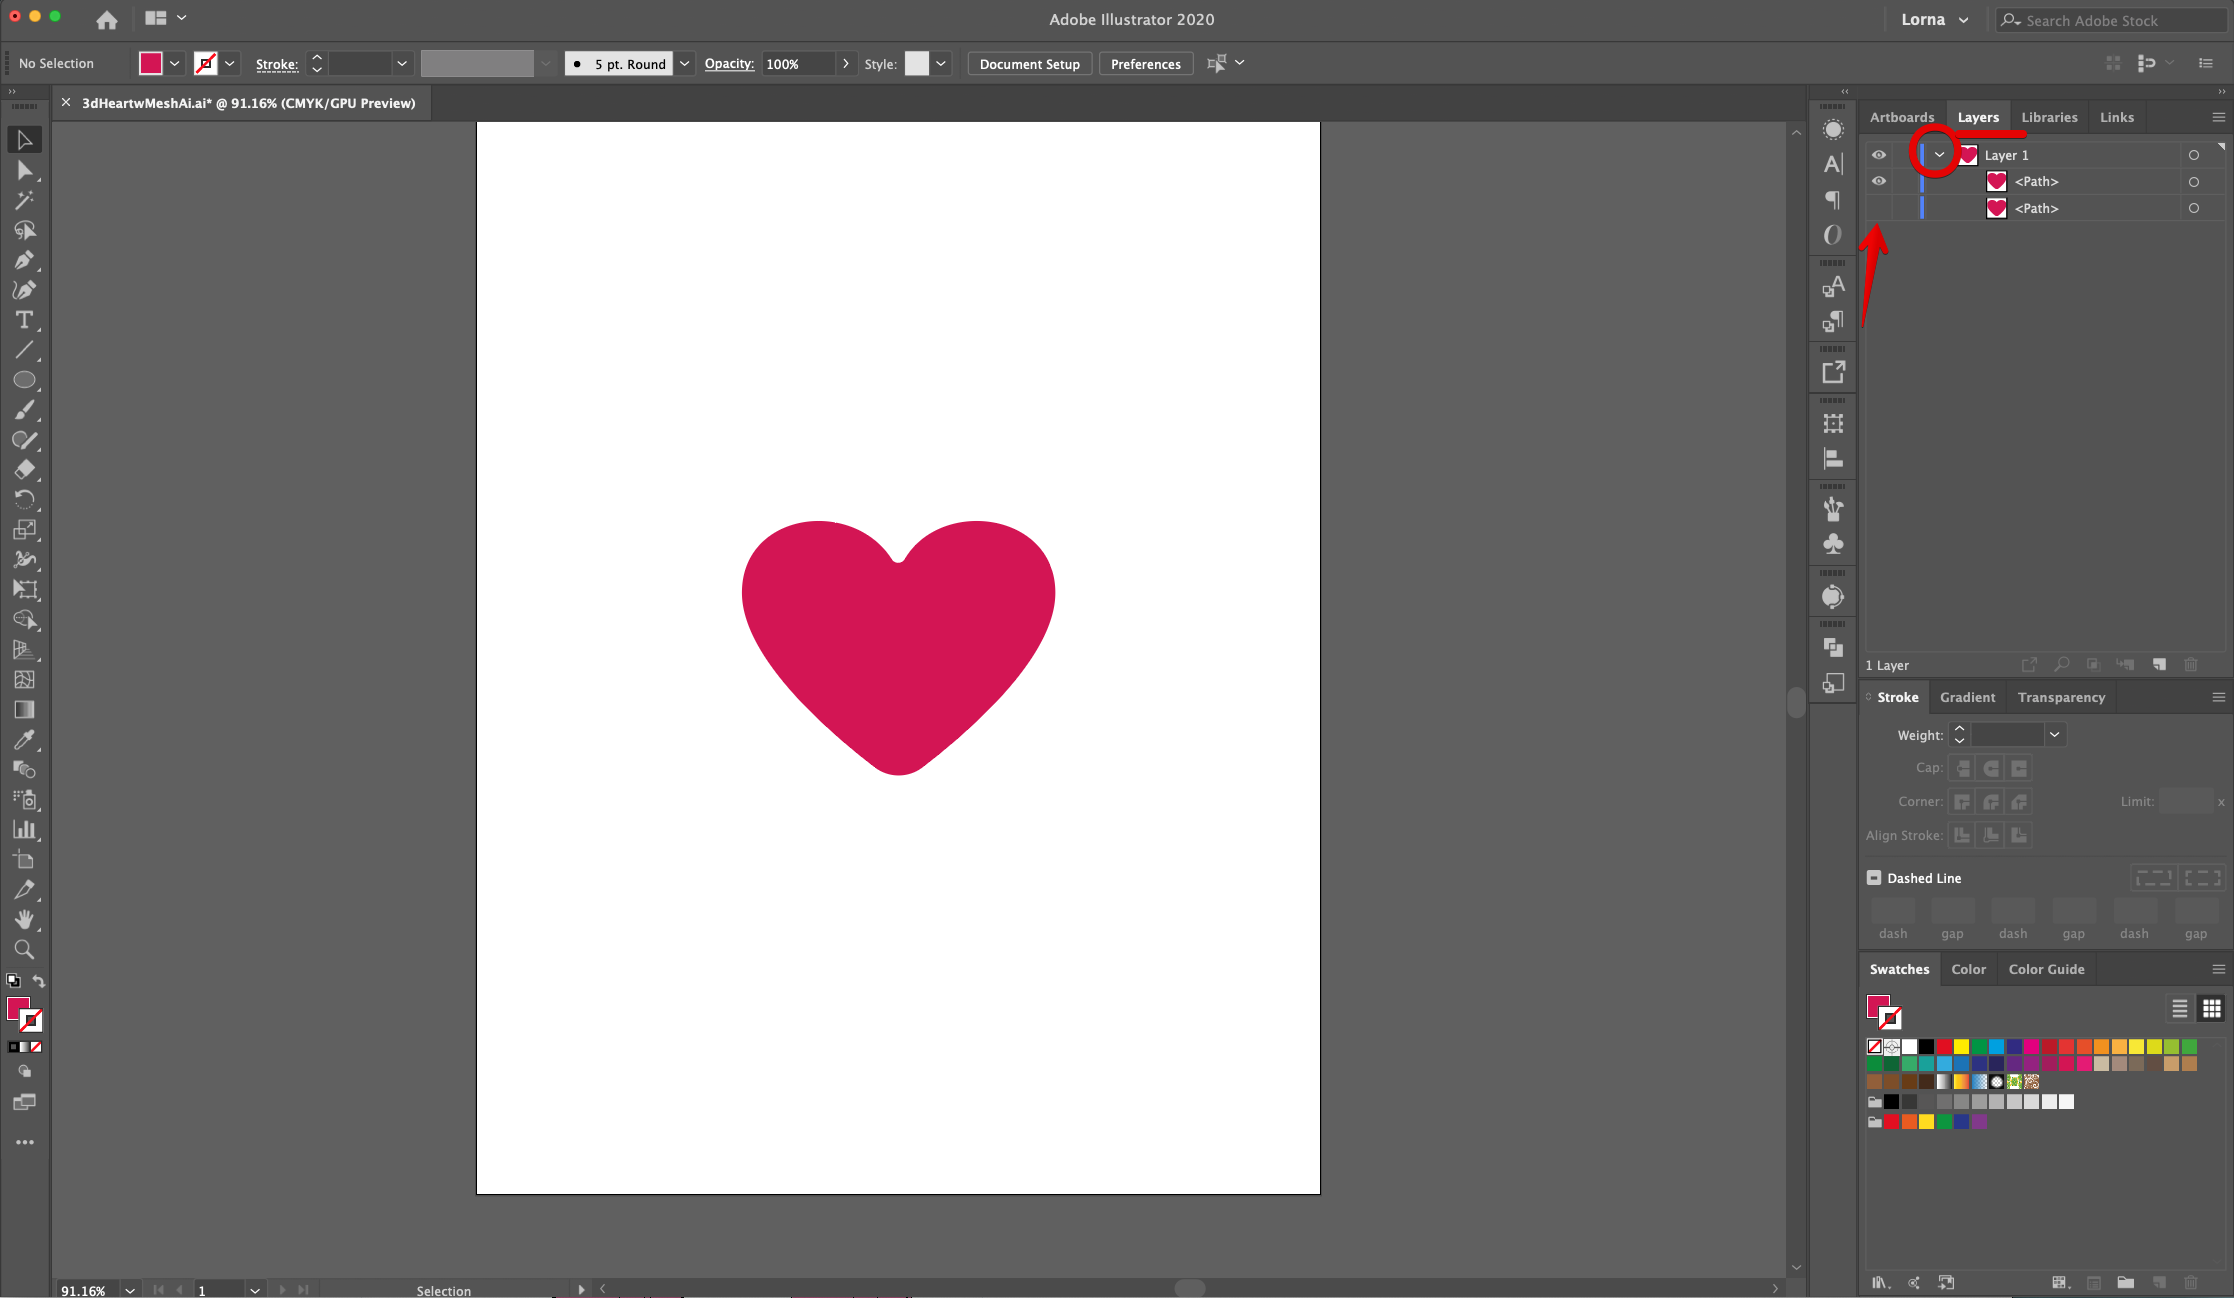
11 - To show the contents of the Layer, click on the small arrow on the left side of its Thumbnail and Hide the bottom one. You can use this copy to make other color variations or shadows.
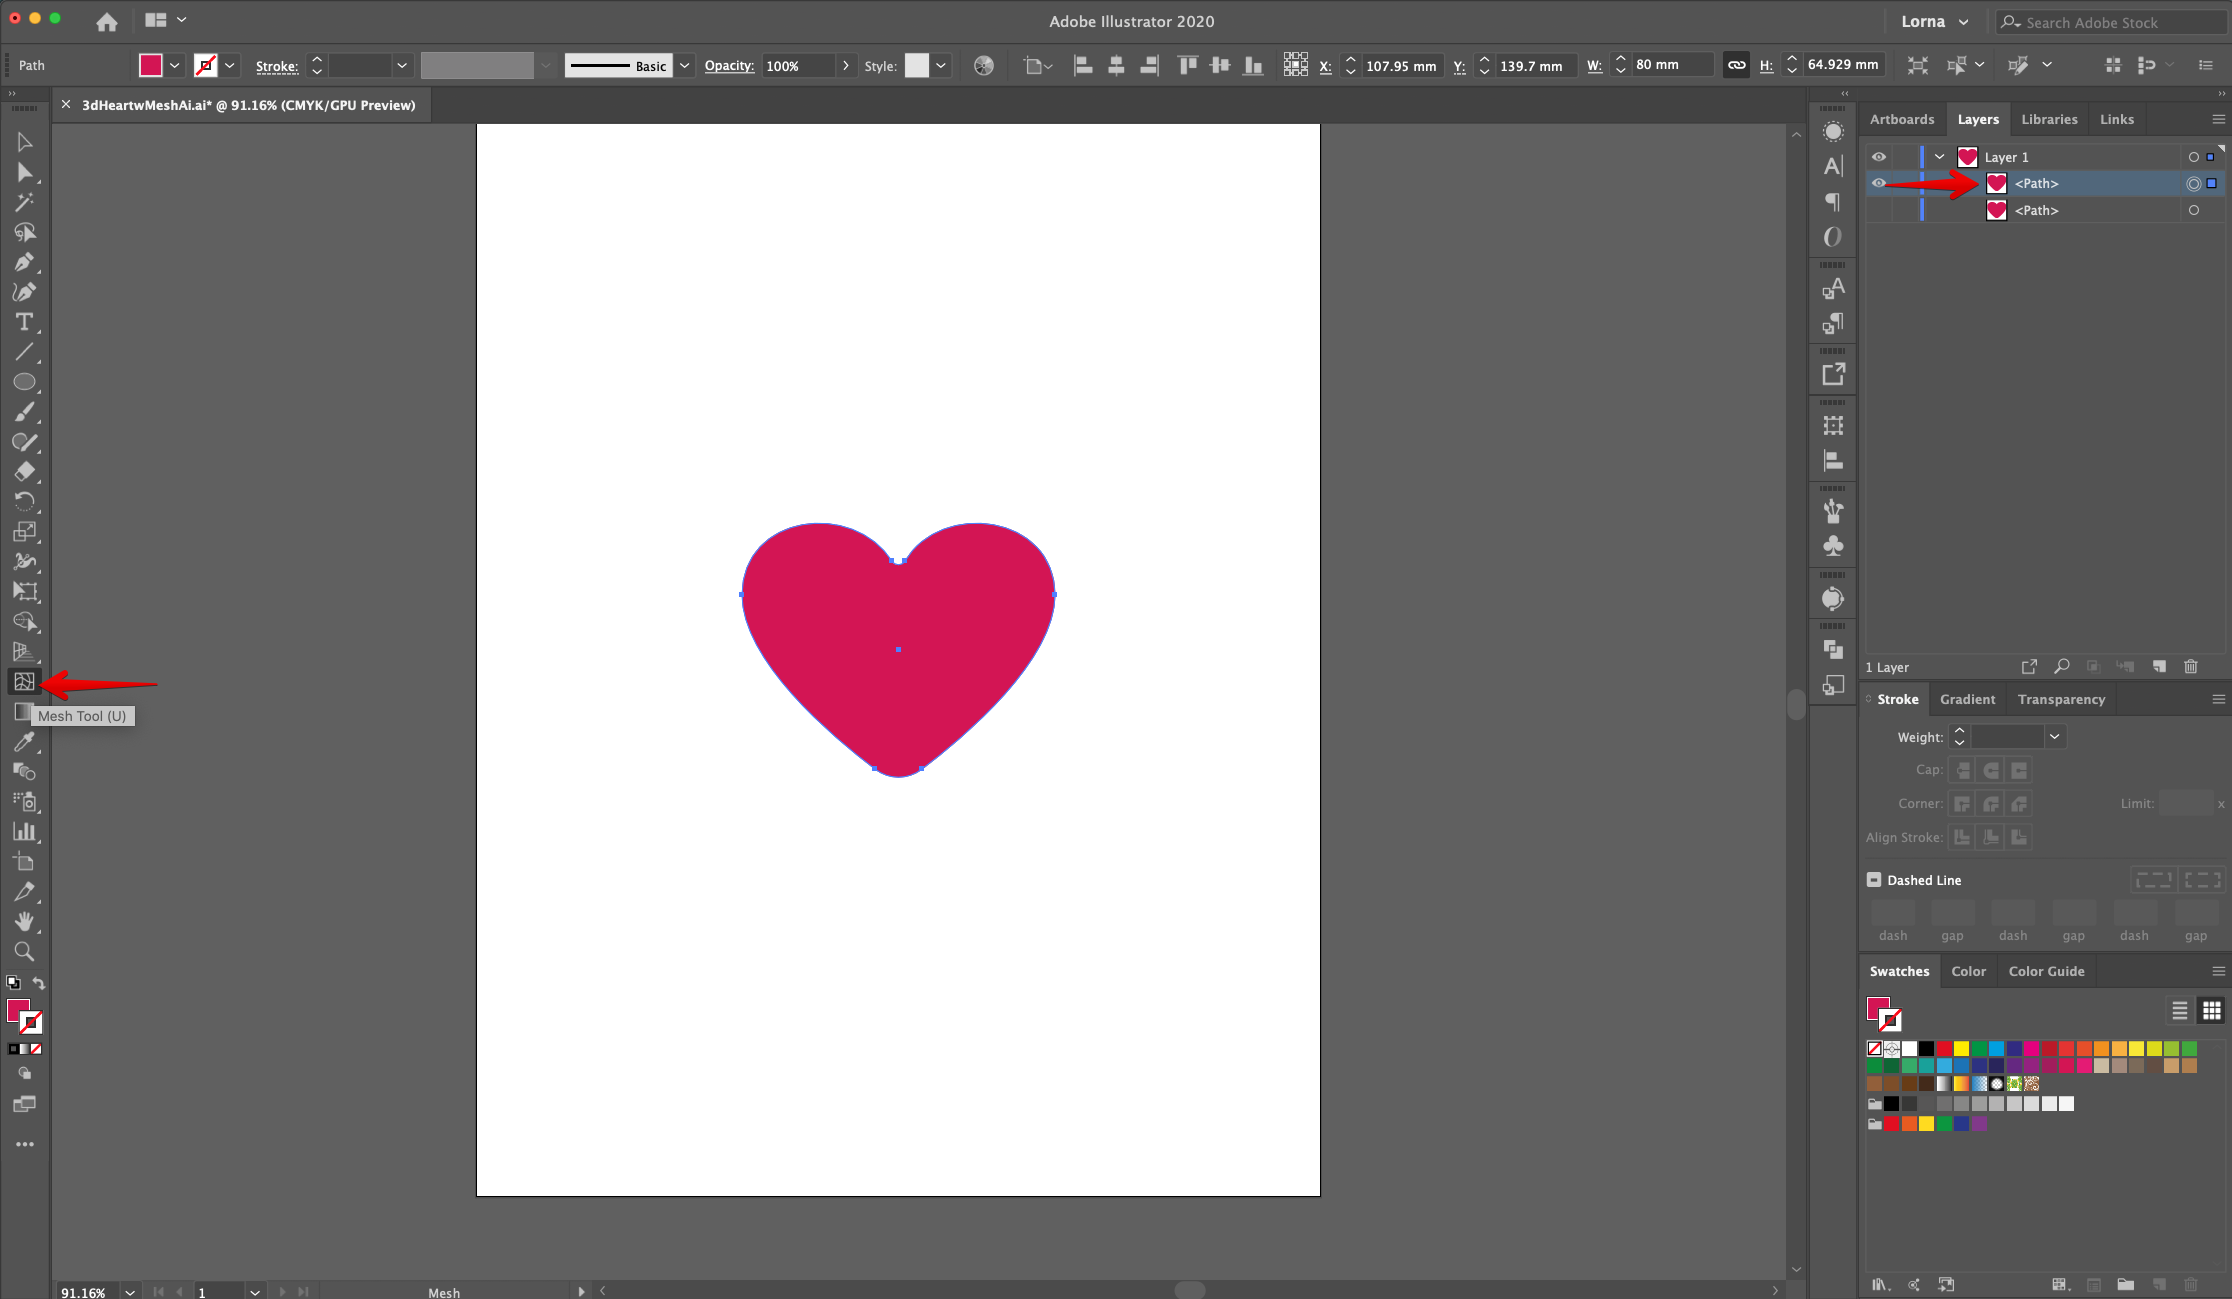
12 Select the “Mesh Tool” (U) and click the bottom tip of the “Heart” (in the center) to create the first “Mesh Point”. Create other 4 “Mesh Points” along the Horizontal length of the “Heart” (leave a bit more space between them in the center portion of the heart).
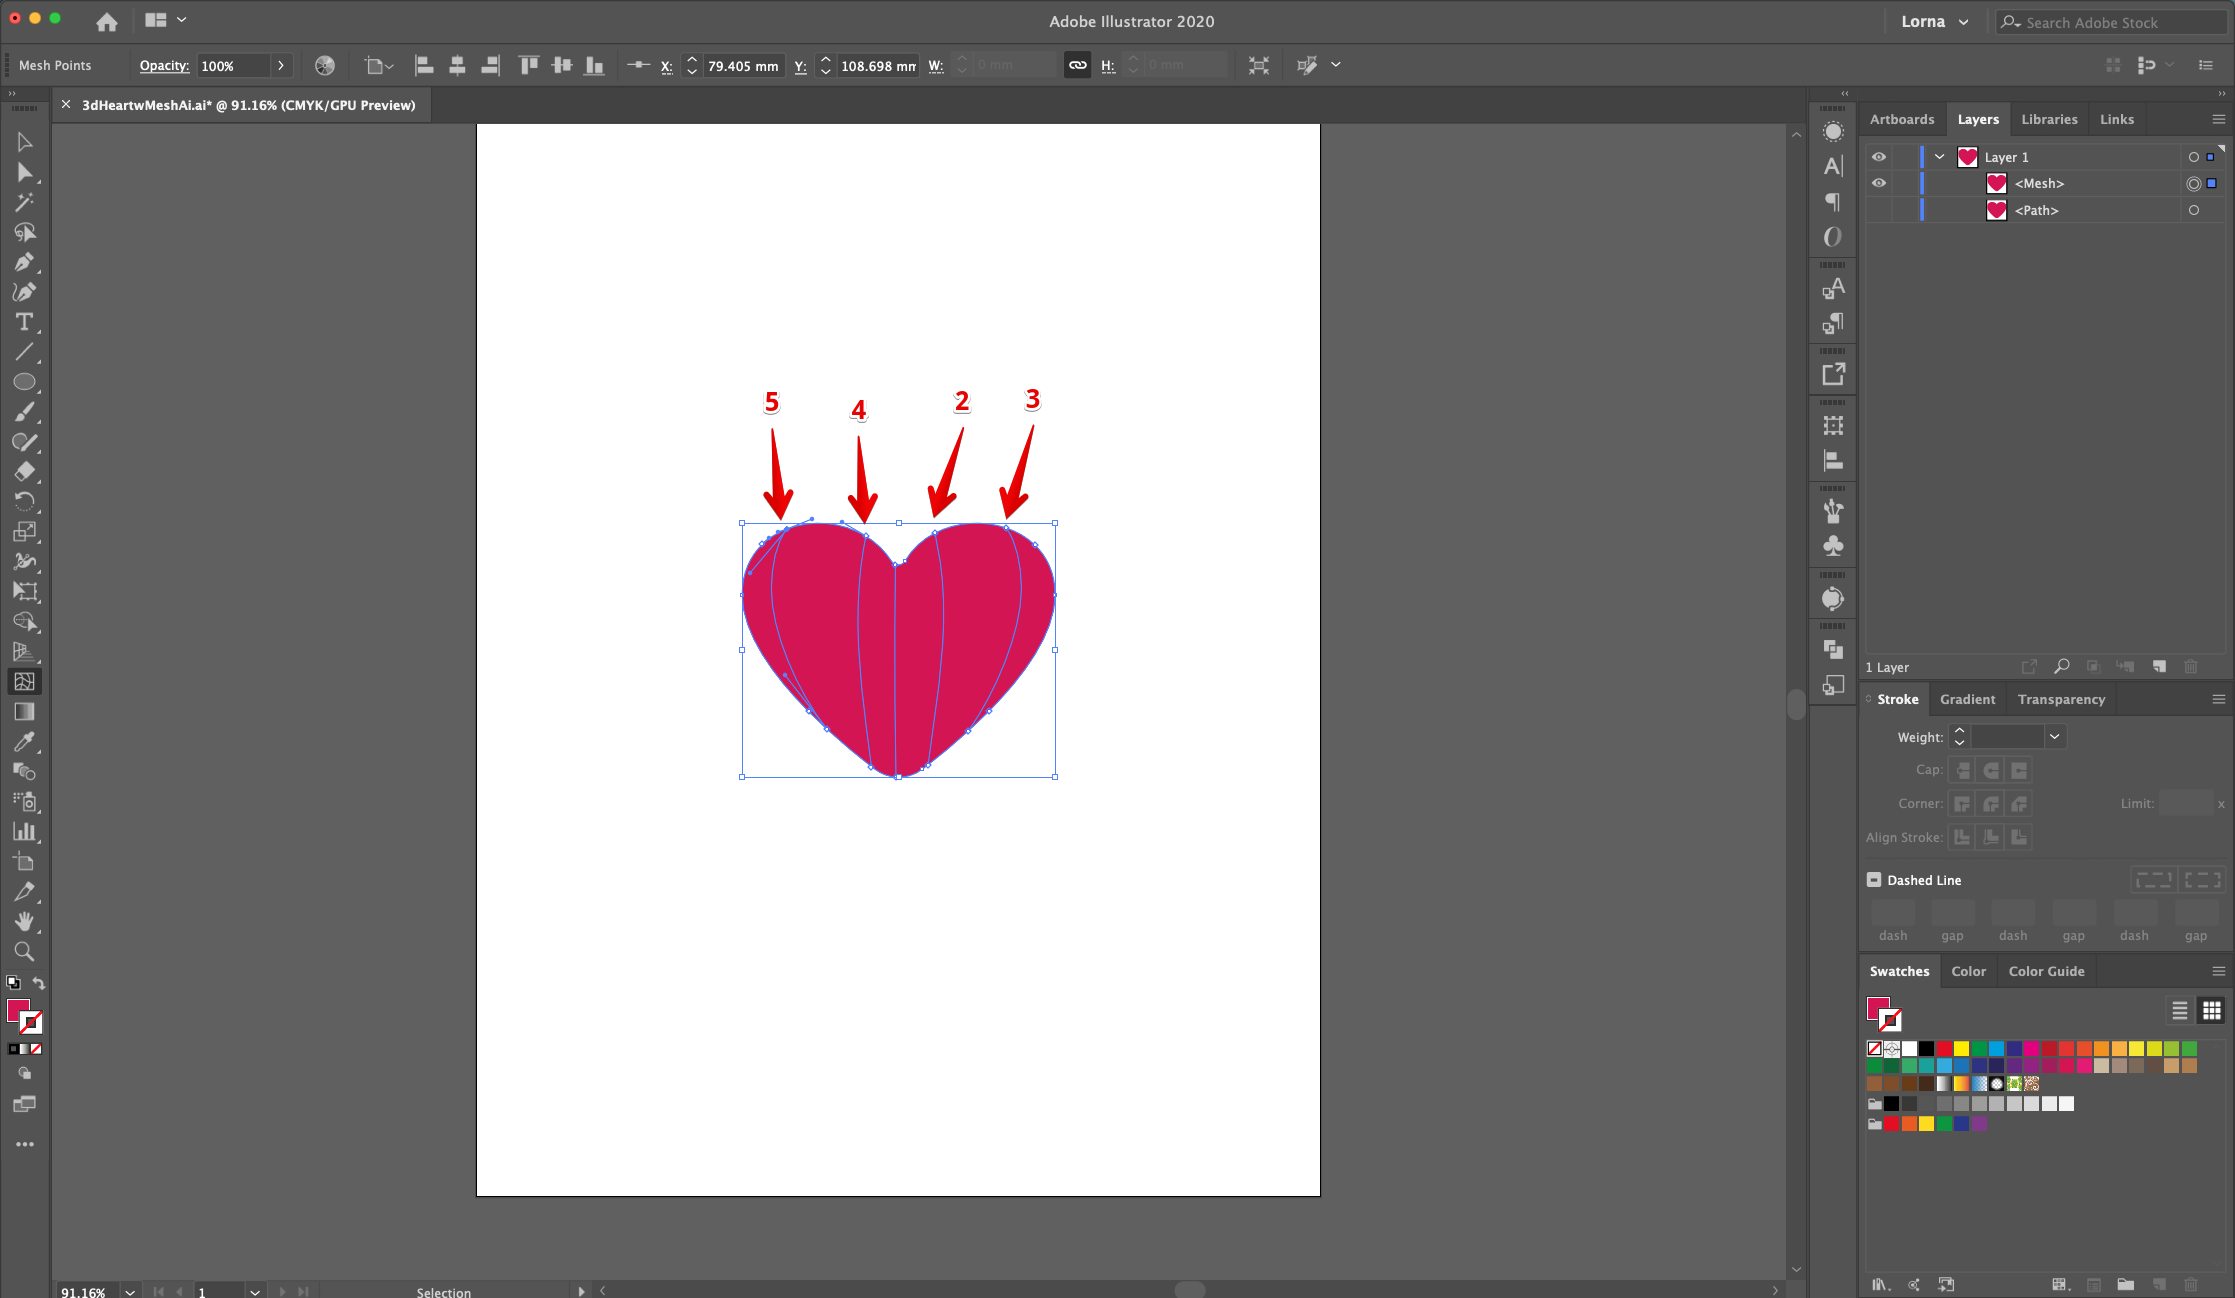
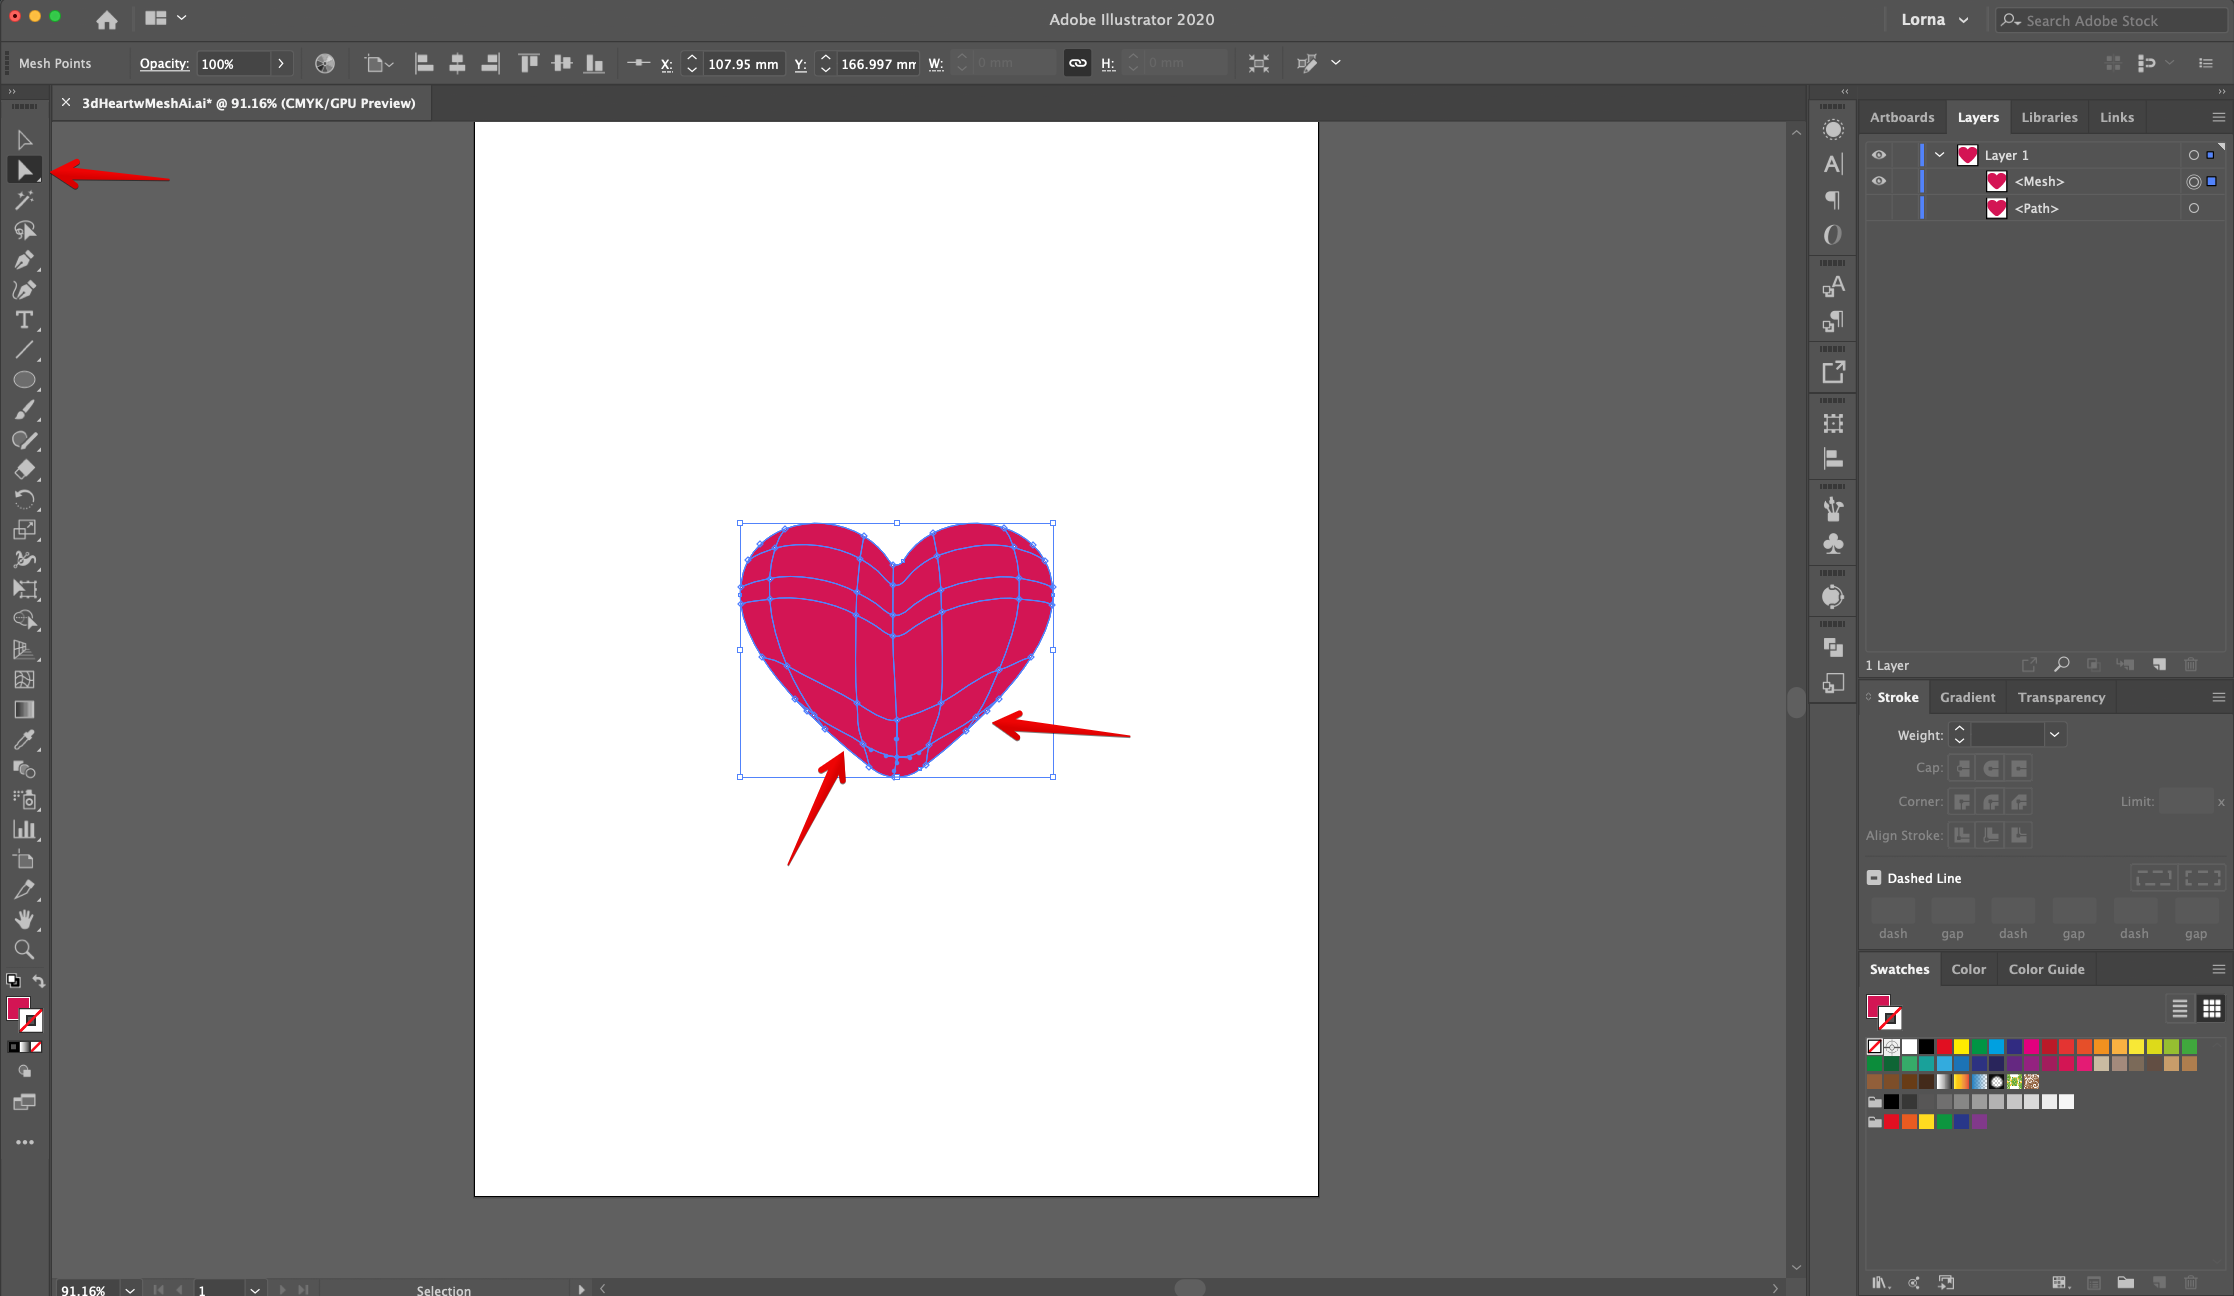
13 - Now, make 5 more “Mesh Points” running down the line created in the “Center”. Place 3 of them close together in the top of the “Heart”, leave more space between the ones in the center (2) and place the final one close to the bottom. Use the “Direct Selection Tool” (A) to select the “Anchor Points” that may need some fixing.

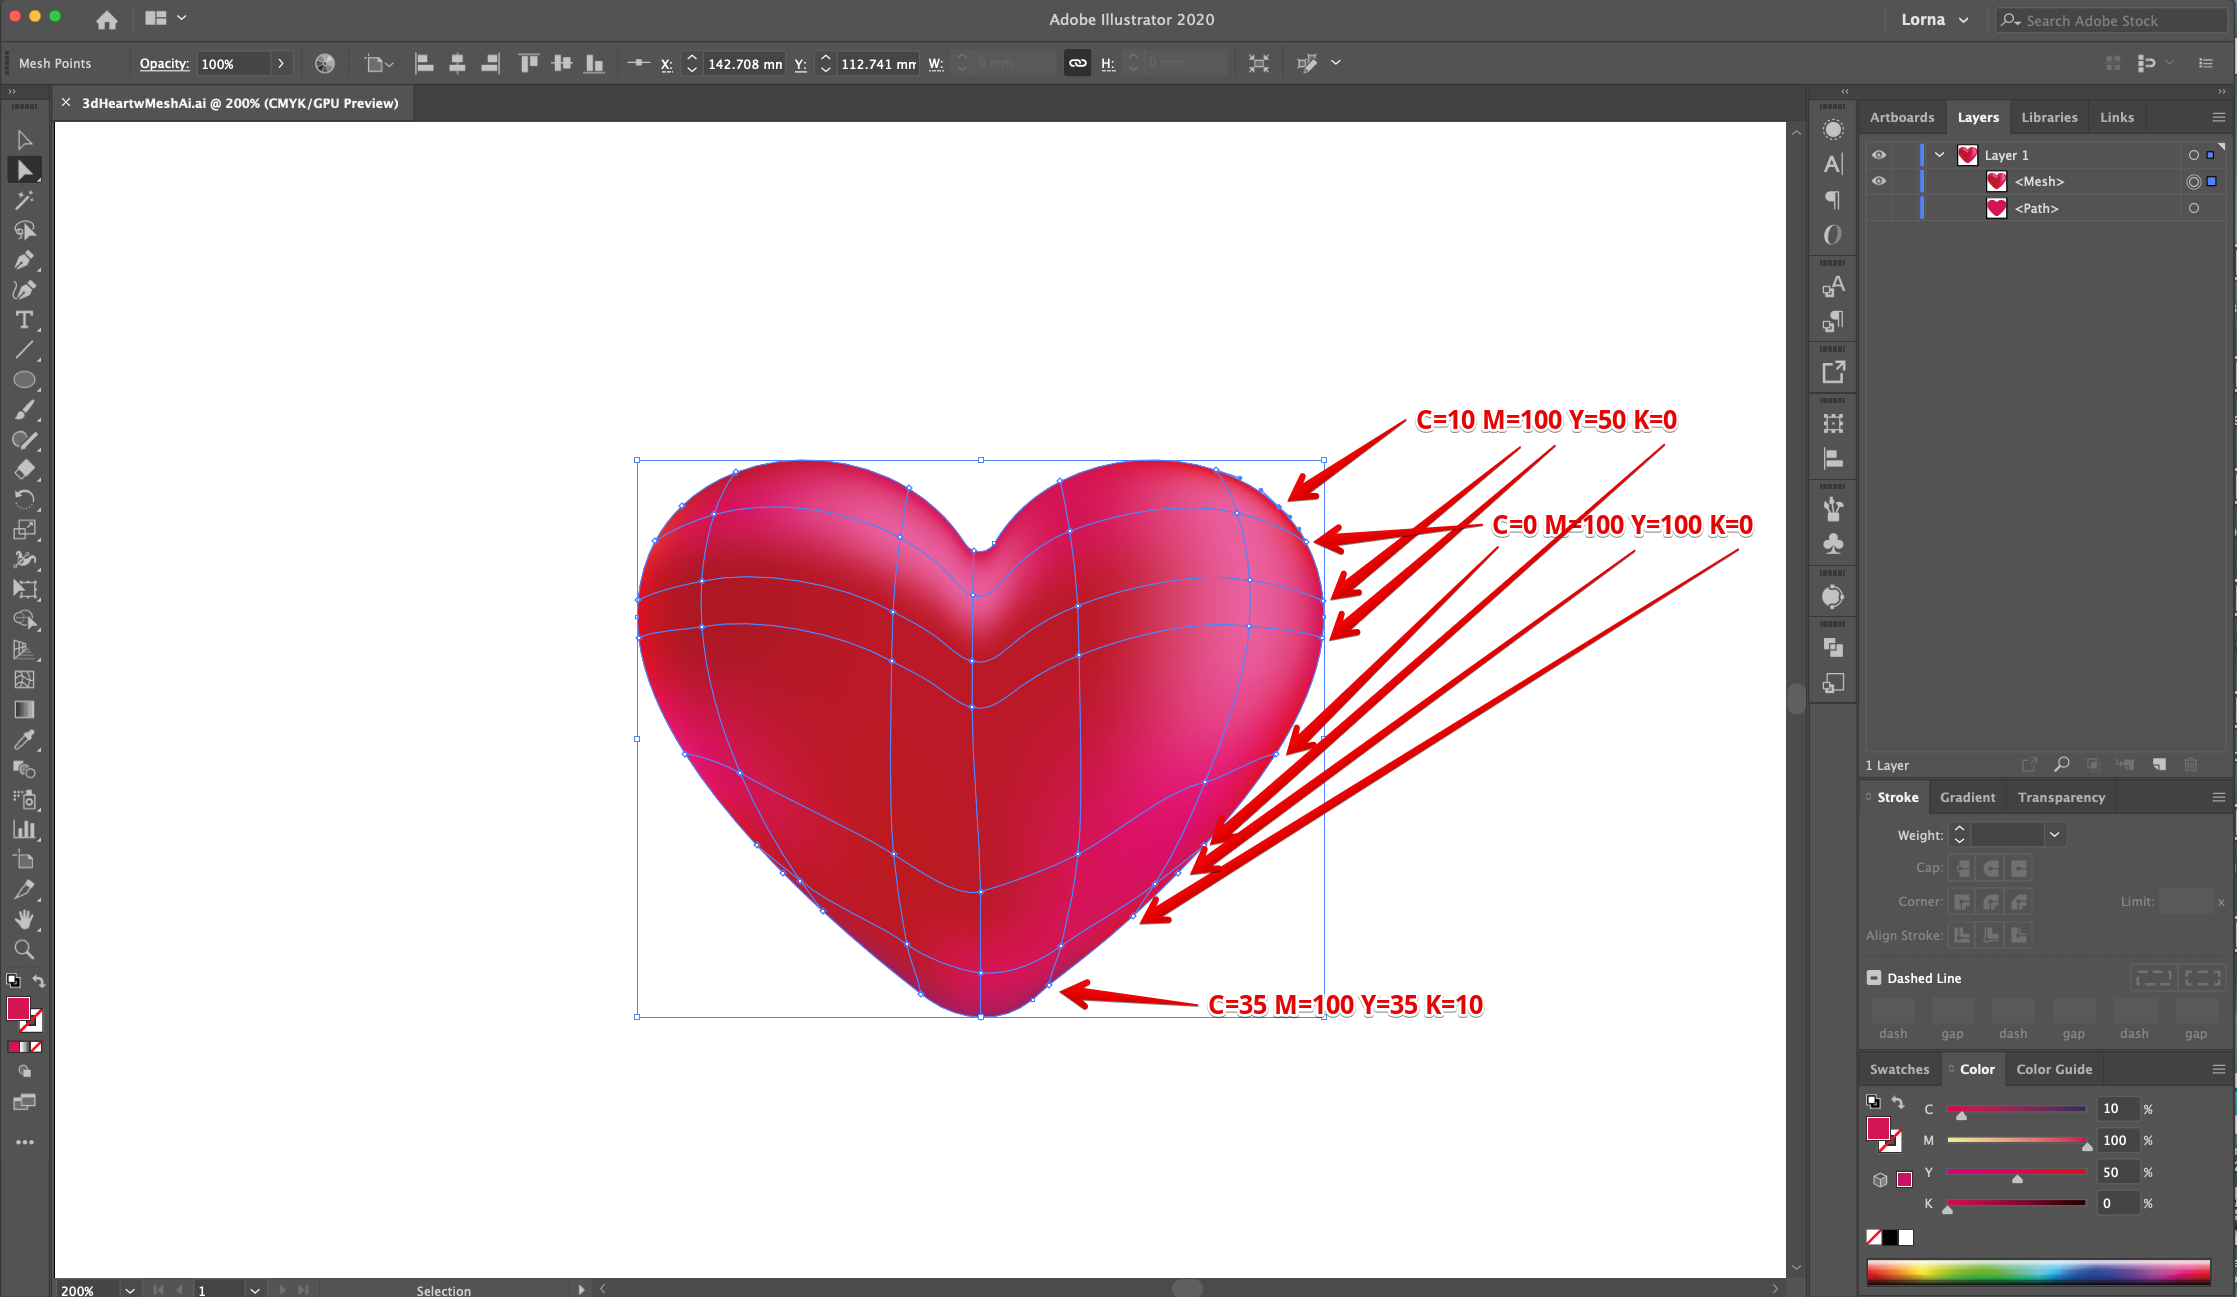
14 To add the 3D effect to the “Heart” we are going to add different color shades to the “Mesh Points”. Starting with the Left-most line we used the following from top to bottom: C=15 M=100 Y=90 K=100, C=0 M=90 Y=85 K=0, C=15 M=100 Y=90 K=100, C=0 M=100 Y=100 K=0, C=0 M=95 Y=20 K=0 and C=35 M=100 Y=35 K=10.
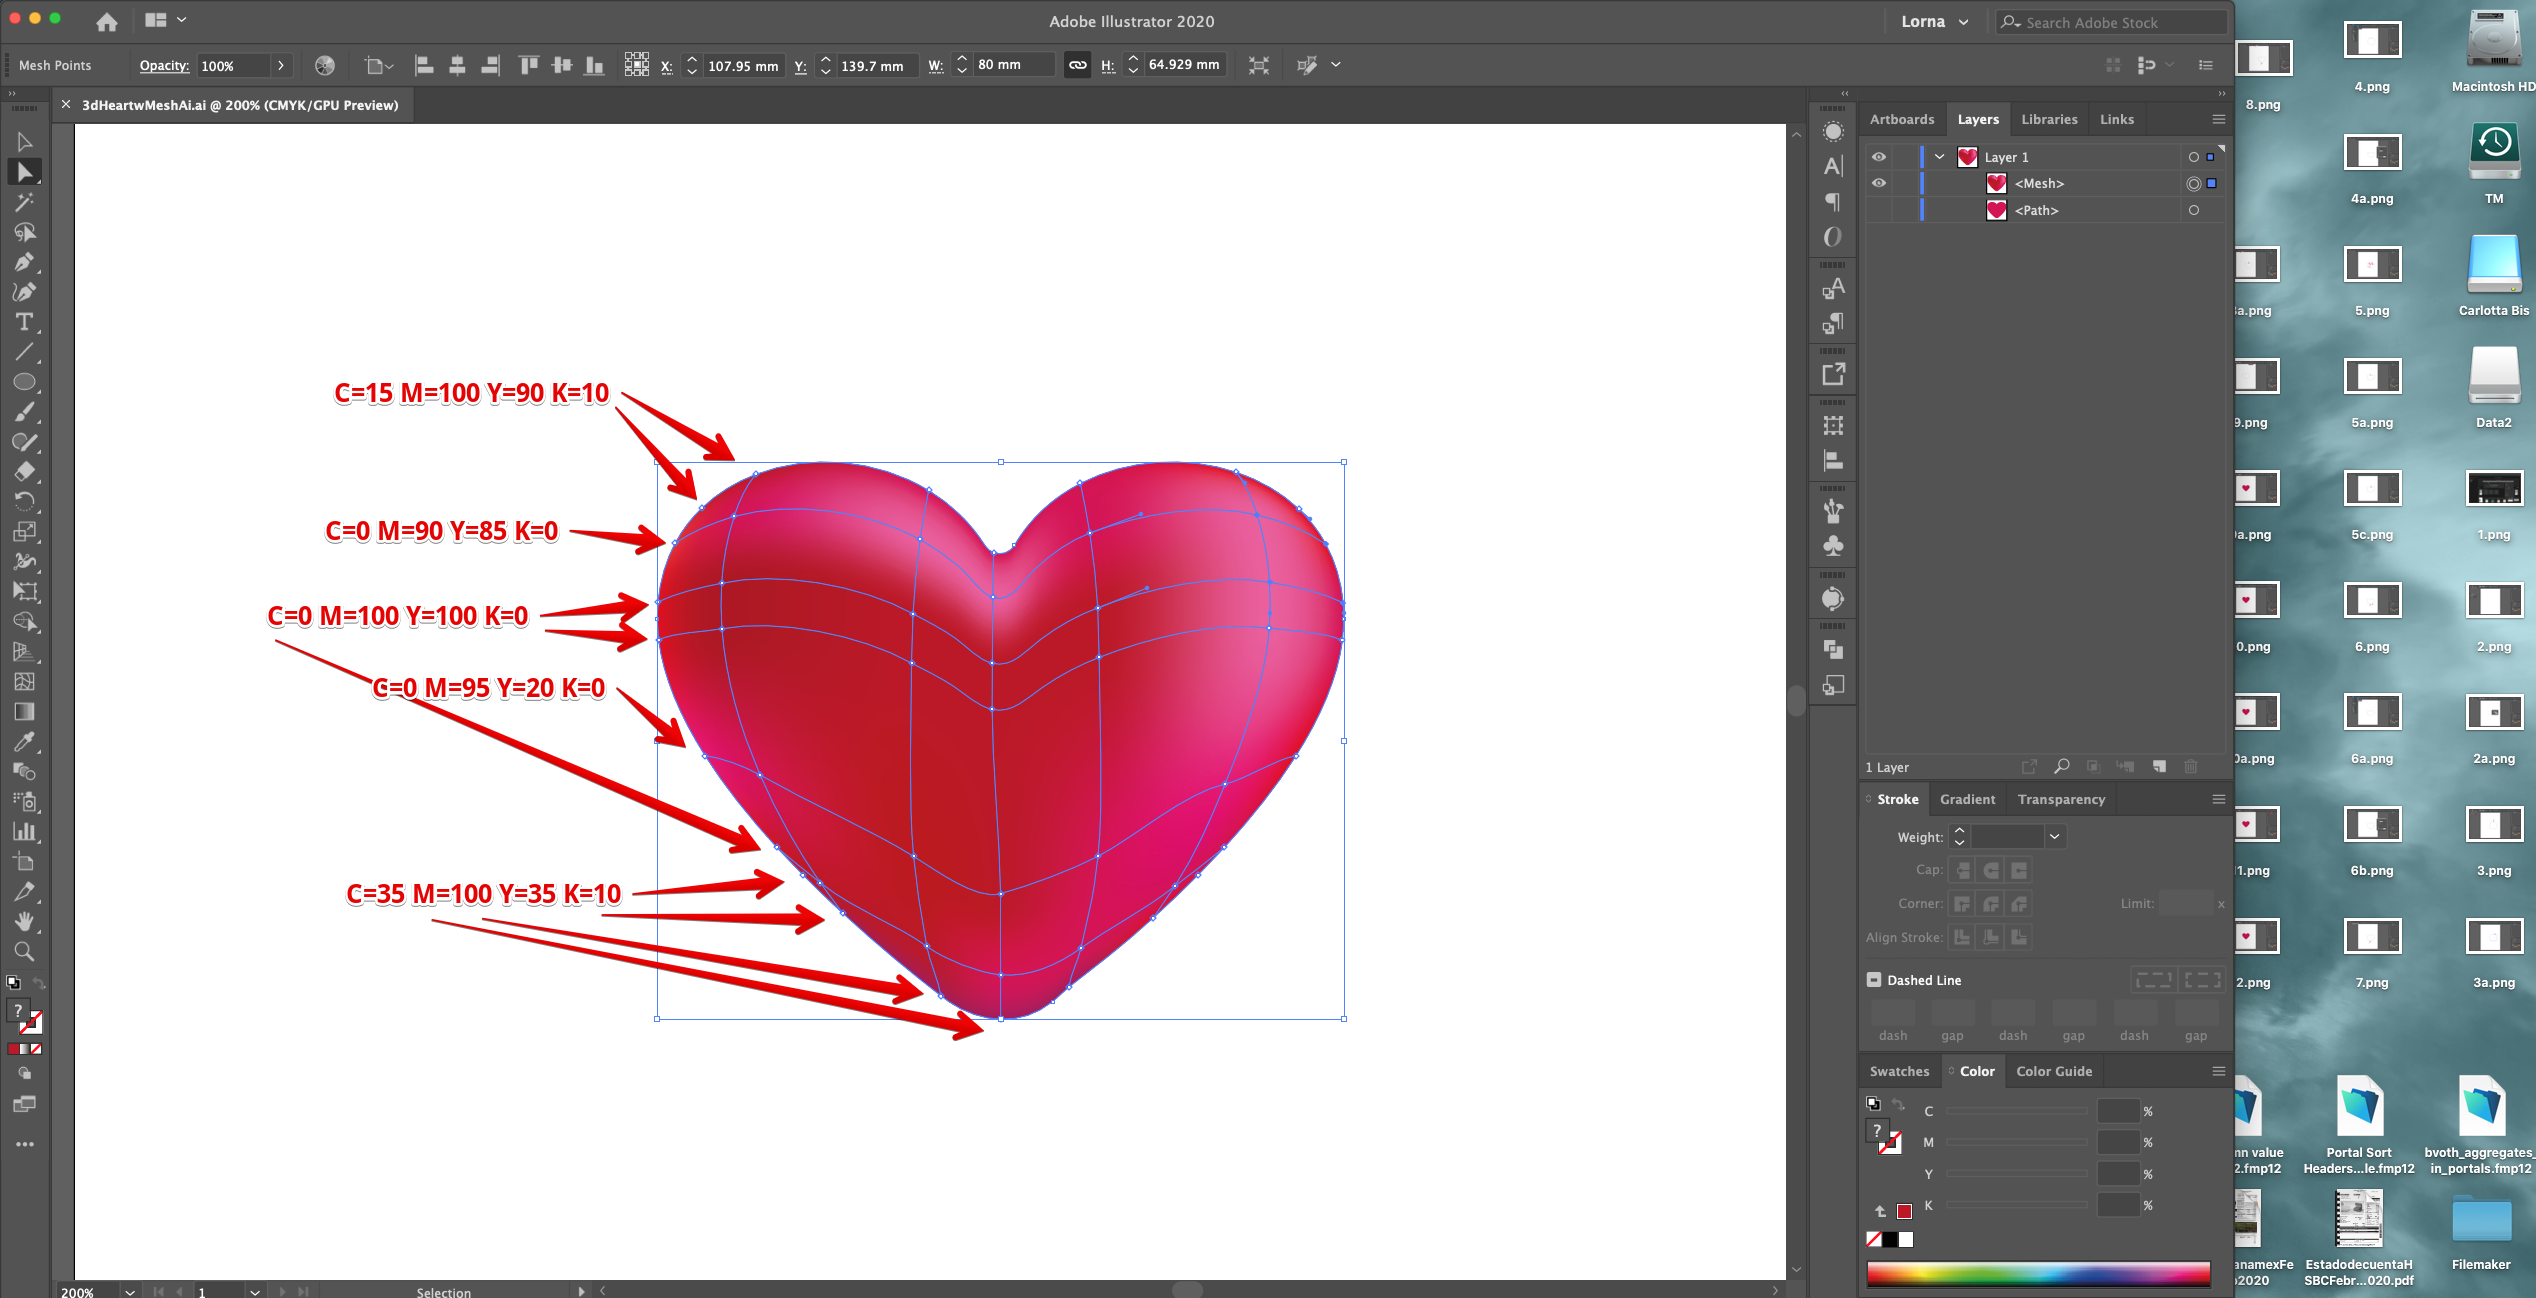
15 - Now the second from left (top to bottom): C=5 M=100 Y=90 K=10, C=10 M=100 Y=50 K=0 and C=15 M=100 Y=90 K=20.

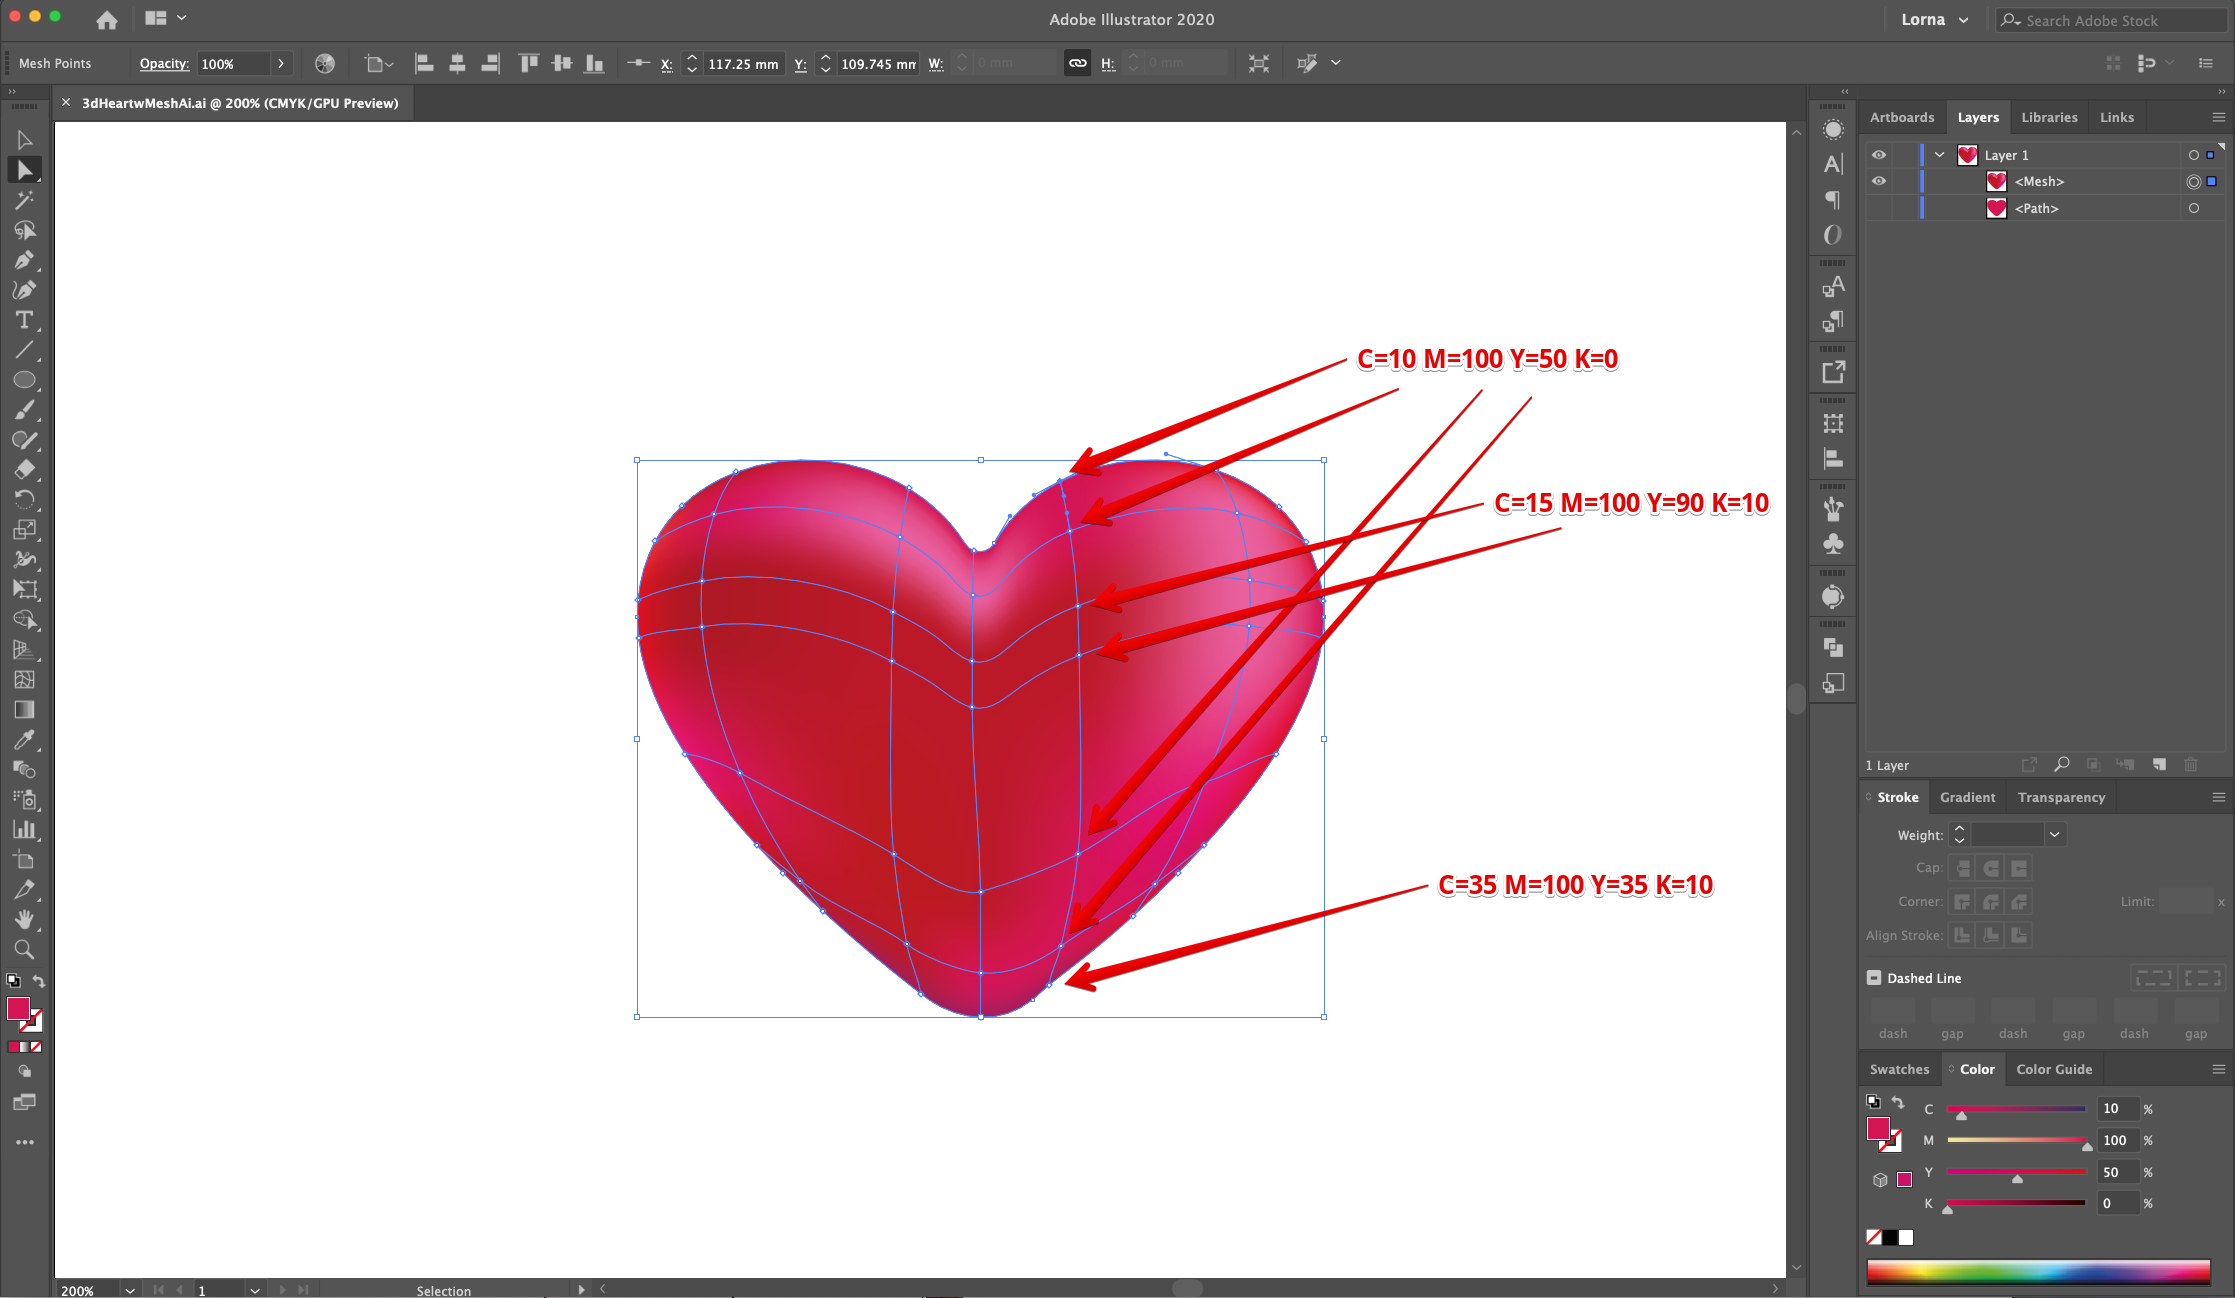
16 - For the third row from left (top to bottom): C=10 M=100 Y=50 K=0, C=0 M=76 Y=0 K=0, C=15 M=100 Y=90 K=10, C=15 M=100 Y=100 K=10, and C=35 M=100 Y=30 K=10.
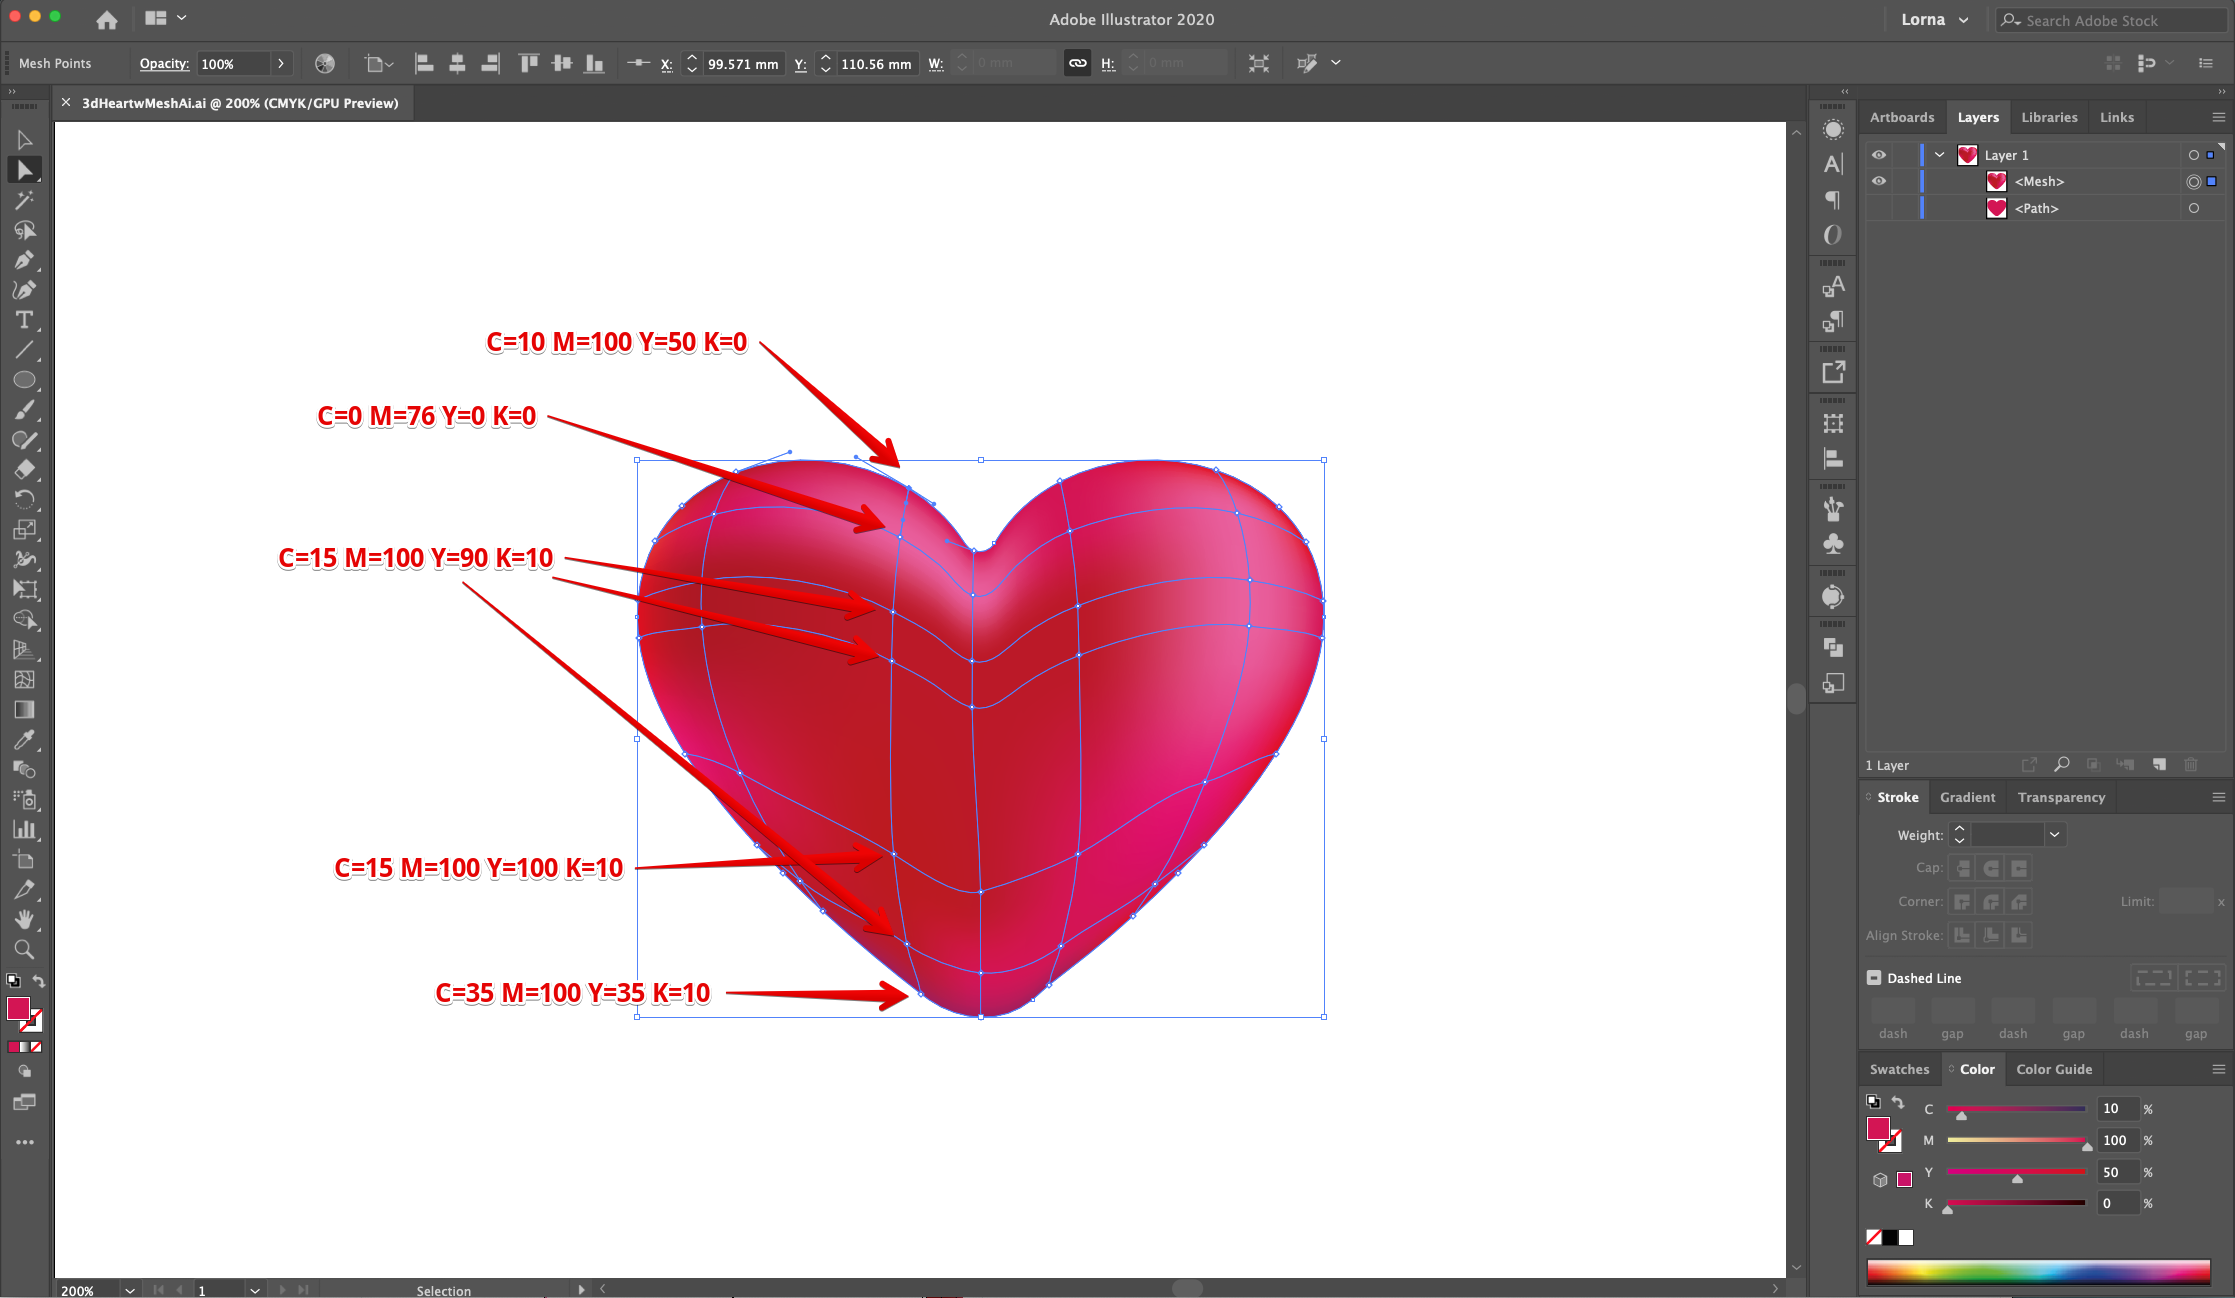
17 - For the fourth row from left (top to bottom): C=10 M=100 Y=50 K=0, C=0 M=76 Y=0 K=0 and C=15 M=100 Y=90 K=10.
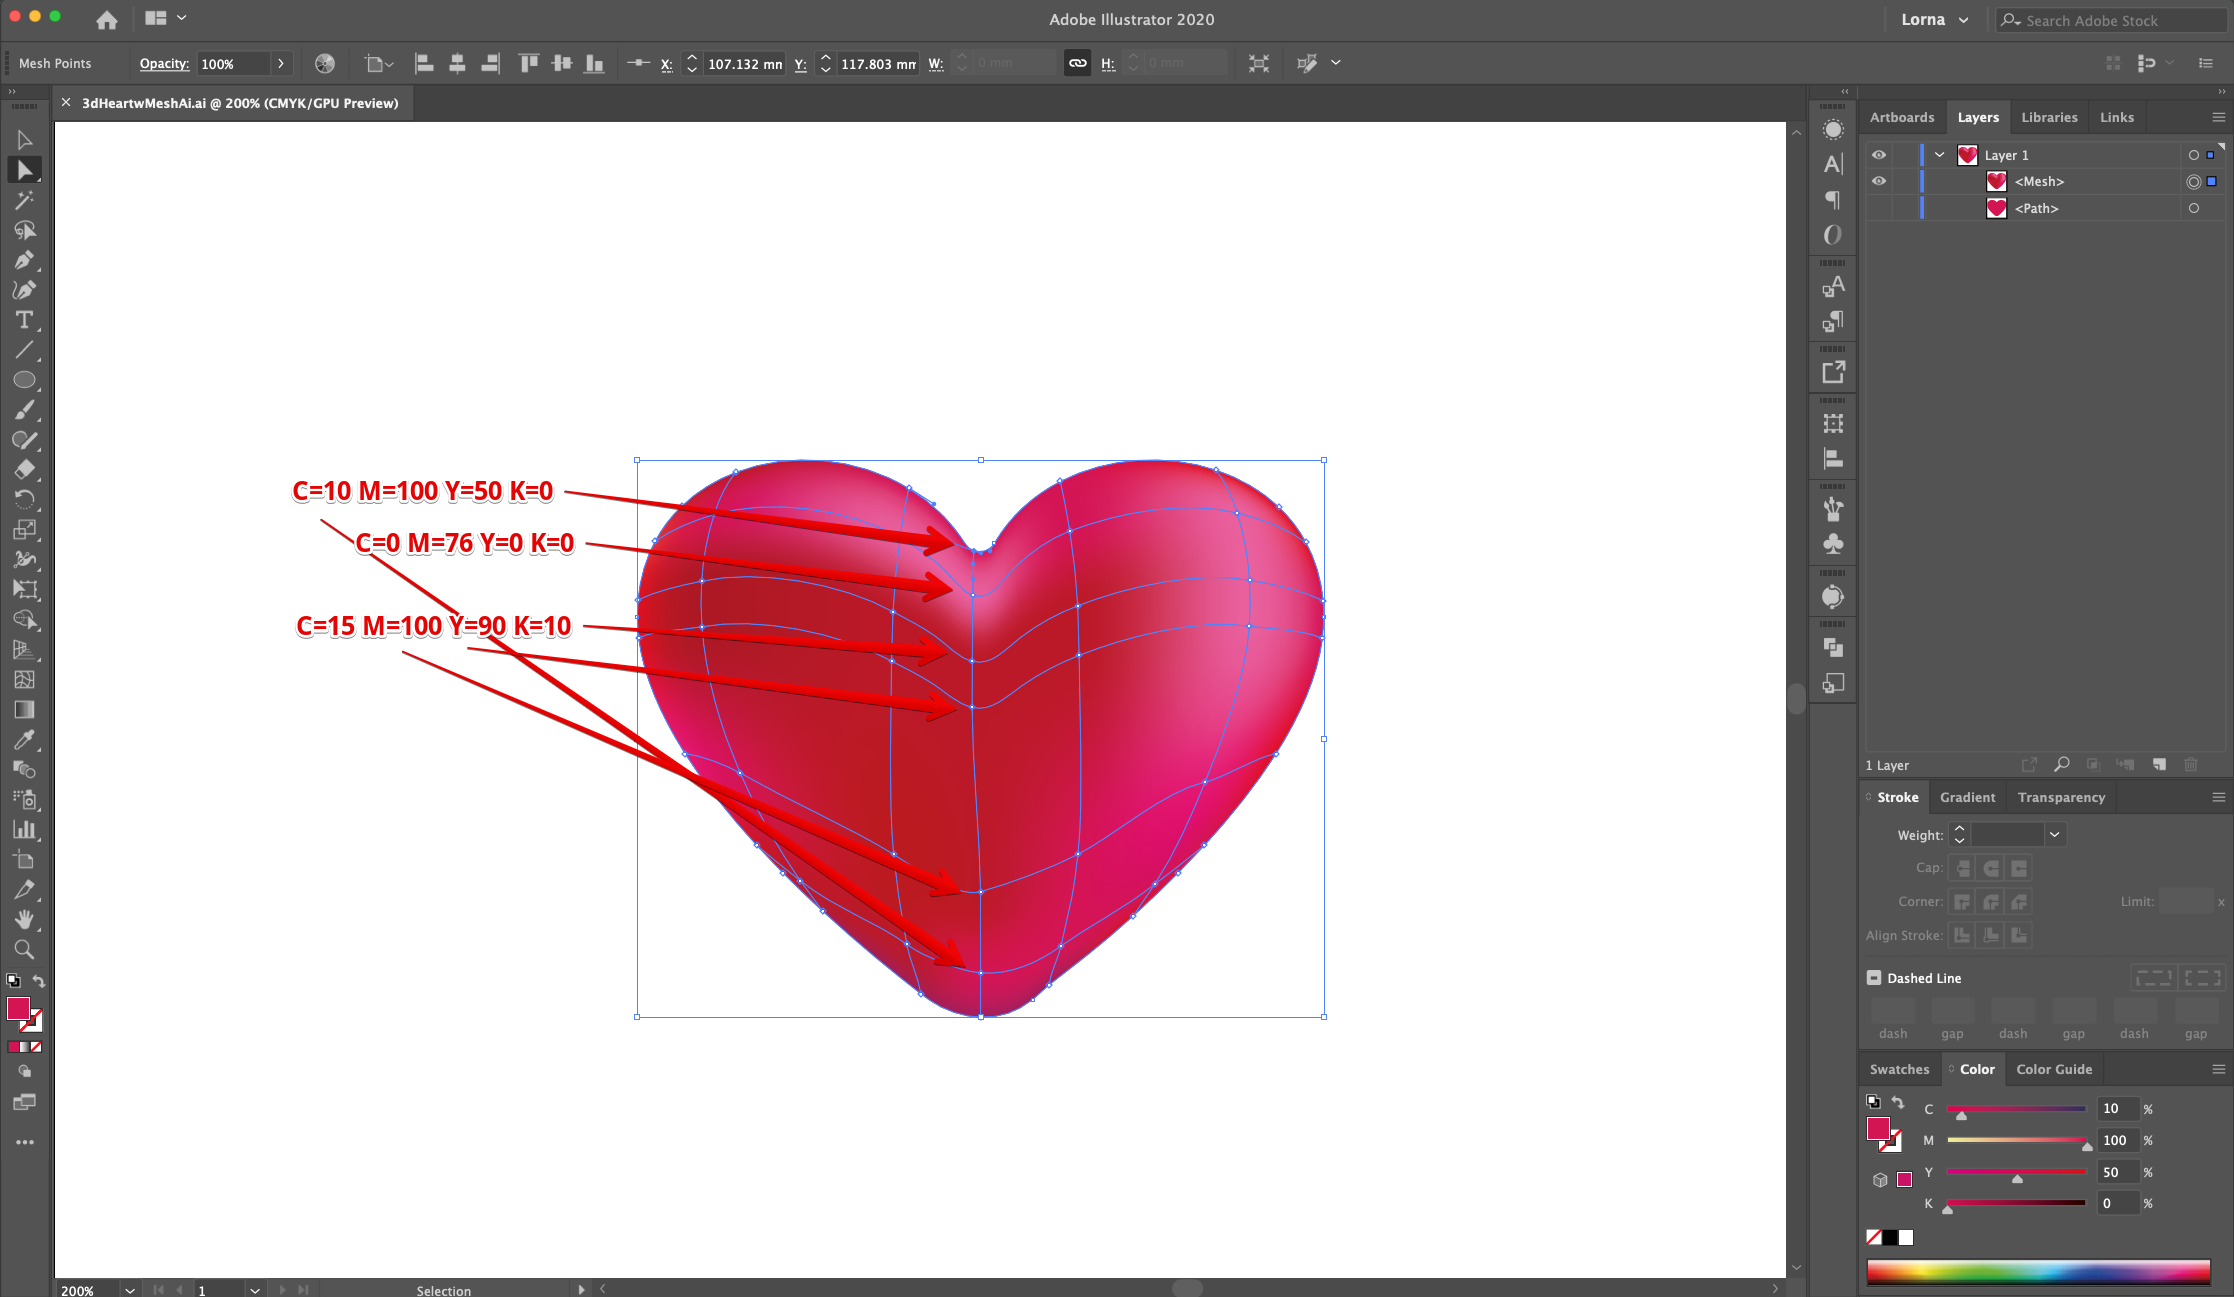
18 - For the fifth row from left (top to bottom): C=10 M=100 Y=50 K=0, C=15 M=100 Y=90 K=10 and C=35 M=100 Y=35K=10.
19 - For the sixth row from left (top to bottom): C=0 M=100 Y=100 K=0, C=0 M=76 Y=0 K=0, C=0 M=95 Y=20 K=0, and C=10 M=100 Y=50 K=10.
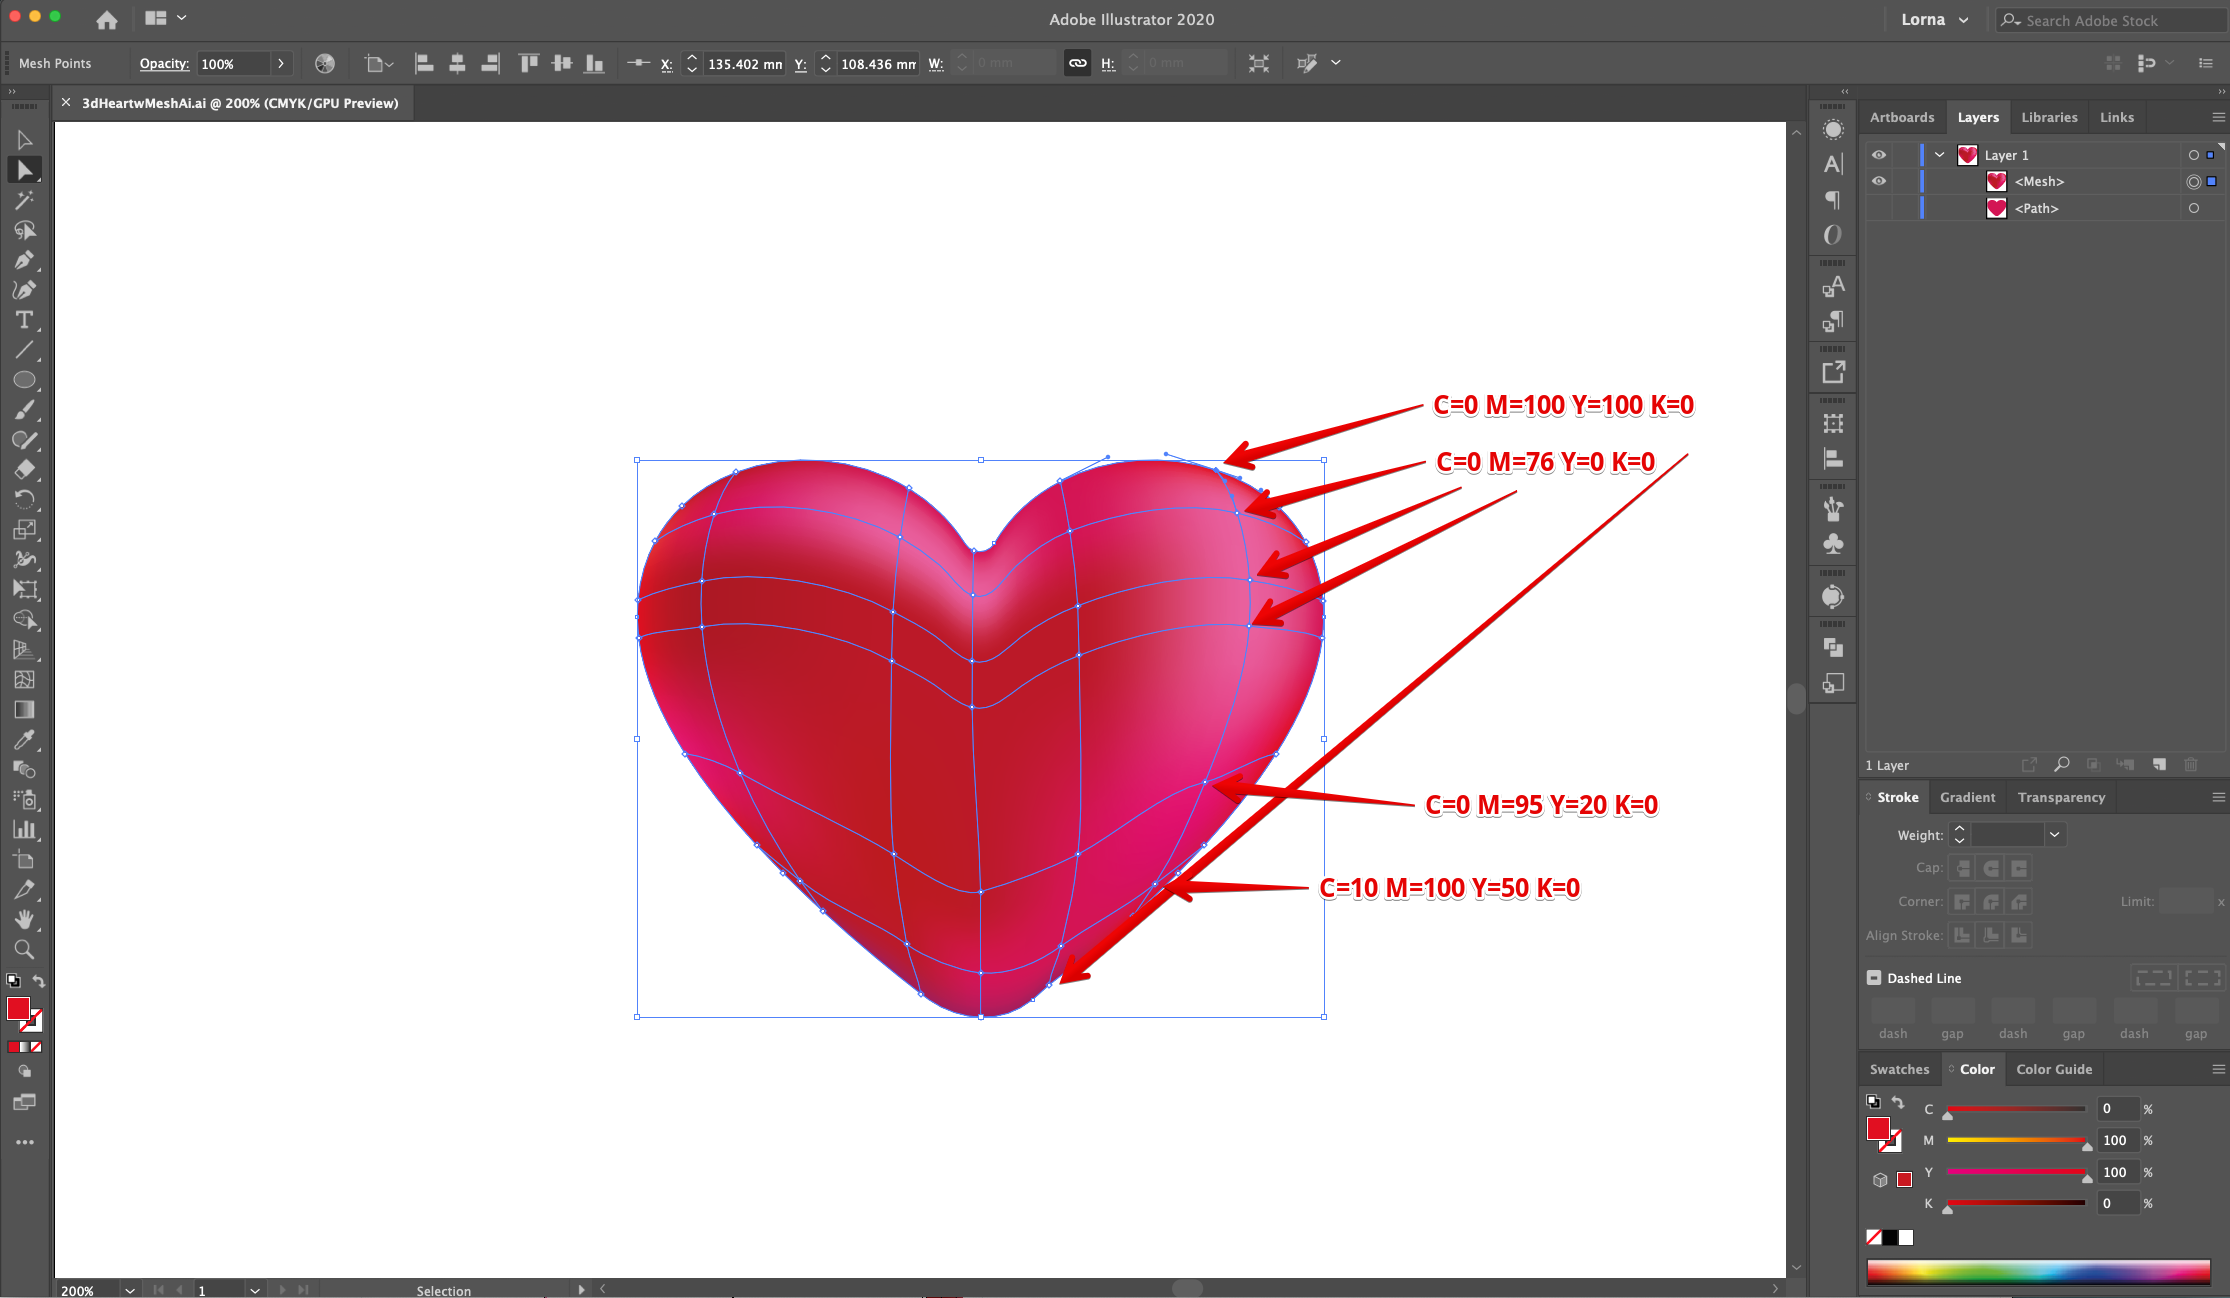
20 - And for the las one (right side): C=10 M=100 Y=50 K=0, C=0 M=100 Y=100 K=0 and C=35 M=100 Y=35K=10.
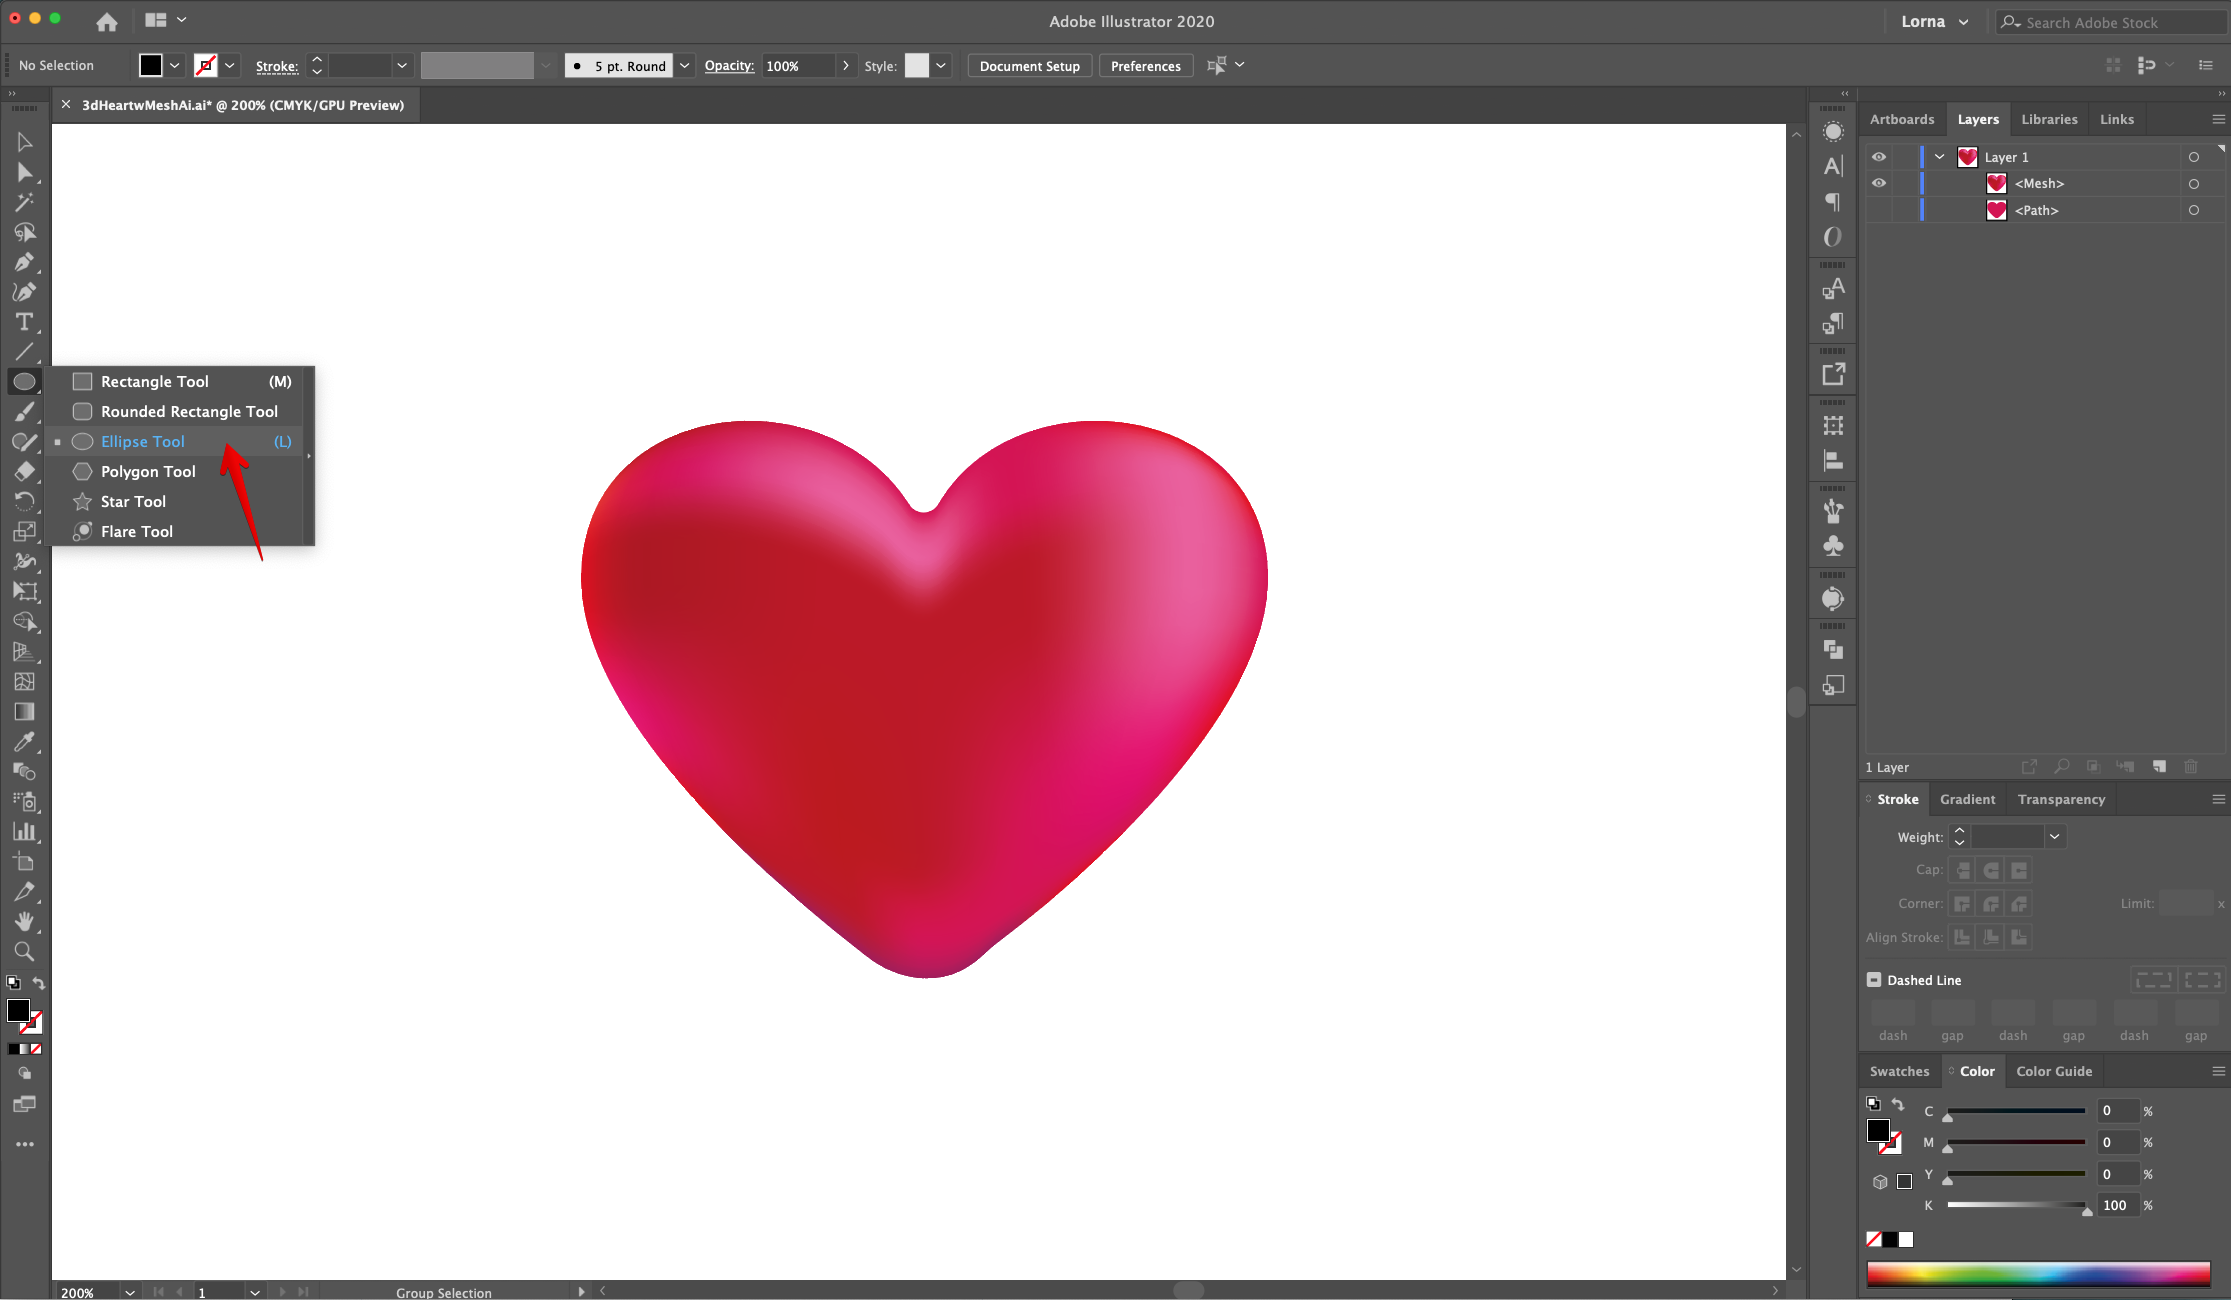
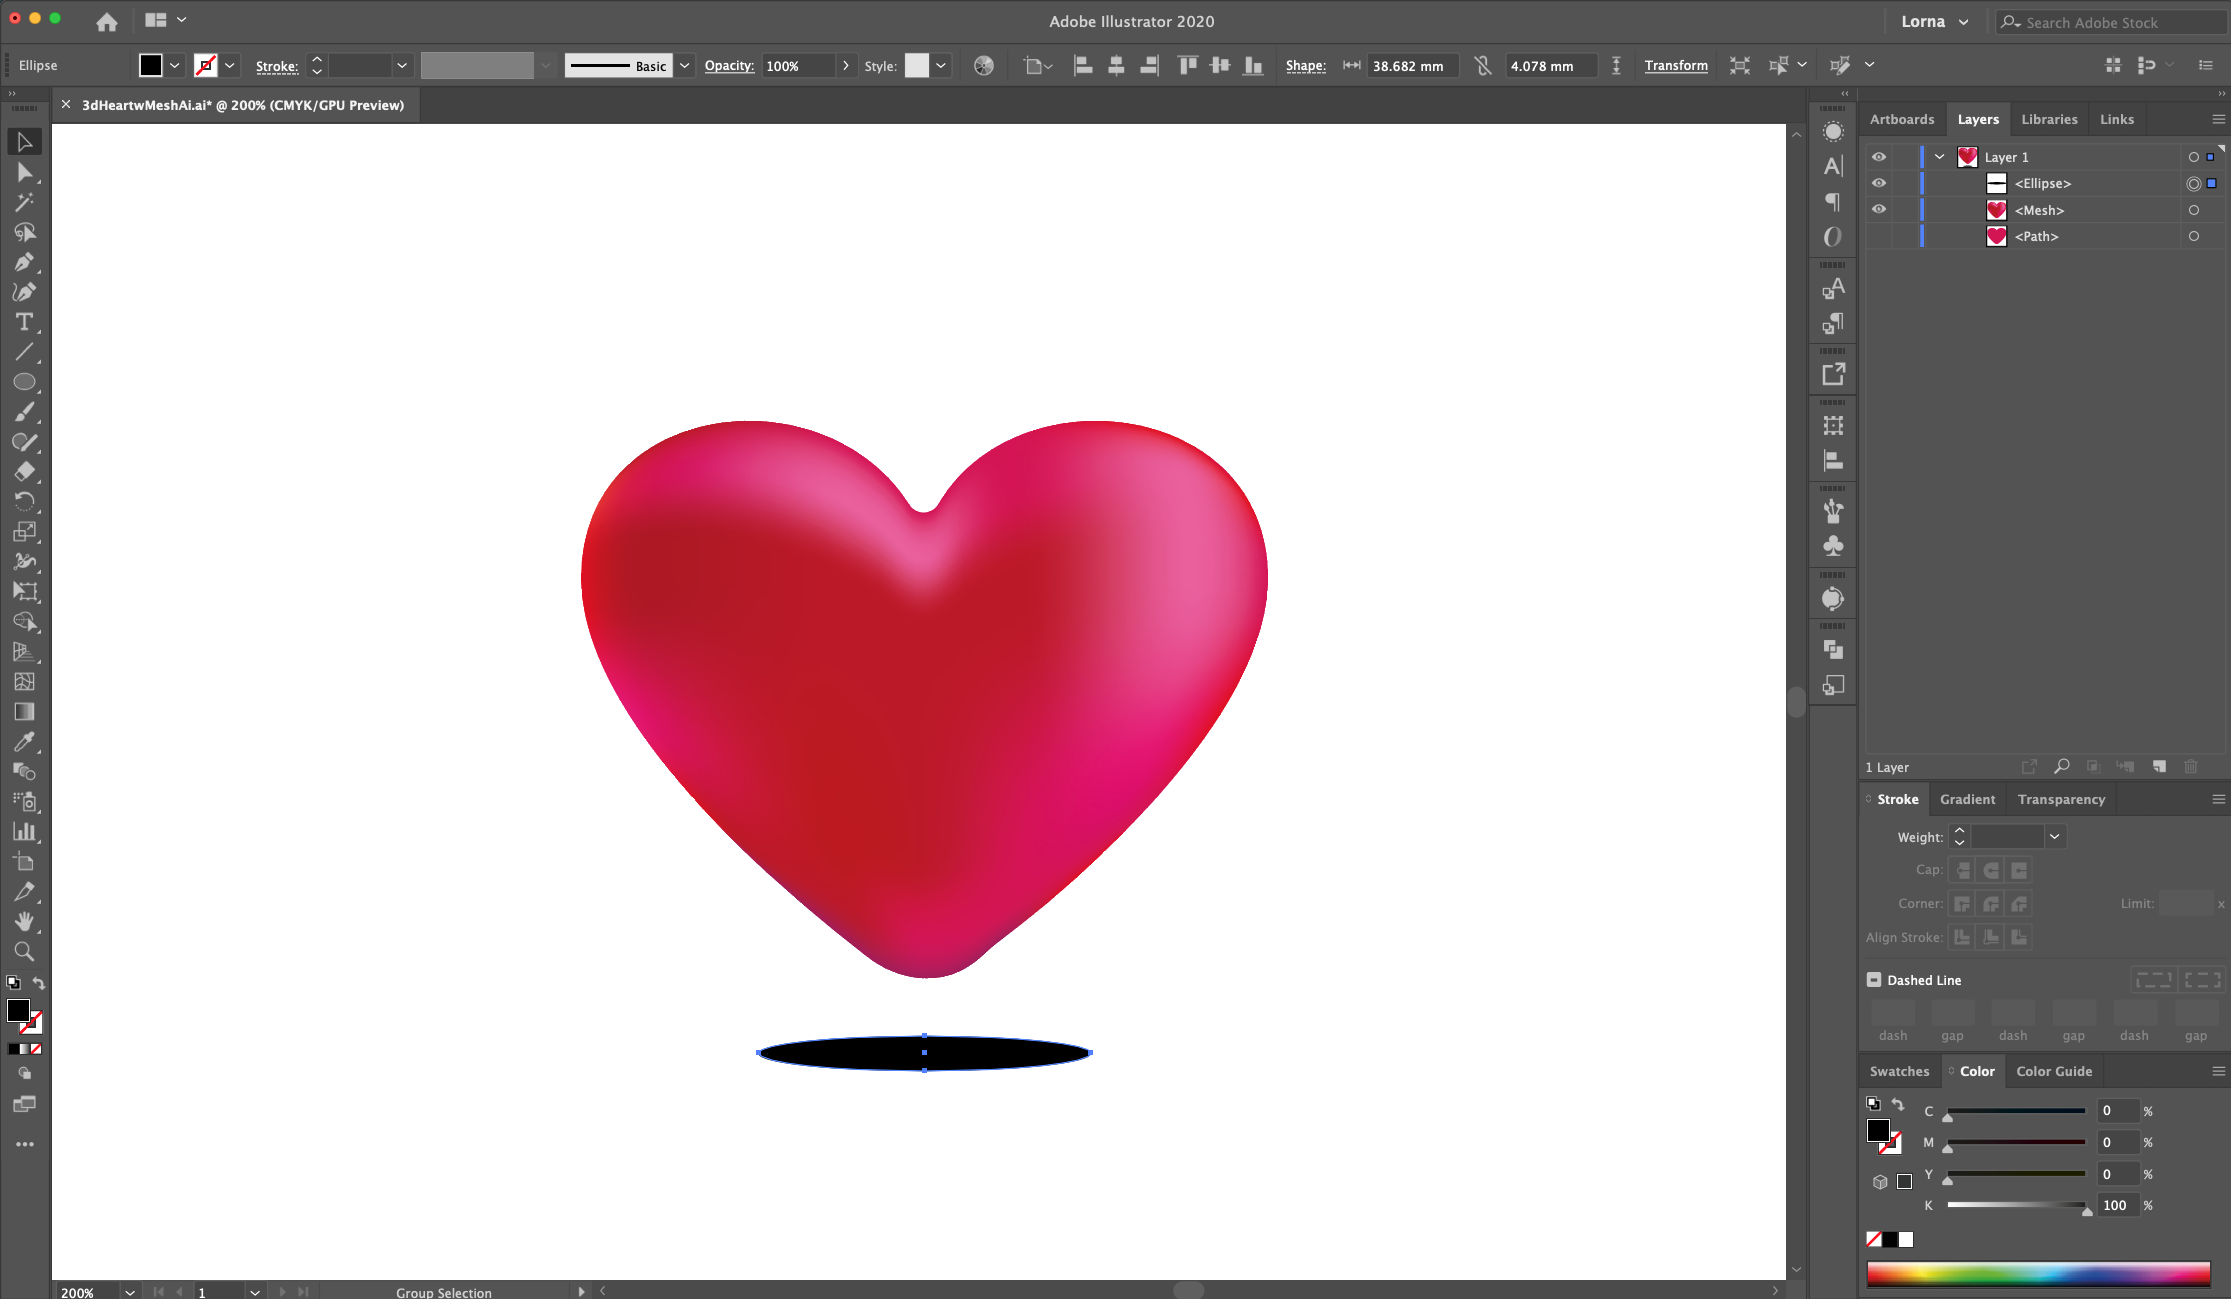
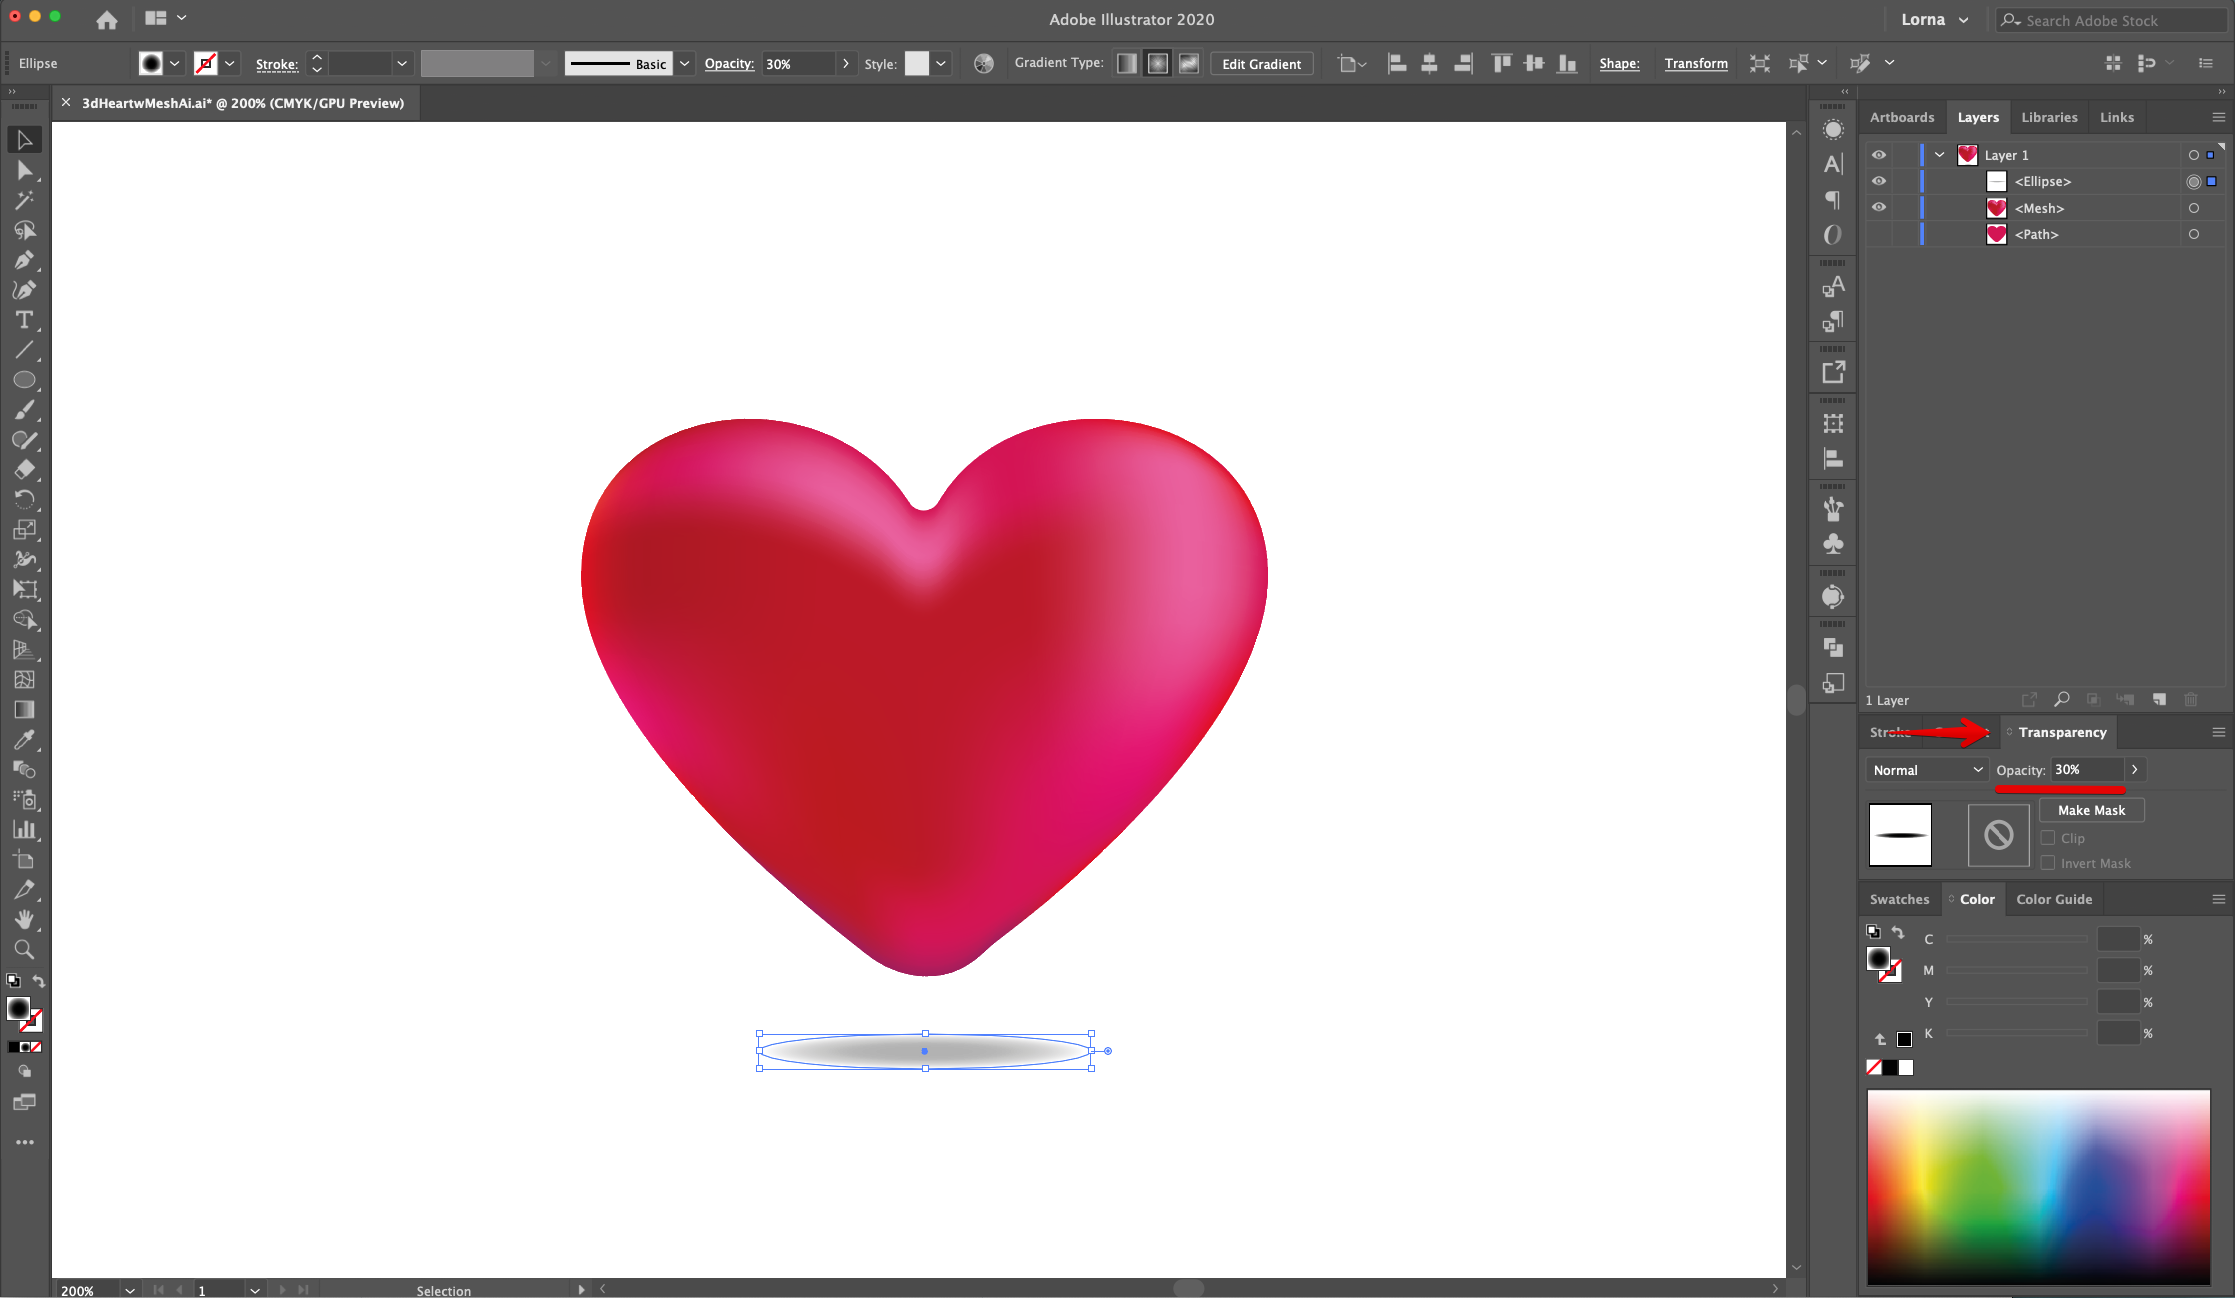
21 - Select the “Ellipse Tool” (E), click inside the “Canvas” and create an “Oval” shape under the “Heart” to make the shadow.
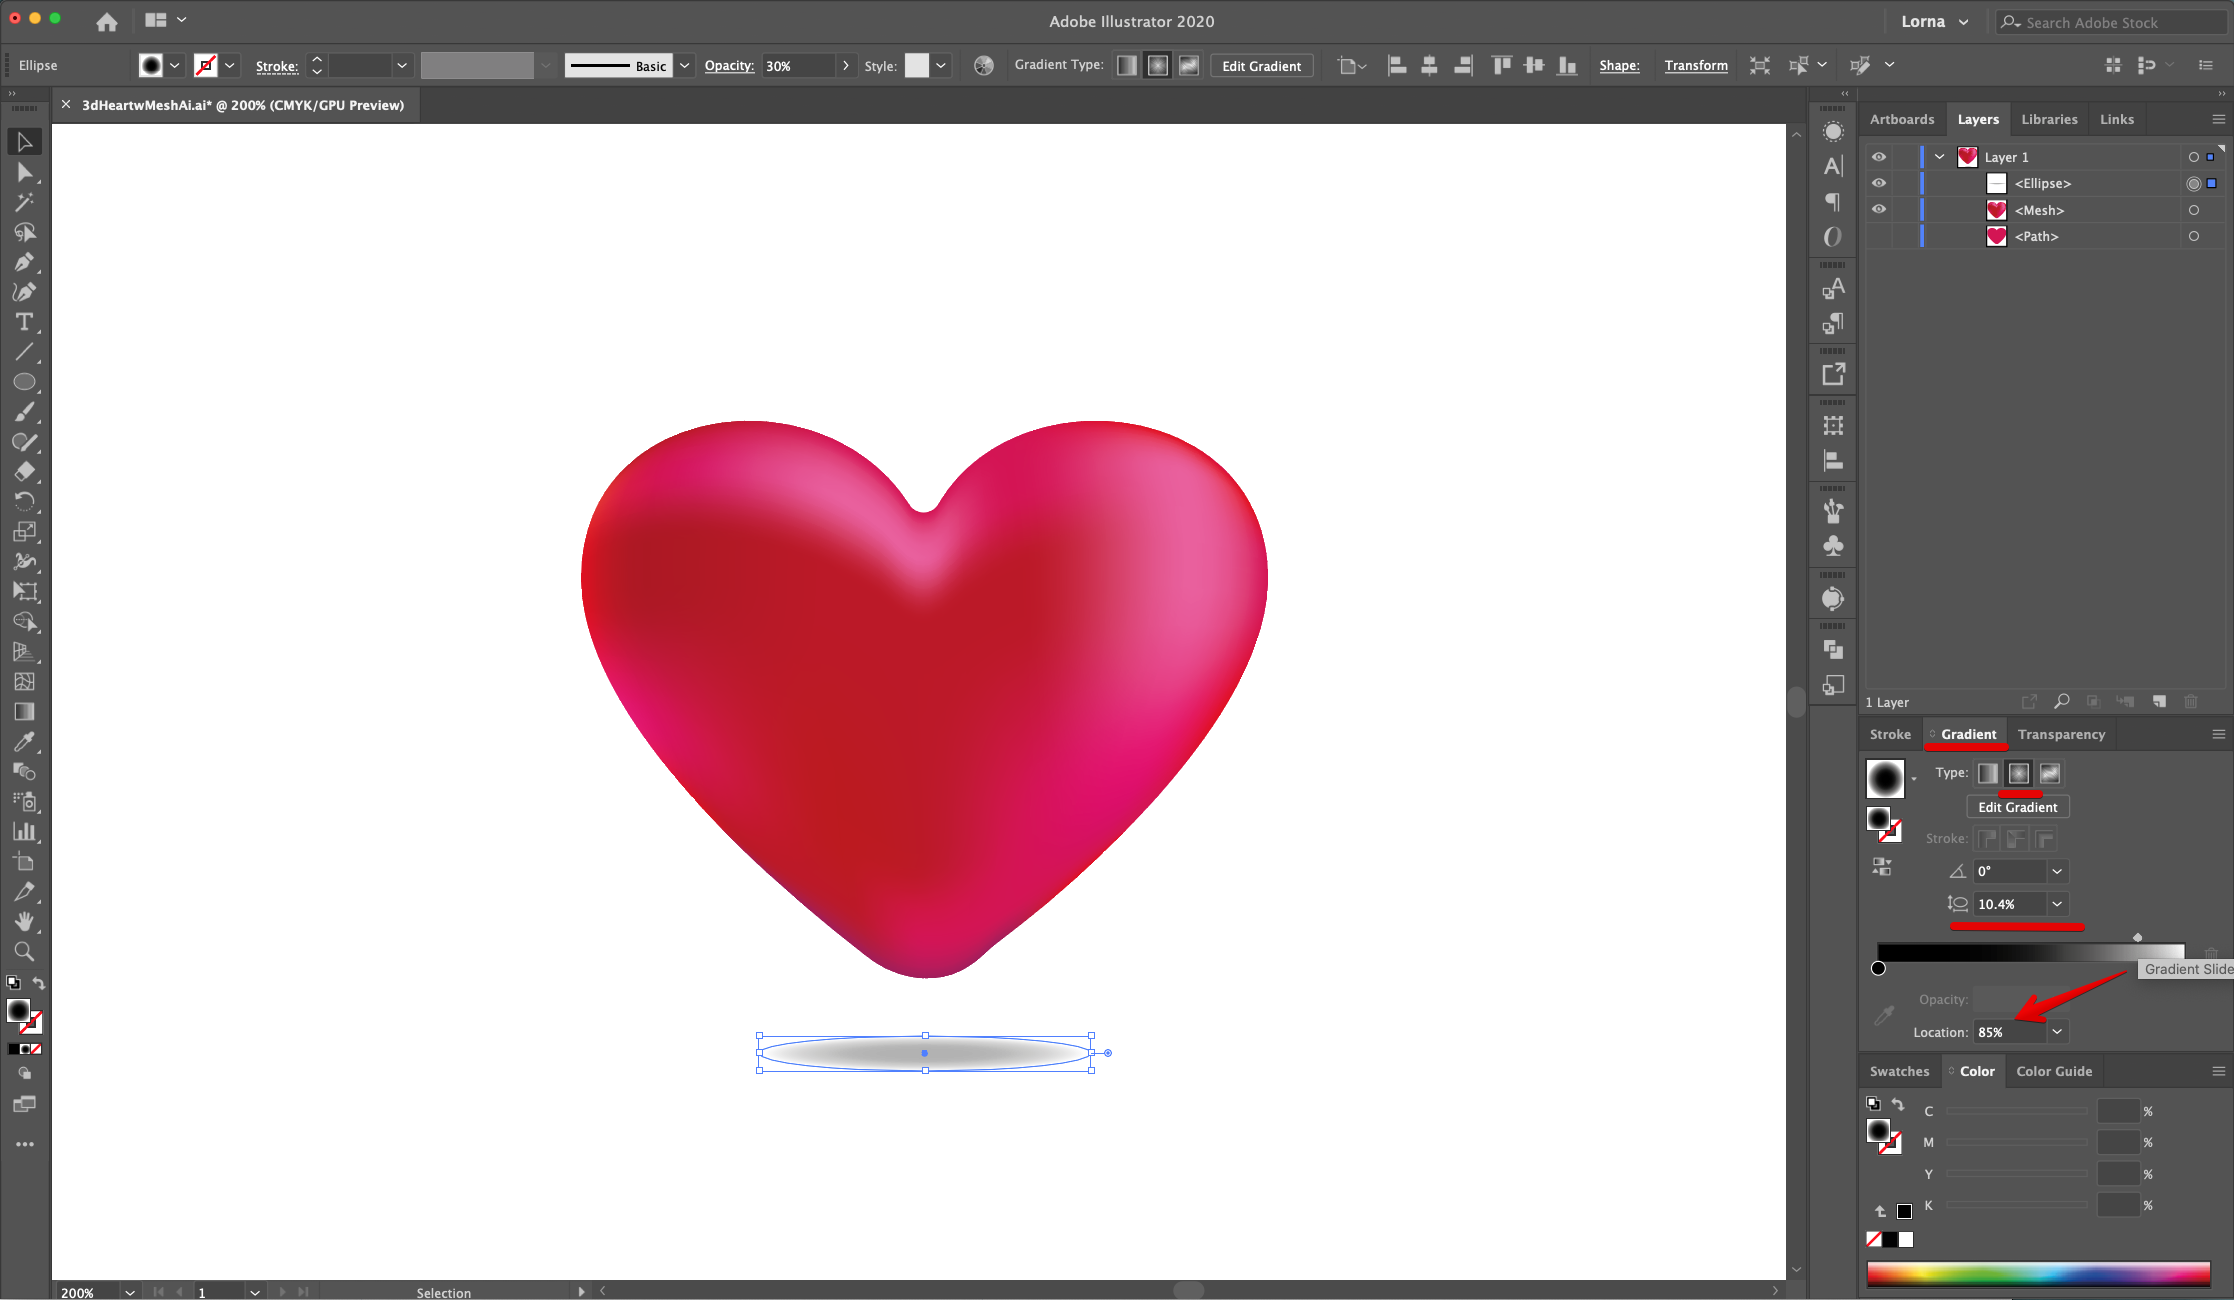
22 - Fill it with a “Radial Gradient” from Black to Transparent, use a 10.4% “Radius” and place the “Location” of the “Midpoint” at about 85%. Head to the “Transparency Panel” and lower the “Opacity” to 30%.
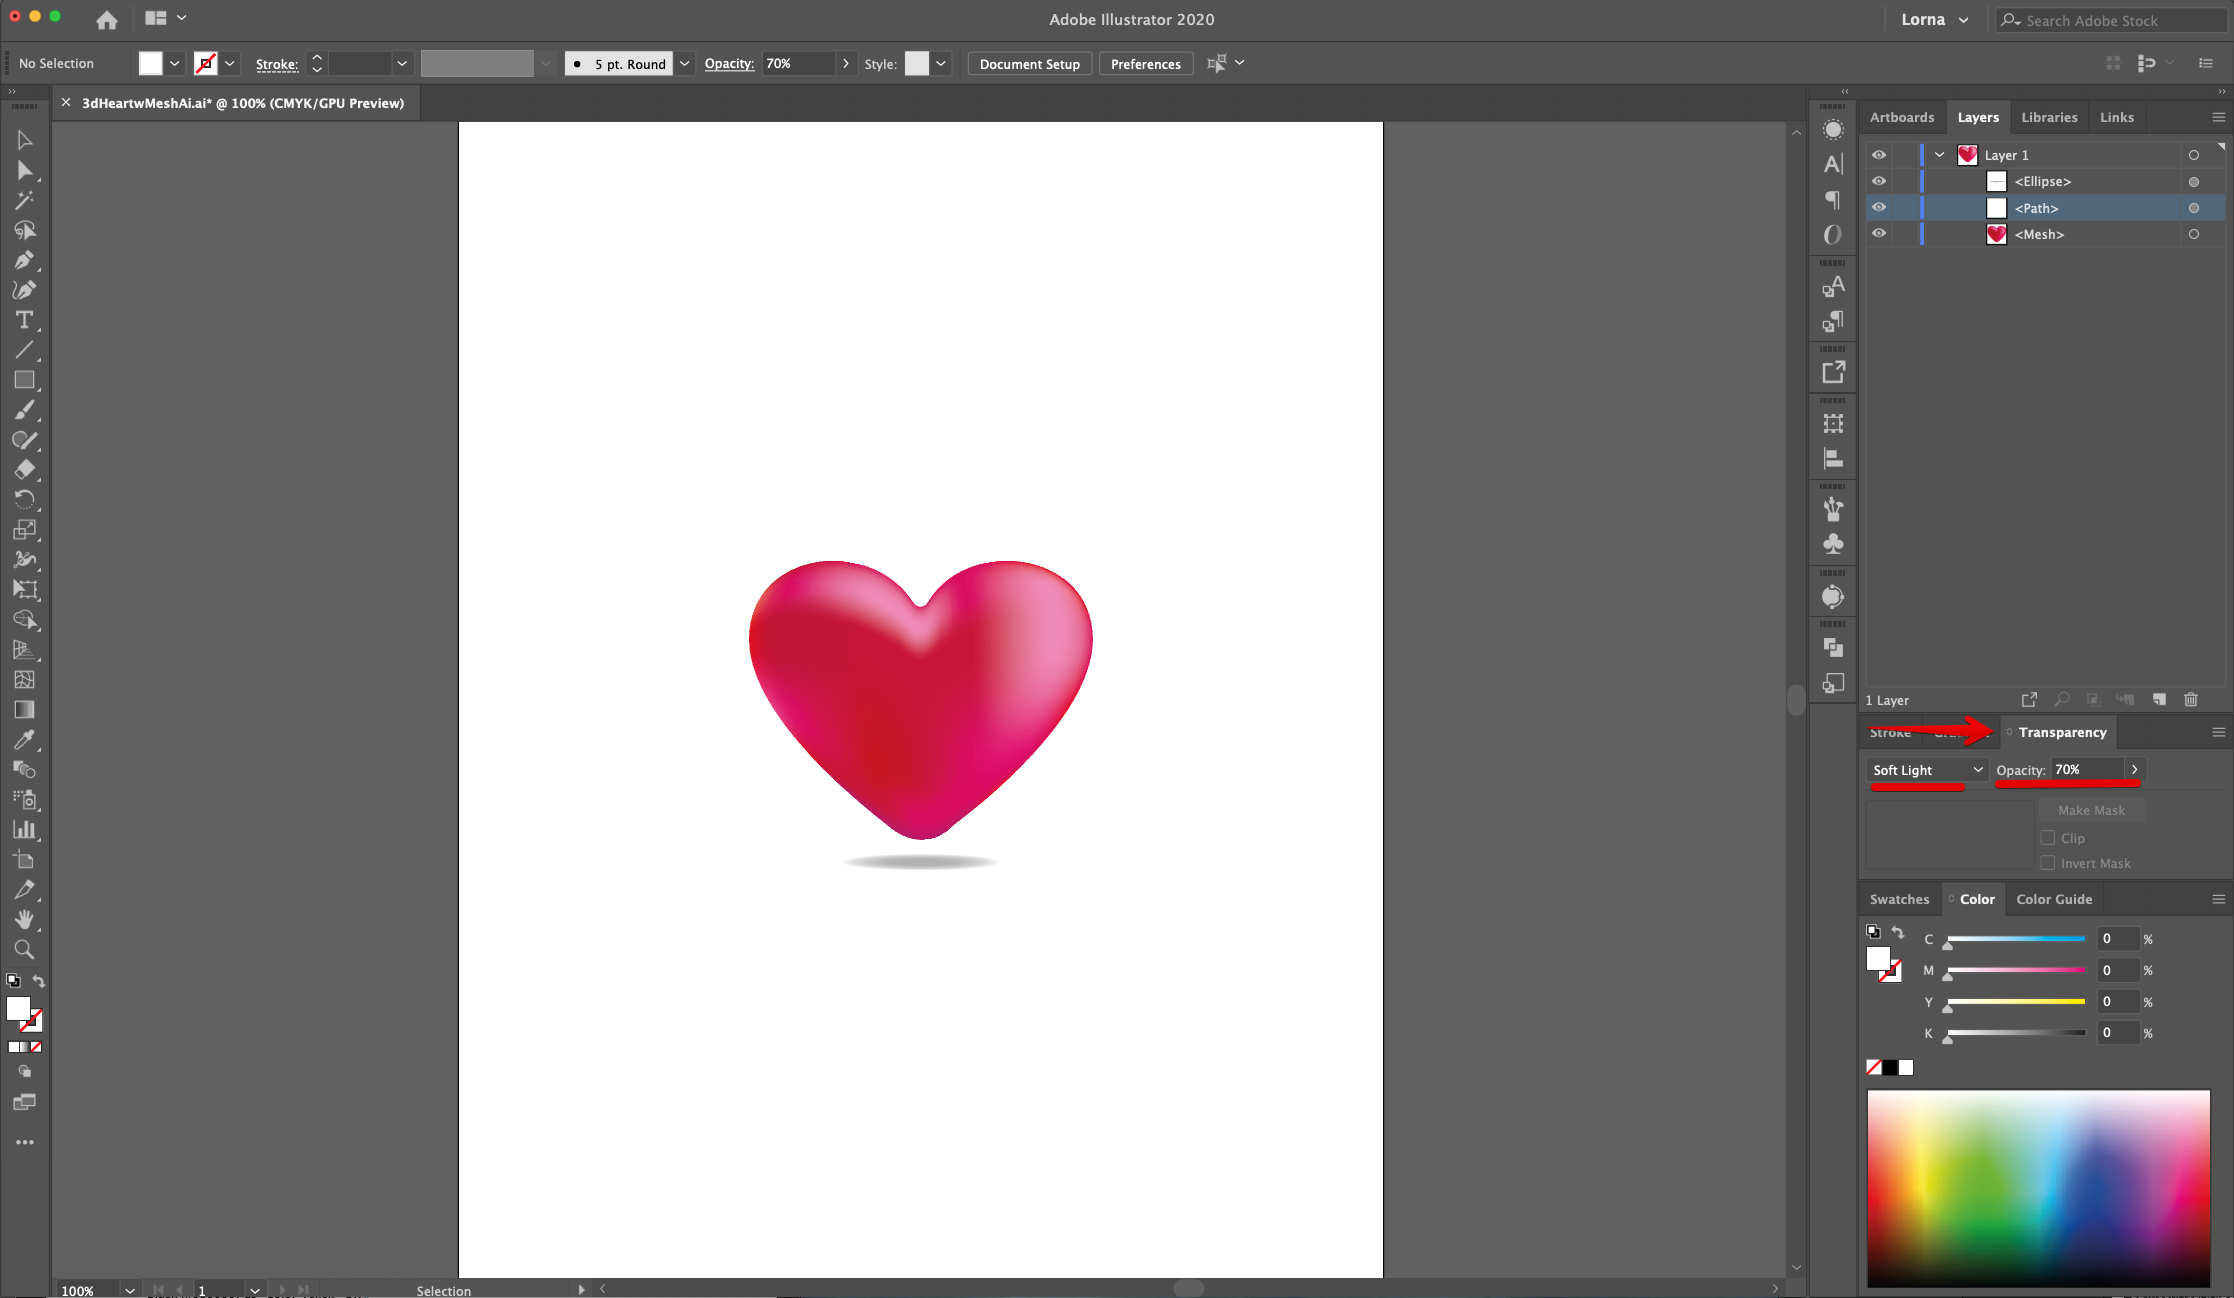
23 - Turn the visibility of the “Heart” copy back on, drag it so it is placed on top of the one with the “Mesh” and change the “Fill” color to White. In the “Transparency Panel” change the “Blending Mode” to “Soft Light” and lower the “Opacity” to 70%.
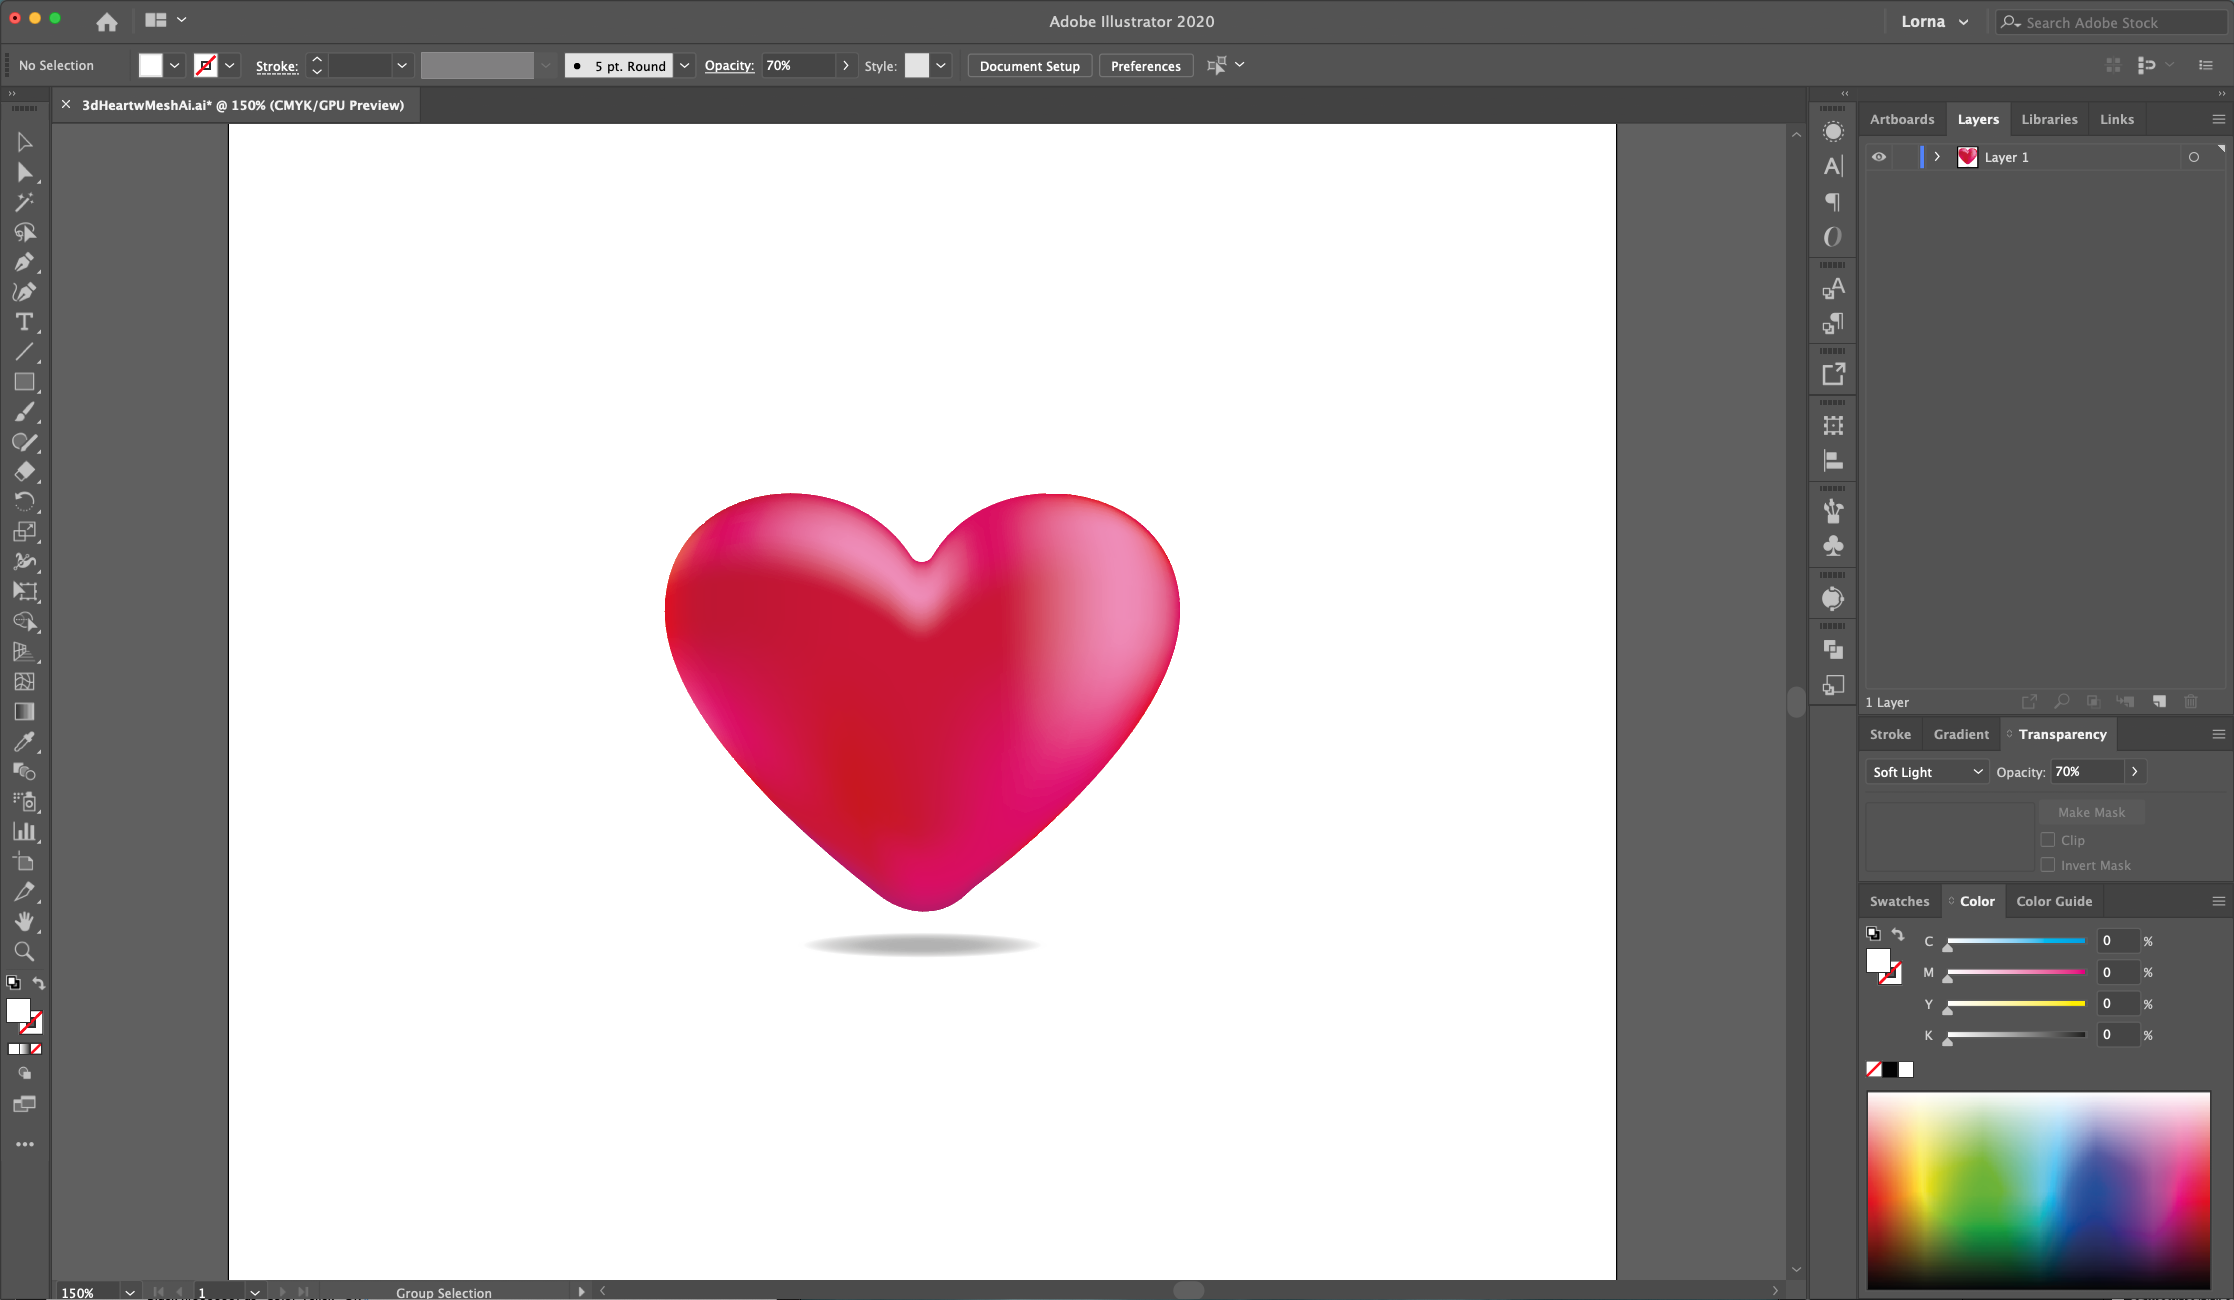
24 - Check out your work!
2 - Select the “Ellipse Tool” (E), click inside the “Canvas” and input a “Width” and “Height” of 80 mm. Click “OK”.
3 - Use the “Direct Selection Tool” (A) to click on the top “Anchor Point”.
4 - Go to Object > Transform > Move (Shift + Command/Control + M) and use a “Vertical” distance of 35 mm with a -90° “Angle”. Click “OK”.
5 - Still using the Direct Selection Tool” (A)and while holding the “Option/Alt”, key select the “Handles” and drag them “Up” one by one to create the top curves of the “Heart”.
6 - Now, use the “Direct Selection Tool” (A) to click on the bottom “Anchor Point”. Go to Object > Transform > Move (Shift + Command/Control + M) and use a “Vertical” distance of 9 mm with a -90° “Angle”. Click “OK”.
7 - With it still selected, click on “Convert selected anchor points to corner” in the Top Menu to make the lines straight.
8 - Give it a 10 mm “Corner Radius” in the Top Menu. Then, select the Top “Anchor Point” and give it a 2 mm “Corner Radius”.
9 - Center the shape using the “Horizontal and Vertical Align Center” options on your Top Menu and make sure that “Align to Artboard” is selected. Or use the same options in the “Align Panel”.
10 - Fill the “Heart” with a medium pink shade (we used one from the “Swatches Panel”, make a “Copy” (Command/Control + C) and “Paste in Back” (Command/Control + B).
11 - To show the contents of the Layer, click on the small arrow on the left side of its Thumbnail and Hide the bottom one. You can use this copy to make other color variations or shadows.
12 Select the “Mesh Tool” (U) and click the bottom tip of the “Heart” (in the center) to create the first “Mesh Point”. Create other 4 “Mesh Points” along the Horizontal length of the “Heart” (leave a bit more space between them in the center portion of the heart).
13 - Now, make 5 more “Mesh Points” running down the line created in the “Center”. Place 3 of them close together in the top of the “Heart”, leave more space between the ones in the center (2) and place the final one close to the bottom. Use the “Direct Selection Tool” (A) to select the “Anchor Points” that may need some fixing.
14 To add the 3D effect to the “Heart” we are going to add different color shades to the “Mesh Points”. Starting with the Left-most line we used the following from top to bottom: C=15 M=100 Y=90 K=100, C=0 M=90 Y=85 K=0, C=15 M=100 Y=90 K=100, C=0 M=100 Y=100 K=0, C=0 M=95 Y=20 K=0 and C=35 M=100 Y=35 K=10.
15 - Now the second from left (top to bottom): C=5 M=100 Y=90 K=10, C=10 M=100 Y=50 K=0 and C=15 M=100 Y=90 K=20.
16 - For the third row from left (top to bottom): C=10 M=100 Y=50 K=0, C=0 M=76 Y=0 K=0, C=15 M=100 Y=90 K=10, C=15 M=100 Y=100 K=10, and C=35 M=100 Y=30 K=10.
17 - For the fourth row from left (top to bottom): C=10 M=100 Y=50 K=0, C=0 M=76 Y=0 K=0 and C=15 M=100 Y=90 K=10.
18 - For the fifth row from left (top to bottom): C=10 M=100 Y=50 K=0, C=15 M=100 Y=90 K=10 and C=35 M=100 Y=35K=10.
19 - For the sixth row from left (top to bottom): C=0 M=100 Y=100 K=0, C=0 M=76 Y=0 K=0, C=0 M=95 Y=20 K=0, and C=10 M=100 Y=50 K=10.
20 - And for the las one (right side): C=10 M=100 Y=50 K=0, C=0 M=100 Y=100 K=0 and C=35 M=100 Y=35K=10.
21 - Select the “Ellipse Tool” (E), click inside the “Canvas” and create an “Oval” shape under the “Heart” to make the shadow.
22 - Fill it with a “Radial Gradient” from Black to Transparent, use a 10.4% “Radius” and place the “Location” of the “Midpoint” at about 85%. Head to the “Transparency Panel” and lower the “Opacity” to 30%.
23 - Turn the visibility of the “Heart” copy back on, drag it so it is placed on top of the one with the “Mesh” and change the “Fill” color to White. In the “Transparency Panel” change the “Blending Mode” to “Soft Light” and lower the “Opacity” to 70%.
24 - Check out your work!


