
Brain Texture in Illustrator
For this tutorial, we will use some “Color Swatches” in different shades of Pink to create the “Brain” and the Font “Brain Melt” from Font Bundles.
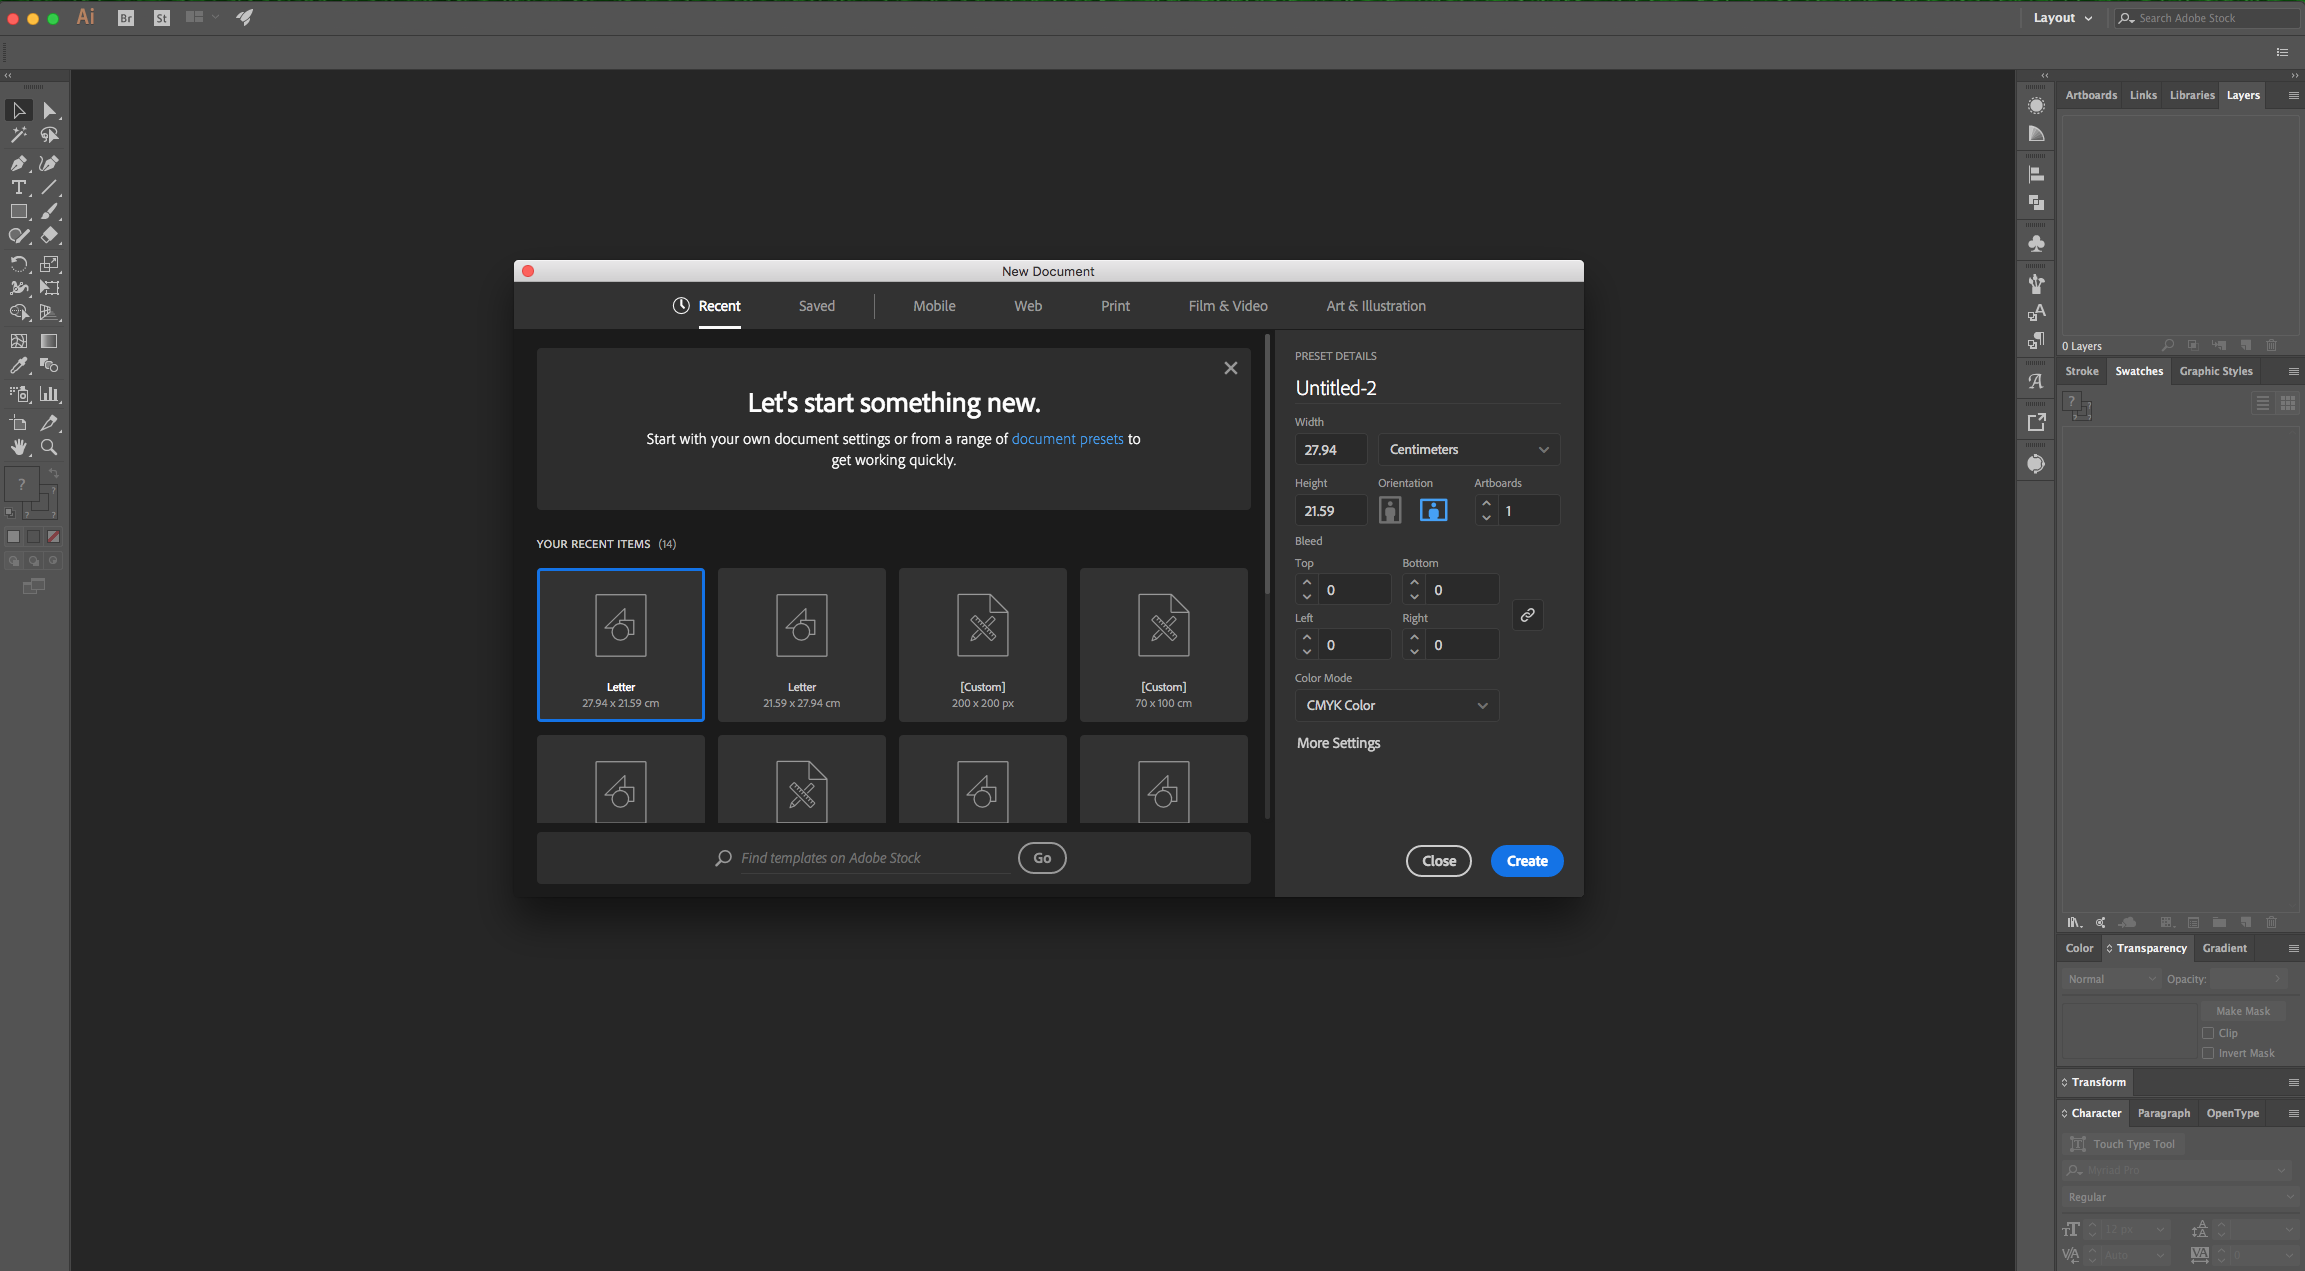
1 - In Illustrator, create a “New Document”.
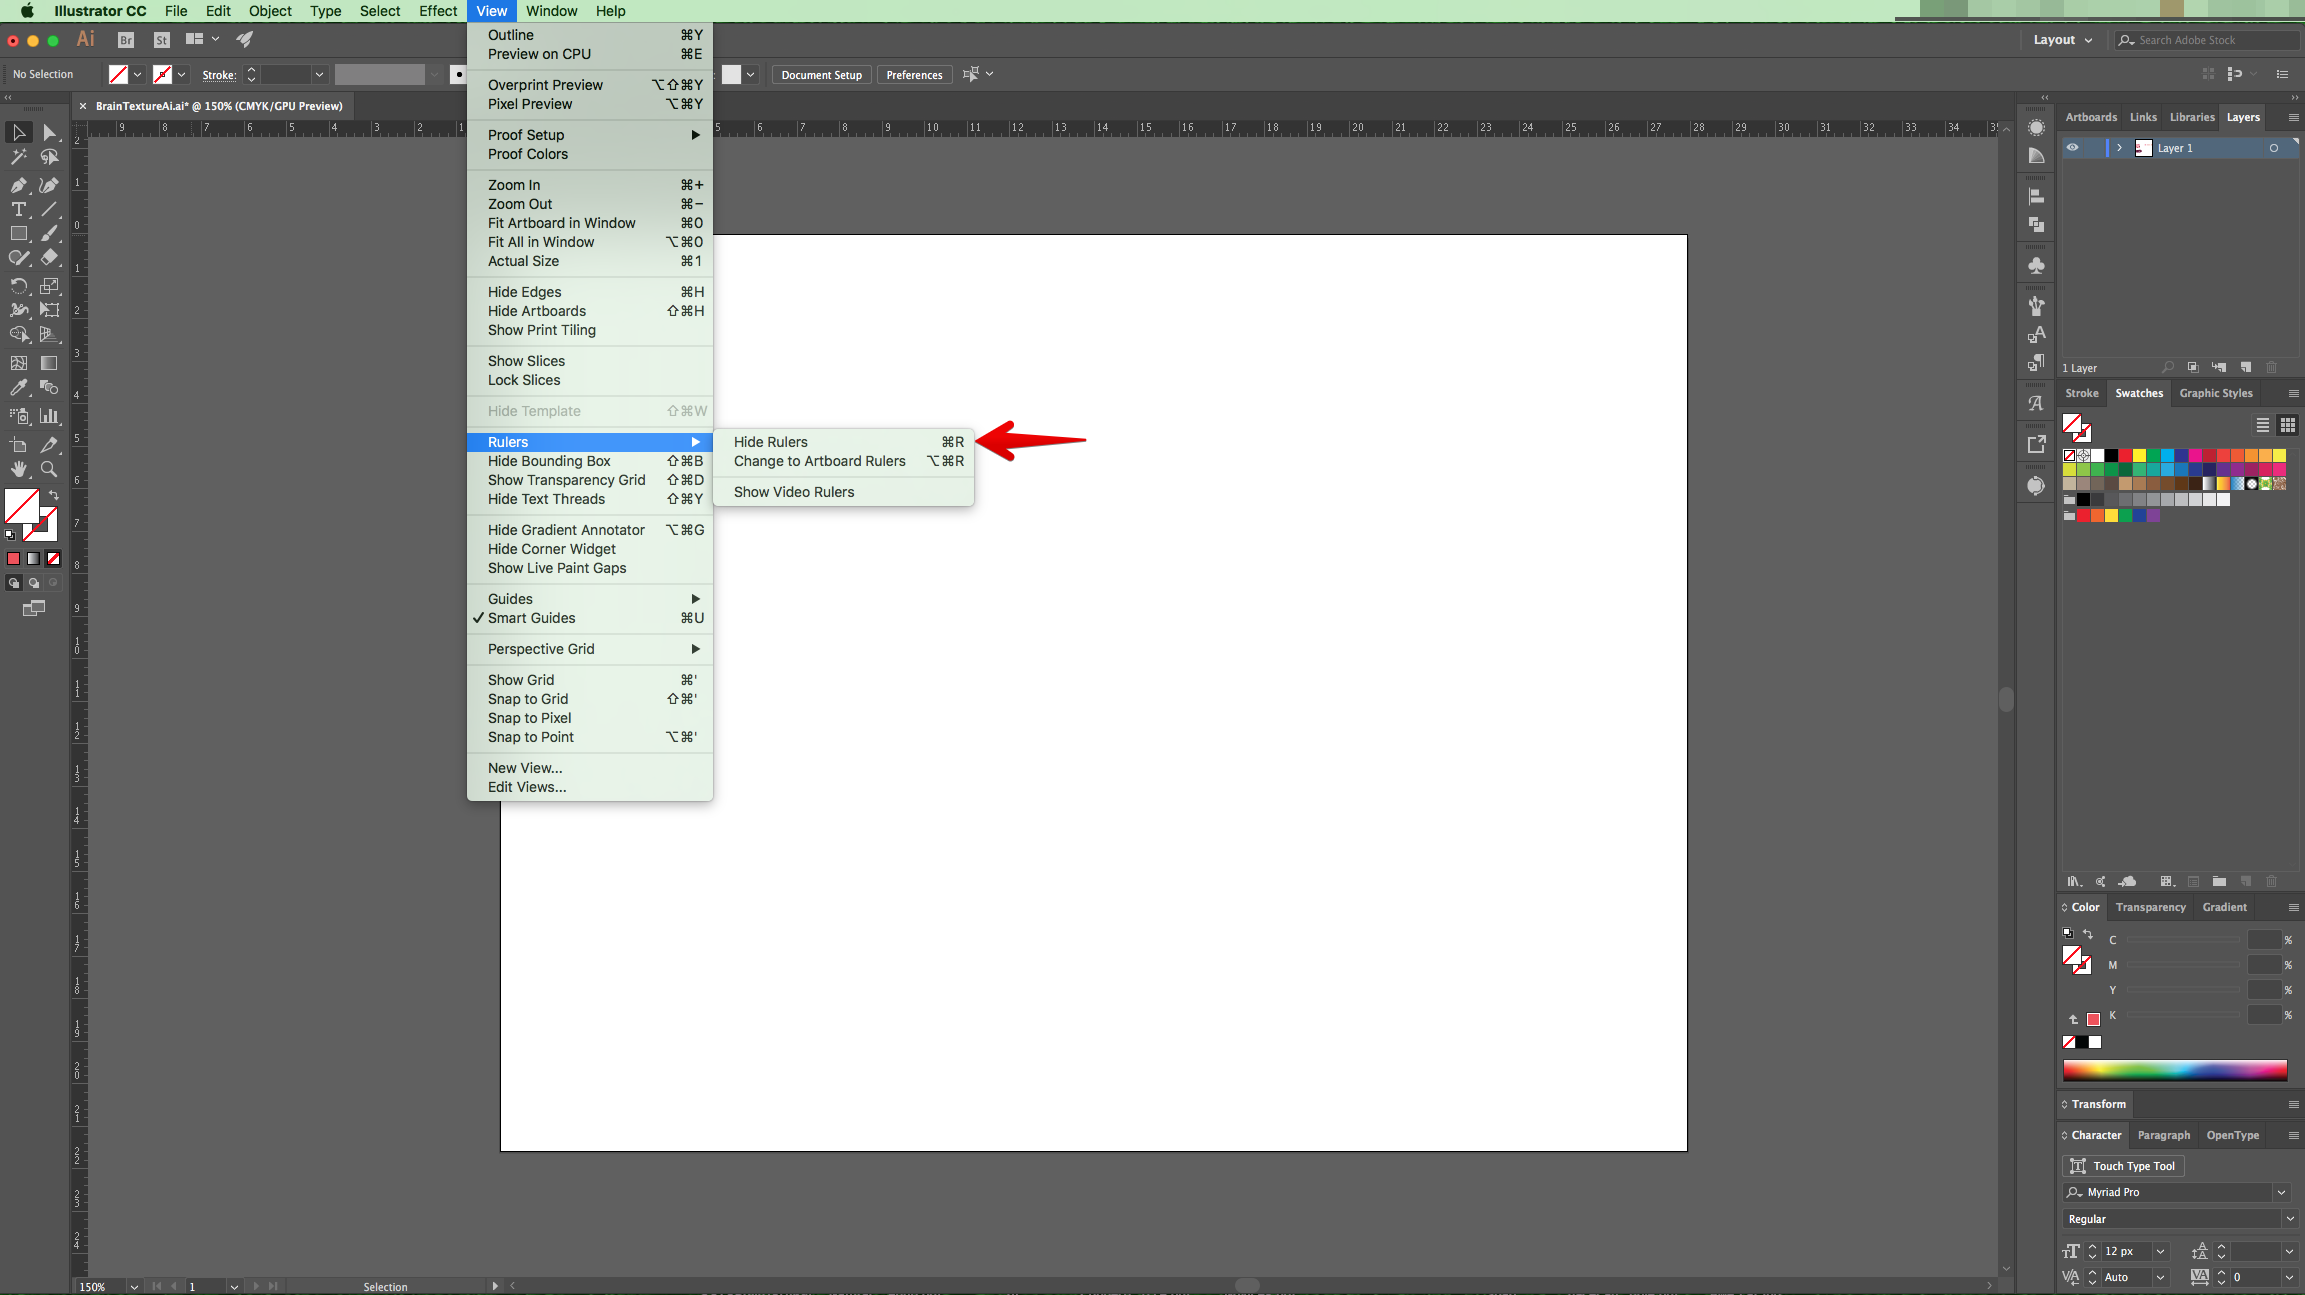
2 - If the “Rulers” are not enabled, go to View > Rulers > Show Rulers (Command/Control + R) to turn them ON. Also, enable “Snap to Grid” (View > Snap to Grid).
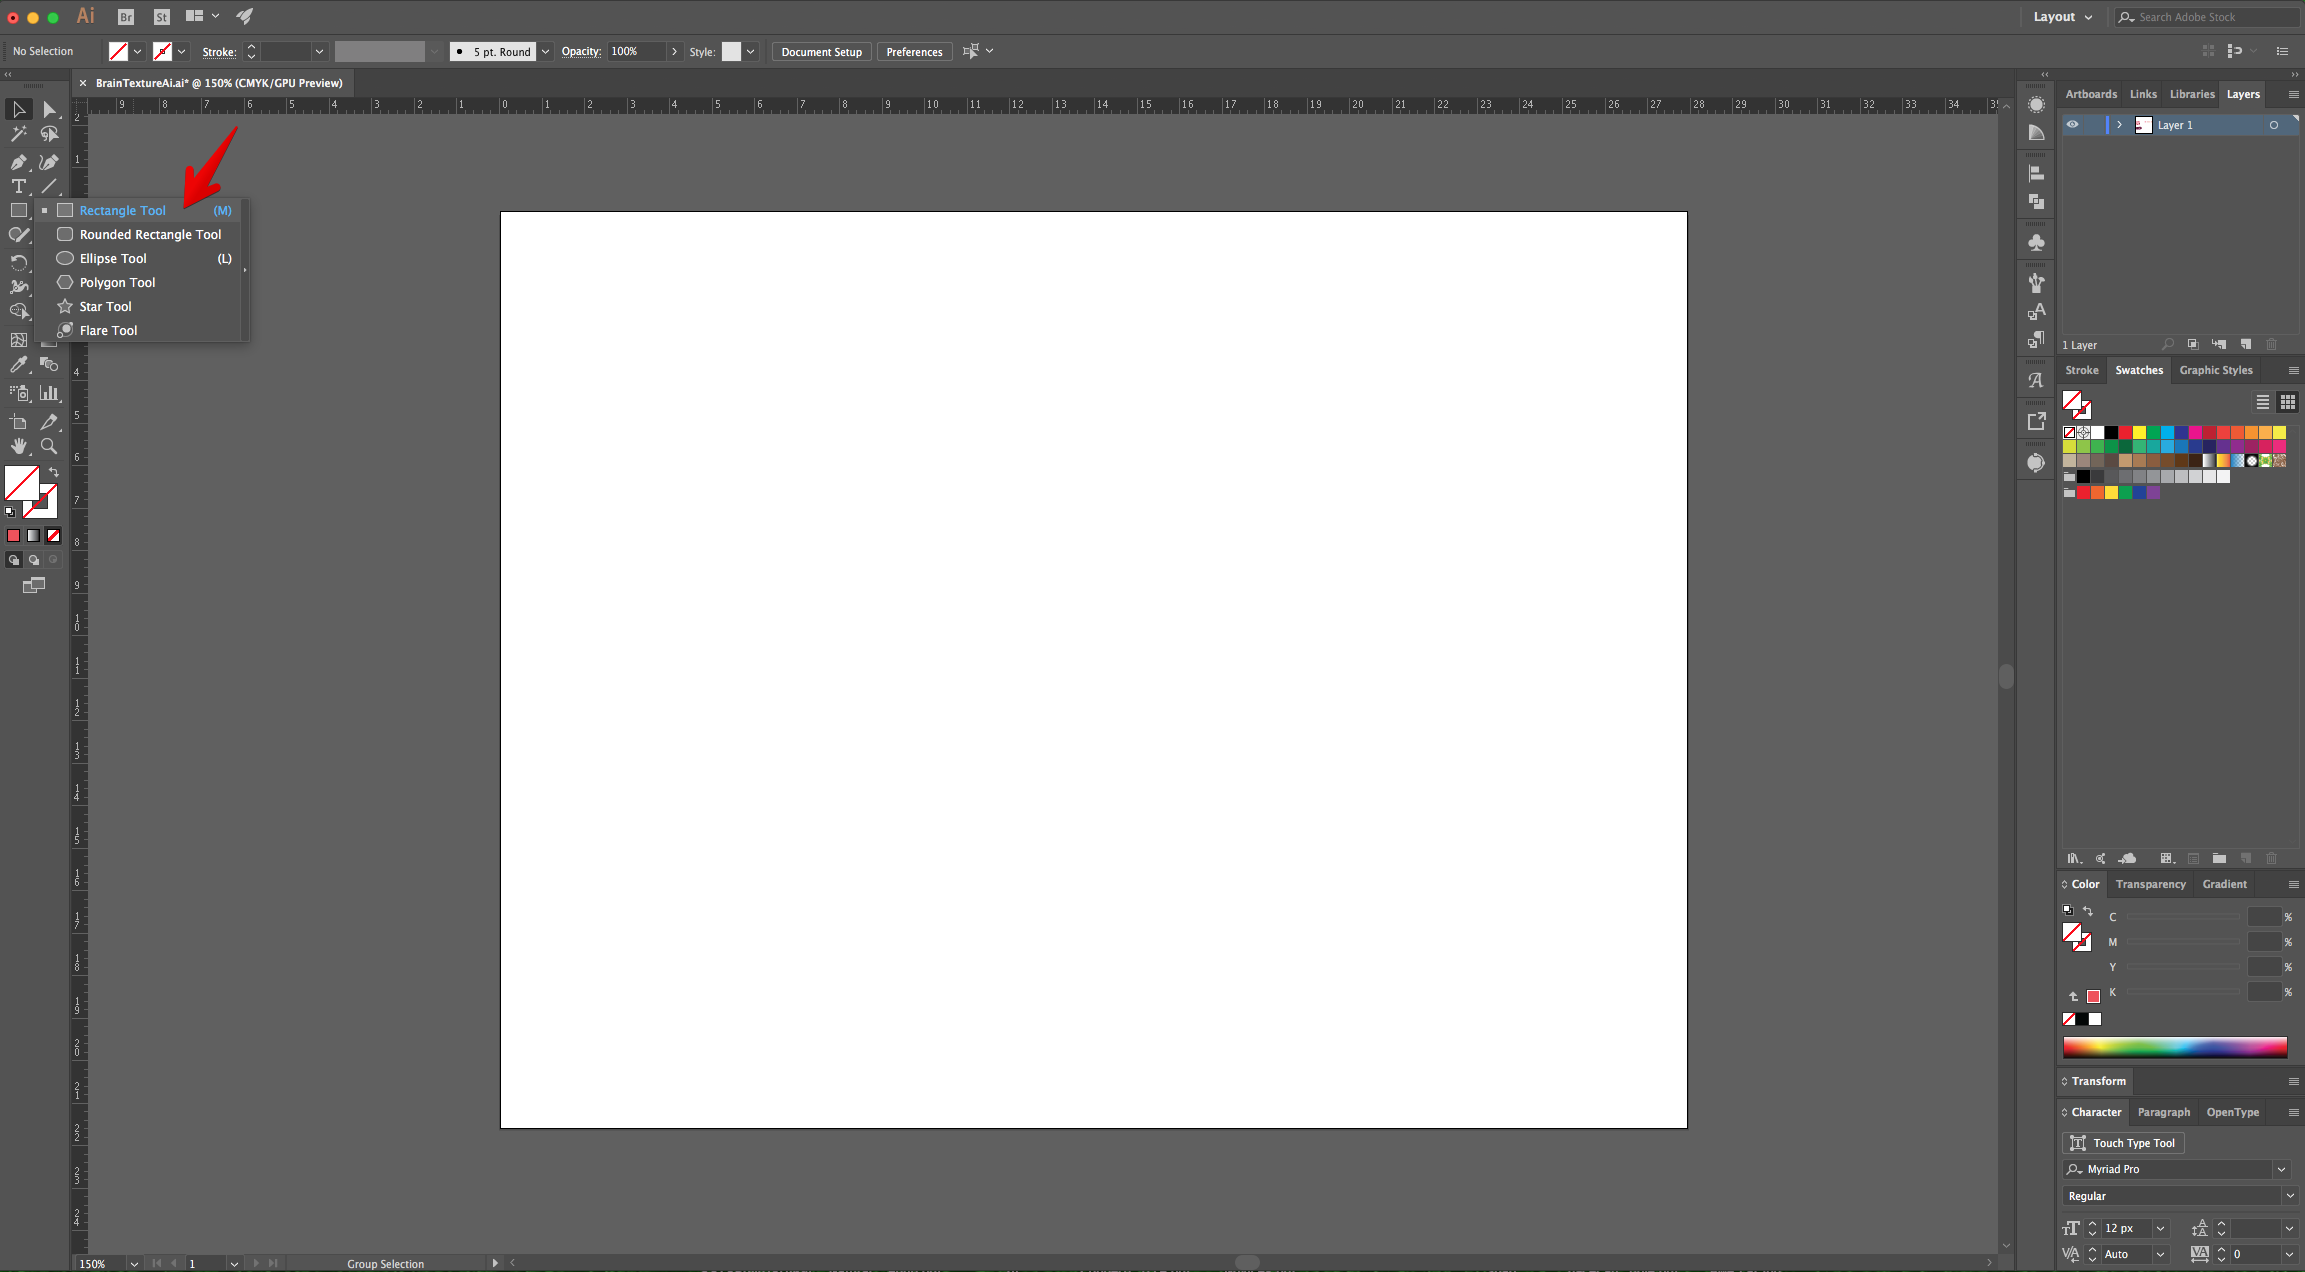
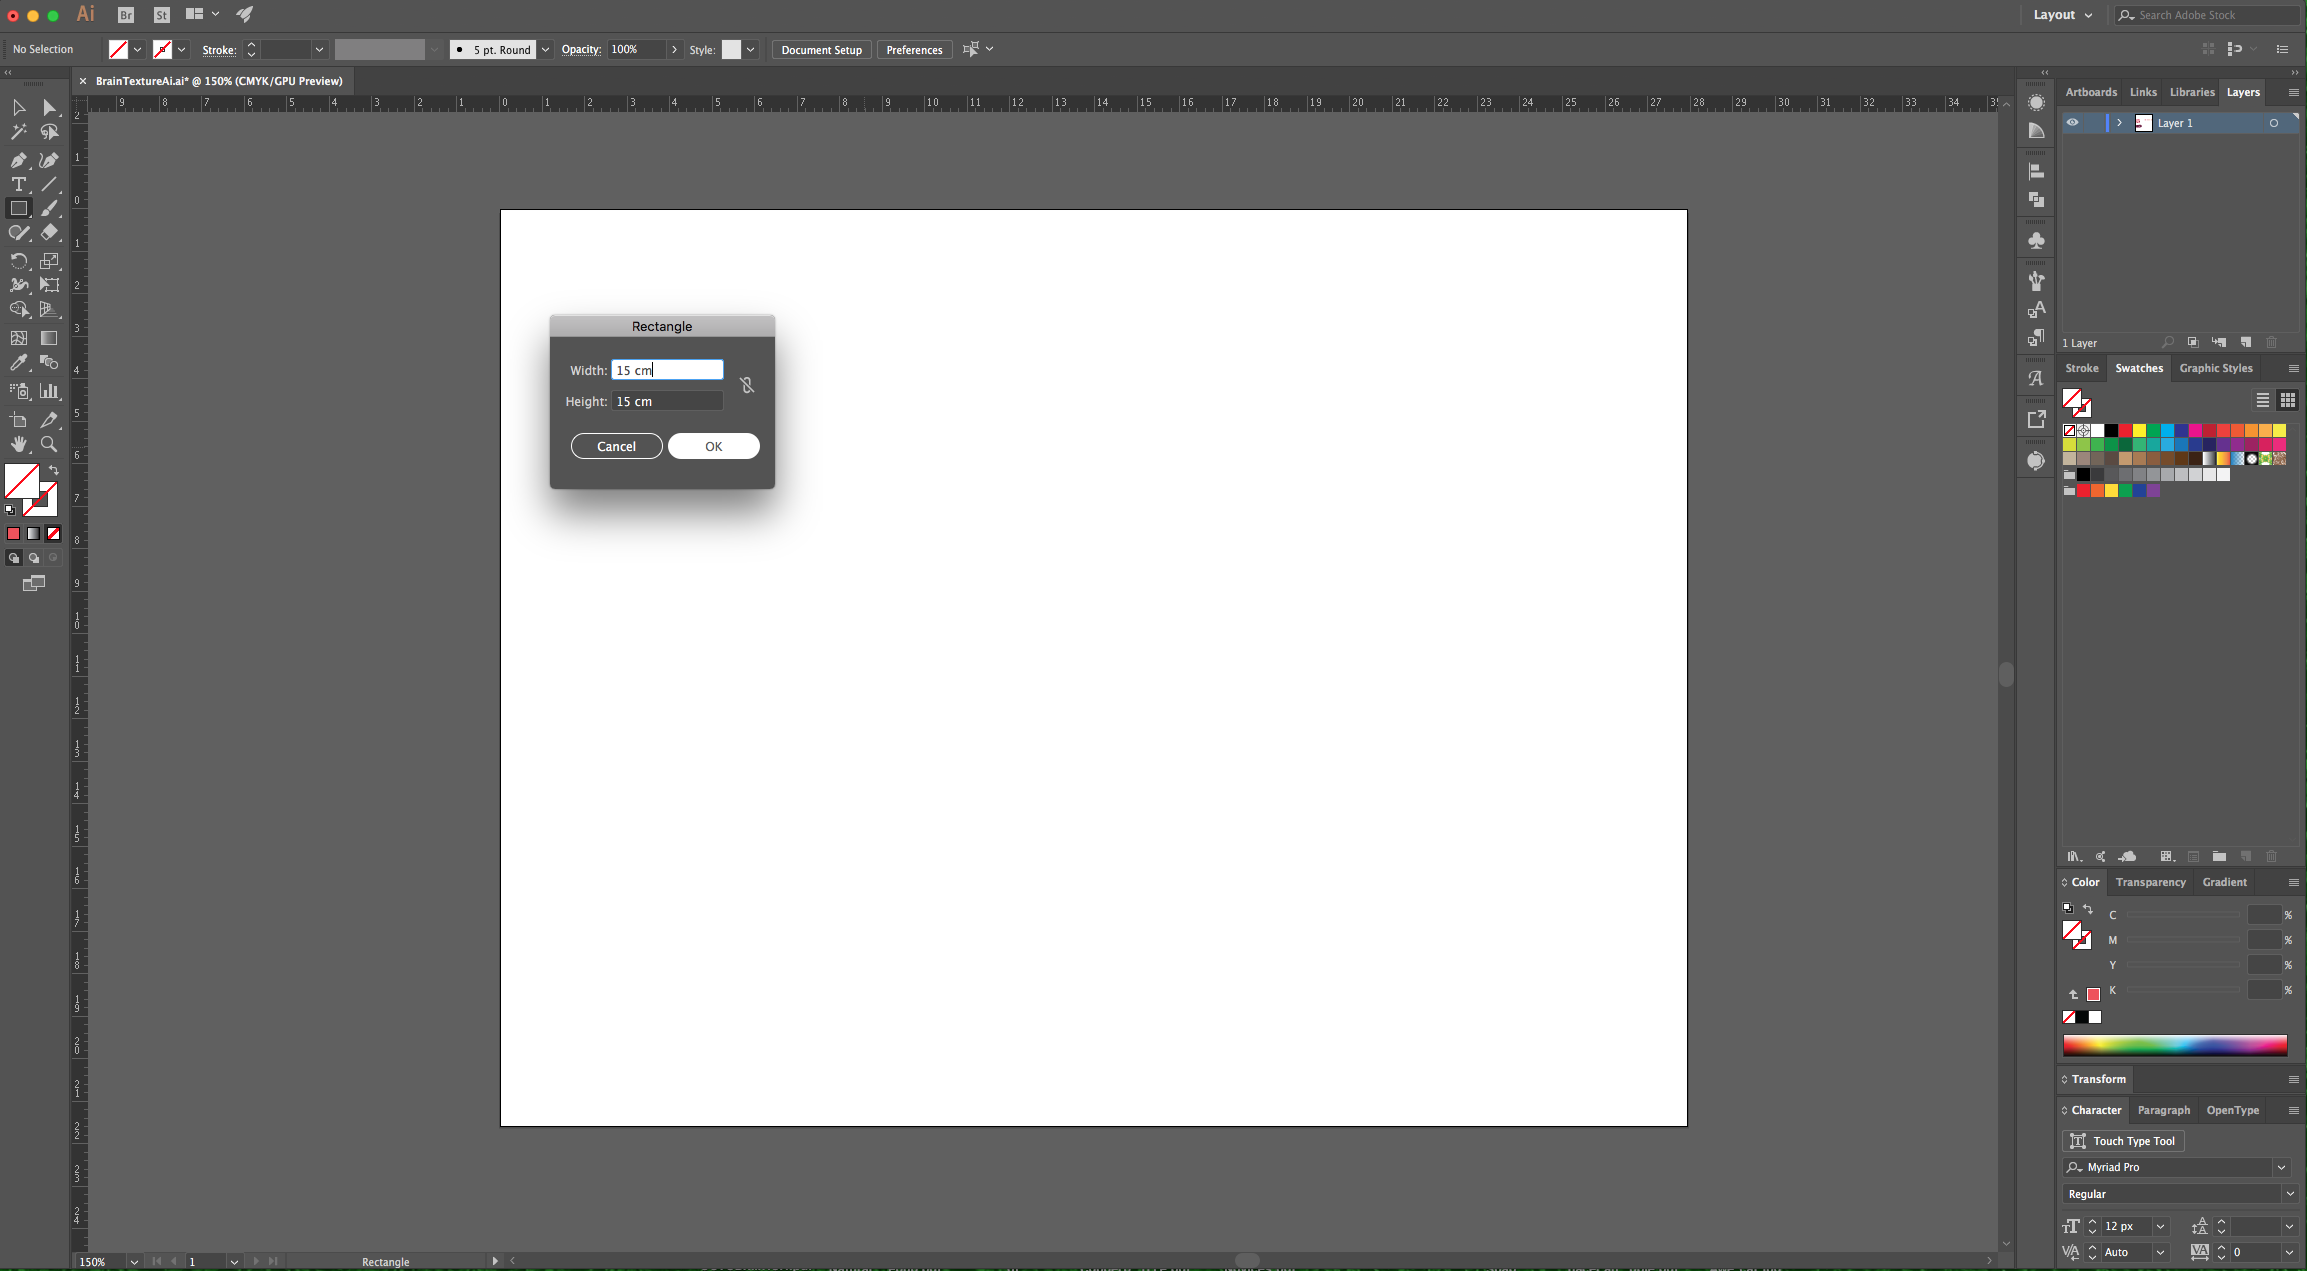
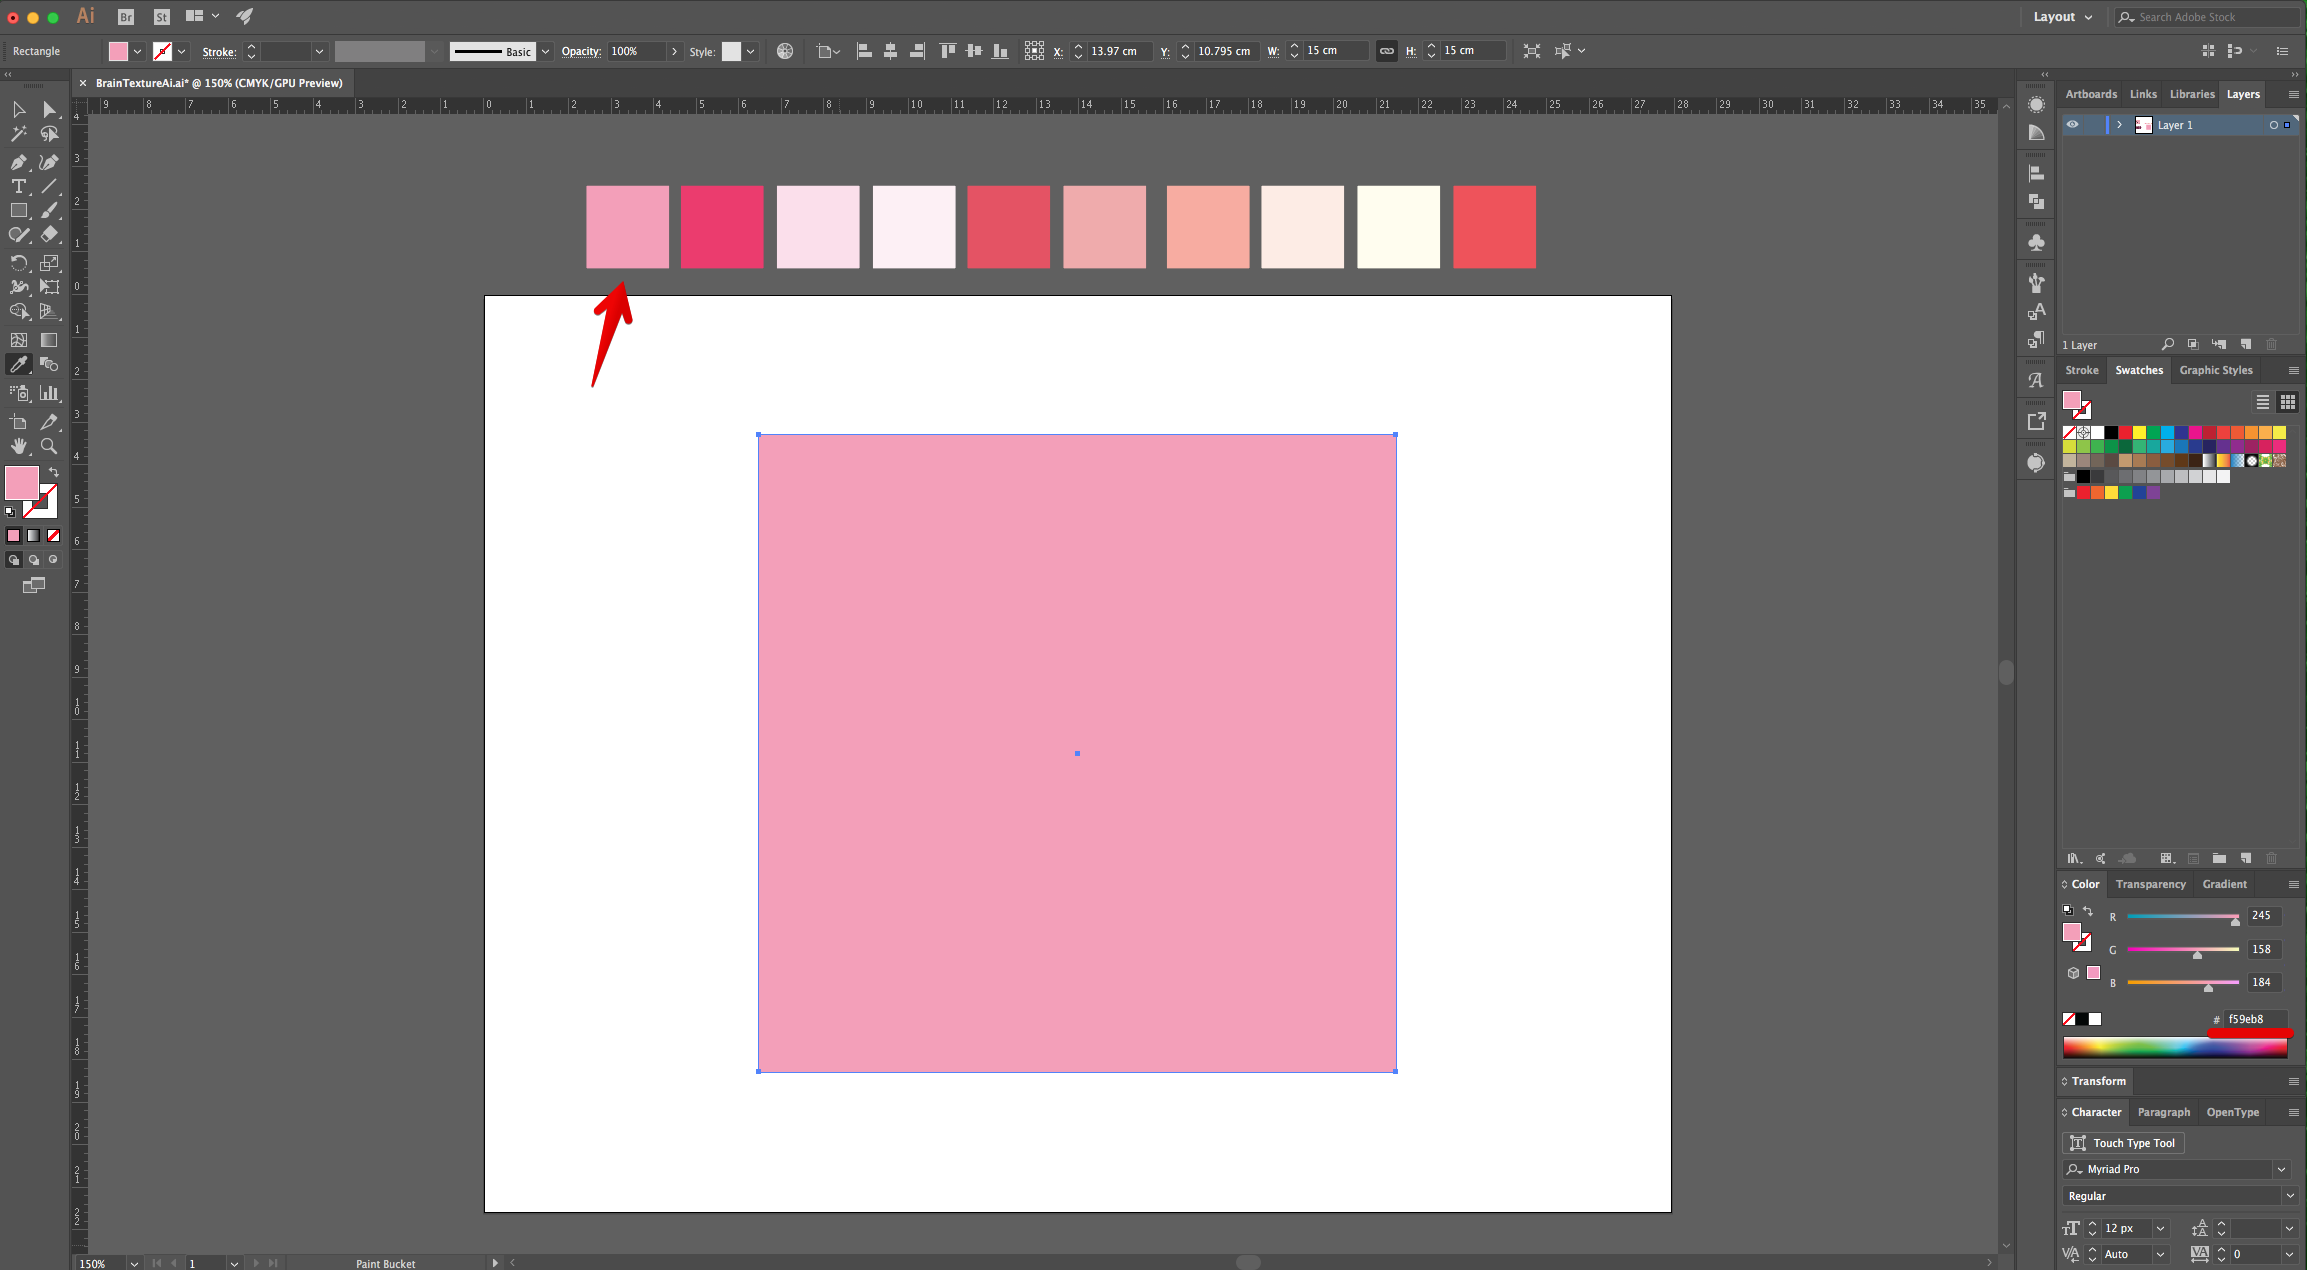
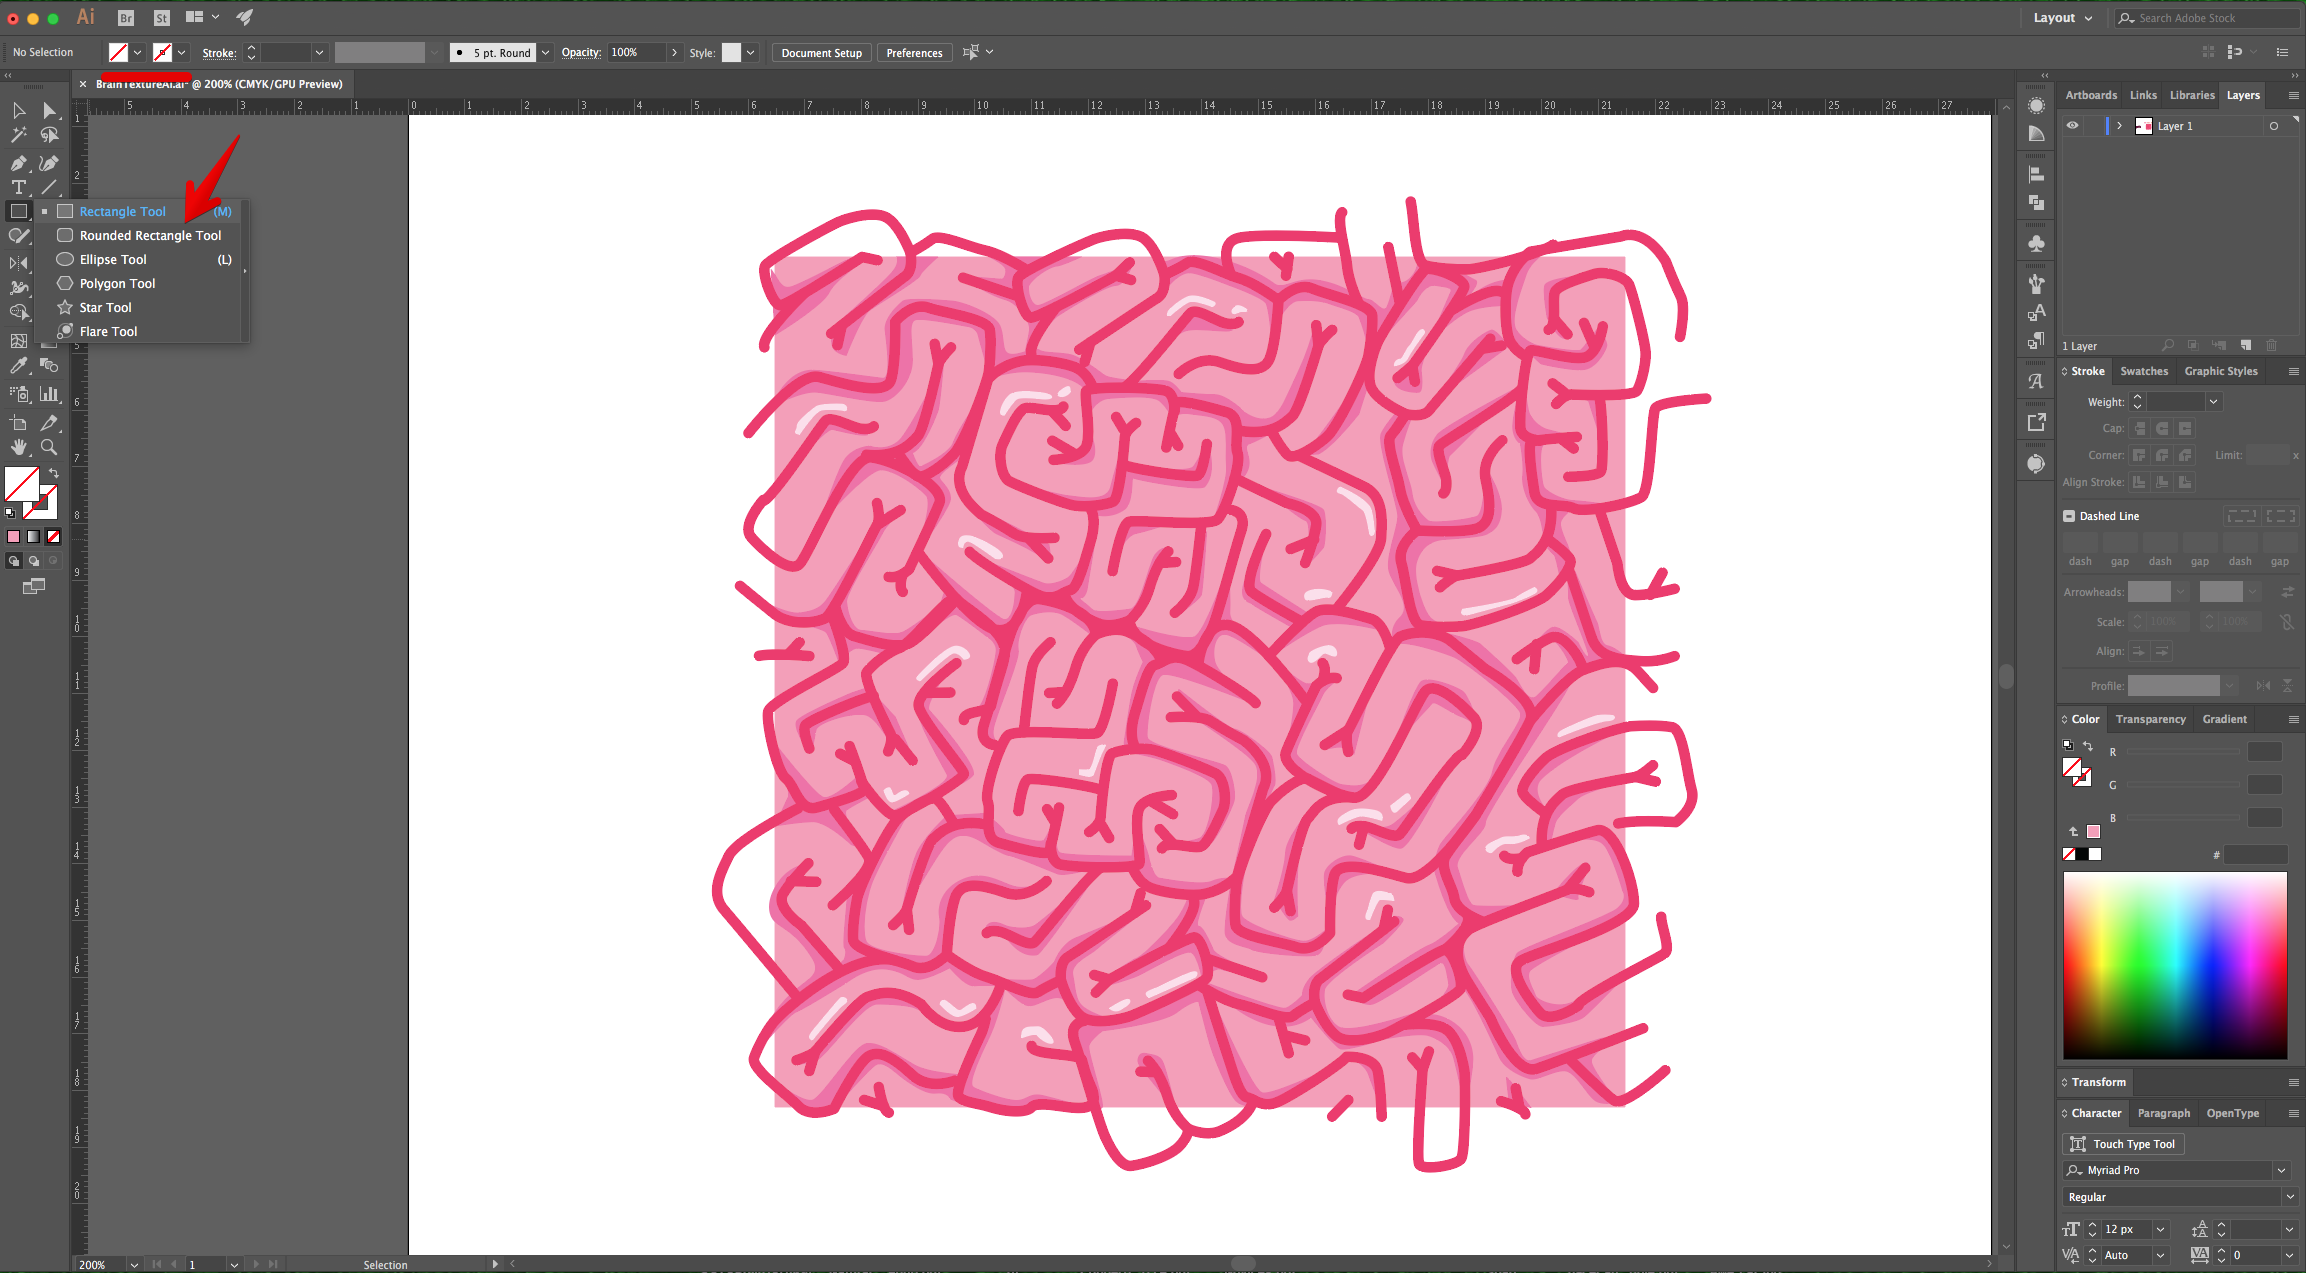
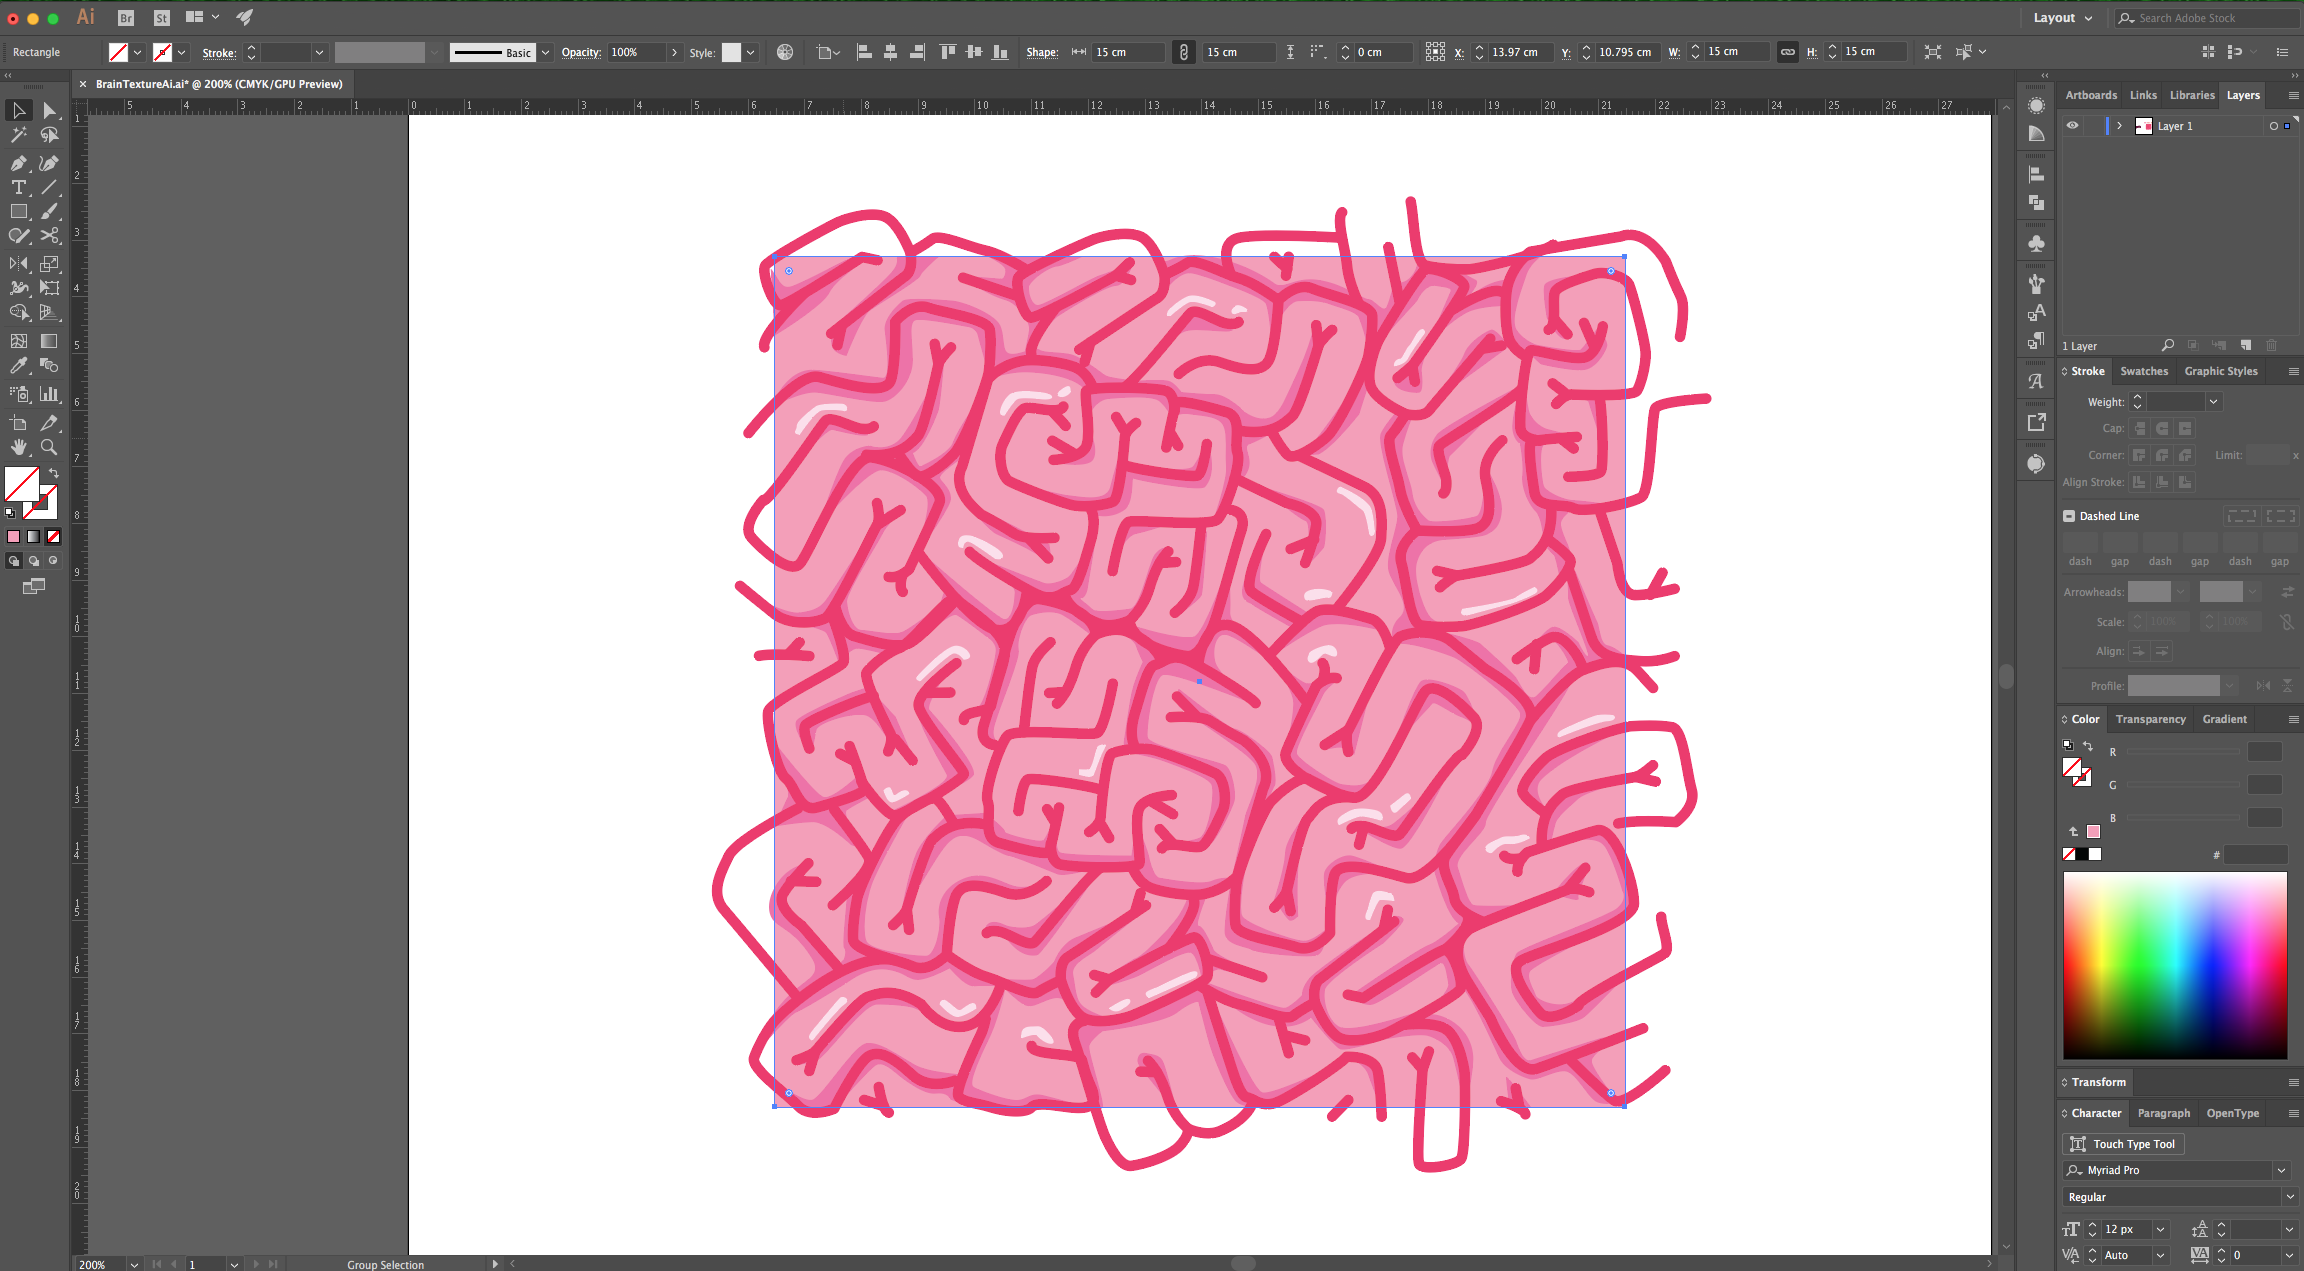
3 - Select the “Rectangle Tool” (M), click inside the “Canvas” and draw a 15 x 15 cm “Square”.
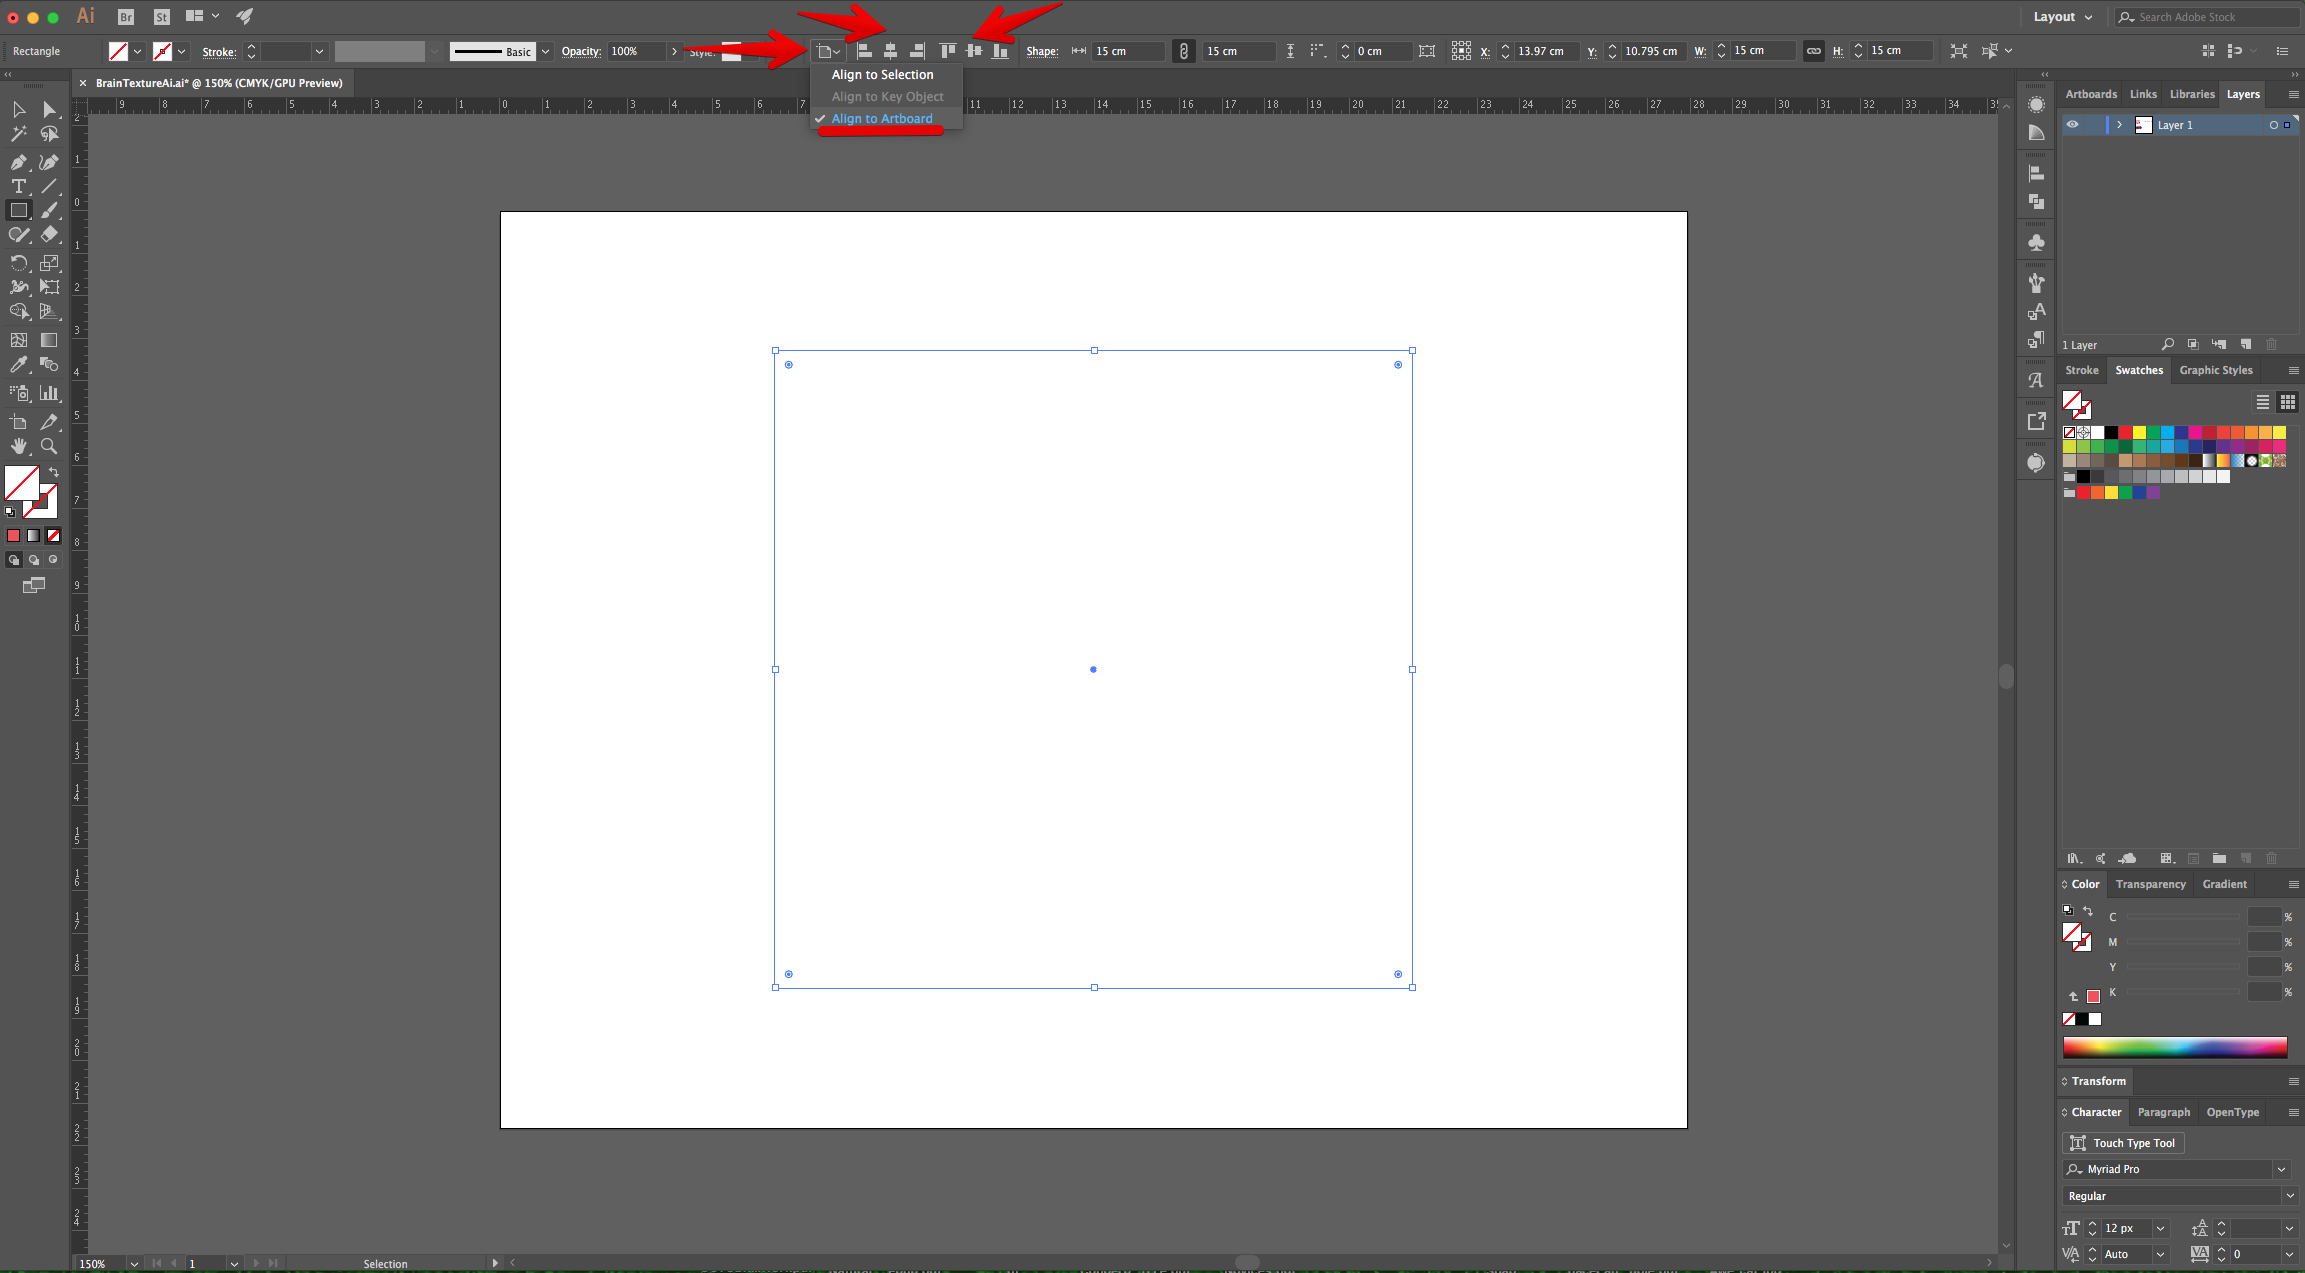
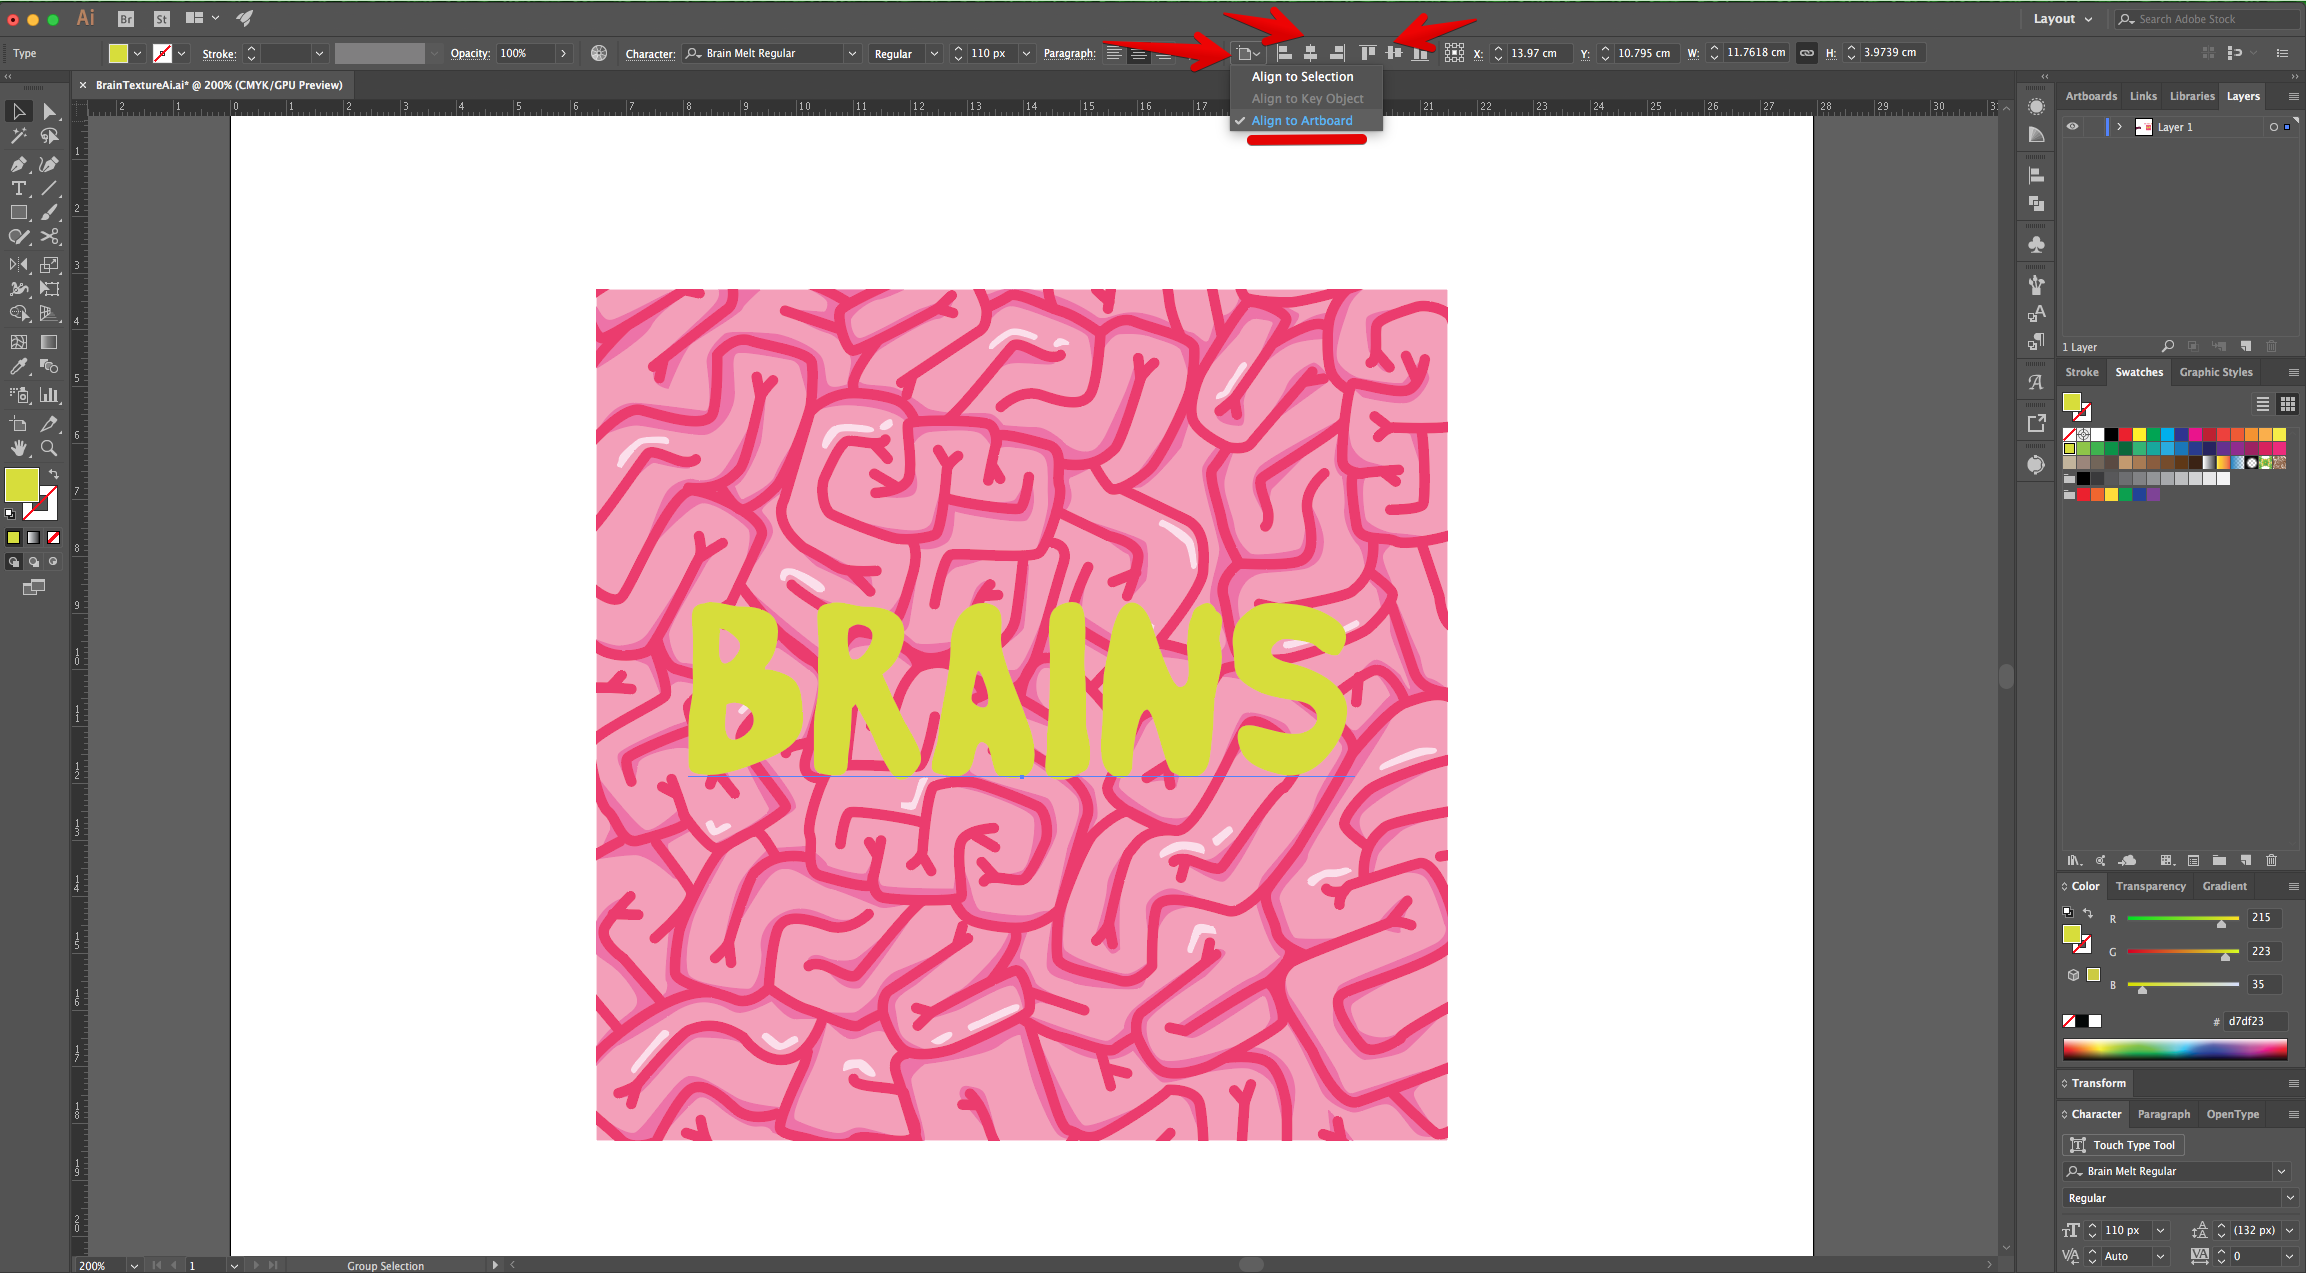
4 - Center it using the “Horizontal and Vertical Align Center” options on your Top Menu and make sure that “Align to Artboard” is selected. Or use the same options in the “Align Panel”.
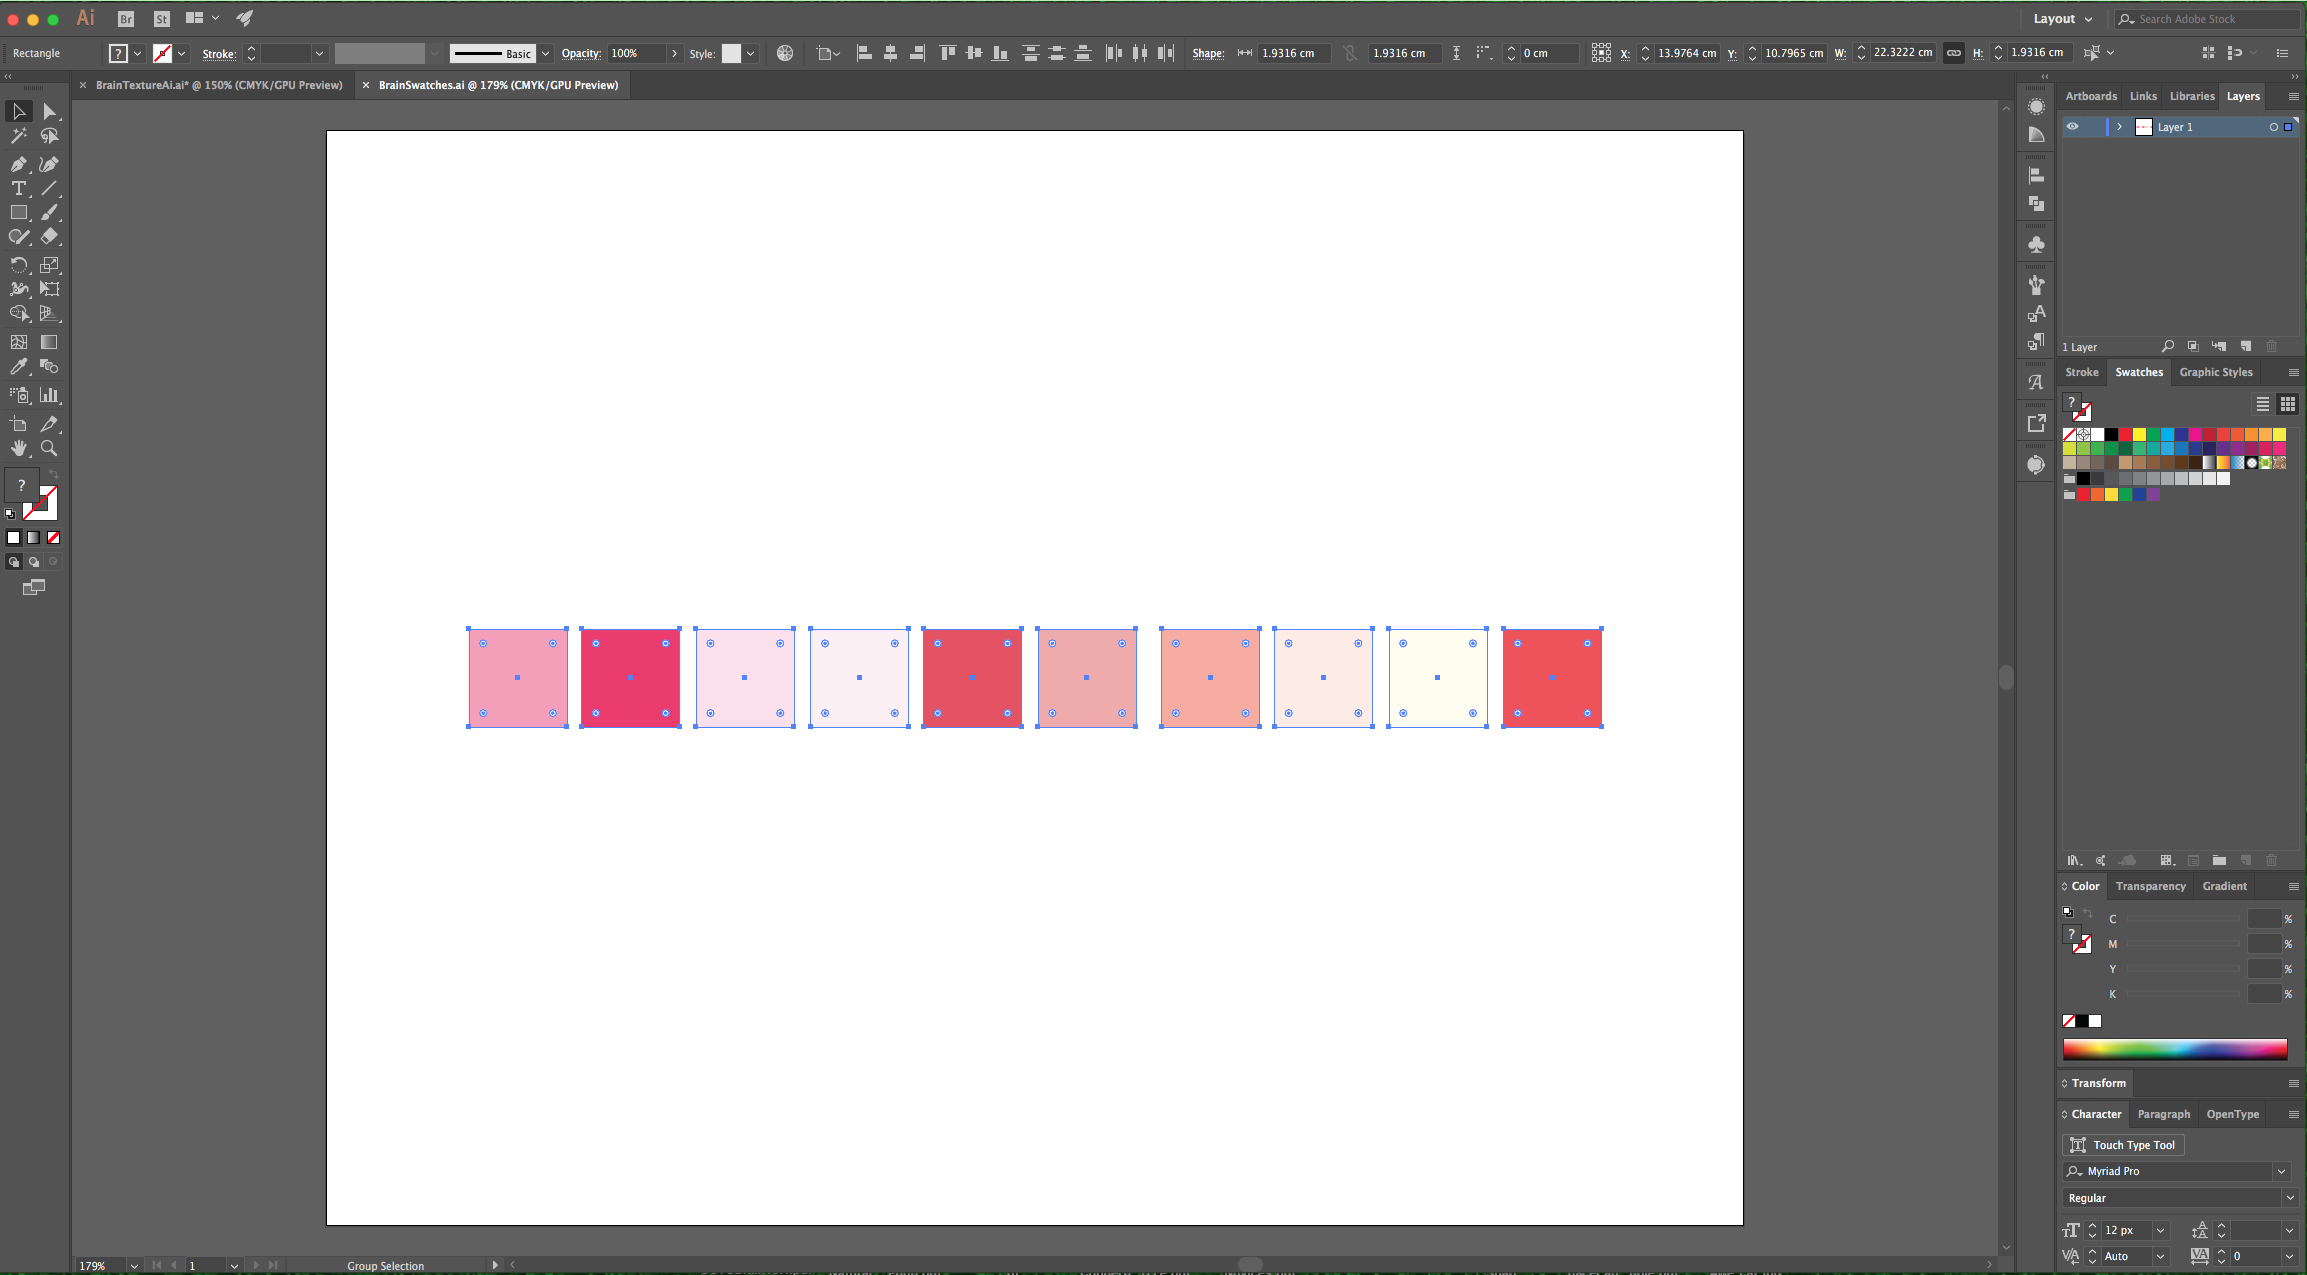
5 - Open the “Swatches” file, “Copy” (Command/Control + C) and “Paste” (Command/Control + V) them into your original “Document”.
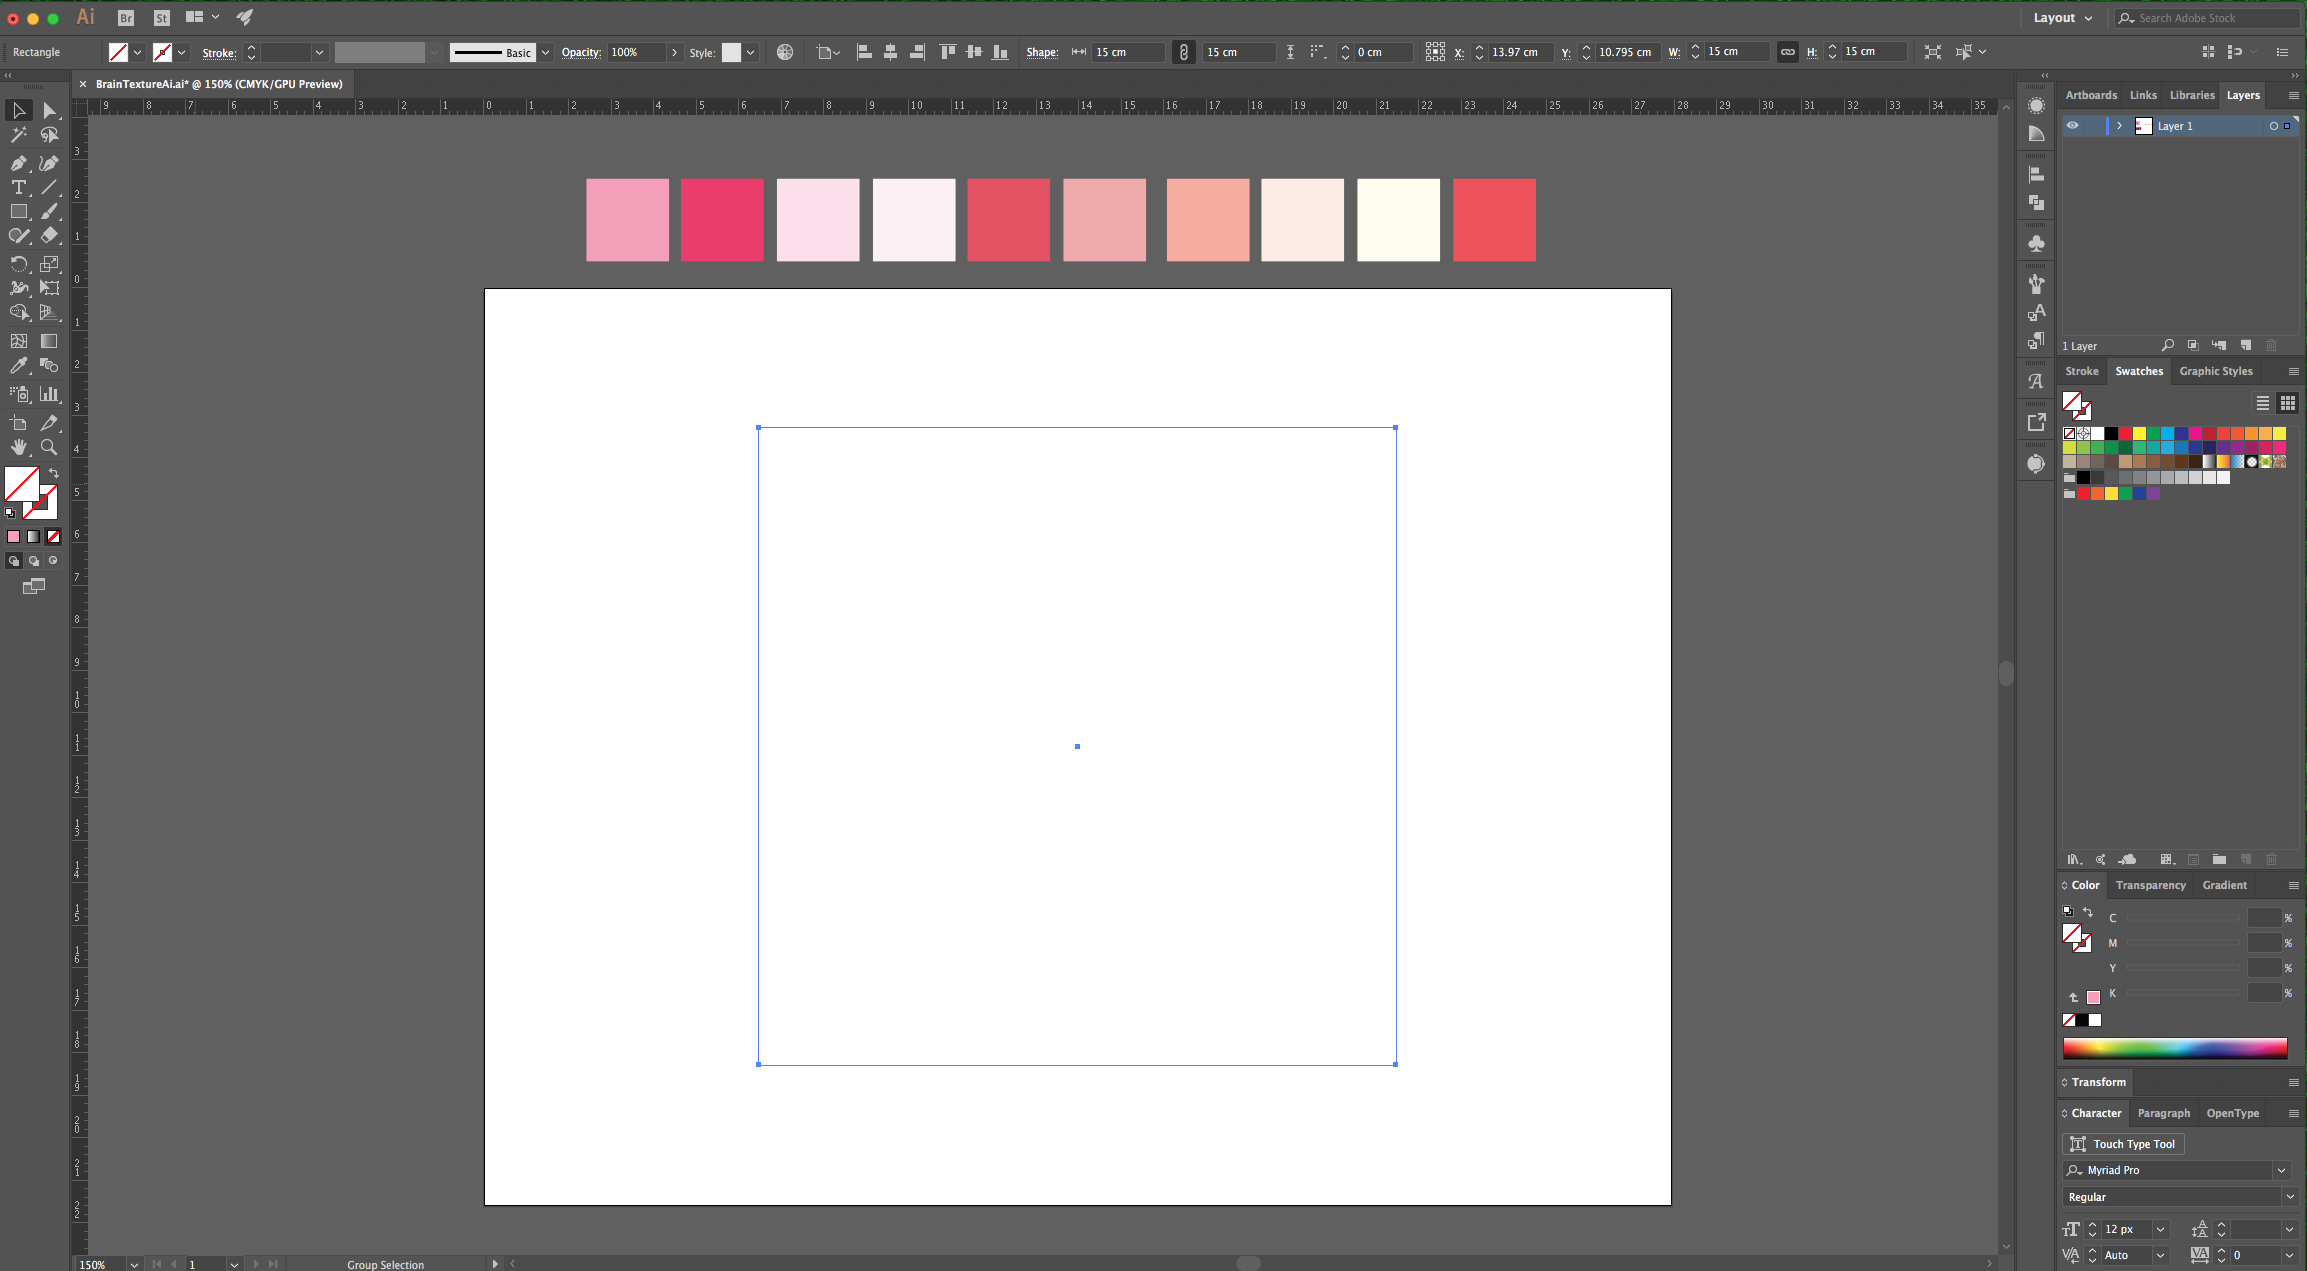
6 - With the “Eyedropper Tool” (E) select one of the intermediate shades to use it as “Fill” color for the “Square” you created.

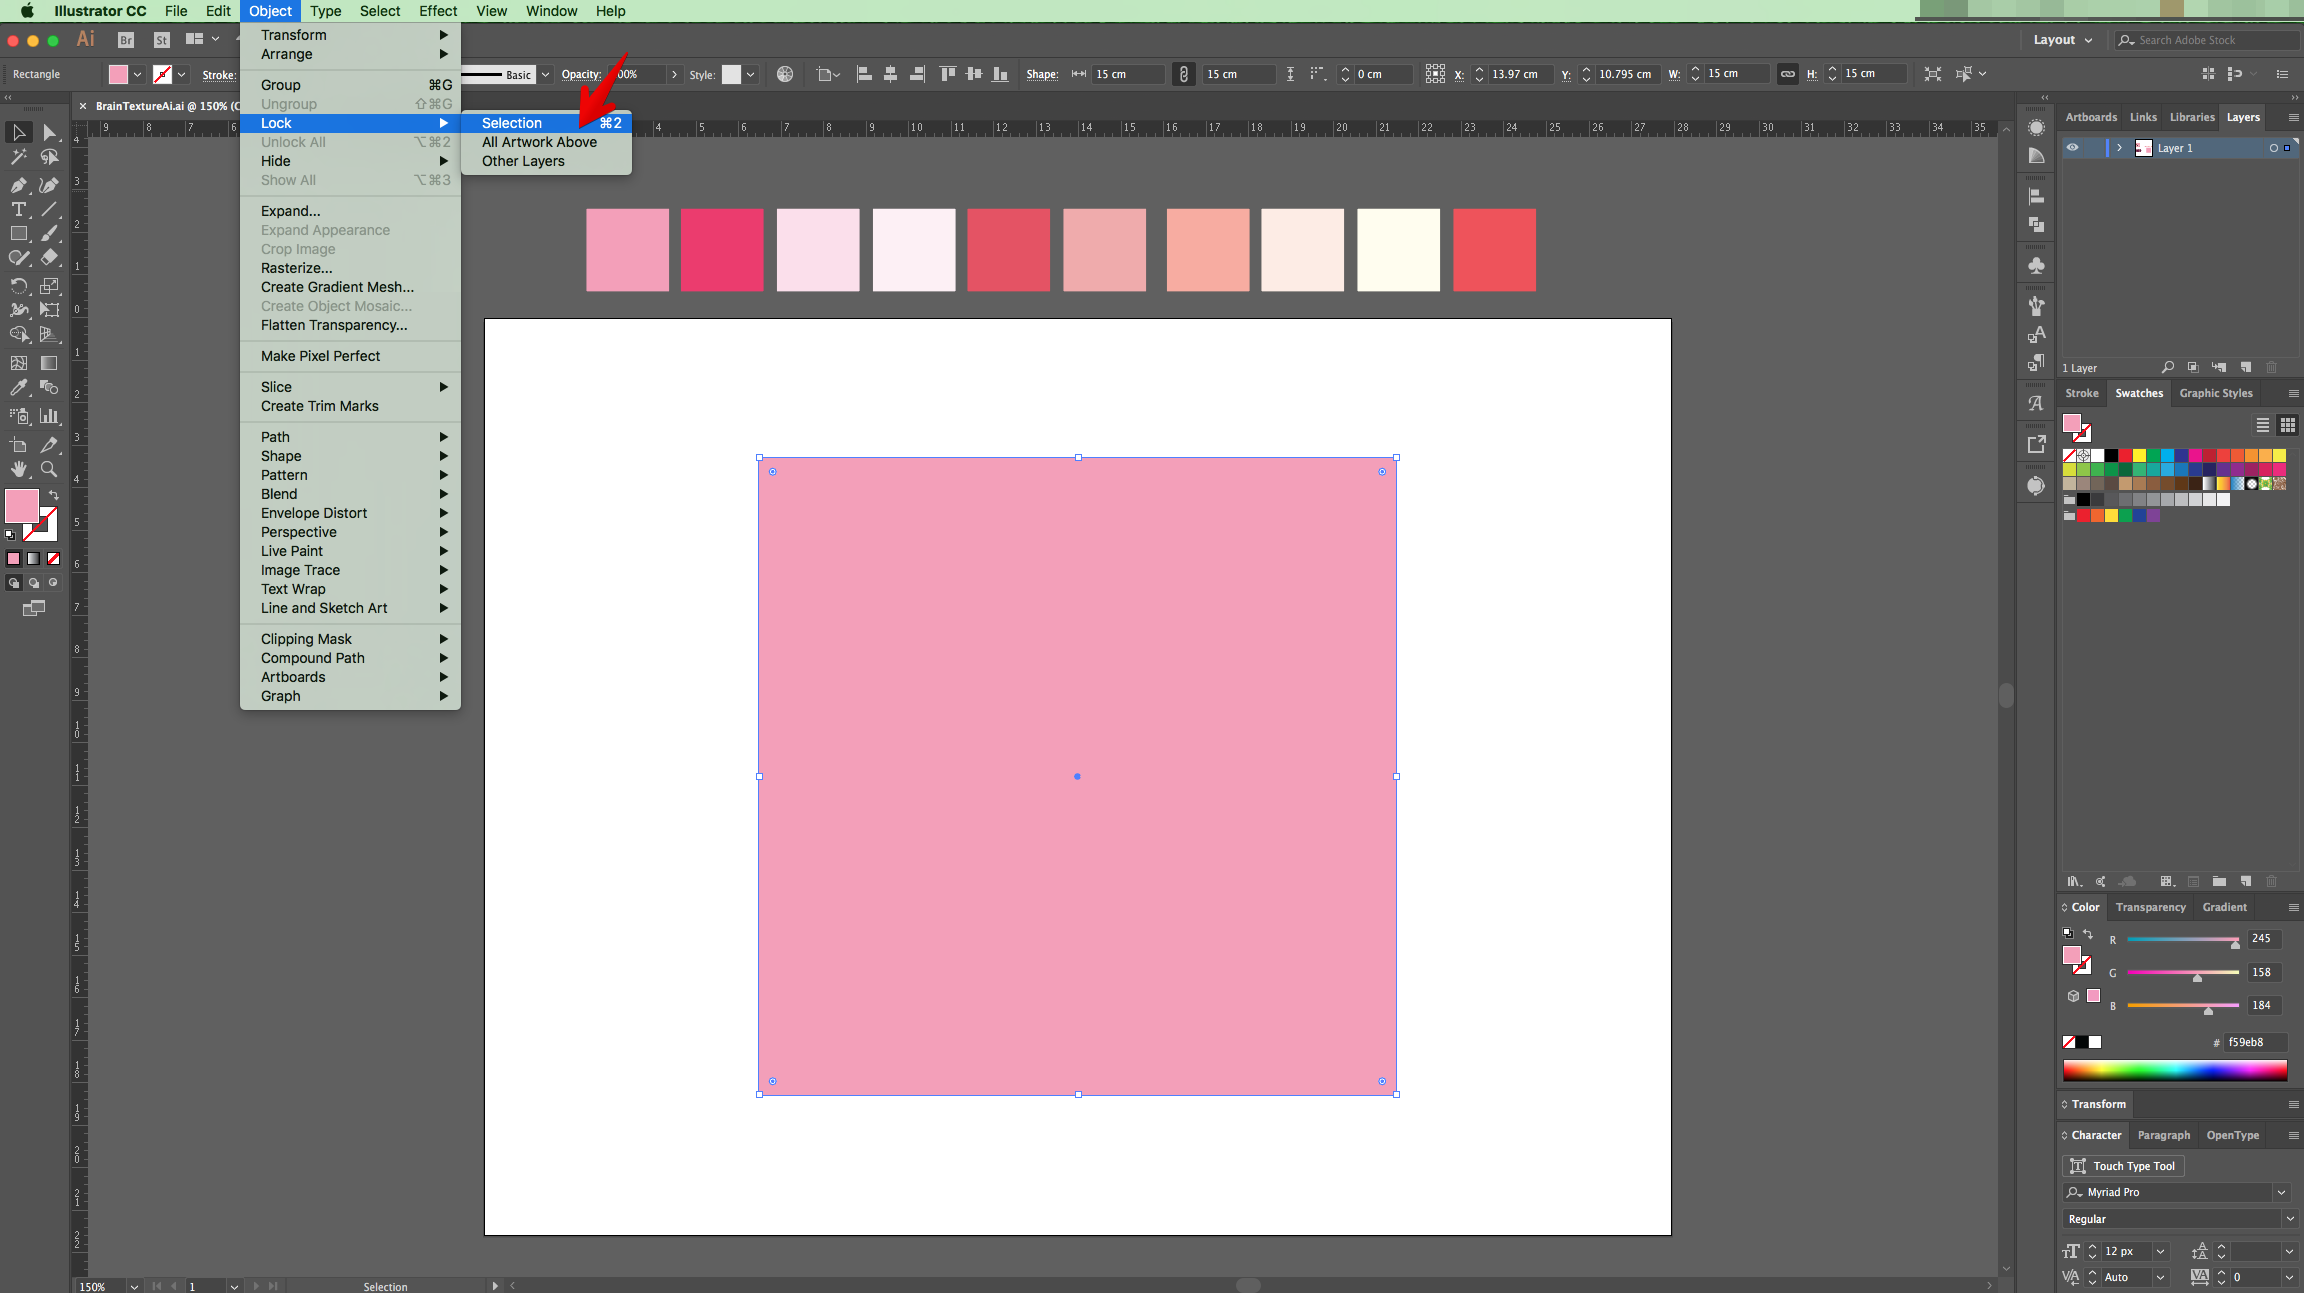
7 - Lock this Layer by clicking to the left of its thumbnail and bringing out the small Padlock icon or by going to Object > Lock > Selection (Command/Control + 2). “Create New Layer” by clicking on the button at the bottom of the “Layers Panel”.
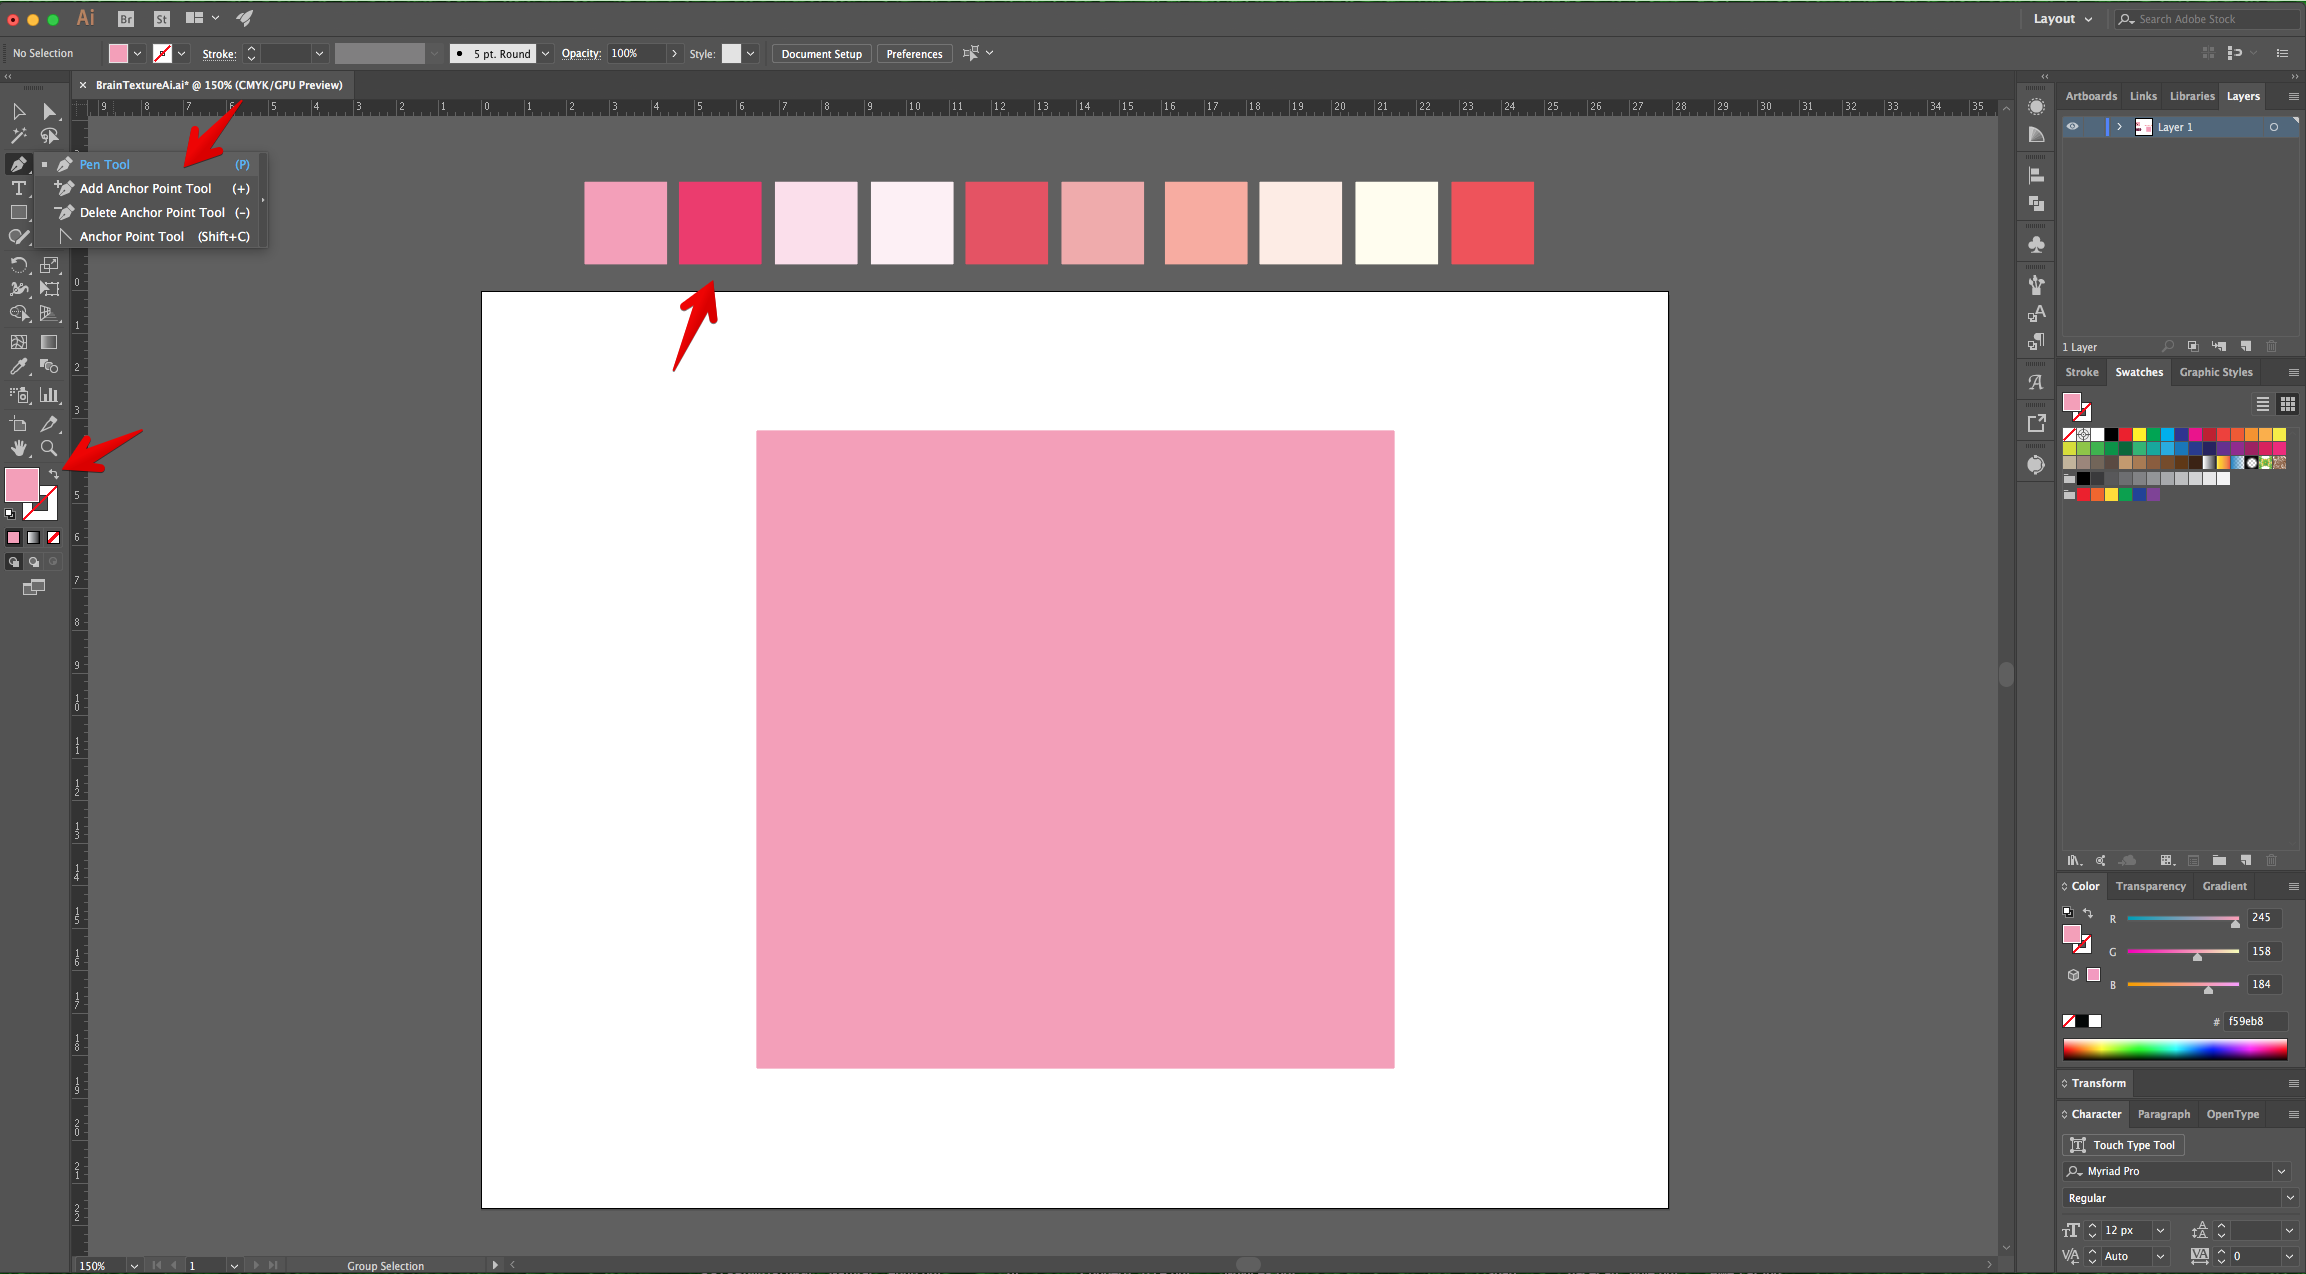
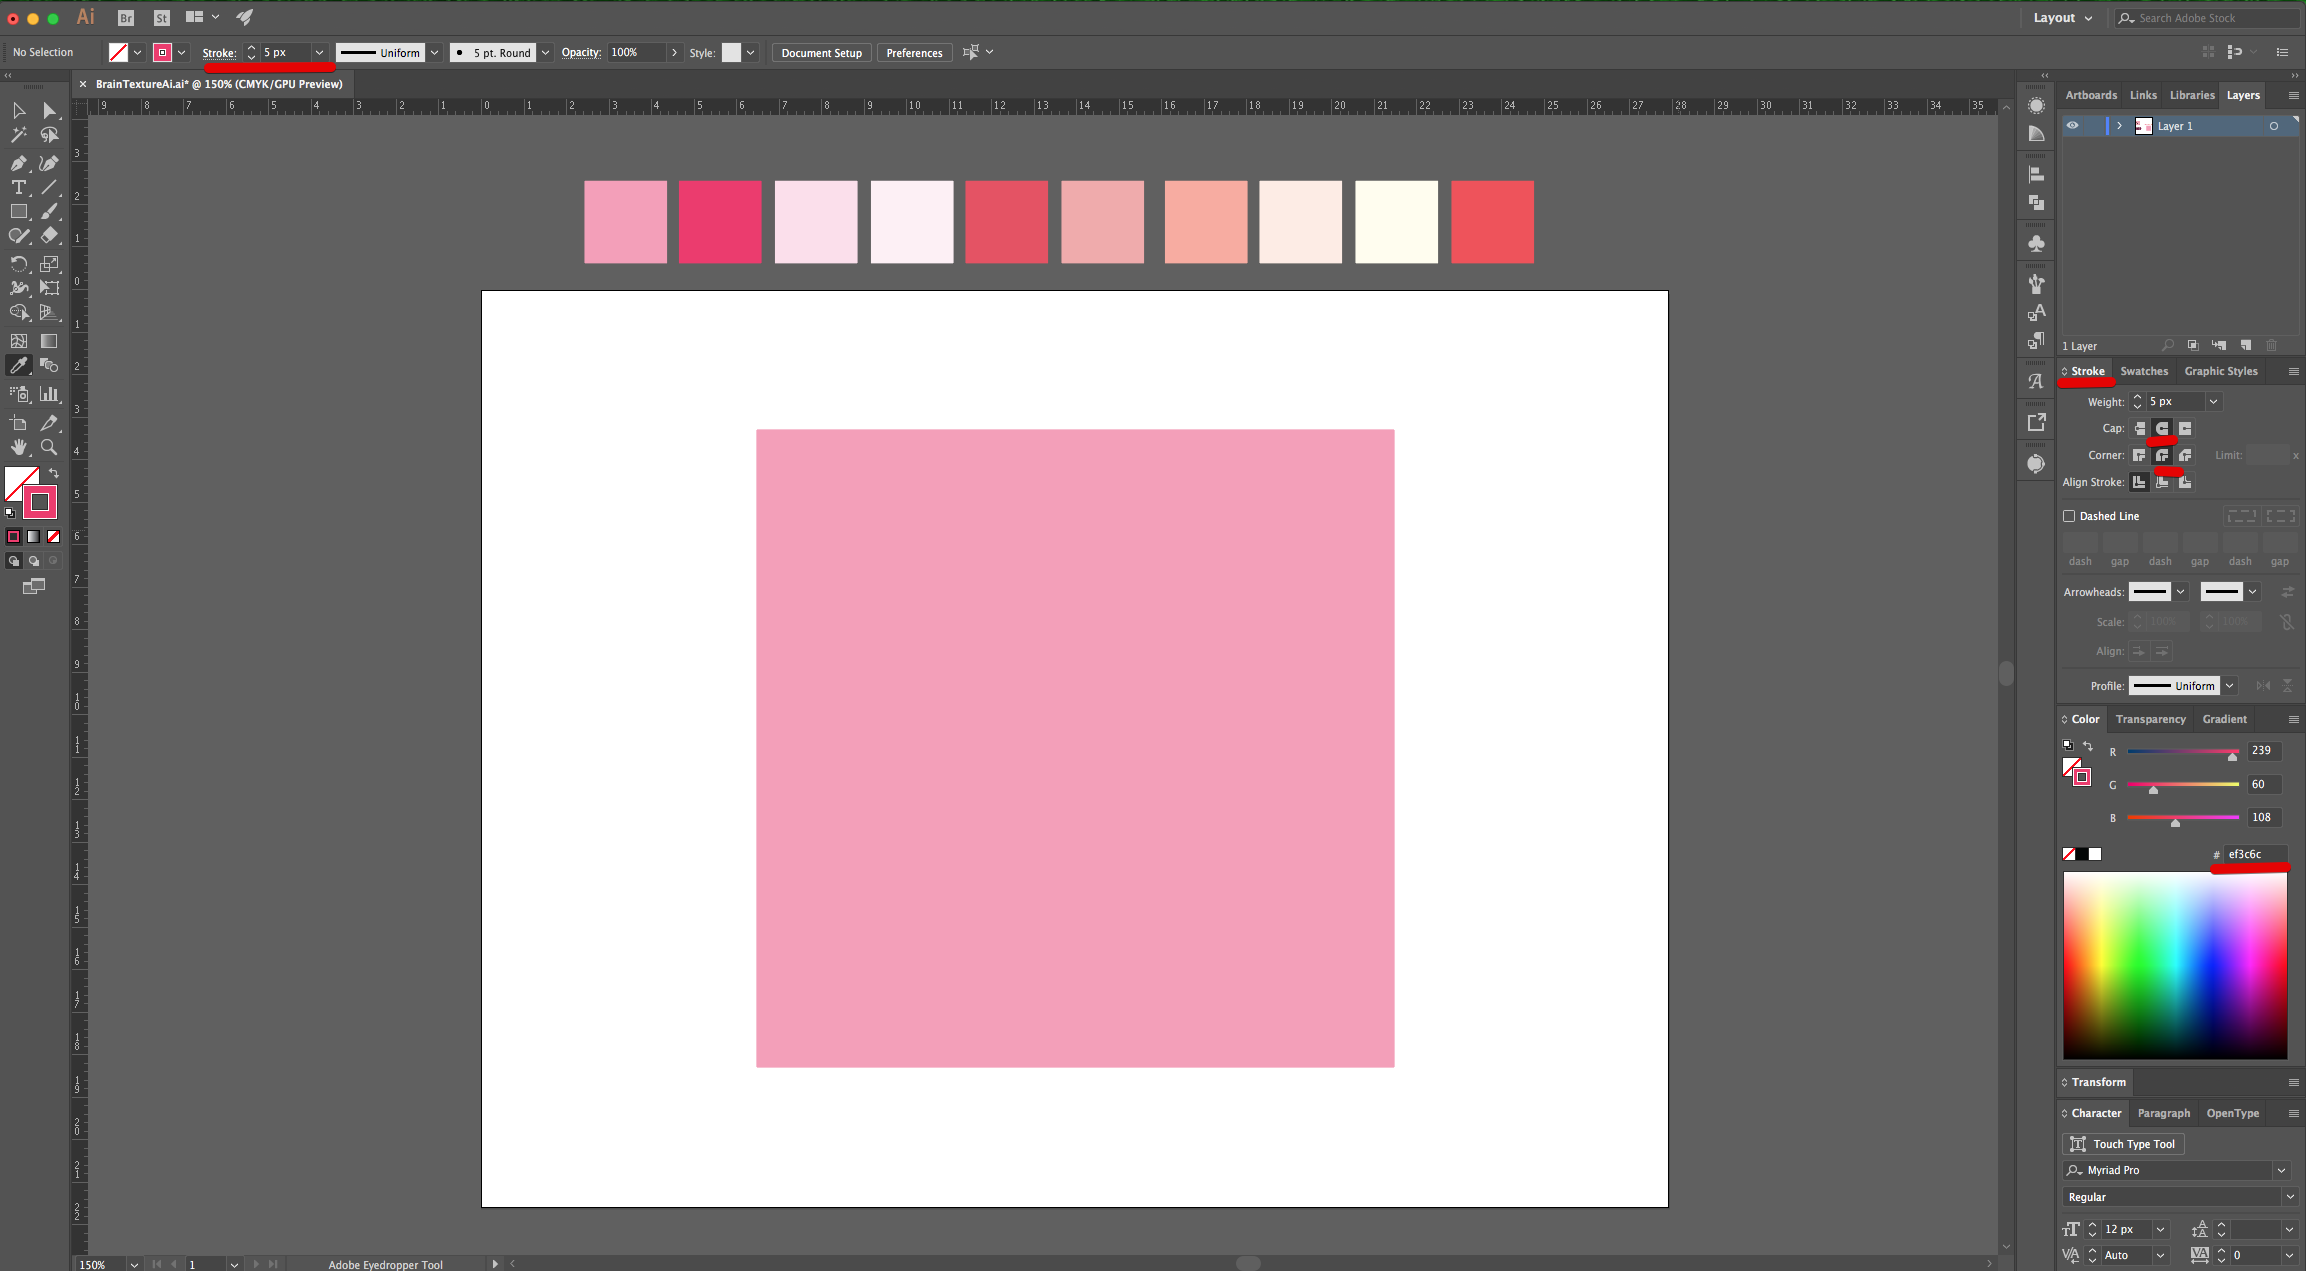
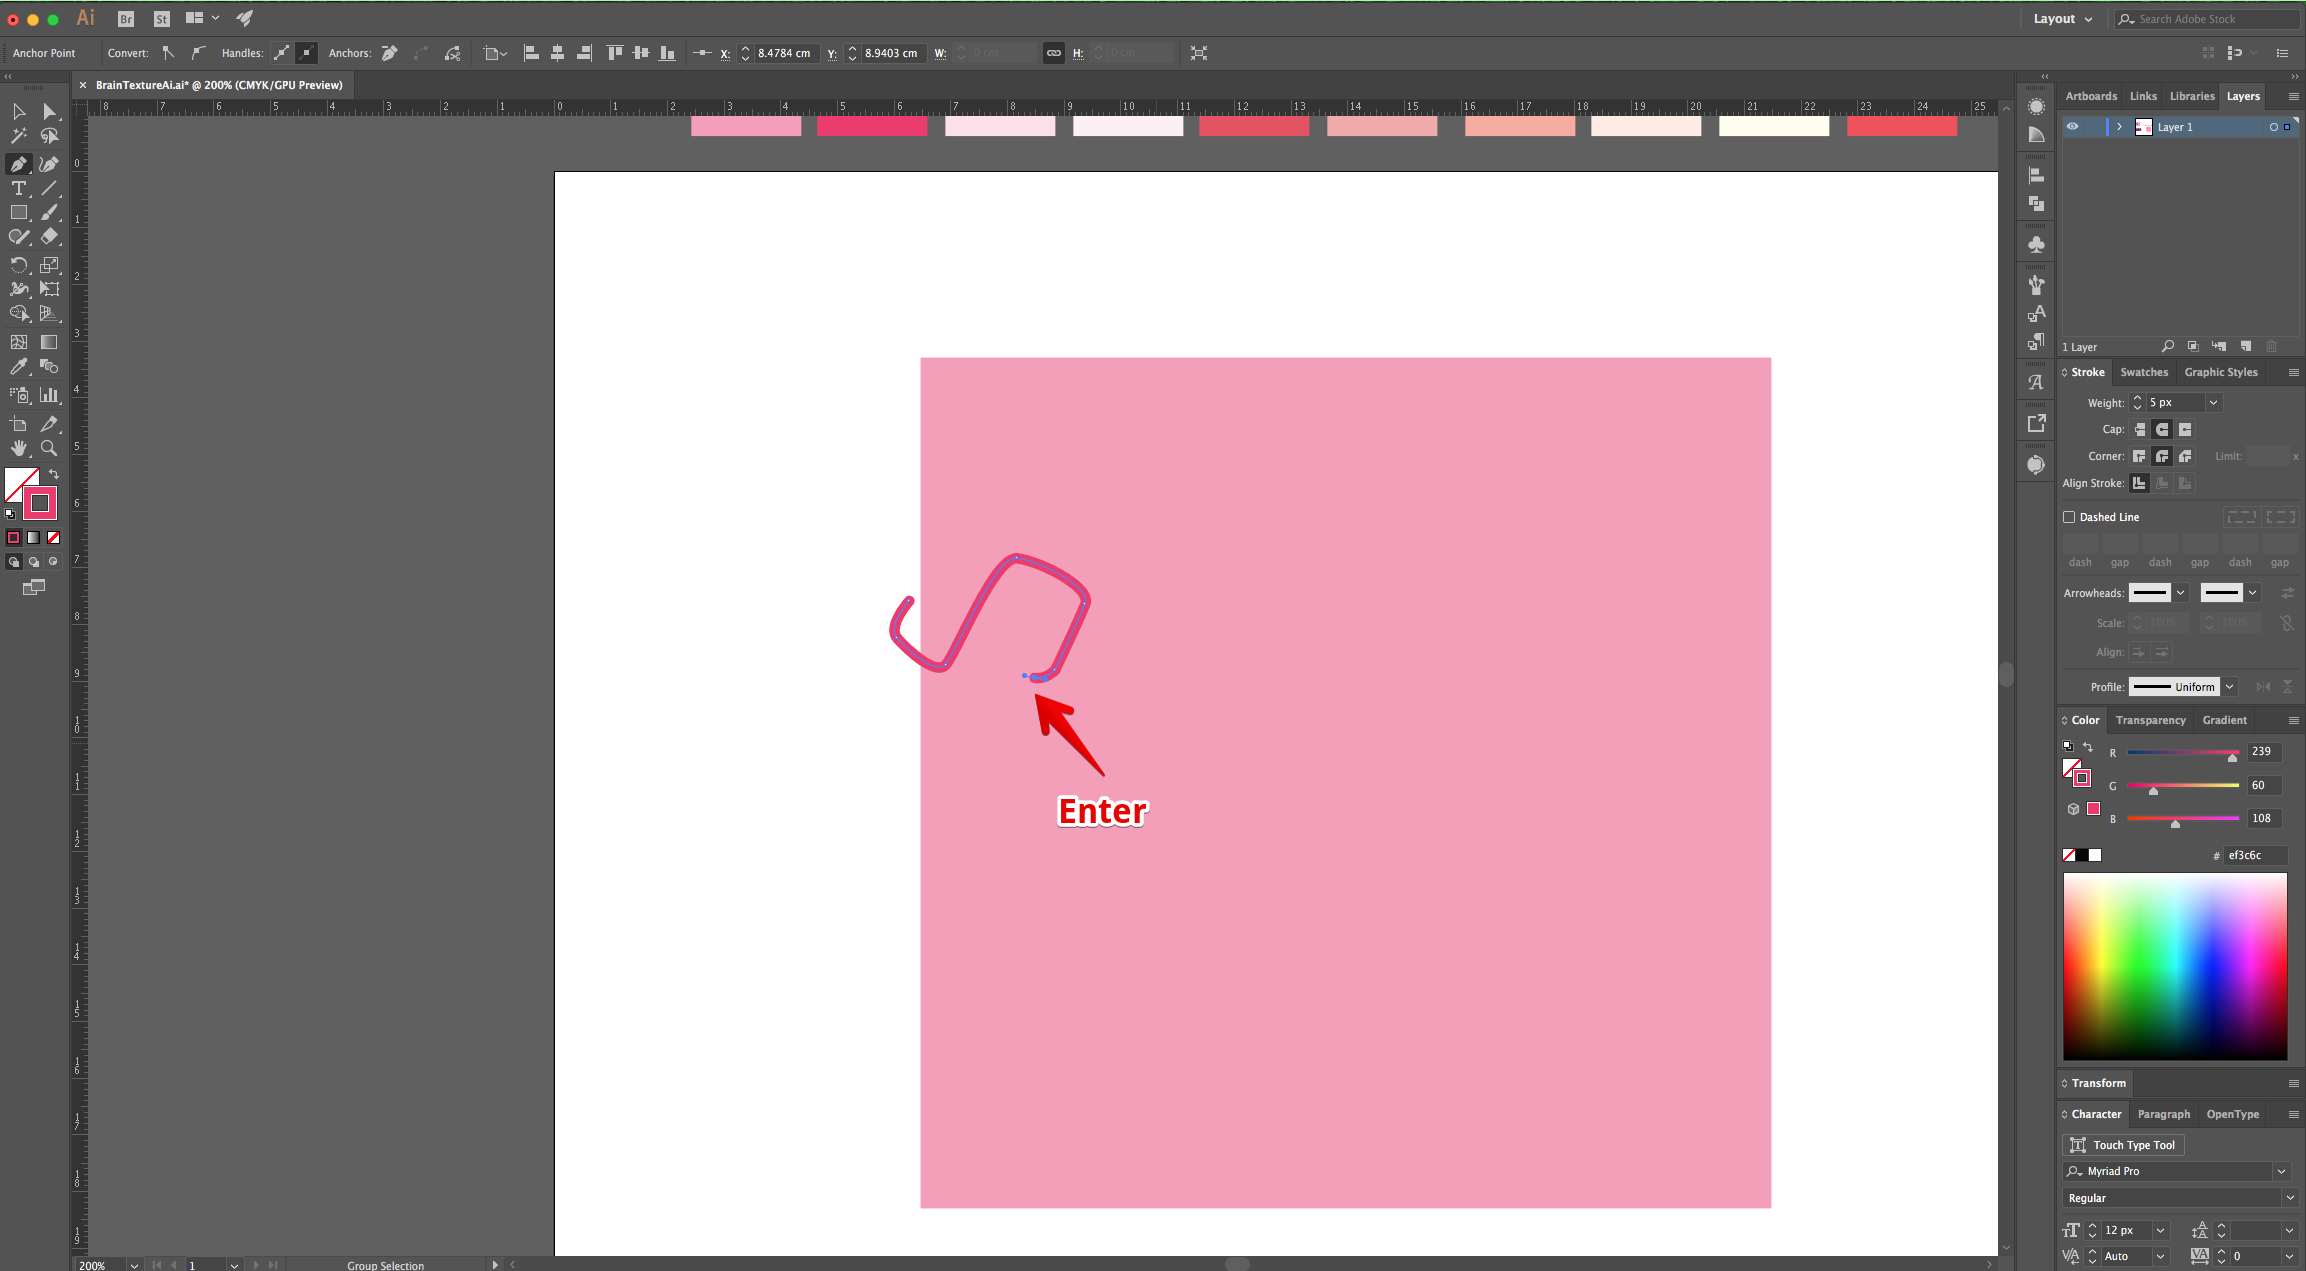
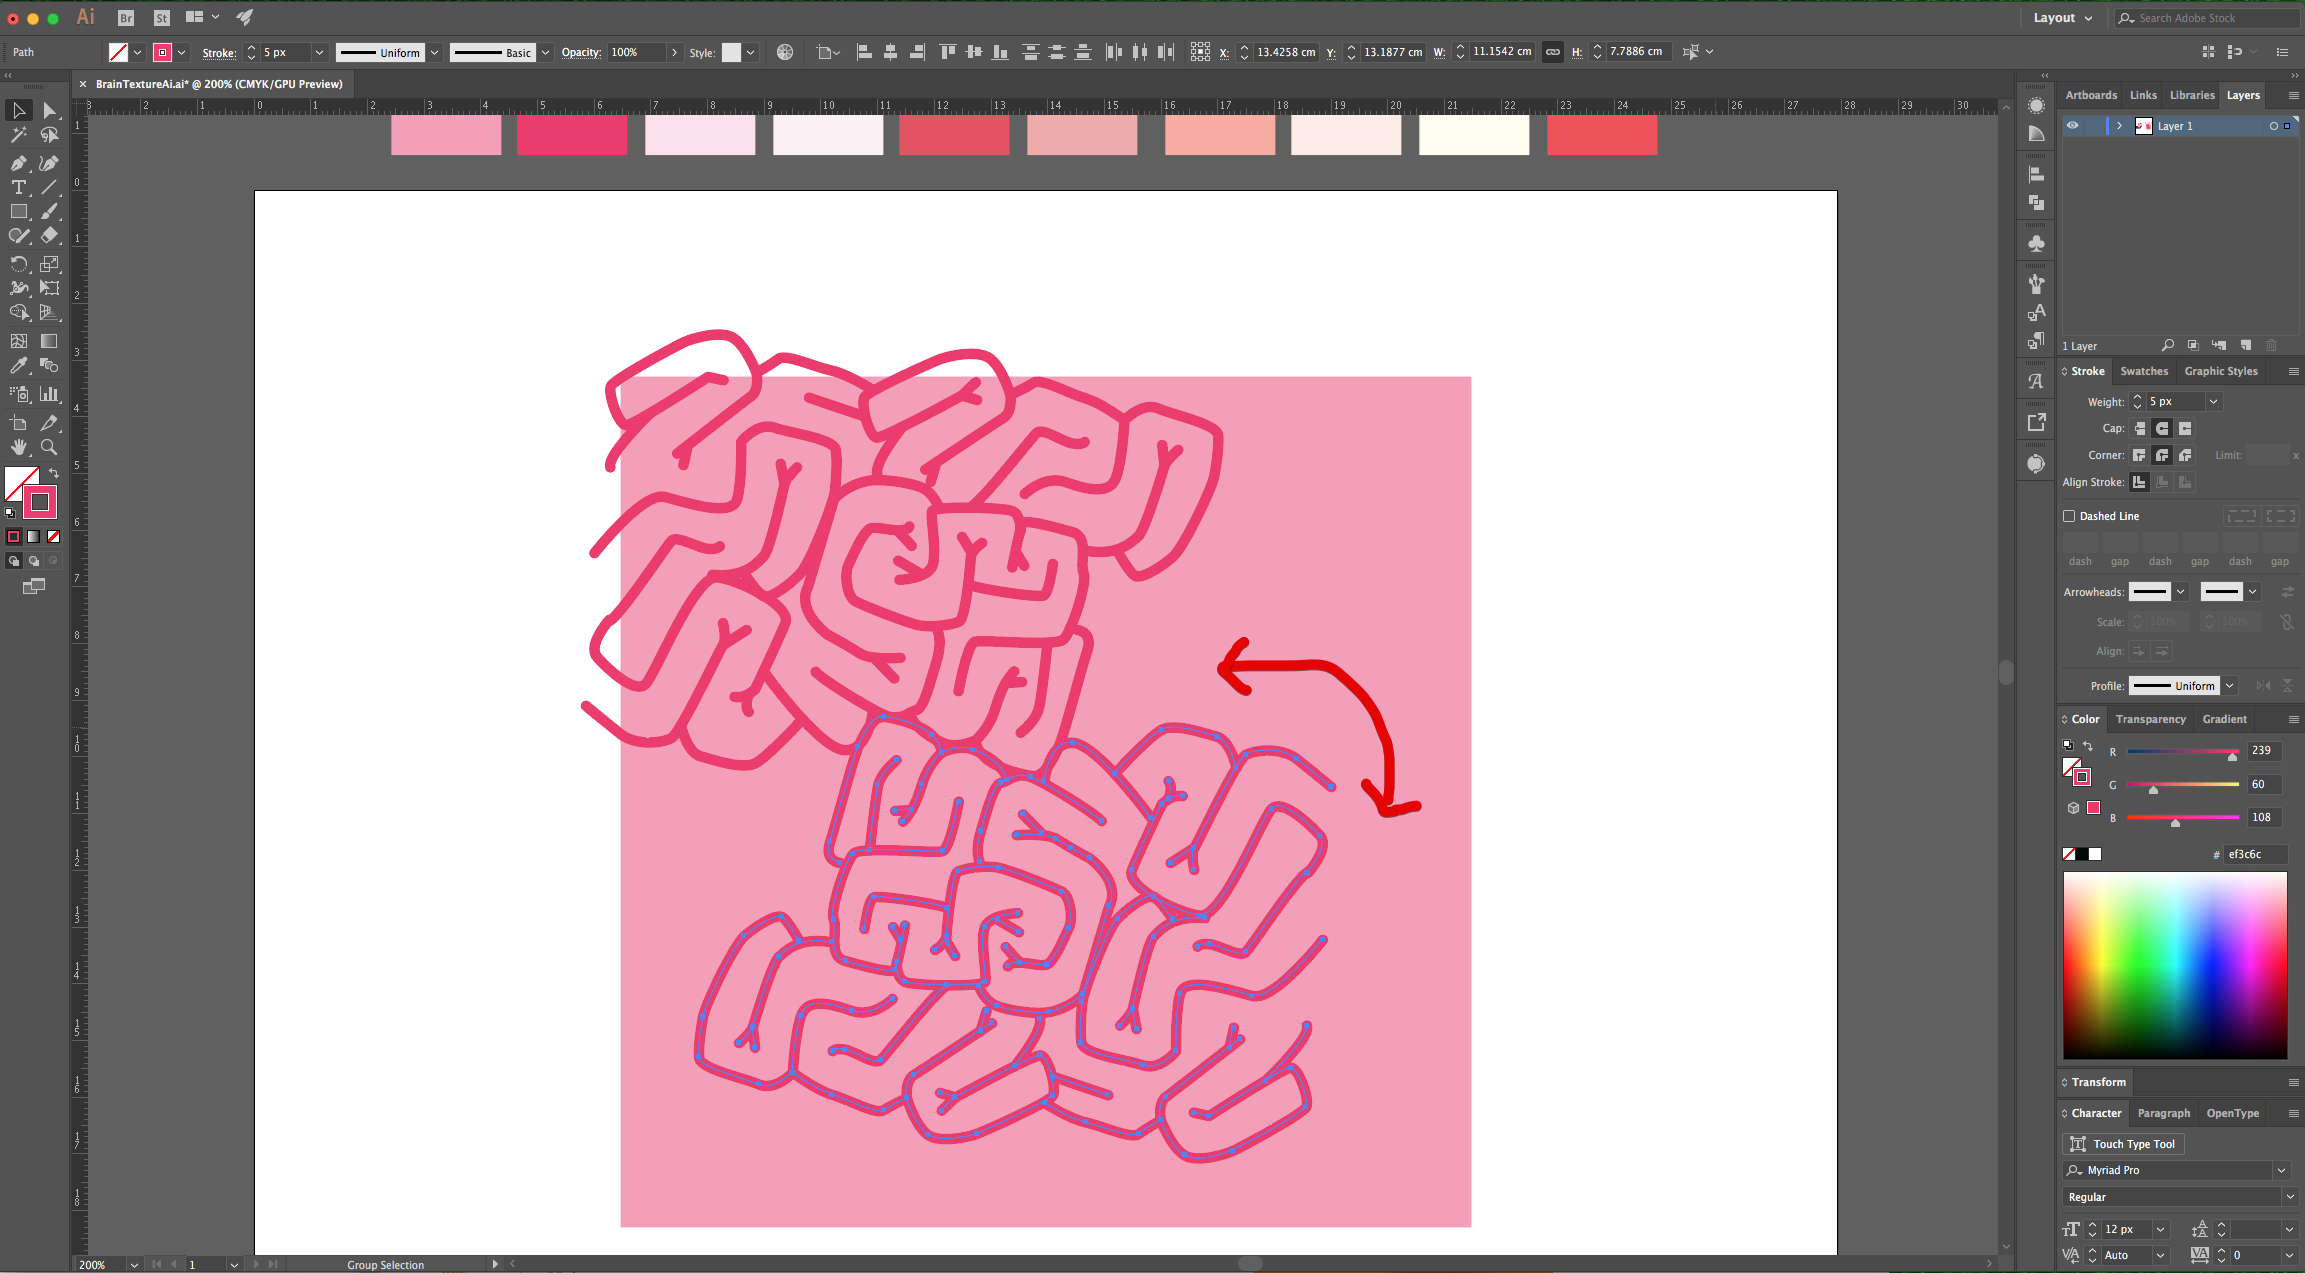
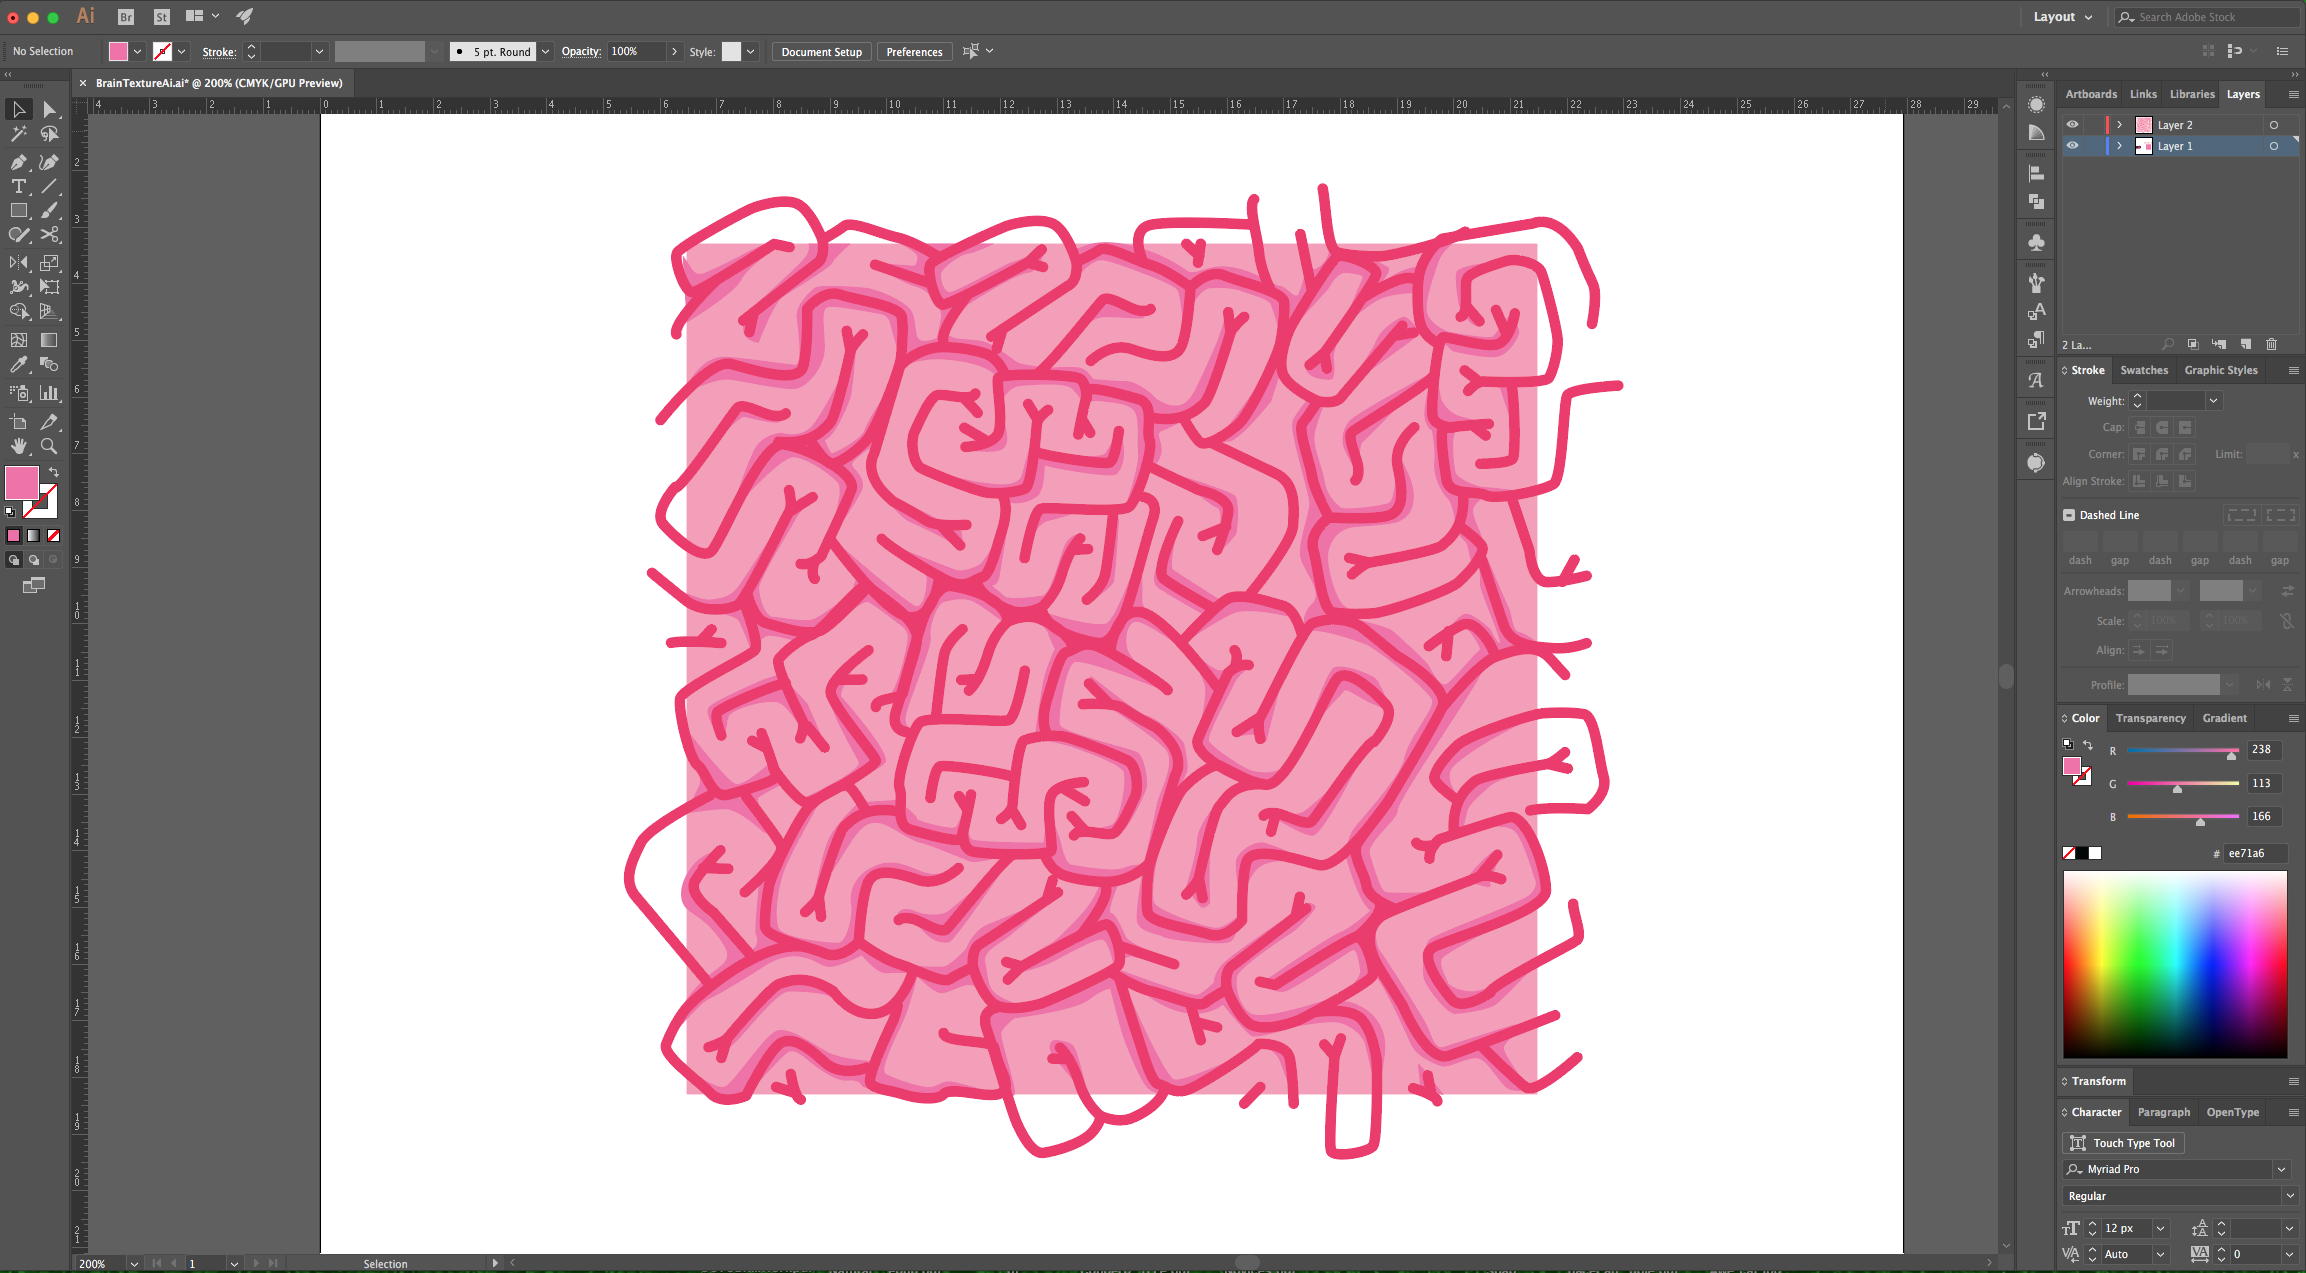
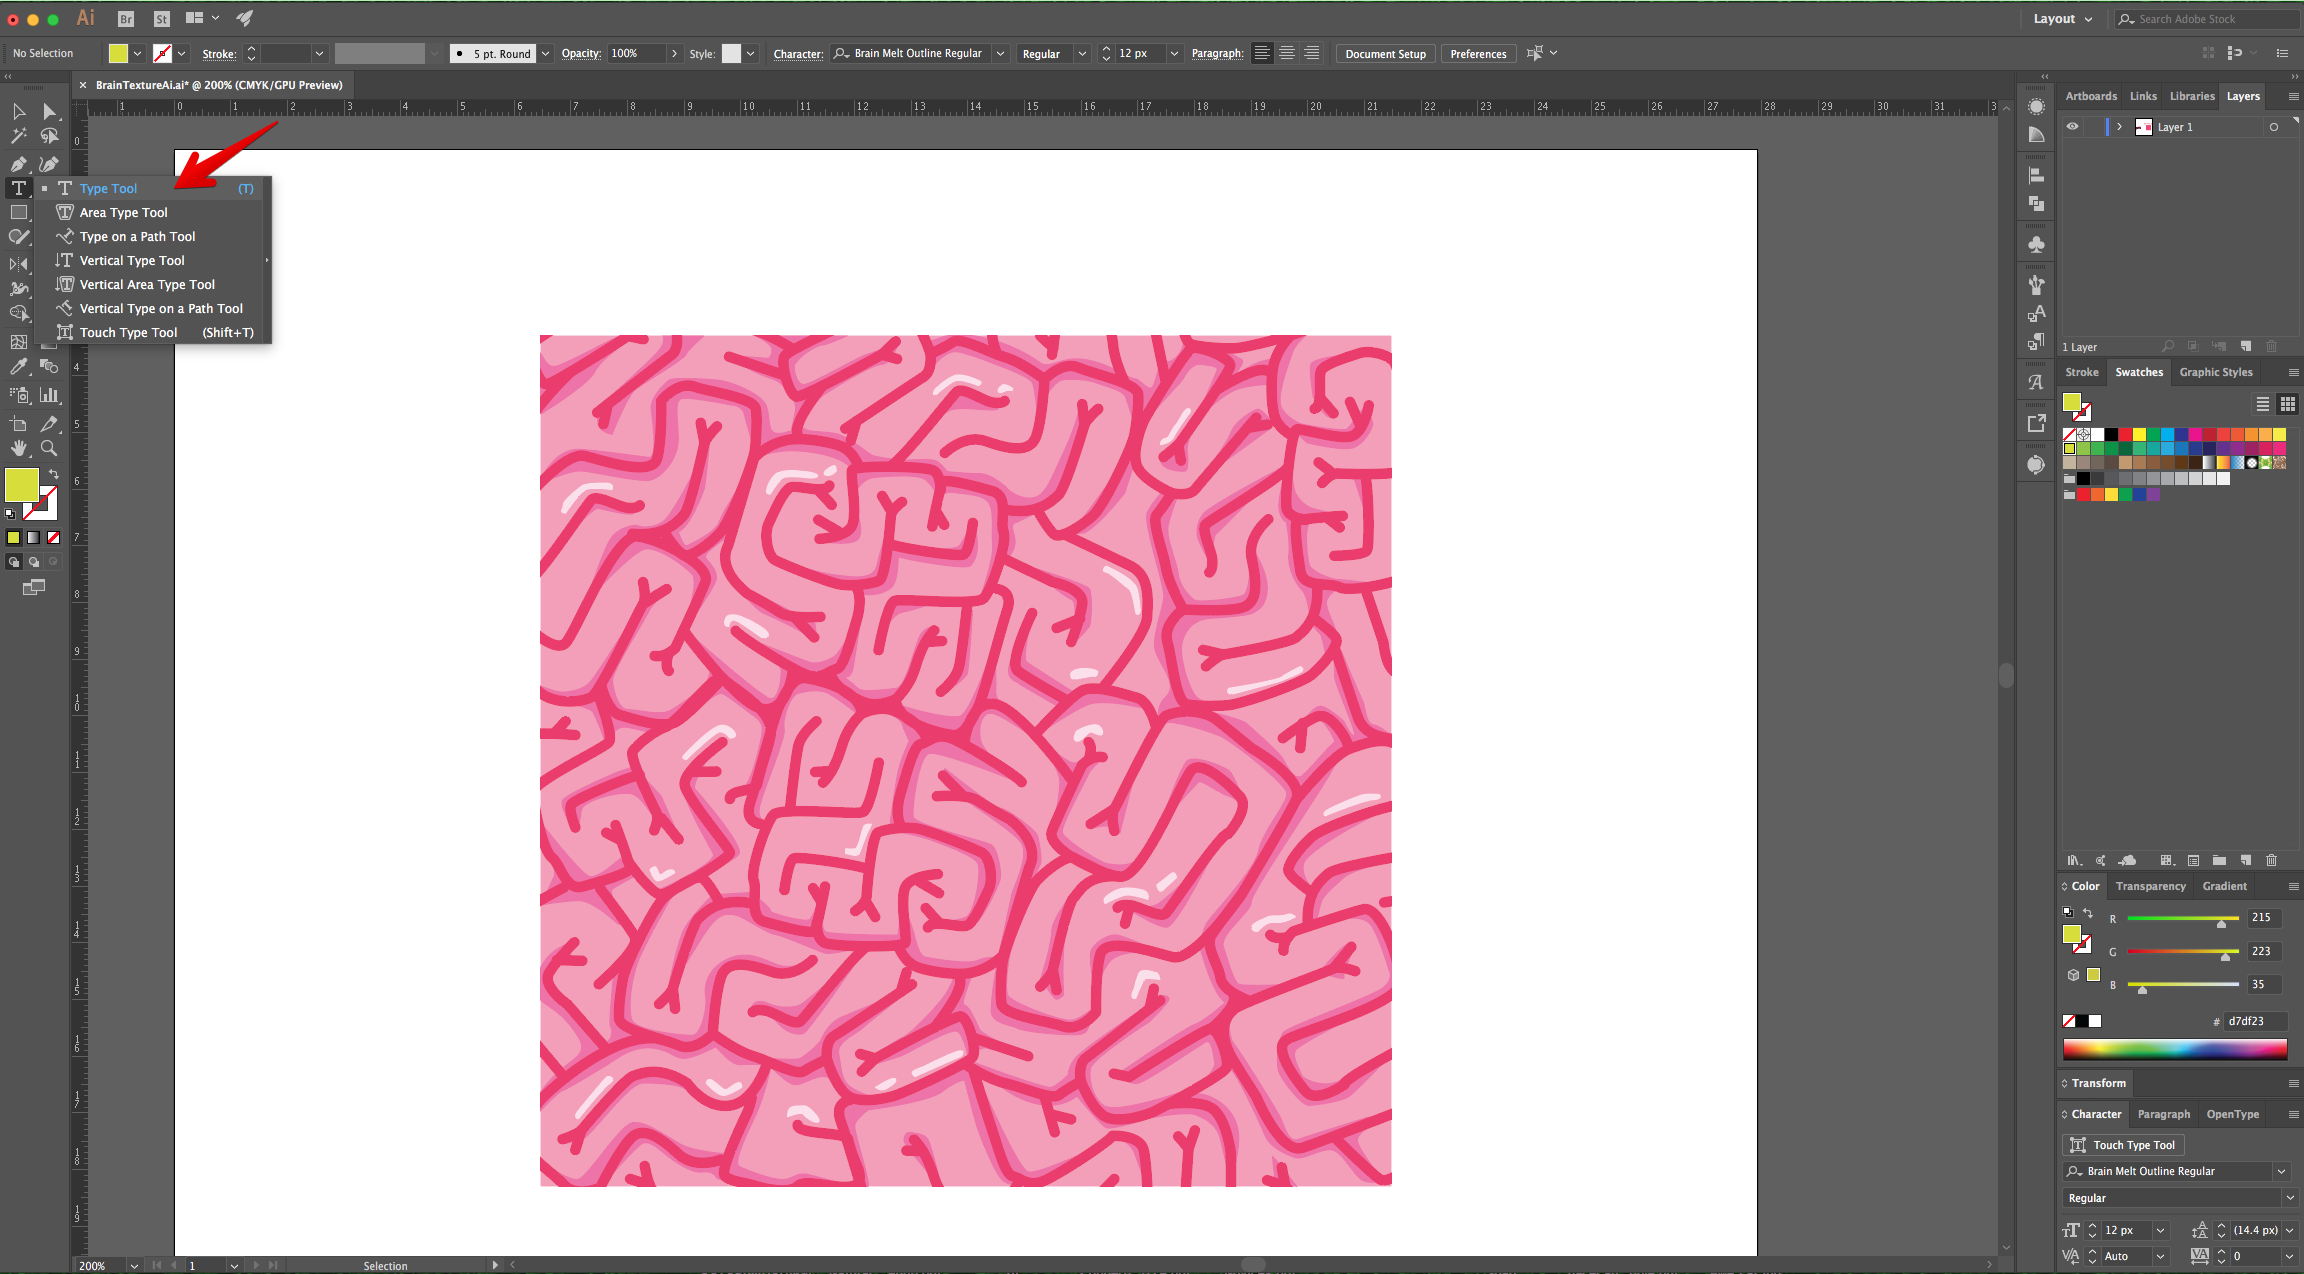
8 - Choose the “Pen Tool” (P), and choose a darker shade of Pink for the “Stroke” color (we used #f59eb8). Make the “Weight” 5 px with a “Rounded Cap and Corner”.
9 - Start drawing some convoluted lines to create the “Brain”. Hit Enter/Return to close the “Path” and start a new one. You can draw some portions of the lines outside the square edges.
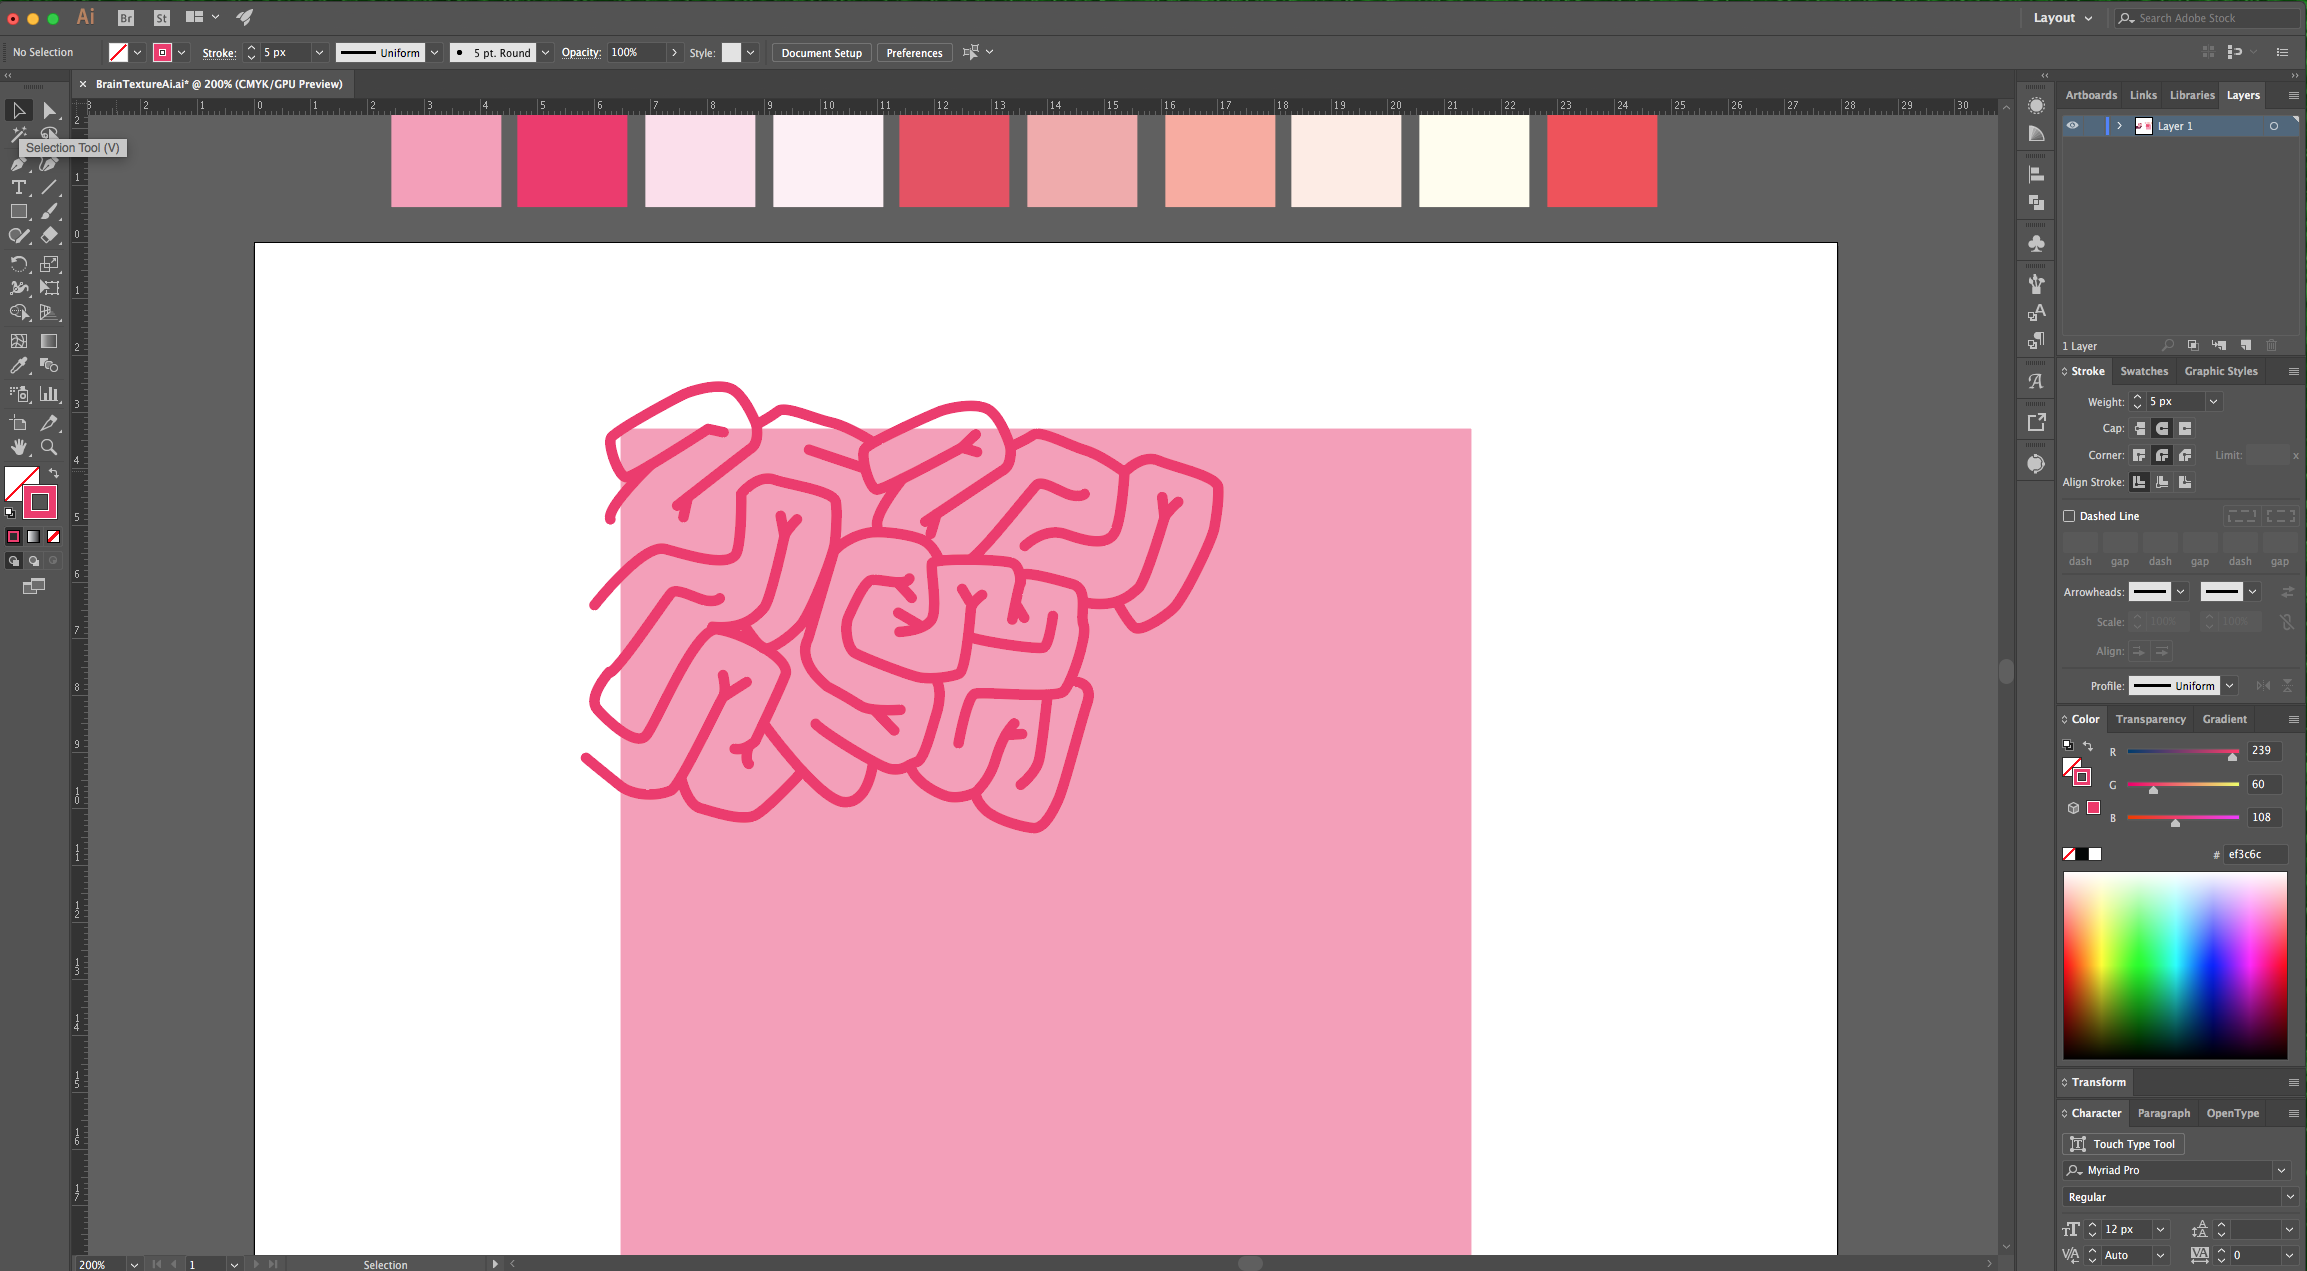
10 - You can select portions of the pattern, “Copy” (Command/Control + C) and “Paste” (Command/Control + V) them.
11 - Then, maybe rotate them to create different arrangements. Keep going until you fill the entire “Square”.

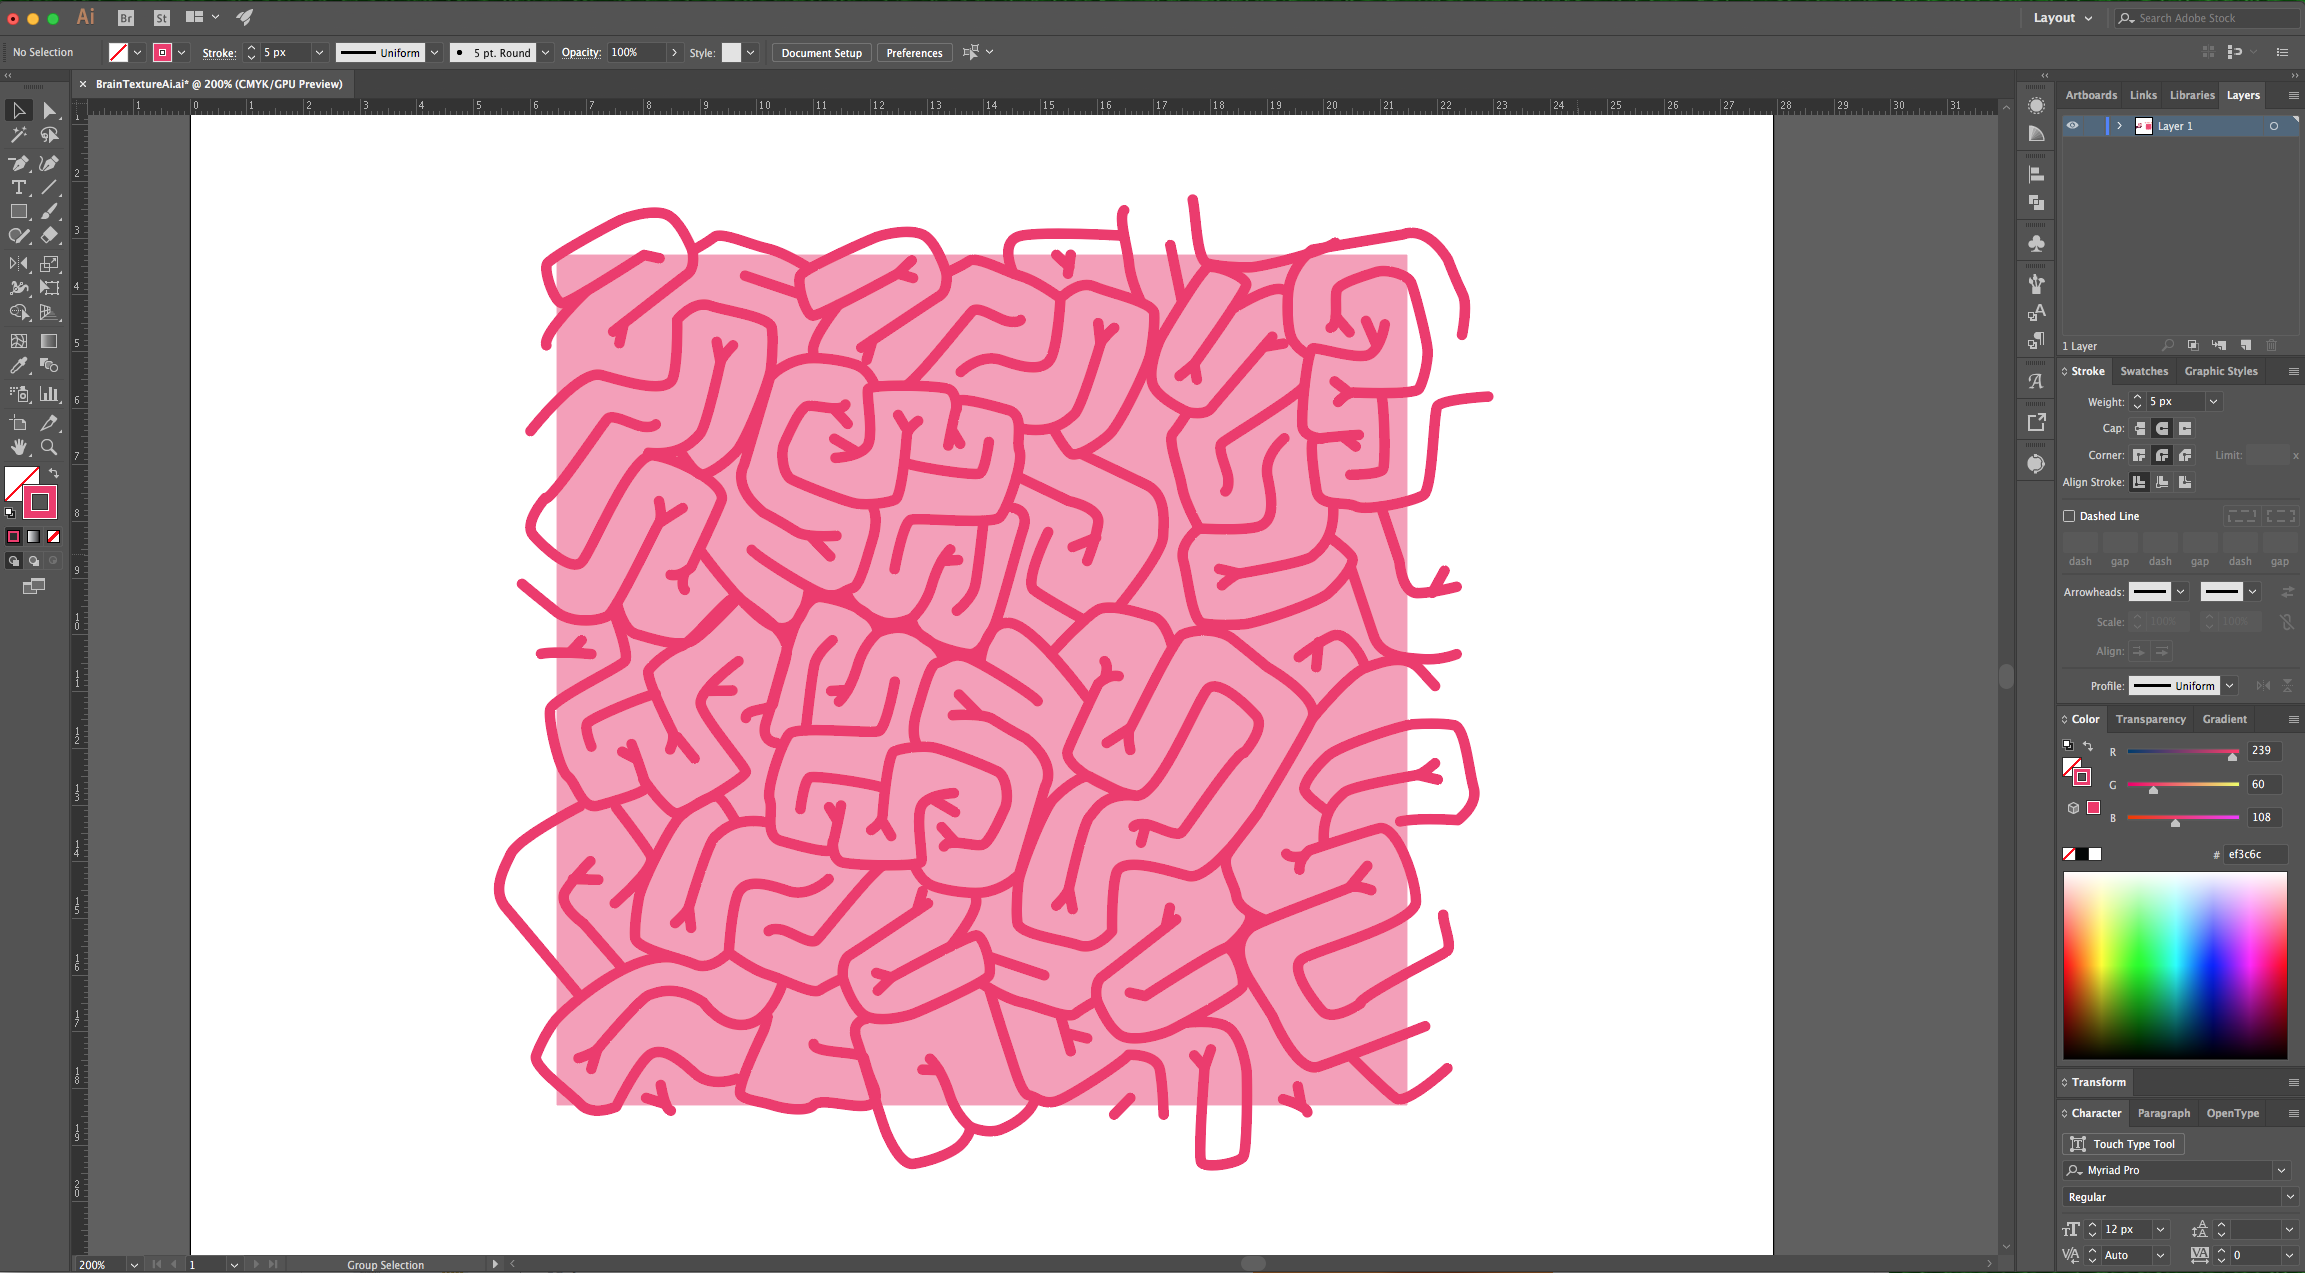
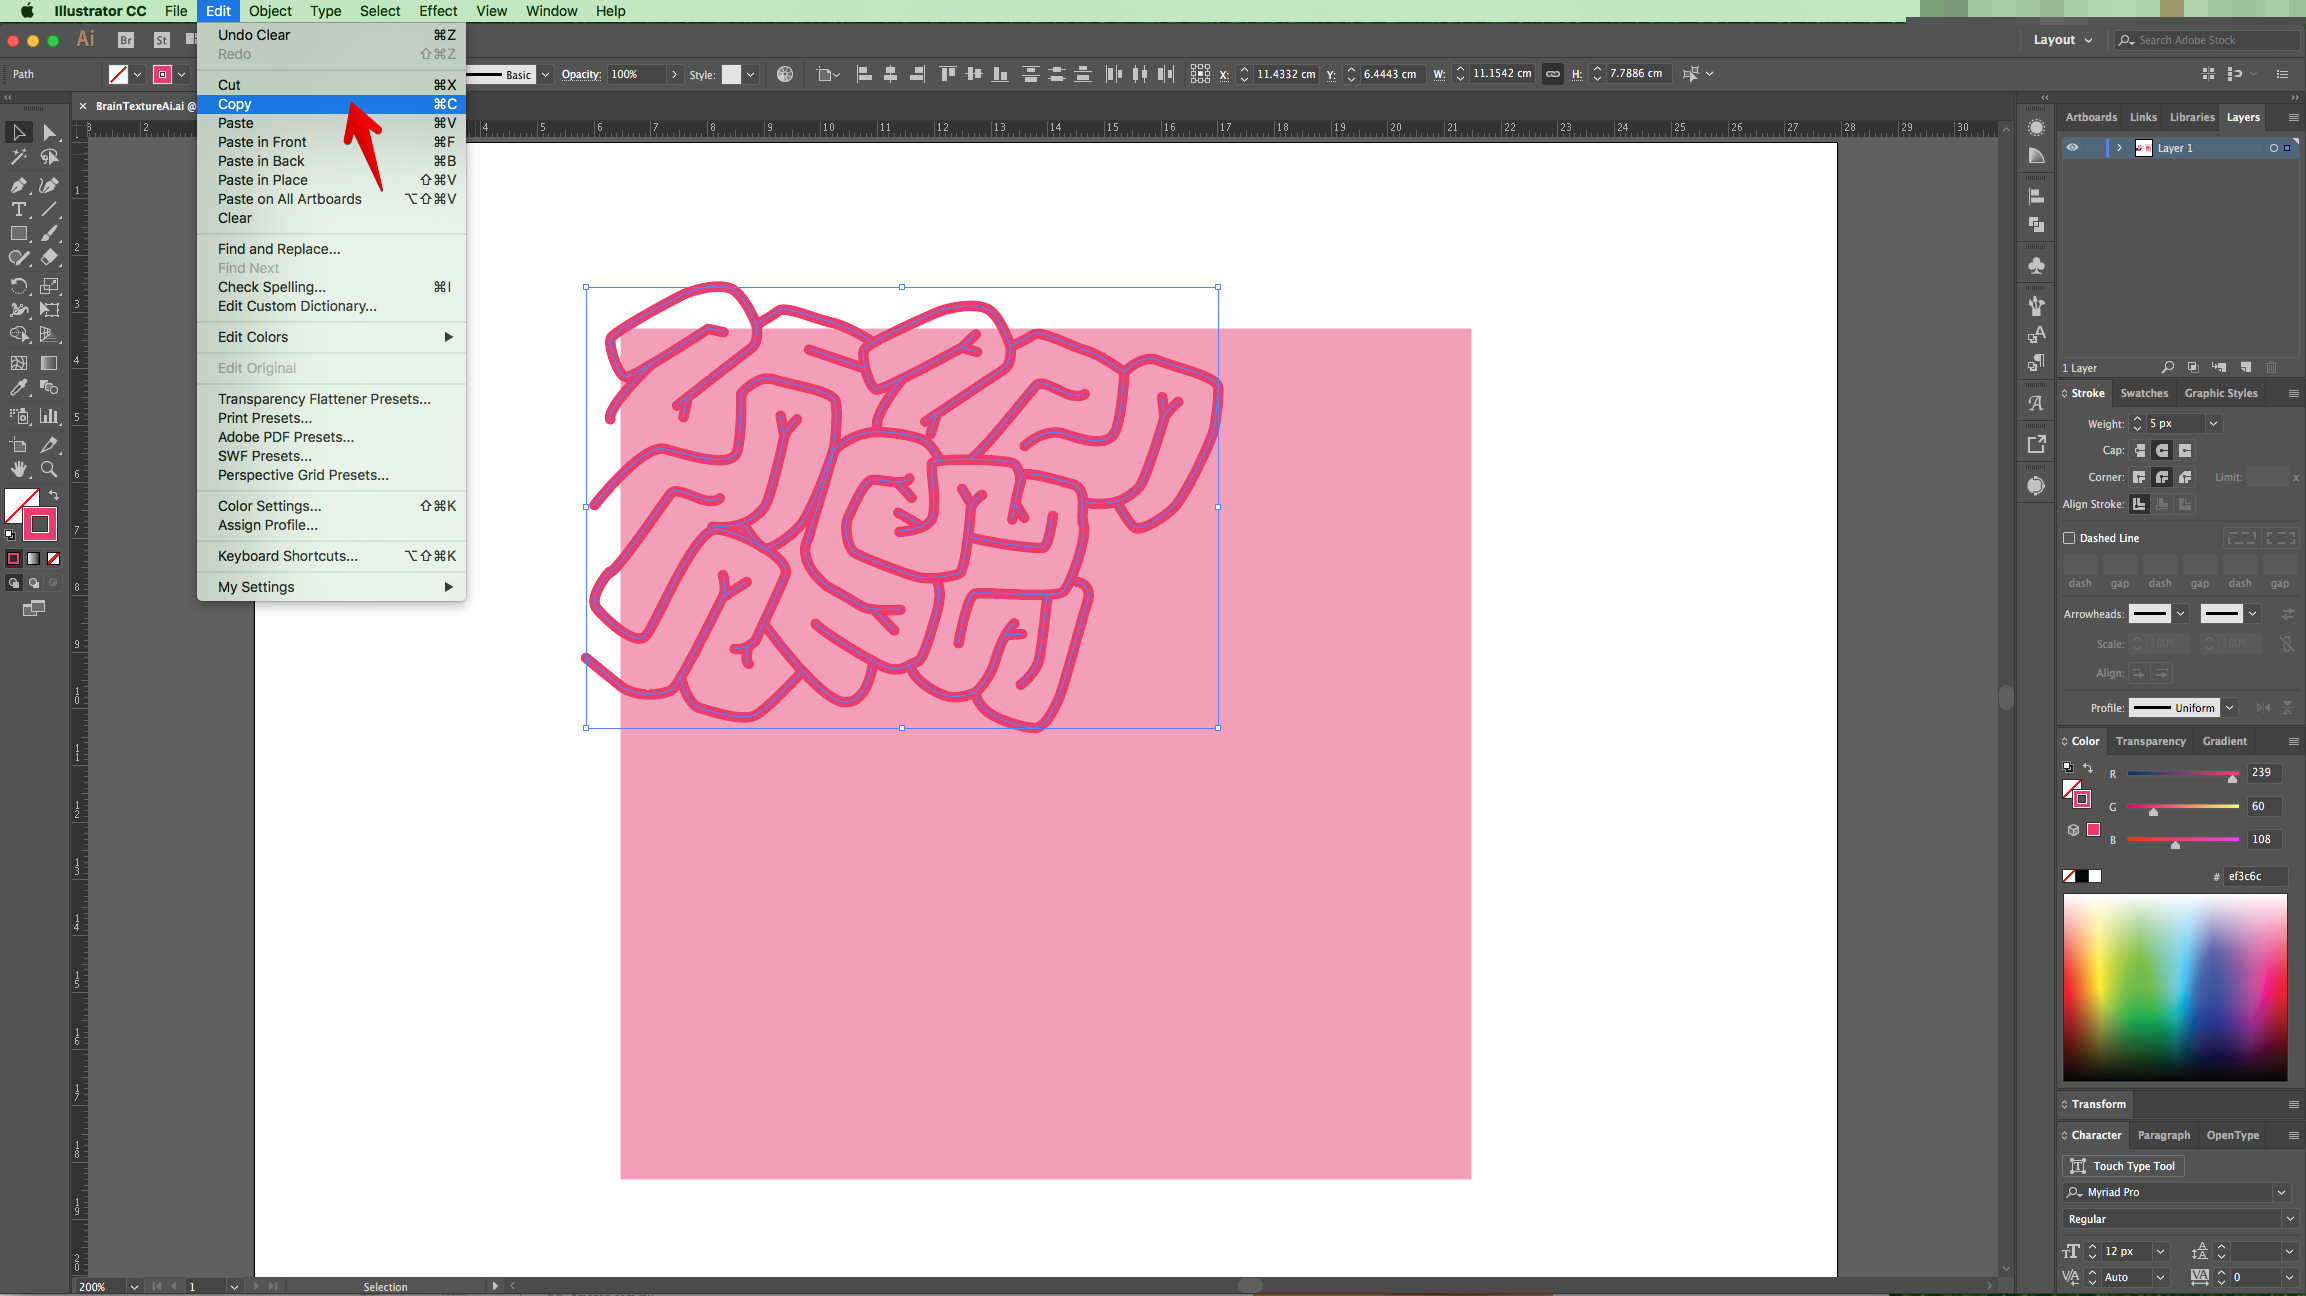
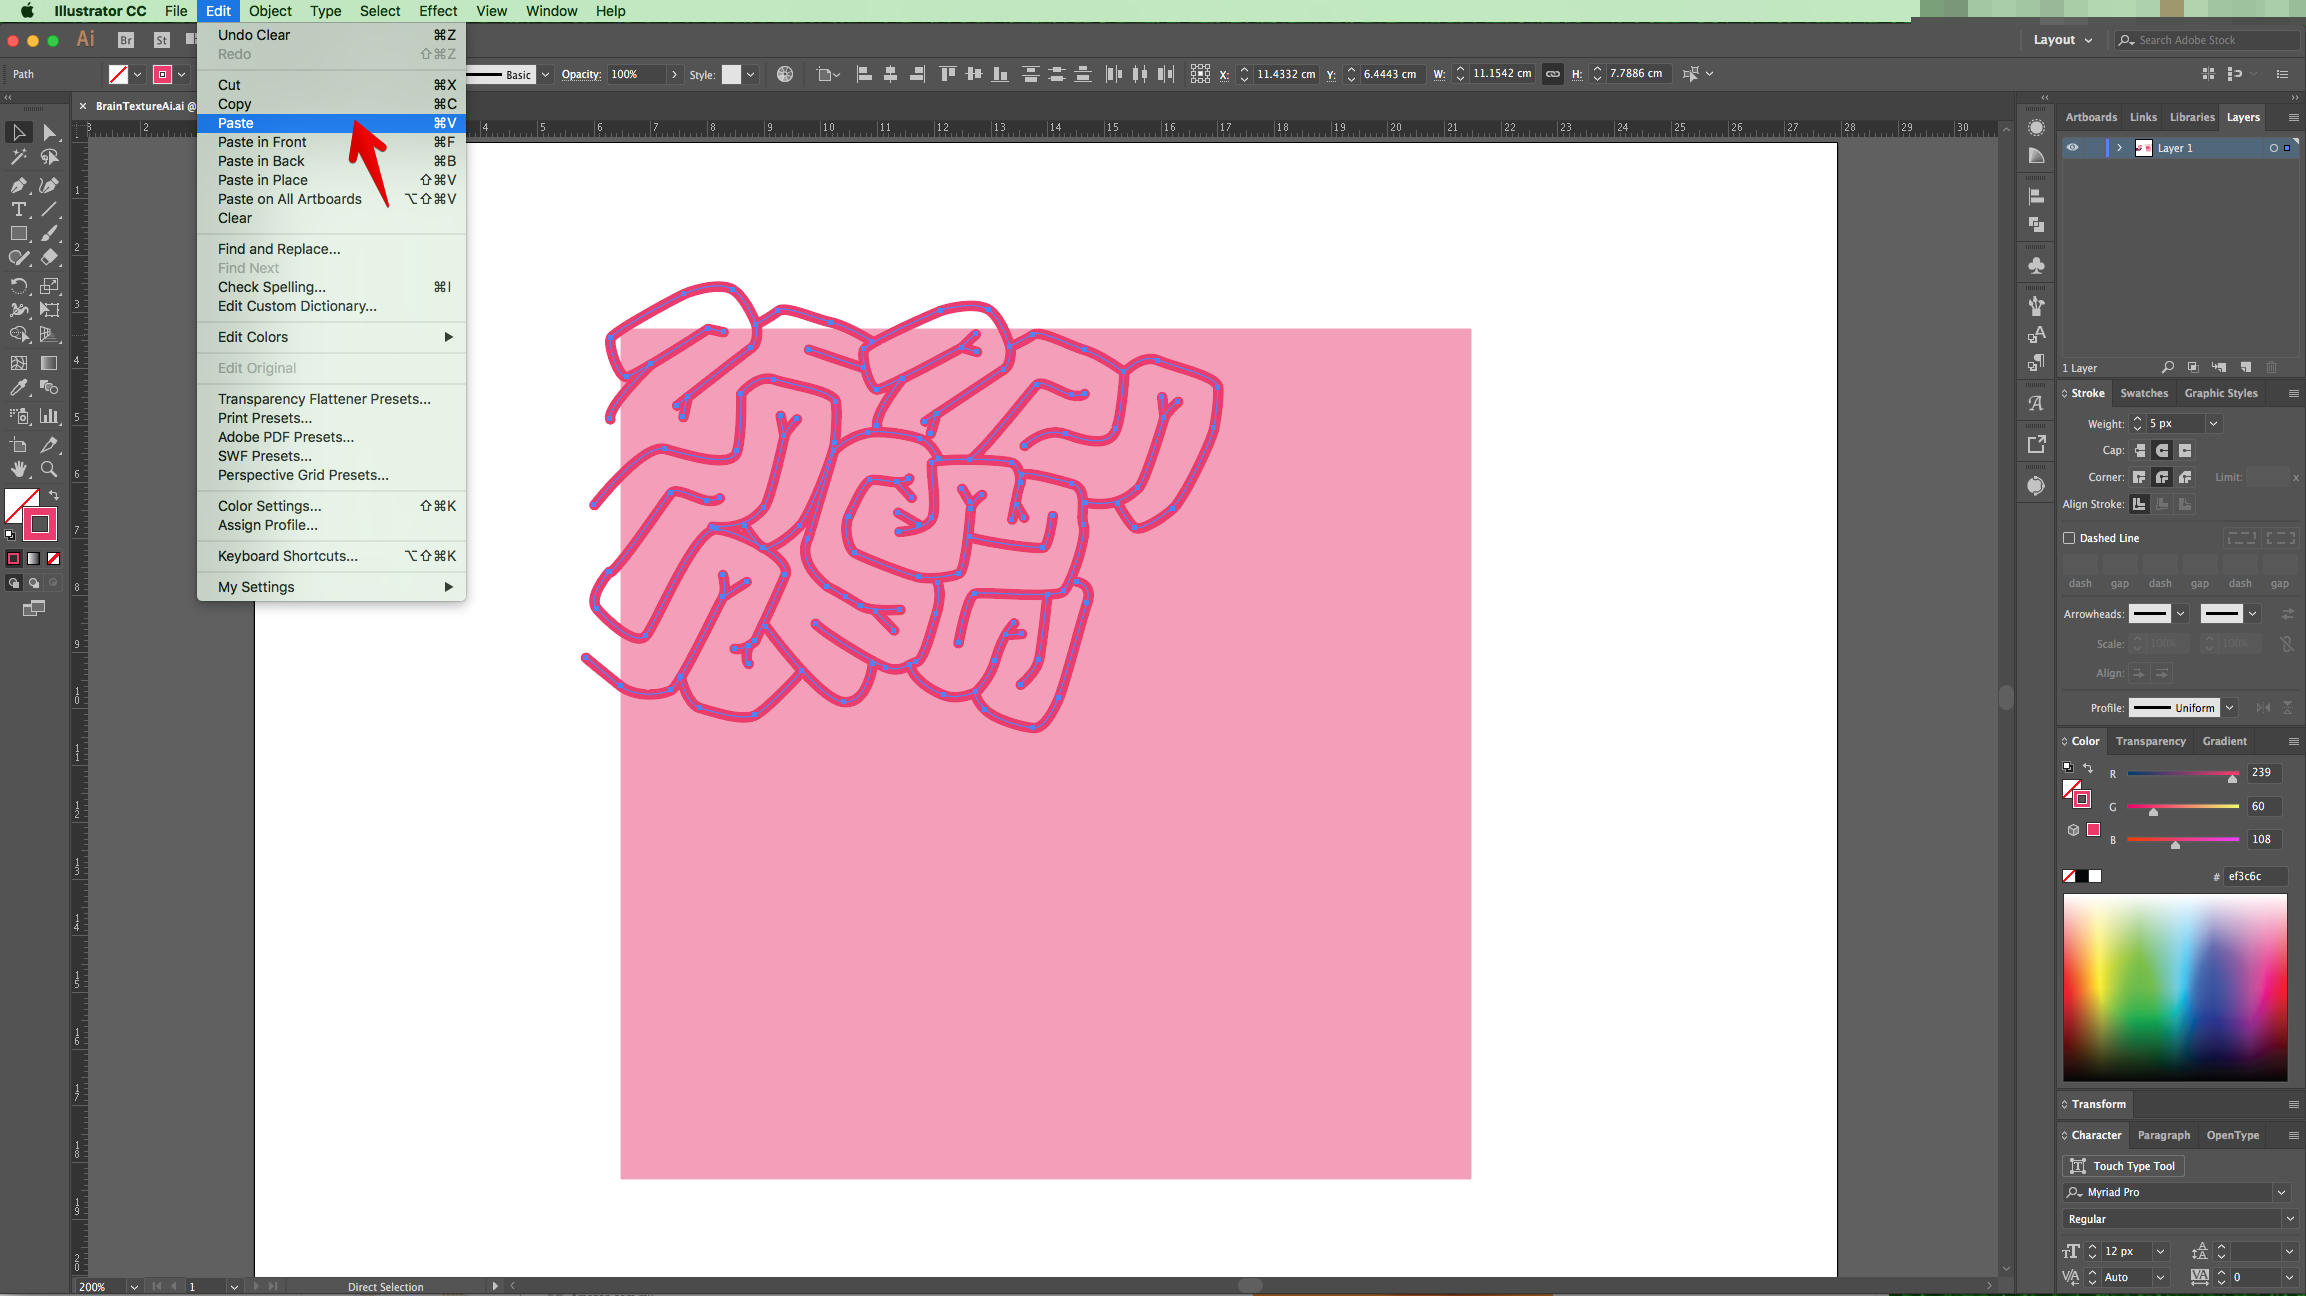
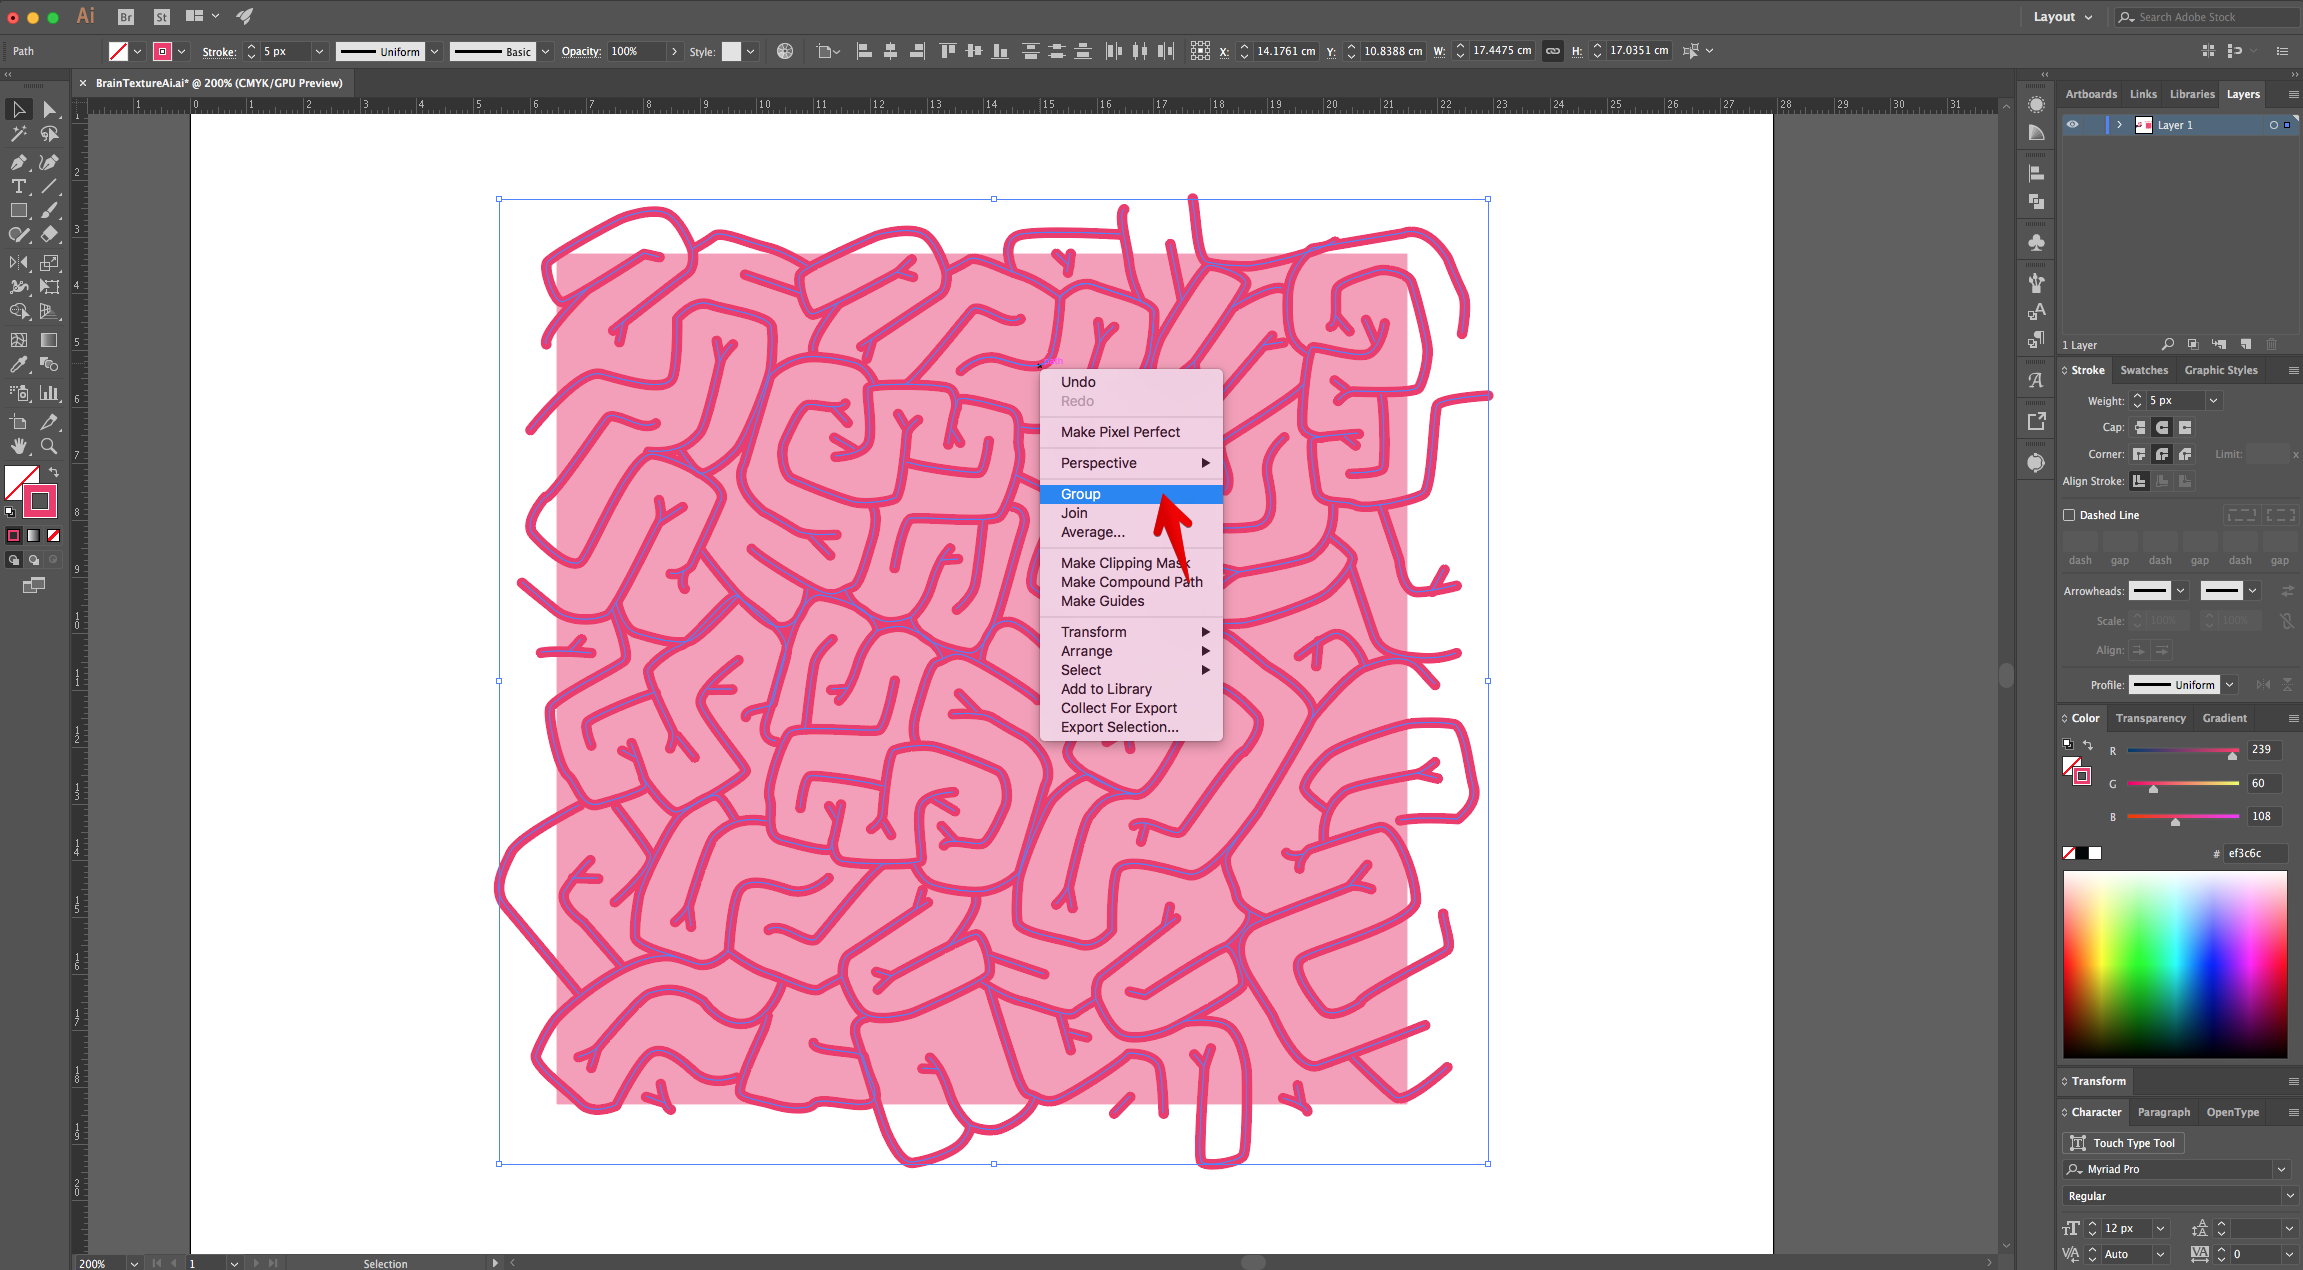
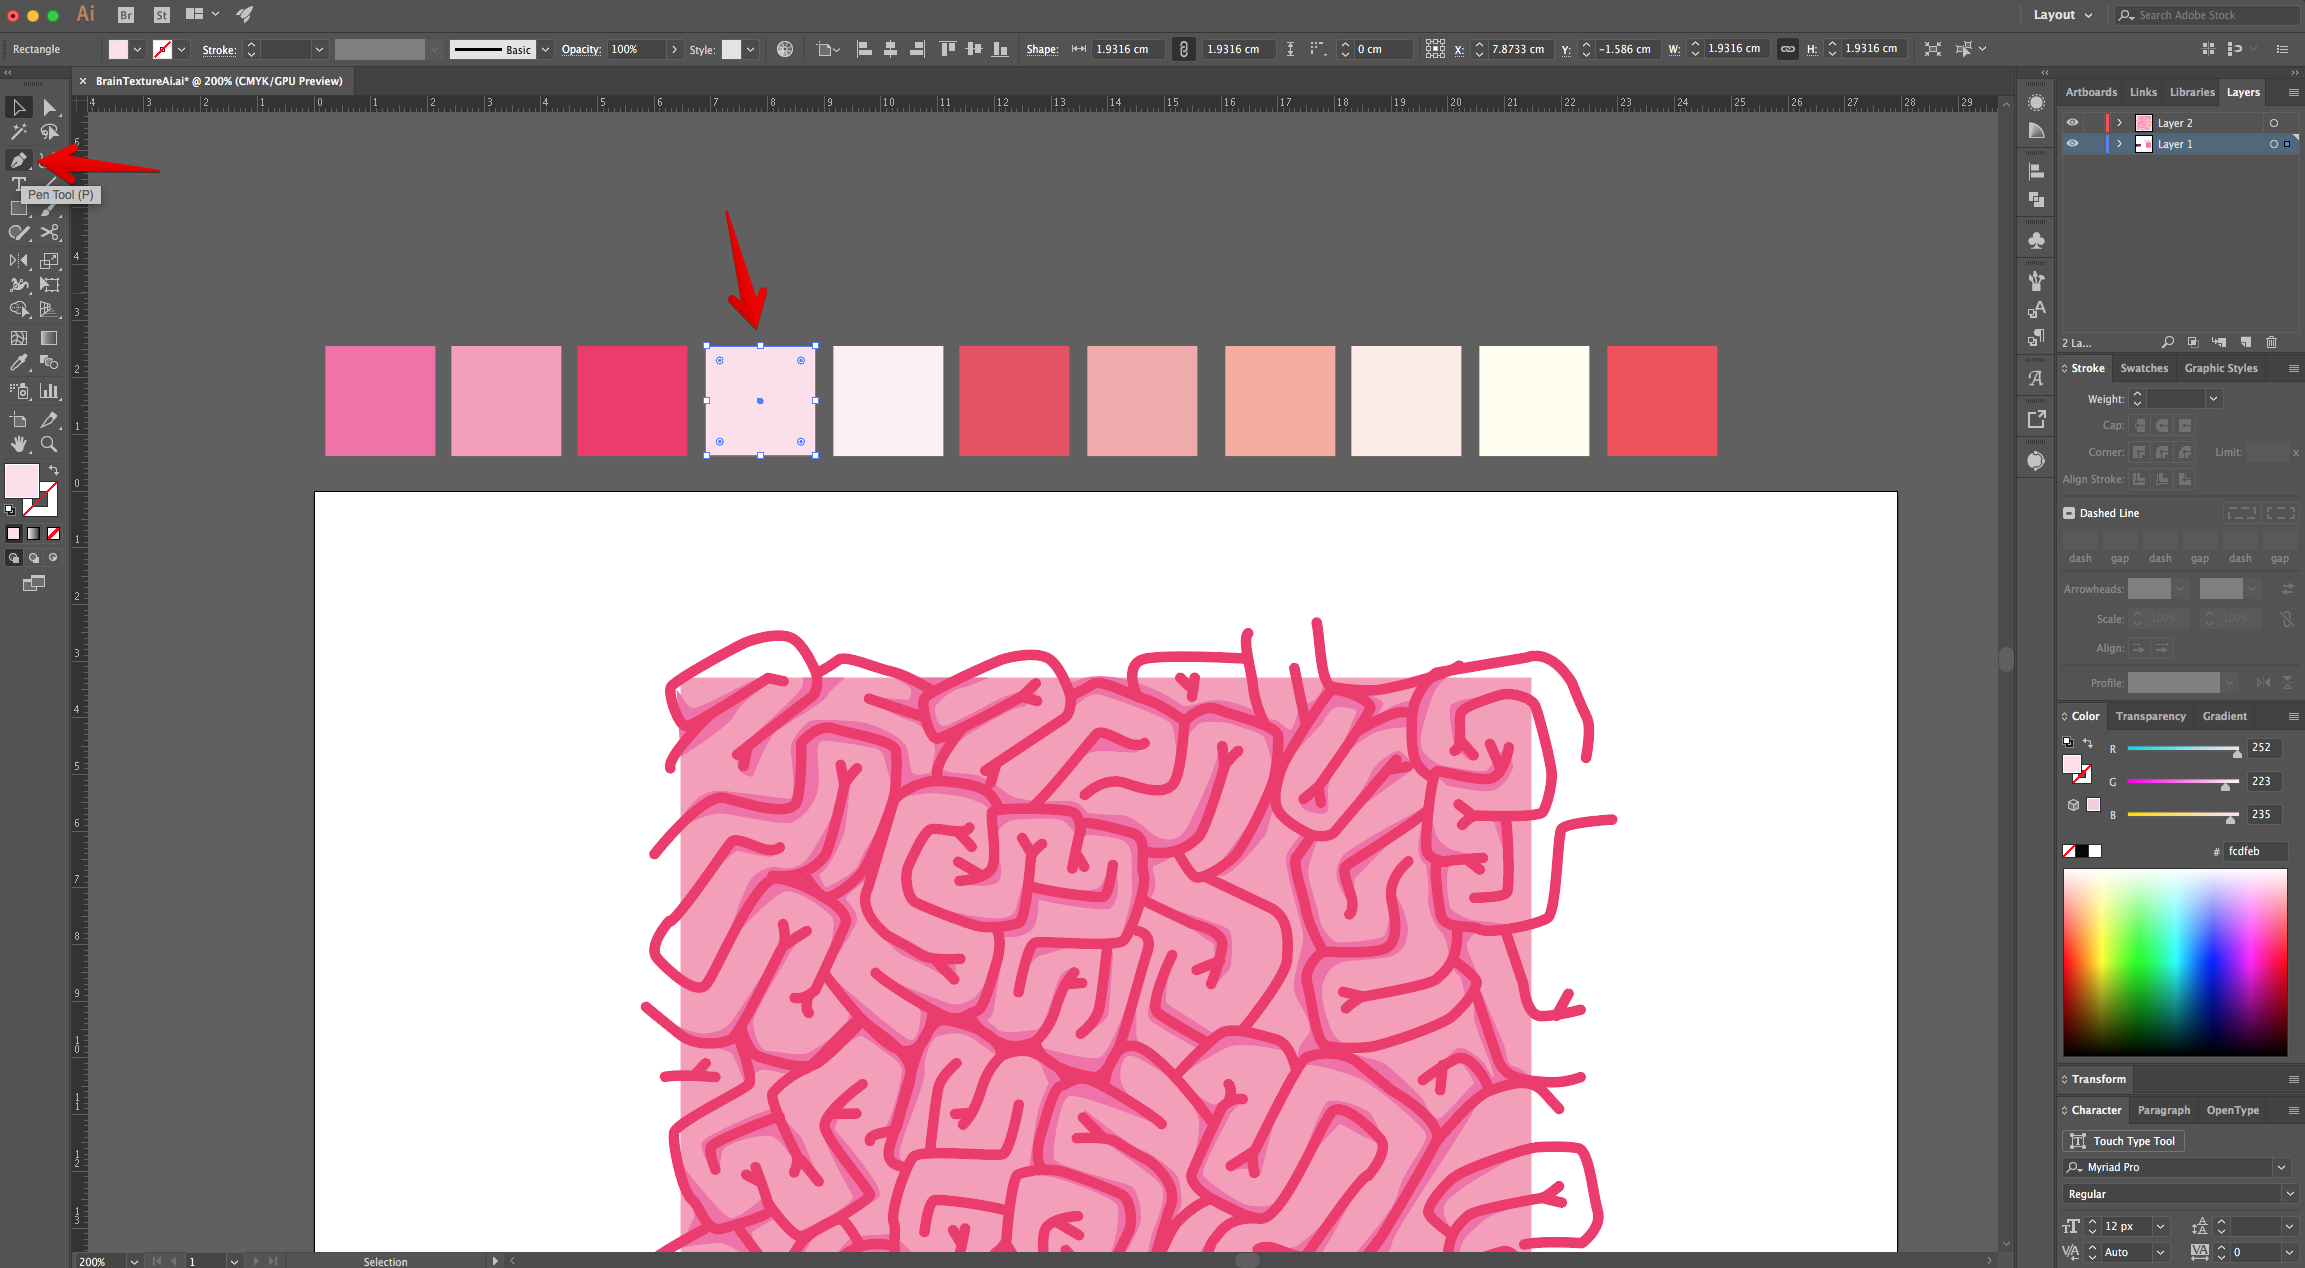
12 - Select everything, right-click on top and choose “Group”.
13 - Choose the “Pen Tool” (P) again, and this time choose an intermediate shade of Pink as “Fill” color (we used #efaaab). Draw some convoluted shapes under the previously created “Lines” to create some “Shades” under some of them. You can draw some portions of the lines outside the square edges.

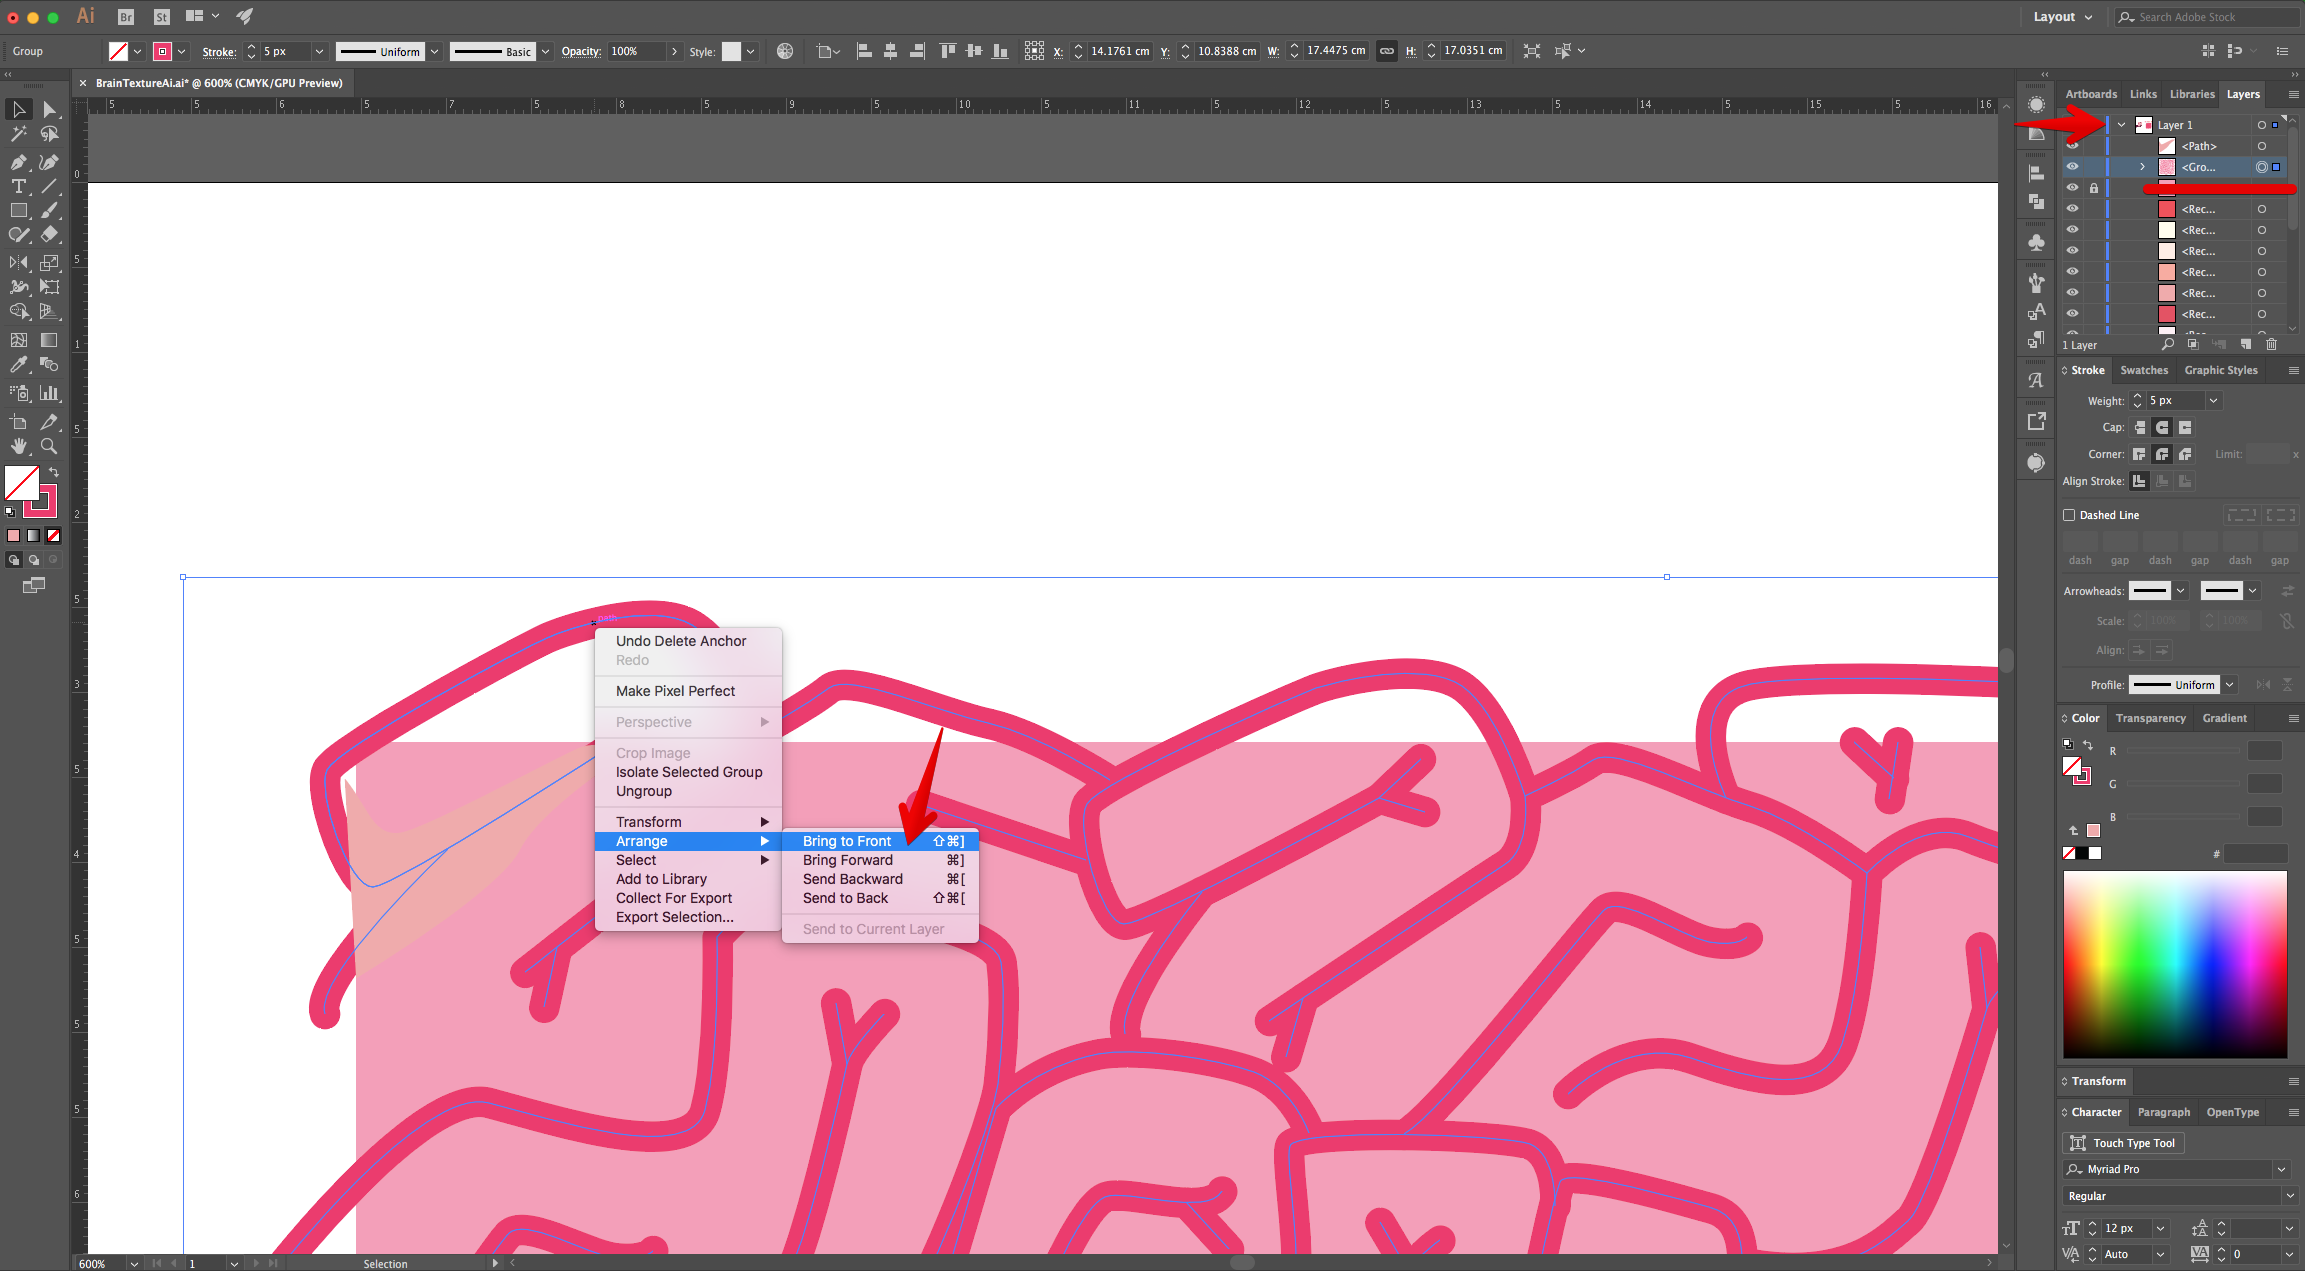
14 - Make sure they are placed under the “Lines” so you will have a better idea of the shape of the “Path”. To do this, select the “Lines”, right-click on top and choose “Bring to Front”.
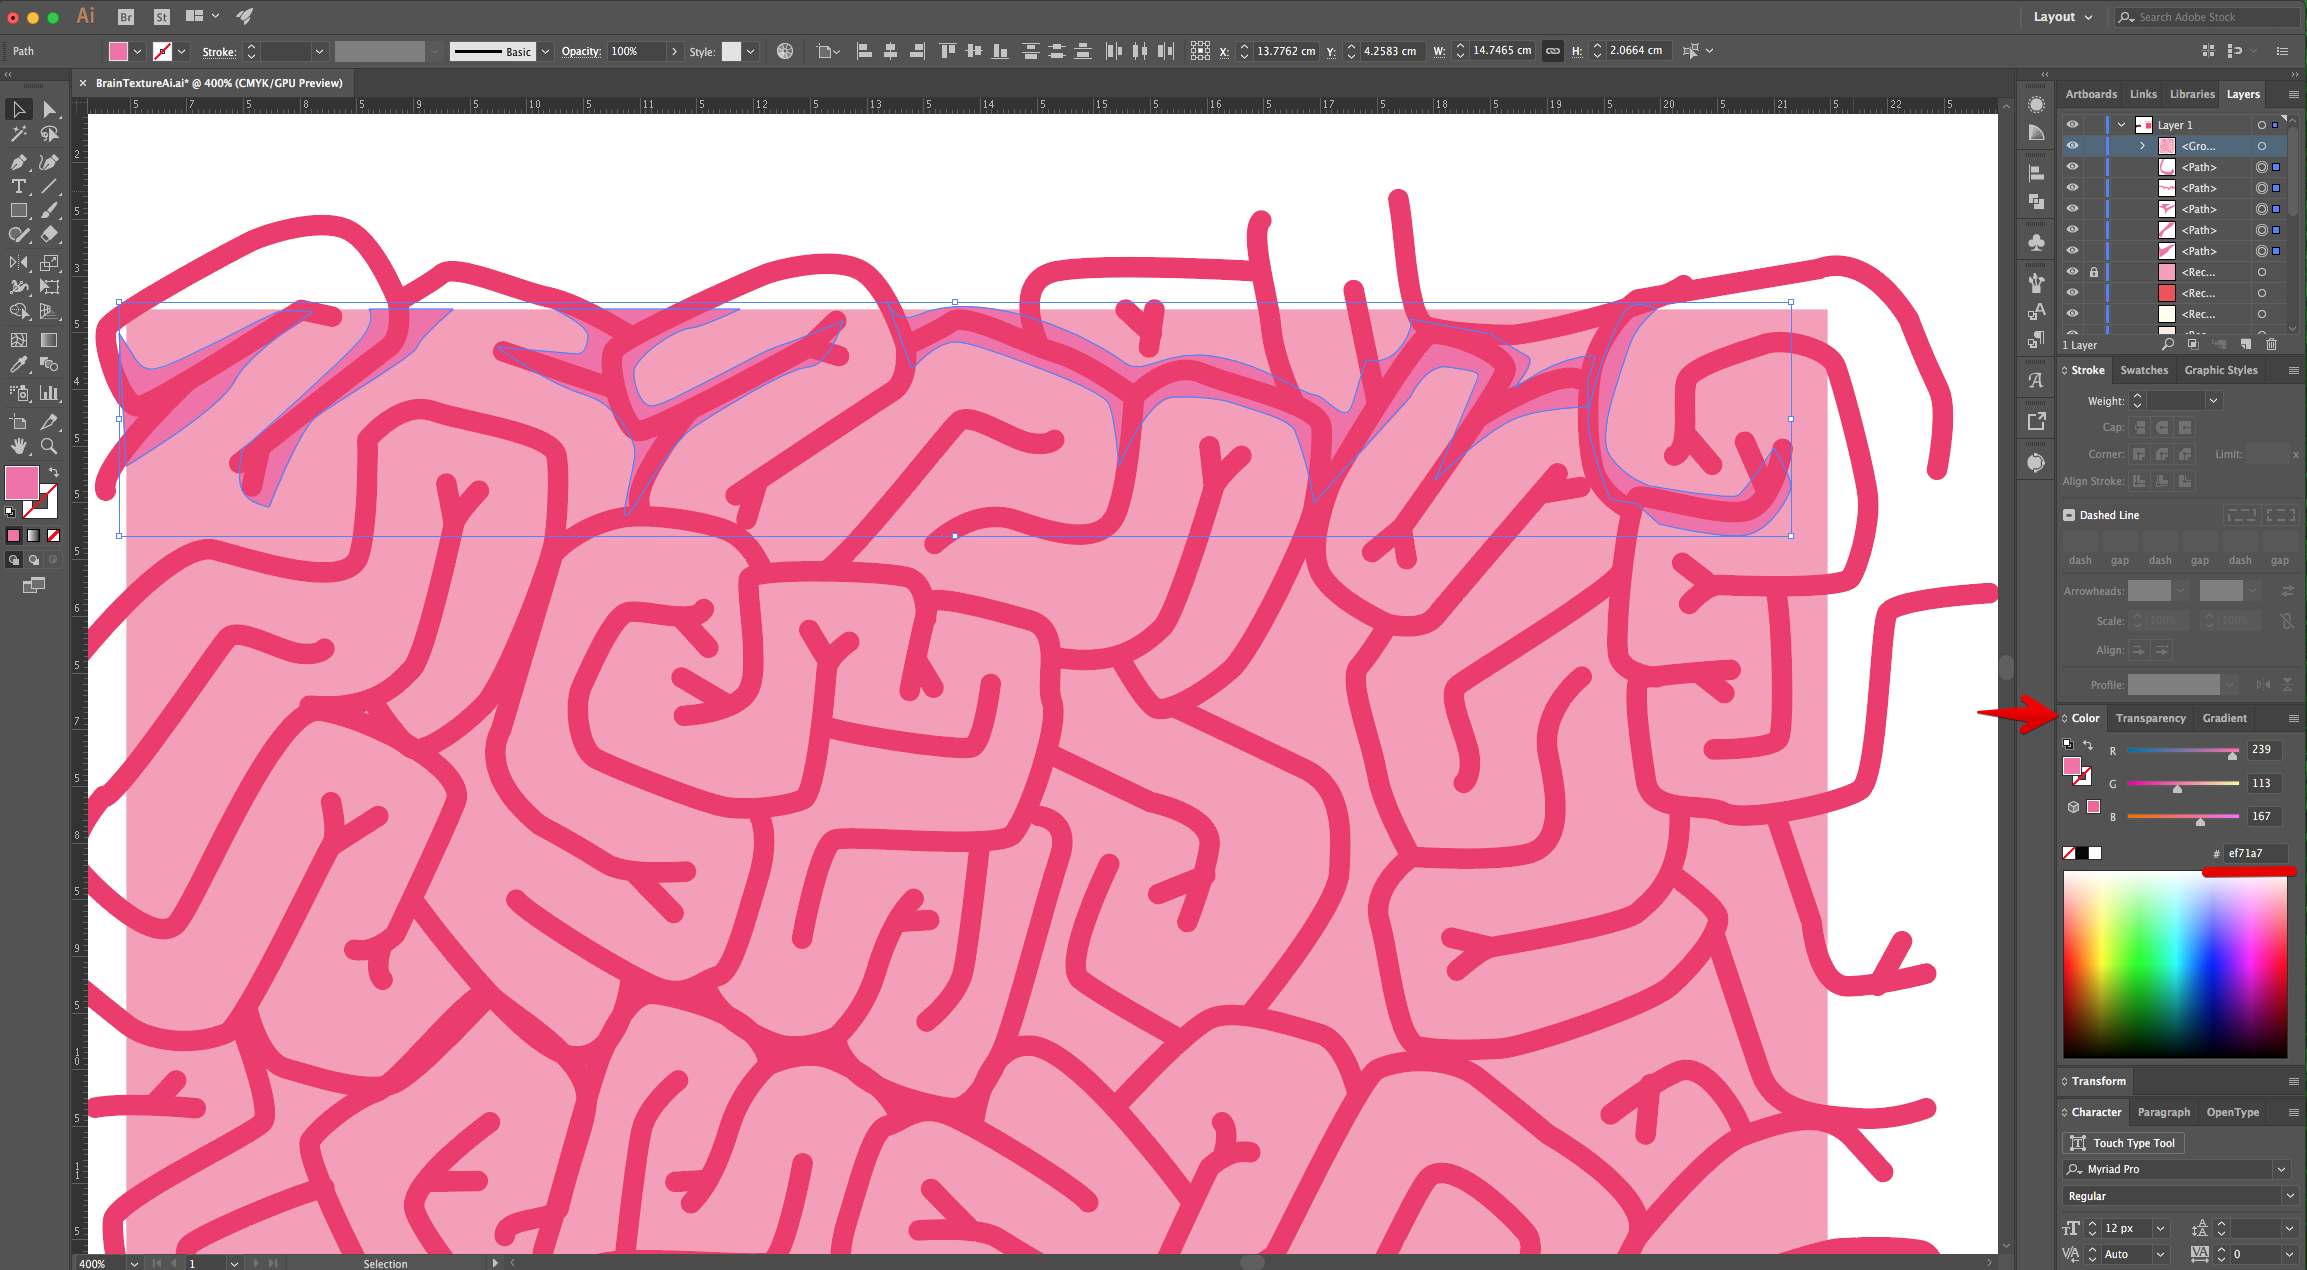
15 - If you think that the color is not working, you can select all the paths and change it slightly in the “Color Panel”. We used #ef71a7. Finish adding “Shades” to the rest of the “Lines”.
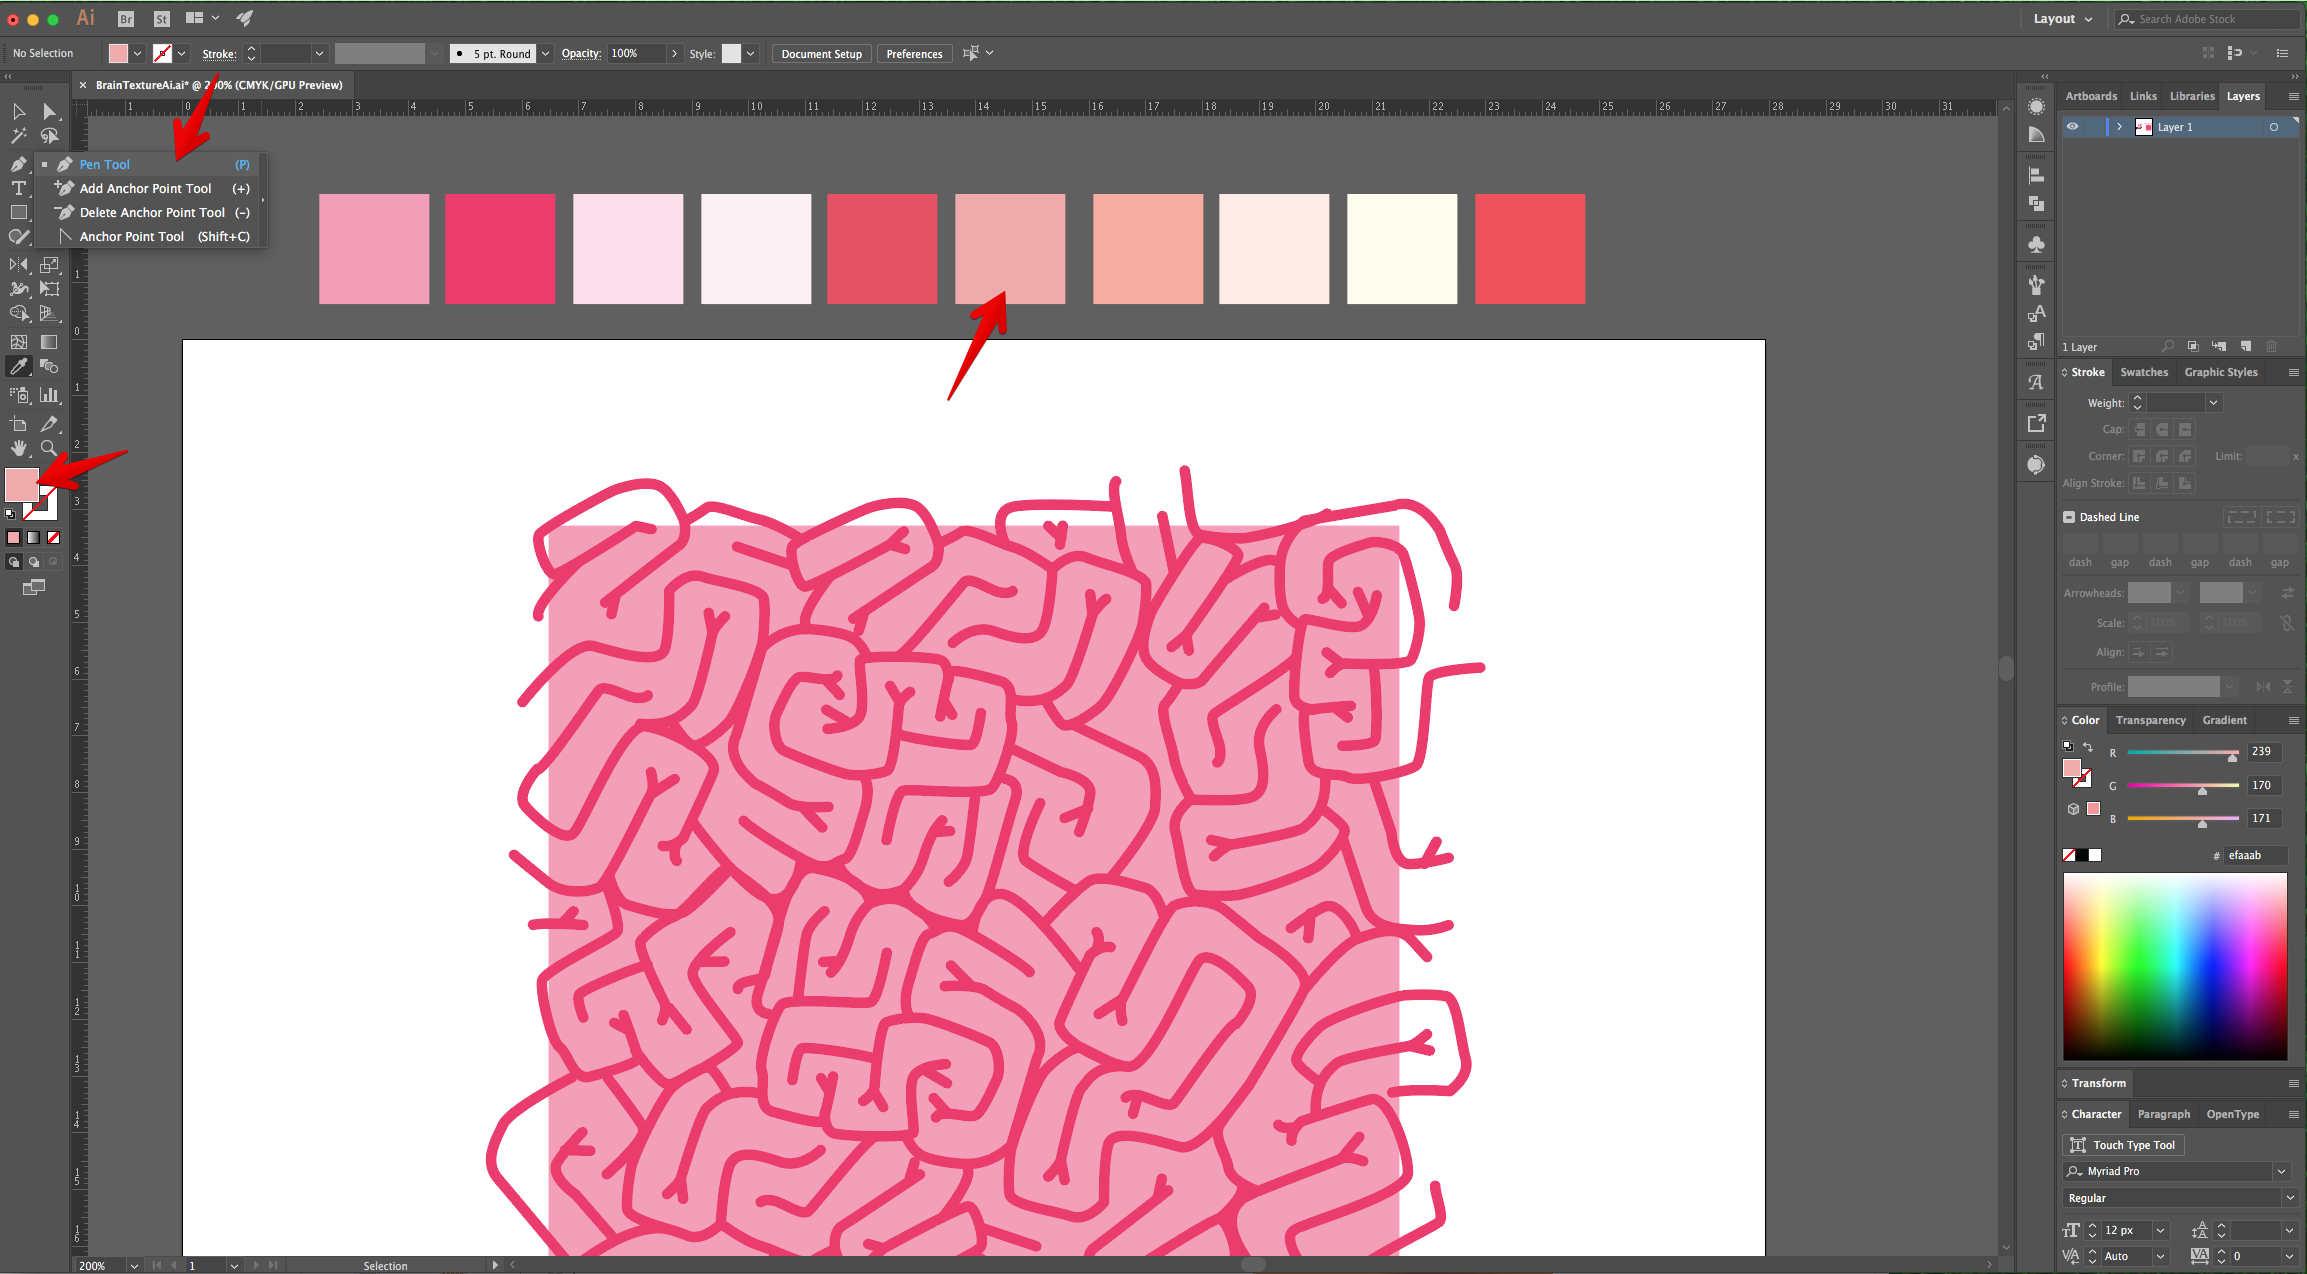
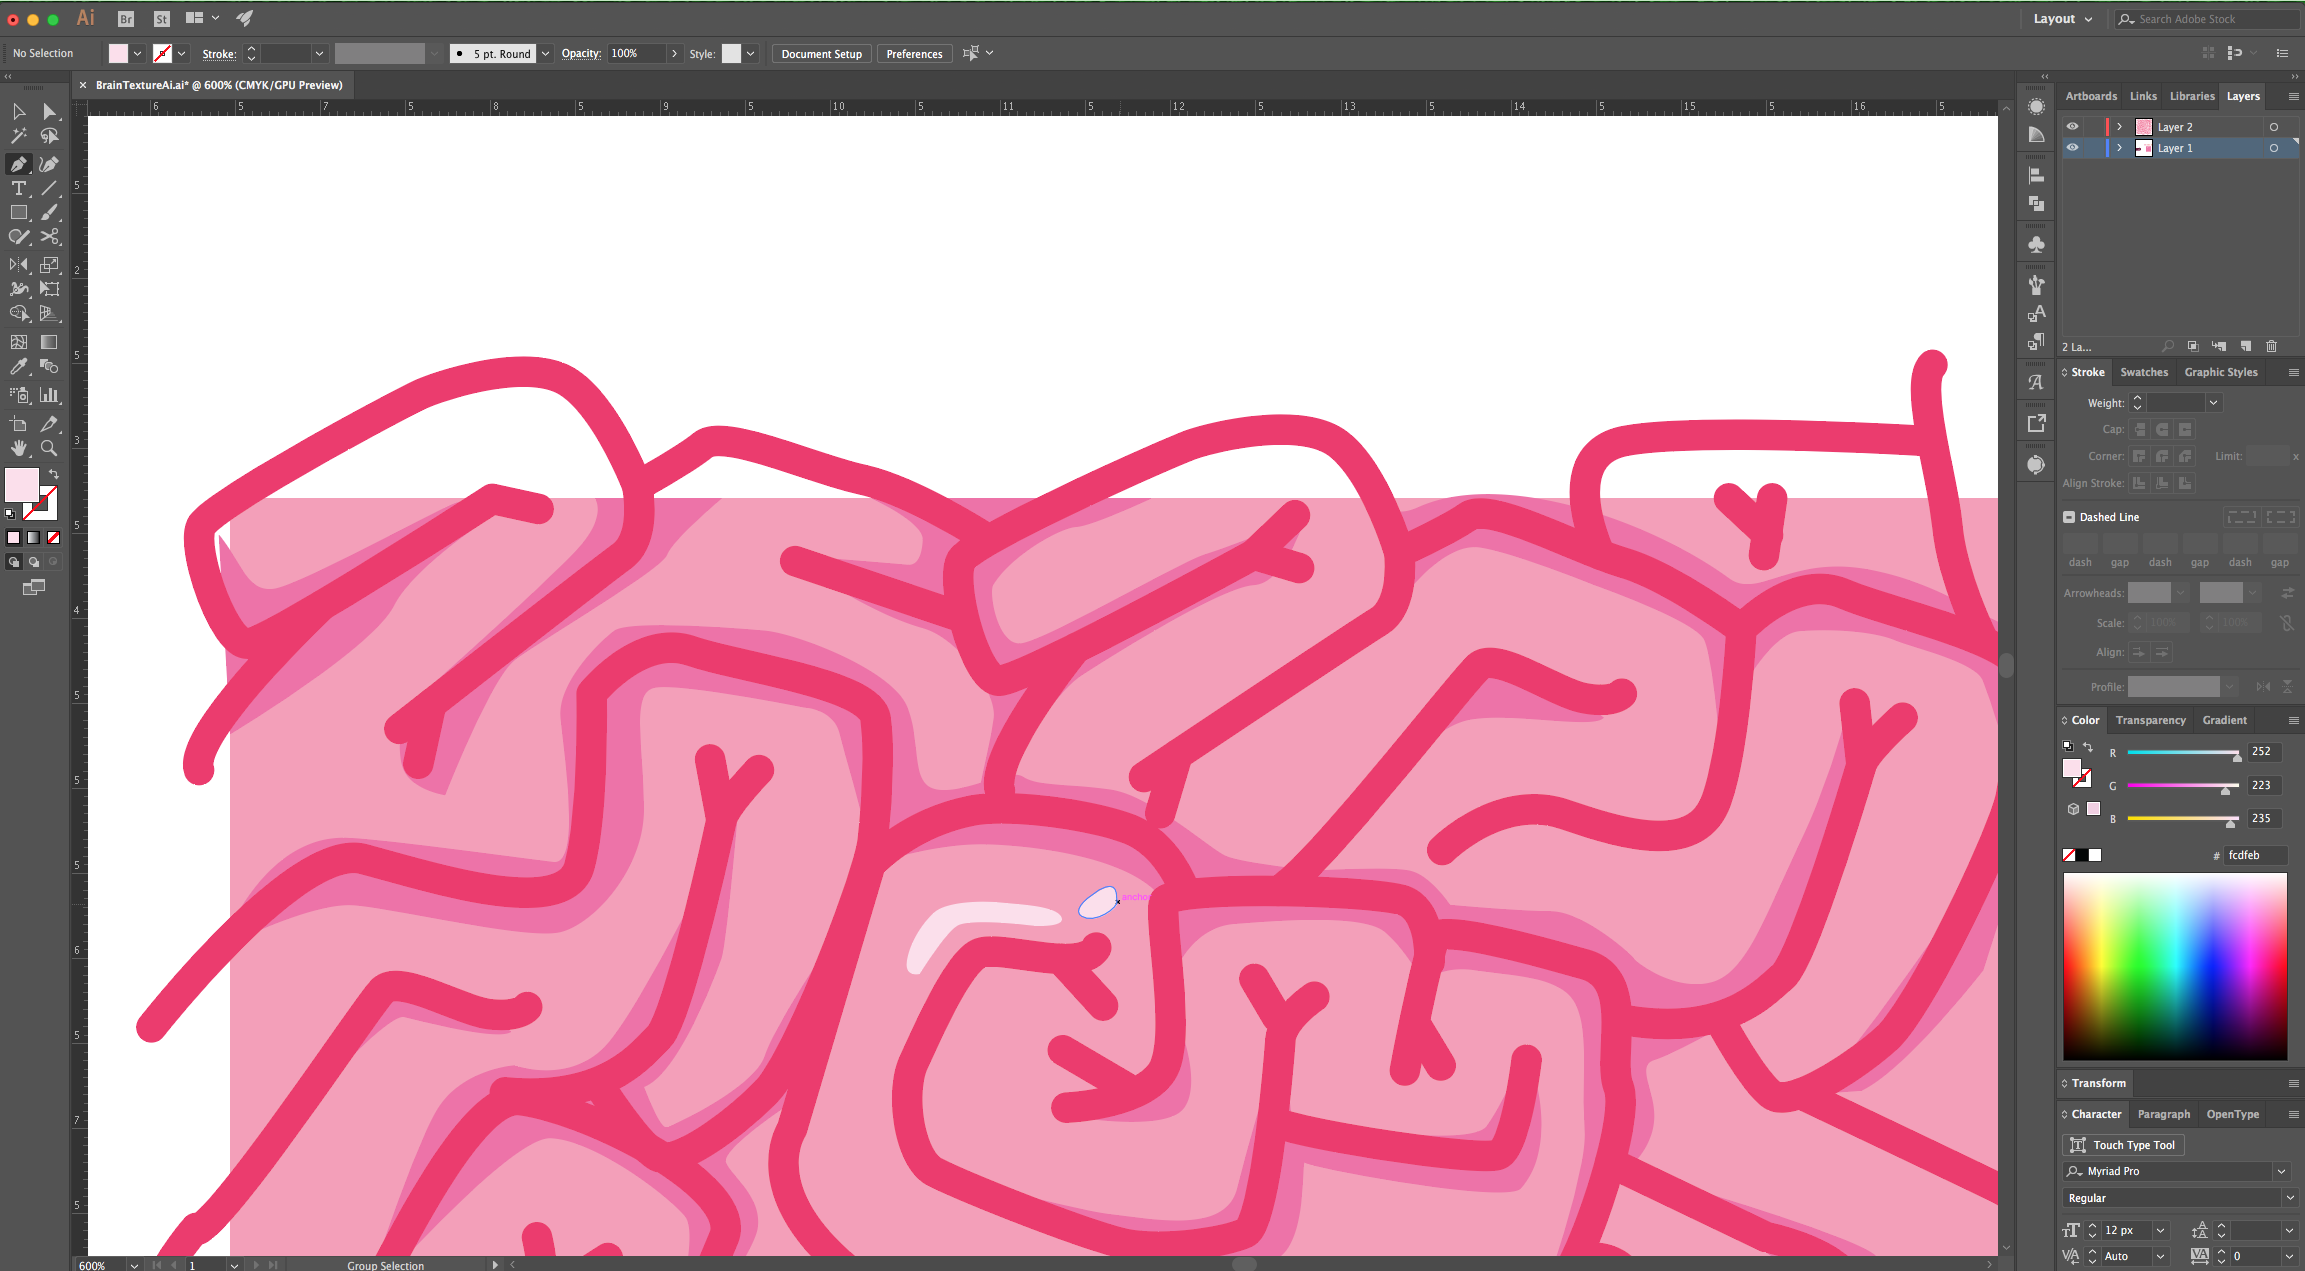
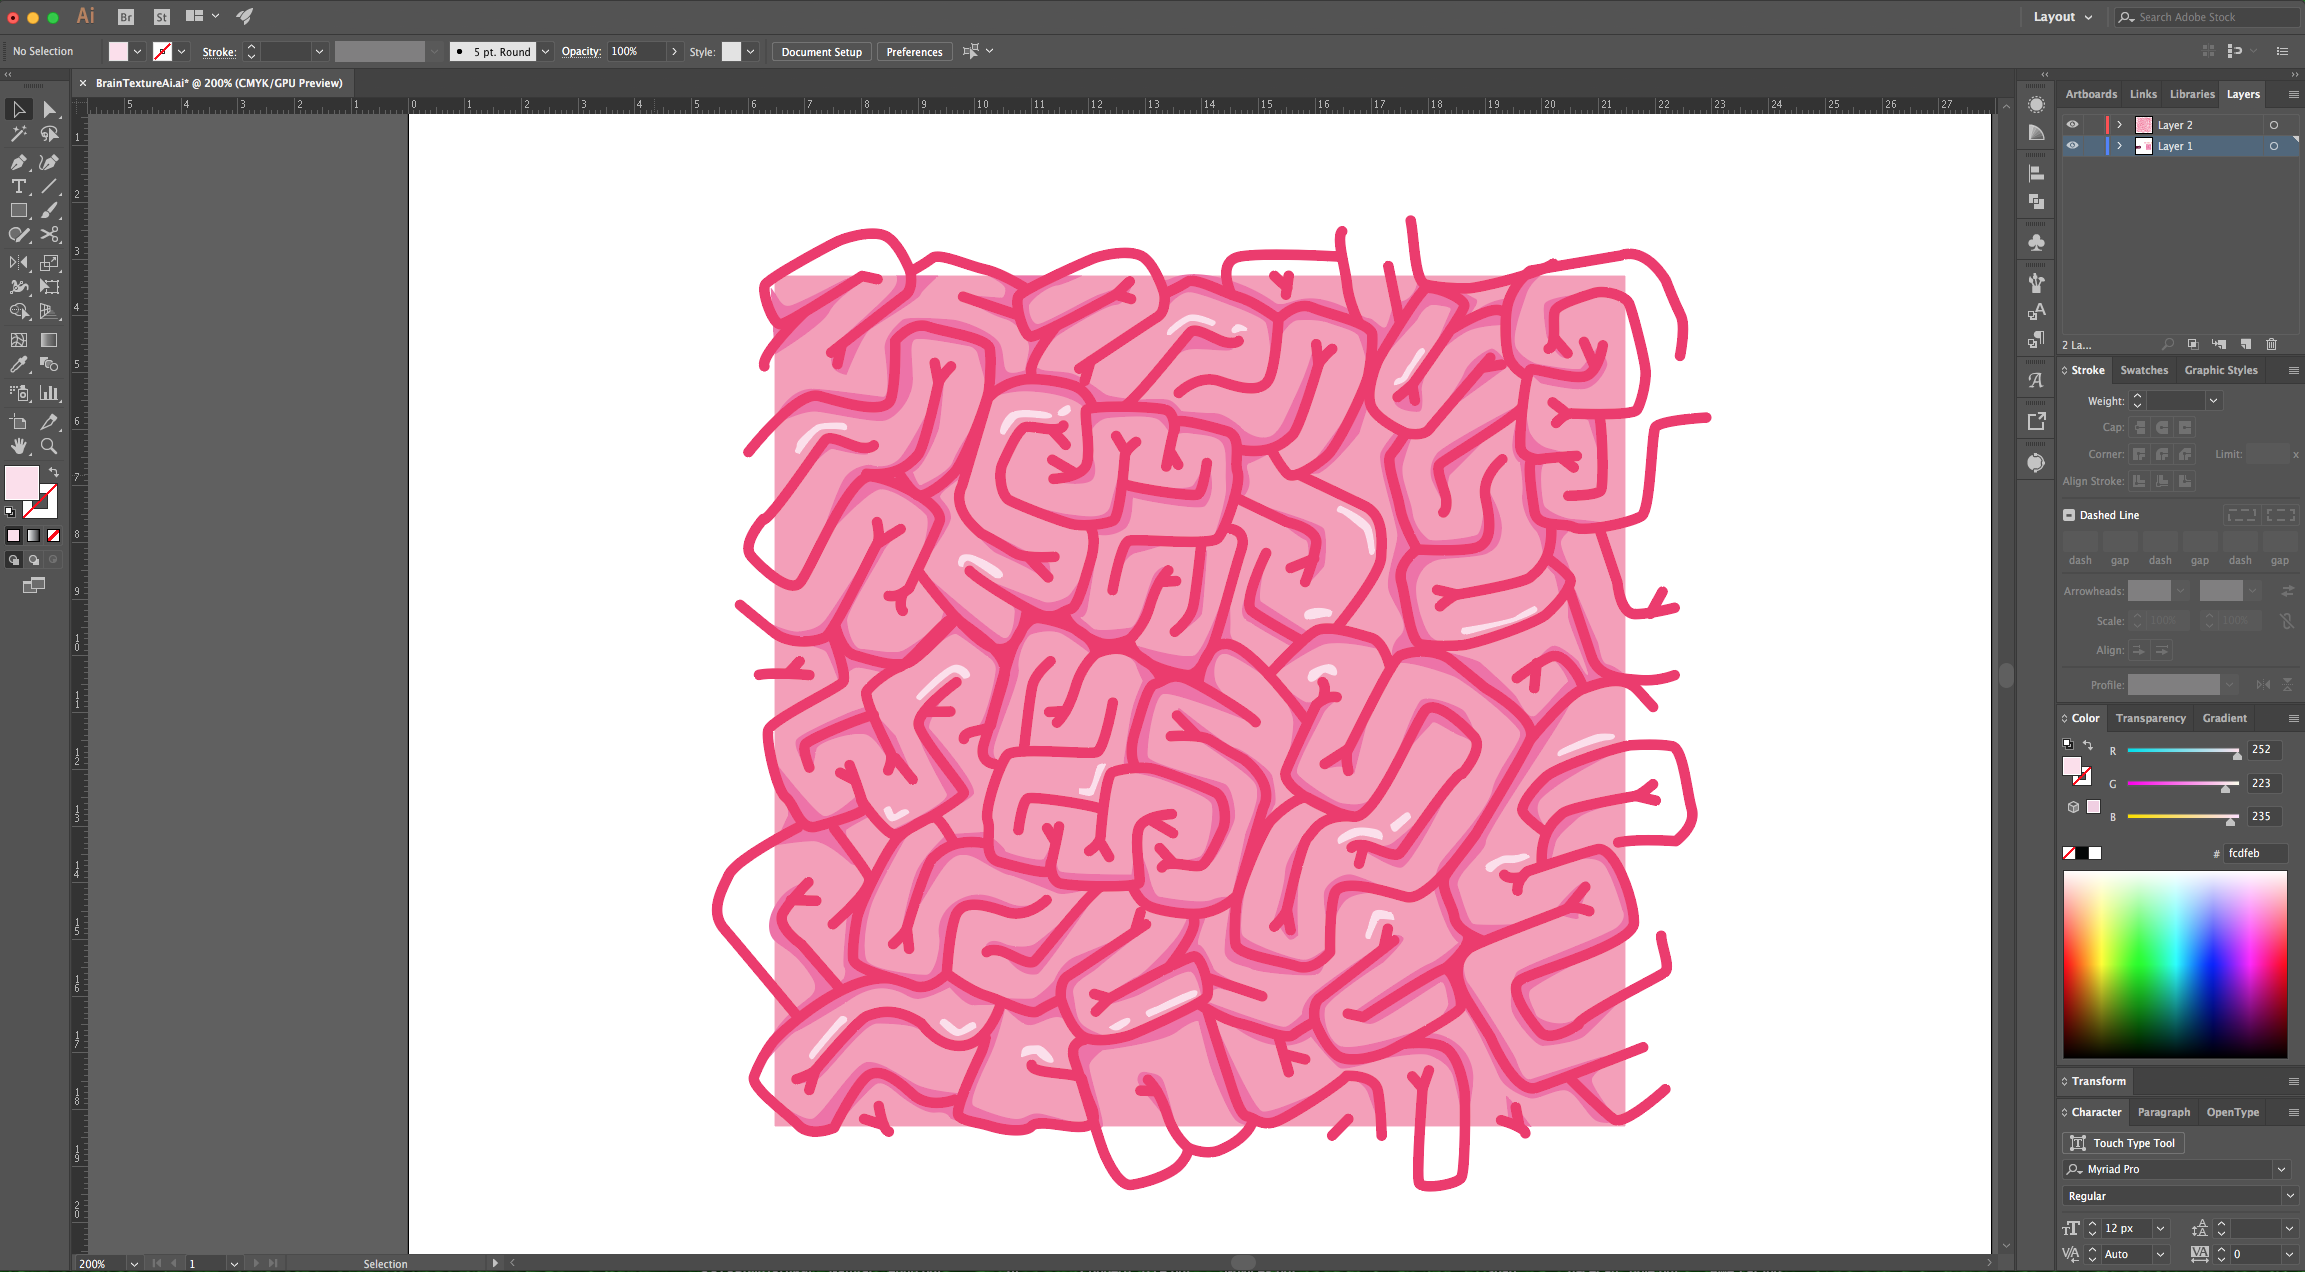
16 - Now, select a lighter shade of Pink as “Fill” color (we used #fcdfeb) and use the “Pen Tool” (P) again to create some “Highlights” around the “Texture”.
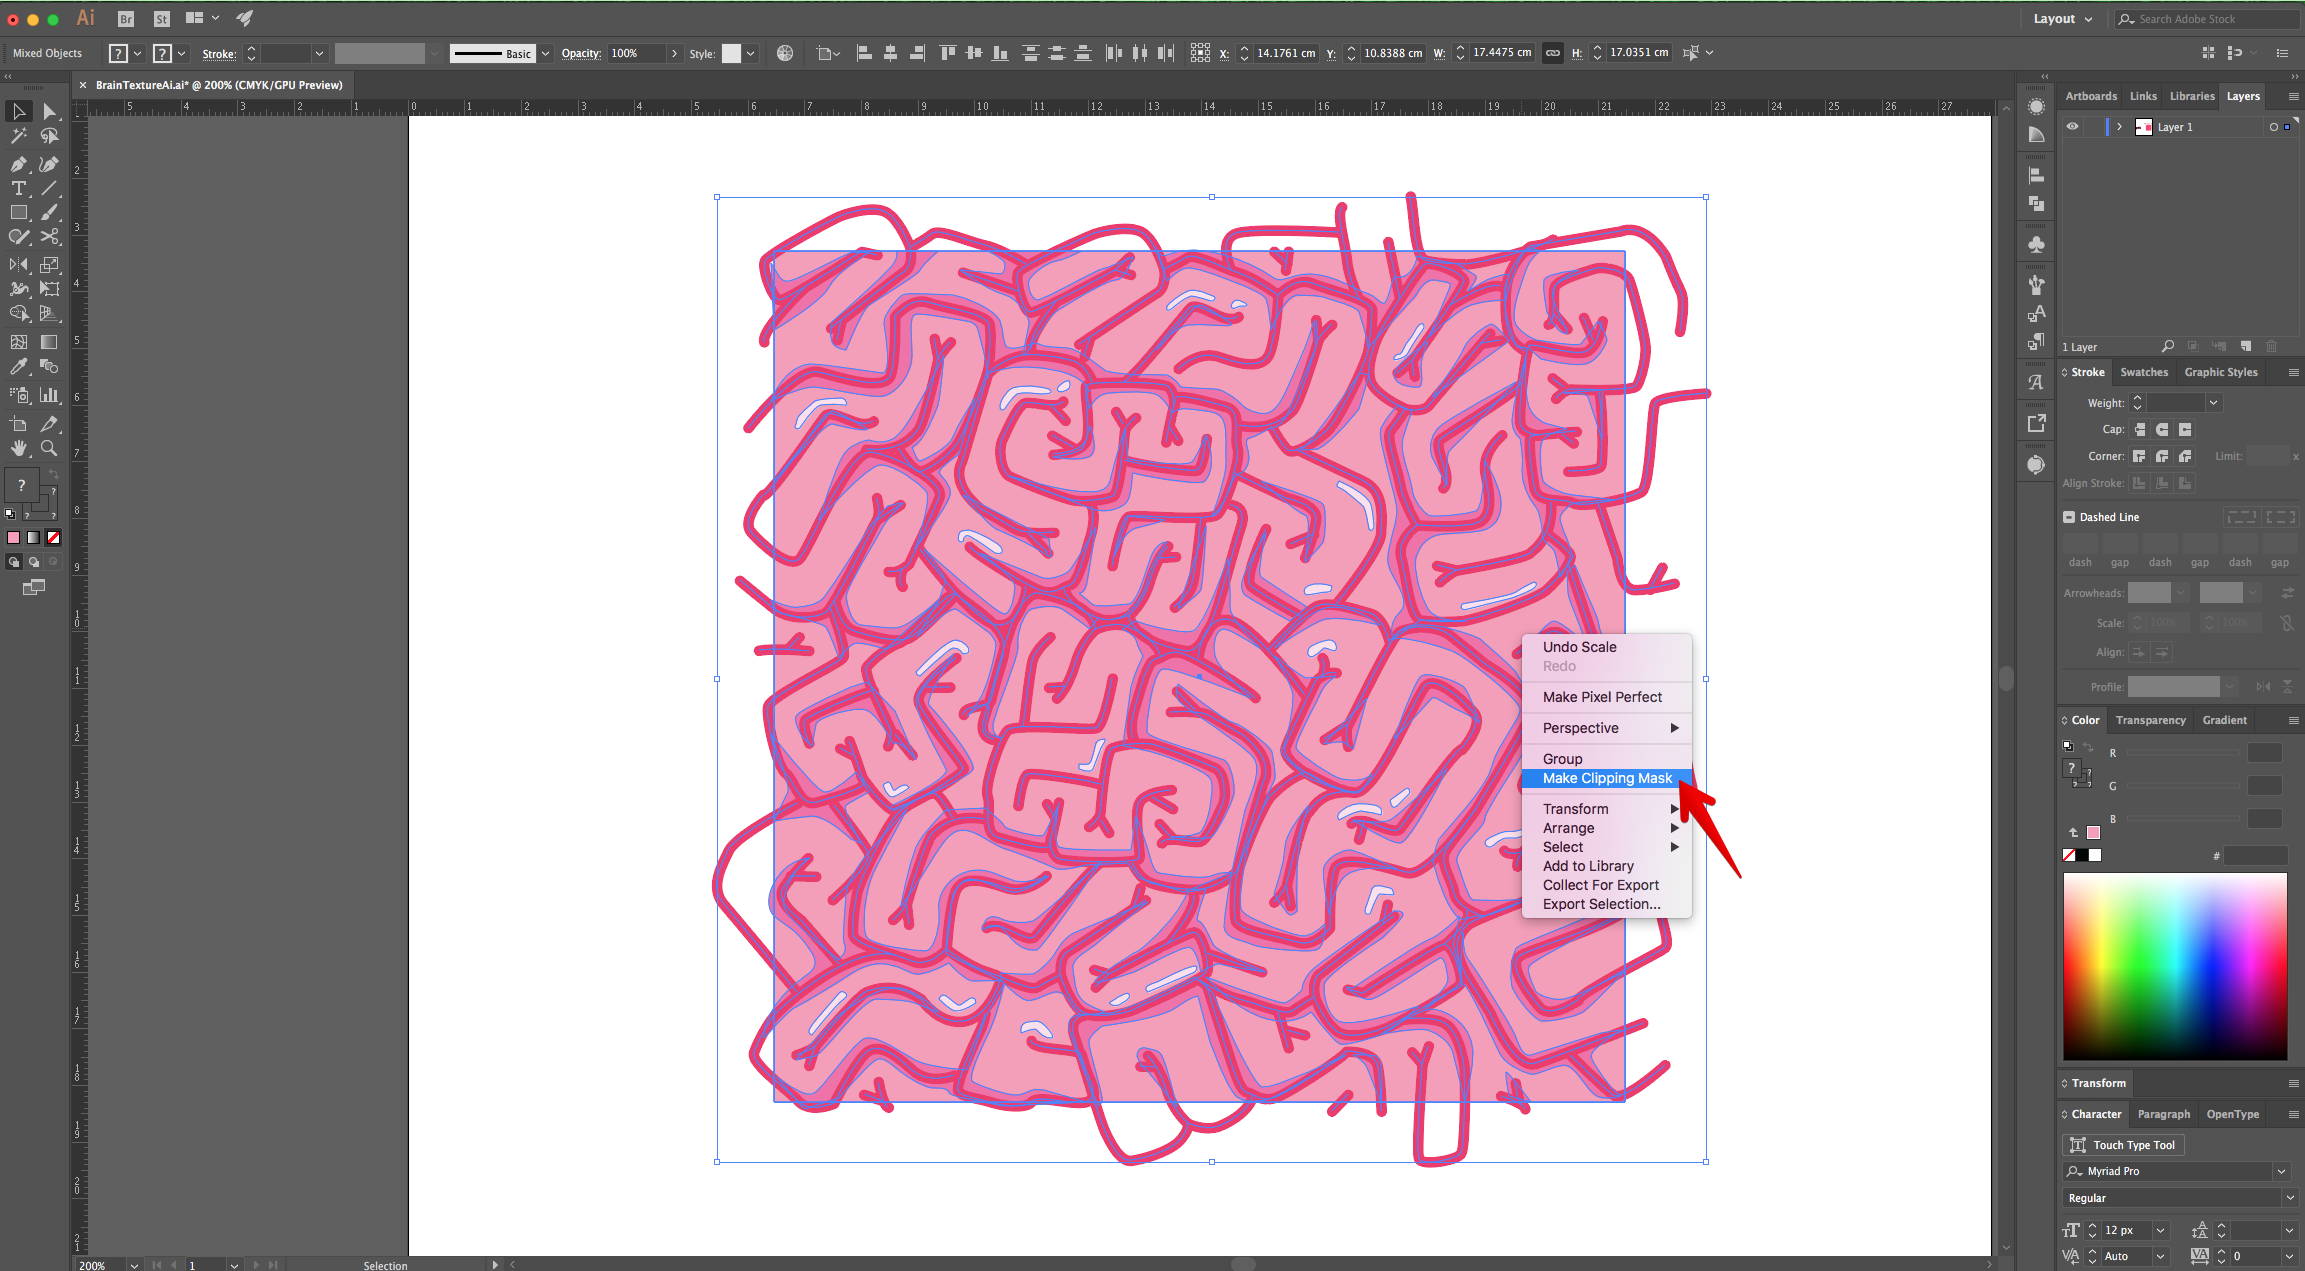
17 - Unlock the “Square” by going to Object > Unlock All (Command/Control + 2).

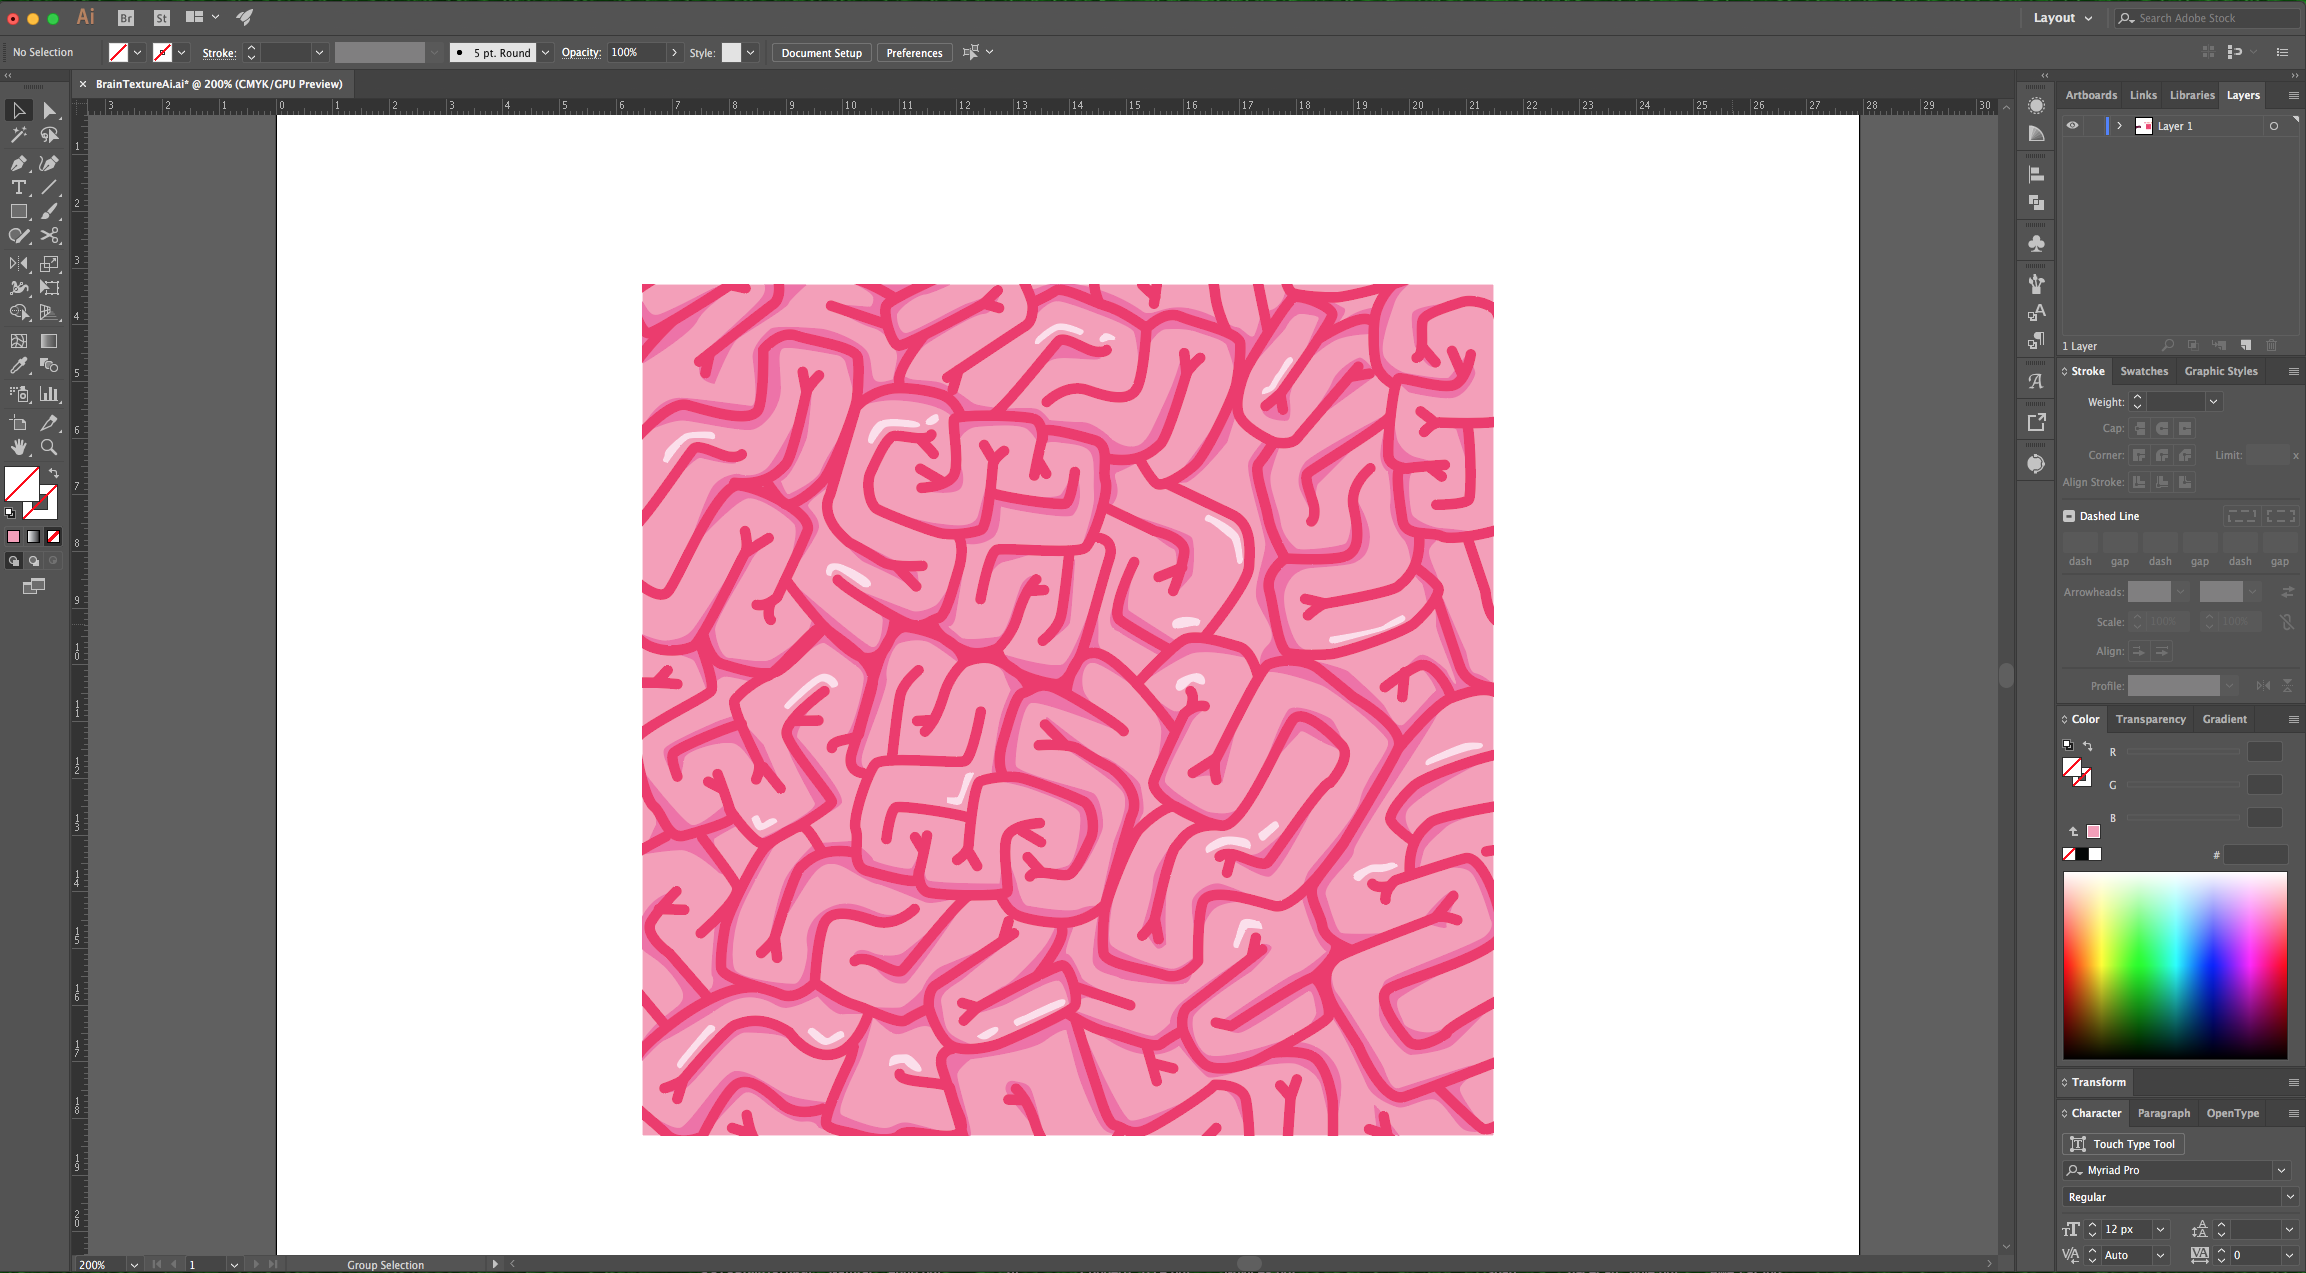
18 - Select the “Rectangle Tool” (M) and create a “Square” on top of the original one but give it NO “Fill” and “Stroke” color.
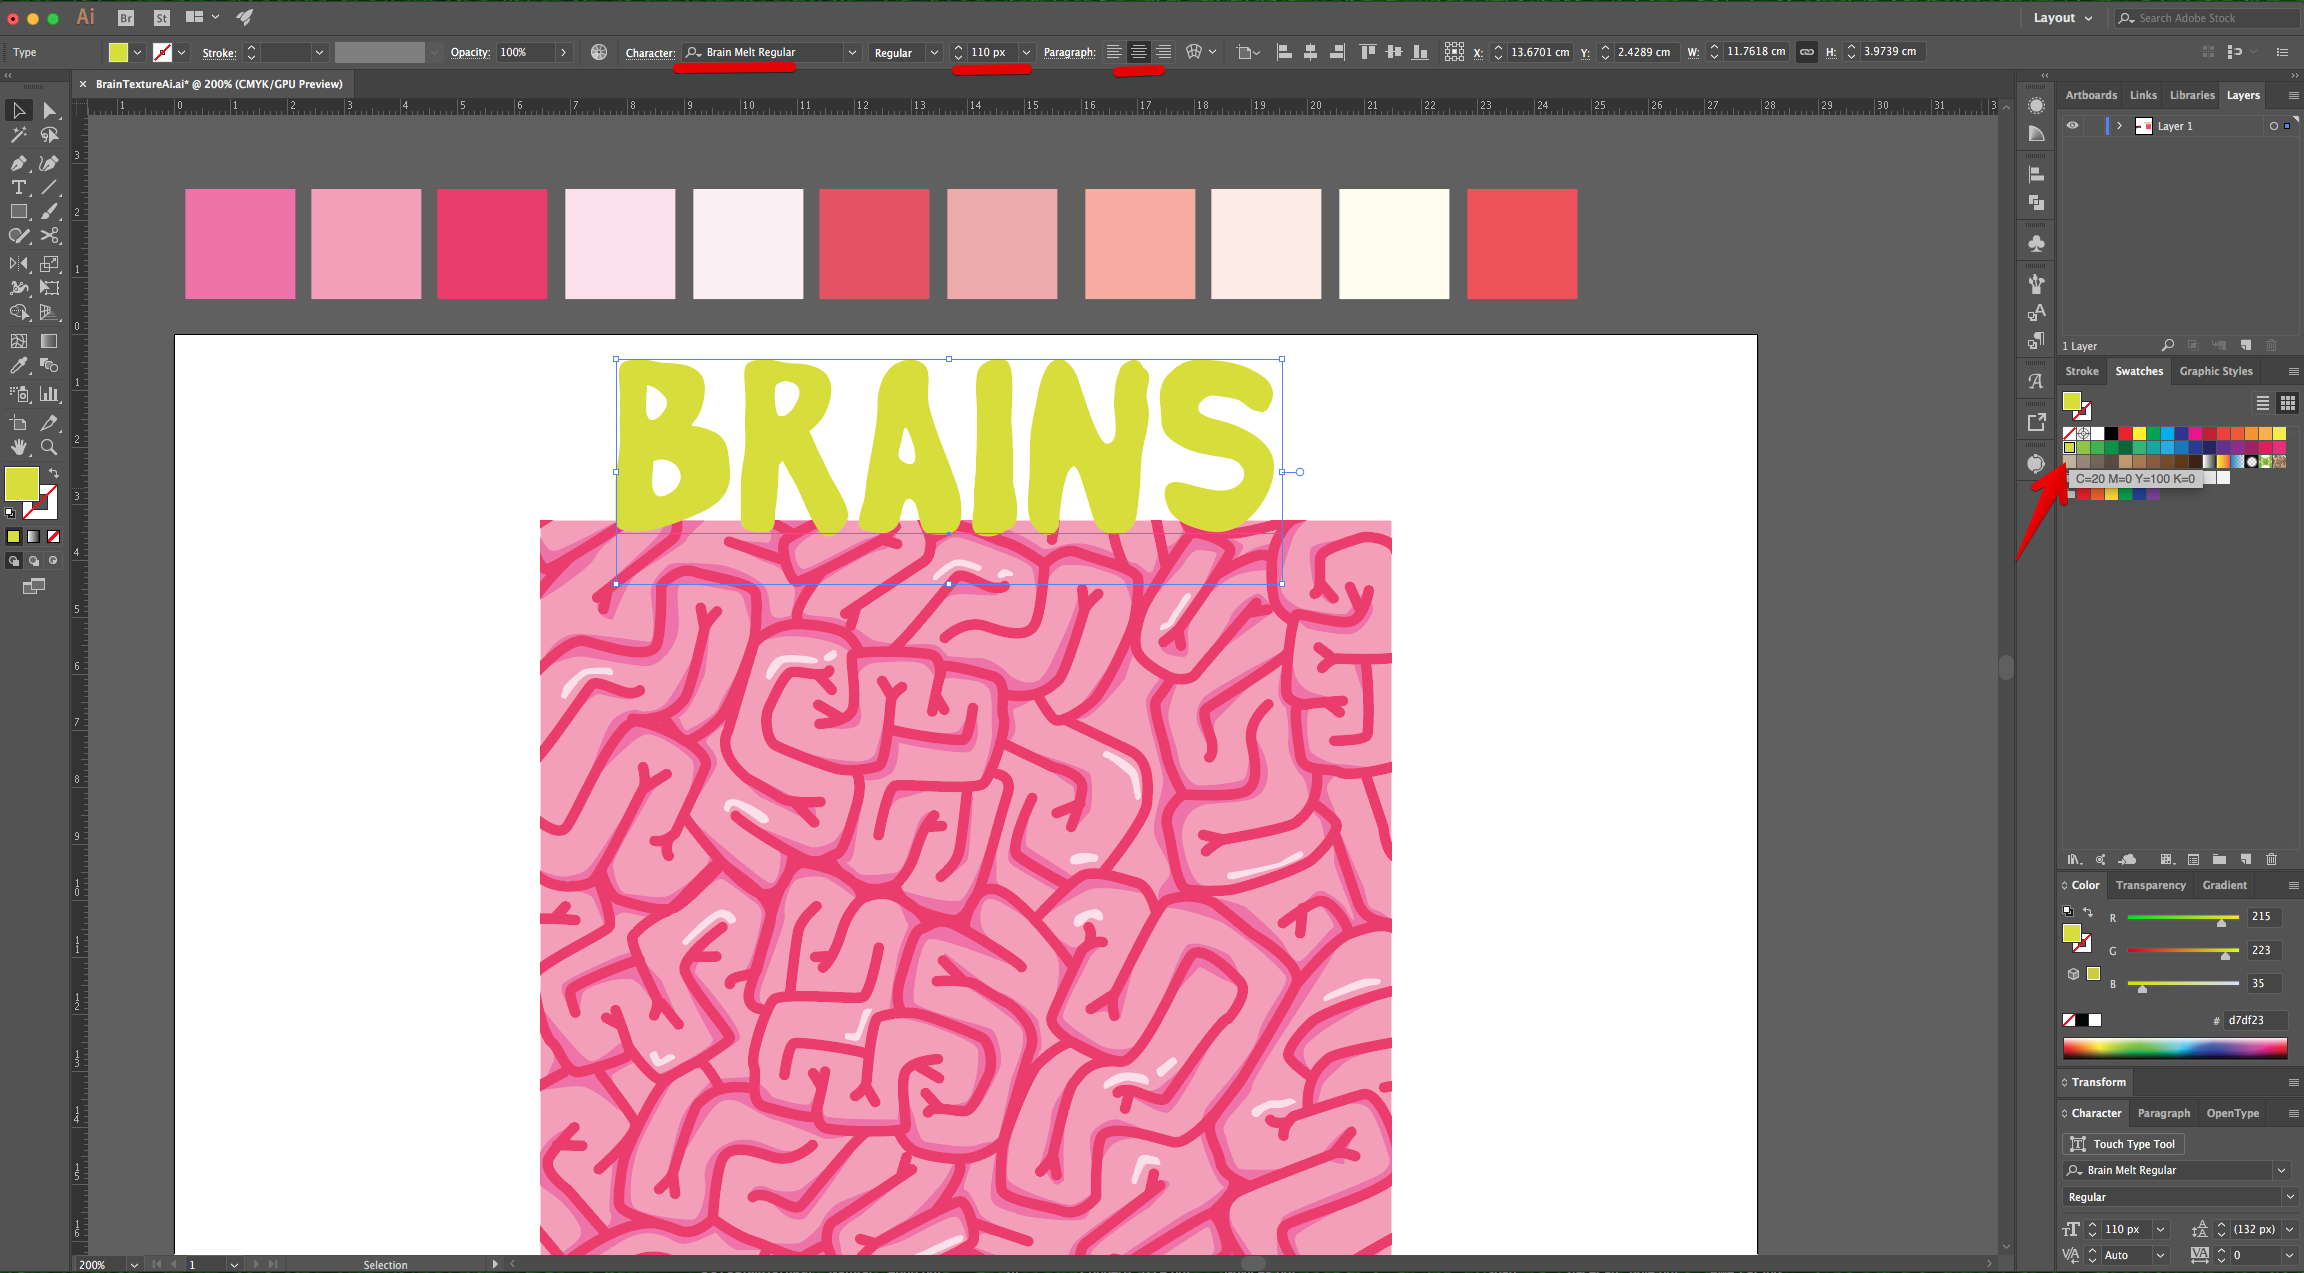
19 - Use the “Selection Tool” (V) to select everything. Right-click on top and choose “Make Clipping Mask”.
20 - Select the “Type Tool” (T), choose your font (we used “Brain Melt Regular”) and type your text. The Size will depend on your word (ours was 110 pt) and fill it with a medium Green from the “Swatches Panel”.
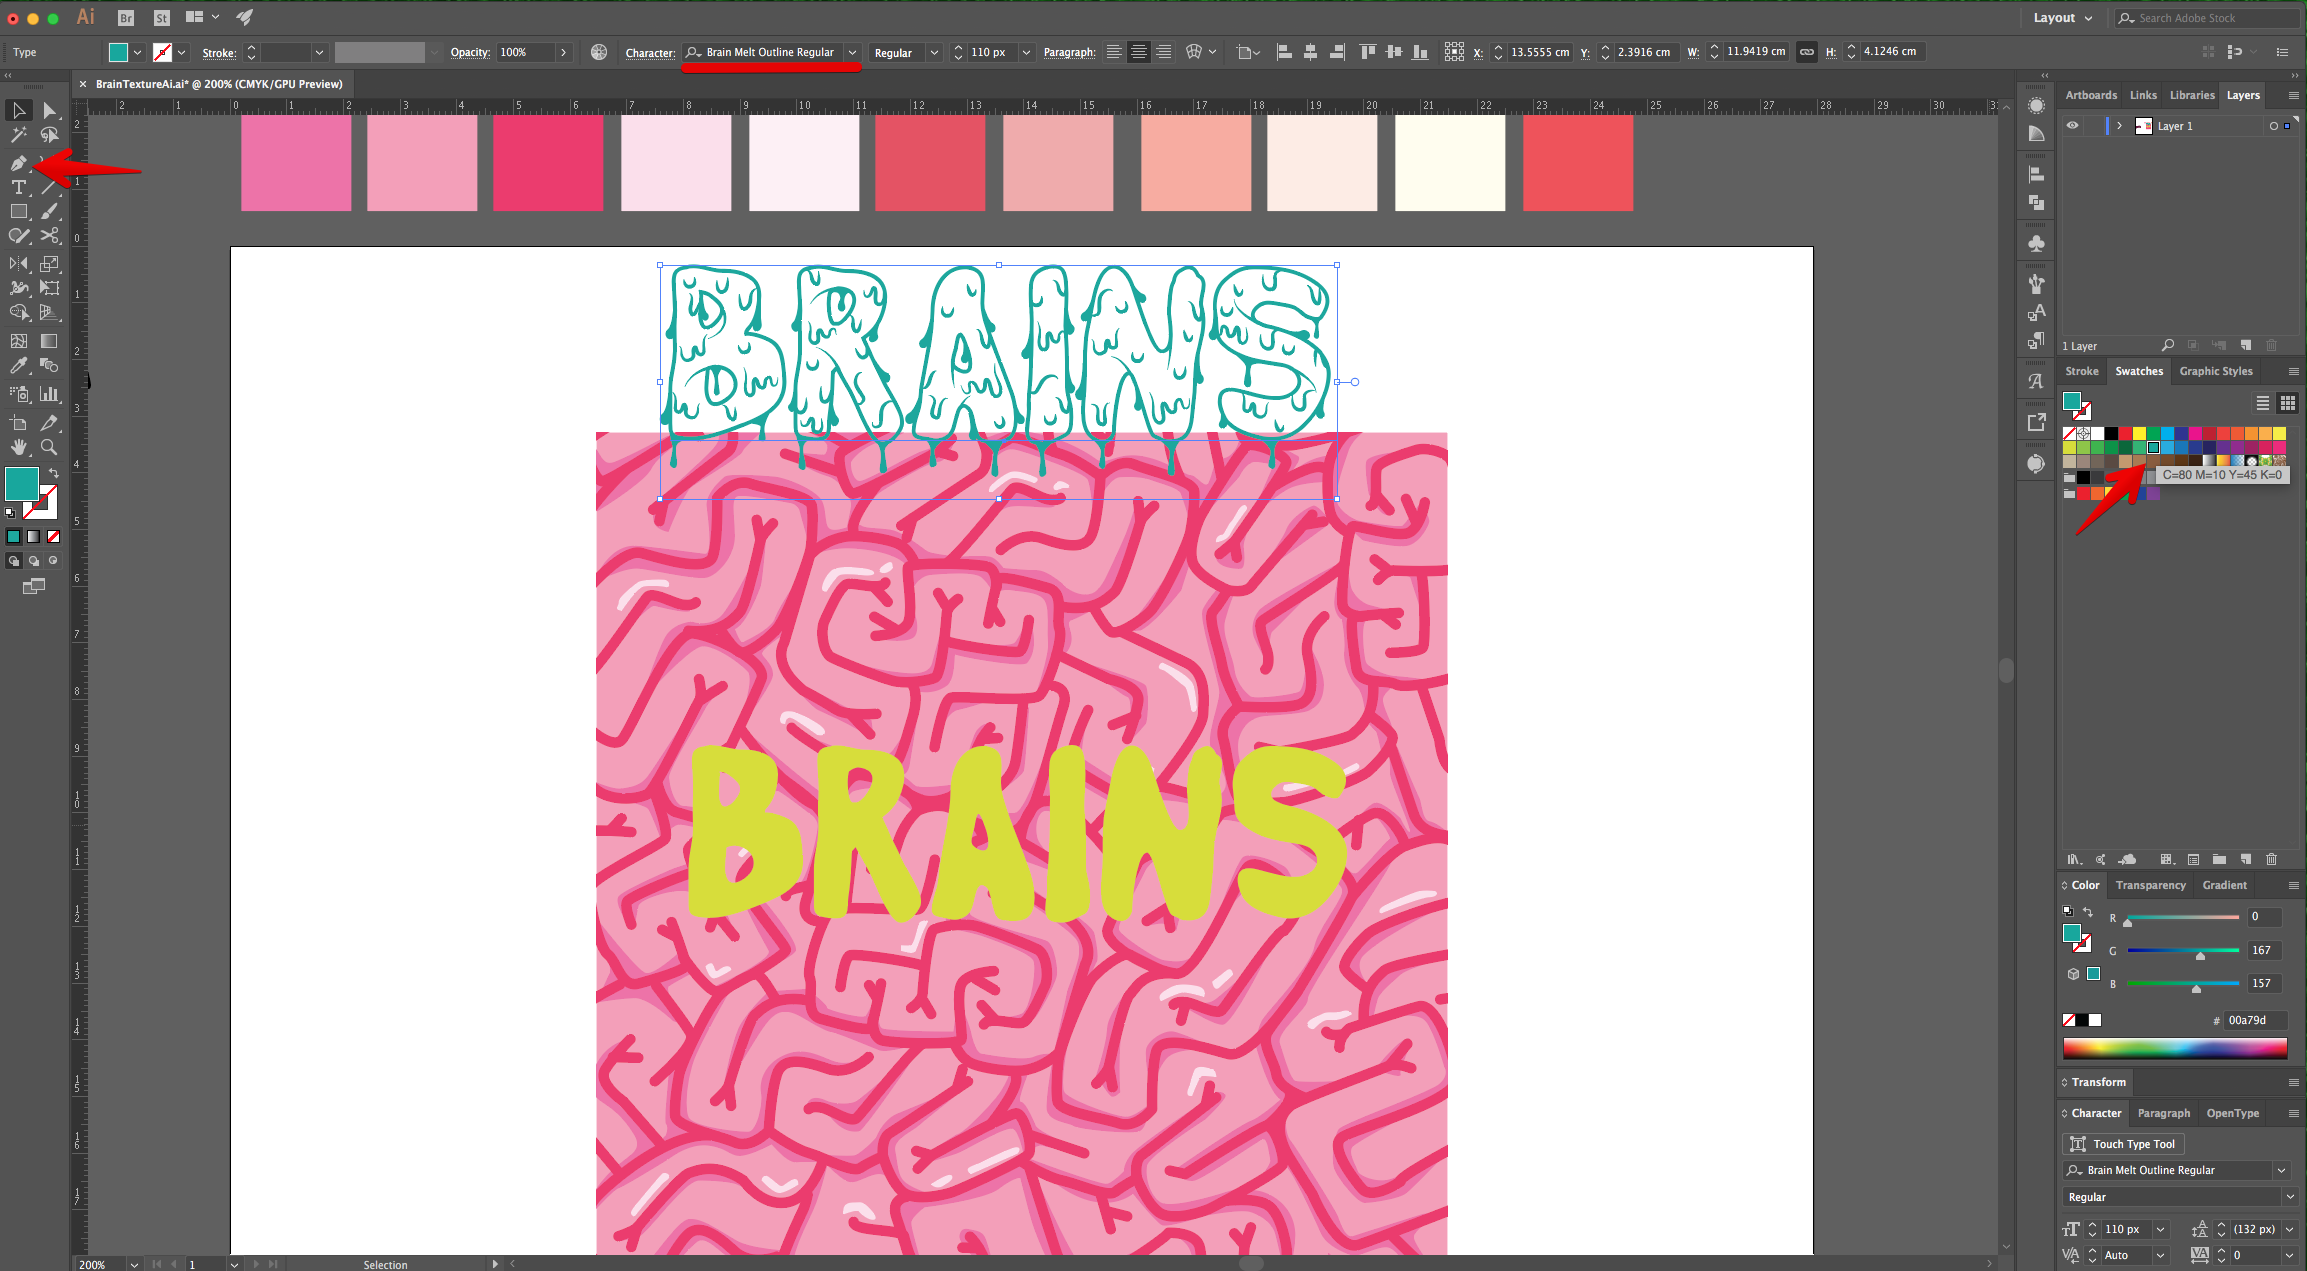
21 - Center it using the “Horizontal and Vertical Align Center” options on your Top Menu and make sure that “Align to Artboard” is selected. Or use the same options in the “Align Panel”.
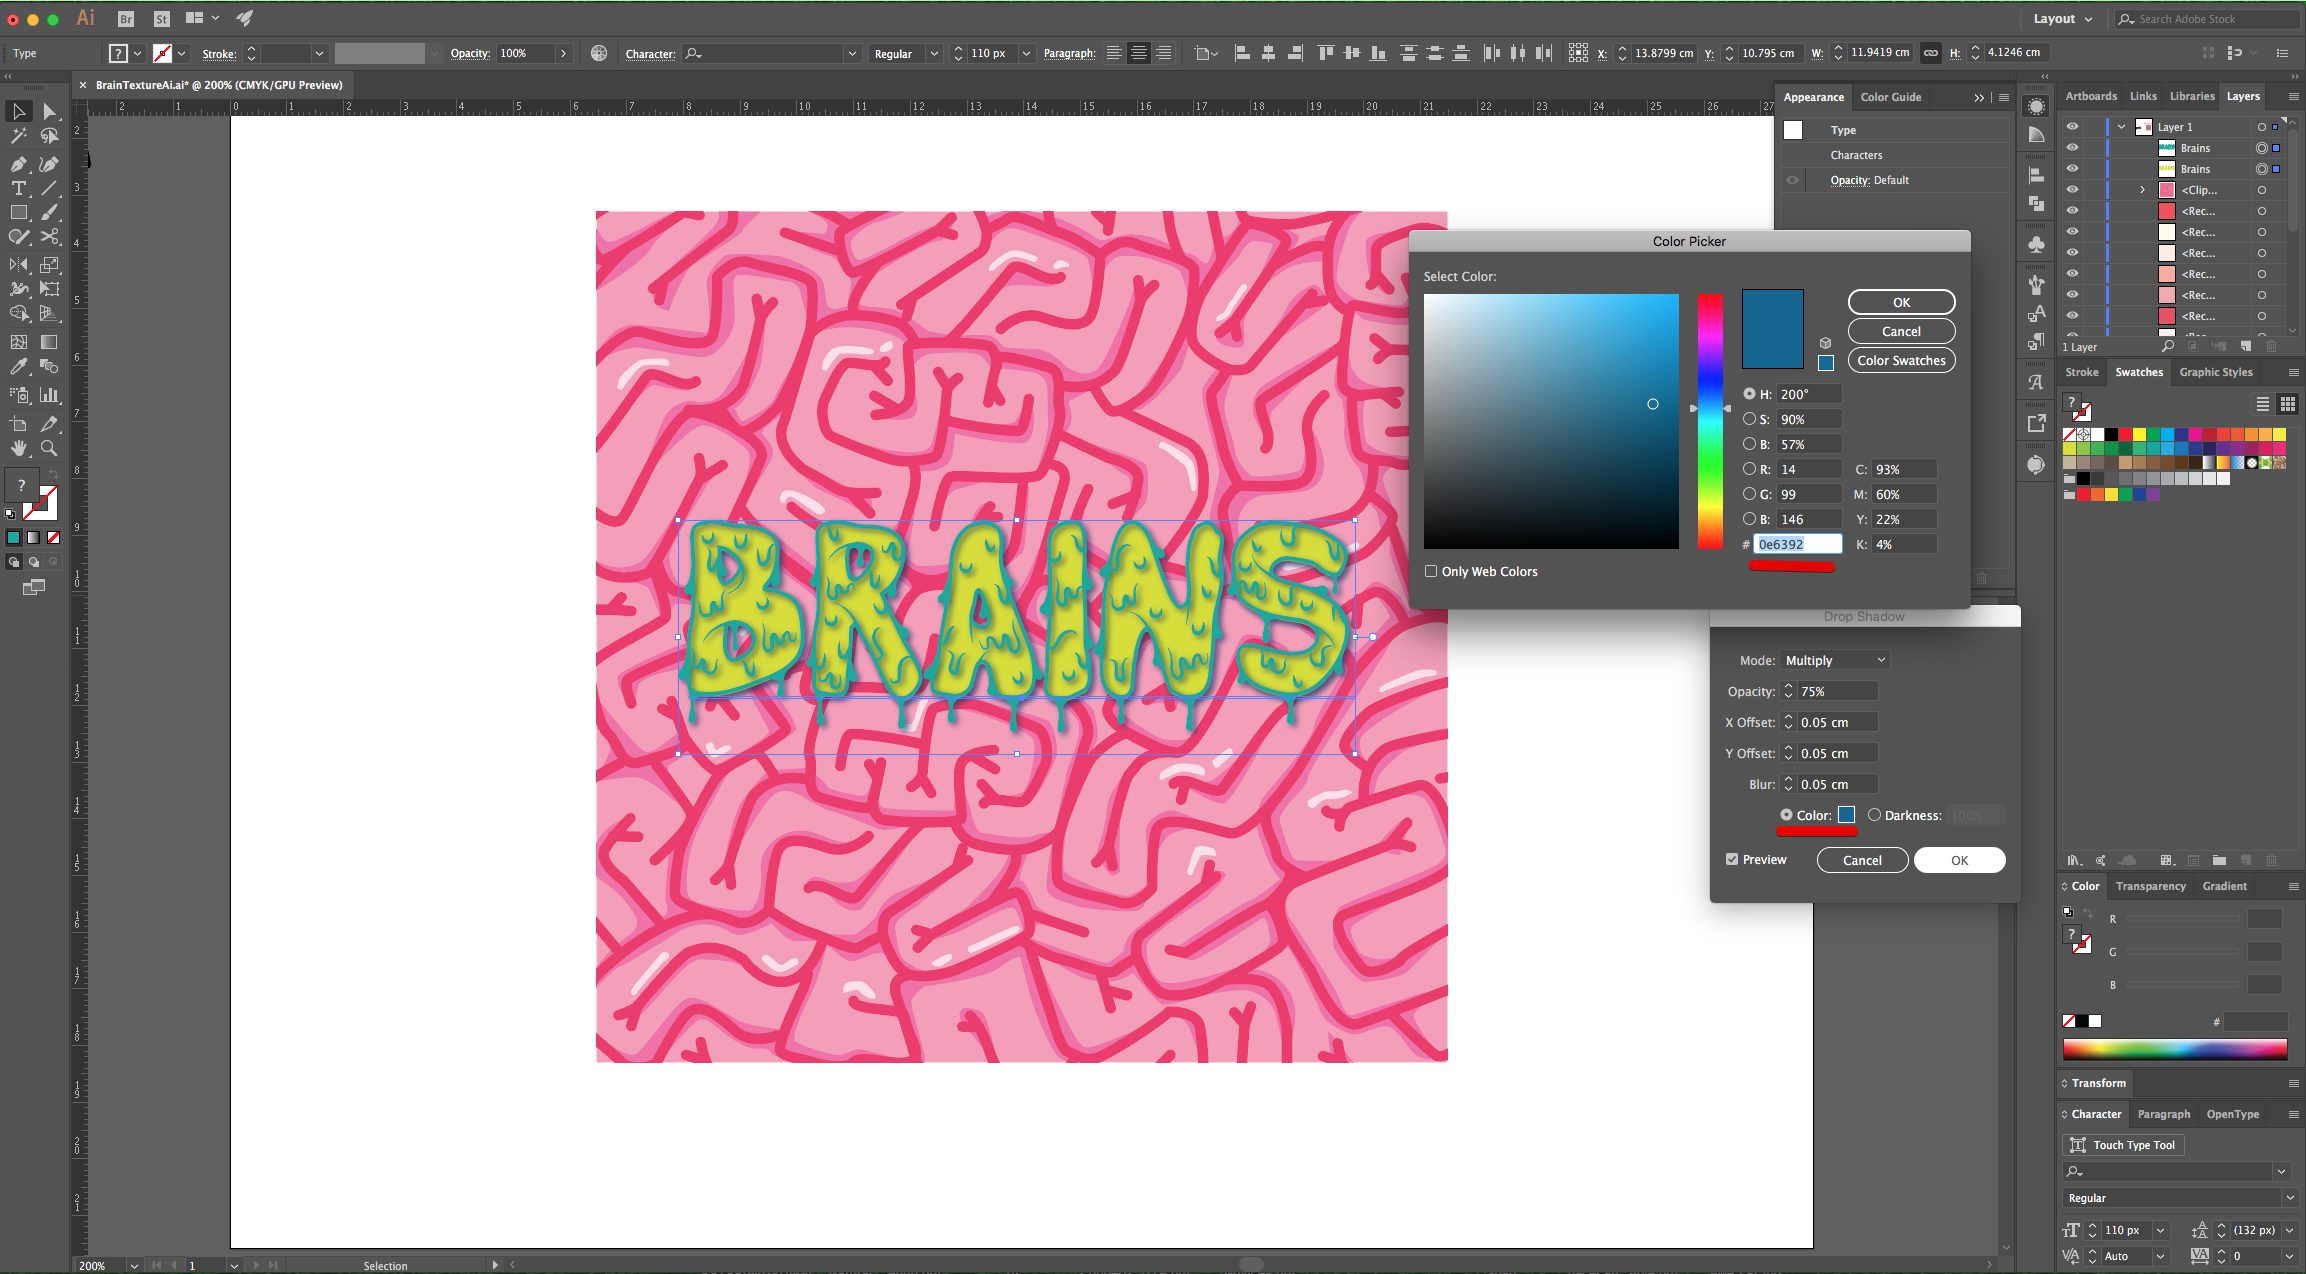
22 - Select the “Type Tool” (T) again and this time choose “Brain Melt Outline Regular”) and type your text again. Use the same font size (ours was 110 pt) and fill it with a contrasting shade from the “Swatches Panel”. Place it on top of the first text.
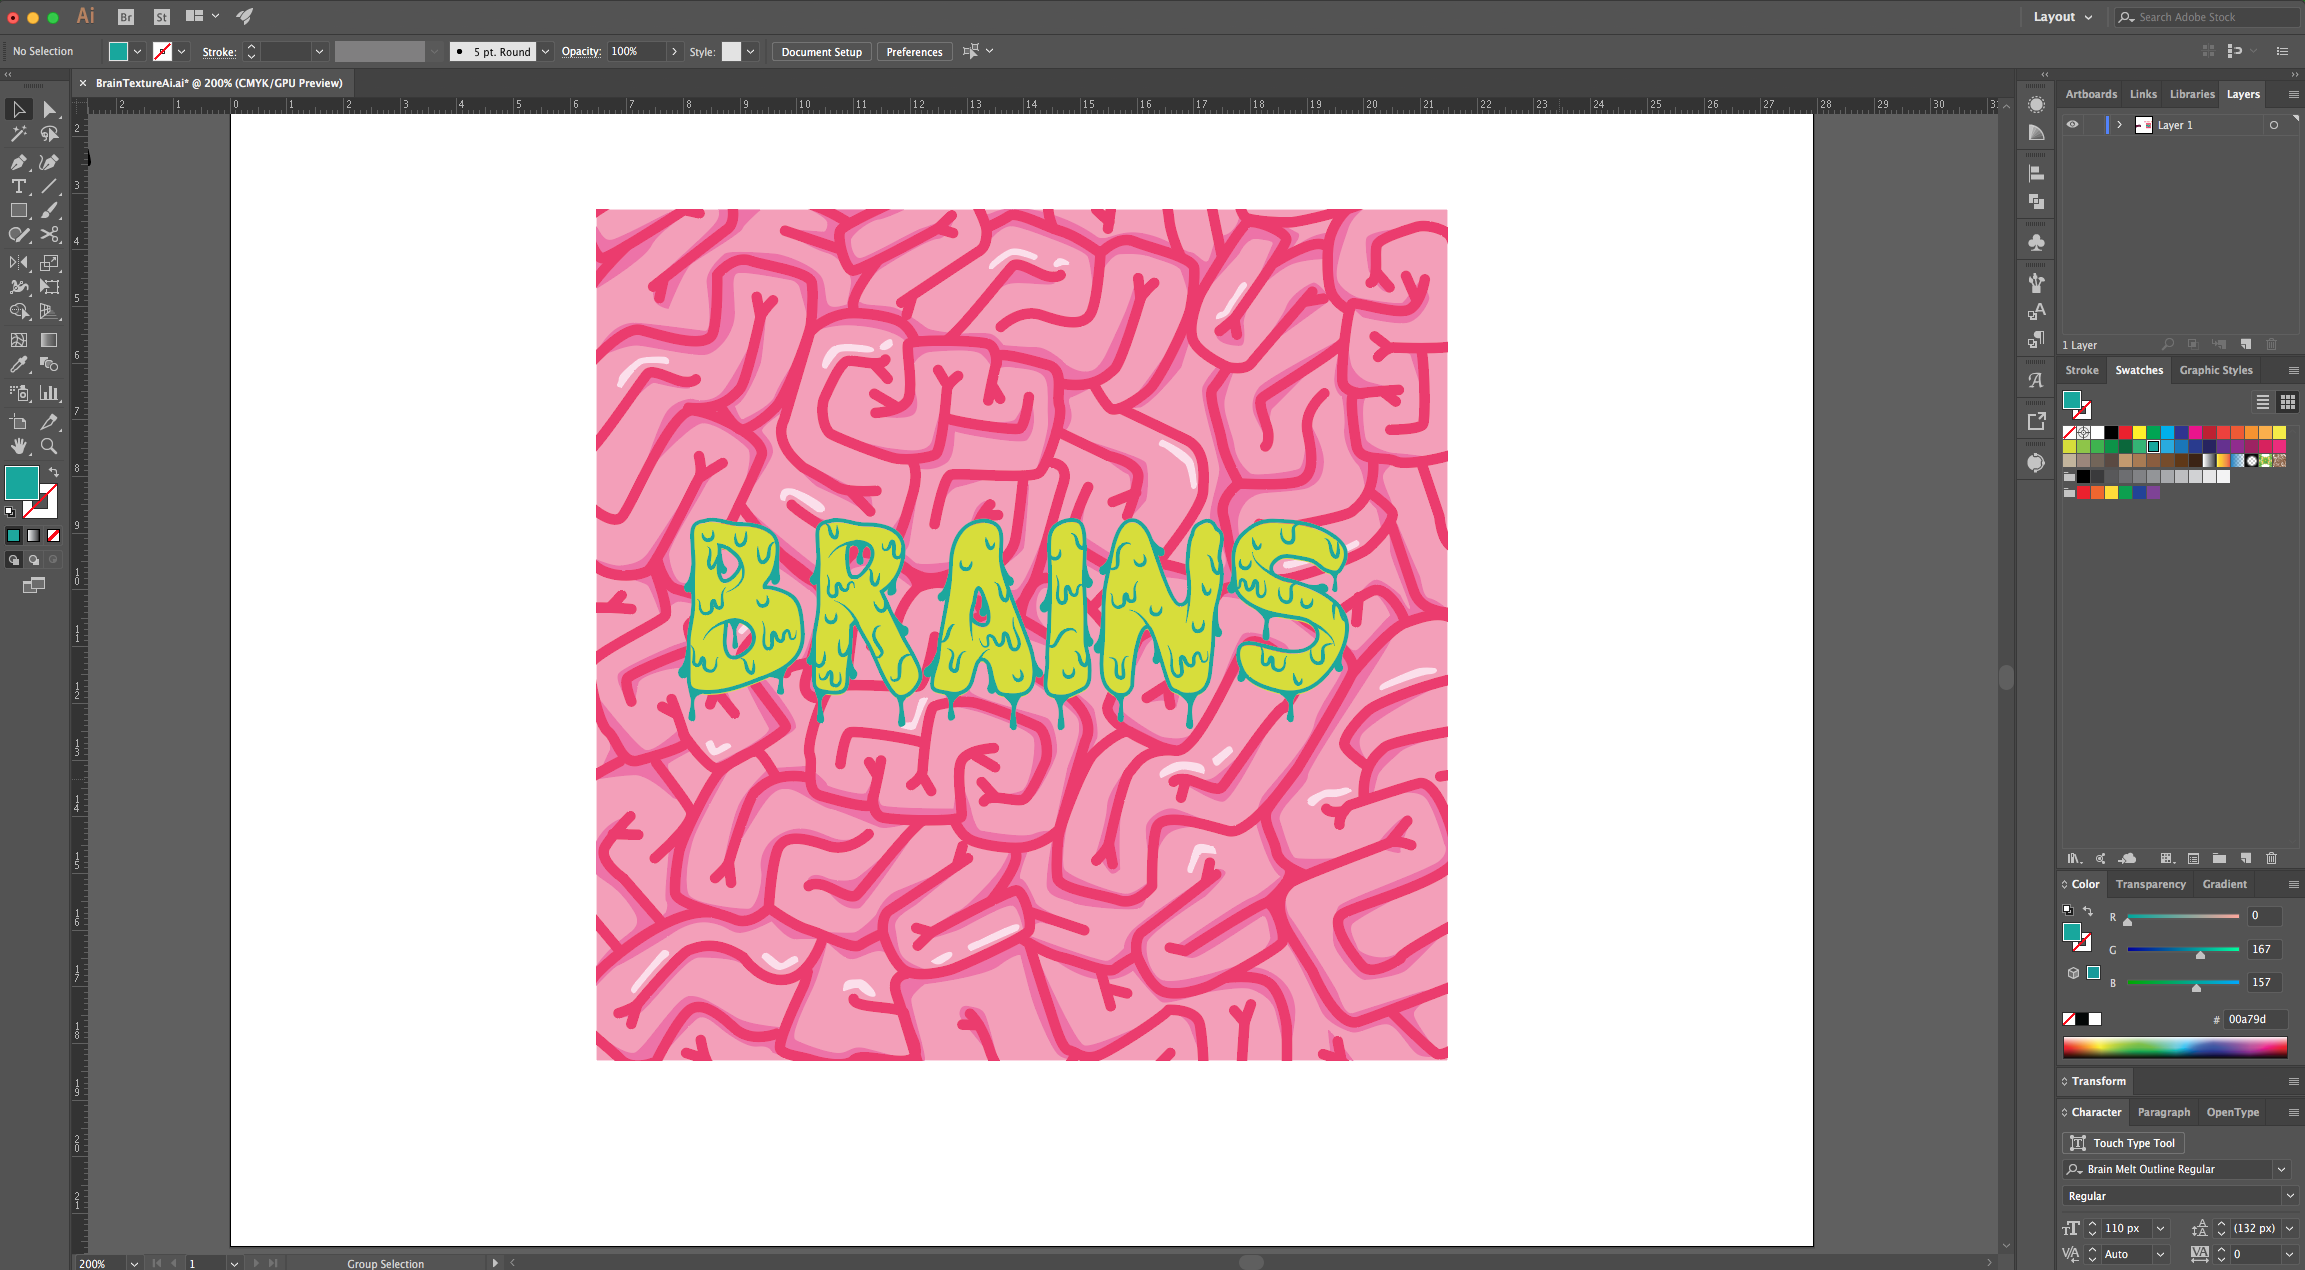
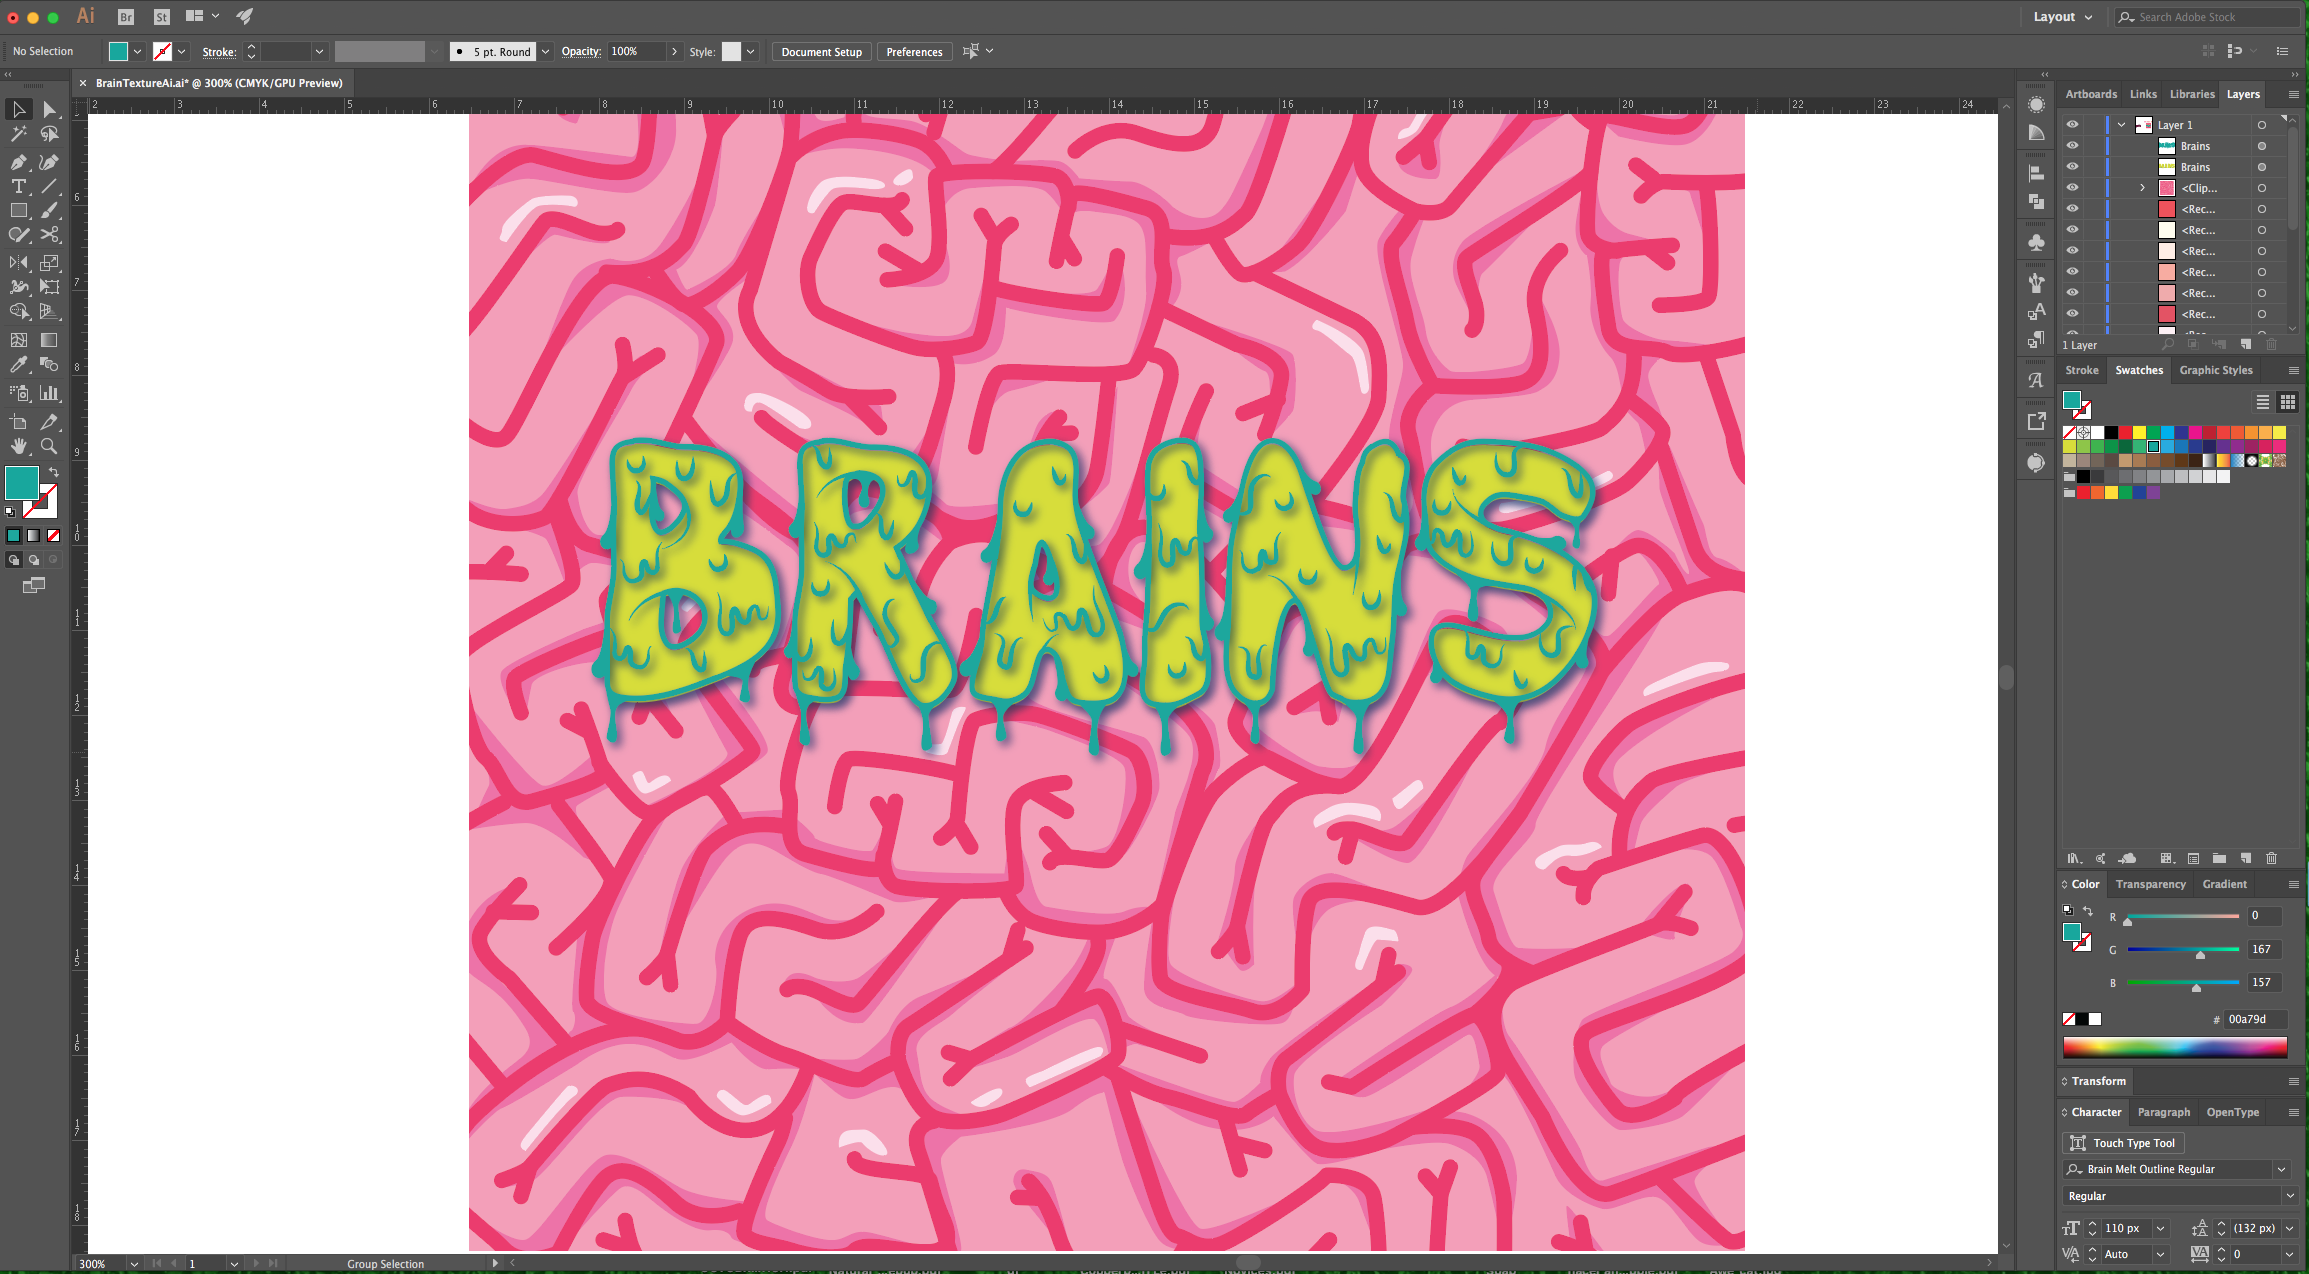
23 - Select both words, head to the “Appearance Panel”, click on the “Effects” Menu at the bottom and navigate to Stylize > Drop Shadow, use “Multiply”, 75% for “Opacity”, 0.05 cm for the other values and “Color” with a dark Blue (#0e6392), click “OK.
24 - Check out your Artwork!
1 - In Illustrator, create a “New Document”.
2 - If the “Rulers” are not enabled, go to View > Rulers > Show Rulers (Command/Control + R) to turn them ON. Also, enable “Snap to Grid” (View > Snap to Grid).
3 - Select the “Rectangle Tool” (M), click inside the “Canvas” and draw a 15 x 15 cm “Square”.
4 - Center it using the “Horizontal and Vertical Align Center” options on your Top Menu and make sure that “Align to Artboard” is selected. Or use the same options in the “Align Panel”.
5 - Open the “Swatches” file, “Copy” (Command/Control + C) and “Paste” (Command/Control + V) them into your original “Document”.
6 - With the “Eyedropper Tool” (E) select one of the intermediate shades to use it as “Fill” color for the “Square” you created.
7 - Lock this Layer by clicking to the left of its thumbnail and bringing out the small Padlock icon or by going to Object > Lock > Selection (Command/Control + 2). “Create New Layer” by clicking on the button at the bottom of the “Layers Panel”.
8 - Choose the “Pen Tool” (P), and choose a darker shade of Pink for the “Stroke” color (we used #f59eb8). Make the “Weight” 5 px with a “Rounded Cap and Corner”.
9 - Start drawing some convoluted lines to create the “Brain”. Hit Enter/Return to close the “Path” and start a new one. You can draw some portions of the lines outside the square edges.
10 - You can select portions of the pattern, “Copy” (Command/Control + C) and “Paste” (Command/Control + V) them.
11 - Then, maybe rotate them to create different arrangements. Keep going until you fill the entire “Square”.
12 - Select everything, right-click on top and choose “Group”.
13 - Choose the “Pen Tool” (P) again, and this time choose an intermediate shade of Pink as “Fill” color (we used #efaaab). Draw some convoluted shapes under the previously created “Lines” to create some “Shades” under some of them. You can draw some portions of the lines outside the square edges.
14 - Make sure they are placed under the “Lines” so you will have a better idea of the shape of the “Path”. To do this, select the “Lines”, right-click on top and choose “Bring to Front”.
15 - If you think that the color is not working, you can select all the paths and change it slightly in the “Color Panel”. We used #ef71a7. Finish adding “Shades” to the rest of the “Lines”.
16 - Now, select a lighter shade of Pink as “Fill” color (we used #fcdfeb) and use the “Pen Tool” (P) again to create some “Highlights” around the “Texture”.
17 - Unlock the “Square” by going to Object > Unlock All (Command/Control + 2).
18 - Select the “Rectangle Tool” (M) and create a “Square” on top of the original one but give it NO “Fill” and “Stroke” color.
19 - Use the “Selection Tool” (V) to select everything. Right-click on top and choose “Make Clipping Mask”.
20 - Select the “Type Tool” (T), choose your font (we used “Brain Melt Regular”) and type your text. The Size will depend on your word (ours was 110 pt) and fill it with a medium Green from the “Swatches Panel”.
21 - Center it using the “Horizontal and Vertical Align Center” options on your Top Menu and make sure that “Align to Artboard” is selected. Or use the same options in the “Align Panel”.
22 - Select the “Type Tool” (T) again and this time choose “Brain Melt Outline Regular”) and type your text again. Use the same font size (ours was 110 pt) and fill it with a contrasting shade from the “Swatches Panel”. Place it on top of the first text.
23 - Select both words, head to the “Appearance Panel”, click on the “Effects” Menu at the bottom and navigate to Stylize > Drop Shadow, use “Multiply”, 75% for “Opacity”, 0.05 cm for the other values and “Color” with a dark Blue (#0e6392), click “OK.
24 - Check out your Artwork!
by @lornacane


