
Double Exposure in Photoshop
Learn how to create an astonishing double exposure in Photoshop with this tutorial.
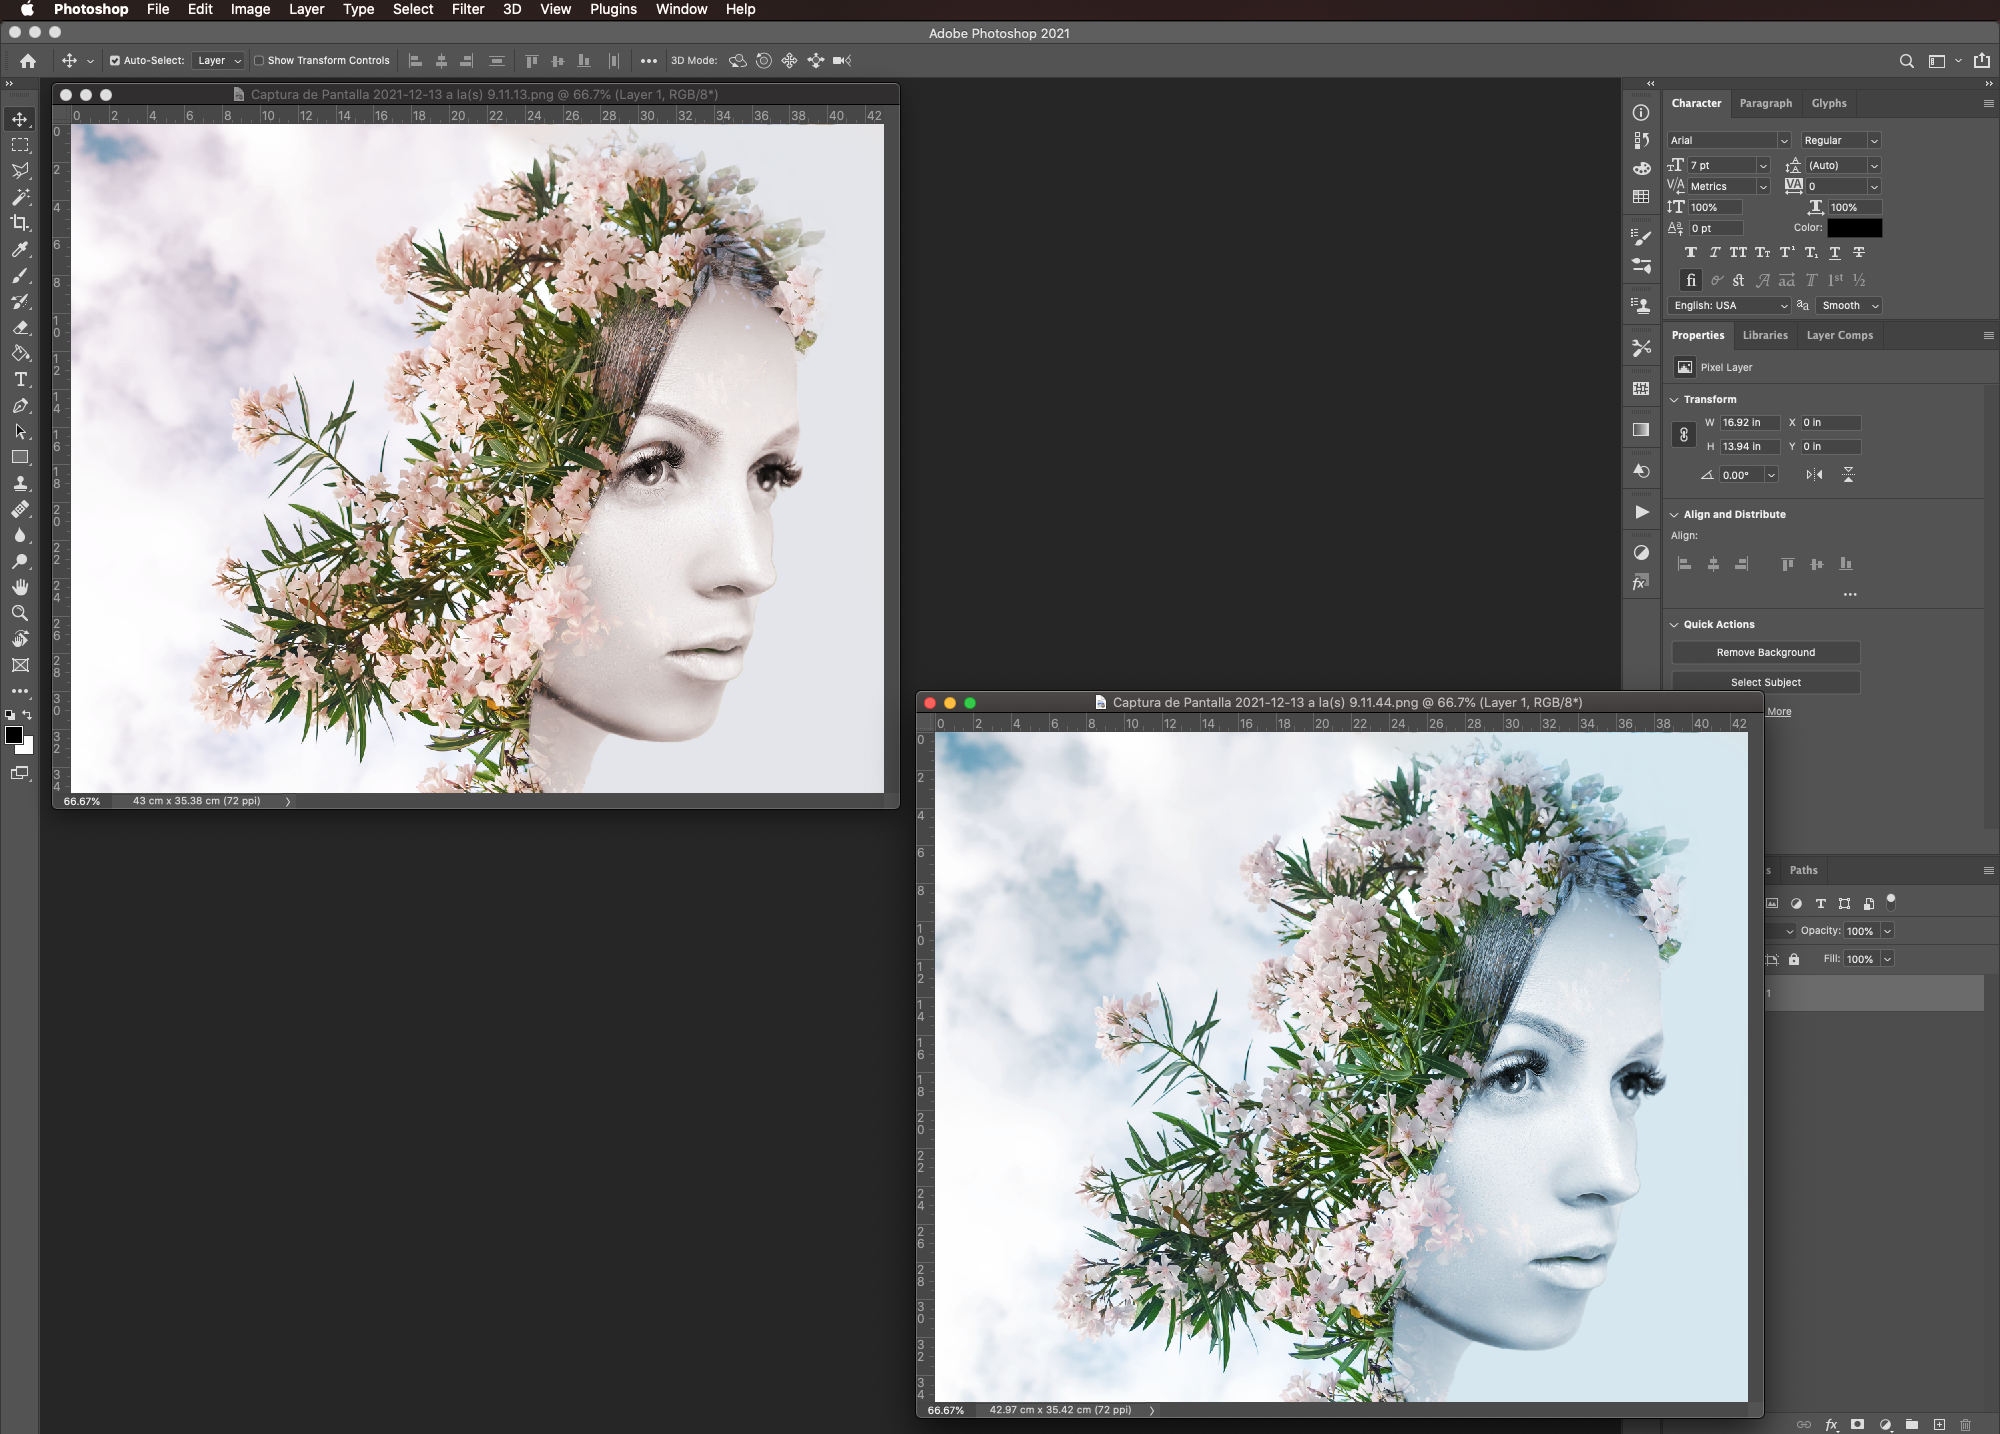
In this tutorial, we will learn how to create a double exposure effect in Photoshop. Double exposure is a photographic concept that can be easily reproduced in Photoshop. We do this by combining two photos with the help of layer masks and blending modes. Your artwork will look wonderful on posters, album covers, or even as the backdrop for a killer ad.

We are going to use this woman's portrait as the base subject. You can also use images of animals, or even other landscapes. We also chose this pink flowers background photo to combine with in order to create the effect.
There are more photos of people to choose from on Design Bundles where you can find what works best for you. Just remember, your subject’s image background should be as neutral as possible, so it will be easier to work with.
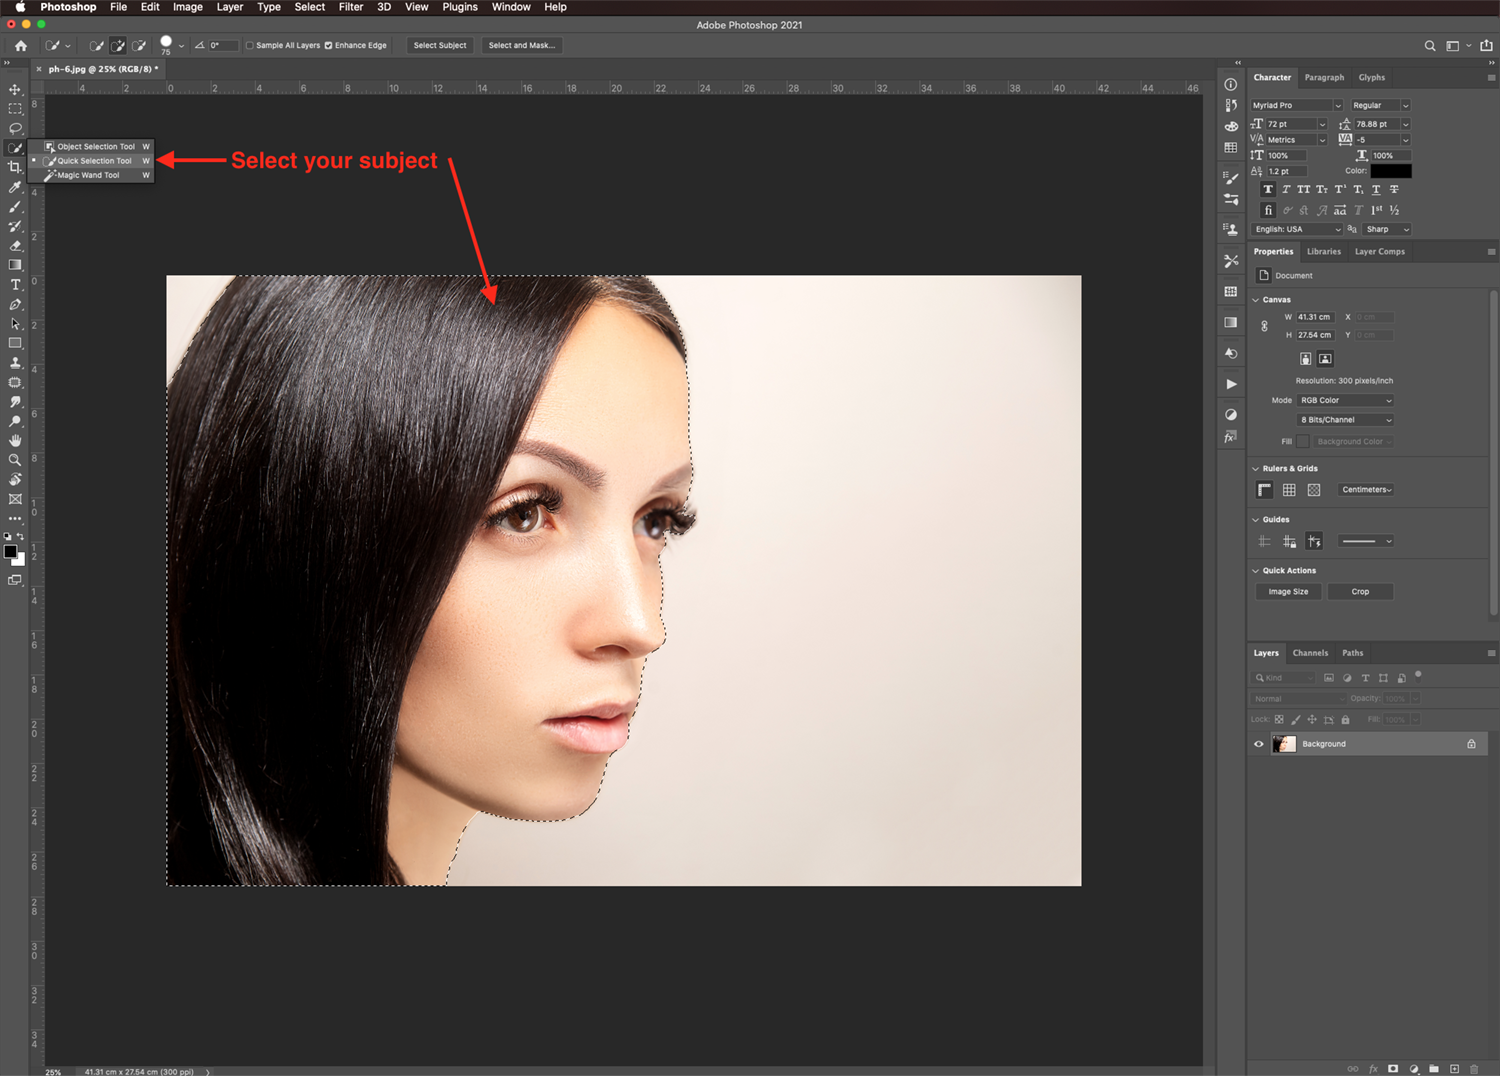
Step 1 - Make a Selection
In Photoshop, open the image you want to use as the base for the double exposure effect. If needed you can crop the image to trim down the edges.
Then, make a selection of your subject using the Quick Selection Tool or the Magic Wand Tool (W), whichever works better for you.
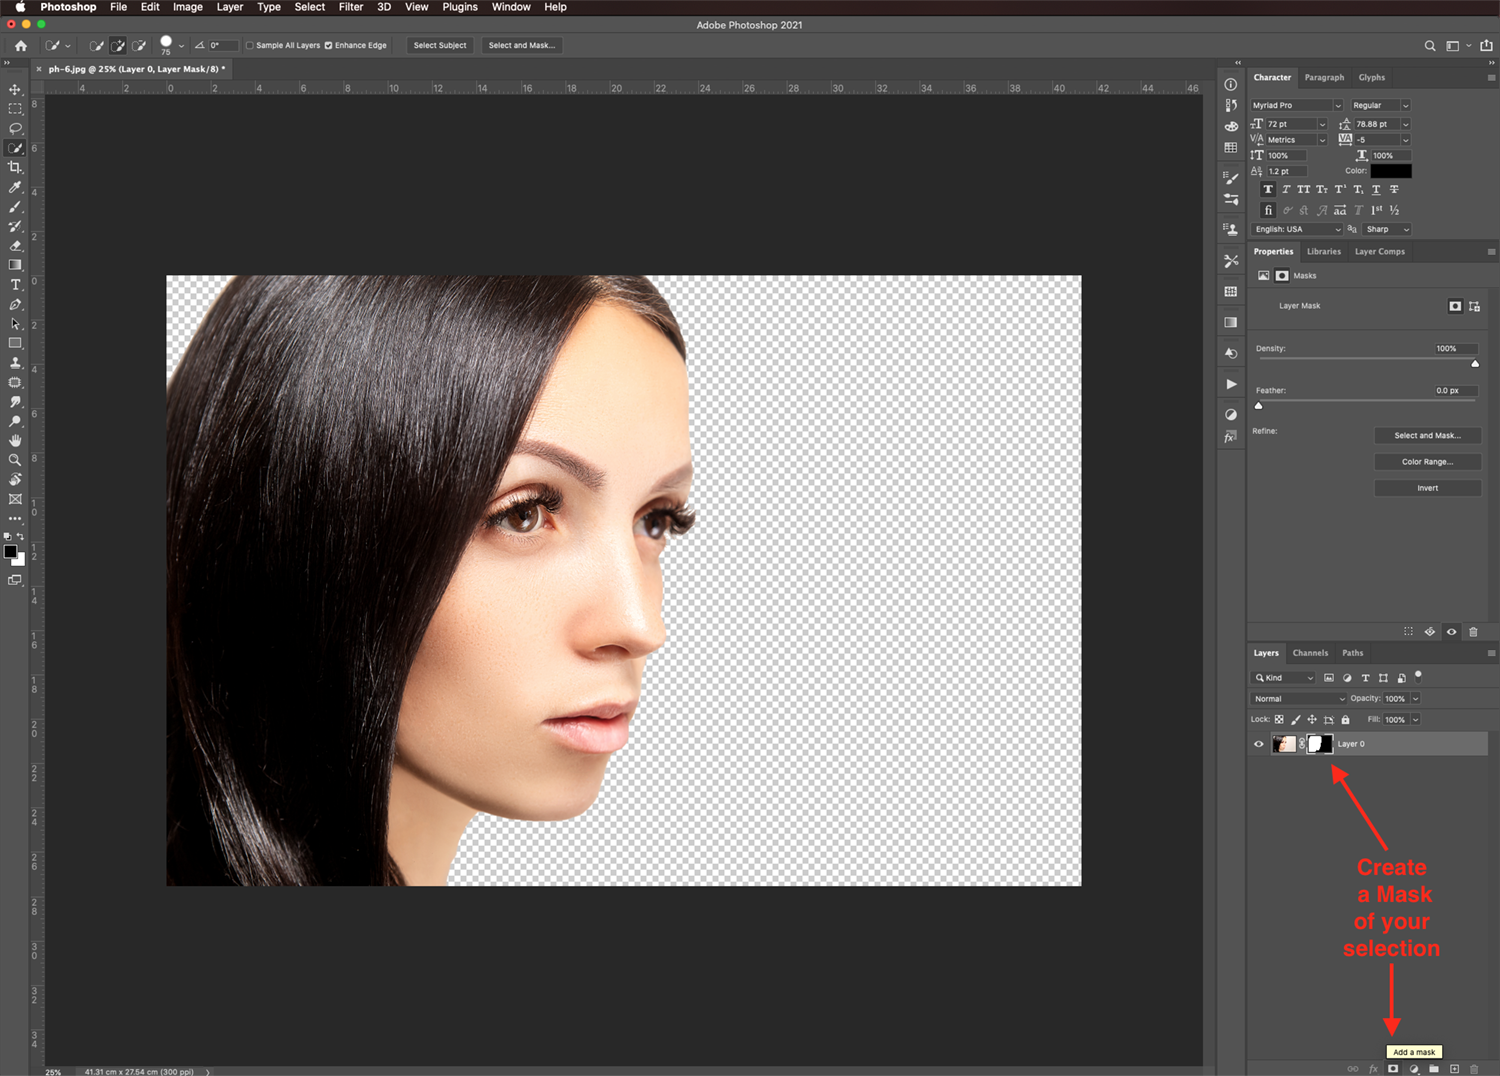
Mask your Selection
Next, mask your selection by clicking on the button at the bottom of the Layers Panel to get rid of the background.
Smooth out the Mask Edges
You may want to smooth out the edges of your masked image. Do this by slightly adjusting the Feather value on the Properties Panel.
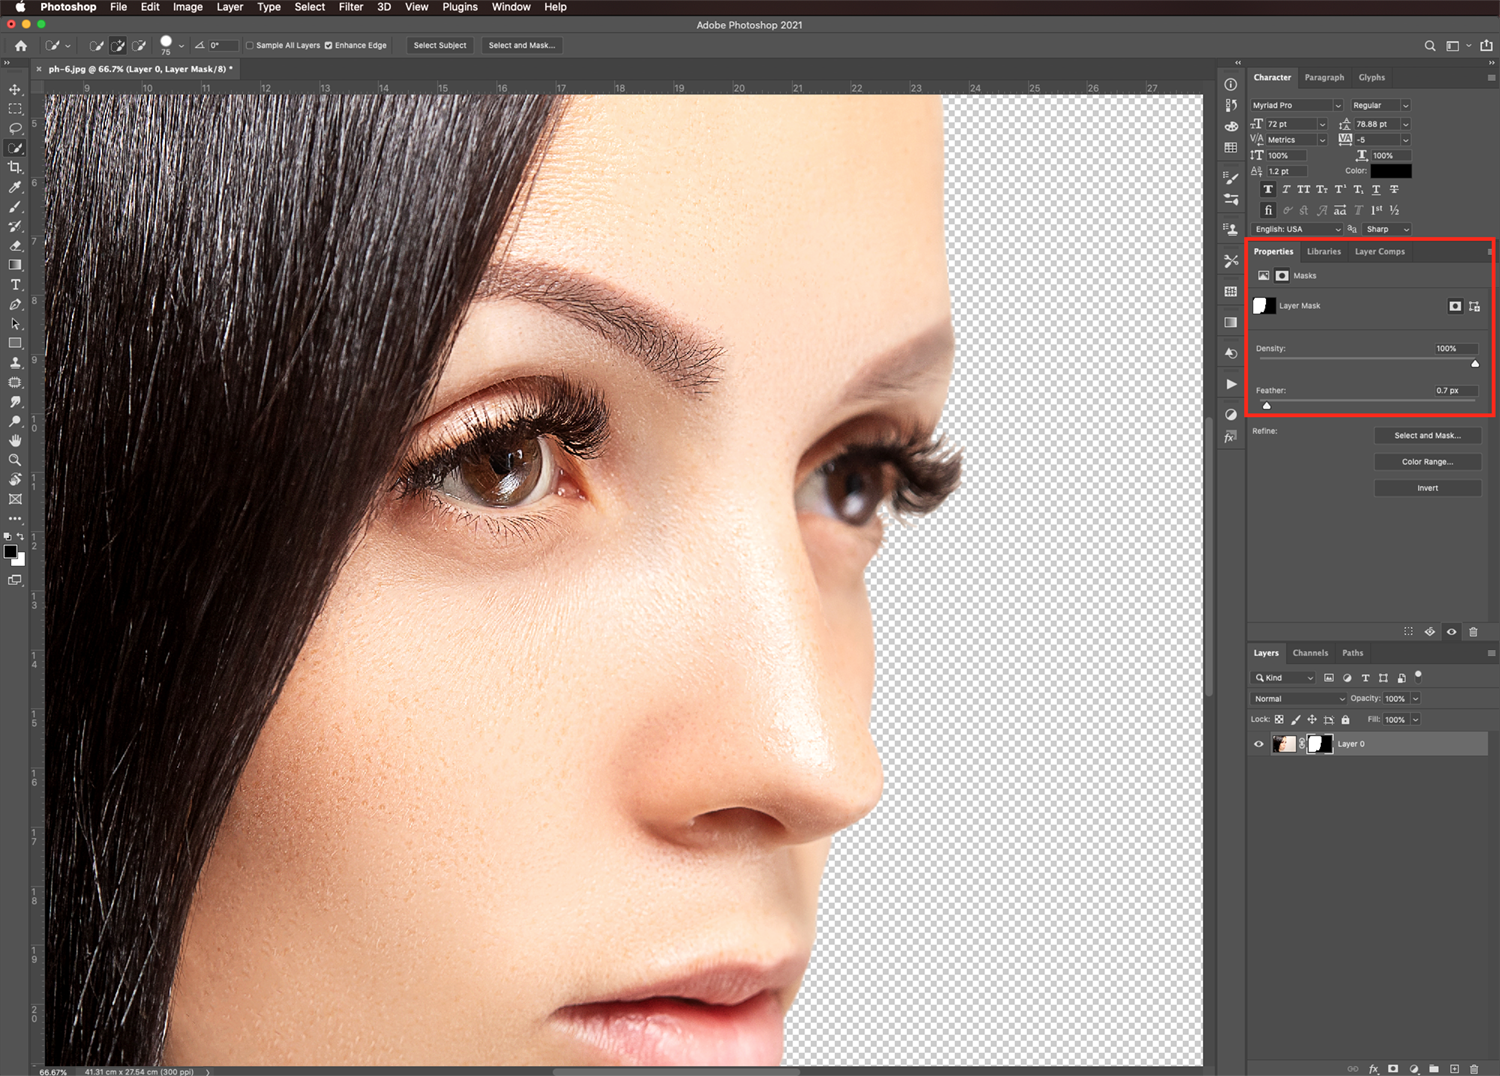
We have a more detailed tutorial on how to mask and smooth mask edges if you need more information.
Step 3 - Add a Solid Color Background
Next, we are going to use a Solid Color Fill layer as our background. Just click on the small black and white circle at the bottom of the Layers Panel. Choose Solid Color and use white as the fill color for now.
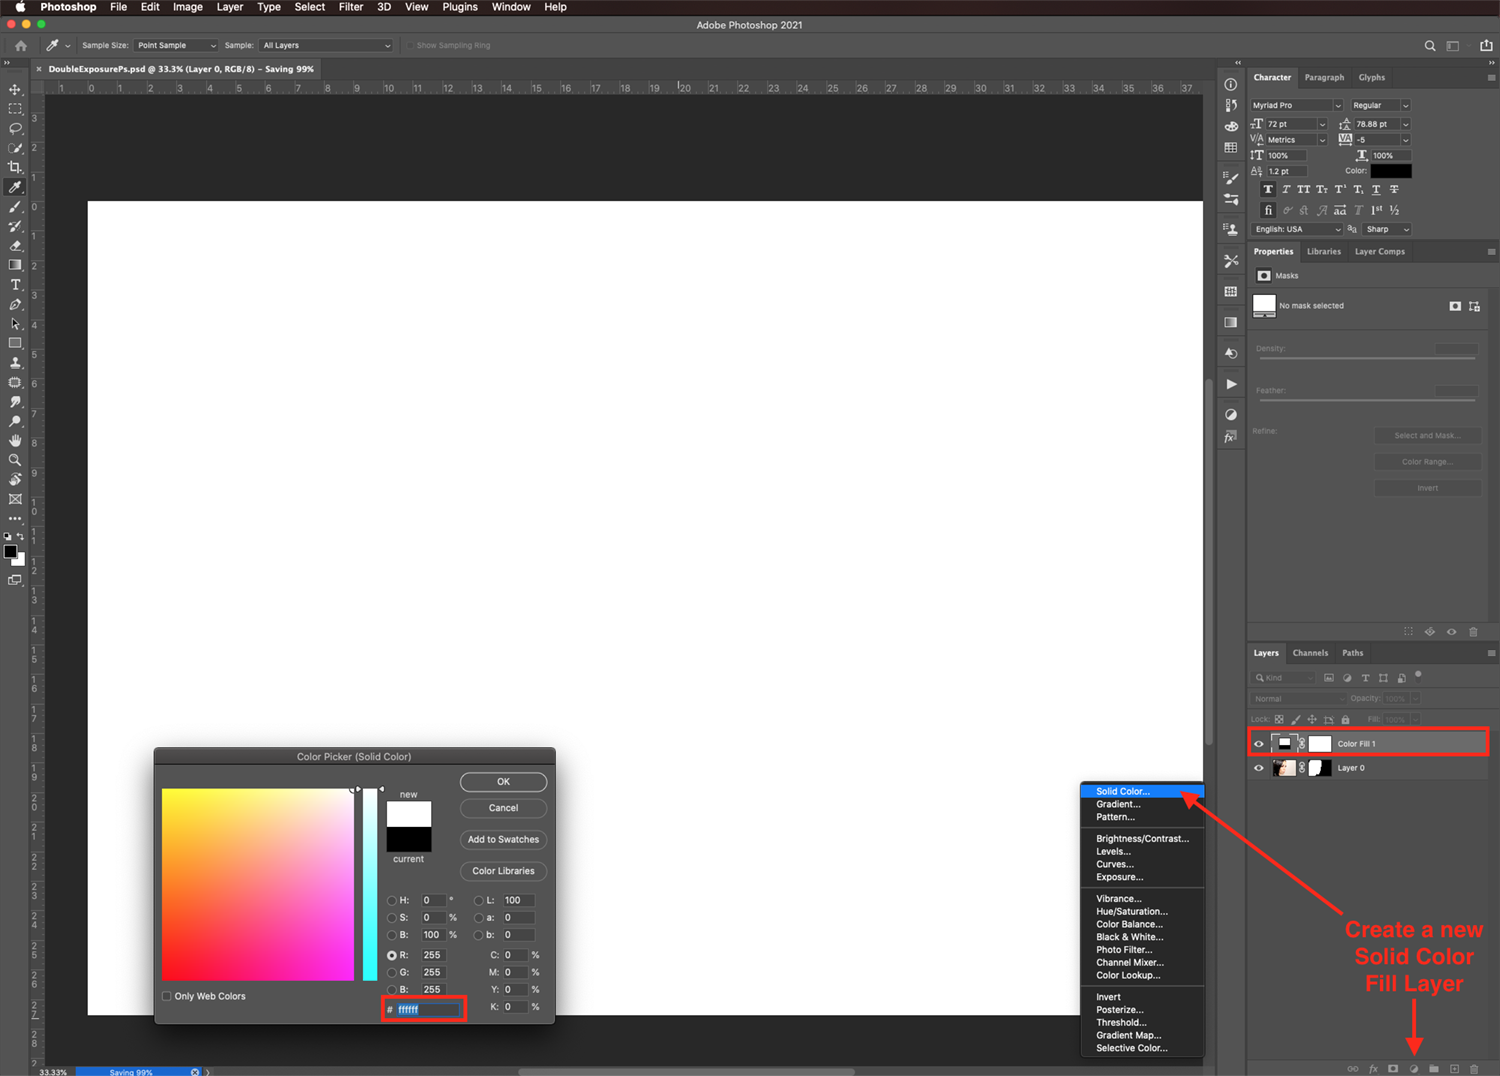
Drag the Fill layers thumbnail so it is placed at the bottom, under the masked subject layer.

Step 4 - Adjust the Canvas Size
You may need to adjust the size of your canvas to accommodate your design. To do it, select the Crop Tool (C) then click + drag out the handles of the sections that need it. Once you are done, hit Enter or click on the small check mark on the top menu.
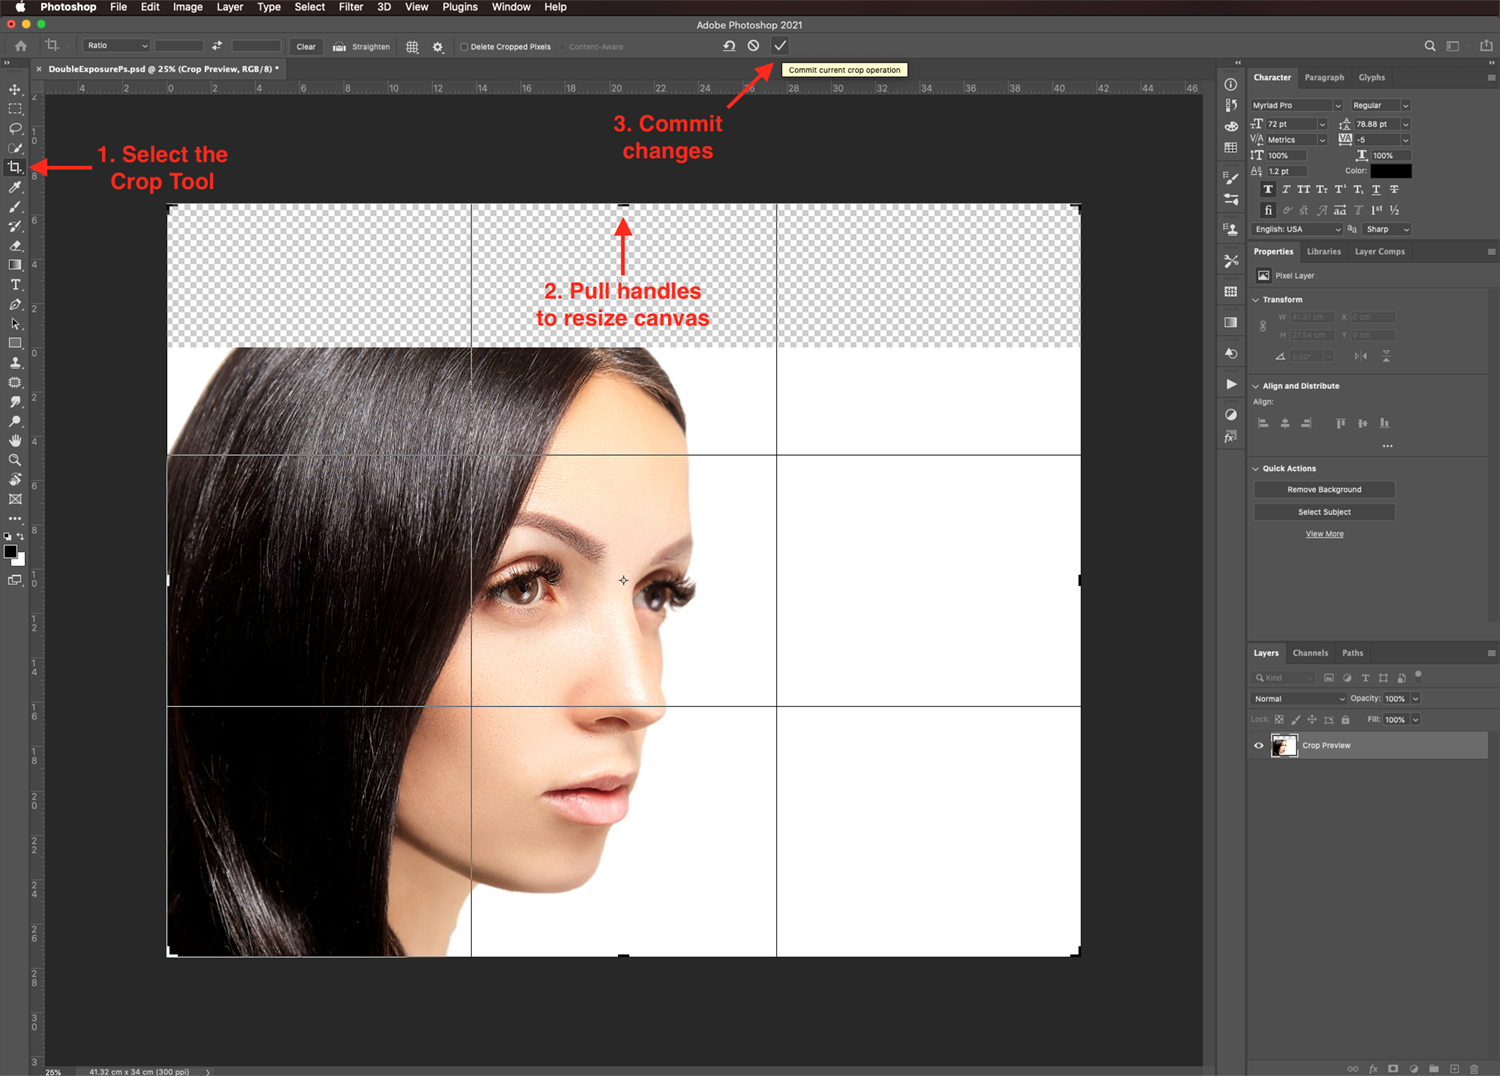
Now we want to reposition our image on the extended canvas. Use the Move Tool (V) to click + drag to reposition your subject if needed.

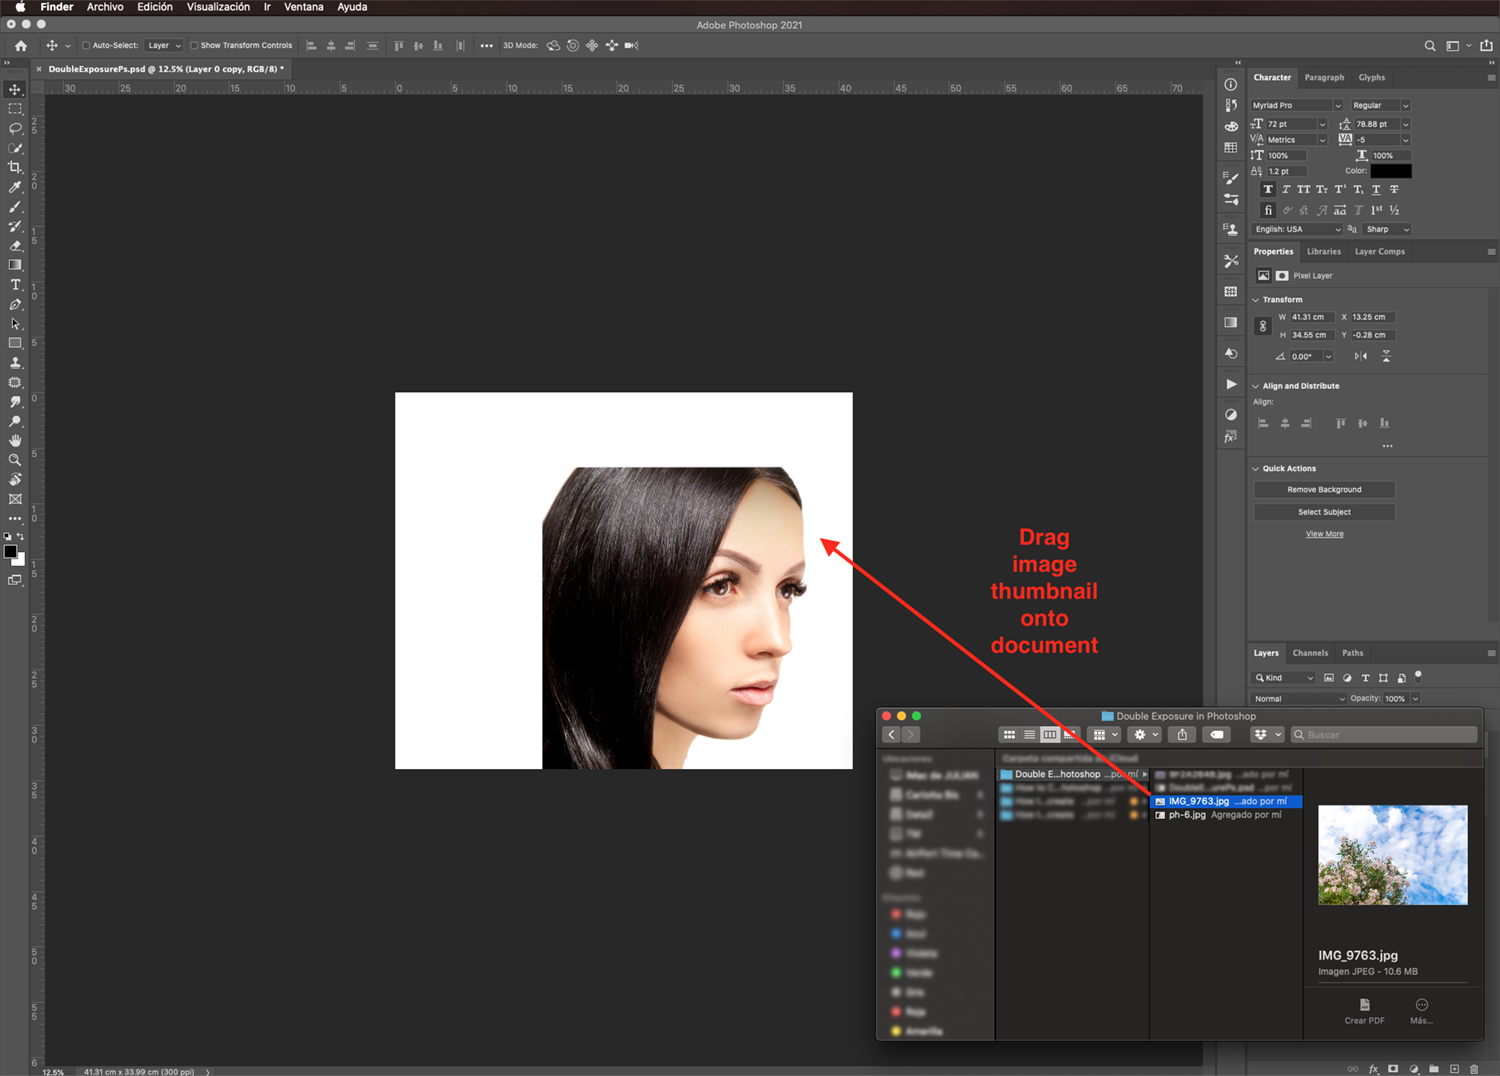
Step 5 - Import the Second Image
Head to where your files are saved. Select the image you want to blend with your subject. Next, drag its thumbnail onto your document to place it there.
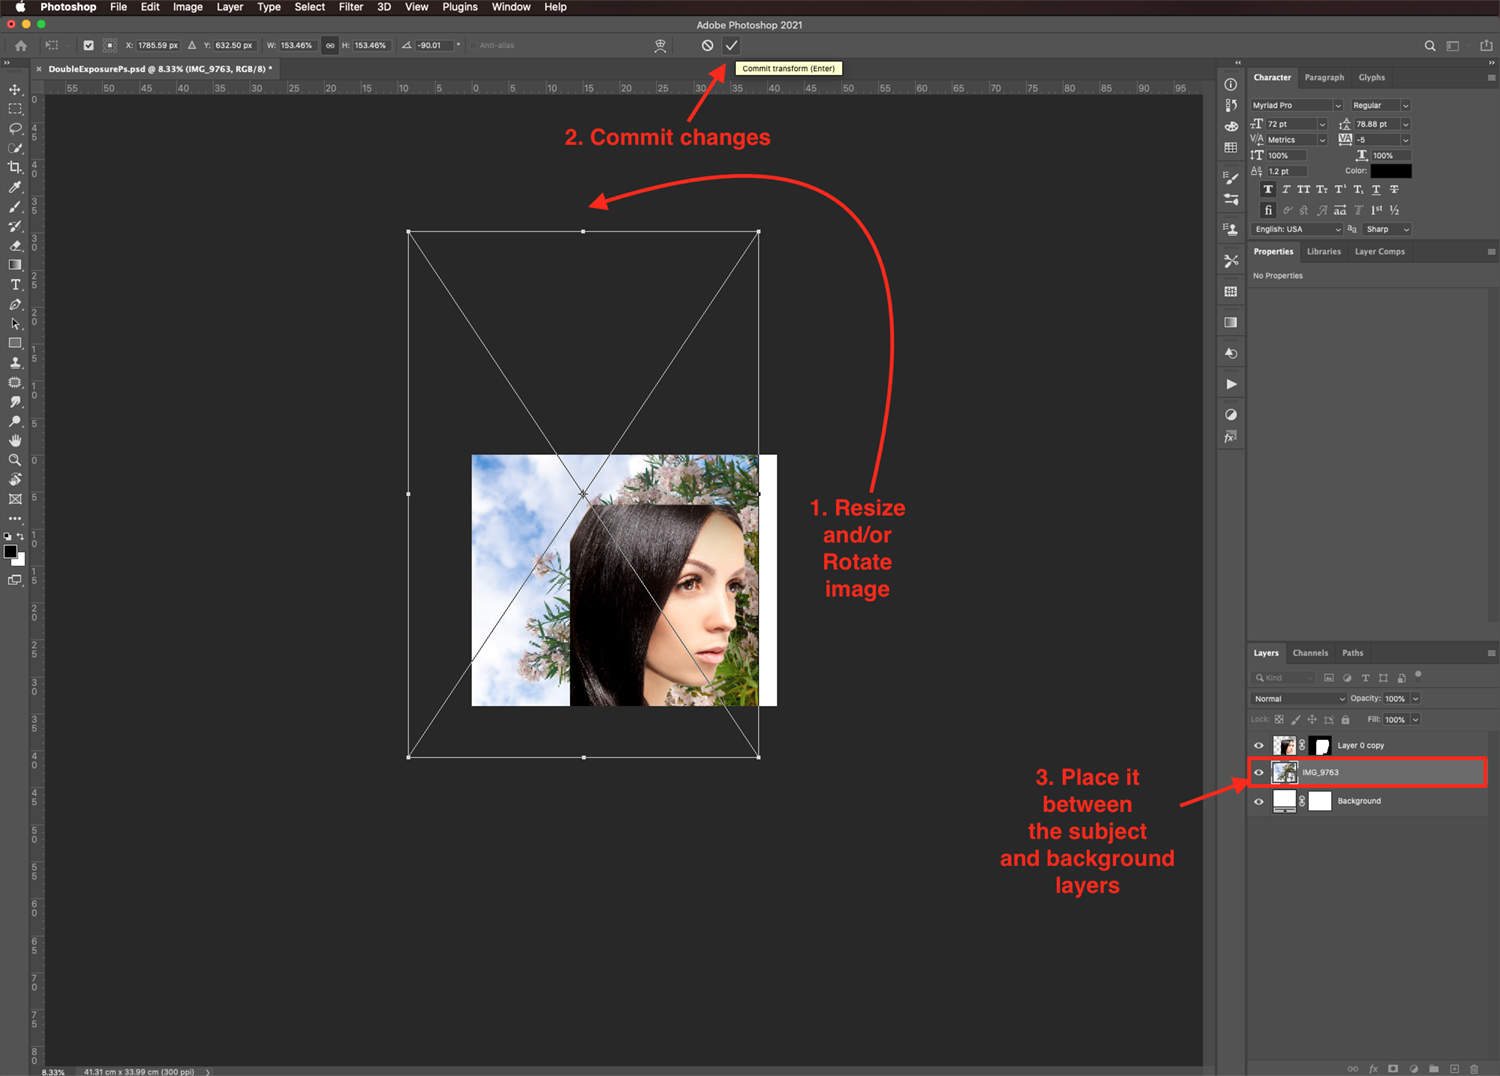
Resize the Second Image
Once your image is placed, you can resize and/or rotate it if needed. Once you are done, hit Enter or click on the small check mark on the top menu.
Make sure it is placed between the background and subject layers.
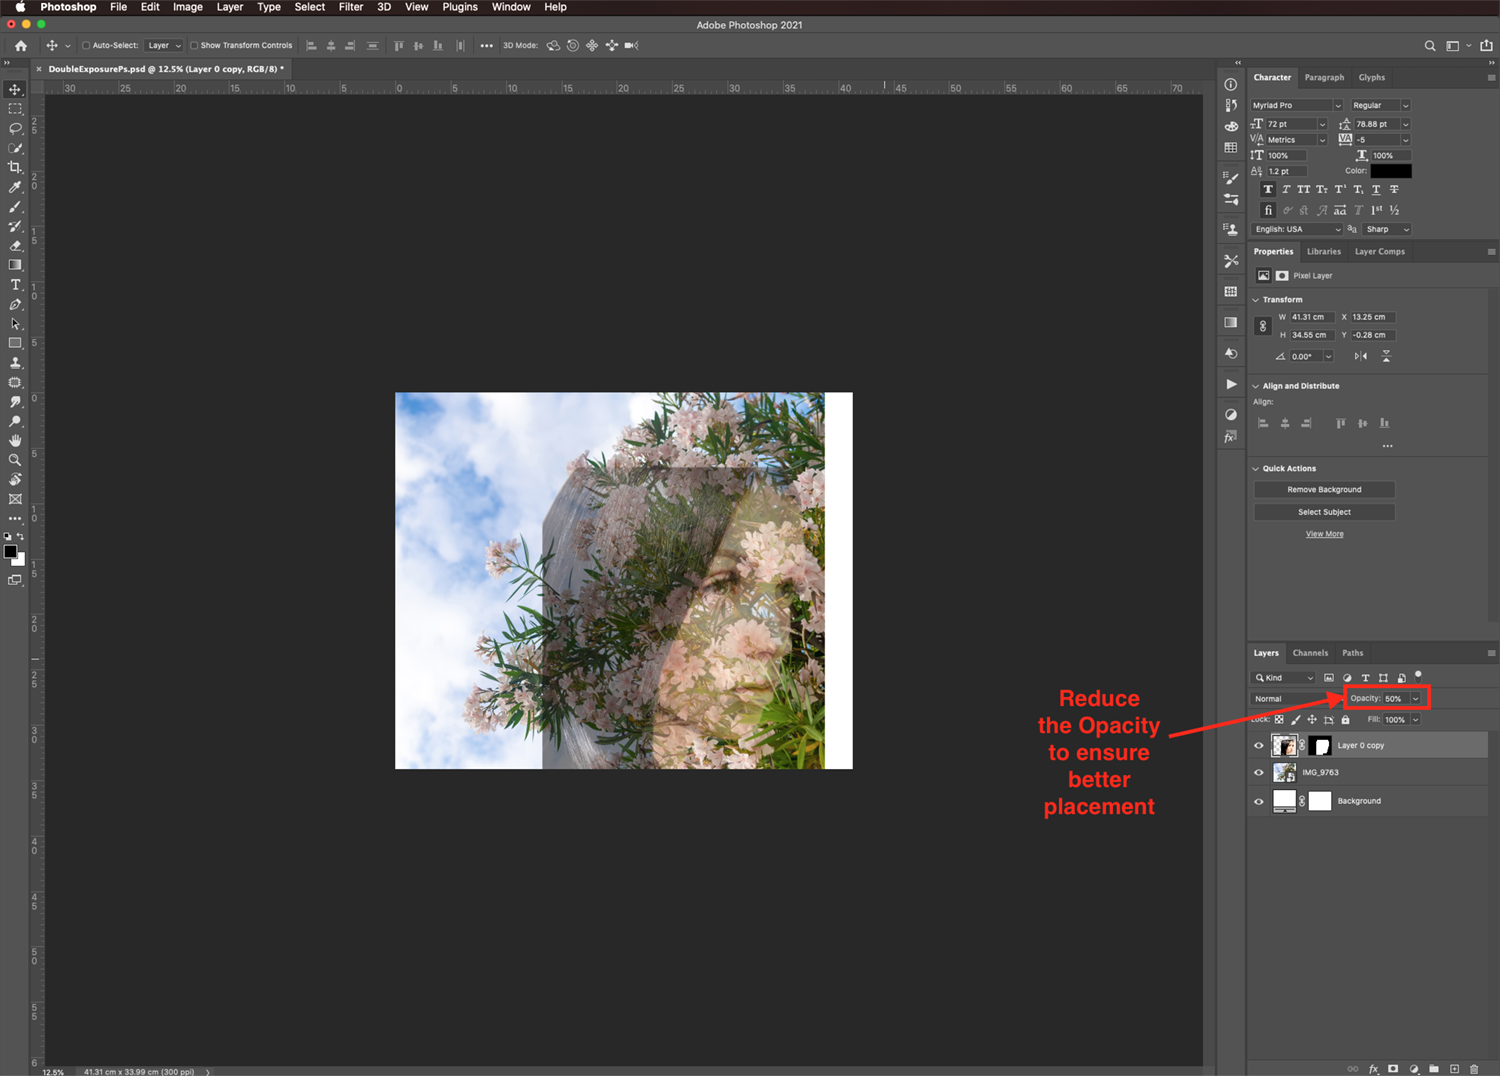
To ensure a better image placement, reduce the Opacity of the subject layer to have a better view. You need to keep in mind that both images need to blend together to create a cohesive shape.
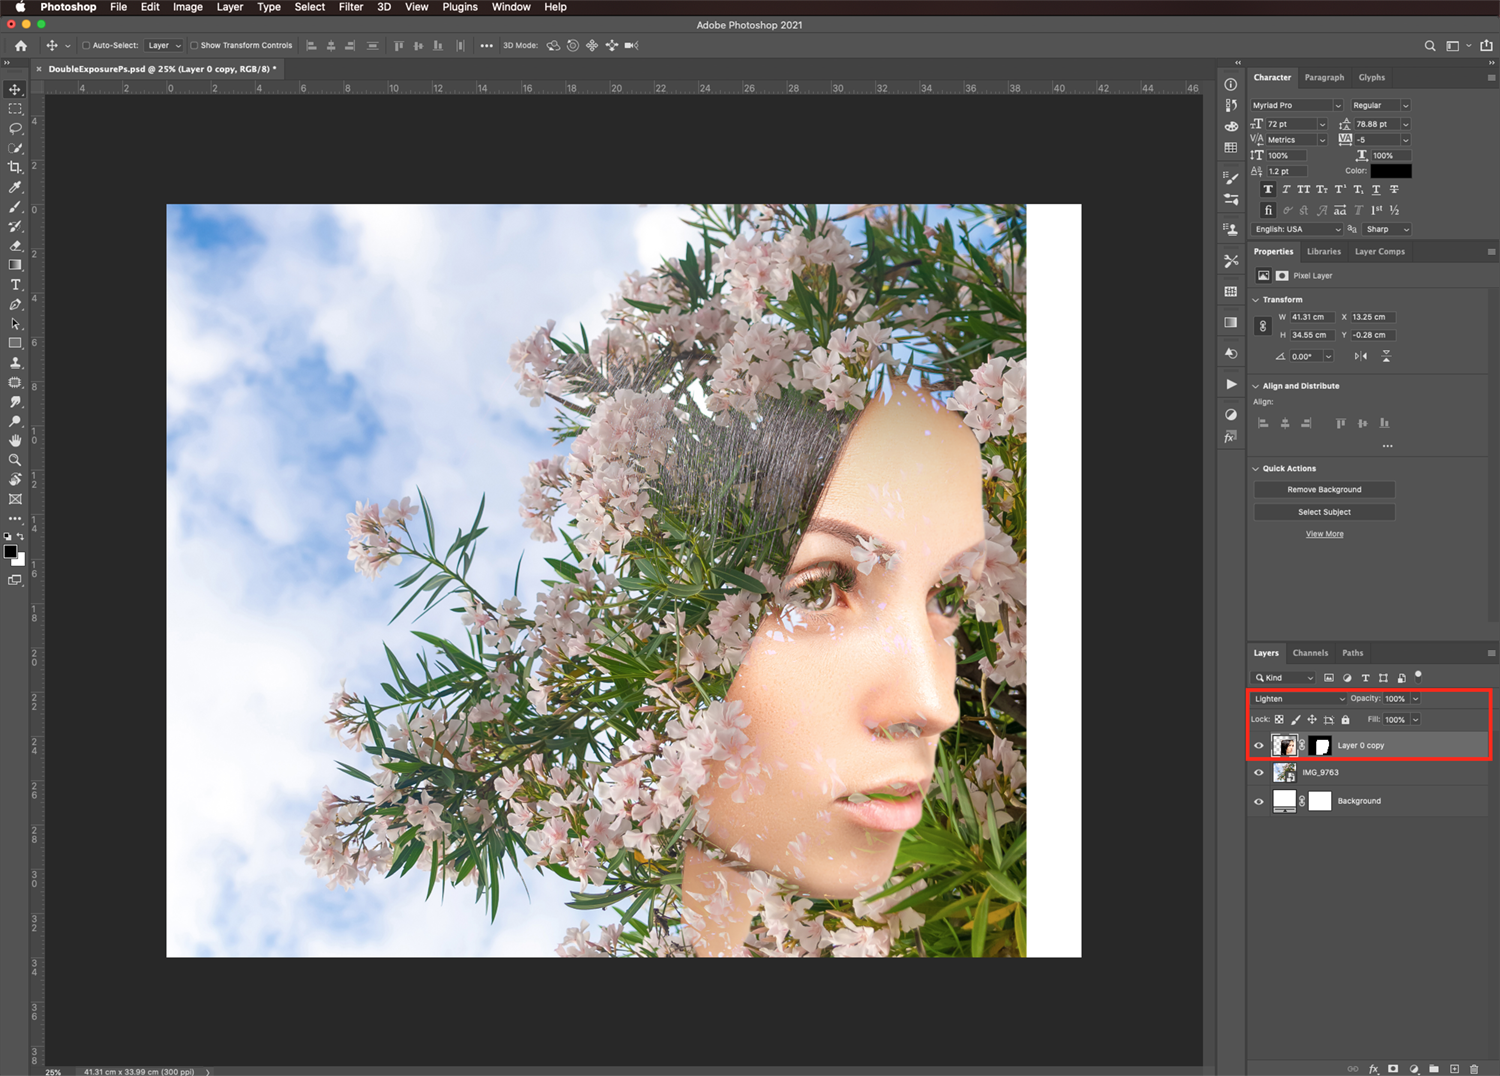
Change Subject Layer Blending Mode
Once you are happy with the placement of your images, bring back the Opacity of the subject layer back to 100%. Now change its Blending Mode to Lighten.
You should get a result where both images blend into each other, creating a nice see-through effect.
Step 6 - Clean up the Images
Since we want both images to overlap and blend into each other, we need to remove some areas of our images. So we are going to hide them using a mask.
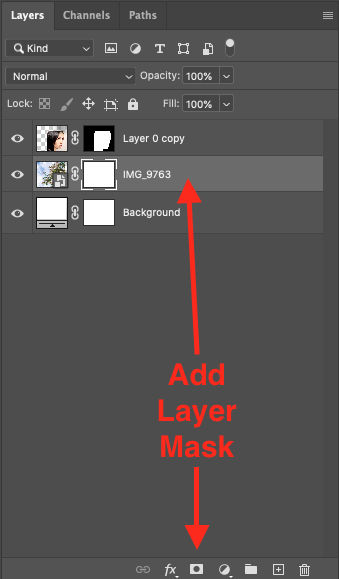
Create a Layer Mask of Second Image
First, make sure that you have the second image layer thumbnail selected on the Layers Panel. Then, click the Add Layer Mask button from the bottom of the panel to create a mask.
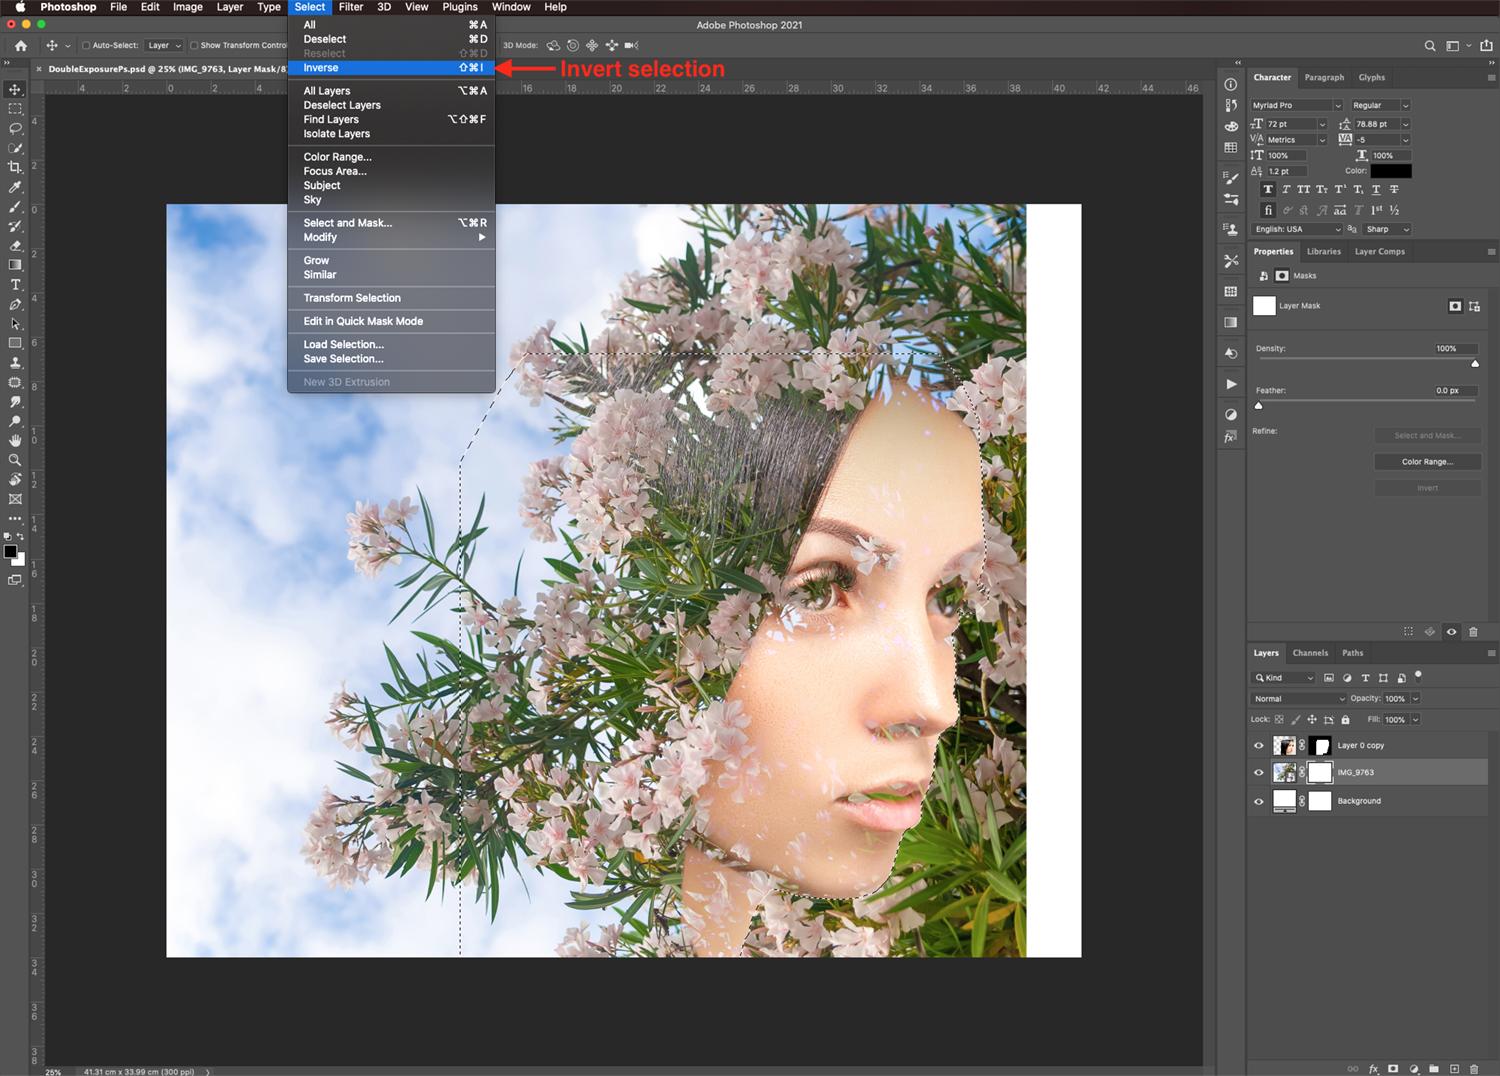
Select the Area Around the Subject
Next, Command/Control-Click on top of the subject mask thumbnail to make a selection. Then, click on the mask thumbnail of the second image to select it.

We want to keep the areas on top of our subject and remove some portions that are outside instead. So we need to invert our selection by going to Select > Inverse (Shift + Command/Control + I).
Delete Unwanted Portions of Second Image
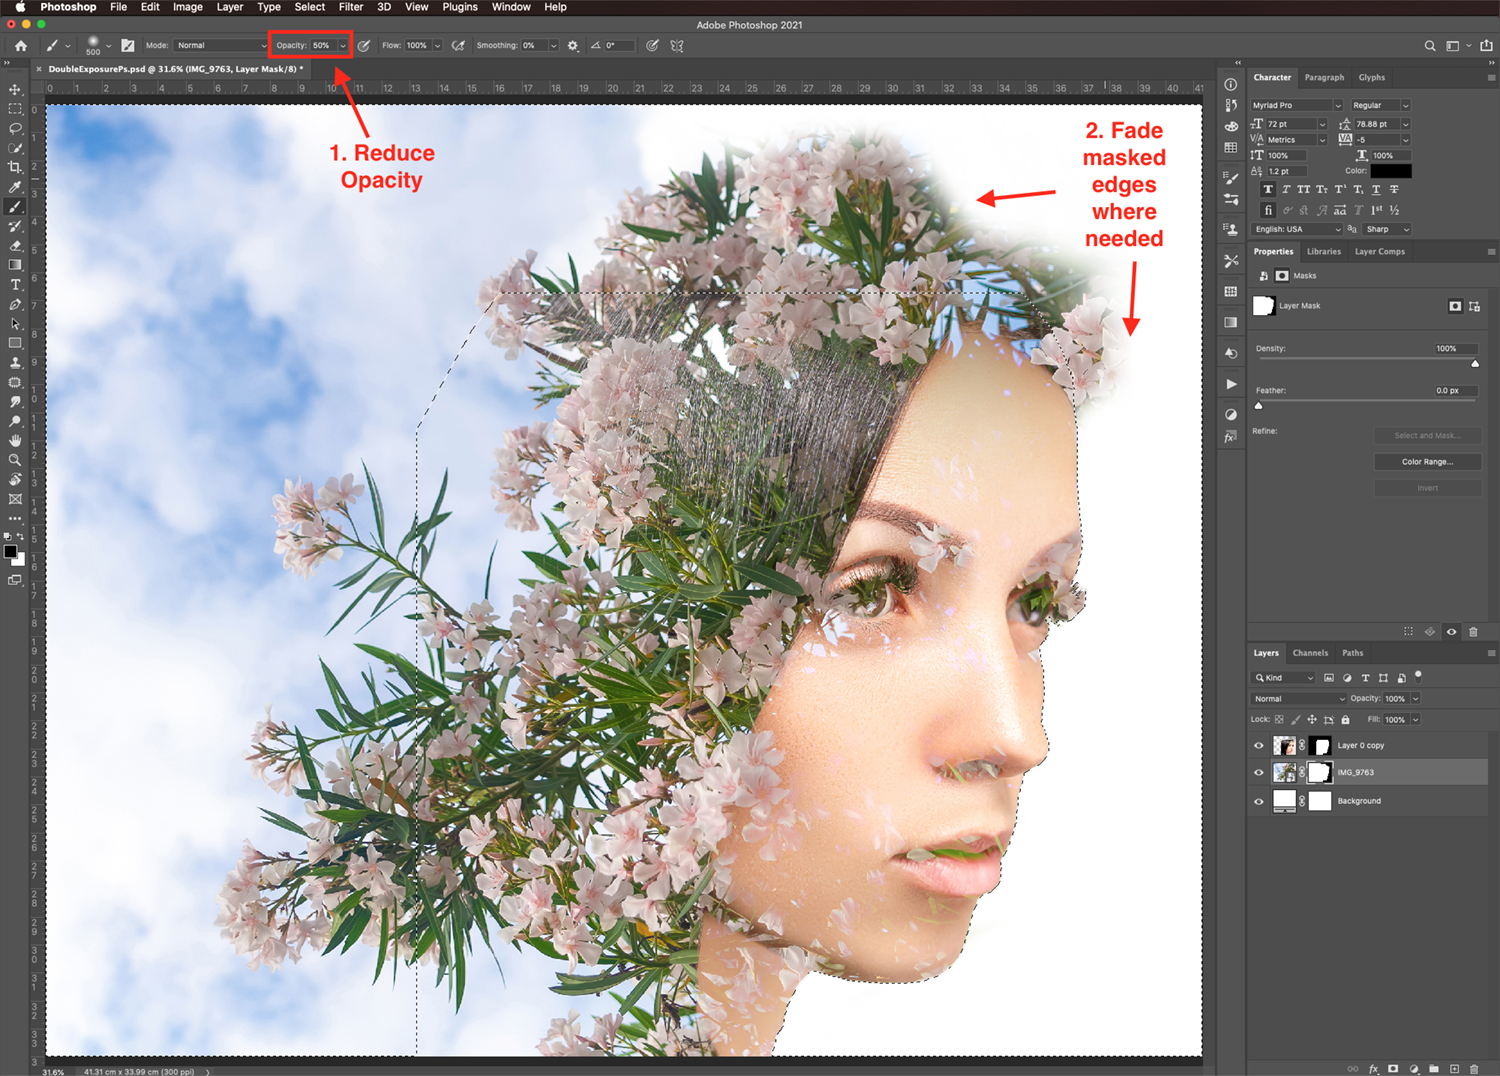
Select the Brush Tool (B) and make sure that black is set as the Foreground color. Choose a soft brush (0% Hardness) to erase the unwanted portions of the second image.
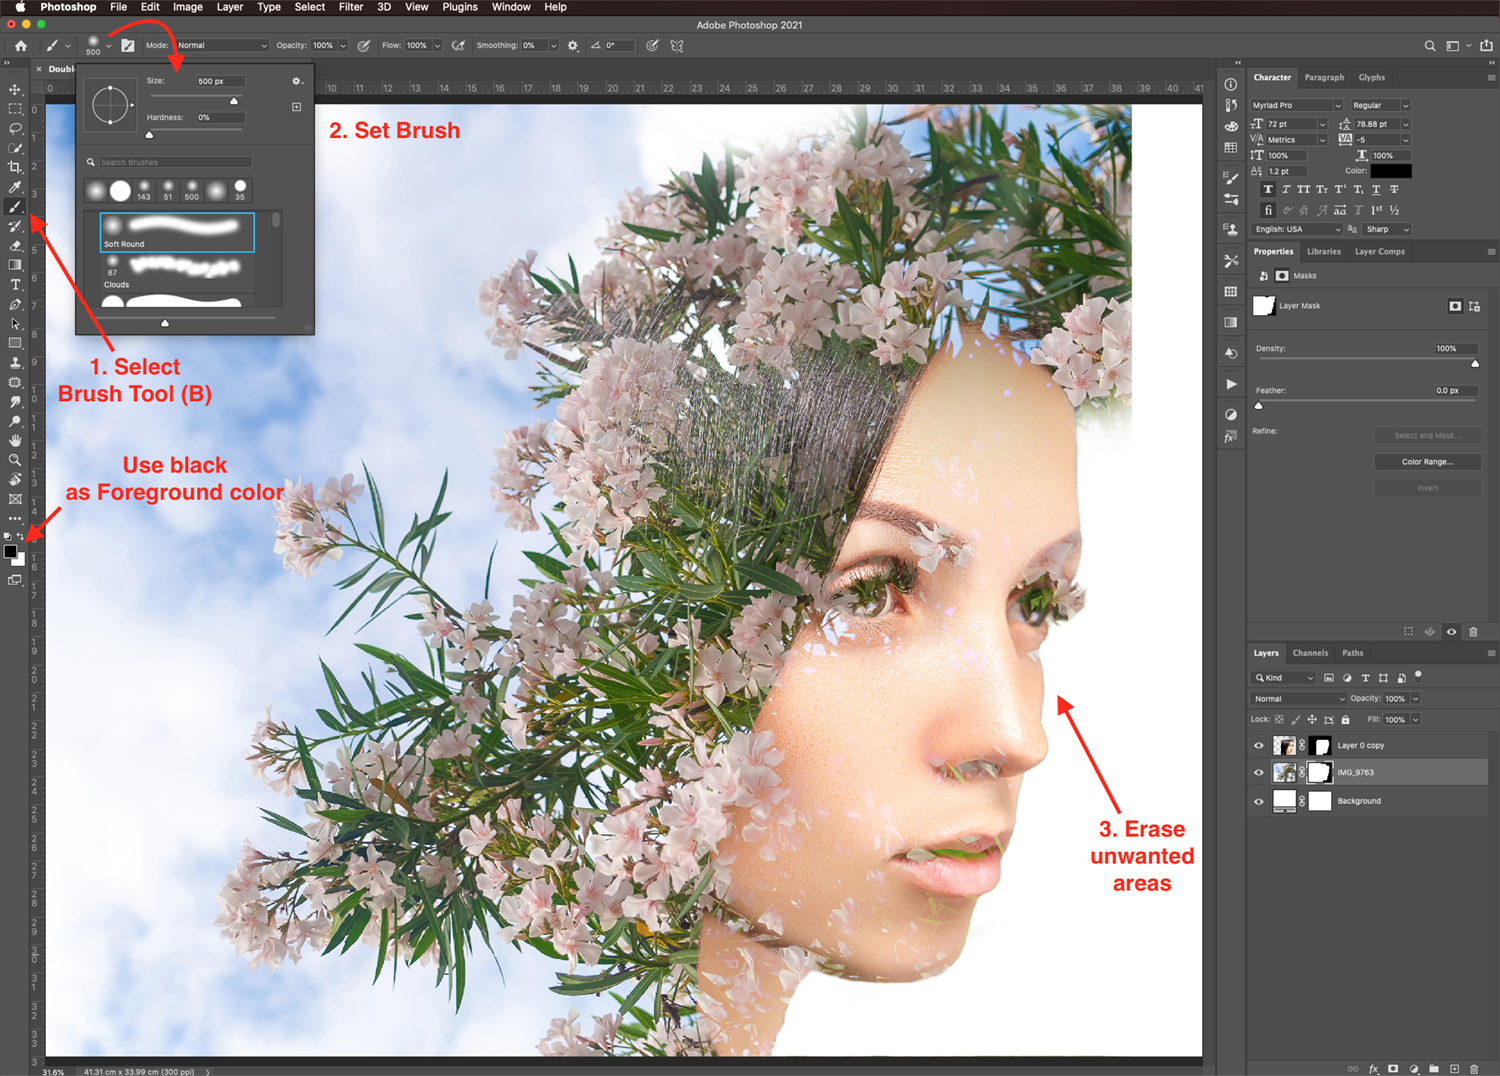
If certain areas need to be blended into the background, reduce the Opacity of your brush to about 50%. Then fade the edges where you think is needed.
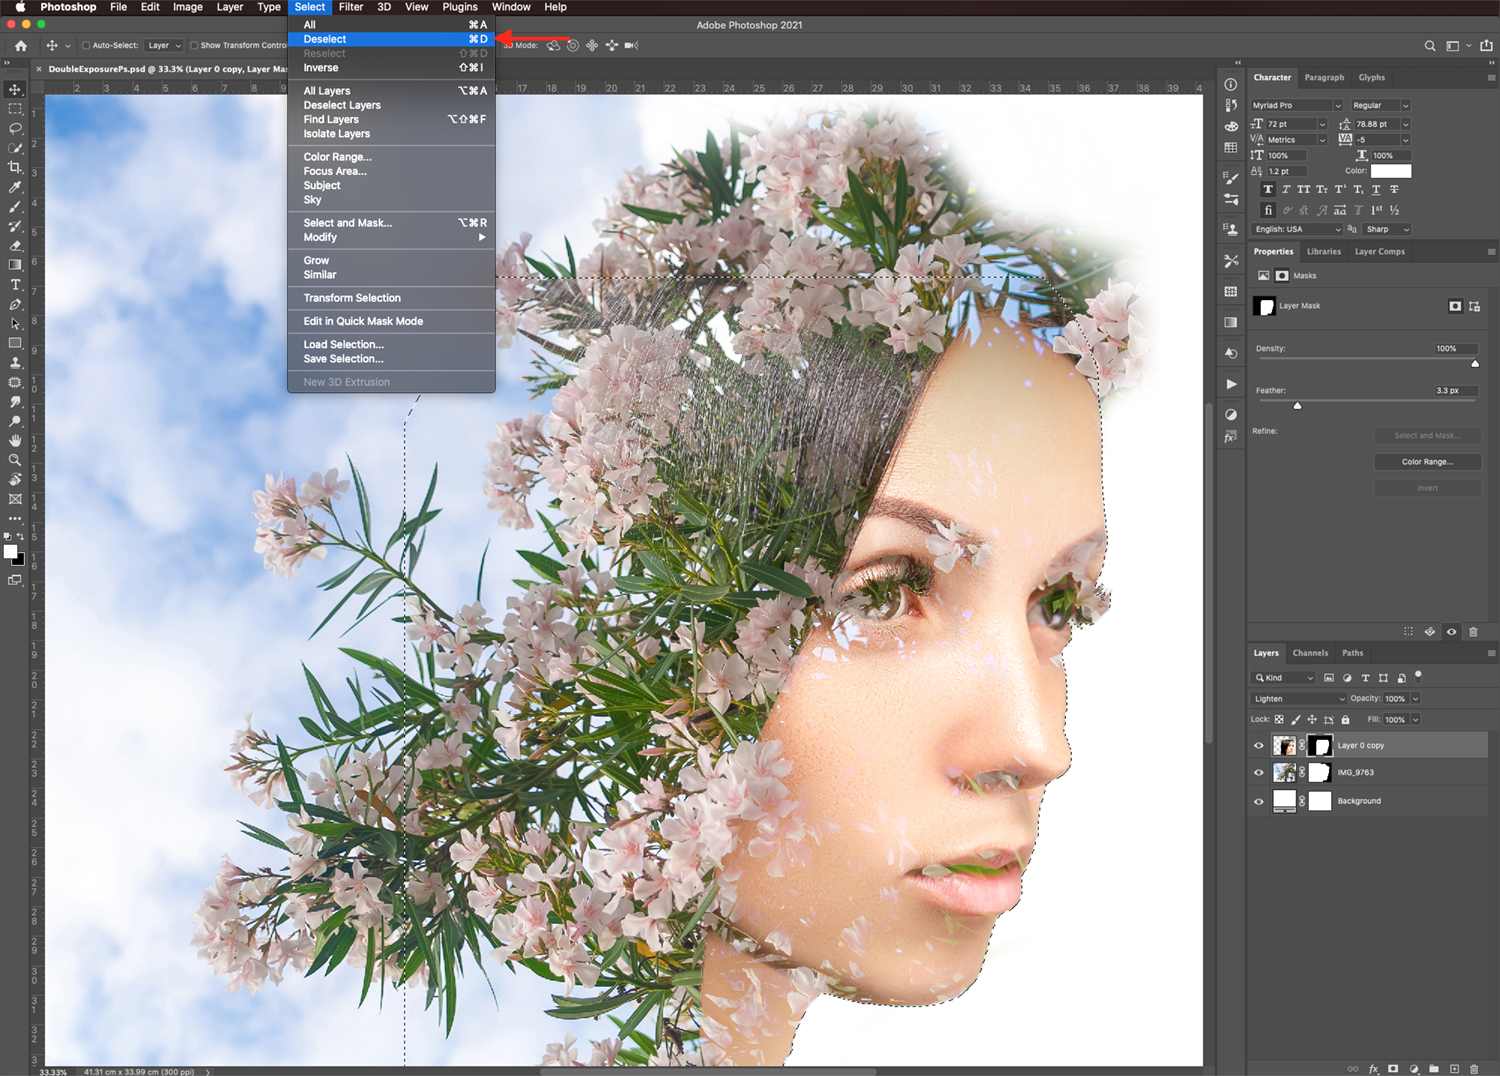
Remember to Deselect (Command/Control + D) once you are done or the next step may not work.
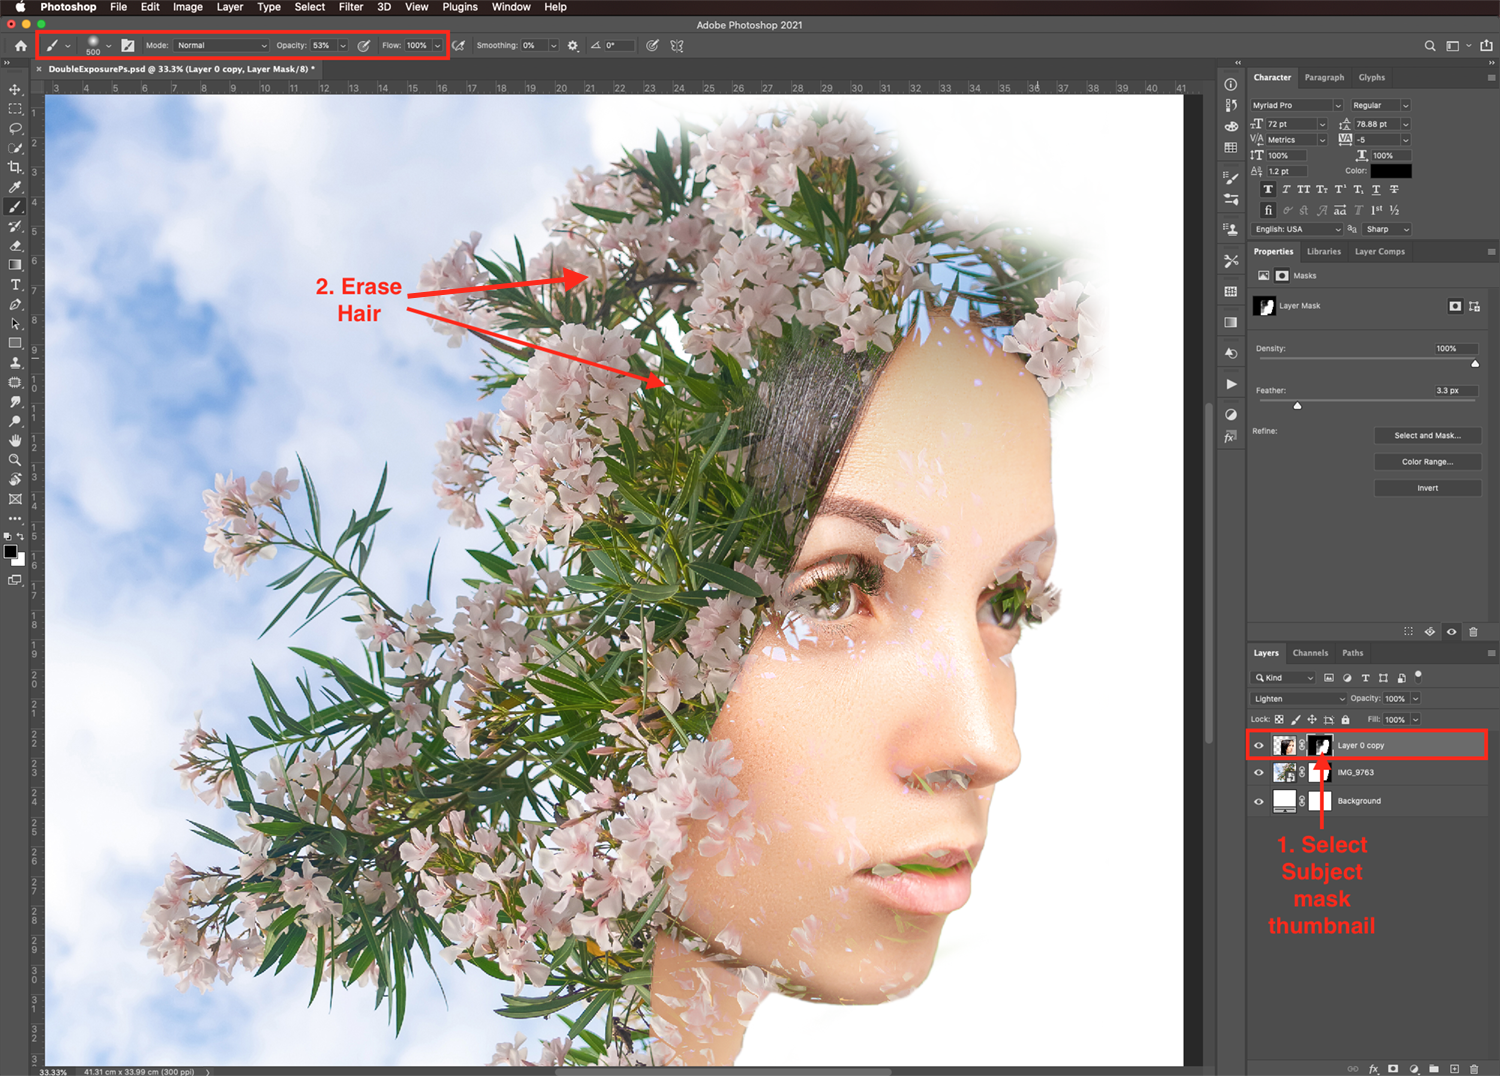
Remove Unwanted Areas From Subject layer
Now, select the mask thumbnail on the subject layer. Remove the overlapping areas that are not working well with the overall design. Like some of the hair that is too evident on the flowers.
Step 7 - Clean Up the Overlapping Areas
The overlapping of the two images is too strong in some areas, so we are going to tone it down a bit.
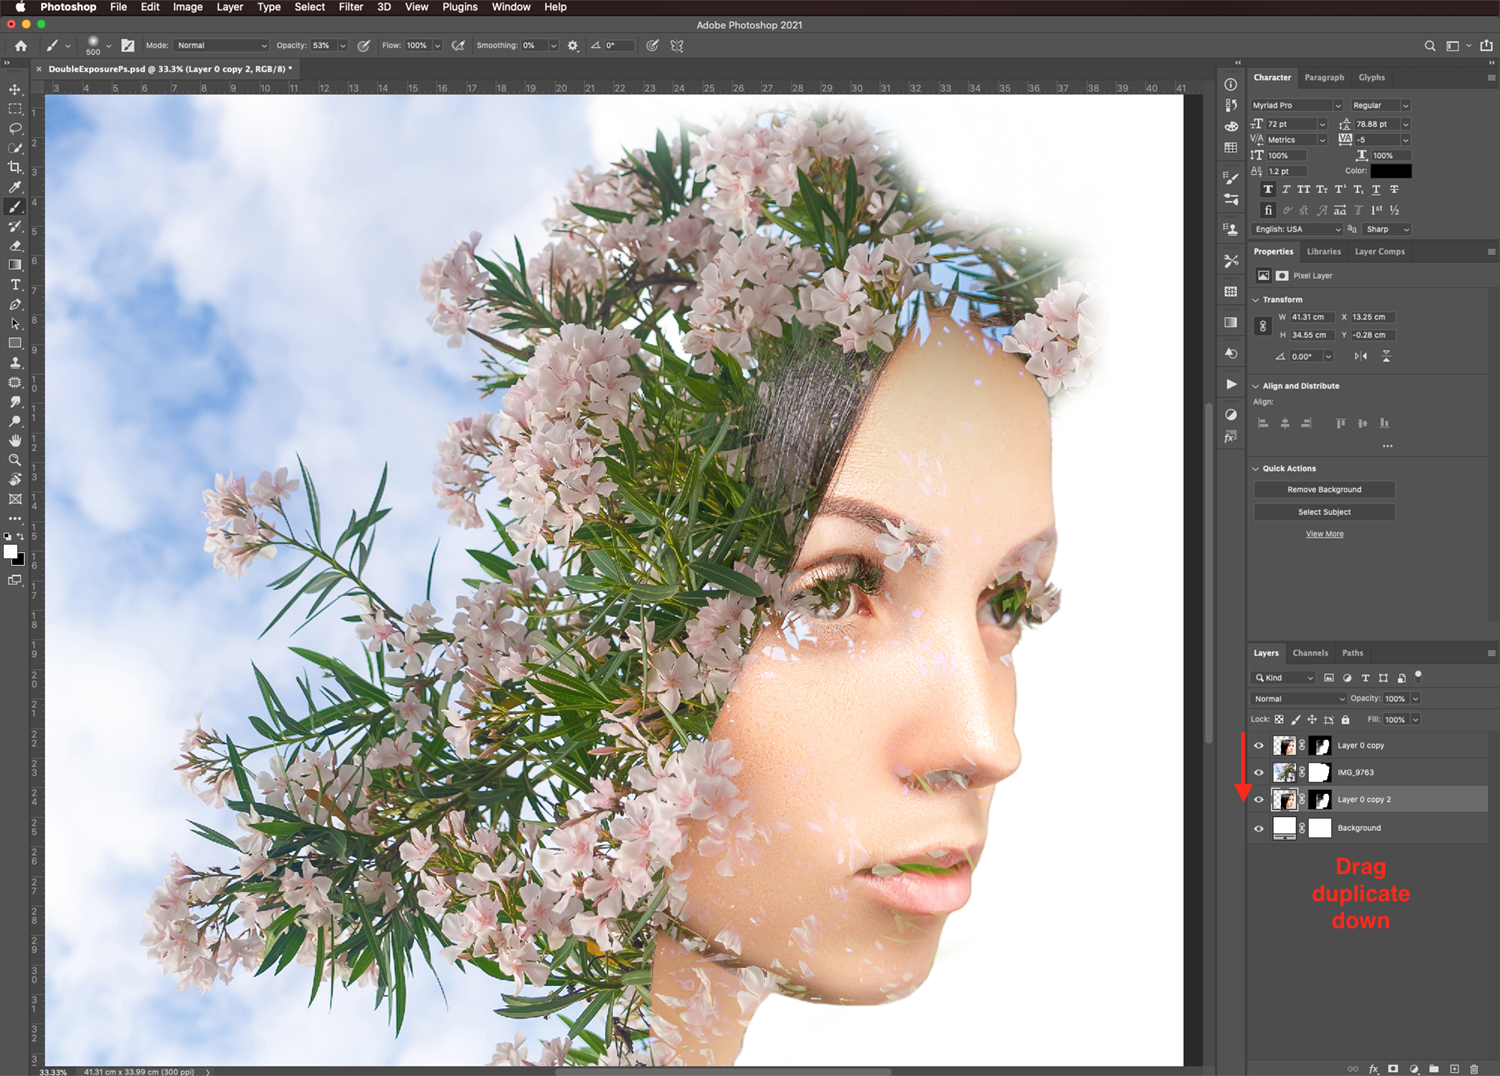
Duplicate the Subject Layer
Duplicate the subject layer (Command/Control + J), and change the Blending Mode back to Normal.
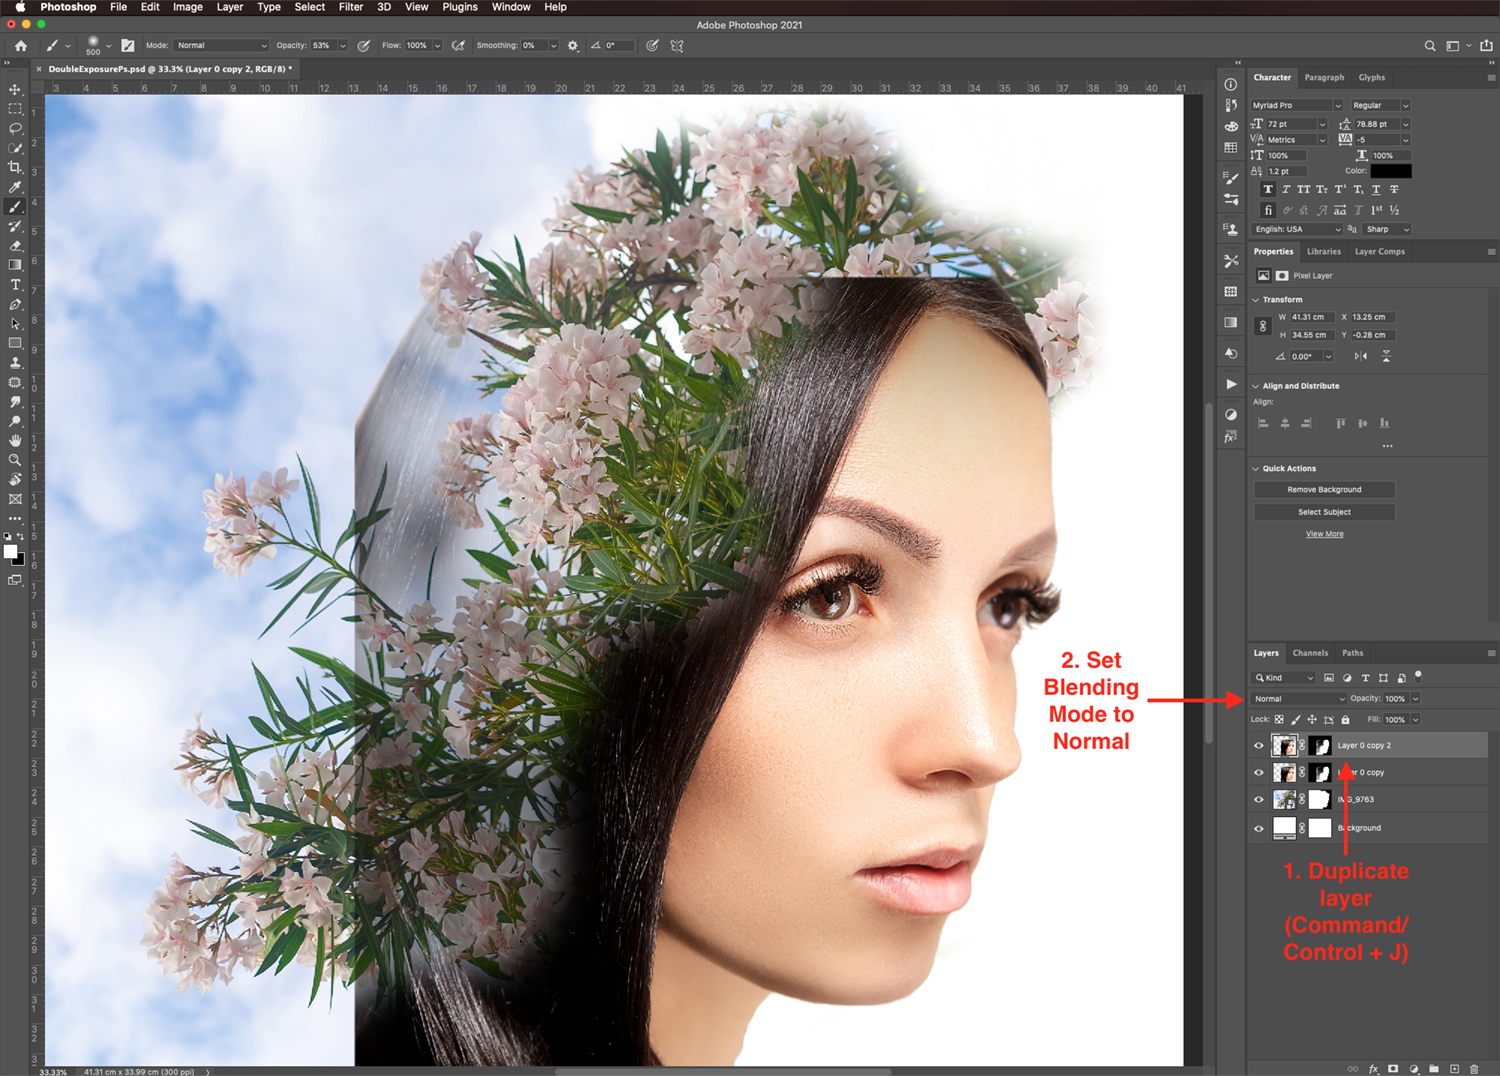
Drag the duplicate thumbnail down so it is placed between the second image and the background layers.
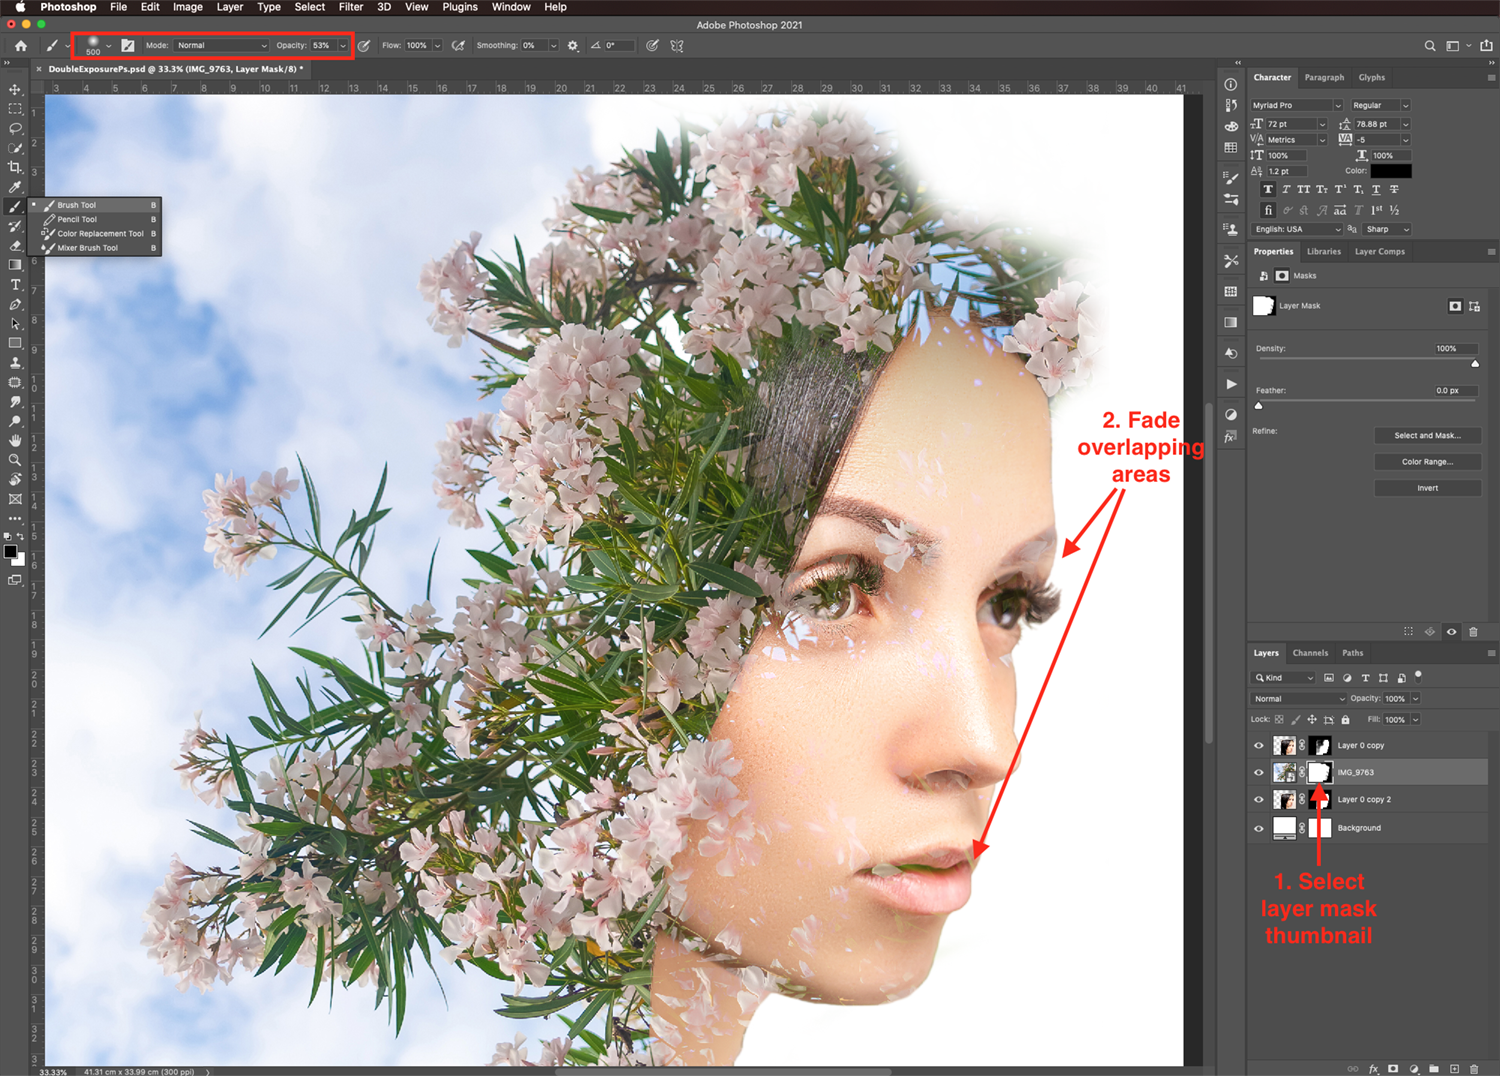
Fade the Overlapping Areas
Make sure that you are working on the second image layer mask thumbnail. Use the soft brush with lowered opacity to slightly tone down the areas that need it.
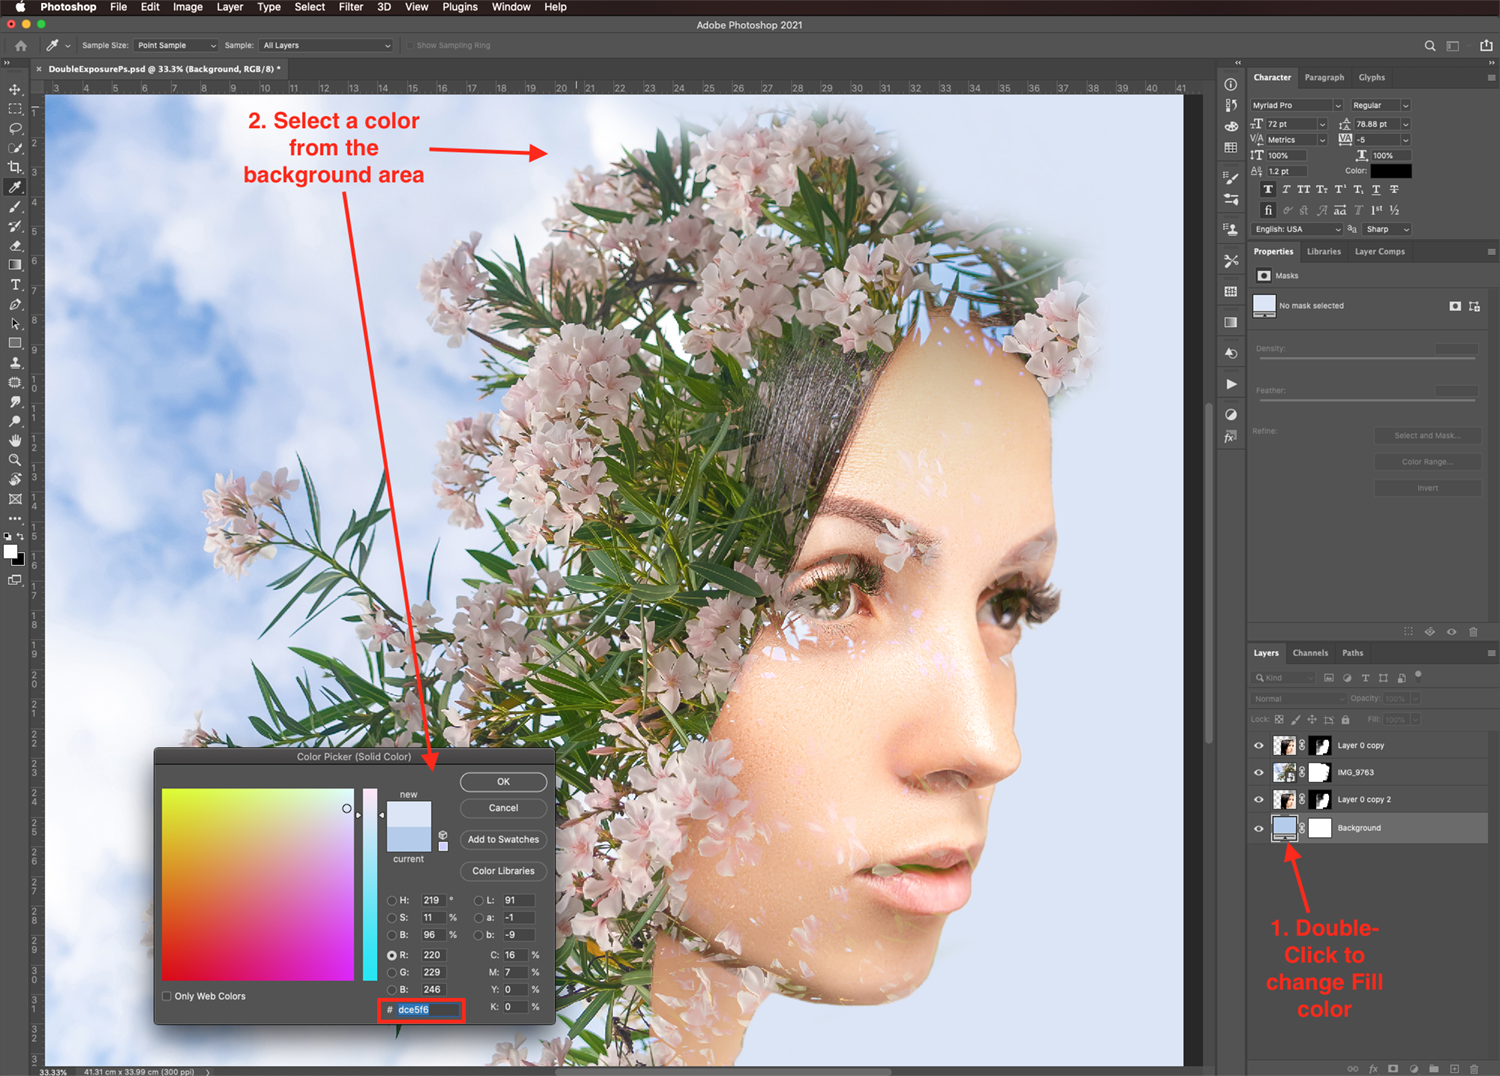
Step 8 - Change the Background Color
We are going to adjust the color of the background so it is more cohesive with the rest of the image.
Double-click on top of the background thumbnail and use the eyedropper to sample from the images. Select a color that blends nicely with the rest of the background.
Step 9 - Refine the Blending of Images
To finish up we are going to apply a few finishing touches to our double exposure. We want to make sure that everything blends together as smoothly as possible.
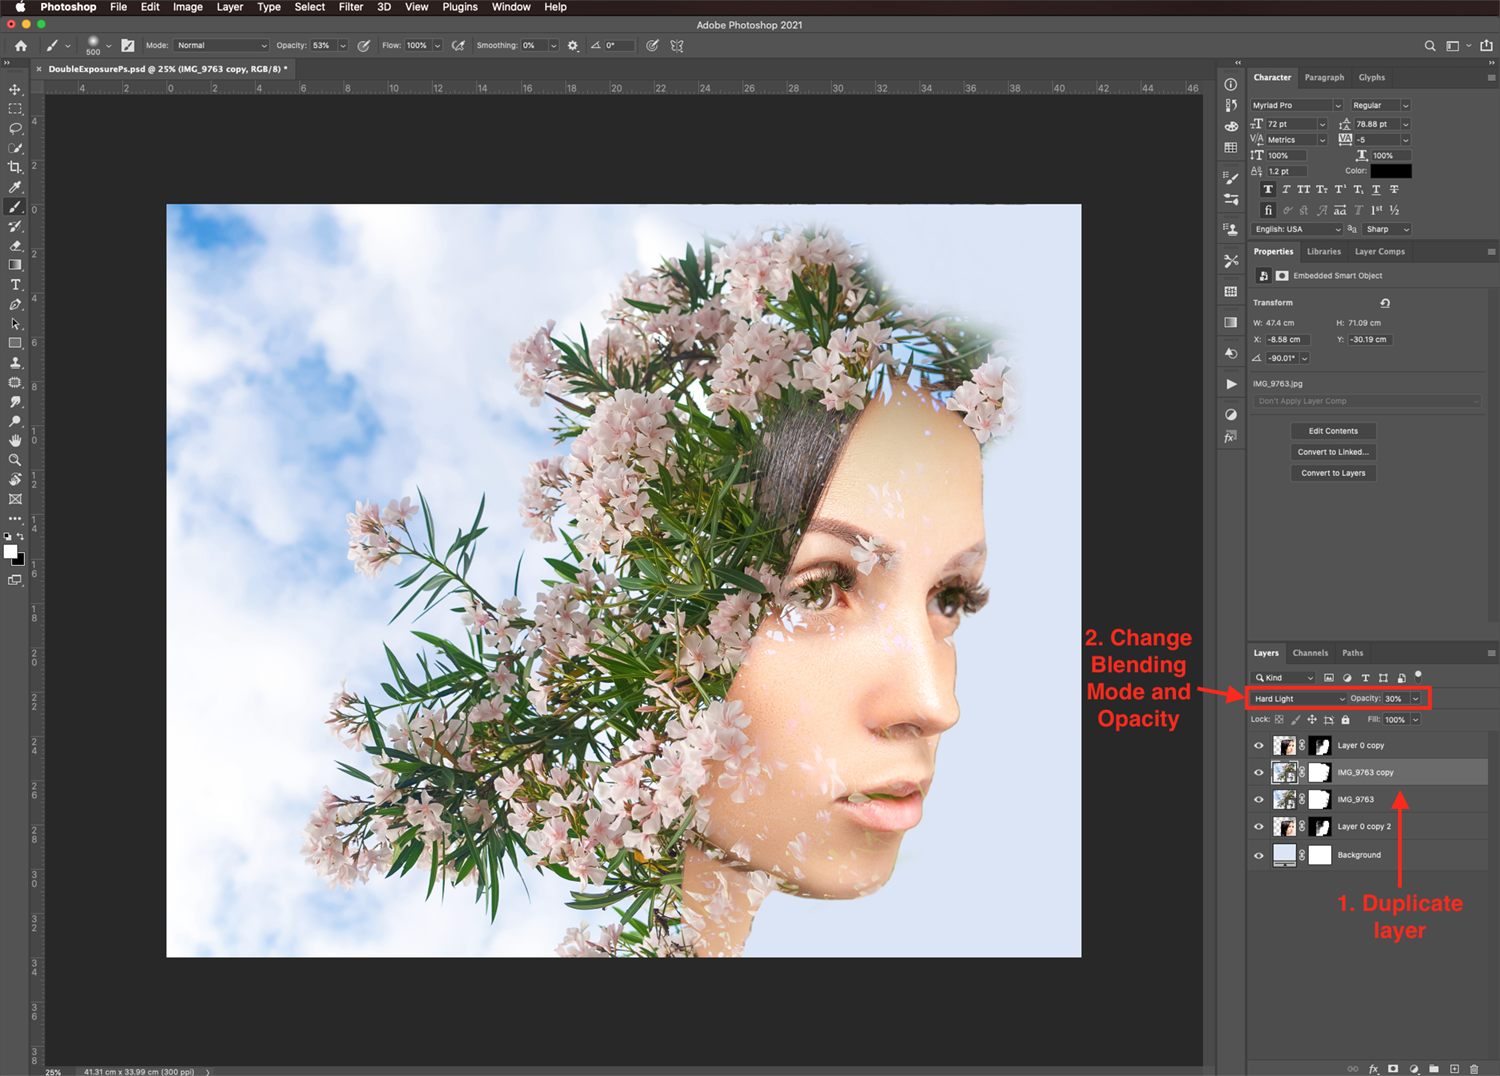
Duplicate the Second Image Layer
First, duplicate the second image layer and change the Blending Mode of the duplicate to Hard Light. Now lower its Opacity to 30%.
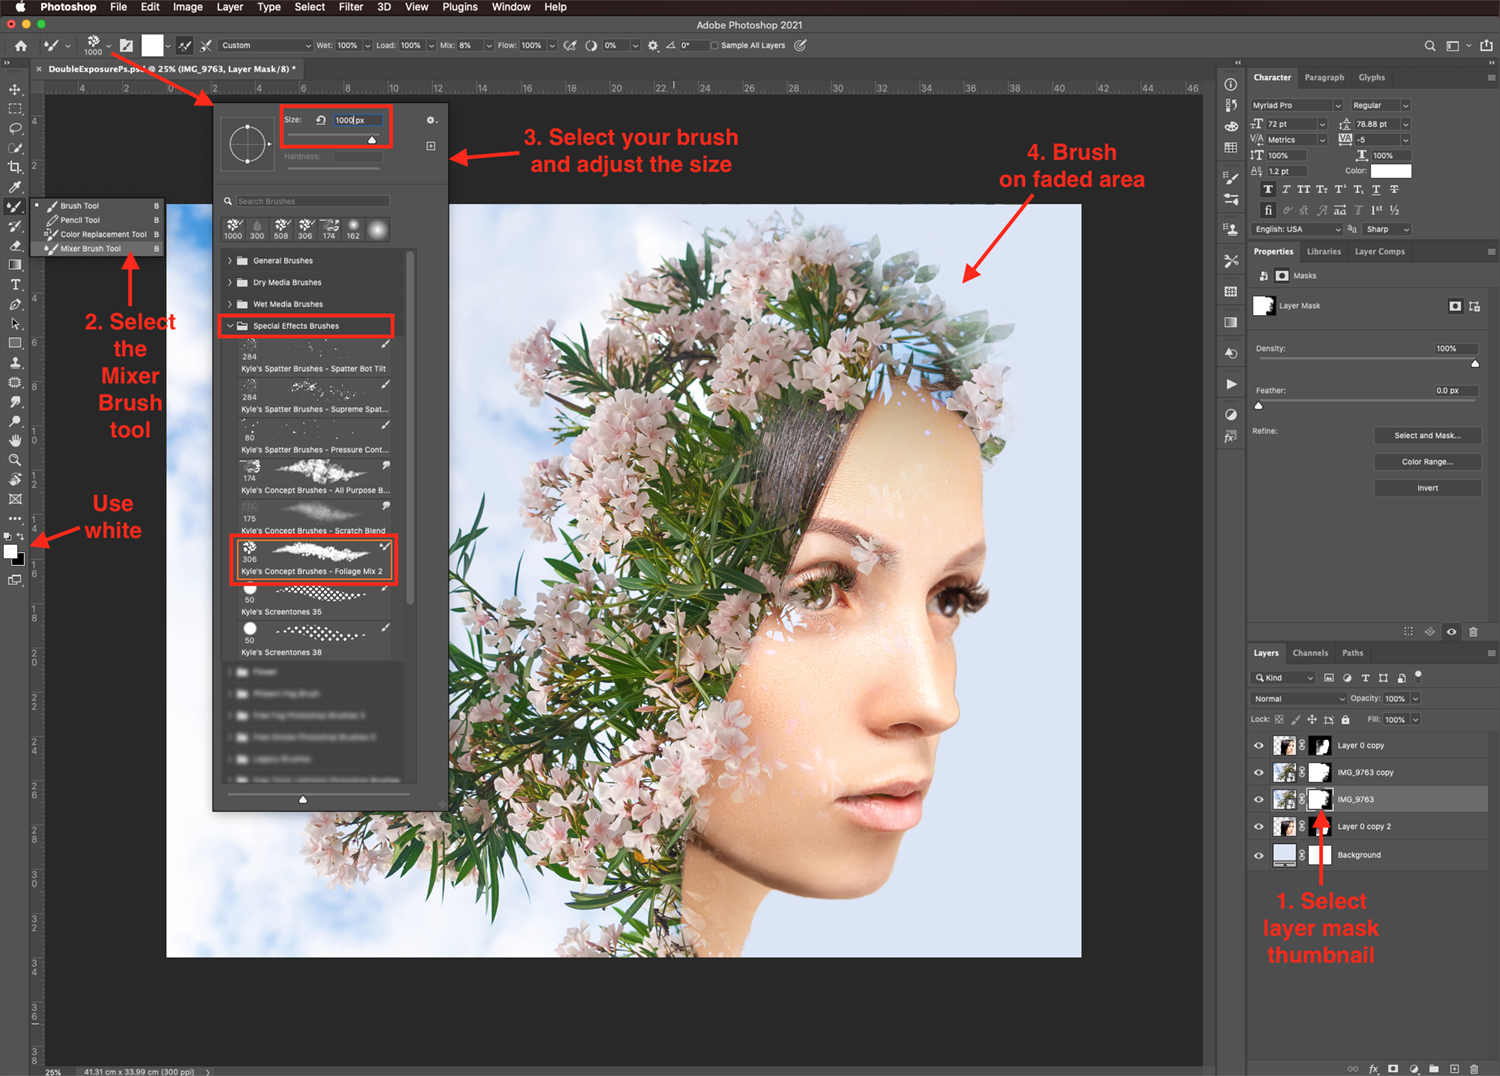
Blend Image with Background Using Mixer Brush
Next, we want the area where the flowers blend with the background to be more defined. So we are going to use a brush to add a more realistic look.
Make sure that you have the second image mask thumbnail selected. Then check that your Foreground color is set to white. Then, use the Mixer Brush Tool (B) with a textured brush to carefully brush on the faded area.
In our case, we used aFoliage Mix brush from the Special Effects packs. These packs are included in the latest version of Photoshop. But you can use any brush you want or you can get some from our Photoshop plugins section.
Step 10 - Adjust the Image Tint
Next, we are going to better blend the subject with the background and adjust the overall tint of our design. To do this we are going to desaturate our subject layers and add a color fill layer on top.
Desaturate the Subject Layers
First, select the subject layer and go to Image > Adjustments > Desaturate (Shift + Command/Control + U). Repeat this with the subject layer duplicate too.

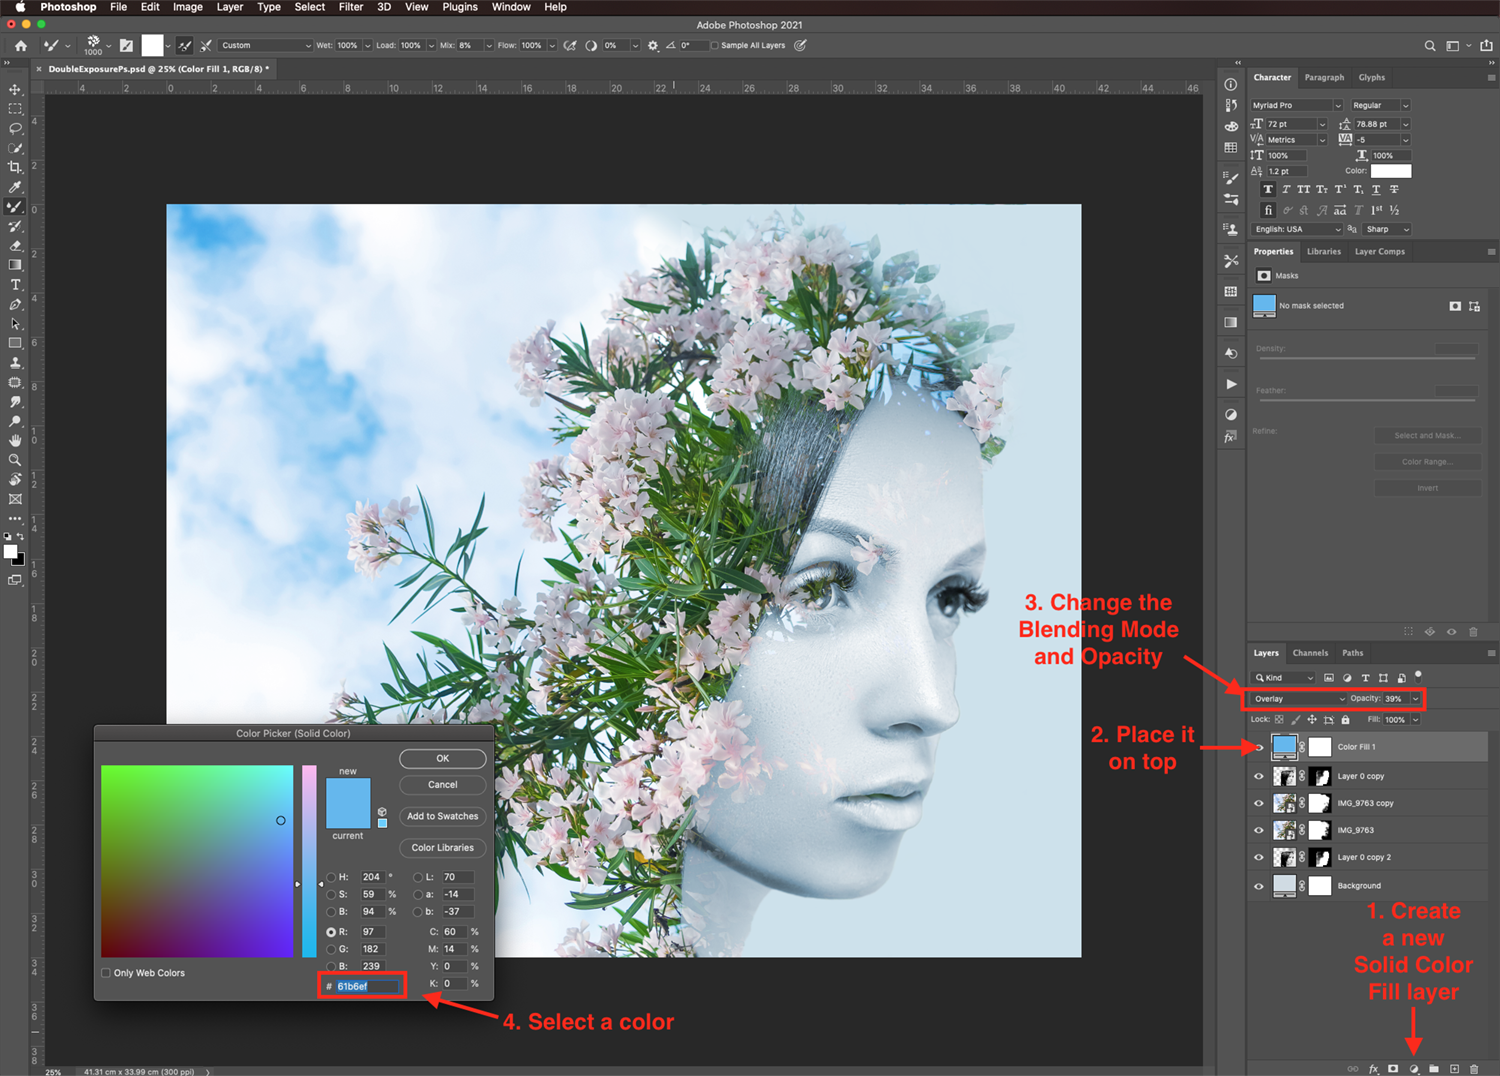
Even Out the Tint with a Color Layer
Next, create a new Solid Color Fill layer on top of everything. Fill it with a color from your image that works well with the overall design.
Then, change theBlending Mode to Overlay and reduce the Opacity to around 40%.
Keep clicking around your image to find the color that works best for your artwork. Then, clickOk.
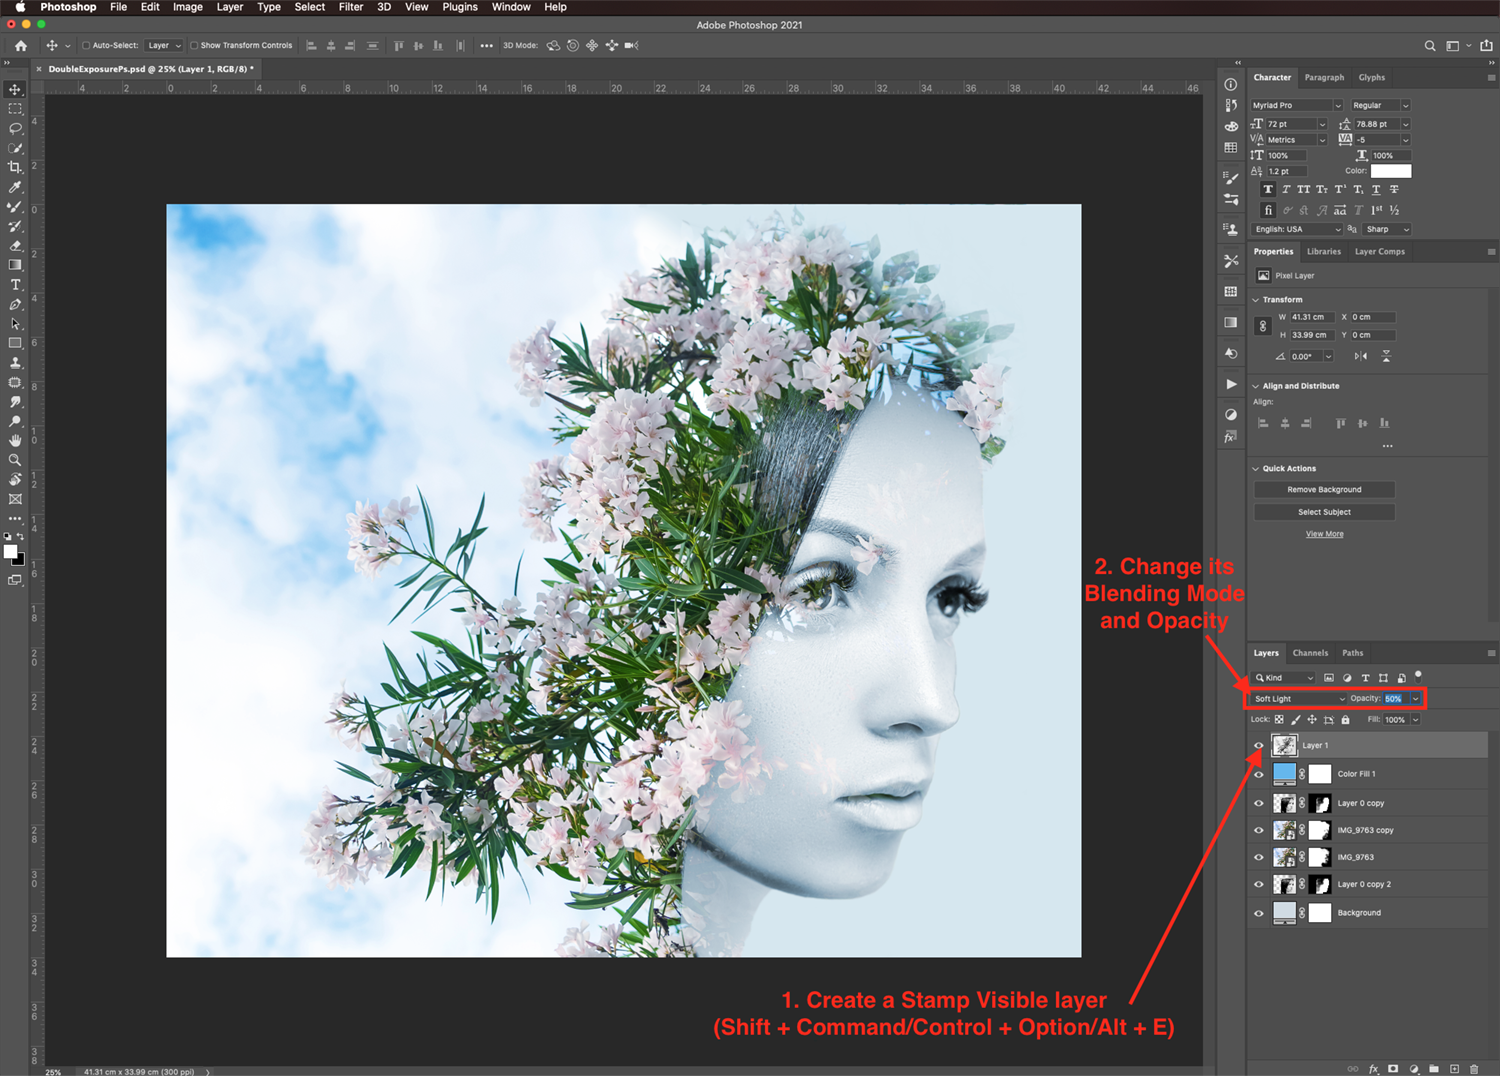
Create a Stamp Visible Layer
Now, let’s create a Stamp Layer from all our visible layers. This will enhance the color and contrast. Do this by clicking the Shift + Command/Control + Option/Alt + E.
Then, we need to change itsBlending Mode to Soft Light and reduce the Opacity to about 50%. This will add more contrast to our image.
Fine Tune the Colors
You can adjust the tint of your double exposure by changing the color of the Solid Color Fill layer on top.

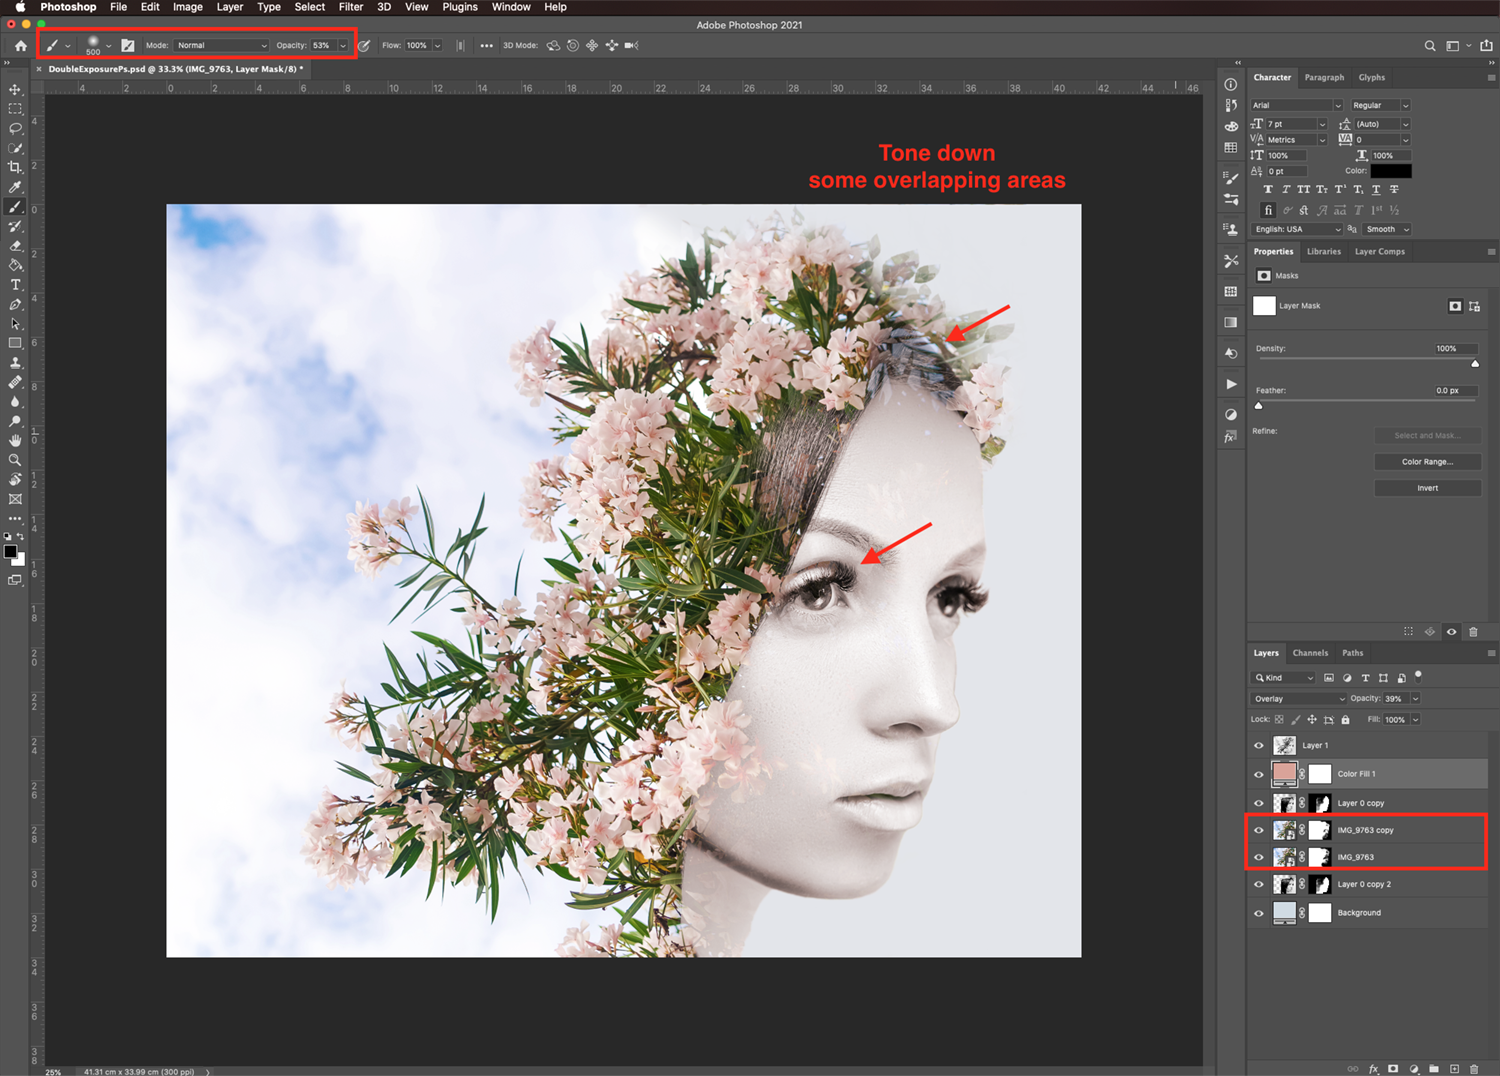
Clean Up Areas as Needed
Take a look at the overlapping areas after fine tuning the colors. If needed, further clean up or tone down the bits and pieces that are too evident.
Experiment with shades and maybe blending modes to achieve different results. For example, pick a blue tone from the sky for a more ethereal feel. You can even pick a shade of pink from the flowers for a warmer result.
You have just created a double exposure in Photoshop. If you want to save time, why not try a ready made action from Design Bundles? It will surely help you speed up your work.
Take your creativity to new levels with our other tutorials such as adding a smoke effect and adding glitter to images in Photoshop.


