- By Design Bundles
- 5 Mins
- Illustrator Tutorials
How to Make an Isometric Grid in Illustrator
Discover how to create perspective type with this step by step Adobe Illustrator tutorial.
Isometric illustrations are made in 2D (2 dimensions) but they look like 3D drawings. Essentially you are mimicking the depth and distortion of the 3D object. To better achieve this you need to create a Grid to aid you with your designs. We will show you how to create an Isometric Grid in Illustrator.
The Isometric Grid is very handy for creating isometric illustrations with the correct perspective. The technique is super quick to use so let’s get started.
Step 1 - Create the Grid
To make your grid, create a new document. Select the Rectangular Grid tool and click inside the canvas to bring out the Tool Options panel.

For the Horizontal and Vertical Dividers, we used a value of 20. A value of 30 can be used depending on your needs.

Now, we are going to create a grid that is larger than our document. Hold the Shift key while dragging down and right to create it making sure that it extends beyond the canvas edges.

Step 2 - Adjust the Grid to the Isometric perspective
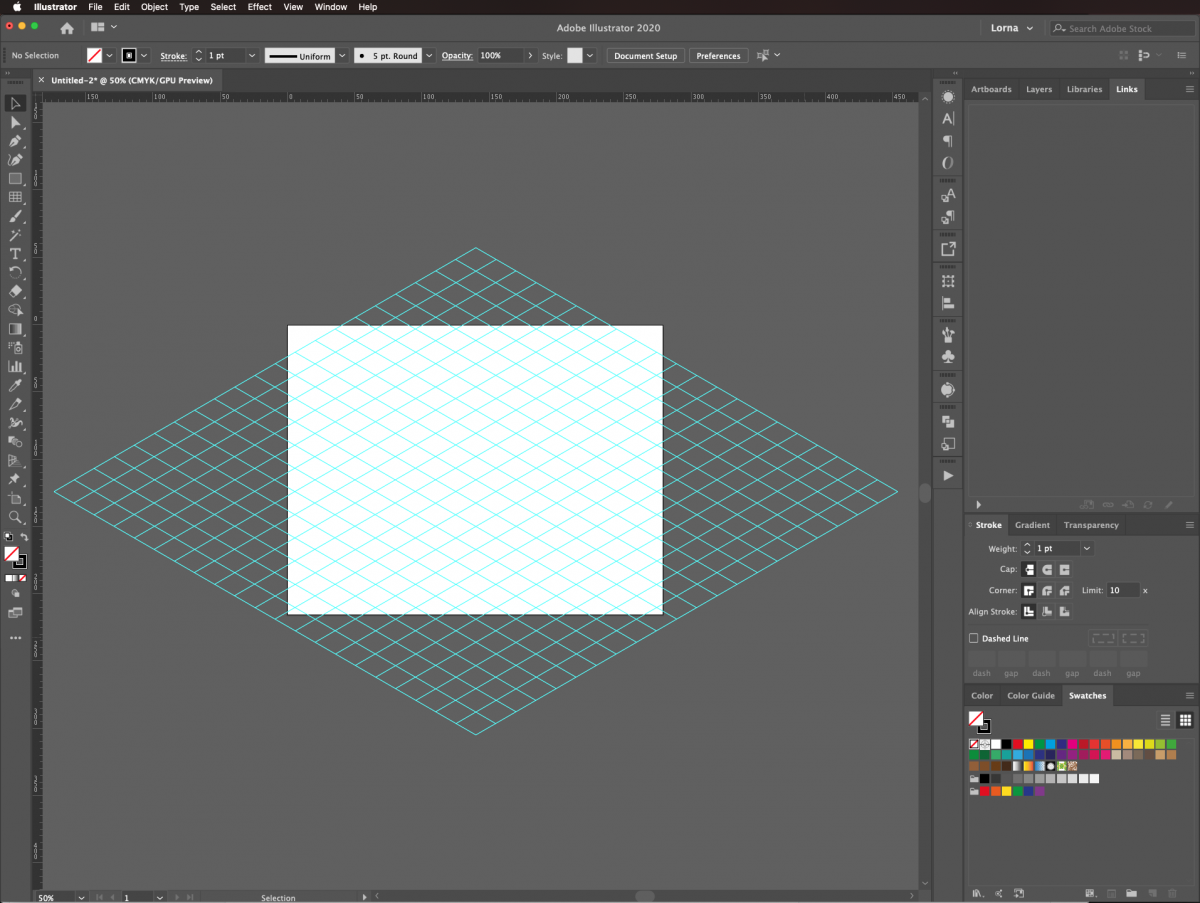
We need to adjust the Grid so it has the correct measurements and perspective to create isometric designs.
Let’s first adjust the Scale. Make sure that it is selected and go to Object > Transform > Scale.

In the Scale panel, check the Non-Uniform button, and use a Vertical Scale of 86.602%.

Next, we will use the Shear tool. Go to Object > Transform > Shear.

We used a Shear Angle of 30° with a Horizontal Axis.

Finally, to rotate the grid, go to Object > Transform > Rotate.

In the options, we used an Angle of -30°.

The resulting grid should look like the image below.

Step 3 - Turn your Grid into Guides
We are going to turn the grid into guides so we can use it as references for Isometric designs. Without deselecting, go to View > Guides > Make Guides (Command/Control + 5) to turn it into guides.

You should notice that the grid color changed to the same one that is assigned to the document guides.

Step 4 - Use the Grid to create Isometric Designs
Your Grid is now ready to be used as a guide. You can use the Pen tool (P) to start creating Isometric vectors.

You can use this to write simple vector text or to make other objects.

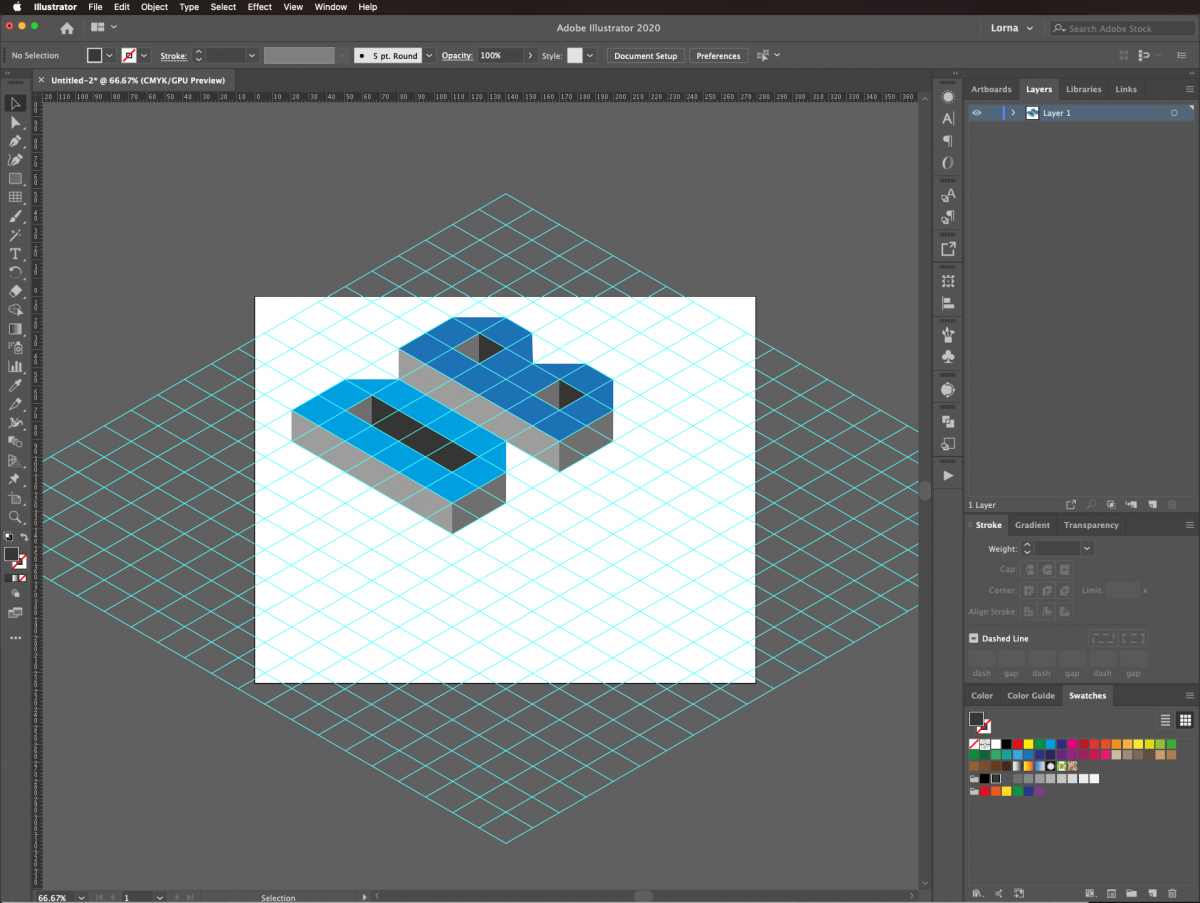
You can also make 3D geometrical shapes like in the image below.

If you wish to hide the guides to check your design without them, go to View > Guides > Hide Guides (Command/Control + ;).

We have now completed our design and this is what it looks like.

The grid can aid you when using the isometric perspective with text and fonts. Check out our full tutorial on creating isometric text in Illustrator.
6 Related Illustrator Tutorials
1 - In Illustrator, create a “New Document”.2 - Select the “Line Segment Tool” (\) and draw a 15 cm long line on the top part of your document. Hold the “Shift” key to make sure the line is straight, use Black as “Stroke” color. Leave the “Weight” at 1 pt.3 - Select The “...
In this tutorial we will learn how to make a 3D Paper Cut Effect .First, we will need a contour shape. You can use any appropriate vector or image for this purpose. If you decide to go with an image, transform it into a vector using Image Trace or create ...
In this tutorial we will be creating a pastel gradient background in Adobe Illustrator. To select our colors we will be using a pastel color palette. Creating gradients in this way gives you full flexibility to create your preferred color blends. It allows you to add and remove colors to ...
In this tutorial you will learn how to design the groundwork of a split monogram in Illustrator. Split monograms can incorporate many different design elements that represent various styles and personalities. This makes them great for creating personalized projects for friends and family.In this tutorial we are going to ...
In this tutorial you are going to learn the quick and easy way to make a ribbon banner in Illustrator, I am then going to show you the settings you can change to create an arched and a wavy flag banner too.Step 1 - Draw a rectangleFirstly, you need to ...
Laser cut ornaments are a beautiful way to add a personal, handcrafted touch to your holiday décor. In this tutorial, I’ll walk you through creating a snowflake ornament using Adobe Illustrator.To keep things simple, we’ll use a pre-made snowflake template from the Design Bundles Plus library, ...

 All your Font Needs


