


By Design Bundles
Silhouette Tutorials2 min
How To Calibrate The Pixscan Mat In Silhouette Studio
1- Open silhouette studio.
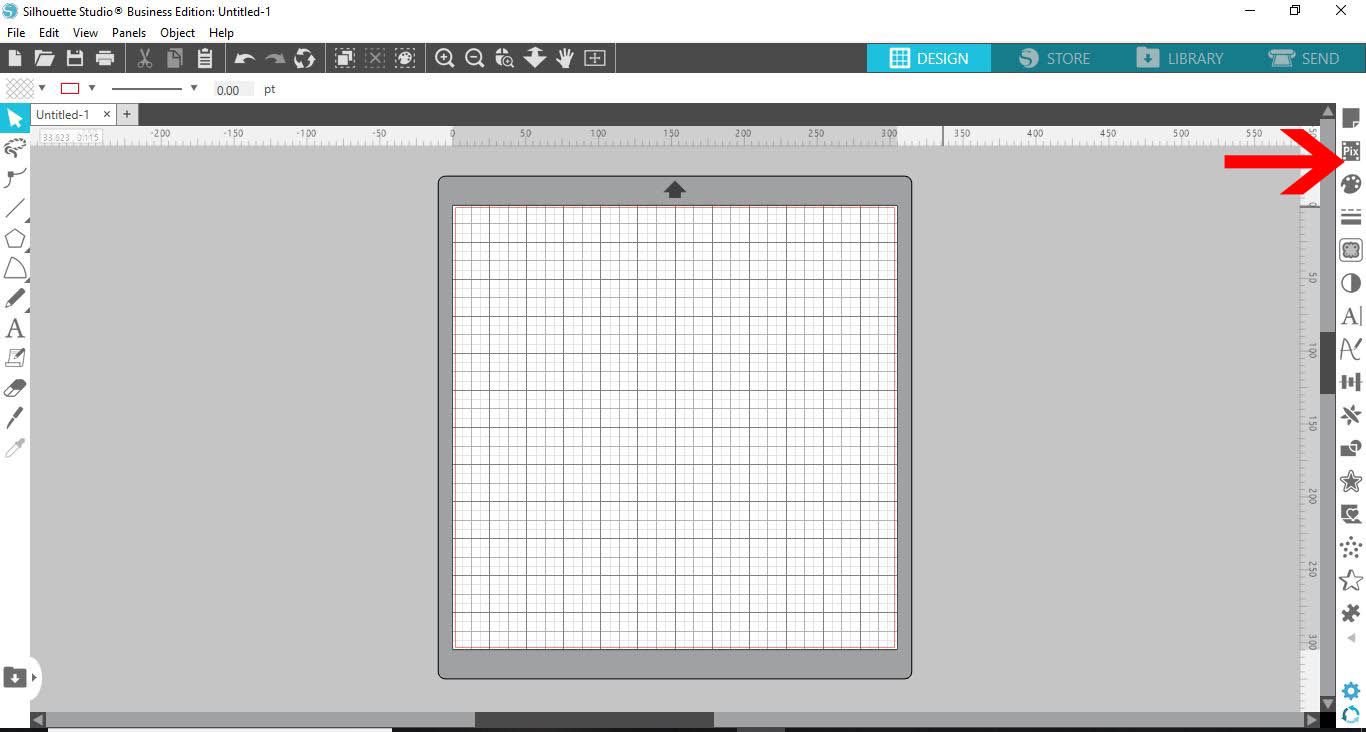
2- Click on the pixscan panel.
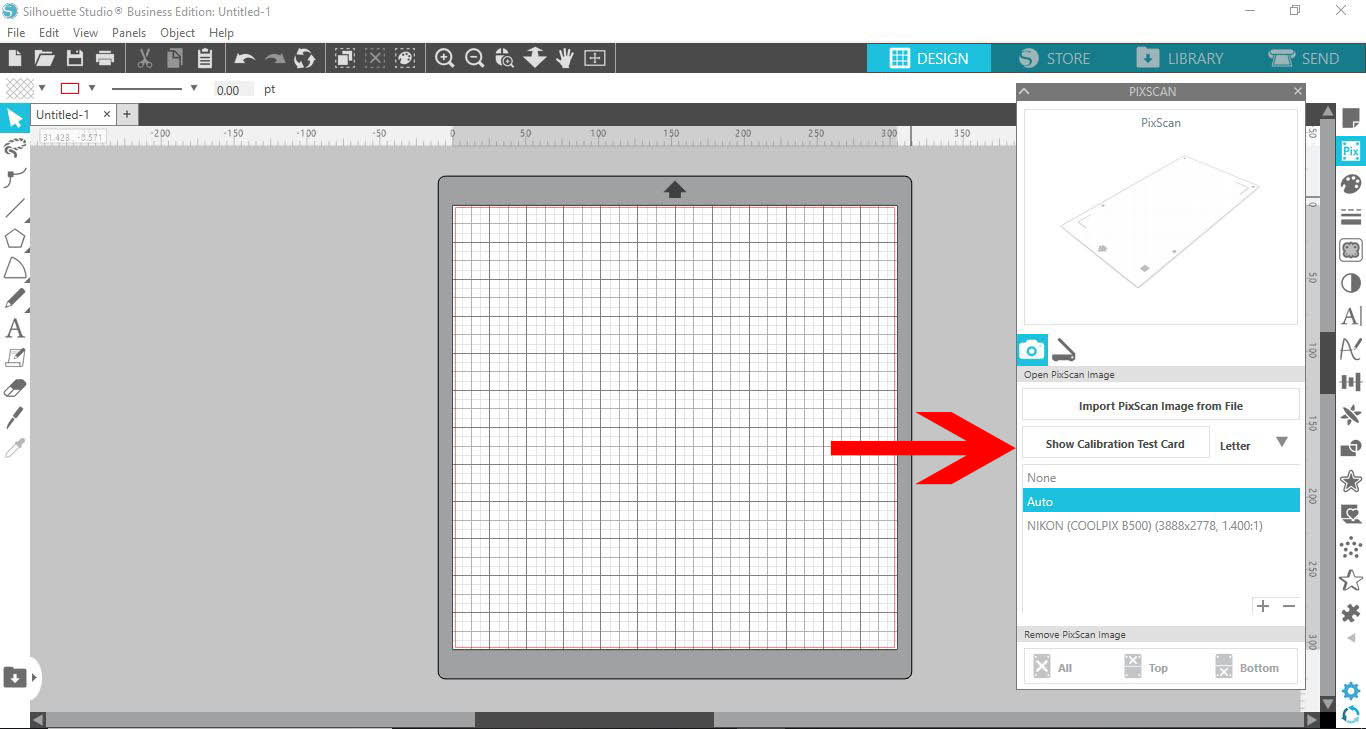
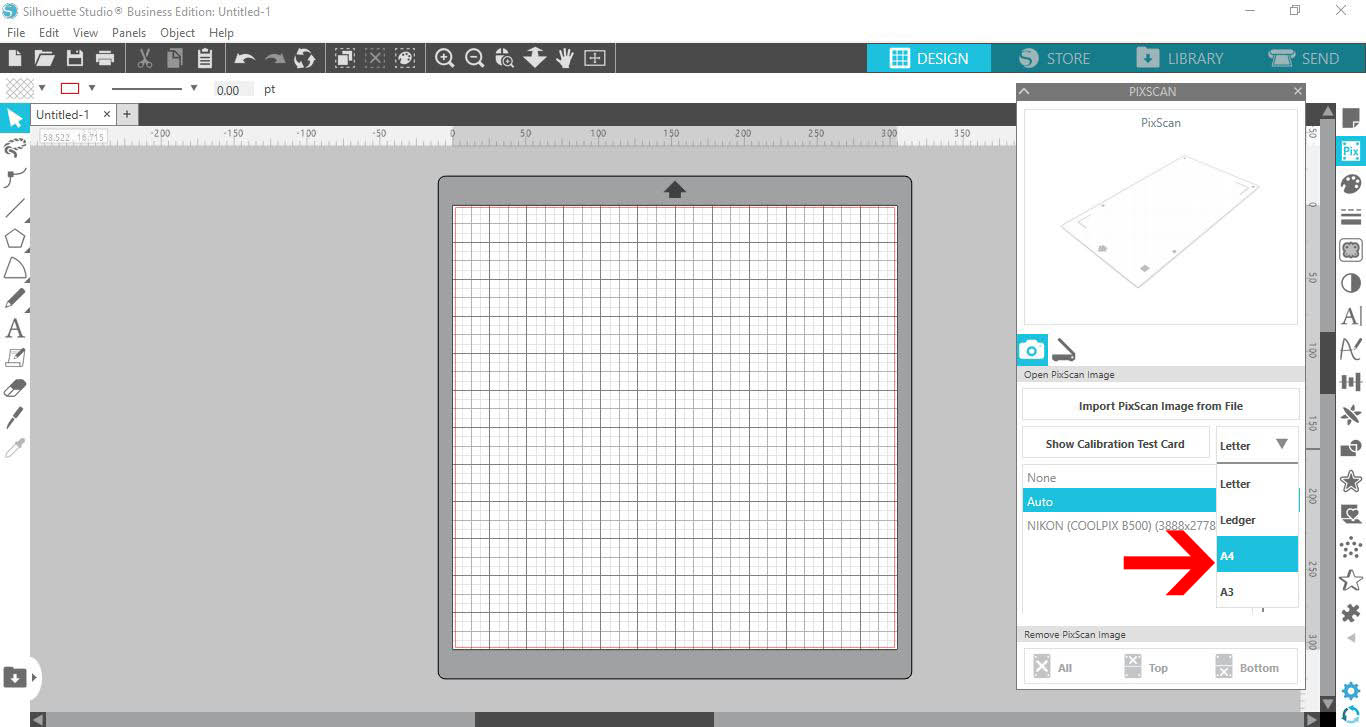
3- In the drop down box select the size of your paper. Next click the show text card icon.
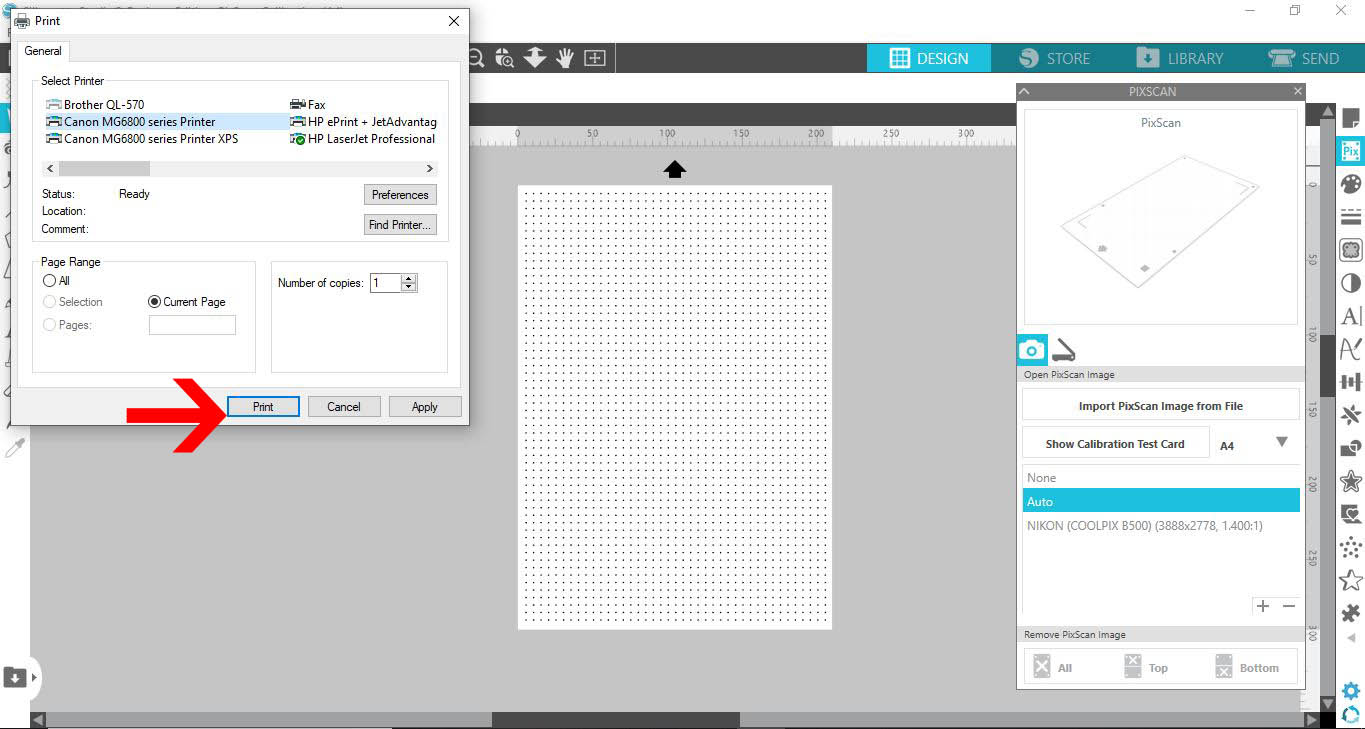
4- The text card will appear on your screen. Click on the print icon.
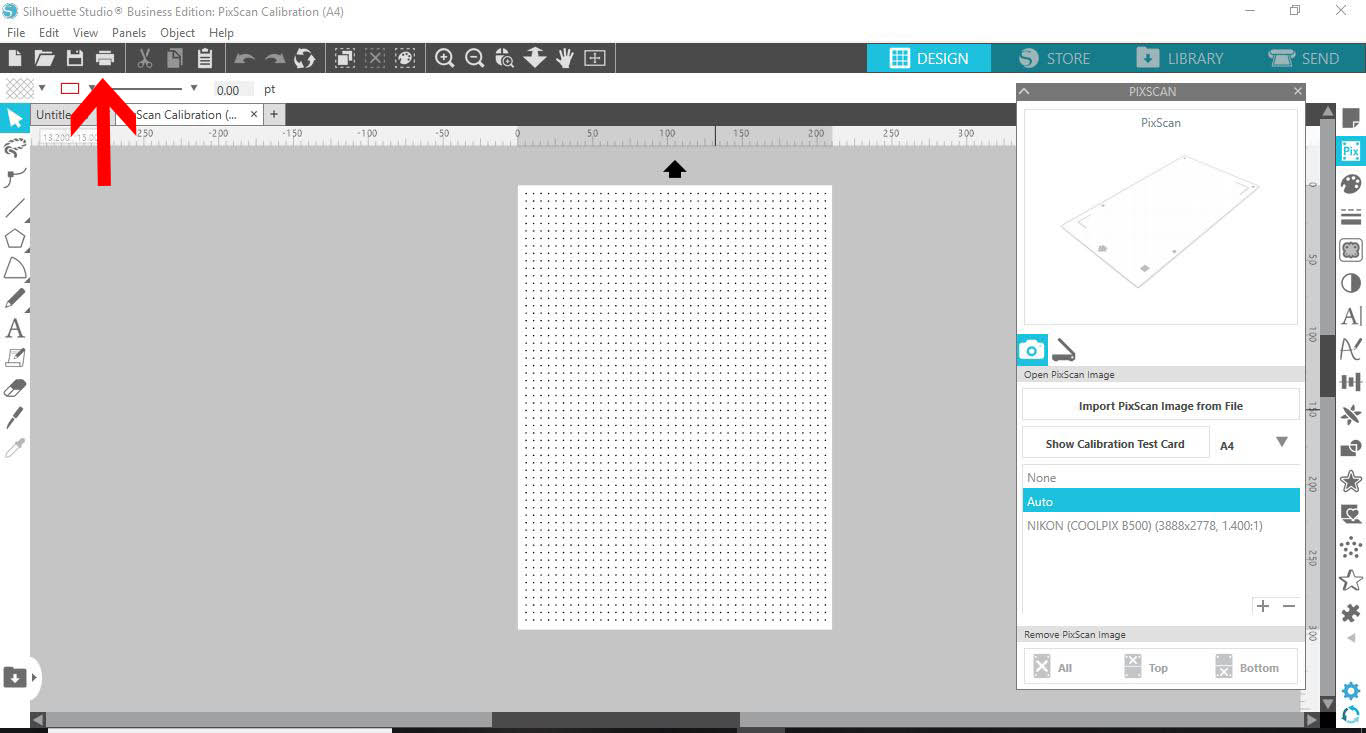
5- Print the test card.
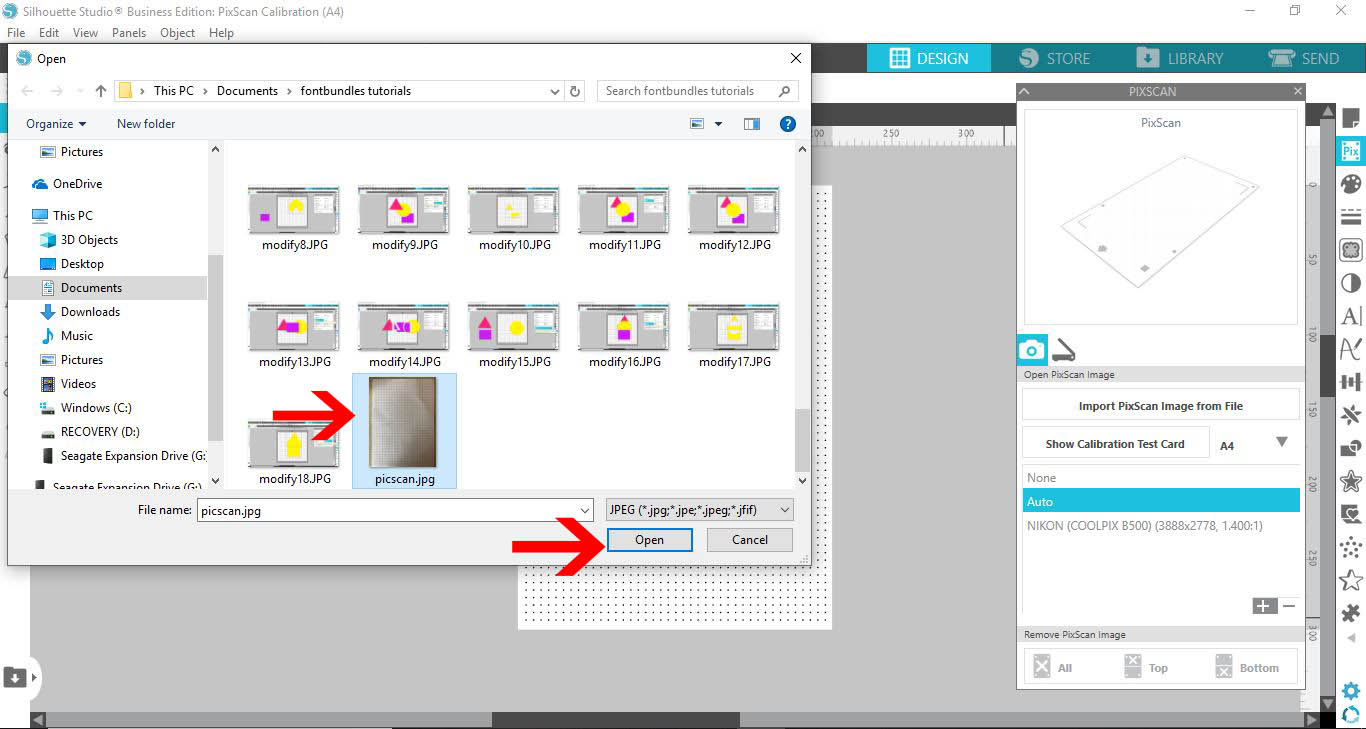
6- Take a photo of the test card with the camera you want to calibrate too. I am using an IphoneX.
Open the picture in the silhouette software by clicking on the little + icon.
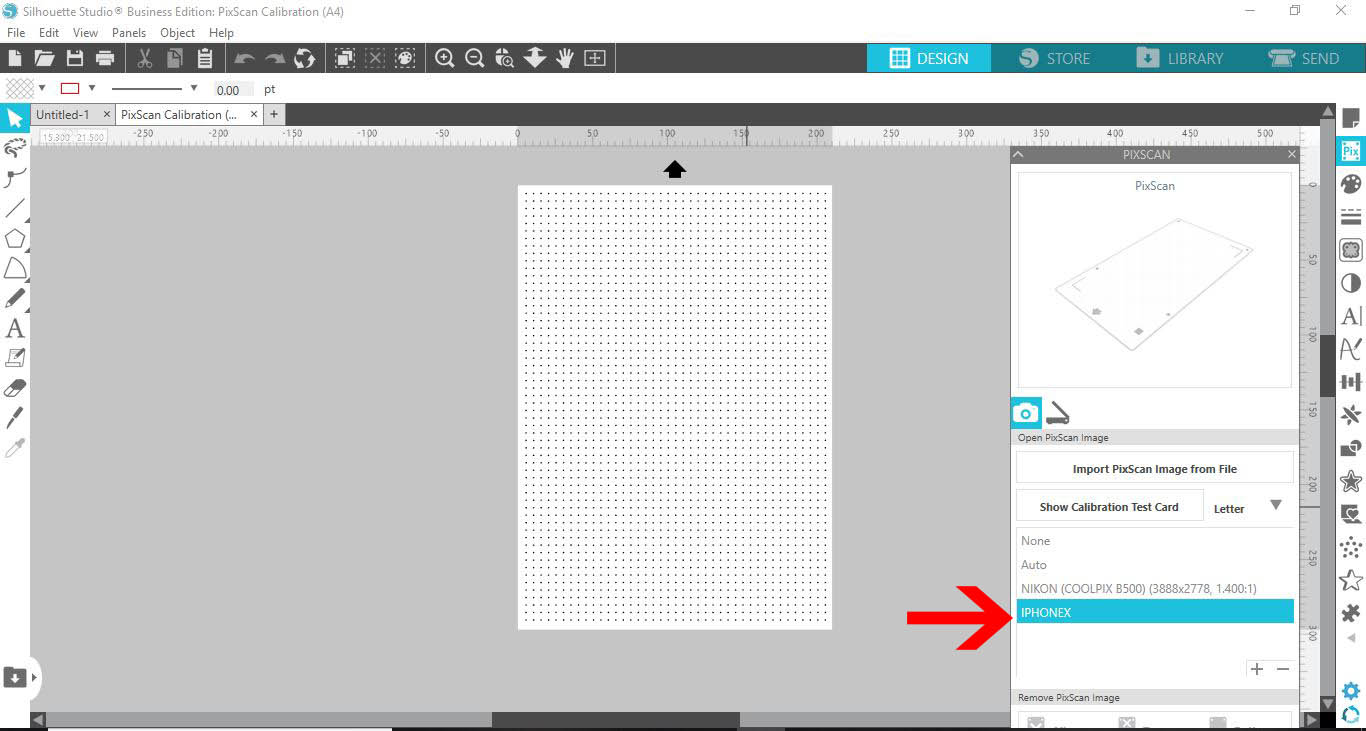
7- The new calibration camera will appear in the pixcan panel. your camera is calibrated ready to use with the pixscan mat.
Related Tutorials
Silhouette Tutorials
How To Use the Pixscan Mat In Silhouette Studio
Silhouette Tutorials
How to Calibrate with the Distance Adjustment Tool in Silhouette Studio
Discover how to adjust your cut lines with the Distance Adjustment tool in Silhouette Studio.
Silhouette Tutorials
How to Cut Stamped Images Without a Picscan Mat in Silhouette Studio
Silhouette Tutorials
How to Create Sublimation Designs in Silhouette Studio
Learn to create Sublimation Designs in Silhouette Studio in 6 easy steps!
Silhouette Tutorials
How to Add a New Cutting Material to Silhouette Studio
Silhouette Tutorials
Removing Unwanted Cut Lines in Silhouette Studio
Today, we'll show you three methods of removing unwanted cut lines in Silhouette Studio.


