Unlimited Downloads 15% off Marketplace Purchases Exclusive Software Access Unlimited Downloads
15% off Marketplace Purchases
Exclusive Software Access
Get Plus Now Maybe Later
How to Calibrate with the Distance Adjustment Tool in Silhouette Studio
  • By Design Bundles
  • 4 Mins
  • Beginner
  • Silhouette Tutorials

How to Calibrate with the Distance Adjustment Tool in Silhouette Studio

Discover how to adjust your cut lines with the Distance Adjustment tool in Silhouette Studio.

In this tutorial we will guide you on how to calibrate with the Distance Adjustment Tool in Silhouette Studio. The tool is used to correct any differences in your design measurement. You may find that your machine is cutting slightly off the design. It can be highly frustrating but with this tutorial we will help you to fix this issue.

An example of where you would use the Distance Adjustment Tool would be for a design like a 3cm square.

When cutting it may be off by 3.3cm, so you would need to correct this. Let’s get started by opening Silhouette Studio.

Step 1 - Print Distance Adjustment Test Page

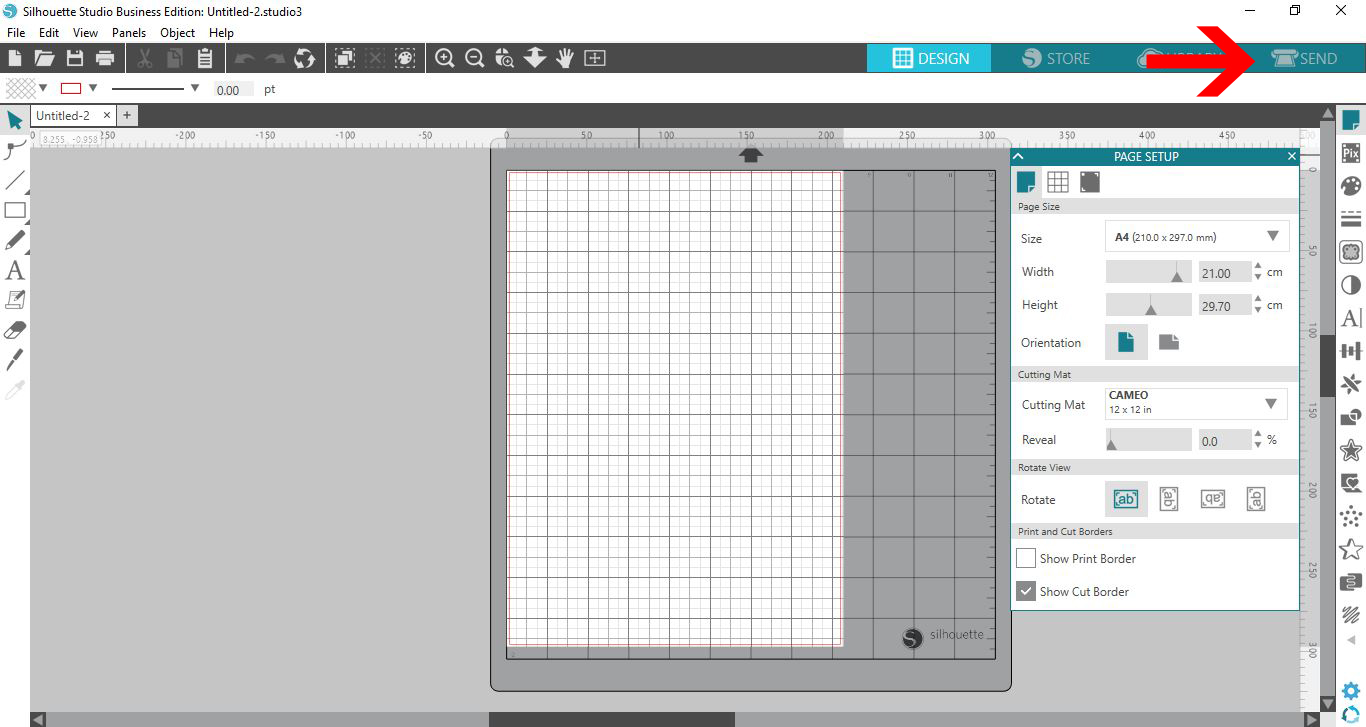
We will need to print out the Distance Adjustment test page in order to adjust. Once you have opened Silhouette Studio, click on the Send panel icon.

Go to Send panel in Silhouette

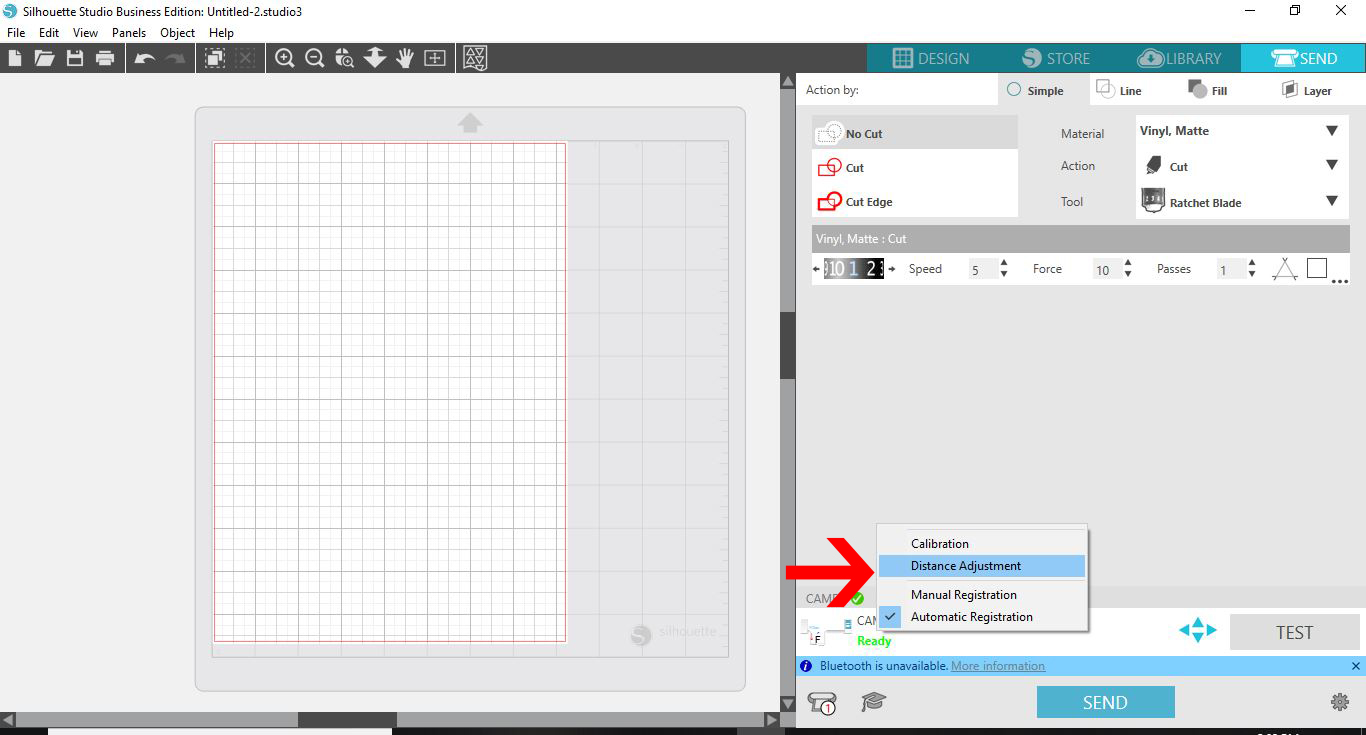
At the bottom of the screen, right click on the currently selected machine icon. In this case, the Cameo is selected. In the pop up window select the Distance Adjustment option.

Select Distance Adjustment in Silhouette

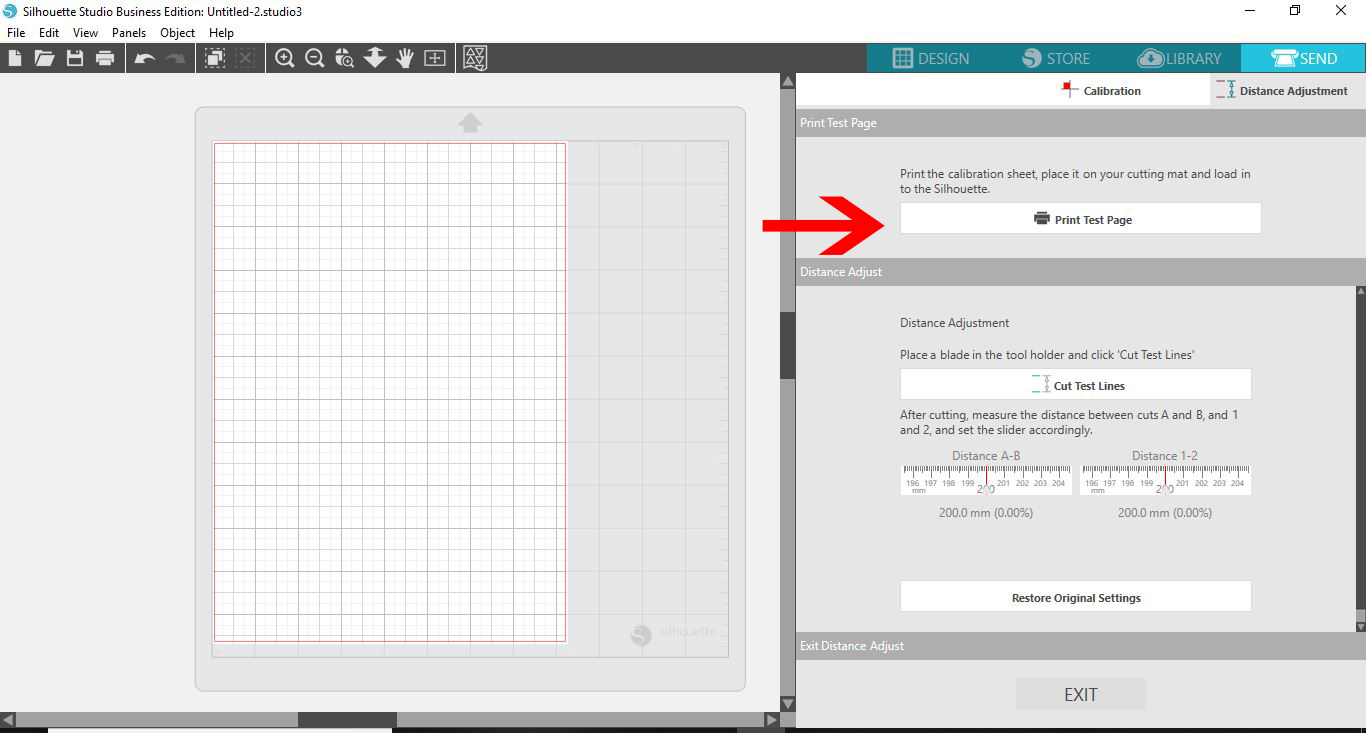
In the window on the right side, click on Print Test Page.

Print test page in Silhouette

The test page will appear on the mat in the Design area. The print options menu will also open where you can select the printer. Choose a letter or A4 size for printing. Then, click on Print.

Select printer in Silhouette Studio

Step 2 - Send Test Sheet to Cut

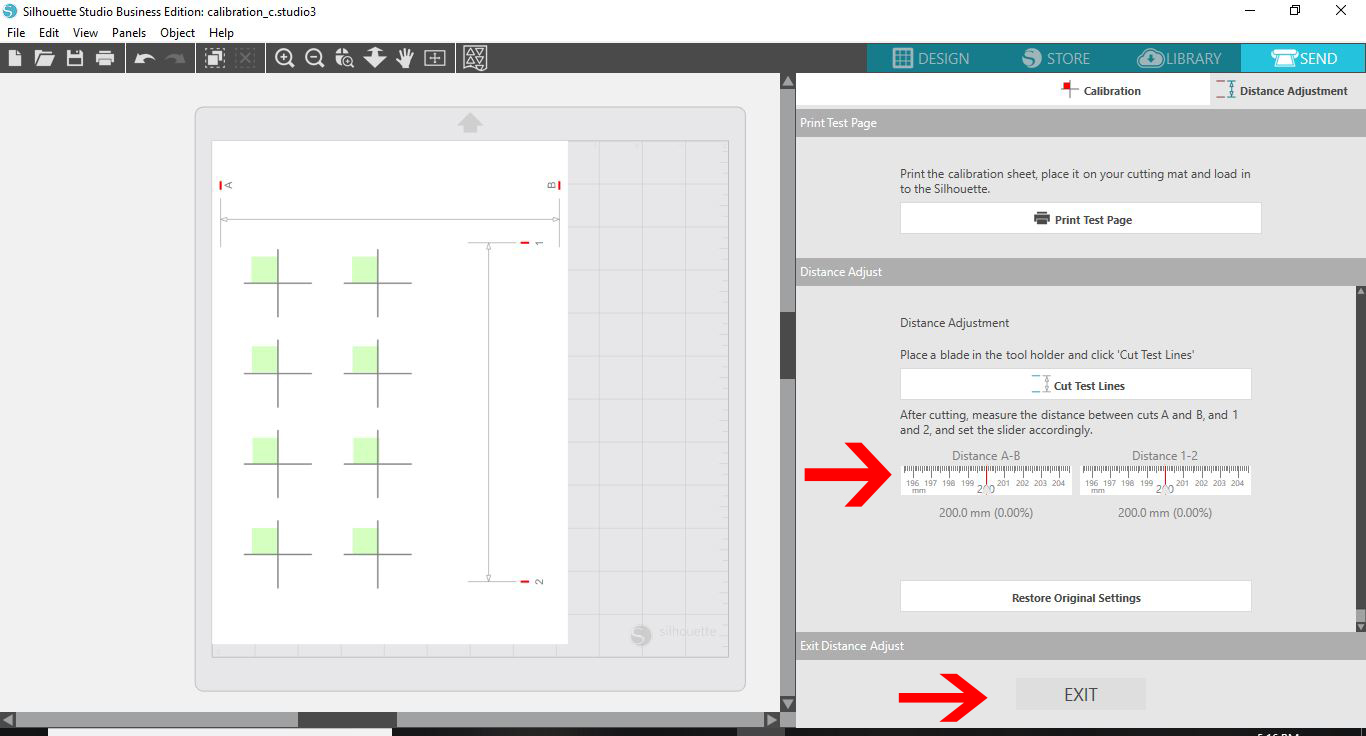
Load the test sheet onto your mat. In the window on the right, click on Cut Test Lines. Your cutting machine will cut a small line just below A and B as well as 1 and 2.

Cut test line in Silhouette

As you can see a small line was also cut above number 2.

Cut line for Distance Adjustment

Now, take a ruler and measure, in mm, the distance between point 1 and 2. Then measure between A and B. If the distance is over 200mm, make a note of the number.

Go back to the screen. Then, under the Distance Adjustment option you will see two sets of measurements. If needed, change the measurements for the Distance A-B and Distance 1-2.

To check that the settings match, print a test sheet and cut again. If everything is correct, you can click on the Exit button to close out.

Adjust measurements for Distance Adjustment

That’s it, your machine has been adjusted. We hope that you have enjoyed following this tutorial and found the information helpful.


6 Related Silhouette Tutorials

1- Open Silhouette Studio2- Add graphic and click on the replicate panel3- To duplicate click on the image showing what you trying to do.Here is the result:3- Rows and columns will produce three or four graphics total in the direction of the image you choose.Here ...

In today’s tutorial you will learn how to use the Modify Tool in Silhouette Studio. With the Modify Tool Panel, you can change the interaction between overlapping objects. This is especially useful when designing cut files from scratch. The ModifyTool is available in all Silhouette Studio versions.Throughout the ...

1- Open silhouette studio.2- Click on the pixscan panel.3- In the drop down box select the size of your paper. Next click the show text card icon.4- The text card will appear on your screen. Click on the print icon.5- Print the test card.6- Take ...

1- Open Silhouette Studio.2- Click on the rectangle tool, a new pop out will appear. select the polygon icon.3- Click and drag on your work space.You will create a polygon.4- Hold the ALT key while creating your polygon to ensure the shape is created straight rather ...

1- Open Silhouette Studio2- Add text or graphics for your project.If it's text you need to have them as separate images to use with this feature. We're using the Weathered Sweater font.3- Open the Transform panel on the left-hand side.4- Select the correct image showing the ...

Splitting or slicing an image in Silhouette Studio is done by using the Knife Tool.Applied to cut lines or images, projects such as creating Split Monograms are easily achieved. Once your image is selected click the Knife Tool on the left side panel, click and drag across your design ...

silhouette studio distance adjustment tool adjust cut lines

You may also like

Help Center
ol image