
How to Create a Split Monogram in Silhouette Studio
Split monograms make for great projects that can be personalized. Any design can be split using the Knife Tool and the Straight Cut option. In this tutorial you will learn how to create a Split Monogram in Silhouette Studio.
We will be using a Sans Serif Font from KA Designs and a Sunflower SVG from BlackCatsMedia.
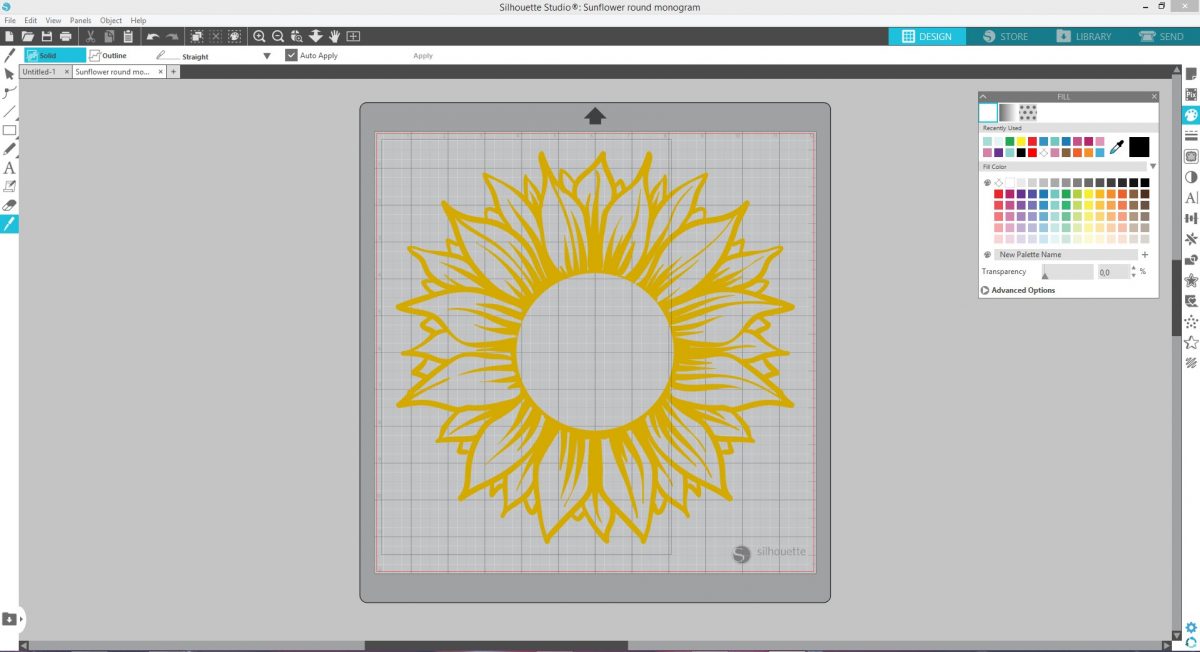
Once you have opened Silhouette Design Studio click on File and then Open. Select the Sunflower Monogram SVG to open and resize on your canvas if necessary.
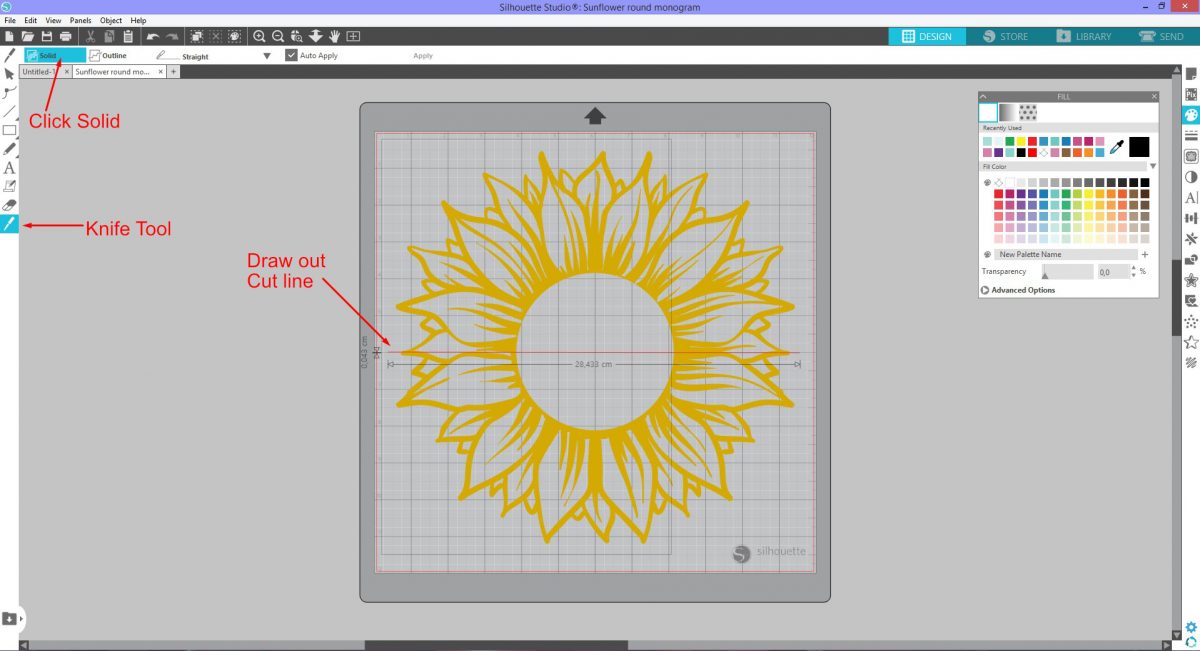
On the left side panel select the Knife Tool and be sure to check that Solid Cut is selected at the top. Starting on one side of the Sunflower, click and drag the cut line through the middle to the other side. Release your mouse button. The Sunflower has been cut into two individual objects.
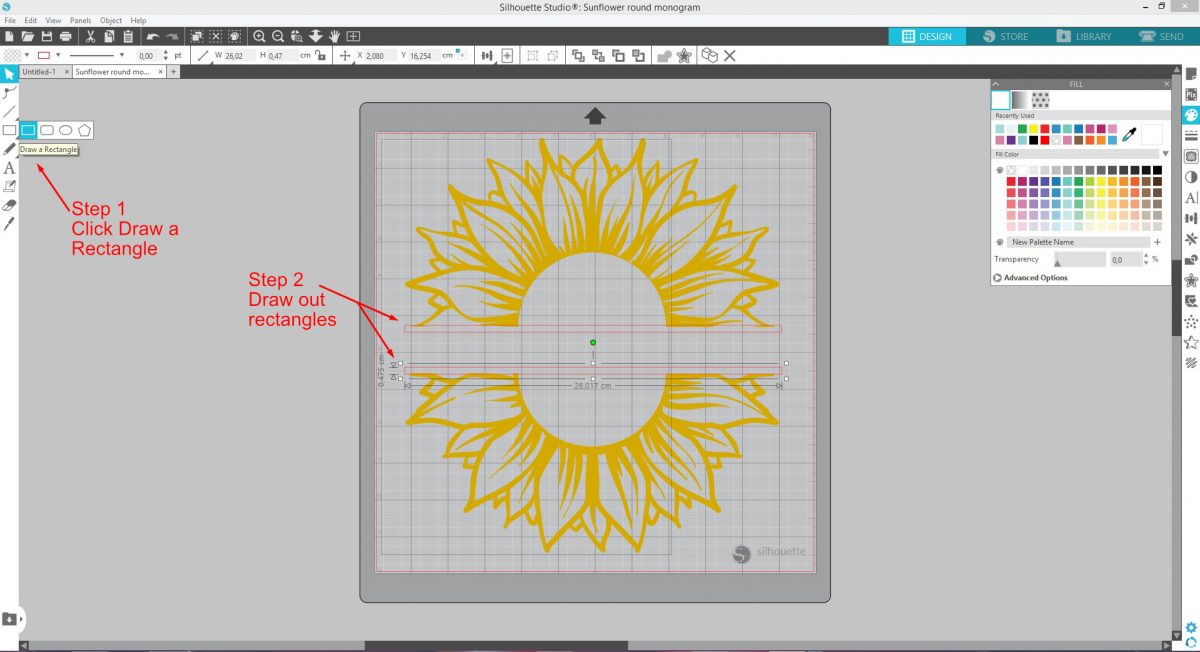
Select the lower half of the Sunflower and shift down to create a space between the two objects. We want to add a rectangle to each of the objects. Click on the Drawing Tools icon and select Draw a Rectangle.
Draw out a rectangle just below the top half of the Sunflower. It should be overlapping on the design ever so slightly. Duplicate the rectangle and move down until it just overlaps on the lower half of the Sunflower.
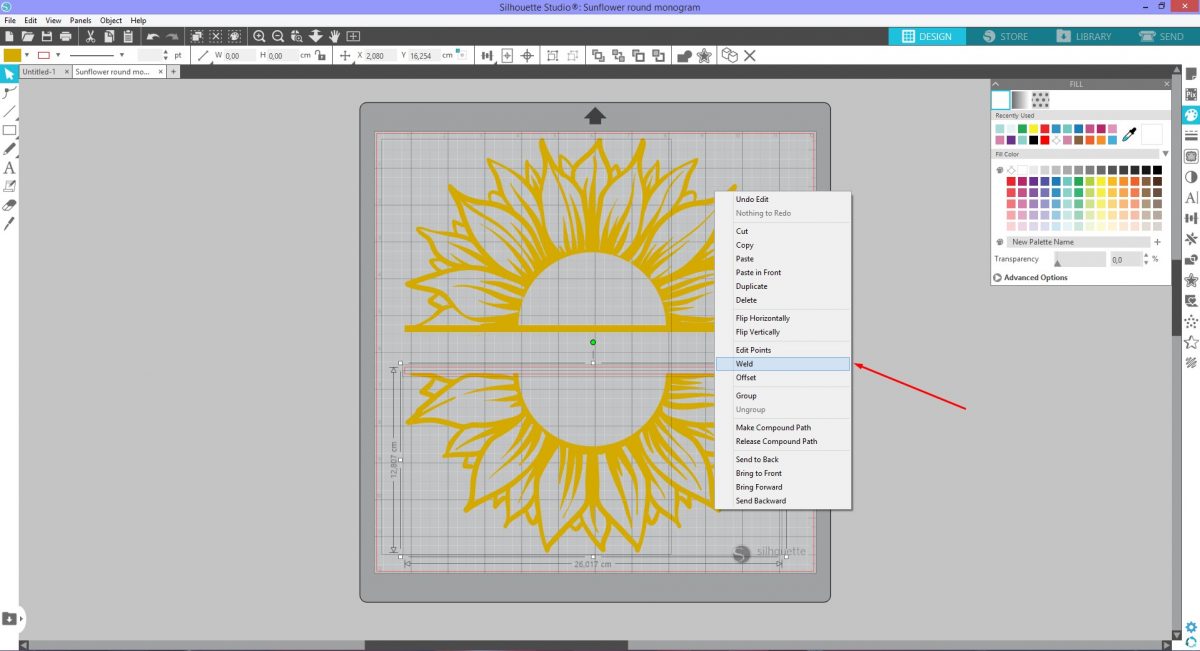
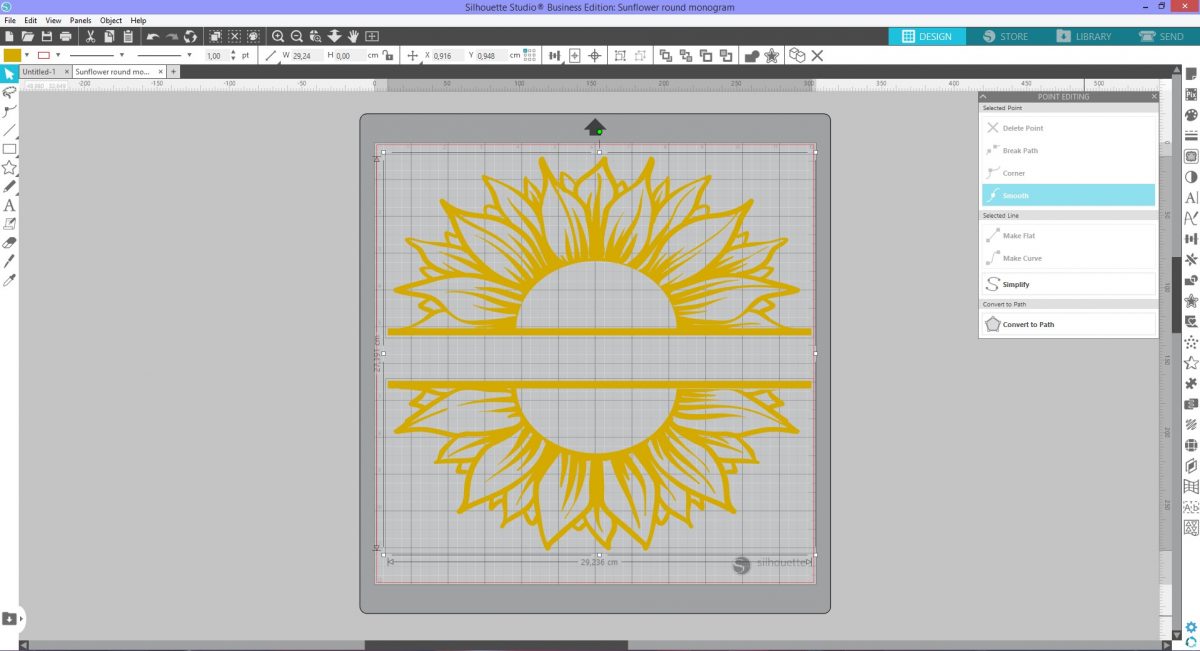
We need to Weld the rectangles to the upper and lower parts of the Sunflower. First select the upper half along with the top rectangle, right click and select Weld. Repeat this for the lower half and second rectangle.
Once welded, adjust the Split Monogram size and spacing until you are happy with it.
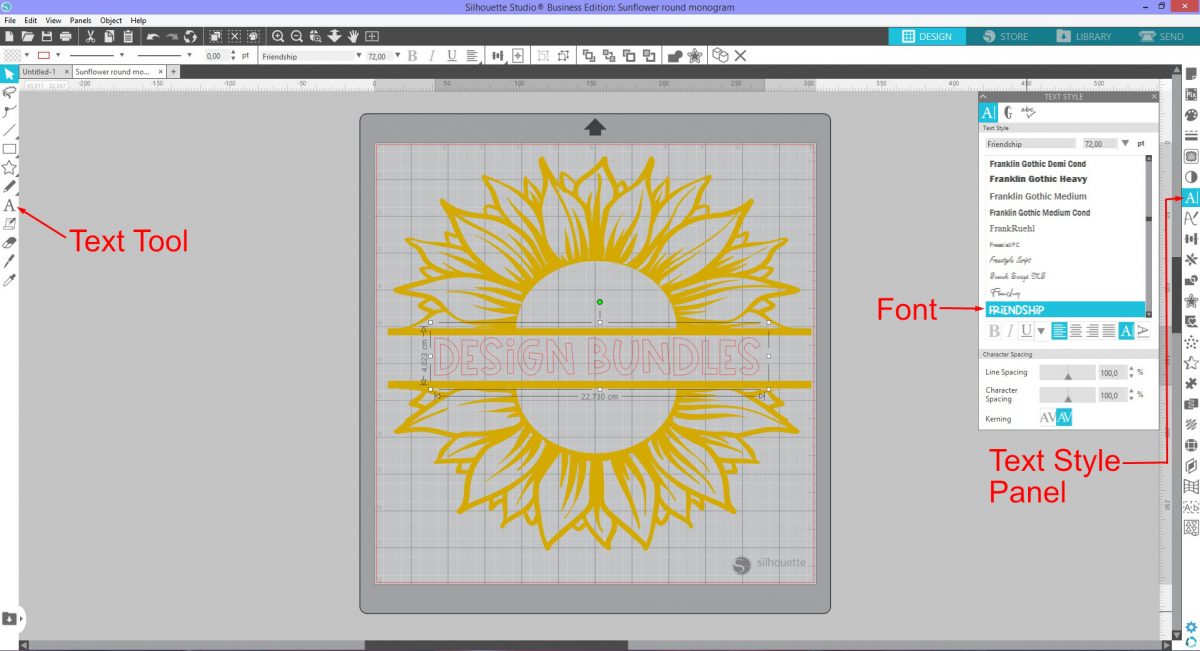
Personalize the Sunflower Monogram with a bold handwritten font to make the text stand out. The Friendship font works beautifully for this example. Type out your text with the Text Tool on the left side panel. Change the font by clicking on the Text Style Panel on the right side.
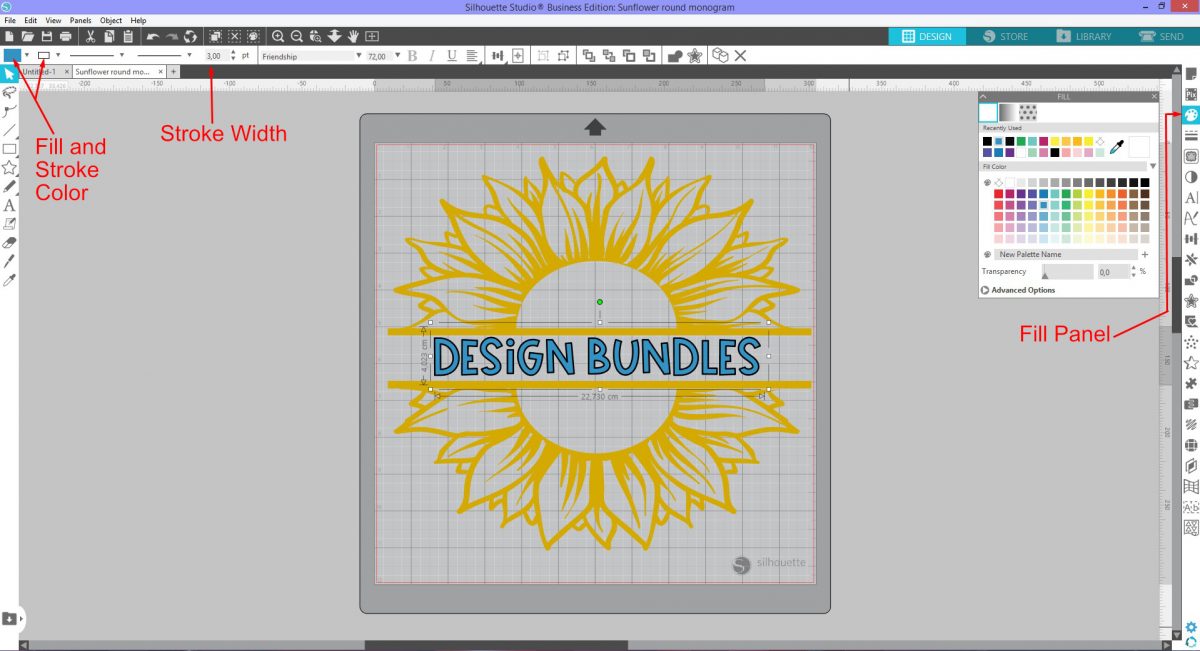
Changing the fill and stroke can be done one of two ways. Click on the Fill at the top left of the screen and choose a color. Do the same with the Stroke option next to it. You can also change the Stroke Width.
Alternatively click on the Fill Panel on the right side. Choose a color, gradient or pattern. The Line Style Panel is directly beneath the Fill Panel. This is where you adjust the stroke width and color.
Split Monograms are very versatile in projects such as keychains and decor featuring family names.
If you liked this tutorial, make sure to check out our other guides on how to use the subtract tool, and how to use the AutoTrace feature in Silhouette Studio.
We will be using a Sans Serif Font from KA Designs and a Sunflower SVG from BlackCatsMedia.
Step 1 - Open the SVG file in Silhouette Studio
Once you have opened Silhouette Design Studio click on File and then Open. Select the Sunflower Monogram SVG to open and resize on your canvas if necessary.
Step 2 - Use the Knife Tool to cut the SVG
On the left side panel select the Knife Tool and be sure to check that Solid Cut is selected at the top. Starting on one side of the Sunflower, click and drag the cut line through the middle to the other side. Release your mouse button. The Sunflower has been cut into two individual objects.
Step 3 - Separate the individual objects and add shapes
Select the lower half of the Sunflower and shift down to create a space between the two objects. We want to add a rectangle to each of the objects. Click on the Drawing Tools icon and select Draw a Rectangle.
Draw out a rectangle just below the top half of the Sunflower. It should be overlapping on the design ever so slightly. Duplicate the rectangle and move down until it just overlaps on the lower half of the Sunflower.
Step 4 - Weld rectangles to Sunflower objects
We need to Weld the rectangles to the upper and lower parts of the Sunflower. First select the upper half along with the top rectangle, right click and select Weld. Repeat this for the lower half and second rectangle.
Once welded, adjust the Split Monogram size and spacing until you are happy with it.
Step 5 - Add text and change the font
Personalize the Sunflower Monogram with a bold handwritten font to make the text stand out. The Friendship font works beautifully for this example. Type out your text with the Text Tool on the left side panel. Change the font by clicking on the Text Style Panel on the right side.
Step 6 - Add color to the text
Changing the fill and stroke can be done one of two ways. Click on the Fill at the top left of the screen and choose a color. Do the same with the Stroke option next to it. You can also change the Stroke Width.
Alternatively click on the Fill Panel on the right side. Choose a color, gradient or pattern. The Line Style Panel is directly beneath the Fill Panel. This is where you adjust the stroke width and color.
Split Monograms are very versatile in projects such as keychains and decor featuring family names.
If you liked this tutorial, make sure to check out our other guides on how to use the subtract tool, and how to use the AutoTrace feature in Silhouette Studio.


