How to Mirror an Image in DesignScape
Learn how to mirror your text and images in DesignScape, the online editor from Design Bundles.

Learn how to mirror your text and images in DesignScape, the online editor from Design Bundles.
This tutorial will show you how to mirror an image, text, or design element in DesignScape. You can also mirror a whole design/project at once just as easily. Included in a Gold Plus Membership, DesignScape comes at no extra cost and is entirely online. If you're looking for an alternative to Photoshop/Illustrator, go ahead and try it out free for 30 days with this Gold Plus Membership trial.
We used a cute puppy bookworm image to show the mirroring process along with the fun hand lettering script font, Houstander.
Before we hop into this tutorial, we will first prepare our image by downloading and unzipping the file.
In DesignScape, click on File > Open (Ctrl/Cmd + O).

Select your image and click Open.

In DesignScape, you have the choice of mirroring one design element or the whole design at once. We will show you both processes.
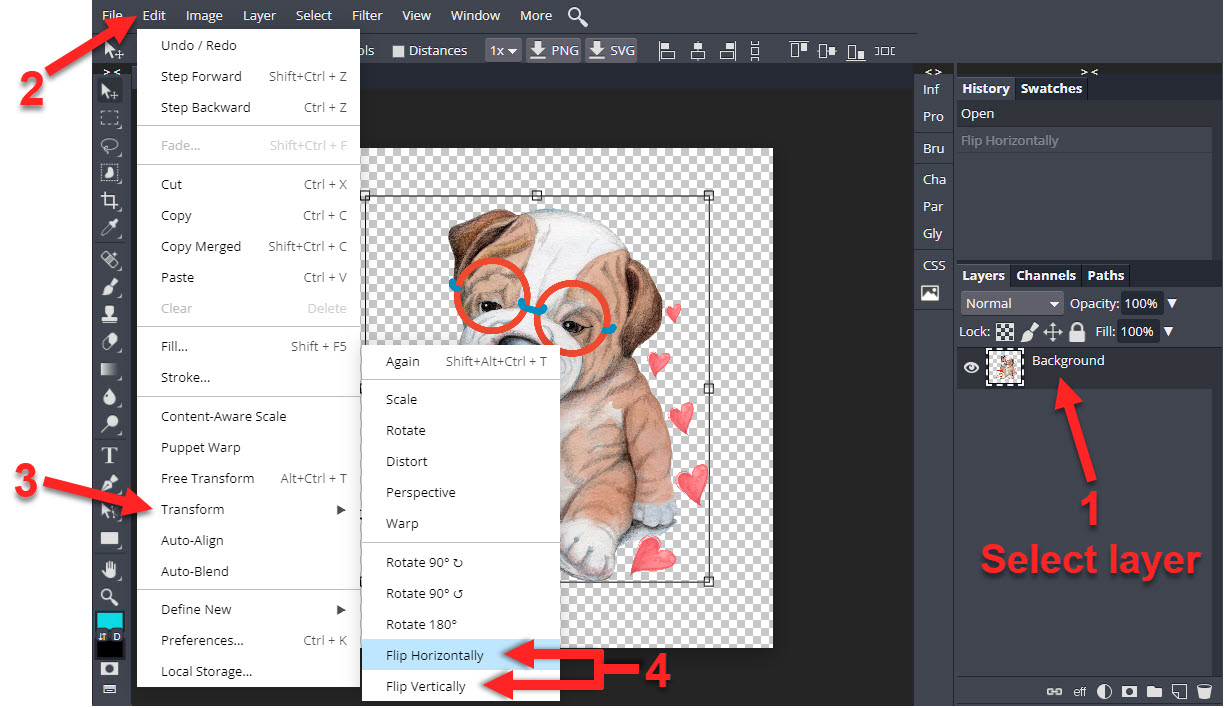
First, select the image/layer by clicking it on the project document or in the Layers panel. Then click Edit > Transform and select Flip Horizontally or Flip Vertically, depending on how you want to mirror the image.

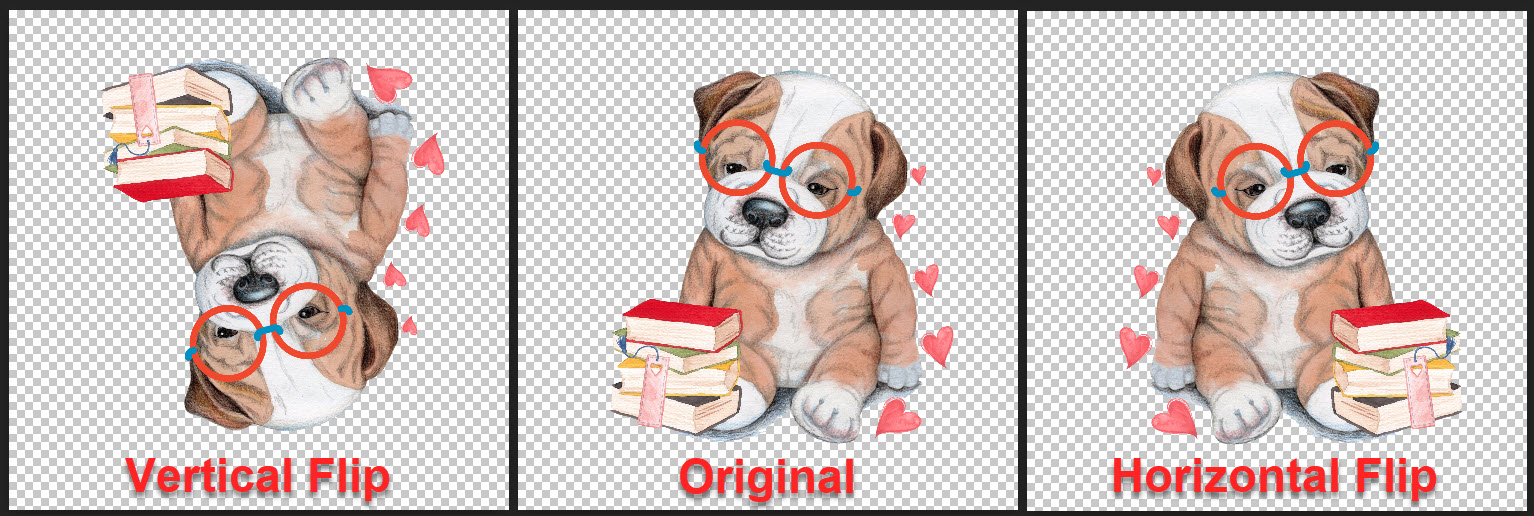
The following image shows the results of mirroring the puppy image vertically and horizontally compared to the original (in the center).

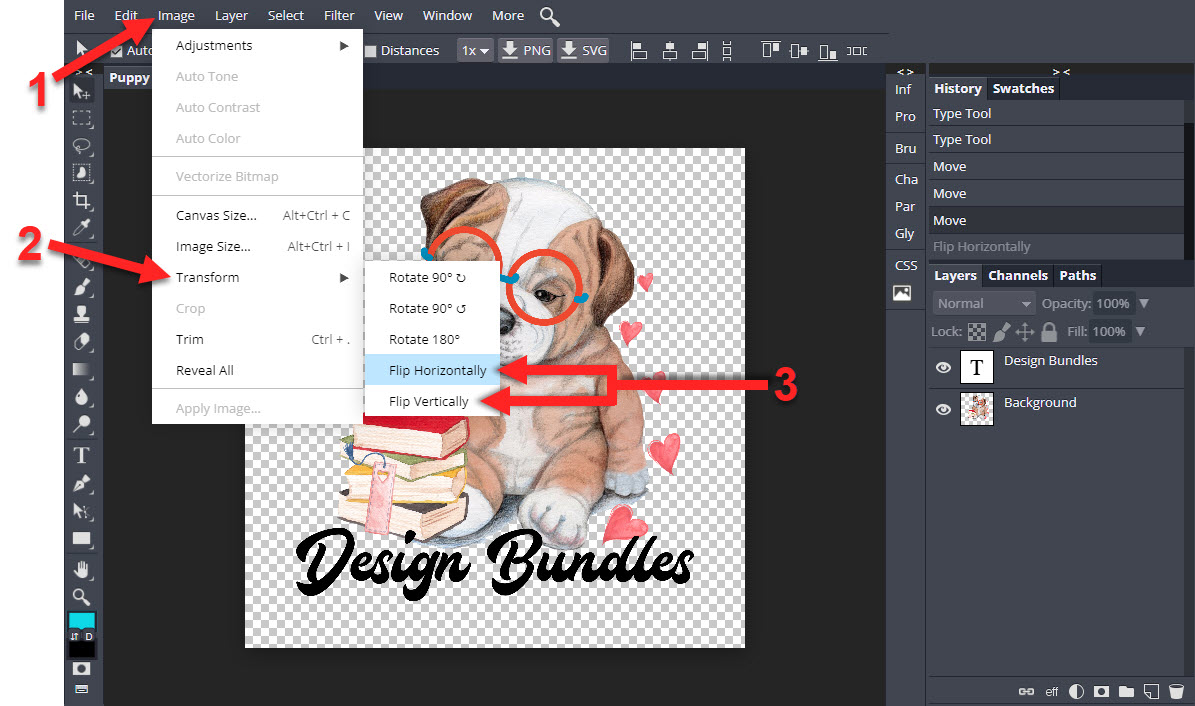
When mirroring a whole design, you don't need to select anything. Click Image > Transform and select Flip Horizontally or Flip Vertically.

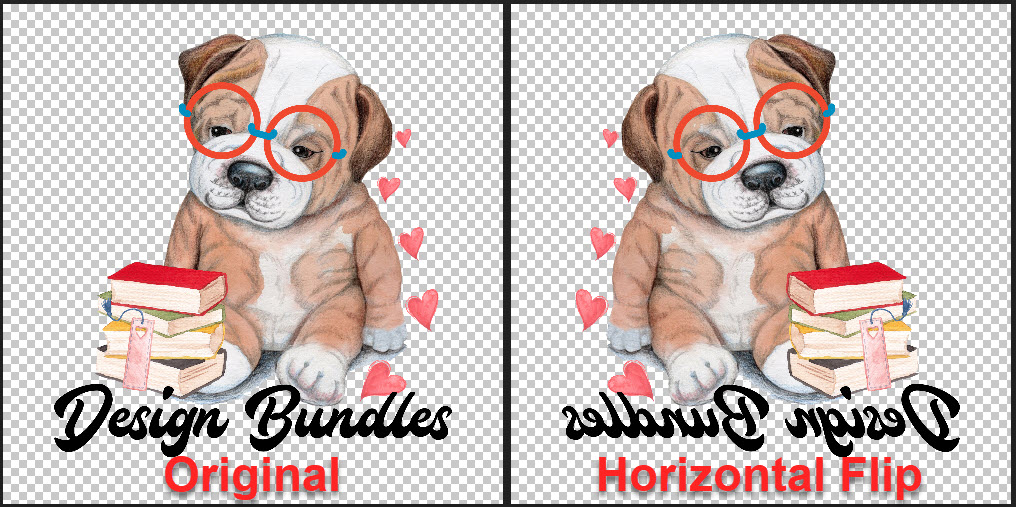
The following image shows the original design and the horizontally flipped design. See how the puppy and the text have both been flipped.
Once you have finished mirroring your image and are happy with your design, you can export/save your design.
It's as simple as that! We hope this tutorial has helped clear up any confusion with mirroring individual design elements and whole designs. If you're interested in learning more, head on over to see our list of DesignScape tutorials.
In Silhouette Studio, you have a super easy option that allows you to mirror your image. You would want to mirror an image when using HTV and for certain types of projects. An example could be adding a decal to the inside of a window. We will show you three ...
Have you ever wanted to mirror text and images in Silhouette Studio with your Curio? Then be sure to check out this tutorial. We will guide you through the steps on setting up your text to be mirrored in projects. This method is mostly used when working with HTV projects ...
For this tutorial, we are going to use the Lego Pattern created for “Lego Text Effect” tutorial (https://designbundles.net/design-school/lego-text-effect-photoshop - Steps 5 to 9). We will also need an image to apply the pattern to. It’s better if the image doesn’t have a great amount of detail, ...
1- Open canvas workspace.Select the design you would like to cut. you can create your own, upload a SVG or use a preset design.2- Resize your design to the dimensions you need.3- Go to the shape icon and create a square.4- Resize the square to 1/4 the ...
*Note SCAL4 Pro used. 1- Open SCAL4 software.2- Import your image that you would like to cut. I am using this Free SVG bundle. As you can see the image I want to cut is larger than my cutting mat.3- Create a rectangle/square.4- Resize the rectangle ...
For this tutorial, we will use the image of a person with a neutral background.1 - In Photoshop, open the image you chose to work with and “Duplicate” it (Command/Control + J).2 - Go to Filter > Camera Raw Filter (Shift + Command/Control + A), zoom in a bit to see ...
By using our website you consent to all cookies in accordance with our cookie policy.


