
How to Move Your Fonts From One PC to Another PC
Discover how to quickly move your fonts from one PC to another PC, saving yourself a ton of time.
In this helpful tutorial we will show you how to move your fonts from one PC to another PC. If you have tons of fonts on your PC, moving them over might seem like a mammoth task. But not to worry, we will guide you on a quick and easy way to do this.
Before we begin, make sure that you have an external hard drive (HDD) or USB stick that can accommodate the size of your fonts folder. If you prefer, you can also use an online cloud service to transfer your fonts.
Step 1 - Locate your Fonts Folder
Your Fonts folder will be located on your PC’s C: drive. To access it click on the File Explorer folder that can be found on your desktop or at the bottom of your taskbar.
Next, select your system’s C: drive from the list.

In the new window that opens, click on the Windows folder.

In the Windows folder you will need to scroll down a bit to find the Fonts folder. It will be a yellow folder with a blue letter “A”.

Step 2 - Copy the Fonts Folder
Right click the Fonts folder and select Copy. This will copy the entire Fonts Folder that contains all the fonts installed on your PC.

You can choose to only copy selected fonts instead of the entire folder. Click on the Fonts folder to access the listed fonts. You will see previews of your fonts in the window that opens. To copy an individual font, right click > Copy.
To select multiple fonts, hold Ctrl + click on each font you want to copy. Then, with your cursor over a selected font, right click > Copy.

Step 3 - Paste Fonts to External Hard Drive
With your fonts copied, locate the external HDD to copy to on the left side of the screen. This will usually be located under your PC’s drives. Click on the external drive to open it.

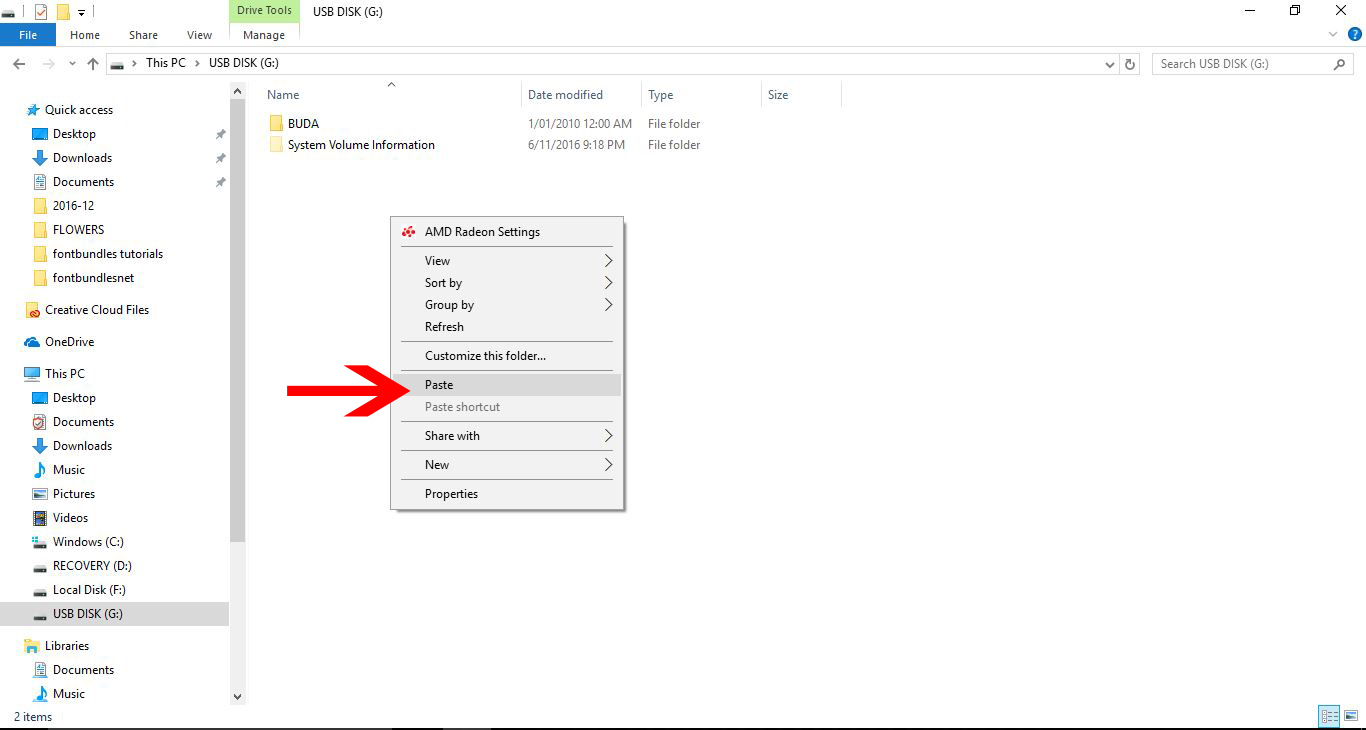
In the window for the external HDD or USB, right click > Paste. You have now copied your fonts over to an external drive.
Once your fonts are in your external HDD or USB you can safely remove it from your PC.
Step 4 - Copy Fonts to New PC
On your new PC, plug in your external HDD or USB. A new window should automatically open but if not, go to the File Explorer and click on the external drive.
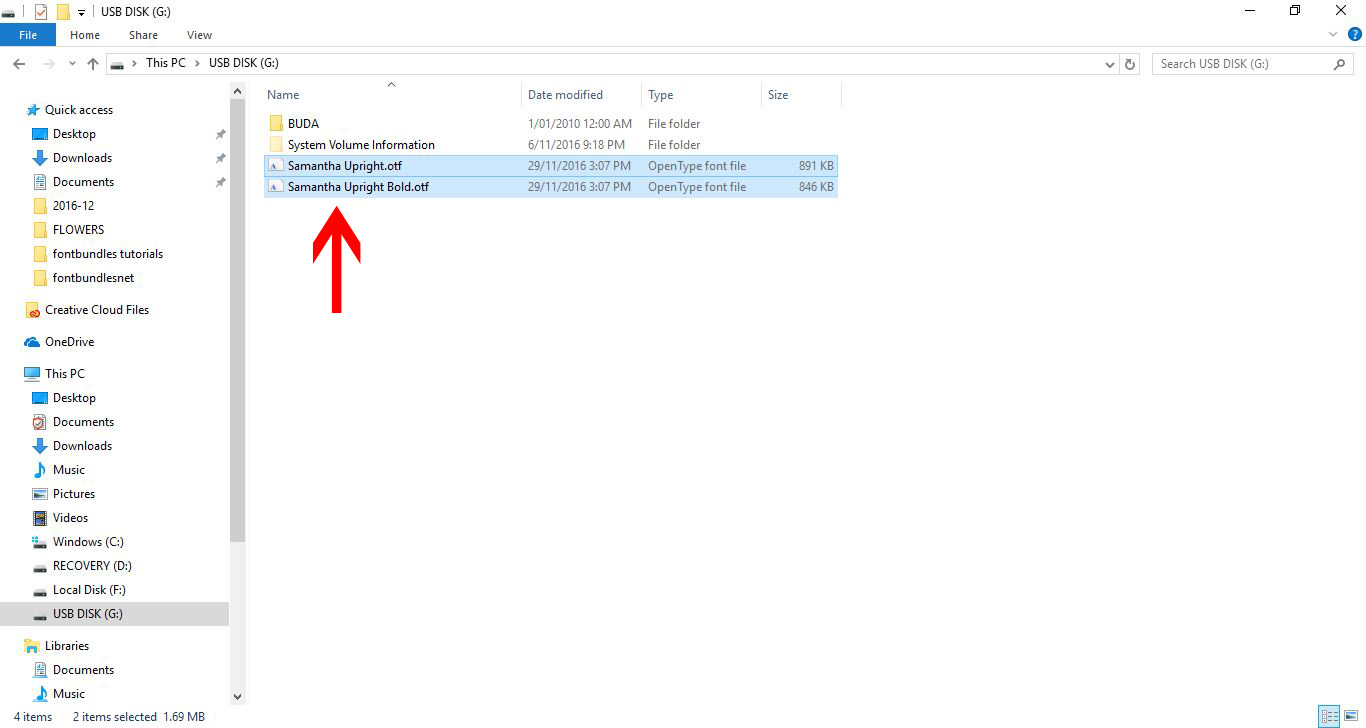
You can individually install the fonts yourself. The fonts or folders can be copied directly from the external drive or copied to your desktop. In the image below an individual font was copied to the desktop.

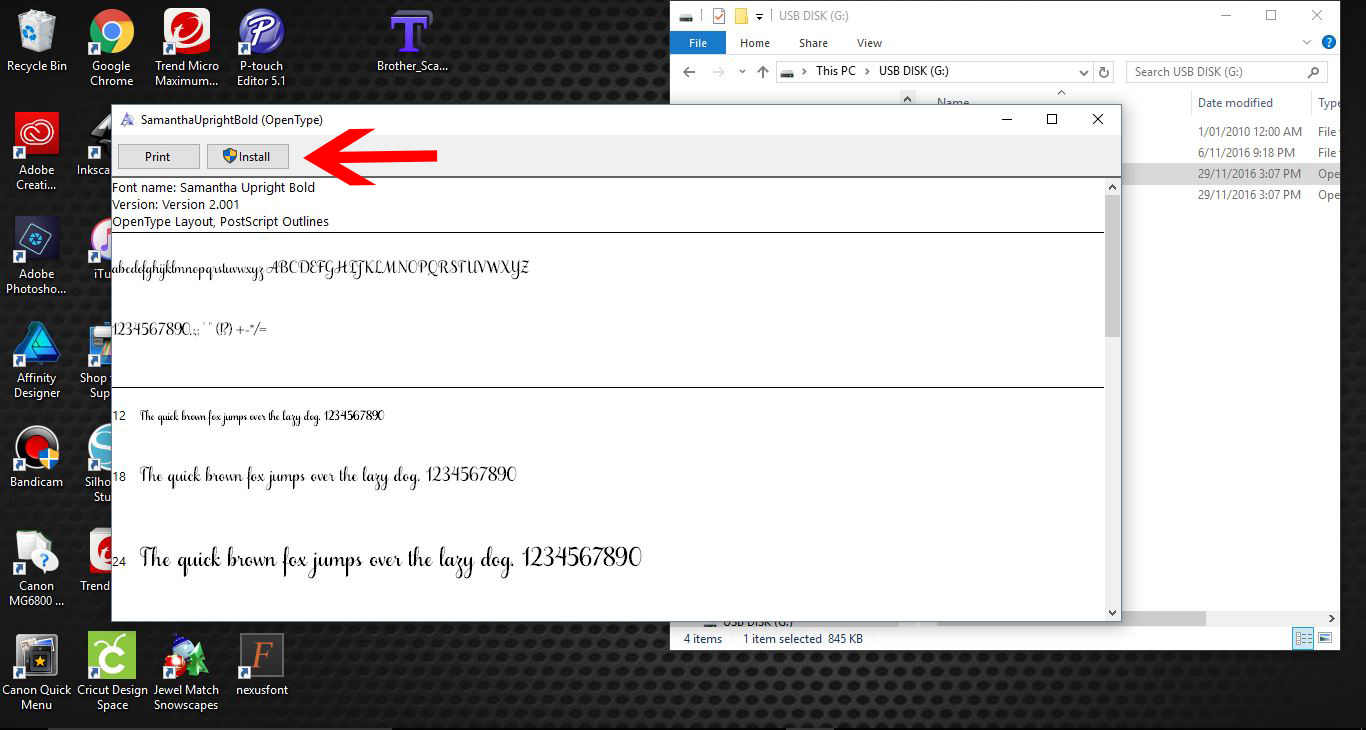
To install, click once on the font to open the Installation window. Next, click on Install top left and the font will be installed on your new PC.
You can also copy all the fonts over to the Fonts folder. Your PC will automatically install the fonts for you and save you a great deal of time installing.
Locate the Fonts folder as before by going to your C: drive > Windows > Fonts. Now go back to the external drive and click on the copied Fonts folder to open. At the top right of the screen click on Select All.

The image below shows that all of the fonts have been selected in the copied folder on the external HDD.

Now right click > Copy the selection then go to the Fonts folder on your new PC. Right click > Paste the fonts into this folder. Your PC will now install the fonts for you.

As quick as that you have moved your fonts from one PC to another PC. You can now use all of your favorite purchased fonts across your new system. We hope that this tutorial has been beneficial in helping you get started on your new PC.


