Unlimited Downloads 15% off Marketplace Purchases Exclusive Software Access Unlimited Downloads
15% off Marketplace Purchases
Exclusive Software Access
Go Unlimited Maybe Later
How to Print and Emboss with the Silhouette Curio
  • By Design Bundles
  • 05 Apr 2019
  • 3 Mins
  • Silhouette Tutorials

How to Print and Emboss with the Silhouette Curio

1- Open Silhouette Studio. Click on the cutting mat options and change to Curio. Change the size of the cut area to fit the curio mat.

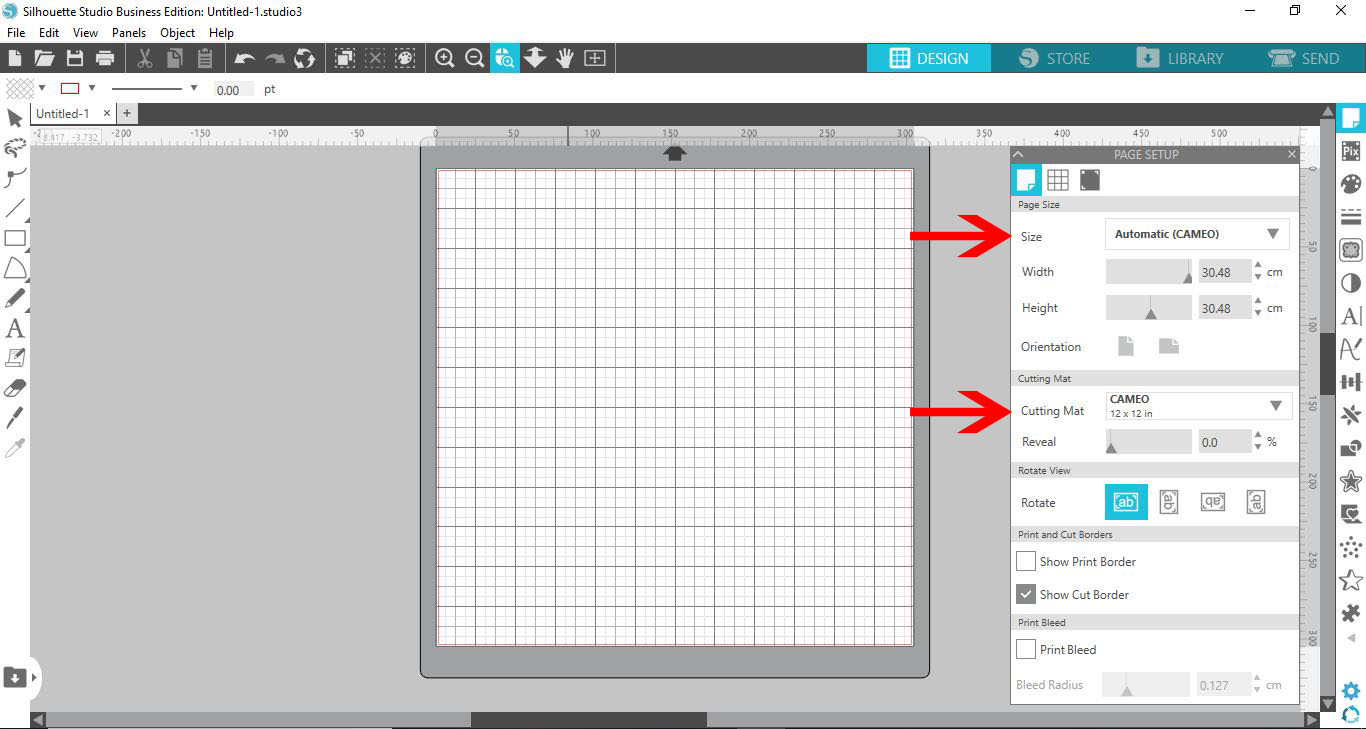
2- With the cutting mat and the size changed, you will see the curio mat appears on the design space.

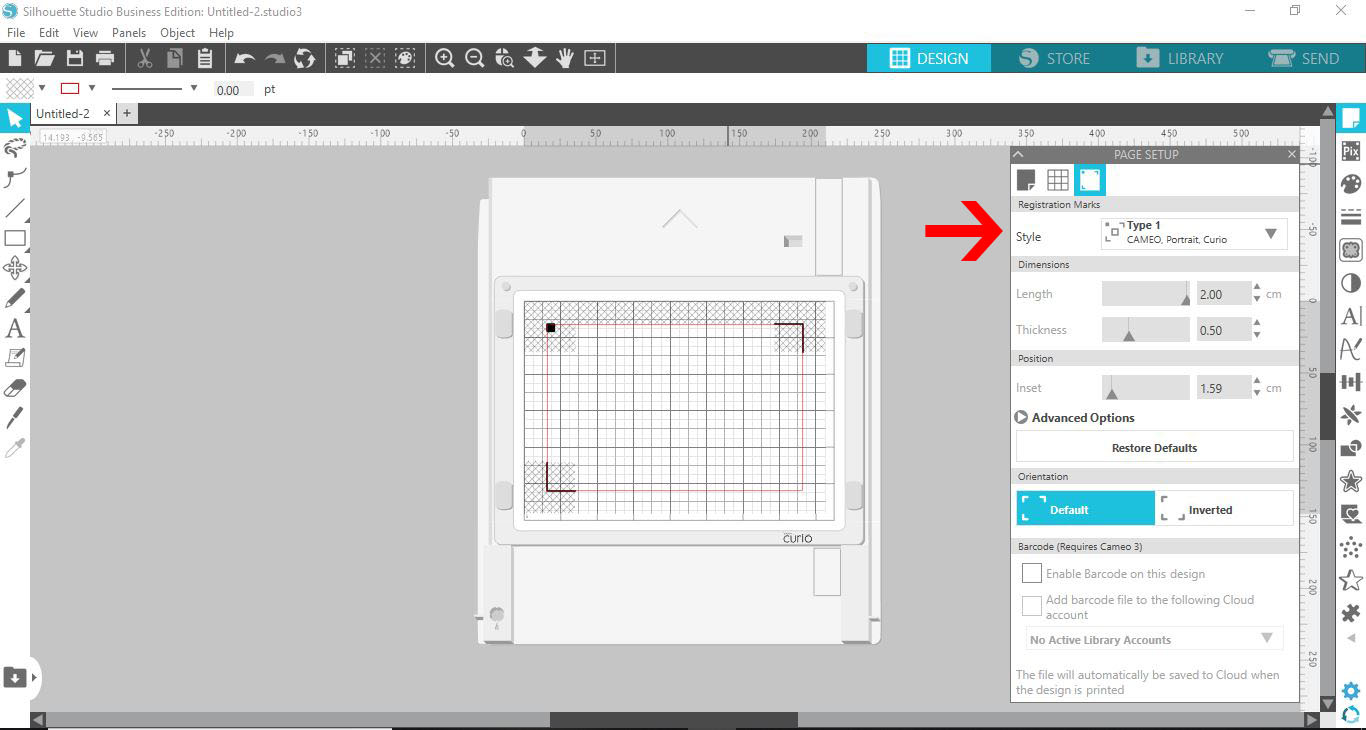
3- Go to page set up and select the registration marks.

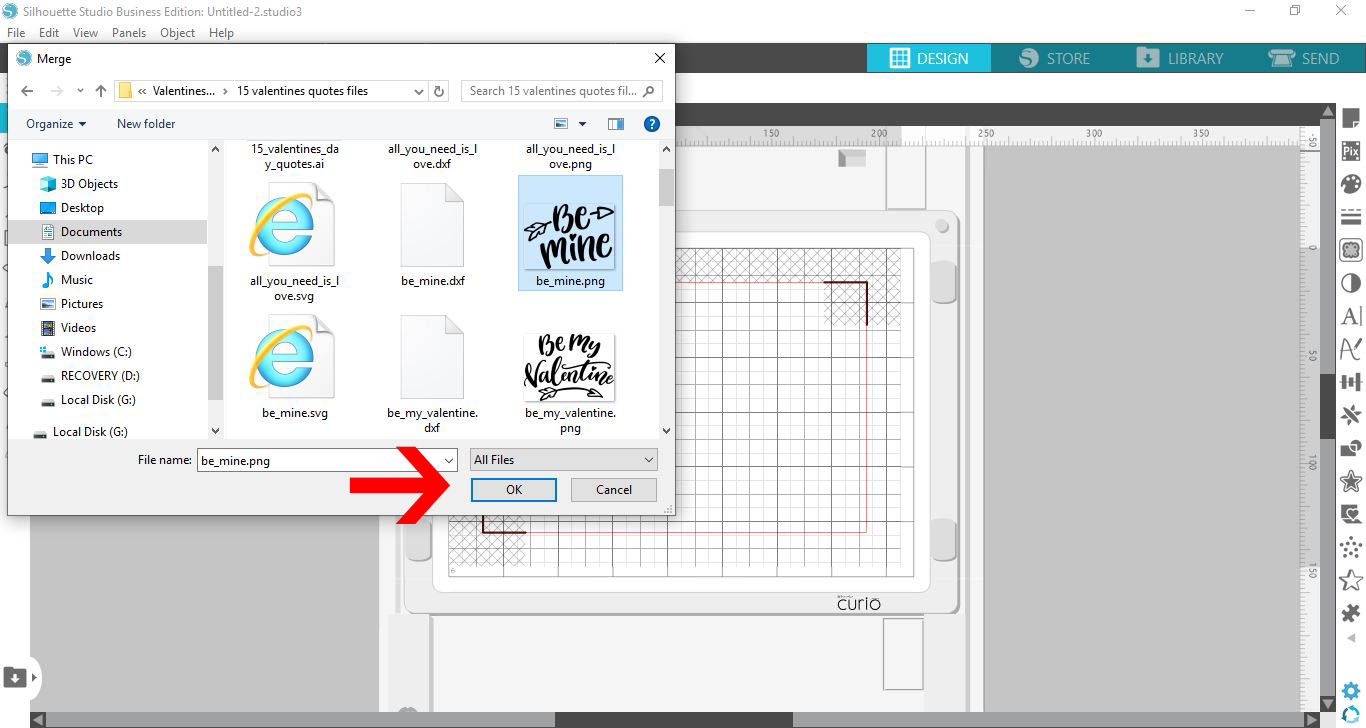
4- Upload your designs.

5- Resize the design. Go to the send screen.

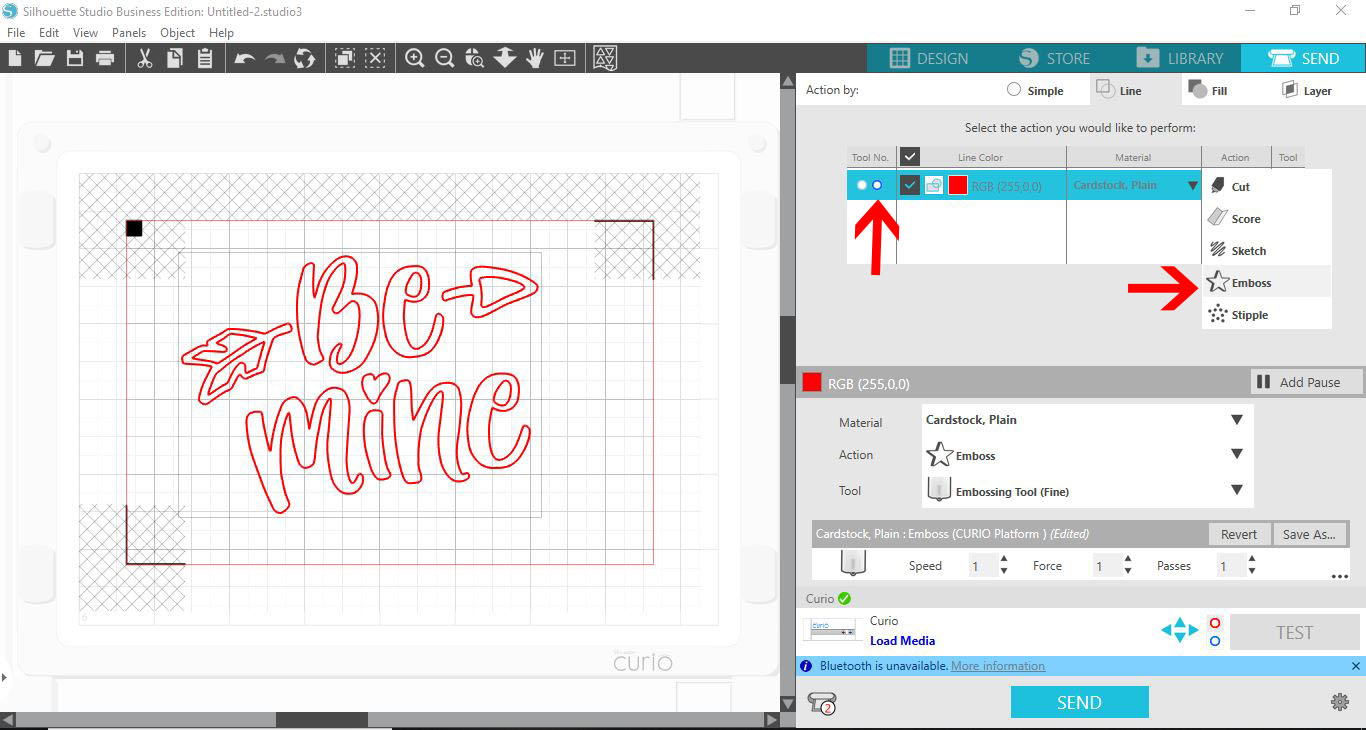
6- You will need to use the cut tool first then the emboss tool. Select the blue circle in the tool option. In the drop down box select the emboss option. Place the embossing tool into the blue circle tool holder and the cutting tool into the red circle holder

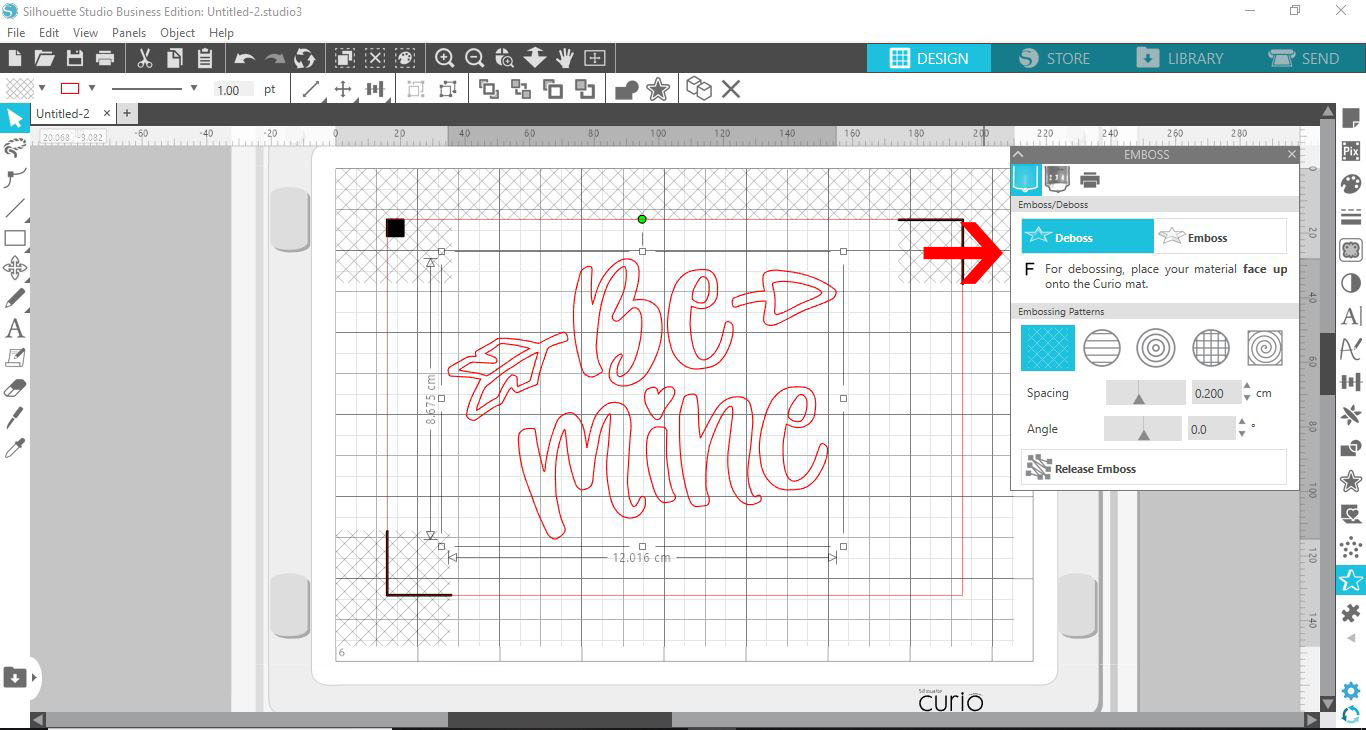
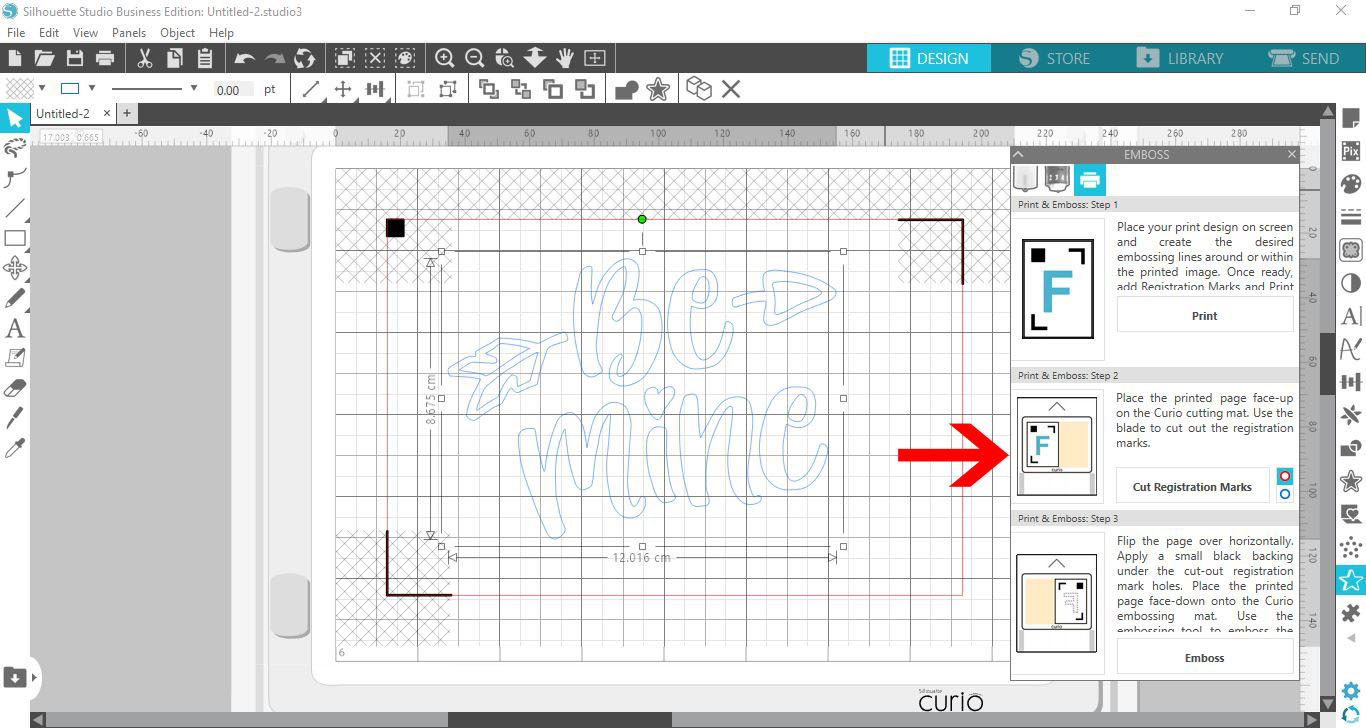
7- Click on the emboss/deboss panel.

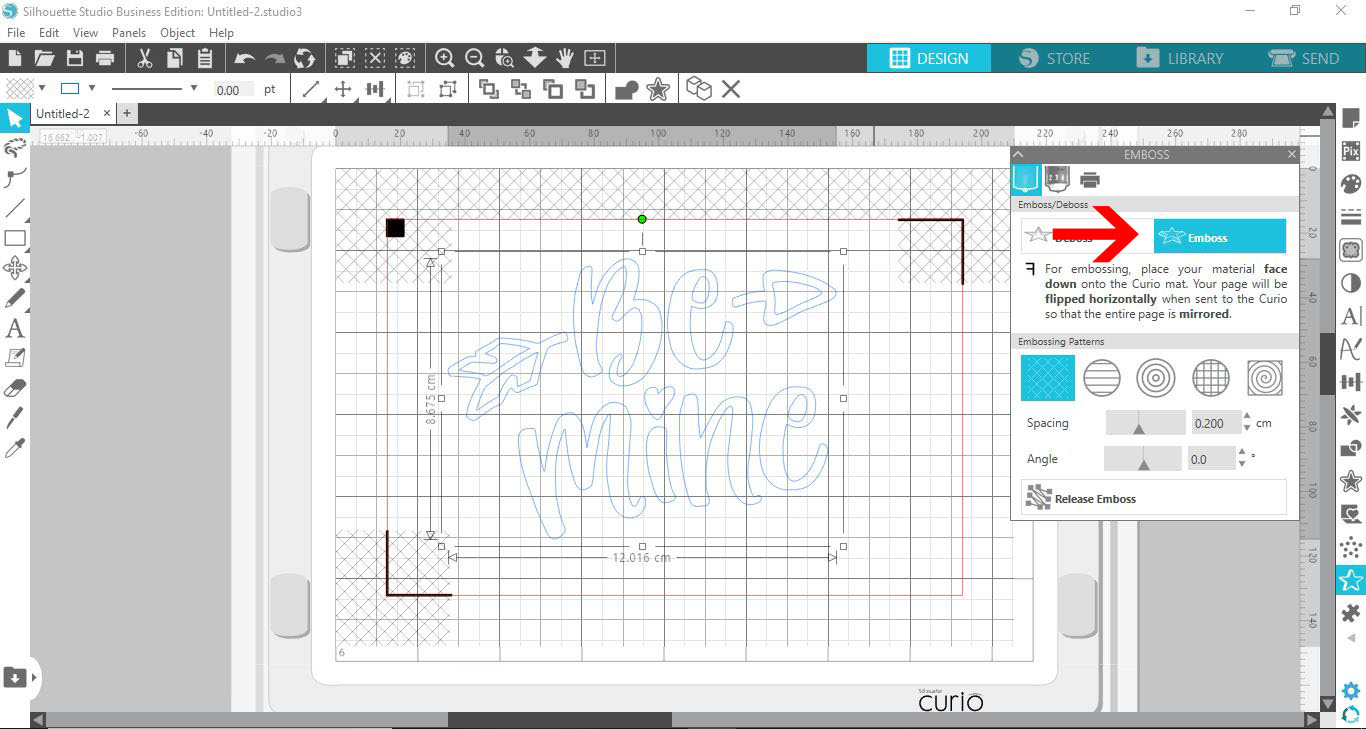
8- Click on the emboss option.

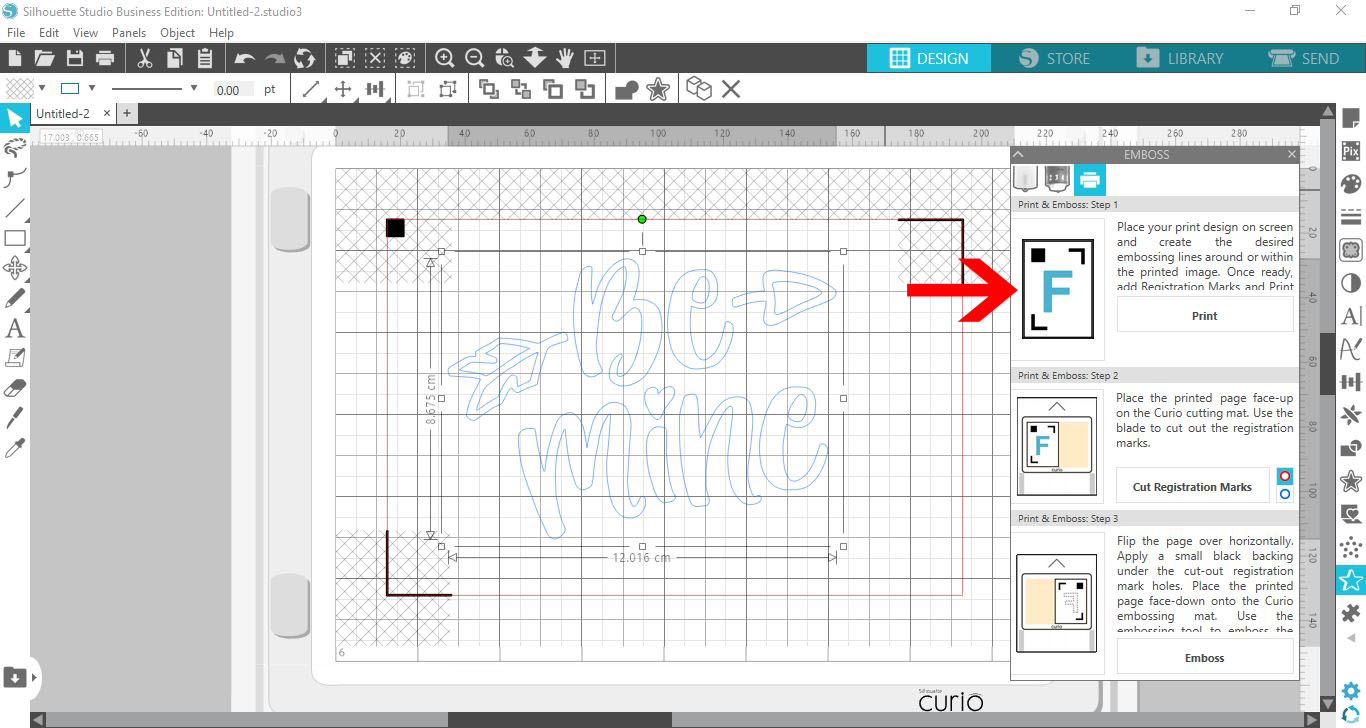
9- Next click on the print option.

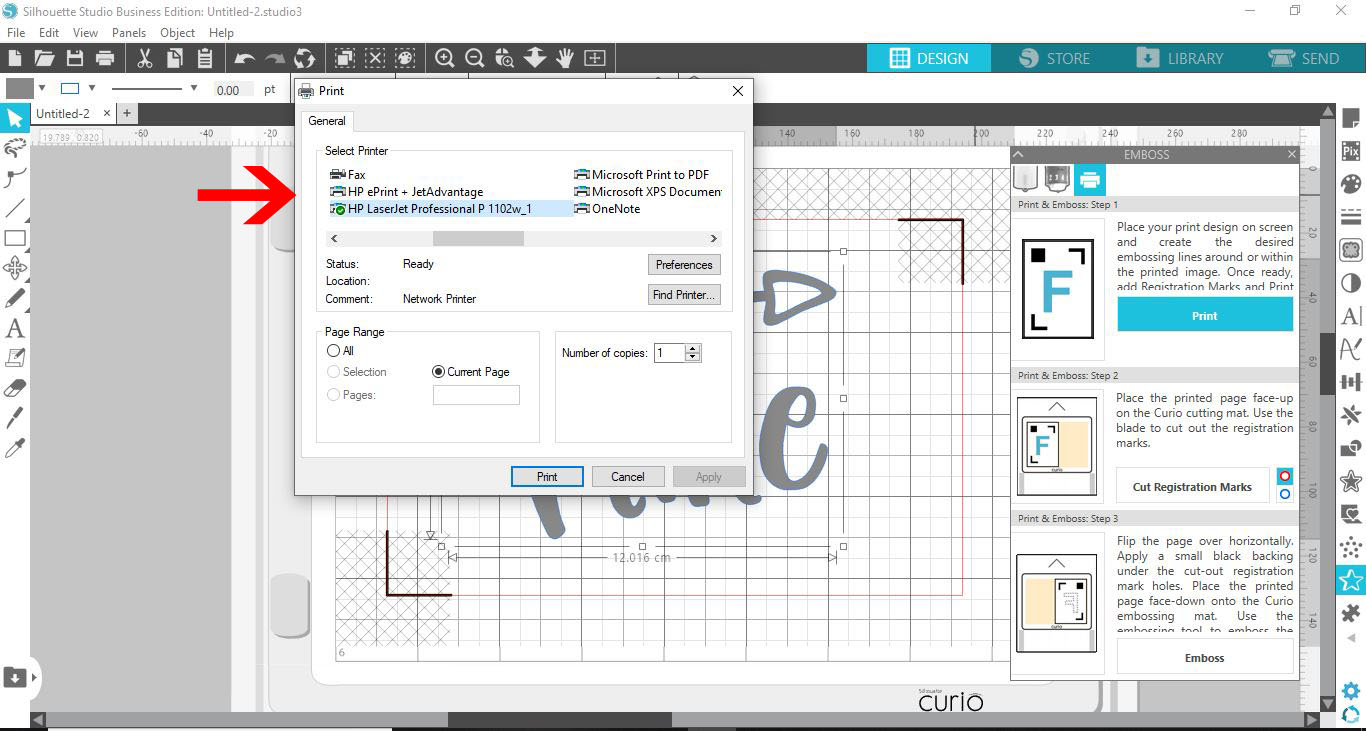
10- Select your printer and print the design with registration marks.

11- Place the design onto your cutting mat.

12- With the design onto the mat click on the cut registration marks.

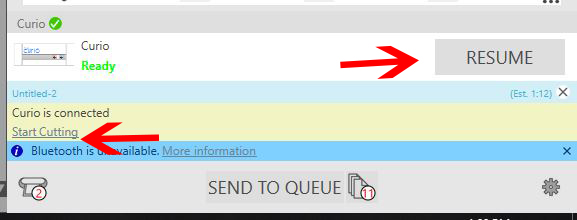
13- If the cutting does not start, click on the start cutting option.

14- The registration marks will be cut out. Keep the cut out parts.

15- Place the Embossing mat on your curio board. (You will need a total of 5 with platform )Place the image face down. The little parts of the registration marks that were cut out, you can place them back in the spaces (this is so the curio can register the design.)

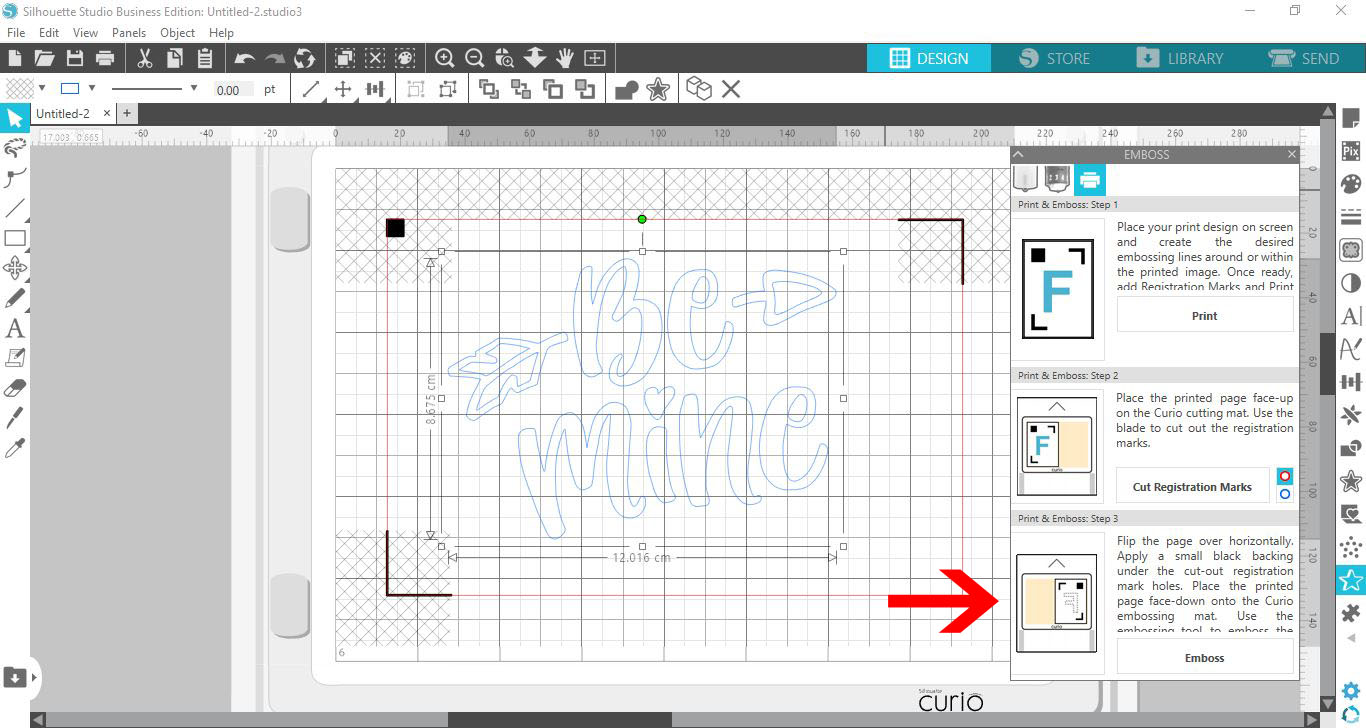
16- Click on the emboss part of the project.

17 - If the design does not start embossing click on the resume icon this will start the embossing.

18- Your design will now emboss.

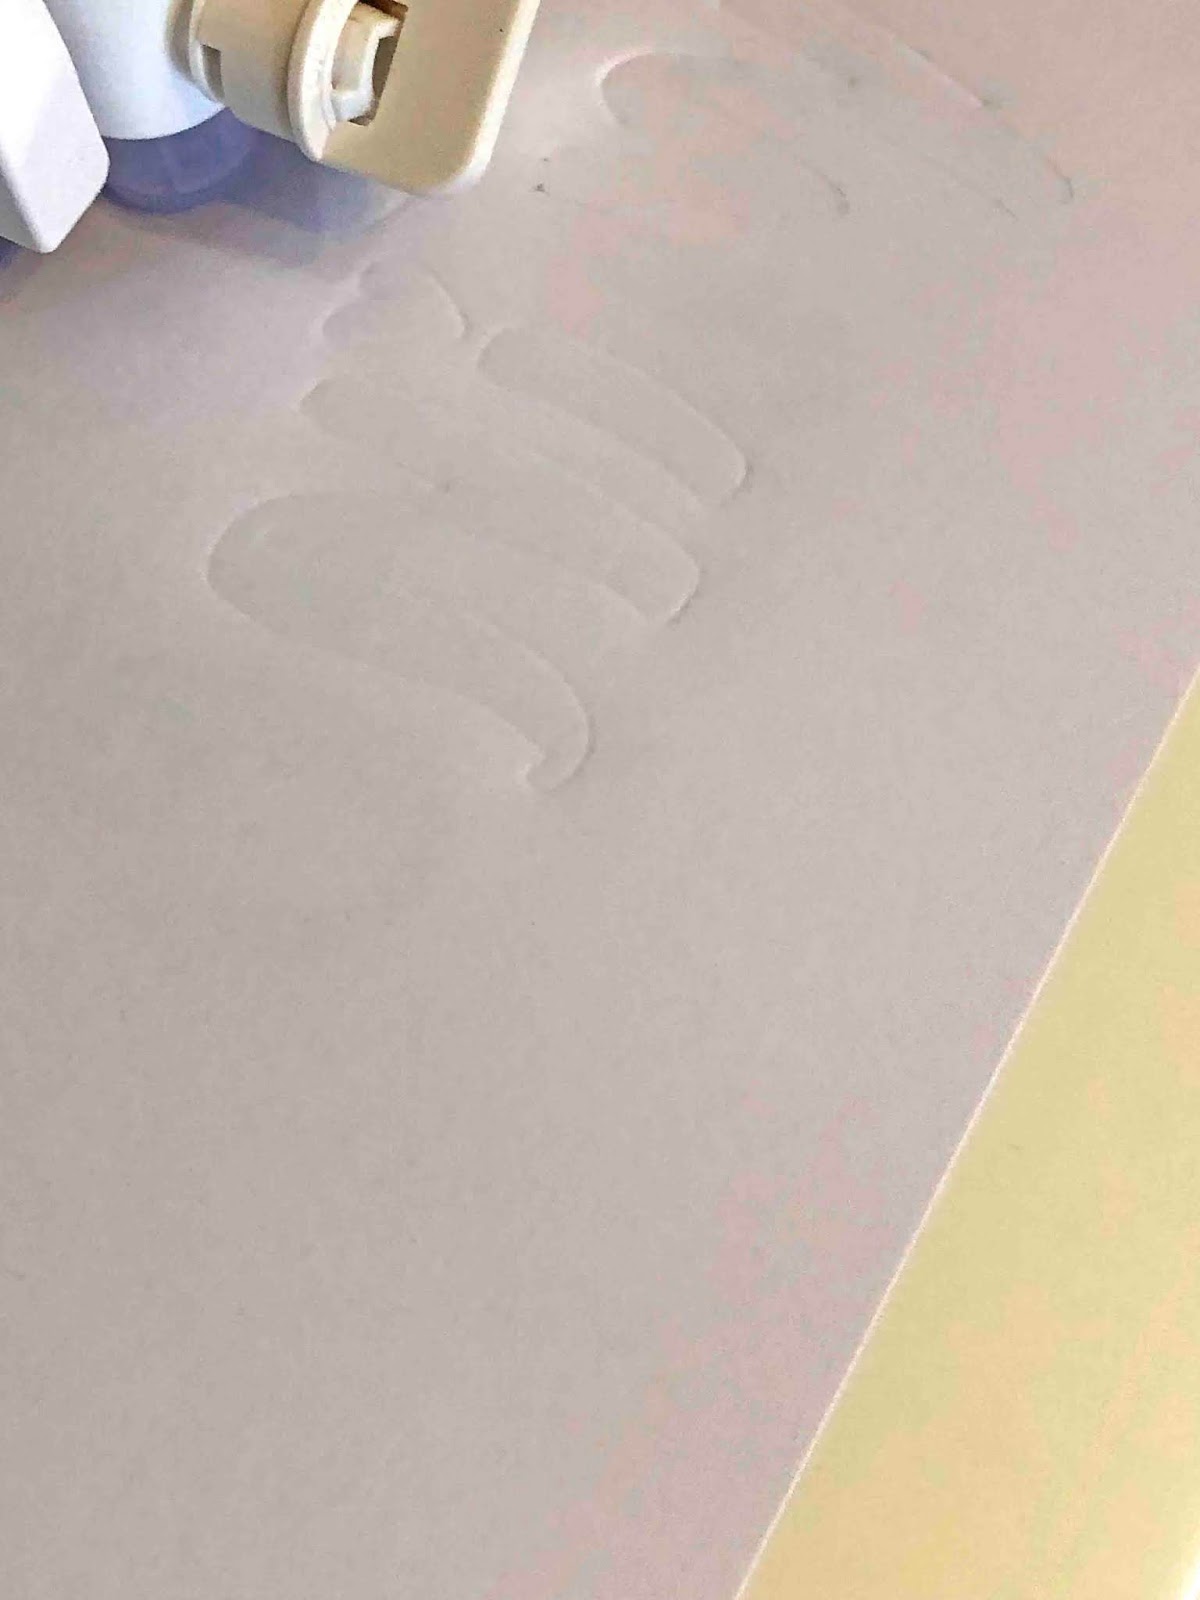
19- Your design will now be embossed. Carefully remove from the embossing mat.


6 Related Silhouette Tutorials

In today’s tutorial, we will guide you on how to Print and Cut with the Silhouette Curio. This feature is especially useful for projects like stickers, cake toppers and more. We will guide you on setting up your Curio work area super quick so you can get started with ...

1- Open Silhouette Studio. Go to the cutting mat and change to the curio. Next Change the media size to fit the curio mat. A5 will work well.2- With the 2 sections changed you will see that the mat on the screen now is the curio mat.3- Select your ...

*Silhouette Cameo 3 used. 1- Open silhouette studio and click on the text icon.2- Type your text.3- You can change your font. I am using  luducudu font from fontbundles.net4- Click on the sketch tool.5- As you can see there are a lot of sketch options in ...

Stippling is the process of using dots to create a design. This can be done with a pen on a medium. Another way is to use the Stippling Tool with the Silhouette Curio. It taps little indentations on thin metal sheets. The end result is a stylish metal sheet design. ...

*CM900 used.1- Open canvas workspace. Click on the text icon.2- Type your text.3- Change your font. I am using Garlic butter font from Font Bundles.4- If any letters are overlapping, click on the weld tool. Once all welded, click on offset.5- In the offset window, ...

Ensure that your file has been downloaded and unzipped to use.1- Open Cricut Design Space.2- Type the text you would like to create a shape from.3- Change the font to the one you would like to use by clicking Edit and then selecting your font from the ...

You may also like

Help Center
ol image