- By Design Bundles
- 4 Mins
- Canva Tutorials
How To Use Mock Ups in Canva
Learn how to use mockups in Canva in just four easy steps.
In this tutorial, we will go over how to use mockups in Canva. Mockups are used by designers to quickly showcase their designs and layouts in a real-life setting. It gives viewers an idea of how the final product will look without actually having to create a product.
For our tutorial, we will be uploading a purchased mockup template from Design Bundles.
Step 1 - Upload Mockup Template
From the side panel, click on the Uploads tab and then click on Upload Media. Locate the design file from your device. You can follow our super easy tutorial on uploading an image if you need more information.
We’ll be using this nursery wall mockup from Design Bundles. We chose the JPEG file. Remember, when using mockups in Canva, they need to be either a JPEG or PNG format. This is because Canva does not support Ps files.
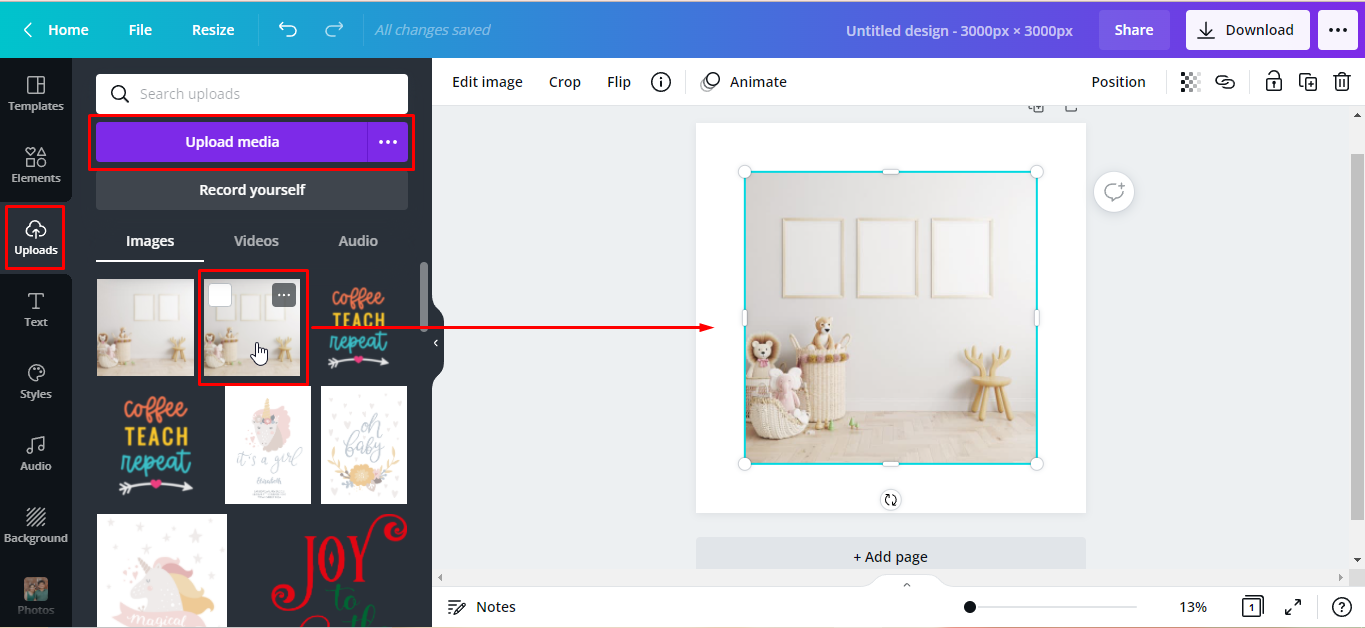
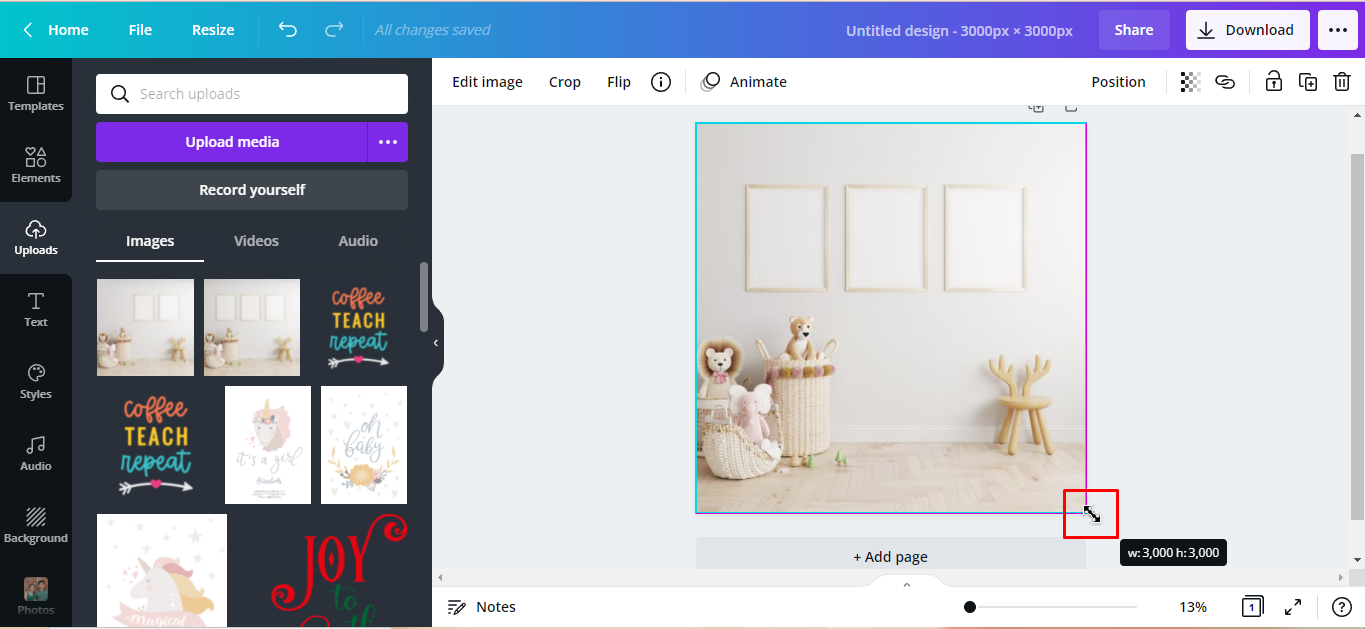
You can adjust the image size by dragging out the white handles on the corner. We increased the image size until it filled our canvas.
Step 2 - Add the Designs
For our mockup, we will use this cute dinosaur clipart, which we already uploaded earlier. Click each chosen clipart to add it to the canvas.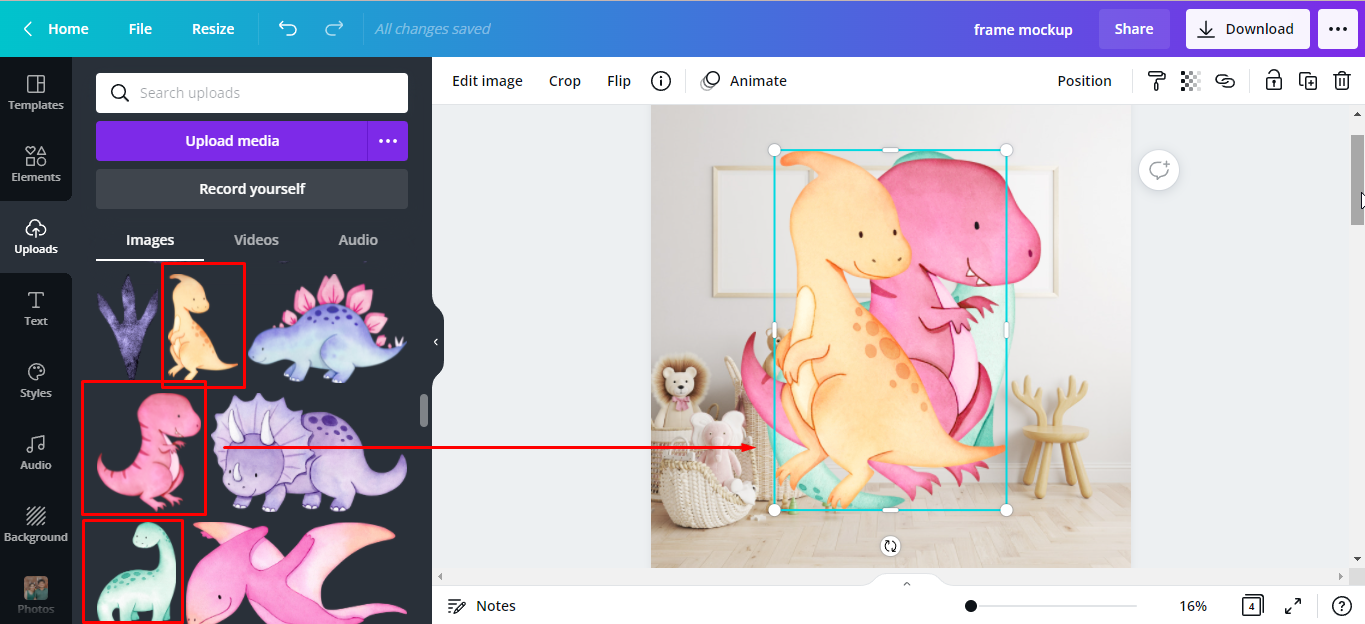
Scale each clipart down to fit into the frames by dragging the corner handles in.
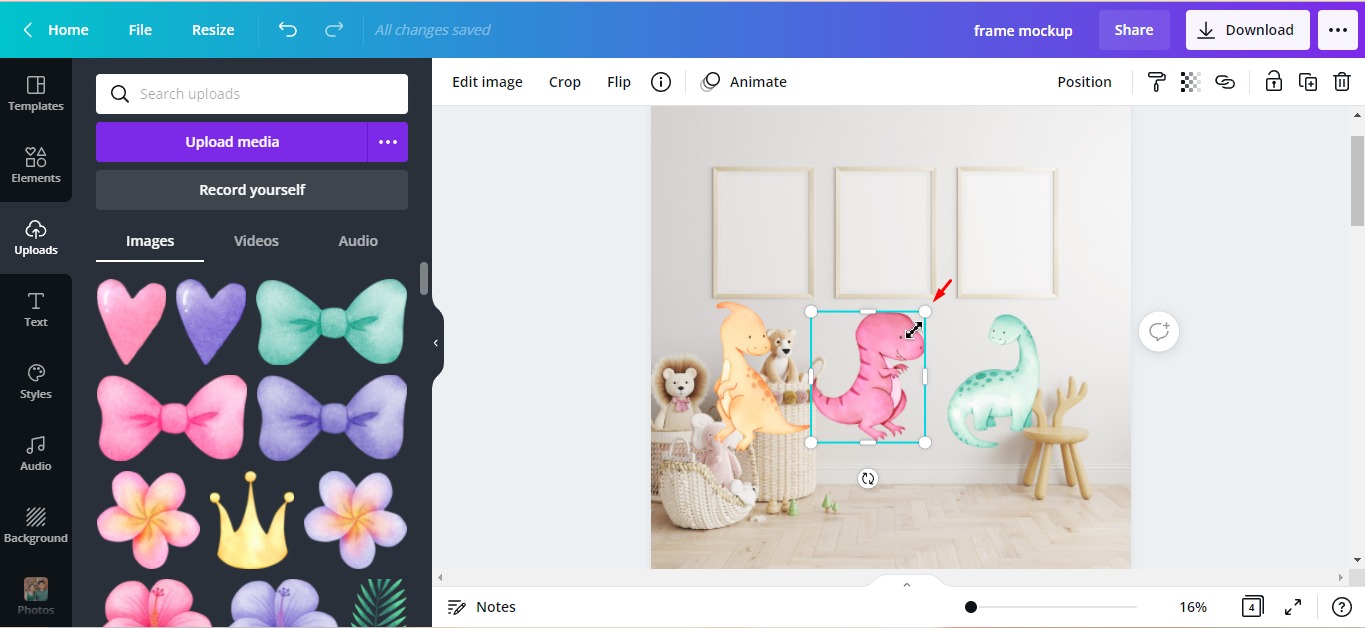
Place each dinosaur on the top of the frames. Crop if necessary. To crop, just drag in the middle handle until it’s appropriately inside the frame.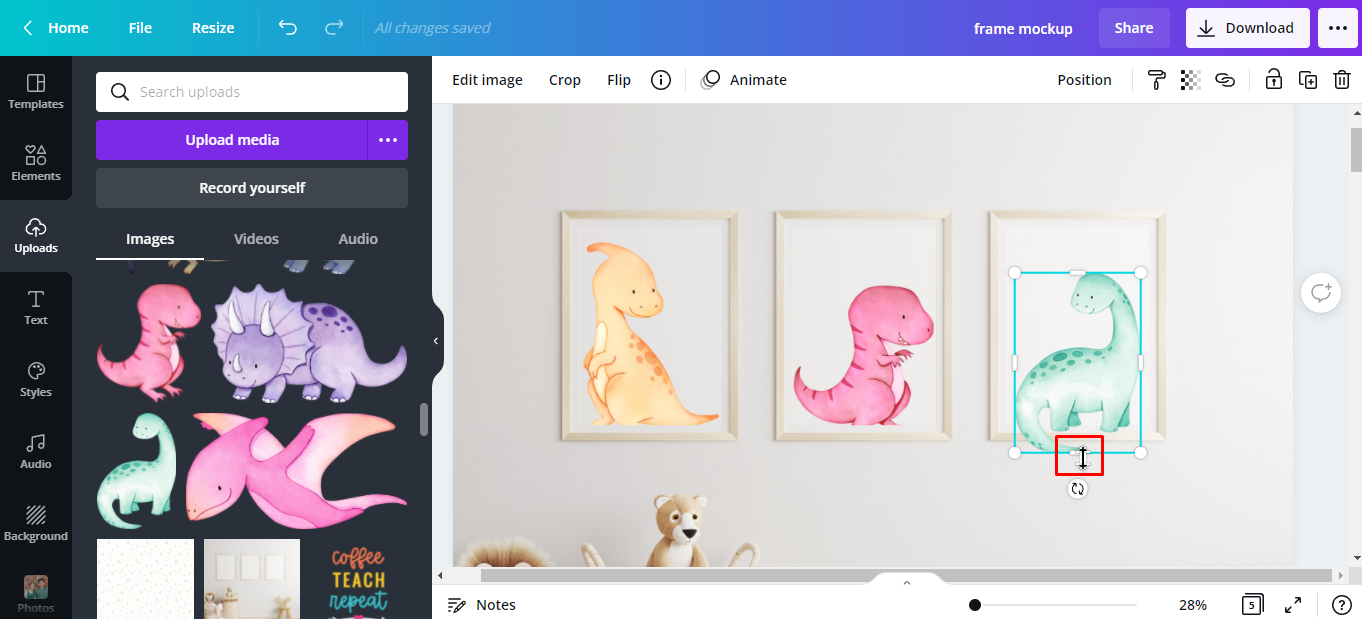
Step 3 - Adjust the Image Brightness
Our images appear too bright and don’t look natural against the lighting in the mockup. So we need to adjust the brightness.
With the image selected, click Edit image and drag the brightness control slider to the left. We will go about -3 to -5. Adjust the contrast also when necessary.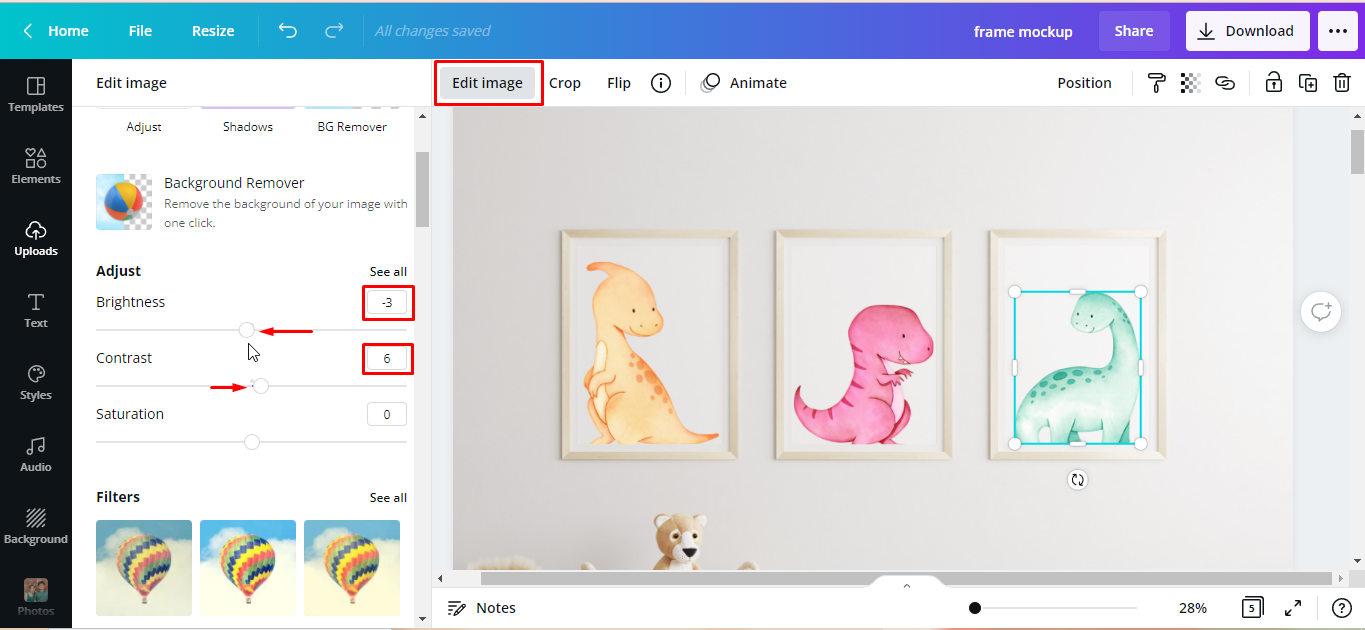
Step 4 - Add Embellishments to Images
The clipart set includes some foliages and cute accessories that you can add to your design. We wanted to add a little more character with a few embellishments. So we gave our dinosaurs a few accessories and added some background elements.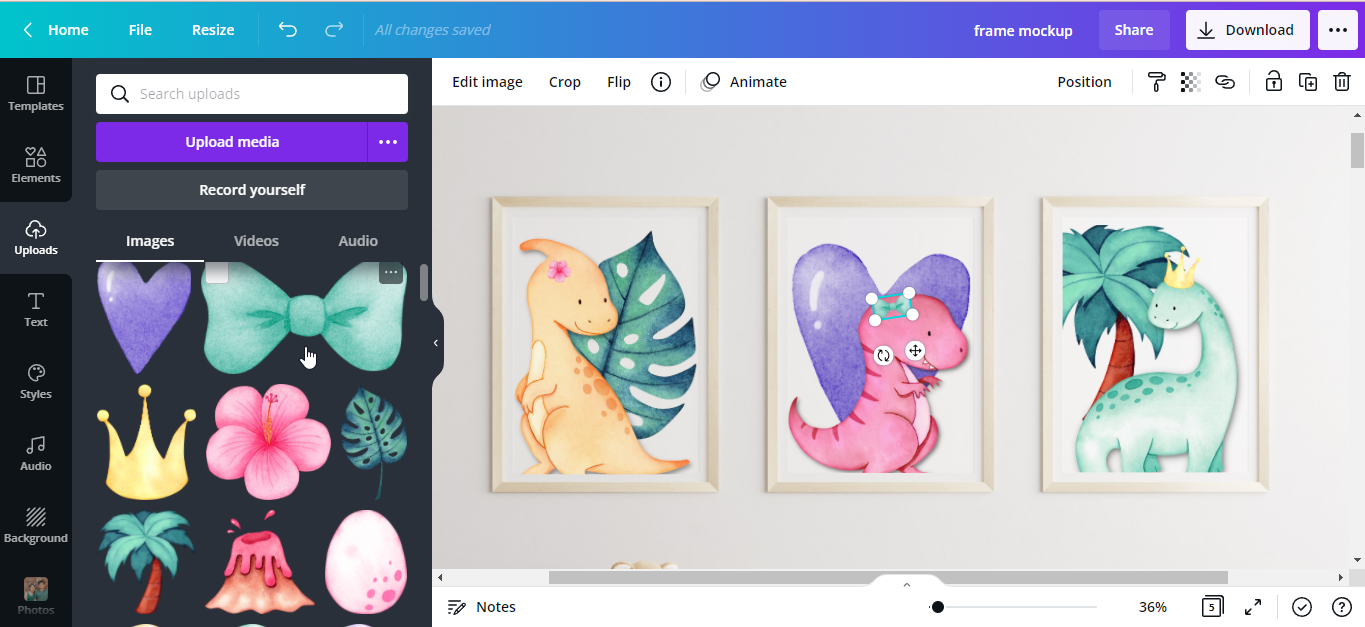
Here’s what our finished frame mockup looks like.
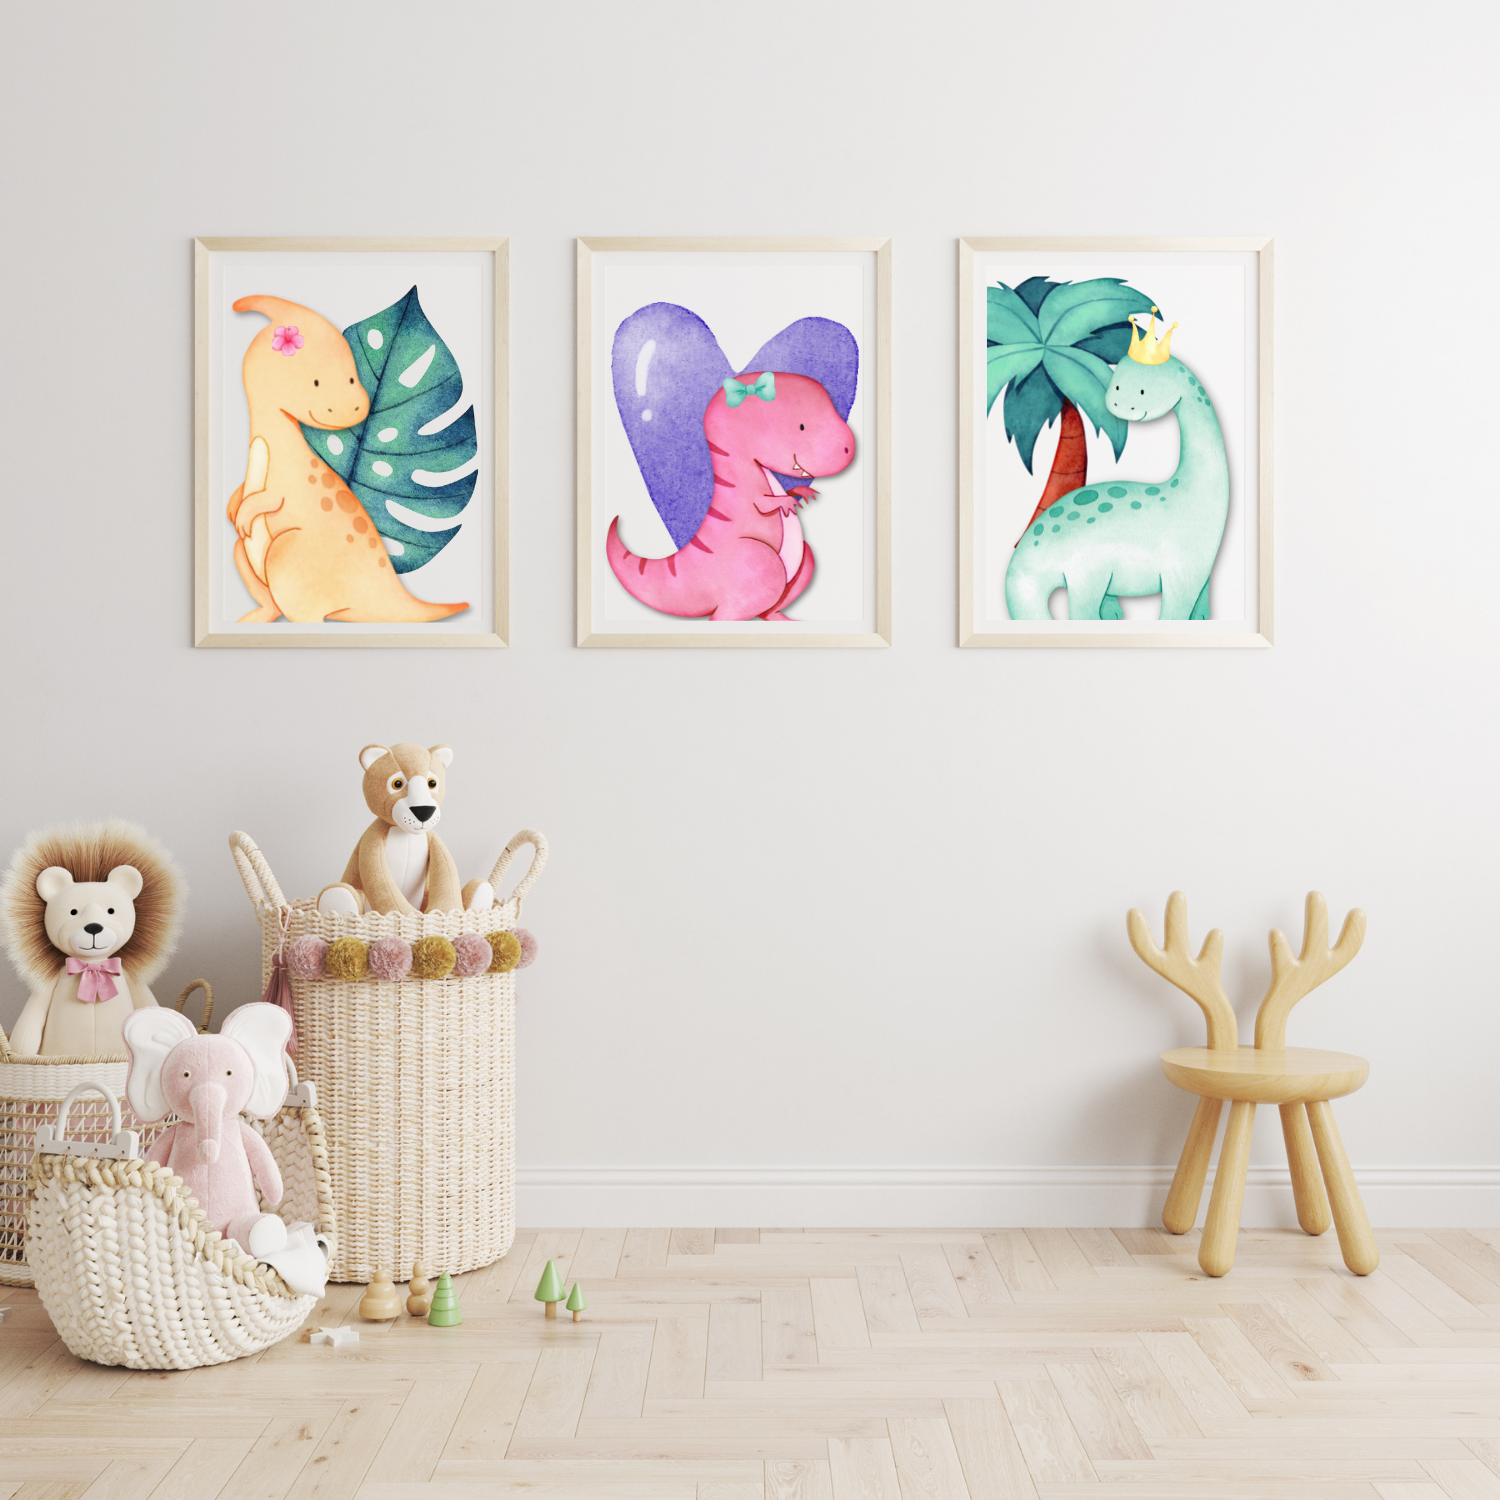
Now that you know how to use mockups in Canva, you can present your designs in a photo-realistic showcase. It can aid in impressing your clients while helping you sell the functionality of your products.
6 Related Canva Tutorials
In this tutorial you will learn how to use mockups in Affinity Designer. Mockups create a visual display for your designs allowing you an end result preview. Usually purchased in PSD formats, mockups can easily be customized in Affinity Designer. We will guide you through the process of using both ...
Ensure that your file has been downloaded and unzipped to use. if you are unsure how to do this check the tutorial here. 1- Open Photoshop. Select file from the top panel. 2- Select the mock up file you would like to use. 3- The file will appear in your ...
1- Log into Cricut Design Space. Click on new project. 2- Click on Upload. 3- Click on upload photo. 4- Click on Browse. 5- Select your mock up. I am using Business Card Mockup from Design Bundles. 6- Click the simple image type. Click continue. 7- Select the ...
1- Open SCAL4 and then click on the file icon. 2- Click Place image. 3- Select the mock up image. 4- Resize and move your mock up. 5- Click on the text icon. 6- Write your text. 7-Select your font. I am using Pampkino from fontbundles.net 8- ...
*Business edition used.1- Open Silhouette Studio. Click on the open icon.2- We need to import the blank mock up into silhouette studio. Go the library then import to library.3- Find your mock up and open.4- The mock up will appear in your library. double click on ...
A craft mockup is an excellent way of showcasing your designs in a realistic view on images without the need for complex software. Mockups give you the freedom to use your designs on several objects quickly and easily, saving you precious time. You can use your craft mockups on the ...

 All your Font Needs

