
Knitted Pattern in Illustrator
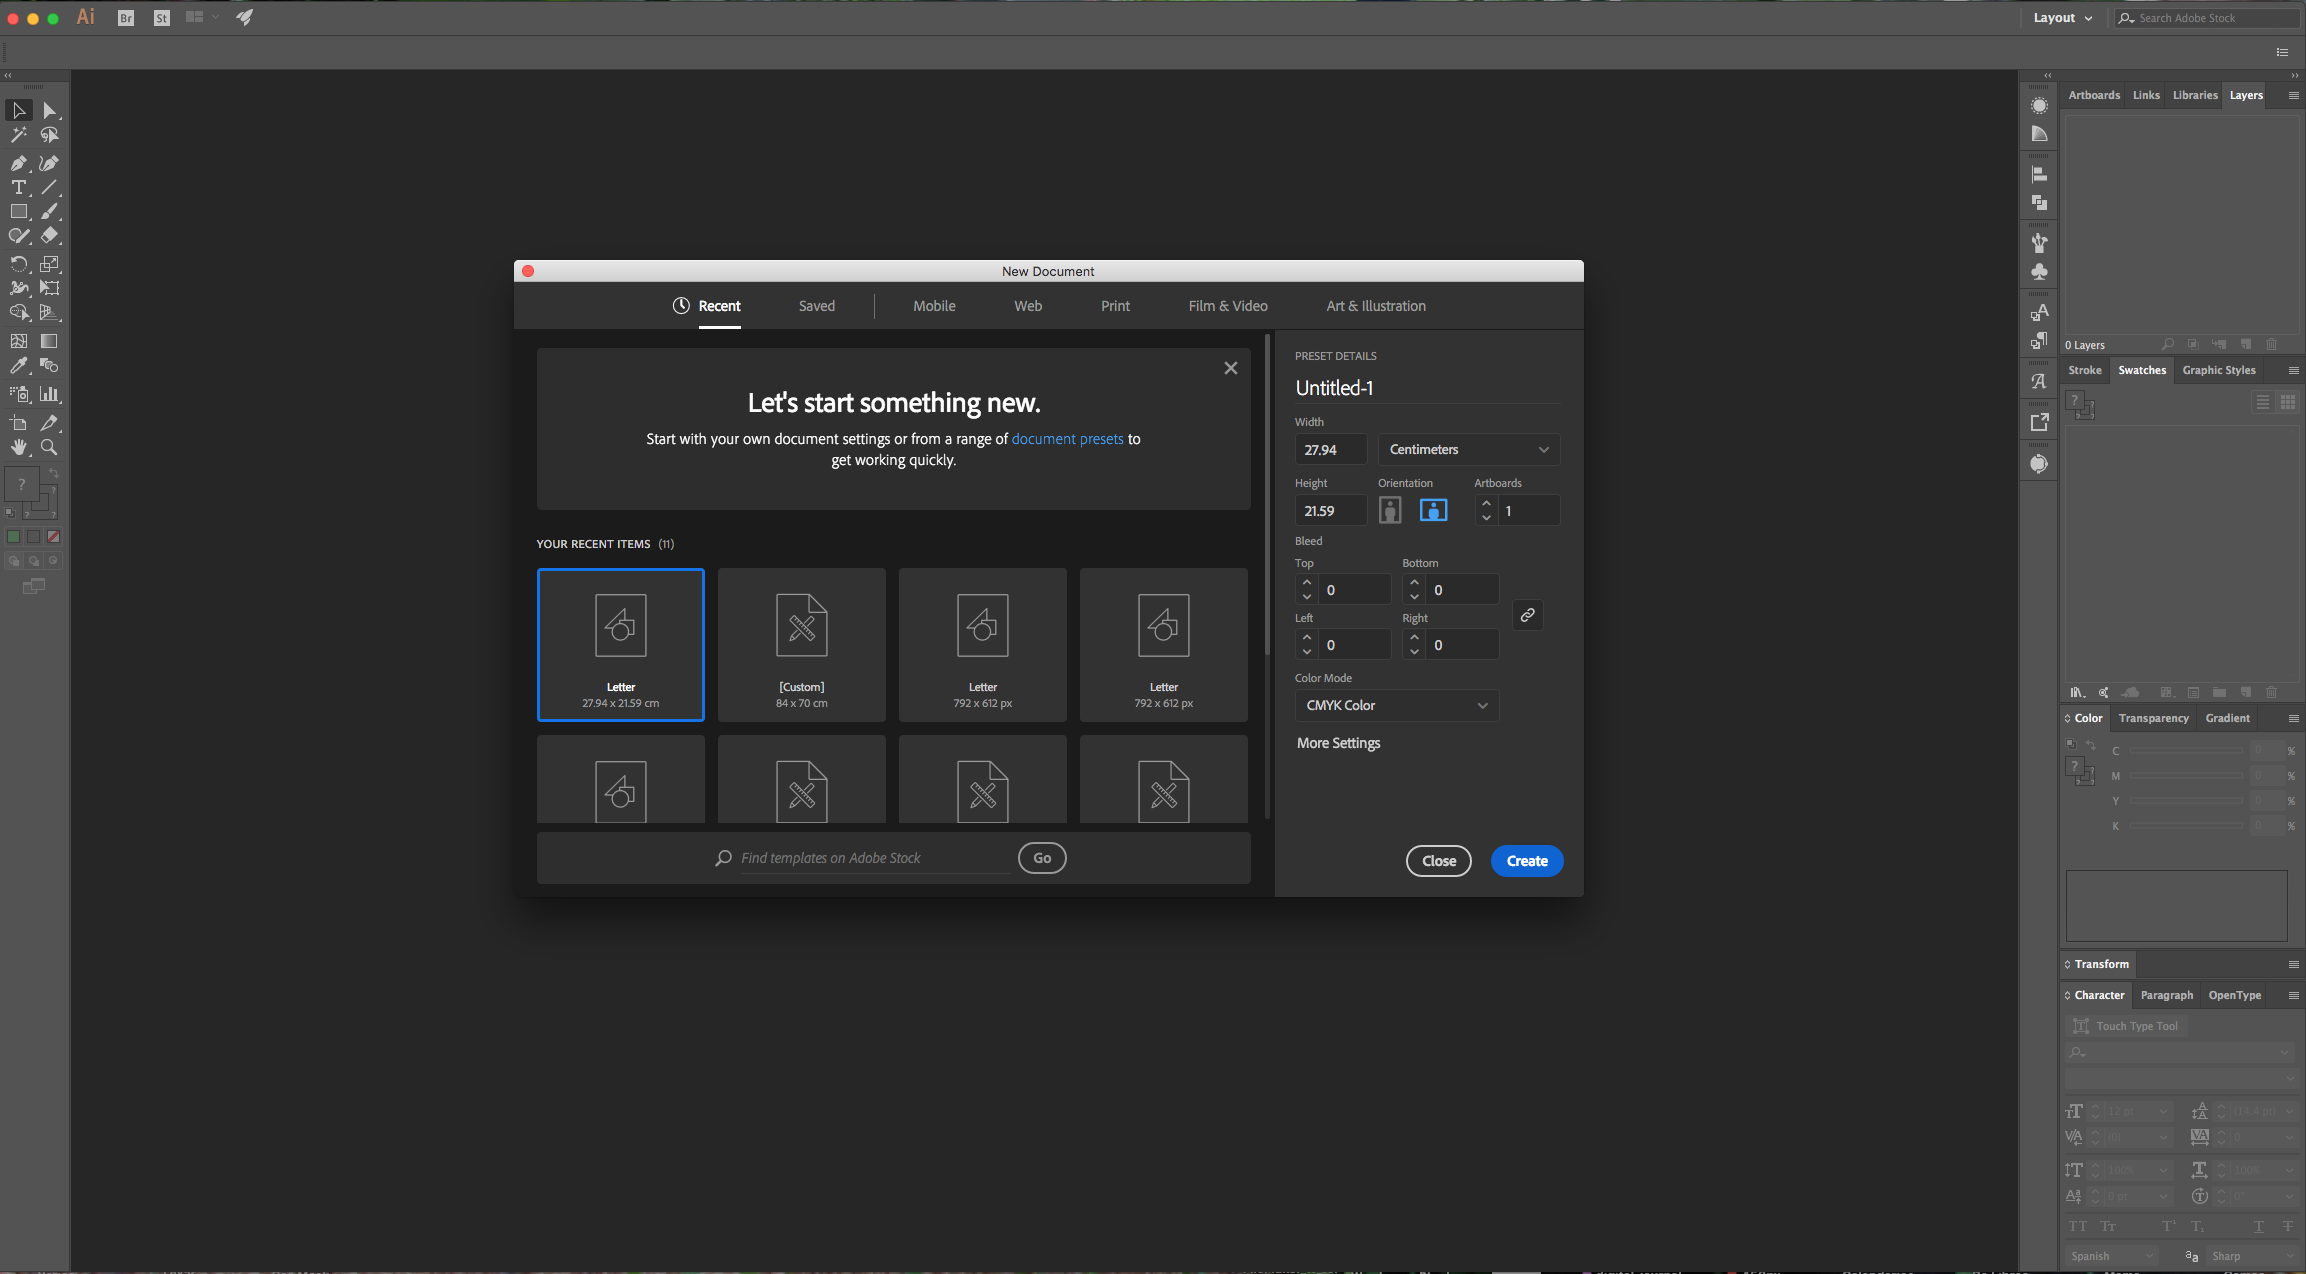
1 - In Illustrator, create a “New Document”.
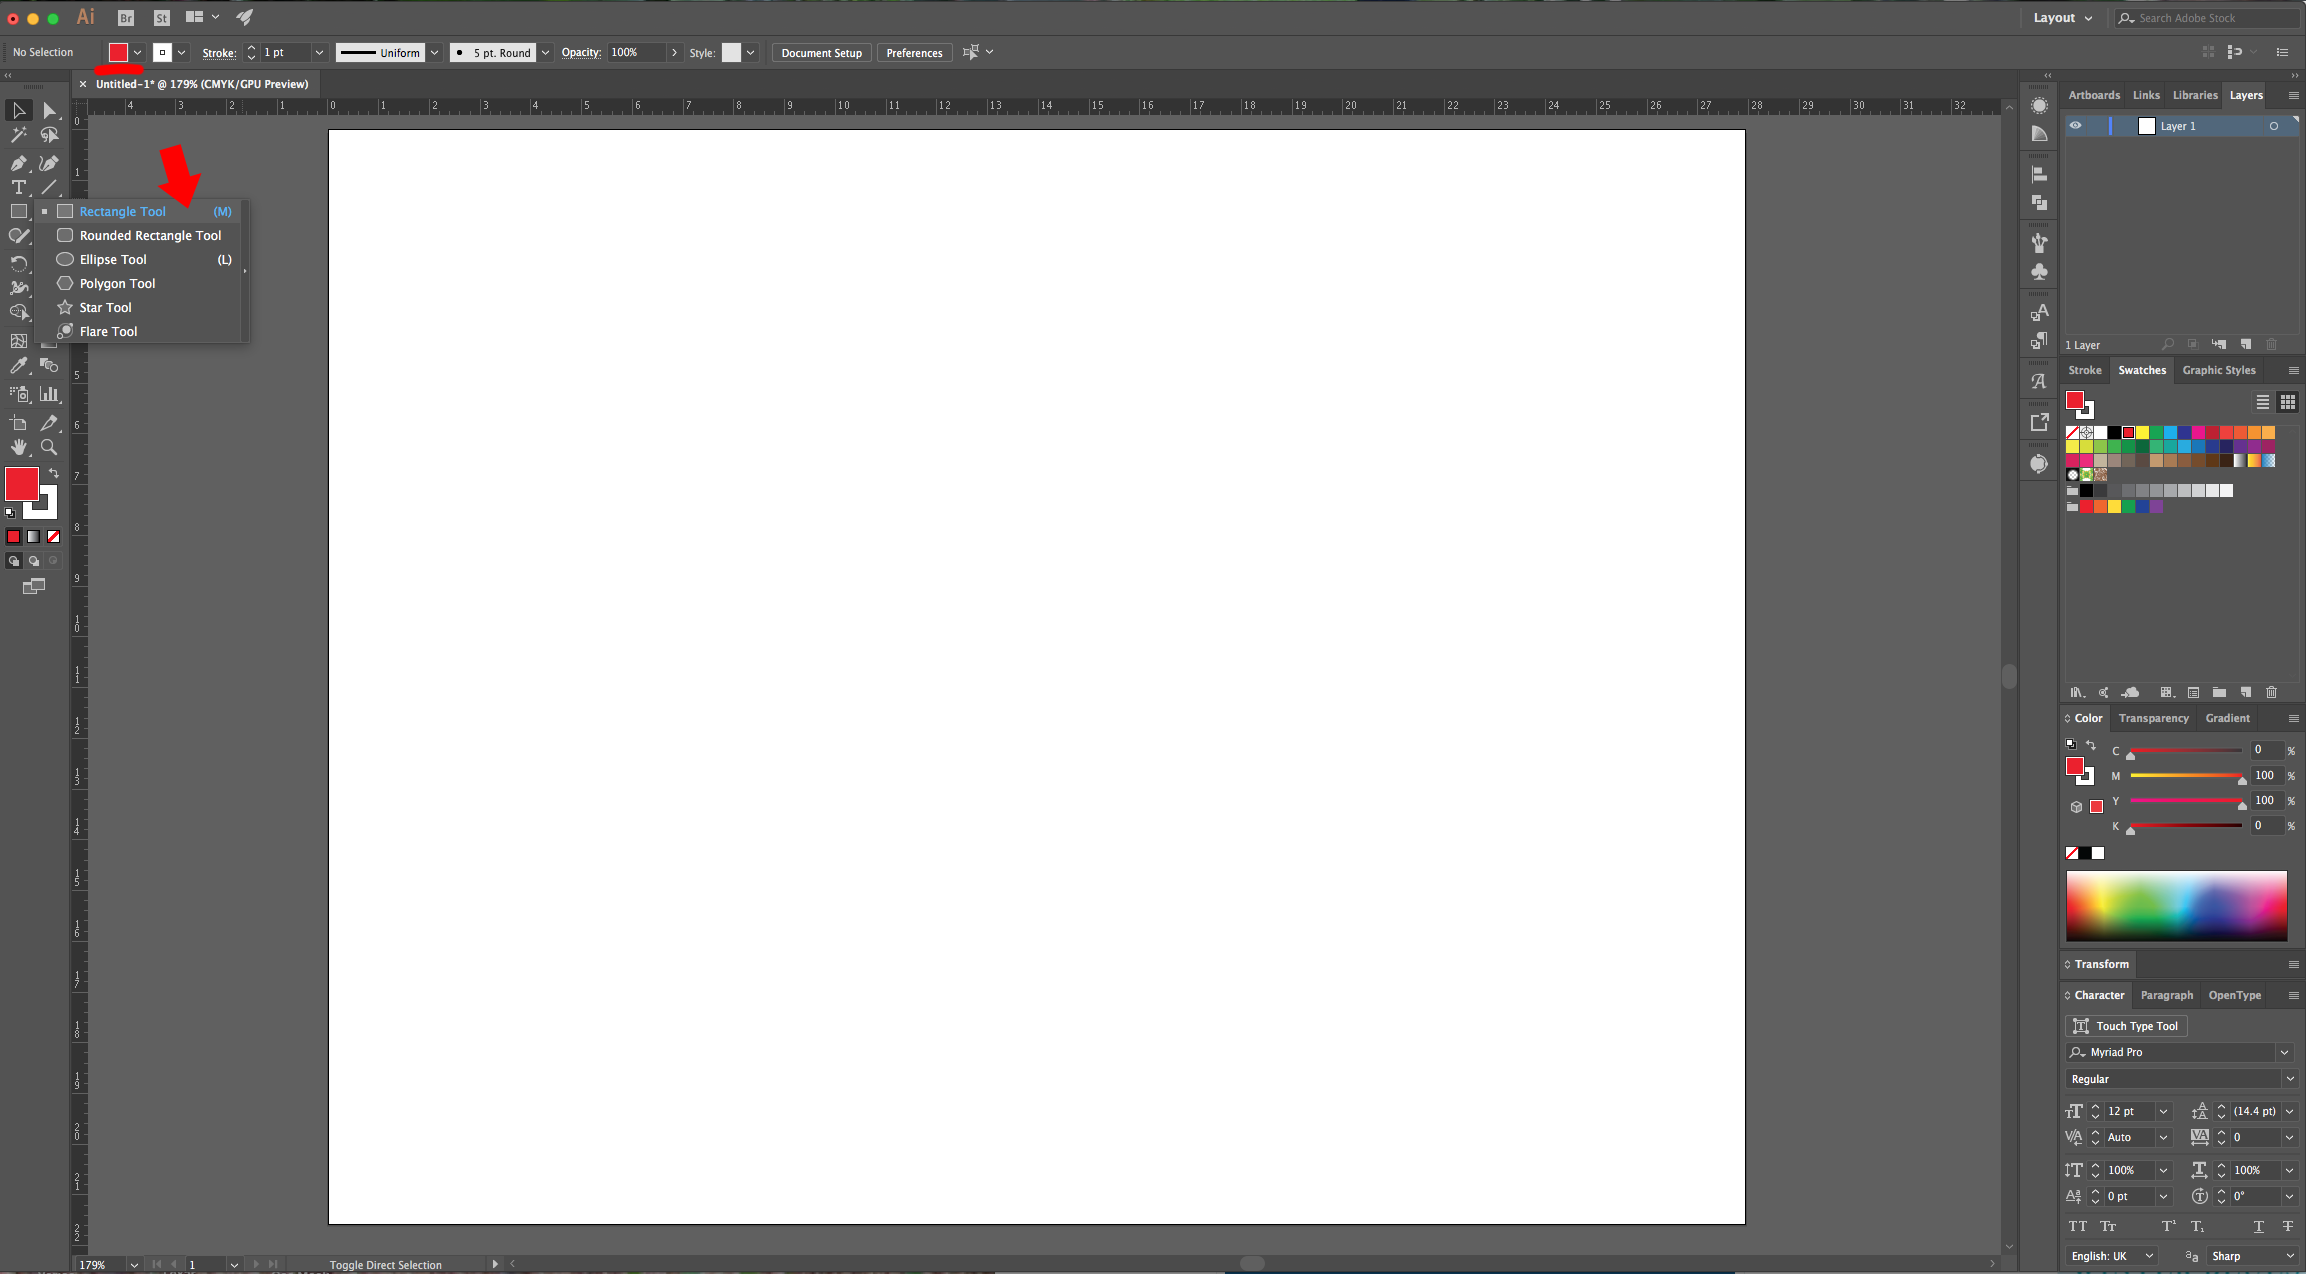
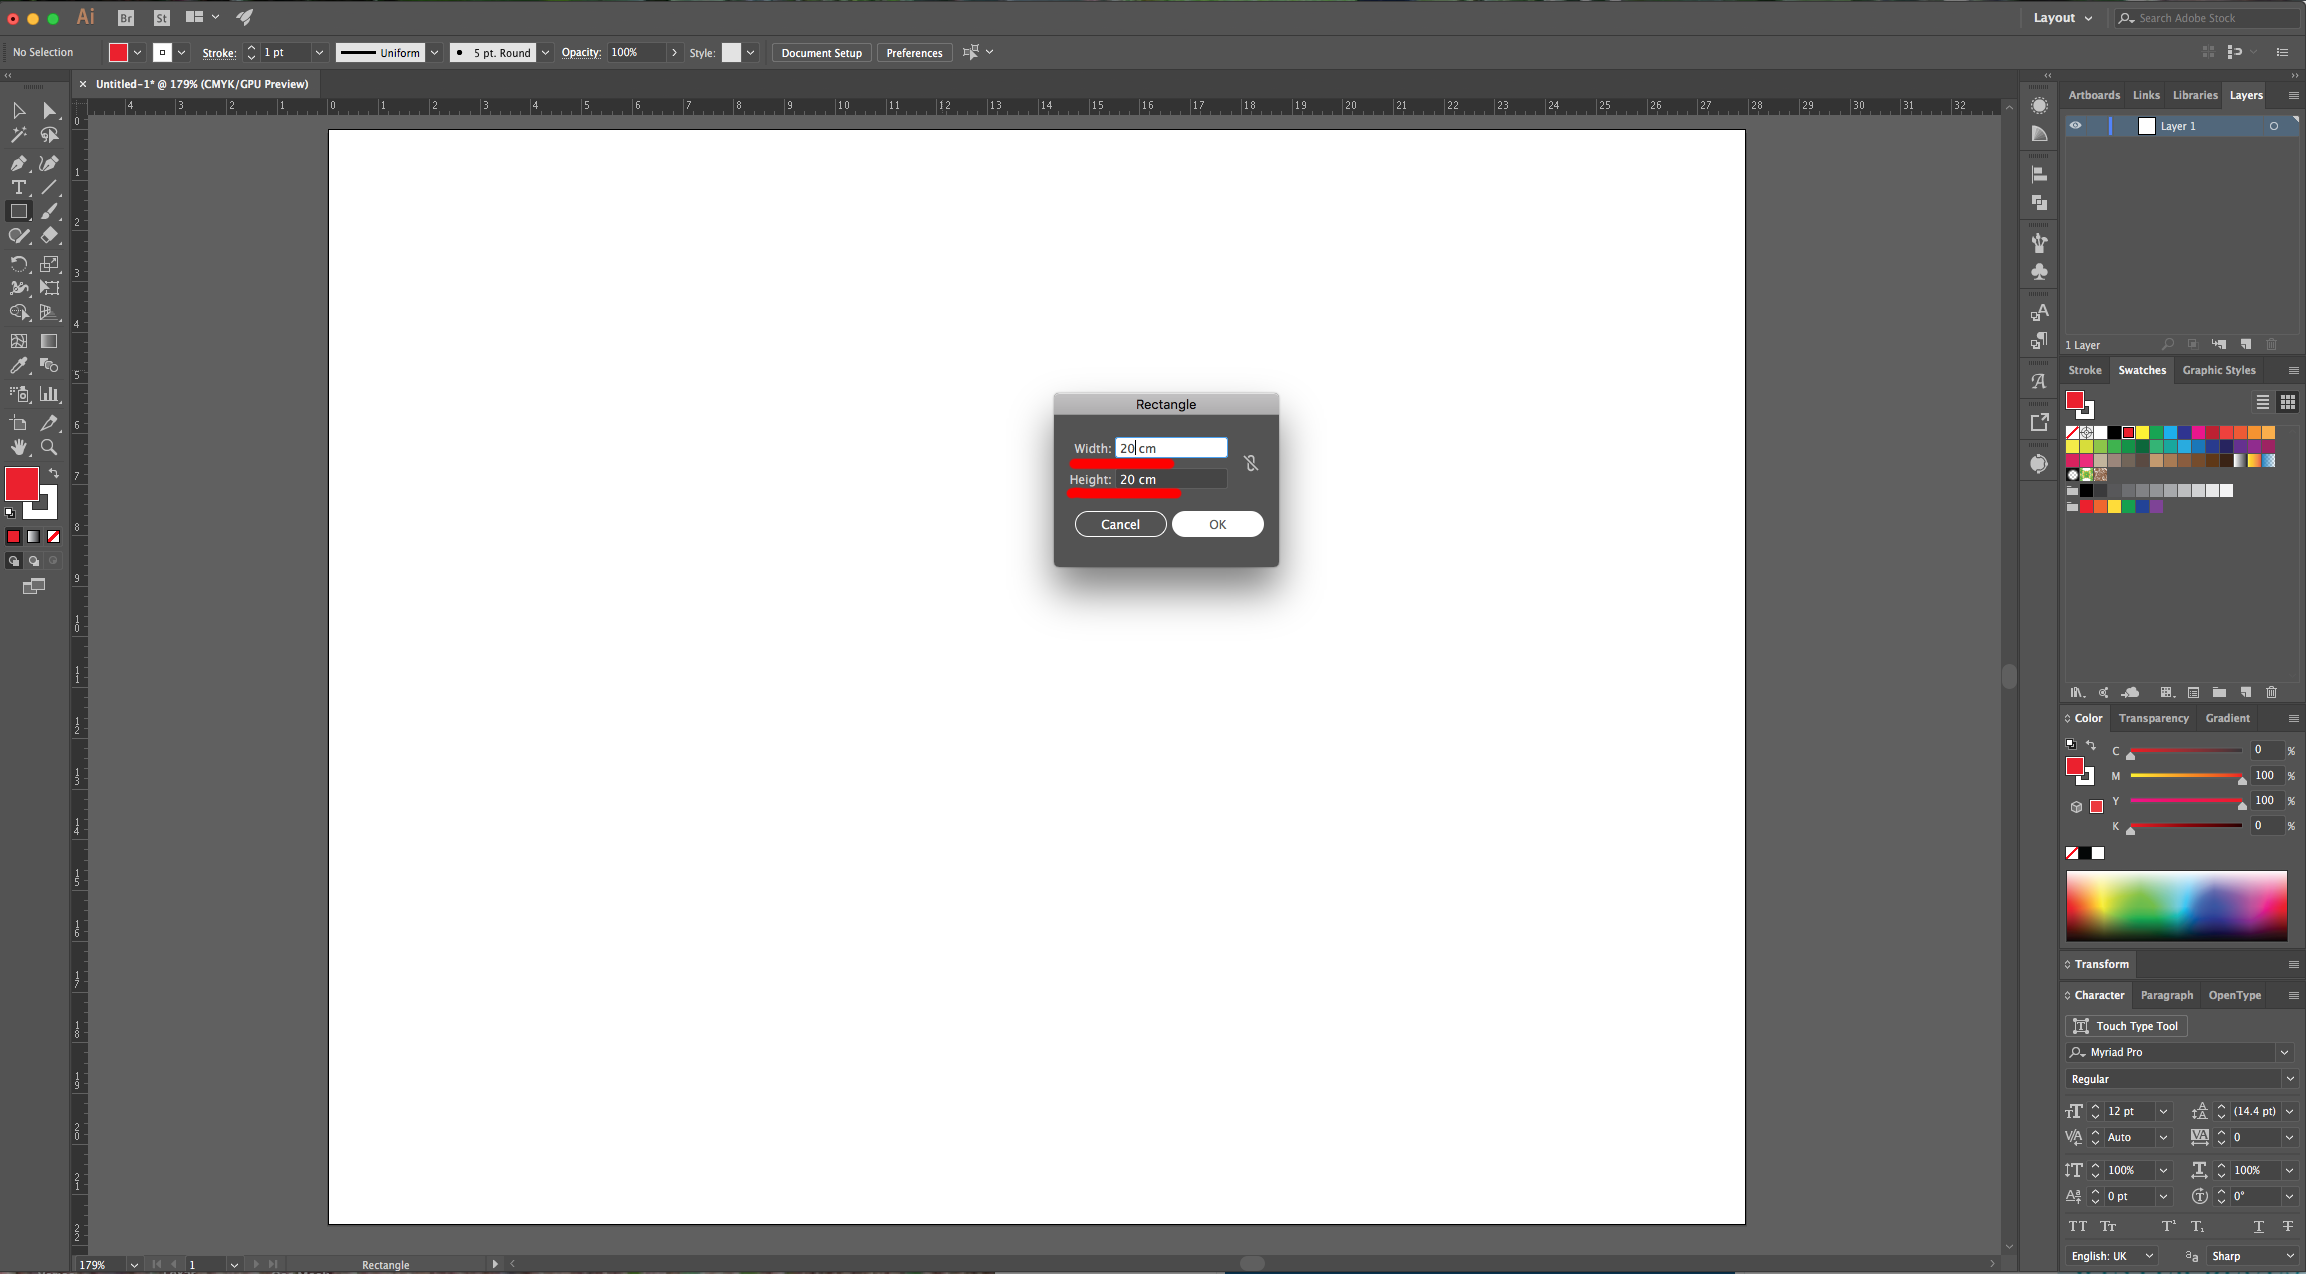
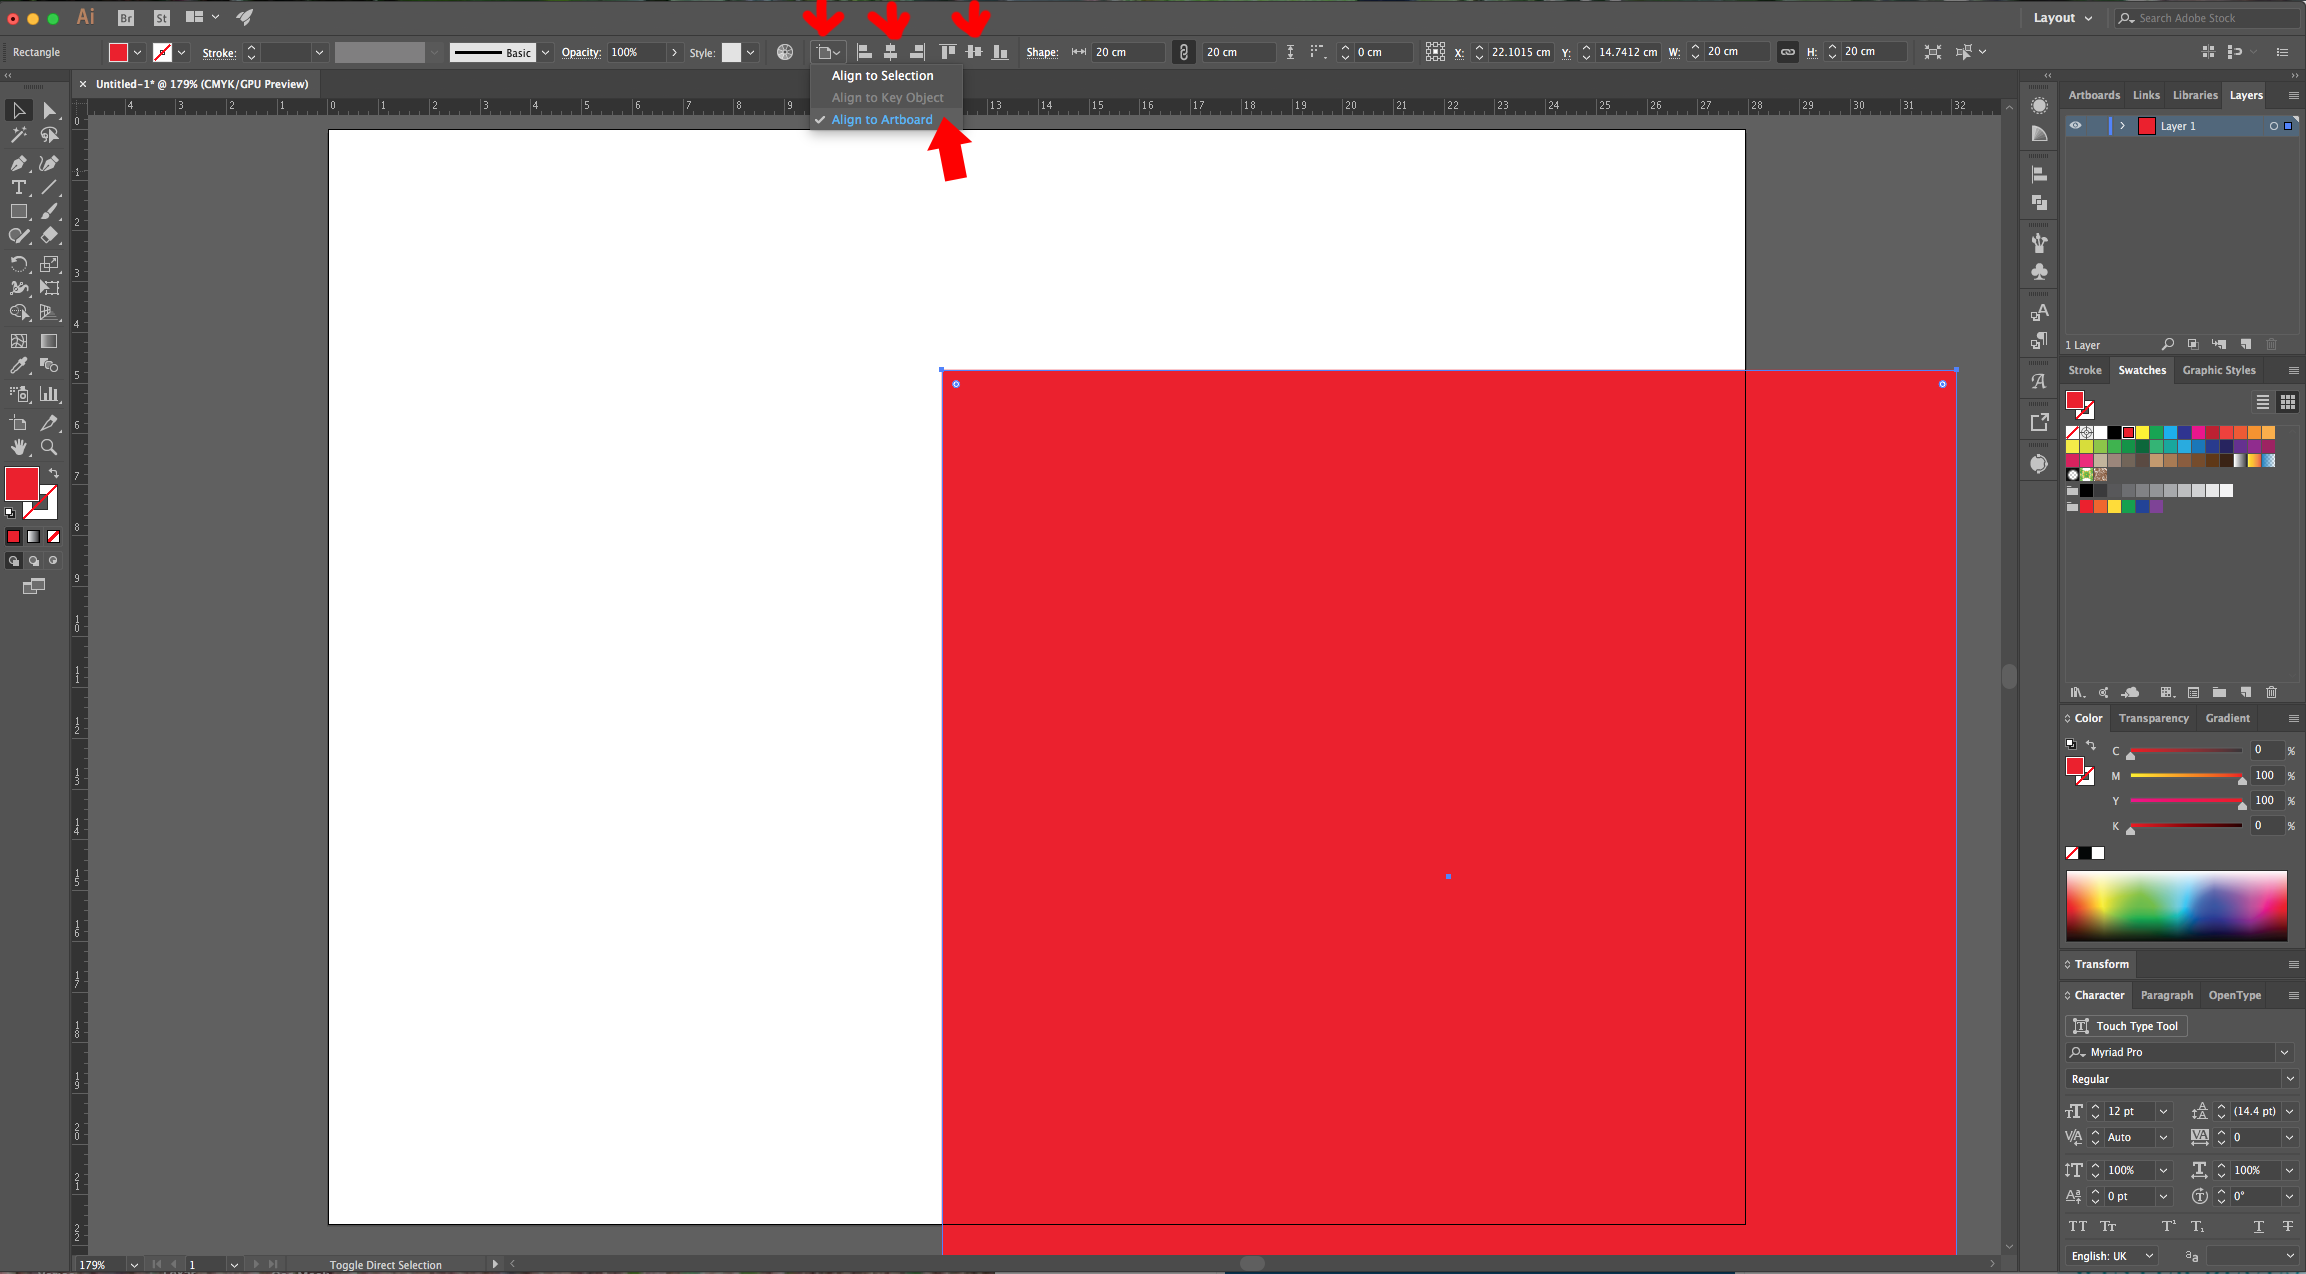
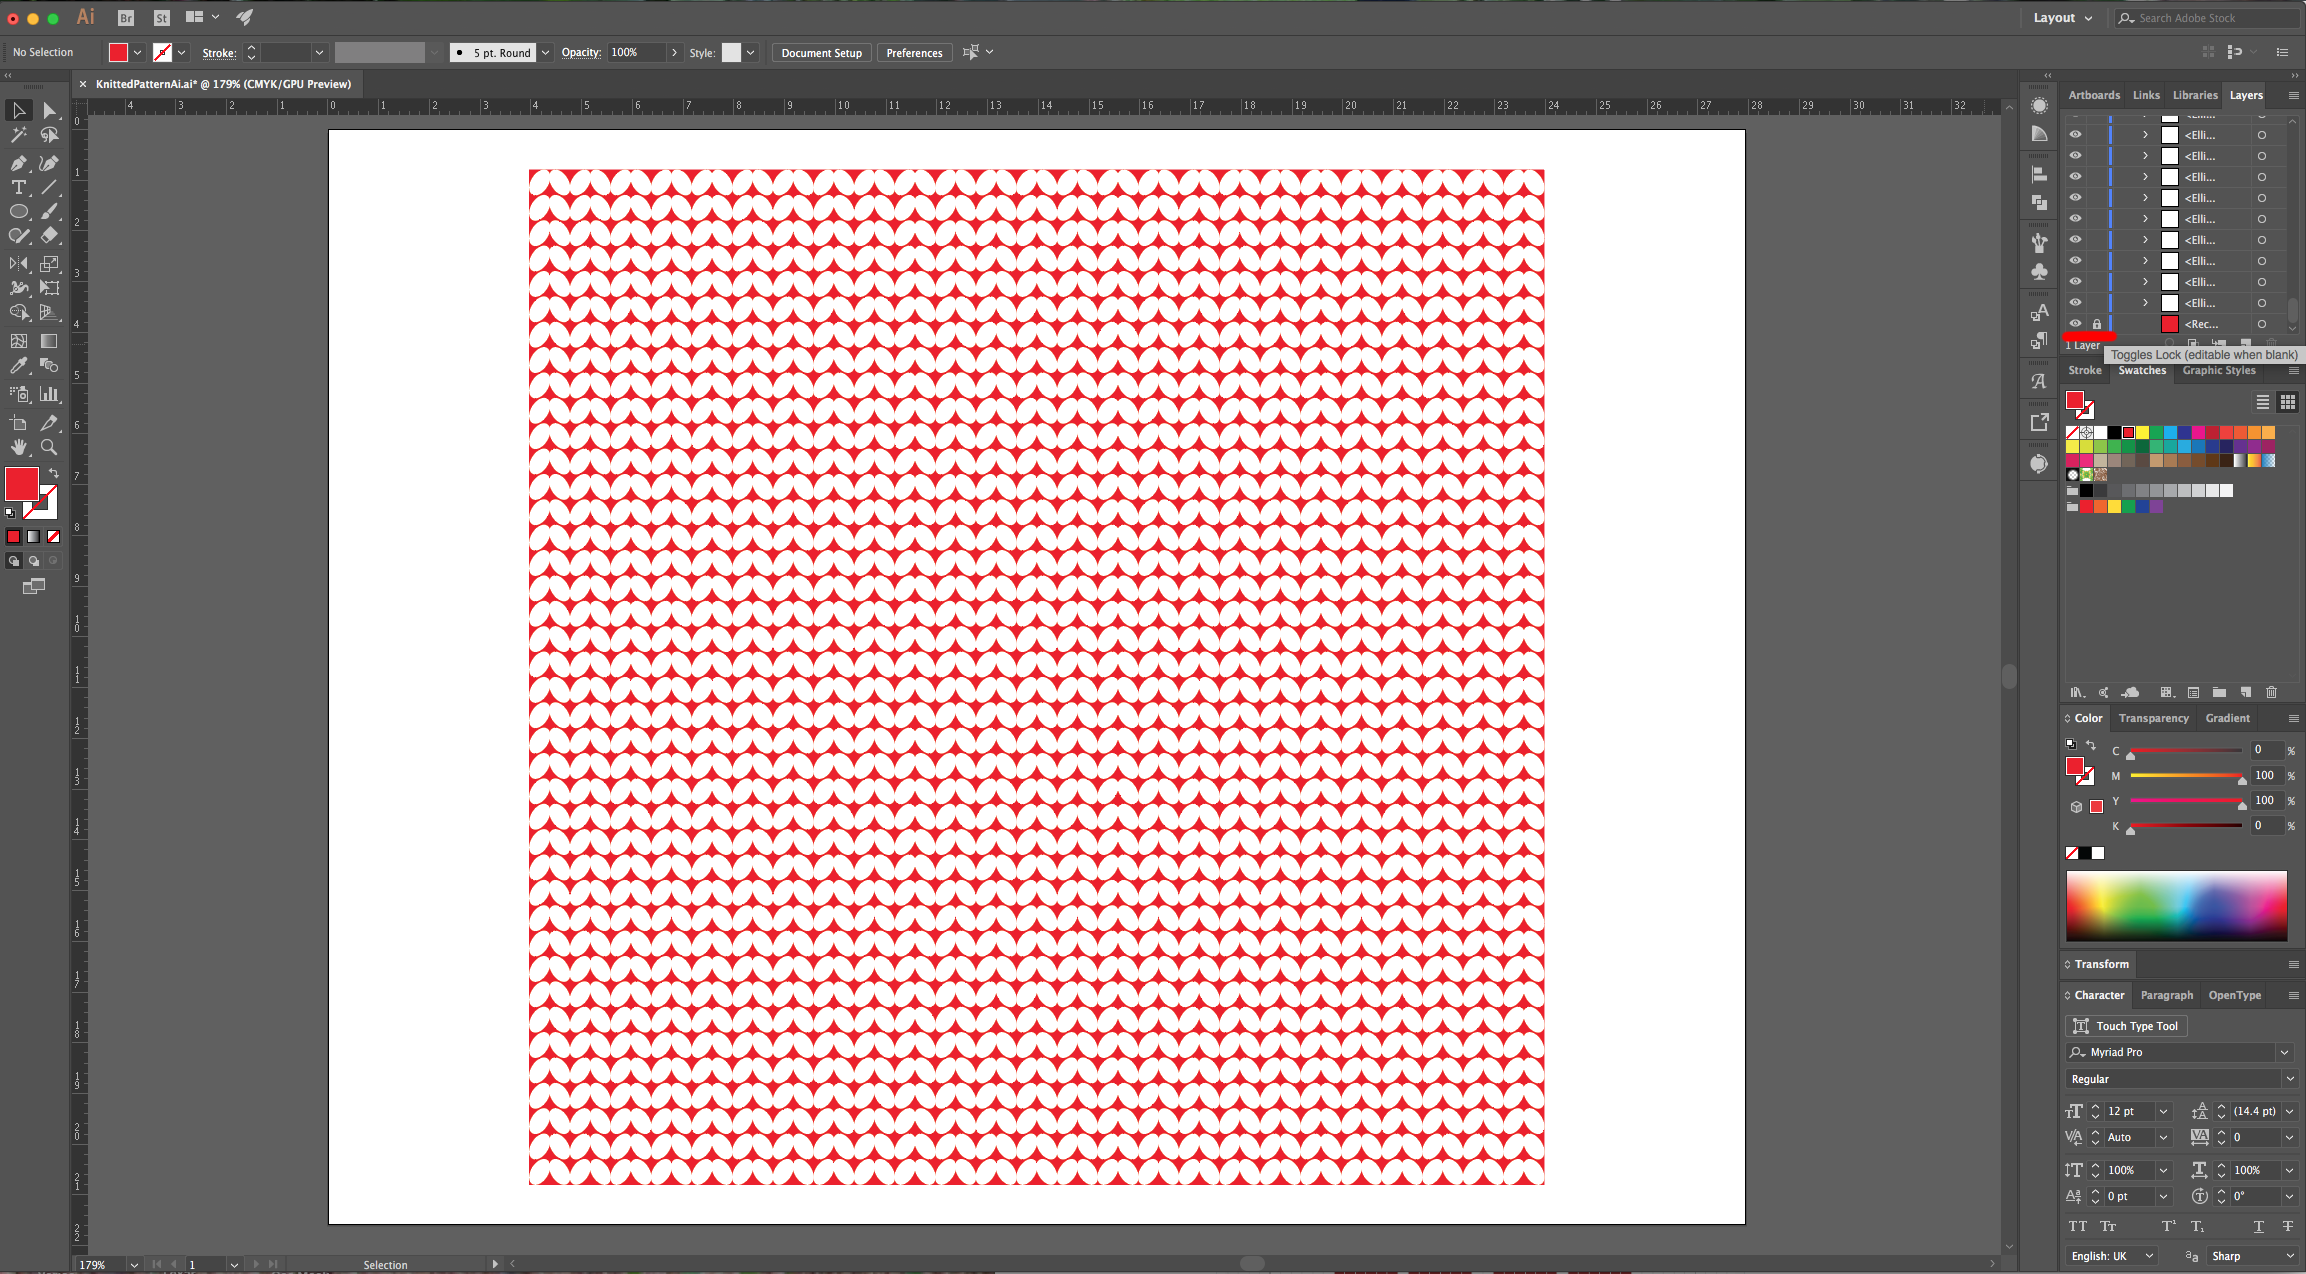
2 - Select the “Rectangle Tool”, click inside your document and input a “Width” and “Height” of 20 cm. Fill it with Red and center it using the “Horizontal and Vertical Align Center” options on your Top Menu and make sure that “Align to Artboard” is selected. Or use the same options in the “Align Panel”.

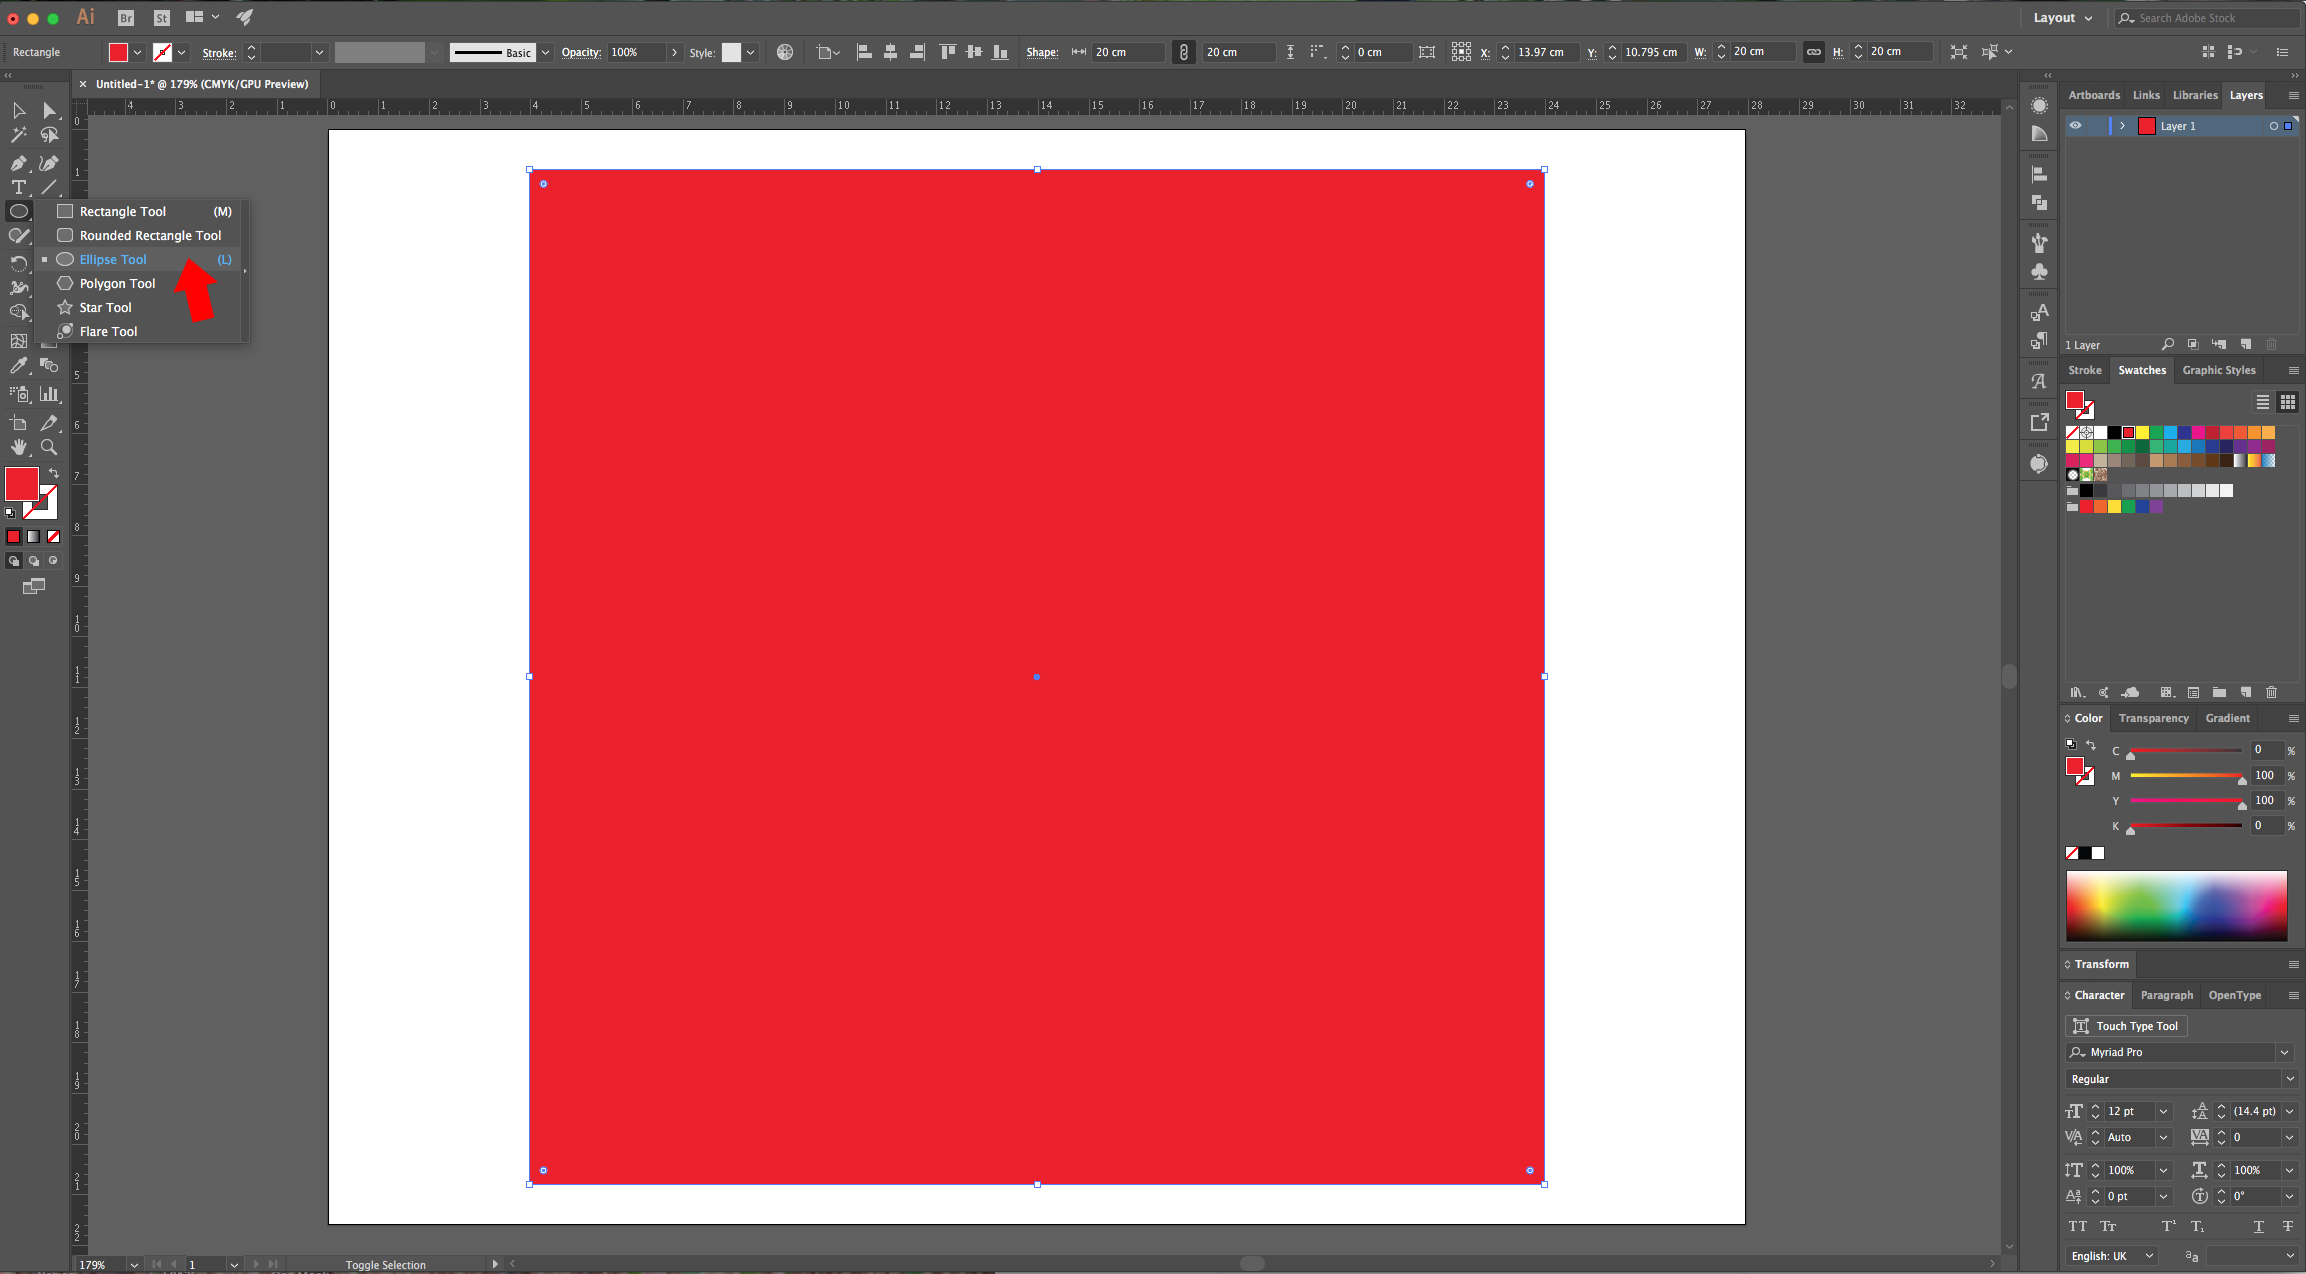
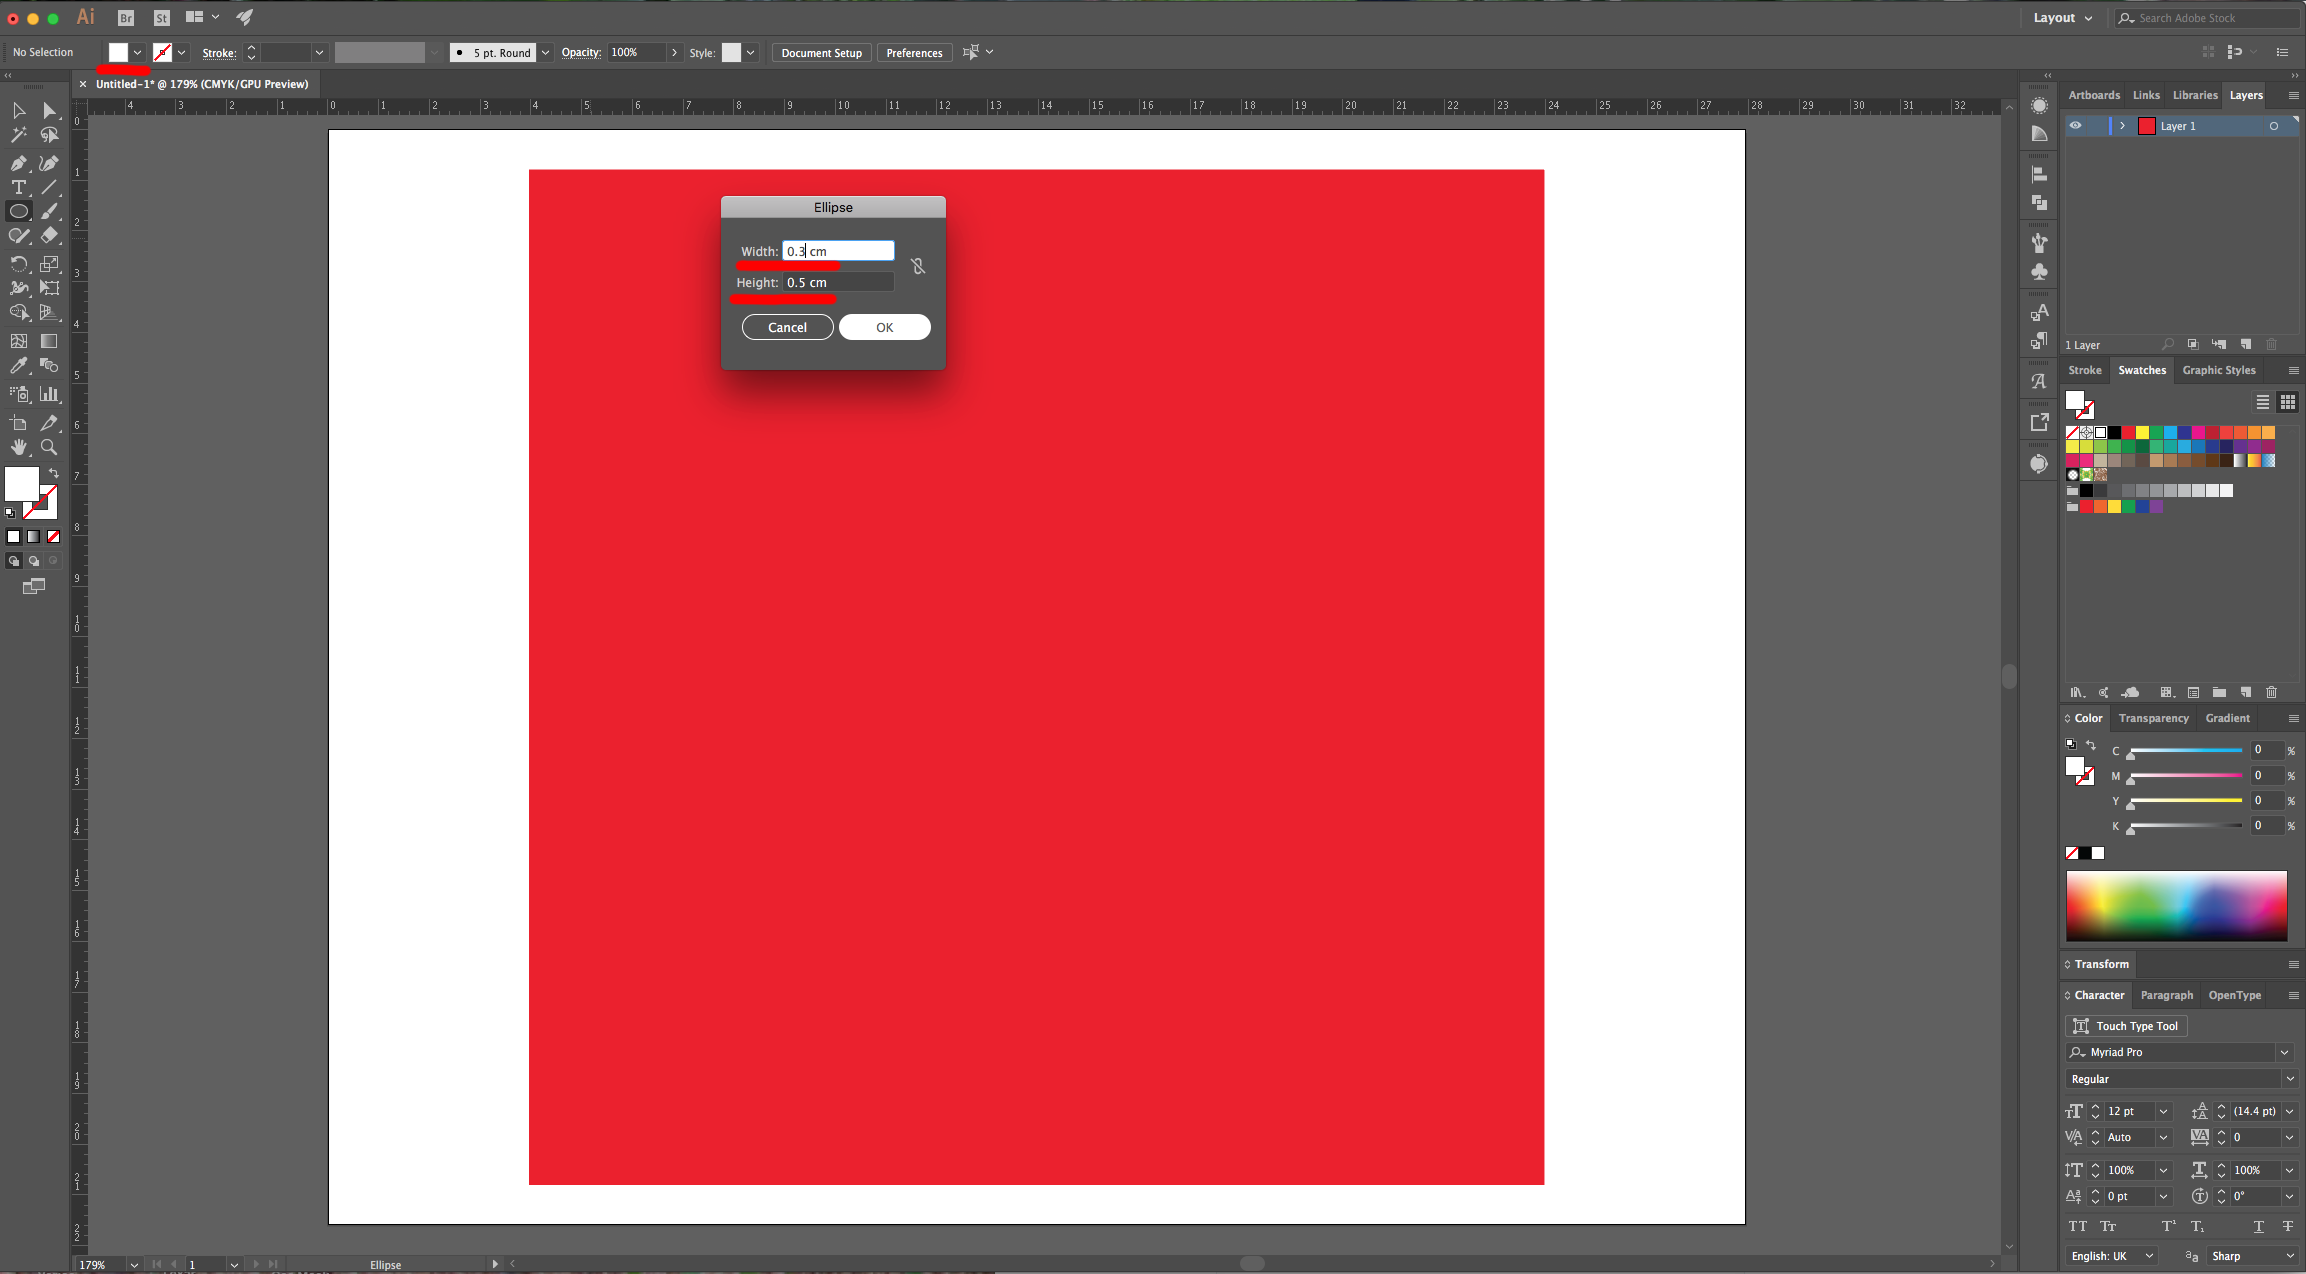
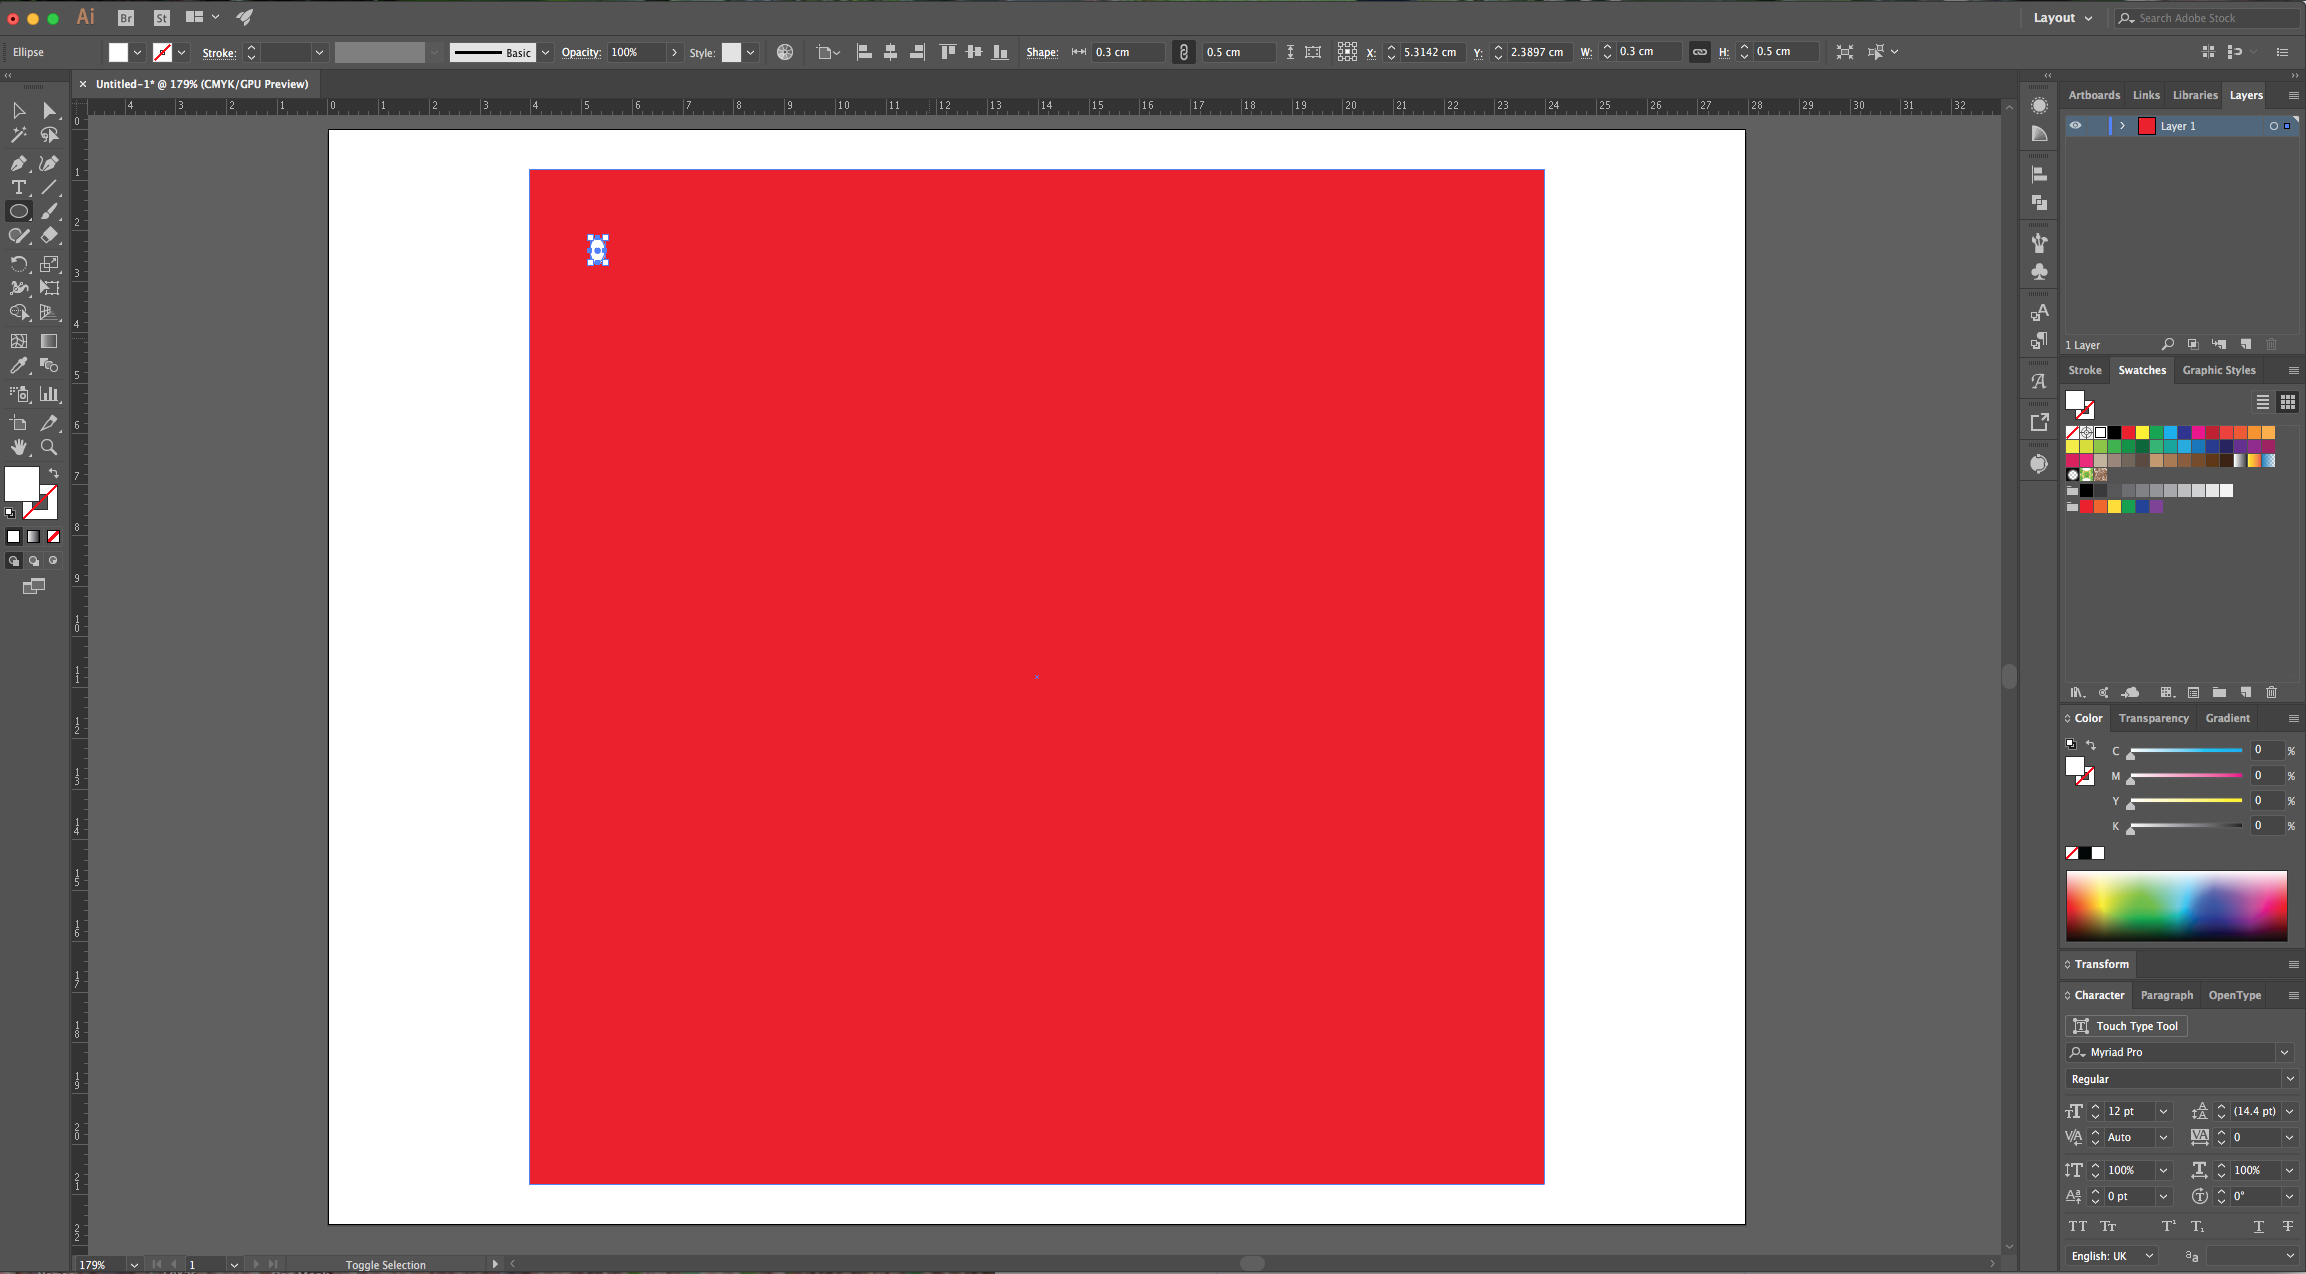
3 - Select the “Ellipse Tool” (L), click inside your document and input a “Width” of 0.3 cm and a “Height” of 0.5 cm and fill it with White.
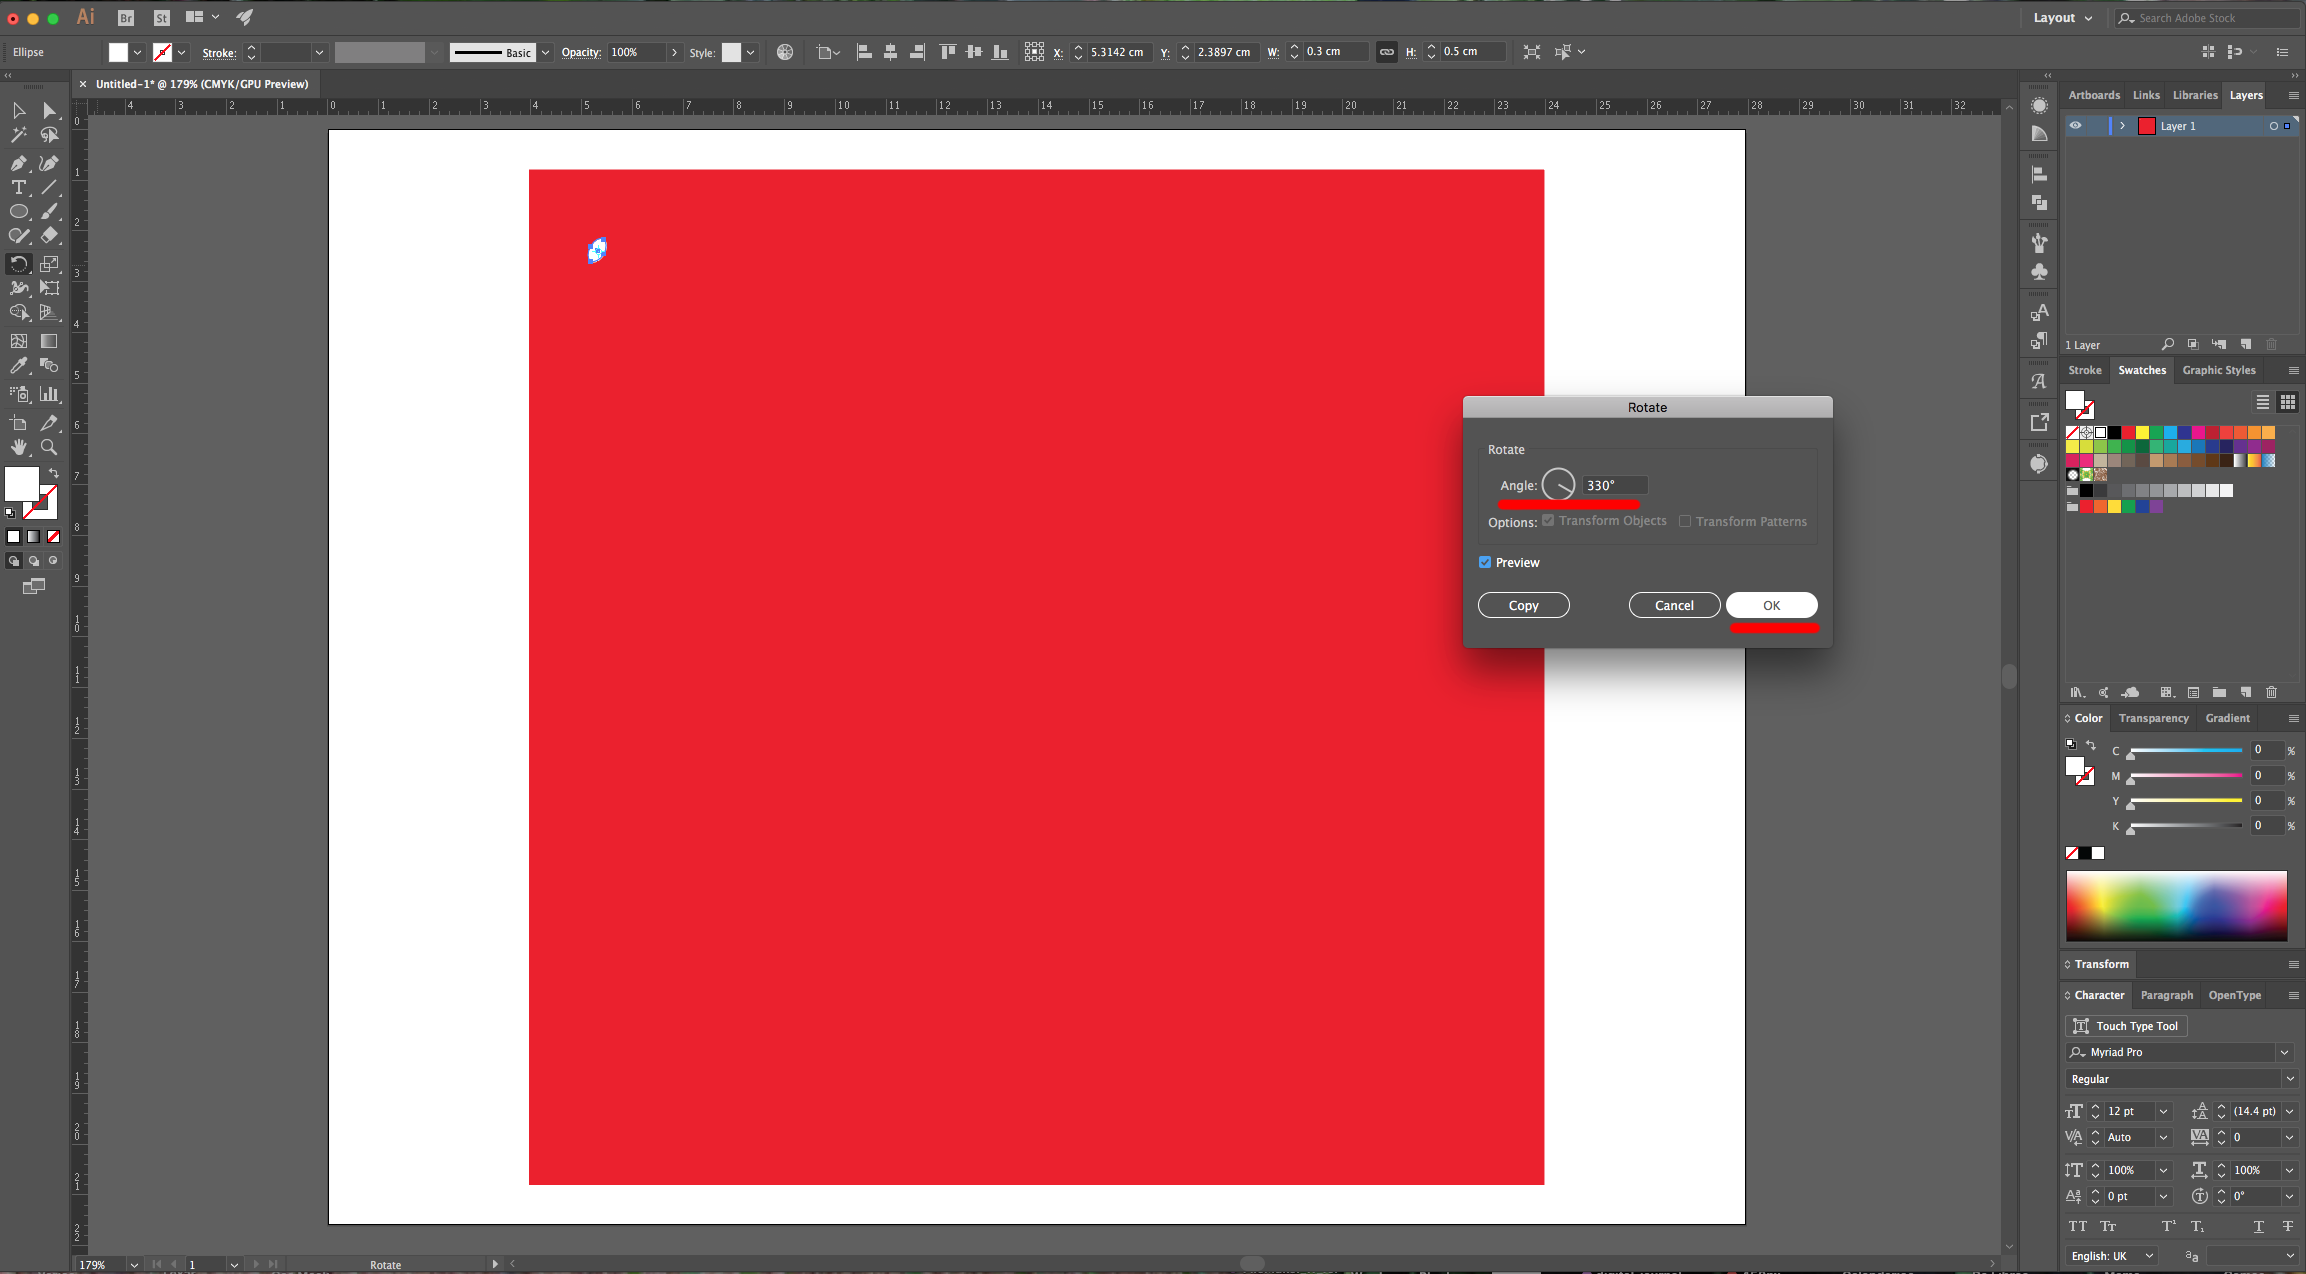
4 - Select the “Rotate Tool” (R) and use a 330° Angle.

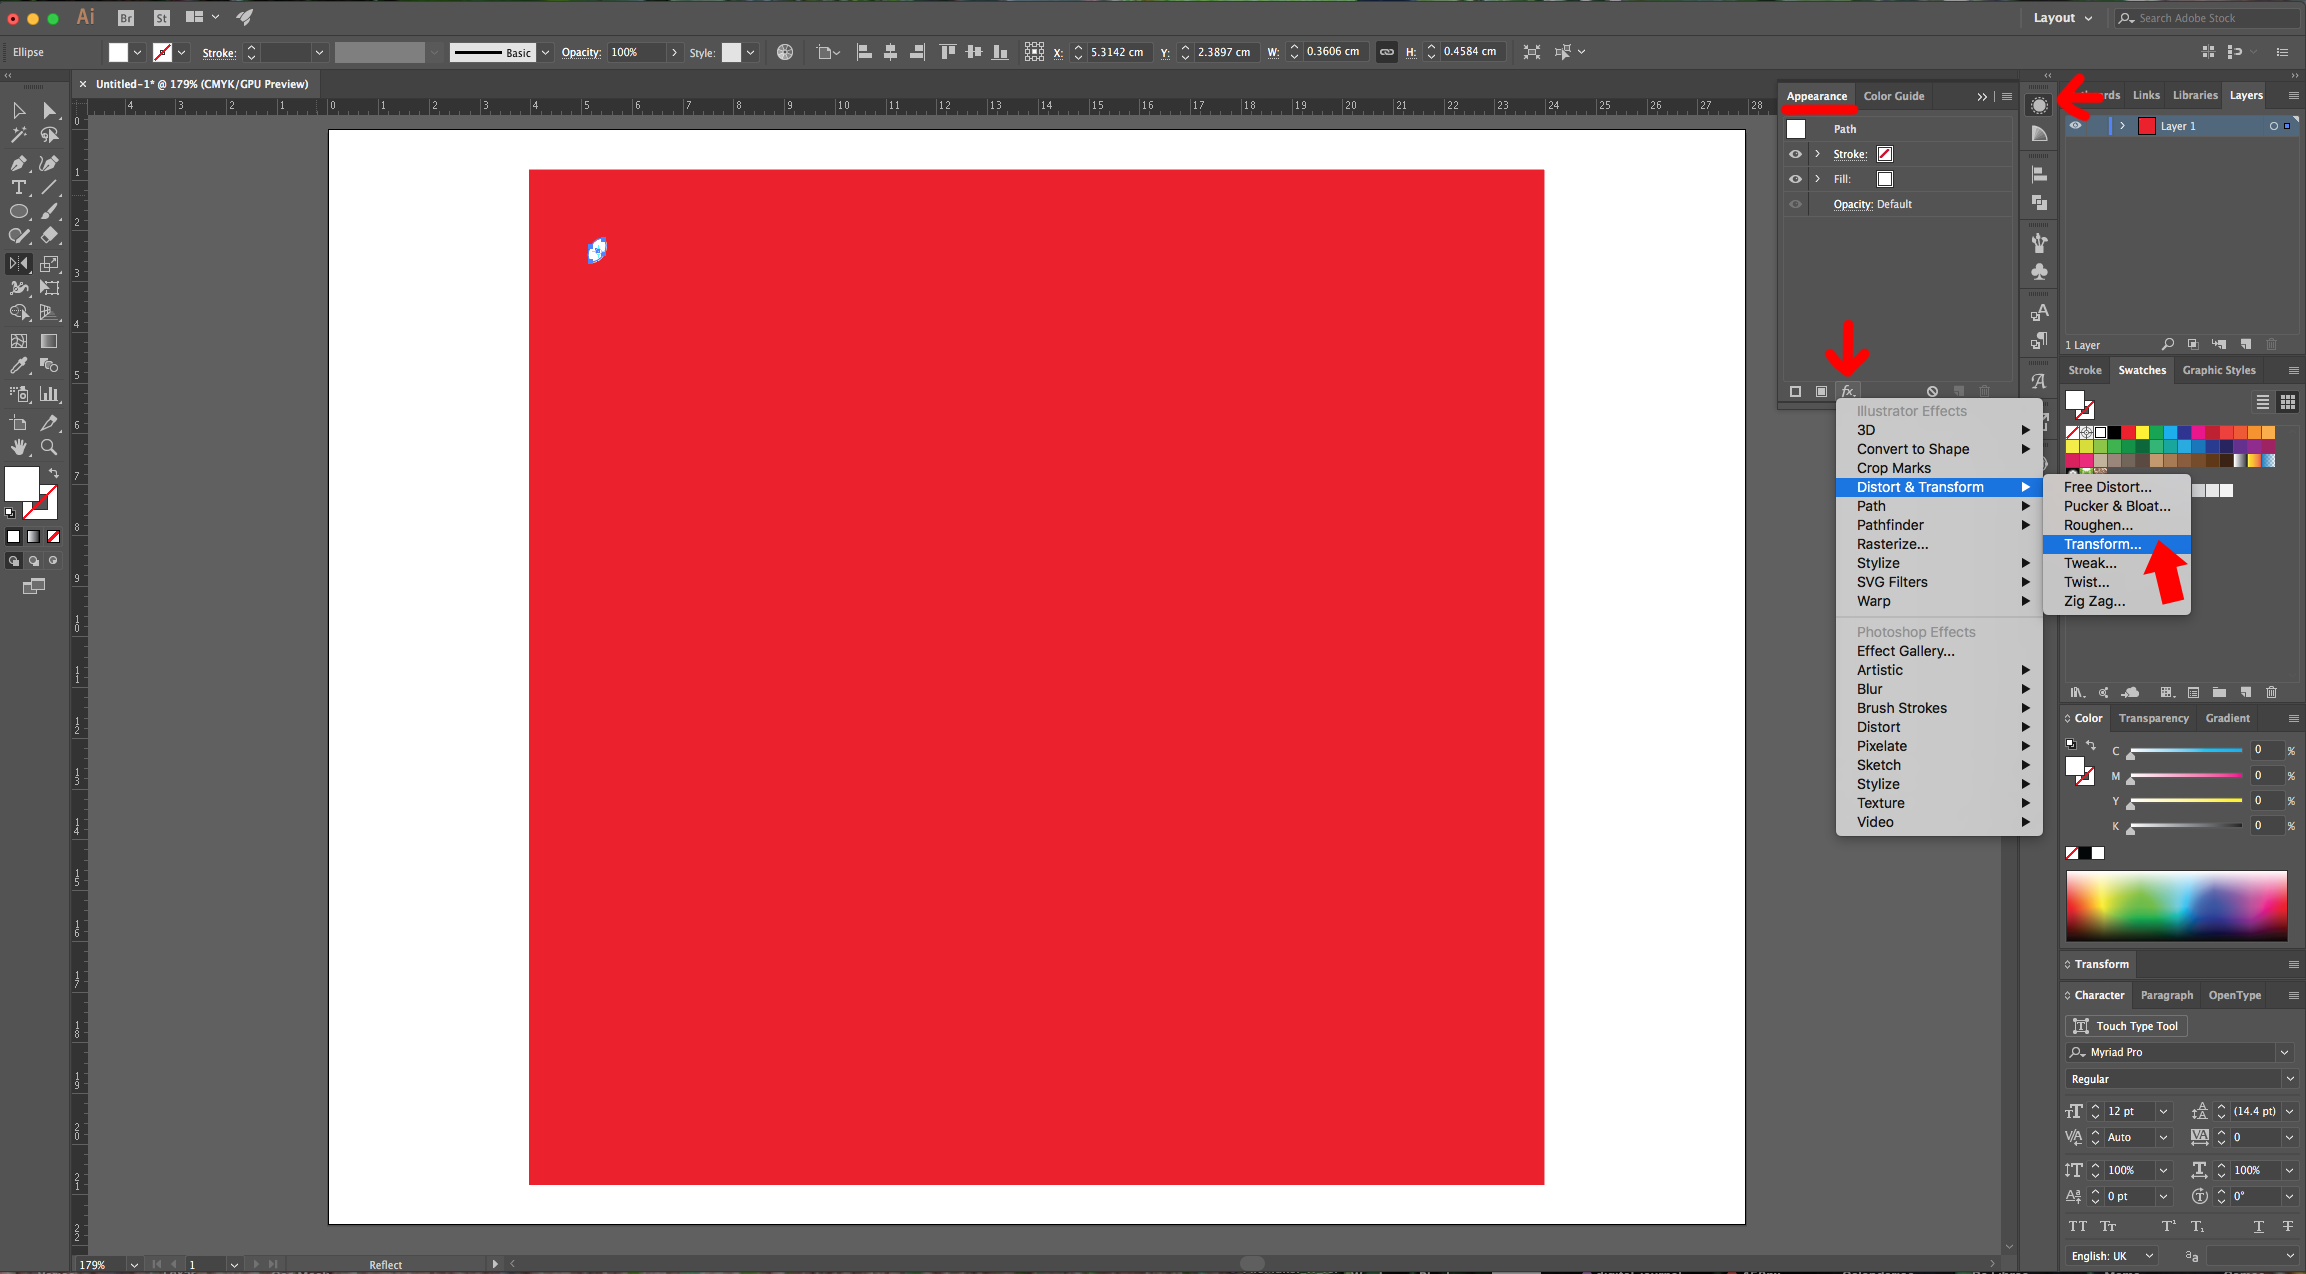
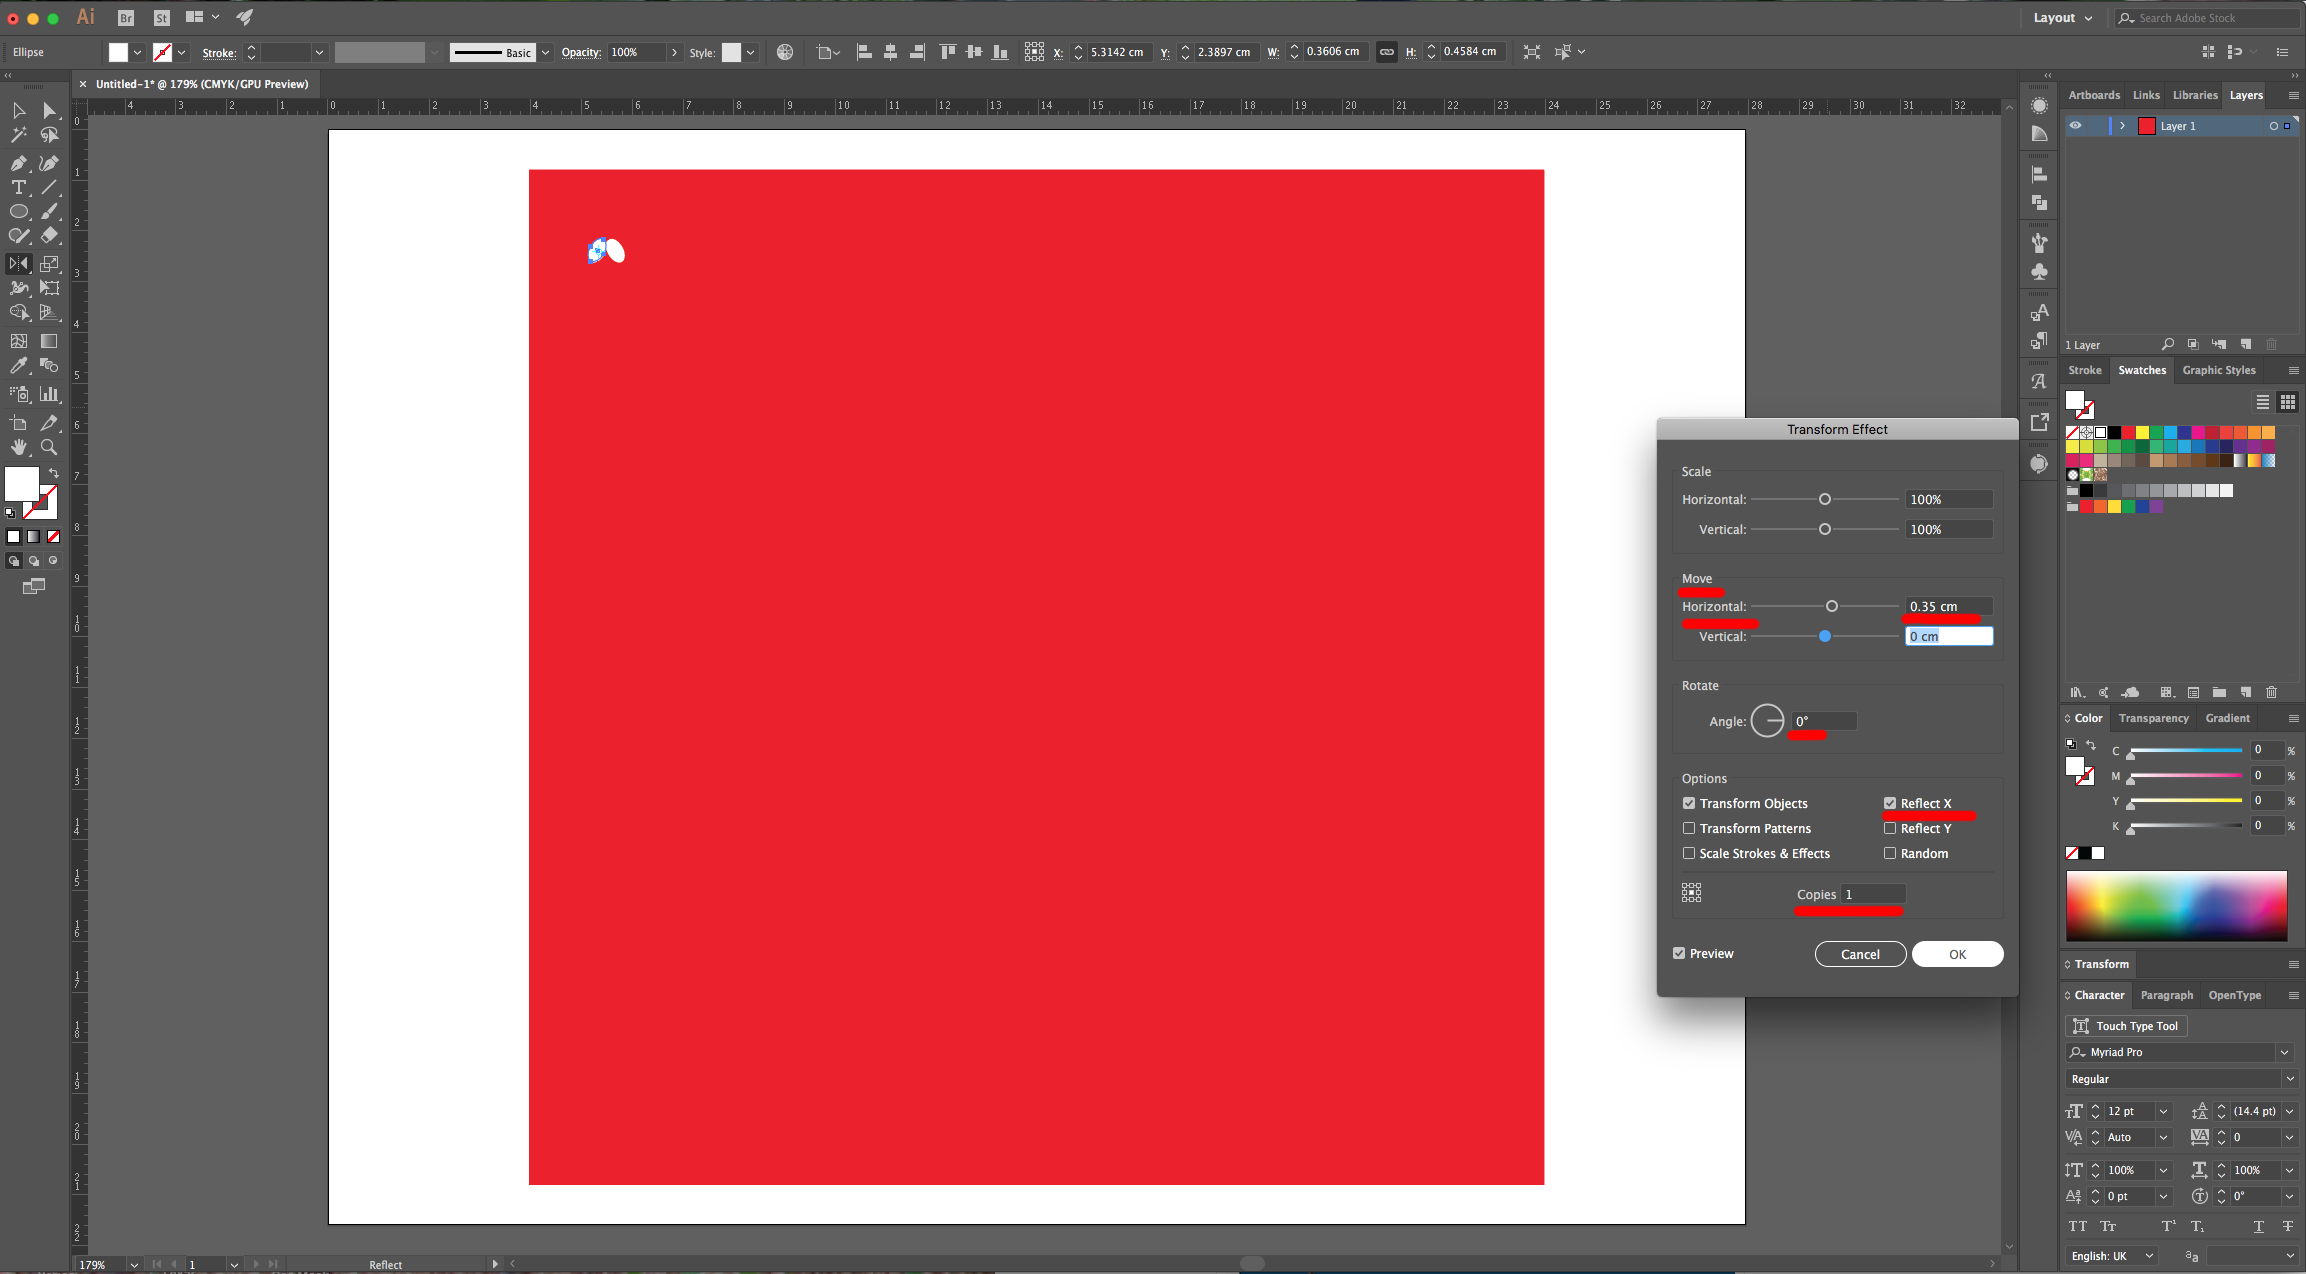
5 - Head to the “Appearance Panel”, click on the “Effects Menu” on the Bottom-Left side of the panel and navigate to Distort and Transform > Transform… Use a “Horizontal Move” of 0.35 cm a 0° Angle, check the “Reflect Y” box and make 1 “Copy”. Go to Object > Expand Appearance.

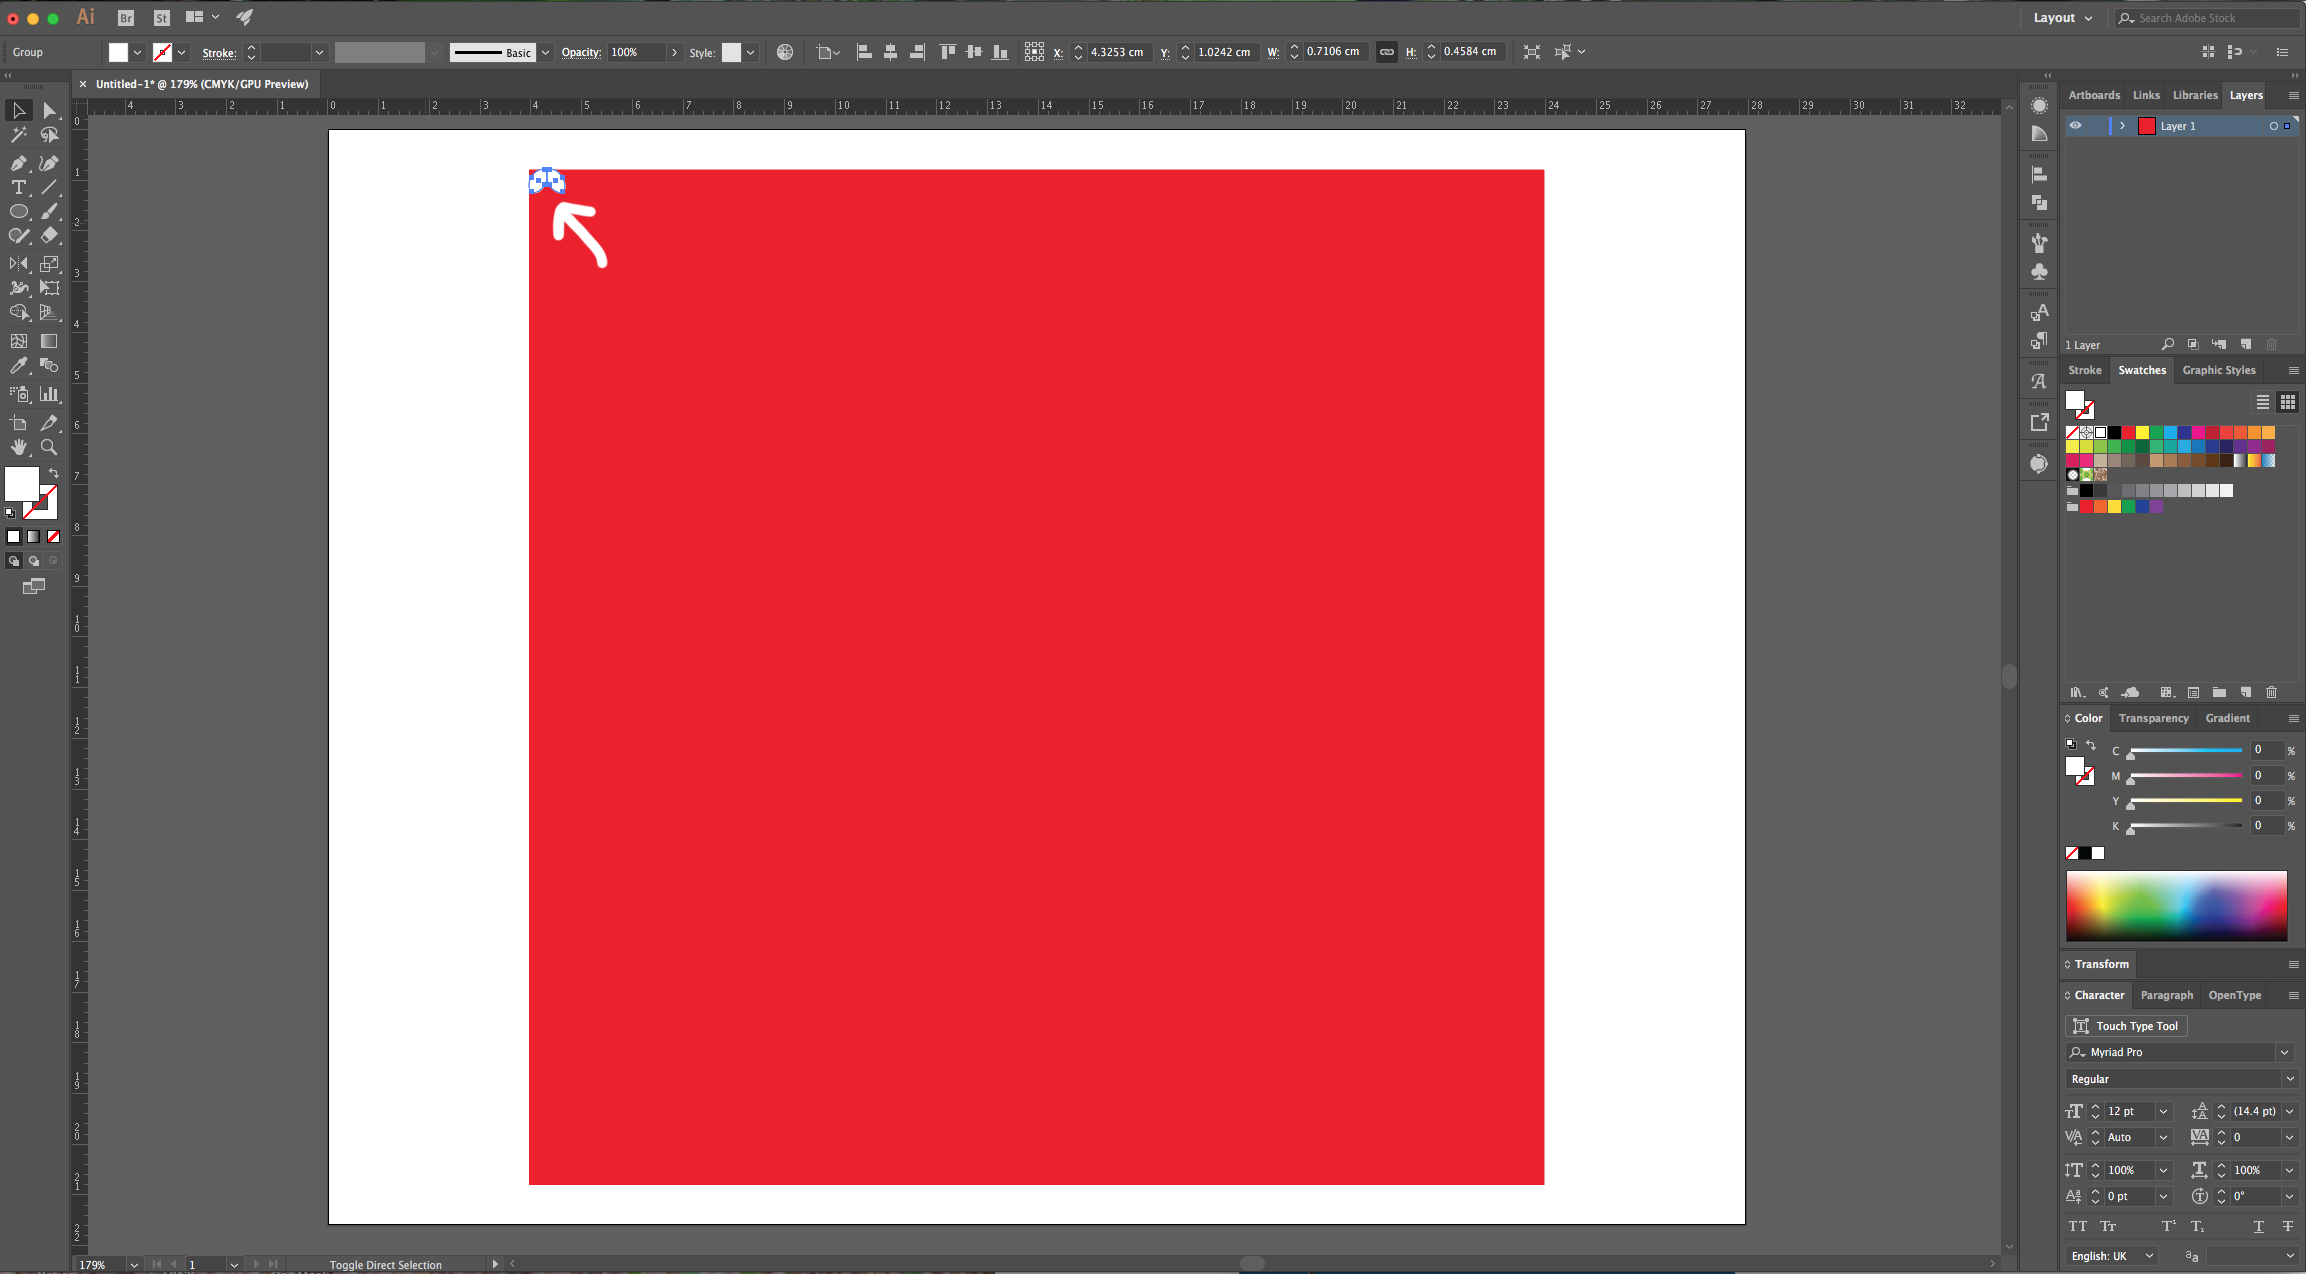
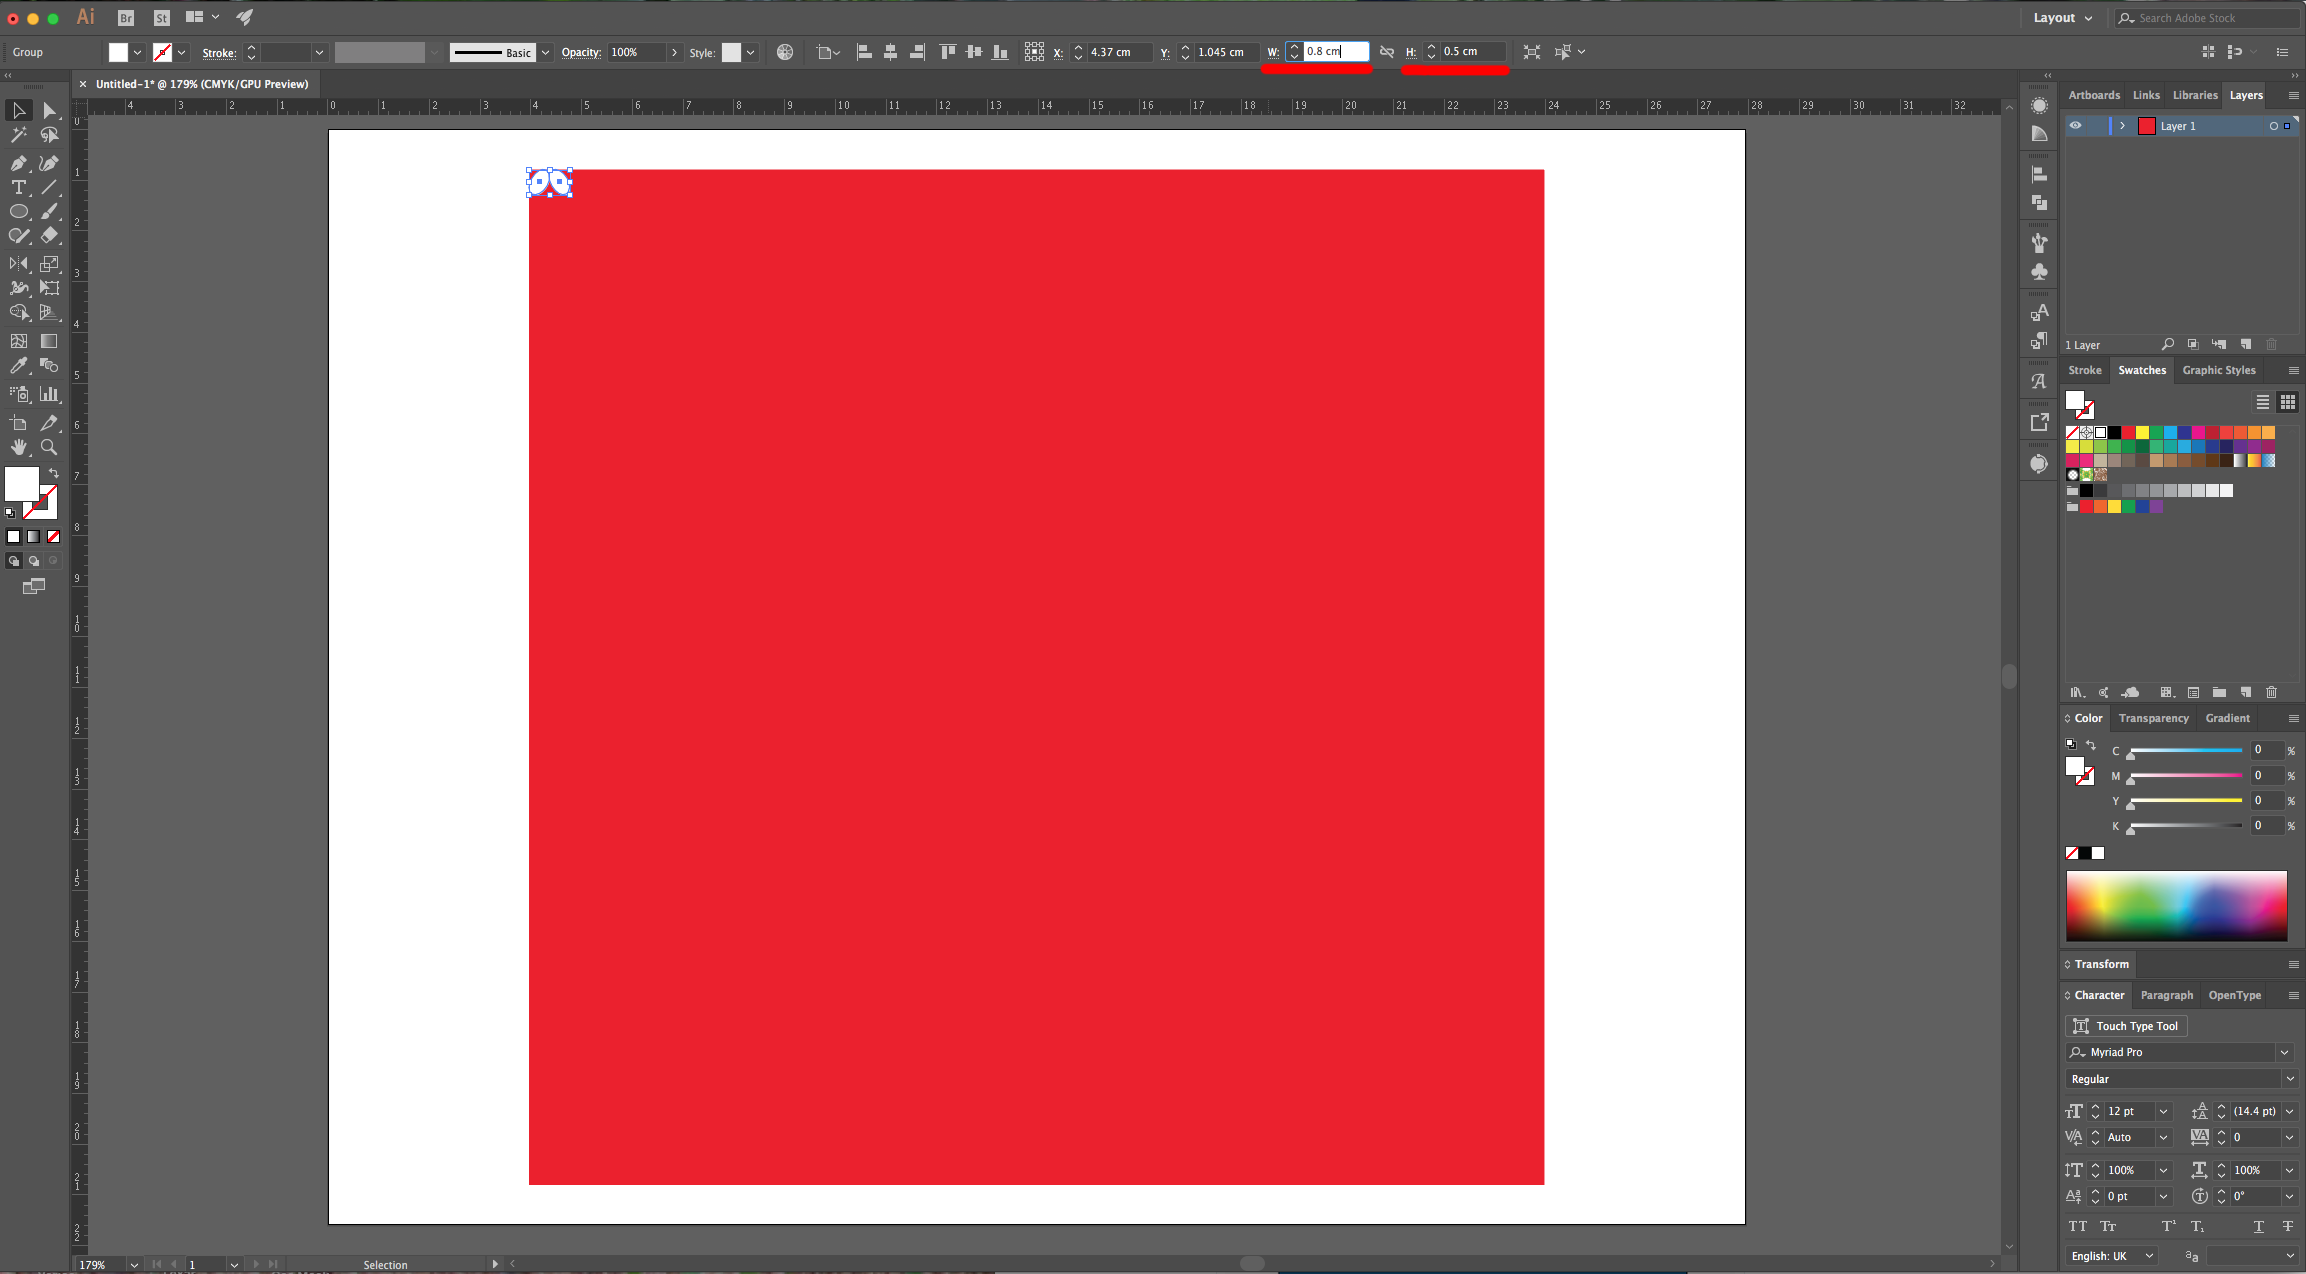
6 - Move your Ovals to the Top-Left corner, re-size them so together they measure 0.8 cm in “Width” and have a “Height” of 0.5 cm.
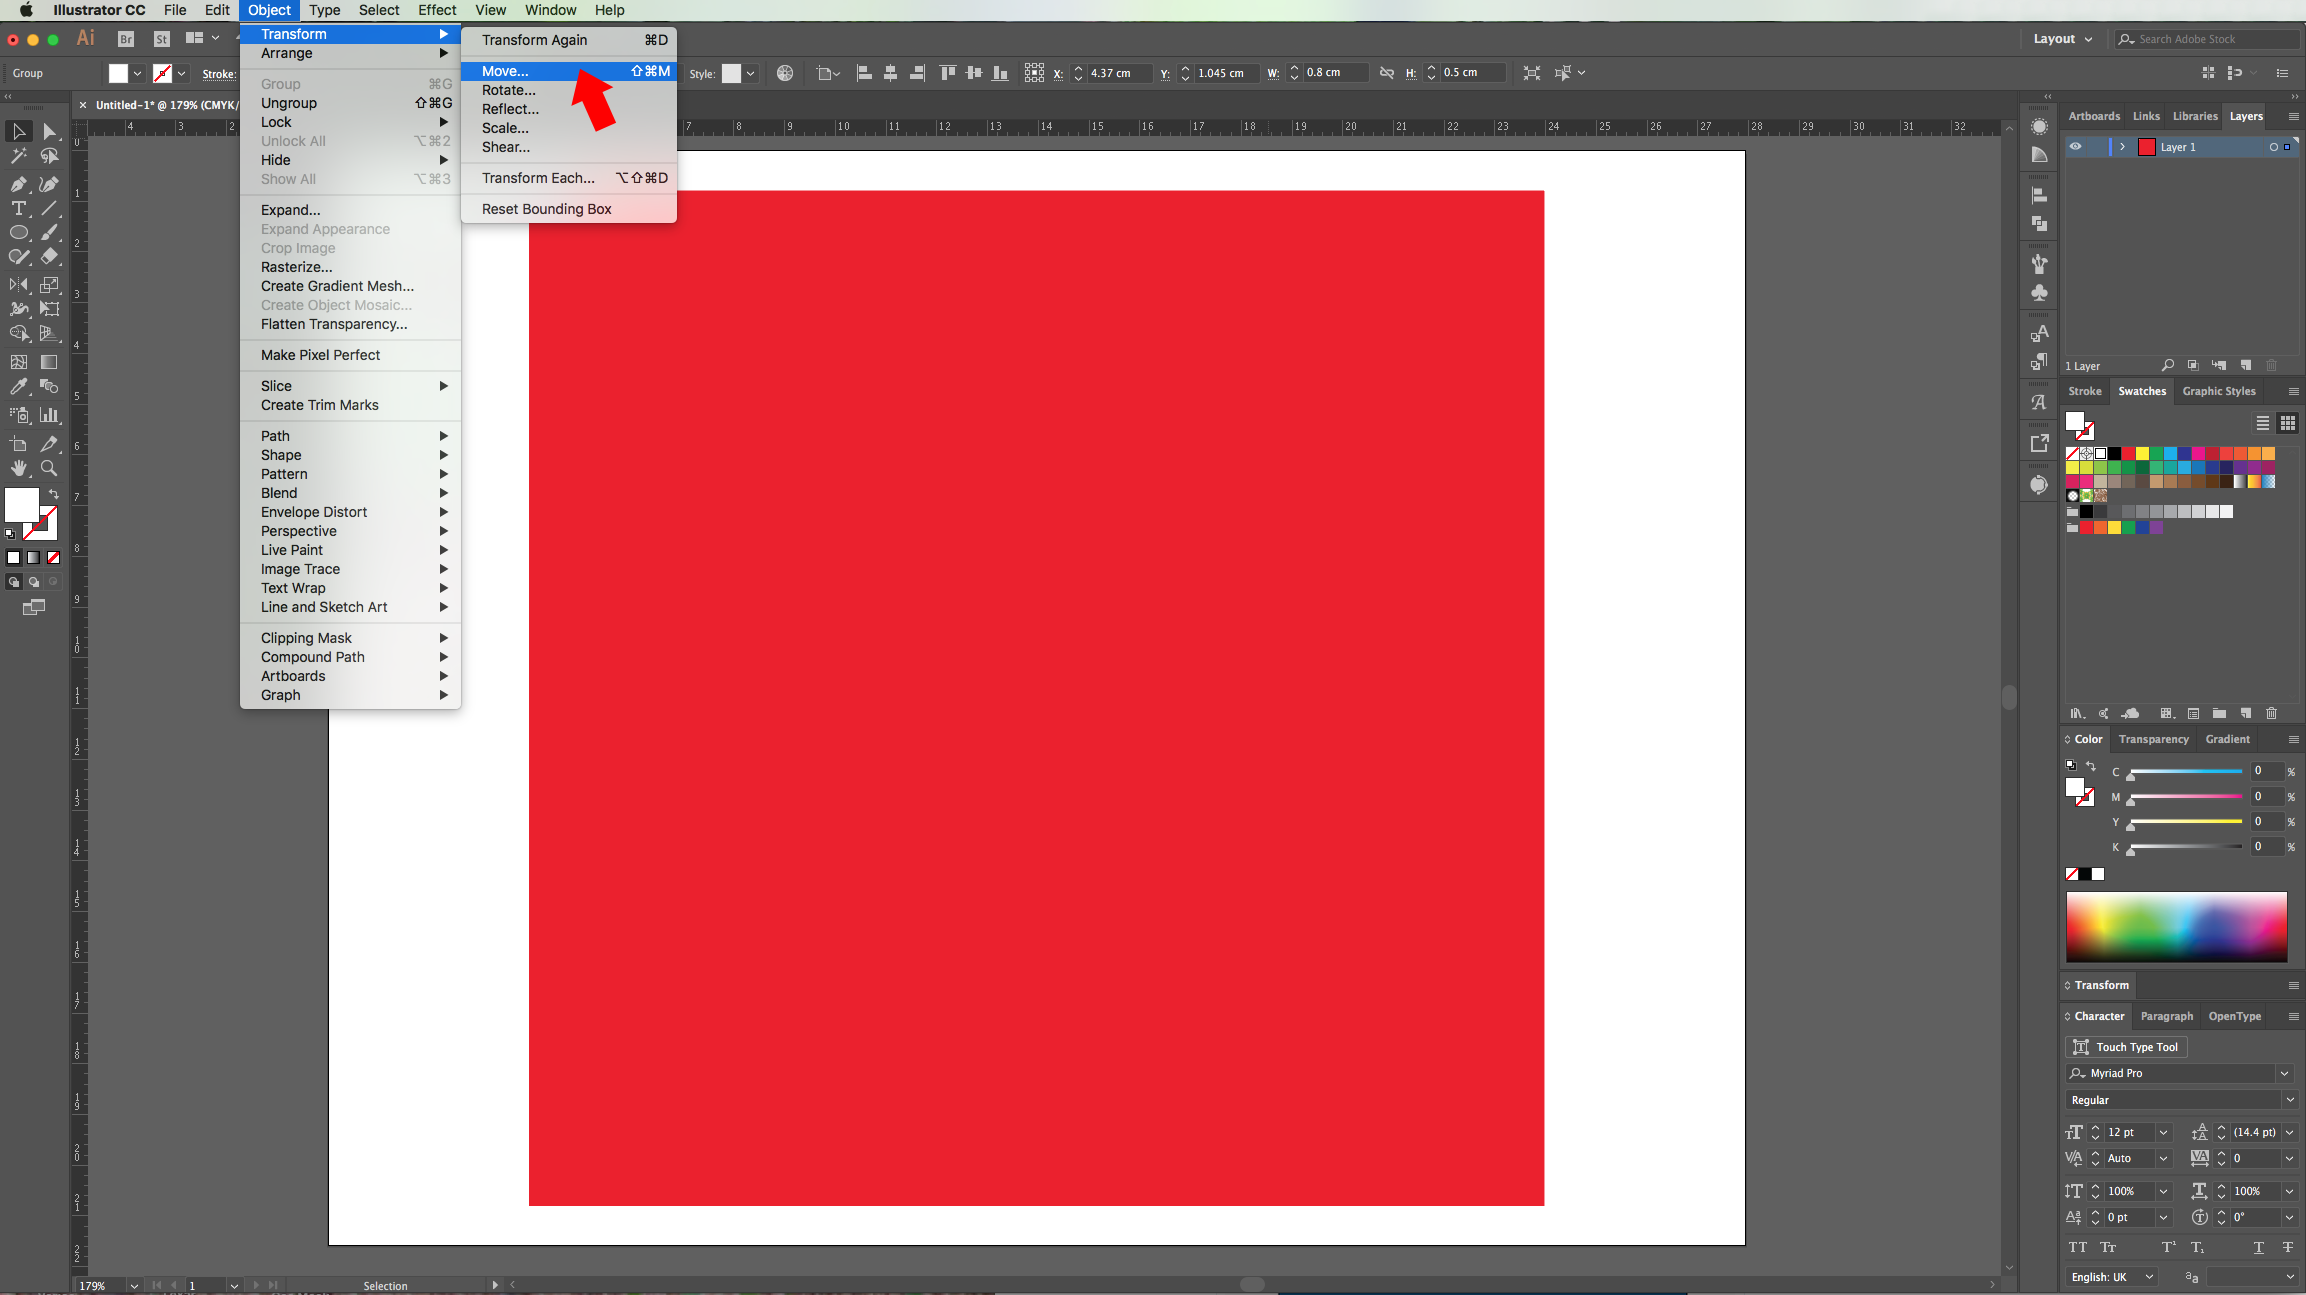
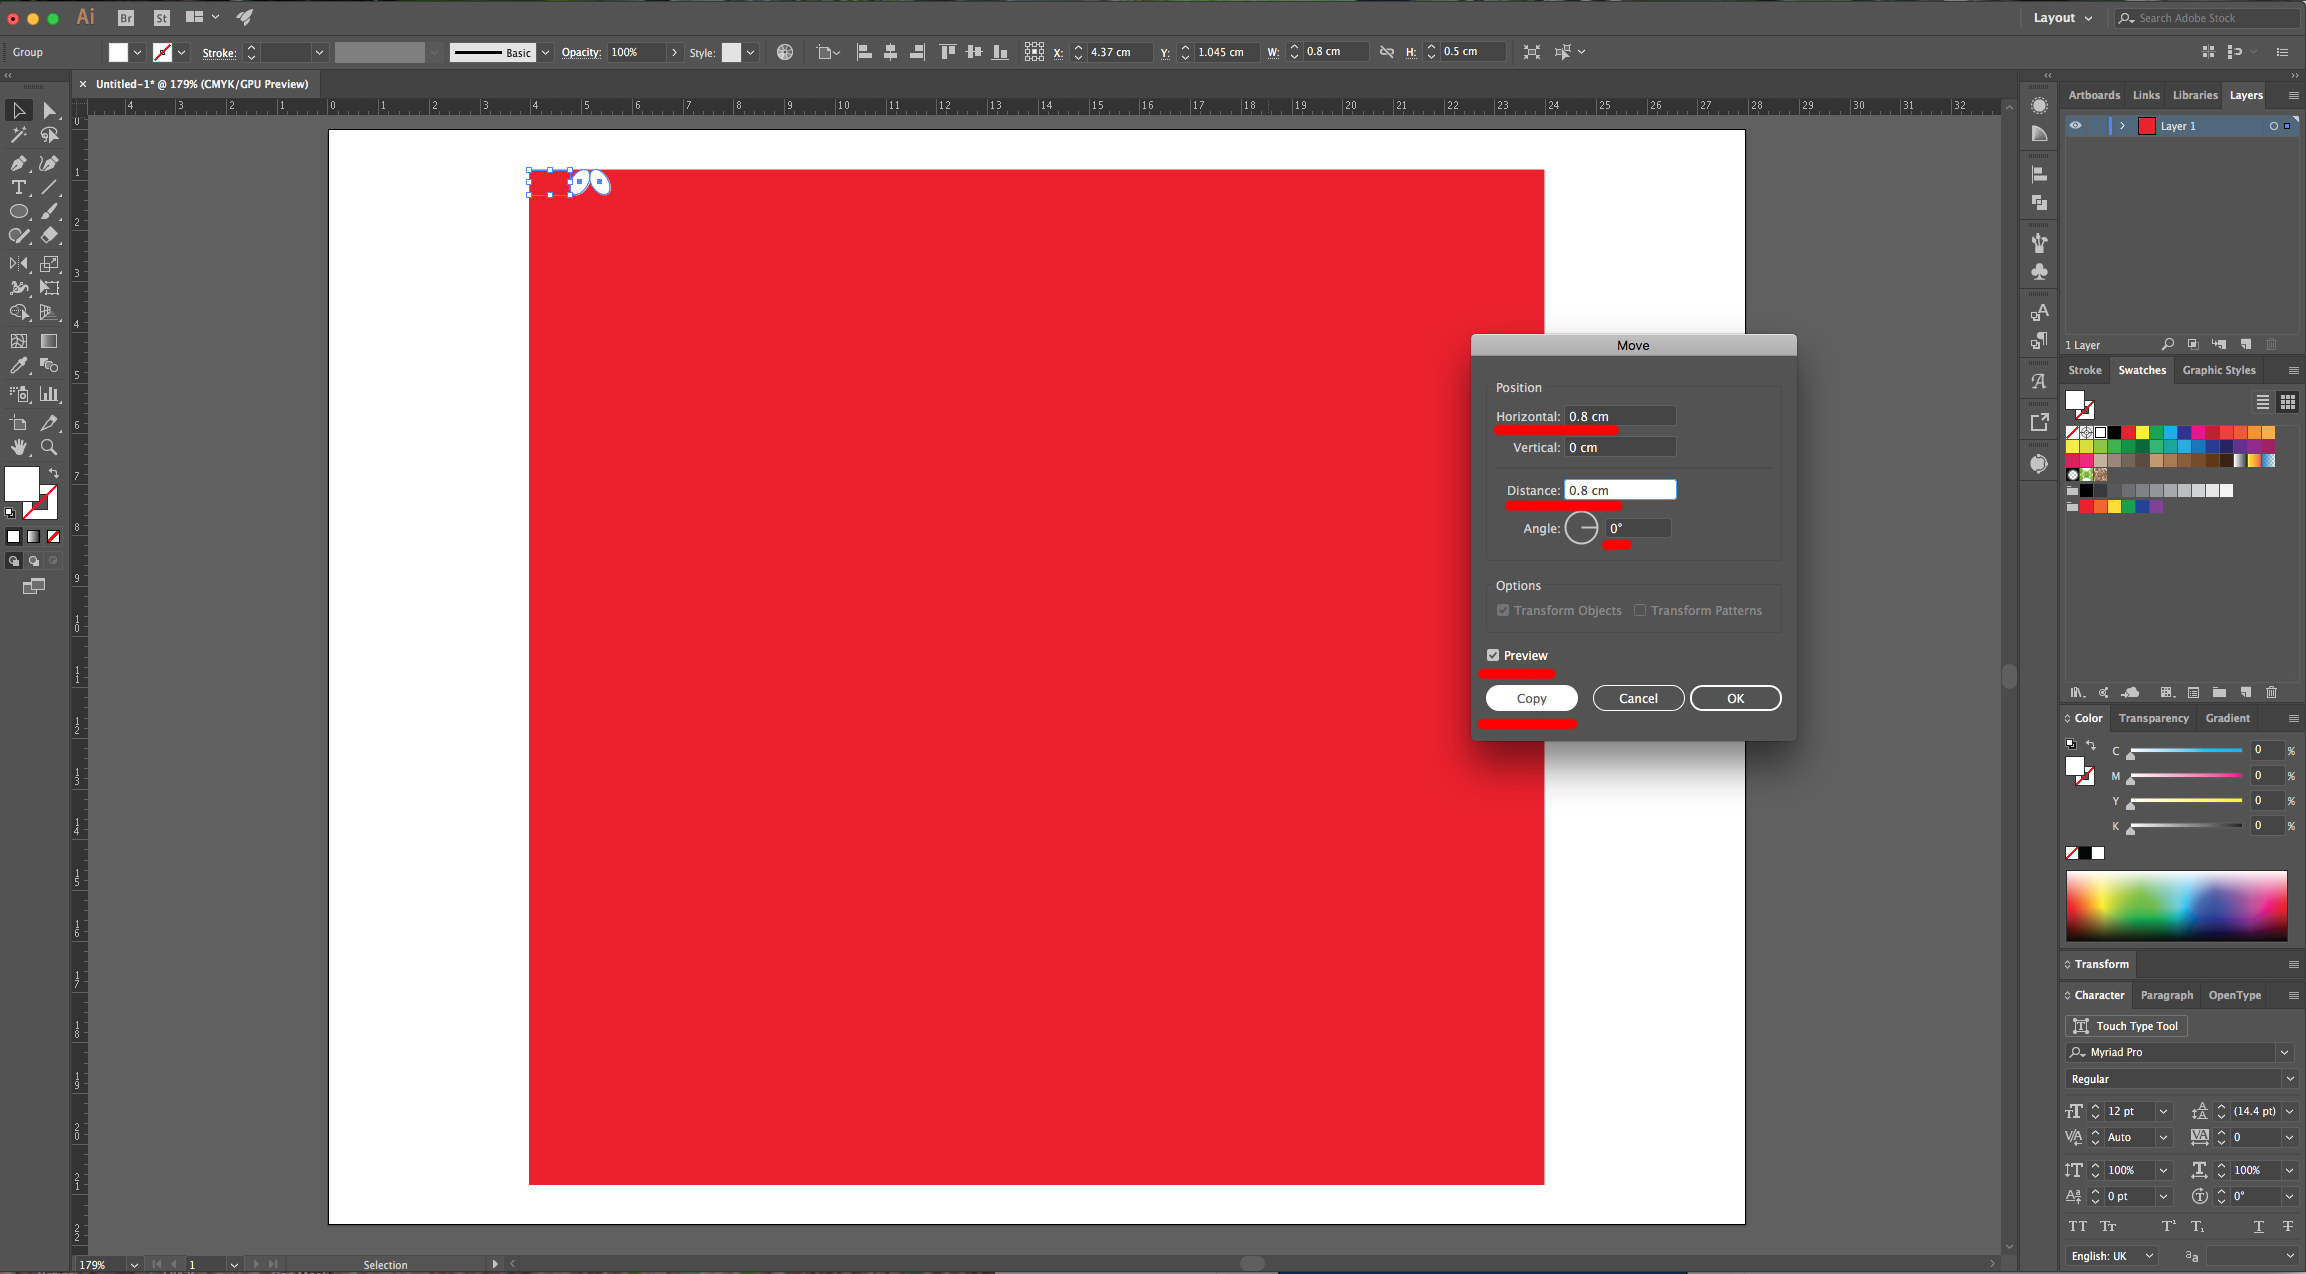
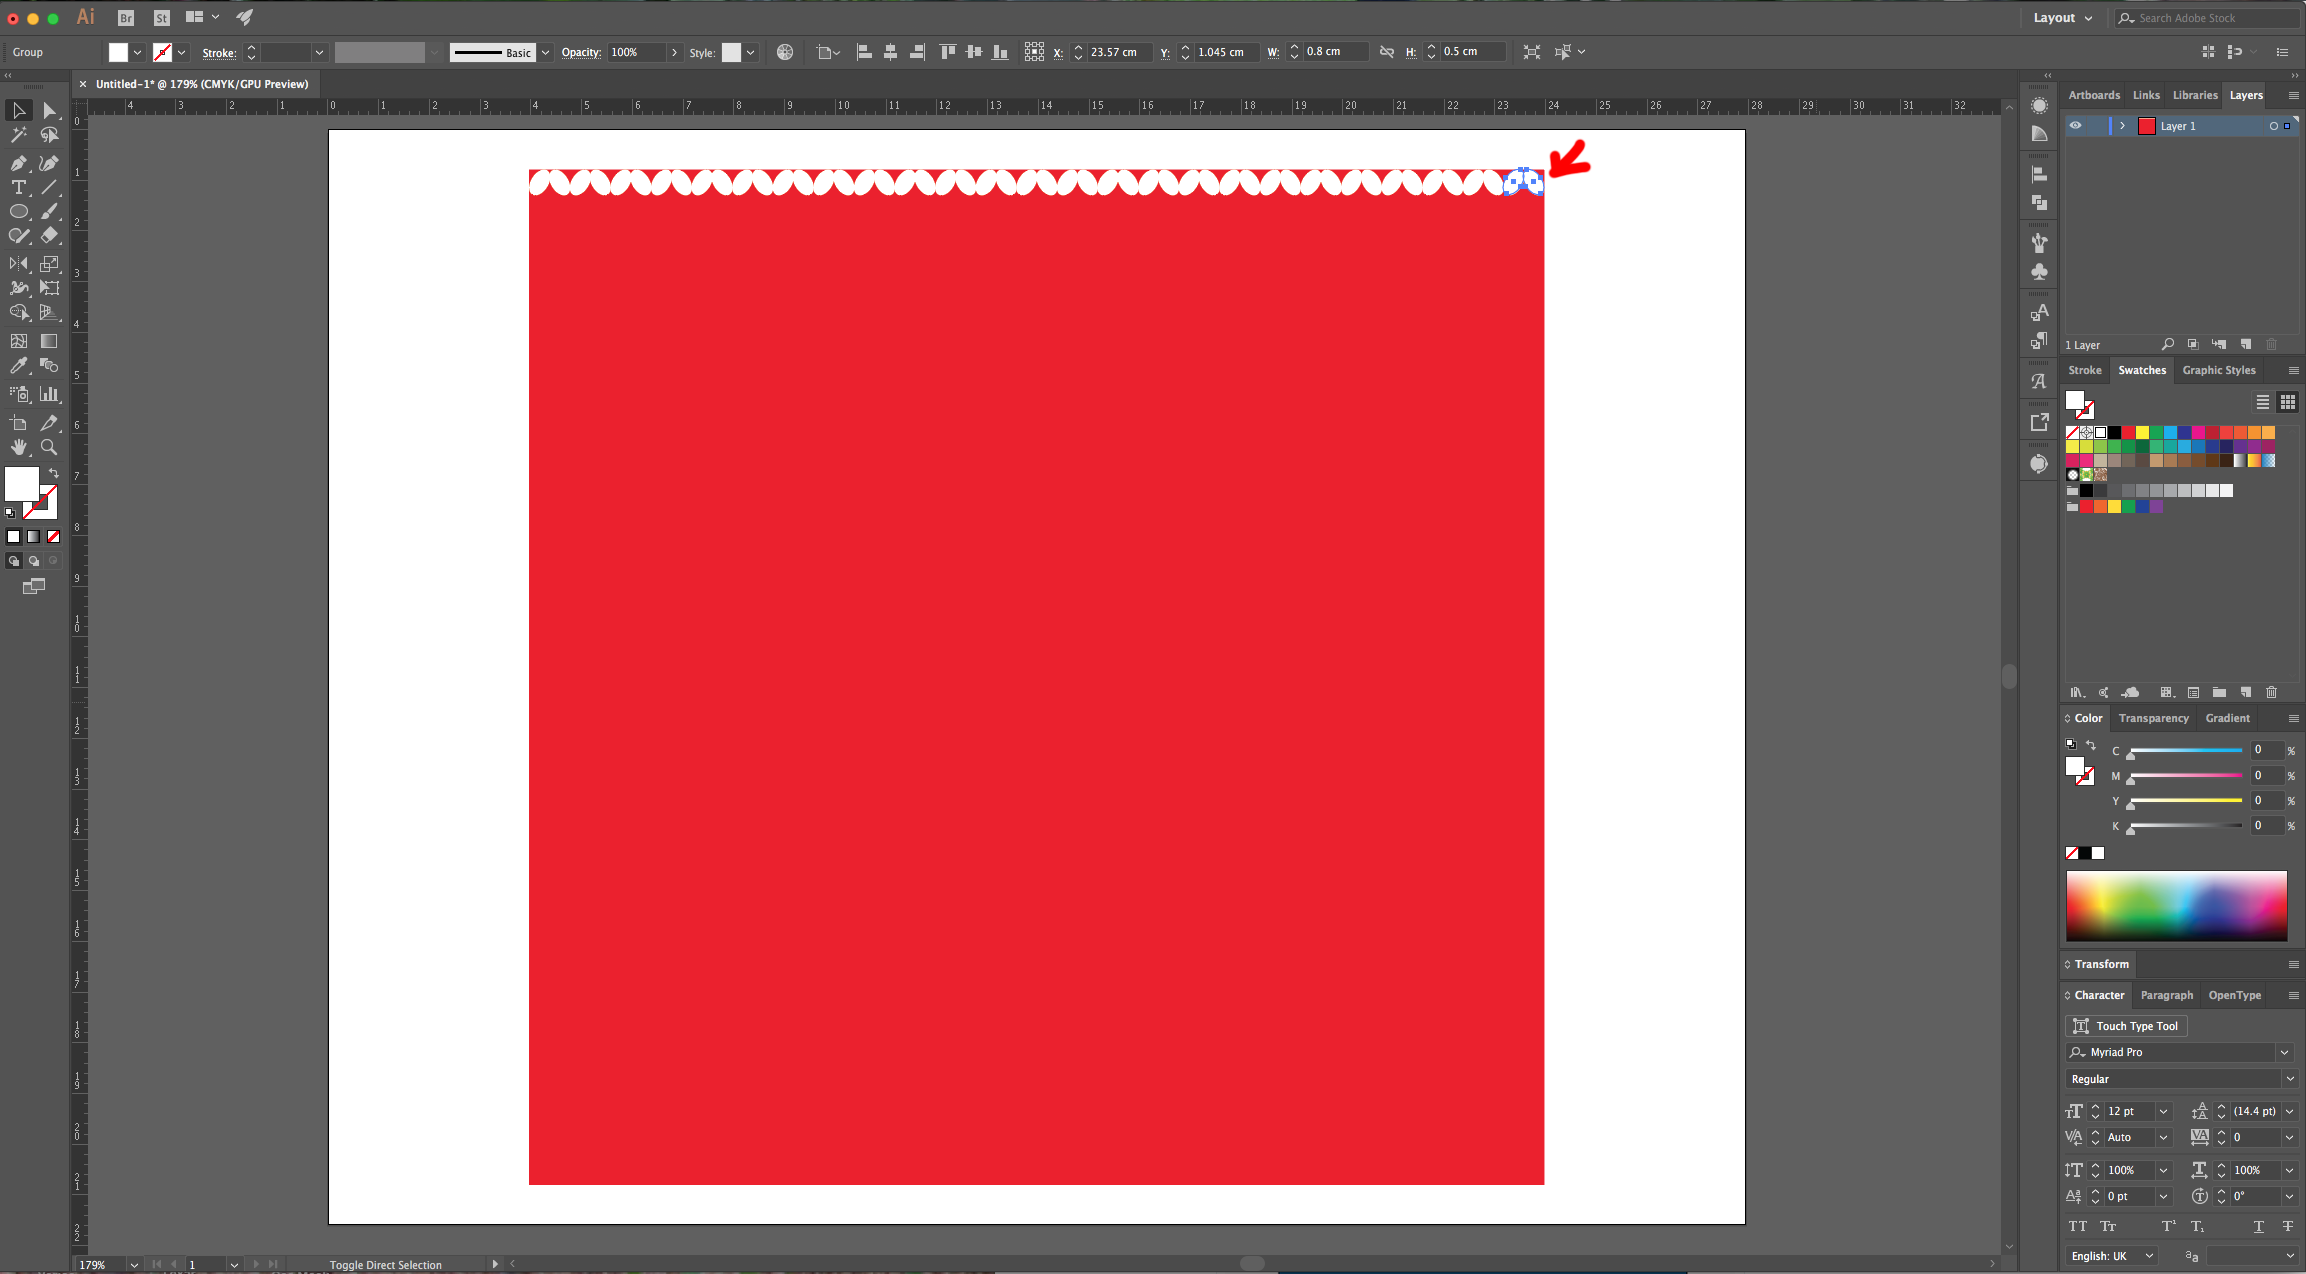
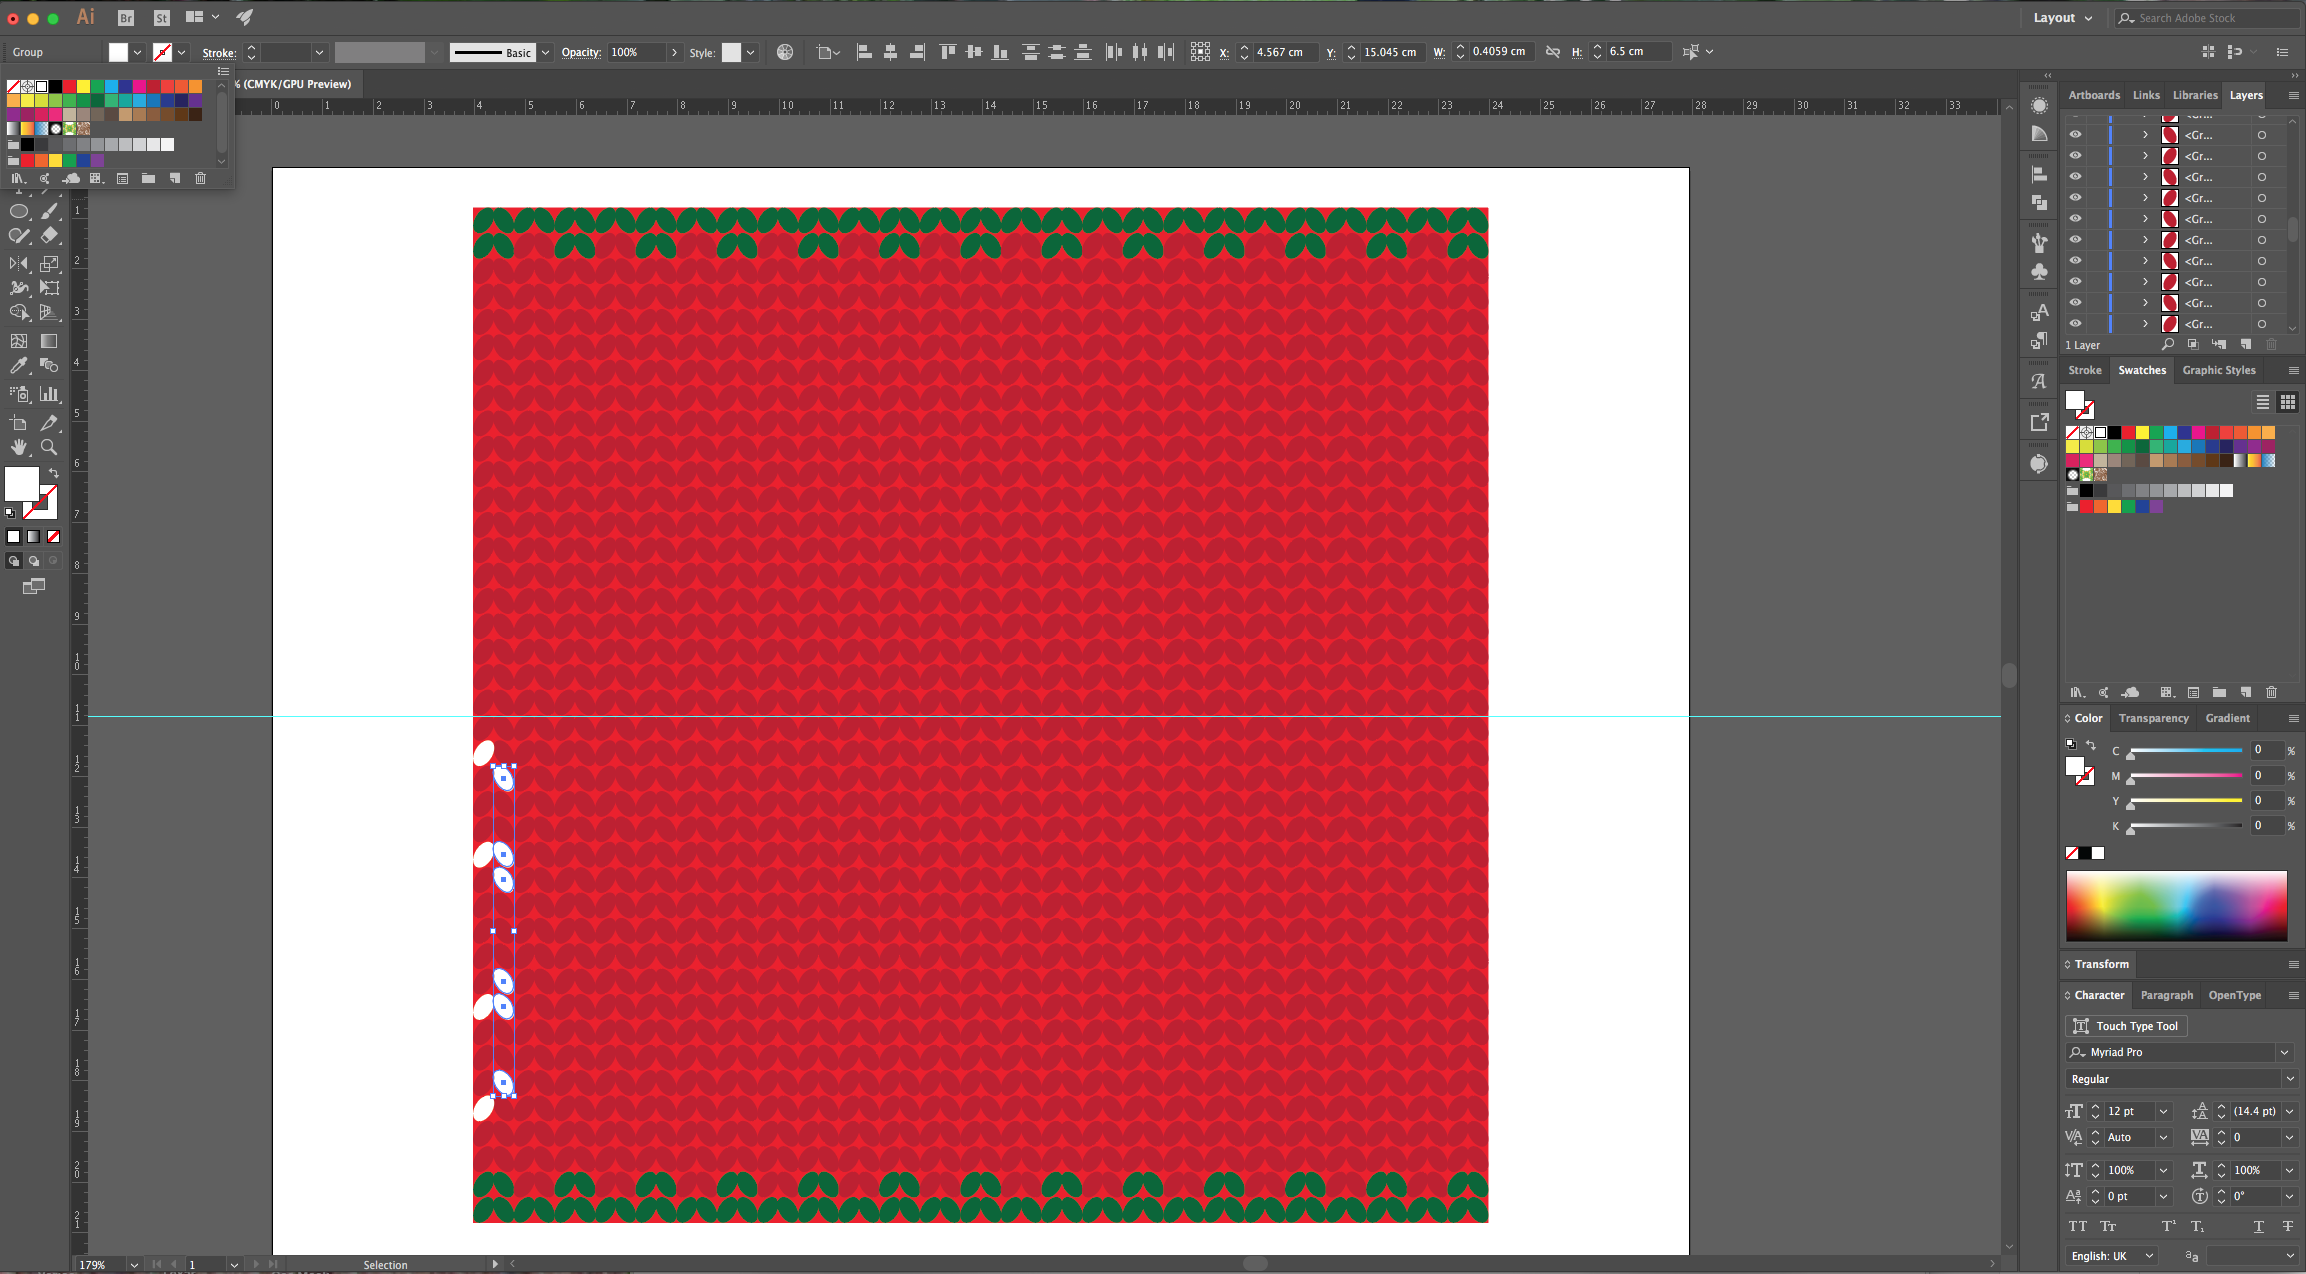
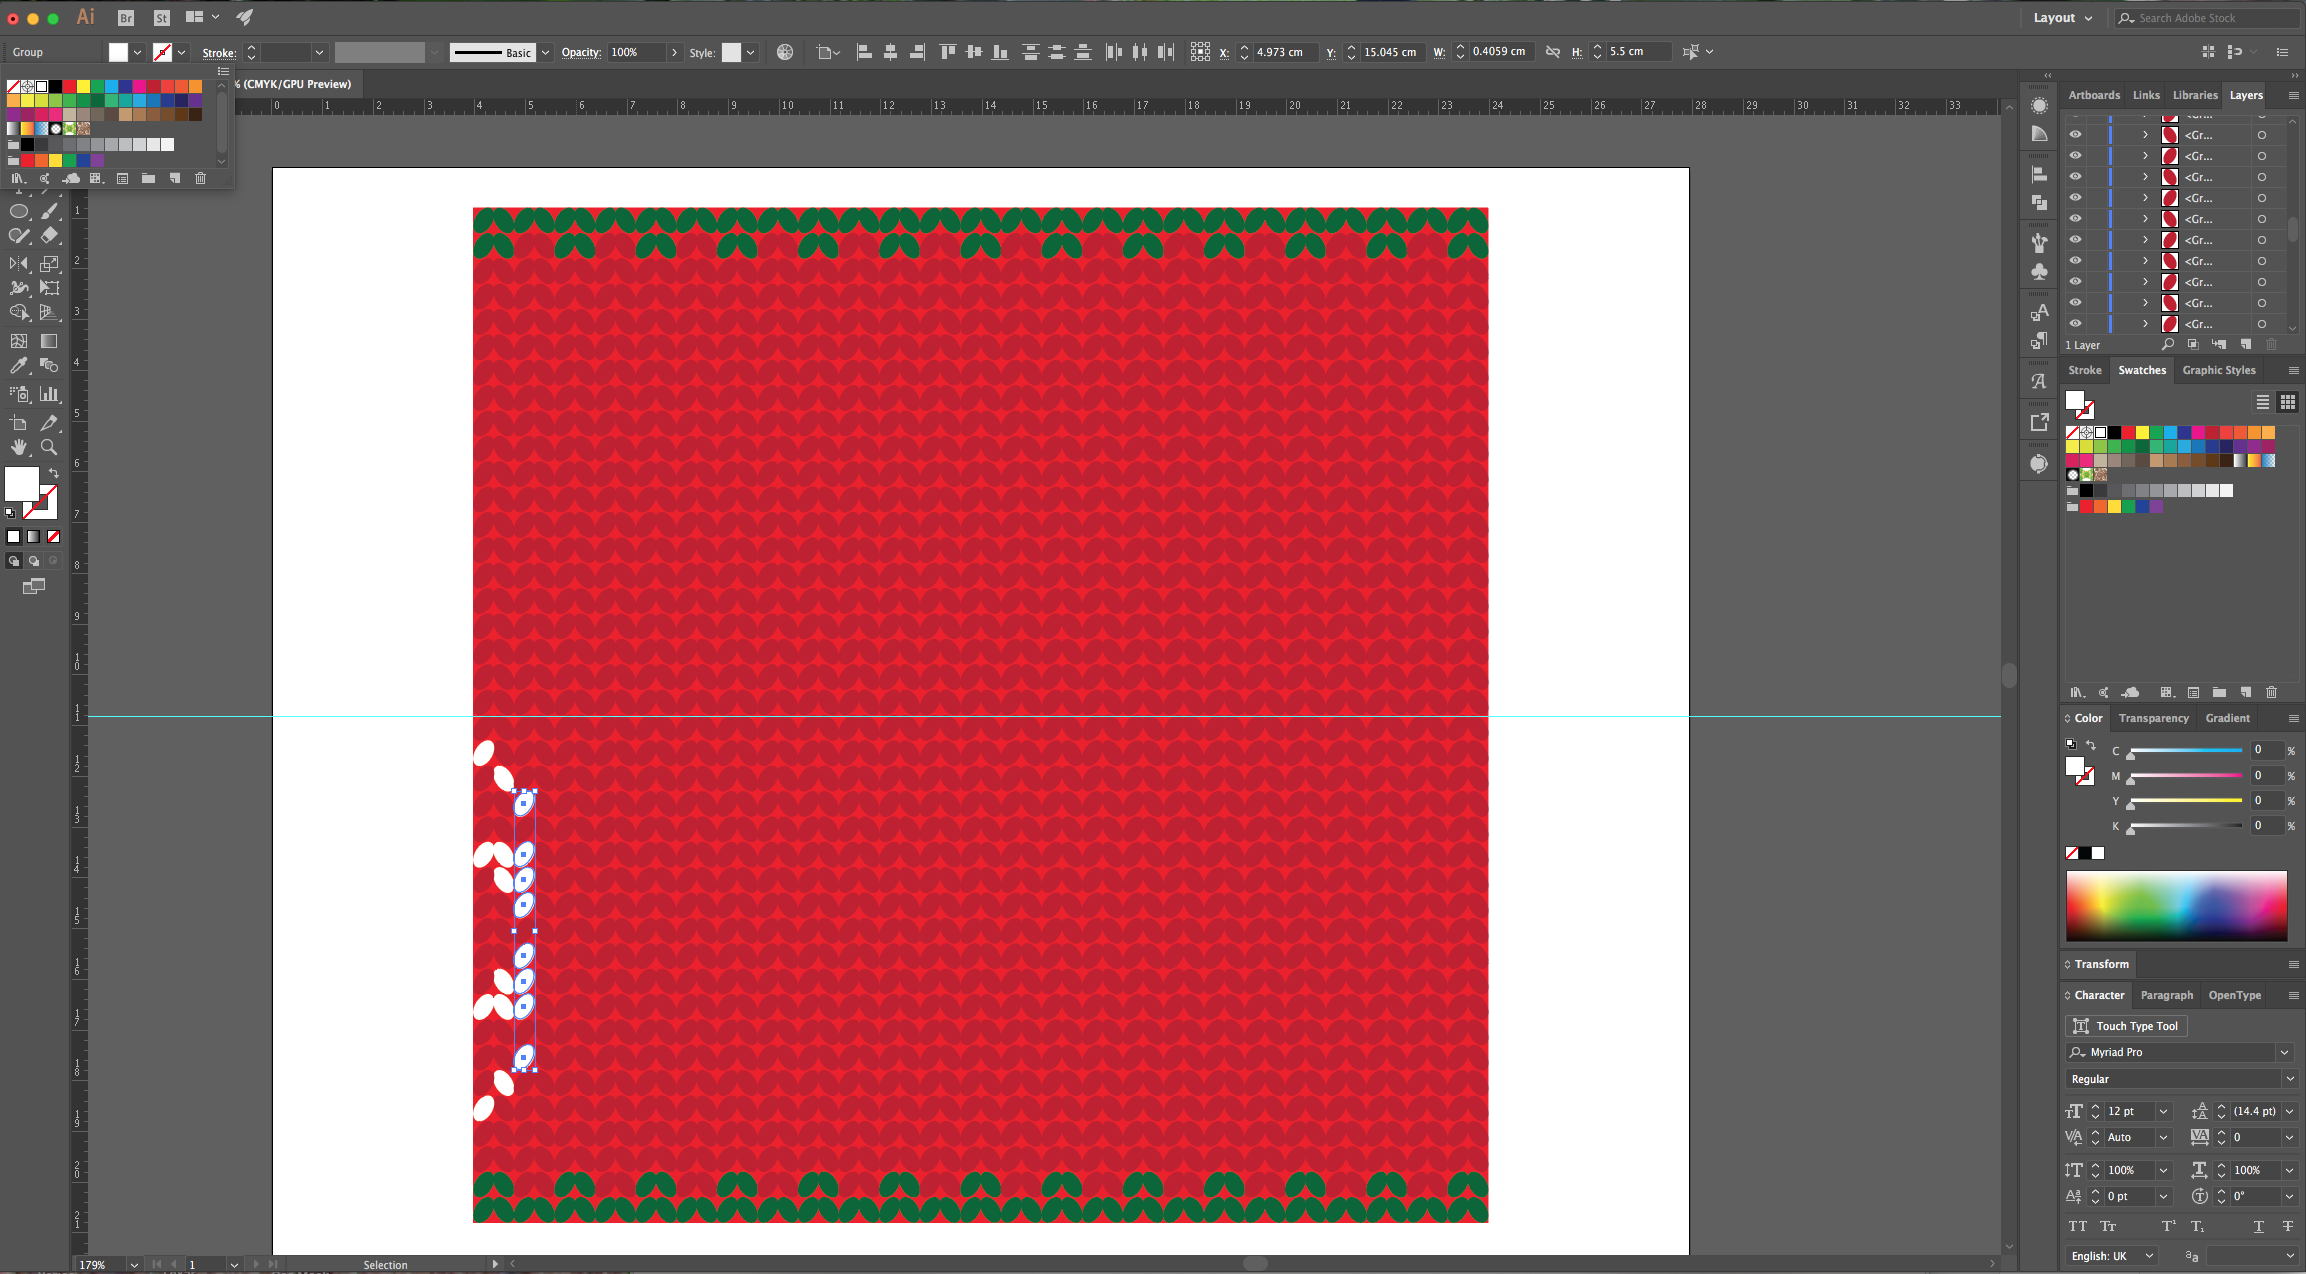
7 - Go to Object > Transform > Move… (Shift + Command/Control + M) use an “Horizontal Position” of 0.8 cm, a “Distance” of 0.8 cm and a 0° Angle. Click “Copy”. Create multiple copies until you reach the other side of the Red Square using Command/Control + D.
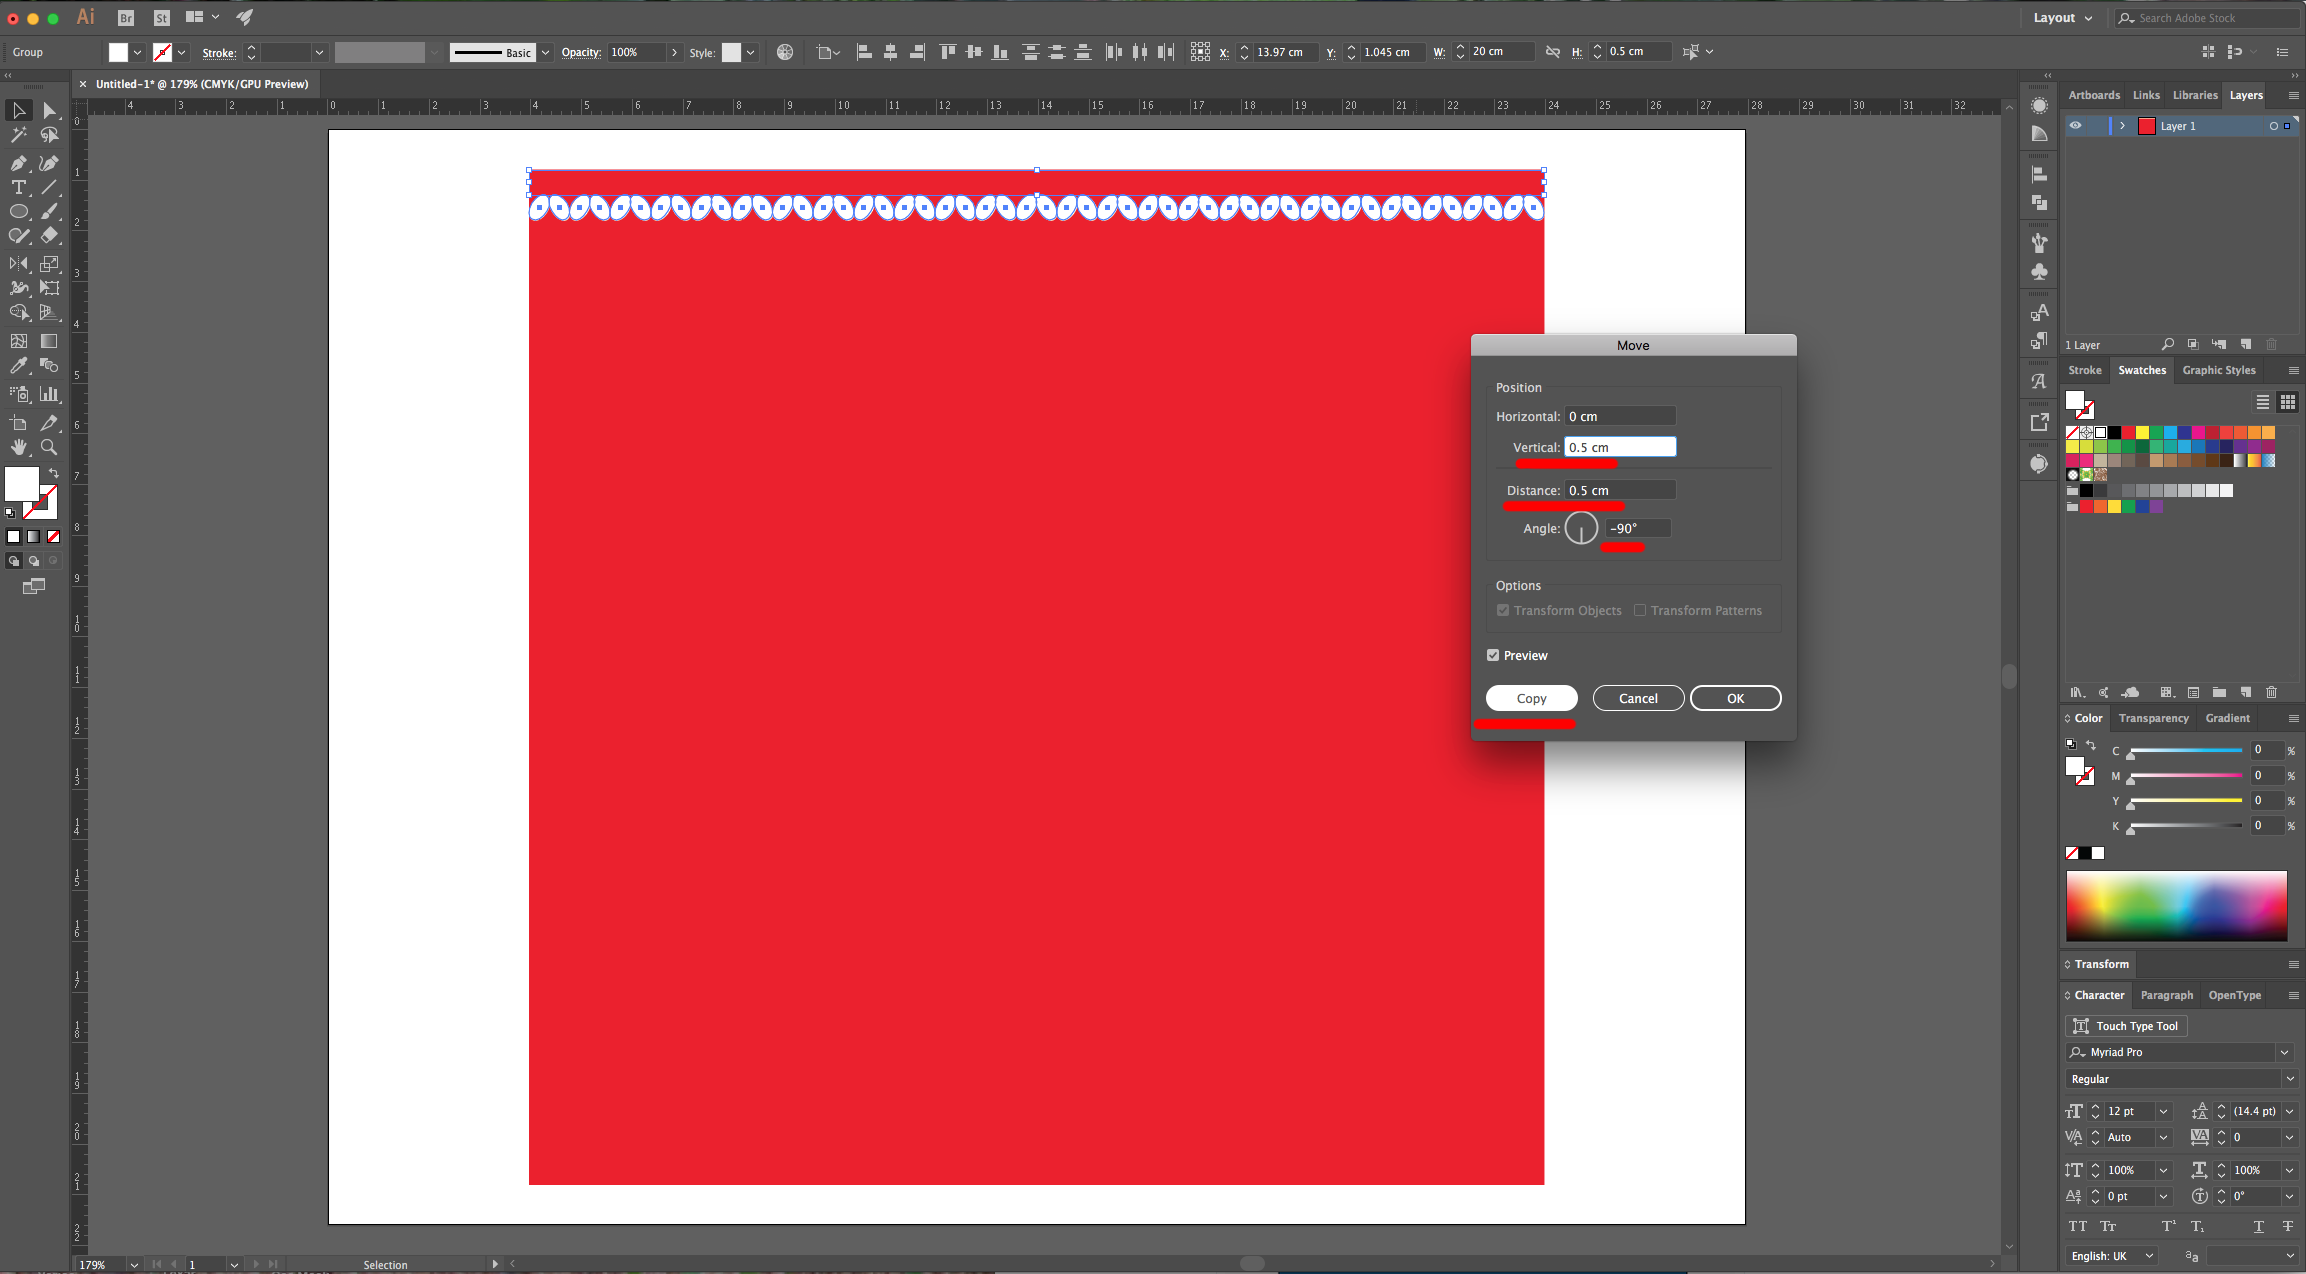
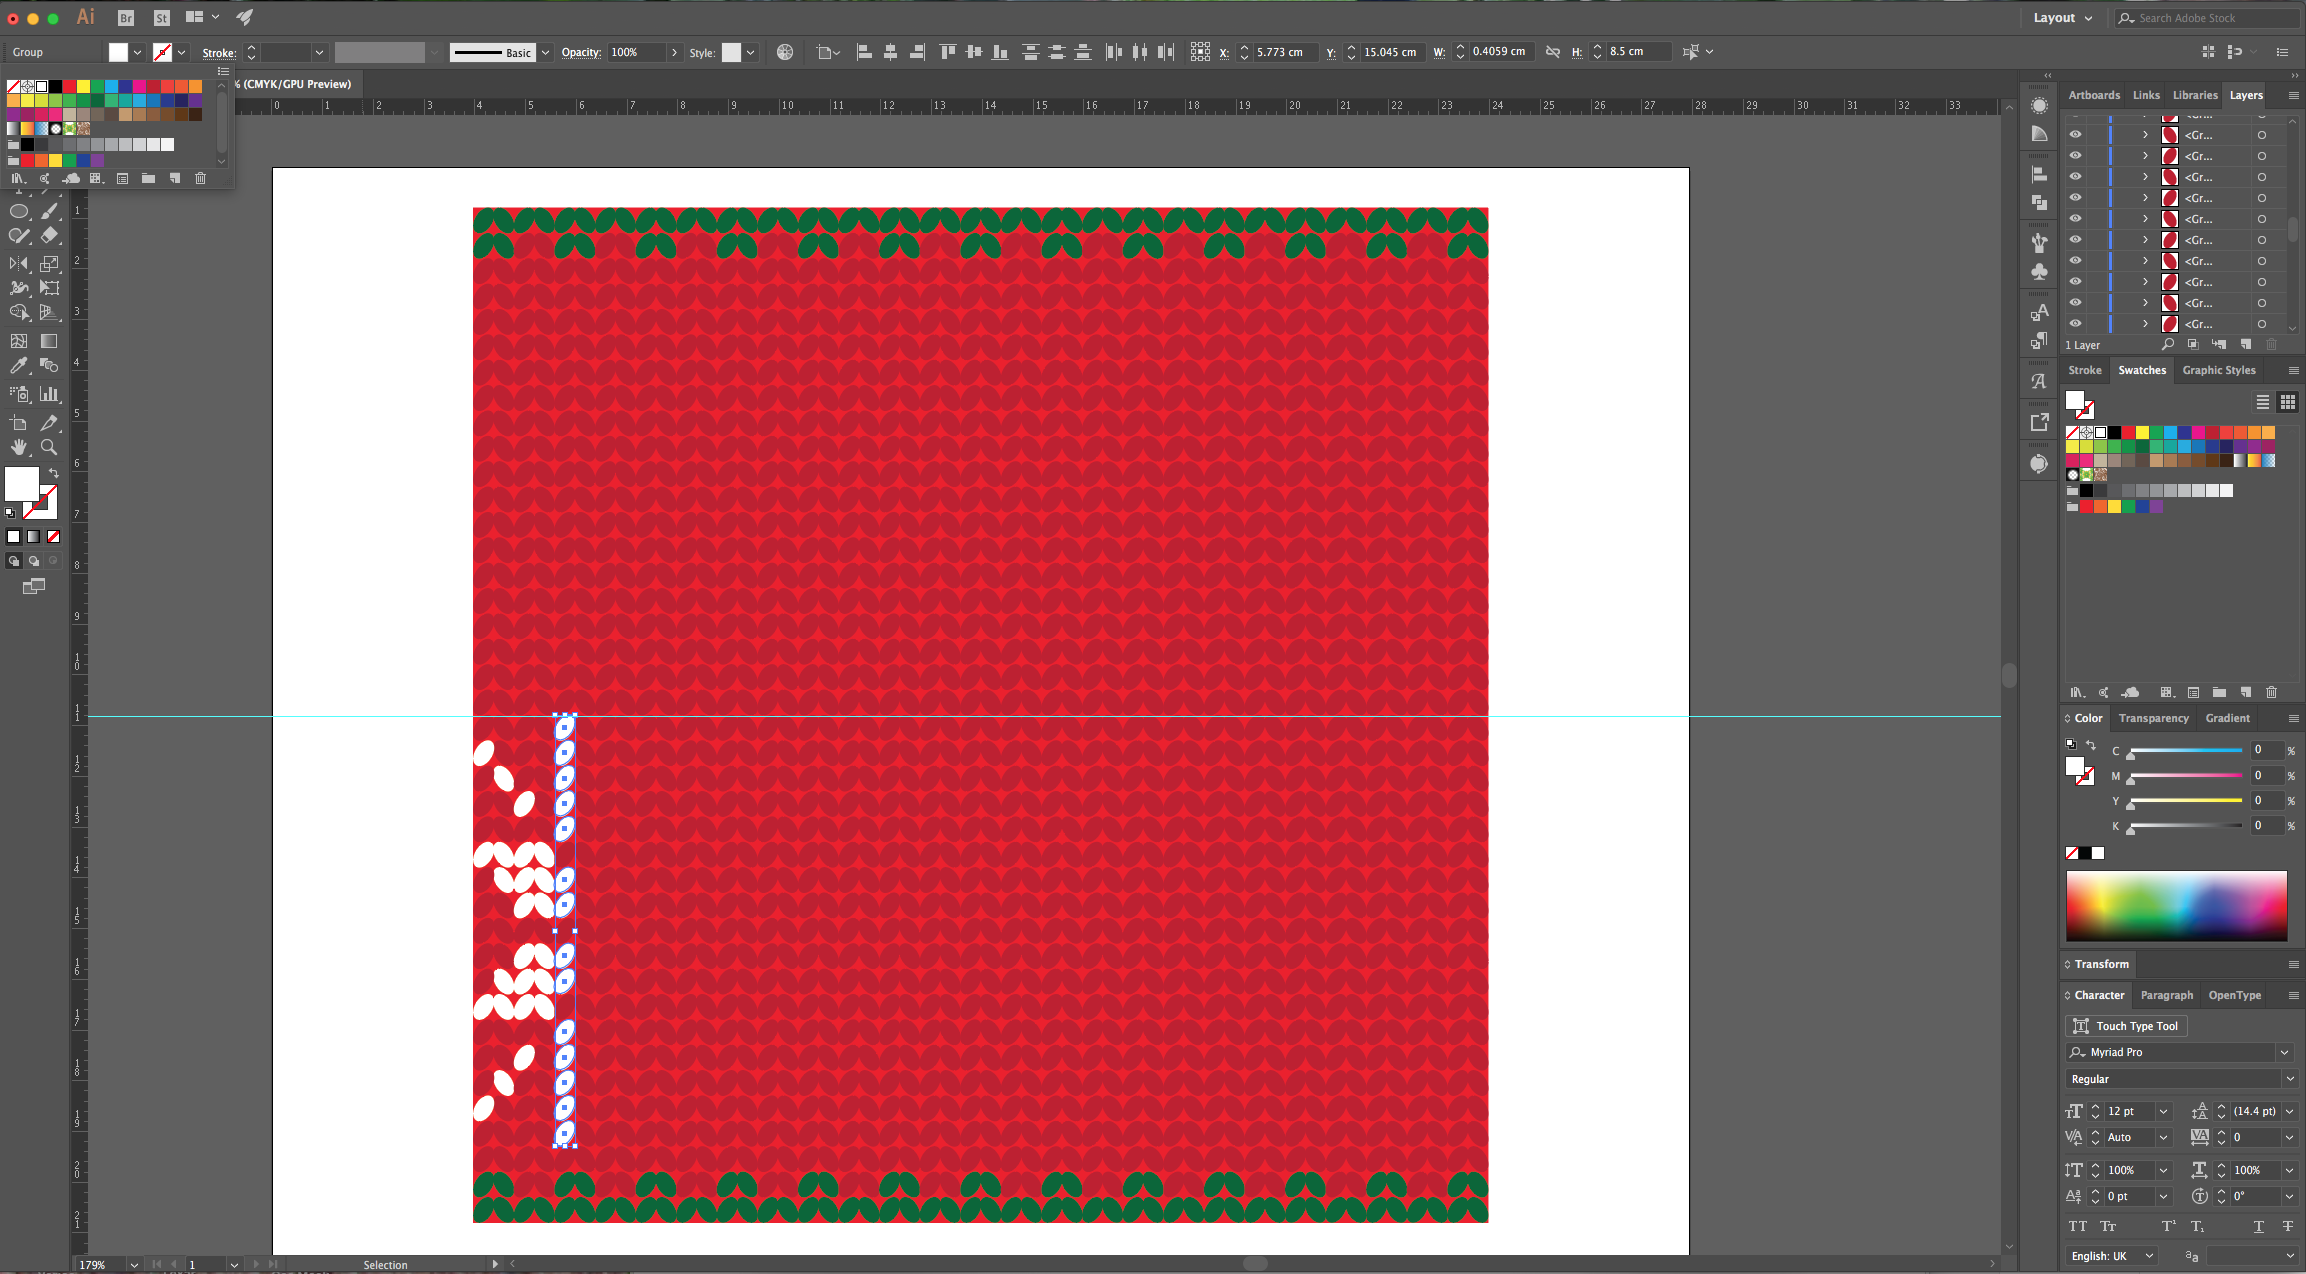
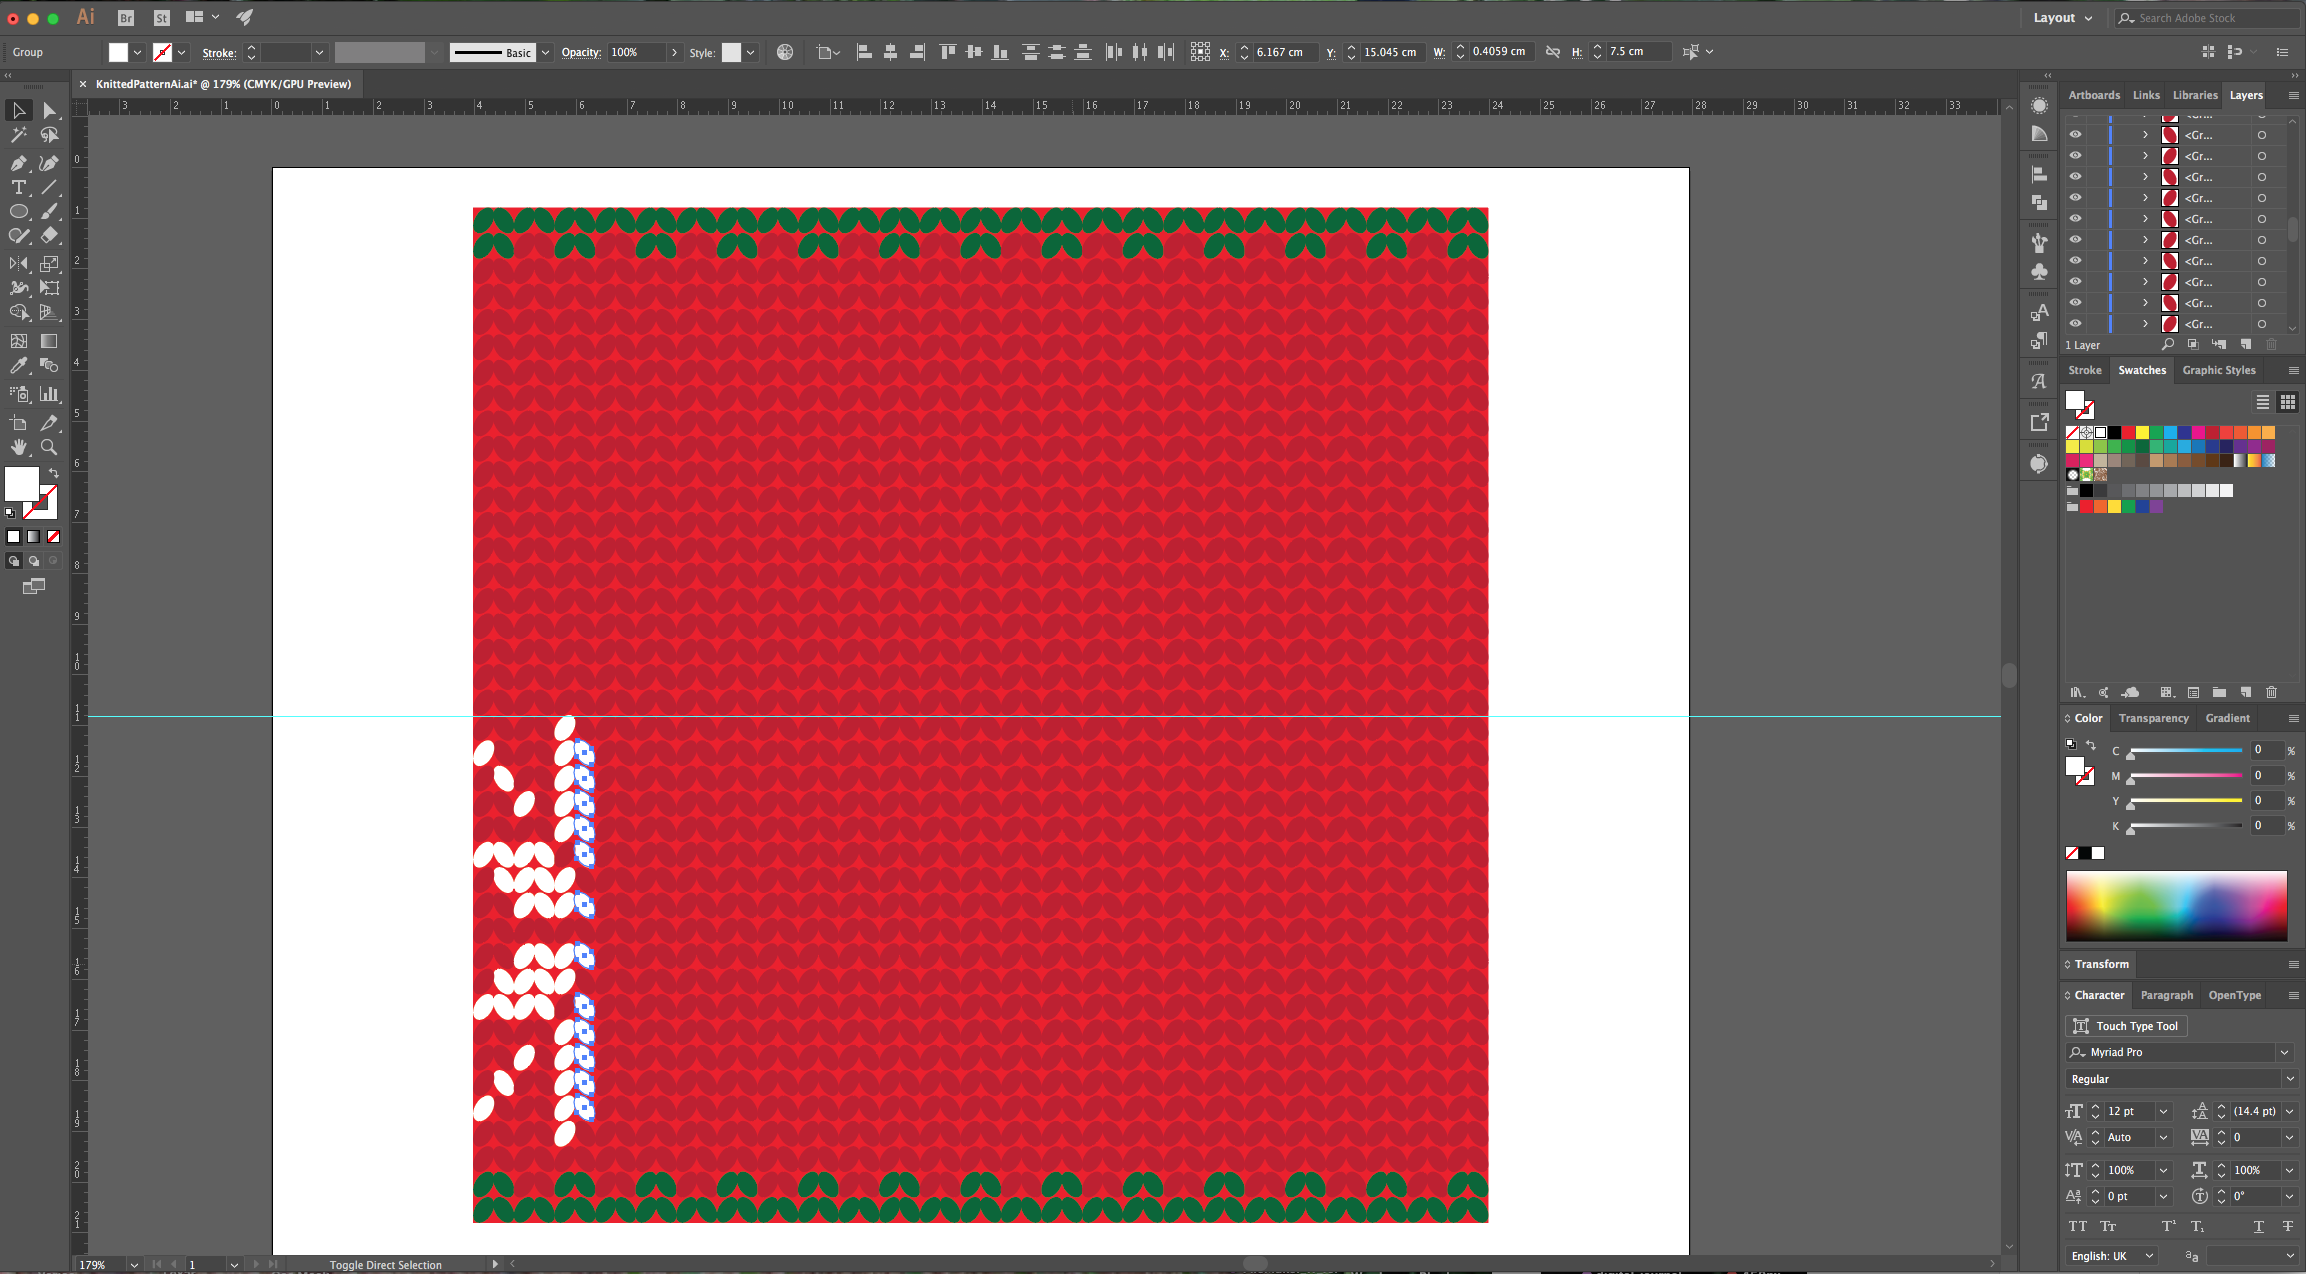
8 - Select all your Ovals, go to Object > Transform > Move… (Shift + Command/Control + M) use an “Vertical Position” of 0.5 cm, a “Distance” of 0.5 cm and a -90° Angle. Click “Copy”. Create multiple copies until you reach the bottom of the Red Square using Command/Control + D.

9 - Click on the small arrow in the left side of the Layer on the “Layers Panel” to show its contents, go all the way to the bottom until you find the Red Square and “Lock” it using the small “Padlock” icon on the left side of its Thumbnail.
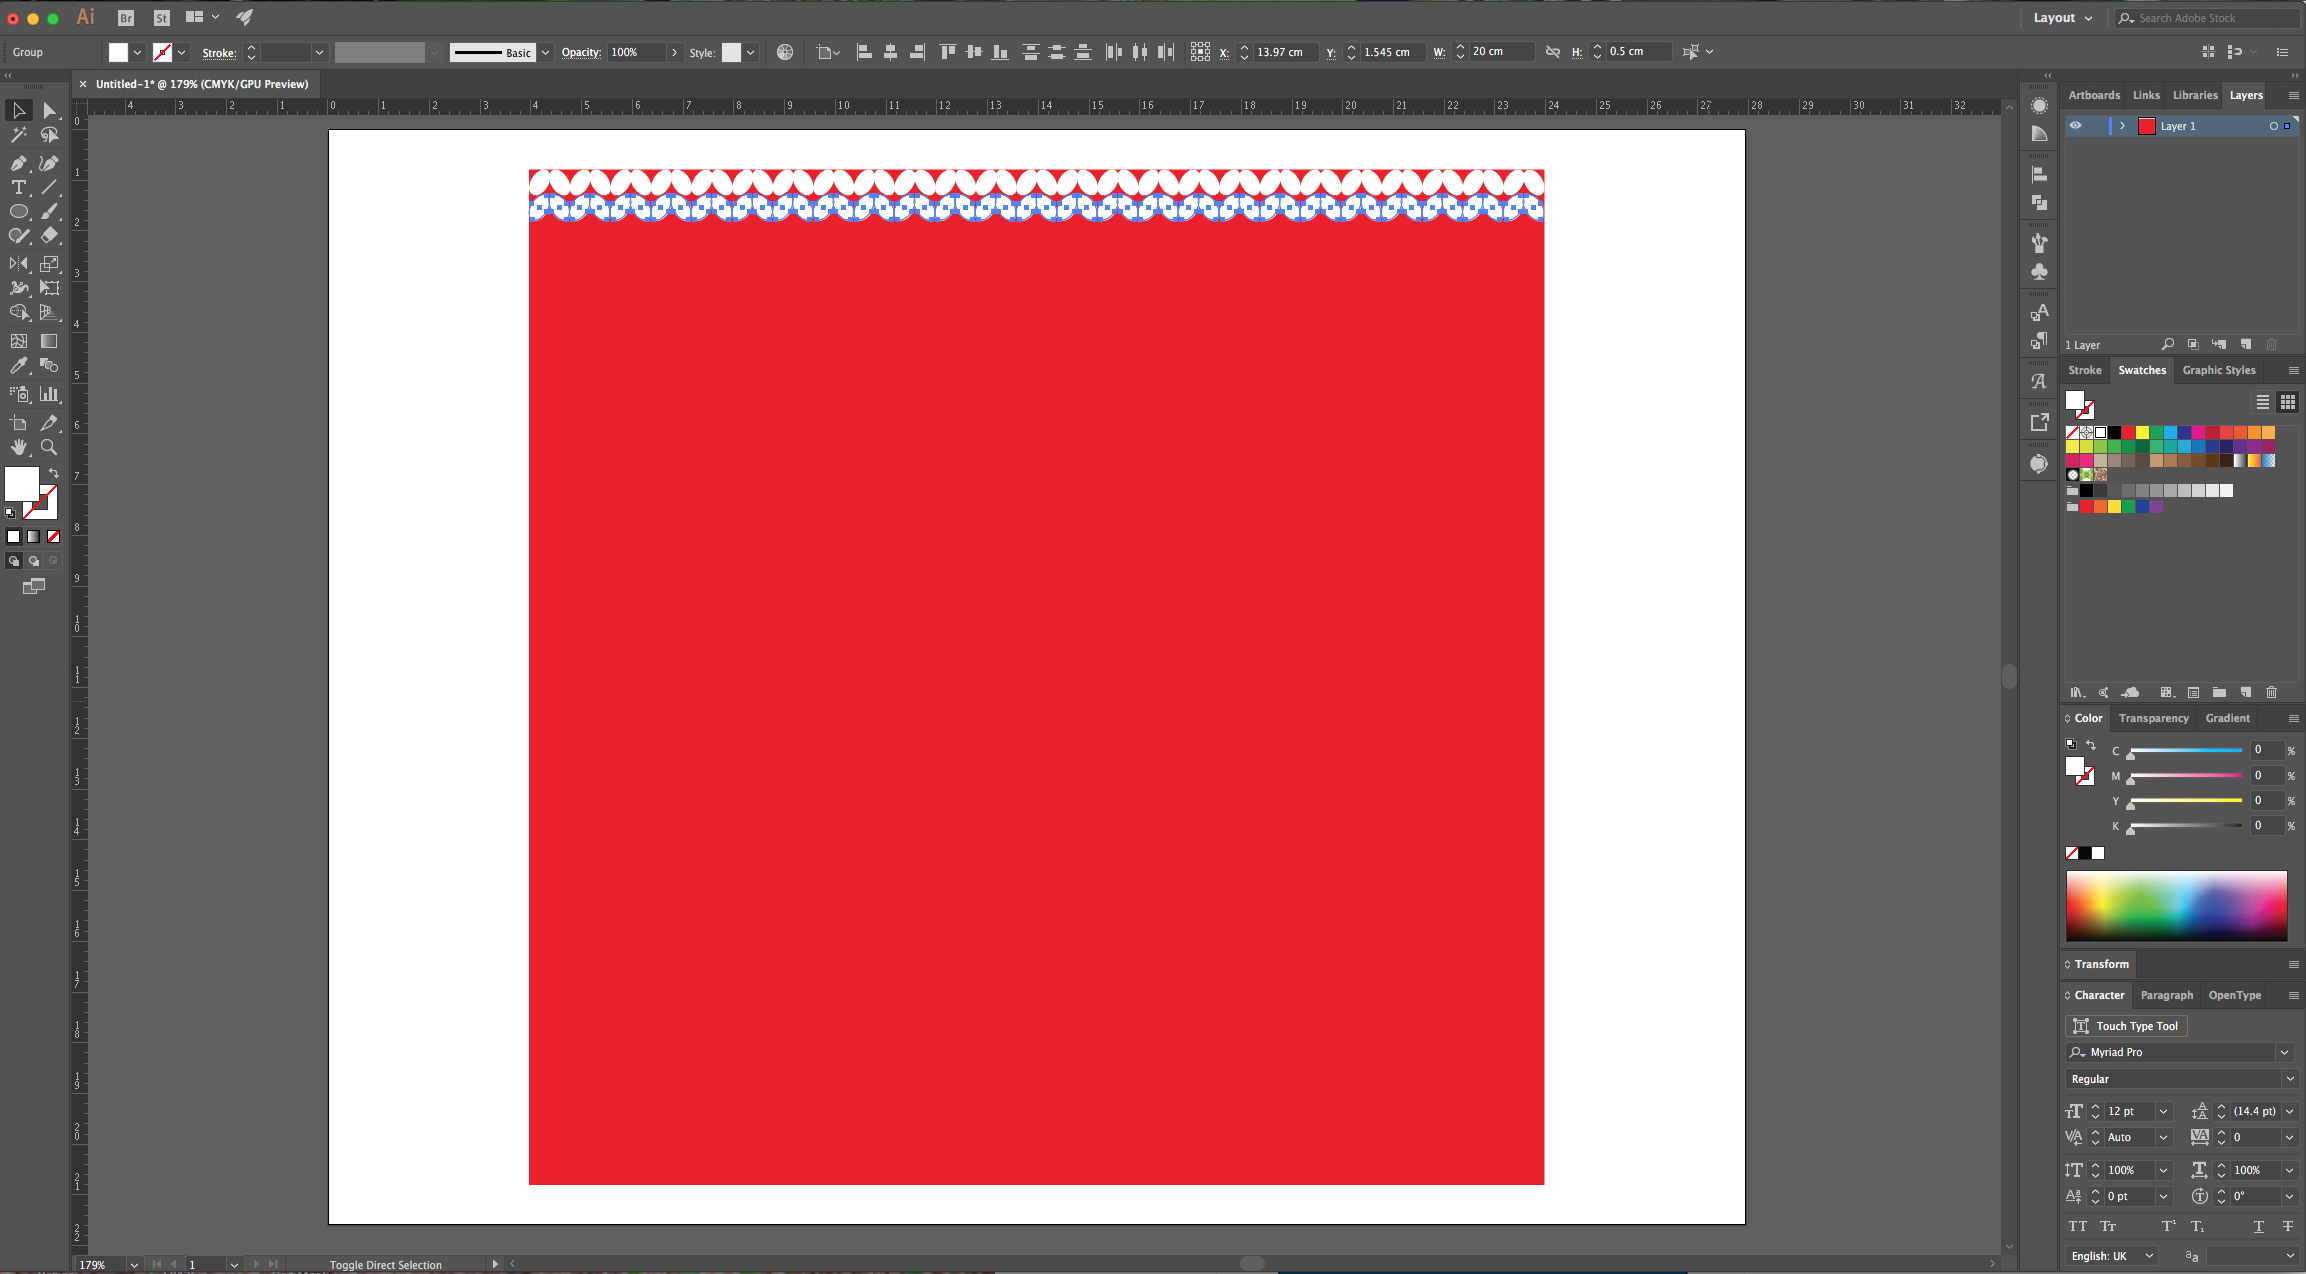
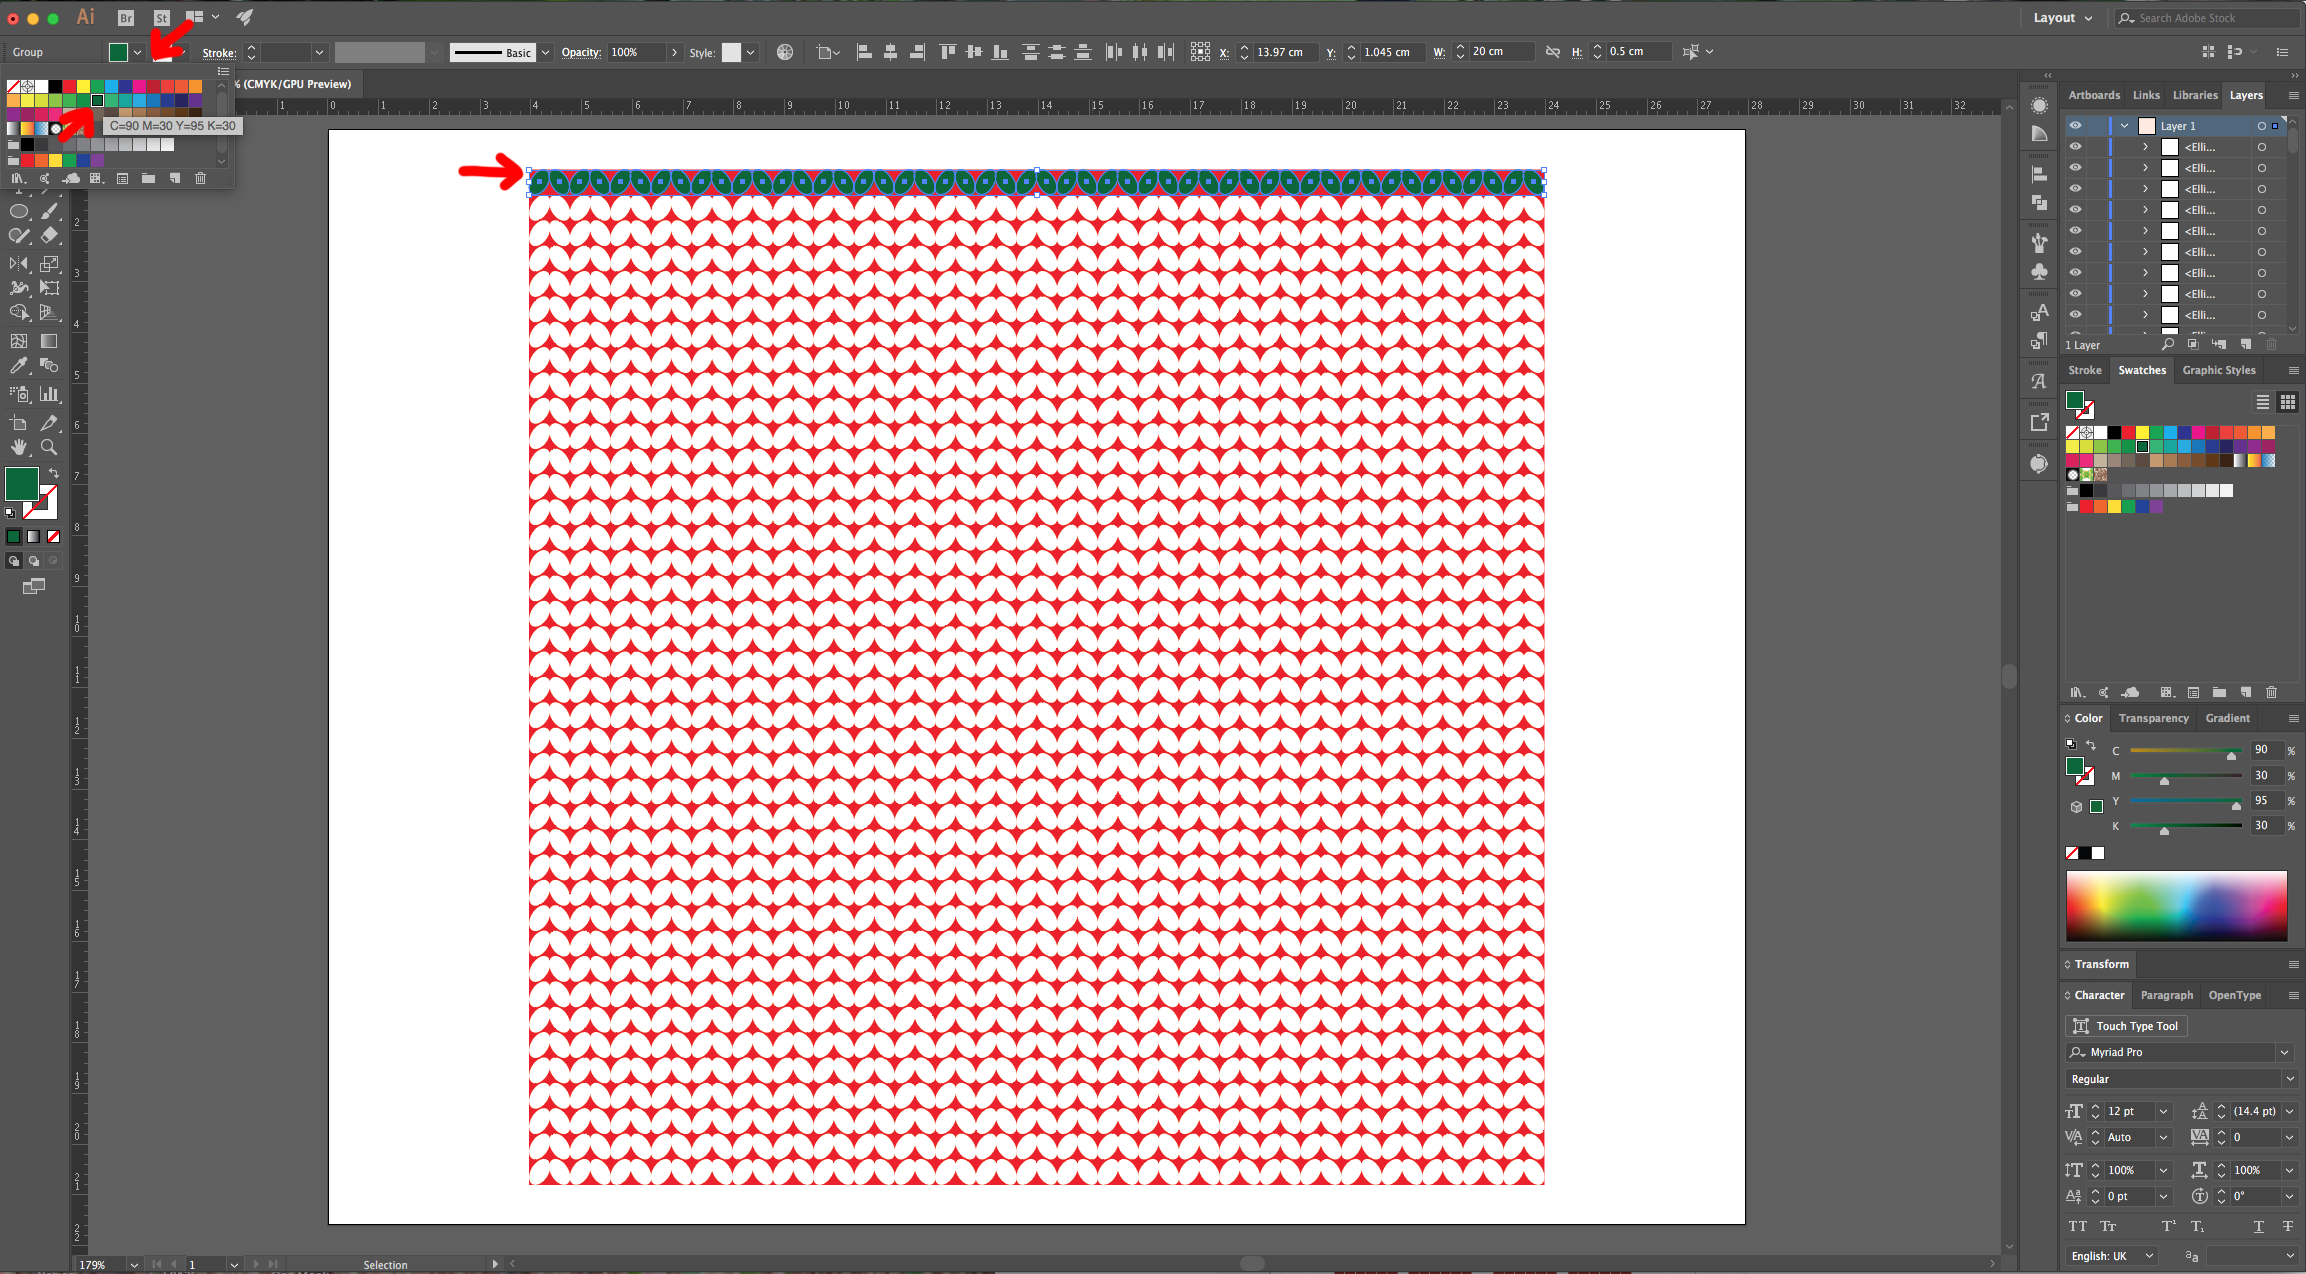
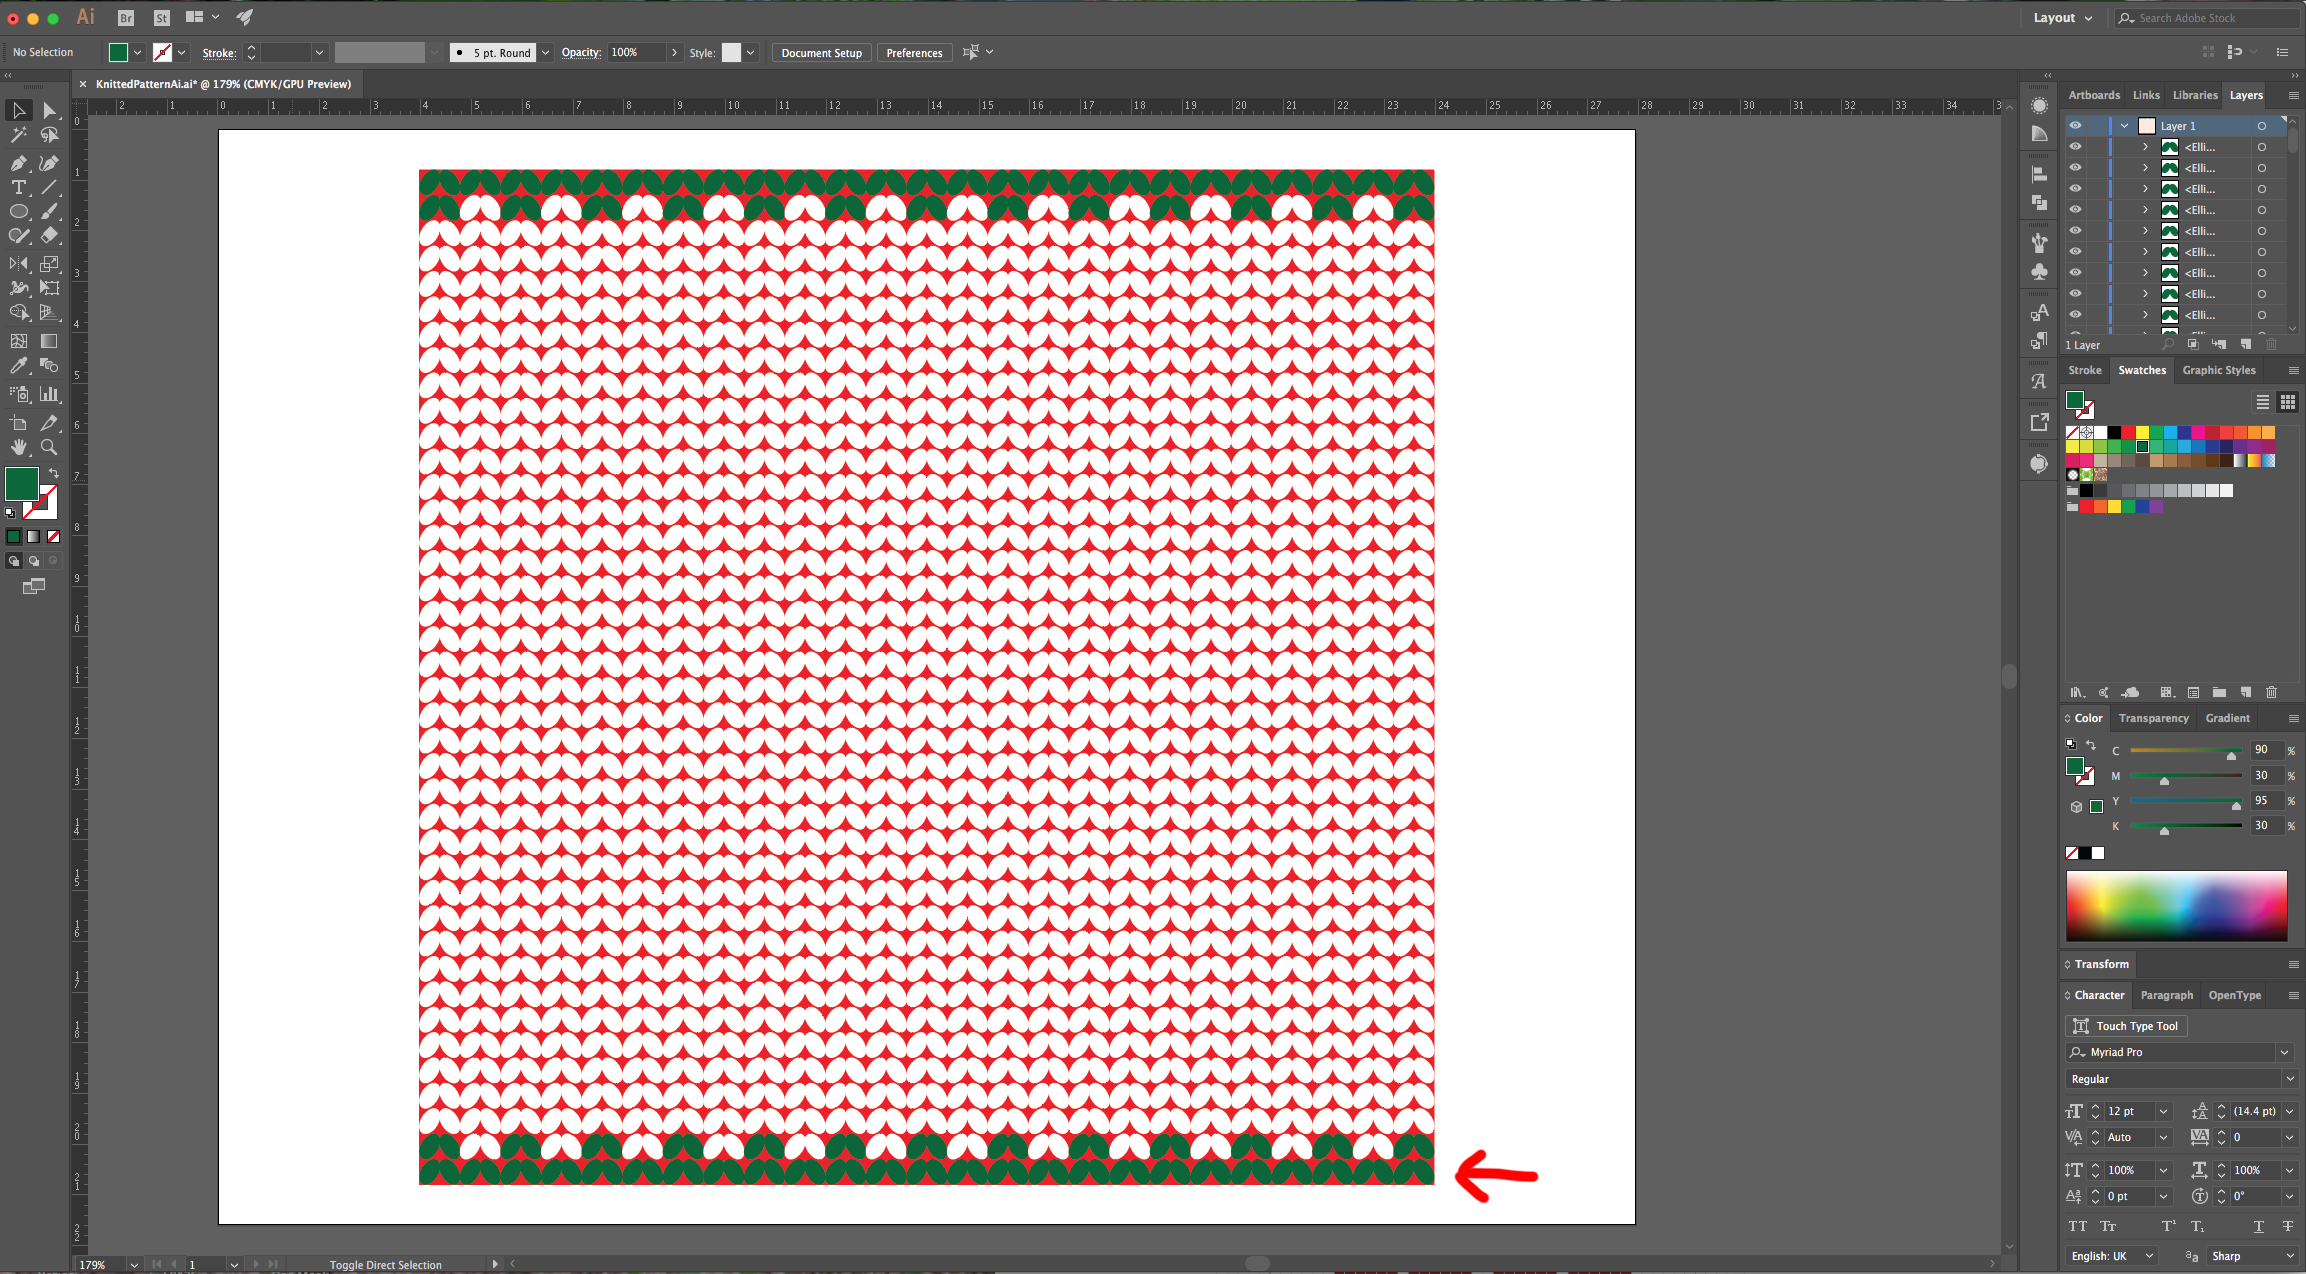
10 - Select the top row of ovals and fill it with a Dark Green from the “Swatches Panel”. For the second row, select the odd ones and fill them with the same green. Do the same at the bottom
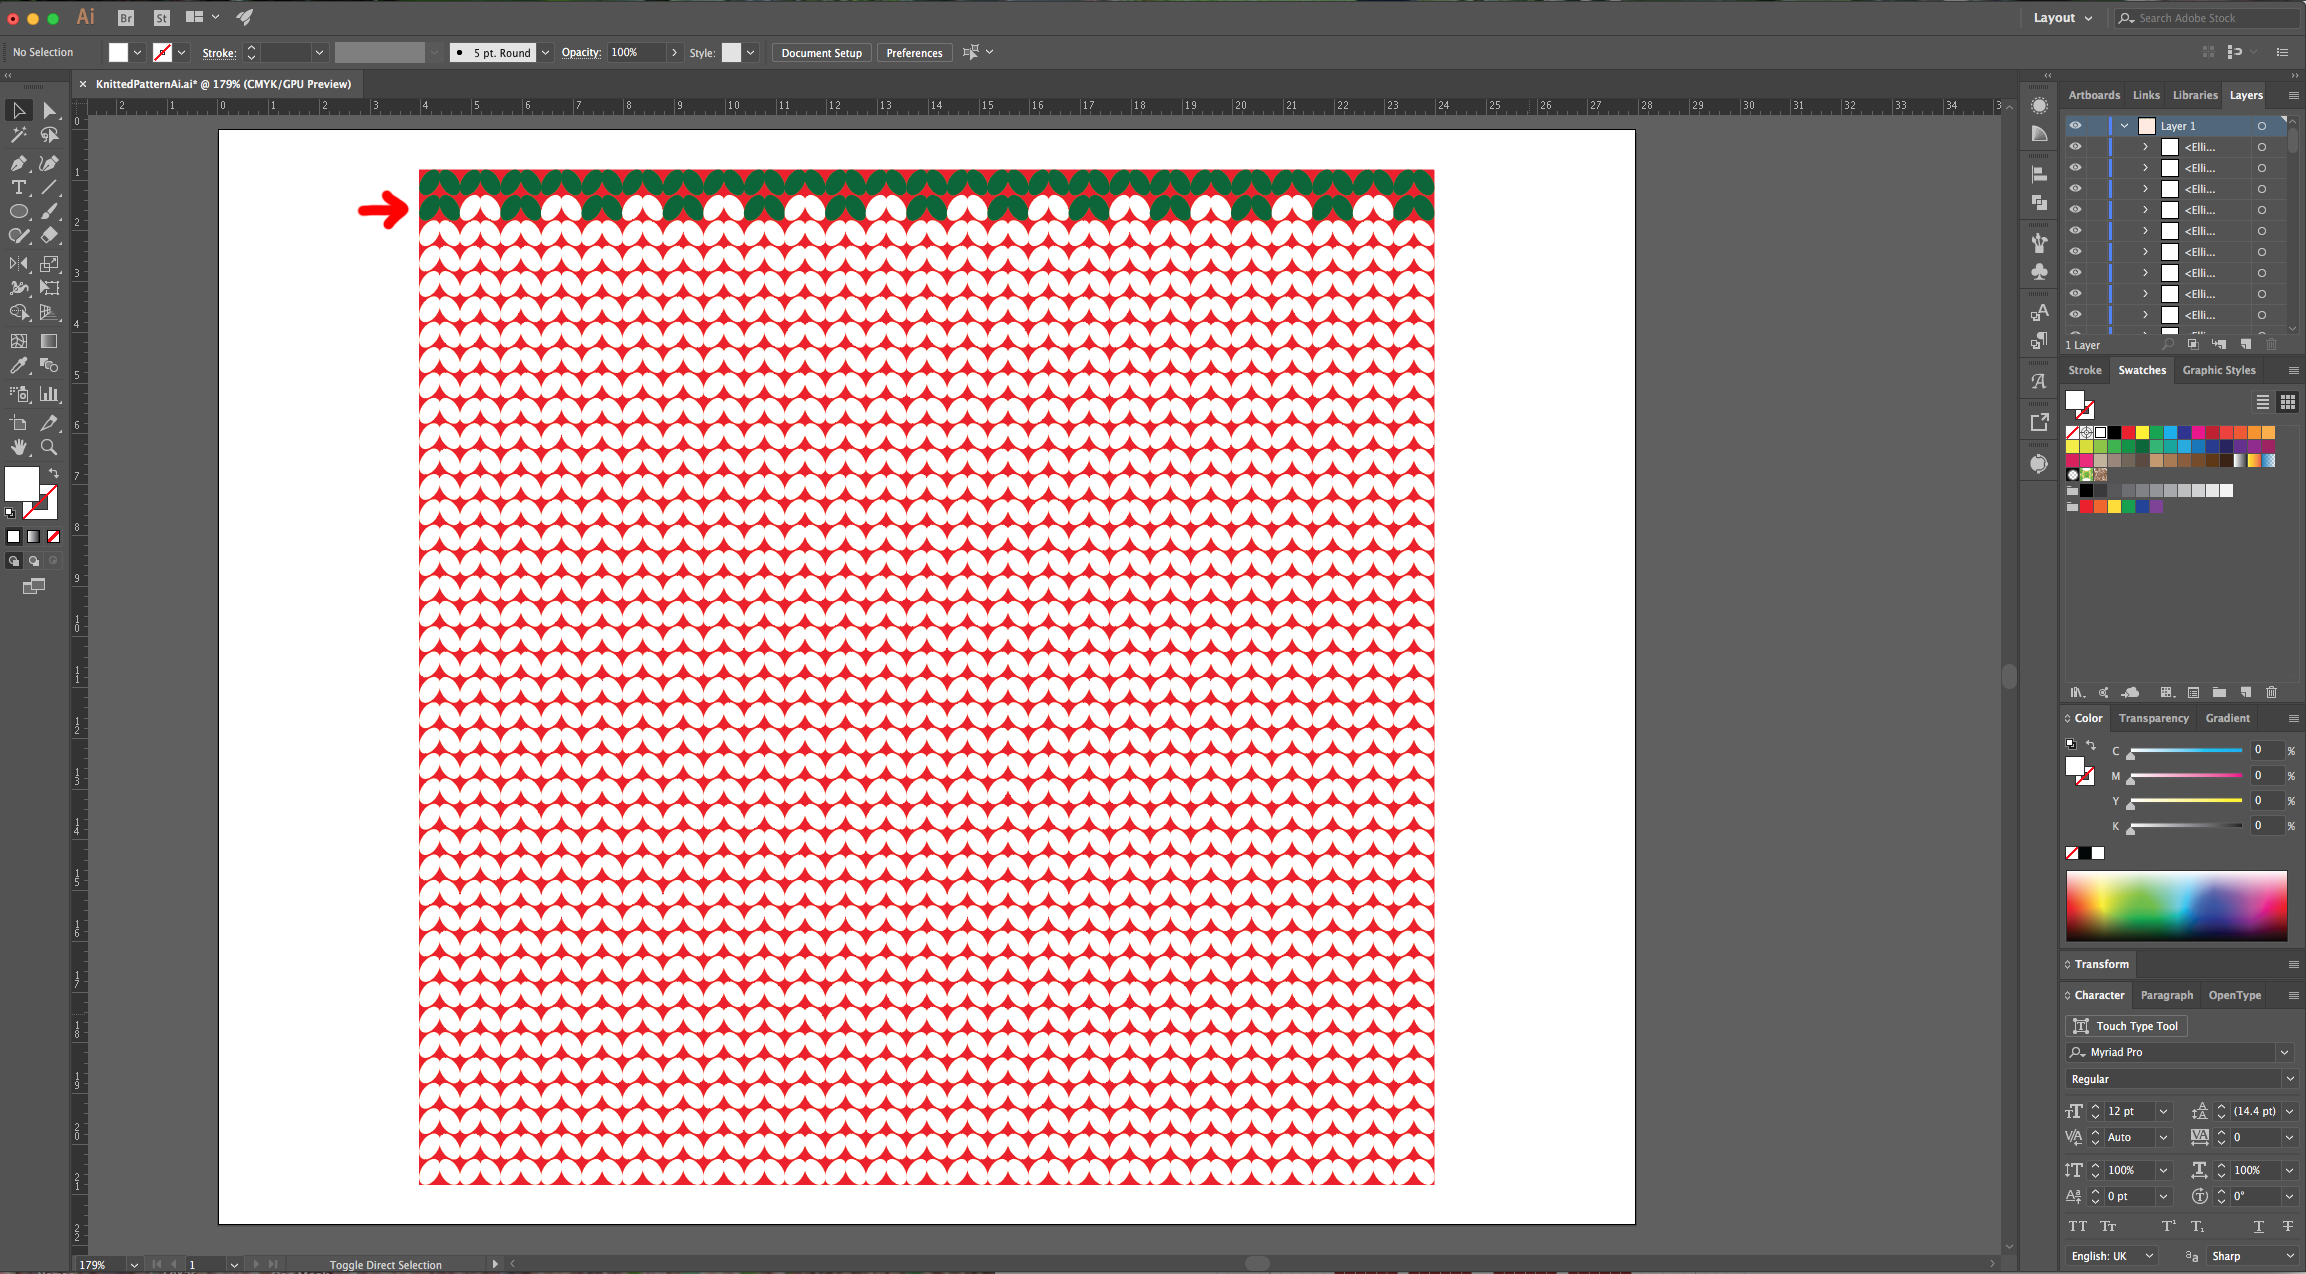
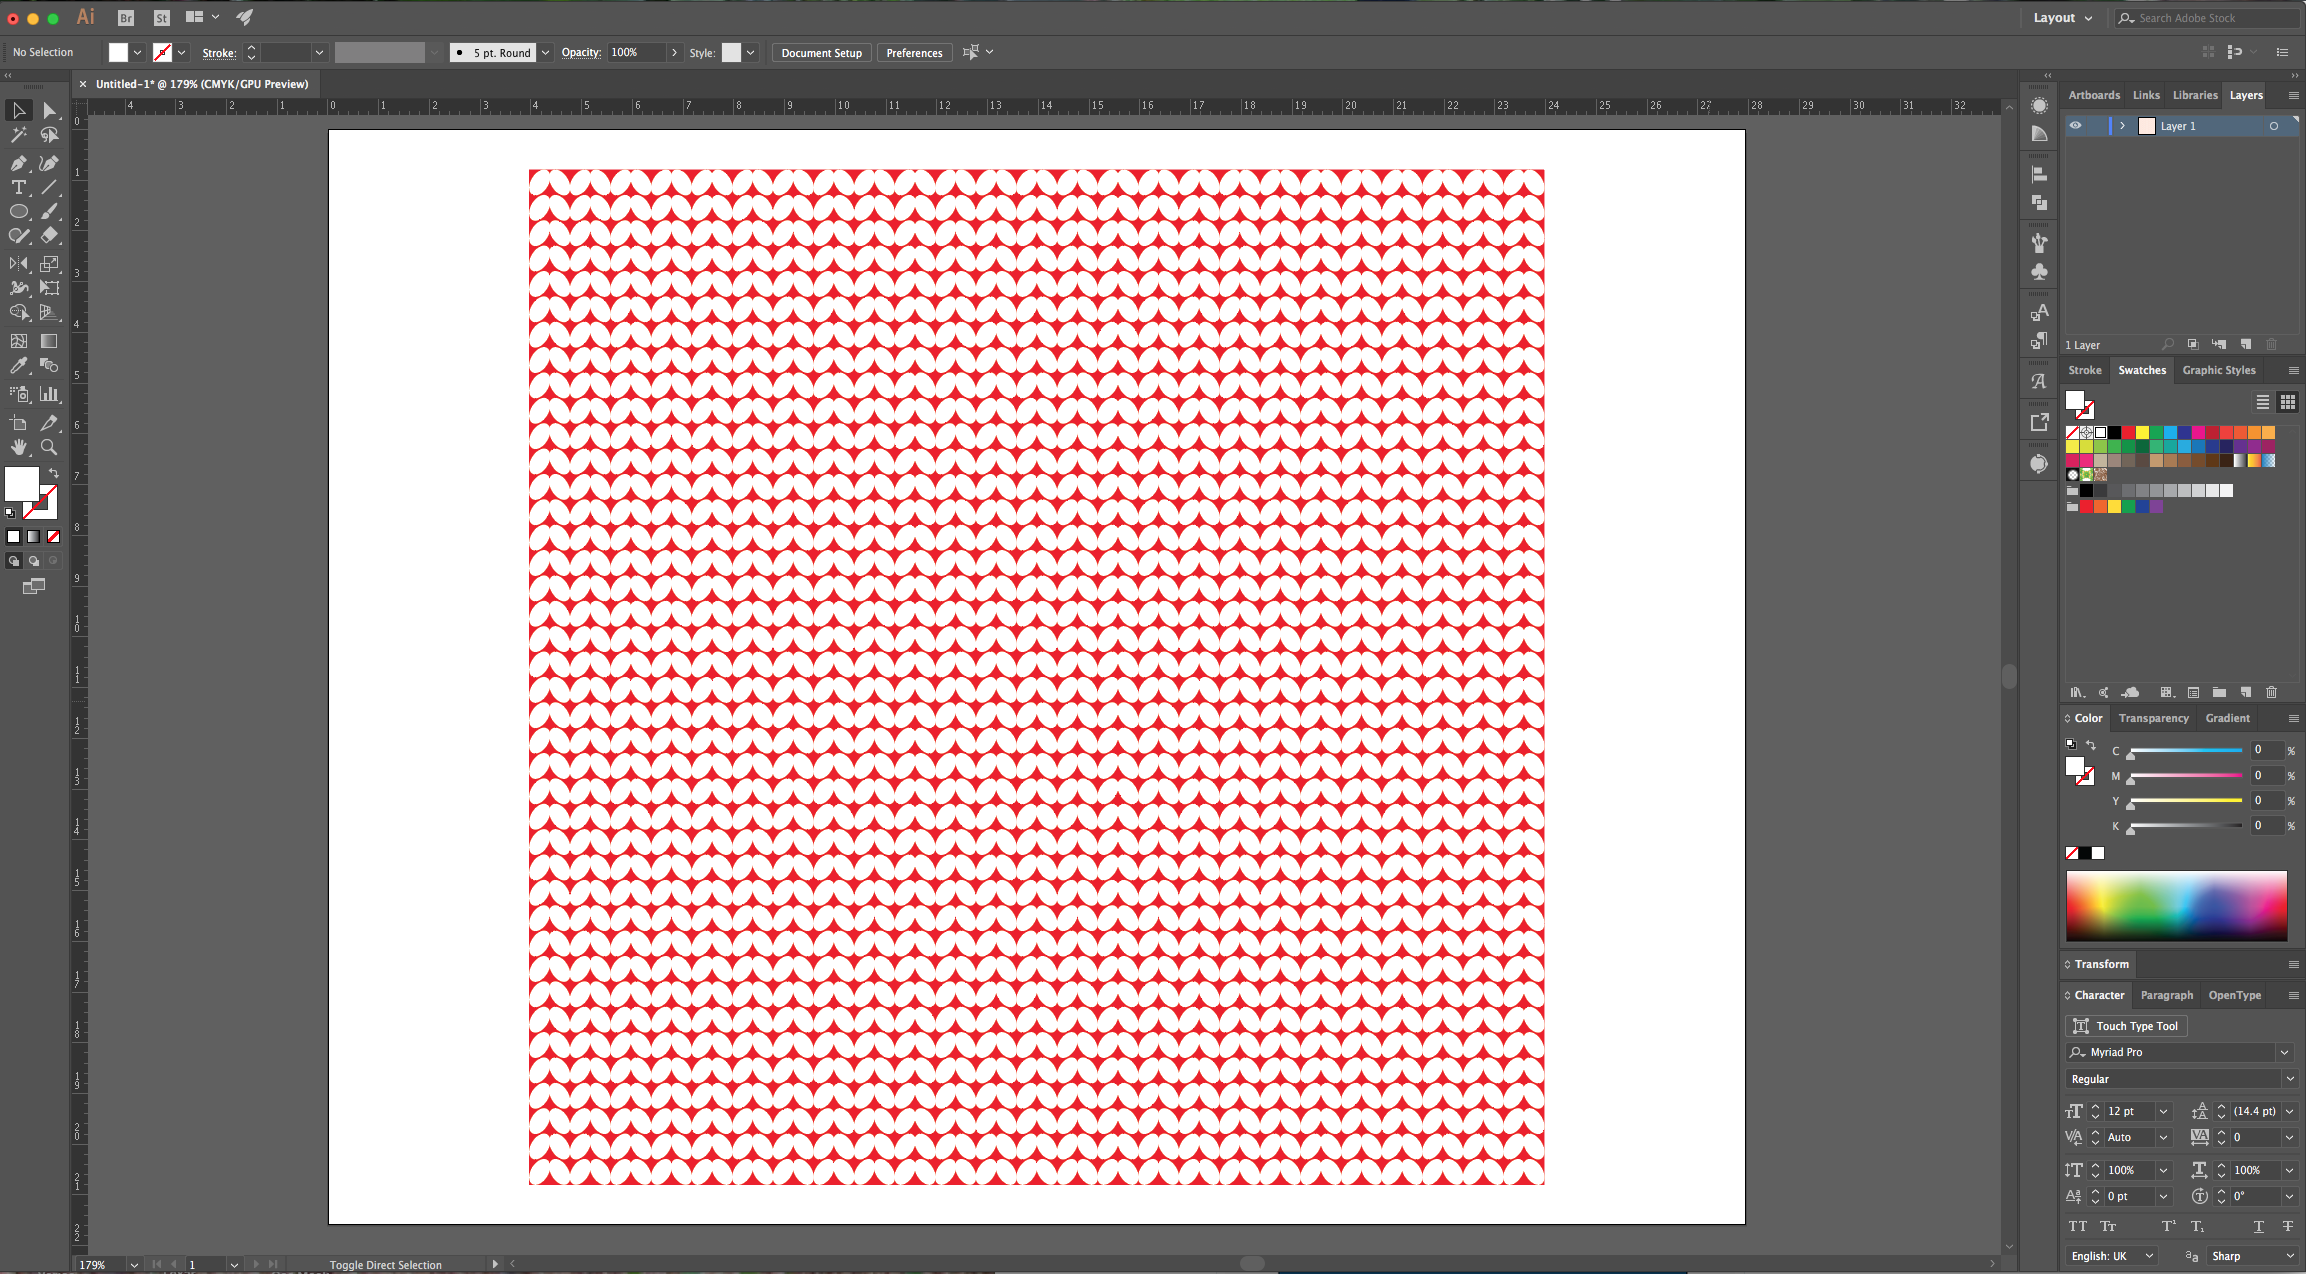
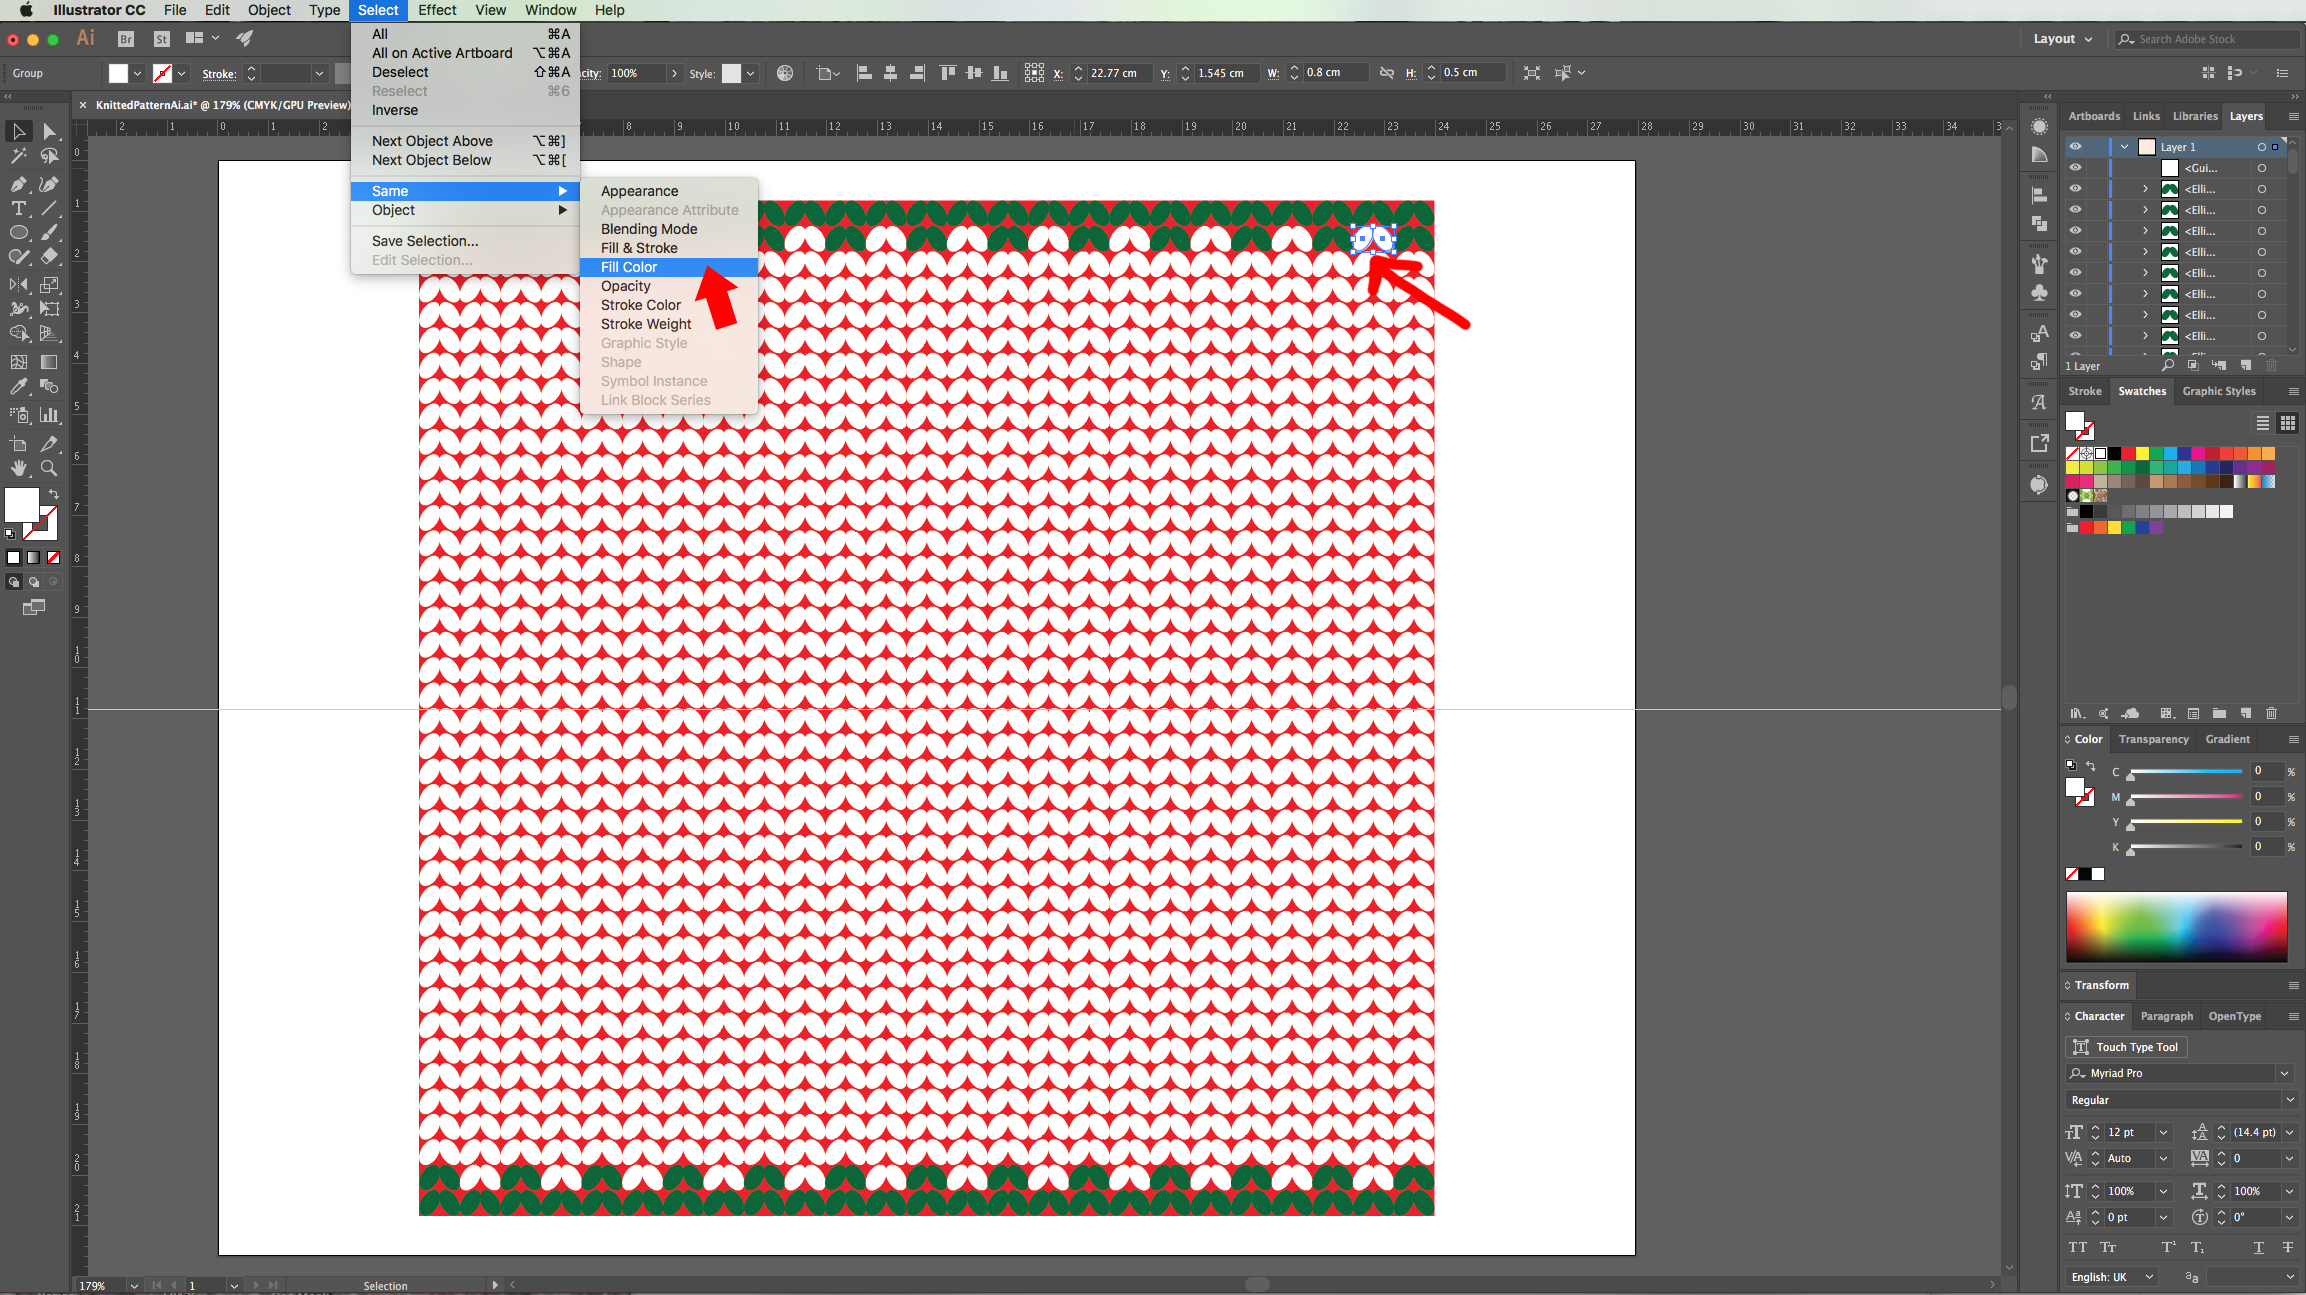
11 - Select one of the White Ovals and go to Select > Same > Fill Color… to select all the White shapes. Change their fill to a darker shade of Red, right-click on top and choose “Ungroup”.
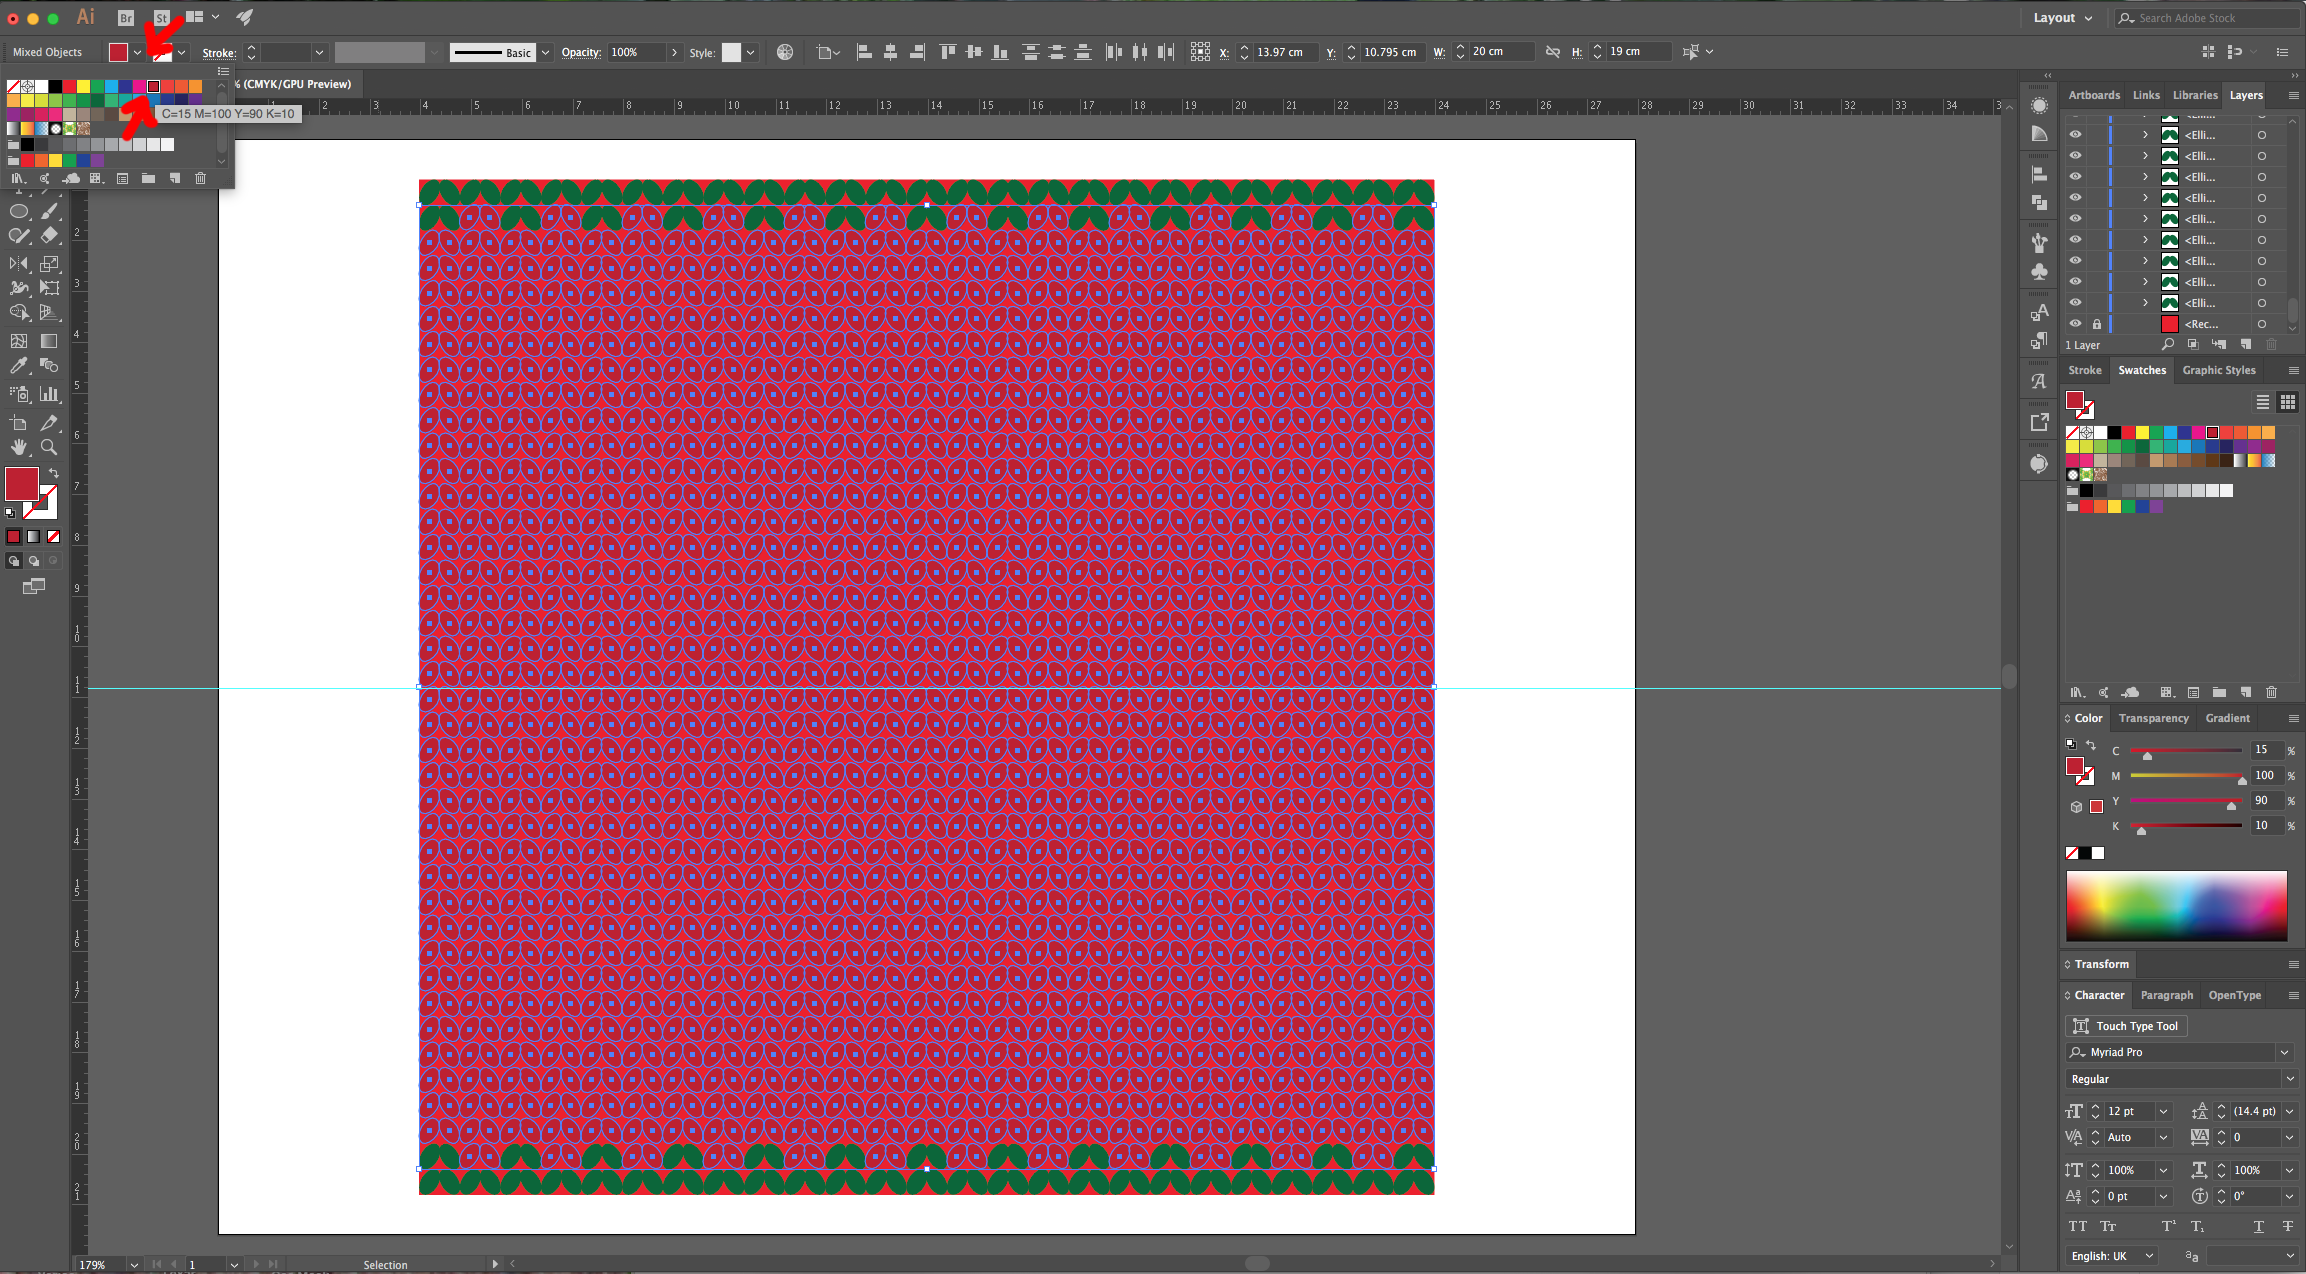
12 - Now, you can create a Pattern by selecting some Ovals and changing their fill to White. In this case we created a “Poinsettia Flower”.

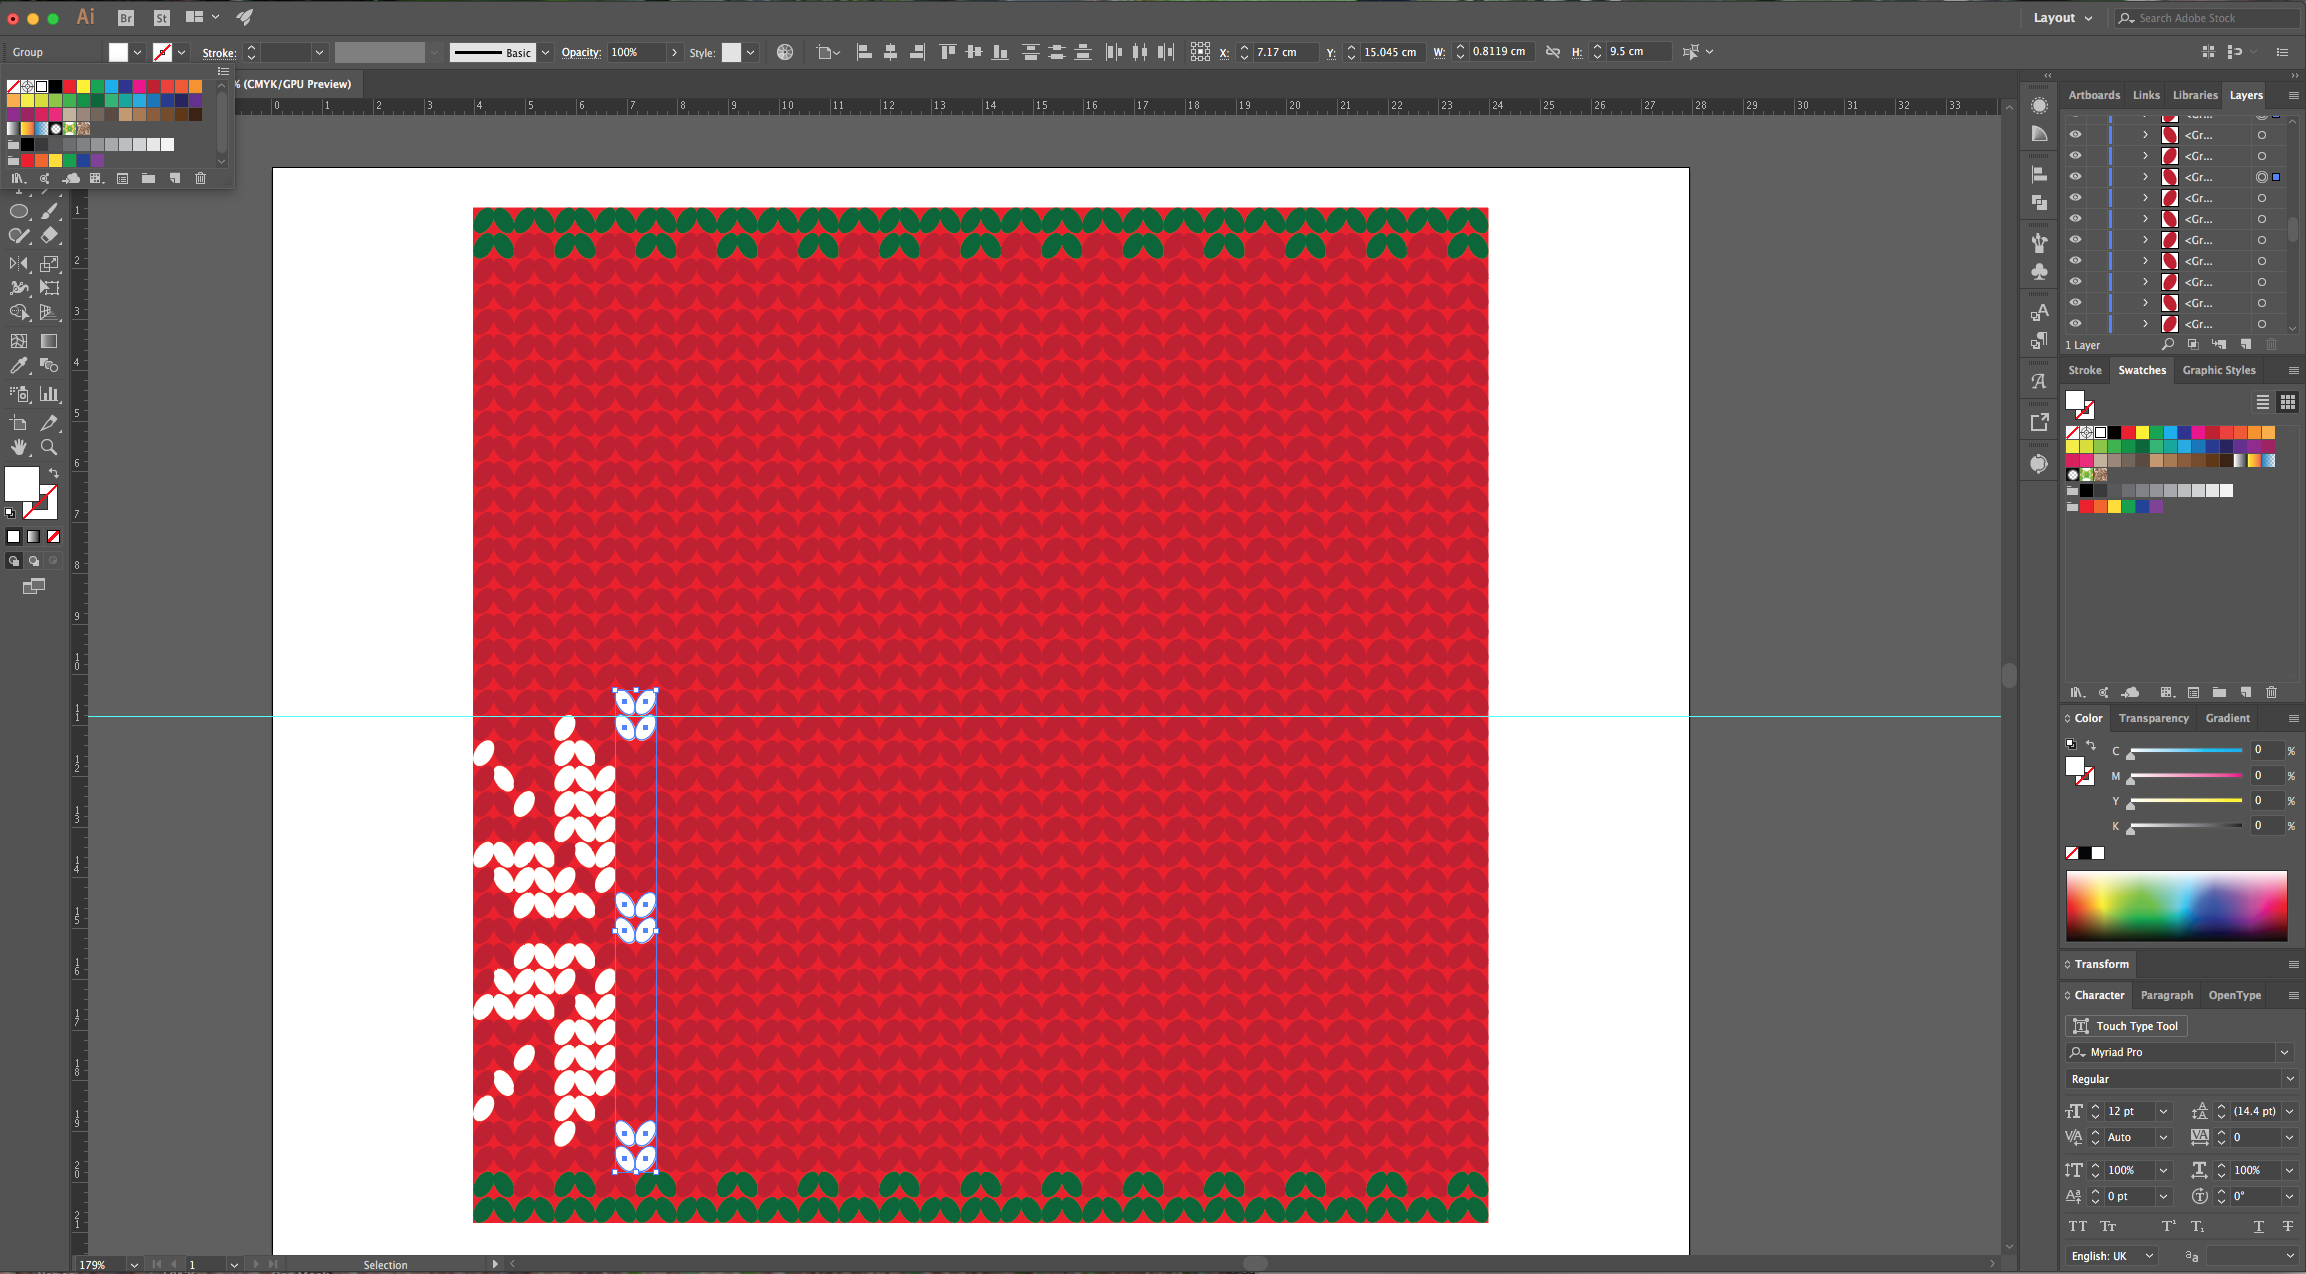
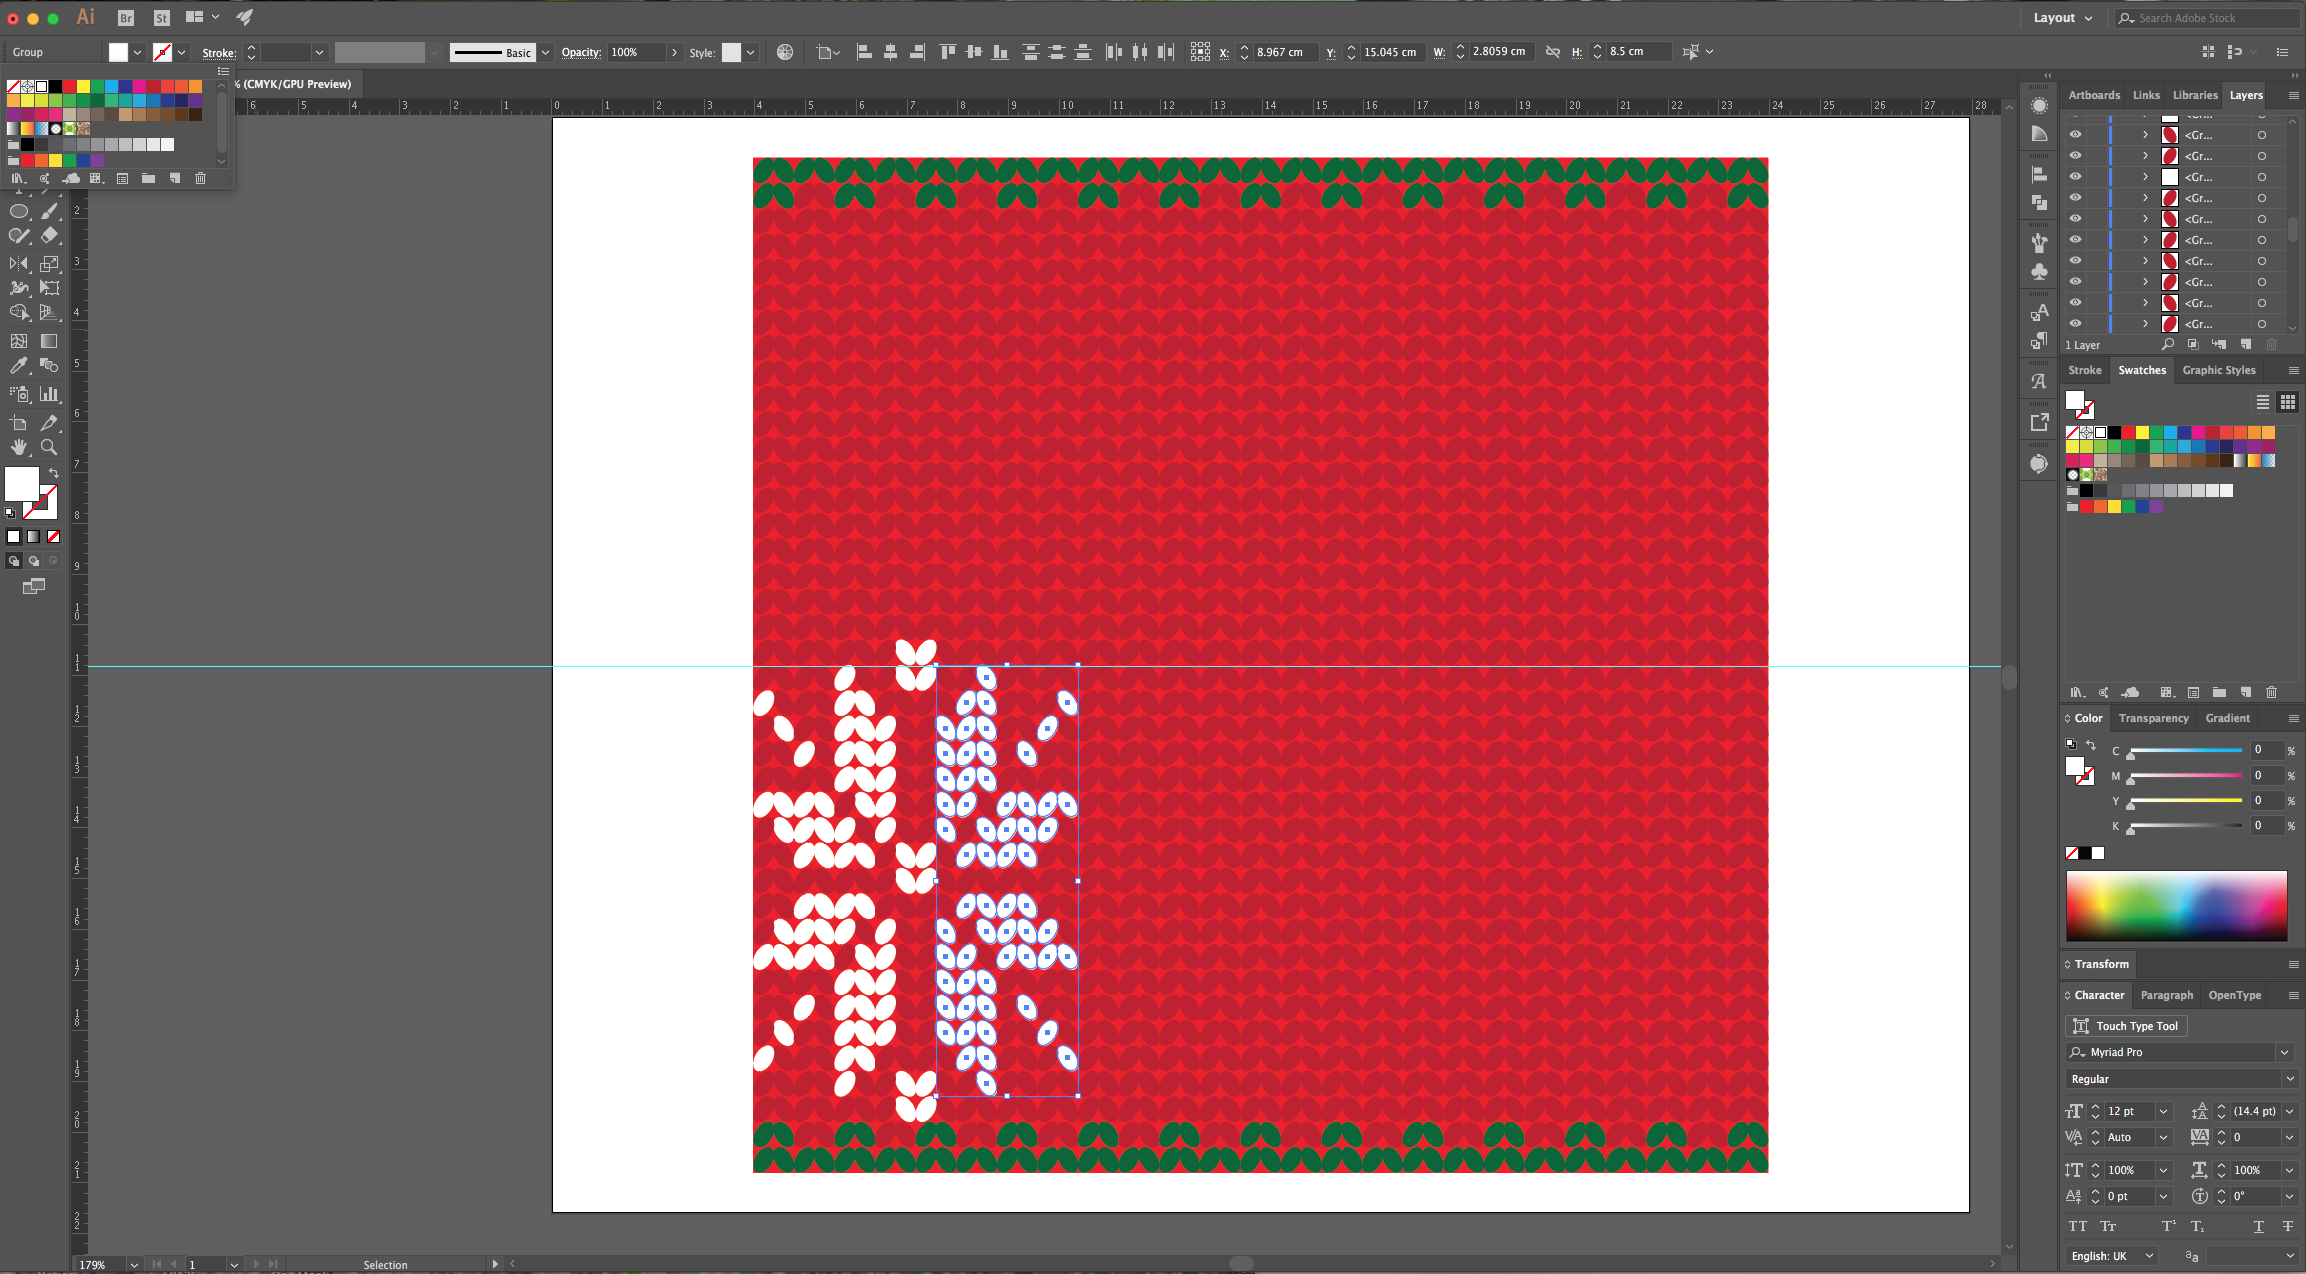
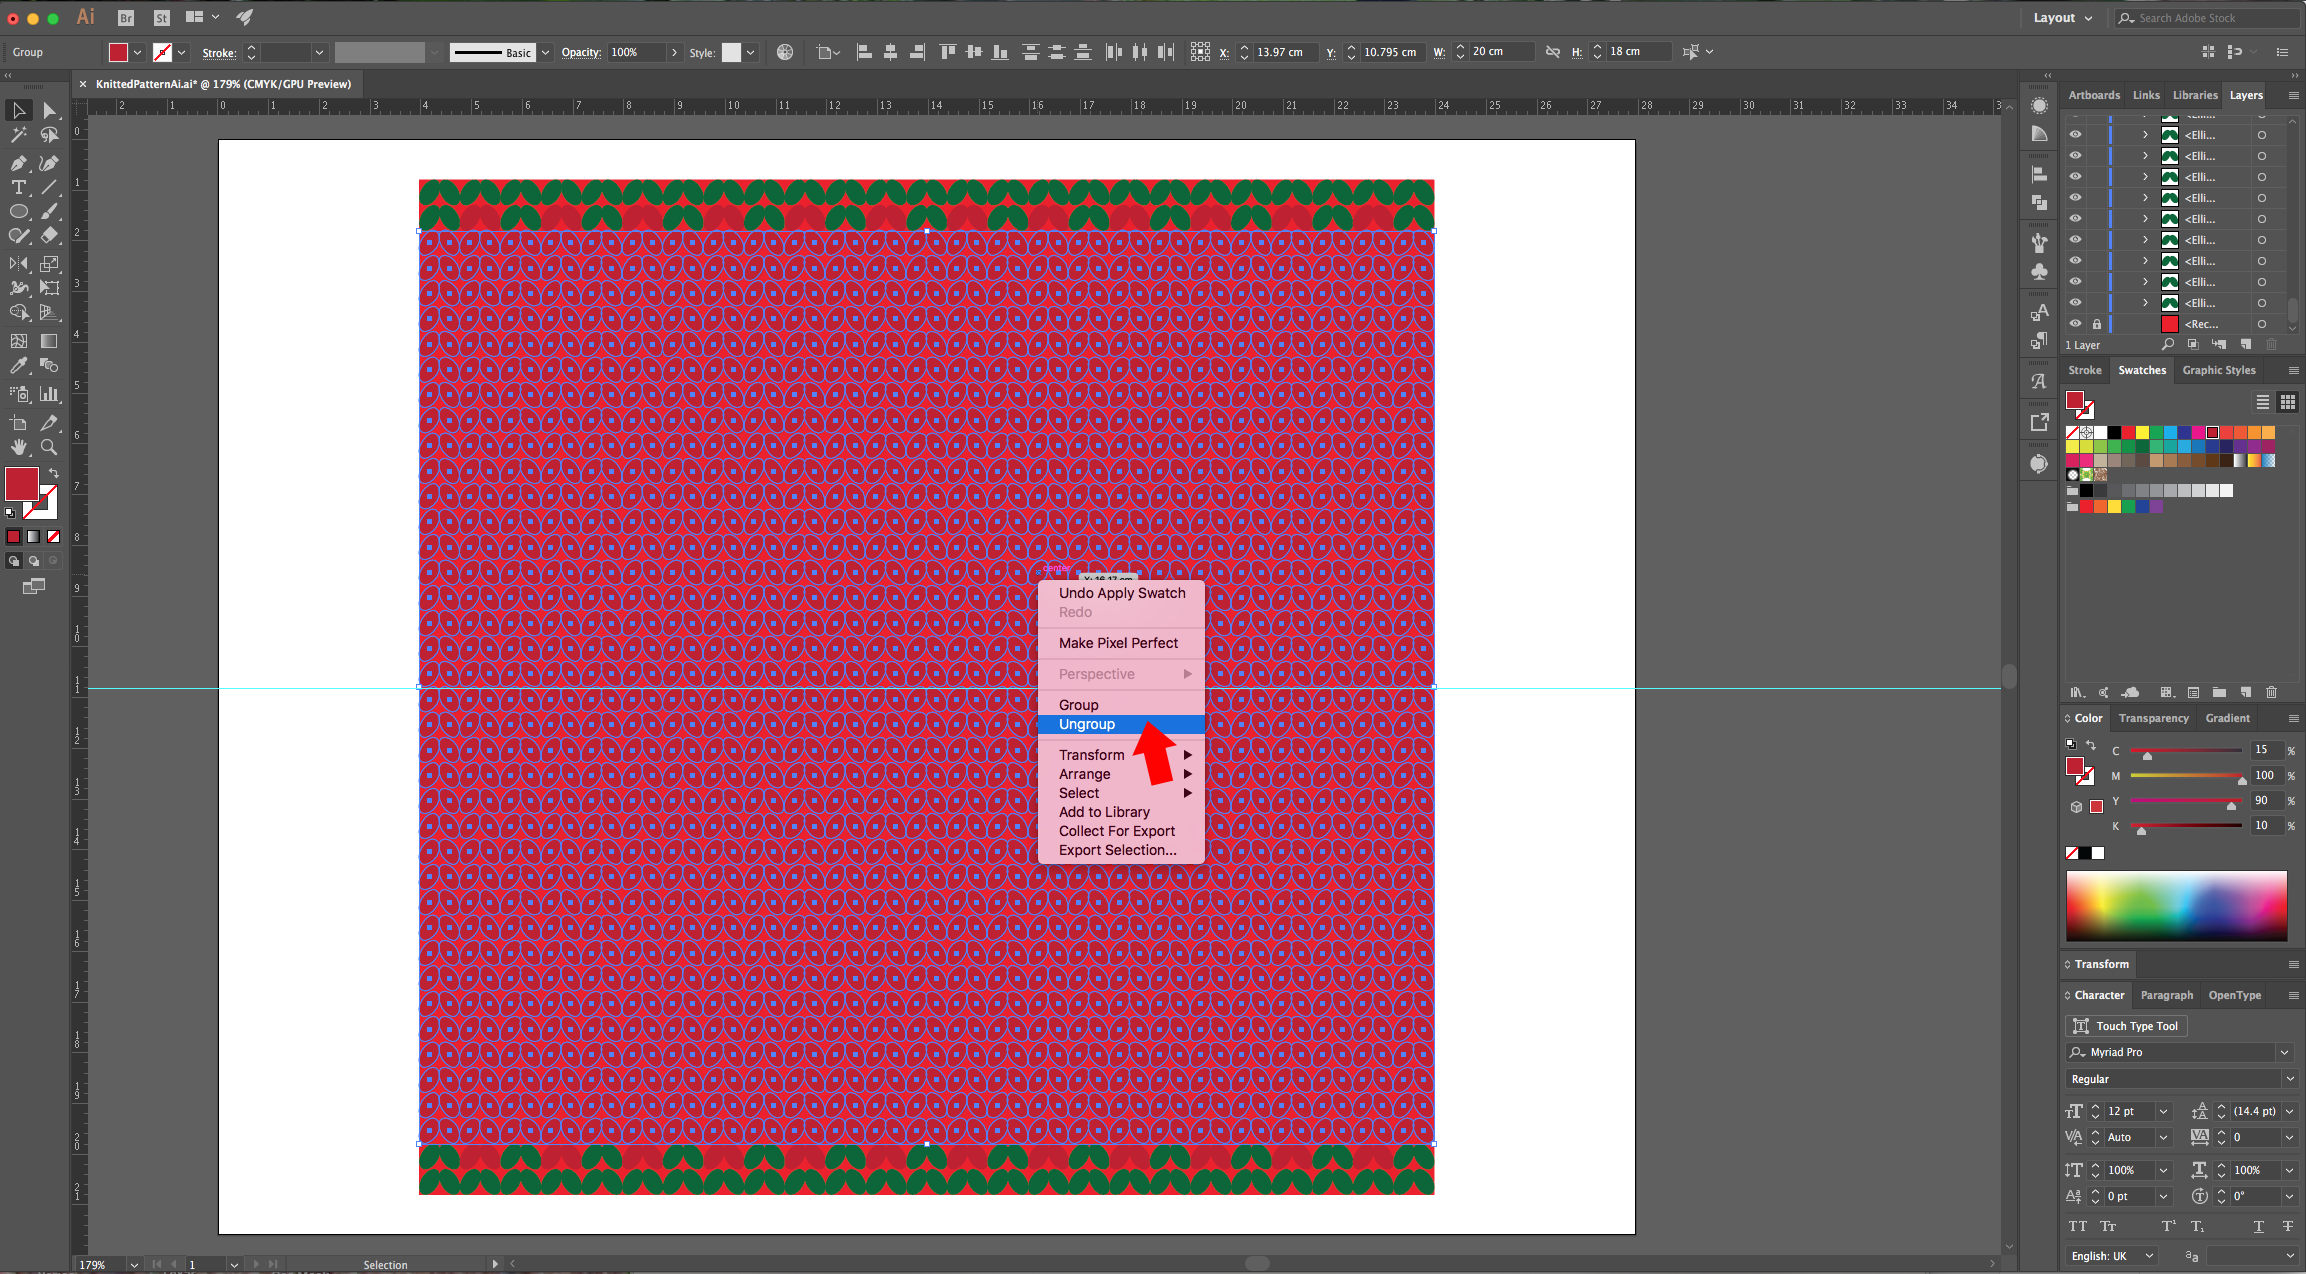
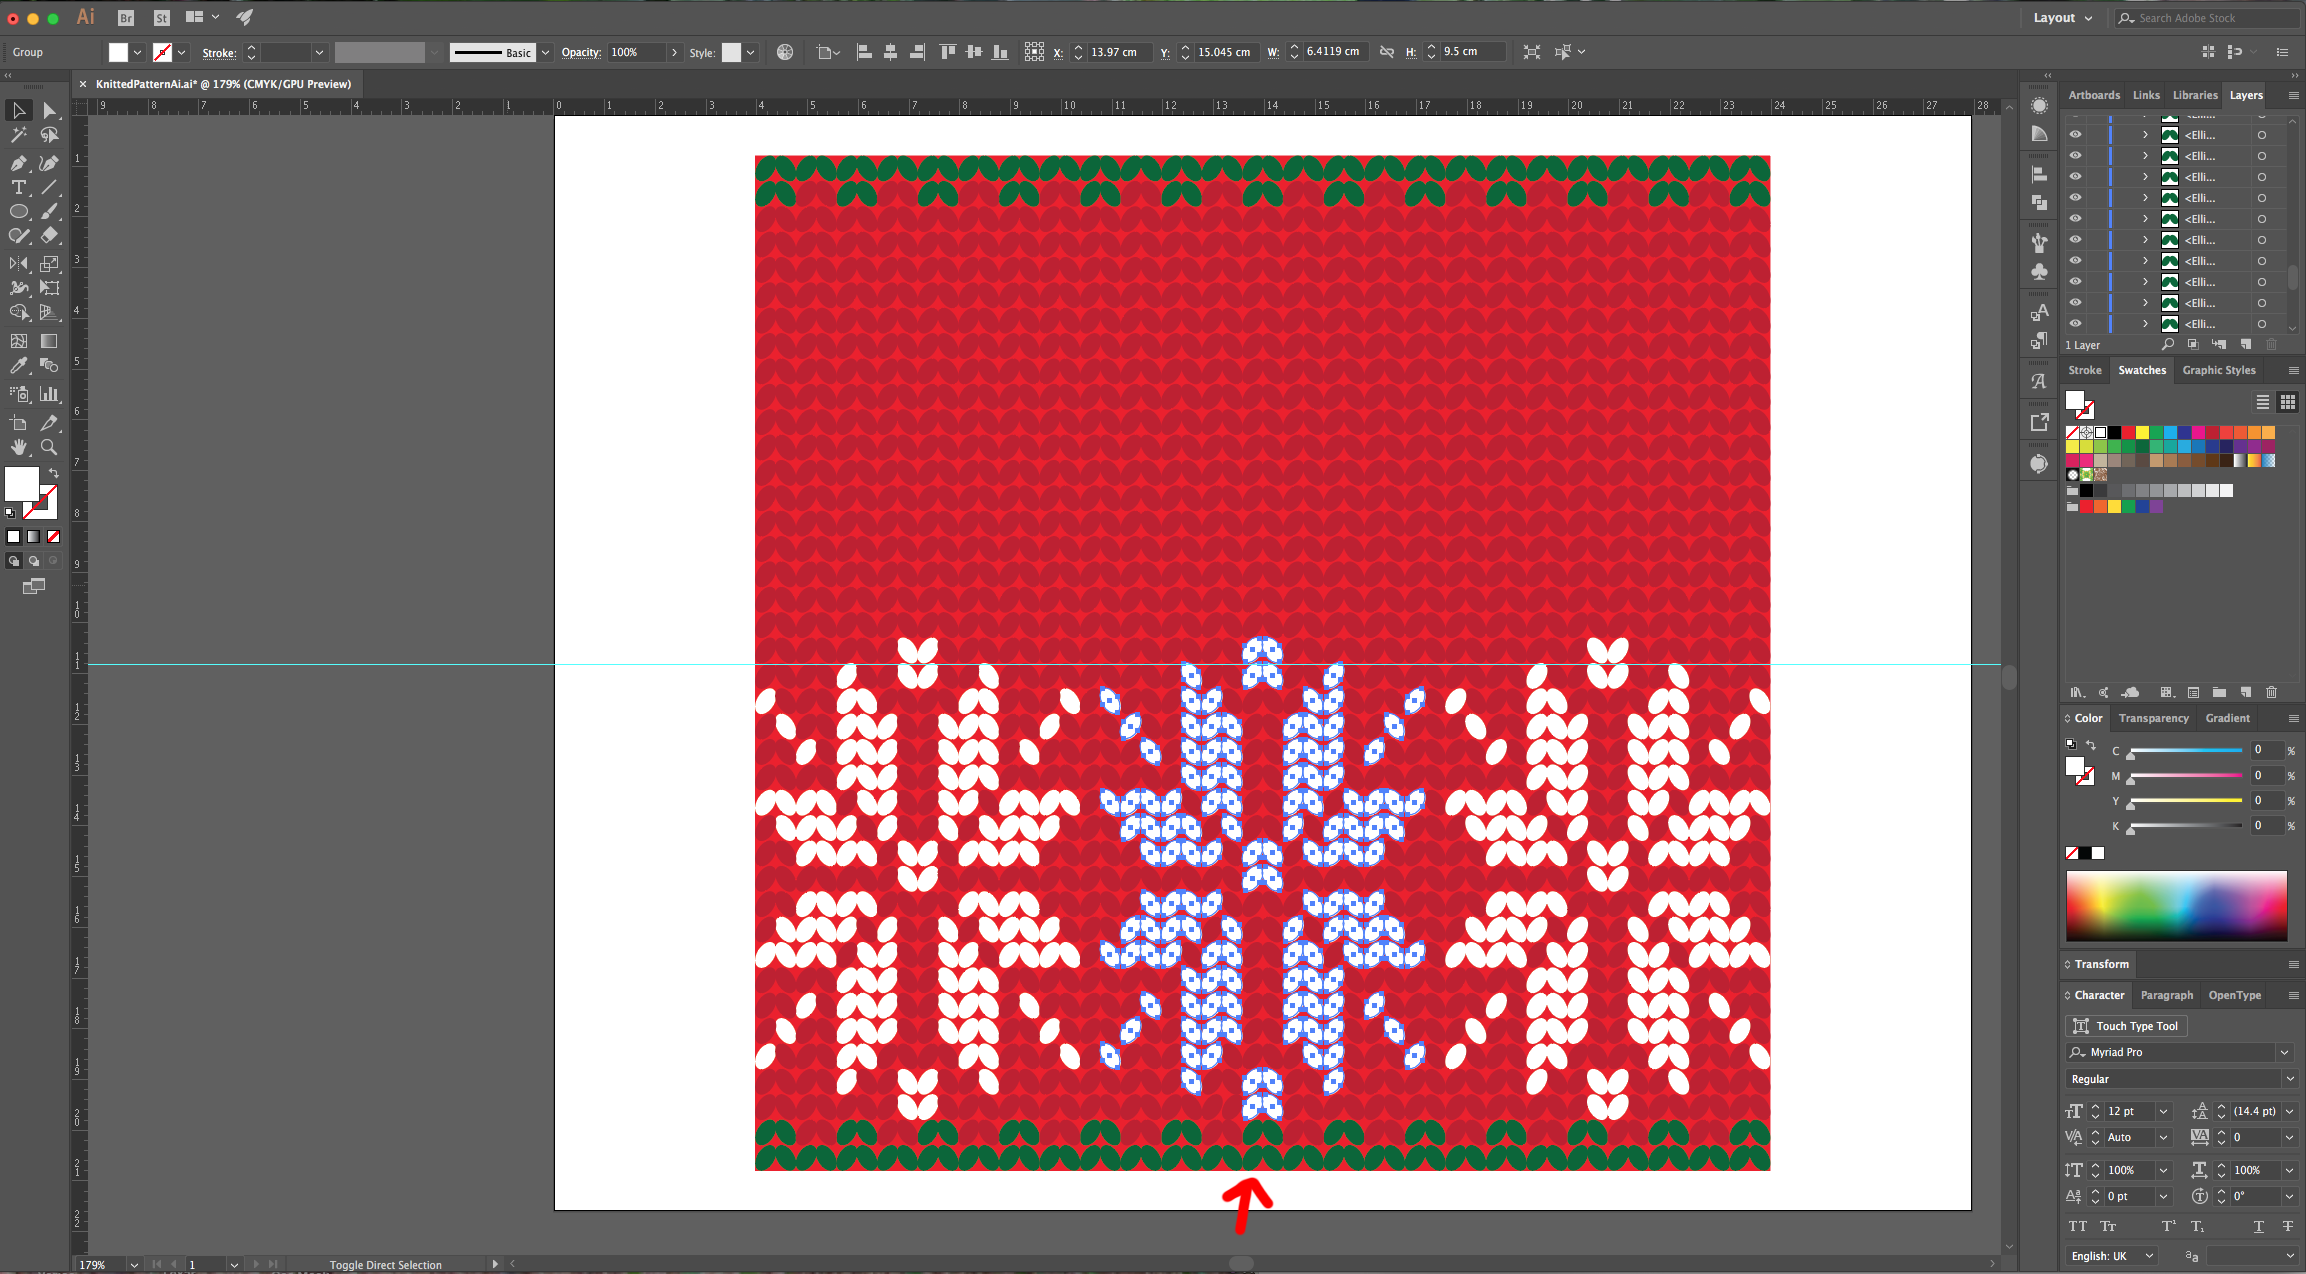
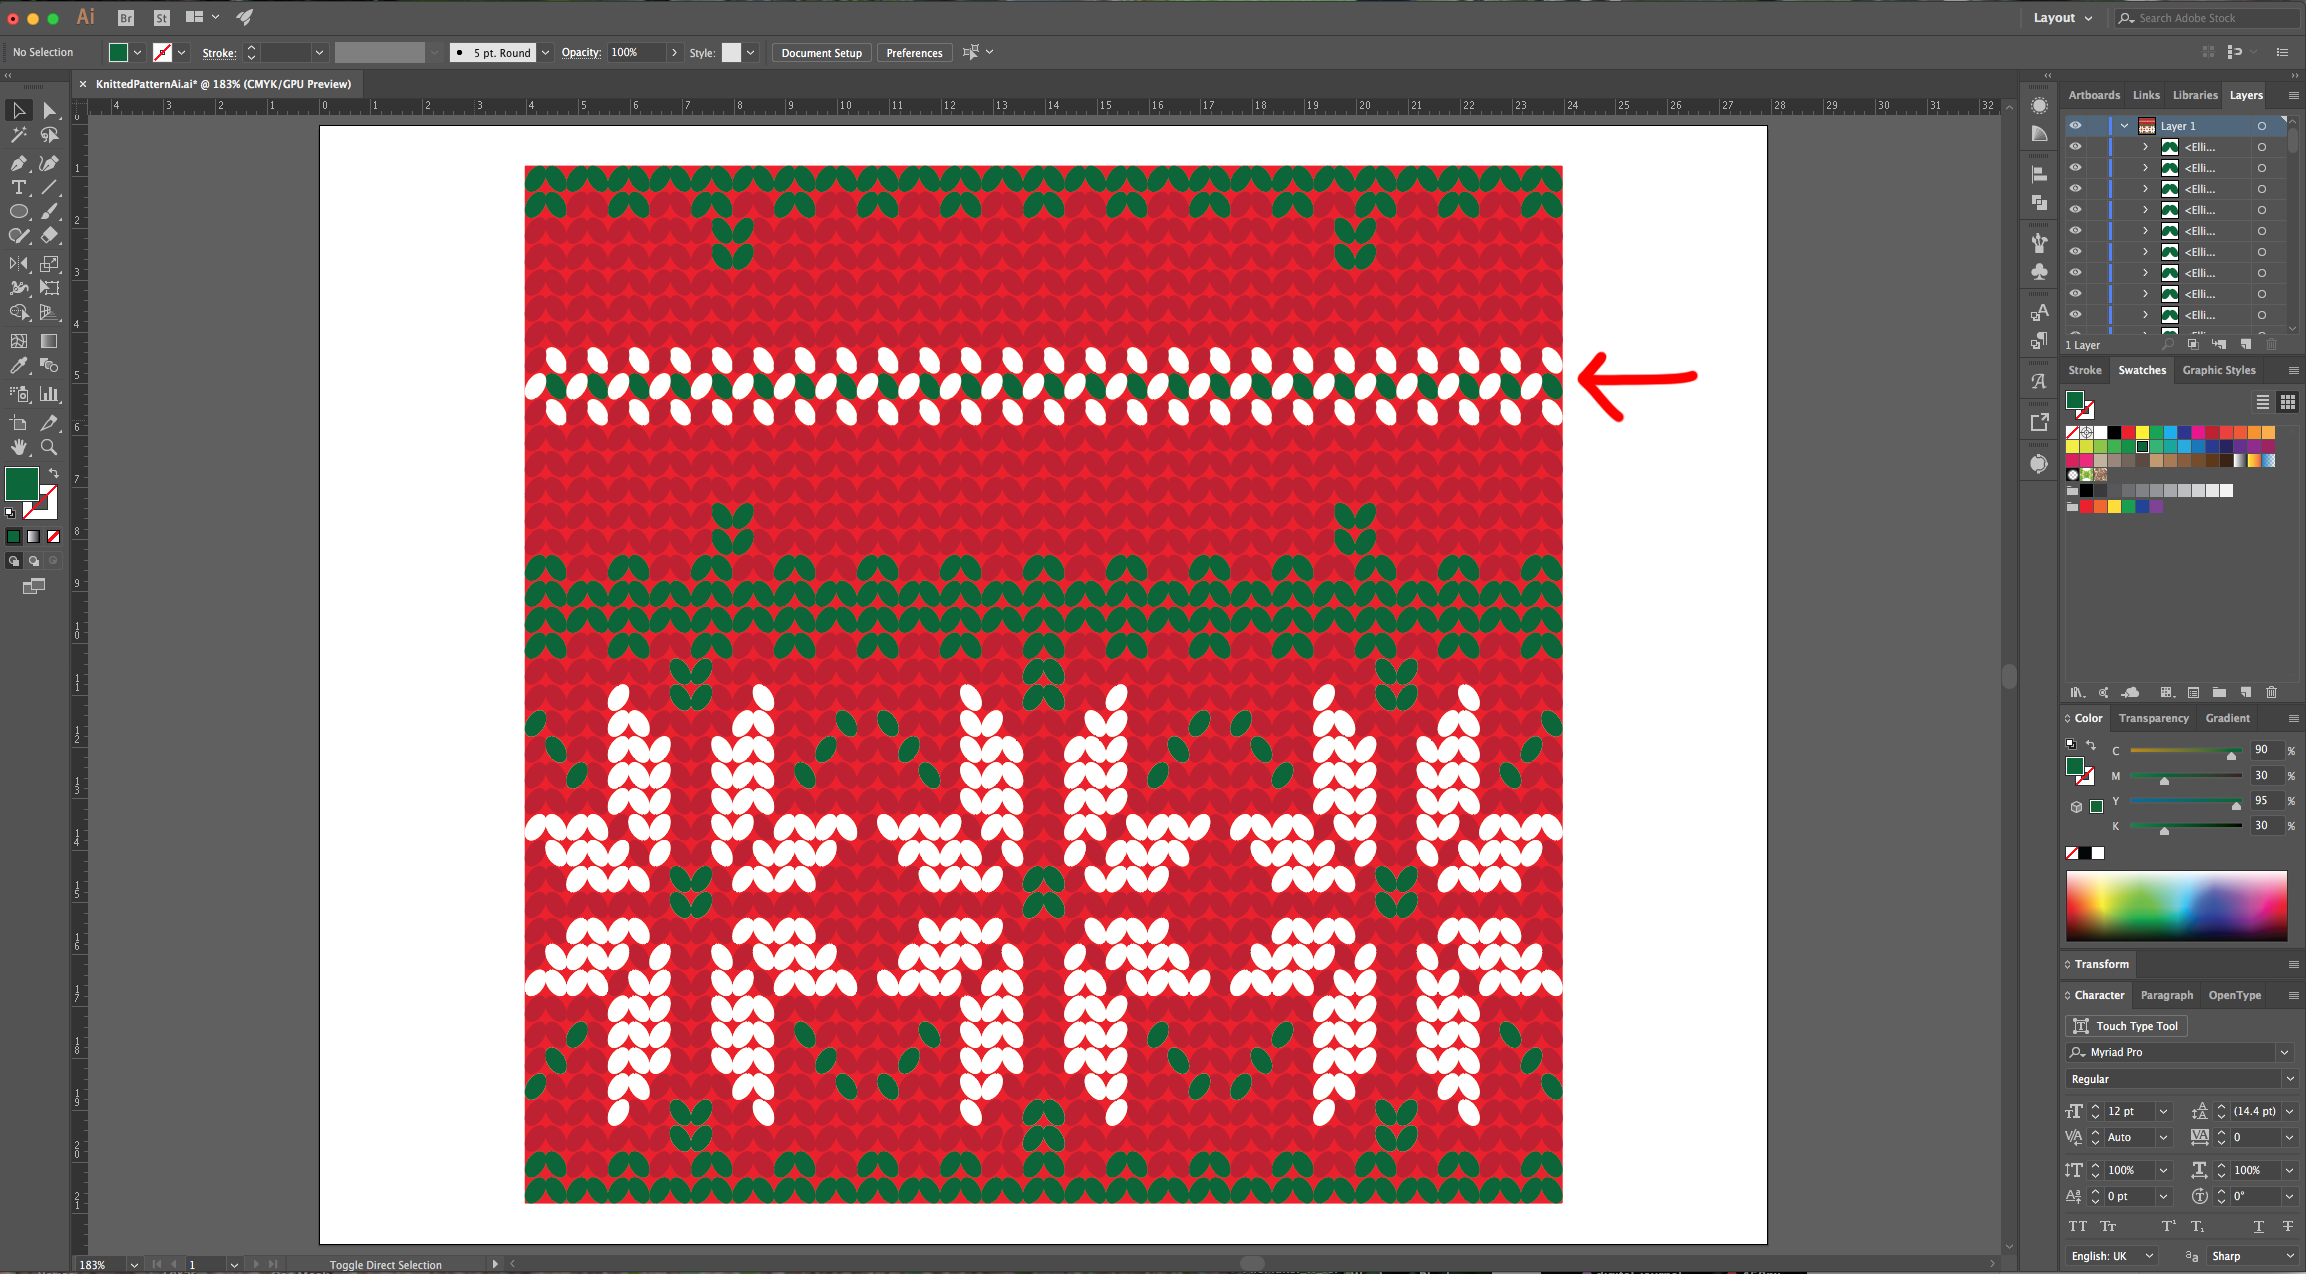
13 - You can “Copy” (Command/Control + C) and “Paste in Front” (Command/Control + F) the flower and then move it all the way to the right while holding the “Shift” key to do it in straight line to duplicate the flower. Then, repeat the flower in the center leaving an unfilled line between it and the other two. Select the centers and sides of the flowers and fill them with Green. Create a Green pattern line in the middle to a visual division and finally, create other type of Pattern on the middle of the top portion too.

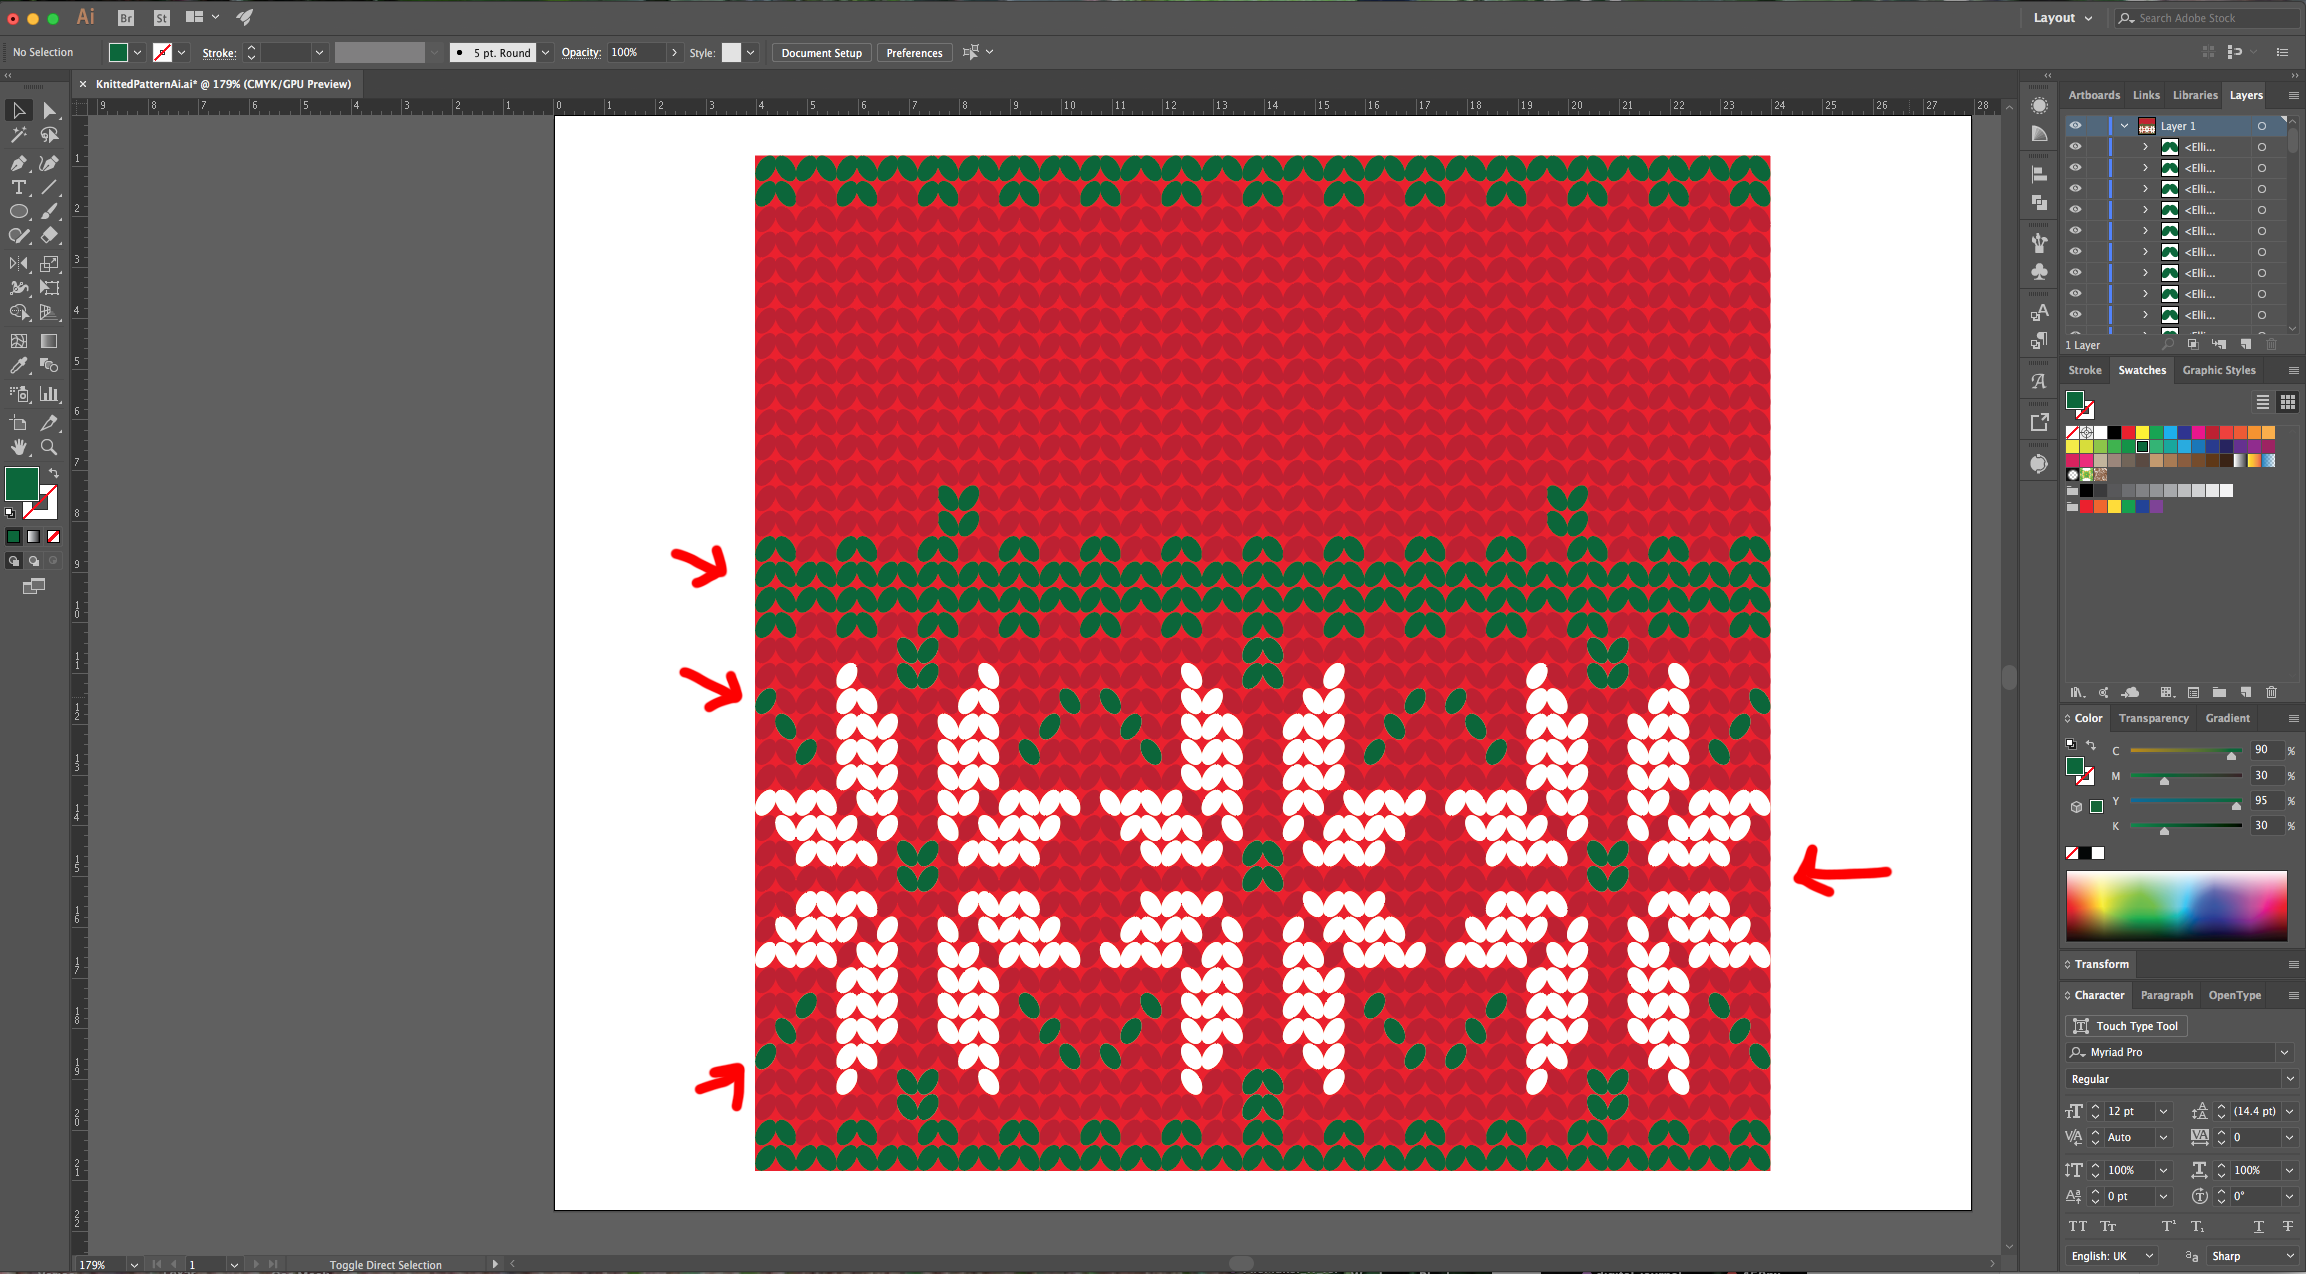
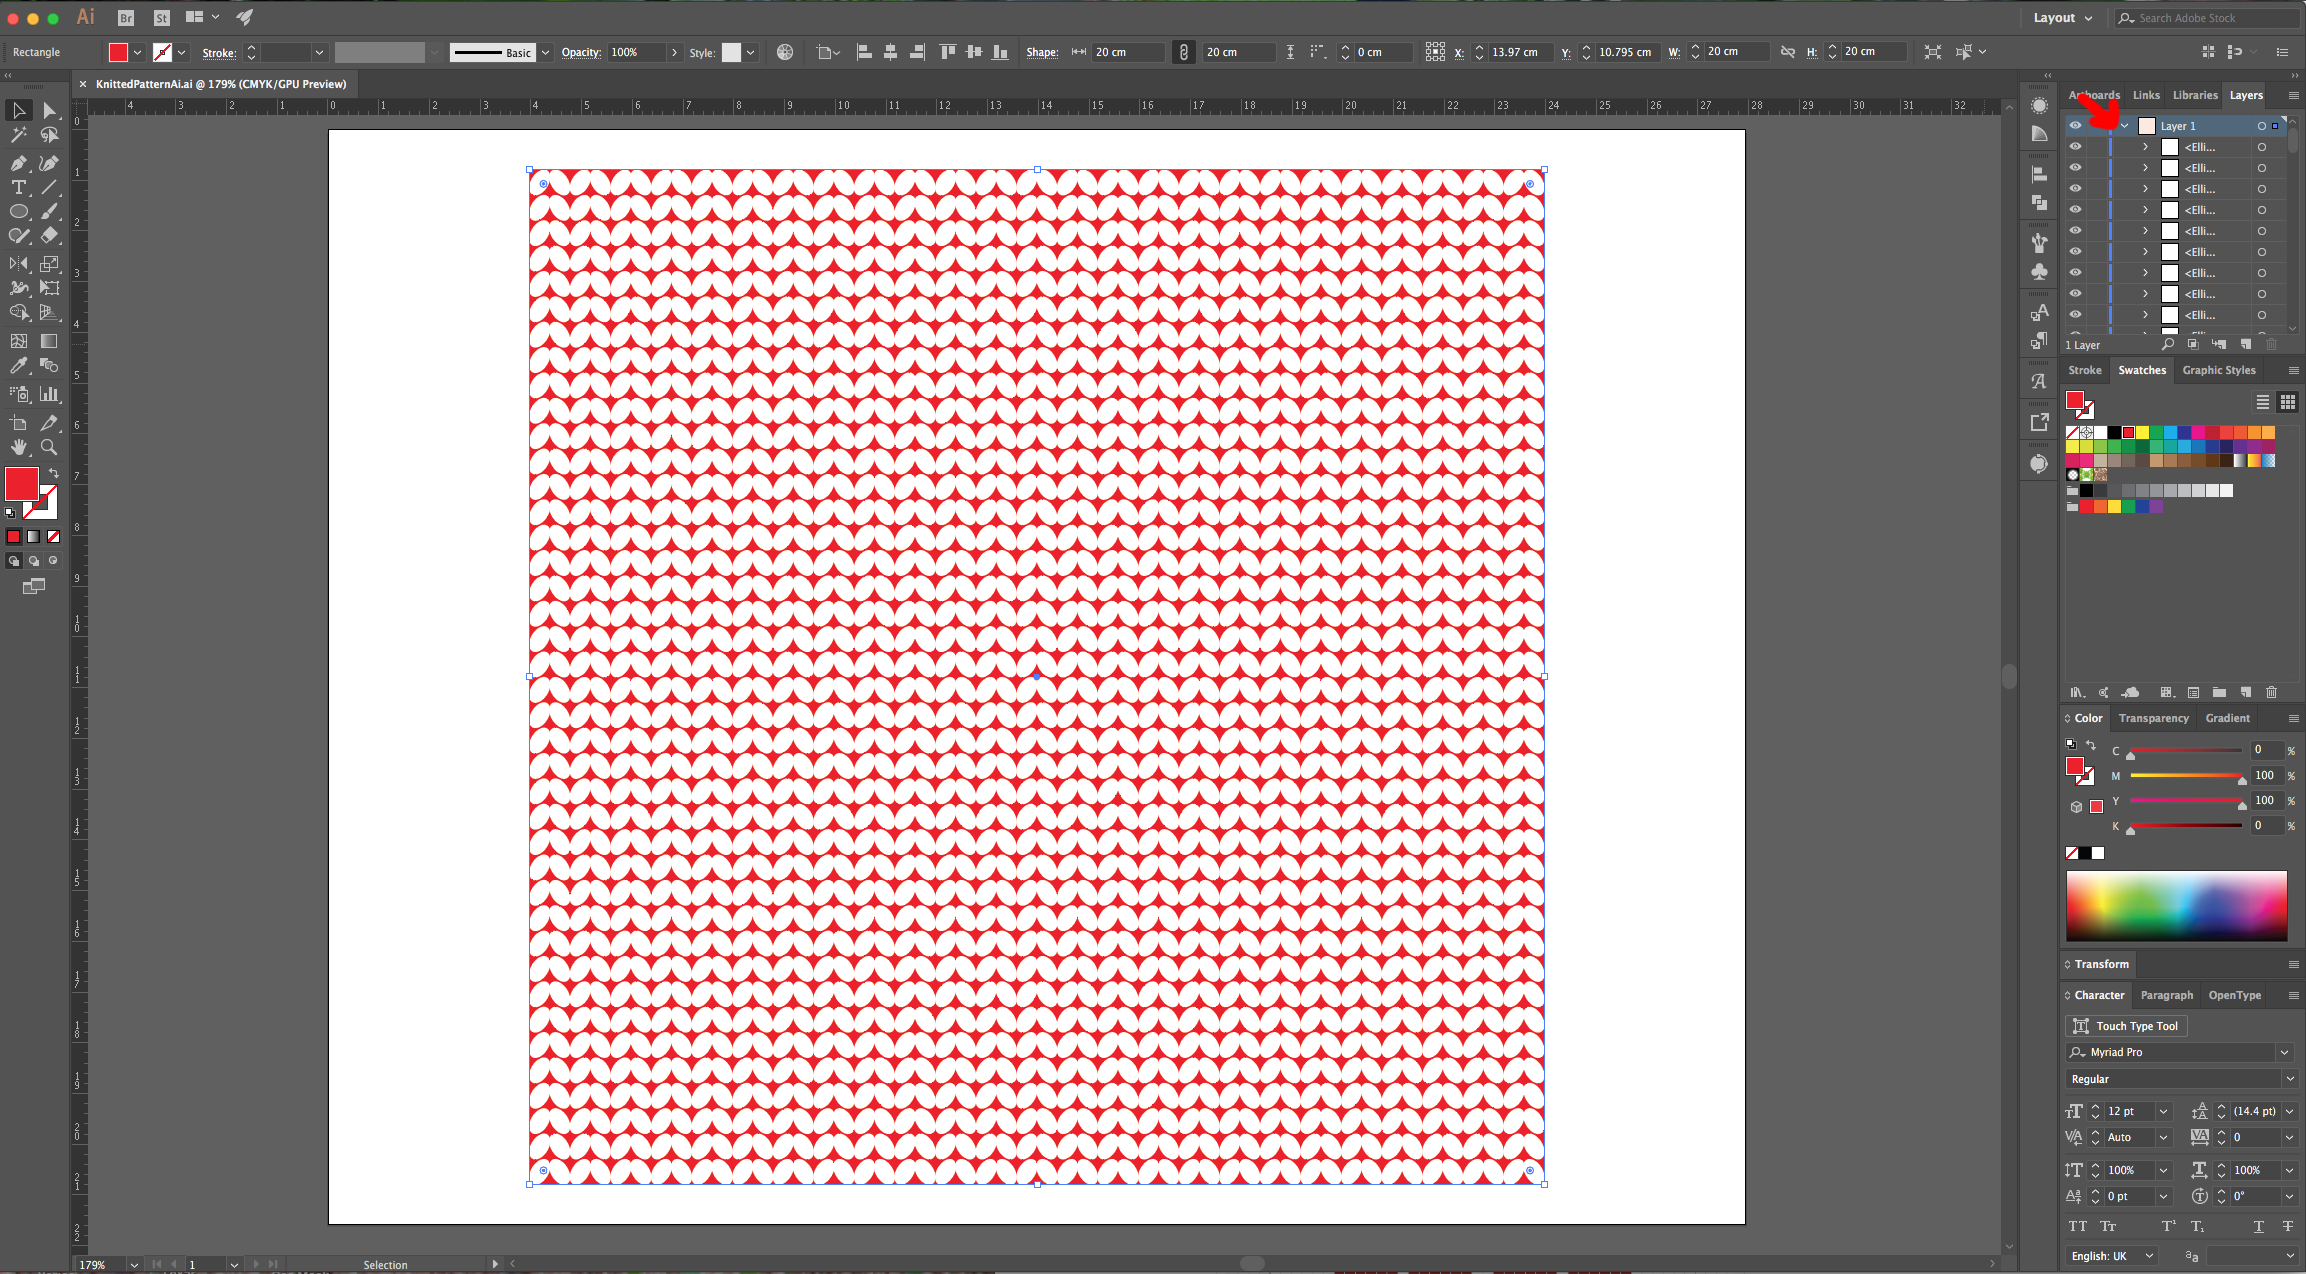
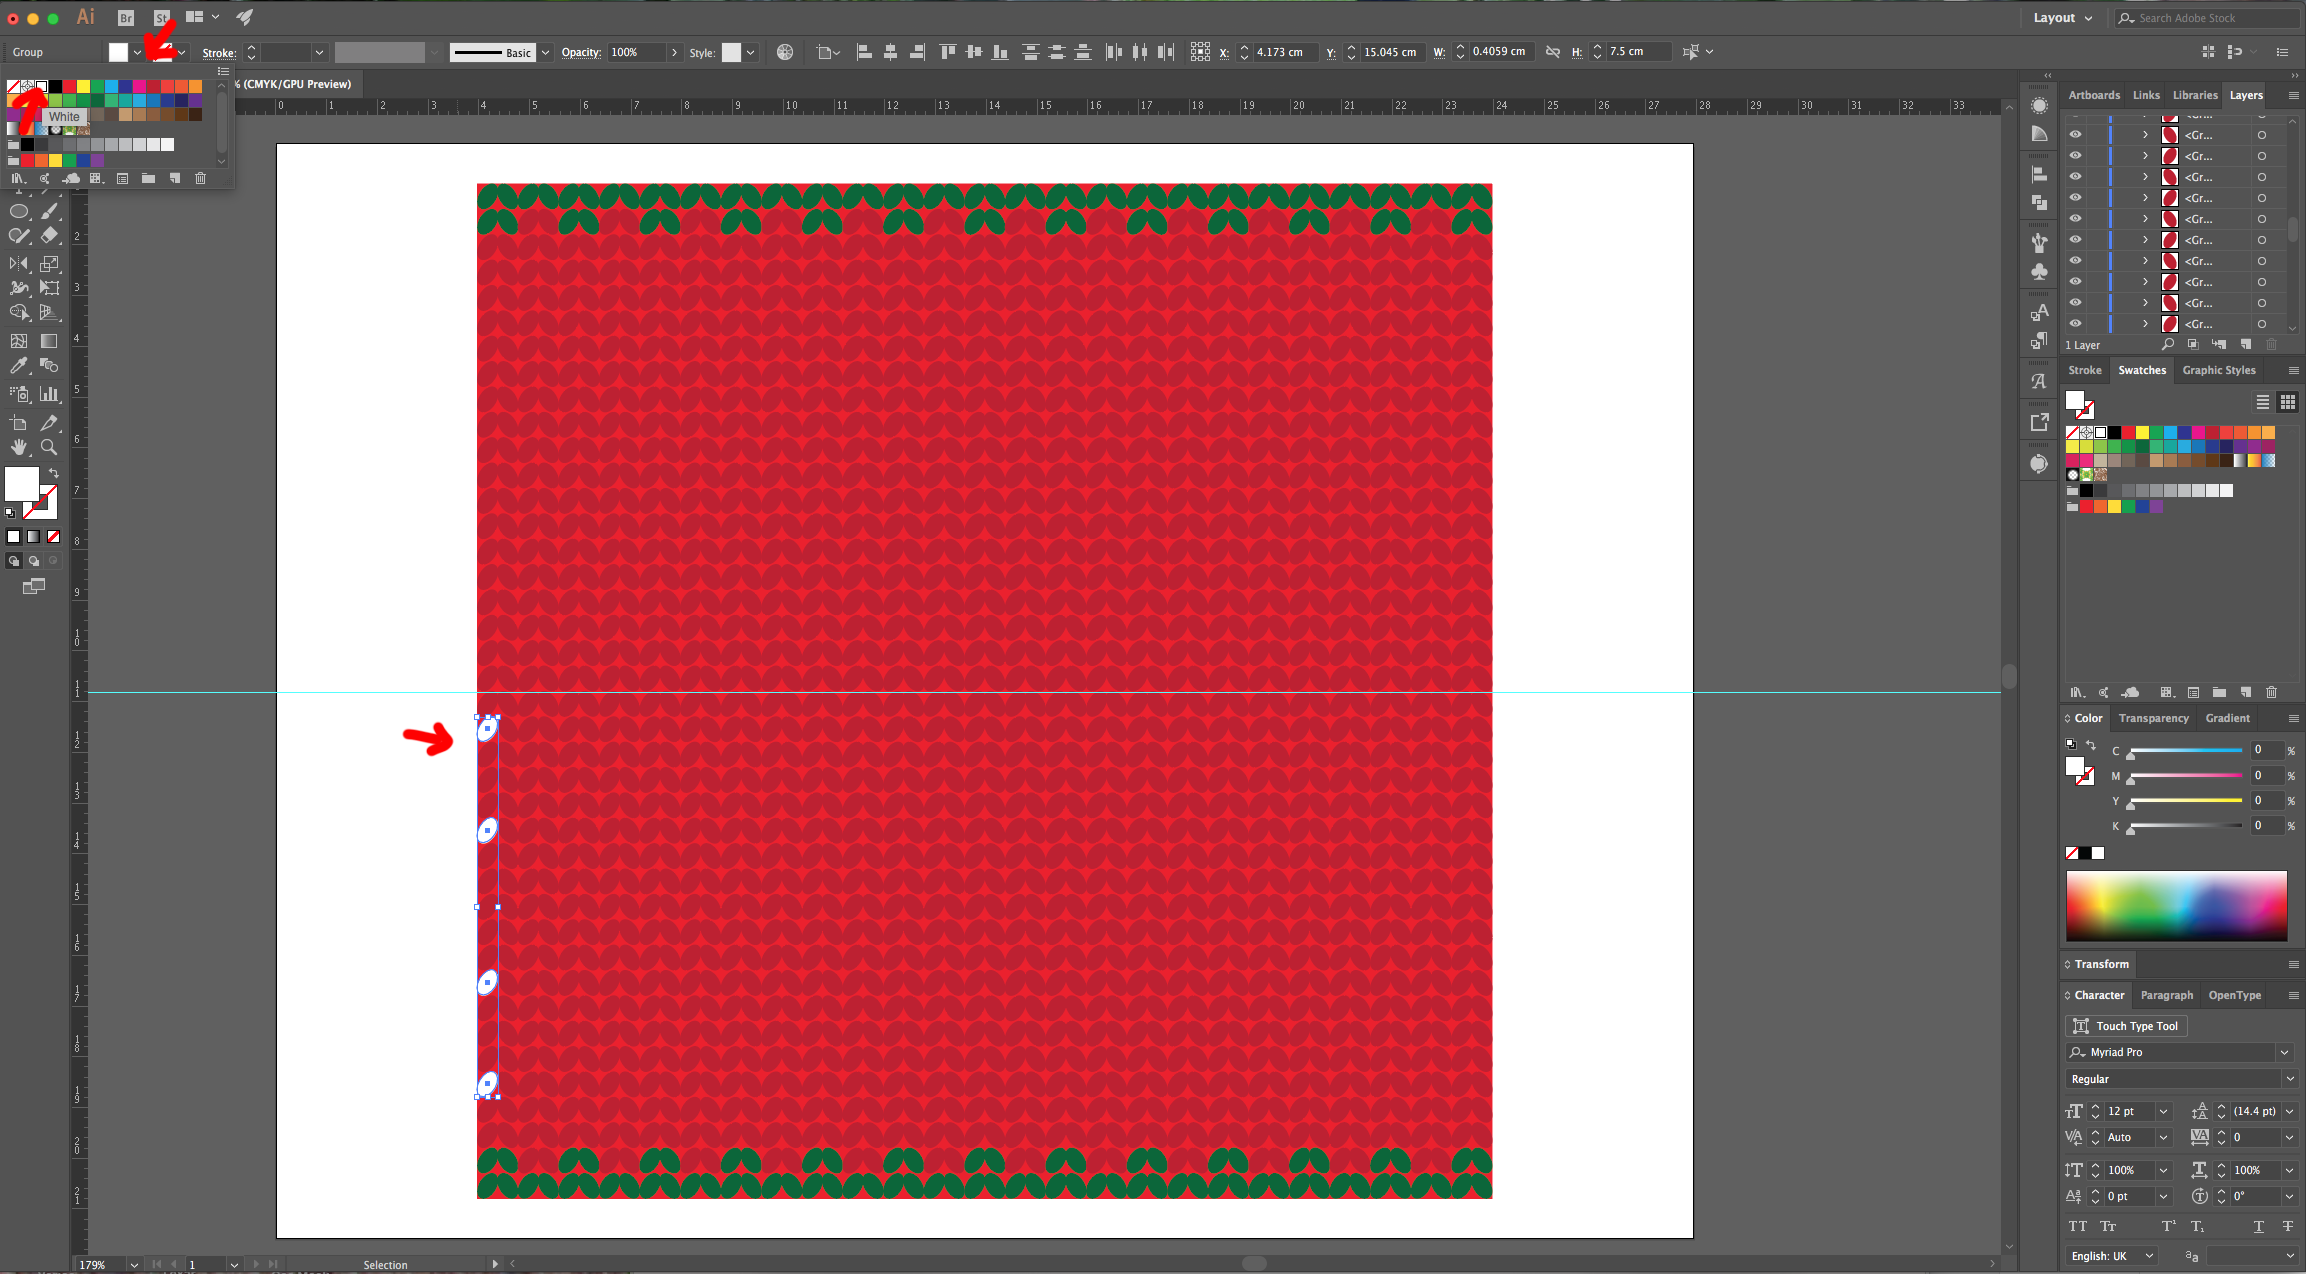
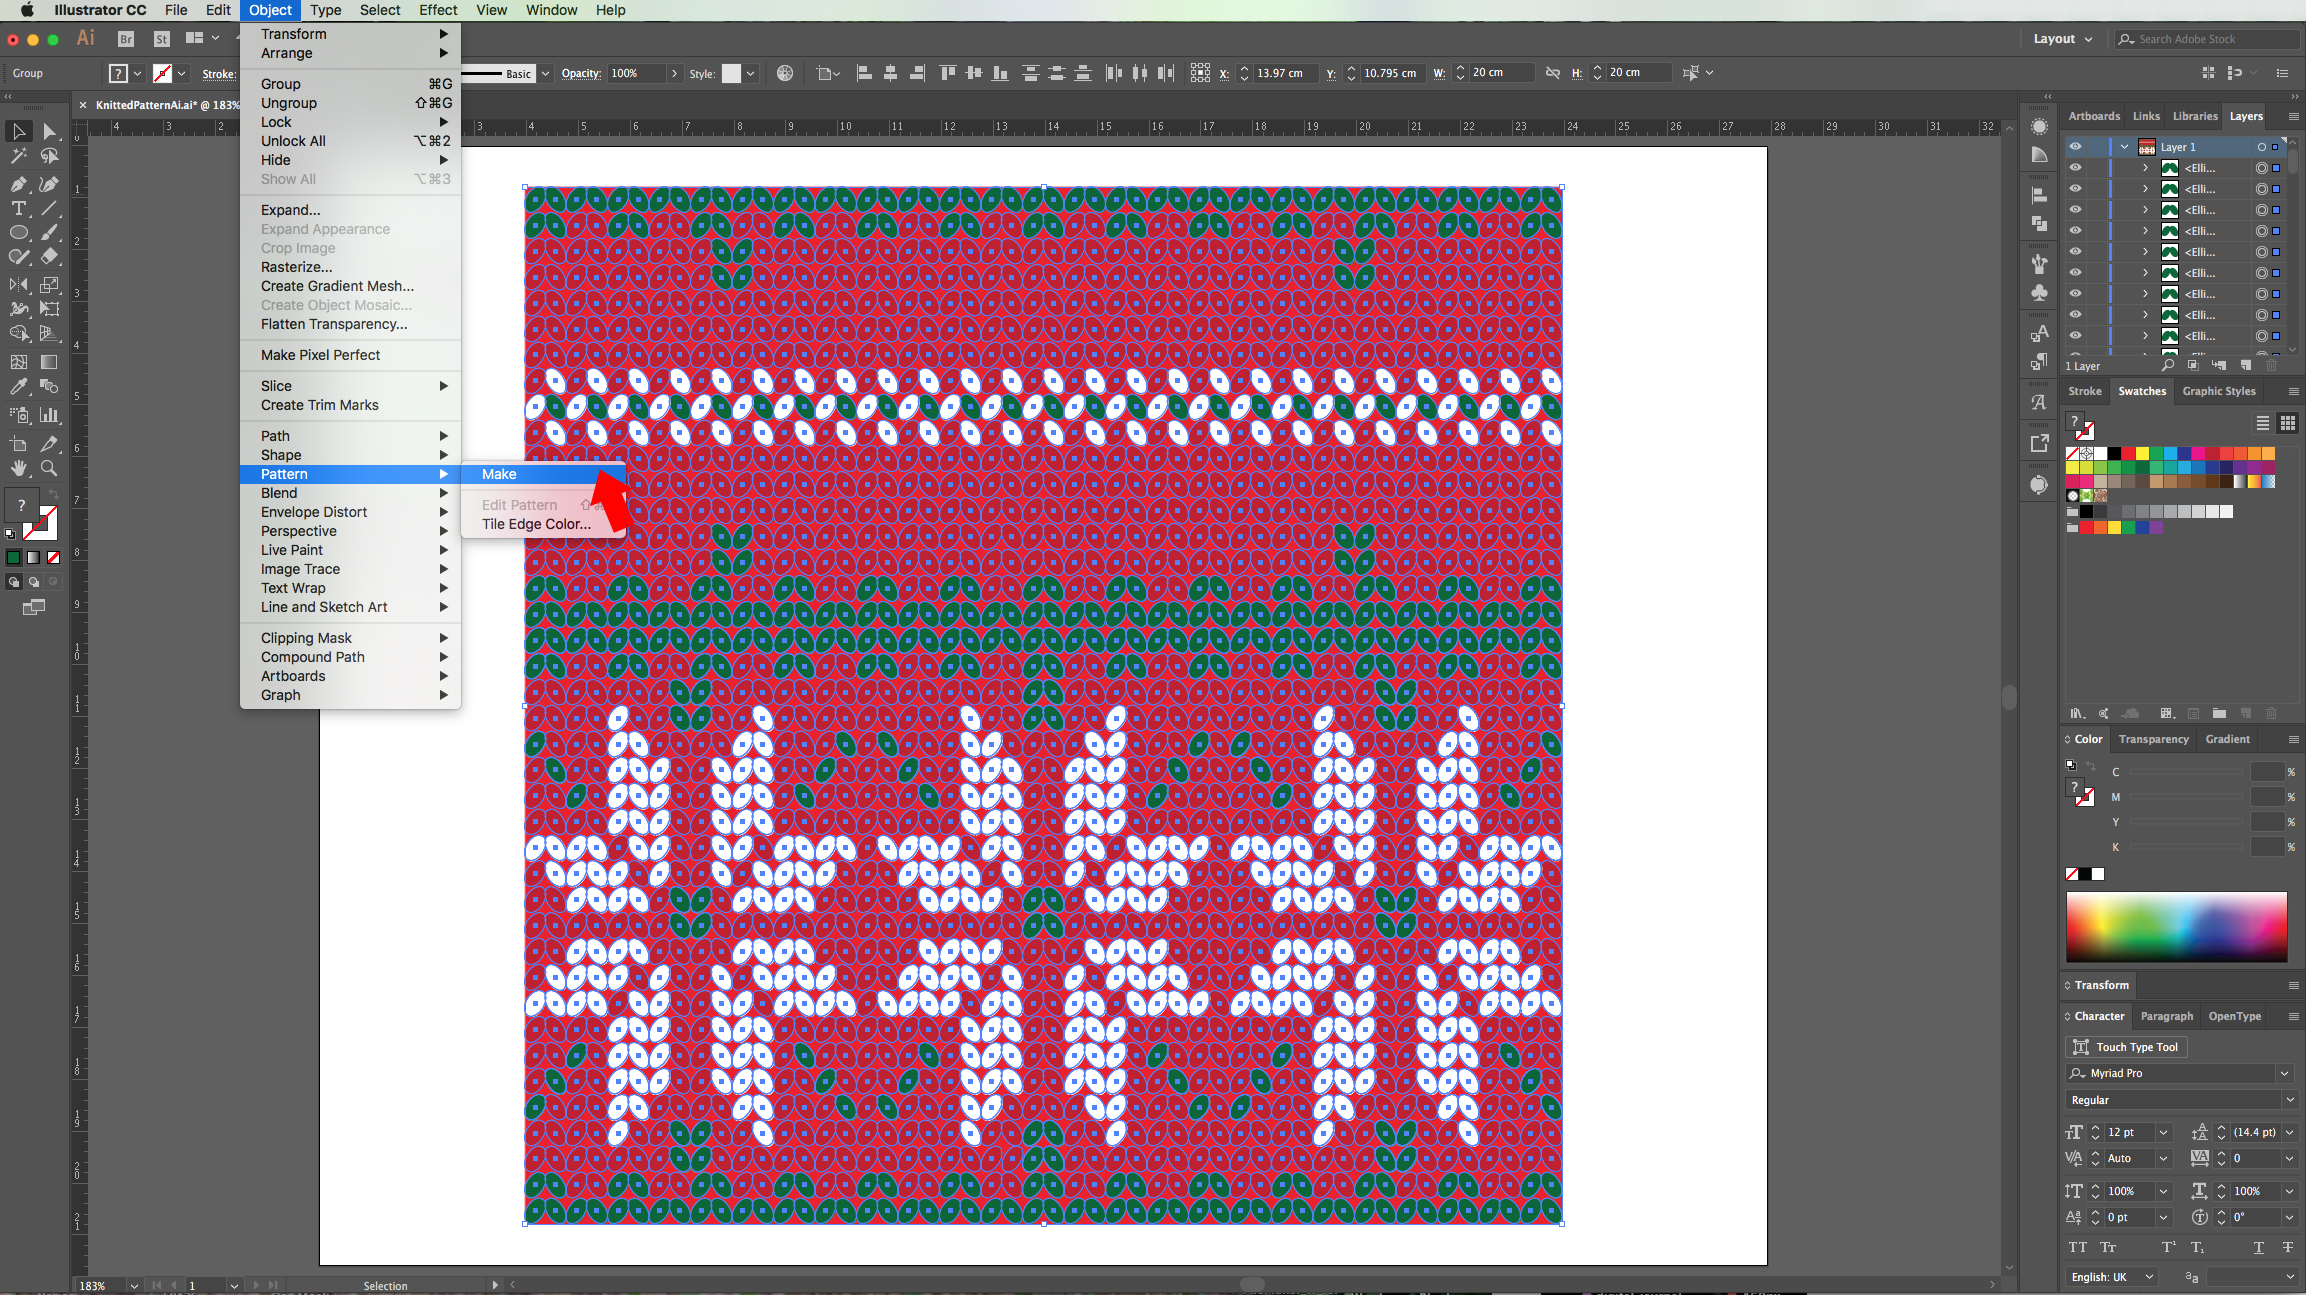
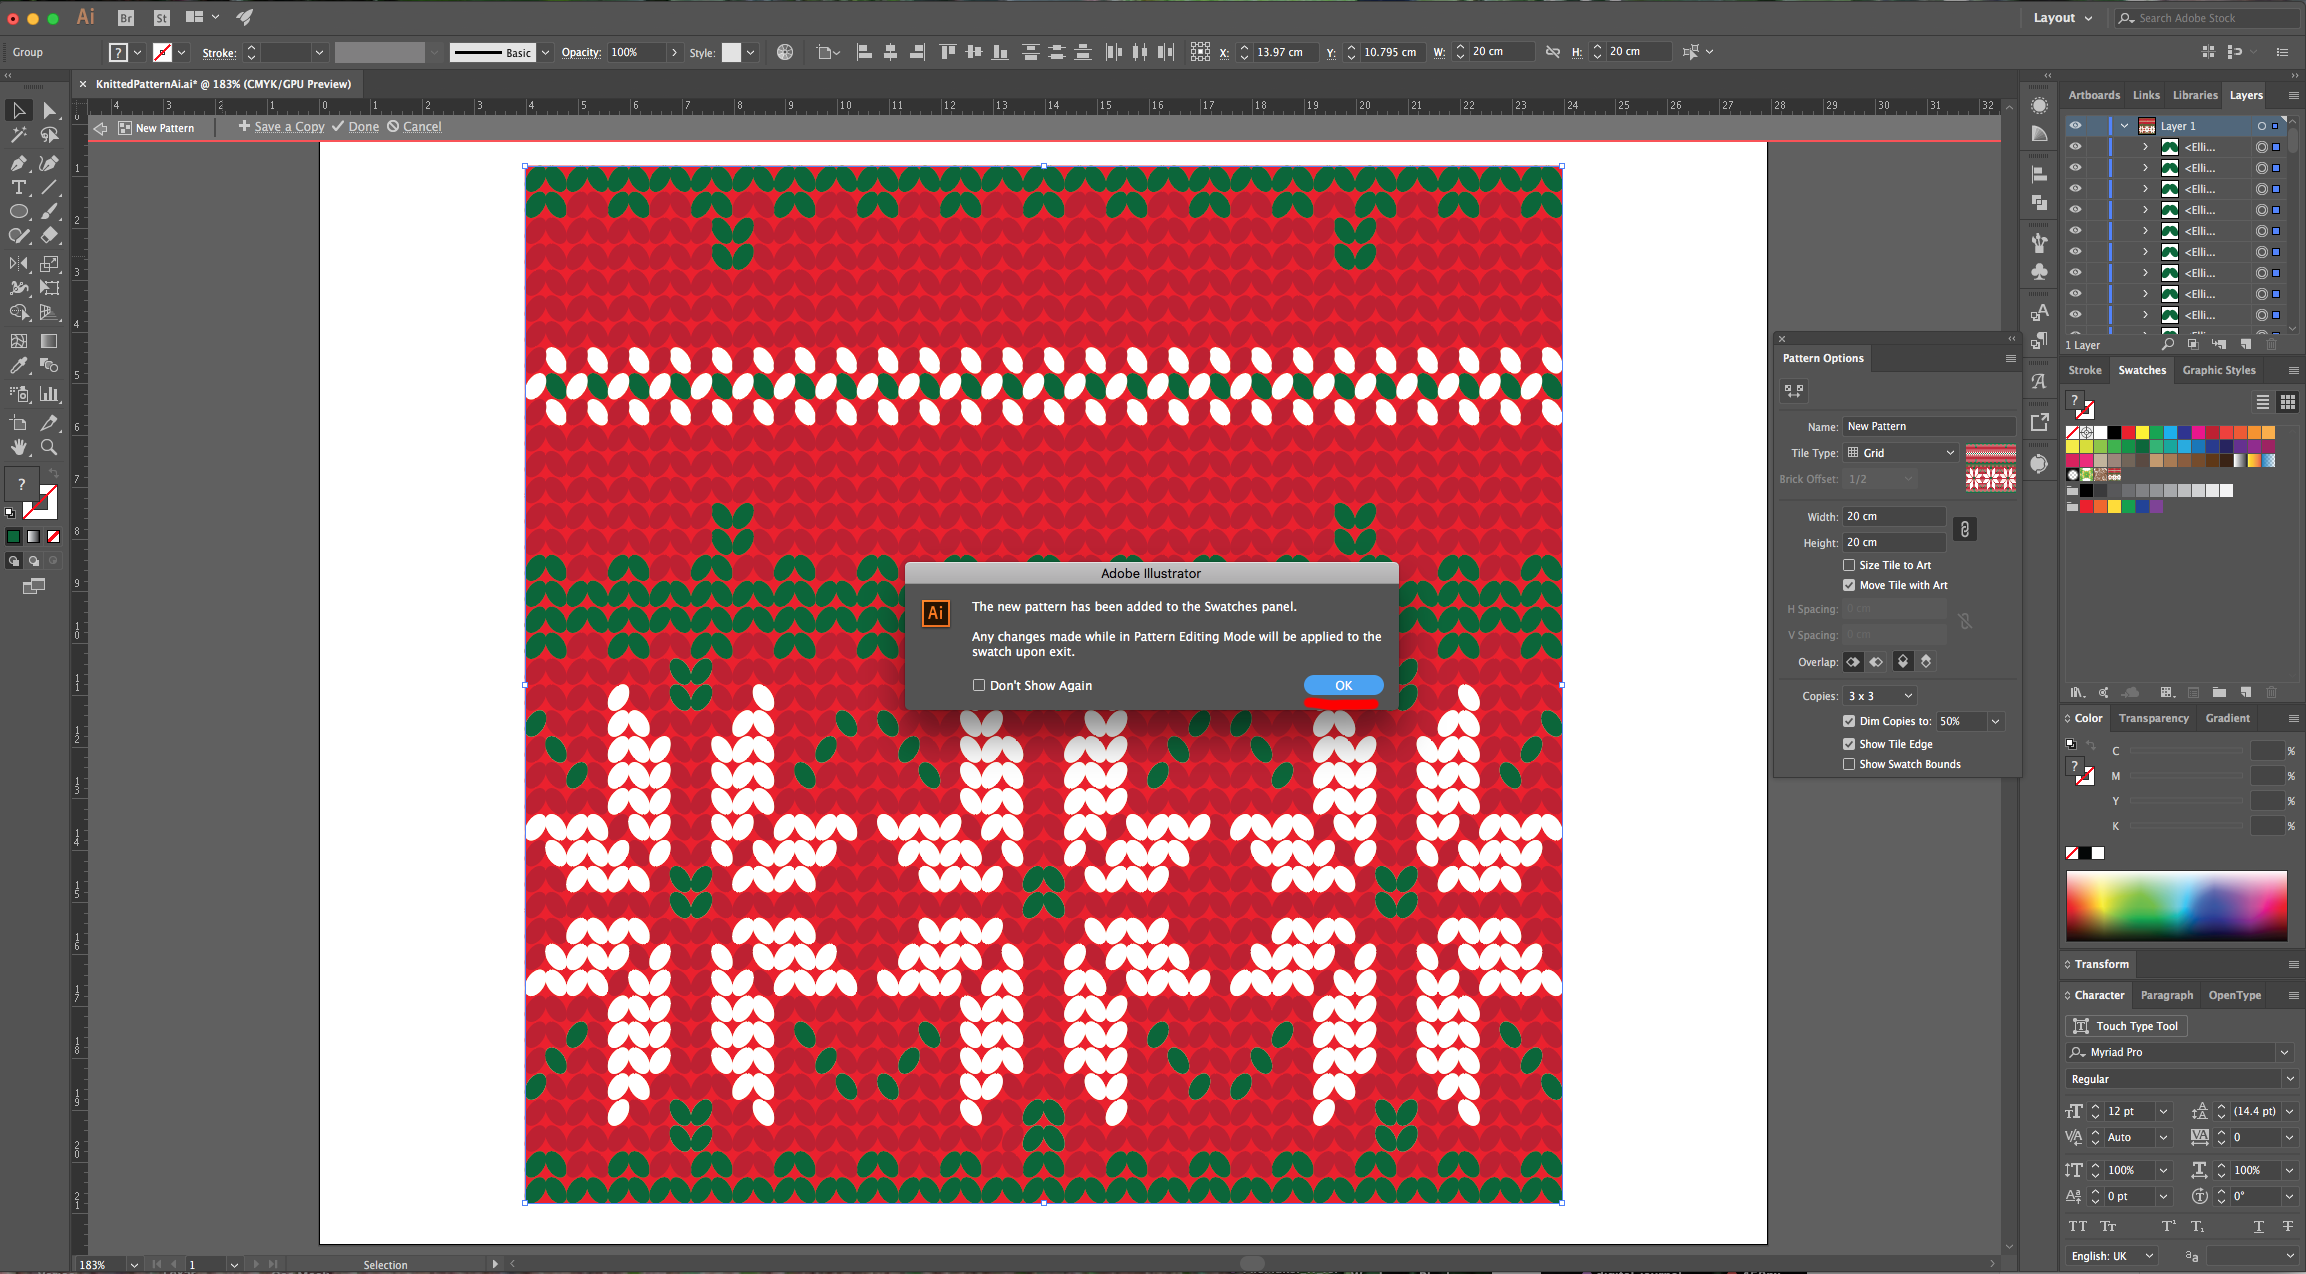
14 - Select everything (don’t forget to unlock the Red Square) and go to Object > Pattern > Make… click “OK” on the “Pop Up” window and check if your Pattern is ok. You can name it if you want and click “Done” in the Top Menu when you are satisfied.
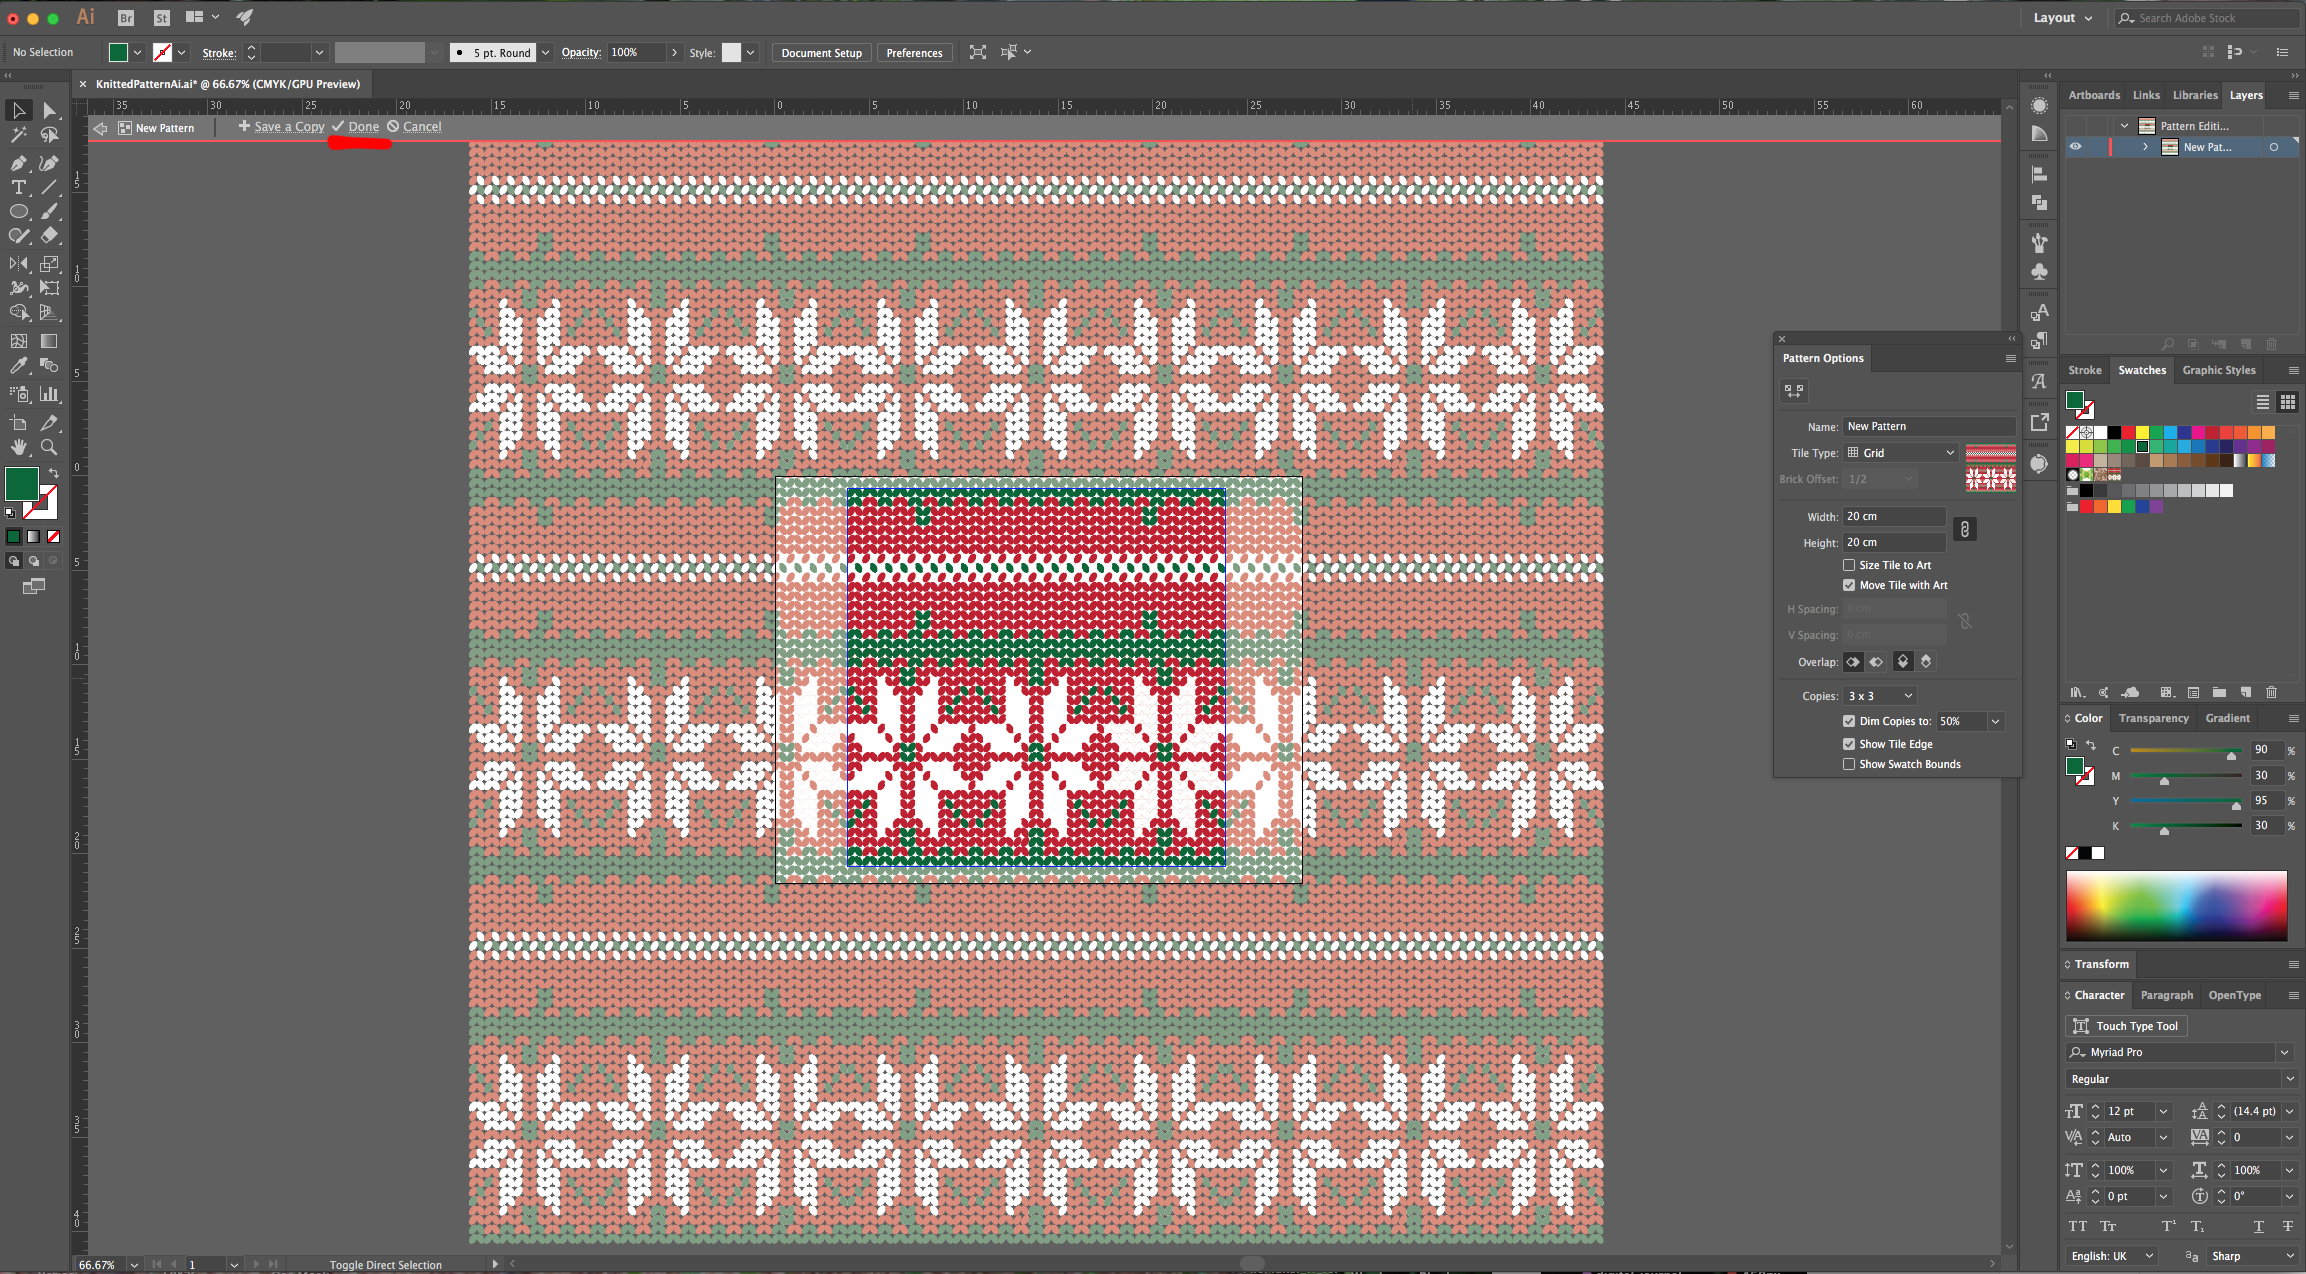
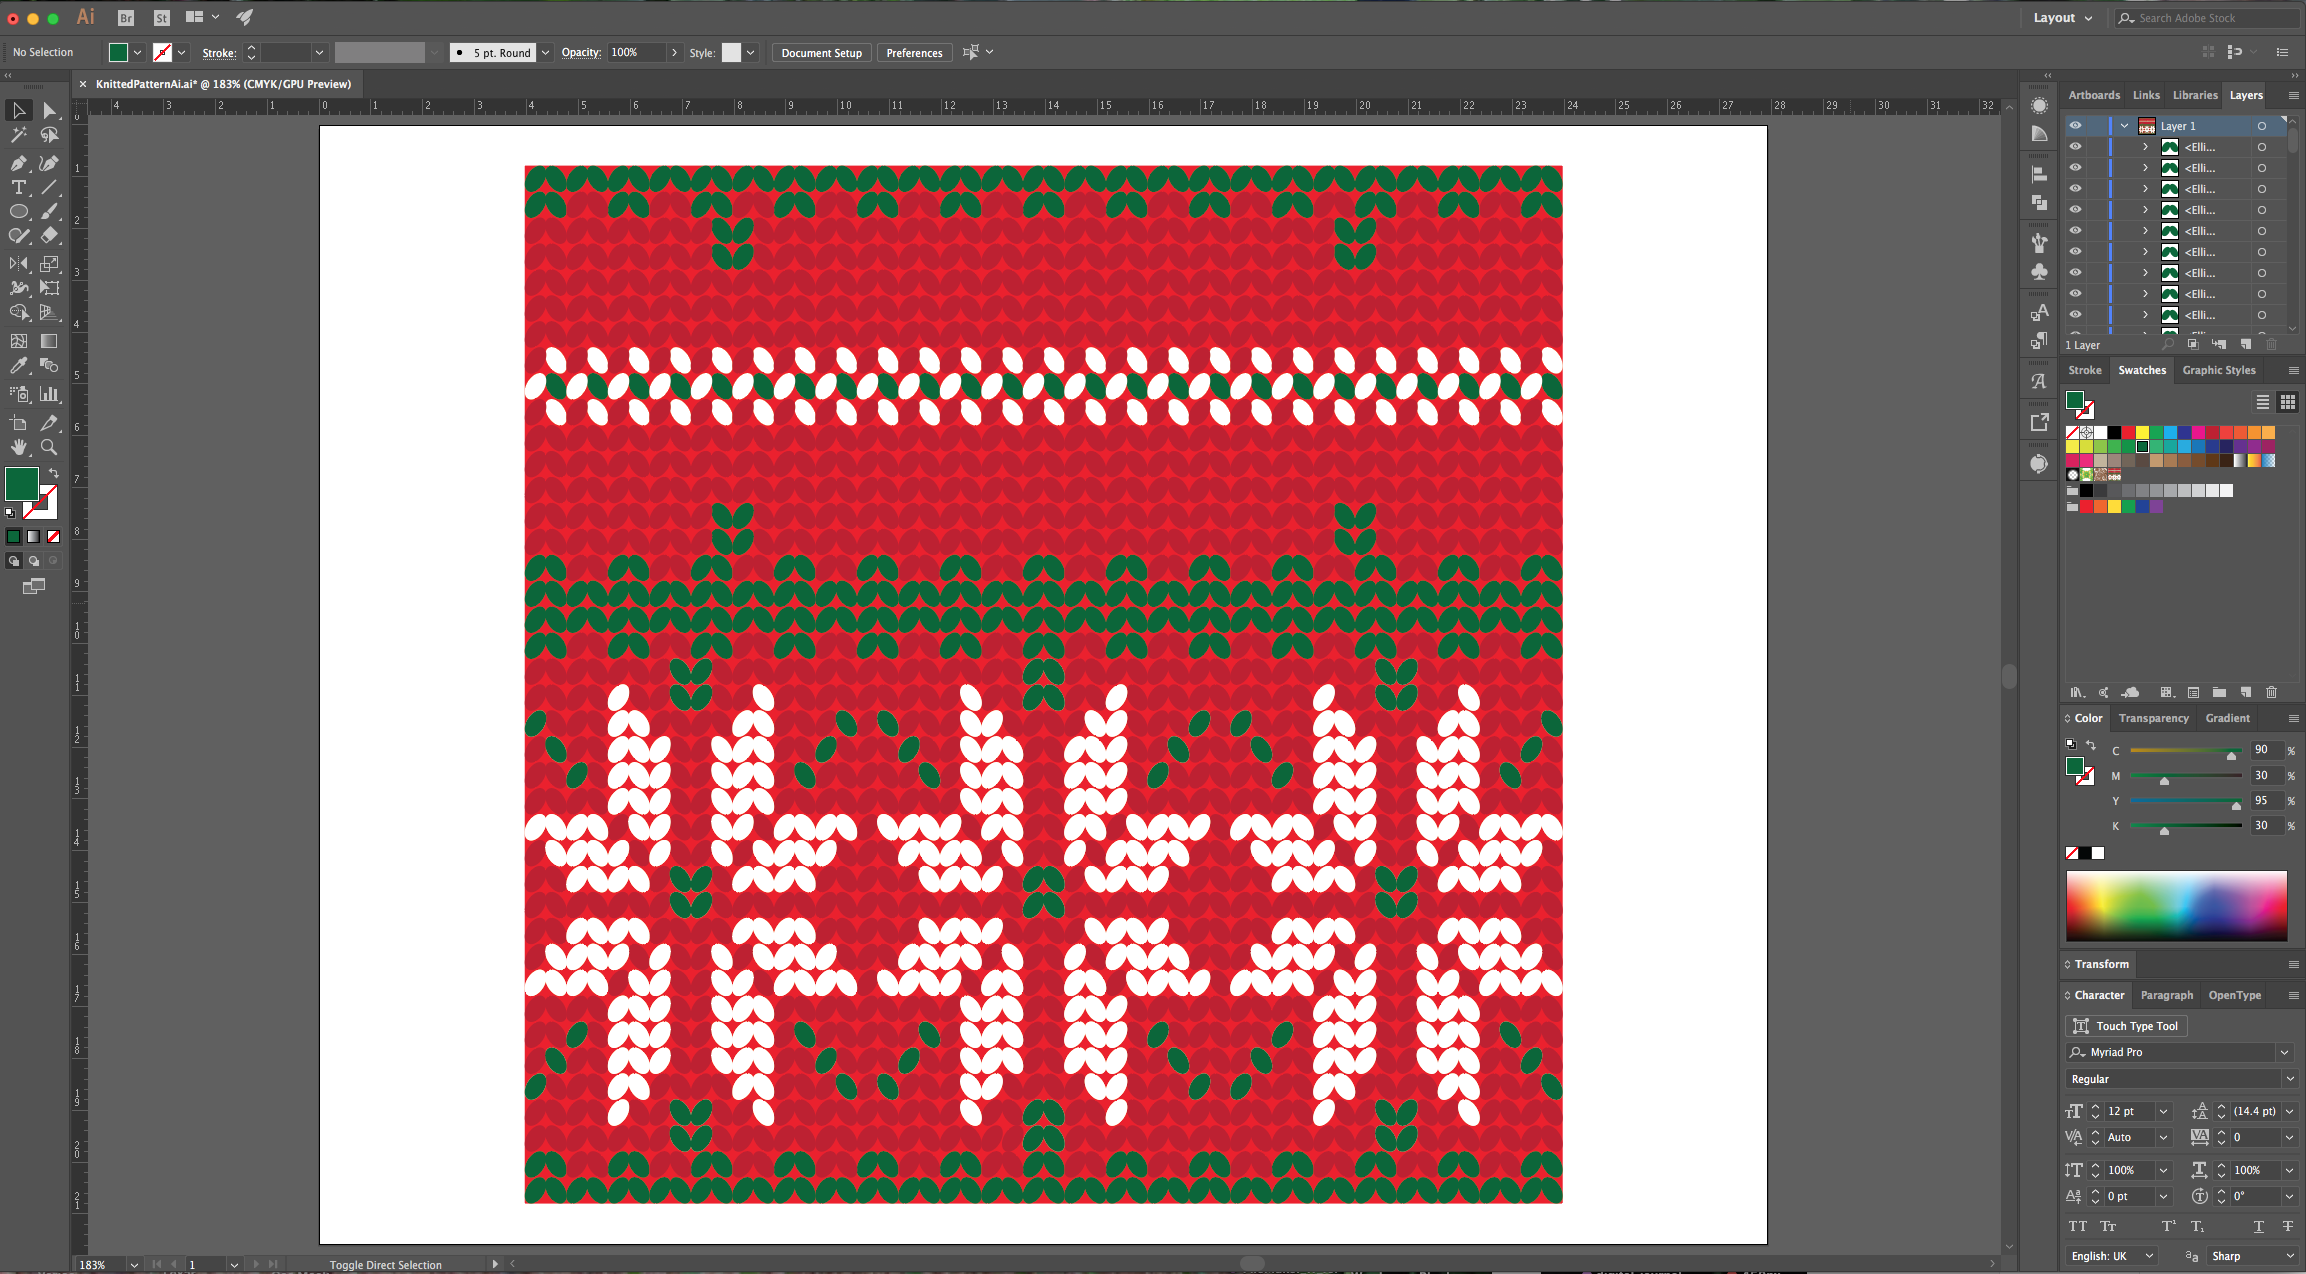
15 - Your work should be similar to this. You can apply the “Pattern” to your vectors now, by selecting it in the “Swatches Panel”.
2 - Select the “Rectangle Tool”, click inside your document and input a “Width” and “Height” of 20 cm. Fill it with Red and center it using the “Horizontal and Vertical Align Center” options on your Top Menu and make sure that “Align to Artboard” is selected. Or use the same options in the “Align Panel”.
3 - Select the “Ellipse Tool” (L), click inside your document and input a “Width” of 0.3 cm and a “Height” of 0.5 cm and fill it with White.
4 - Select the “Rotate Tool” (R) and use a 330° Angle.
5 - Head to the “Appearance Panel”, click on the “Effects Menu” on the Bottom-Left side of the panel and navigate to Distort and Transform > Transform… Use a “Horizontal Move” of 0.35 cm a 0° Angle, check the “Reflect Y” box and make 1 “Copy”. Go to Object > Expand Appearance.
6 - Move your Ovals to the Top-Left corner, re-size them so together they measure 0.8 cm in “Width” and have a “Height” of 0.5 cm.
7 - Go to Object > Transform > Move… (Shift + Command/Control + M) use an “Horizontal Position” of 0.8 cm, a “Distance” of 0.8 cm and a 0° Angle. Click “Copy”. Create multiple copies until you reach the other side of the Red Square using Command/Control + D.
8 - Select all your Ovals, go to Object > Transform > Move… (Shift + Command/Control + M) use an “Vertical Position” of 0.5 cm, a “Distance” of 0.5 cm and a -90° Angle. Click “Copy”. Create multiple copies until you reach the bottom of the Red Square using Command/Control + D.
9 - Click on the small arrow in the left side of the Layer on the “Layers Panel” to show its contents, go all the way to the bottom until you find the Red Square and “Lock” it using the small “Padlock” icon on the left side of its Thumbnail.
10 - Select the top row of ovals and fill it with a Dark Green from the “Swatches Panel”. For the second row, select the odd ones and fill them with the same green. Do the same at the bottom
11 - Select one of the White Ovals and go to Select > Same > Fill Color… to select all the White shapes. Change their fill to a darker shade of Red, right-click on top and choose “Ungroup”.
12 - Now, you can create a Pattern by selecting some Ovals and changing their fill to White. In this case we created a “Poinsettia Flower”.
13 - You can “Copy” (Command/Control + C) and “Paste in Front” (Command/Control + F) the flower and then move it all the way to the right while holding the “Shift” key to do it in straight line to duplicate the flower. Then, repeat the flower in the center leaving an unfilled line between it and the other two. Select the centers and sides of the flowers and fill them with Green. Create a Green pattern line in the middle to a visual division and finally, create other type of Pattern on the middle of the top portion too.
14 - Select everything (don’t forget to unlock the Red Square) and go to Object > Pattern > Make… click “OK” on the “Pop Up” window and check if your Pattern is ok. You can name it if you want and click “Done” in the Top Menu when you are satisfied.
15 - Your work should be similar to this. You can apply the “Pattern” to your vectors now, by selecting it in the “Swatches Panel”.
by @lornacane


