
Rainbow Text in Illustrator
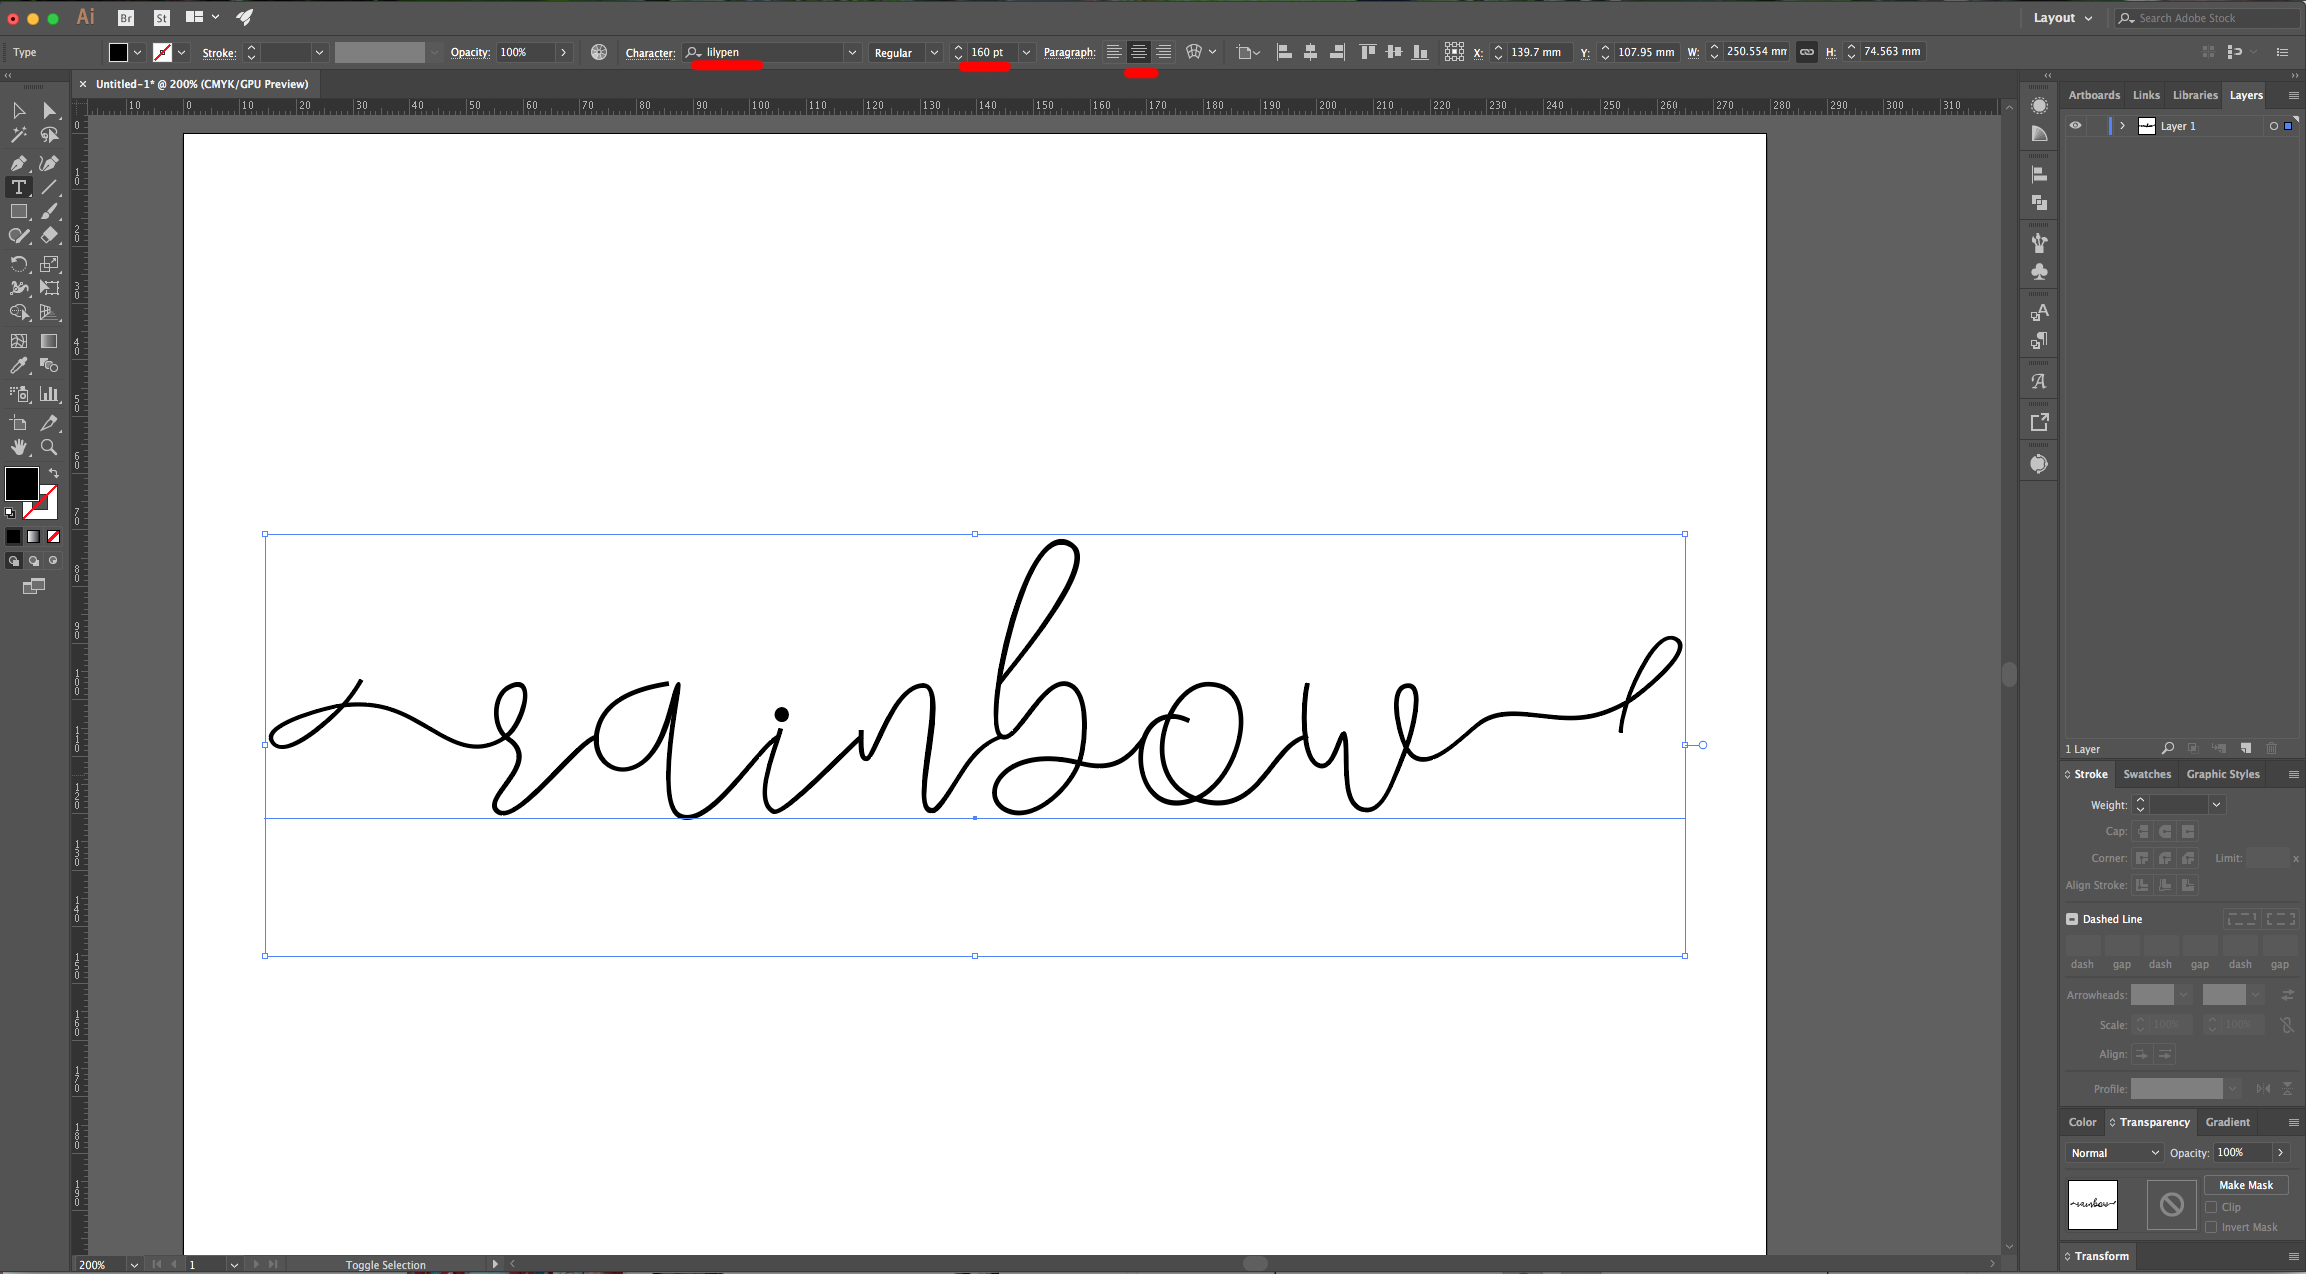
For this tutorial, we will use the Free Font “Lilypen”.
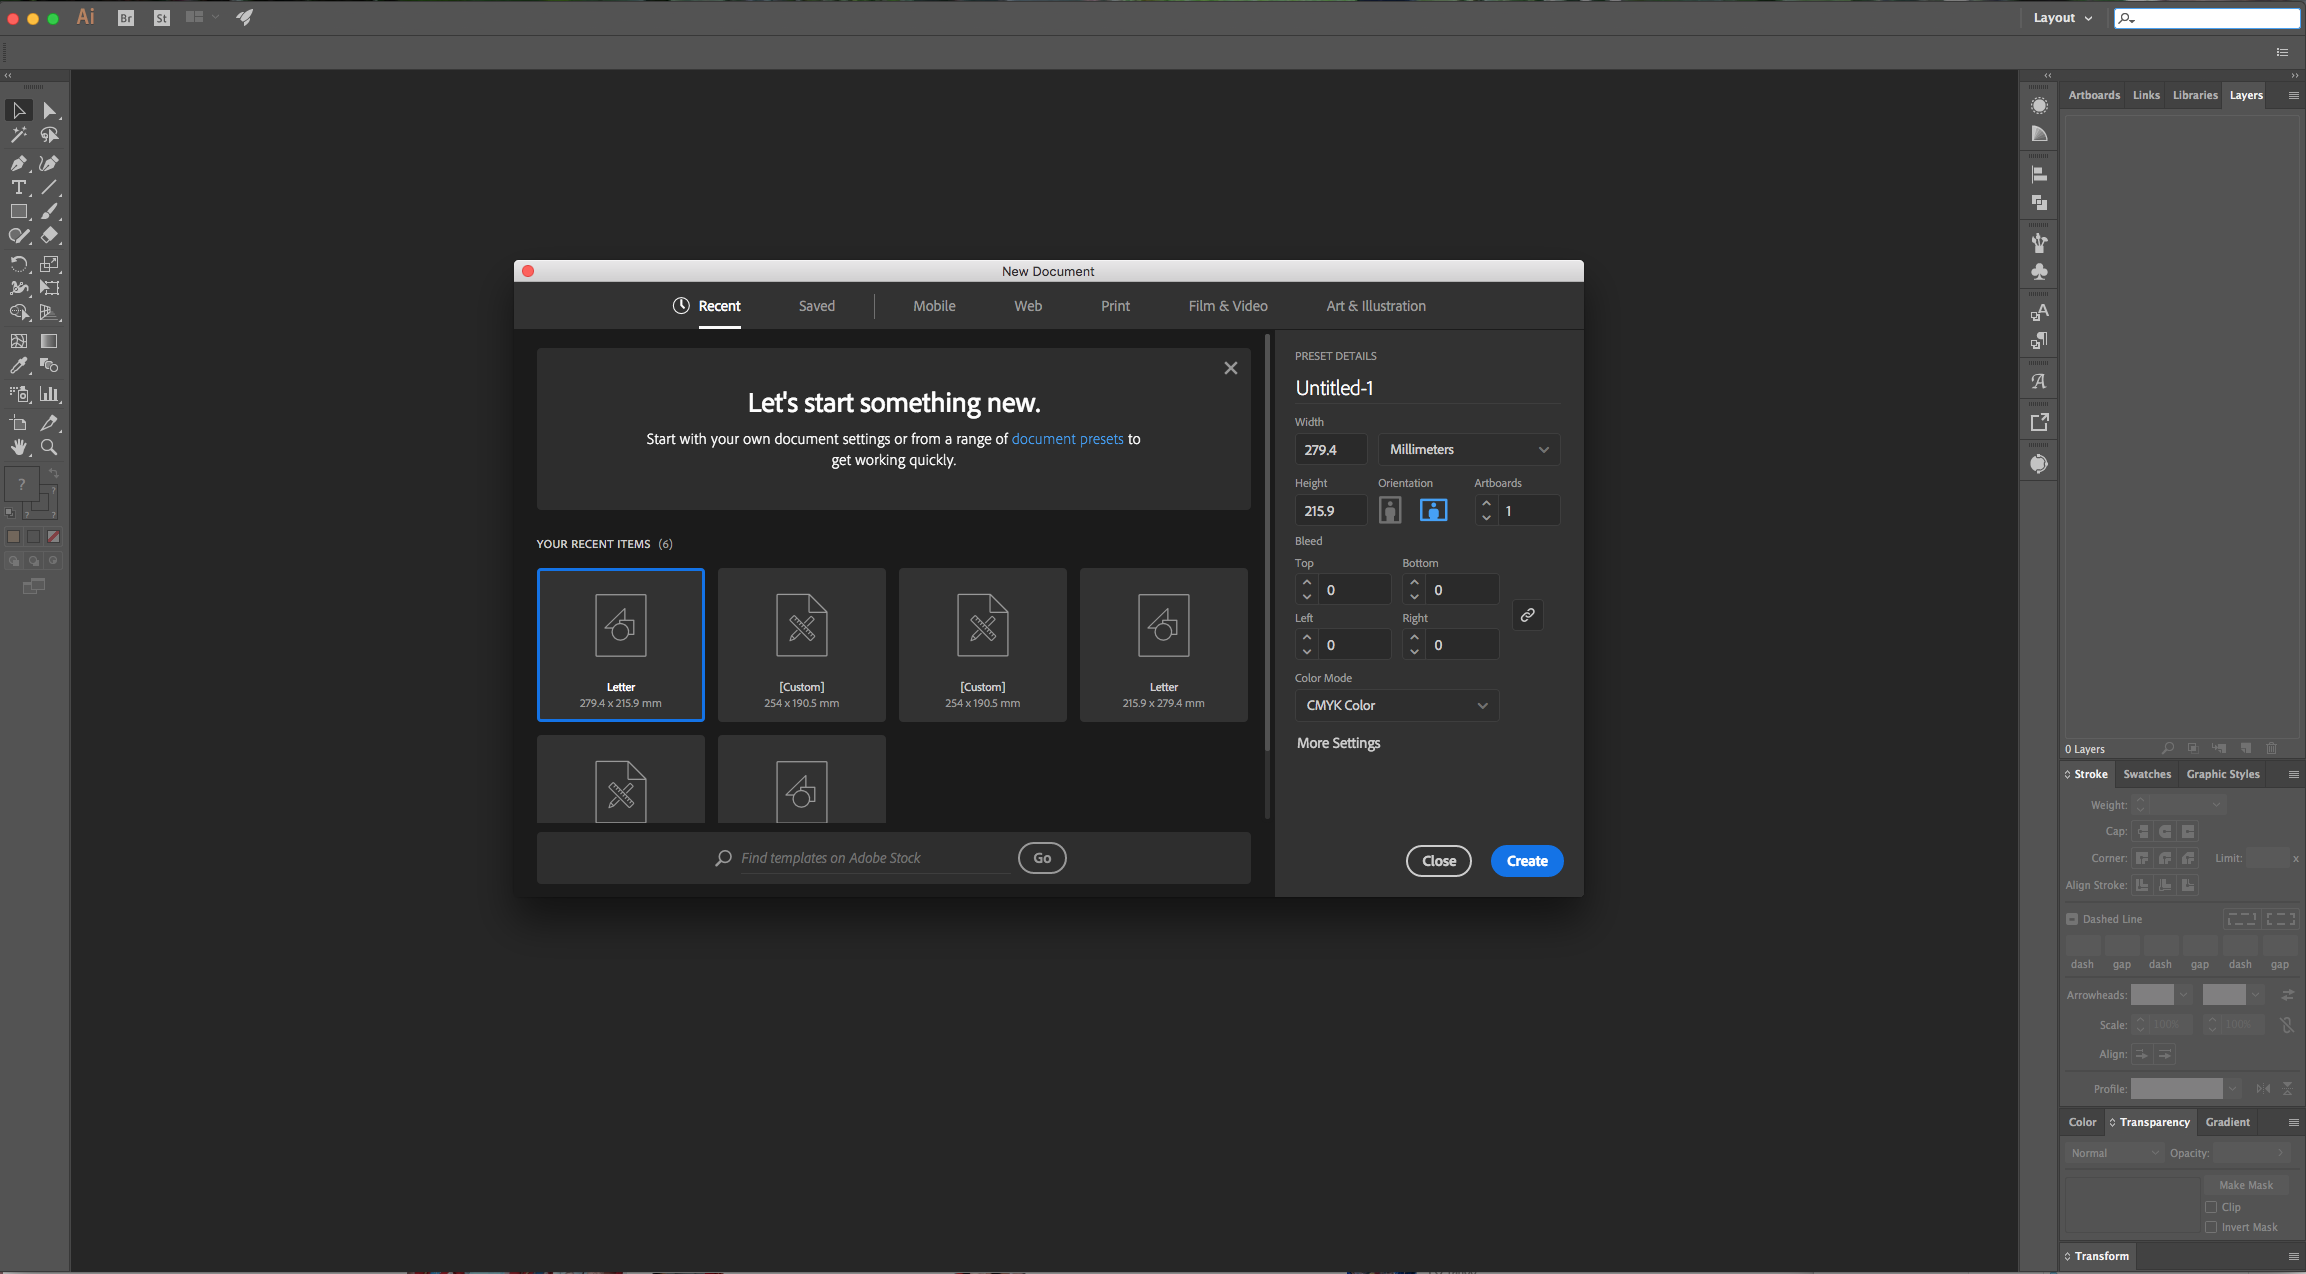
1 - In Illustrator, create a “New Document”.
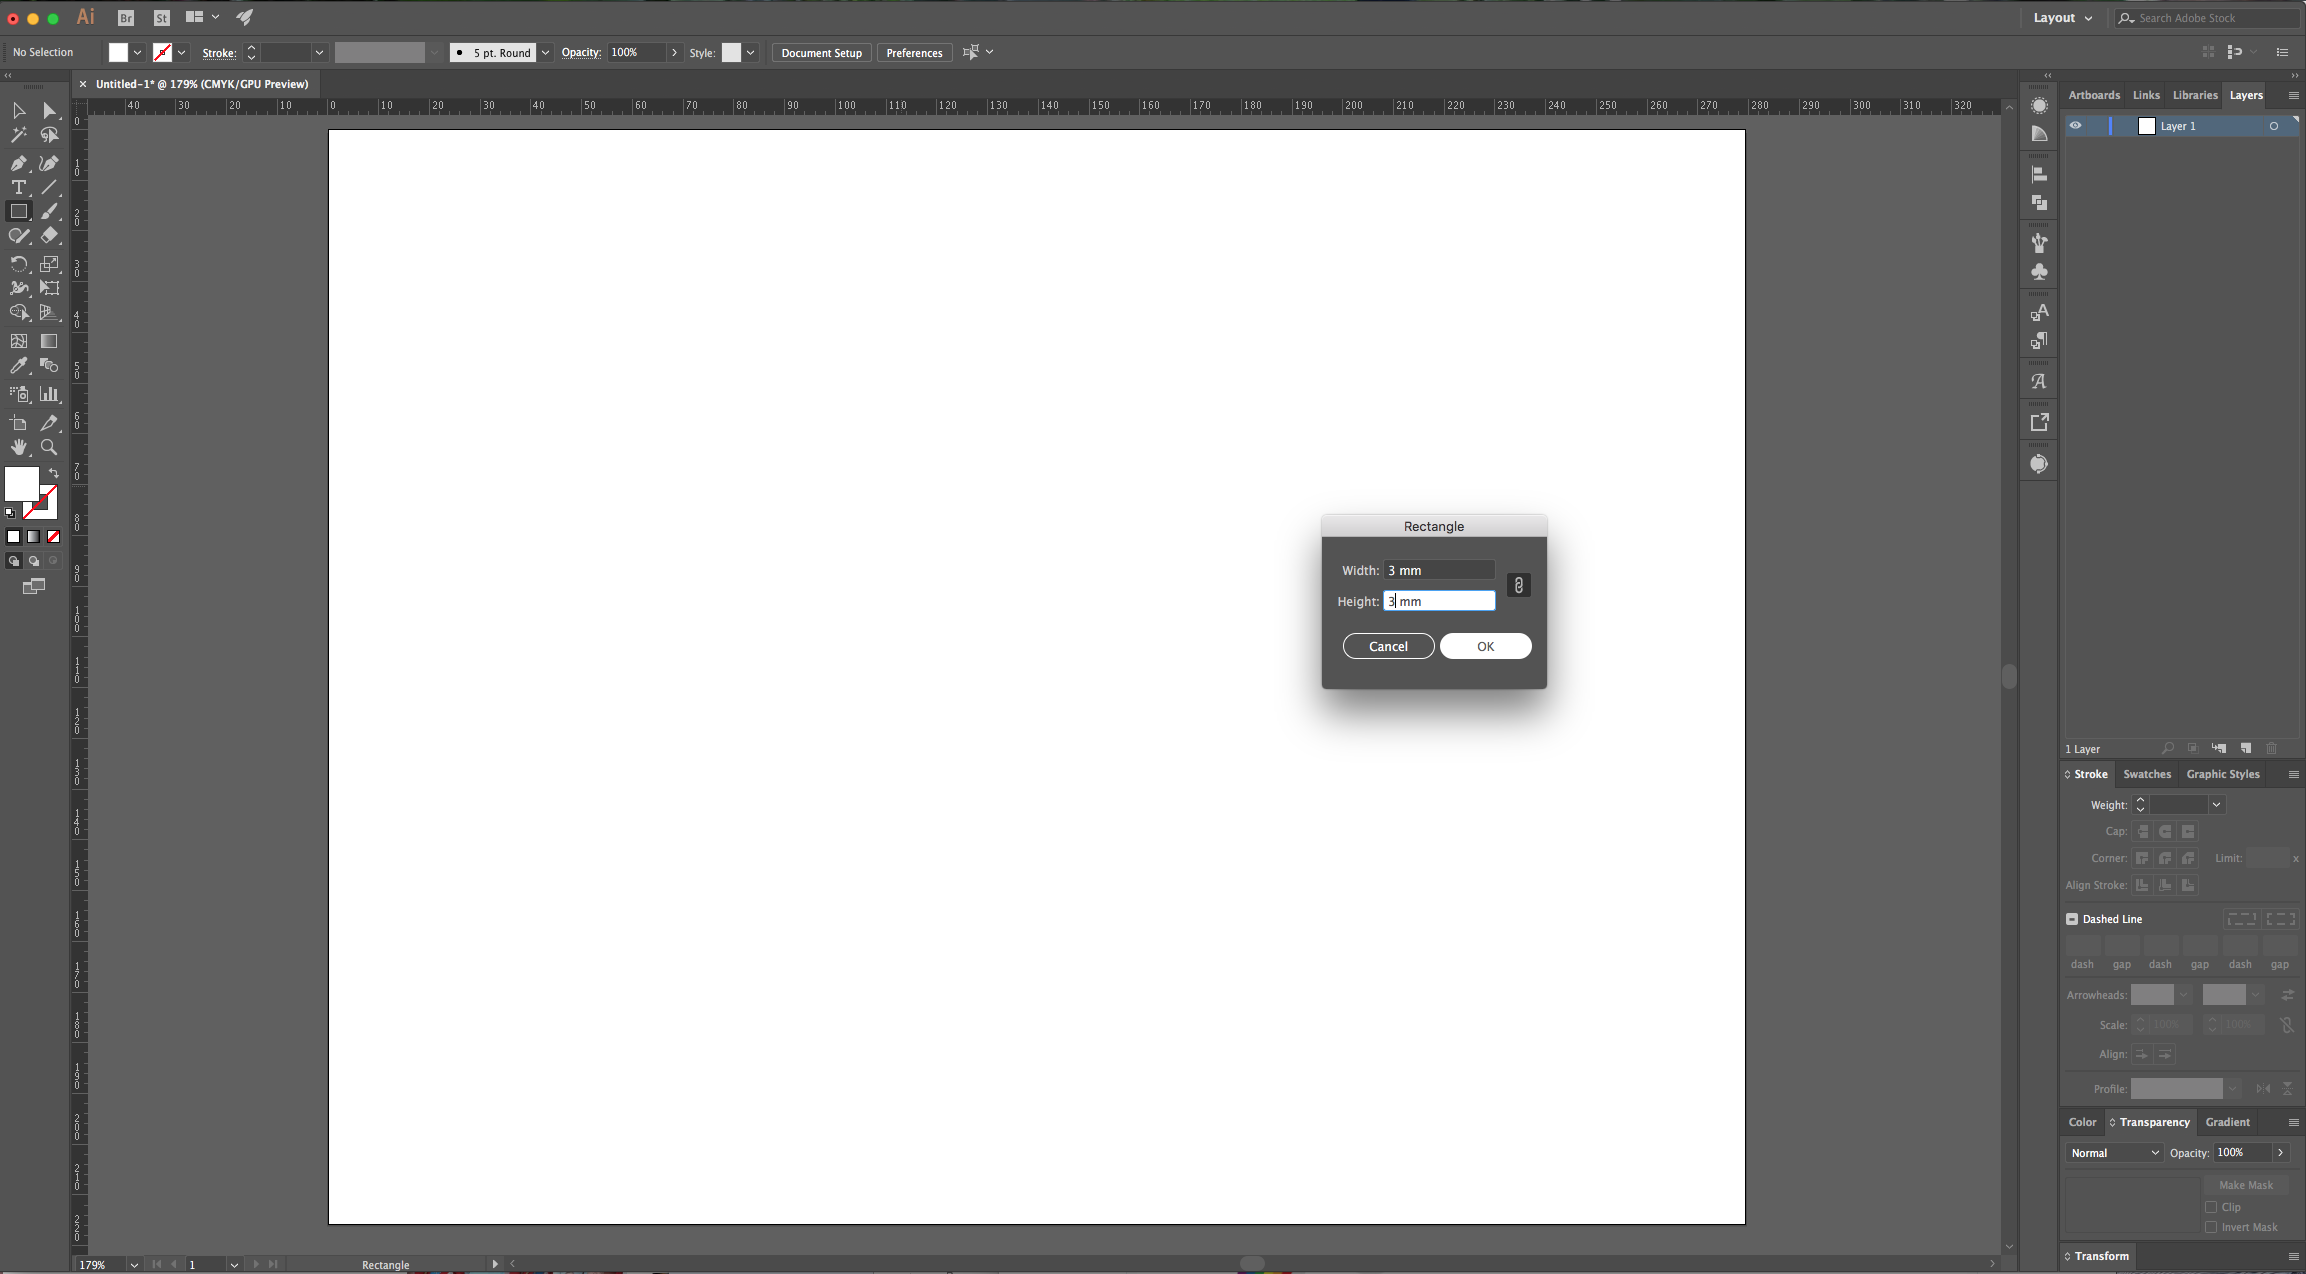
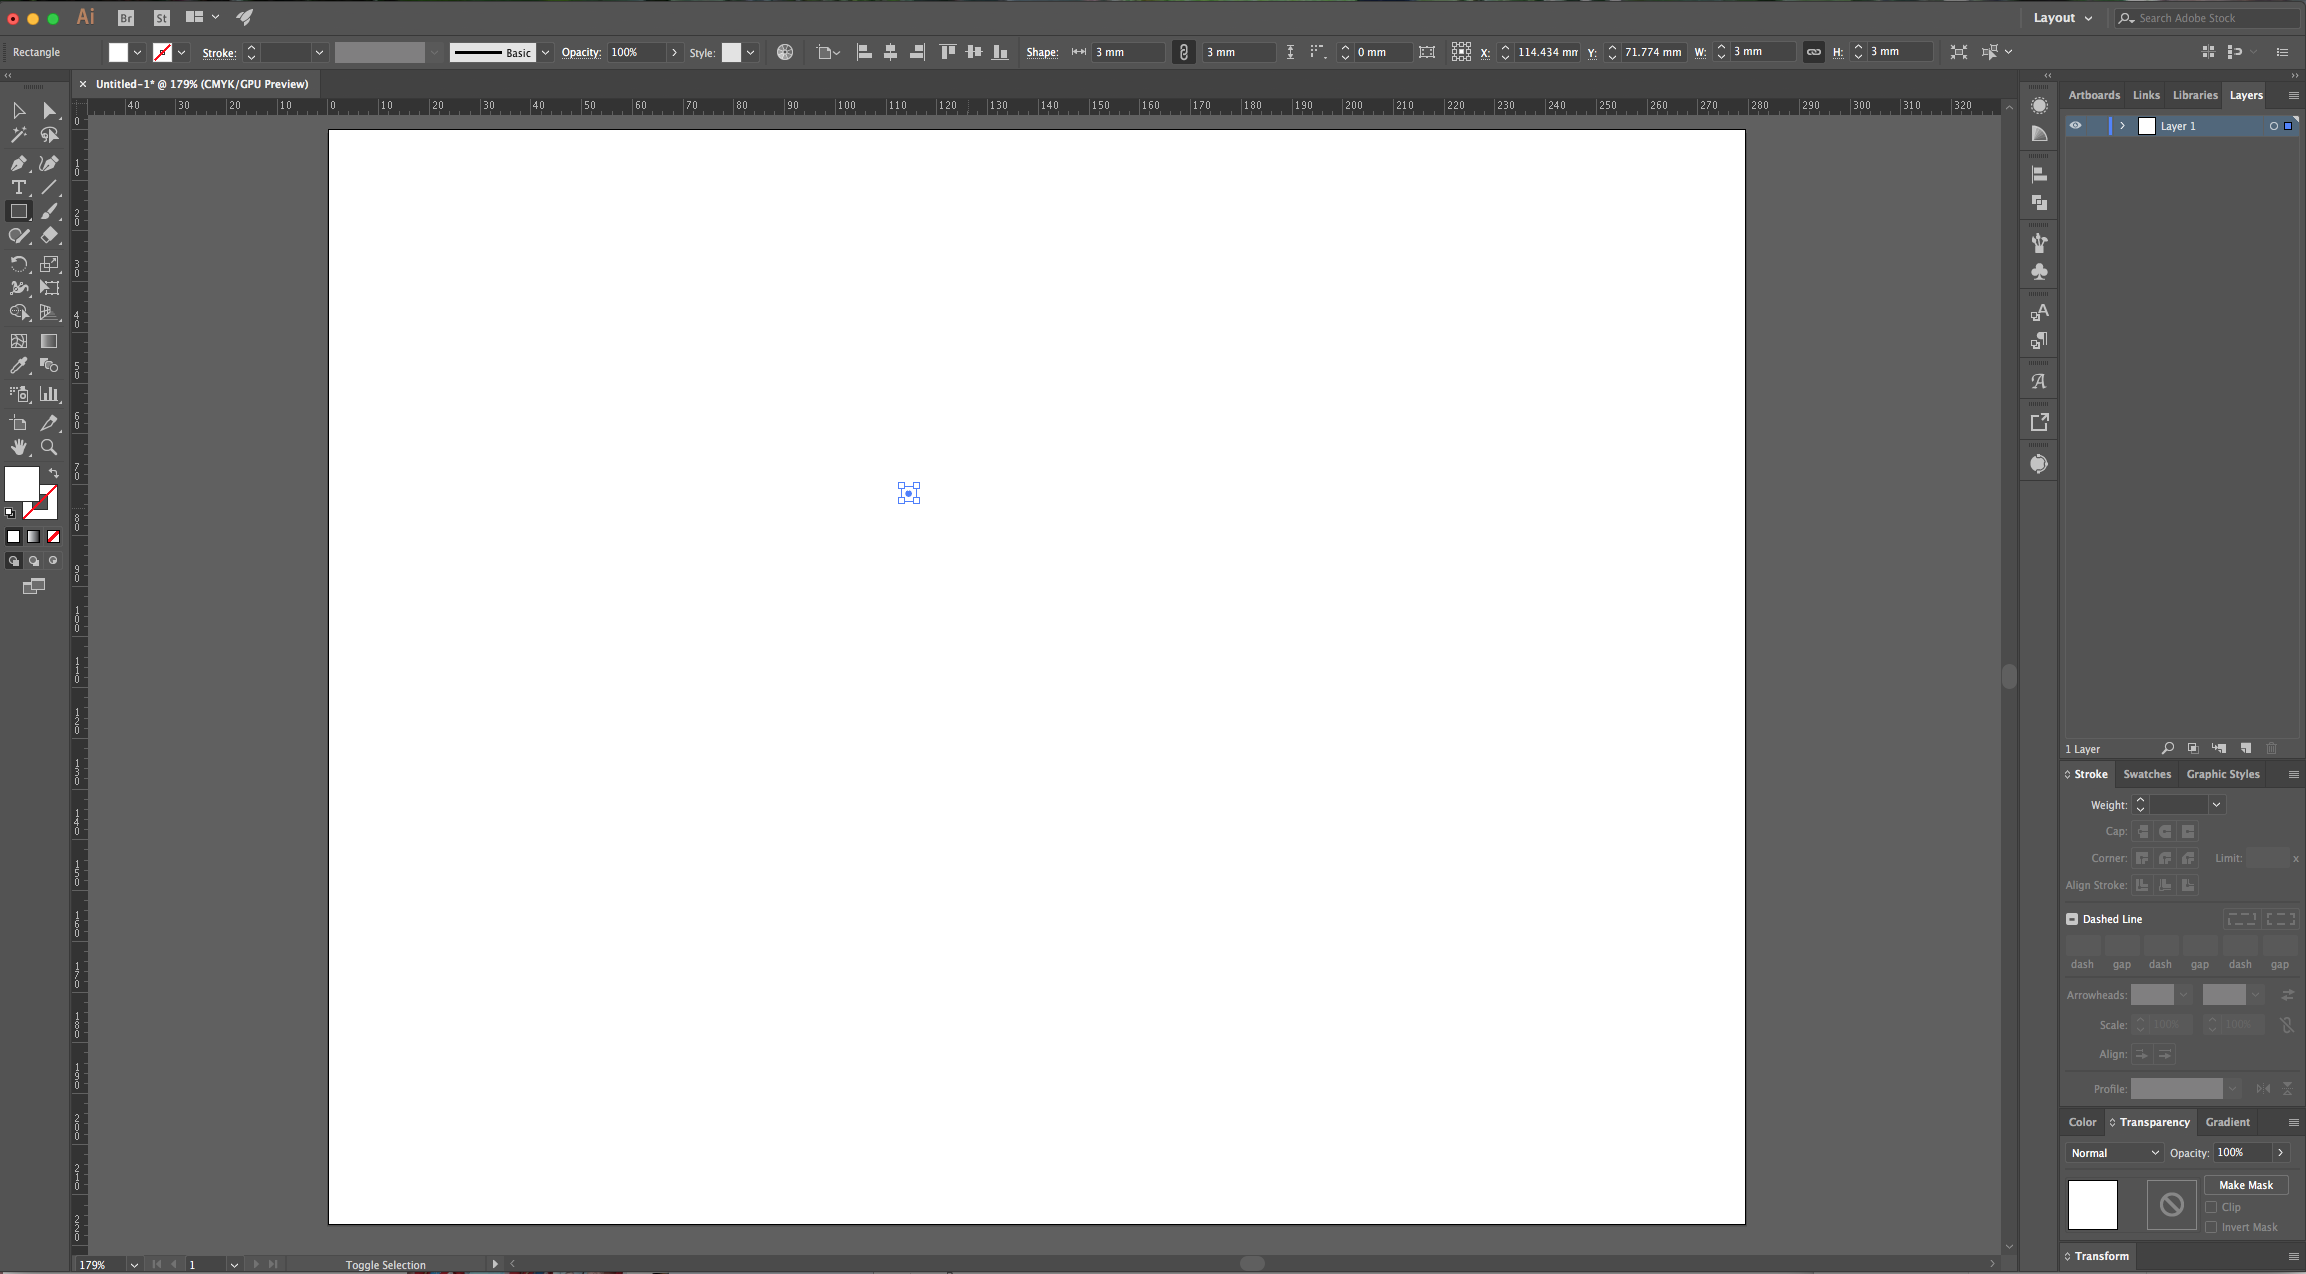
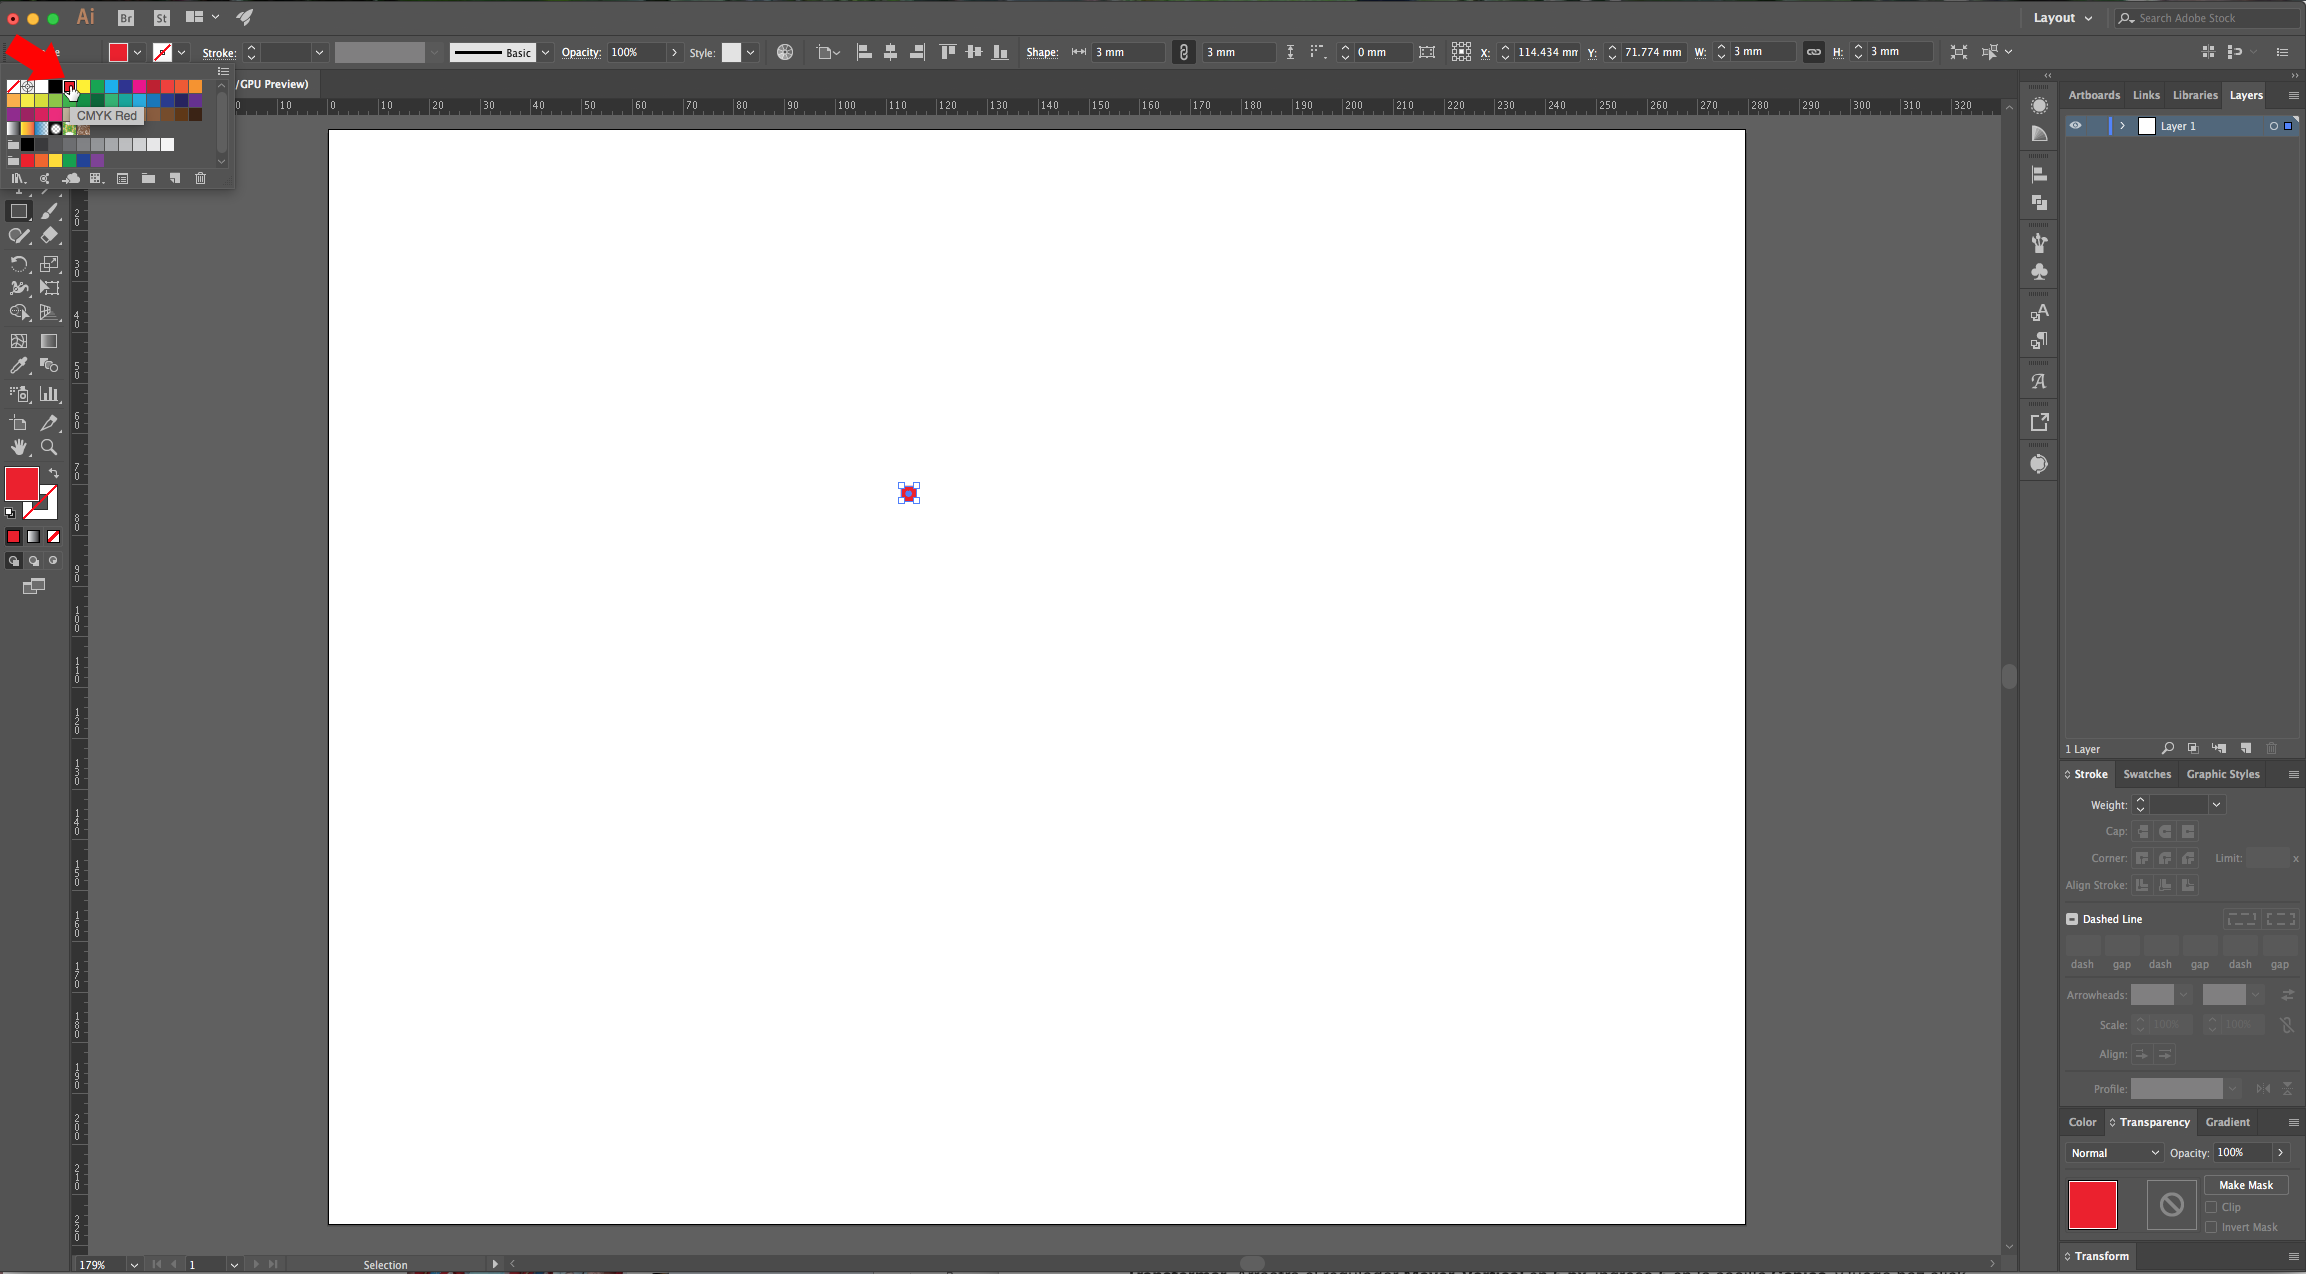
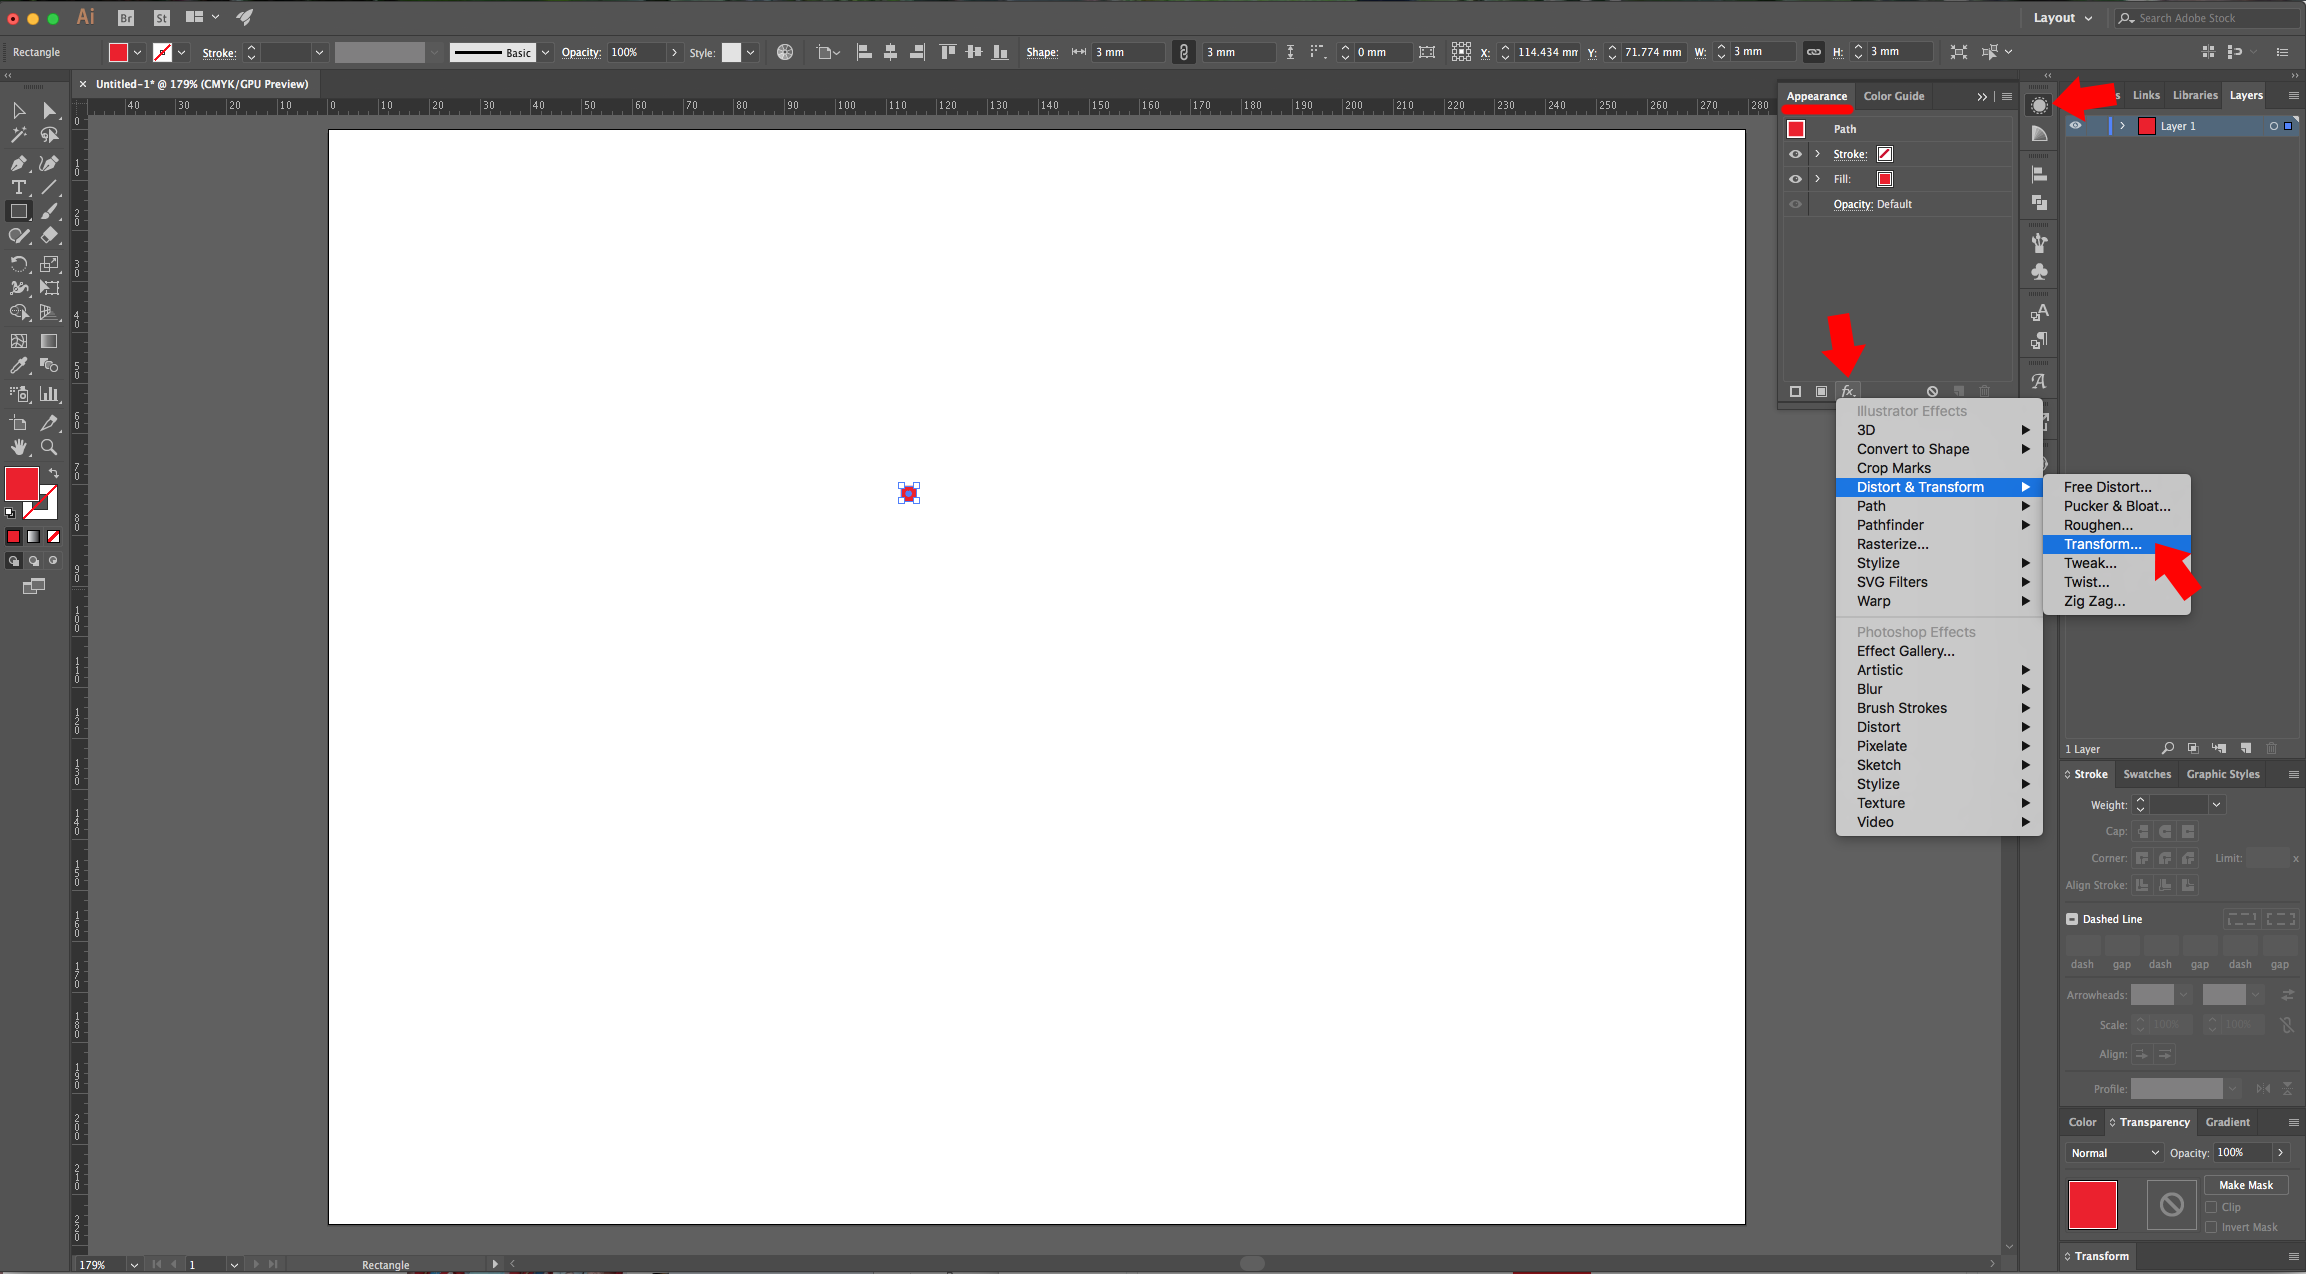
2 - Select the “Rectangle Tool” (M), click on a spot in your “Document” to open the dialogue box and use a “With” and “Height” value of 3 mm (or less). Fill it with red.

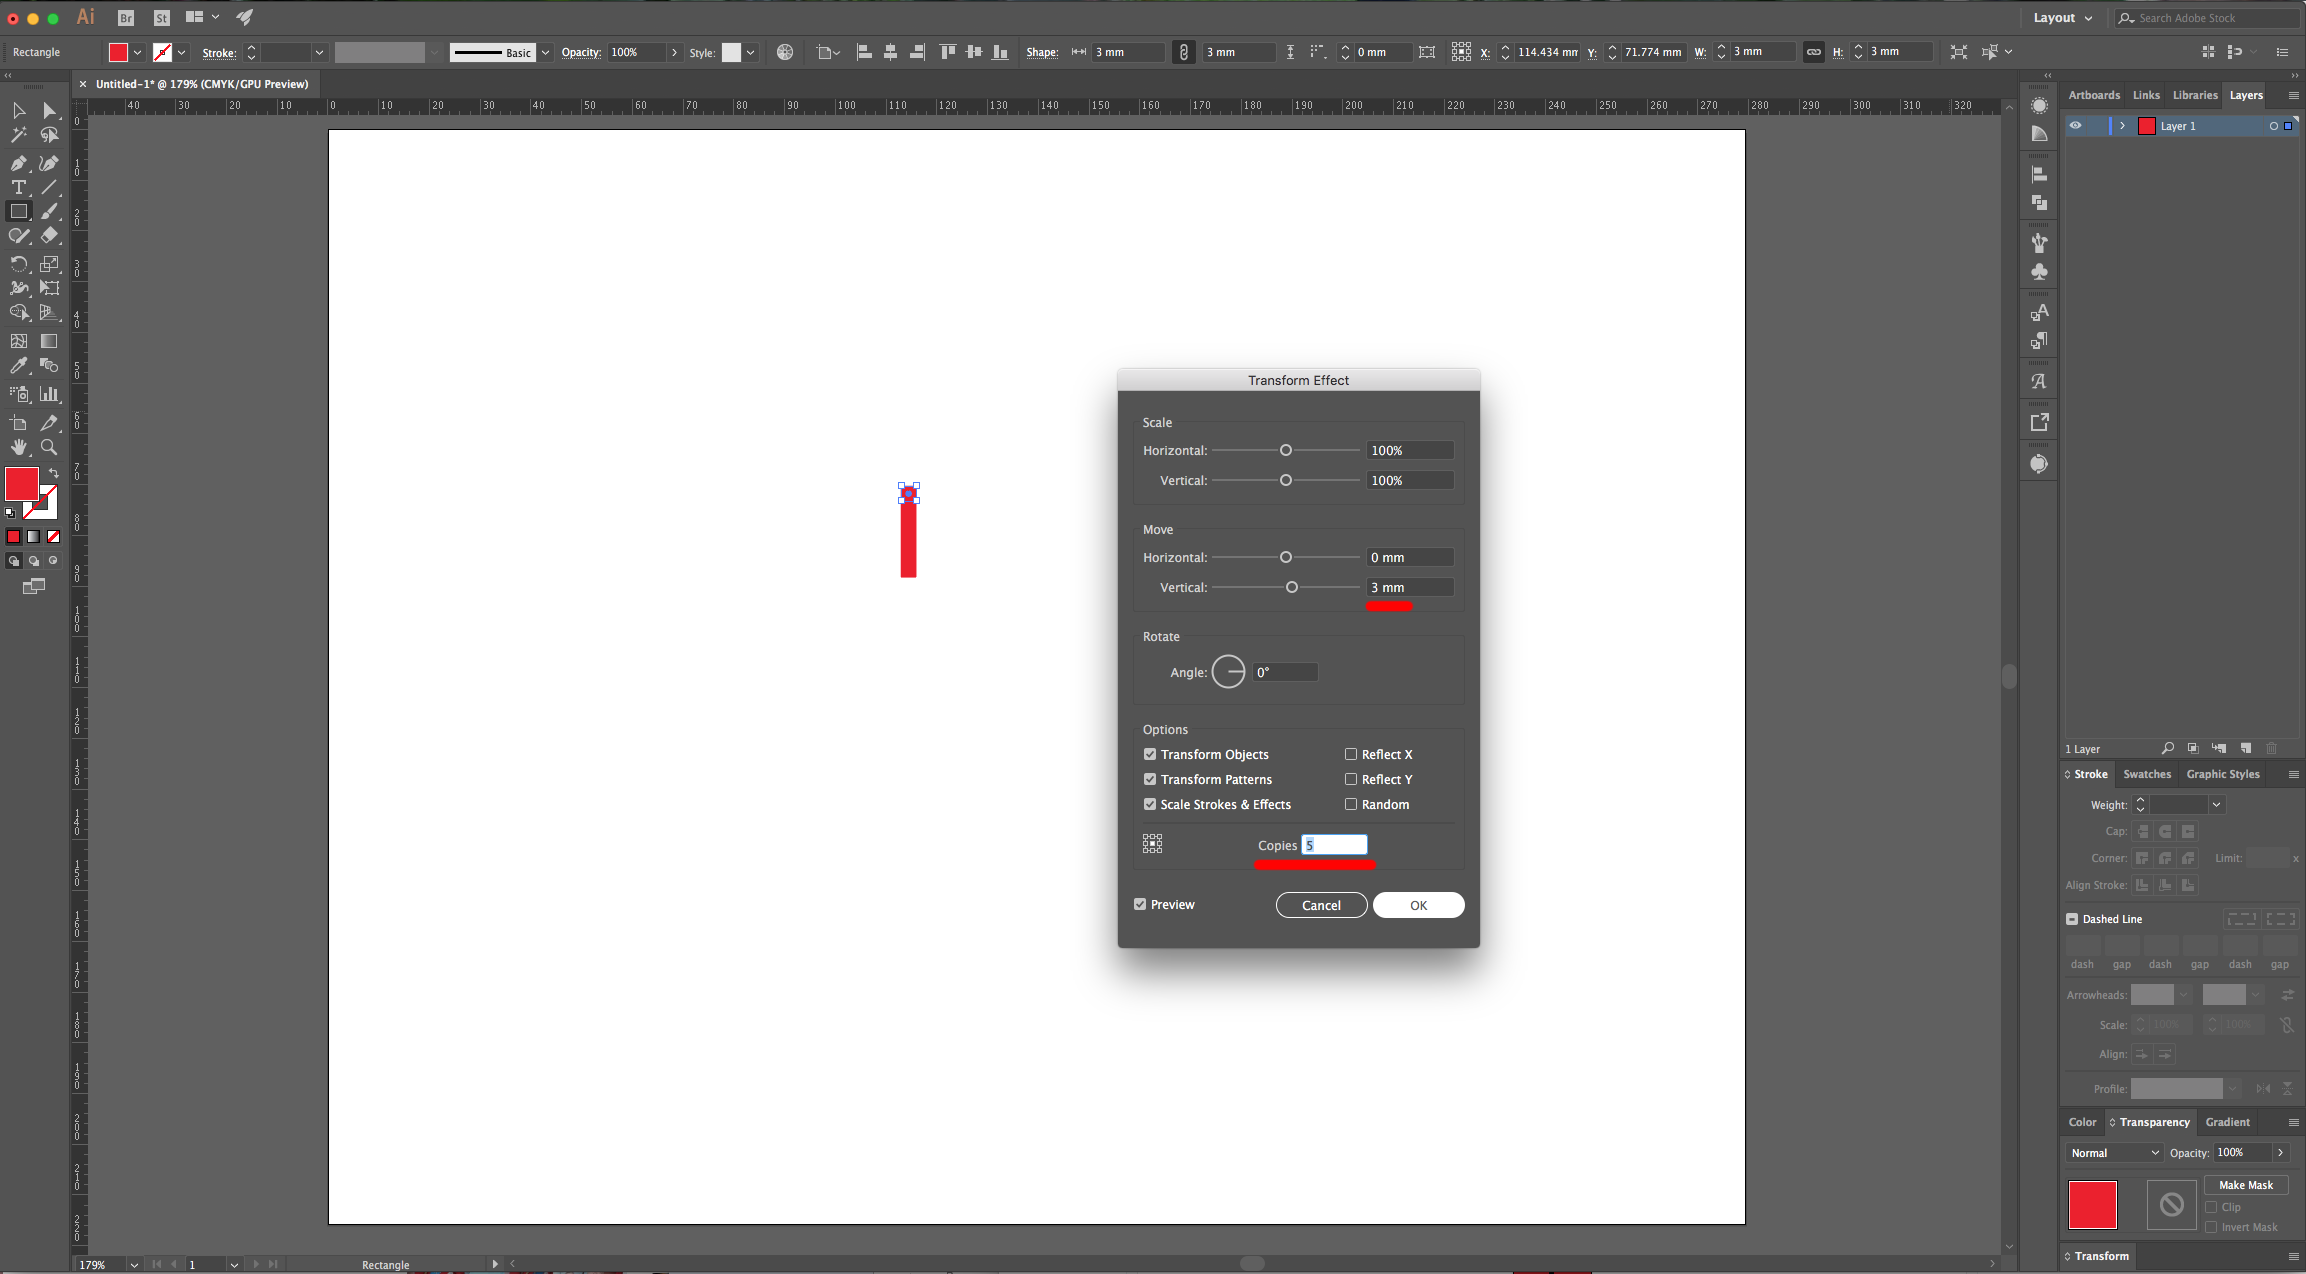
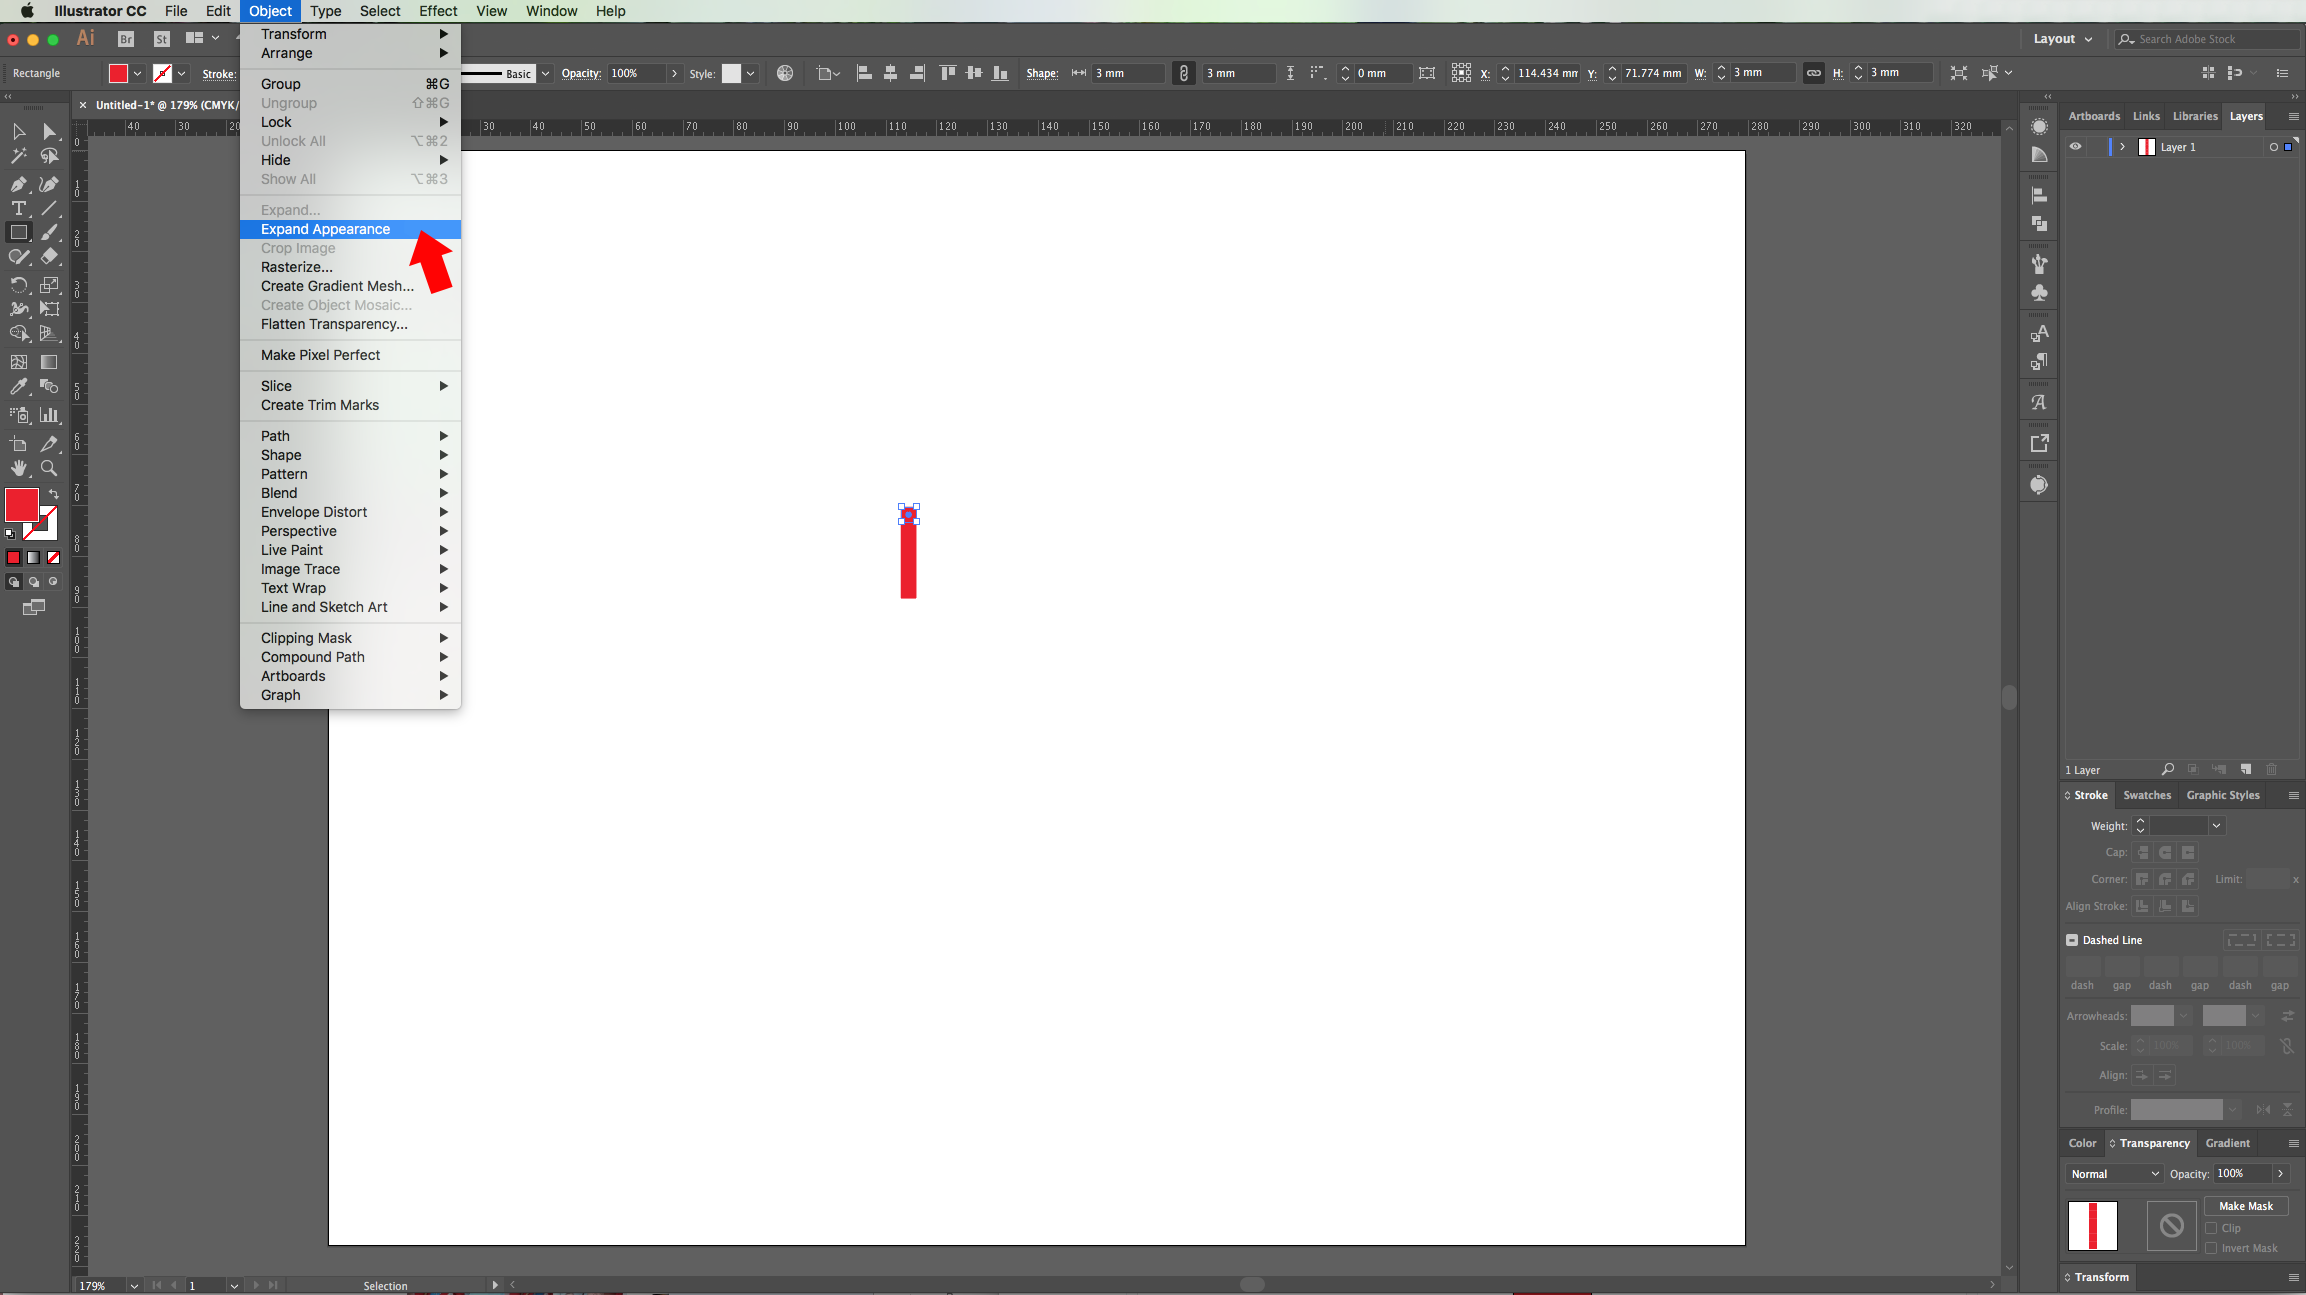
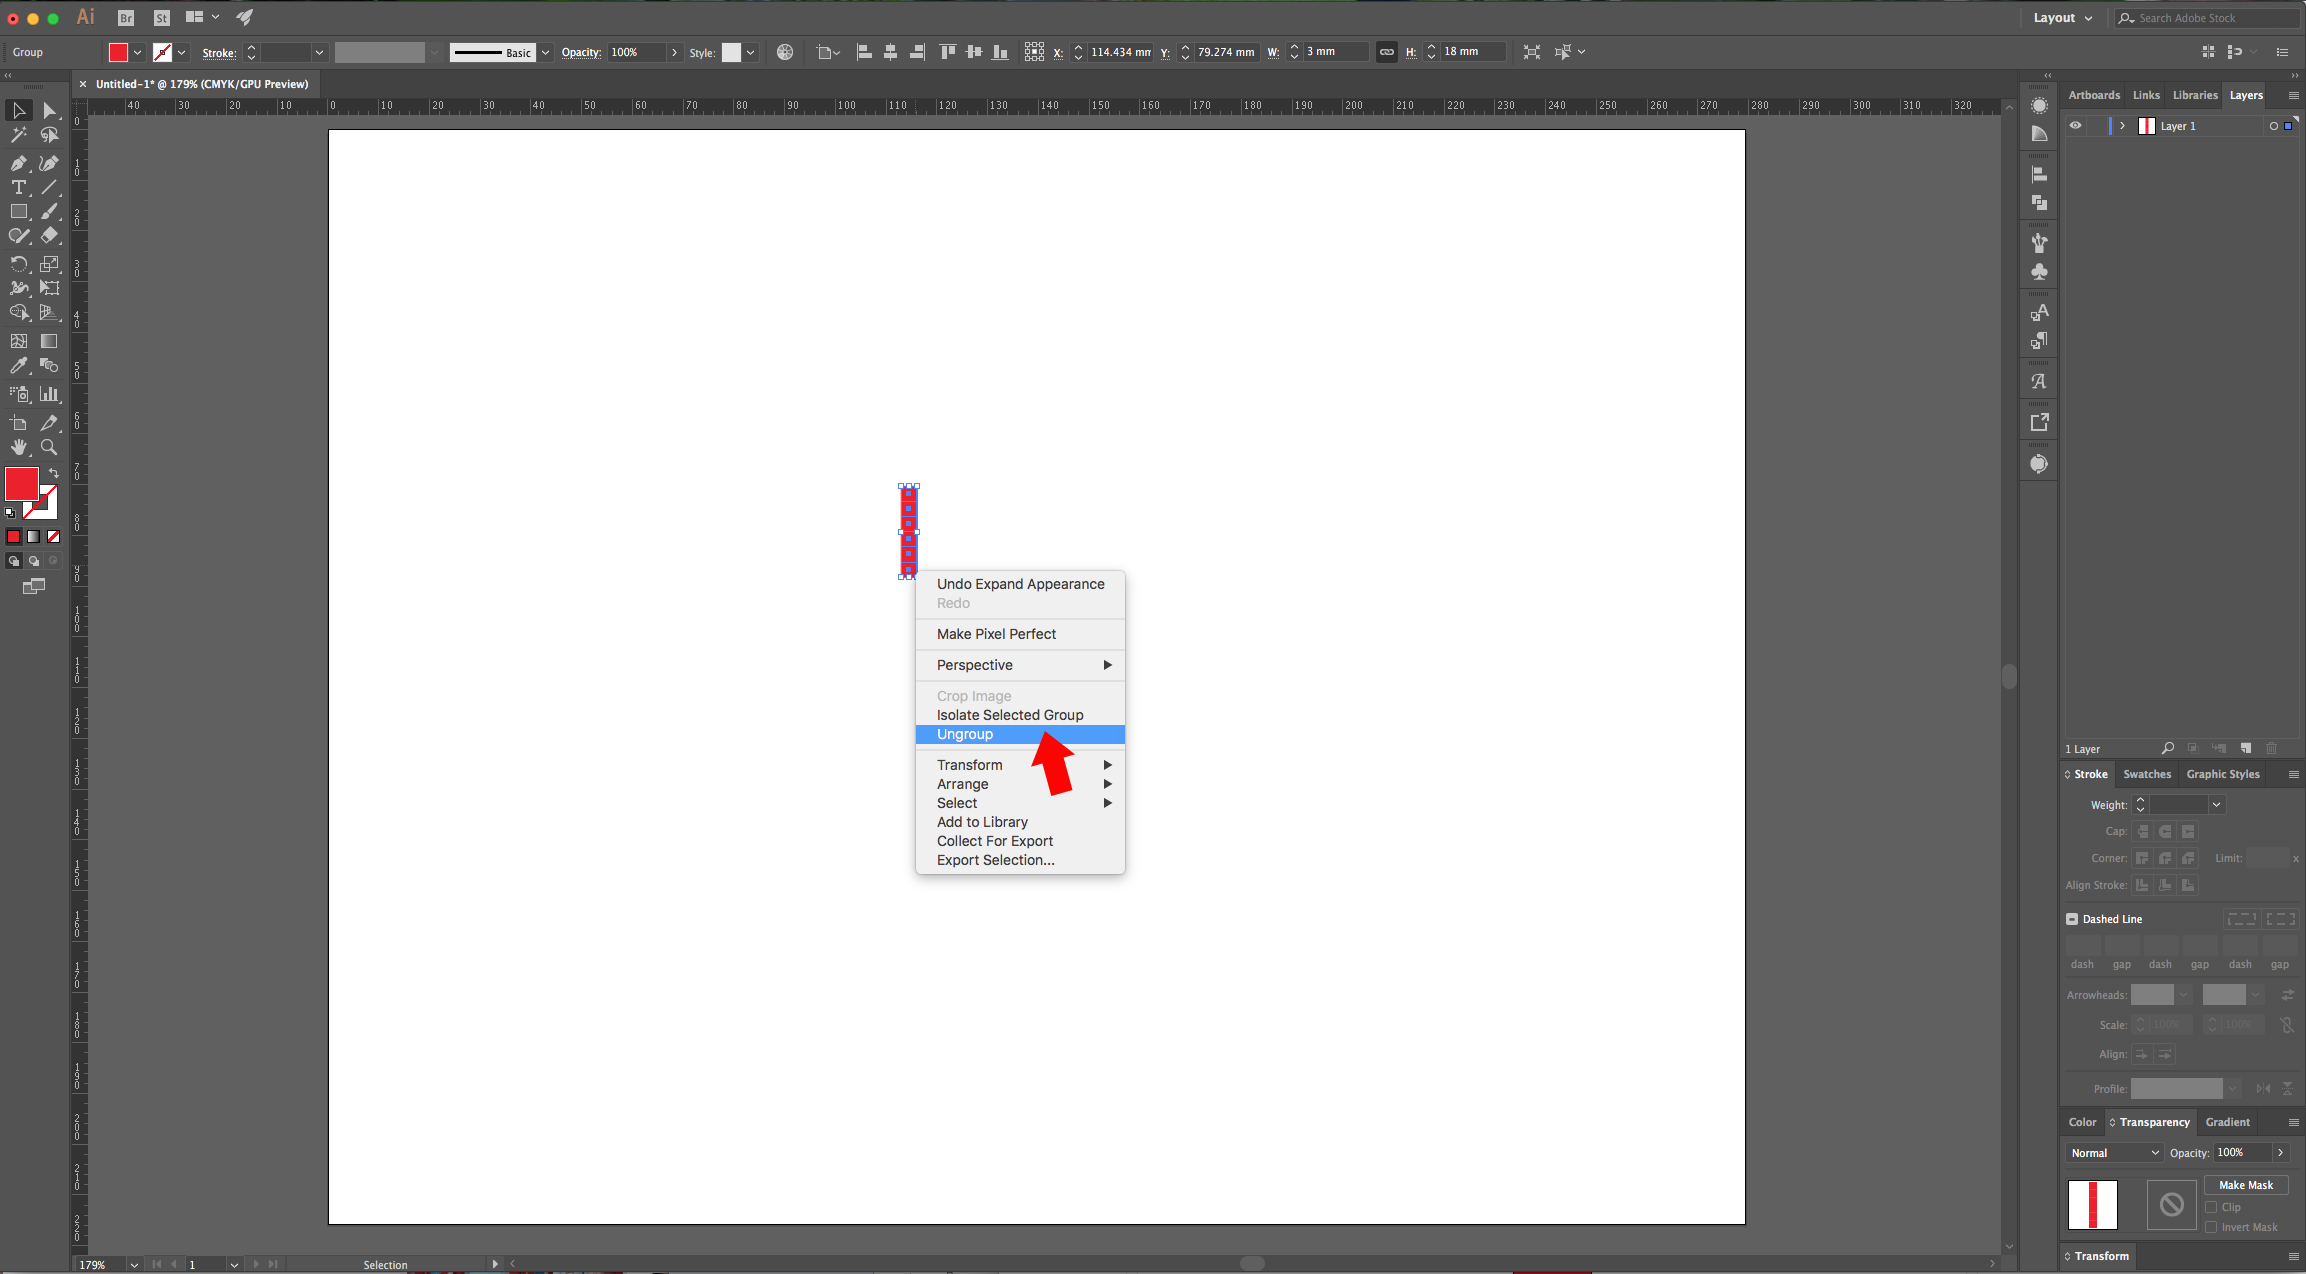
3 - In the “Appearance Panel” click on the “Add New Effect” button at the bottom and choose Distort & Transform > Transform. Use a “Vertical Move” value of 3 mm (or the same you used for your square) and 5 for “Copies”. Click “OK”, go to Object > Expand Appearance and then, right-click on top of your squares and choose “Ungroup”.
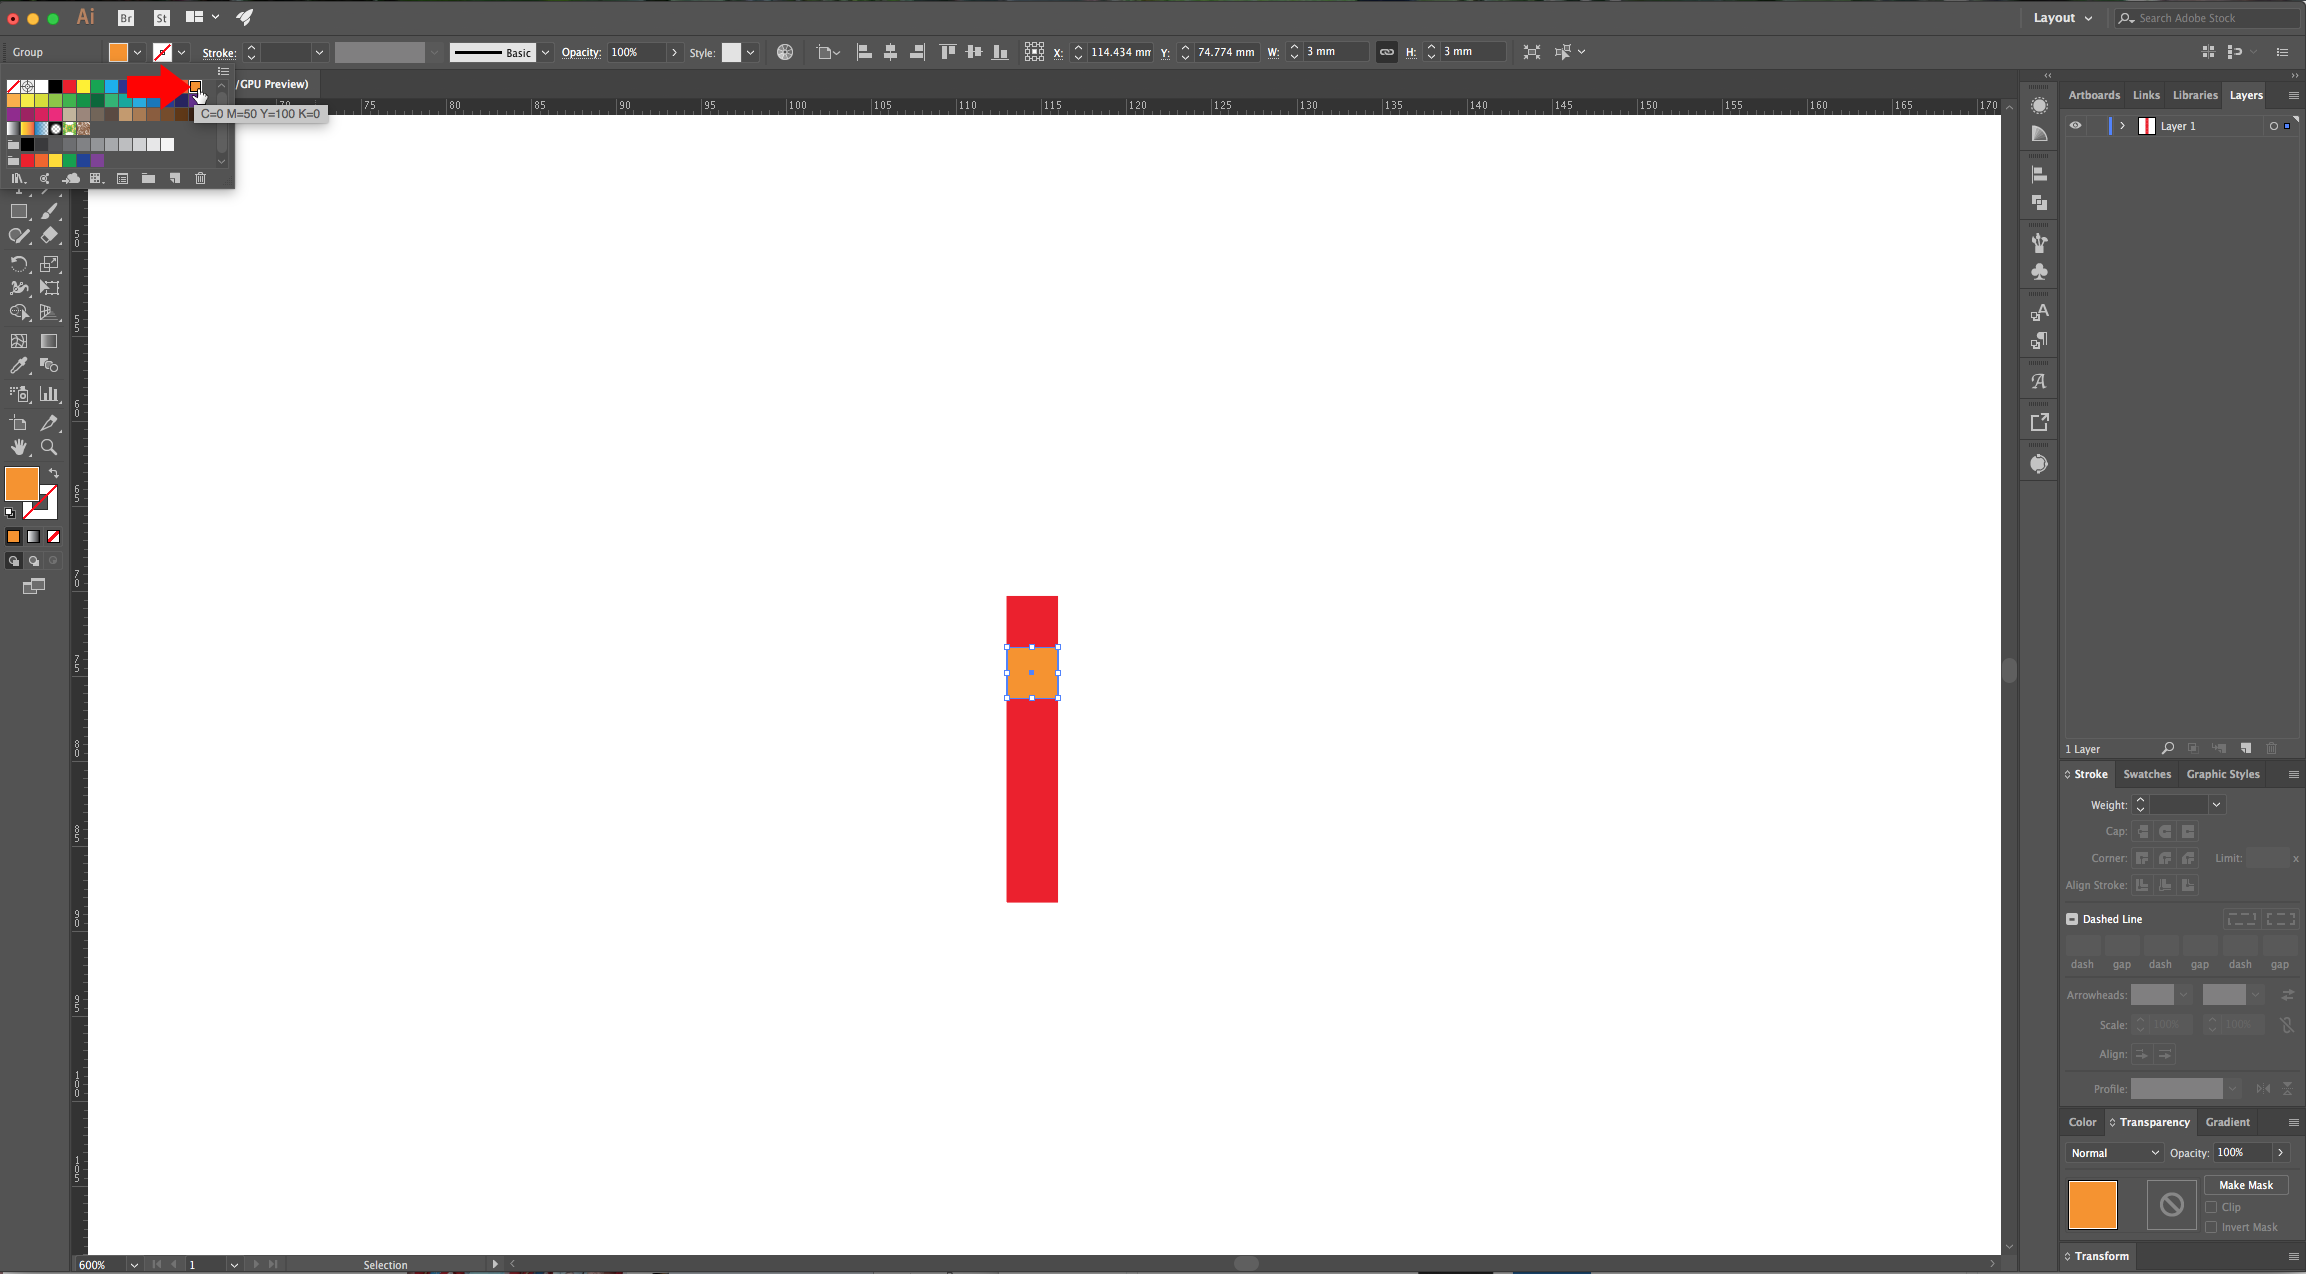
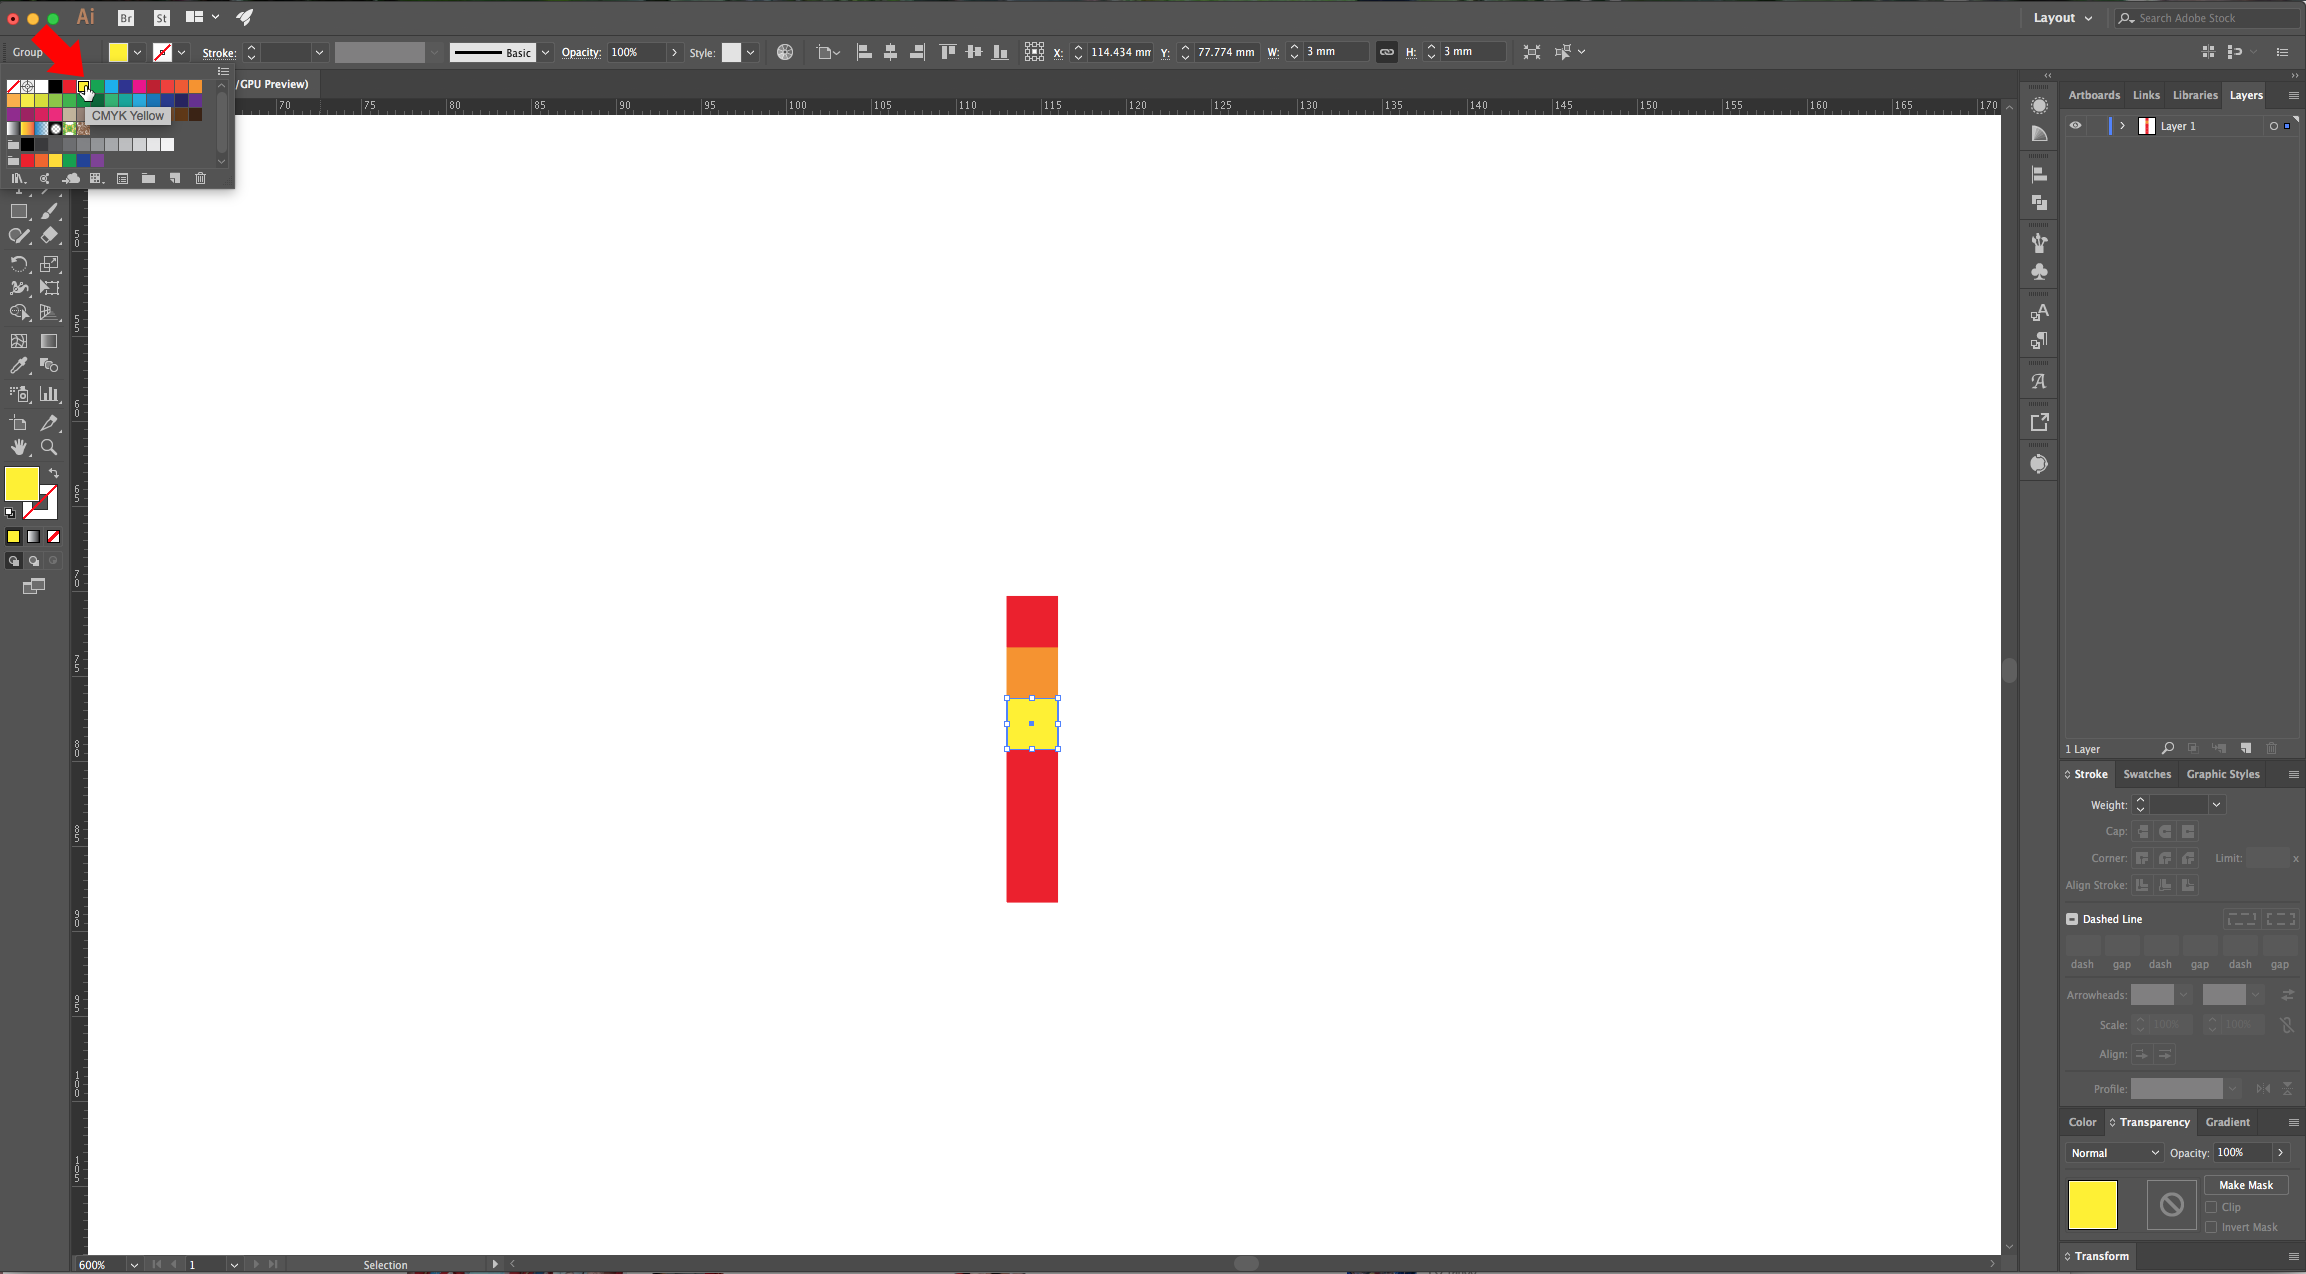
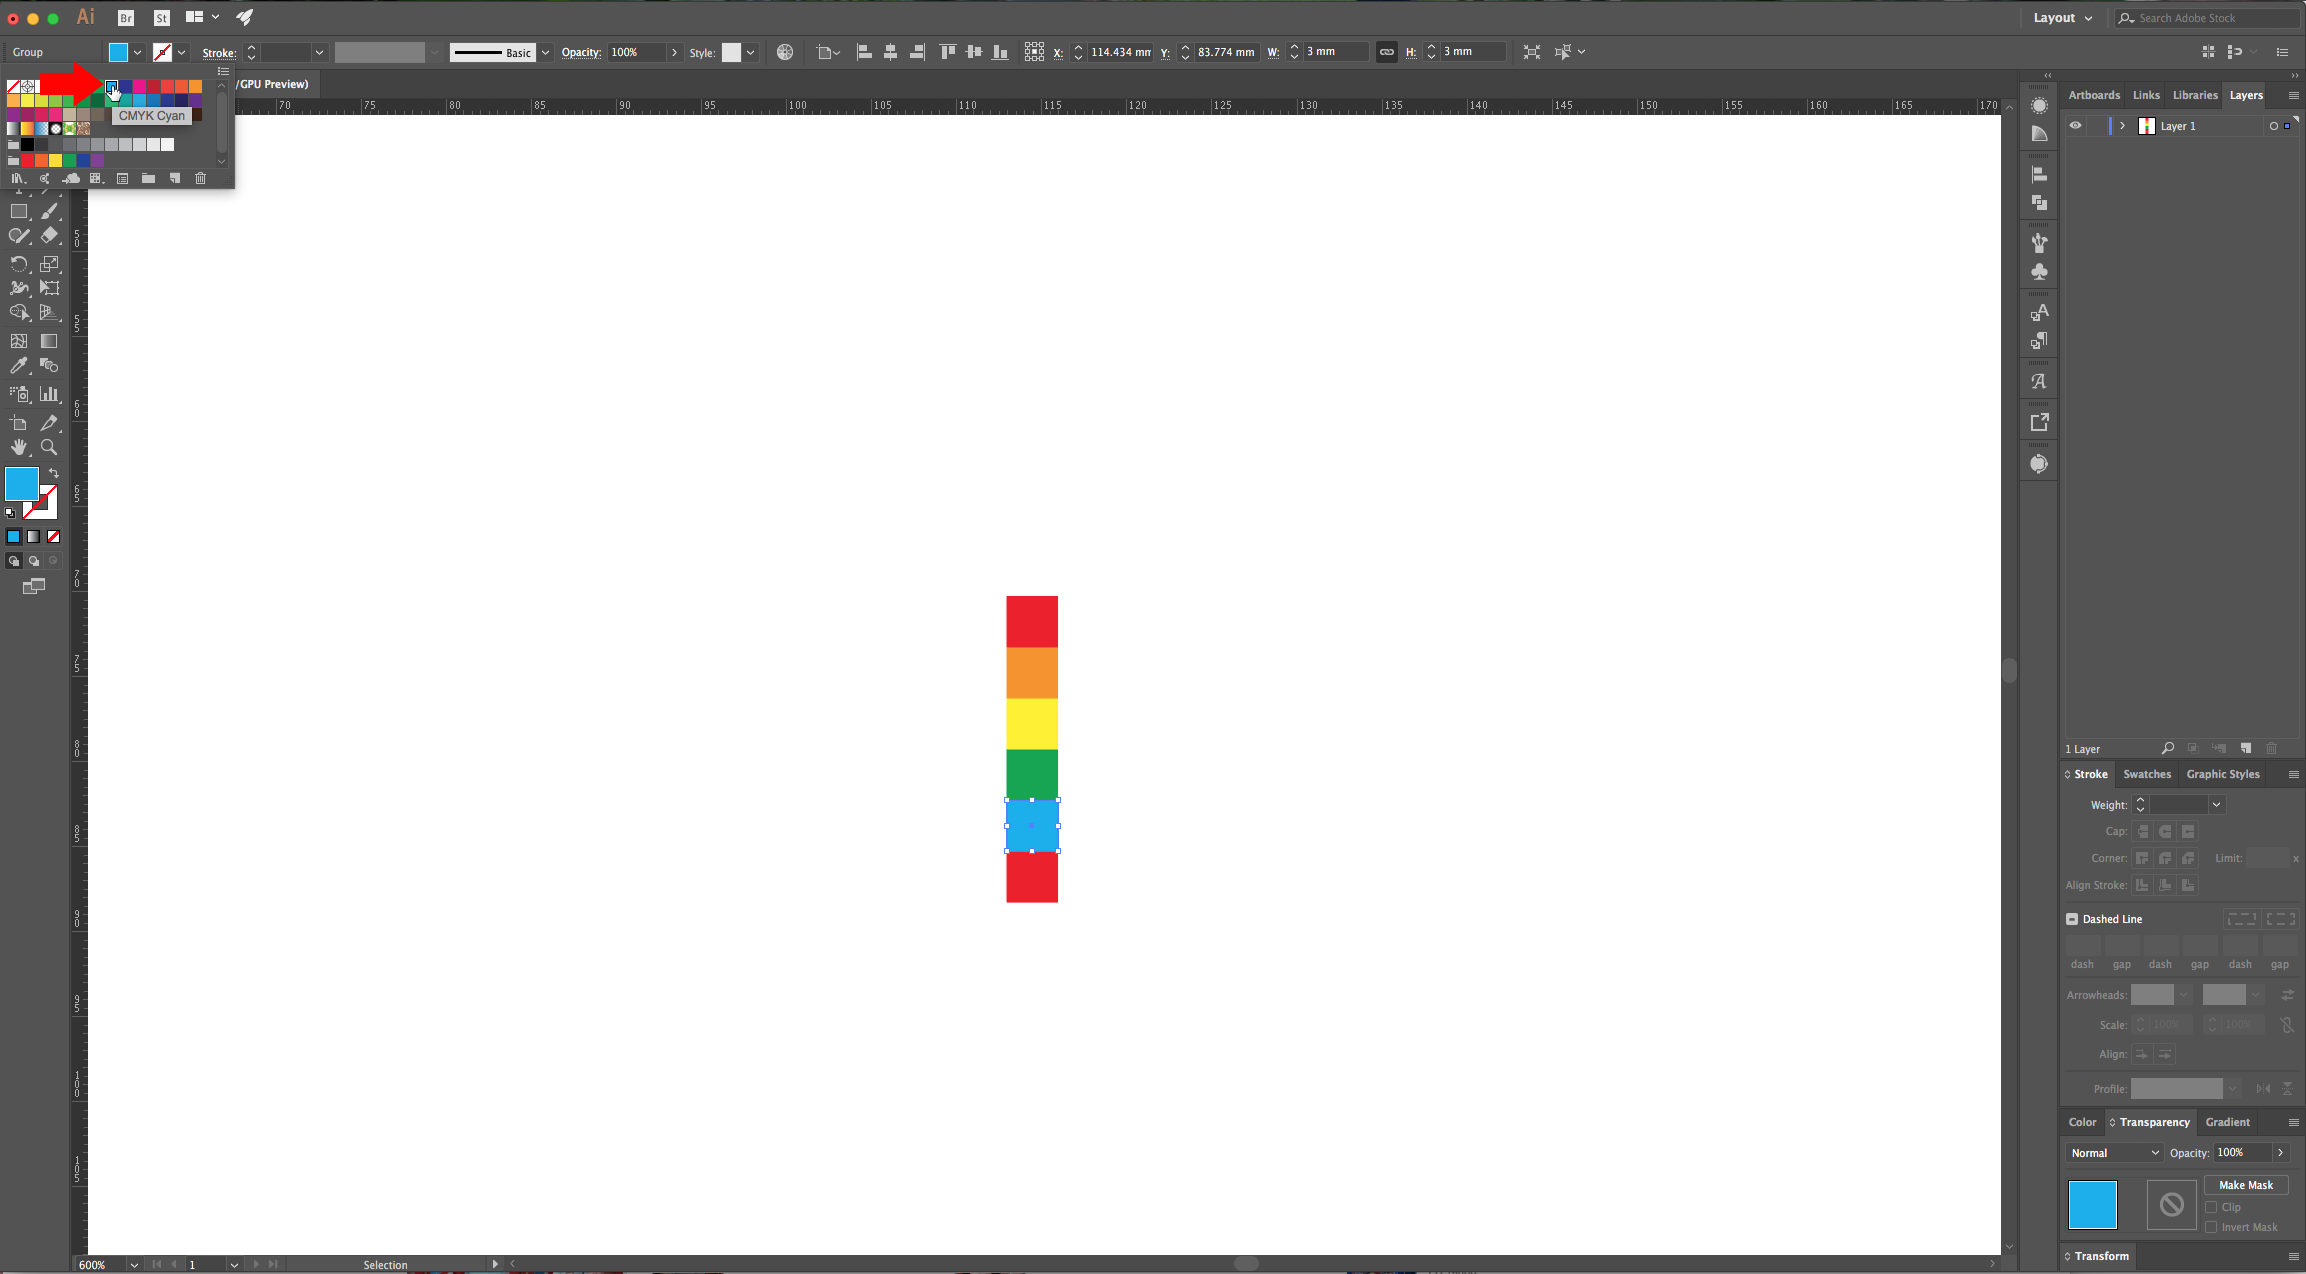
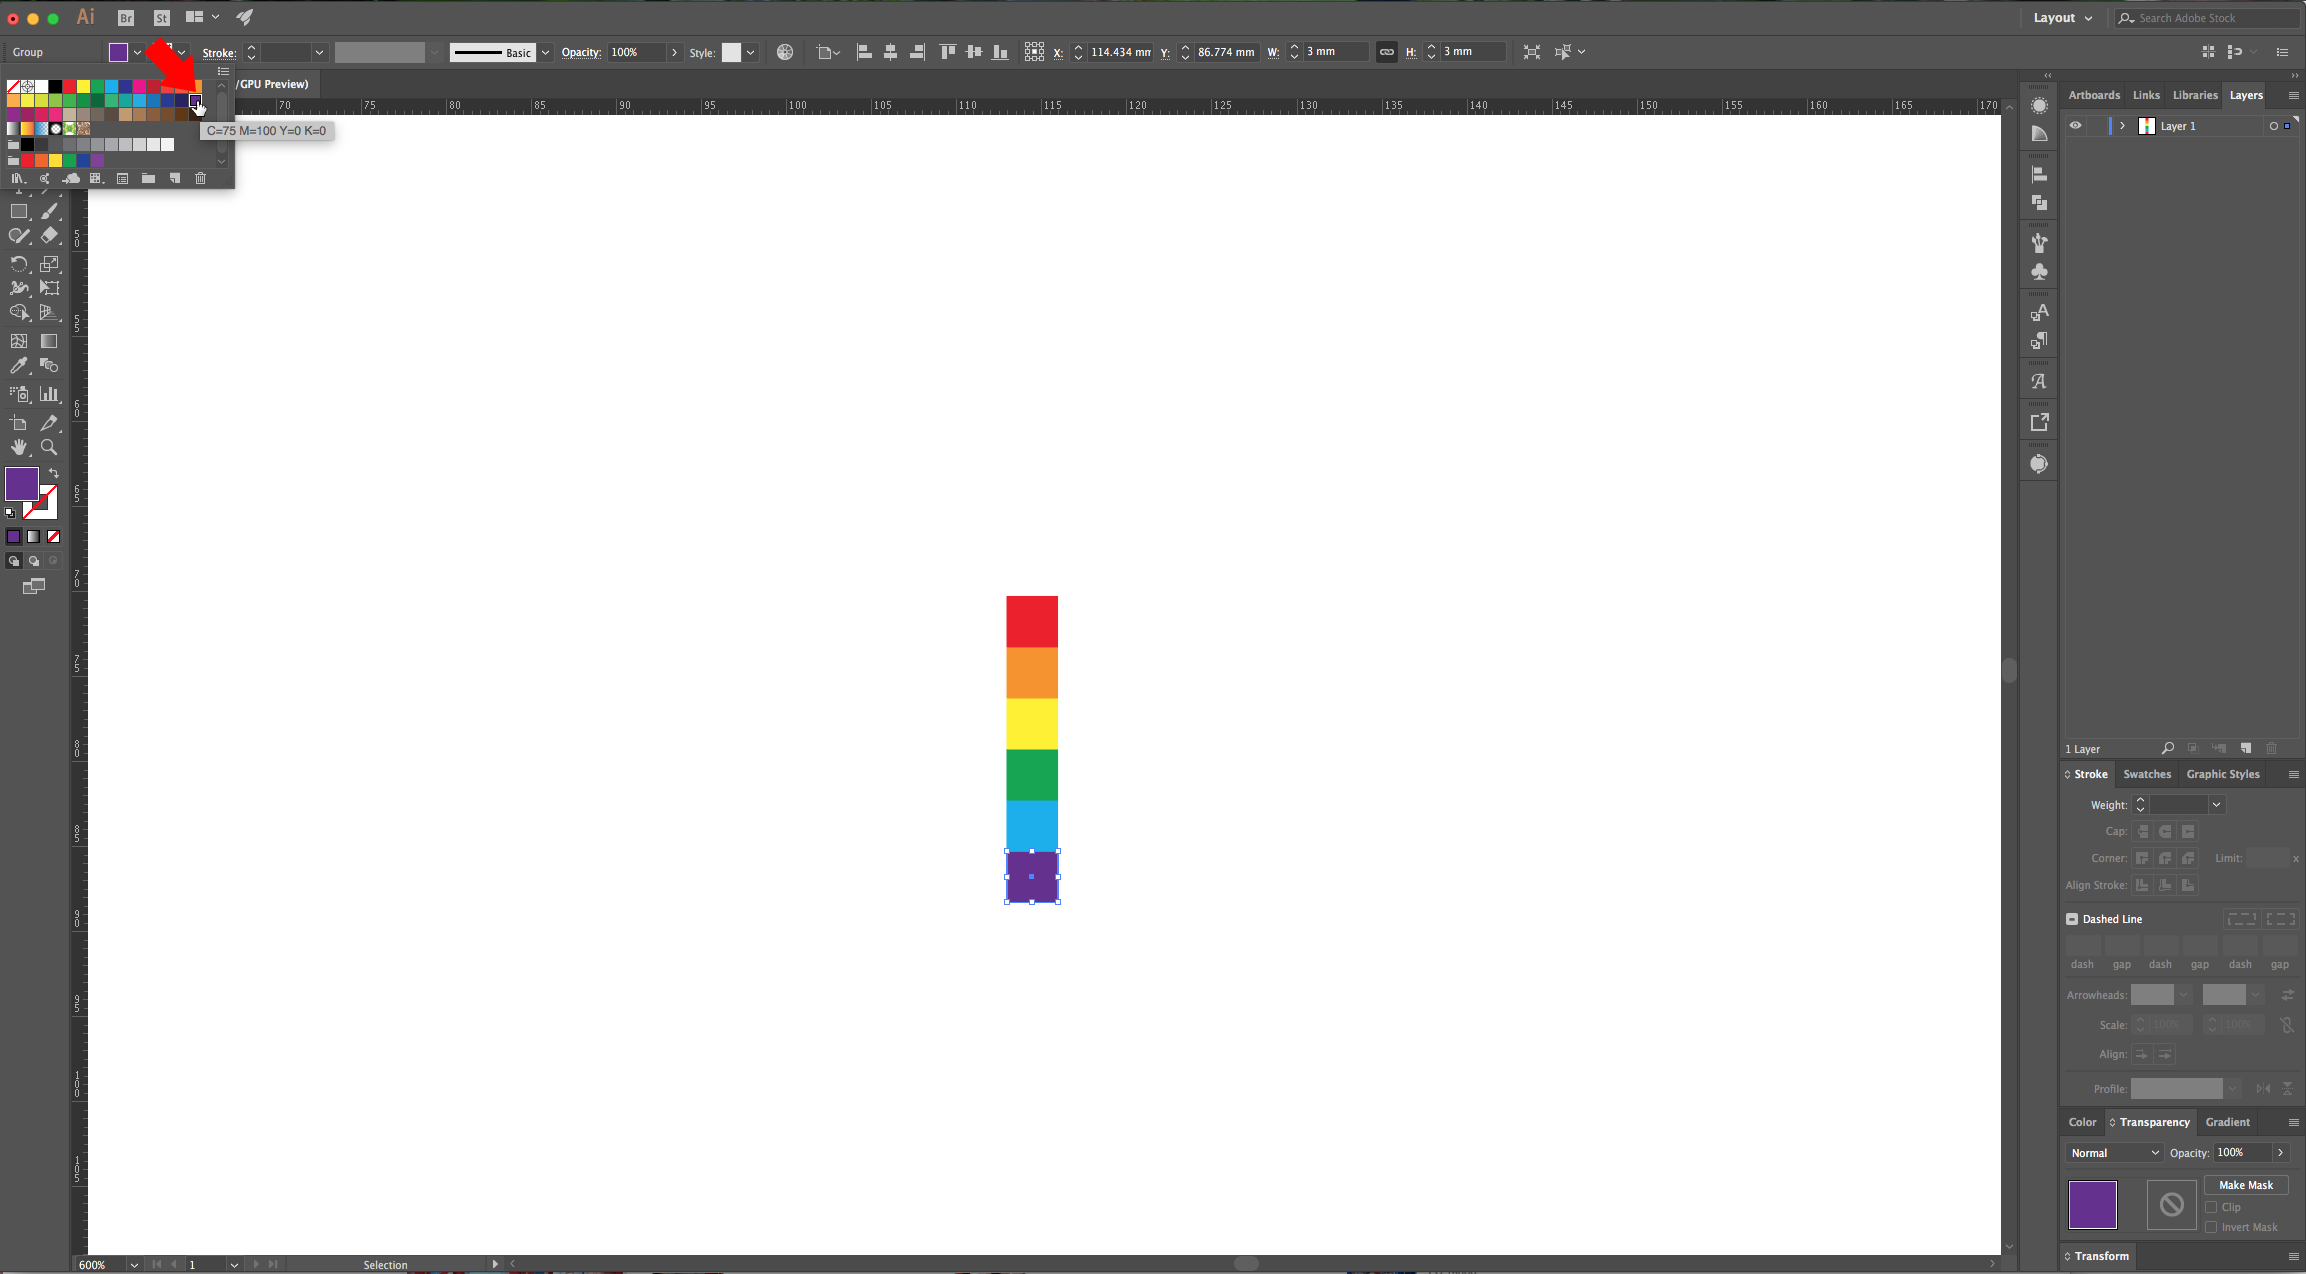
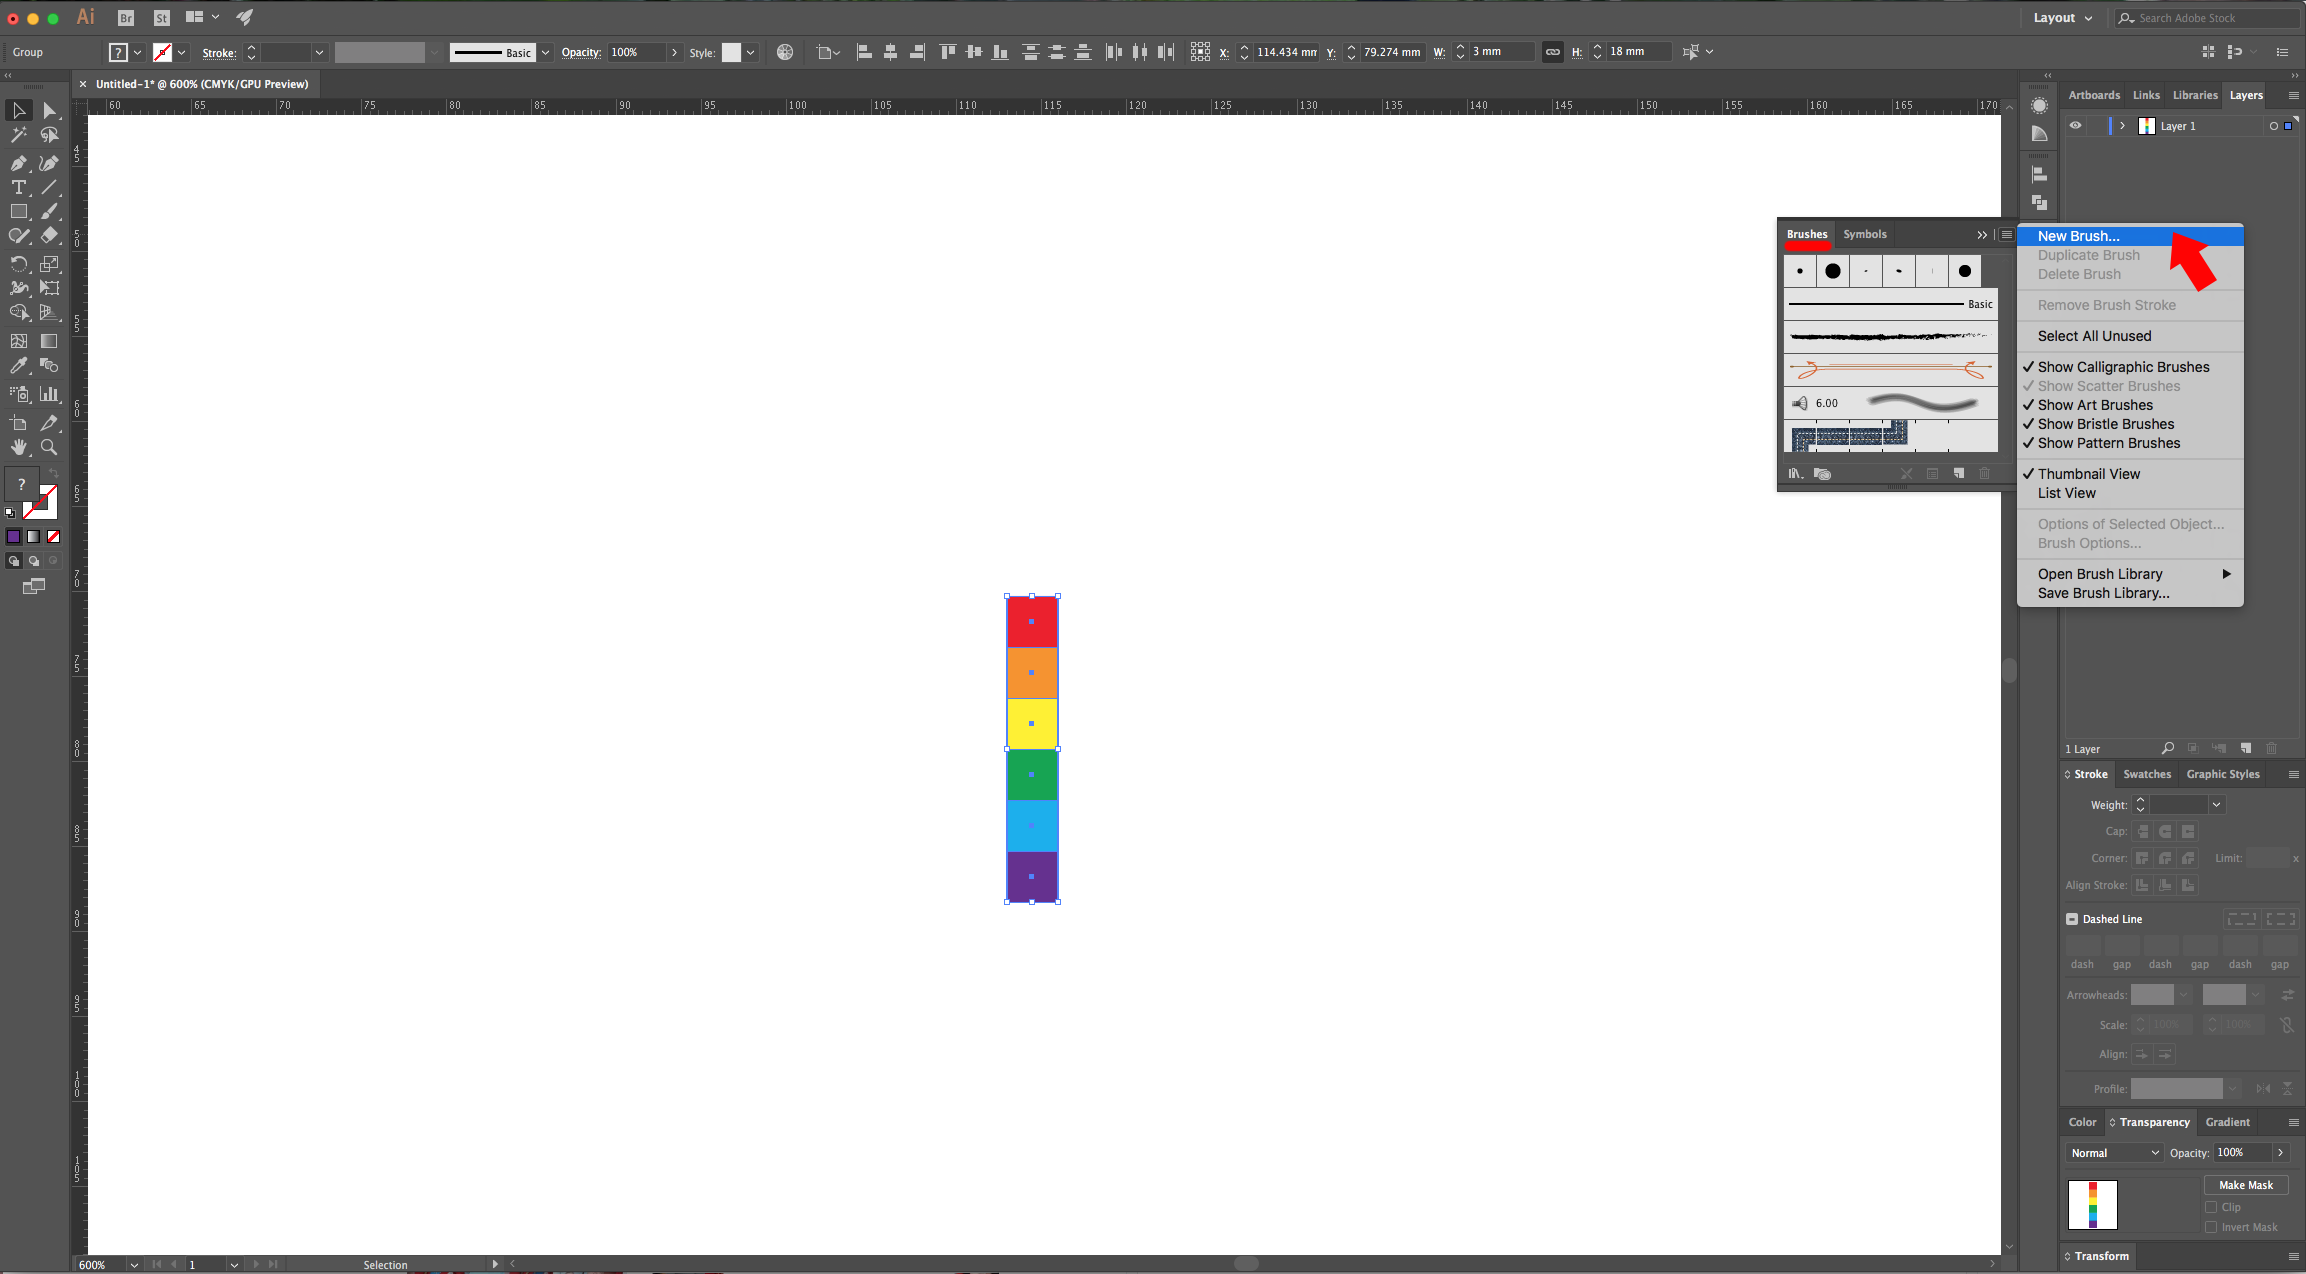
4 - Change the “Fill” color from the second square to orange, the one of the third to yellow, the one of the fourth to green, the next one to blue or cyan and finally purple for the last one.

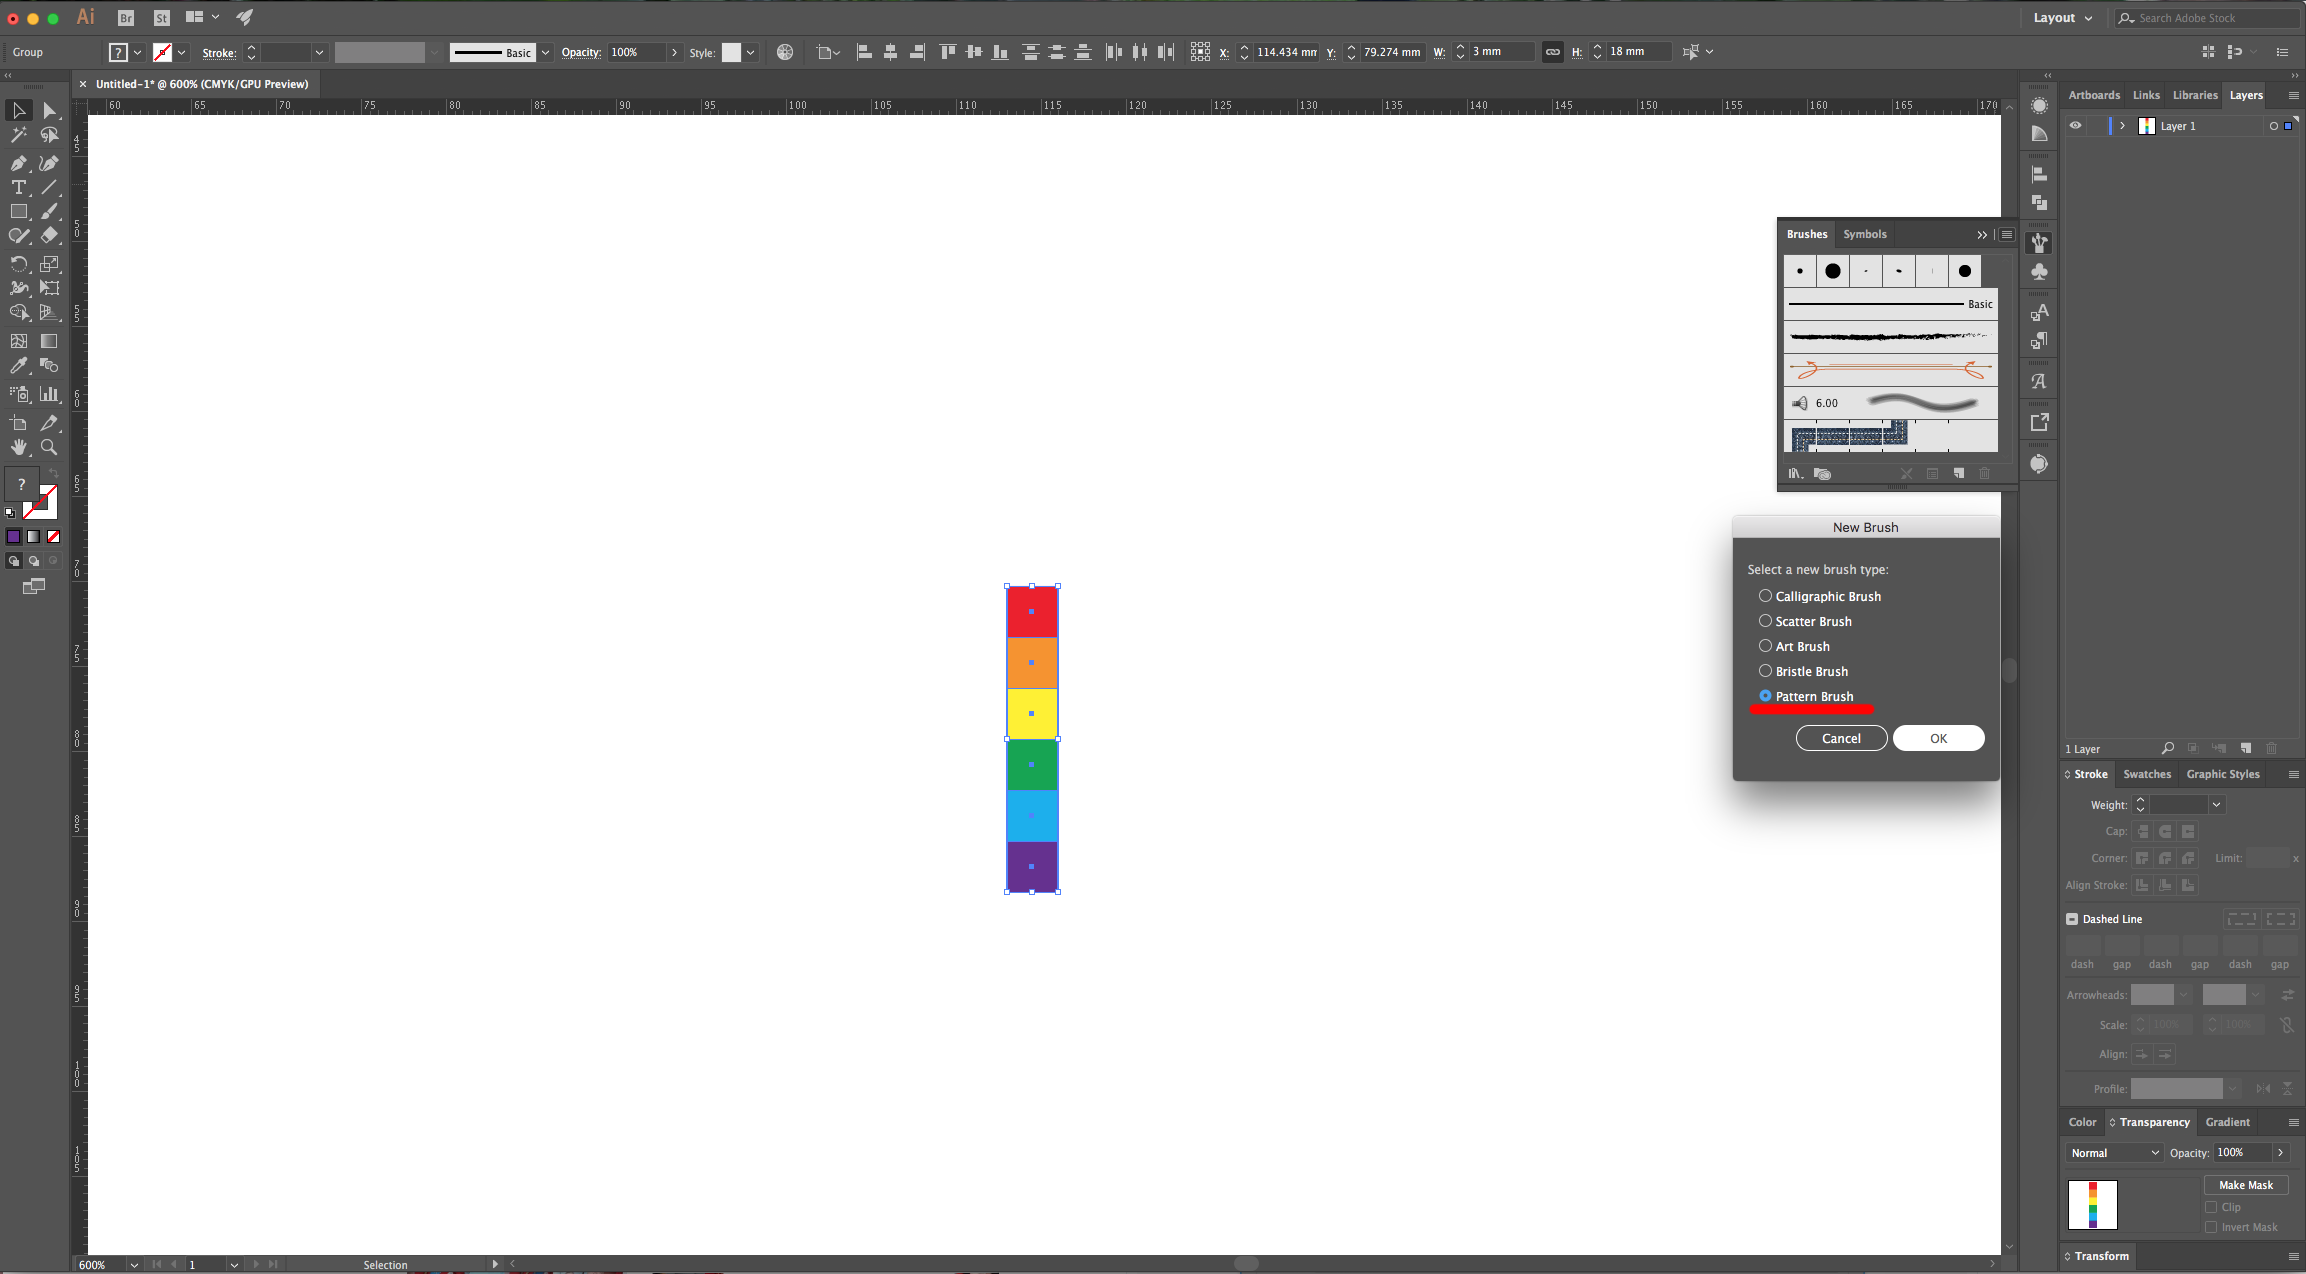
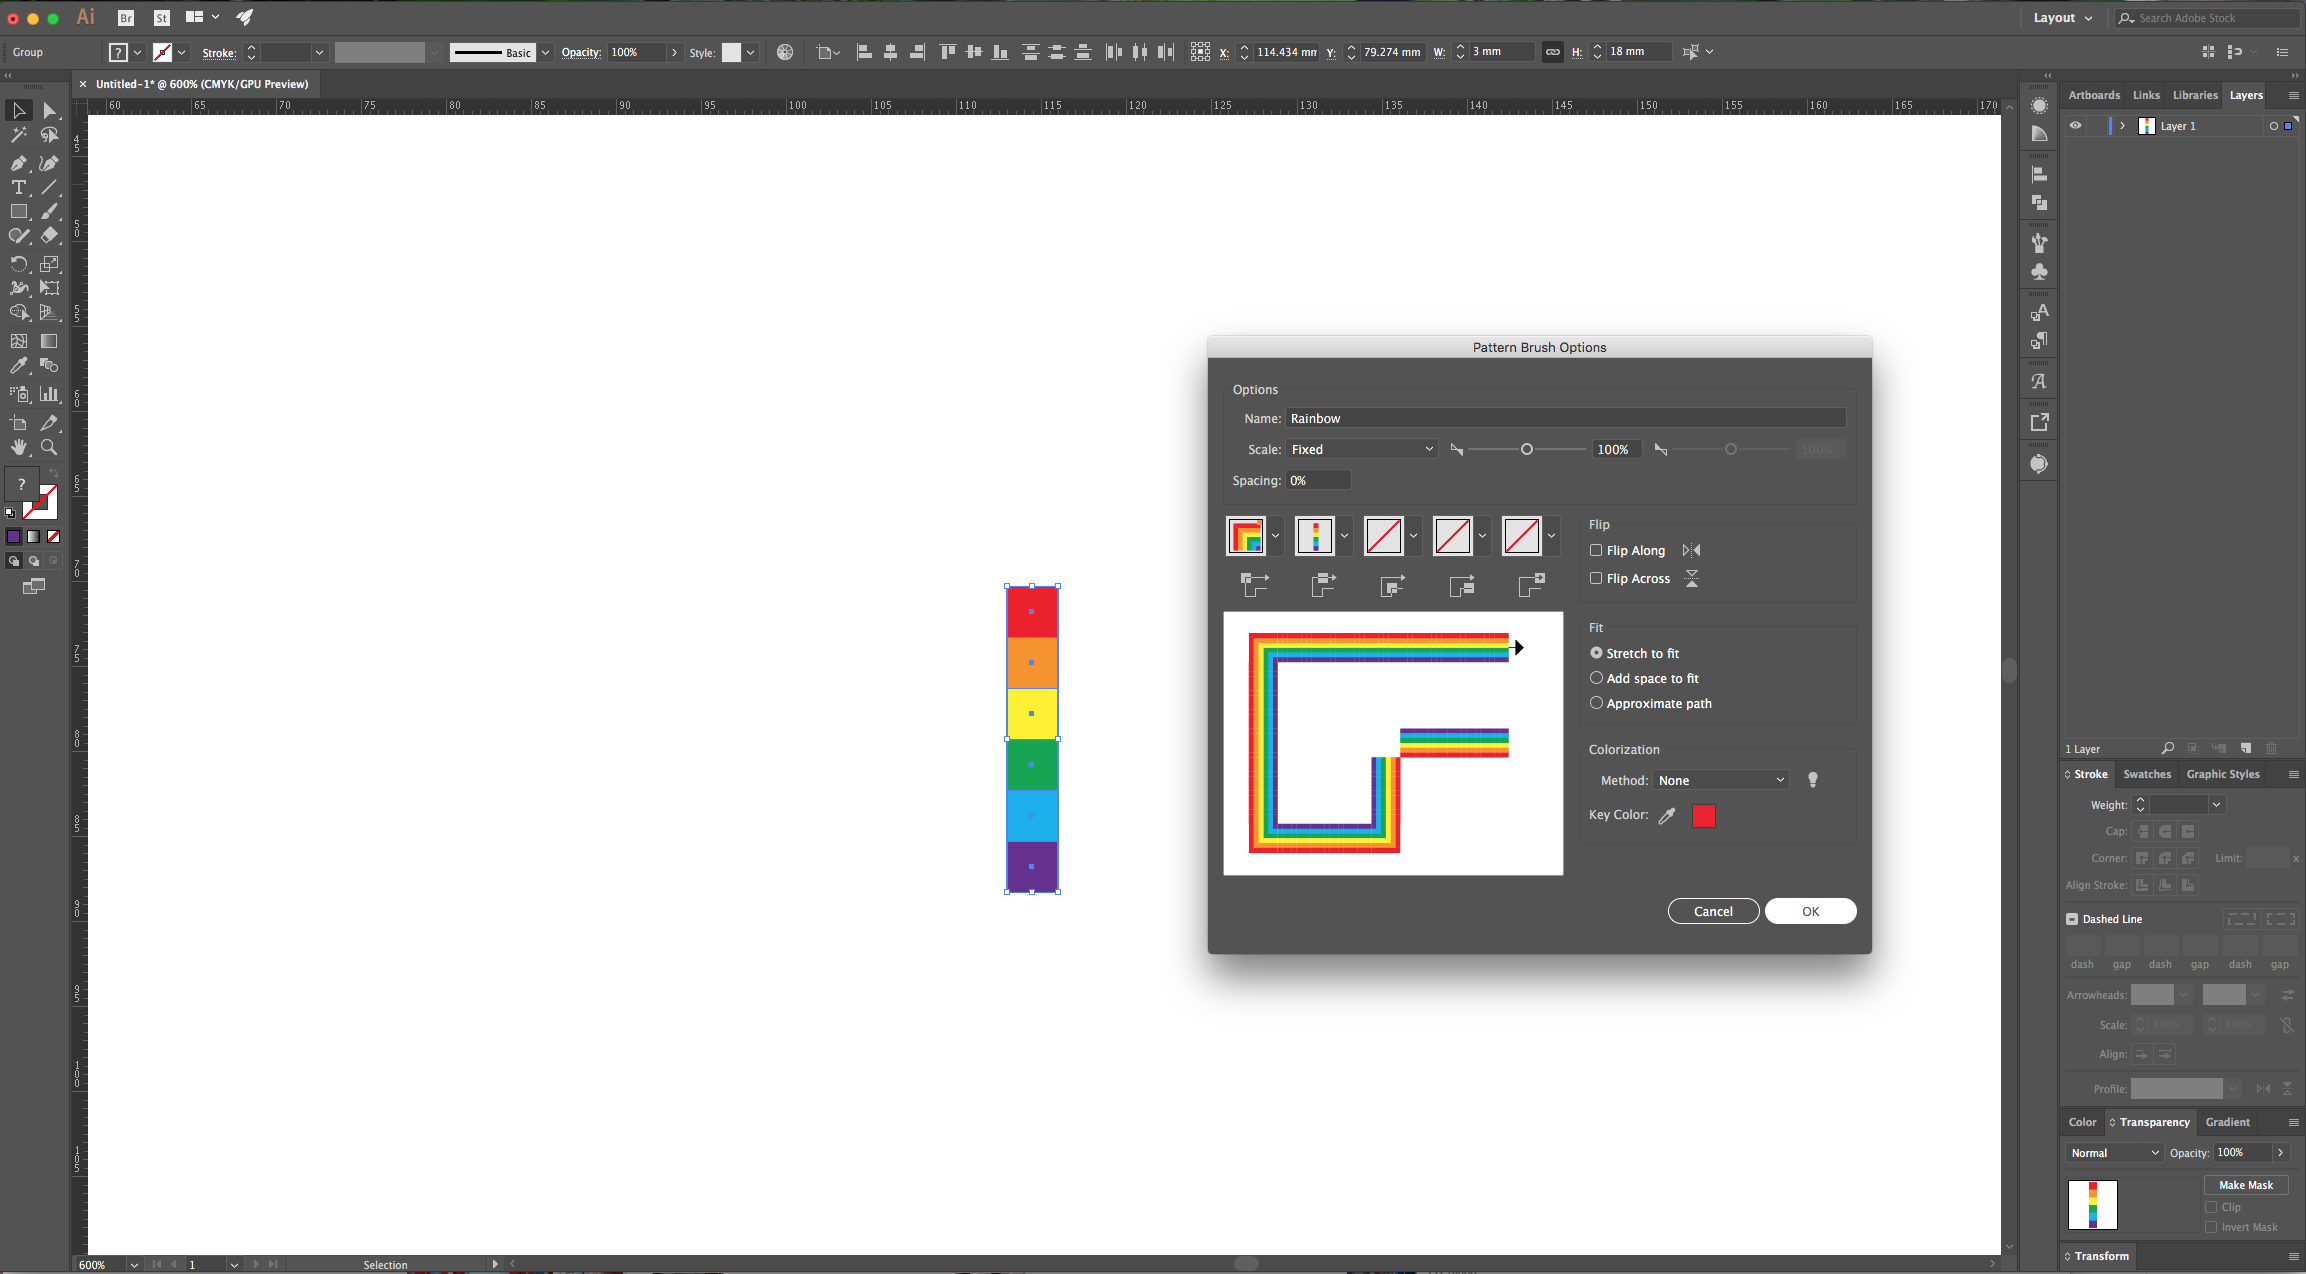
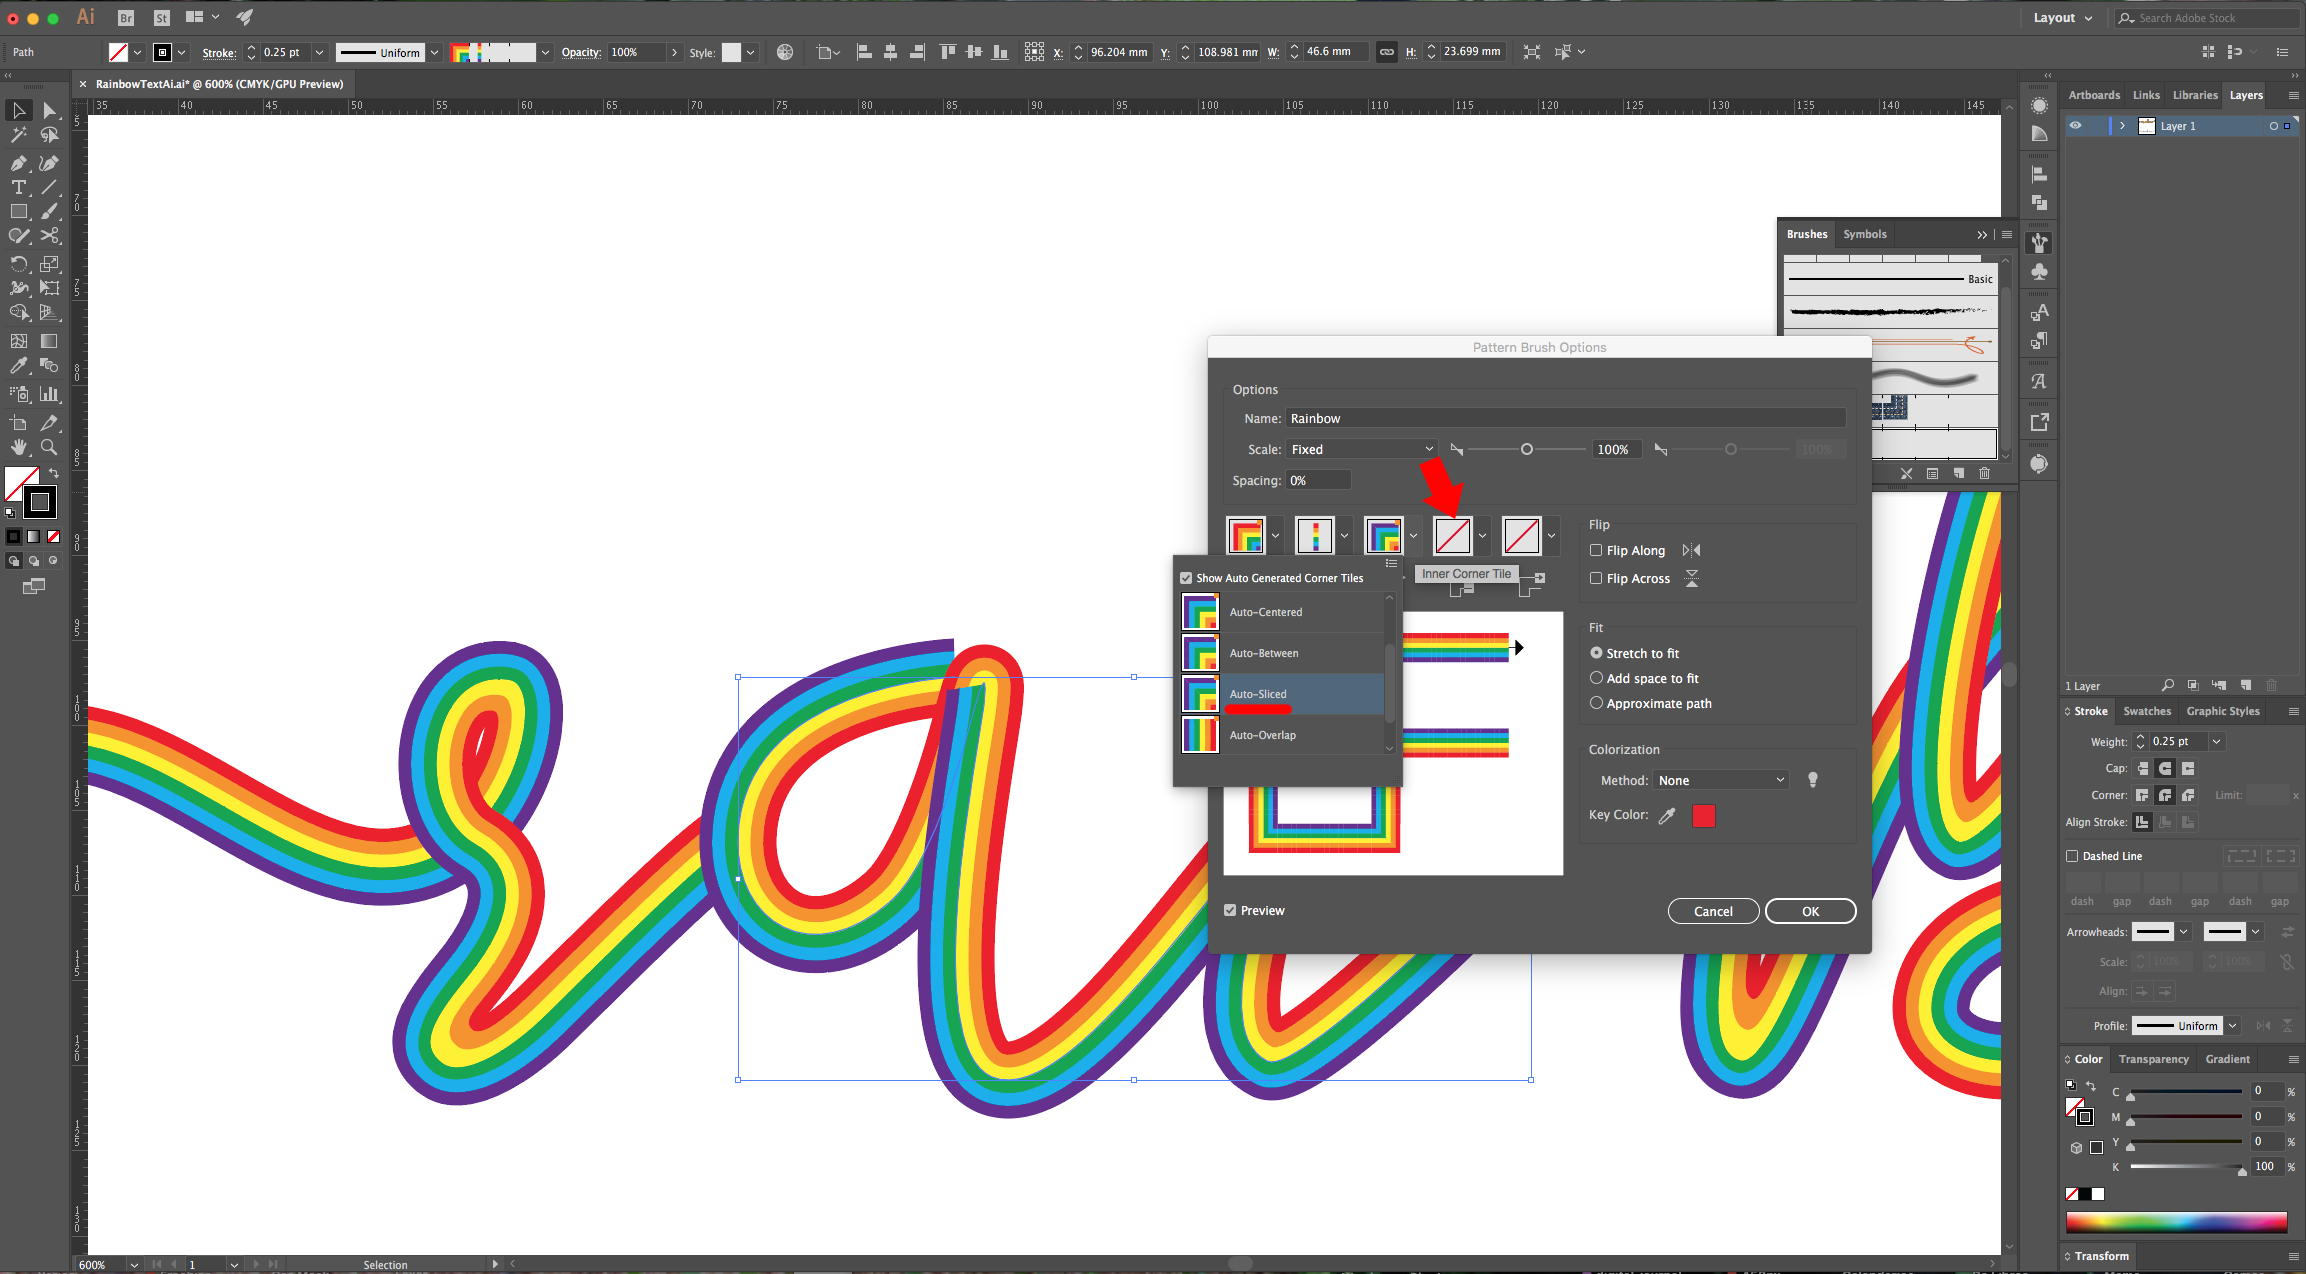
5 - Select all your squares and in the “Brushes Panel”, click on the top-right menu and choose “New Brush” (or click on the small icon at the bottom of the Panel). Choose “Pattern Brush”, give it a name and use the following values:

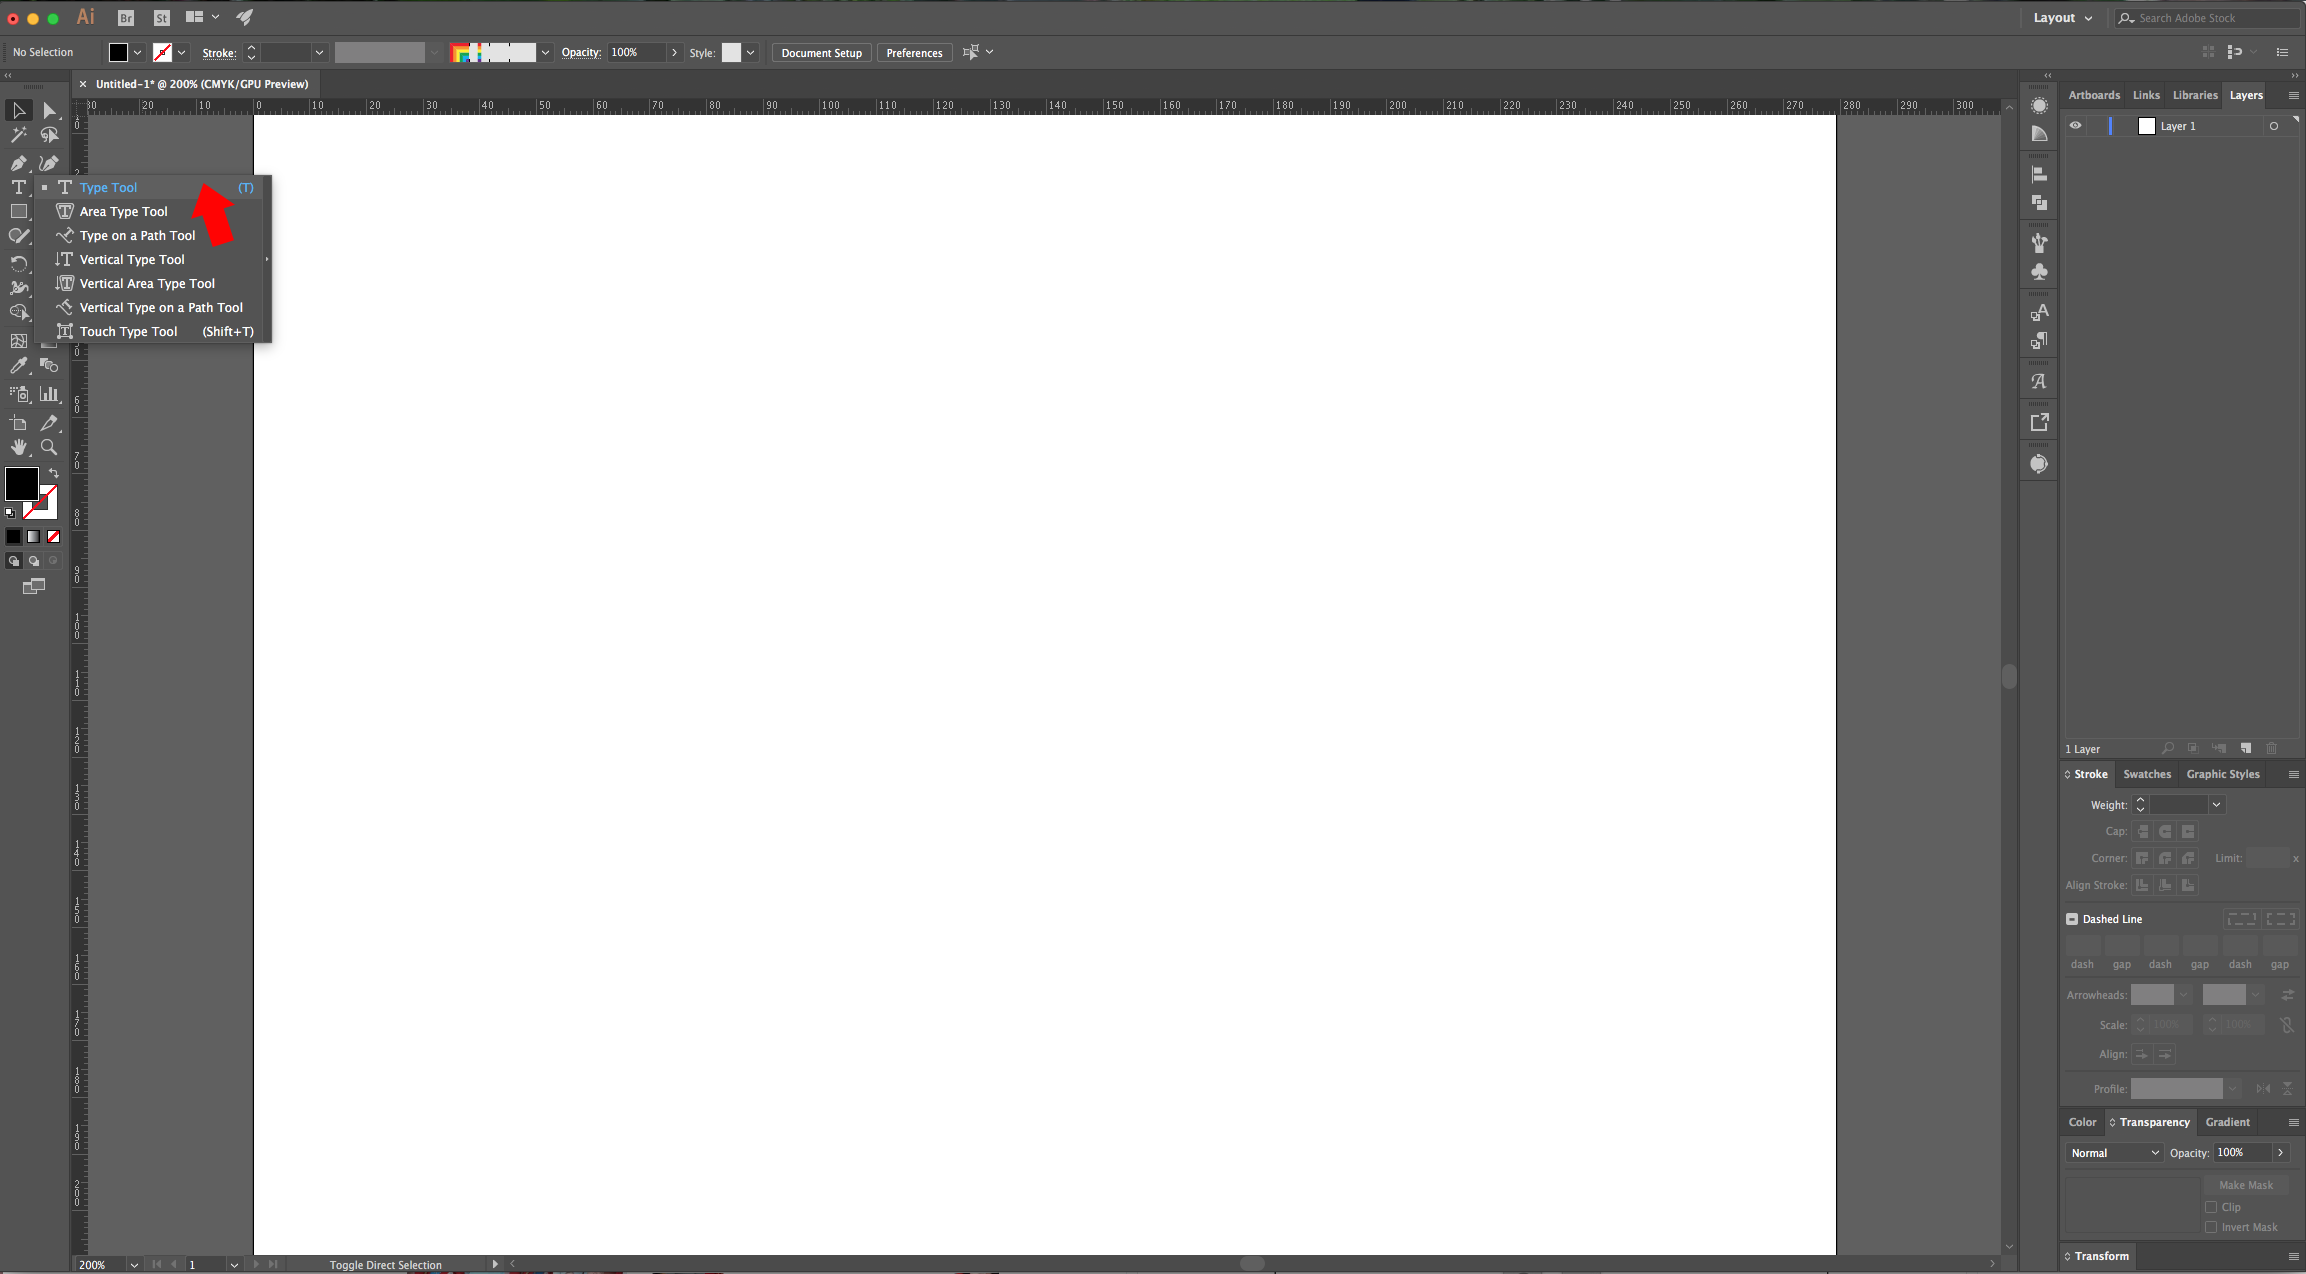
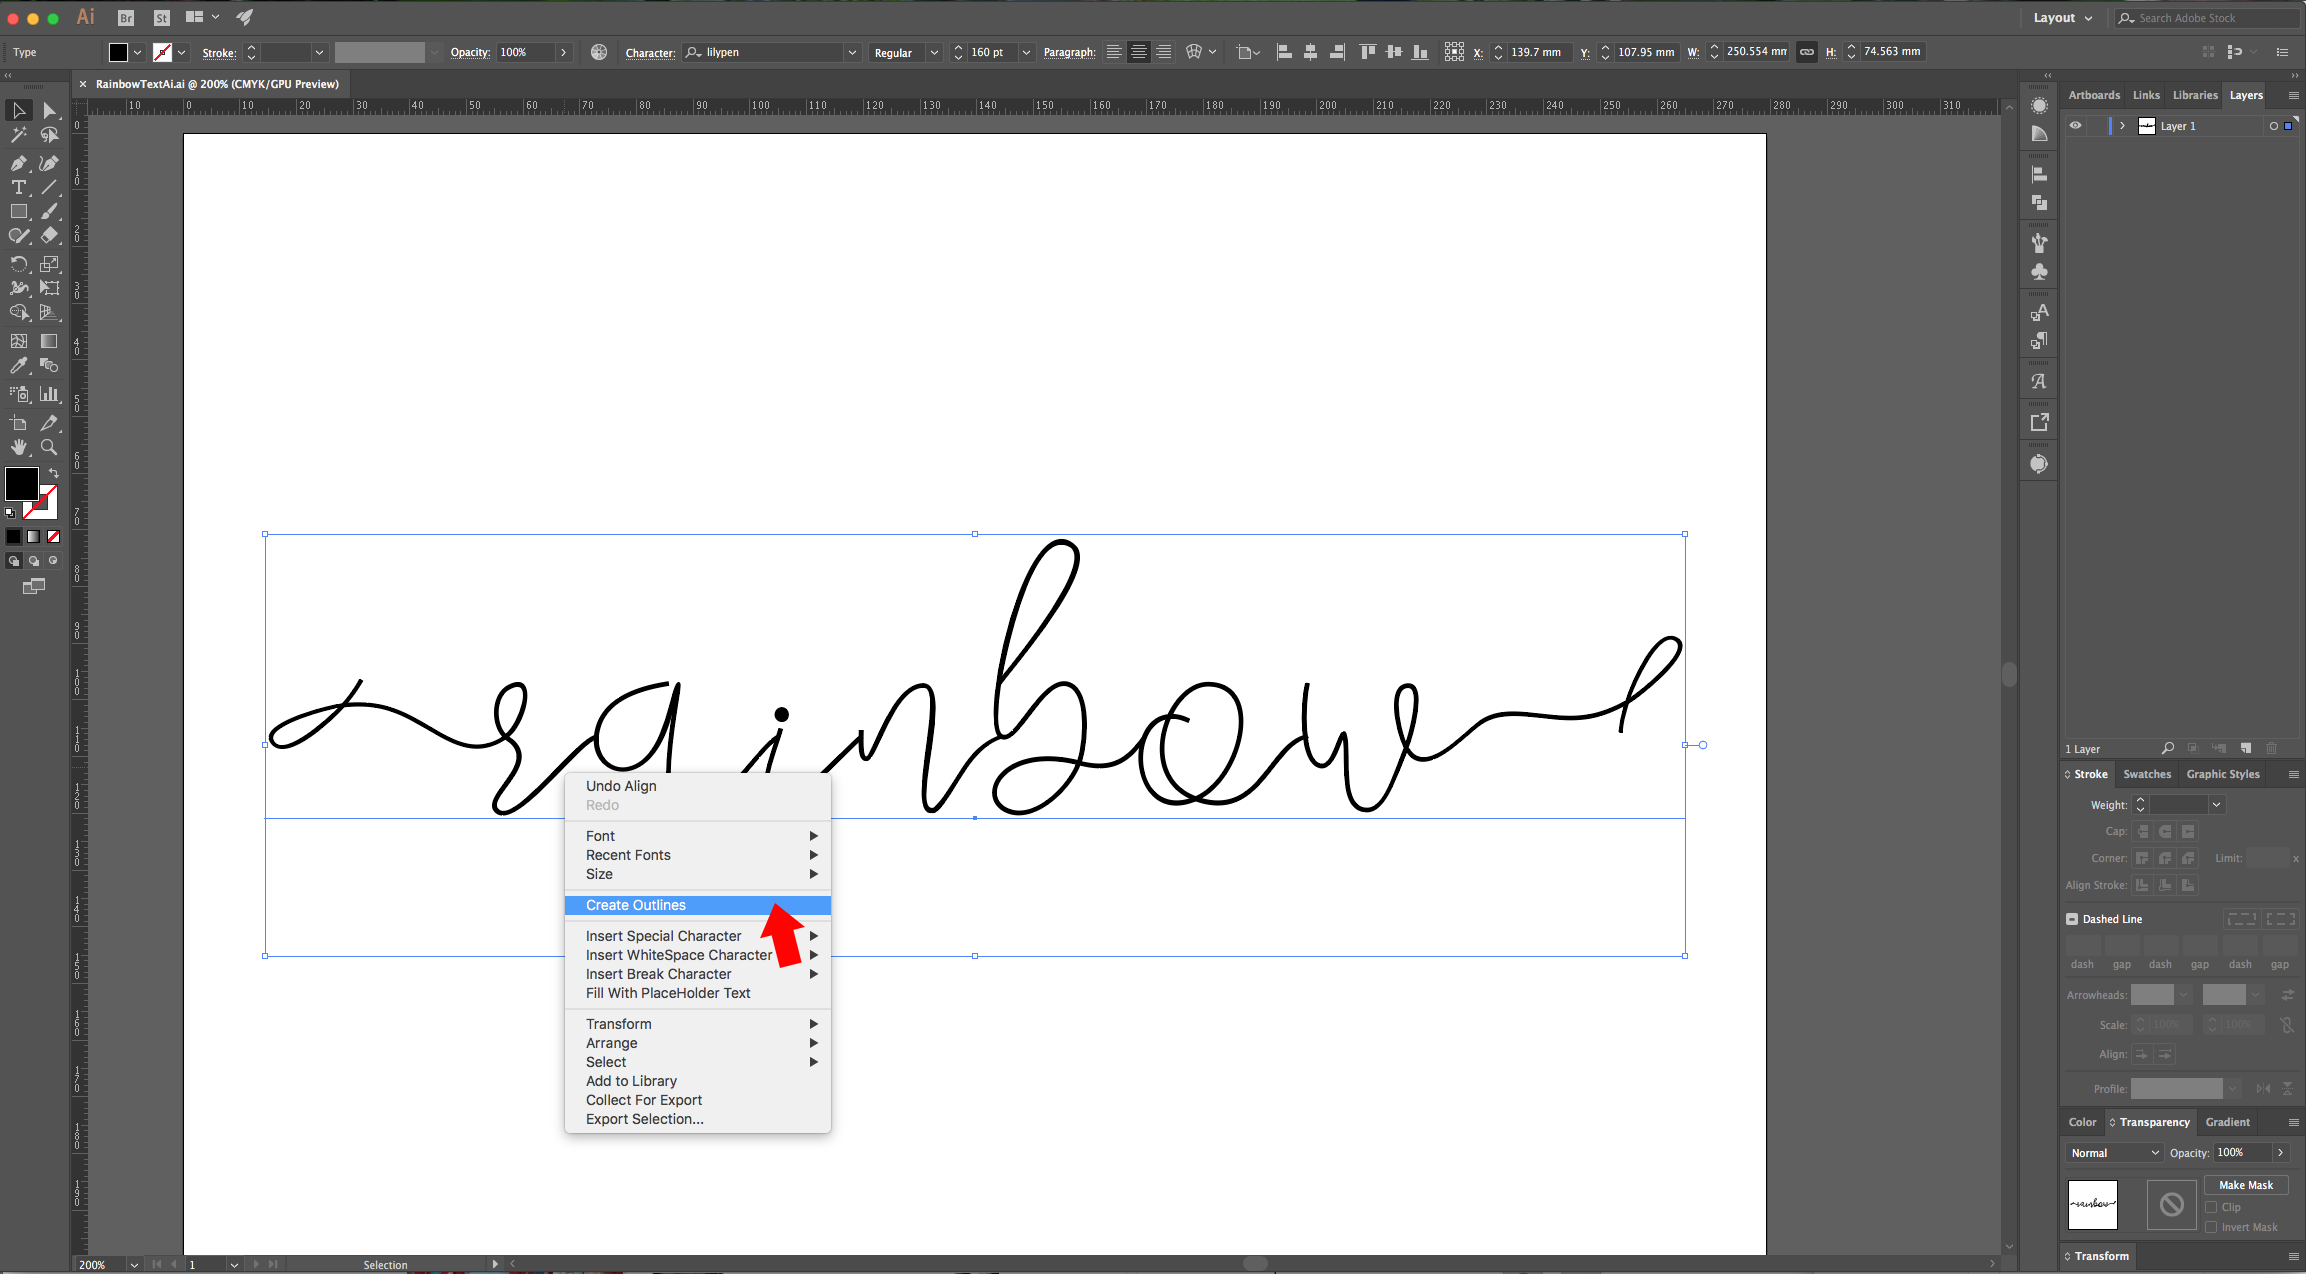
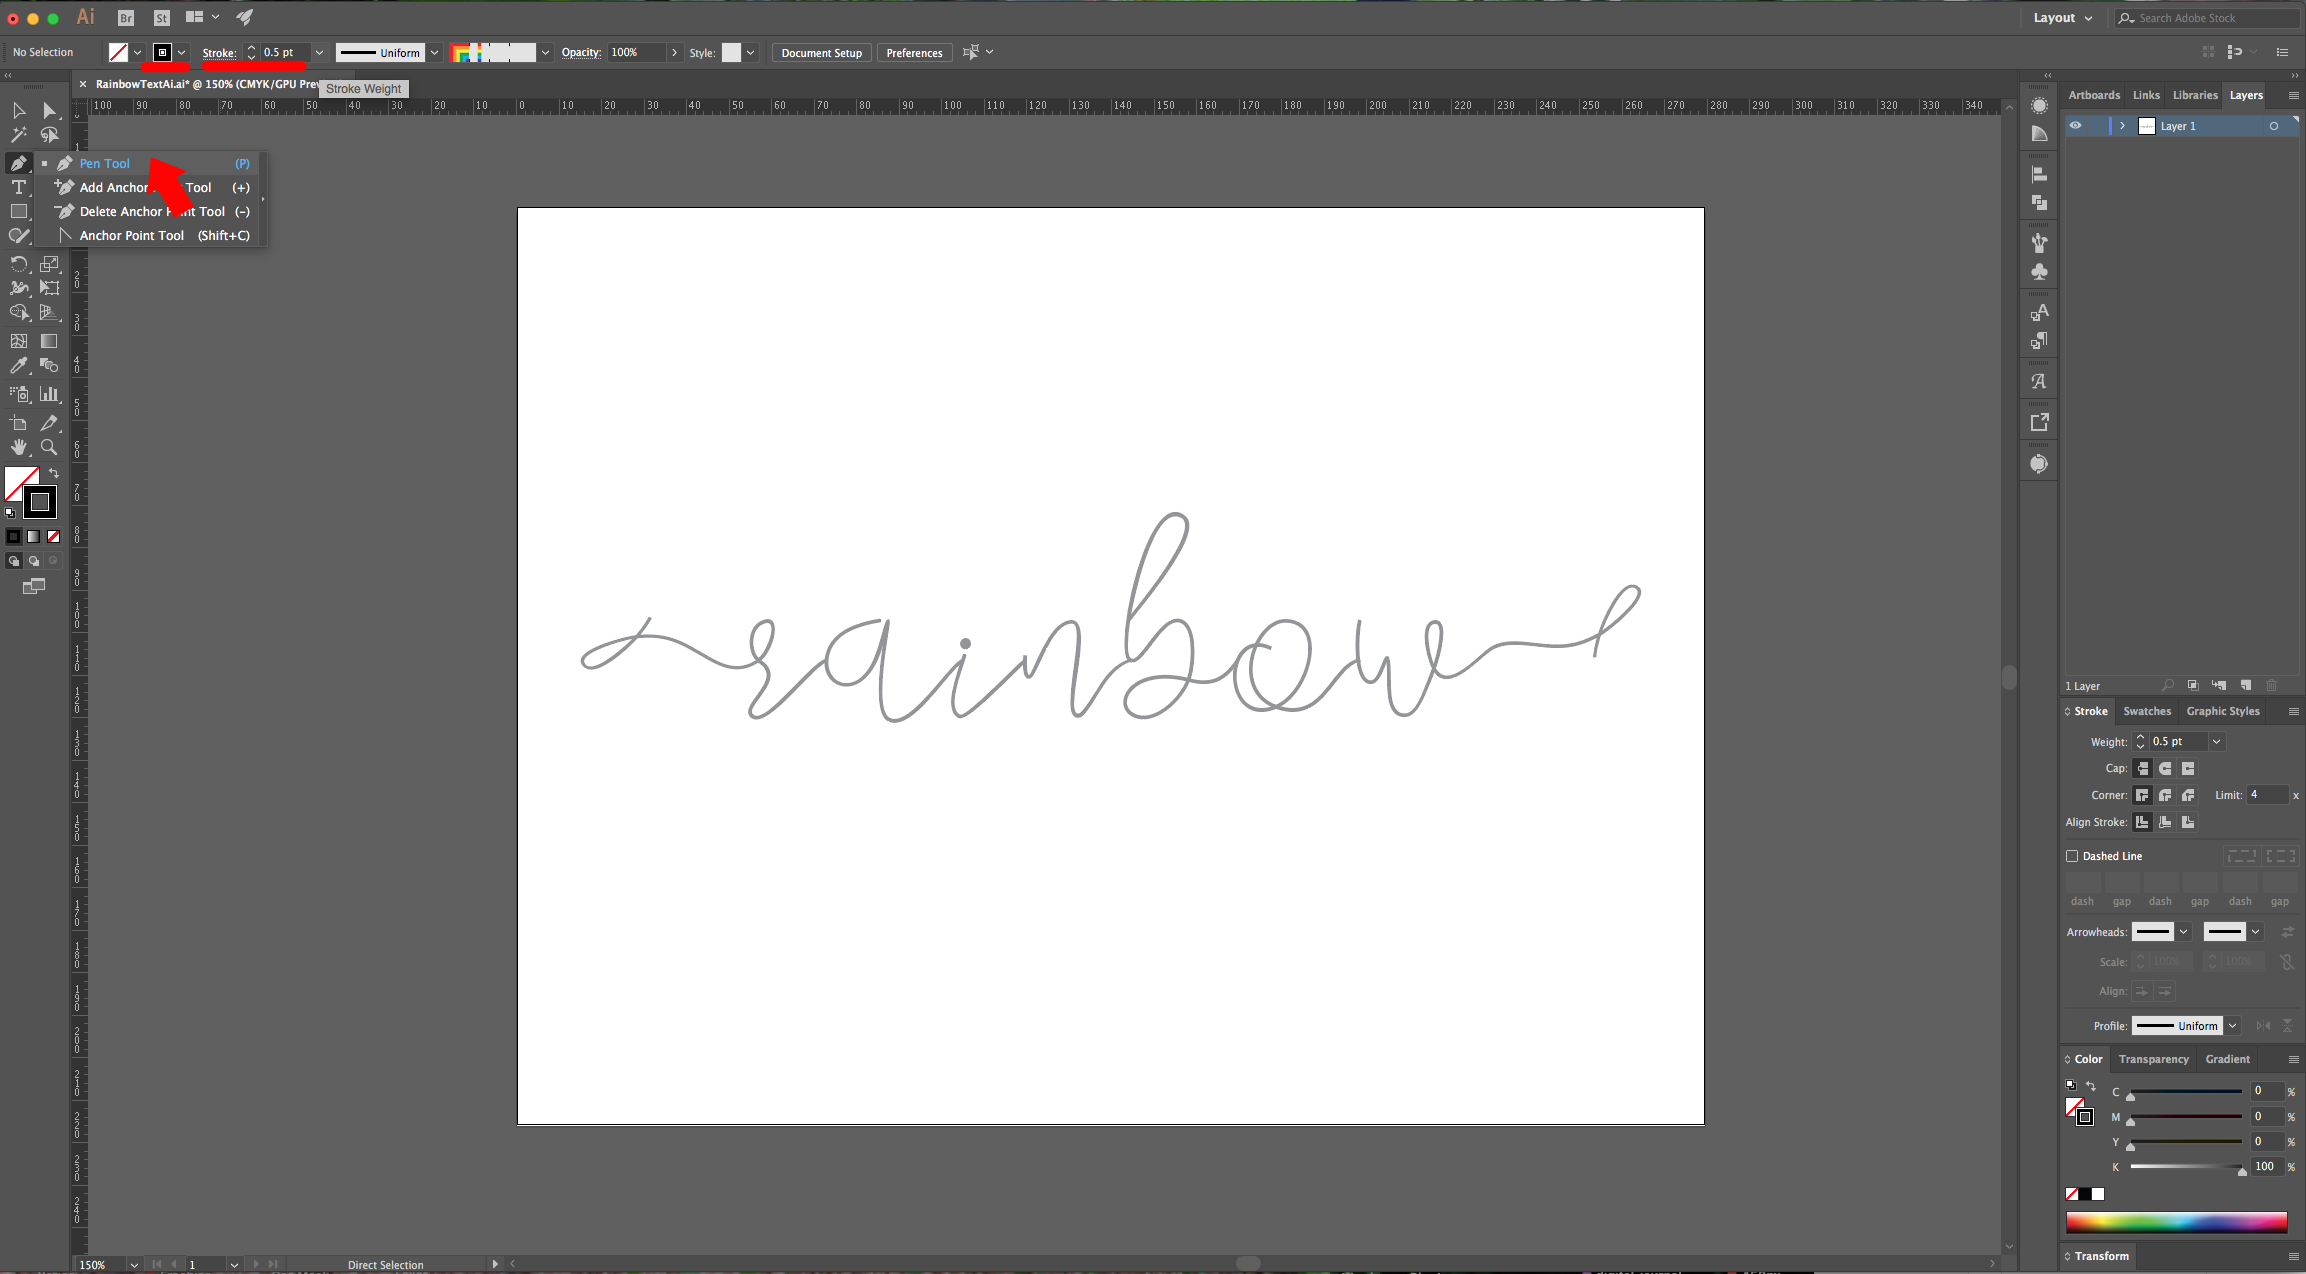
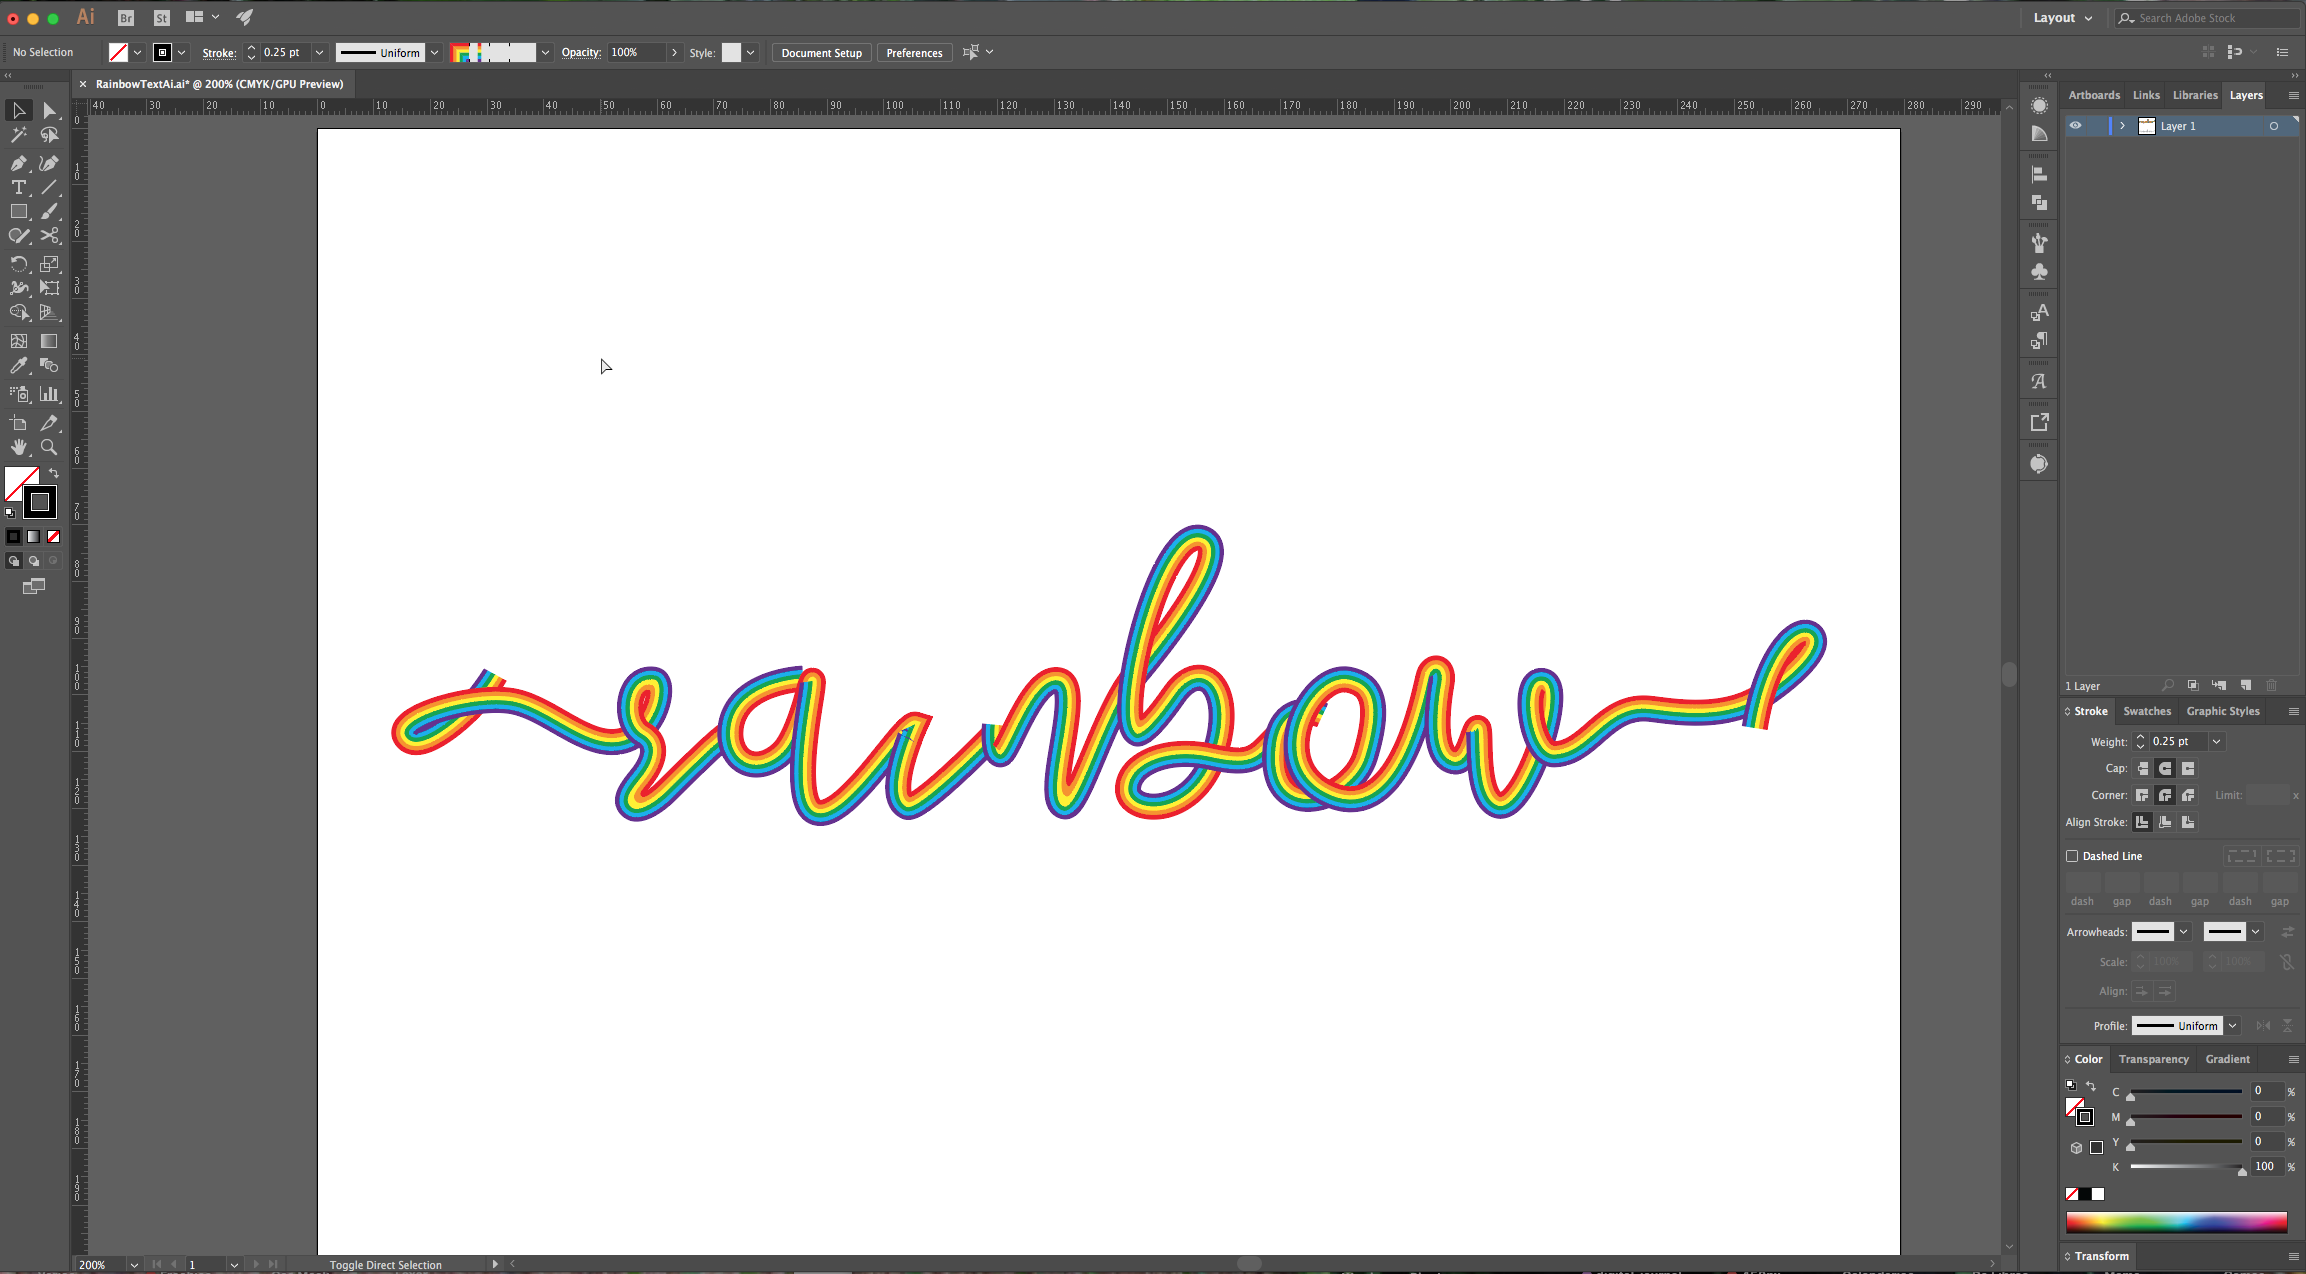
6 - Select the “Type Tool” (T), choose your font (we used Lilypen) and type your text. Right-click on top of it choose “Create Outlines” and change the fill color to a medium gray.
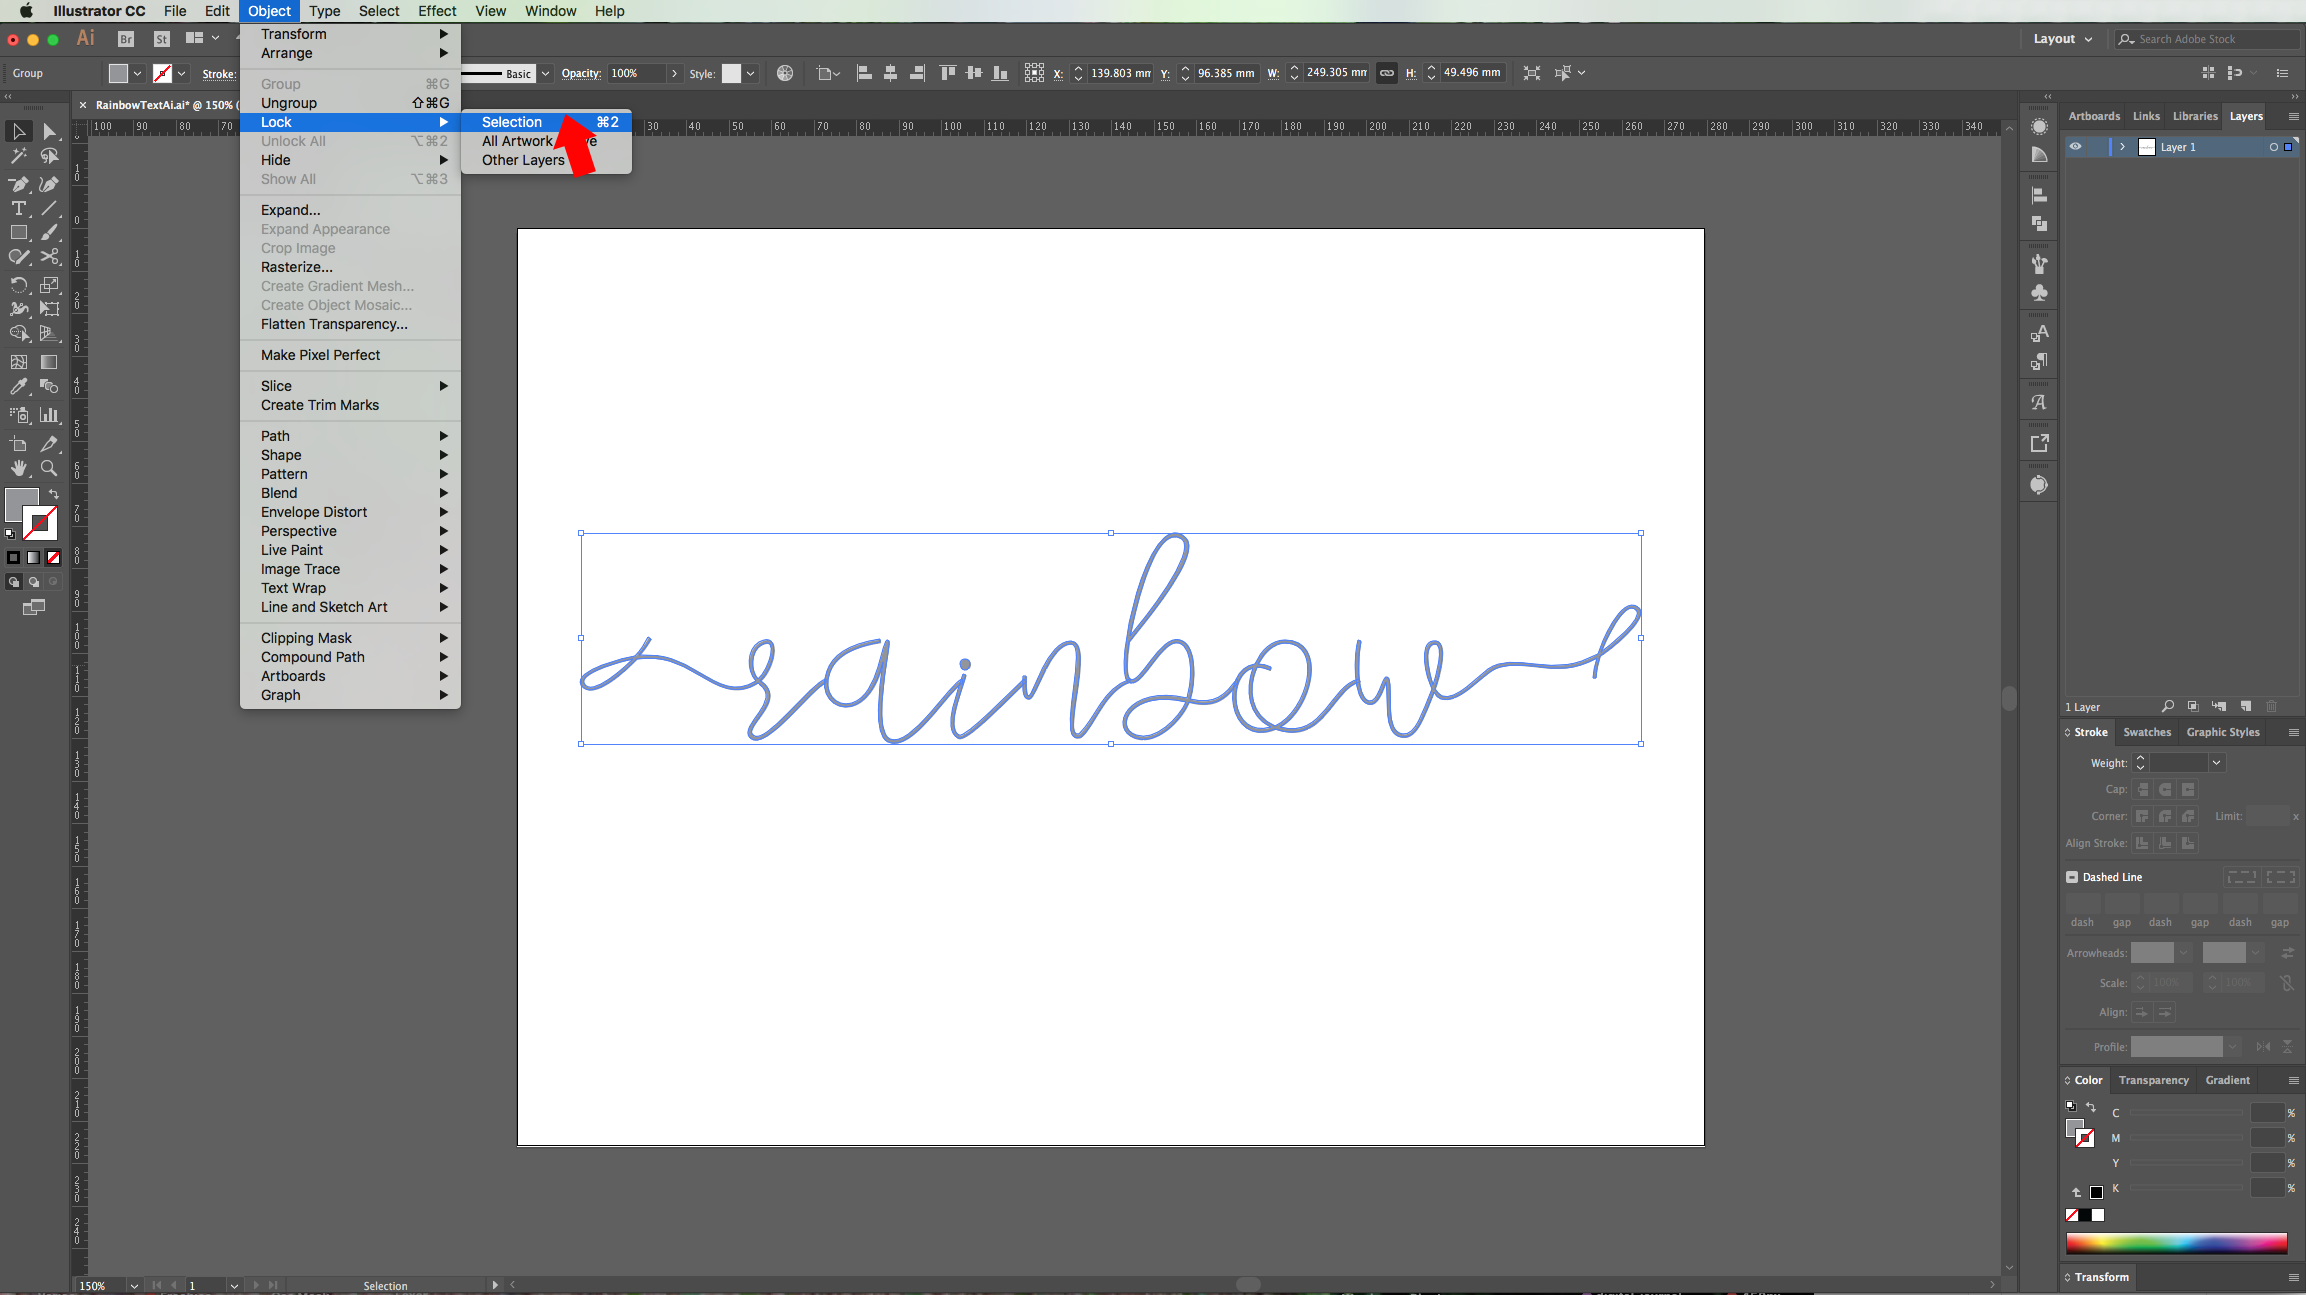
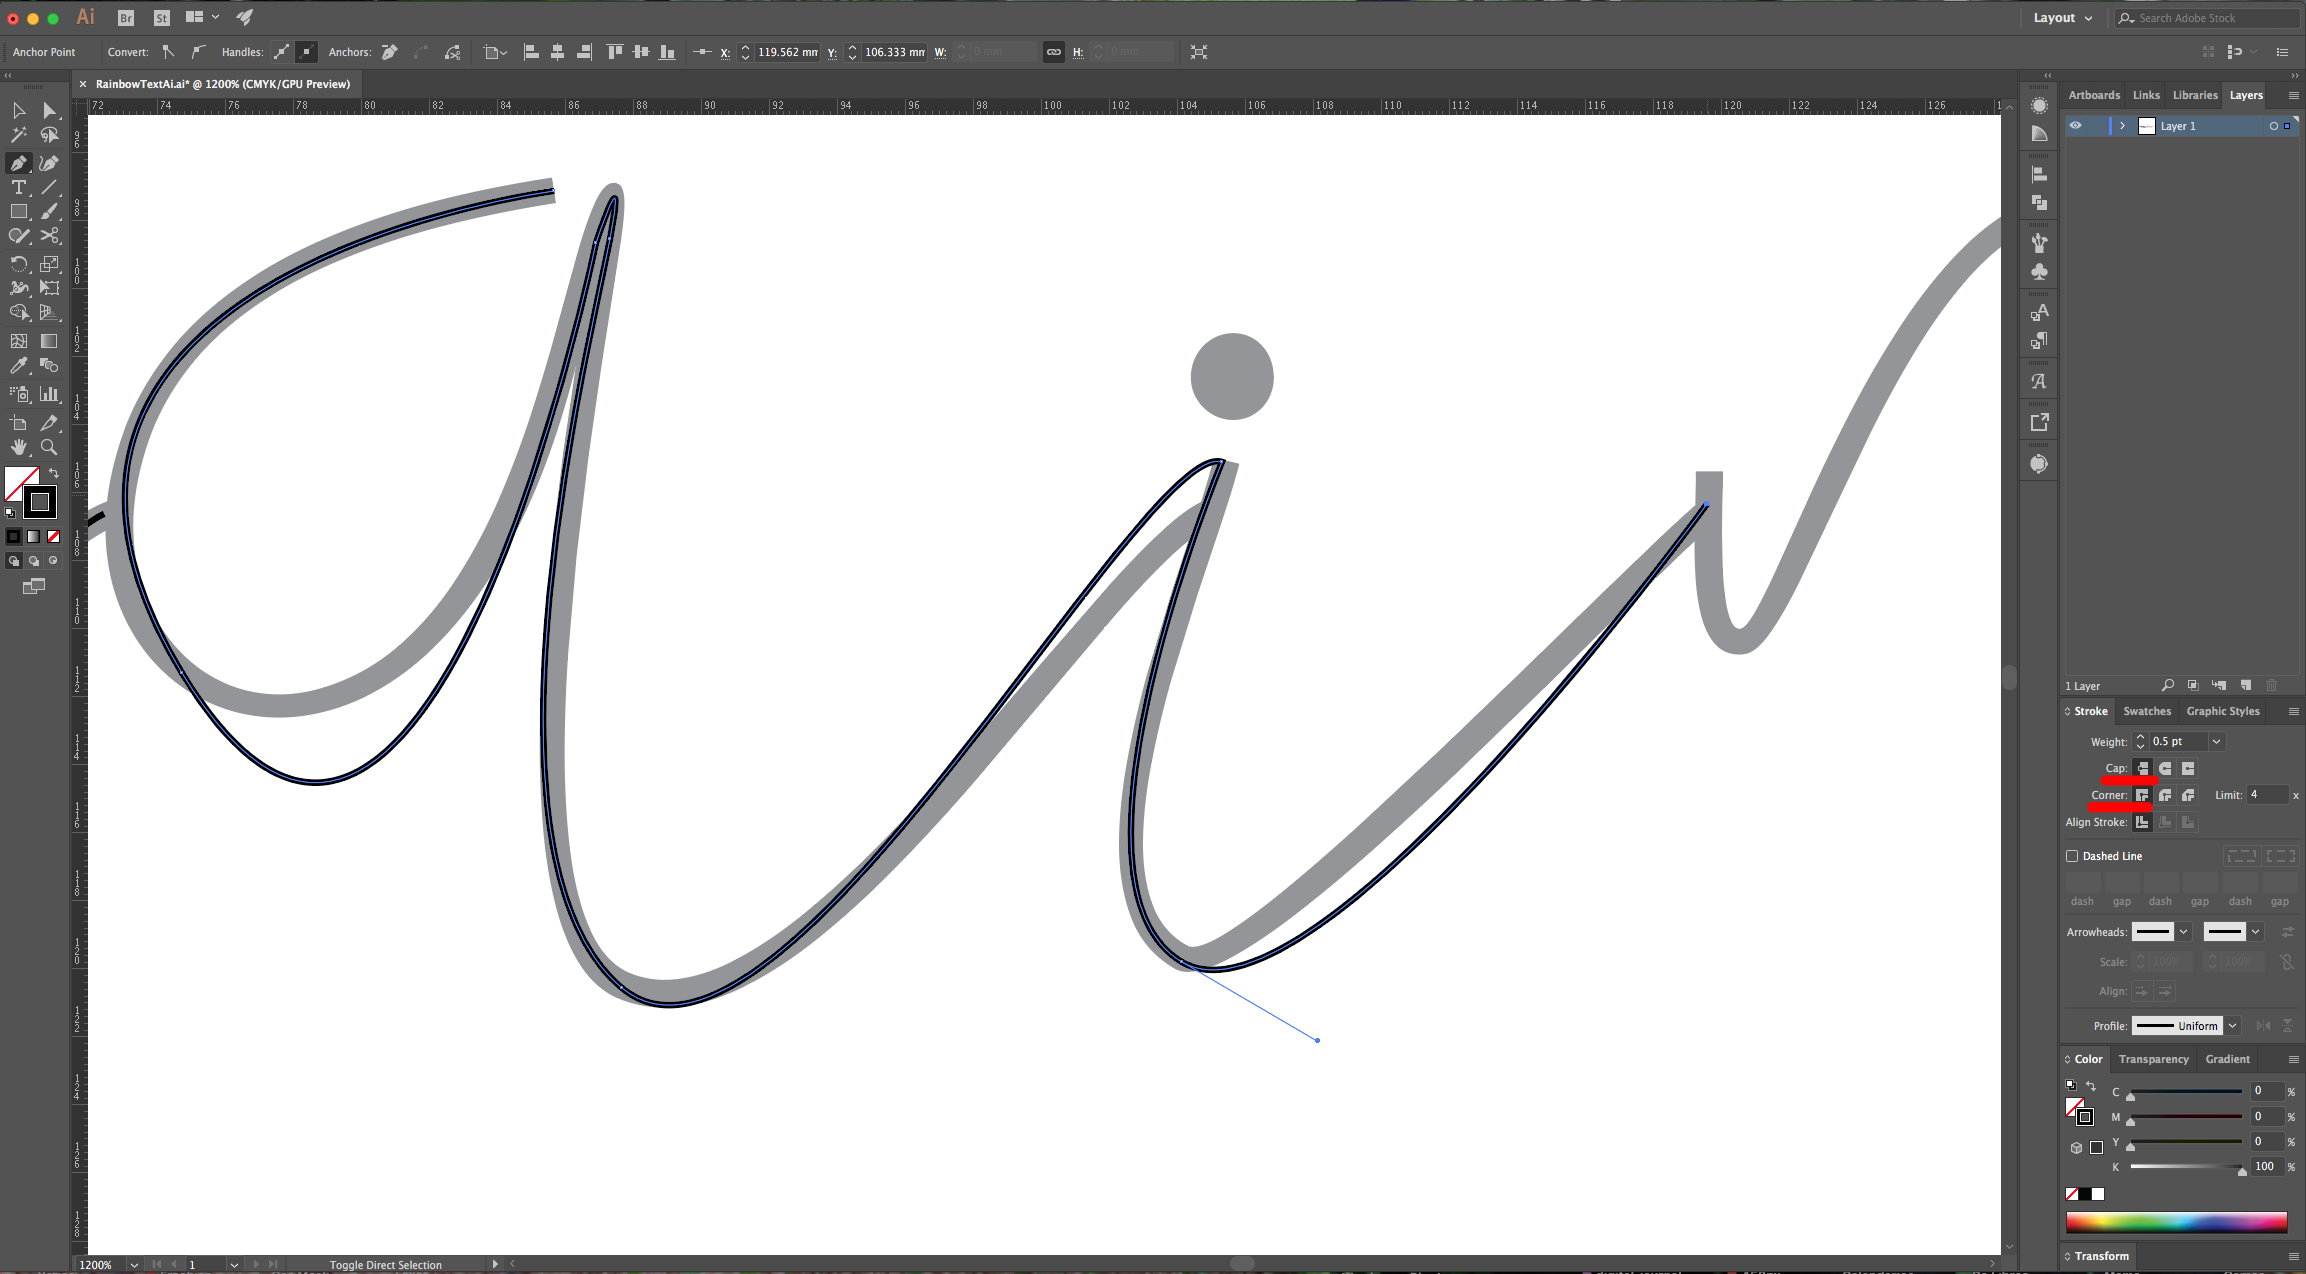
7 - Select your text and go to Object > Lock > Selection (Command/Control + 2). Use the “Pen Tool” (P), use a “Stroke Weight” of 0.5 pt and start tracing your text. You can choose to trace each letter, or to have some letters grouped together depending on your font and word combinations. Use the “Direct Selection Tool” (A) to select an “Anchor Point” and refine your text in case its needed.
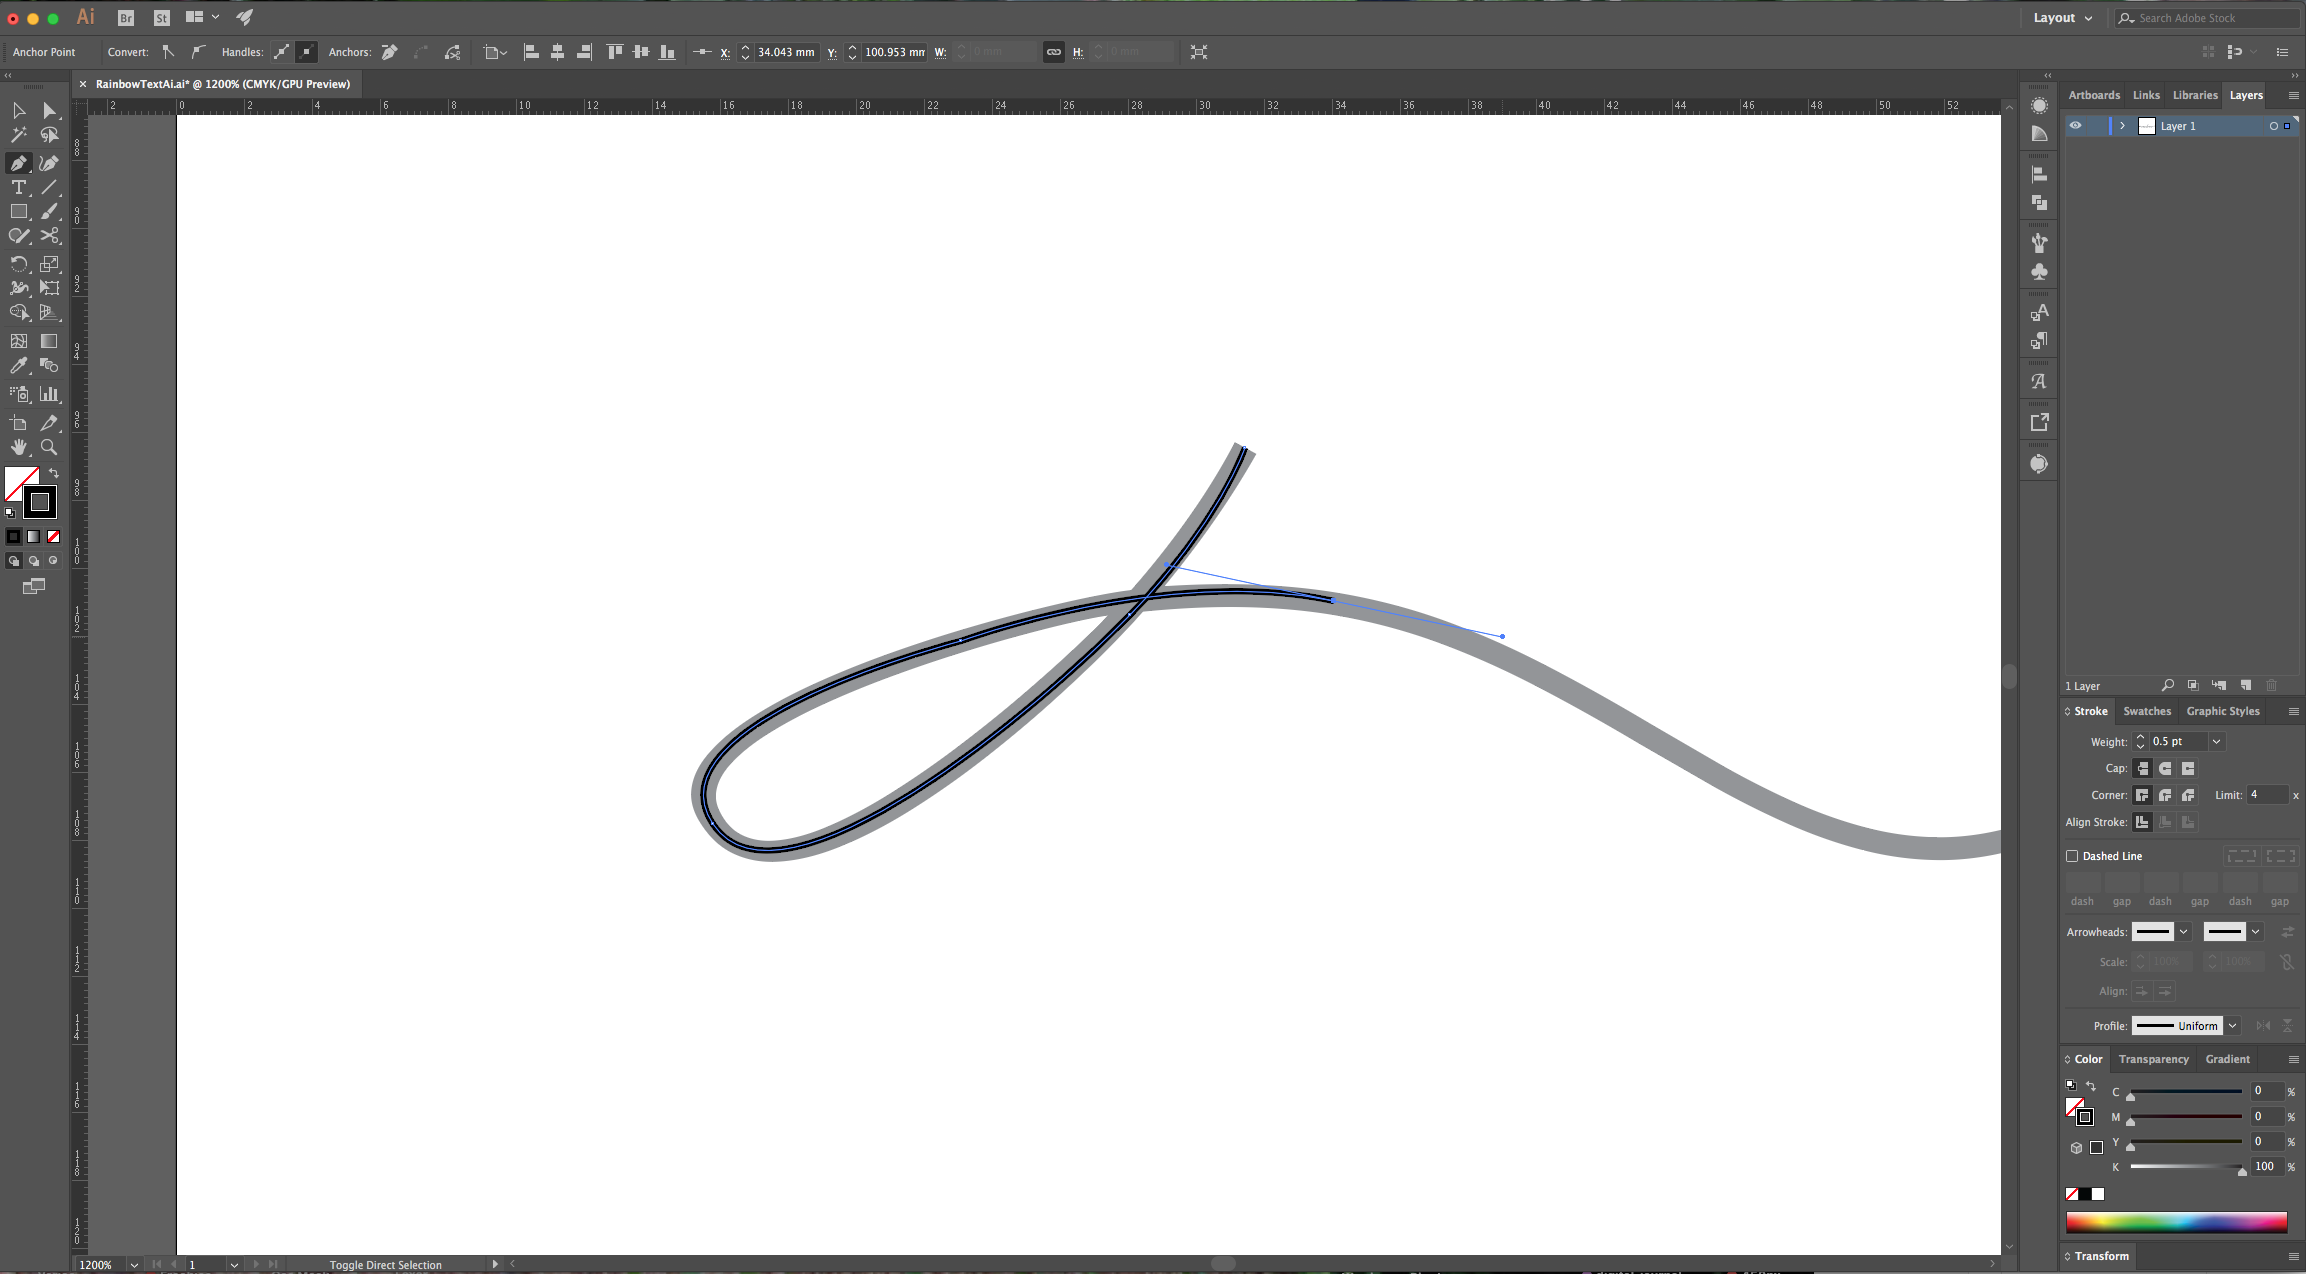
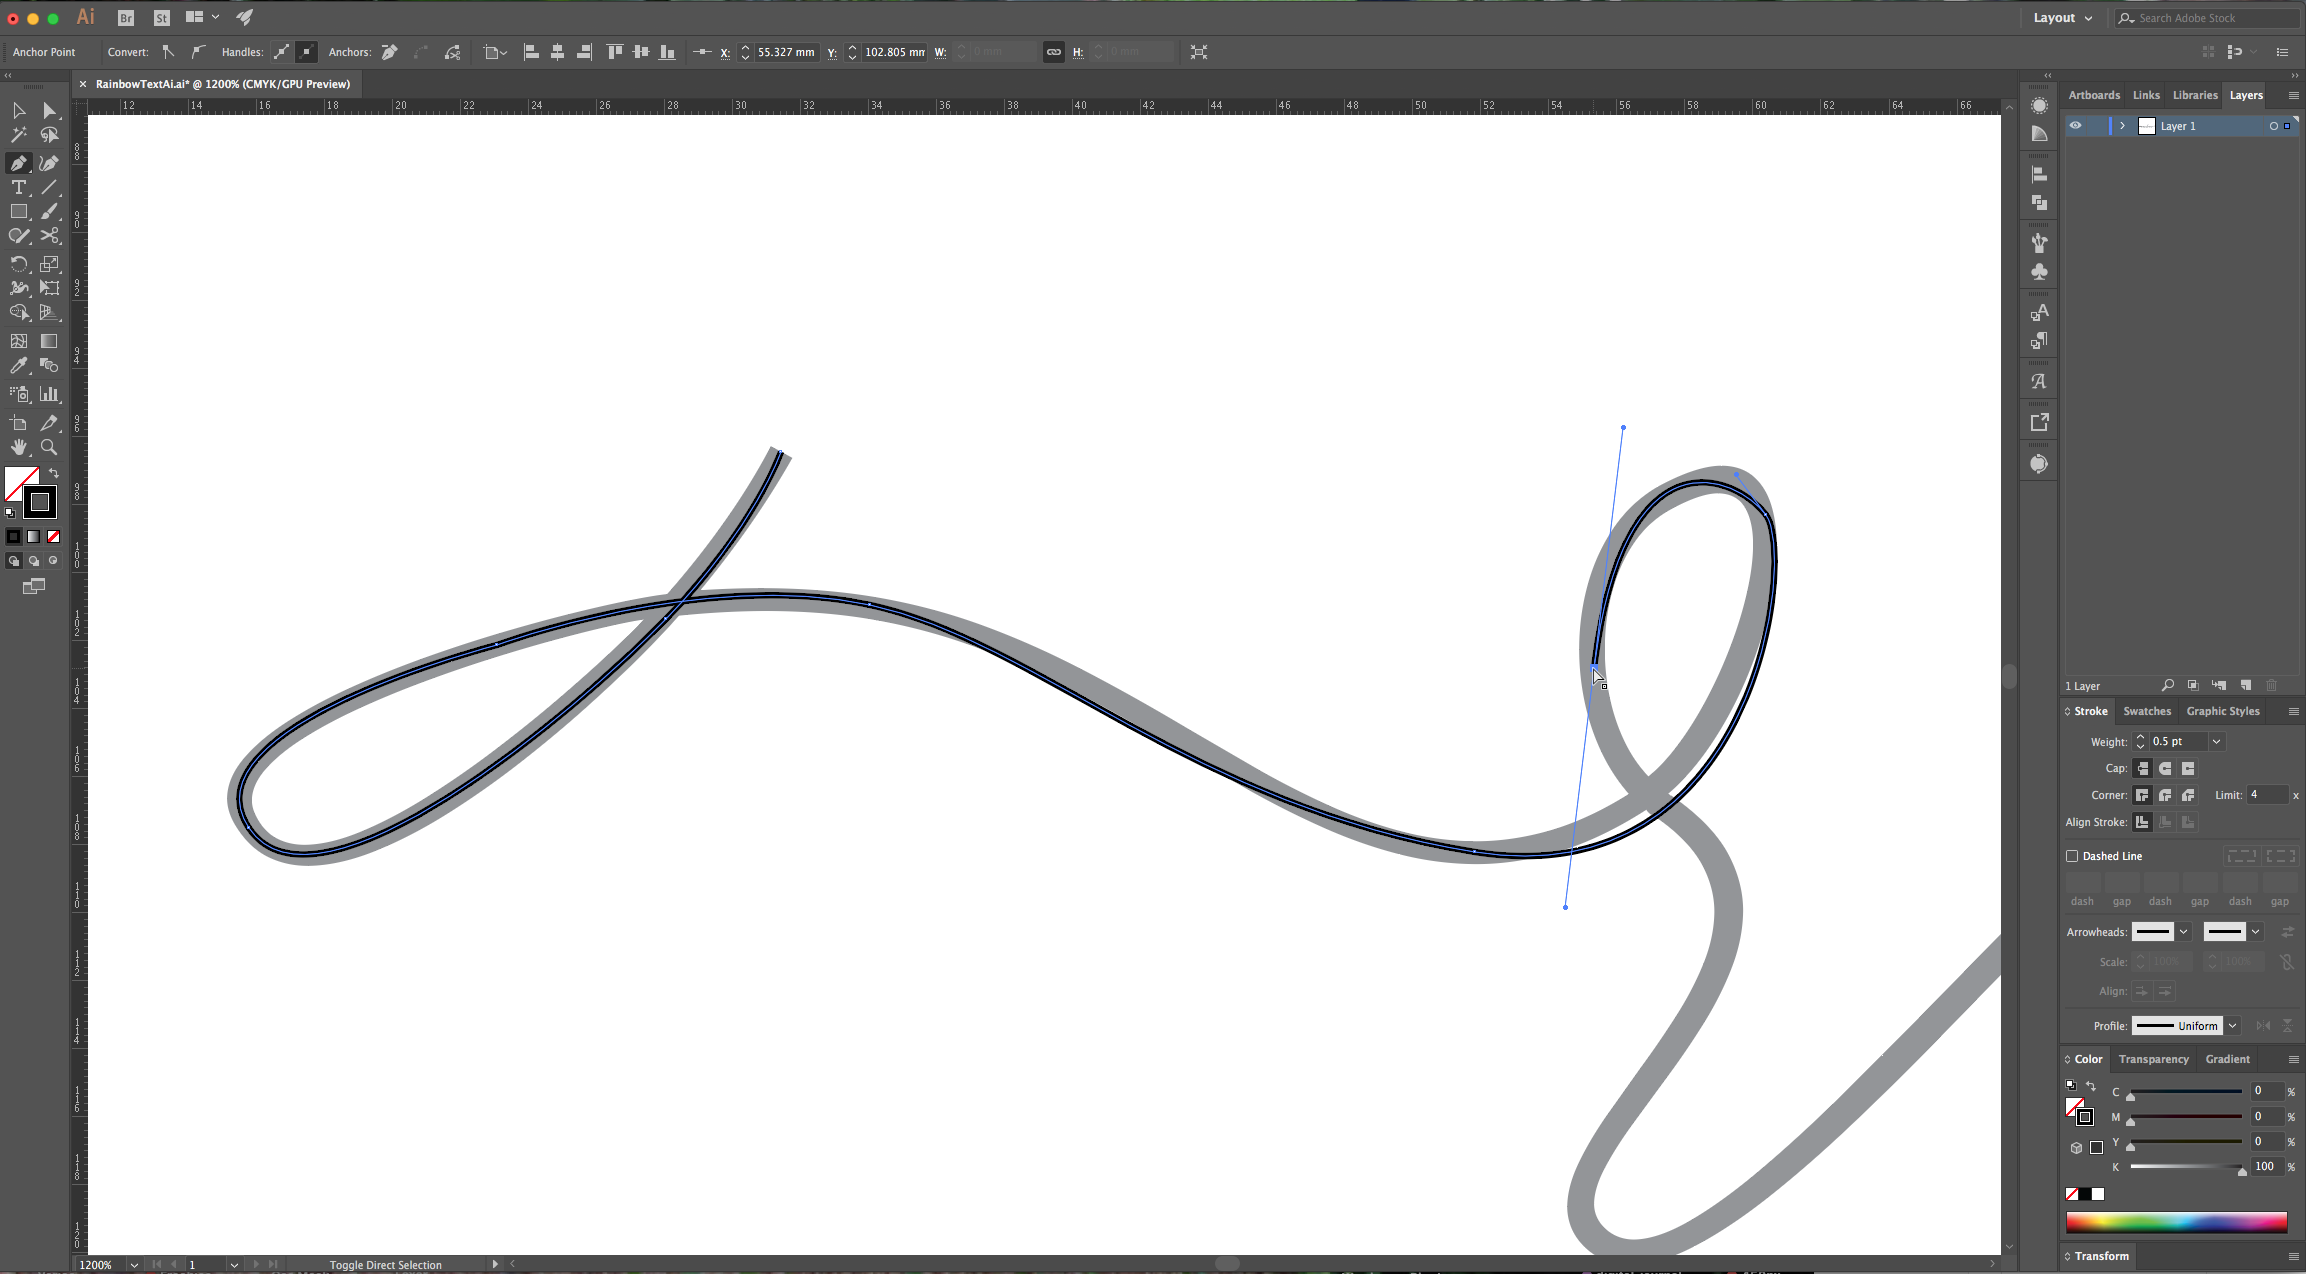
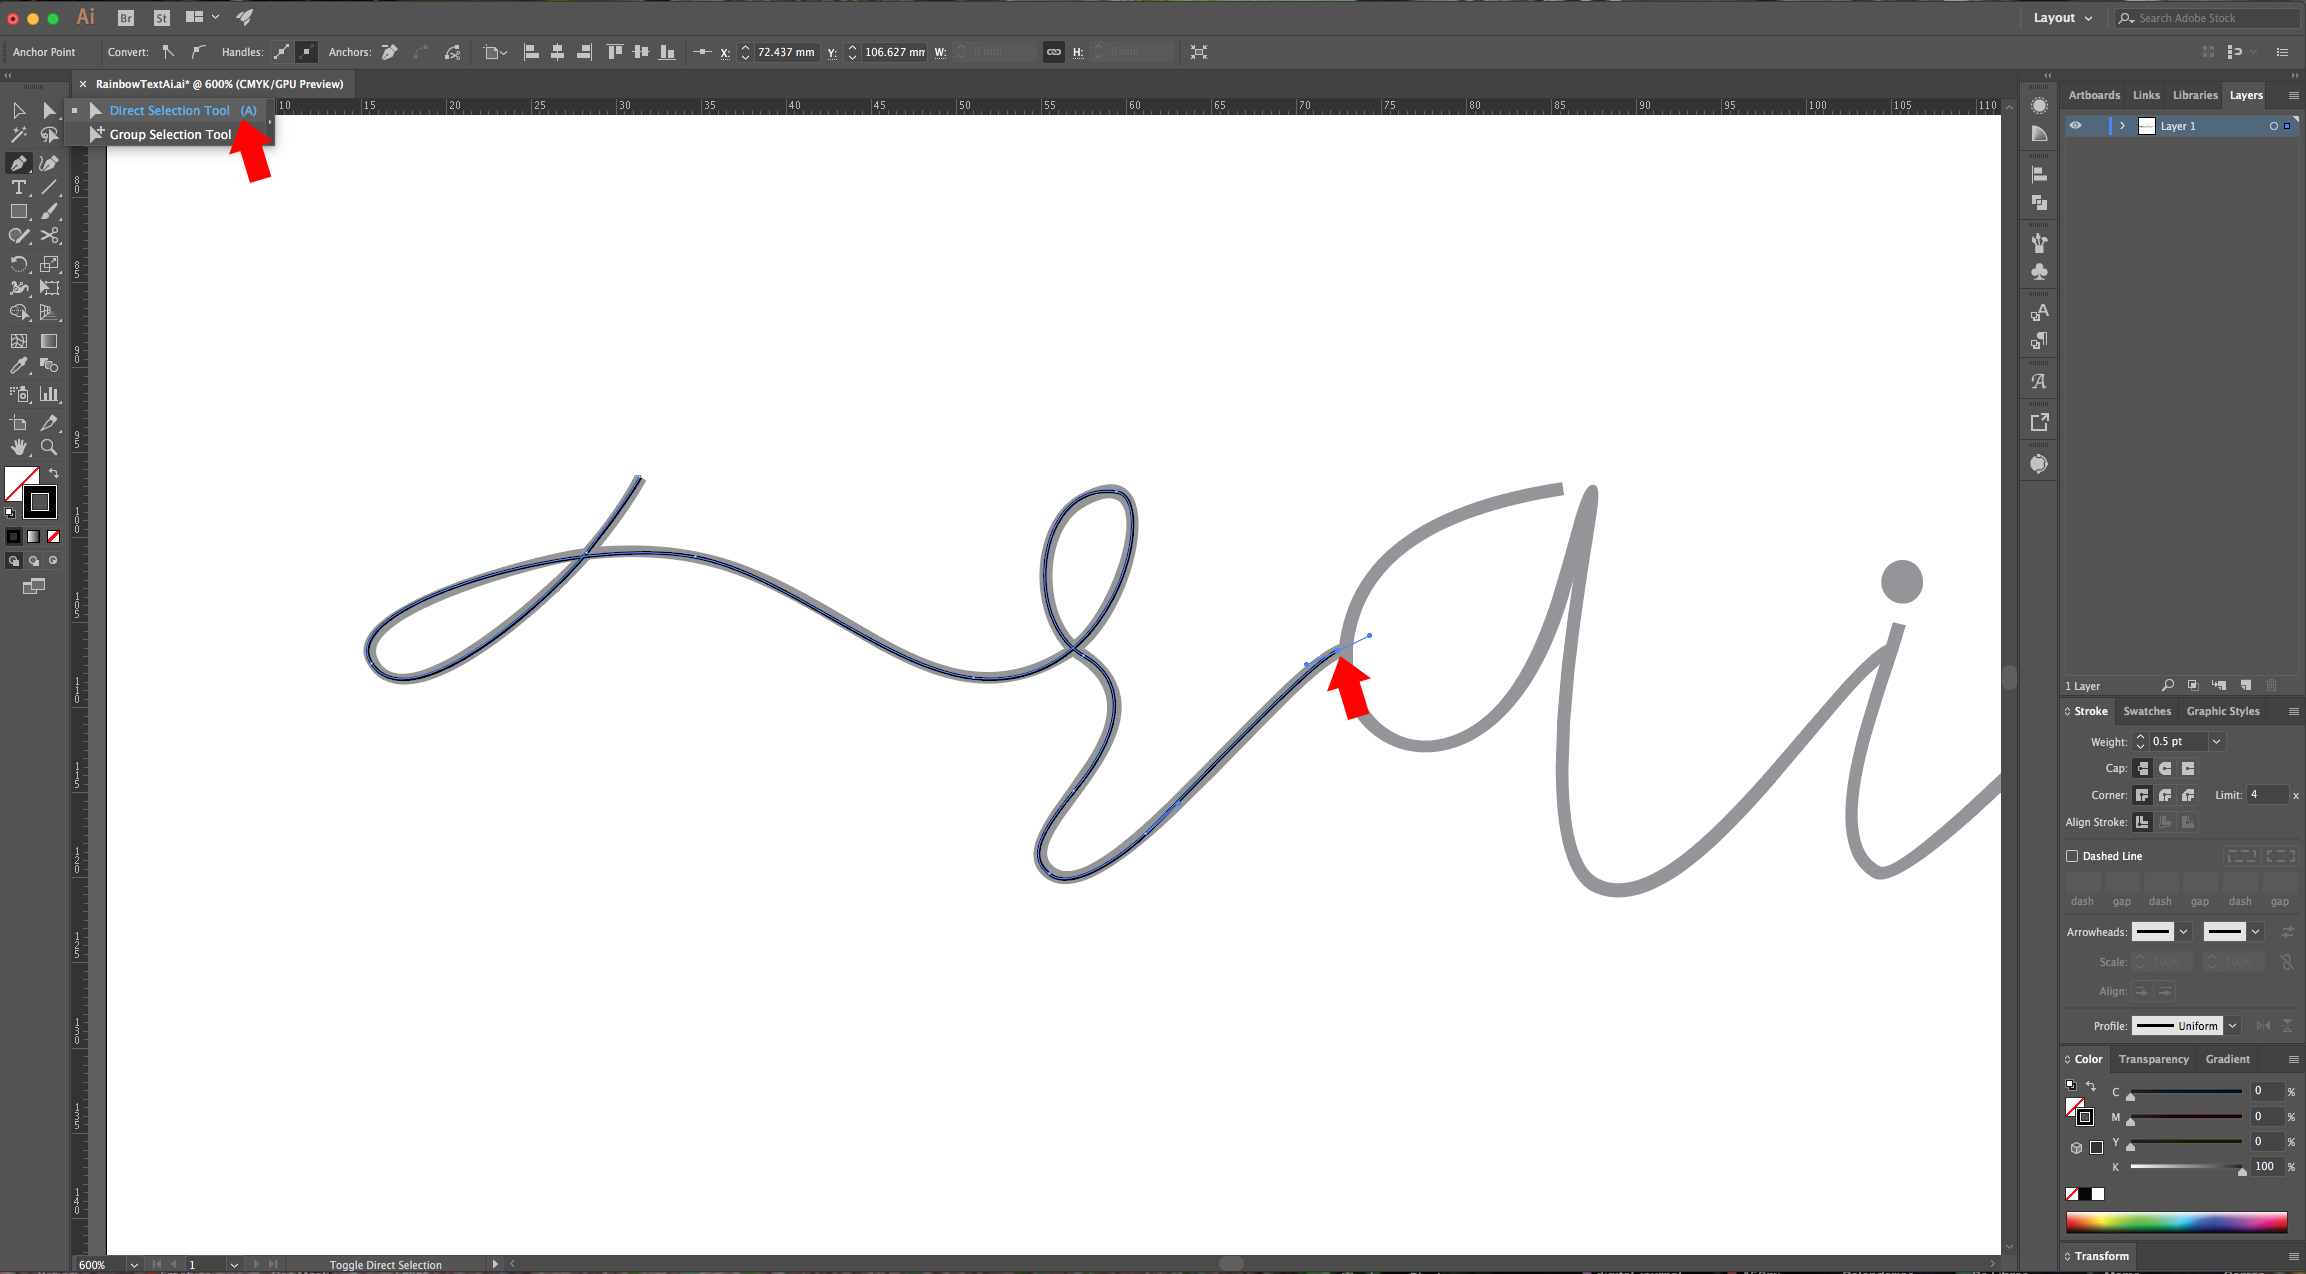
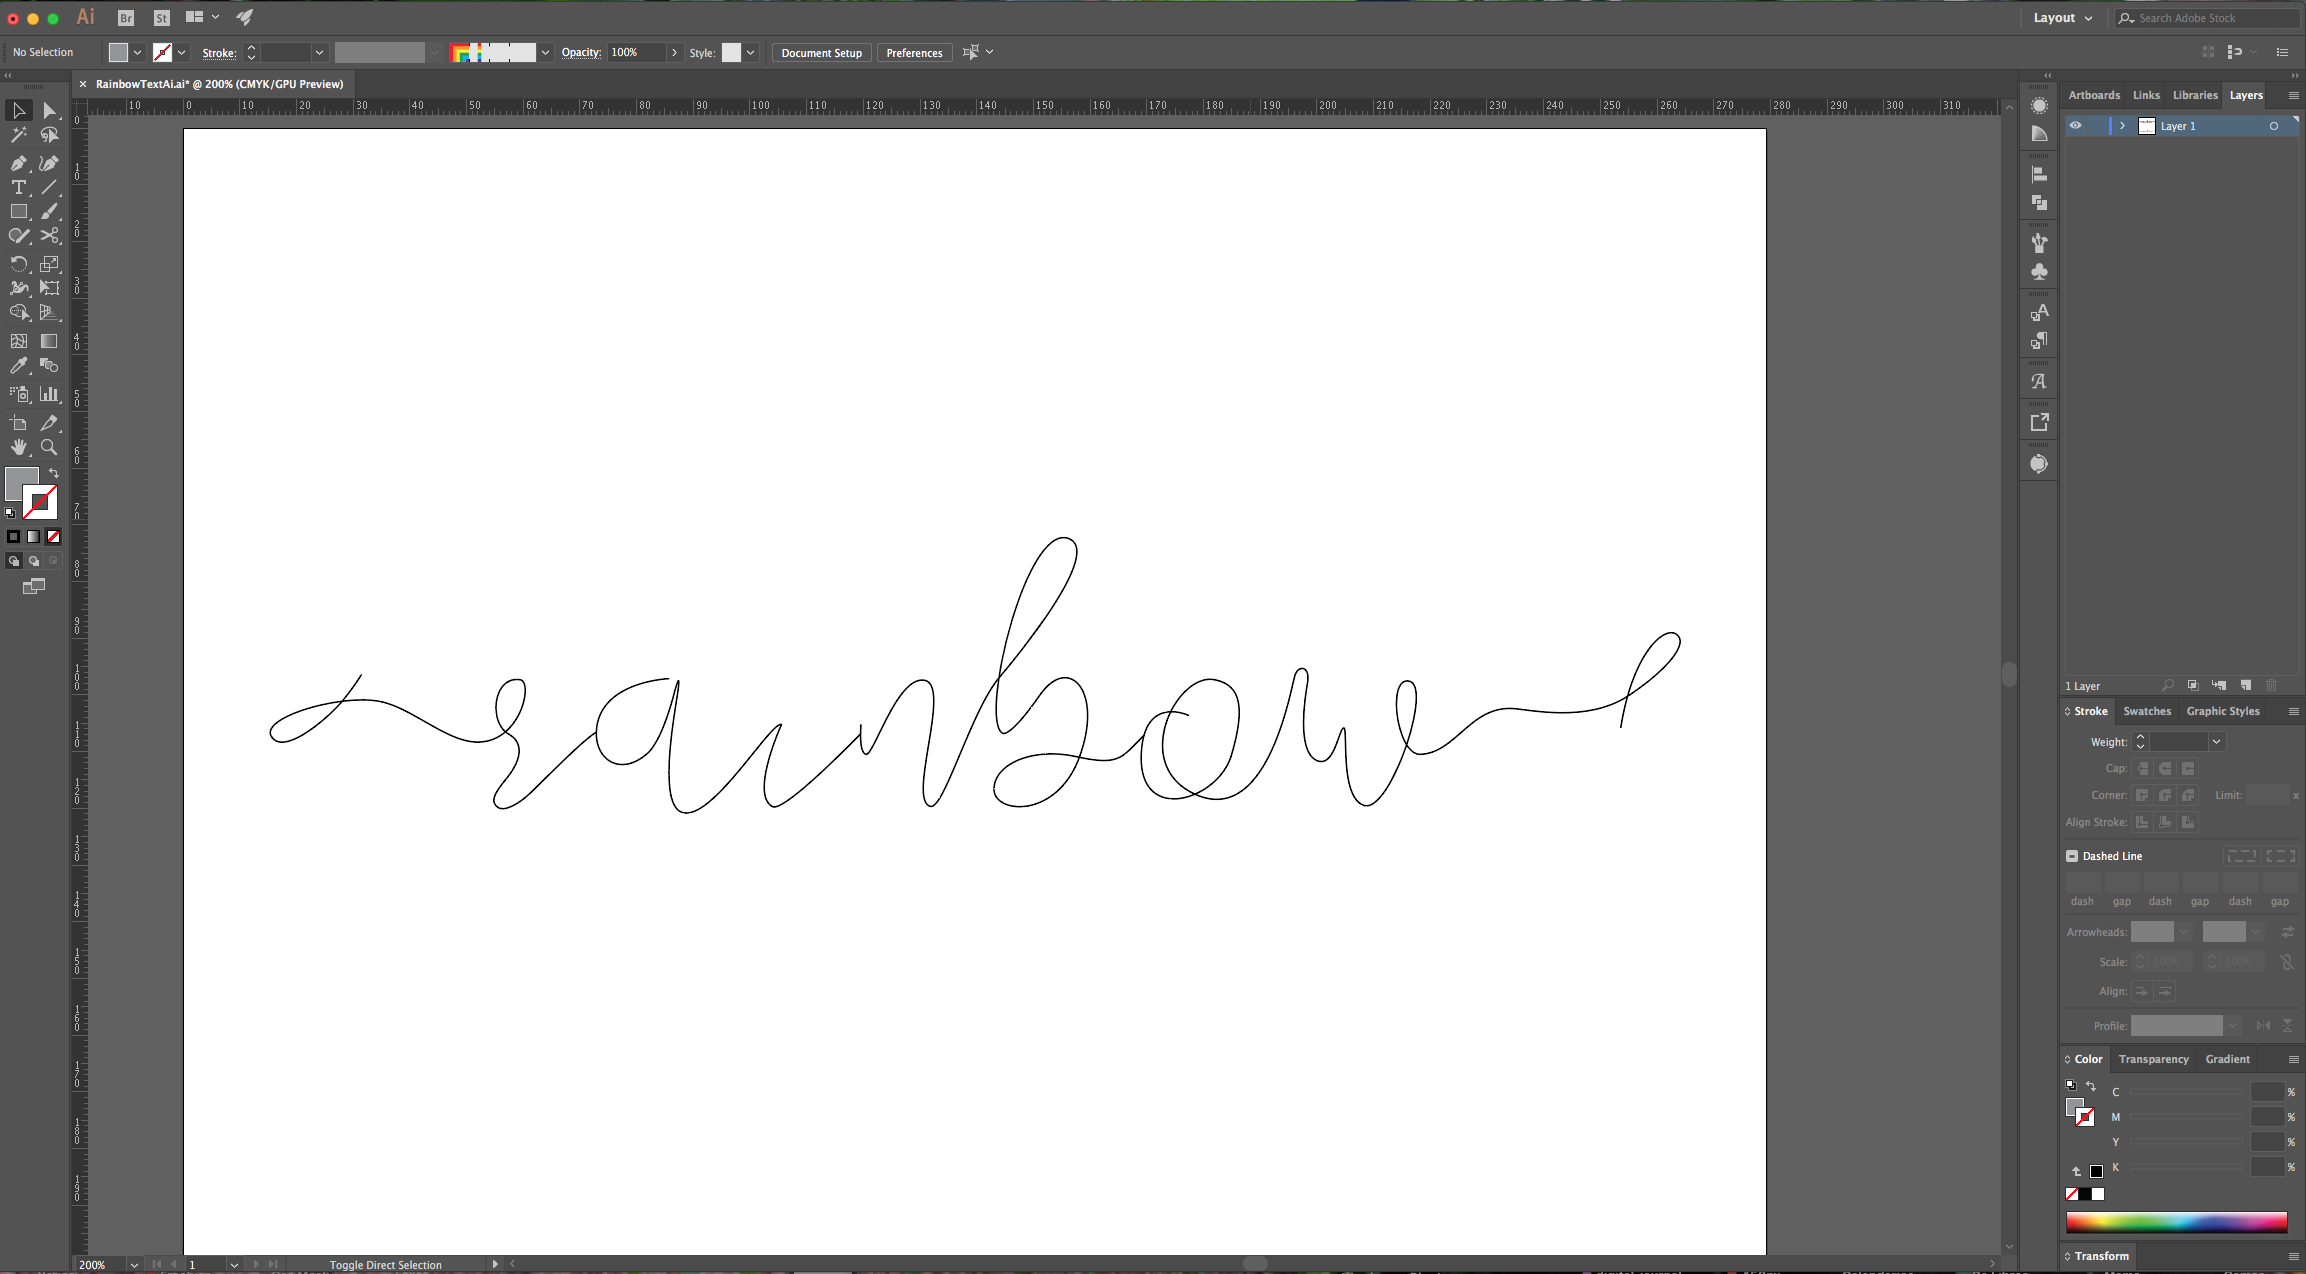
8 - Keep tracing your letters, or groups of letters and fixing them with the “Direct Selection Tool” (A). Change the “Cap” and “Corner” Joins to “Round”. You can modify the appearance of some letters if you want to make the text more fluid.
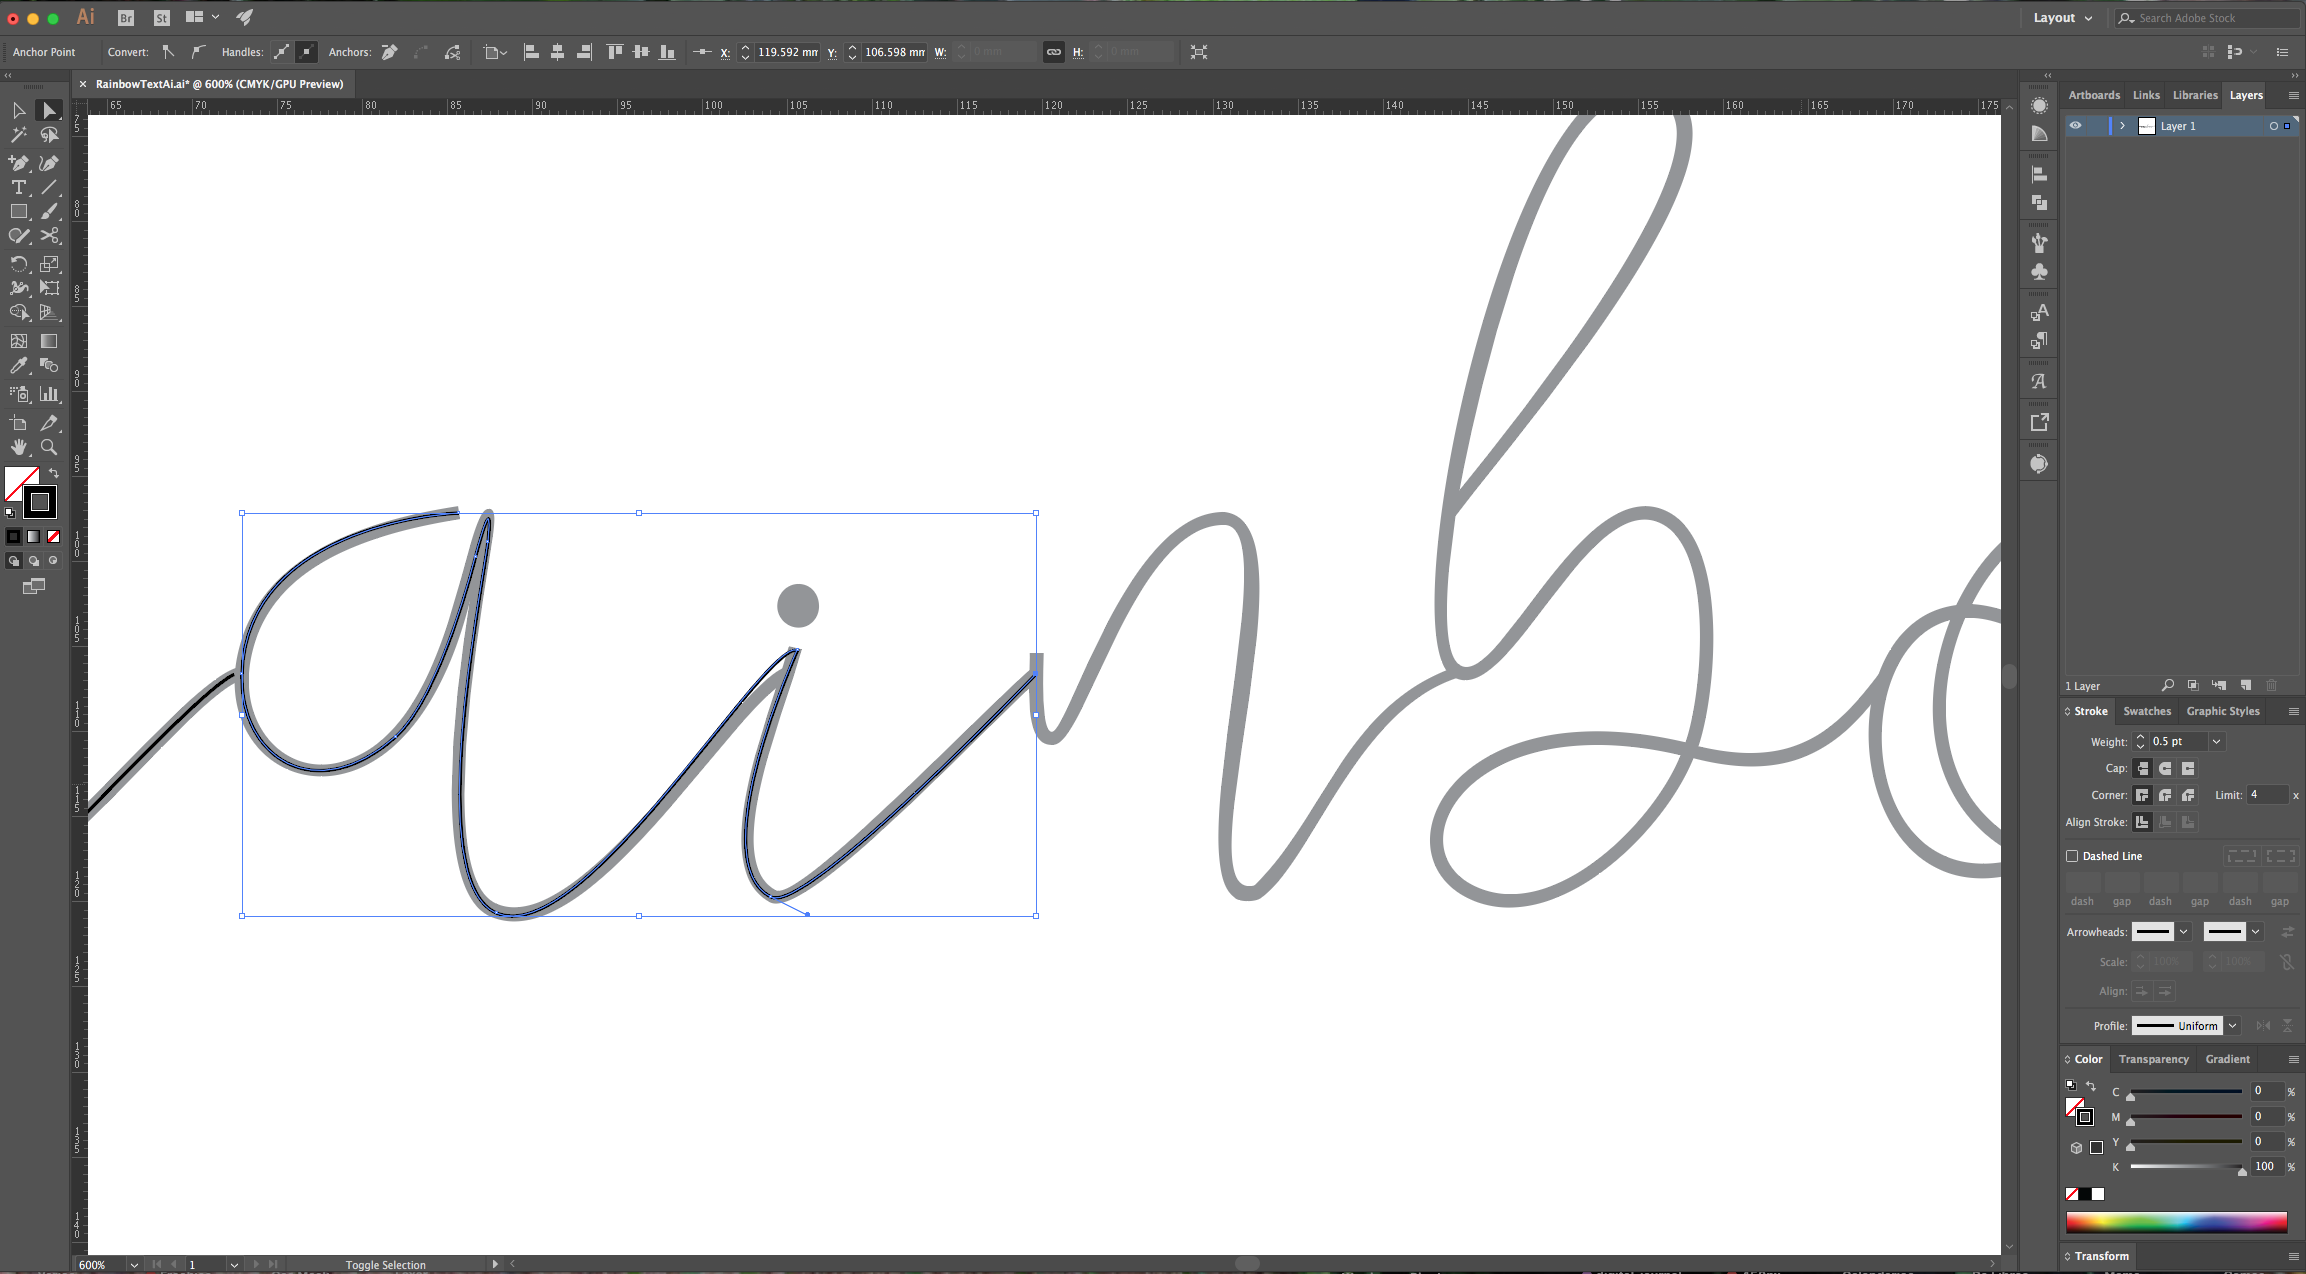
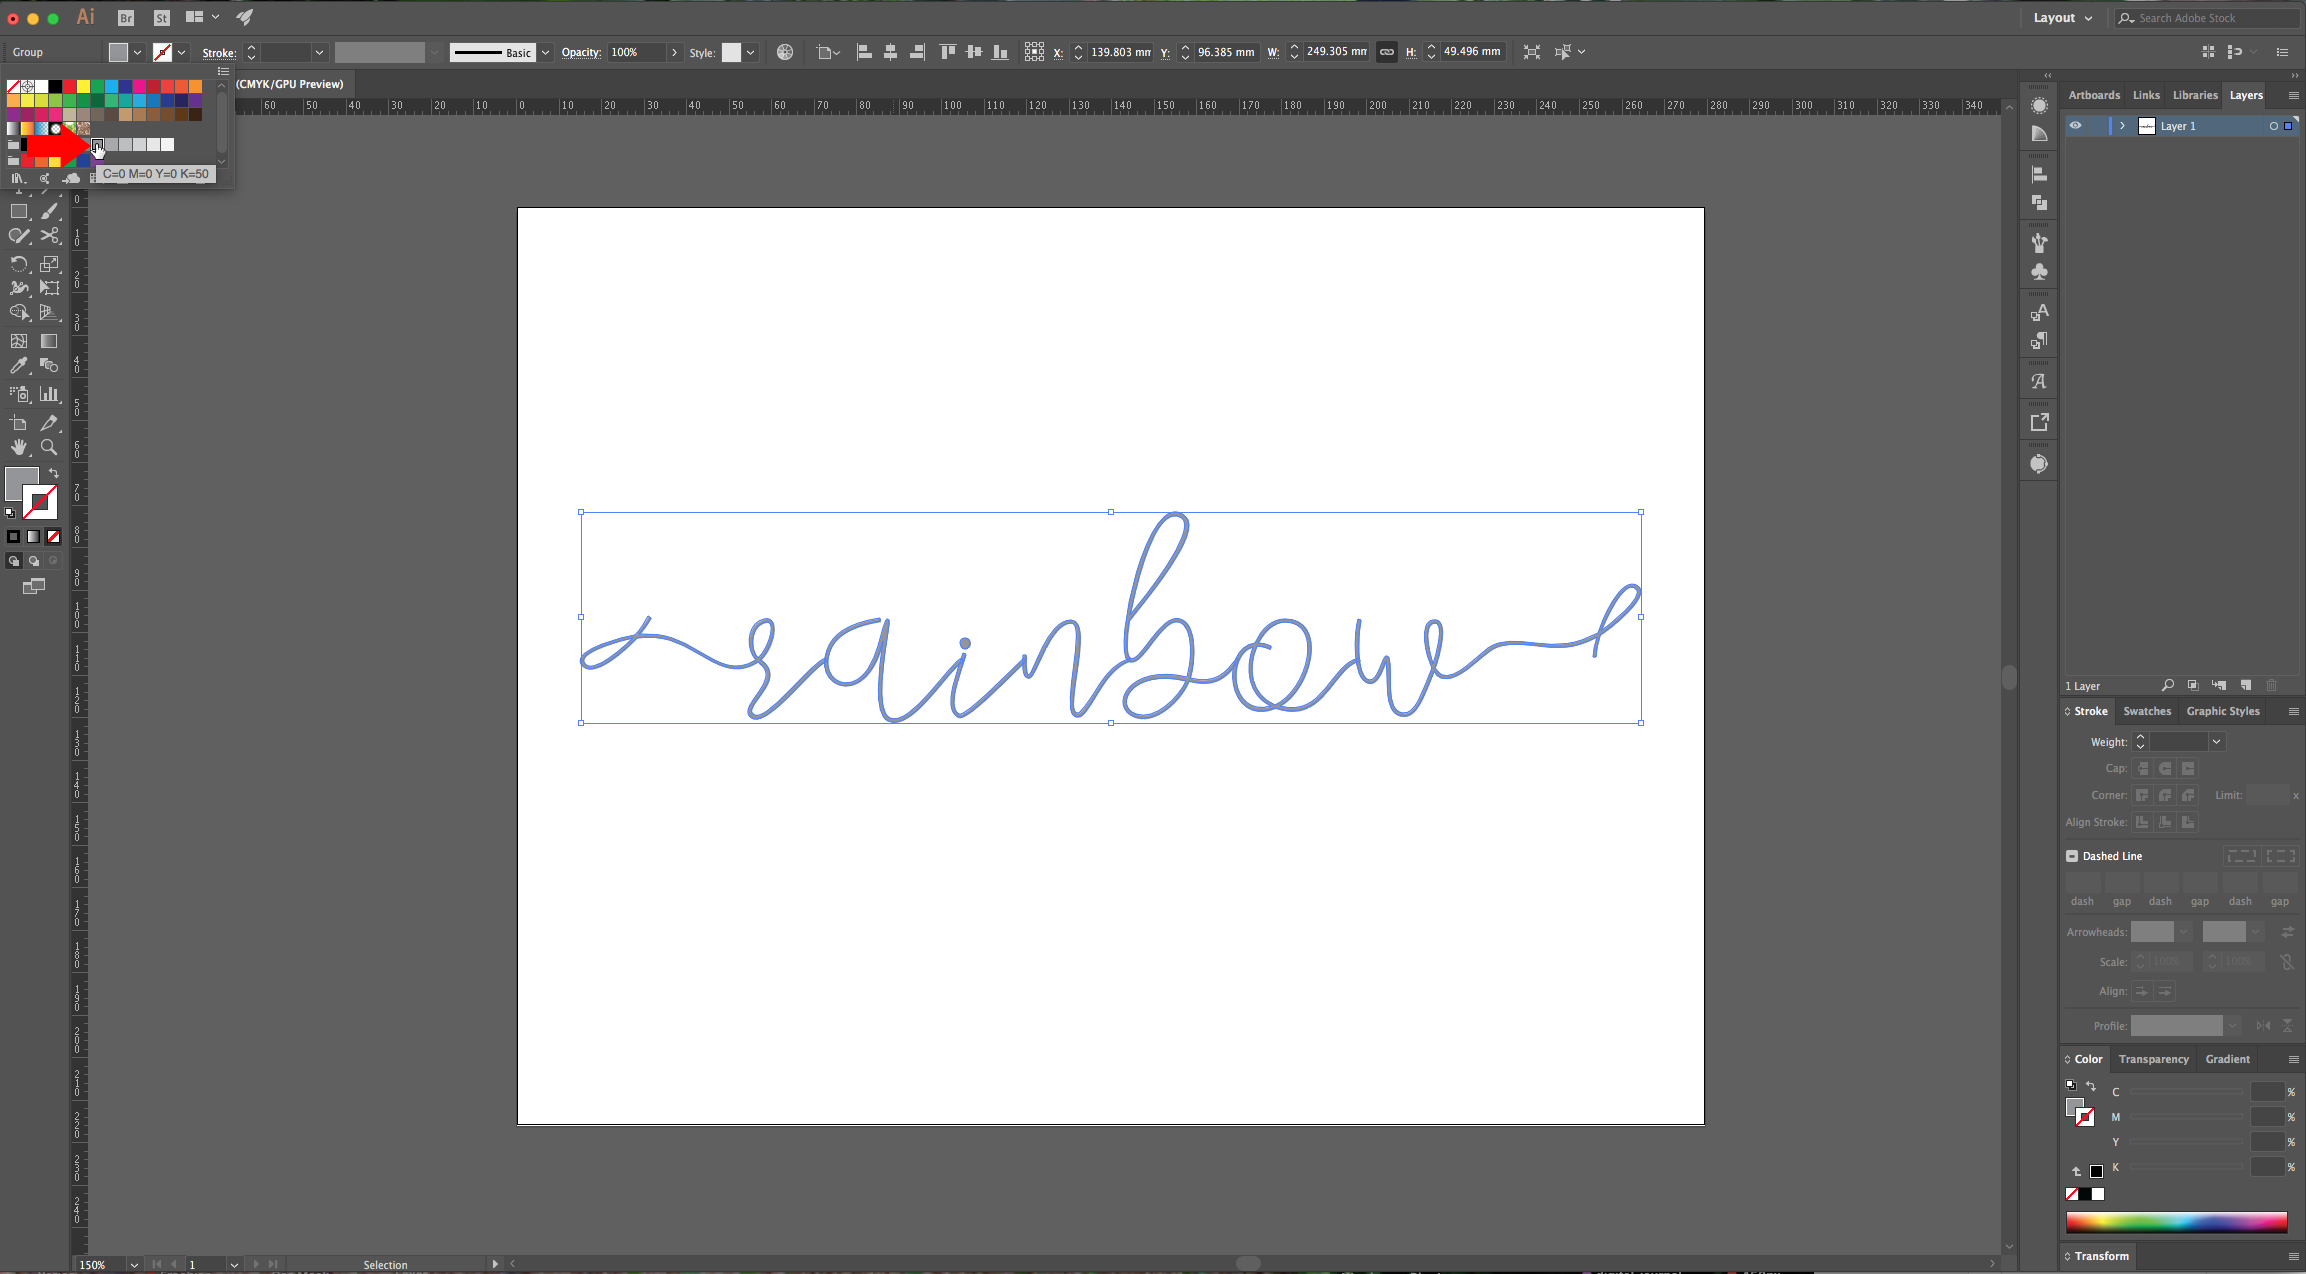
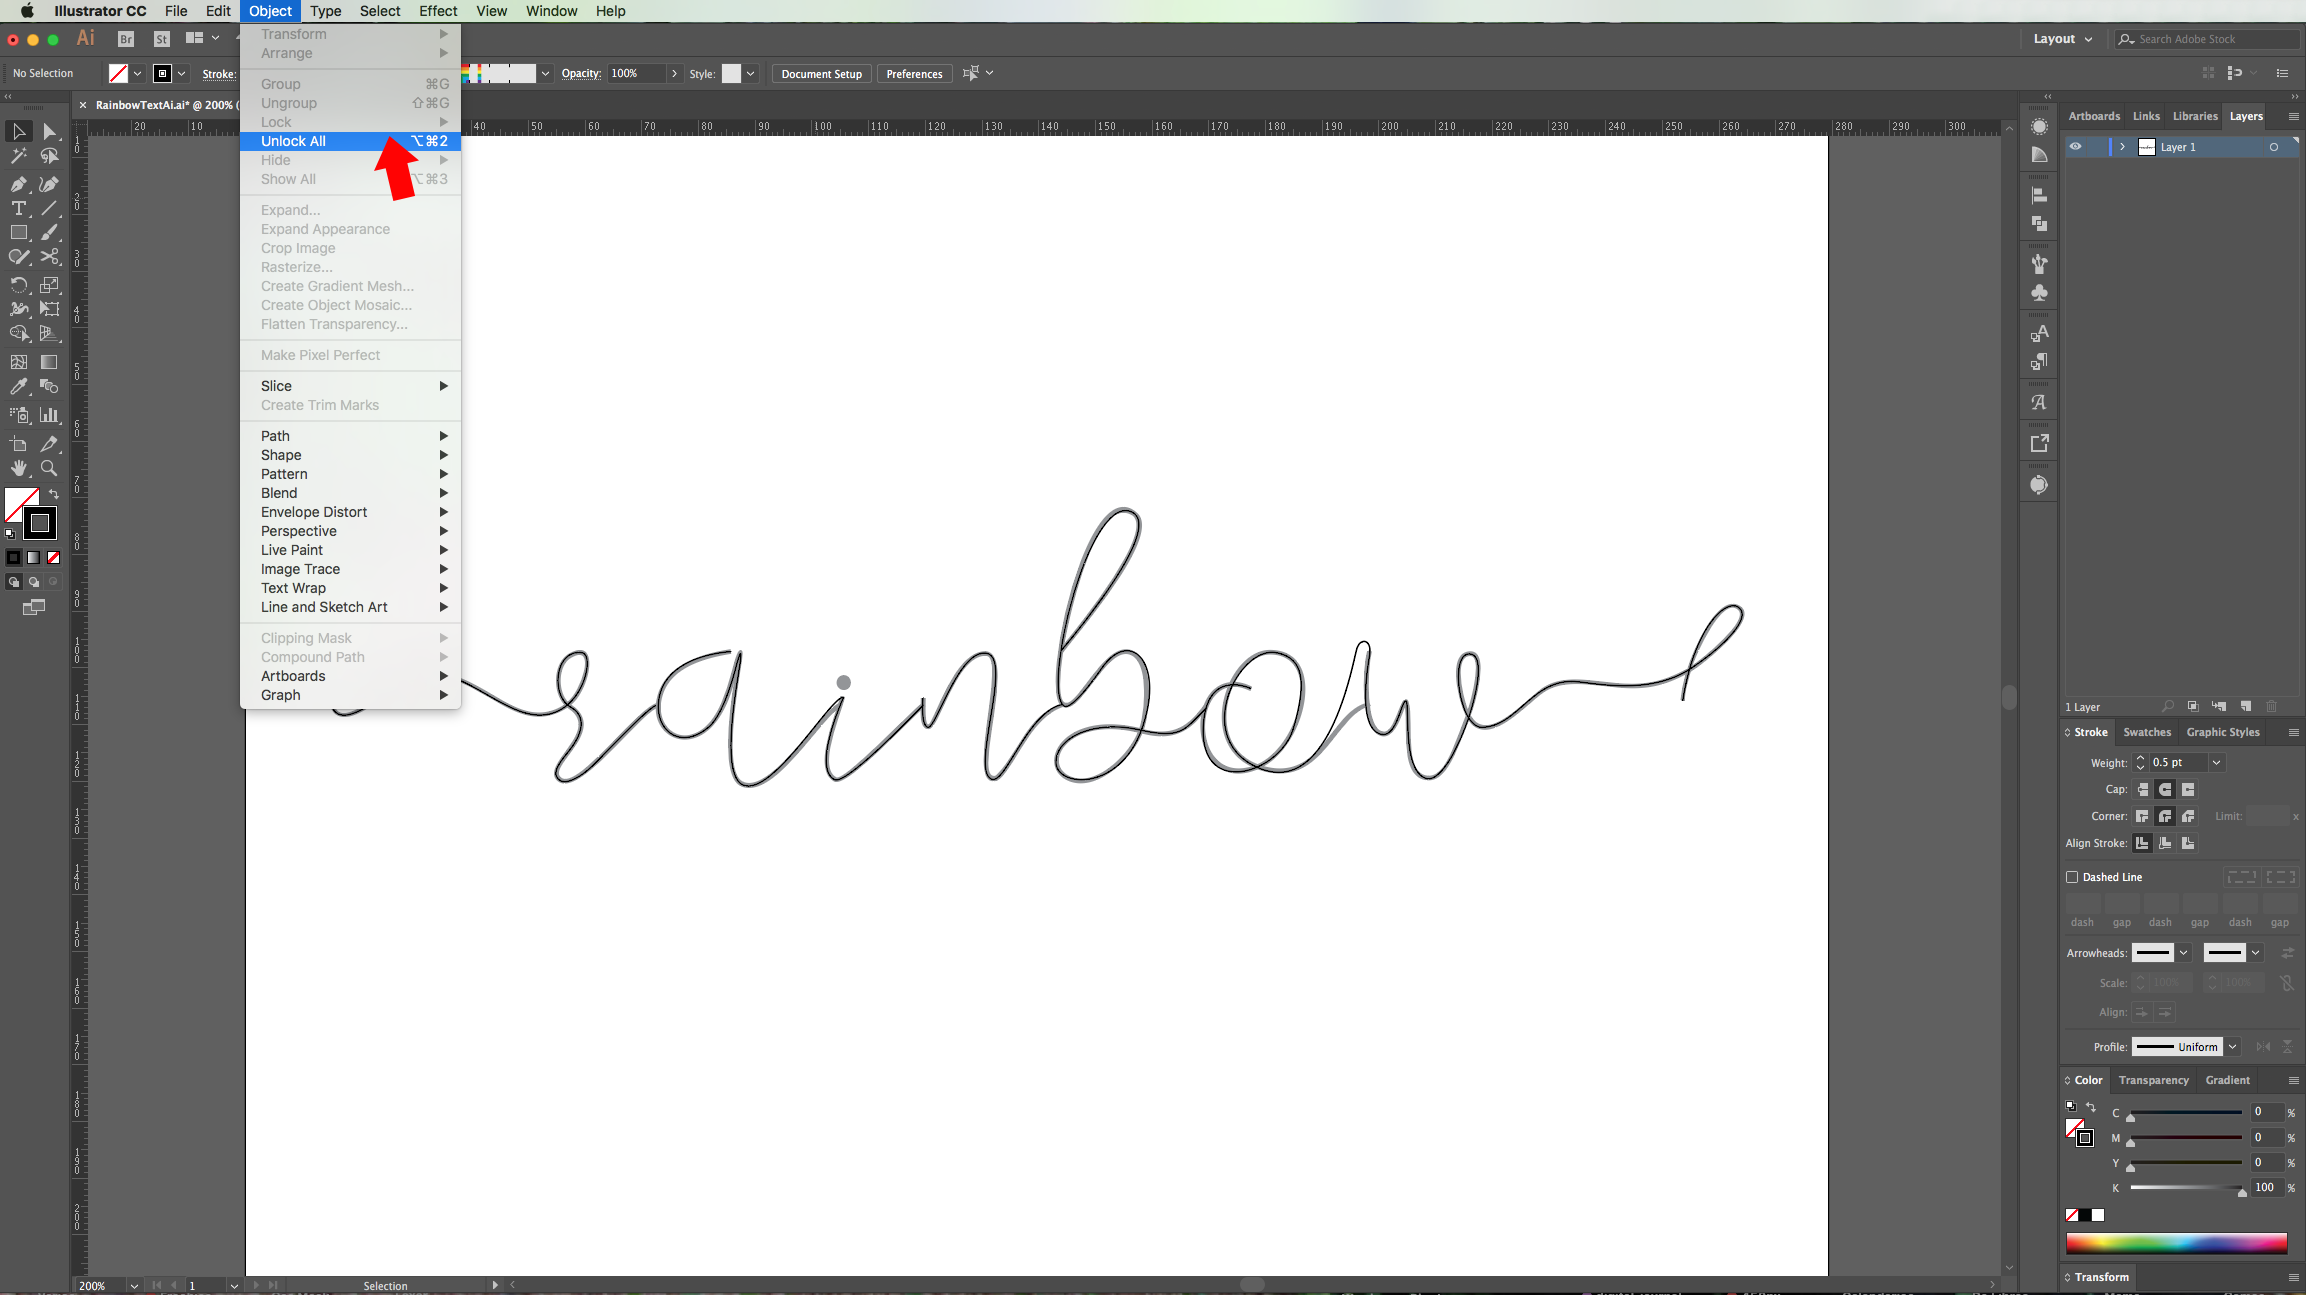
9 - Unlock your original text (Shift + Command/Control + 2) and delete it if you want. Fix the details that may come out on your text and then, change the “Stroke” to your new Brush.
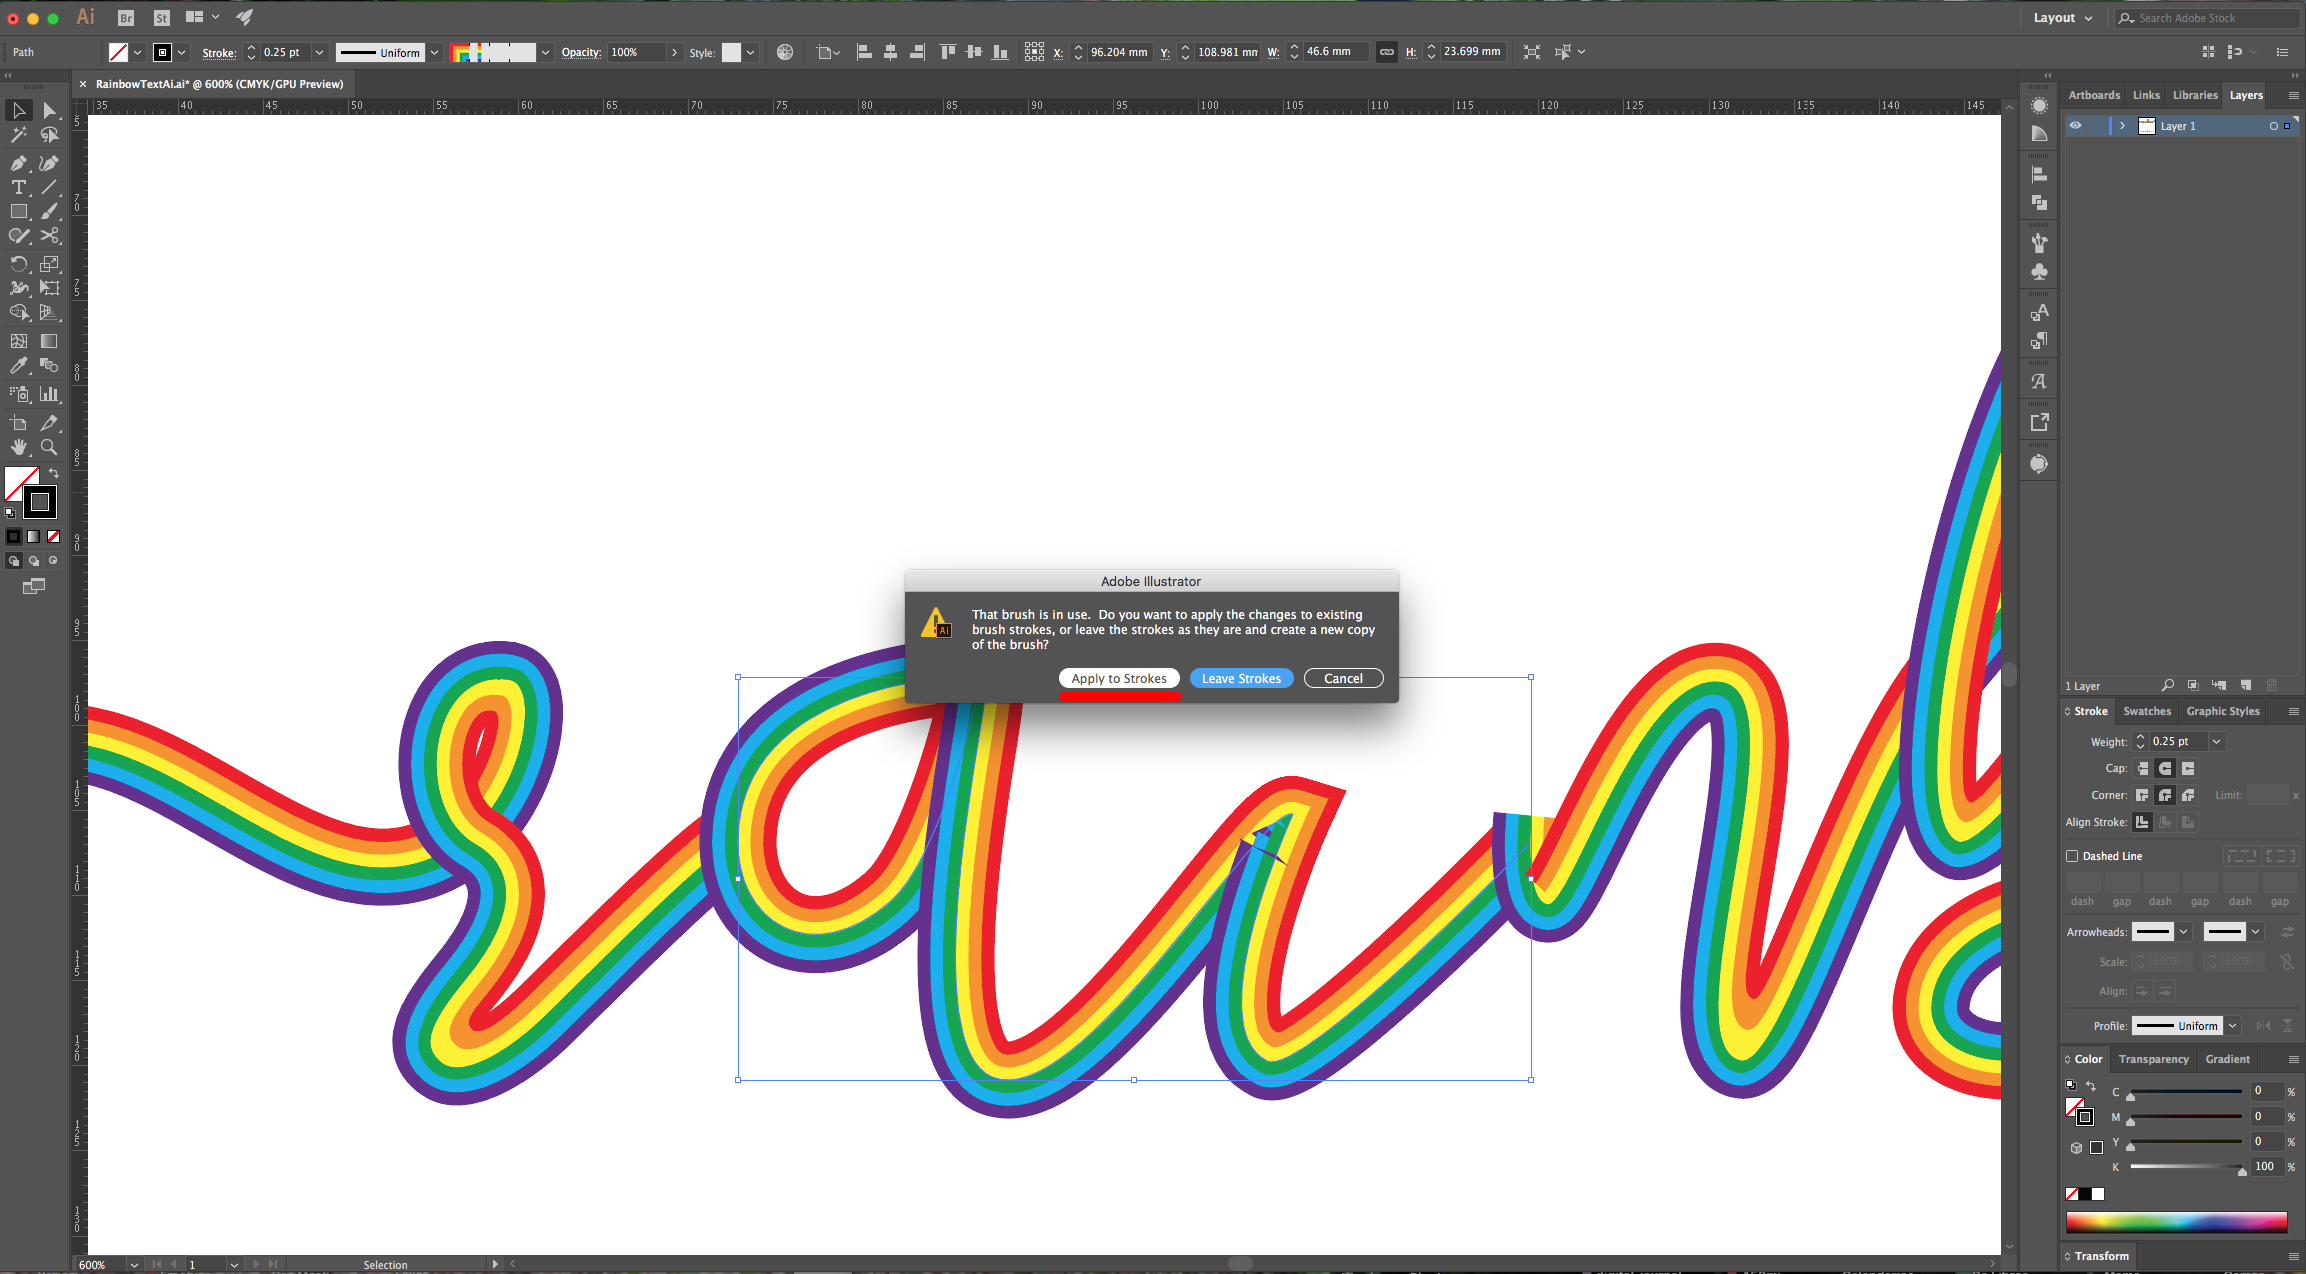
10 - If you want to change something from your Brush settings, double-click on top of its Thumbnail to open the “Patter Brush Options” and fix it. Choose “Apply to Strokes” from the dialog if asked.
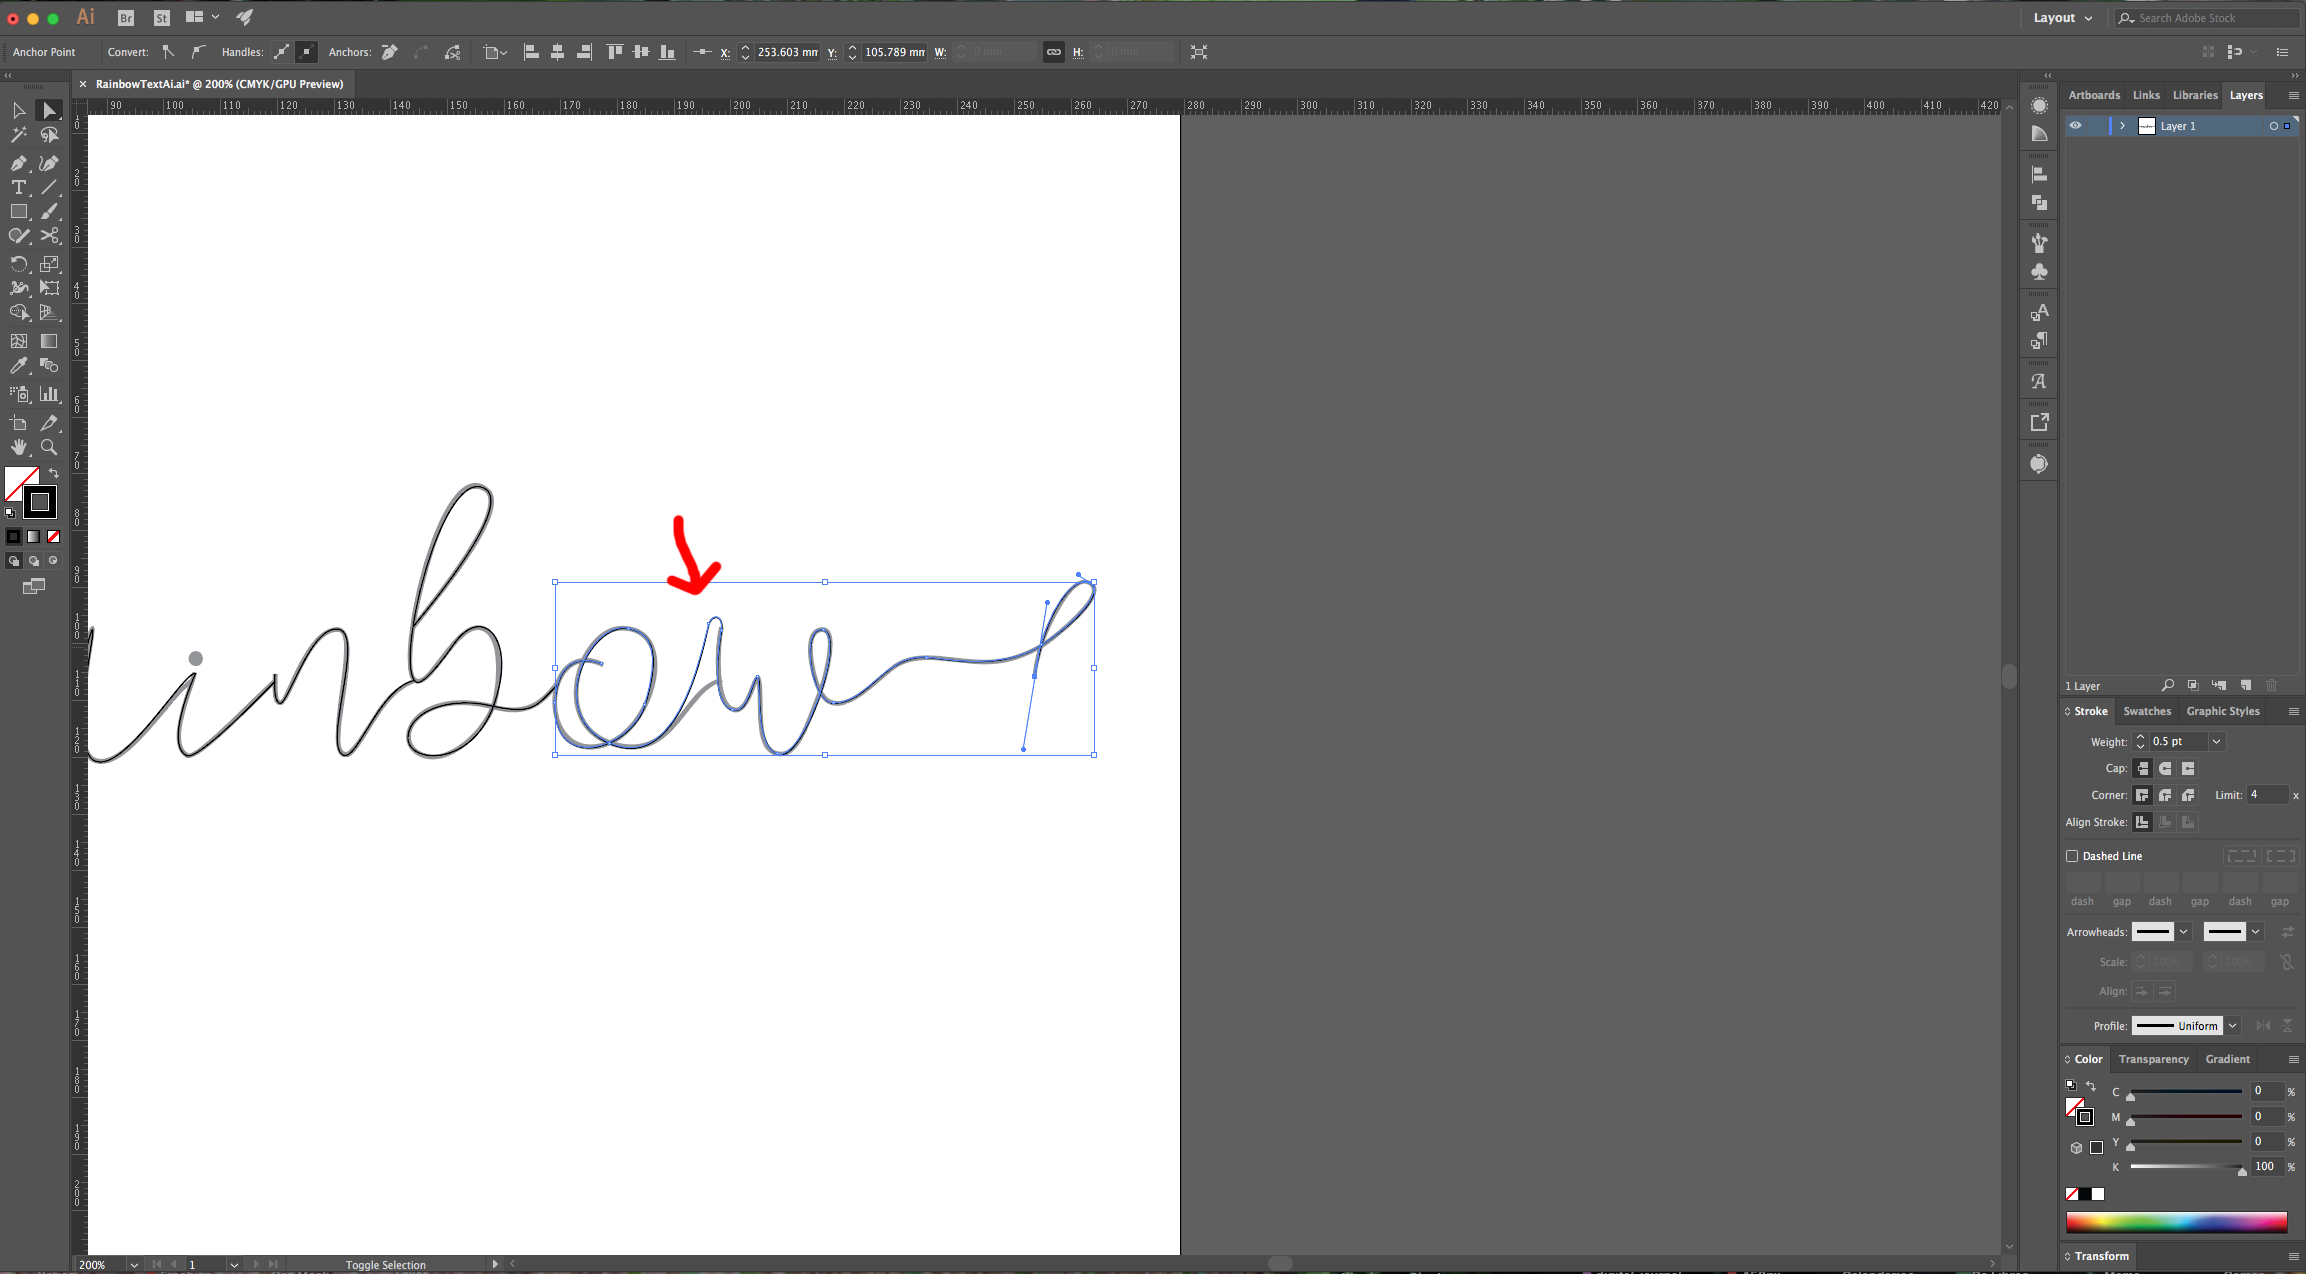
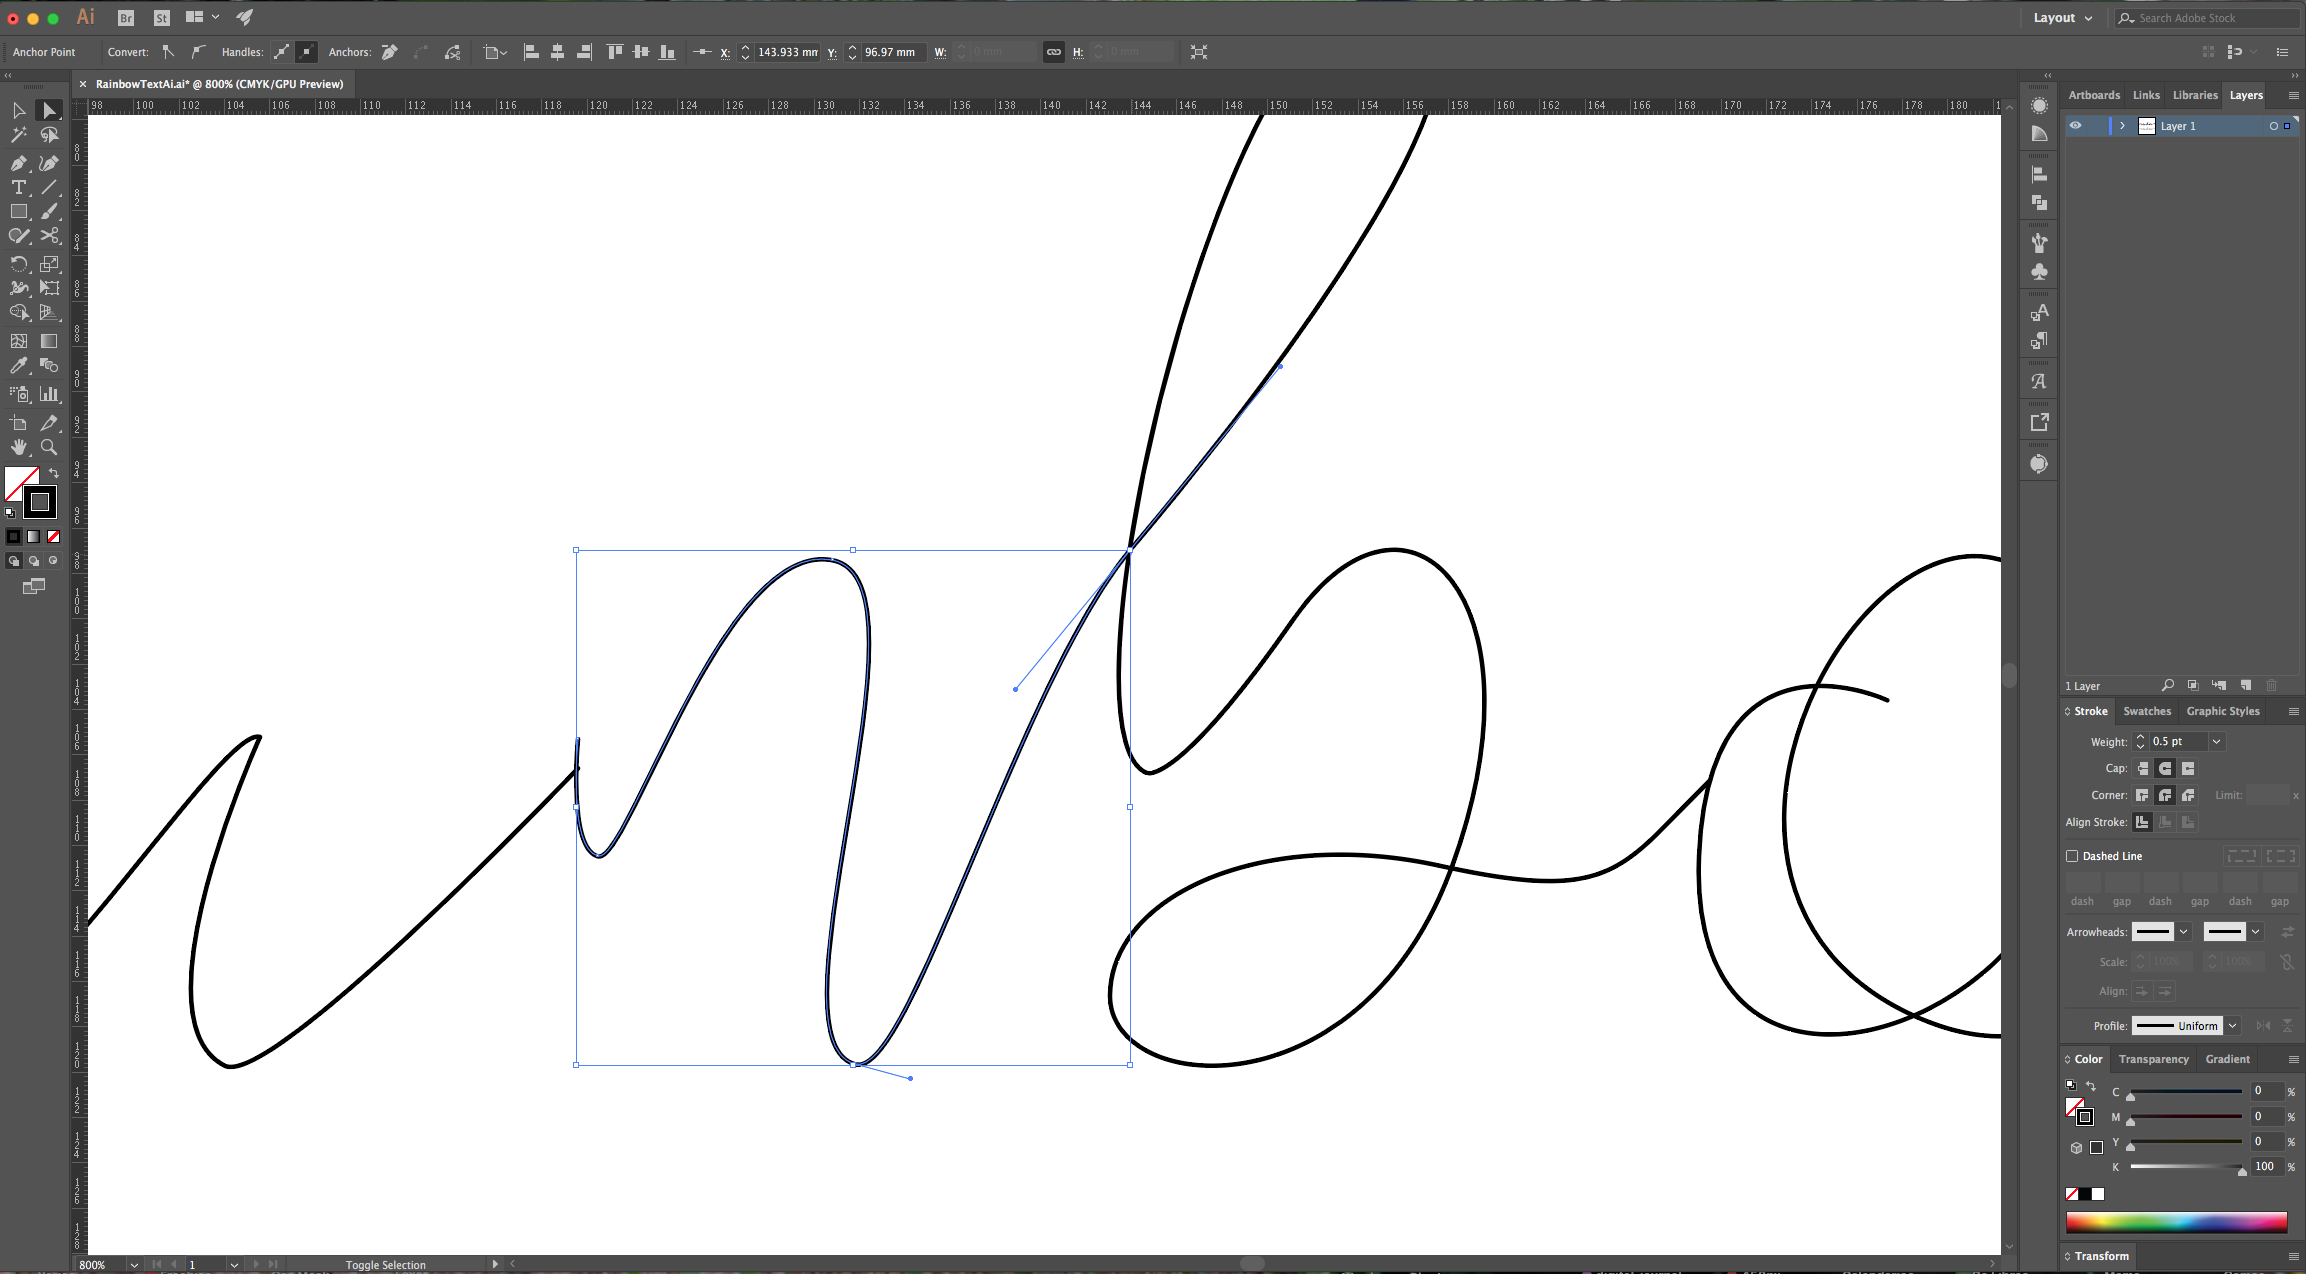
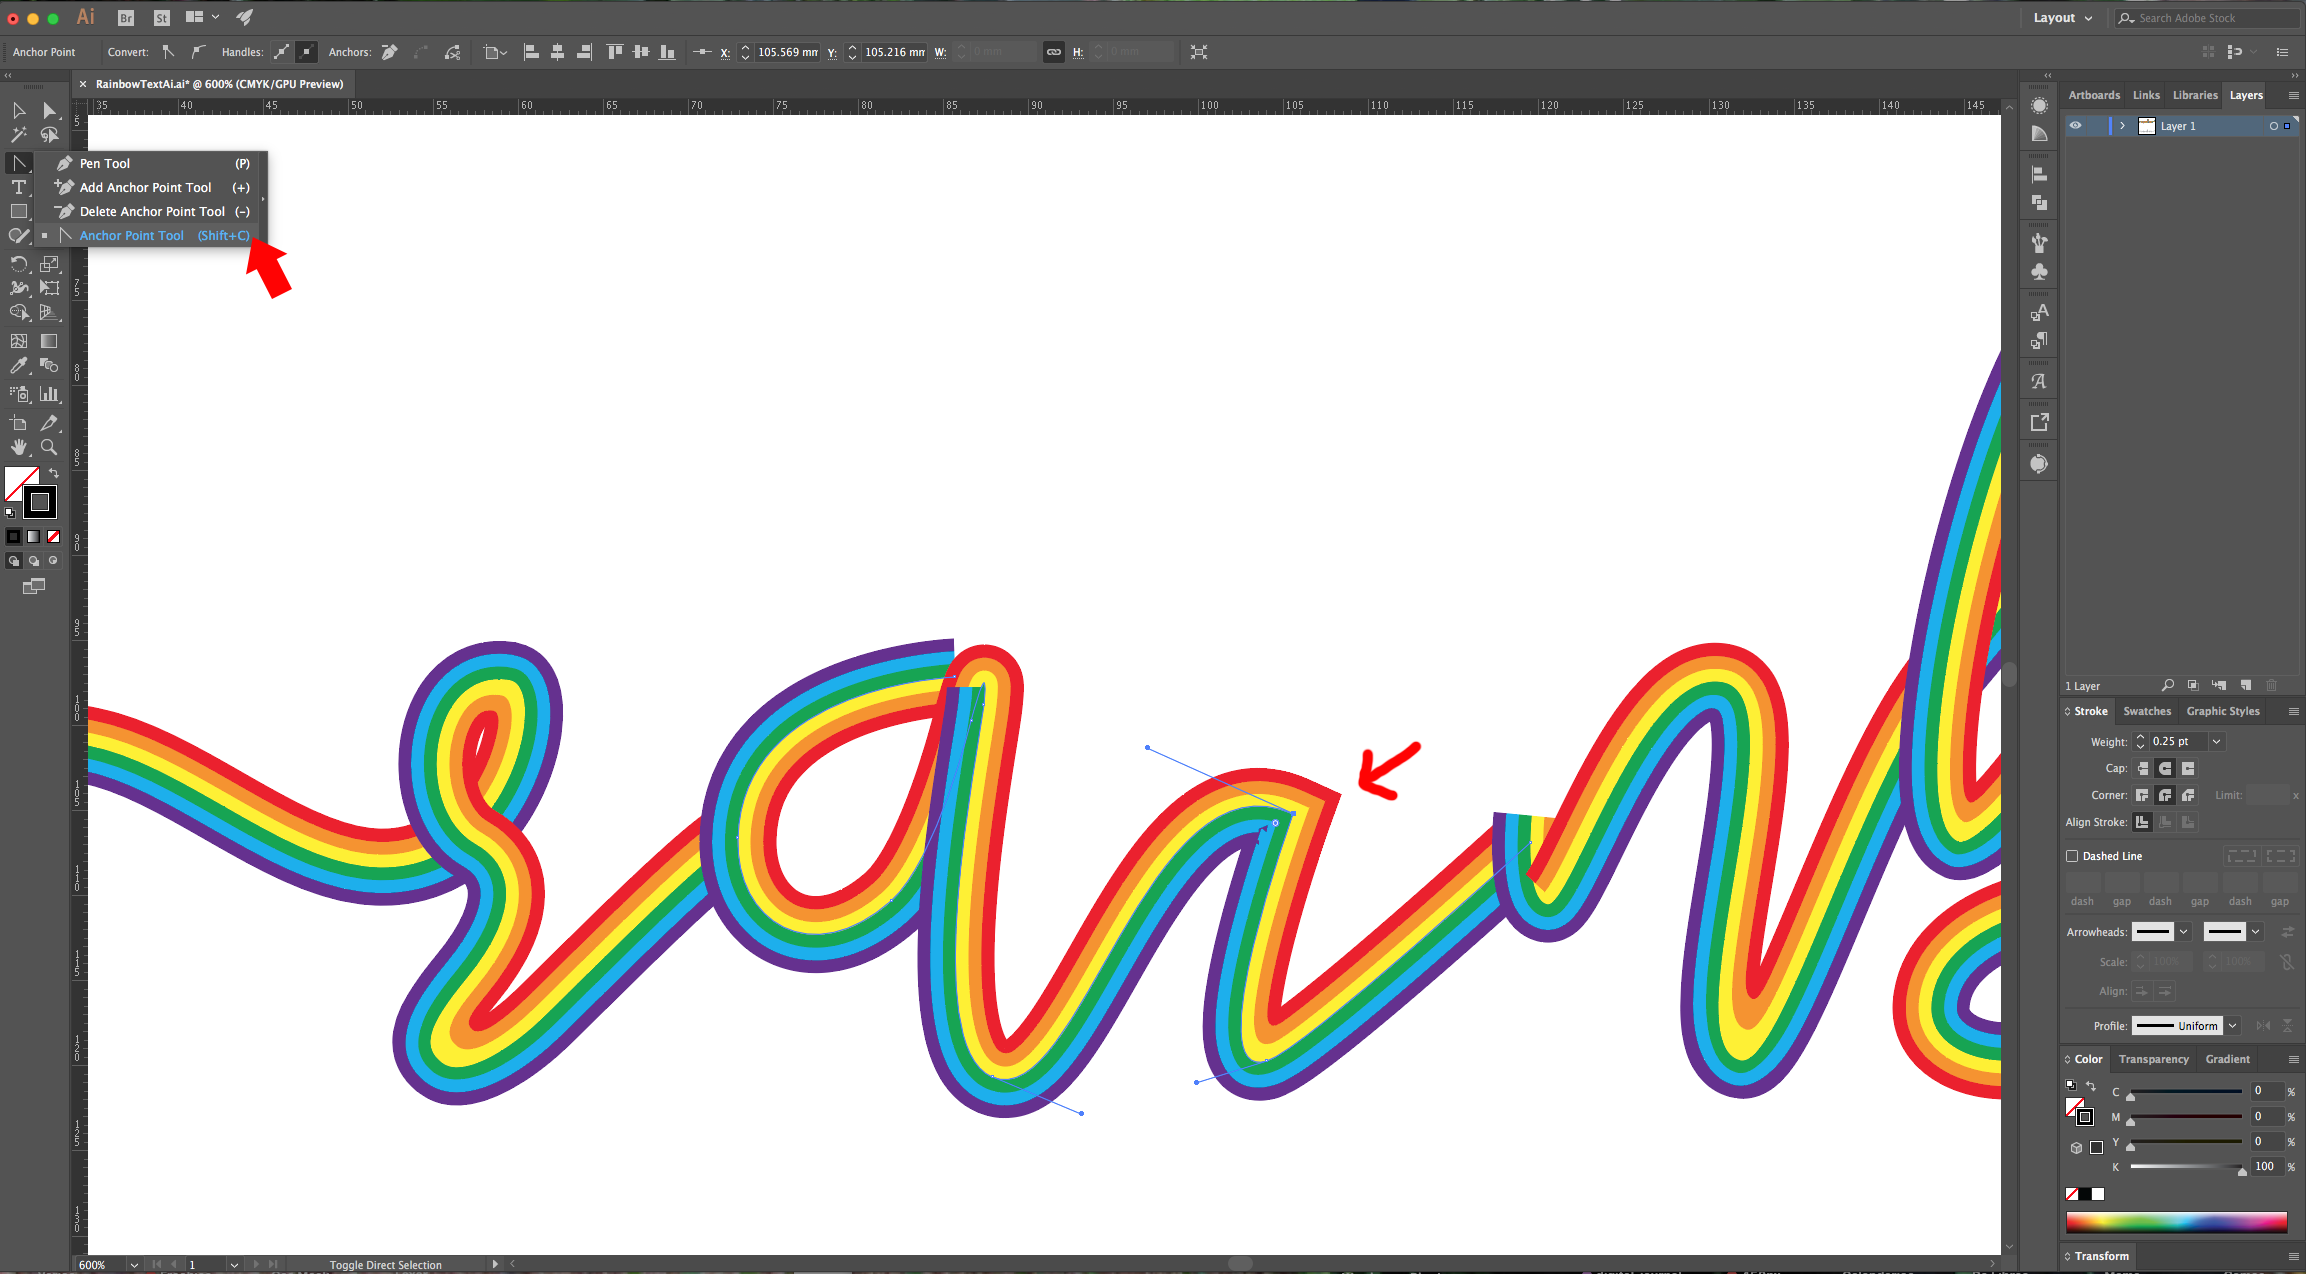
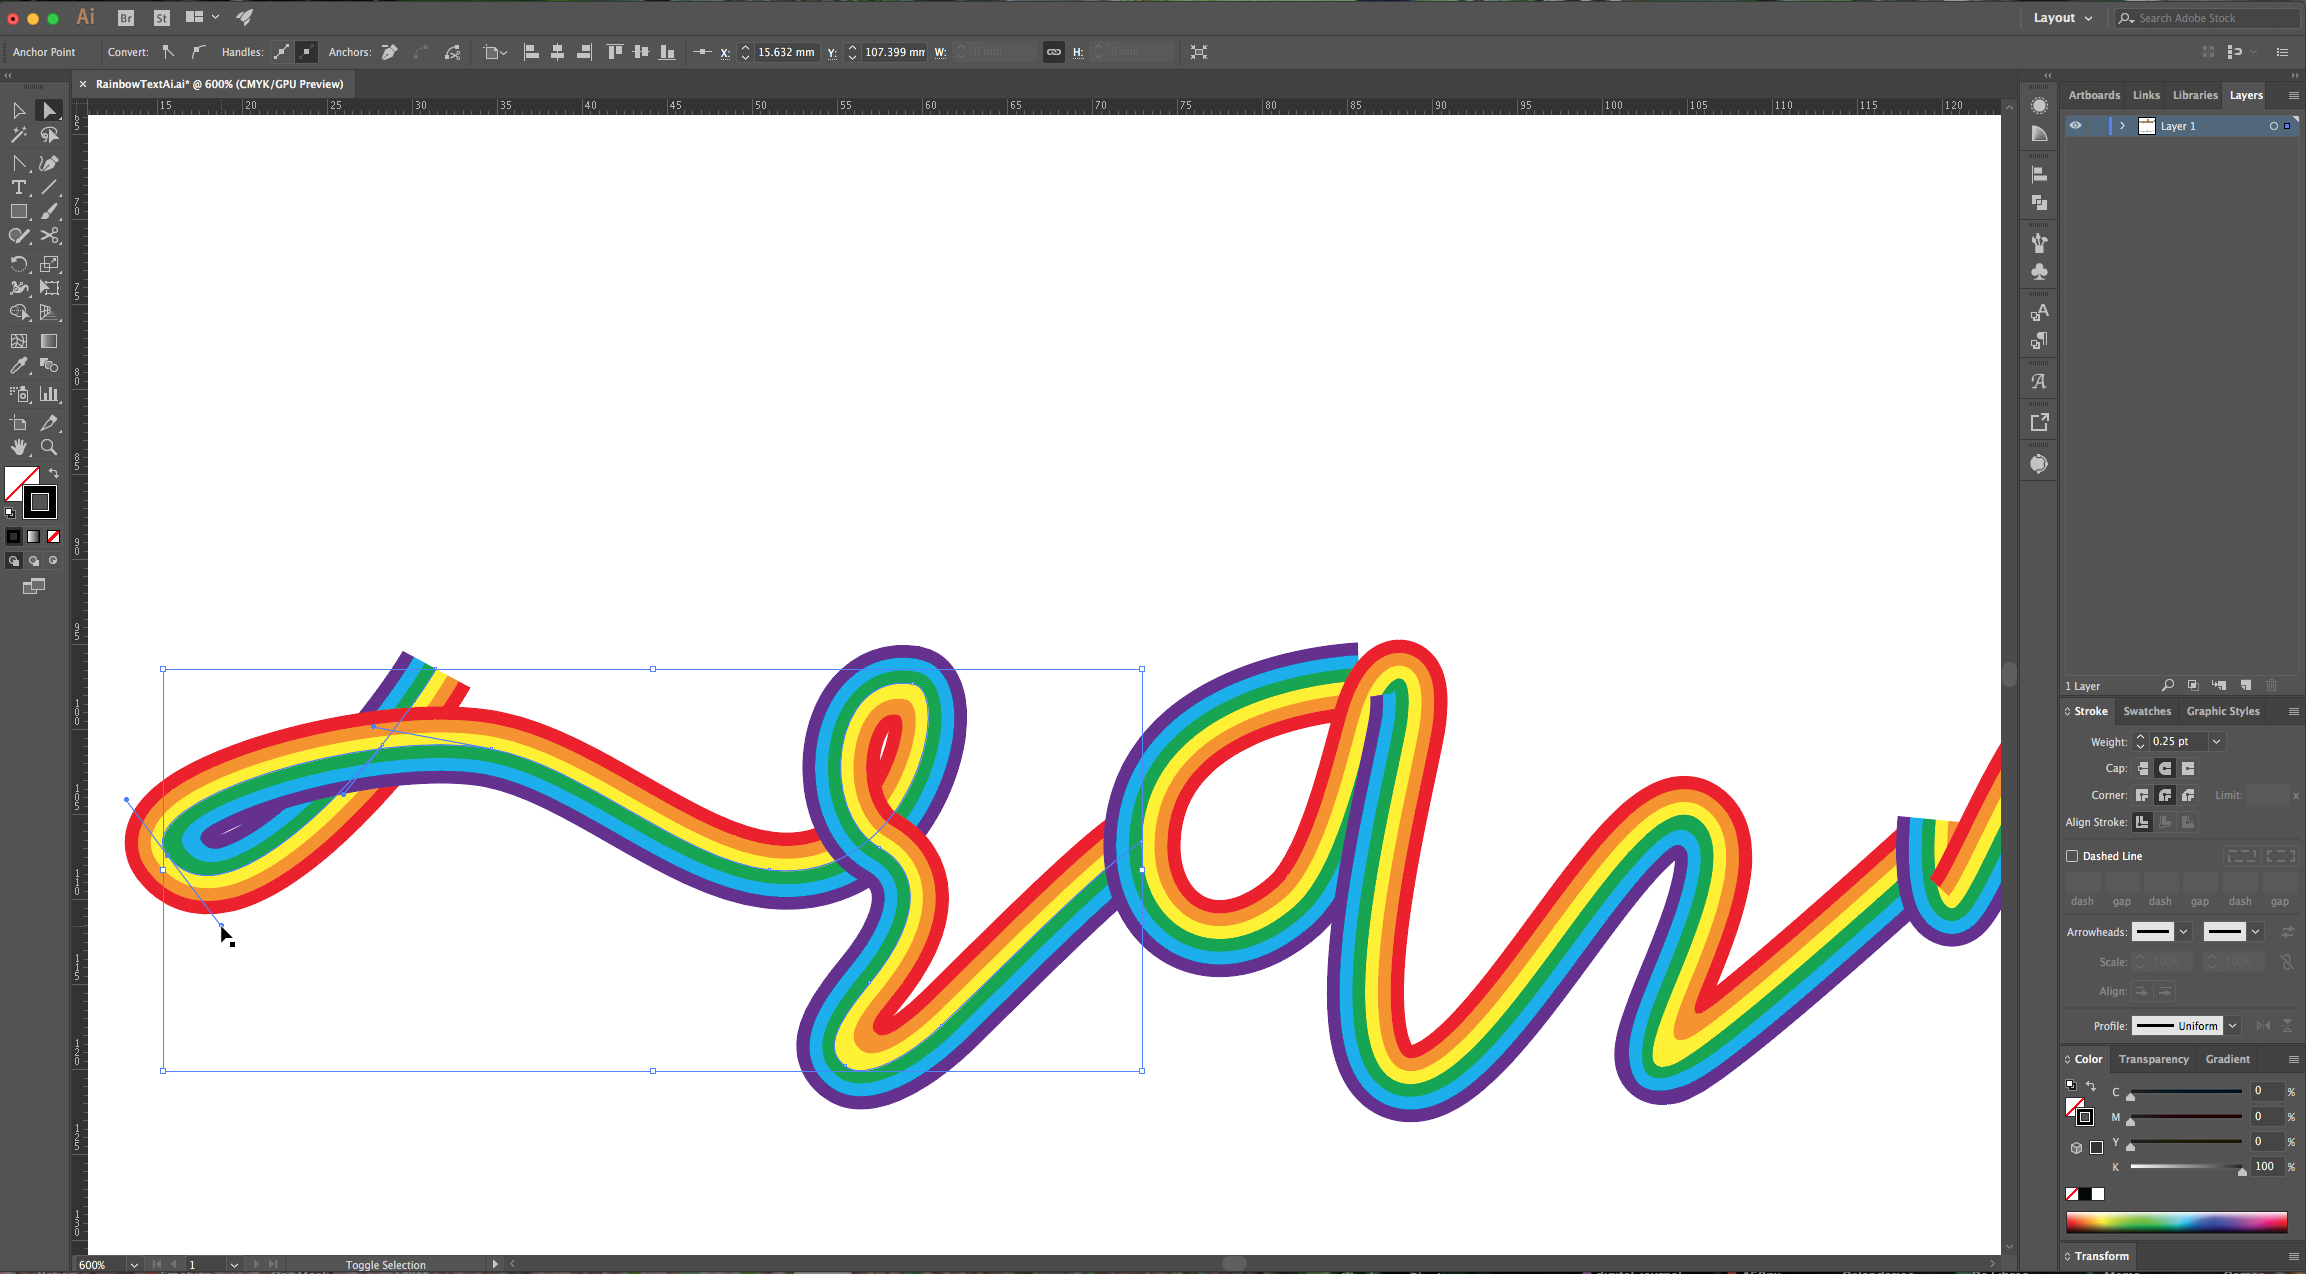
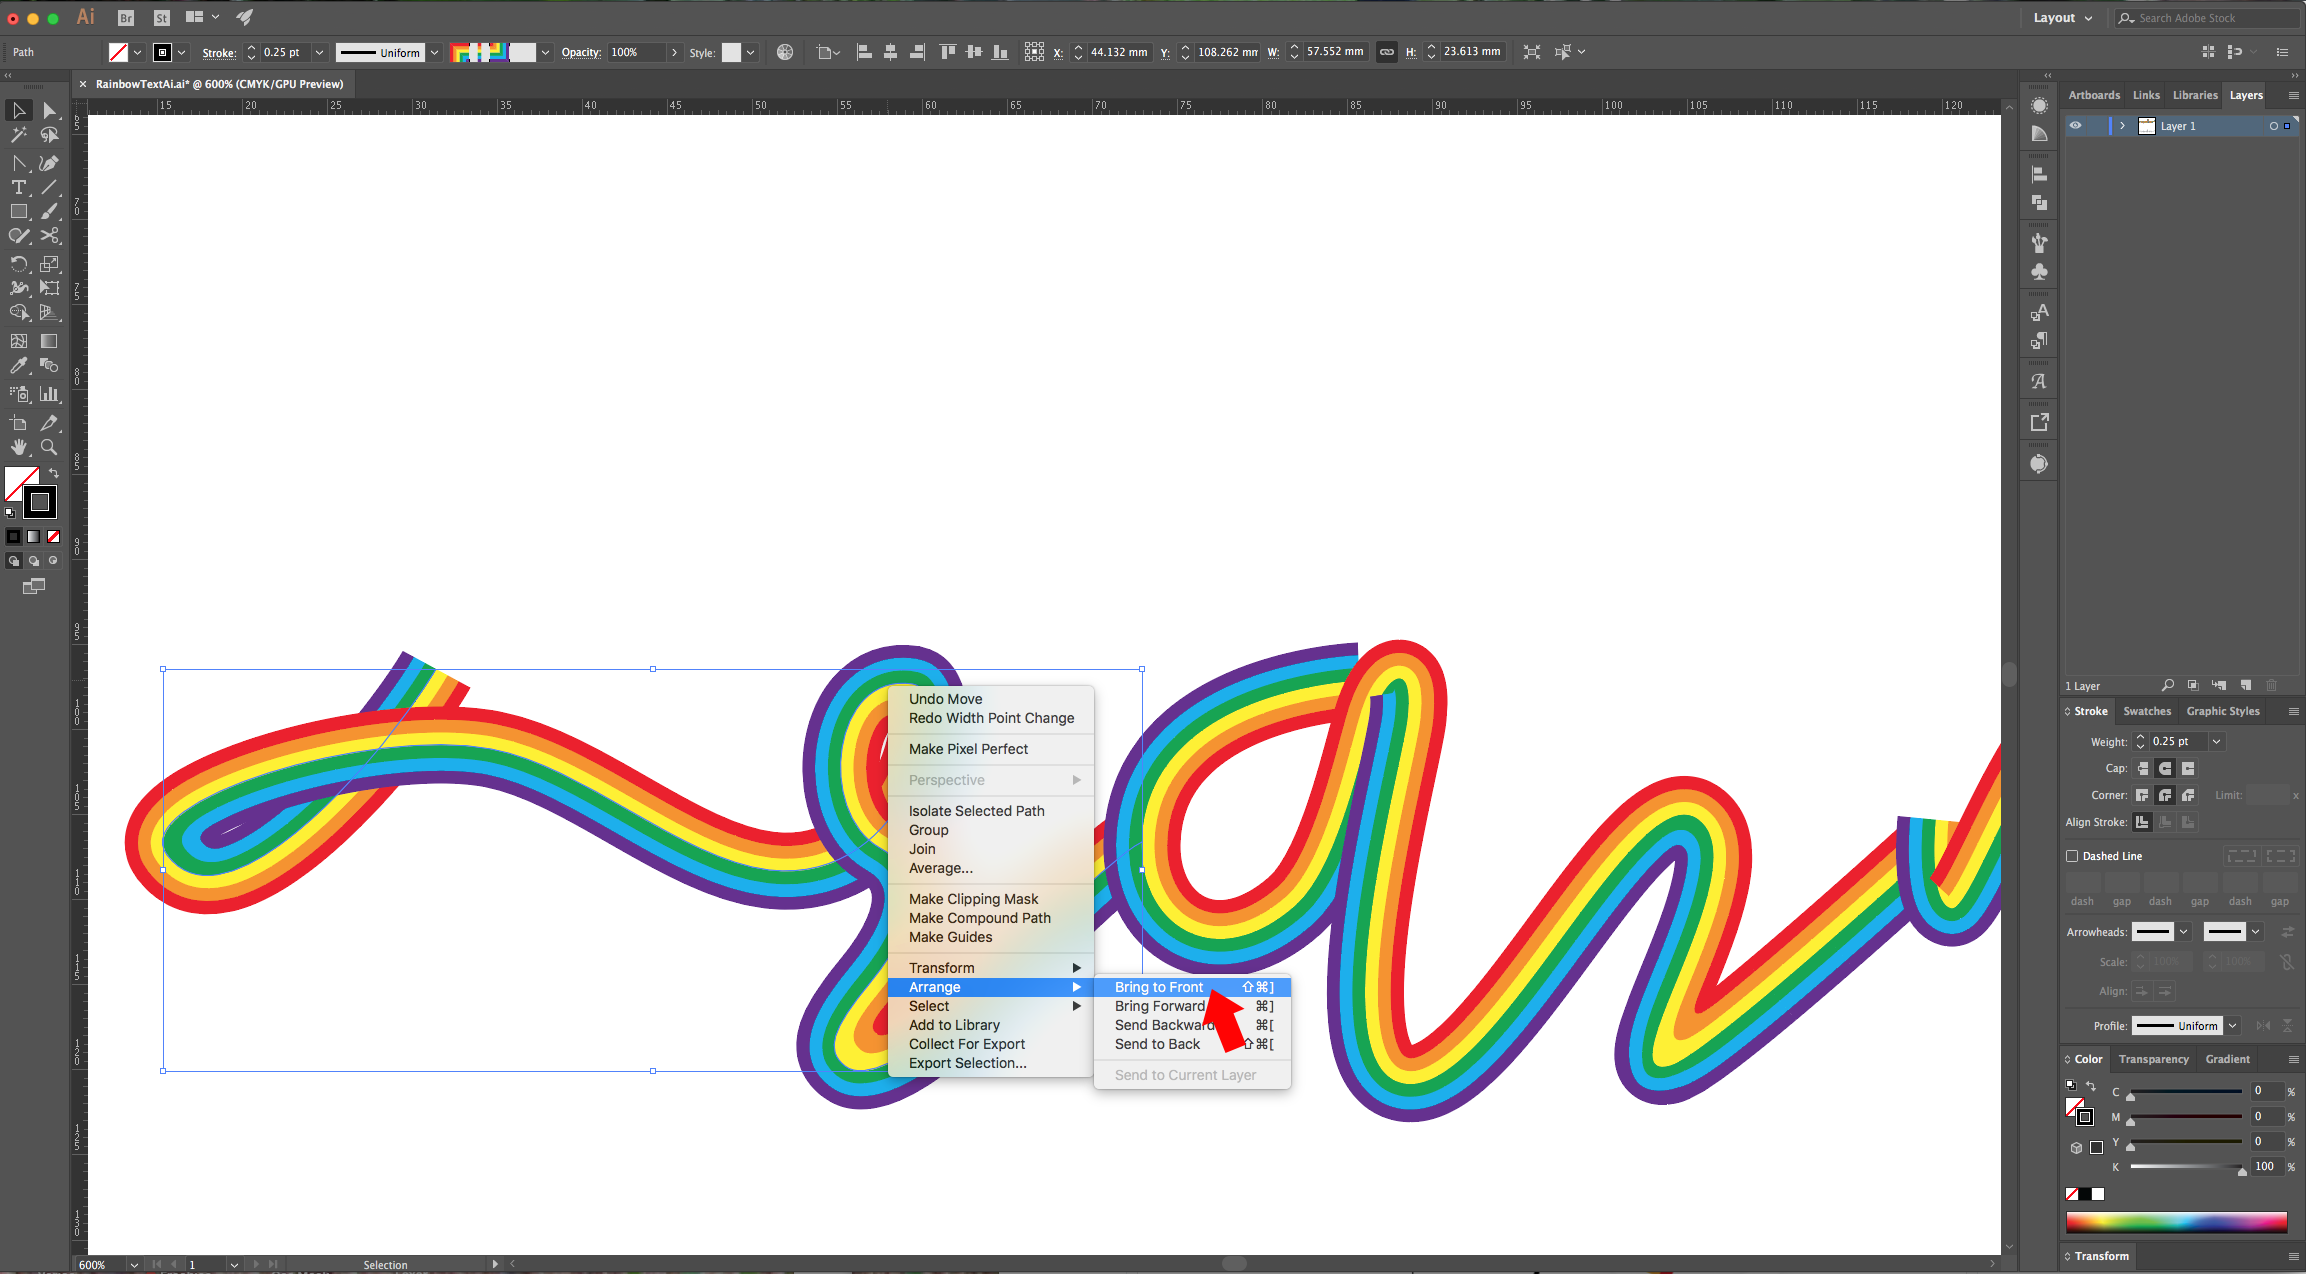
11 - With the “Anchor Point Tool” you can turn a straight point into a curved one by clicking on it and “dragging” to the side to create “handles”. You can also use the “Direct Selection Tool” (A) to select the “Anchor Points” that may have some strange corners to pull the “Handles”. To hide the ending of a letter behind the one that follows or to change the which one is on top of each other, right-click on top of it and choose Arrange > Bring to Front (or whatever you need).
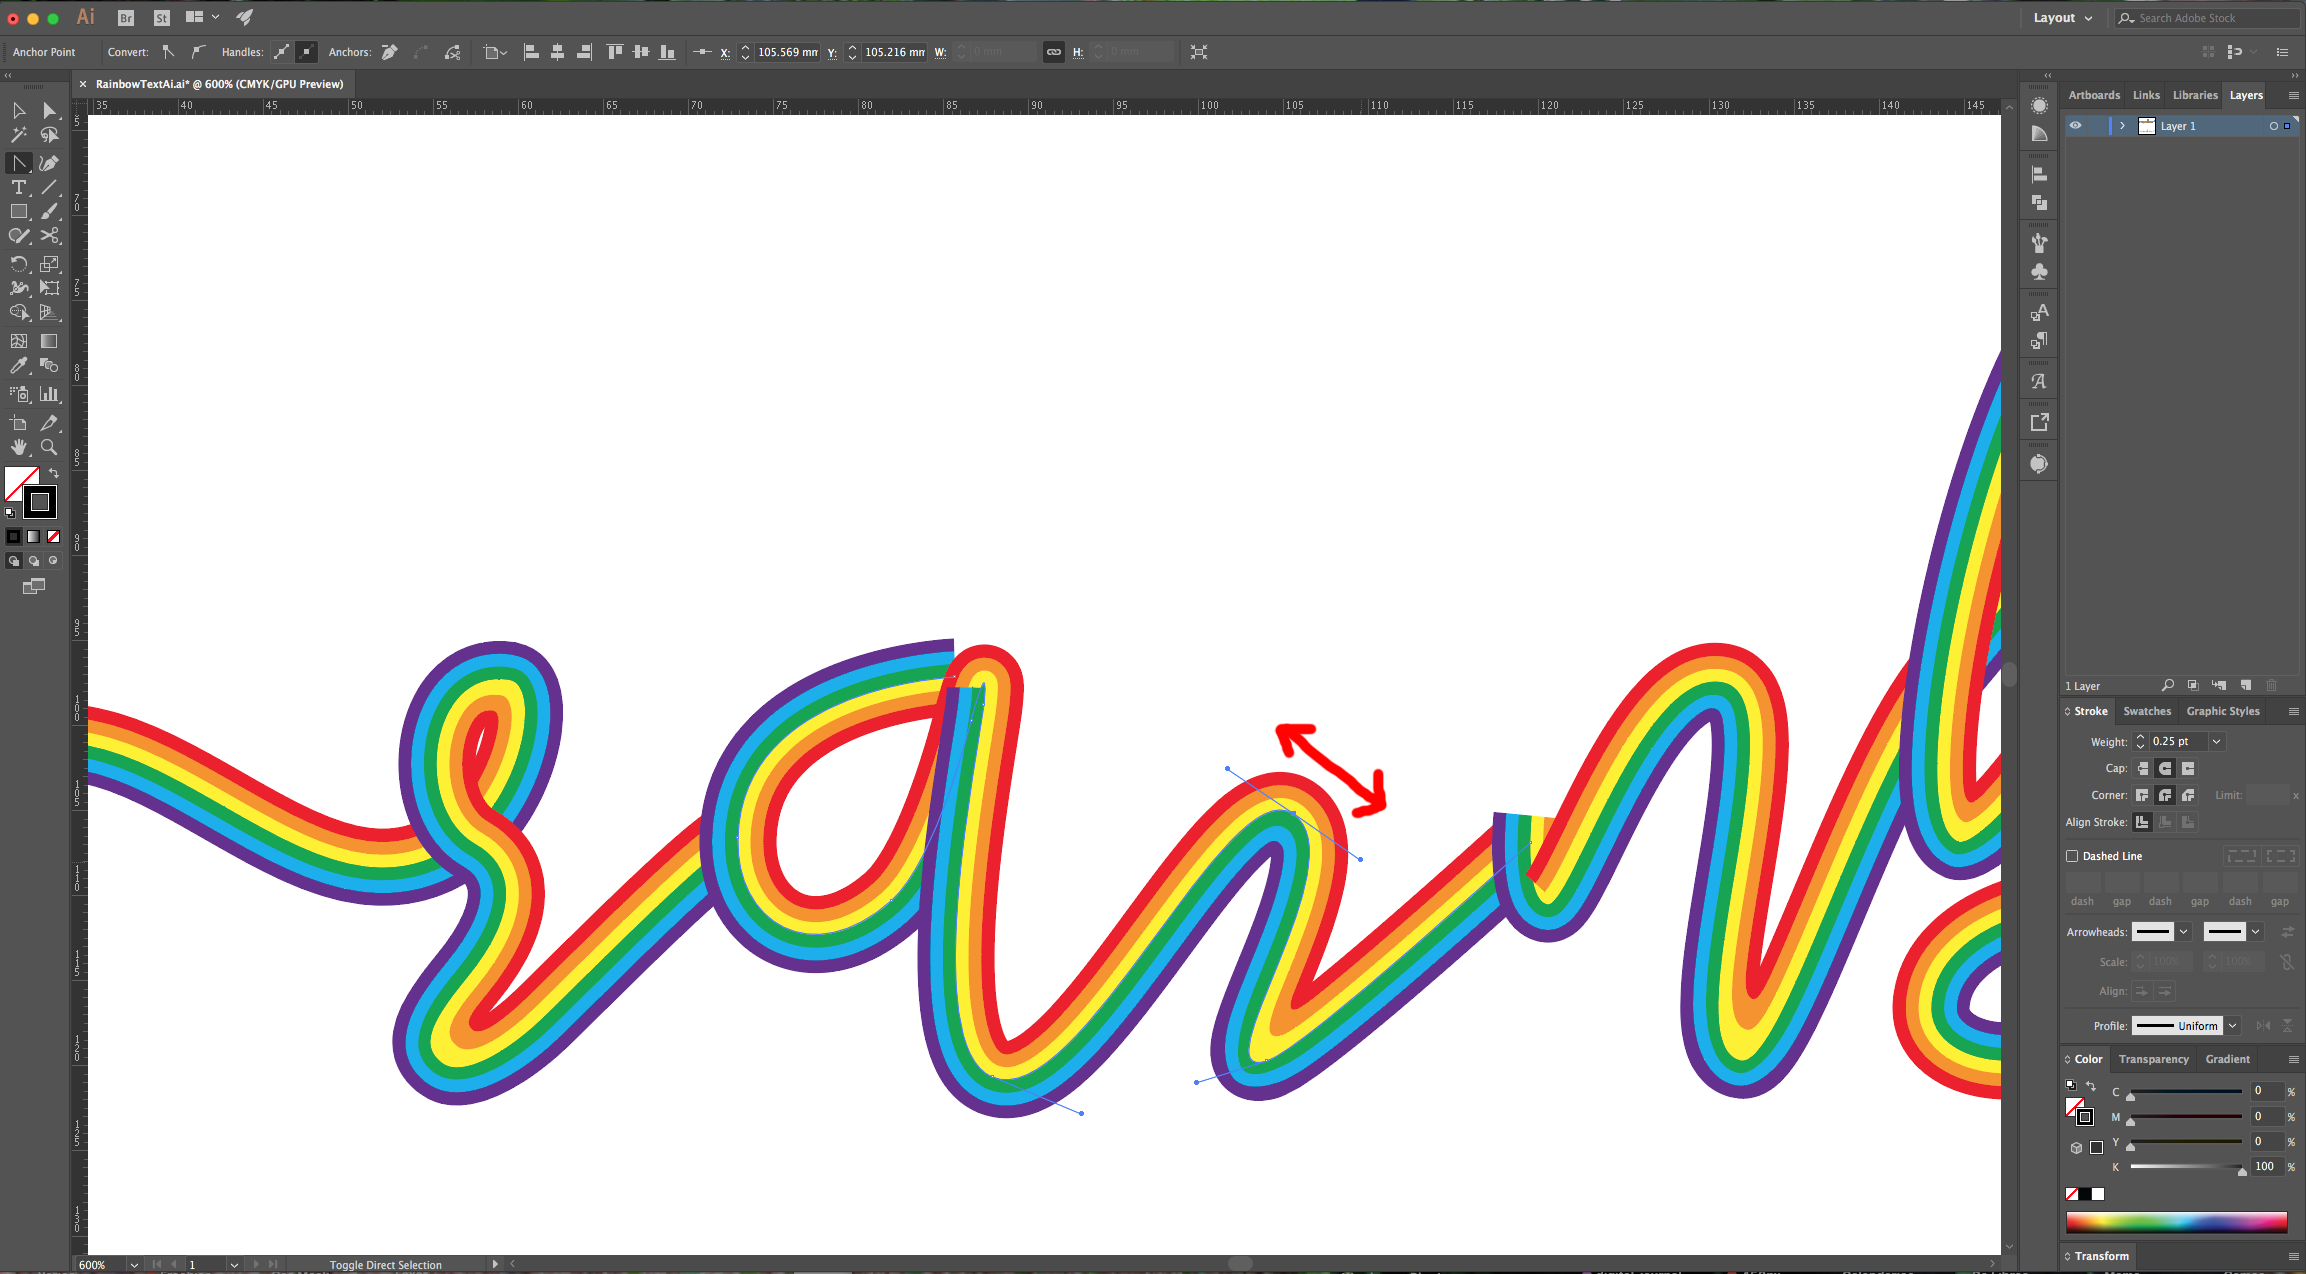
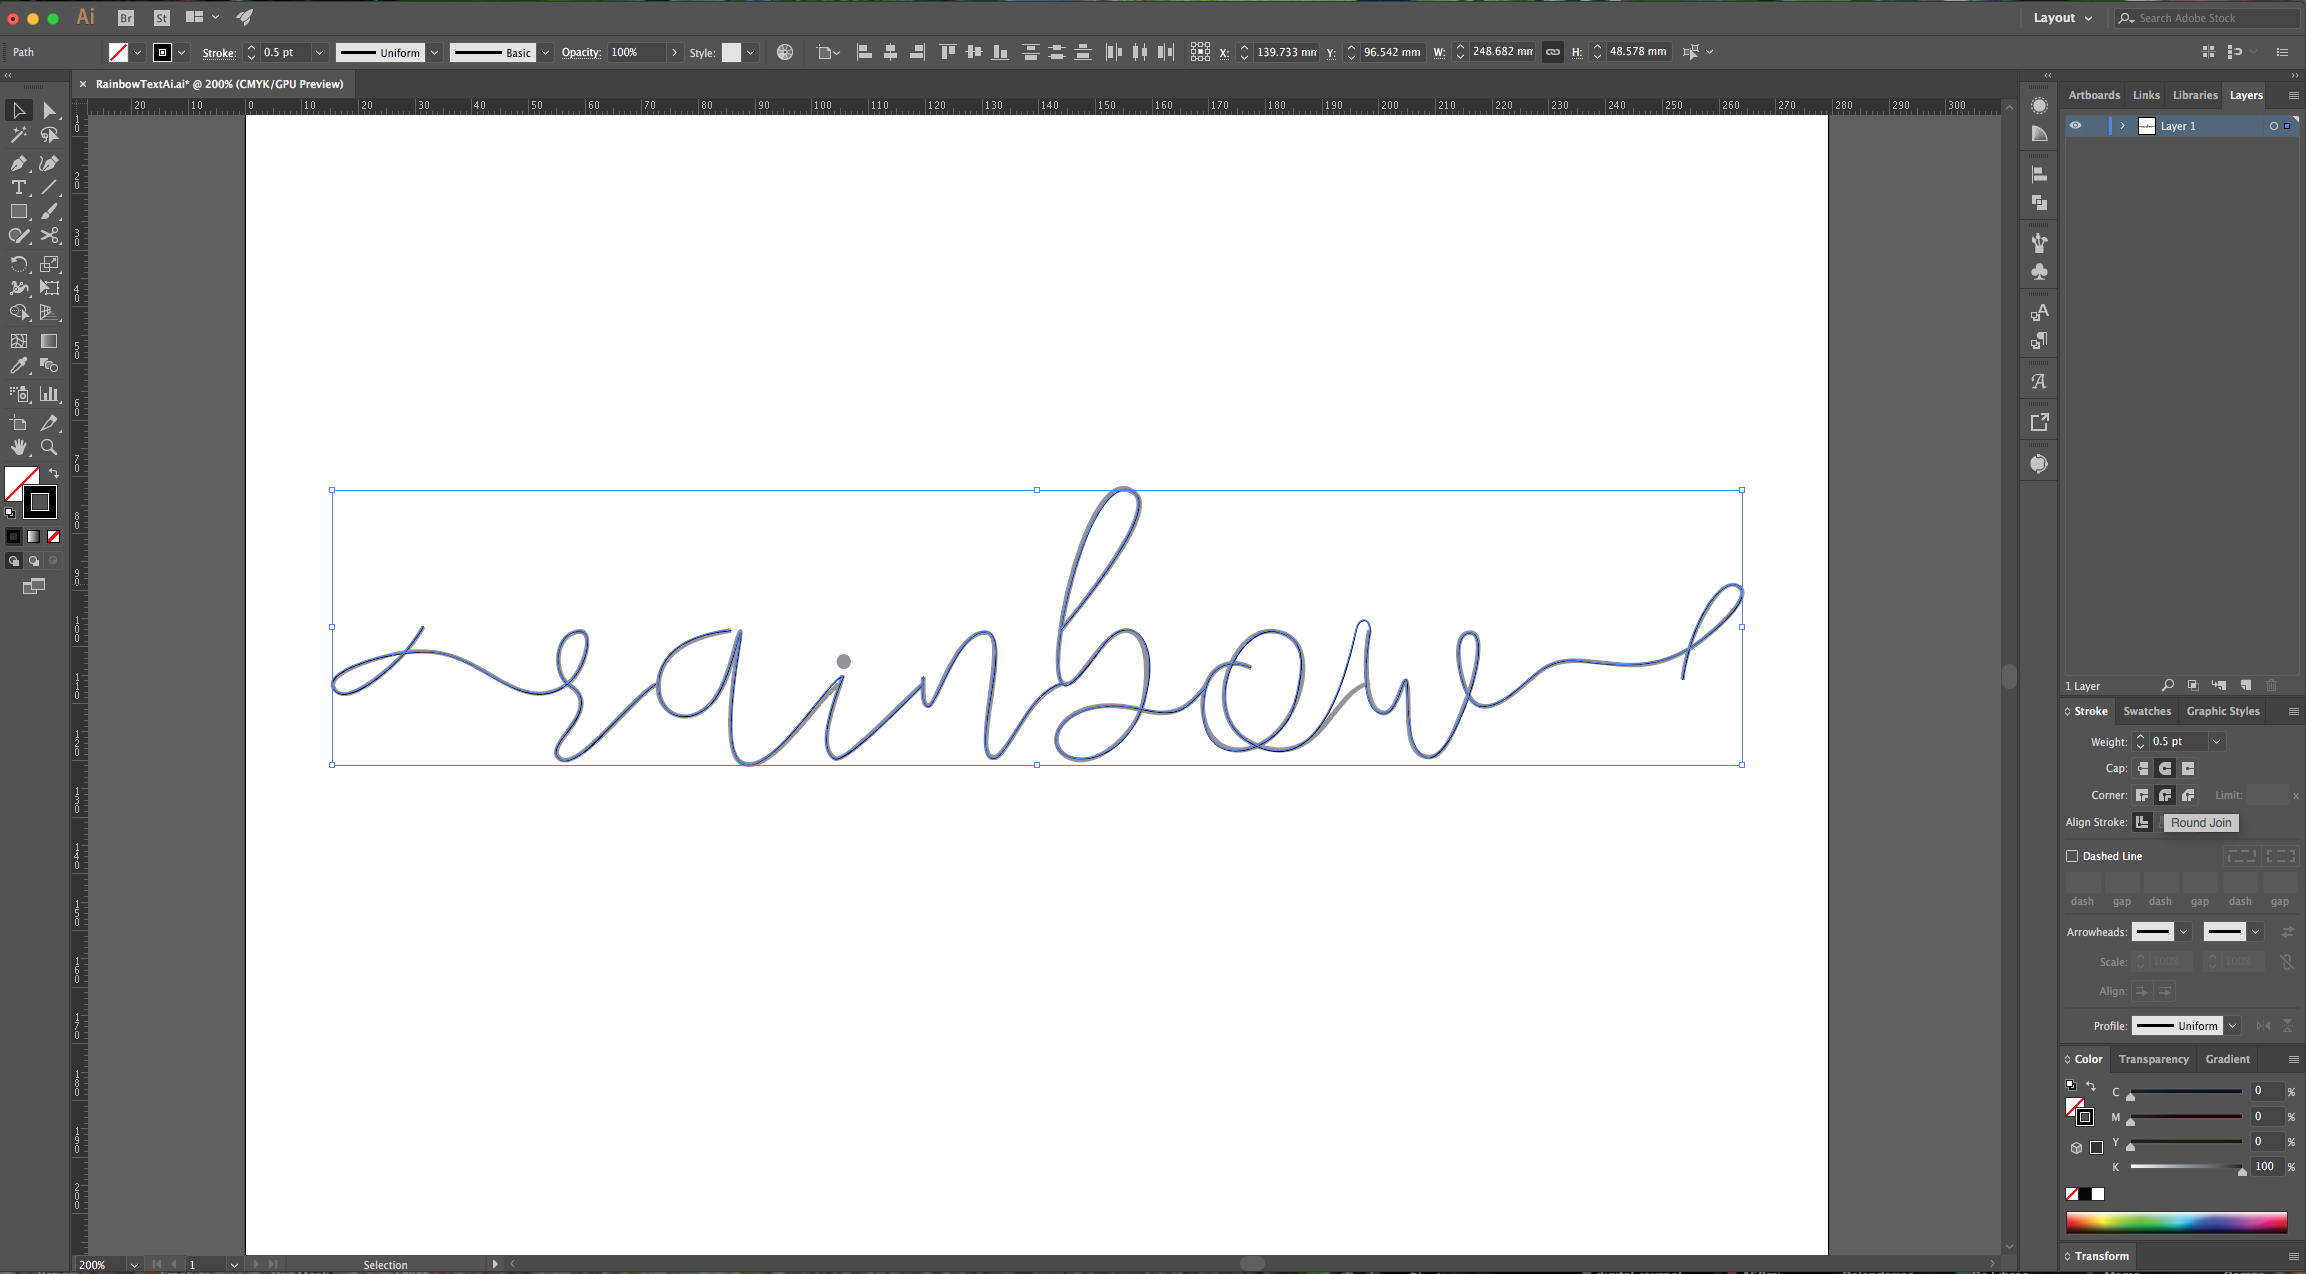
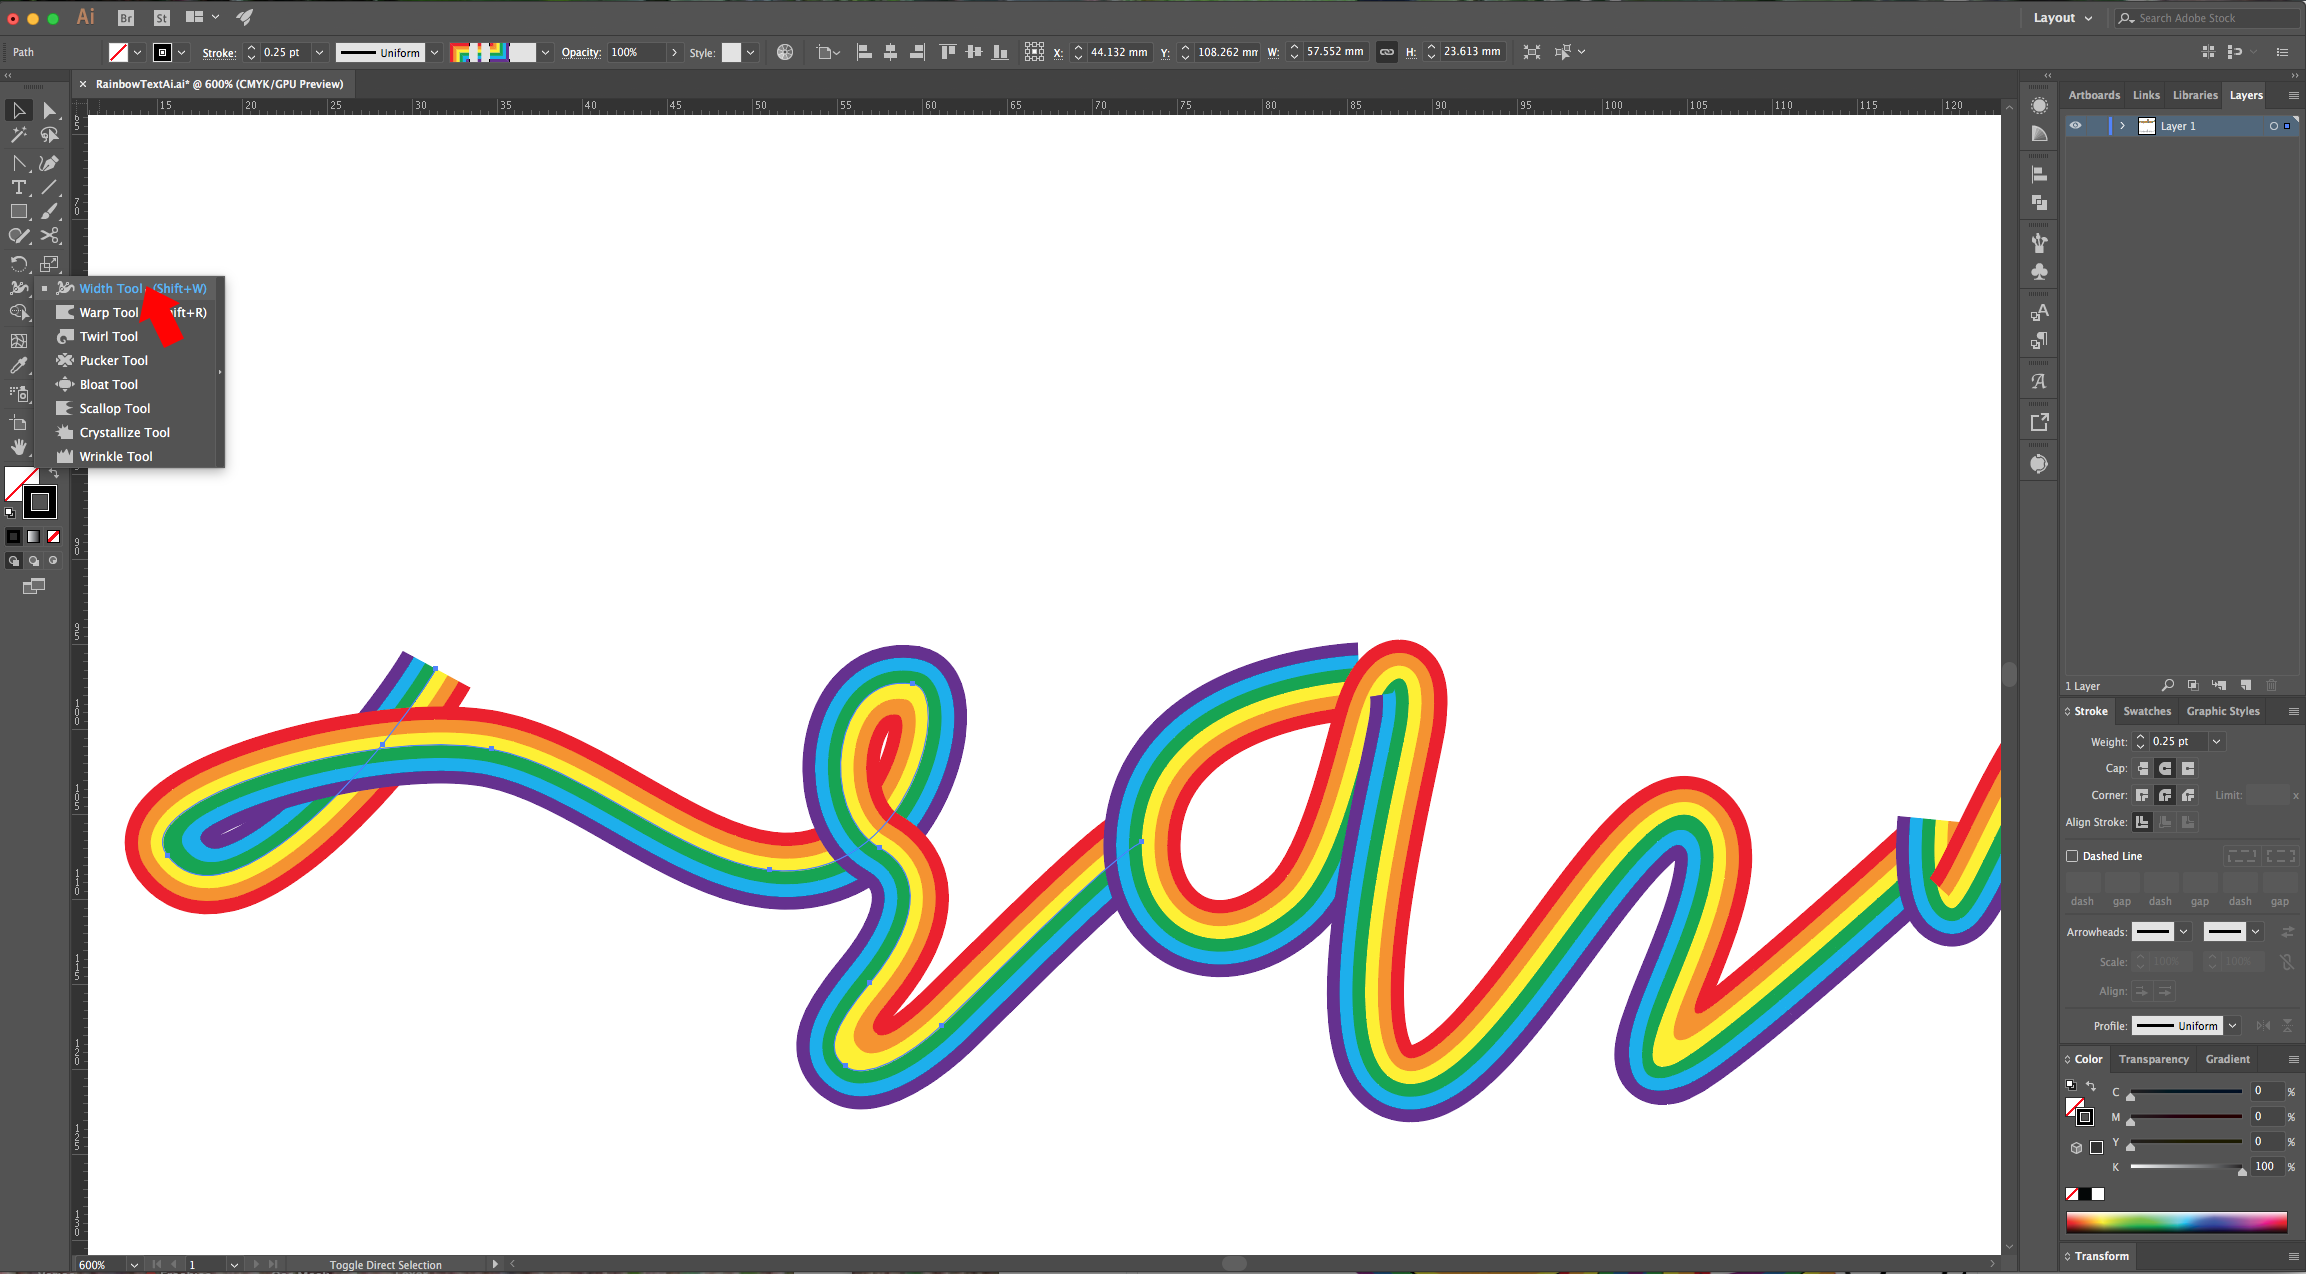
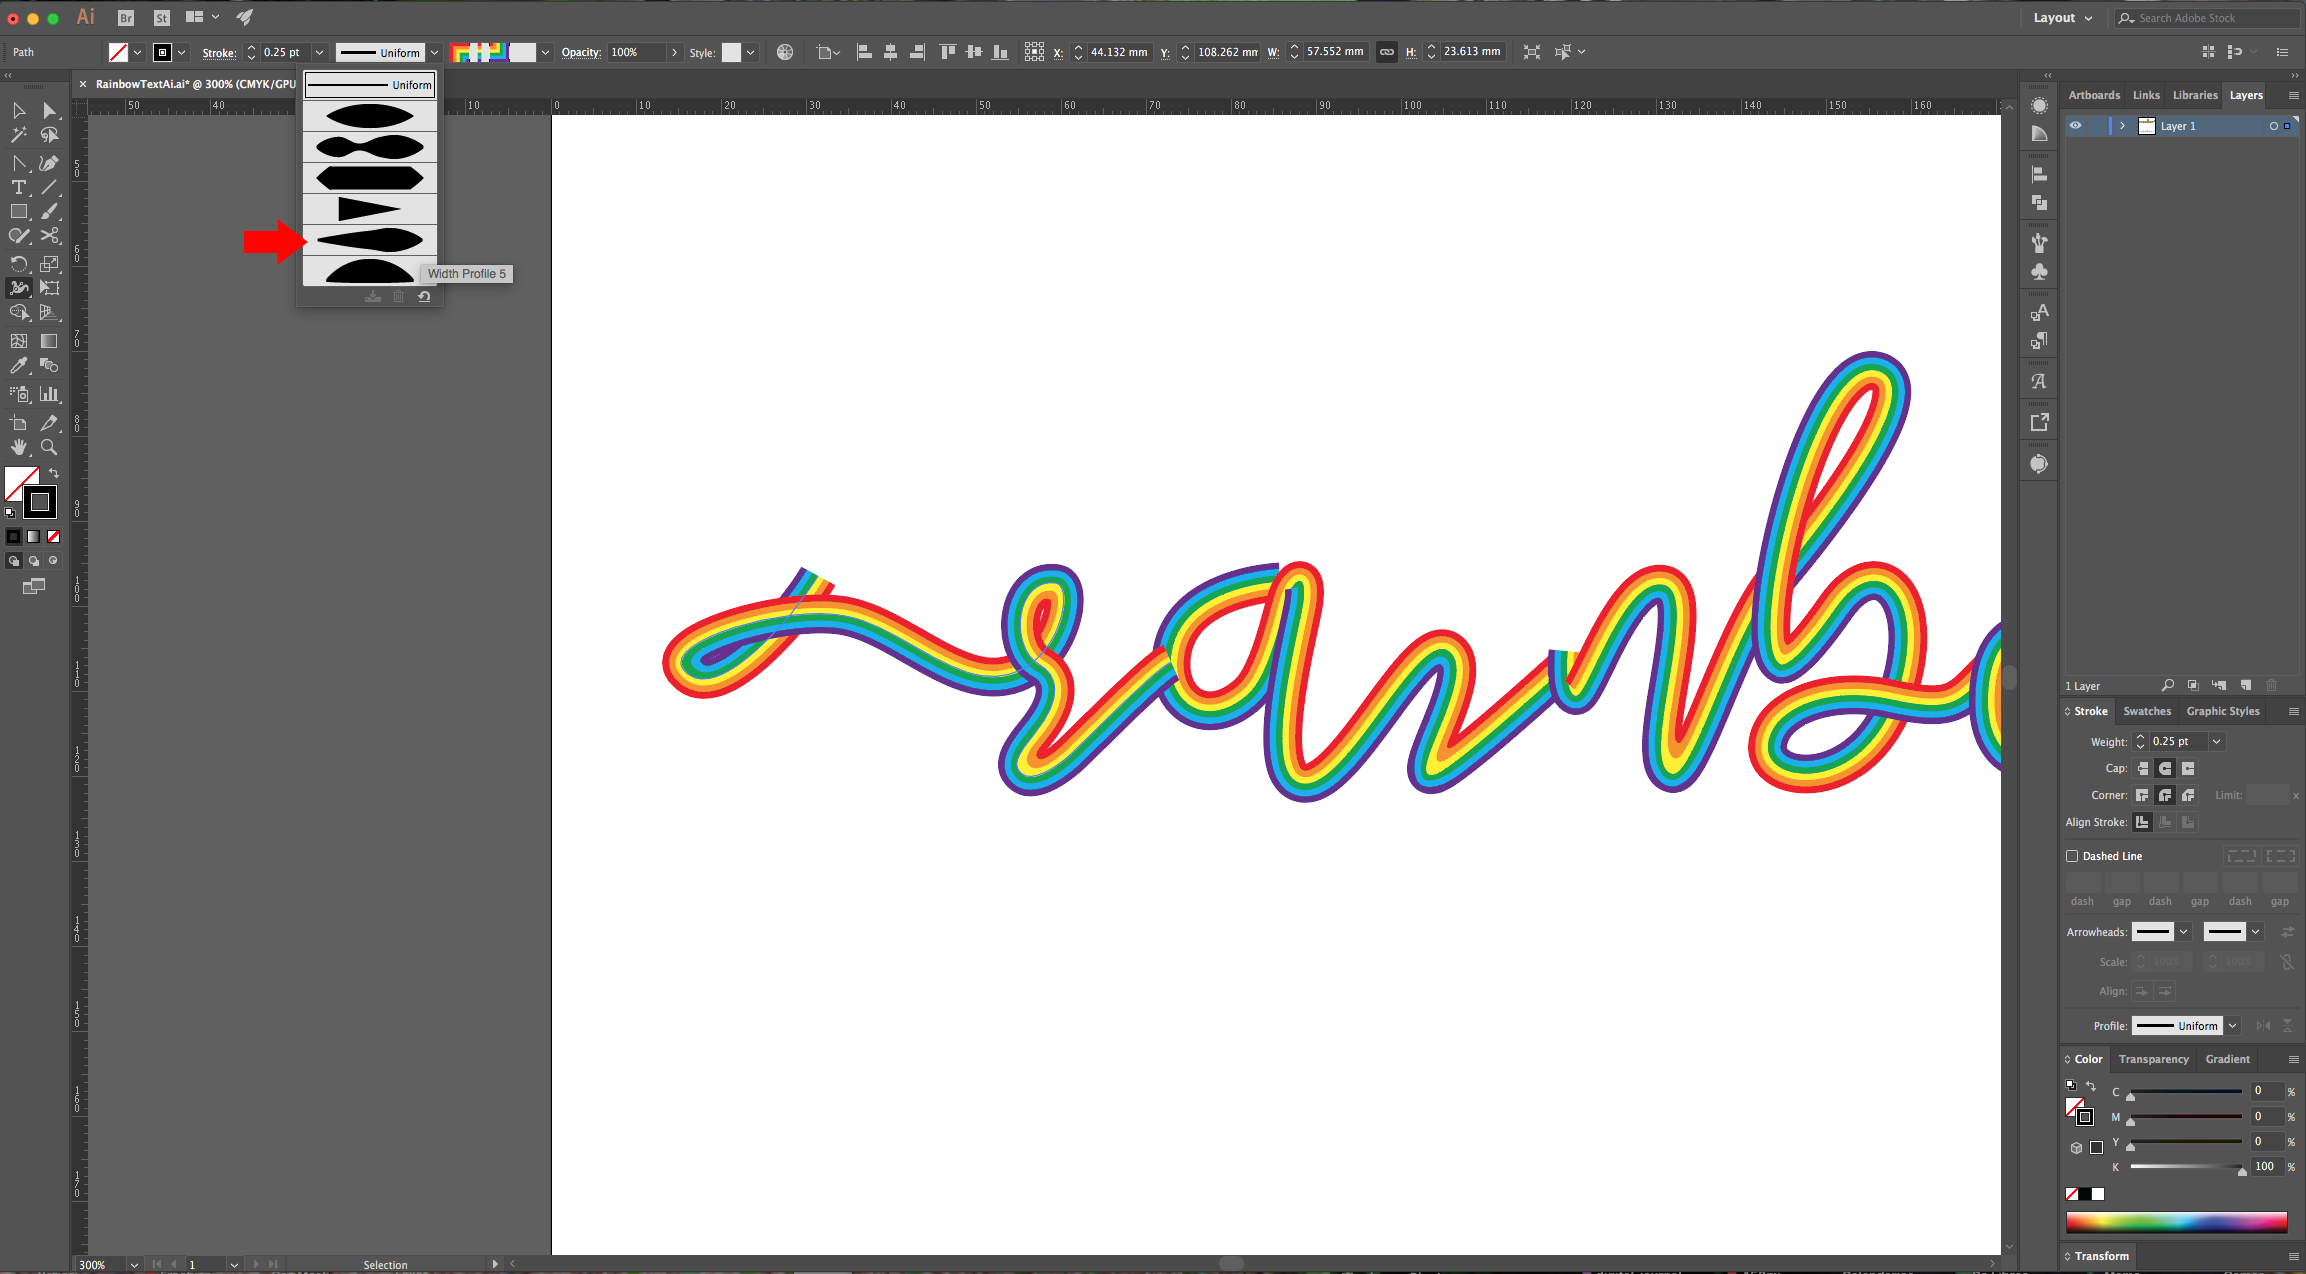
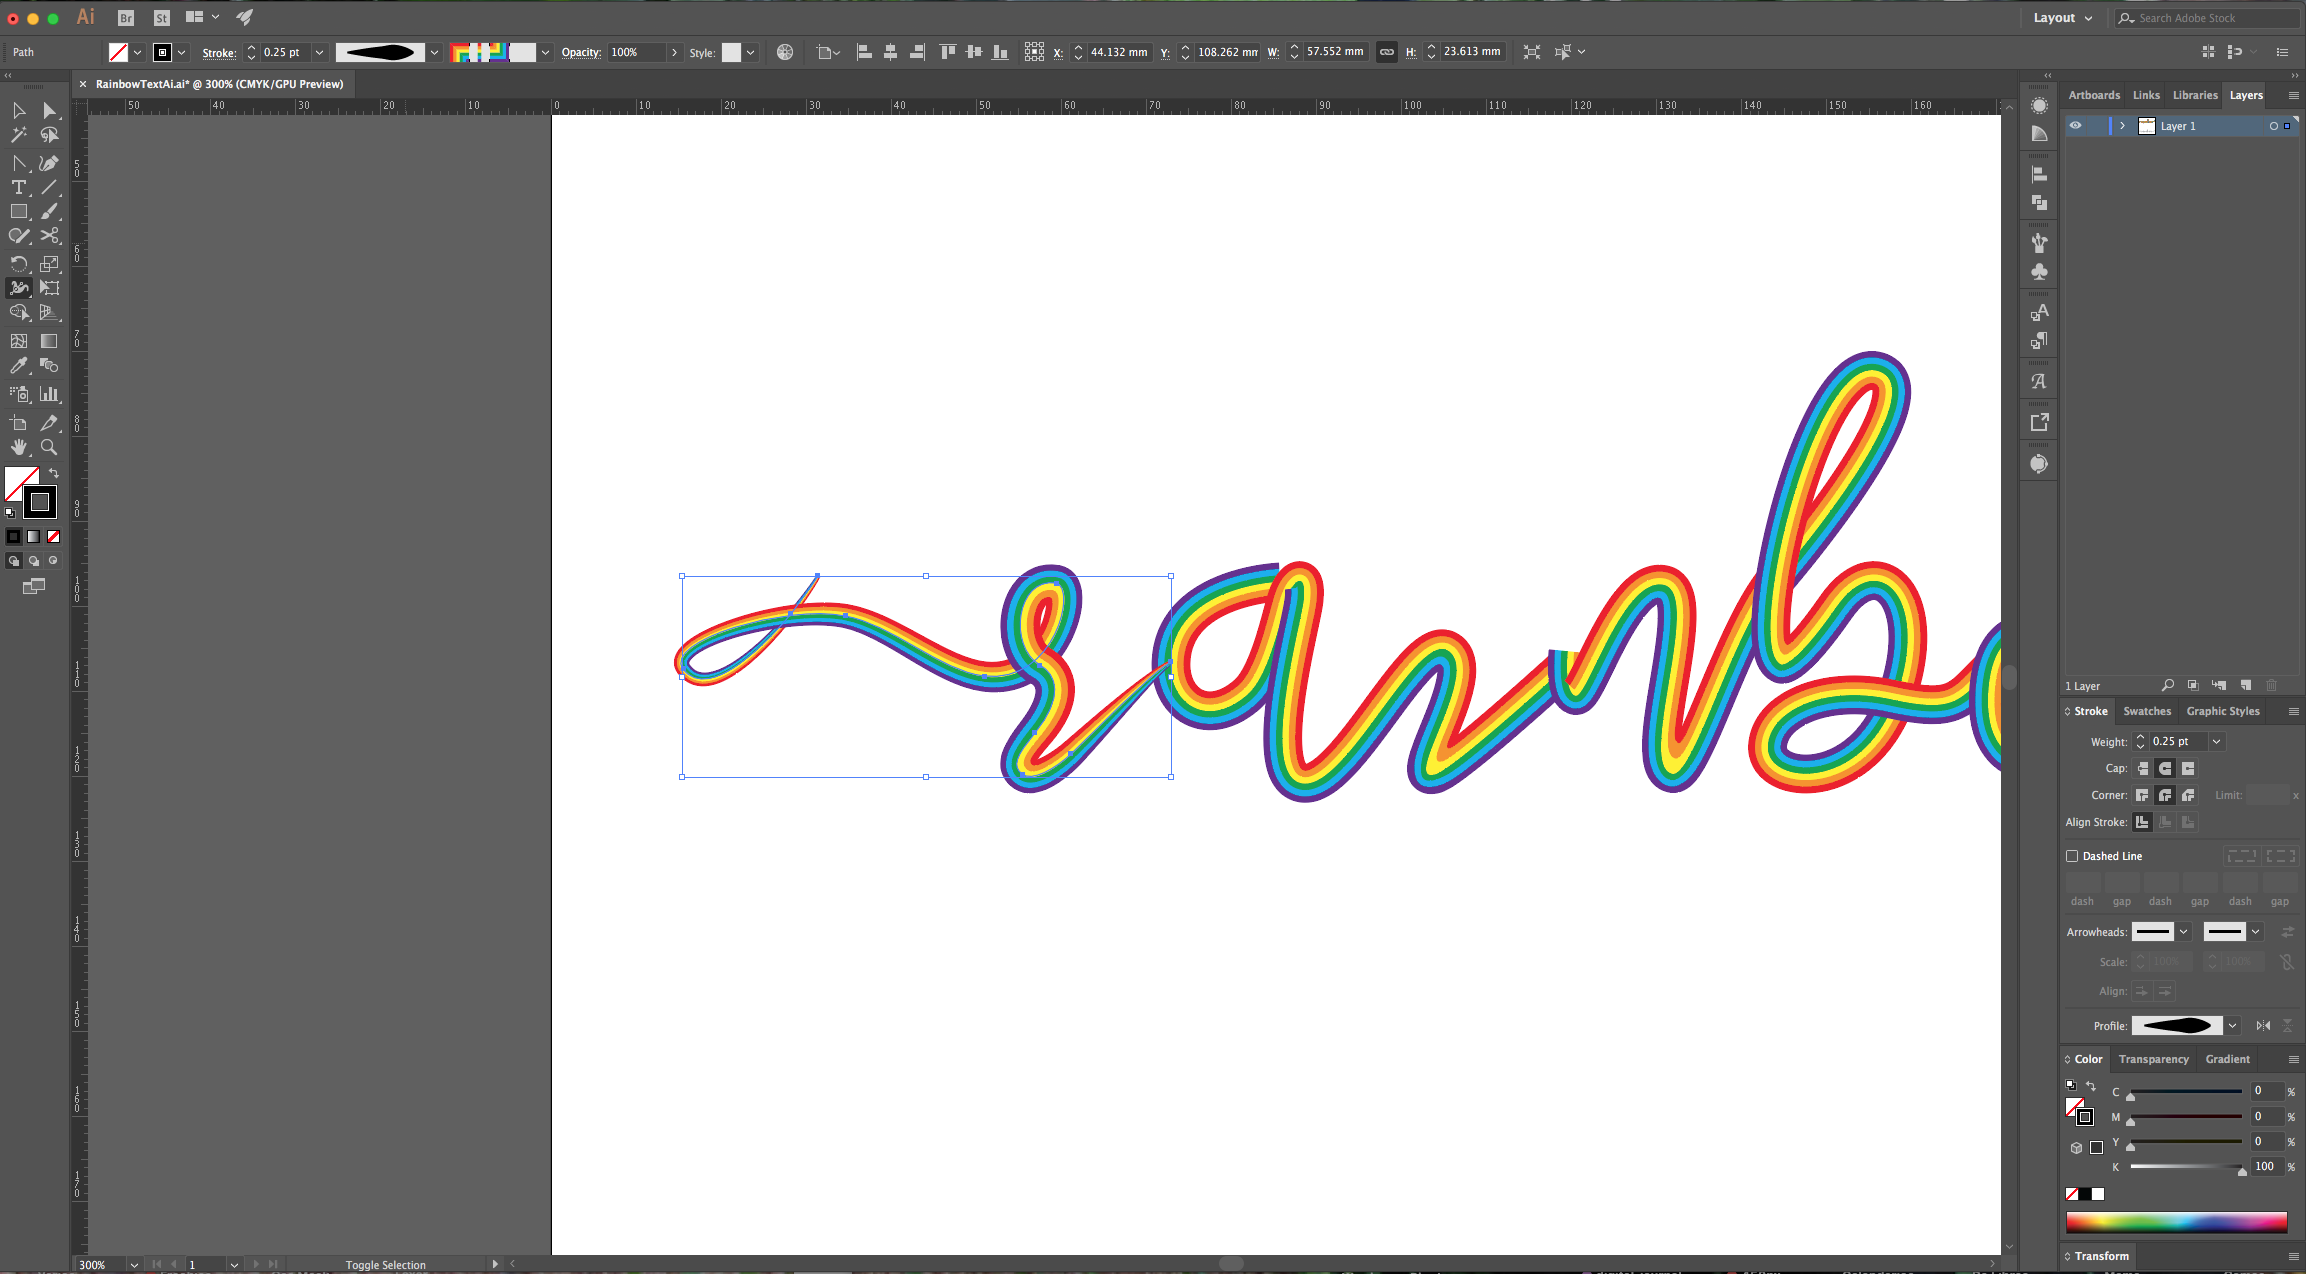
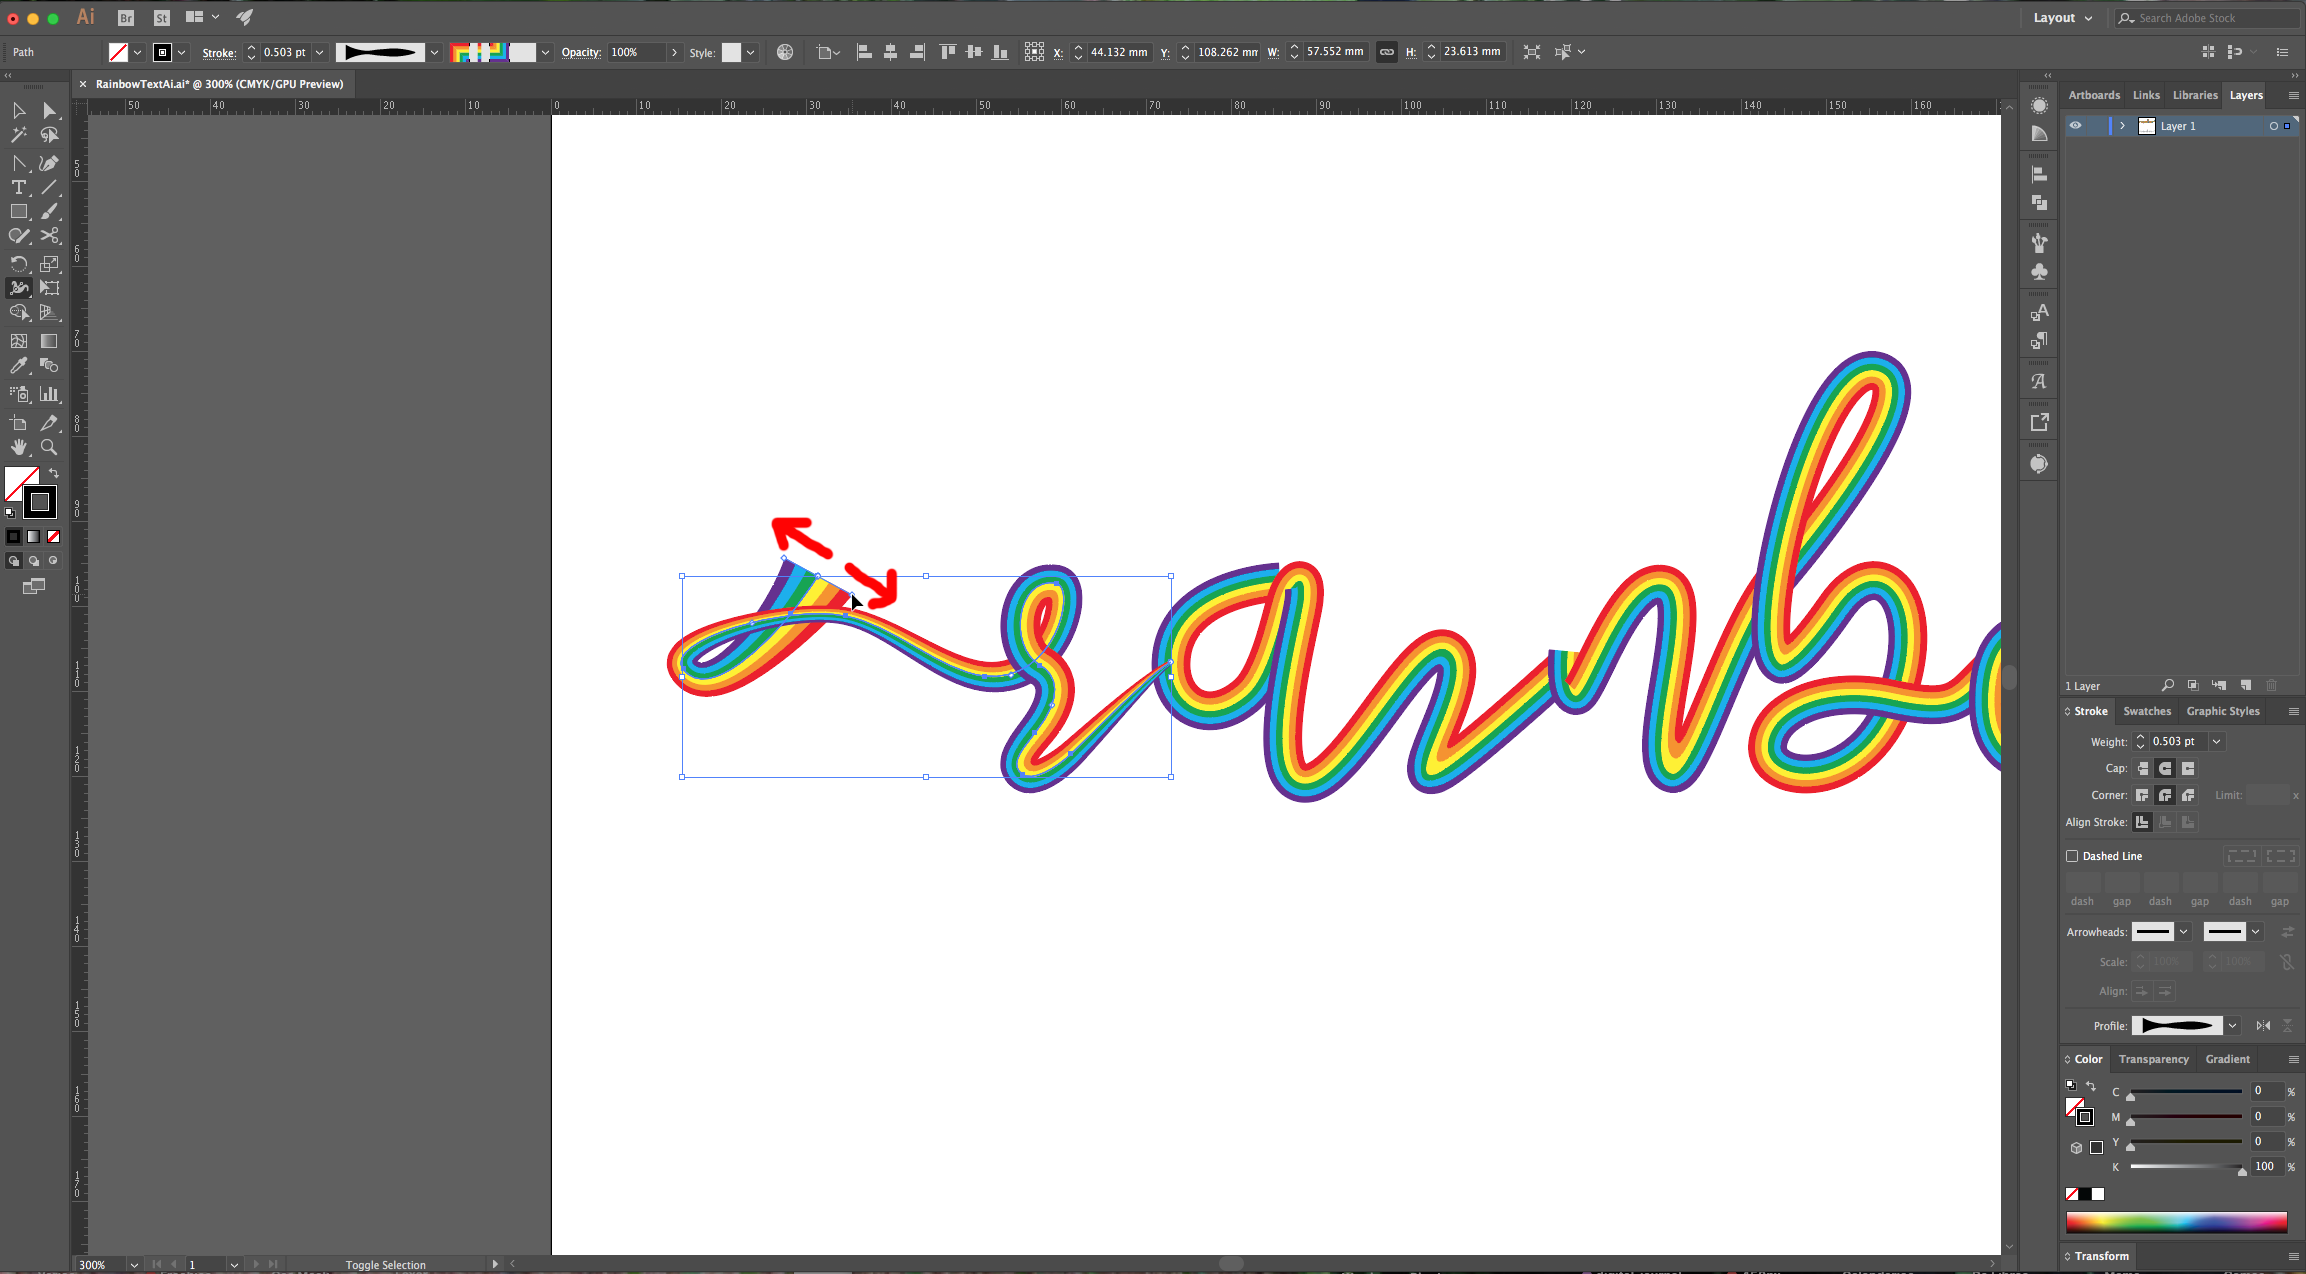
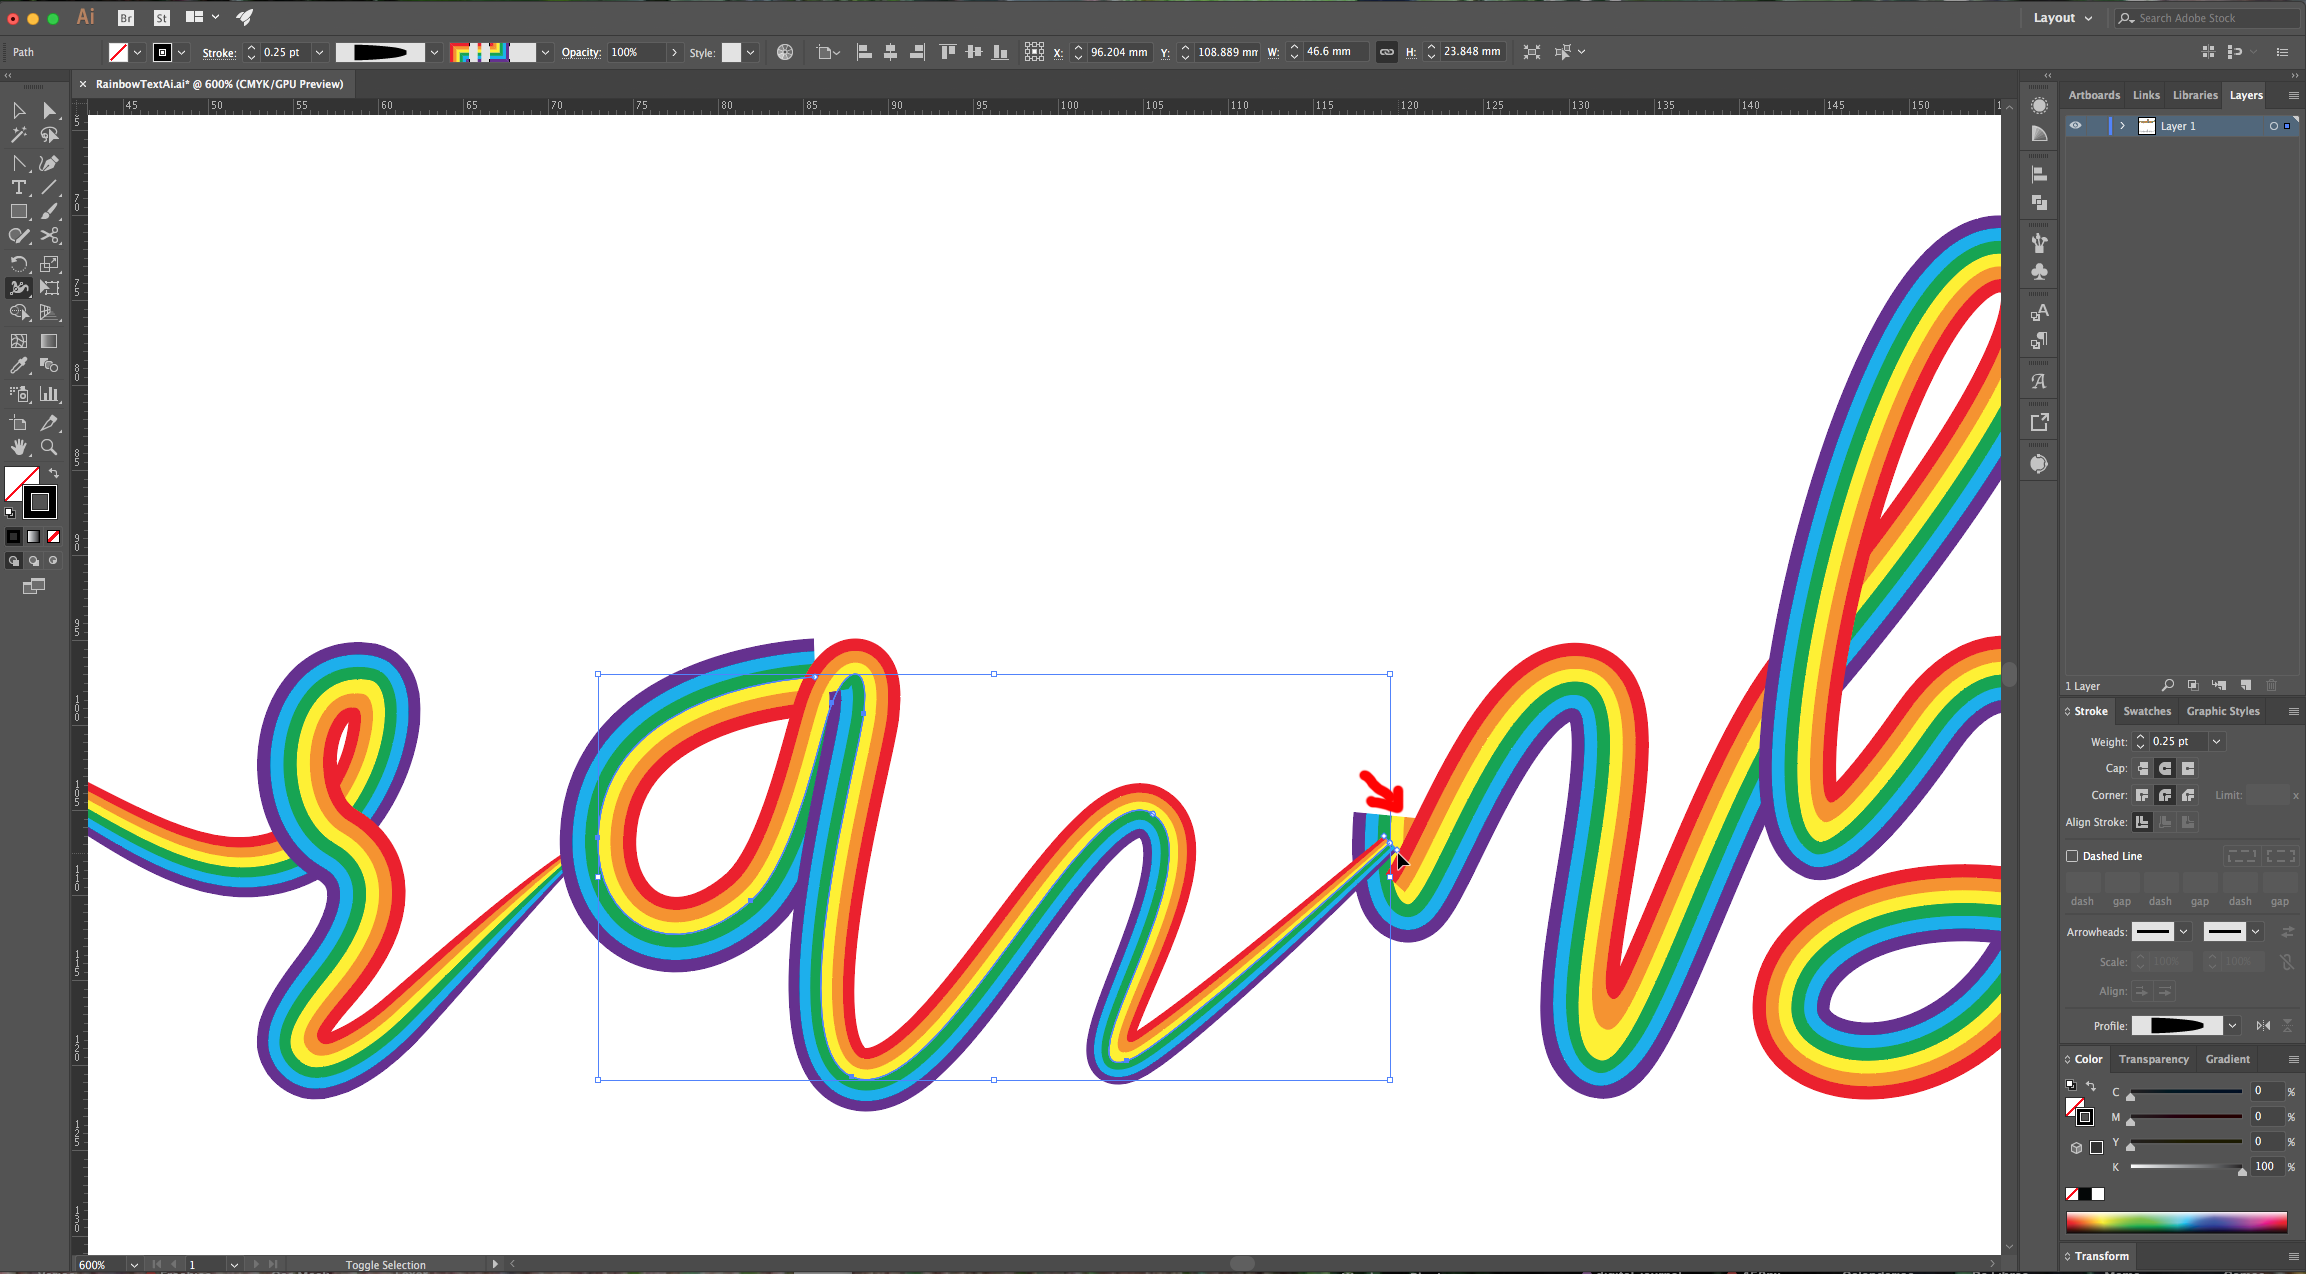
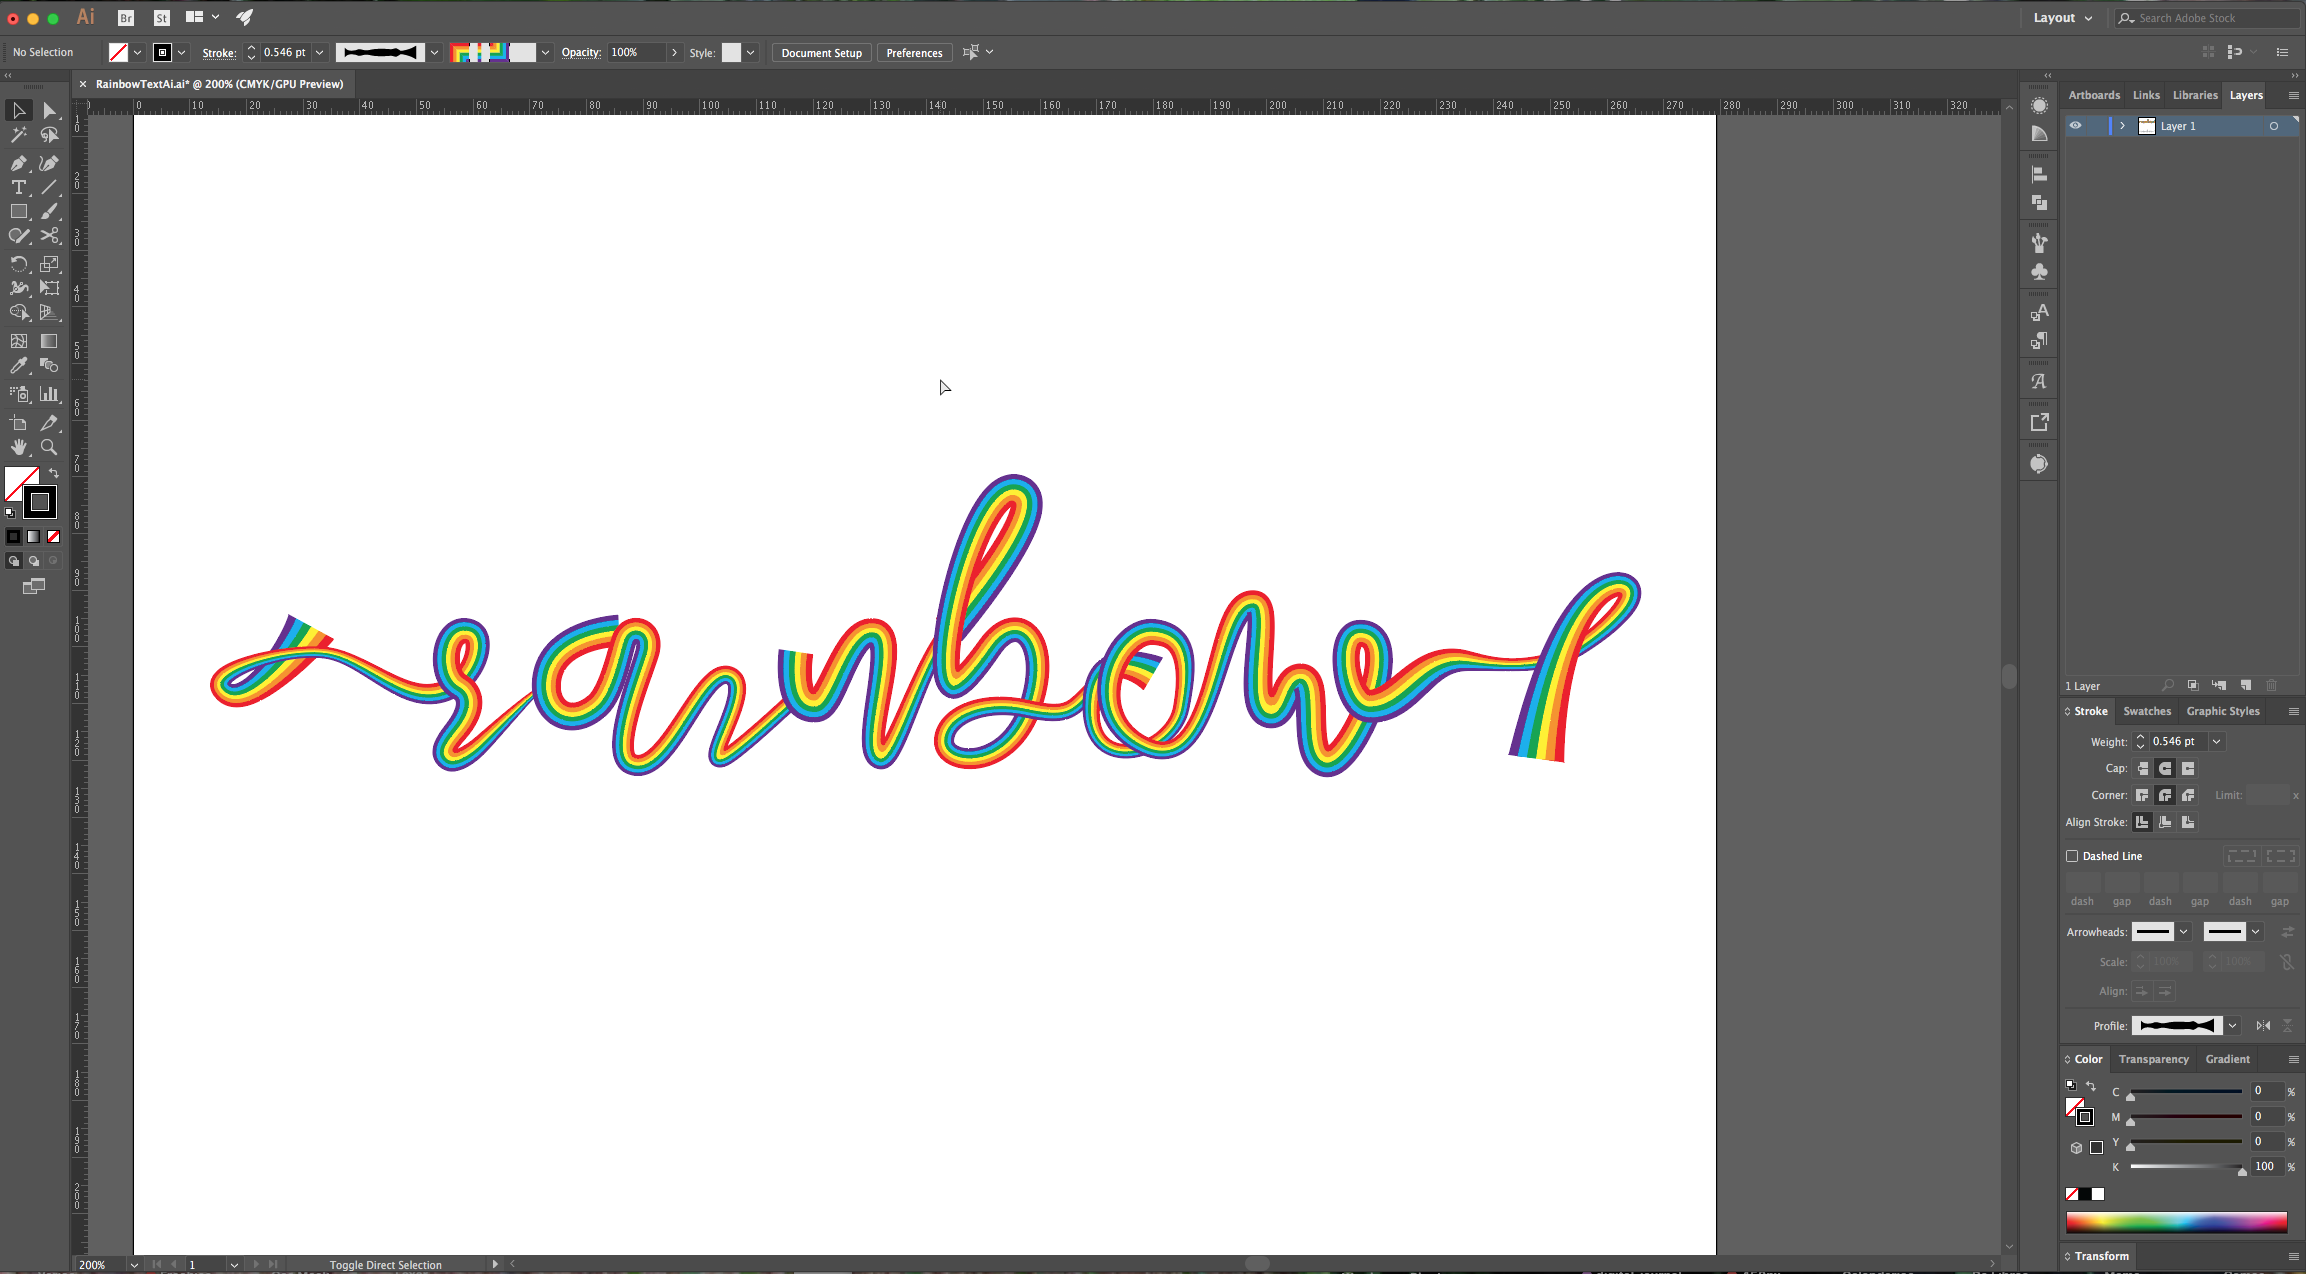
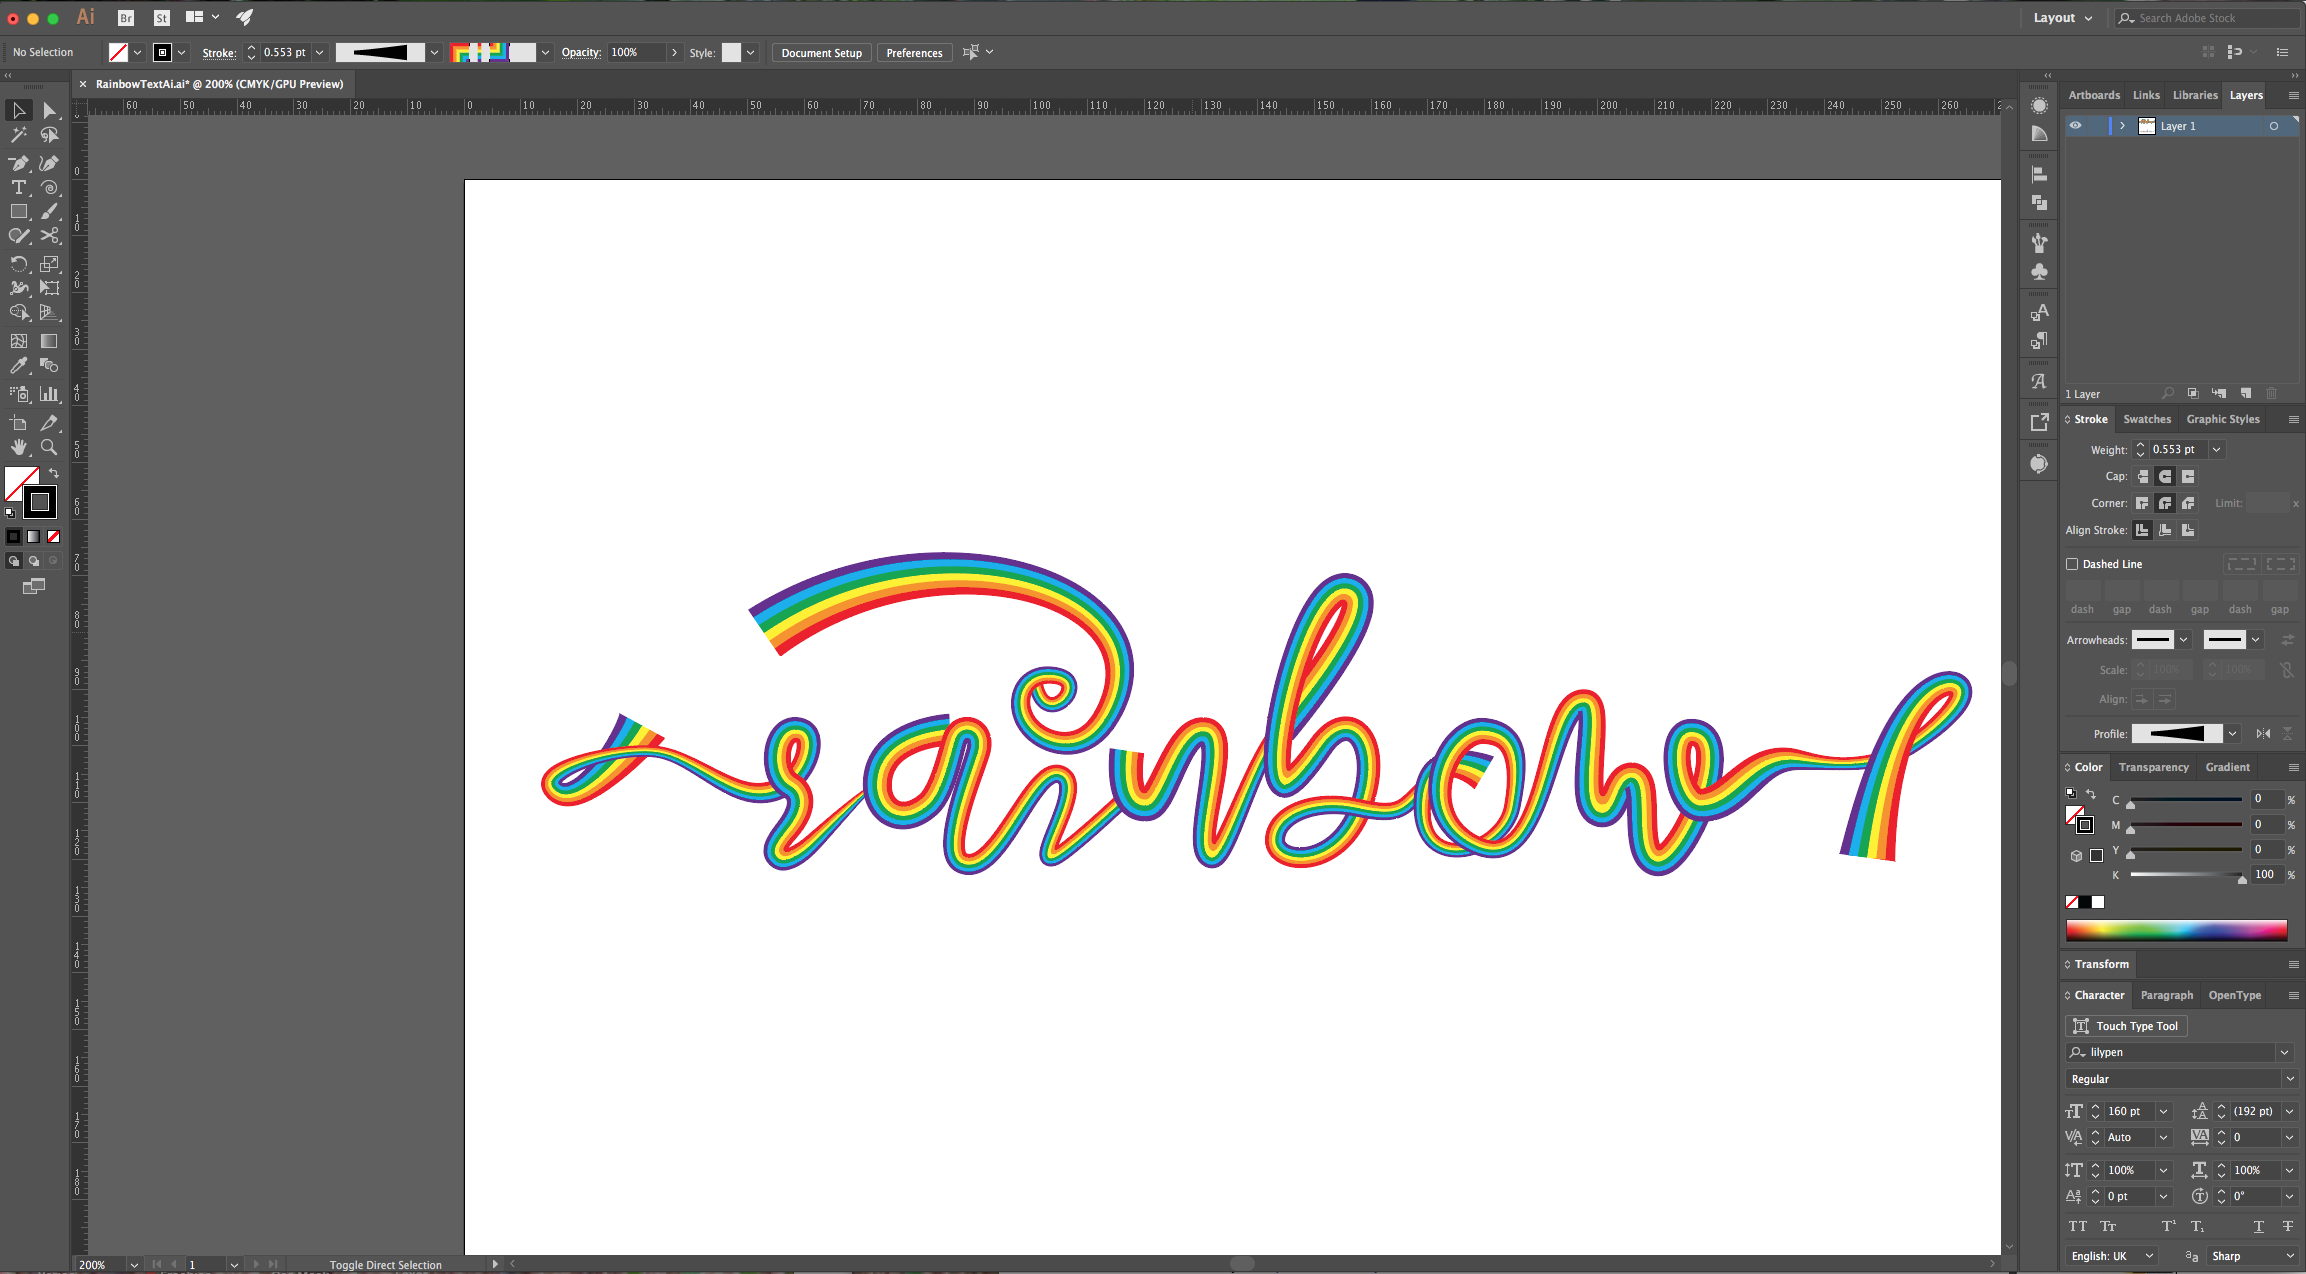
12 - Use the “With Tool” (Shift + W) to make some parts of the text thicker or thinner. You can choose a “With Profile” from the top menu and/or modify it by clicking on your text and dragging. Do this on all your text. You can use the “Direct Selection Tool” (A) to modify some of your points if needed.
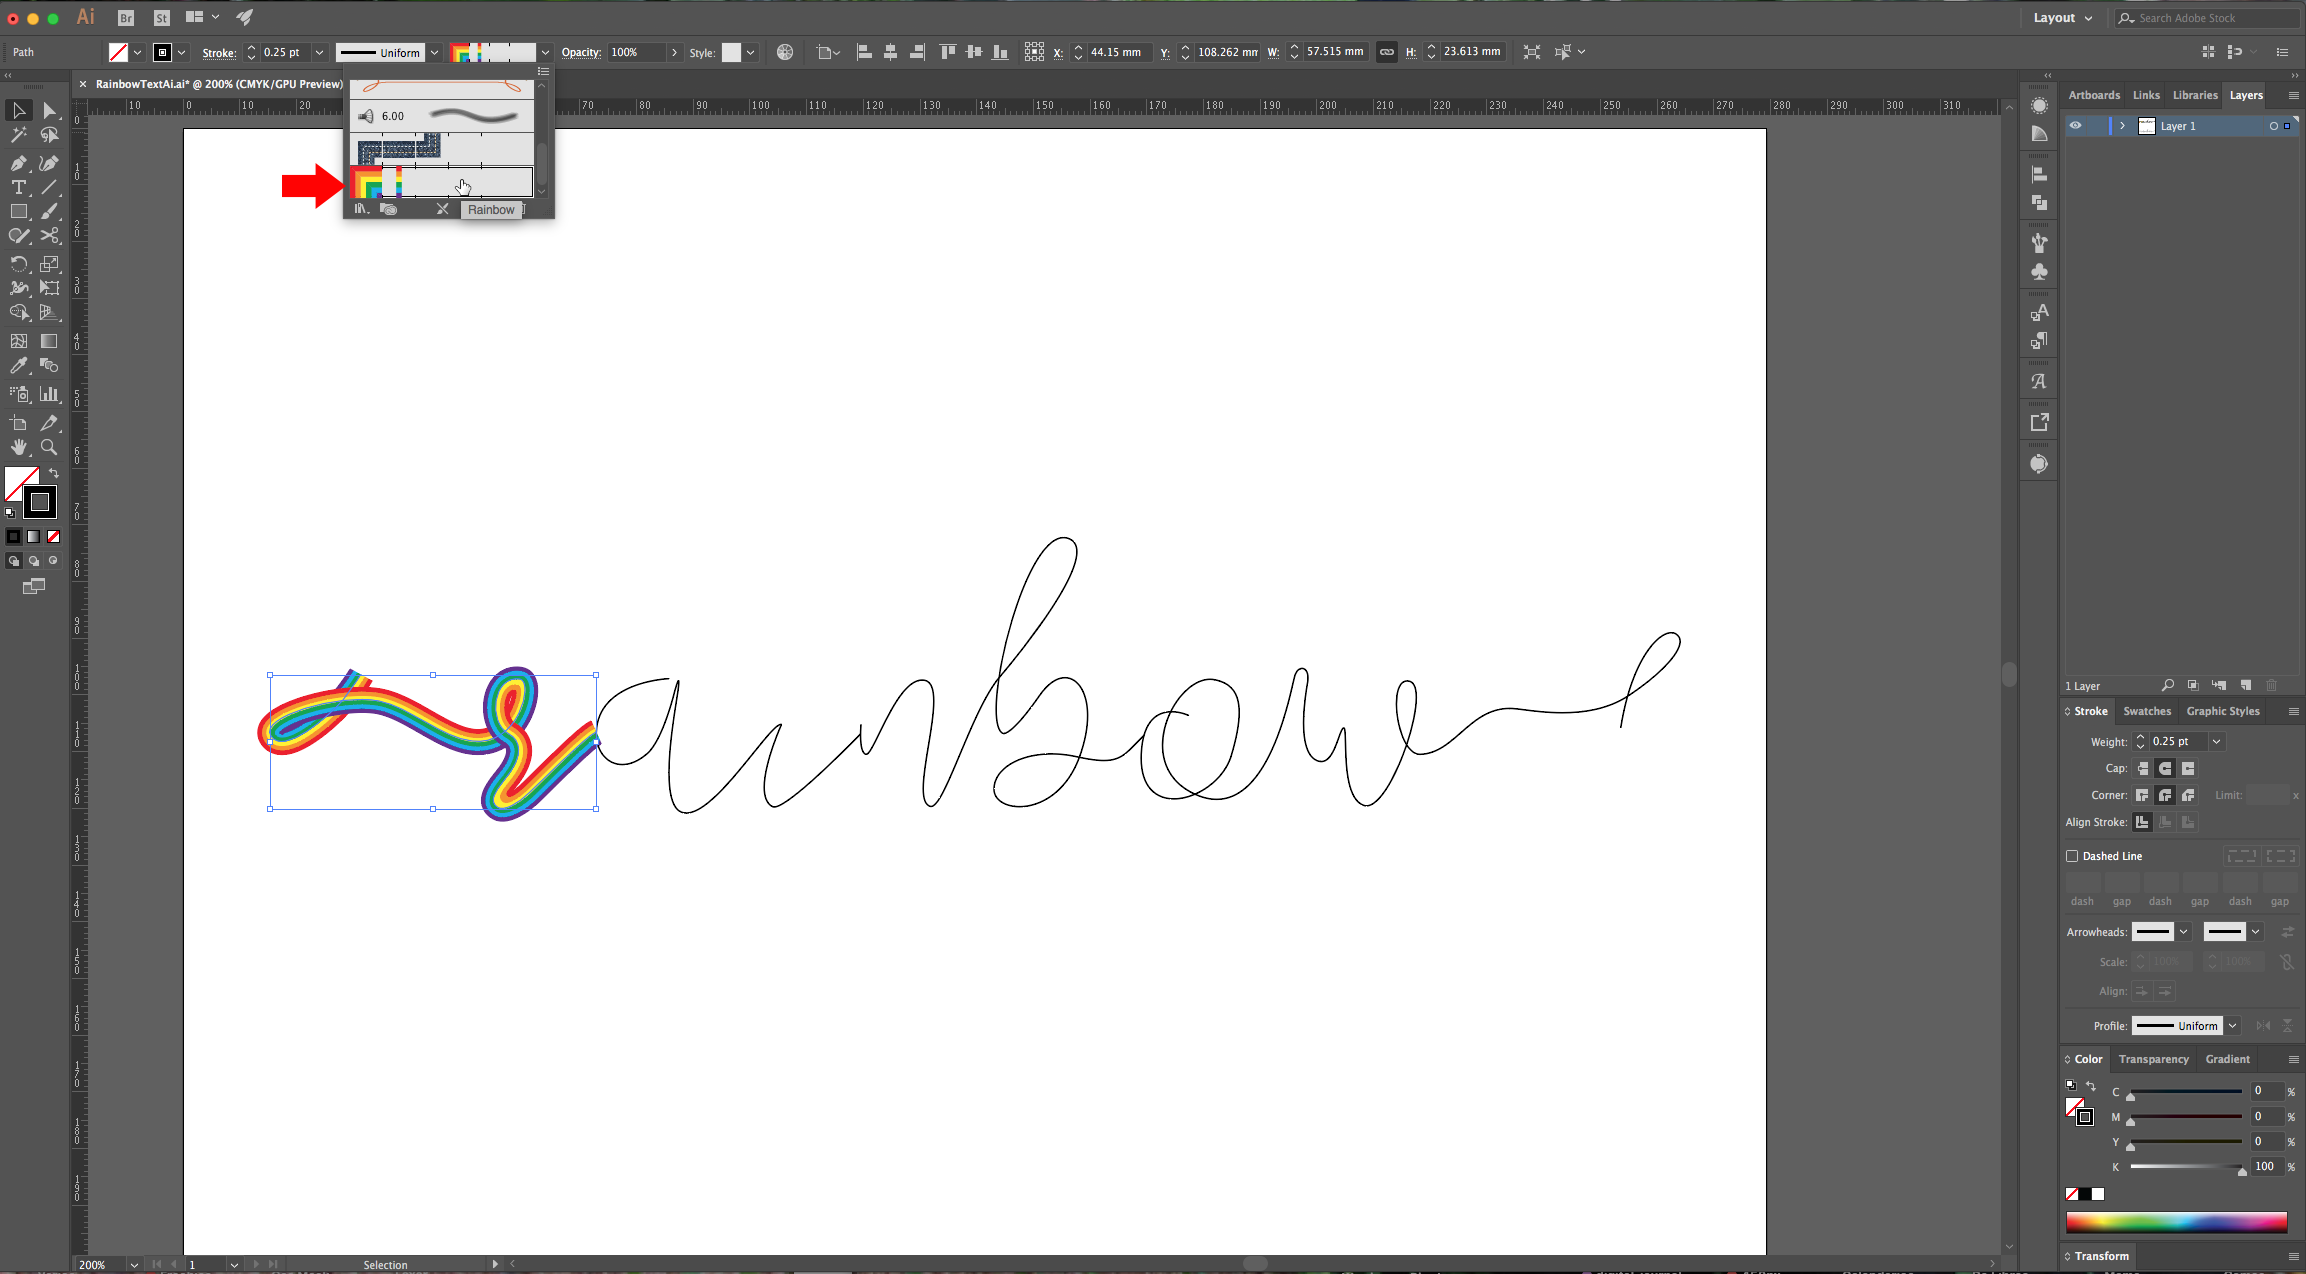
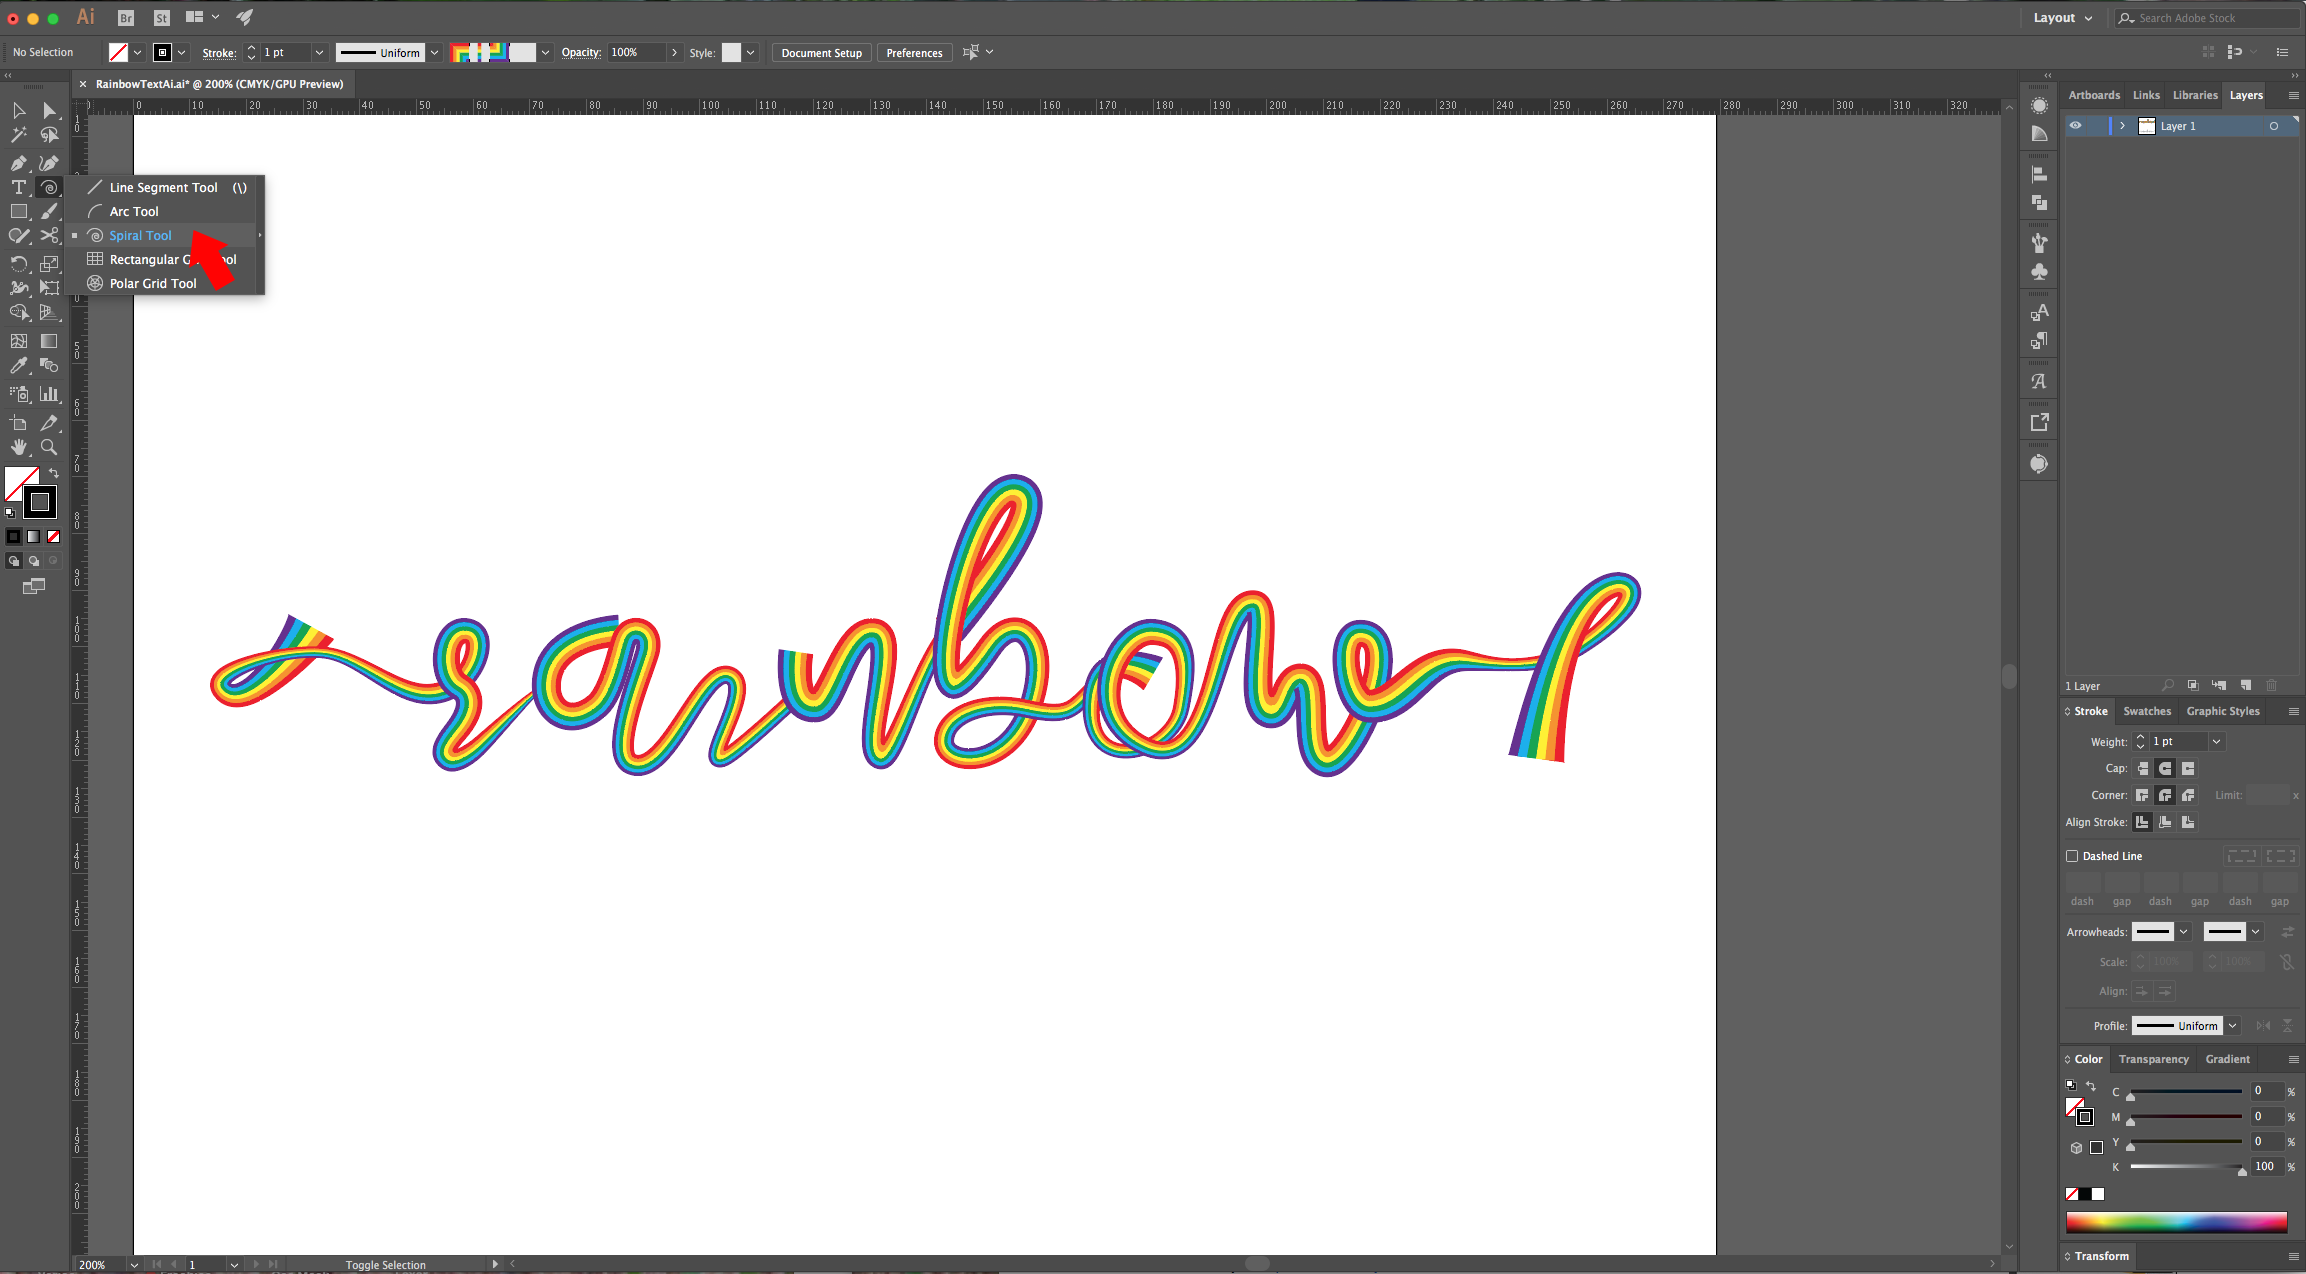
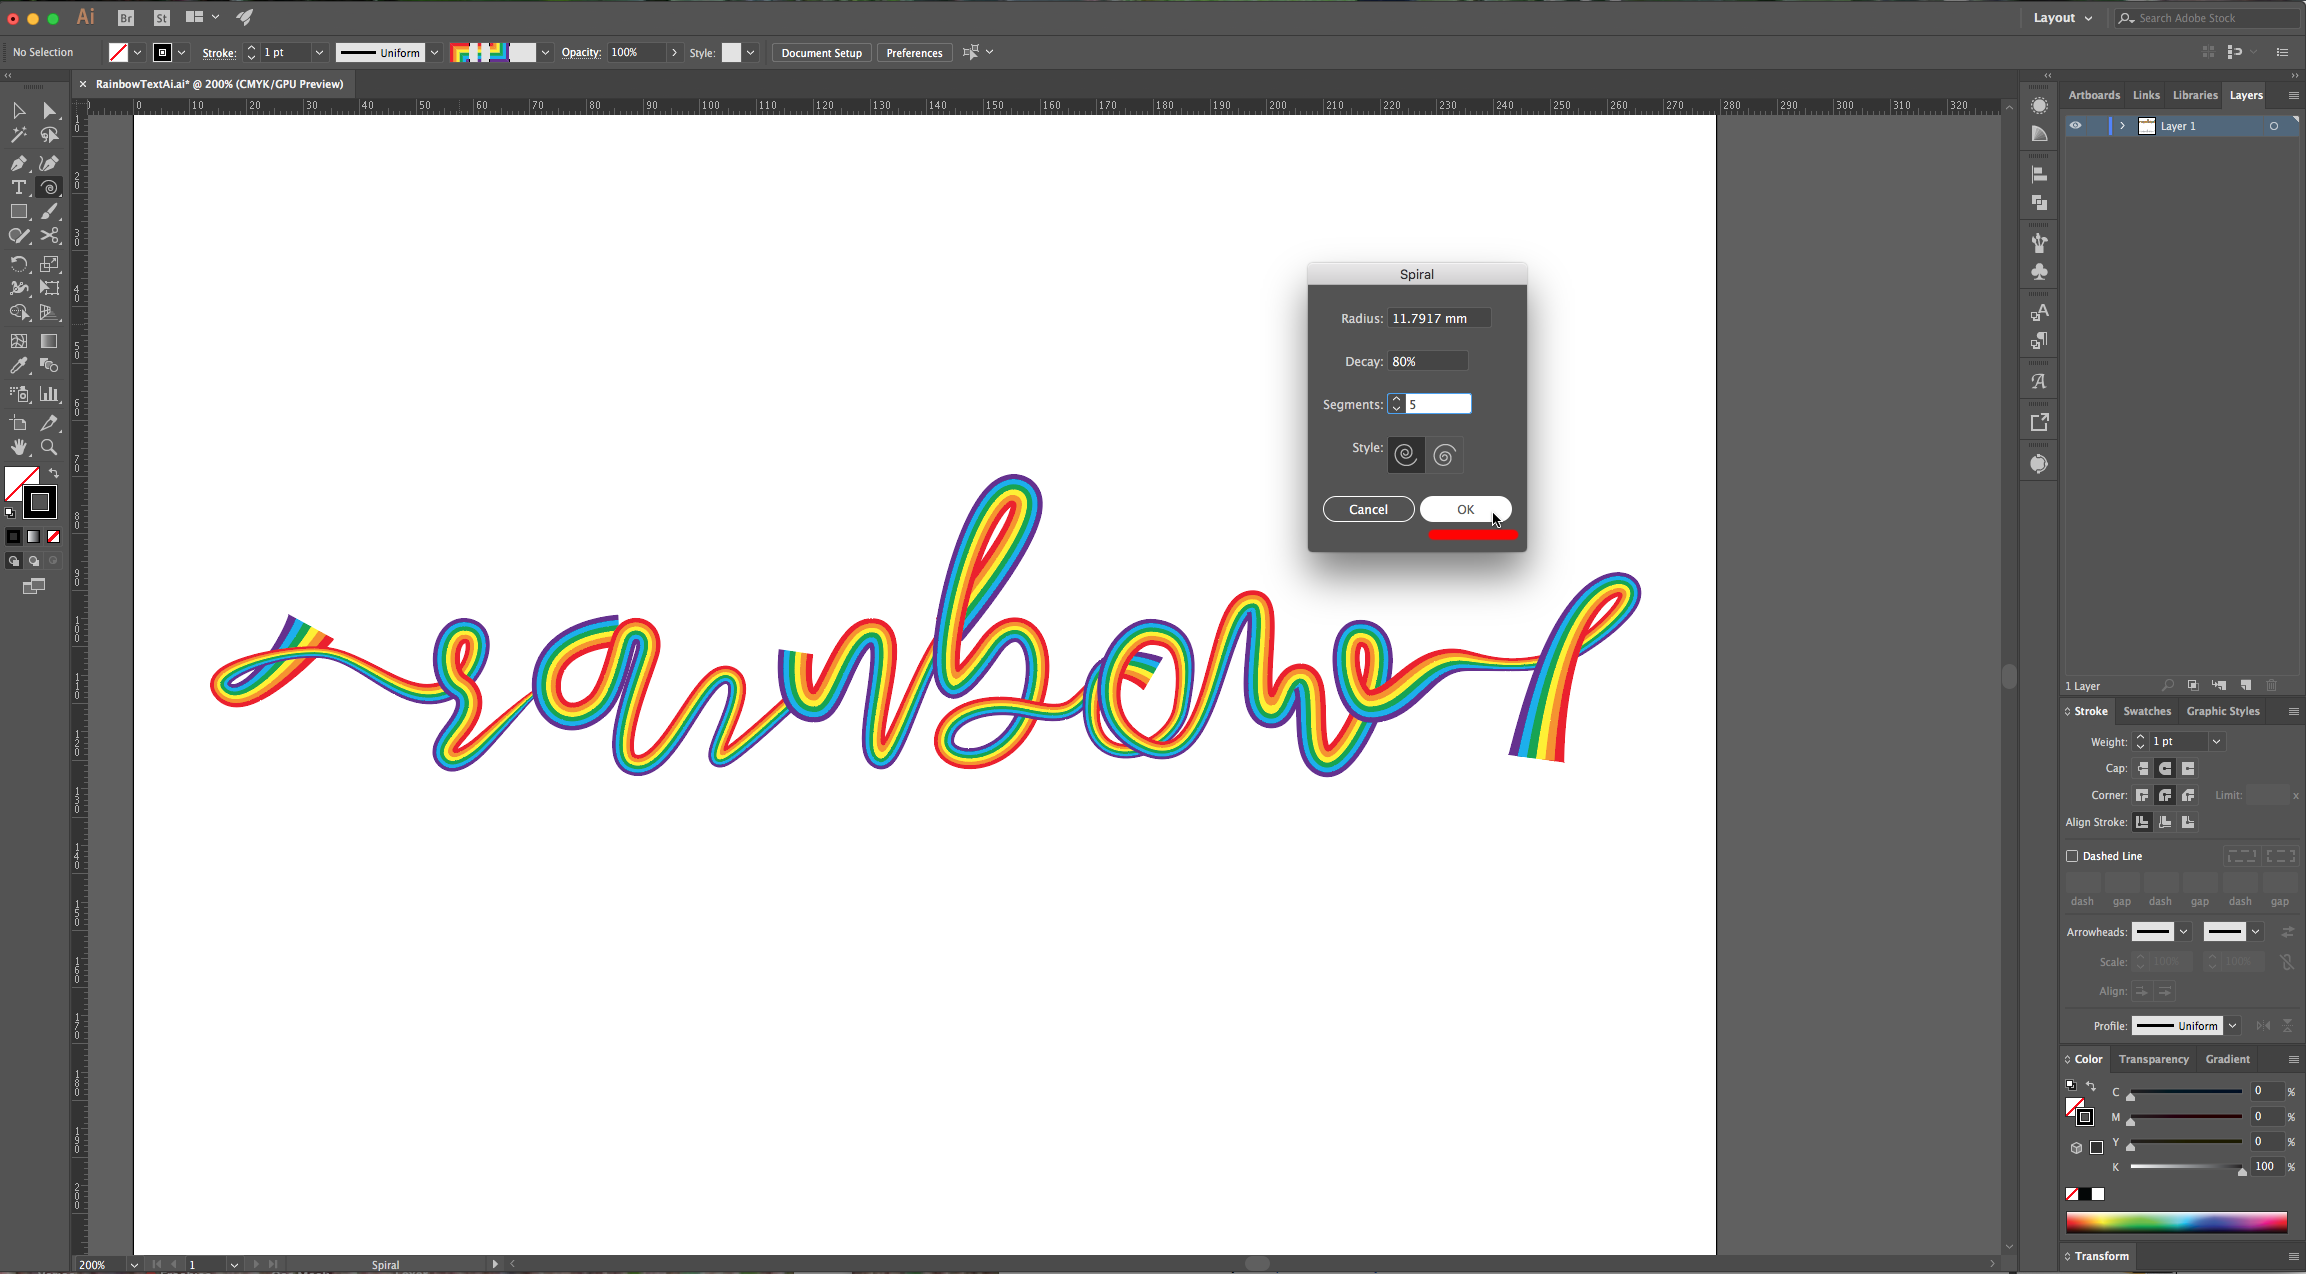
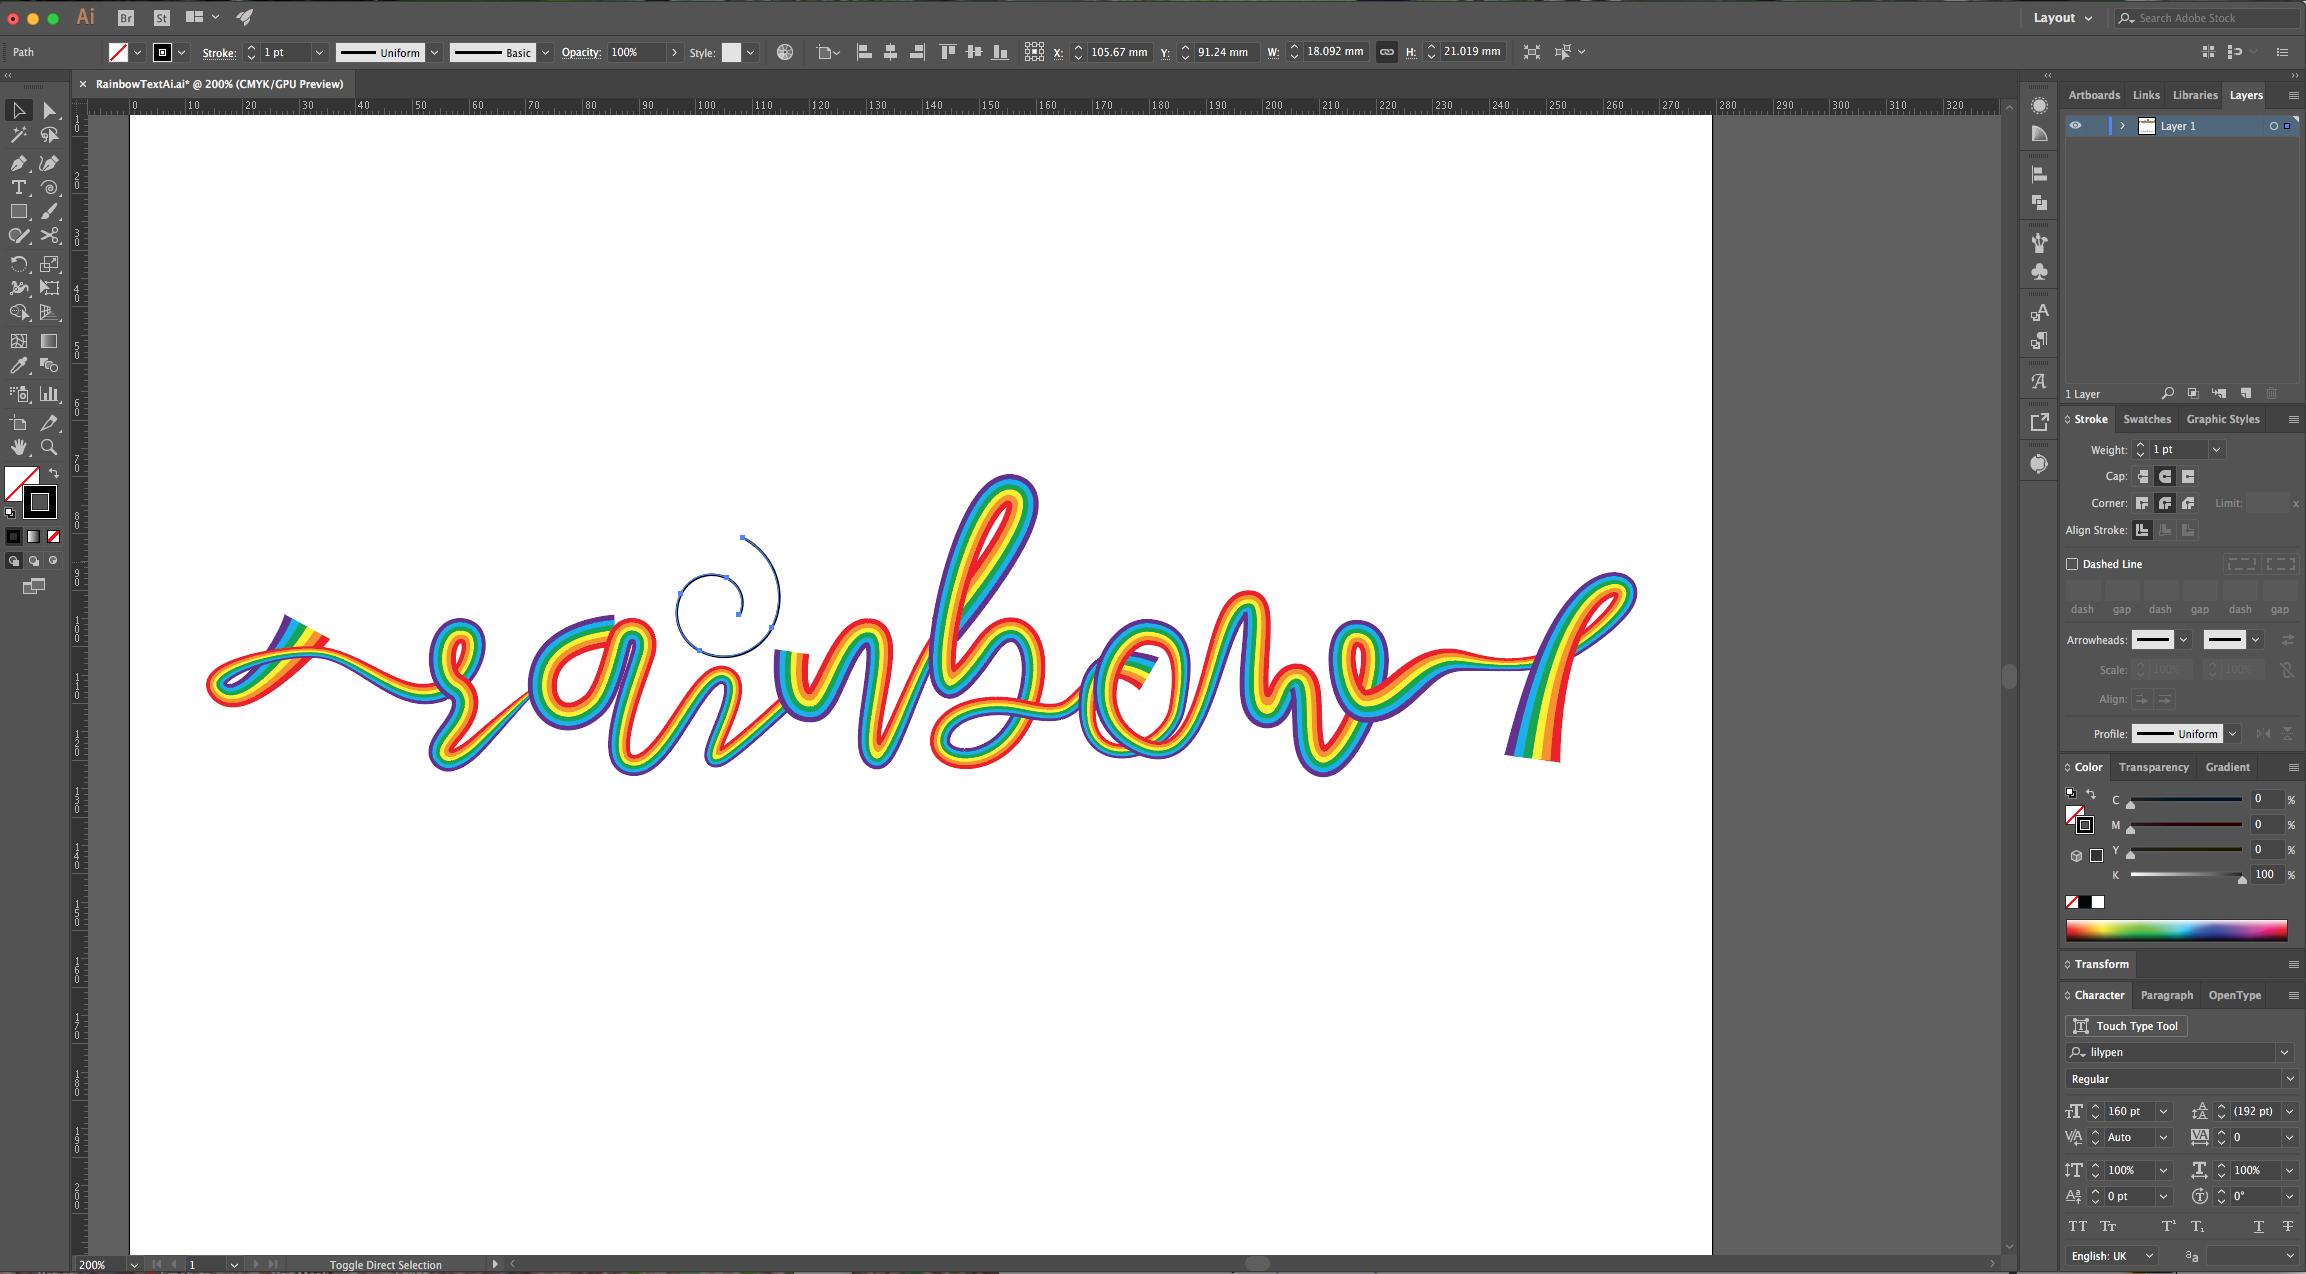
13 - For the “Dot” in the letter “i”, use the “Spiral Tool”, click on your “Document” and specify the number of segments (we used 5) and the “Style” and click “OK”. Change the “Stroke” to the “Rainbow Brush” and the “Weight” to 0.5 pt, then, play around with the path to get a nice look.
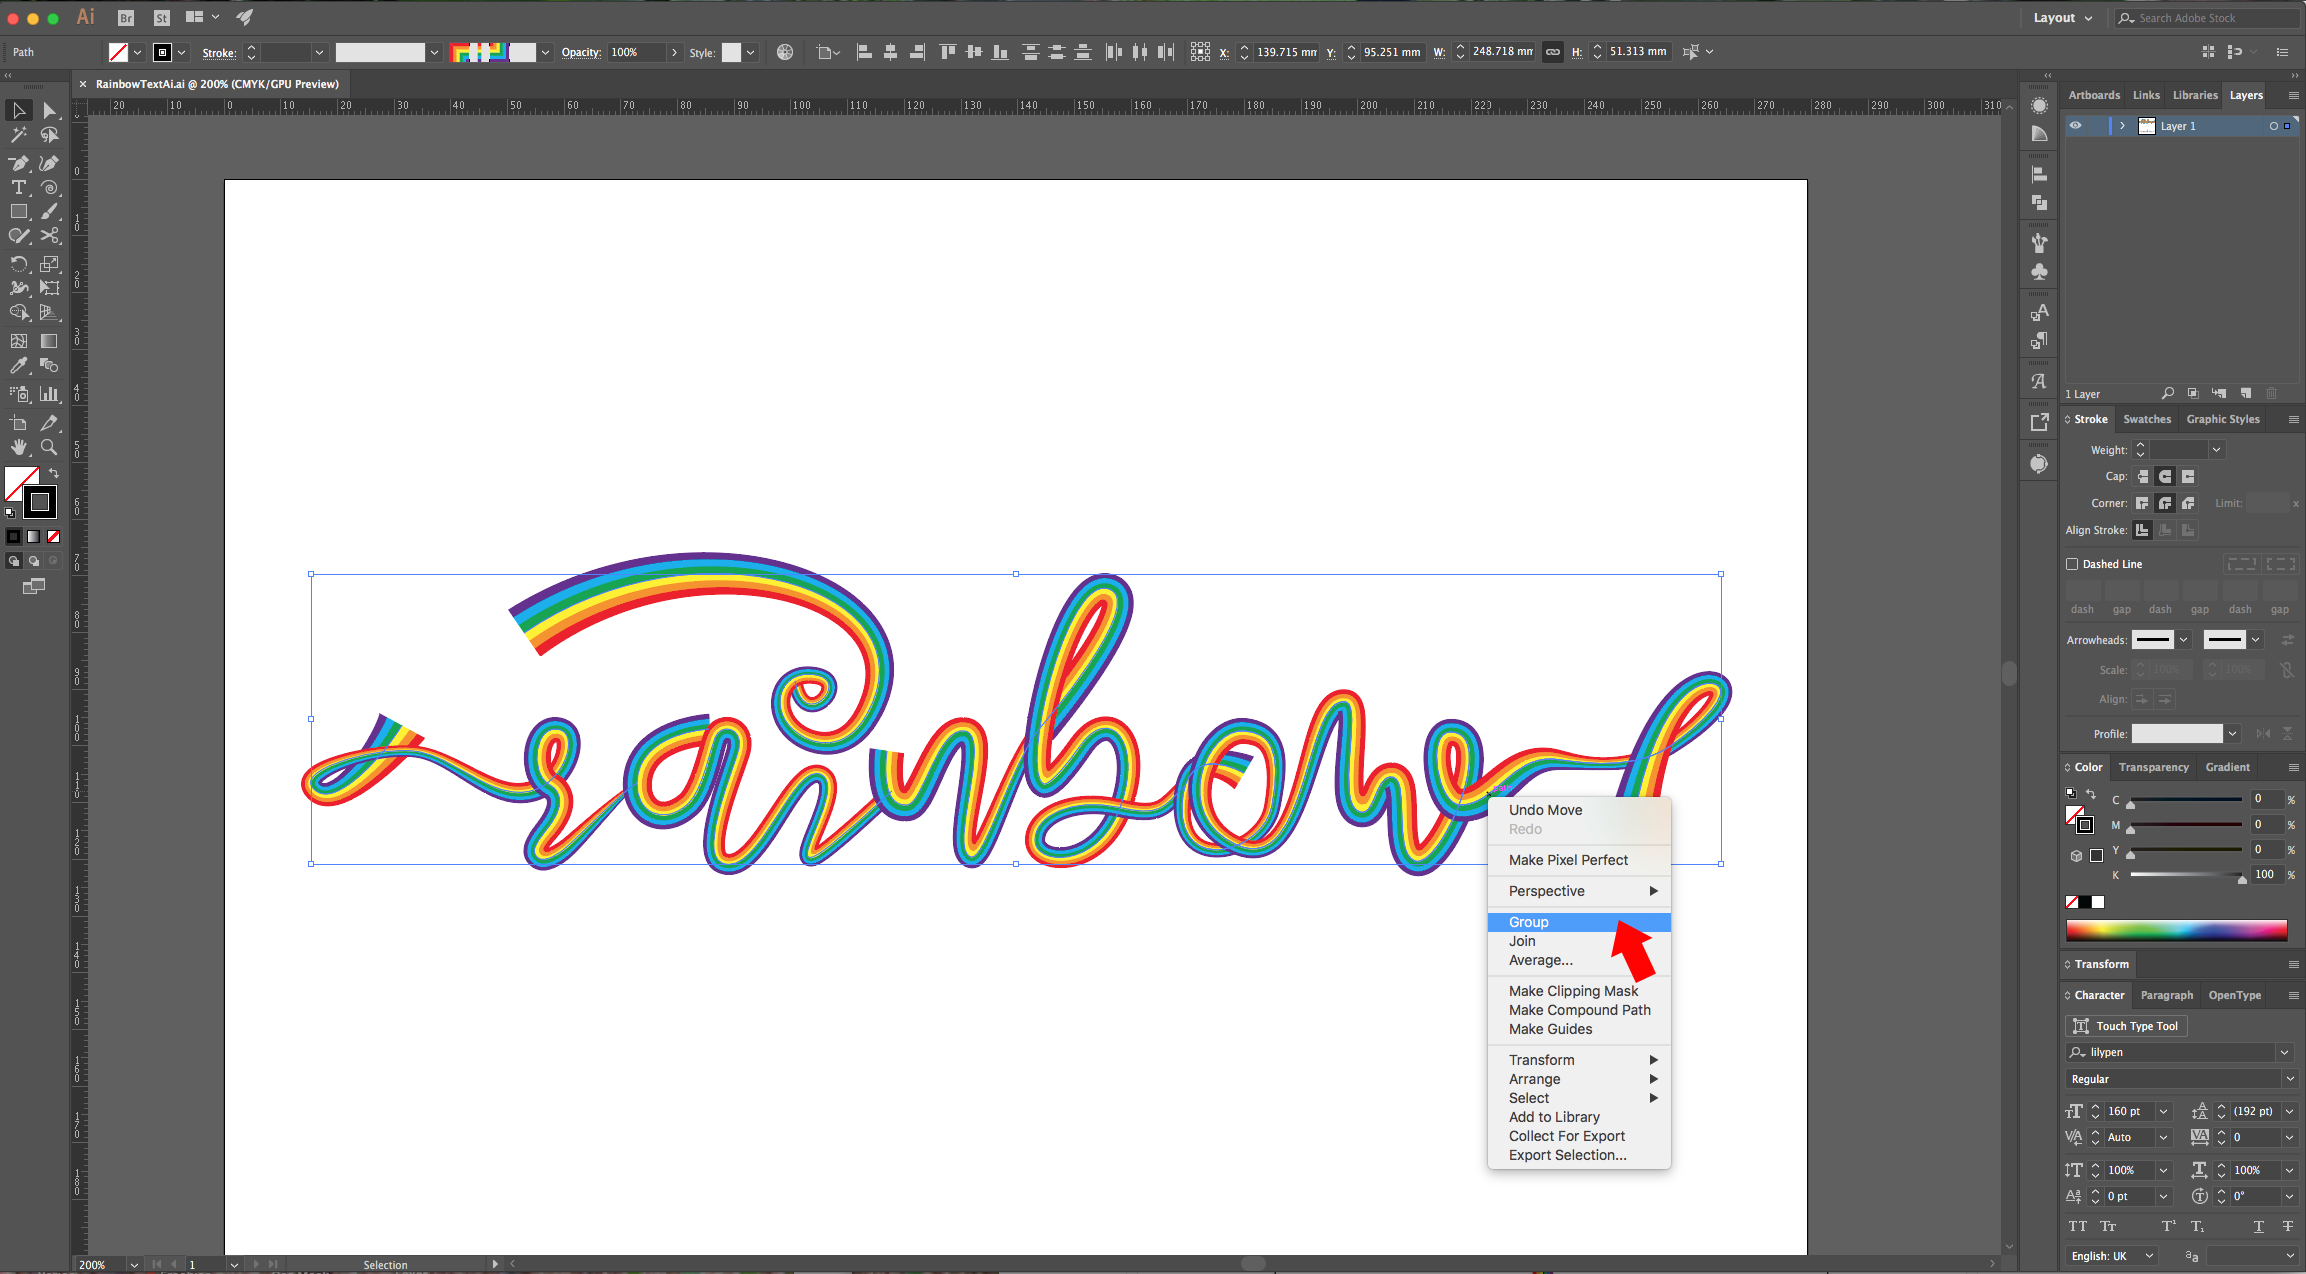
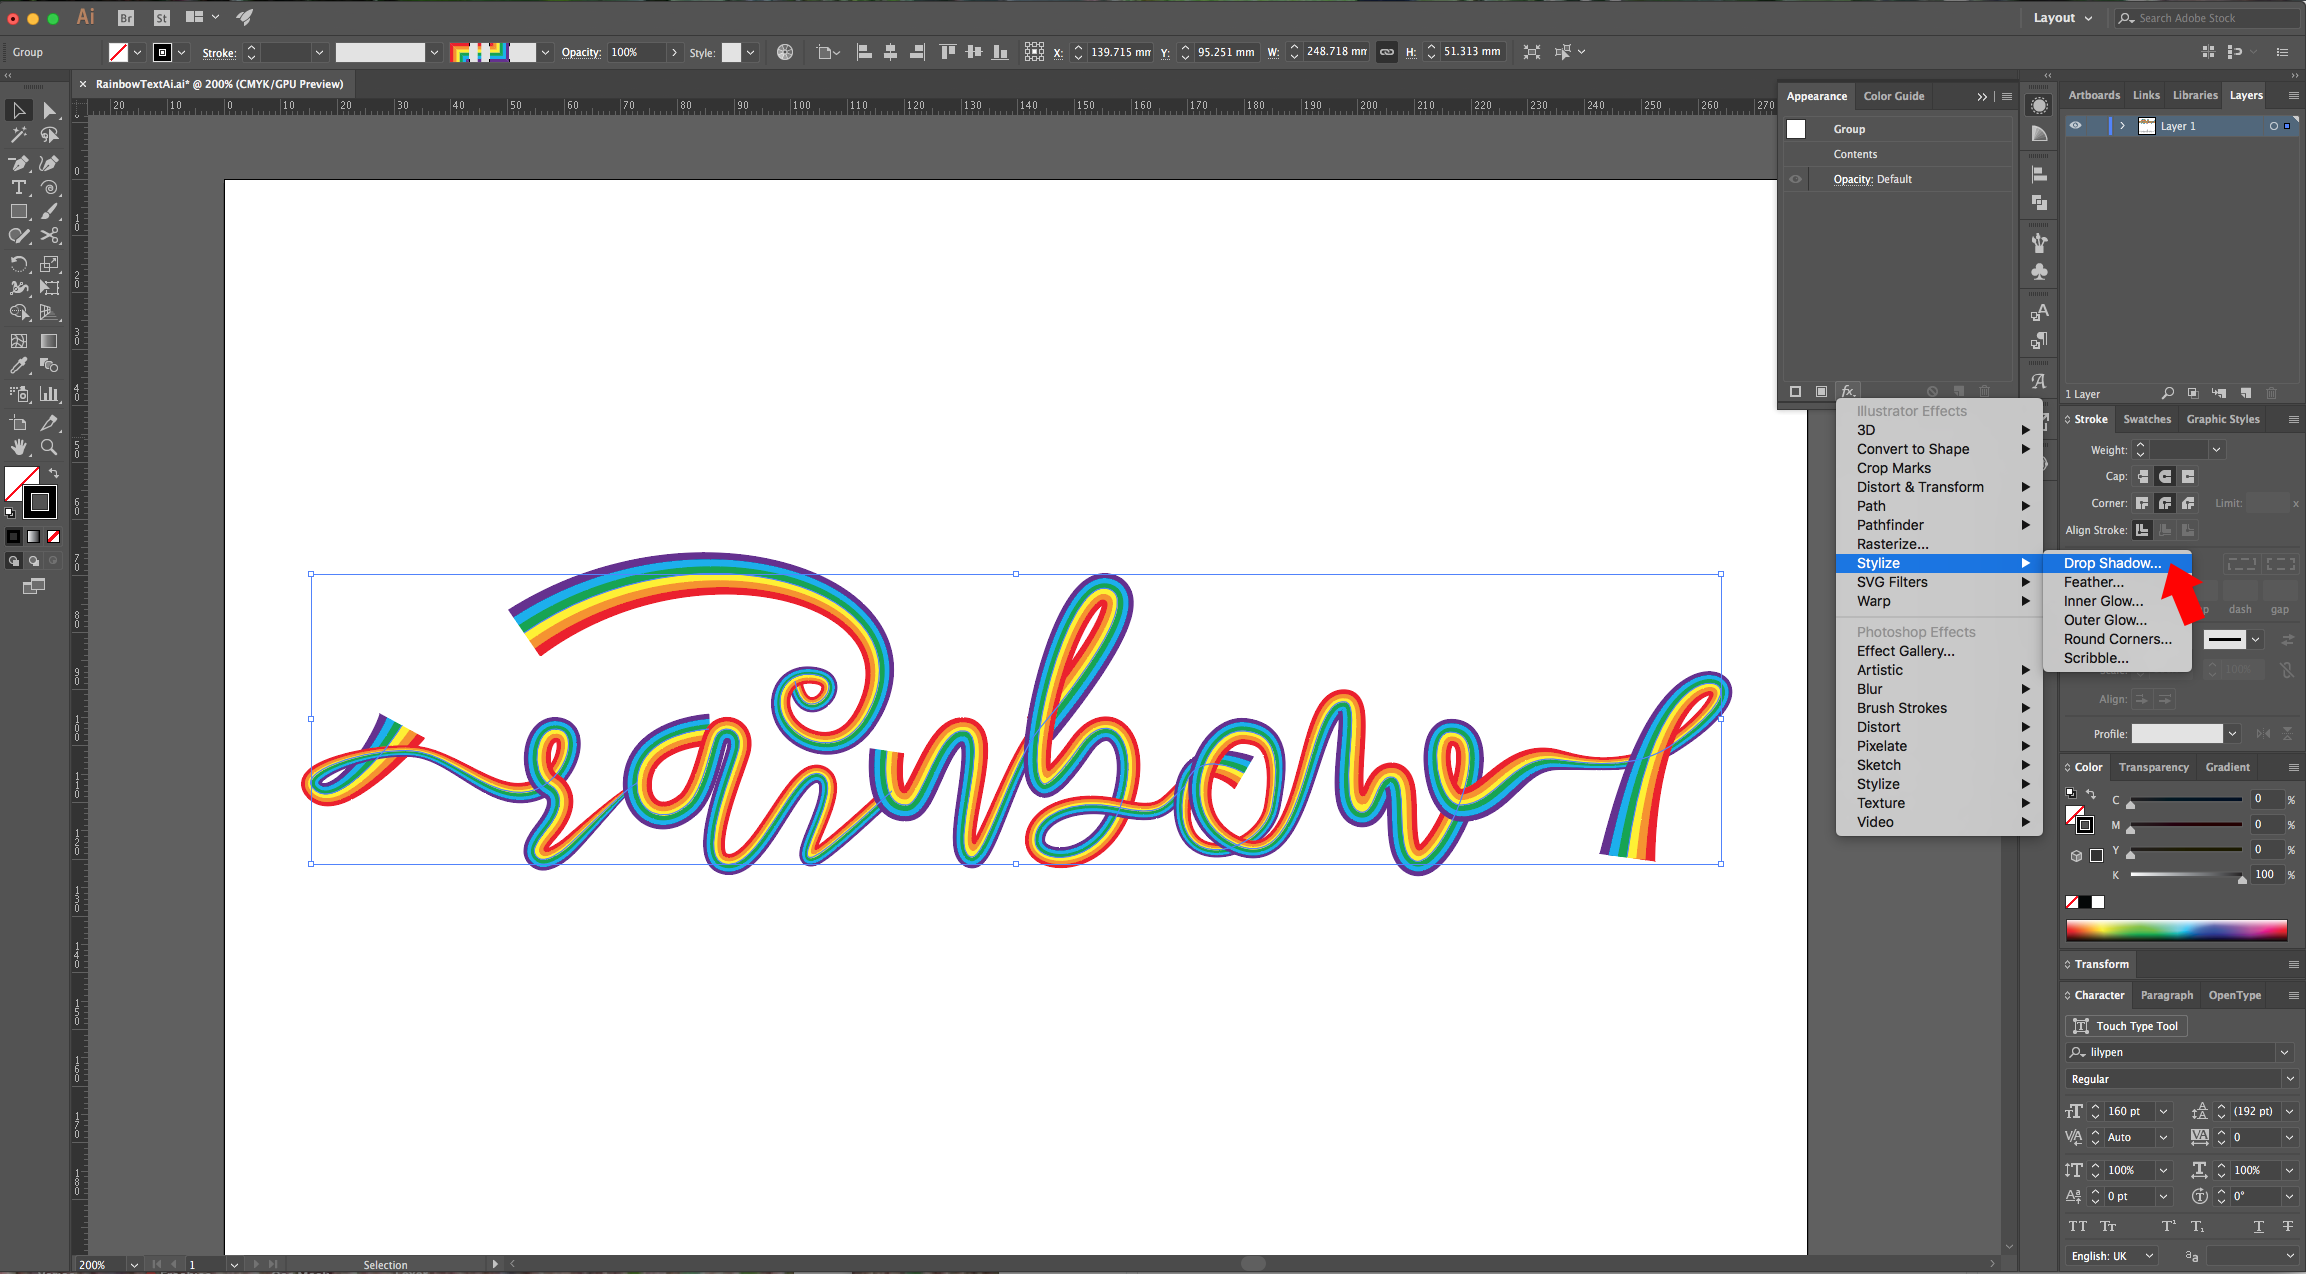
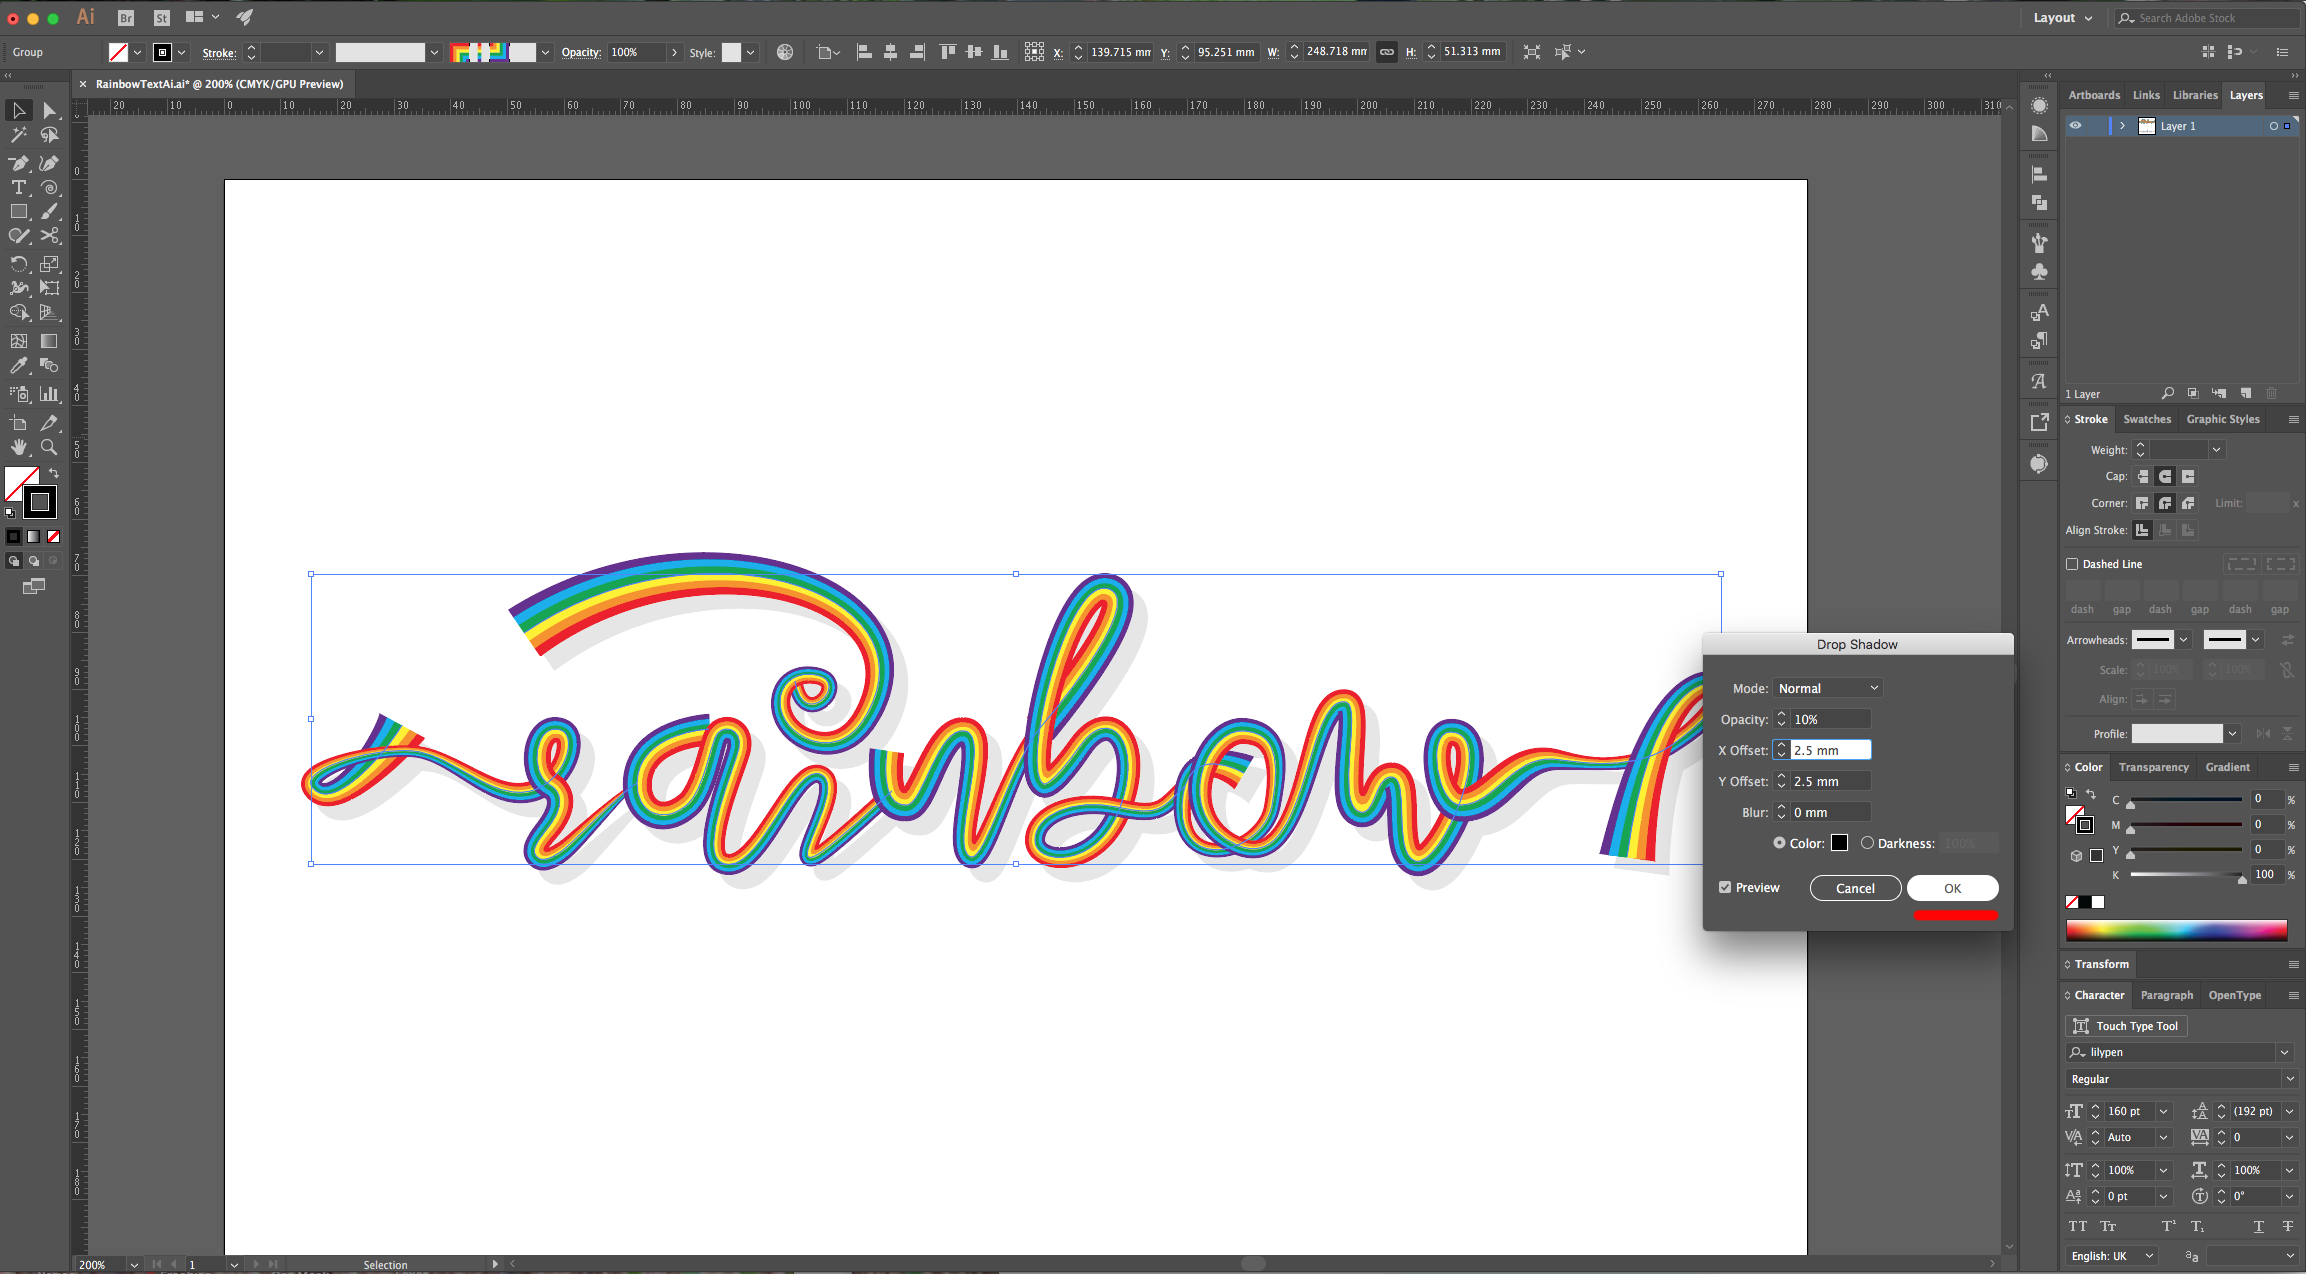
14 - Select all your text, right-click on top of it and choose “Group”. Go to the “Appearance Panel” and in the “Effects” Menu, go to Stylize > Drop Shadow. Use the following values:
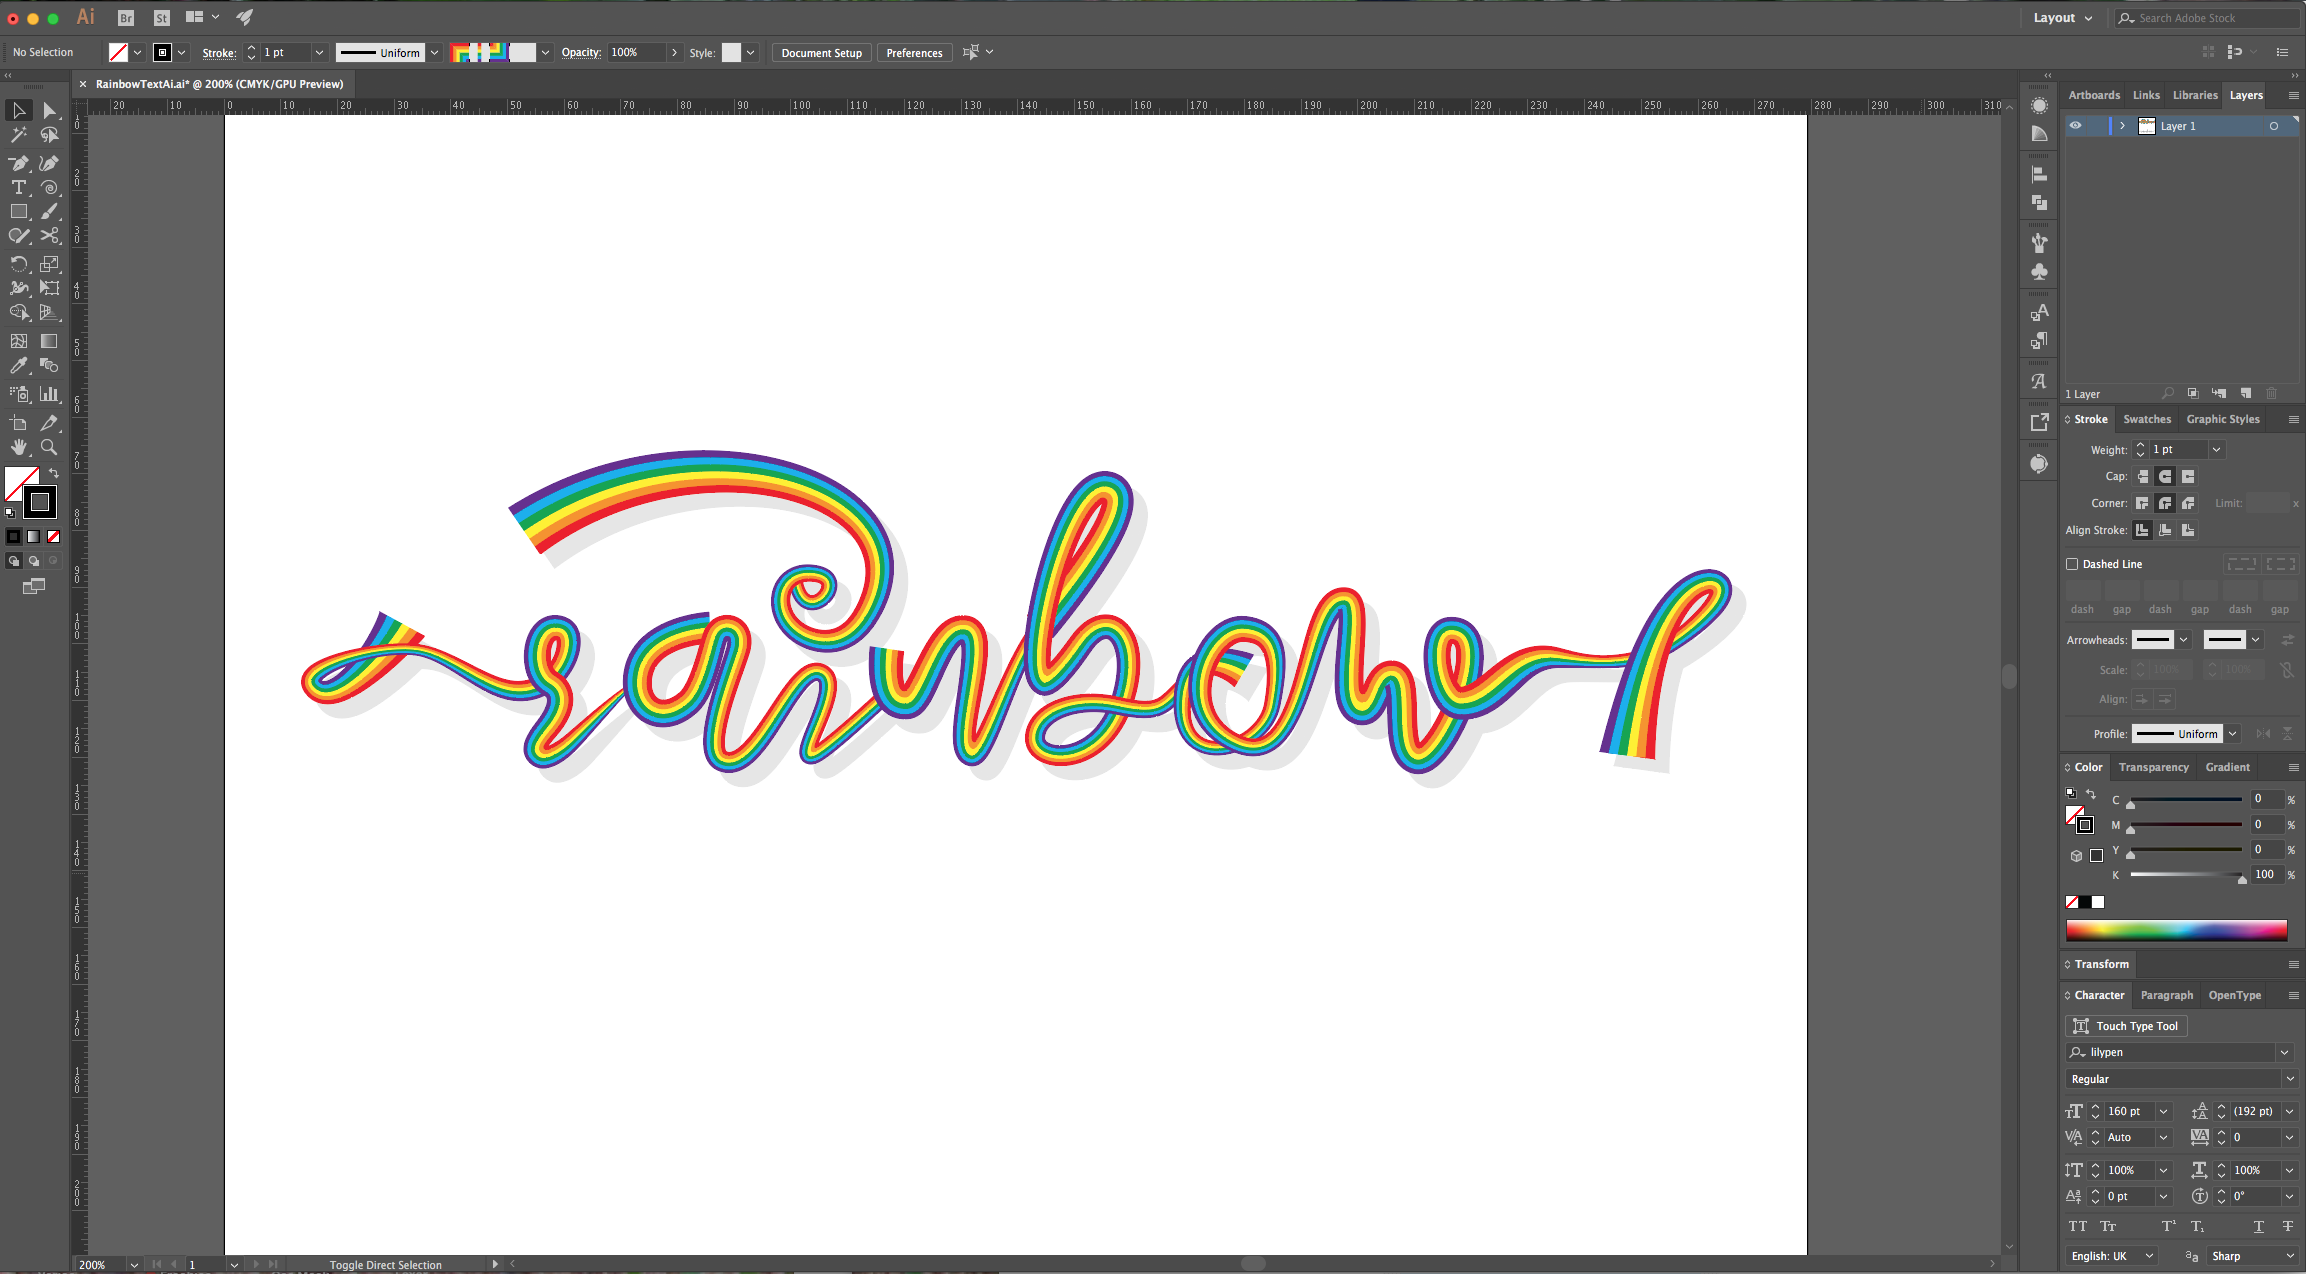
15 - Check it out.
1 - In Illustrator, create a “New Document”.
2 - Select the “Rectangle Tool” (M), click on a spot in your “Document” to open the dialogue box and use a “With” and “Height” value of 3 mm (or less). Fill it with red.
3 - In the “Appearance Panel” click on the “Add New Effect” button at the bottom and choose Distort & Transform > Transform. Use a “Vertical Move” value of 3 mm (or the same you used for your square) and 5 for “Copies”. Click “OK”, go to Object > Expand Appearance and then, right-click on top of your squares and choose “Ungroup”.
4 - Change the “Fill” color from the second square to orange, the one of the third to yellow, the one of the fourth to green, the next one to blue or cyan and finally purple for the last one.
5 - Select all your squares and in the “Brushes Panel”, click on the top-right menu and choose “New Brush” (or click on the small icon at the bottom of the Panel). Choose “Pattern Brush”, give it a name and use the following values:
6 - Select the “Type Tool” (T), choose your font (we used Lilypen) and type your text. Right-click on top of it choose “Create Outlines” and change the fill color to a medium gray.
7 - Select your text and go to Object > Lock > Selection (Command/Control + 2). Use the “Pen Tool” (P), use a “Stroke Weight” of 0.5 pt and start tracing your text. You can choose to trace each letter, or to have some letters grouped together depending on your font and word combinations. Use the “Direct Selection Tool” (A) to select an “Anchor Point” and refine your text in case its needed.
8 - Keep tracing your letters, or groups of letters and fixing them with the “Direct Selection Tool” (A). Change the “Cap” and “Corner” Joins to “Round”. You can modify the appearance of some letters if you want to make the text more fluid.
9 - Unlock your original text (Shift + Command/Control + 2) and delete it if you want. Fix the details that may come out on your text and then, change the “Stroke” to your new Brush.
10 - If you want to change something from your Brush settings, double-click on top of its Thumbnail to open the “Patter Brush Options” and fix it. Choose “Apply to Strokes” from the dialog if asked.
11 - With the “Anchor Point Tool” you can turn a straight point into a curved one by clicking on it and “dragging” to the side to create “handles”. You can also use the “Direct Selection Tool” (A) to select the “Anchor Points” that may have some strange corners to pull the “Handles”. To hide the ending of a letter behind the one that follows or to change the which one is on top of each other, right-click on top of it and choose Arrange > Bring to Front (or whatever you need).
12 - Use the “With Tool” (Shift + W) to make some parts of the text thicker or thinner. You can choose a “With Profile” from the top menu and/or modify it by clicking on your text and dragging. Do this on all your text. You can use the “Direct Selection Tool” (A) to modify some of your points if needed.
13 - For the “Dot” in the letter “i”, use the “Spiral Tool”, click on your “Document” and specify the number of segments (we used 5) and the “Style” and click “OK”. Change the “Stroke” to the “Rainbow Brush” and the “Weight” to 0.5 pt, then, play around with the path to get a nice look.
14 - Select all your text, right-click on top of it and choose “Group”. Go to the “Appearance Panel” and in the “Effects” Menu, go to Stylize > Drop Shadow. Use the following values:
15 - Check it out.


