
Striped Background in Illustrator
For this tutorial you may want to get a Color Palette as reference.
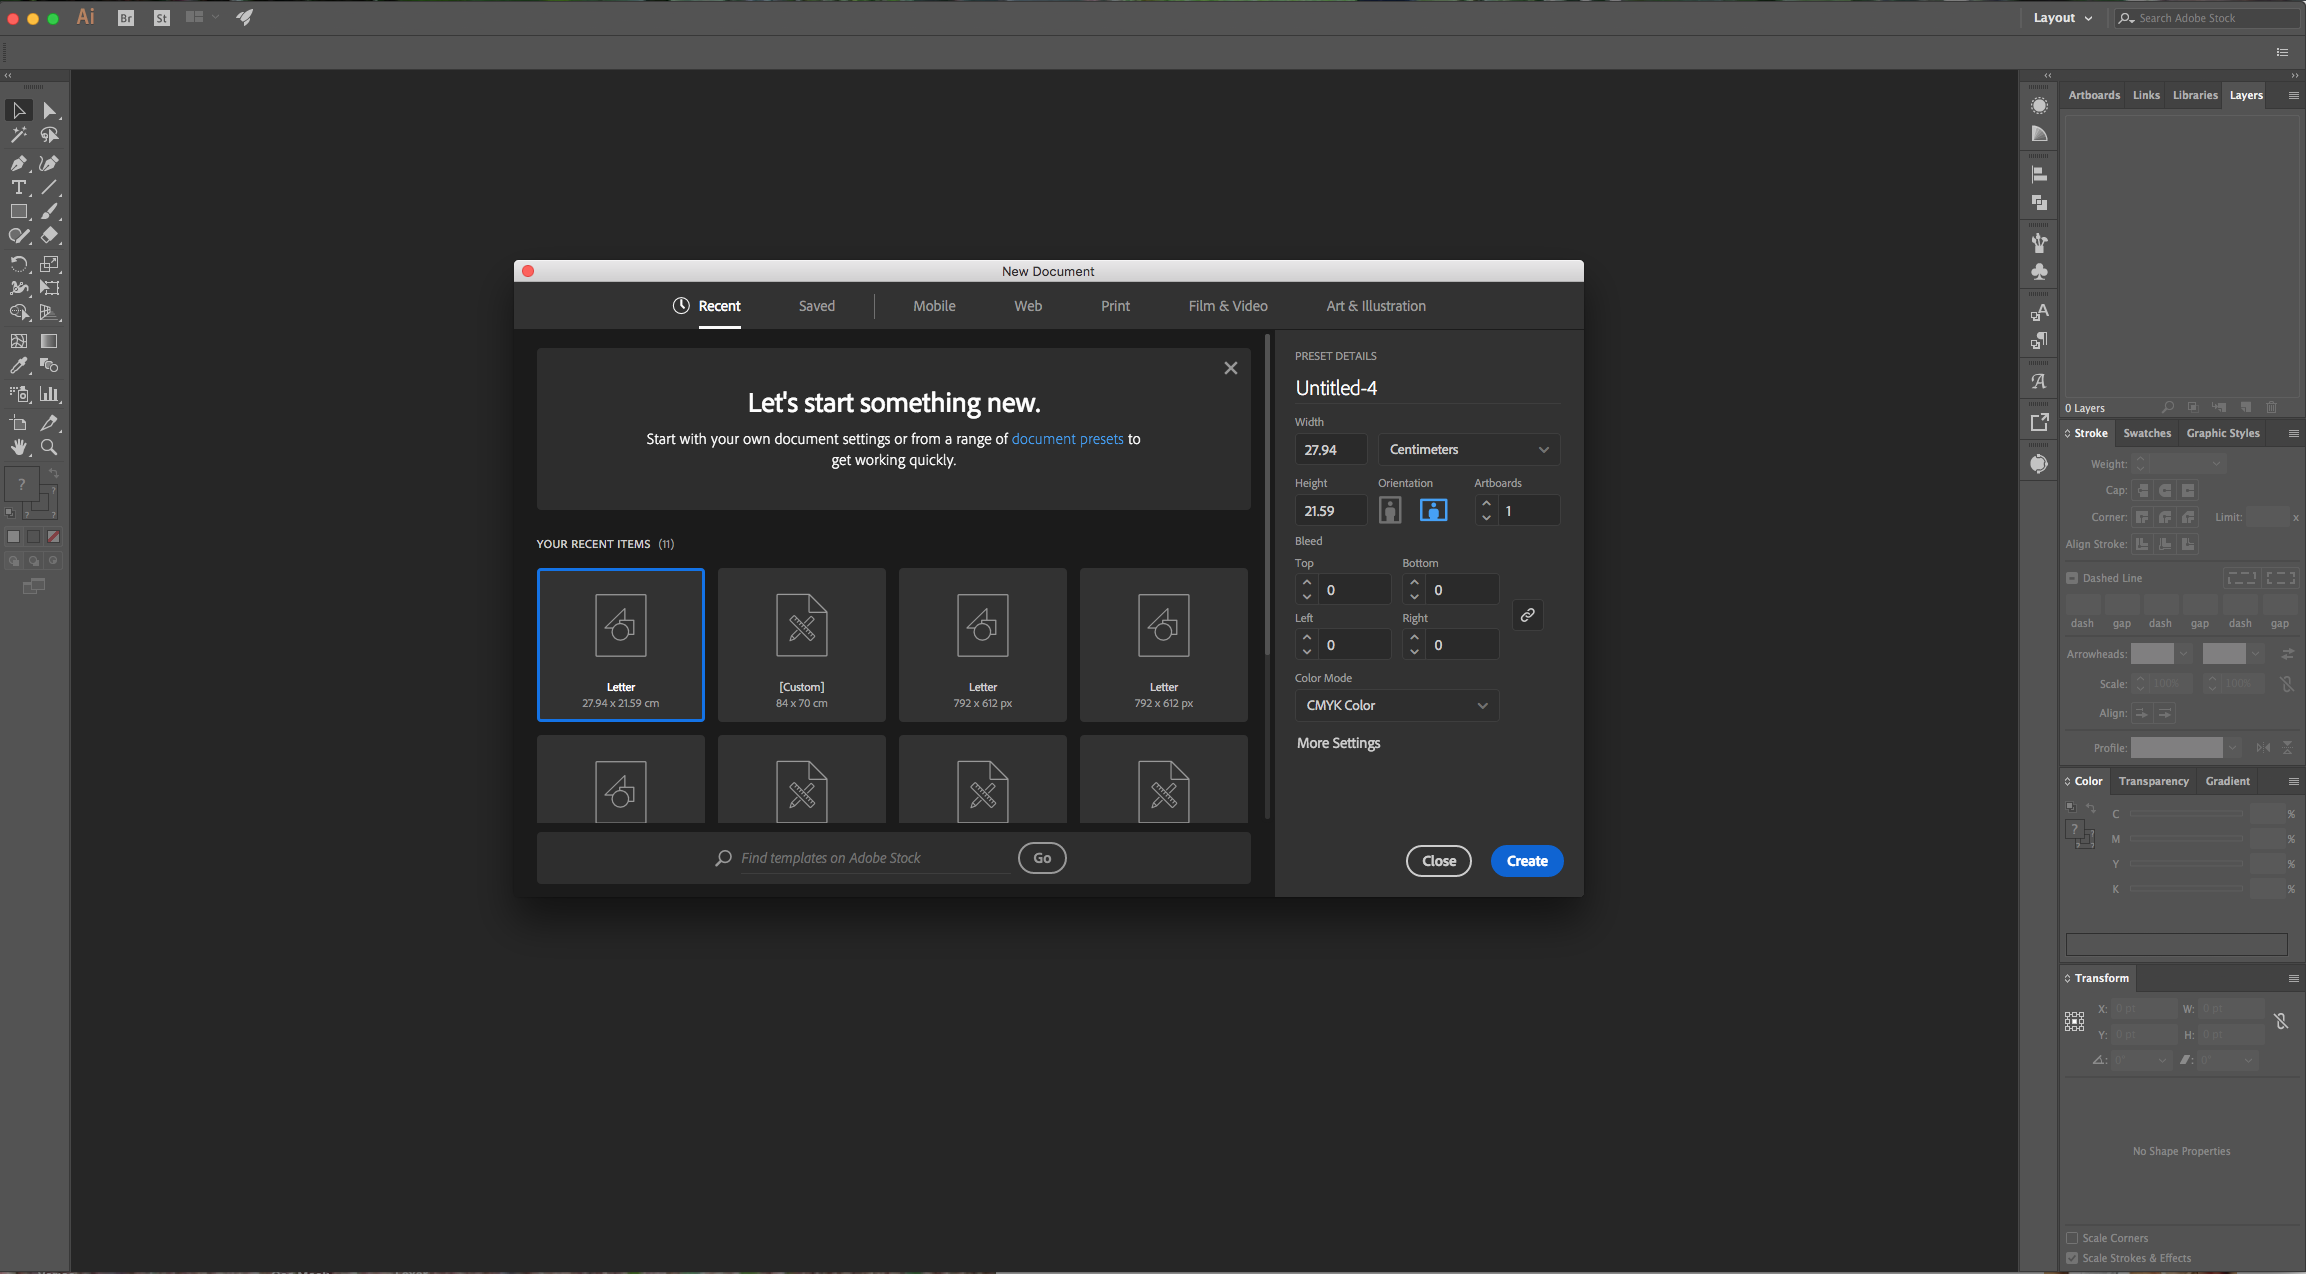
1 - In Illustrator, create a “New Document”.
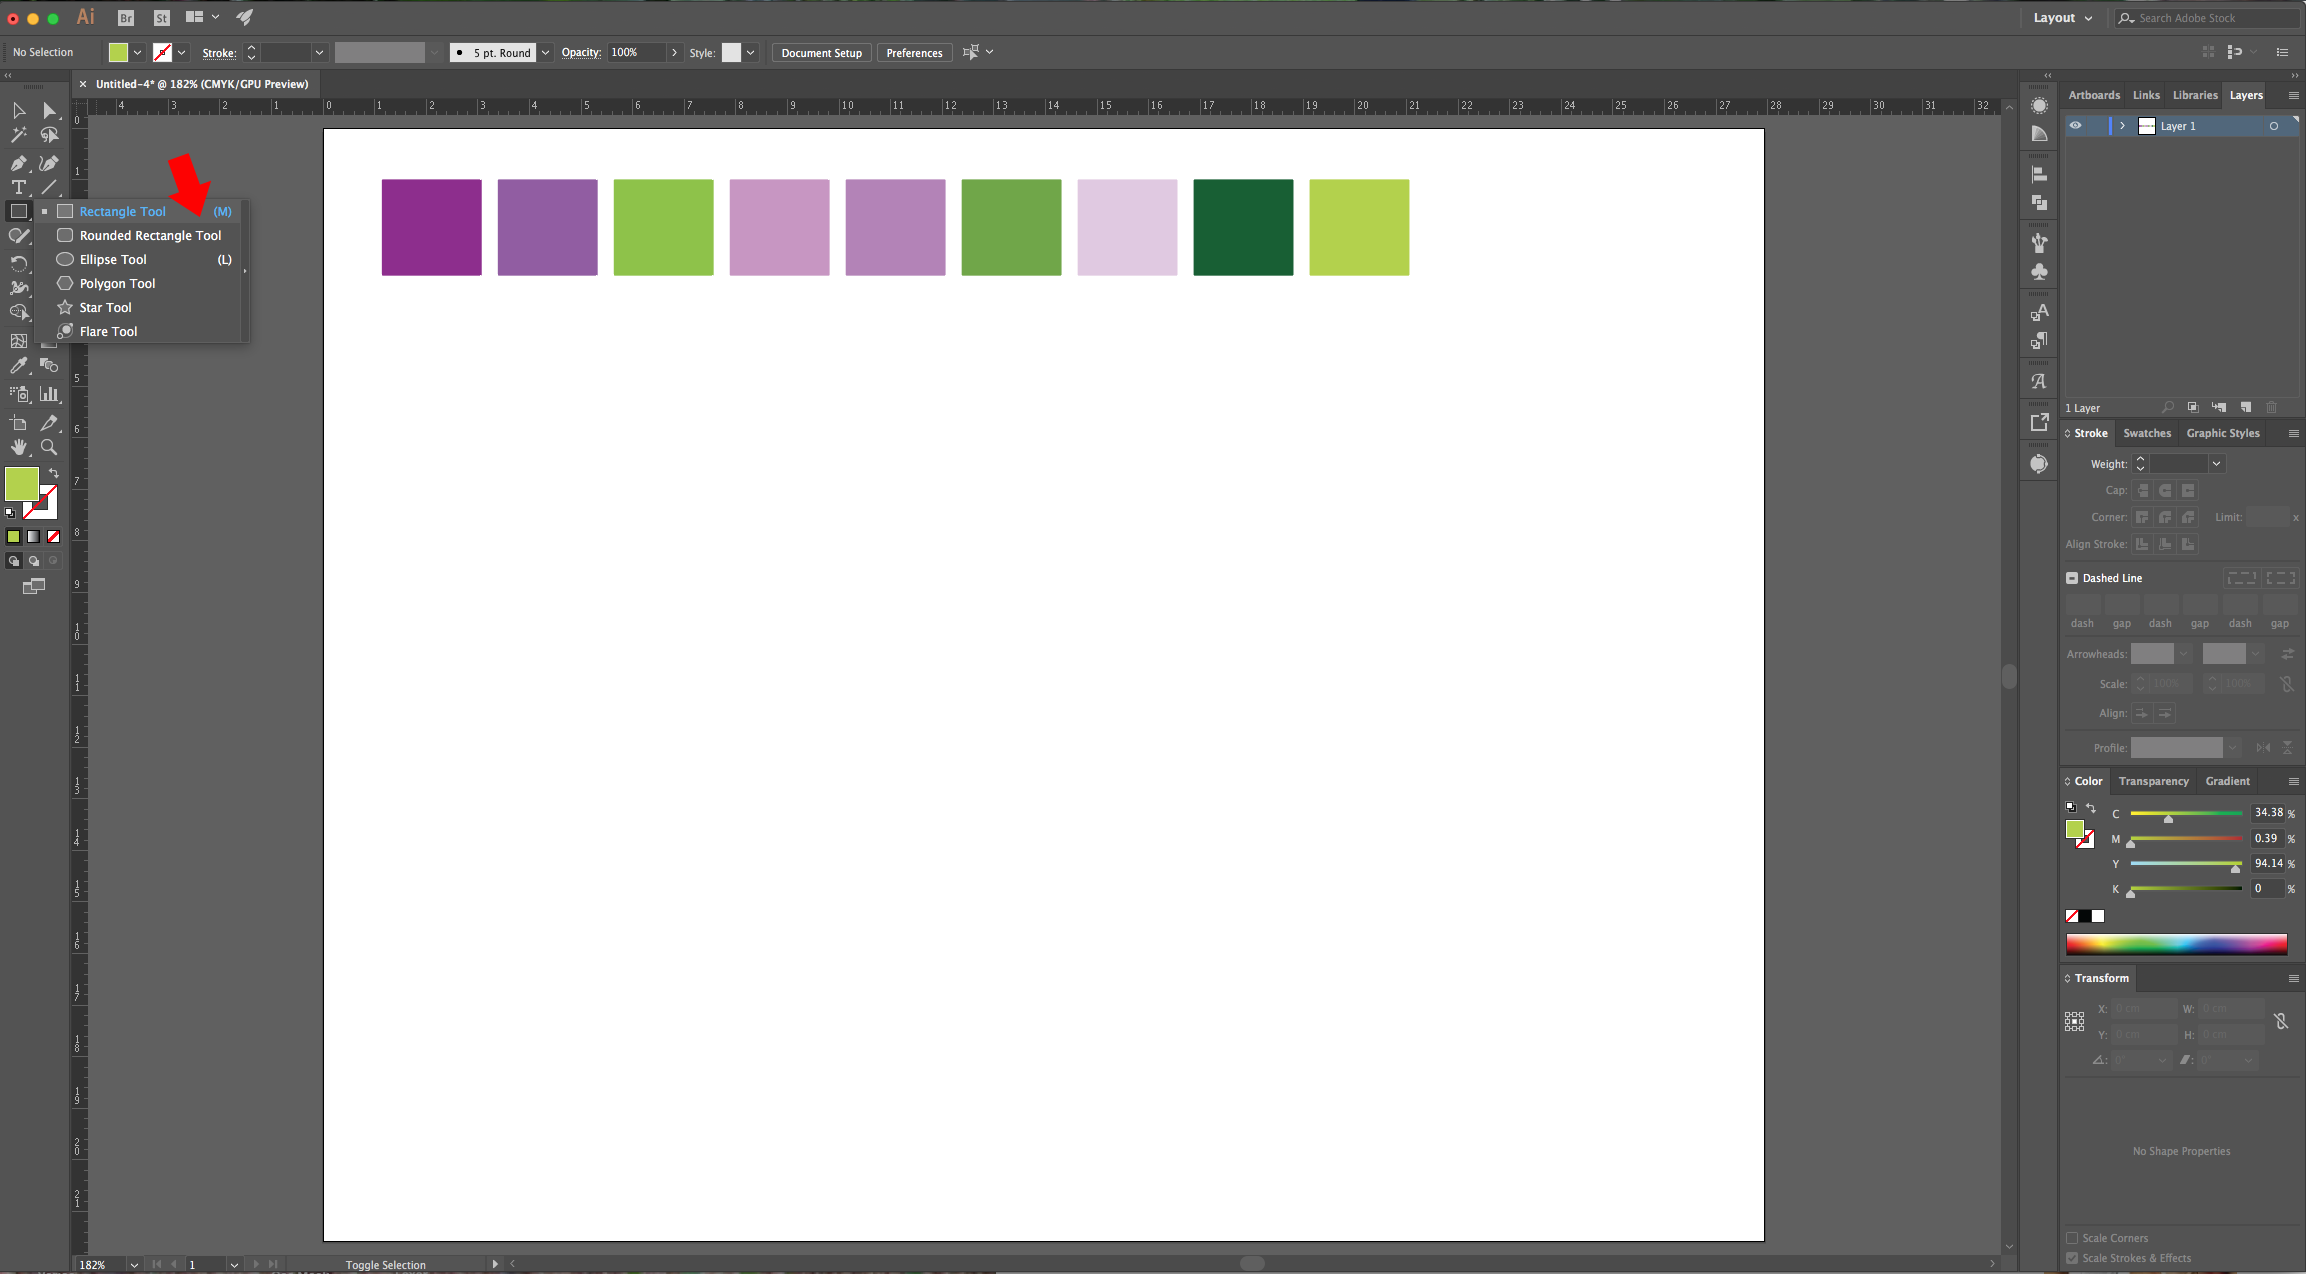
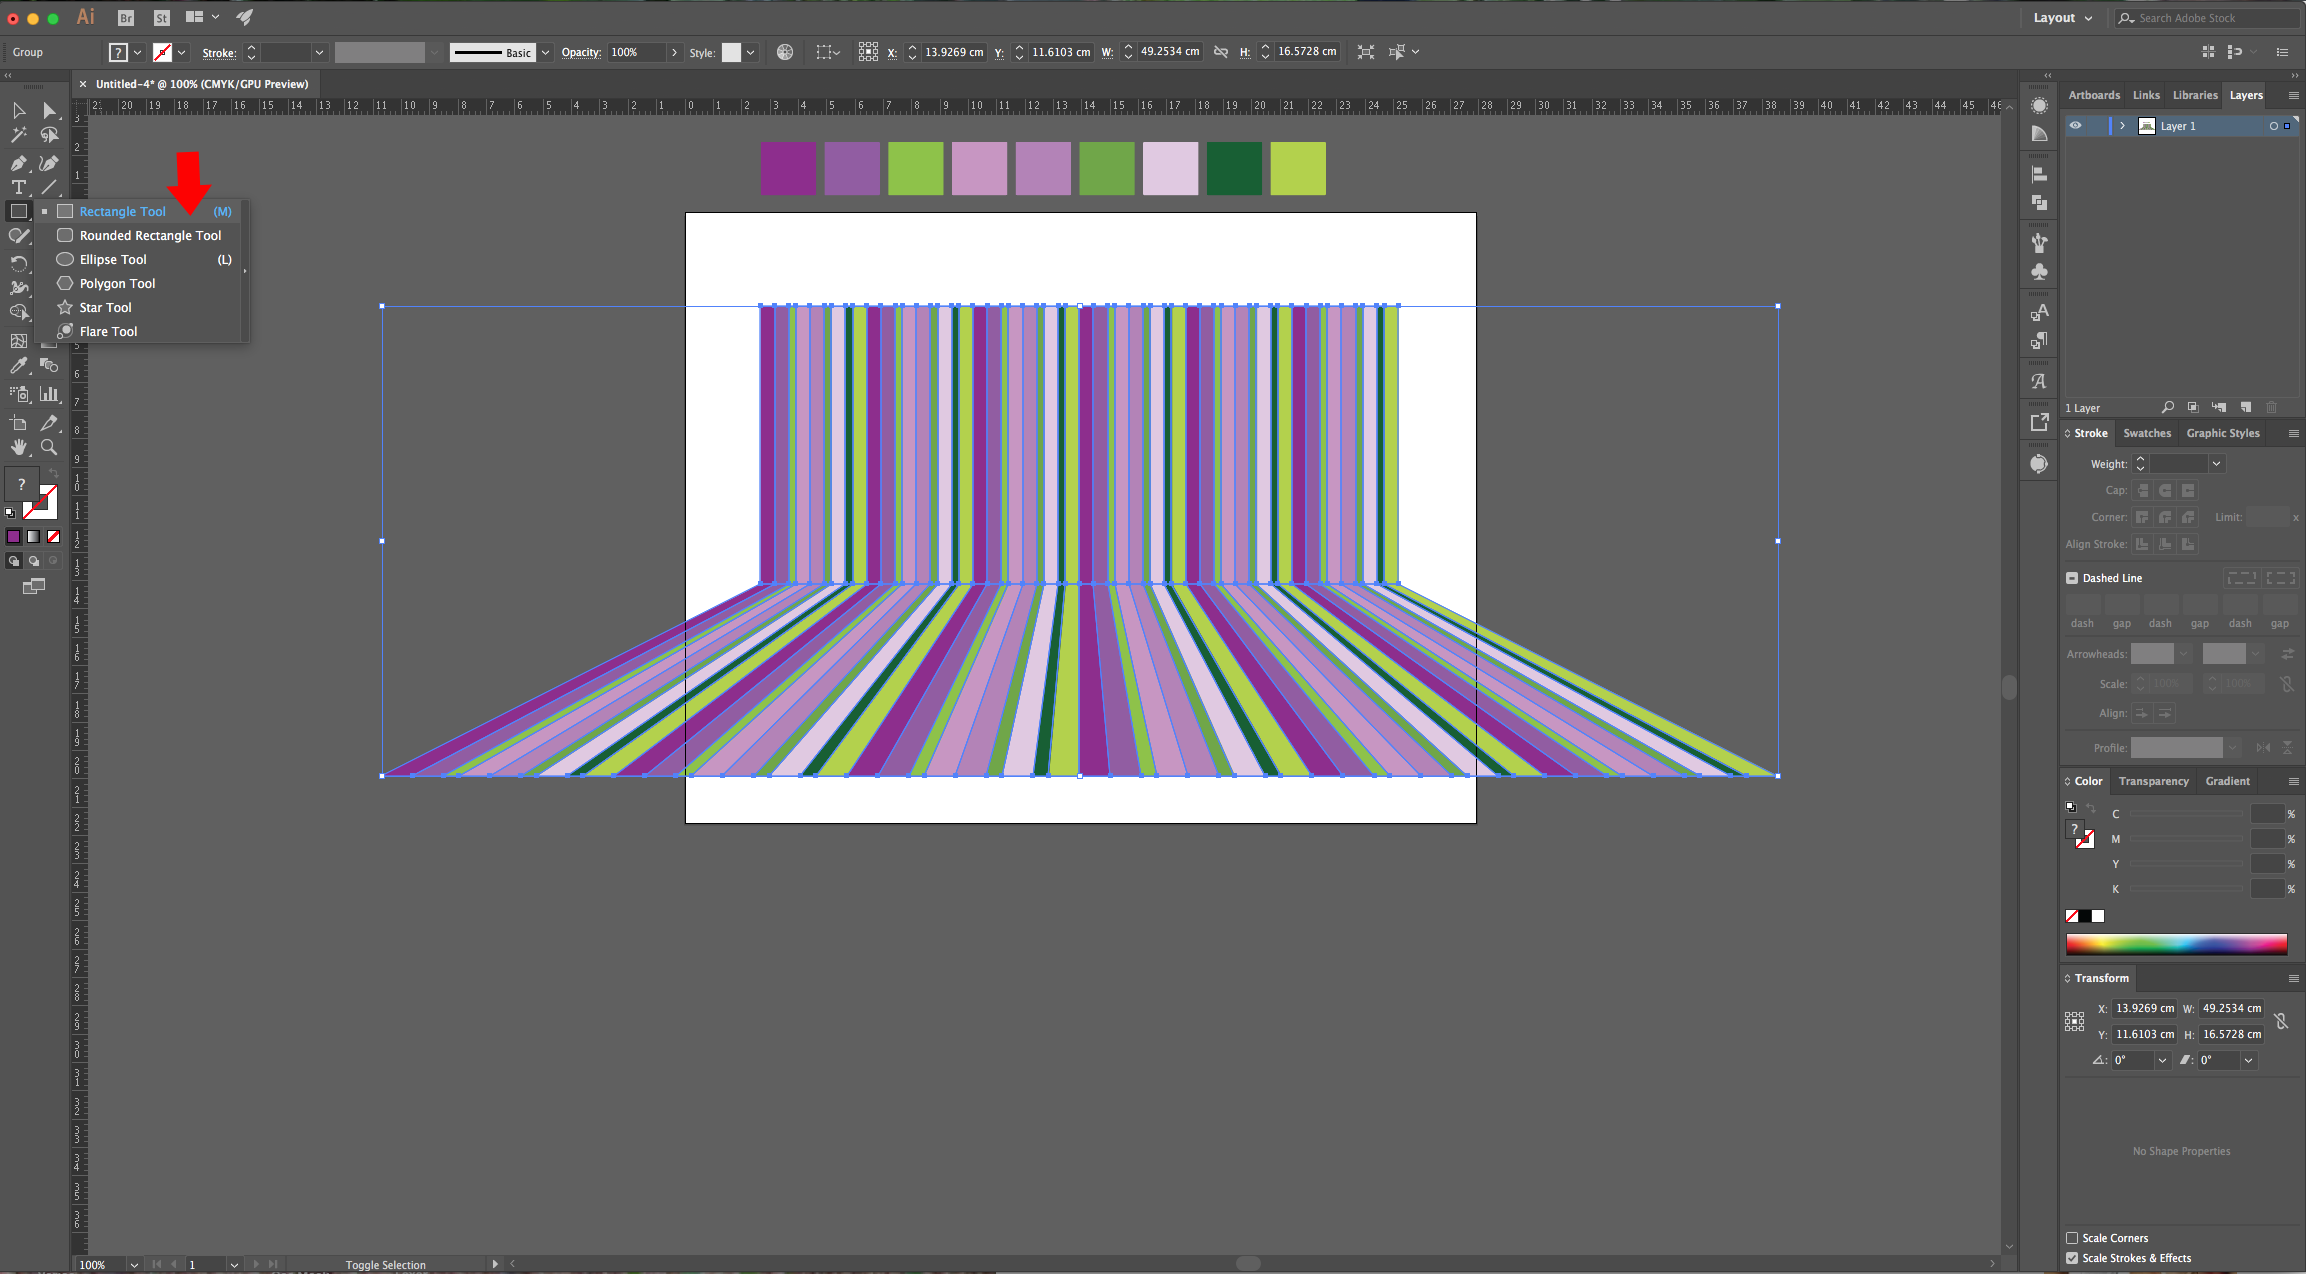
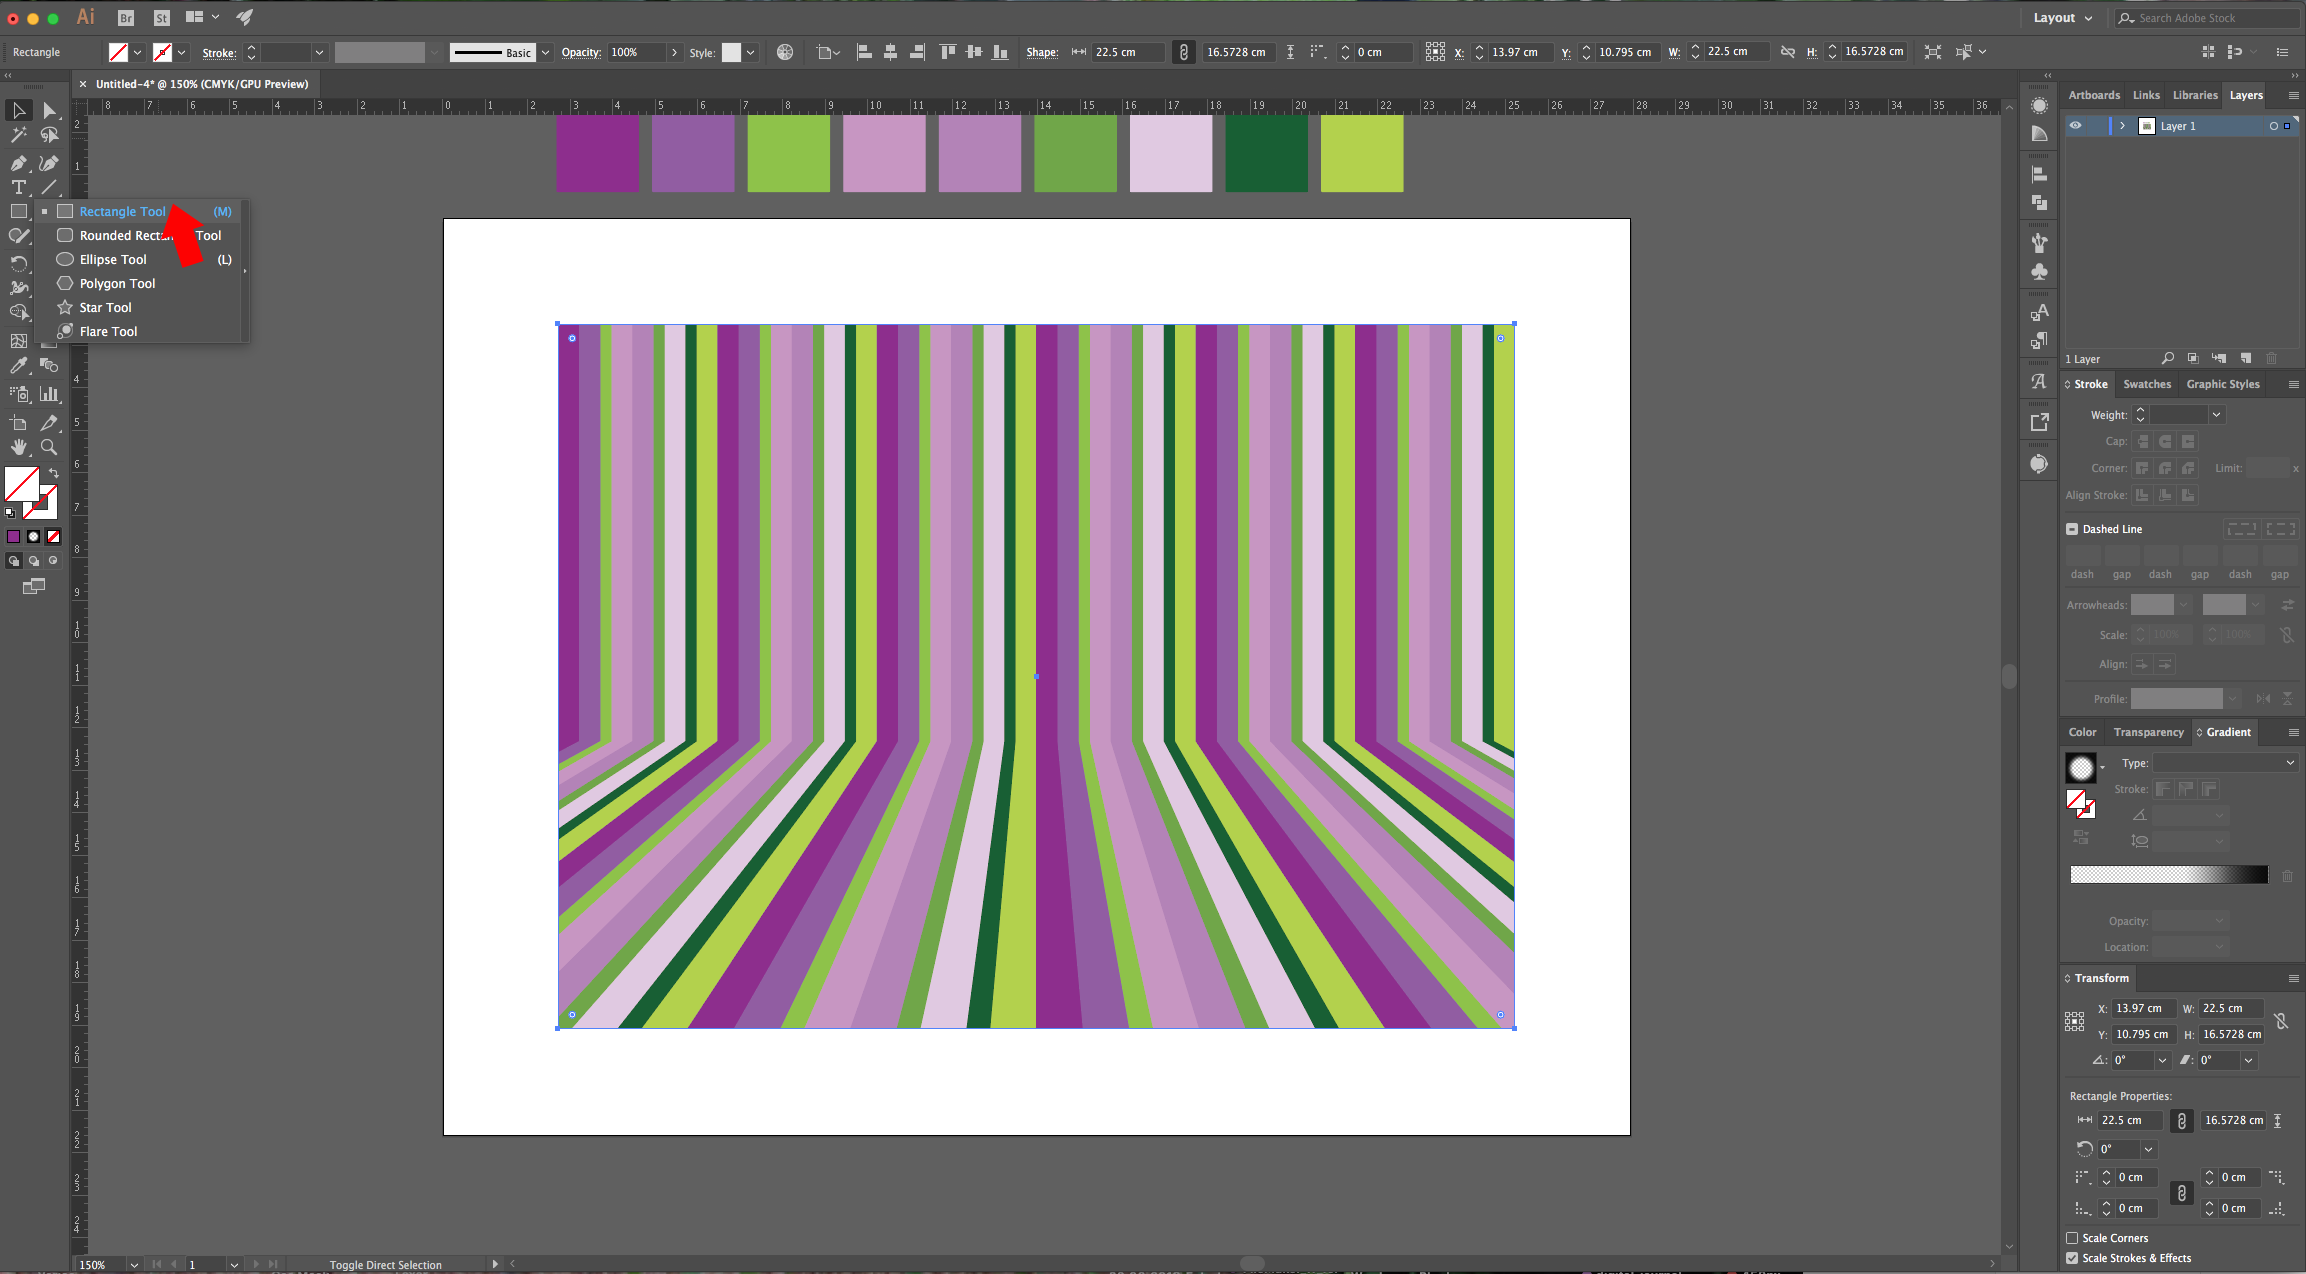
2 - Select the “Rectangle Tool” (M) to add some squares on the top part of your Canvas and fill them with the colors present in your “Color Palette”. If your reference is a flat image, you can “Place” it into your “Document” and use the “Eyedropper Tool” (I) to sample the colors. Make sure the “Smart Guides” are ON (Command/Control + U).

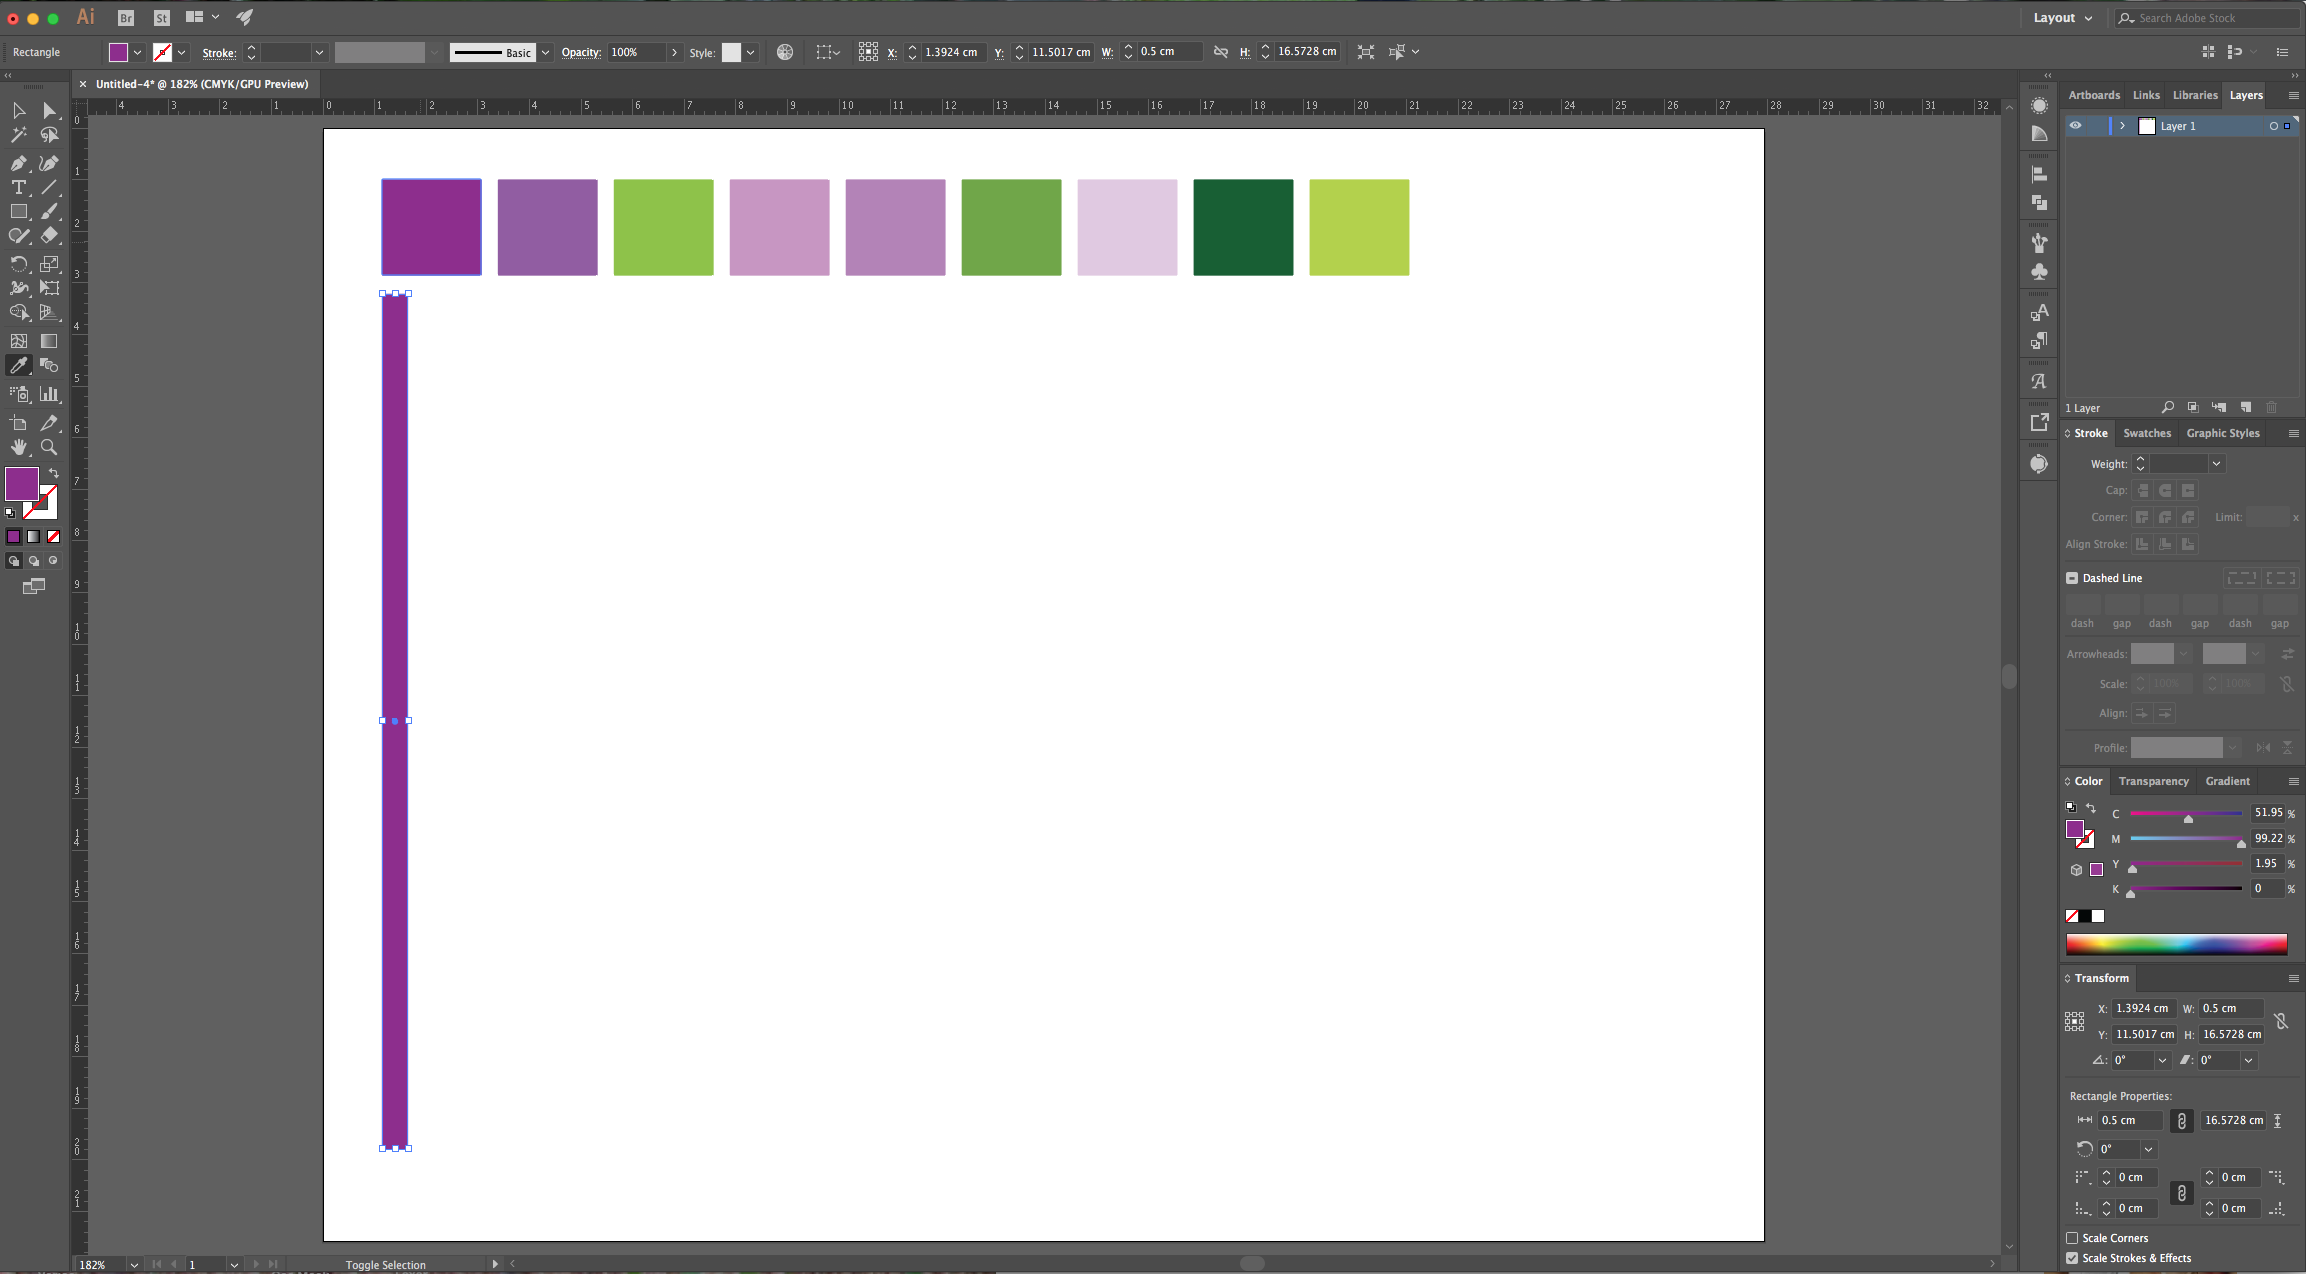
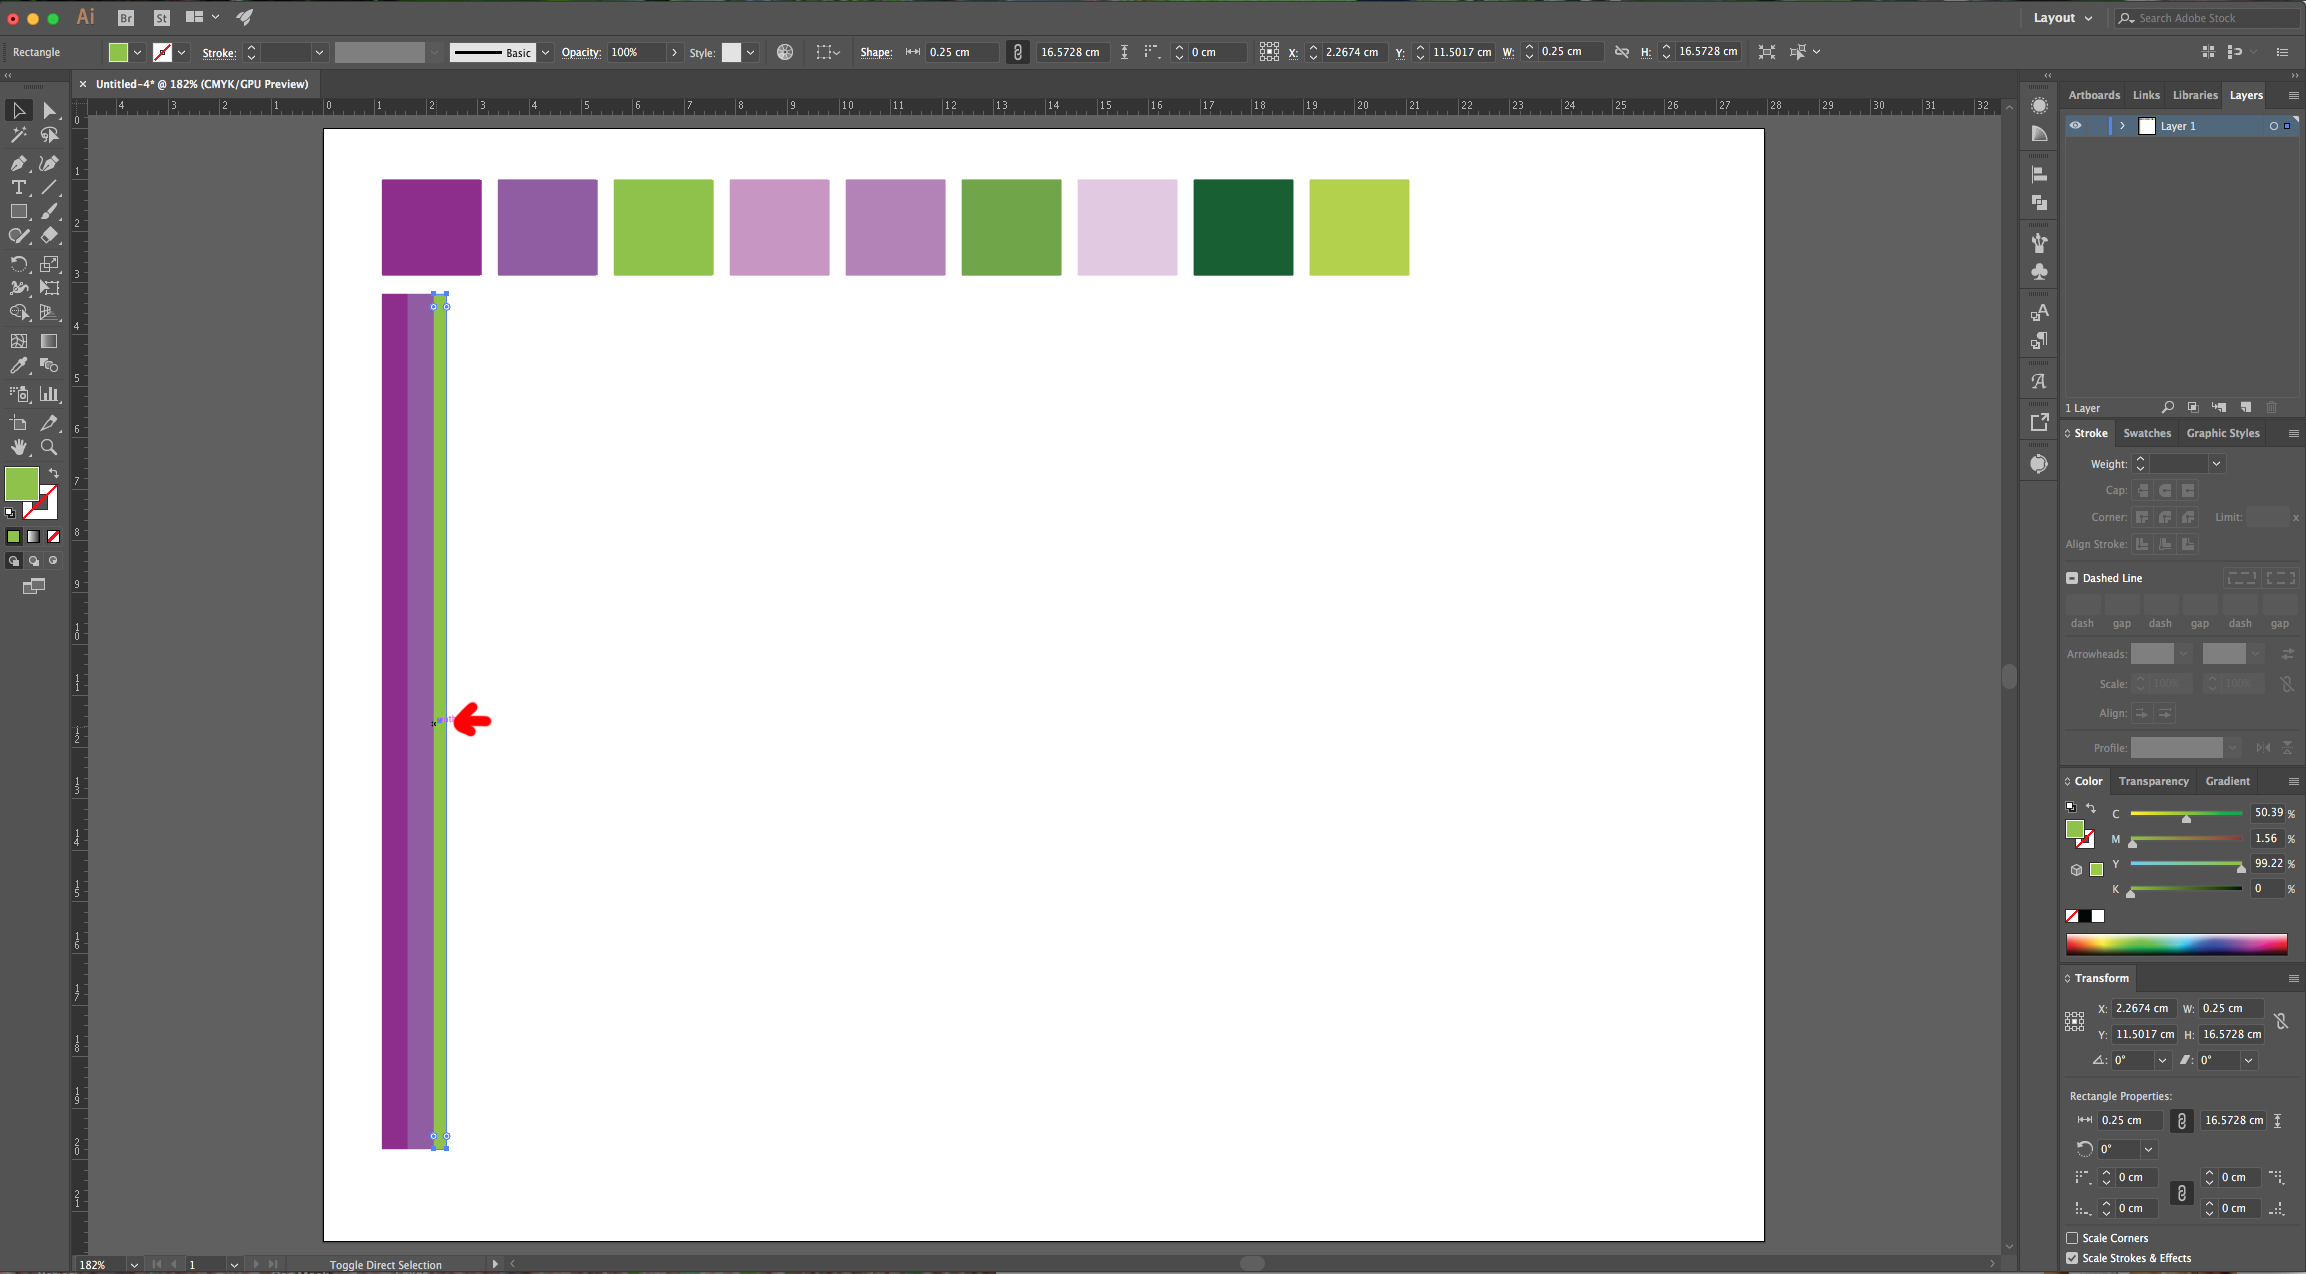
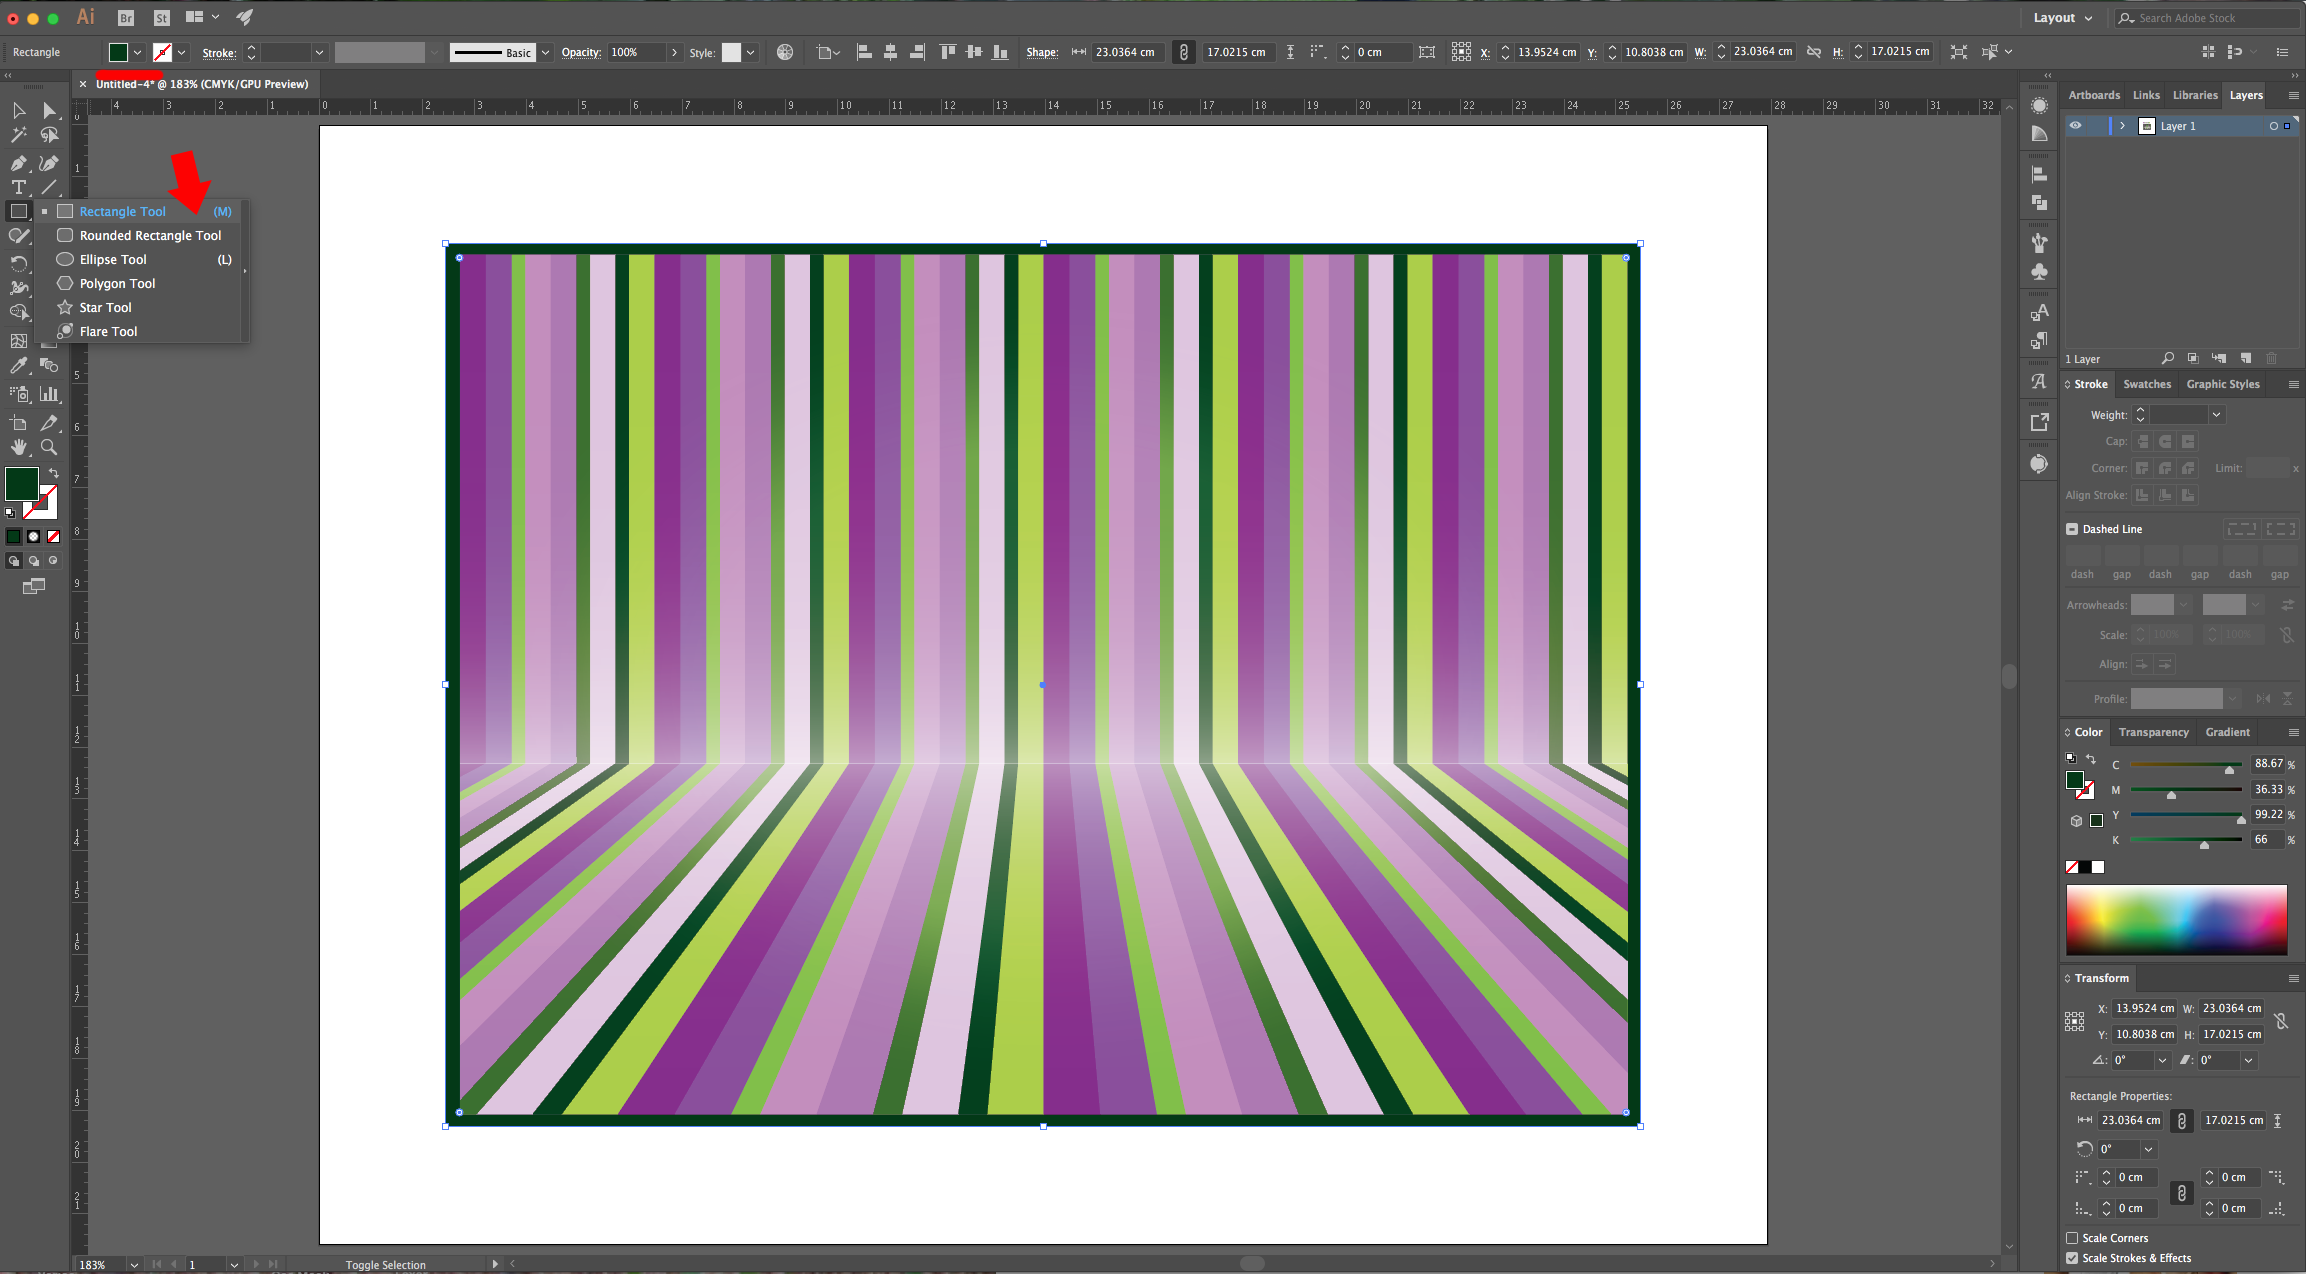
3 - Select the “Rectangle Tool” (M) again and create a vertical rectangle, make it about 5 mm in “Width” and 15 cm in “Height” (or enough to almost reach the bottom of the document).
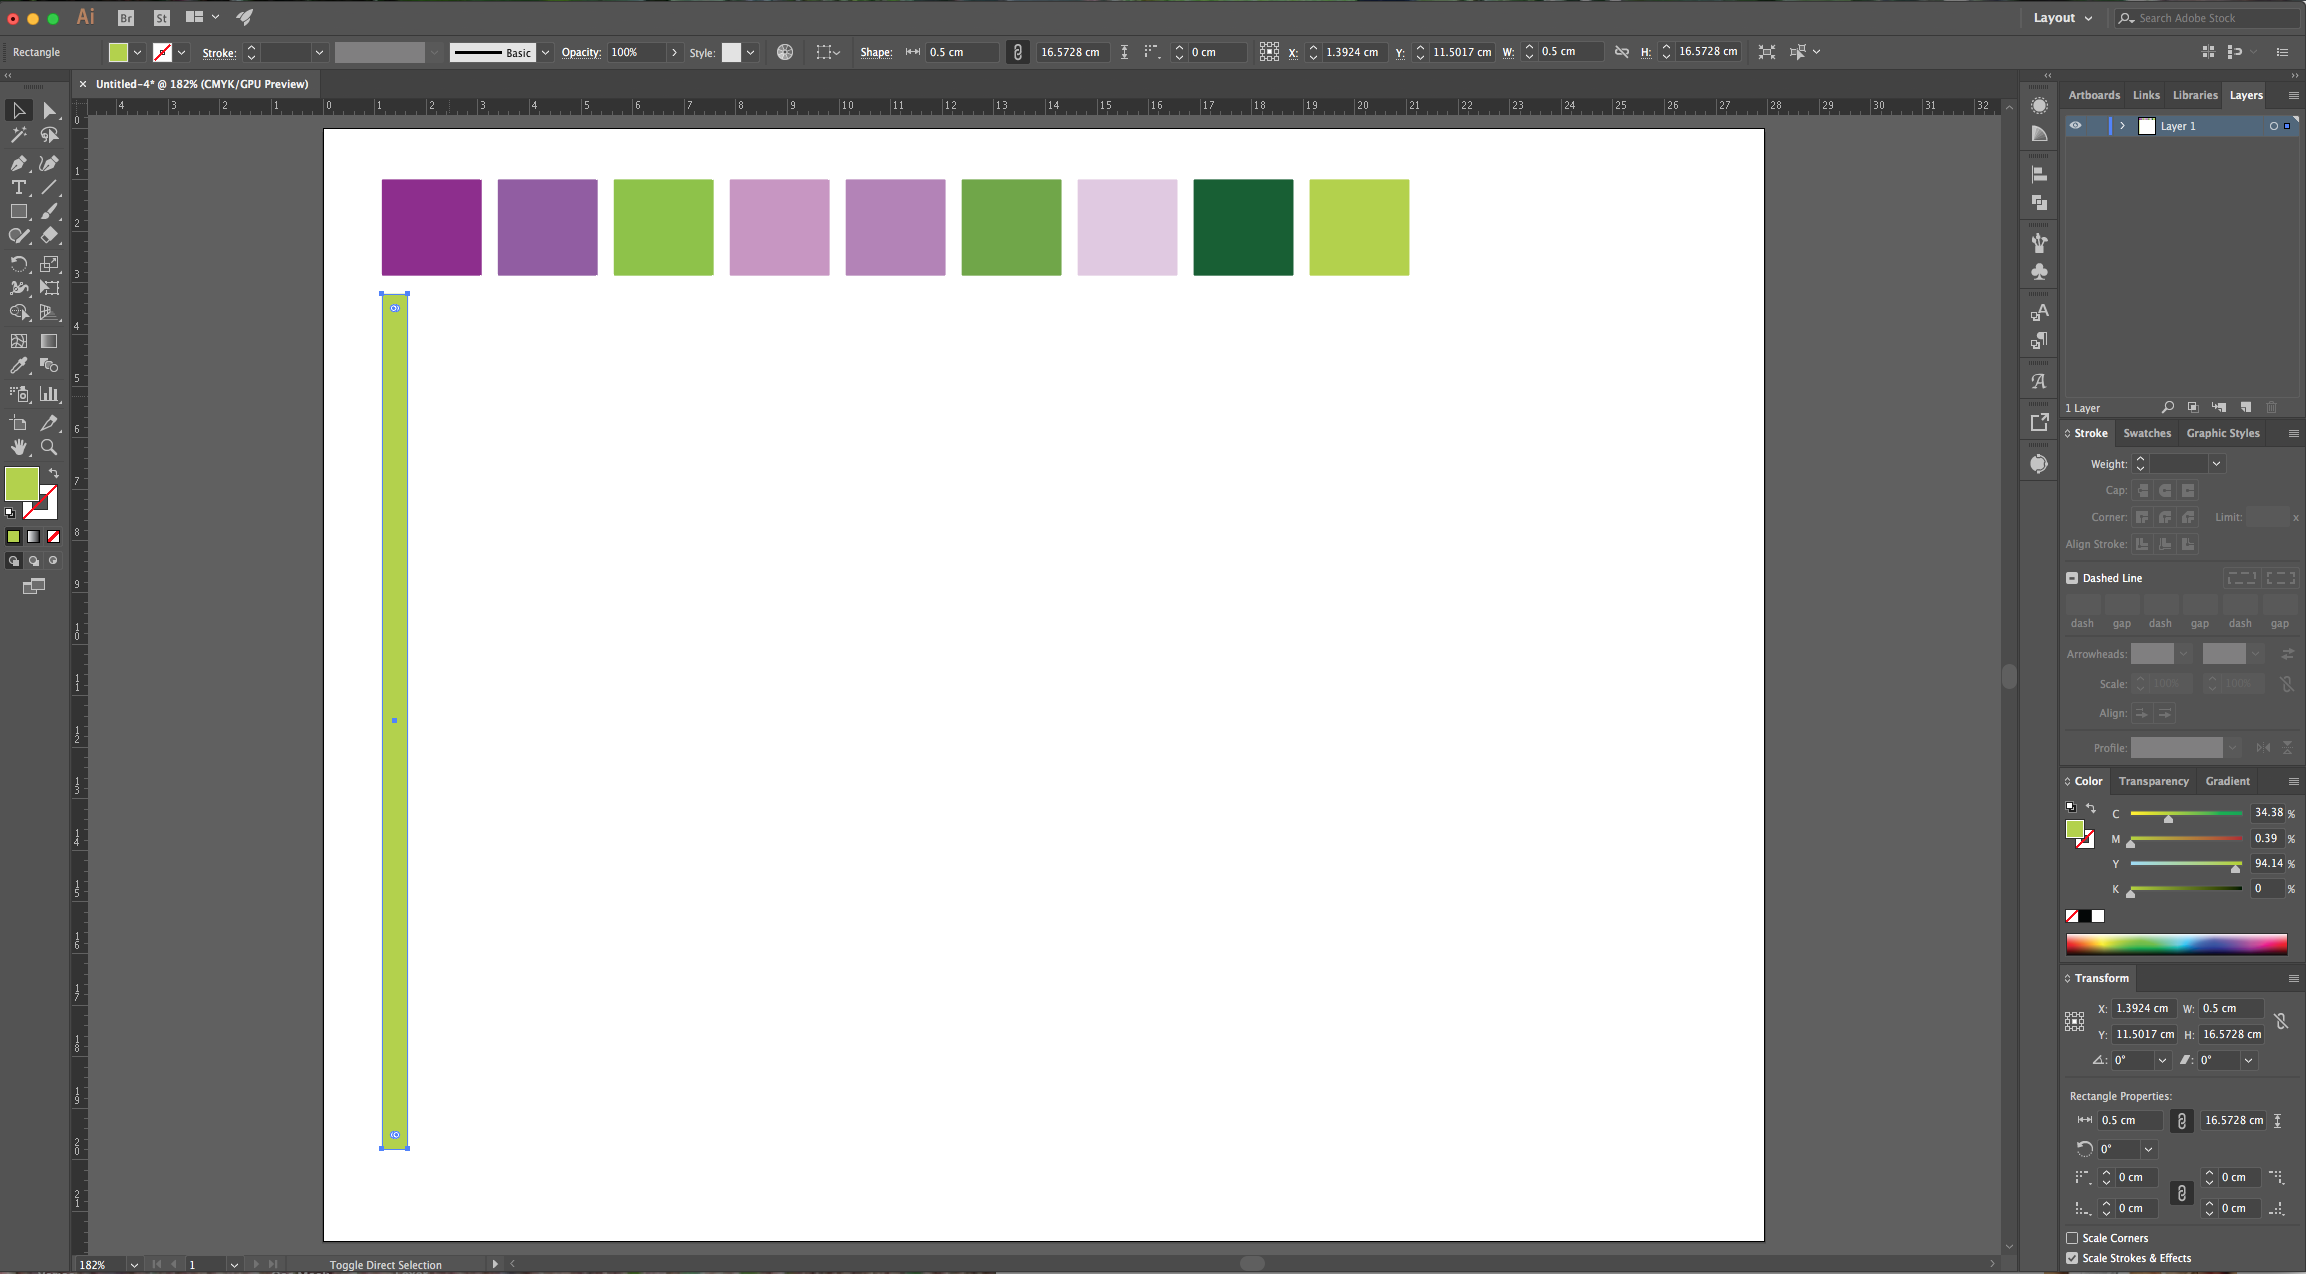
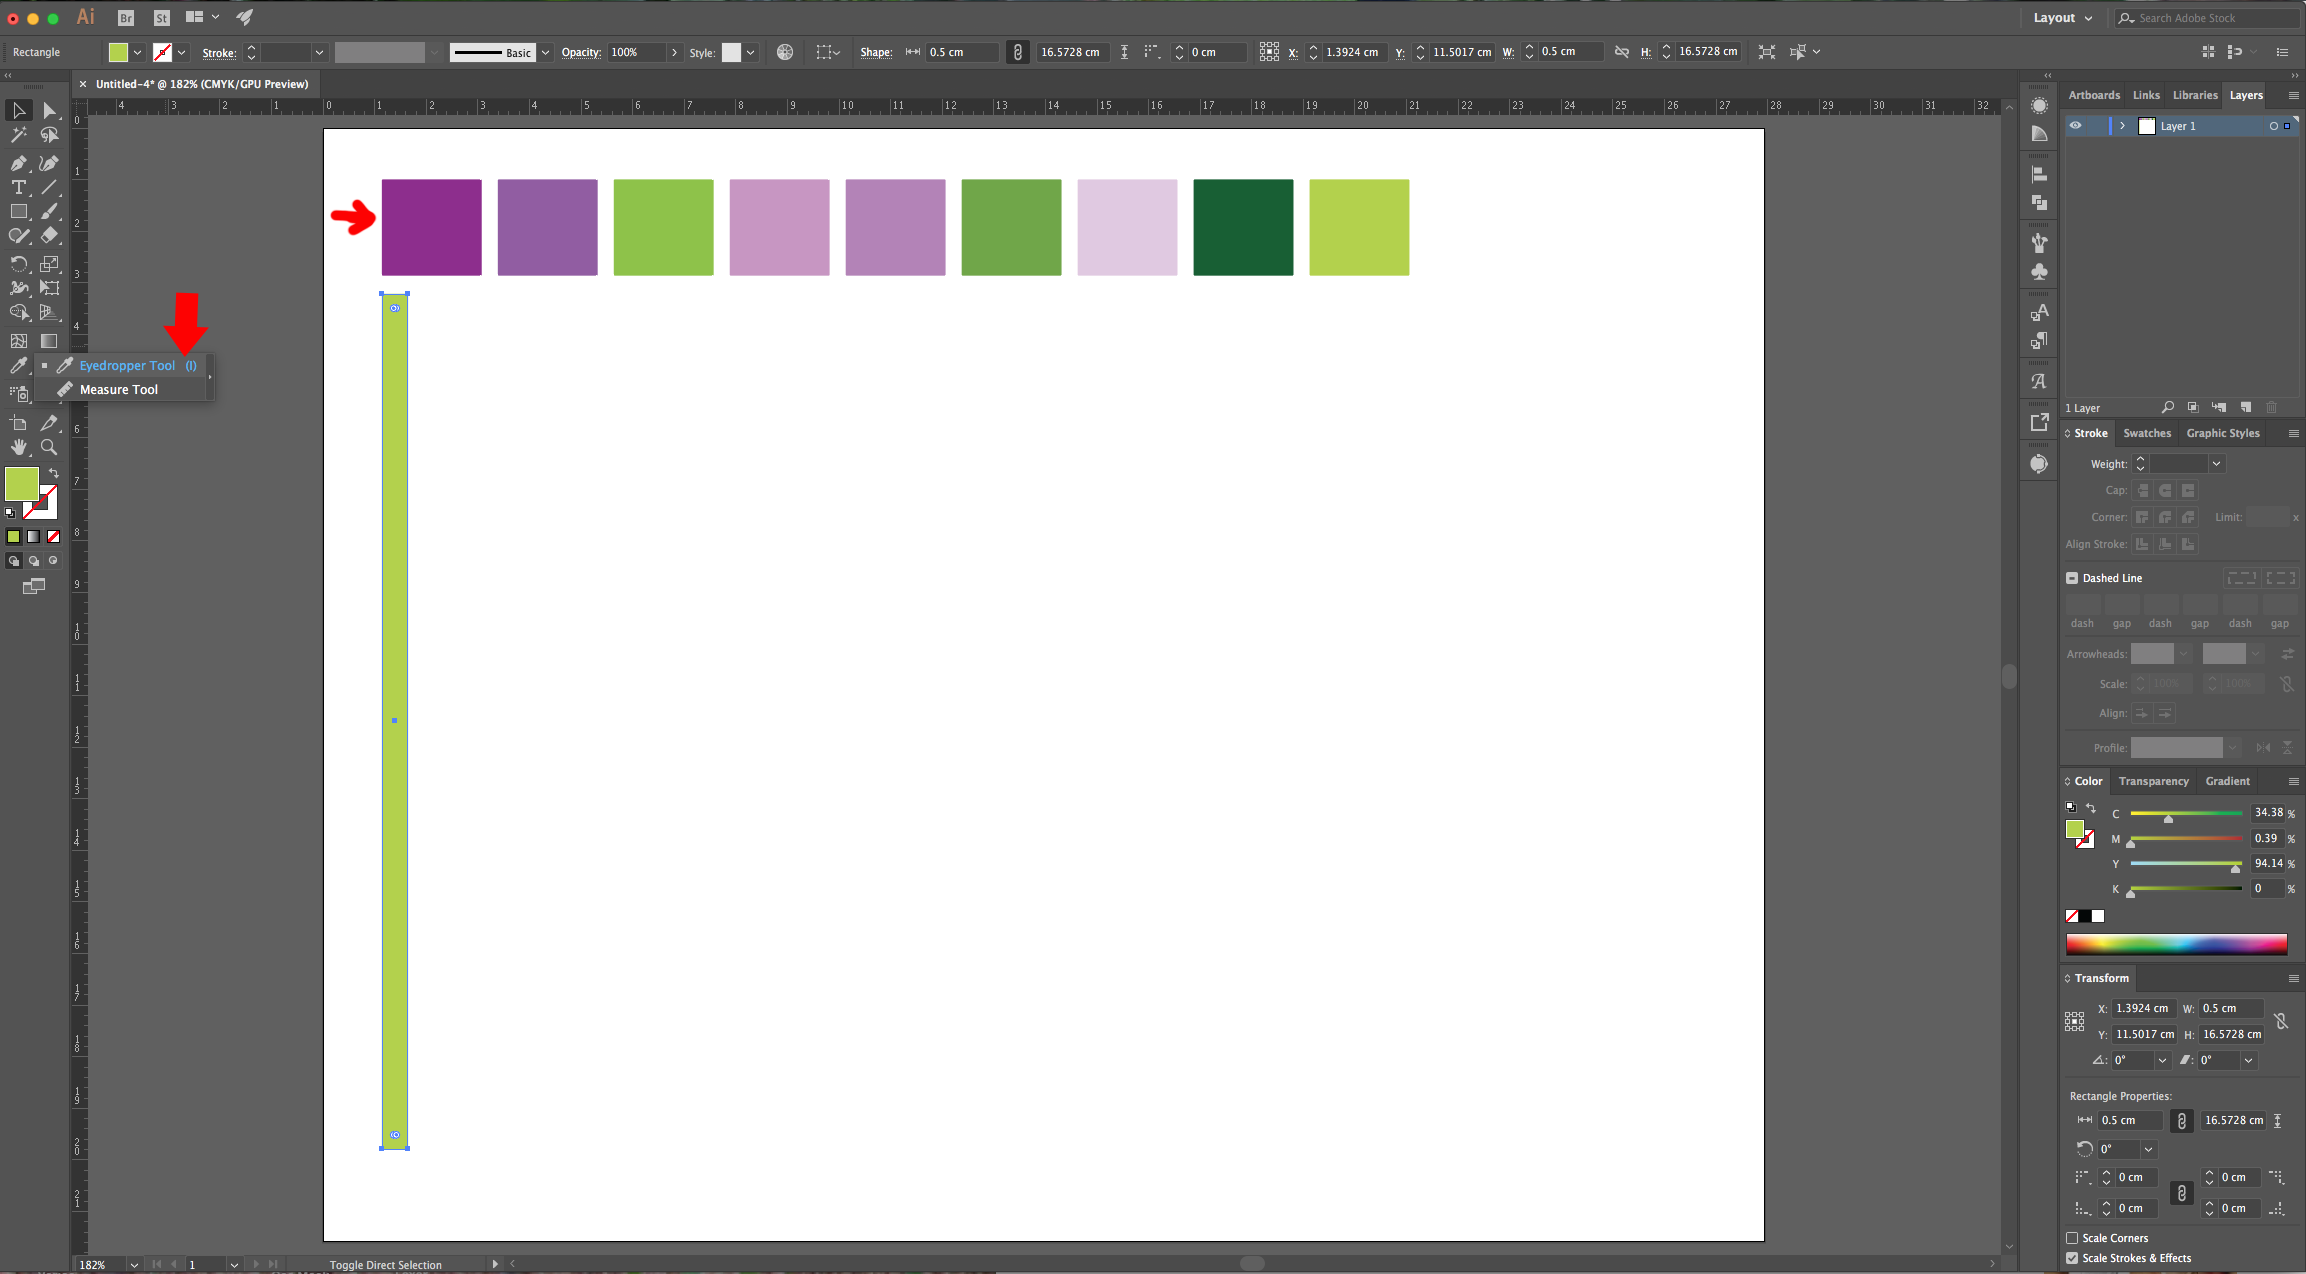
4 - Use the “Eyedropper Tool” (I) to “Fill” the Rectangle with the first color of your Palette.
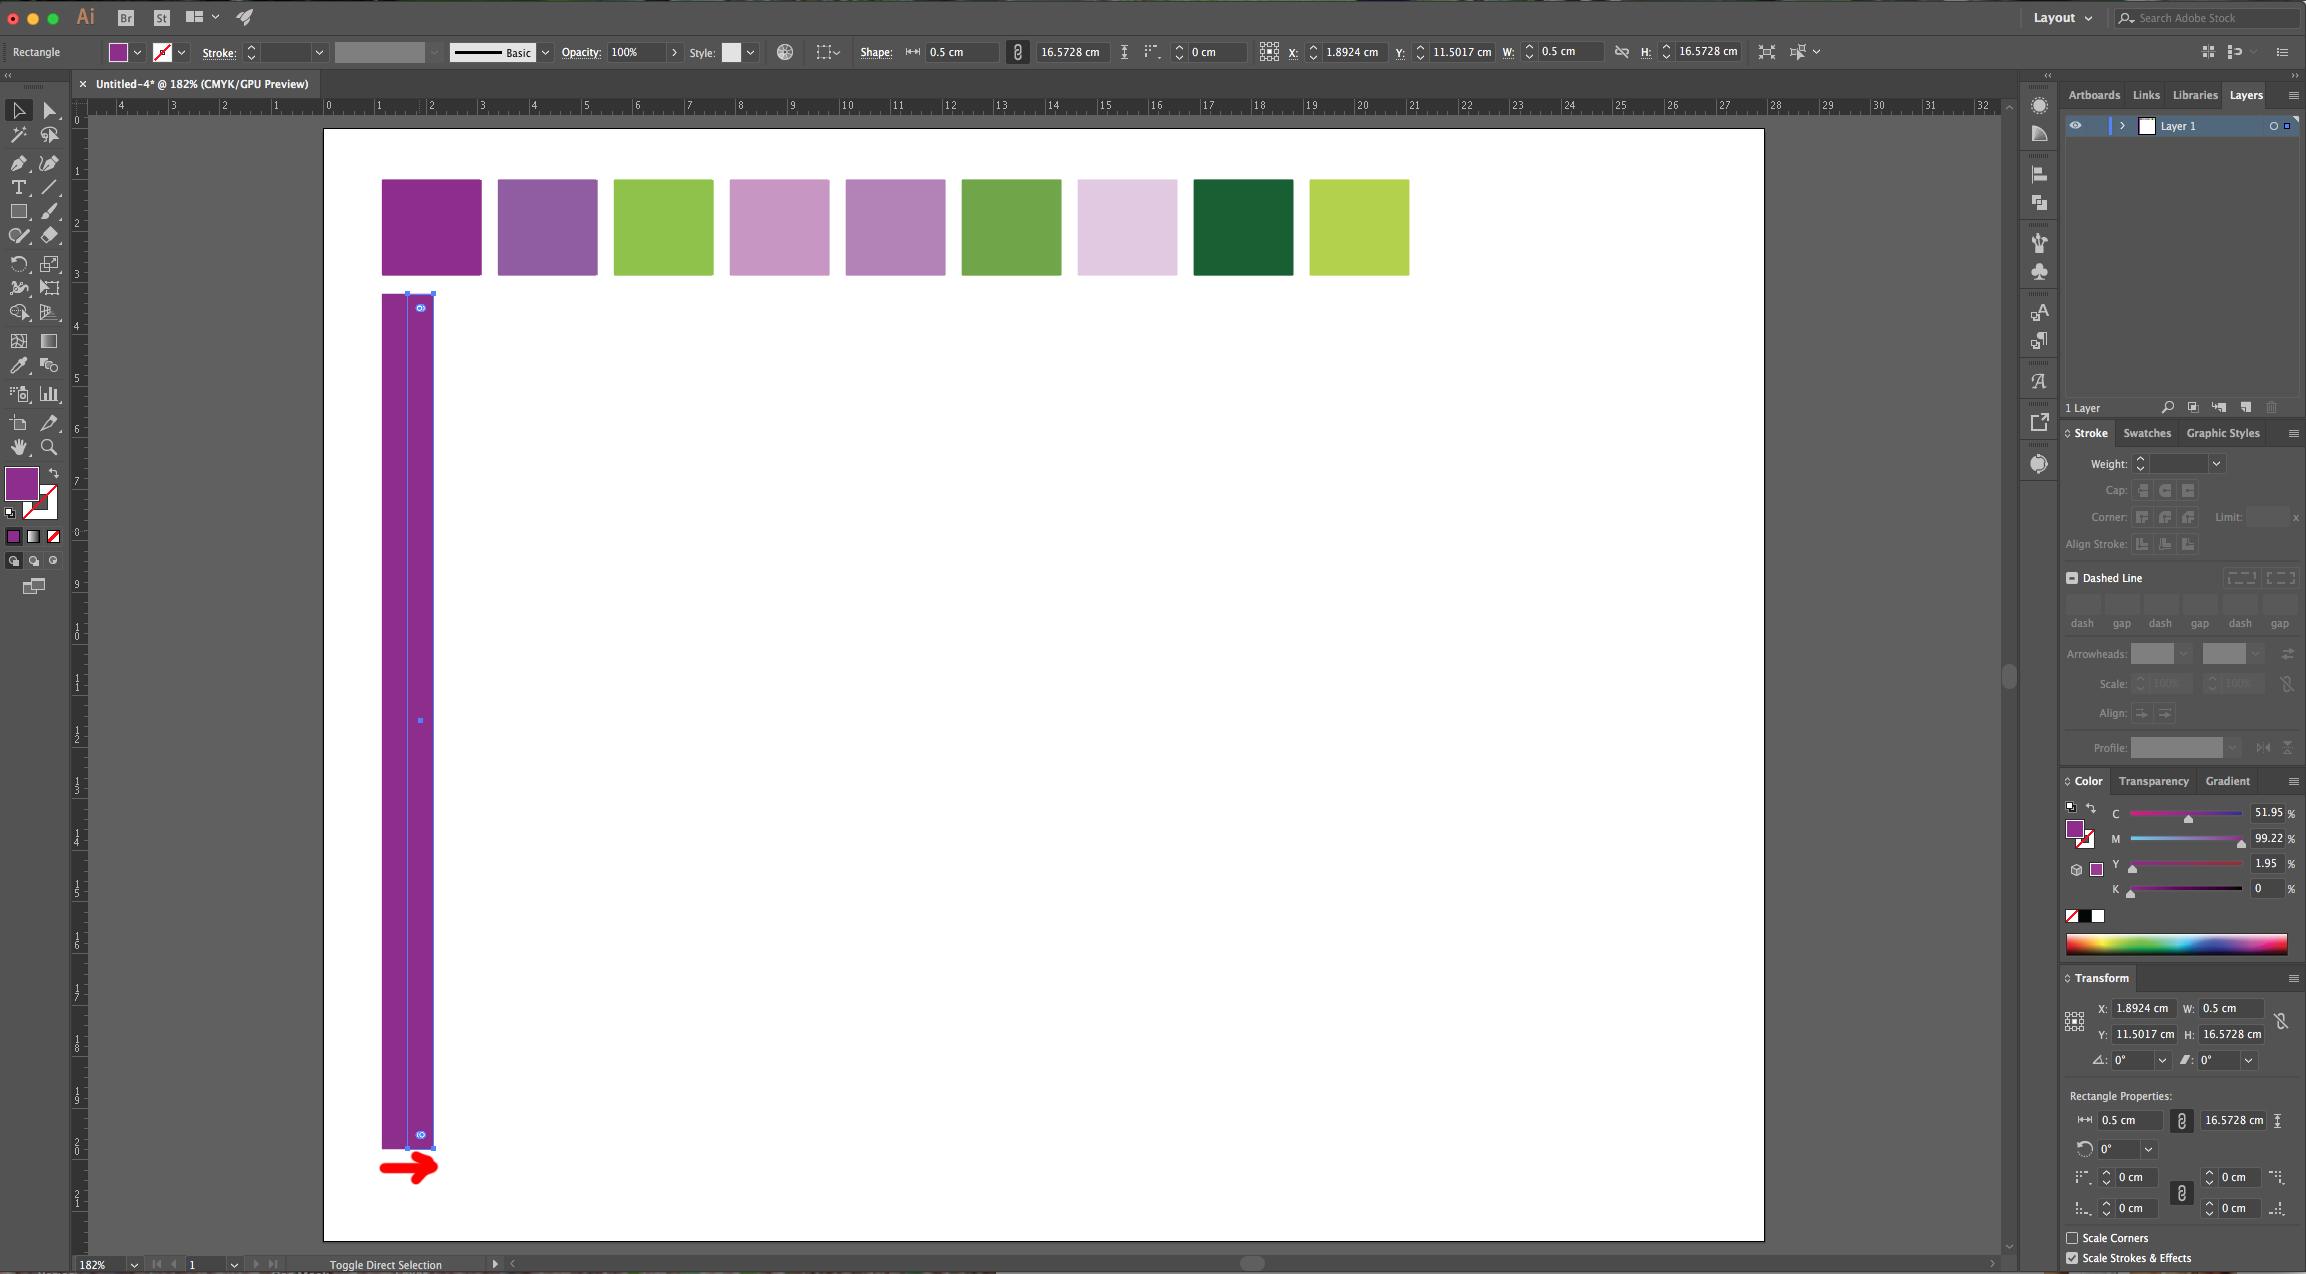
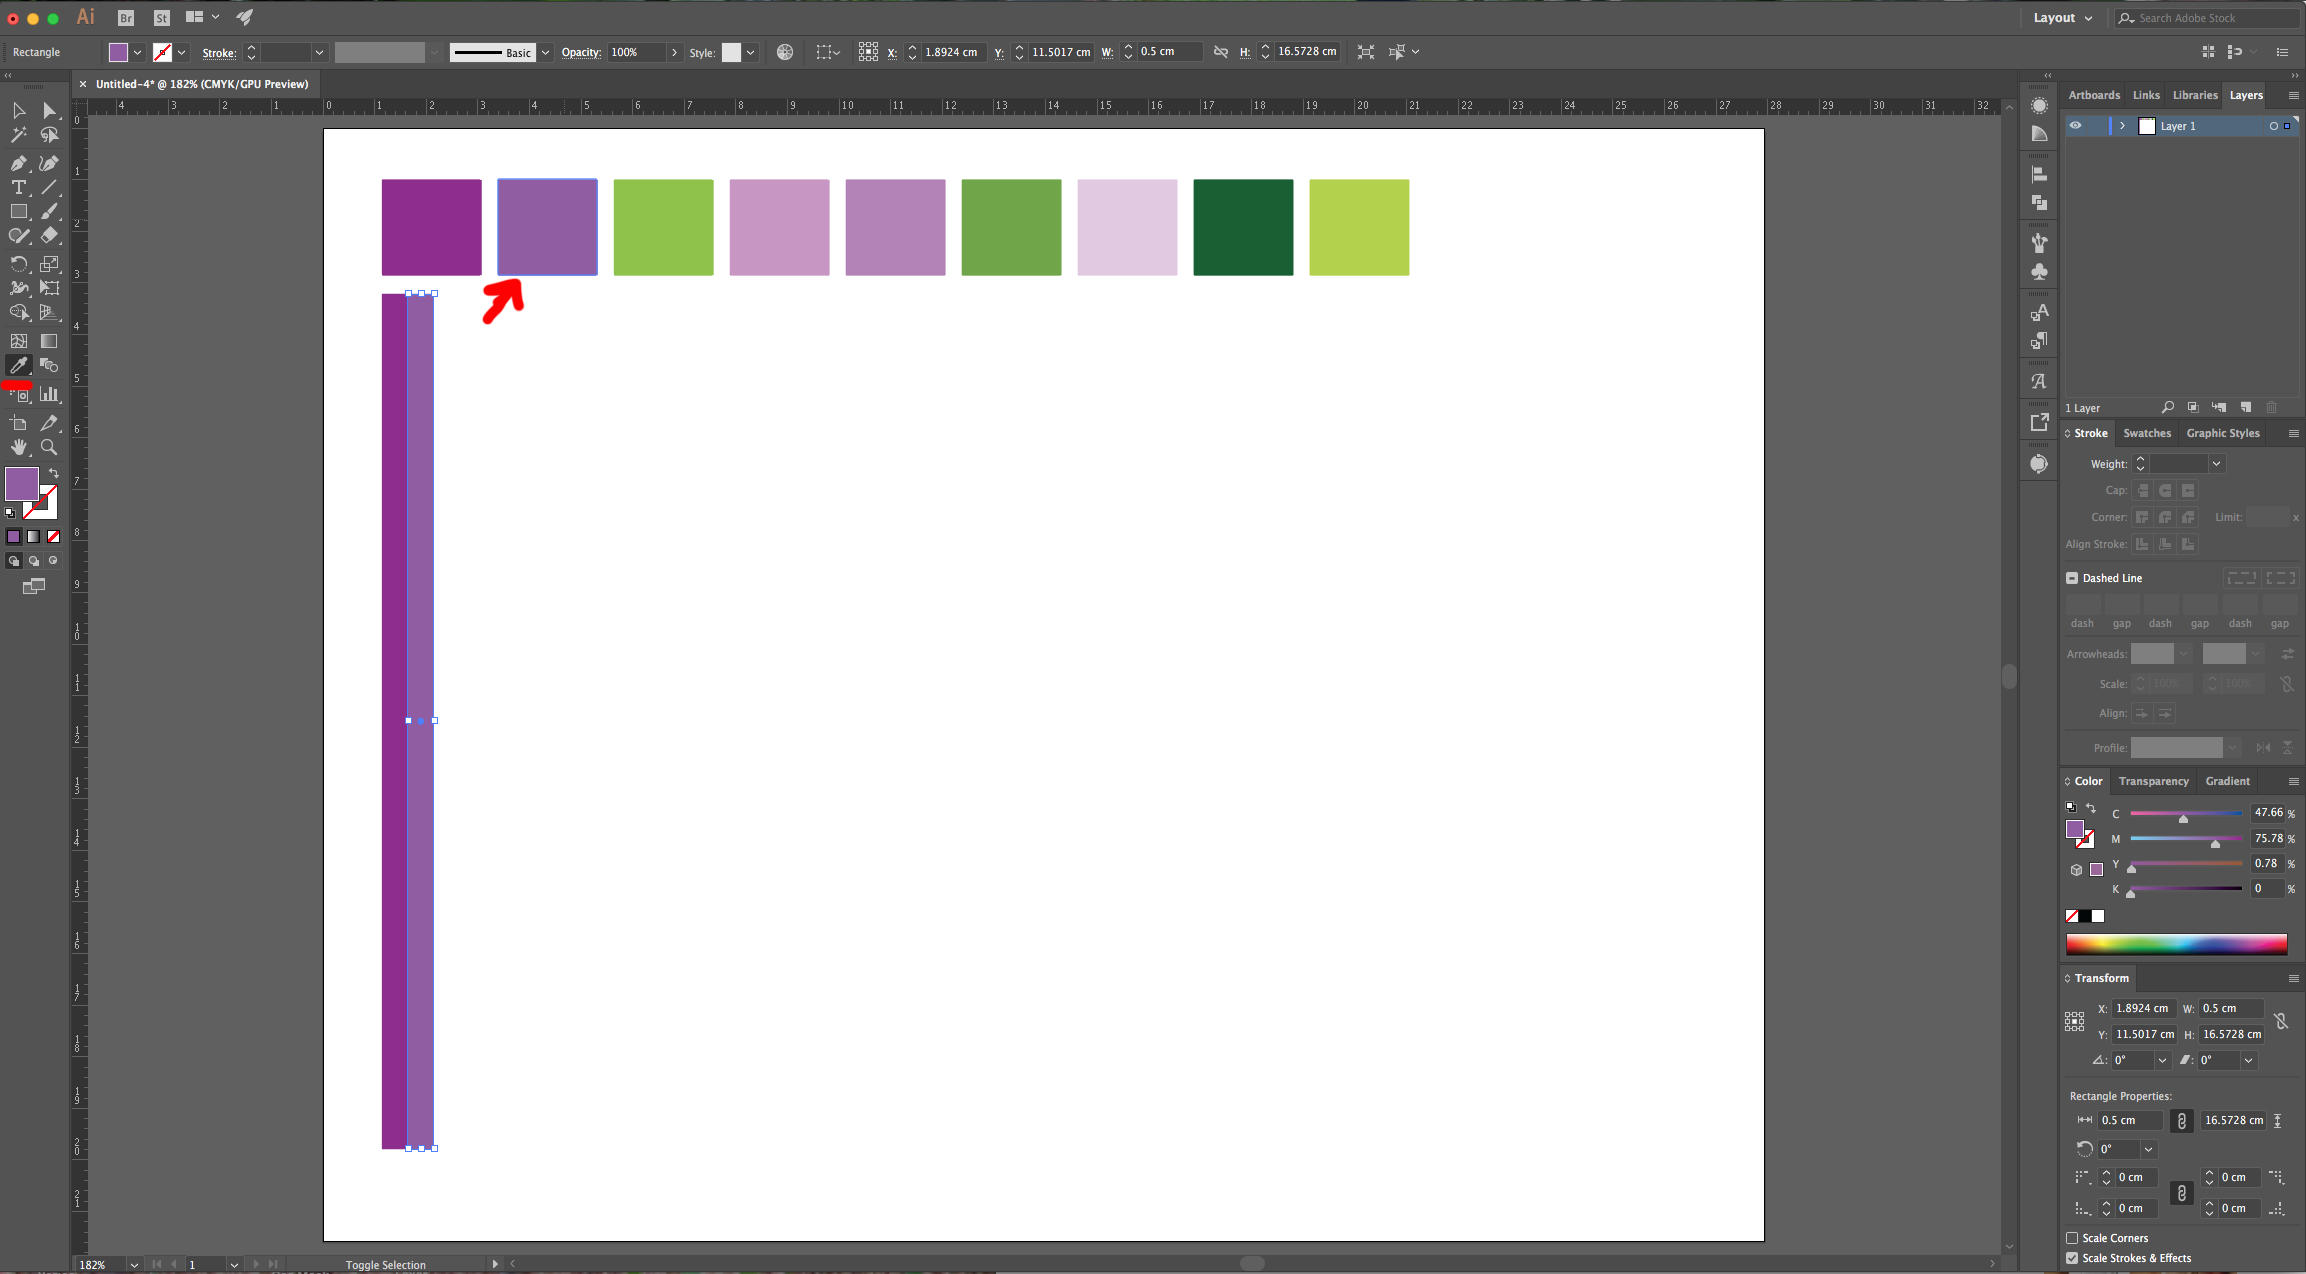
5 - Drag it to the right while holding the “Shift” and “Alt/Option” keys to “Duplicate” it and move it in a straight line. Make its left side touch the right side of the first rectangle, then fill it with the second color in your Palette.
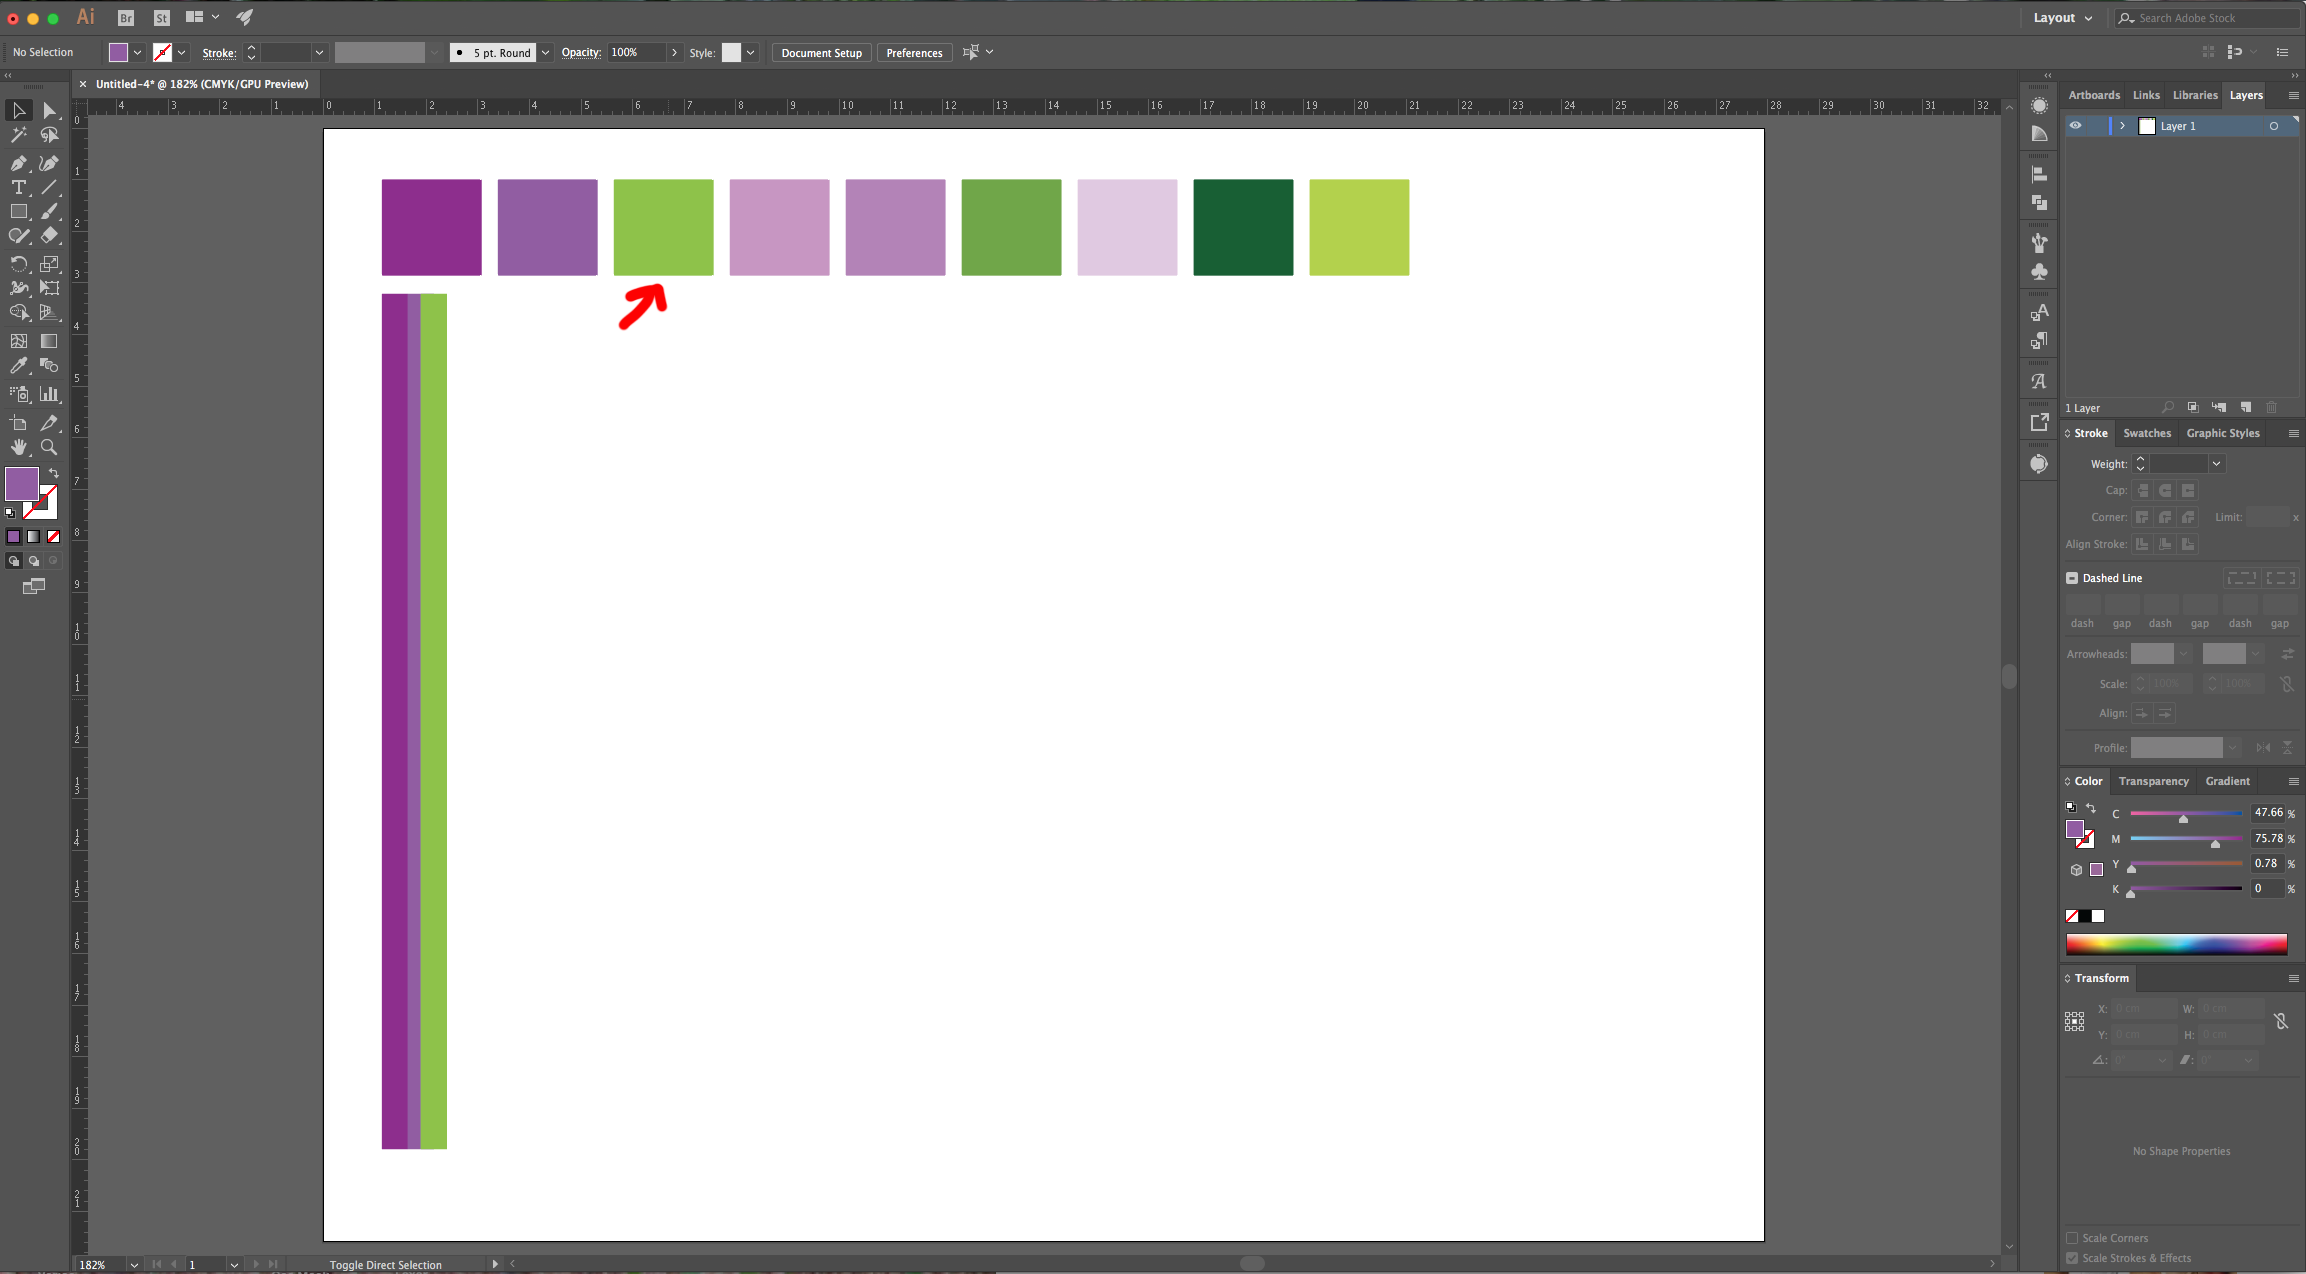
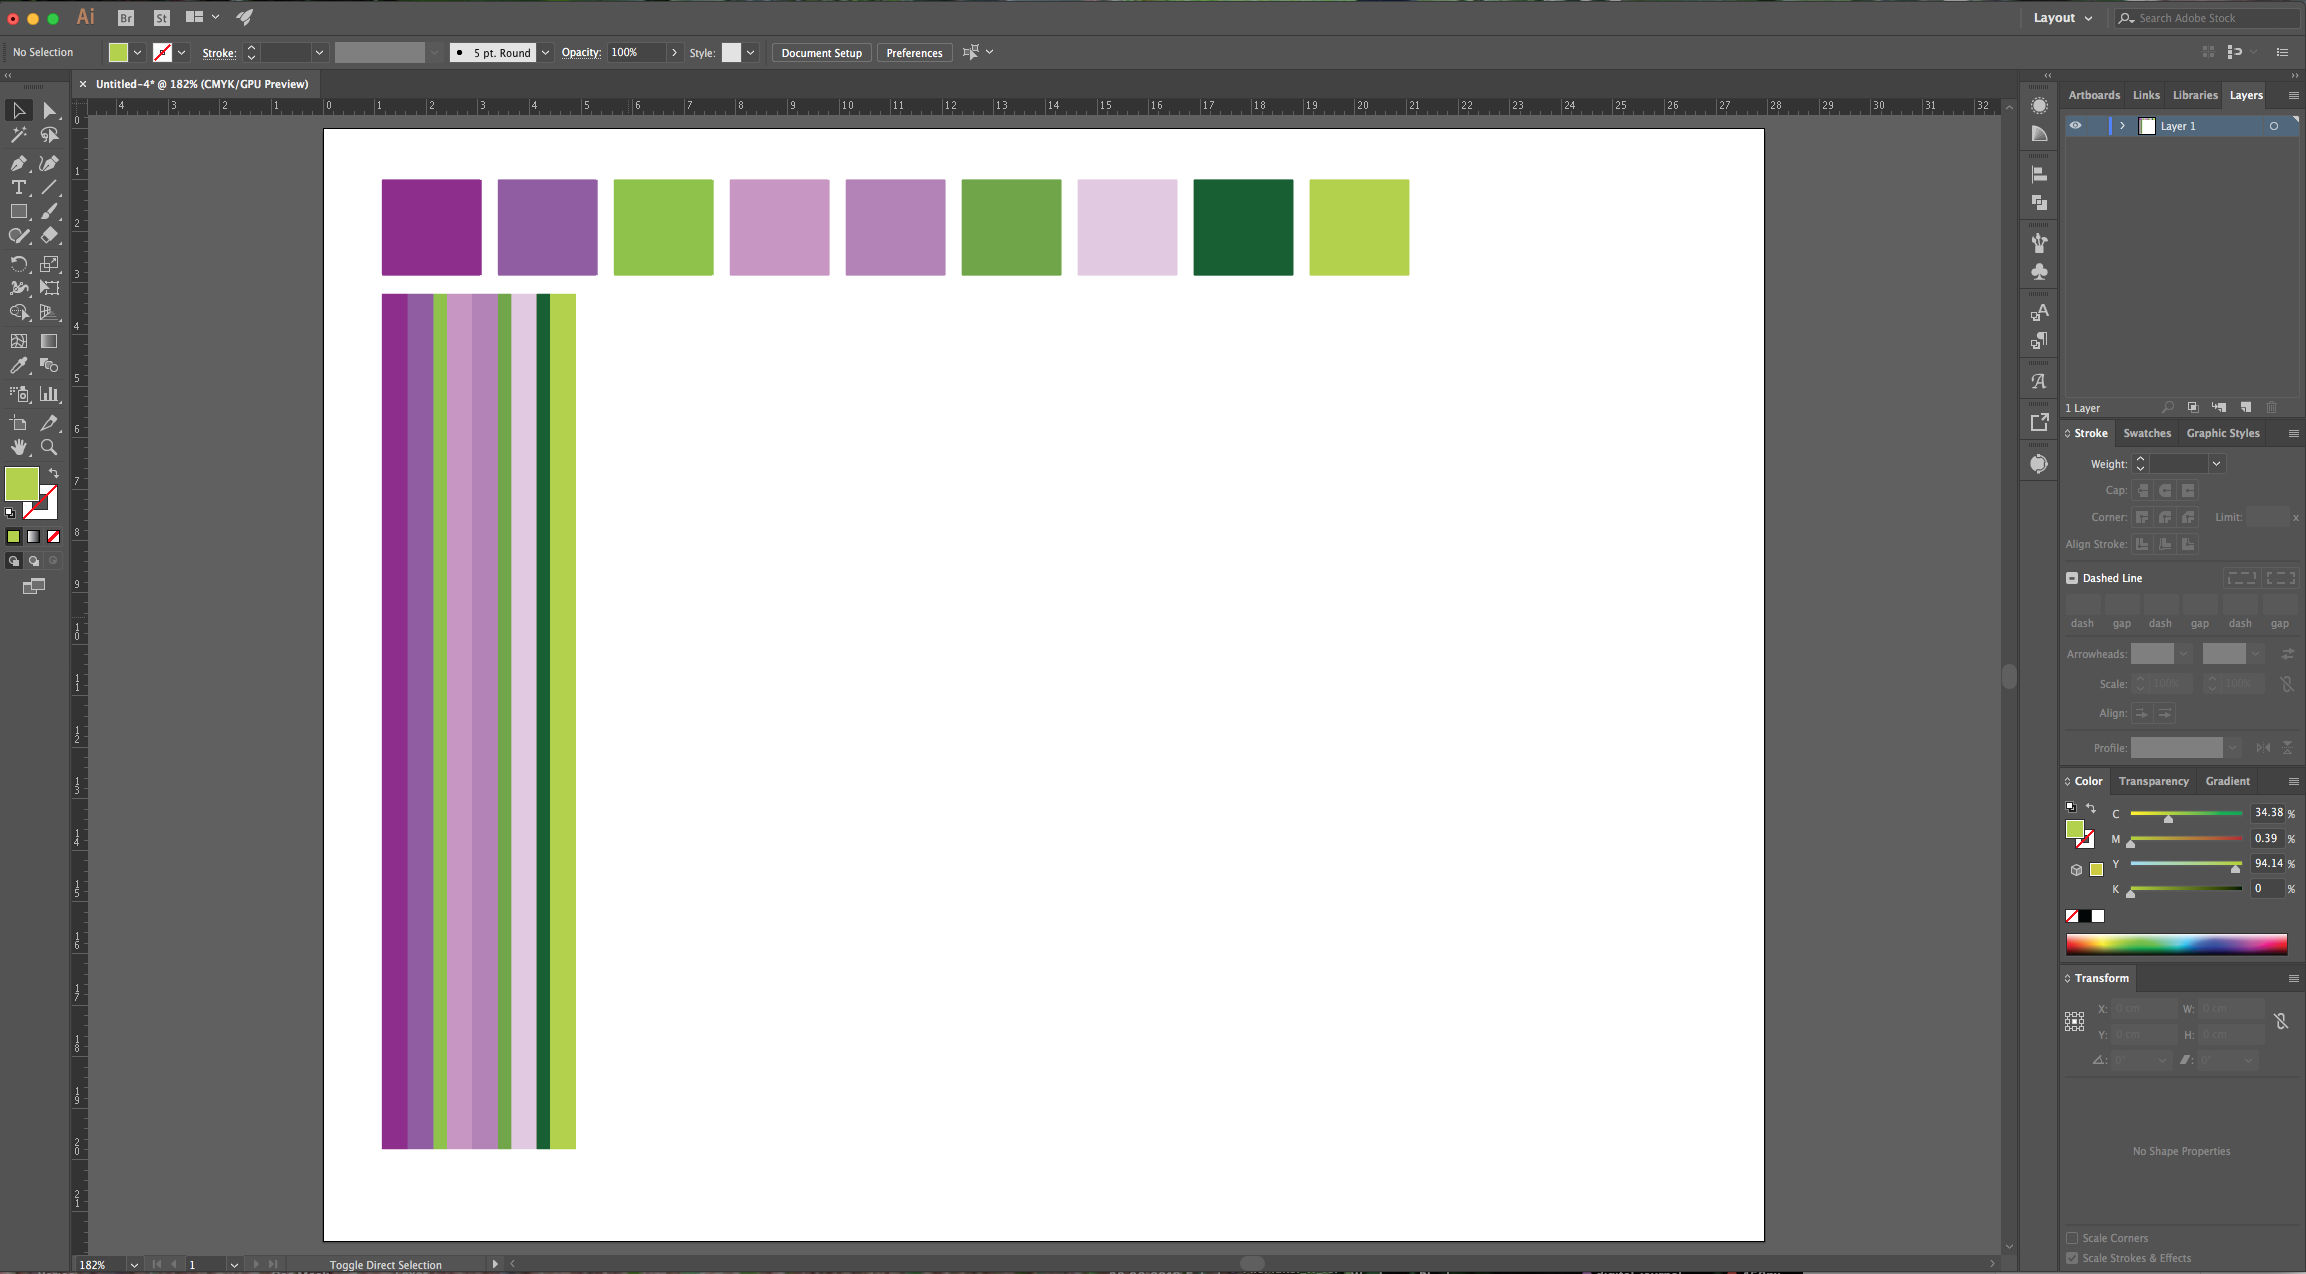
6 - Duplicate your second rectangle, fill it with another color and use the “Selection Tool” to make it half the size in “Width”. Keep adding Thick and Thin lines/rectangles and changing the “Fill” color until you finish your palette swatches to create a Pattern.
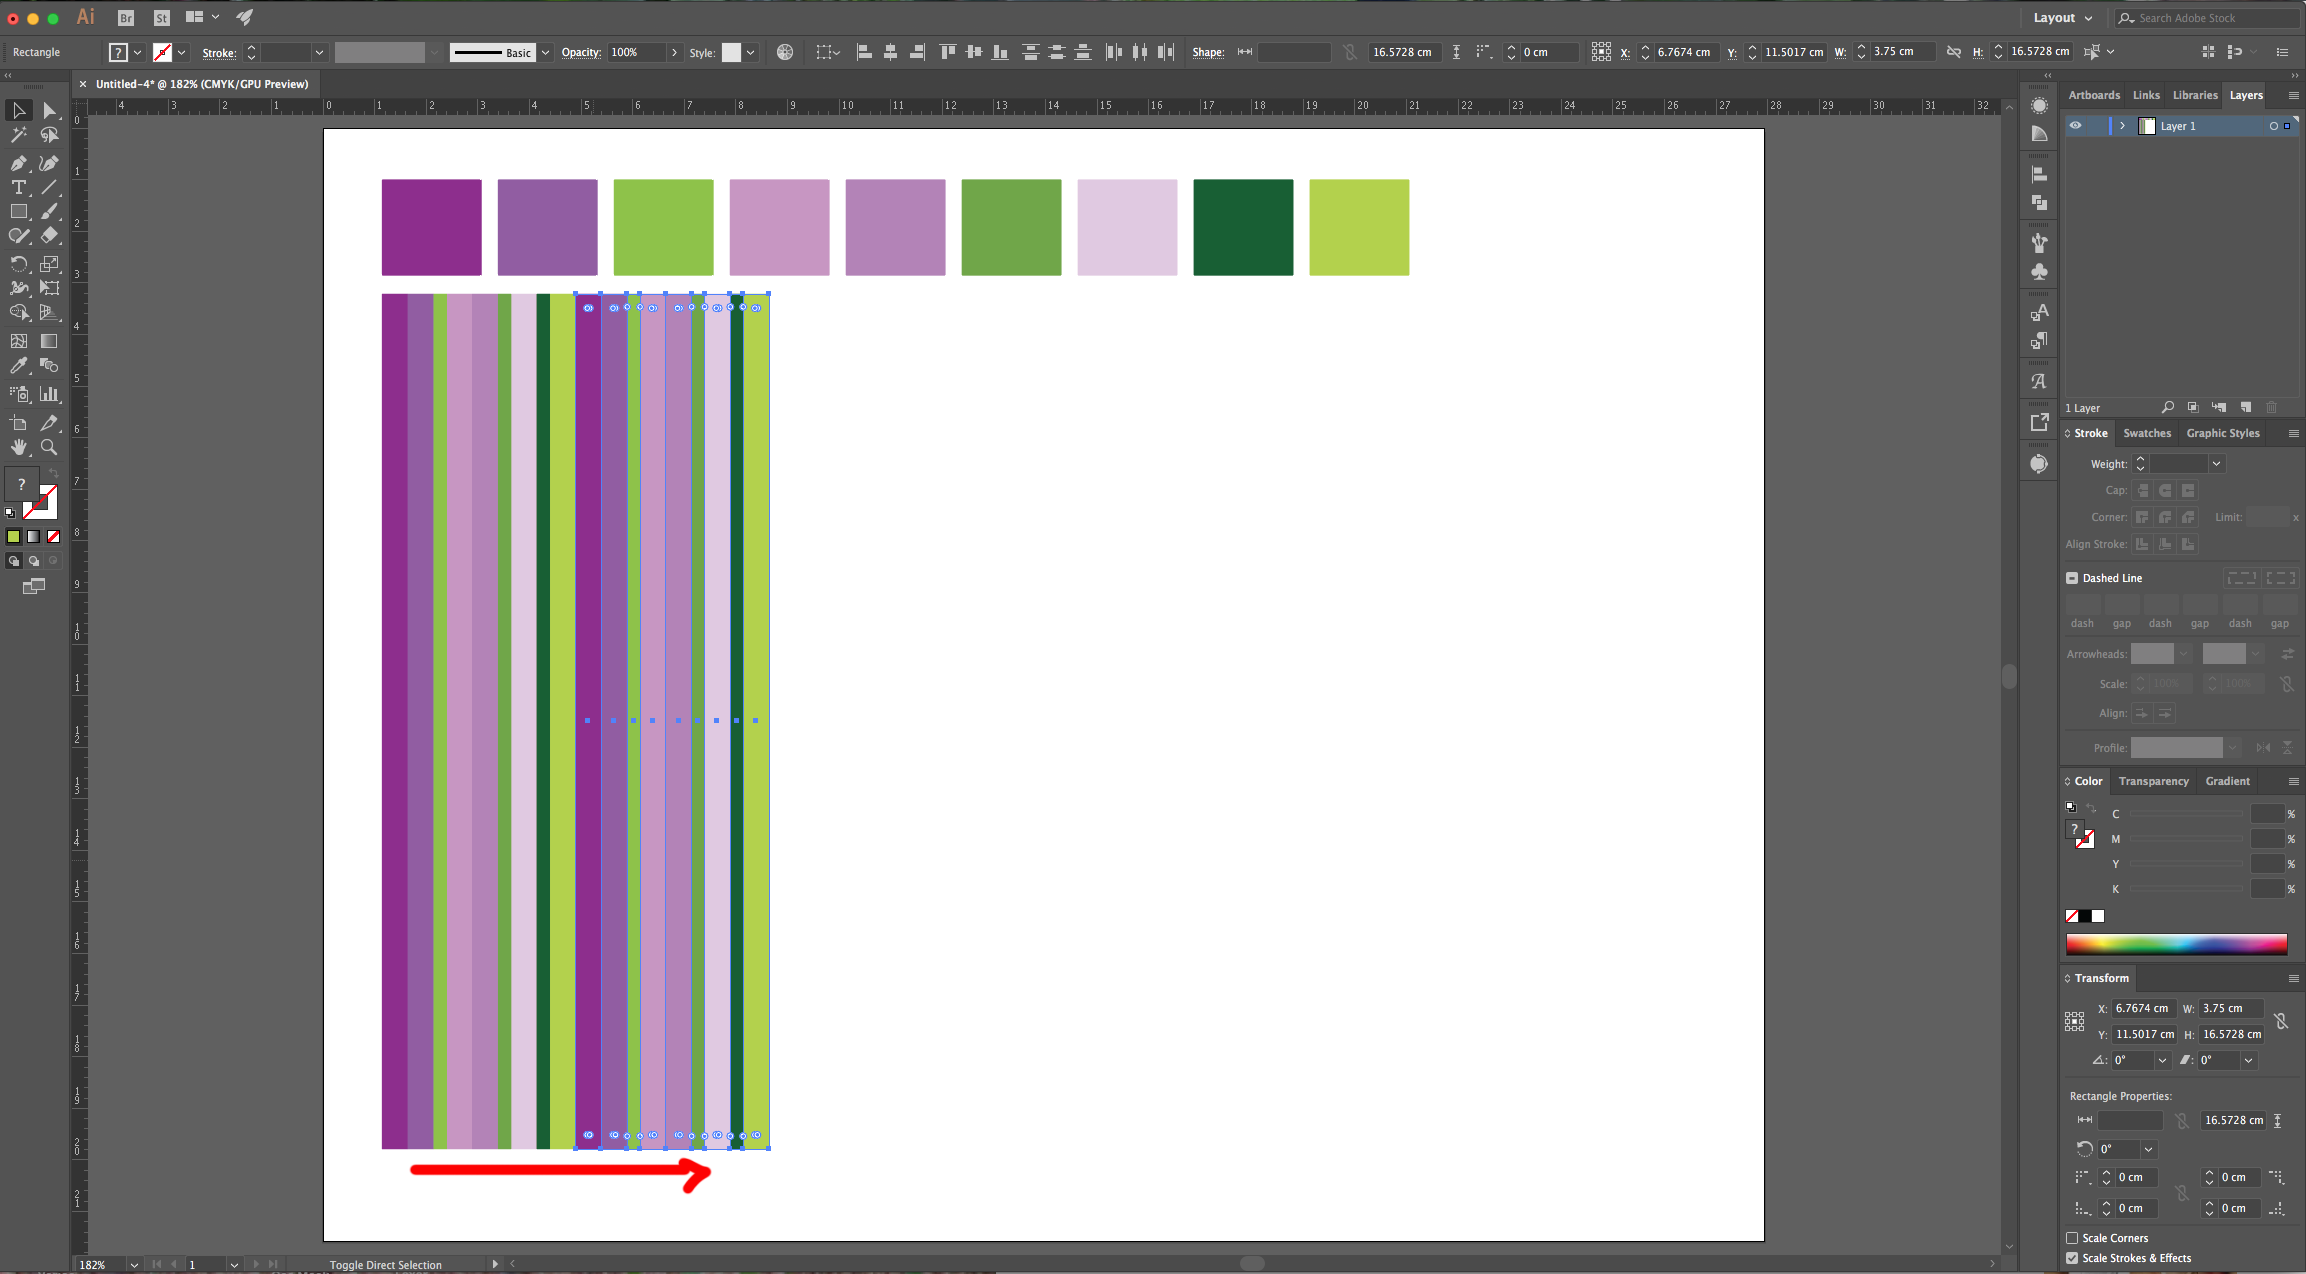
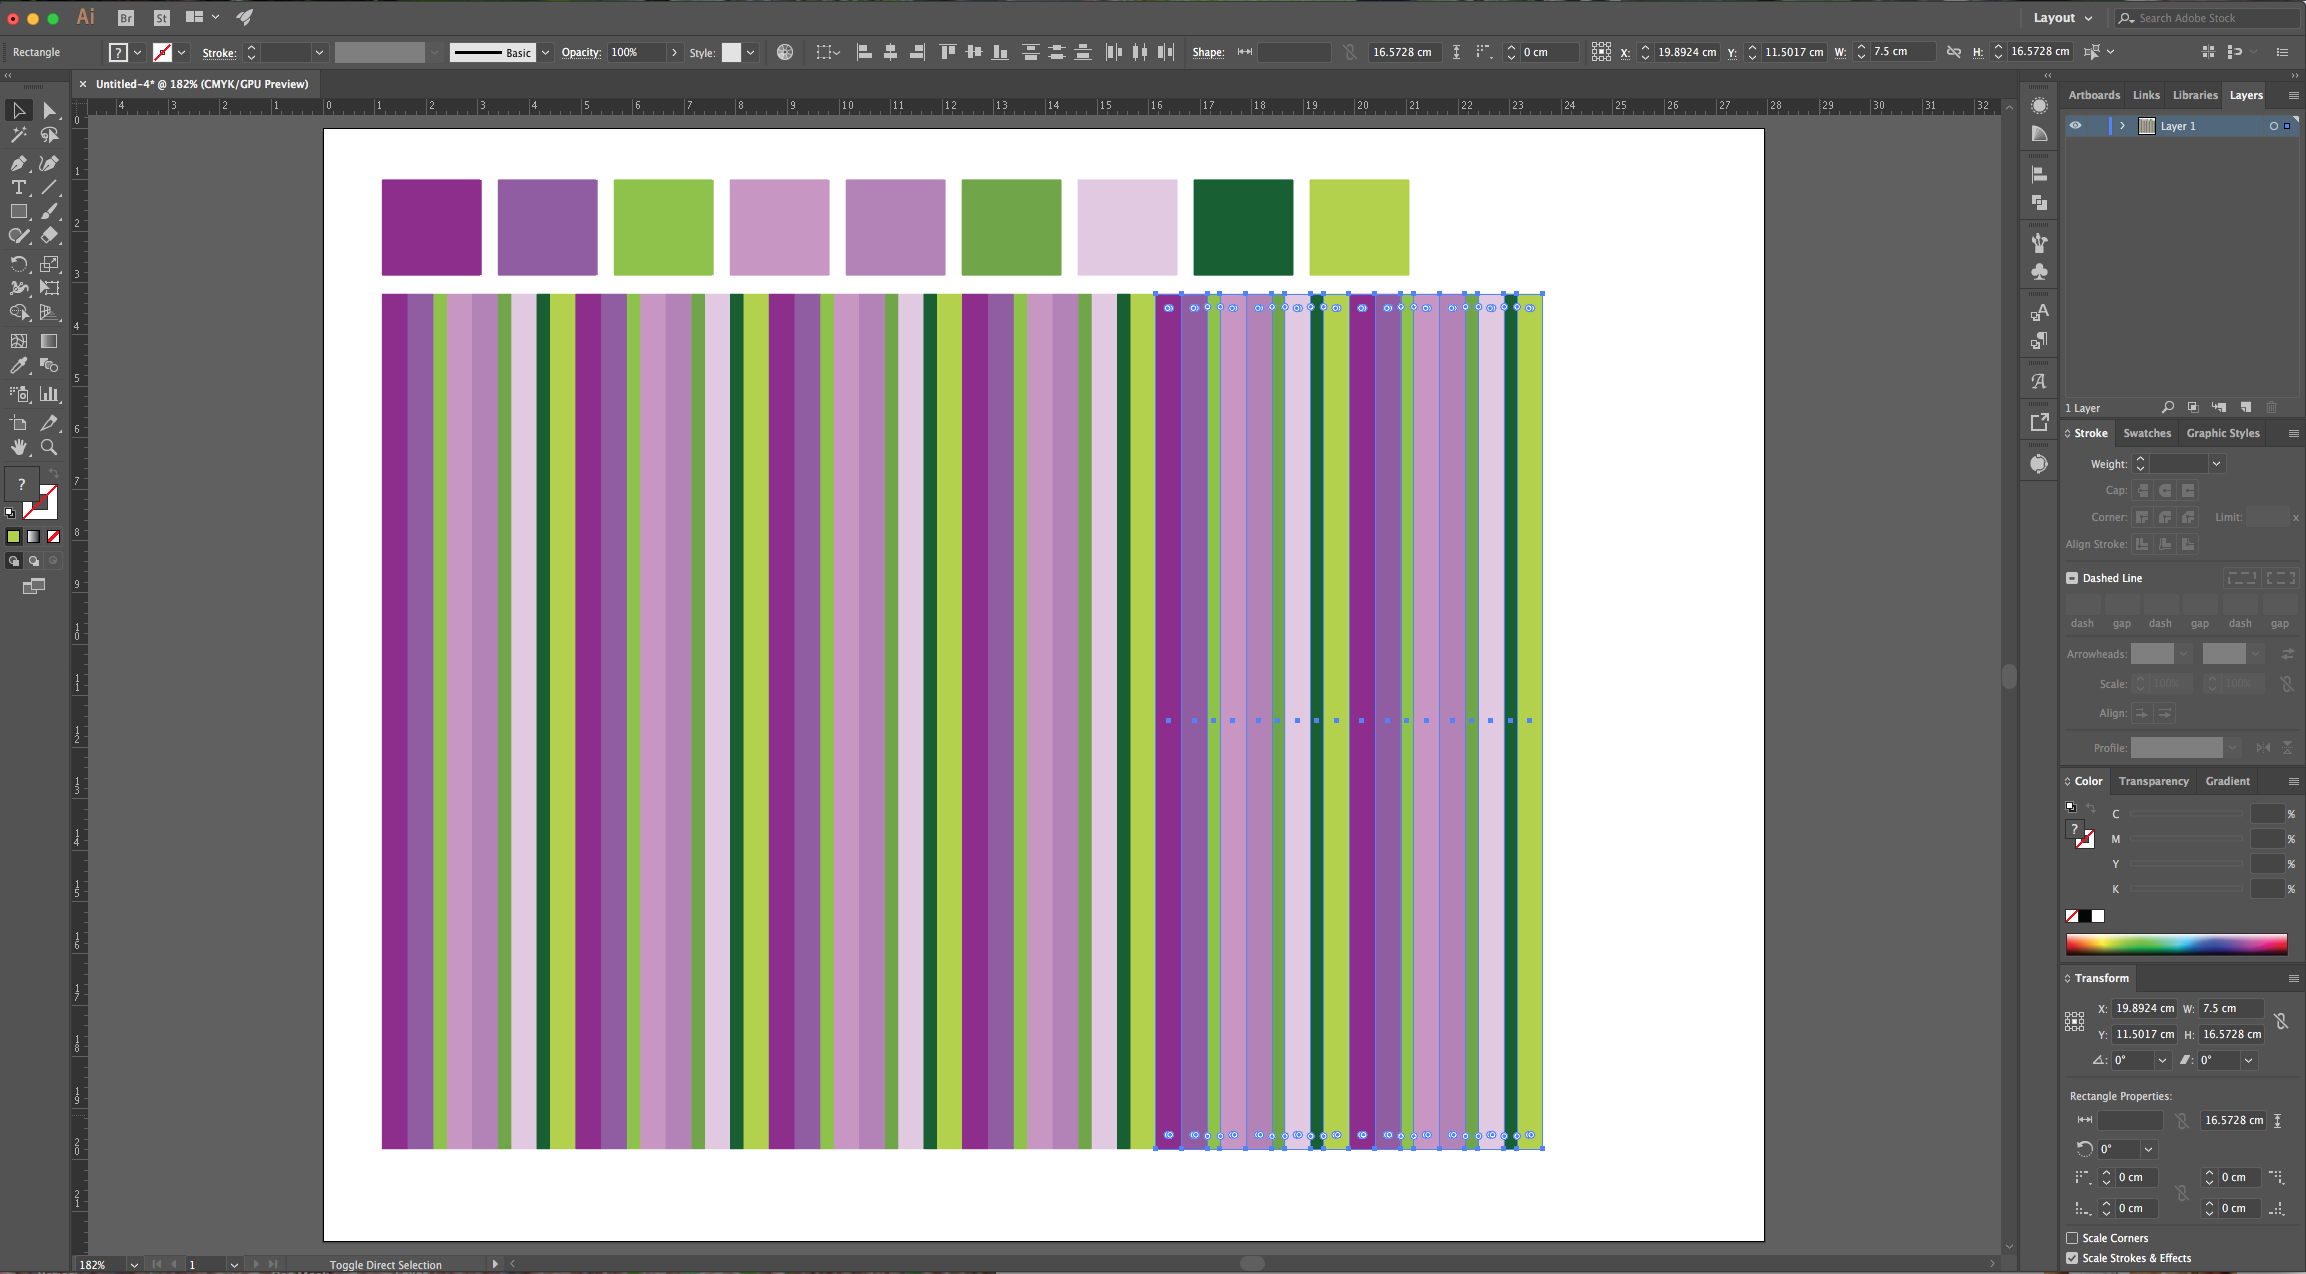
7 - Select all the lines and duplicate them again and again placing them next the end of the other prior group until you fill up almost all the Canvas.
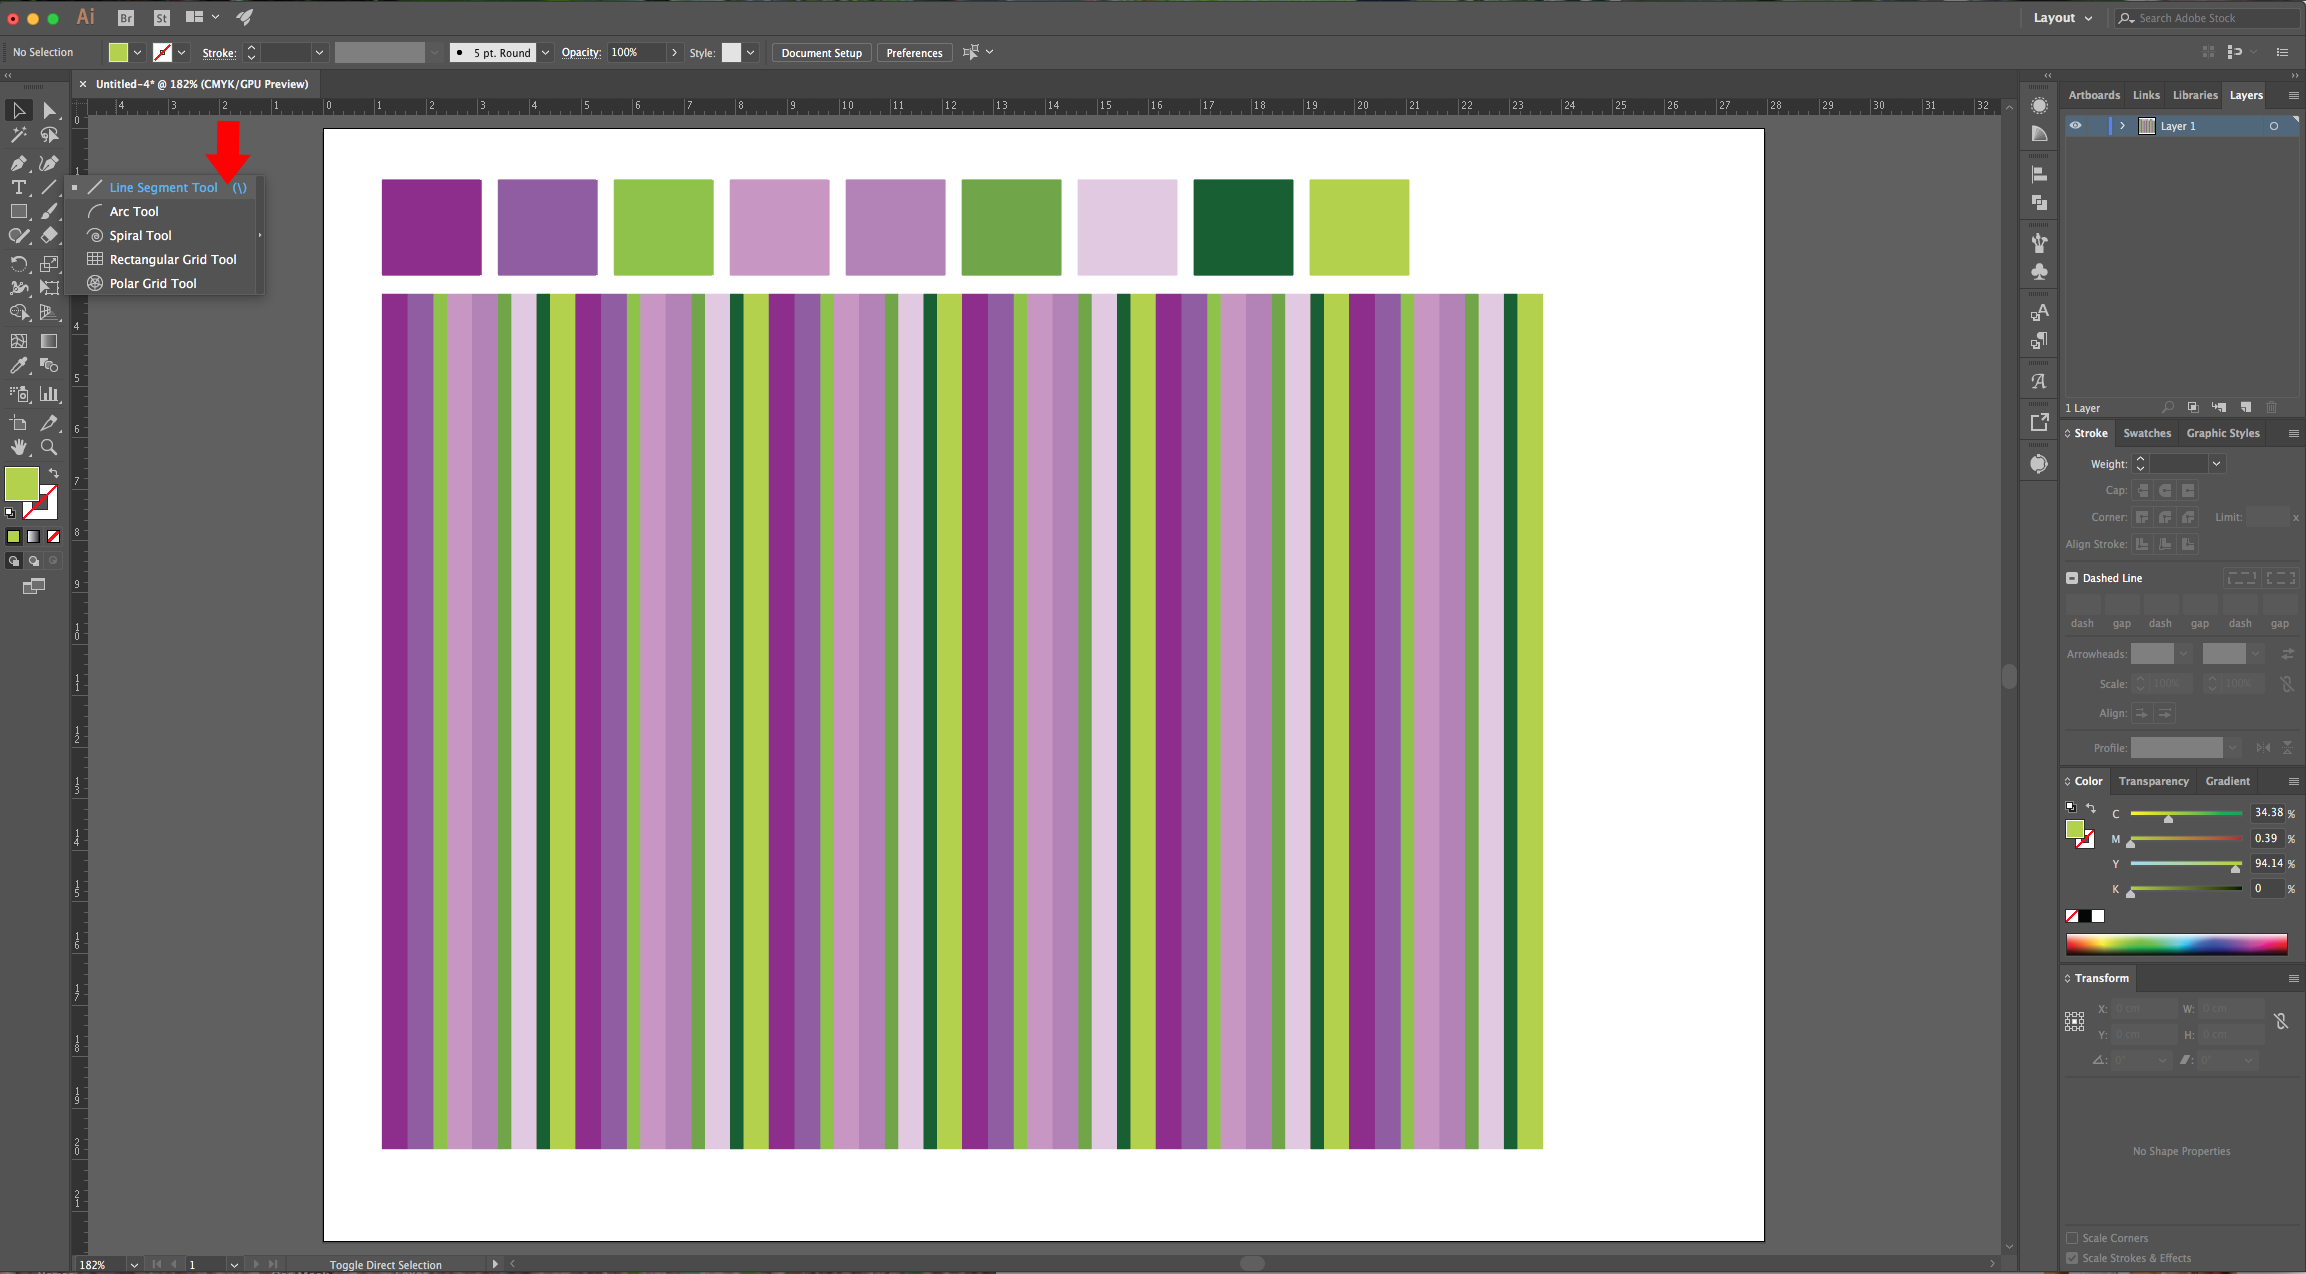
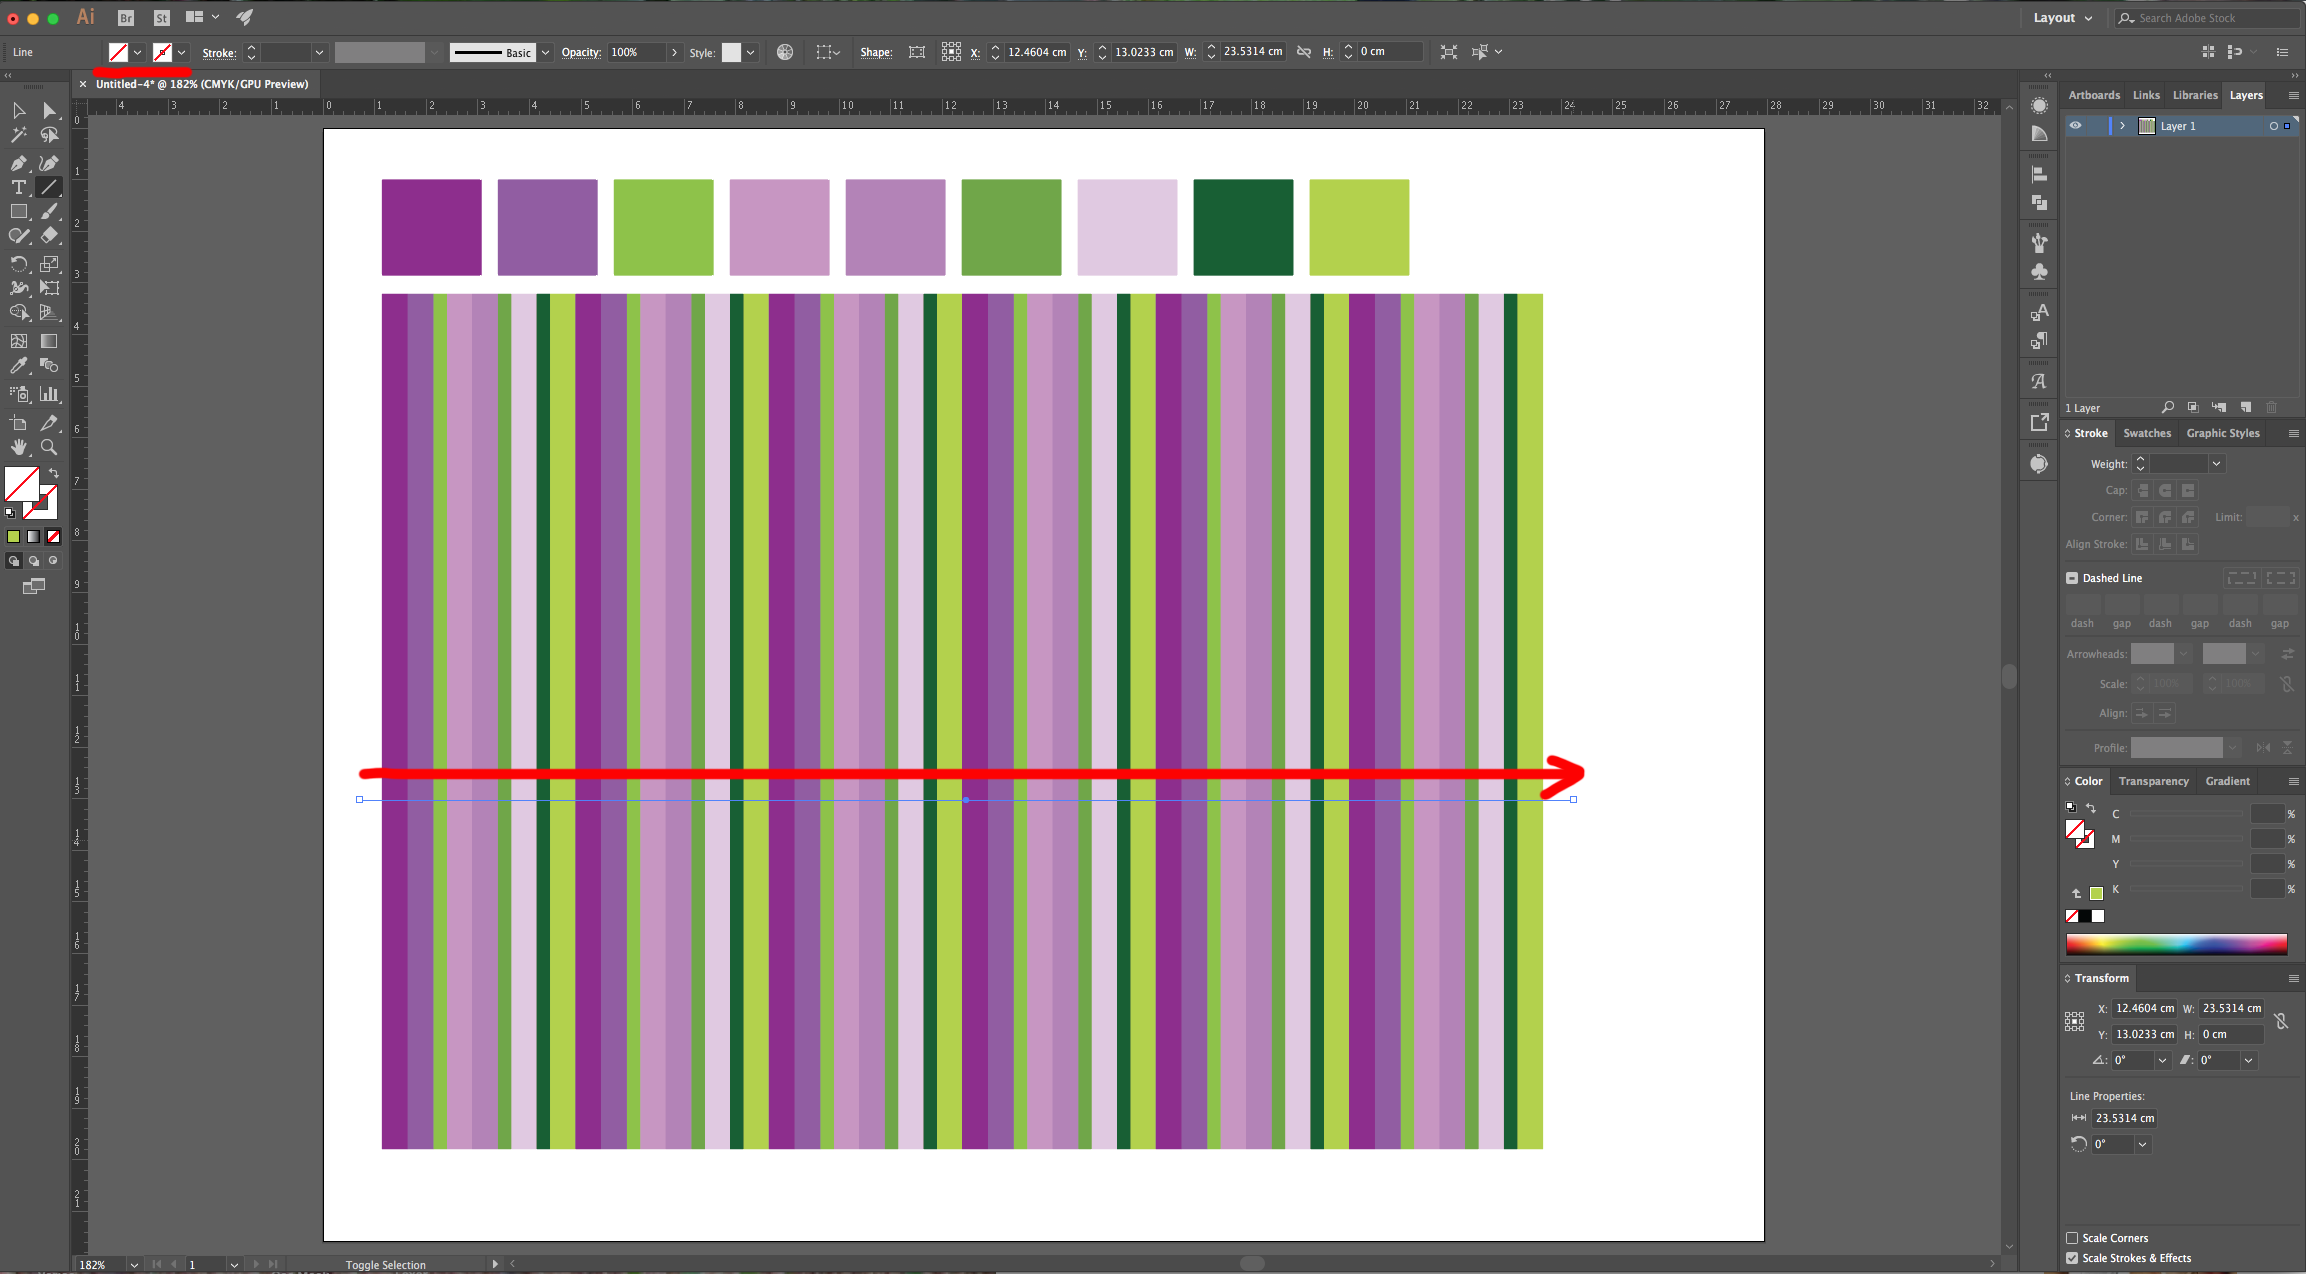
8 - Use the “Line Segment Tool” (\) to draw a “Horizontal” line at about ¾ of the length of your pattern. It should have “NO Fill and Stroke” colors.
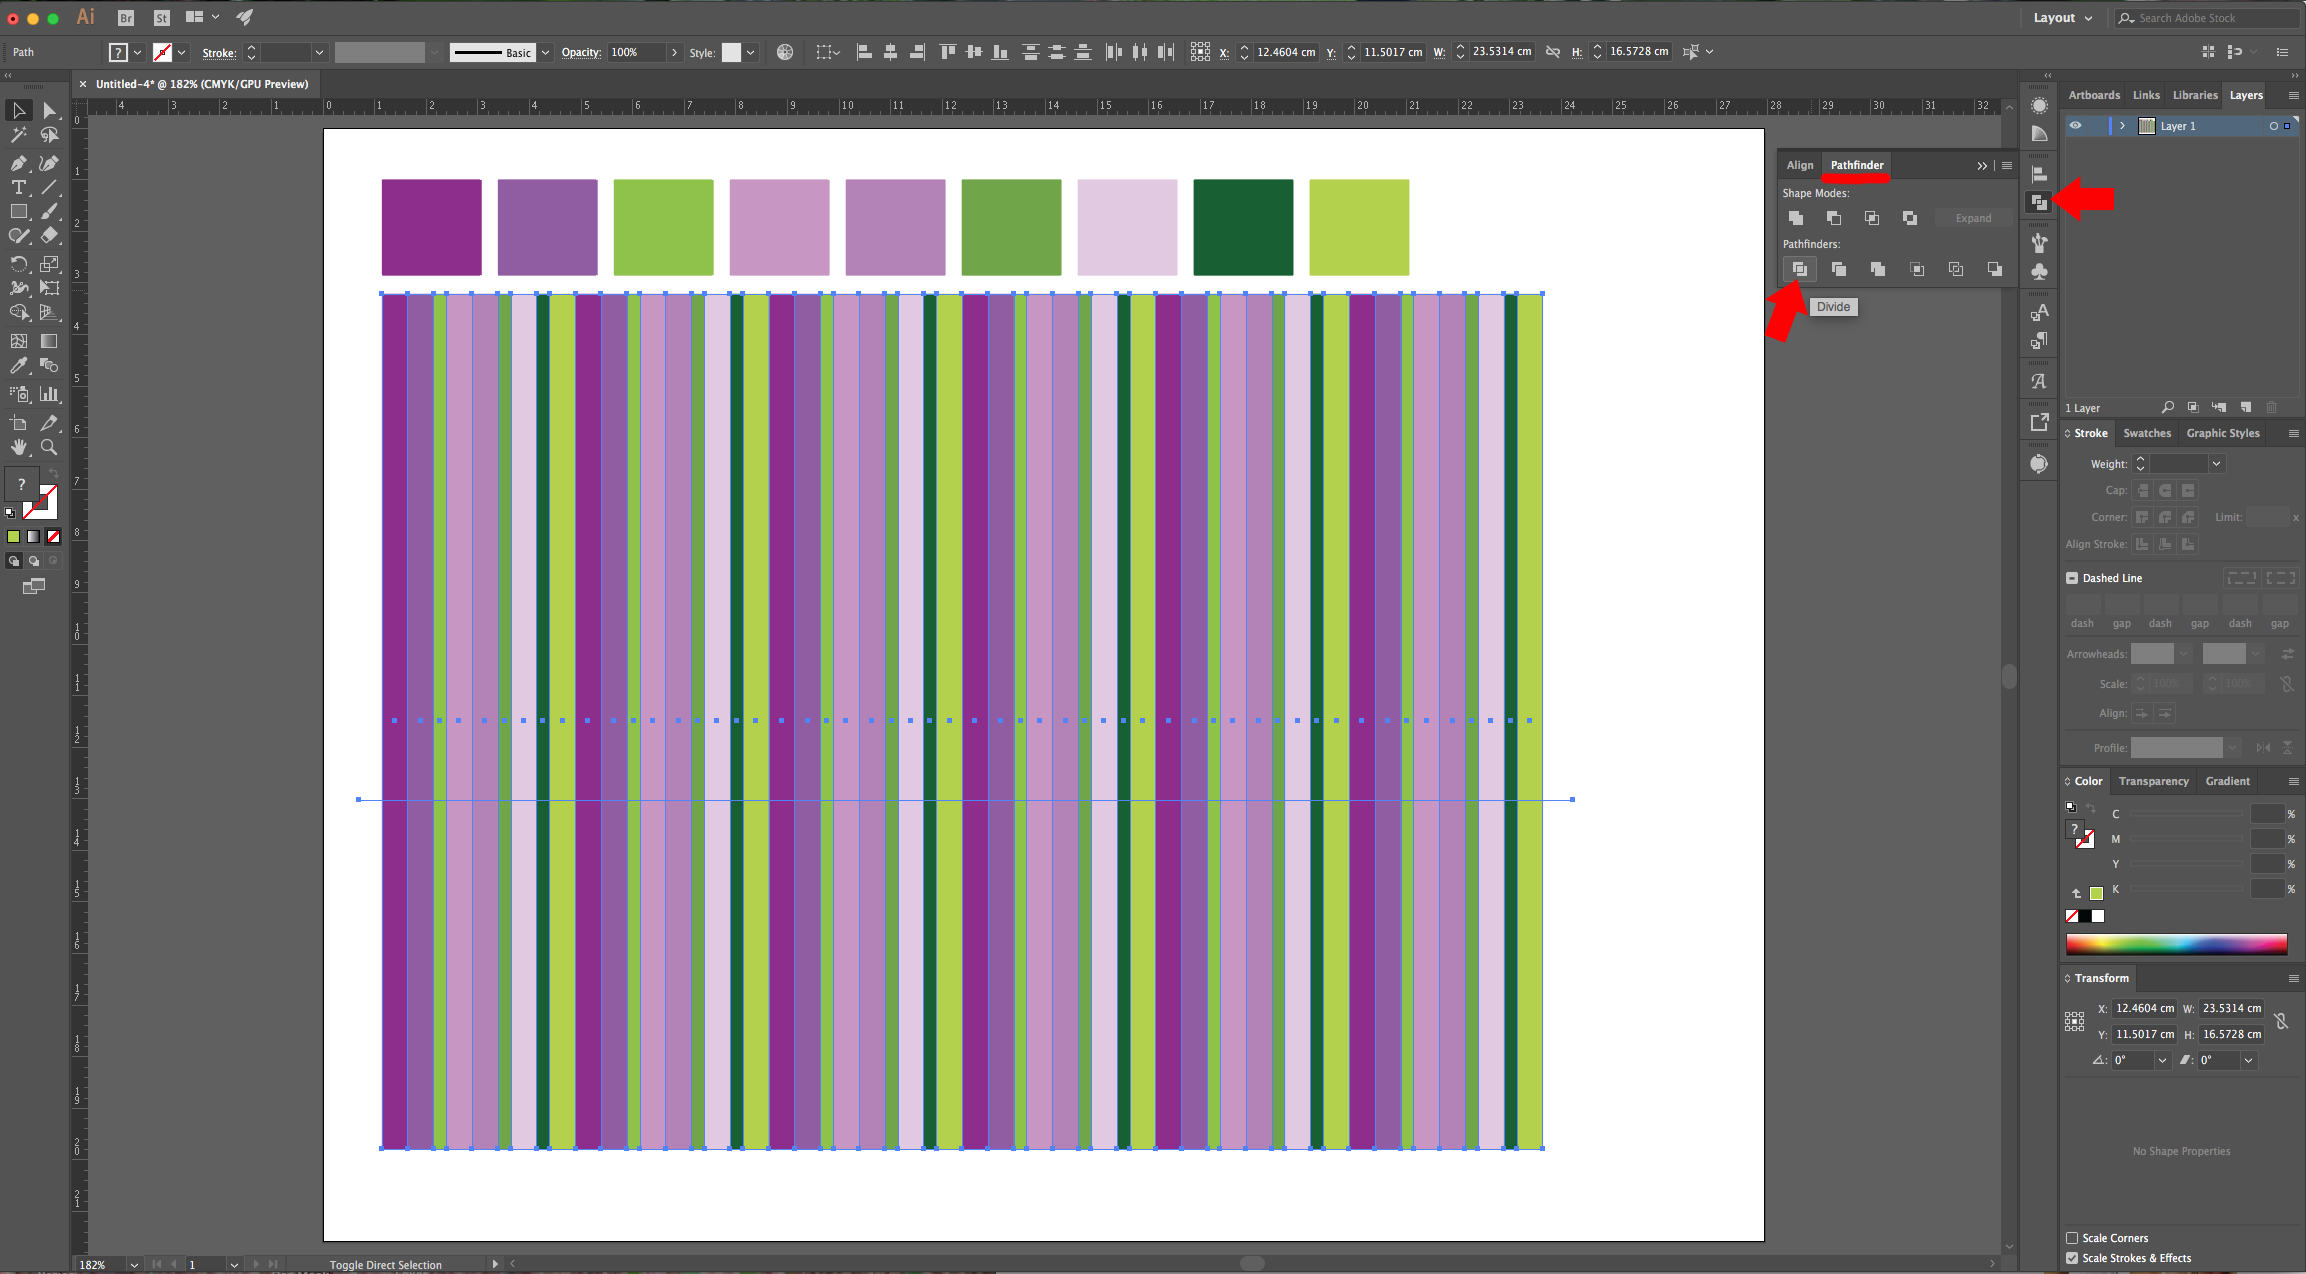
9 - Select the “Pattern” and “Line”, go to the “Pathfinder Panel” and choose “Divide” to cut your pattern where the line was.
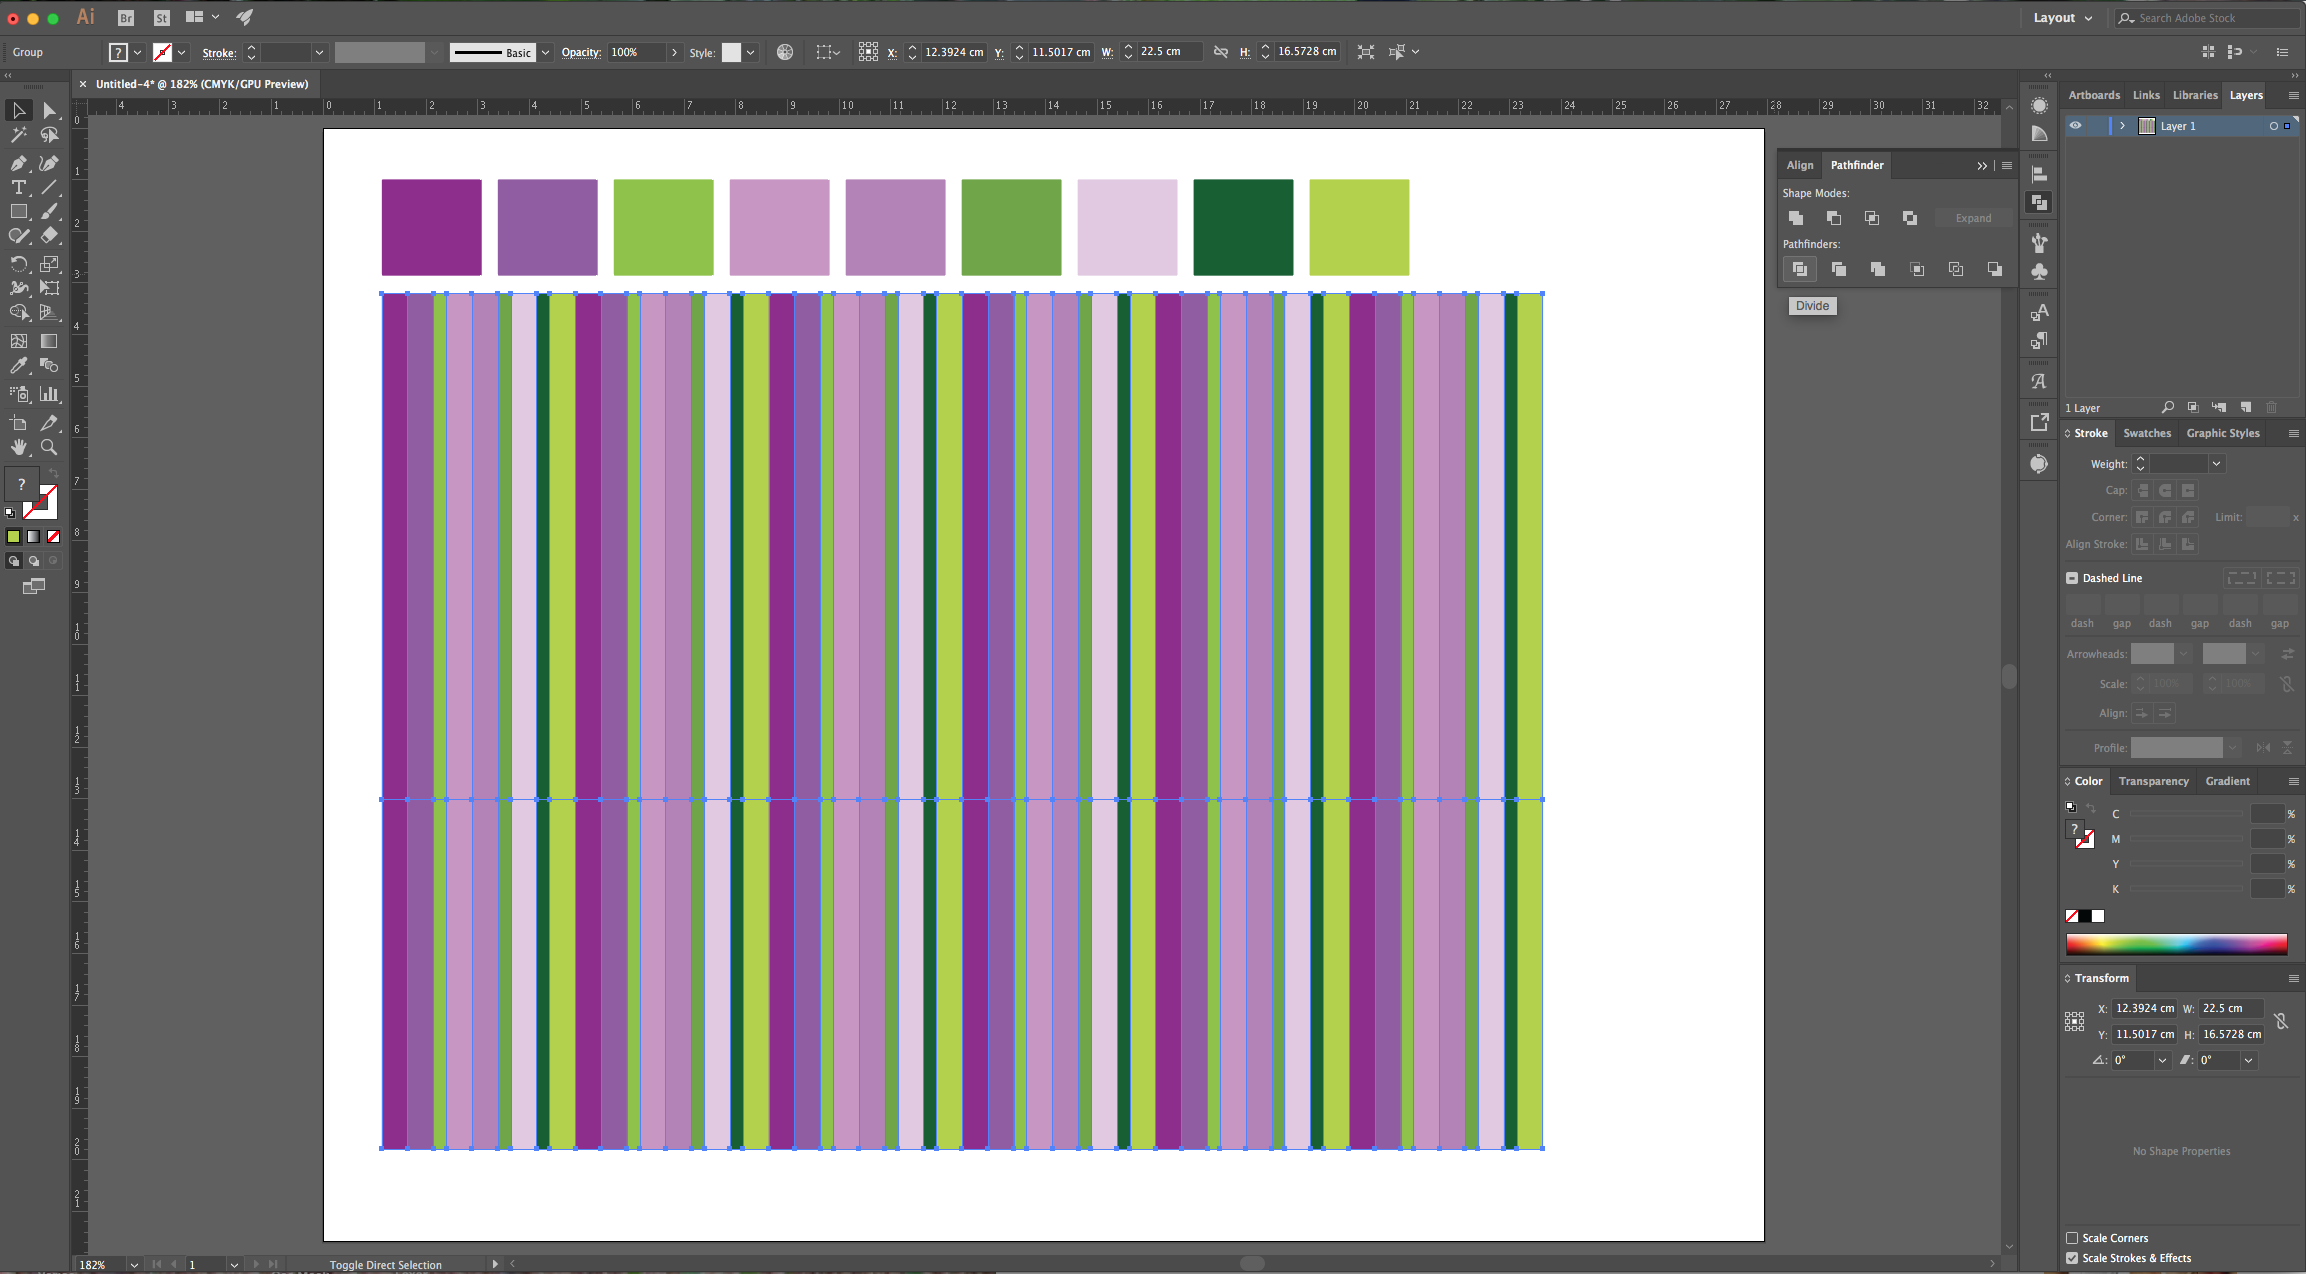
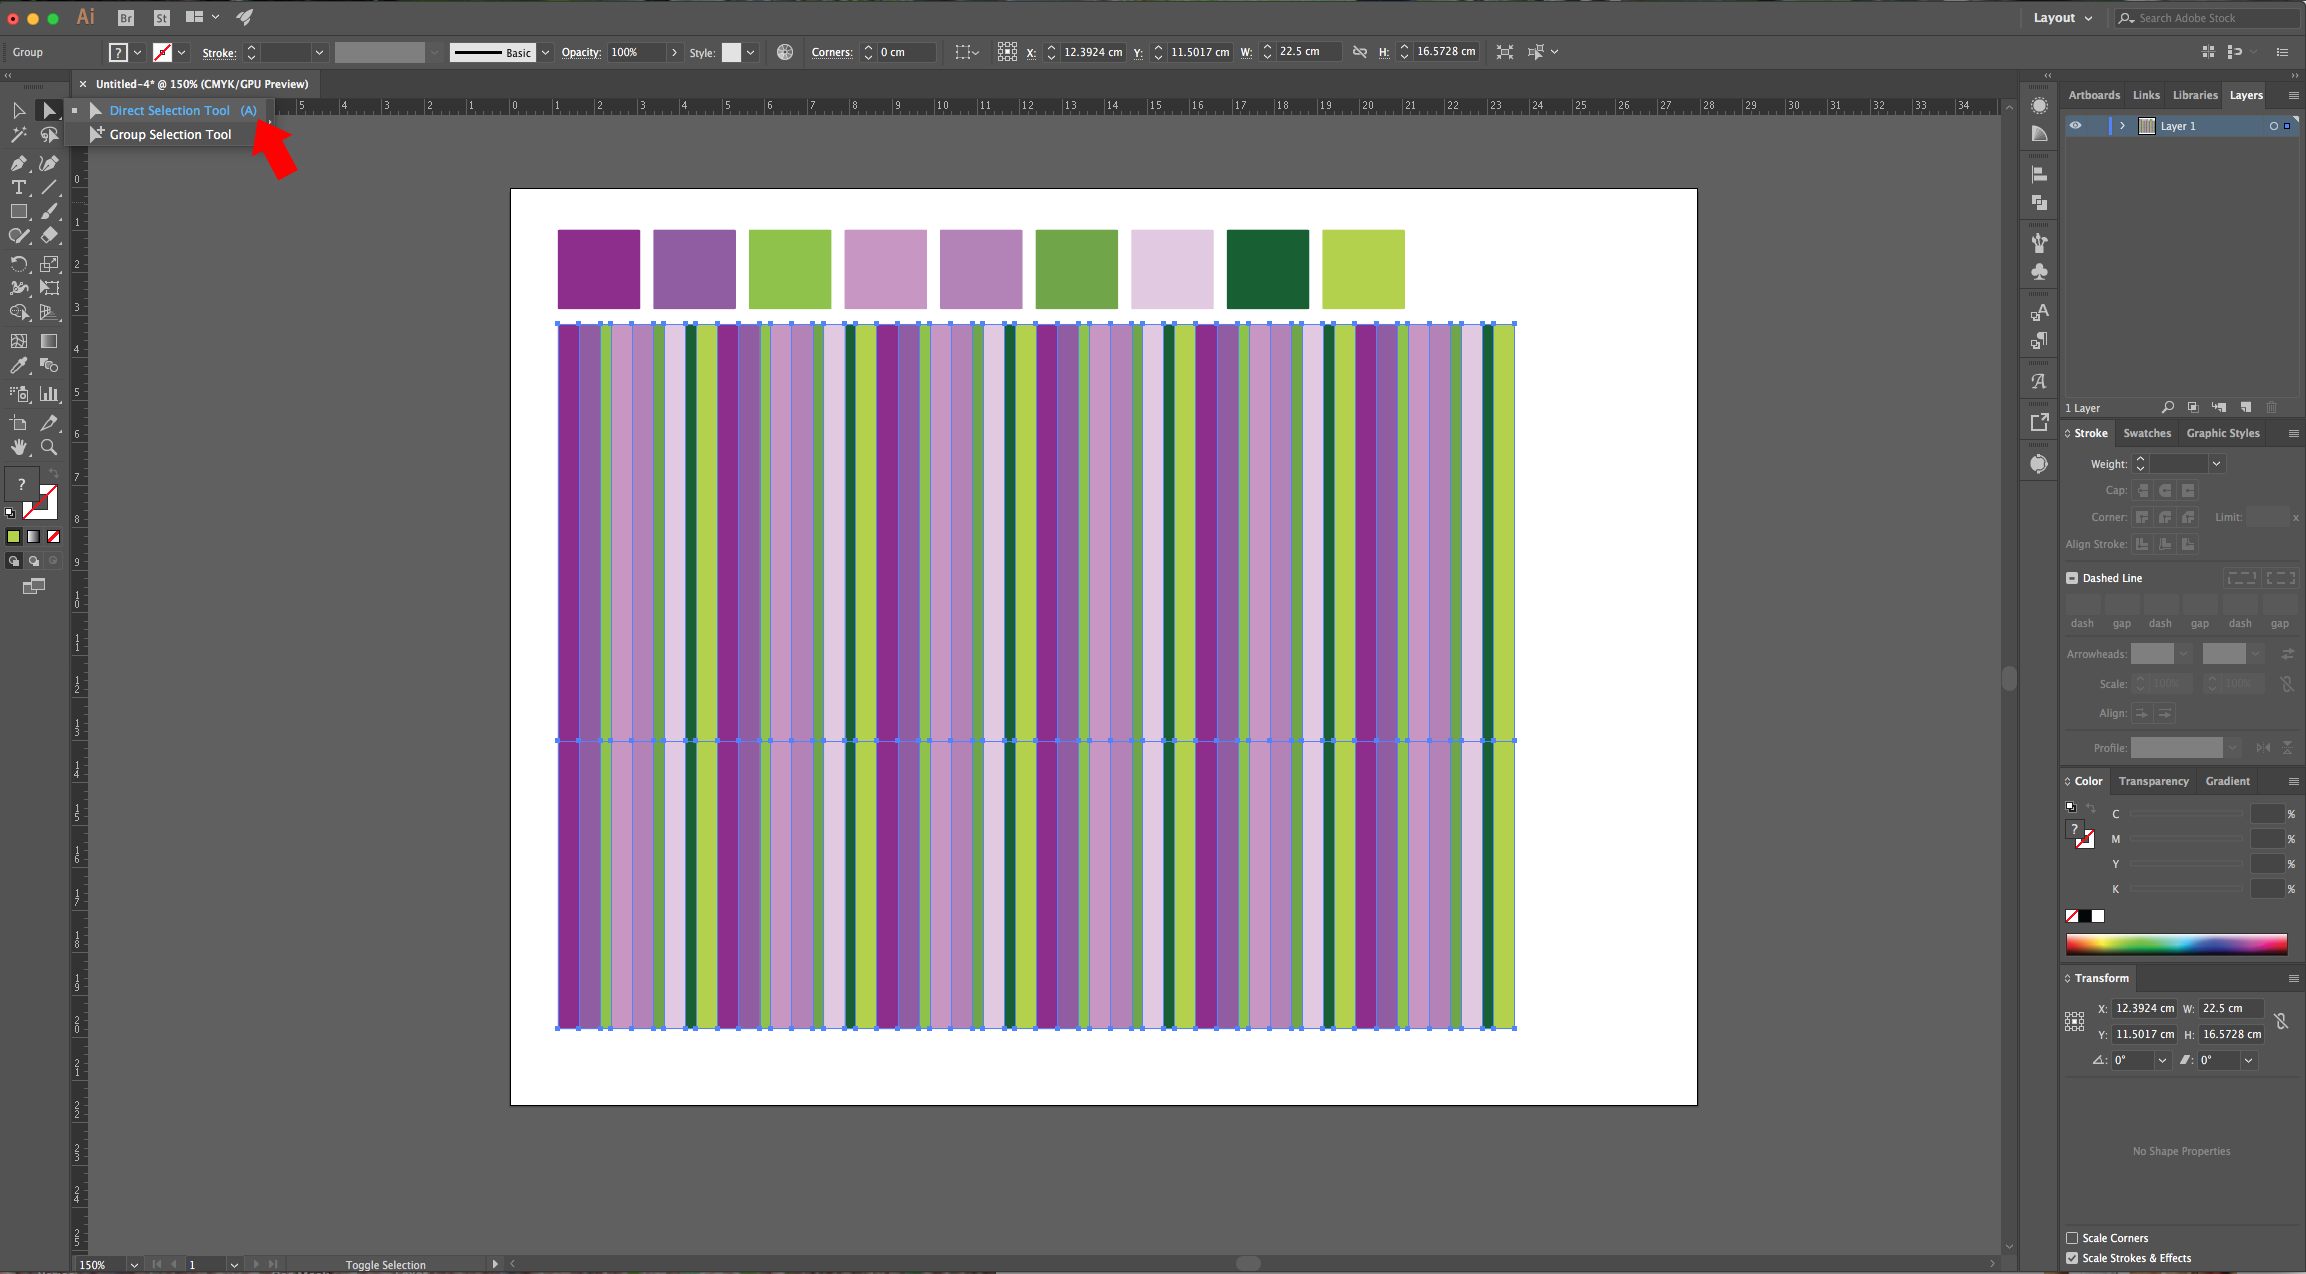
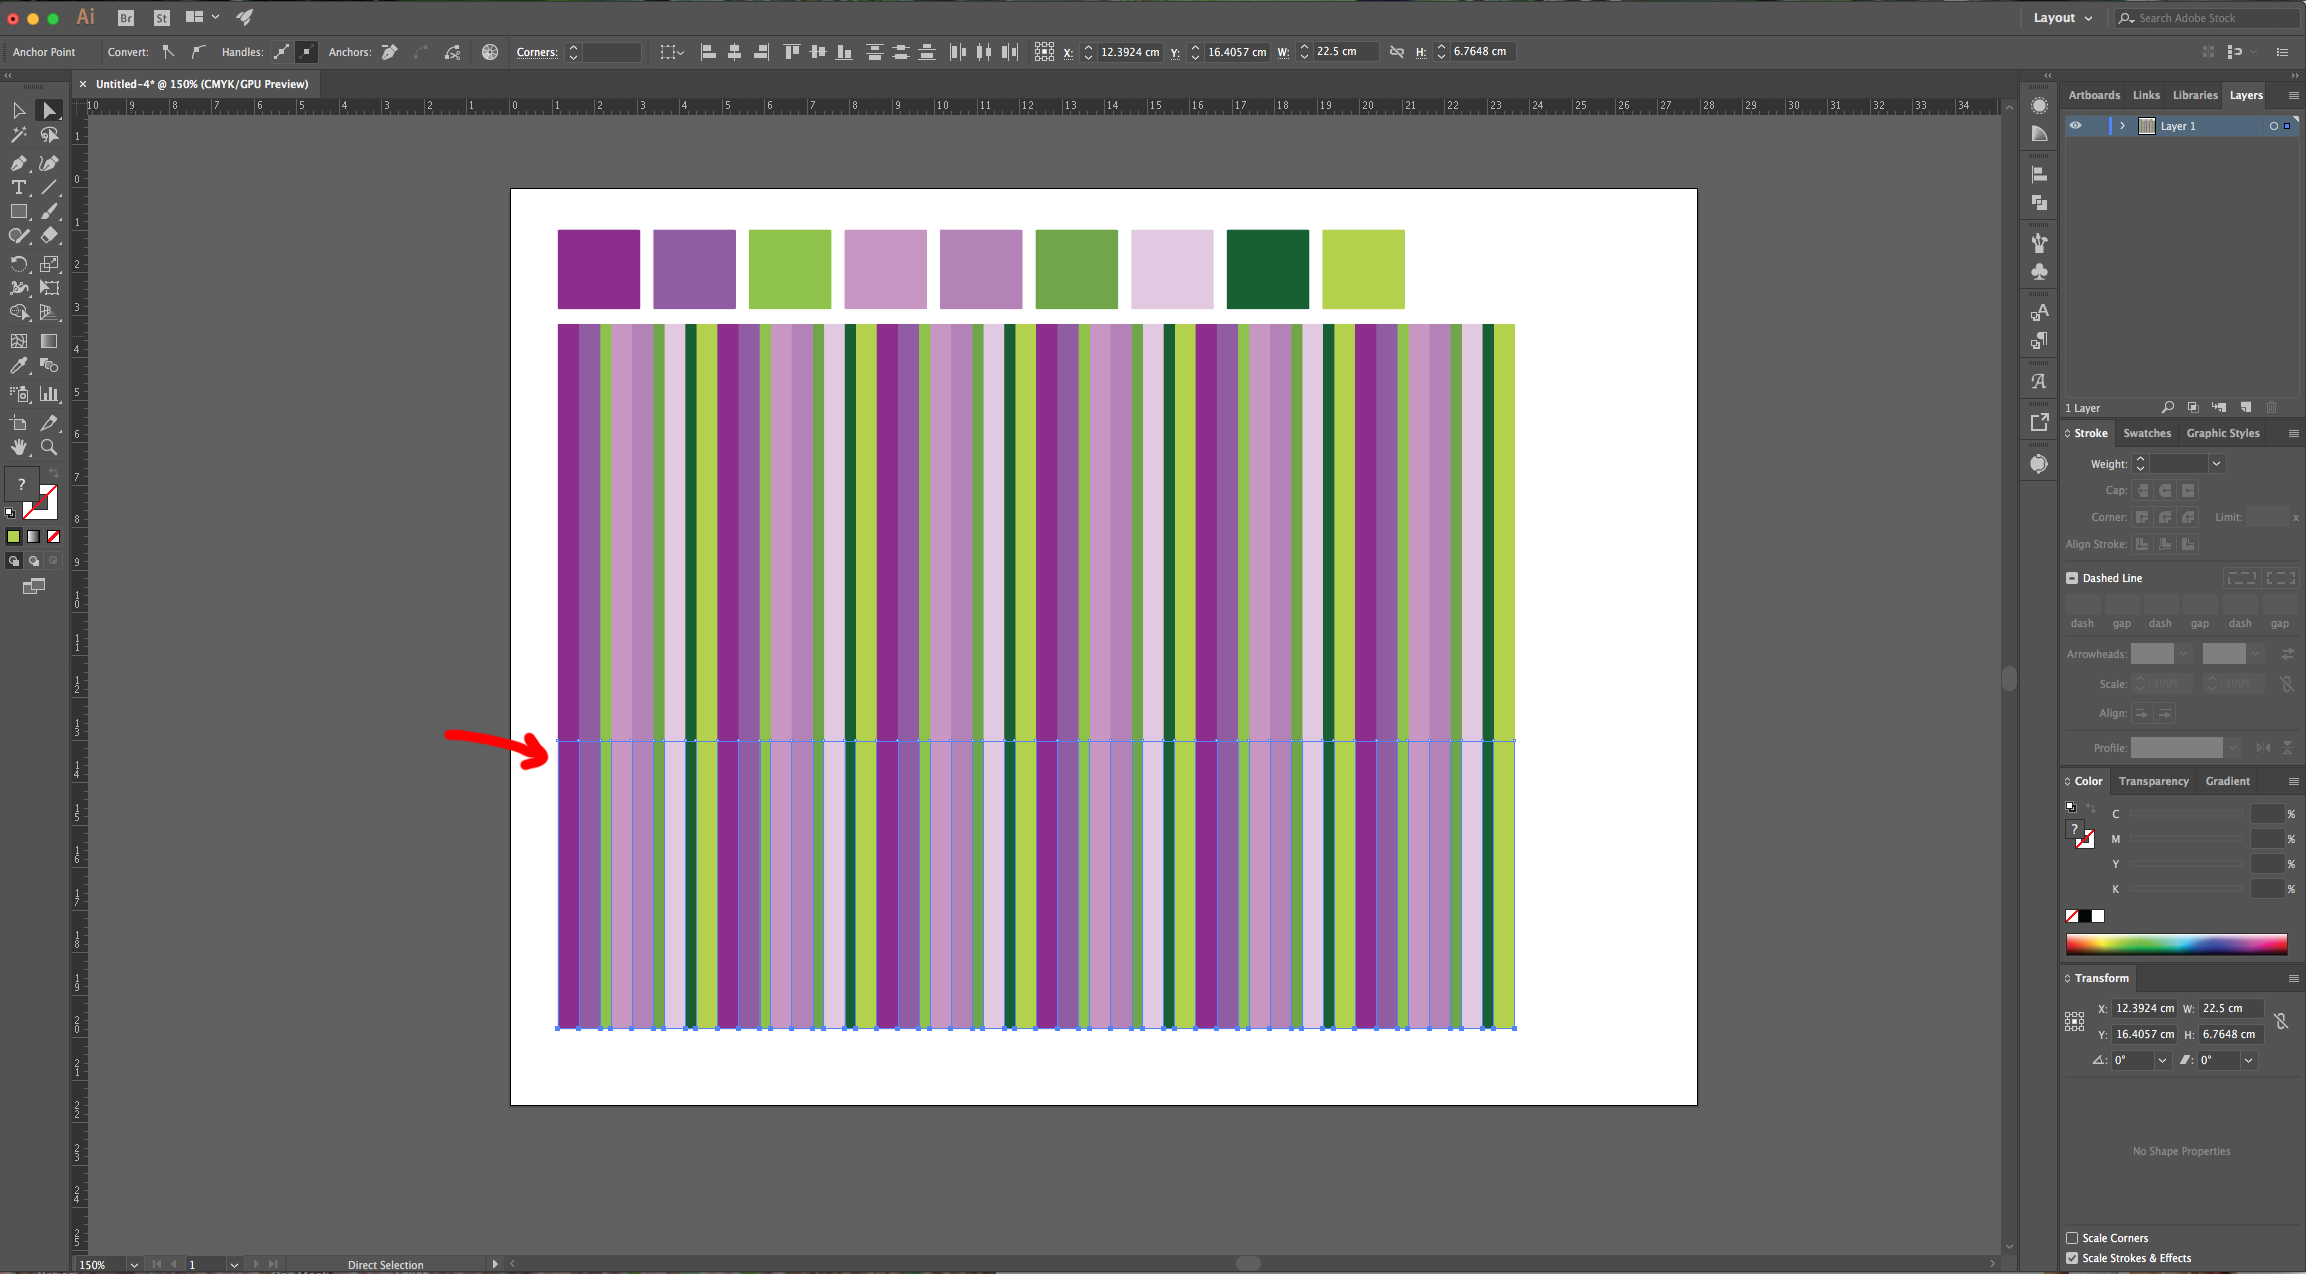
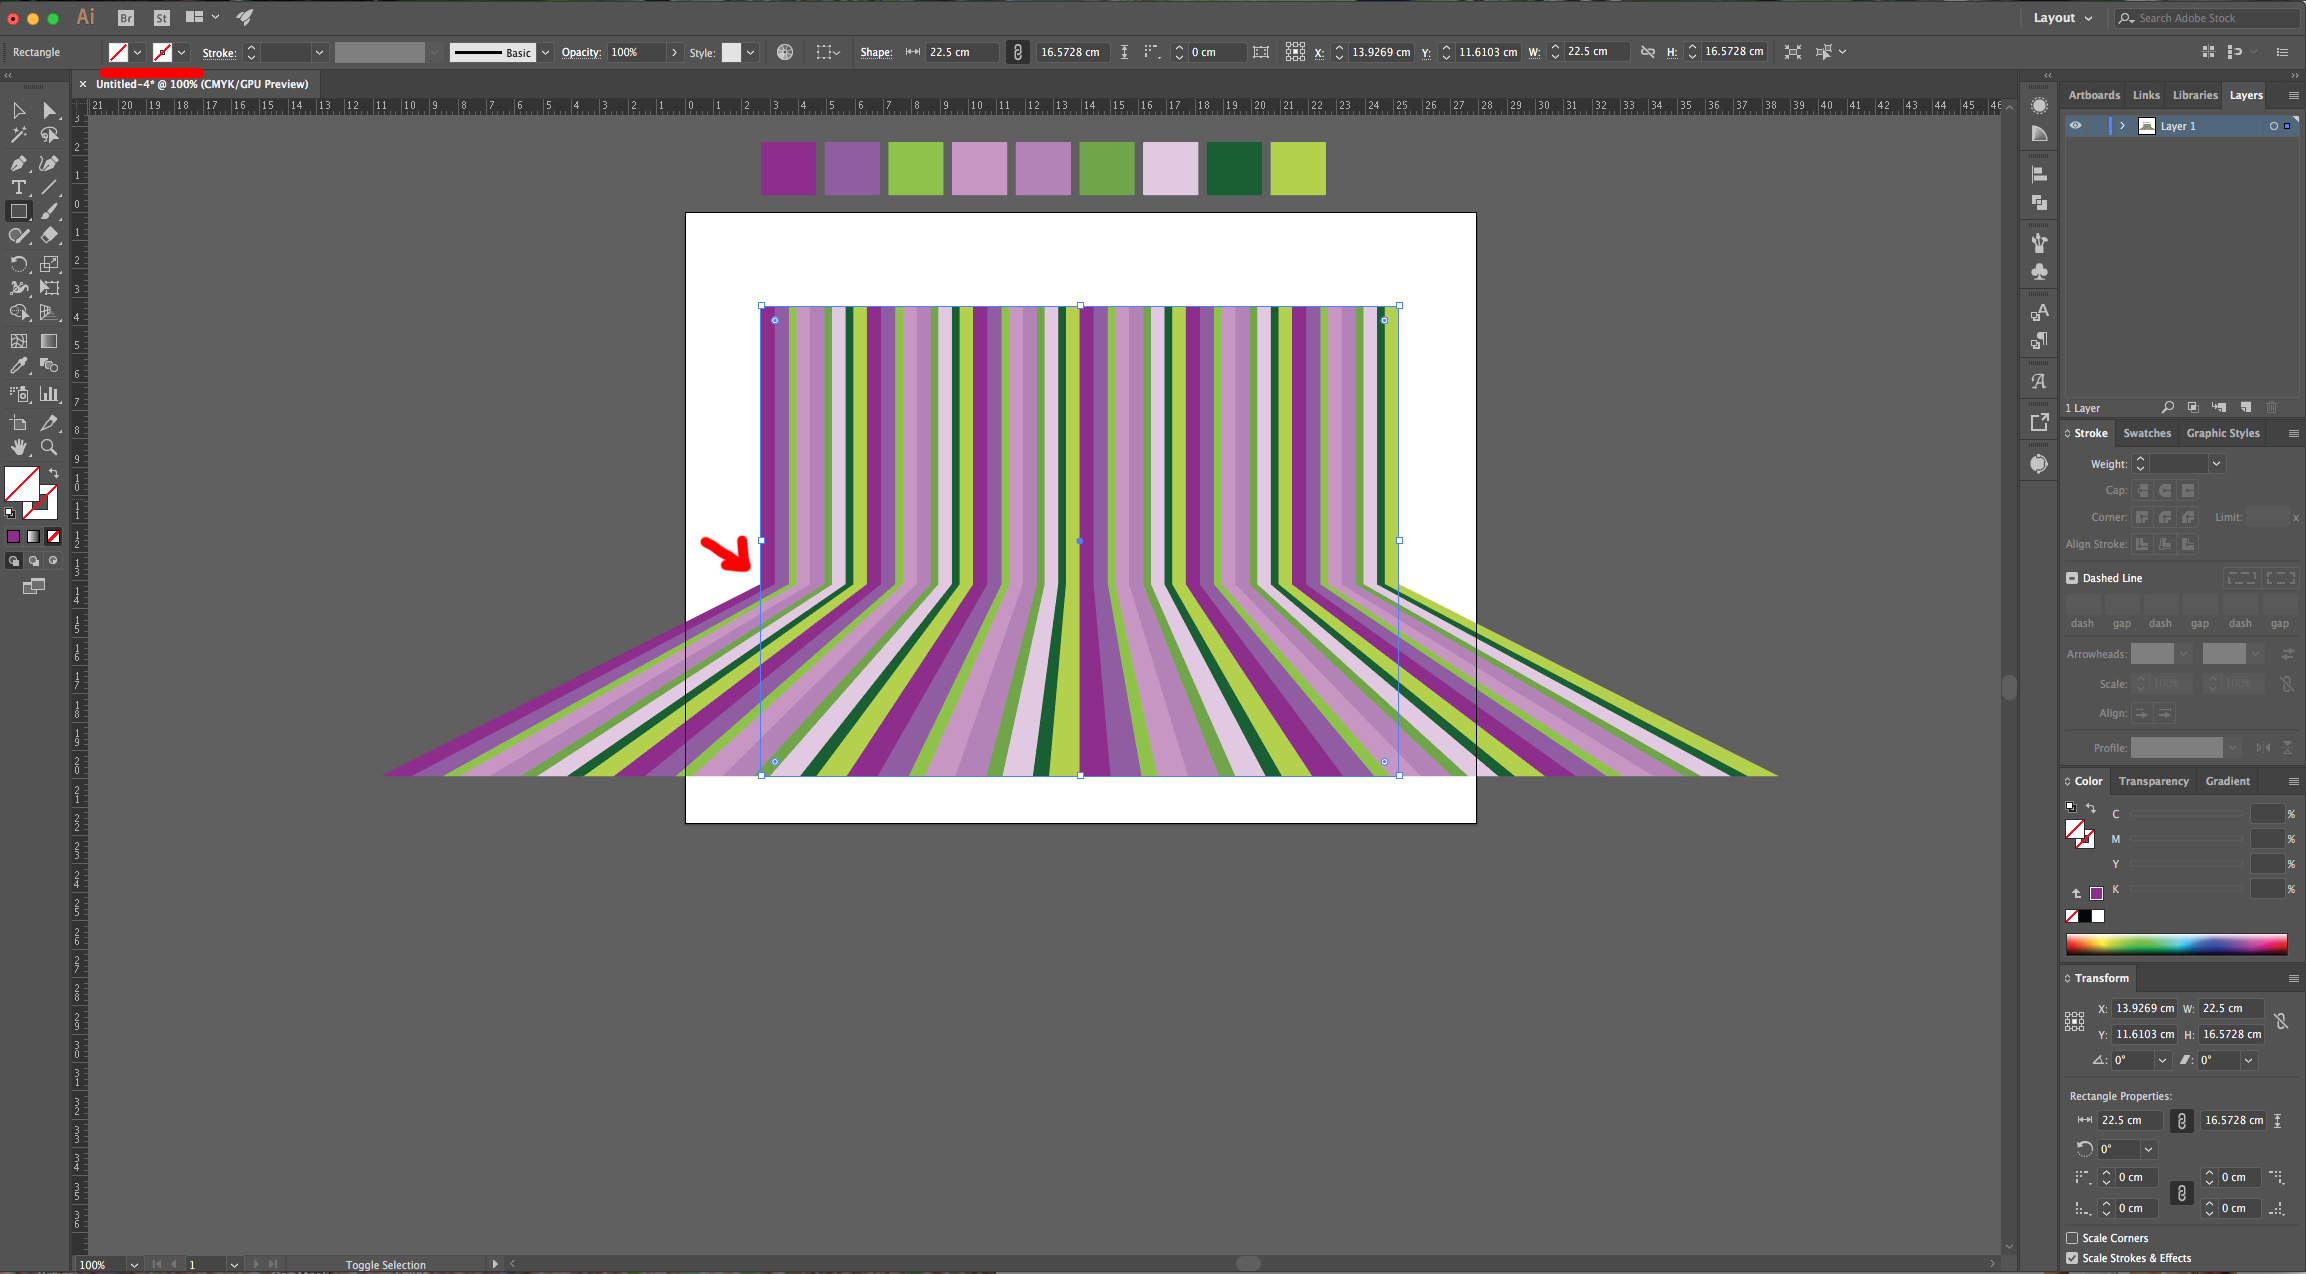
10 - Use the “Direct Selection Tool” (A) to select the bottom part of the Pattern.
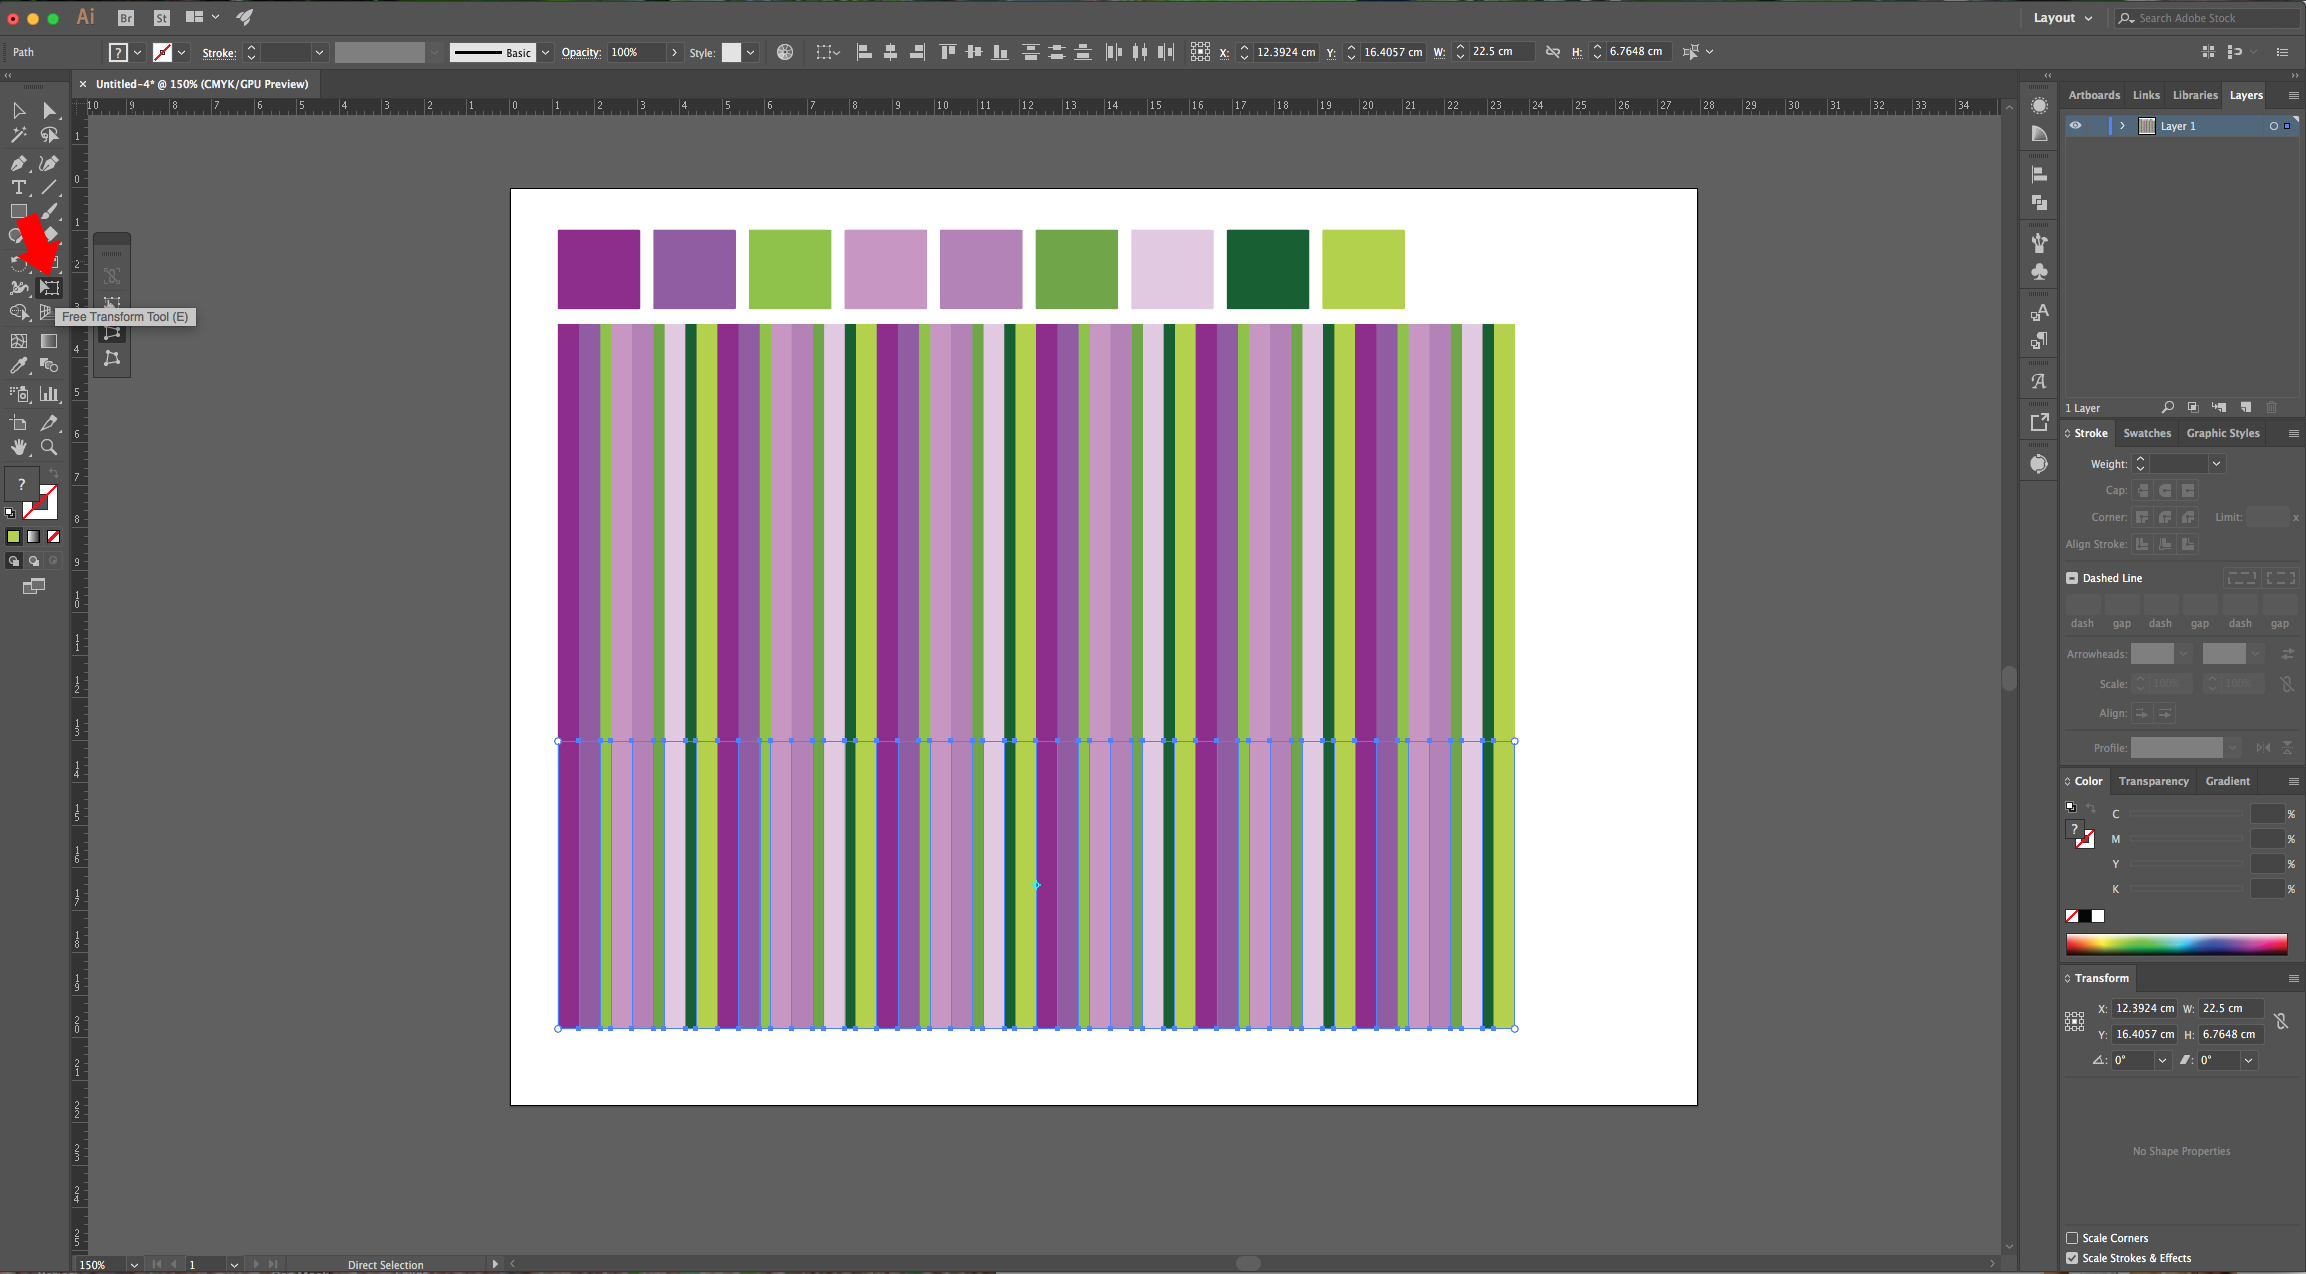
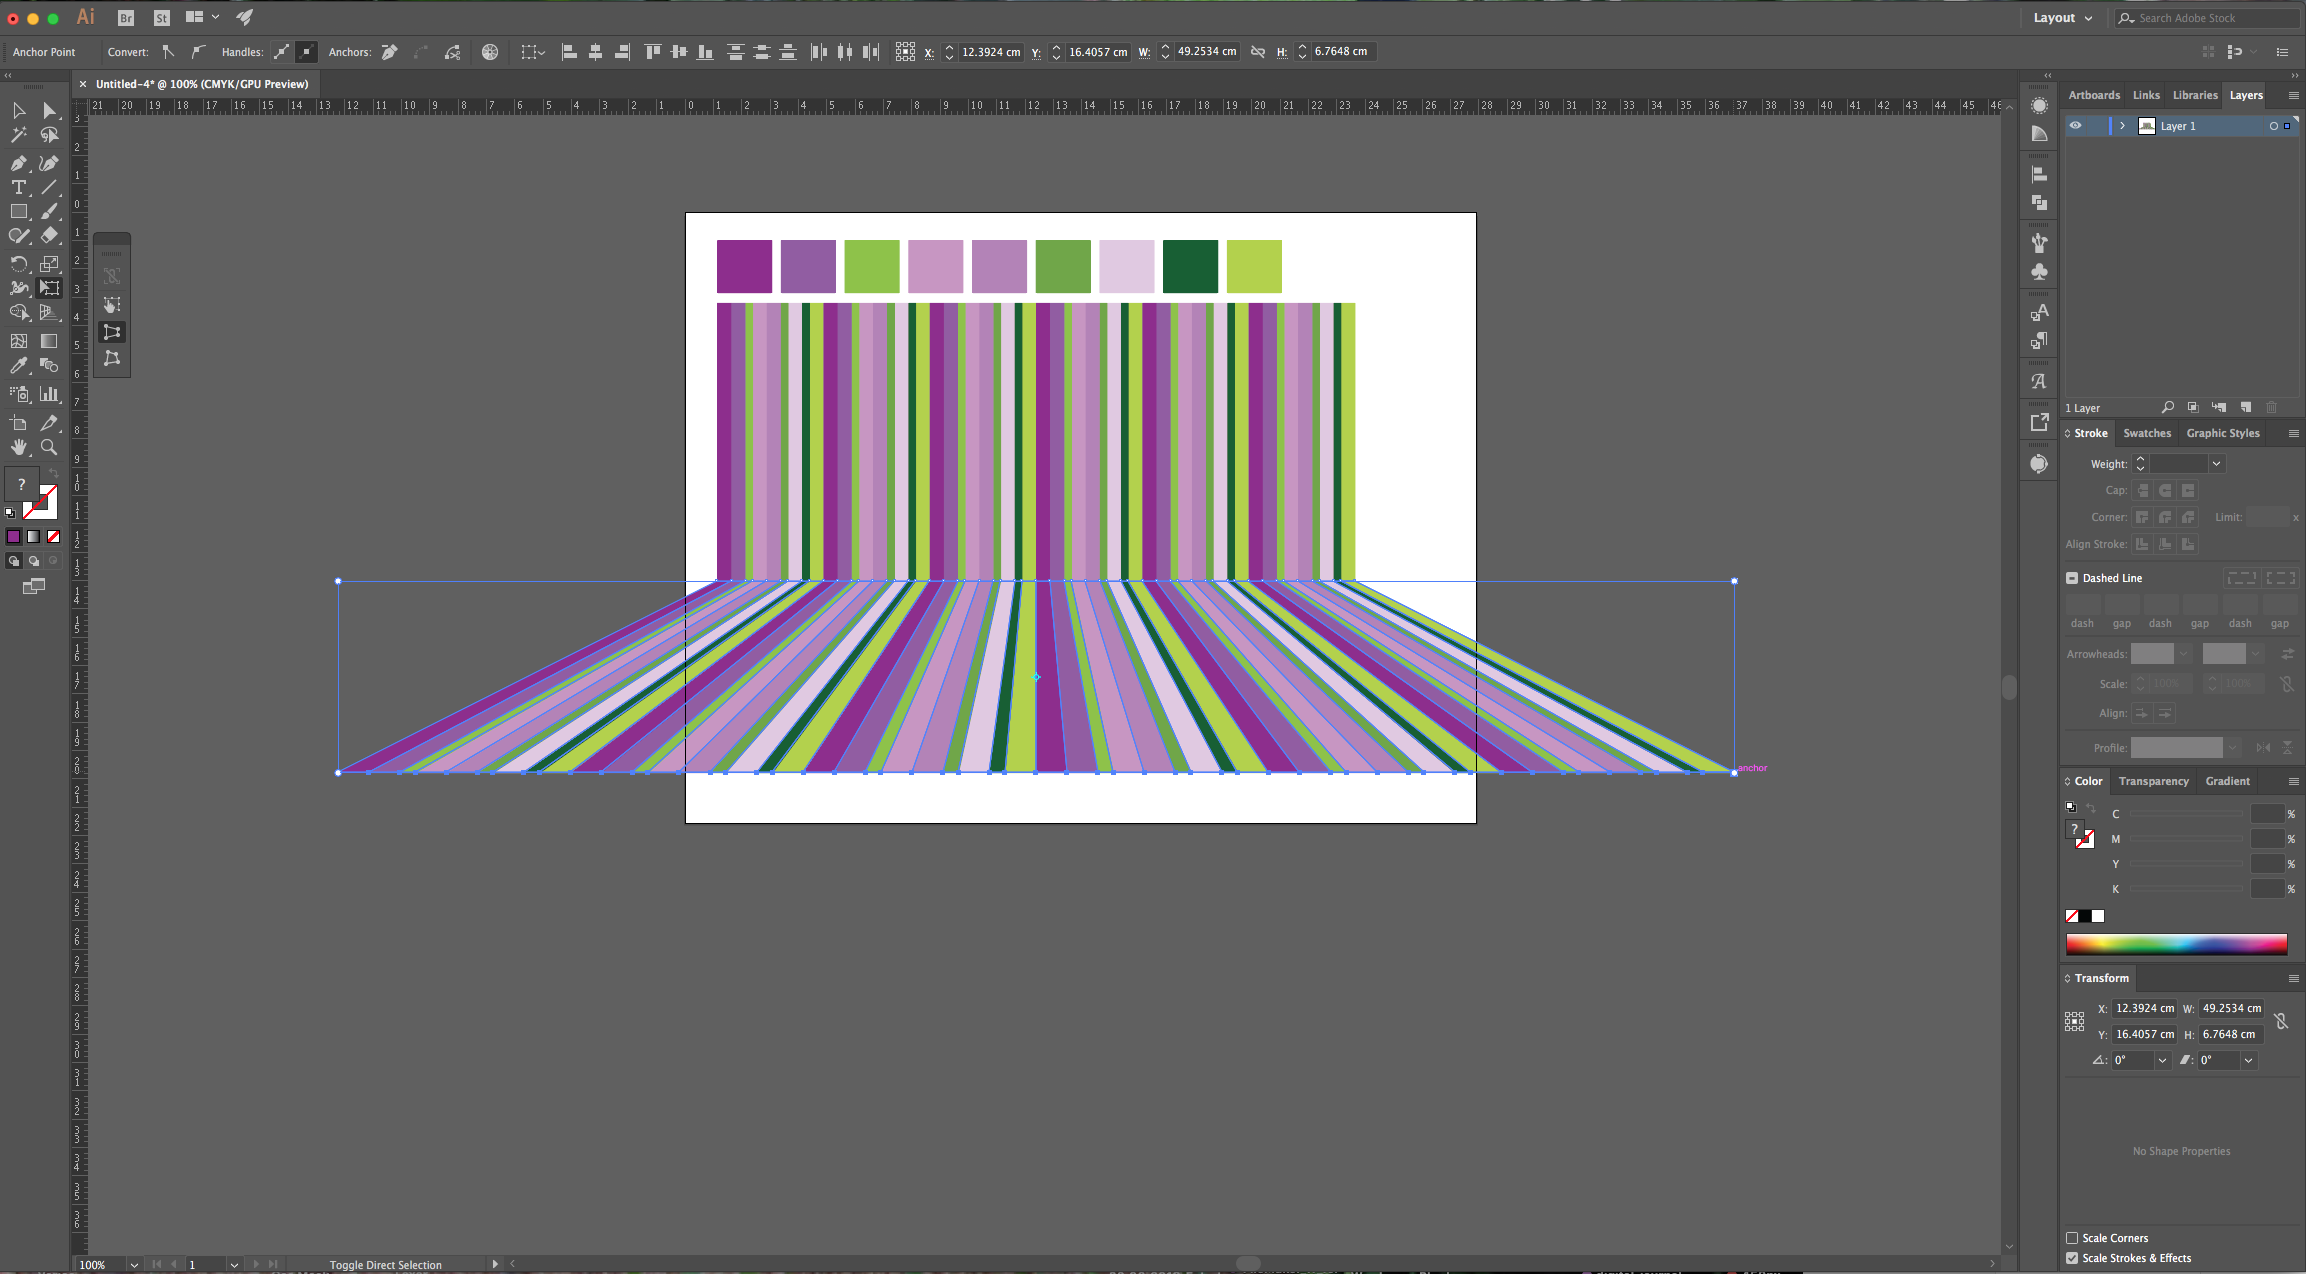
11 - Select the “Free Transform Tool” (E), choose “Perspective Distort” and drag one of the bottom corners of the Pattern Up and to the side. The idea is to make it look like a “Wall” and “Floor” in Perspective.

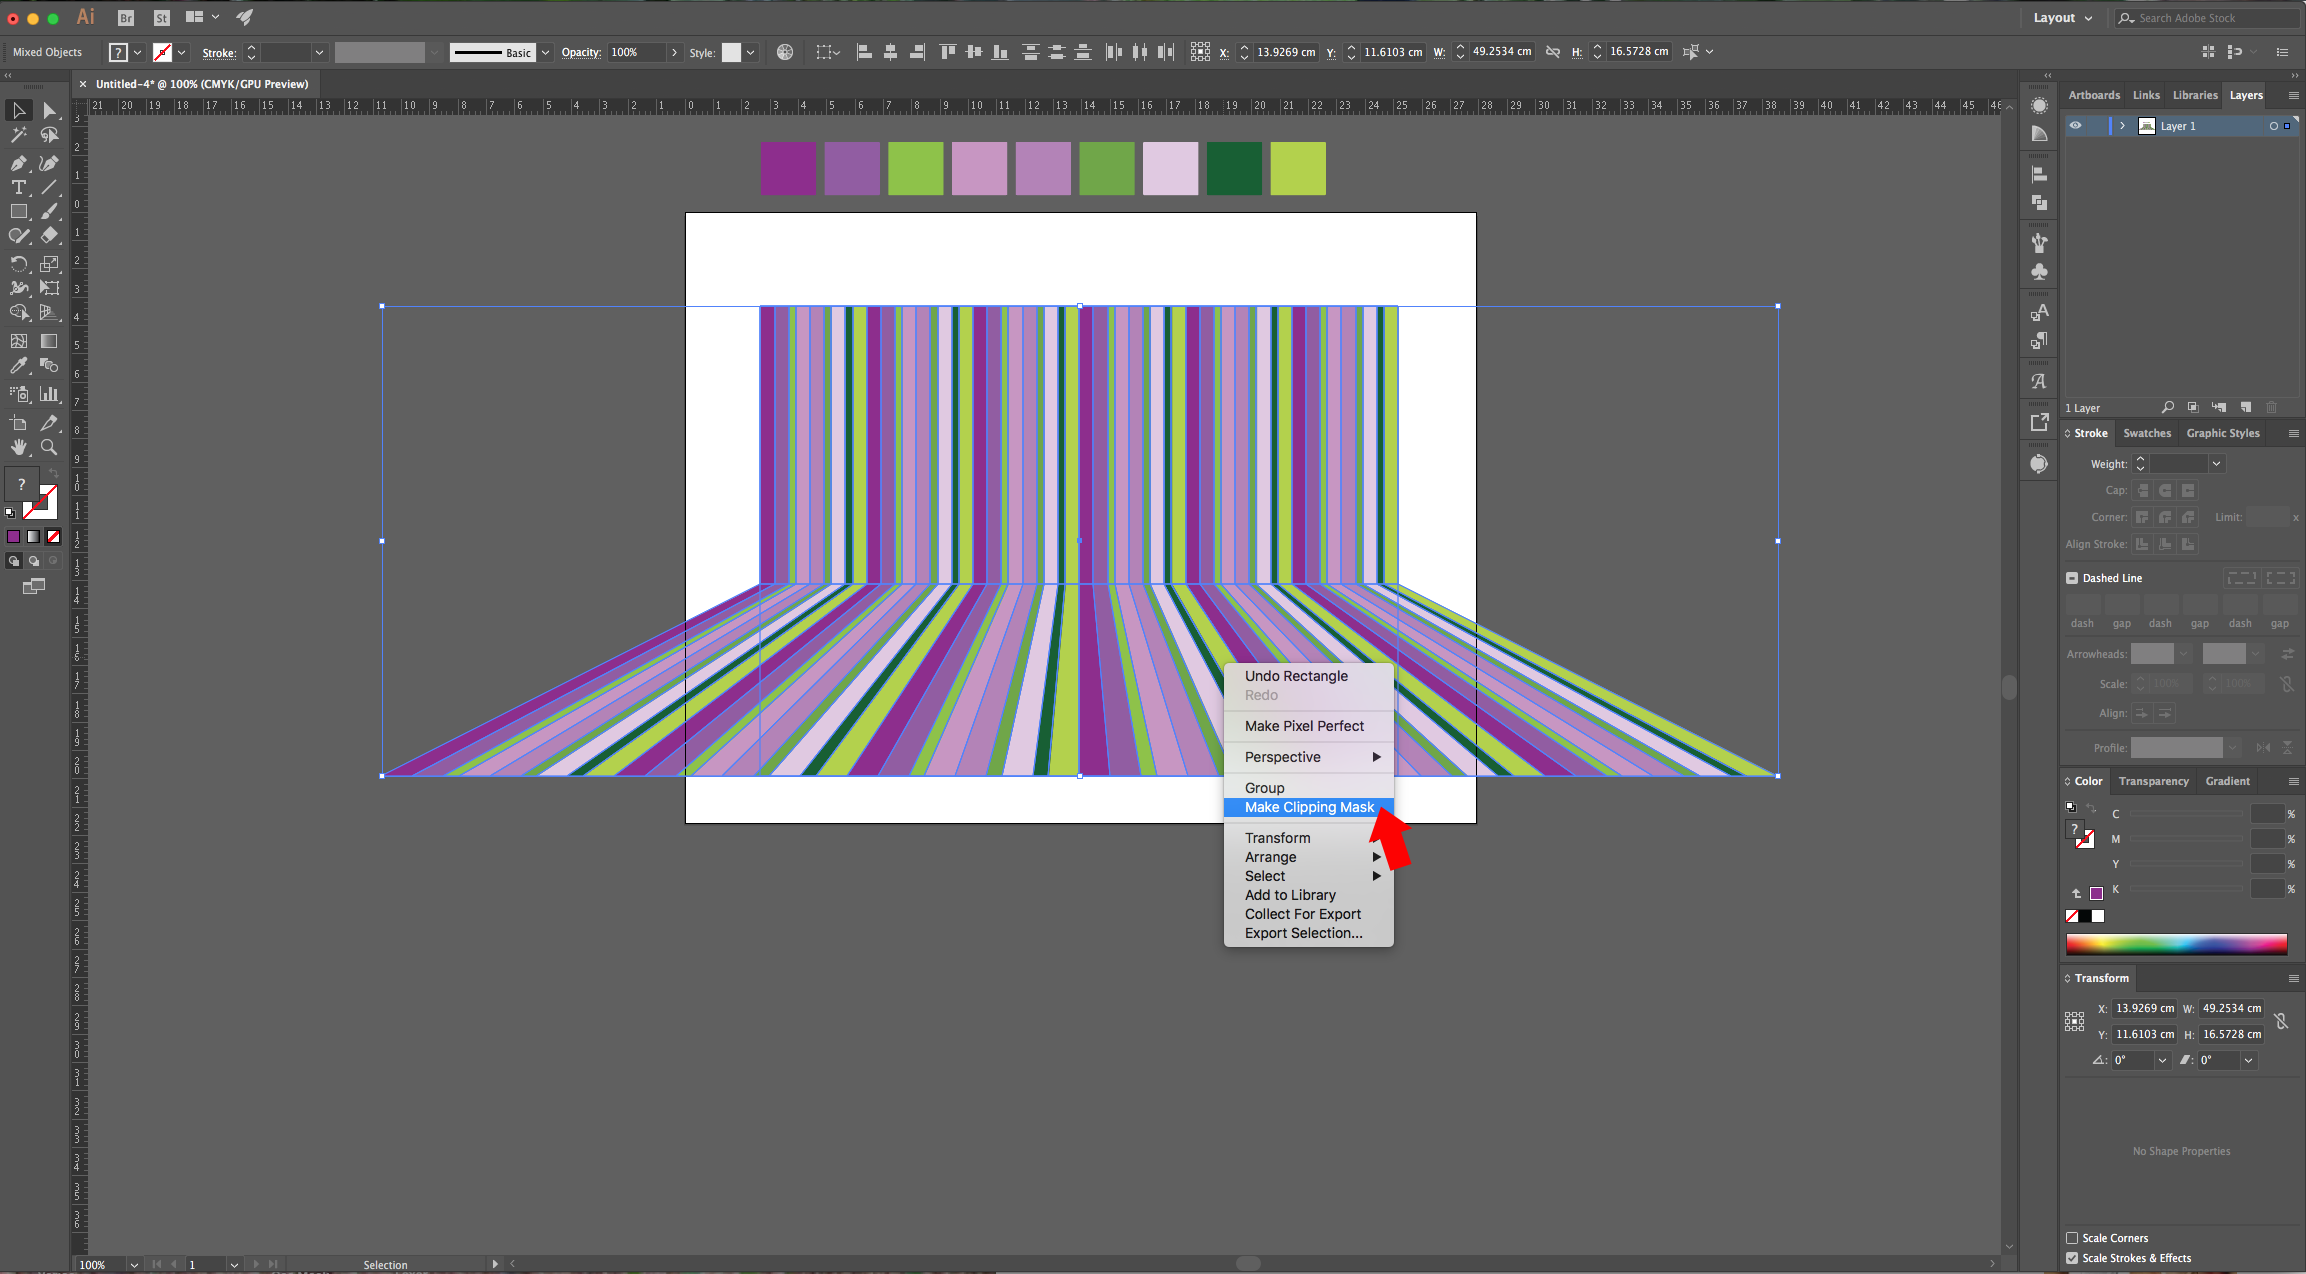
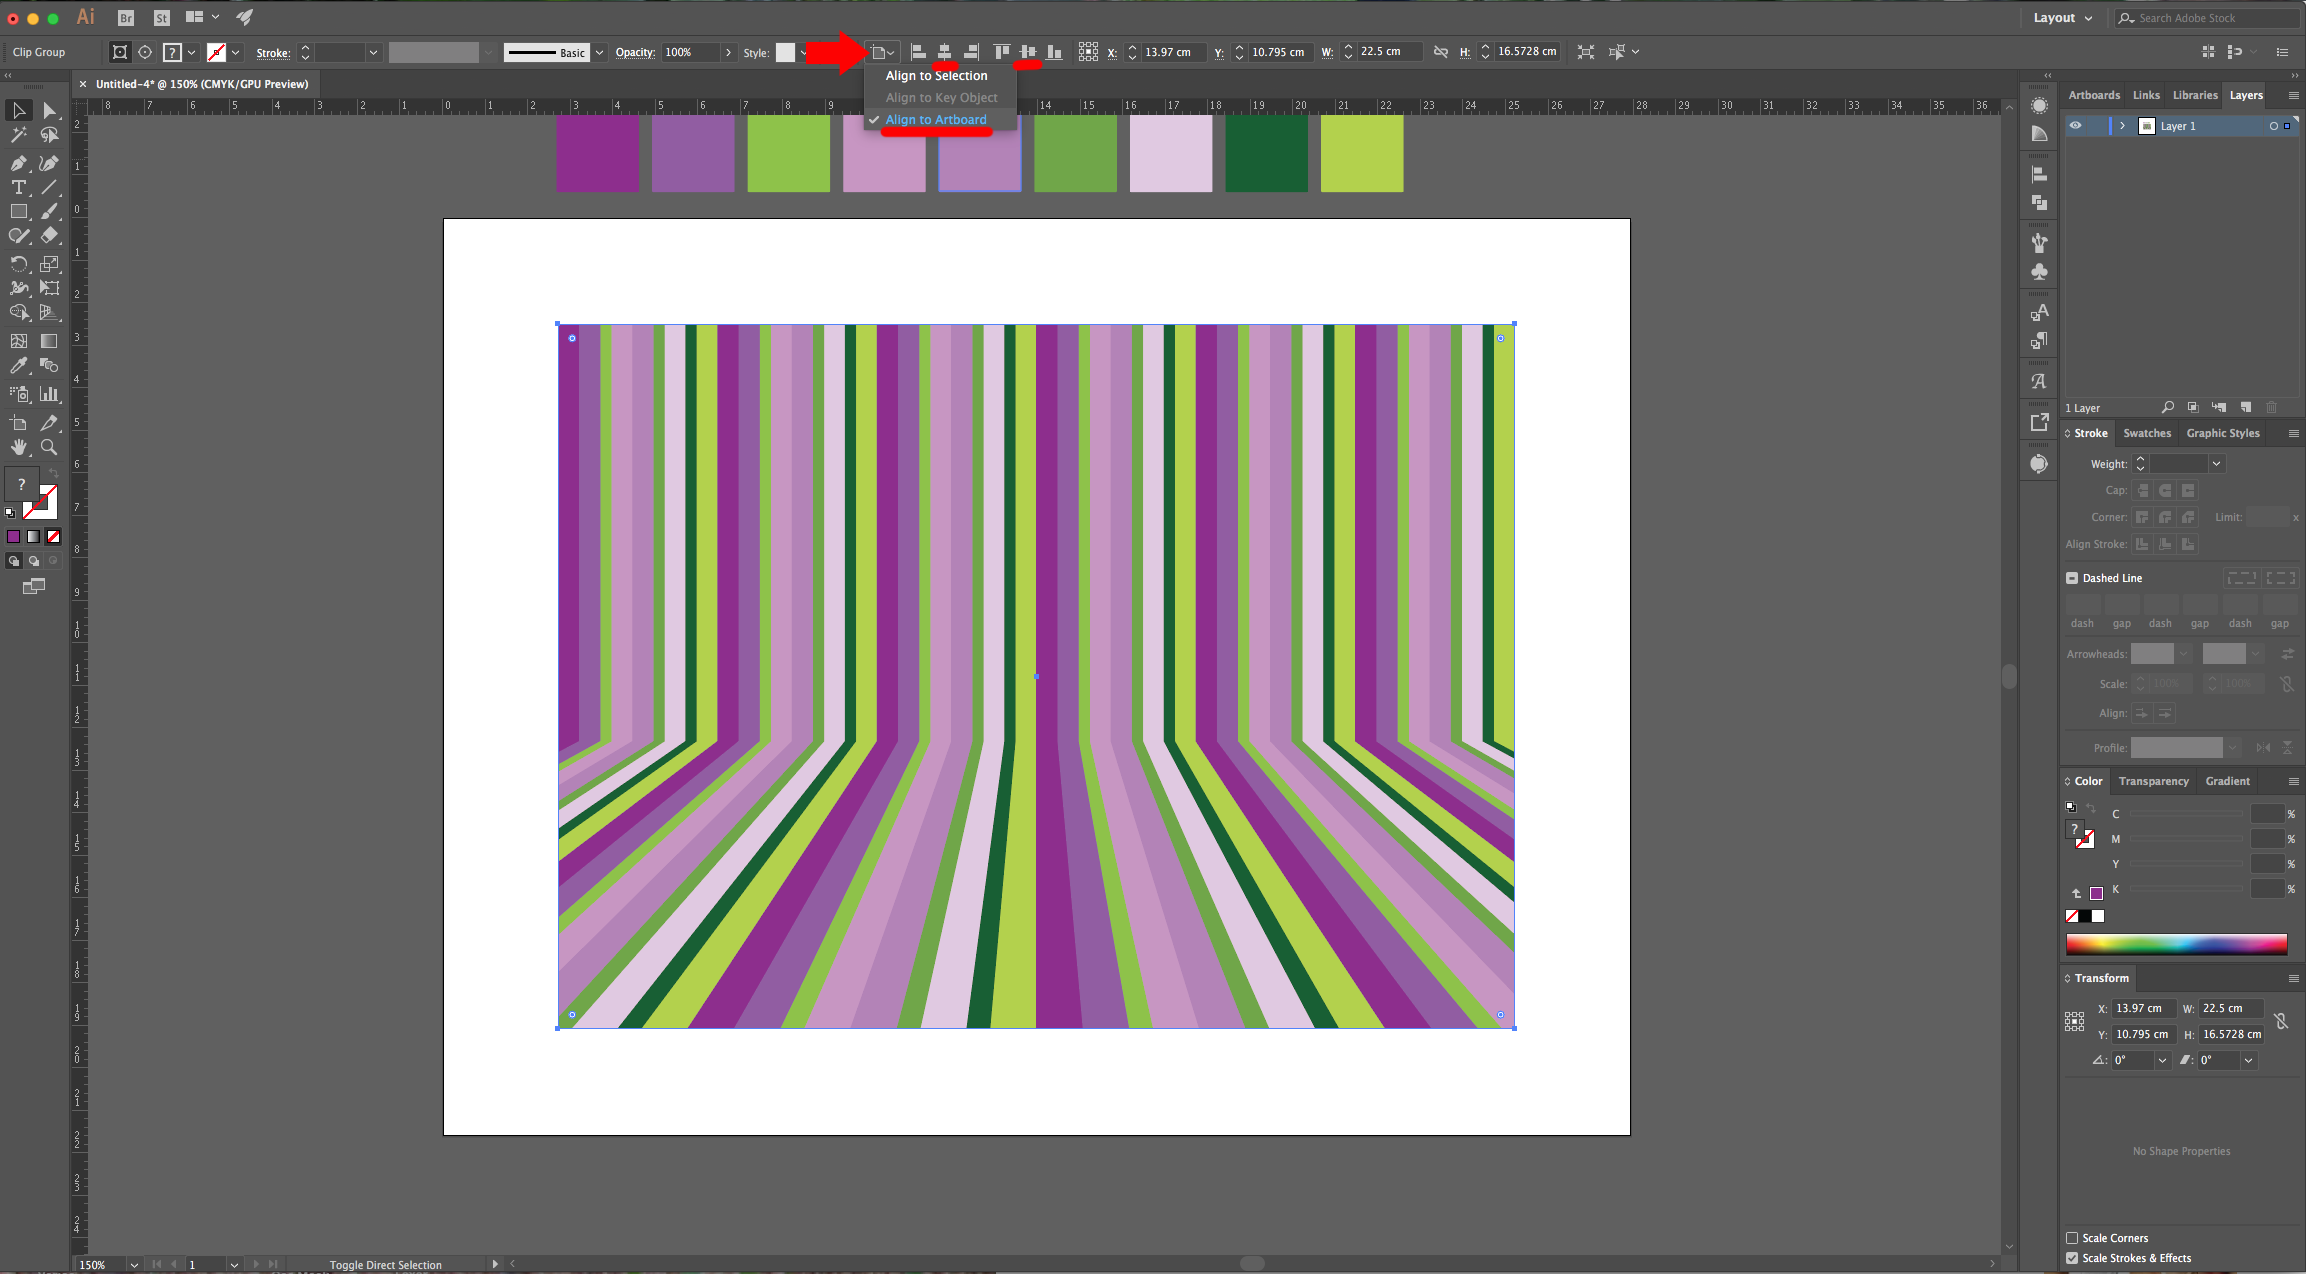
12 - Select the “Rectangle Tool” (M), draw a square on top of your Pattern with “NO Fill and Stroke” colors. Make it the same “Width” and “Height” as your original Pattern. Select both, right-click on top and chose “Make Clipping Mask”. Center it using the “Horizontal and Vertical Align Center” options on your Top Menu and make sure that “Align to Artboard” is selected. Or use the same options in the “Align Panel”.
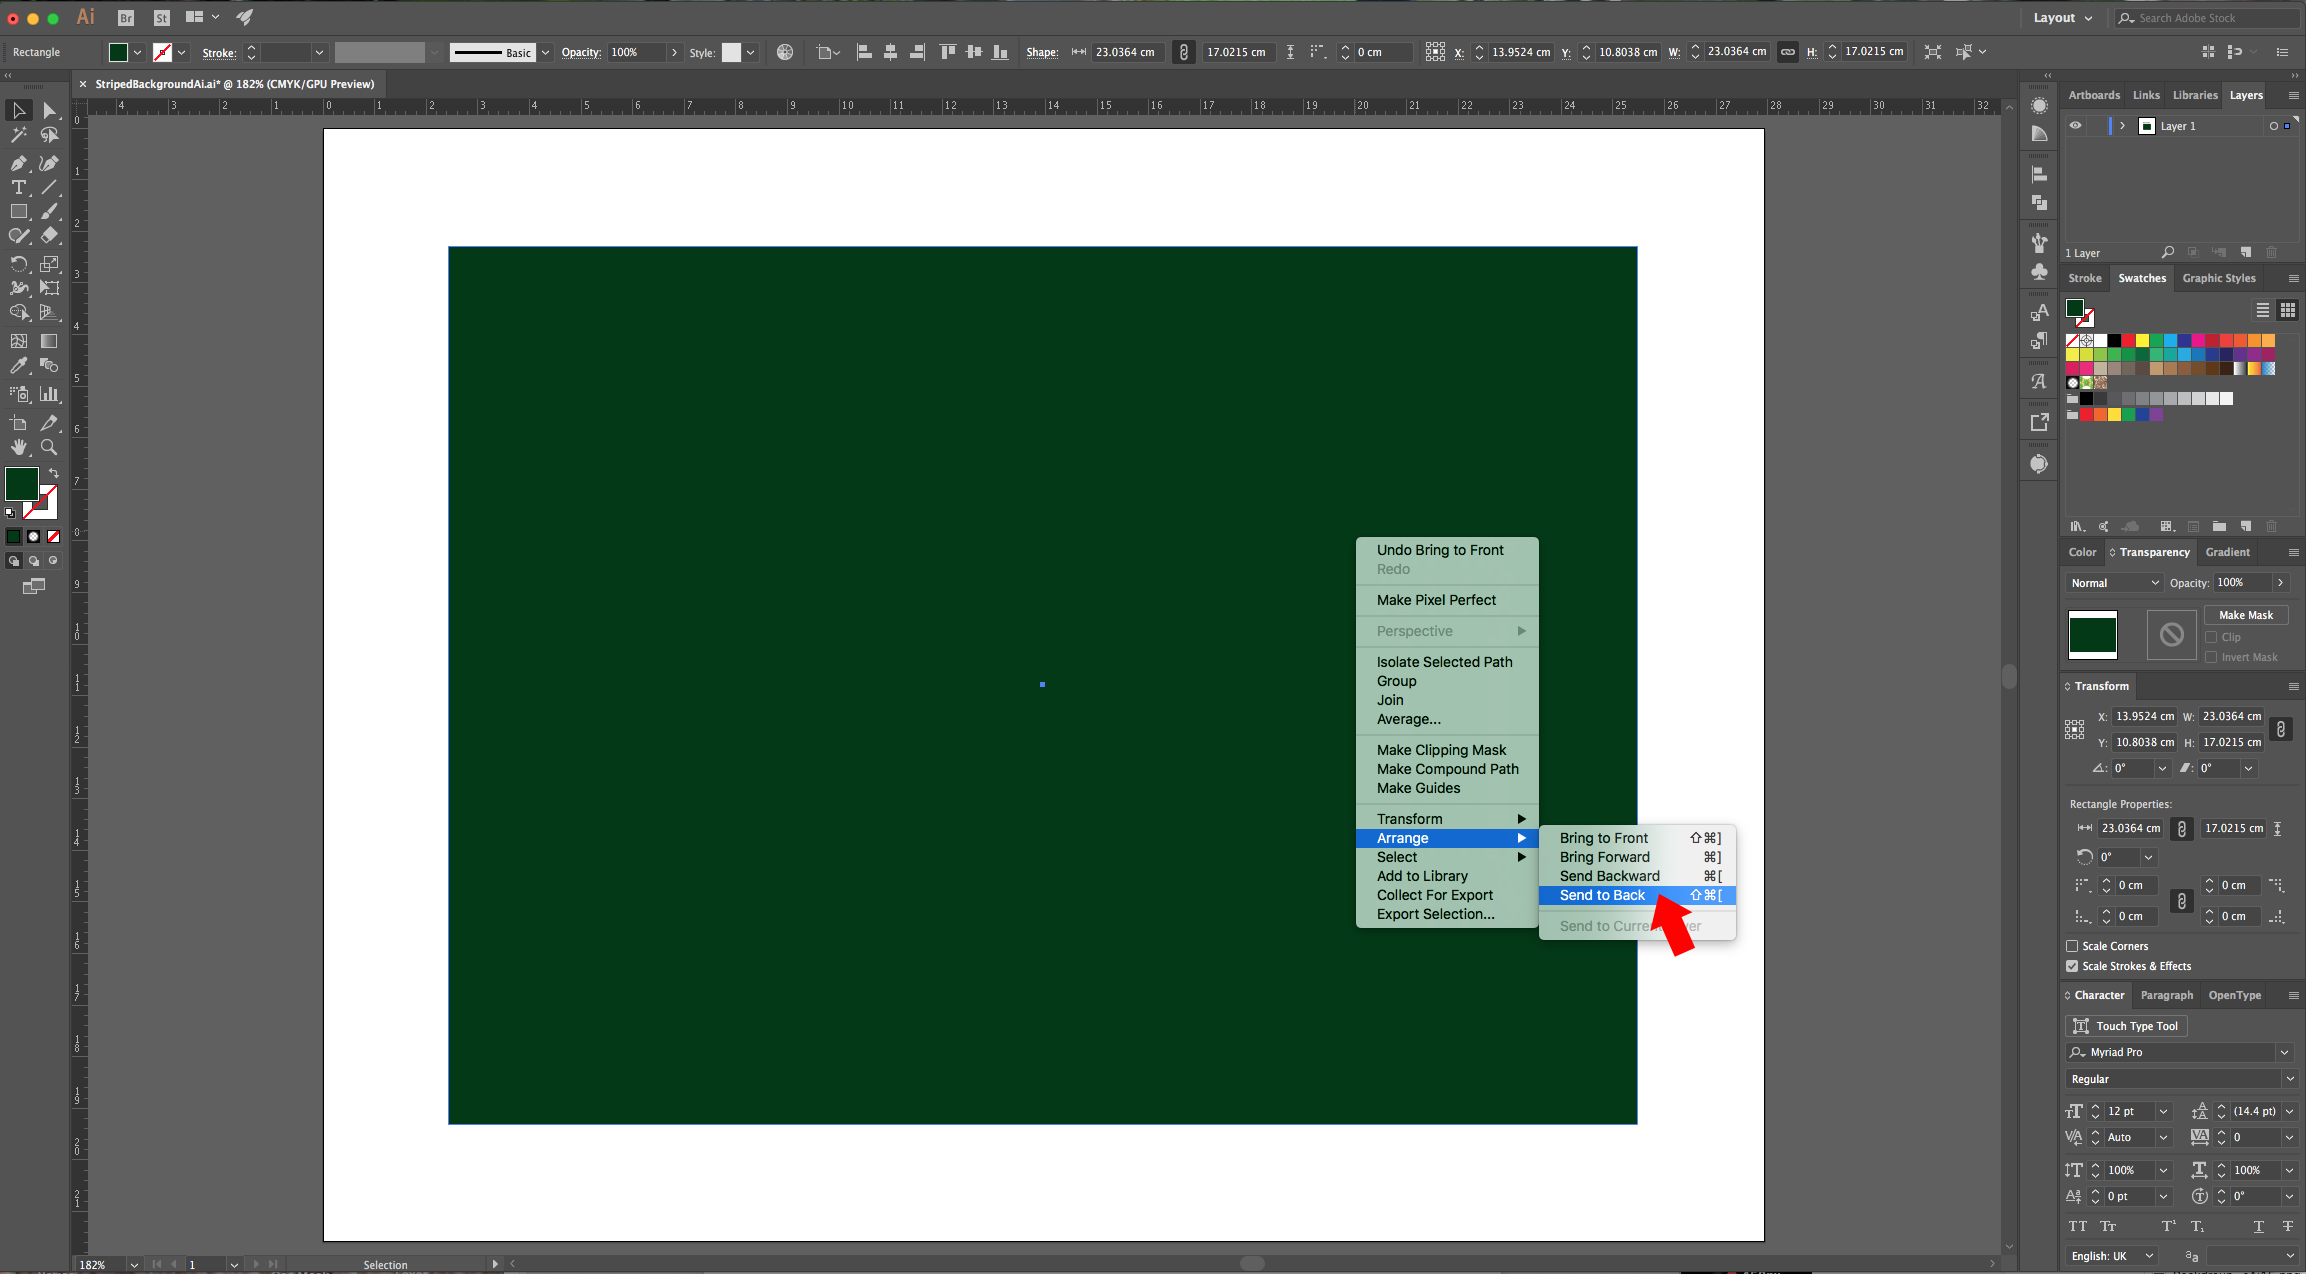
13 - Add another Rectangle of the same size of your Pattern, fill it with one of the palette colors, right-click on top of it and choose Arrange > Send to Back.
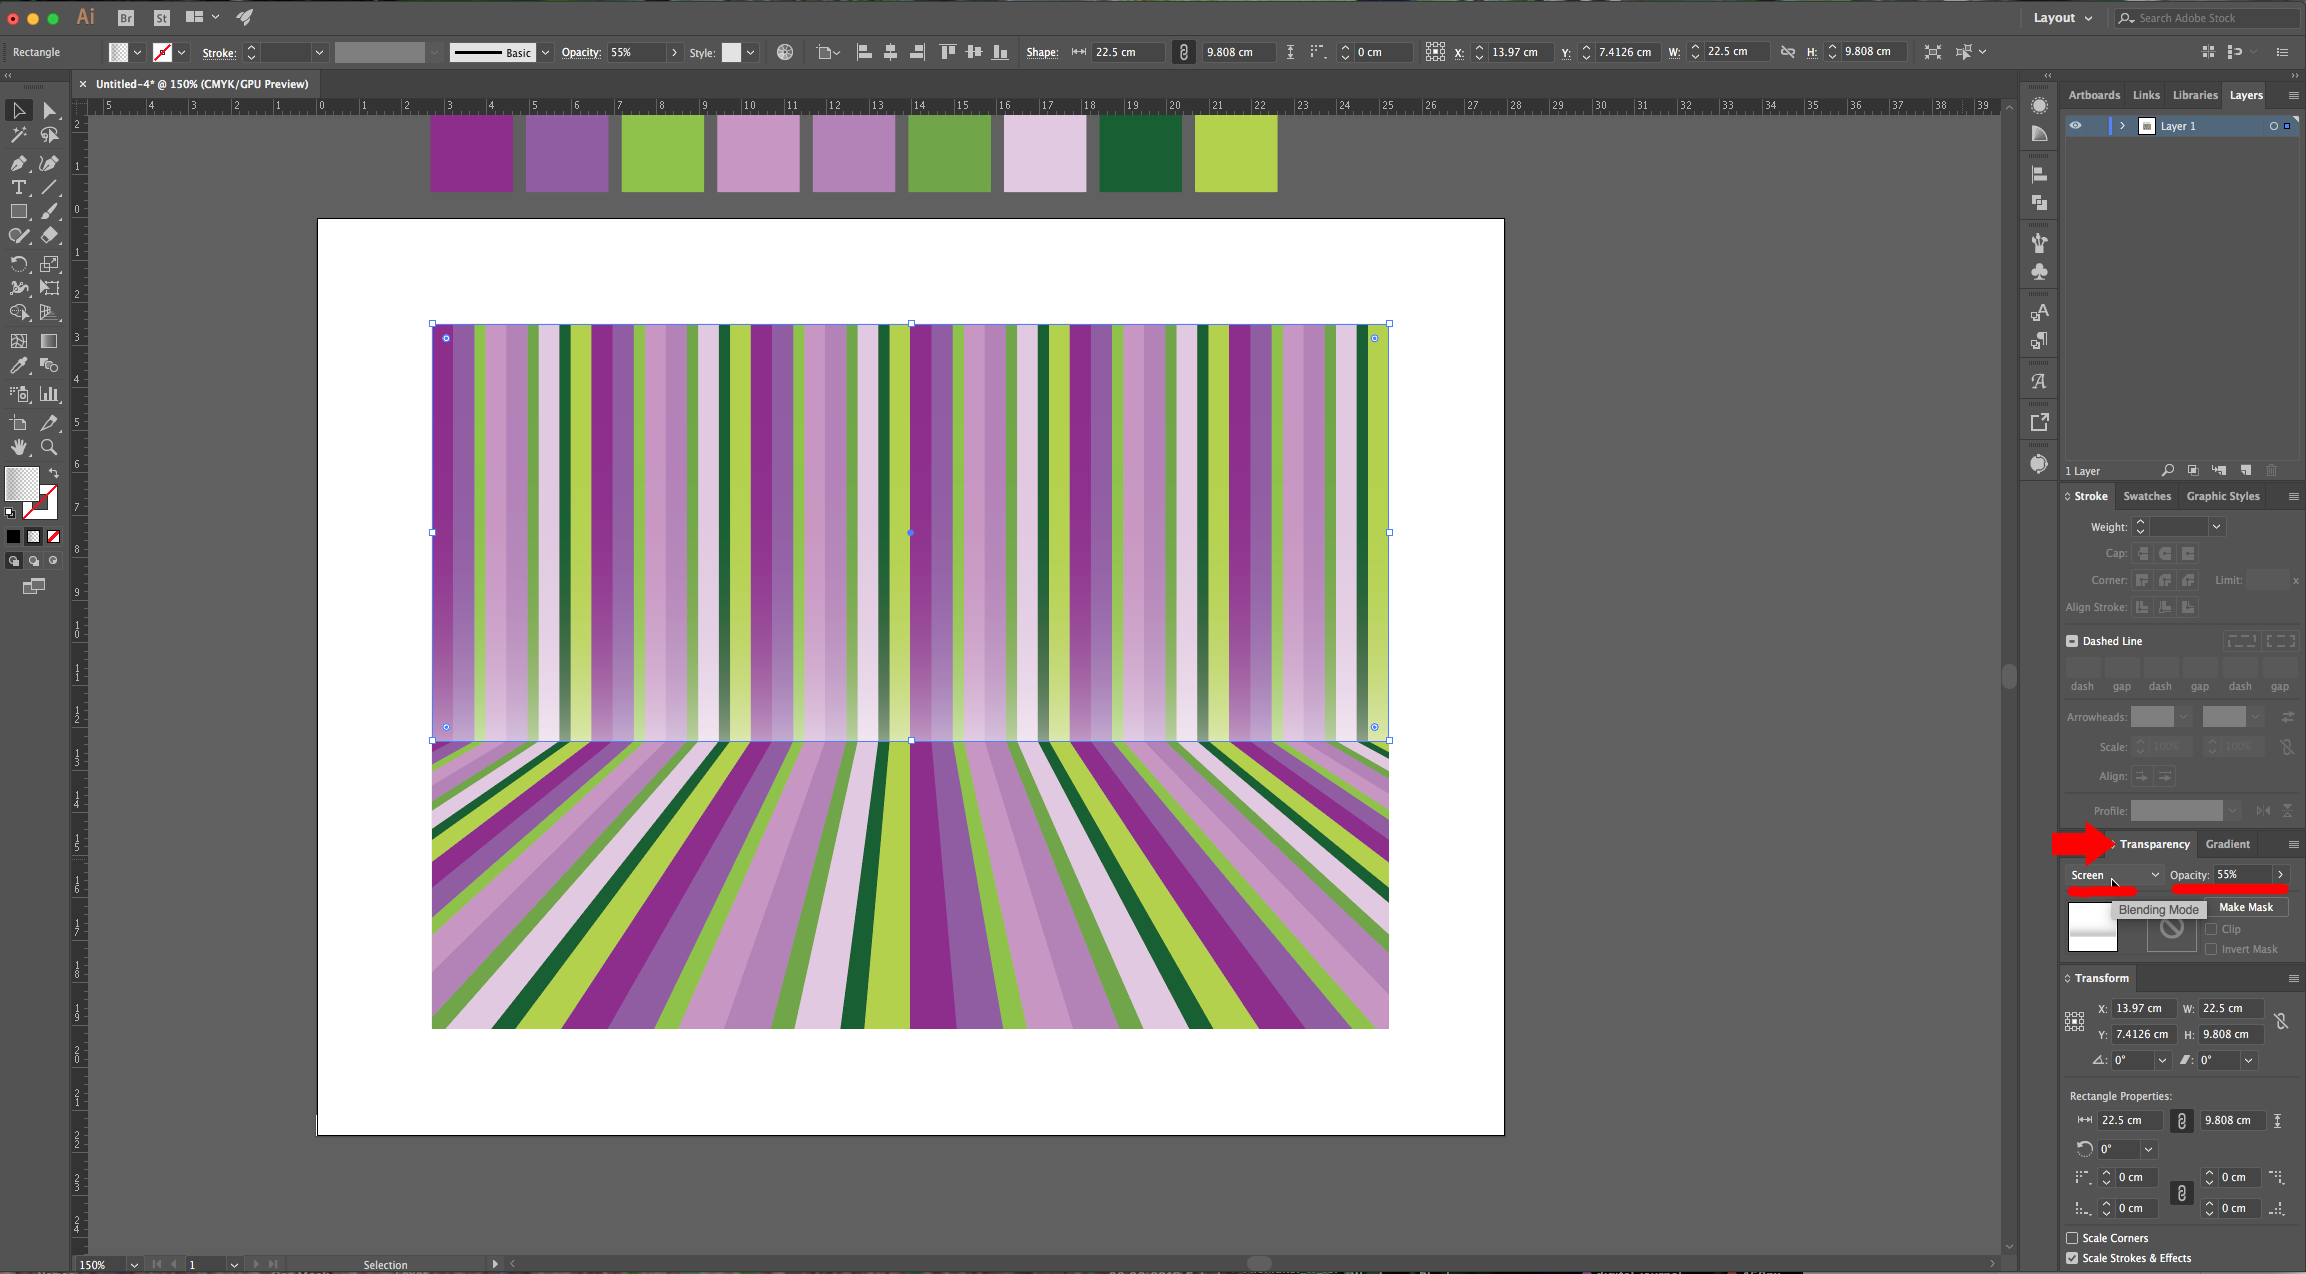
14 - Create another Rectangle, but this time it should just cover the Top portion of the Pattern (the one that has “Straight” lines. Fill it with a “Linear Gradient” from White to Transparent (Opacity 0%) with a 90° Angle and place the “Midpoint” at 13%. Go to the “Transparency Panel” and change the “Blending Mode” to “Screen” and lower the “Opacity” to 55%.
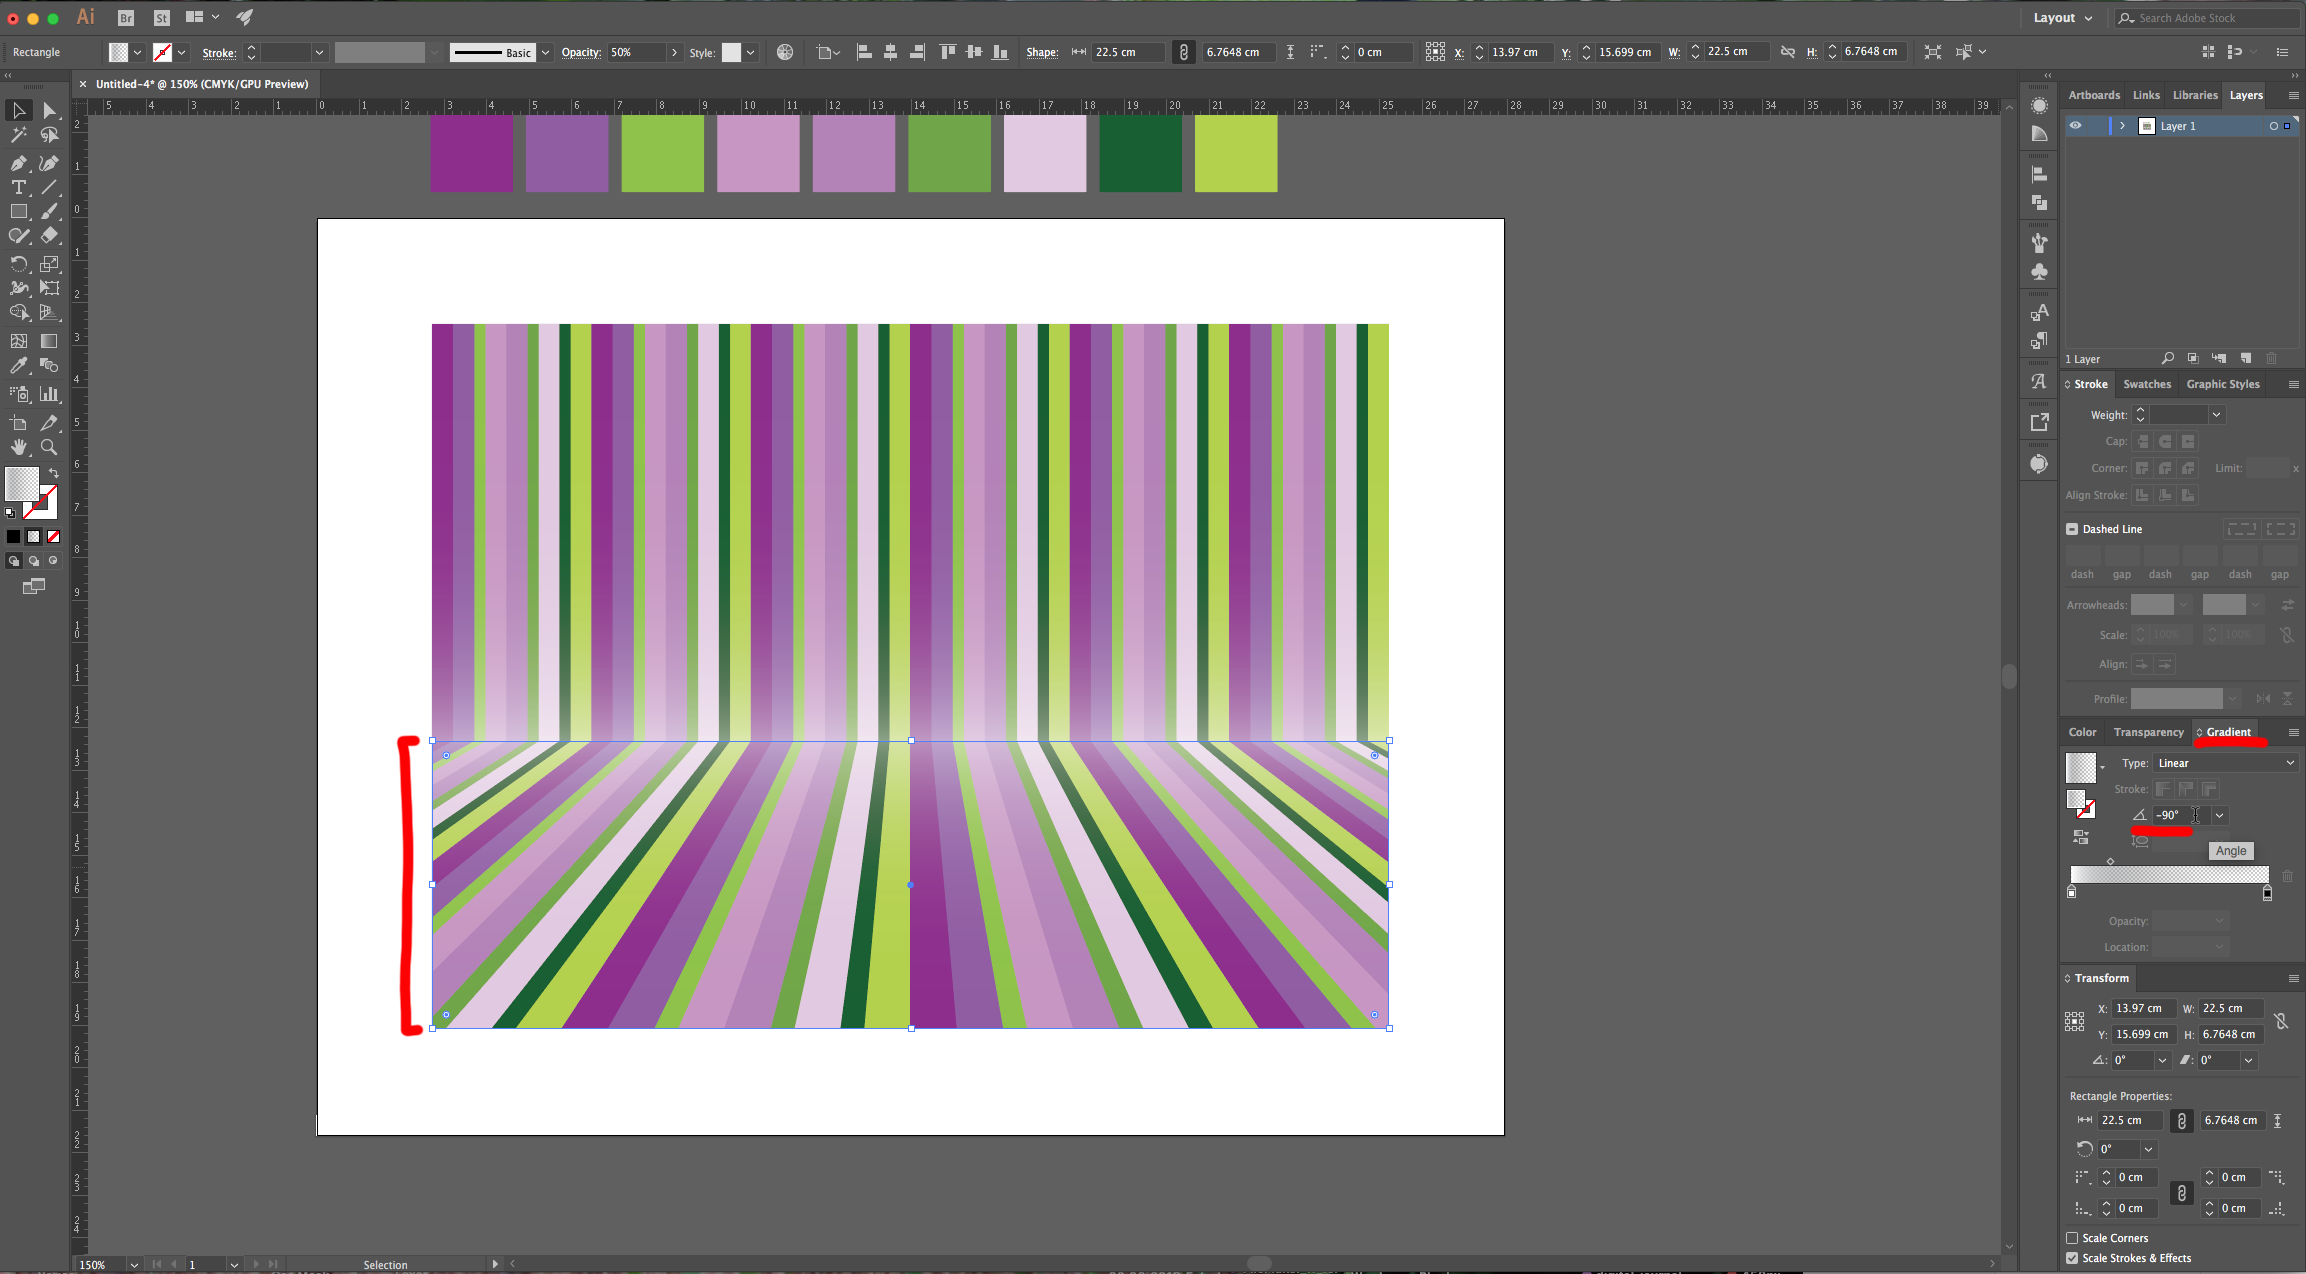
15 - Duplicate the Rectangle, place it and re-size it to cover the Bottom portion of your Pattern. Change the Angle to -90° and change the “Opacity” in the “Transparency Panel” to 50%.

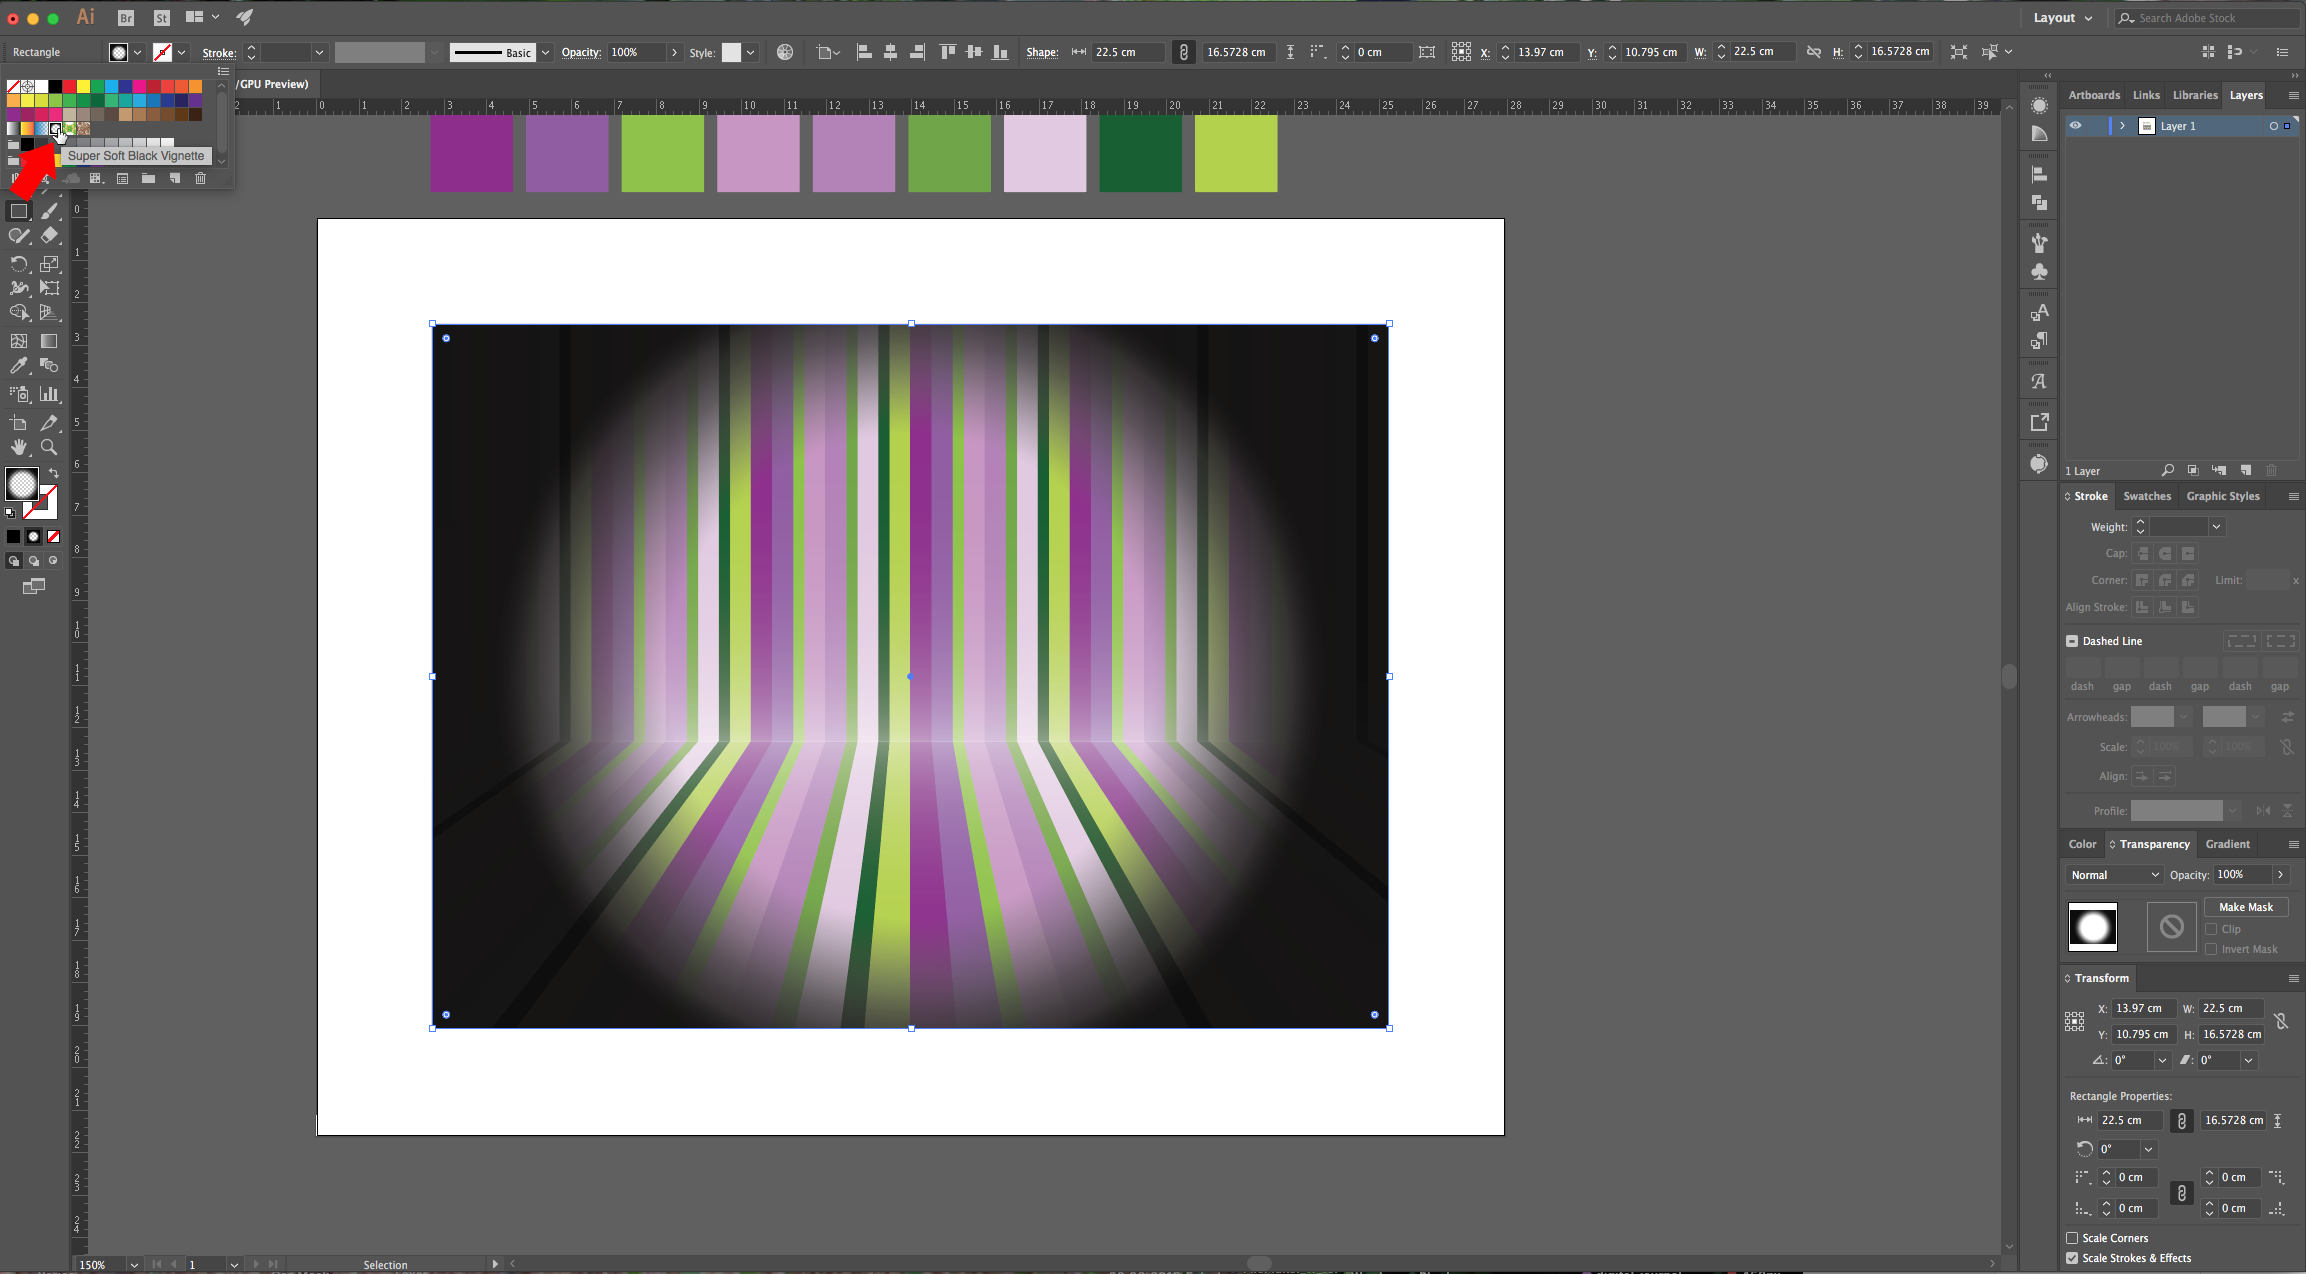
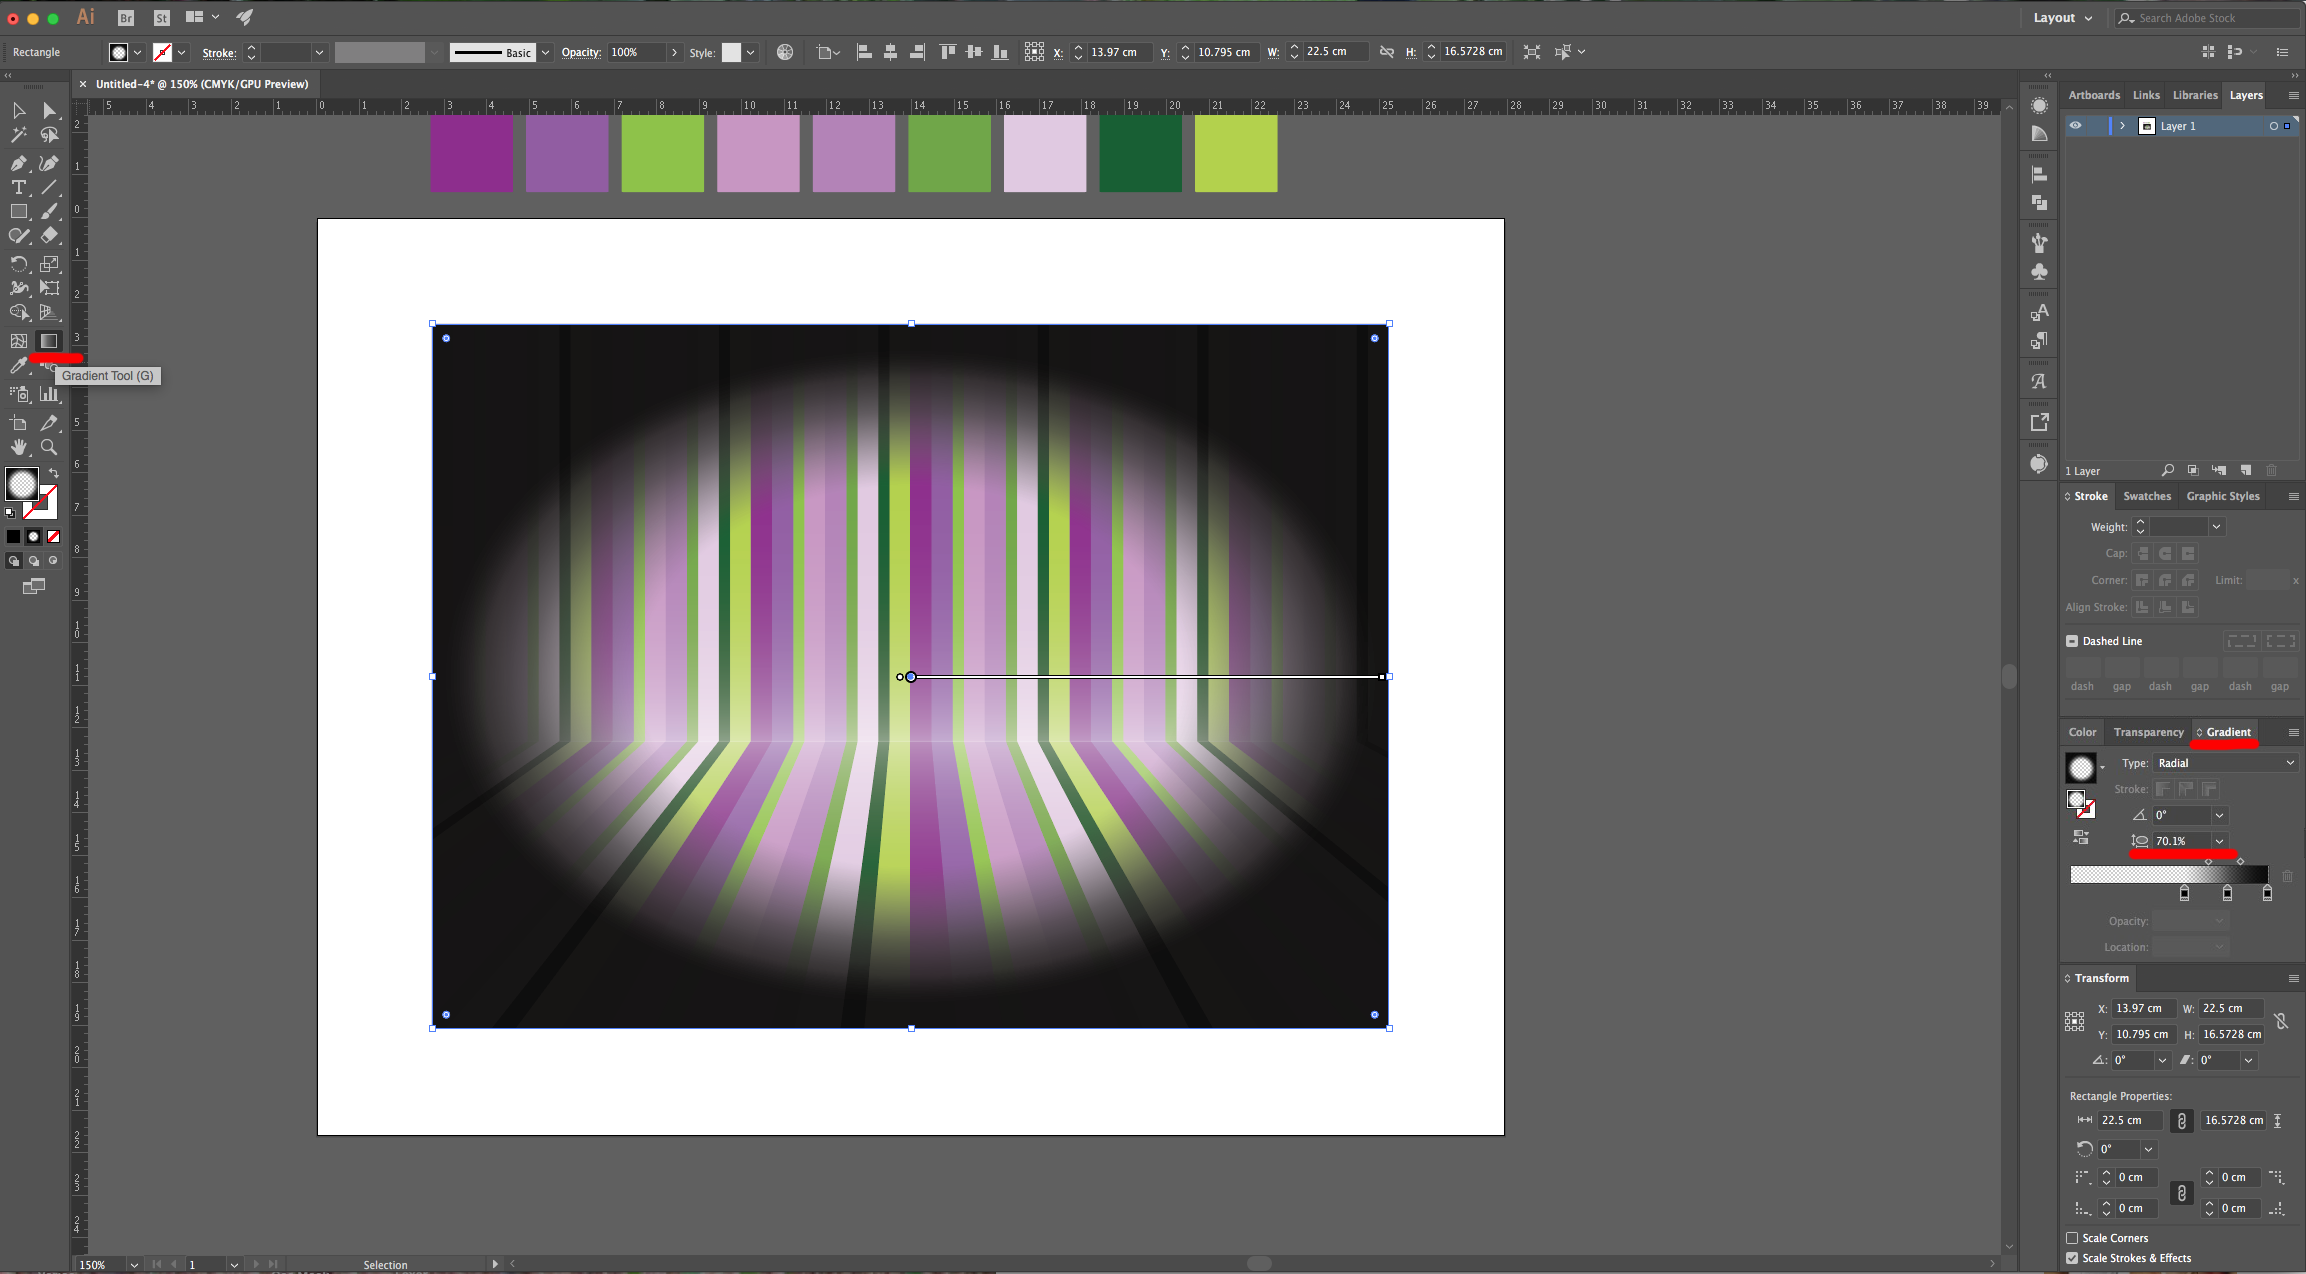
16 - Create another Rectangle that covers the entire Pattern, fill it with a “Radial Gradient” (choose “Super Soft Black Vignette” from the “Swatches Panel”) but change the “Aspect Ratio” to better fit your “Artwork” (we used 79.1%). Go to the “Transparency Panel” and change the “Blending Mode” to “Color Burn” and lower the “Opacity” to 40%.

17 - Create another Rectangle slightly larger than your Pattern (about 3 mm from each side), fill it with the darkest color in your Pattern, right-click on top and choose Arrange > Send to Back. This will create a frame.

1 - In Illustrator, create a “New Document”.
2 - Select the “Rectangle Tool” (M) to add some squares on the top part of your Canvas and fill them with the colors present in your “Color Palette”. If your reference is a flat image, you can “Place” it into your “Document” and use the “Eyedropper Tool” (I) to sample the colors. Make sure the “Smart Guides” are ON (Command/Control + U).
3 - Select the “Rectangle Tool” (M) again and create a vertical rectangle, make it about 5 mm in “Width” and 15 cm in “Height” (or enough to almost reach the bottom of the document).
4 - Use the “Eyedropper Tool” (I) to “Fill” the Rectangle with the first color of your Palette.
5 - Drag it to the right while holding the “Shift” and “Alt/Option” keys to “Duplicate” it and move it in a straight line. Make its left side touch the right side of the first rectangle, then fill it with the second color in your Palette.
6 - Duplicate your second rectangle, fill it with another color and use the “Selection Tool” to make it half the size in “Width”. Keep adding Thick and Thin lines/rectangles and changing the “Fill” color until you finish your palette swatches to create a Pattern.
7 - Select all the lines and duplicate them again and again placing them next the end of the other prior group until you fill up almost all the Canvas.
8 - Use the “Line Segment Tool” (\) to draw a “Horizontal” line at about ¾ of the length of your pattern. It should have “NO Fill and Stroke” colors.
9 - Select the “Pattern” and “Line”, go to the “Pathfinder Panel” and choose “Divide” to cut your pattern where the line was.
10 - Use the “Direct Selection Tool” (A) to select the bottom part of the Pattern.
11 - Select the “Free Transform Tool” (E), choose “Perspective Distort” and drag one of the bottom corners of the Pattern Up and to the side. The idea is to make it look like a “Wall” and “Floor” in Perspective.
12 - Select the “Rectangle Tool” (M), draw a square on top of your Pattern with “NO Fill and Stroke” colors. Make it the same “Width” and “Height” as your original Pattern. Select both, right-click on top and chose “Make Clipping Mask”. Center it using the “Horizontal and Vertical Align Center” options on your Top Menu and make sure that “Align to Artboard” is selected. Or use the same options in the “Align Panel”.
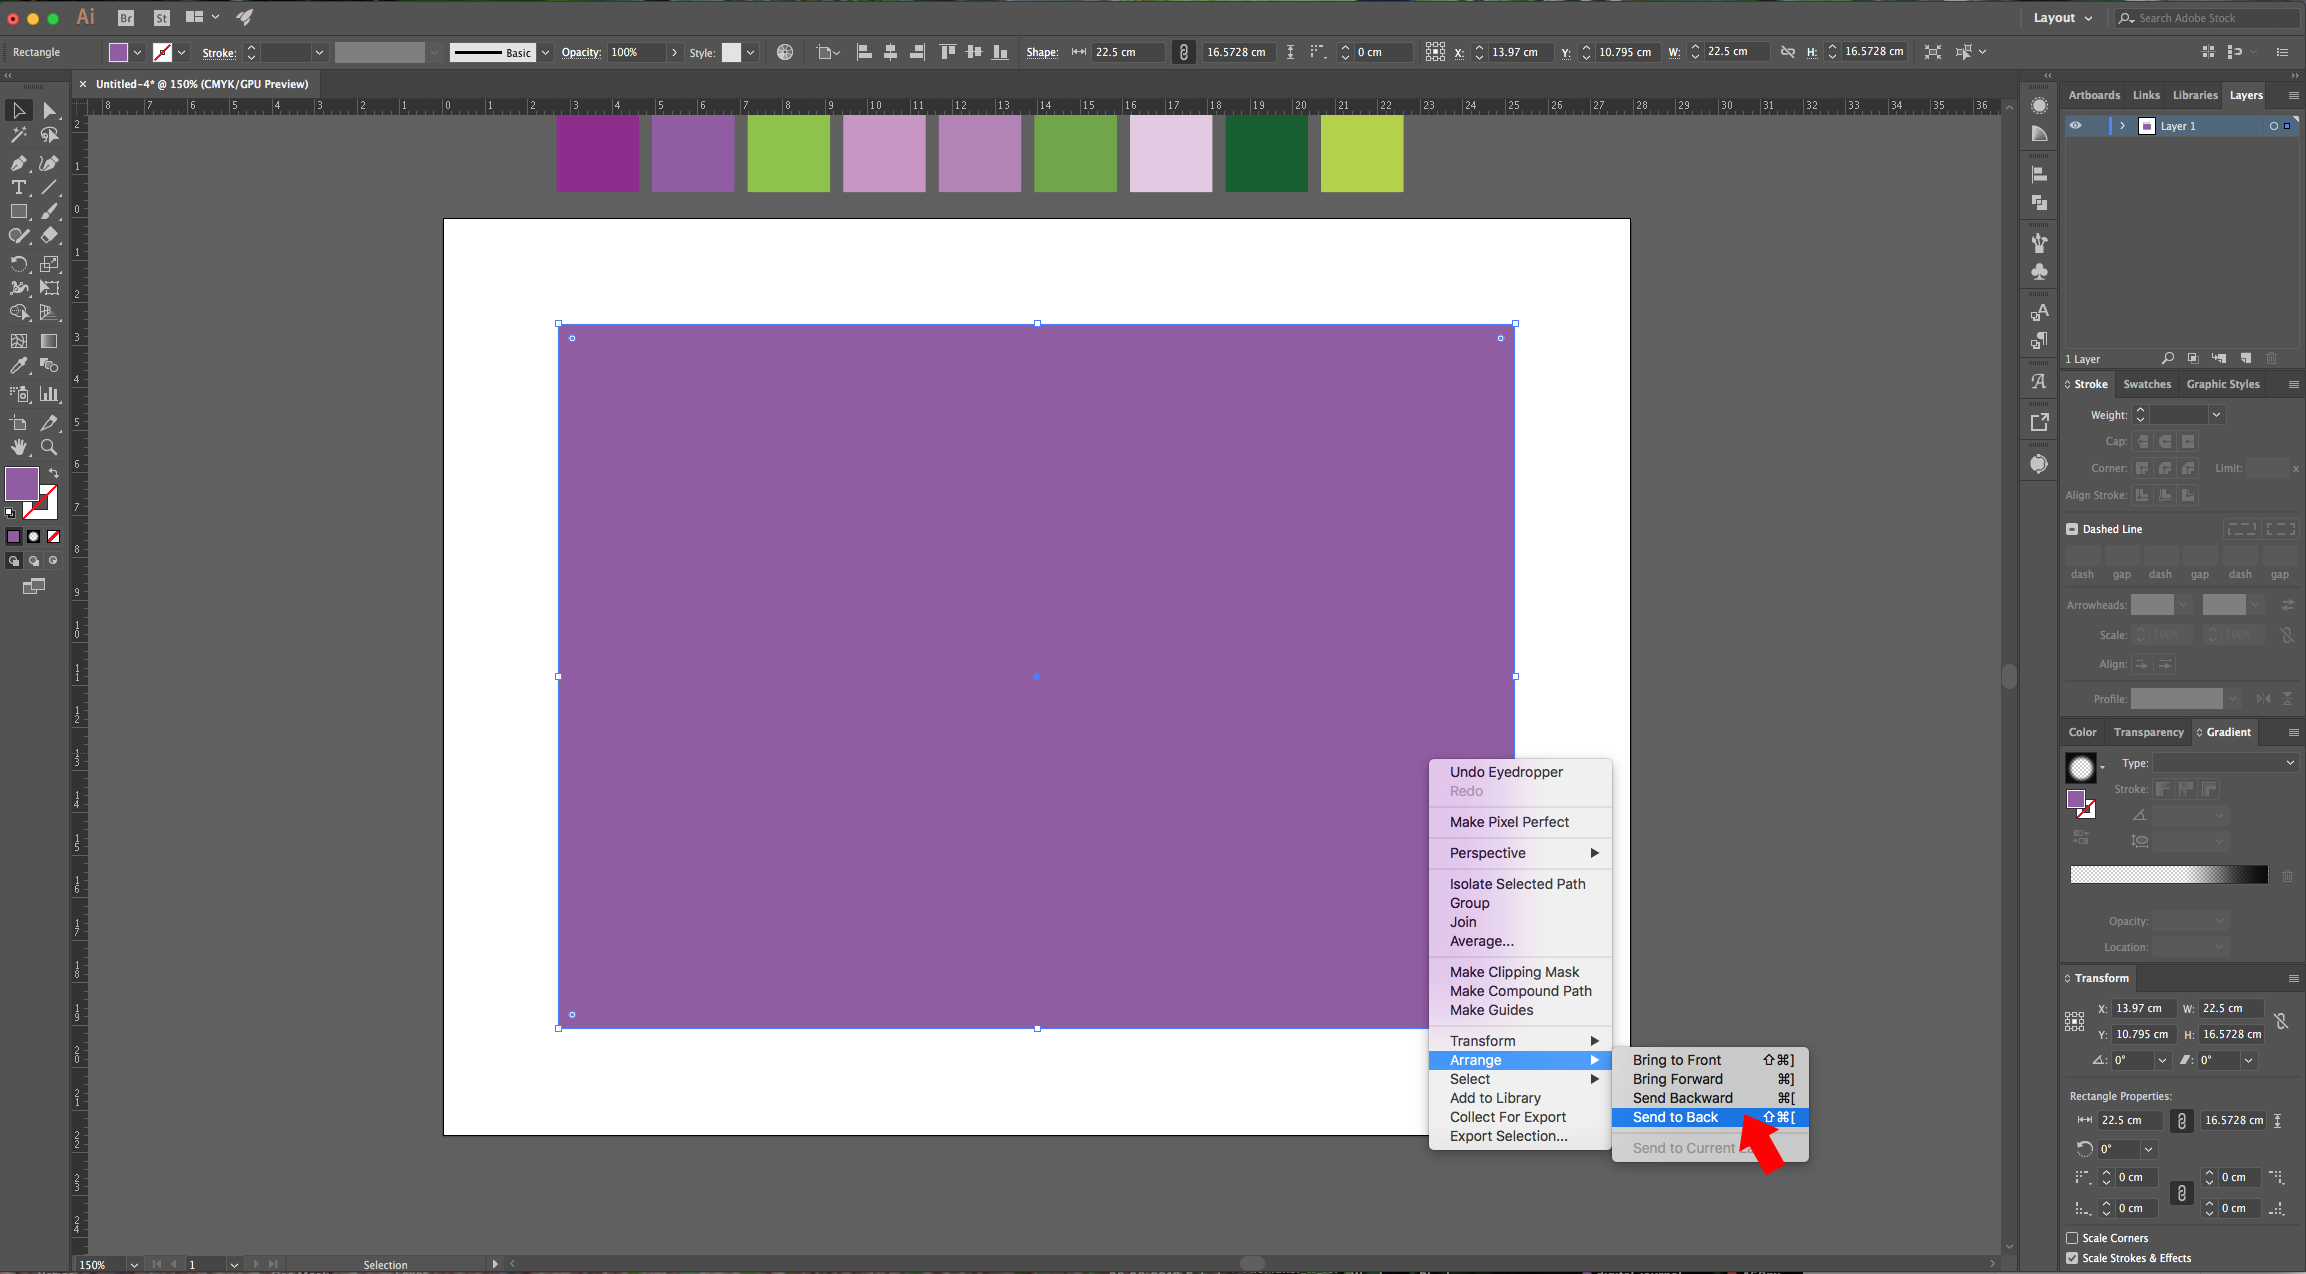
13 - Add another Rectangle of the same size of your Pattern, fill it with one of the palette colors, right-click on top of it and choose Arrange > Send to Back.
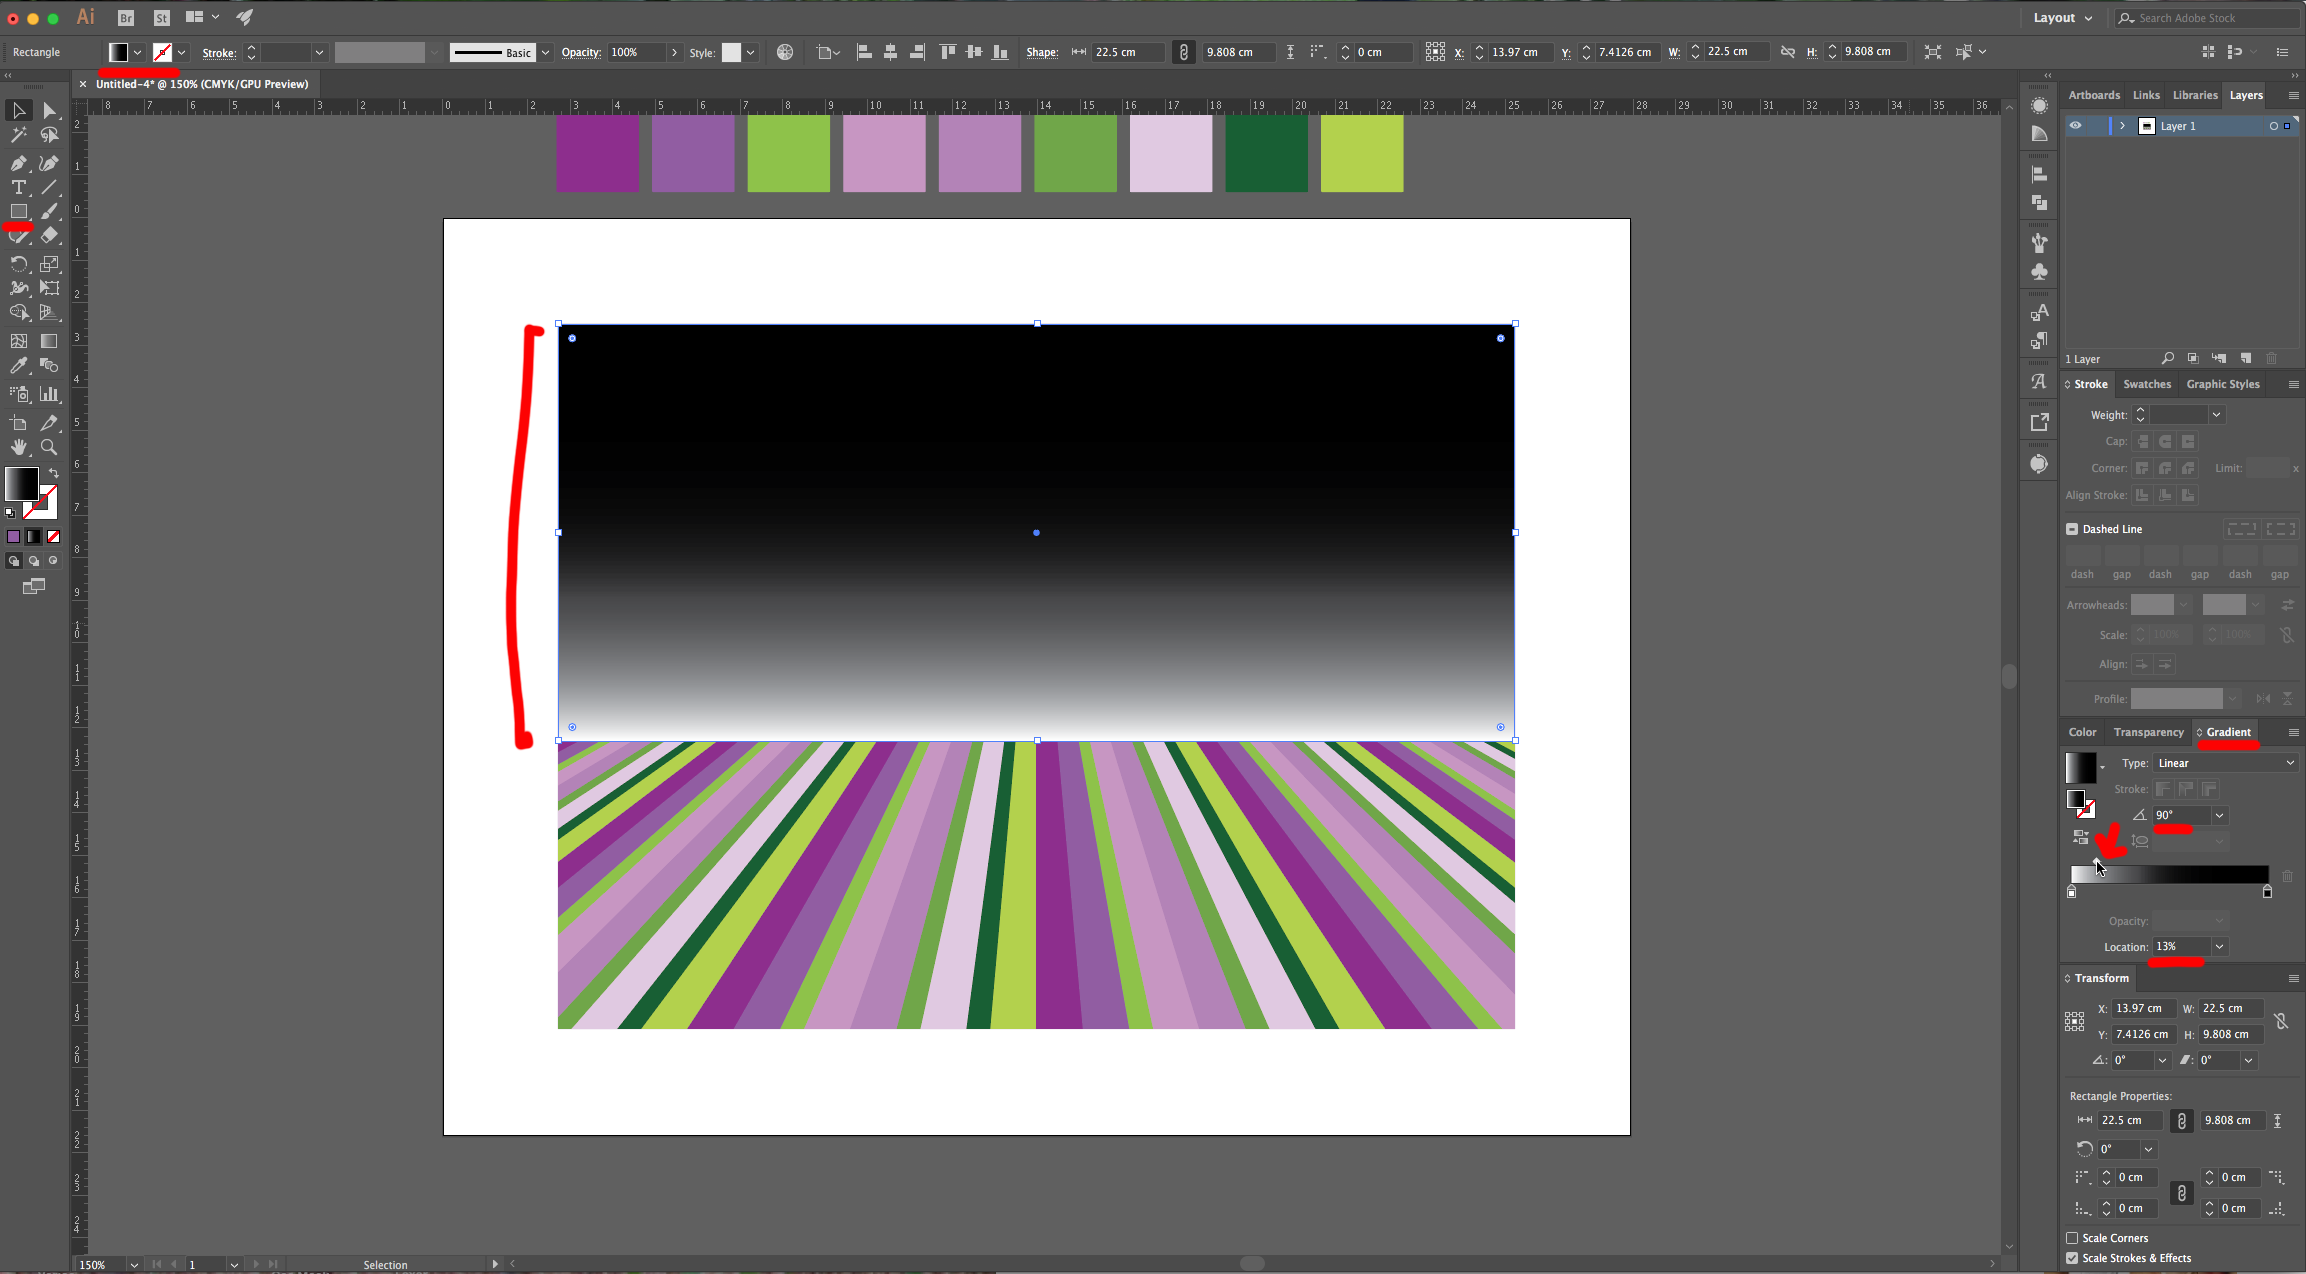
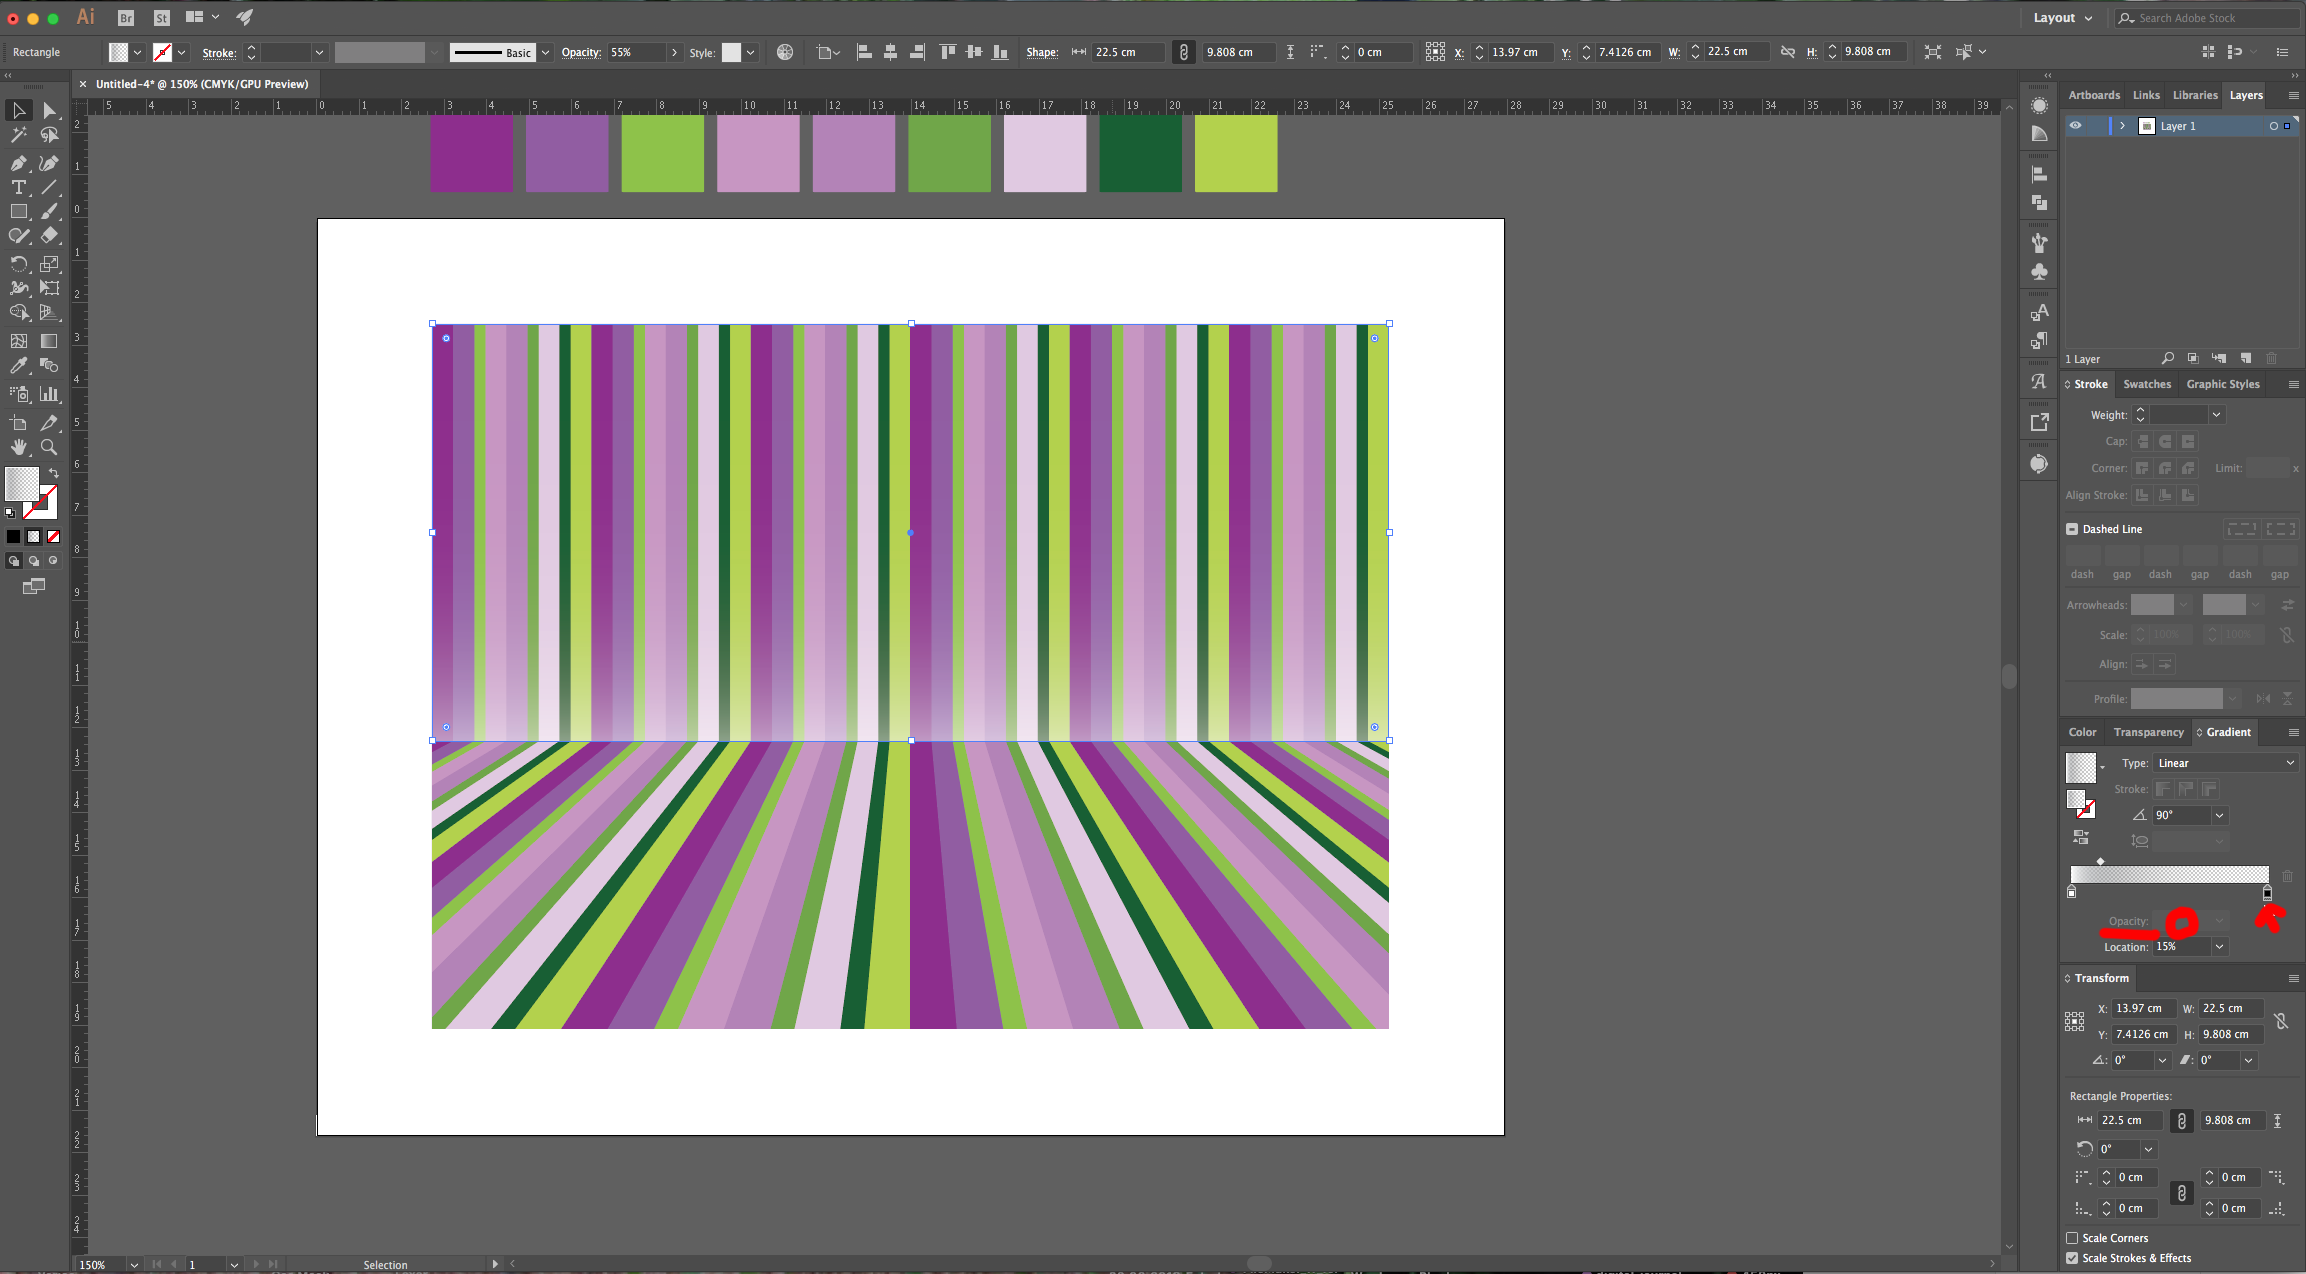
14 - Create another Rectangle, but this time it should just cover the Top portion of the Pattern (the one that has “Straight” lines. Fill it with a “Linear Gradient” from White to Transparent (Opacity 0%) with a 90° Angle and place the “Midpoint” at 13%. Go to the “Transparency Panel” and change the “Blending Mode” to “Screen” and lower the “Opacity” to 55%.
15 - Duplicate the Rectangle, place it and re-size it to cover the Bottom portion of your Pattern. Change the Angle to -90° and change the “Opacity” in the “Transparency Panel” to 50%.
16 - Create another Rectangle that covers the entire Pattern, fill it with a “Radial Gradient” (choose “Super Soft Black Vignette” from the “Swatches Panel”) but change the “Aspect Ratio” to better fit your “Artwork” (we used 79.1%). Go to the “Transparency Panel” and change the “Blending Mode” to “Color Burn” and lower the “Opacity” to 40%.
17 - Create another Rectangle slightly larger than your Pattern (about 3 mm from each side), fill it with the darkest color in your Pattern, right-click on top and choose Arrange > Send to Back. This will create a frame.
by @lornacane


