Using the Pathfinder in Illustrator
We are going to explore Illustrator’s “Pathfinder Panel”.
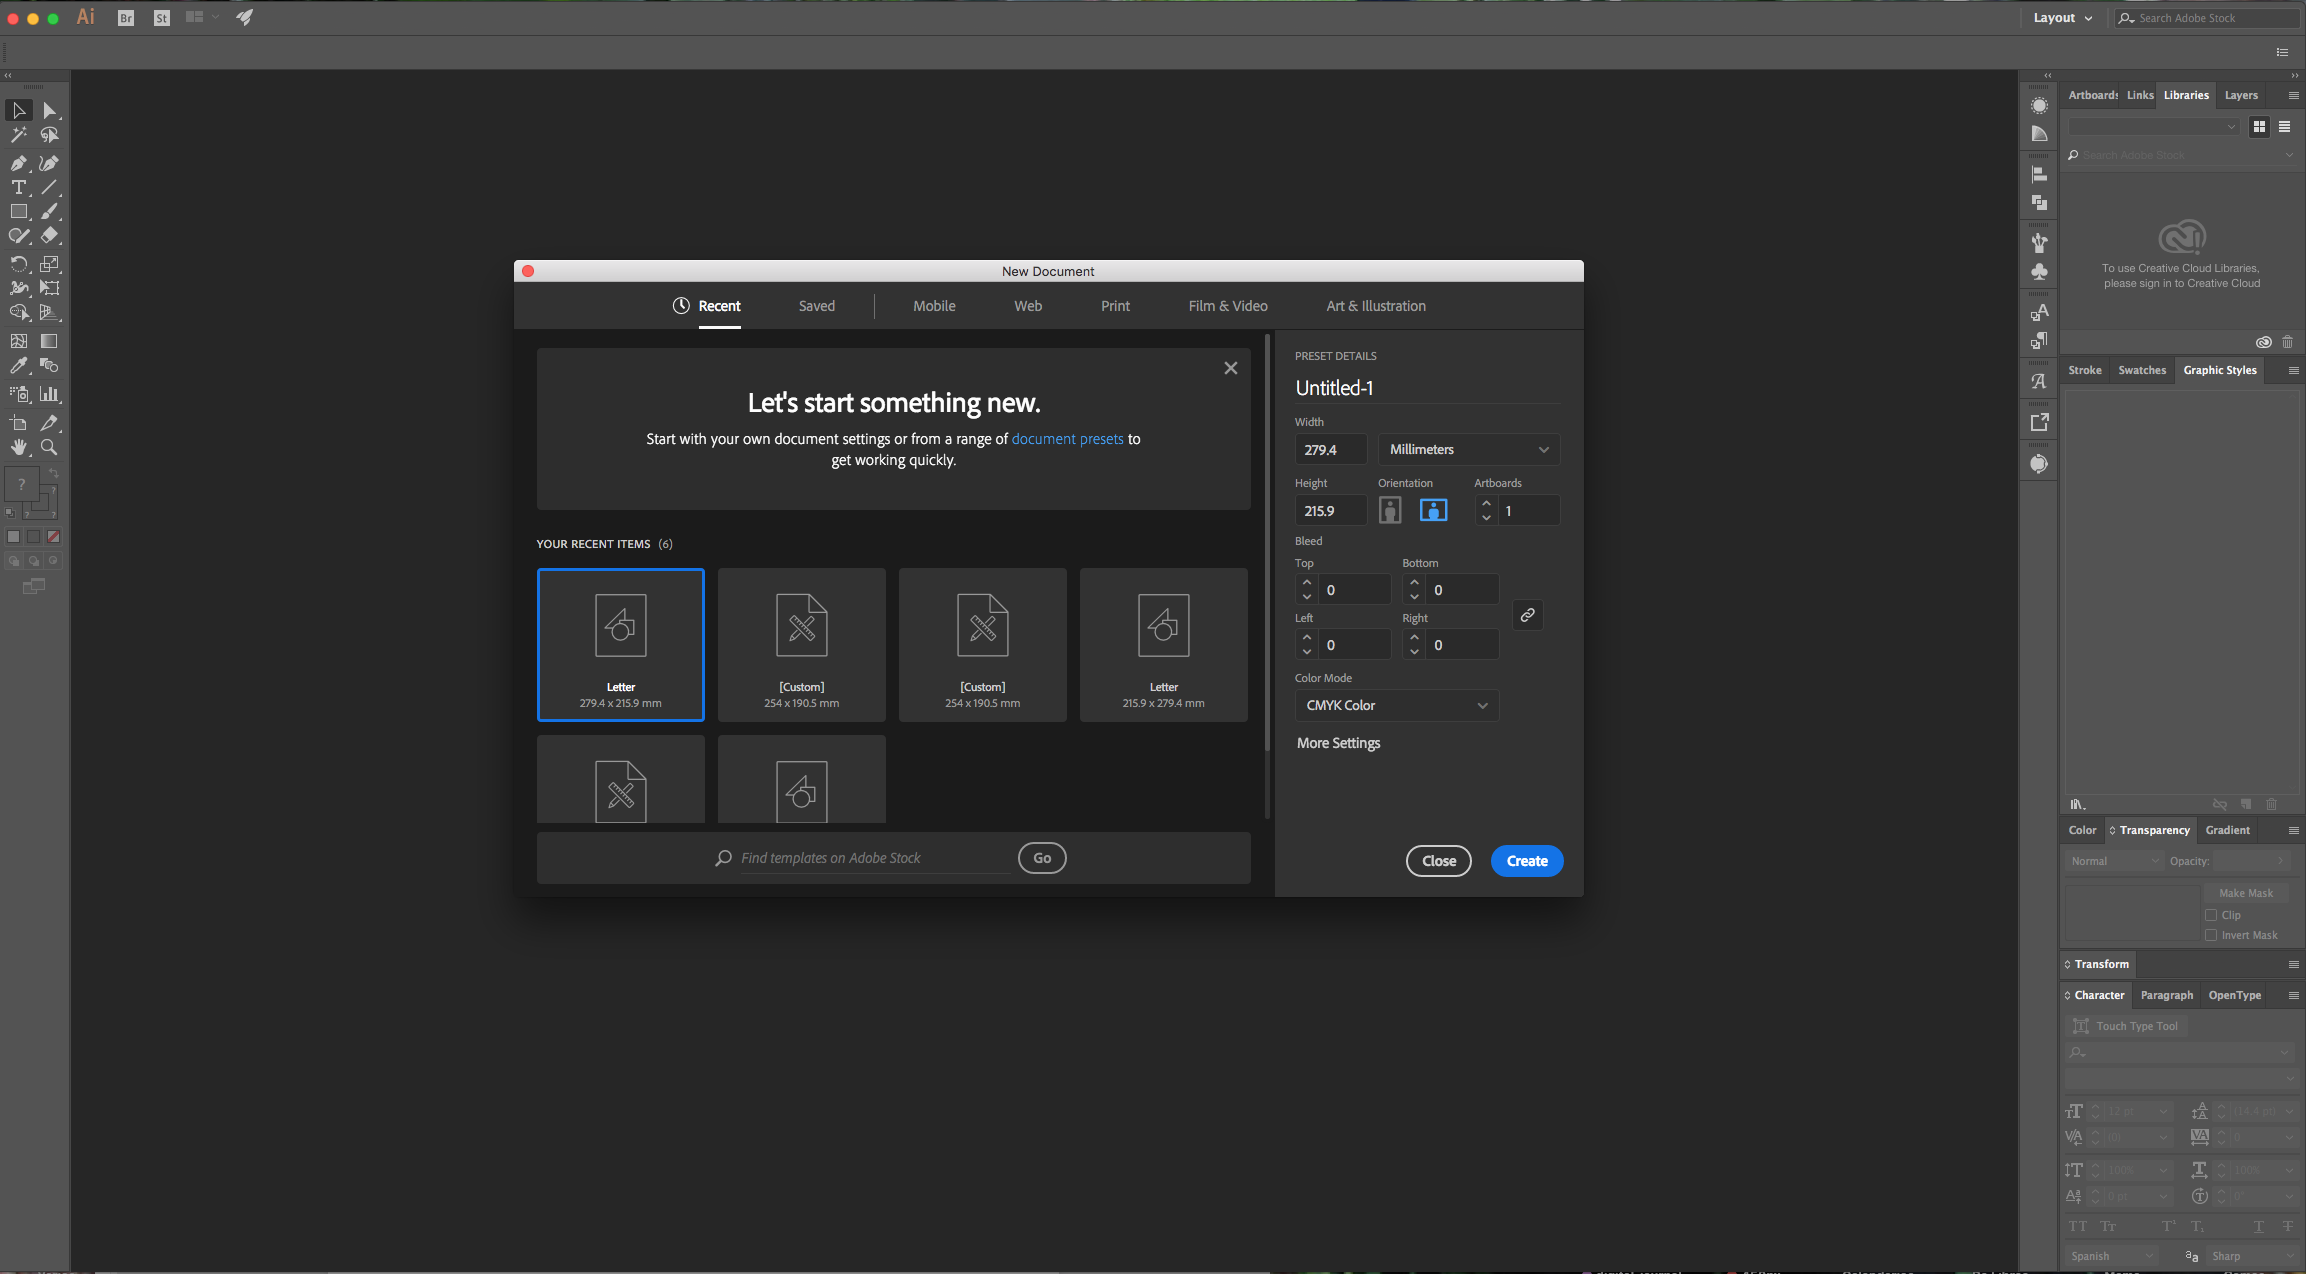
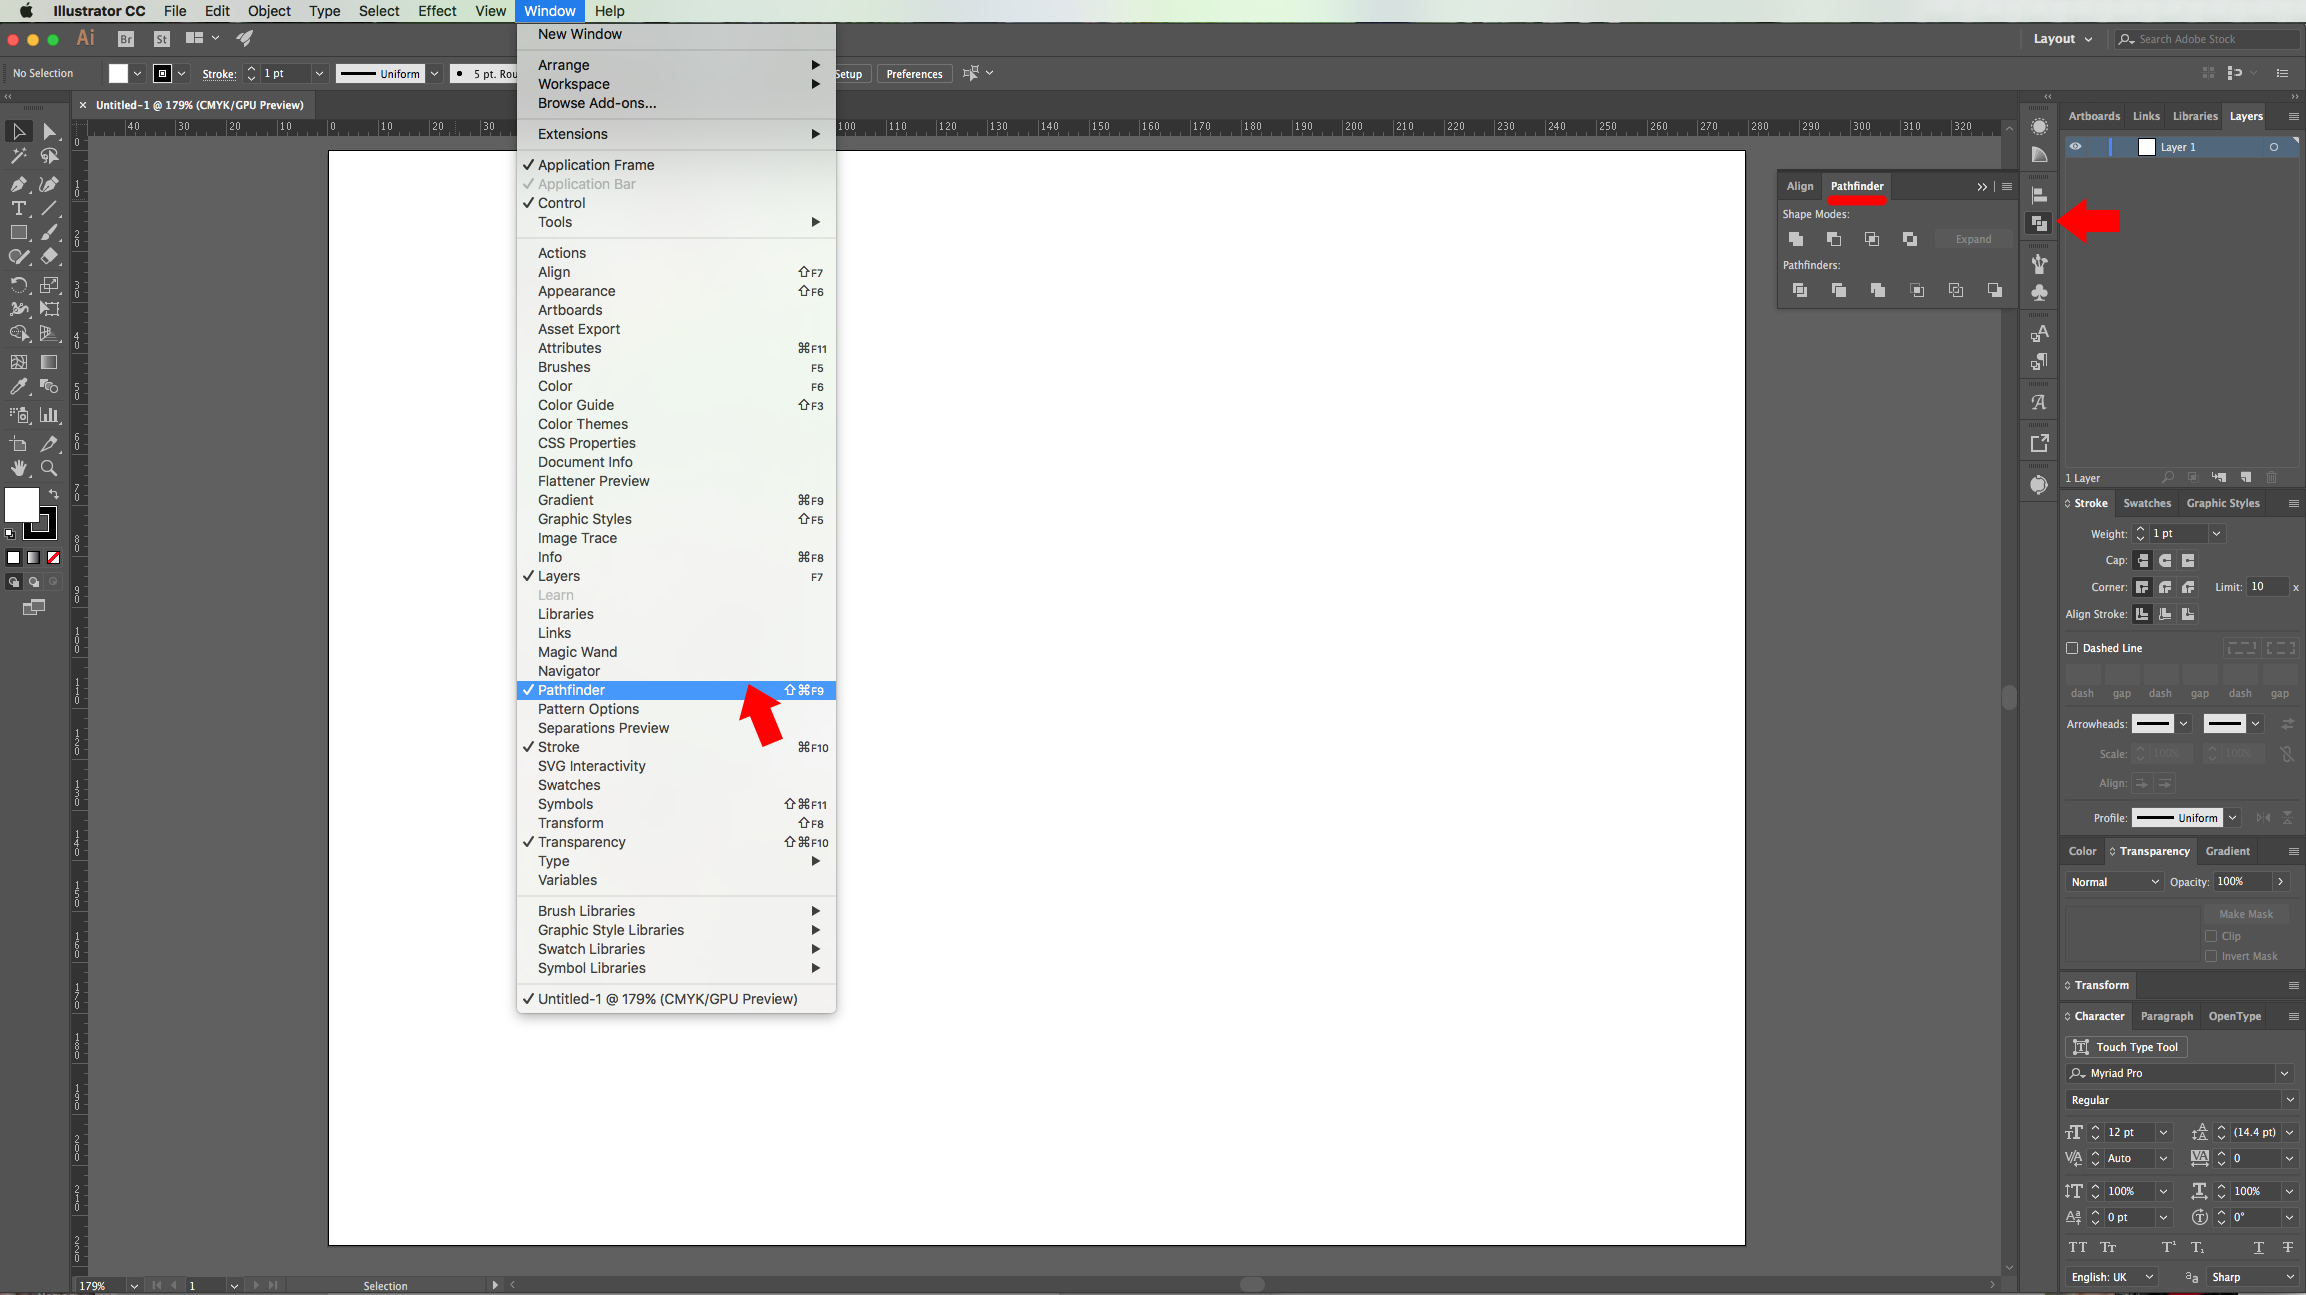
1 - In Illustrator, create a “New Document”. Make sure the “Pathfinder Panel” is open by going to Window > Pathfinder (Shift + Command/Control + F9).
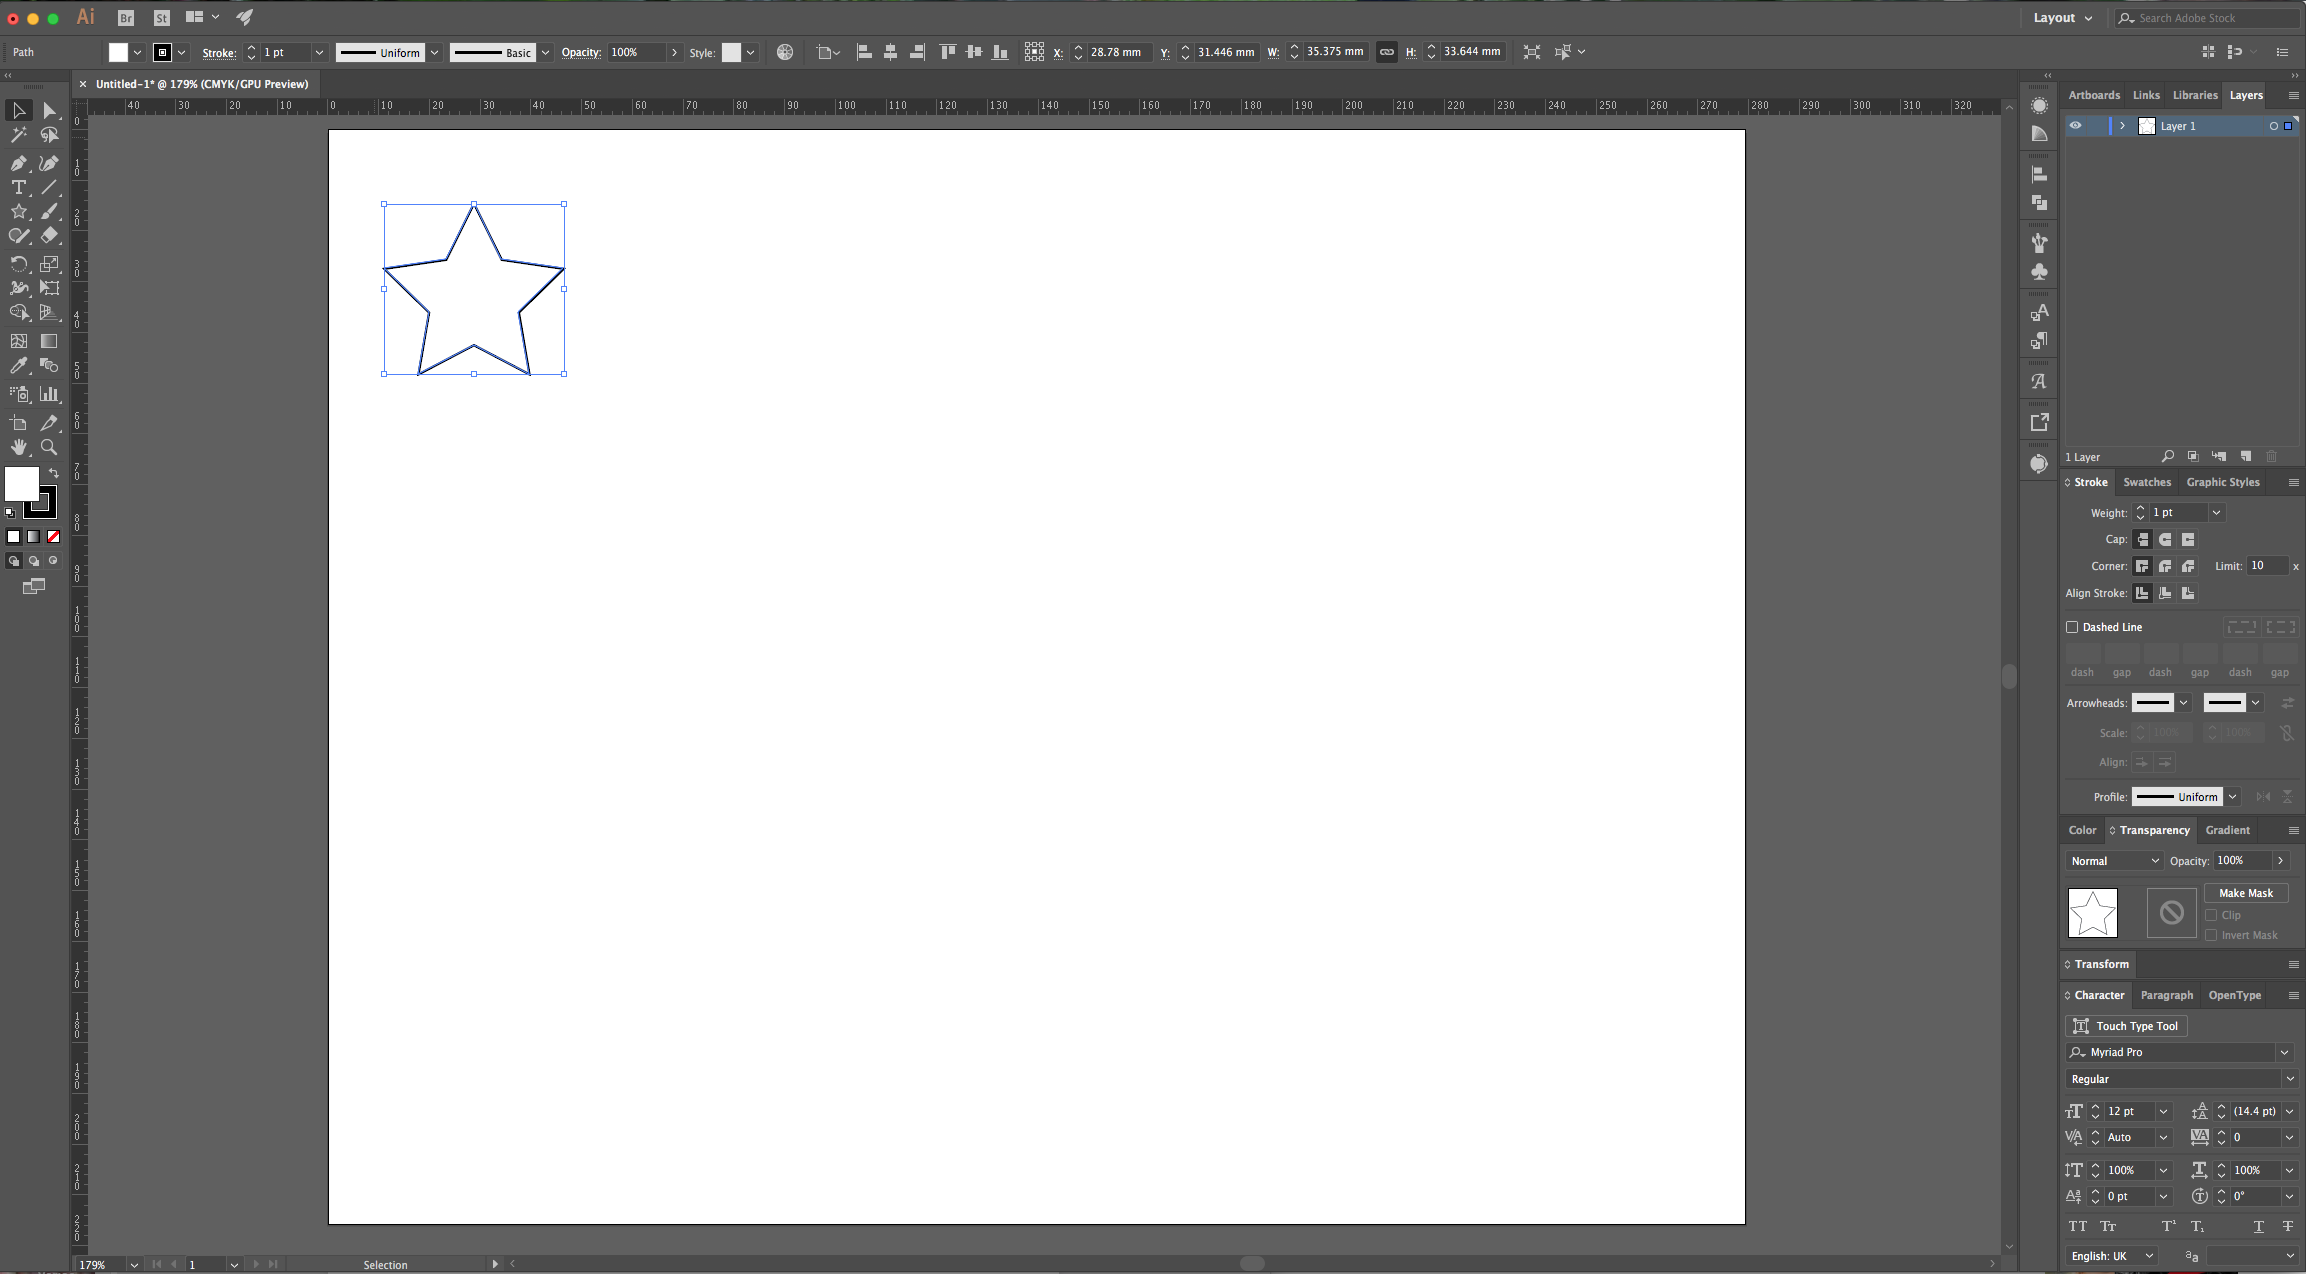
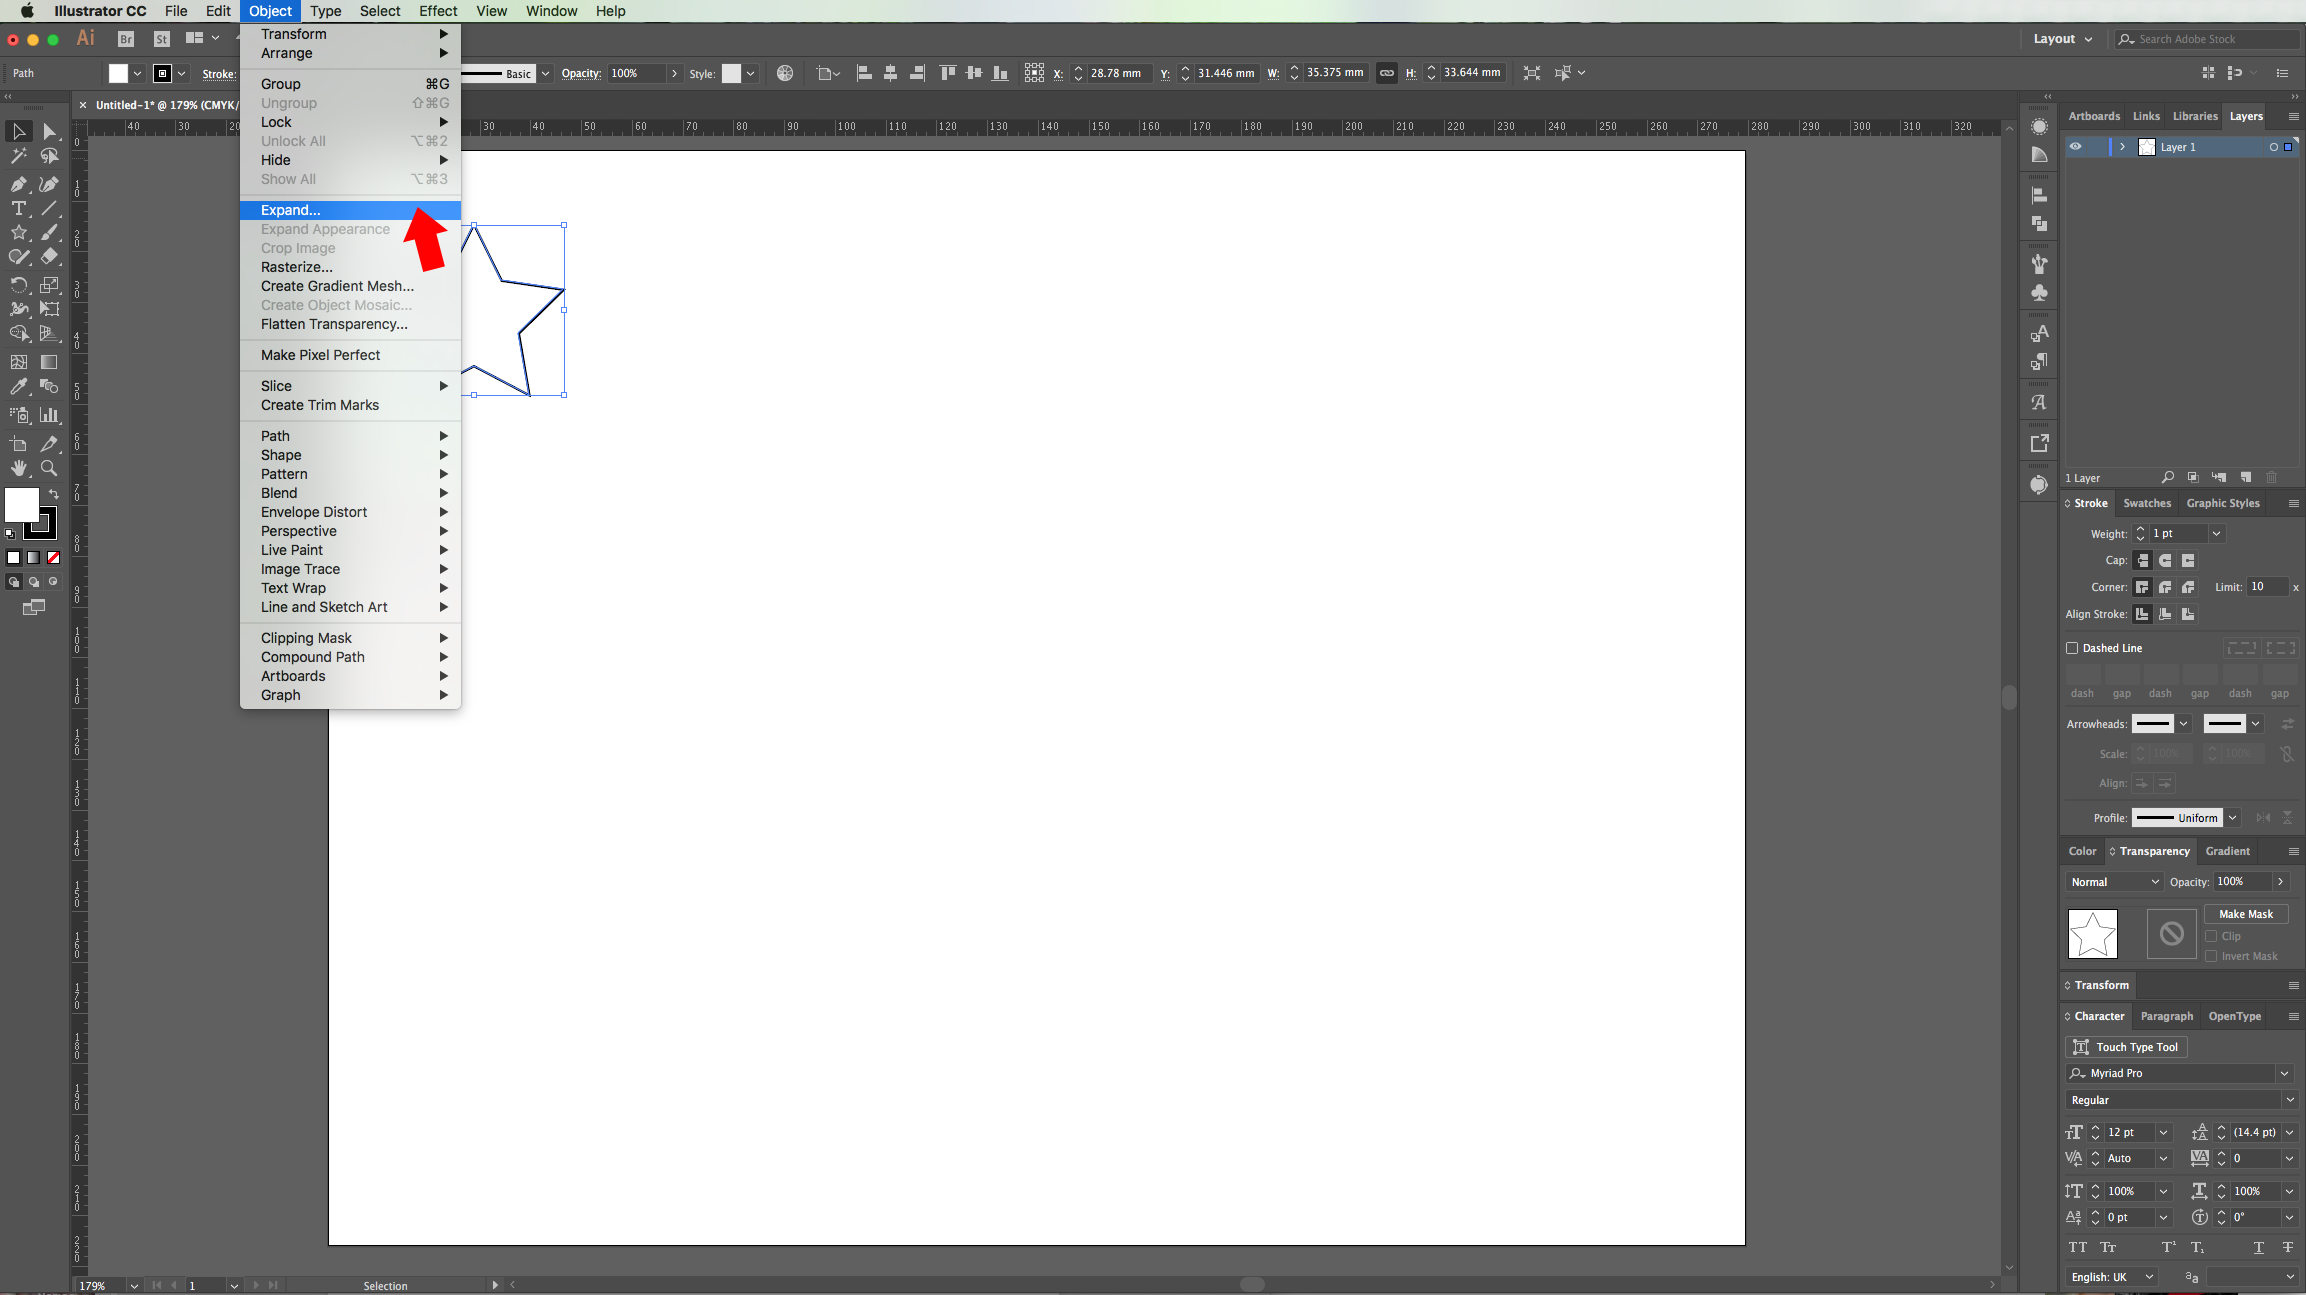
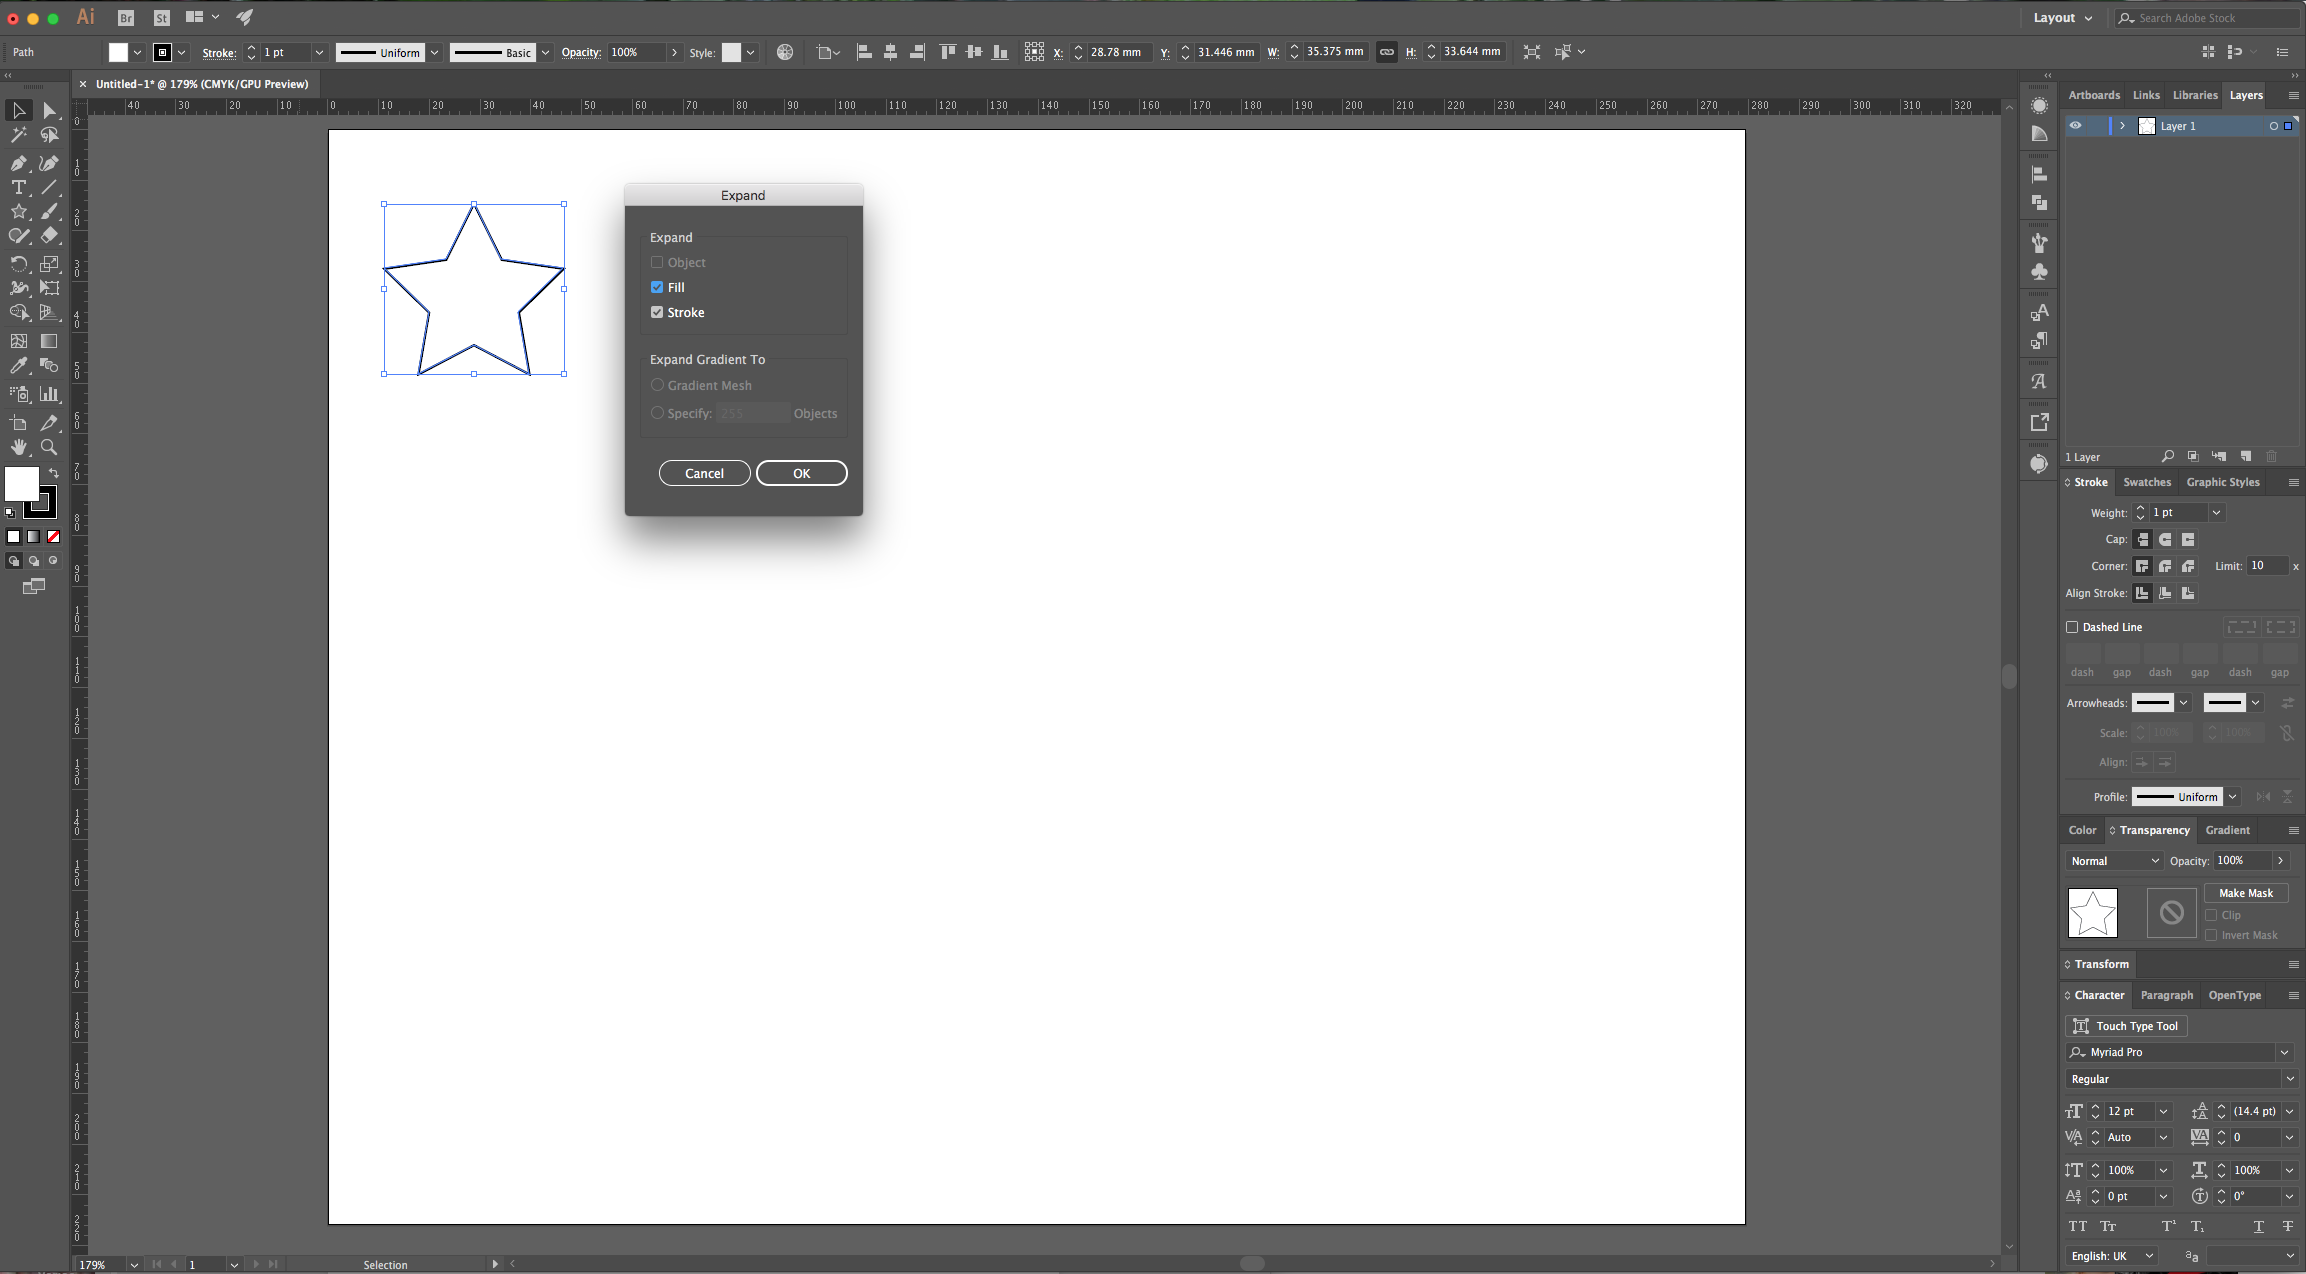
2 - There are certain things to take into account when using some of “Pathfinder’s” features, like if one of the “Paths” you want to work with has a “Stroke” is a good idea to select your “Path” and go to Object > Expand and make sure the “Fill” and “Stroke” boxes are checked. This will turn your “Stroke” into a “Path” and then, depending on your needs, you may have to use “Unite” in “Pathfinder” to merge them together. Just remember that they will have just one color.

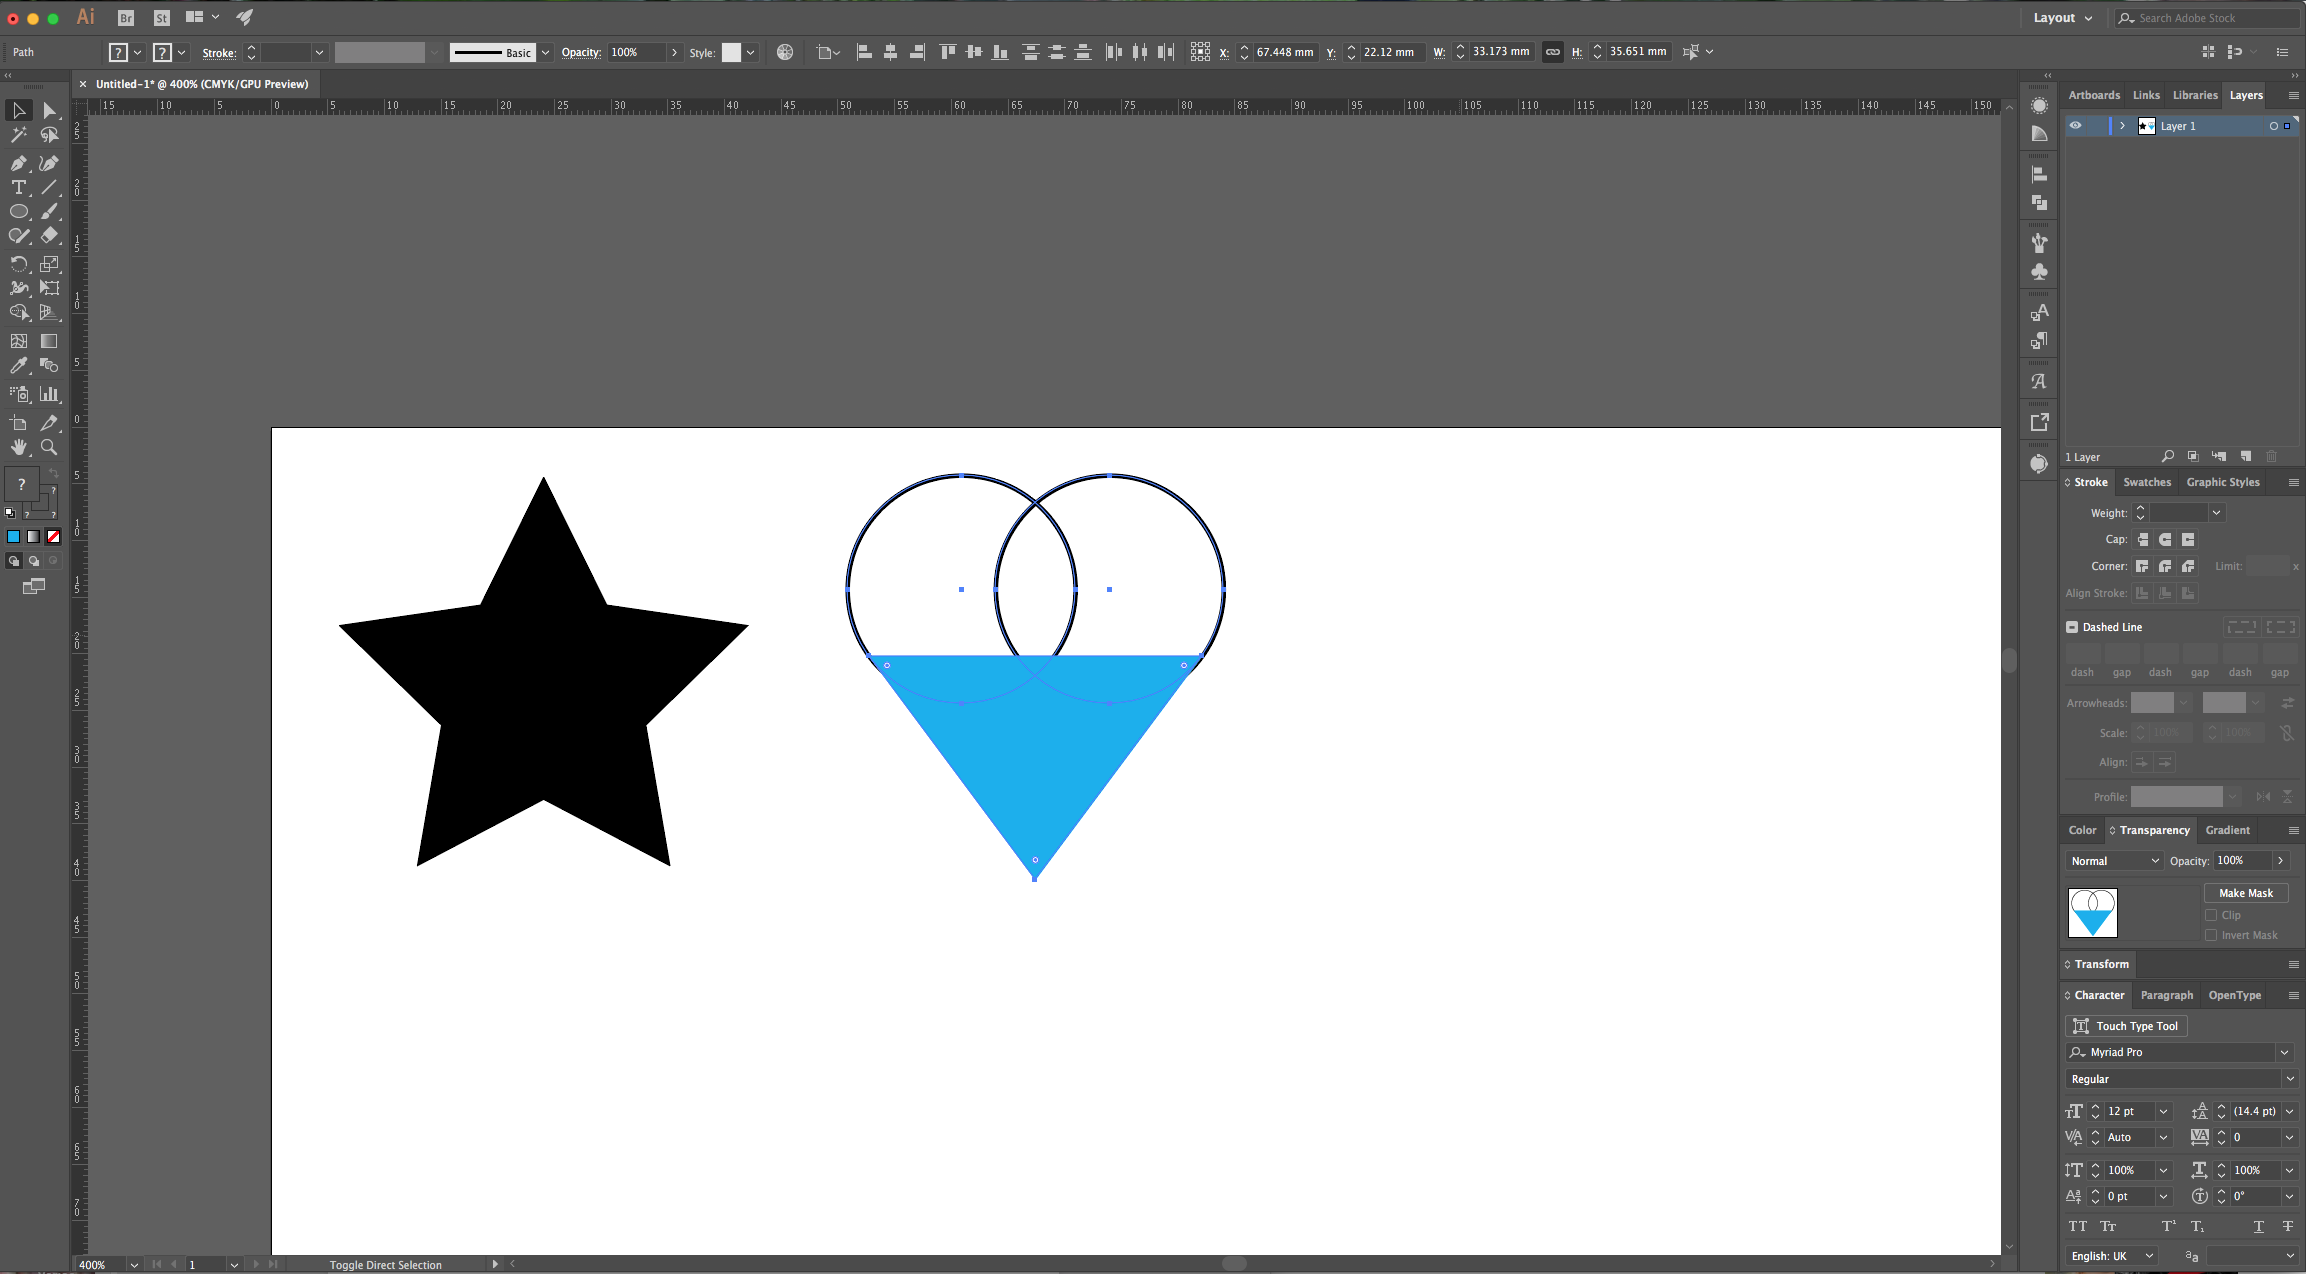
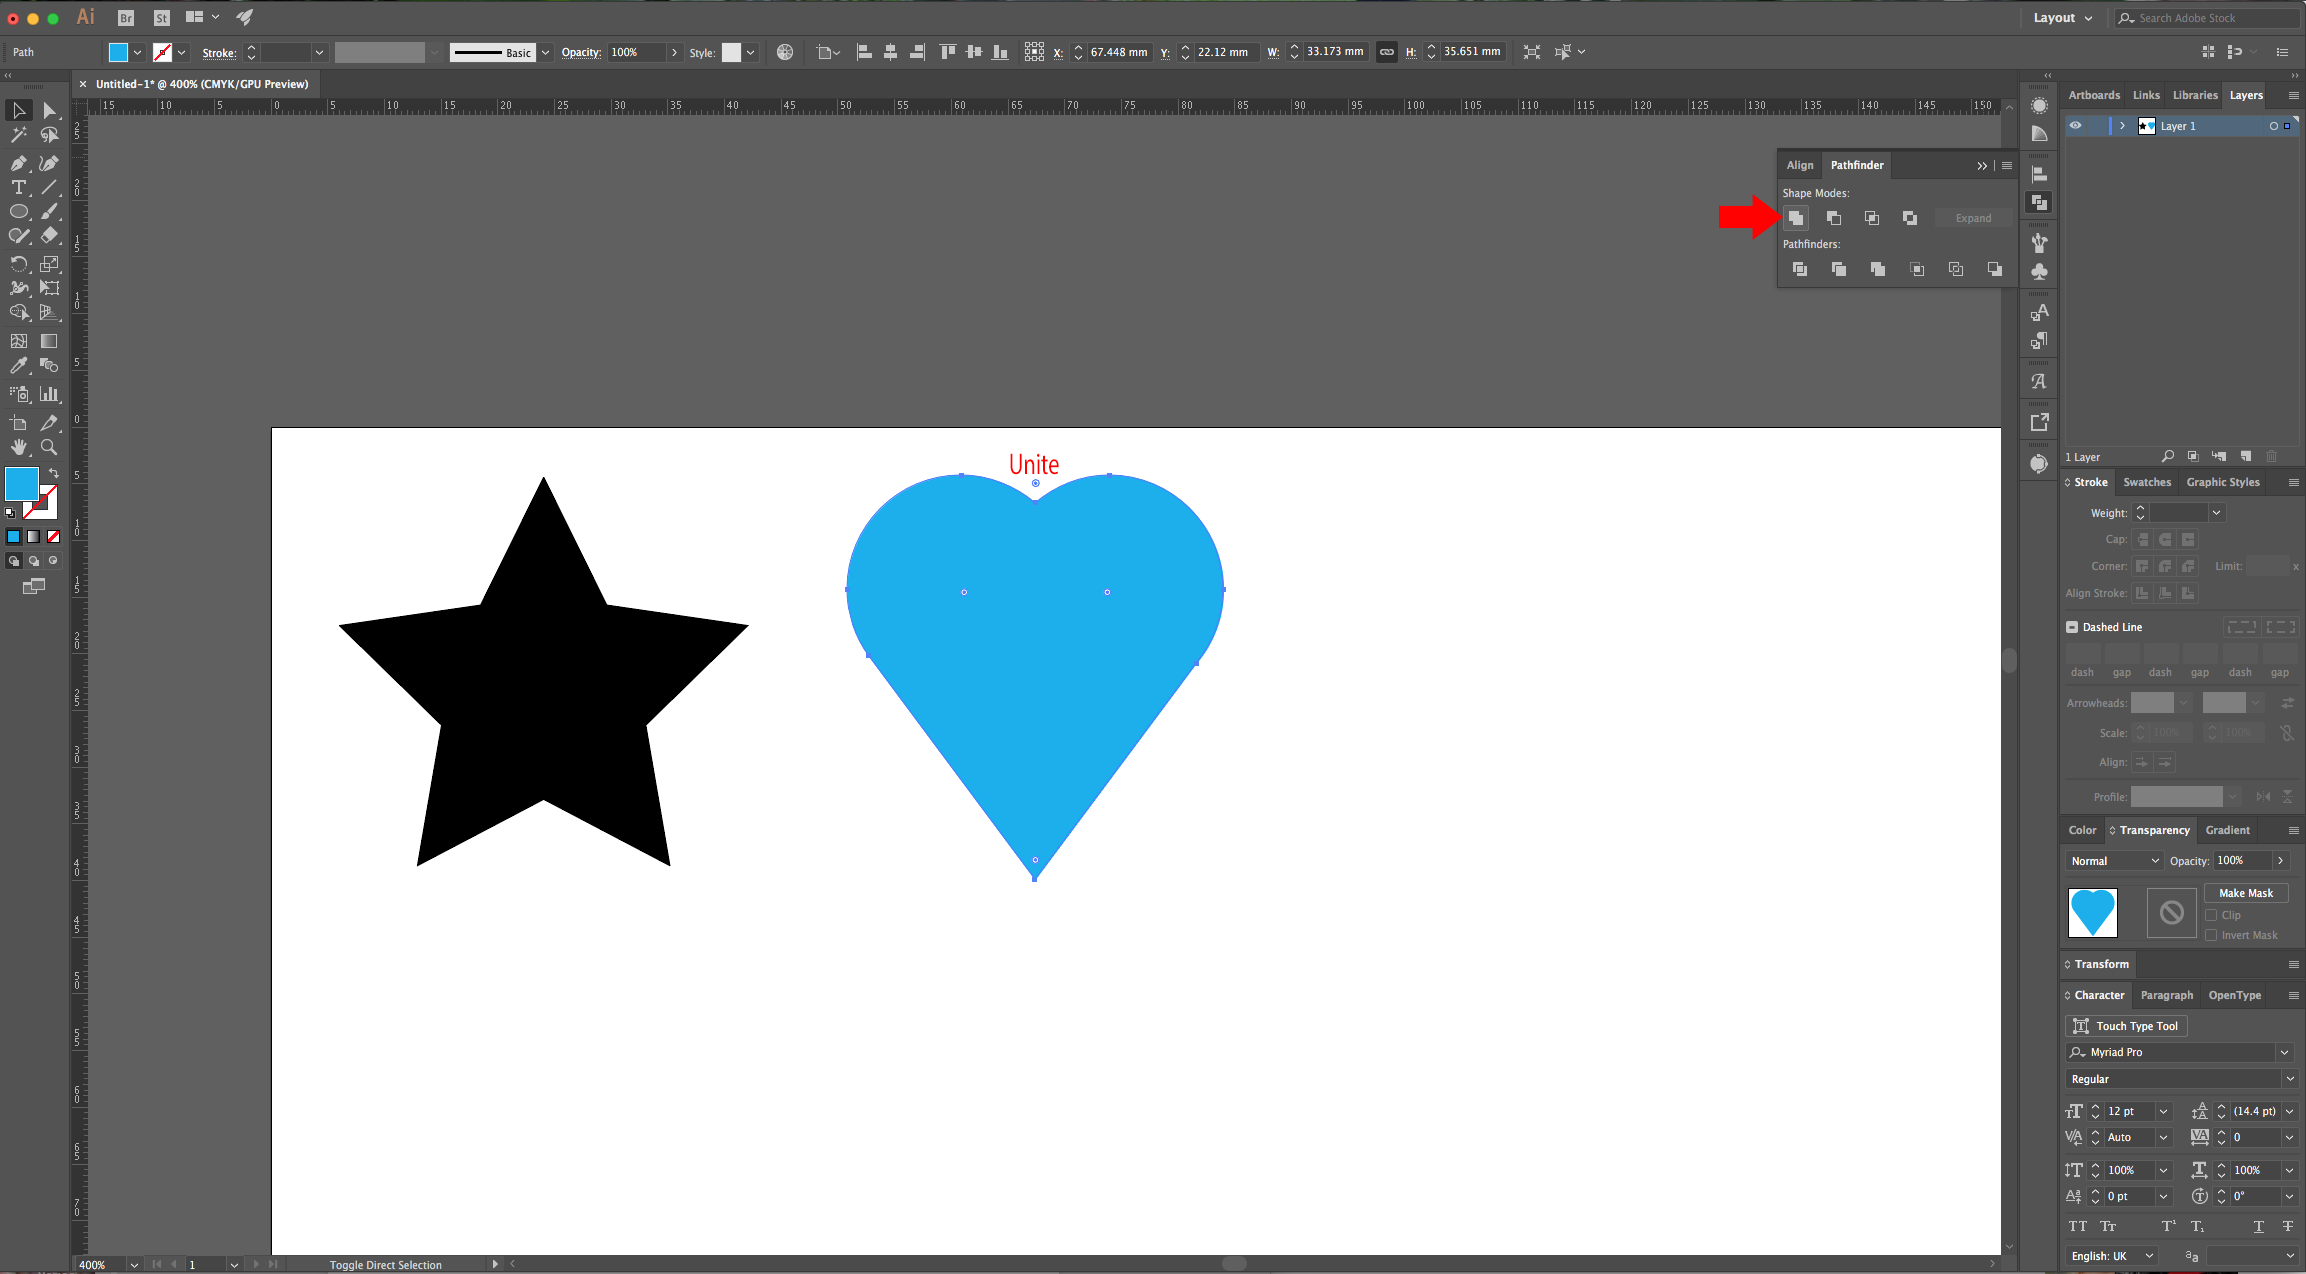
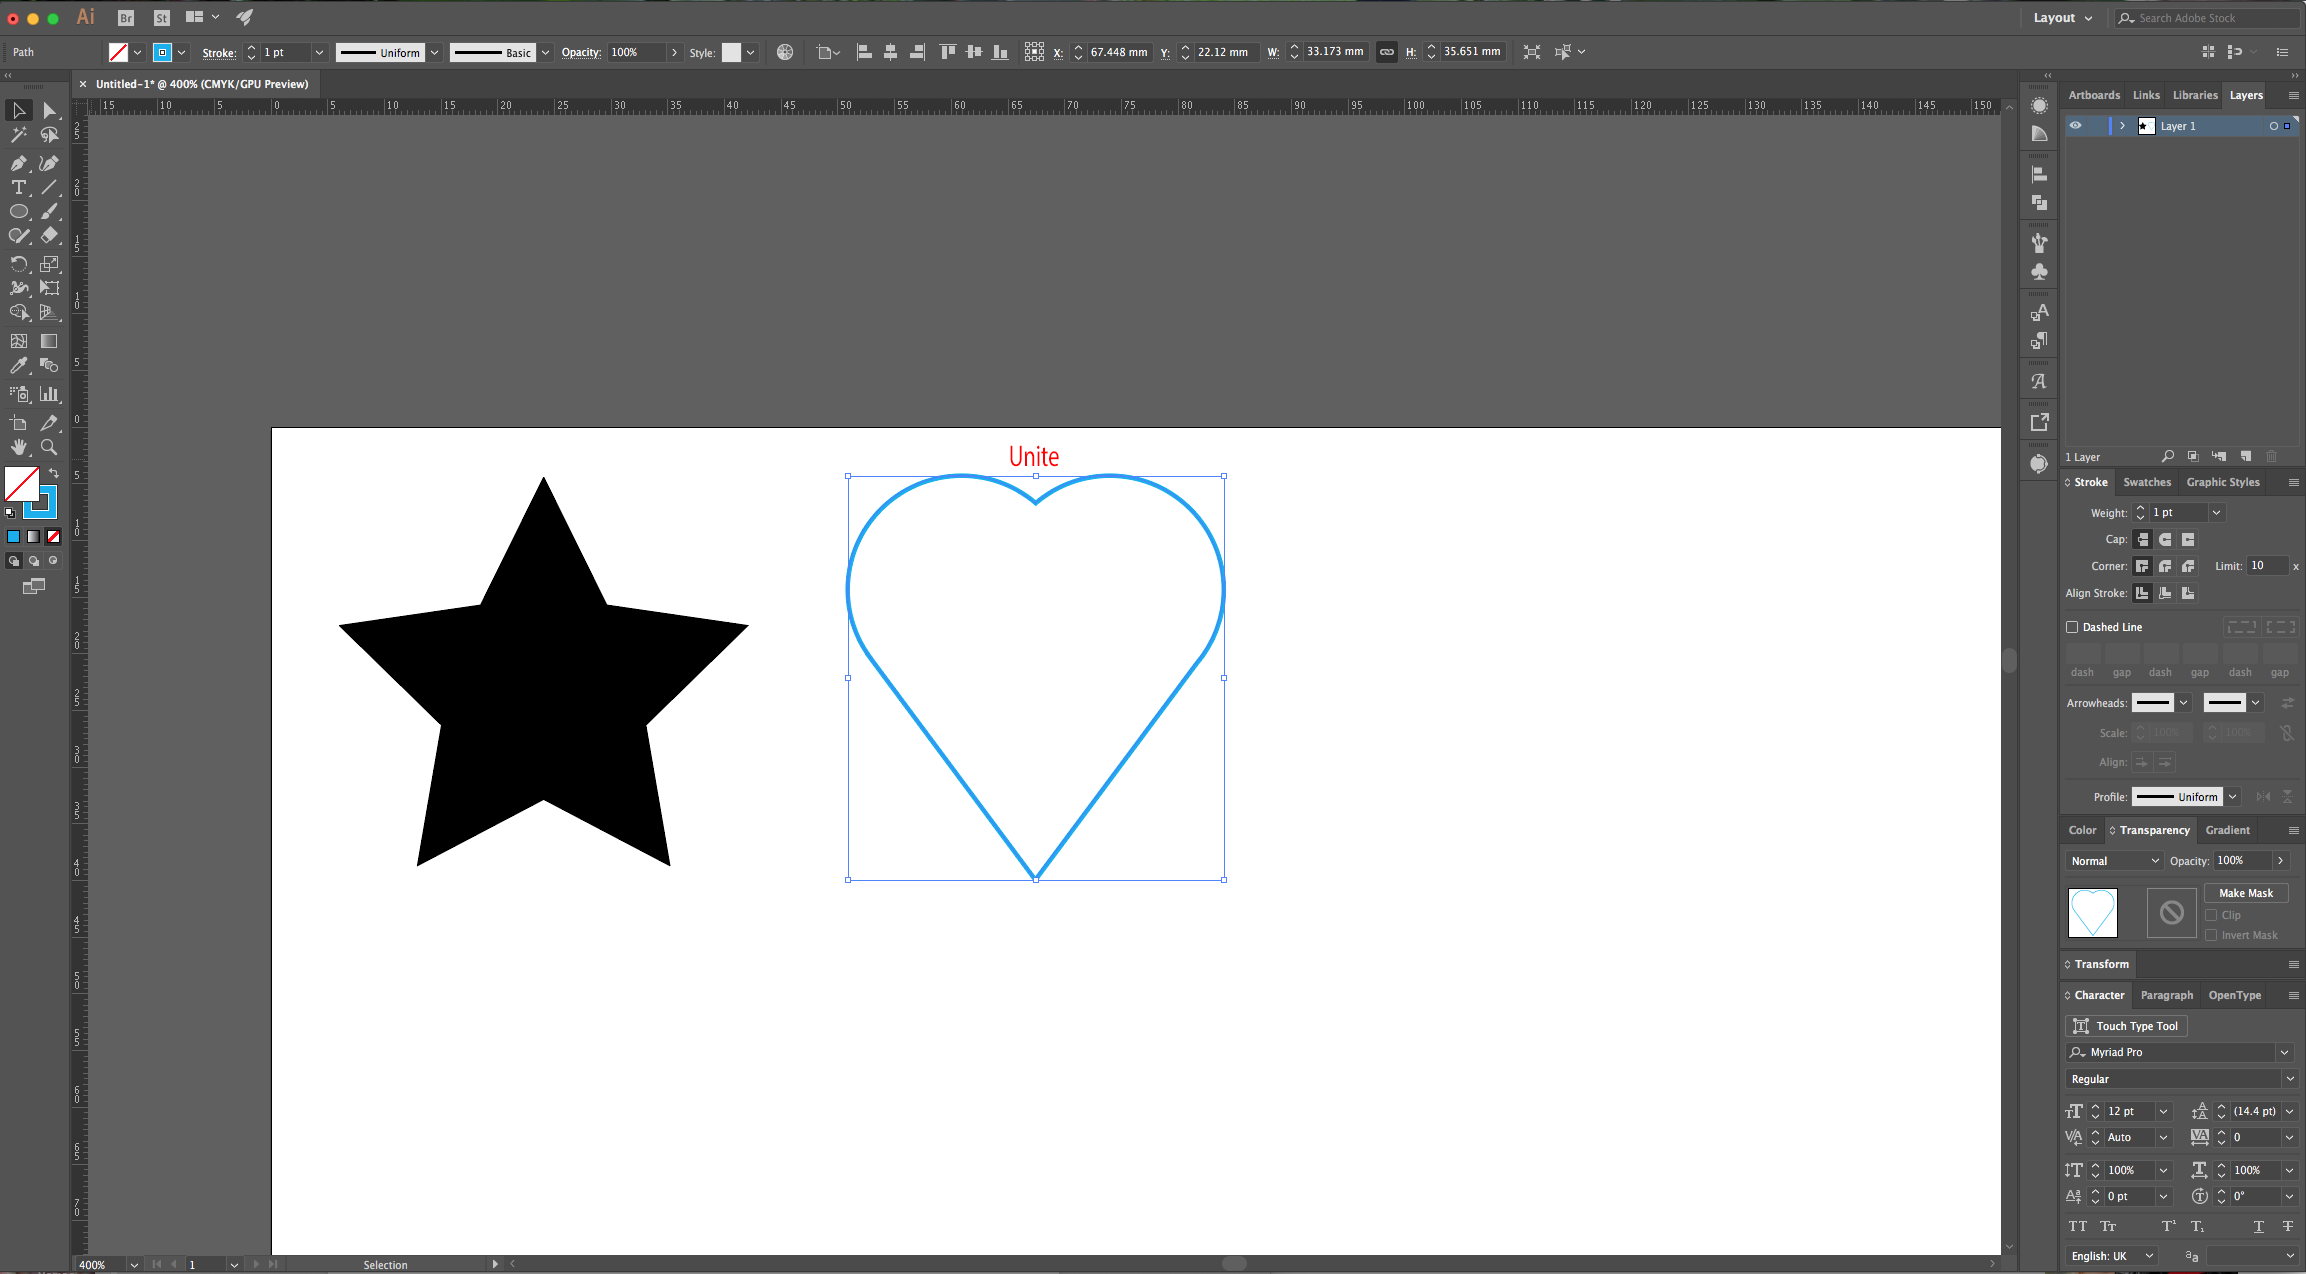
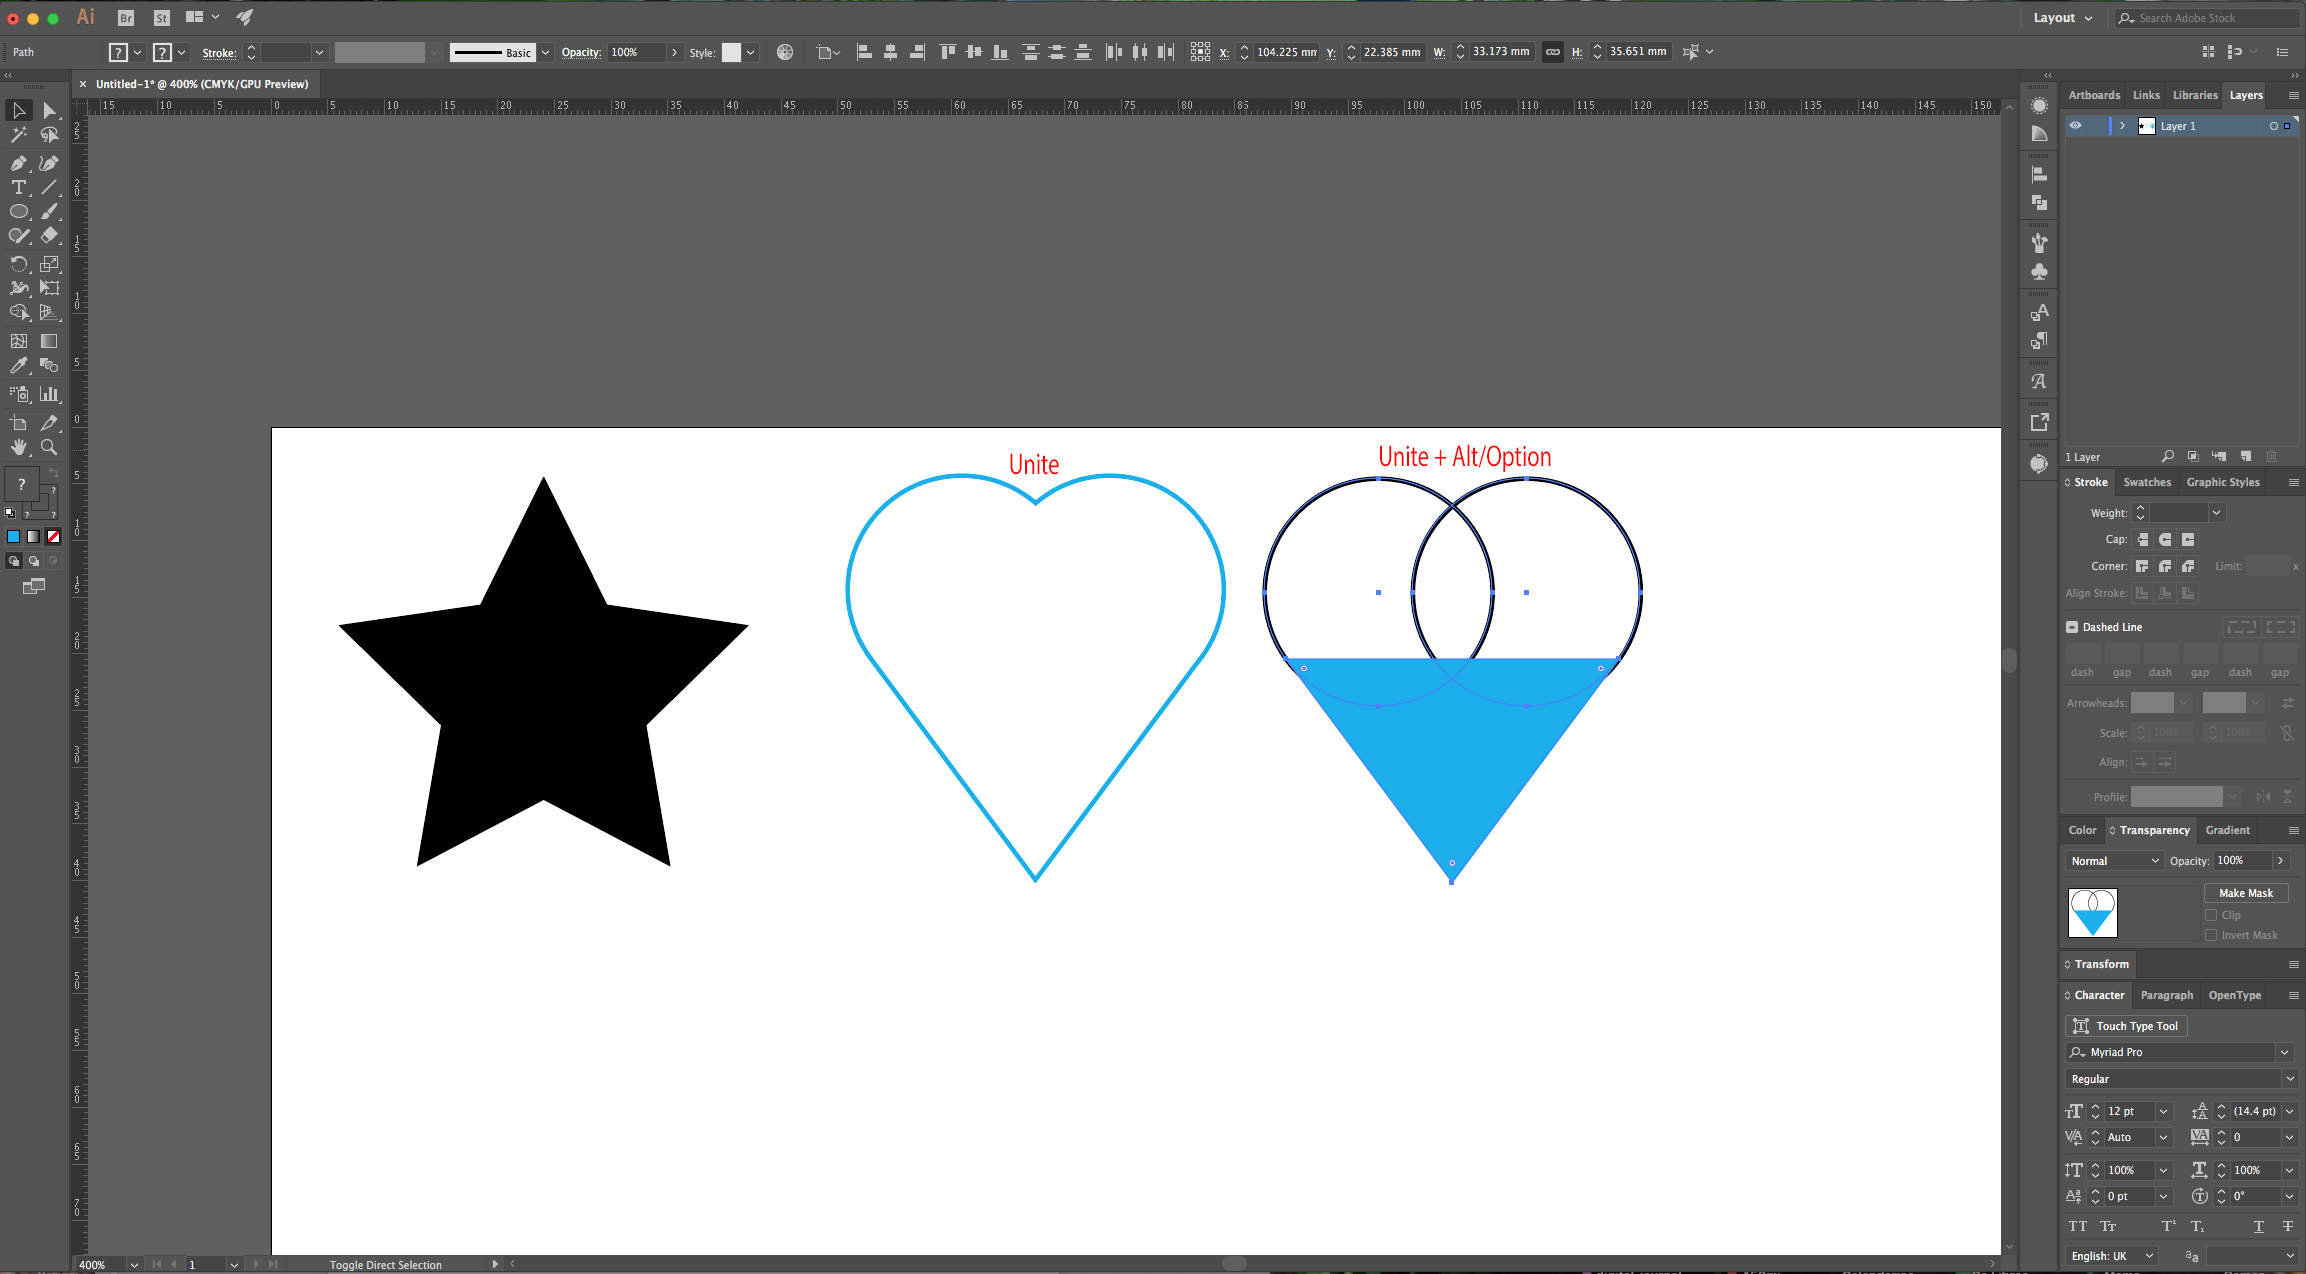
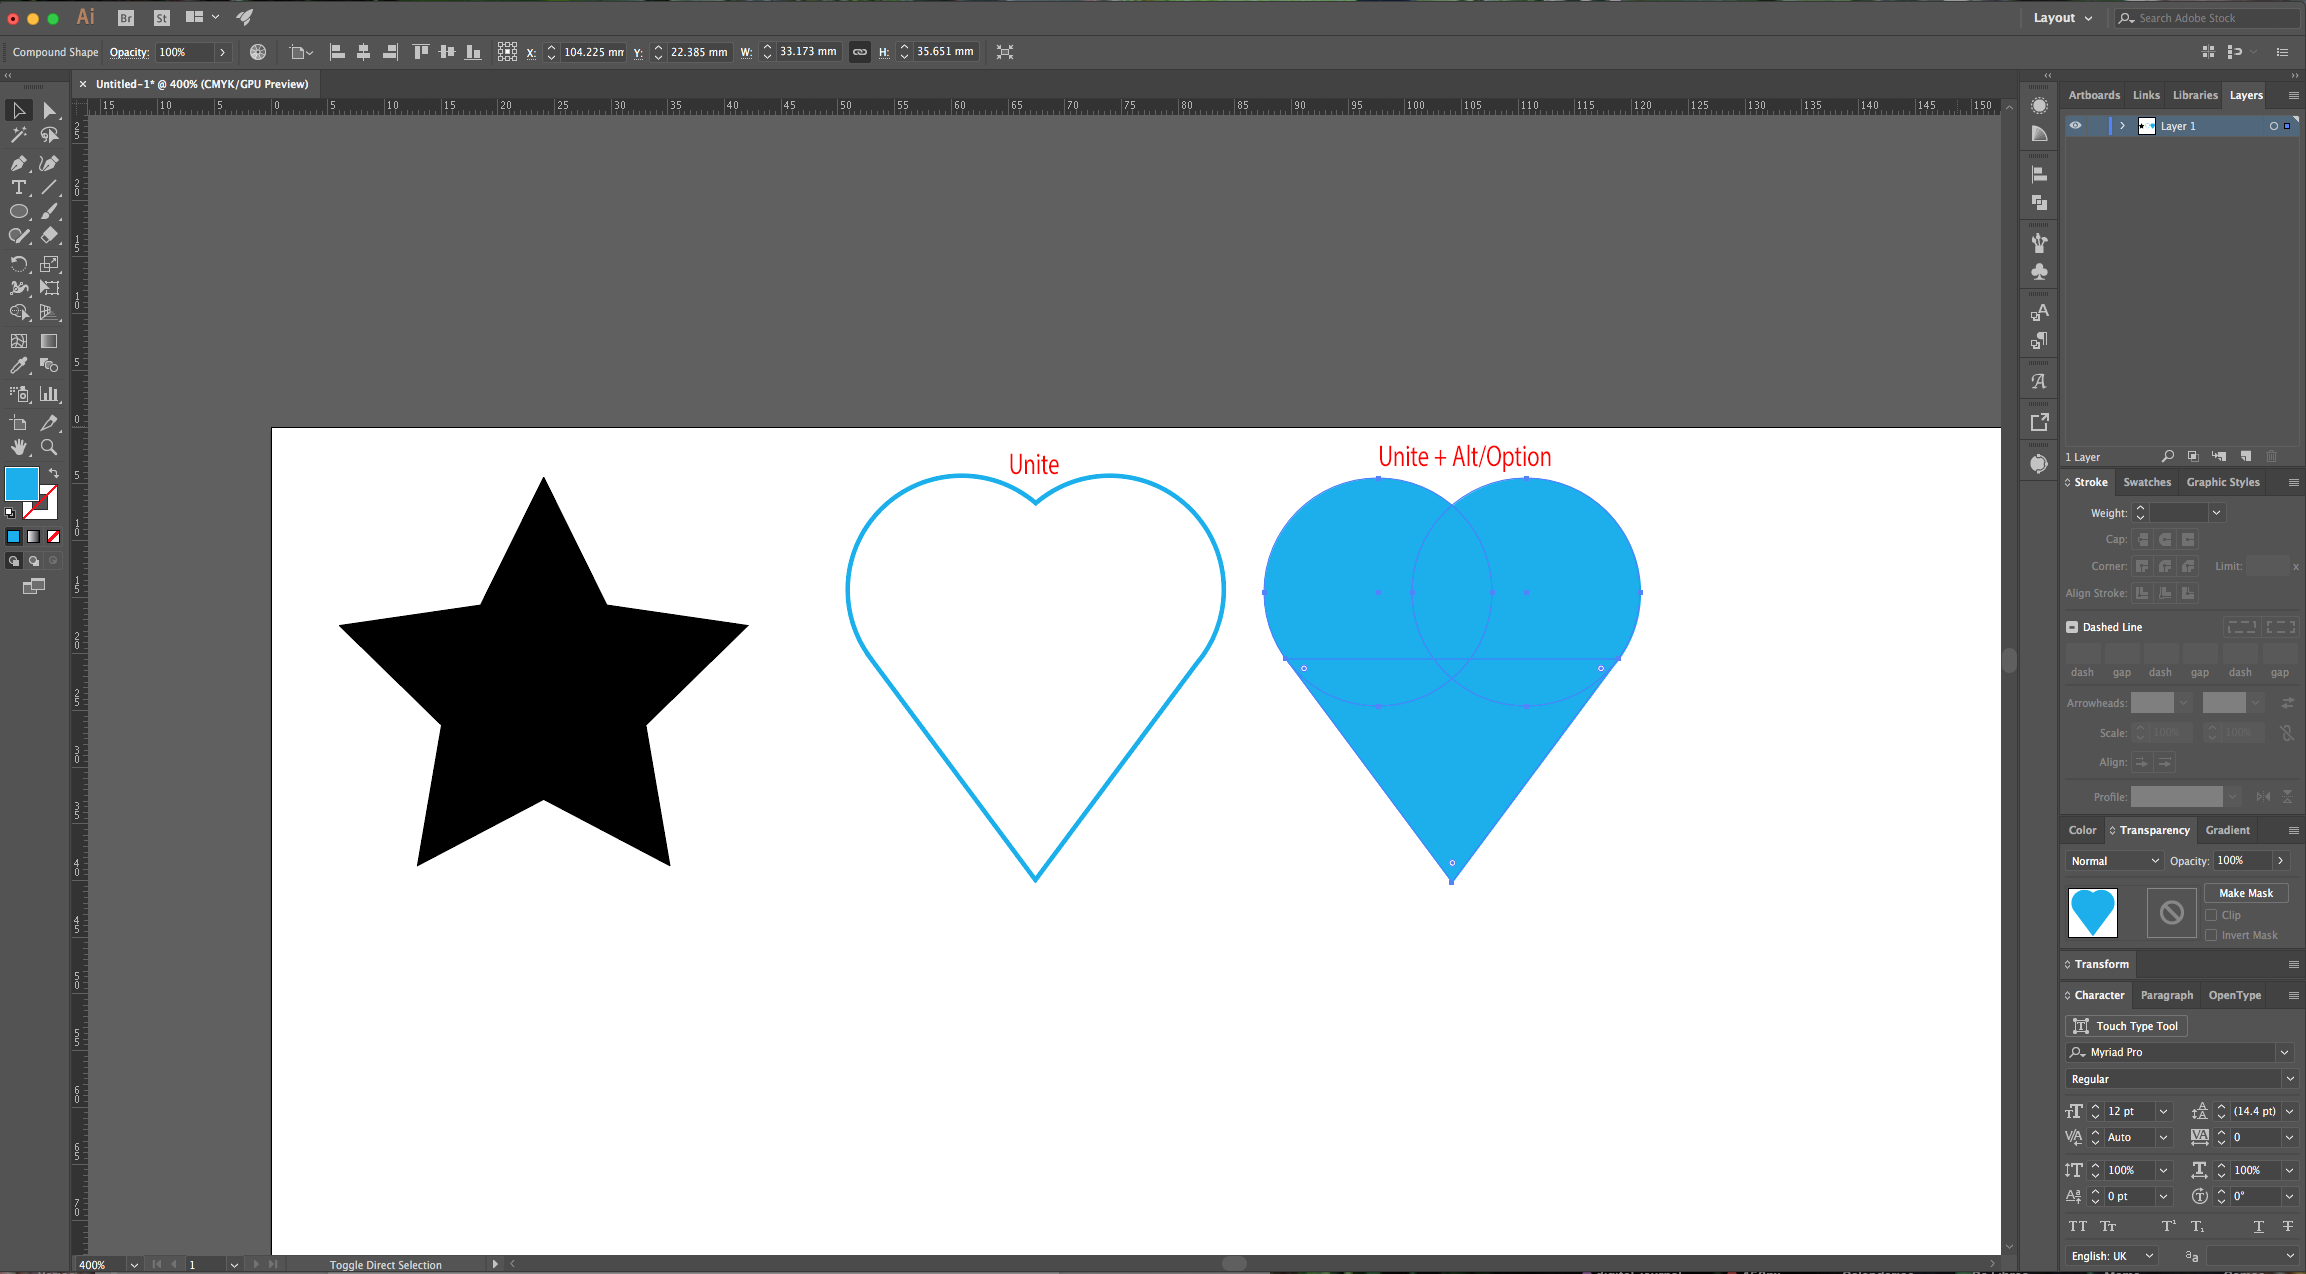
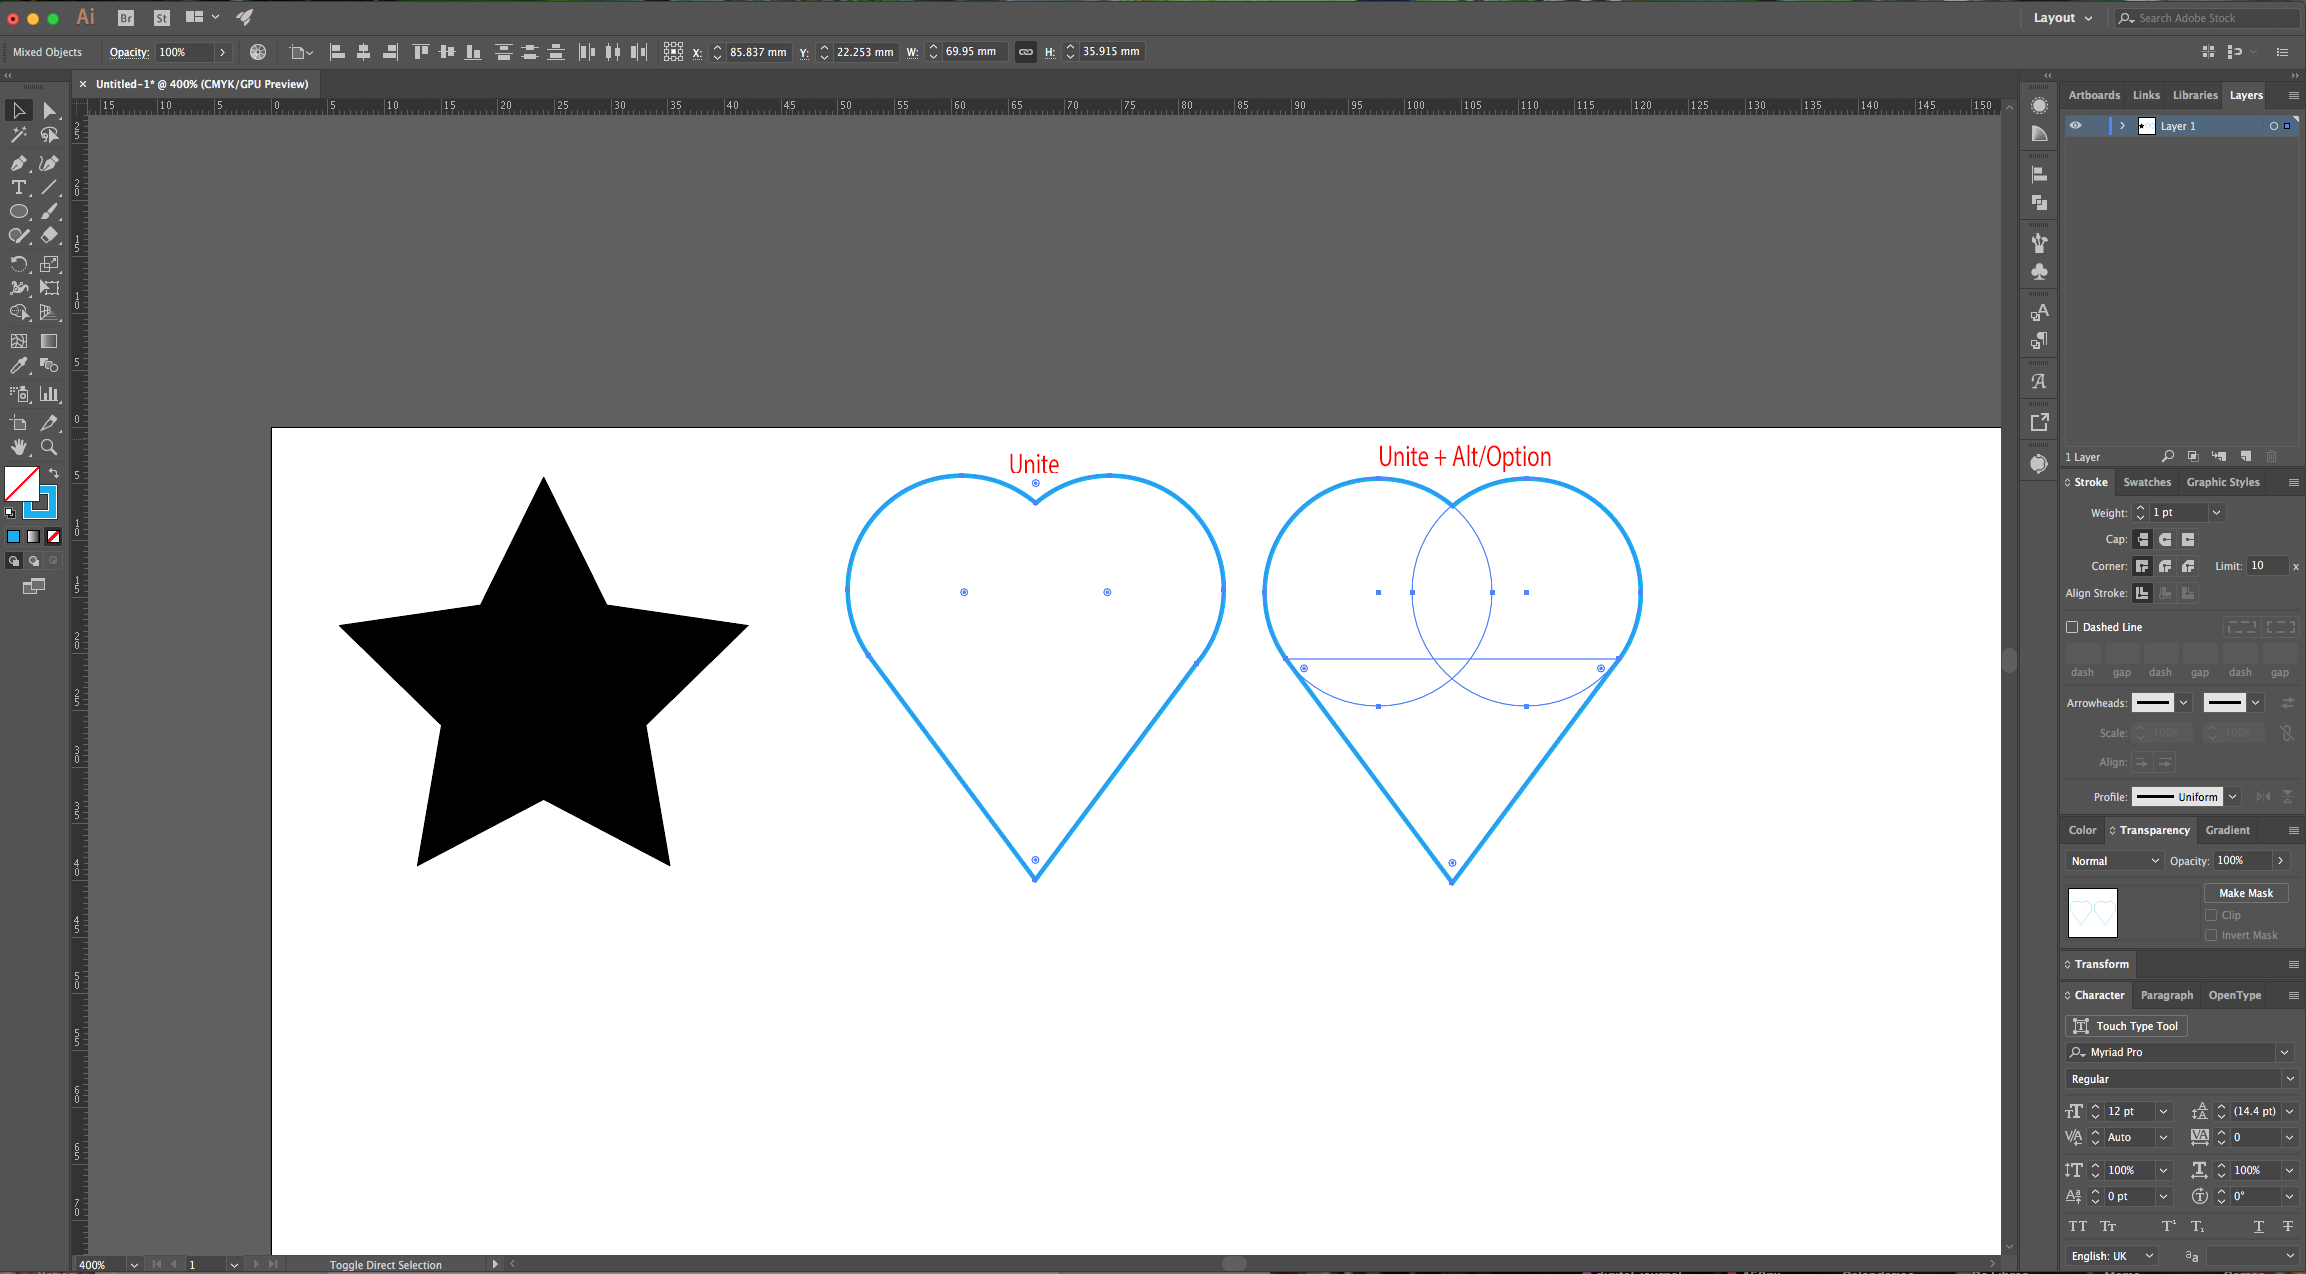
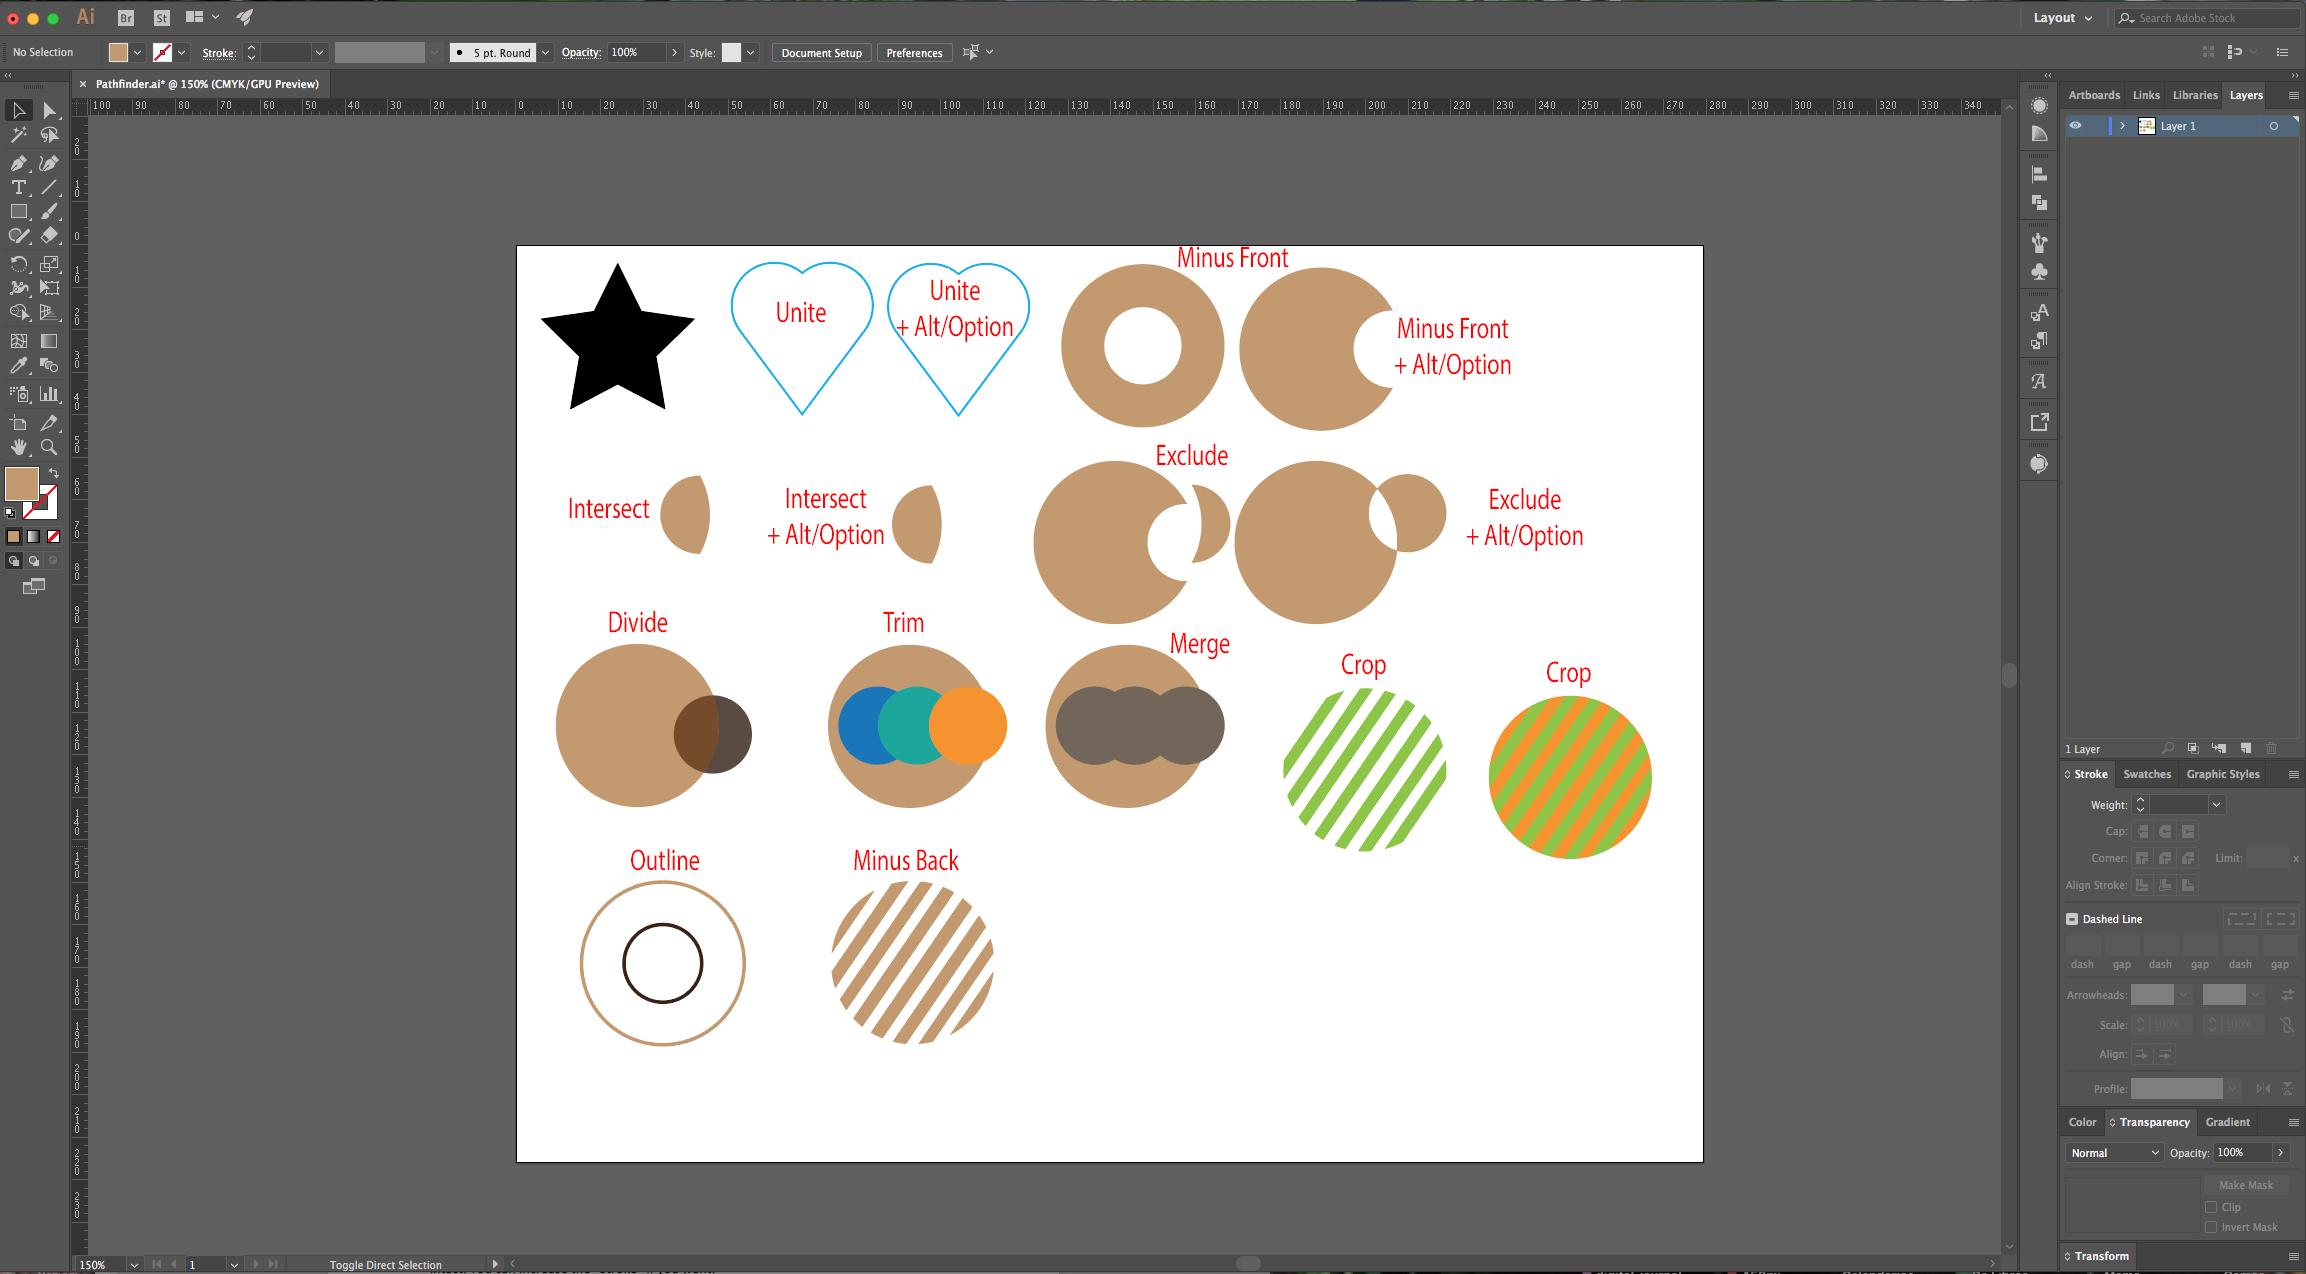
3 - The first option in the “Pathfinder Panel” is “Unite”. Select all the “Paths” you want together with the “Selection Tool” and choose it in the “Panel”. It will unite everything and make it the same color as the one of the objects on top. If you hold the “Alt/Option” key and choose this option you will “Create a Compound Shape and Add to the Shape Area”.
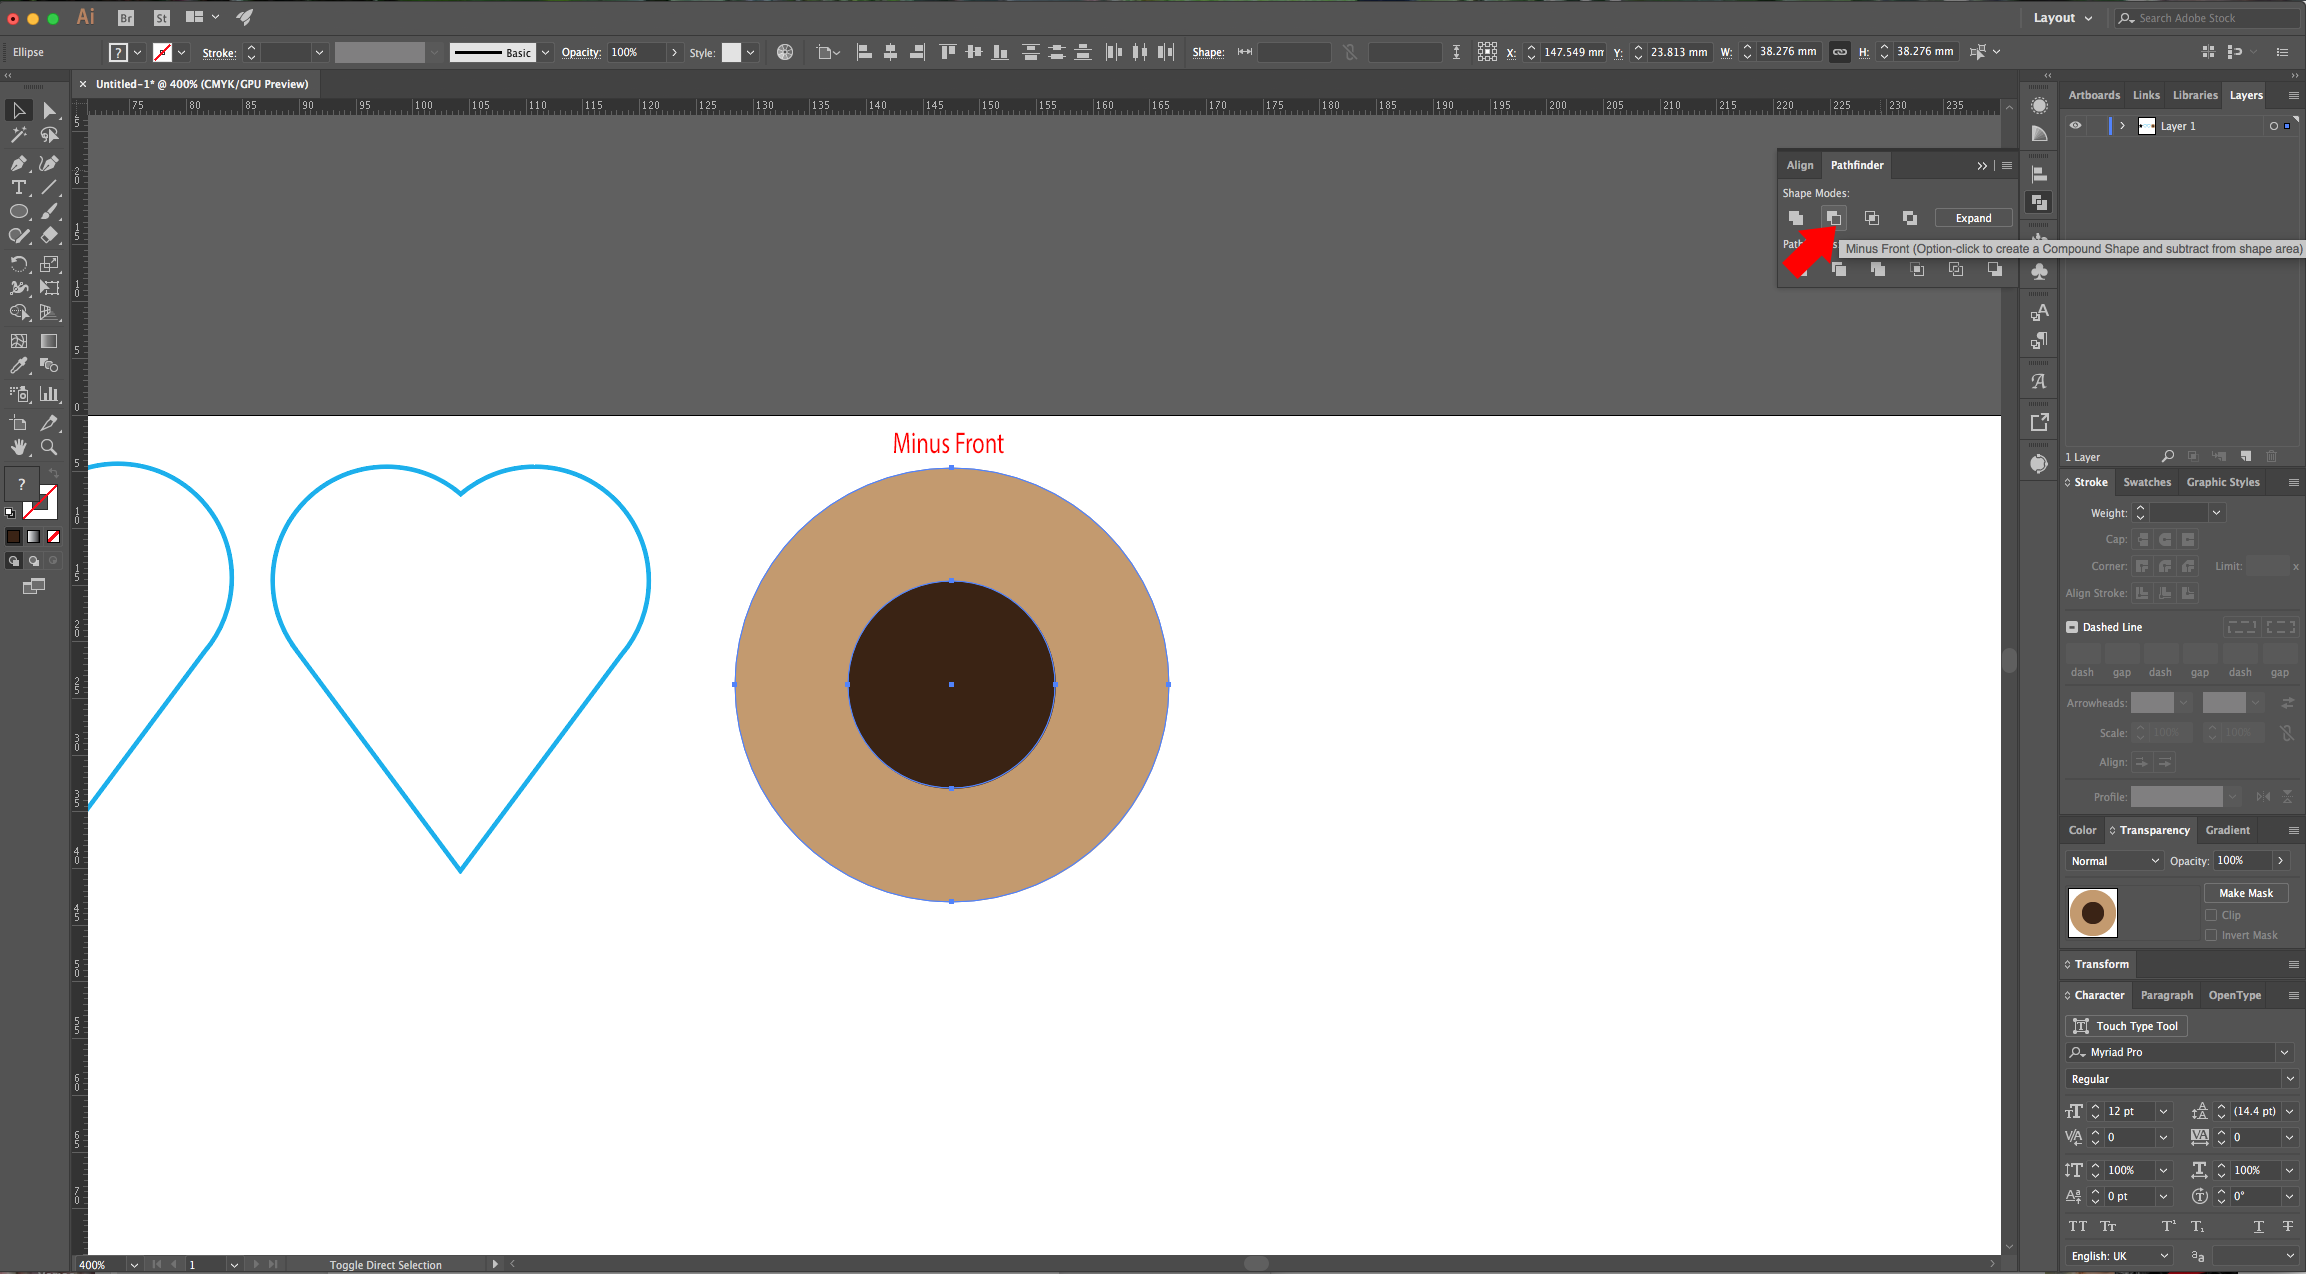
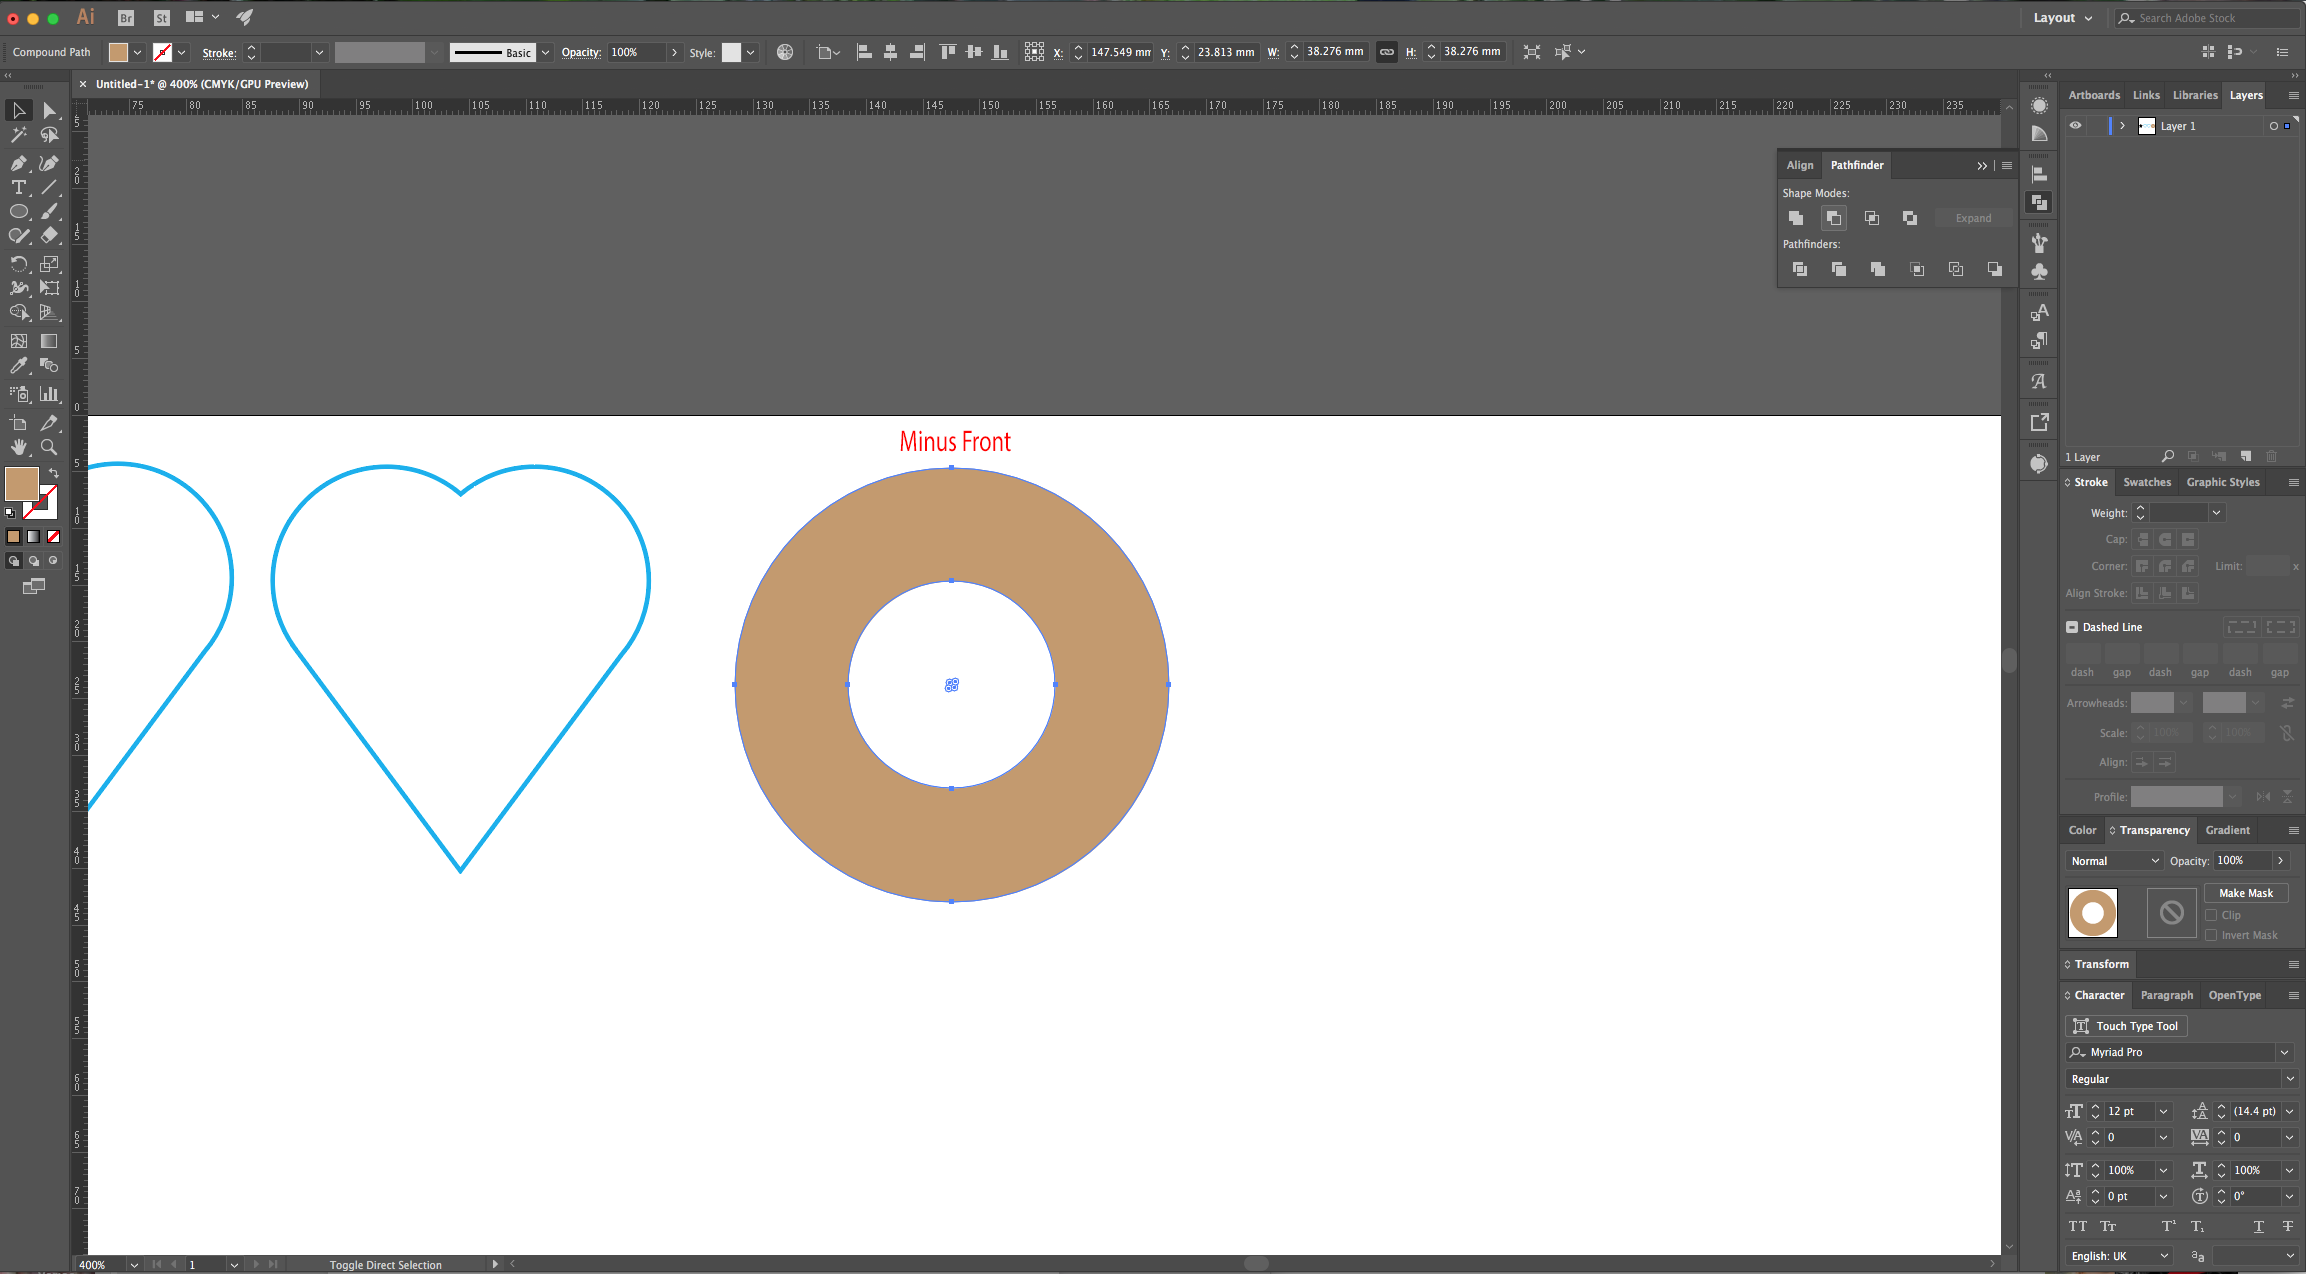
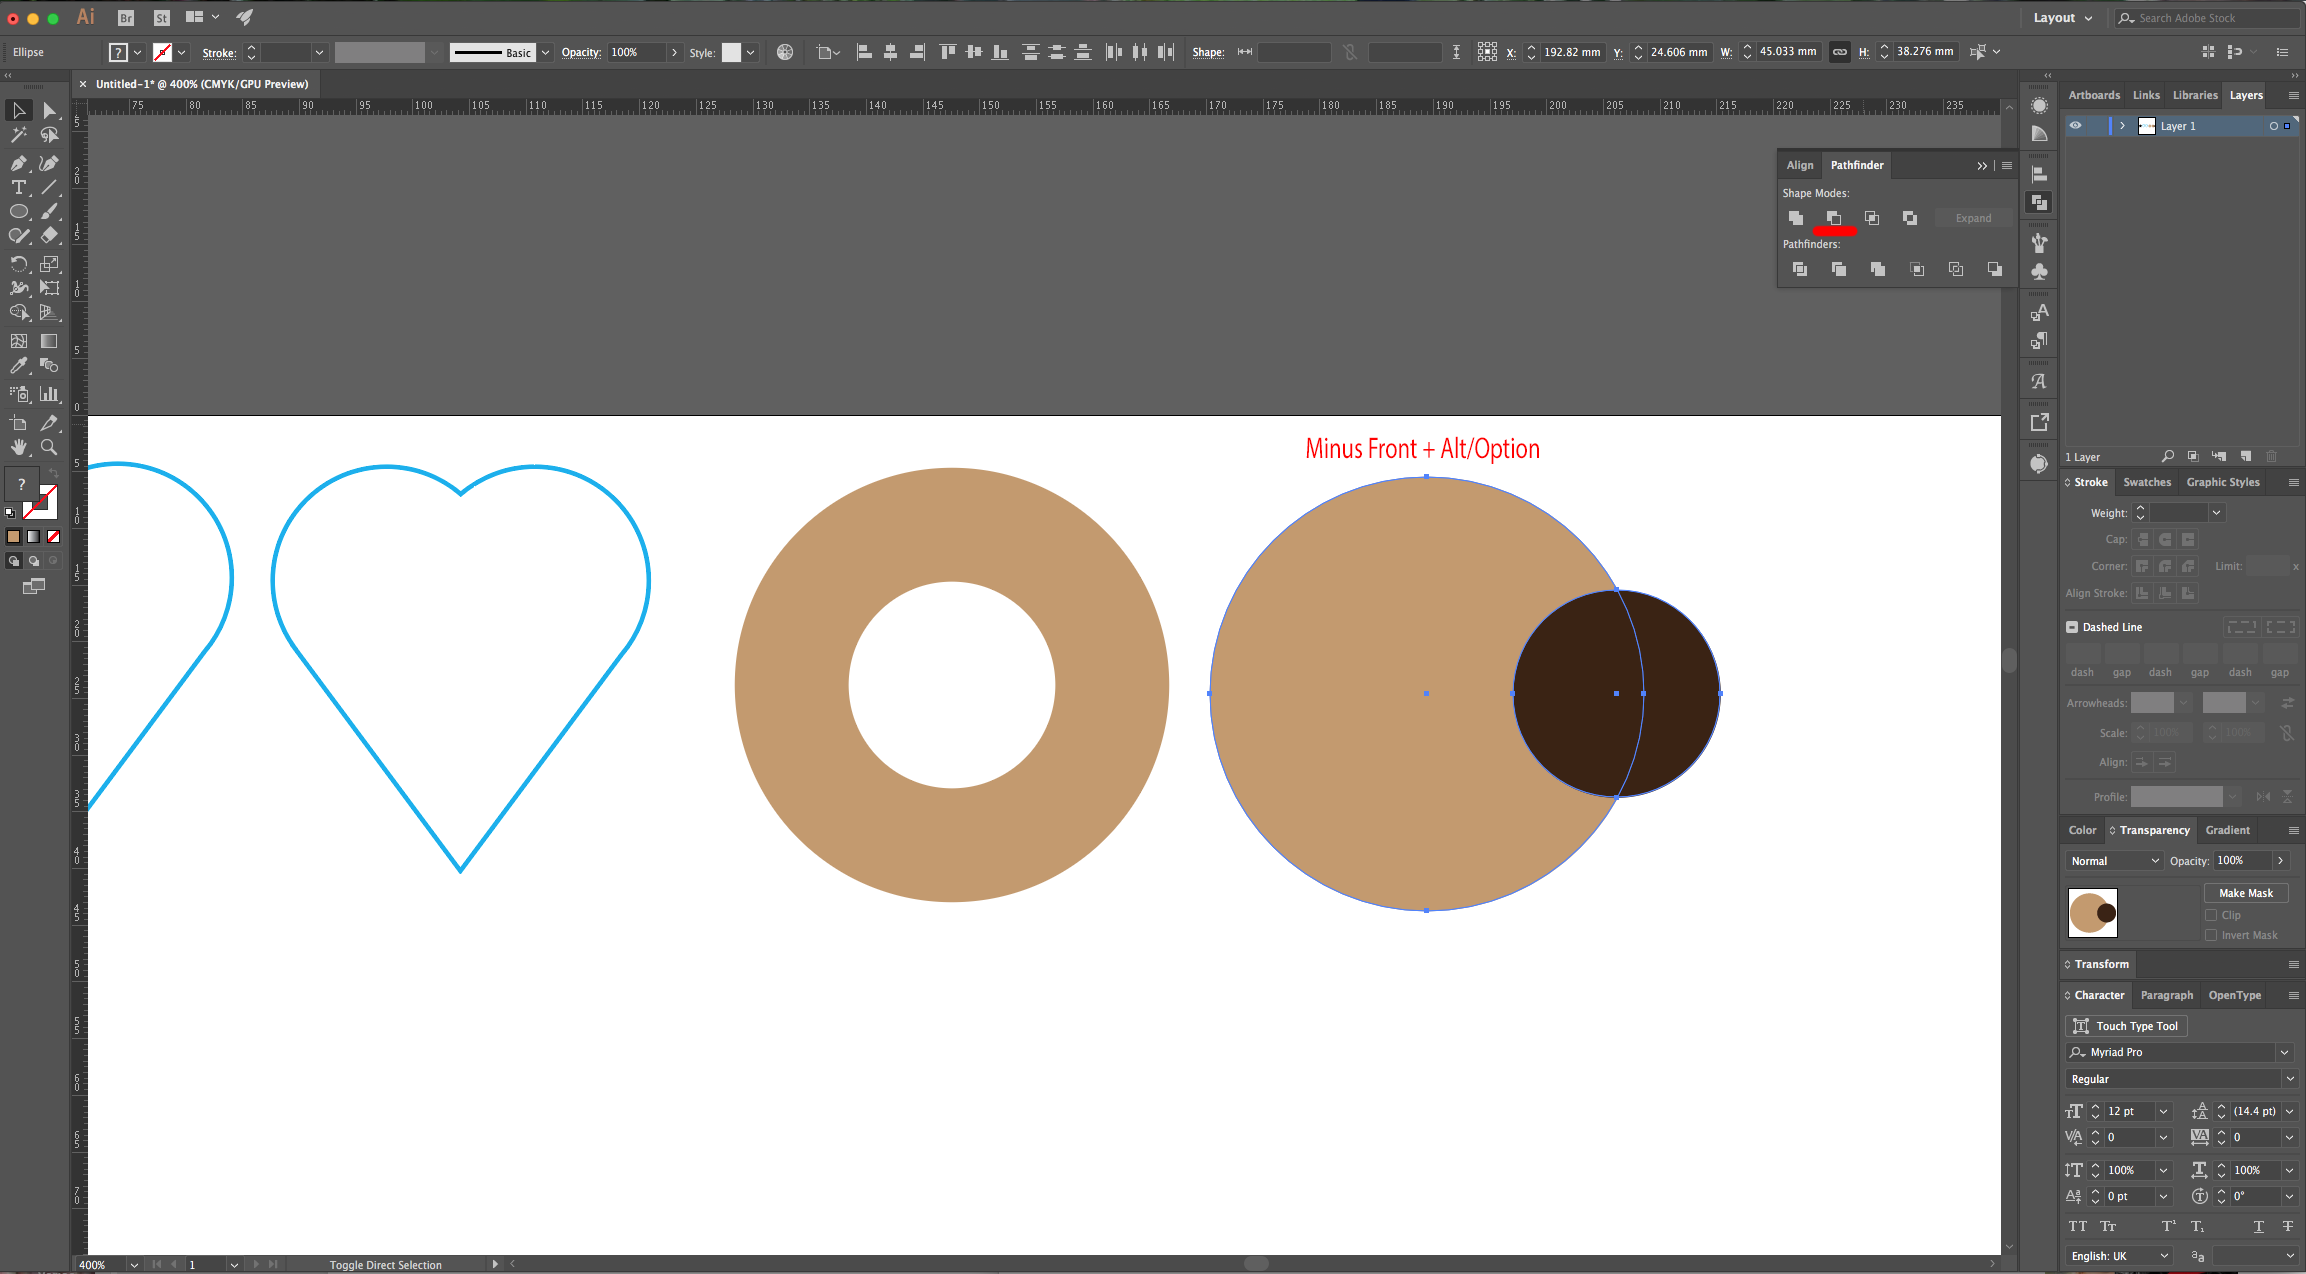
4 - The second option is “Minus Front” or “Subtract”. As the name says, with this you can erase the portion that “Path” that stands on top occupies. In this option, you can hold the “Alt/Option” key to “Create a Compound Shape”.

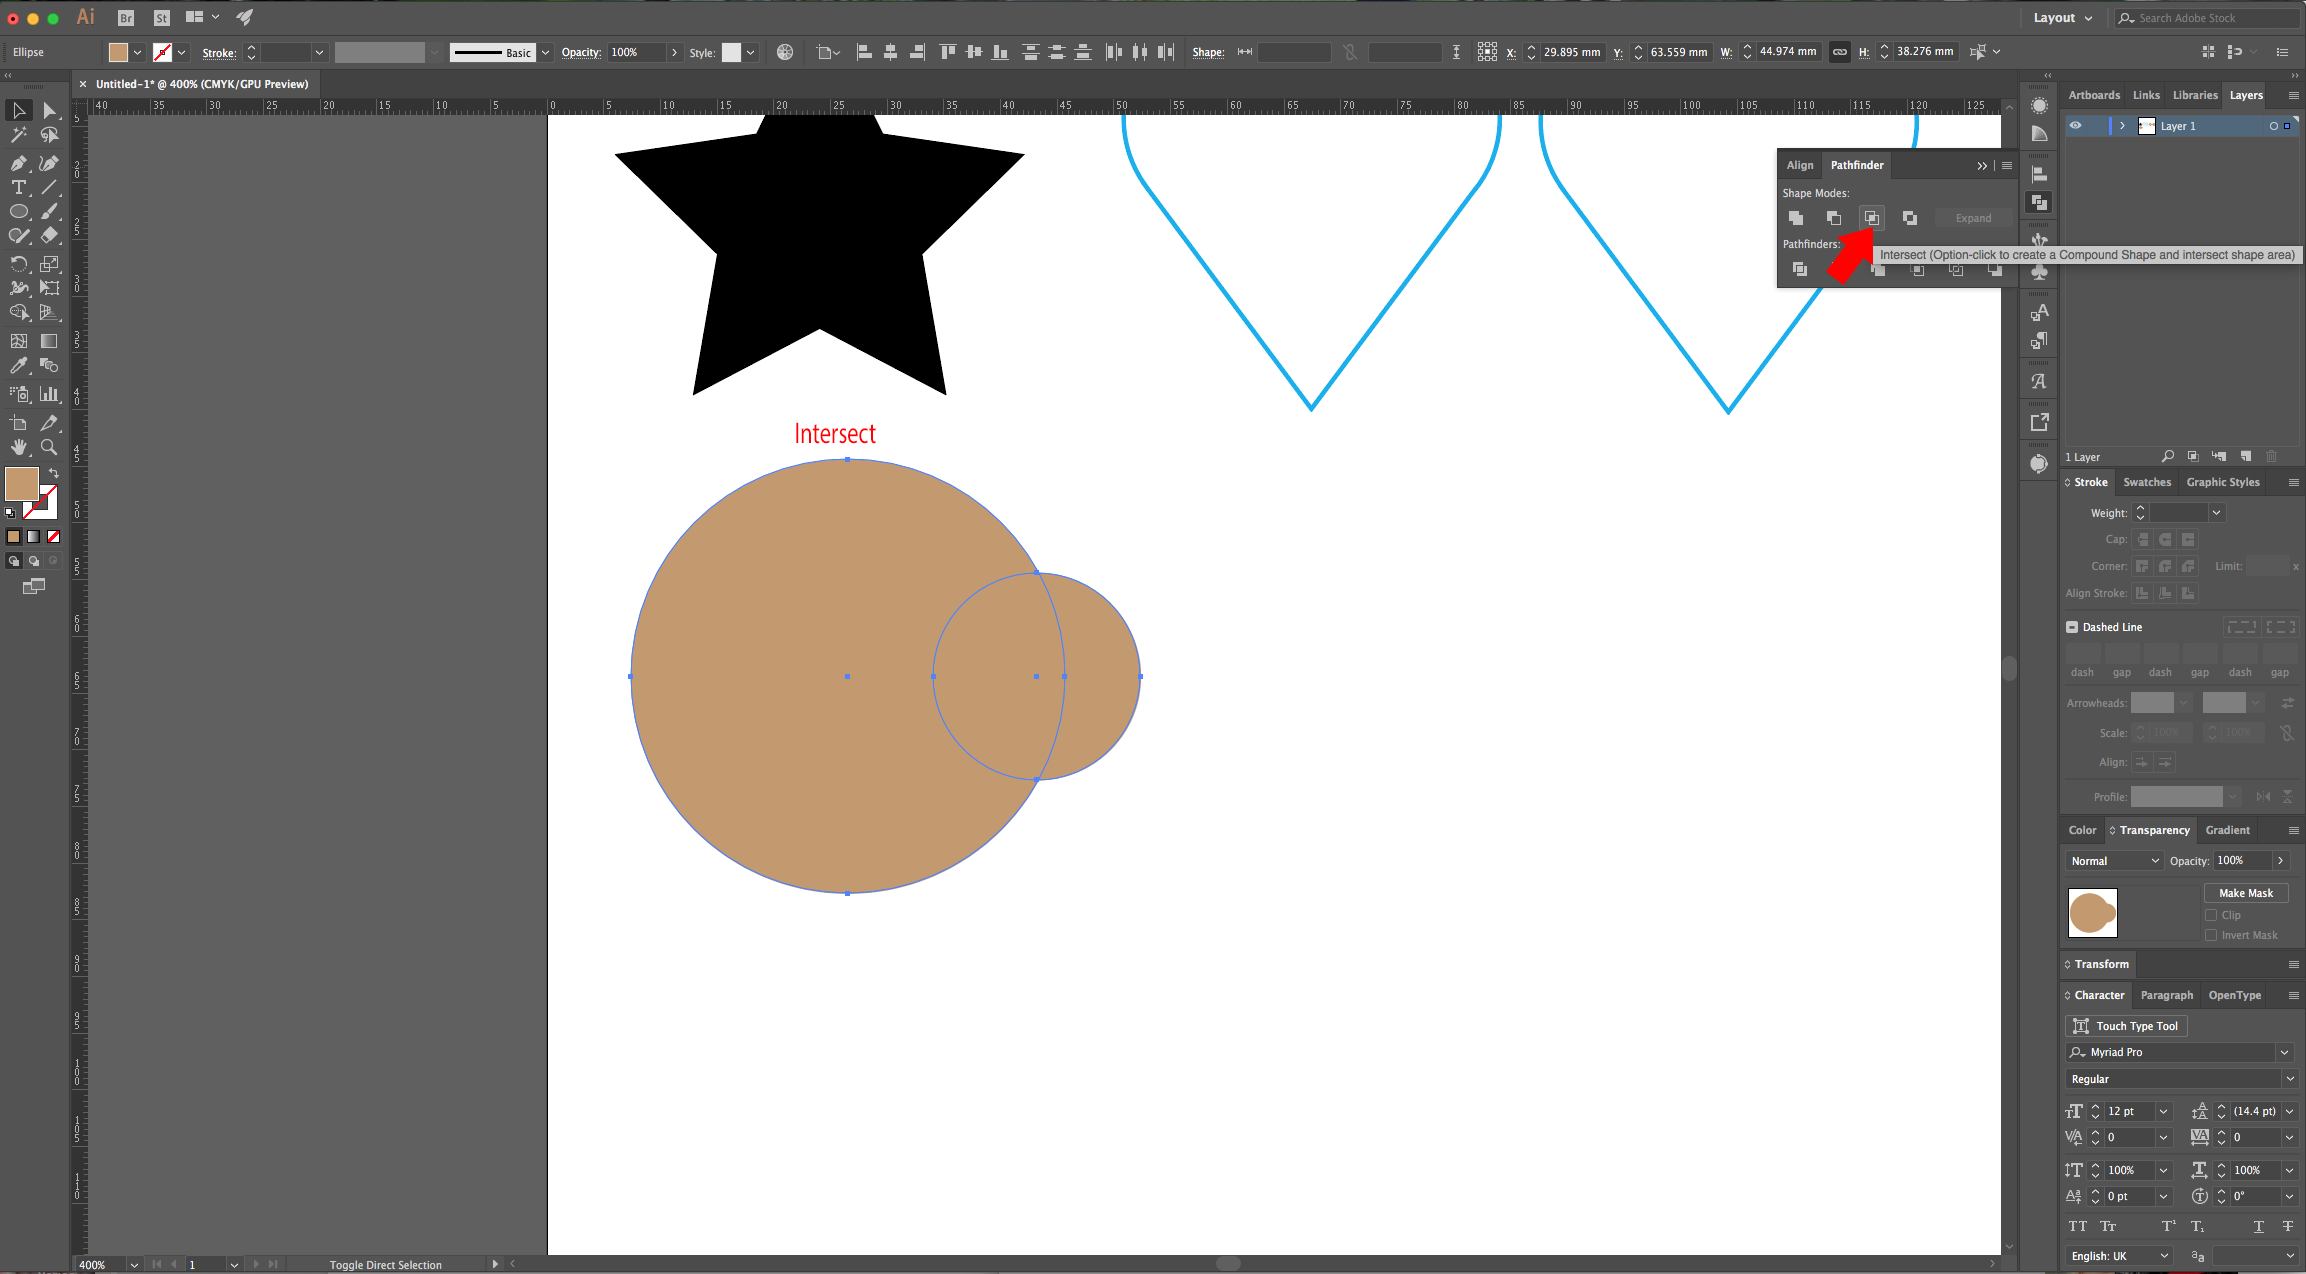
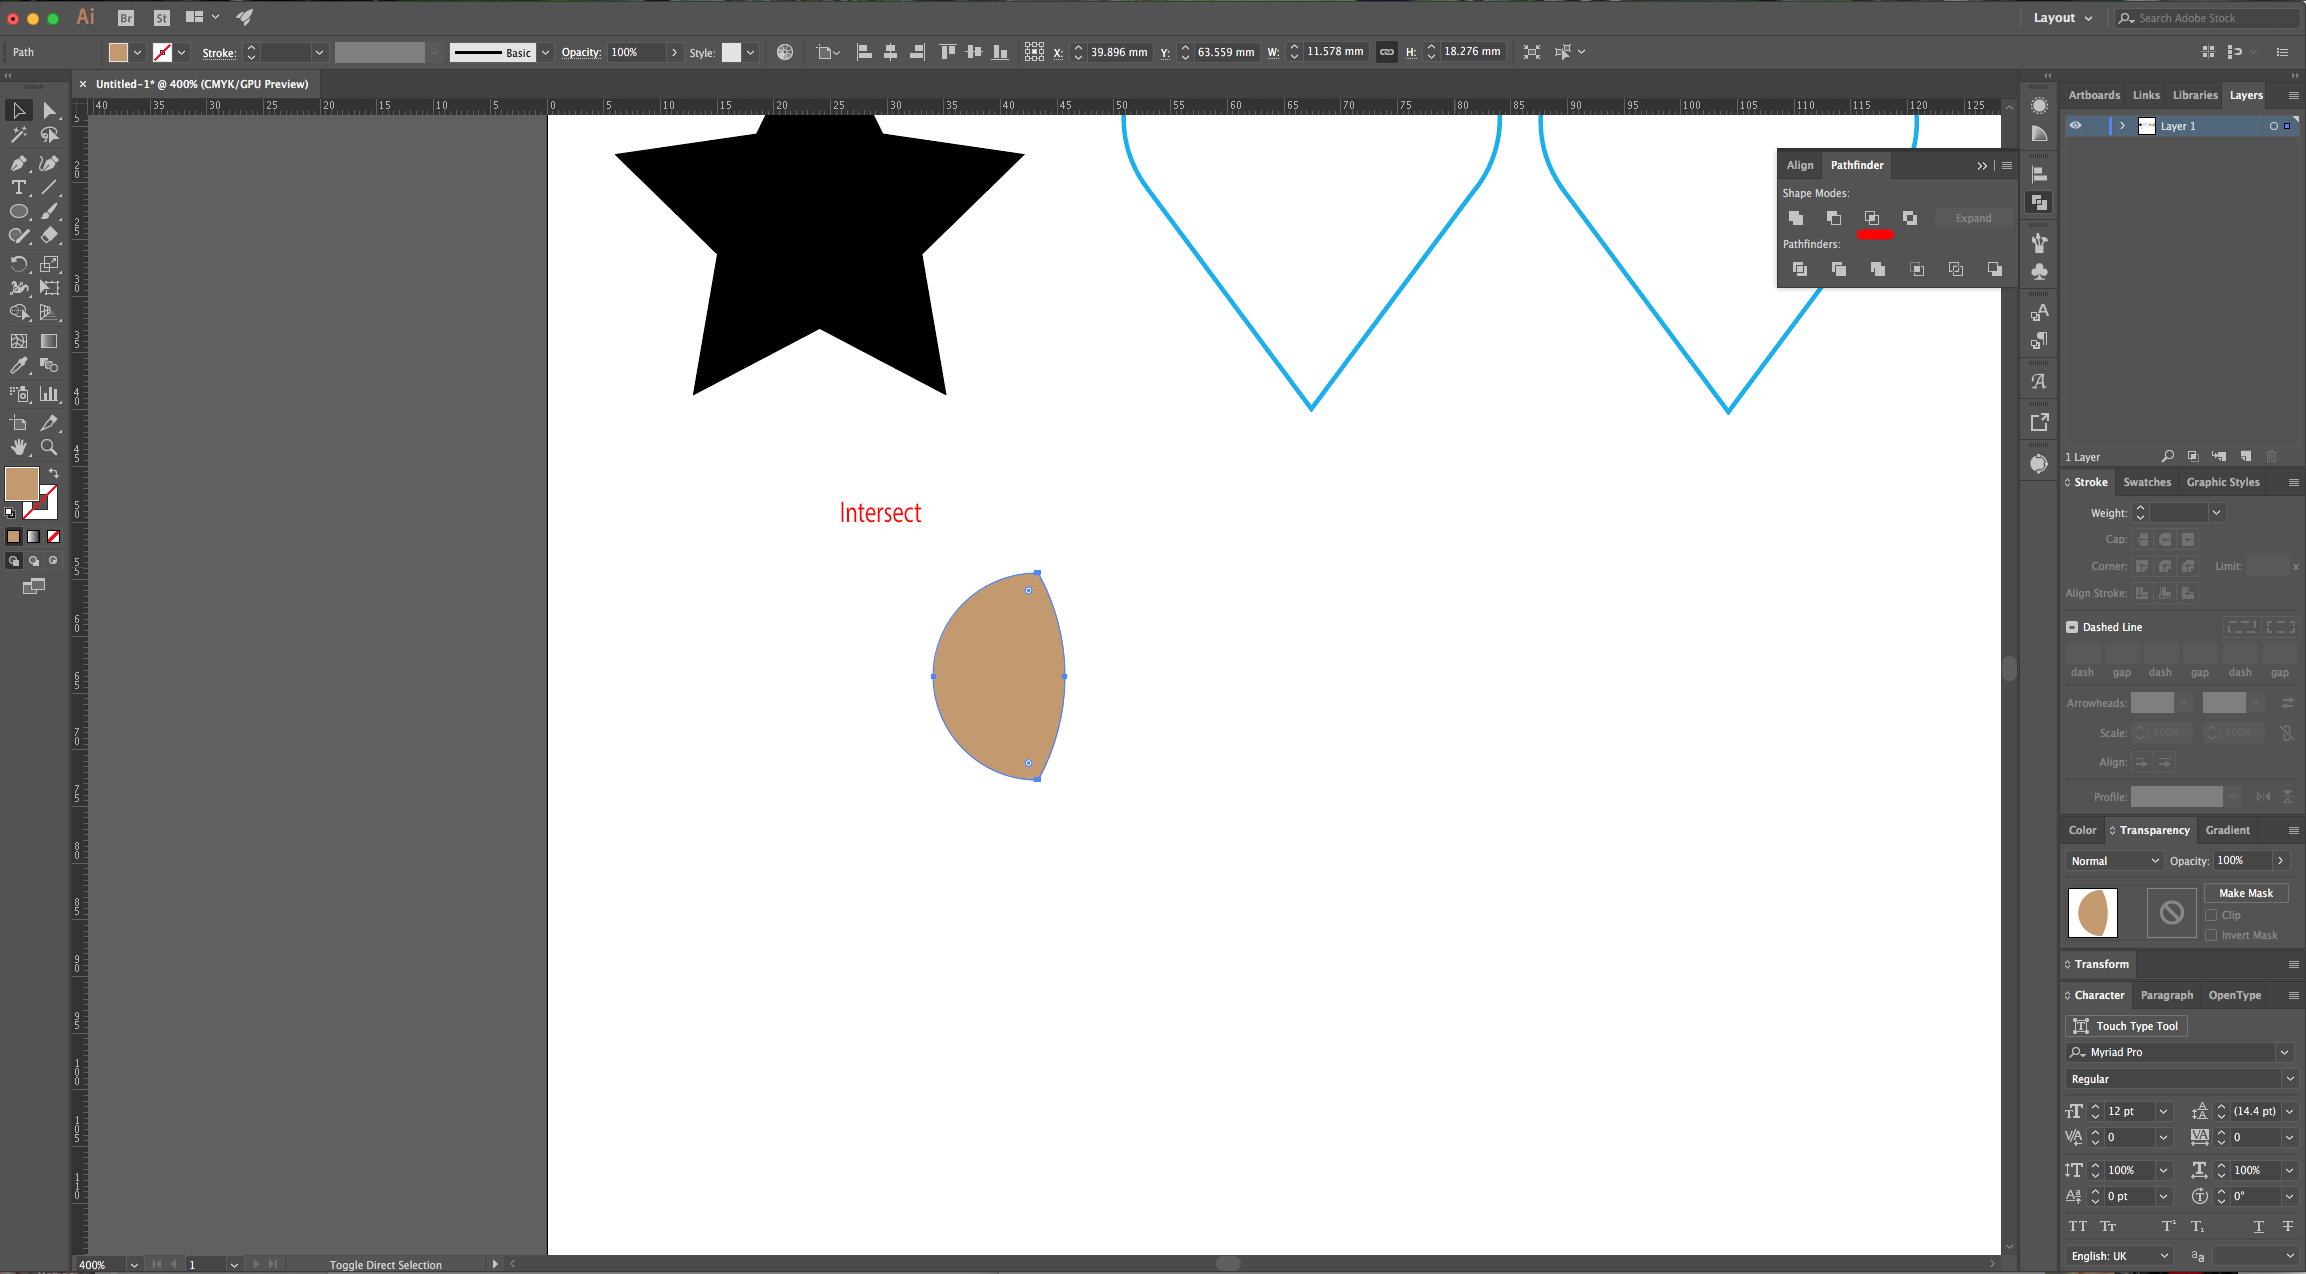
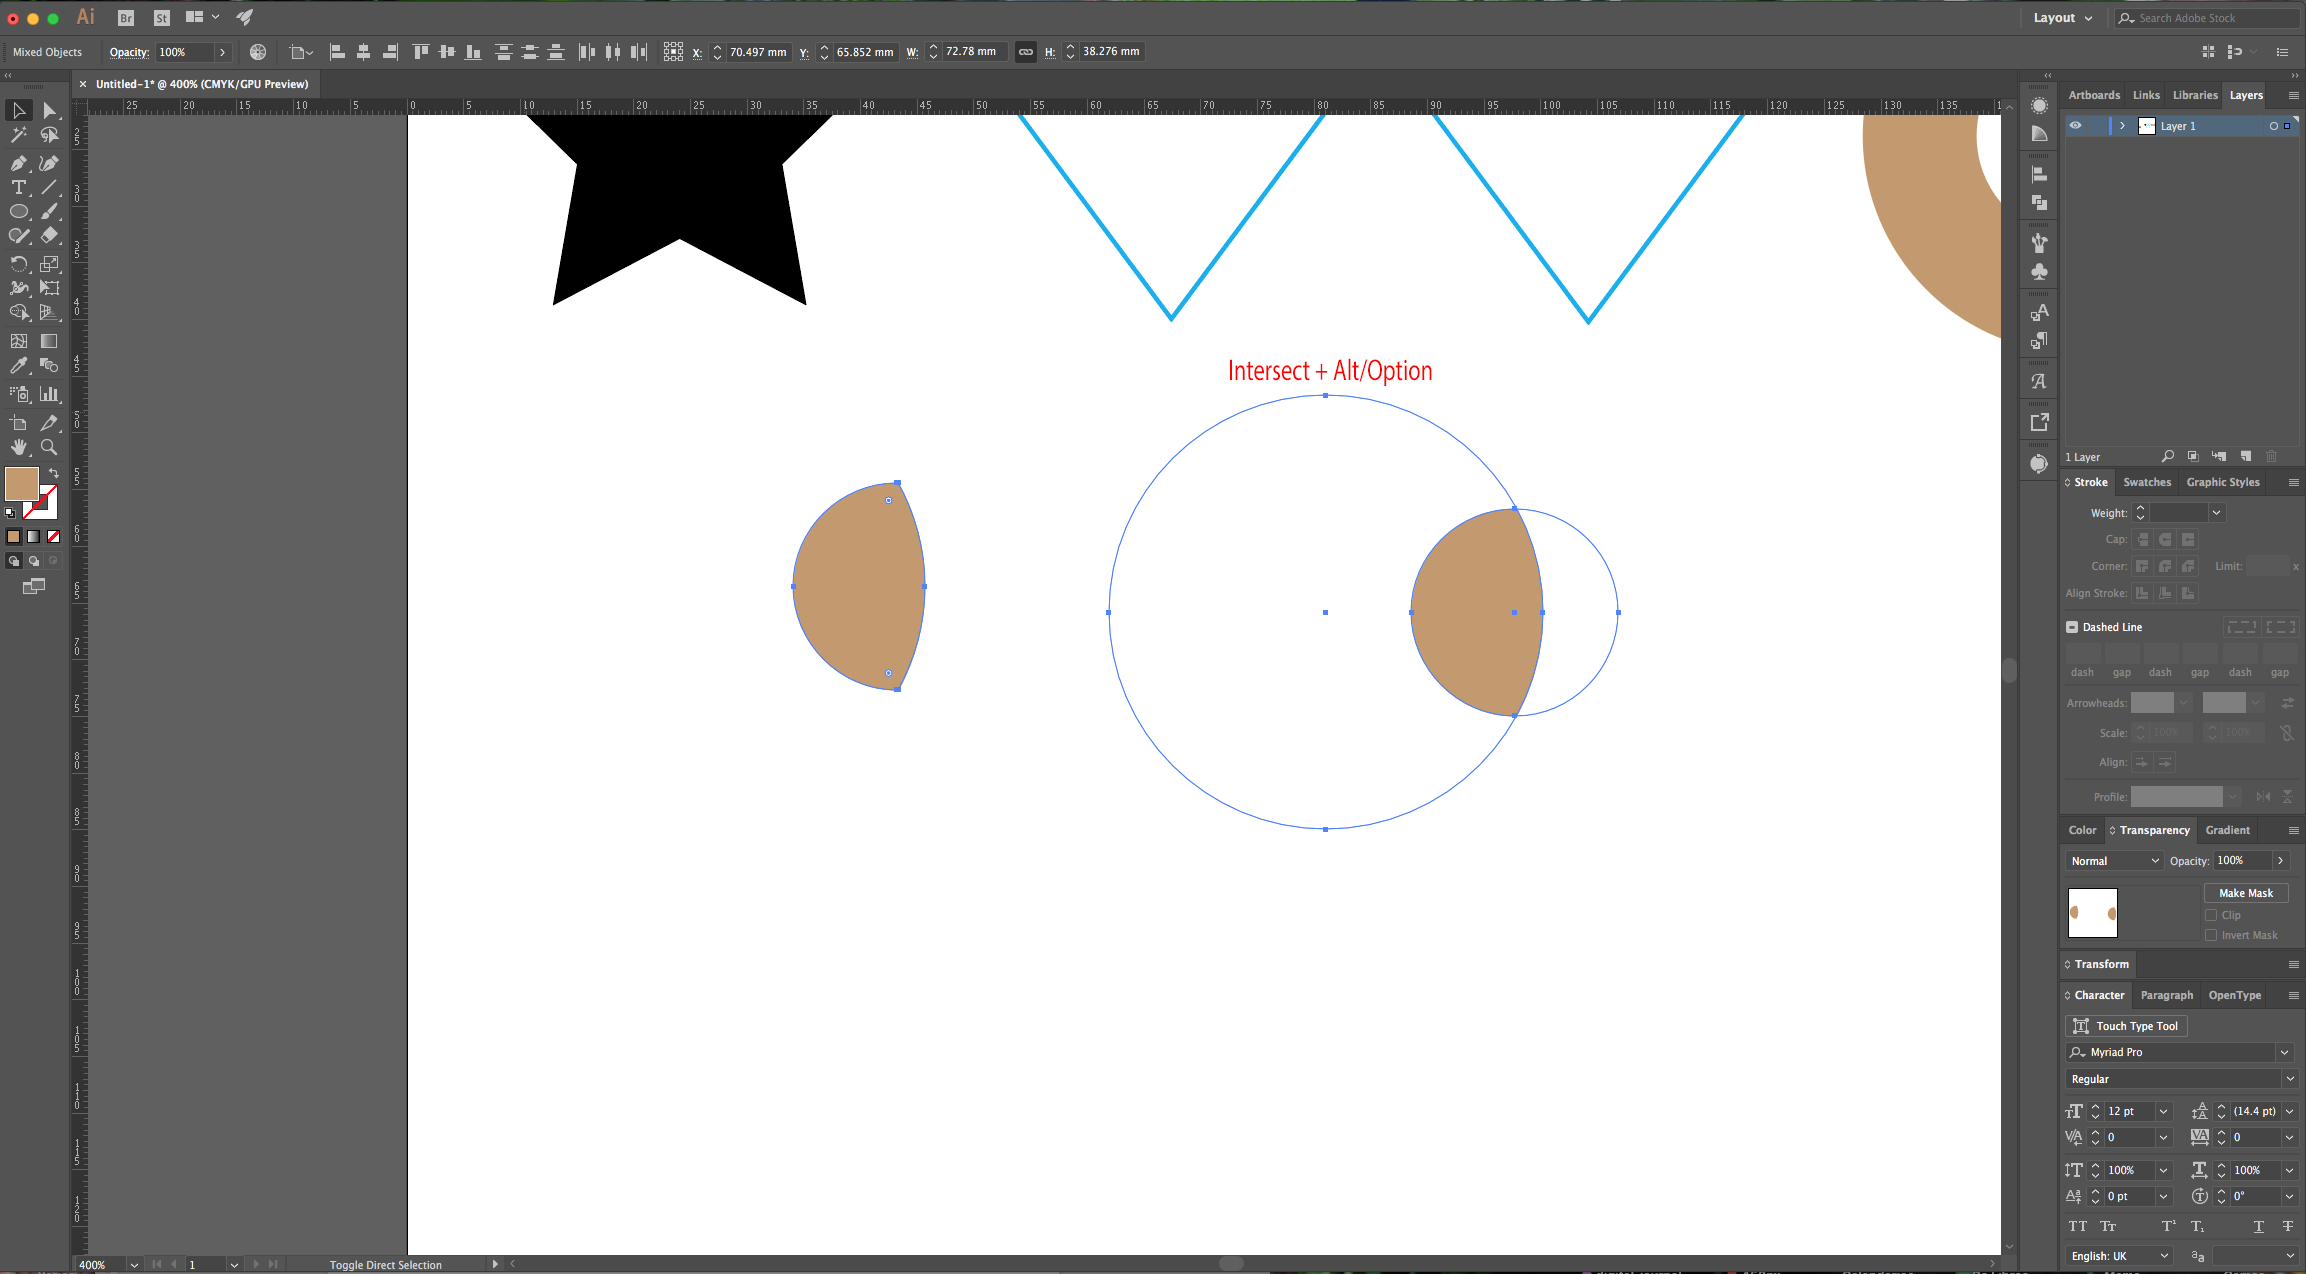
5 - Next, is the “Intersect” option. It subtracts everything except the portions of the “Paths” that intersect. If you hold the “Alt/Option” key and choose this option you will “Create a Compound Shape”.
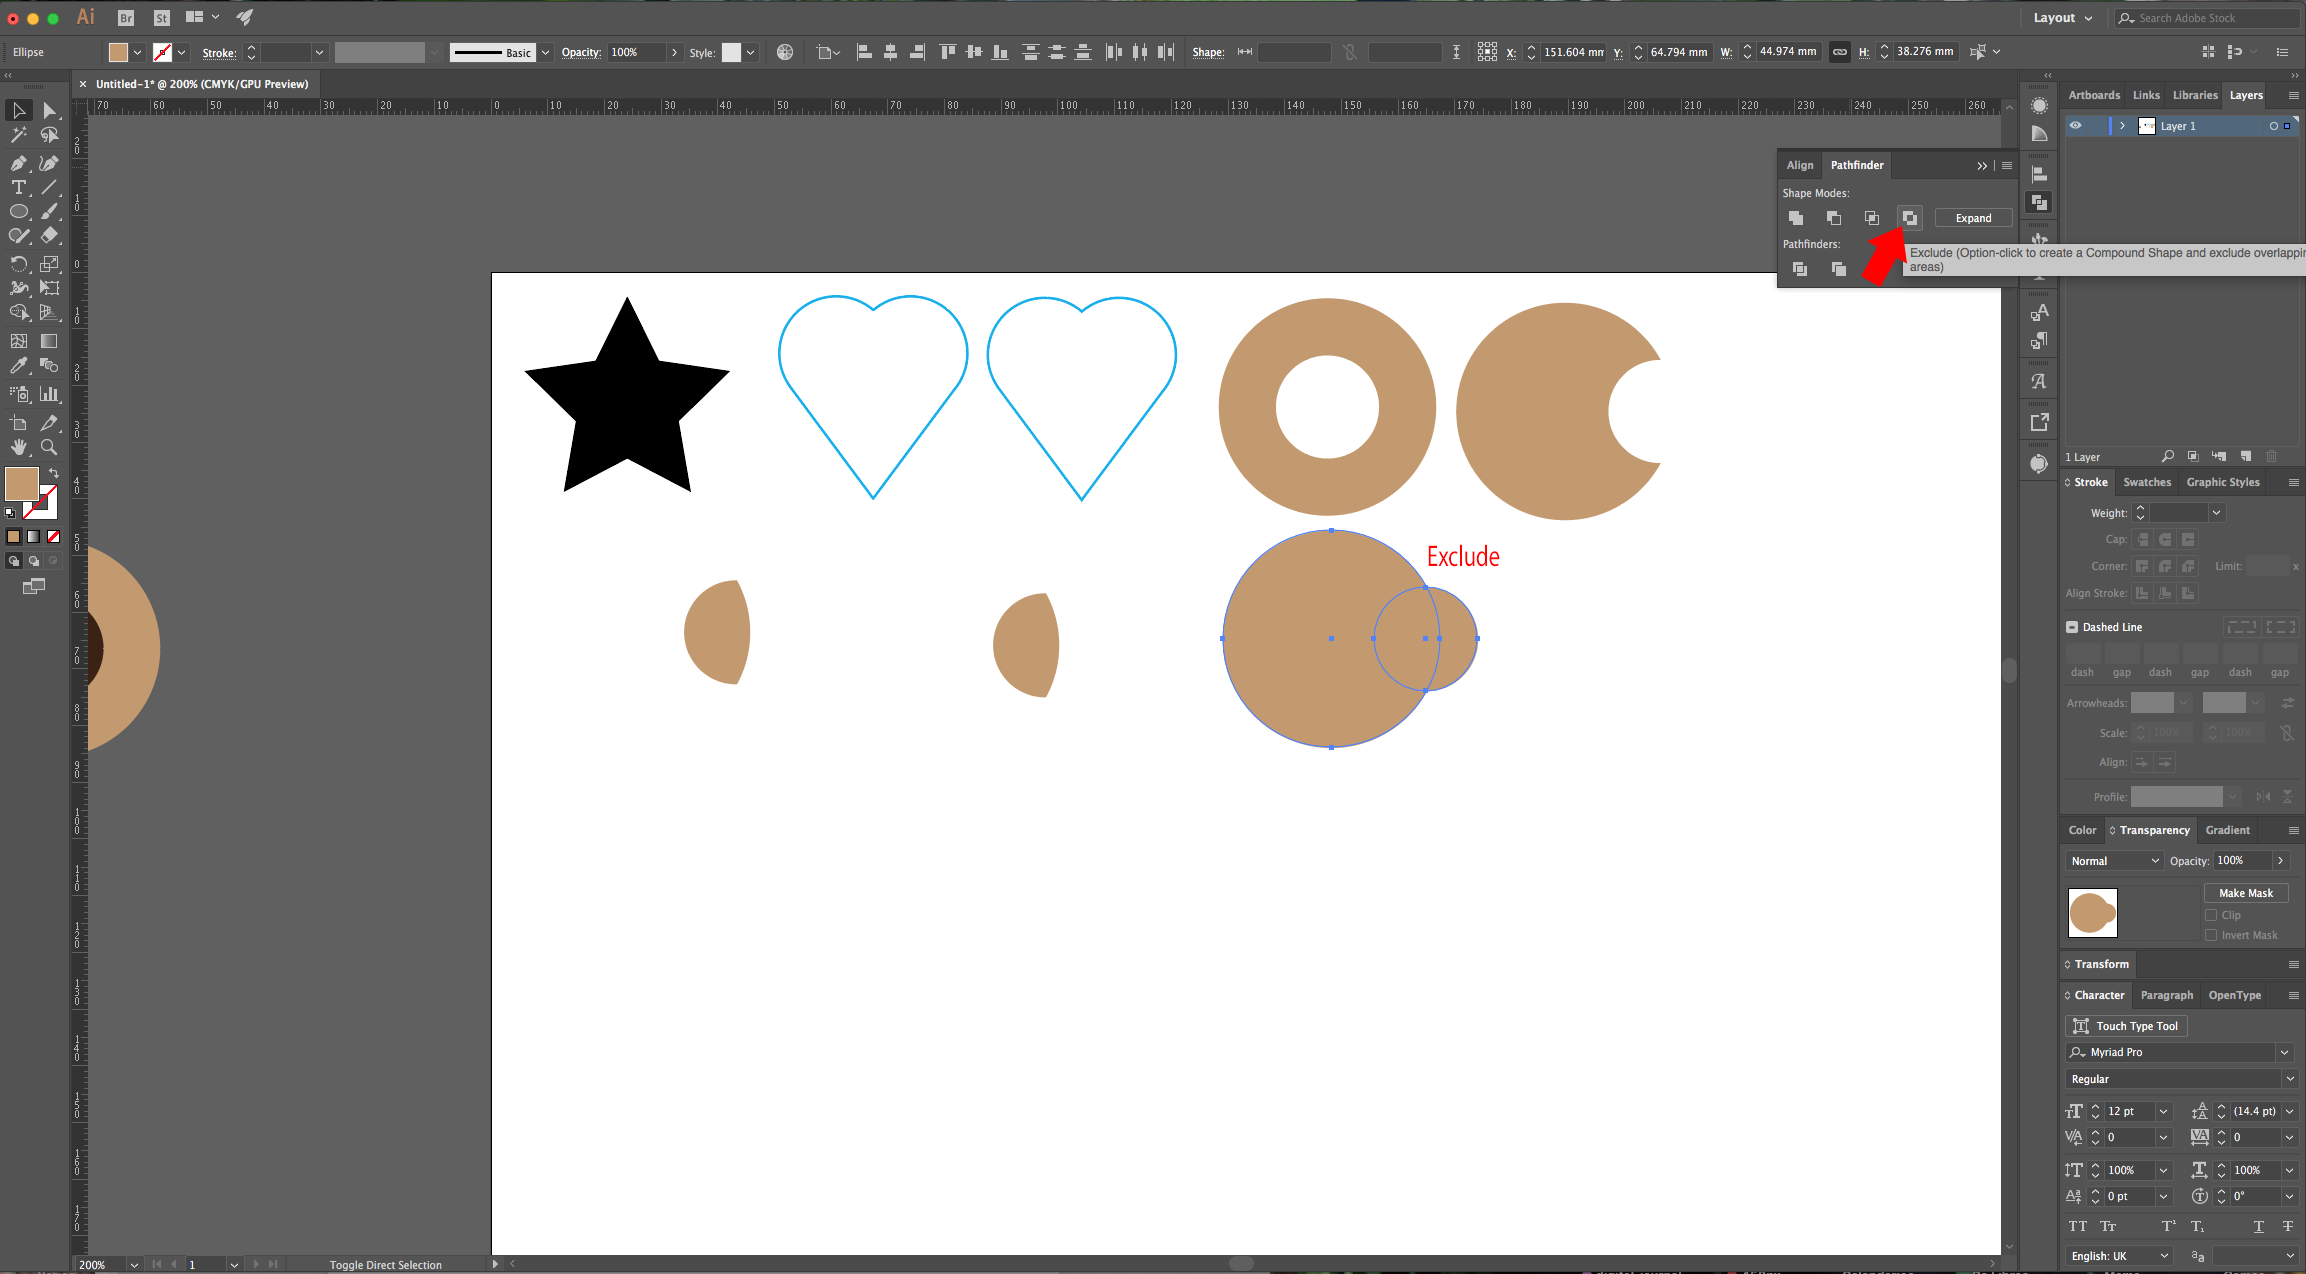
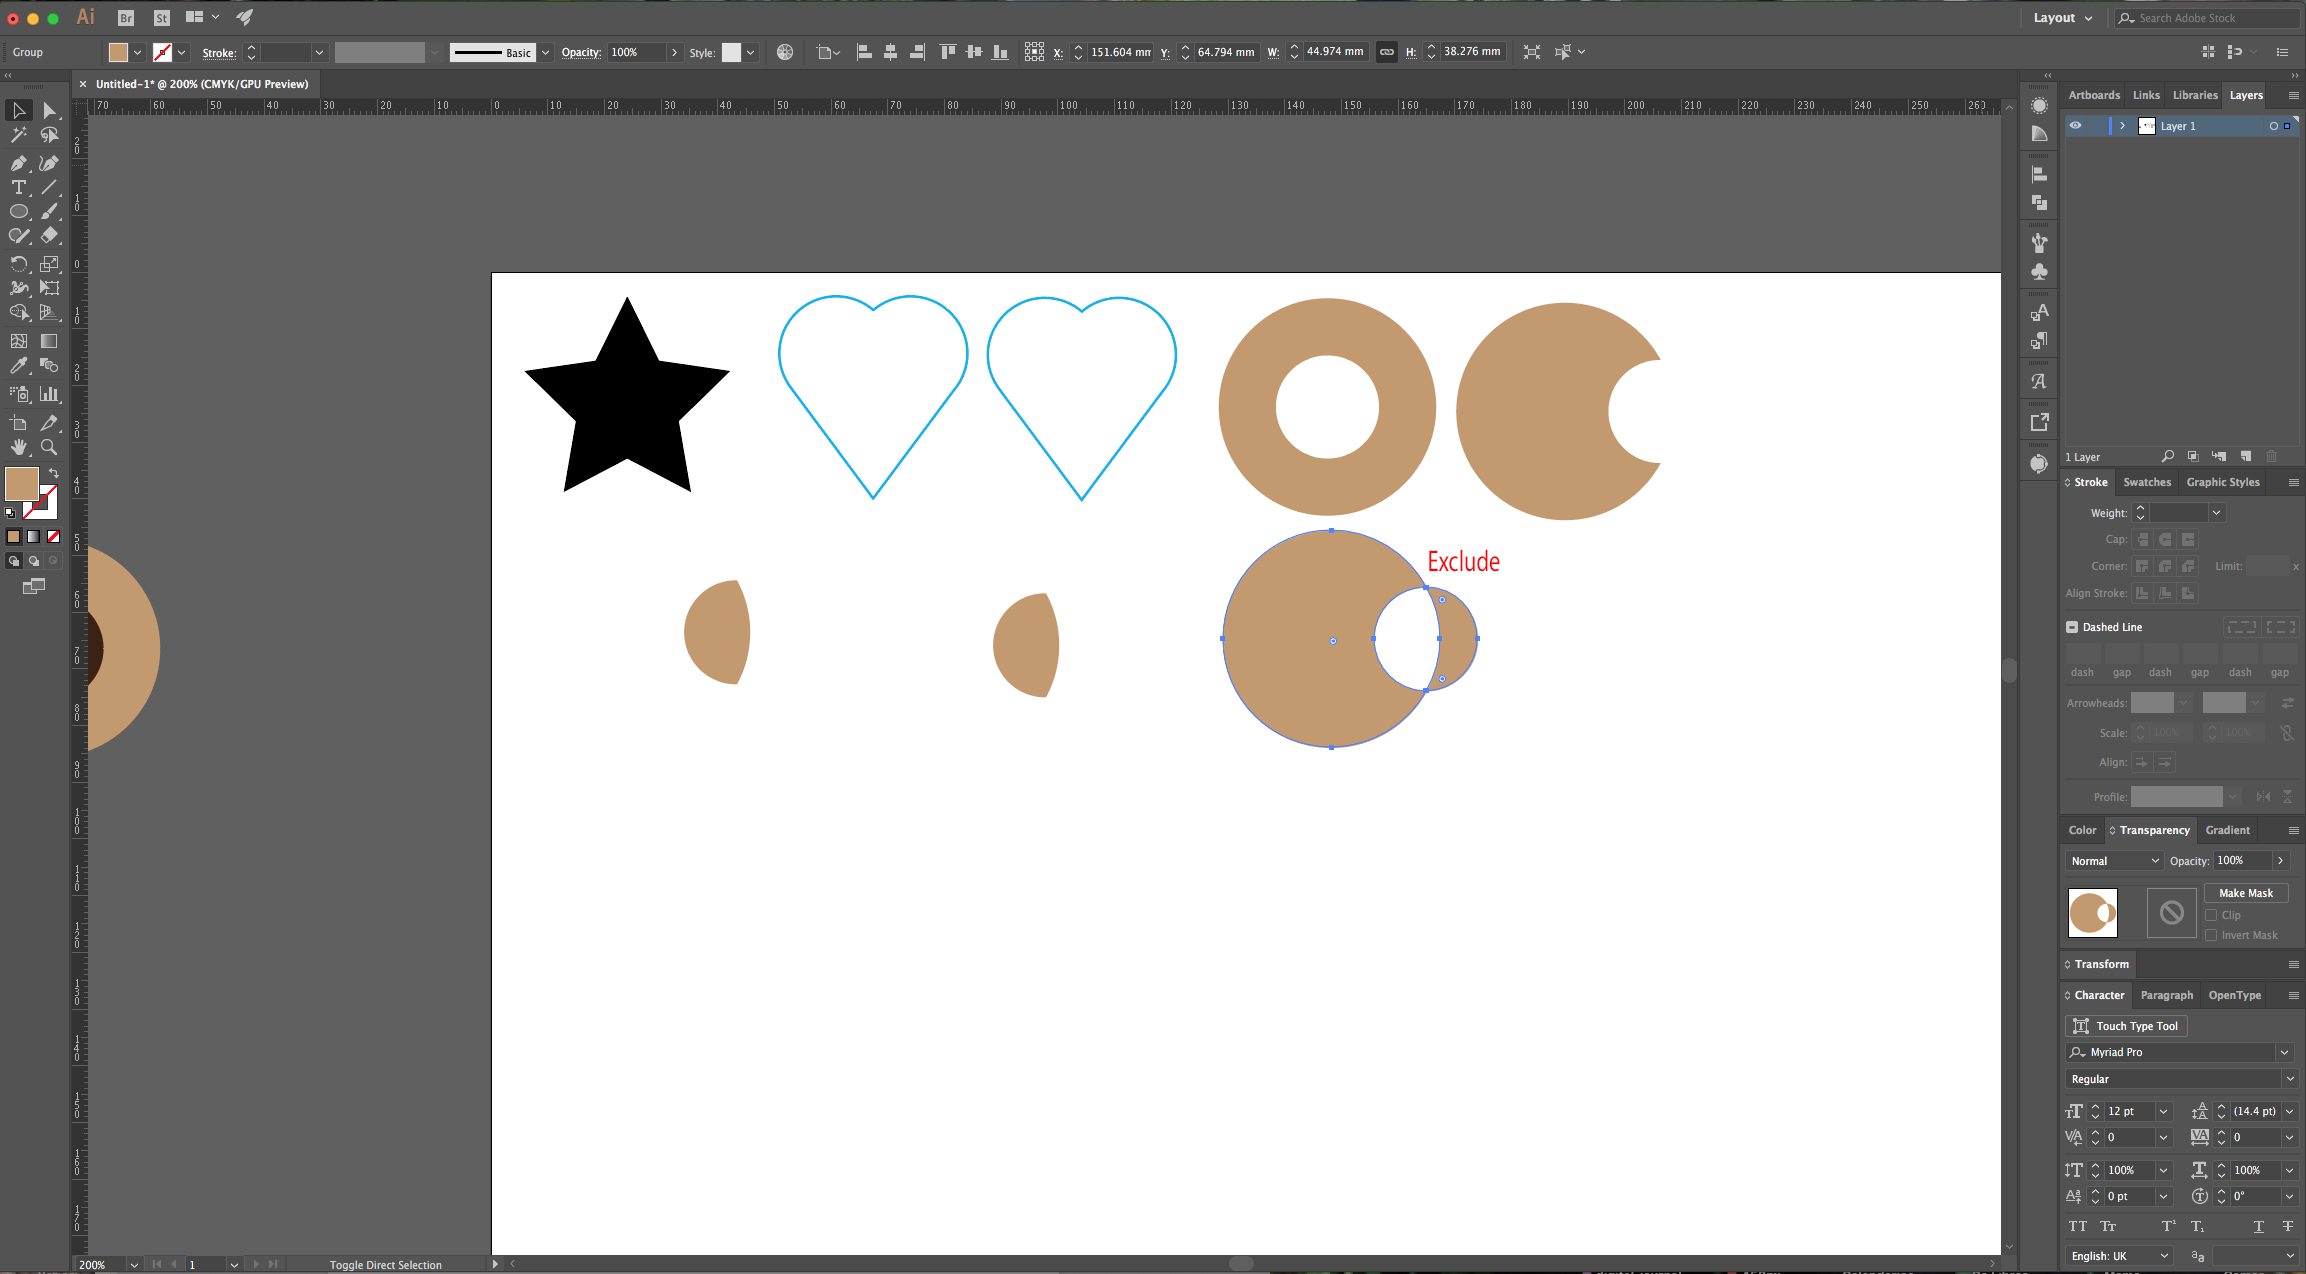
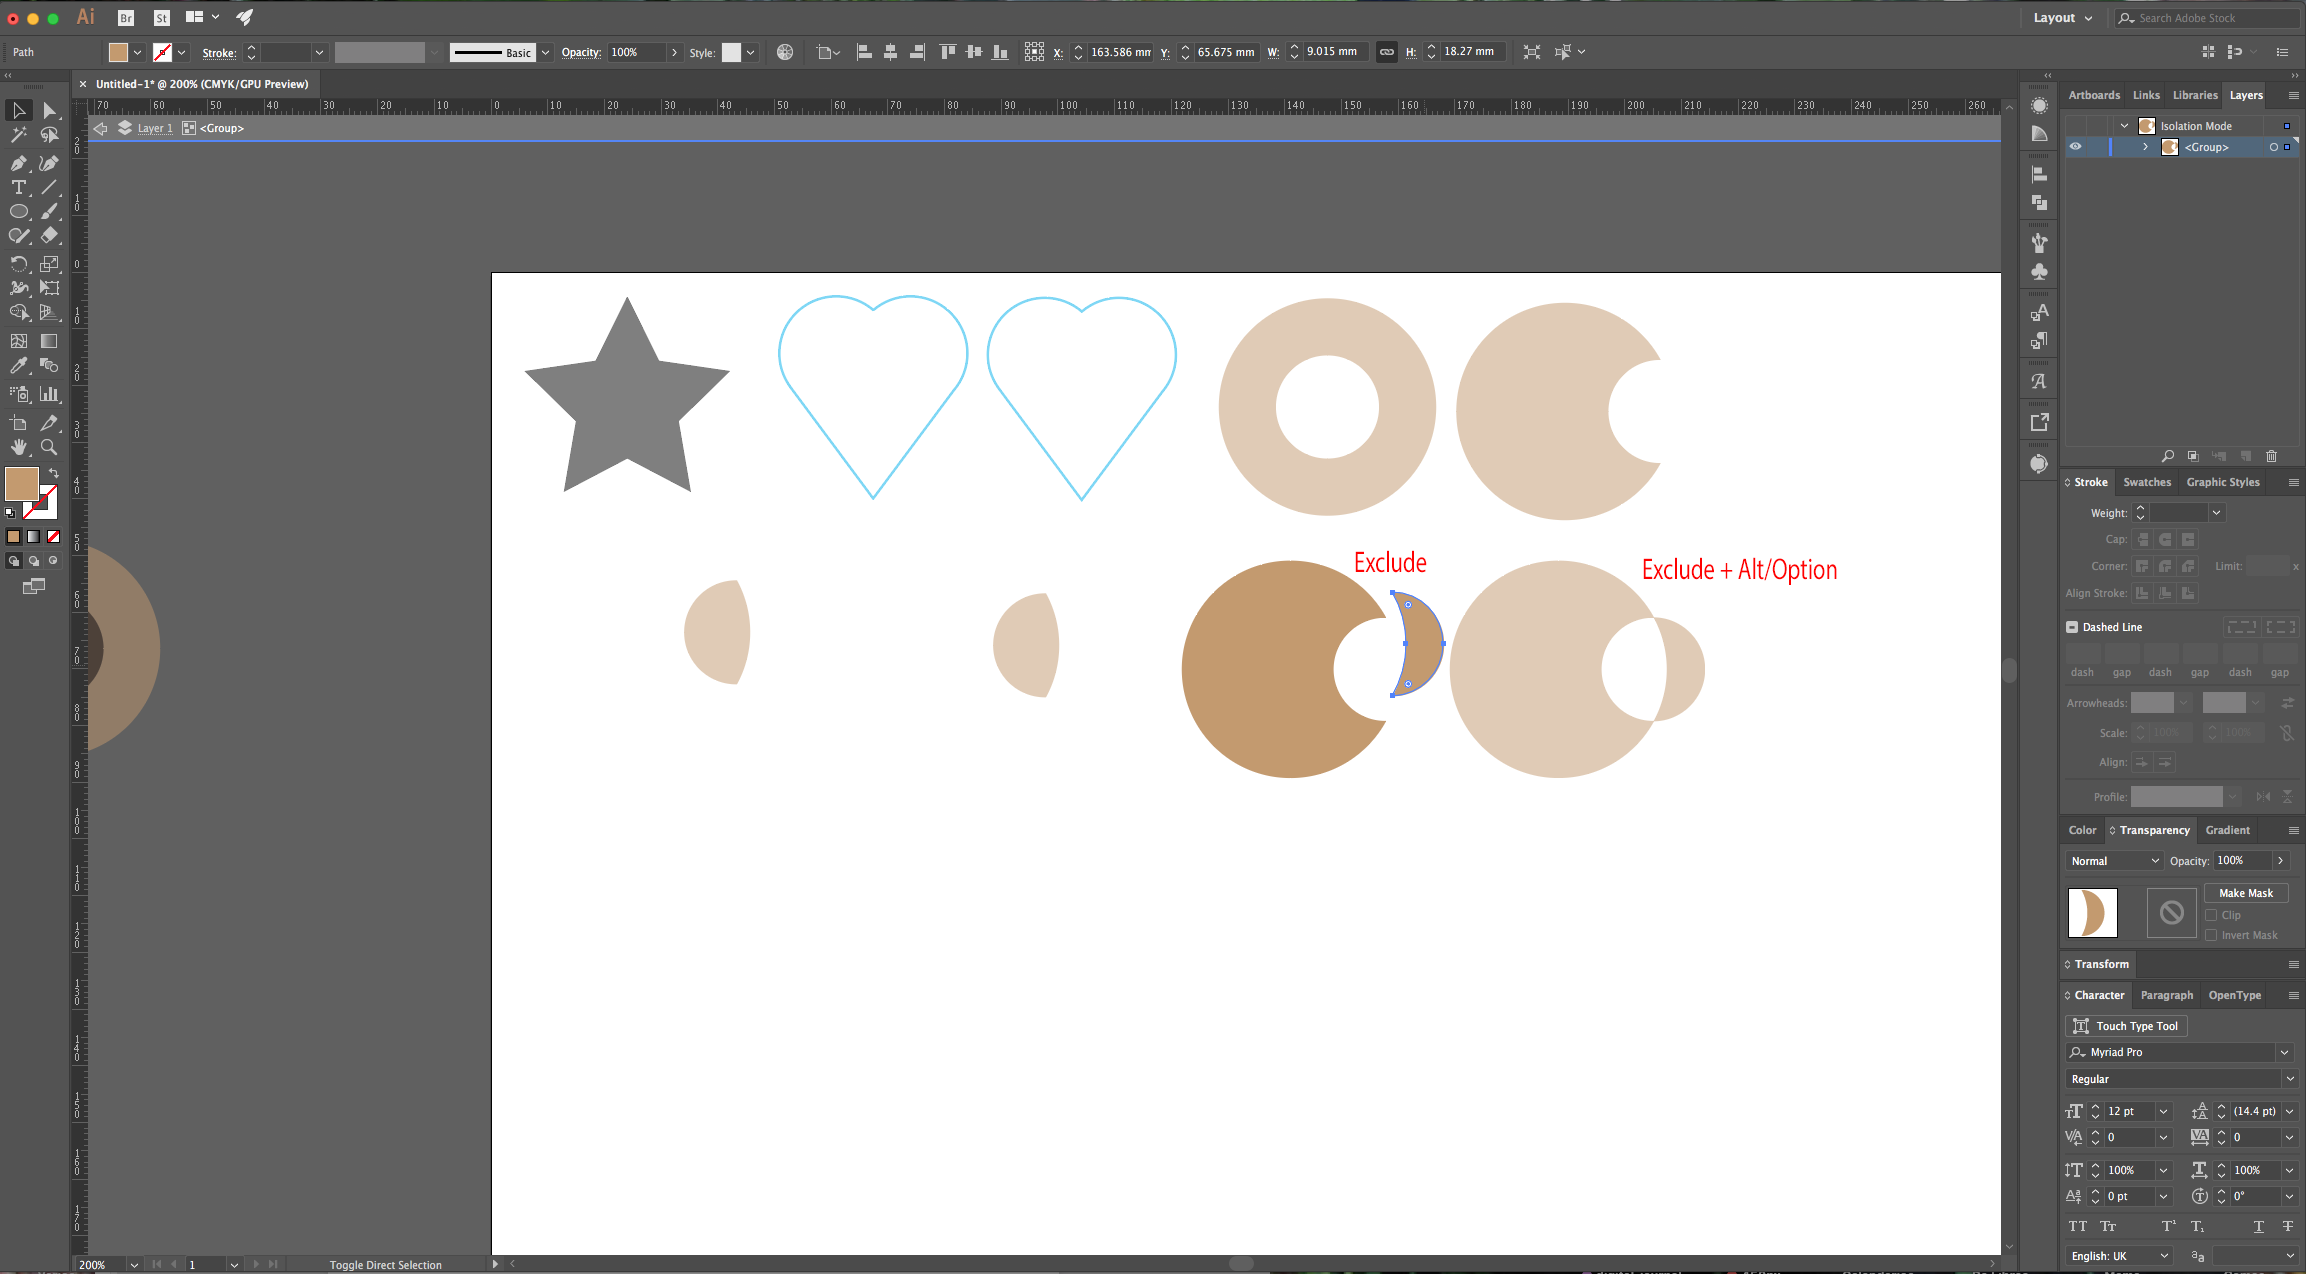
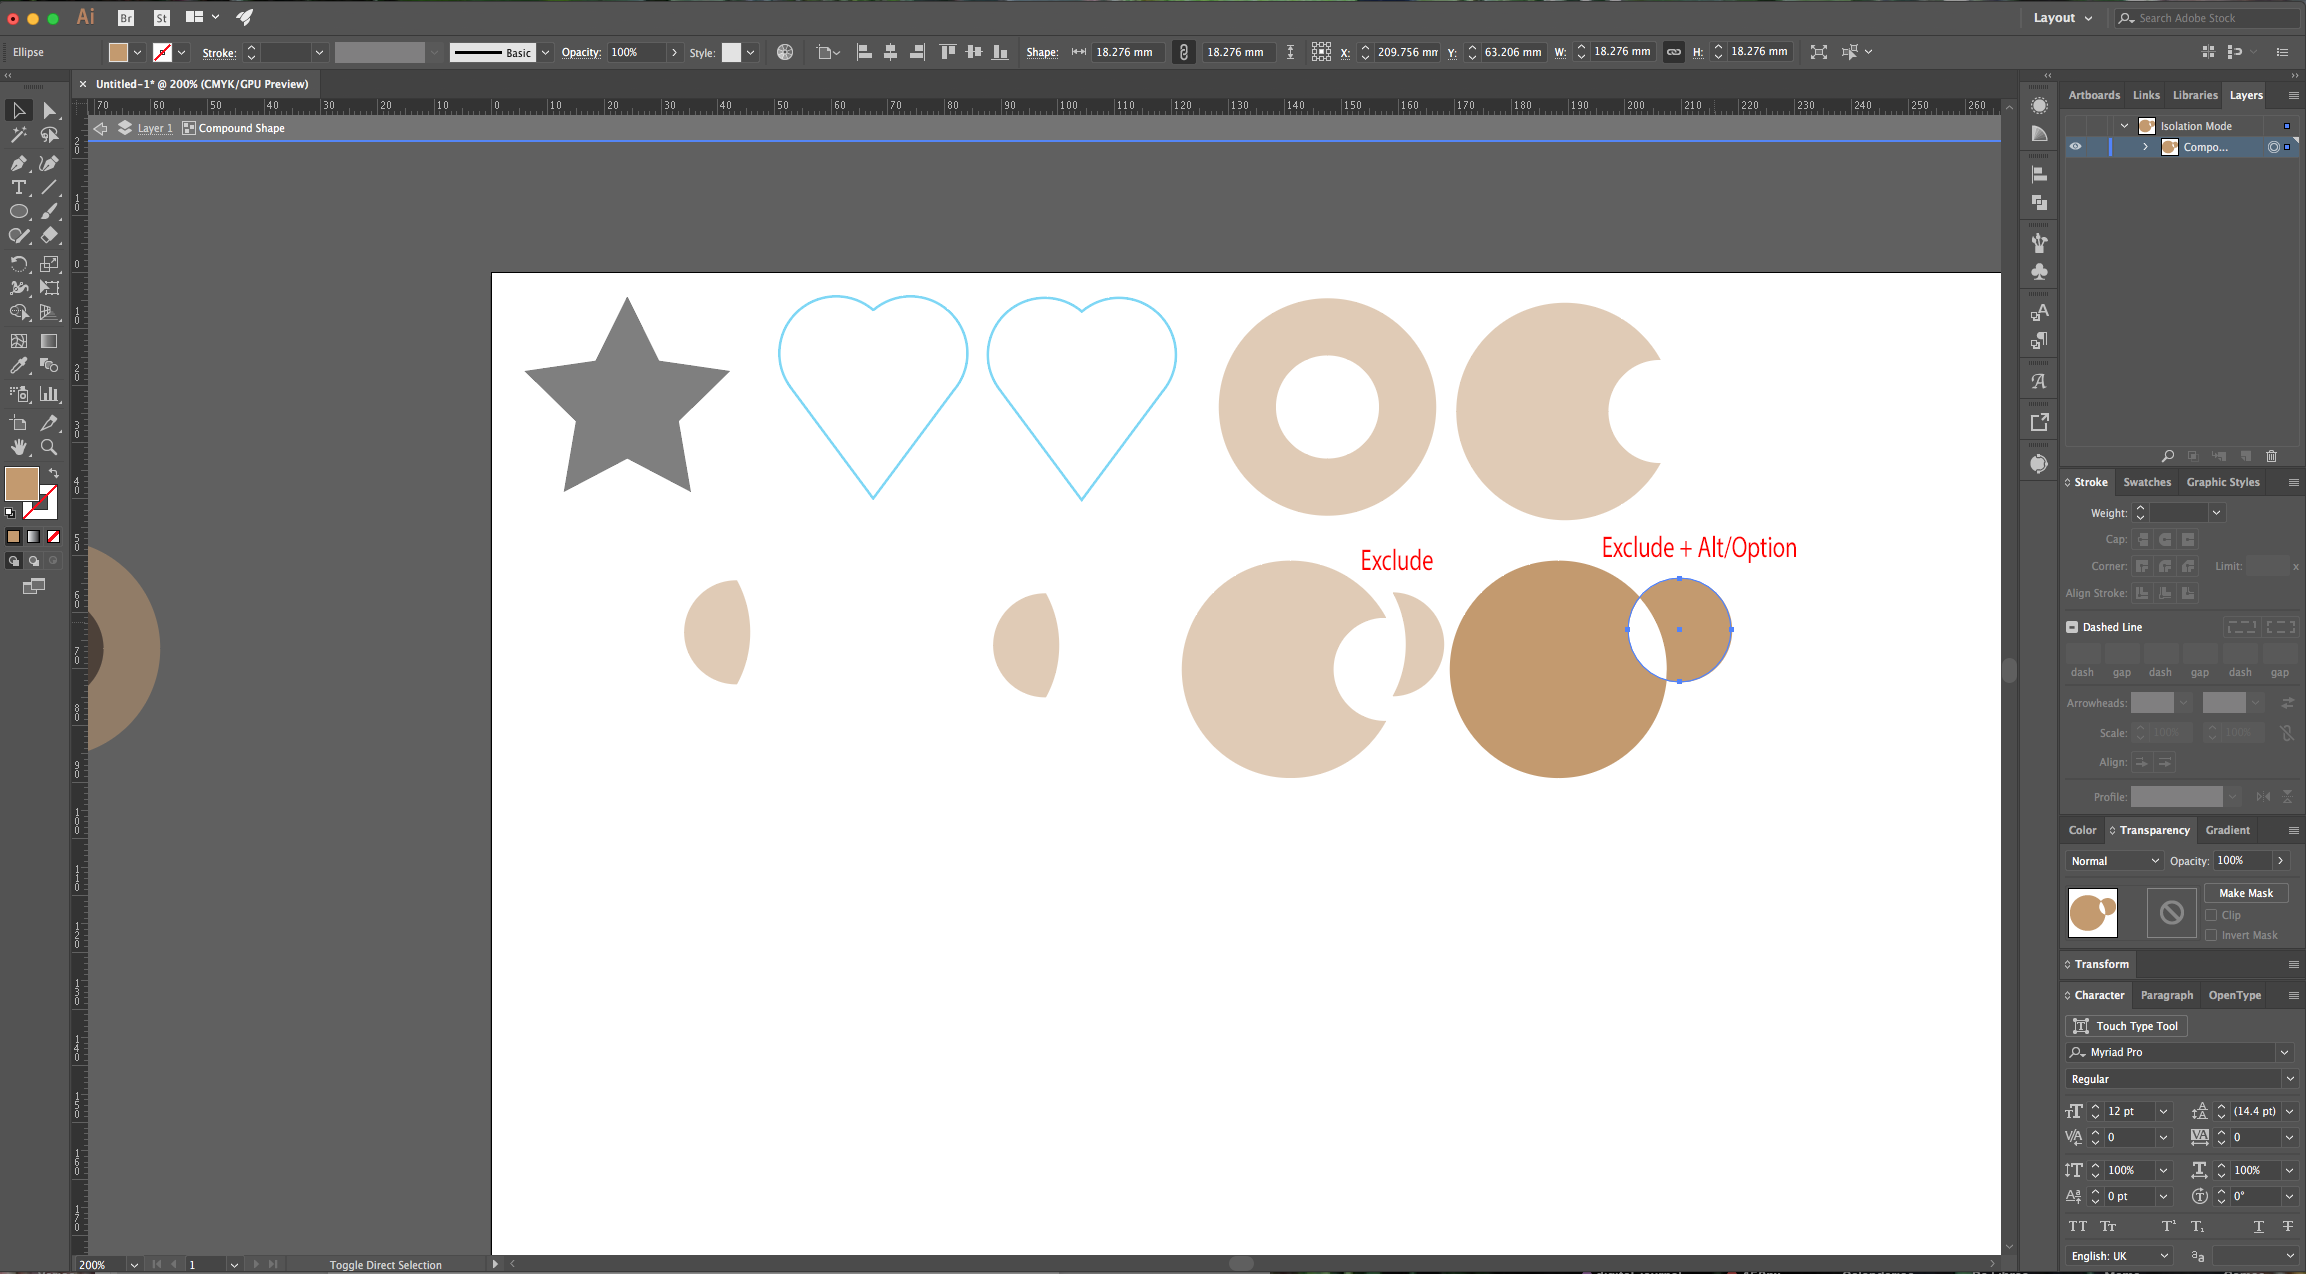
6 - The “Exclude” option is very similar to “Intersect”, just inversed. It will subtract the portions of the “Pats” that intersect and leave the rest. If you hold the “Alt/Option” key and choose this option you will “Create a Compound Shape”. With this we covered the “Shape Options”.
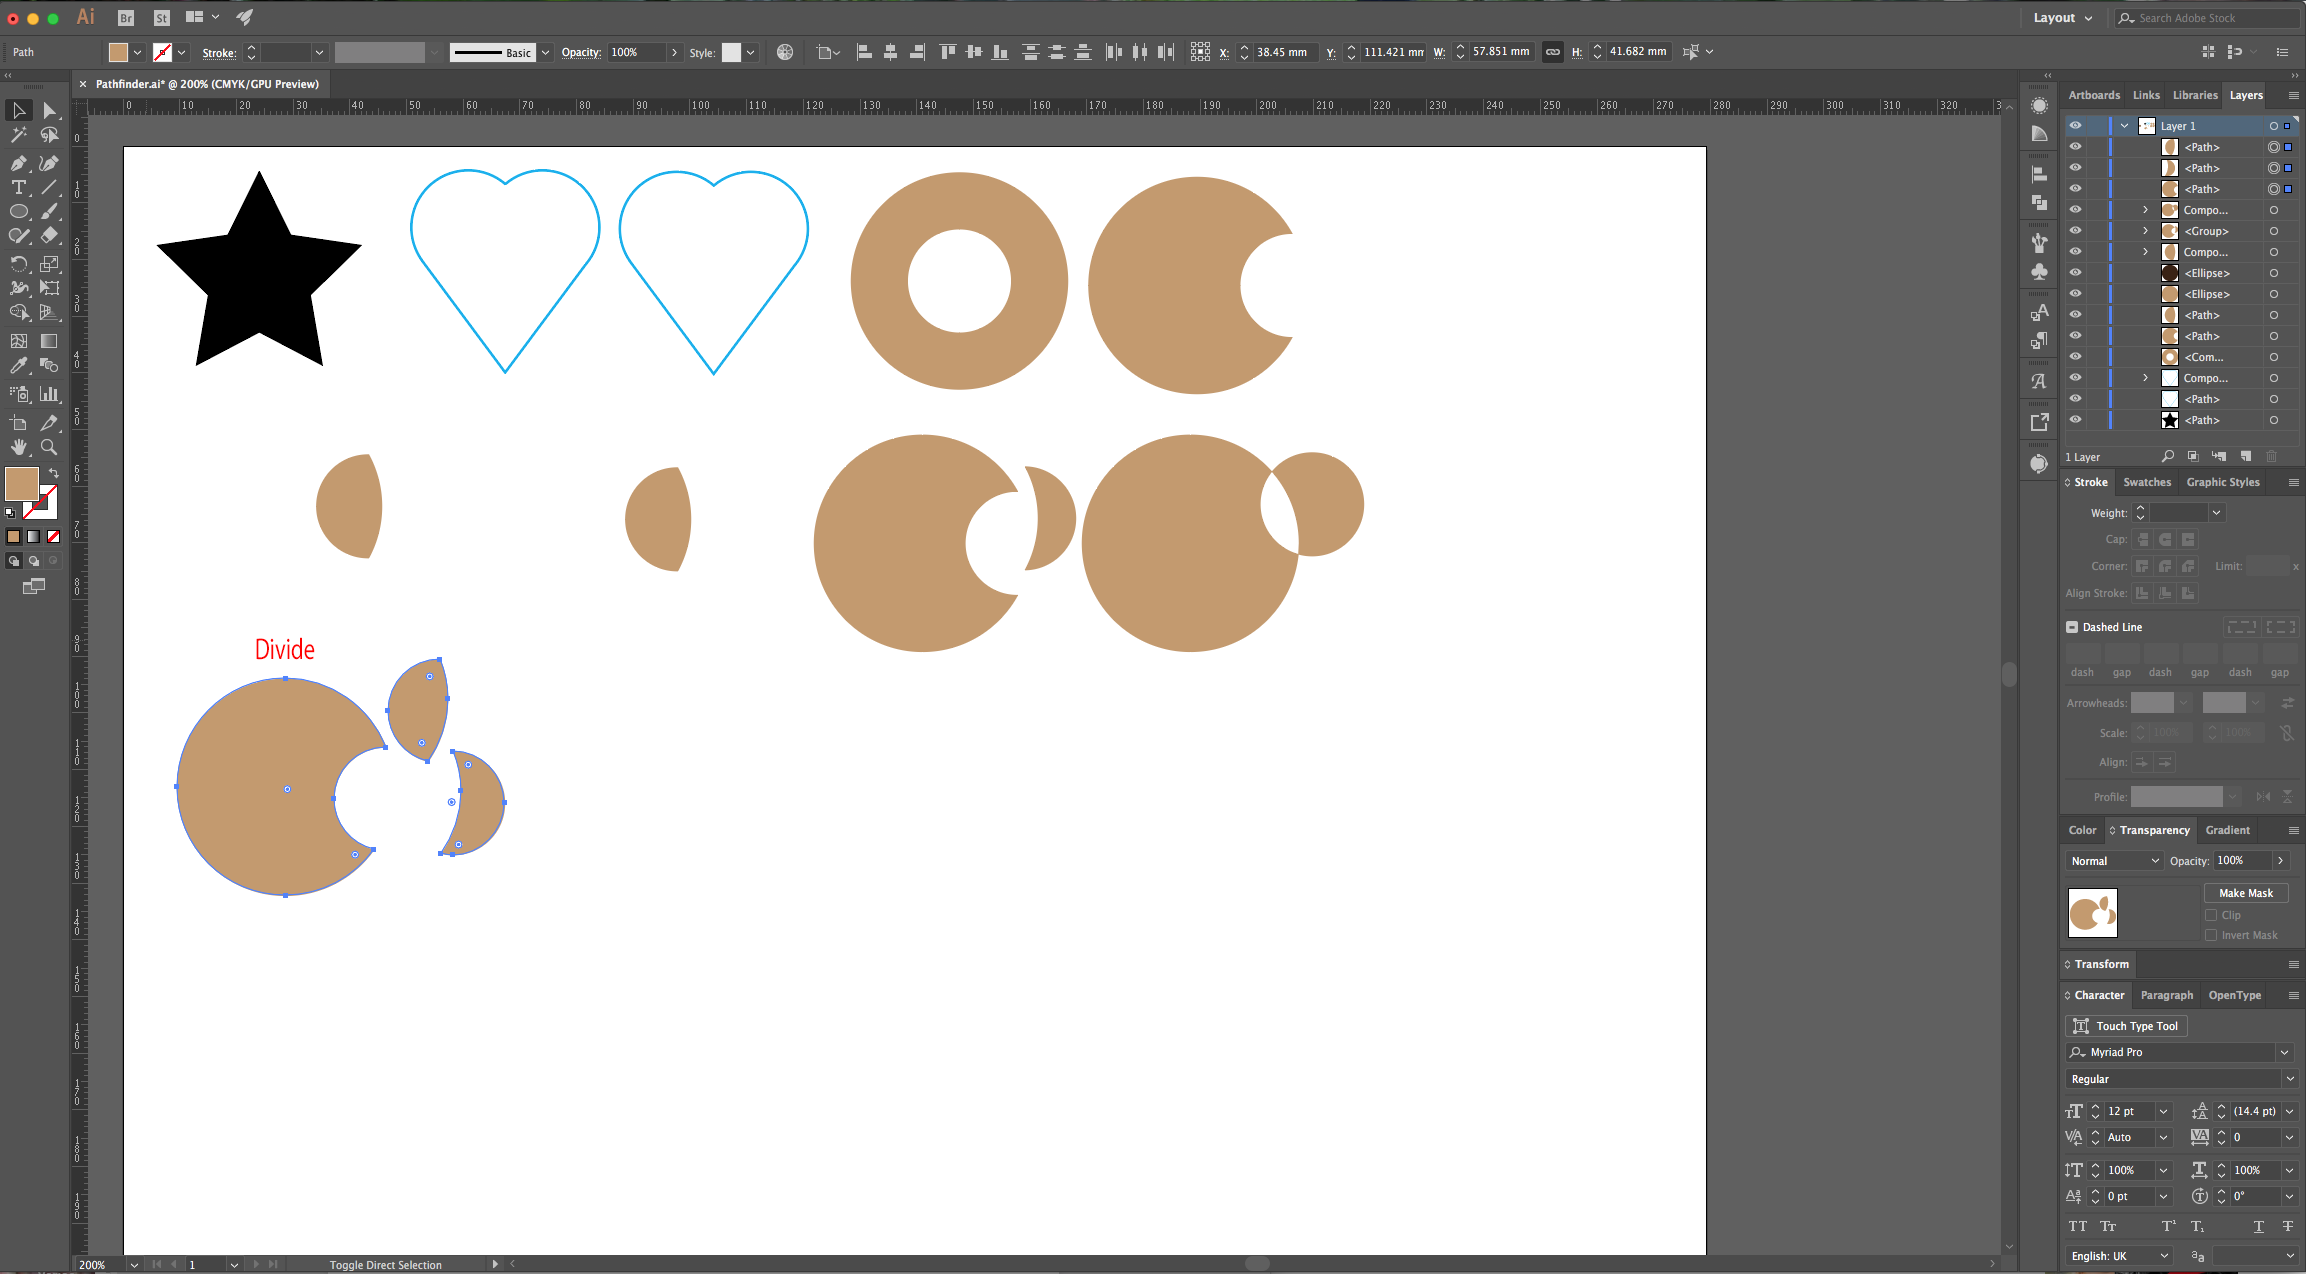
7 - Now, the “Pathfinder Options”. The first one is “Divide” and it will split each portion of the “Paths” into a different object including the overlapping region. After using it, if you “Ungroup” your “Paths” you will have 3 different ones.


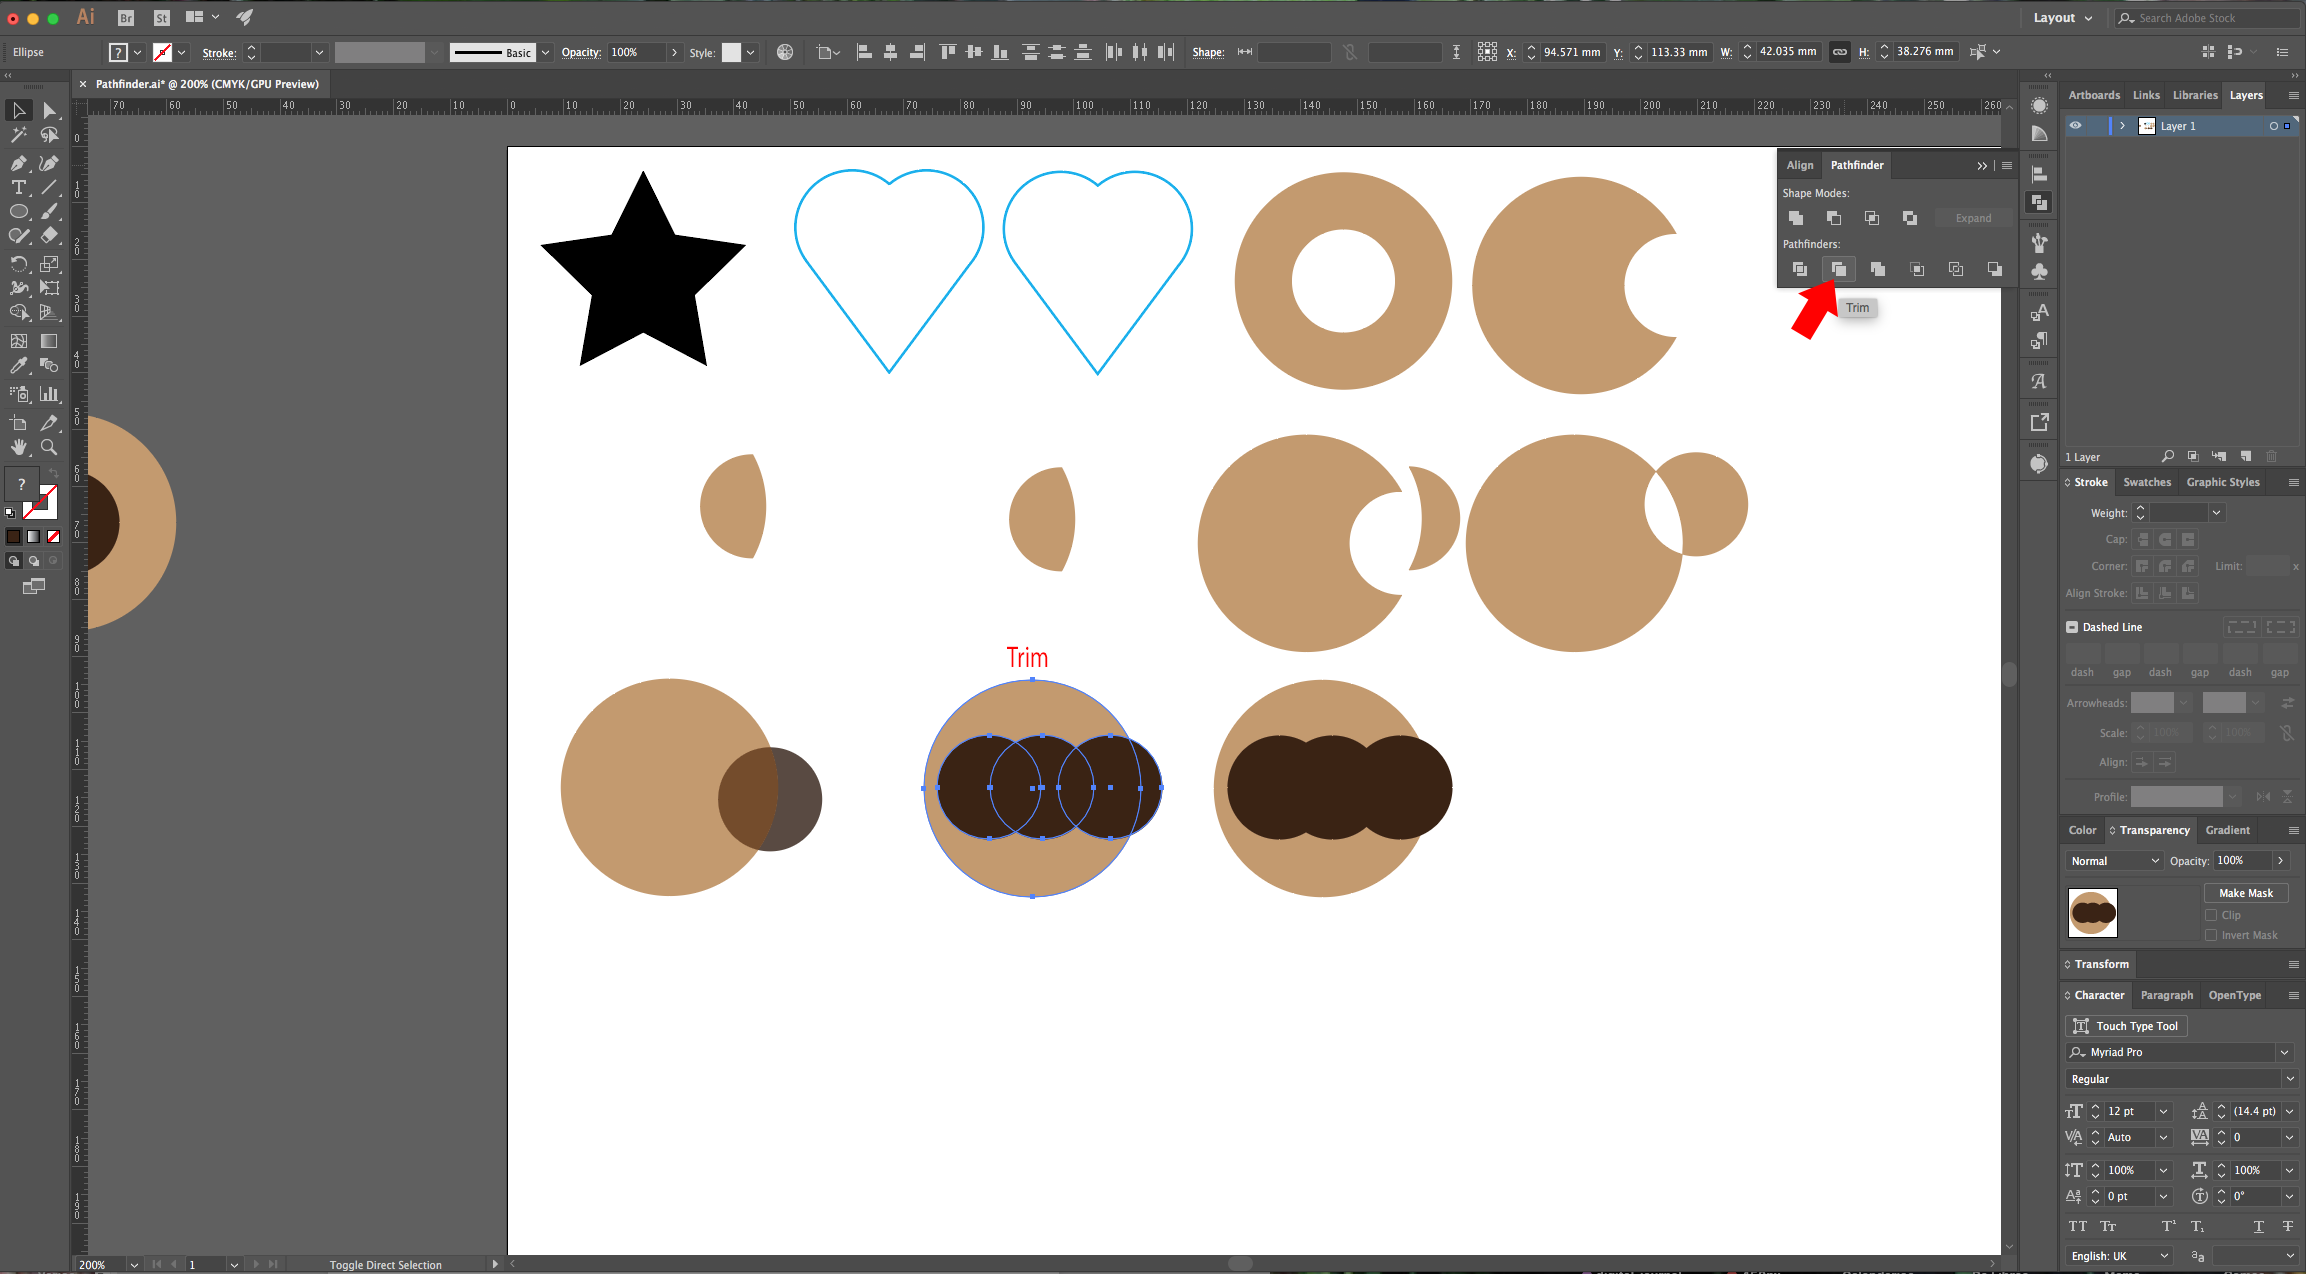
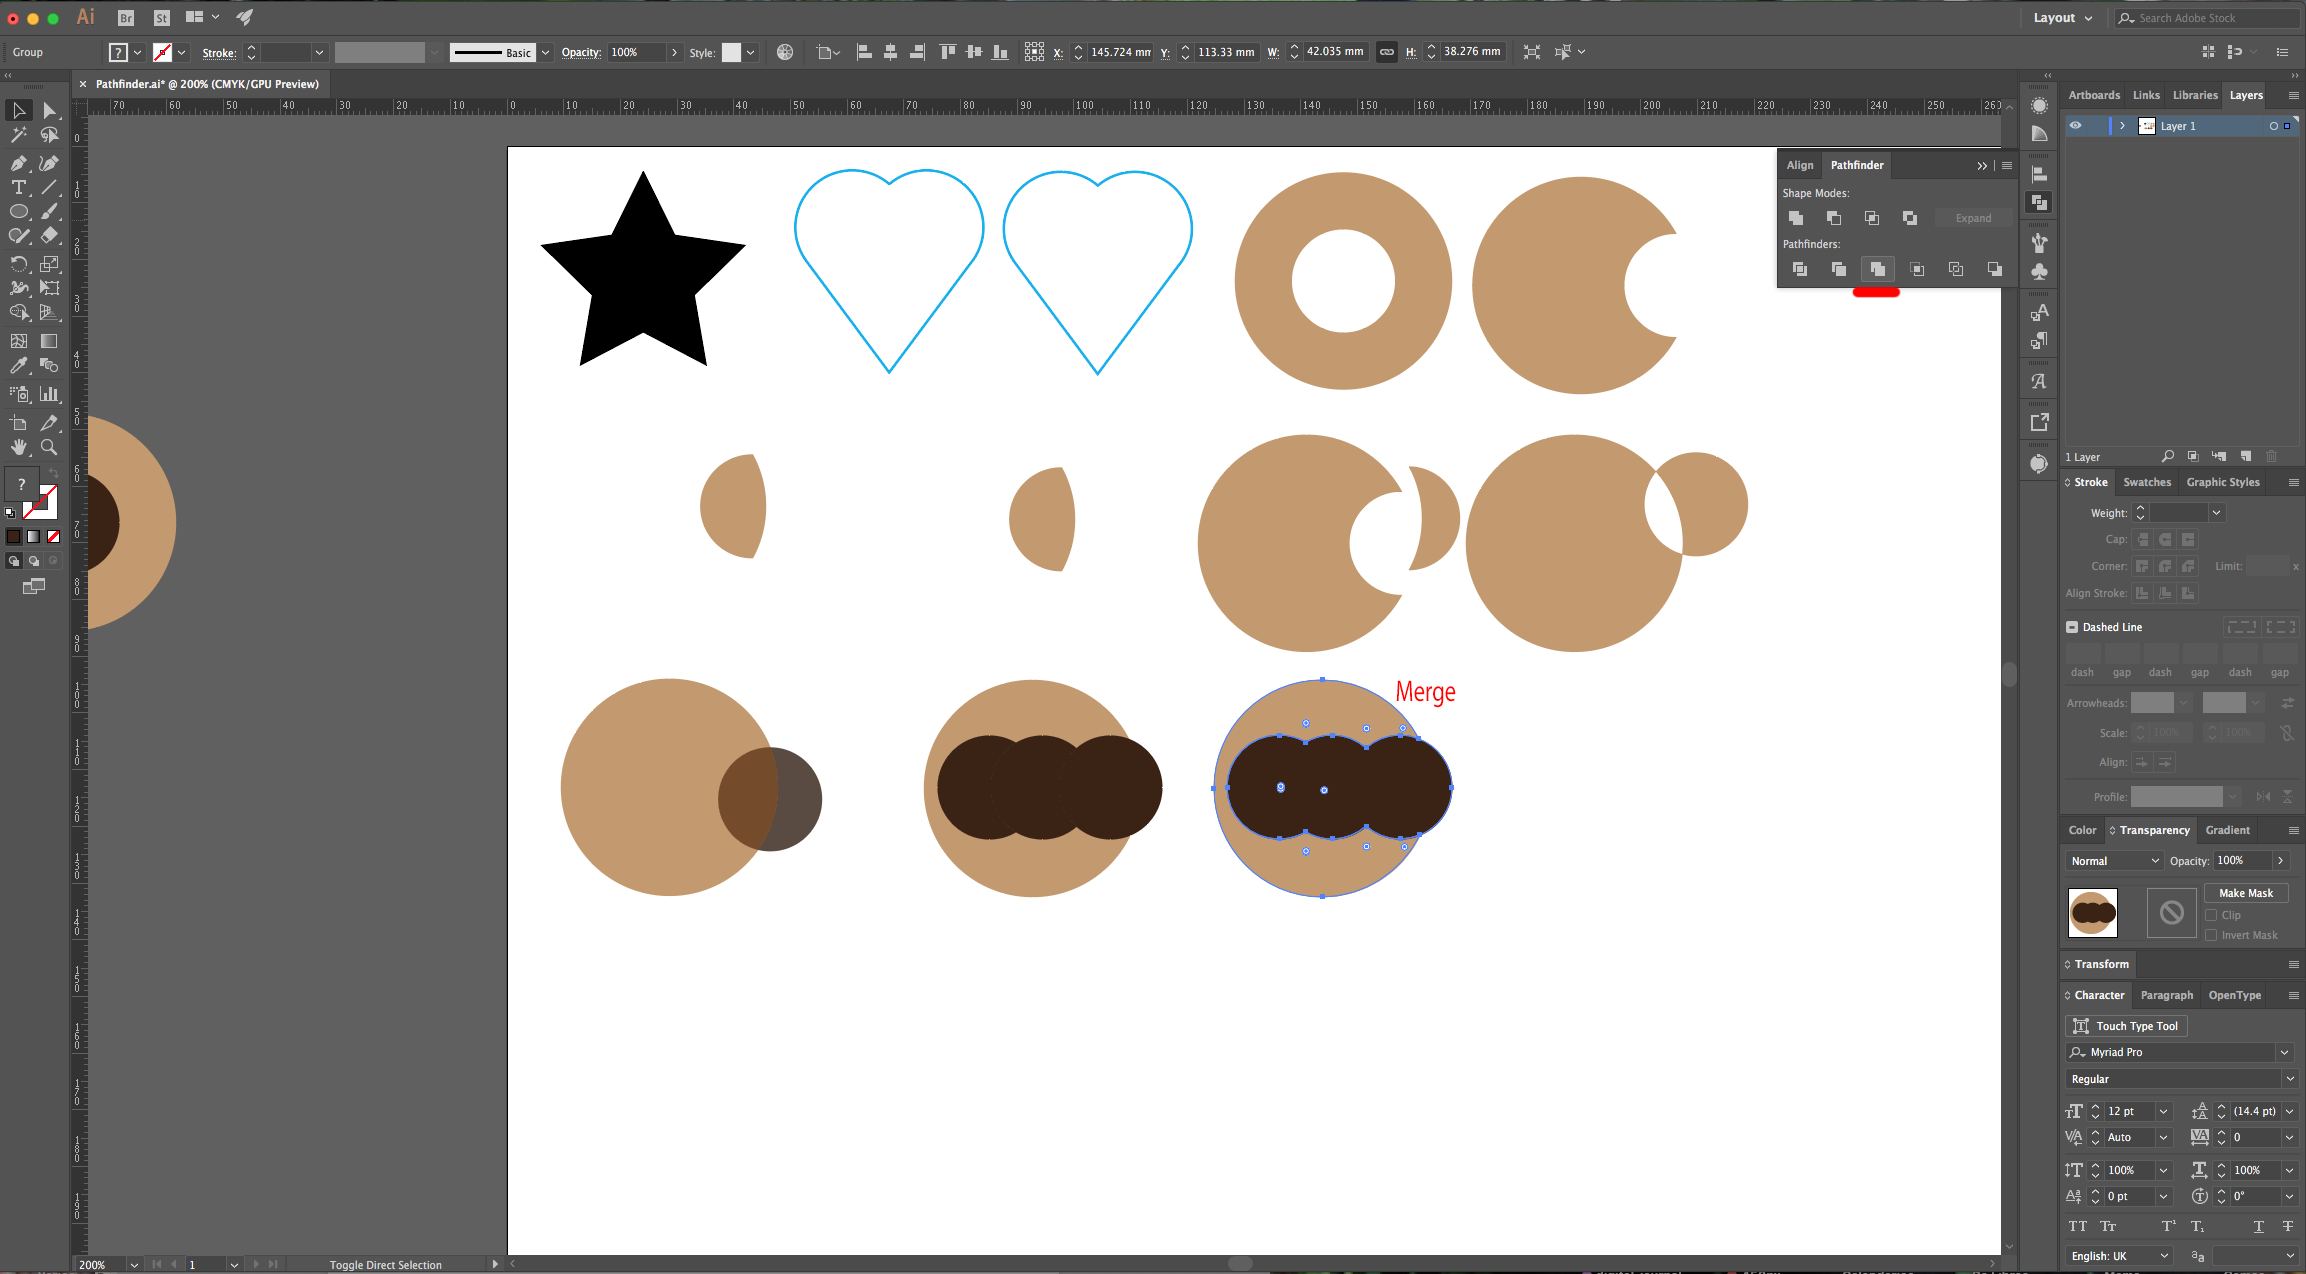
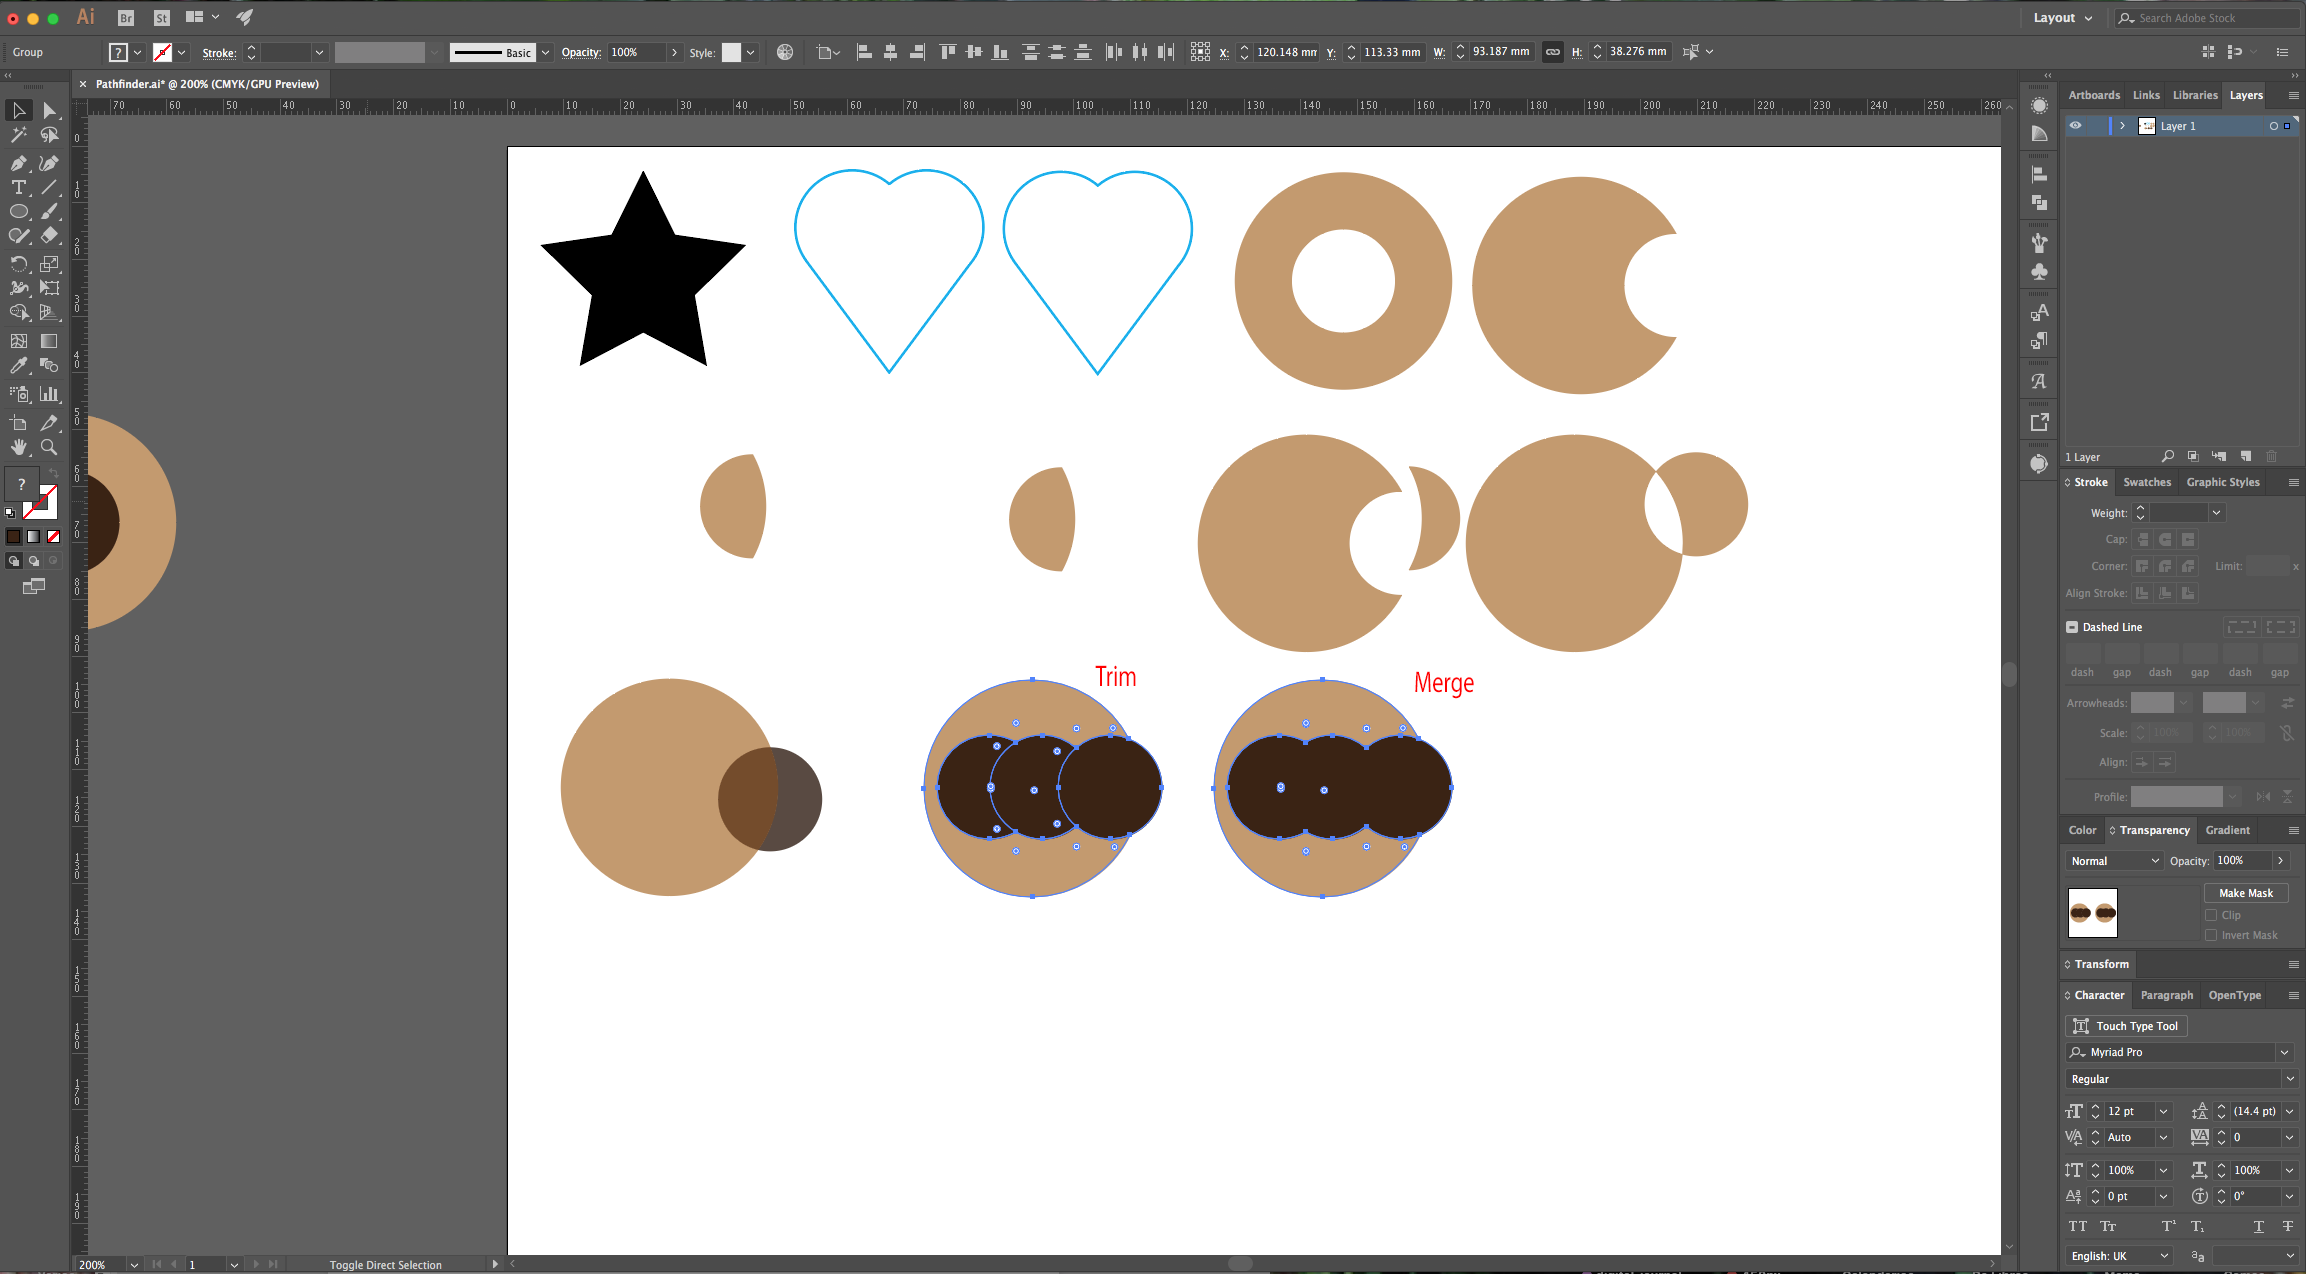
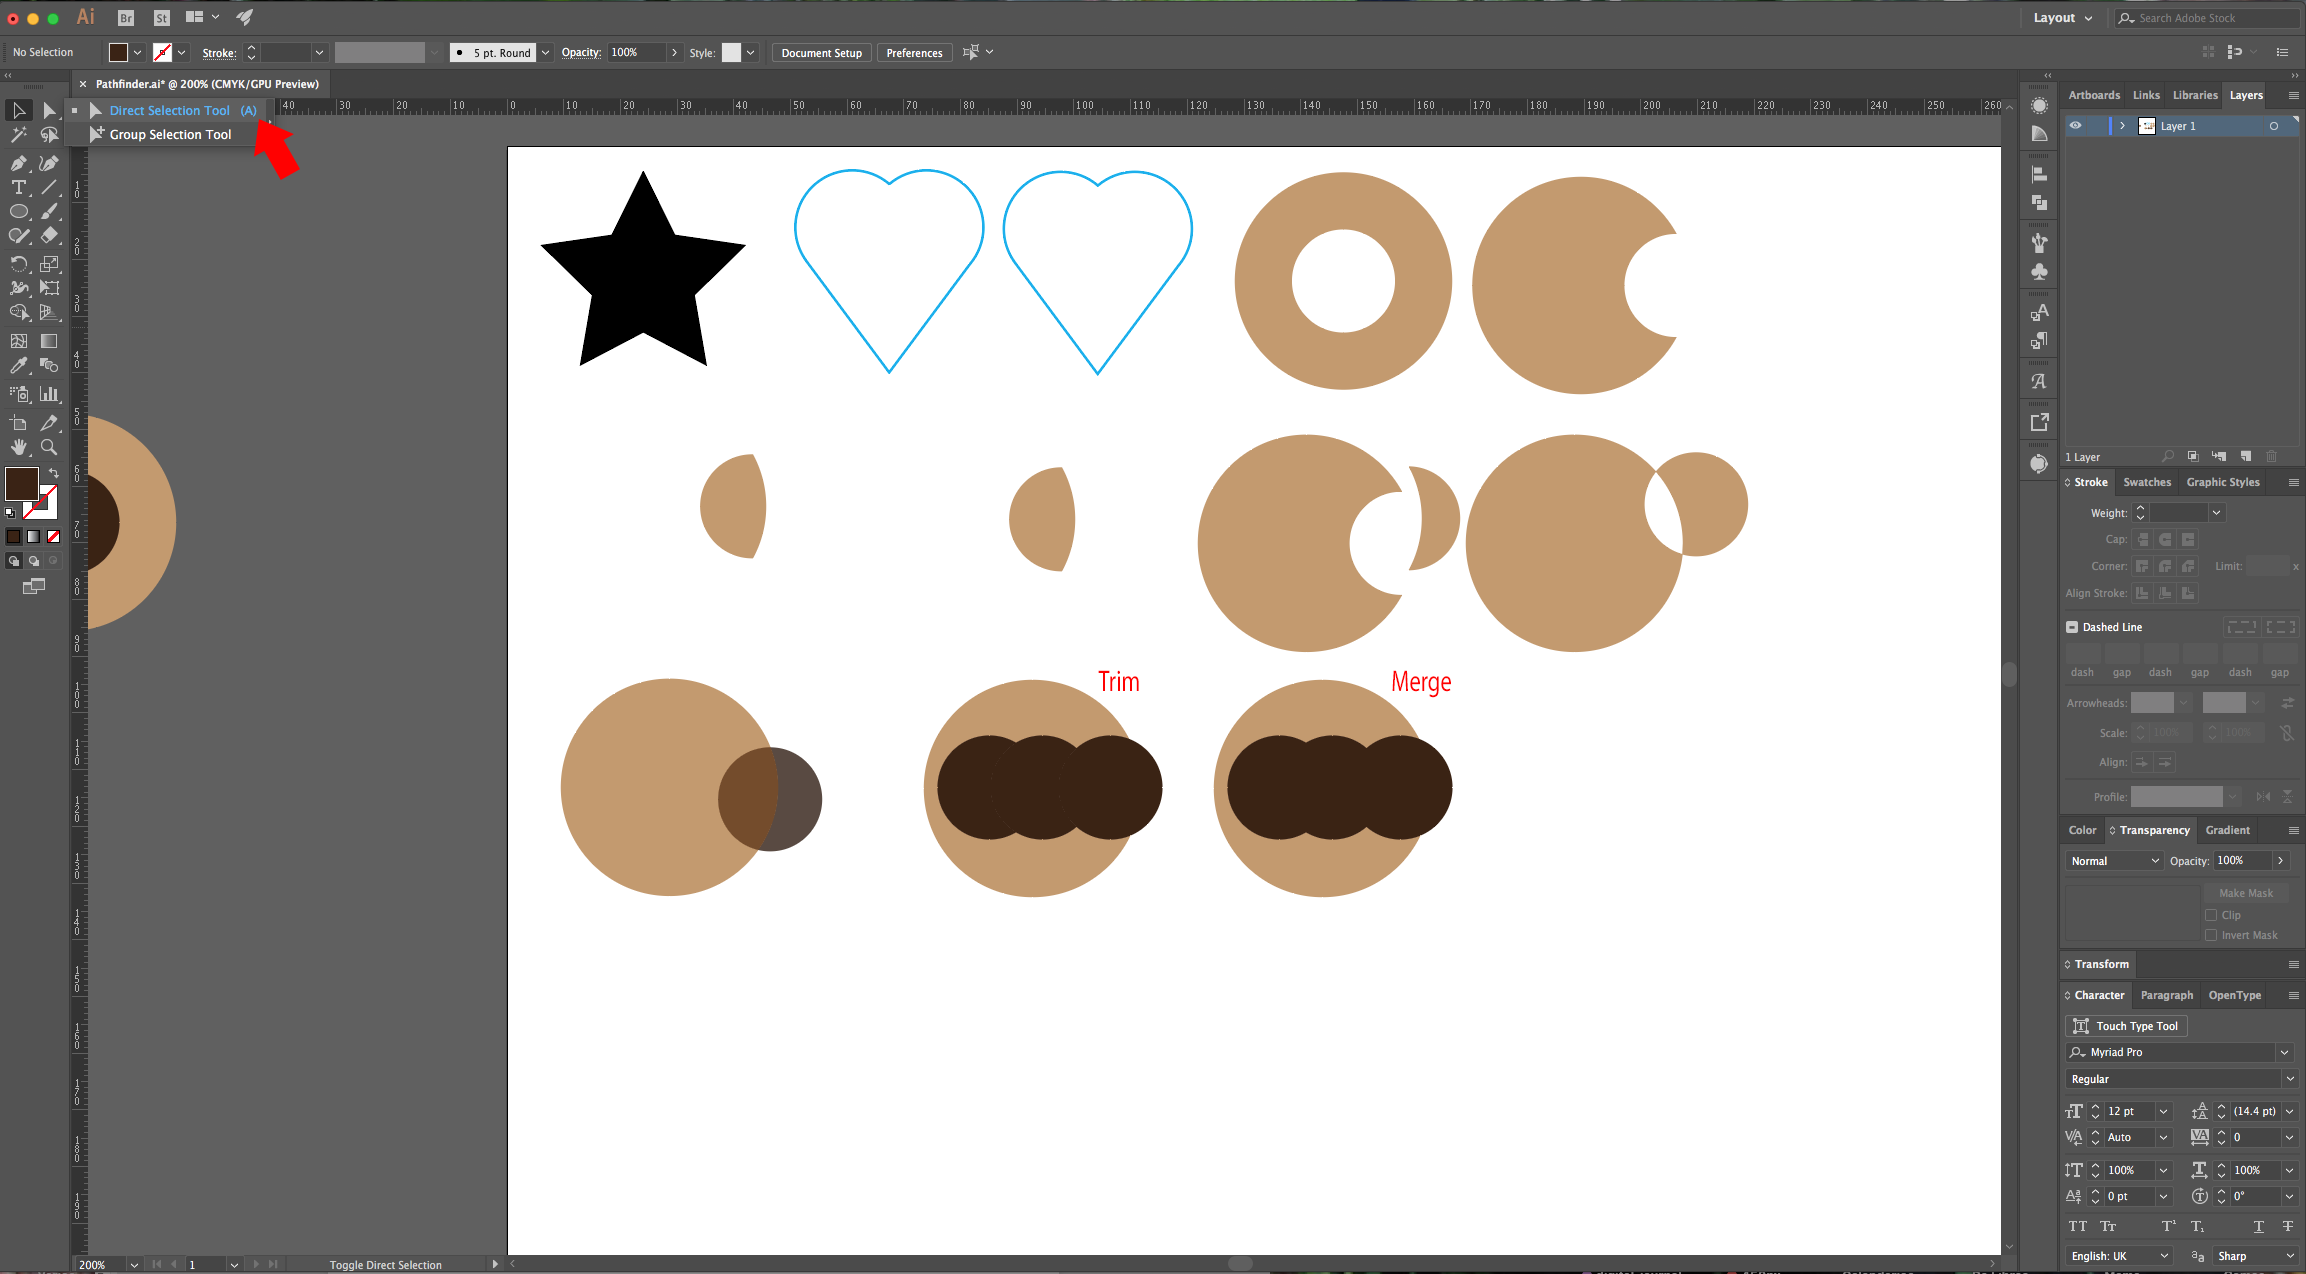
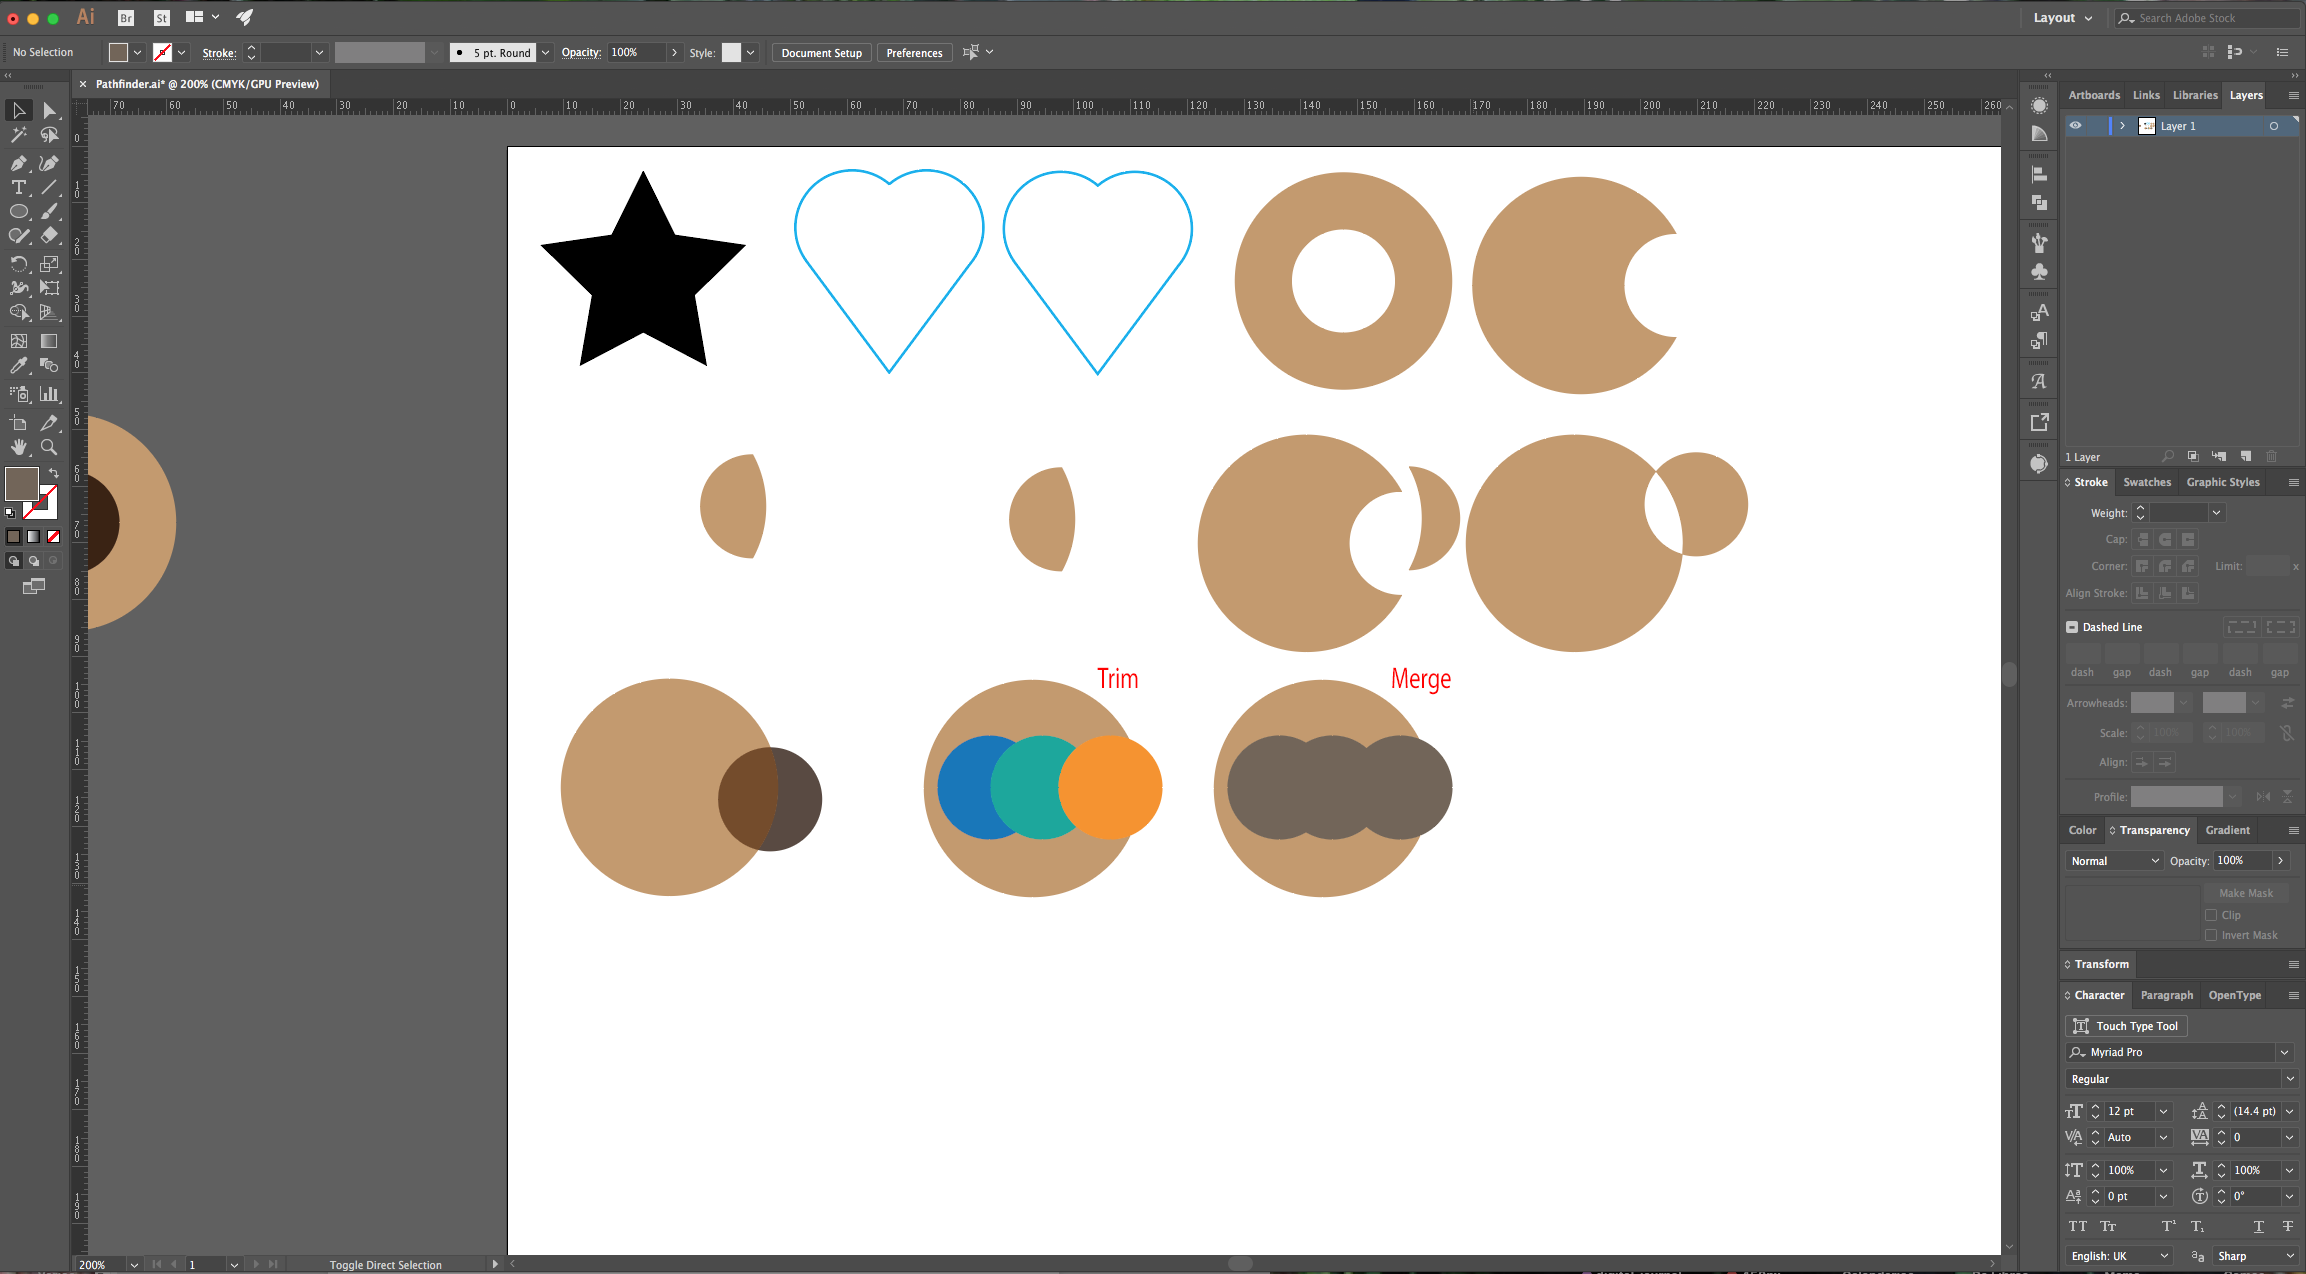
8 - Next, we have “Trim” and “Merge”, they act very similar but “Trim” will separate overlapping “Paths” even if they have the same color and “Merge” will fuse them together.


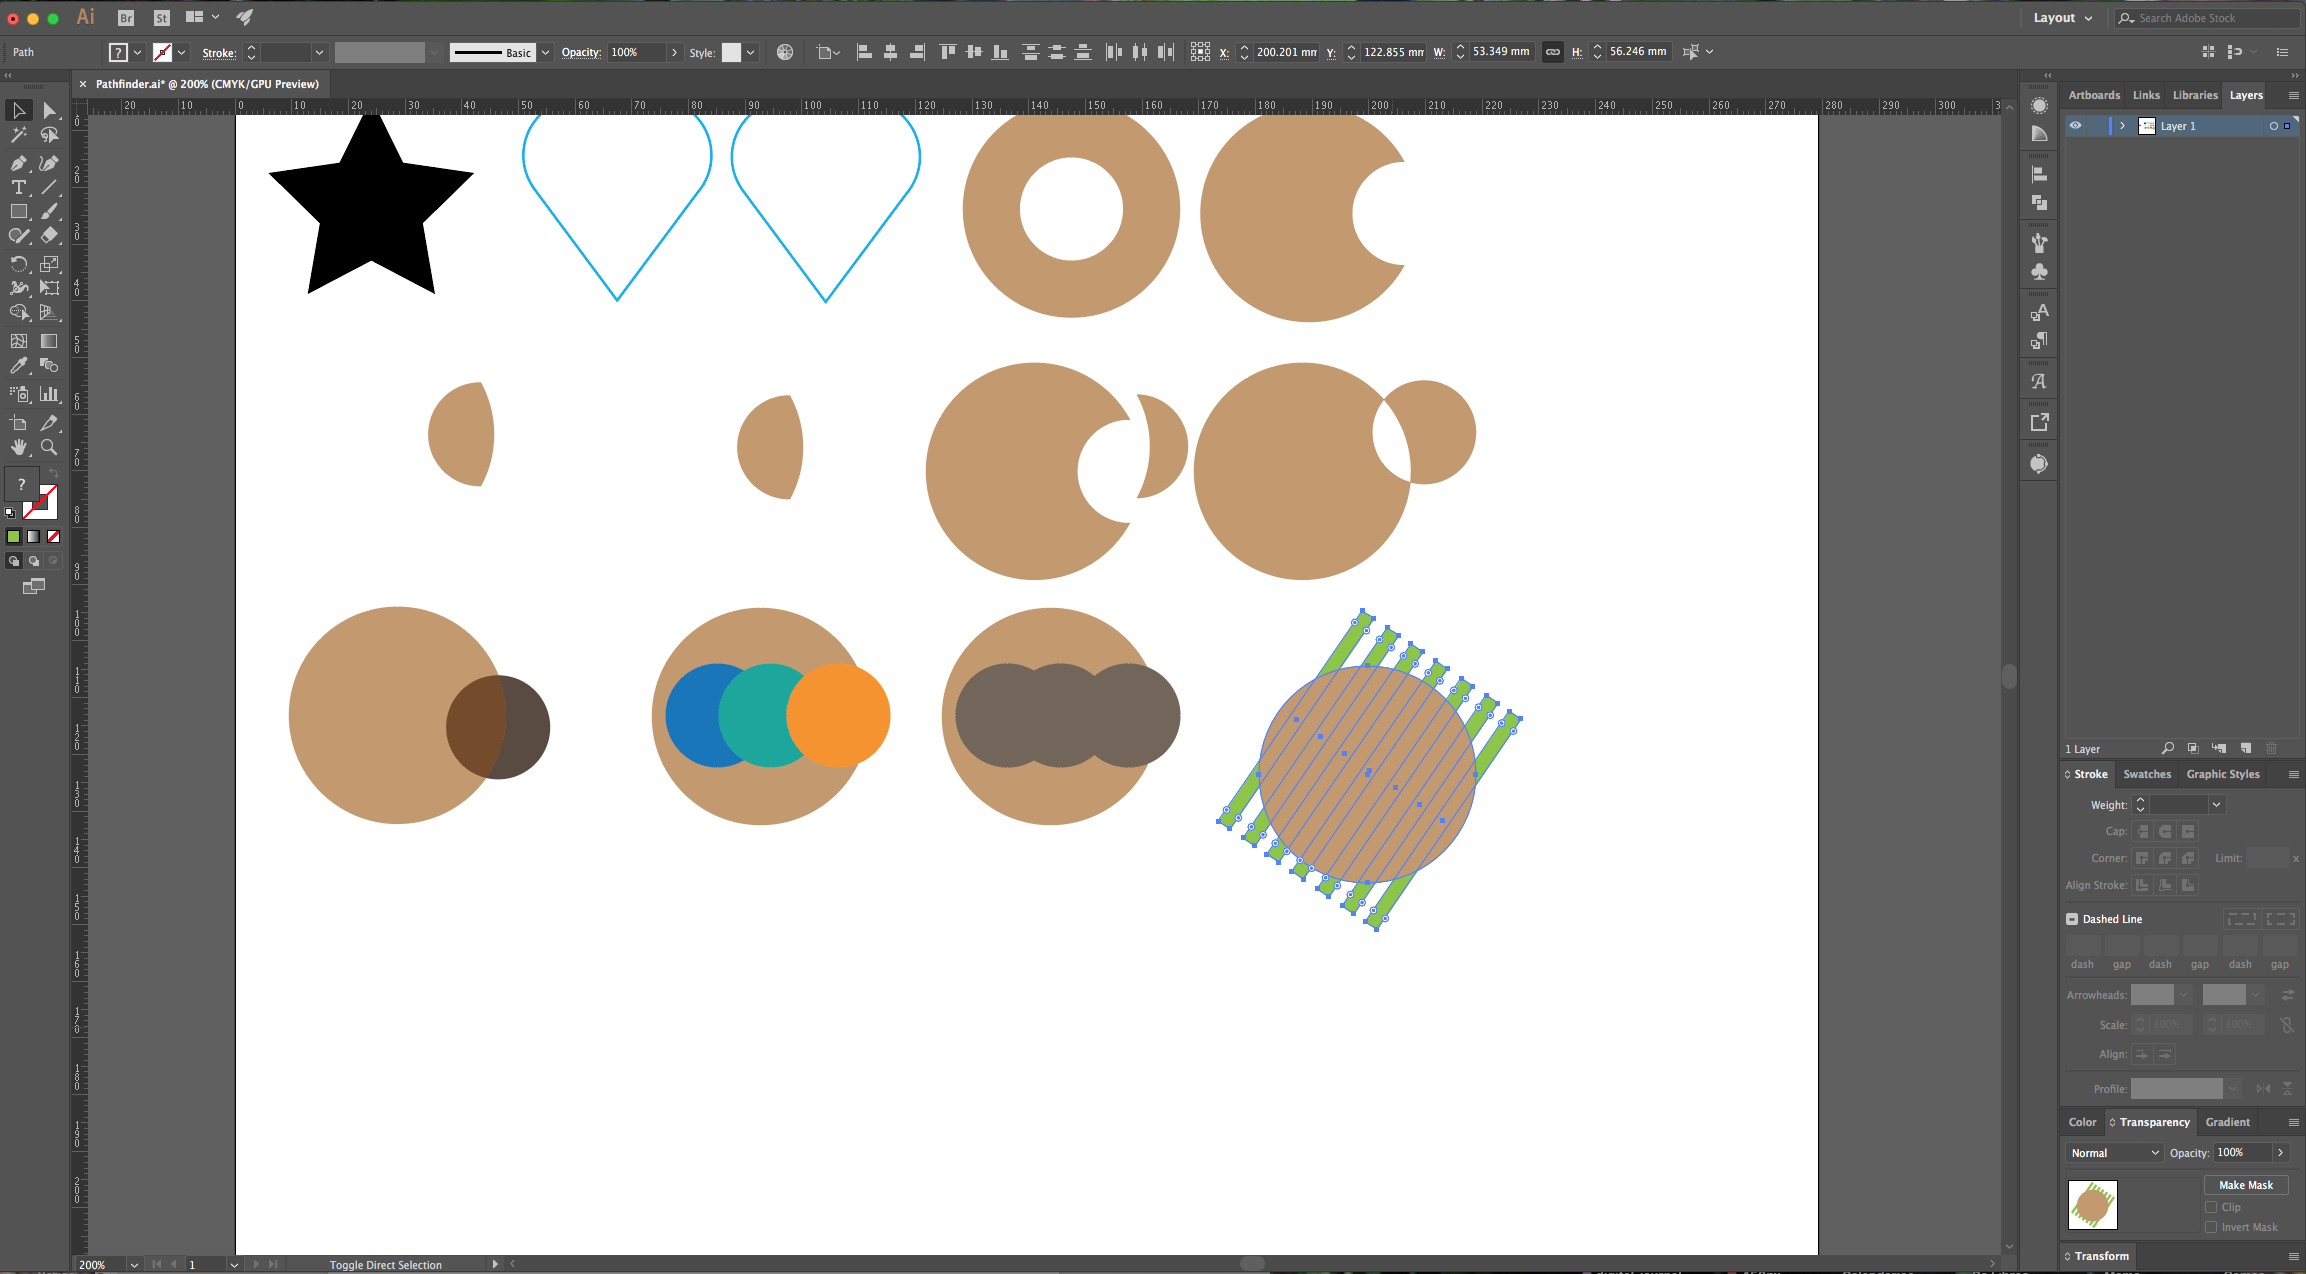
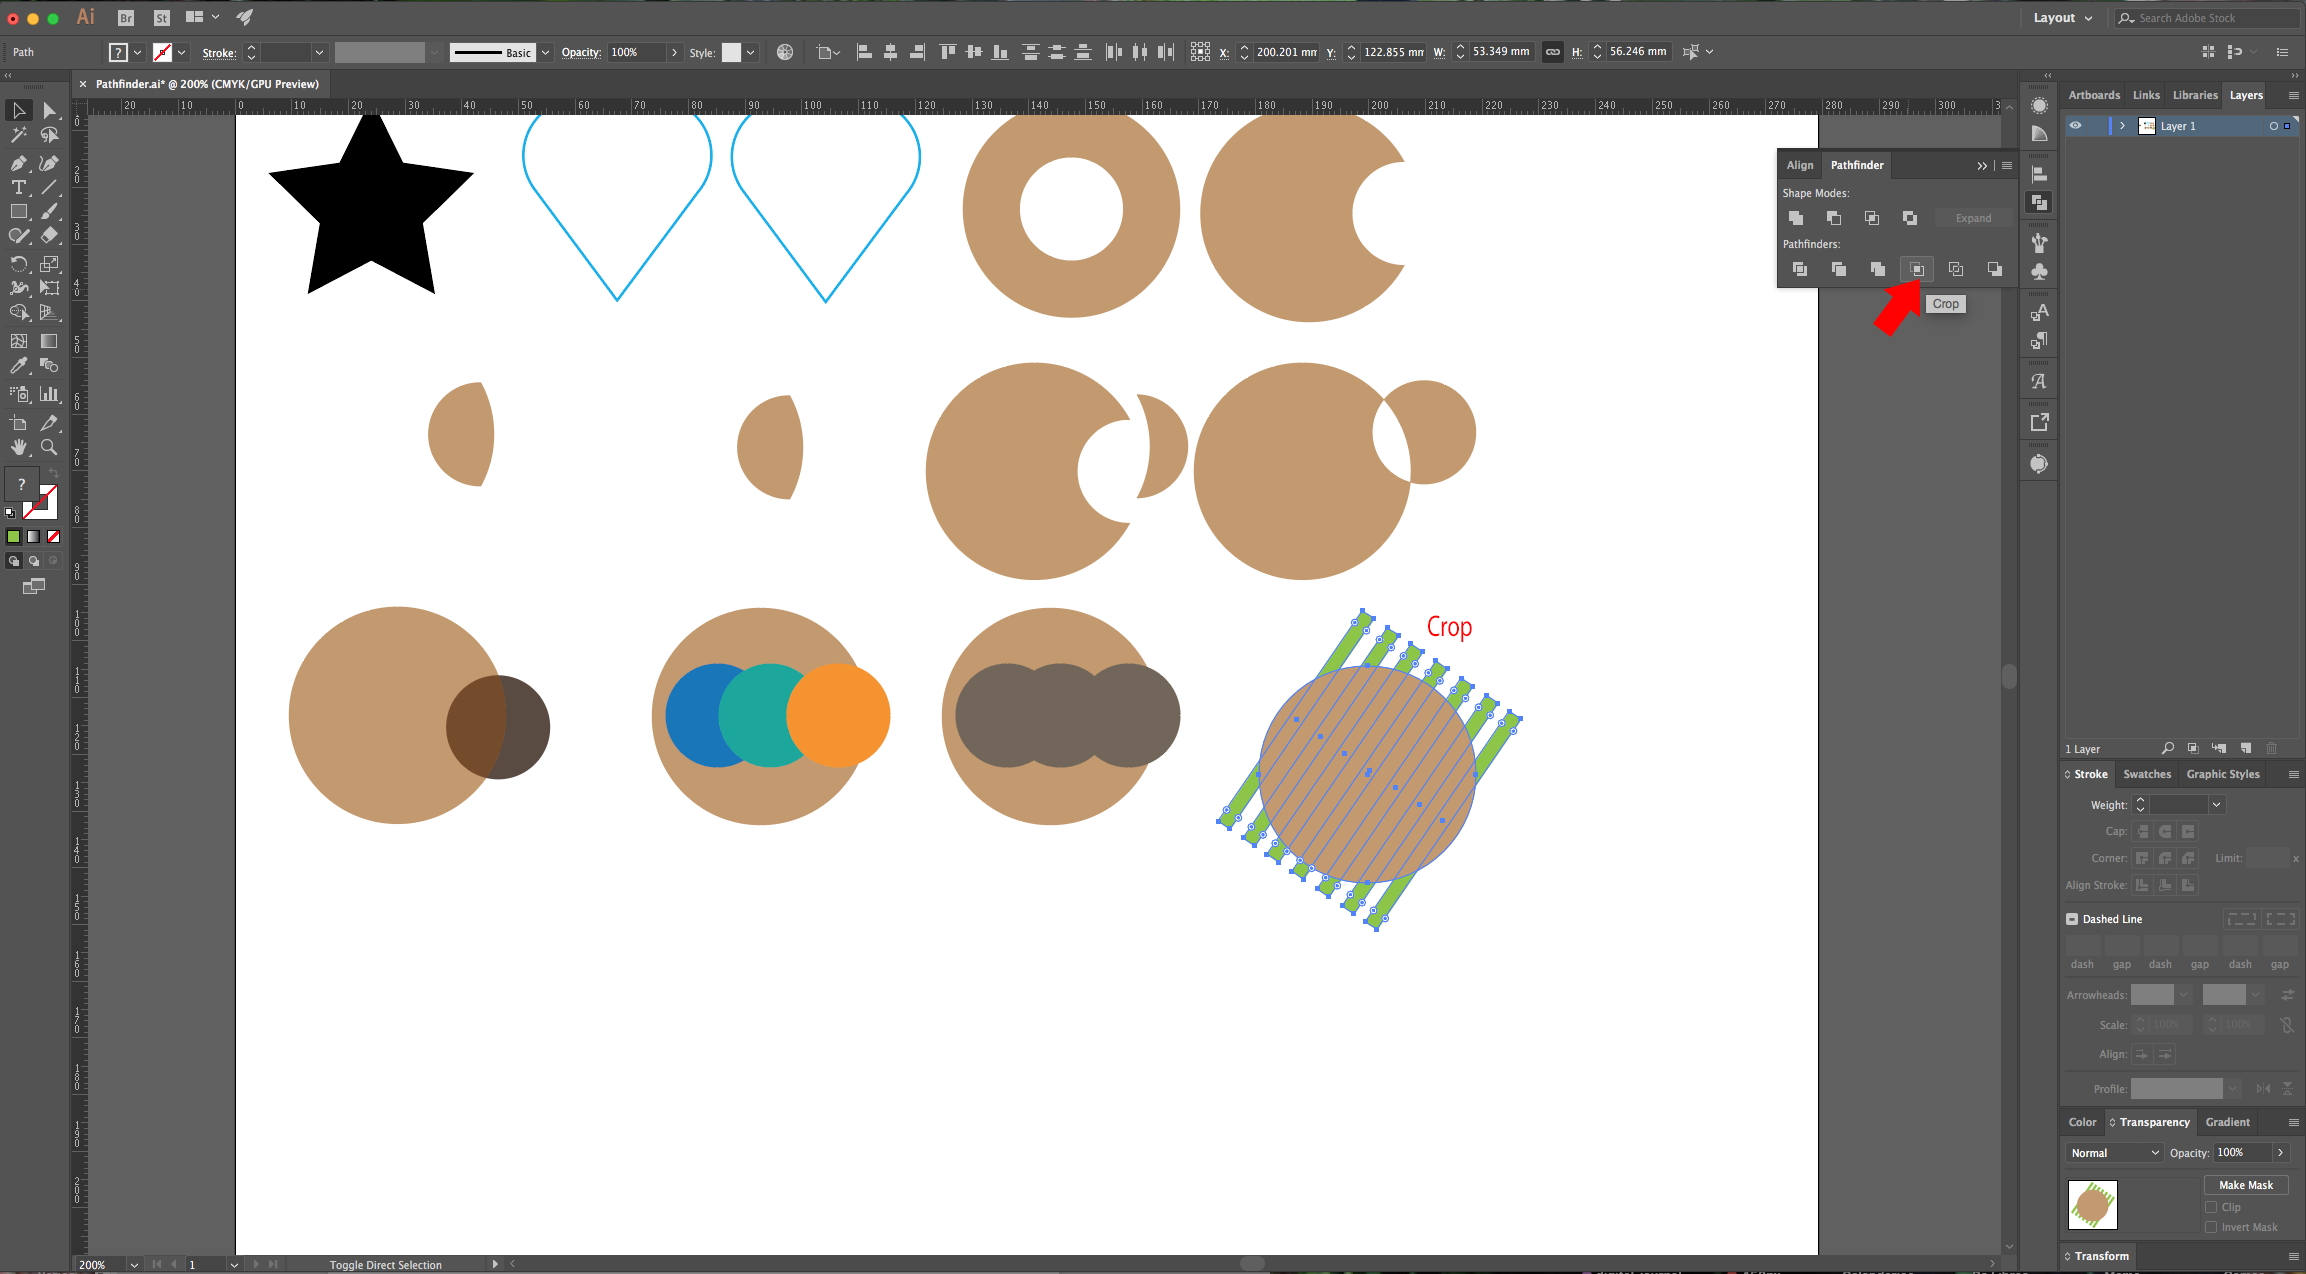
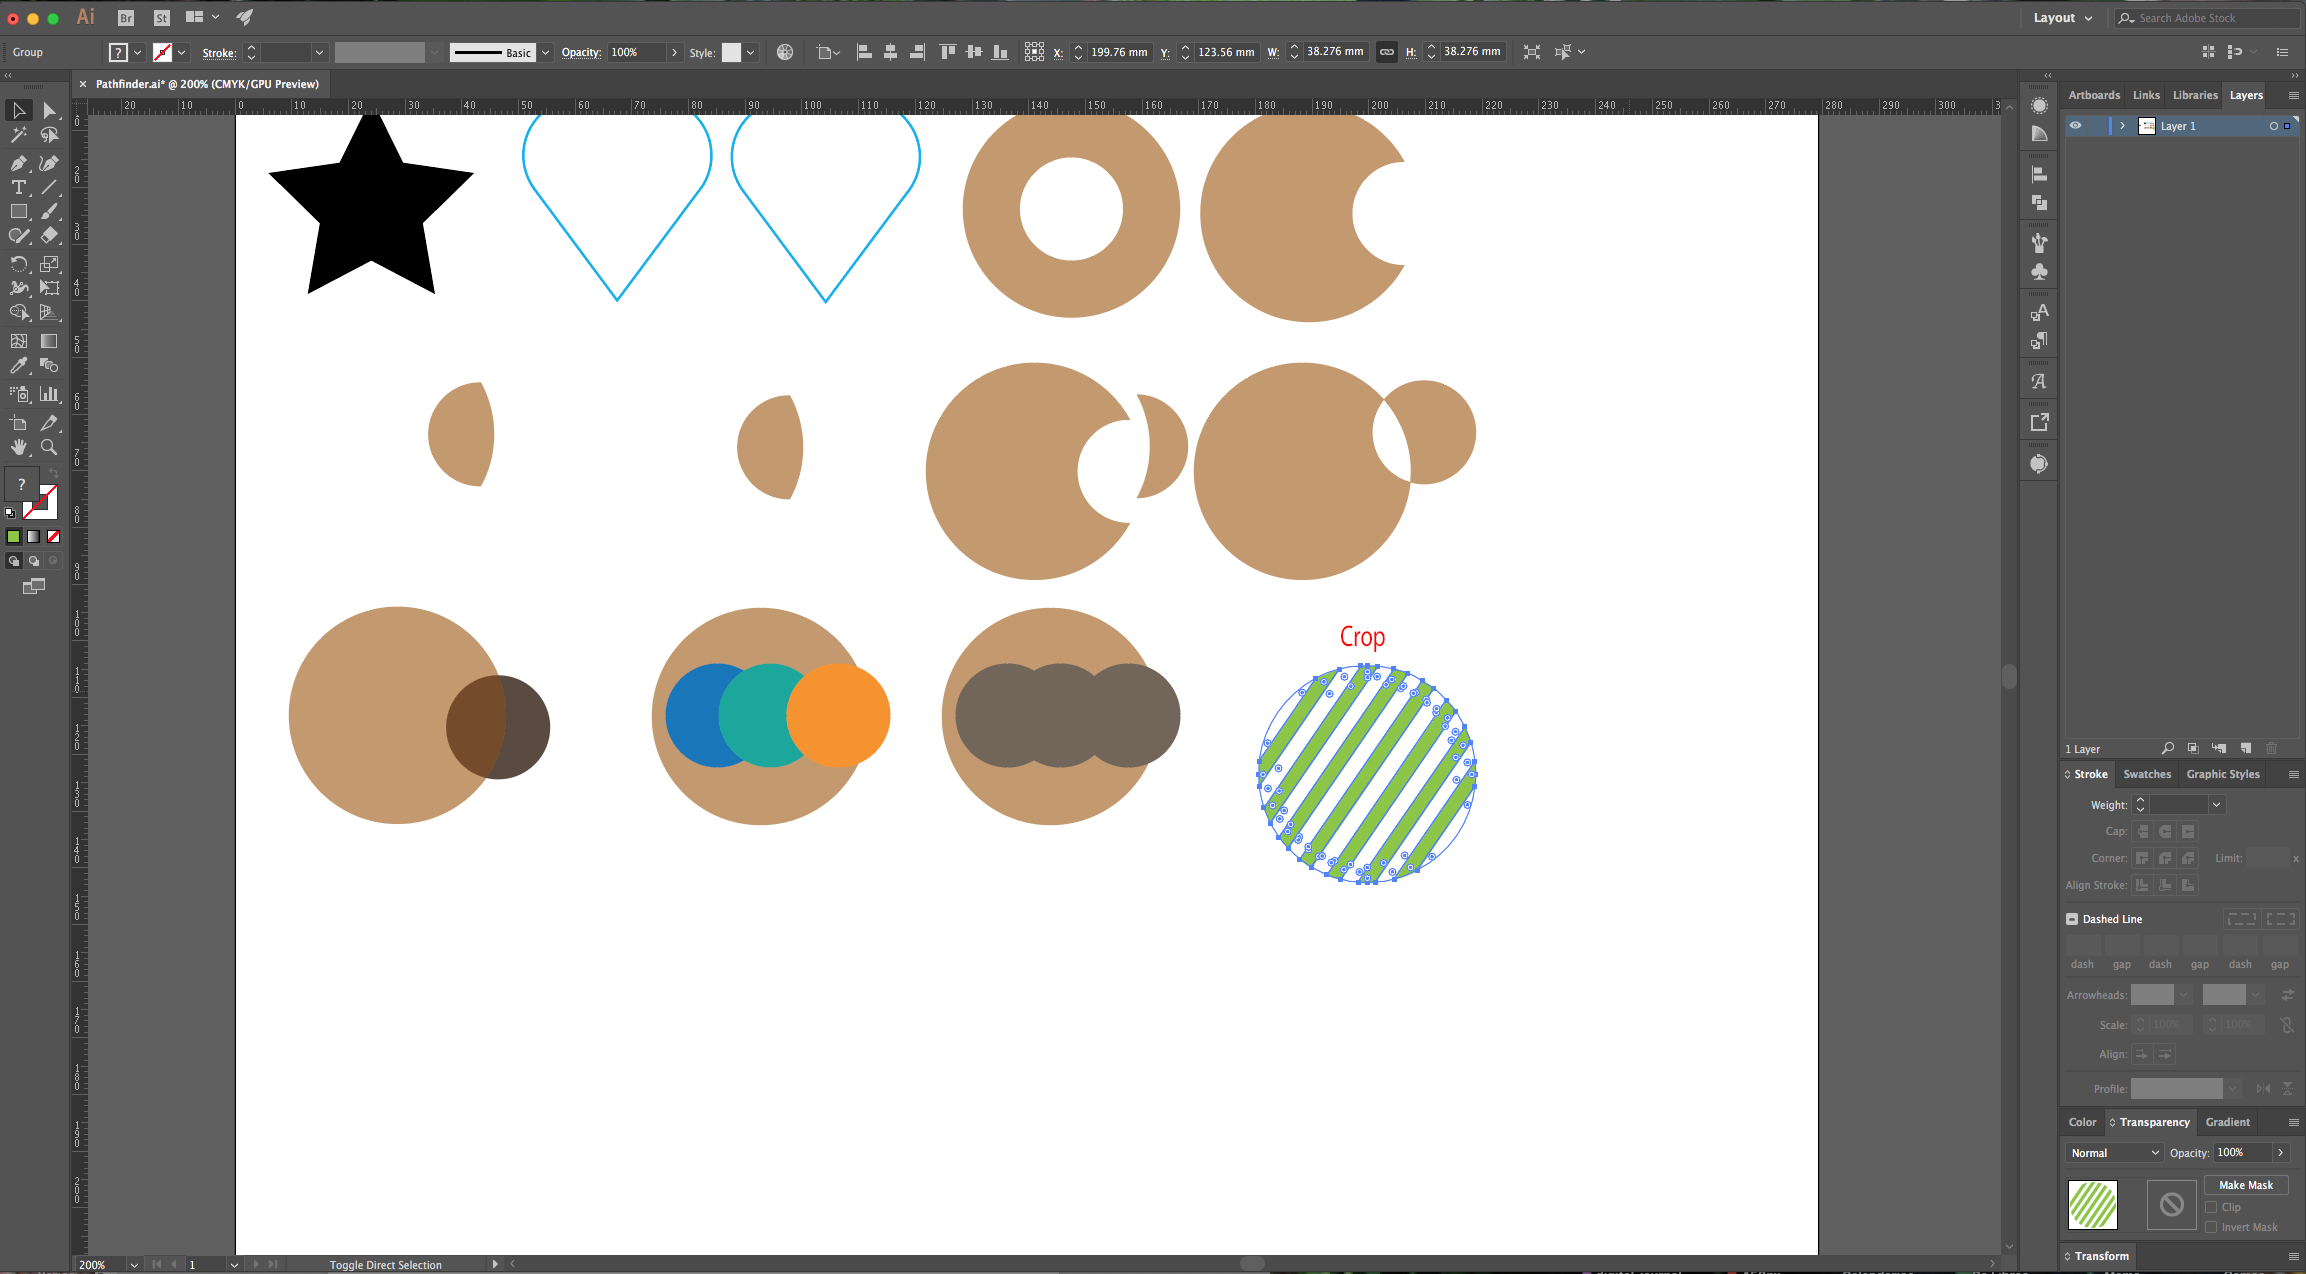
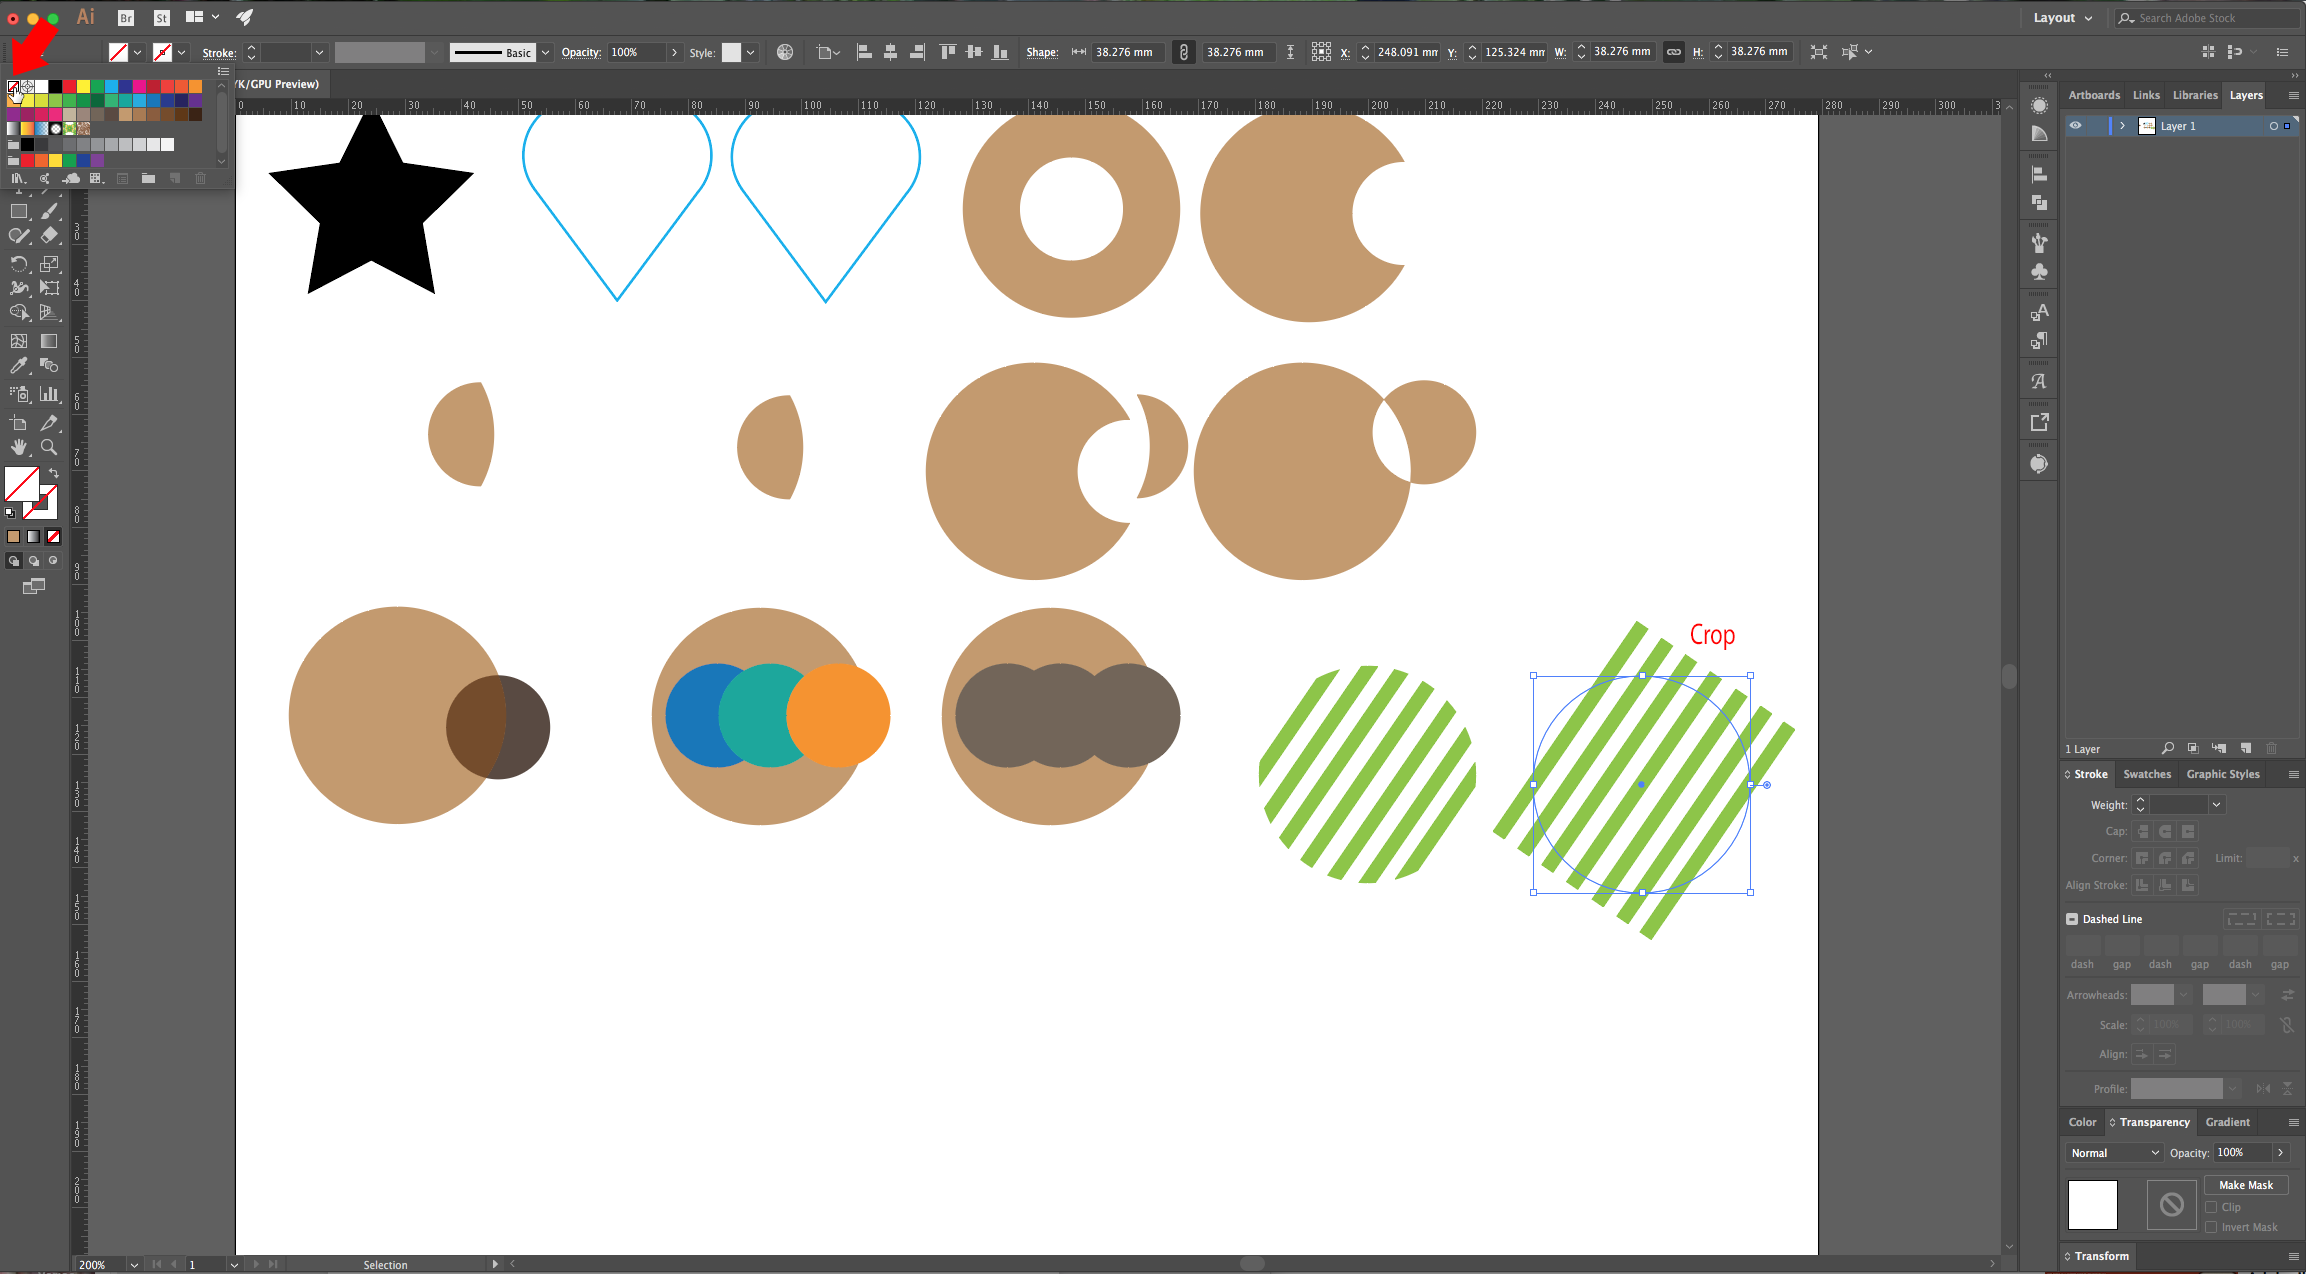
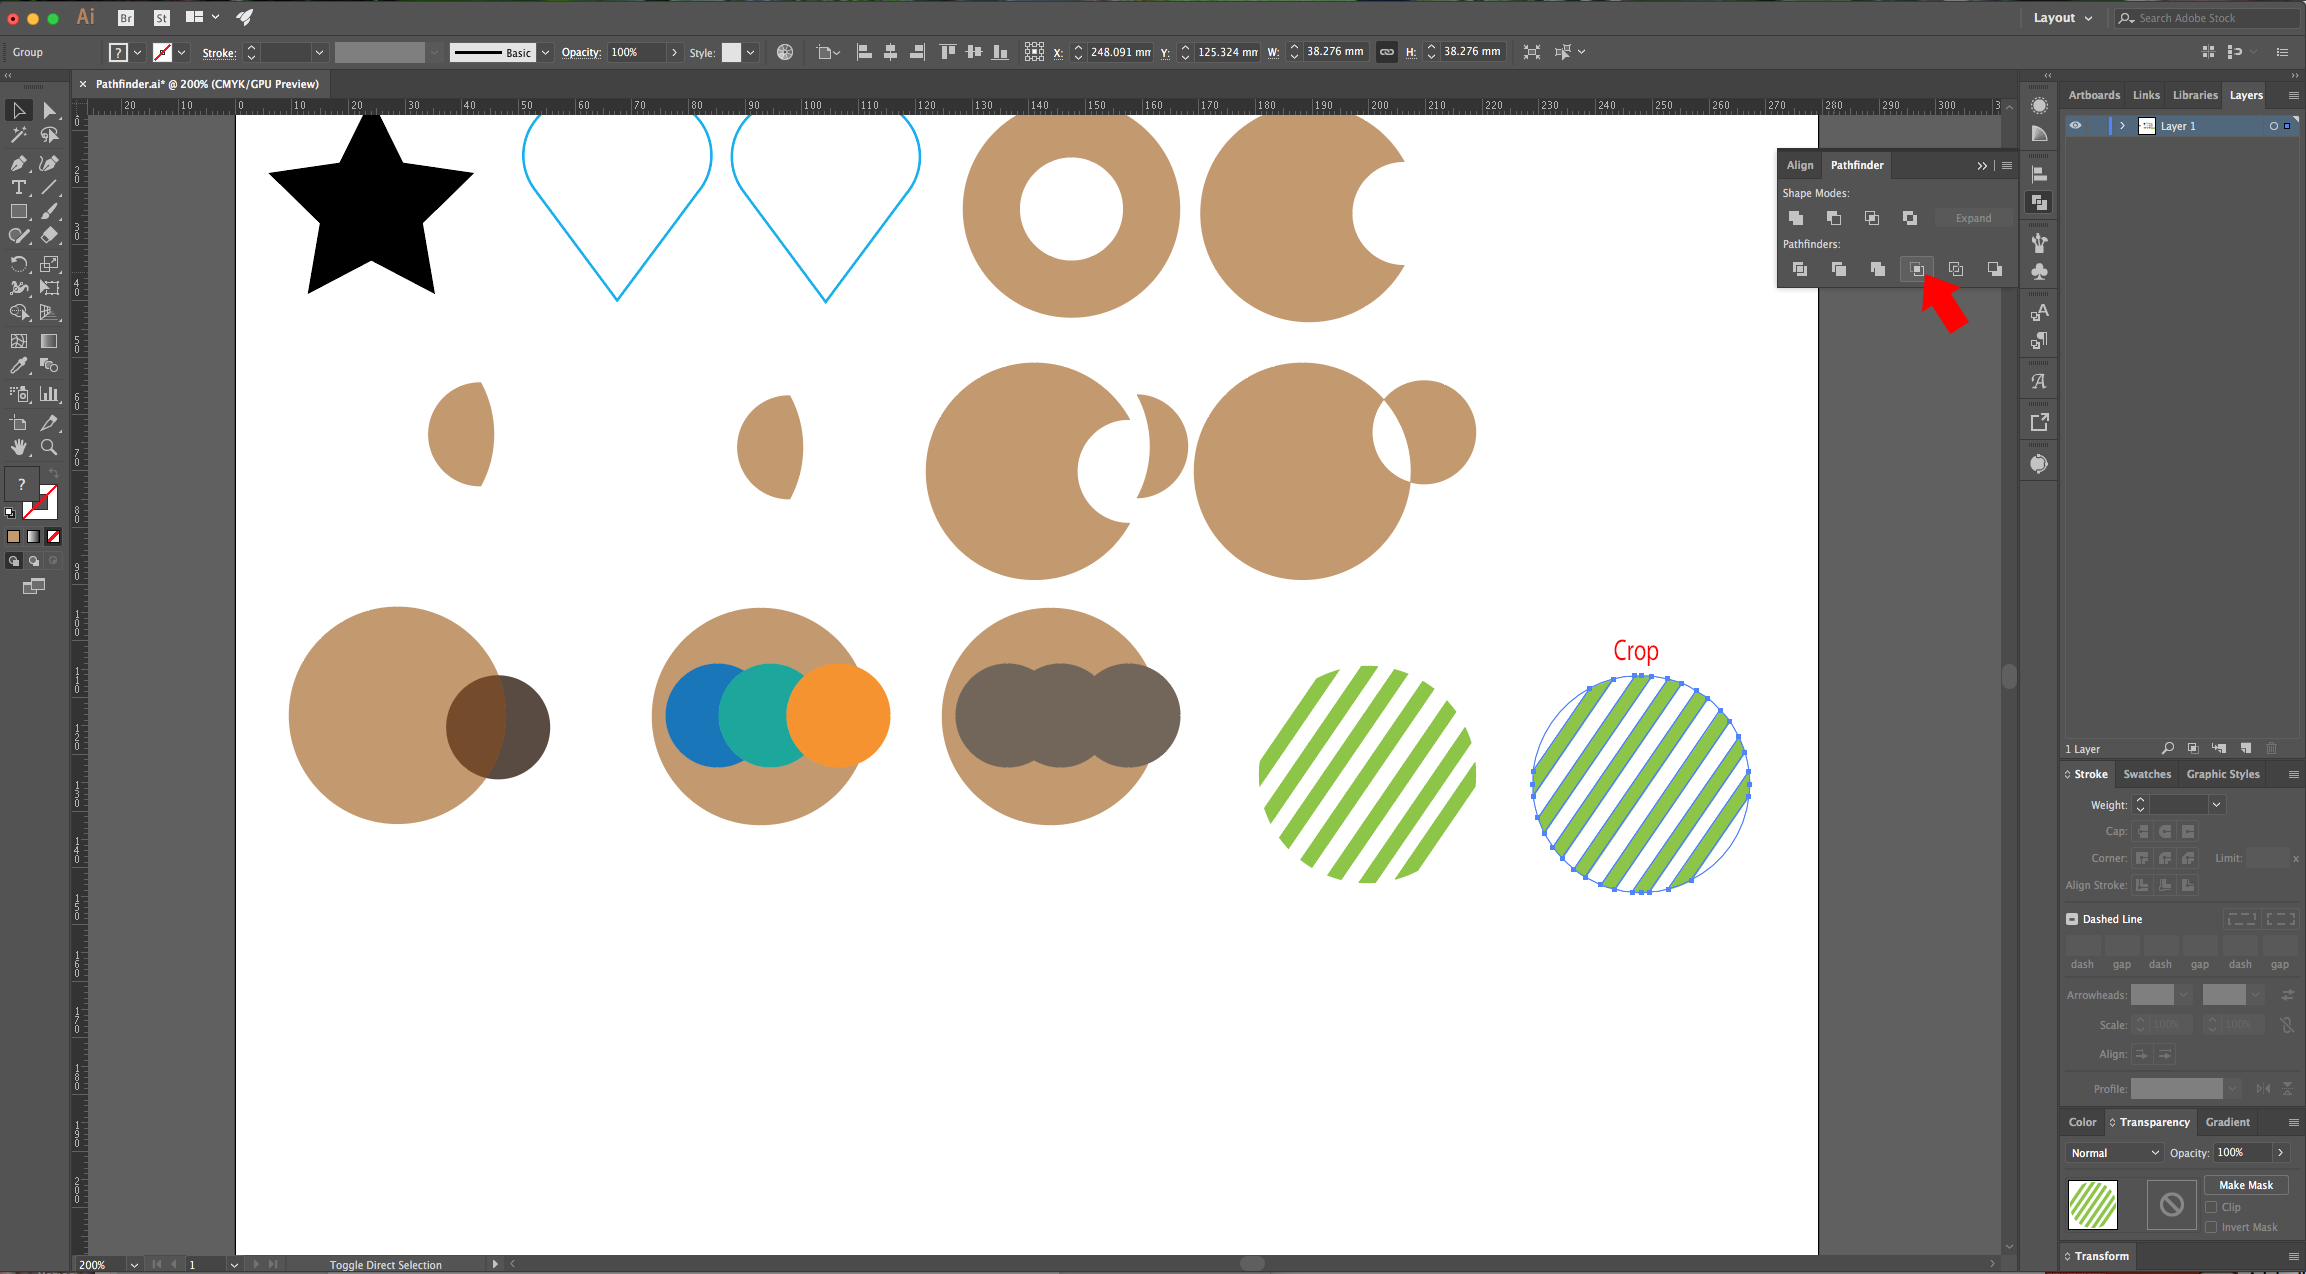
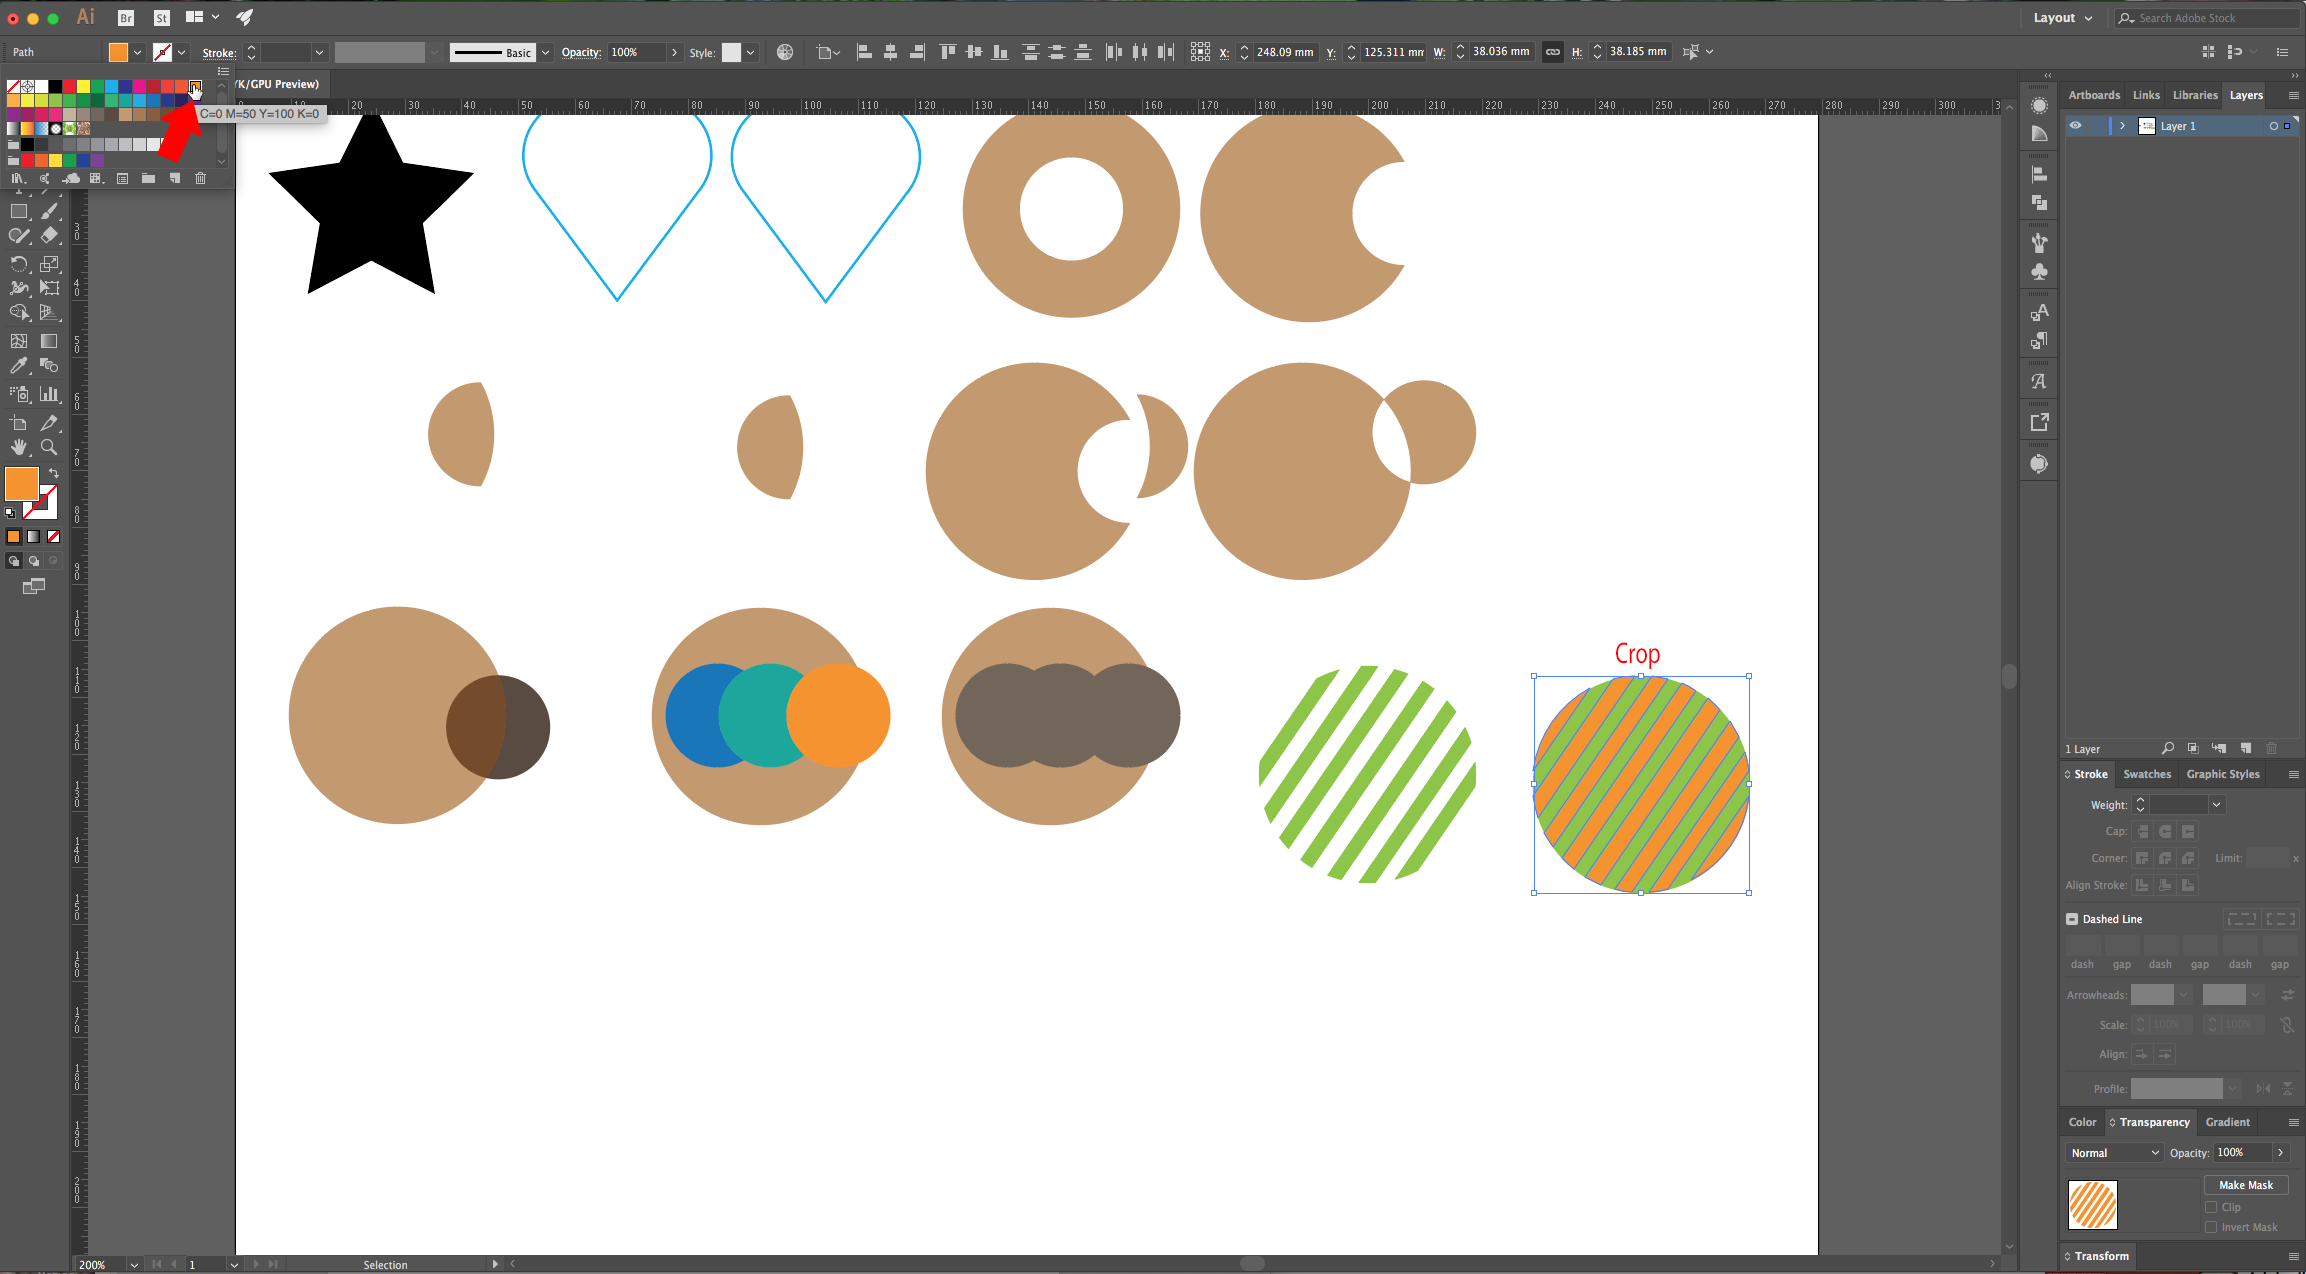
9 - “Crop” will help you cut “Paths” into a shape. Place the shape you want your “Paths” to be cut into on “Top”, it can even have “No Fill” and it still work. Take into account that it will create some “Paths” that fill the empty space.
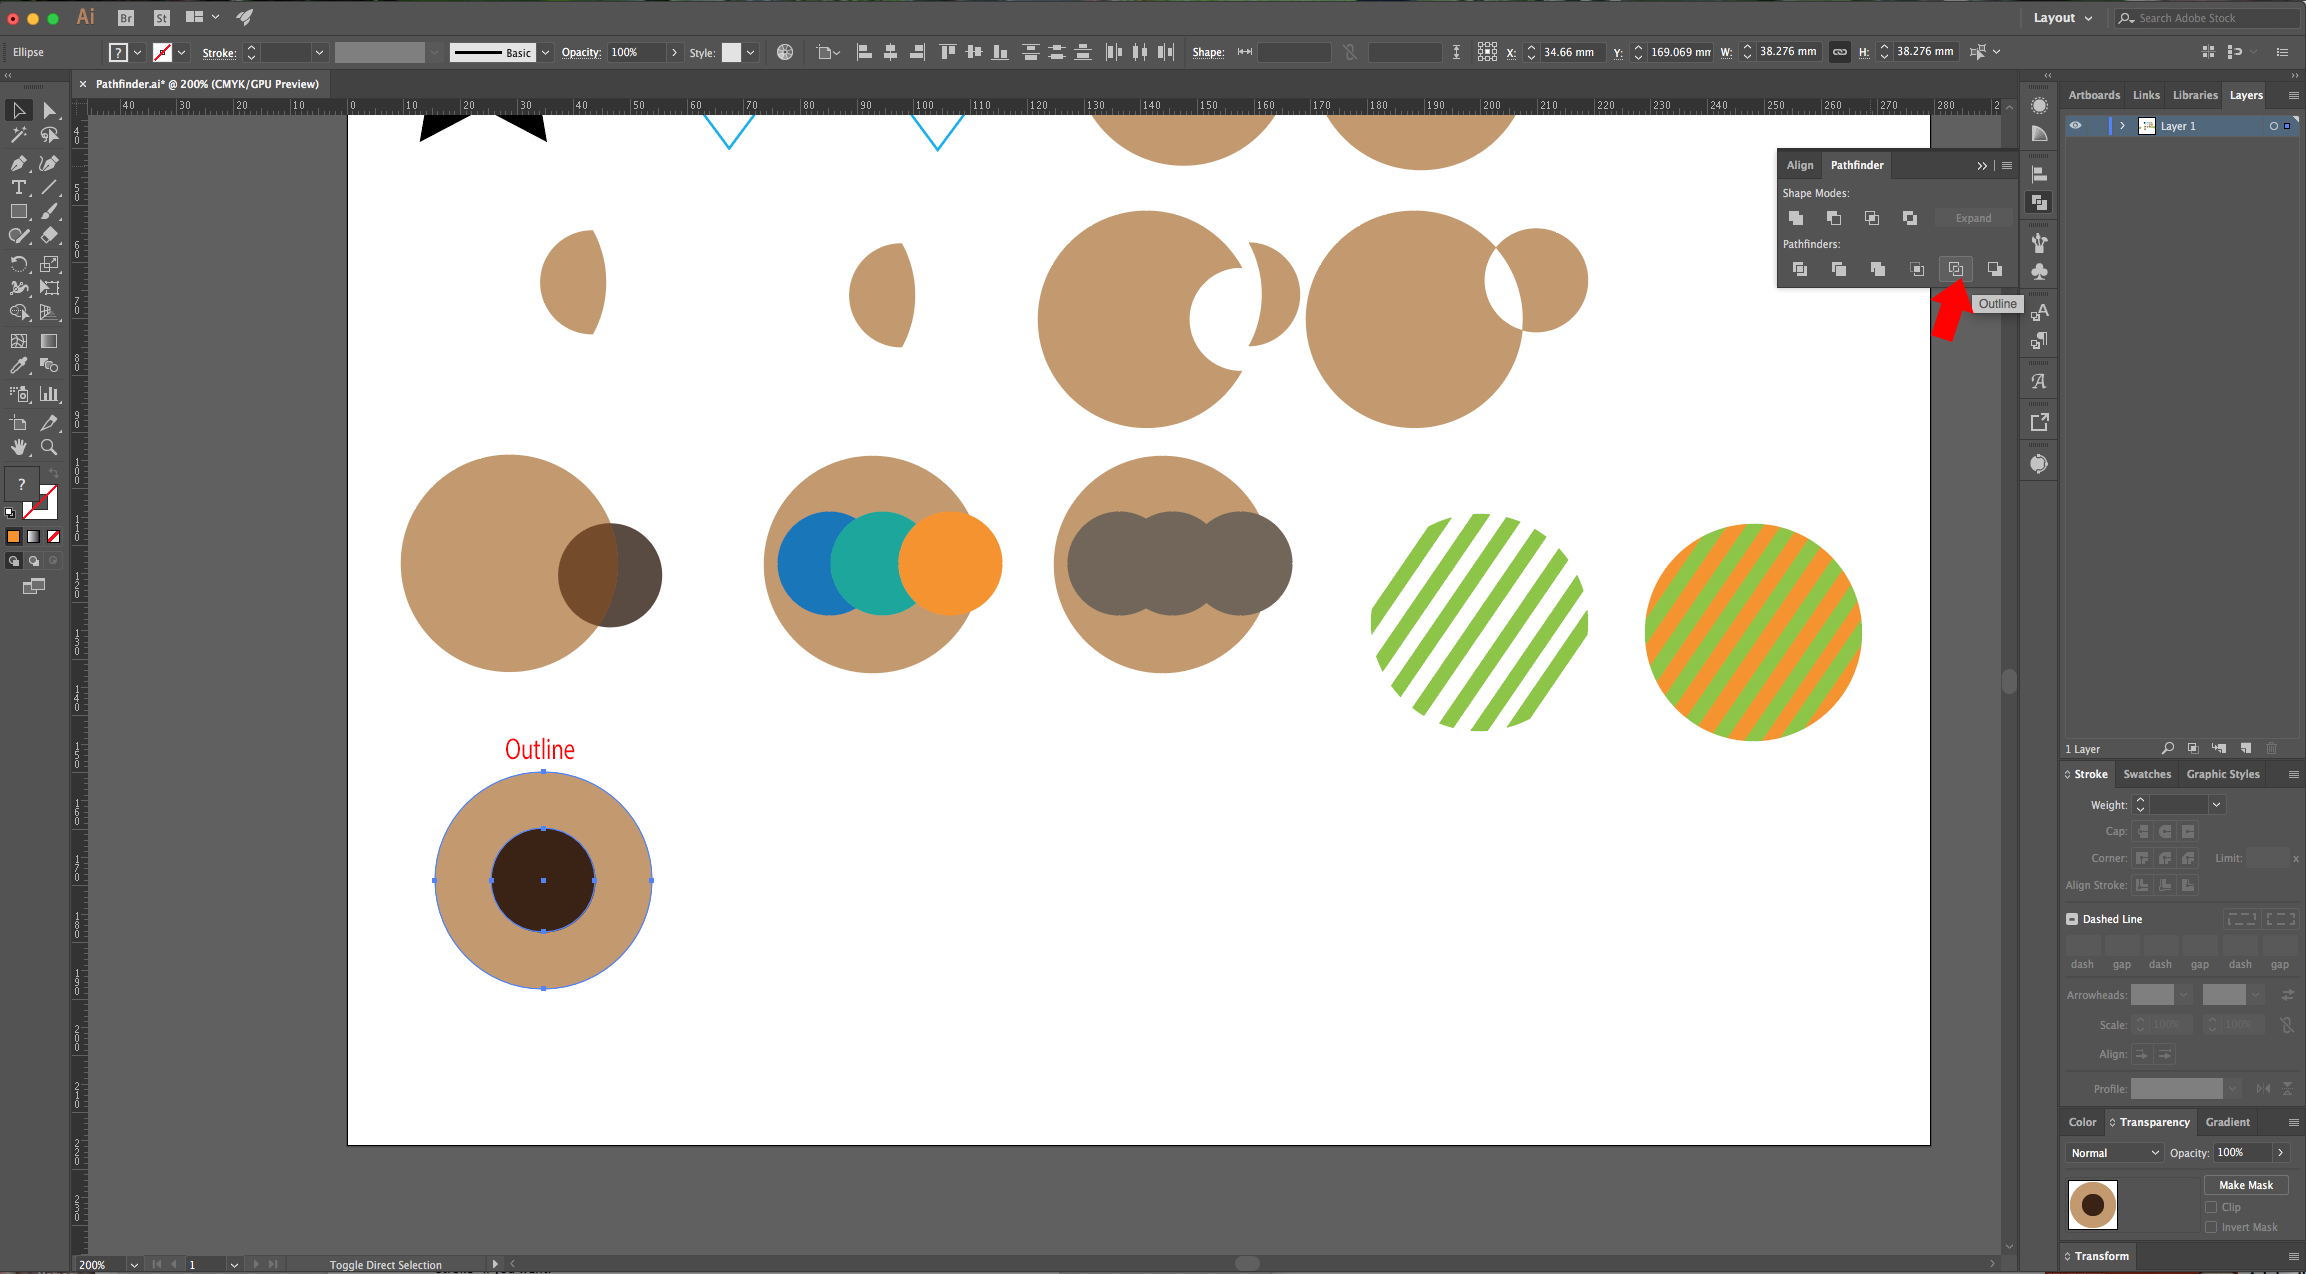
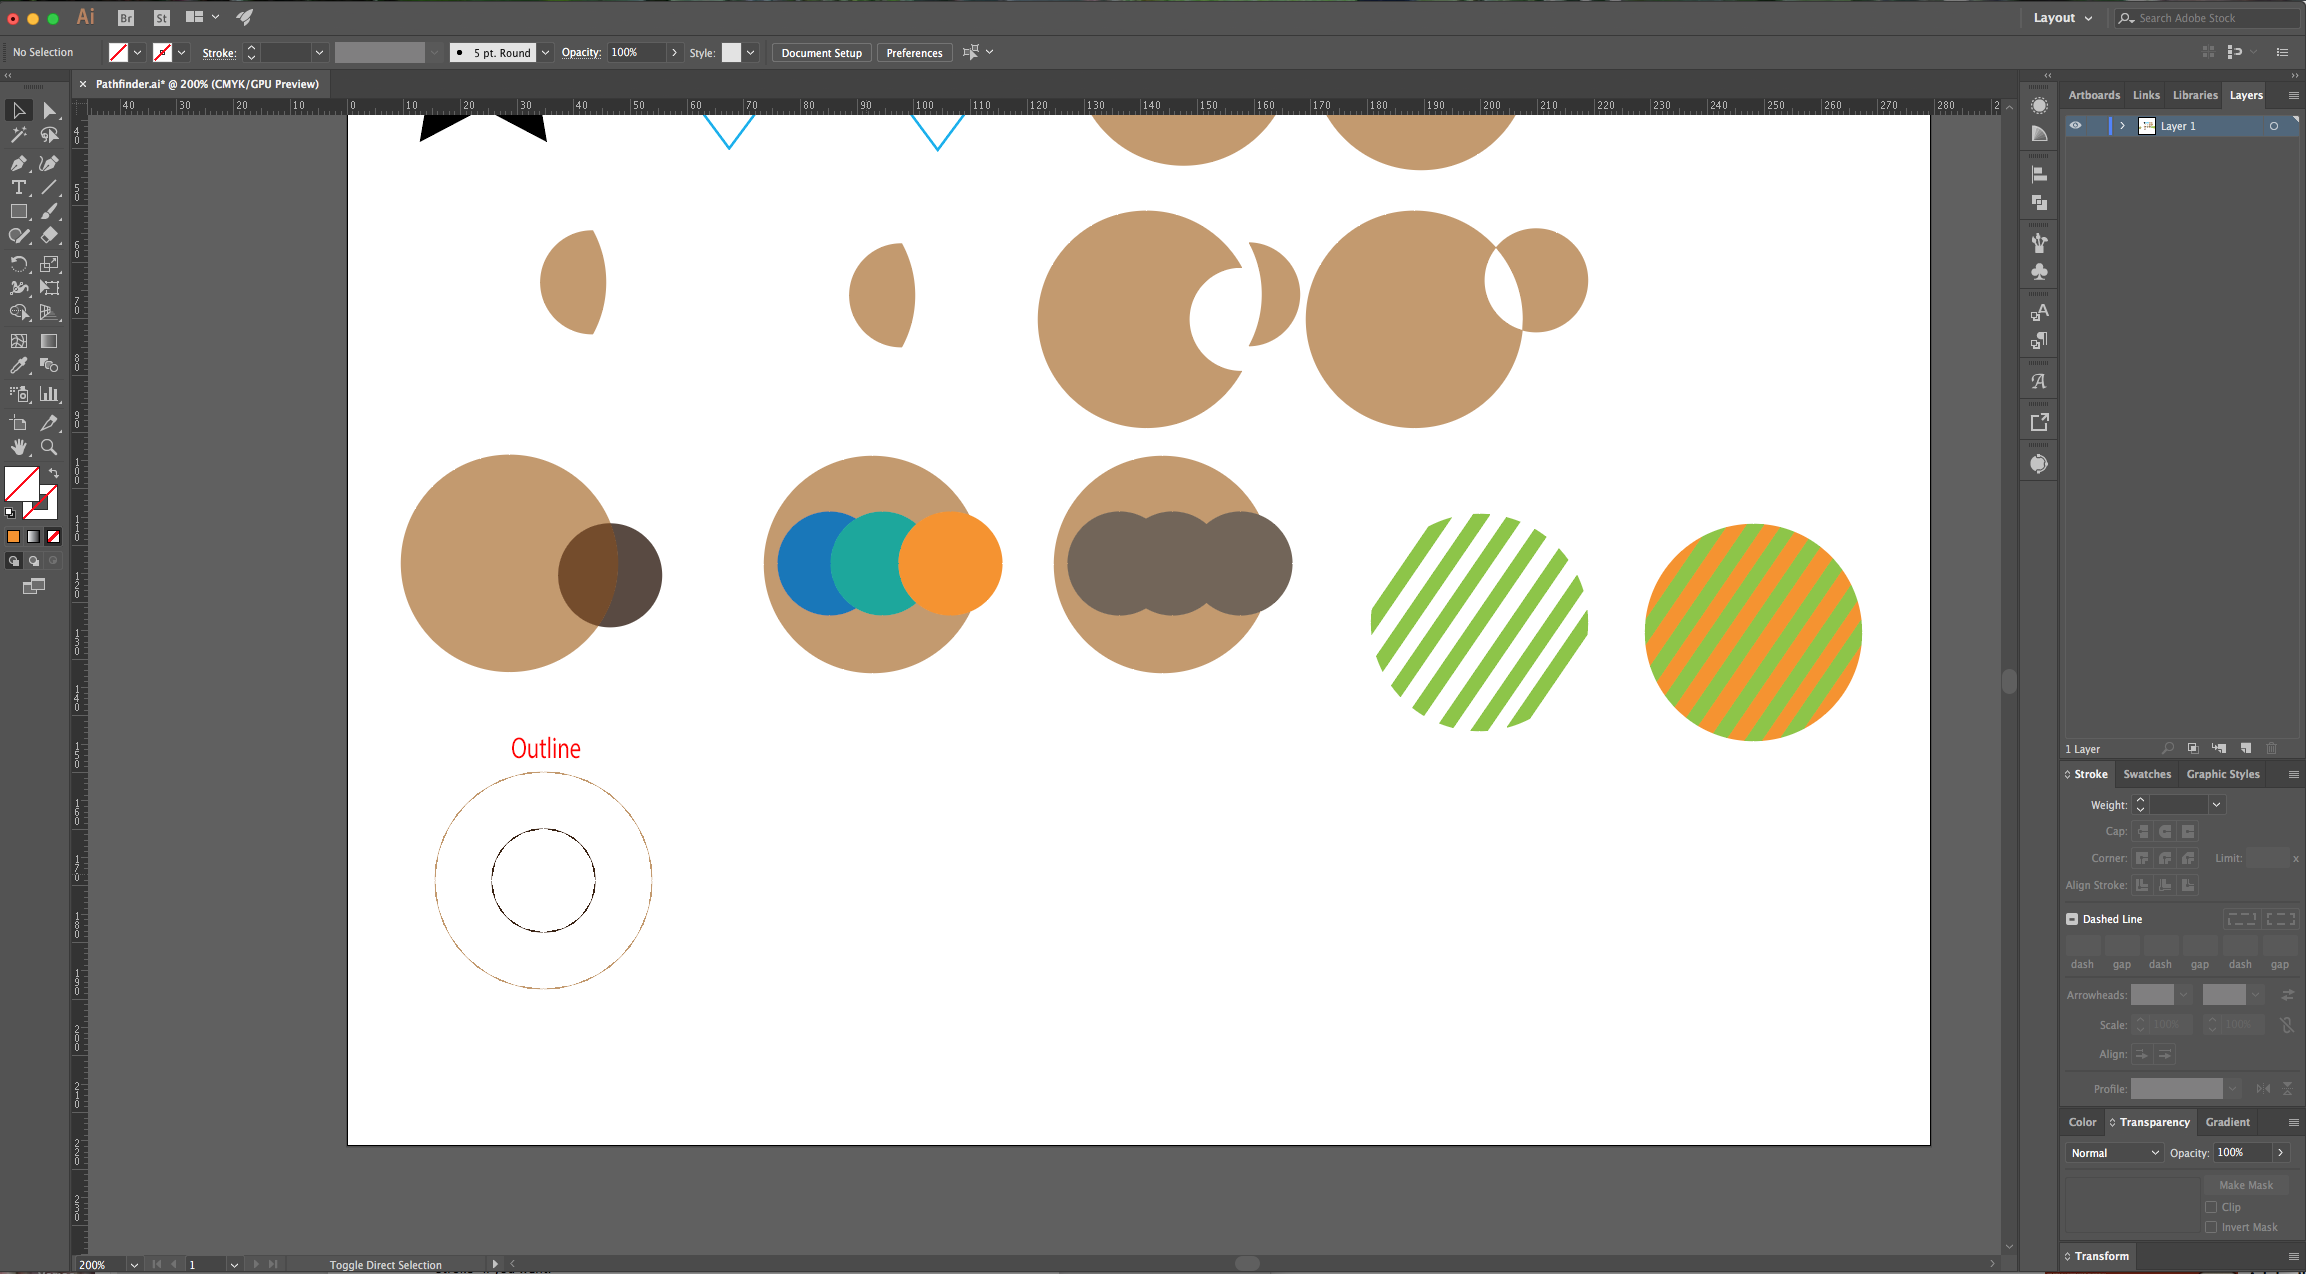
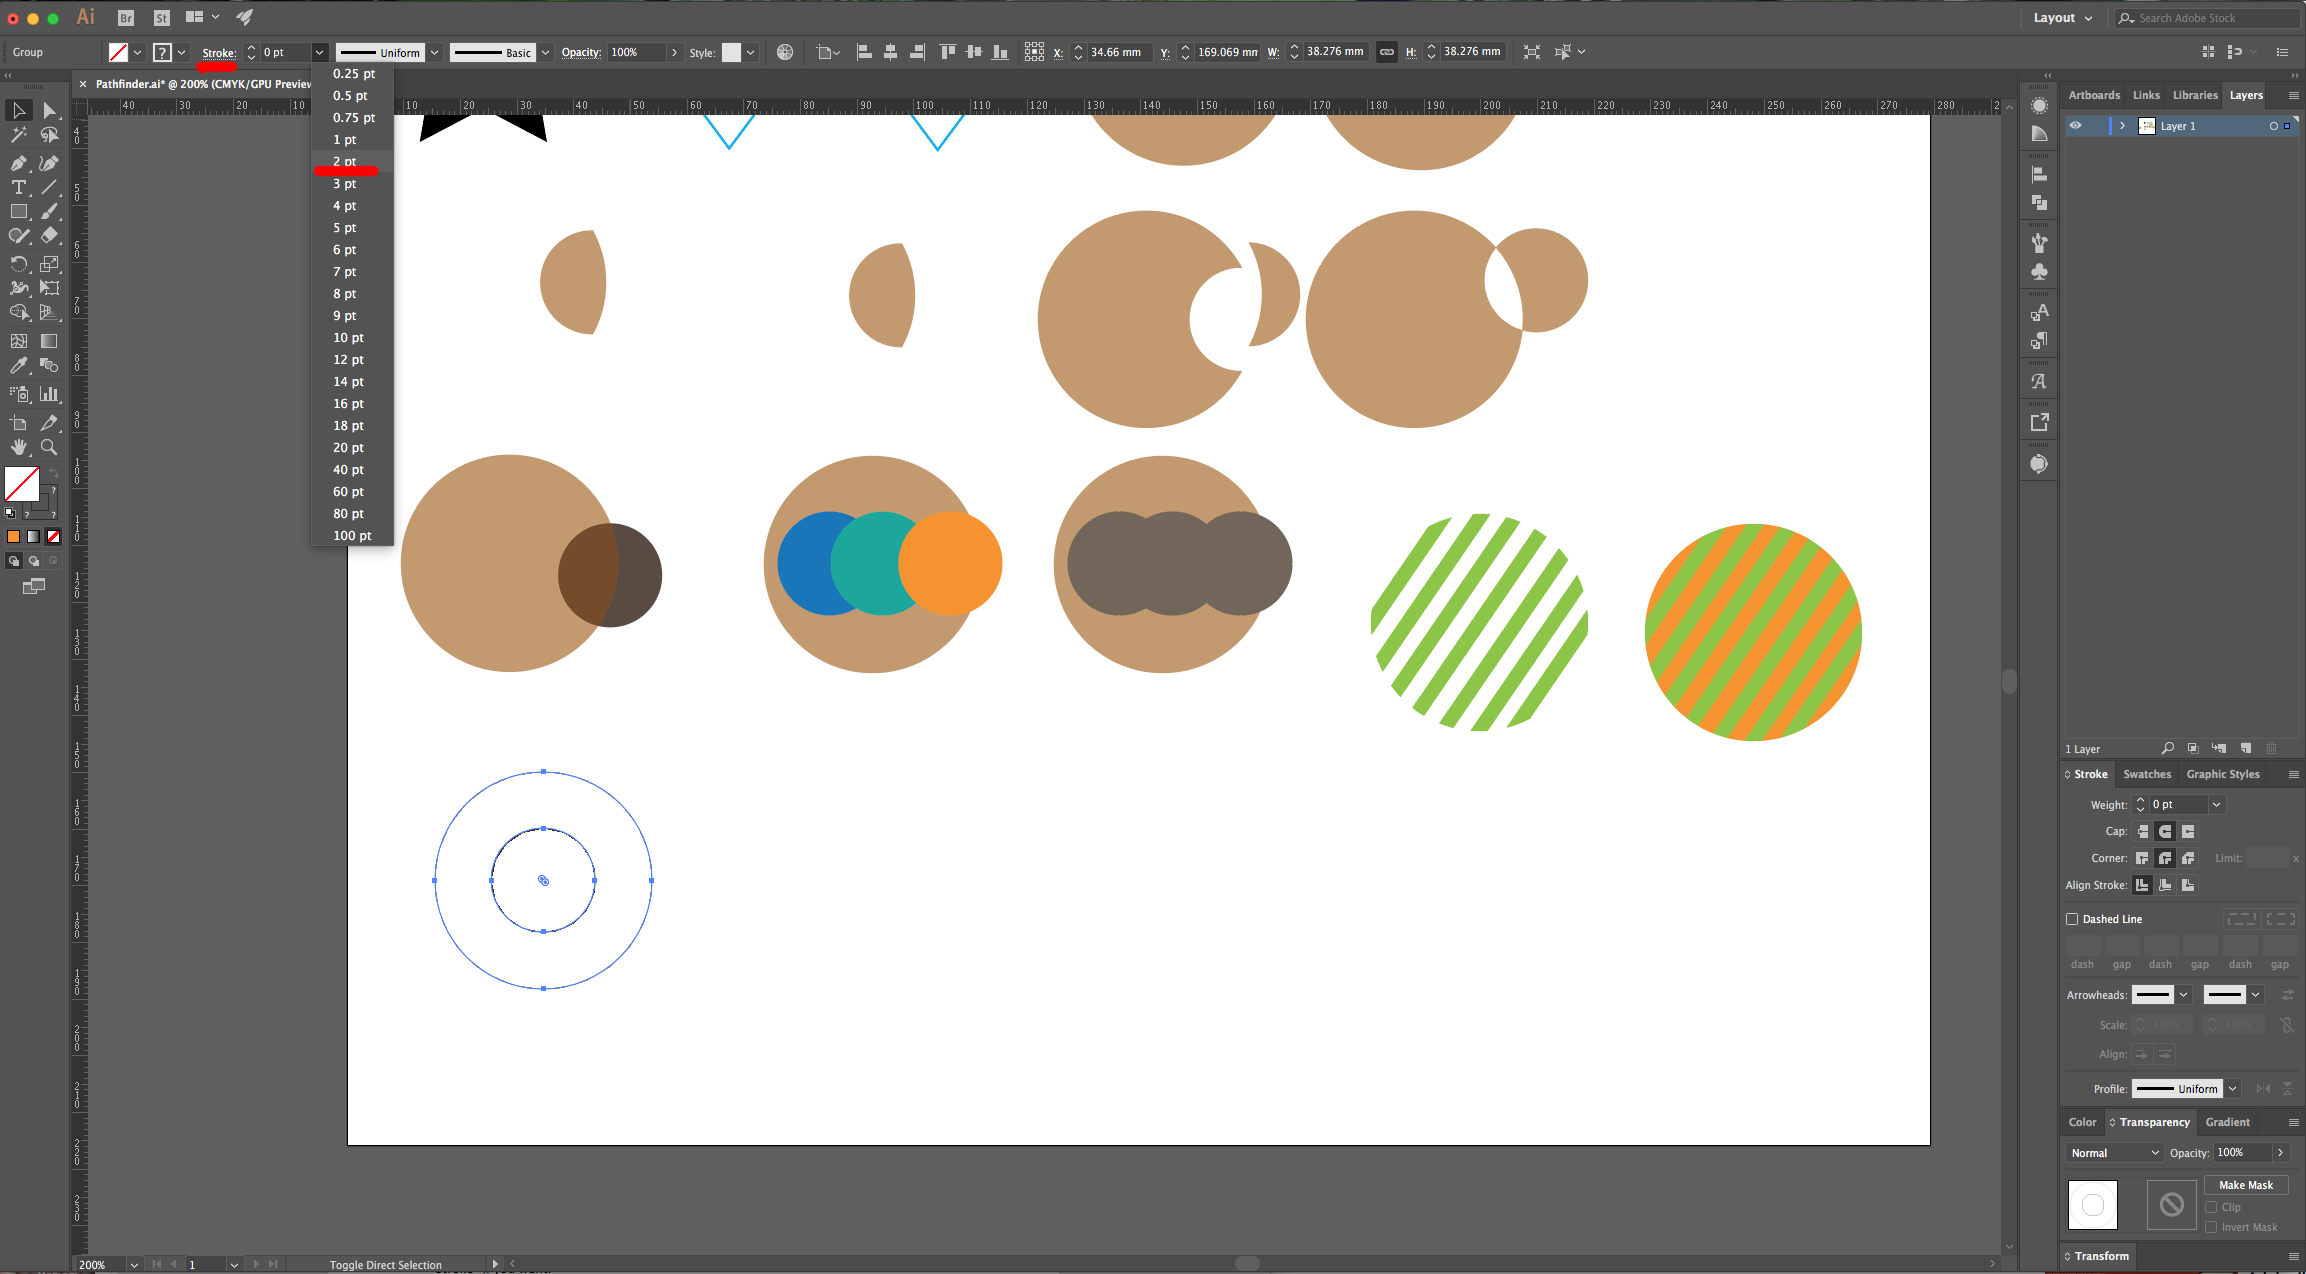
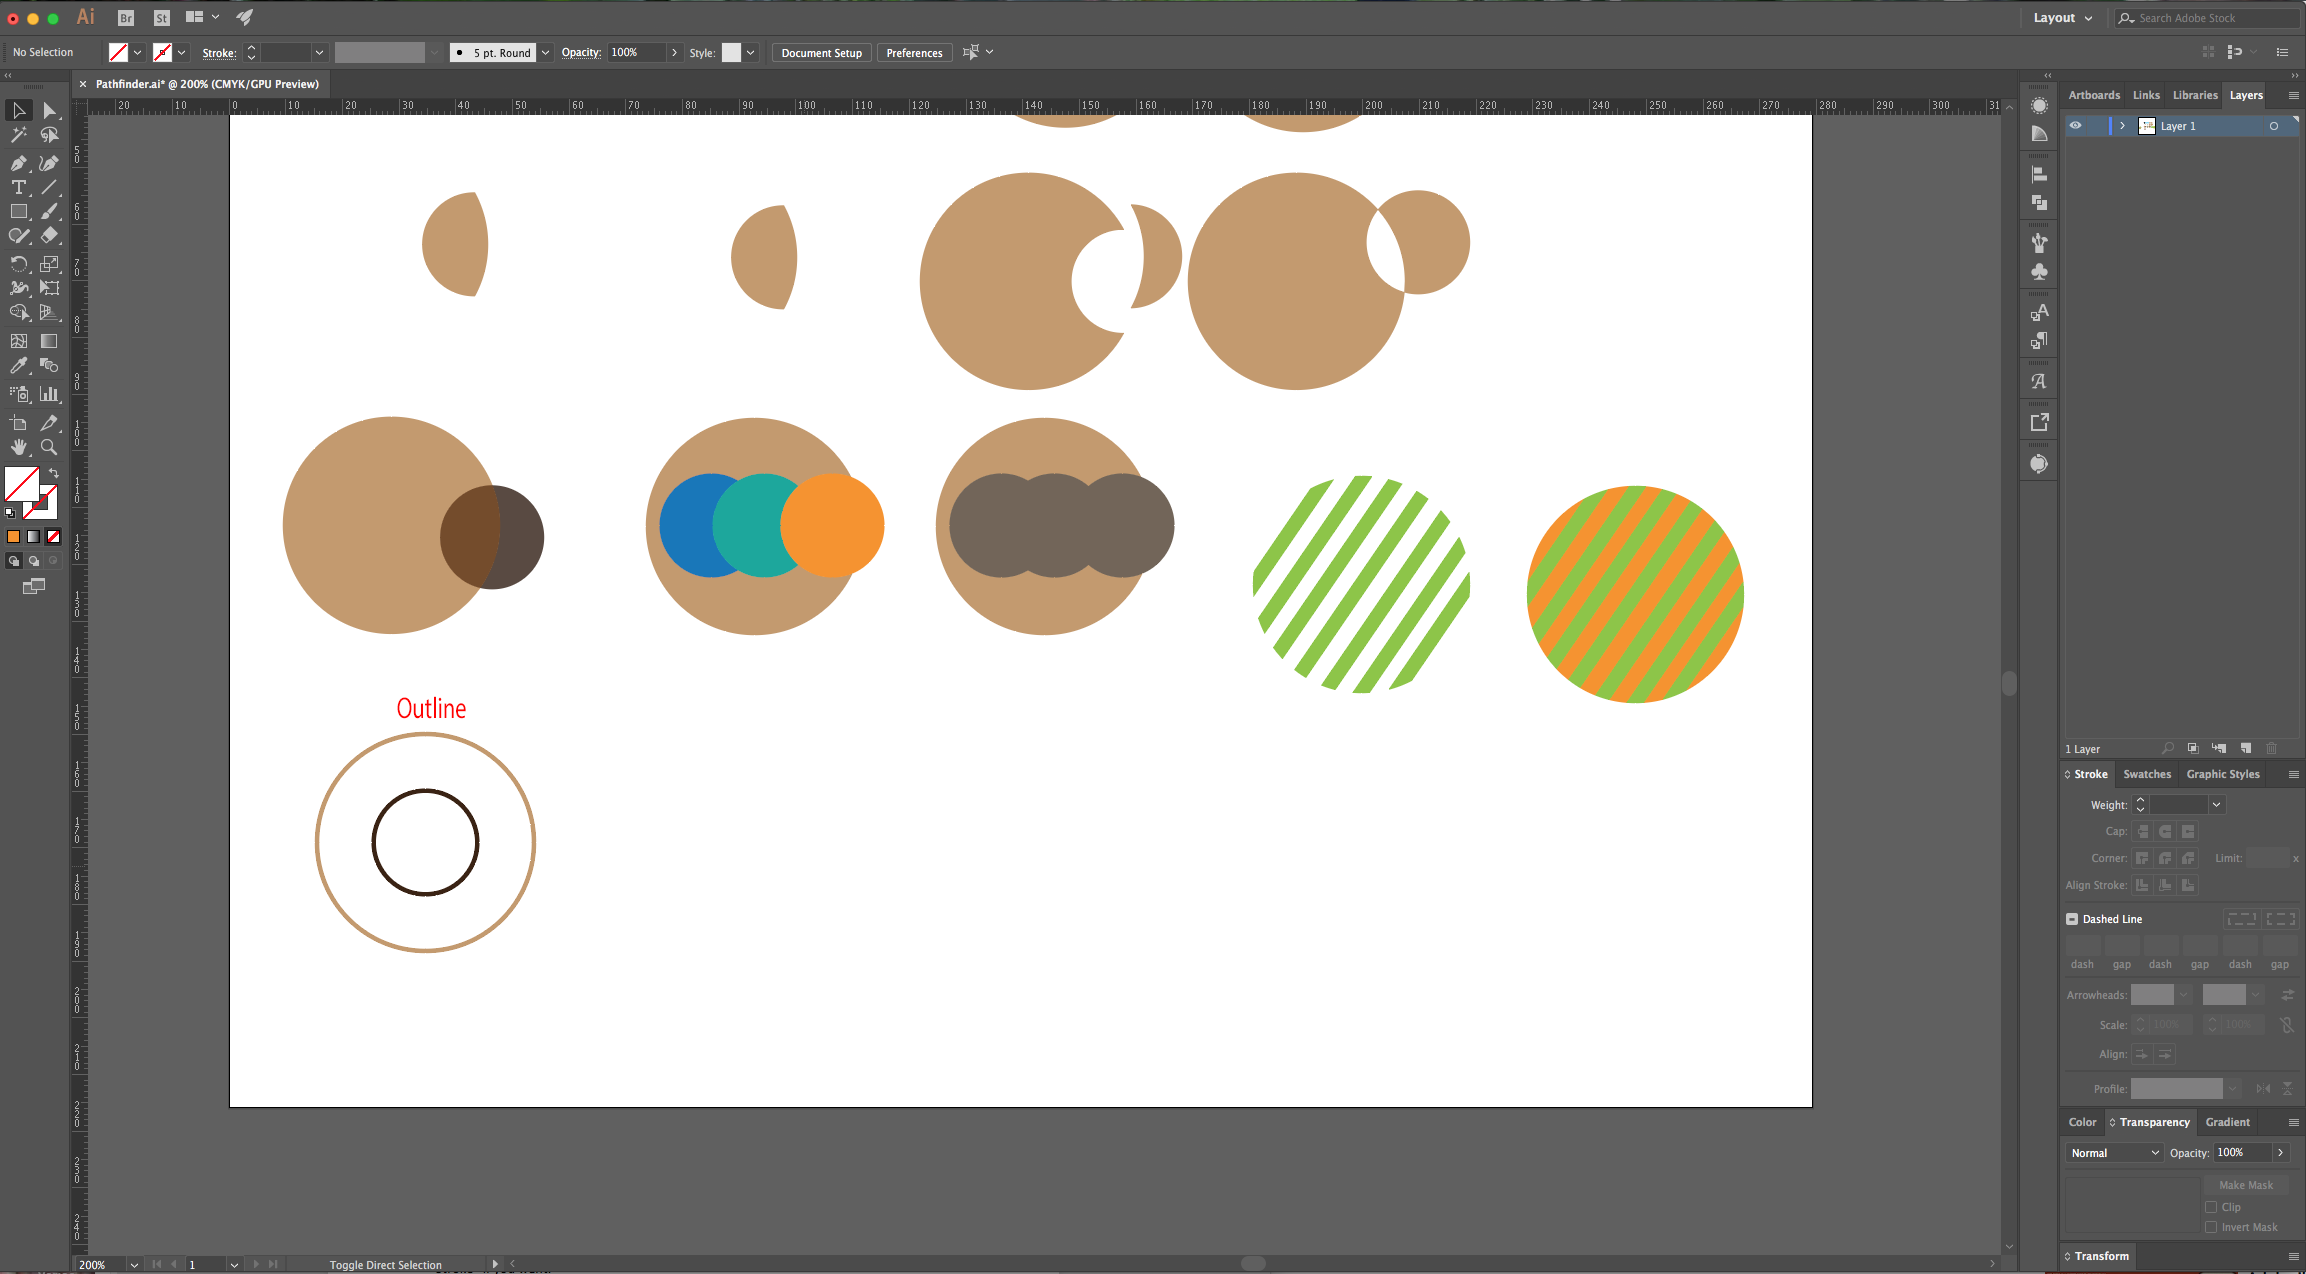
10 - “Outline” will create a very thin line around your “Shapes” but will keep the colors intact. You can increase the “Stroke” if you want.
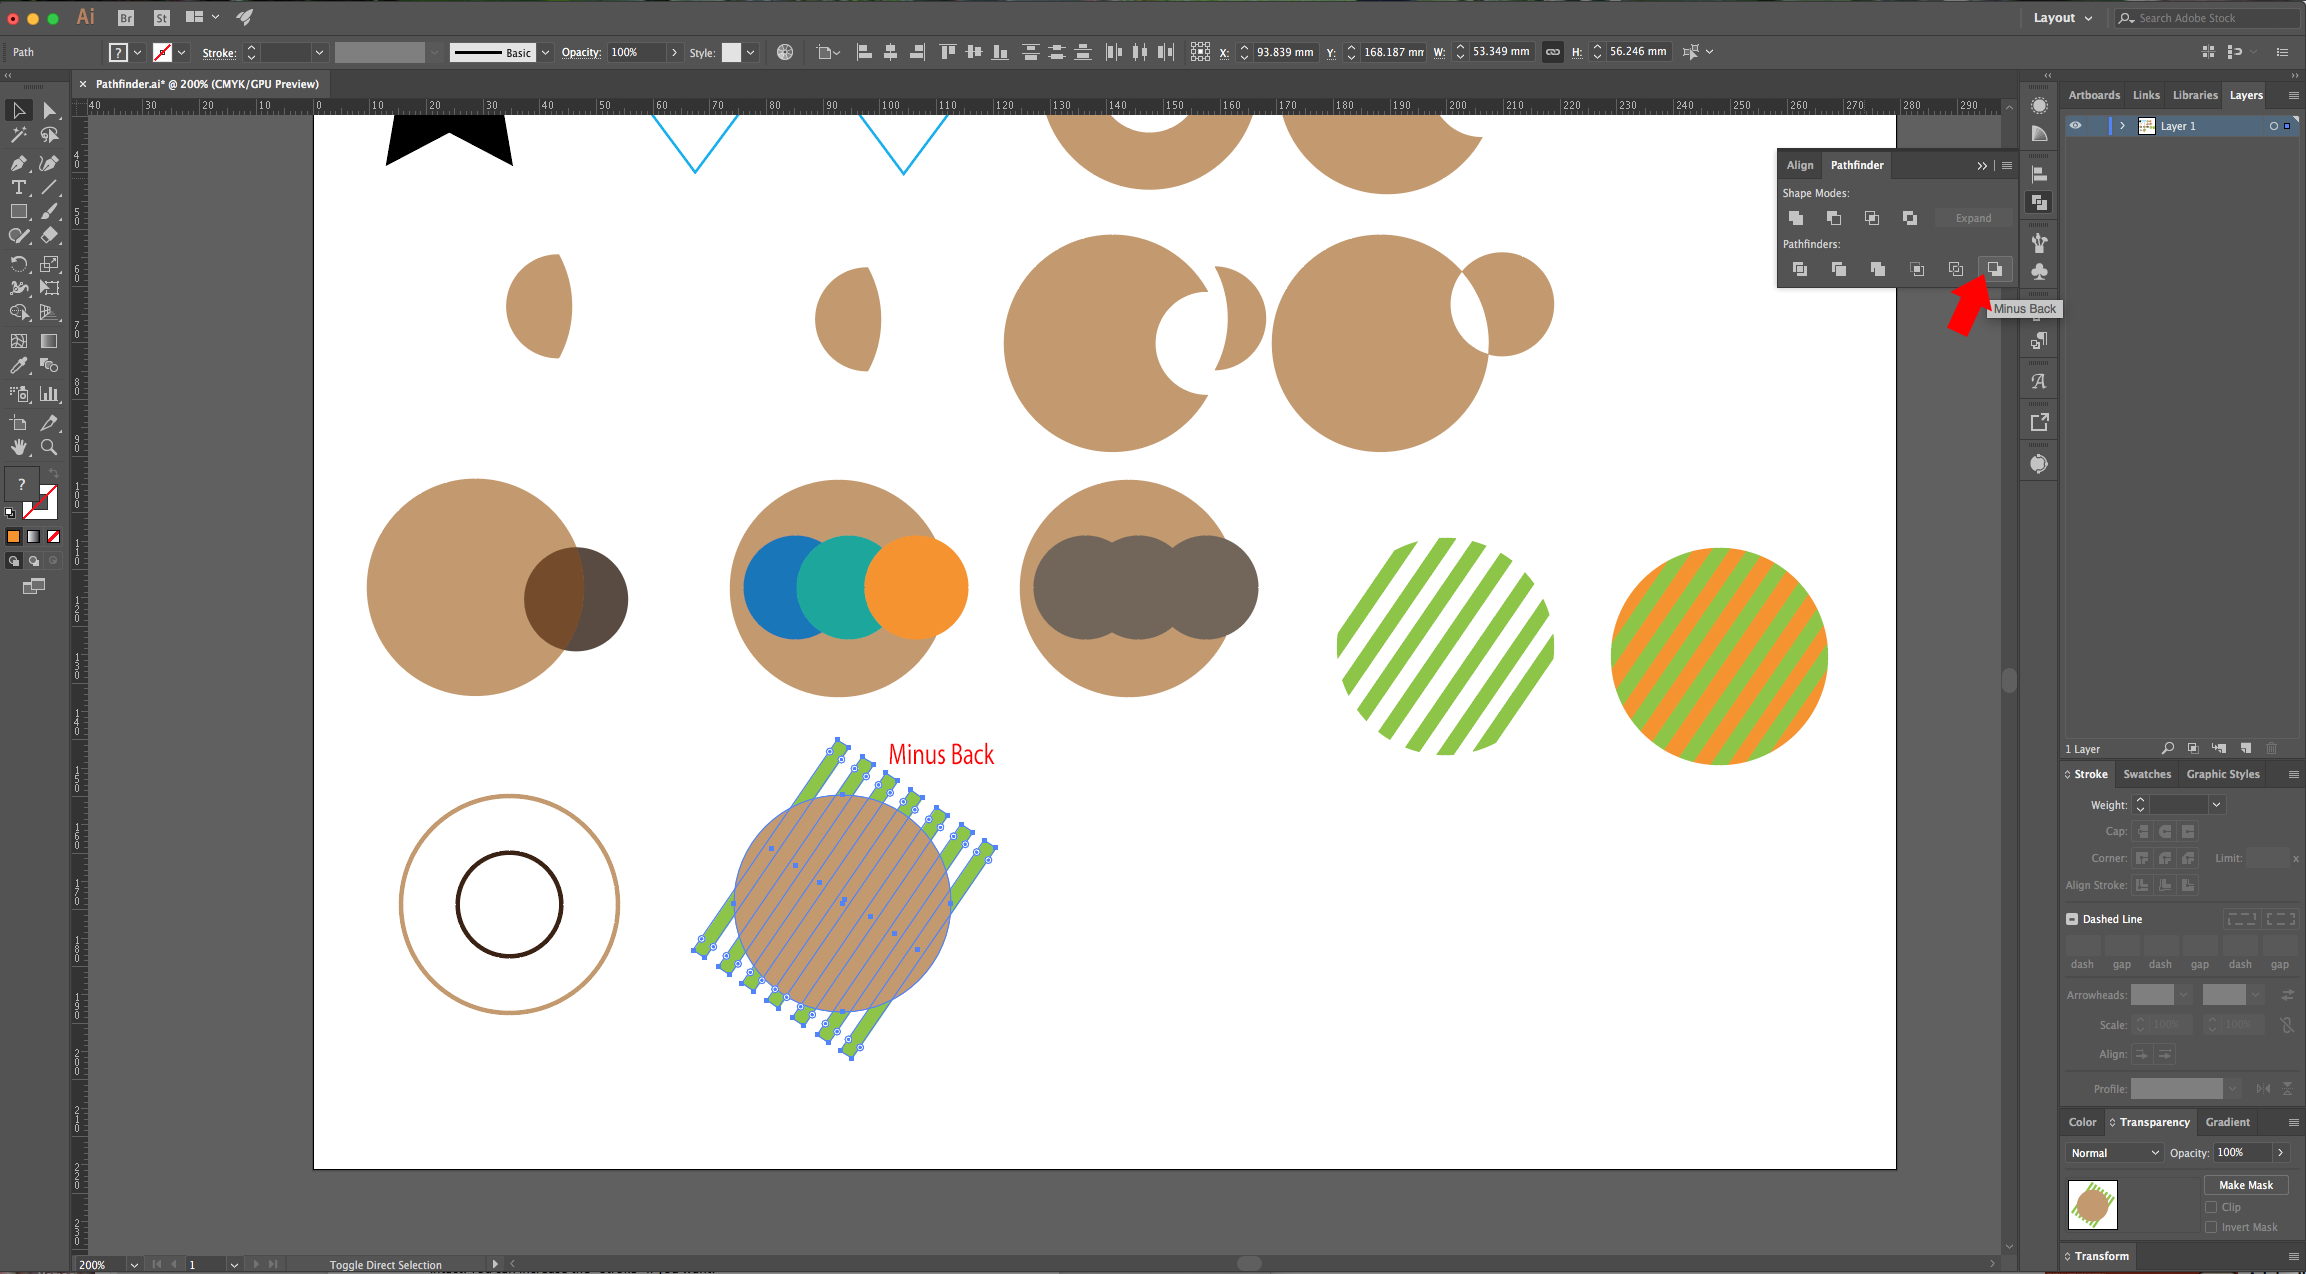
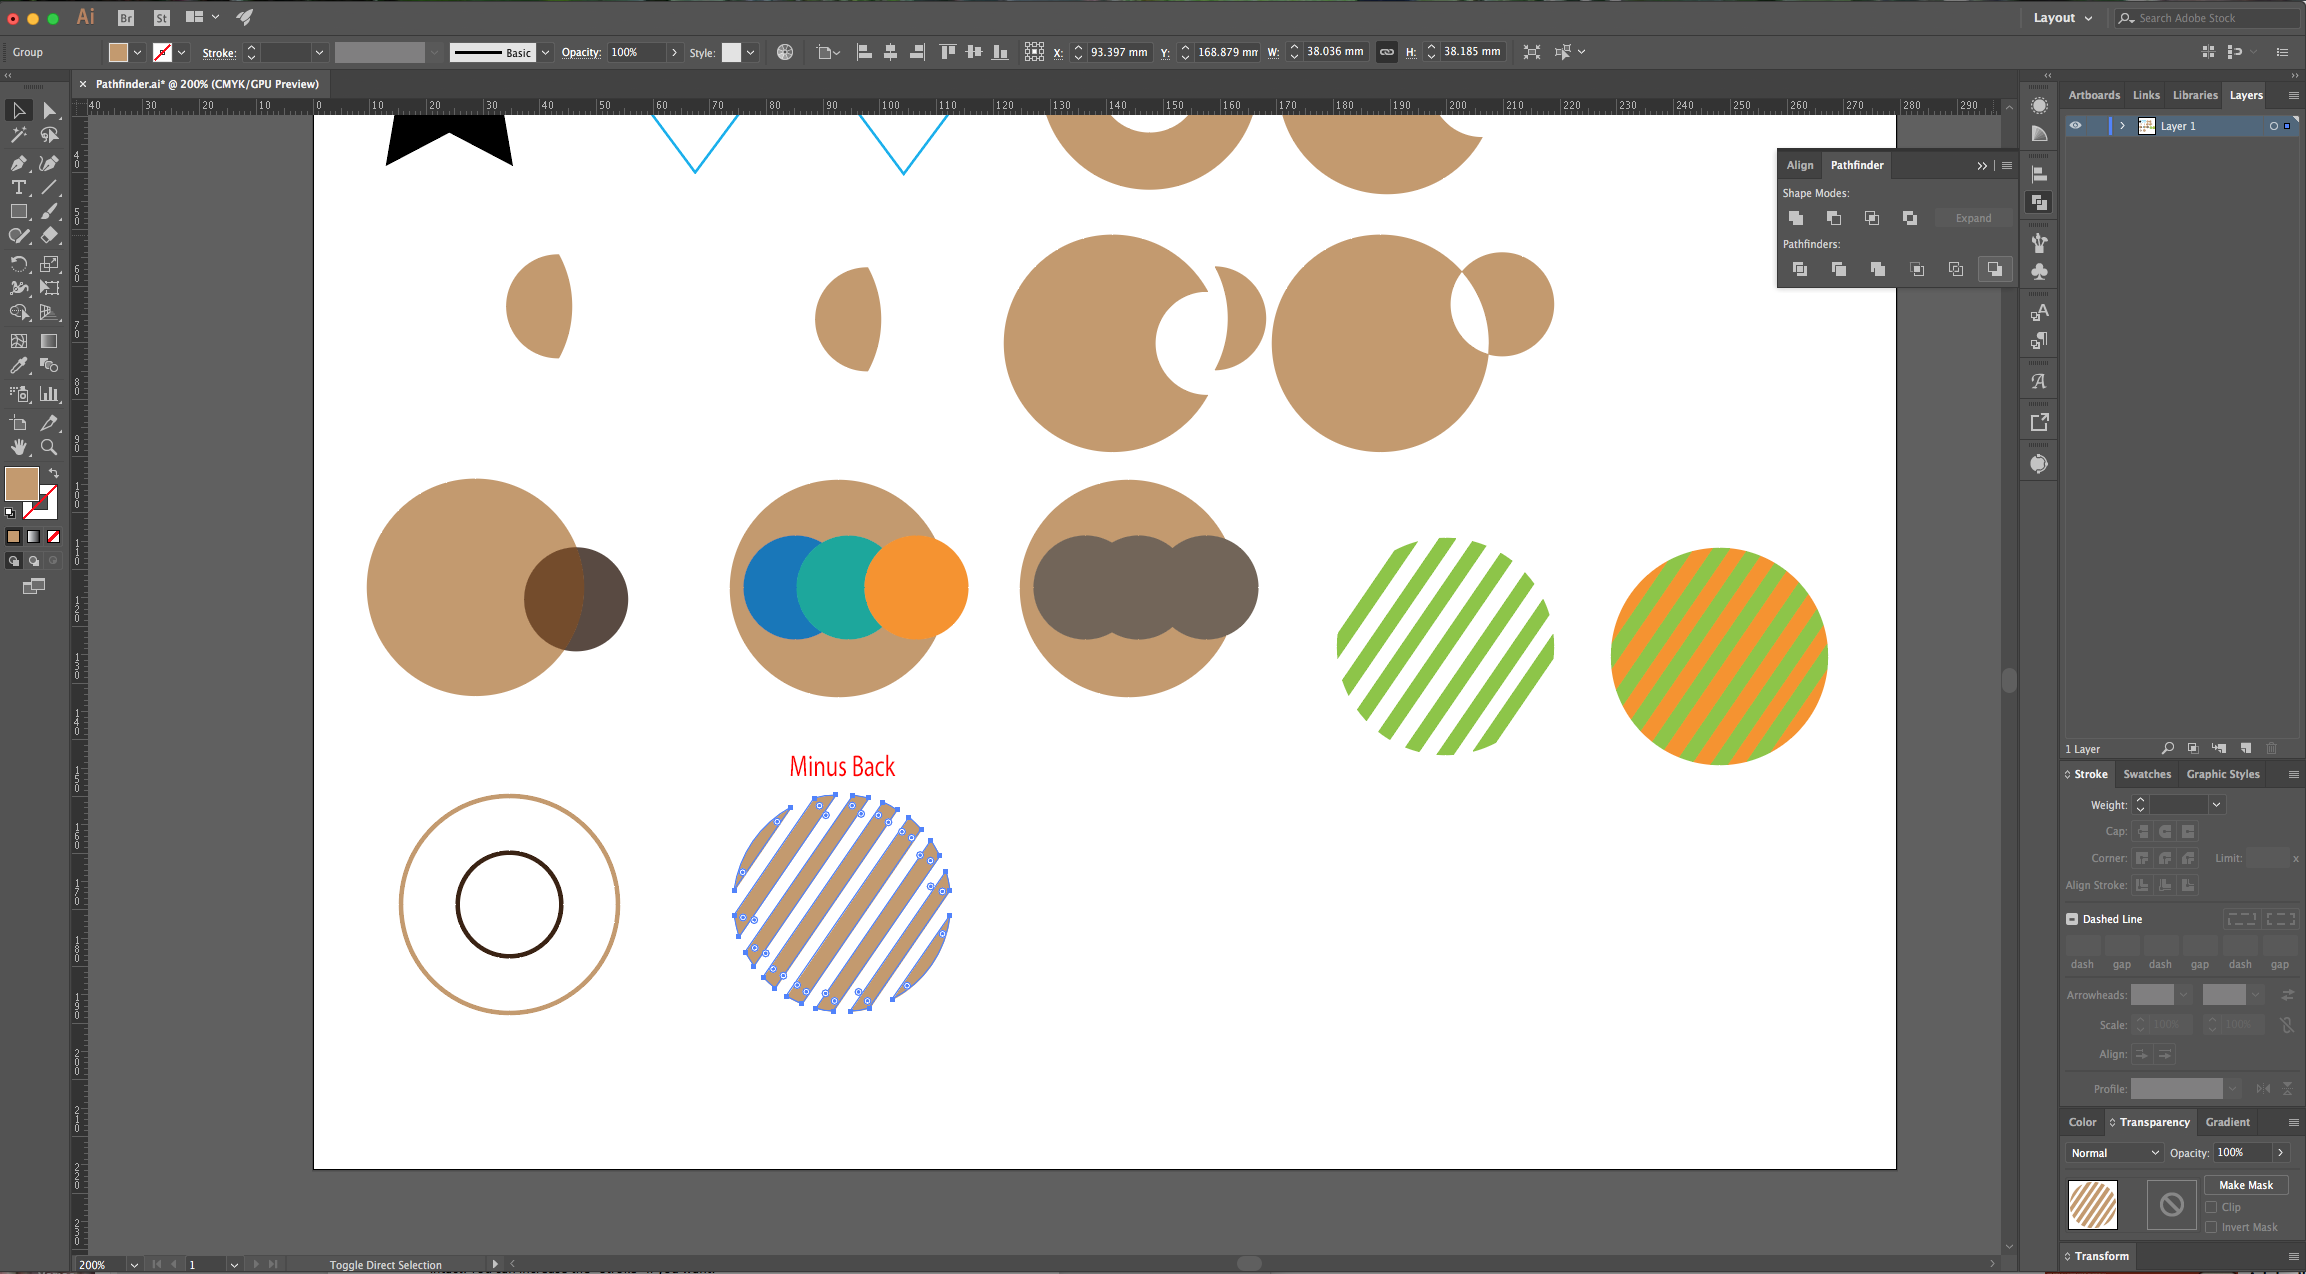
11 - Finally, “Minus Back” works very similar to “Minus Front”, but it will erase the “Path” placed behind. In this case, there will be no “Paths” created to fill the empty space.
1 - In Illustrator, create a “New Document”. Make sure the “Pathfinder Panel” is open by going to Window > Pathfinder (Shift + Command/Control + F9).
2 - There are certain things to take into account when using some of “Pathfinder’s” features, like if one of the “Paths” you want to work with has a “Stroke” is a good idea to select your “Path” and go to Object > Expand and make sure the “Fill” and “Stroke” boxes are checked. This will turn your “Stroke” into a “Path” and then, depending on your needs, you may have to use “Unite” in “Pathfinder” to merge them together. Just remember that they will have just one color.
3 - The first option in the “Pathfinder Panel” is “Unite”. Select all the “Paths” you want together with the “Selection Tool” and choose it in the “Panel”. It will unite everything and make it the same color as the one of the objects on top. If you hold the “Alt/Option” key and choose this option you will “Create a Compound Shape and Add to the Shape Area”.
4 - The second option is “Minus Front” or “Subtract”. As the name says, with this you can erase the portion that “Path” that stands on top occupies. In this option, you can hold the “Alt/Option” key to “Create a Compound Shape”.
5 - Next, is the “Intersect” option. It subtracts everything except the portions of the “Paths” that intersect. If you hold the “Alt/Option” key and choose this option you will “Create a Compound Shape”.
6 - The “Exclude” option is very similar to “Intersect”, just inversed. It will subtract the portions of the “Pats” that intersect and leave the rest. If you hold the “Alt/Option” key and choose this option you will “Create a Compound Shape”. With this we covered the “Shape Options”.
7 - Now, the “Pathfinder Options”. The first one is “Divide” and it will split each portion of the “Paths” into a different object including the overlapping region. After using it, if you “Ungroup” your “Paths” you will have 3 different ones.
8 - Next, we have “Trim” and “Merge”, they act very similar but “Trim” will separate overlapping “Paths” even if they have the same color and “Merge” will fuse them together.
9 - “Crop” will help you cut “Paths” into a shape. Place the shape you want your “Paths” to be cut into on “Top”, it can even have “No Fill” and it still work. Take into account that it will create some “Paths” that fill the empty space.
10 - “Outline” will create a very thin line around your “Shapes” but will keep the colors intact. You can increase the “Stroke” if you want.
11 - Finally, “Minus Back” works very similar to “Minus Front”, but it will erase the “Path” placed behind. In this case, there will be no “Paths” created to fill the empty space.
by @lornacane


