How to Create Waves and Zig Zag in Illustrator
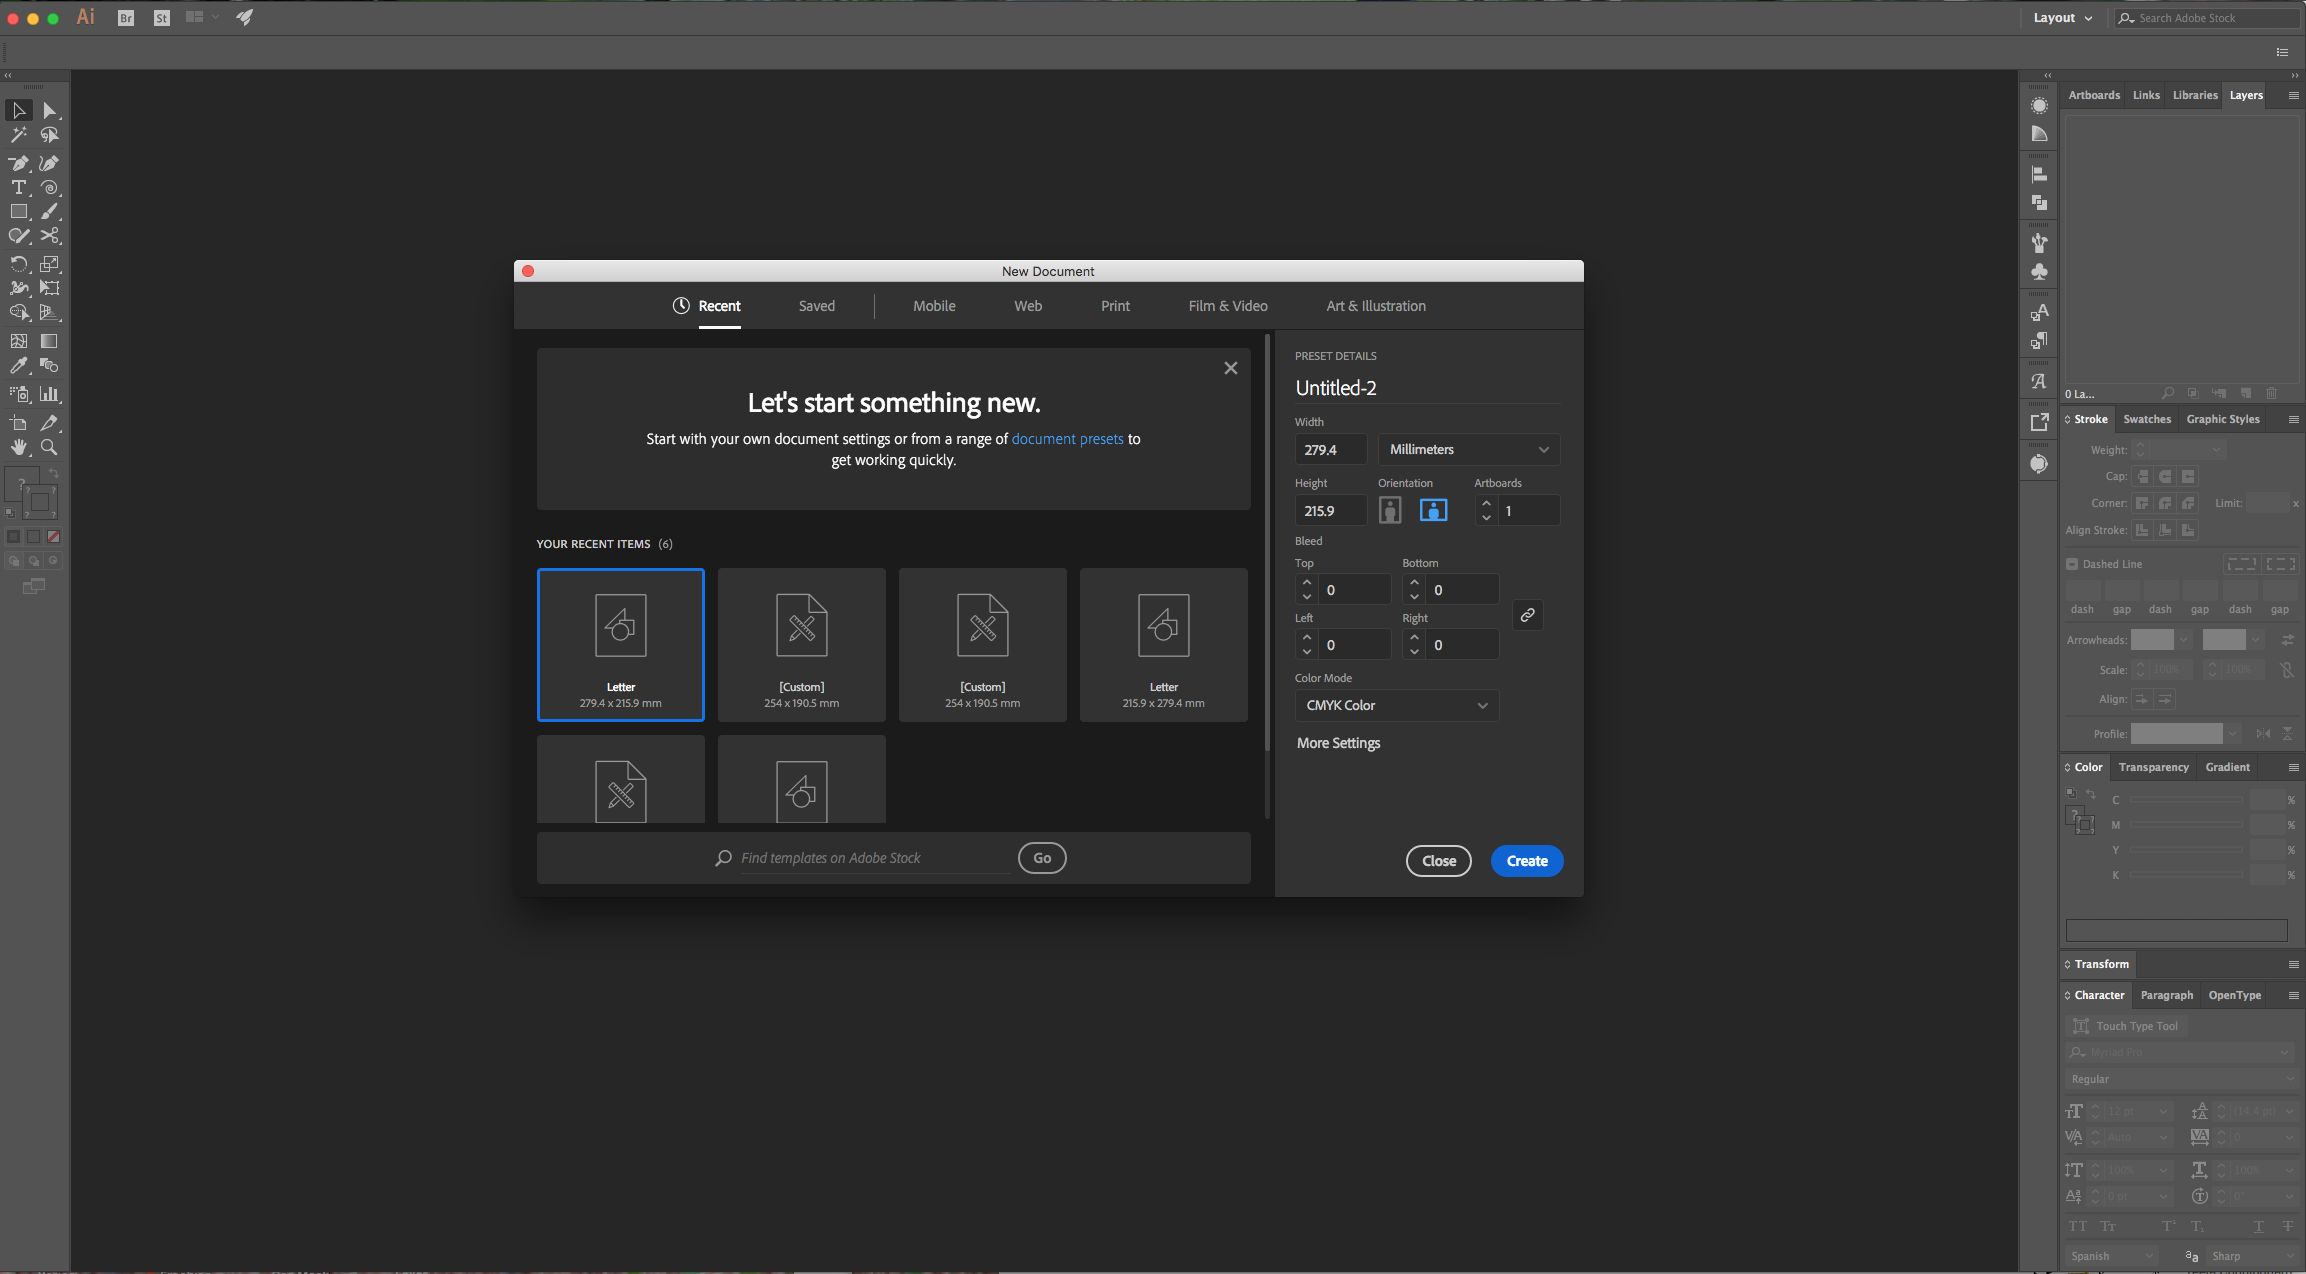
1 - In Illustrator, create a “New Document”.
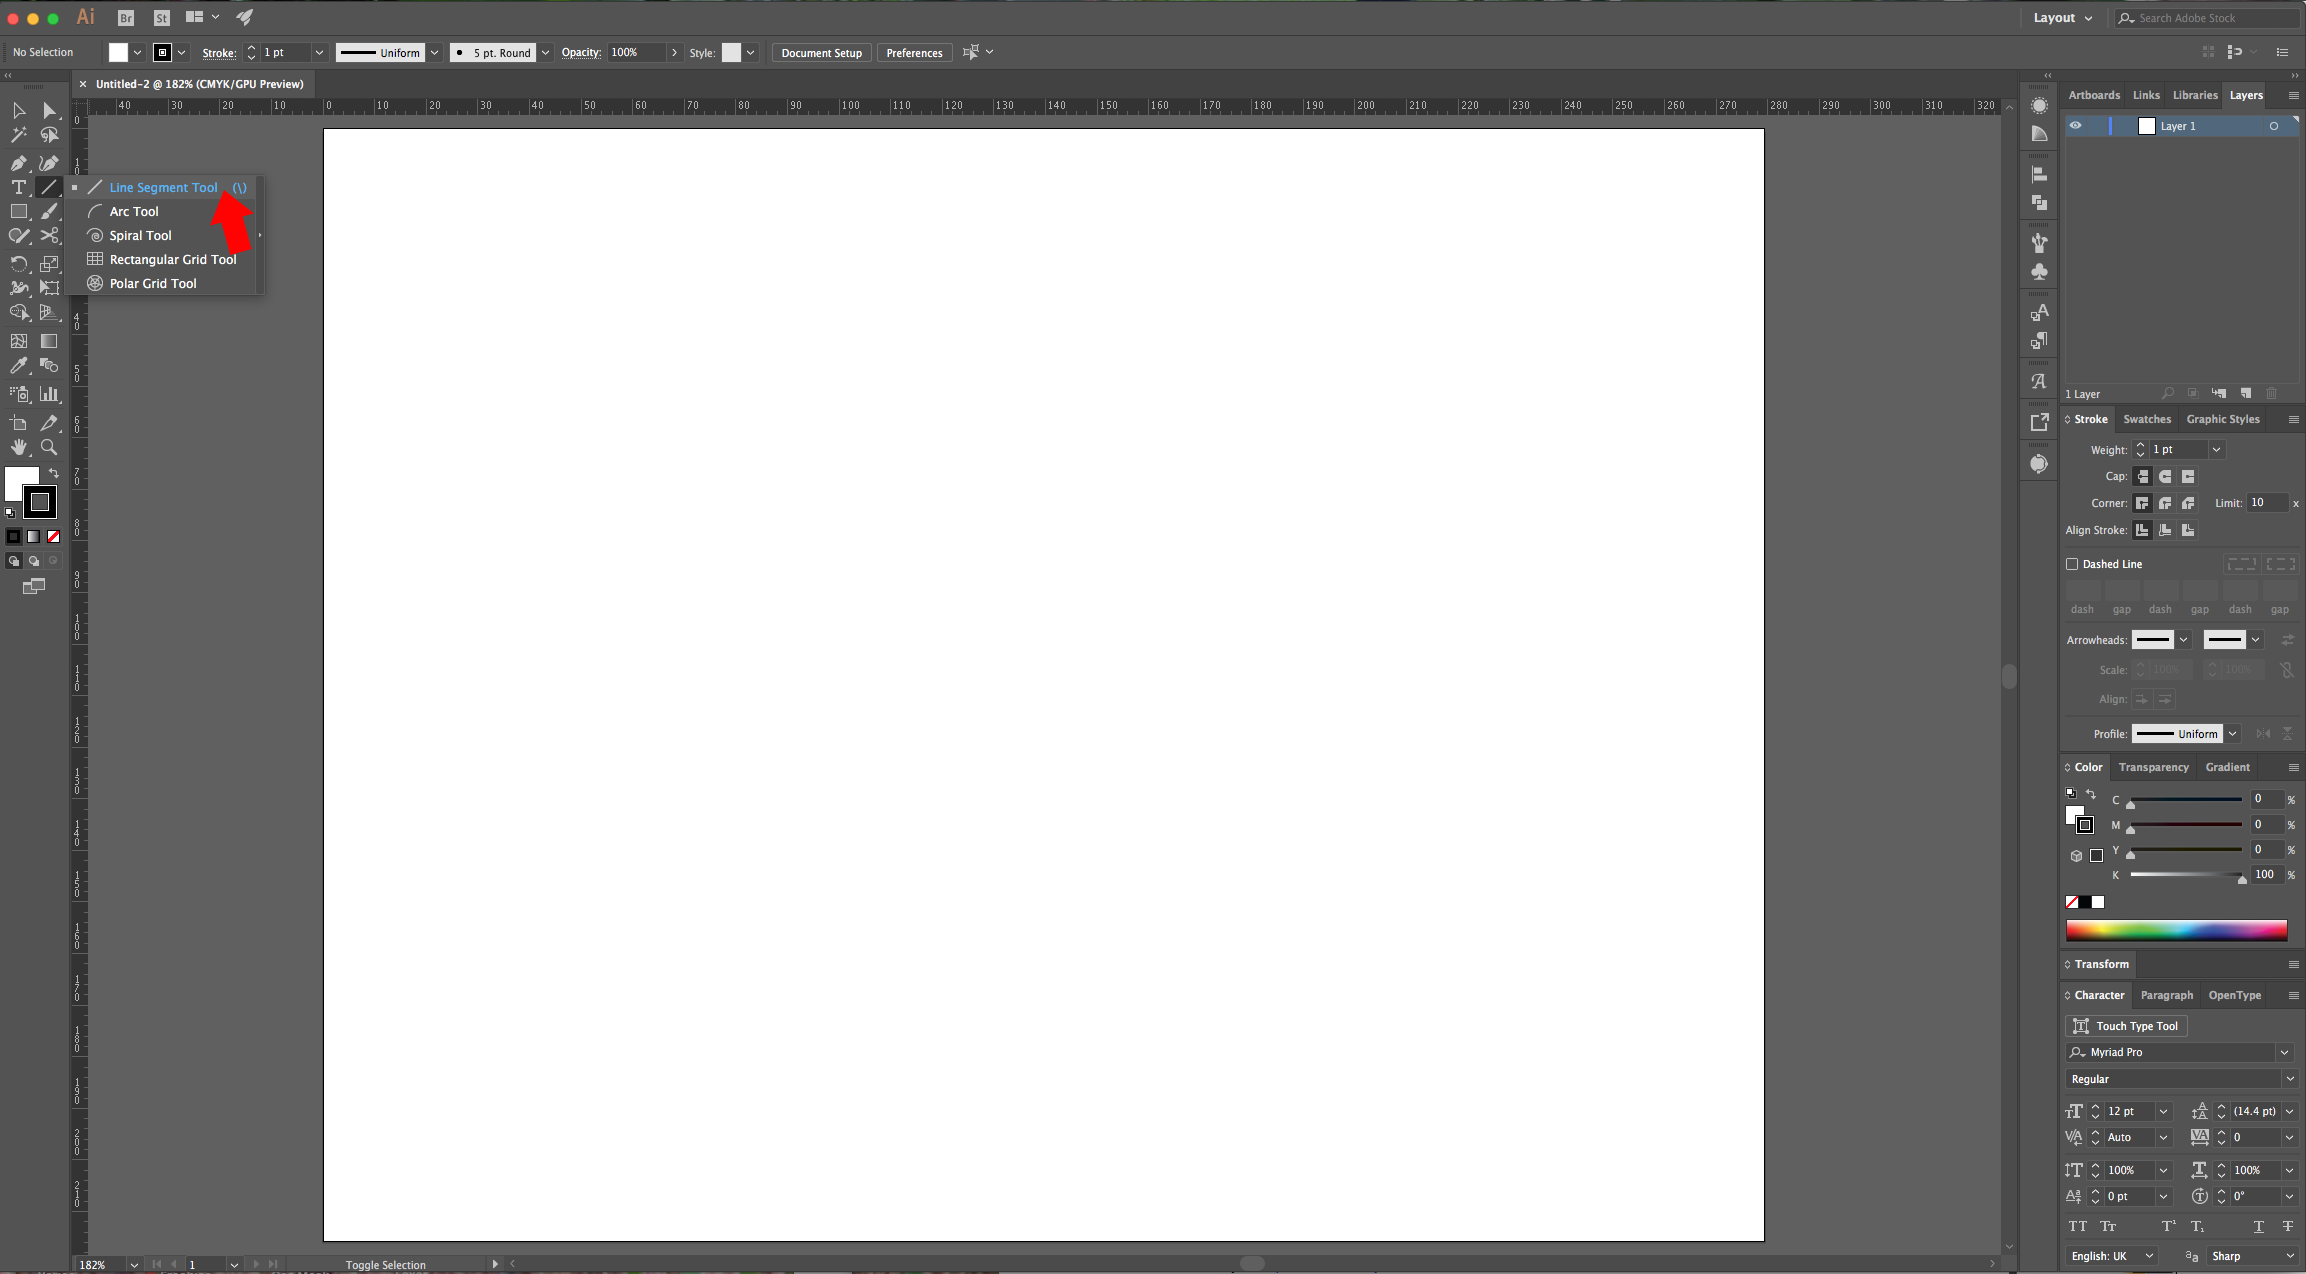
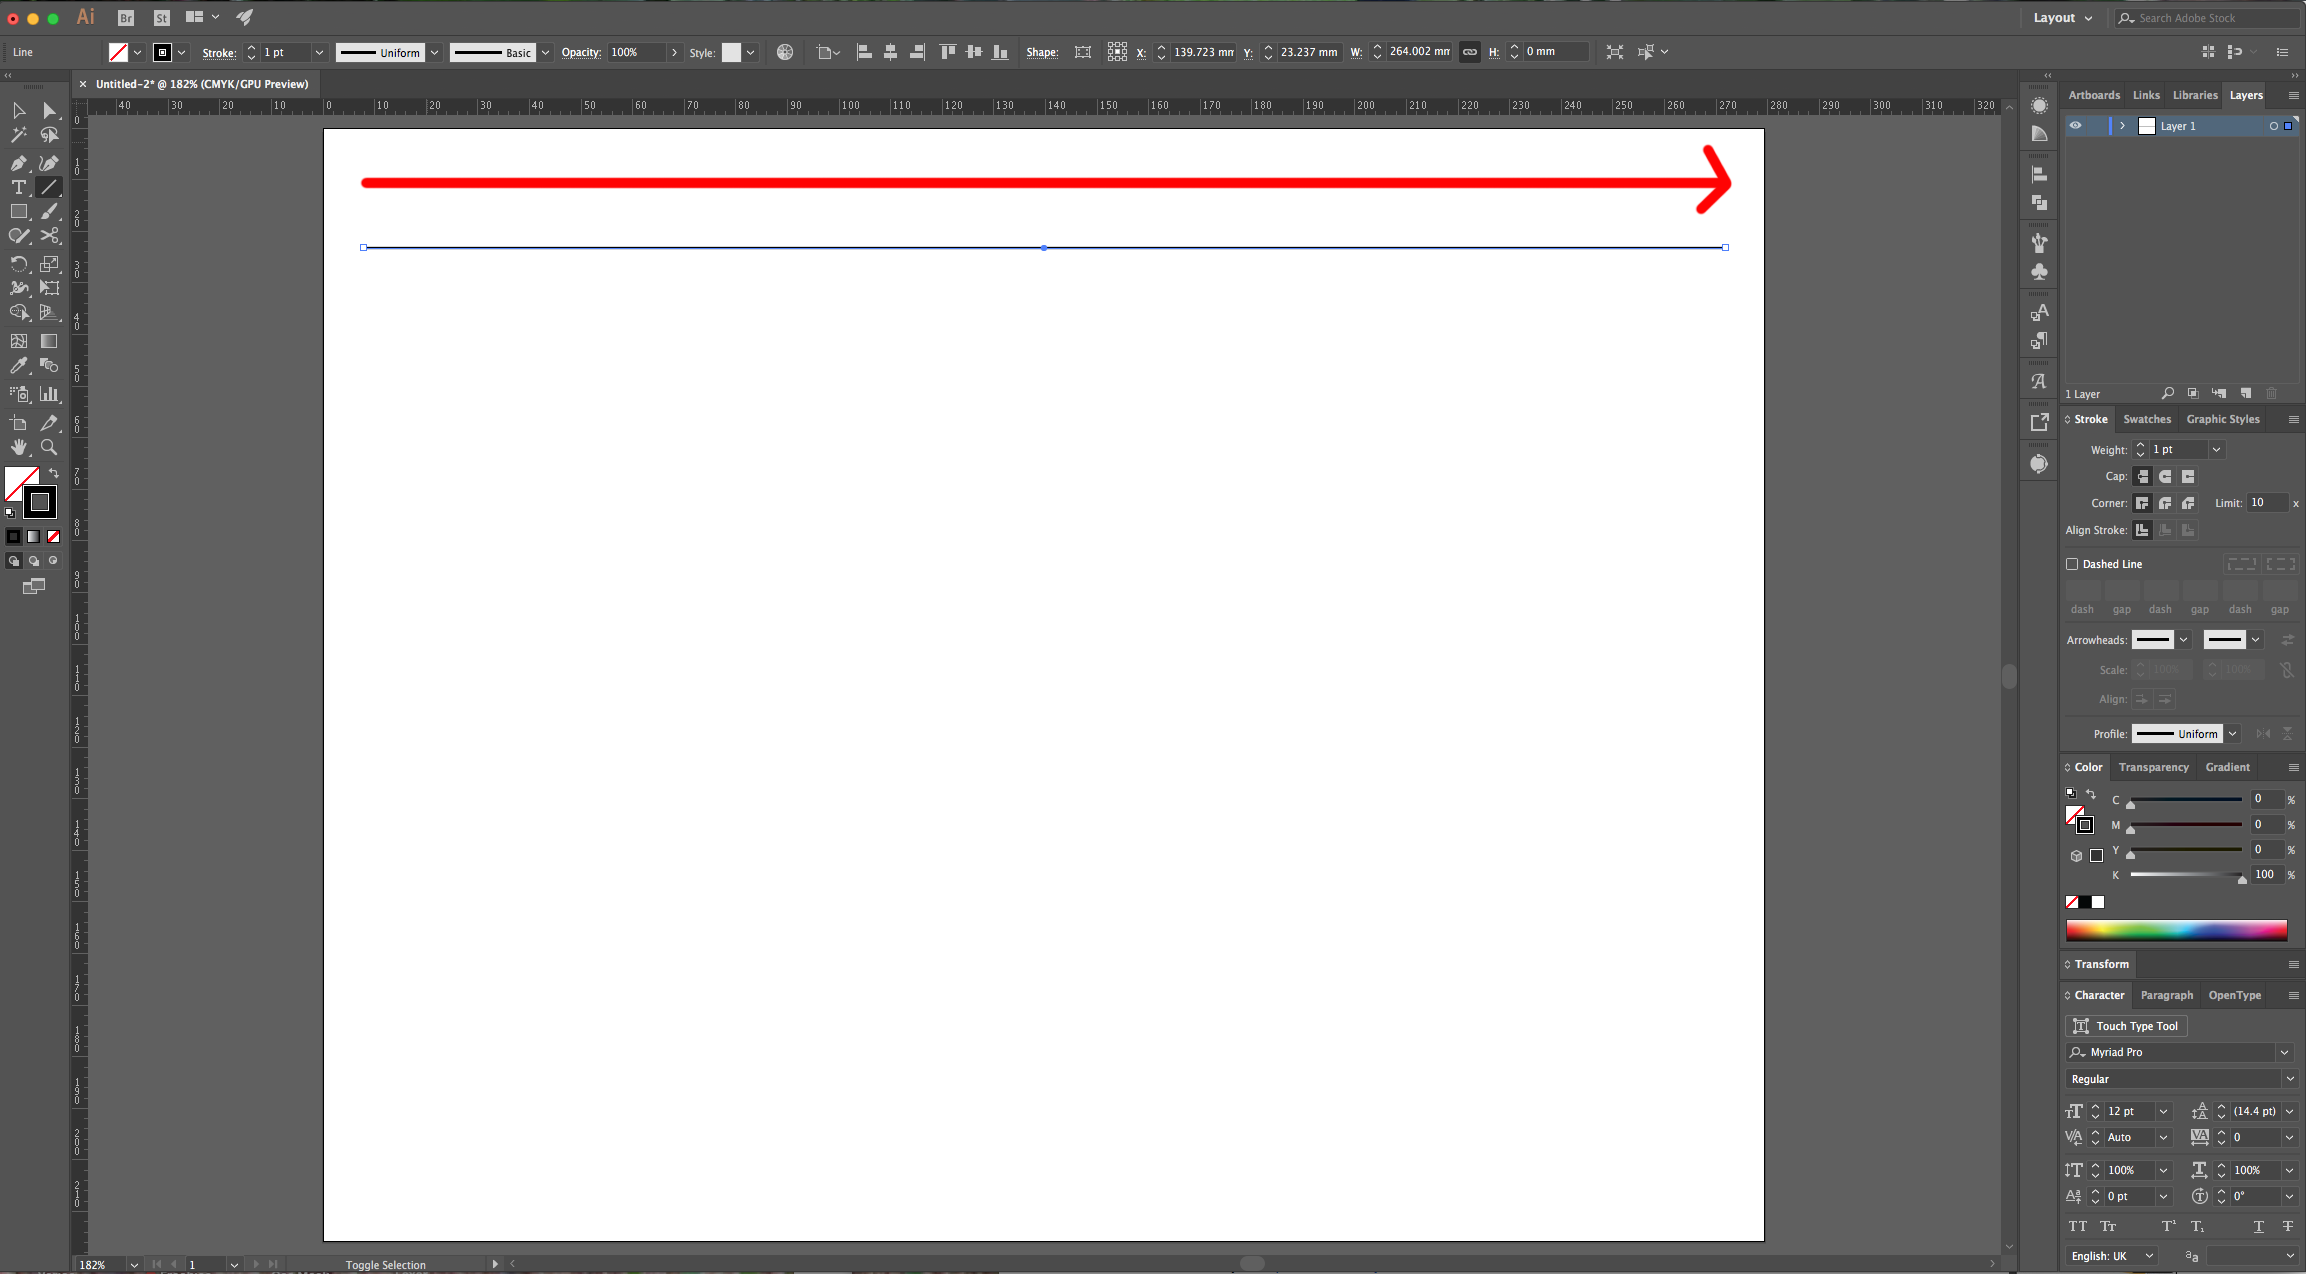
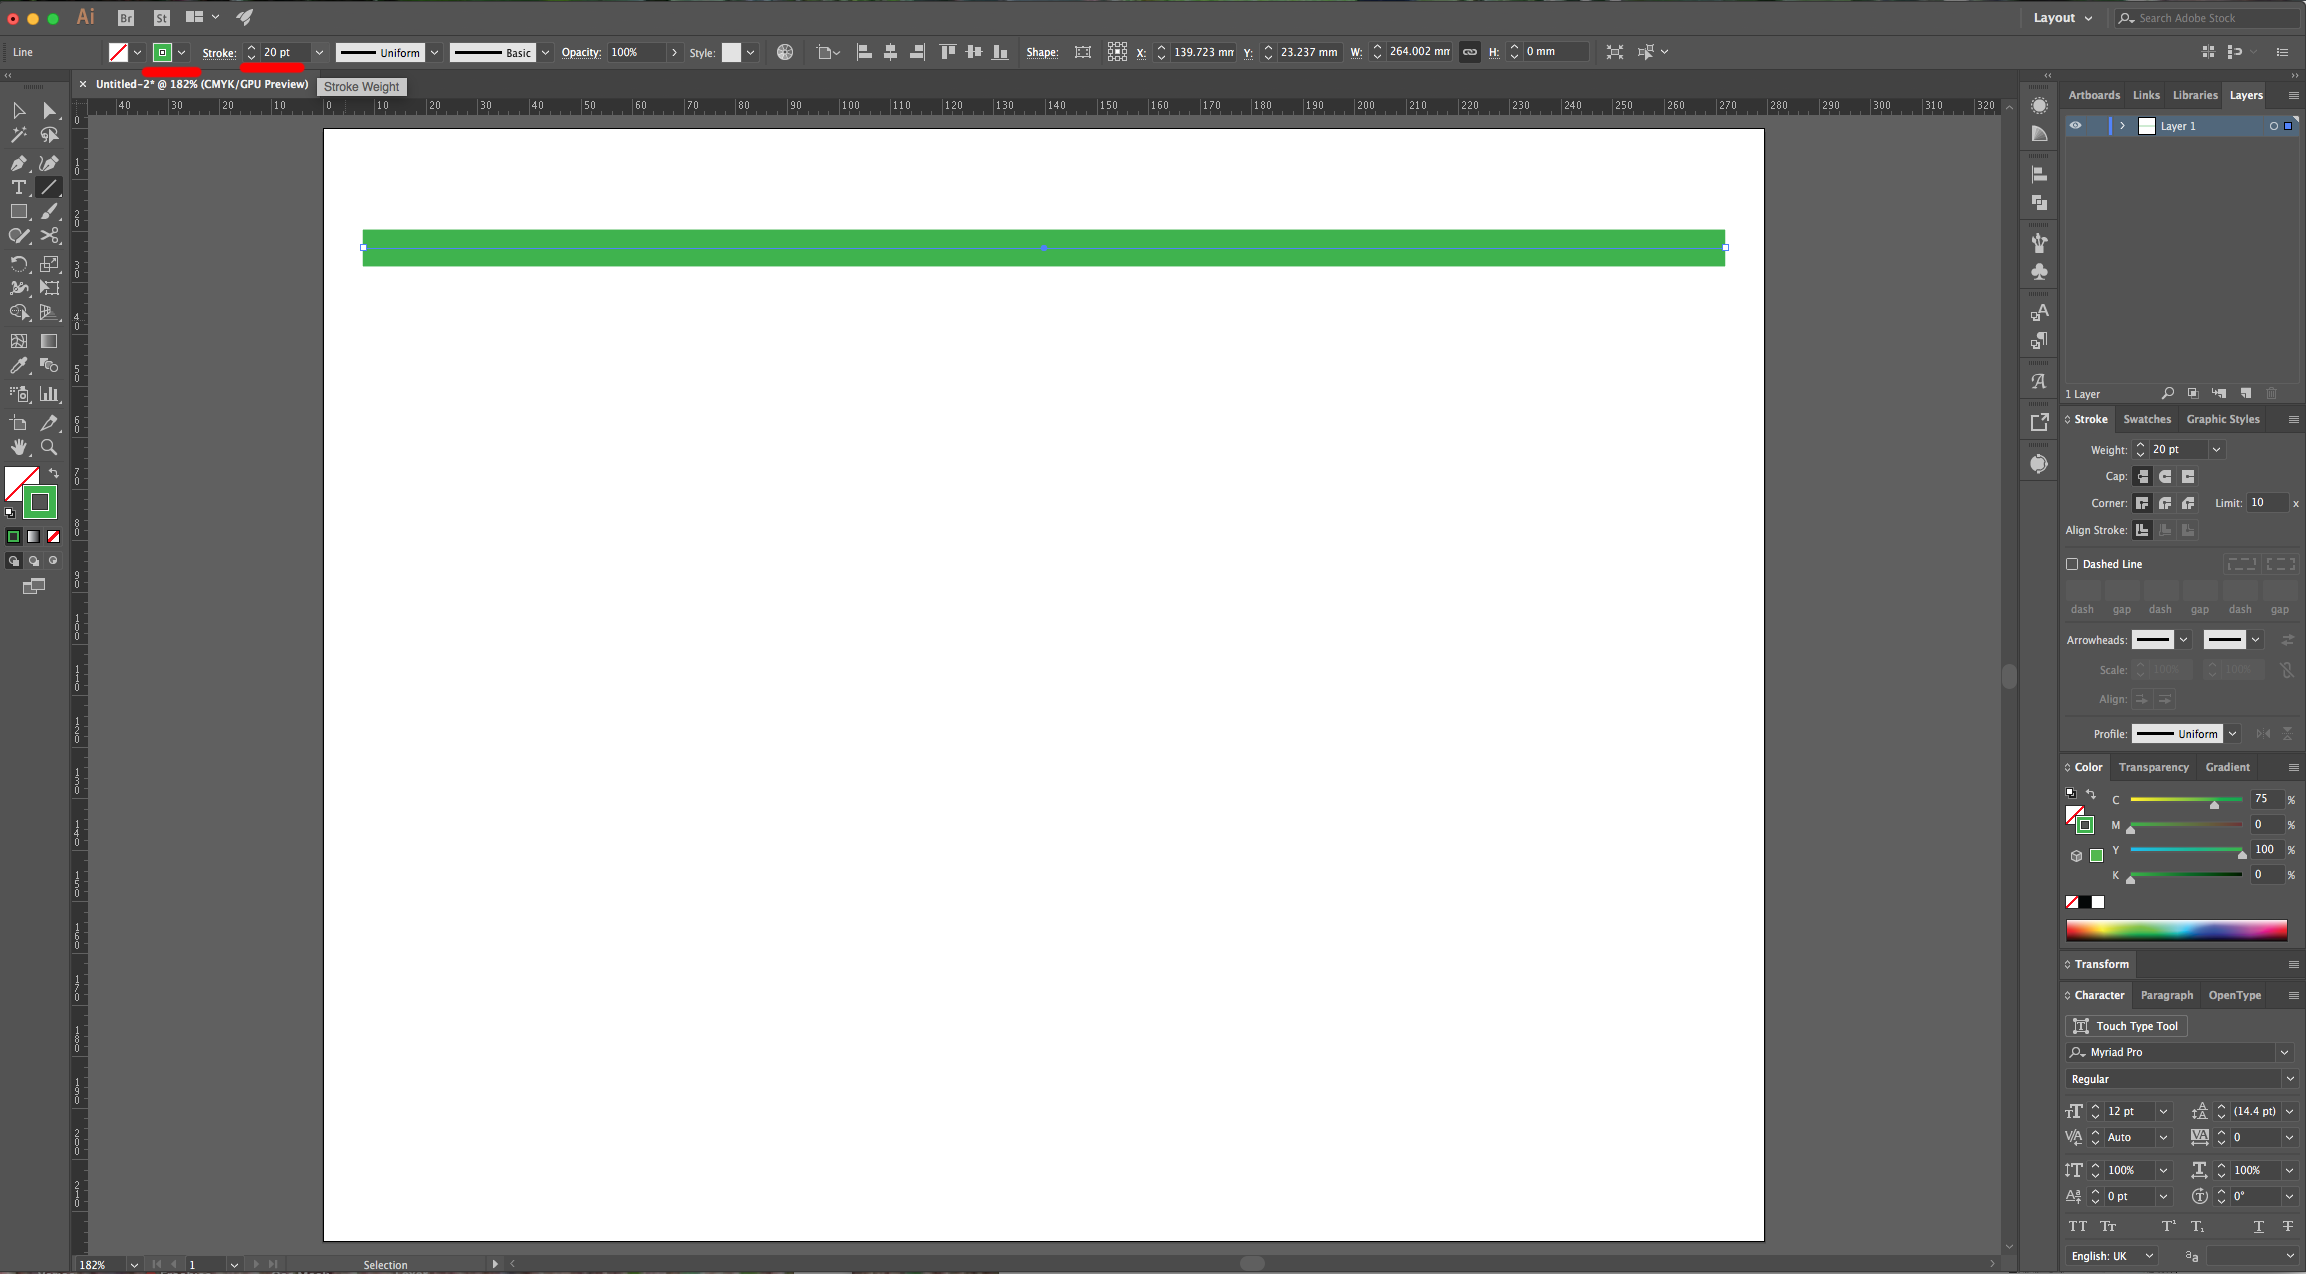
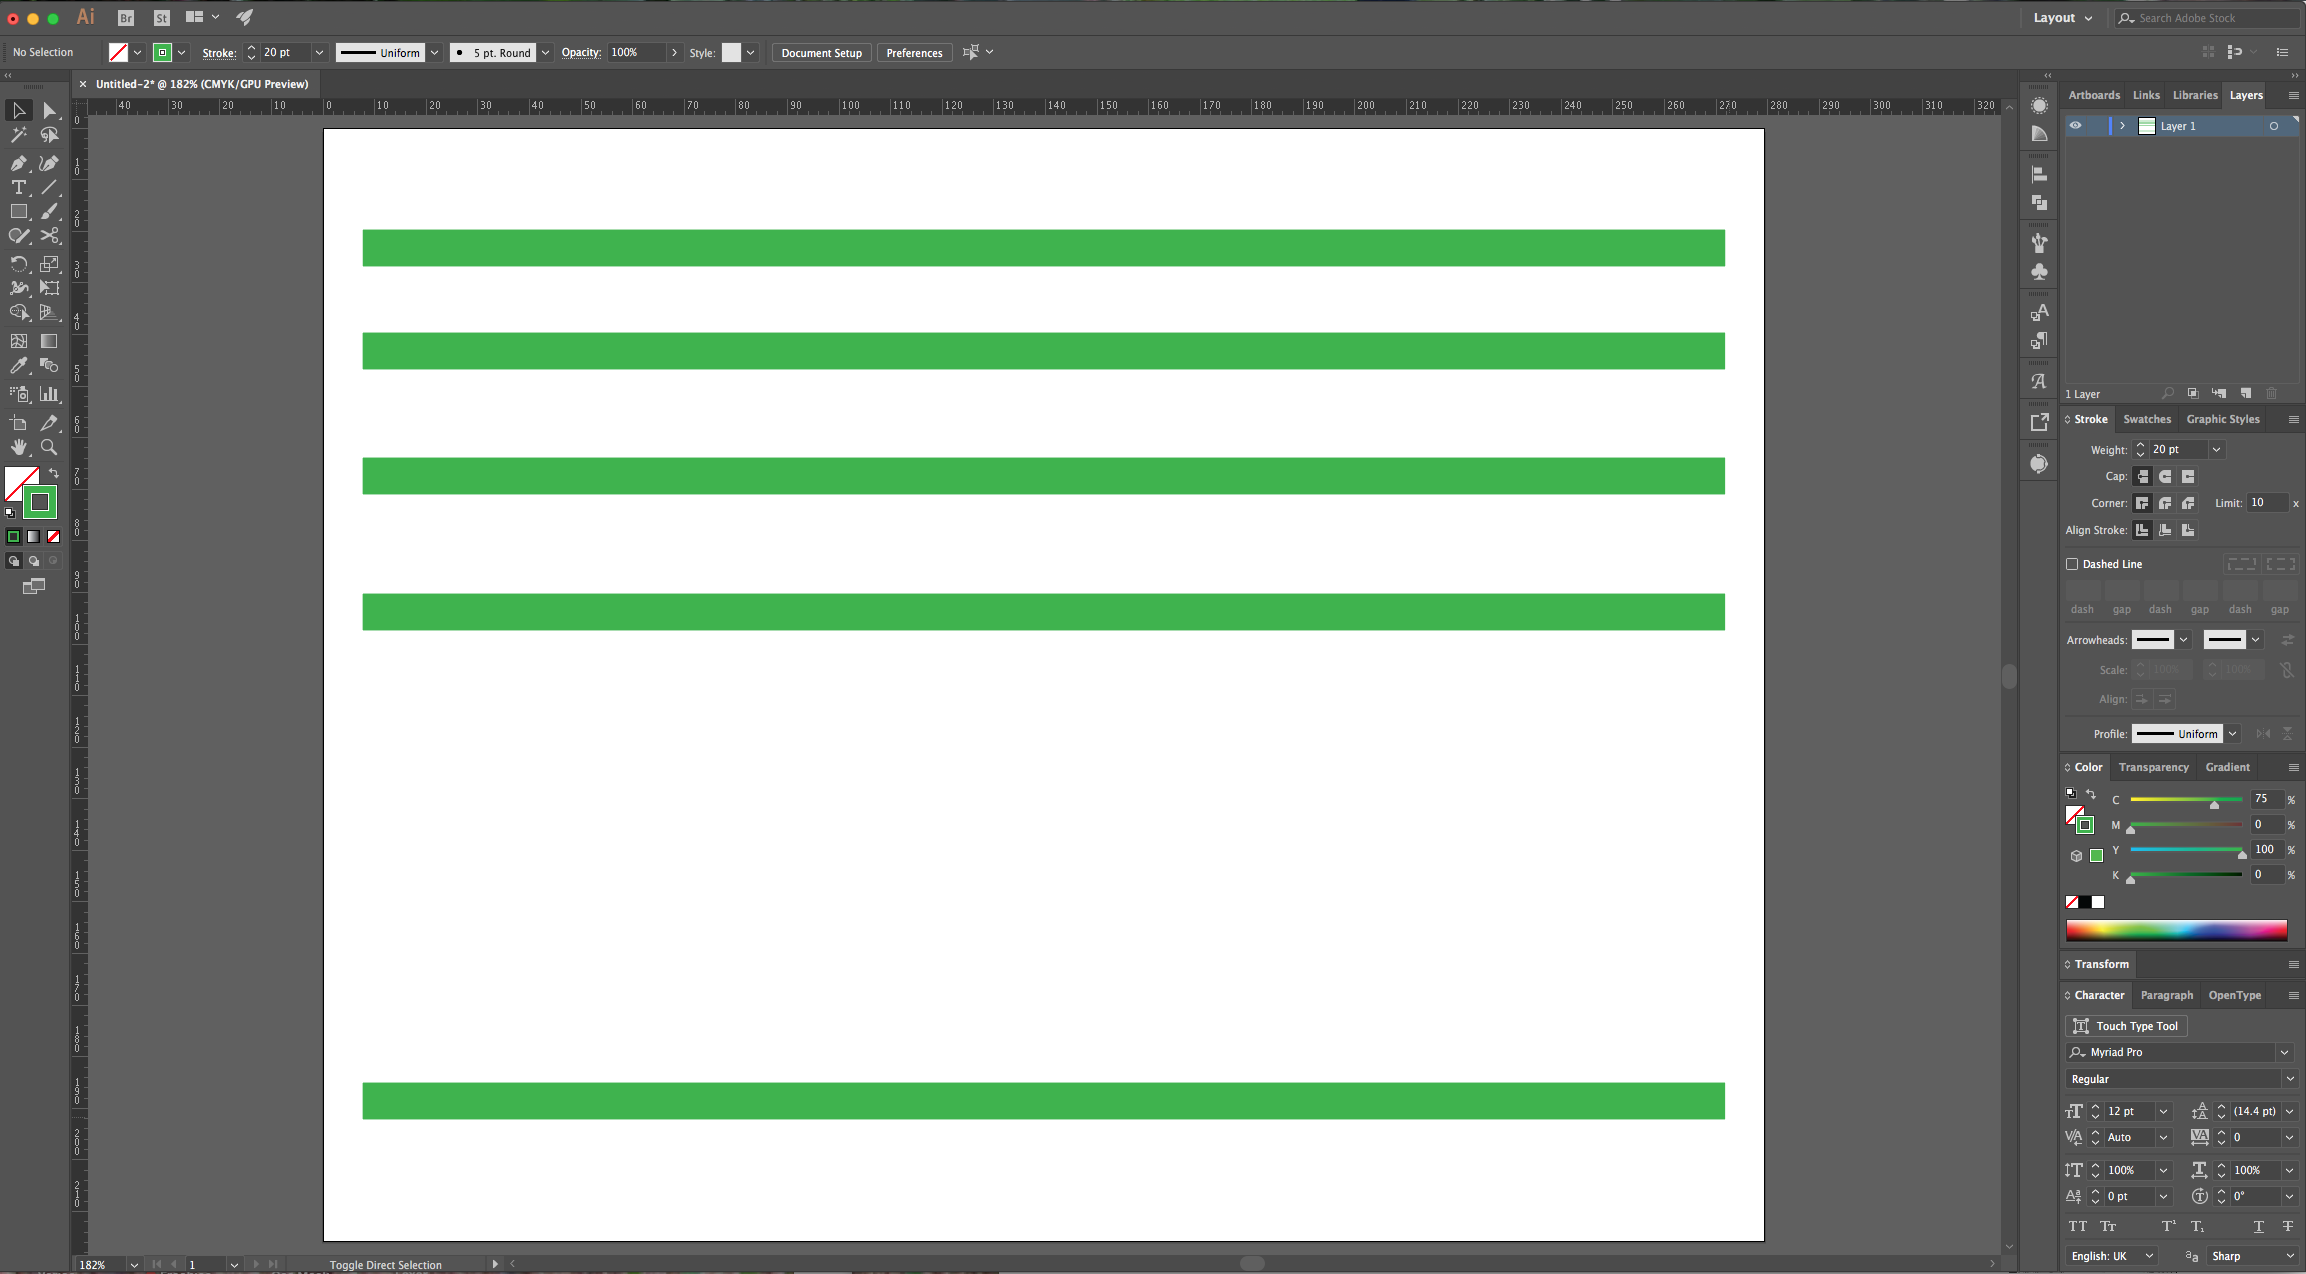
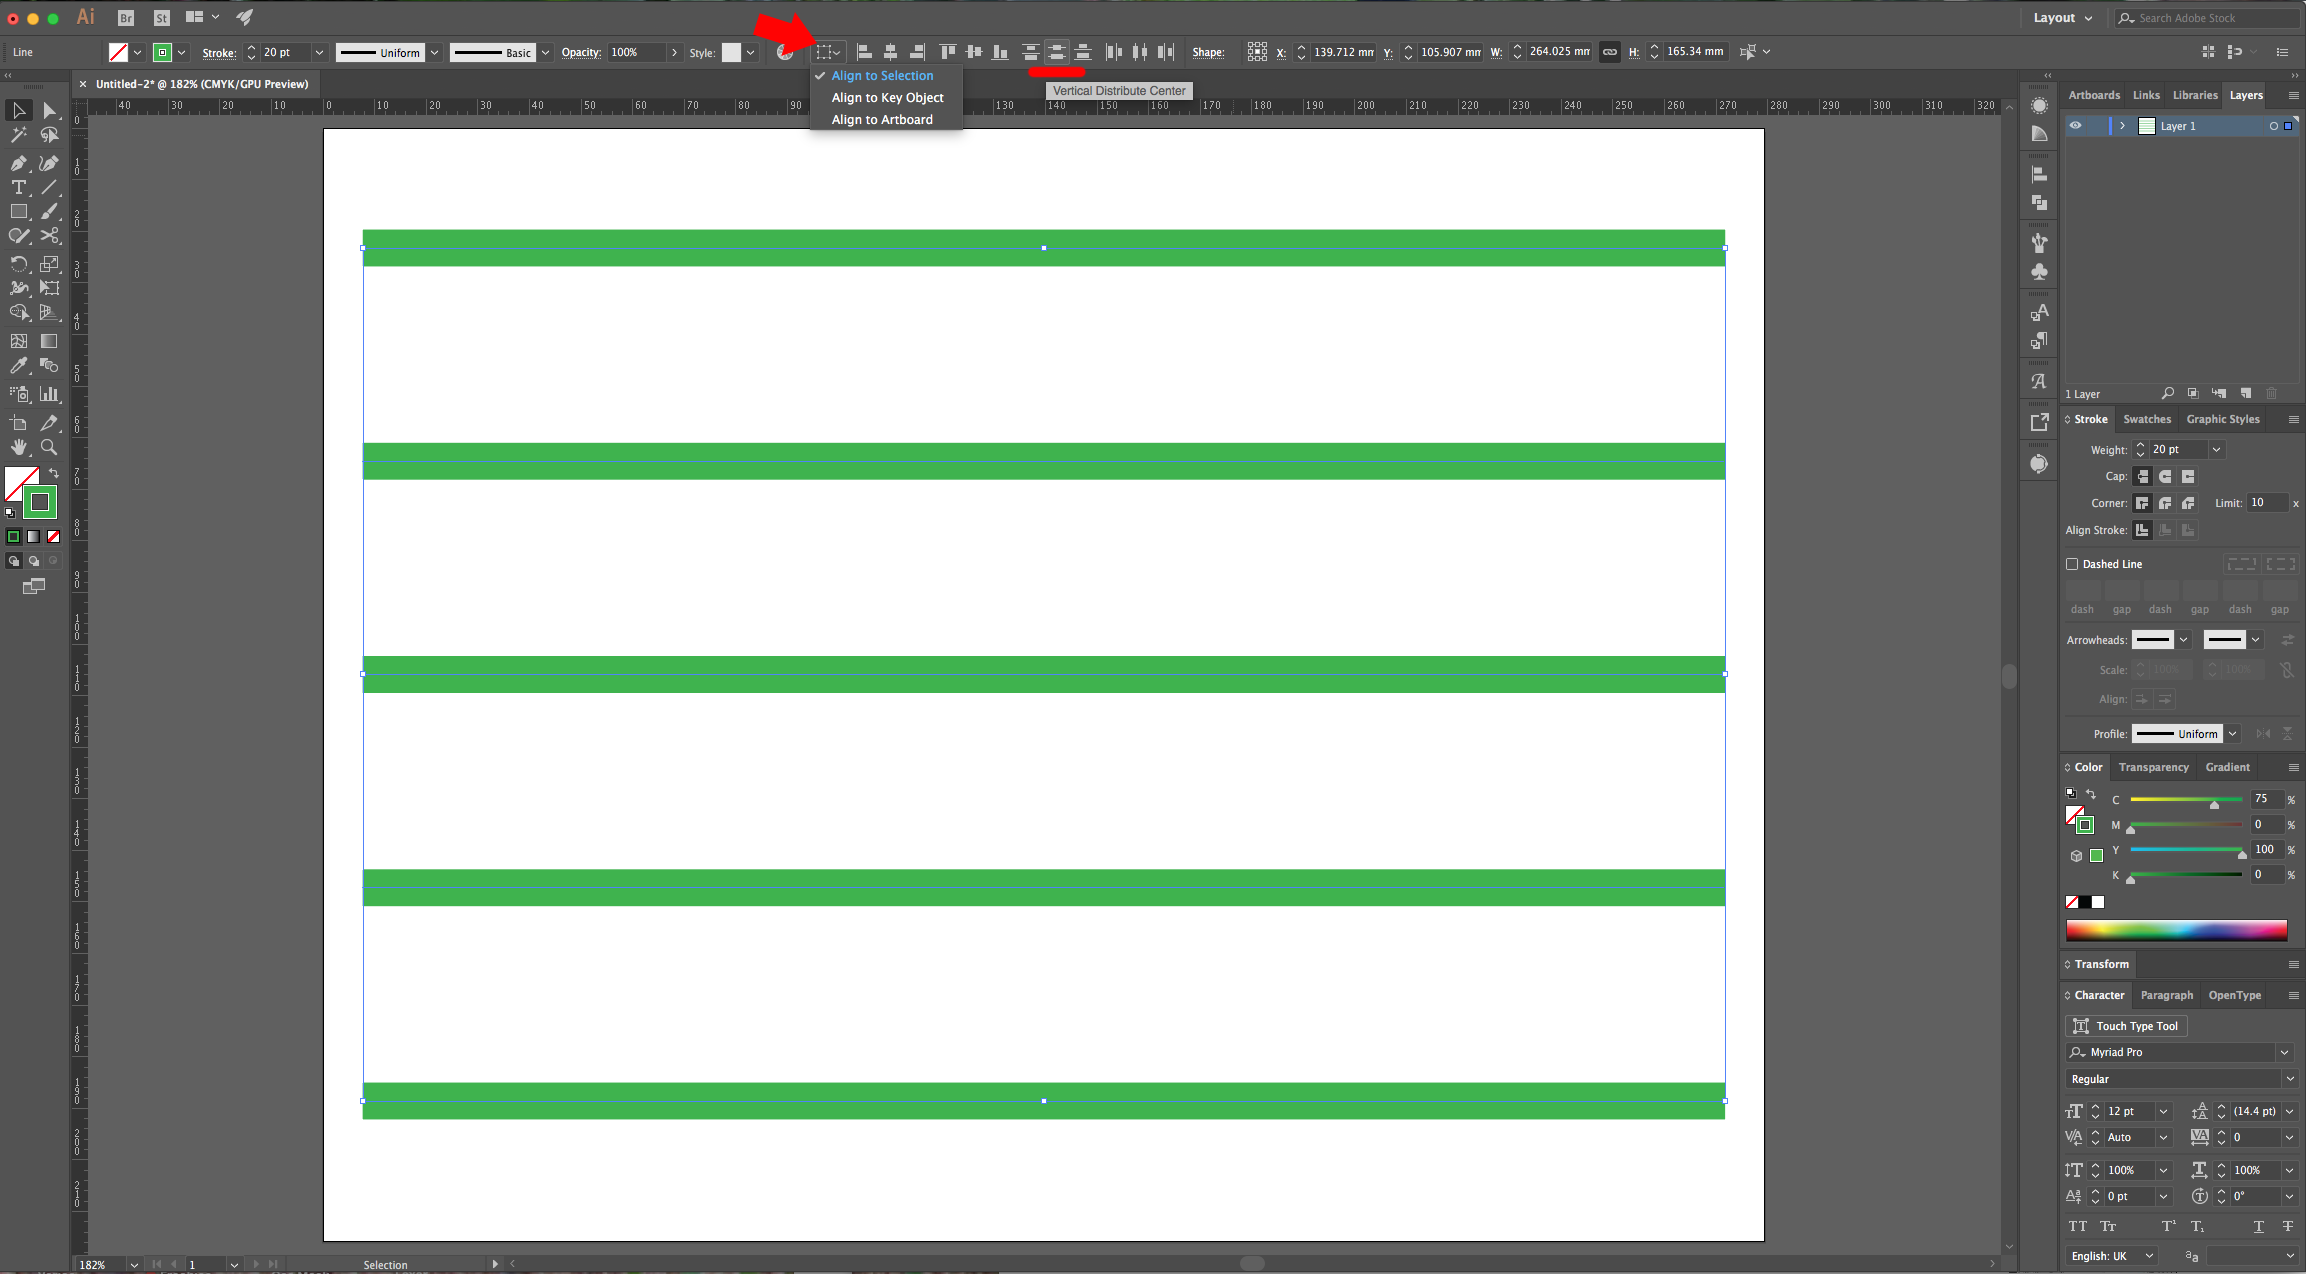
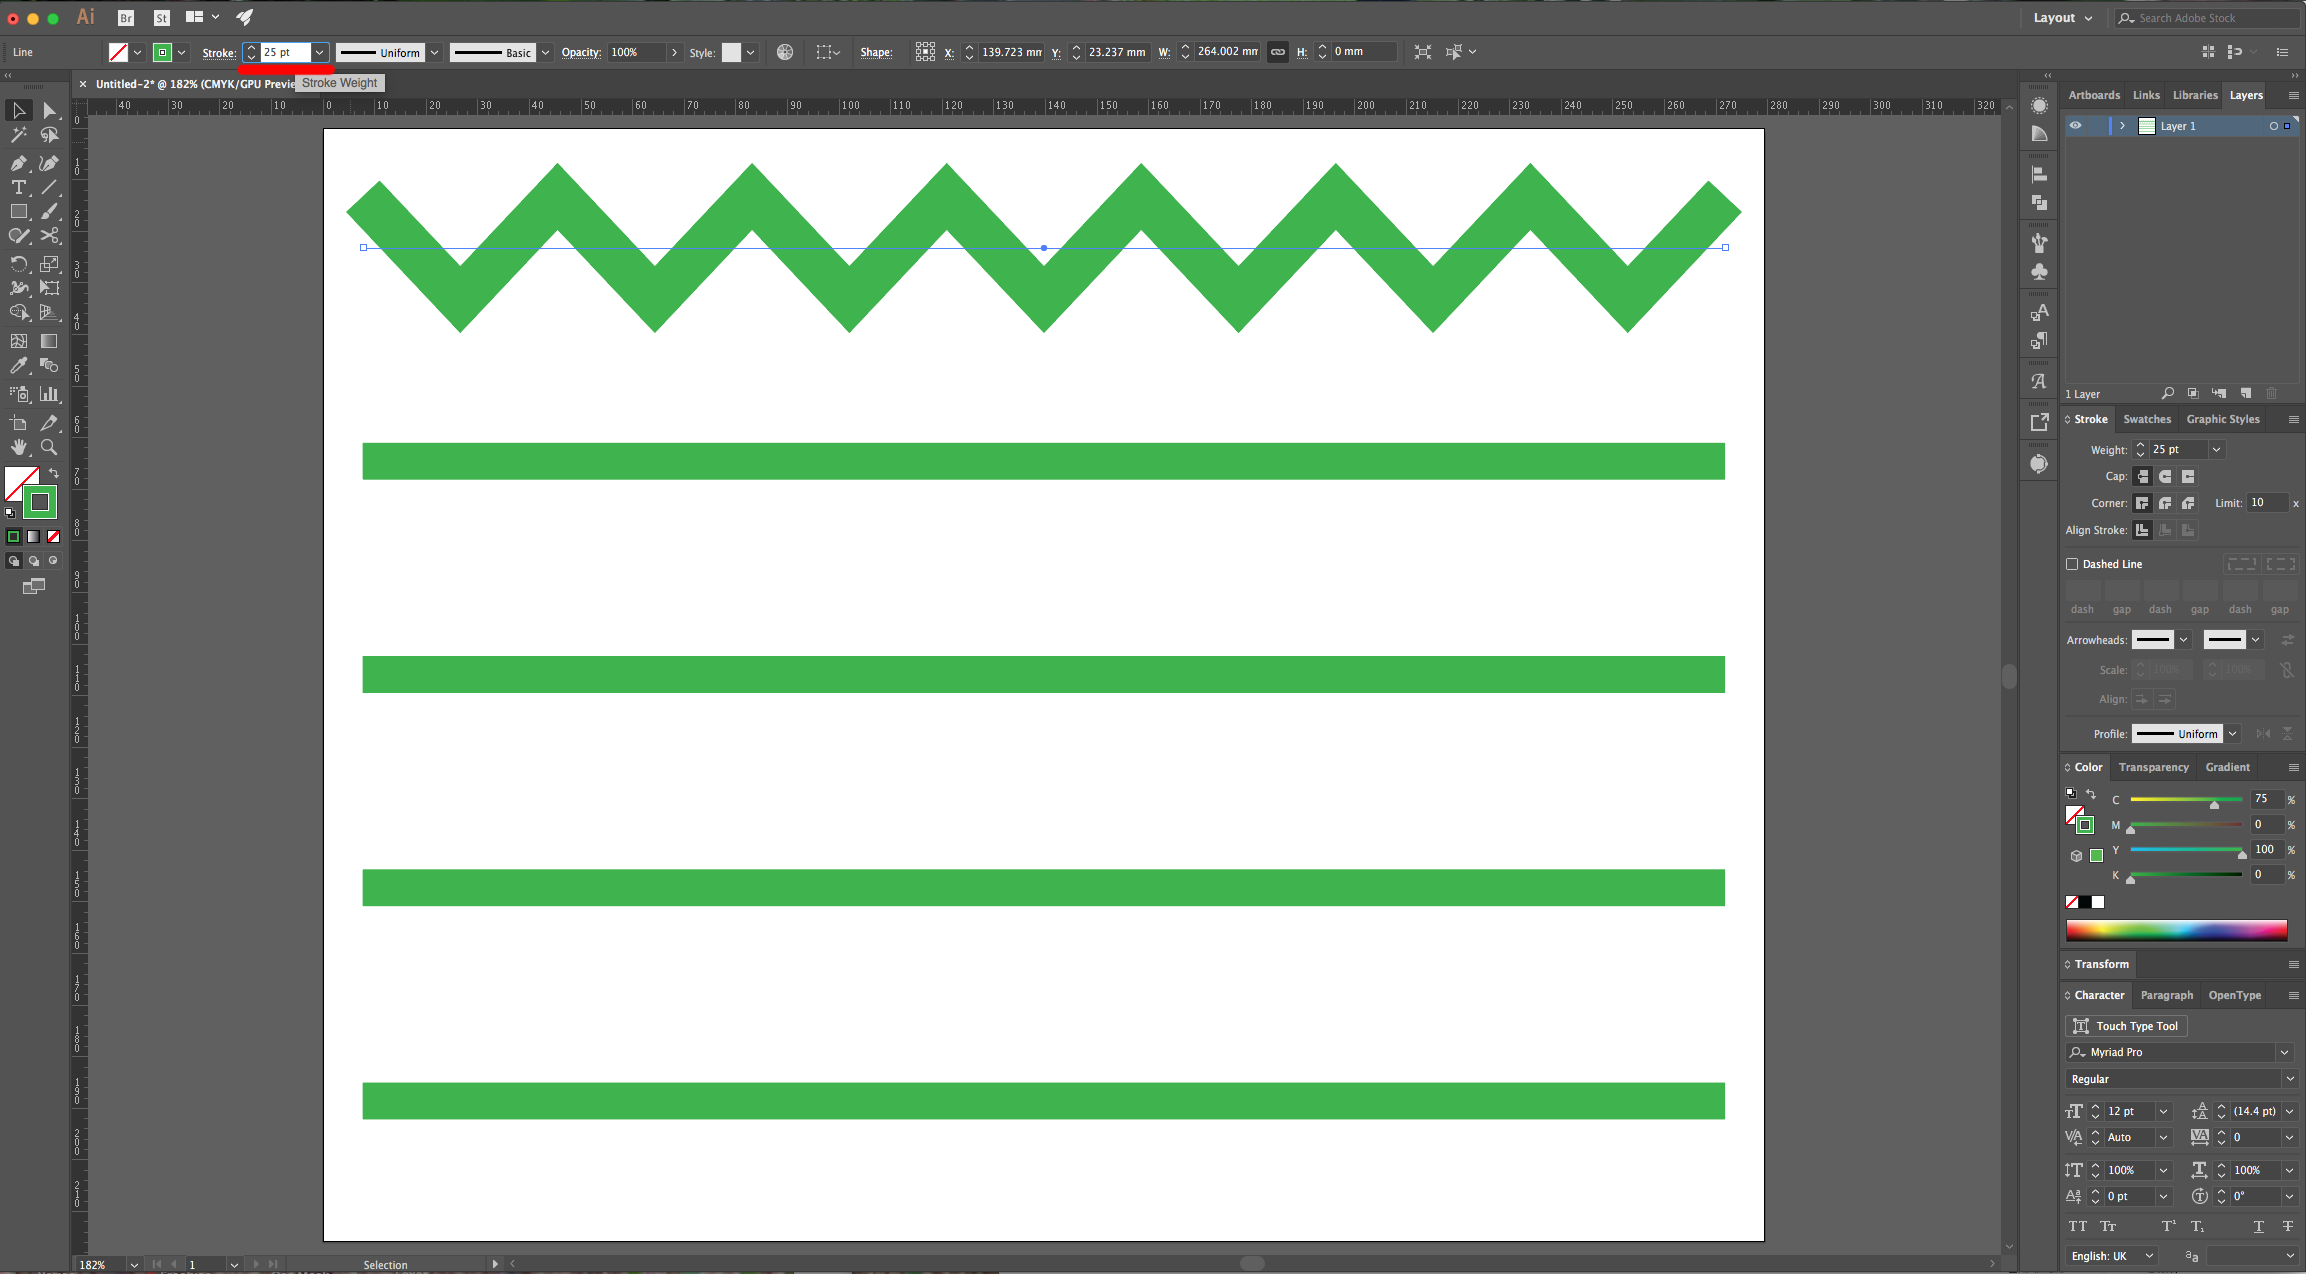
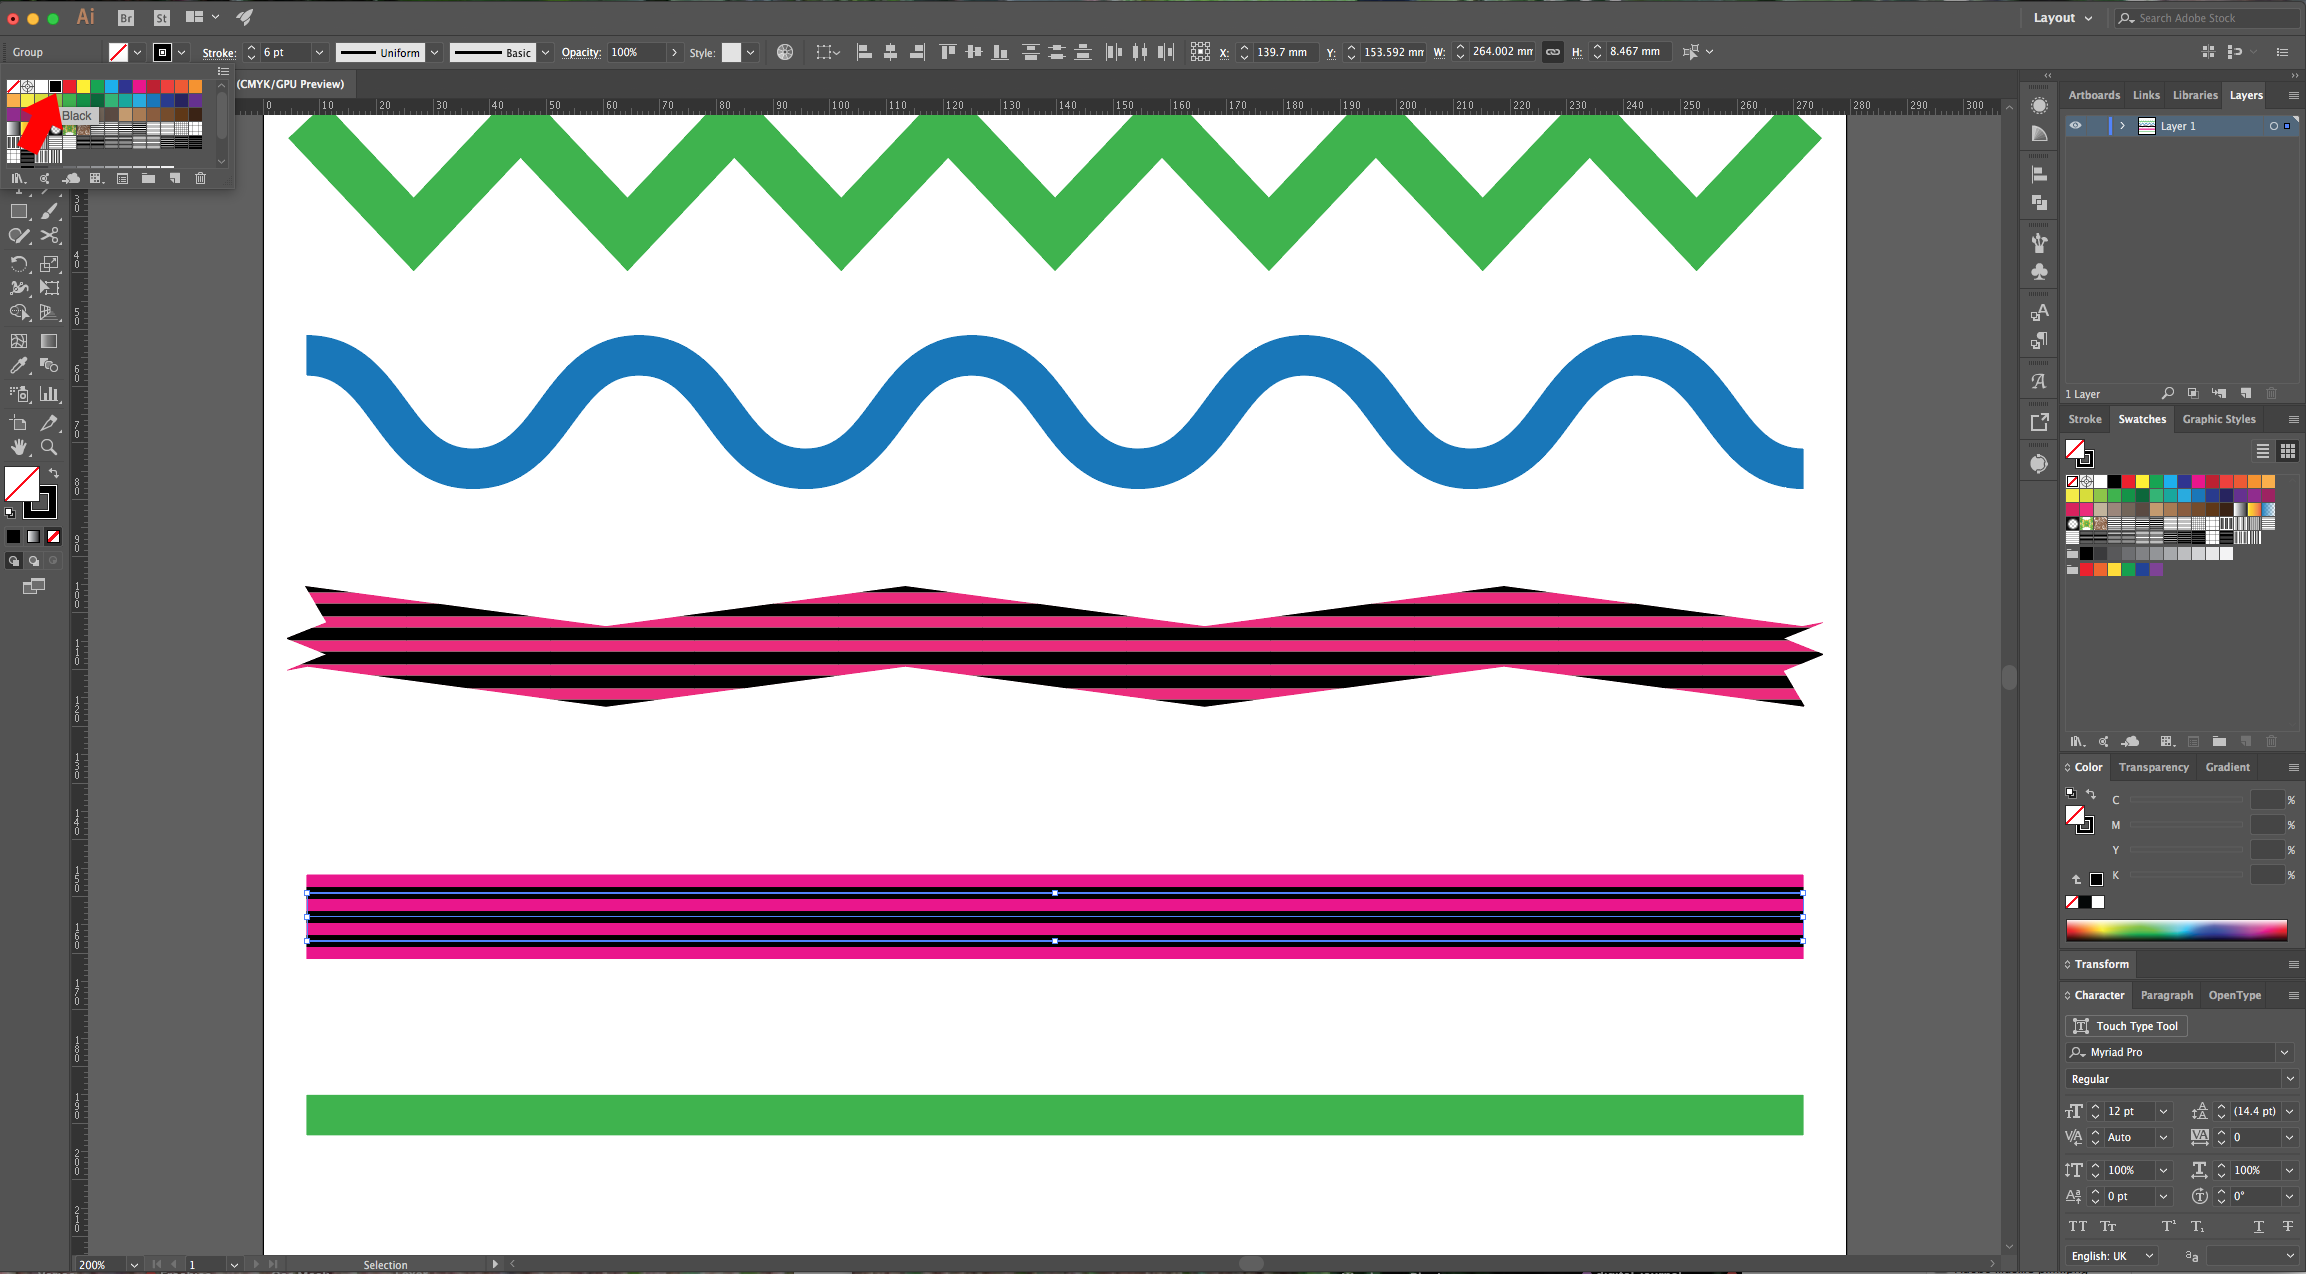
2 - With the “Line Segment Tool” (\), draw a line on the top part of your document from side to side. Change the “Stroke Weight” to about 20 pt and fill it with the color of your choice. With your line still selected, hold the Alt/Option and Shift keys while dragging downwards to duplicate it. Repeat this other two or three times. Place the last one at the bottom of the Document, then select all your lines and using “Align to Selection” click on “Vertical Distribute Center” from the Top Menu.
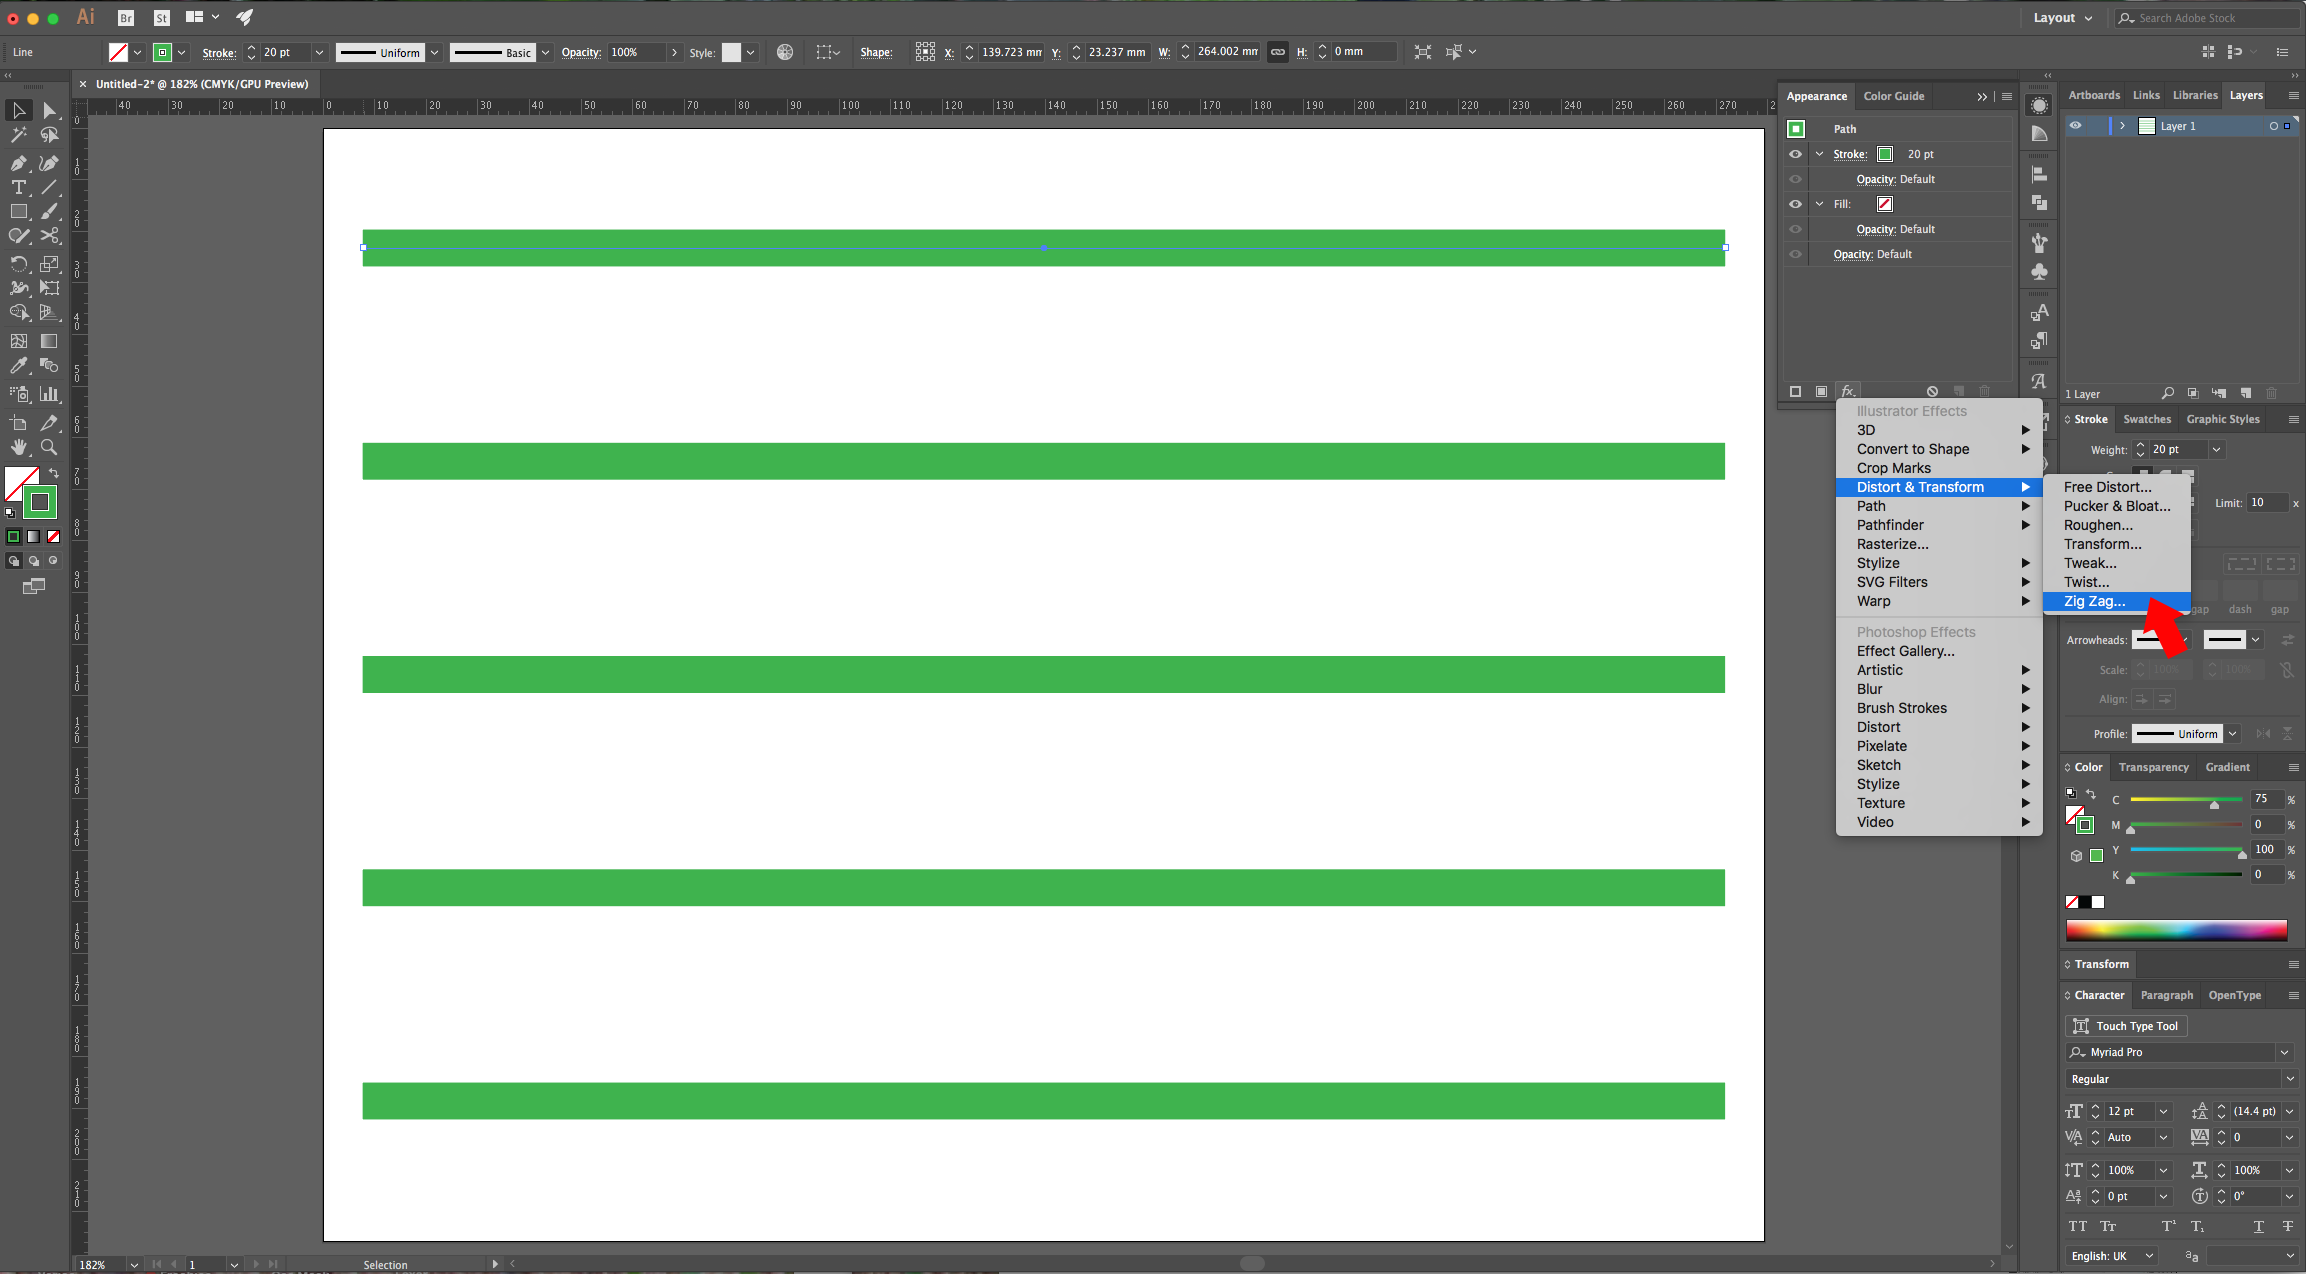
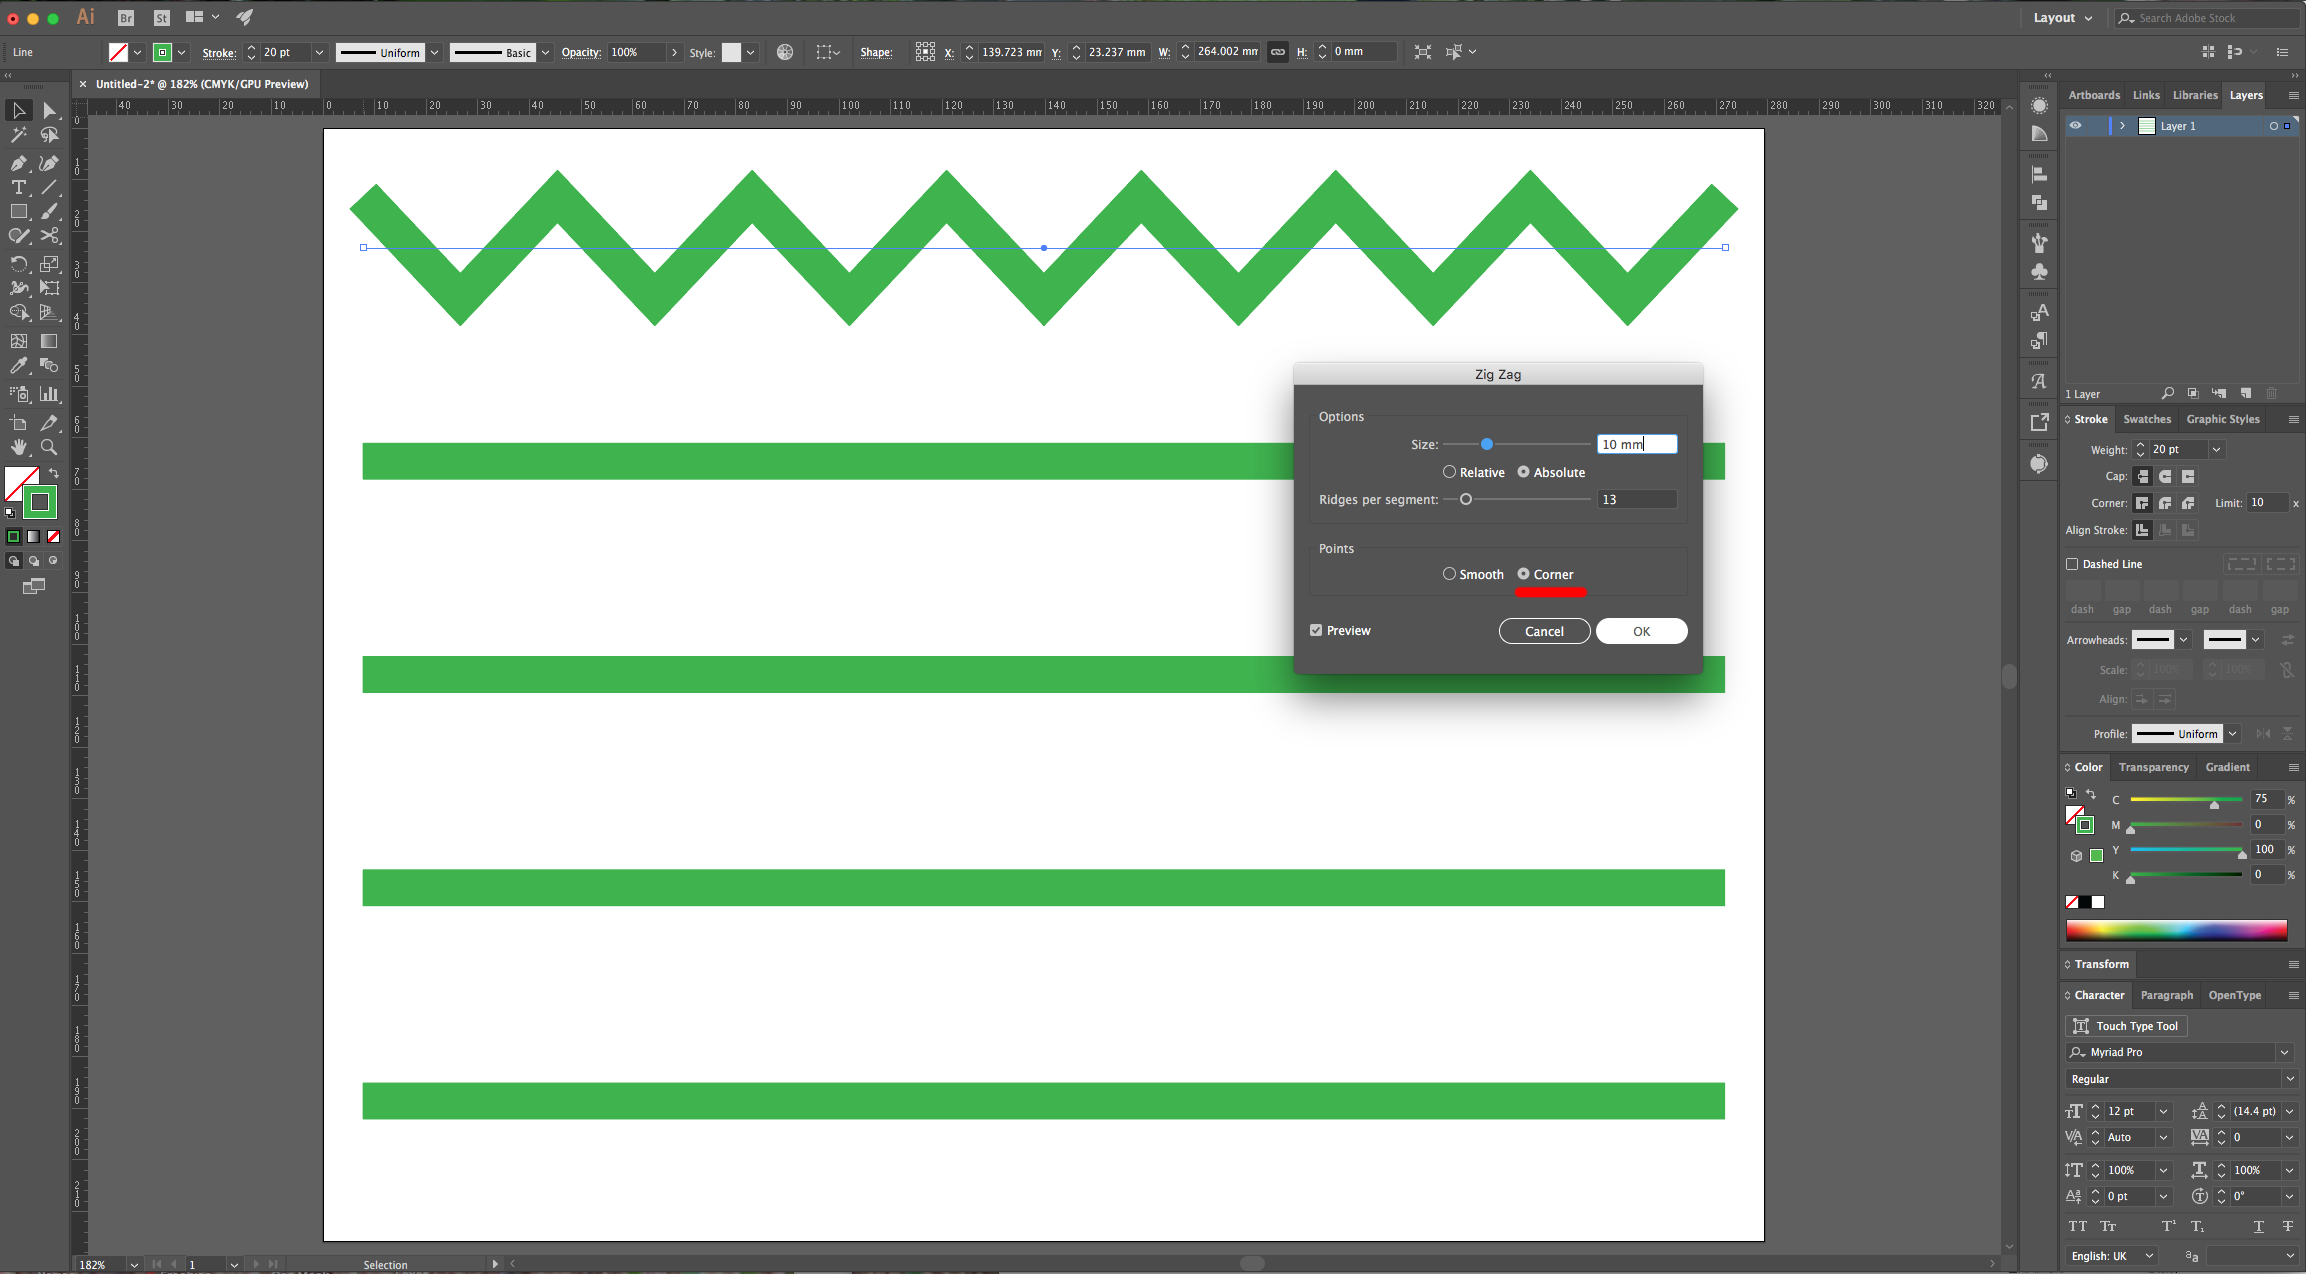
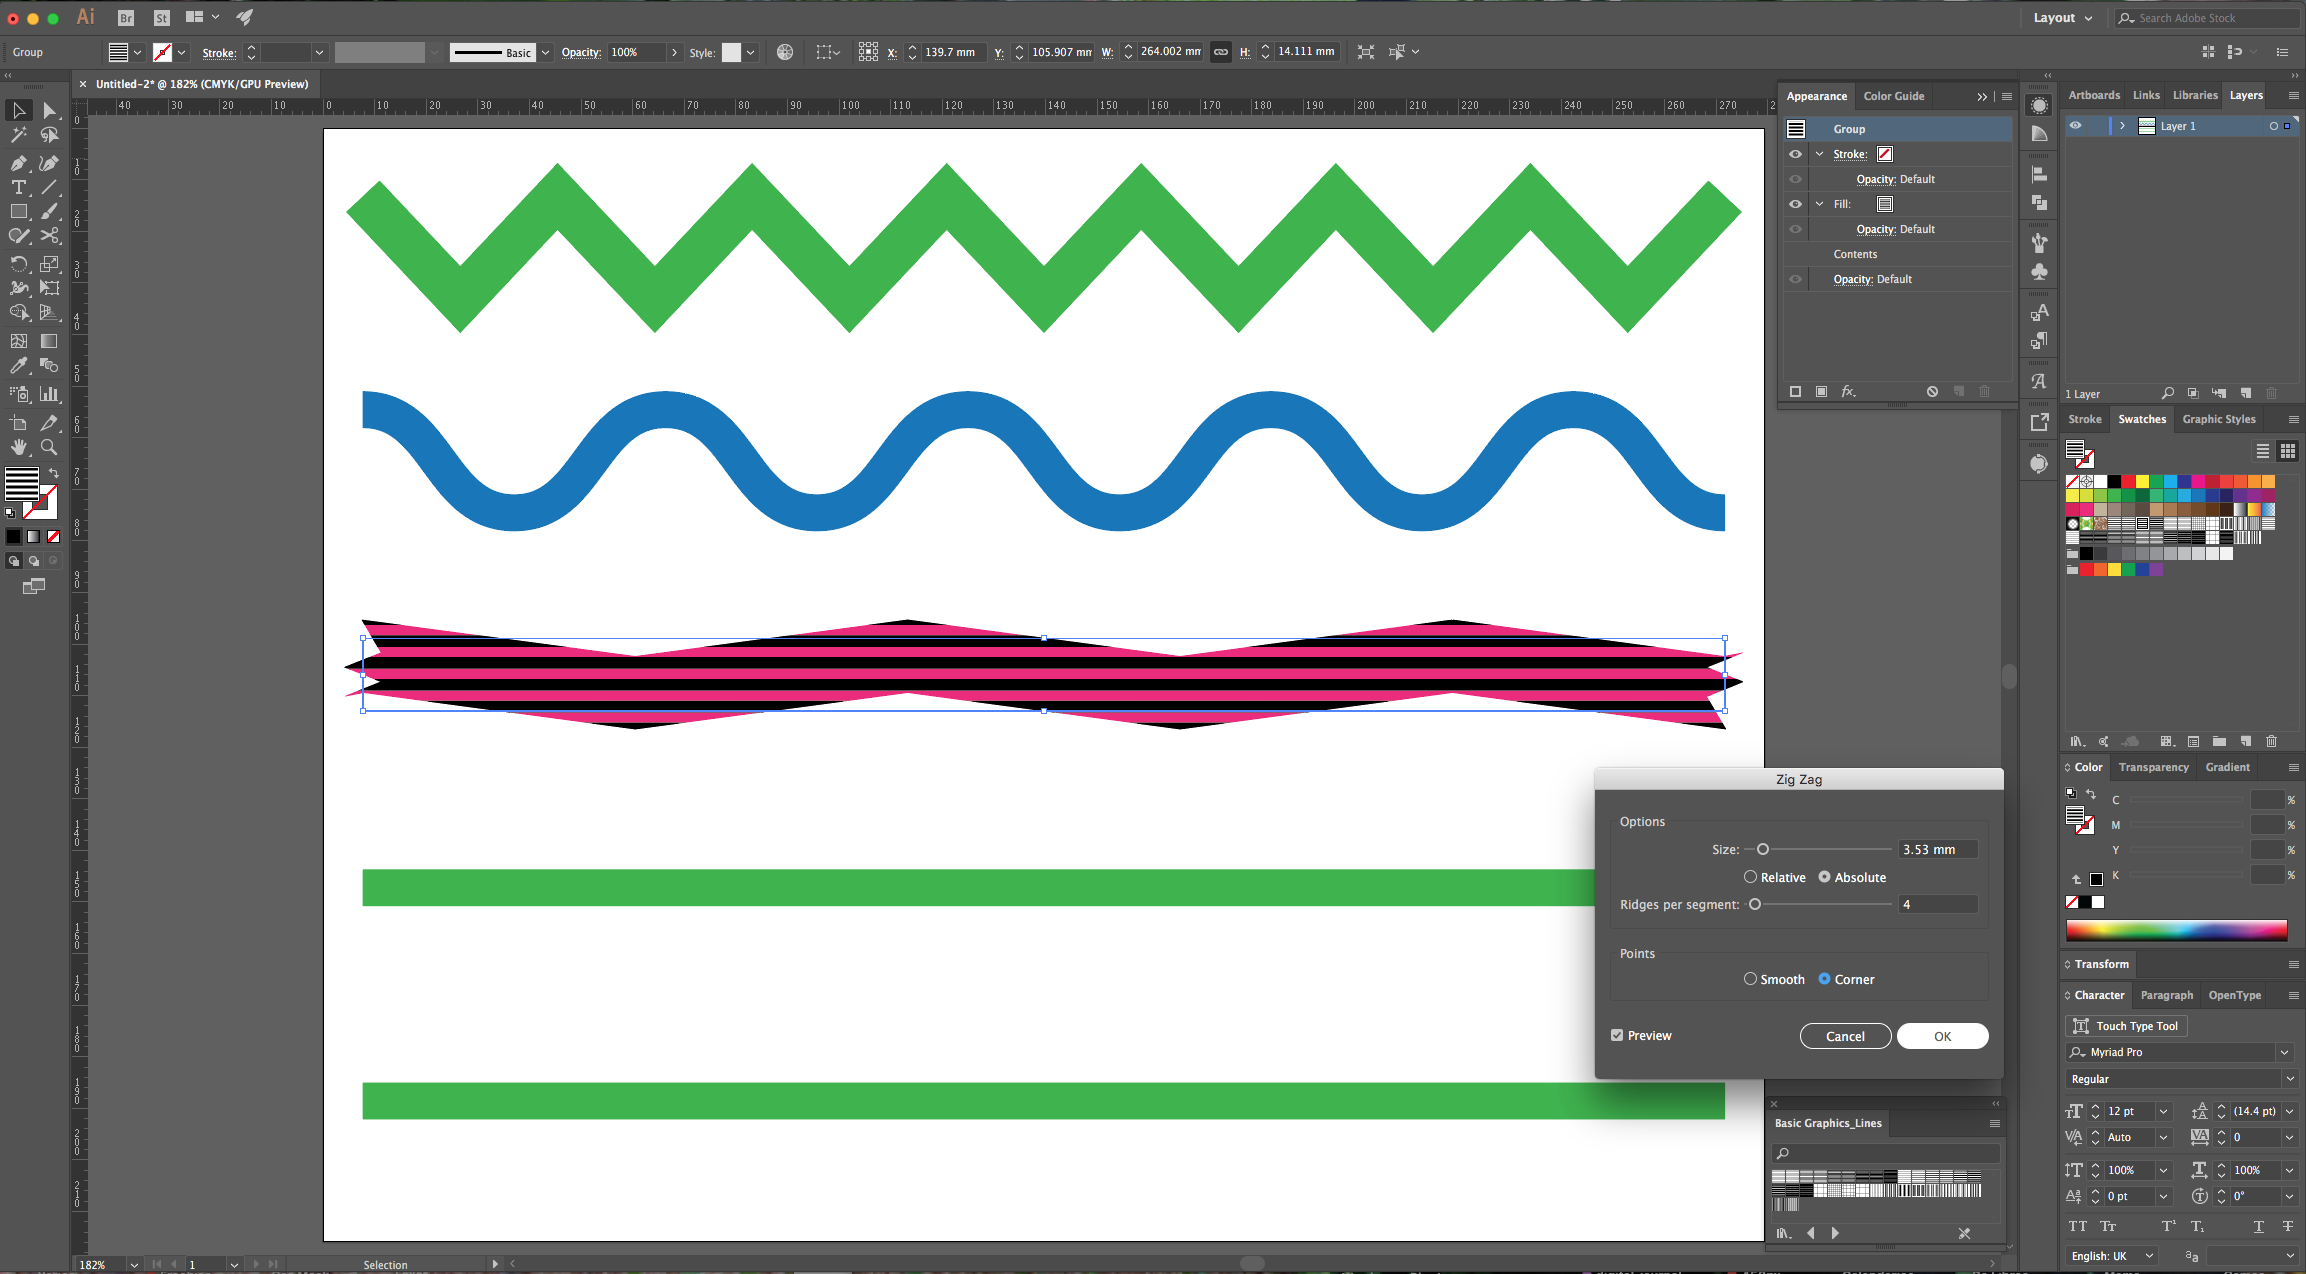
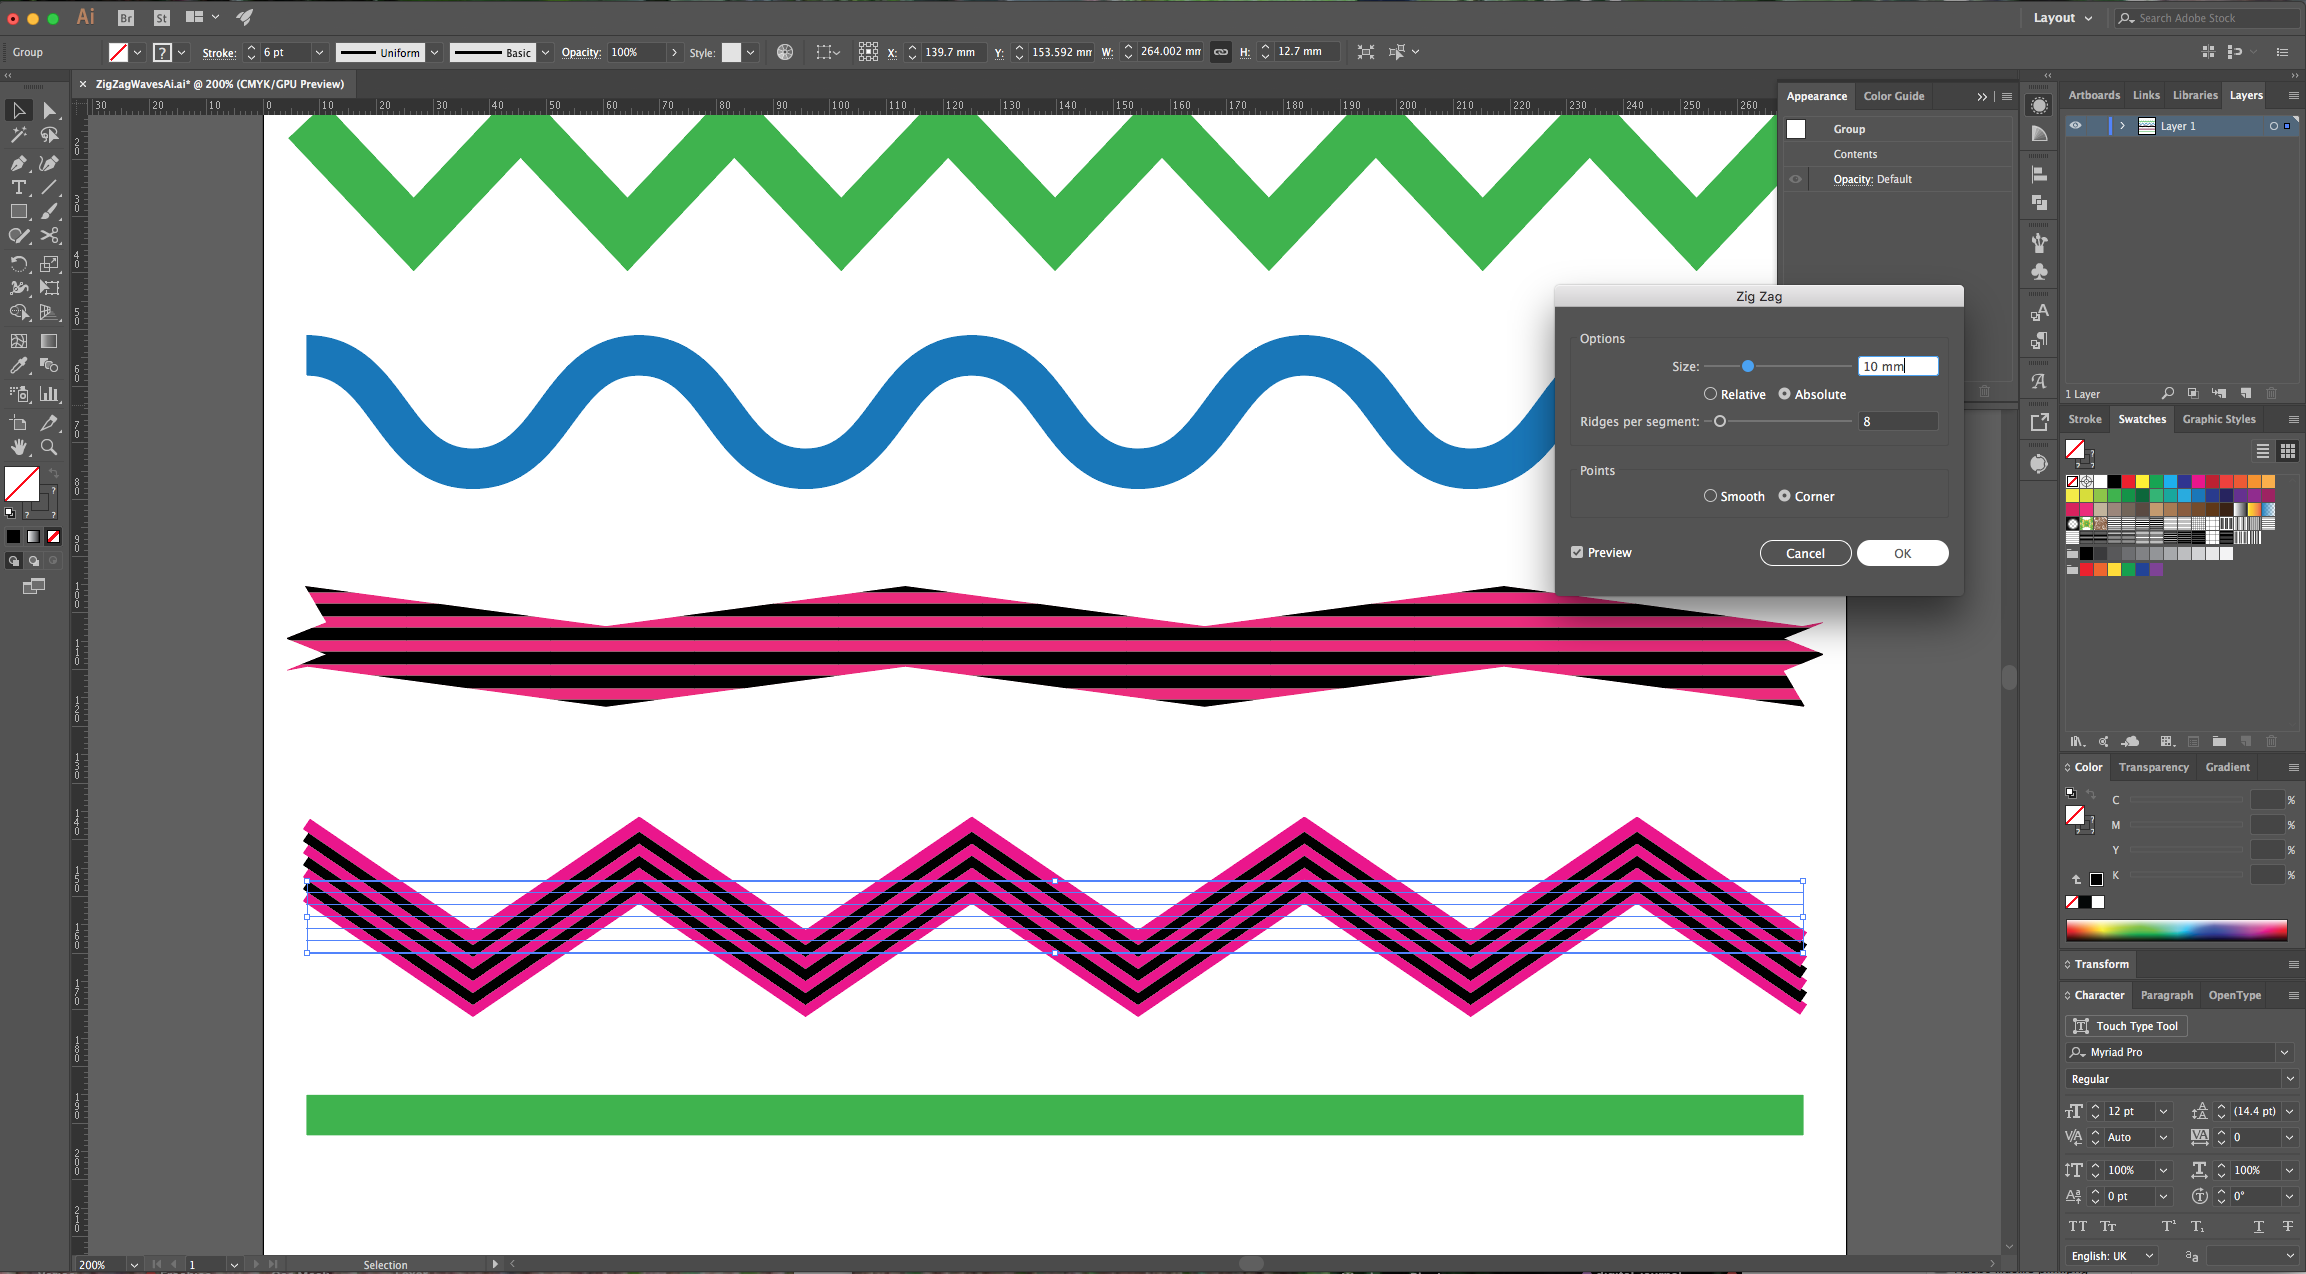
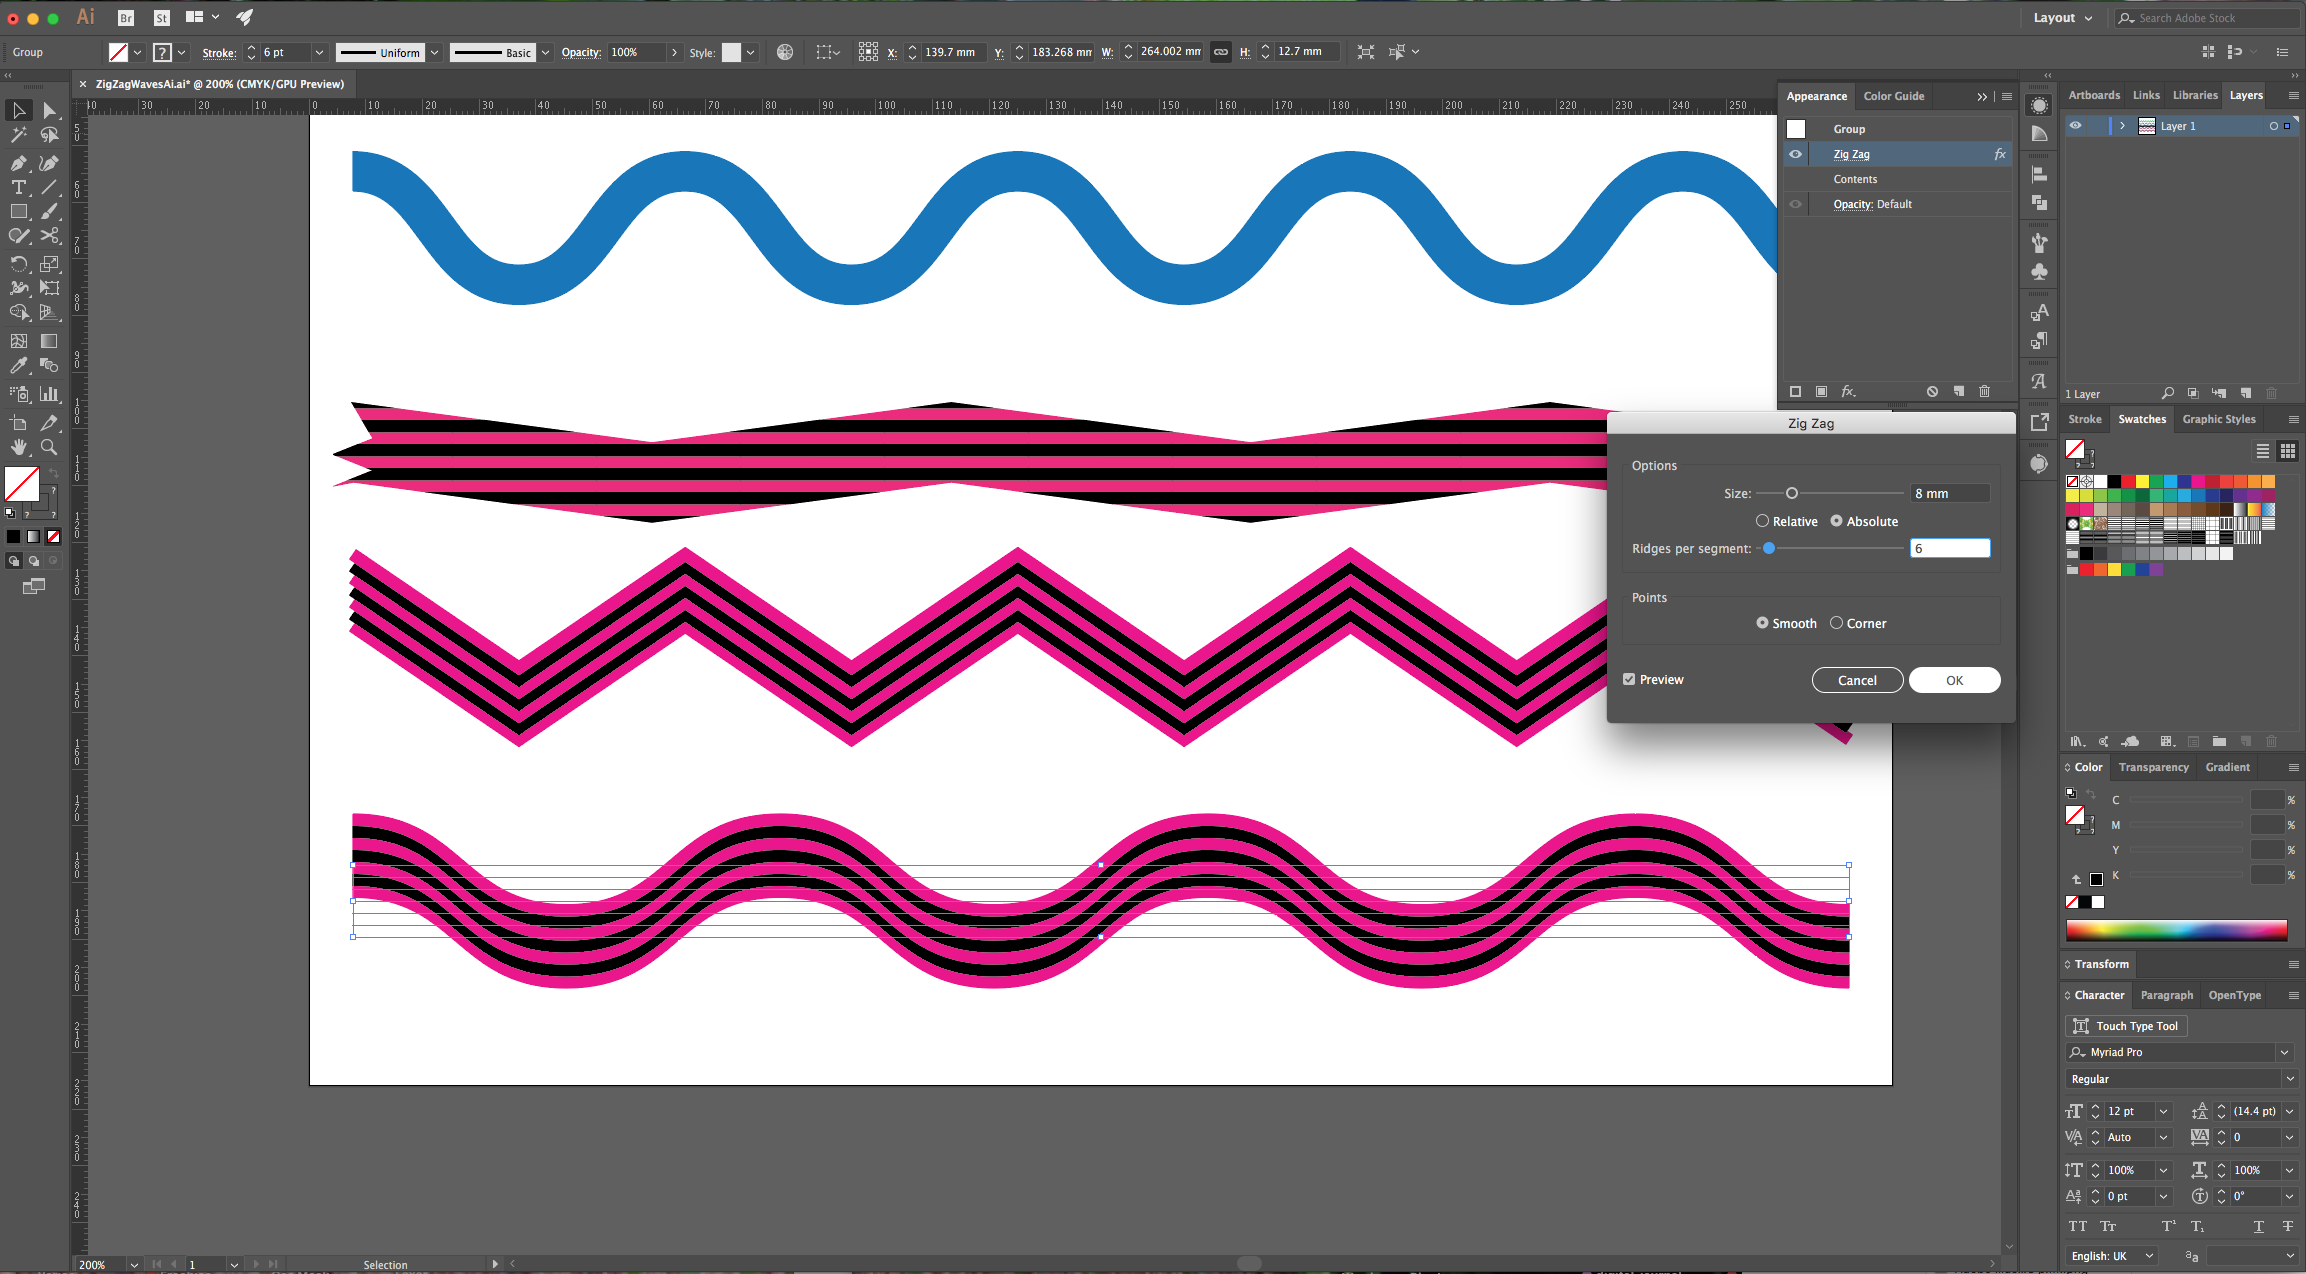
3 - In the “Appearance Panel” click on the “Add New Effect” button at the bottom and choose Distort & Transform > Zig Zag. In this case use “Corner” in the “Points” section, check the “Preview” box to be able to see the results and choose a value for “Size” and for “Ridges per Segment”.
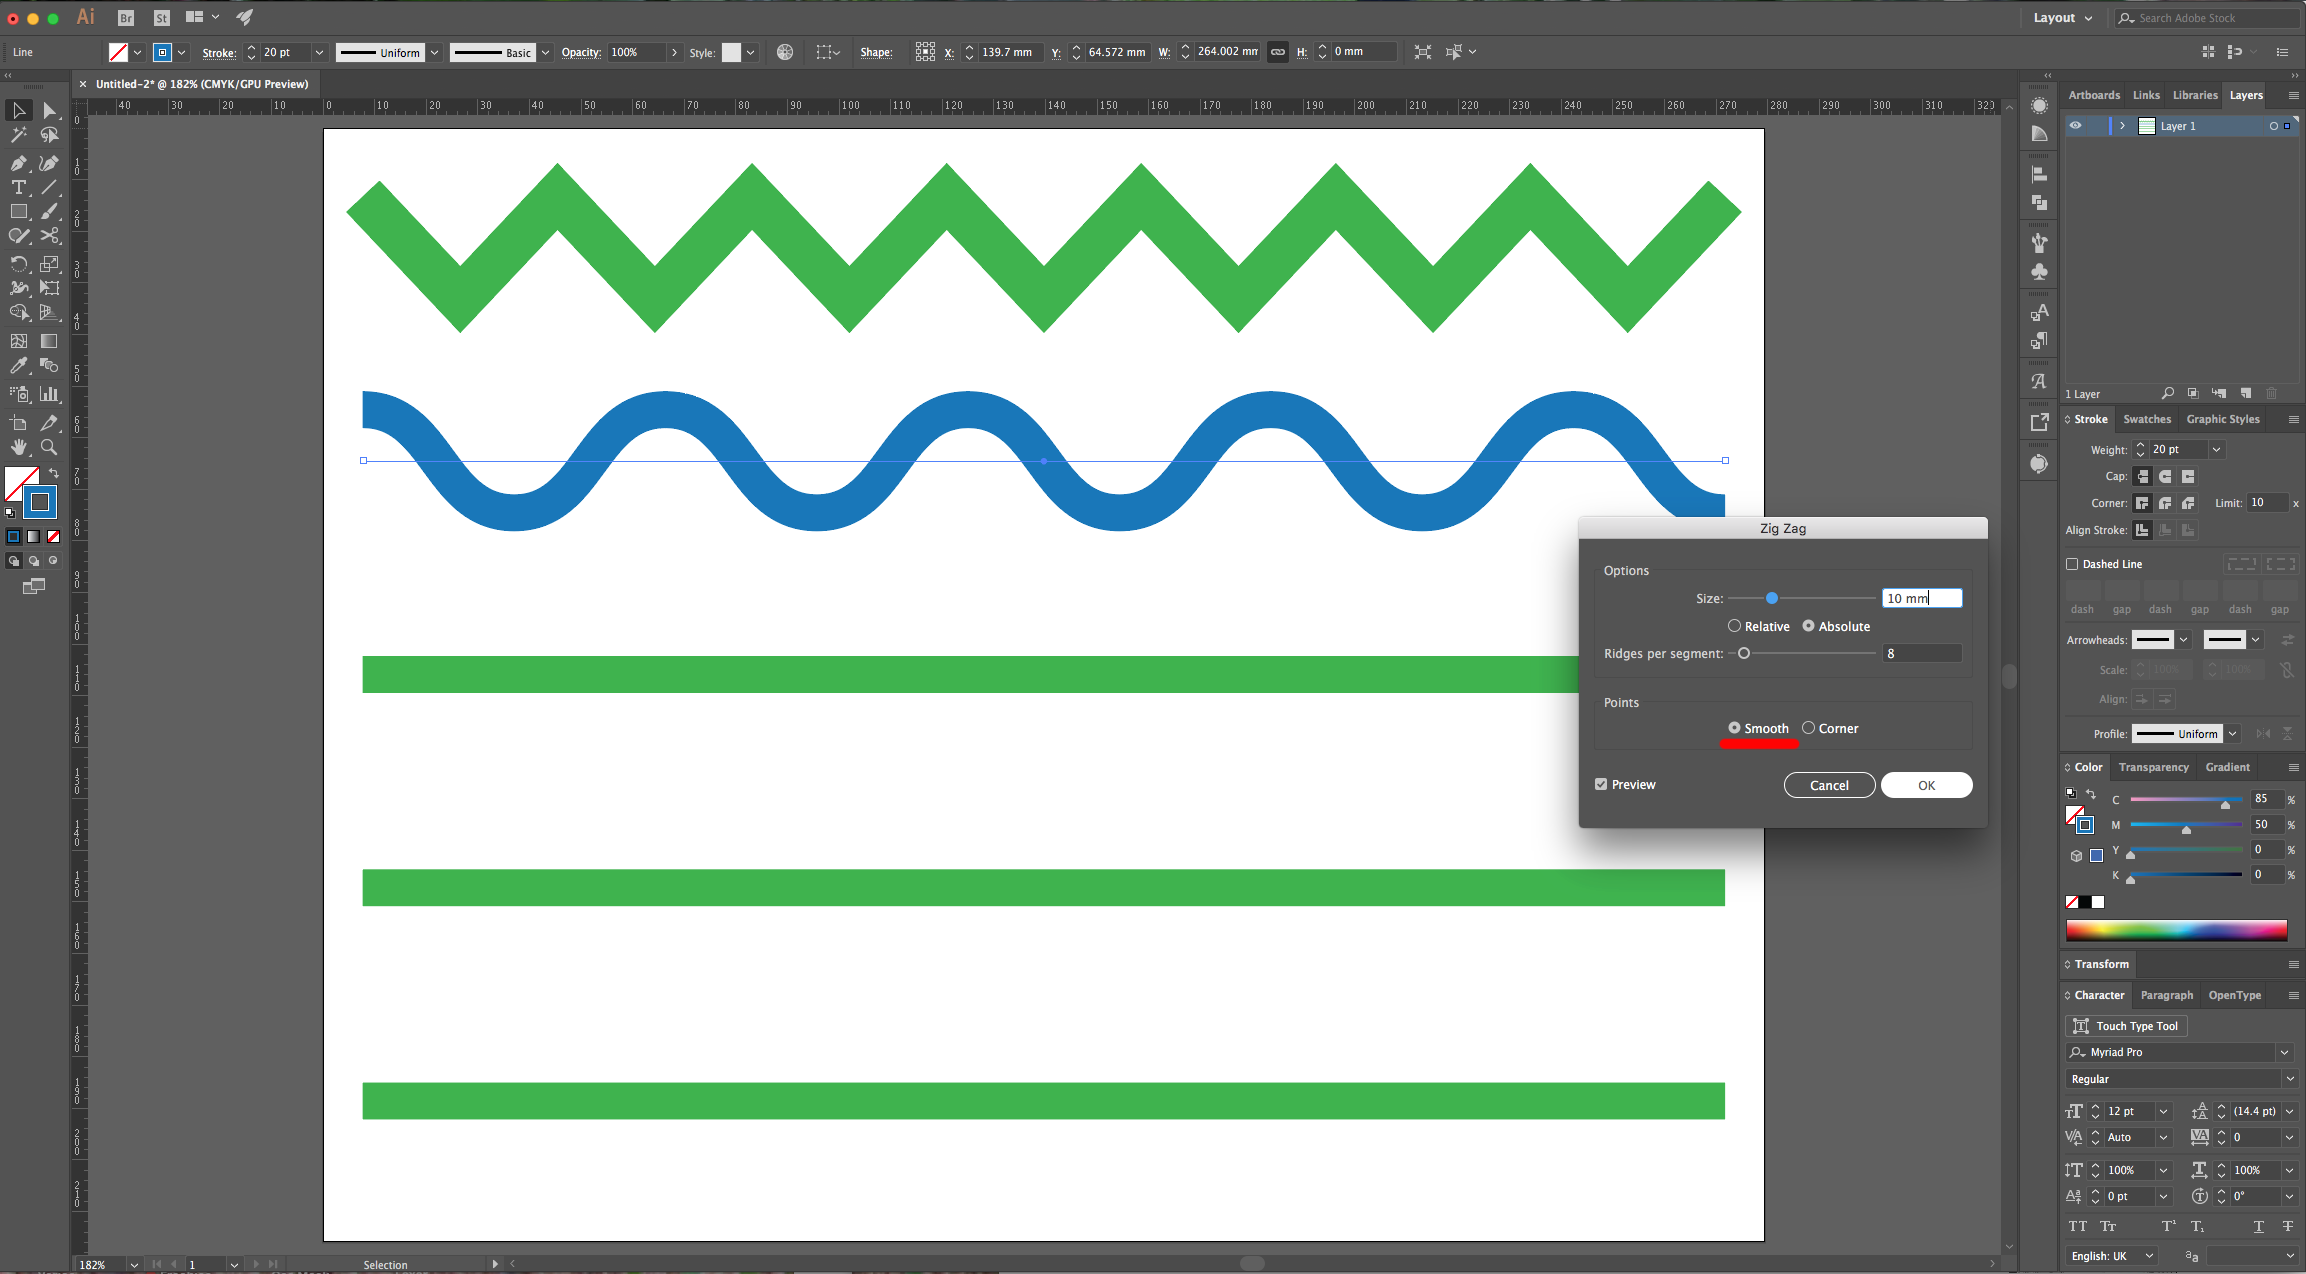
4 - Select another one of your lines and change the color if you want. Repeat the “Zig Zag” Effect, but this time use “Smooth” instead of “Corner”.
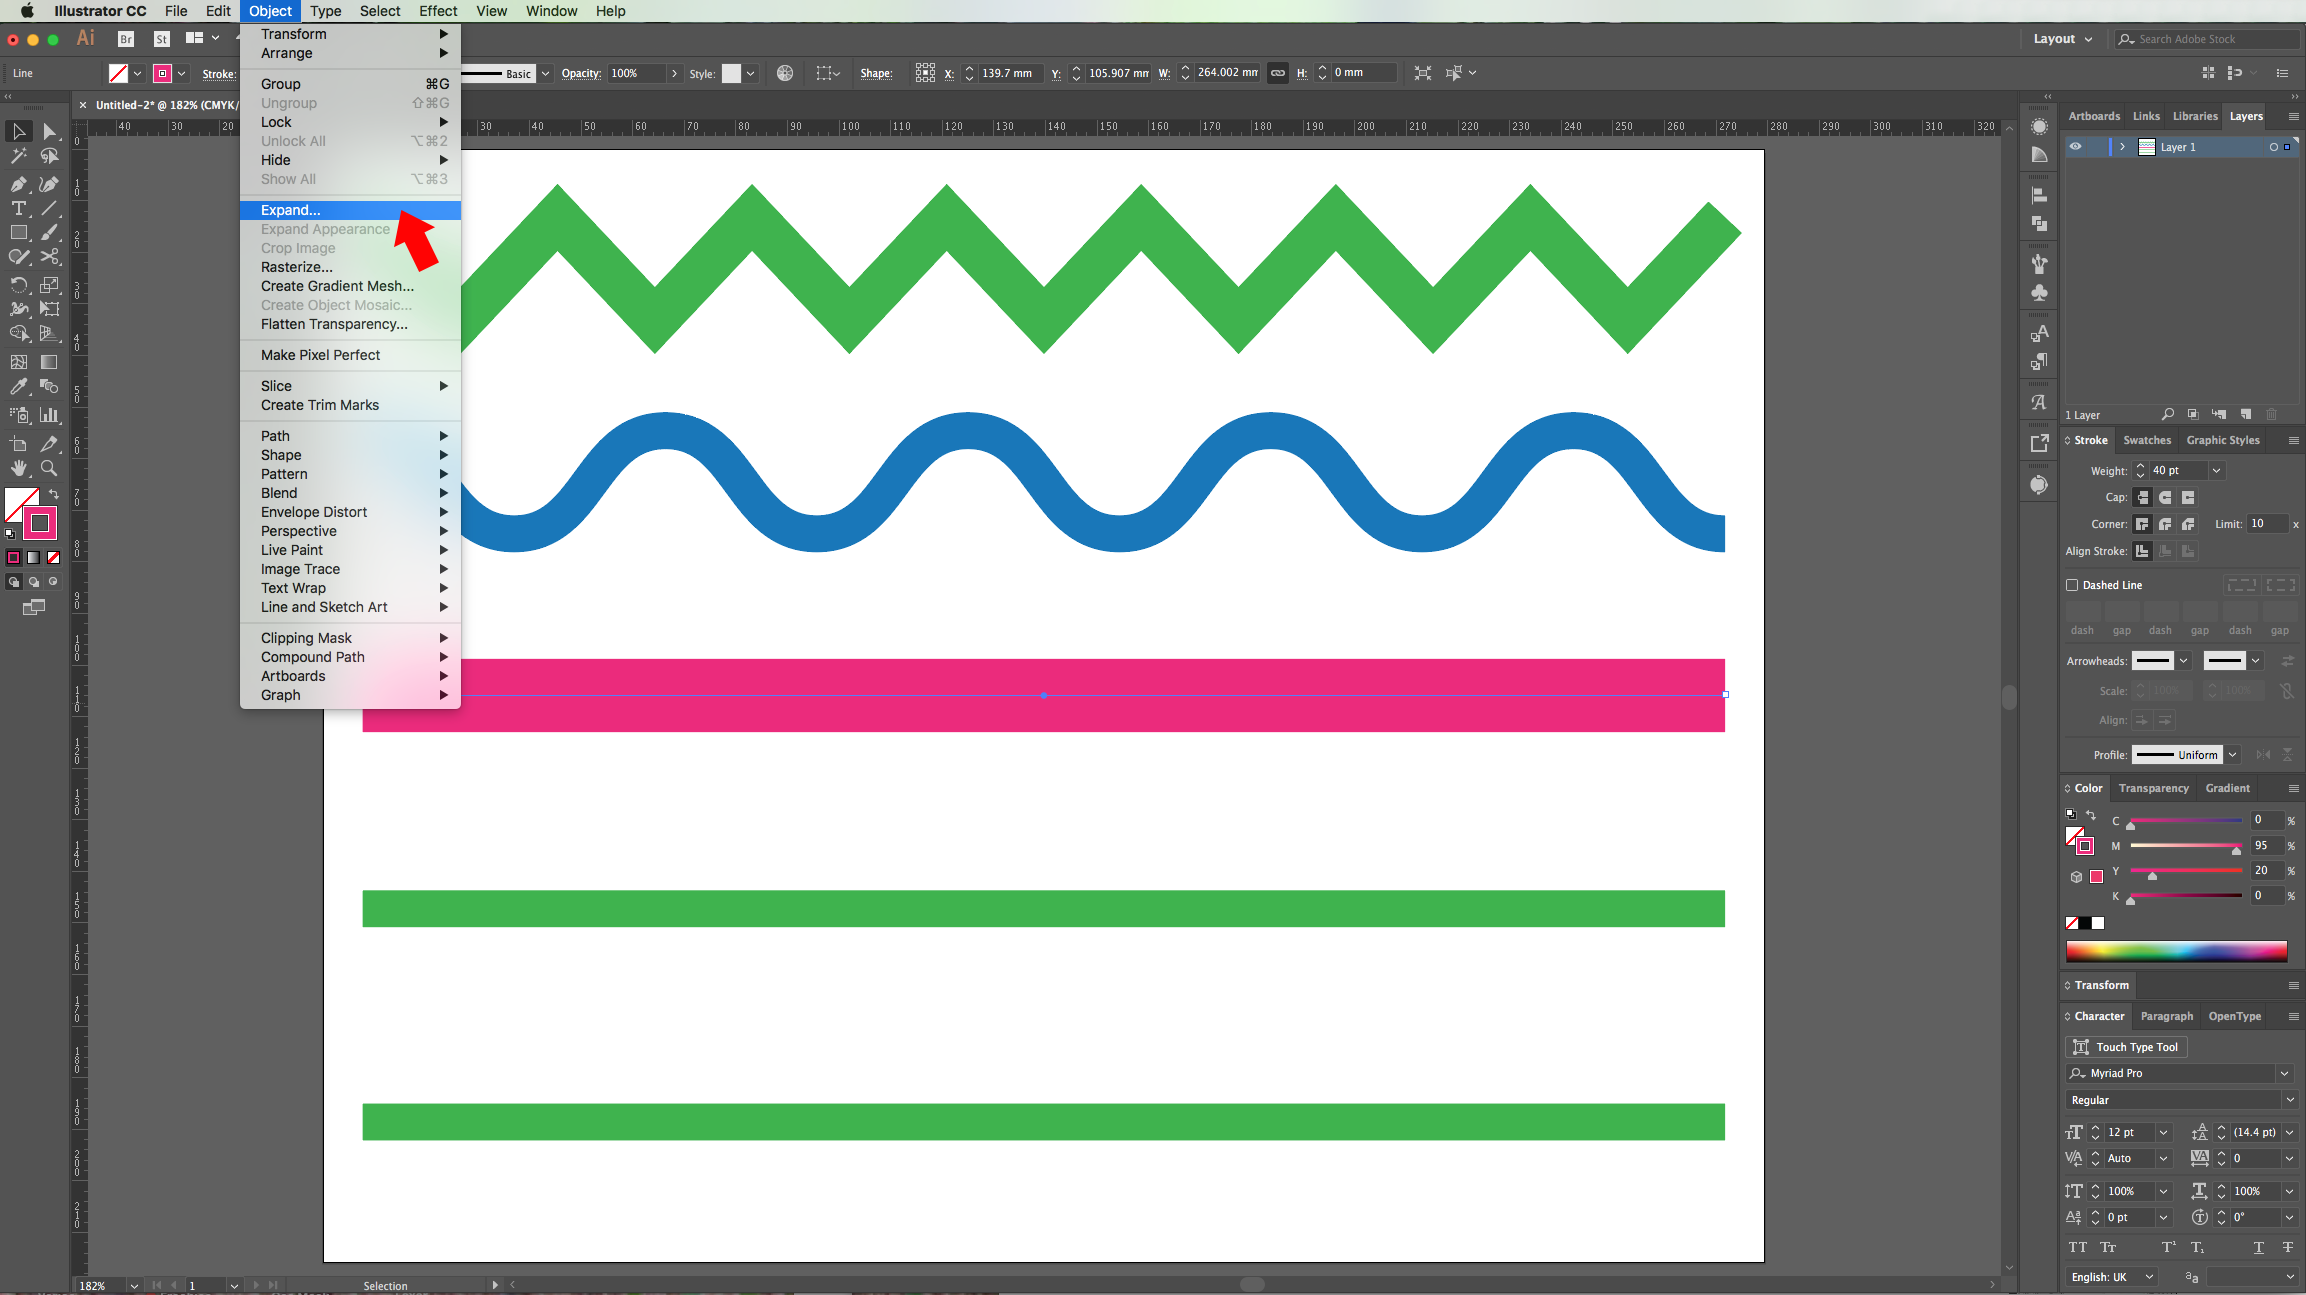
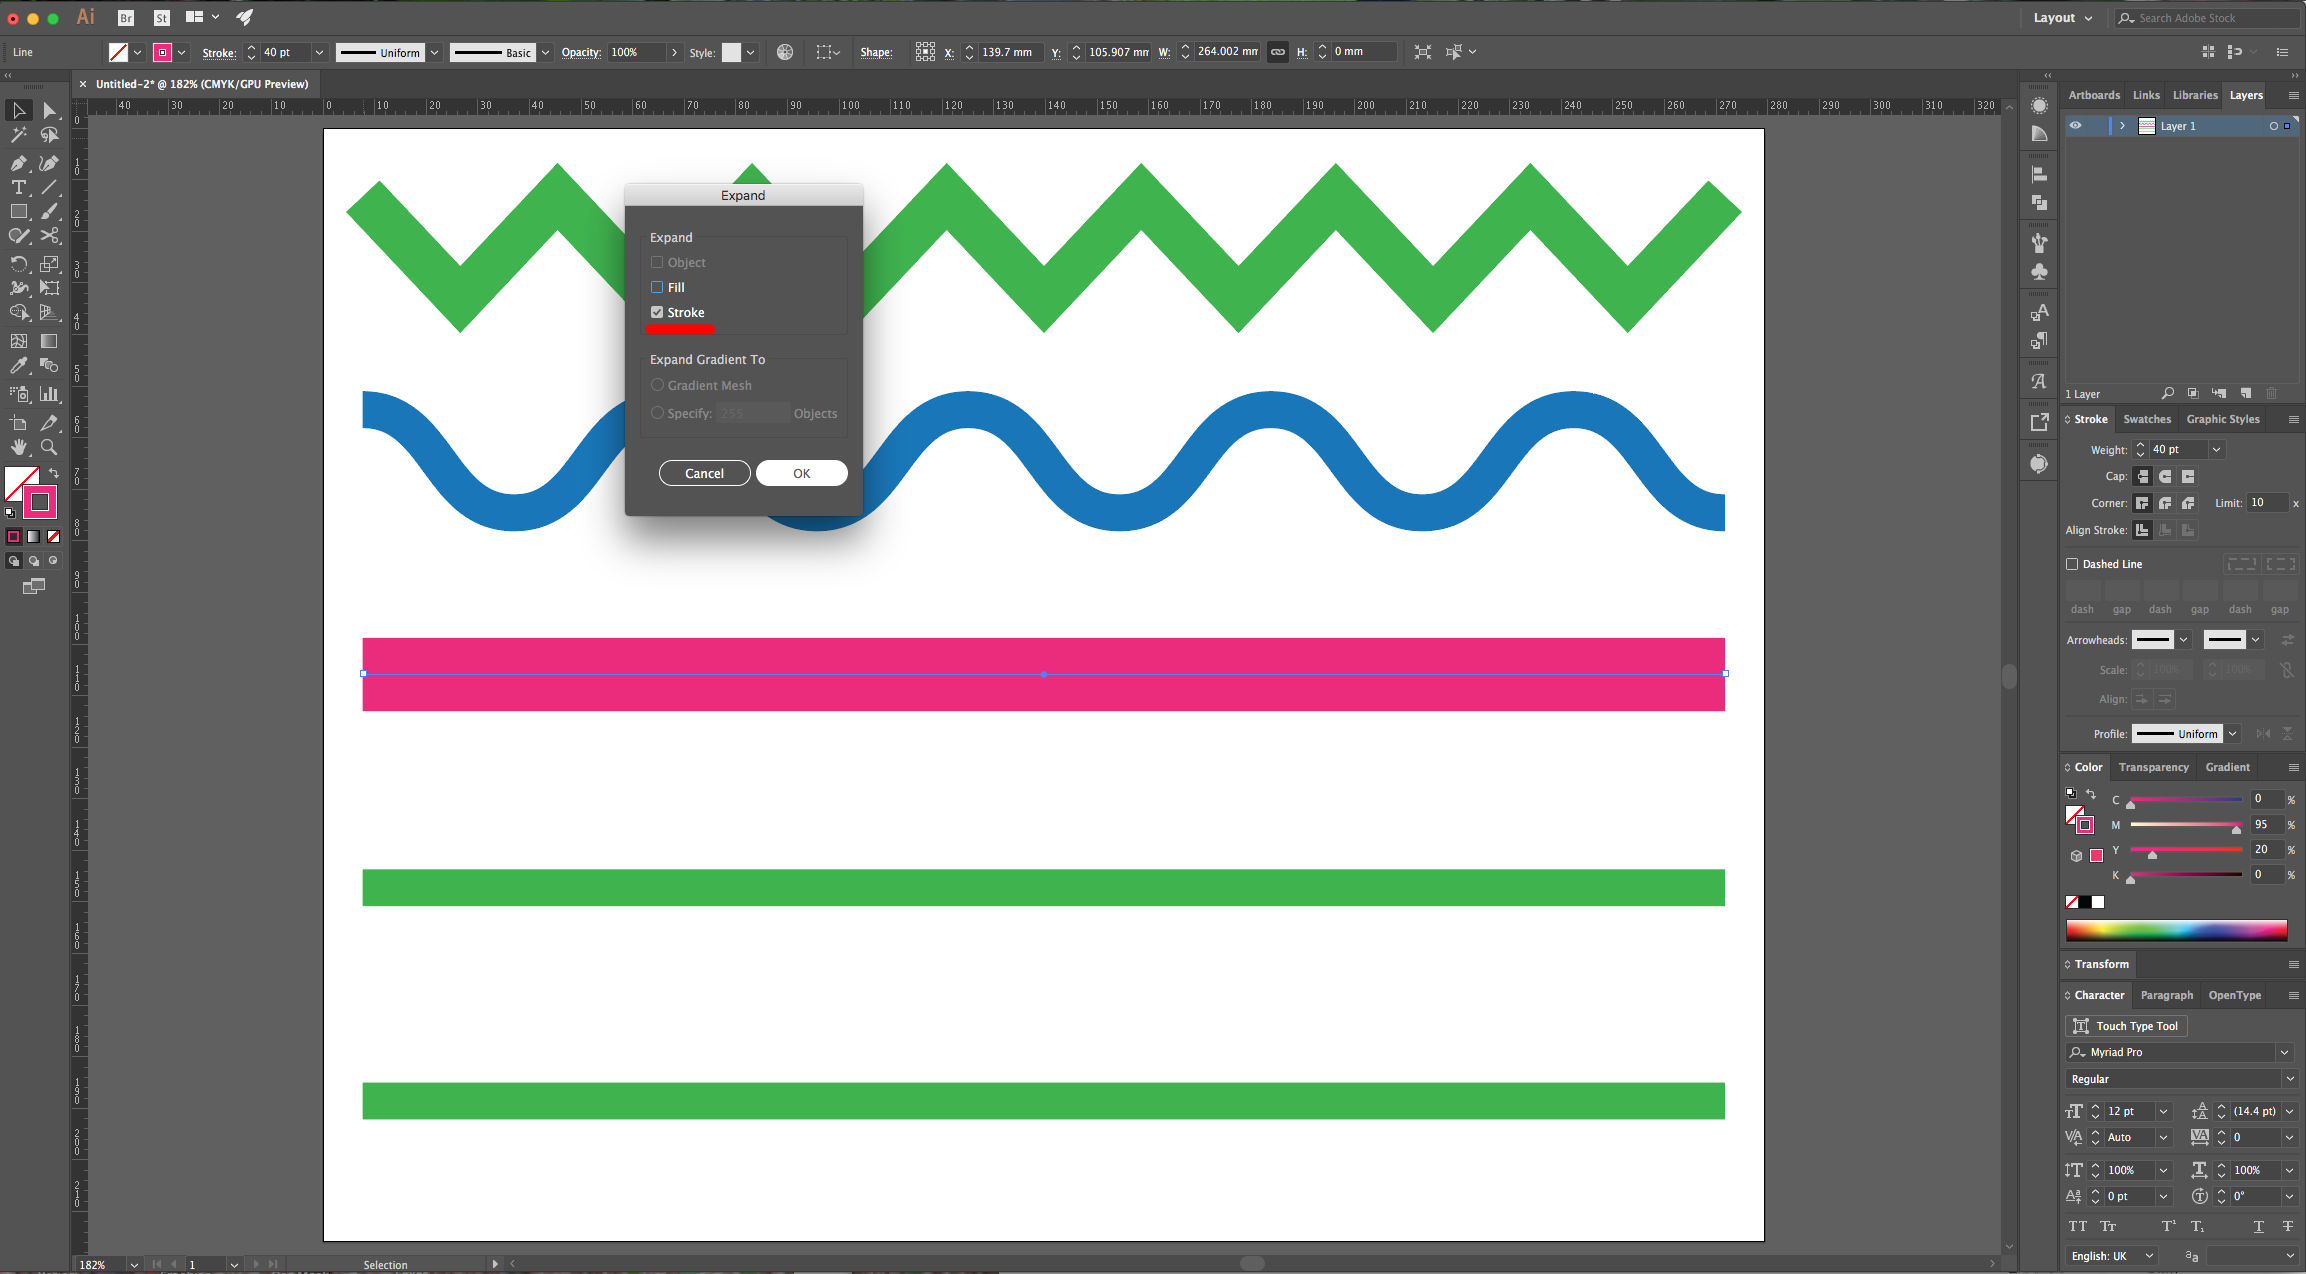
5 - In case you would like to apply a “Pattern” as “Fill” doing the “Zig Zag” Effect will have unexpected results. For example, select another one of your lines, change the color and make it thicker (about 40 pt). Go to Object > Expand, and make sure the “Stroke” box is checked.
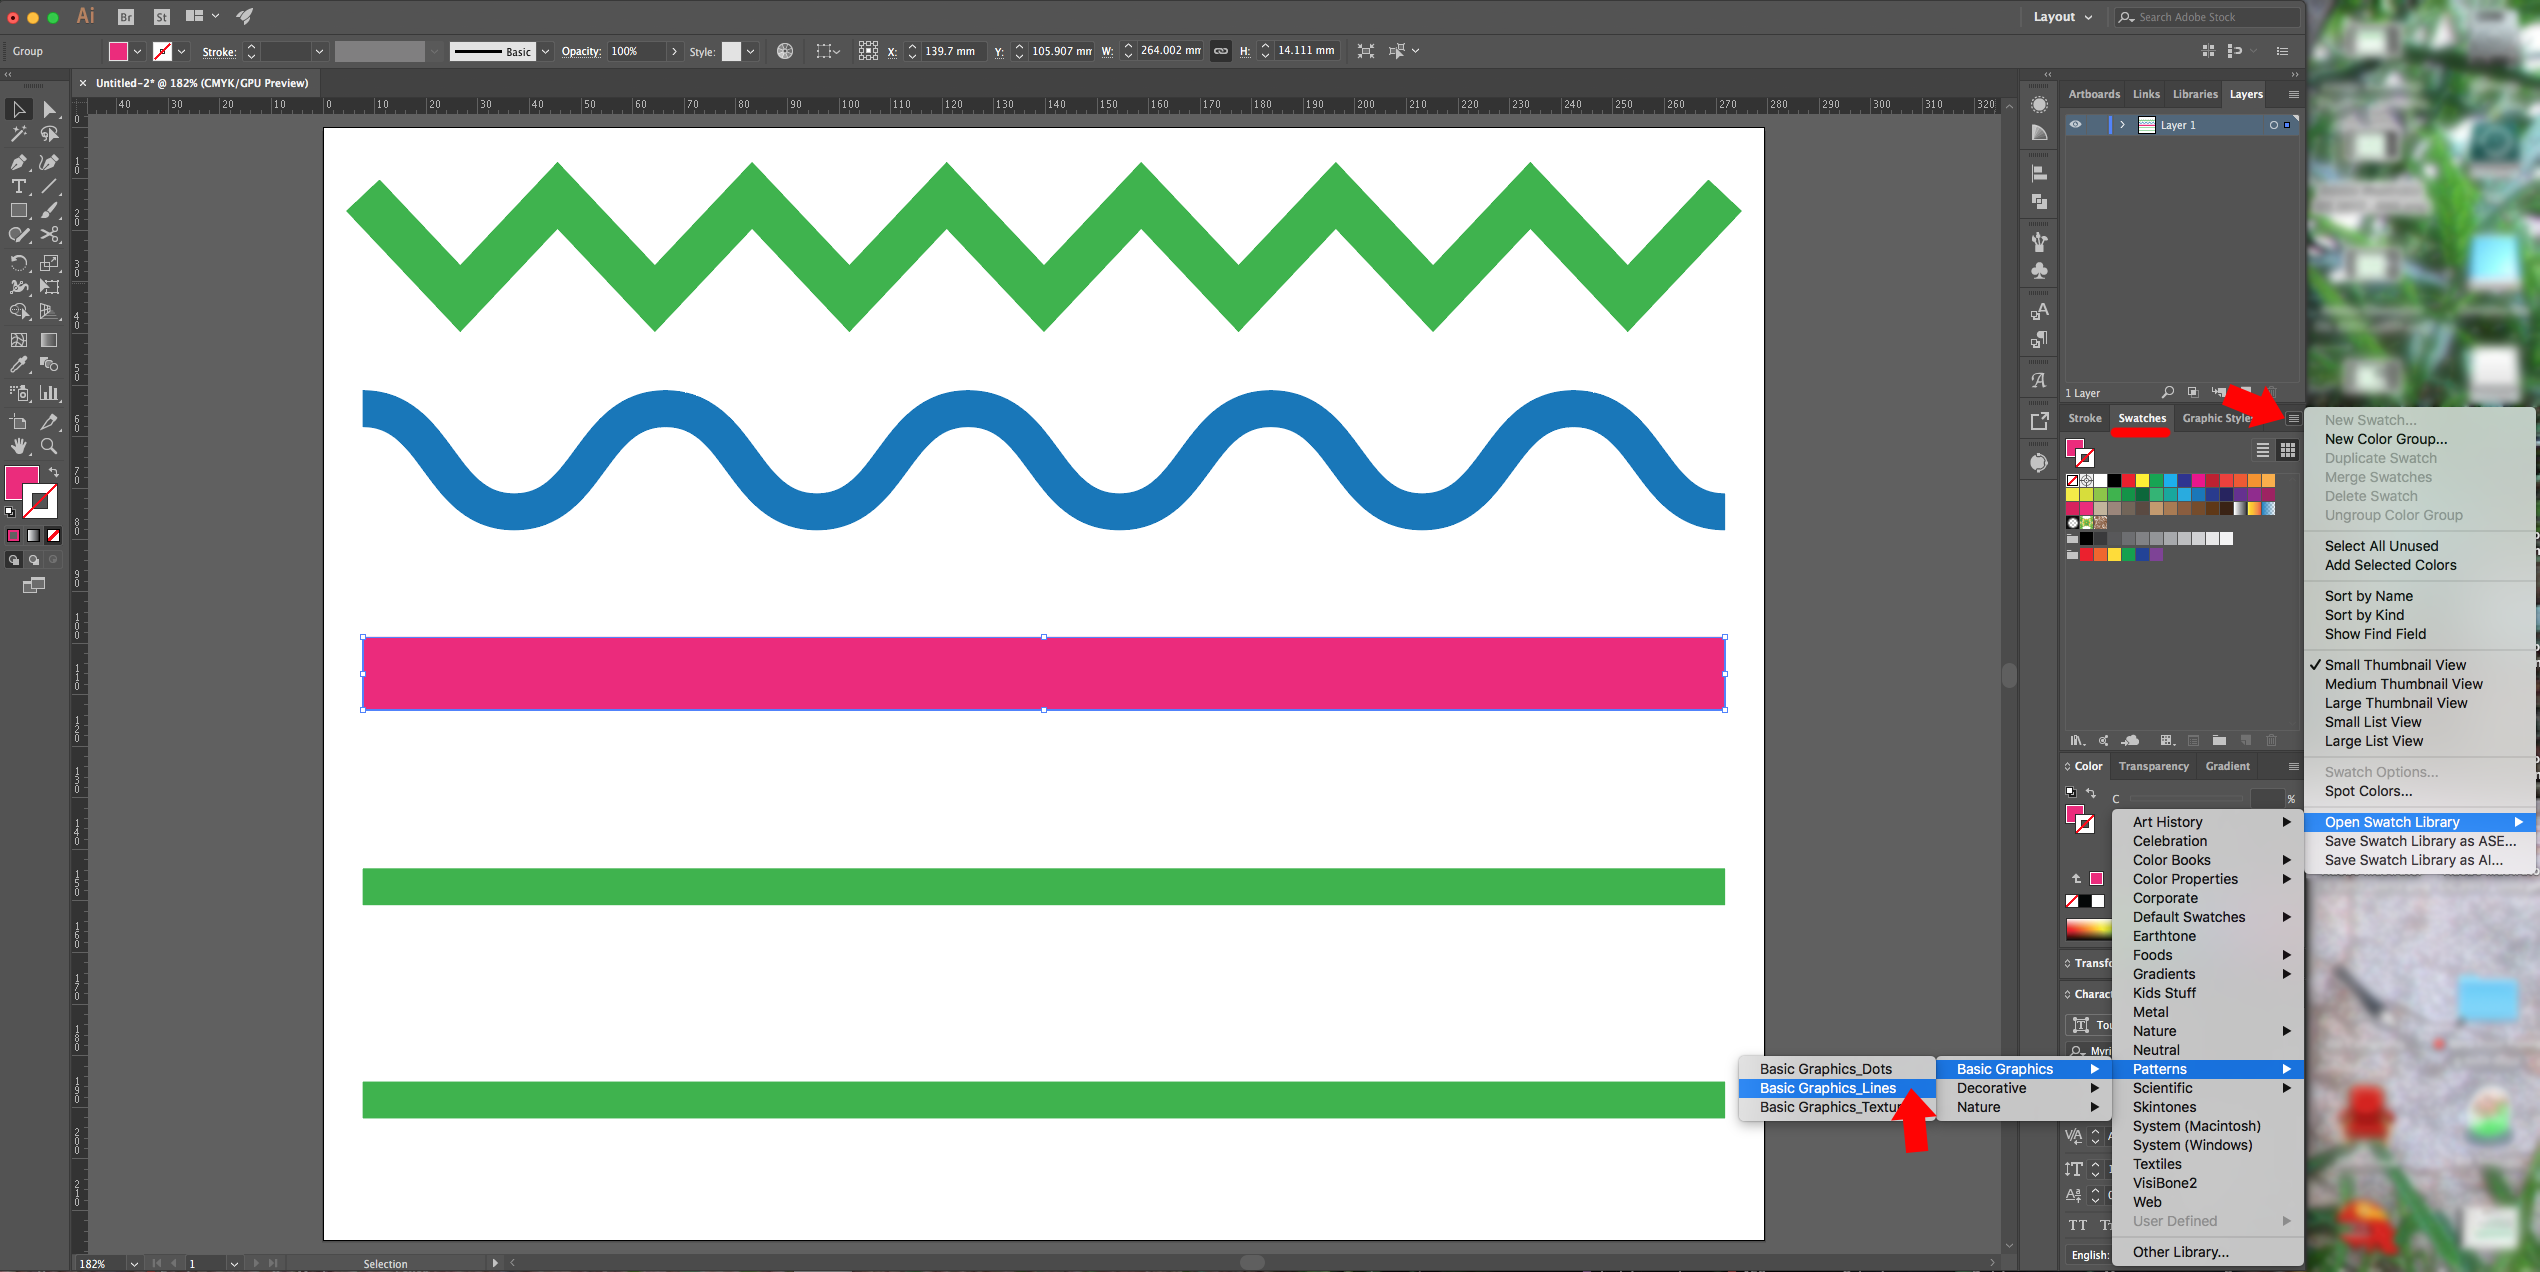
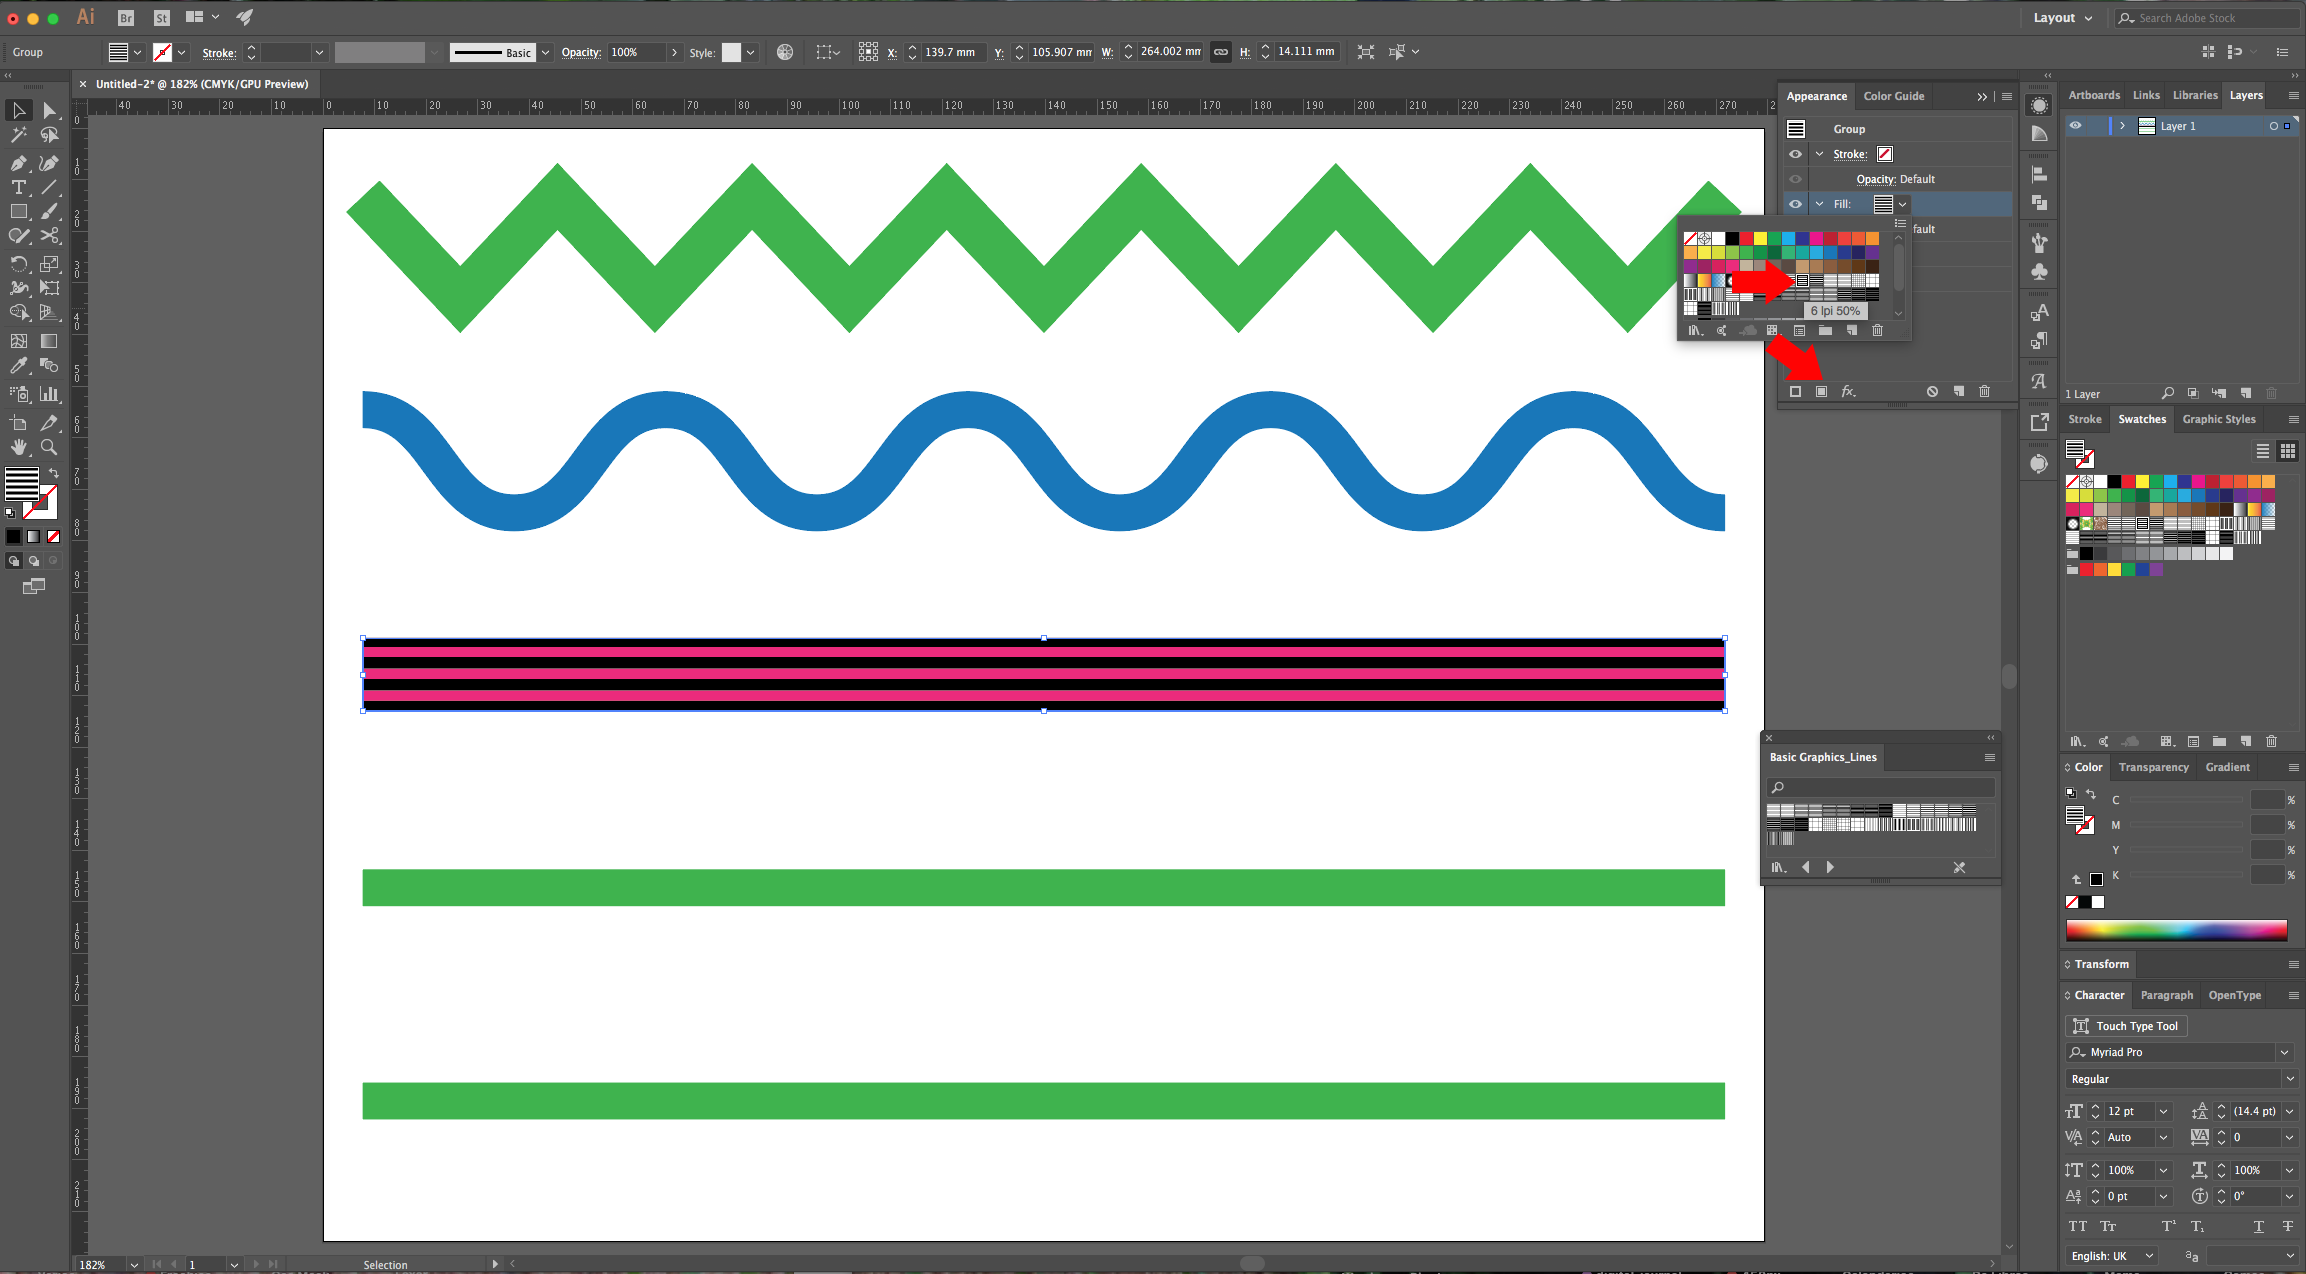
6 - Then go to the “Swatches Panel”, click on the Menu button in the Top-Right corner and navigate to Open Swatch Library > Patterns > Basic Graphics > Basic Graphics _Lines to open a floating panel window. In the Appearance Panel” click on the “Add New Fill” button and choose one of the “Patterns” (they should appear in the “Swatches Panel”). Now, try to apply the “Zig Zag” Effect and you will notice it doesn’t affect the “Pattern” Fill.

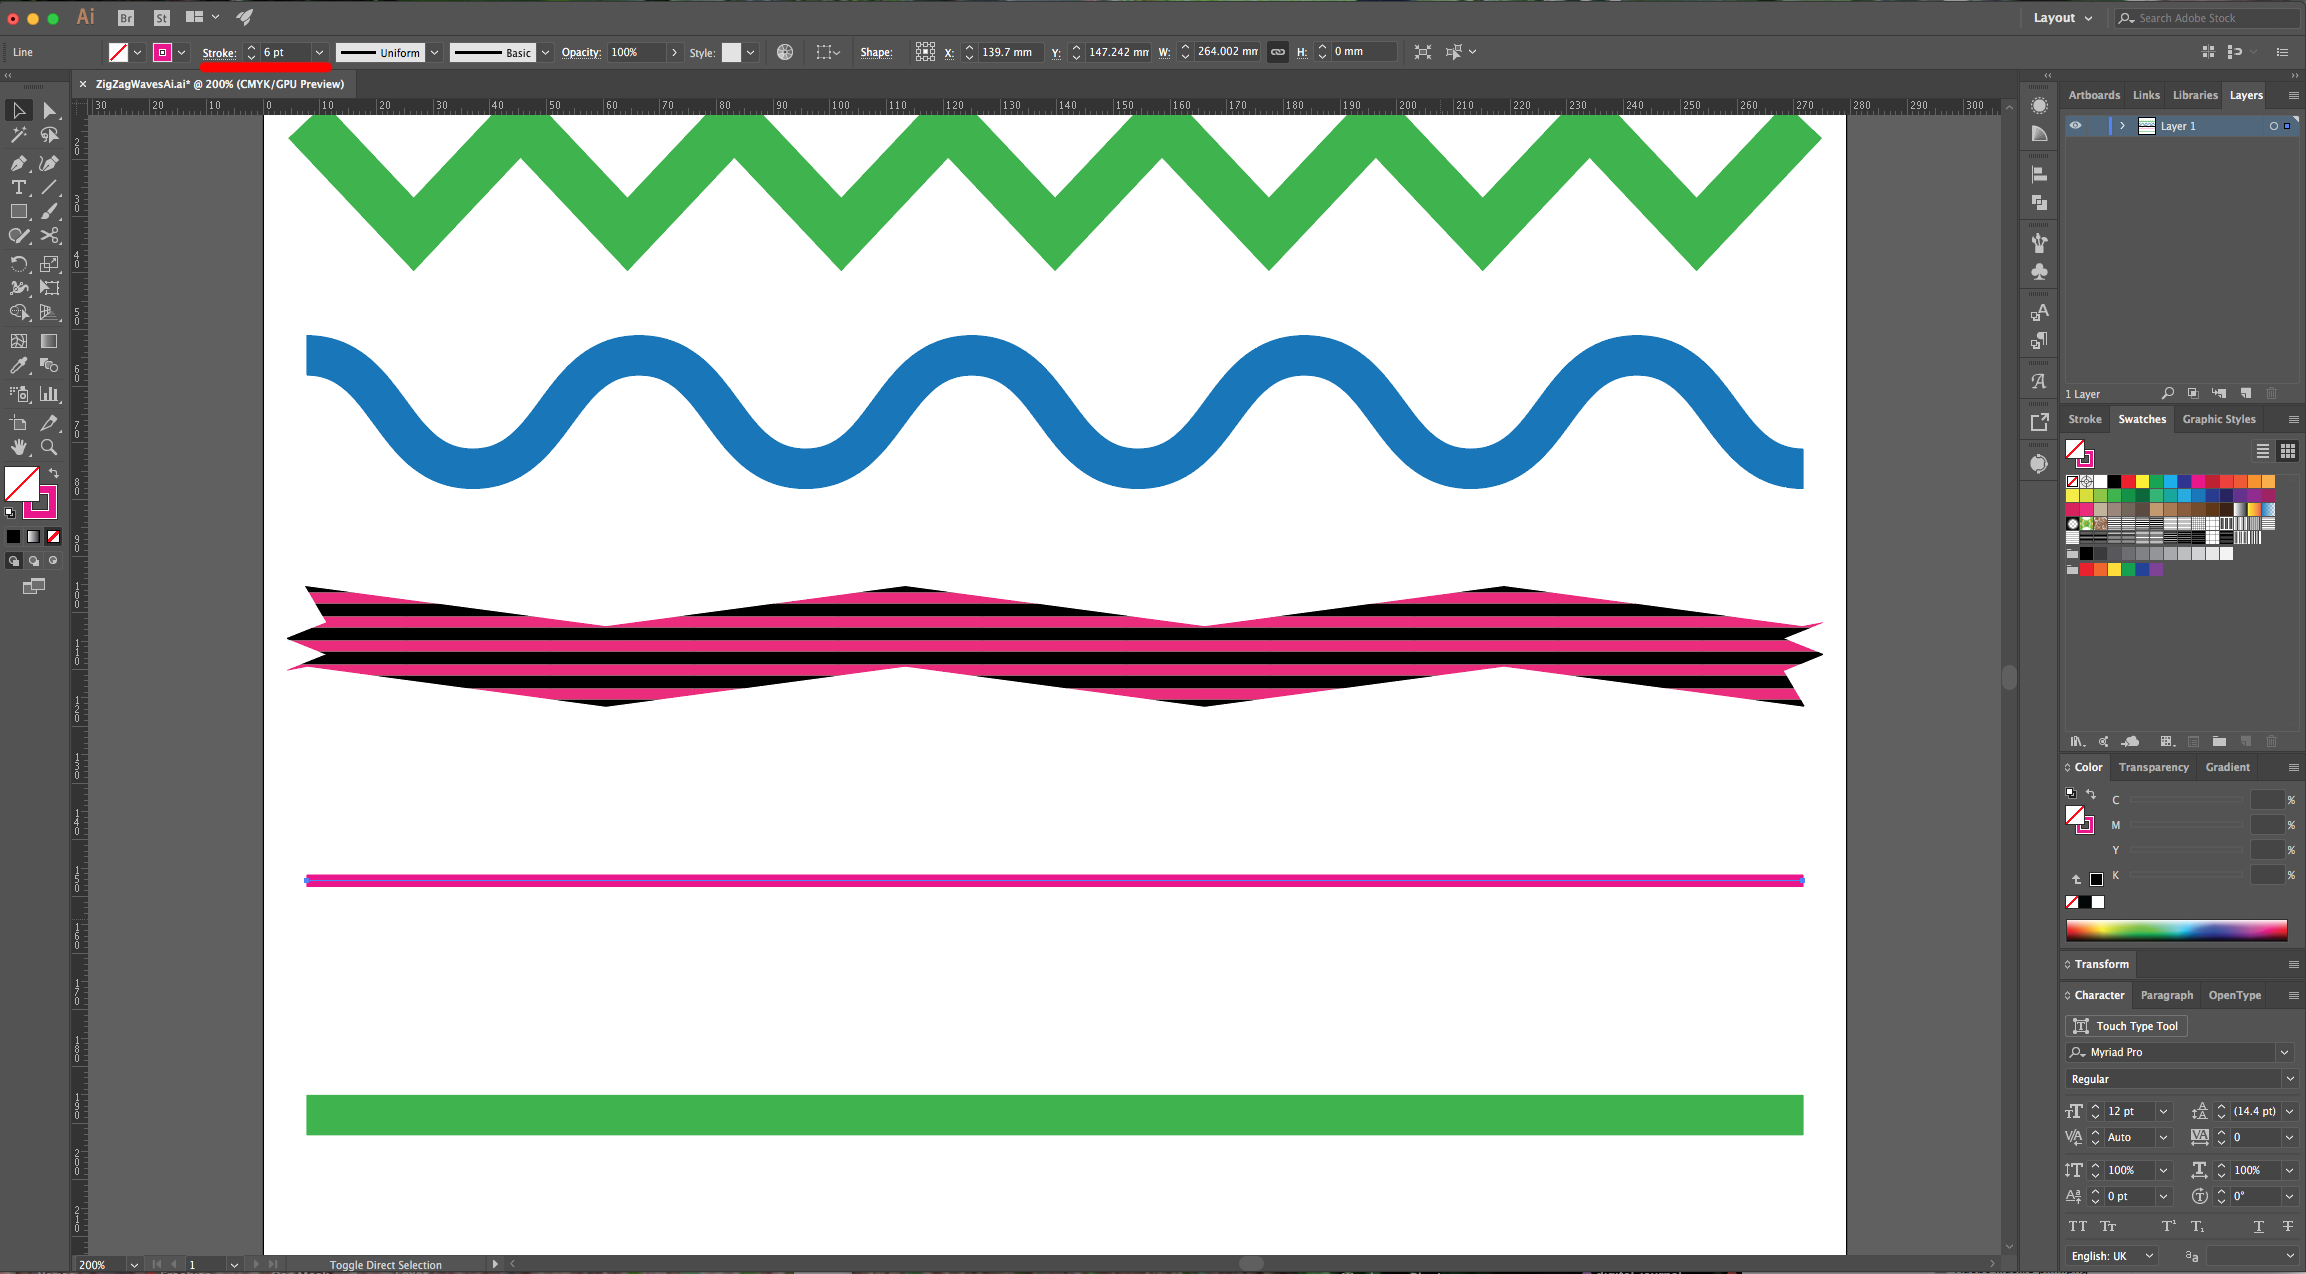
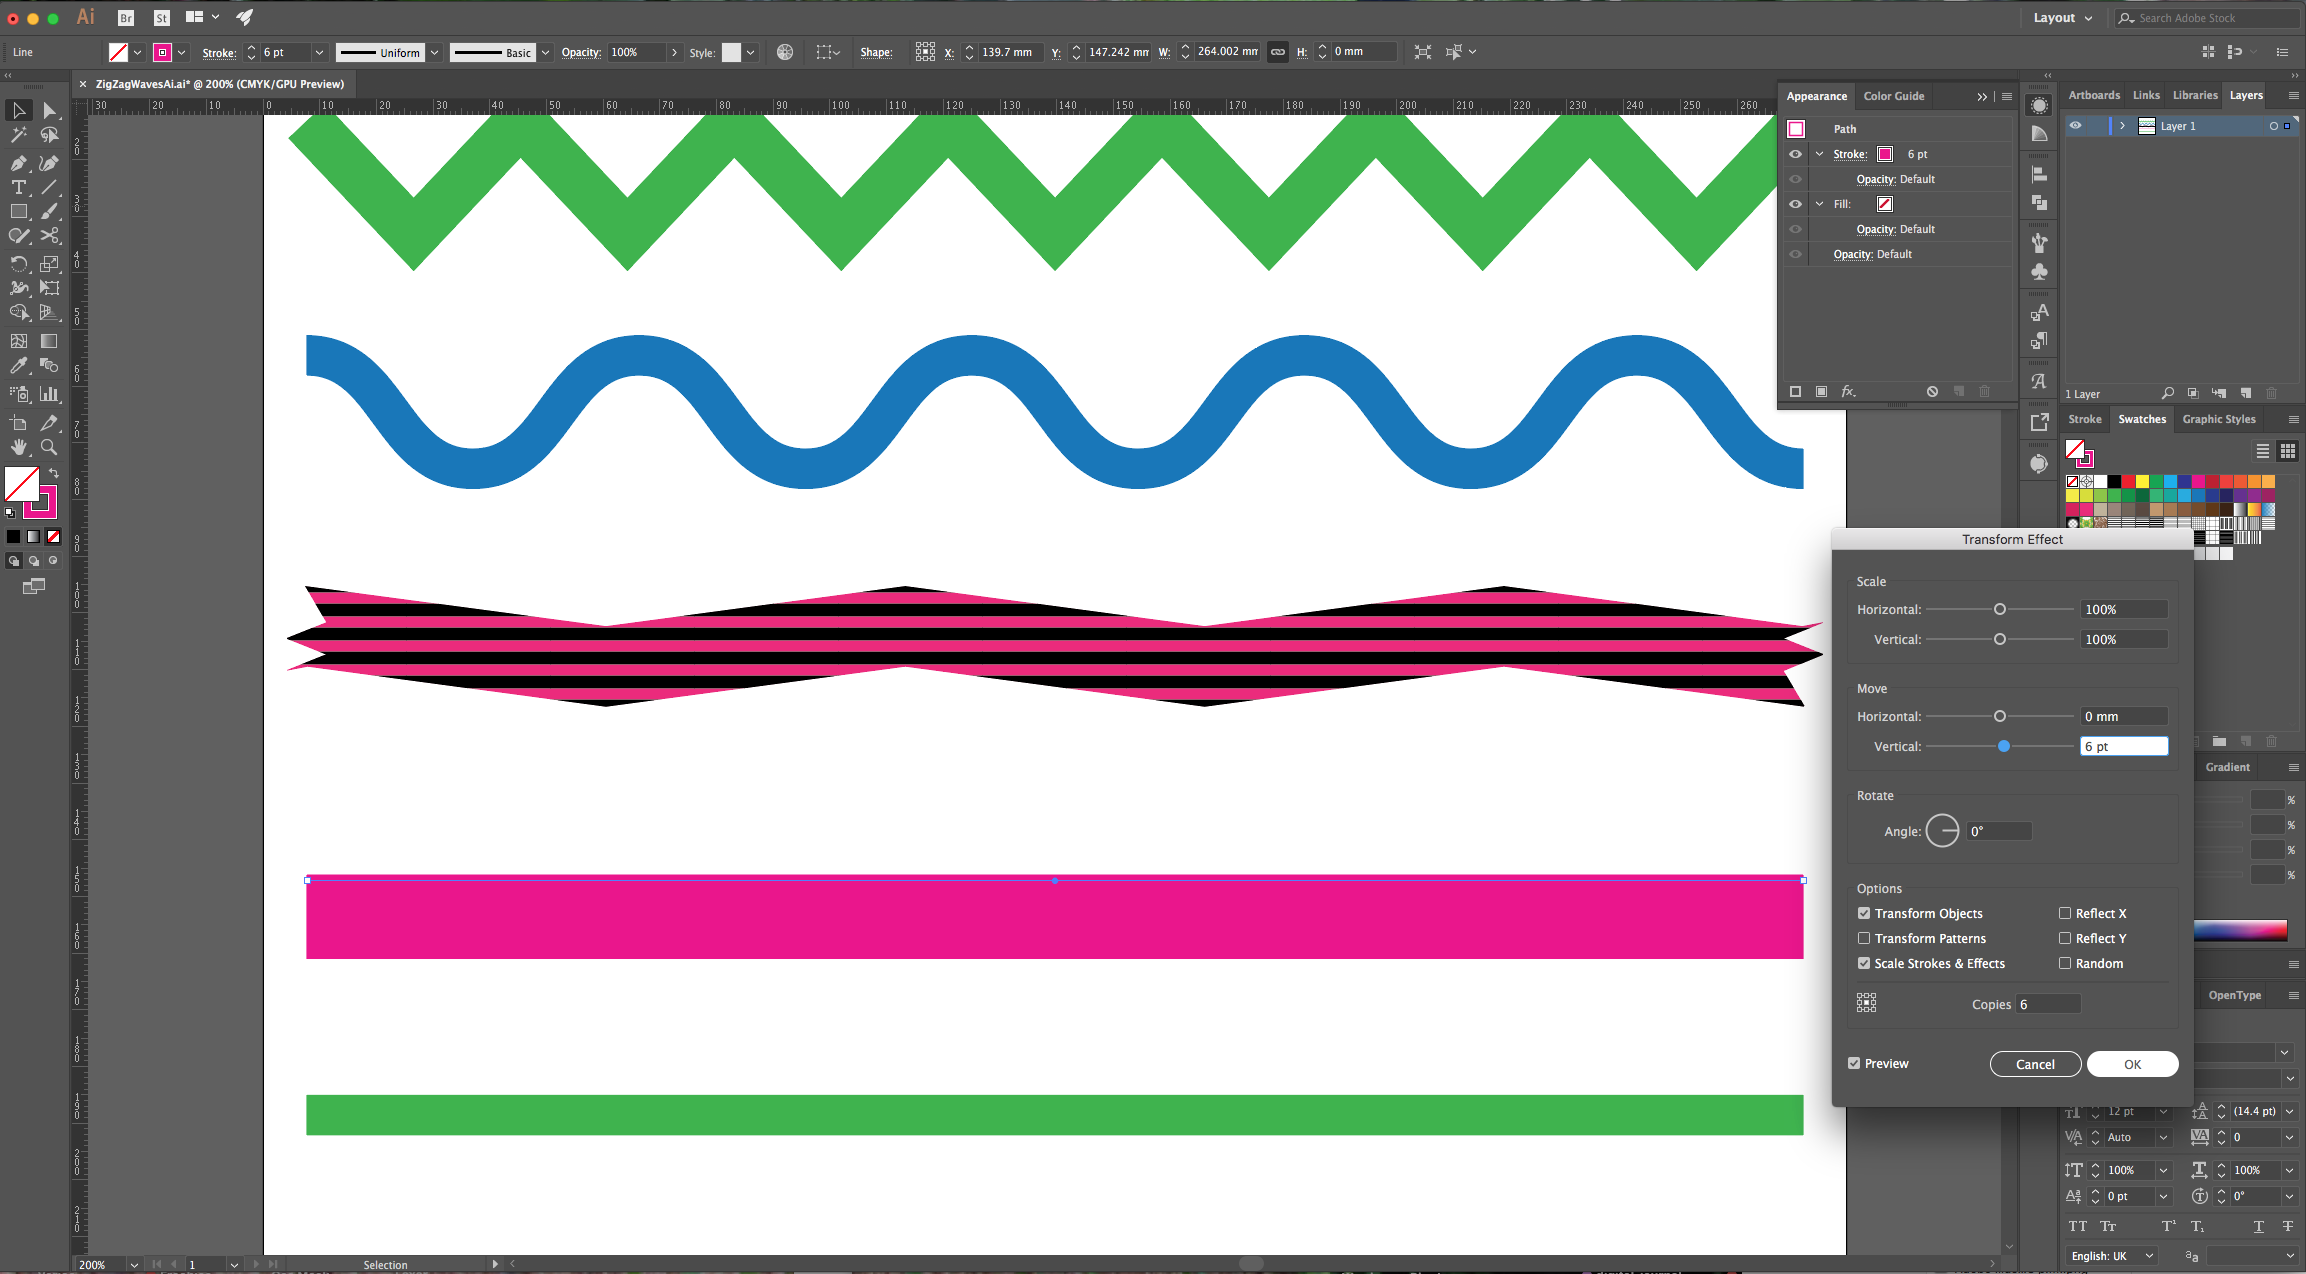
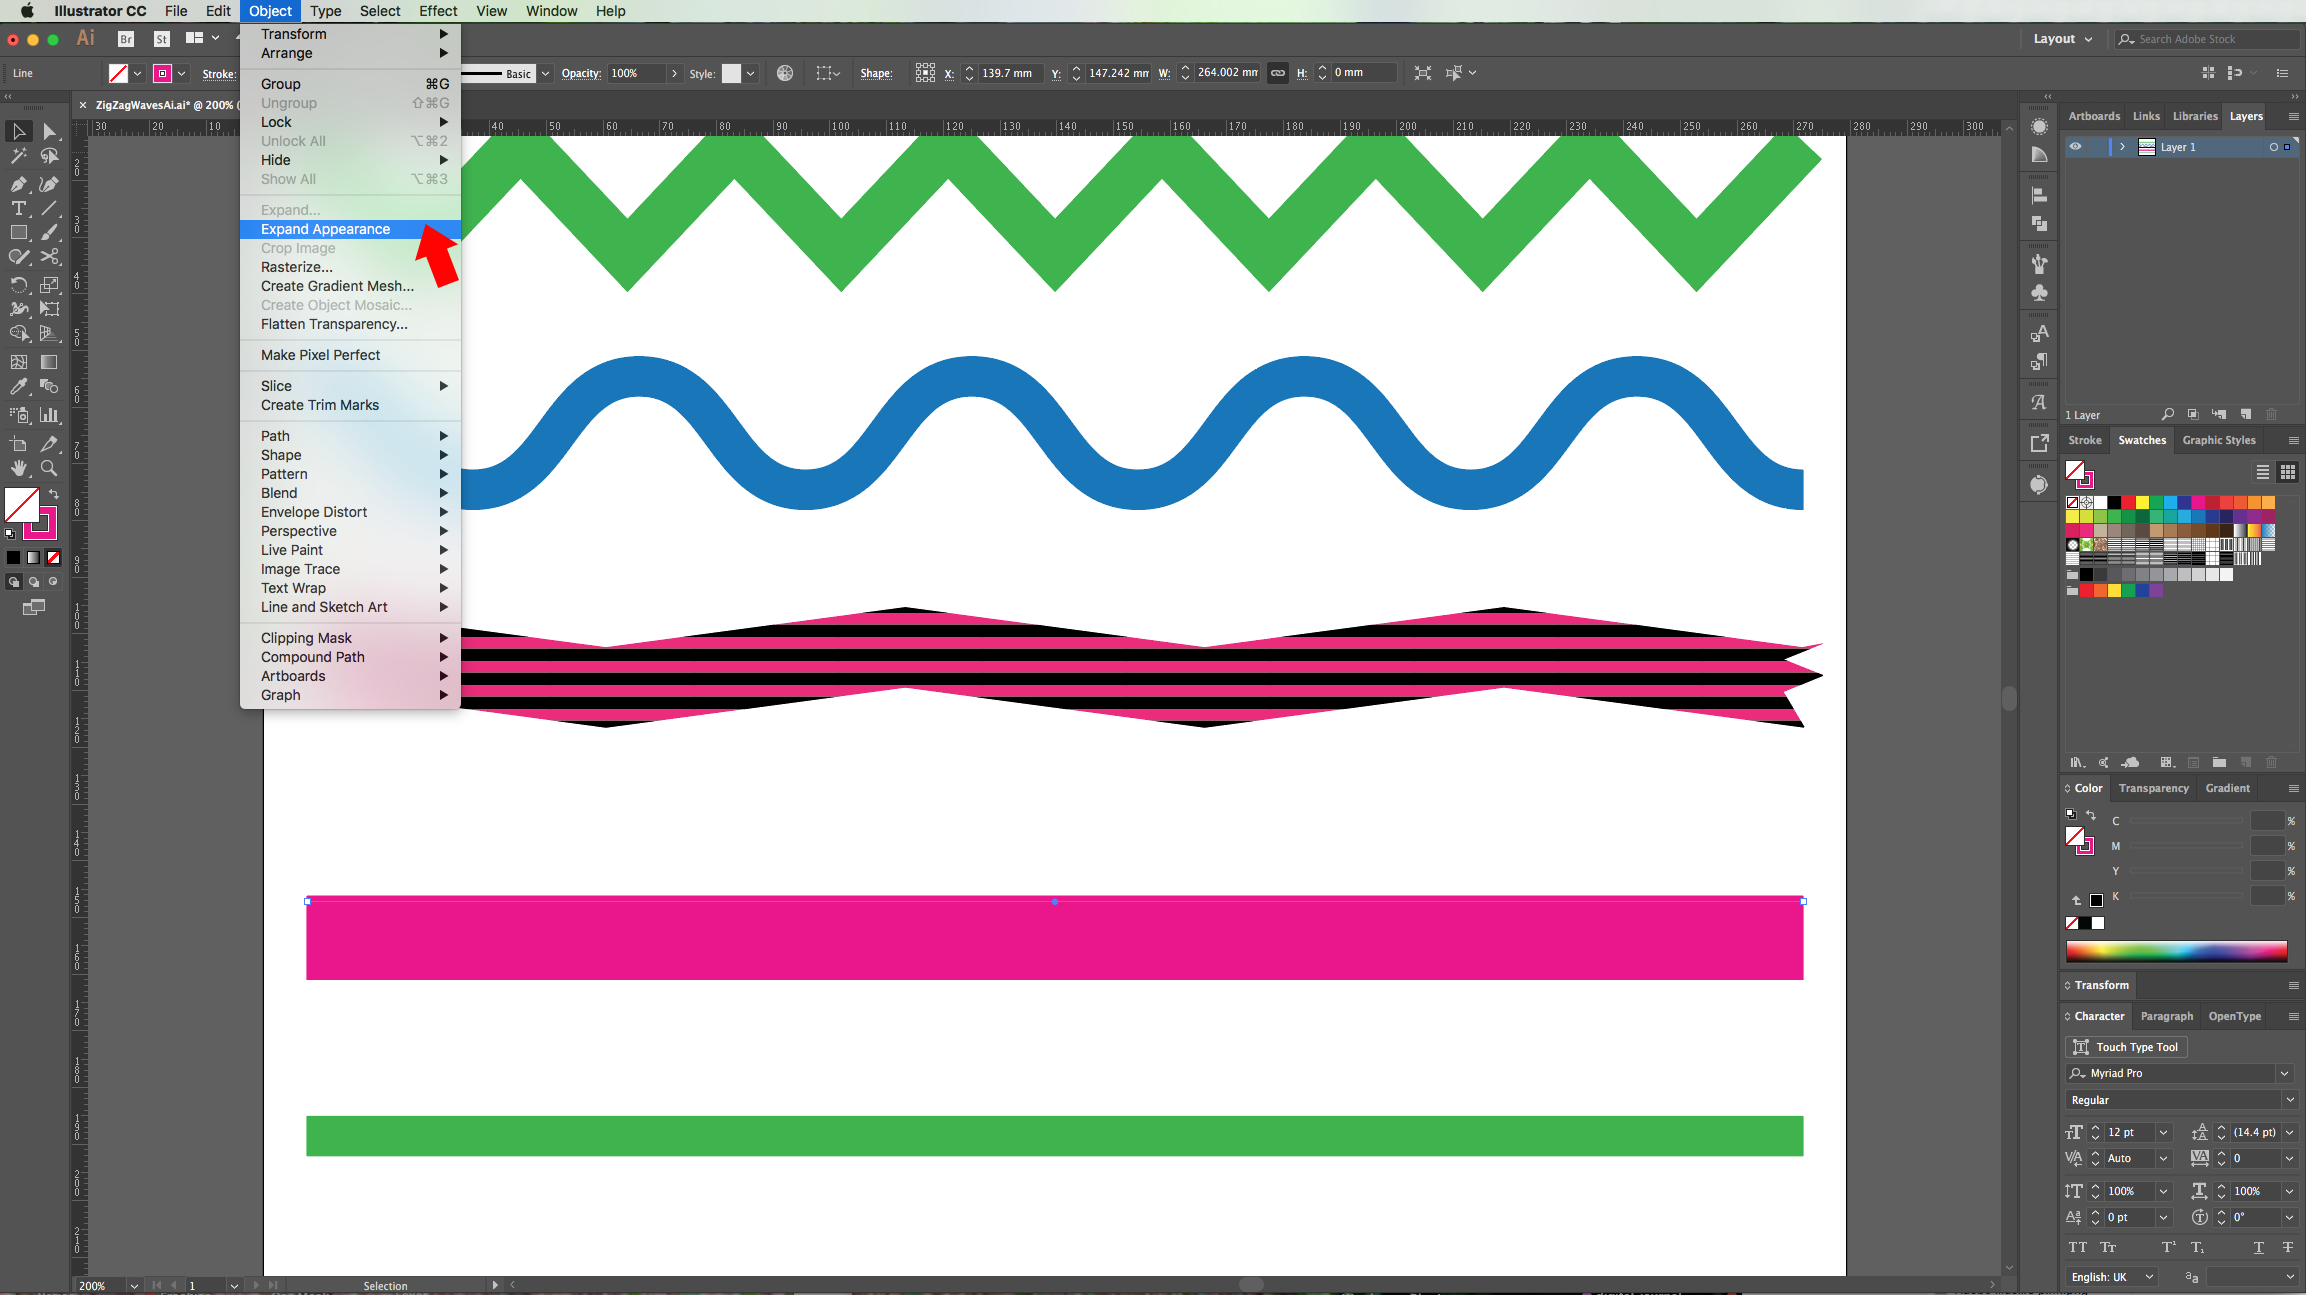
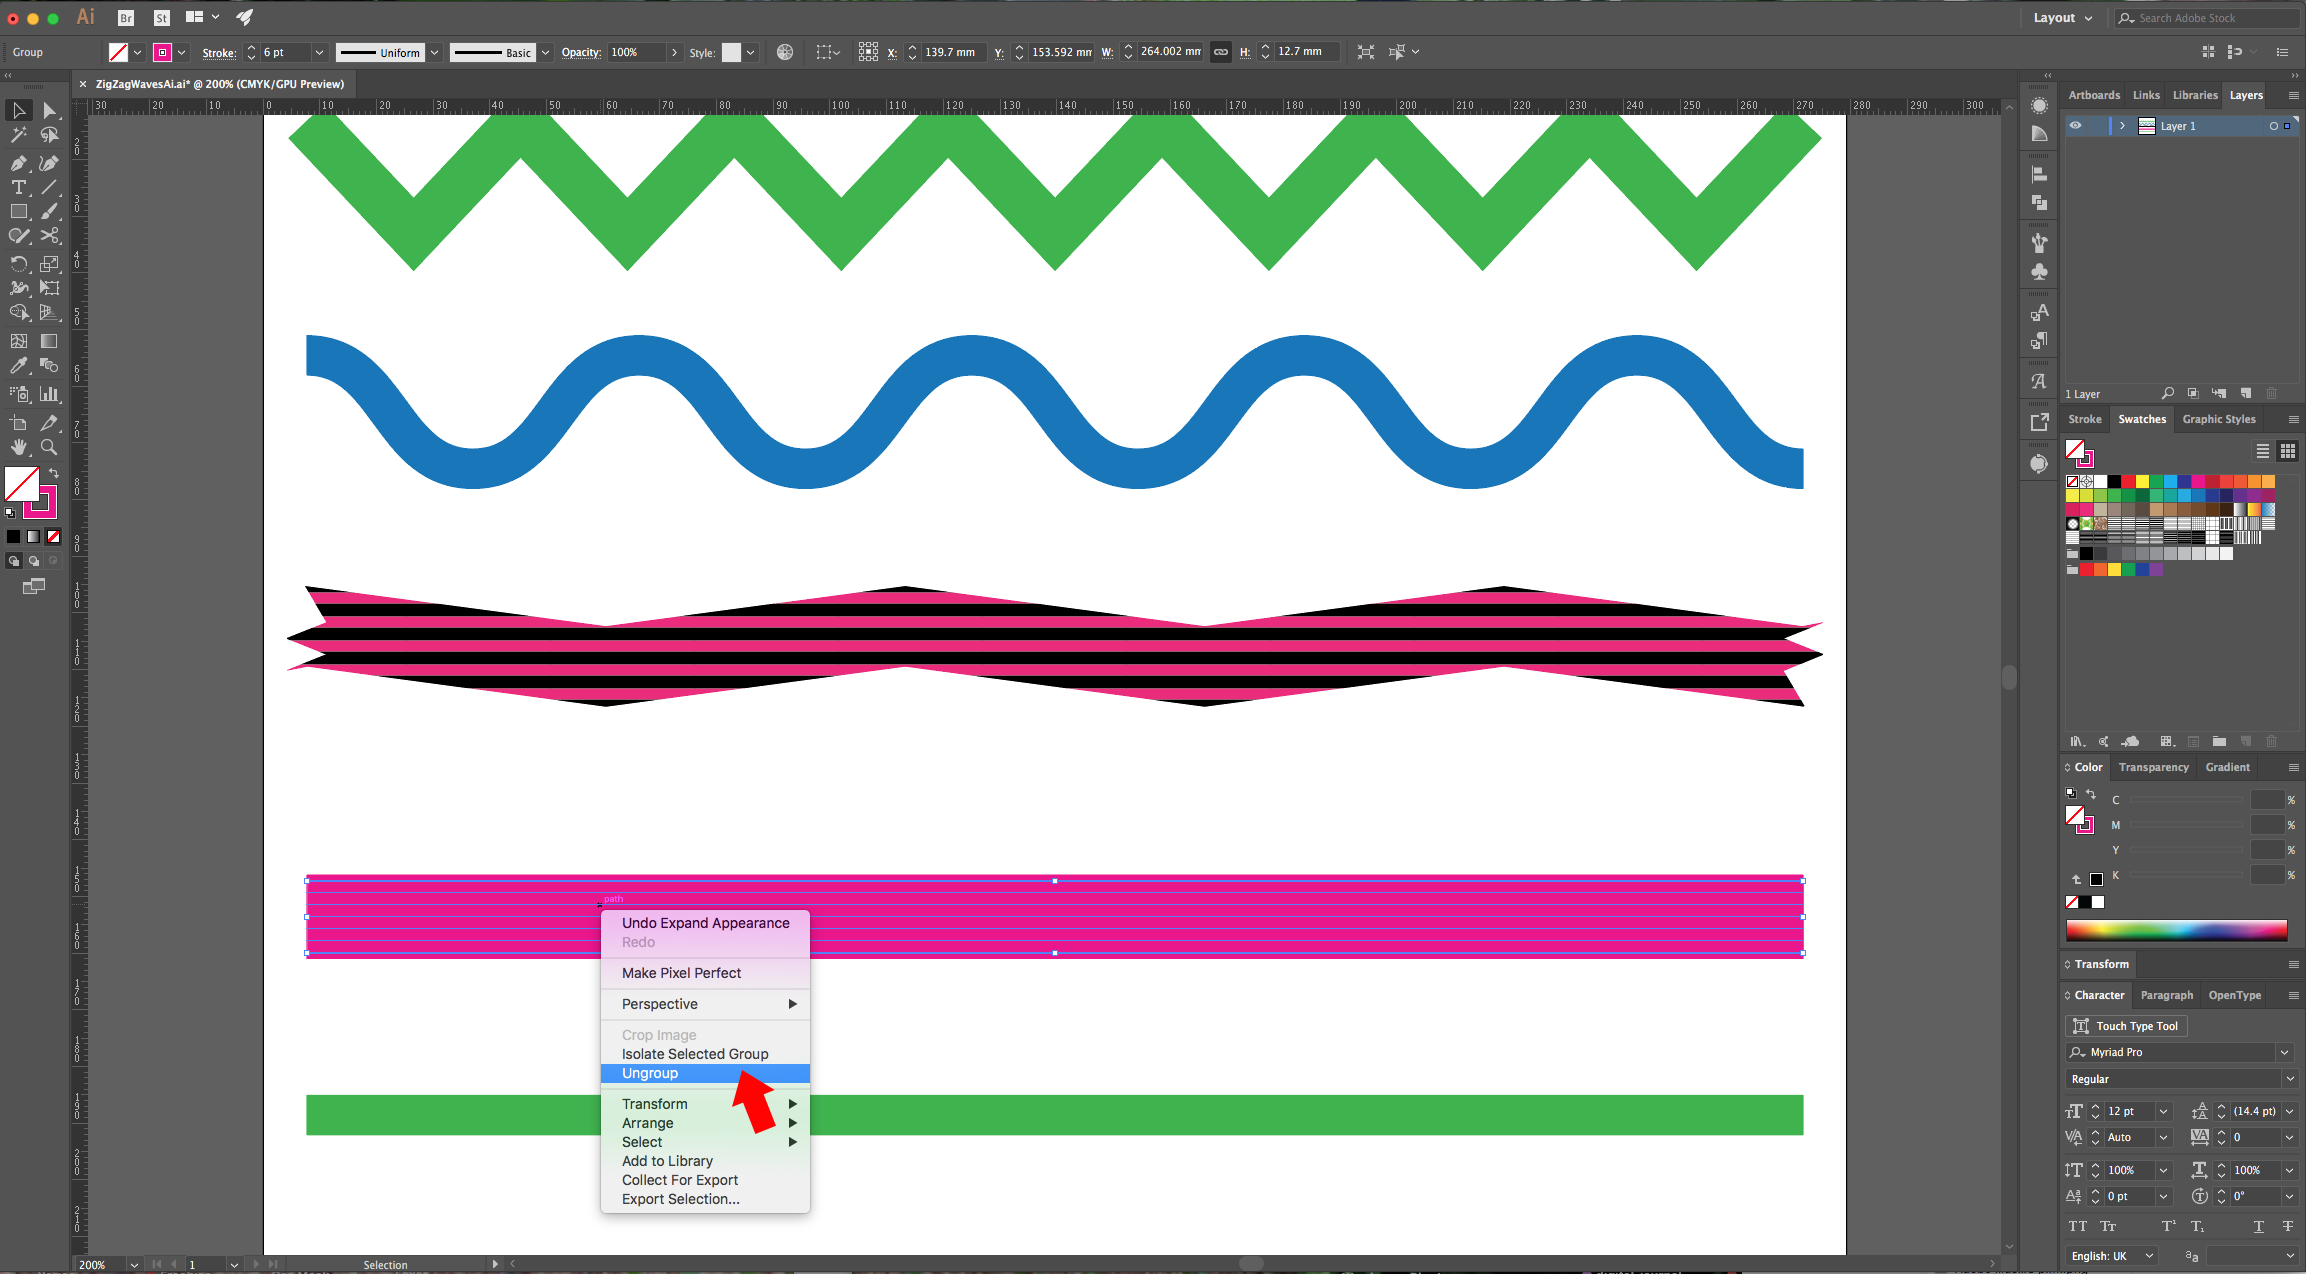
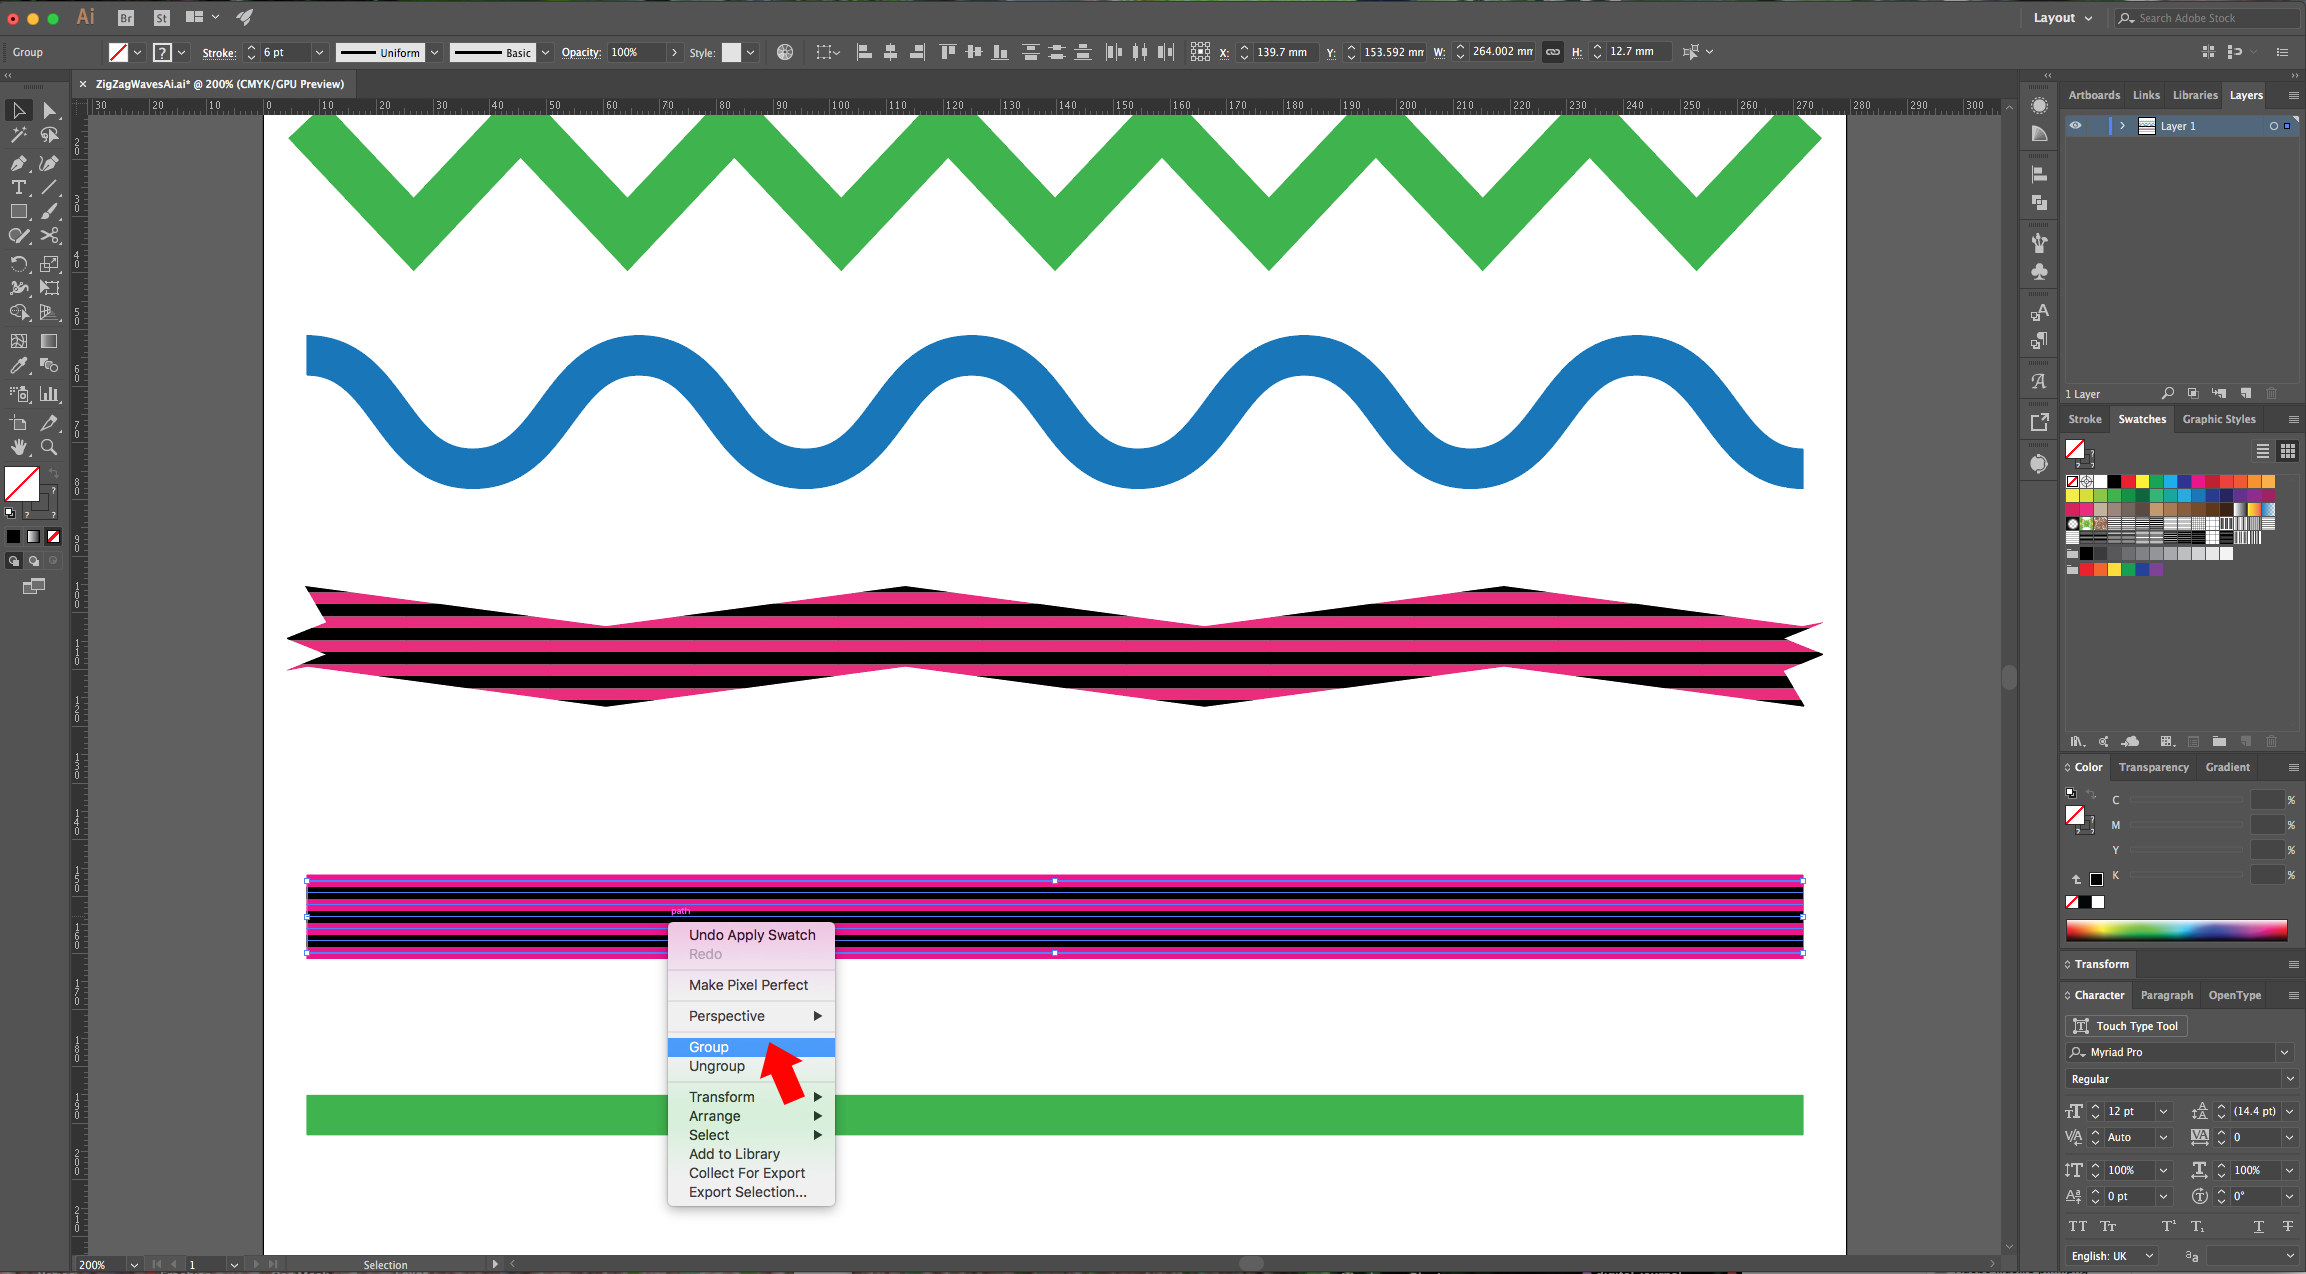
7 - To apply the effect to the “Pattern” Fill we will use a workaround. Choose one of your lines, give it a “Stroke Weight” of about 6 pt. In the “Appearance Panel” click on the “Effects” Menu and go to “Distort & Transform > Transform. Use a “Vertical Move” value of 6 pt (the same value used for the “Stroke Weight”) and make 6 “Copies”. Then, go to Object > Expand Appearance, right-click on top of your lines and choose “Ungroup”. Select the “Even” lines (second, fourth and sixth) and change their color (we used Black). You can “Group” them together again (Command/Control + G).
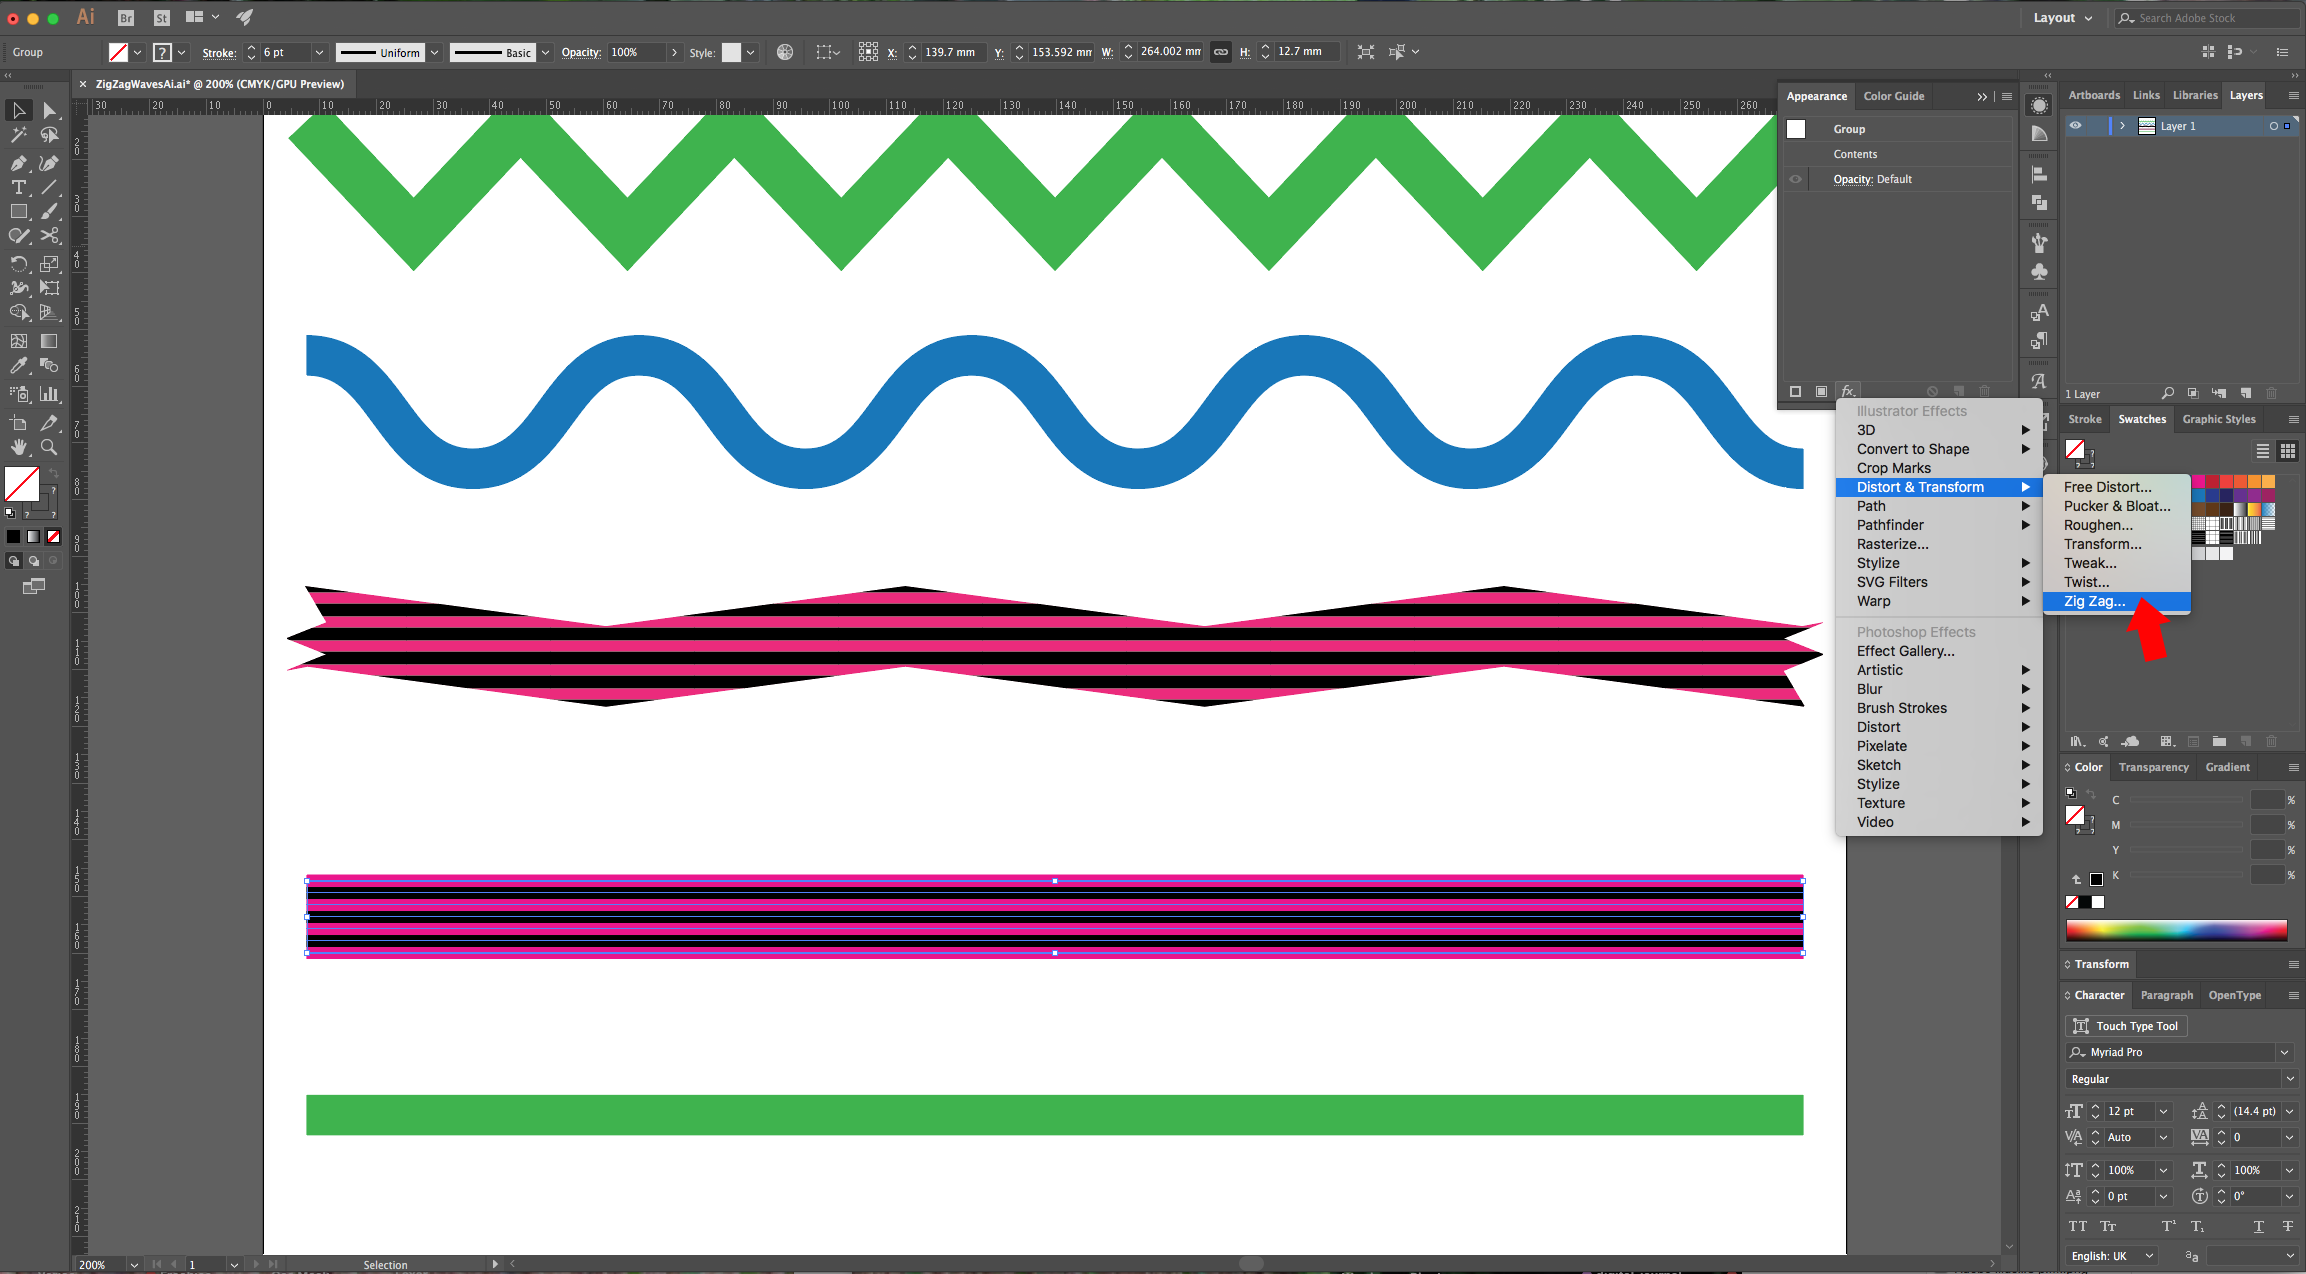
8 - Now, apply the “Zig Zag” Effect and check the result. Try it with the “Smooth” setting to check how the “Waves” look.
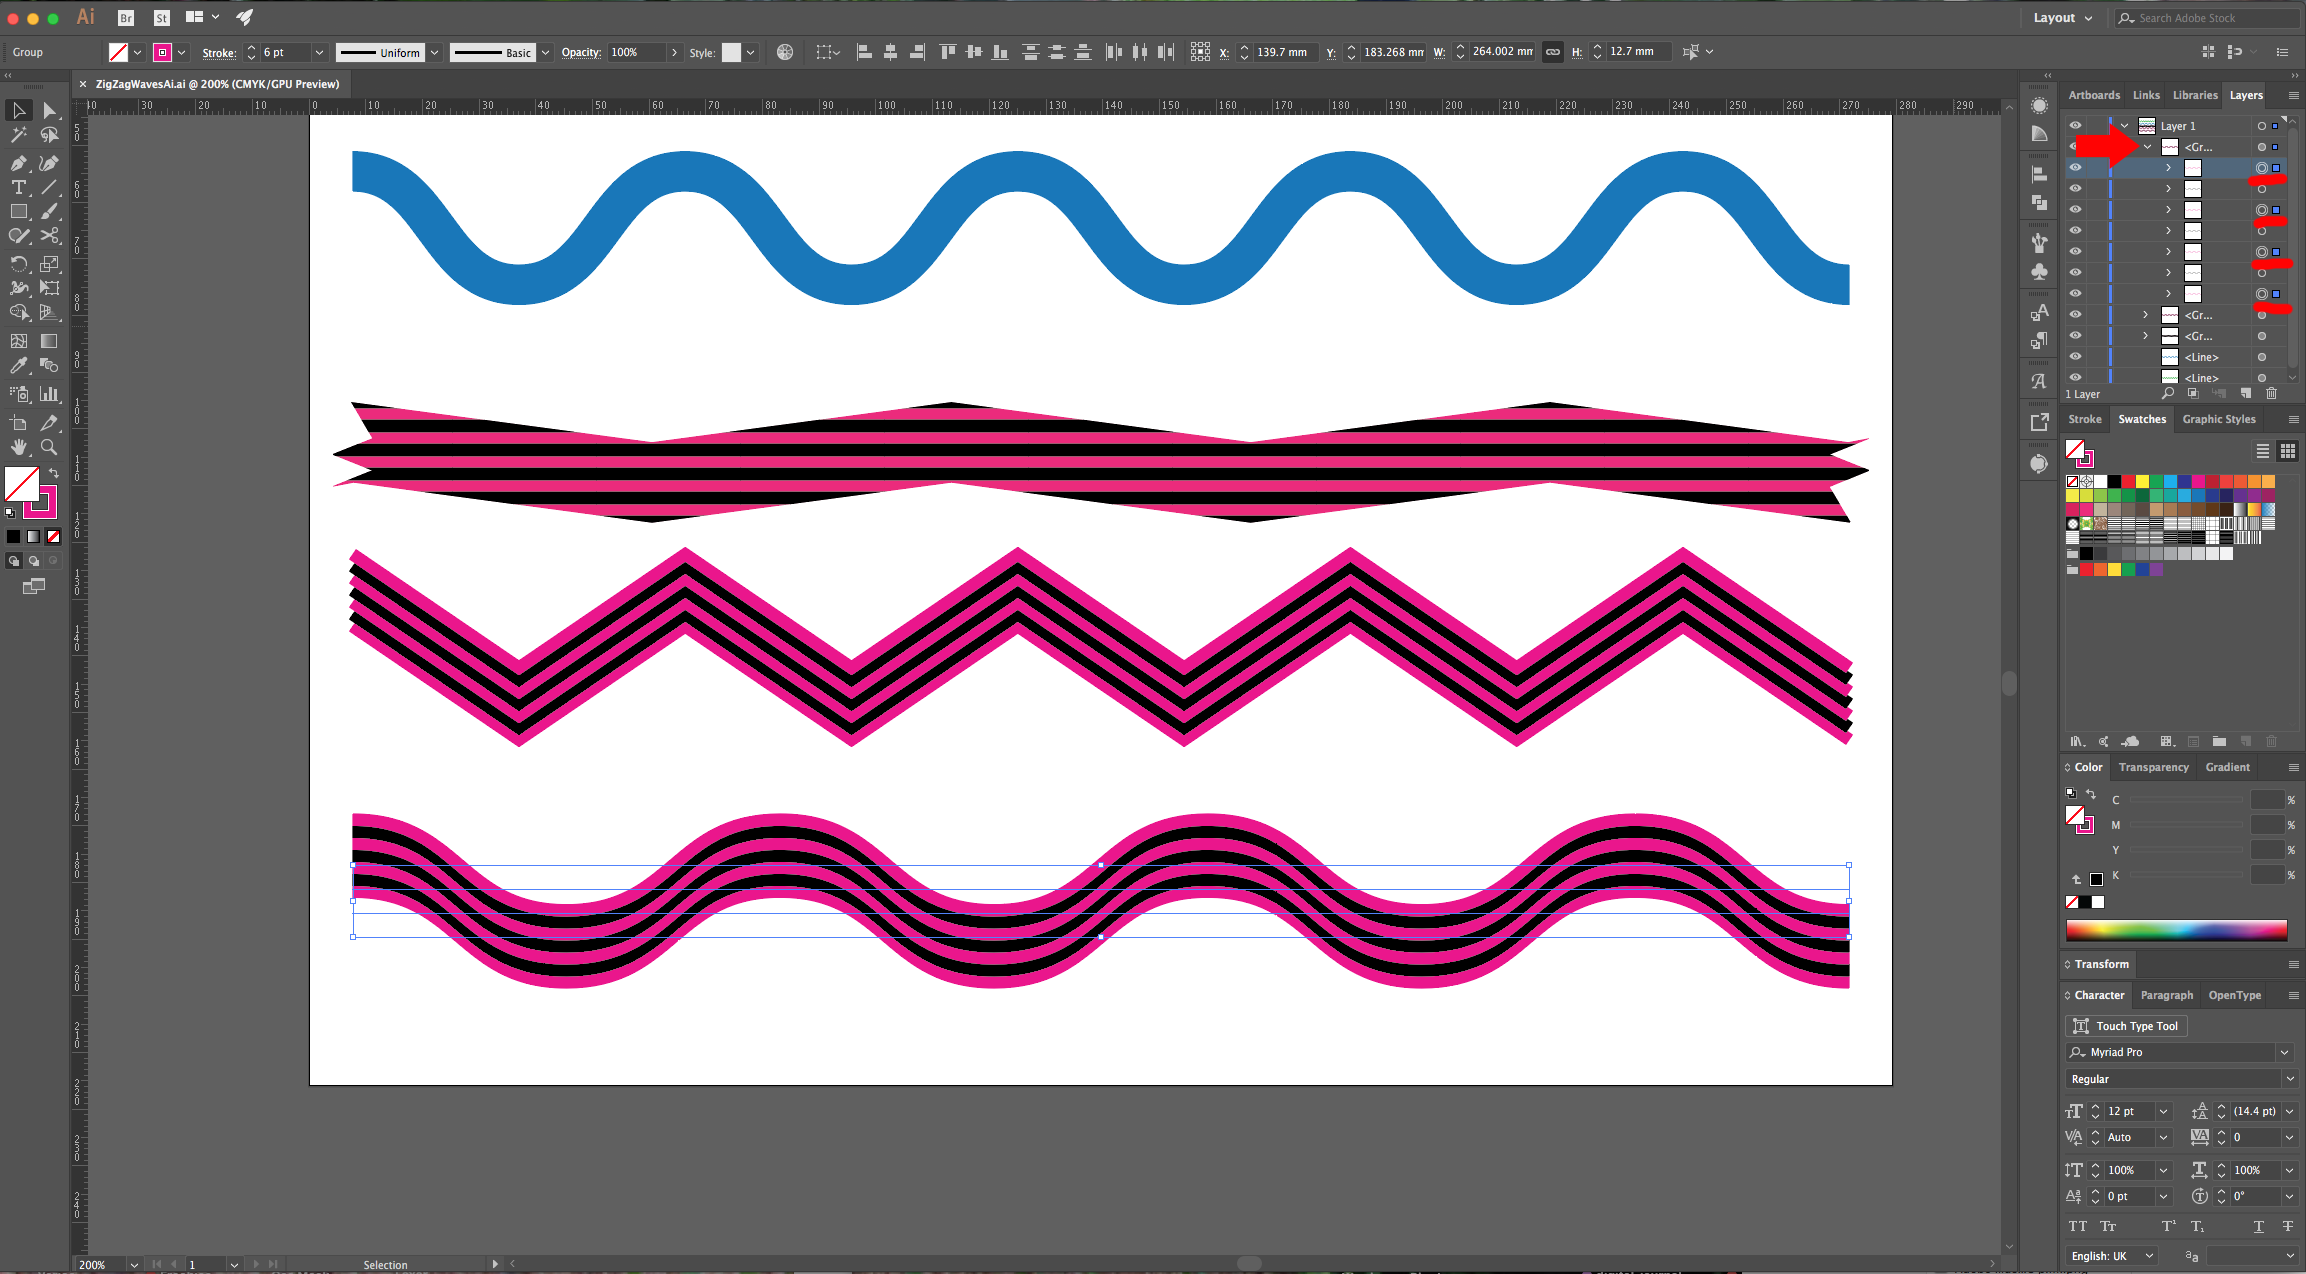
9 - To change the color of your lines, go to the “Layers Panel” and click on the small arrow located to the left of your selection’s thumbnail to show its contents. Then, select just the lines you want (use the “Shift” key to select multiple lines together). Now, you can change the color.
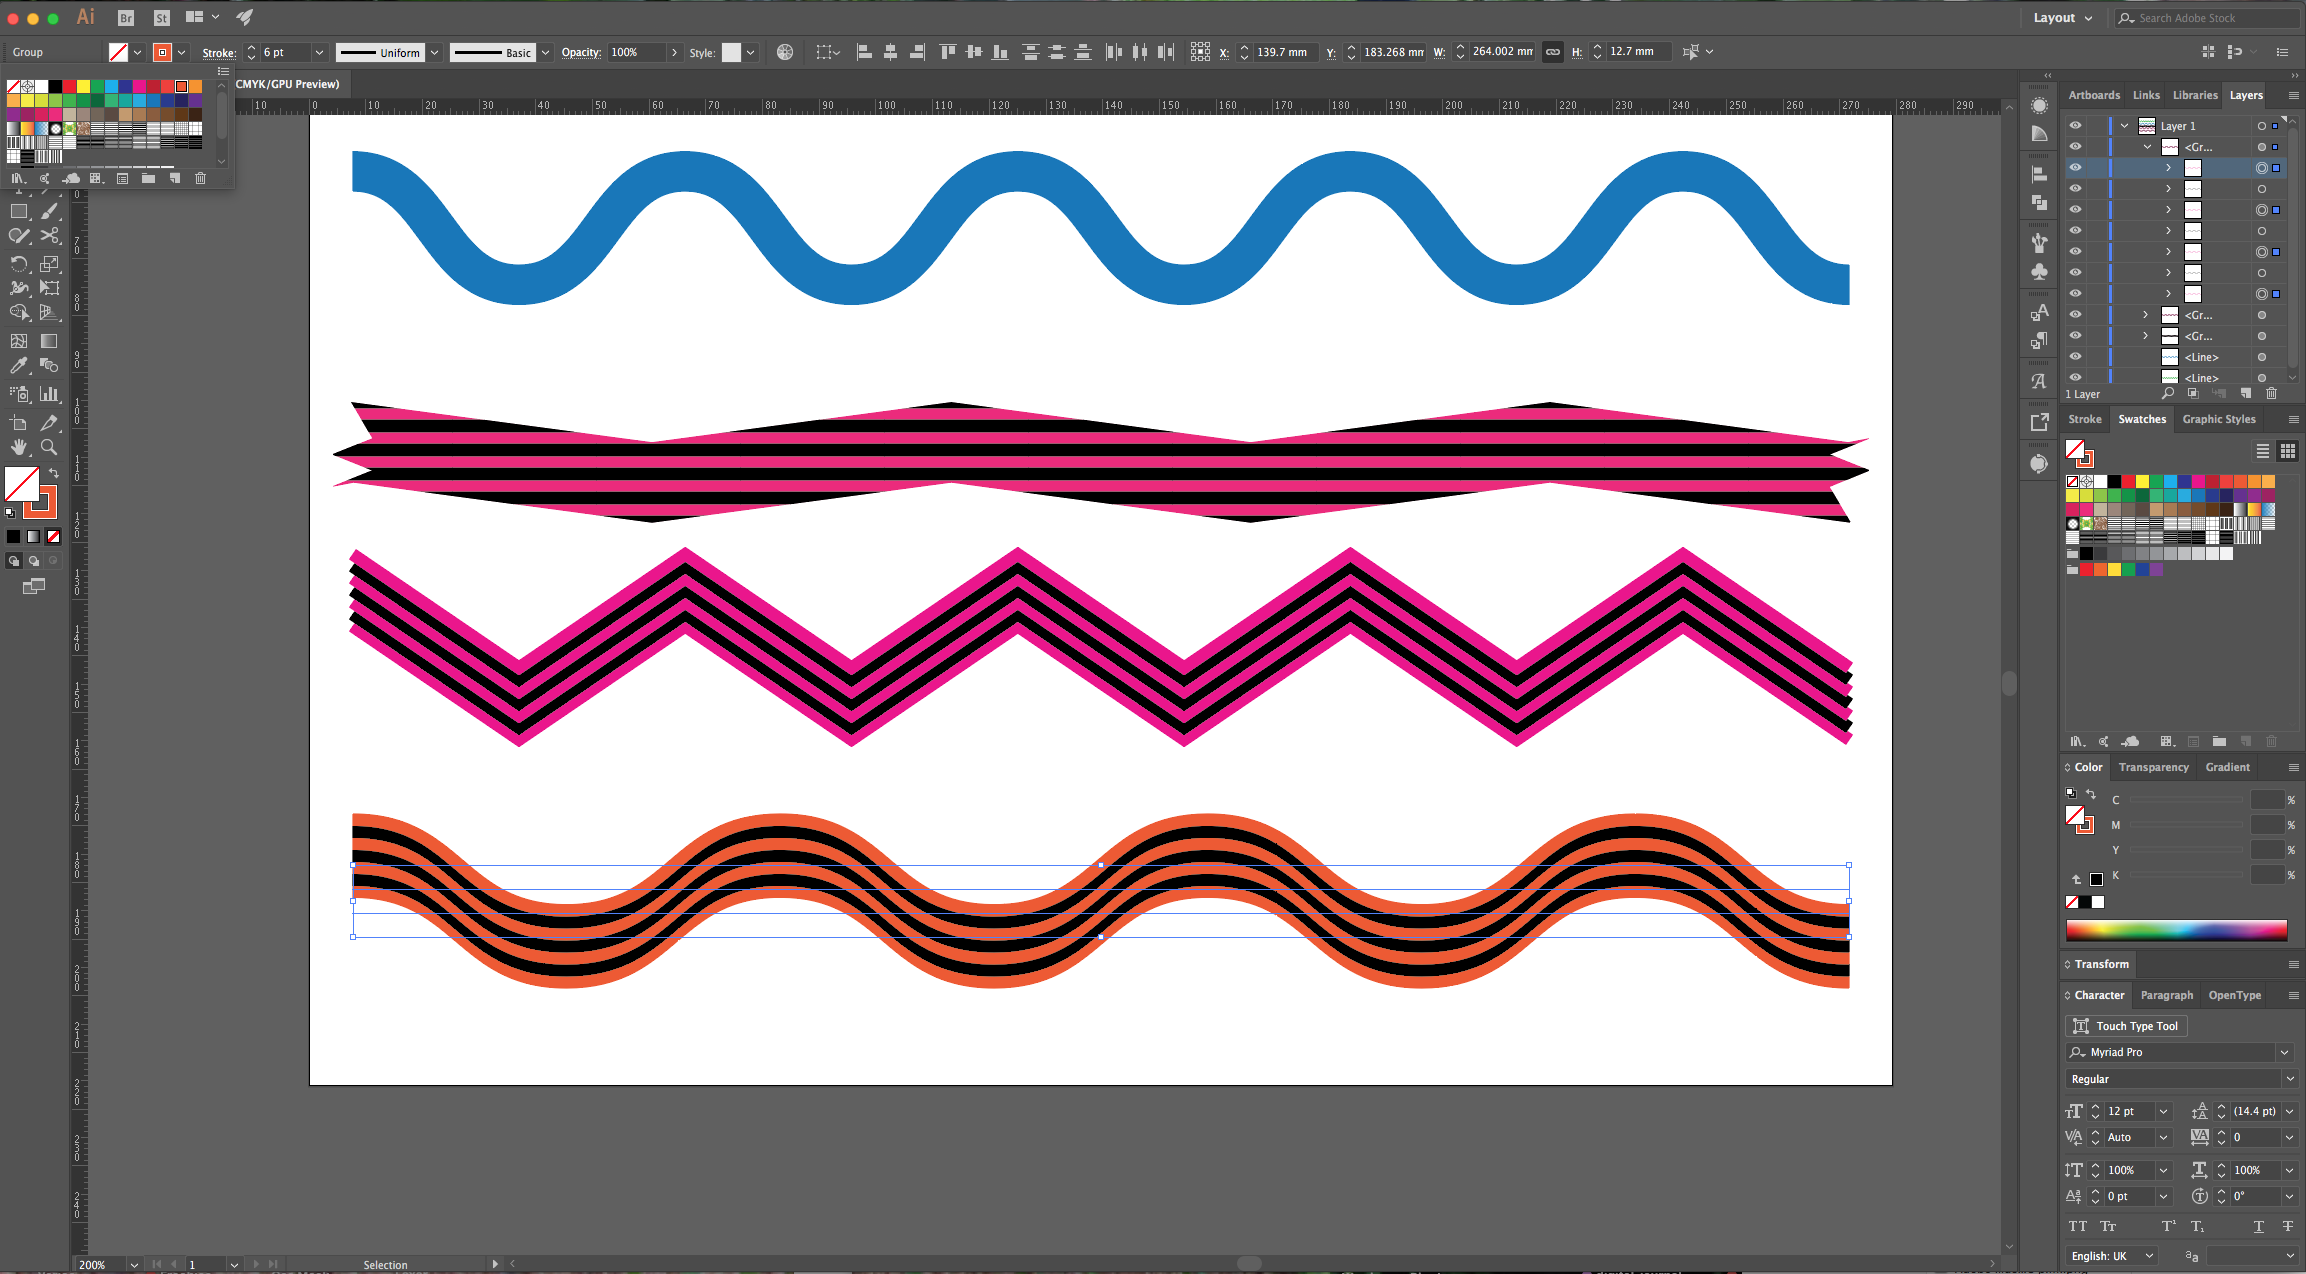
10 - Check out the different results.
2 - With the “Line Segment Tool” (\), draw a line on the top part of your document from side to side. Change the “Stroke Weight” to about 20 pt and fill it with the color of your choice. With your line still selected, hold the Alt/Option and Shift keys while dragging downwards to duplicate it. Repeat this other two or three times. Place the last one at the bottom of the Document, then select all your lines and using “Align to Selection” click on “Vertical Distribute Center” from the Top Menu.
3 - In the “Appearance Panel” click on the “Add New Effect” button at the bottom and choose Distort & Transform > Zig Zag. In this case use “Corner” in the “Points” section, check the “Preview” box to be able to see the results and choose a value for “Size” and for “Ridges per Segment”.
4 - Select another one of your lines and change the color if you want. Repeat the “Zig Zag” Effect, but this time use “Smooth” instead of “Corner”.
5 - In case you would like to apply a “Pattern” as “Fill” doing the “Zig Zag” Effect will have unexpected results. For example, select another one of your lines, change the color and make it thicker (about 40 pt). Go to Object > Expand, and make sure the “Stroke” box is checked.
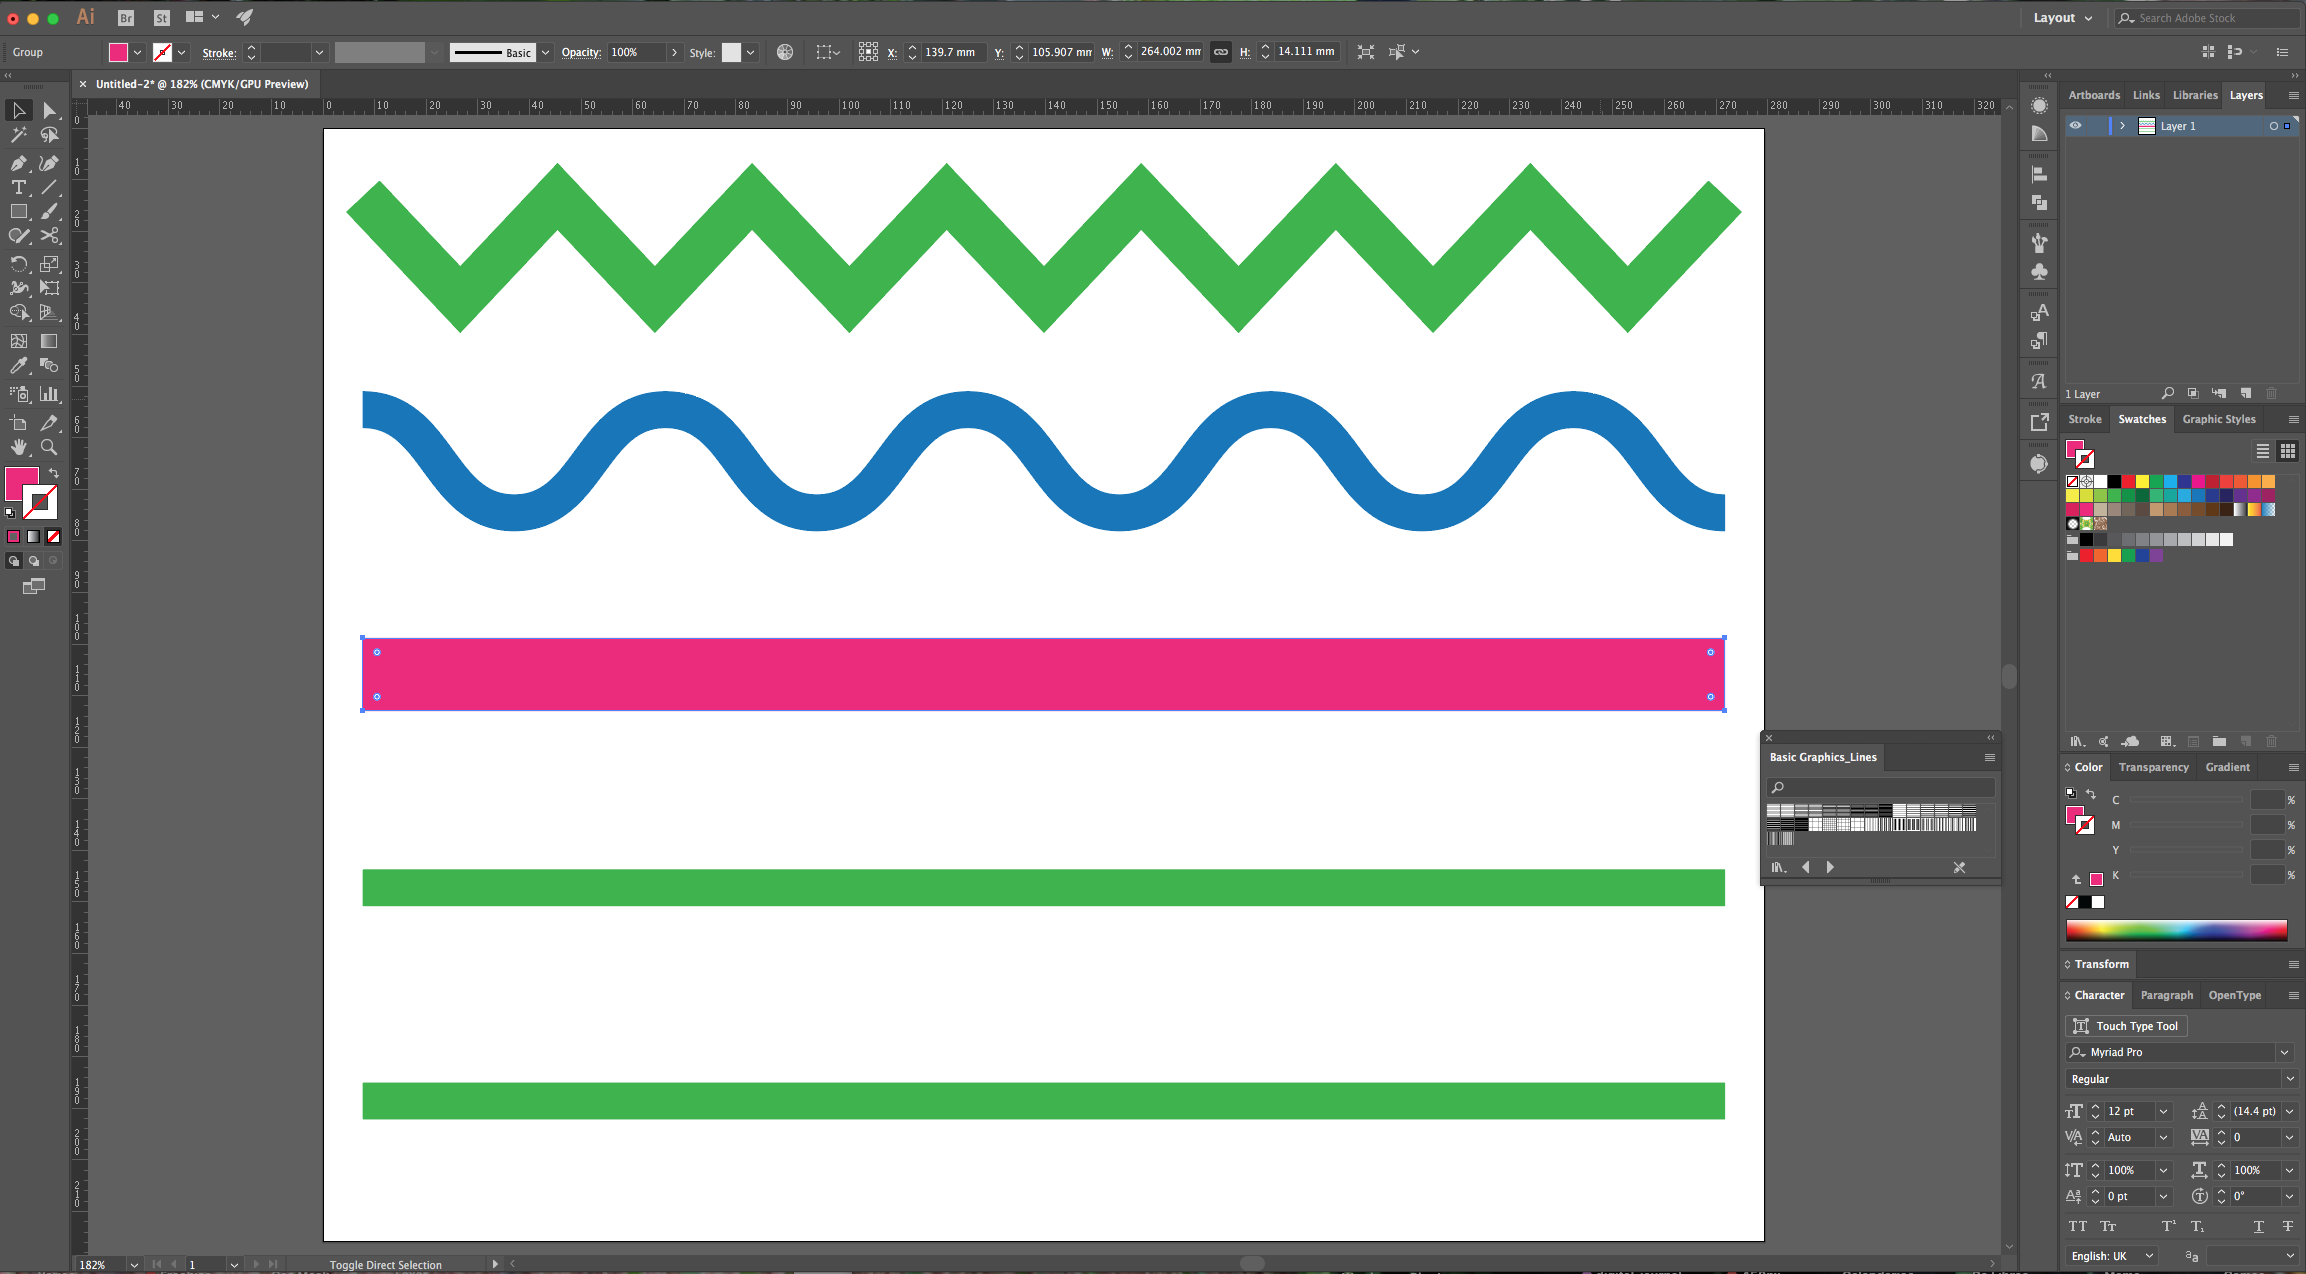
6 - Then go to the “Swatches Panel”, click on the Menu button in the Top-Right corner and navigate to Open Swatch Library > Patterns > Basic Graphics > Basic Graphics _Lines to open a floating panel window. In the Appearance Panel” click on the “Add New Fill” button and choose one of the “Patterns” (they should appear in the “Swatches Panel”). Now, try to apply the “Zig Zag” Effect and you will notice it doesn’t affect the “Pattern” Fill.
7 - To apply the effect to the “Pattern” Fill we will use a workaround. Choose one of your lines, give it a “Stroke Weight” of about 6 pt. In the “Appearance Panel” click on the “Effects” Menu and go to “Distort & Transform > Transform. Use a “Vertical Move” value of 6 pt (the same value used for the “Stroke Weight”) and make 6 “Copies”. Then, go to Object > Expand Appearance, right-click on top of your lines and choose “Ungroup”. Select the “Even” lines (second, fourth and sixth) and change their color (we used Black). You can “Group” them together again (Command/Control + G).
8 - Now, apply the “Zig Zag” Effect and check the result. Try it with the “Smooth” setting to check how the “Waves” look.
9 - To change the color of your lines, go to the “Layers Panel” and click on the small arrow located to the left of your selection’s thumbnail to show its contents. Then, select just the lines you want (use the “Shift” key to select multiple lines together). Now, you can change the color.
10 - Check out the different results.
by @lornacane


