
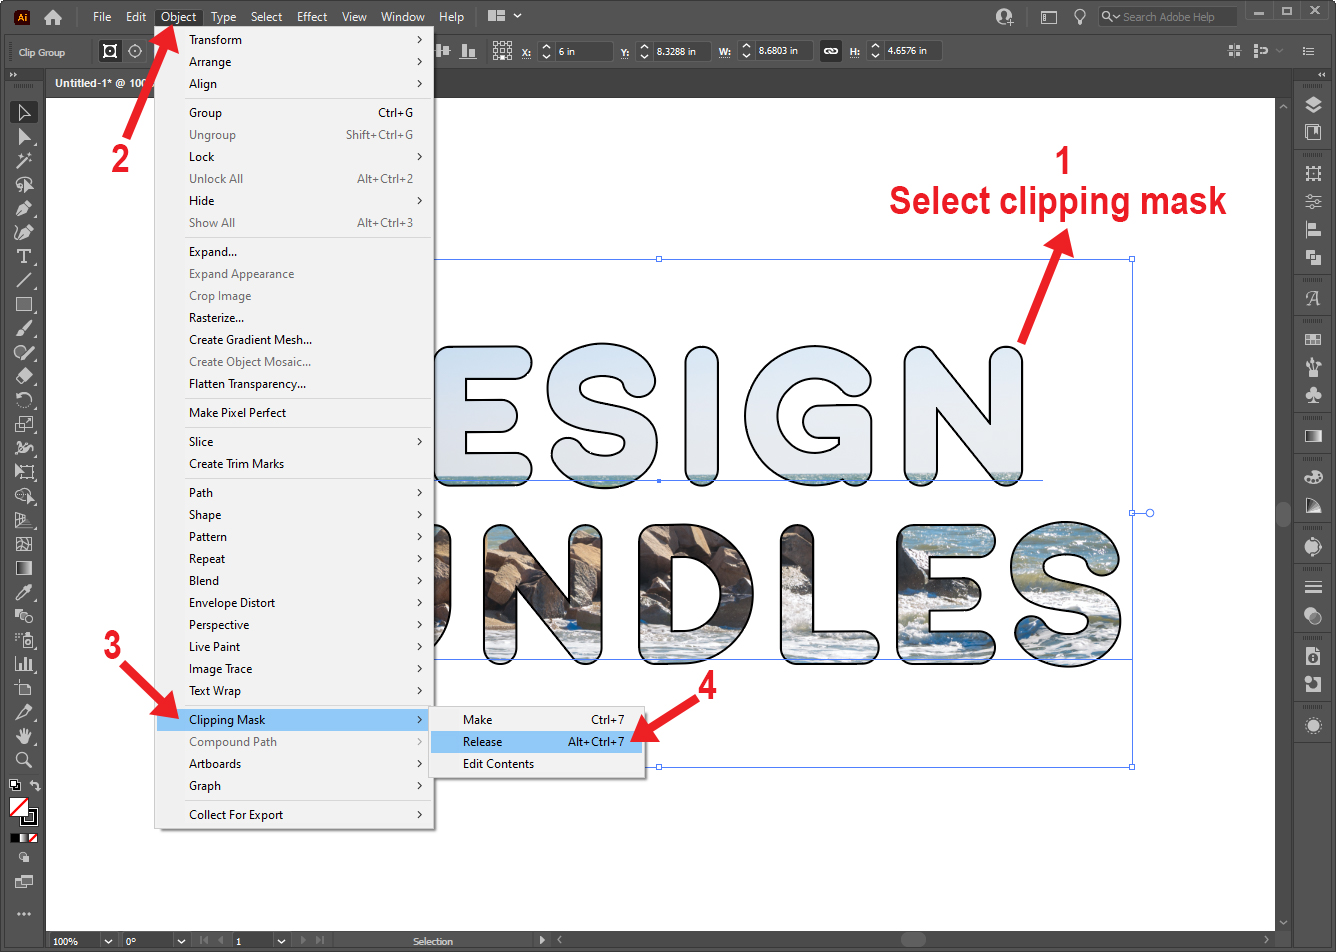
How to Create and Use a Clipping Mask in Illustrator
Learn how to make, edit, and release a clipping mask in Adobe Illustrator.
In this tutorial, you will learn how to make a clipping mask in Illustrator. Creating and using clipping masks in Illustrator is very useful as it's a non-destructive method of editing. We will go over how to make, edit, and release a clipping mask.
If you’d like to follow along, we will be using a rounded sans serif font called Homeland in addition to some nature photos mentioned throughout the tutorial.
The text objects in this tutorial will be the clipping masks, while the photos will be the masked objects, and only areas inside the text/clipping mask will be seen. The clipping mask and its masked objects together are called a clipping set, and a clipping set can be made with two or more selected objects.
Method 1 - Select Objects and Make Clipping Mask
Step 1 - Add Text
A clipping mask can be any vector object. When the clipping mask is made, the clipping mask will have no fill or stroke. You can add text using the Text Tool (T) or create a shape using one of the shape tools.We added the text "DESIGN BUNDLES" and aligned it to the center of the canvas.

Step 2 - Place and Edit Image
Go to File > Place. In the Place dialog box, select the image and click Place. We used a tropical beach sunset photo from Design Bundles.

If the image needs to be resized, tap Transform in the top toolbar. Make sure the aspect ratio (chain icon) is locked and enter a new width.

With the image still selected, though you may no longer be able to see your image, click on the Horizontal Align Center and Vertical Align Center buttons either in the top toolbar or in the Align panel.

Step 3 - Rearrange Image and Text Order
In Illustrator, the clipping mask is the topmost layer. Because we want the text to be the clipping mask, we will move the image behind the text. Select the image, right-click, and go to Arrange > Send to Back. Click and drag the corners of the image while holding Shift to resize if needed.

Step 4 - Make Clipping Mask
Select both the image and text. Go to Object > Clipping Mask > Make (Ctrl/Cmd+7).
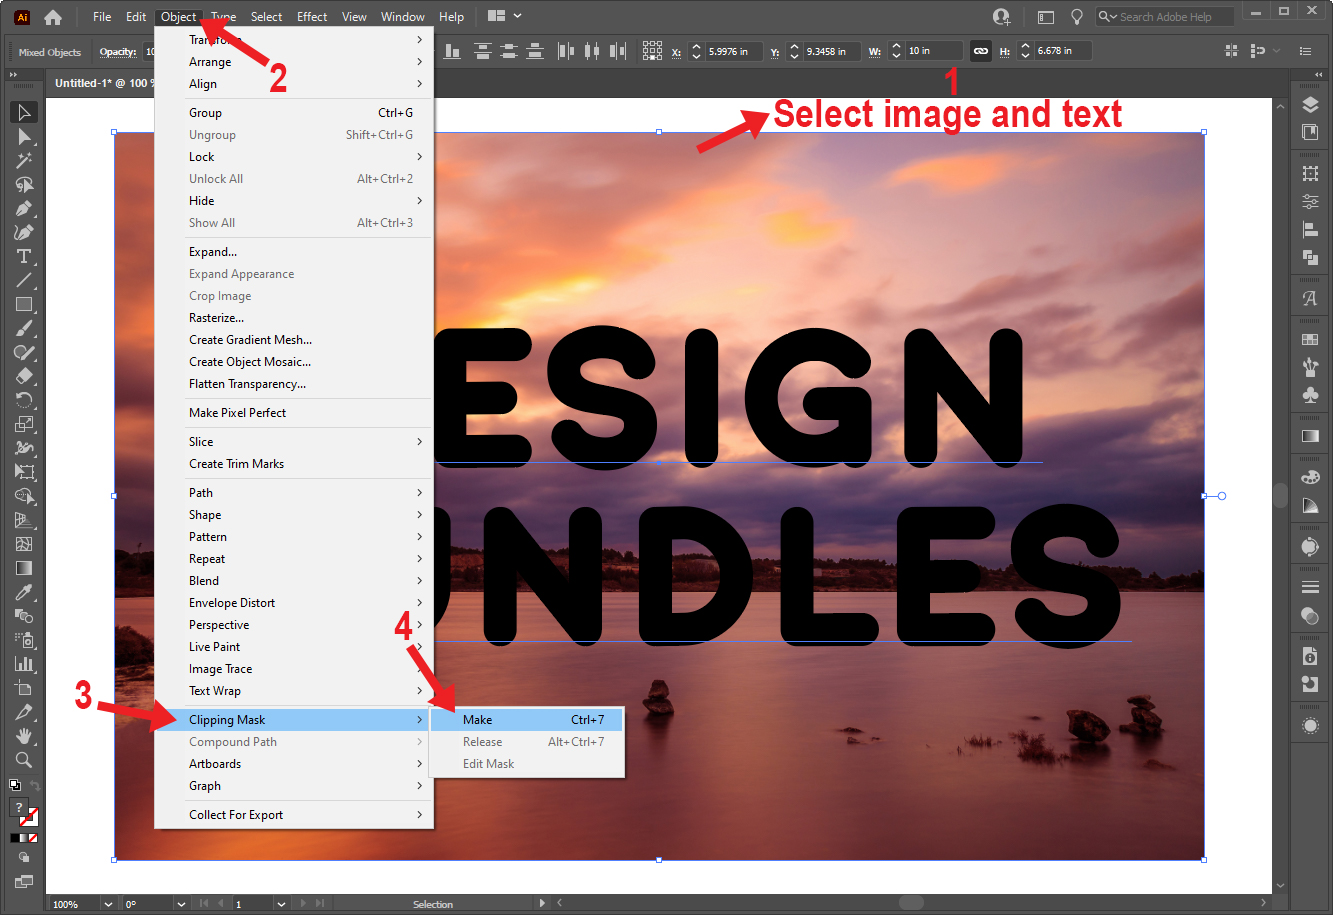
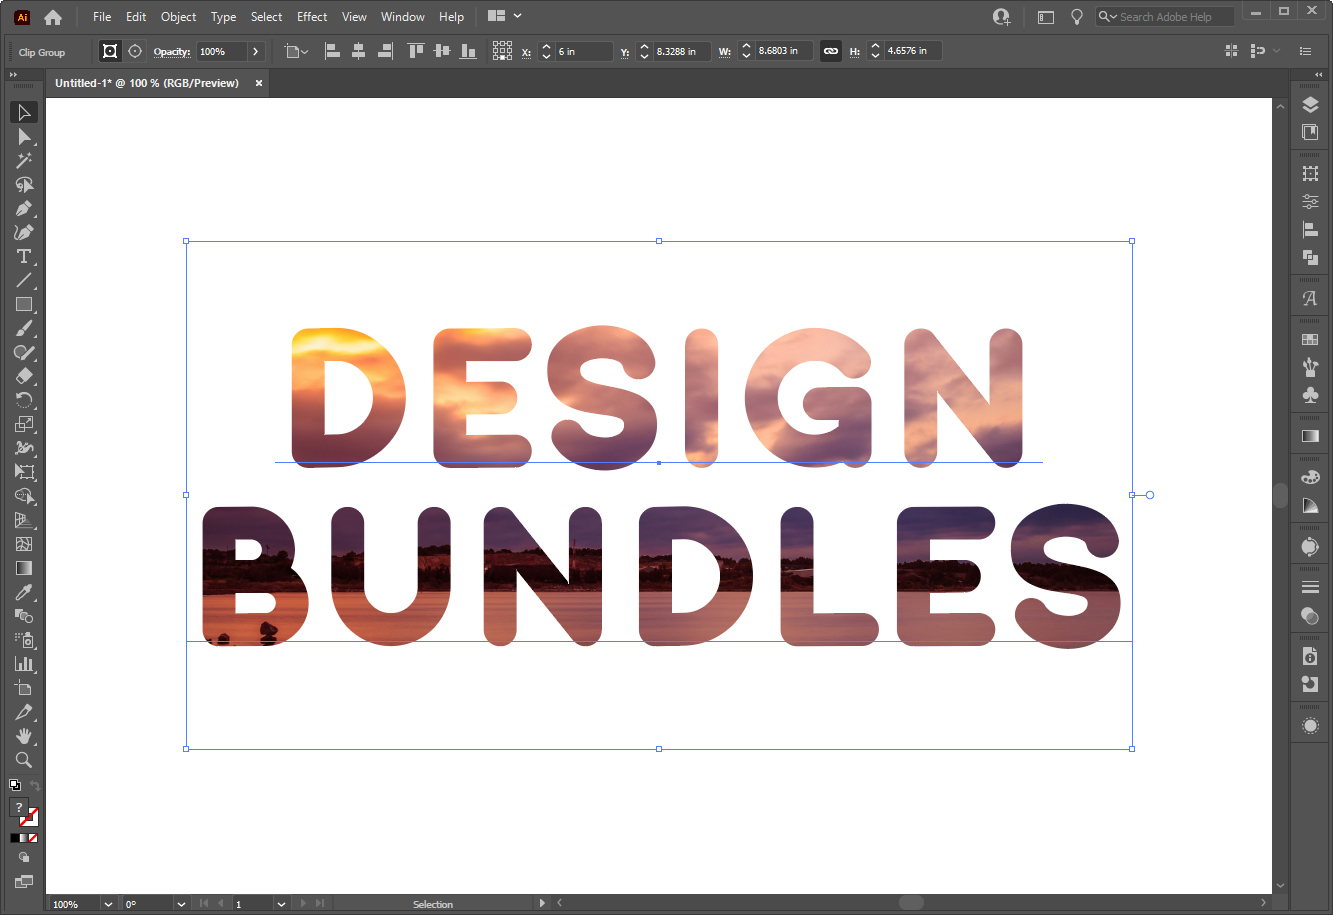
The only visible areas of the image are where the text is. See the following image for an example.
Step 5 - Edit Clipping Mask and Masked Objects in Isolation Mode
Since clipping masks are non-destructive, you can edit or change the clipping mask and its masked objects at any time. To do this, double-click on the clipping mask, or you can select the clipping mask, right-click, and choose Isolate Selected Clipping Mask instead.

In Isolation Mode, you can edit the text and image and add even more images, shapes, or text to the clipping mask.
To exit Isolation Mode, double-click outside of the clipping mask and its masked objects or click Esc.
Method 2 - Draw Inside Mode
Draw Inside mode is another way to create a clipping mask. In Illustrator, you have to enable the Draw Inside mode and exit the Draw Inside mode when done.
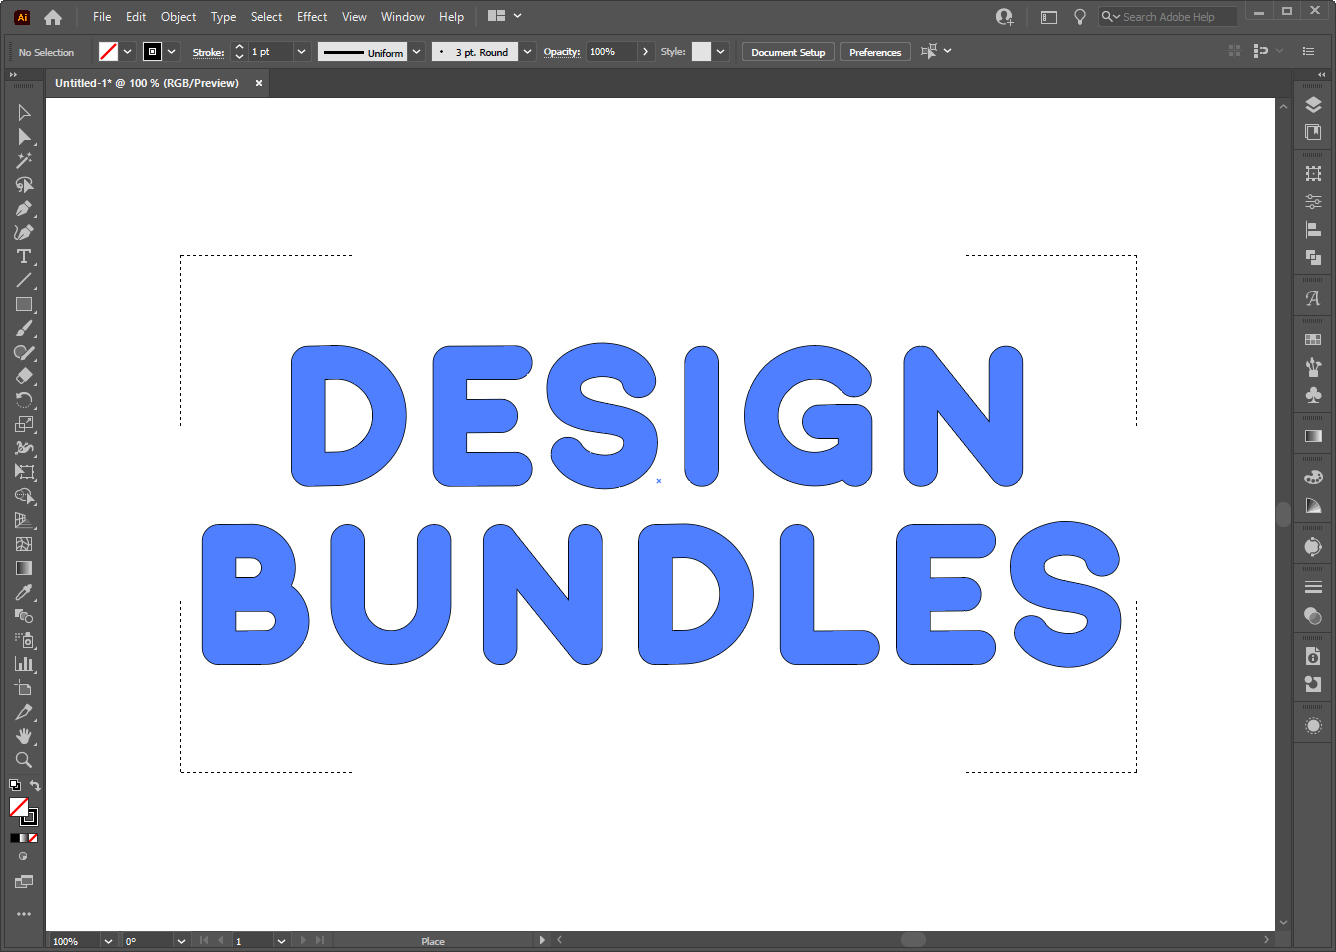
Step 1 - Add Text
Again, you can add text or a shape using one of the shape tools to be the clipping mask. We typed out DESIGN BUNDLES and set the fill to none. You can also set the stroke to none or select a color. We chose black as the stroke color.

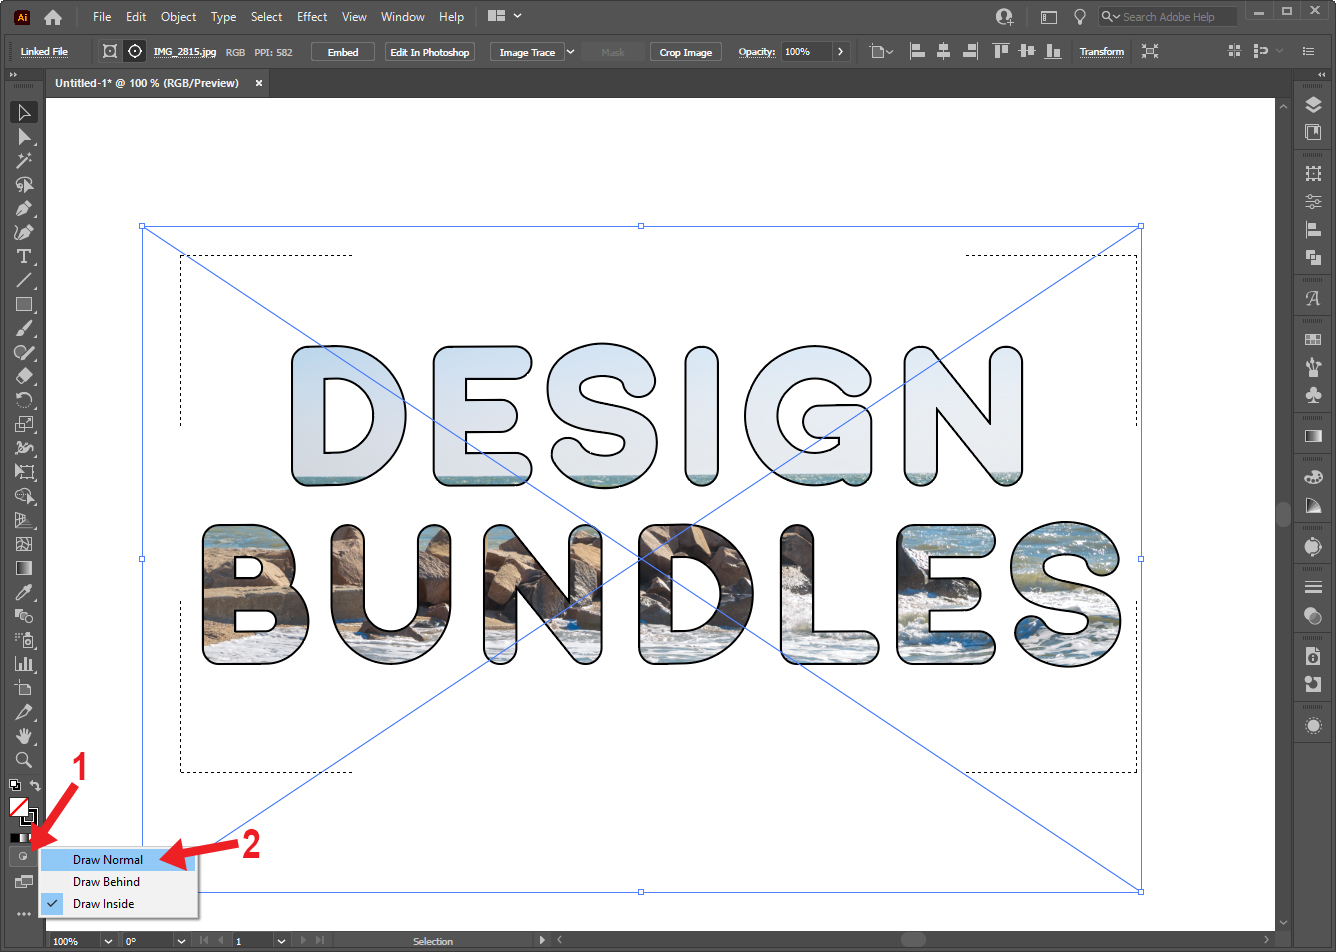
Step 2 - Enable Draw Inside
With the text selected, click the Drawing Modes button located under the Fill and Stroke section in the left toolbar and choose Draw Inside.

If your left toolbar is expanded or has two columns of tools, the three buttons for the Drawing Modes will be visible. Click the far right button under the None button to enable Draw Inside.

When Draw Inside is active, the corners of the text frame will have dashed lines.

Step 3 - Draw or Place Image Inside Text
Now you can draw inside the text object using any of the drawing tools or shape tools. You can also place text or an image inside. We will be placing an image inside the text. Go to File > Place.

Select the image you want to place inside the object and click Place. We will be using a beautiful seashore photo for this part, but many other stunning nature photos are available on Design Bundles.

You will see that when we hover over the text where we want to place the image inside, it’s highlighted in blue. Click the text.
Where you click will be the top left corner of the image.

Step 4 - Edit Image Size and Placement
After placing the image, you can resize and move the image to your liking. If you unselected the image and have a hard time selecting it again, open the Layers panel and click on the circle to the right of the image layer.

Step 5 - Exit Draw Inside Mode
Once you’re done editing the text/clipping mask and its masked contents, you want to exit Draw Inside. To exit Draw Inside, select the Draw Normal mode.
Step 6 - Edit Clipping Mask
You can edit the clipping mask and its clipped objects the same way we did in Method 1 in Isolation Mode.
Releasing a Clipping Mask
If you would like to release the clipping mask, select the clipping mask, go to Object > Clipping Mask > Release (Alt/Option+Ctrl/Cmd+7).
Check out our other Illustrator tutorials, such as using the recolor artwork tool, using the blend tool with text, and creating a floral logo.


