
Weaved Pattern in Illustrator
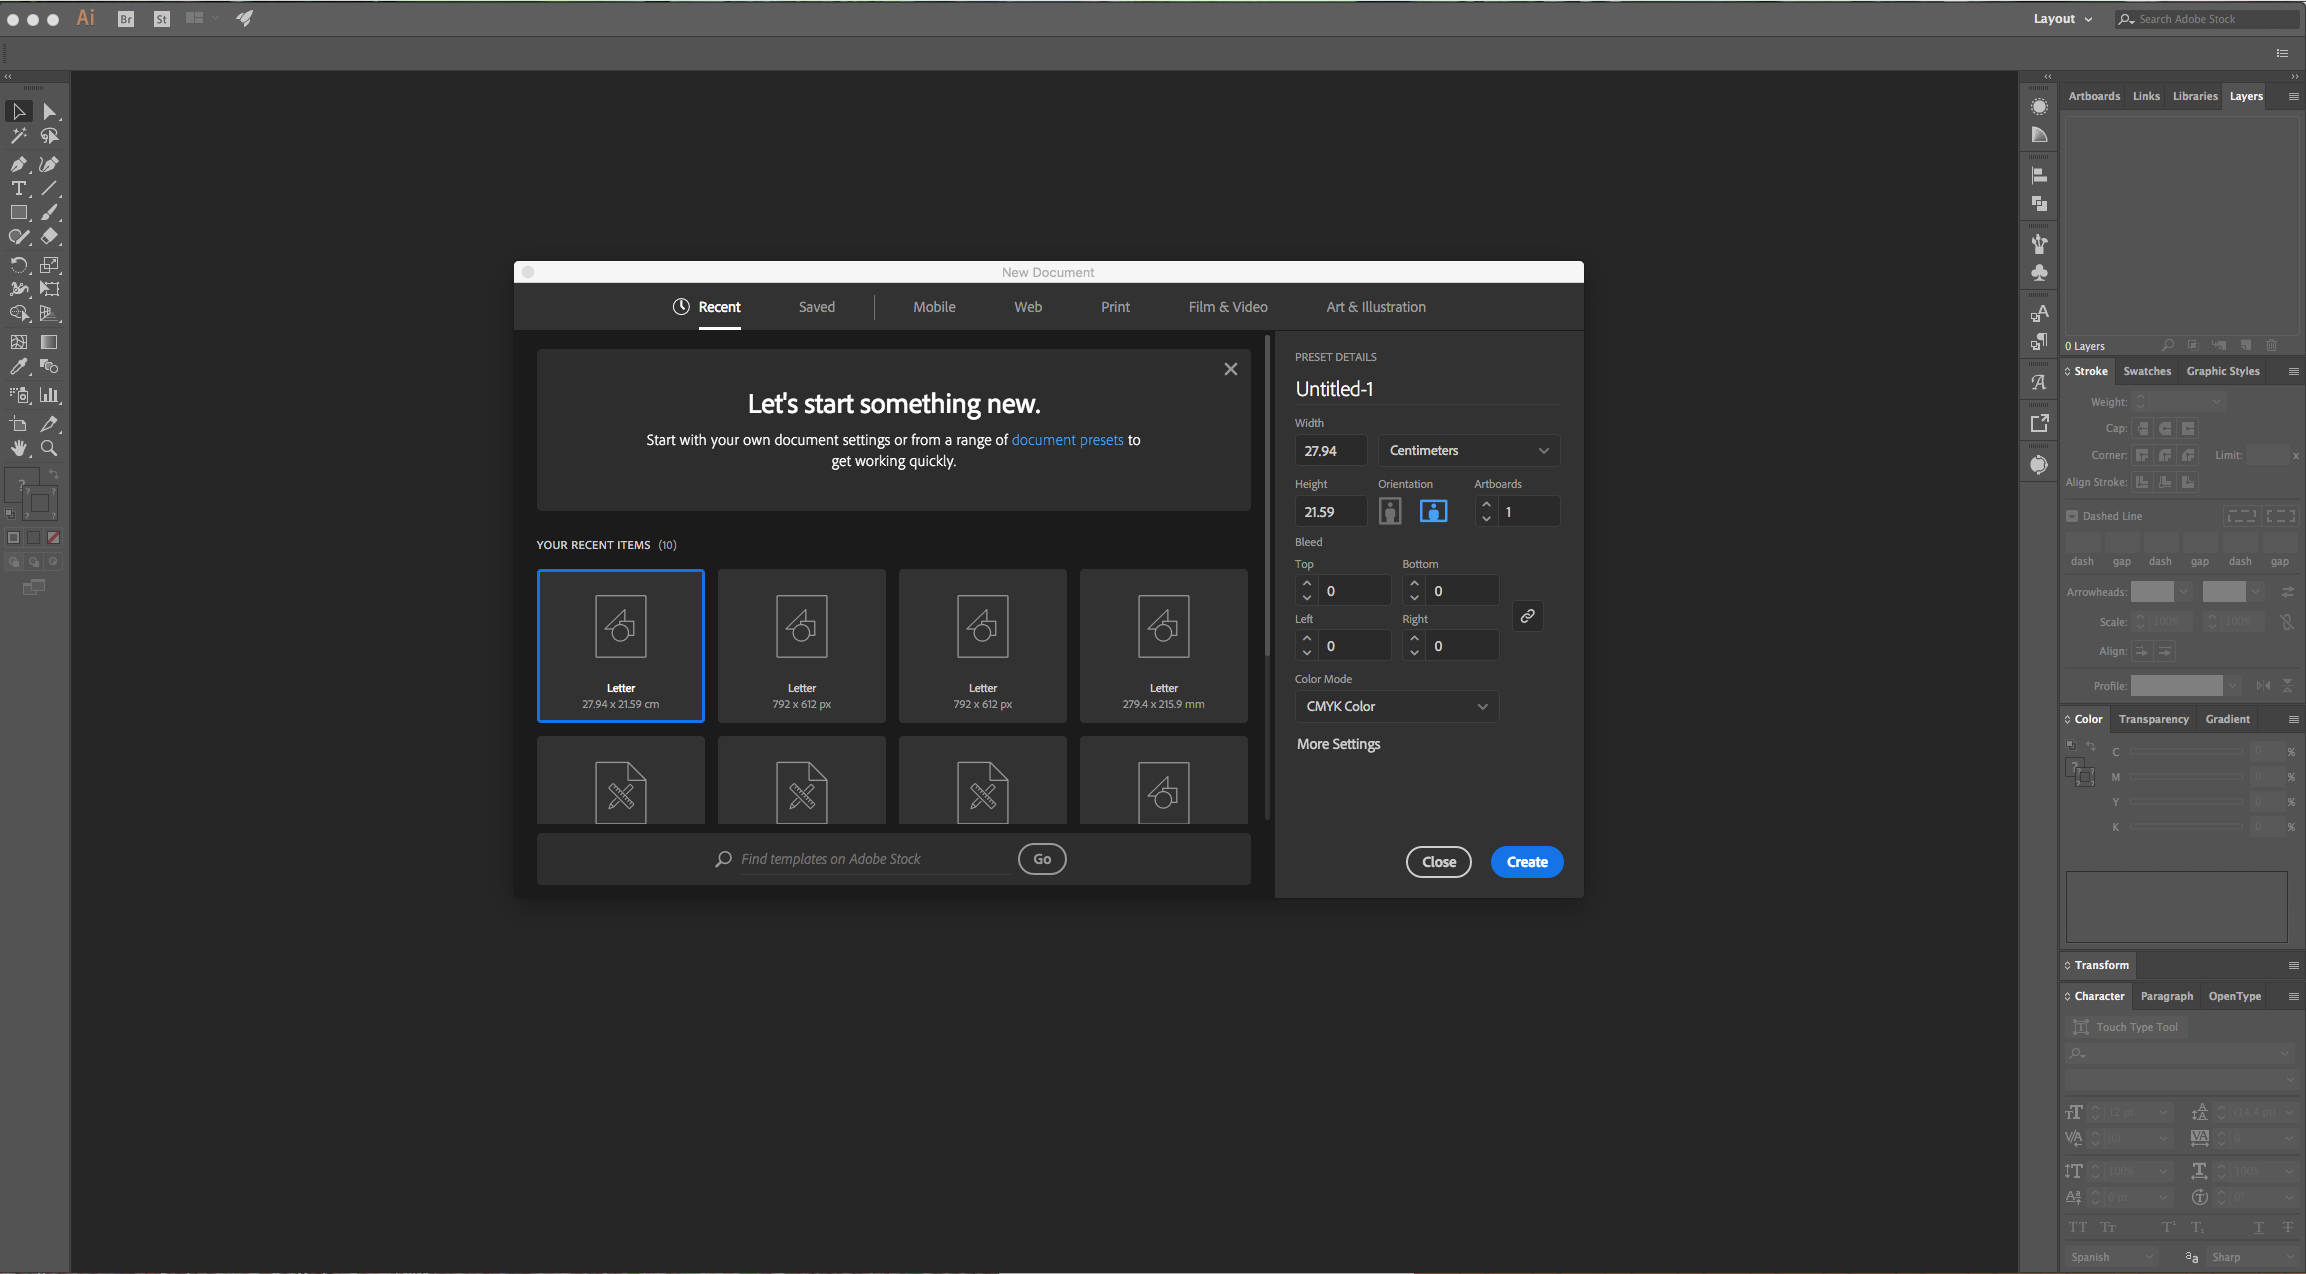
1 - In Illustrator, create a “New Document”.
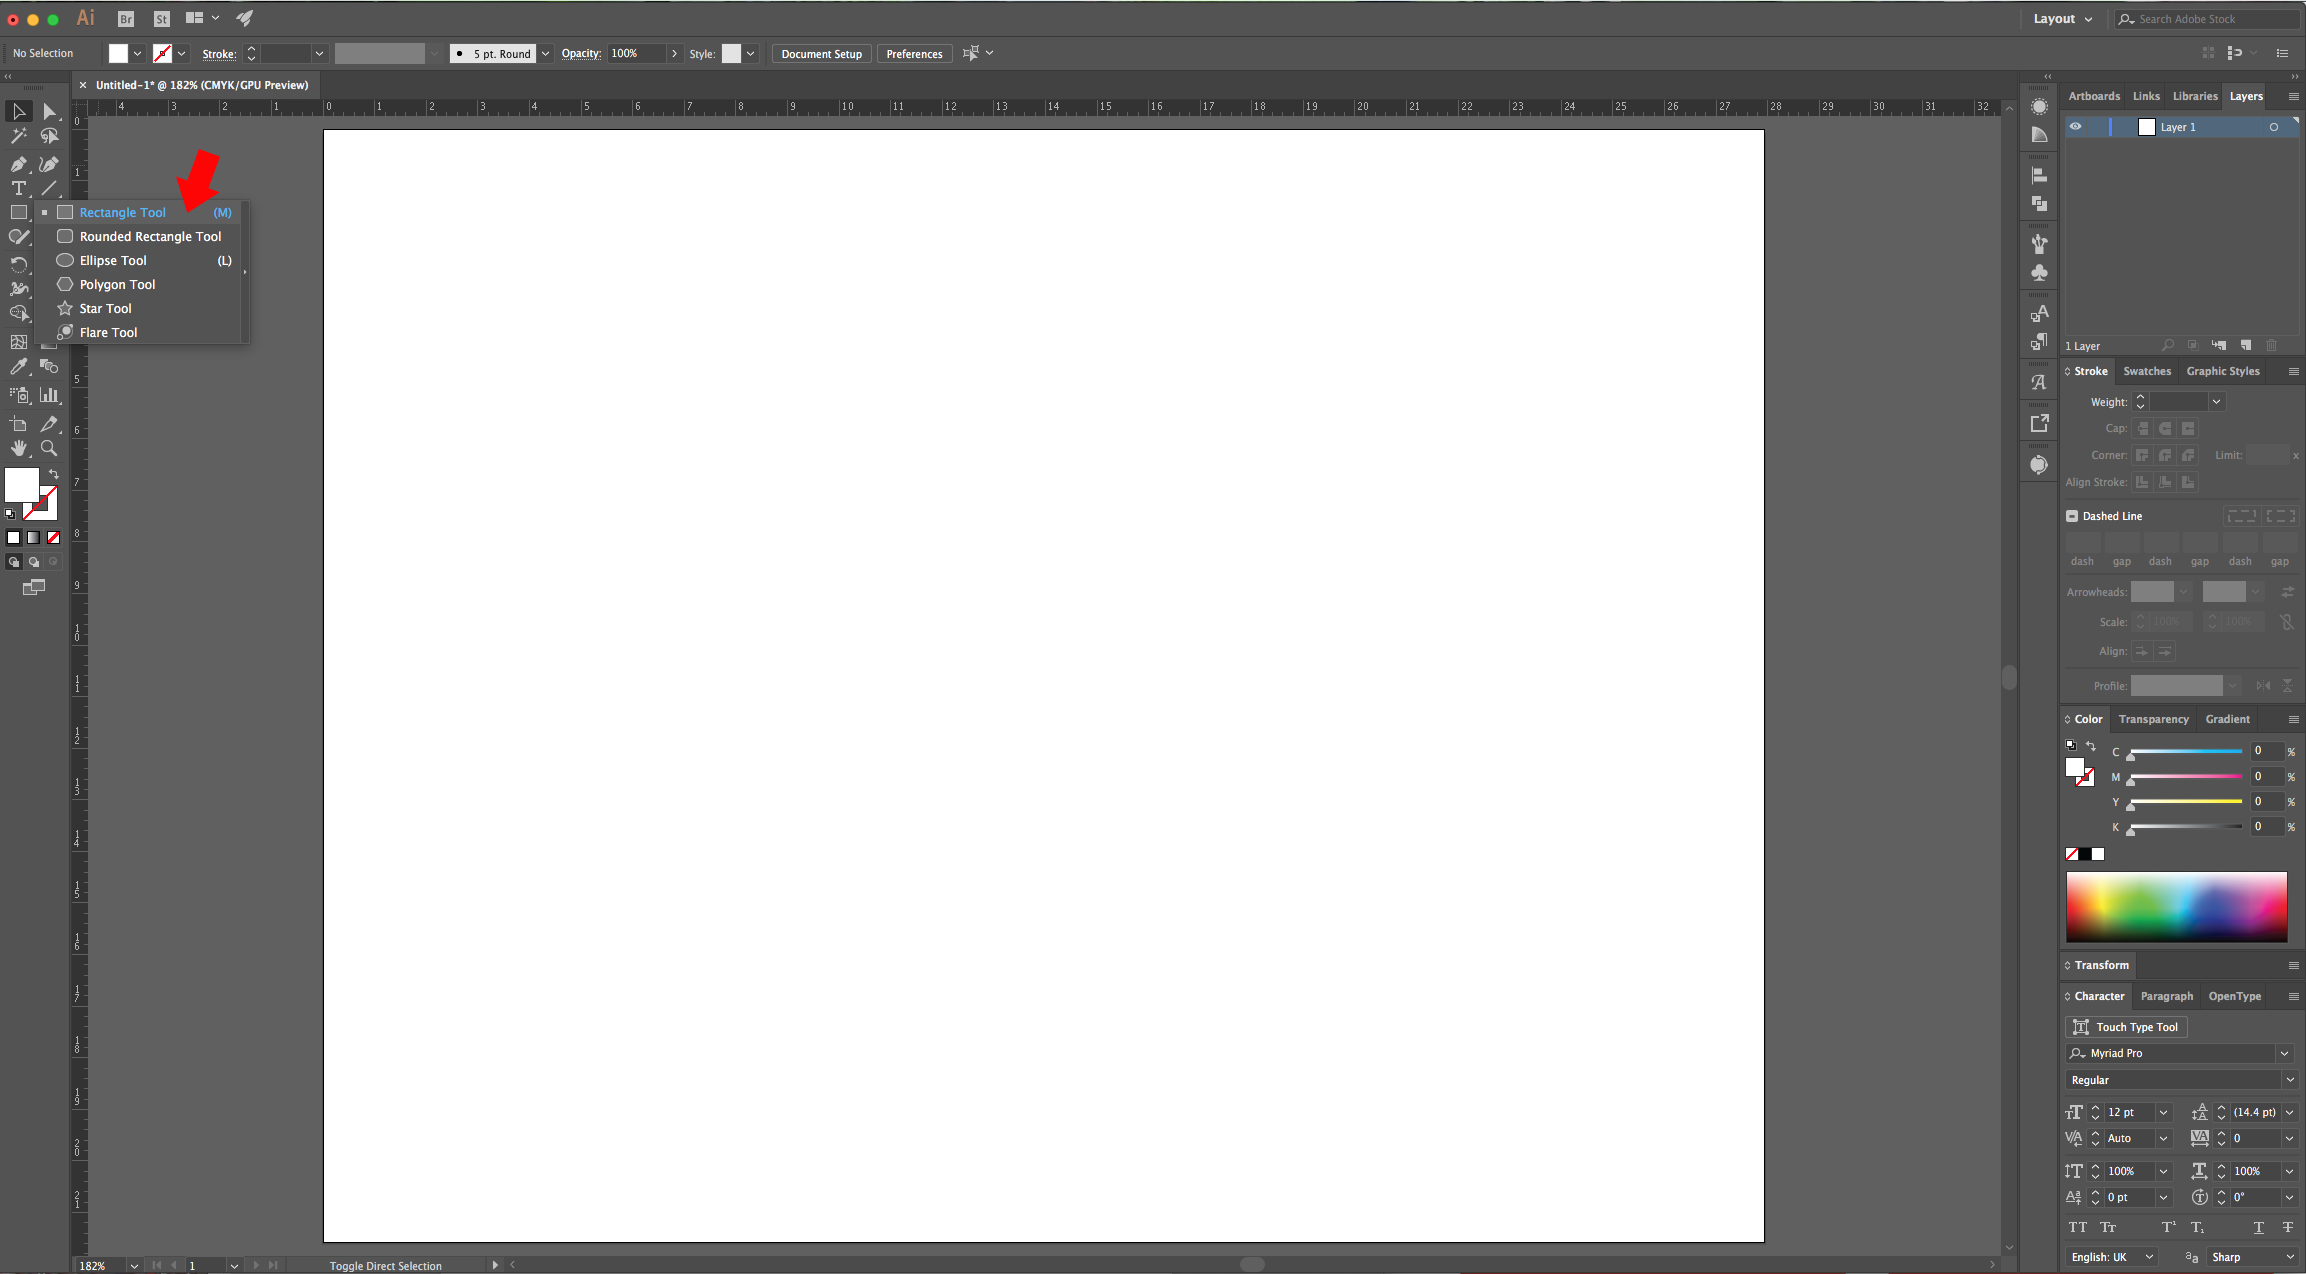
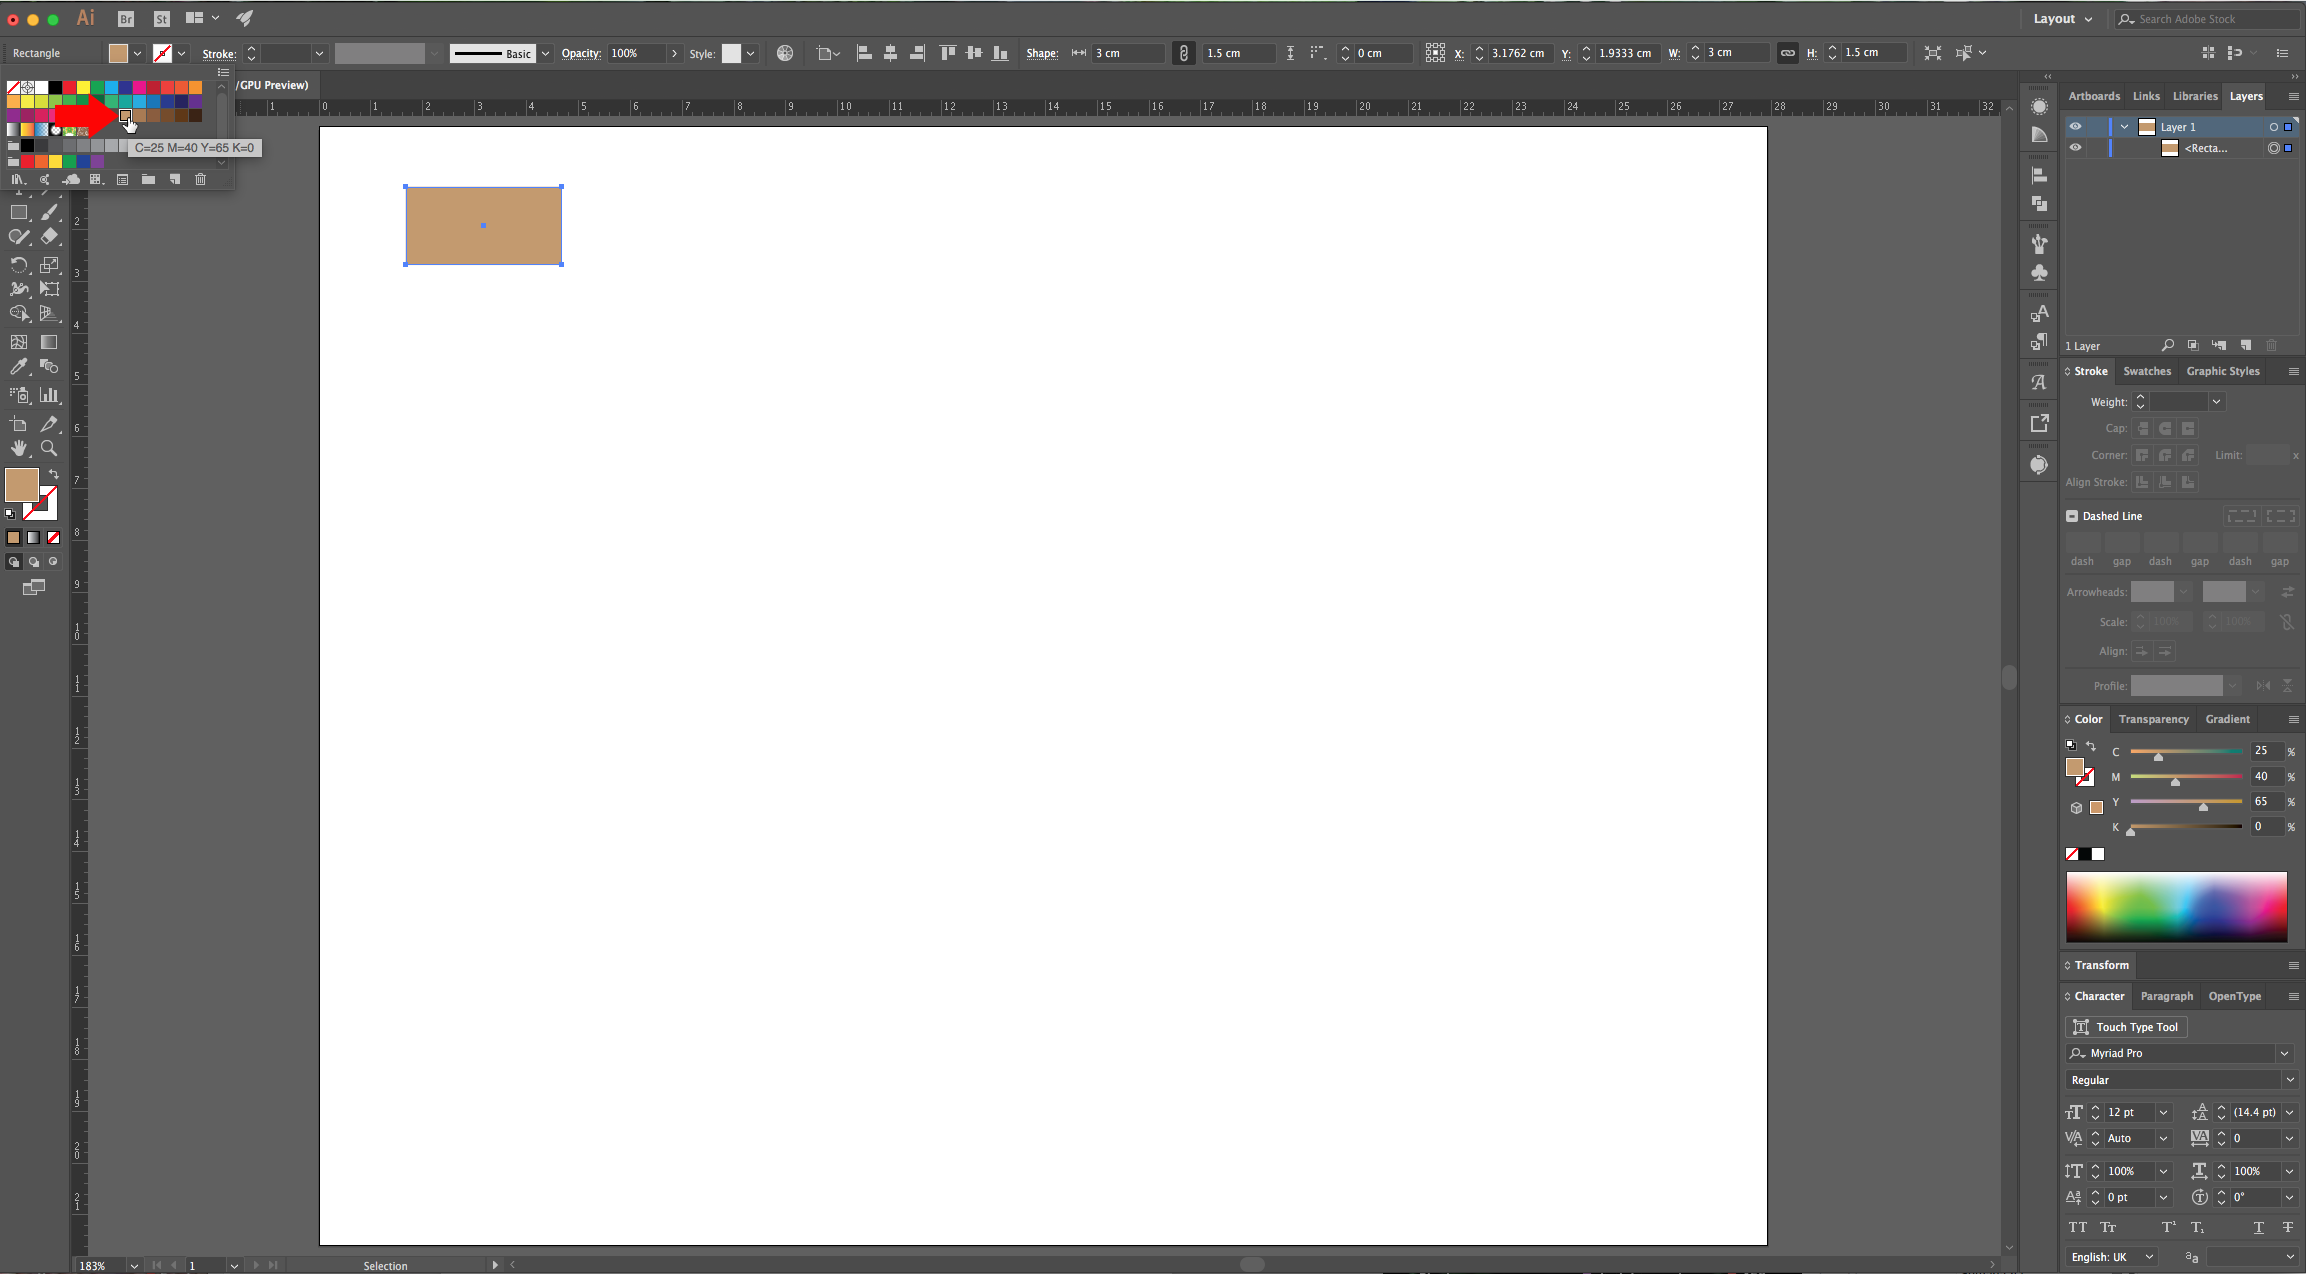
2 - Select the “Rectangle Tool” (M) and click inside your canvas. Use a “With” of 3 cm and a “Height” of 1.5 cm and click “OK”, then, fill it with a medium brown from the “Swatch Panel”.

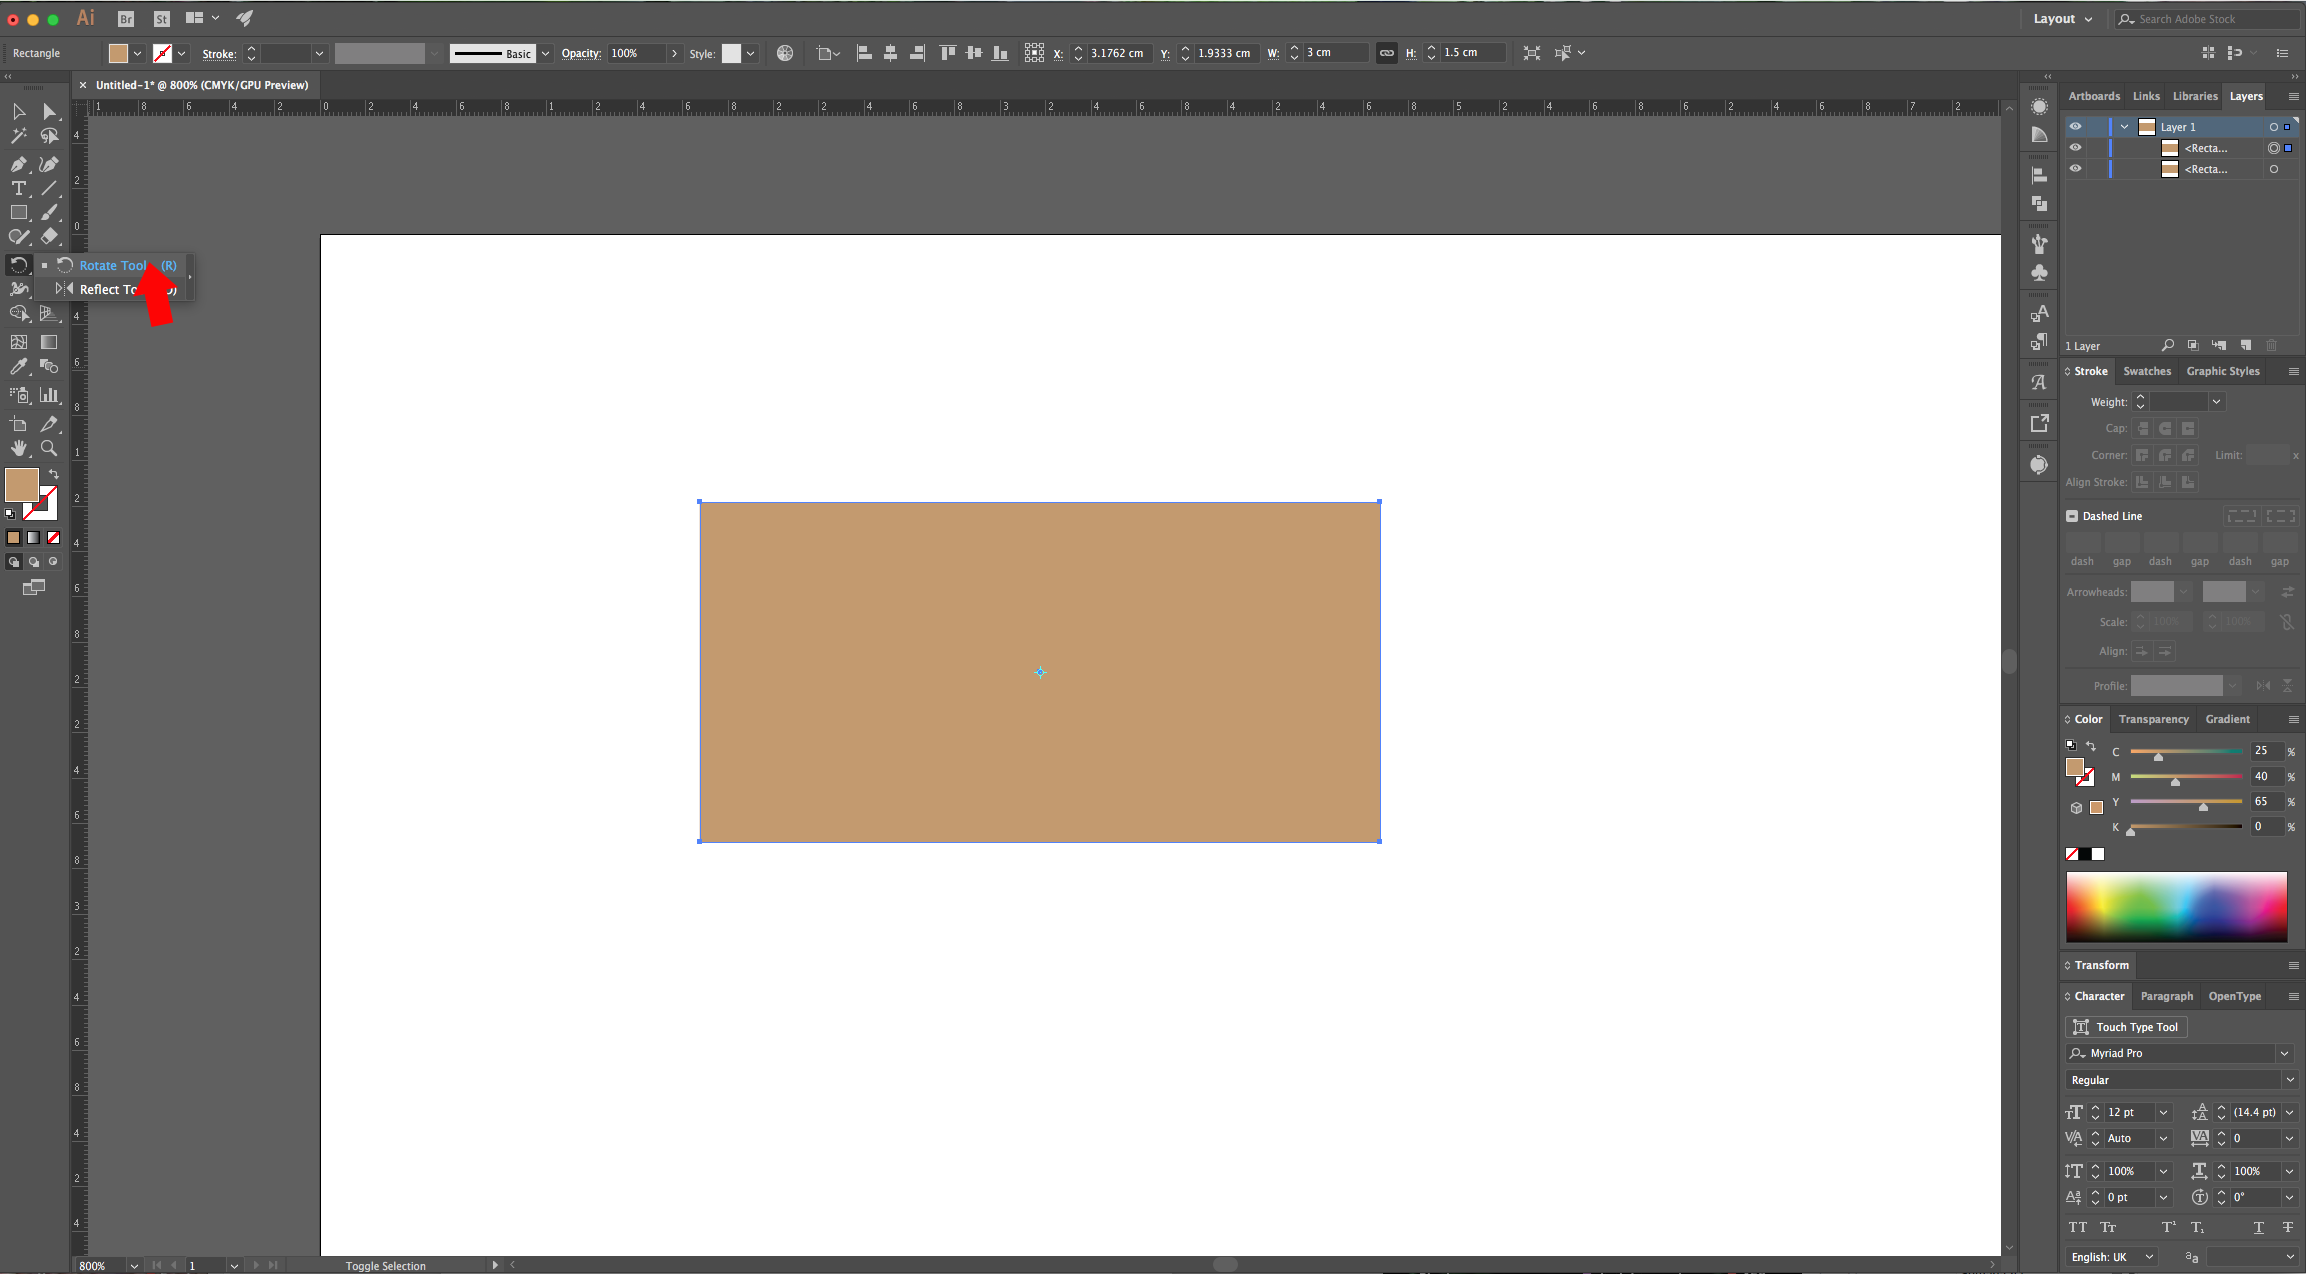
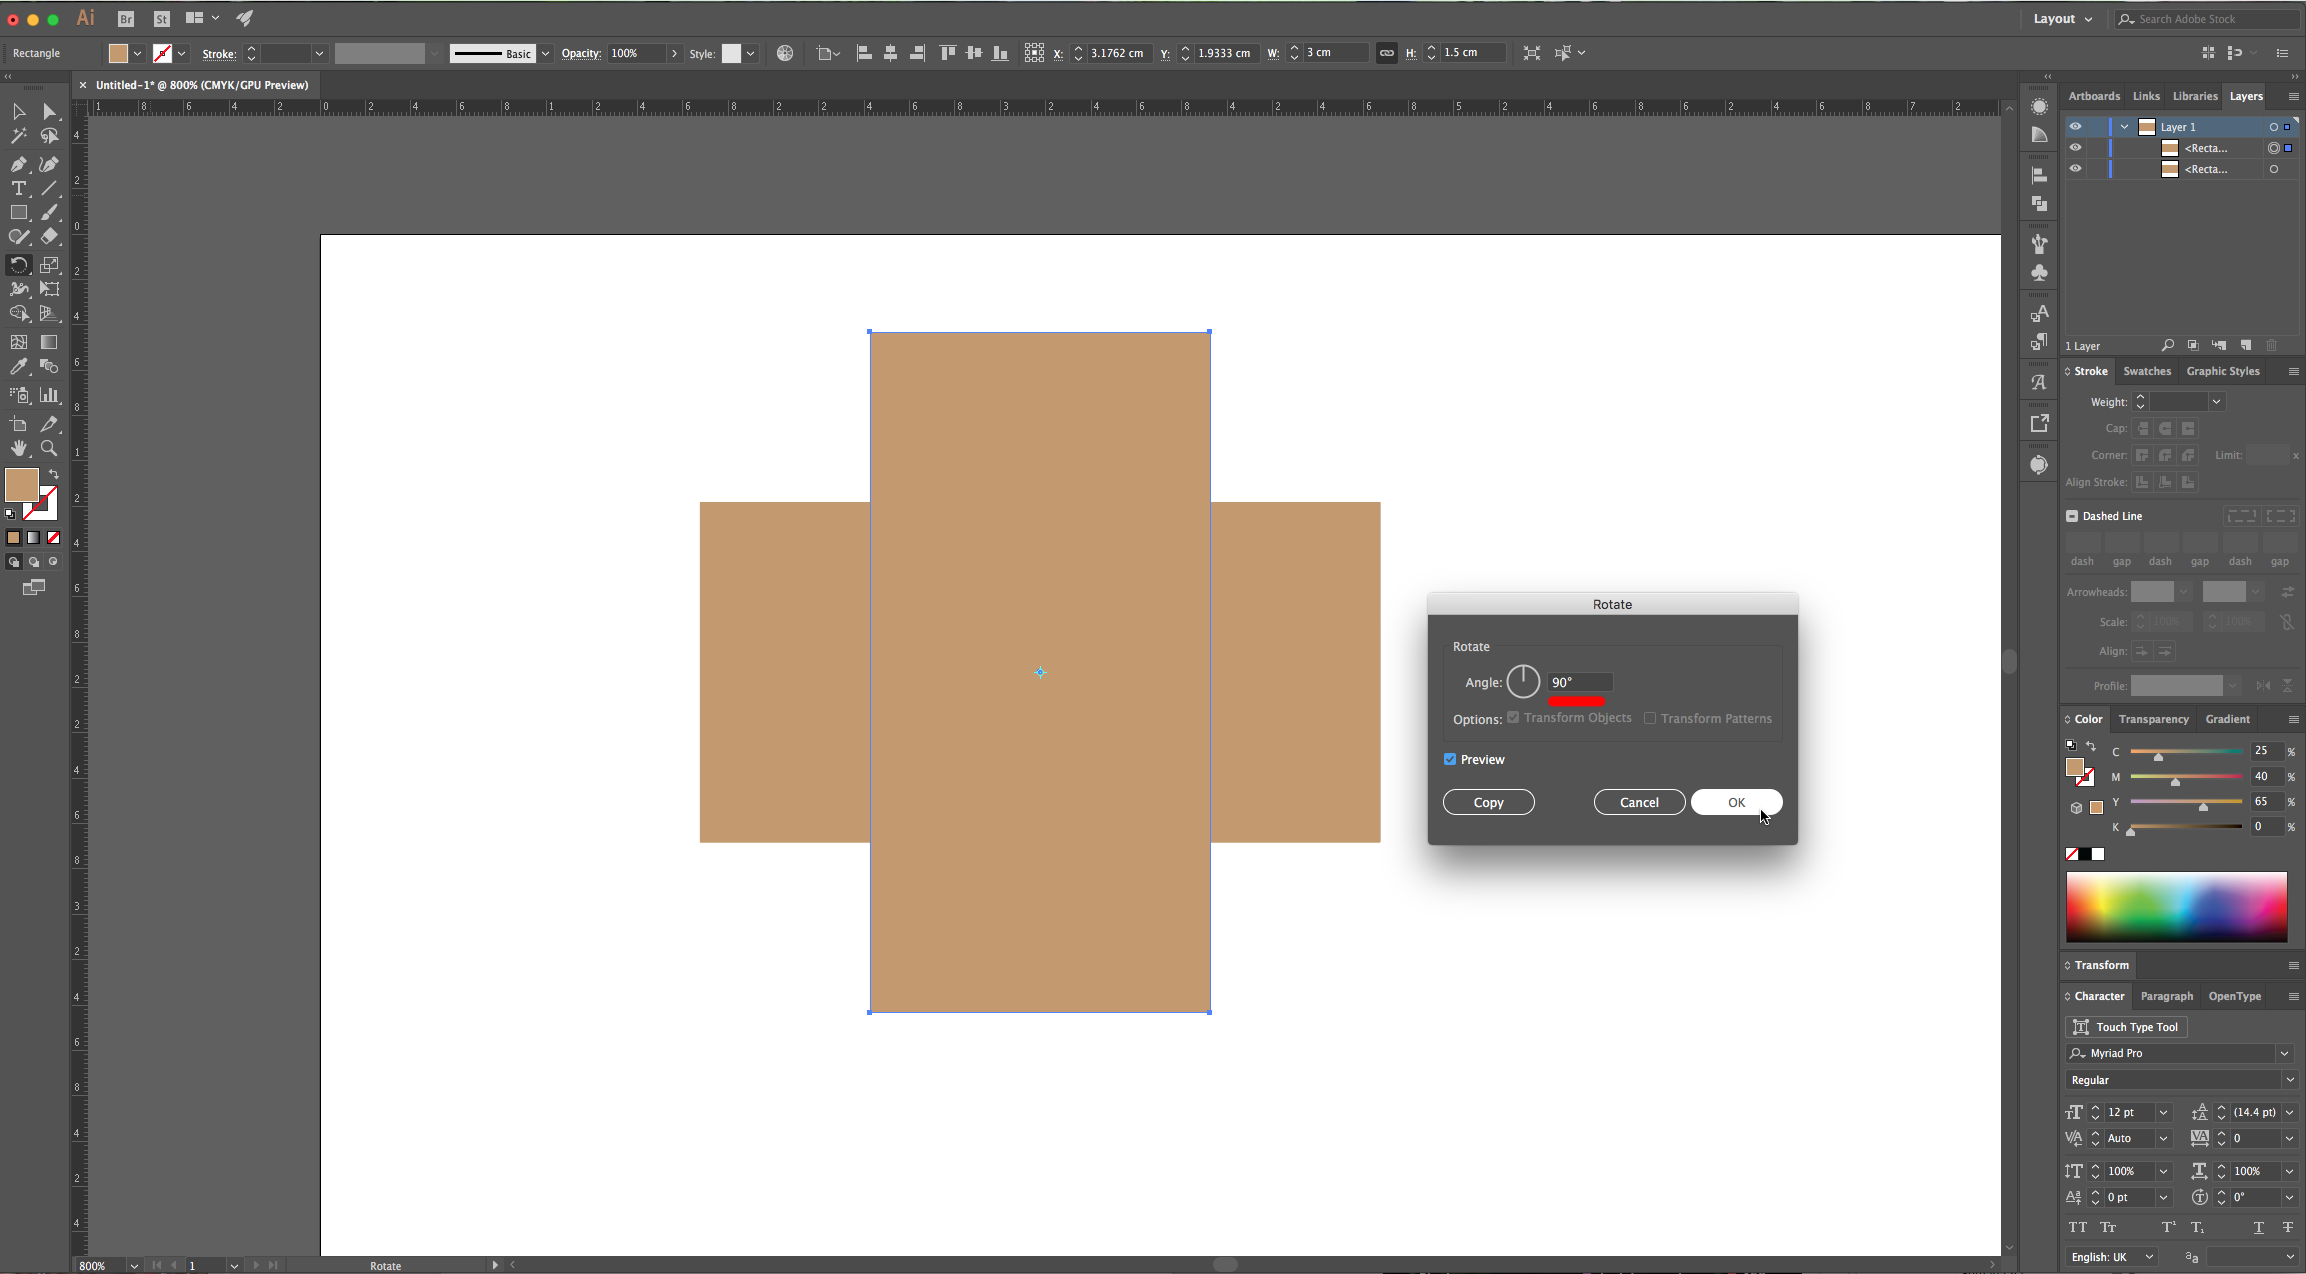
3 - With your rectangle still selected, “Copy” it (Command/Control + C) and “Paste to Back” (Command/Control + B). Use the “Rotate Tool” (R) to flip your rectangle in a 90° Angle.
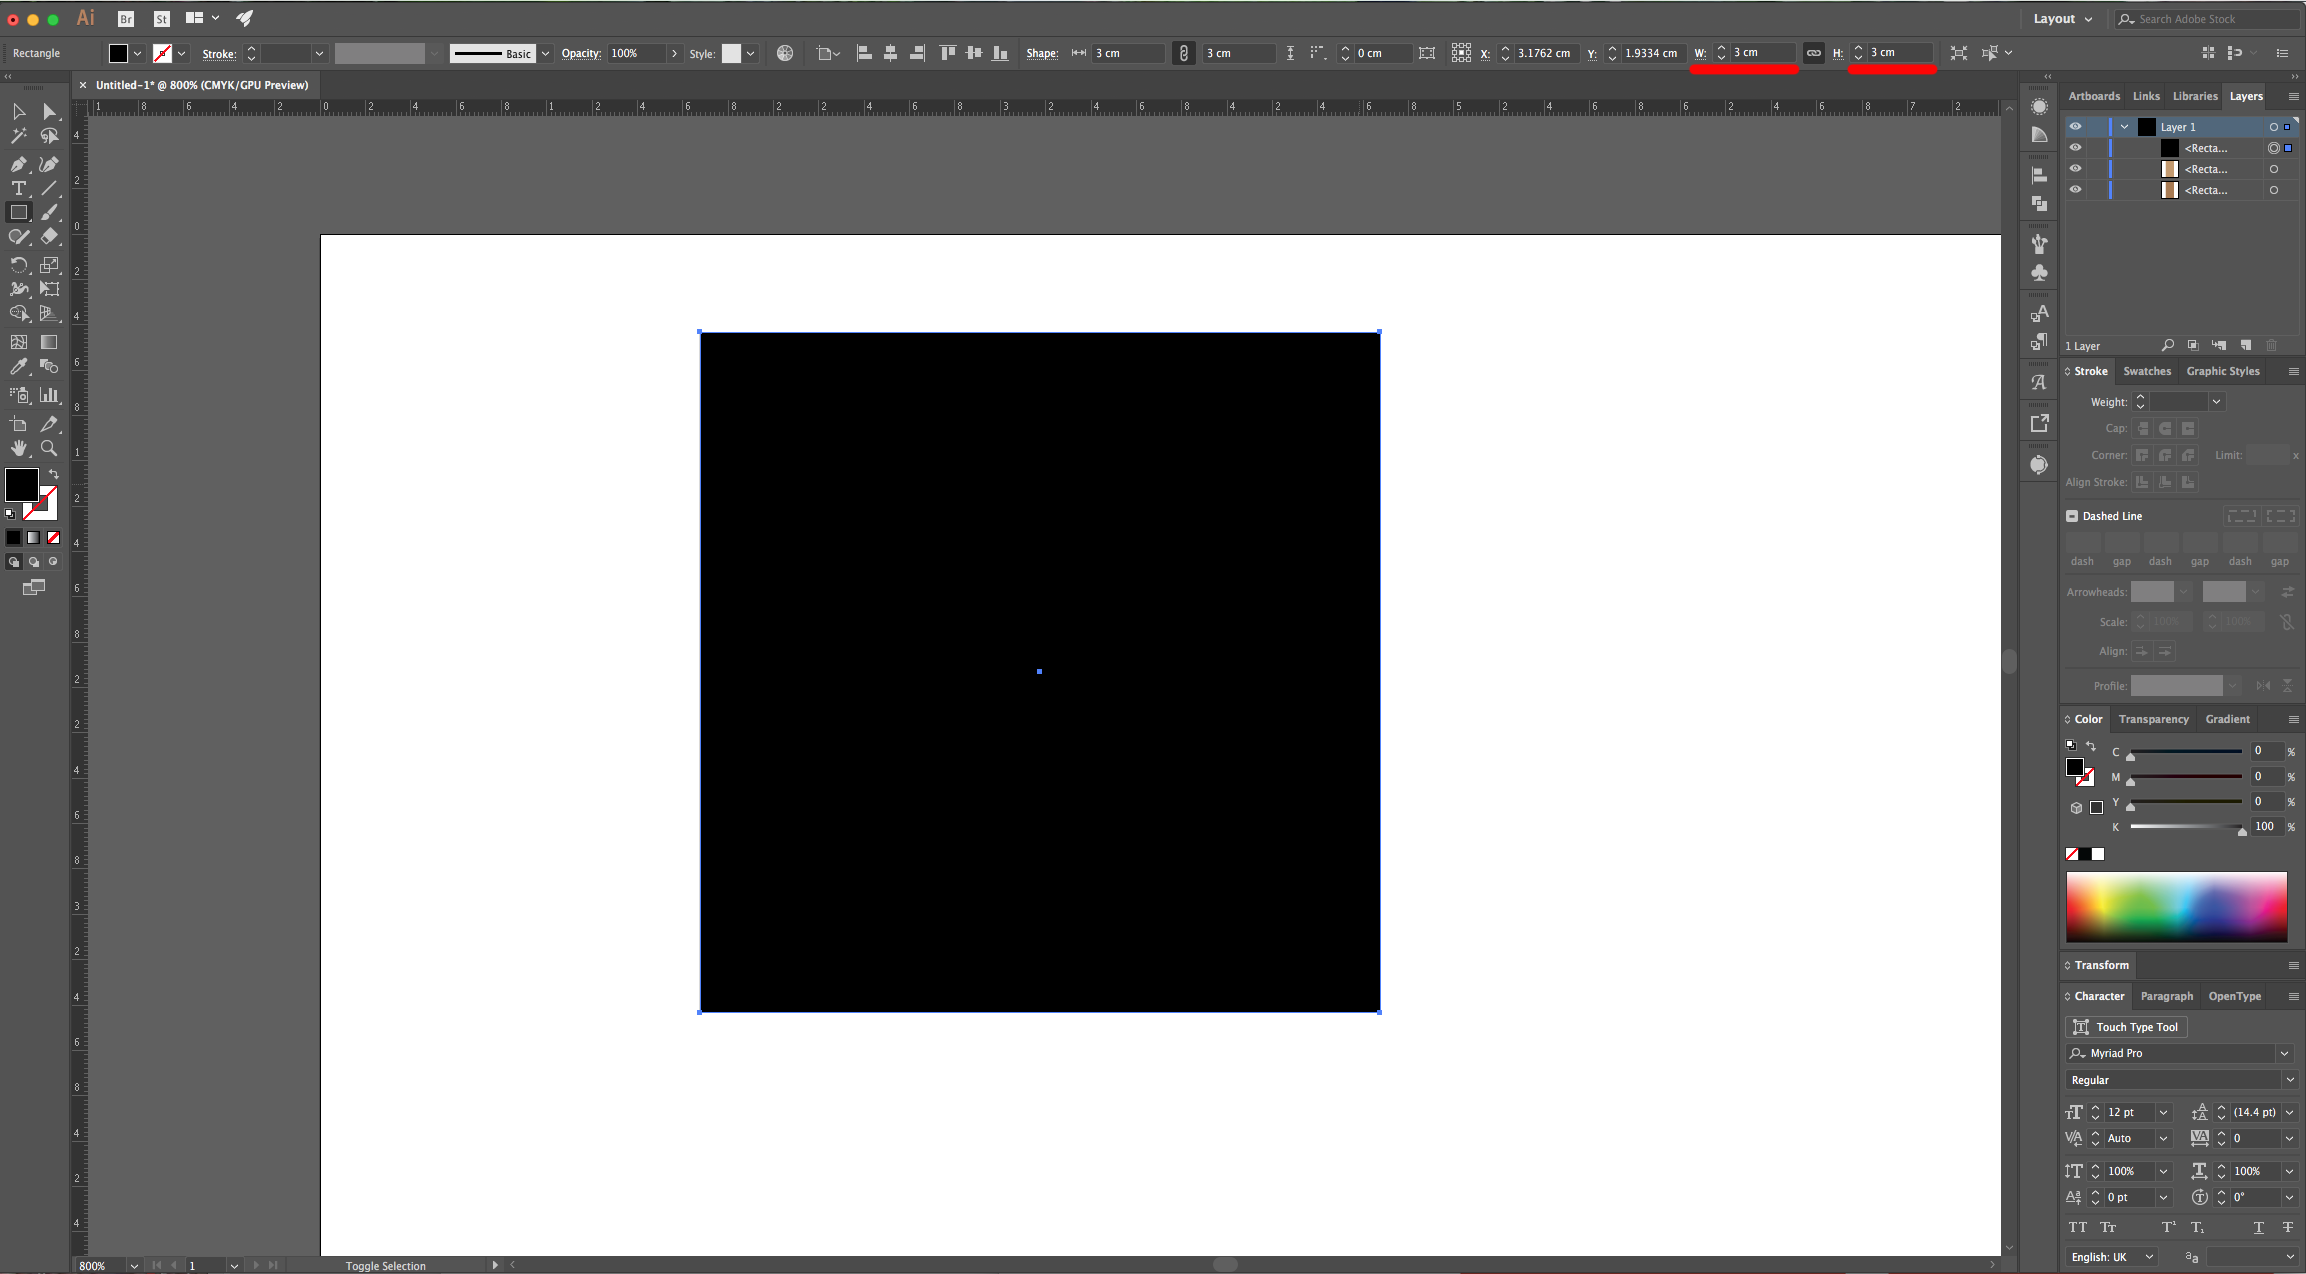
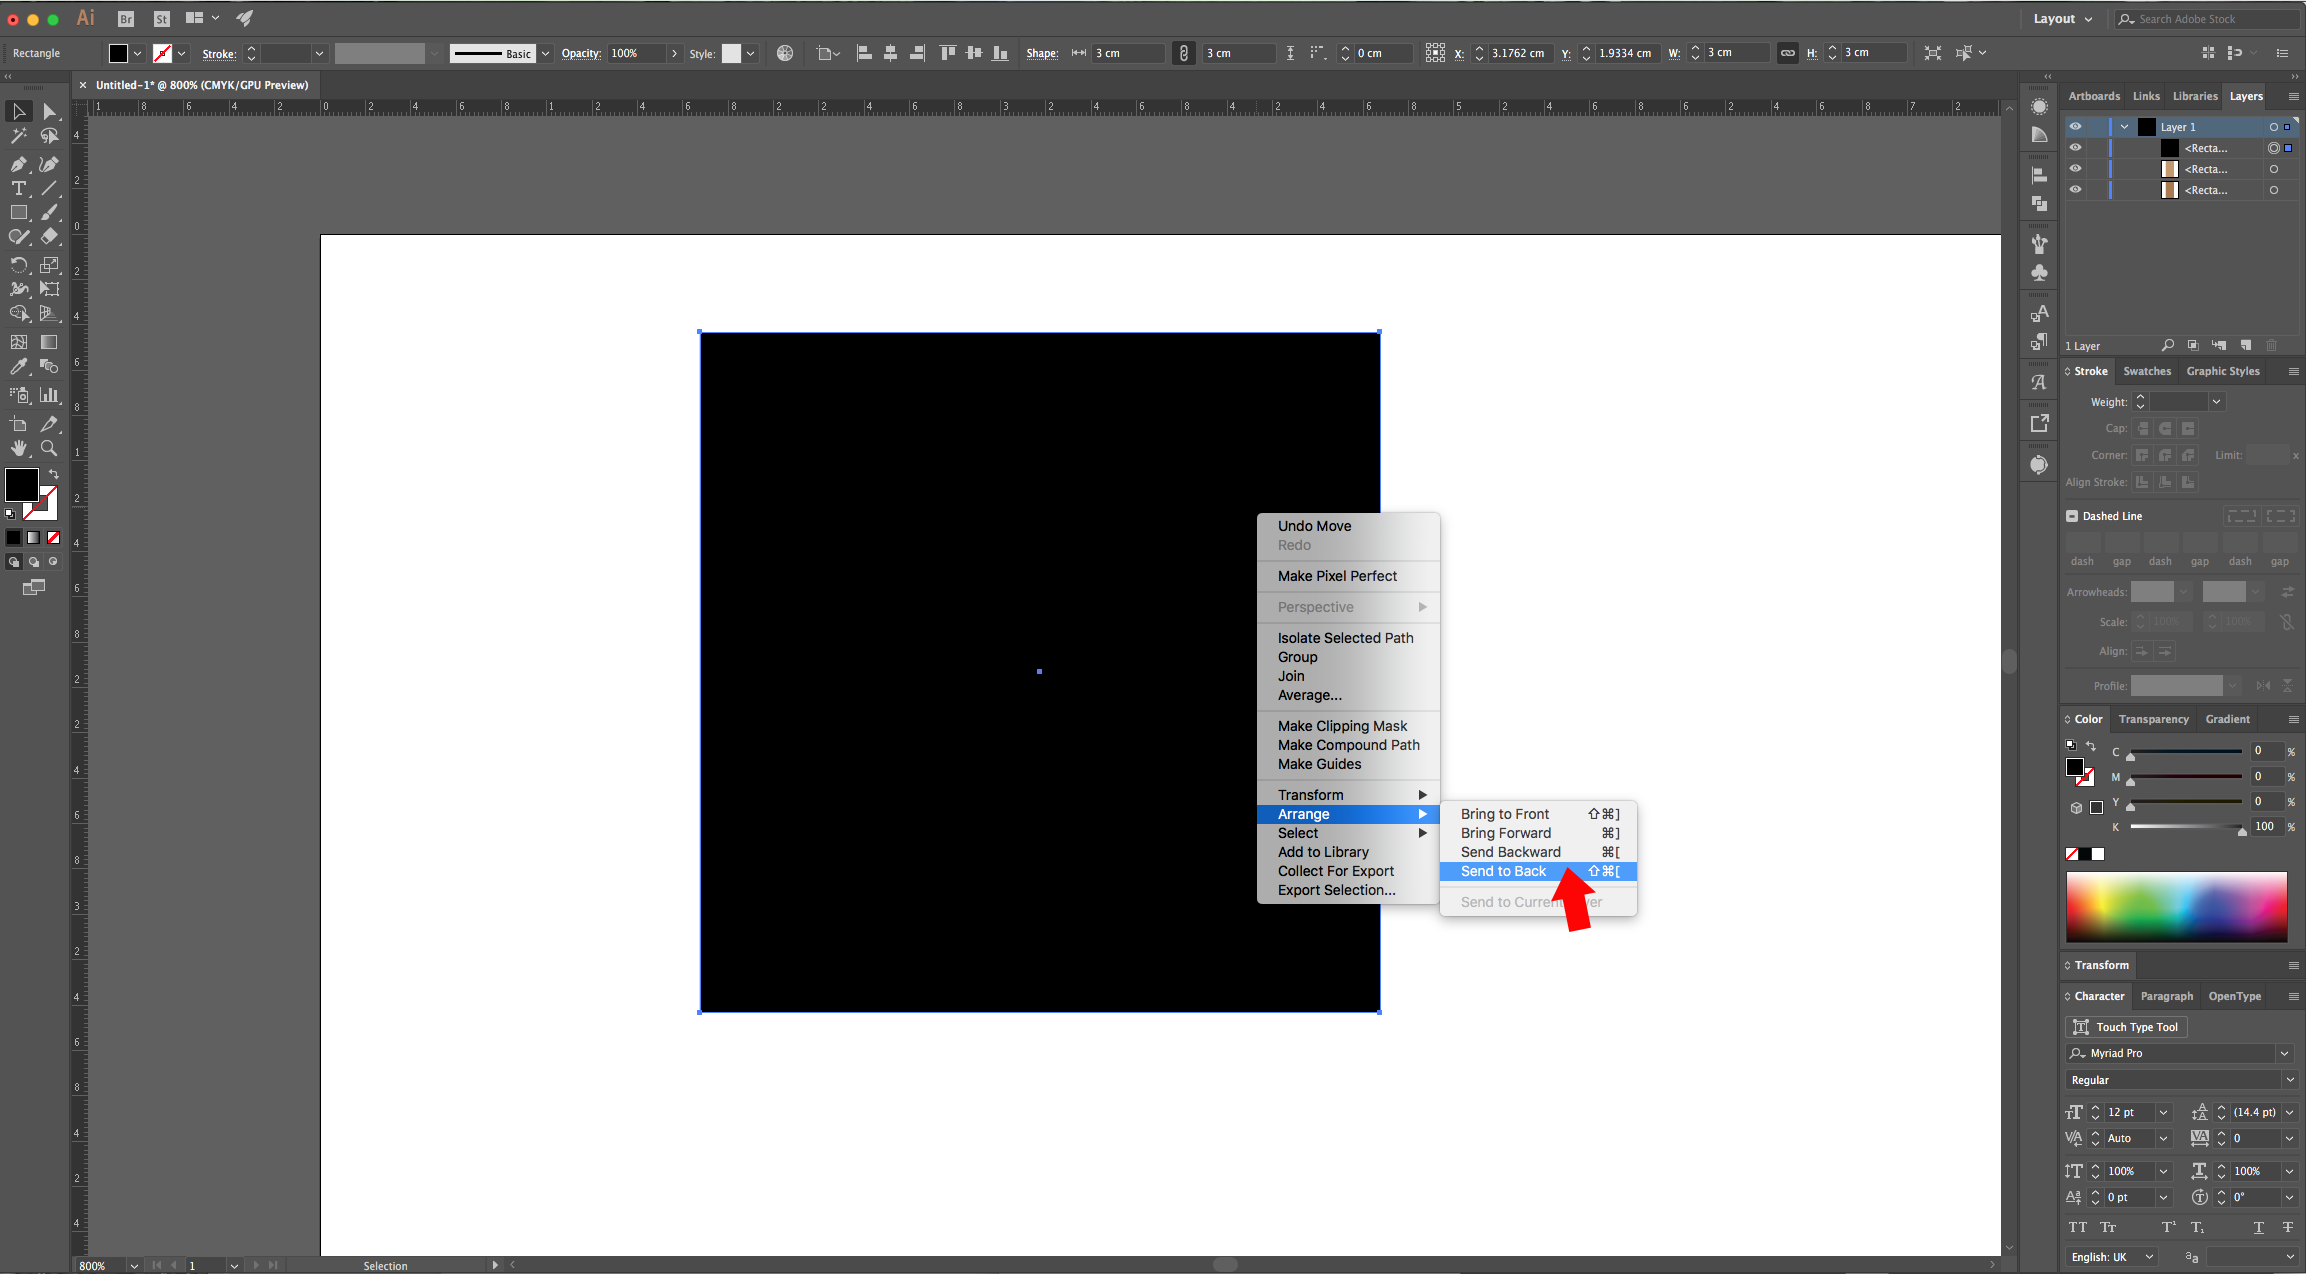
4 - Create another rectangle with a 3 cm “With” and “Height”, place it right on top of your rectangles. Right-click on it and choose Arrange > Send to Back and change its “Fill” color to a dark brown.

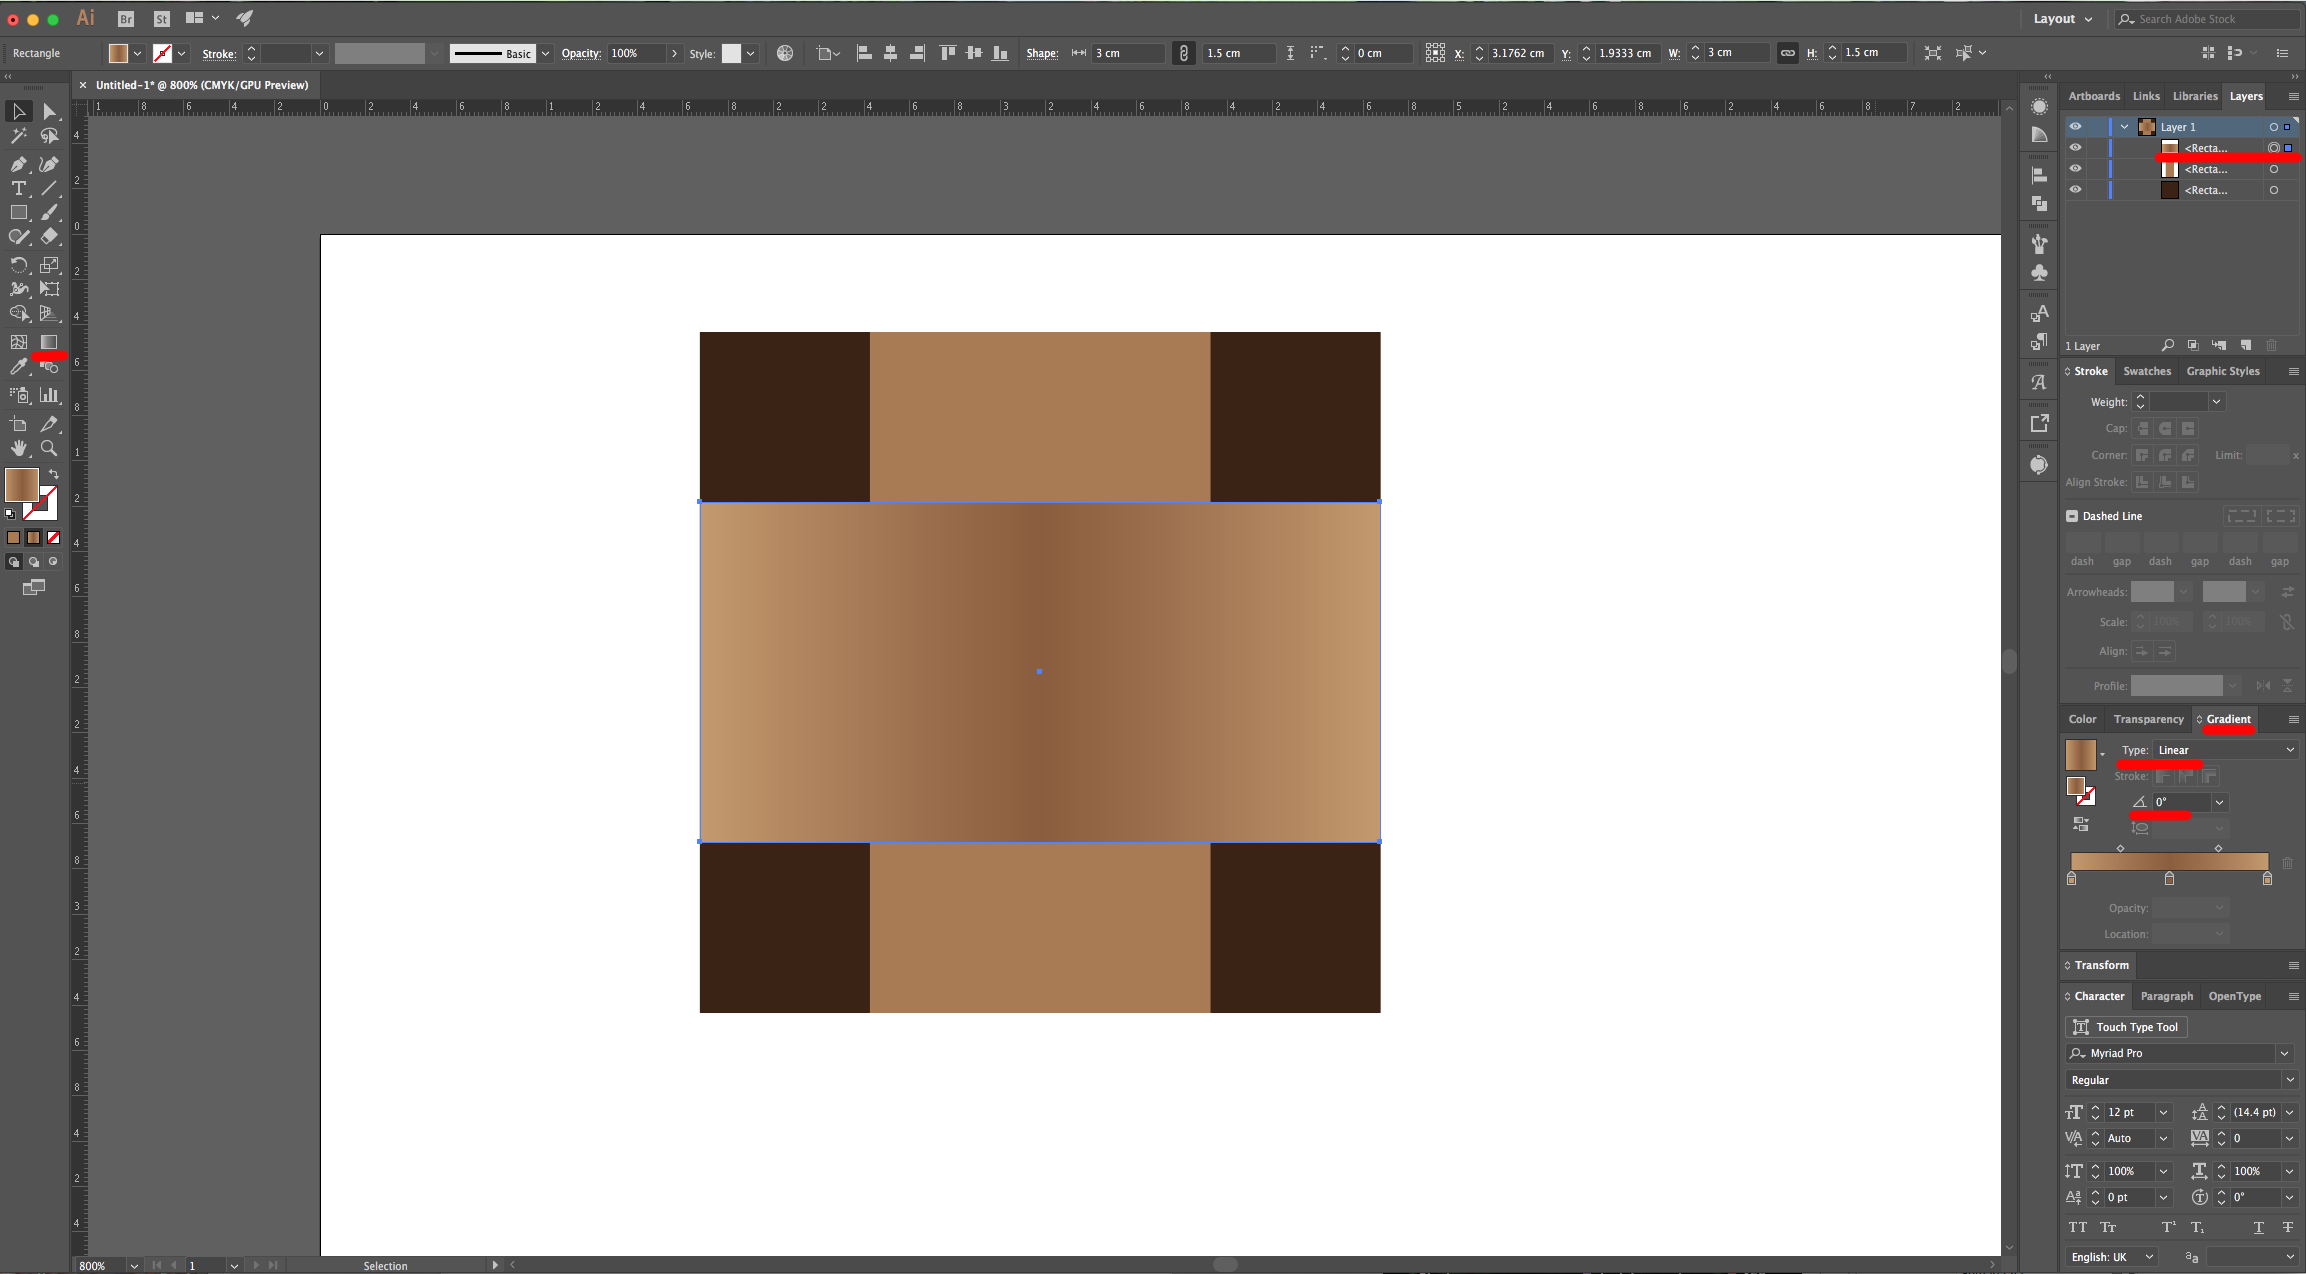
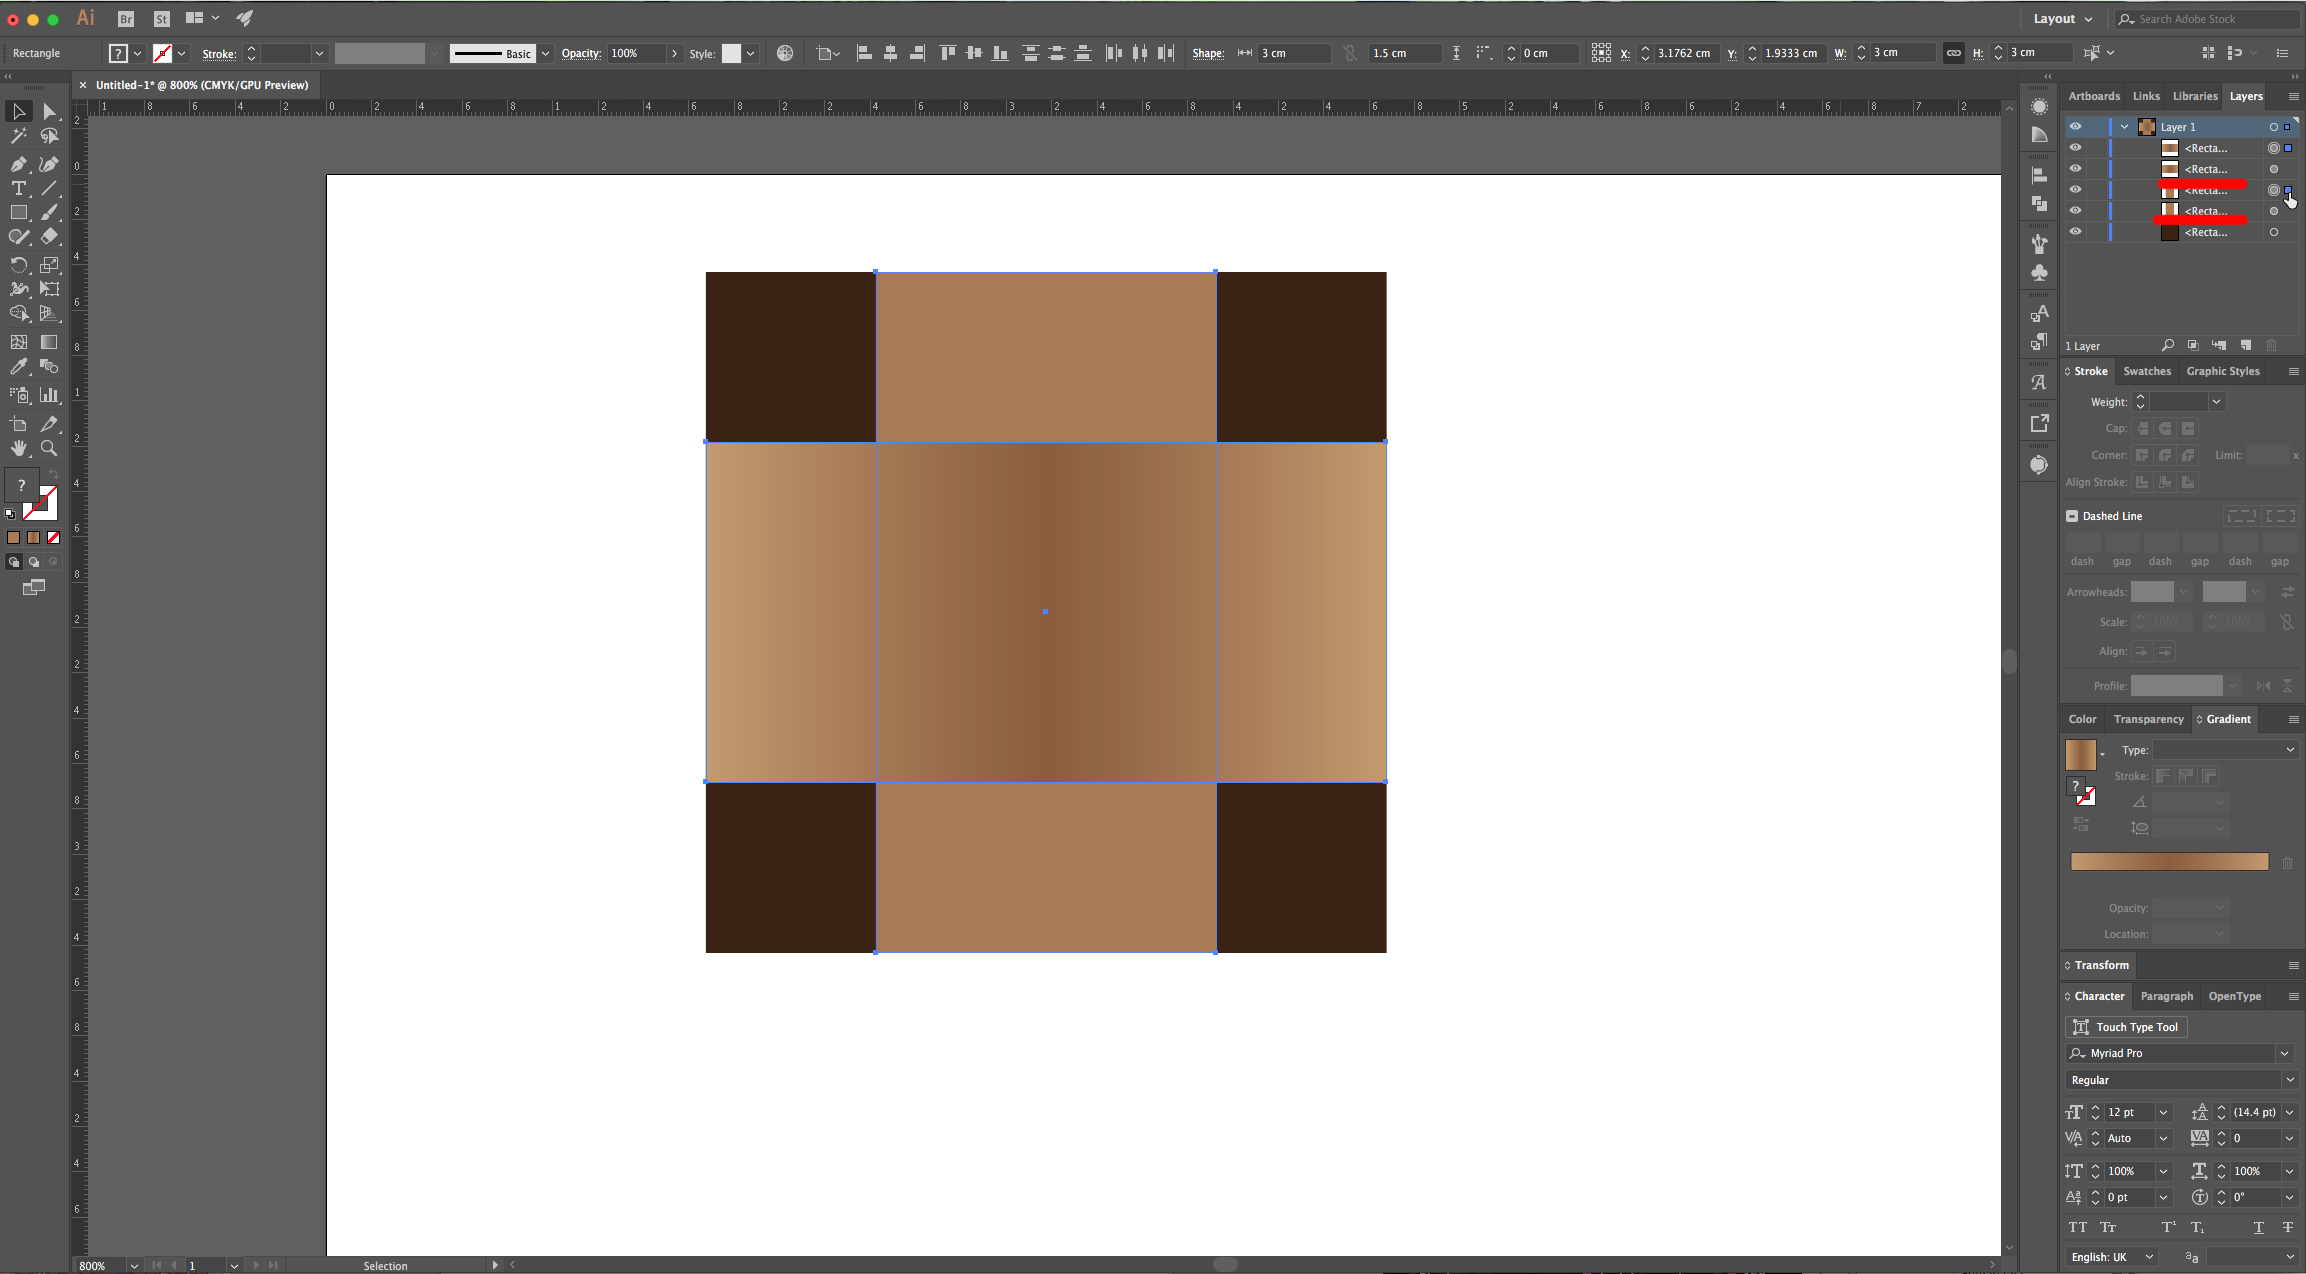
5 - Select the Top-most rectangle (the horizontal one) and change the “Fill” to a “Linear Gradient” with a 0° Angle and with 3 spots (0%, 50% and 100%). The first and last should be the same color (we used #c49a6c), and the second one should be a darker shade (we used #8b5e3c).
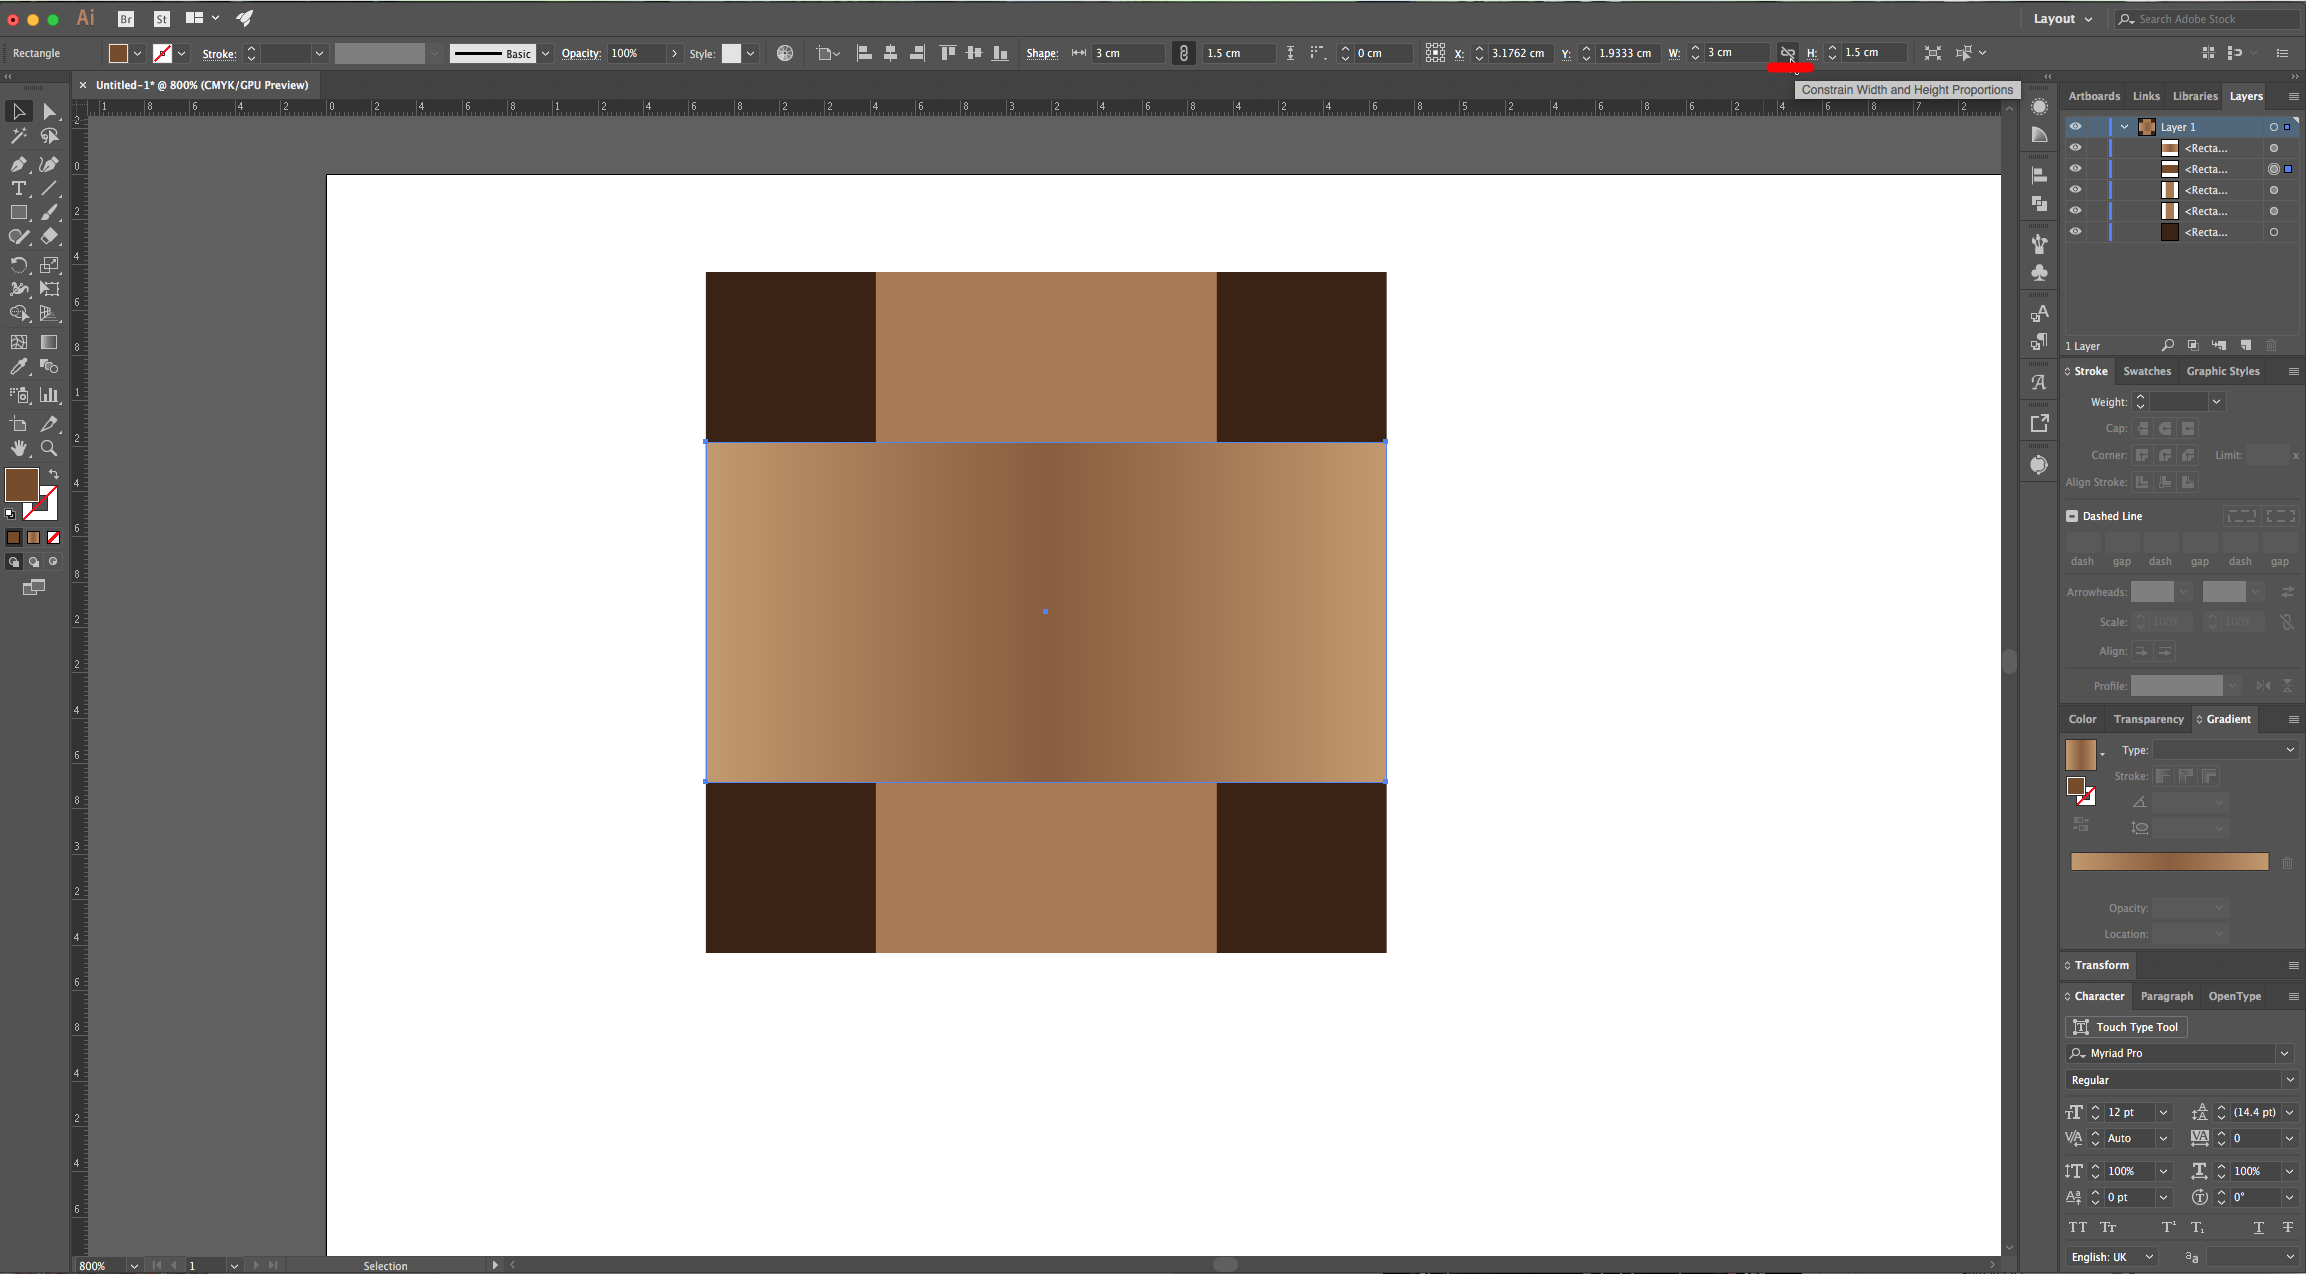
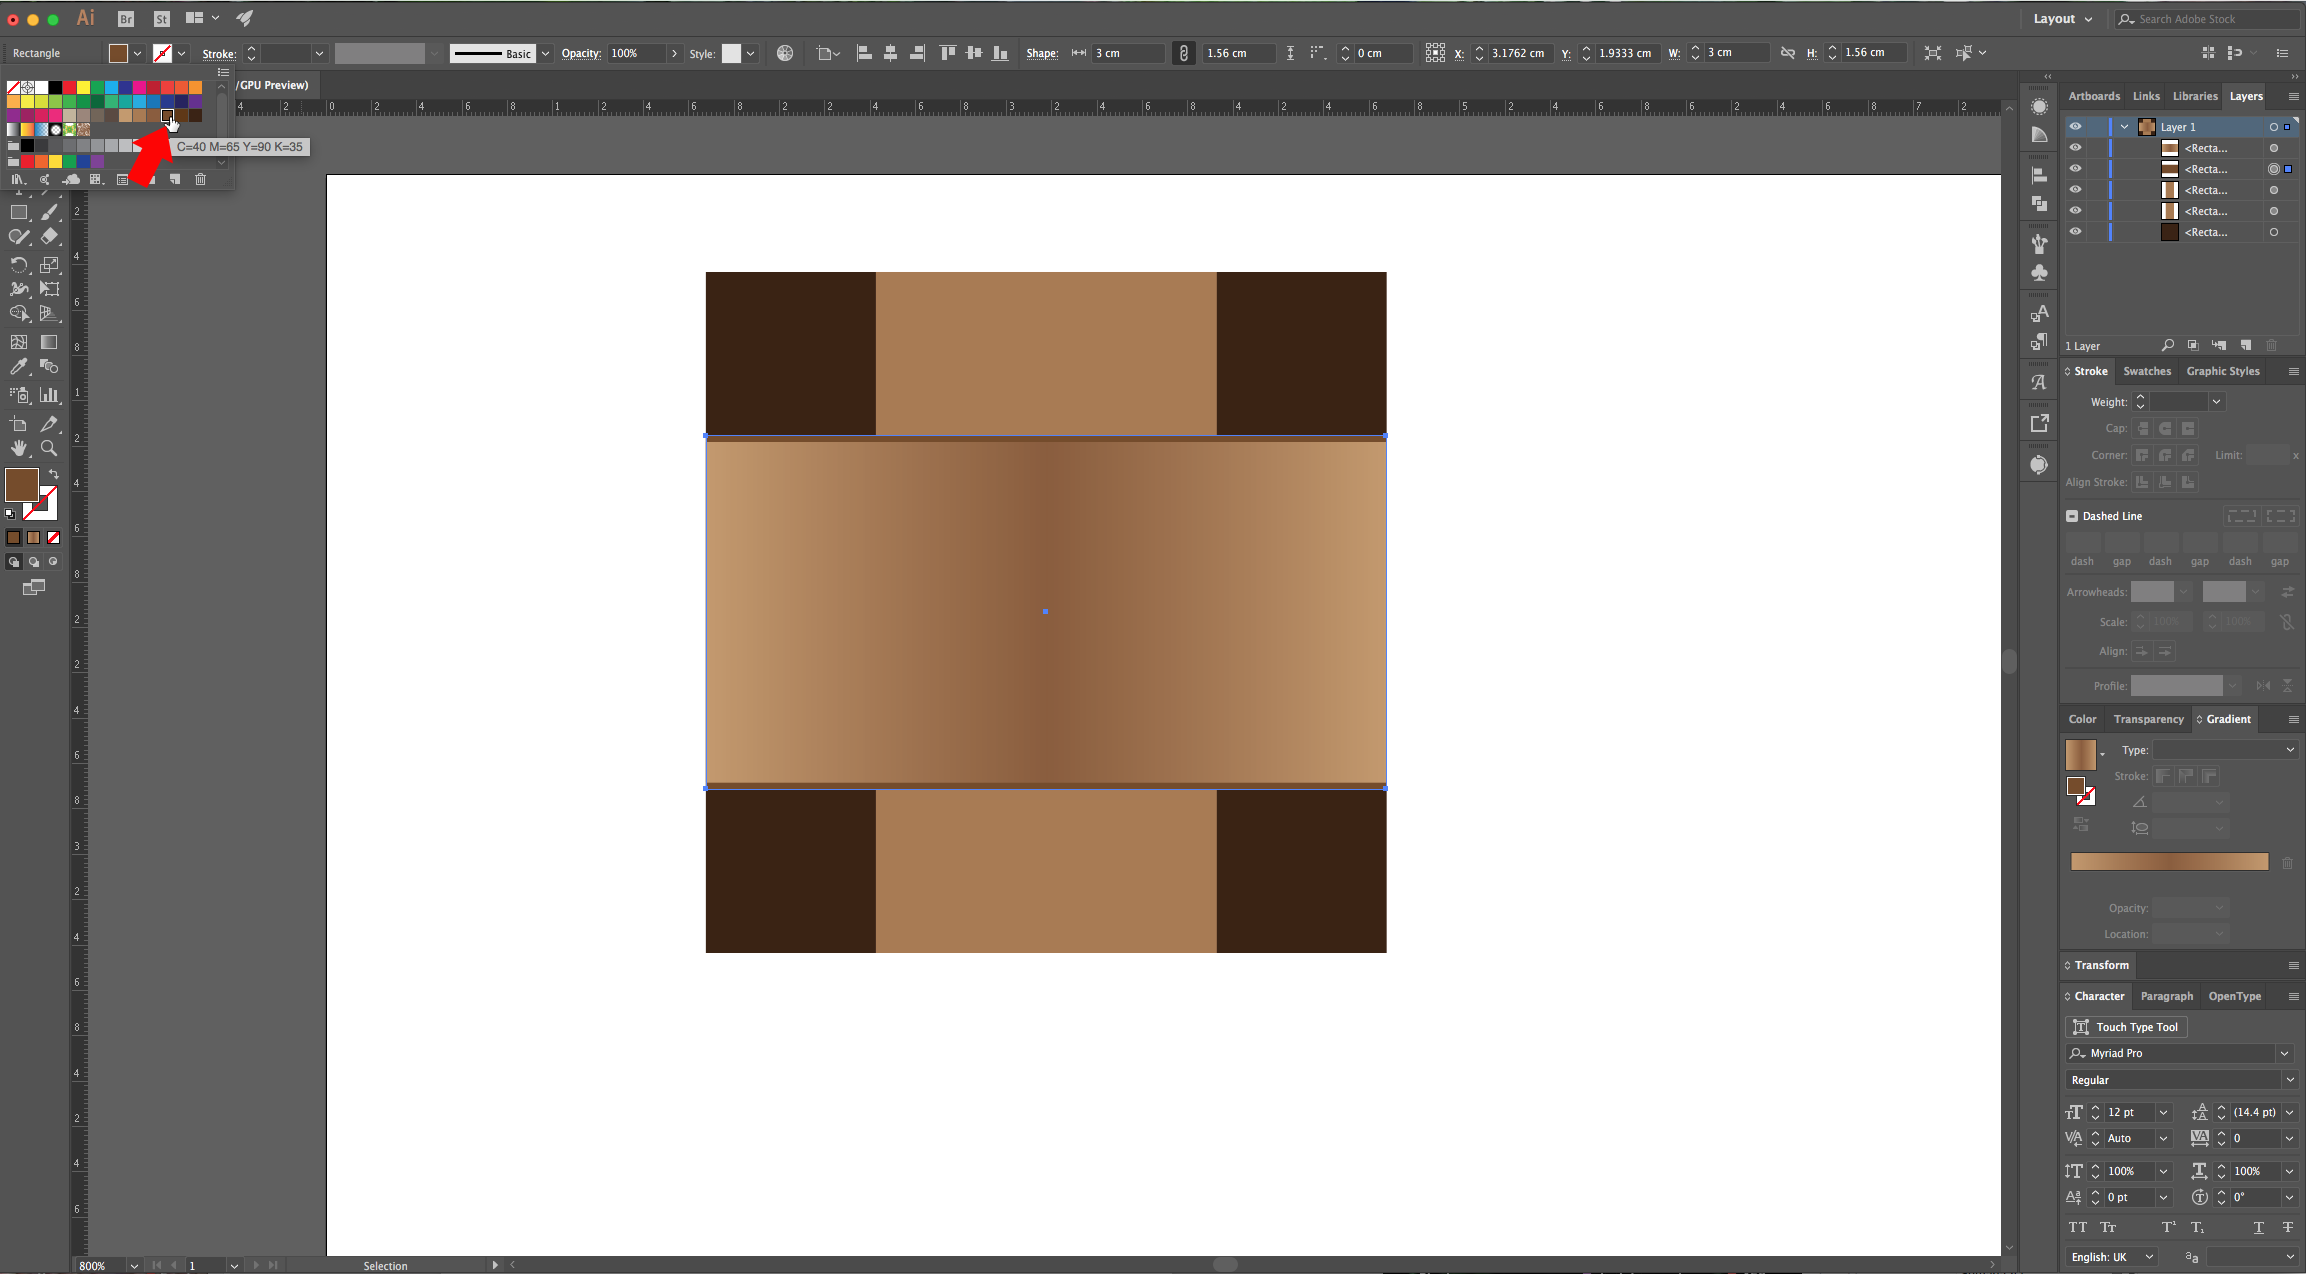
6 - Duplicate both rectangles (horizontal and vertical). Select the second rectangle counting from the Top (the bottom horizontal one), click on the “Constrain Width and Height Proportions” icon on the Top Menu making sure the little chain is crossed and change the “H Value” from 1.5 cm to 1.56 cm. Change the “Fill” color to a darker shade so you end up with darker “Lines” on the top and bottom. Do the same with the bottom vertical rectangle to create the “Lines” left and right.


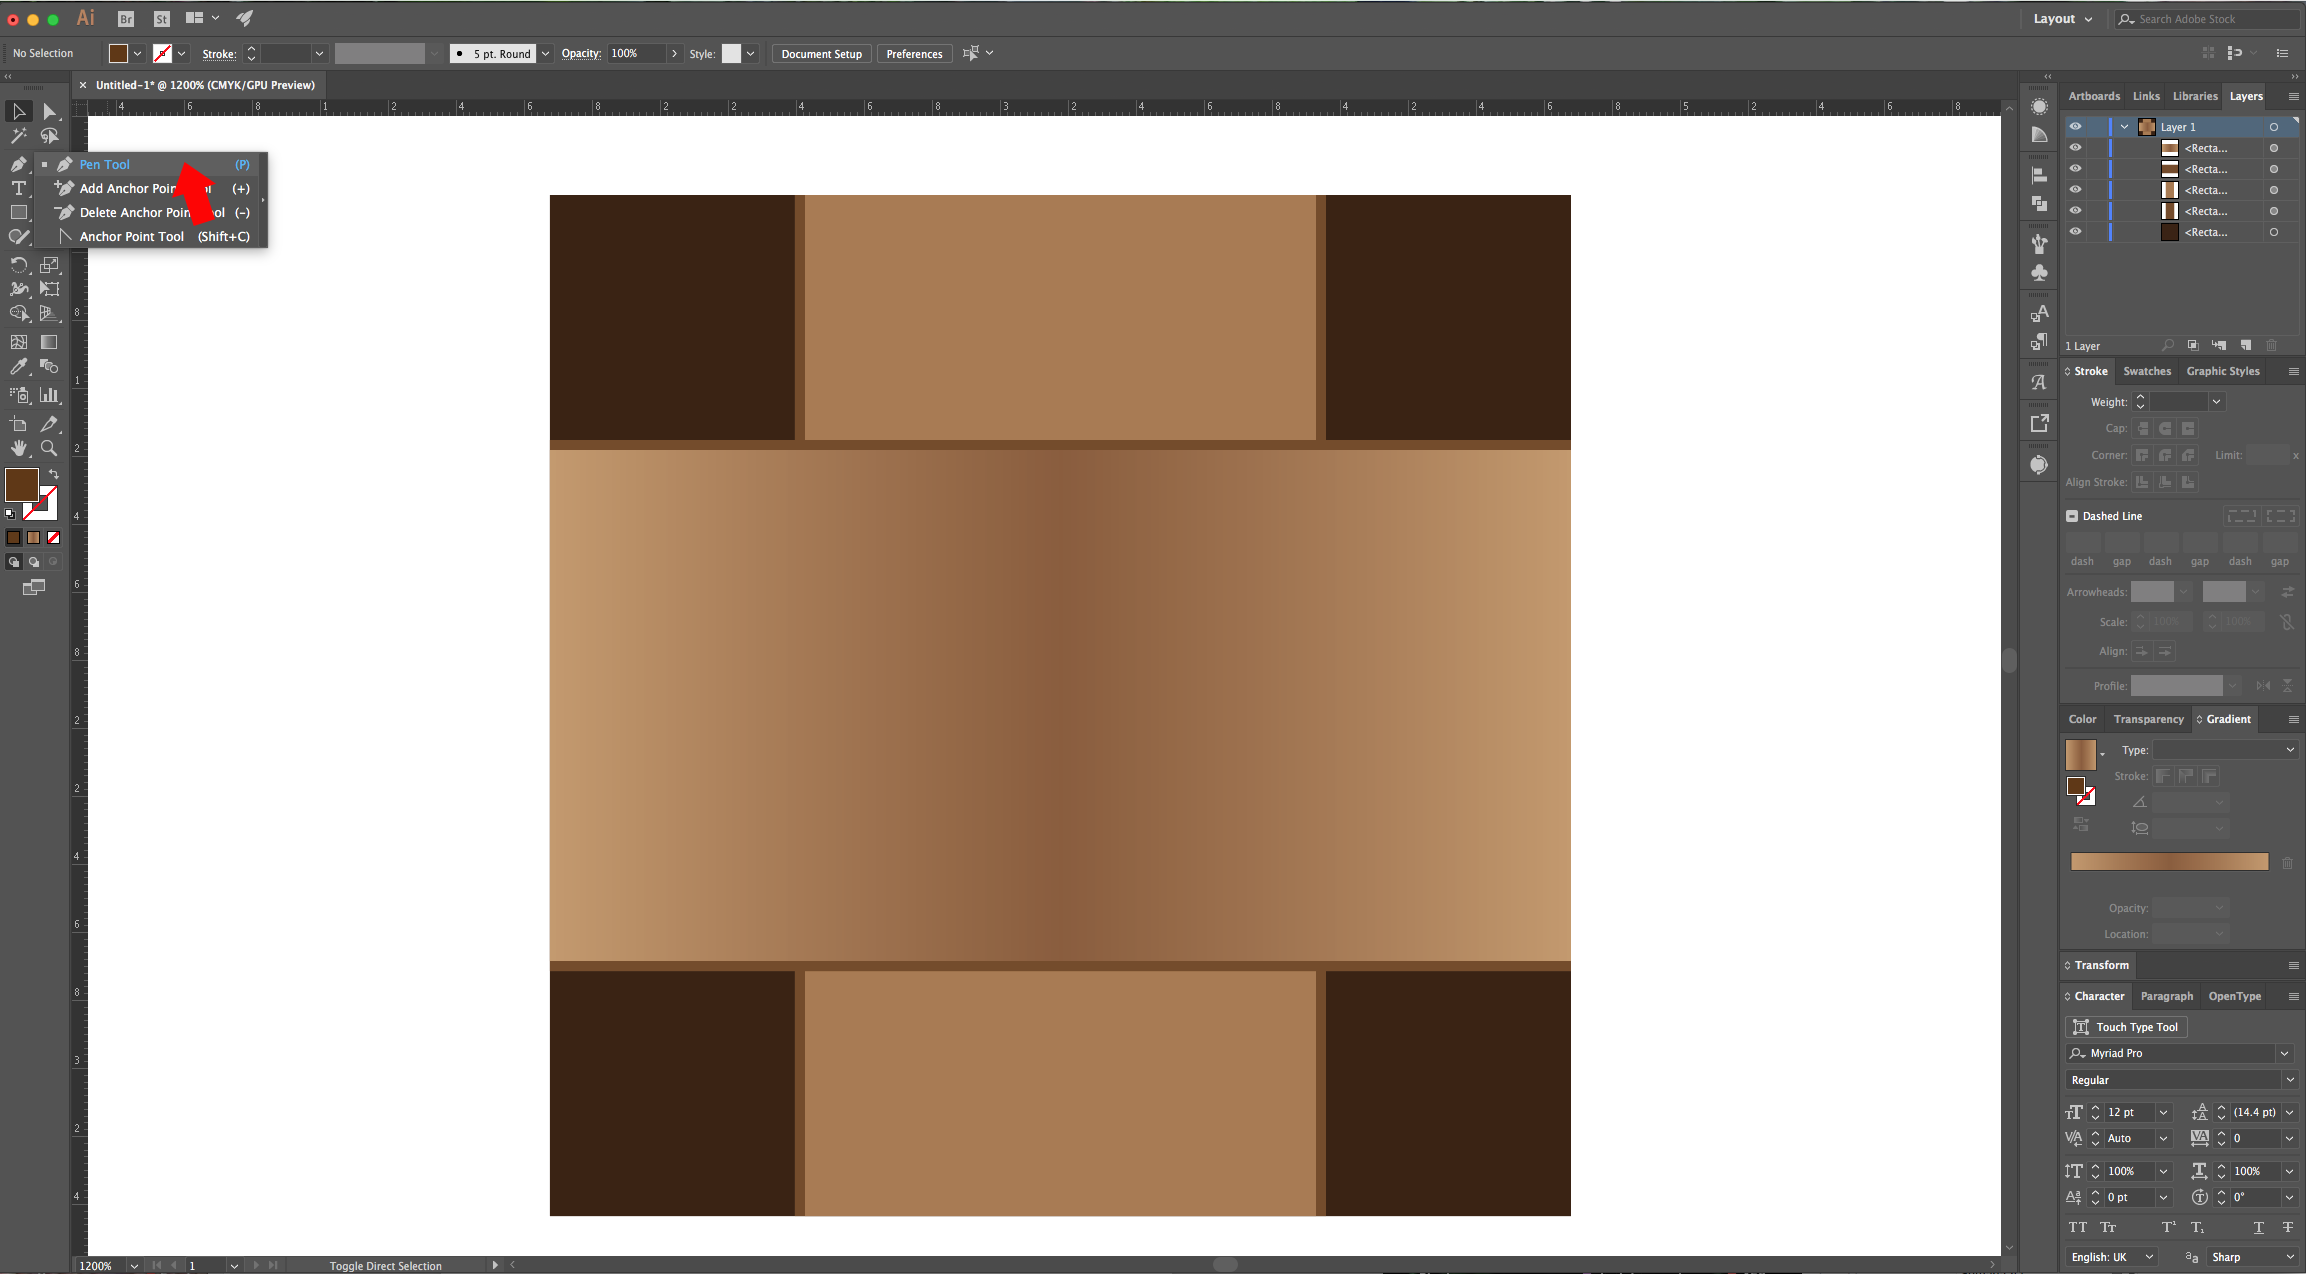
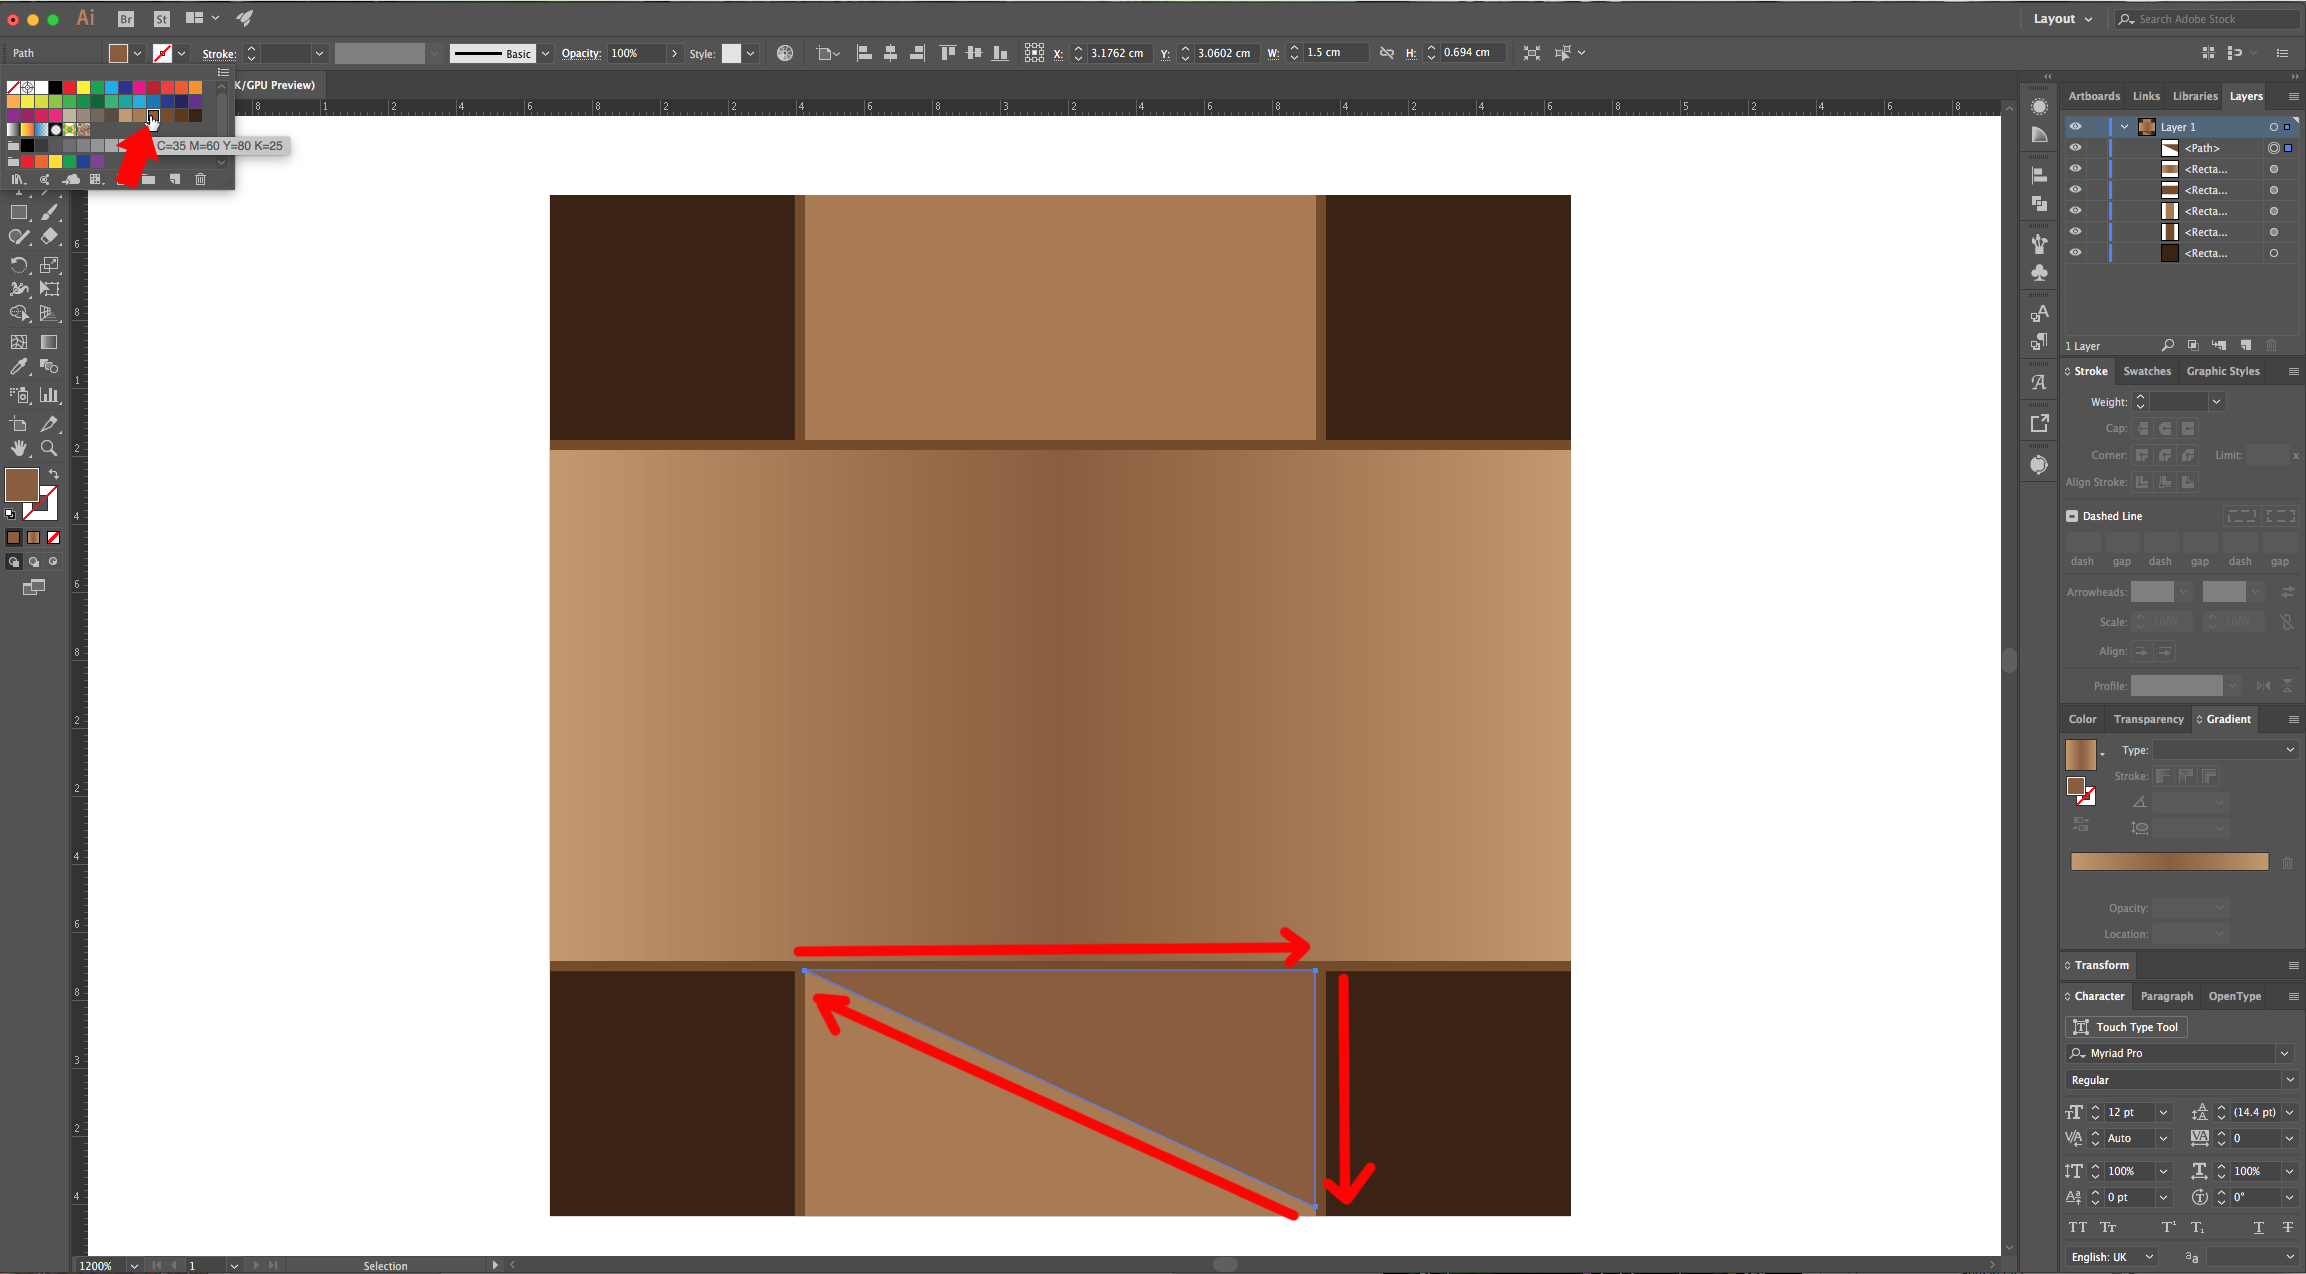
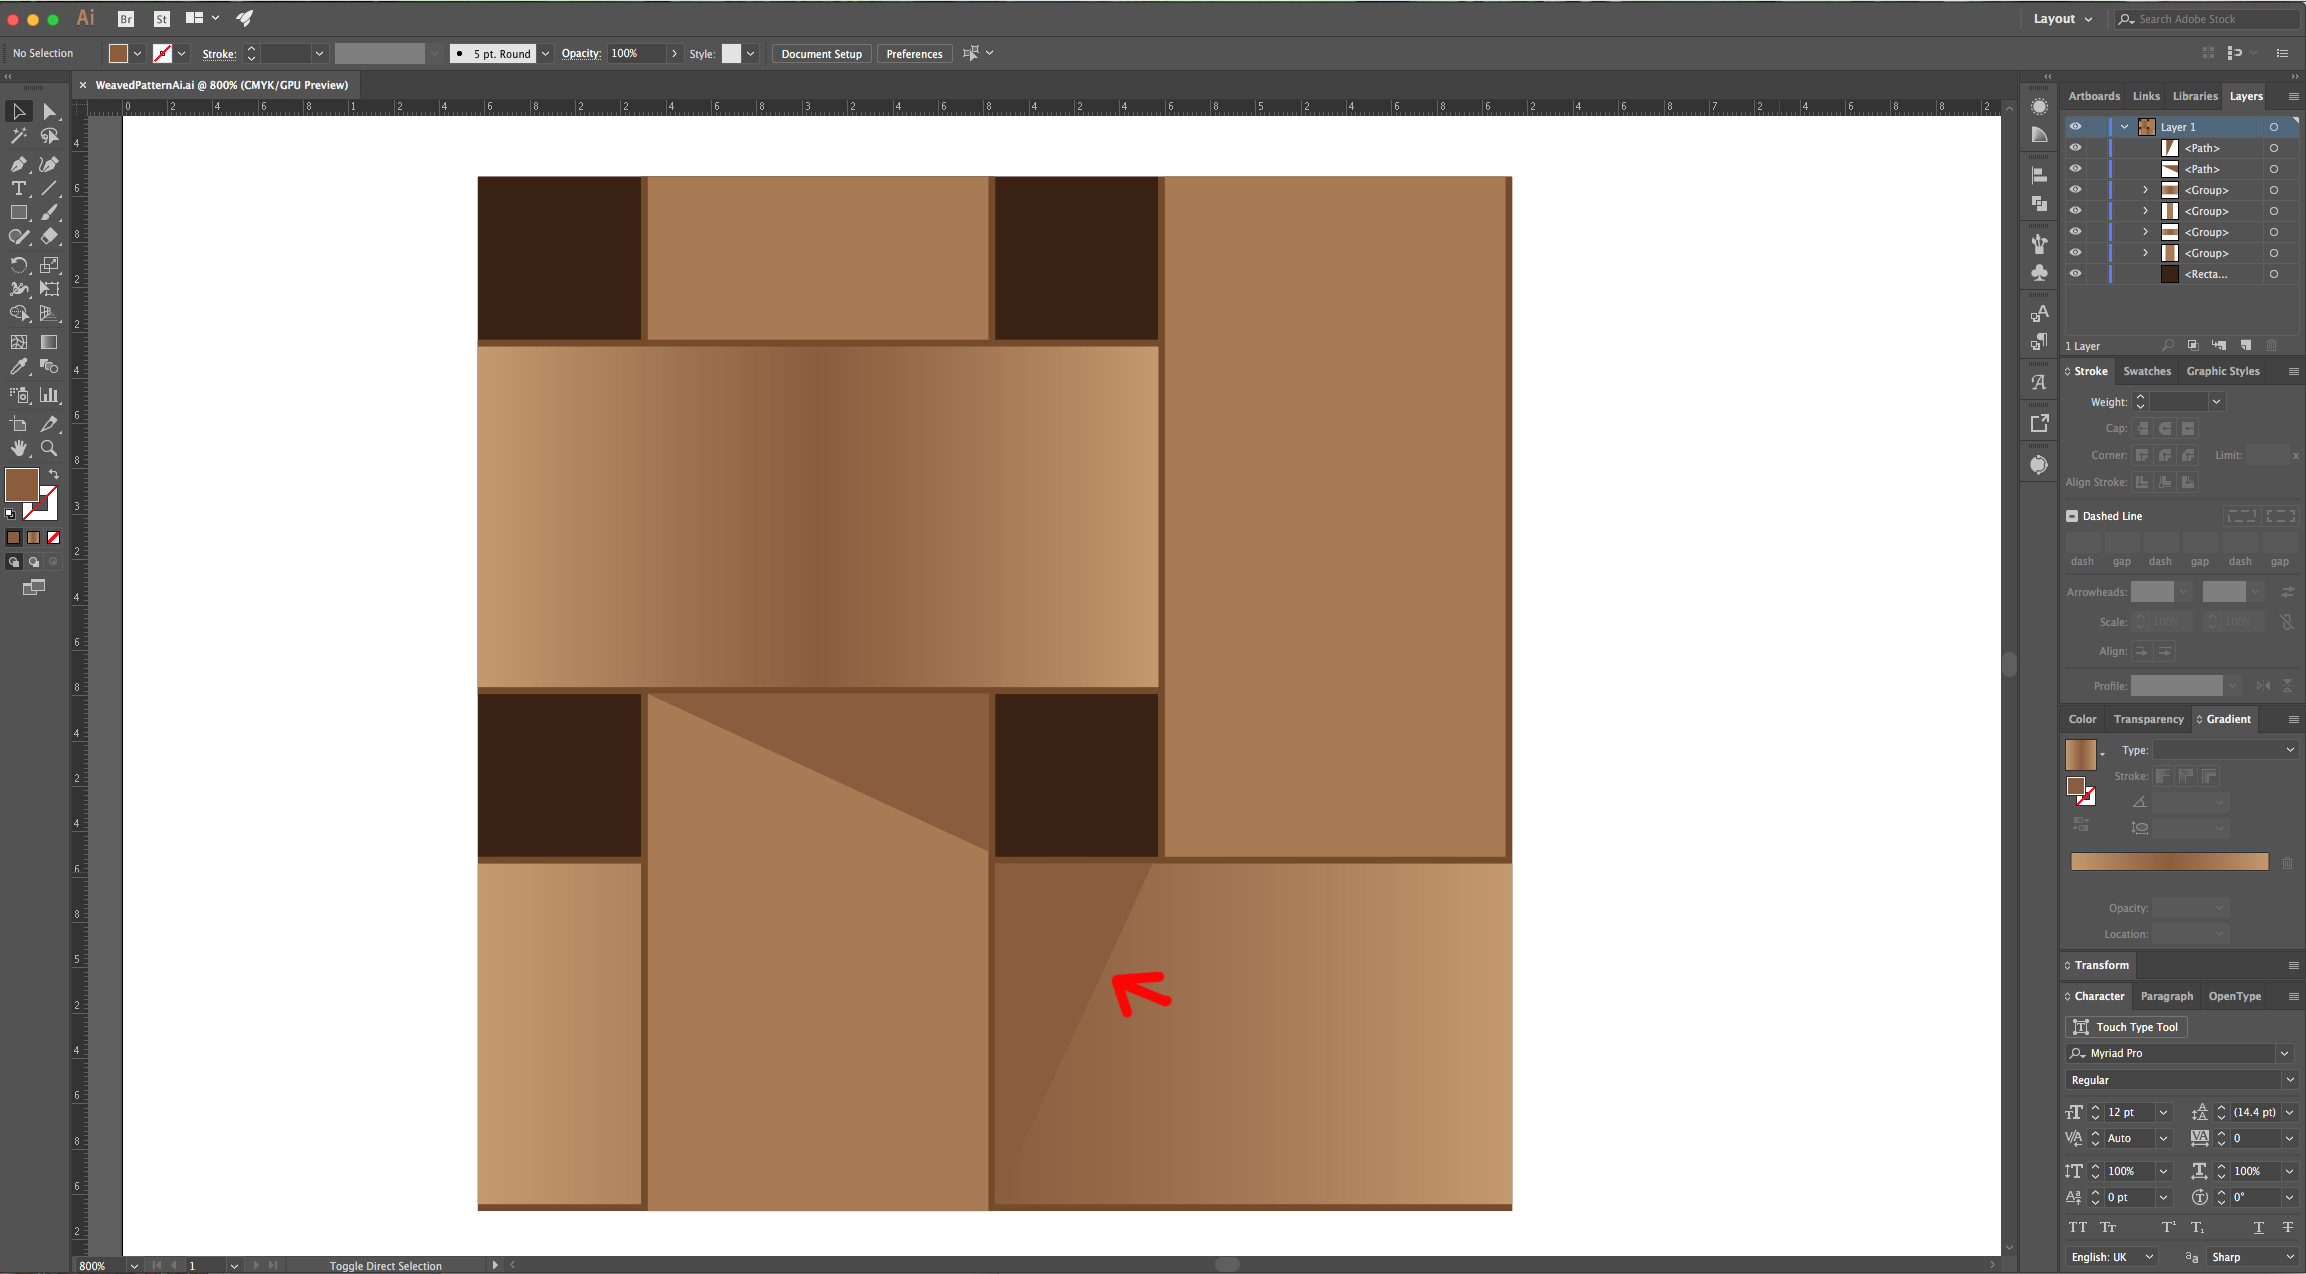
7 - Use the “Pen Tool” (P) to create a right-angled triangle “Shadow” starting from the bottom-left point where the two rectangles intersect to the bottom-right, then down almost to the end of the vertical rectangle and back to the starting point. Fill it with a medium brown.
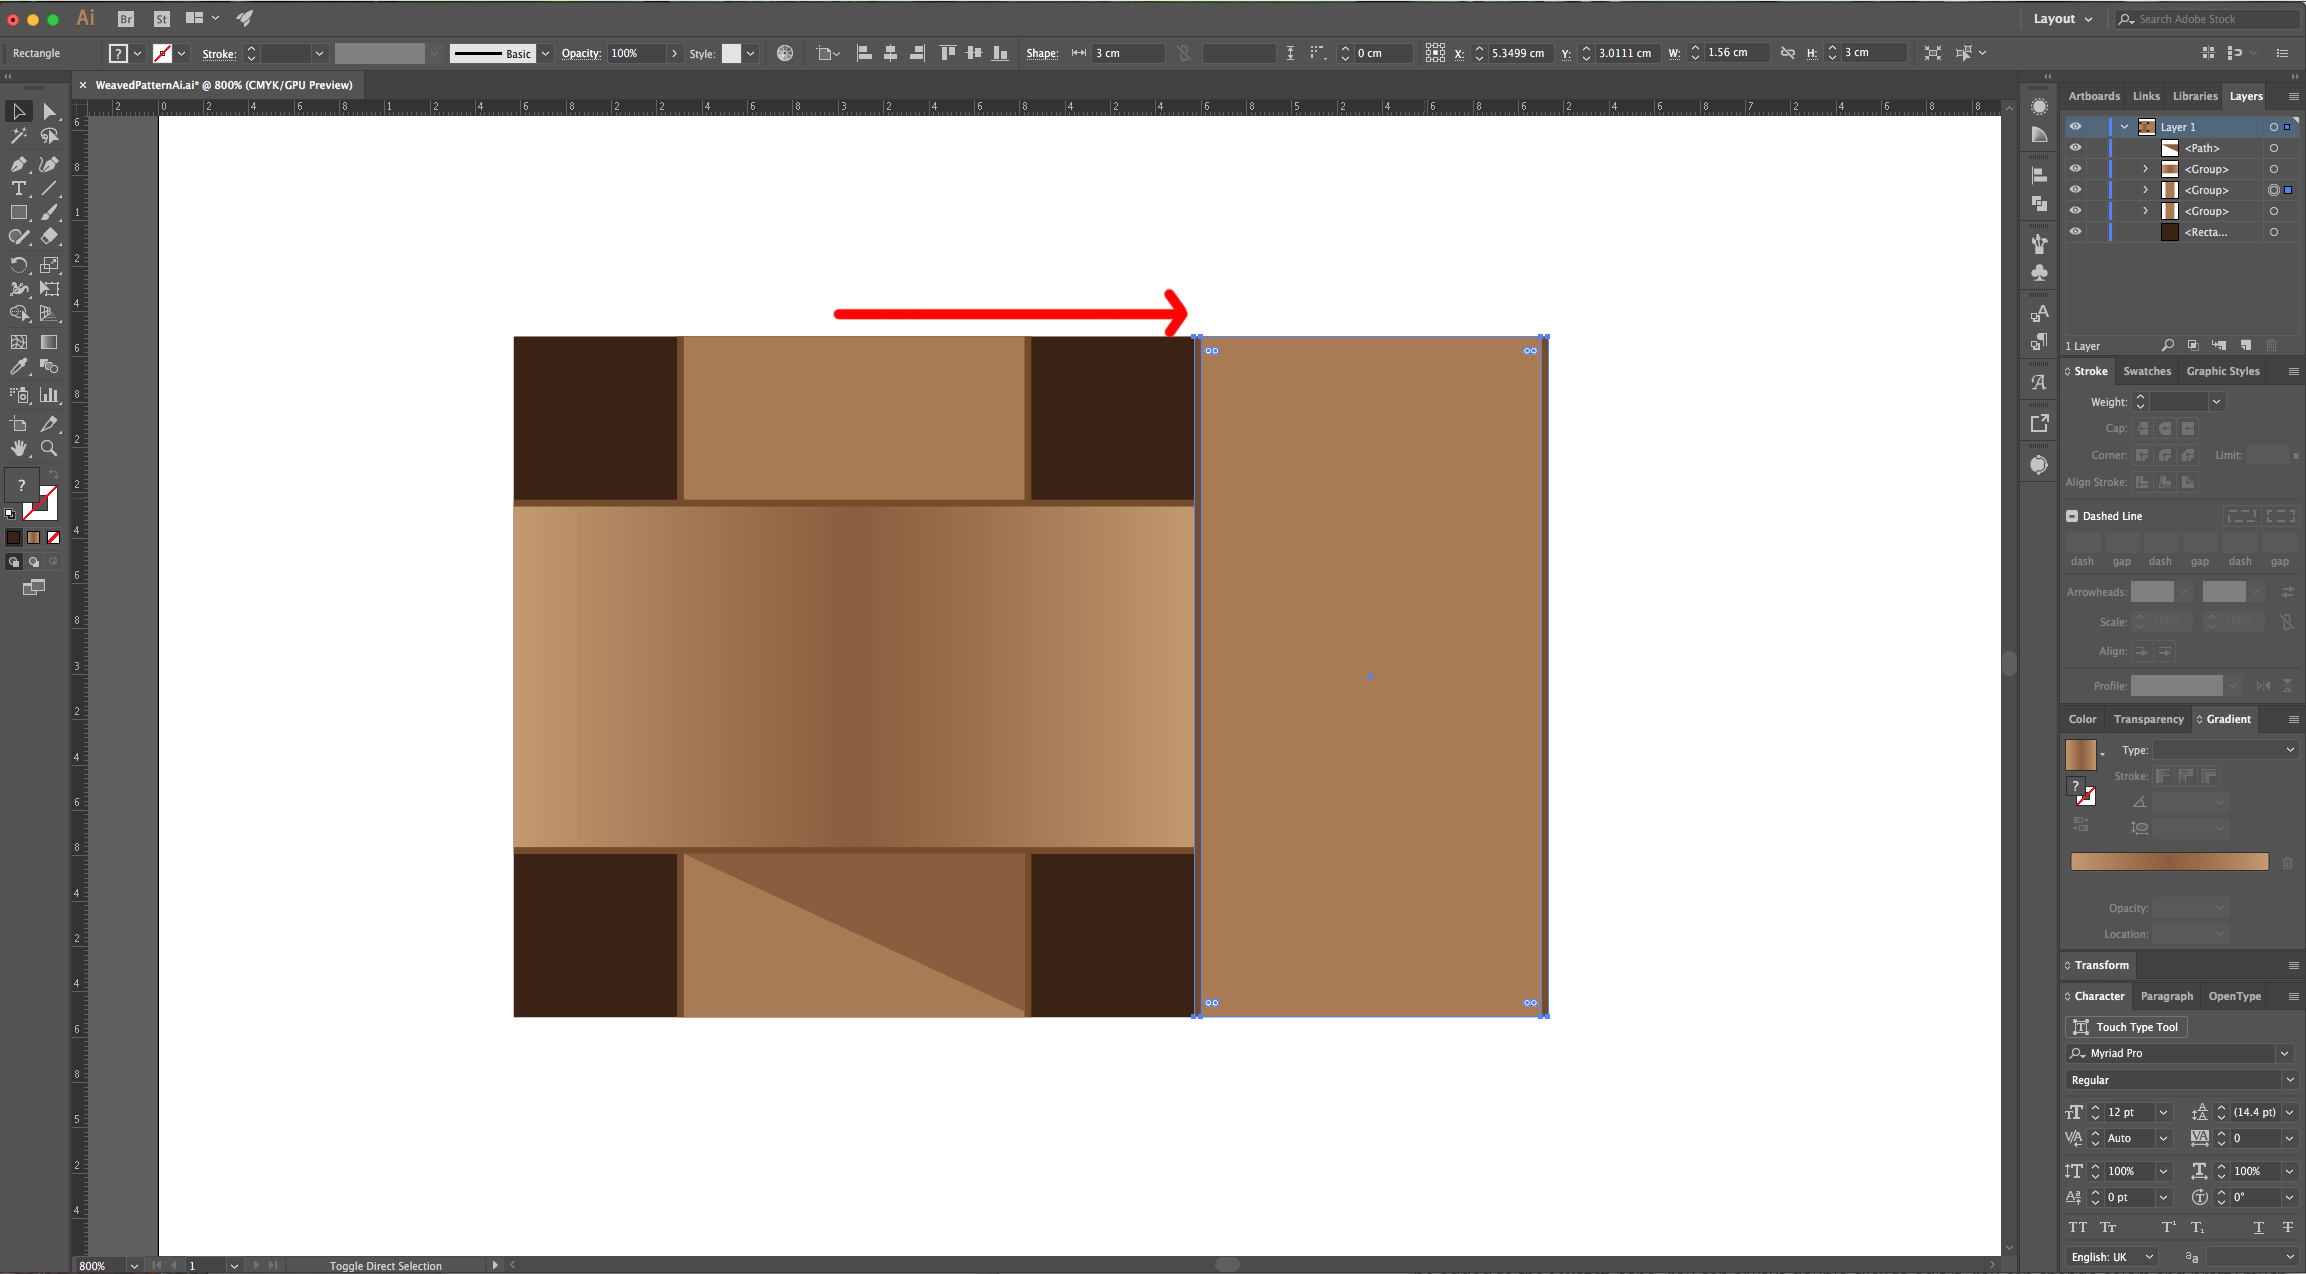
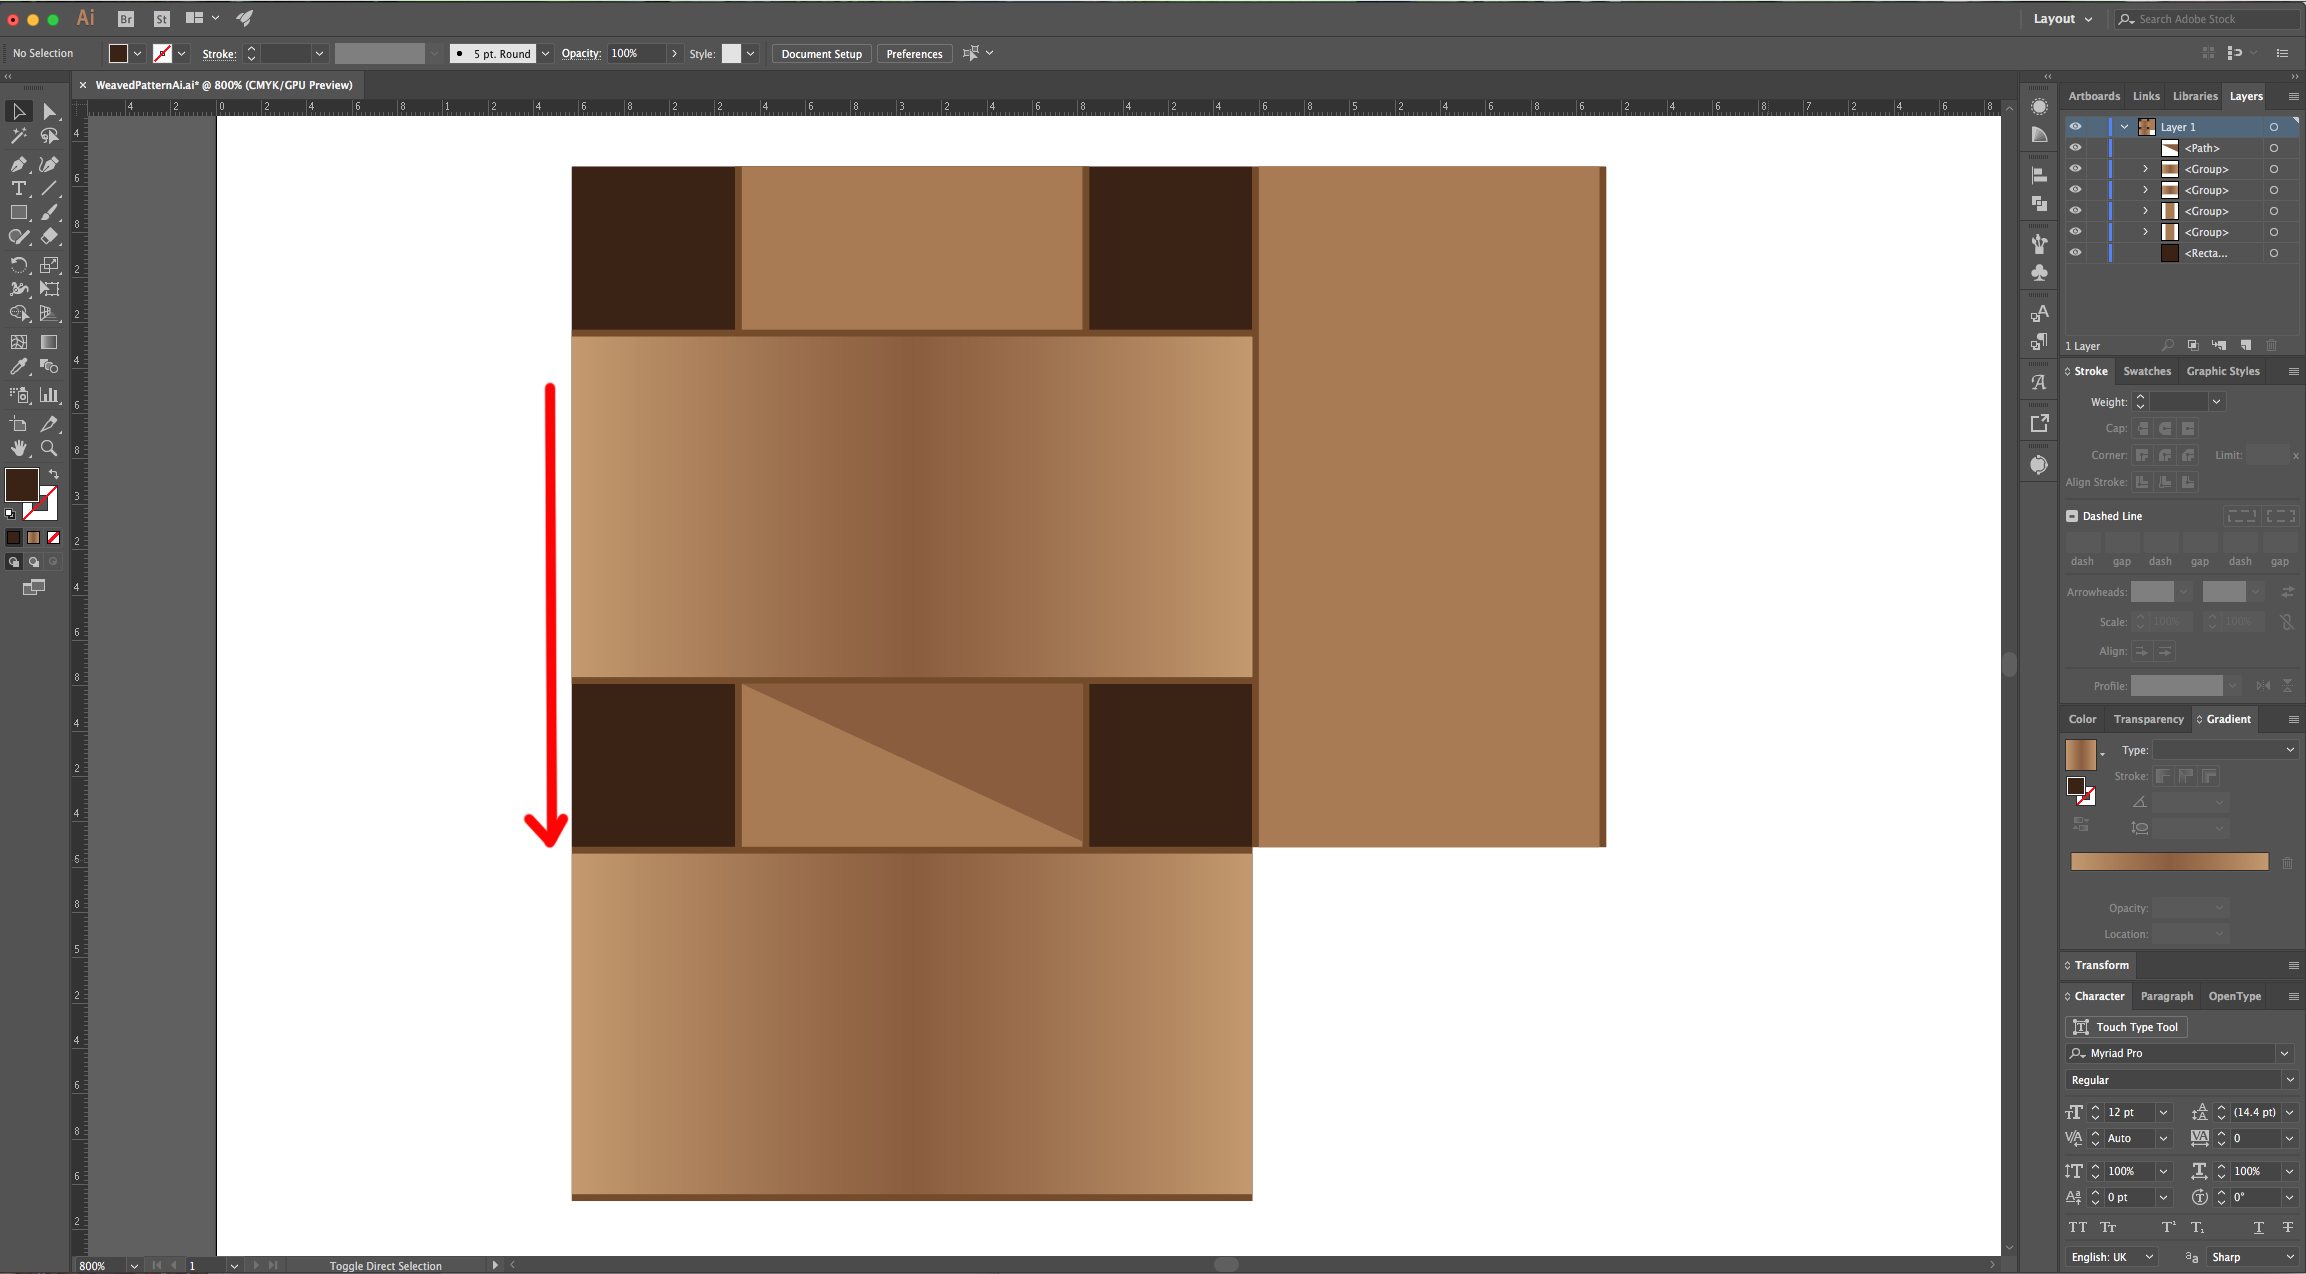
8 - Hold the “Shift” and “Alt/Option” keys, then click on your “Vertical” rectangle and drag to the right to create a duplicate right next to your paths. Repeat this with the “Horizontal” rectangle but drag down and place it under them.
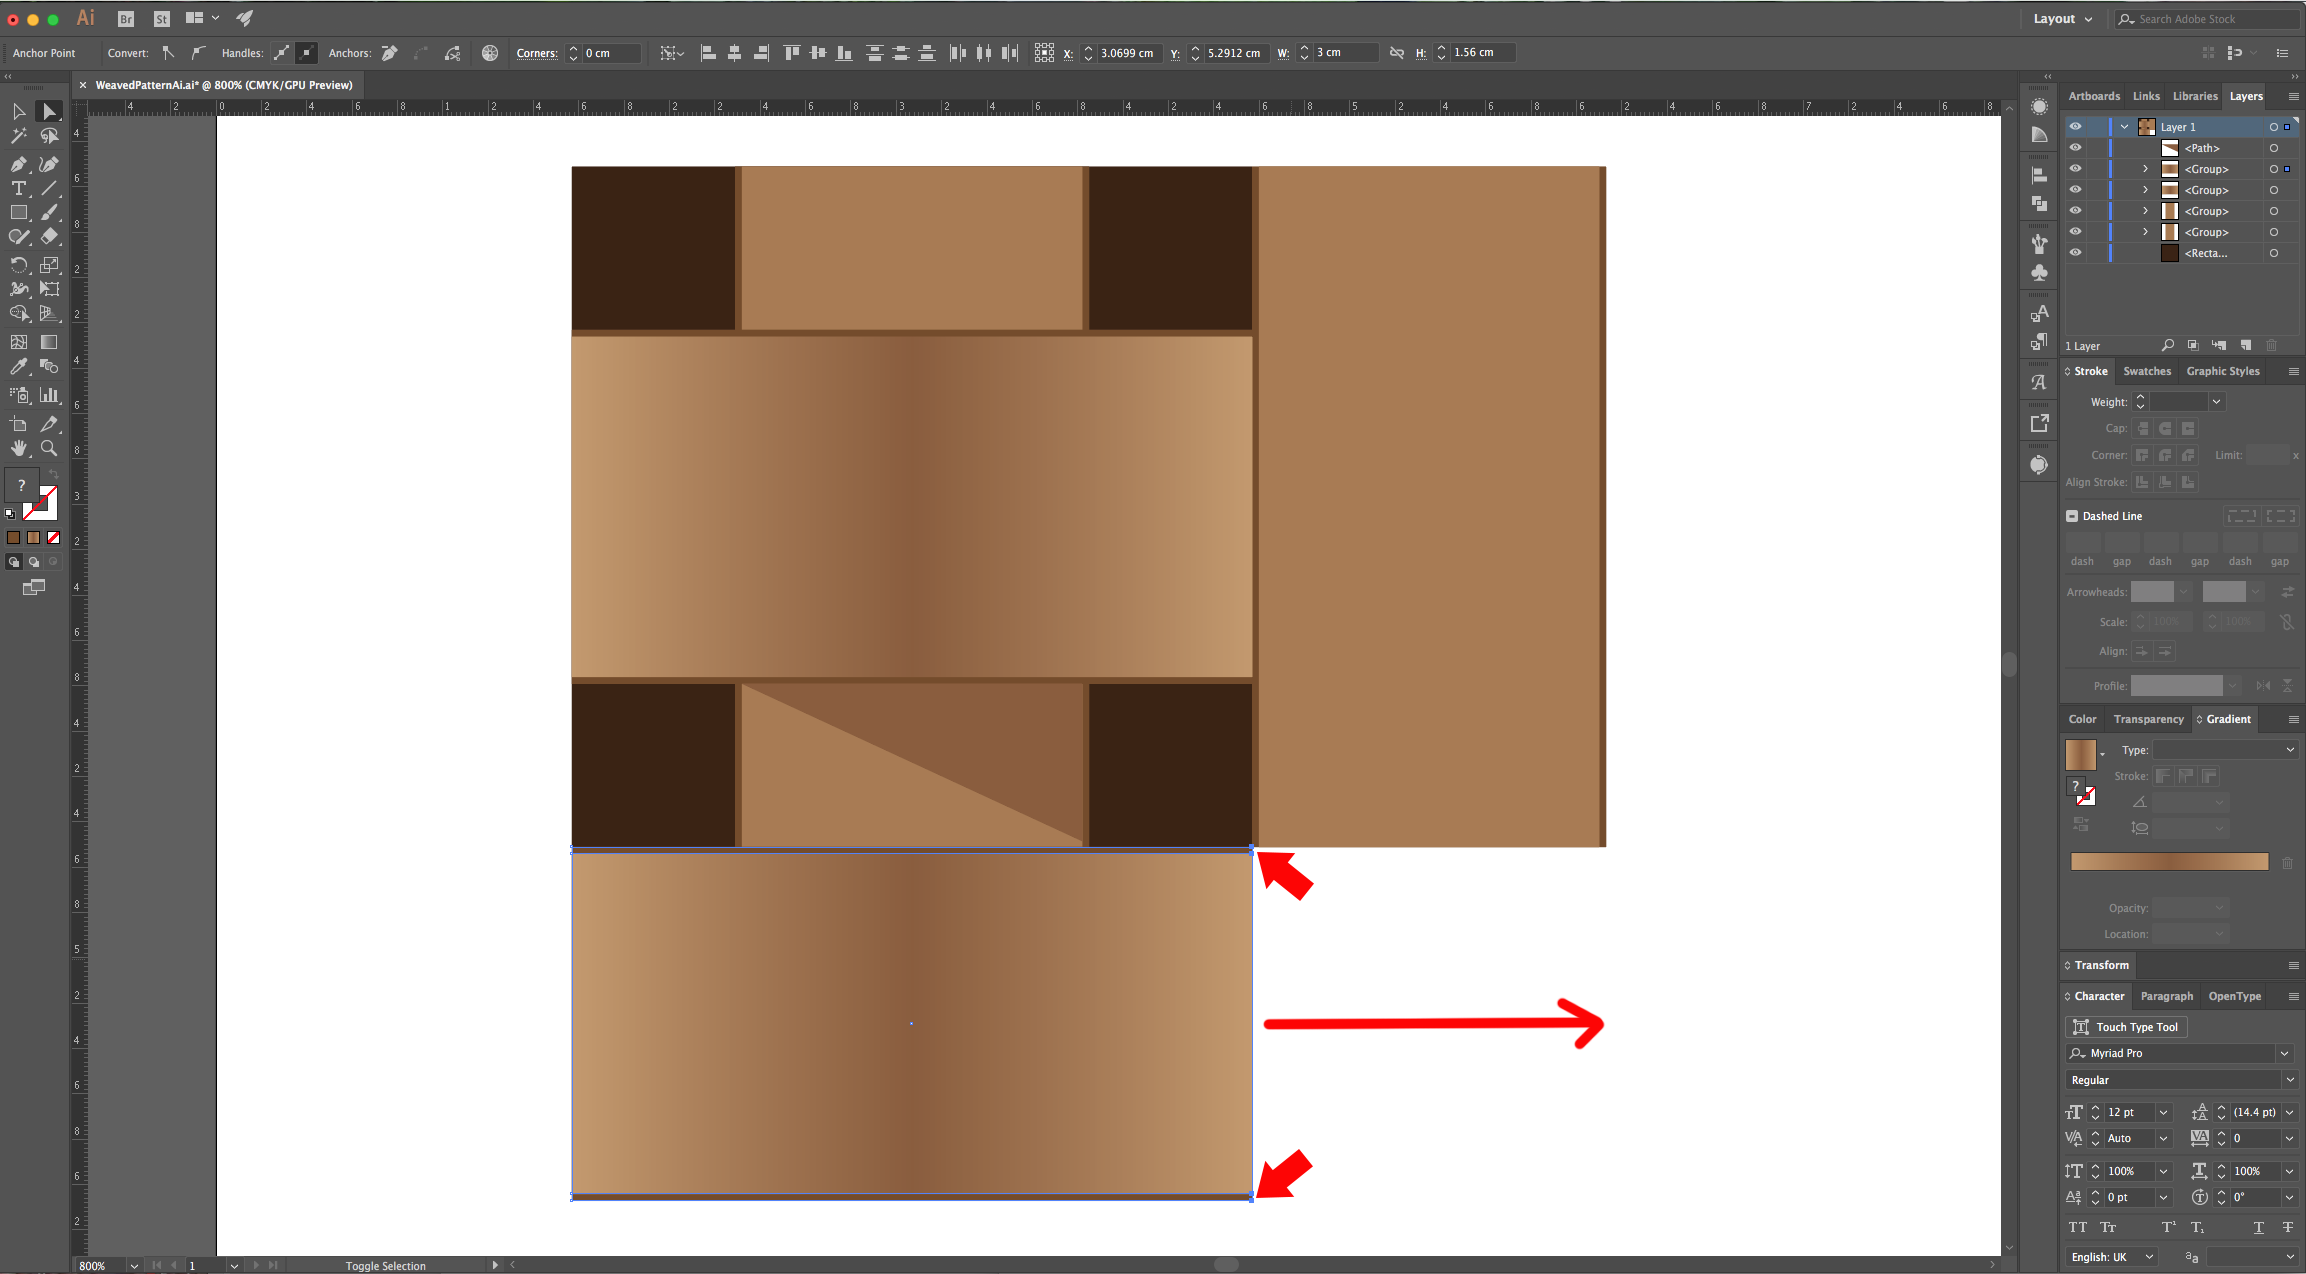
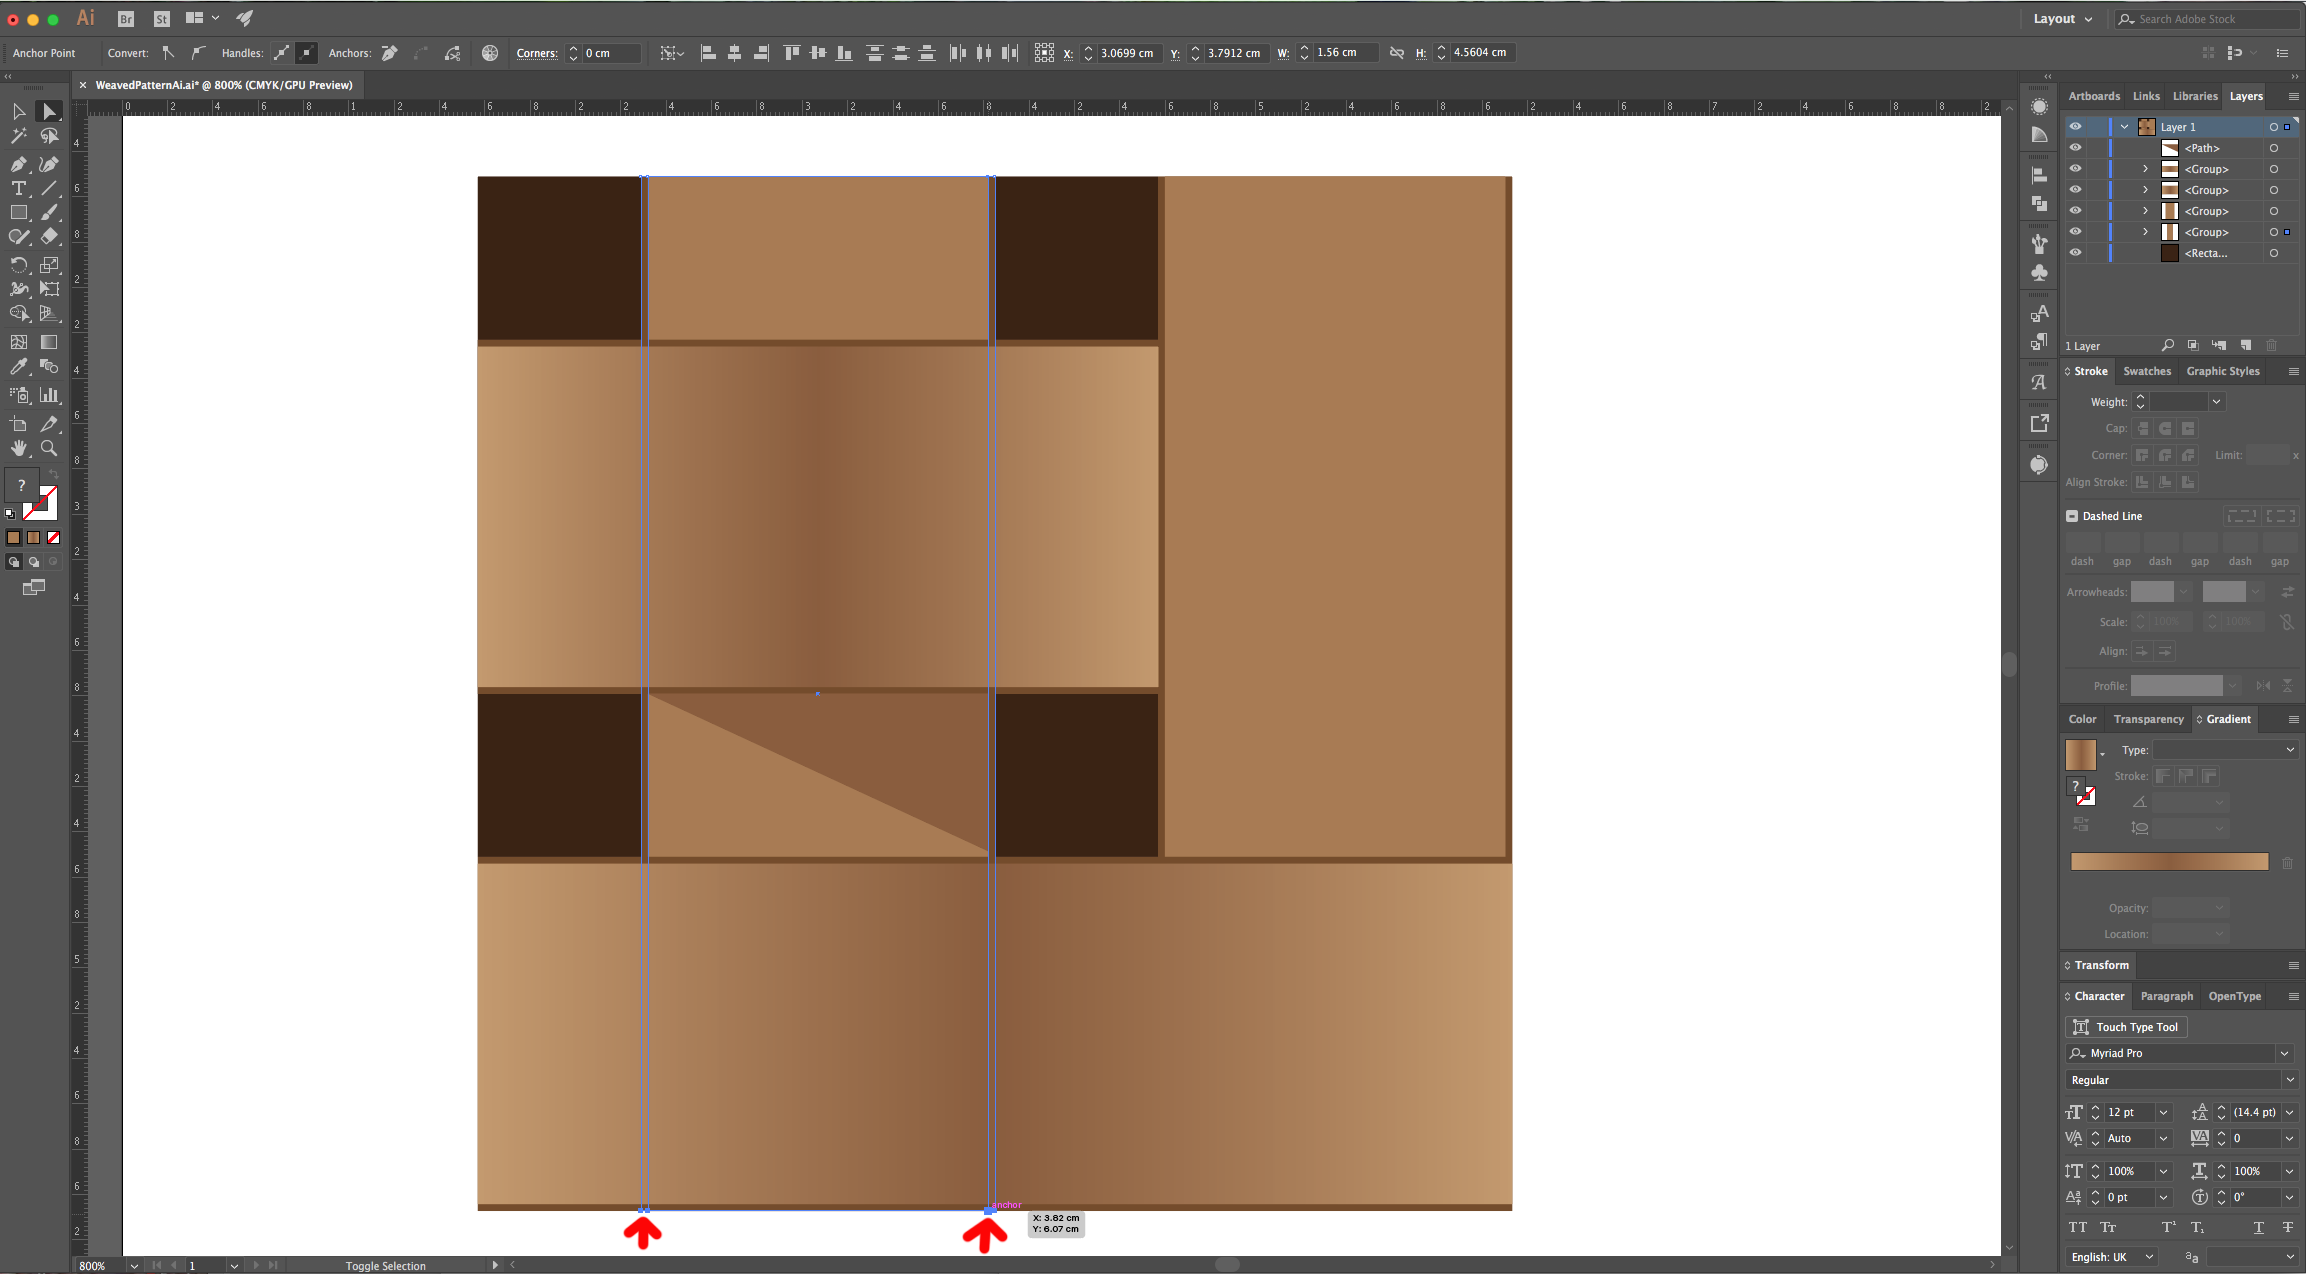
9 - Select the “Direct Selection Tool” (A), click on the four “Anchor points” in the right of the bottom horizontal rectangles (don’t forget the one that form the darker “Lines”) and click the Right “Arrow” key until they reach the right side of your duplicate vertical rectangle (it should be longer now).

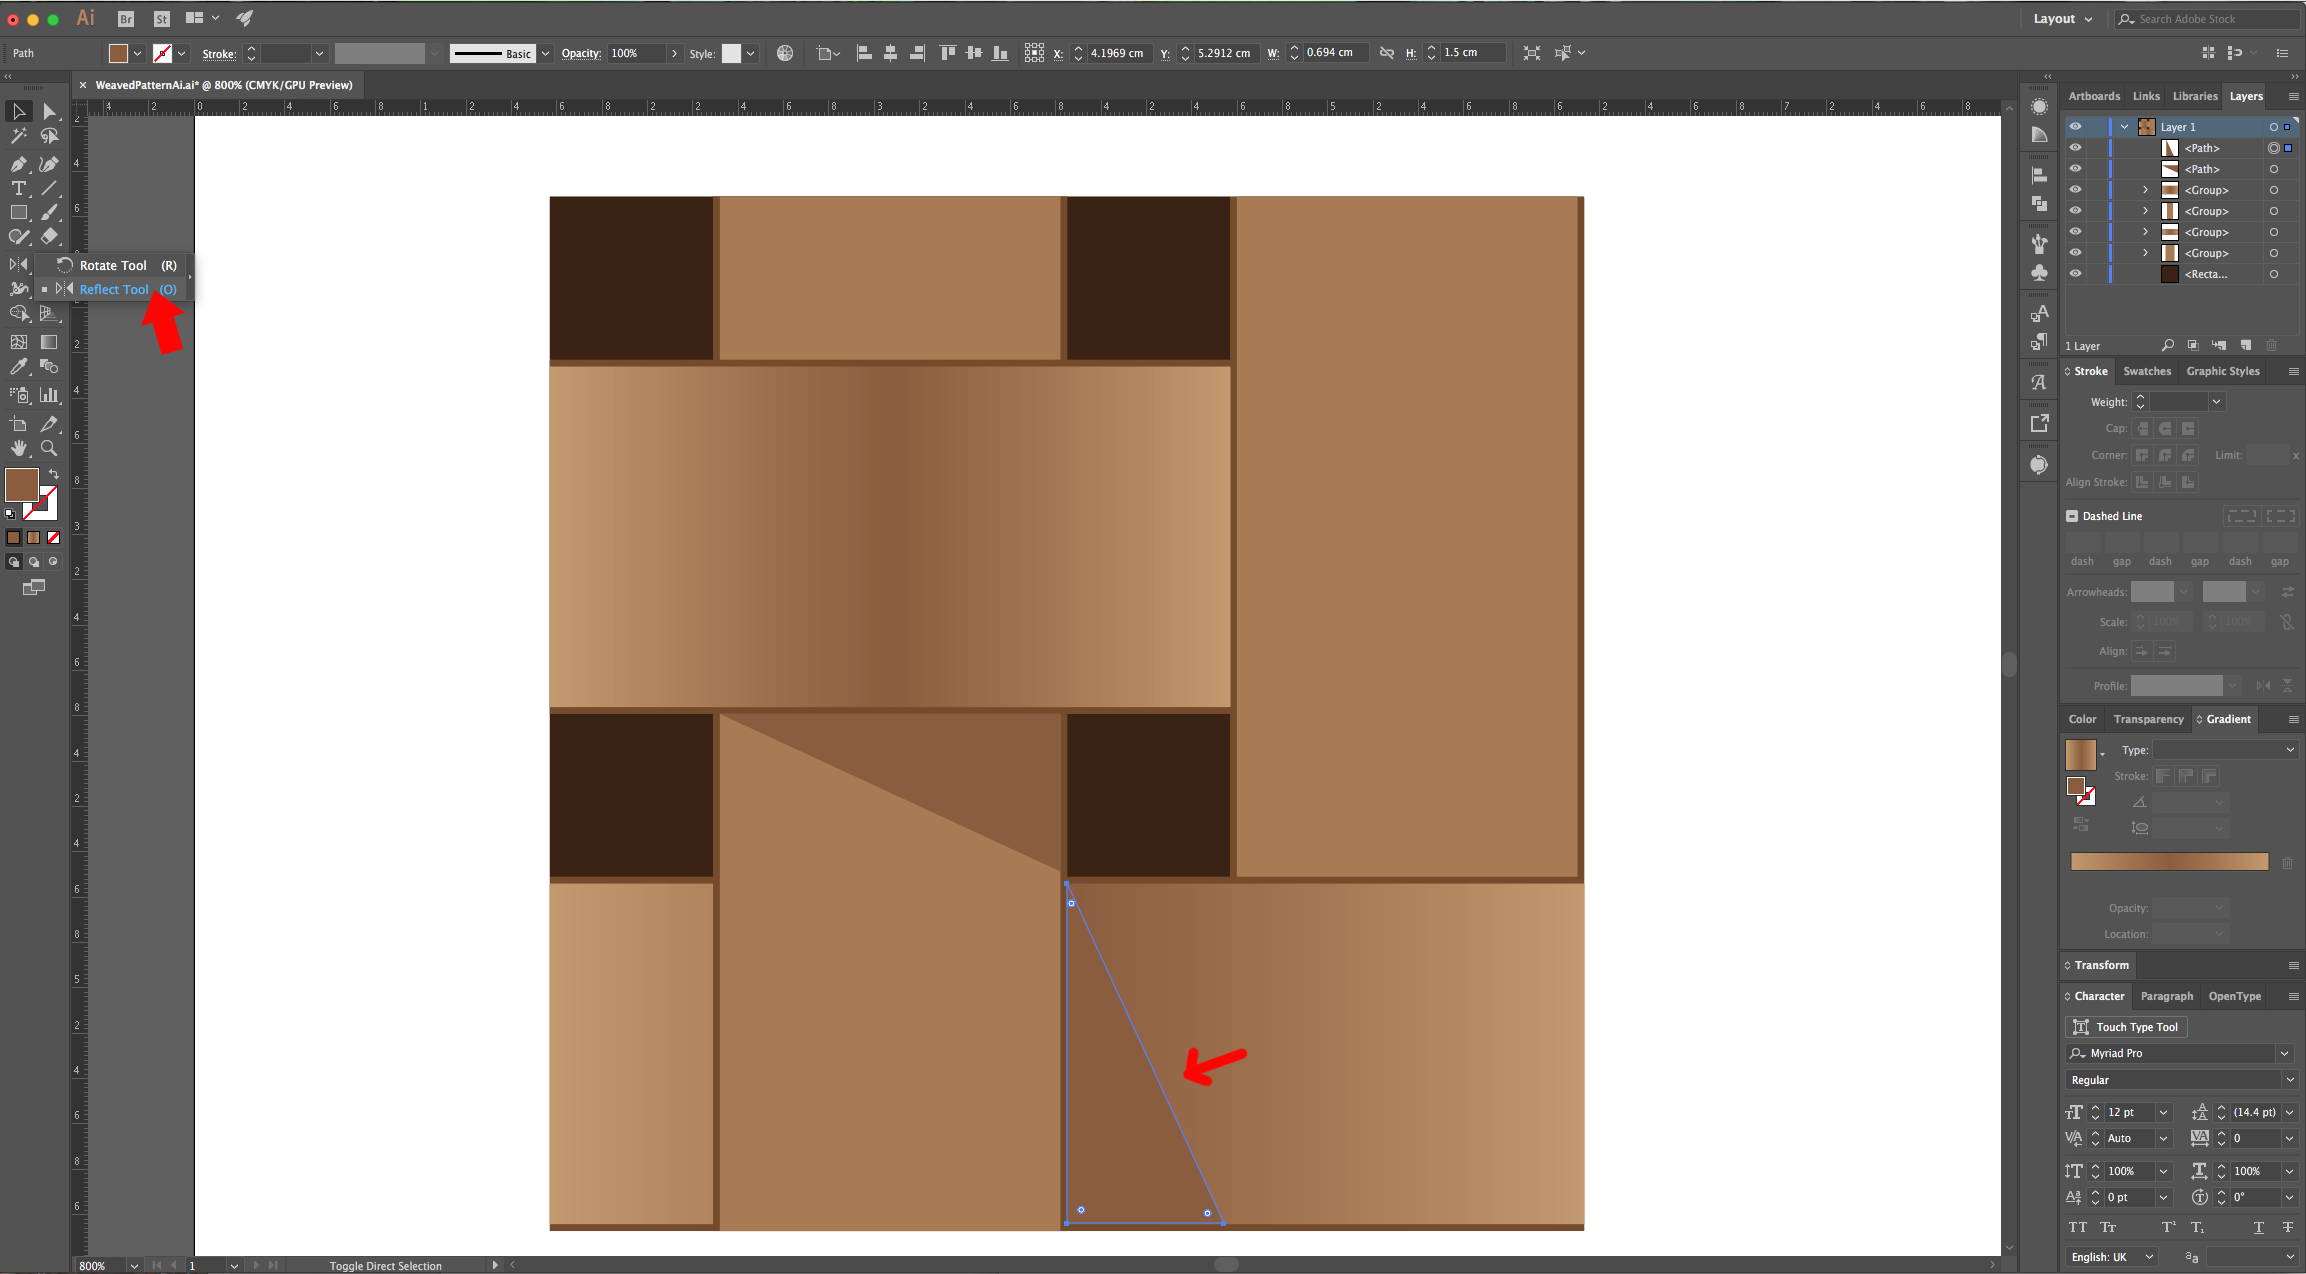
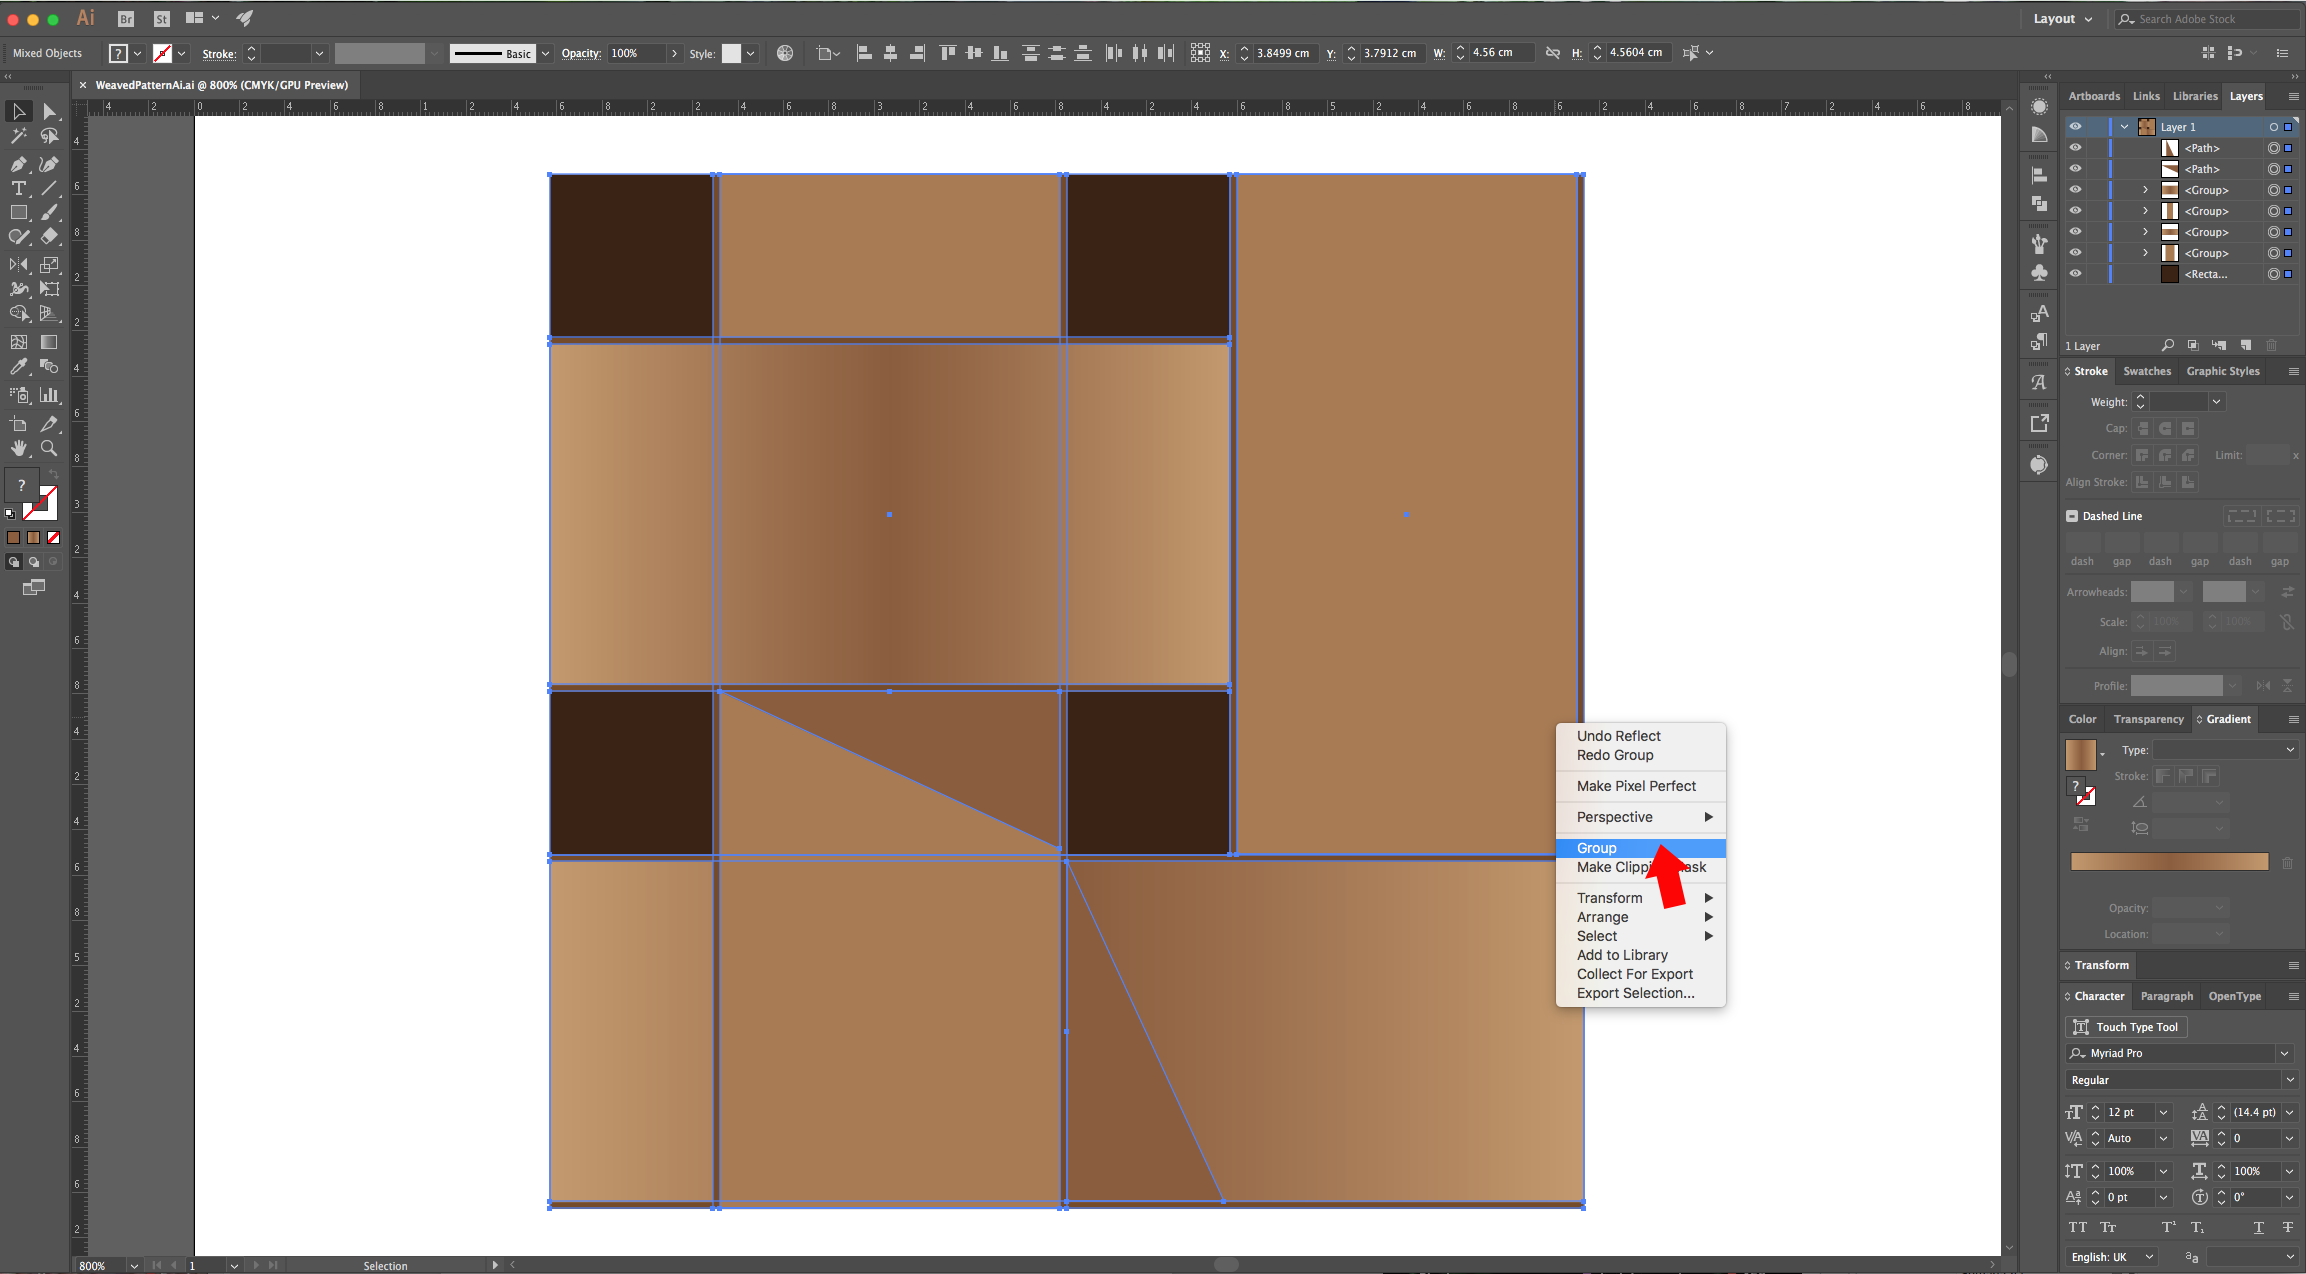
10 - Do the same with the original vertical rectangle, select the bottom “Anchor points” and click the Down “Arrow” key until you reach the bottom. This portion should be under the duplicate horizontal rectangle. You should have “piece” of a weaved pattern now. Duplicate the “Triangular” Shadow and place it on top of the bottom horizontal rectangle right next to the spot where the vertical one covers it and use the “Reflect Tool” (O) to change its “Angle”. Then, select everything and “Group” it together (Command/Control + G).
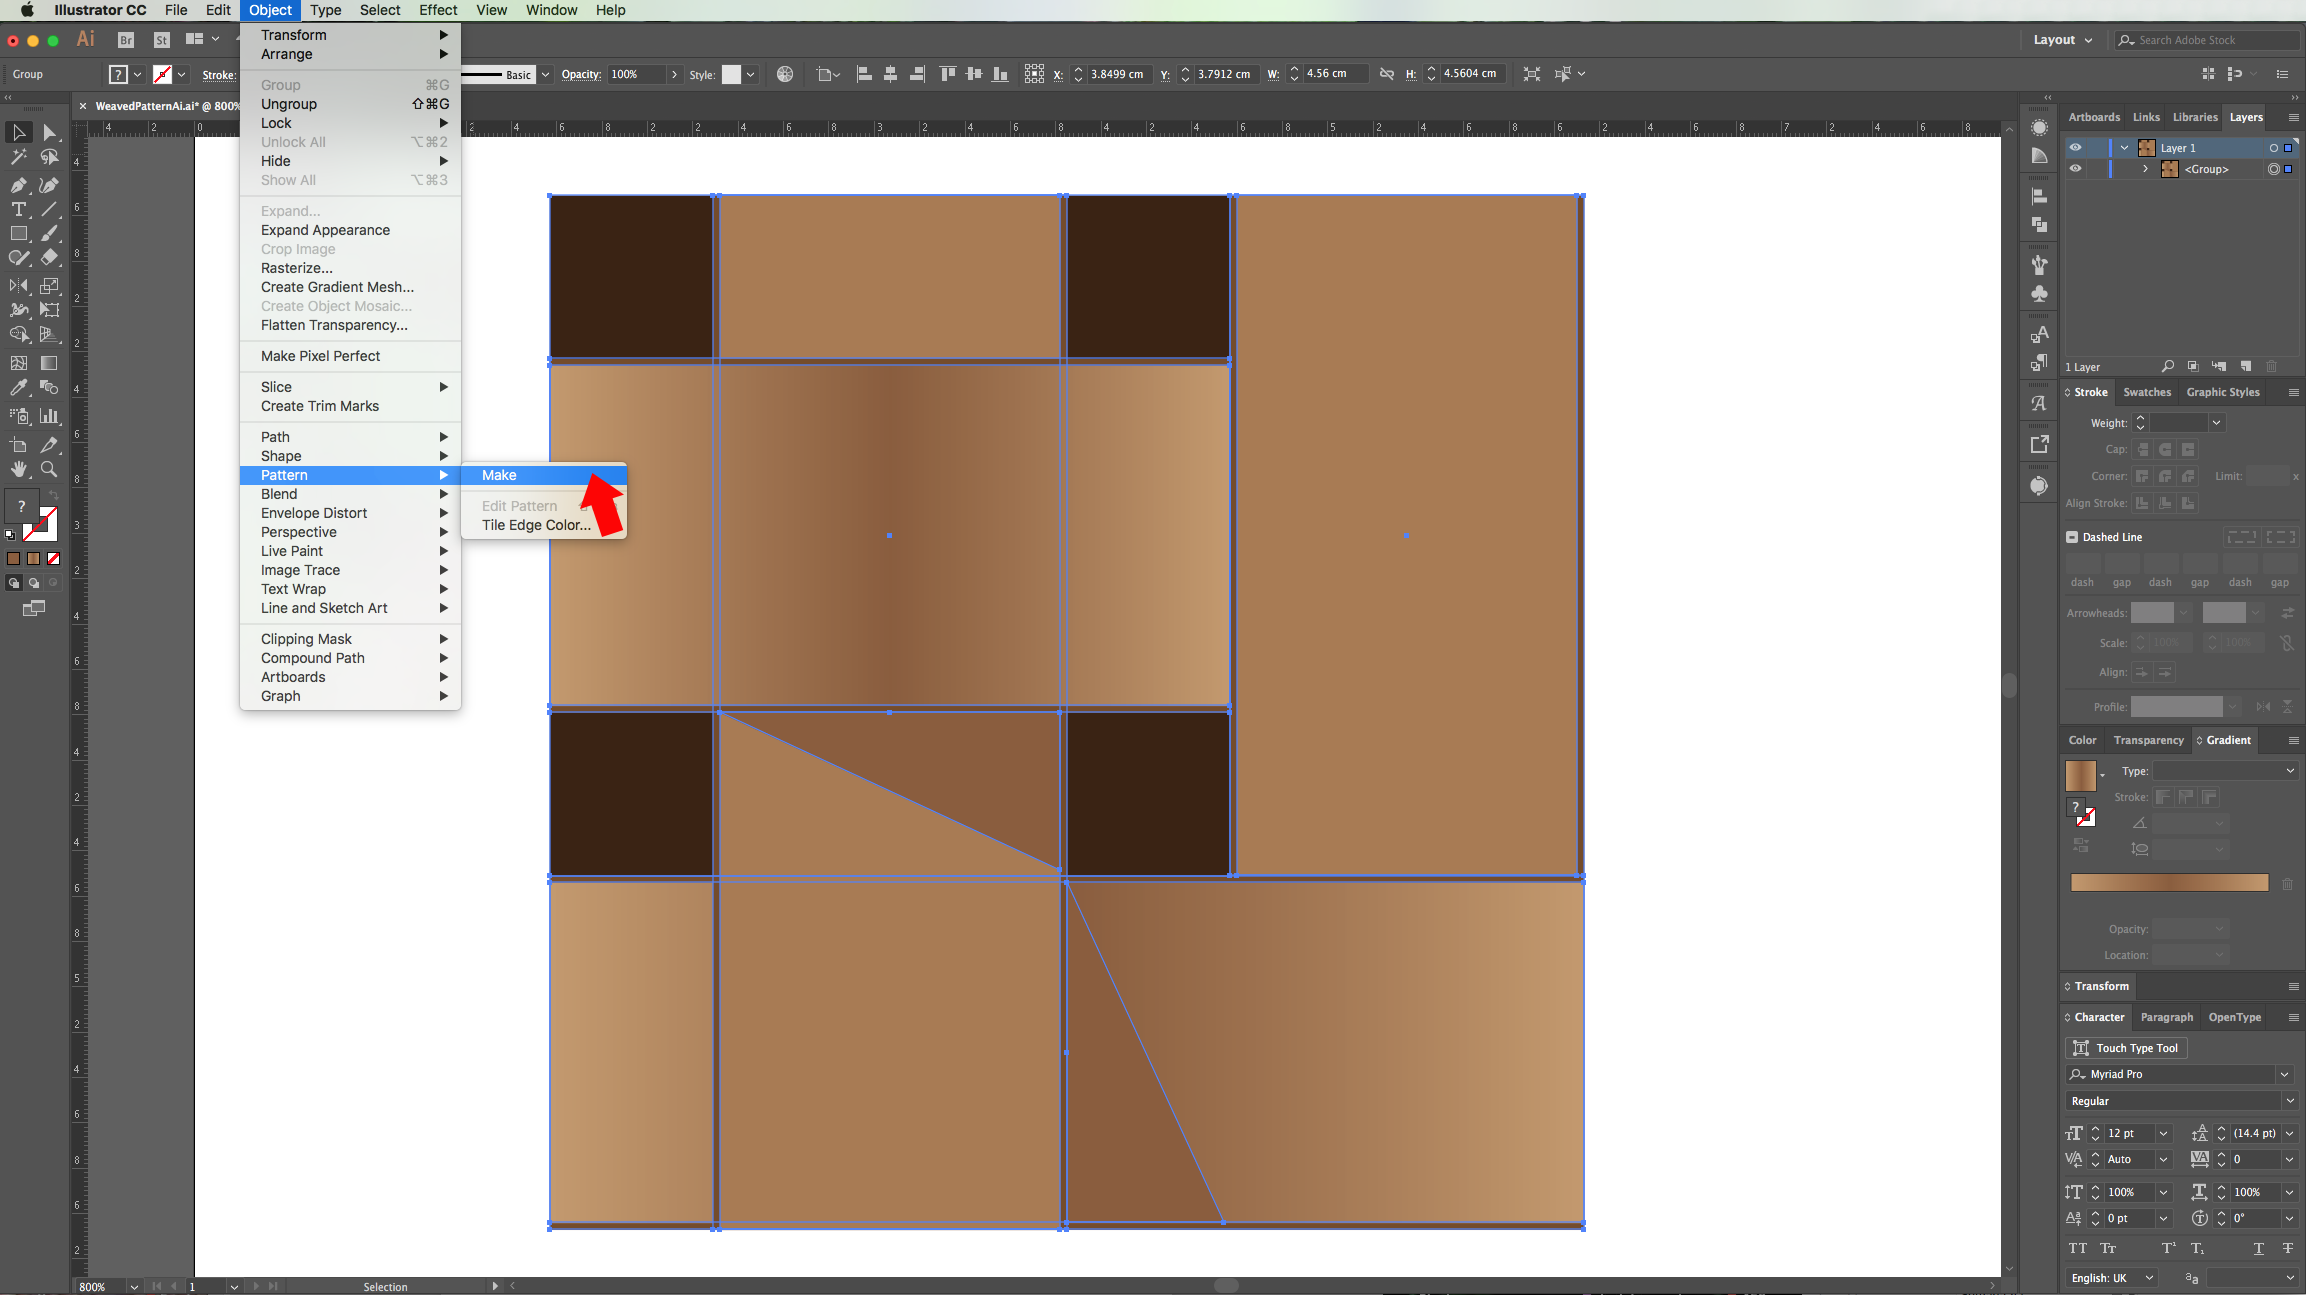
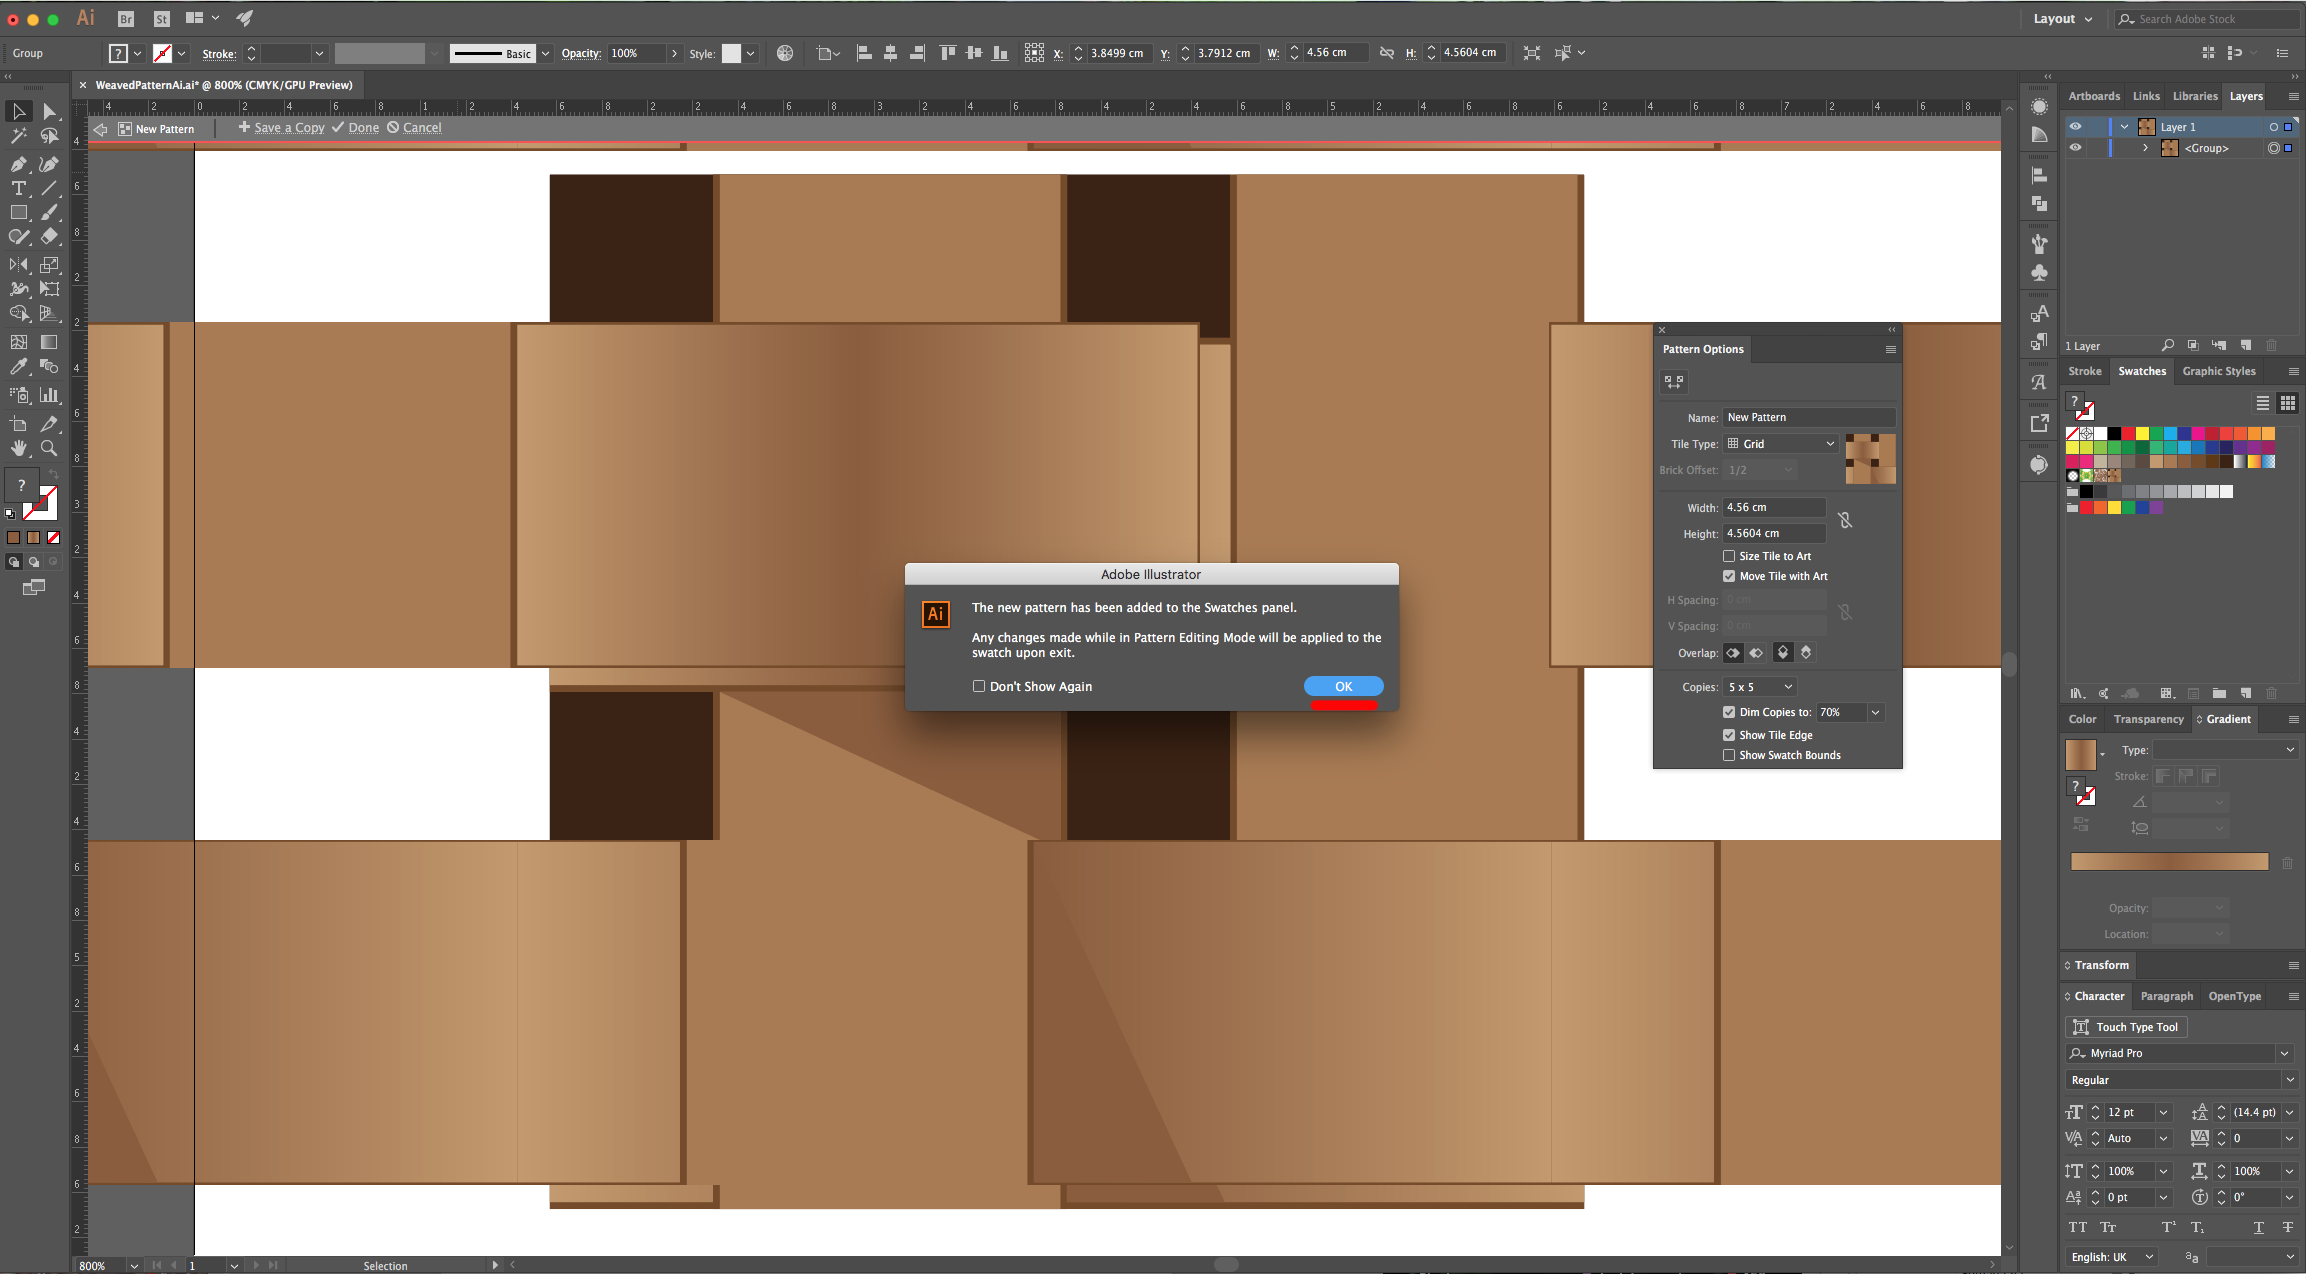
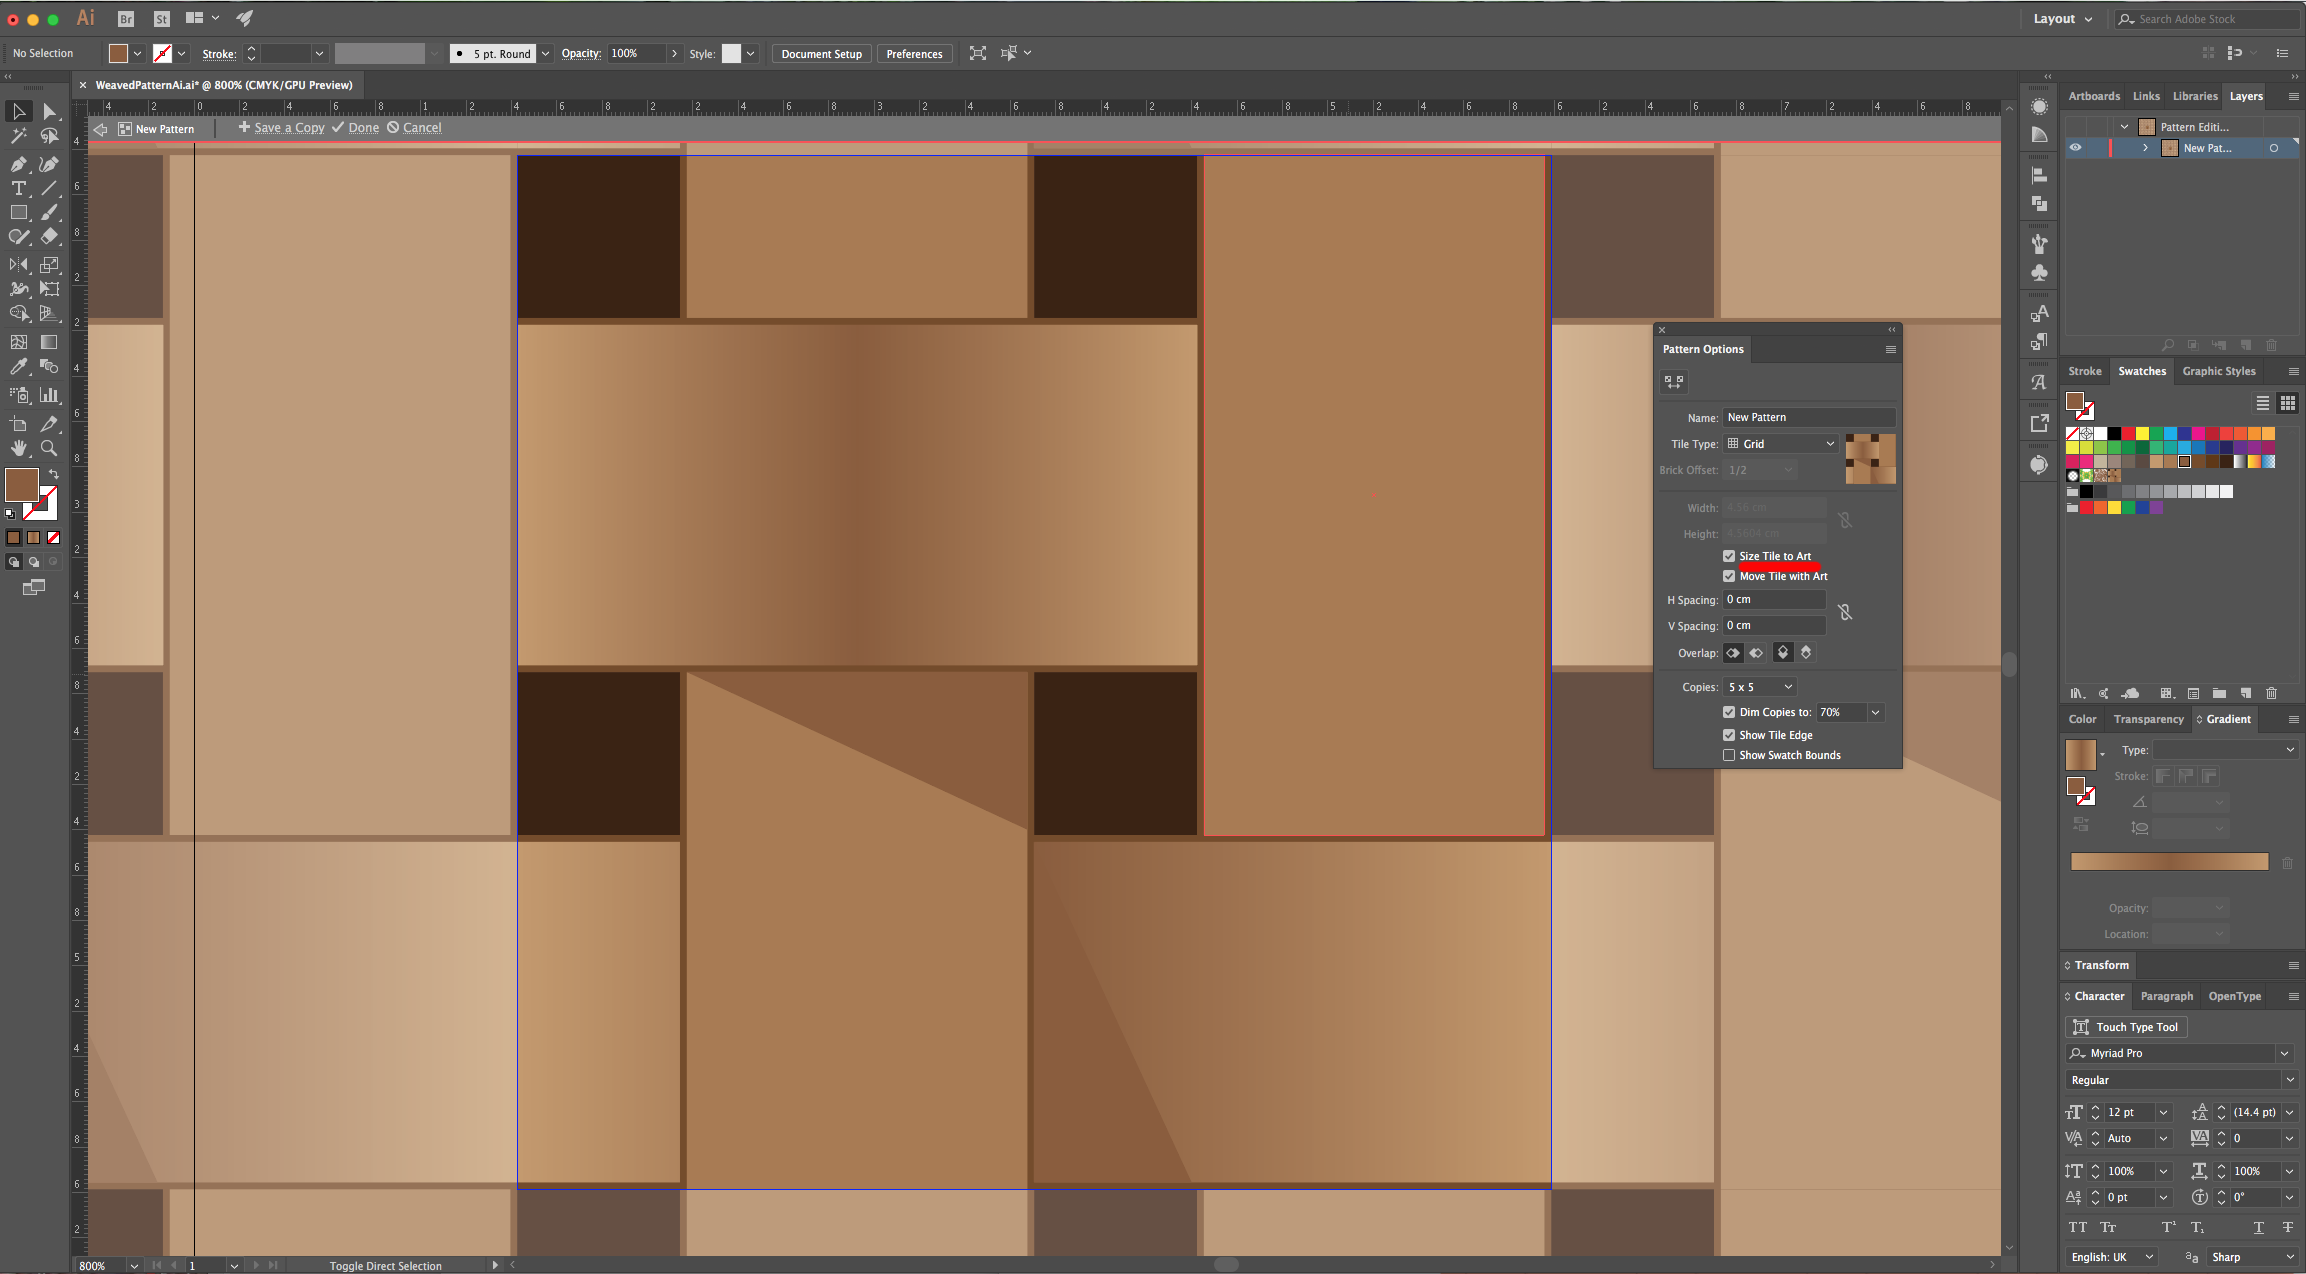
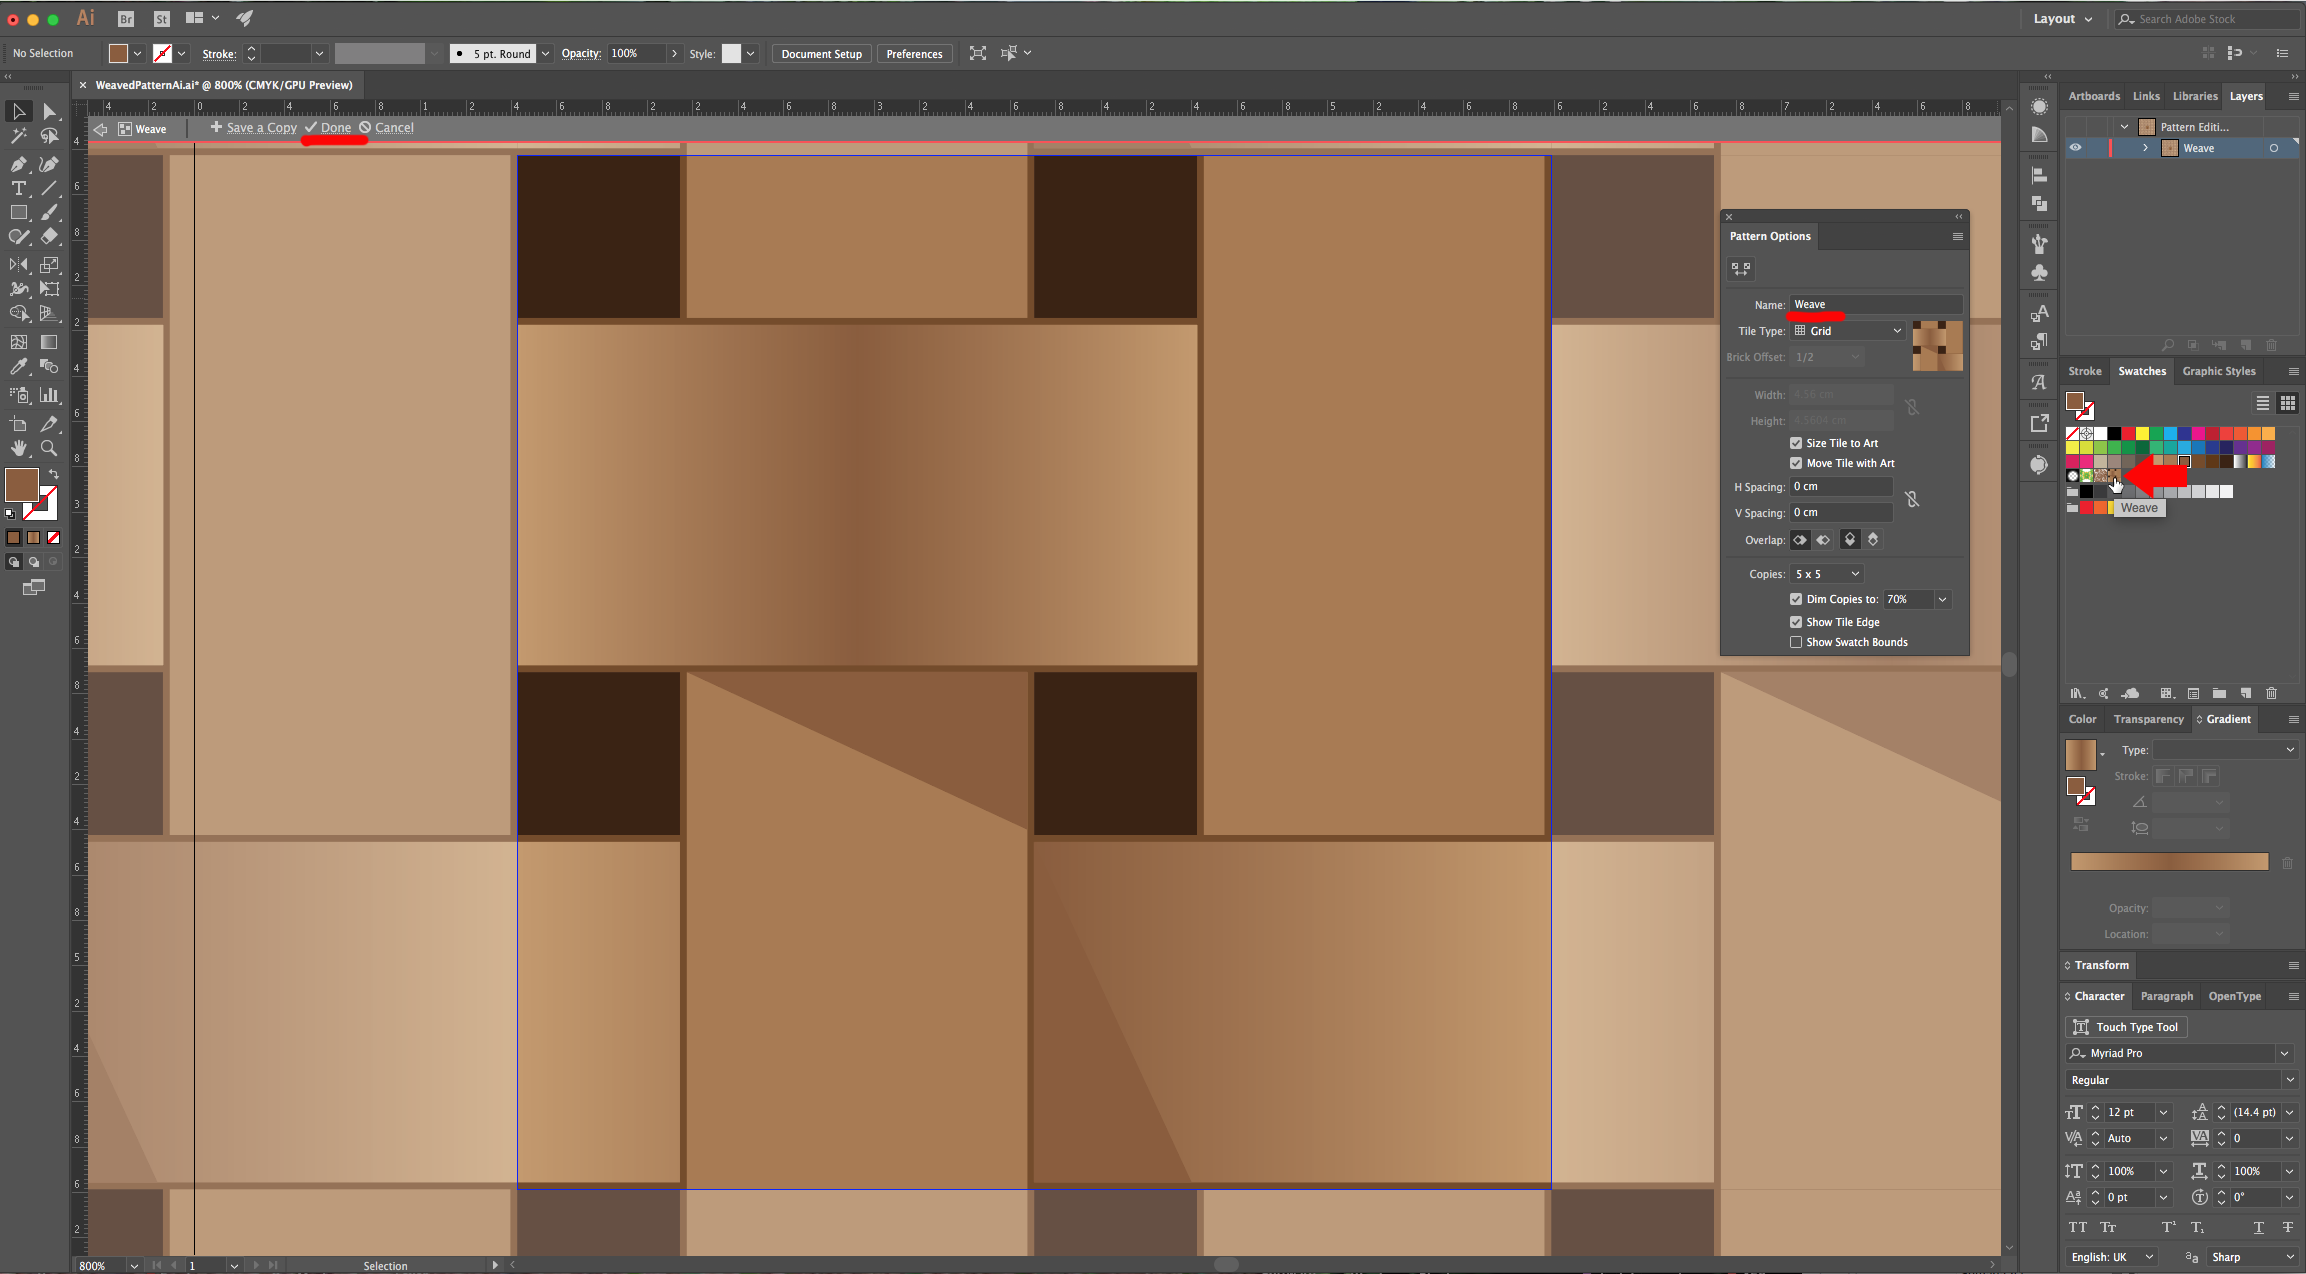
11 - Go to Object > Pattern > Make, click “OK” on the Pop-up window and check that your “Pattern” works. Check the “Size Tile to Art” box or use the “Default” settings if you prefer. Name your pattern and click on the small “Check mark” on the Top Menu when you are “Done”.
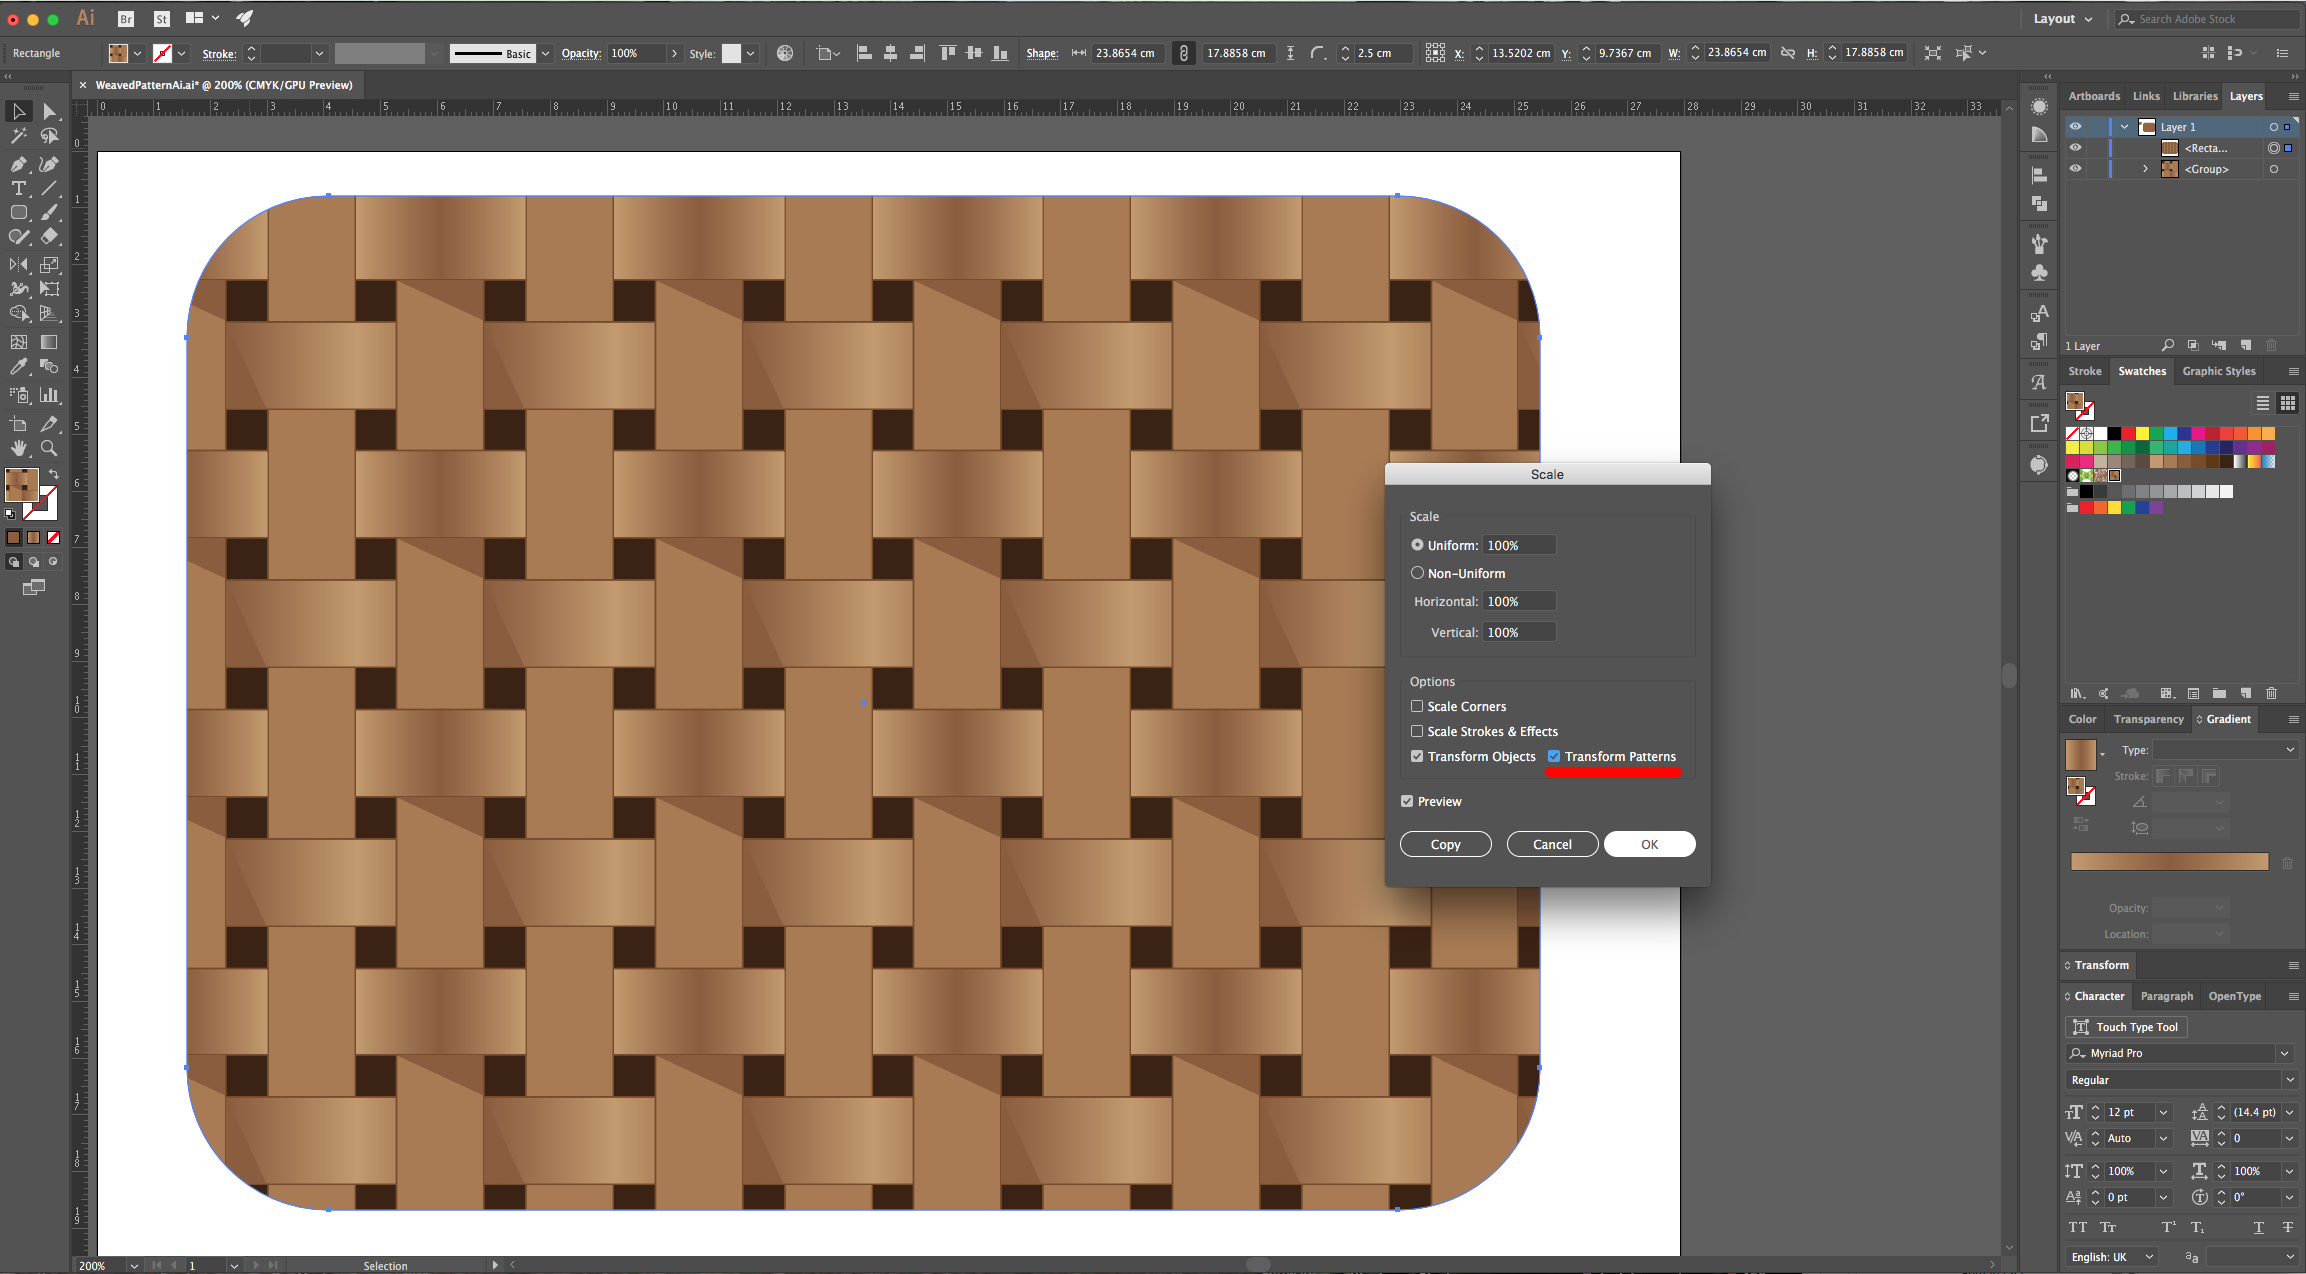
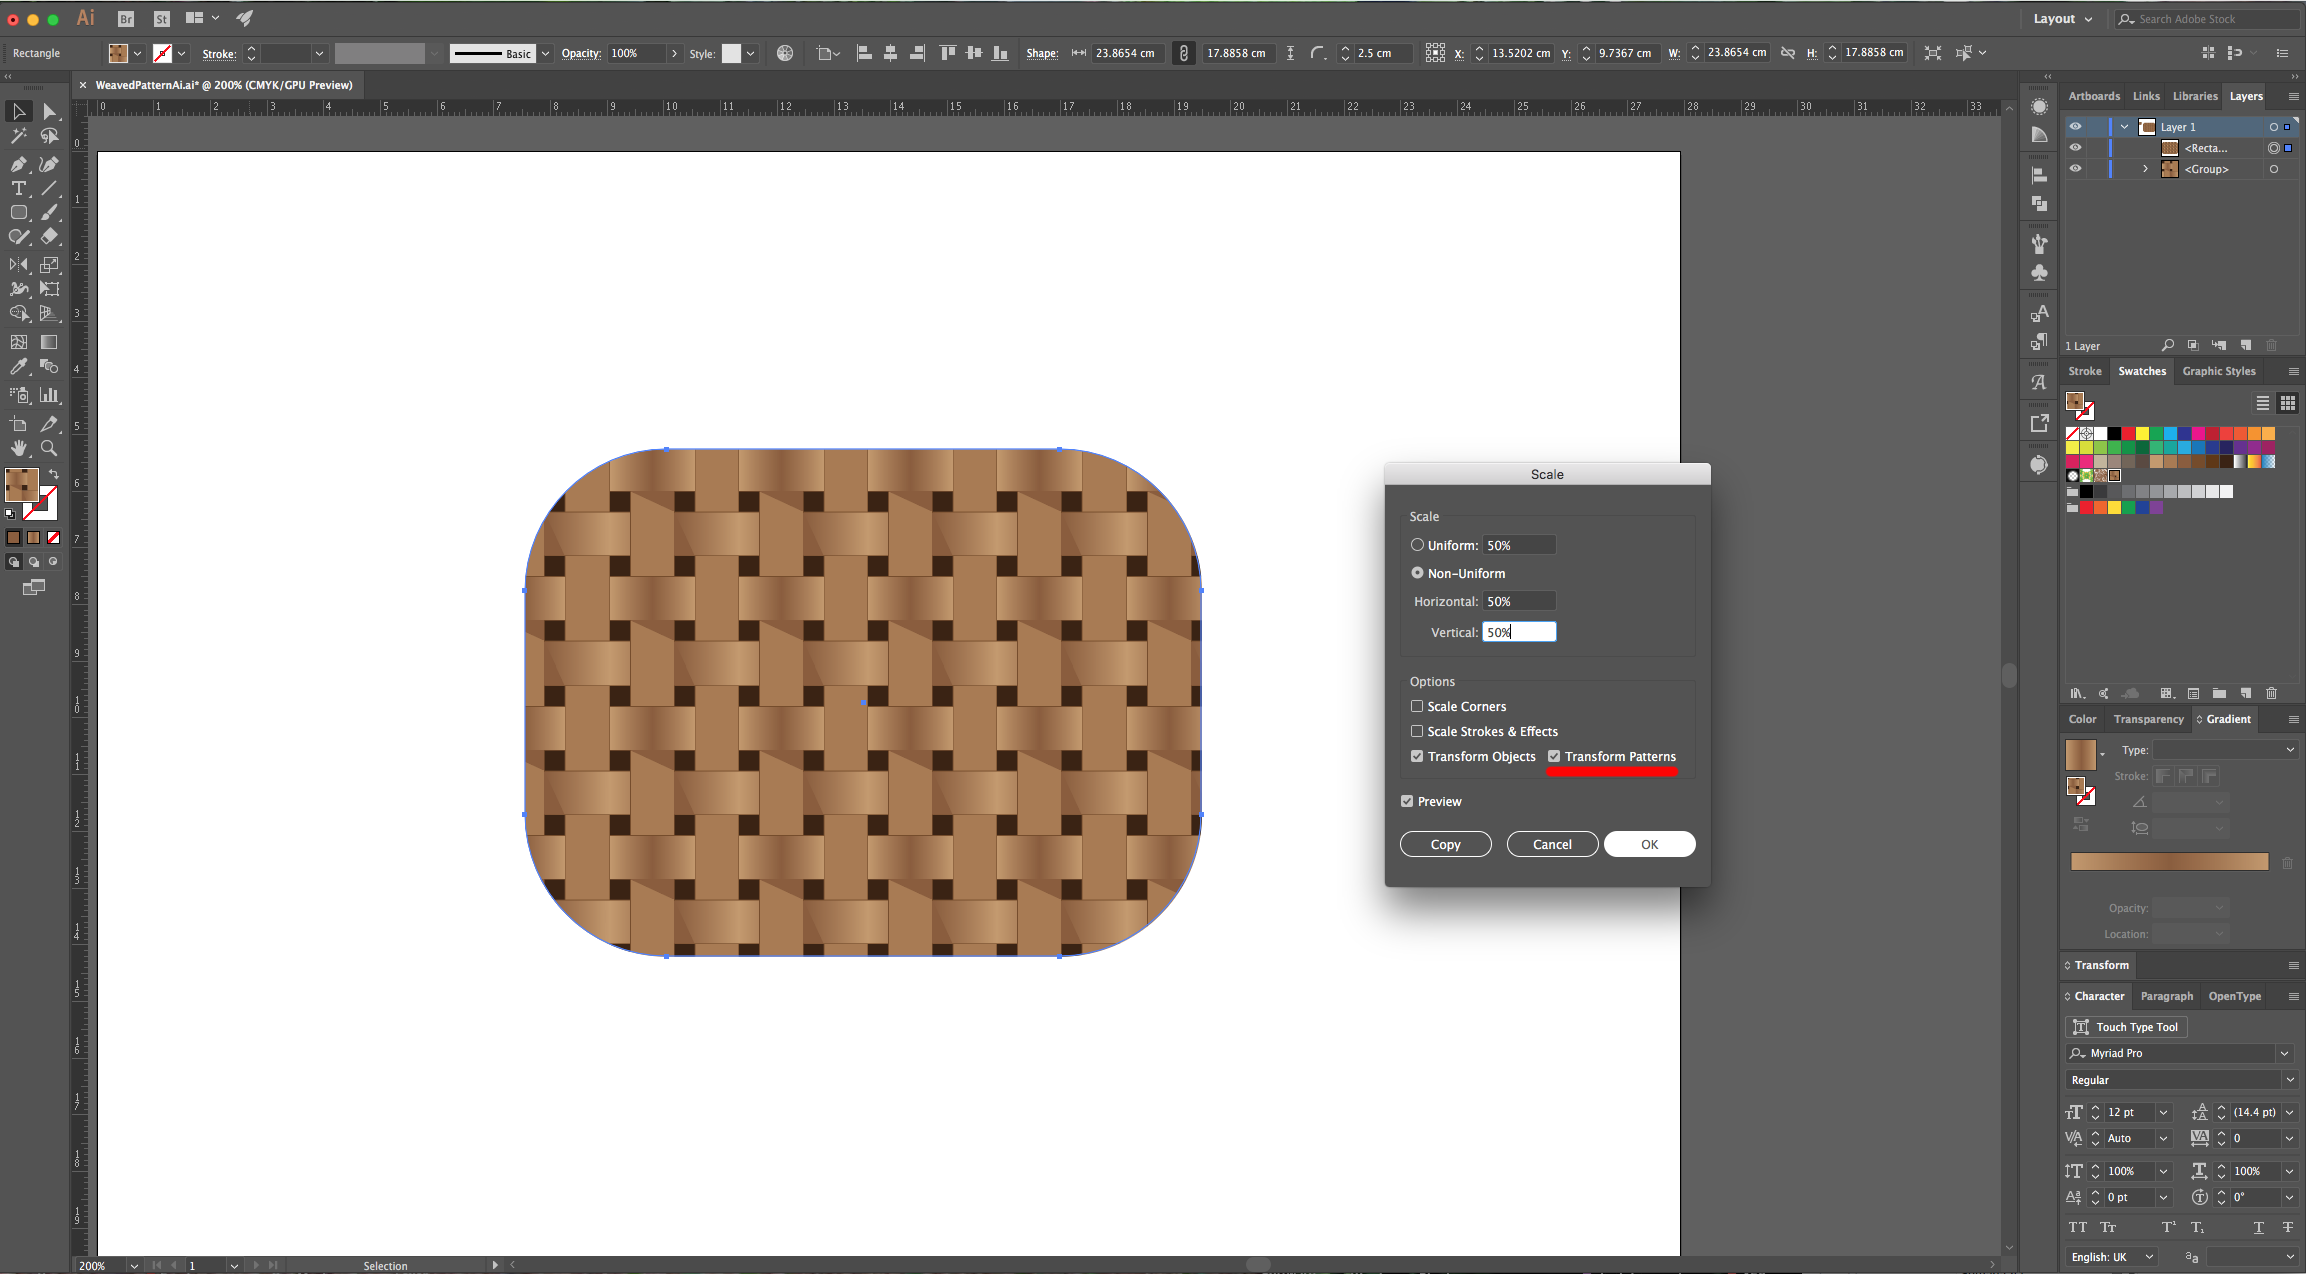
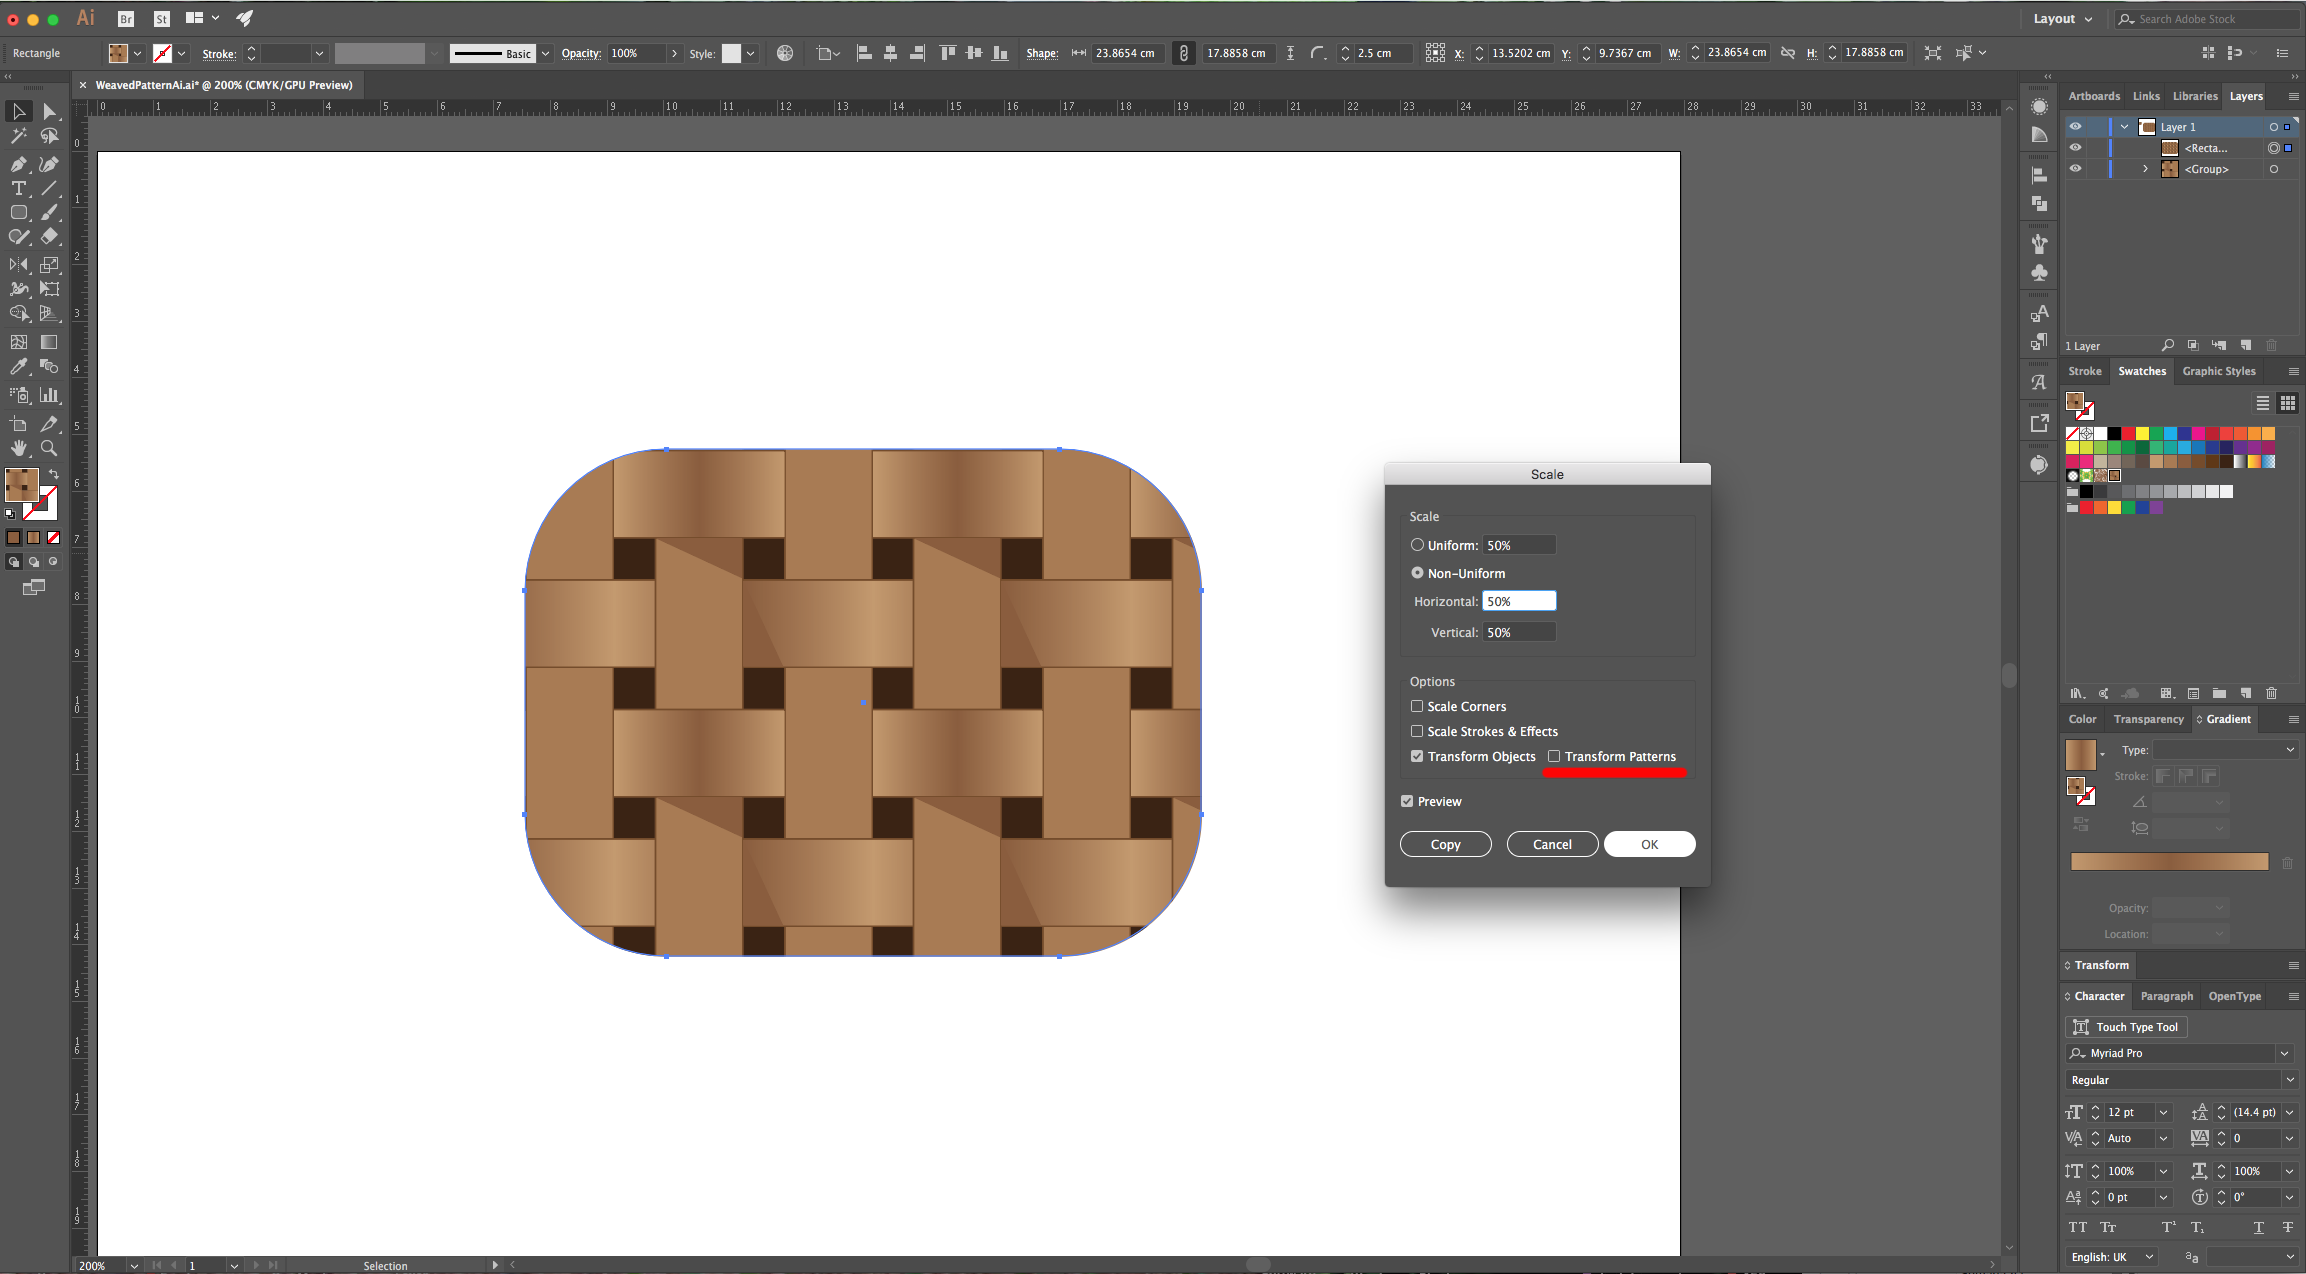
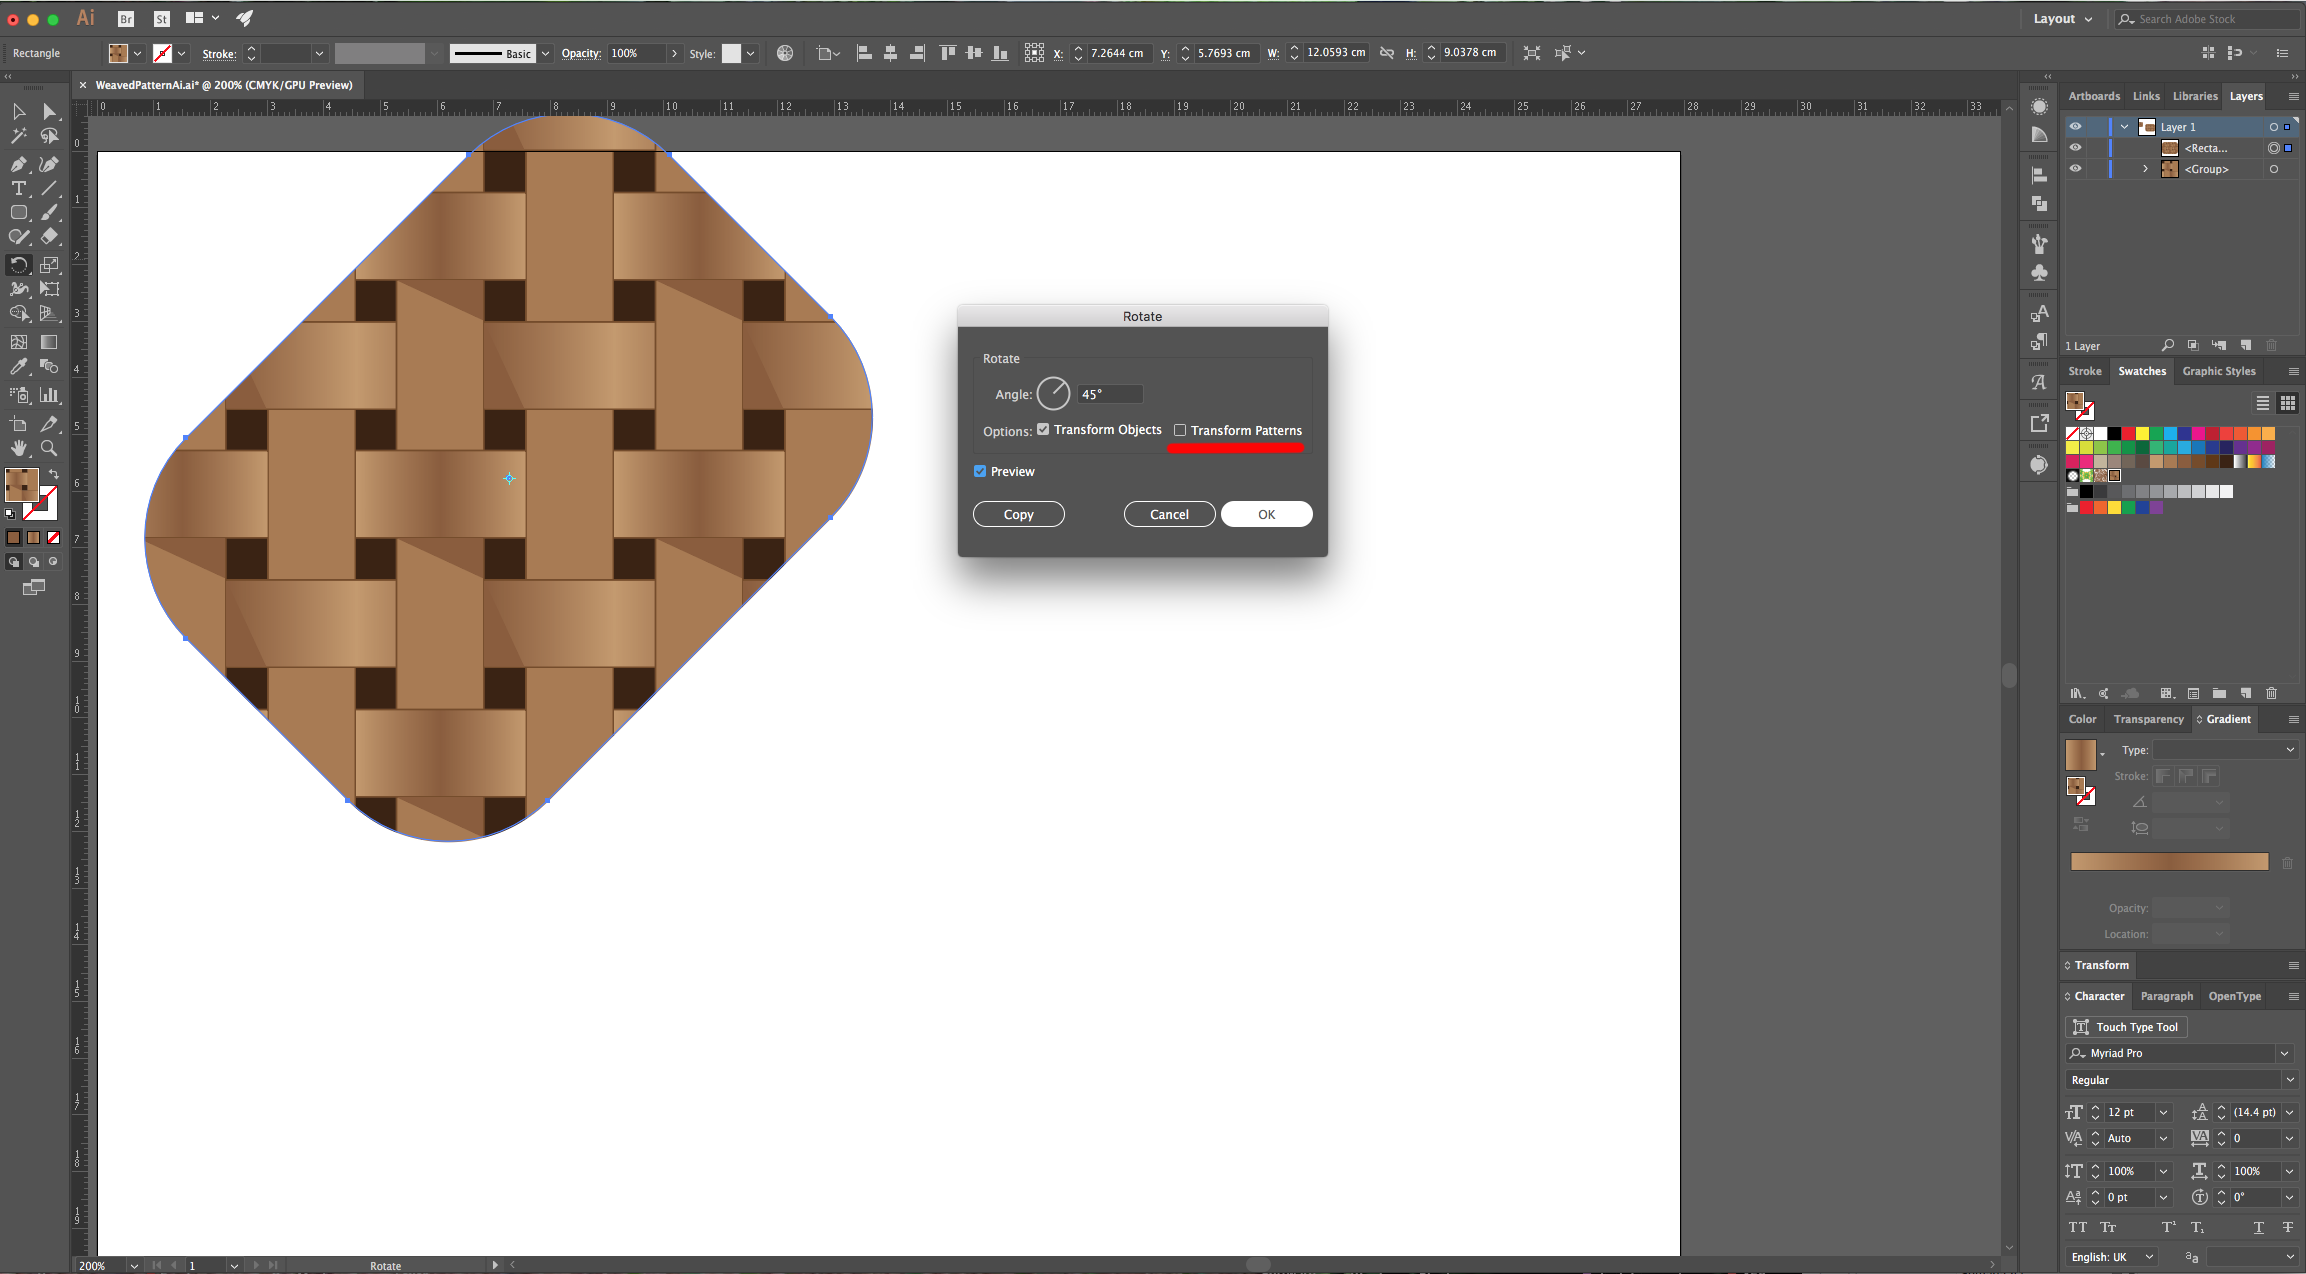
12 - Now you can use the “Pattern” as “Fill”. Make sure to enable or disable “Transform Patterns” when “Scaling” and/or “Rotating”, etc. depending on how you want your pattern to behave.

2 - Select the “Rectangle Tool” (M) and click inside your canvas. Use a “With” of 3 cm and a “Height” of 1.5 cm and click “OK”, then, fill it with a medium brown from the “Swatch Panel”.
3 - With your rectangle still selected, “Copy” it (Command/Control + C) and “Paste to Back” (Command/Control + B). Use the “Rotate Tool” (R) to flip your rectangle in a 90° Angle.
4 - Create another rectangle with a 3 cm “With” and “Height”, place it right on top of your rectangles. Right-click on it and choose Arrange > Send to Back and change its “Fill” color to a dark brown.
5 - Select the Top-most rectangle (the horizontal one) and change the “Fill” to a “Linear Gradient” with a 0° Angle and with 3 spots (0%, 50% and 100%). The first and last should be the same color (we used #c49a6c), and the second one should be a darker shade (we used #8b5e3c).
6 - Duplicate both rectangles (horizontal and vertical). Select the second rectangle counting from the Top (the bottom horizontal one), click on the “Constrain Width and Height Proportions” icon on the Top Menu making sure the little chain is crossed and change the “H Value” from 1.5 cm to 1.56 cm. Change the “Fill” color to a darker shade so you end up with darker “Lines” on the top and bottom. Do the same with the bottom vertical rectangle to create the “Lines” left and right.
7 - Use the “Pen Tool” (P) to create a right-angled triangle “Shadow” starting from the bottom-left point where the two rectangles intersect to the bottom-right, then down almost to the end of the vertical rectangle and back to the starting point. Fill it with a medium brown.
8 - Hold the “Shift” and “Alt/Option” keys, then click on your “Vertical” rectangle and drag to the right to create a duplicate right next to your paths. Repeat this with the “Horizontal” rectangle but drag down and place it under them.
9 - Select the “Direct Selection Tool” (A), click on the four “Anchor points” in the right of the bottom horizontal rectangles (don’t forget the one that form the darker “Lines”) and click the Right “Arrow” key until they reach the right side of your duplicate vertical rectangle (it should be longer now).
10 - Do the same with the original vertical rectangle, select the bottom “Anchor points” and click the Down “Arrow” key until you reach the bottom. This portion should be under the duplicate horizontal rectangle. You should have “piece” of a weaved pattern now. Duplicate the “Triangular” Shadow and place it on top of the bottom horizontal rectangle right next to the spot where the vertical one covers it and use the “Reflect Tool” (O) to change its “Angle”. Then, select everything and “Group” it together (Command/Control + G).
11 - Go to Object > Pattern > Make, click “OK” on the Pop-up window and check that your “Pattern” works. Check the “Size Tile to Art” box or use the “Default” settings if you prefer. Name your pattern and click on the small “Check mark” on the Top Menu when you are “Done”.
12 - Now you can use the “Pattern” as “Fill”. Make sure to enable or disable “Transform Patterns” when “Scaling” and/or “Rotating”, etc. depending on how you want your pattern to behave.
by @lornacane


