
Arabesques in Illustrator
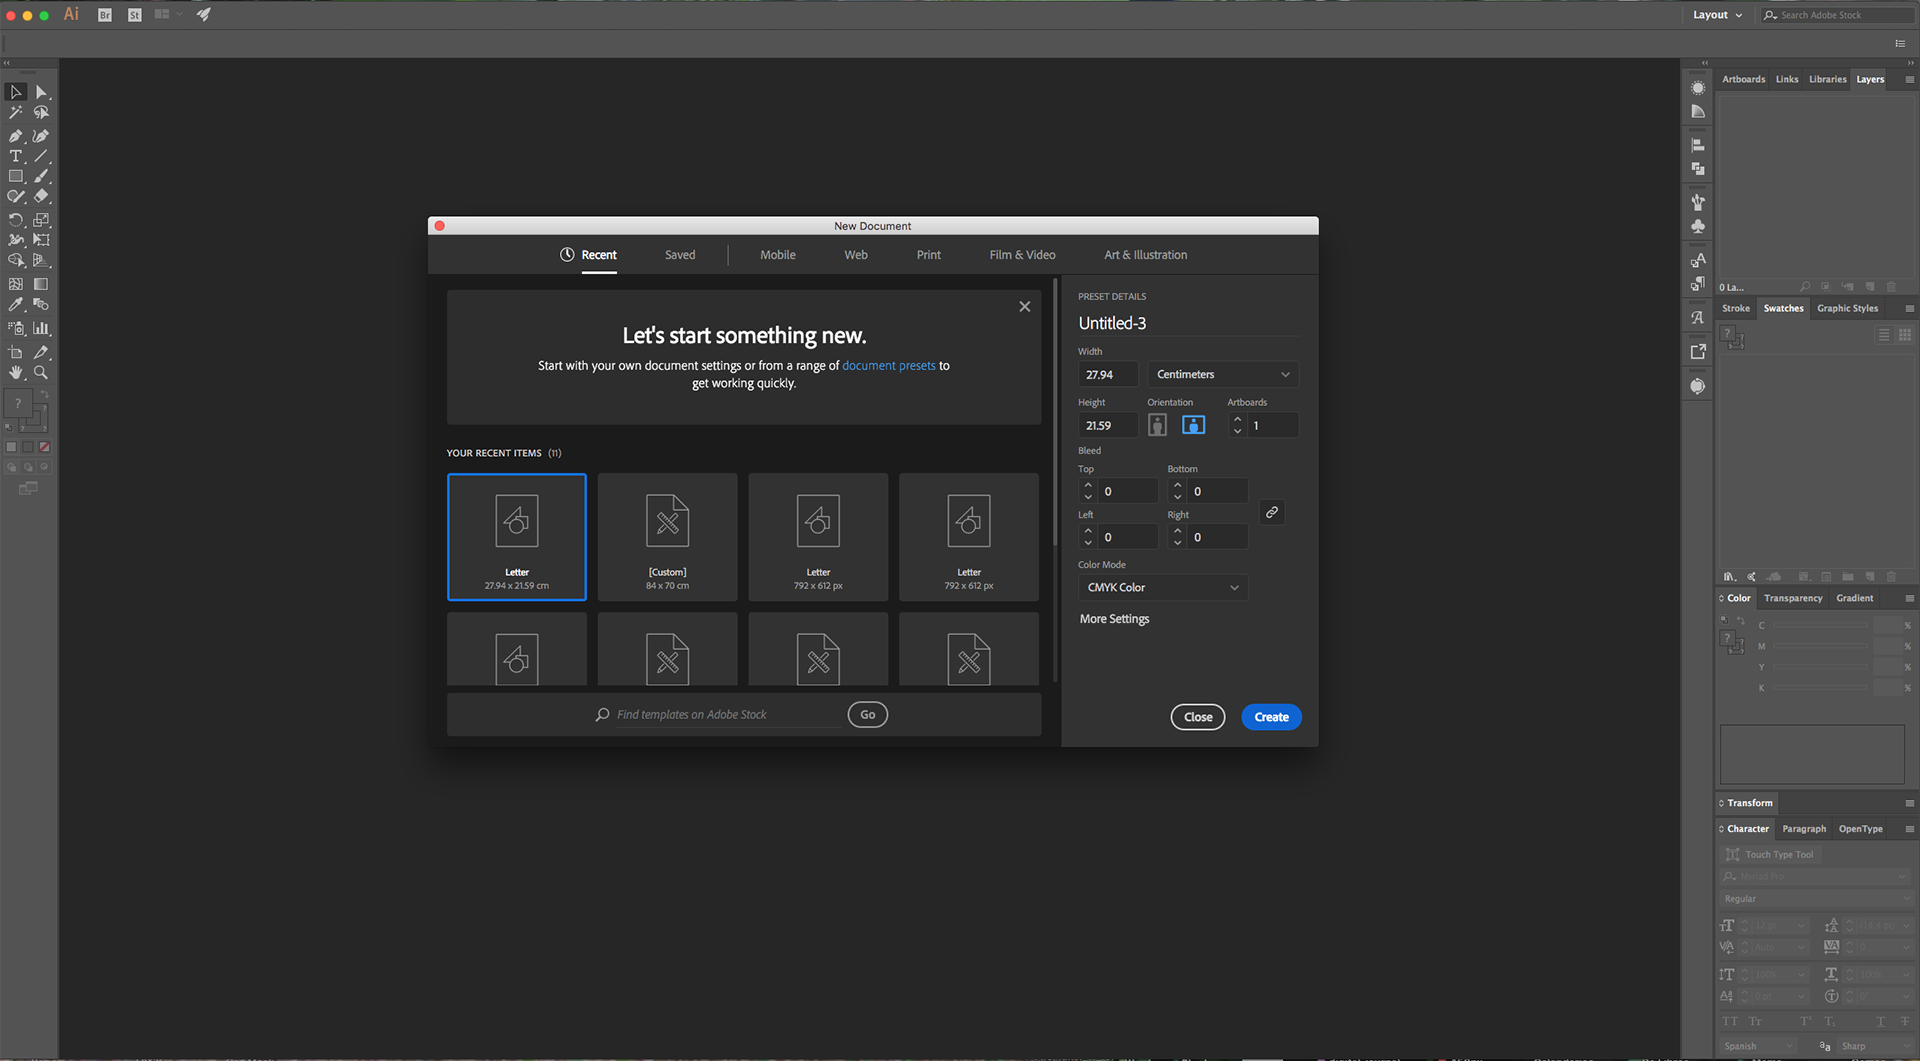
1 - In Illustrator, create a “New Document”.
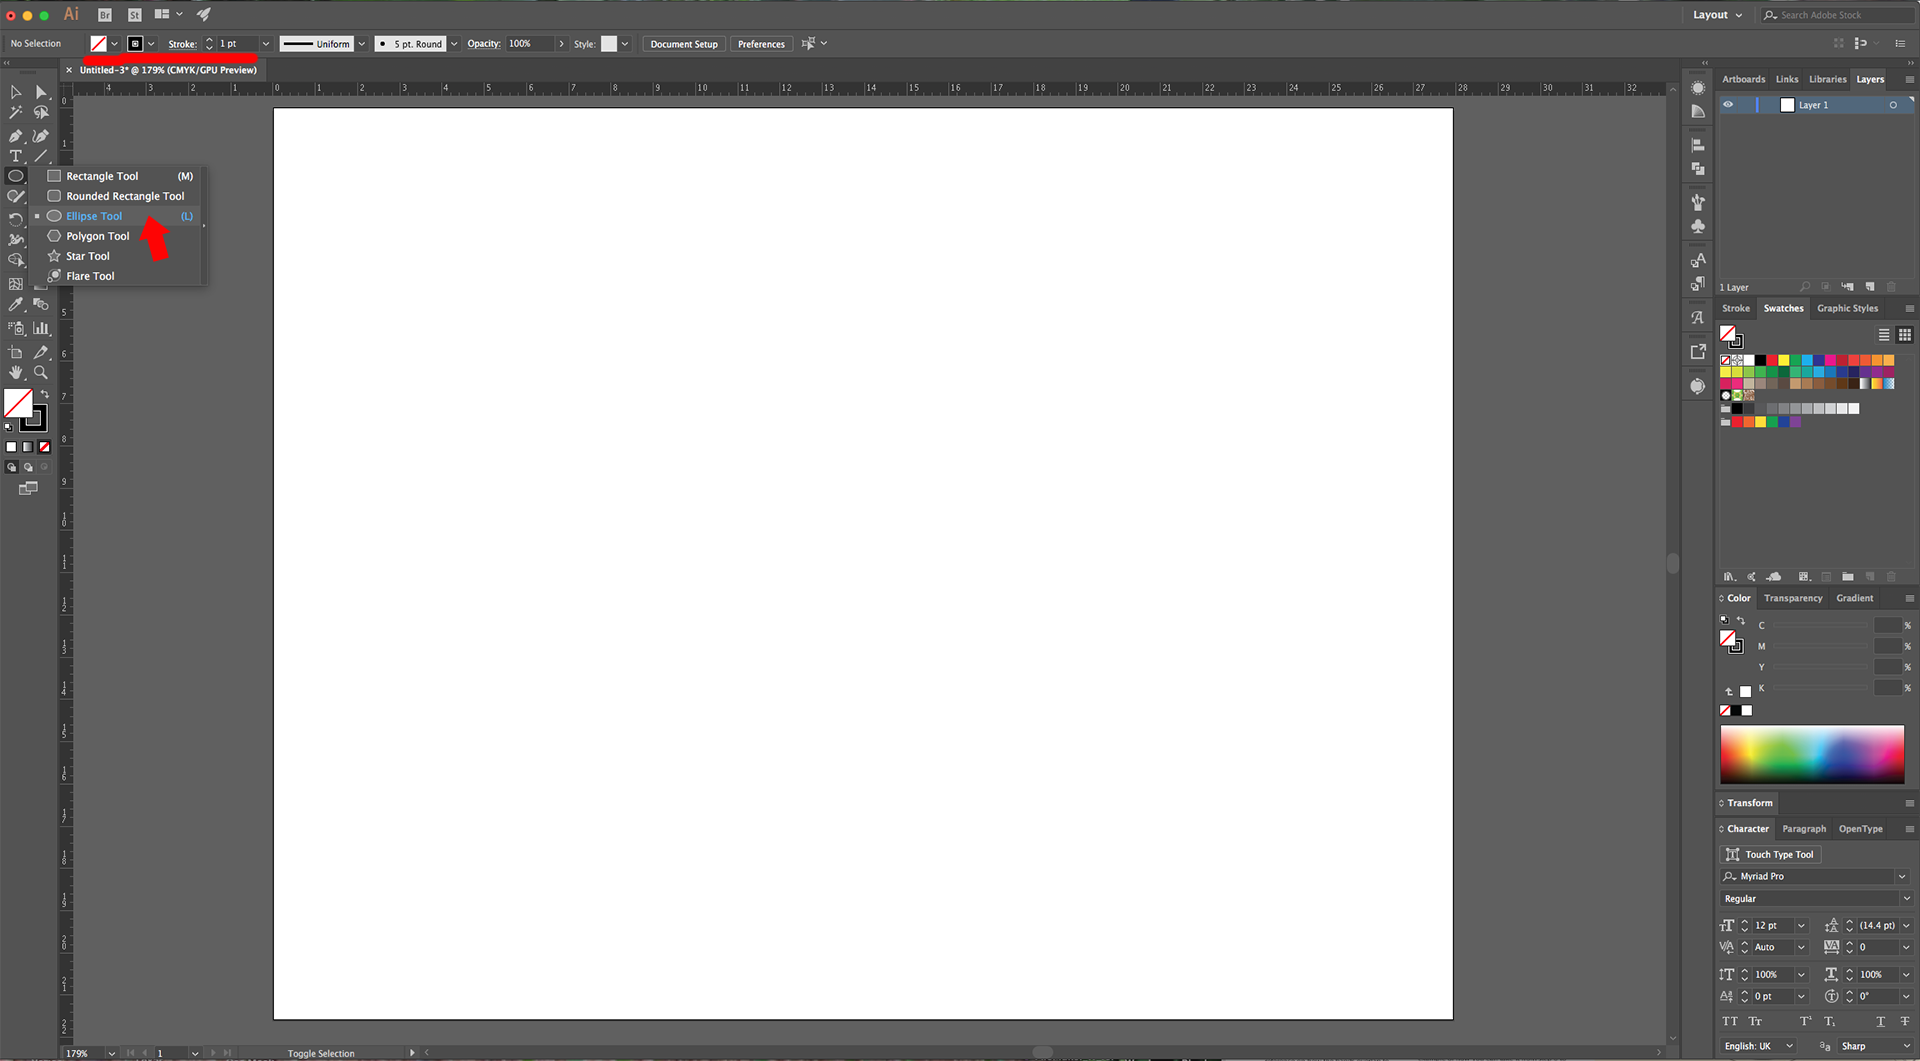
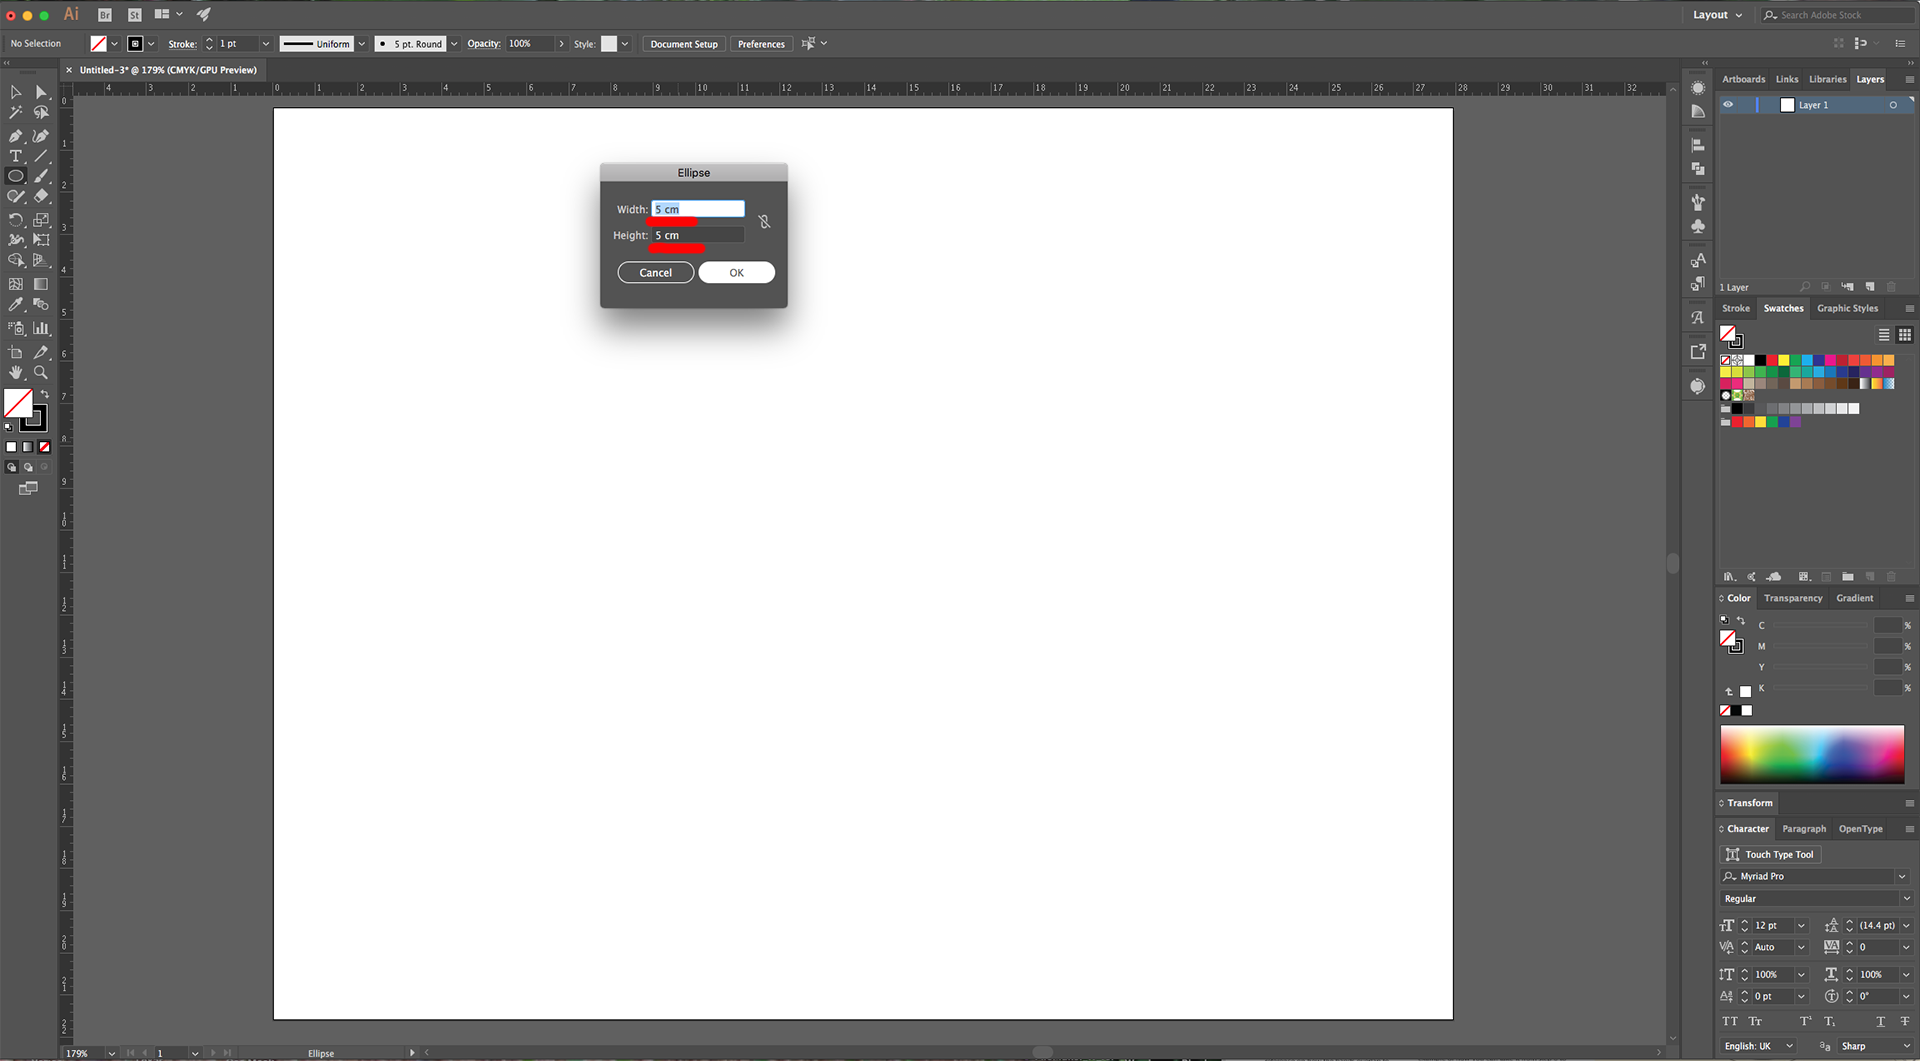
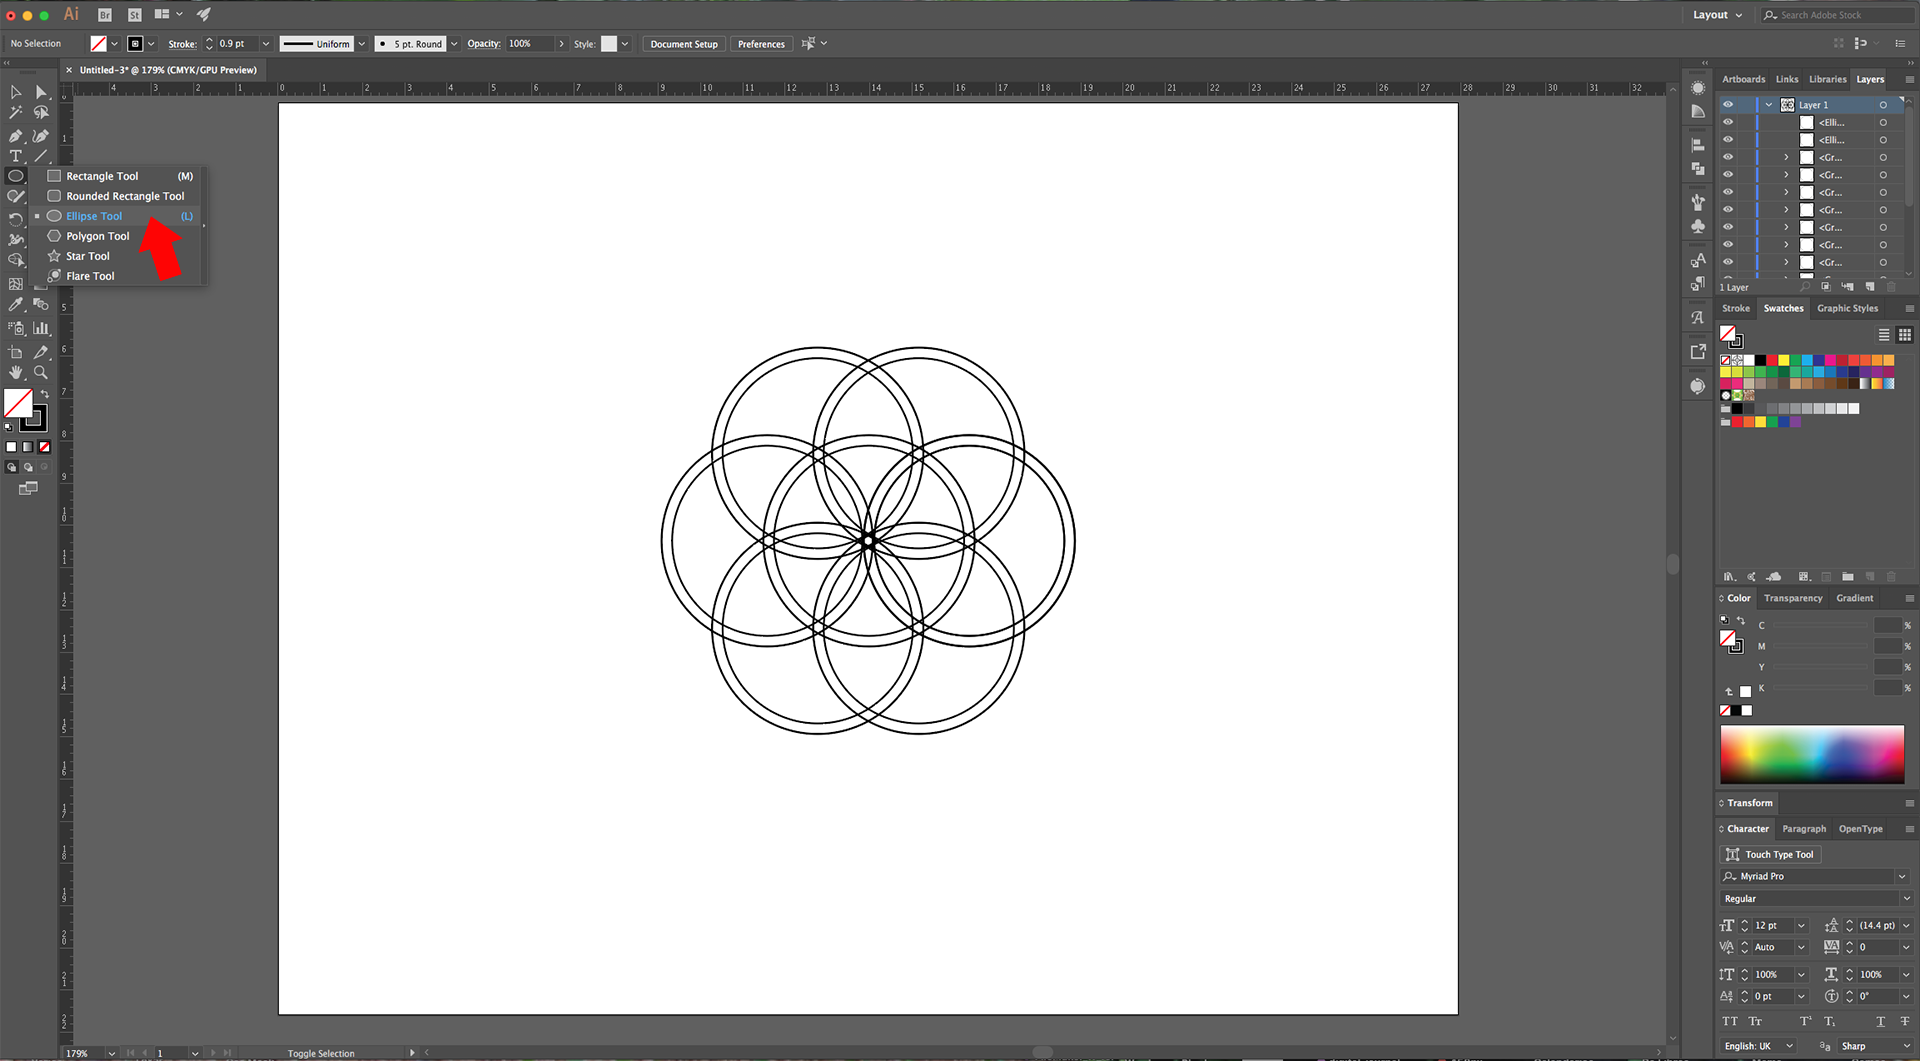
2 - Select the “Ellipse Tool” (L), click inside you Canvas and create a 5 cm (Width) by 5 cm (Height) “Circle”. Give it a 1 pt Black “Stroke” and NO “Fill”.
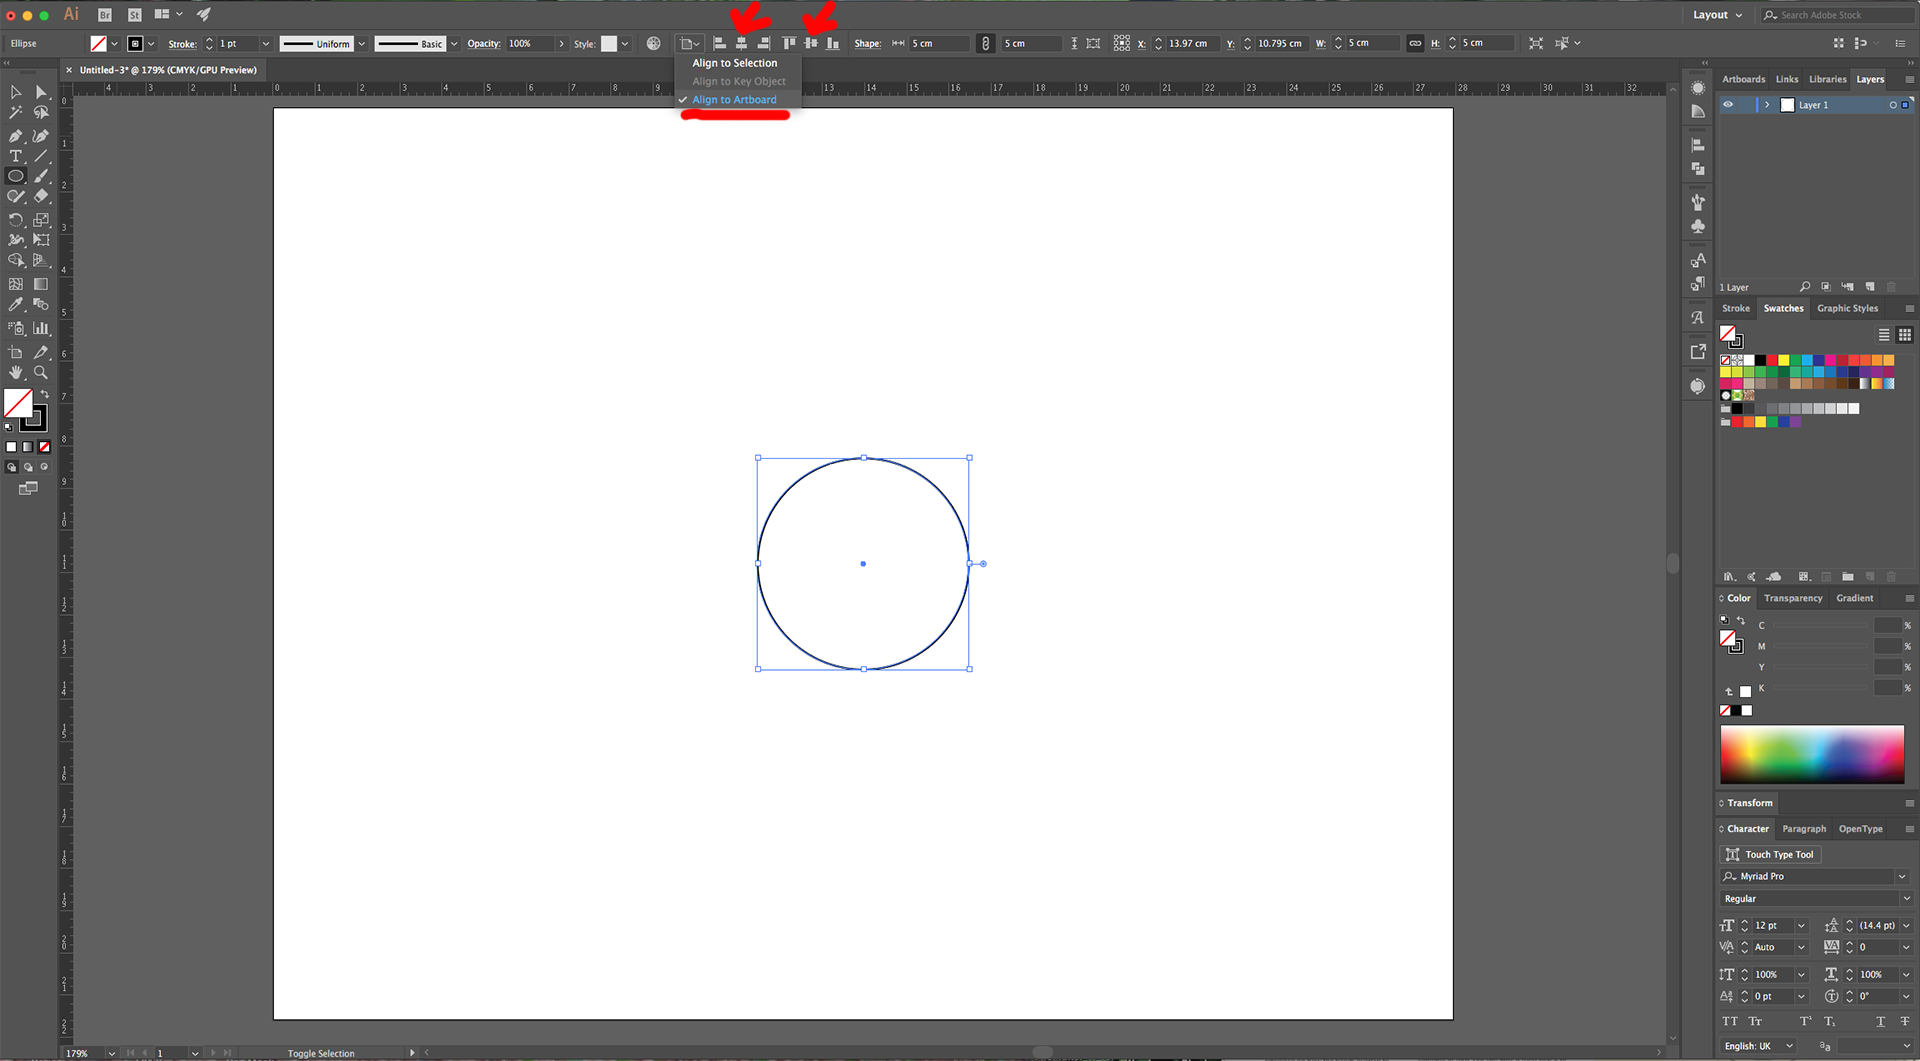
3 - Center it using the “Horizontal and Vertical Align Center” options on your Top Menu and make sure that “Align to Artboard” is selected. Or use the same options in the “Align Panel”.
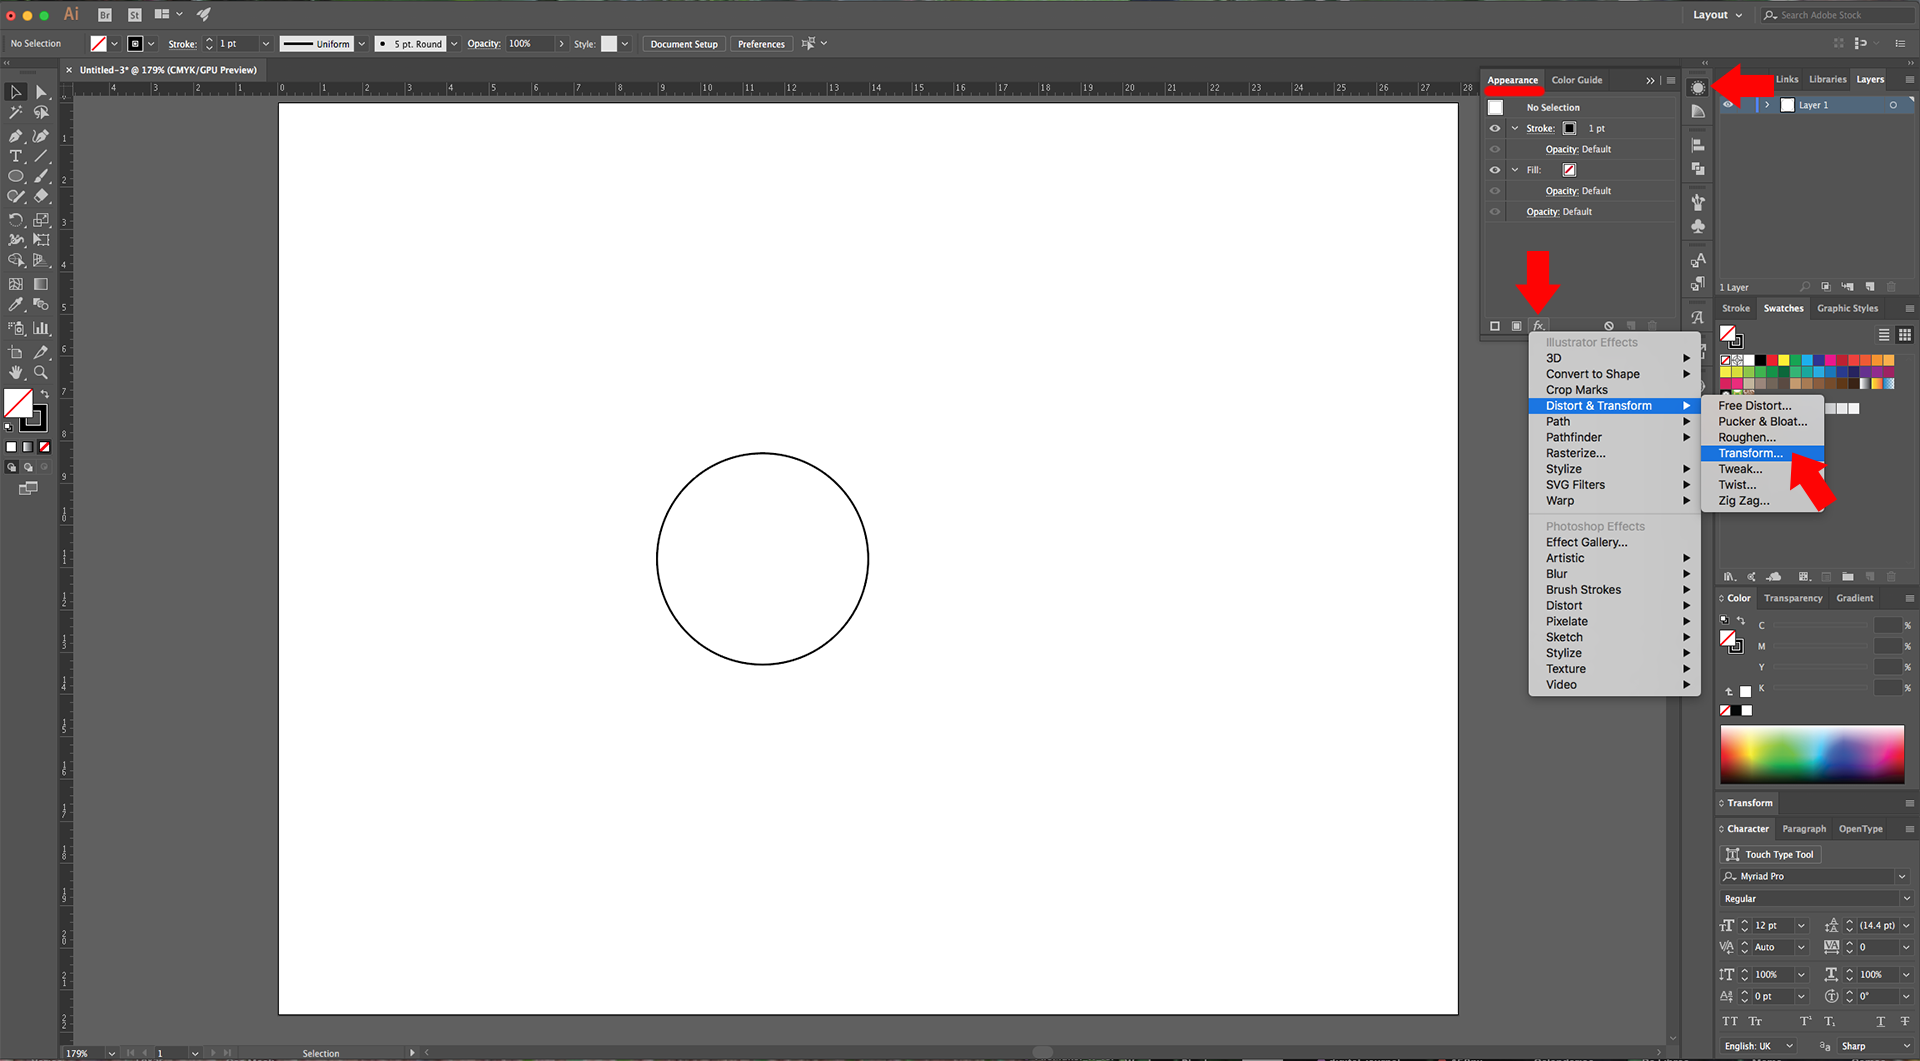
4 - Head to the “Appearance Panel”, click on the “Effects Menu” on the Bottom-Left side of the panel and navigate to Distort & Transform > Transform. Input a “Rotate Angle” of 300°, choose the “Middle-Left” point as “Reference Point” and make 6 “Copies”.

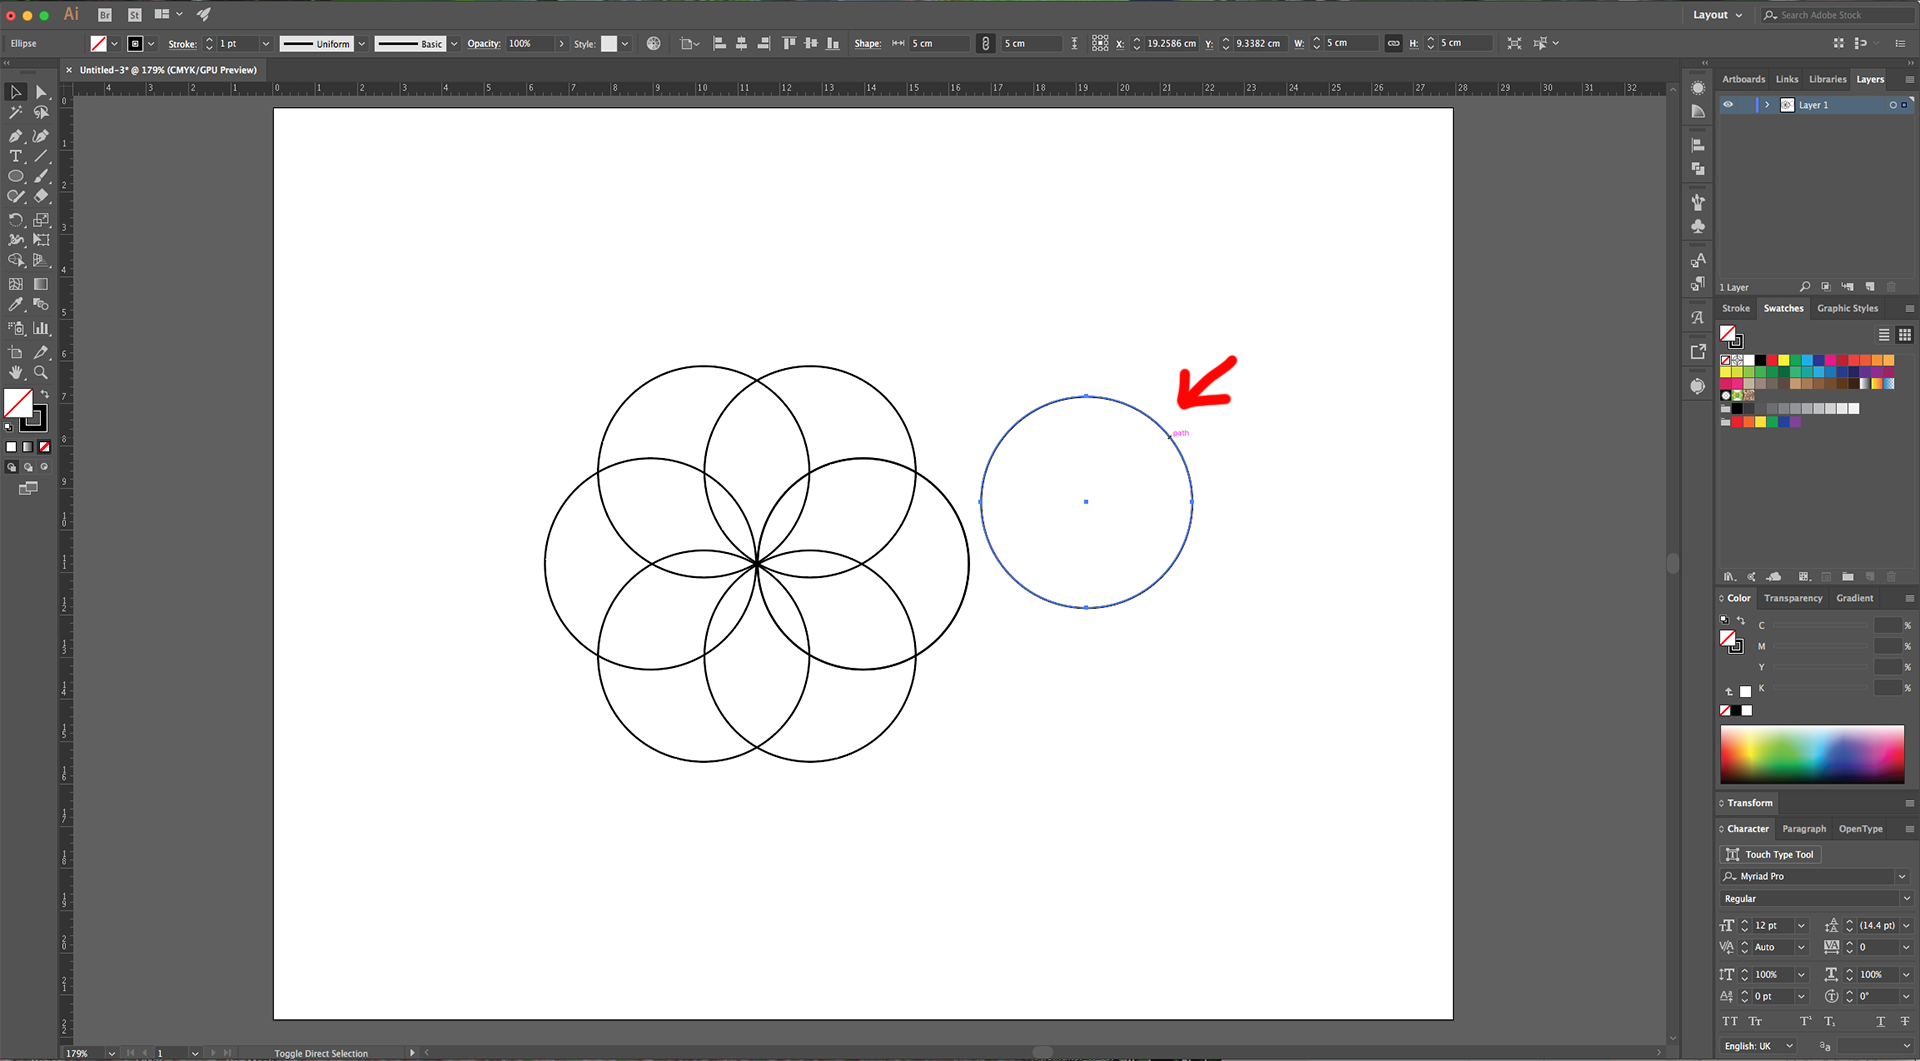
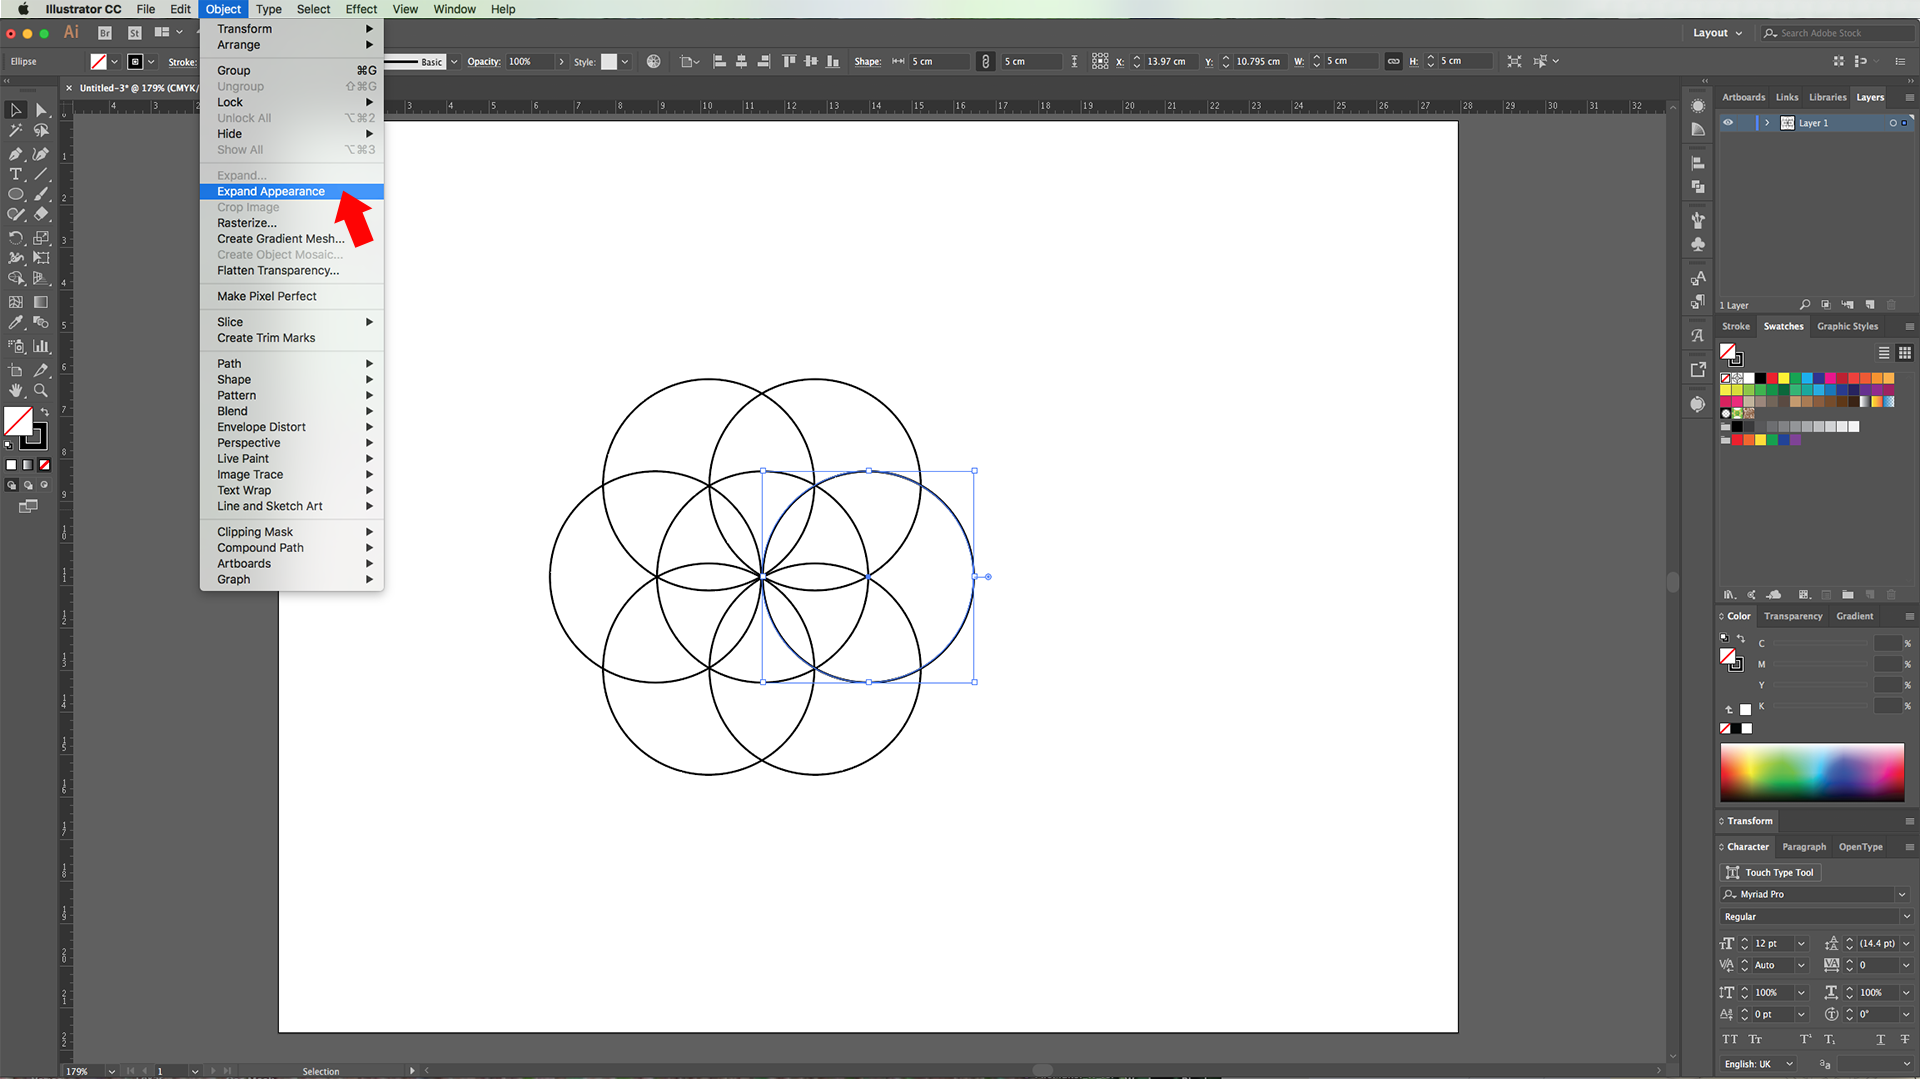
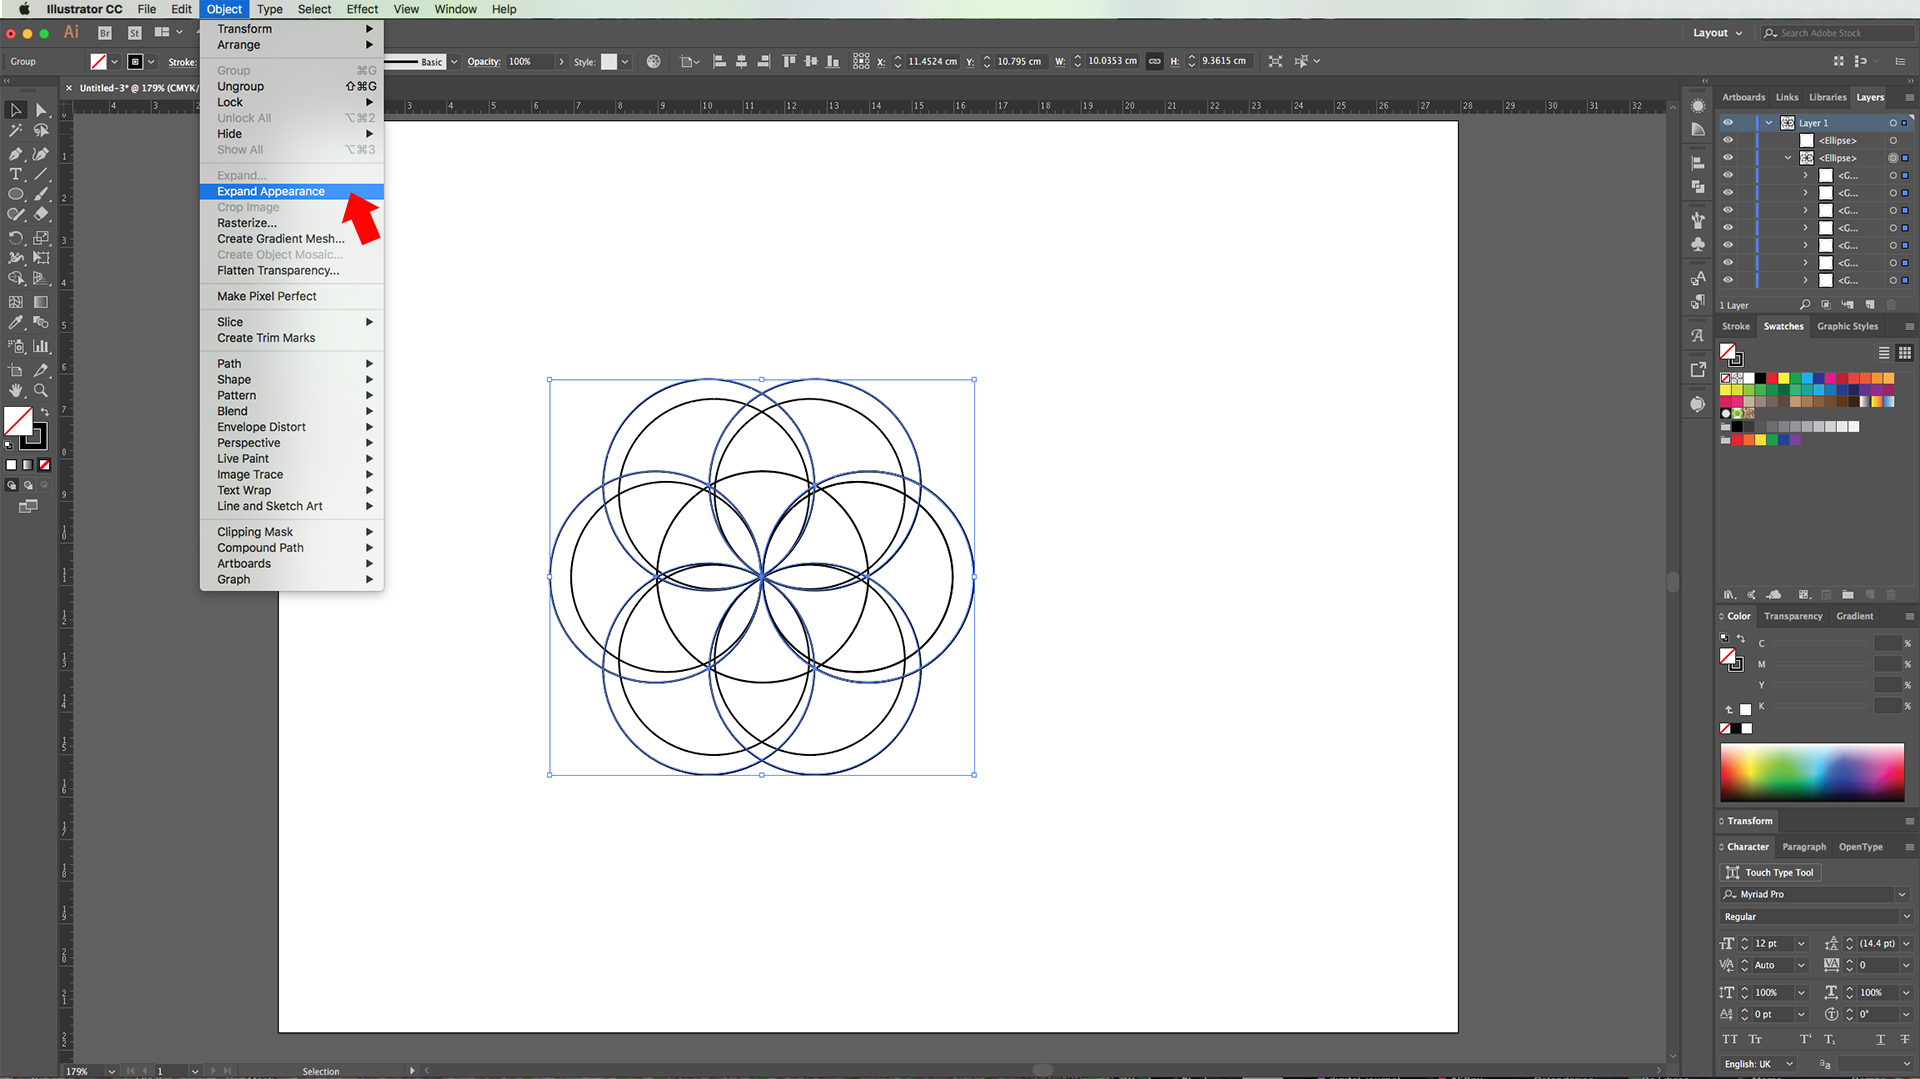
5 - Create another 5 by 5 cm Circle and center it on top of the ones. Make sure the centers of both shapes sit on top of each other. Select the first shape and go to Object > Expand Appearance.
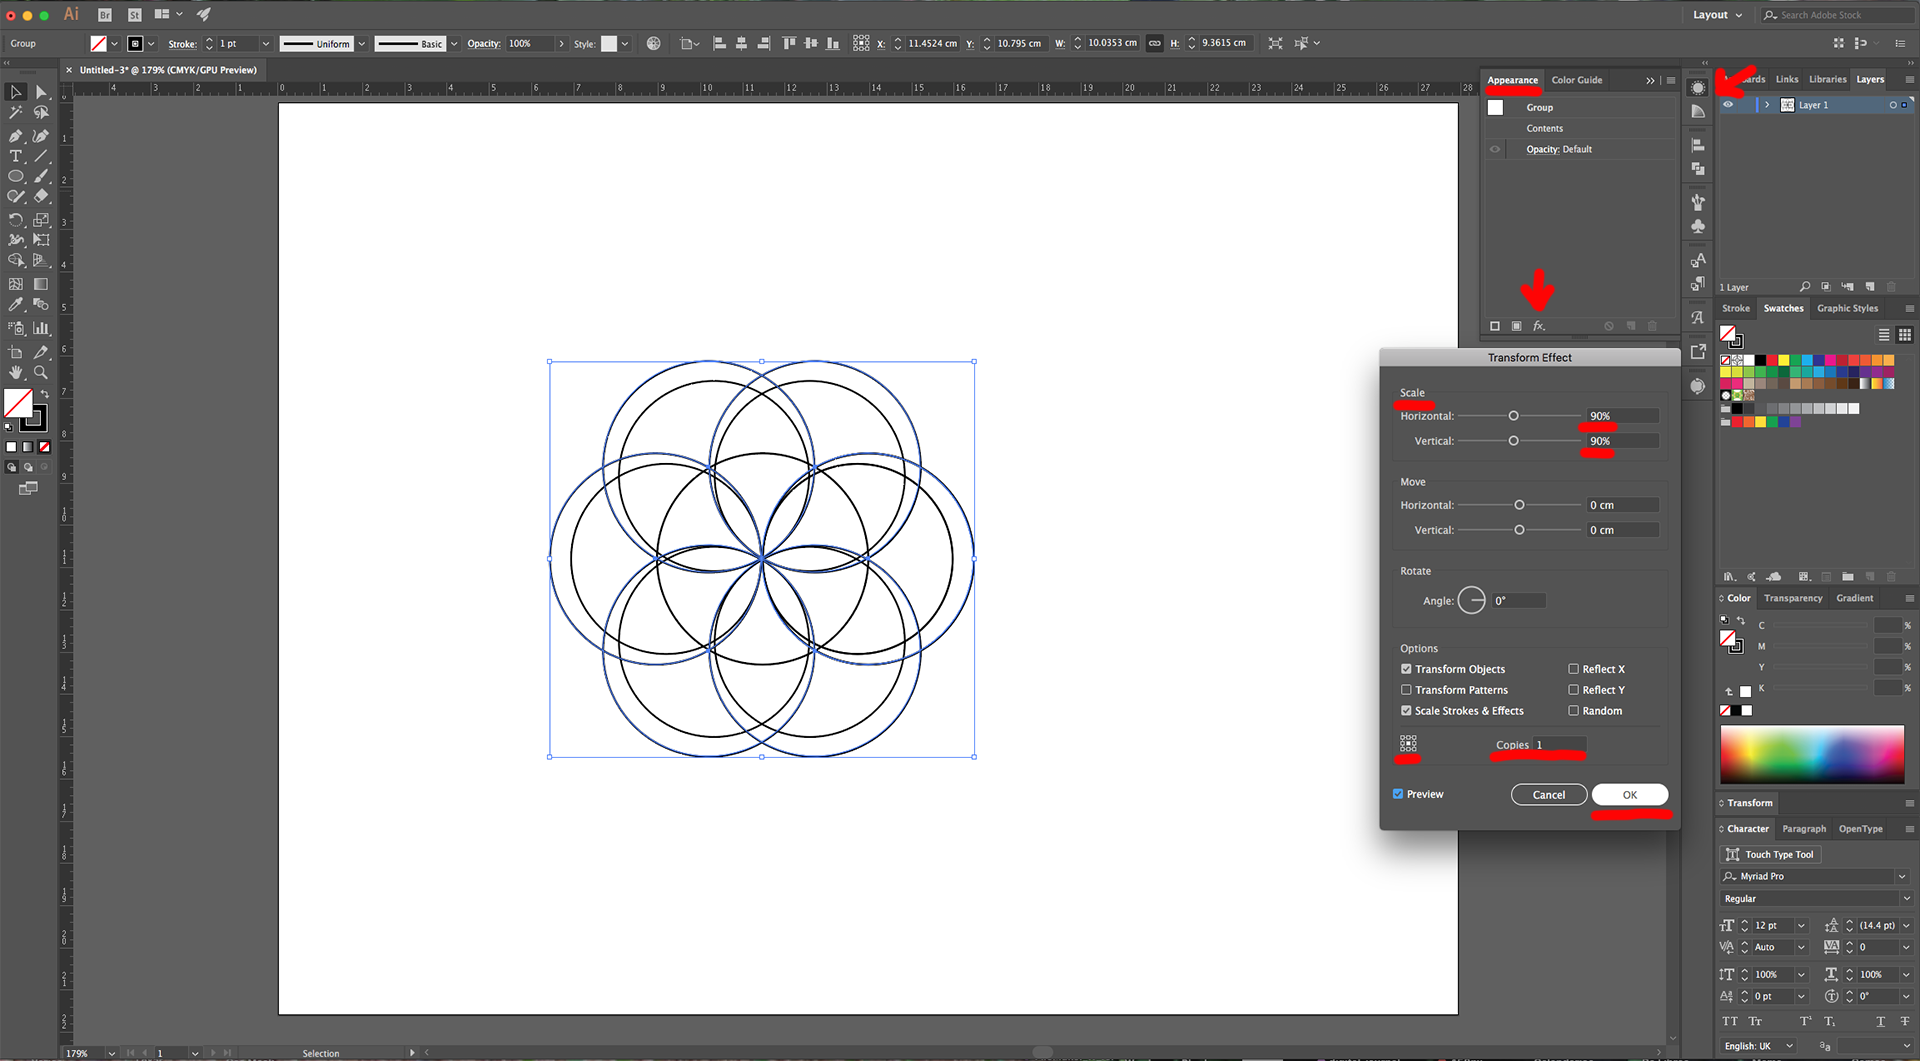
6 - Back in the “Appearance Panel” with the first shape still selected, go to Distort & Transform and this time use a “Horizontal” and “Vertical” Scale of 90%, choose the “Center” point as “Reference Point”, make sure the “Scale Strokes & Effects” box is checked and make 1 “Copy”. Go to Object > Expand Appearance.
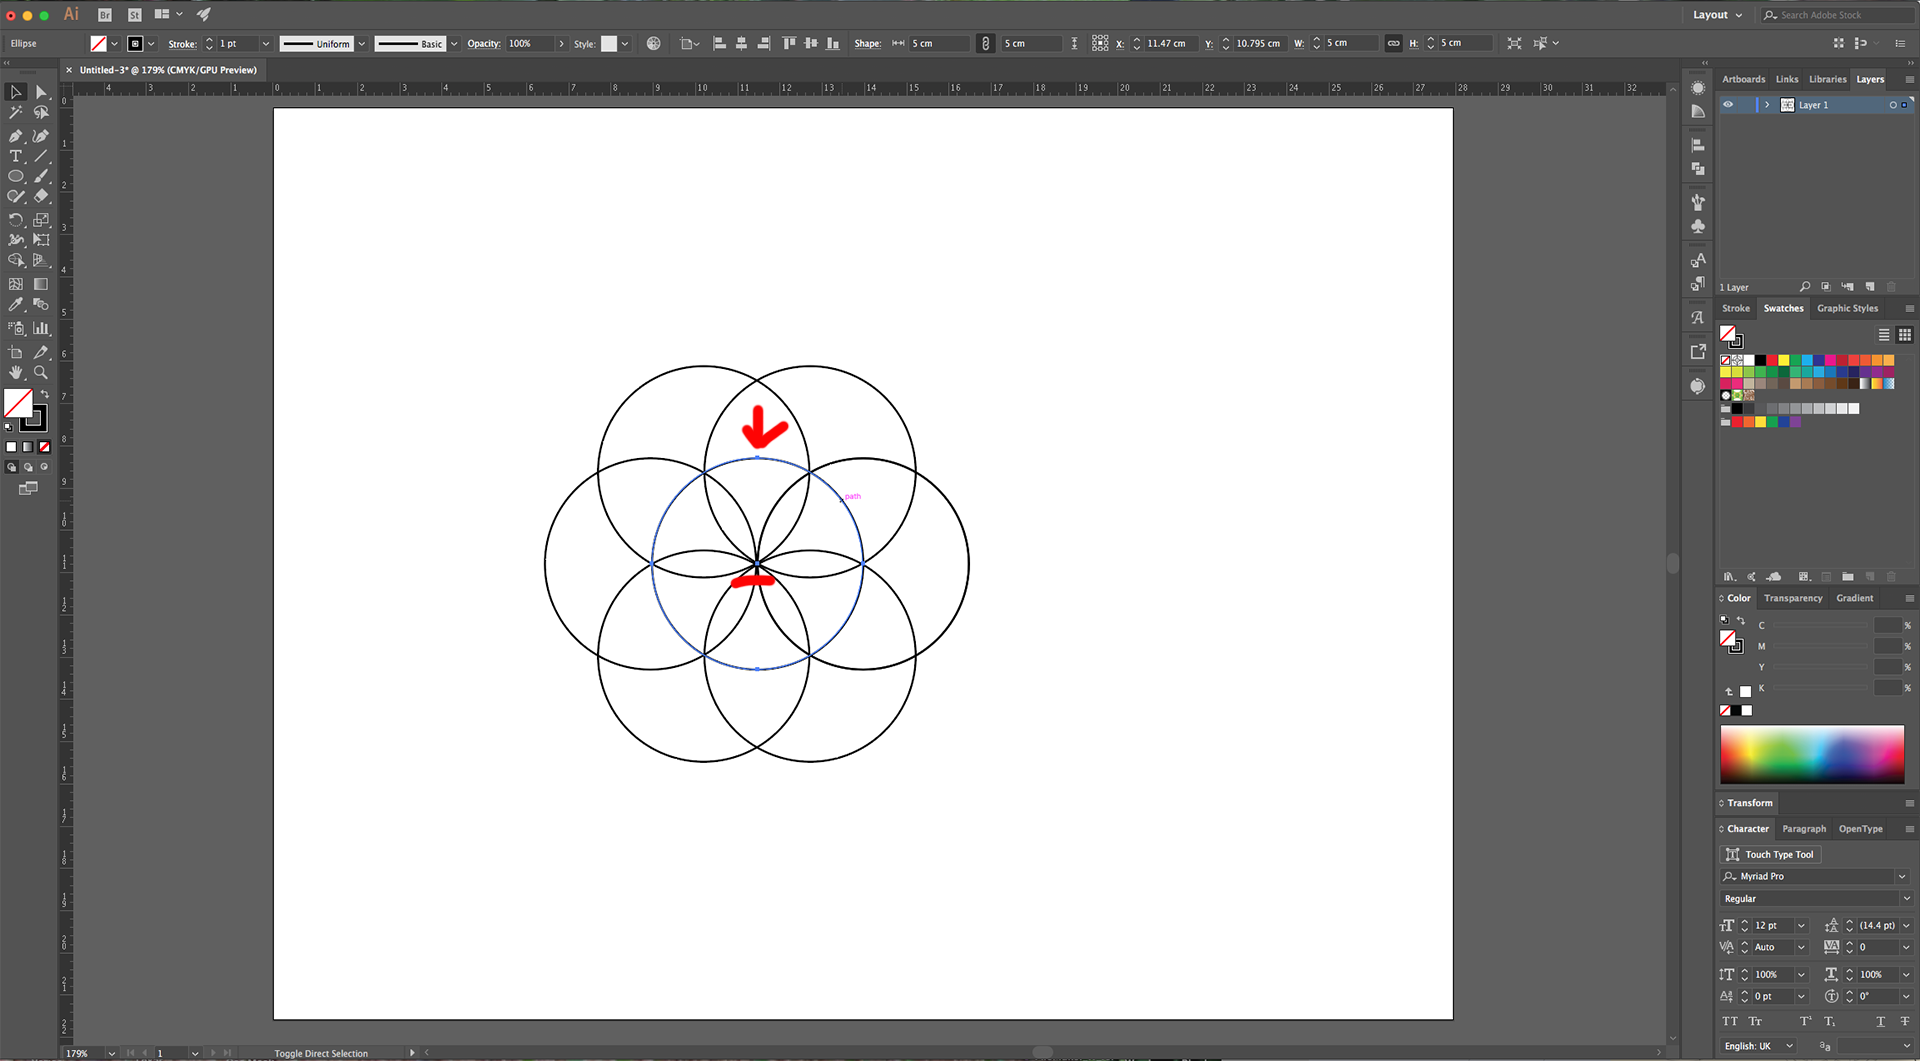
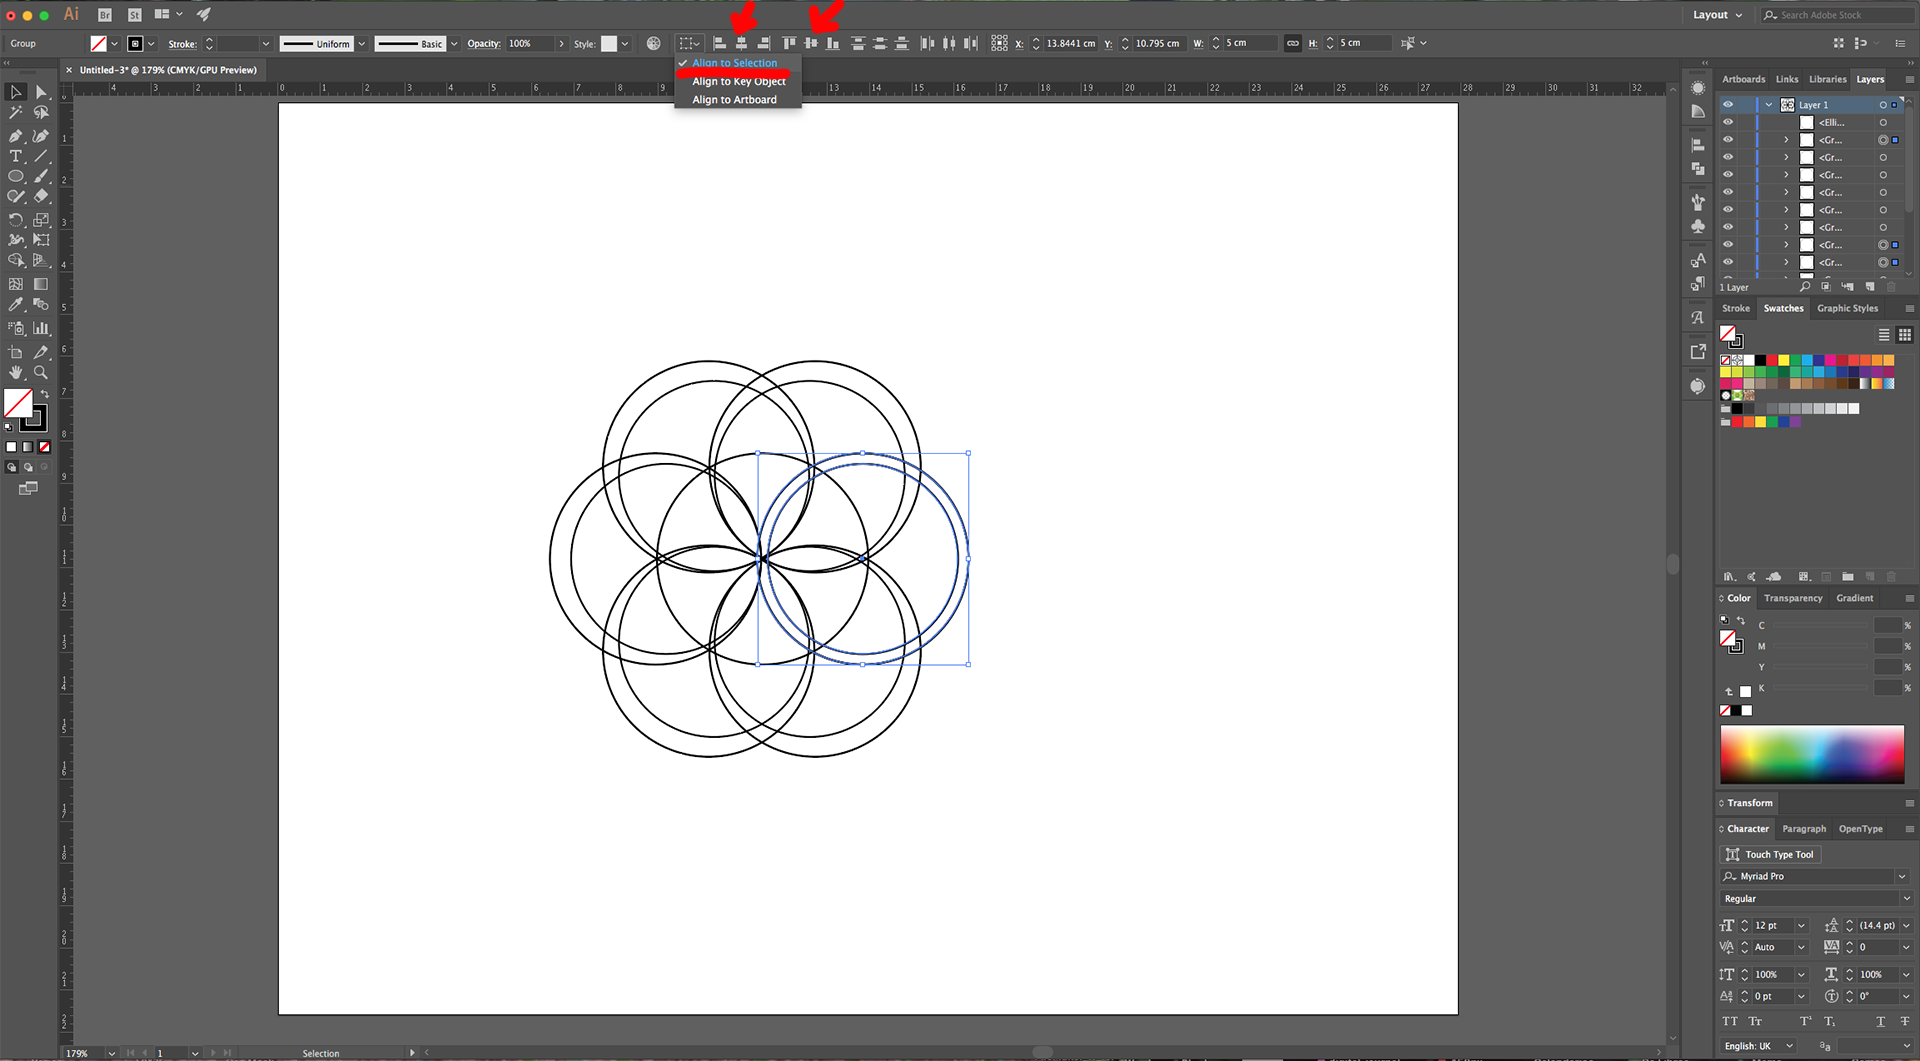
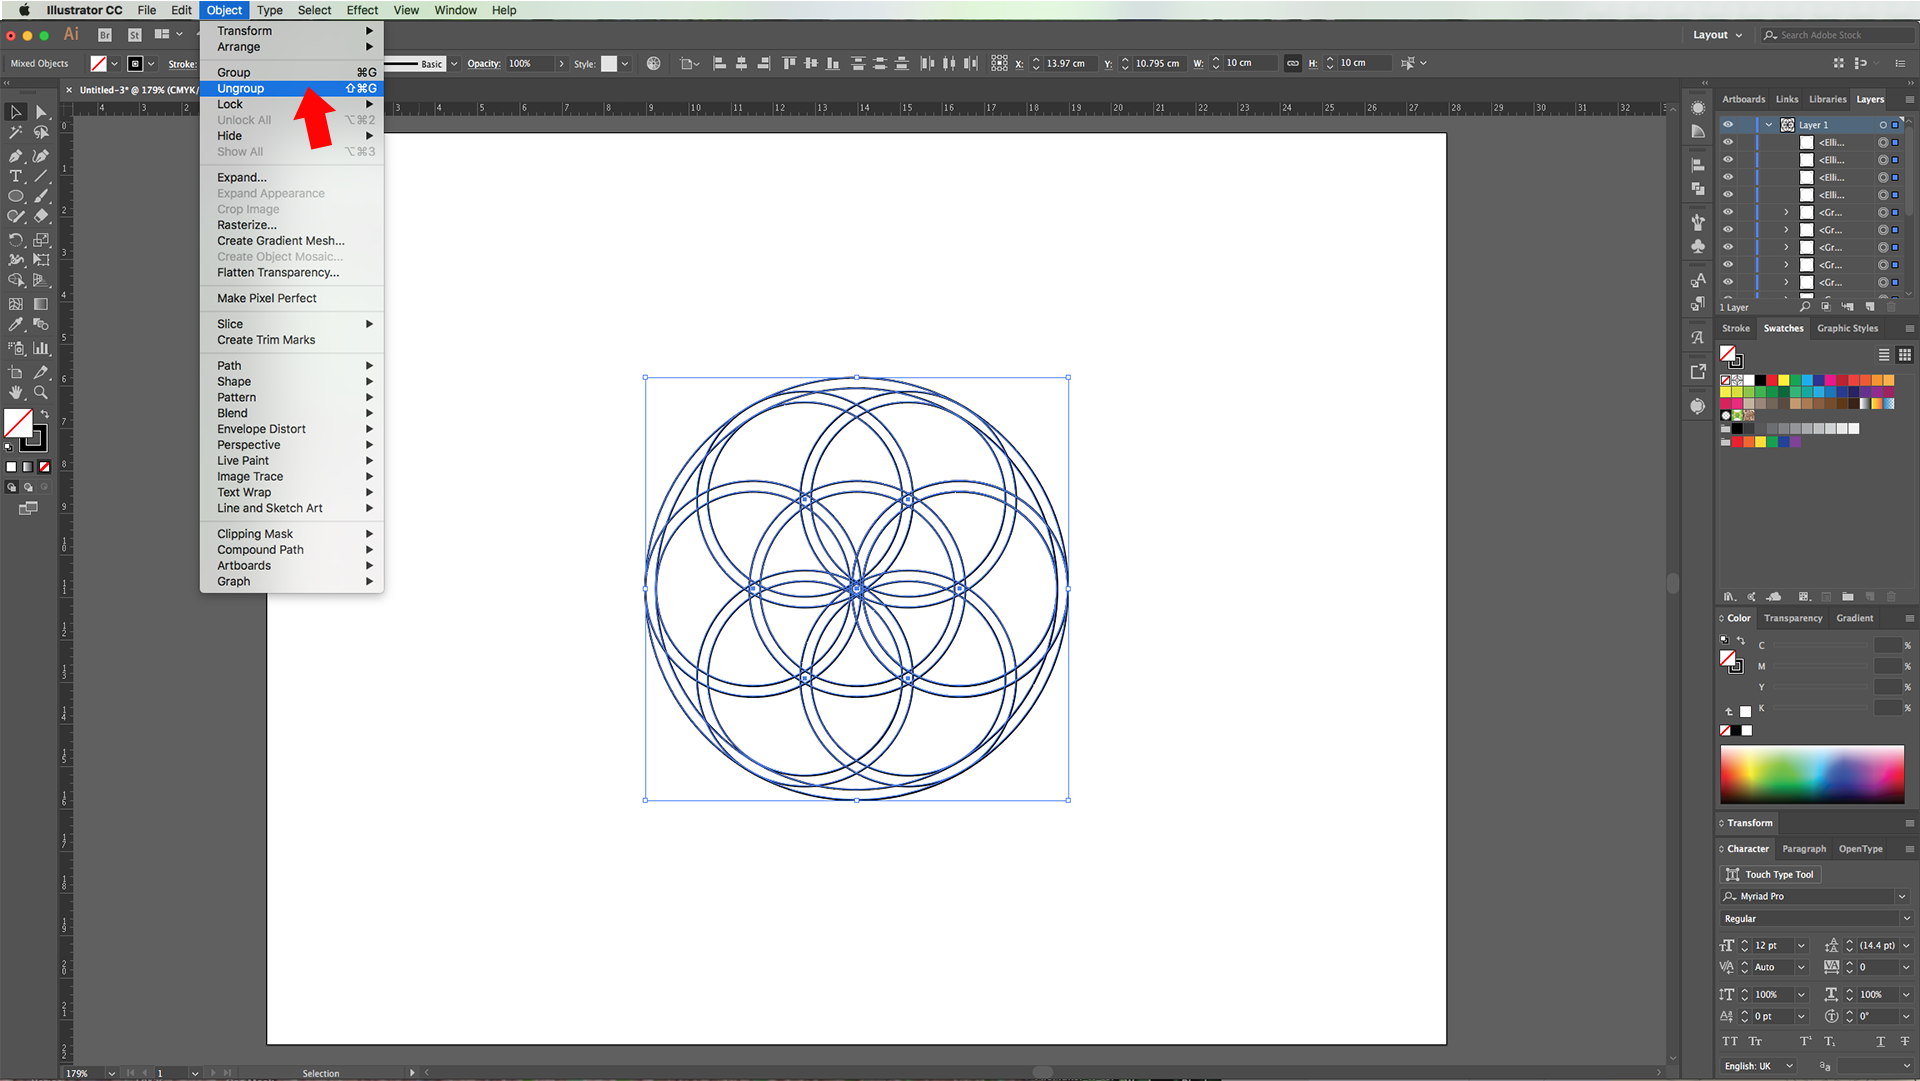
7 - Right-click on top and choose “Ungroup”. Select the two overlapped Circles on the right side and Center them using the “Horizontal and Vertical Align Center” options on your Top Menu but make sure that “Align to Selection” is your choice this time. Or use the same options in the “Align Panel”. Repeat with the rest of the Circles to make them all Concentric.

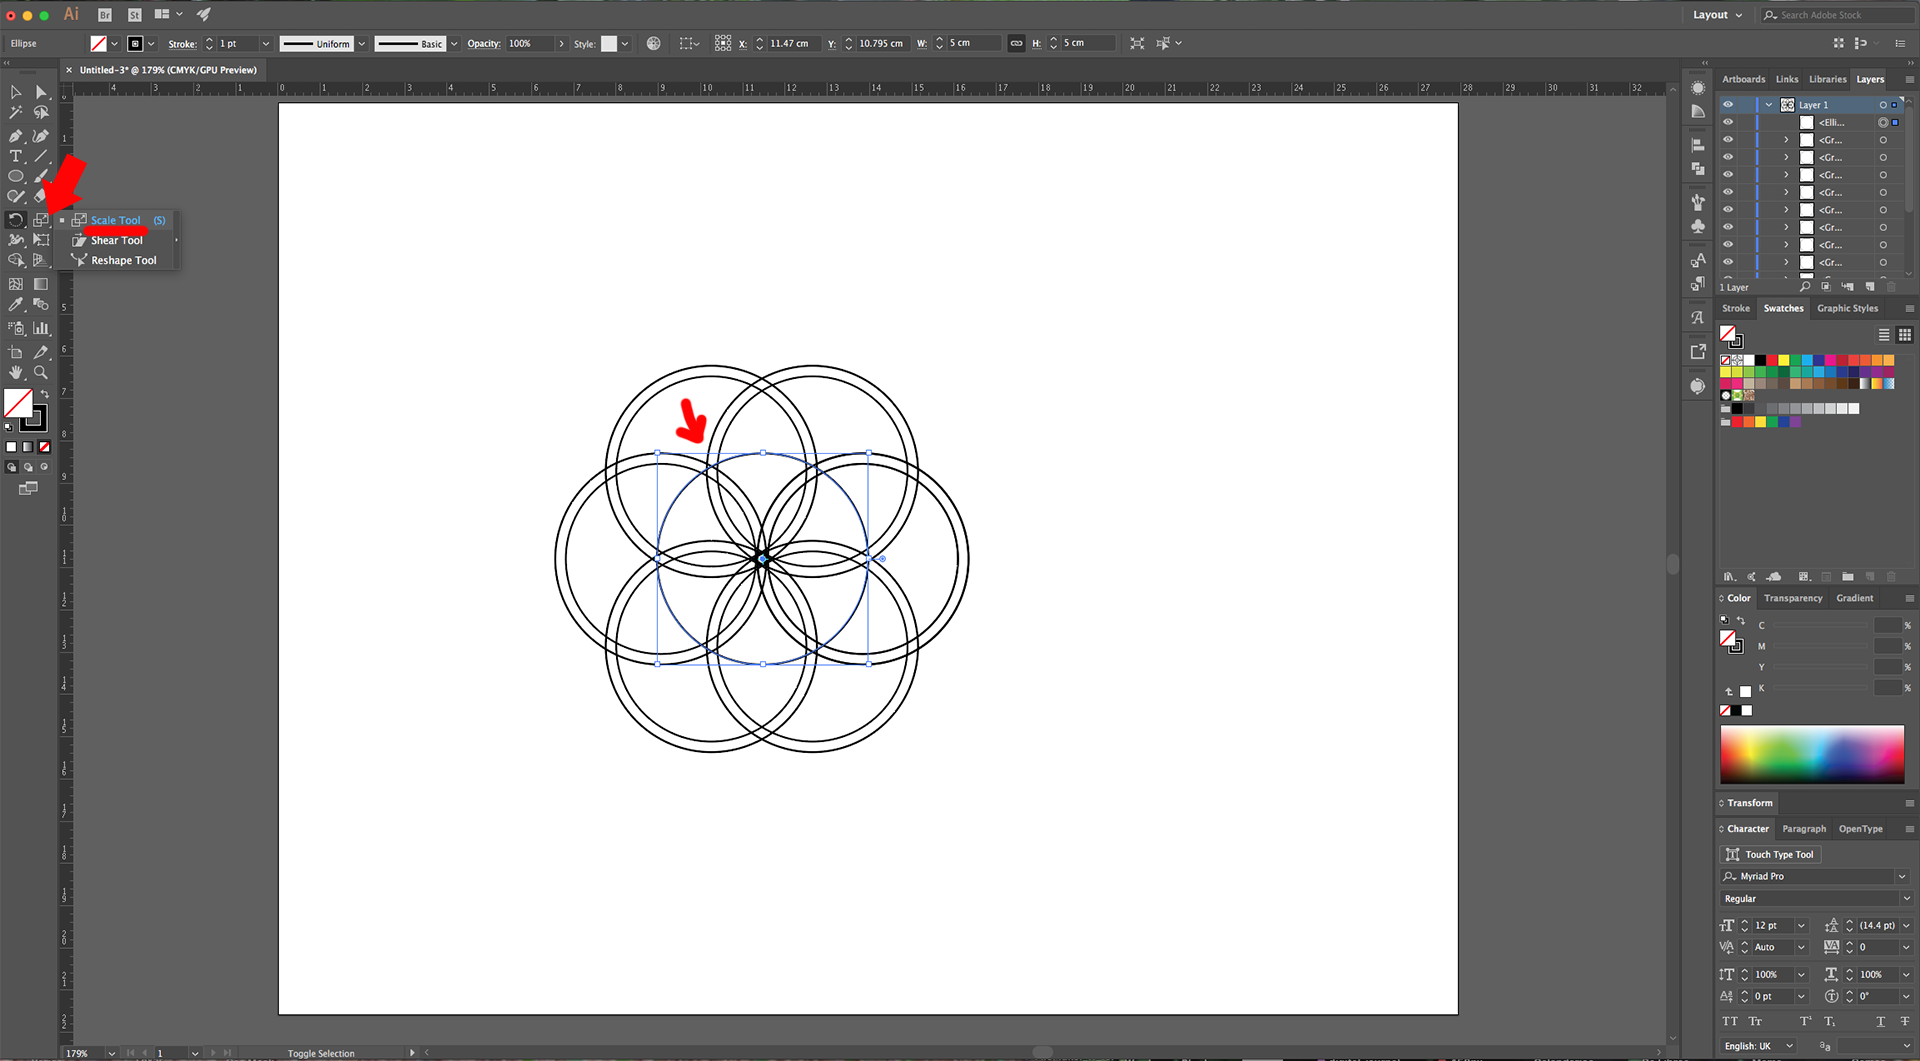
8 - Select the Middle Circle and double-click on the “Scale Tool” (S). Input a “Uniform” 90% “Scale”, make sure the “Scale Strokes & Effects” box is checked and click “Copy”.


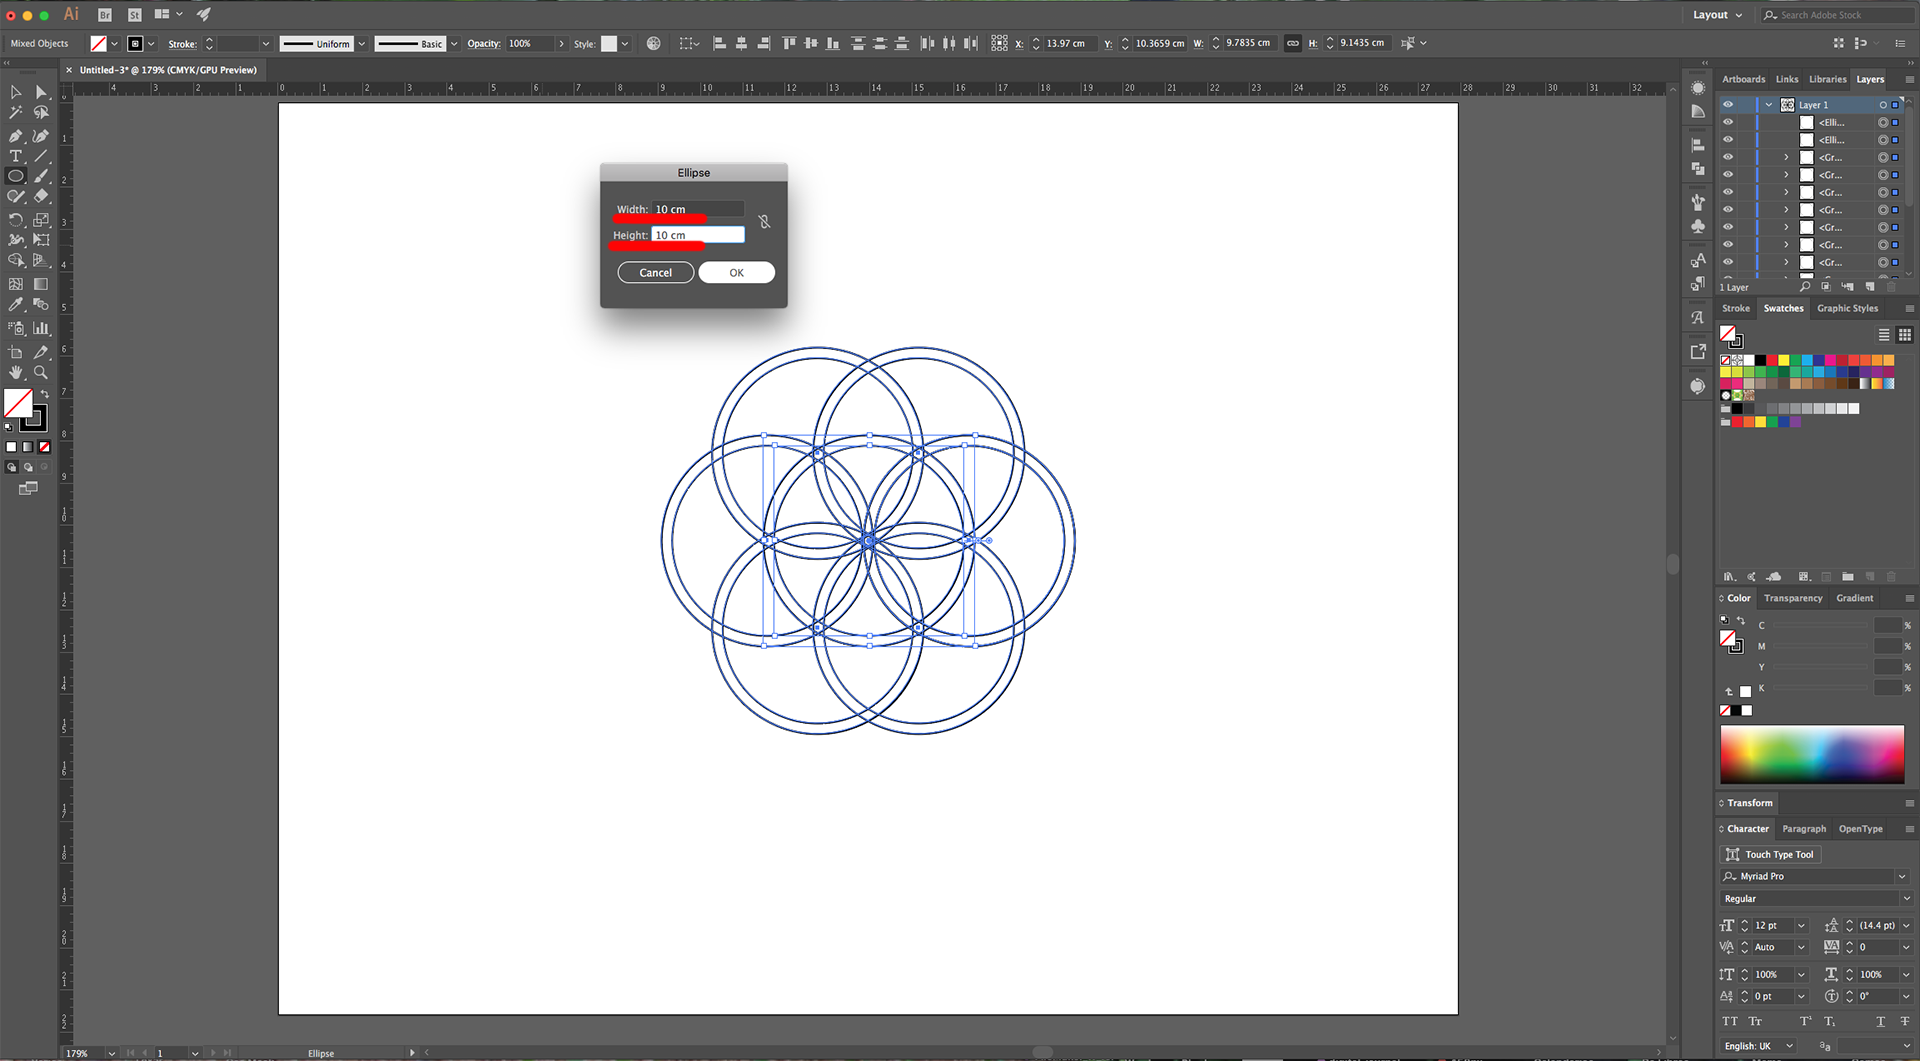
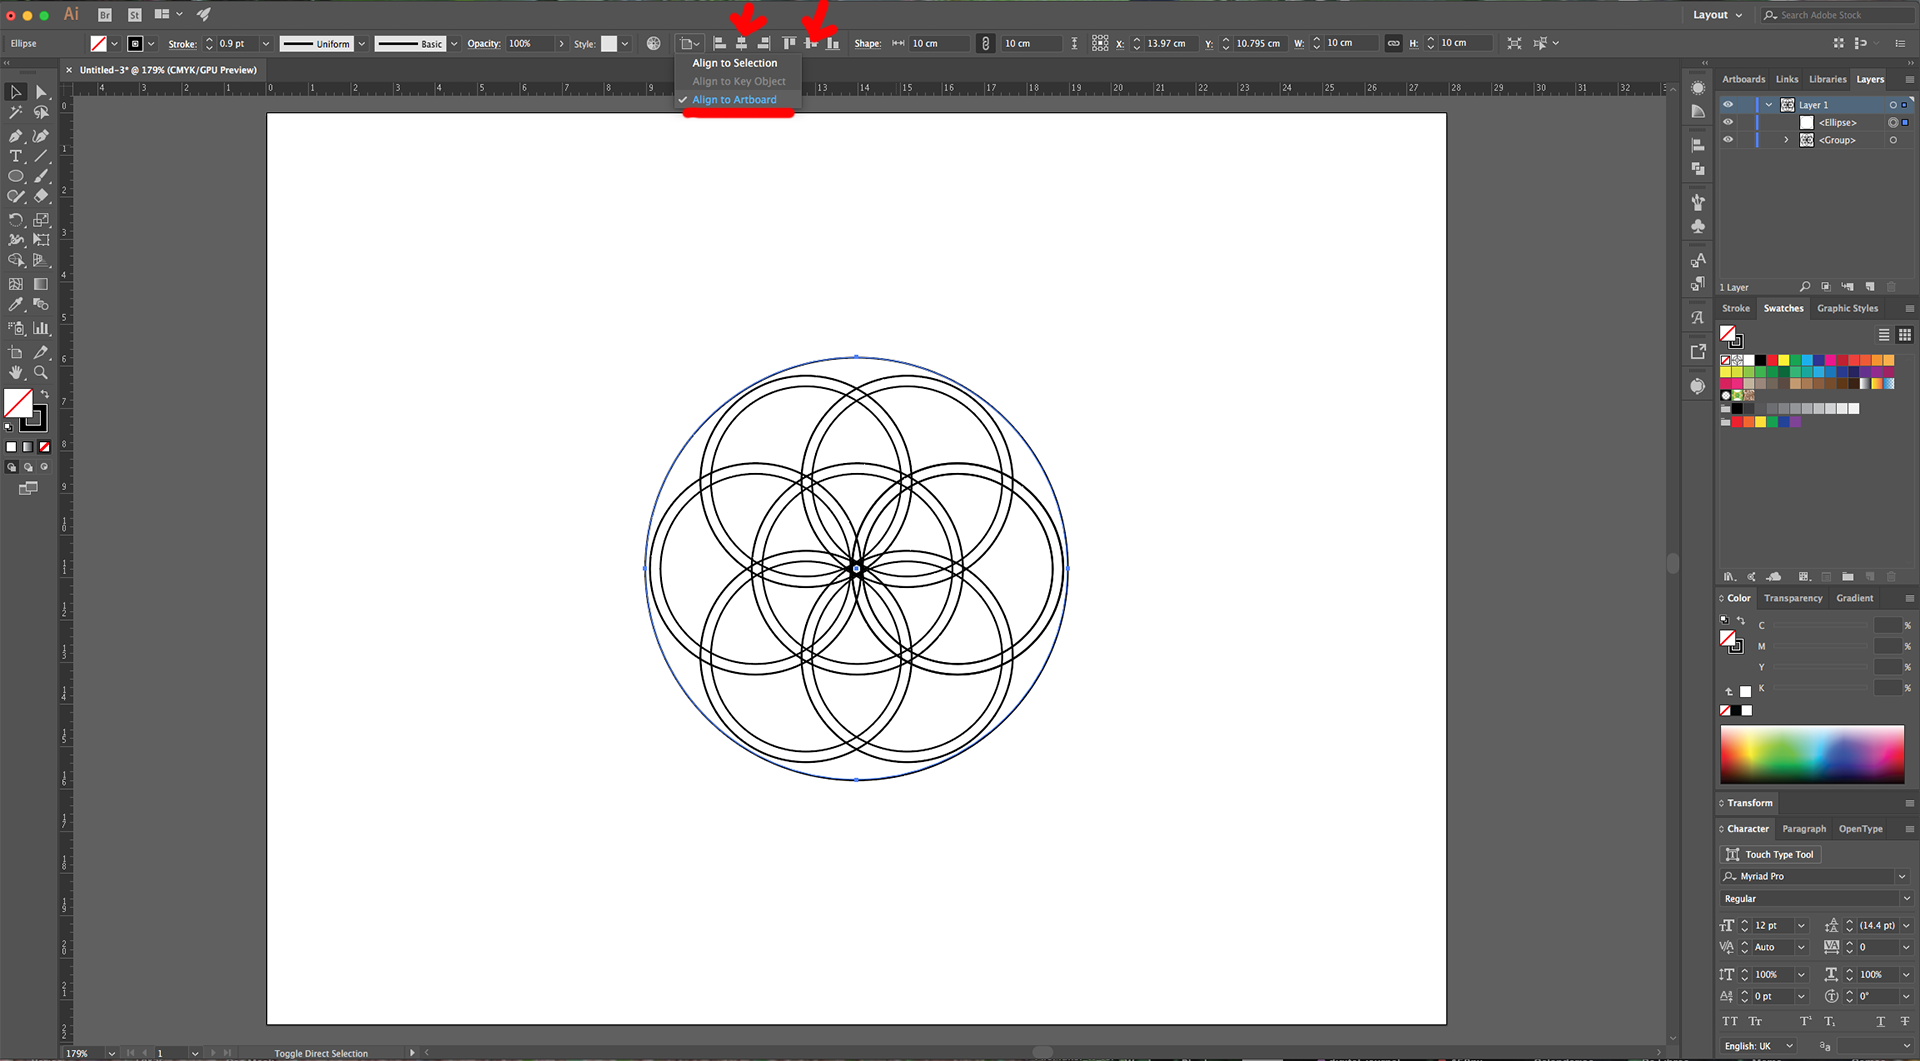
9 - Select the “Ellipse Tool” (L), click inside you Canvas and create a 10 cm (Width) by 10 cm (Height) “Circle”. Give it a 1 pt Black “Stroke” and NO “Fill”. Center it using the “Horizontal and Vertical Align Center” options on your Top Menu and make sure that “Align to Artboard” is selected. Or use the same options in the “Align Panel”.
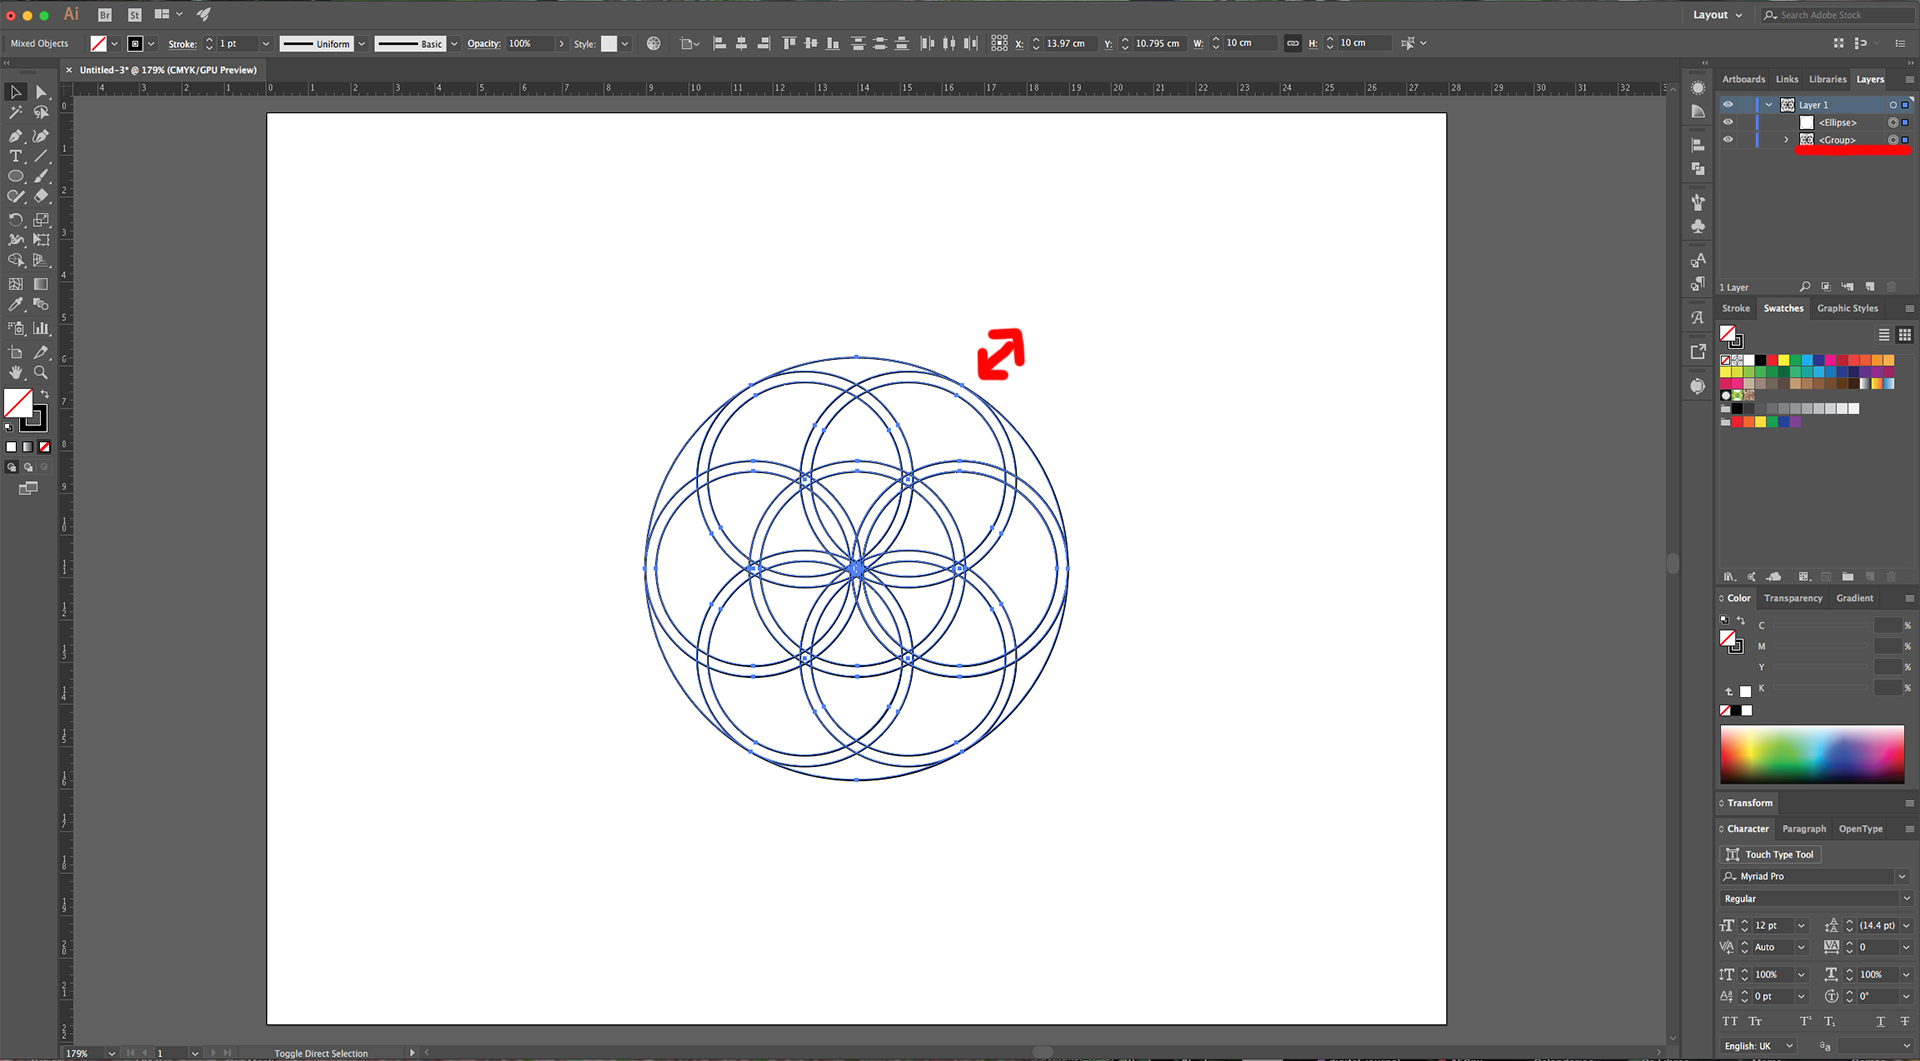
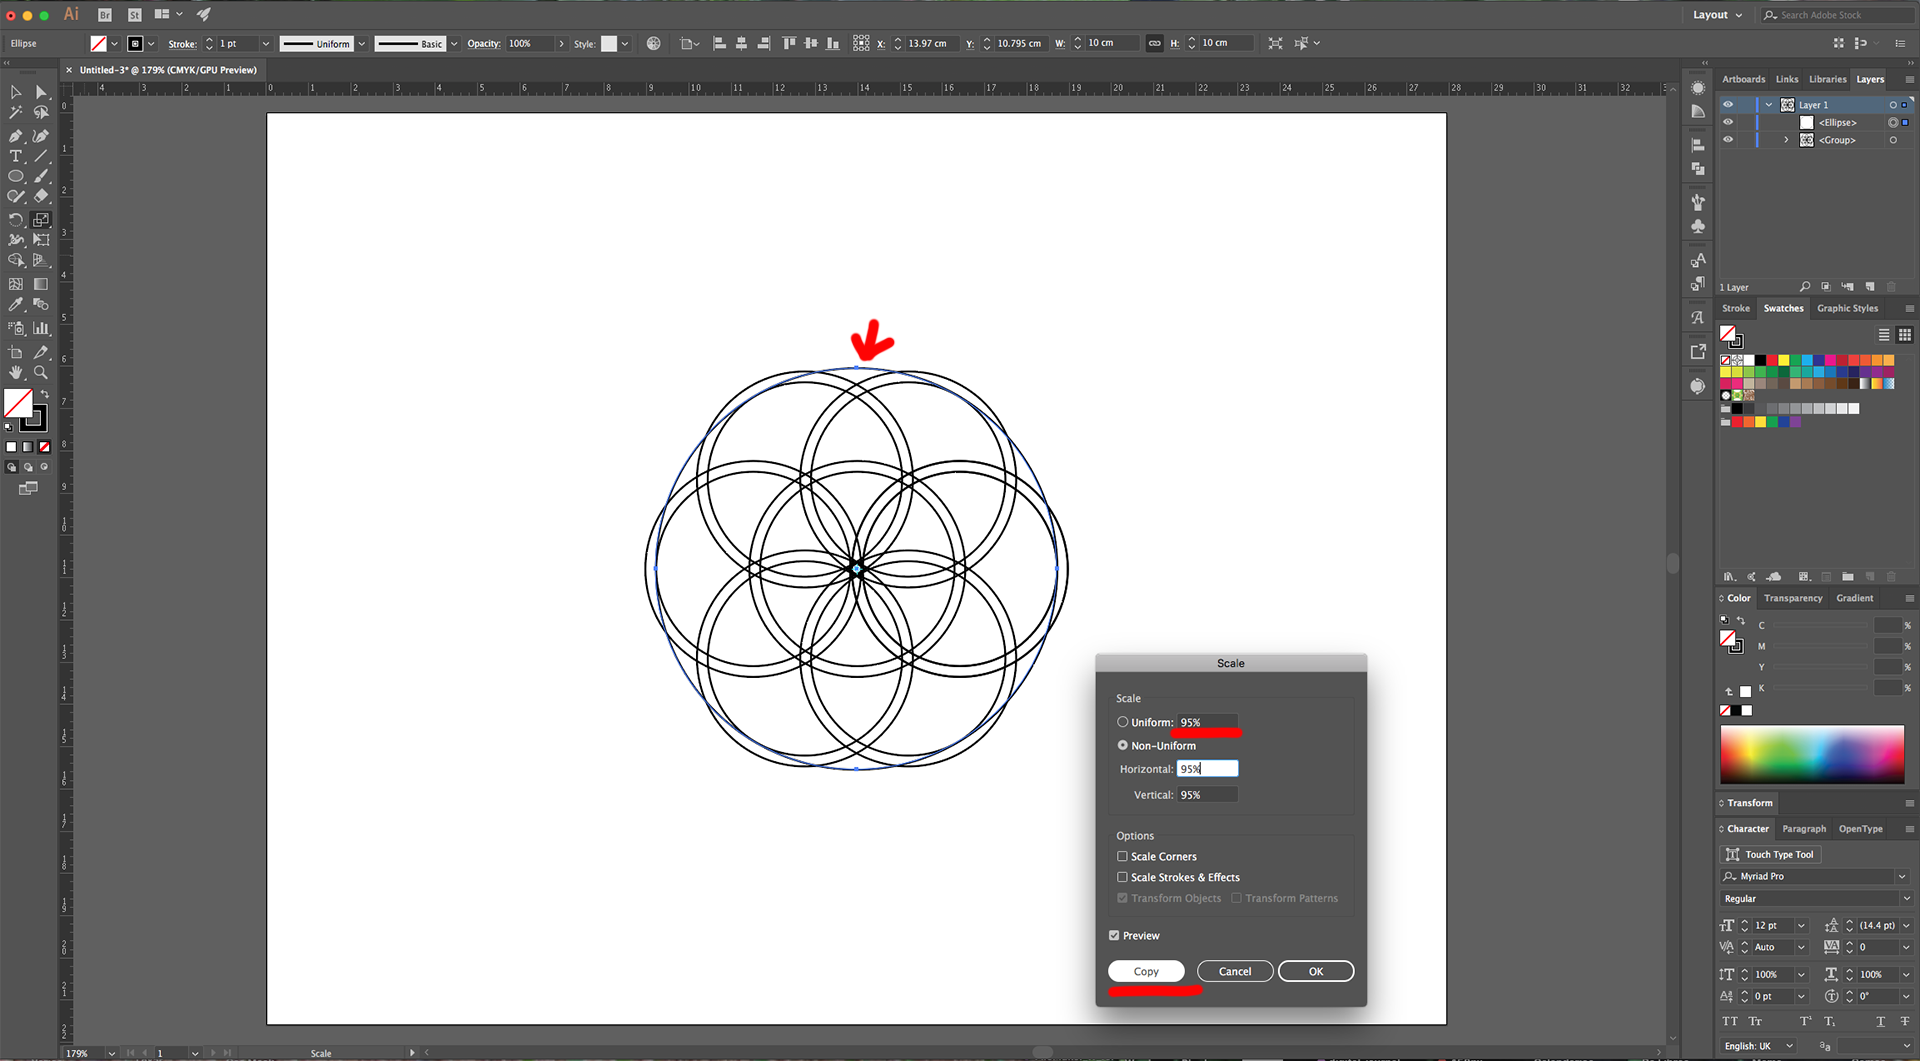
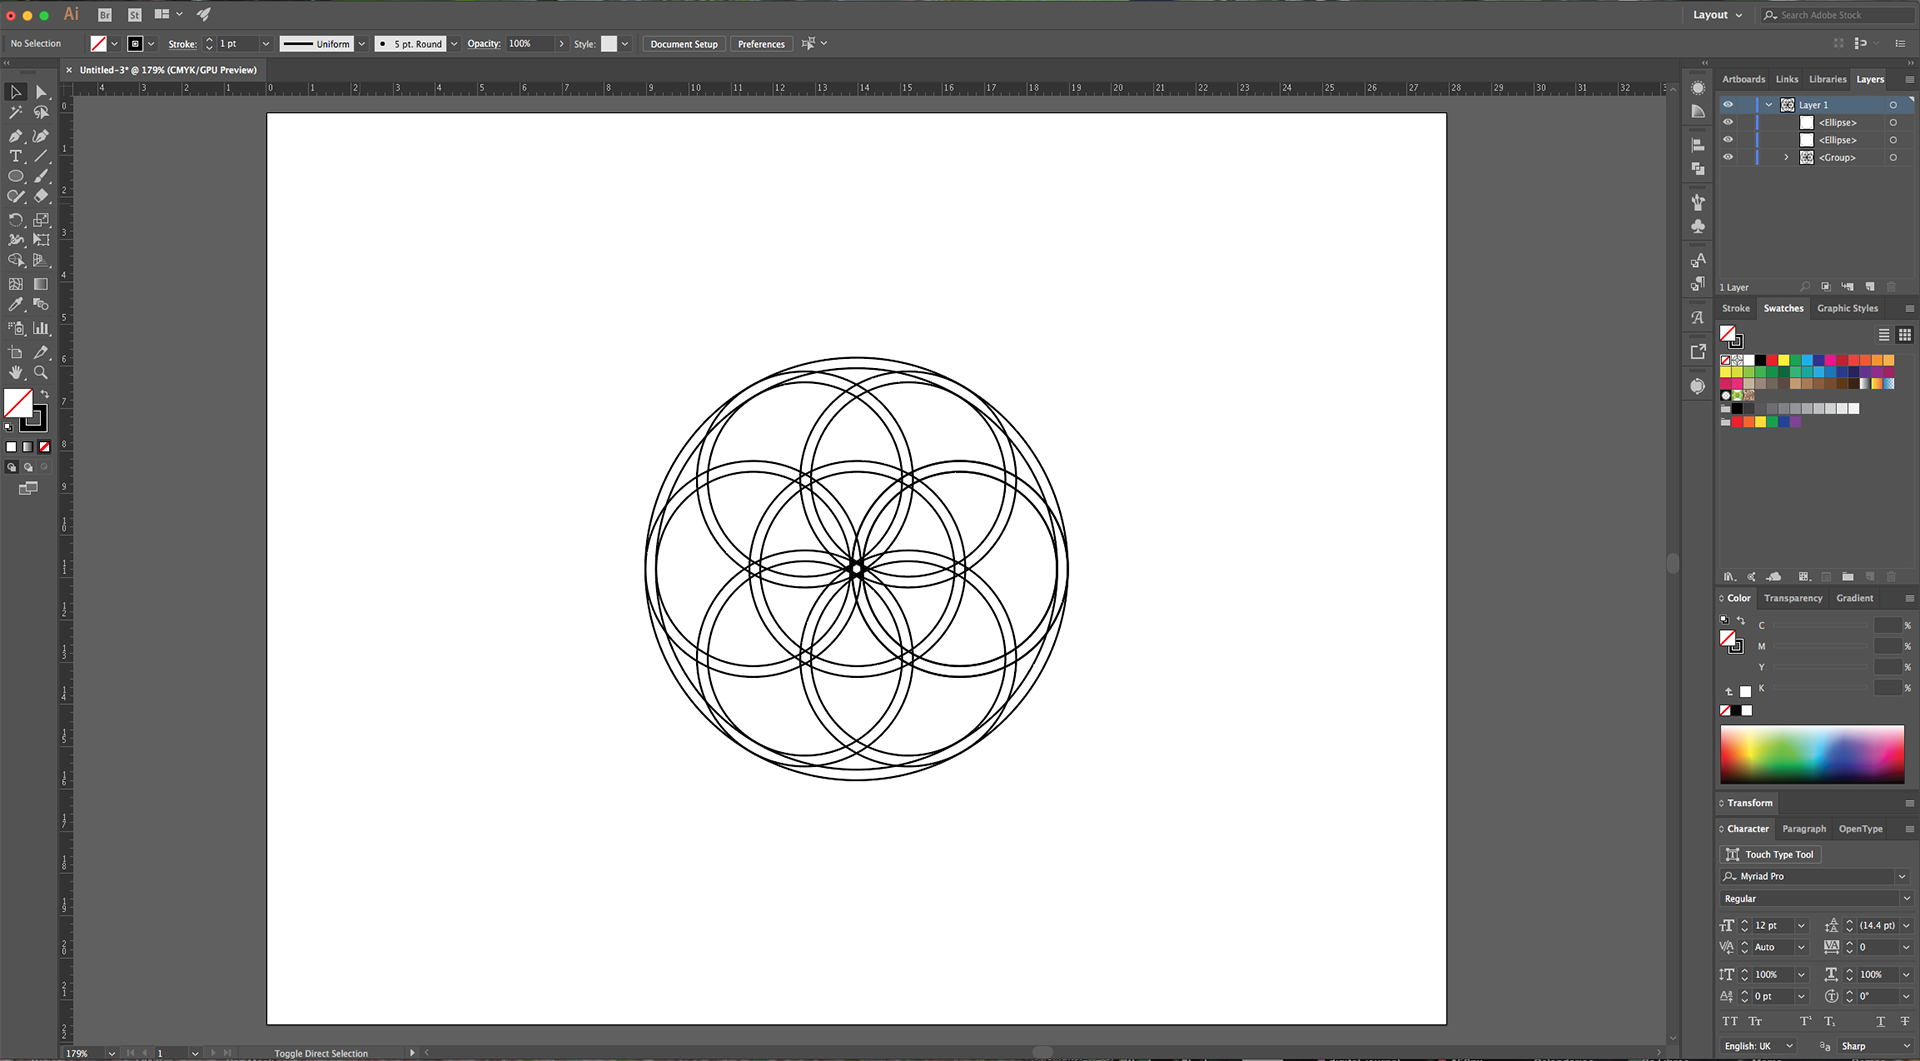
10 - It should coincide with your other shape’s edges. If they don’t touch properly, select them and scale it proportionally (“Shift” key). Select the bigger Circle, double-click on the “Scale Tool” (S). Input a “Uniform” 95% “Scale”, make sure the “Scale Strokes & Effects” box is checked and click “Copy”.
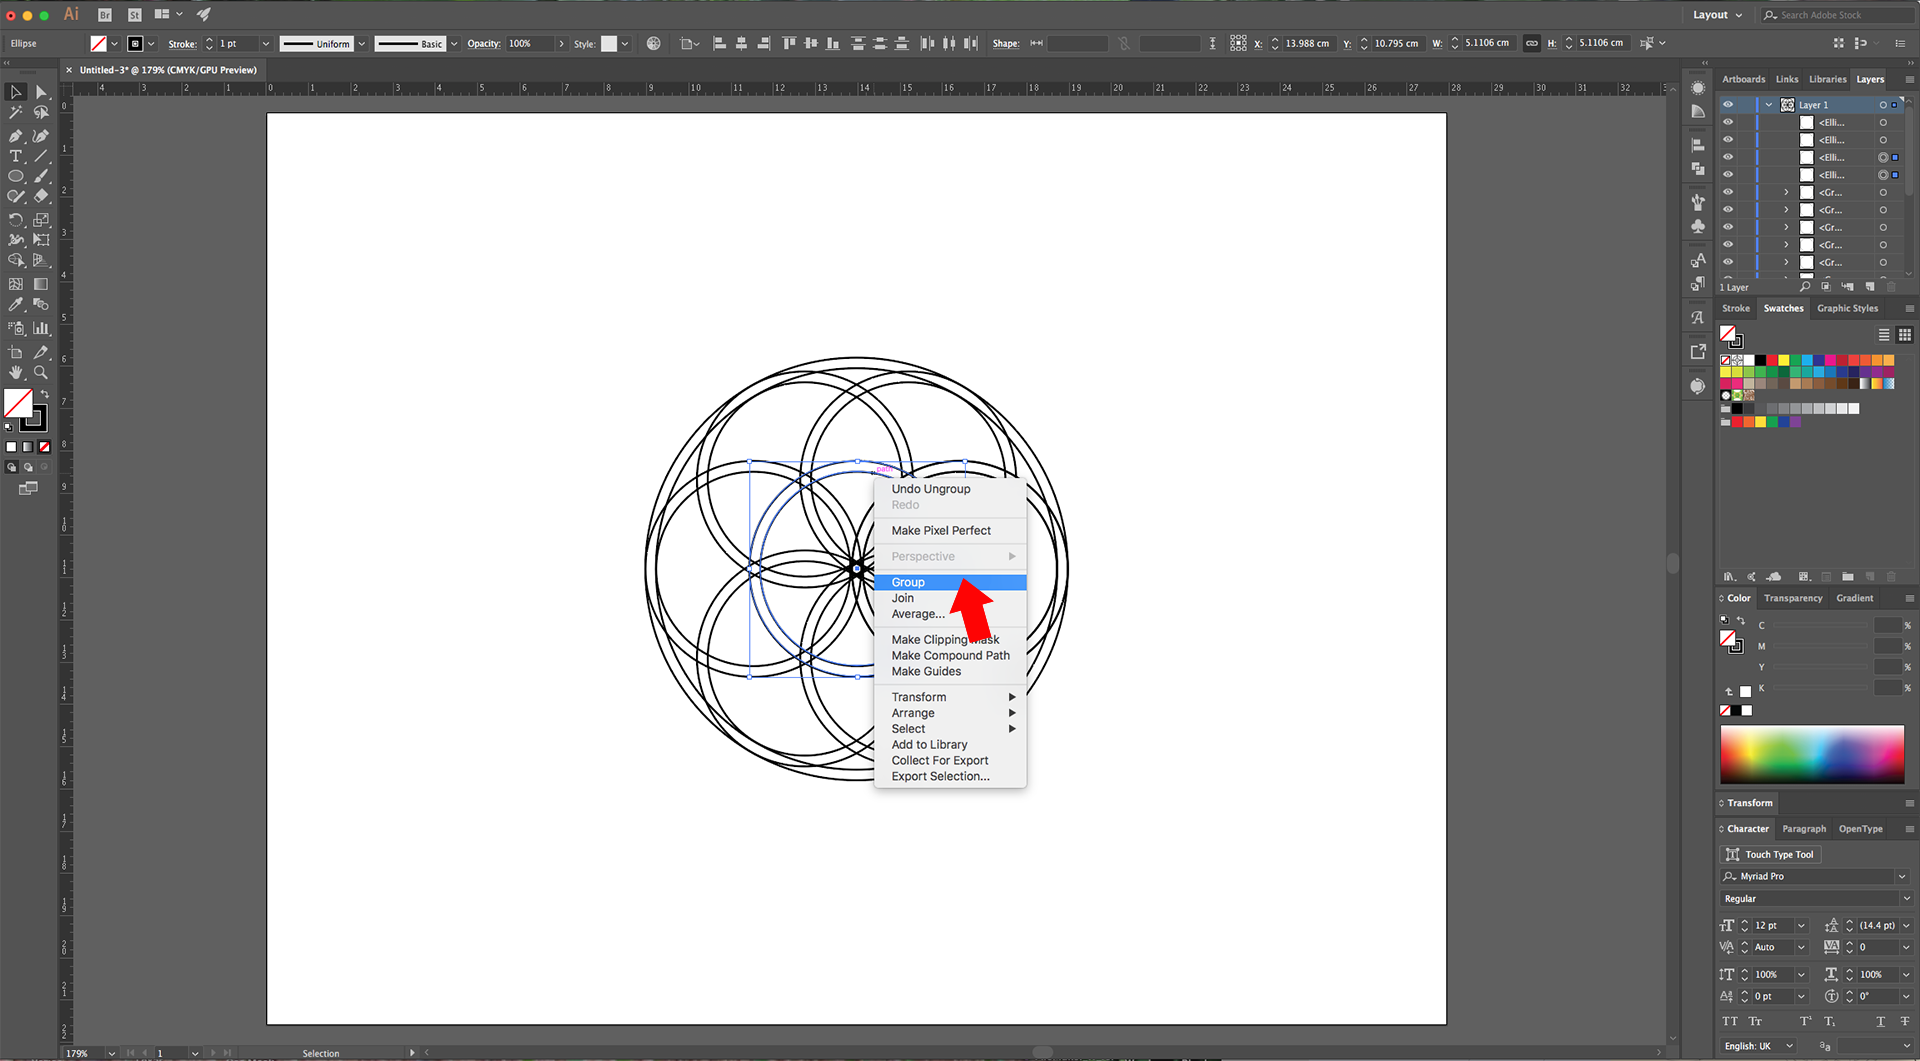
11 - Right-click on top and choose “Ungroup”. Then select just the two Center Circles, right-click on top and choose “Group”.
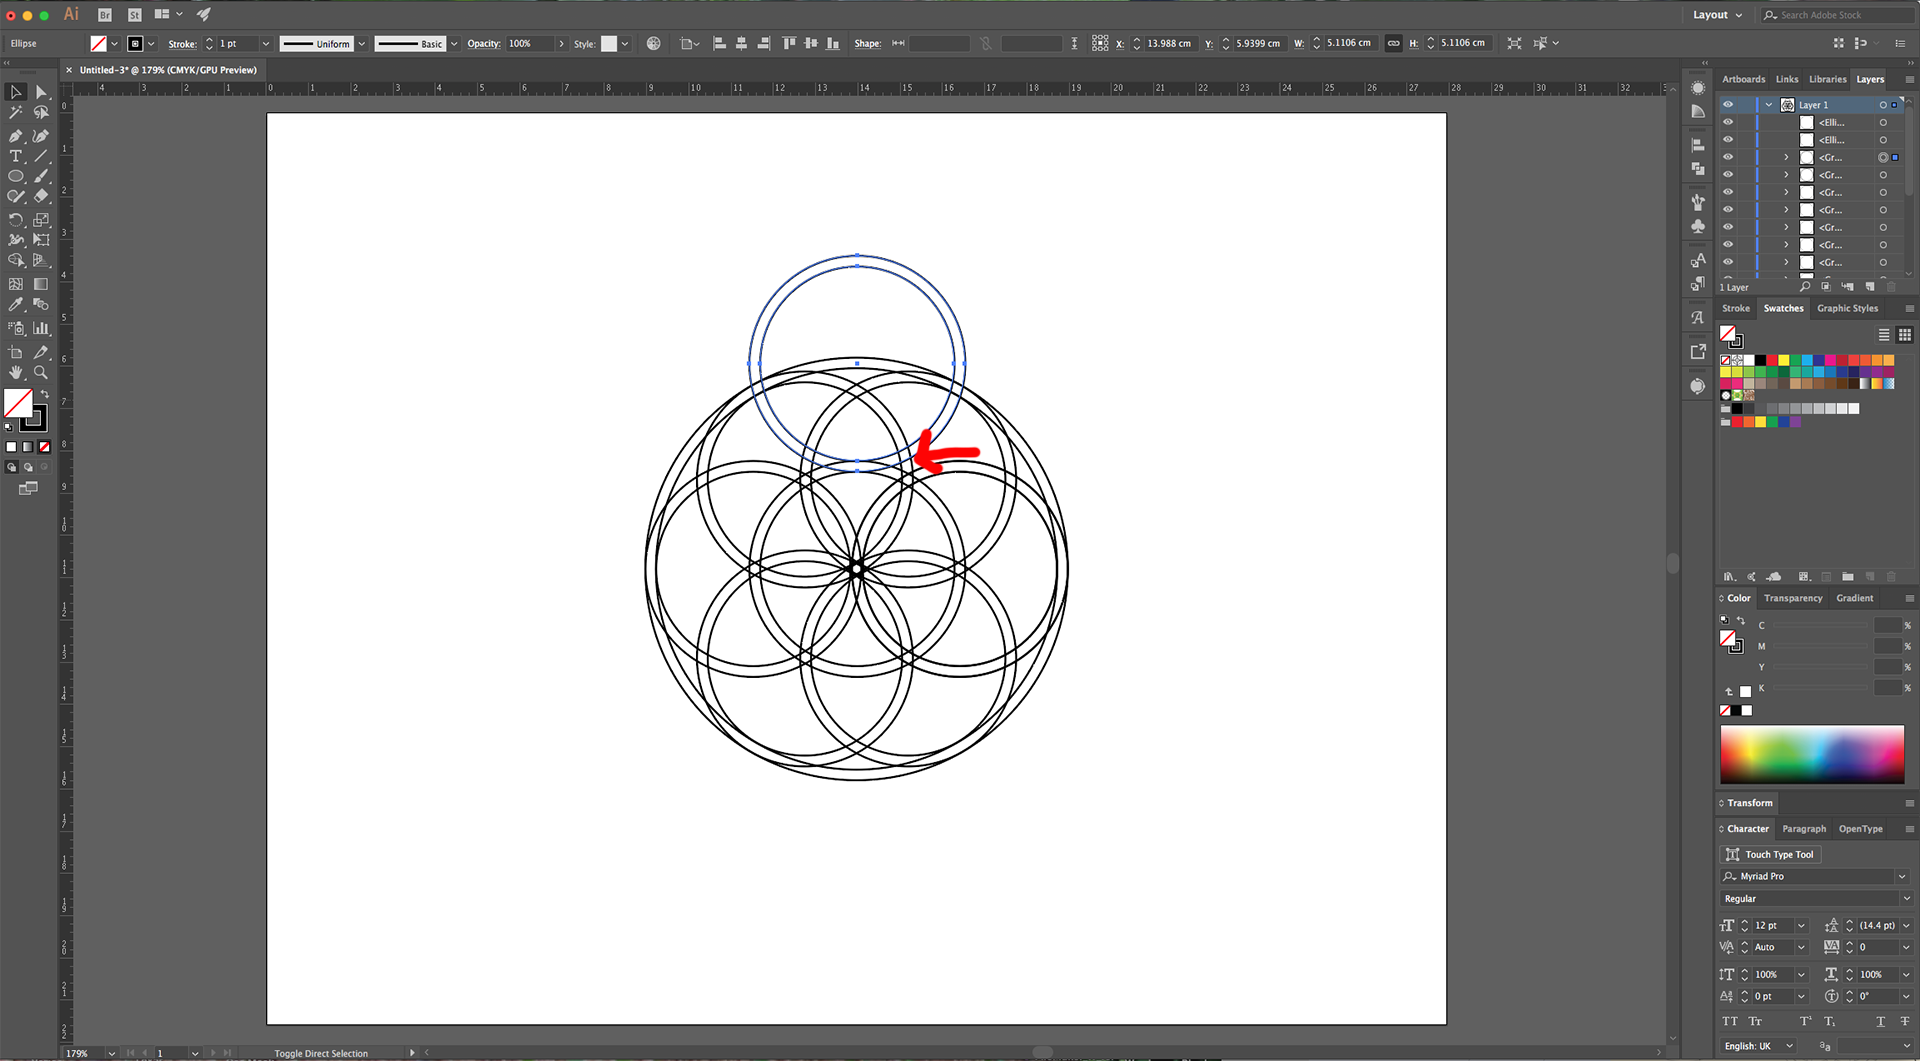
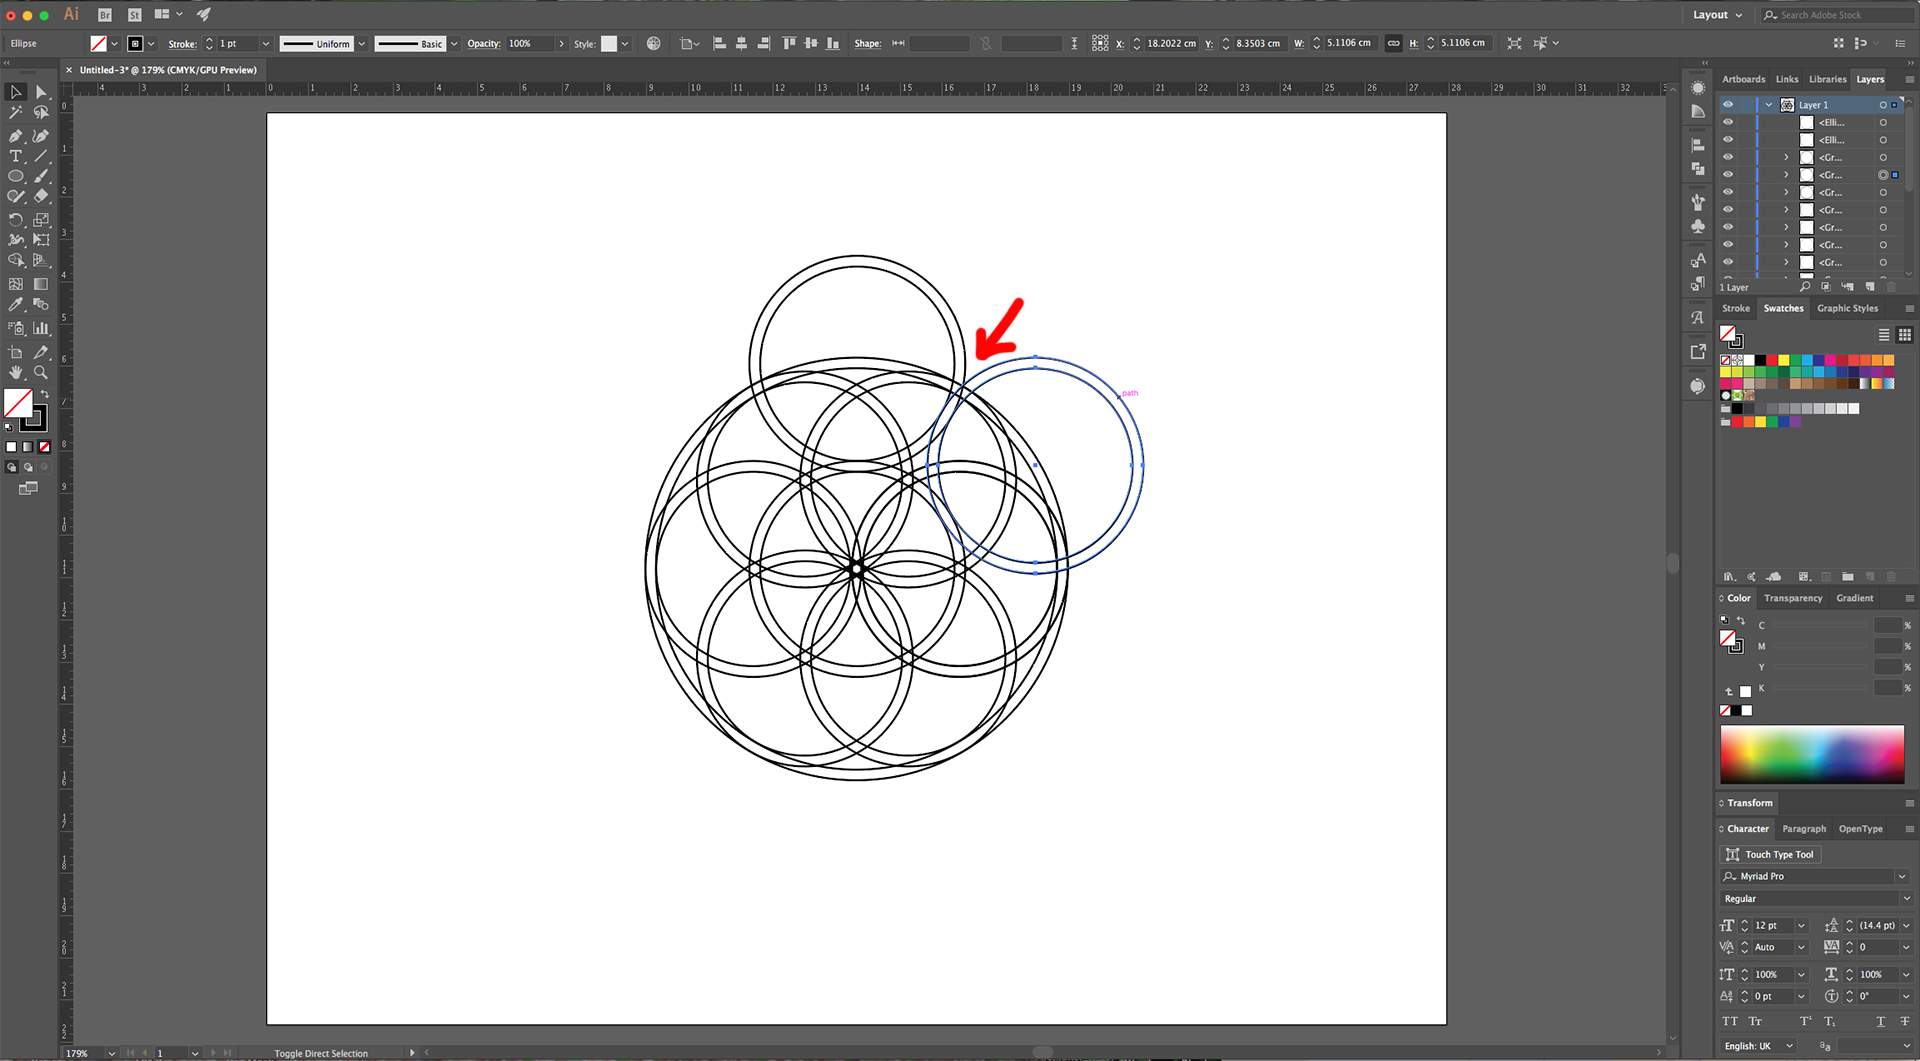
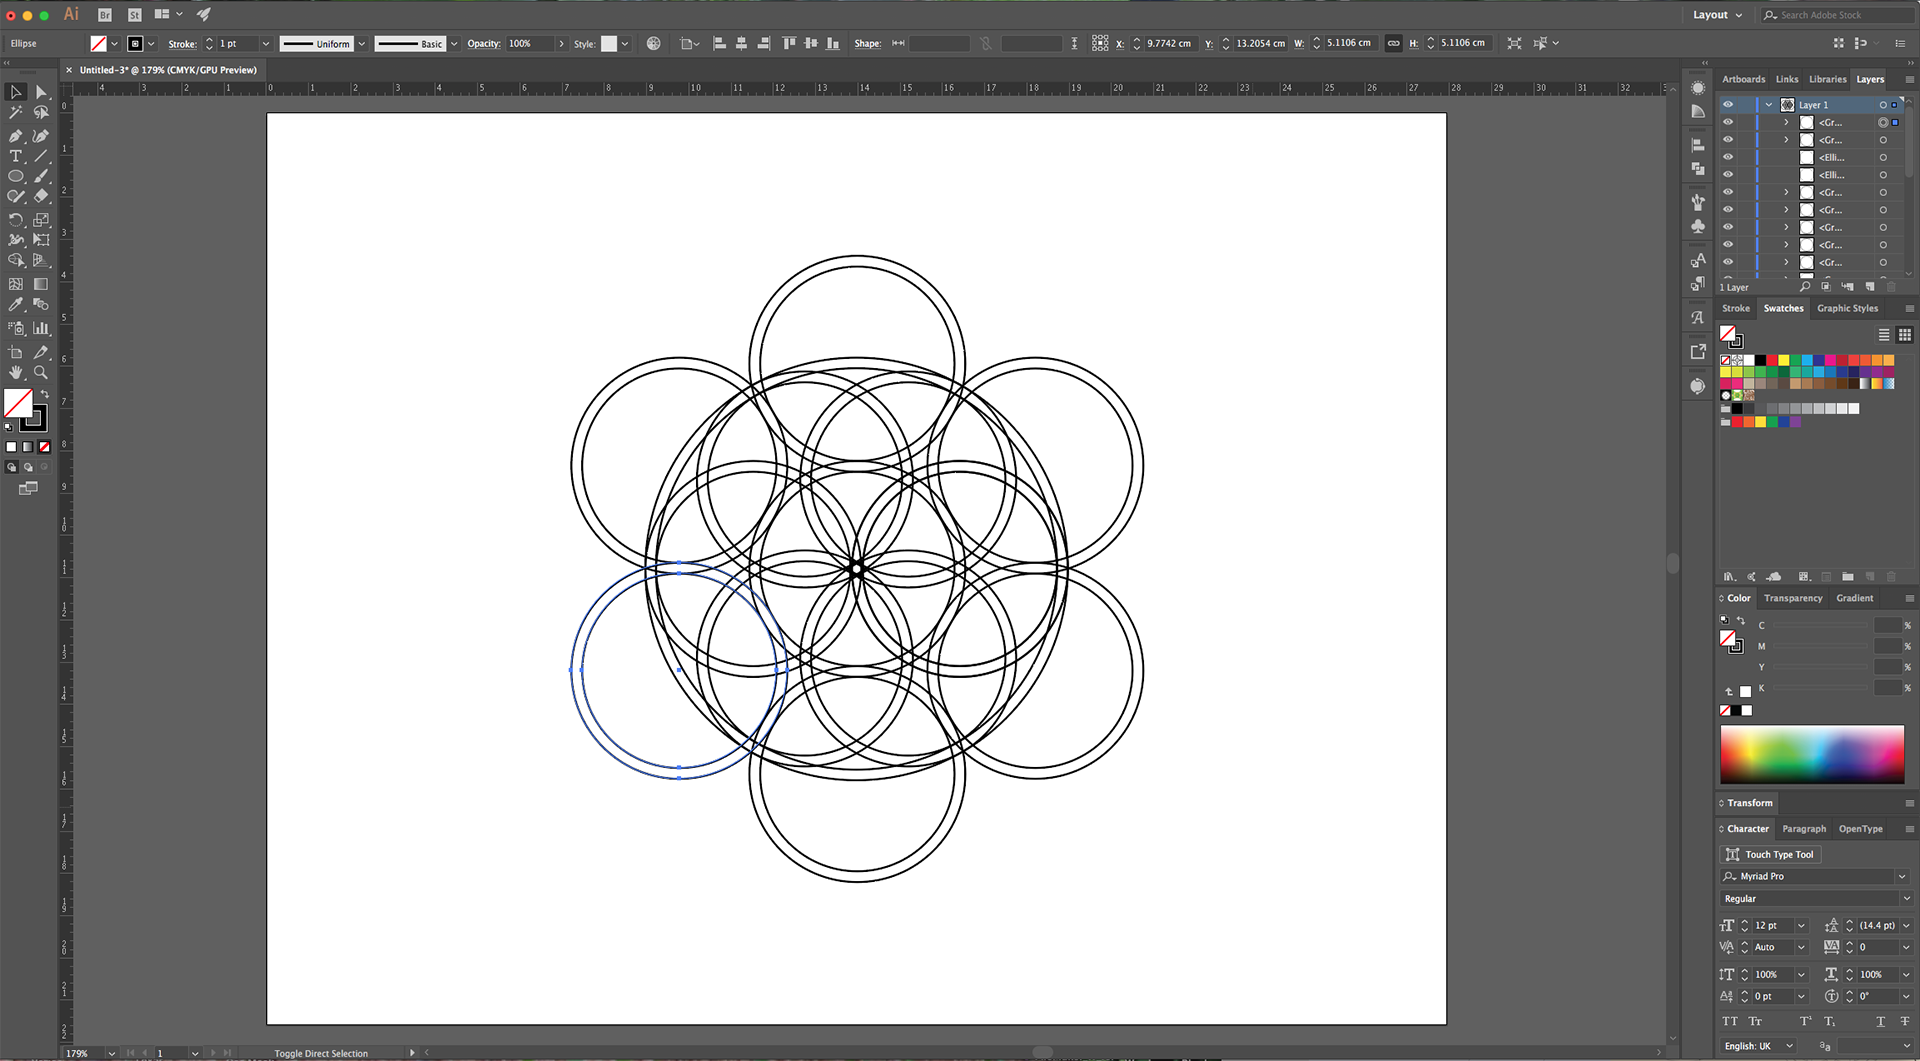
12 - “Copy” the Group (Command/Control + C) and “Paste in Place” (Command/Control + P). Hold the “Shift” key while dragging the copy Up to do this in a straight line and place the Shape bottom exactly over the top of the ones in the center (the lines should overlap). Repeat this until you create Circles all around the Shape like “Petals”. The bottoms and sides should overlap with the ones in the center and with each other.
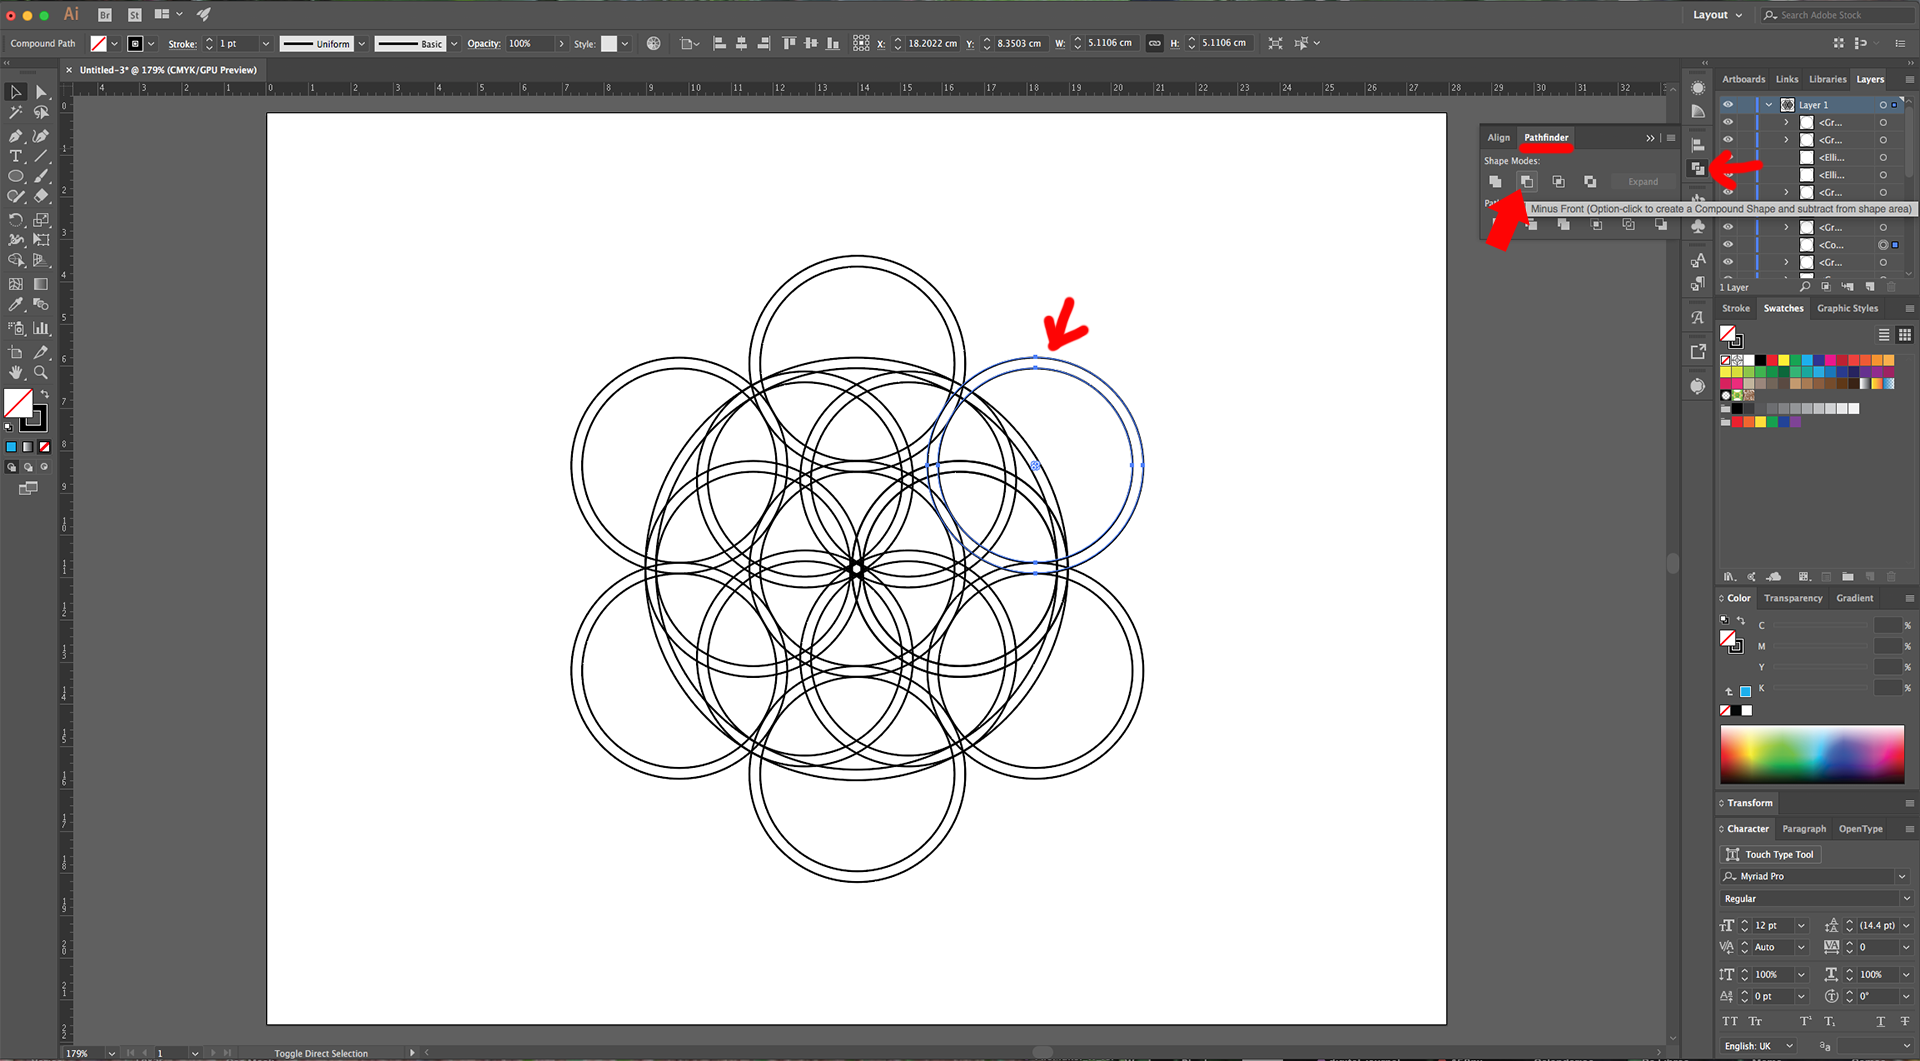
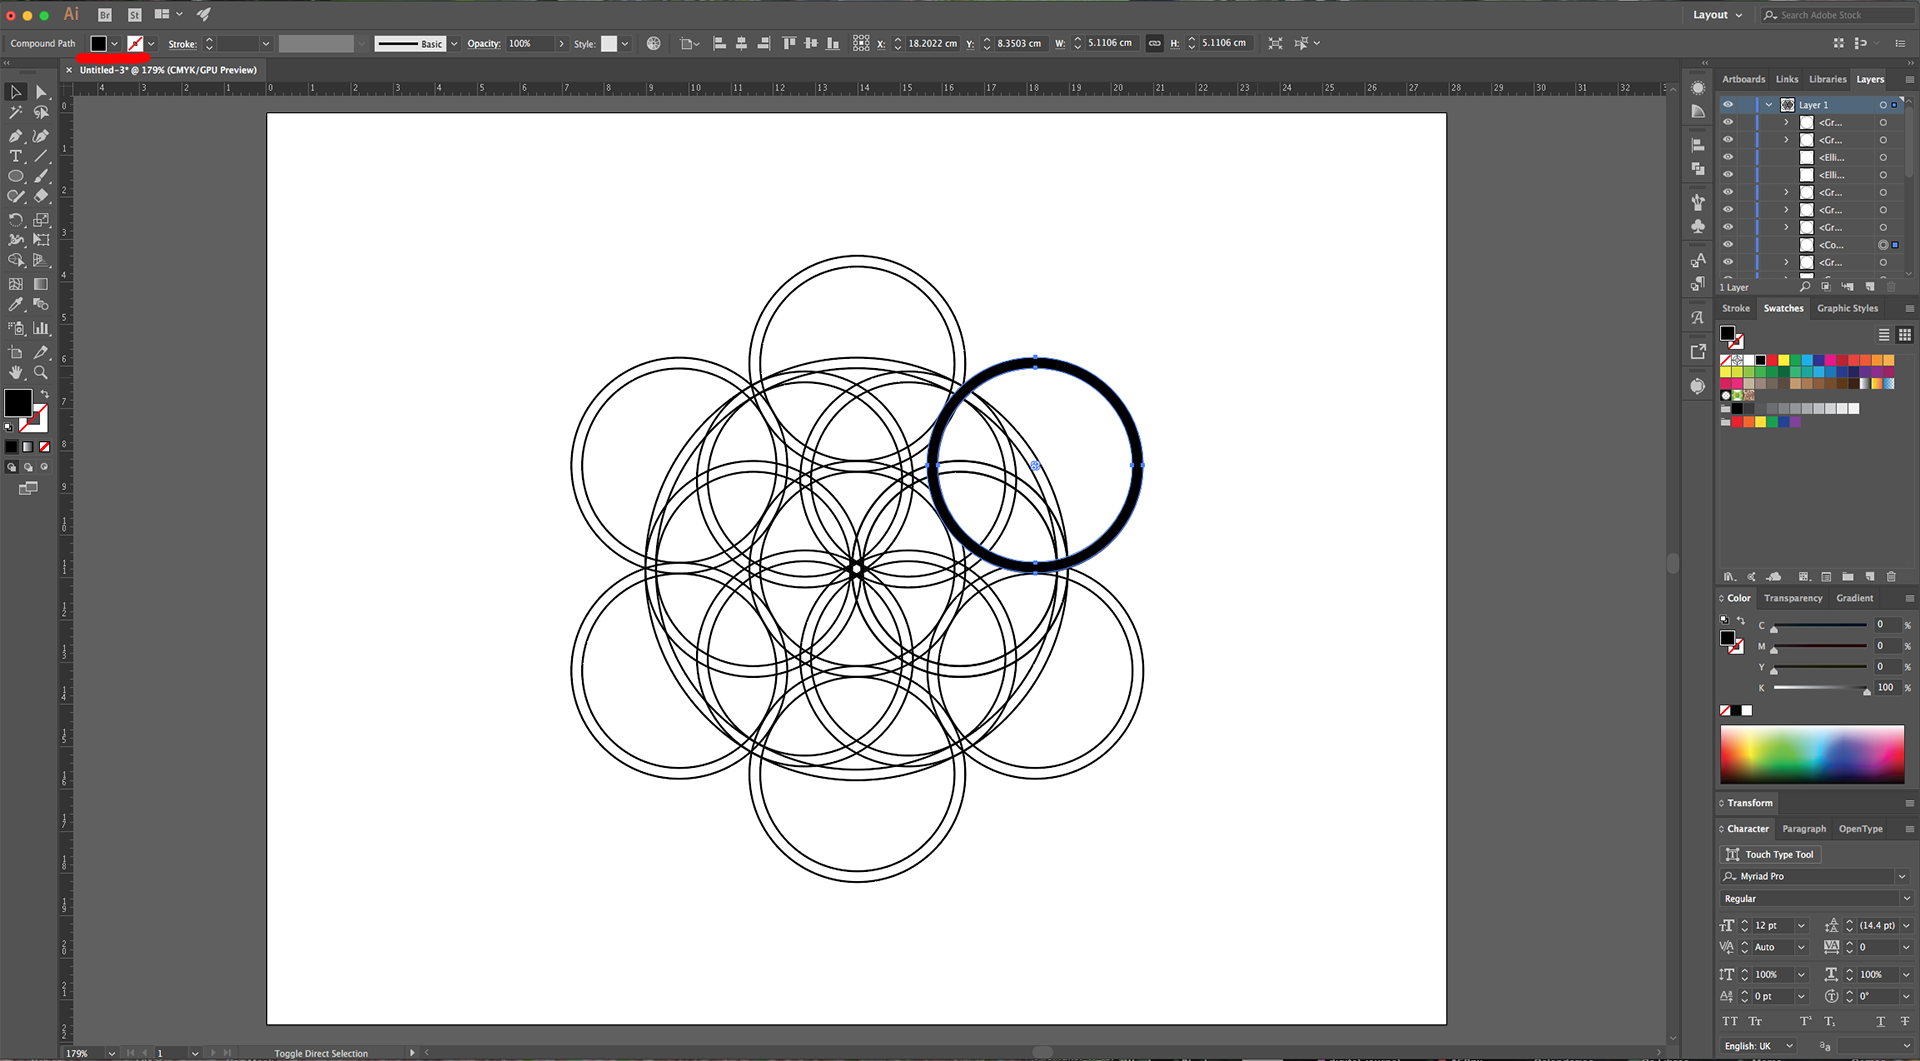
13 - Select one of the outside “donuts” or group of two circles, head to the “Pathfinder Panel” and choose “Minus Front”. Fill the resulting Shape with a color (we used Black).
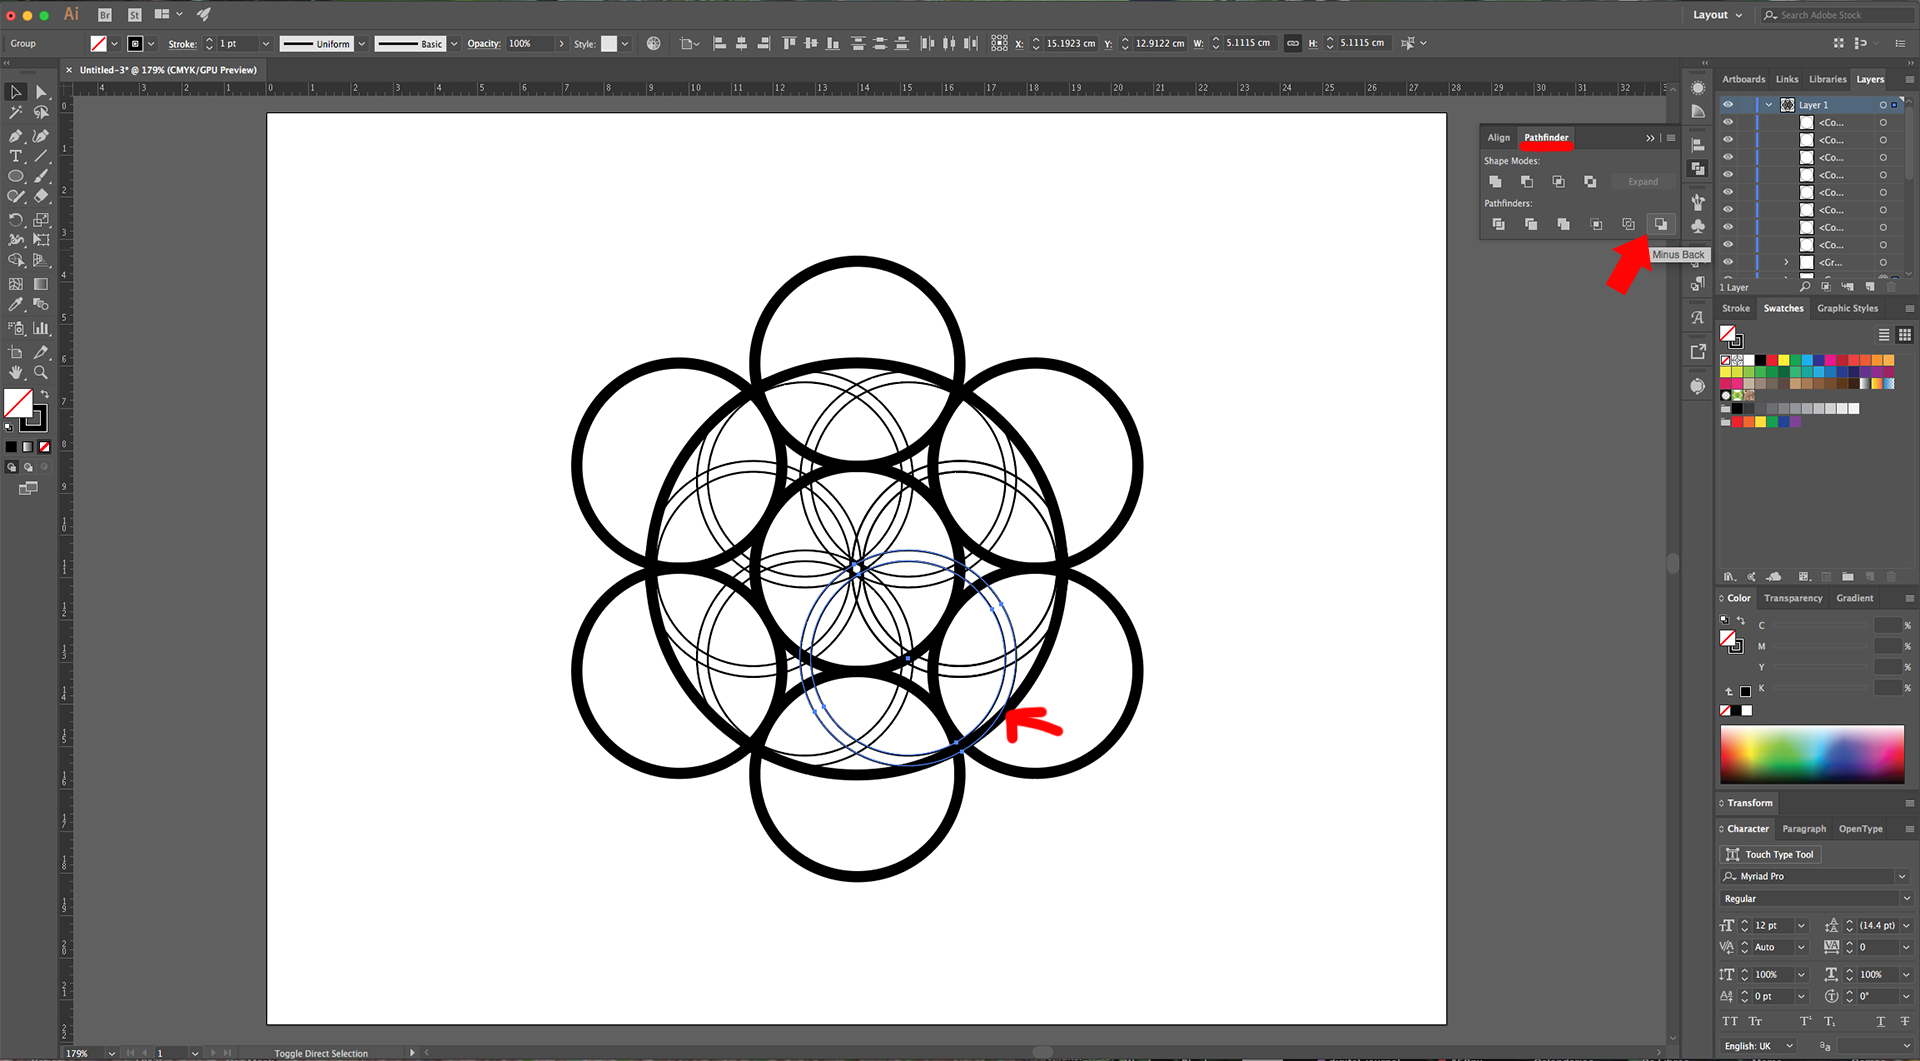
14 - Repeat with the rest of the Shapes including the big and small ones in the center but not the inner ones. Select one of those, head to the “Pathfinder Panel” and choose “Minus Back” instead.
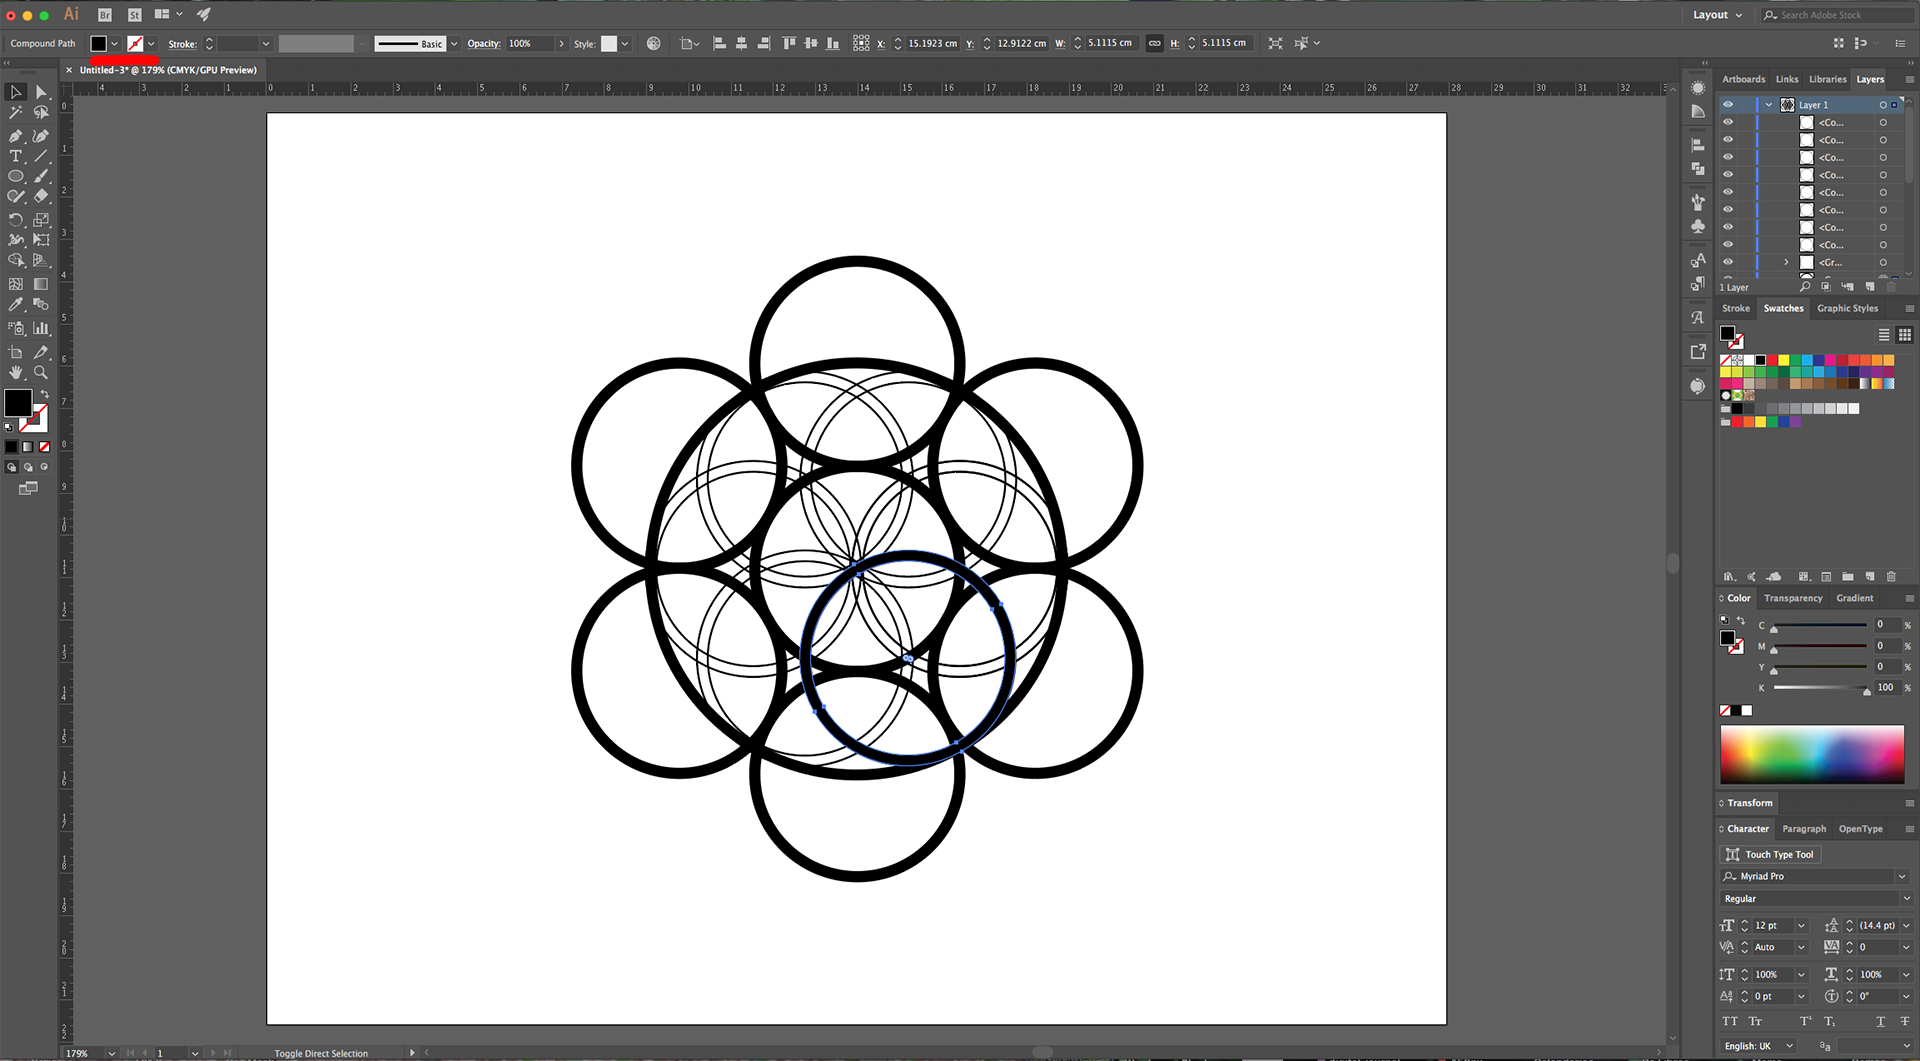
15 - Fill the shape with Black and repeat with the rest. All the circular shapes should be filled now.

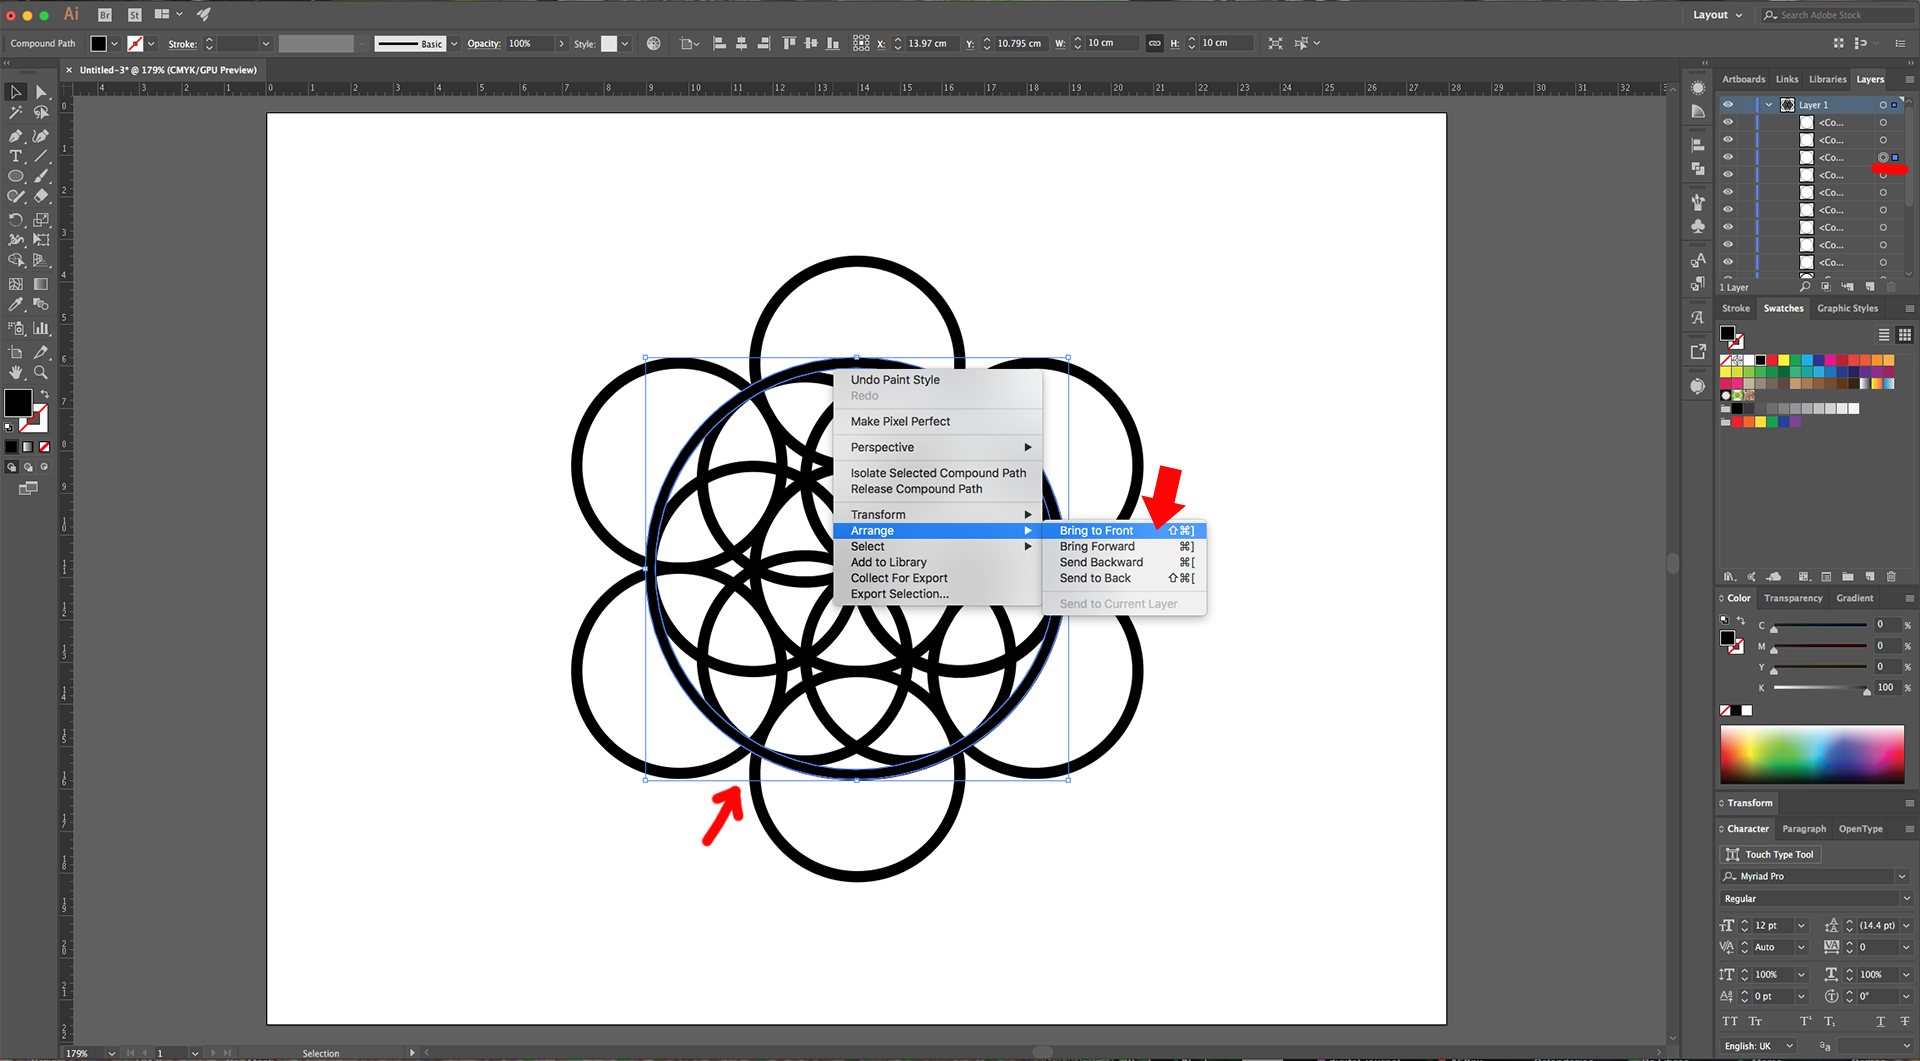
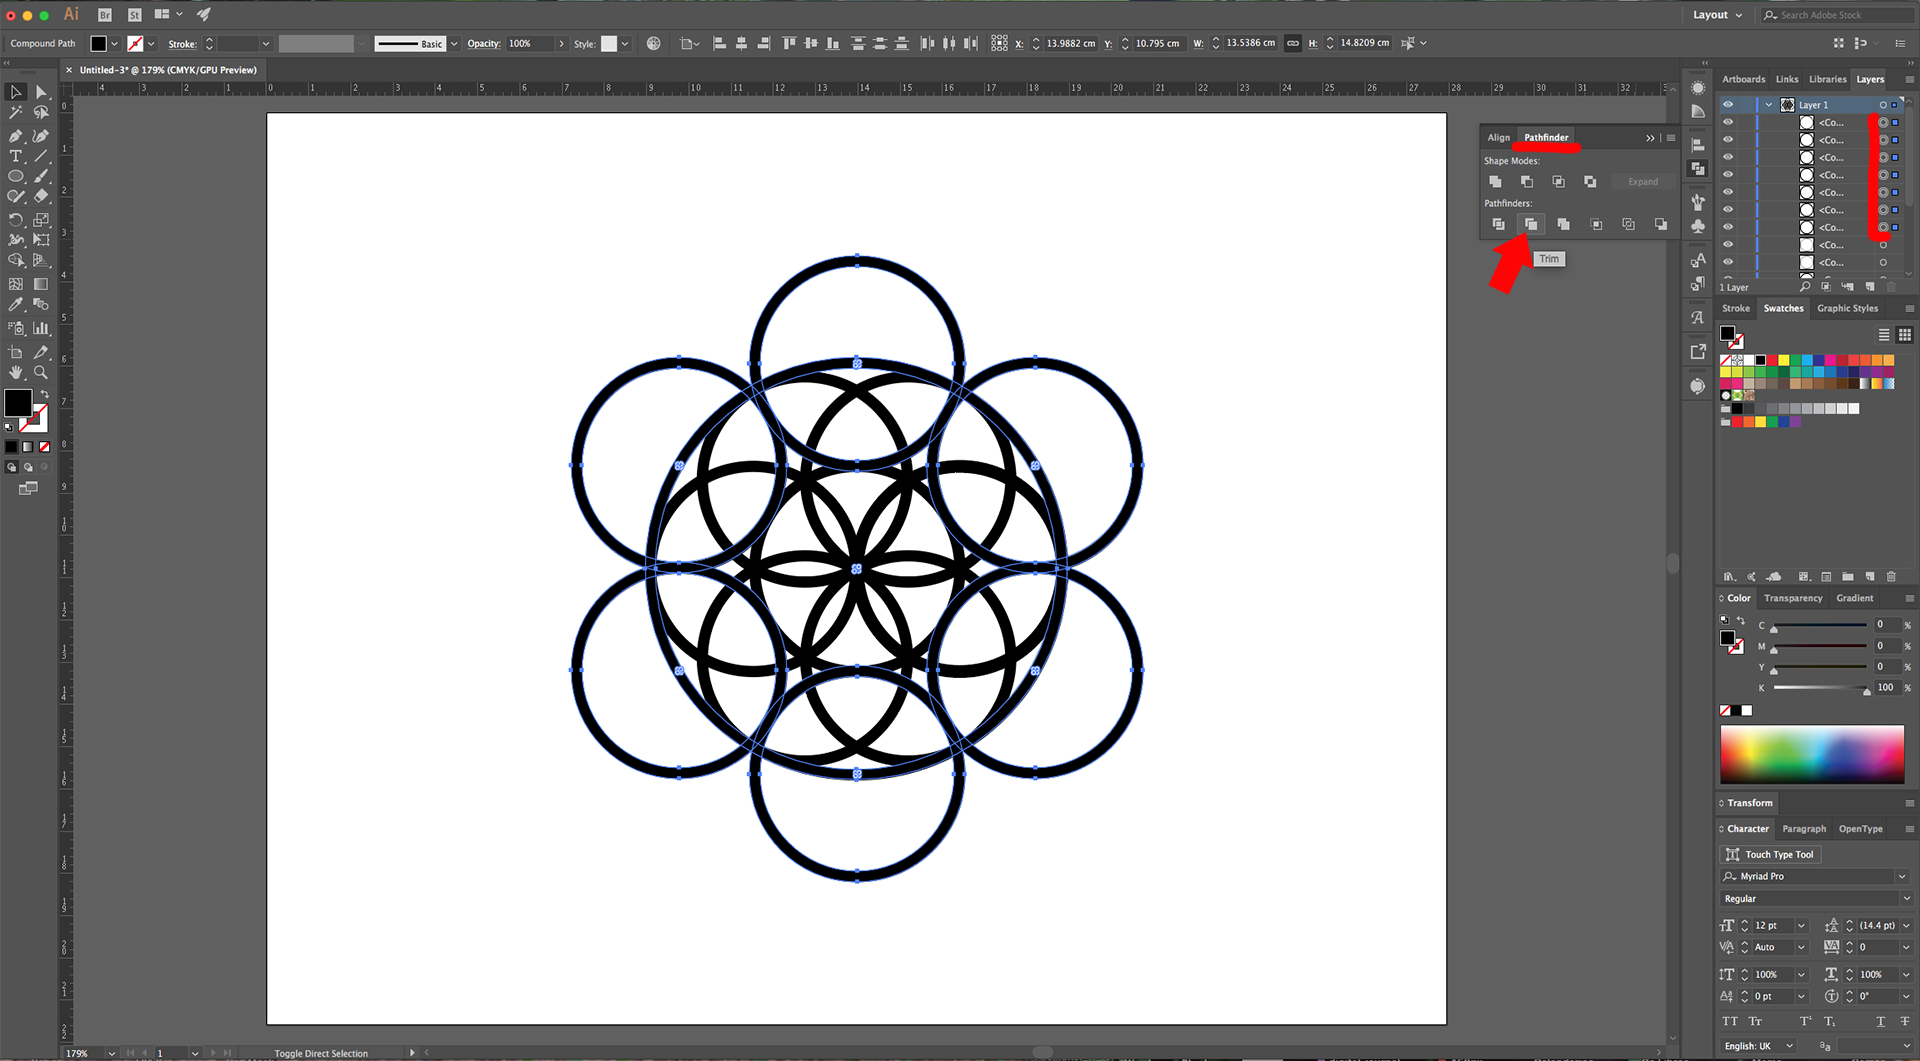
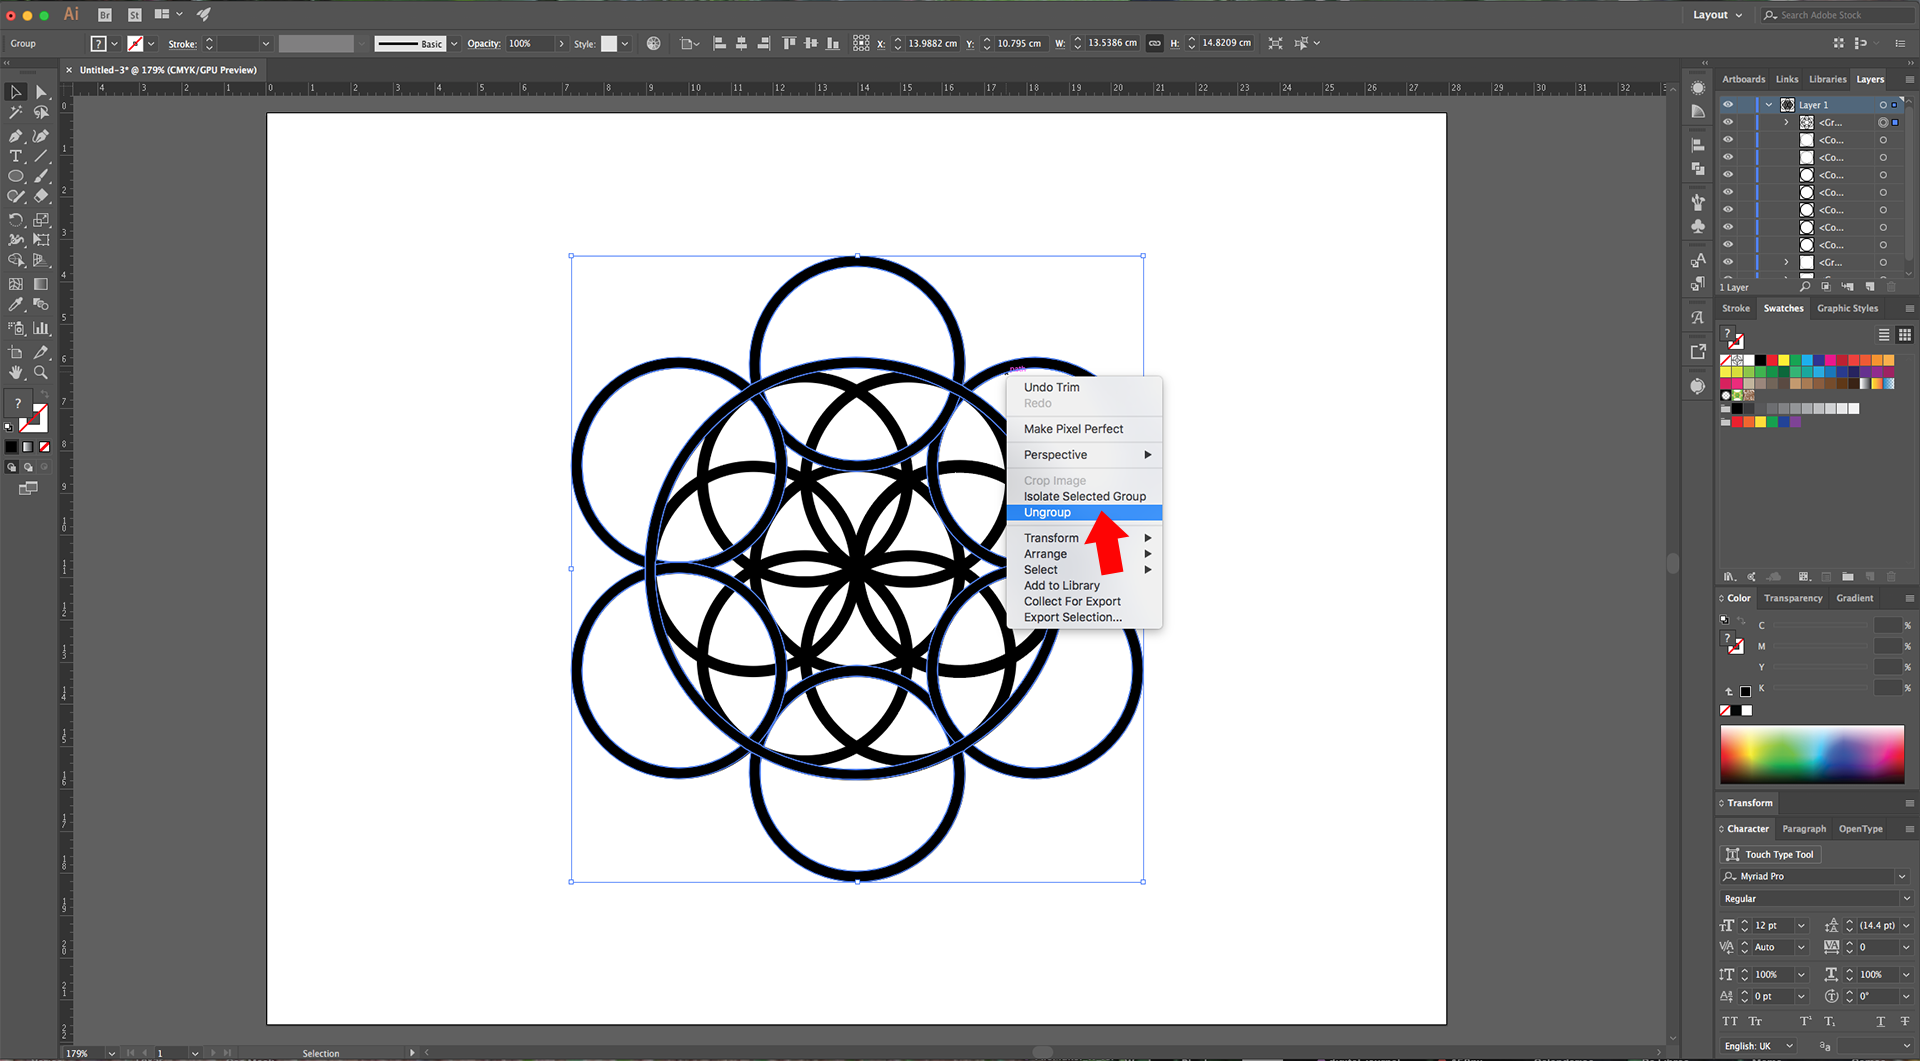
16 - Select the bigger Shape, right-click on top and choose “Bring to Front”. Keep it selected and using the “Shift” key add all the outer shapes to the selection. Go to the “Pathfinder Panel” and choose “Trim”. Right-click on top and choose “Ungroup”.
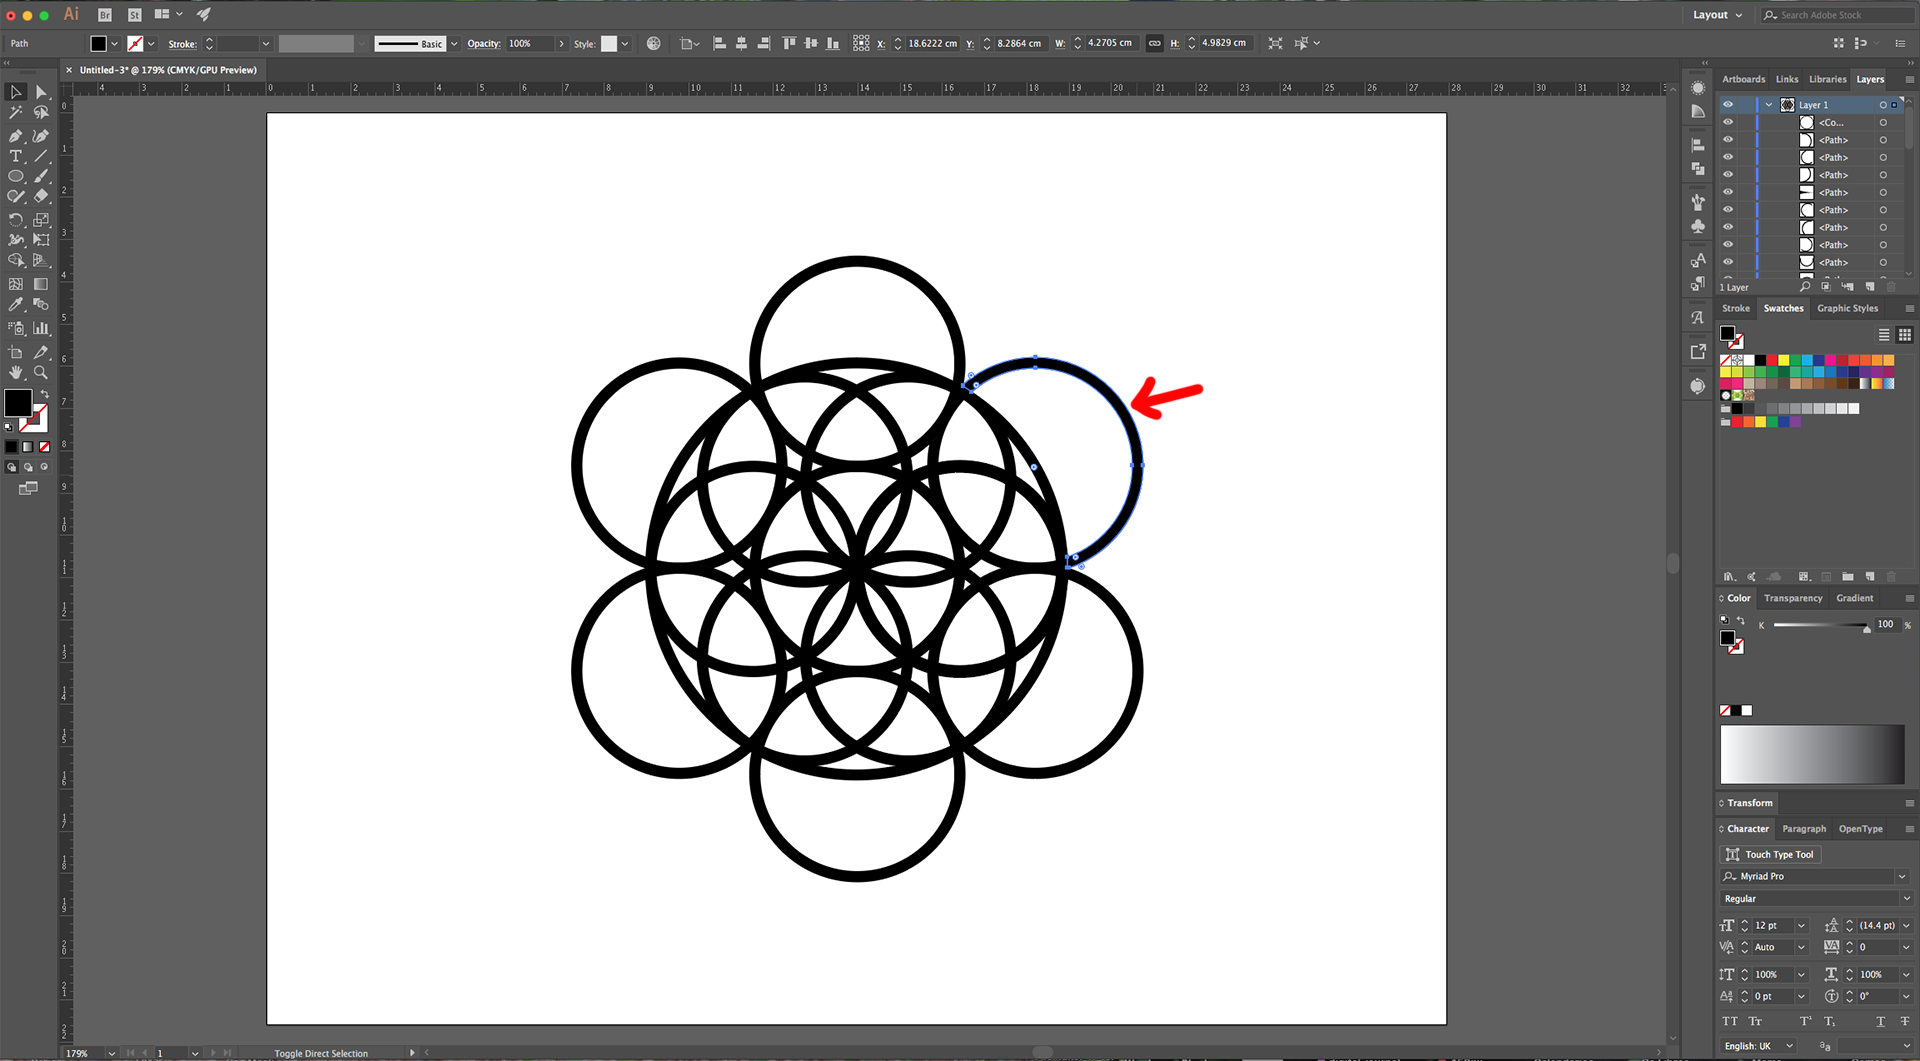
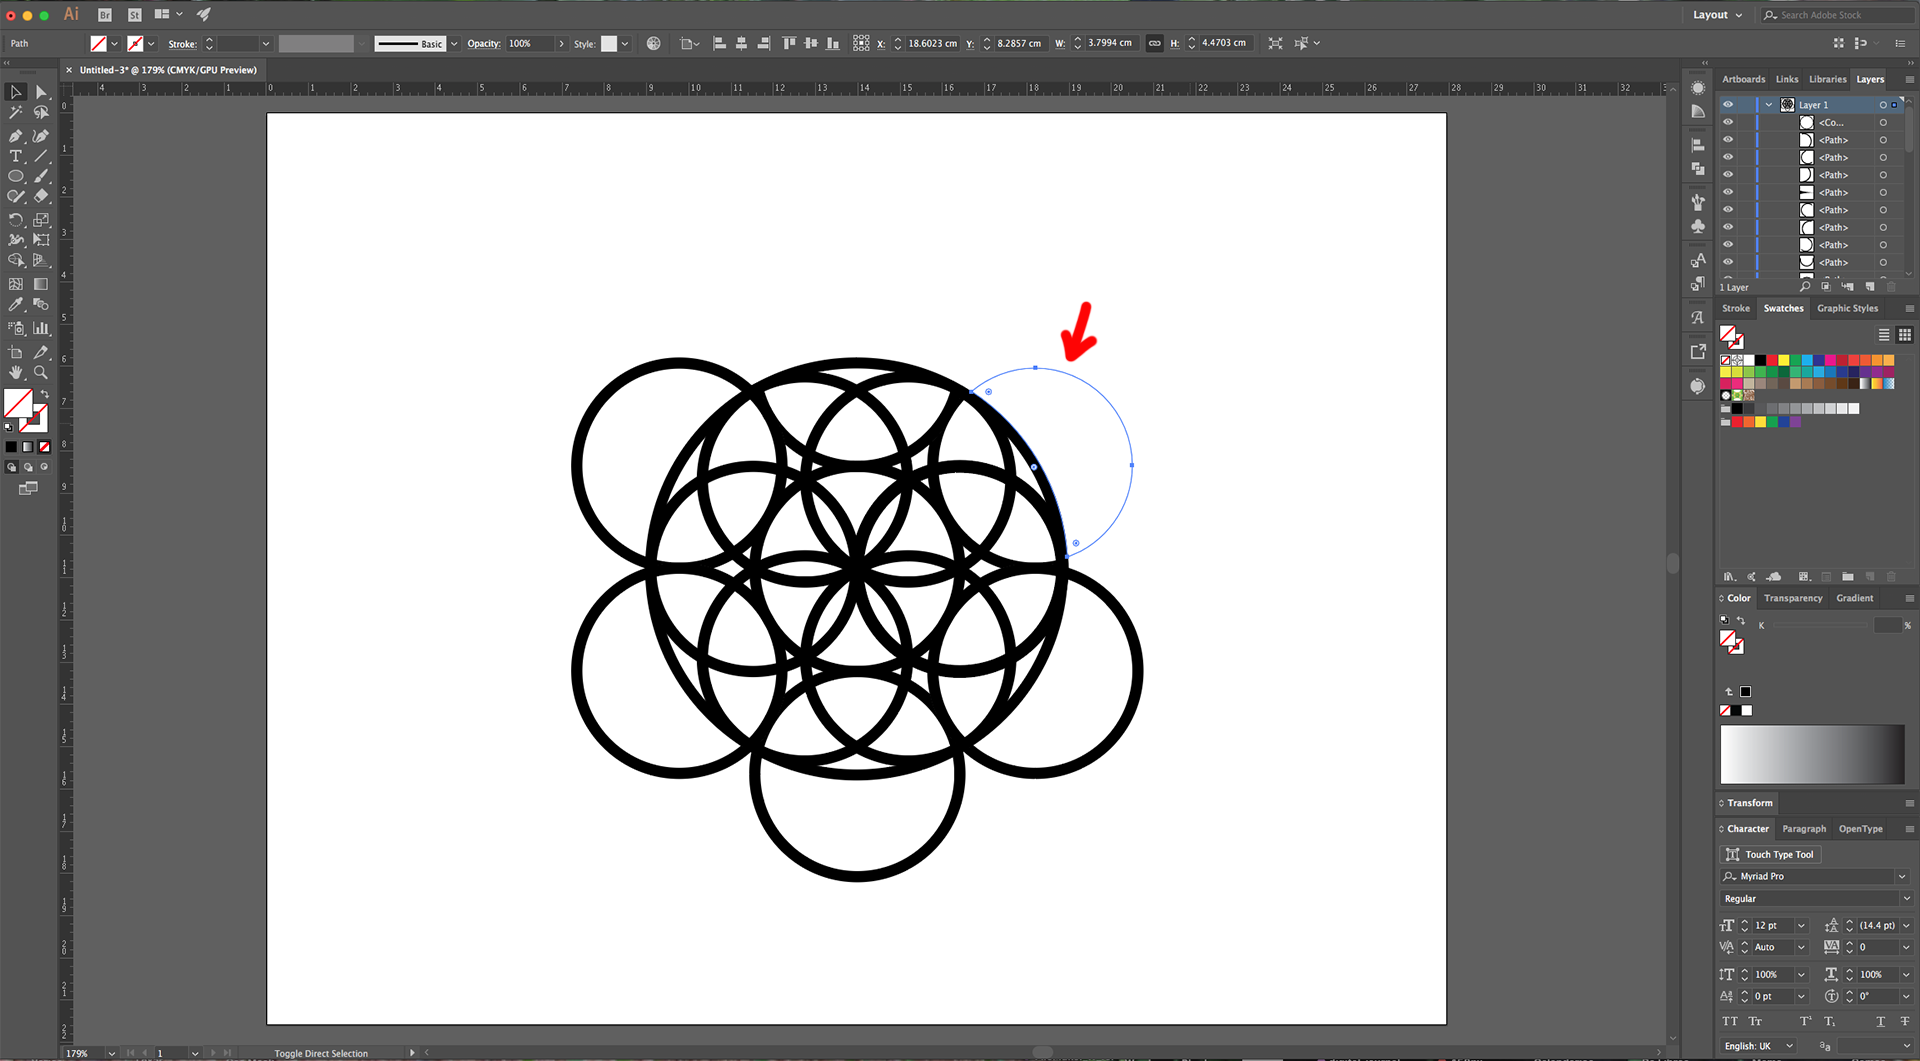
17 - Select the portions of the outer shapes that are outside the Big Circle and “Delete” them. You may need to delete the White inner portion too.
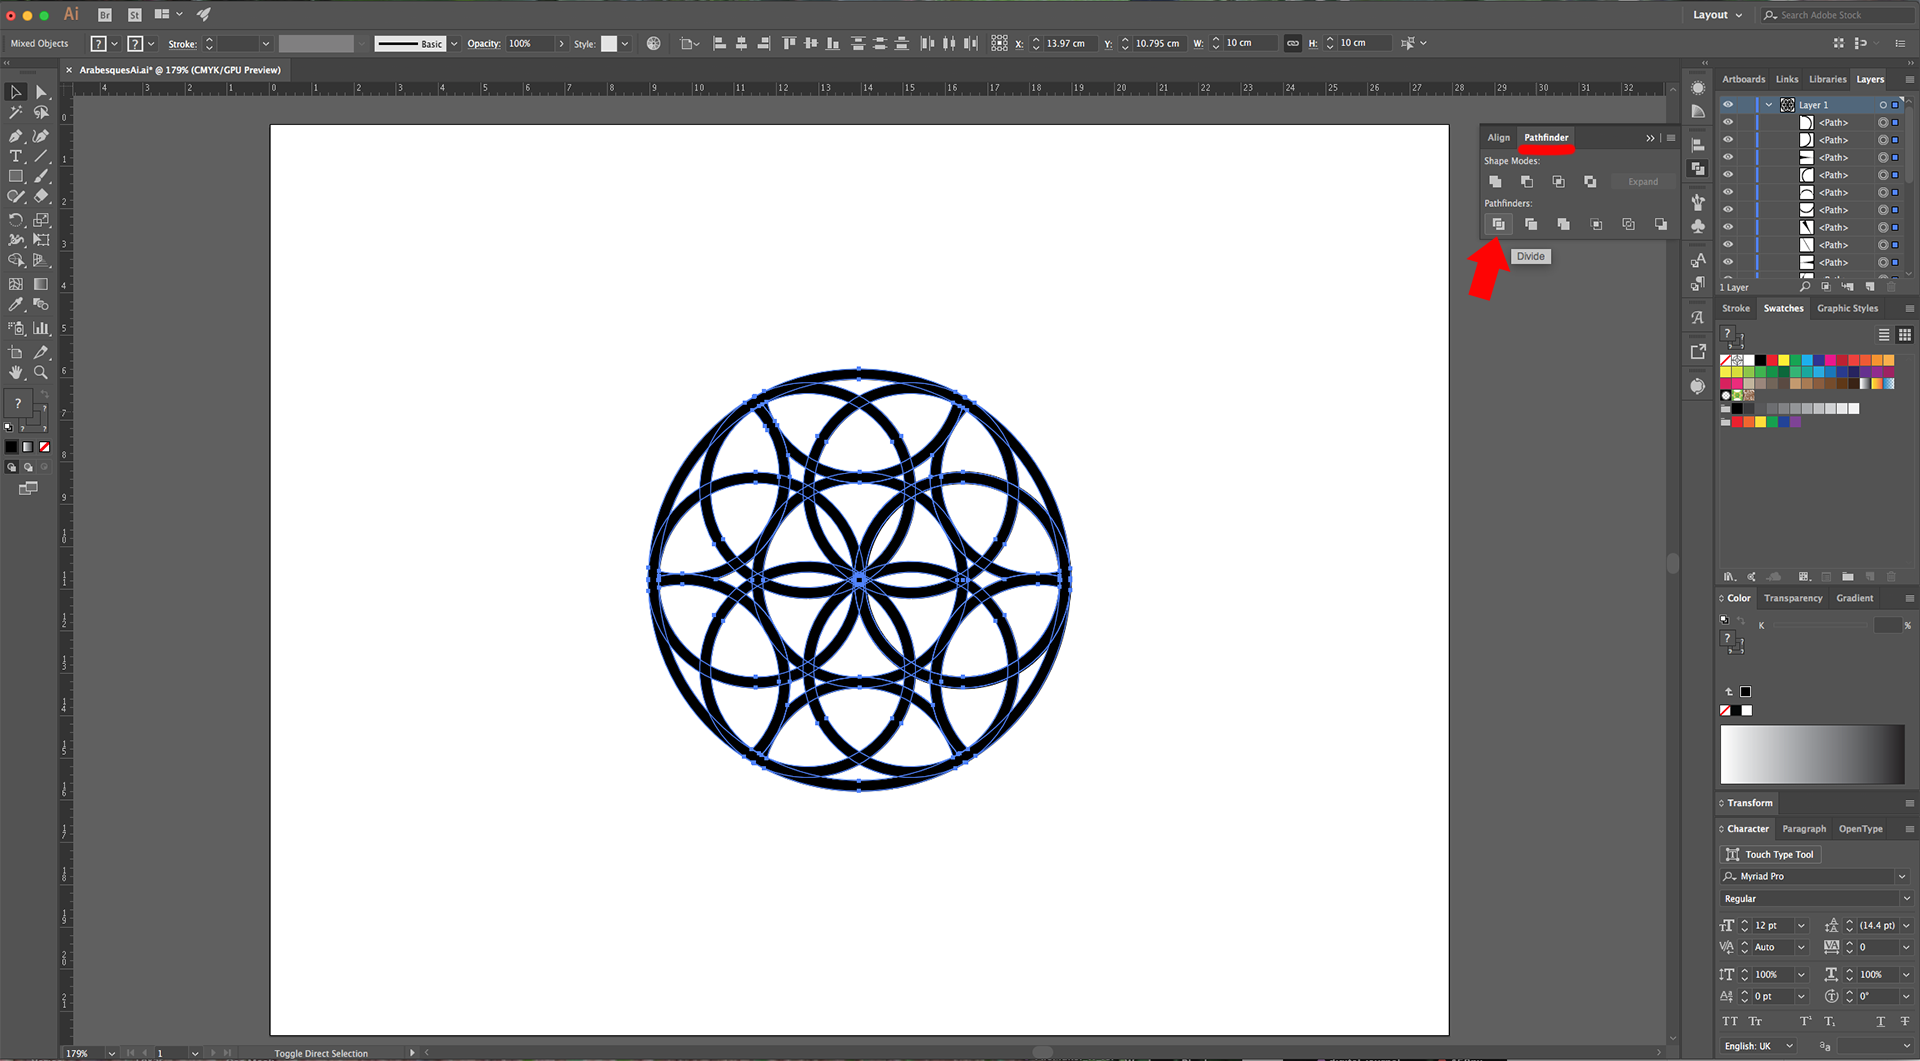
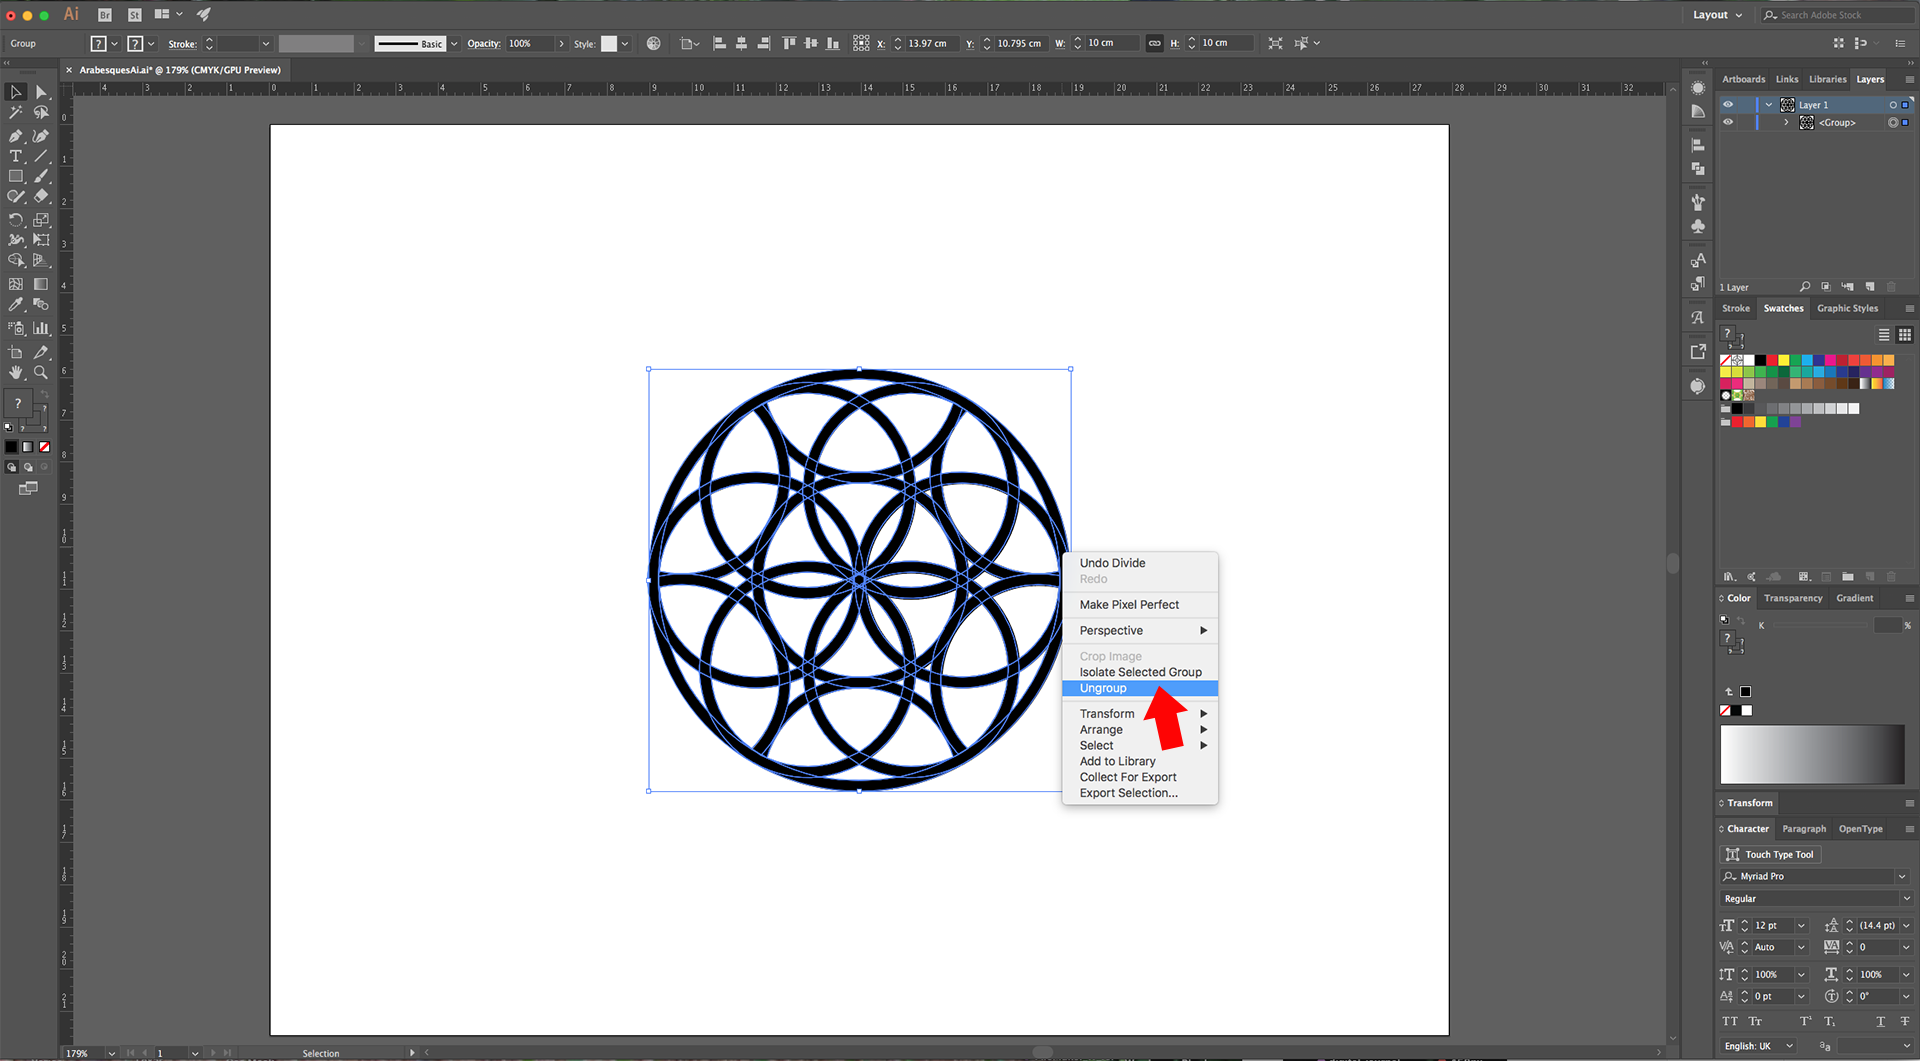
18 - Select everything, head to the “Pathfinder Panel” and choose “Divide”, right-click on top and “Ungroup”. Now you should have all the different portions of the overlapping shapes divided.
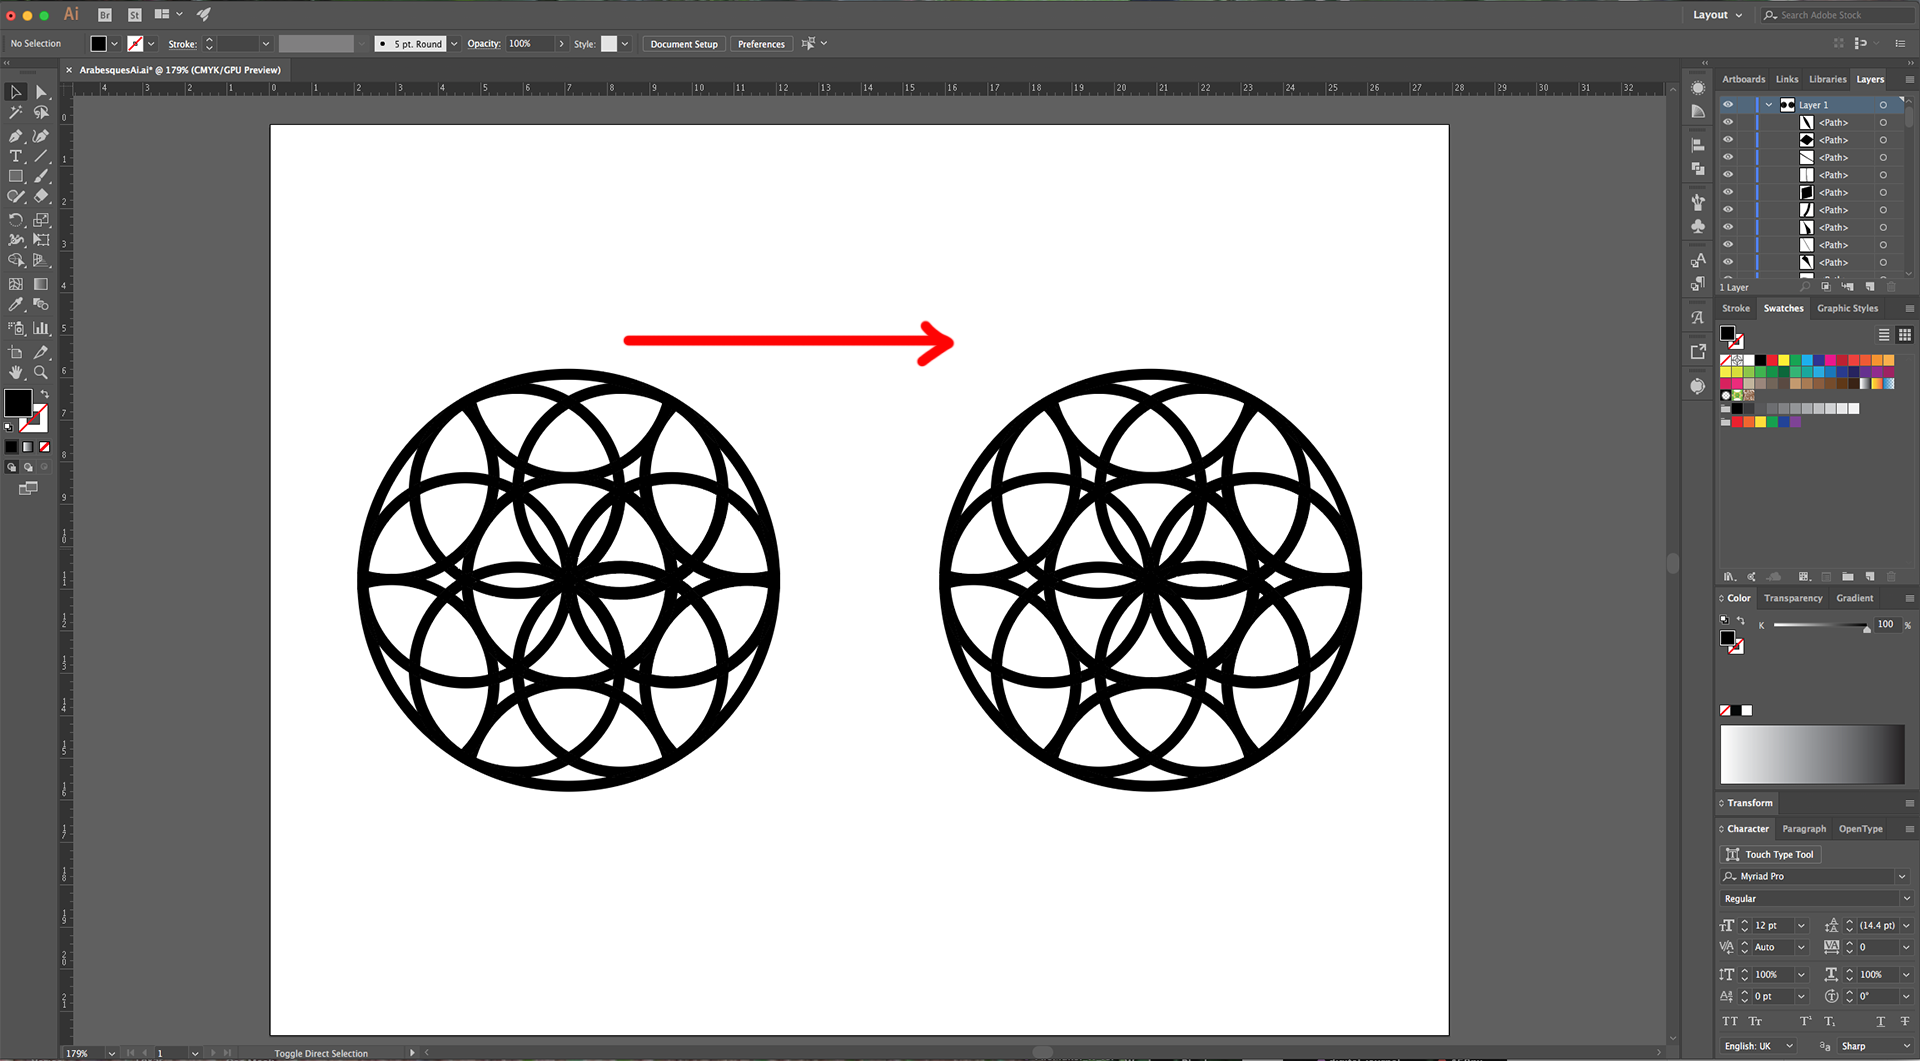
19 - You can leave this vector as a Base and “Duplicate” it by holding the “Shift” and “Alt/Option” keas while dragging it to the side.
20 - Select different portions of the Shapes and change the “Fill” color to create patterns. You may need to “Bring to Front” or “Send to Back” some of them in order to achieve the desired result.
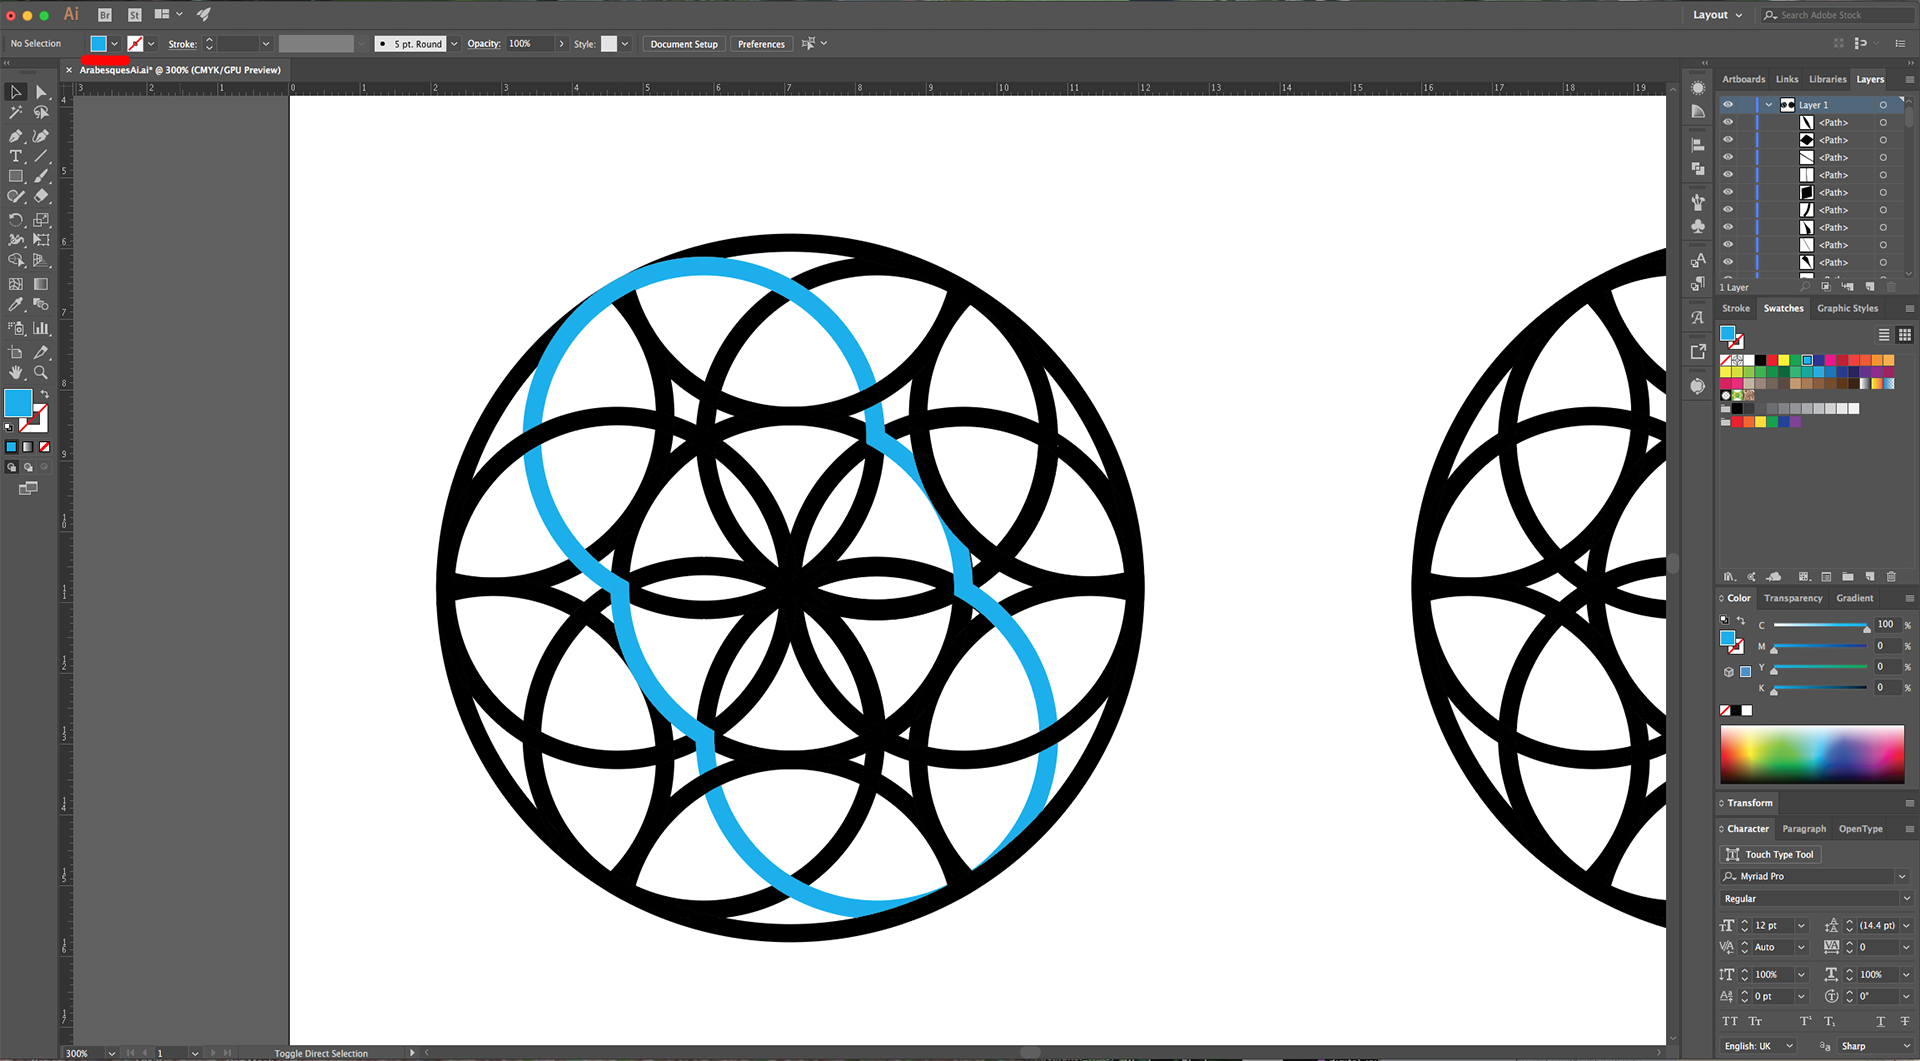
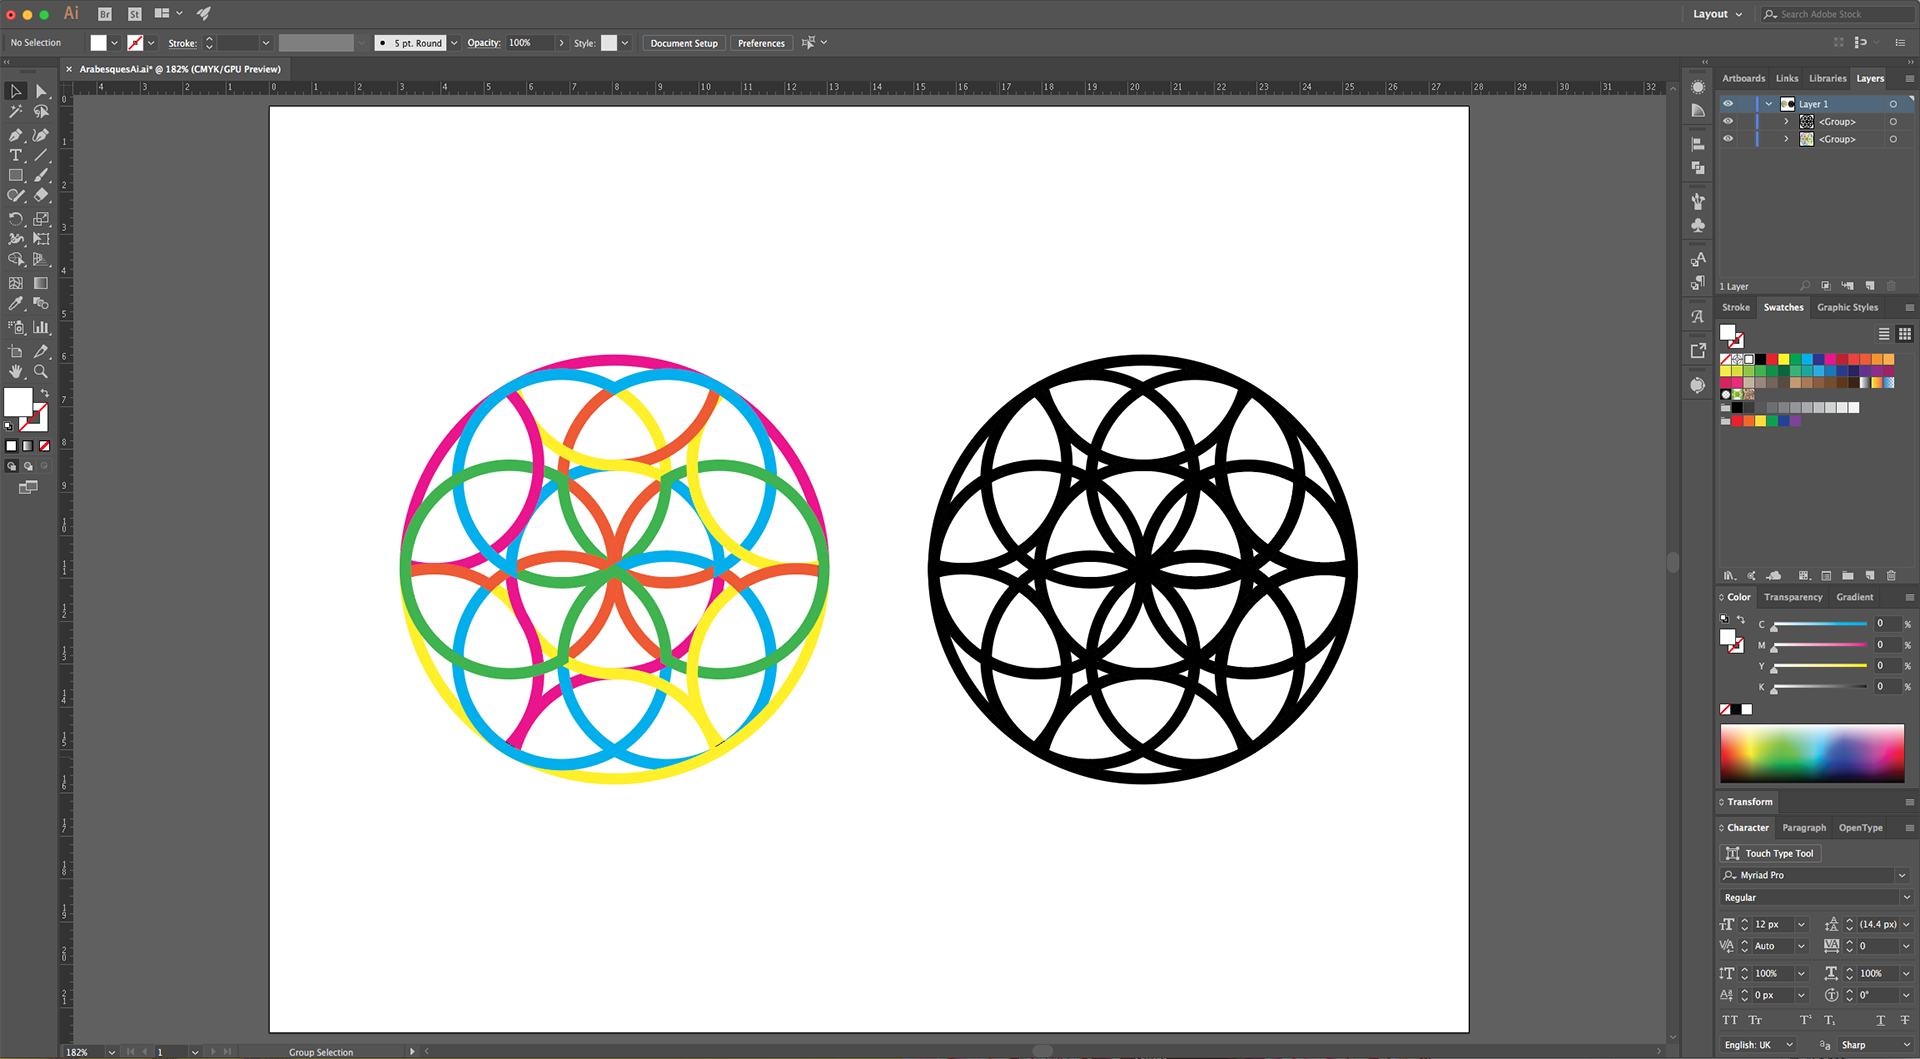
21 - You can do different “Patterns” to create “Arabesques”.
2 - Select the “Ellipse Tool” (L), click inside you Canvas and create a 5 cm (Width) by 5 cm (Height) “Circle”. Give it a 1 pt Black “Stroke” and NO “Fill”.
3 - Center it using the “Horizontal and Vertical Align Center” options on your Top Menu and make sure that “Align to Artboard” is selected. Or use the same options in the “Align Panel”.
4 - Head to the “Appearance Panel”, click on the “Effects Menu” on the Bottom-Left side of the panel and navigate to Distort & Transform > Transform. Input a “Rotate Angle” of 300°, choose the “Middle-Left” point as “Reference Point” and make 6 “Copies”.
5 - Create another 5 by 5 cm Circle and center it on top of the ones. Make sure the centers of both shapes sit on top of each other. Select the first shape and go to Object > Expand Appearance.
6 - Back in the “Appearance Panel” with the first shape still selected, go to Distort & Transform and this time use a “Horizontal” and “Vertical” Scale of 90%, choose the “Center” point as “Reference Point”, make sure the “Scale Strokes & Effects” box is checked and make 1 “Copy”. Go to Object > Expand Appearance.
7 - Right-click on top and choose “Ungroup”. Select the two overlapped Circles on the right side and Center them using the “Horizontal and Vertical Align Center” options on your Top Menu but make sure that “Align to Selection” is your choice this time. Or use the same options in the “Align Panel”. Repeat with the rest of the Circles to make them all Concentric.
8 - Select the Middle Circle and double-click on the “Scale Tool” (S). Input a “Uniform” 90% “Scale”, make sure the “Scale Strokes & Effects” box is checked and click “Copy”.
9 - Select the “Ellipse Tool” (L), click inside you Canvas and create a 10 cm (Width) by 10 cm (Height) “Circle”. Give it a 1 pt Black “Stroke” and NO “Fill”. Center it using the “Horizontal and Vertical Align Center” options on your Top Menu and make sure that “Align to Artboard” is selected. Or use the same options in the “Align Panel”.
10 - It should coincide with your other shape’s edges. If they don’t touch properly, select them and scale it proportionally (“Shift” key). Select the bigger Circle, double-click on the “Scale Tool” (S). Input a “Uniform” 95% “Scale”, make sure the “Scale Strokes & Effects” box is checked and click “Copy”.
11 - Right-click on top and choose “Ungroup”. Then select just the two Center Circles, right-click on top and choose “Group”.
12 - “Copy” the Group (Command/Control + C) and “Paste in Place” (Command/Control + P). Hold the “Shift” key while dragging the copy Up to do this in a straight line and place the Shape bottom exactly over the top of the ones in the center (the lines should overlap). Repeat this until you create Circles all around the Shape like “Petals”. The bottoms and sides should overlap with the ones in the center and with each other.
13 - Select one of the outside “donuts” or group of two circles, head to the “Pathfinder Panel” and choose “Minus Front”. Fill the resulting Shape with a color (we used Black).
14 - Repeat with the rest of the Shapes including the big and small ones in the center but not the inner ones. Select one of those, head to the “Pathfinder Panel” and choose “Minus Back” instead.
15 - Fill the shape with Black and repeat with the rest. All the circular shapes should be filled now.
16 - Select the bigger Shape, right-click on top and choose “Bring to Front”. Keep it selected and using the “Shift” key add all the outer shapes to the selection. Go to the “Pathfinder Panel” and choose “Trim”. Right-click on top and choose “Ungroup”.
17 - Select the portions of the outer shapes that are outside the Big Circle and “Delete” them. You may need to delete the White inner portion too.
18 - Select everything, head to the “Pathfinder Panel” and choose “Divide”, right-click on top and “Ungroup”. Now you should have all the different portions of the overlapping shapes divided.
19 - You can leave this vector as a Base and “Duplicate” it by holding the “Shift” and “Alt/Option” keas while dragging it to the side.
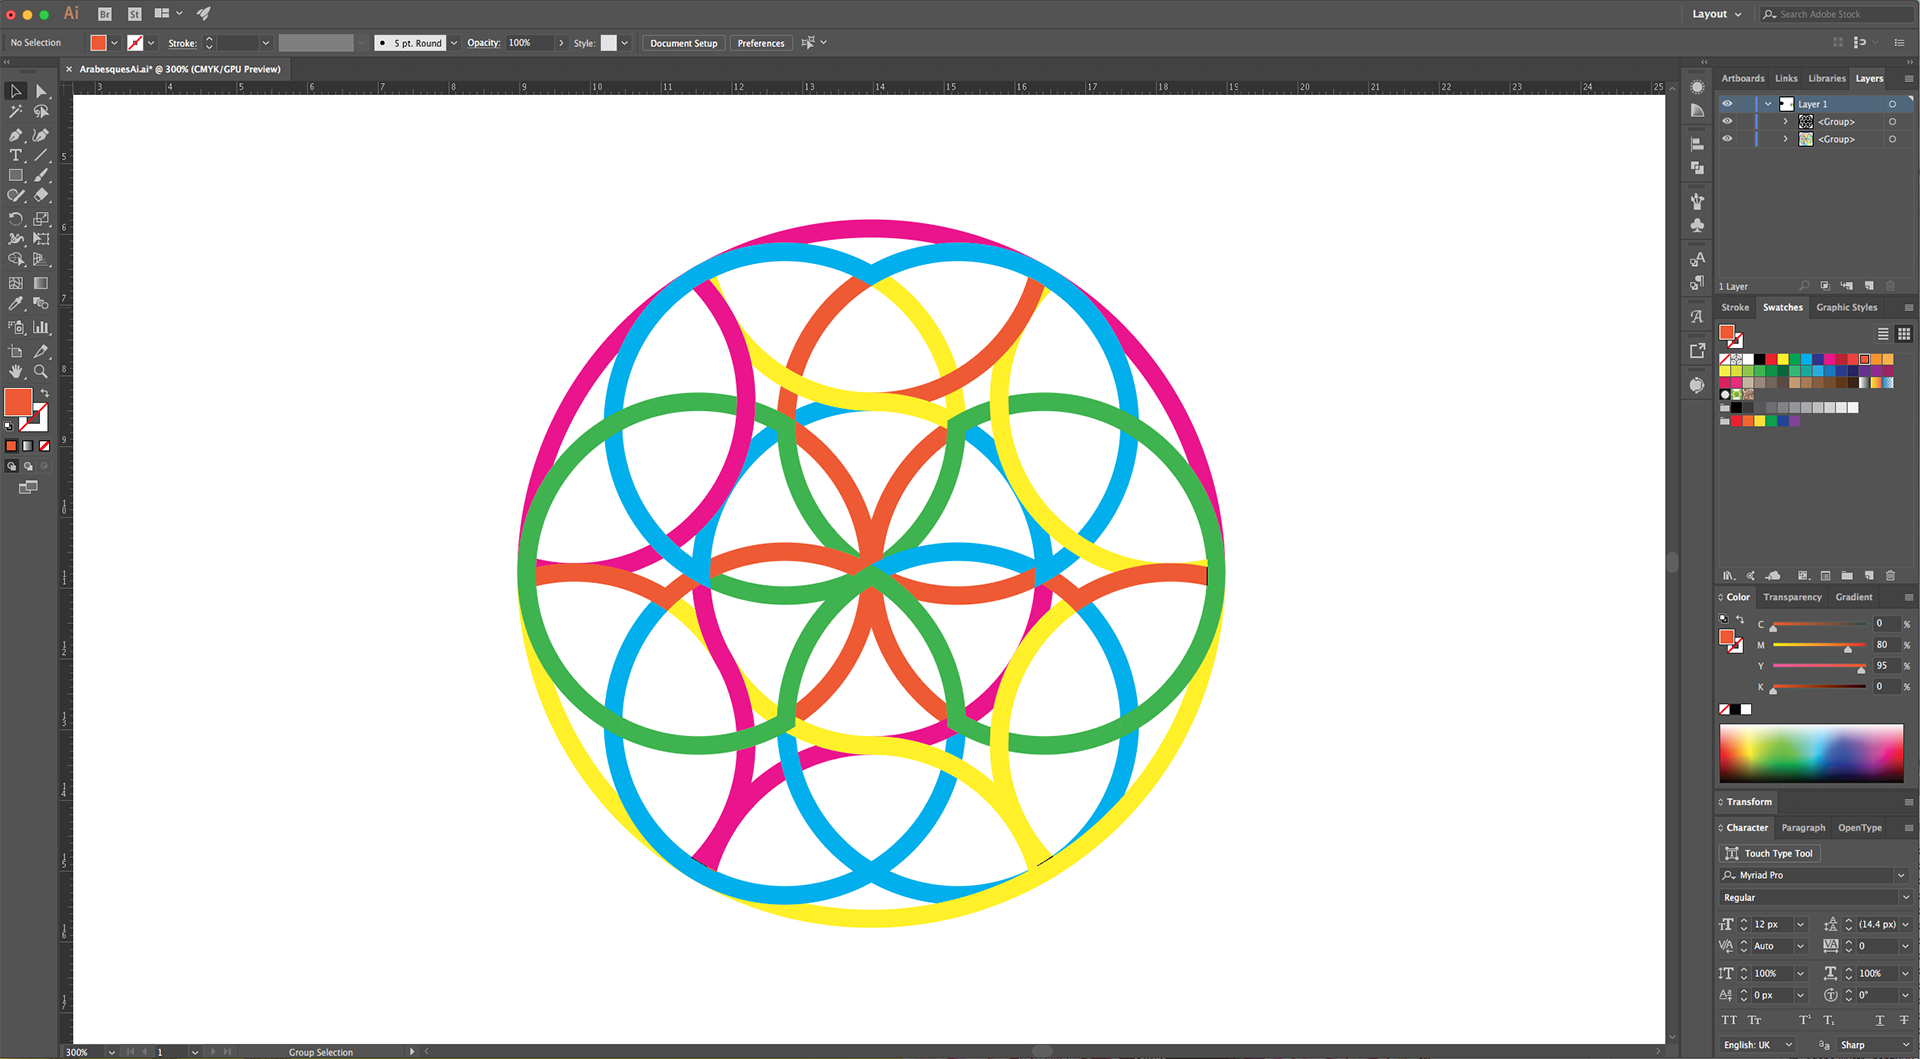
20 - Select different portions of the Shapes and change the “Fill” color to create patterns. You may need to “Bring to Front” or “Send to Back” some of them in order to achieve the desired result.
21 - You can do different “Patterns” to create “Arabesques”.
by @lornacane


