
Graphs in Illustrator
In this step by step tutorial, learn how to create a graph in Illustrator.
For this tutorial, we will use some Vectors to use as part of the Chart Designs and some Sample Data, saved as a “Tab Separated”.txt document.
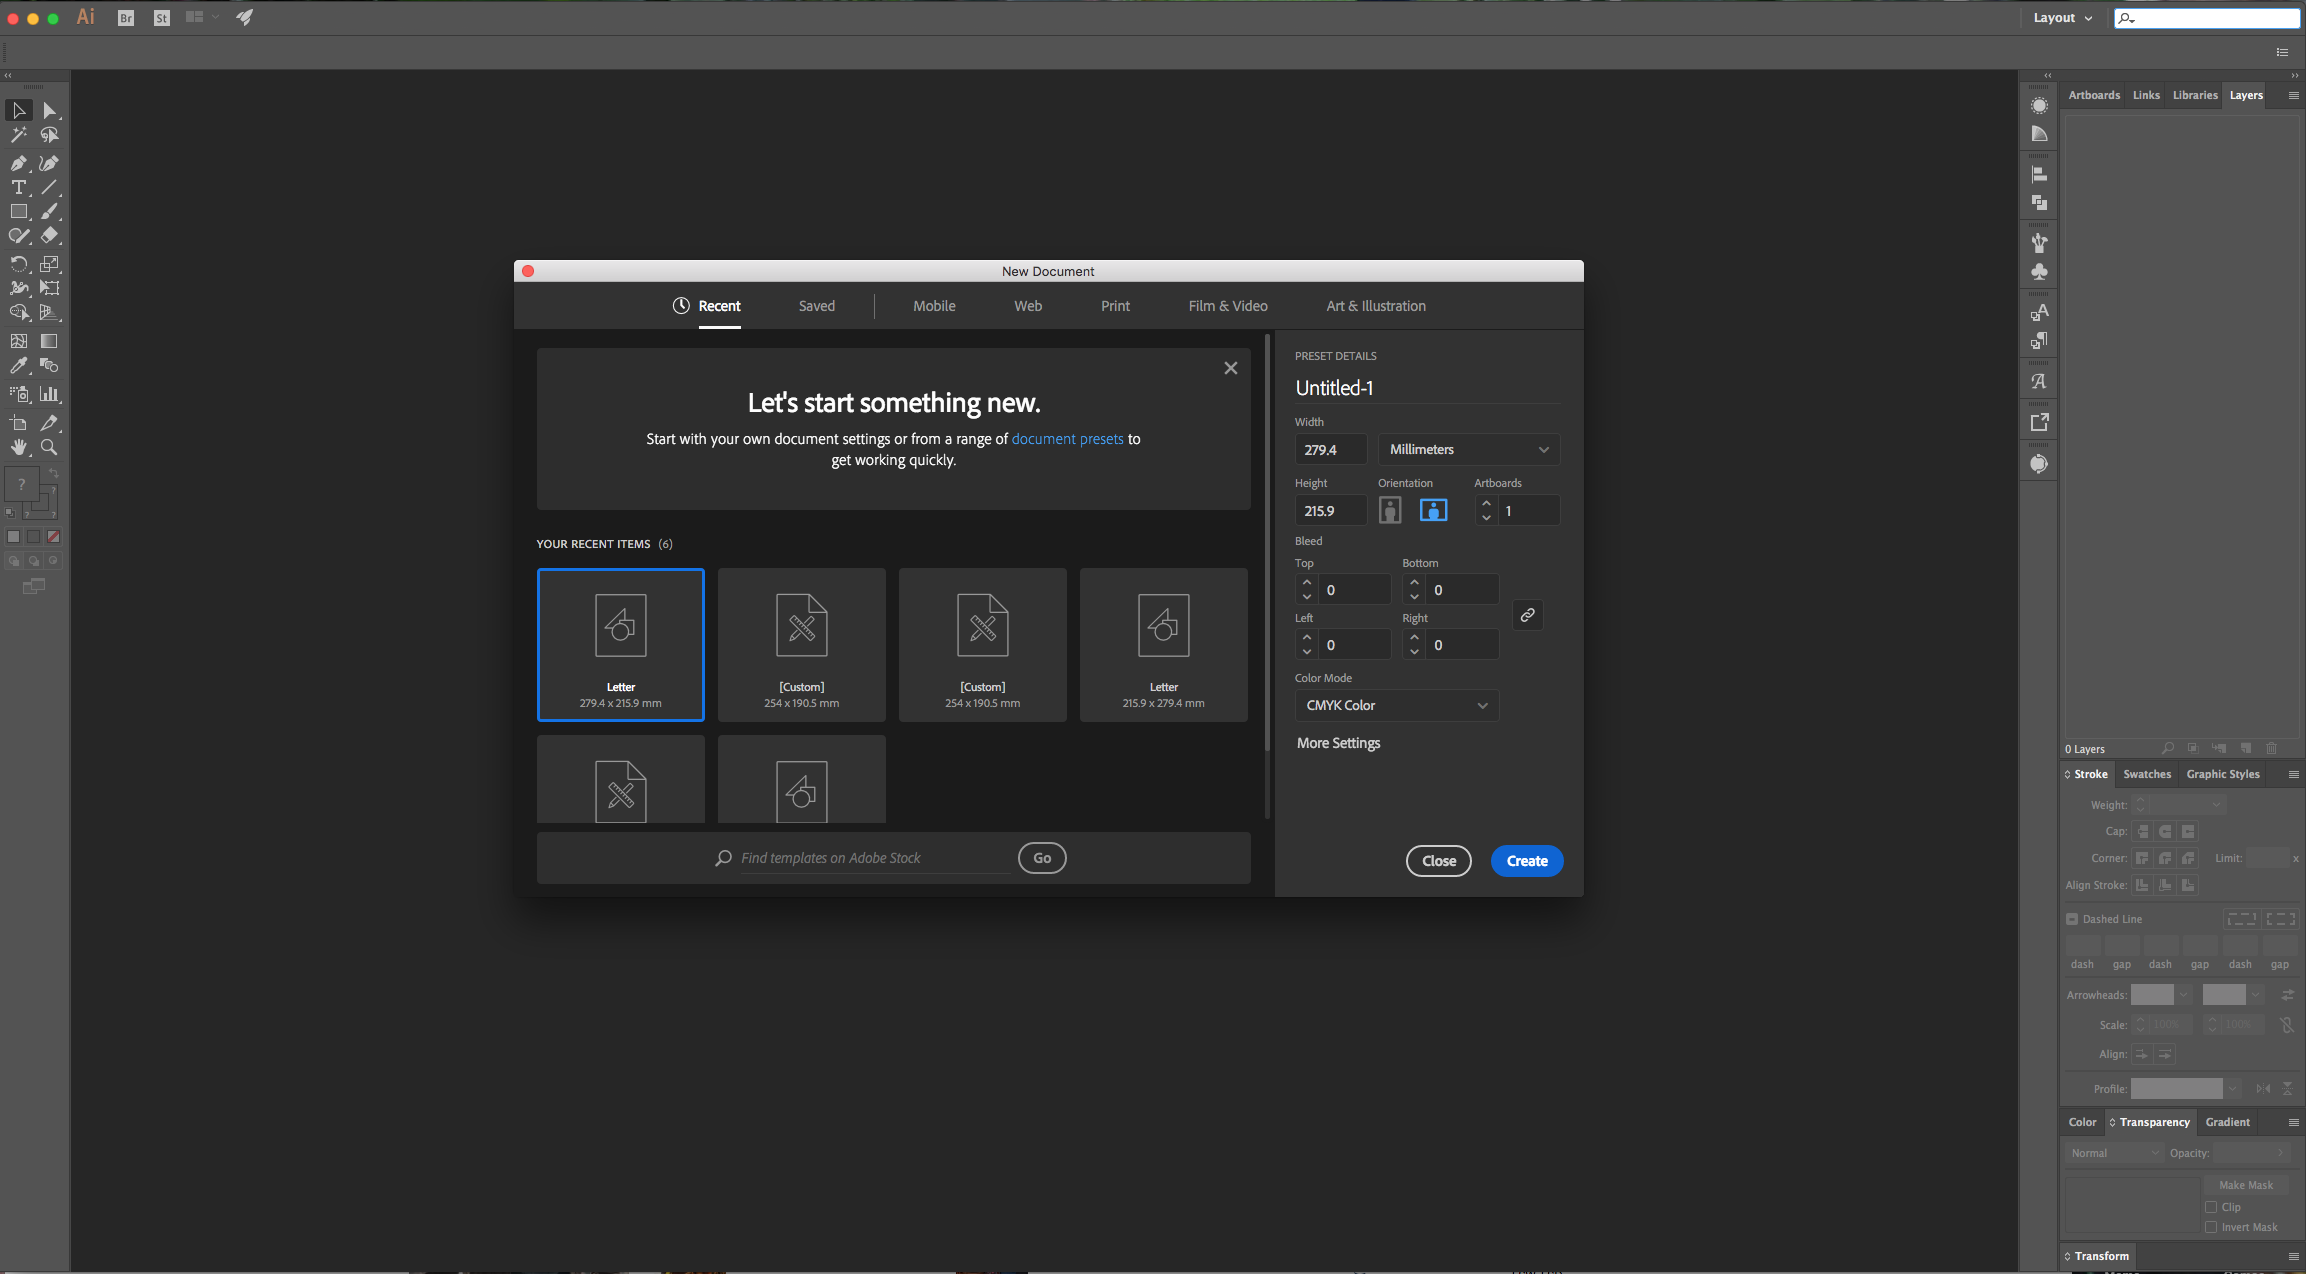
1 - In Illustrator, create a “New Document”.
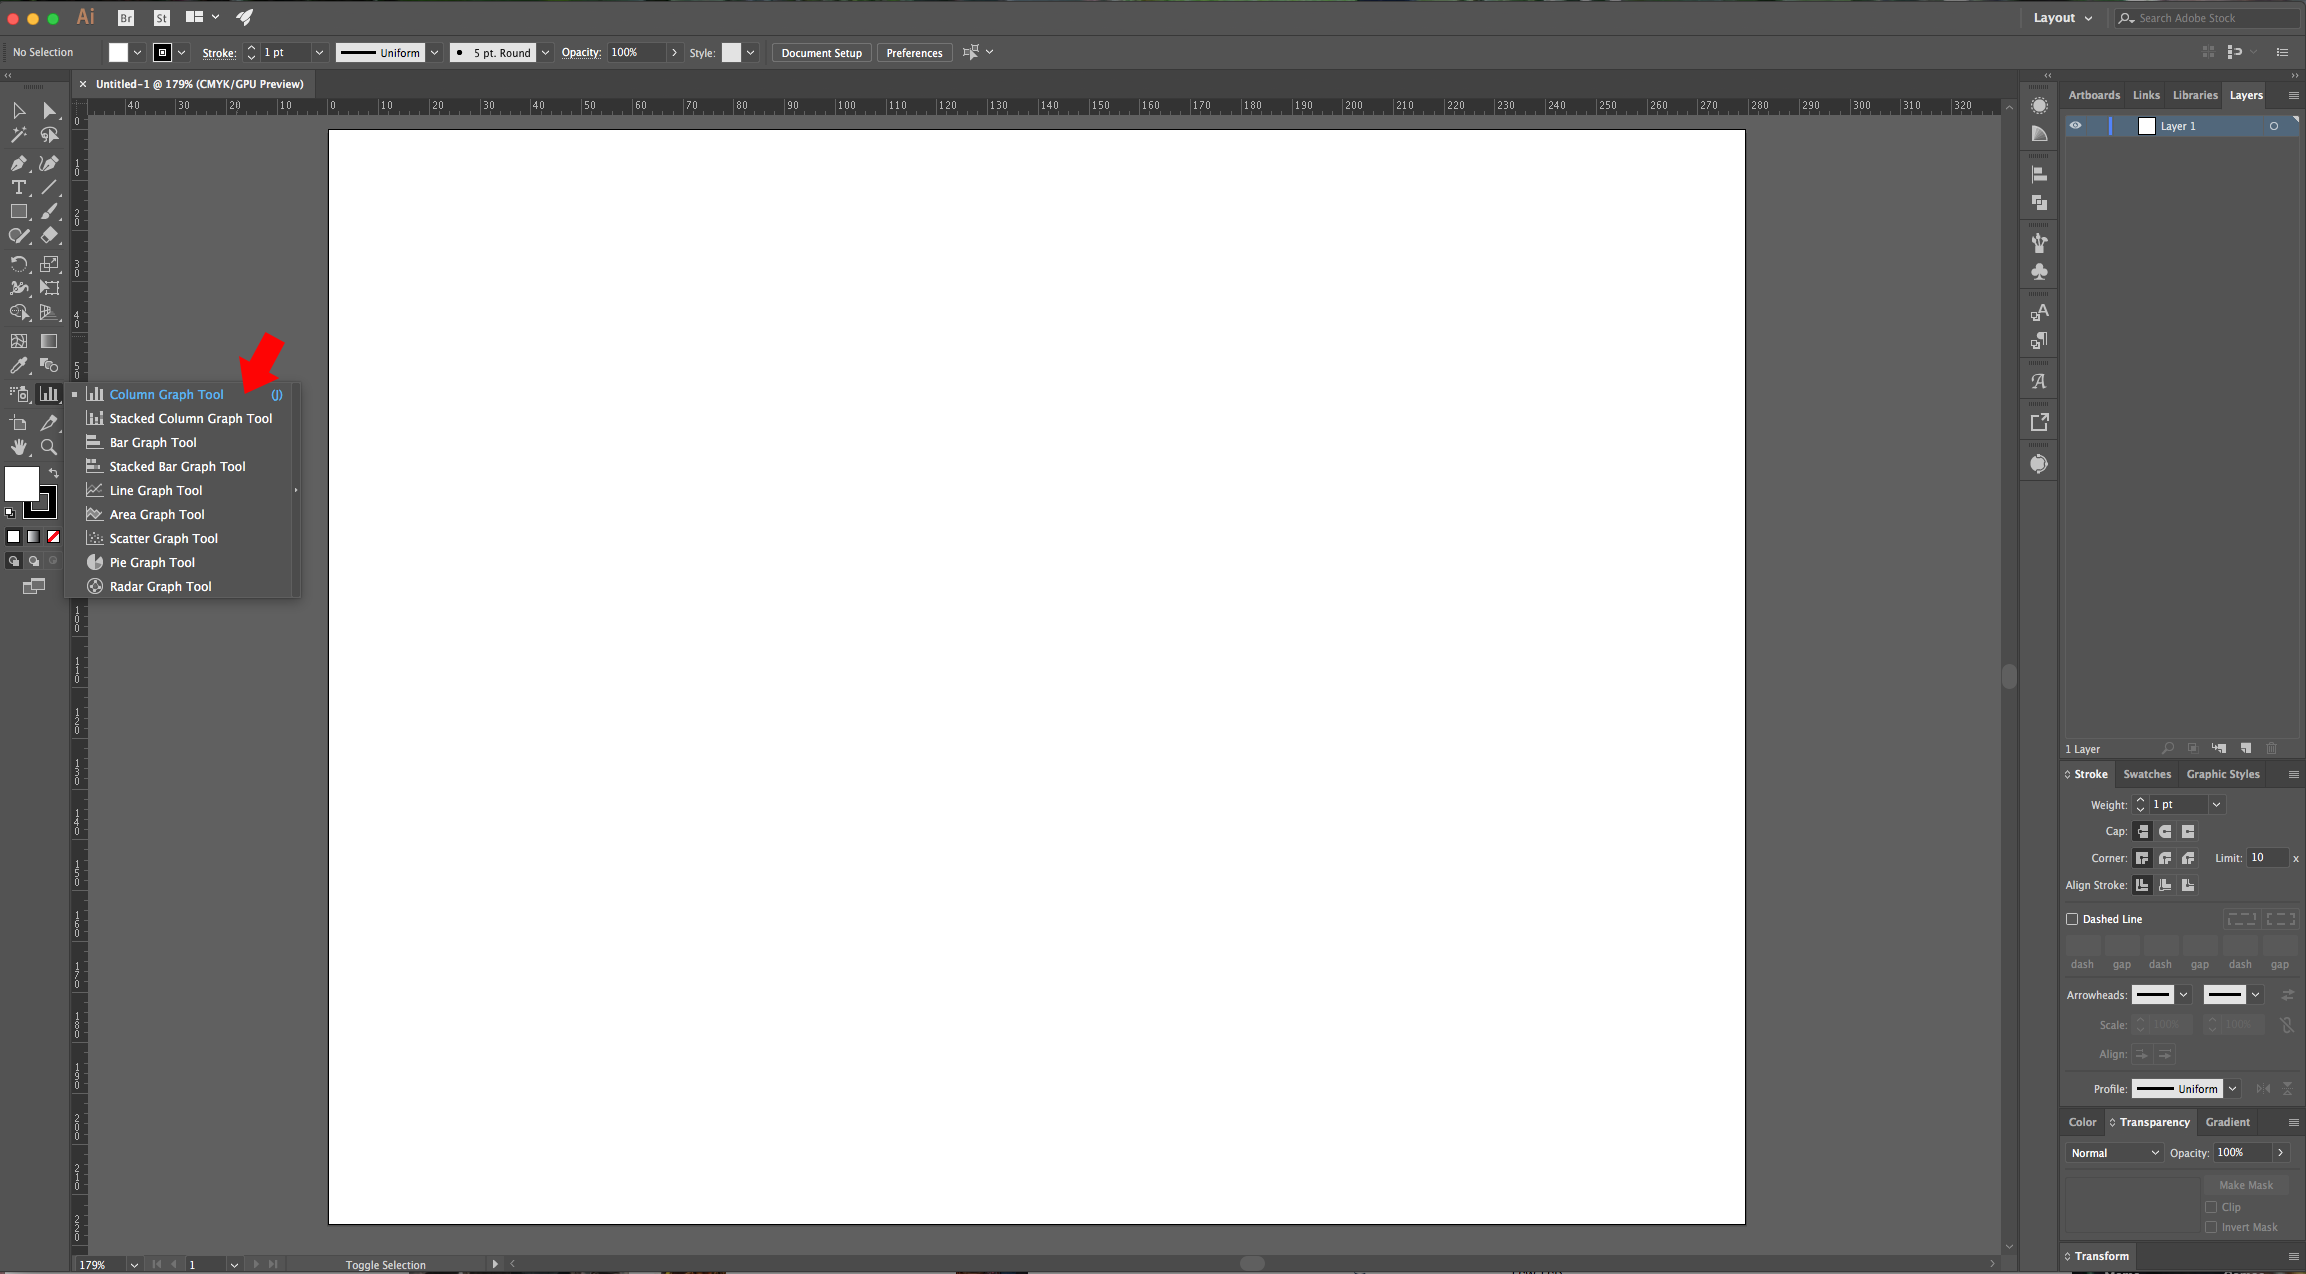
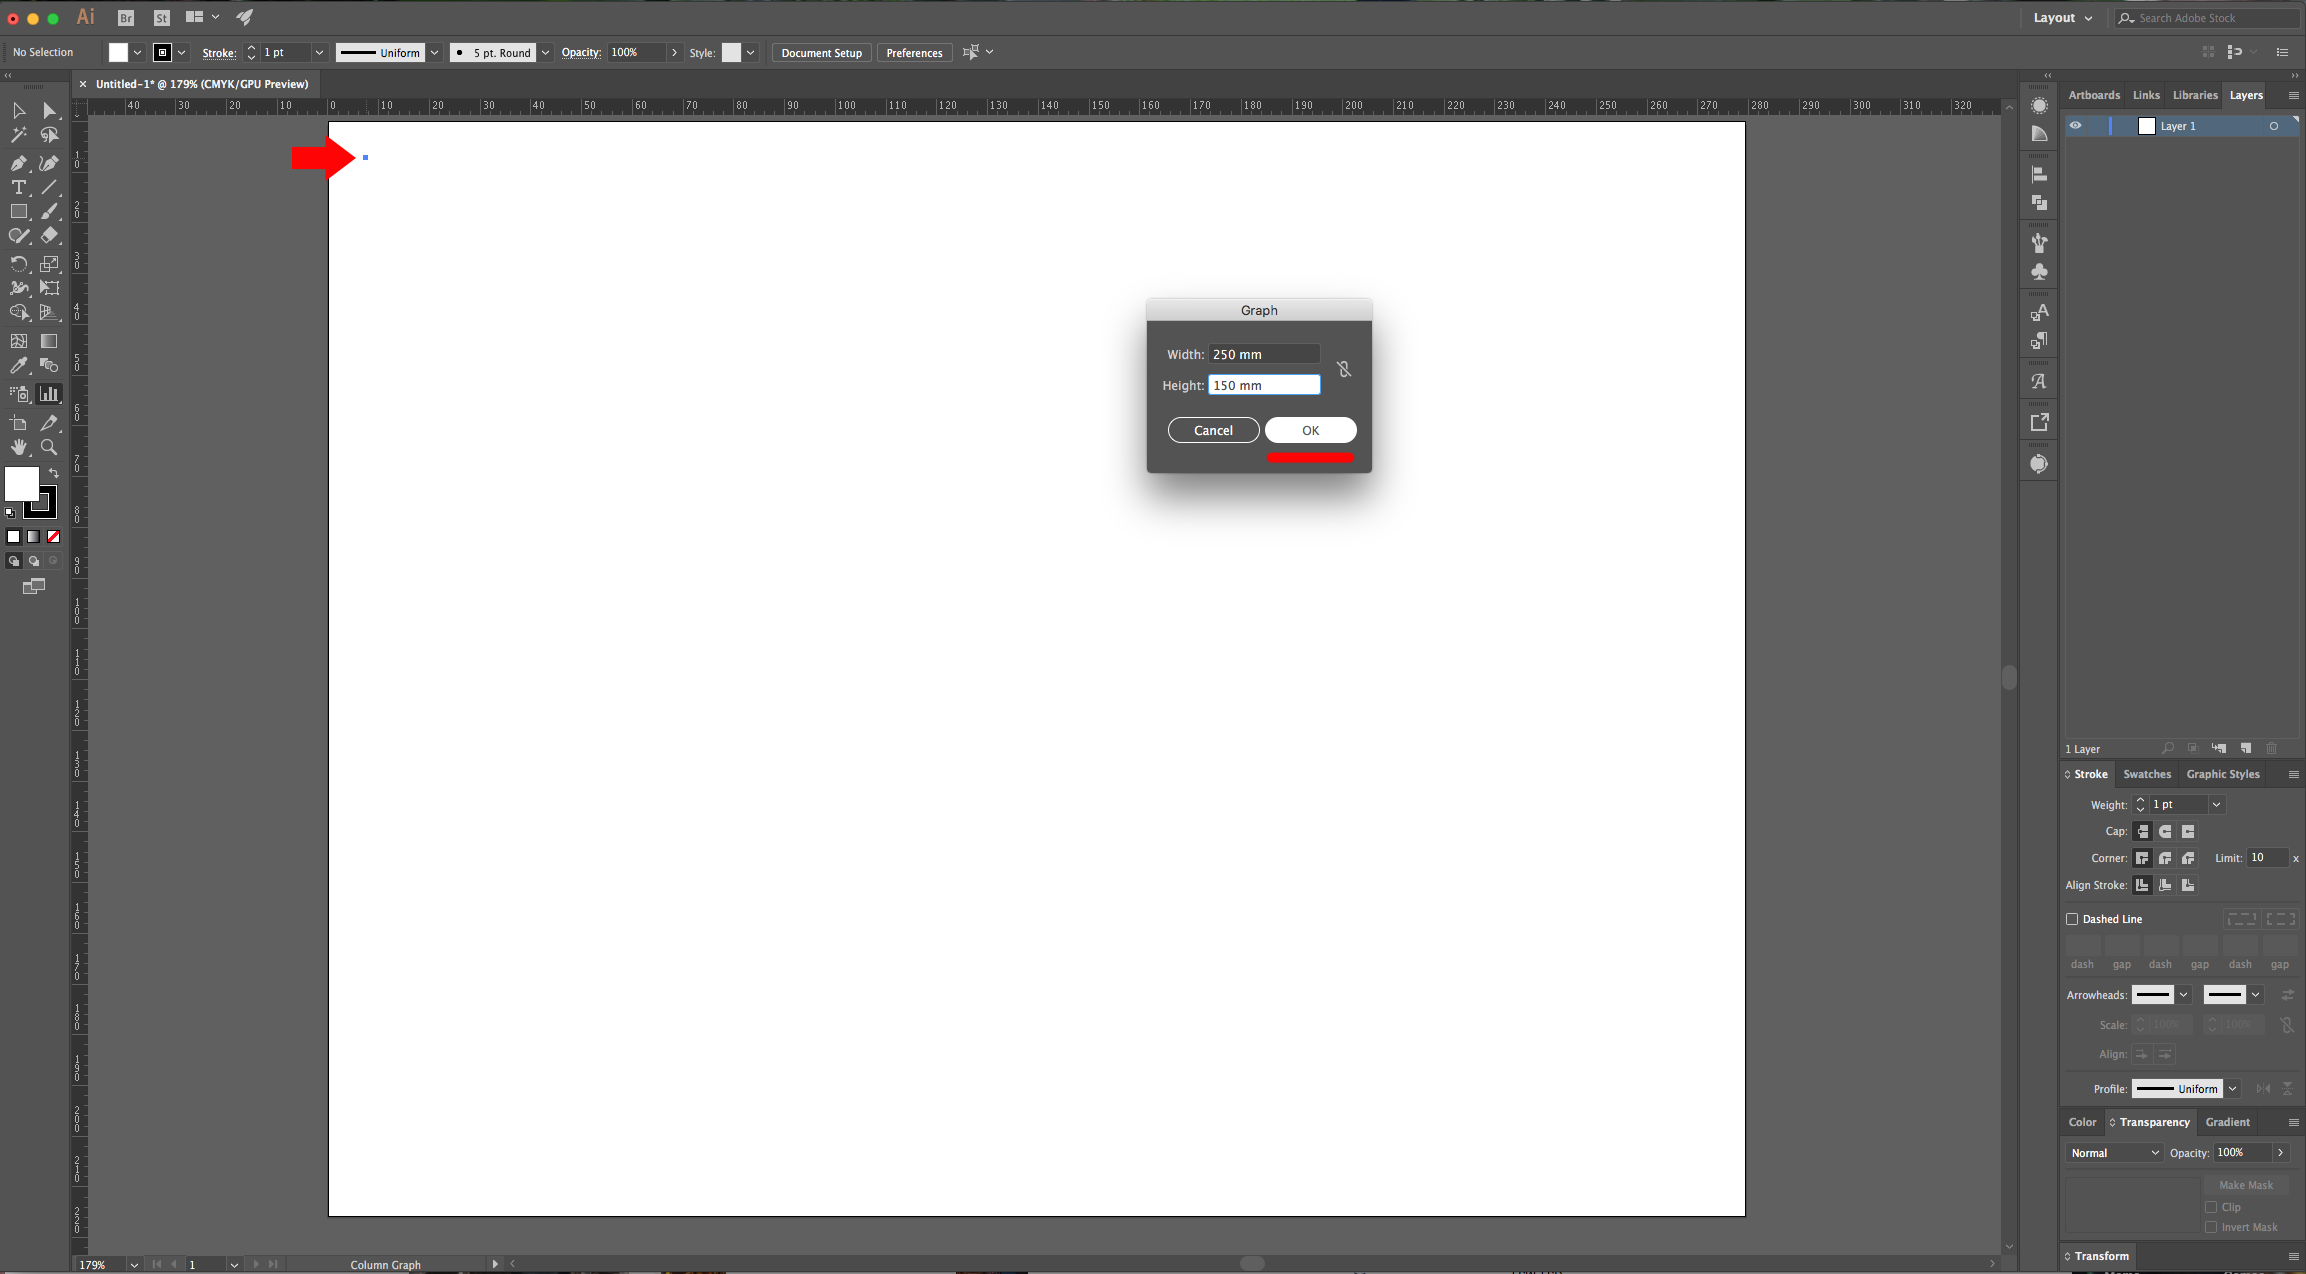
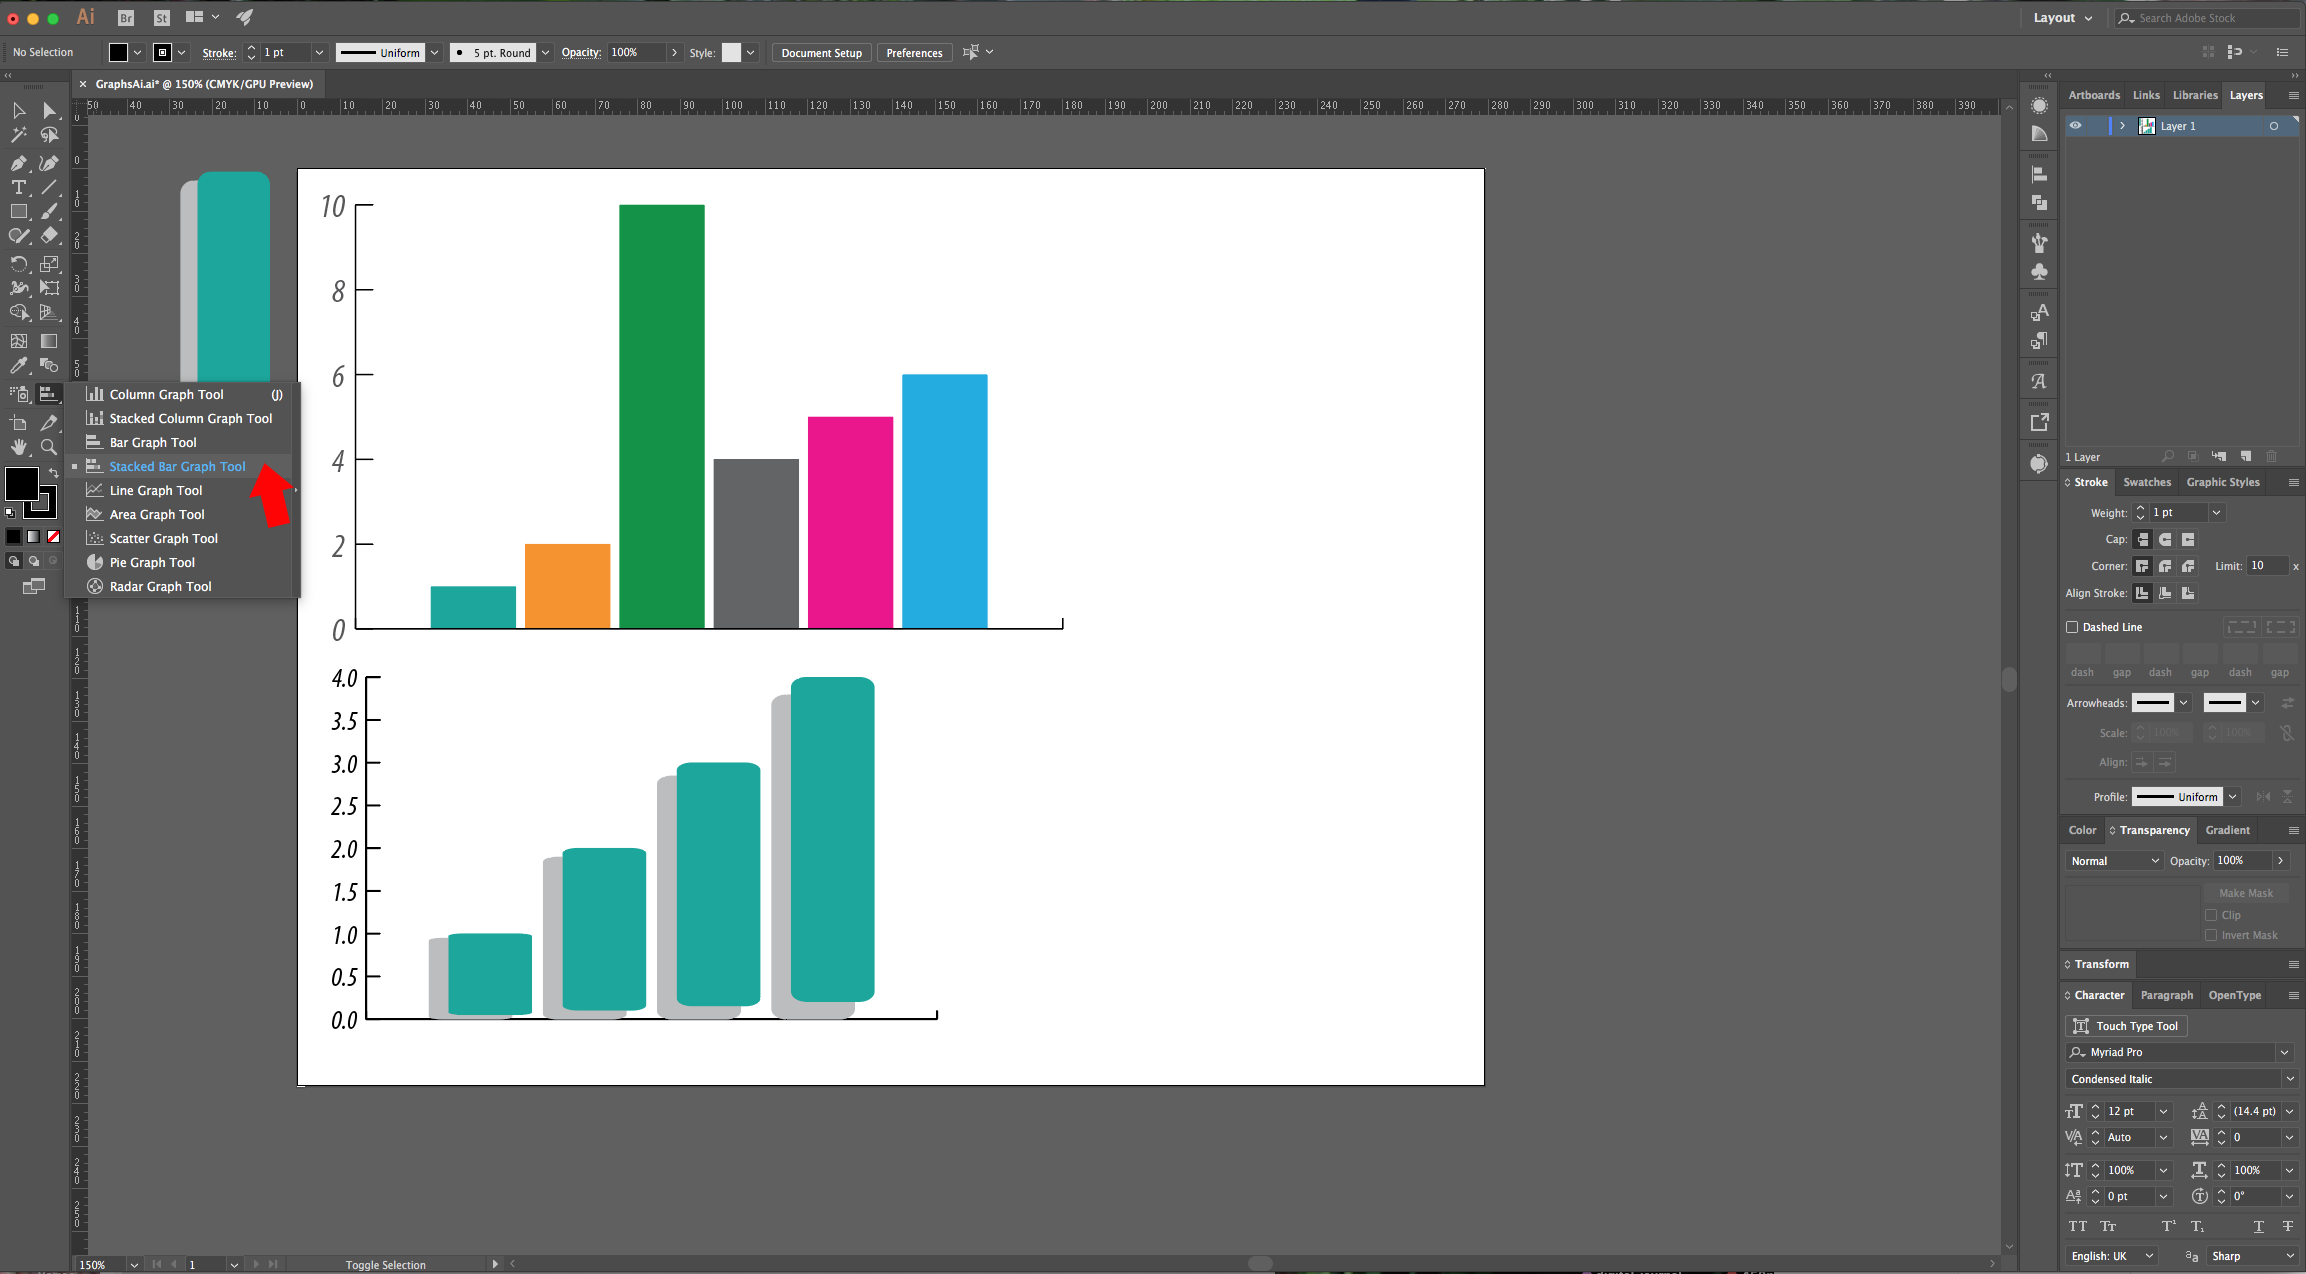
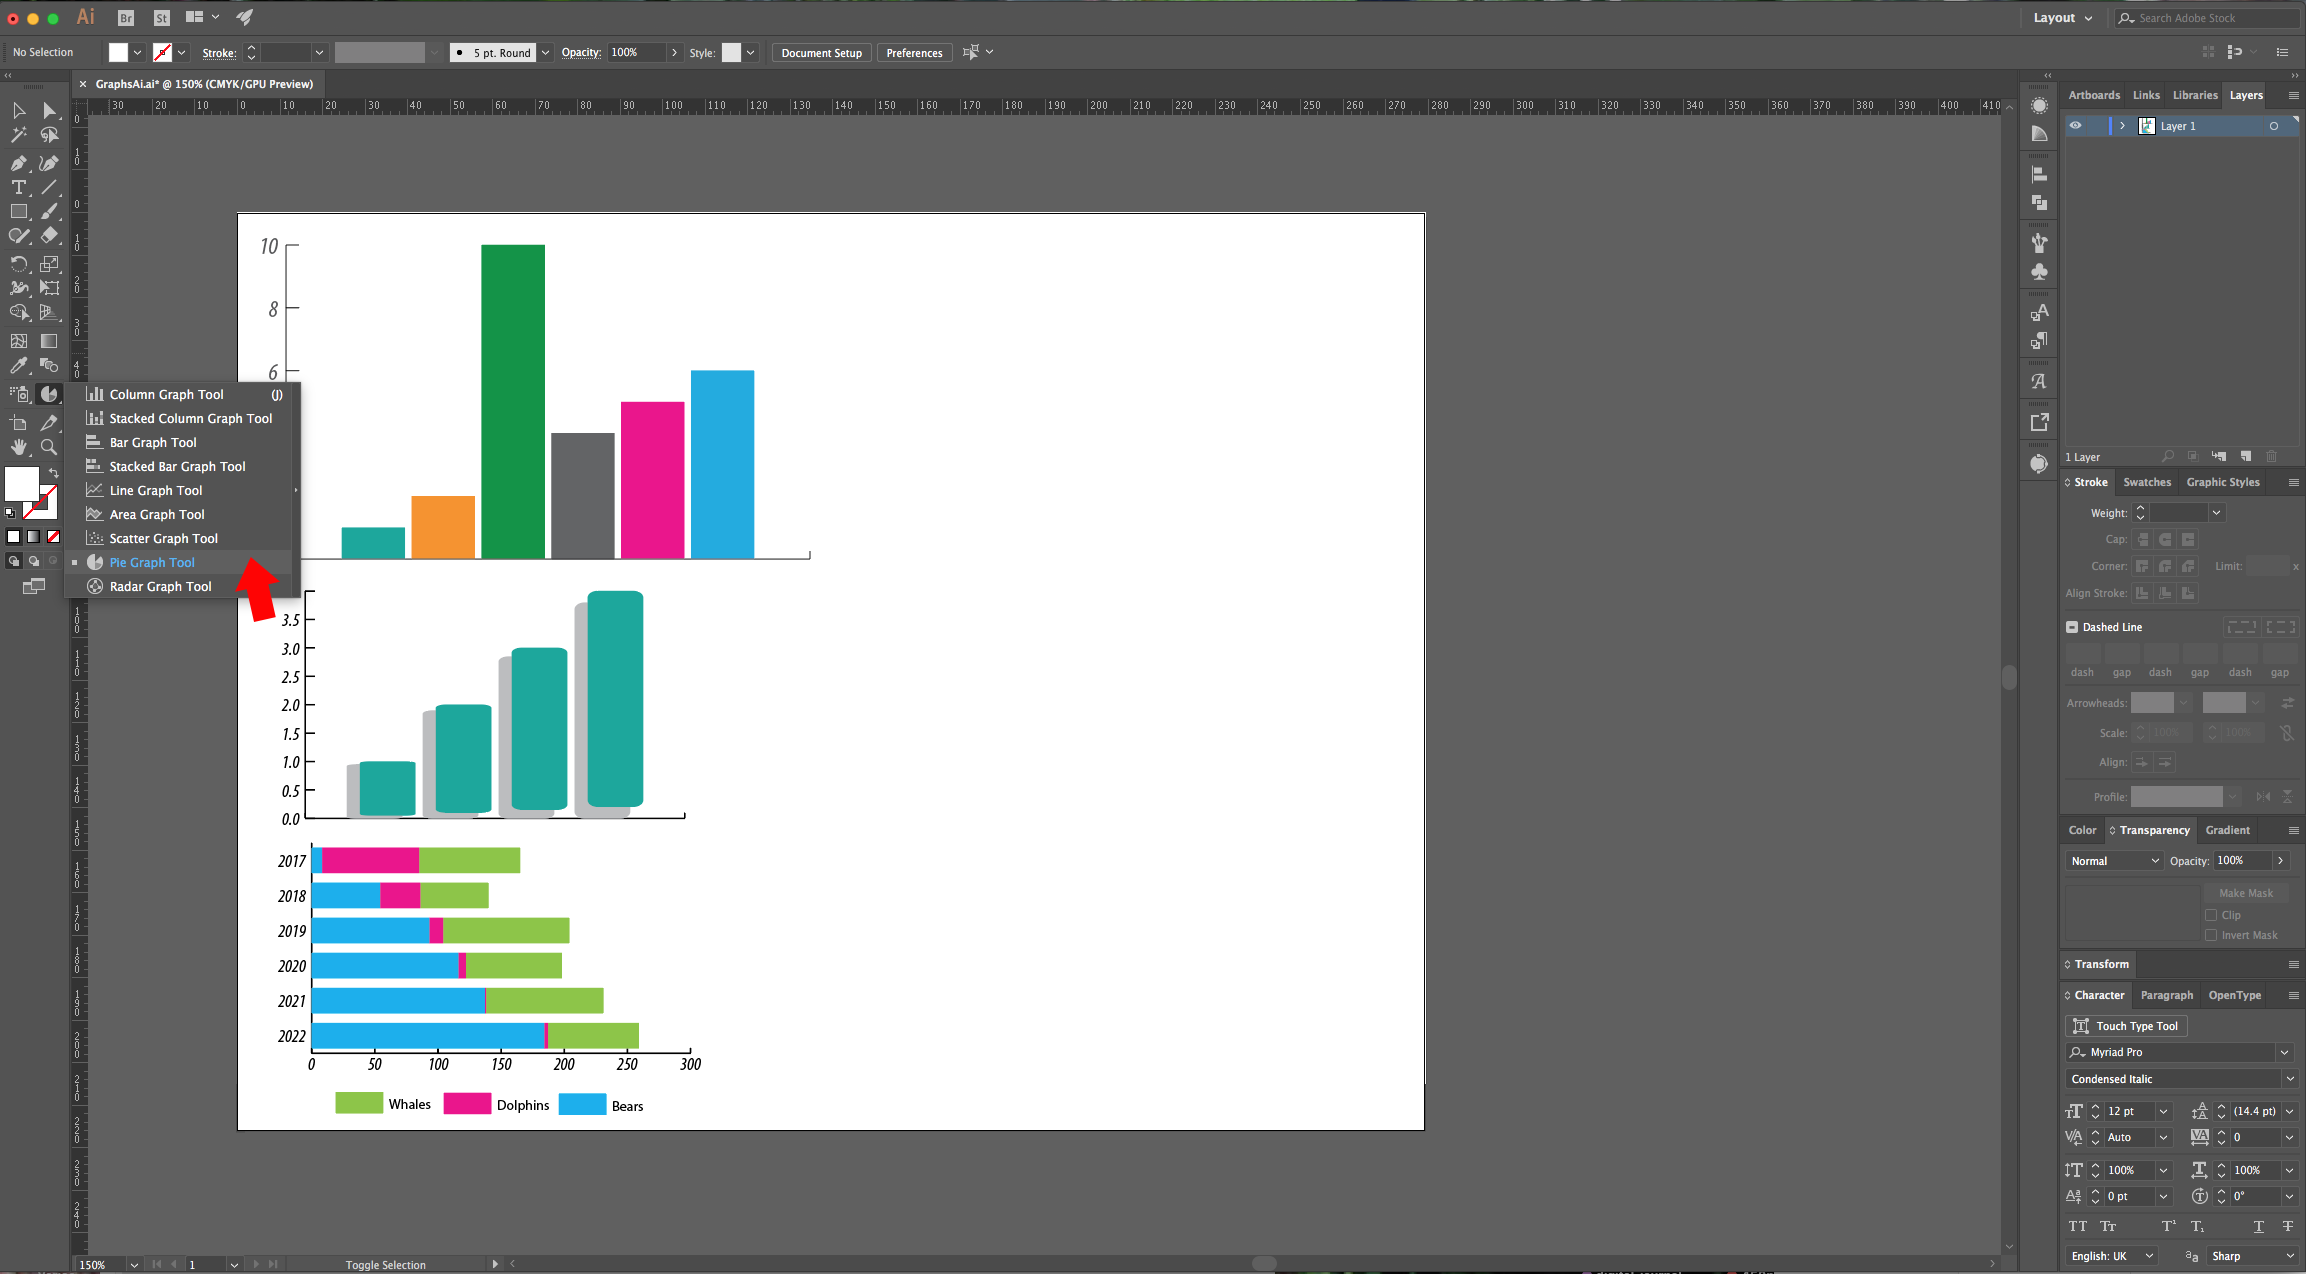
2 - Select the “Column Graph Tool” (J), click on the top left of your document and input the desired “With” and “Height” of your “Graph”. Or, you can drag your cursor on your document, covering the area you wish to cover.
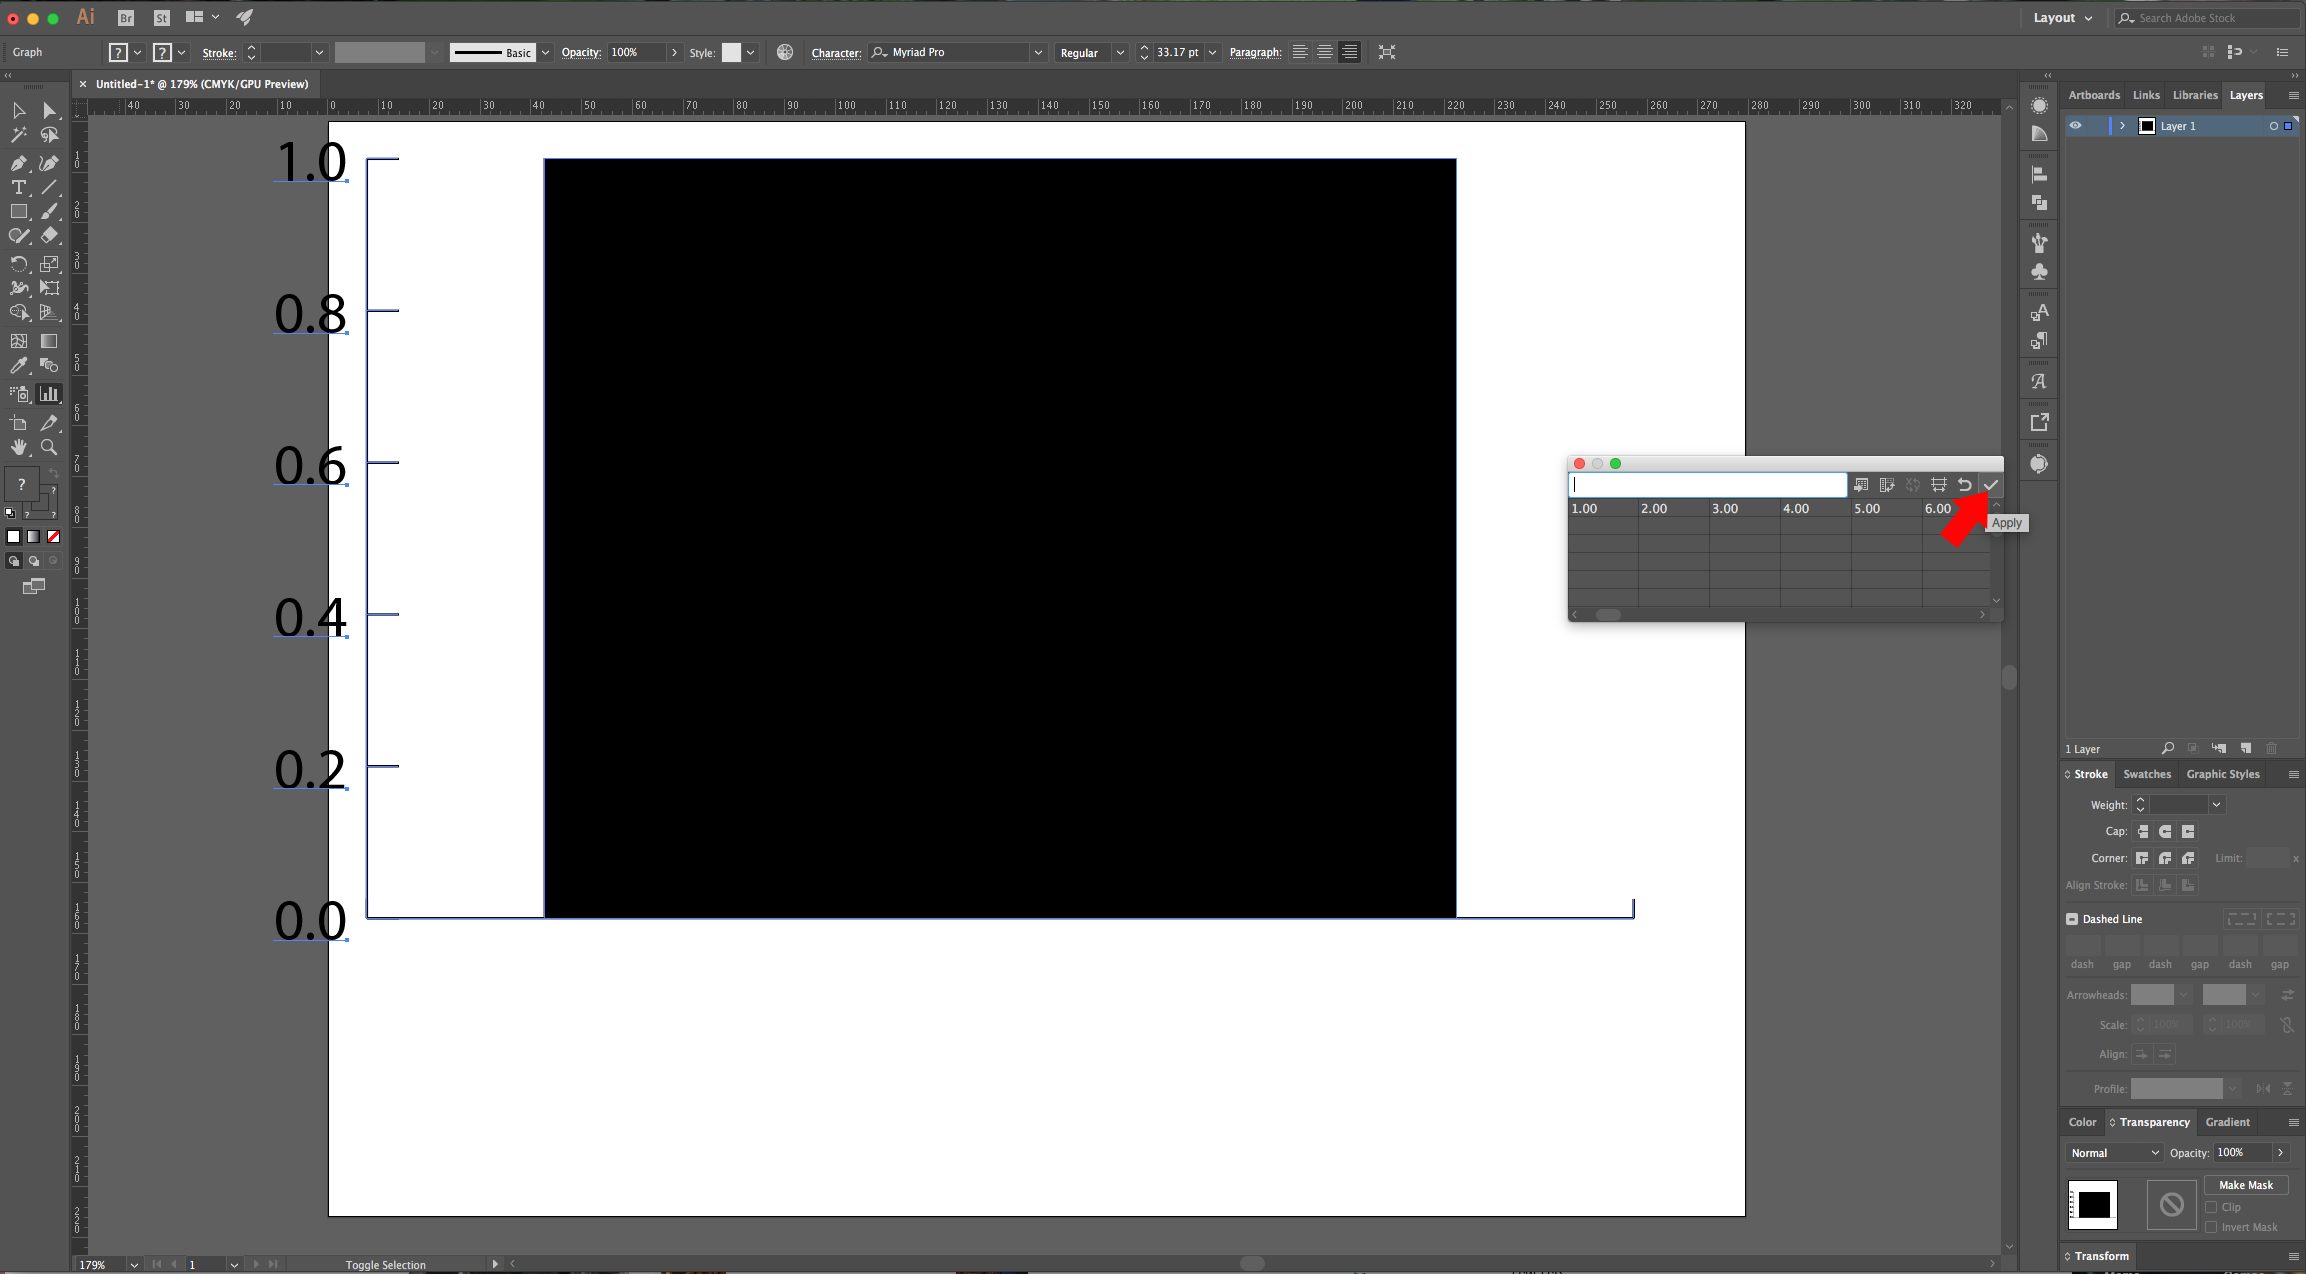
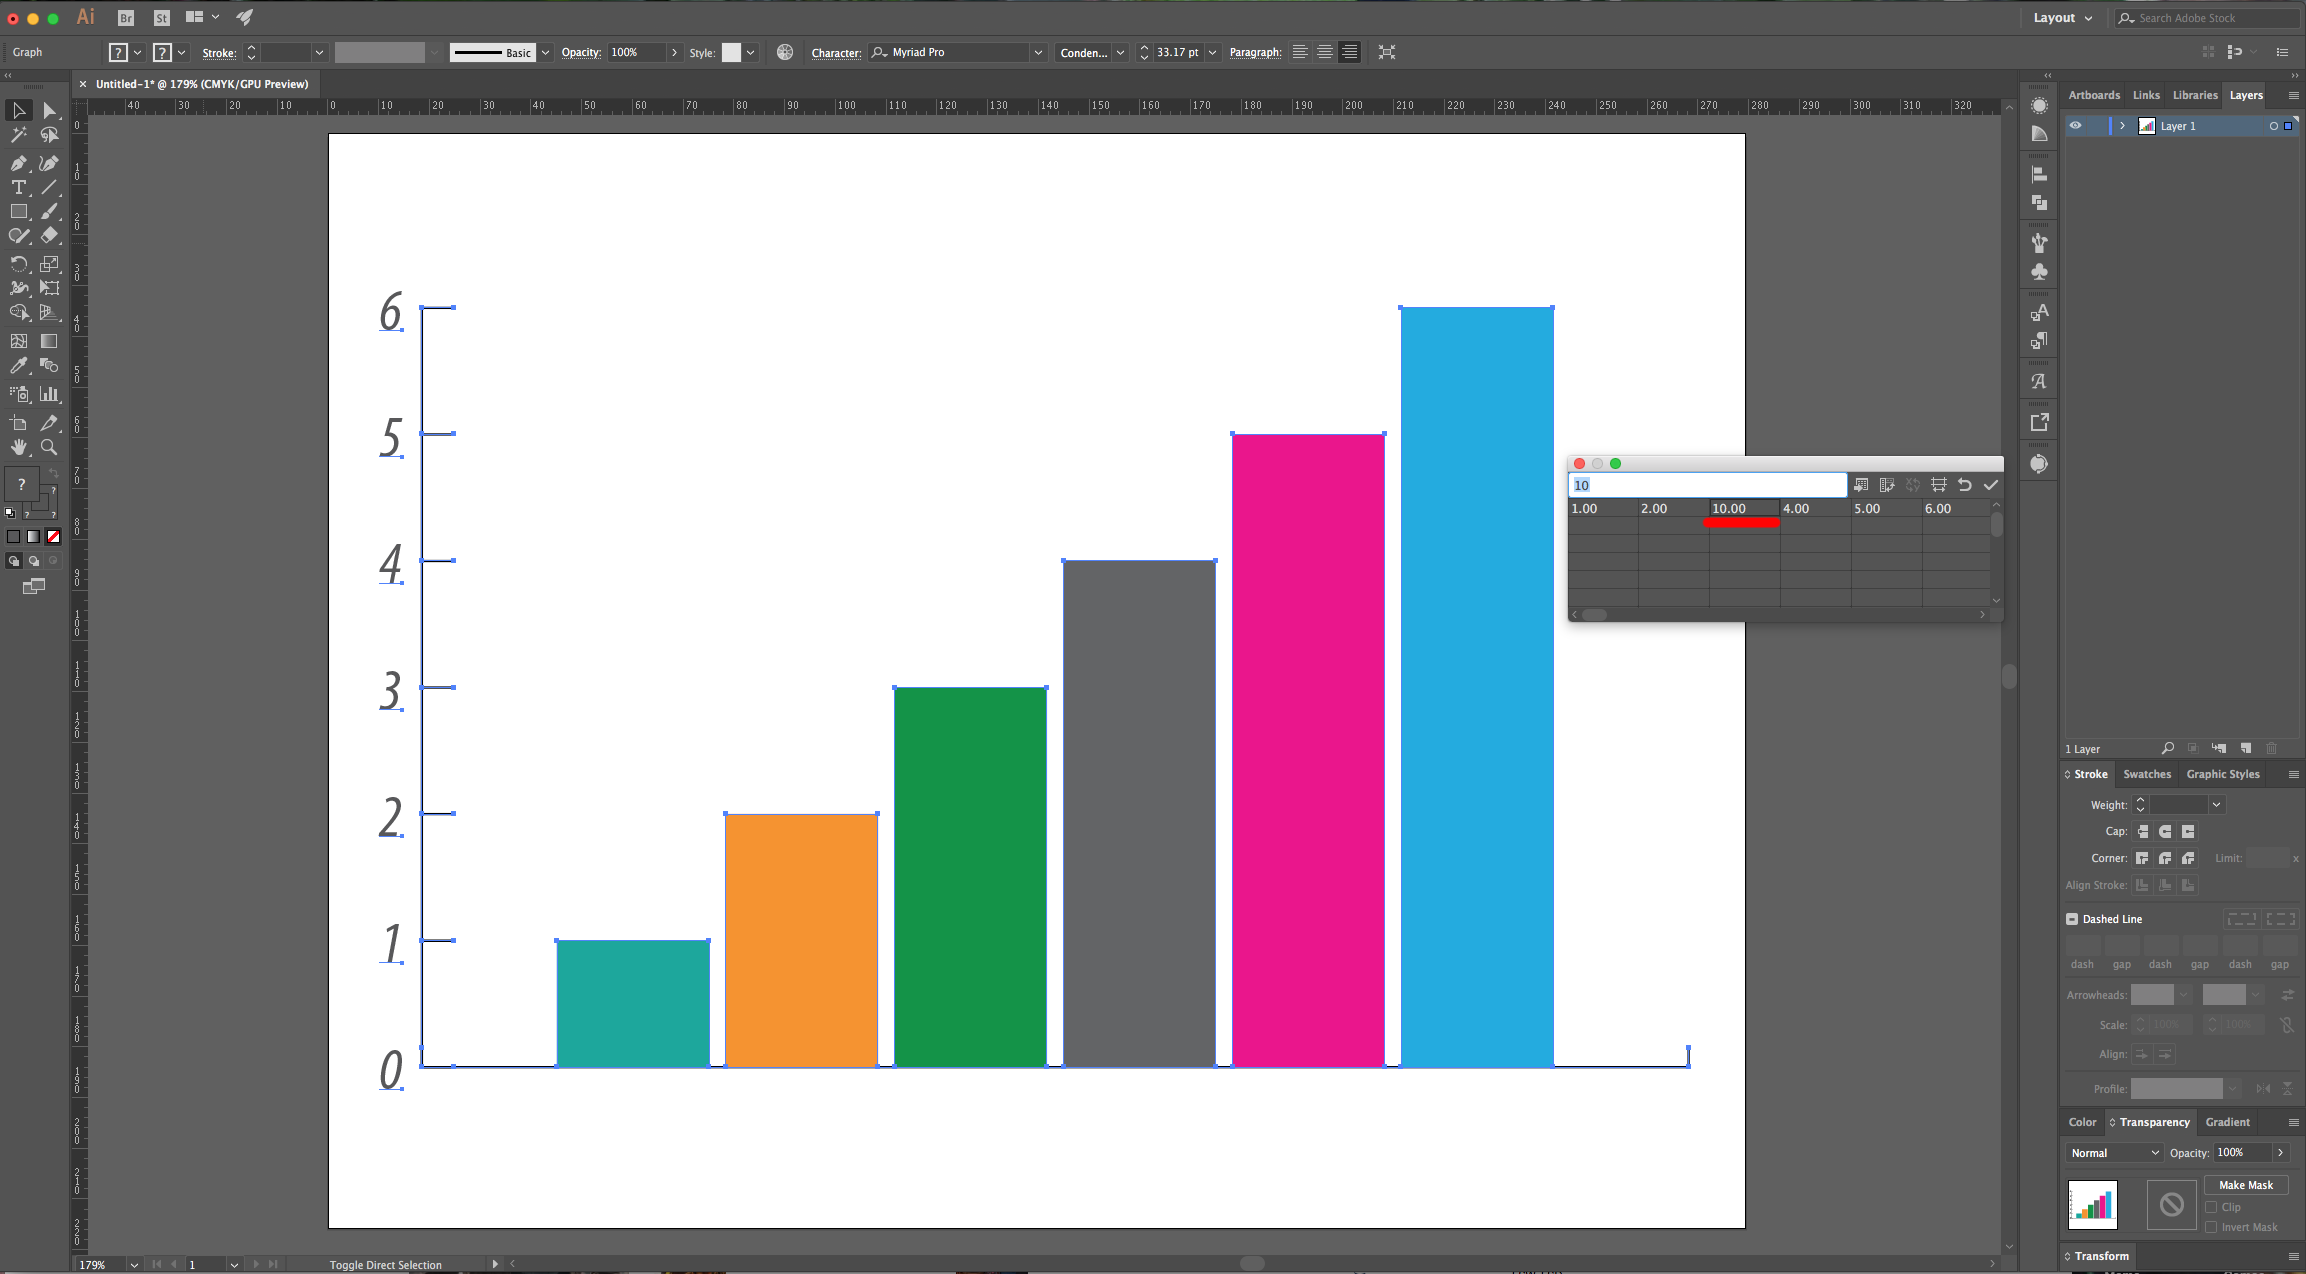
3 - A “Data” window will open, there you can input some numbers (click the “Tab” key to go to the next “Cell”). When you are finished, click the “Checkmark” icon on the top-right to create your “Chart”. You can click the “Red” button on the top-left to close the window.
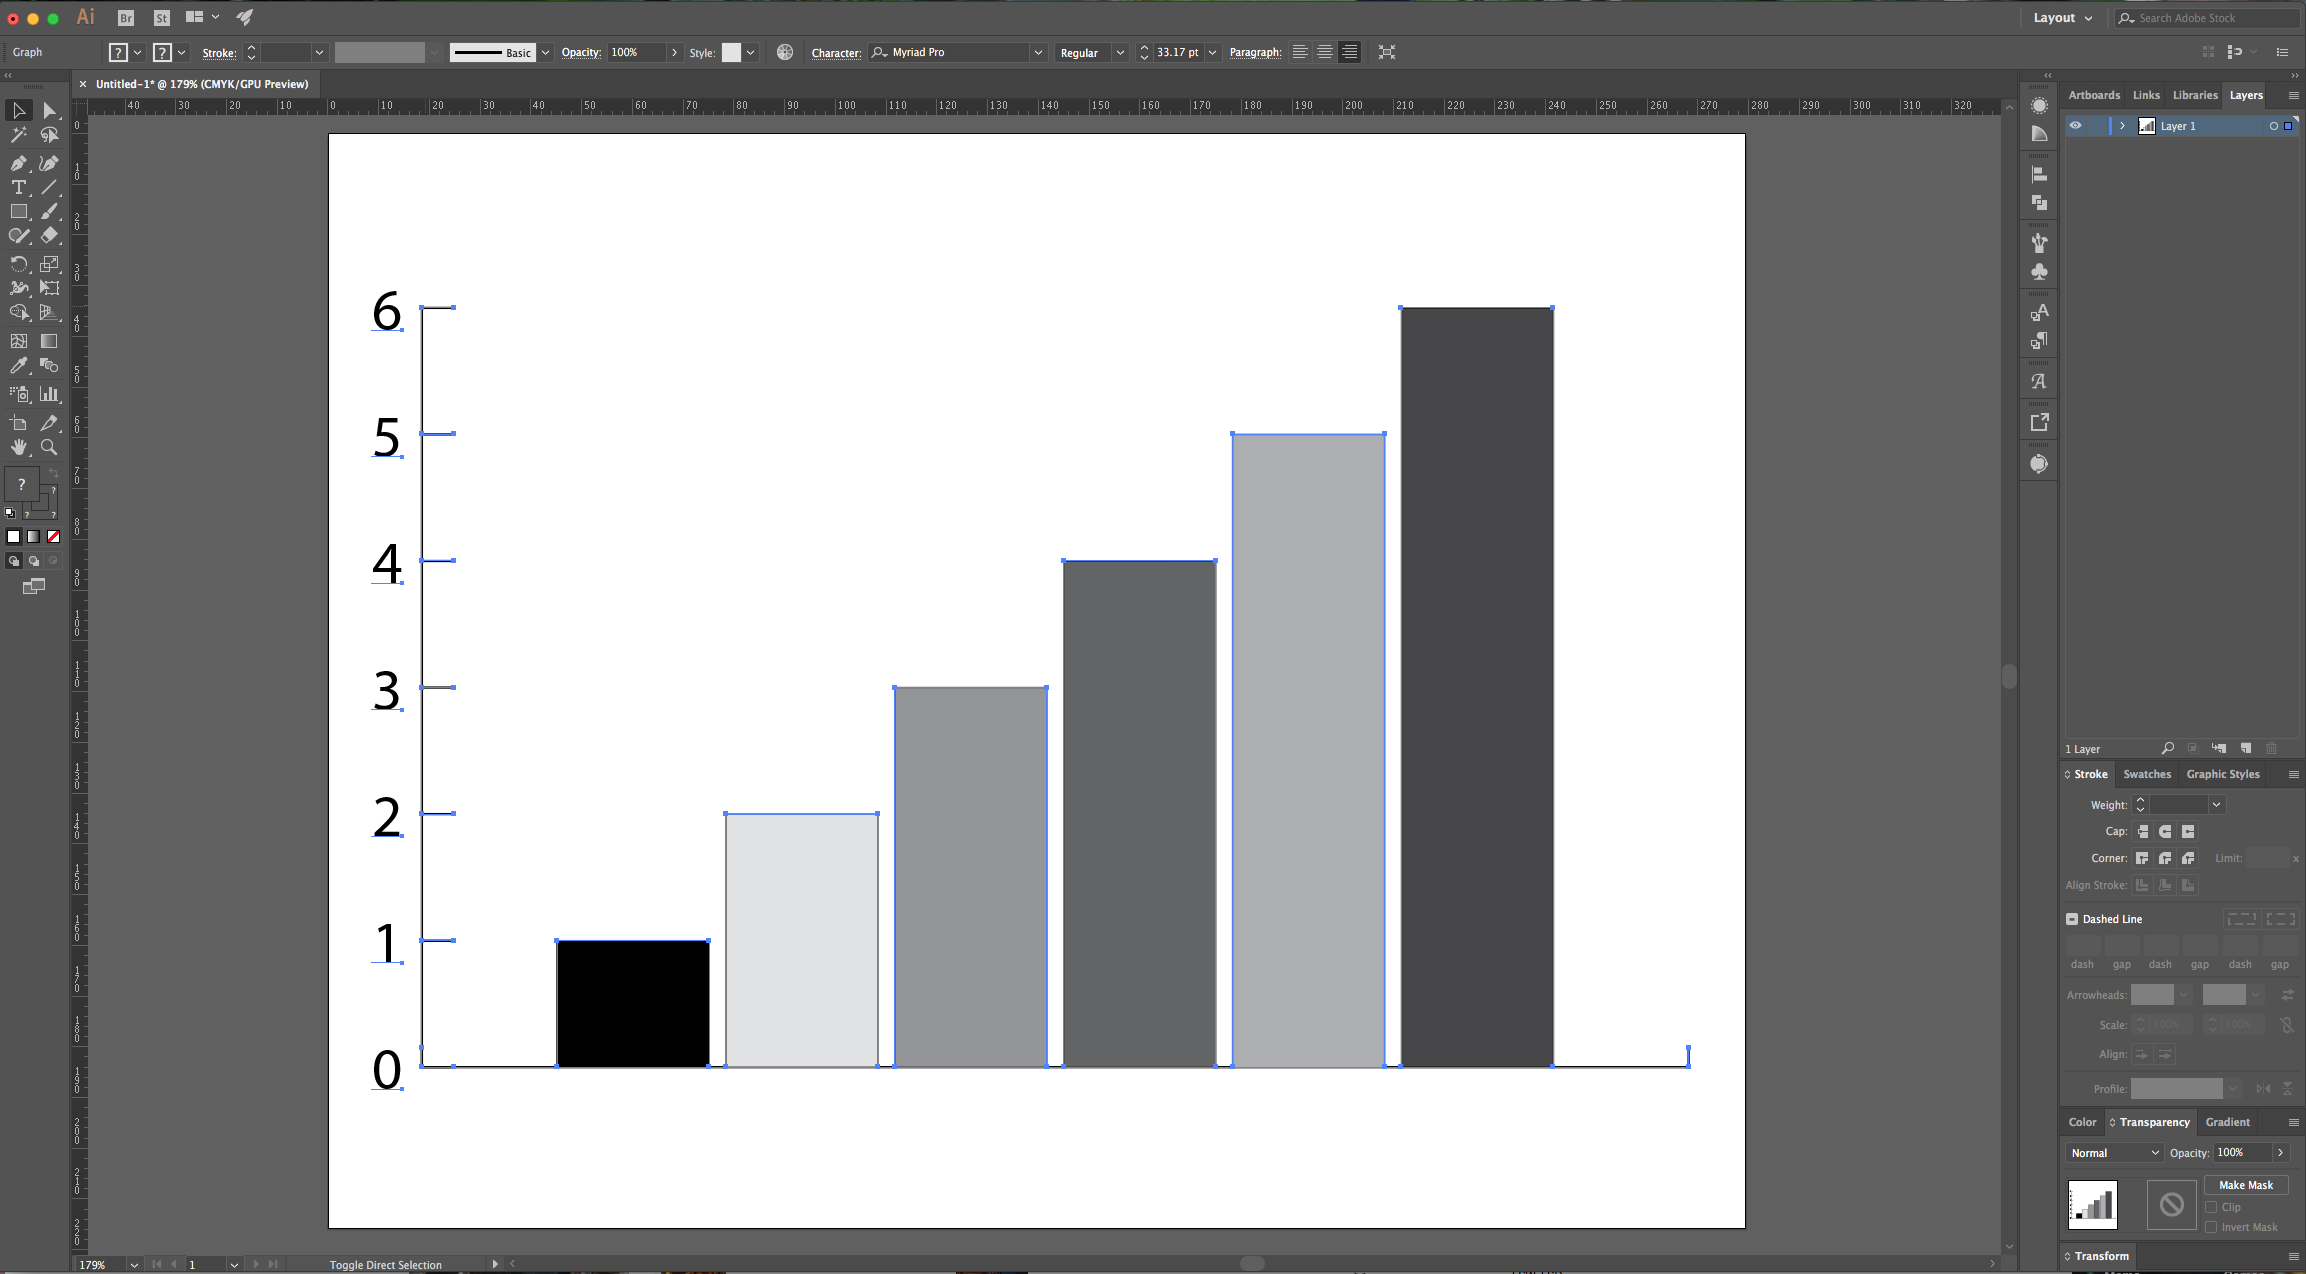
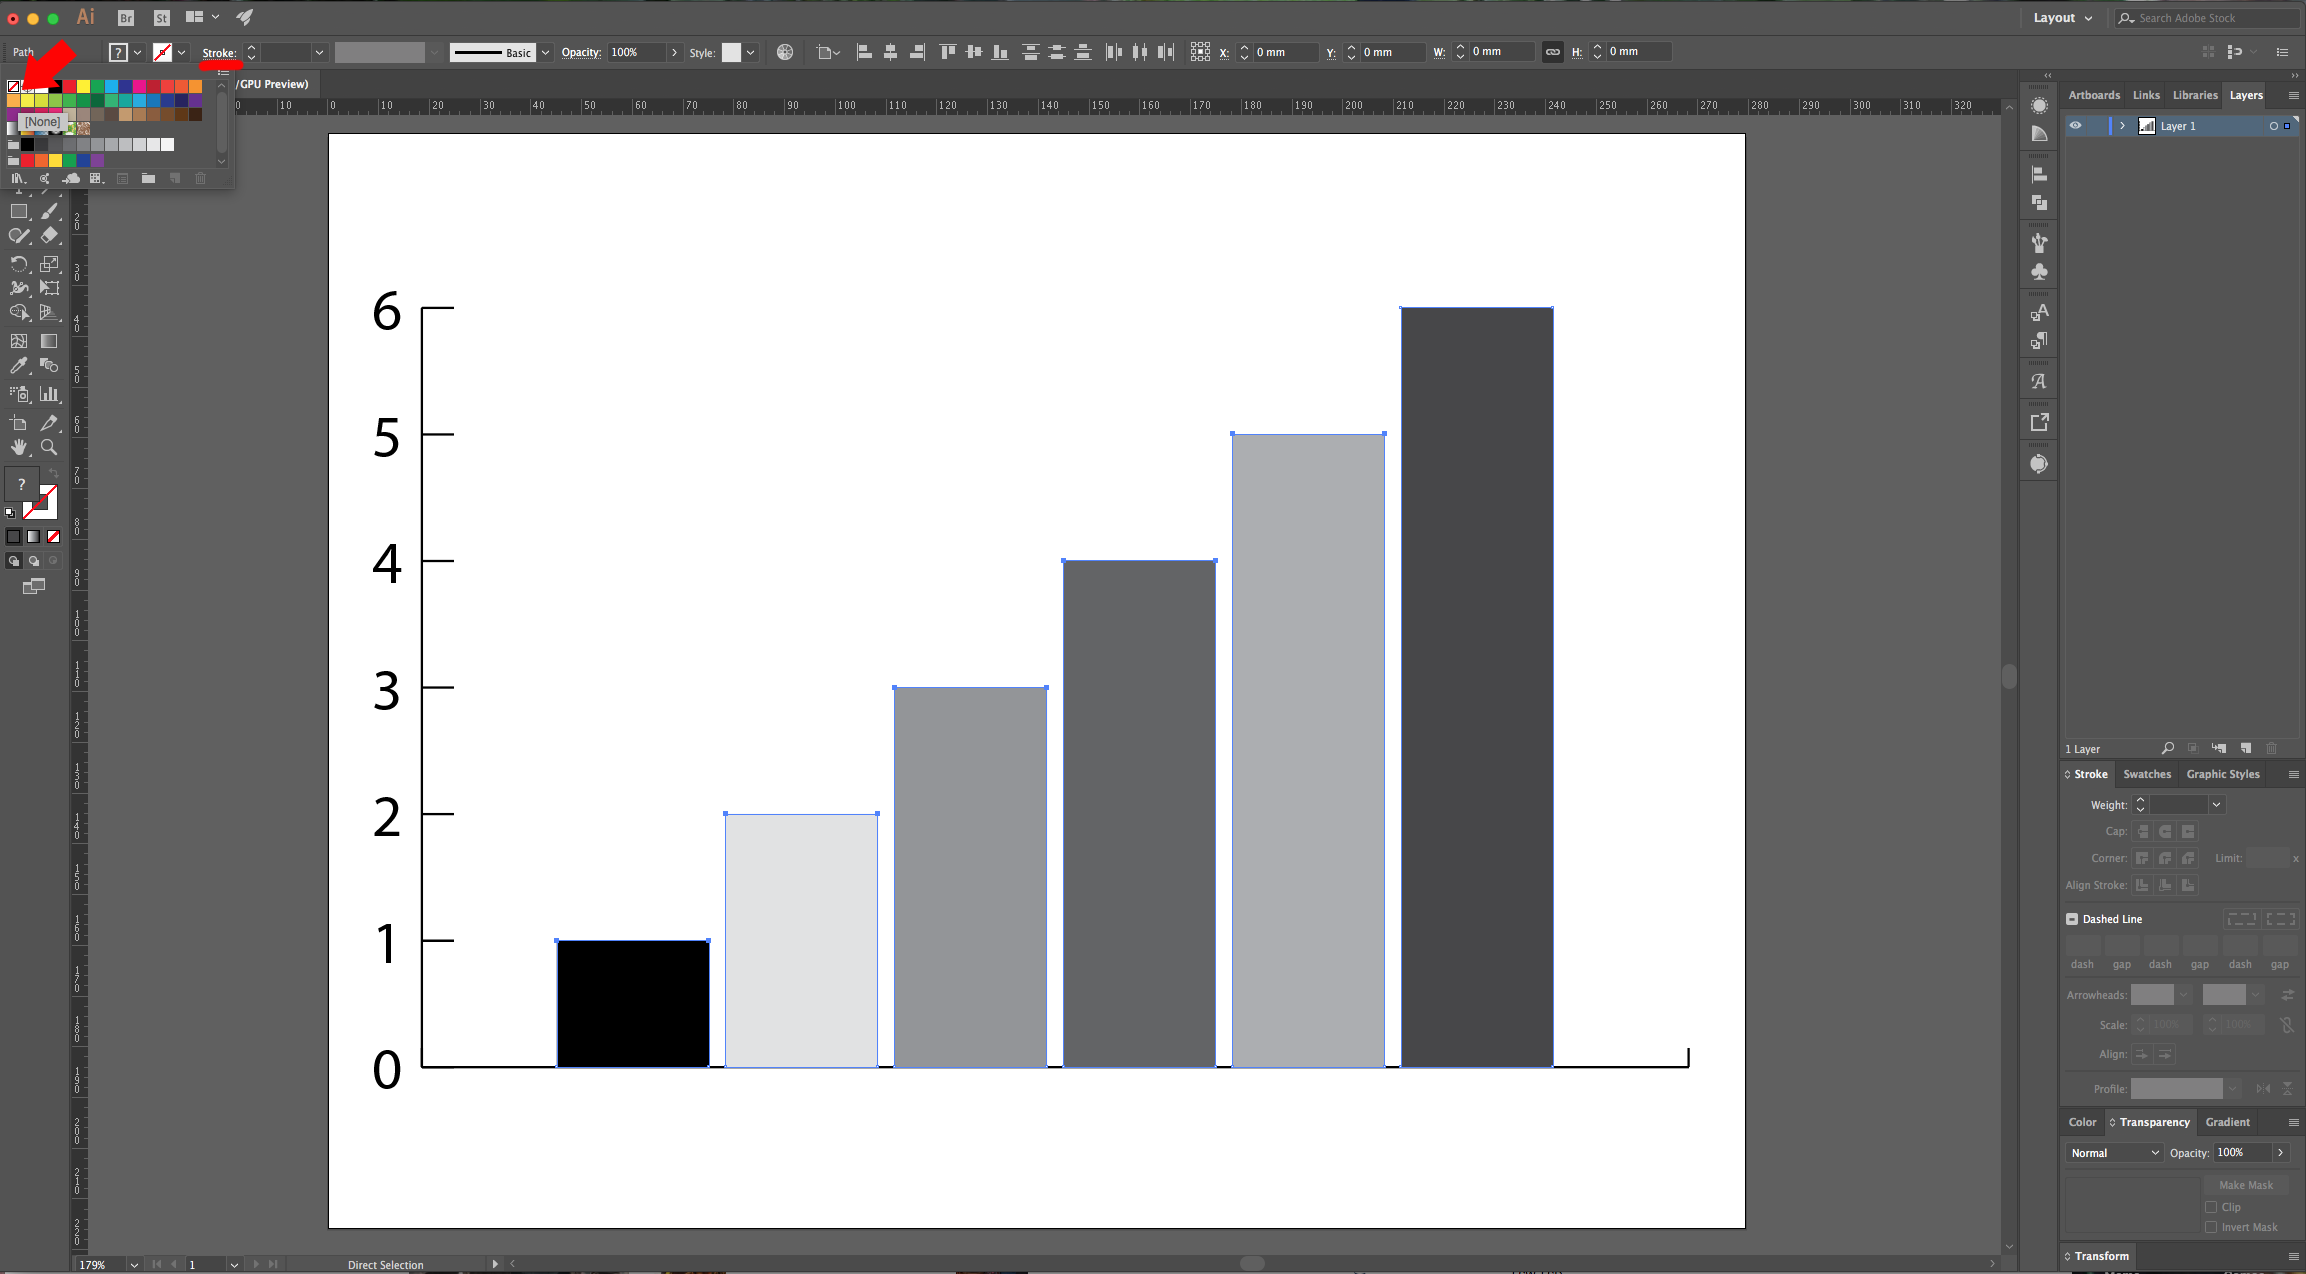
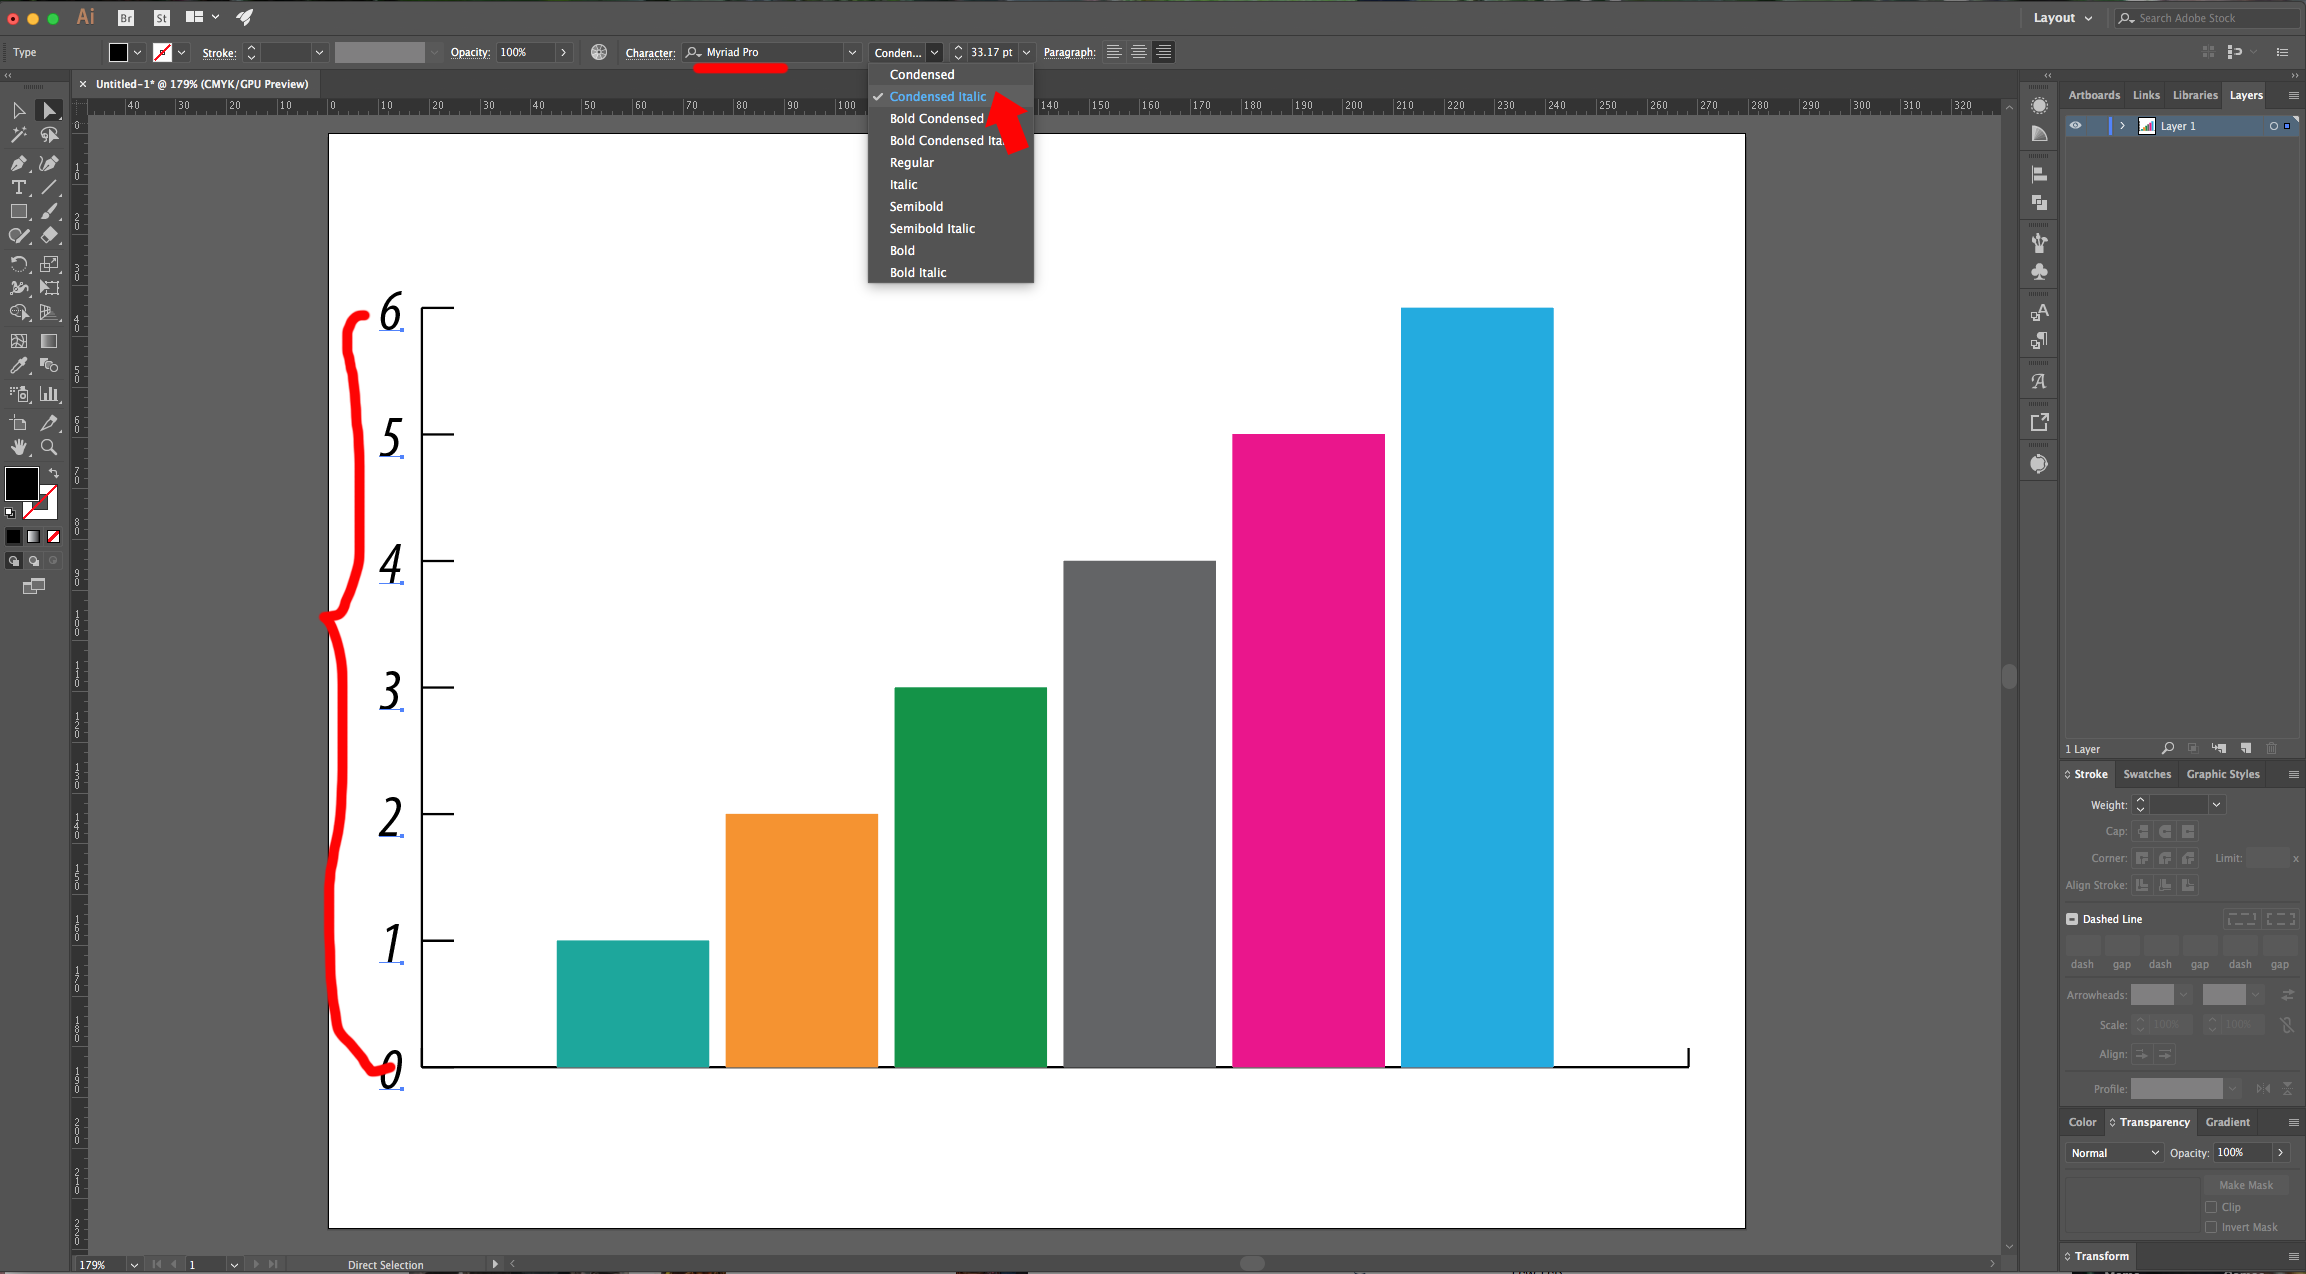
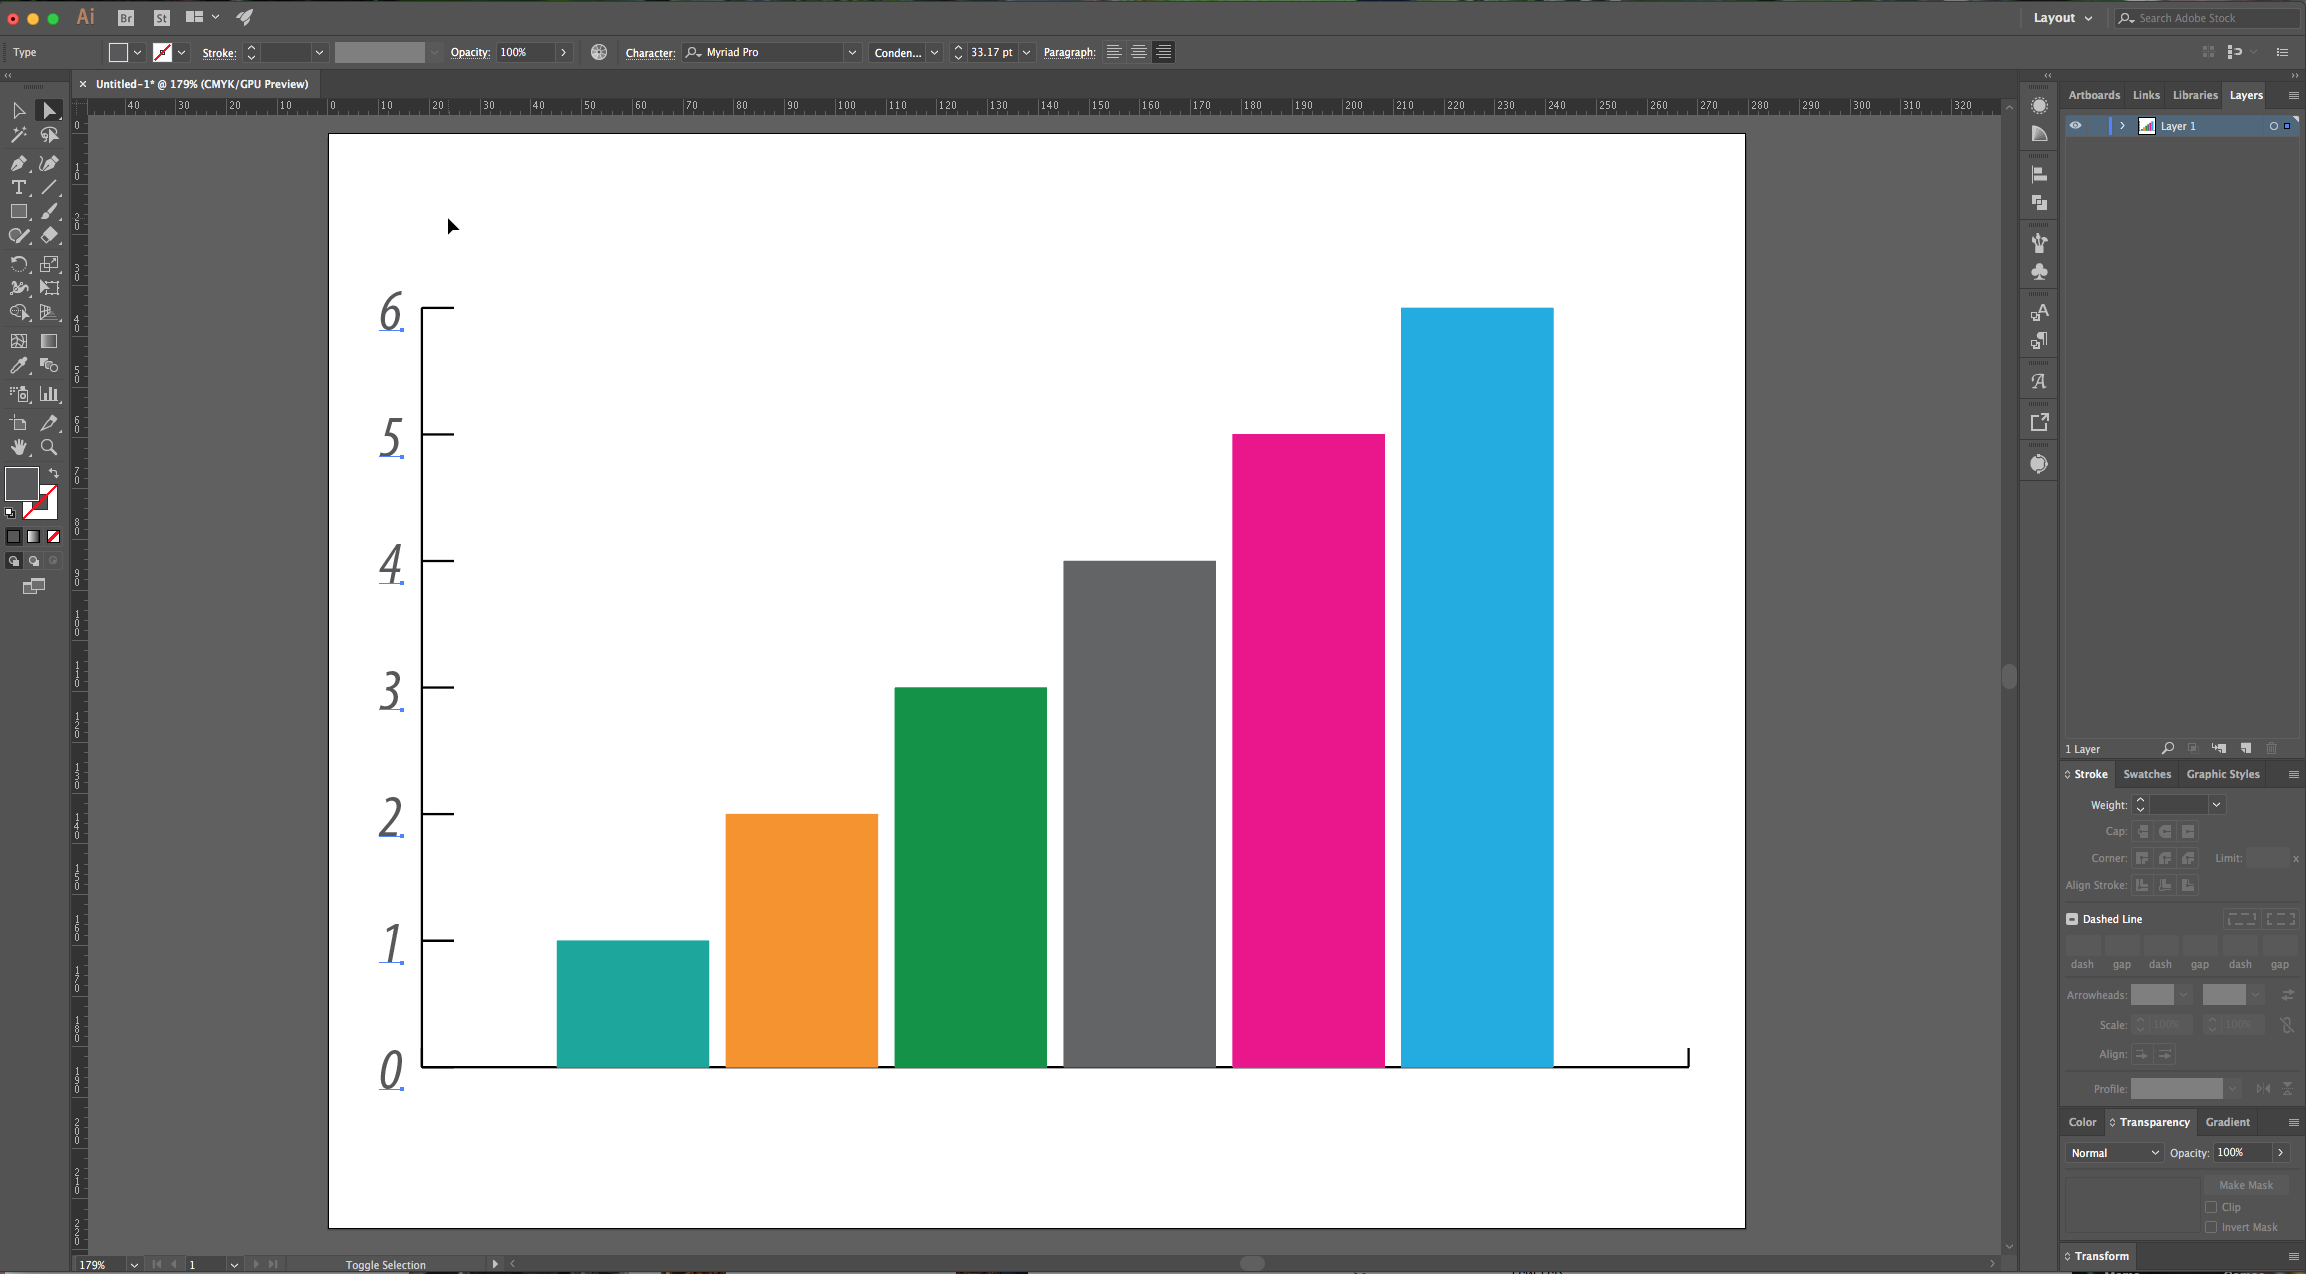
4 - Use the “Direct Selection Tool” (A) to modify your “Graph”. You can select all your “Bars” and remove the “Stroke”, change the “Fill” and modify the “Font”.


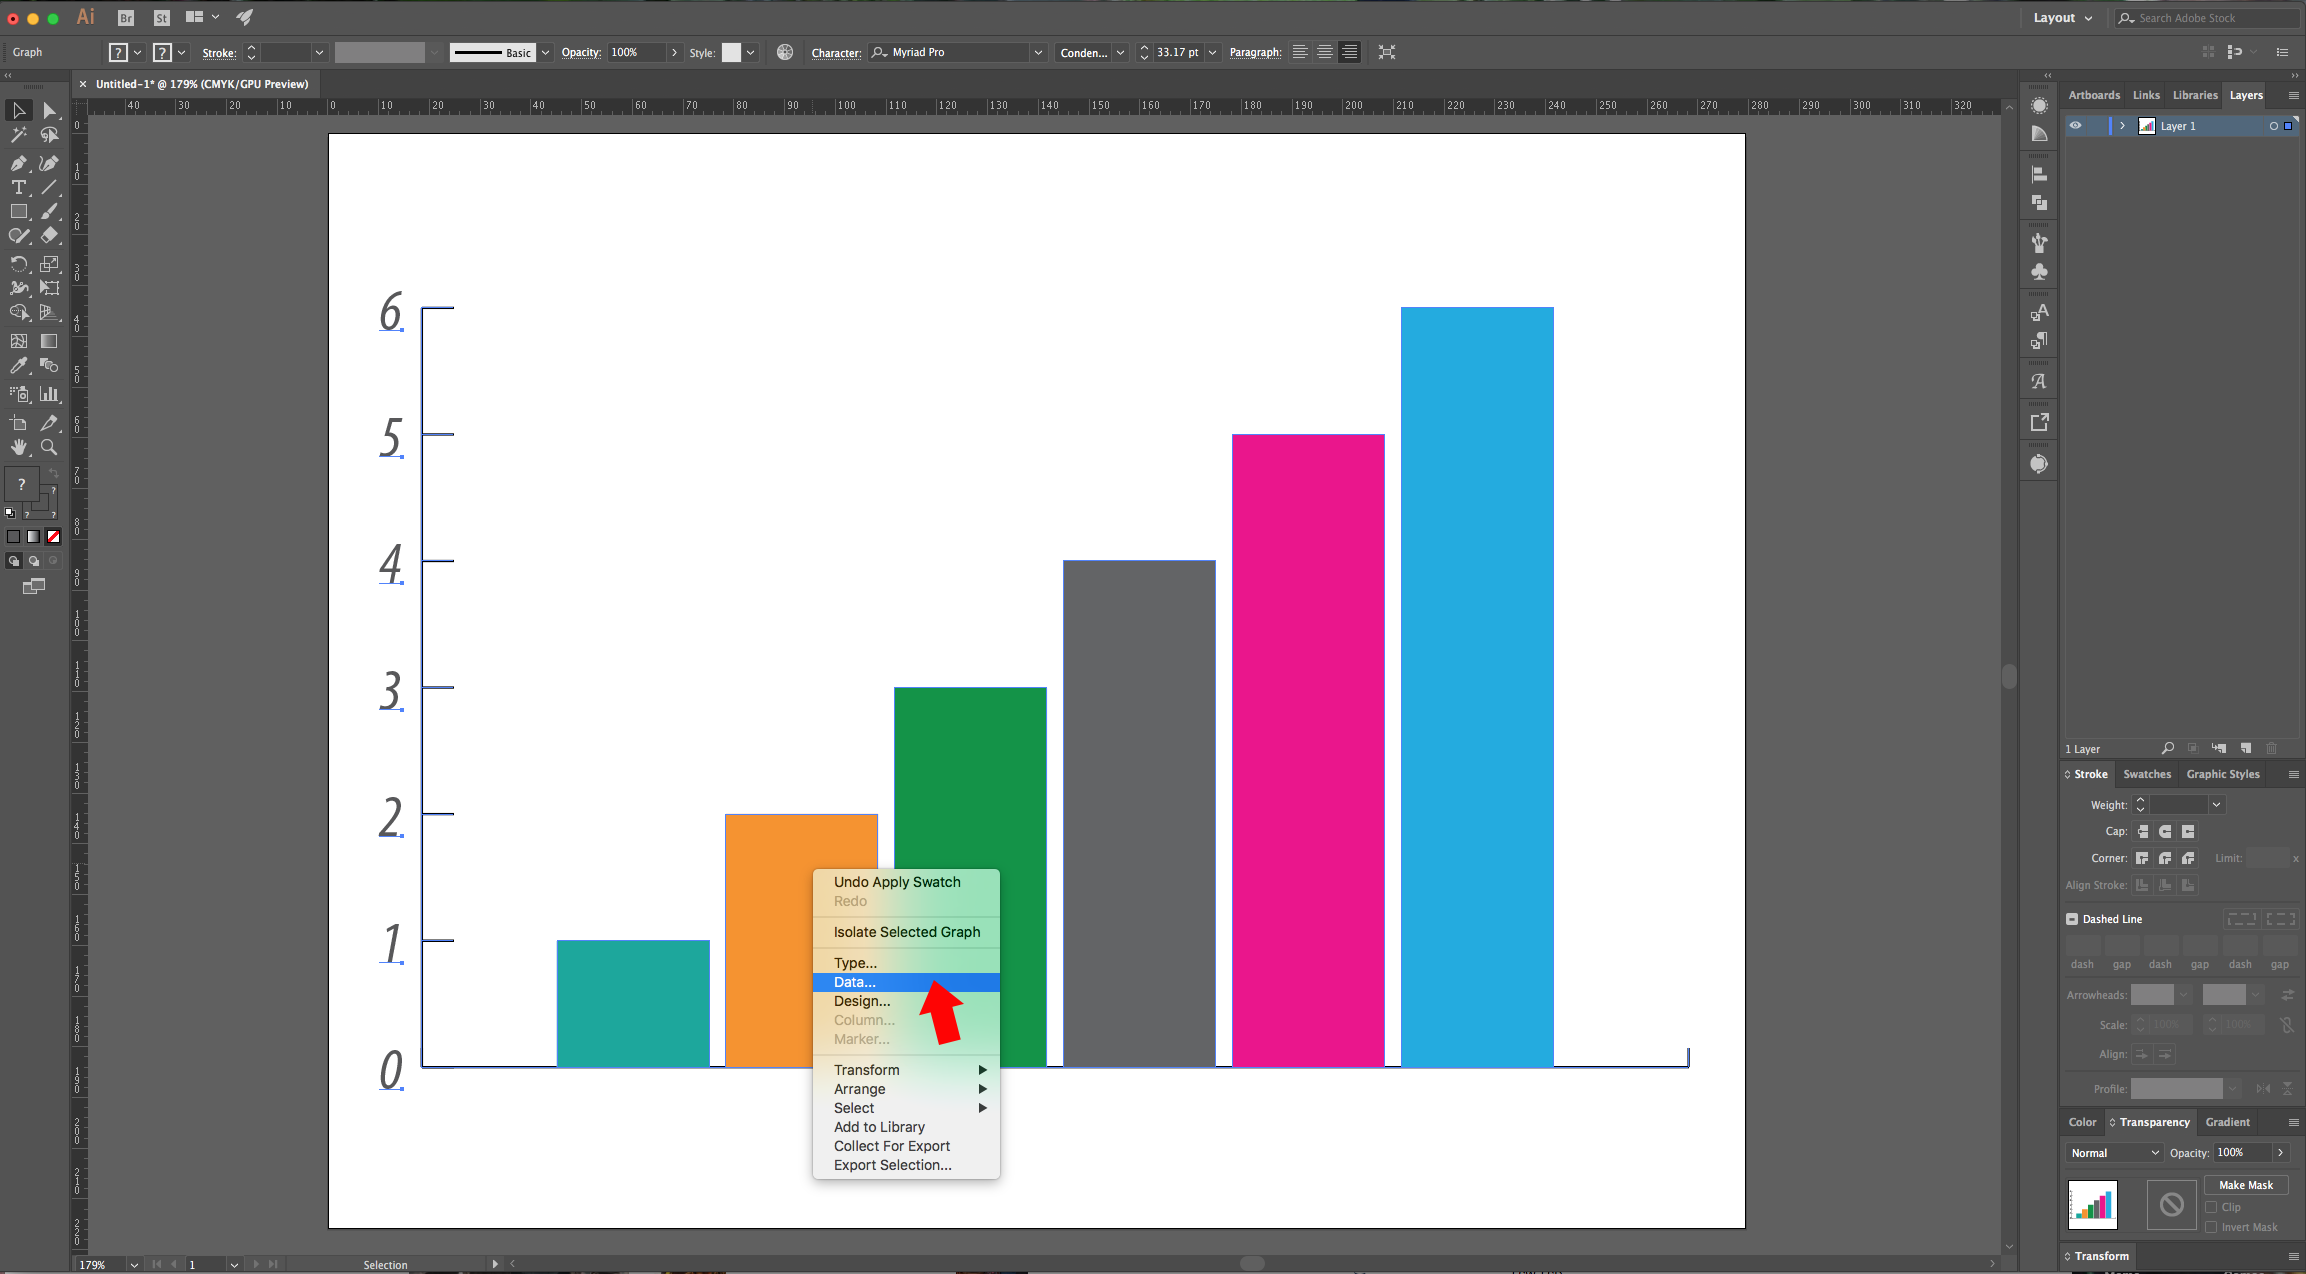
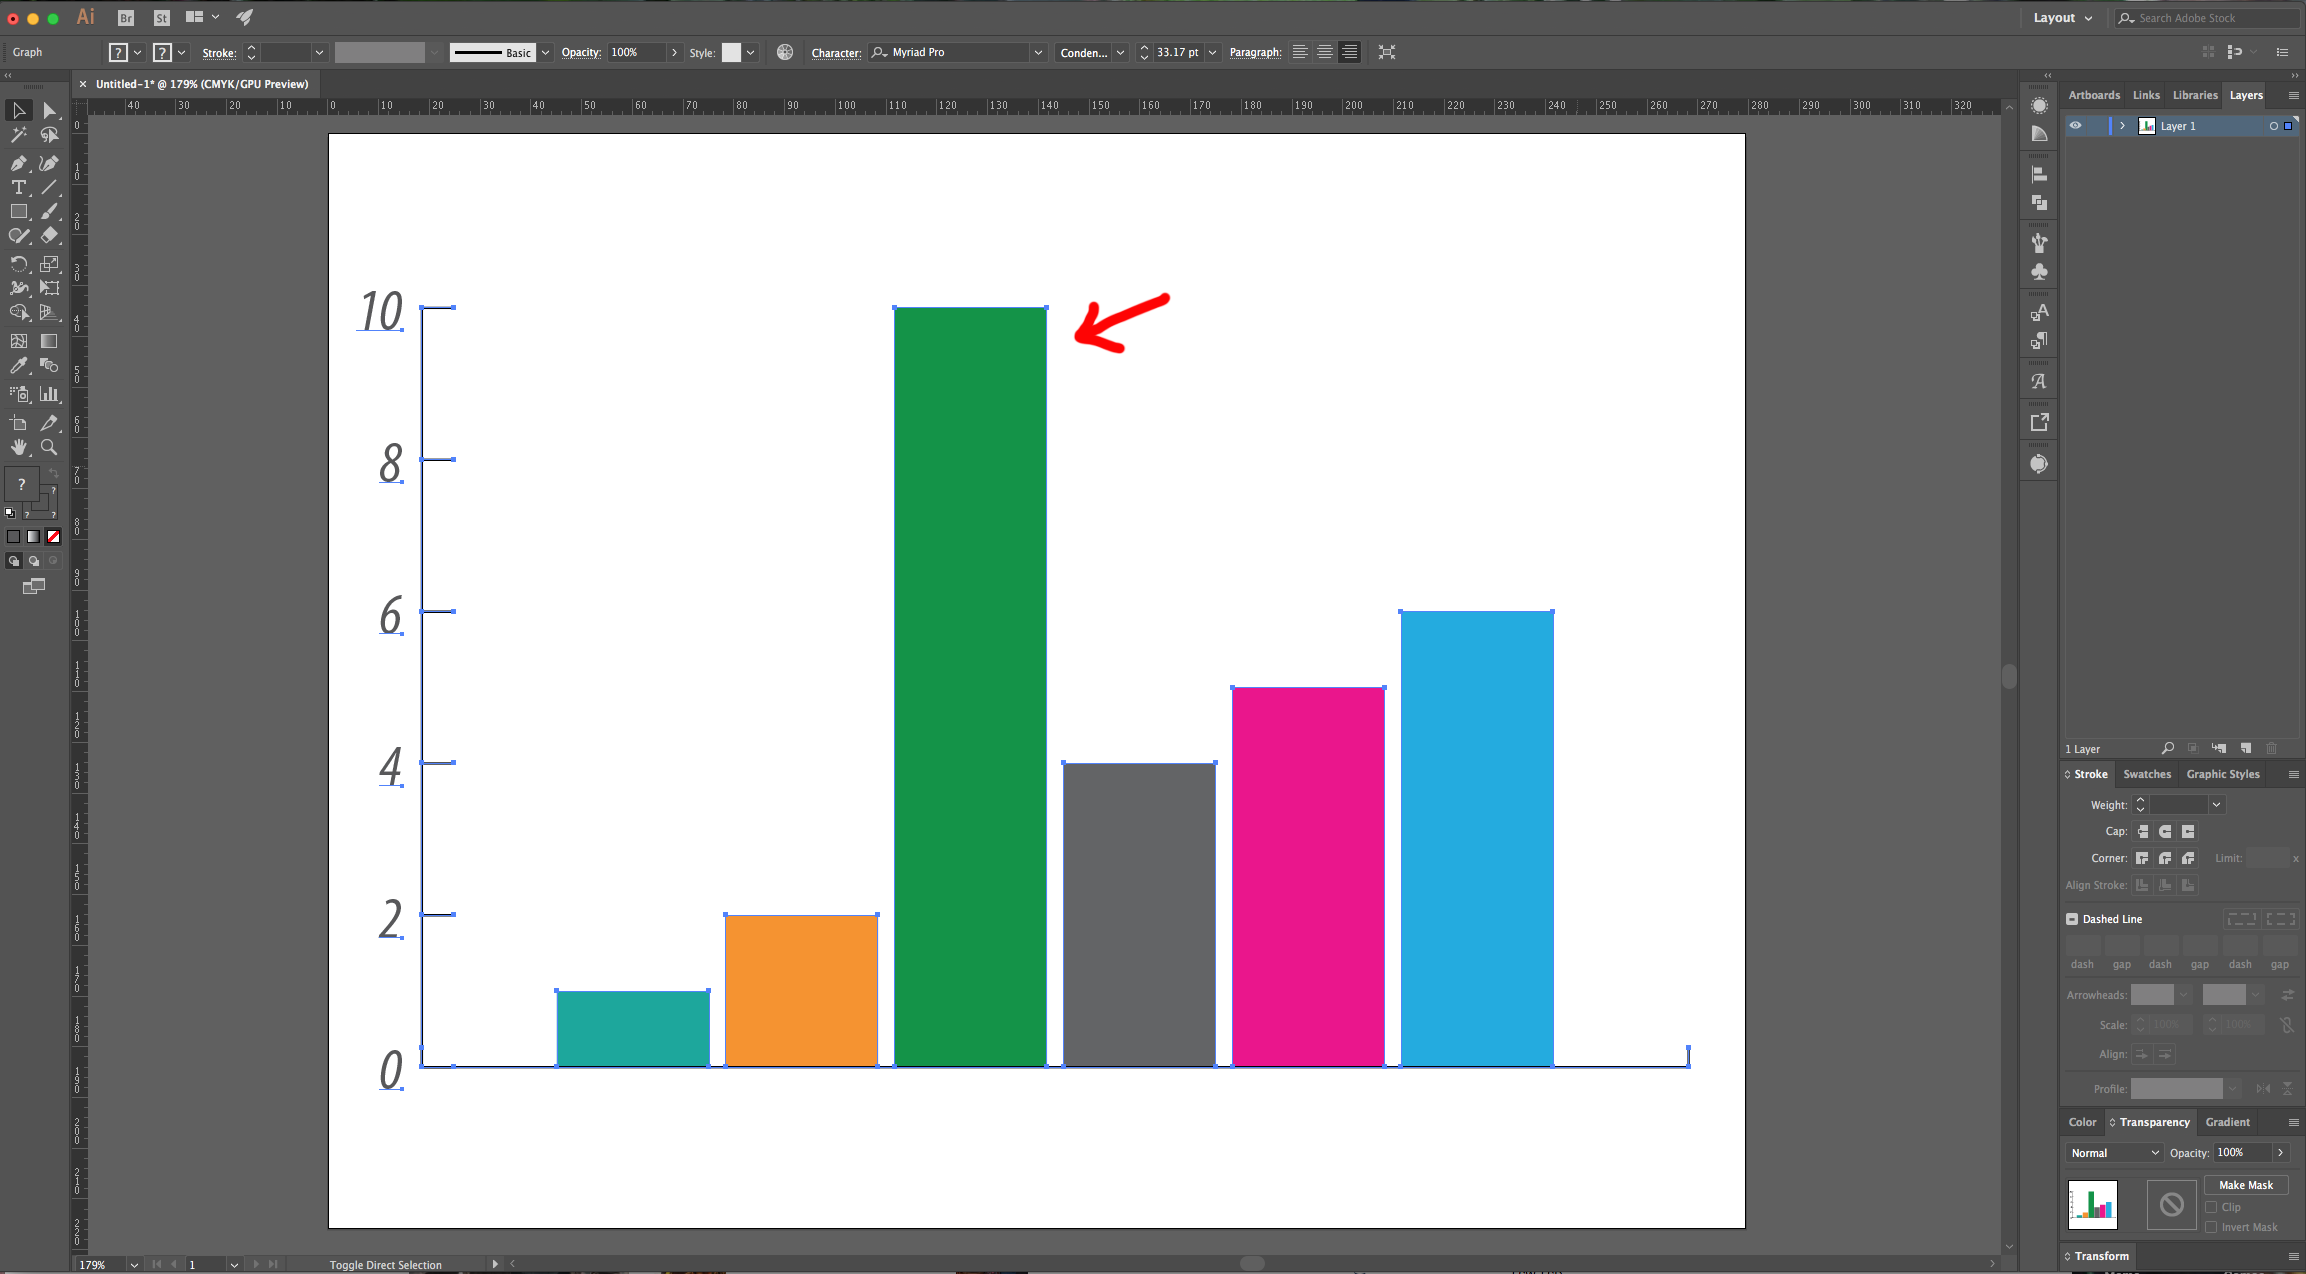
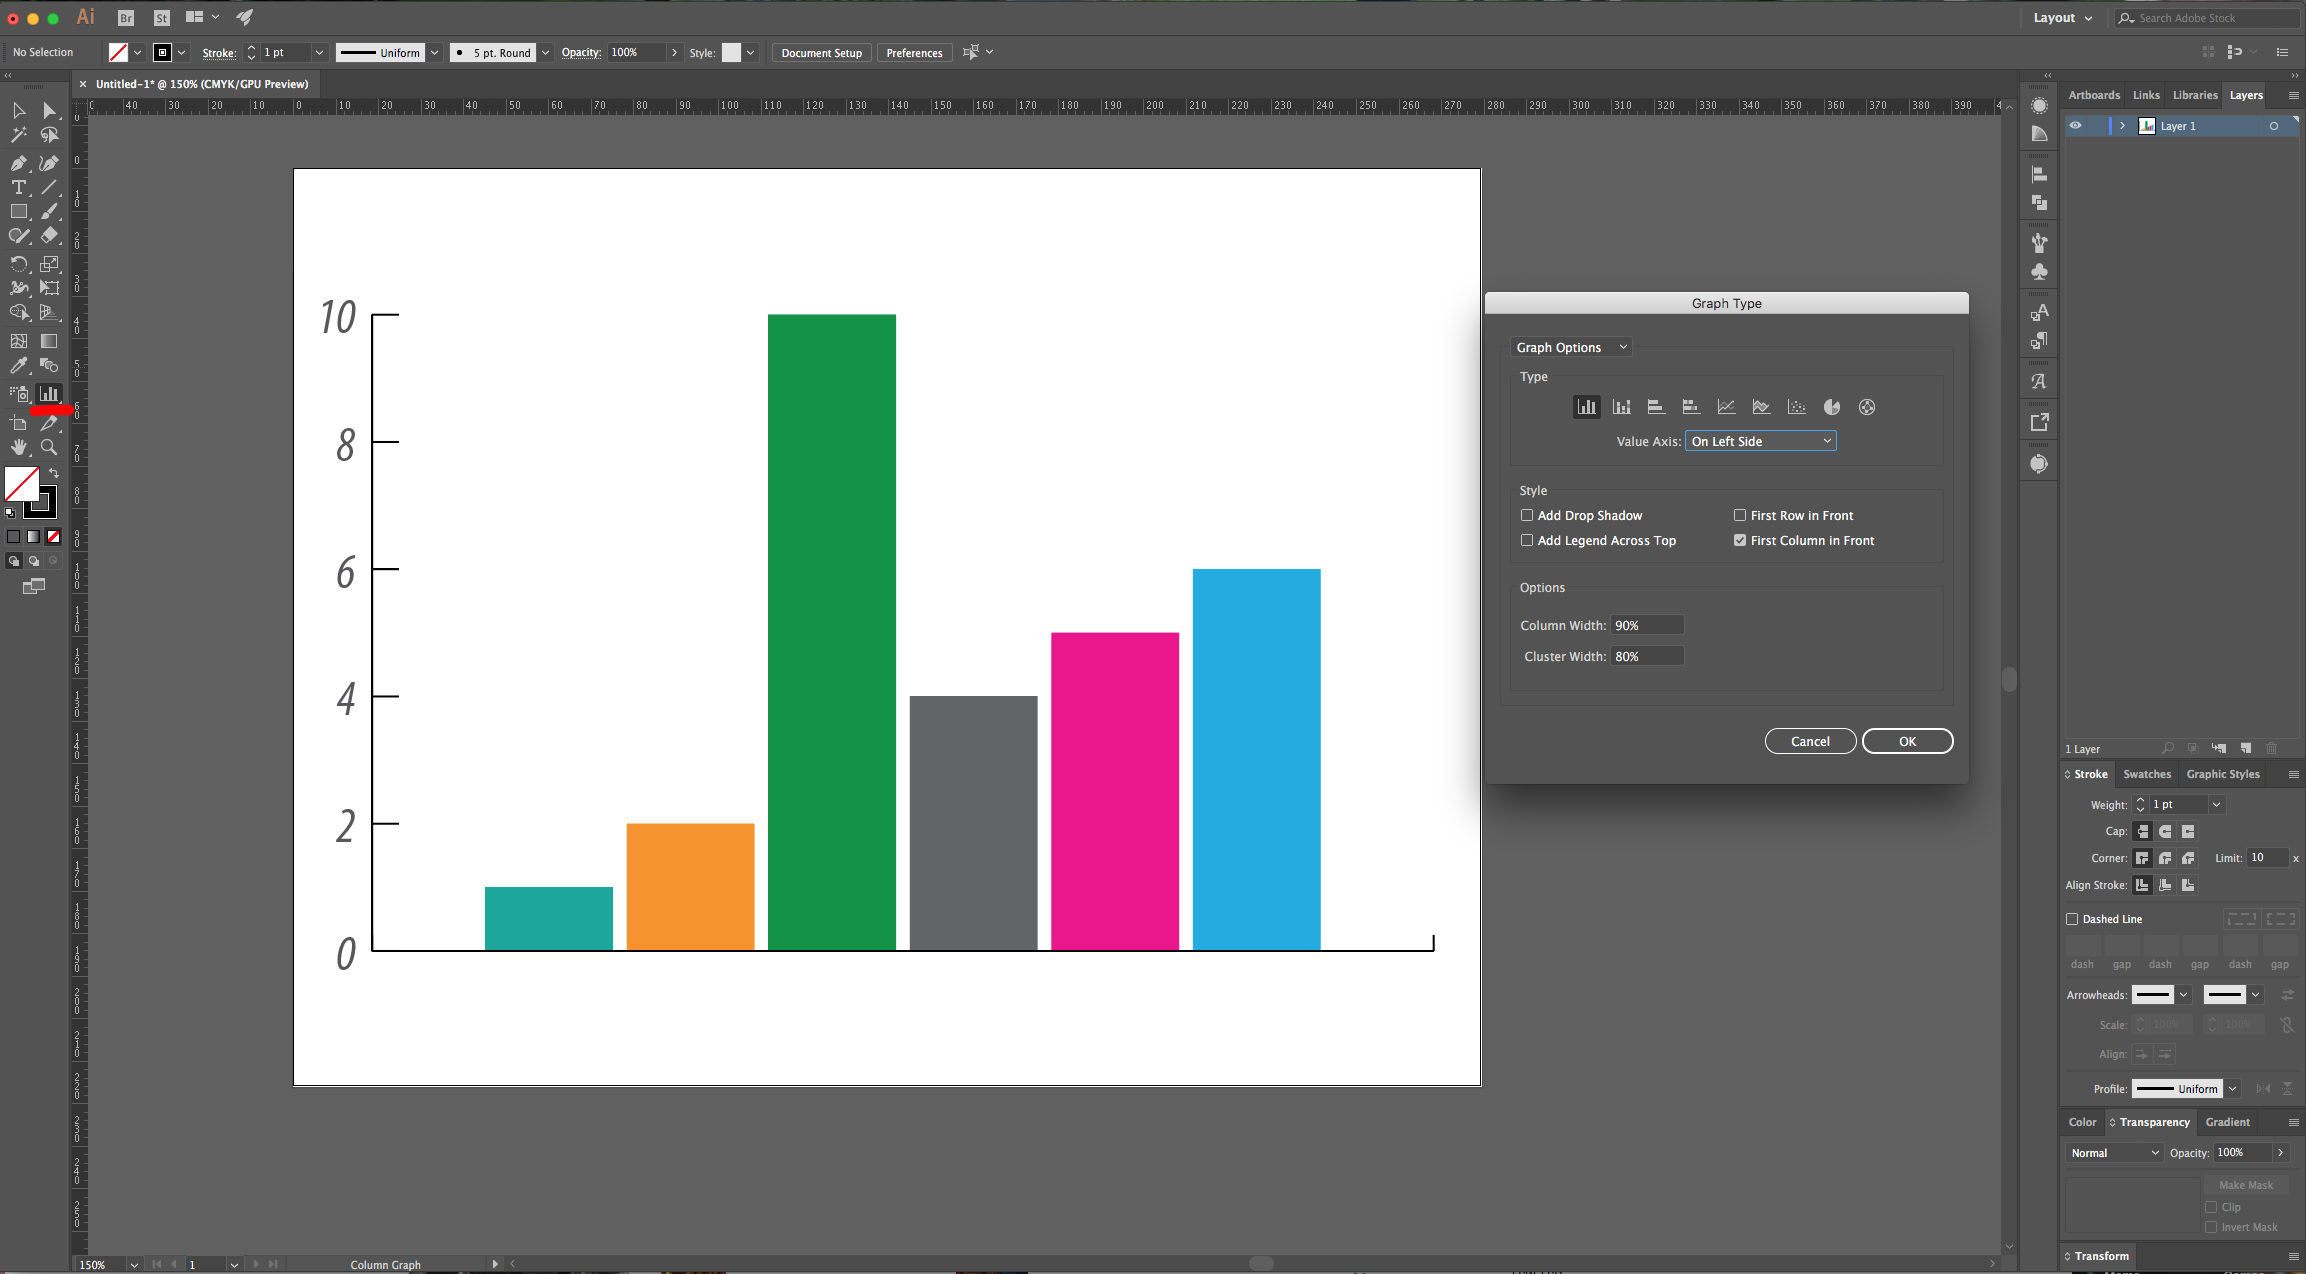
5 - Right-click on top of your “Graph” and choose “Data” to re-open the window. You can change the values there and you should see the changes reflected in the “Graph”. If you double-click on the “Graph” icon in the “Toolbar” you will open a “Graph Type” Panel where you can modify some settings (this should be done before creating the Graph).
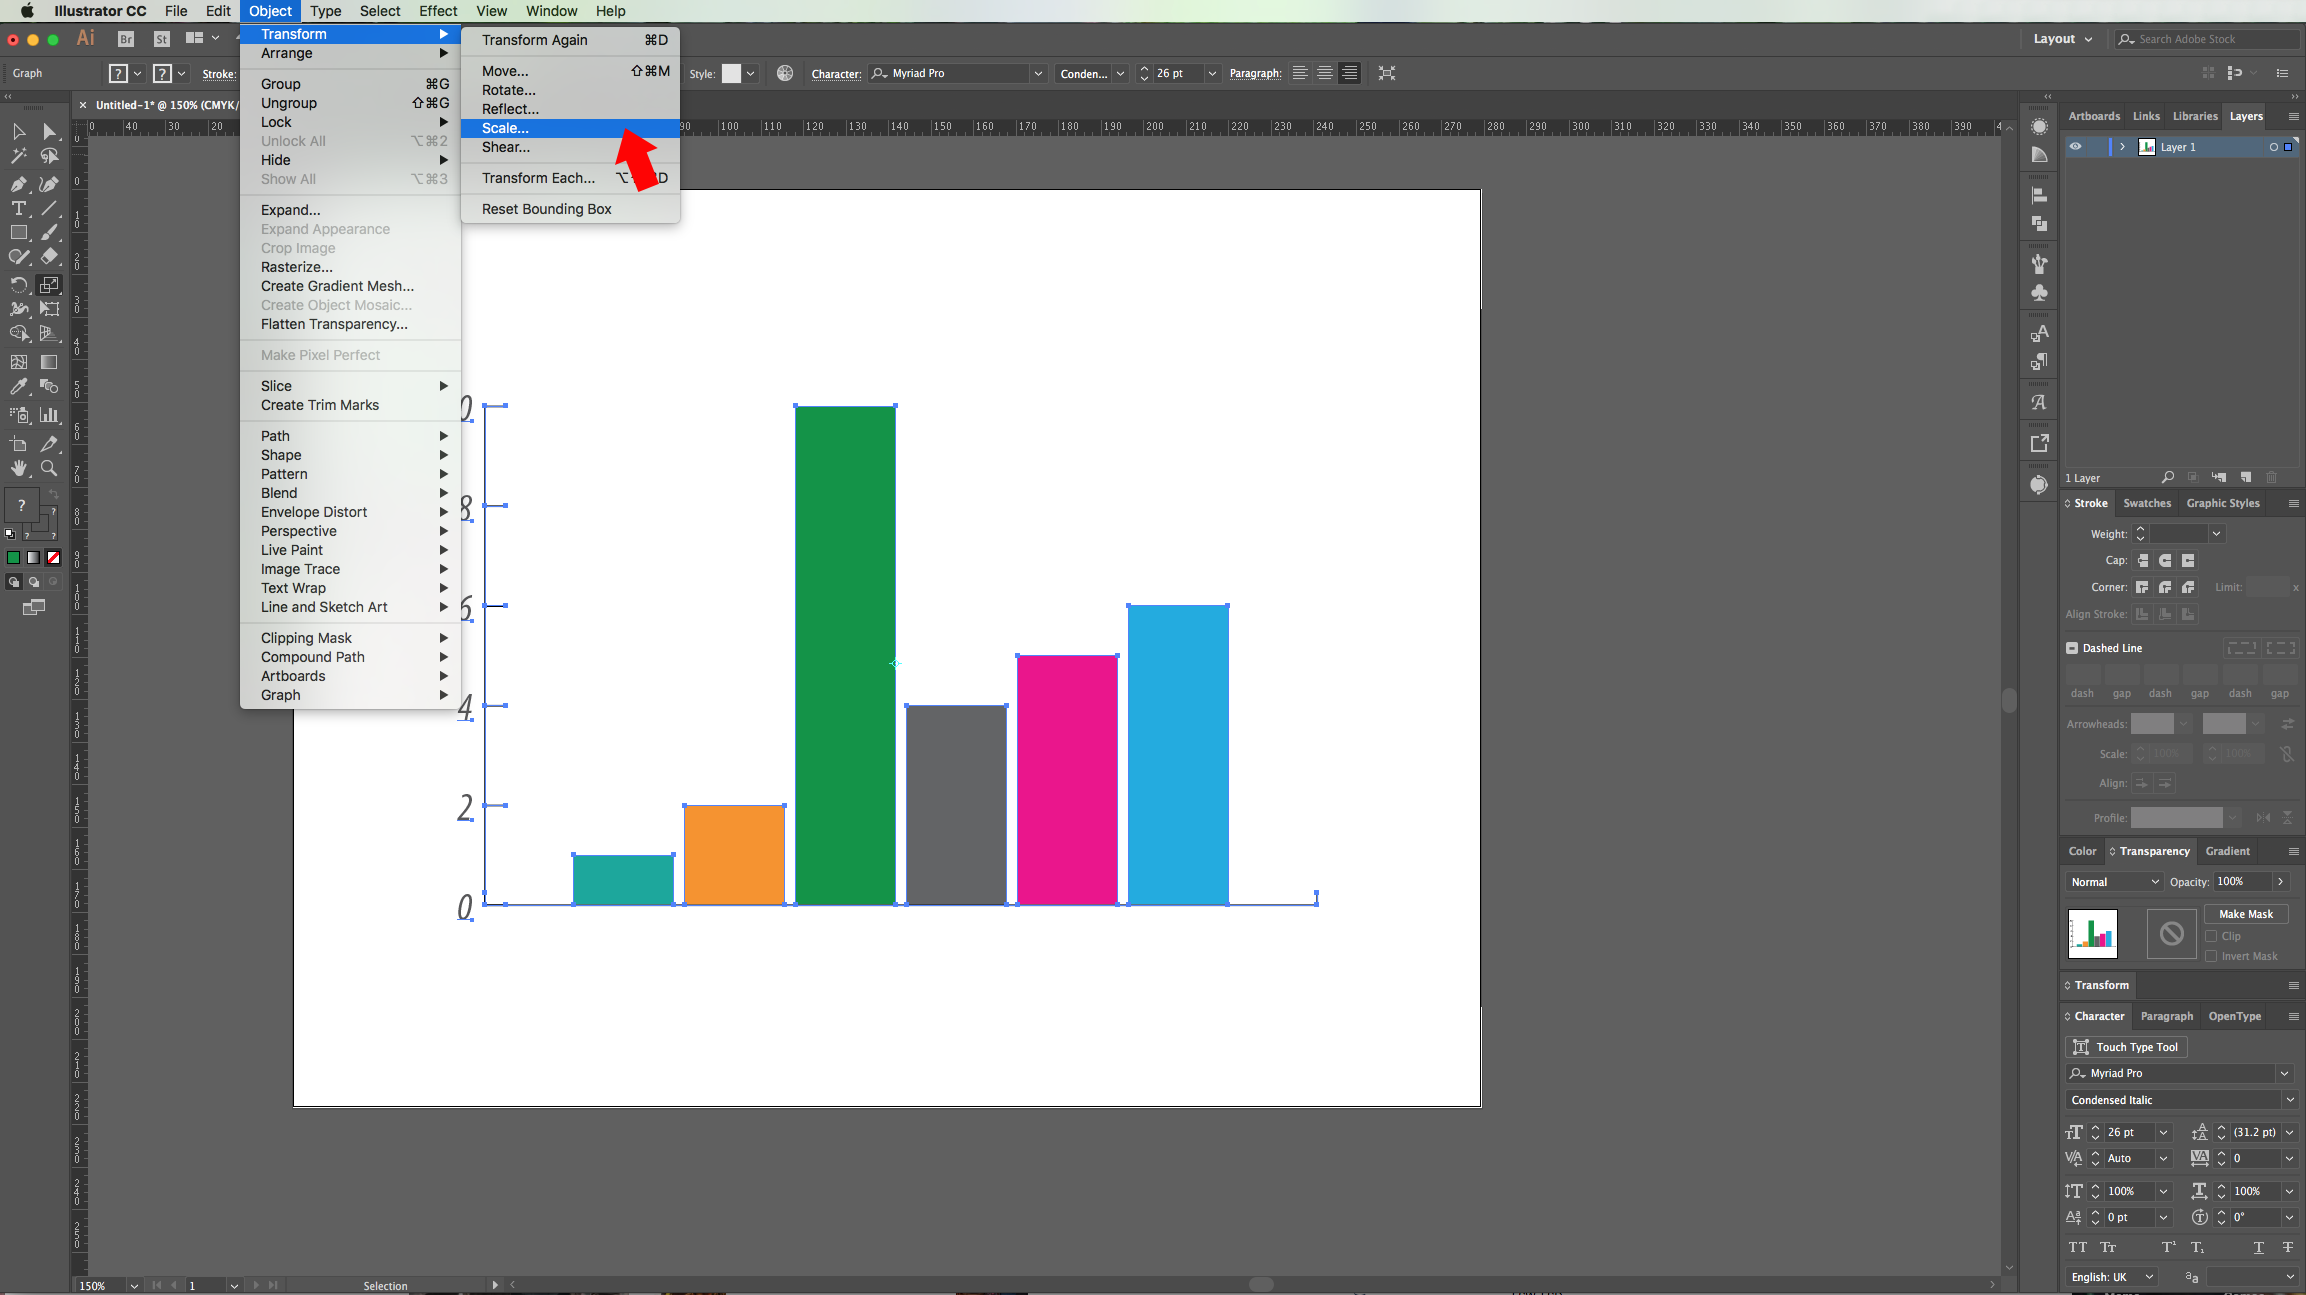
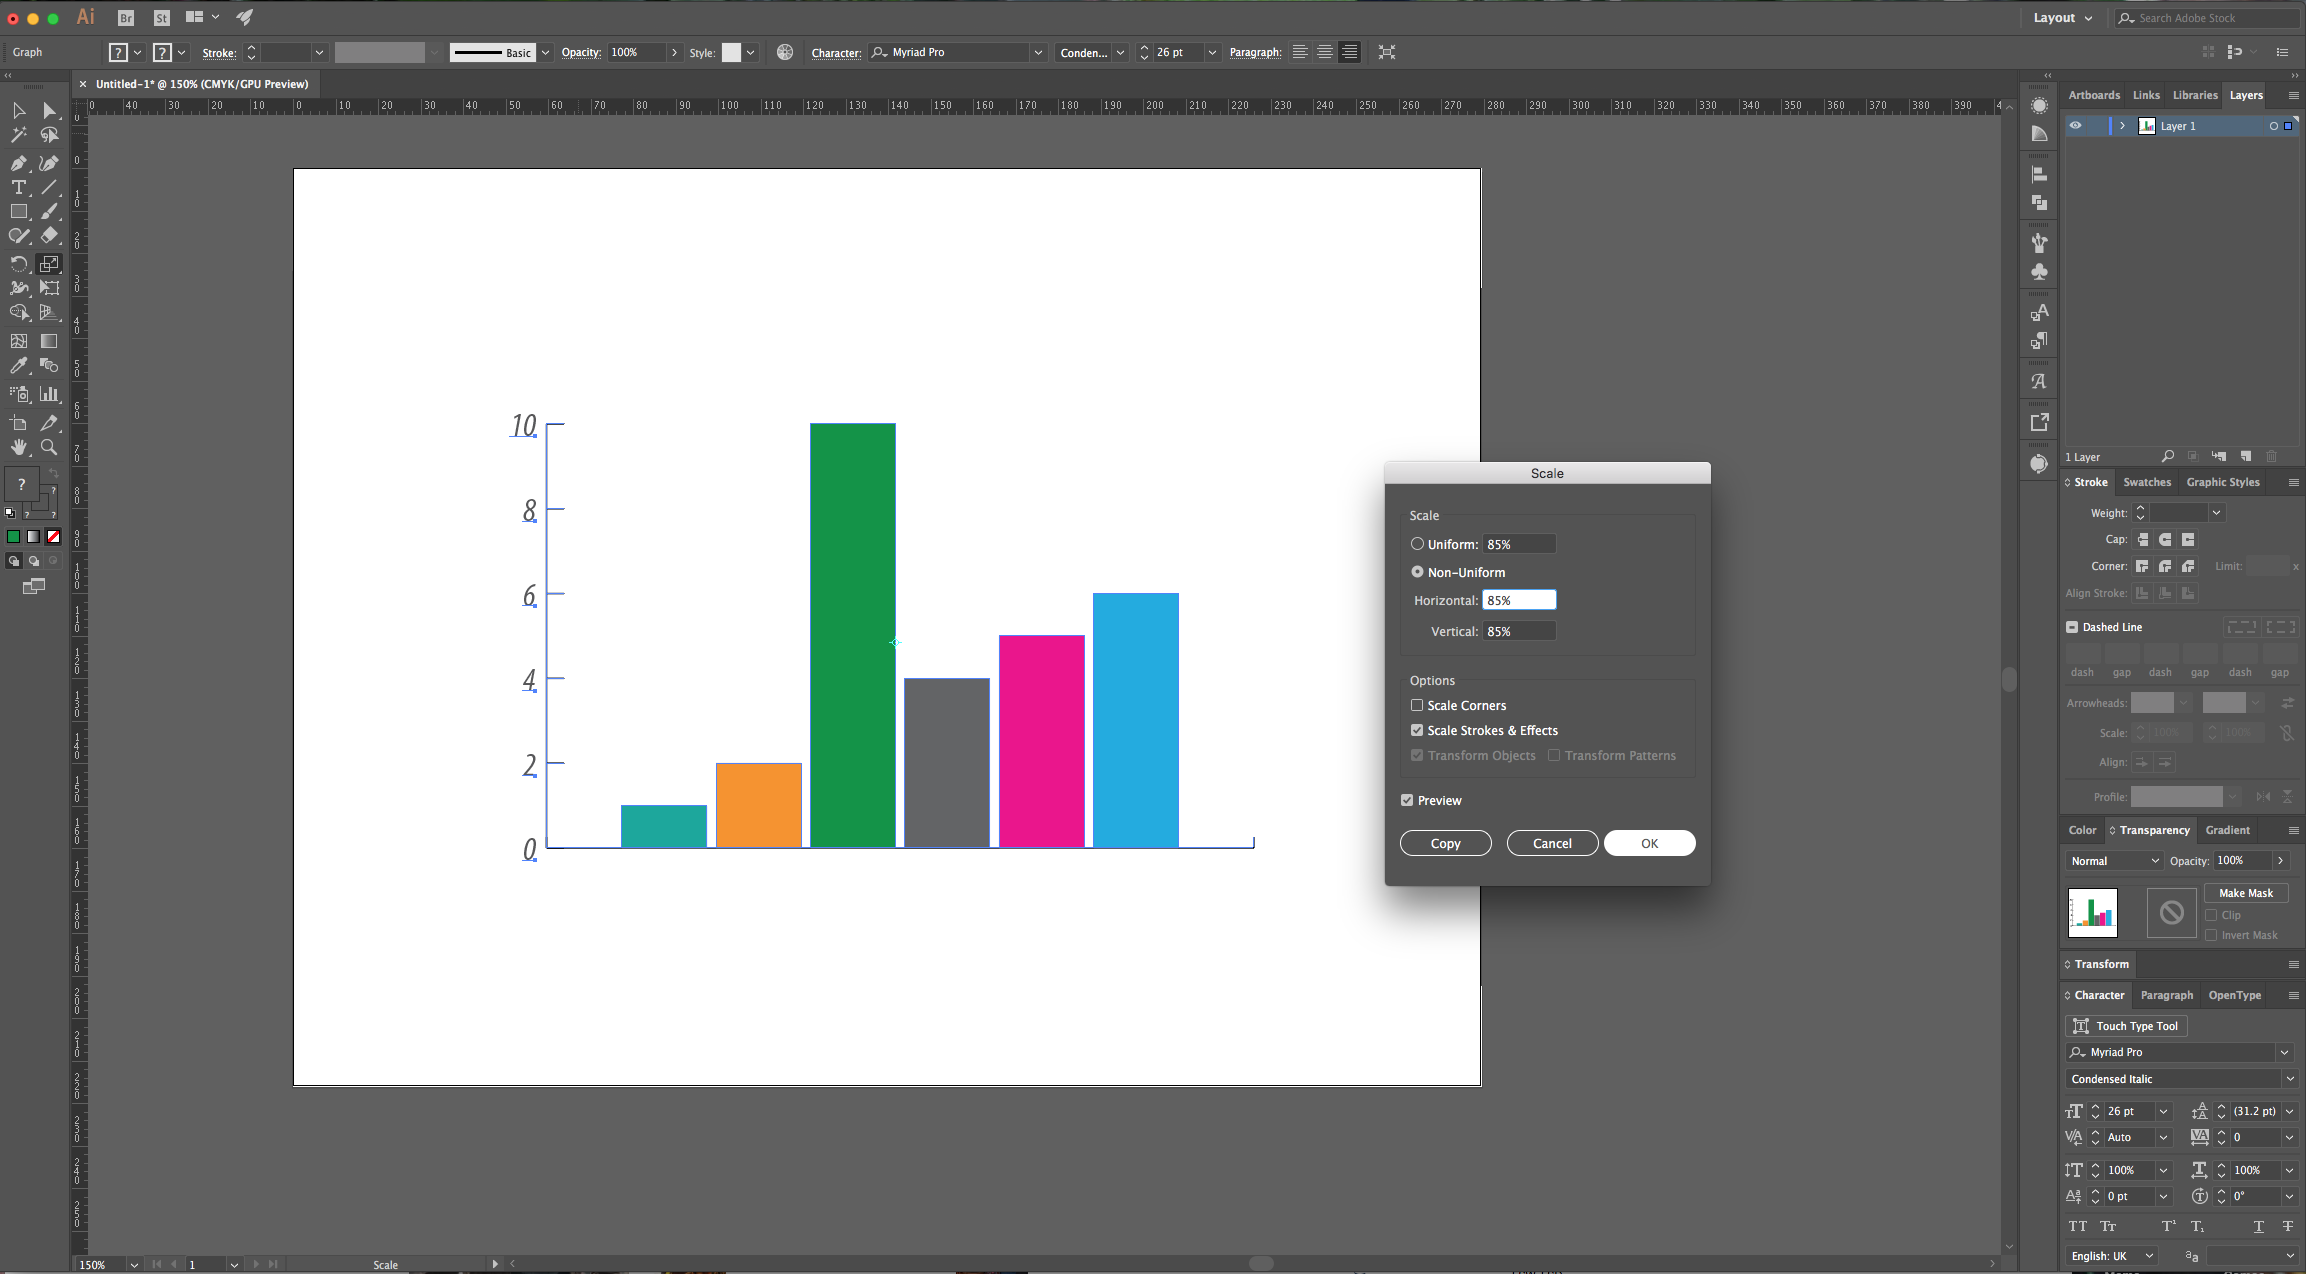
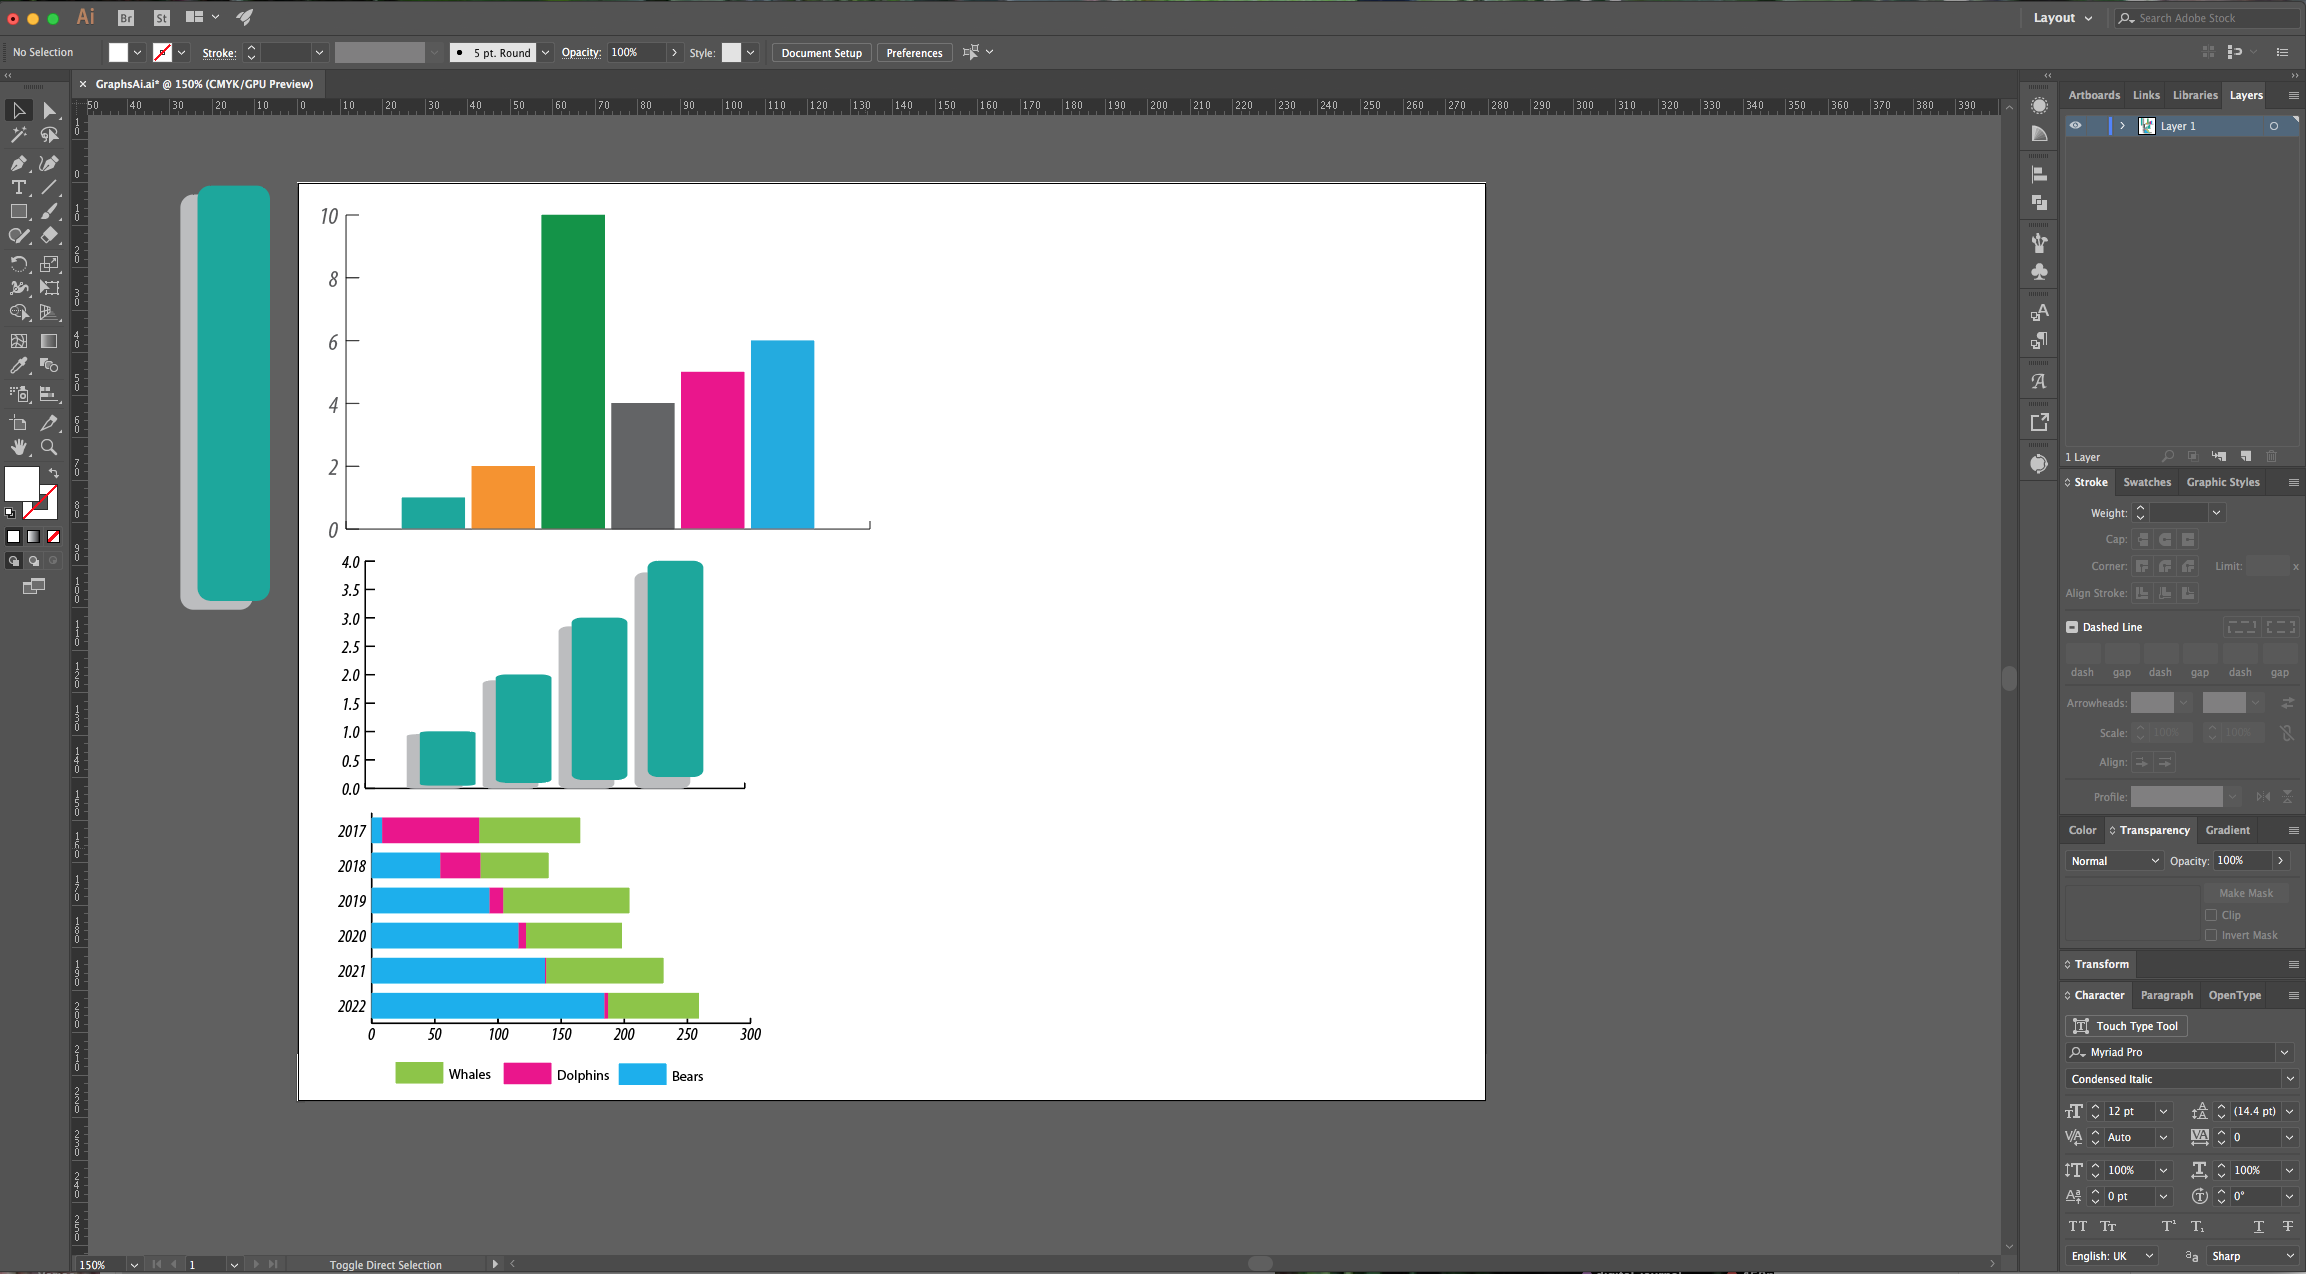
6 - To change the “Size” of the “Graph” use the “Scale Tool” (S) or go to Object > Transform > Scale and change the values there.


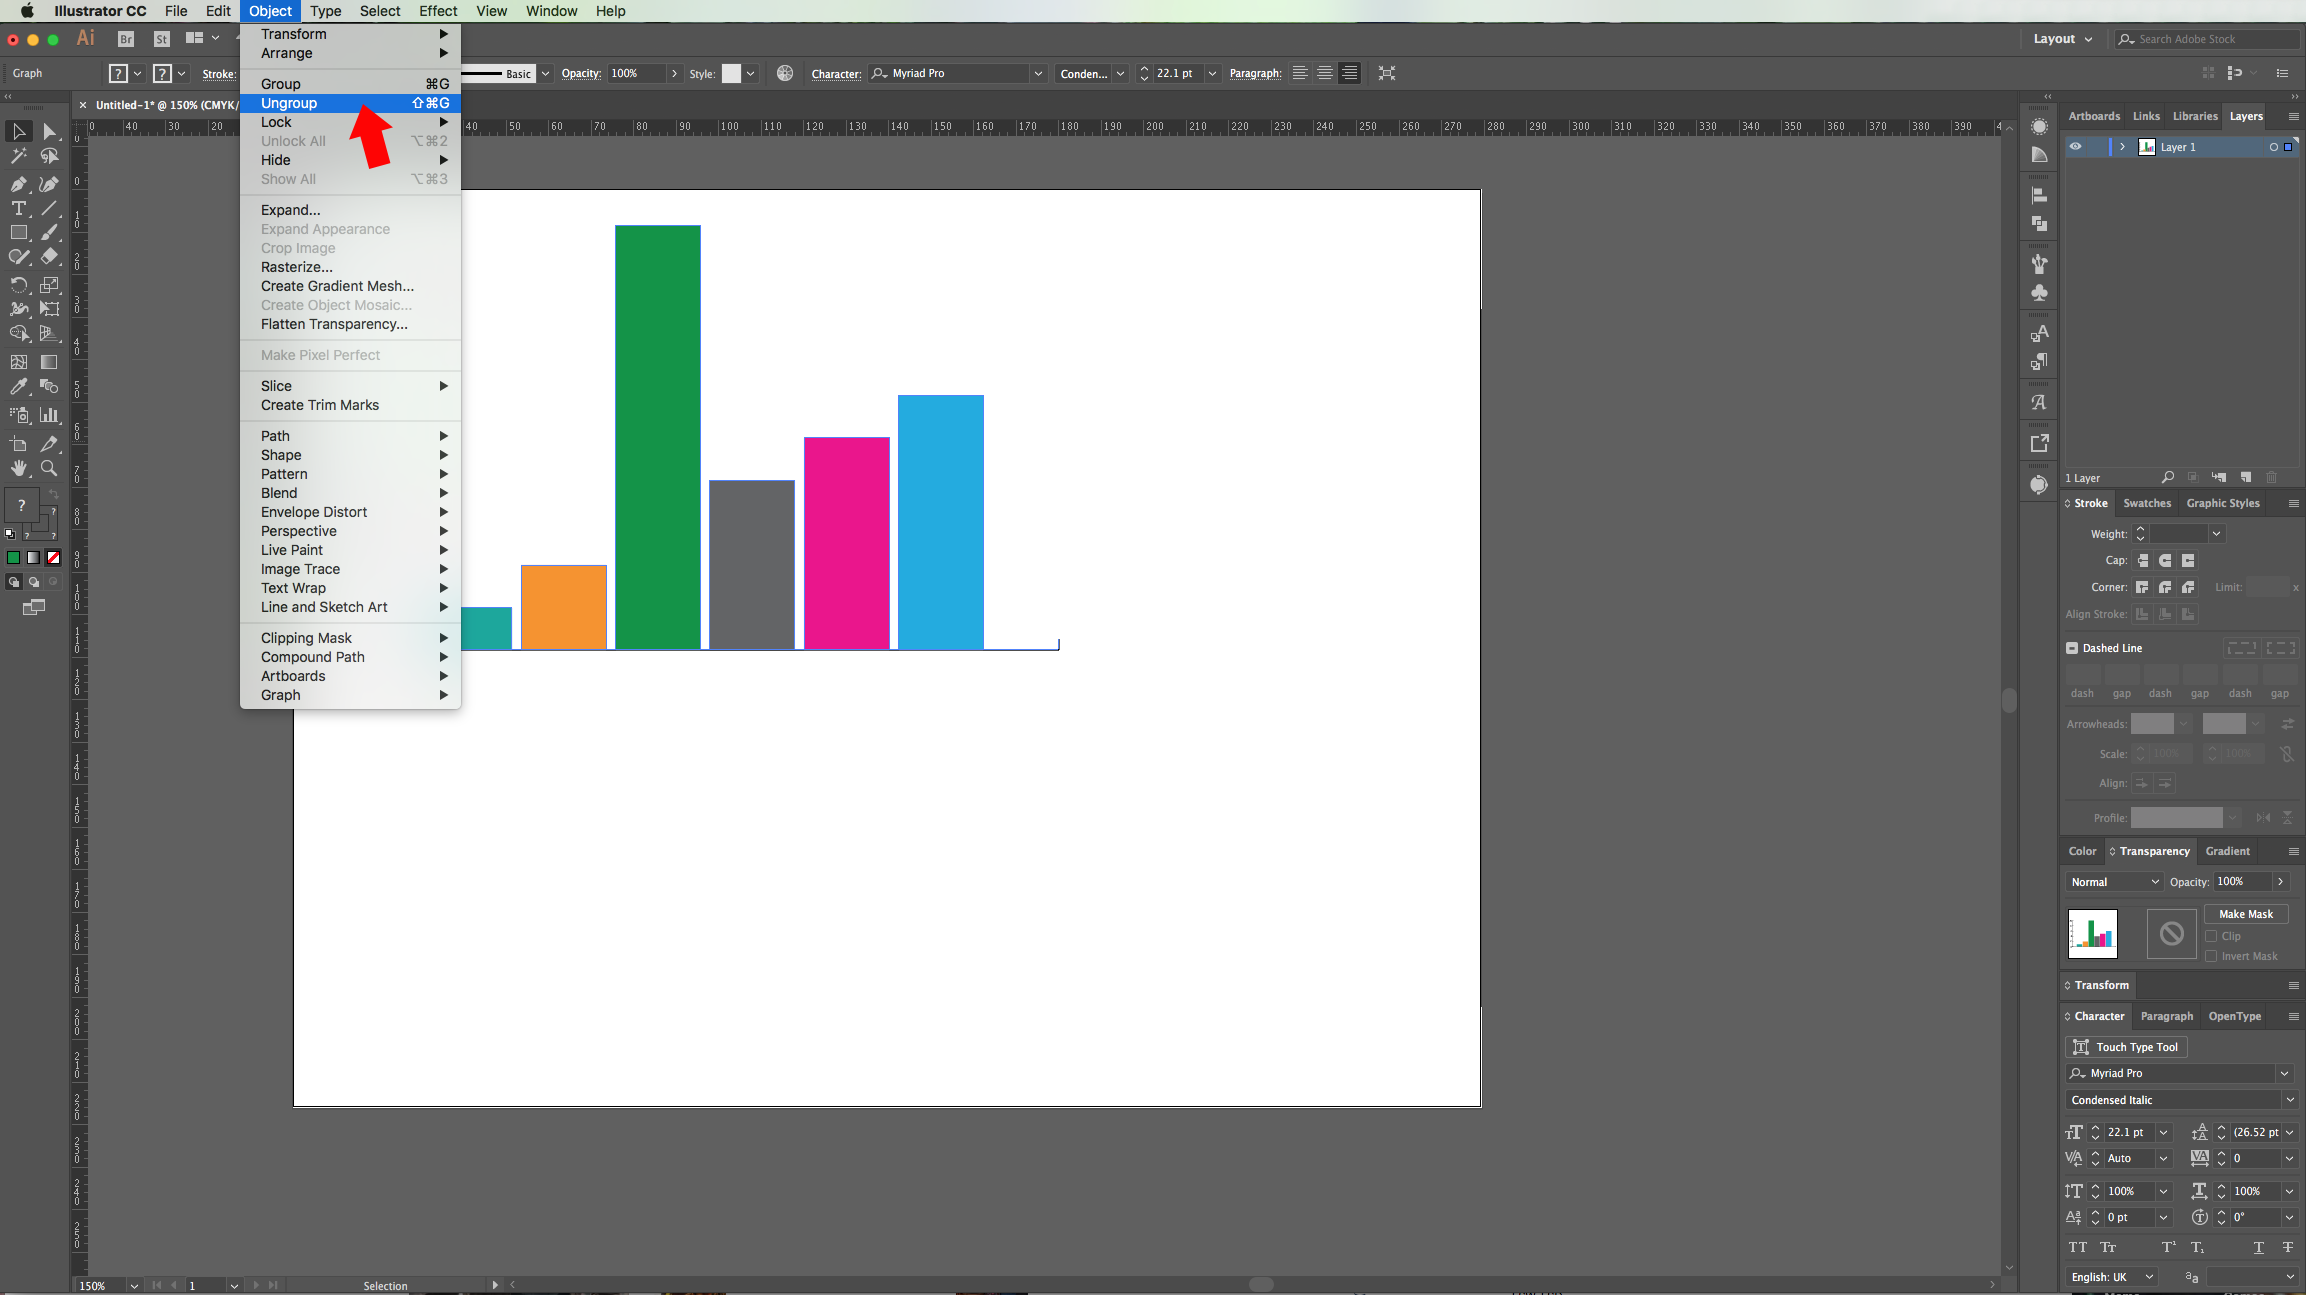
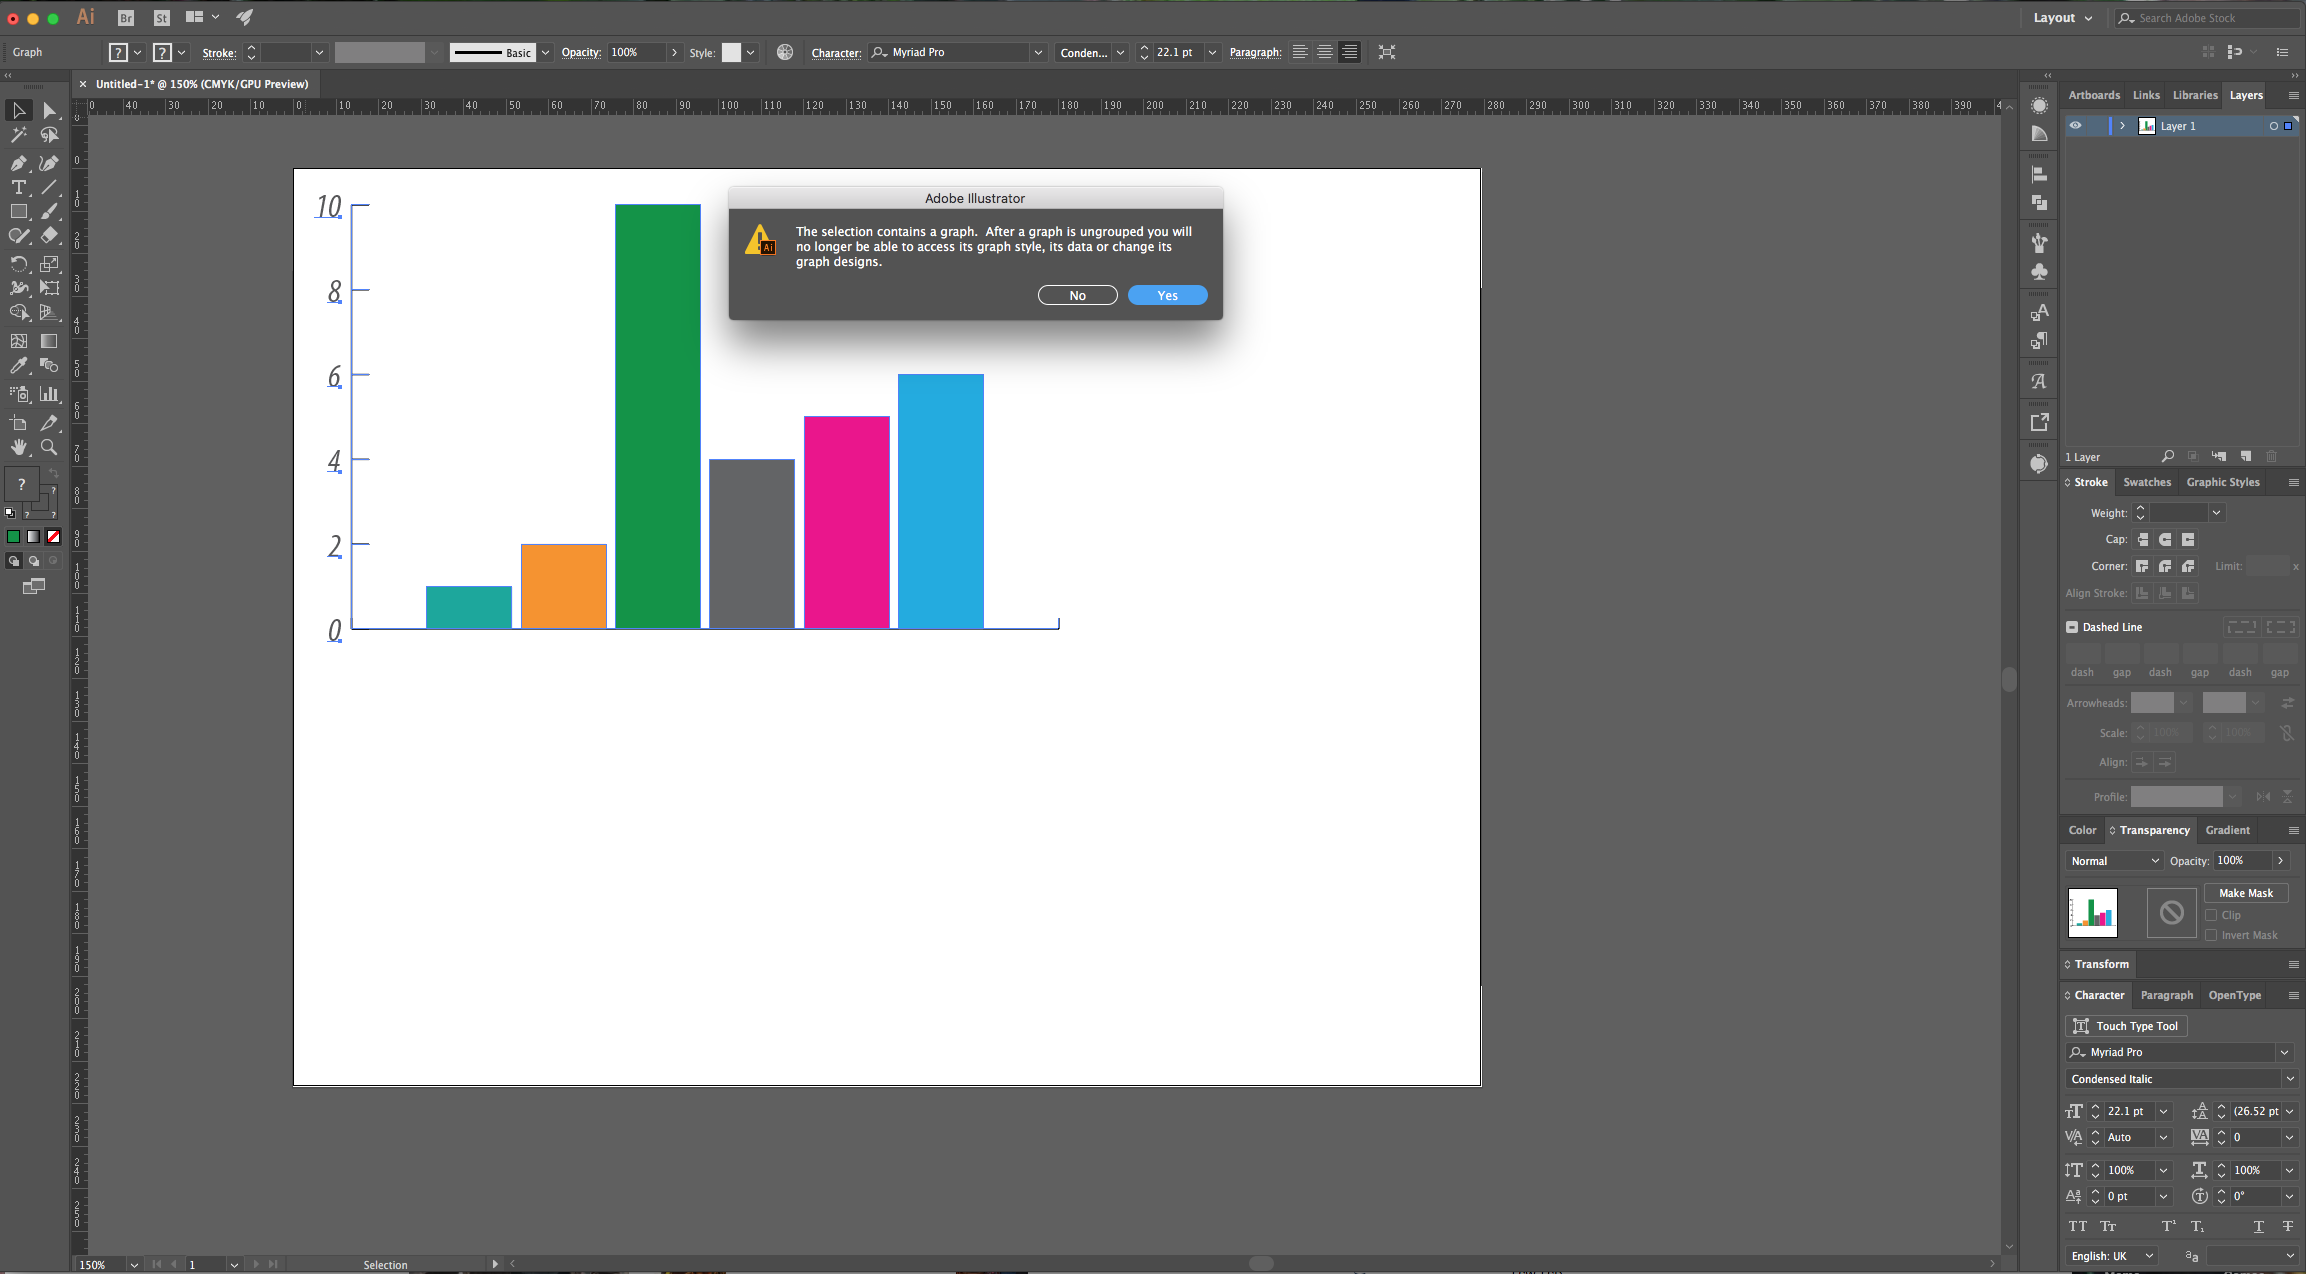
7 - To modify your “Graph” even further, right-click on top of it and choose “Ungroup”, and click “OK” on the Pop-up window. Just remember that you will no longer be able to access the “Data” and other features.
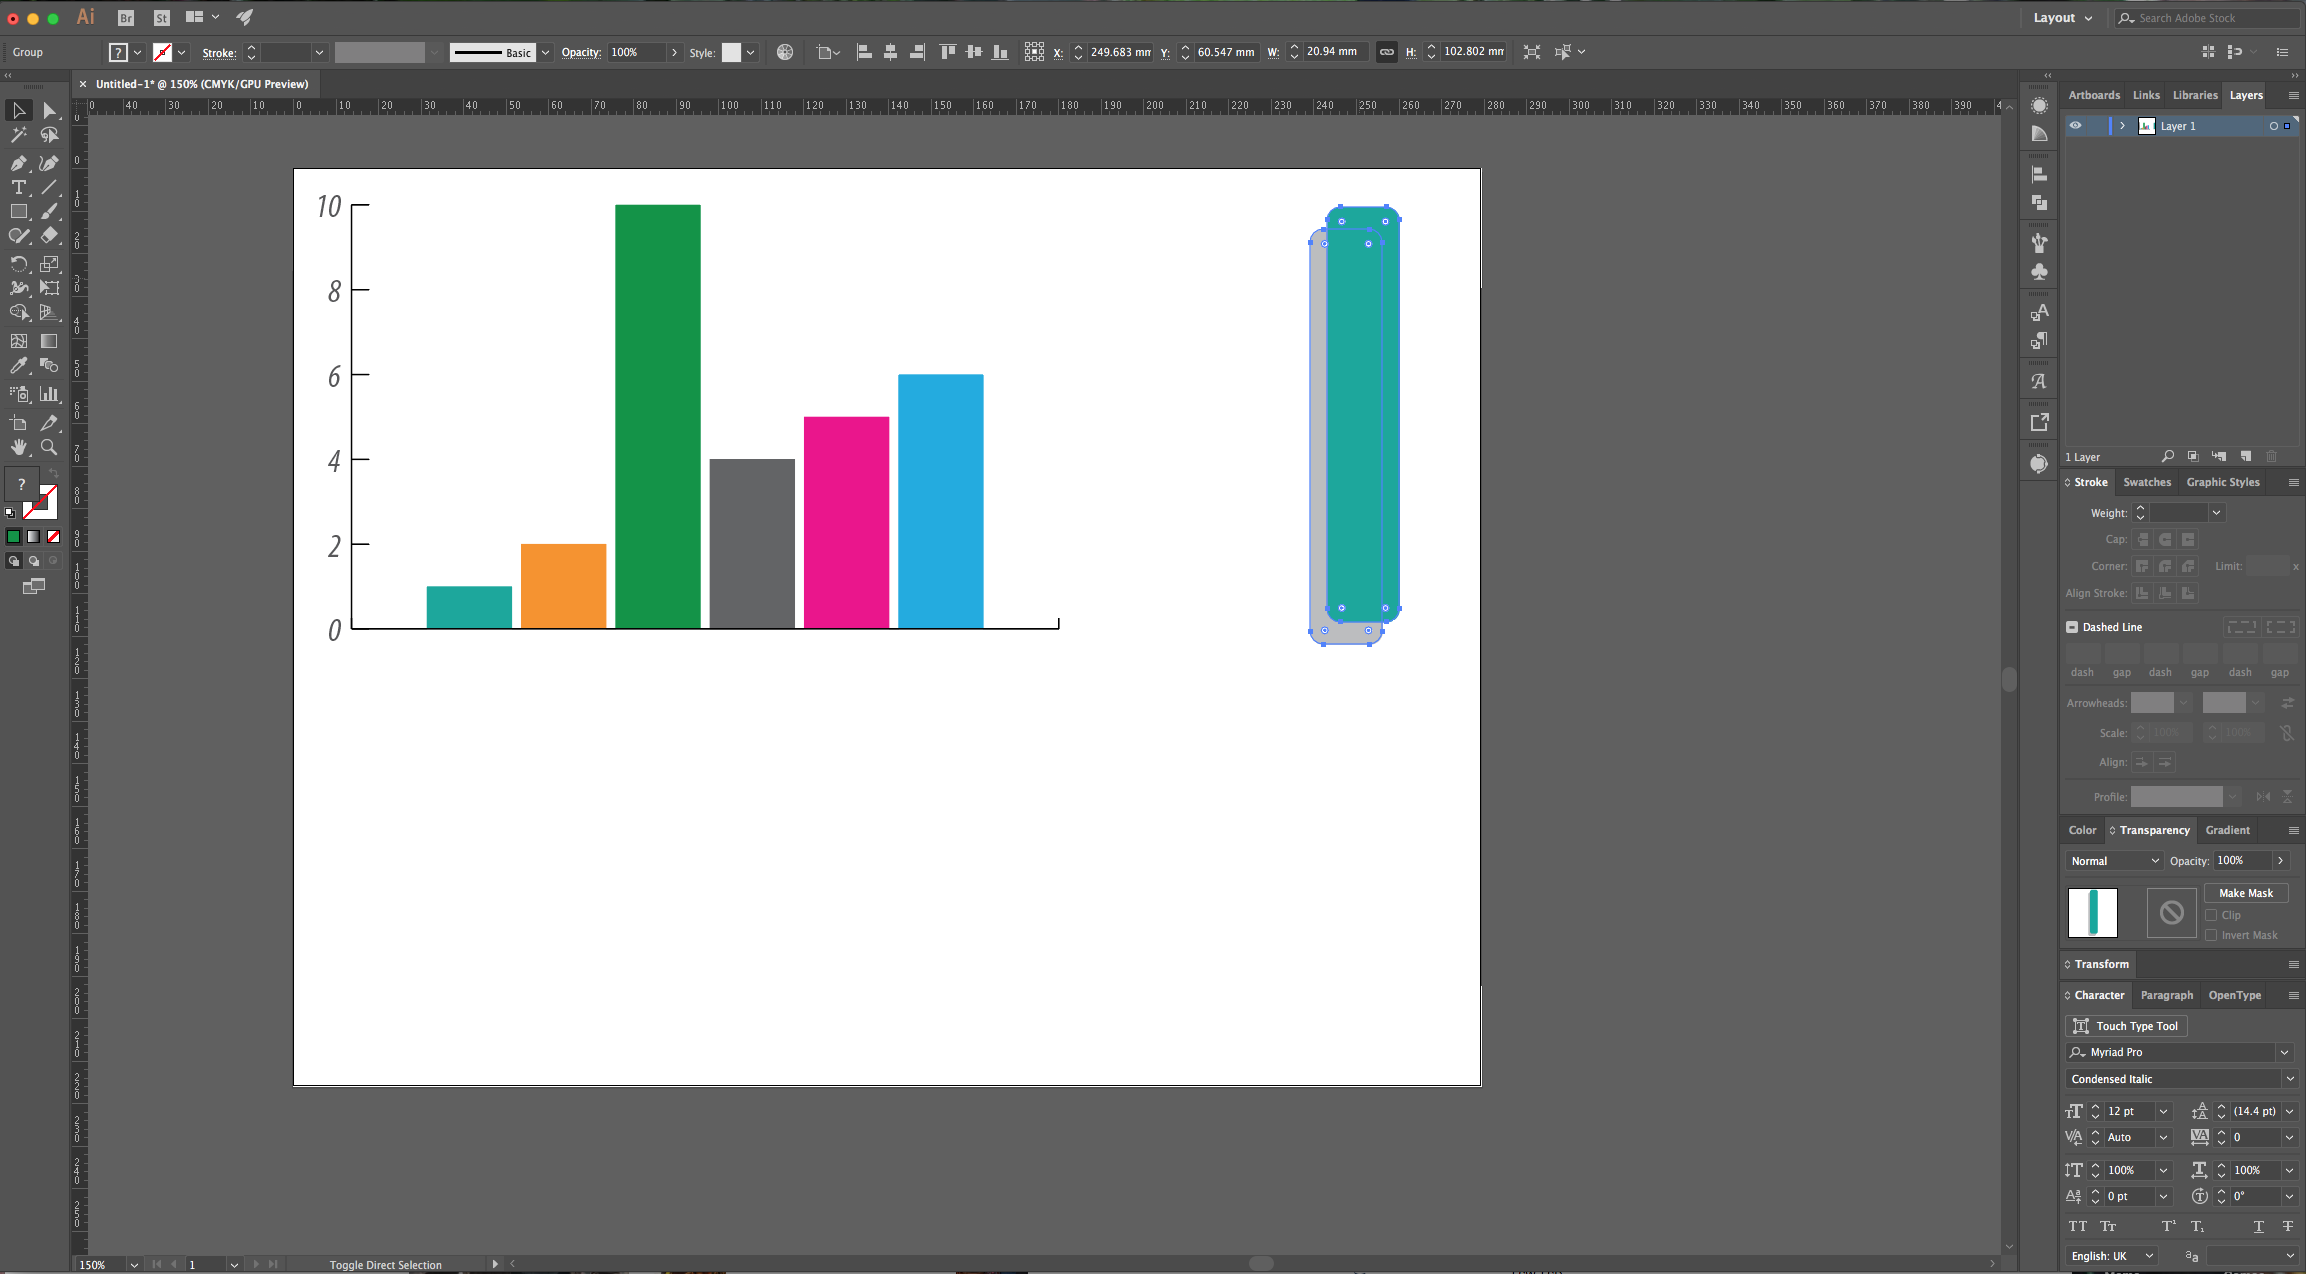
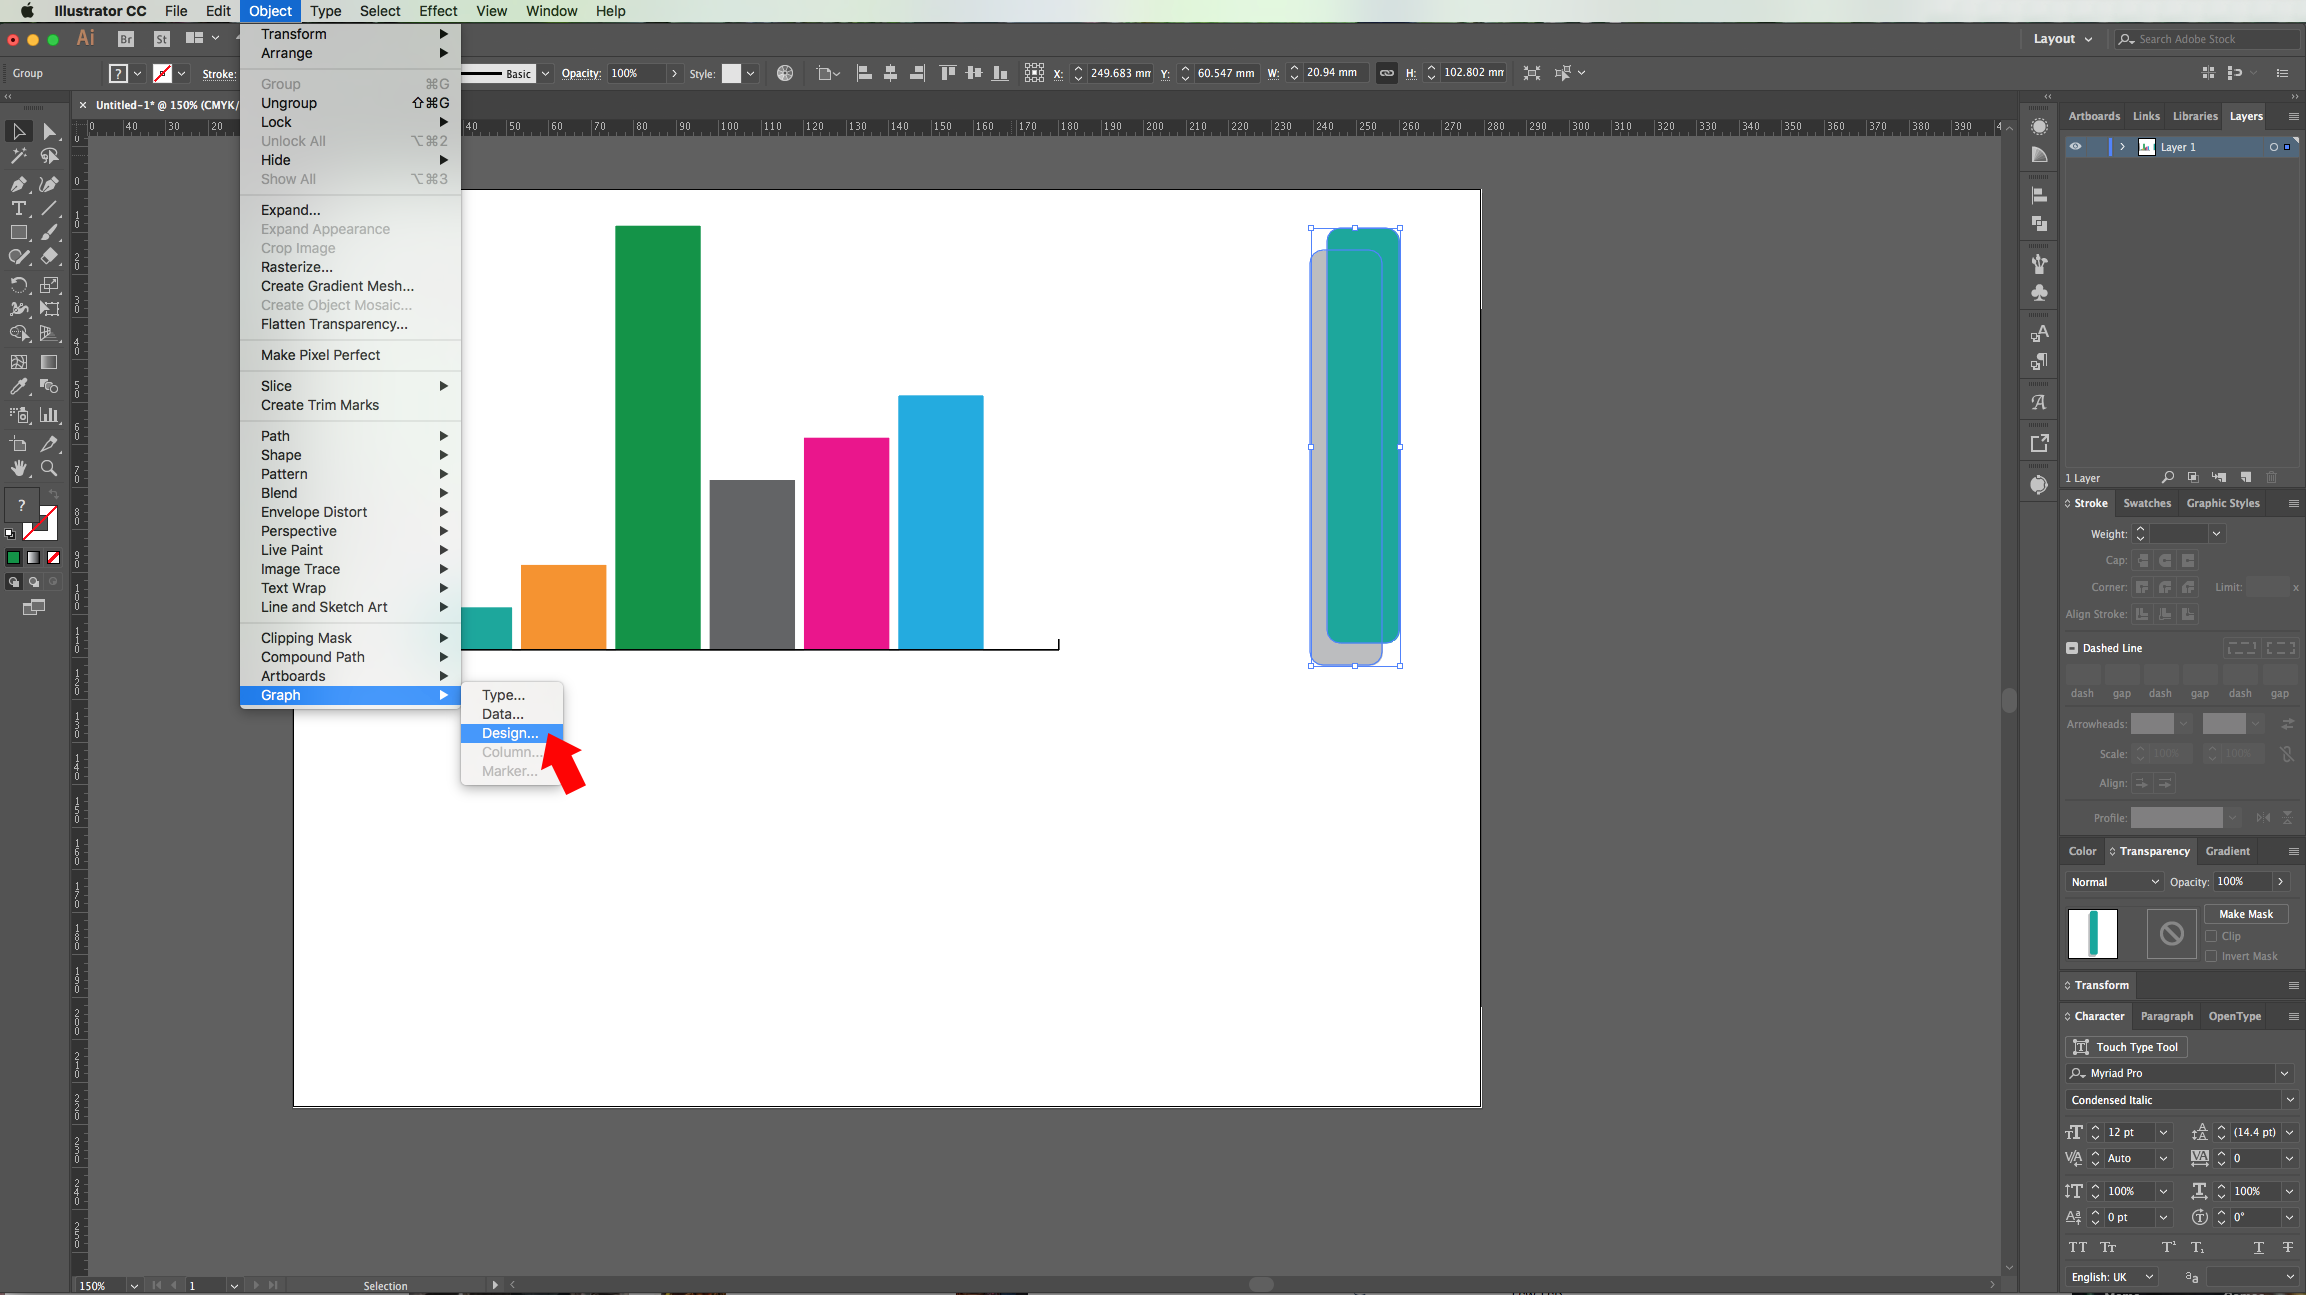
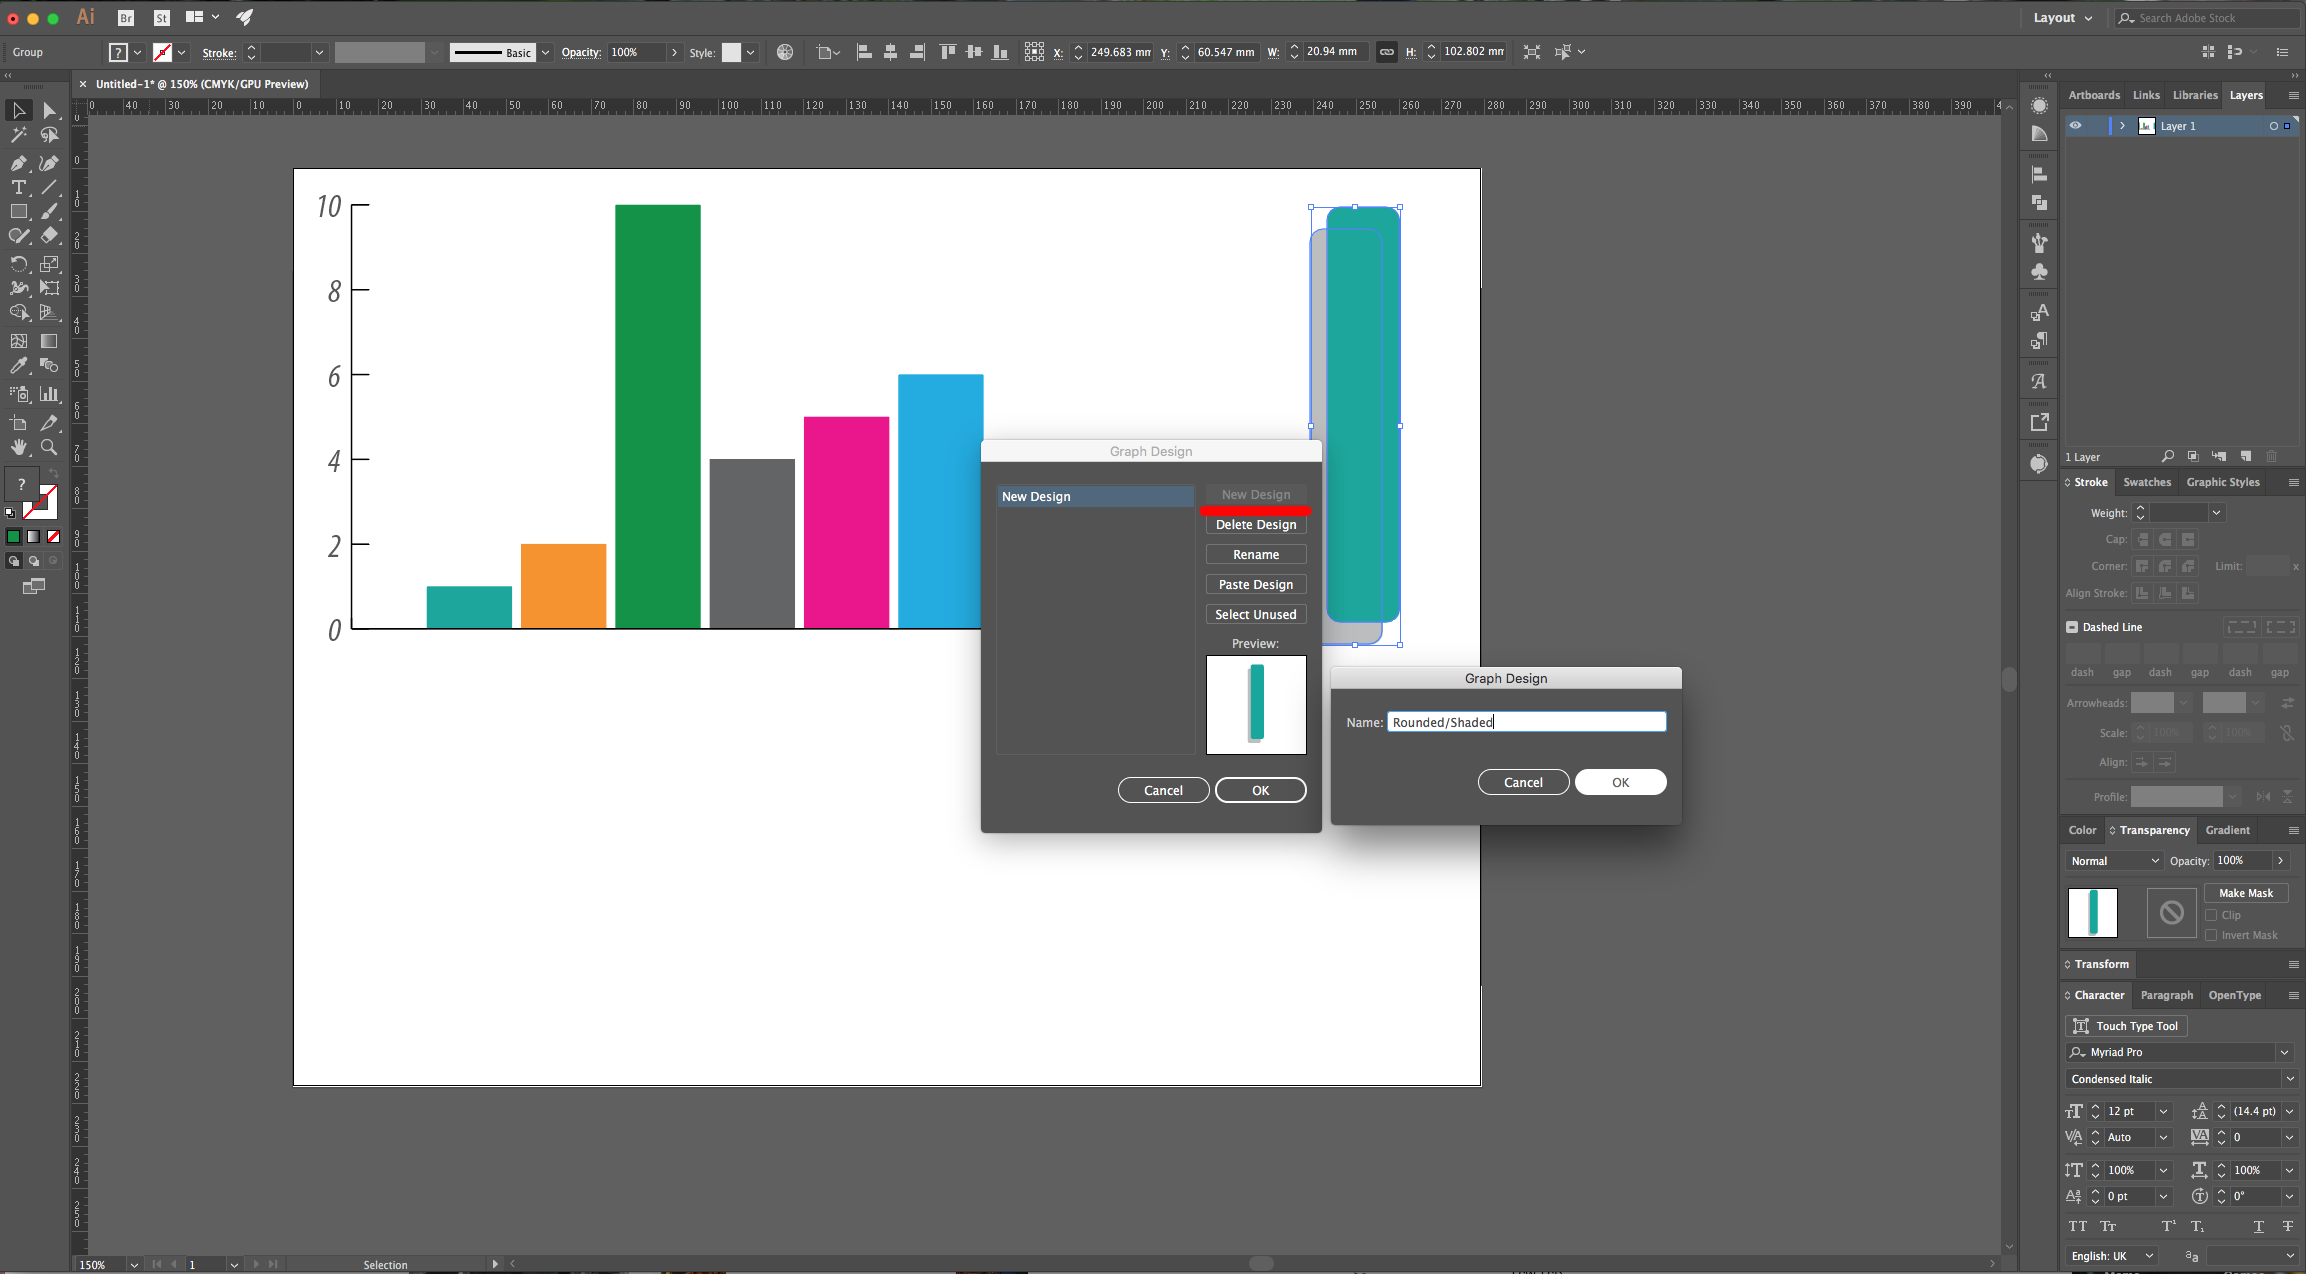
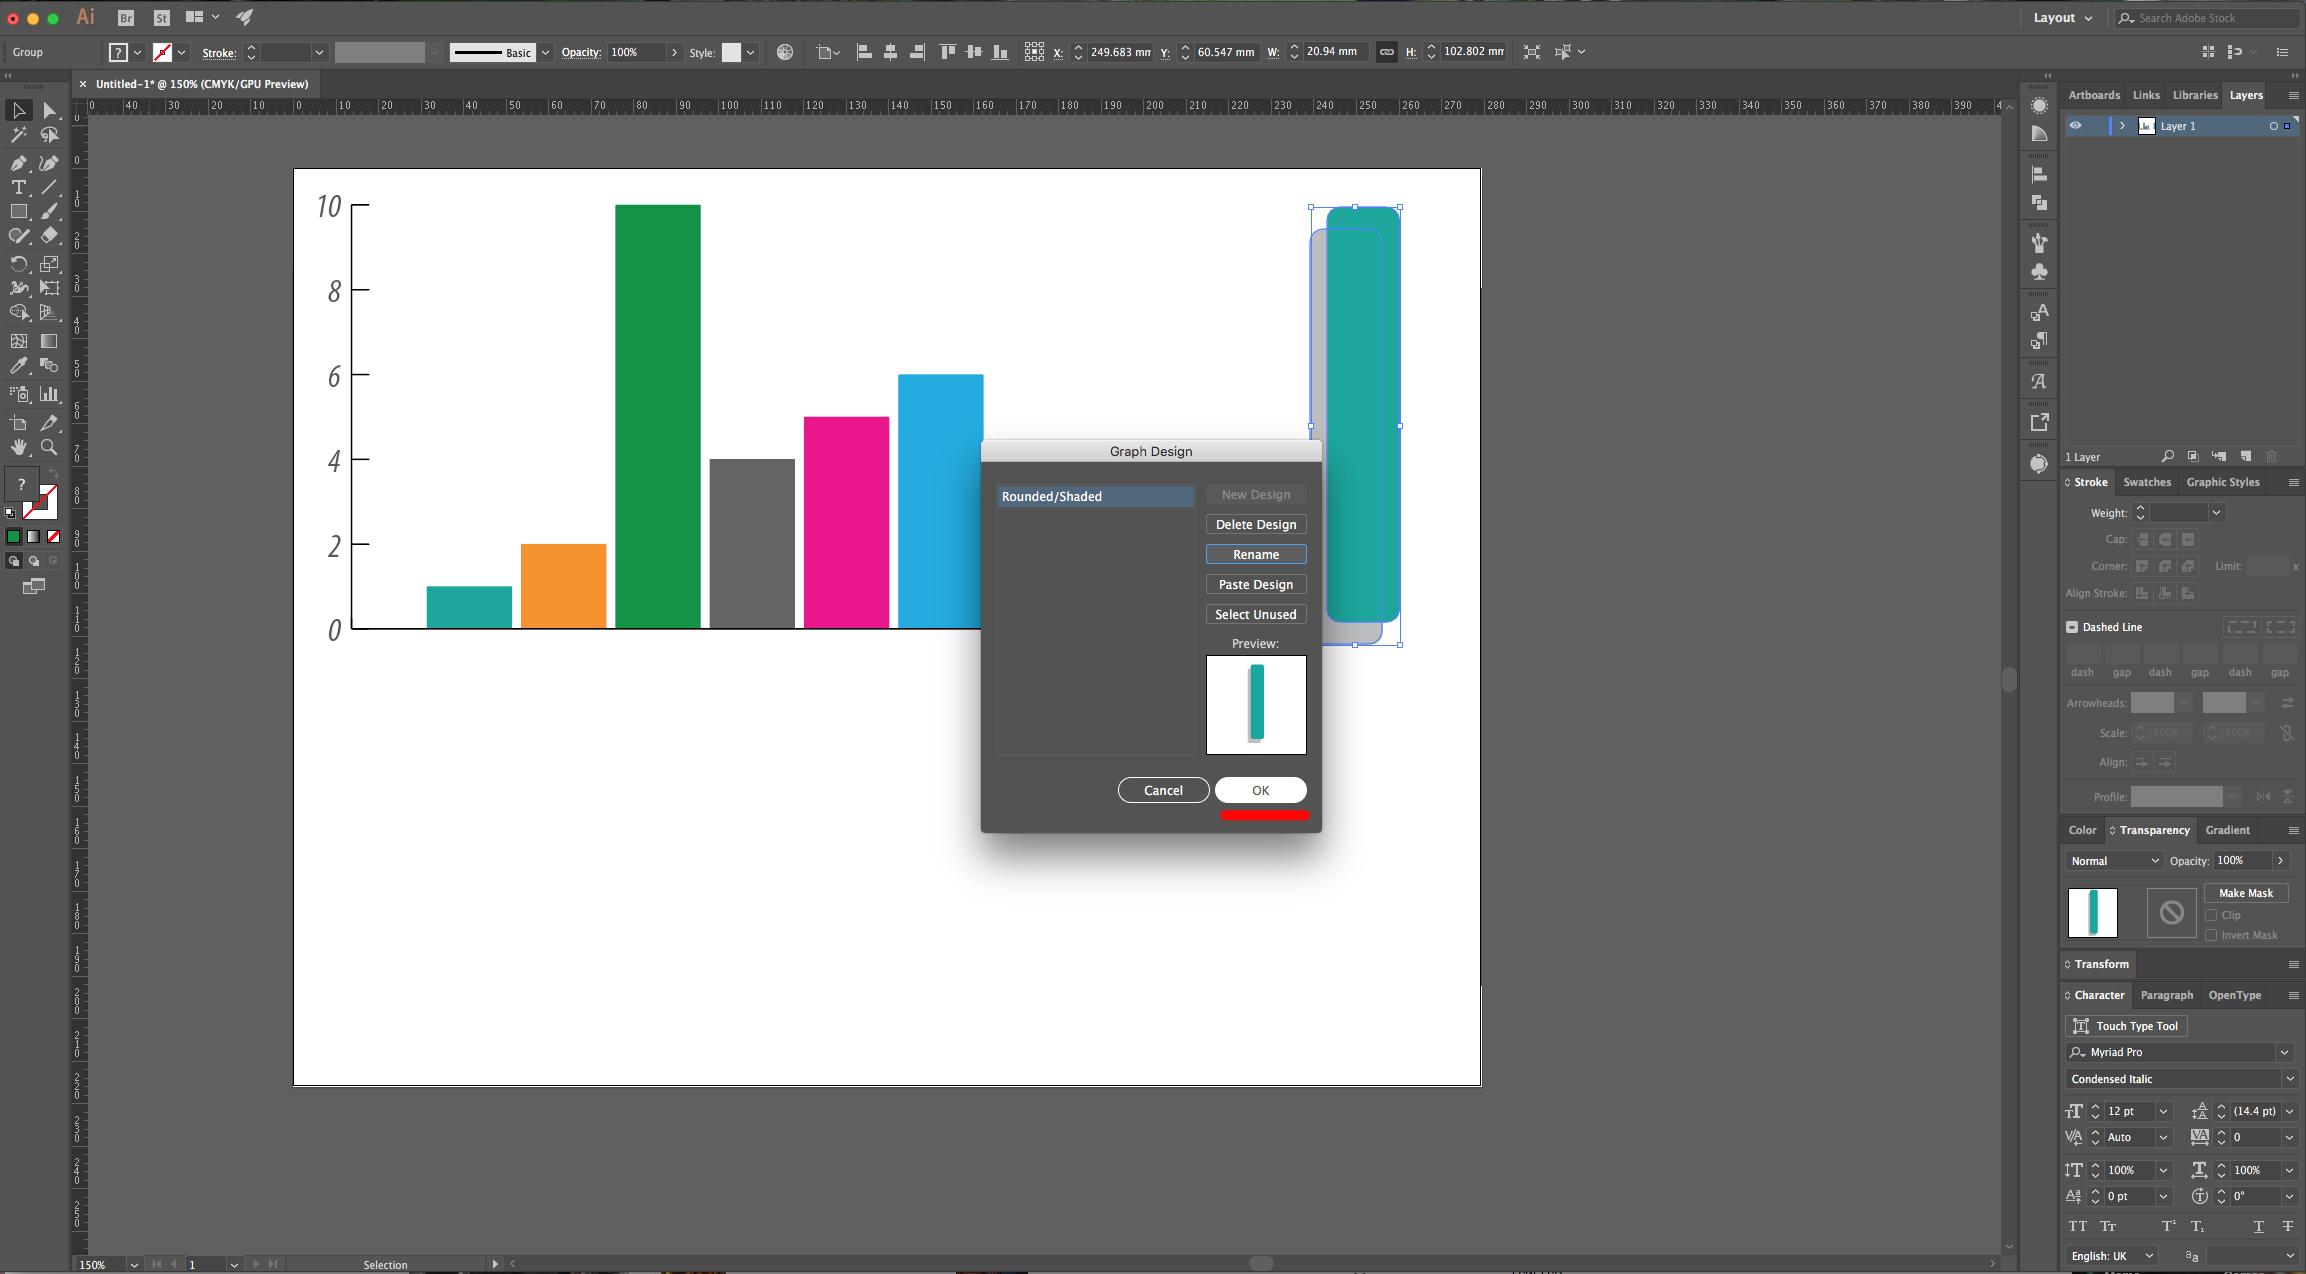
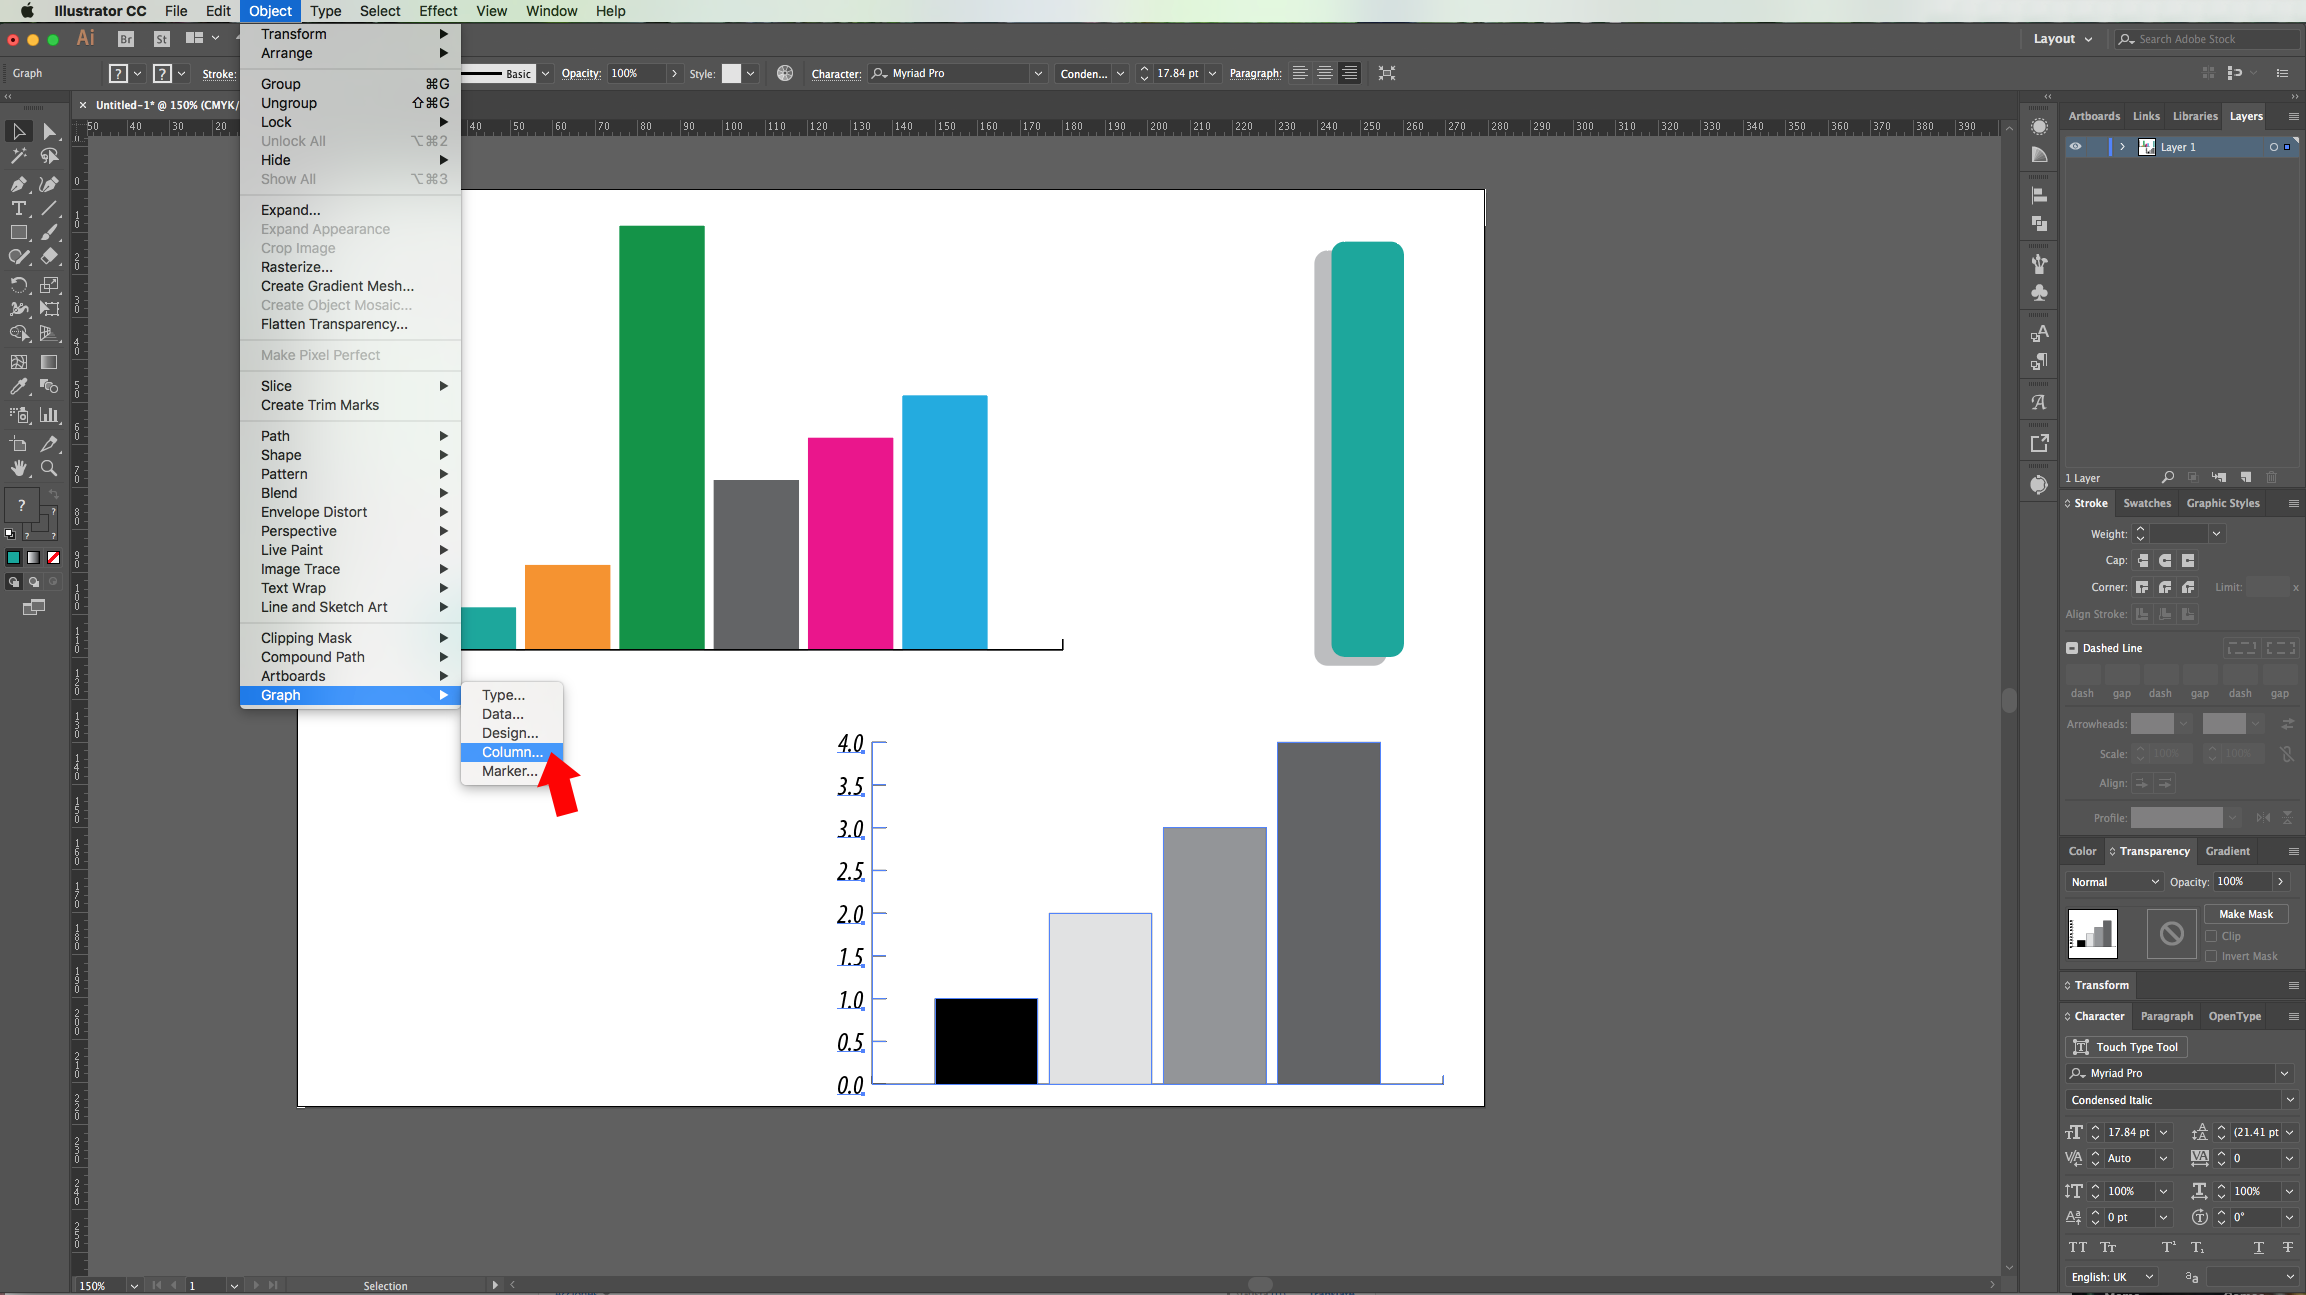
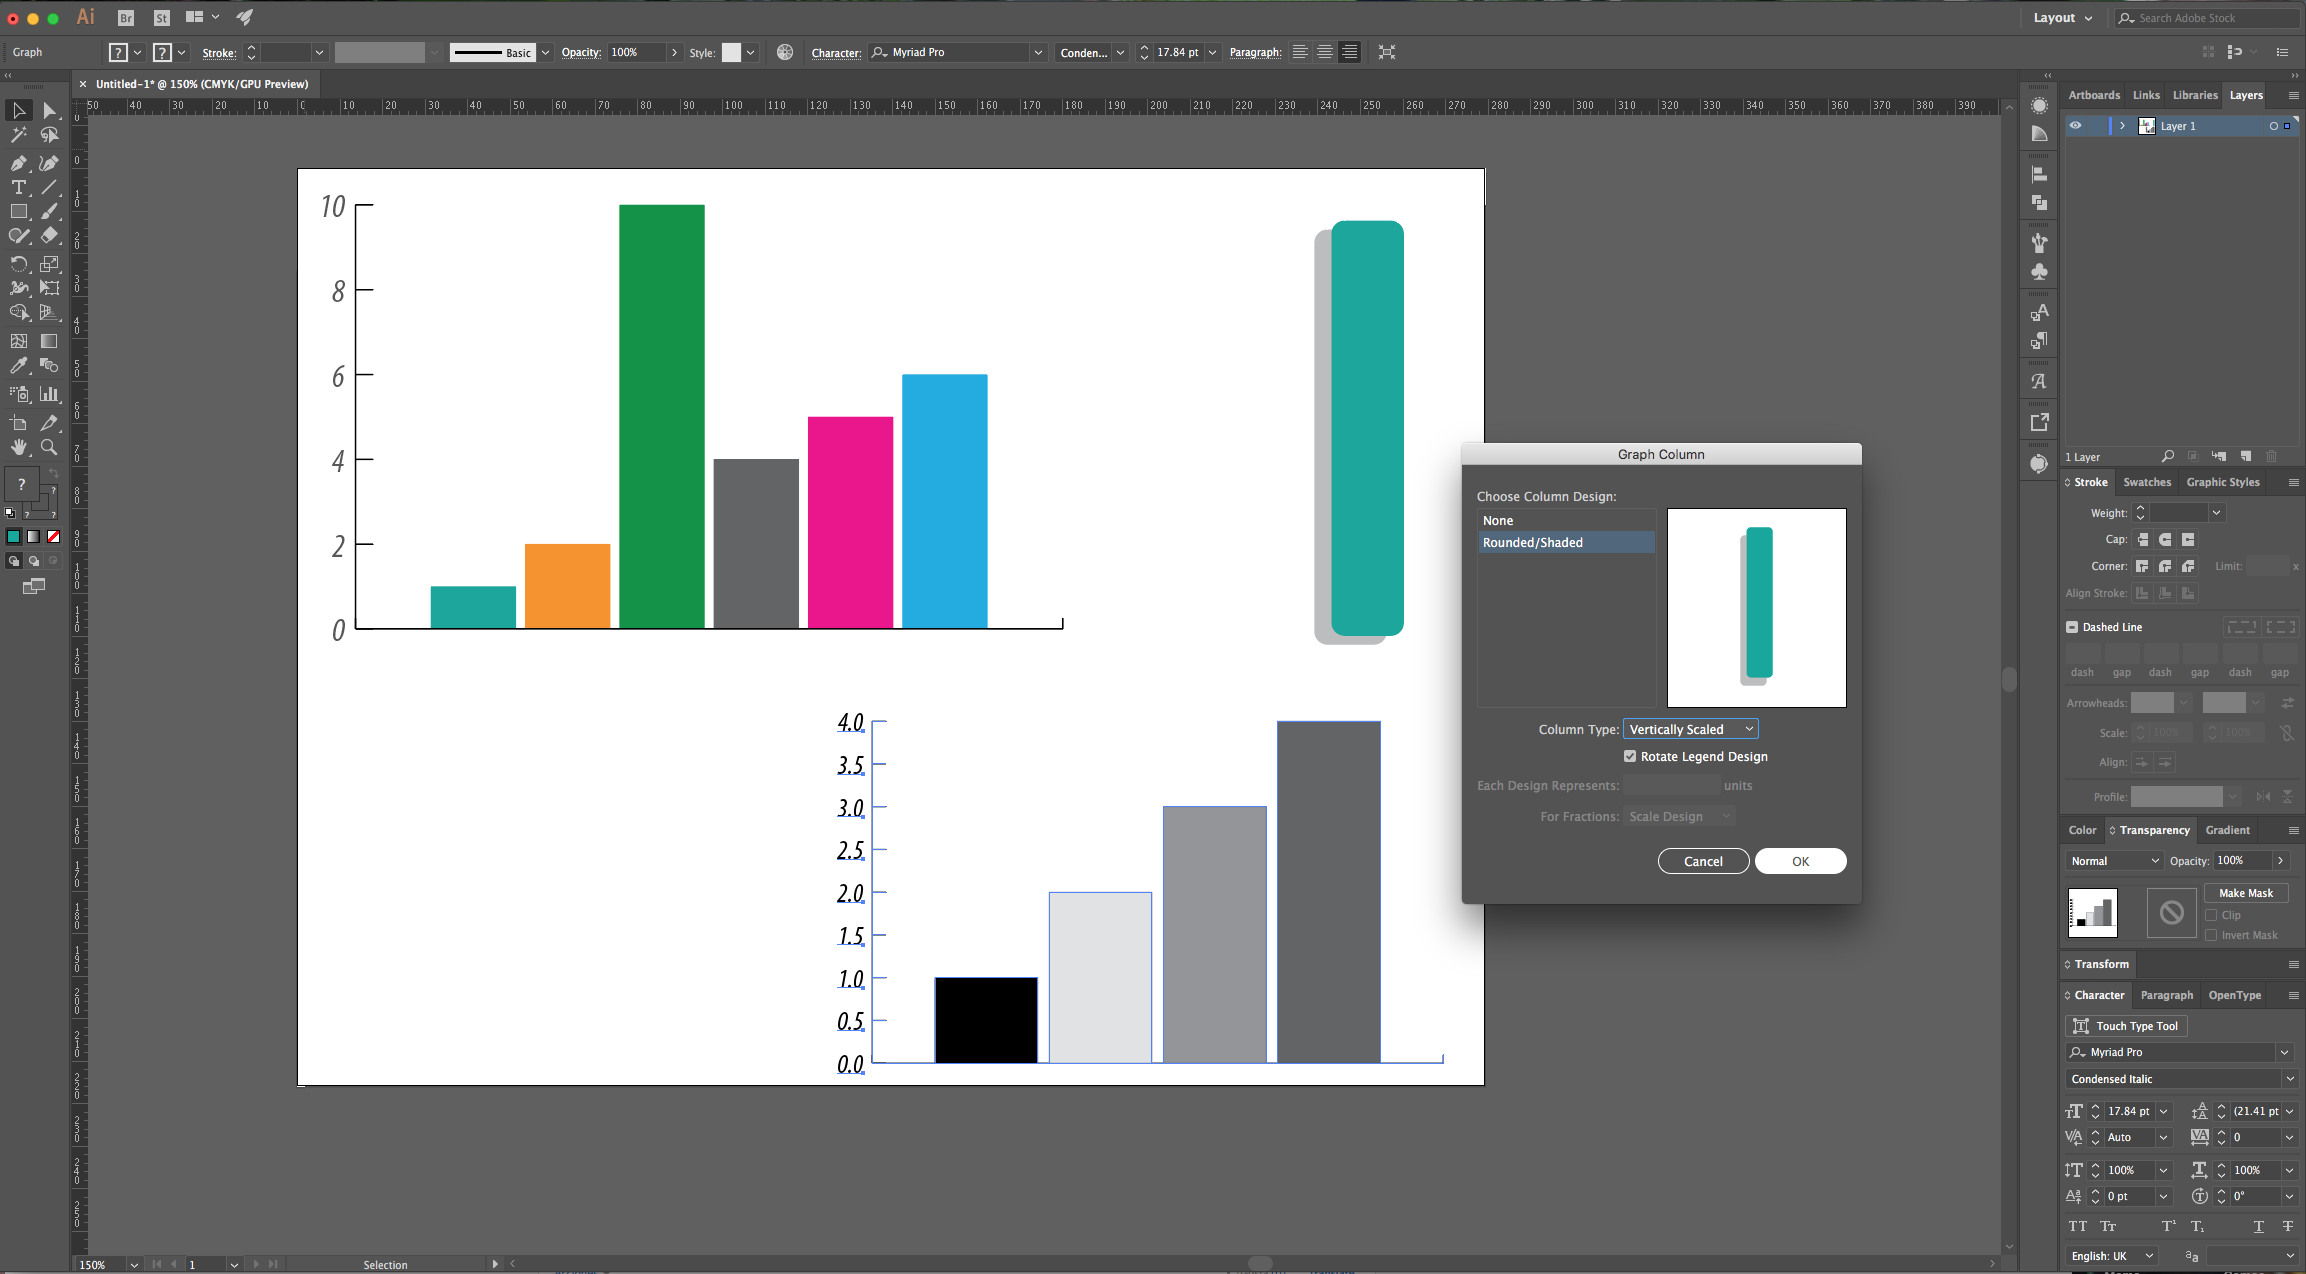
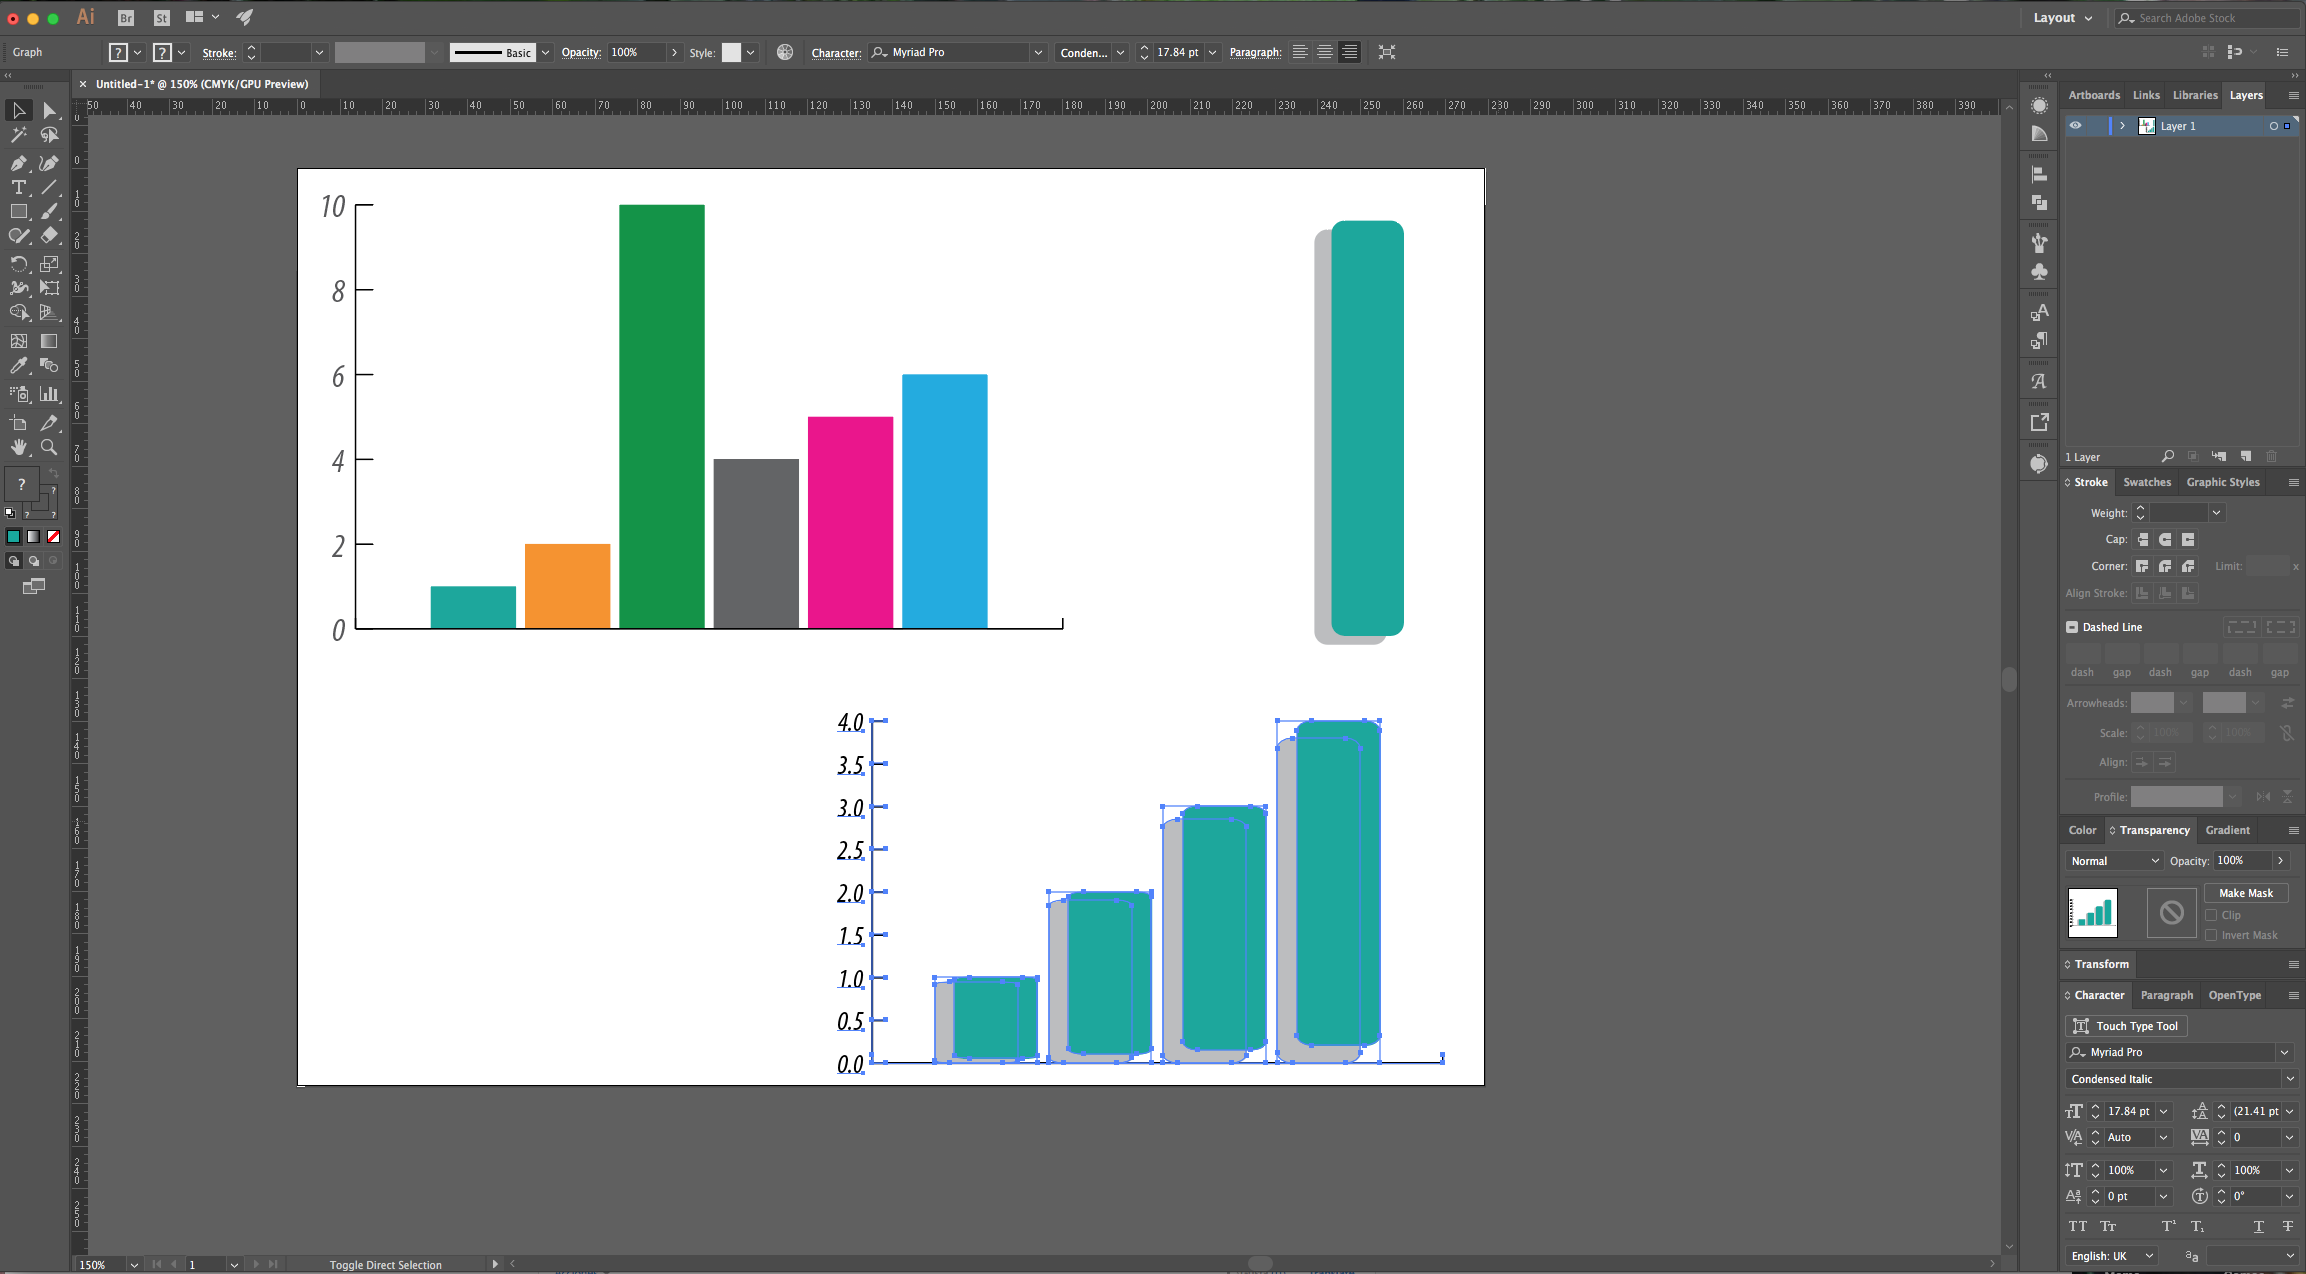
8 - You can modify the “Bars” appearance even further. Open the File with the “Design Vectors” you chose, select one of them a to “Copy” (Command/Control + C) and “Paste” (Command/Control +V) it onto your document. With it still selected, go to Object > Graph > Design, click on the “New Design” button give it a name and click “OK”. Then, go to Object > Graph > Column and select your new design.
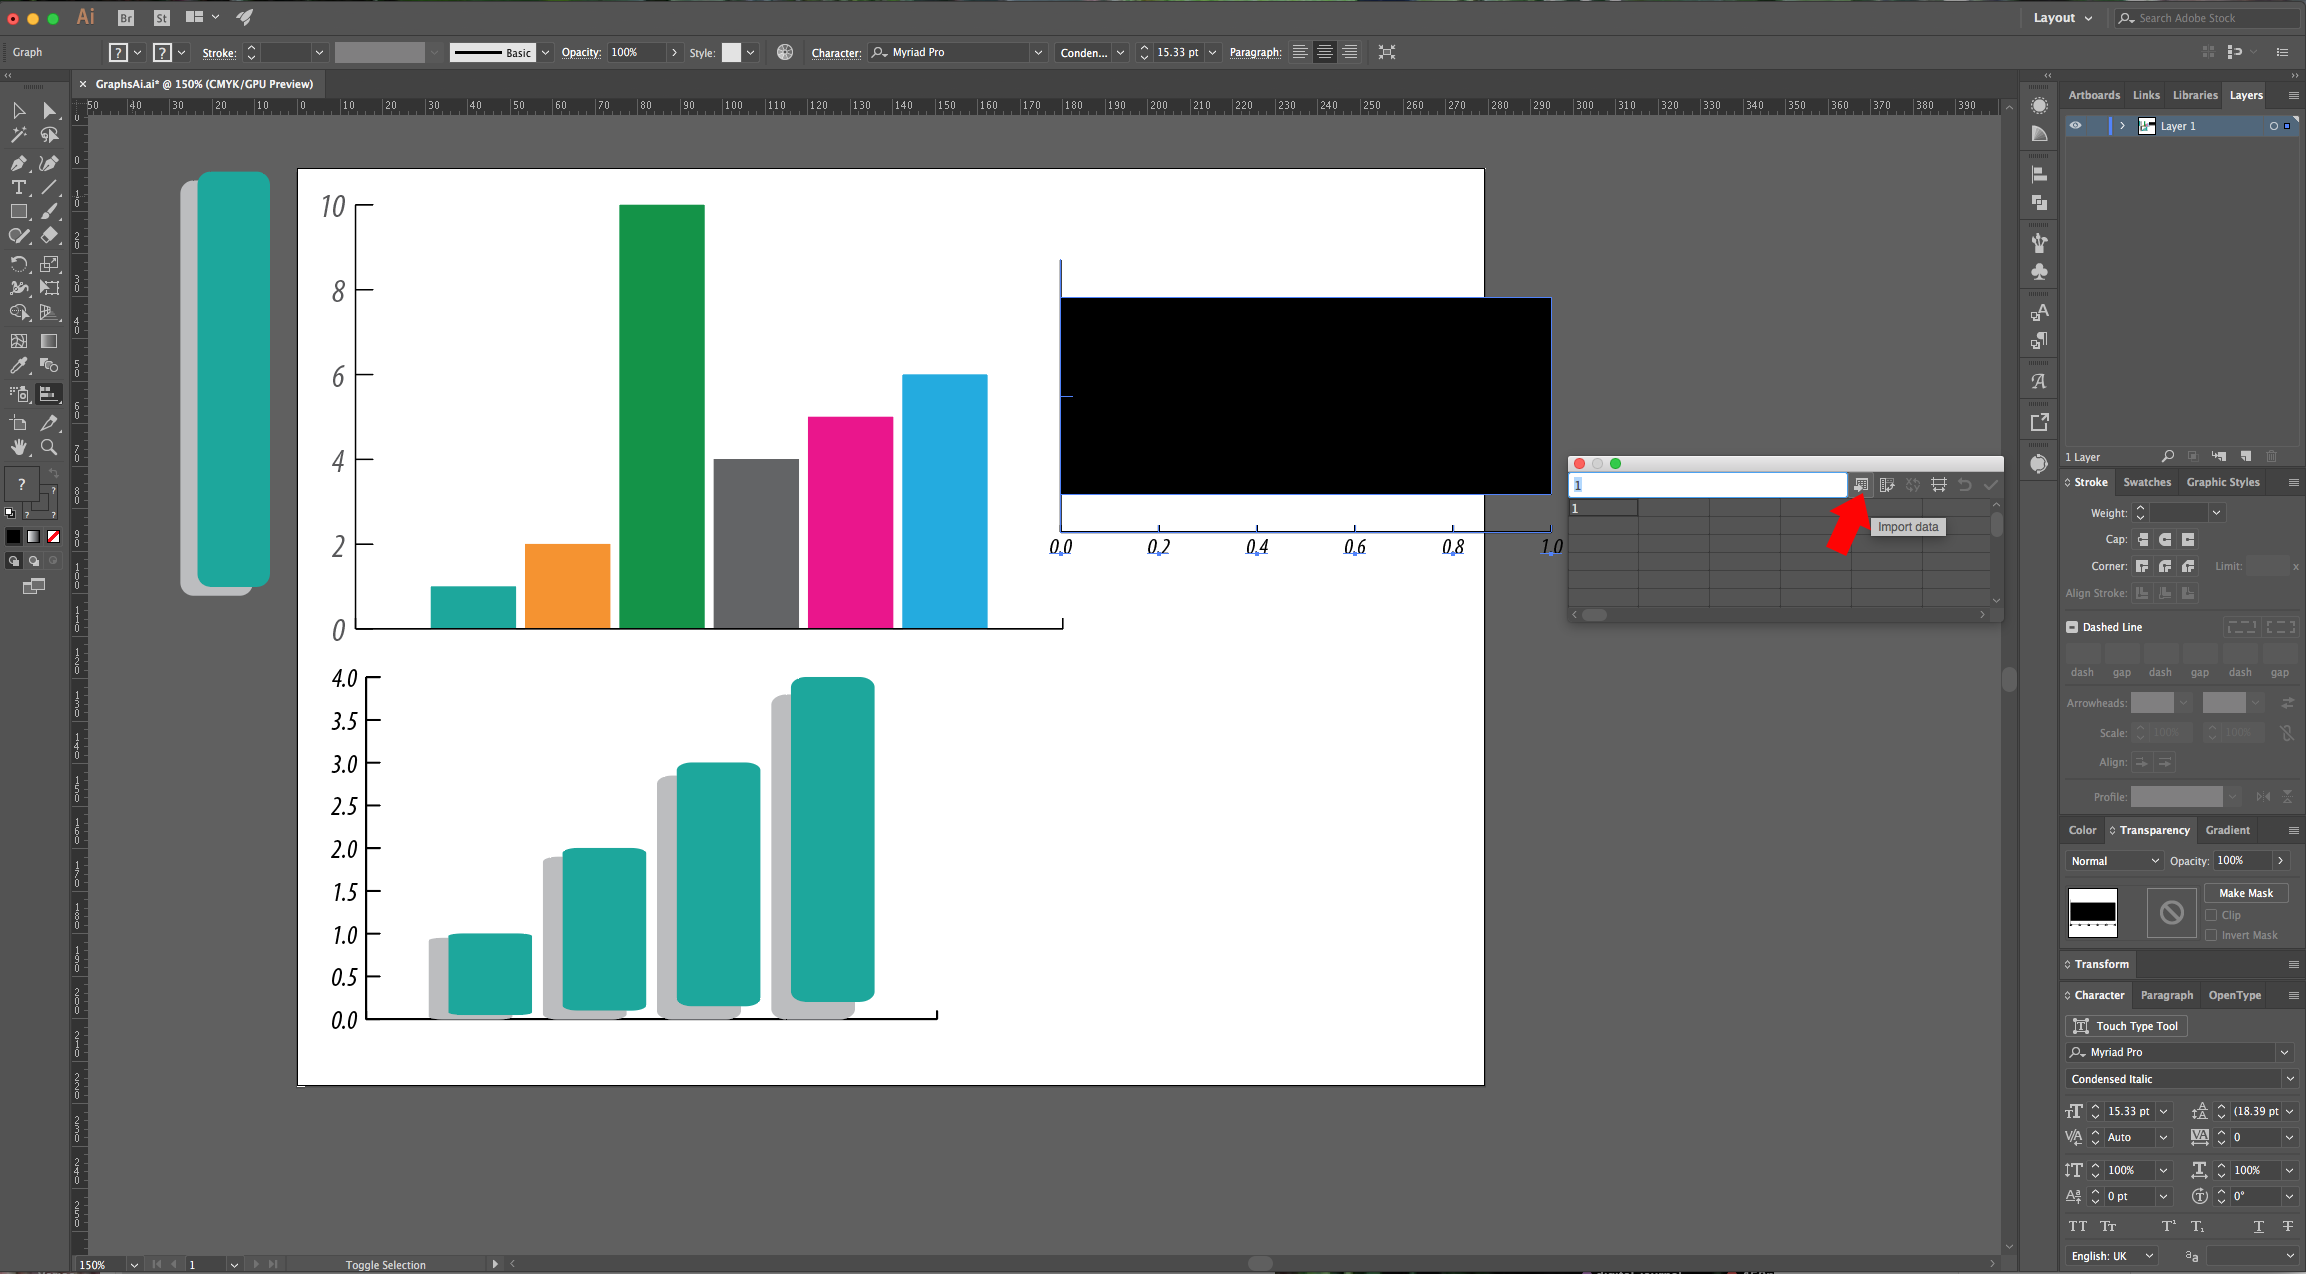
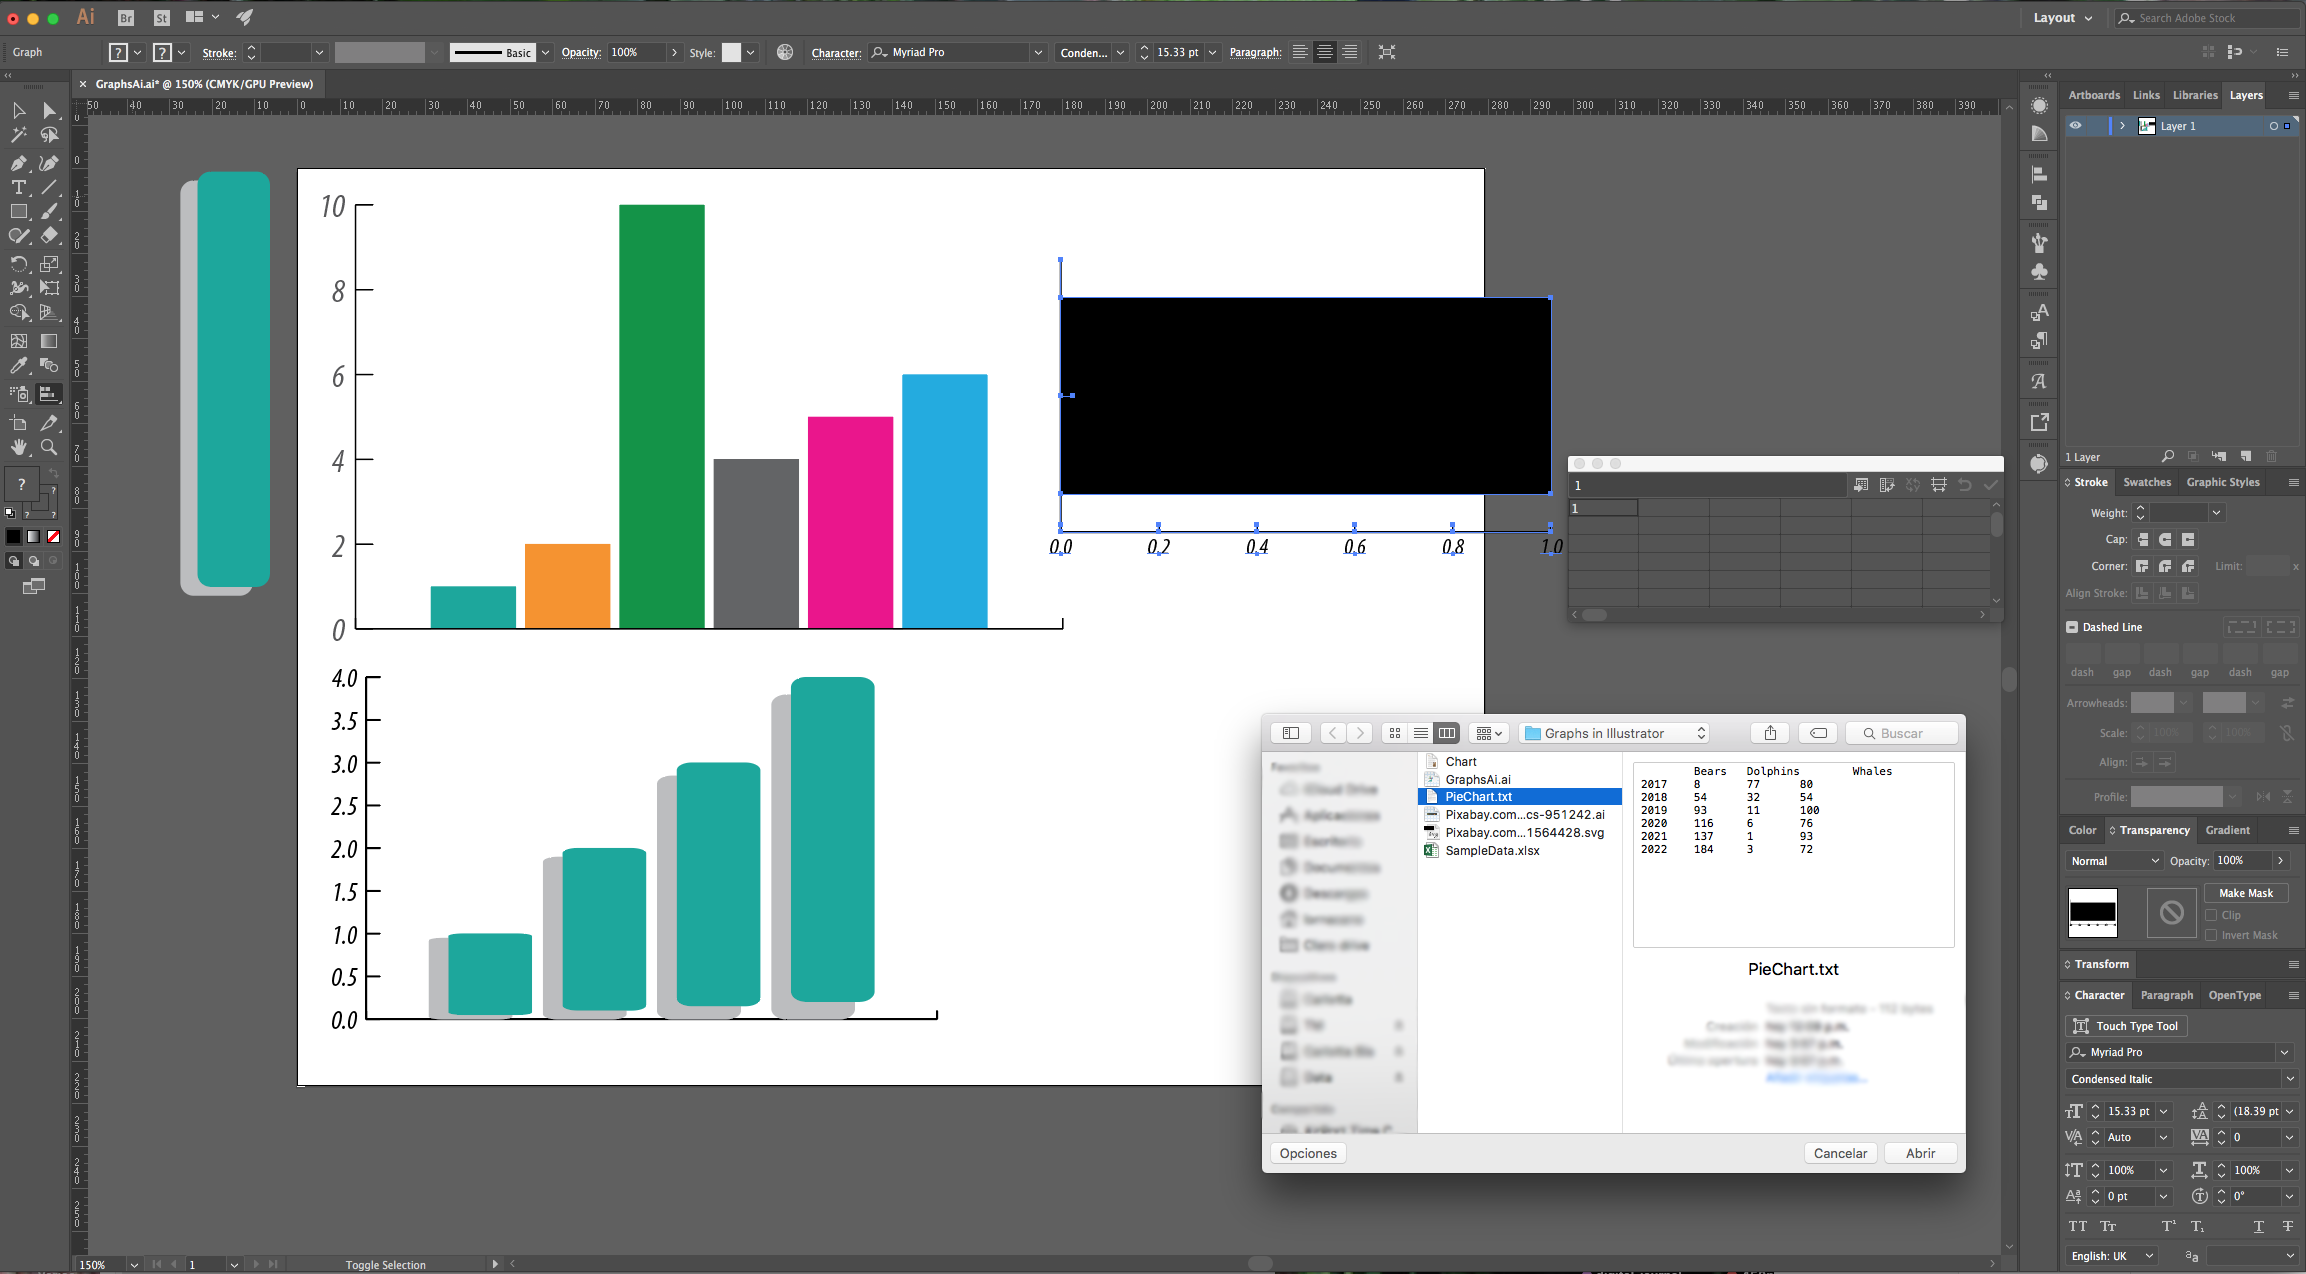
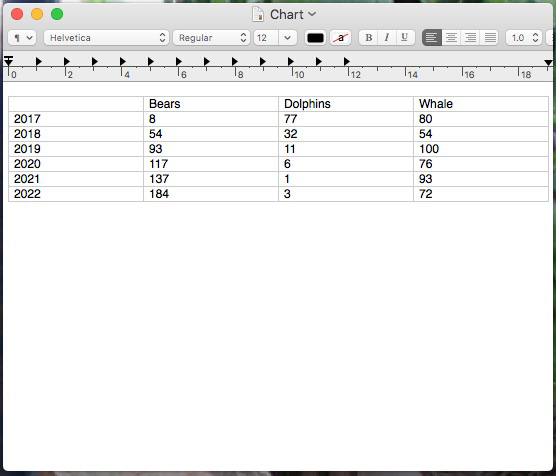
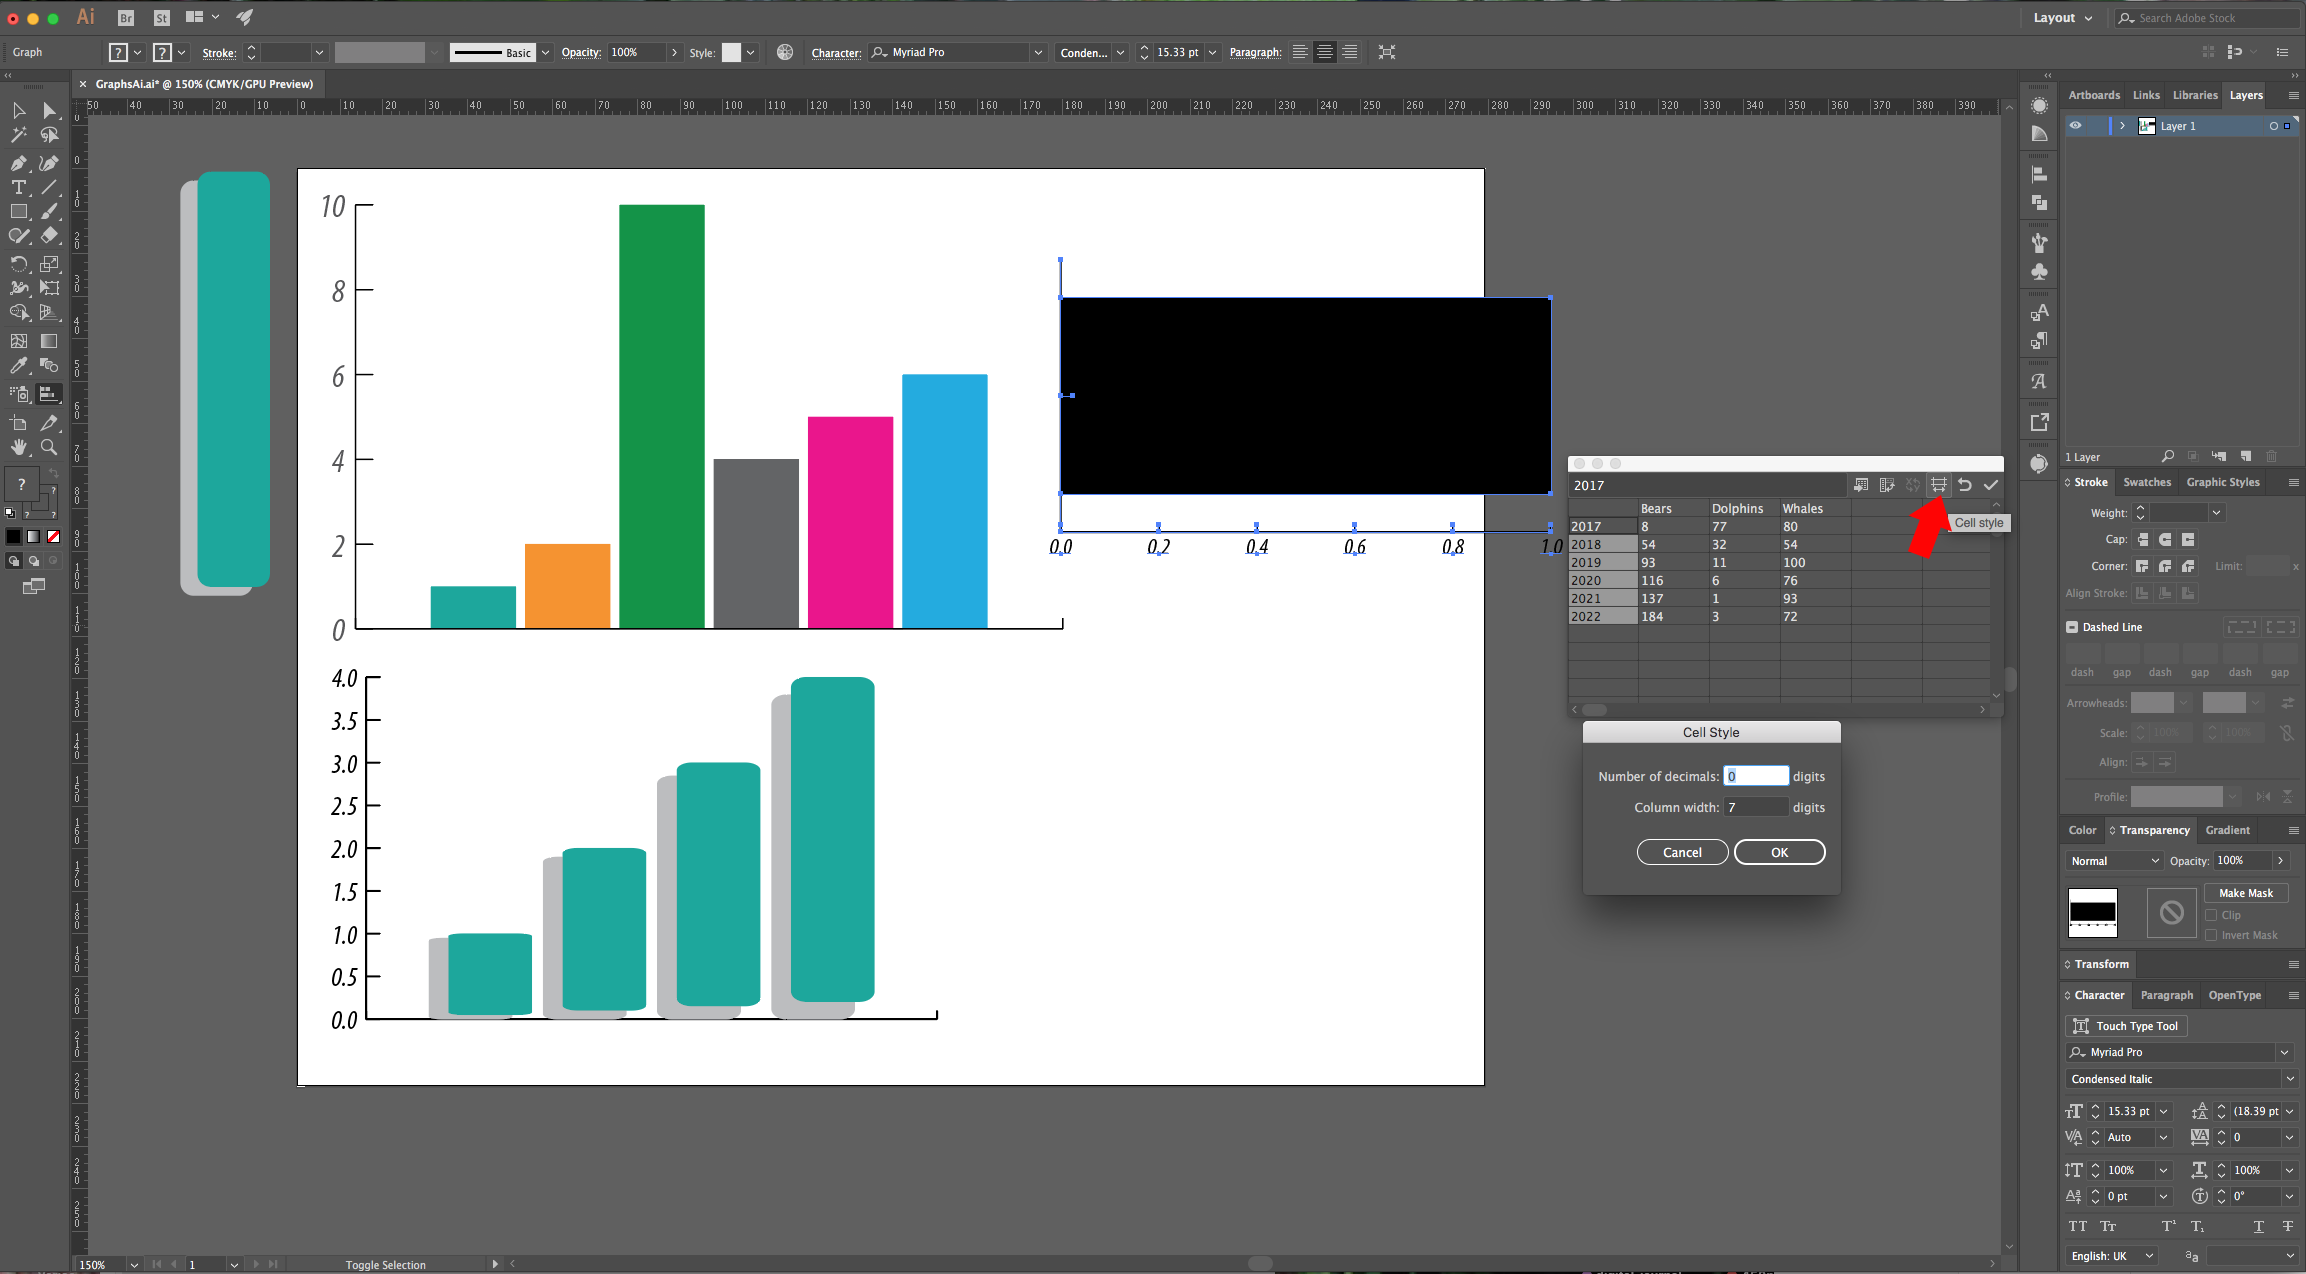
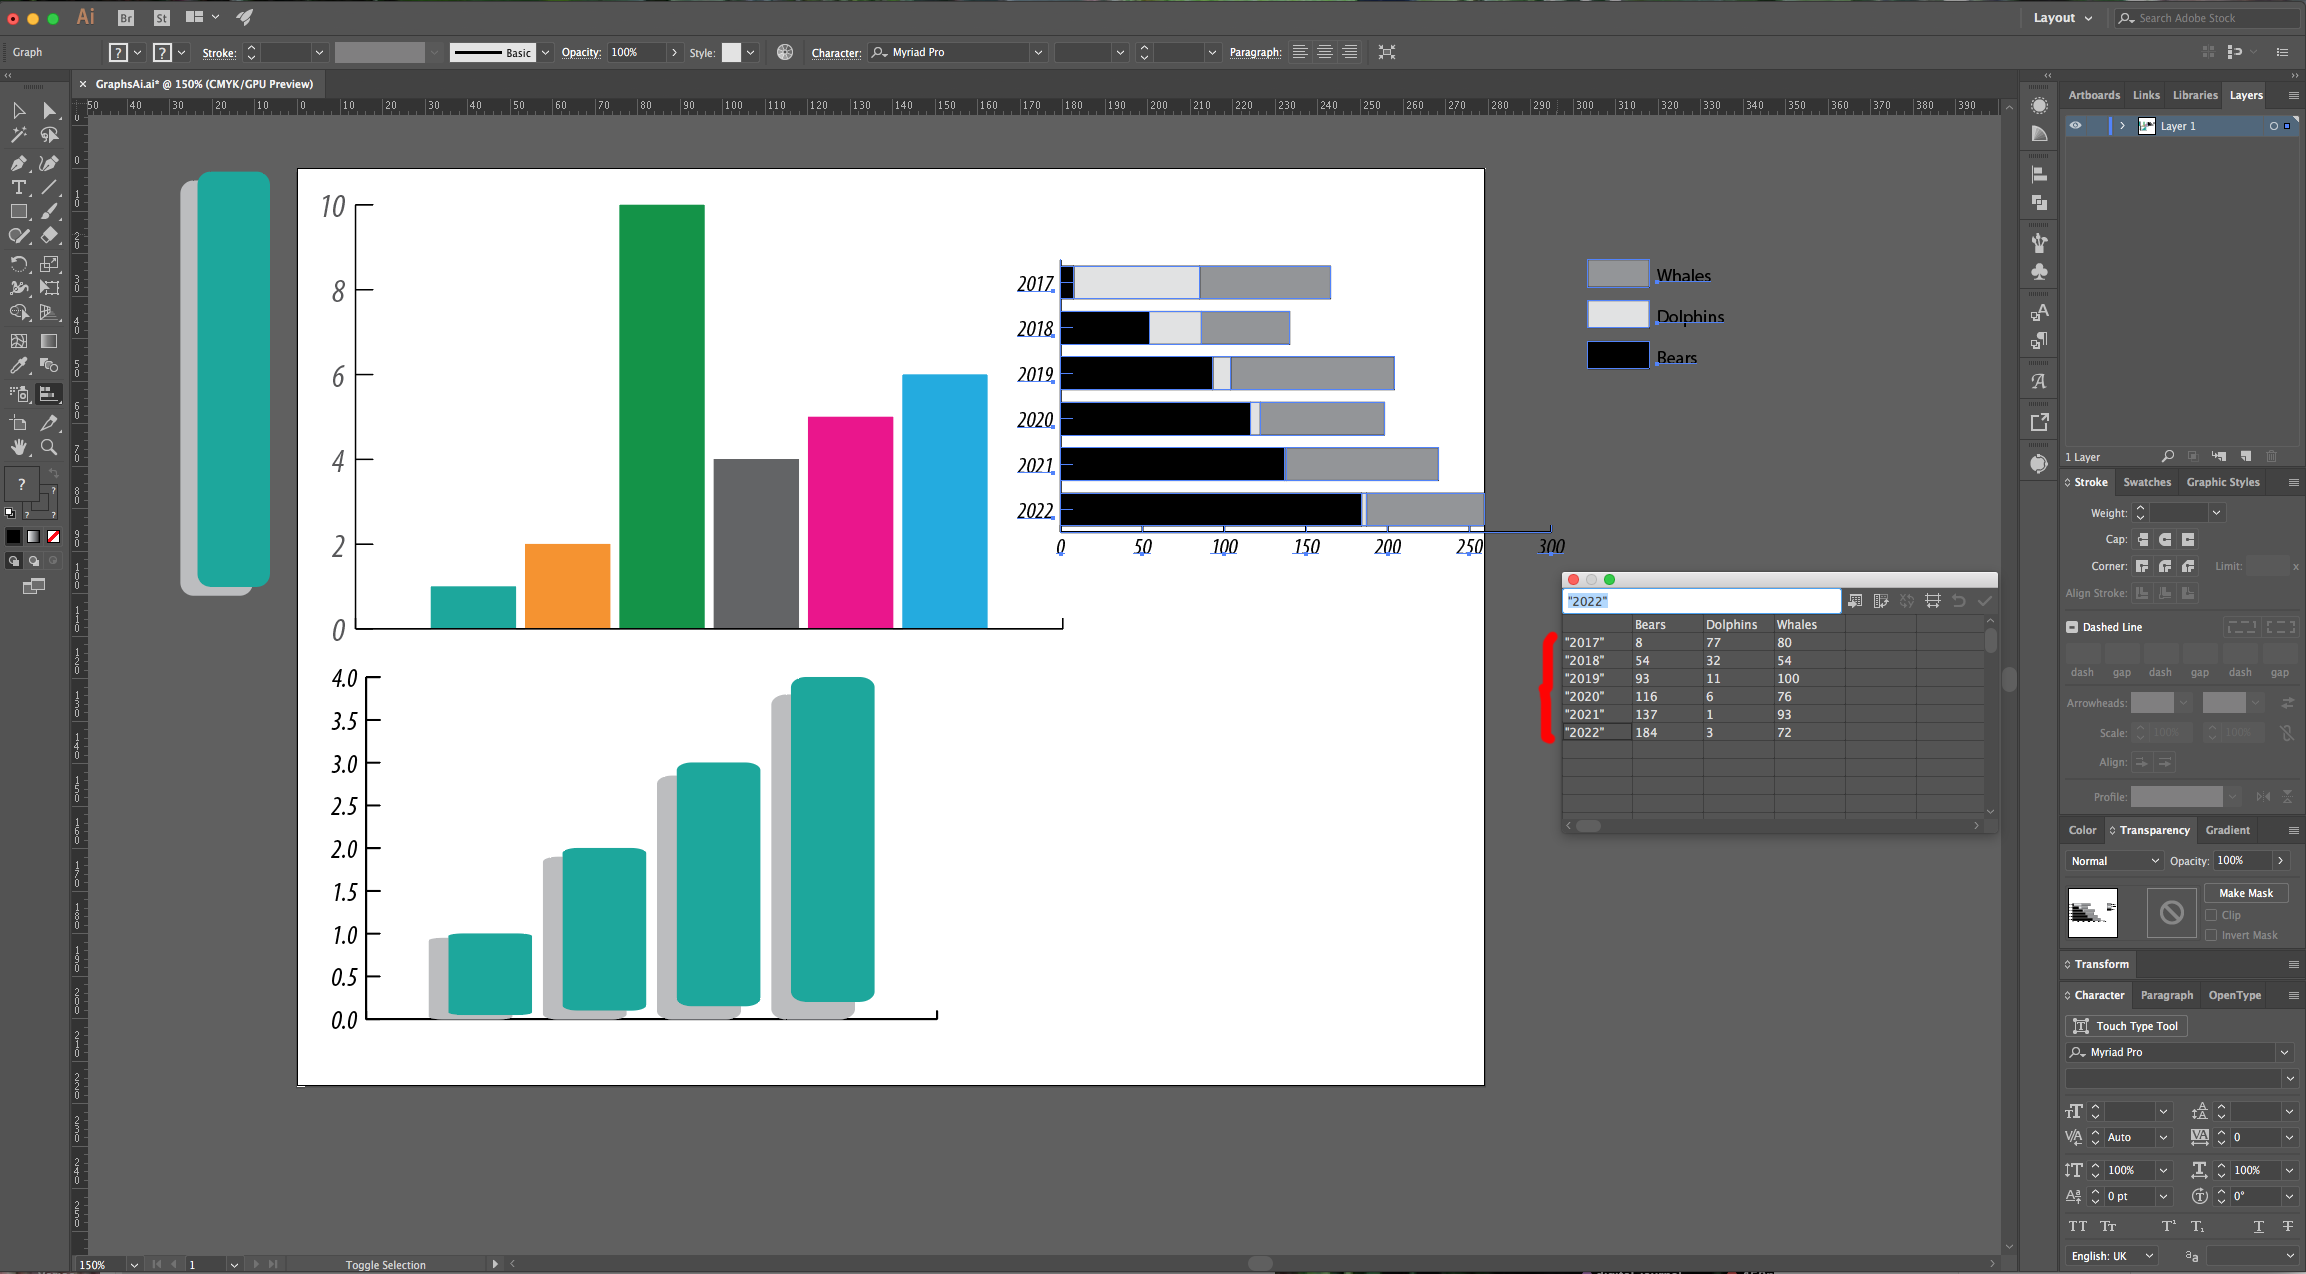
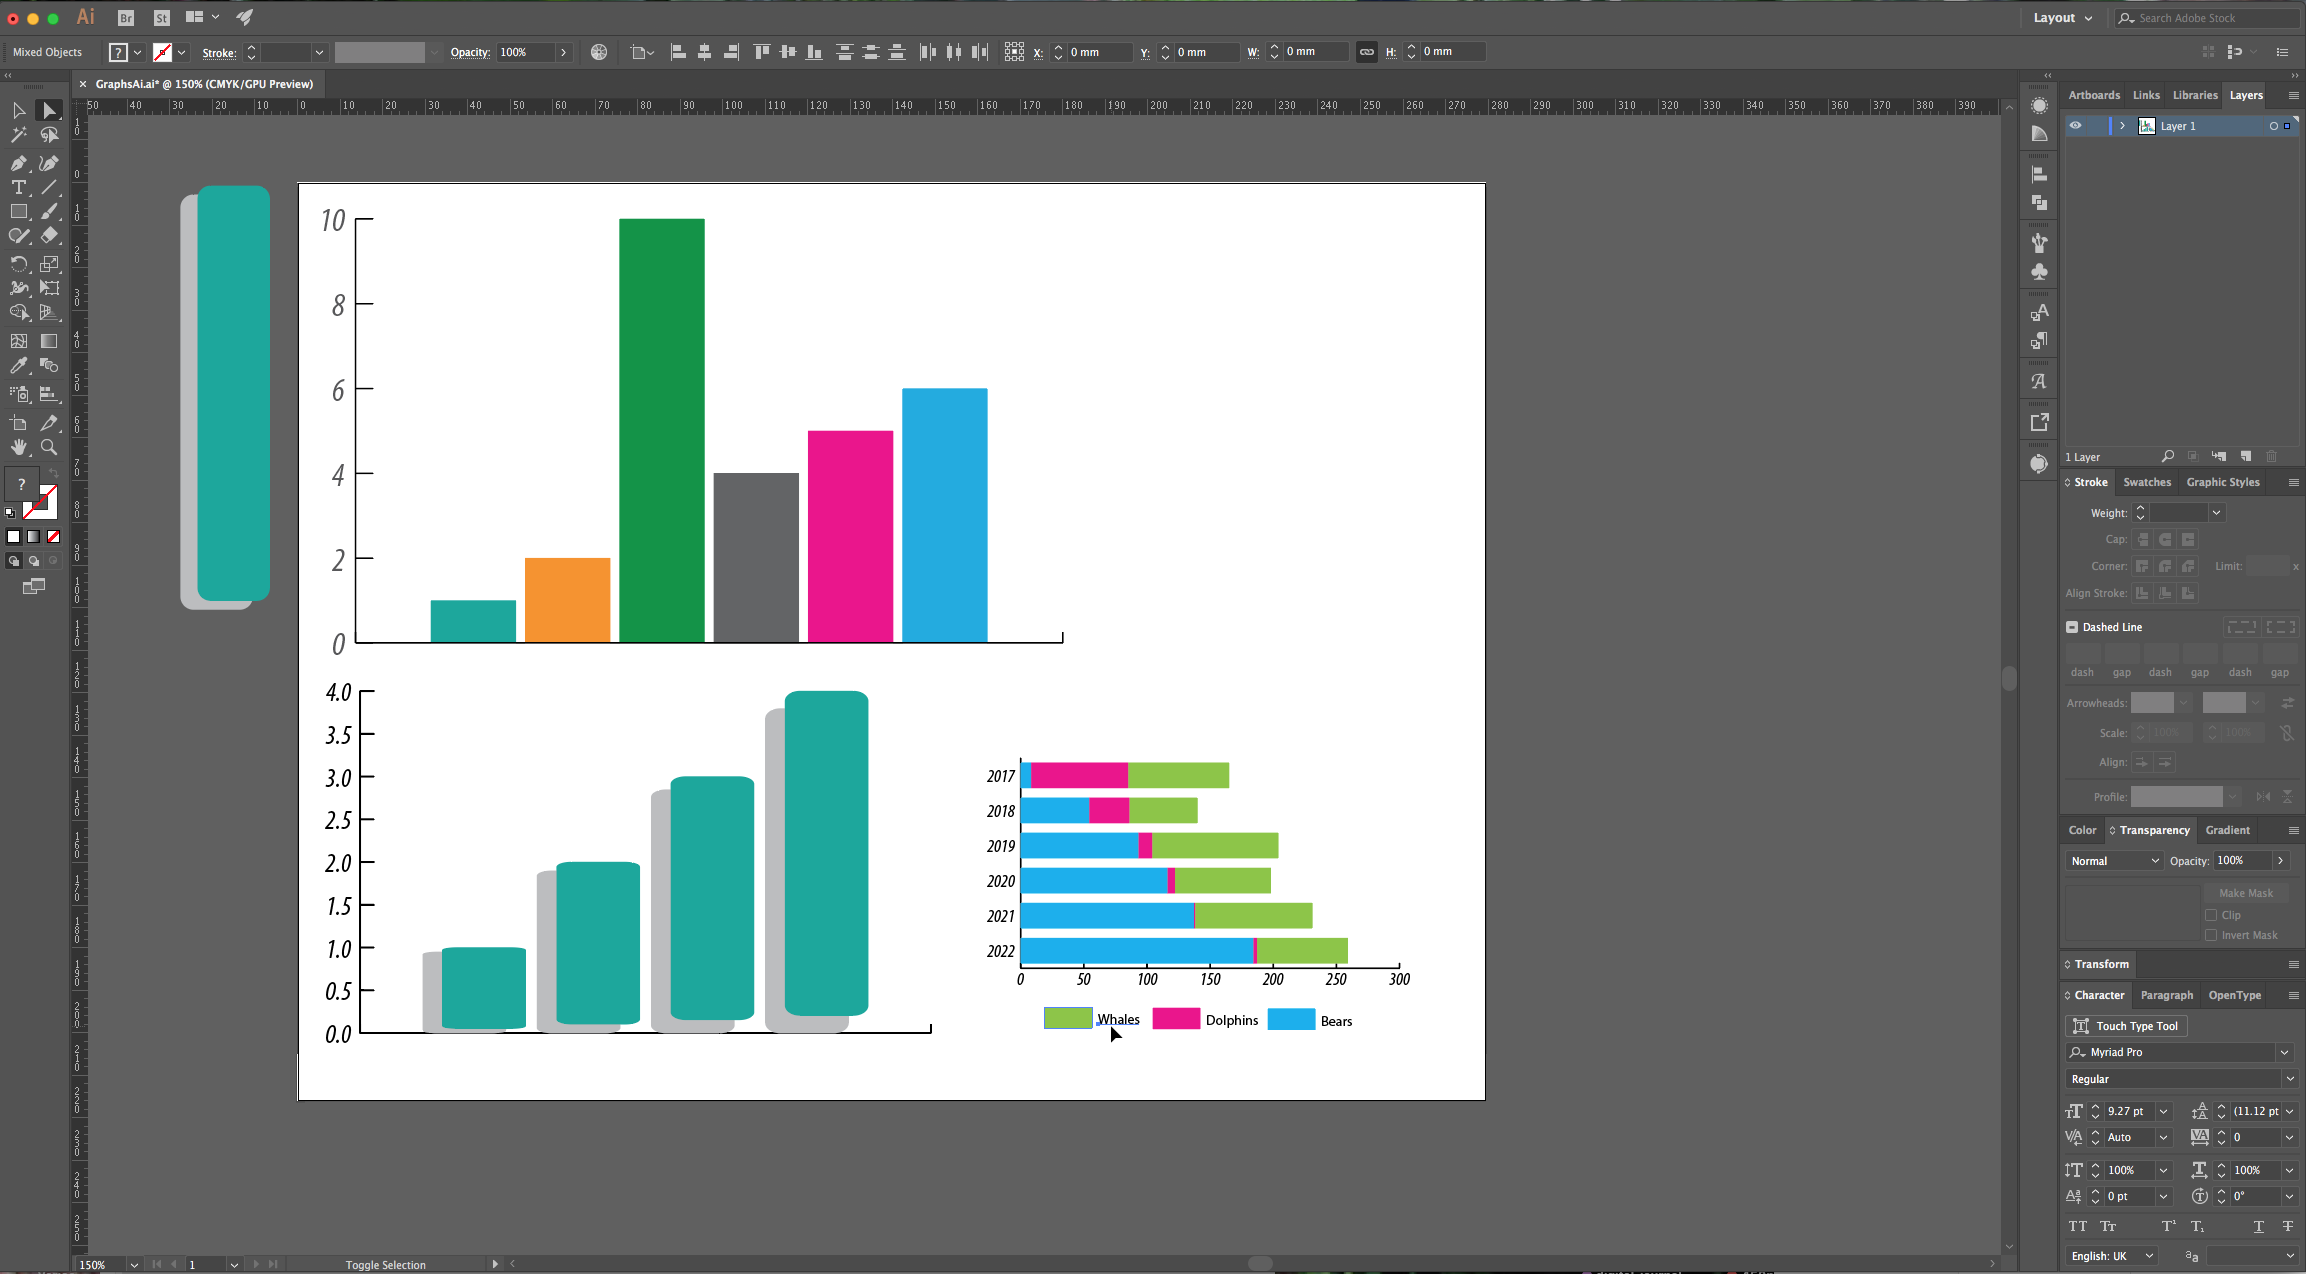
9 - You can also use data imported from another file, just make sure it is placed inside a “Table” (Tab Separated) and saved as a .txt file. Create your “Graph” and in the “Data” window click on the “Import Data” button, then navigate to your file and select it. Once your data is in, you can change the “Cell Style” by clicking on the button on the tip-right menu. The “Labels” go on “Top” and to create the ones for the other side surround the word with “Quotation Marks” (in our case, the dates).
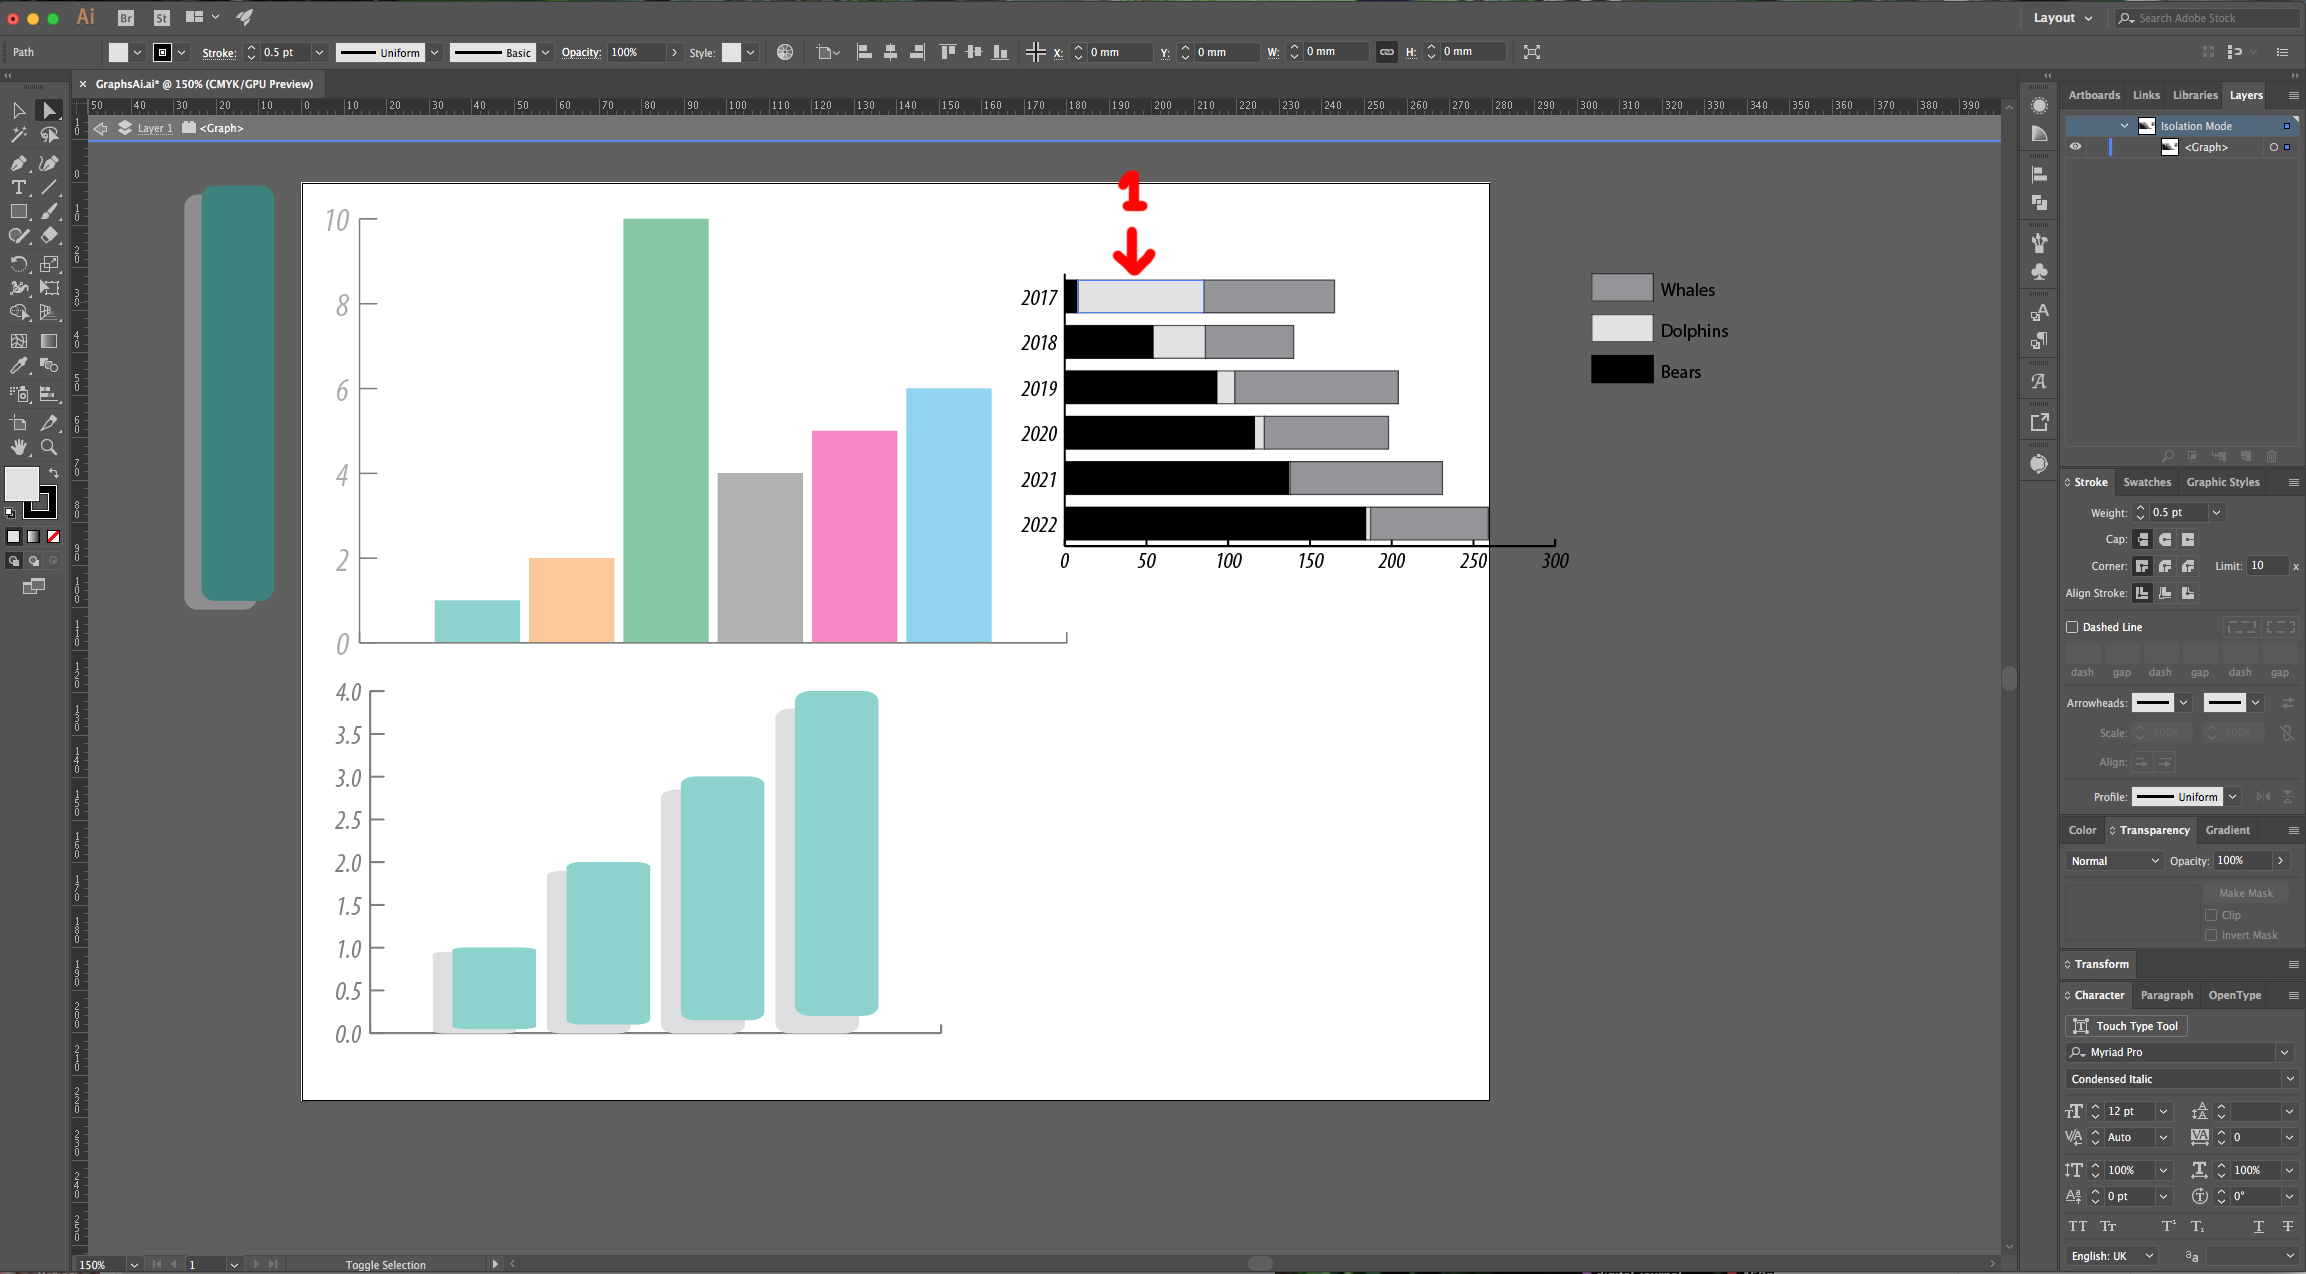
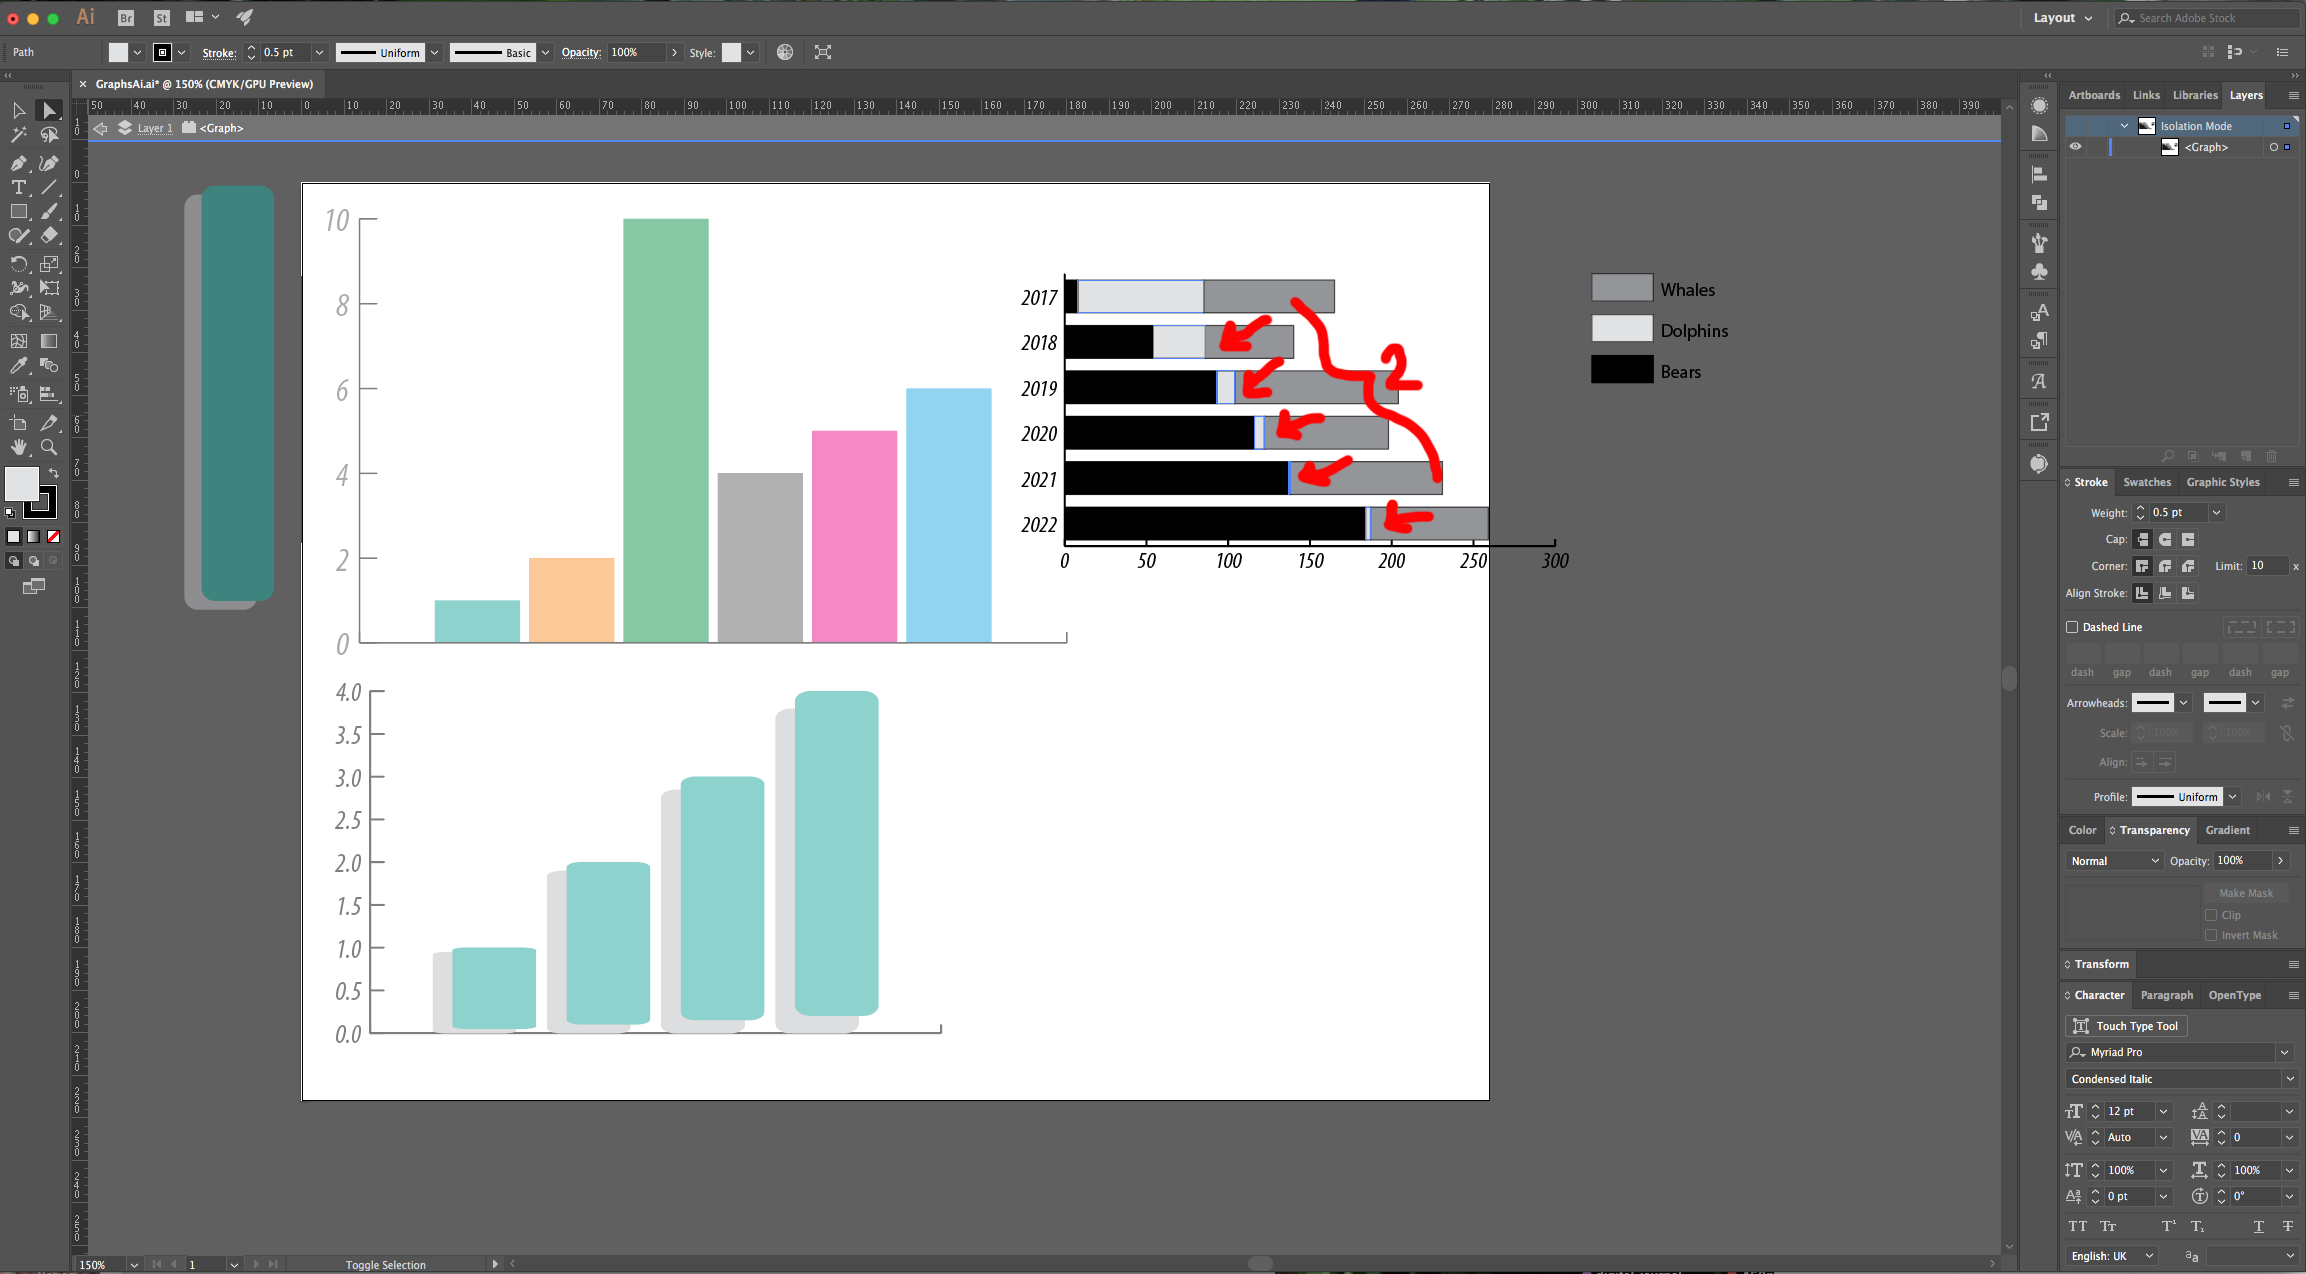
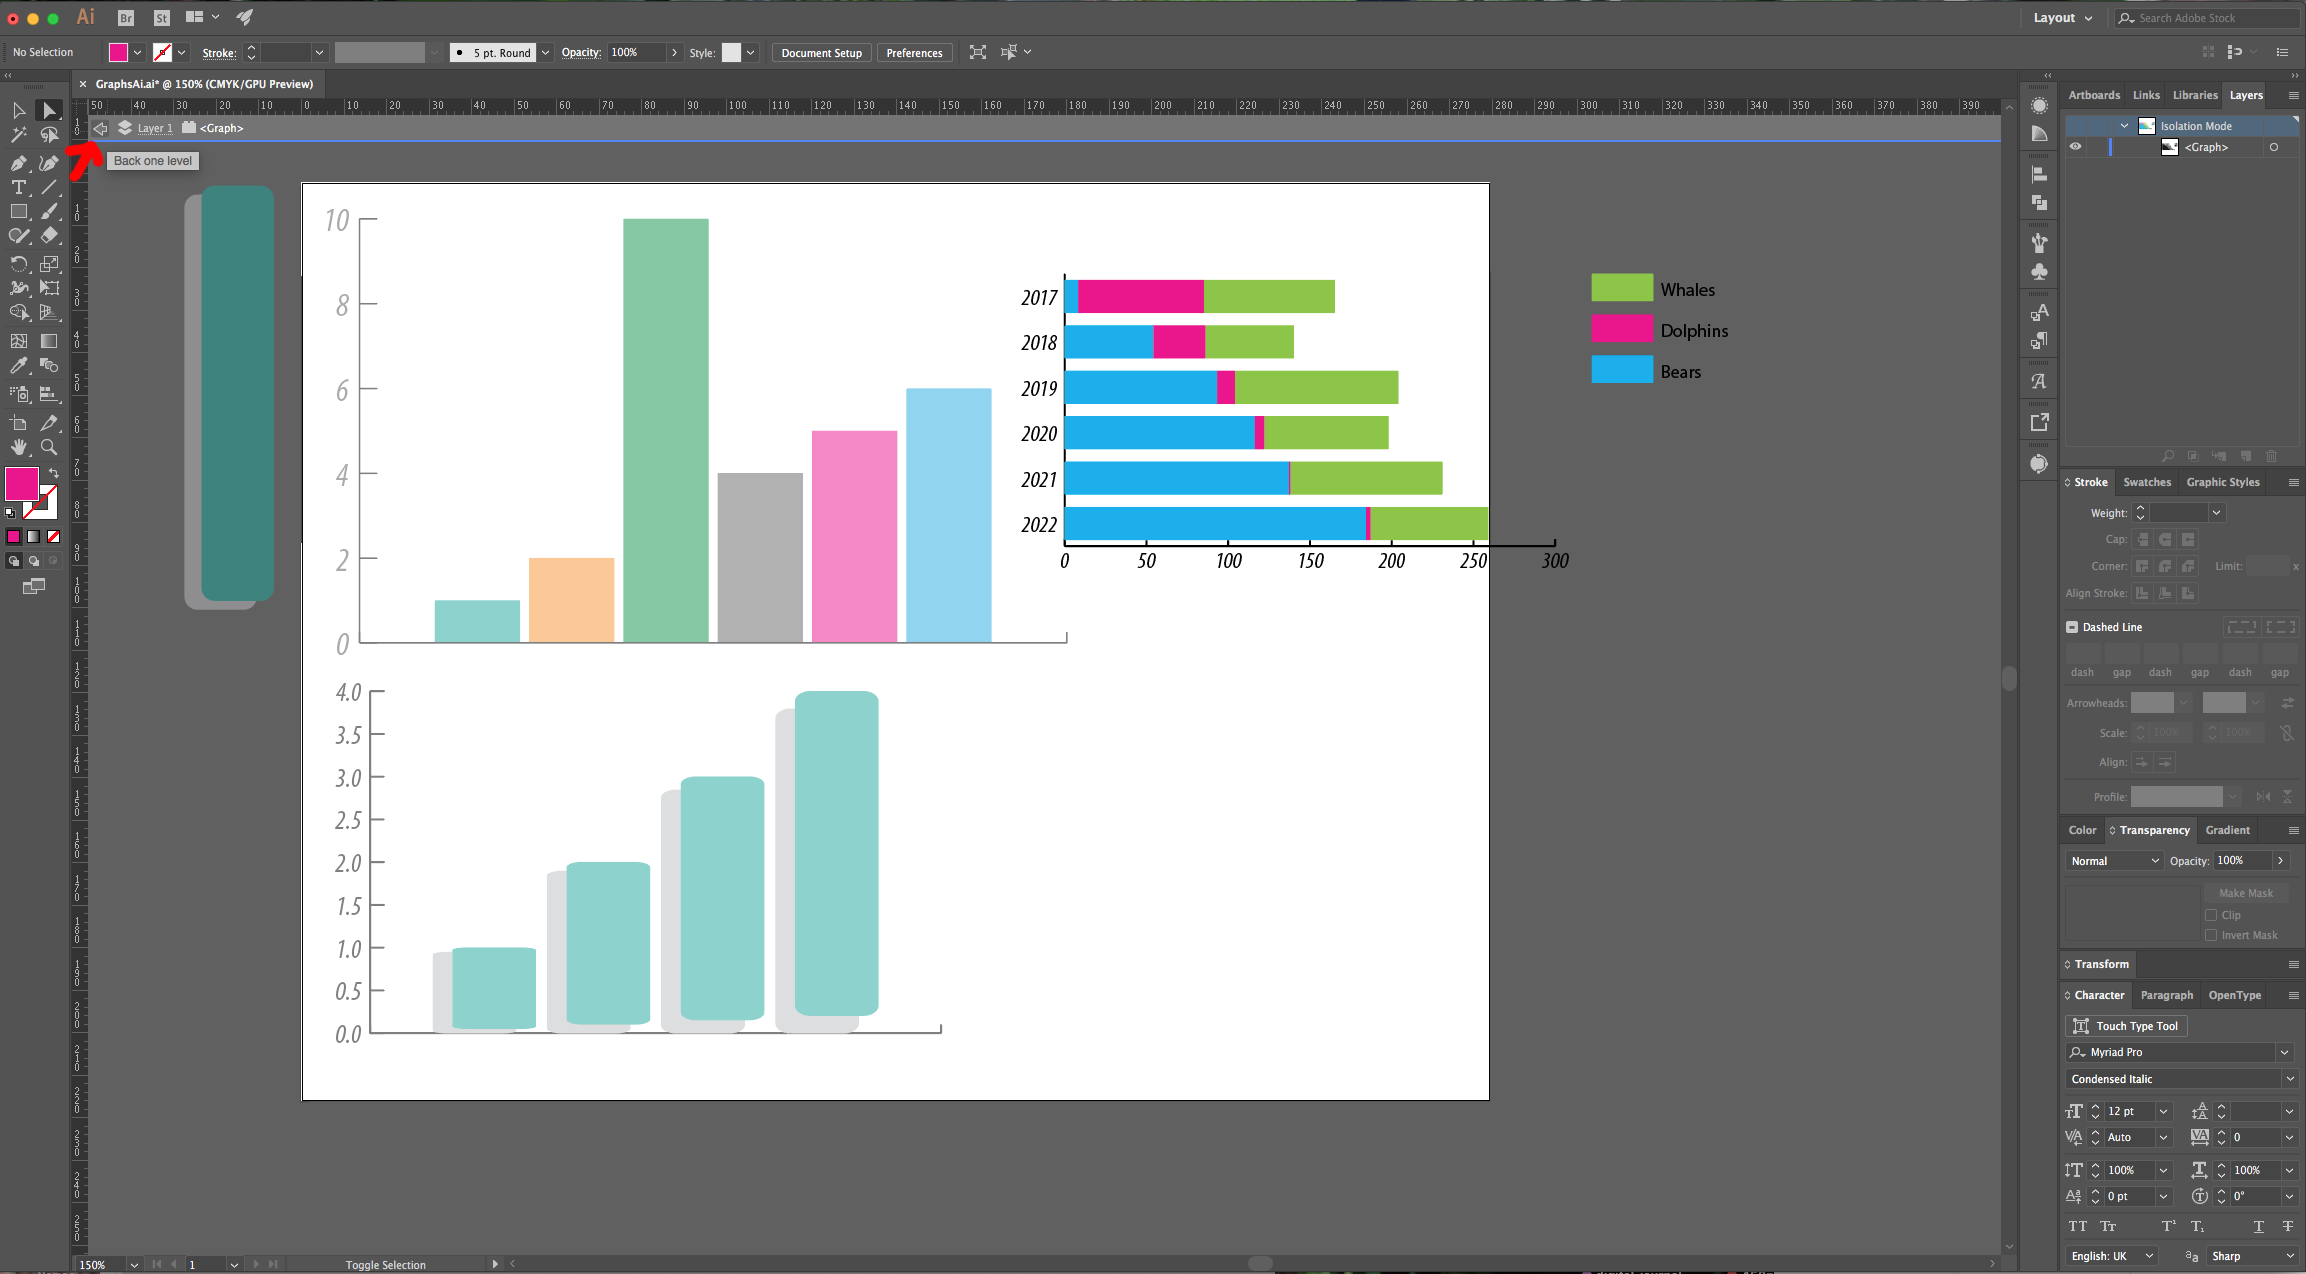
10 - You will notice that the “Labels” boxes are outside the space you considered when creating your “Graph”. Use the “Direct Selection Tool” (A) to move them. You can also double-click on your “Graph” to enter “Isolation Mode” and modify your vectors. Keep the “Alt/Option” key pressed while selecting one vector with a specific color and click once to select just that path, twice to select the other pieces of the “Graph” that have the same color and if you click a third time you will select the “Label” square also (Clicking a fourth time selects everything). Once you are done, click on the arrow on the top-left to exit “Isolation Mode”.

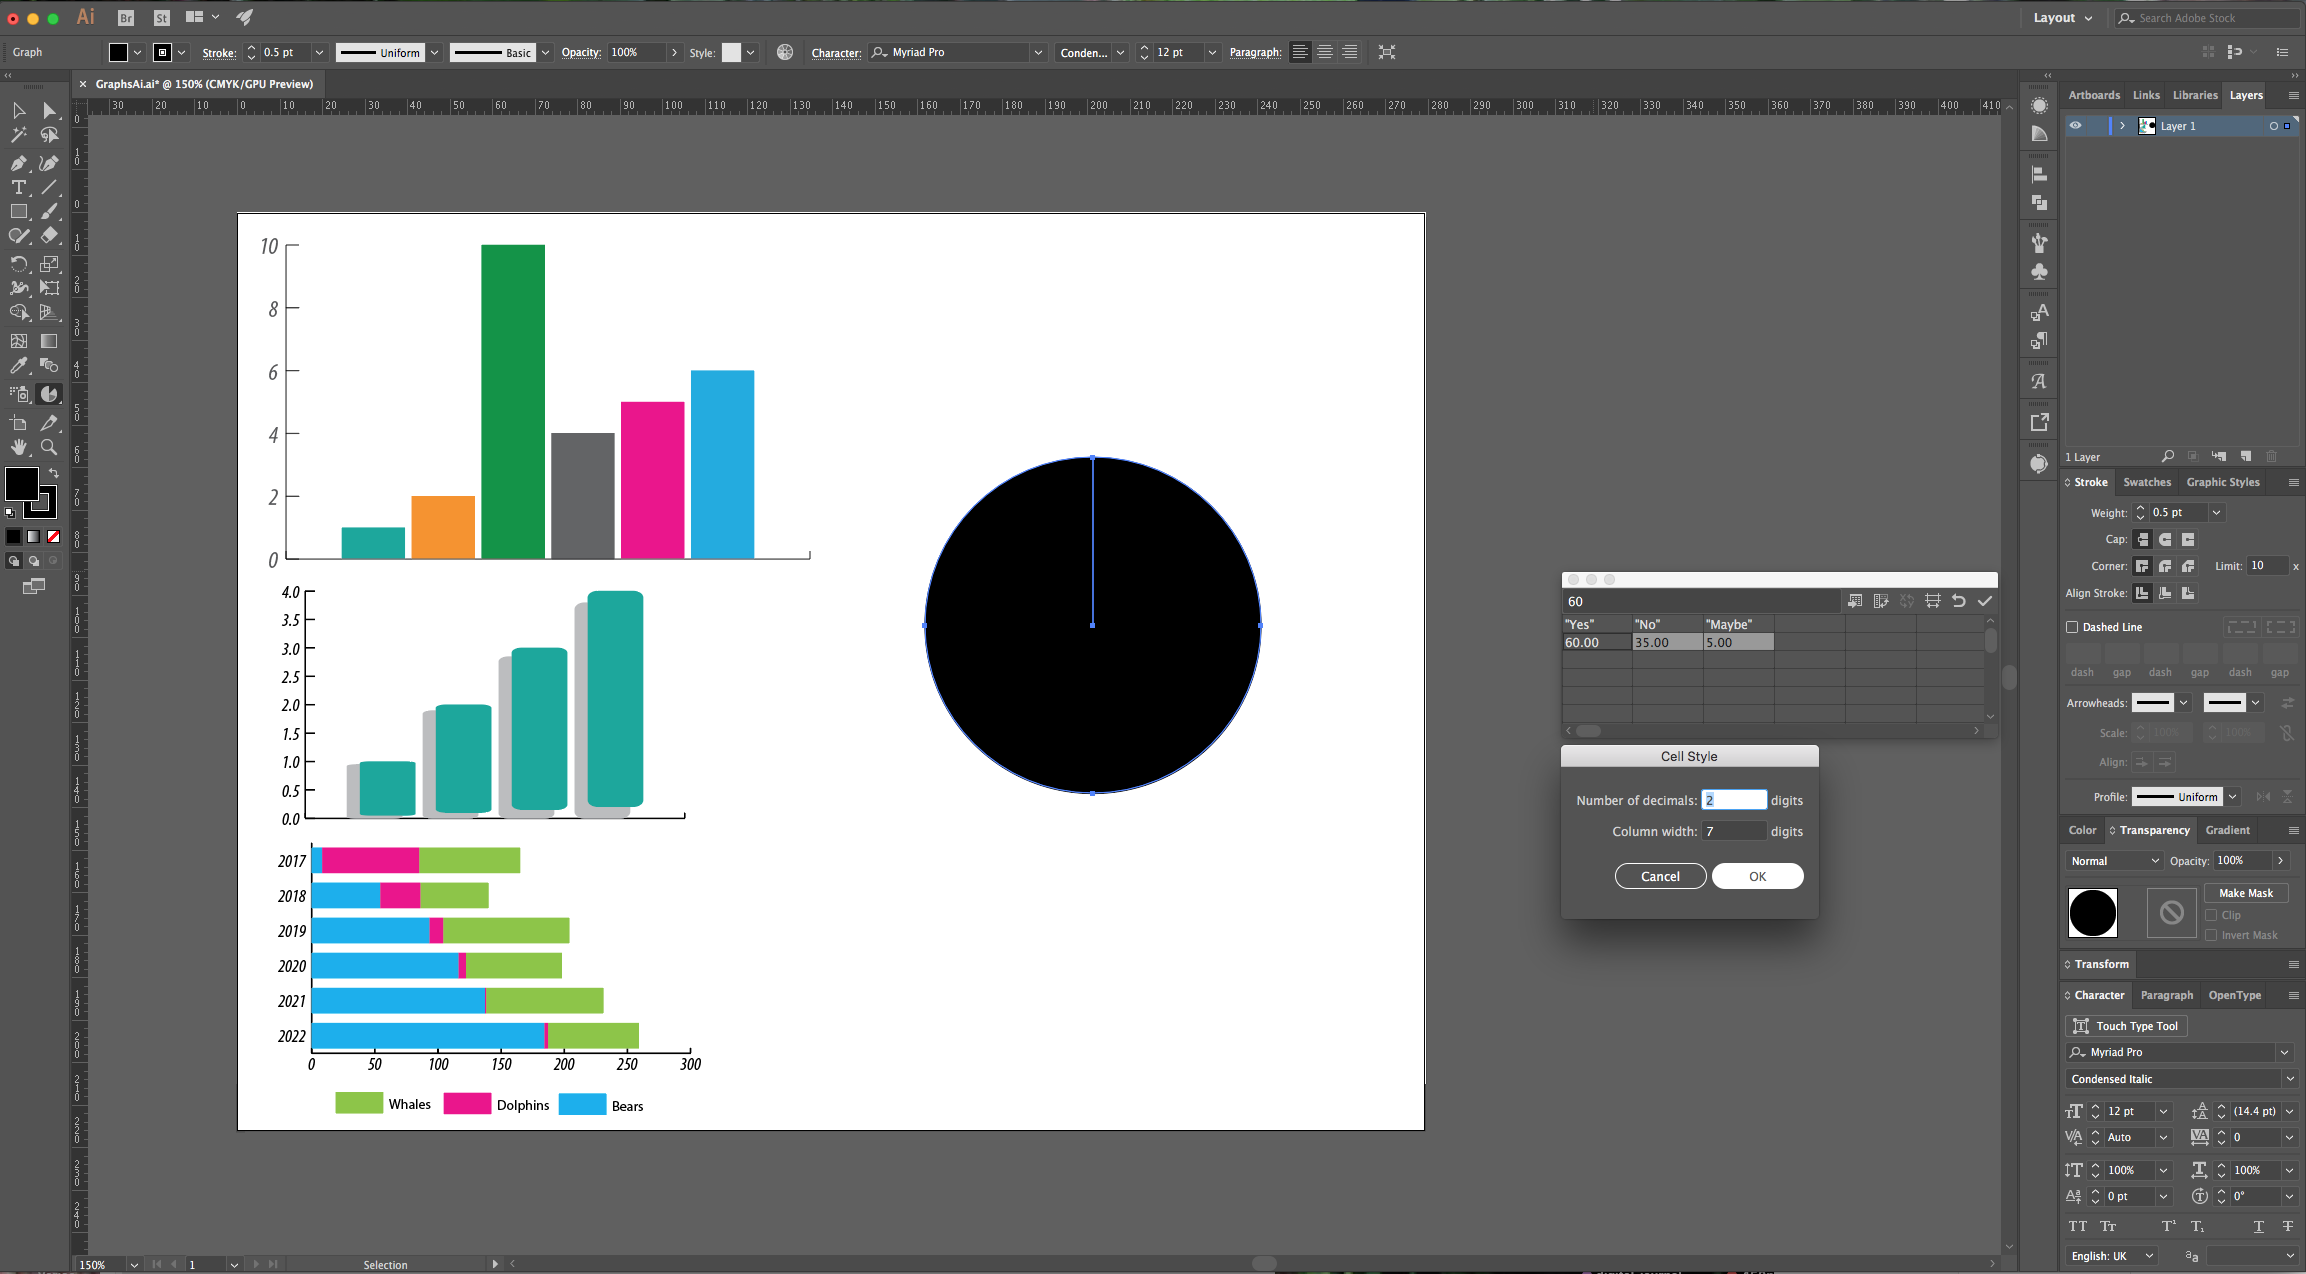
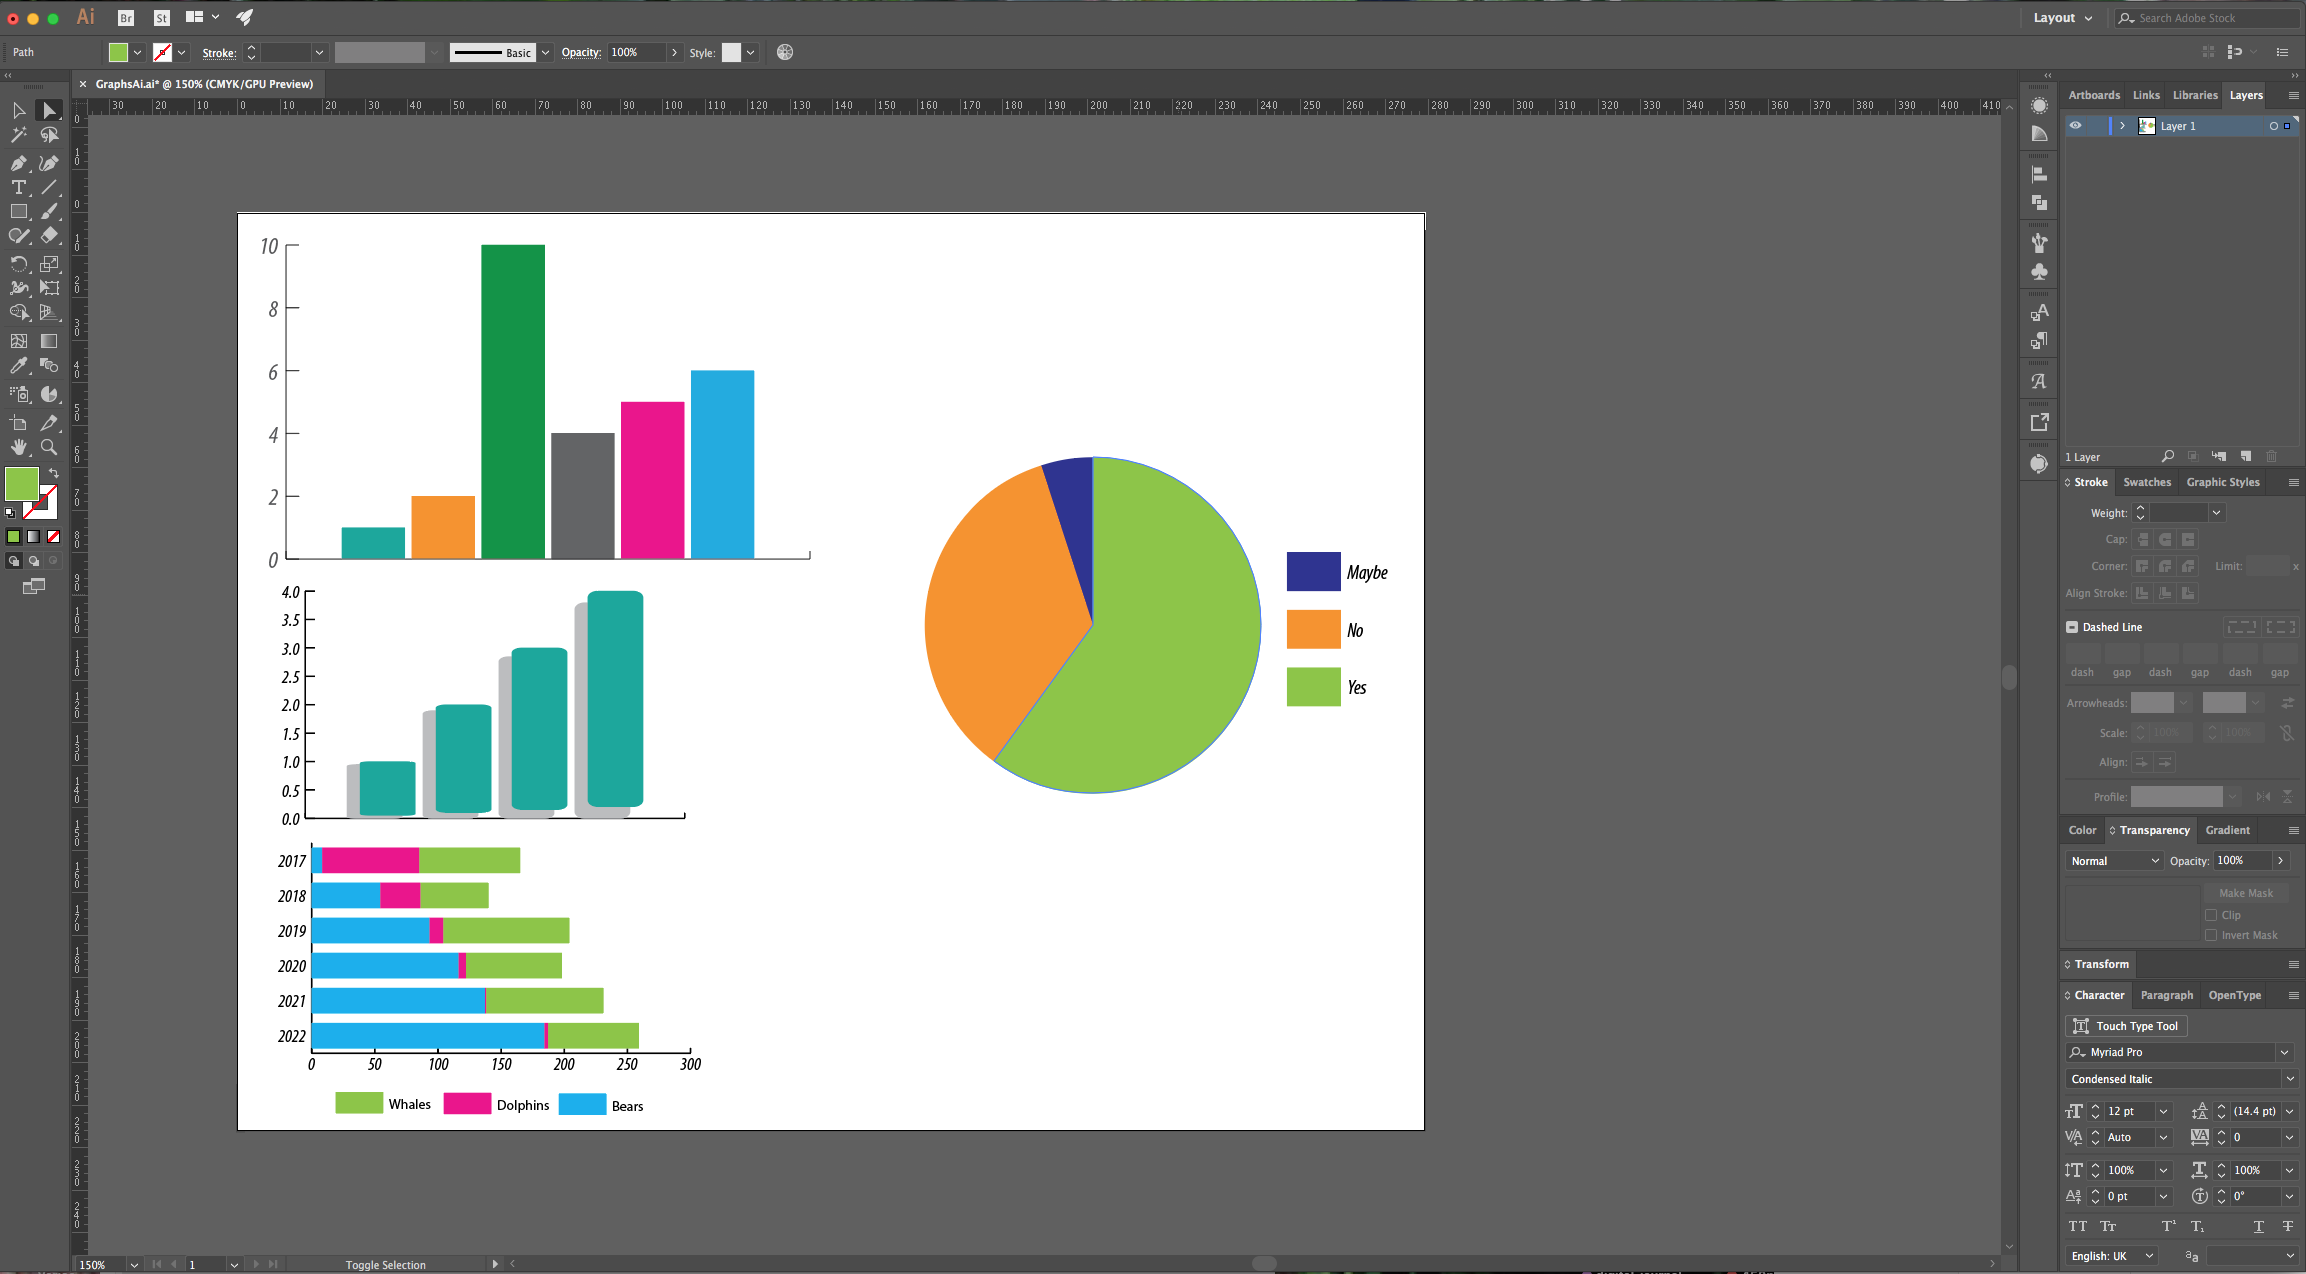
11 - To make a “3D Pie Graph”, select the “Pie Graph Tool”, input some data and use the “Quotation Marks” on your “Top Labels”. You can change the number of “Decimals” in your “Cell”. Change the colors of your “Pie” and “Ungroup” once to separate the “Text” from the “Paths”.

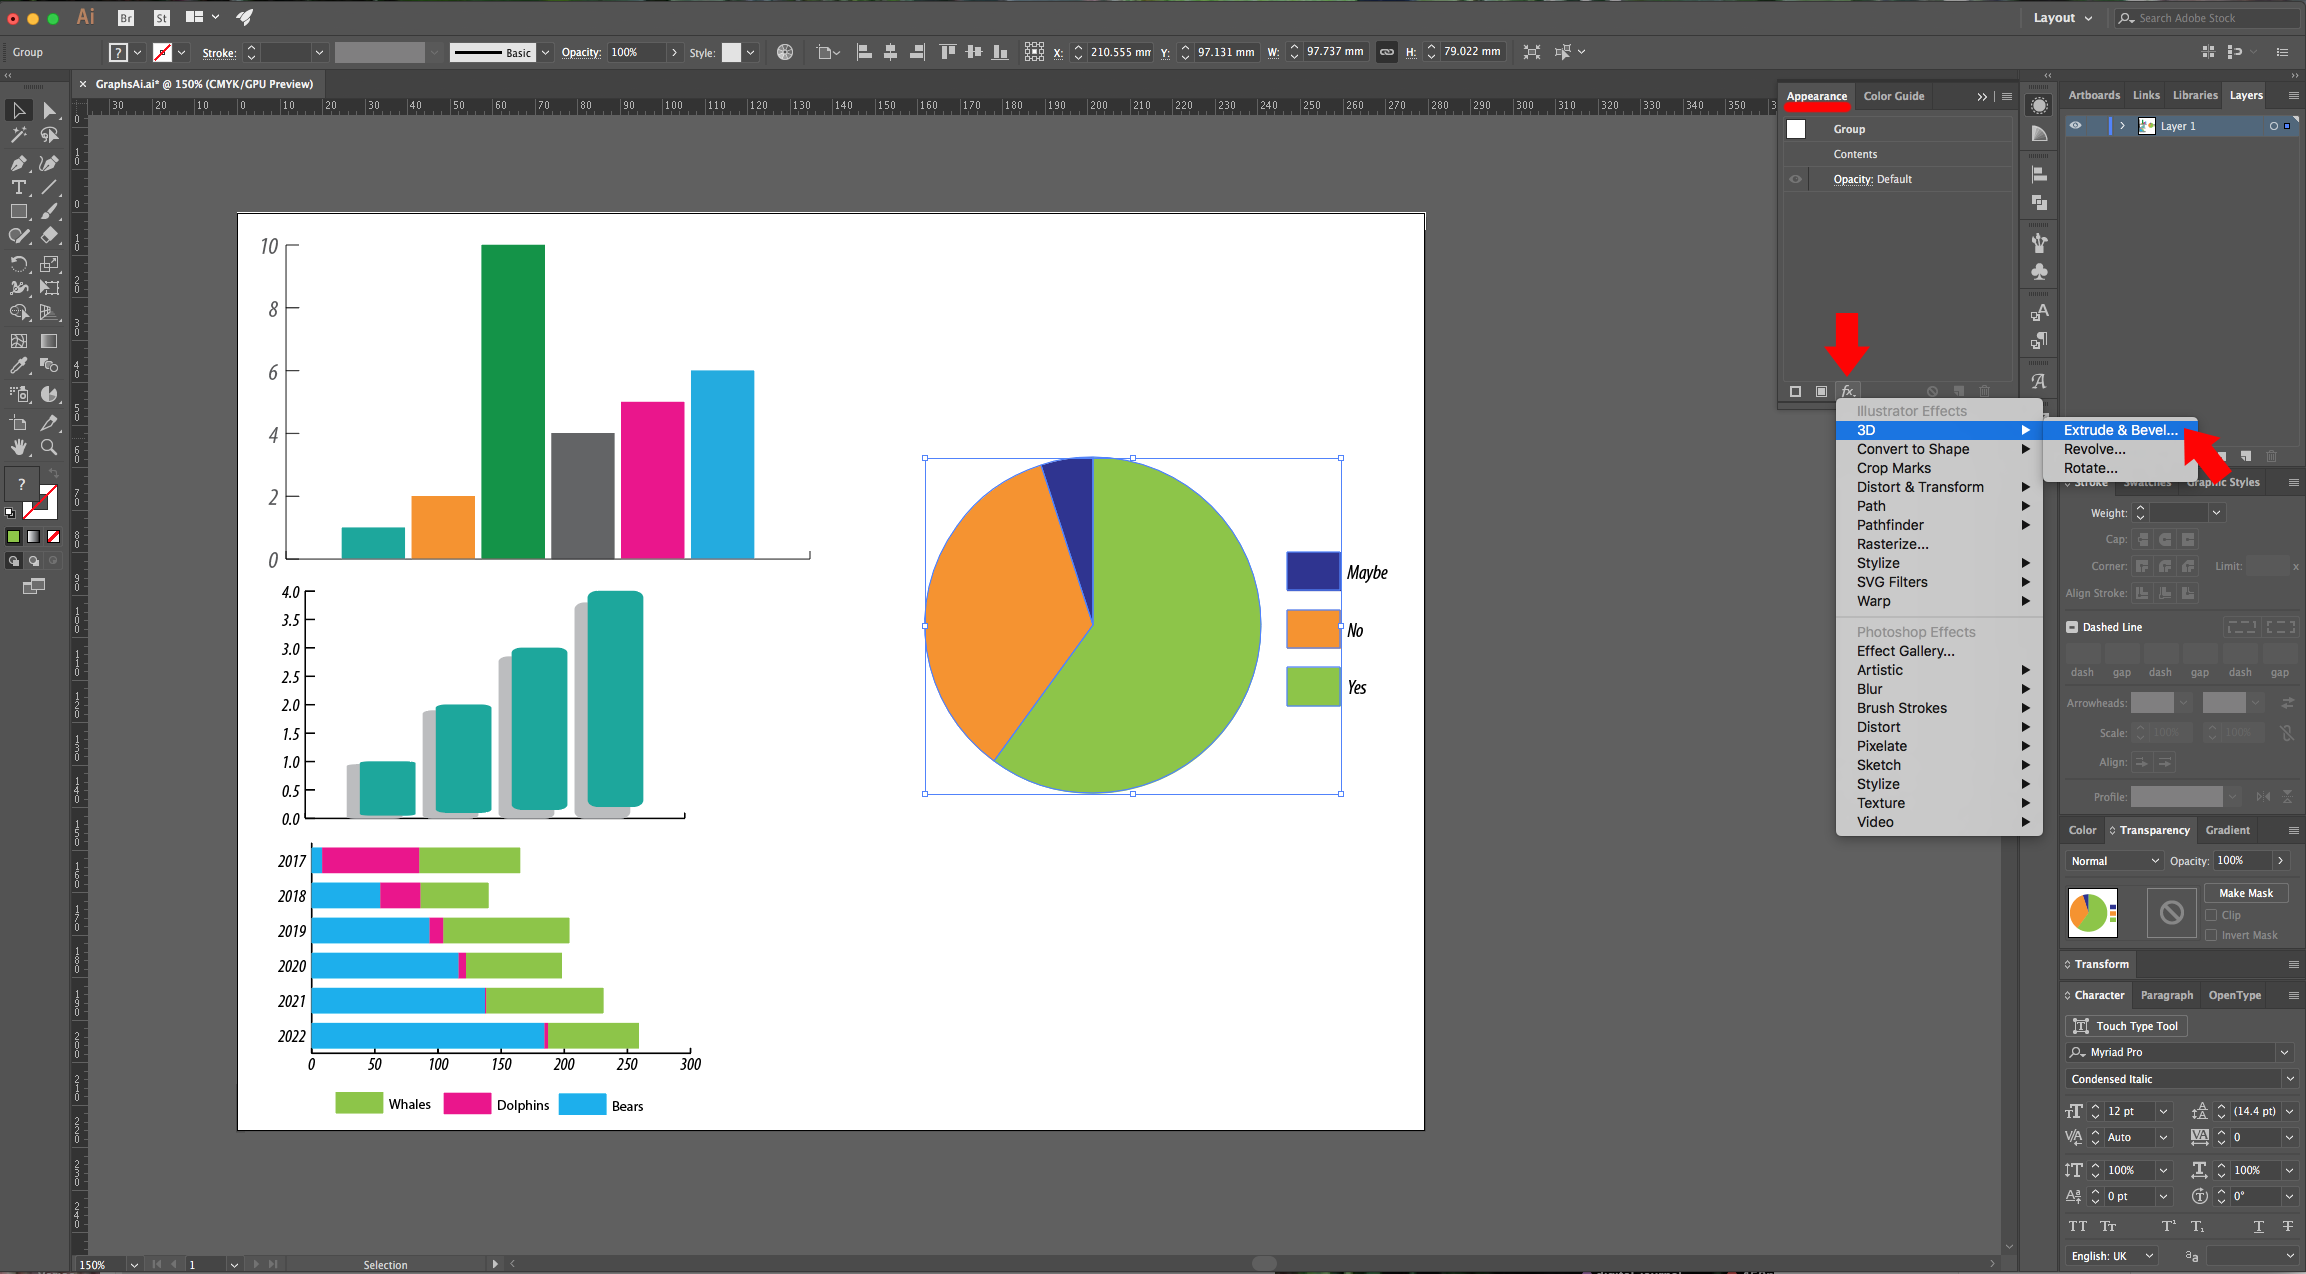
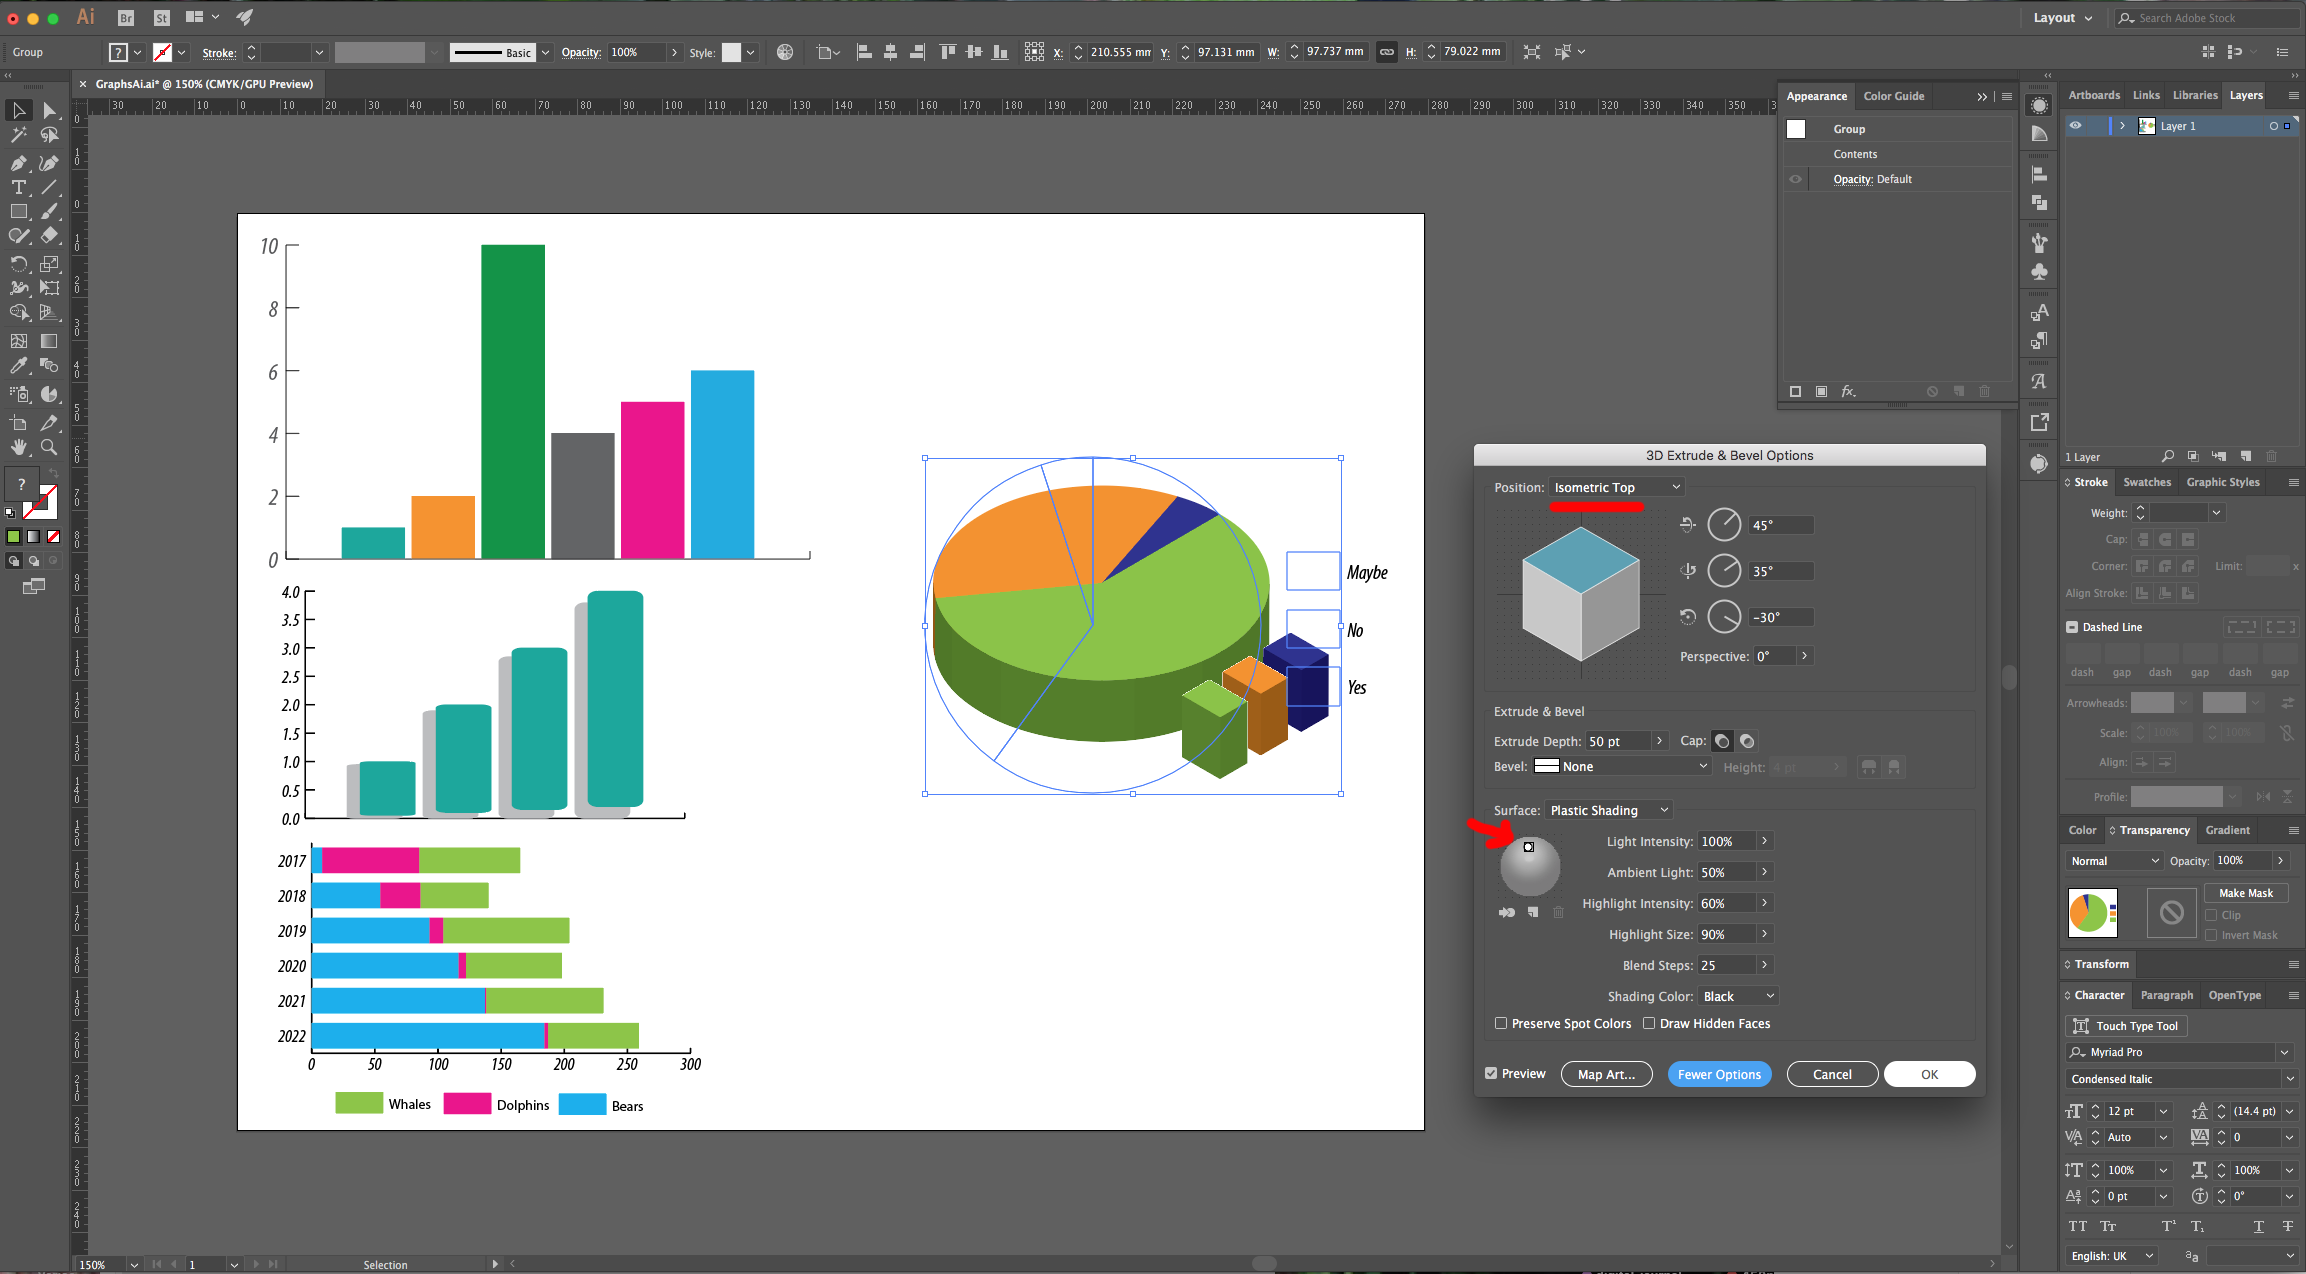
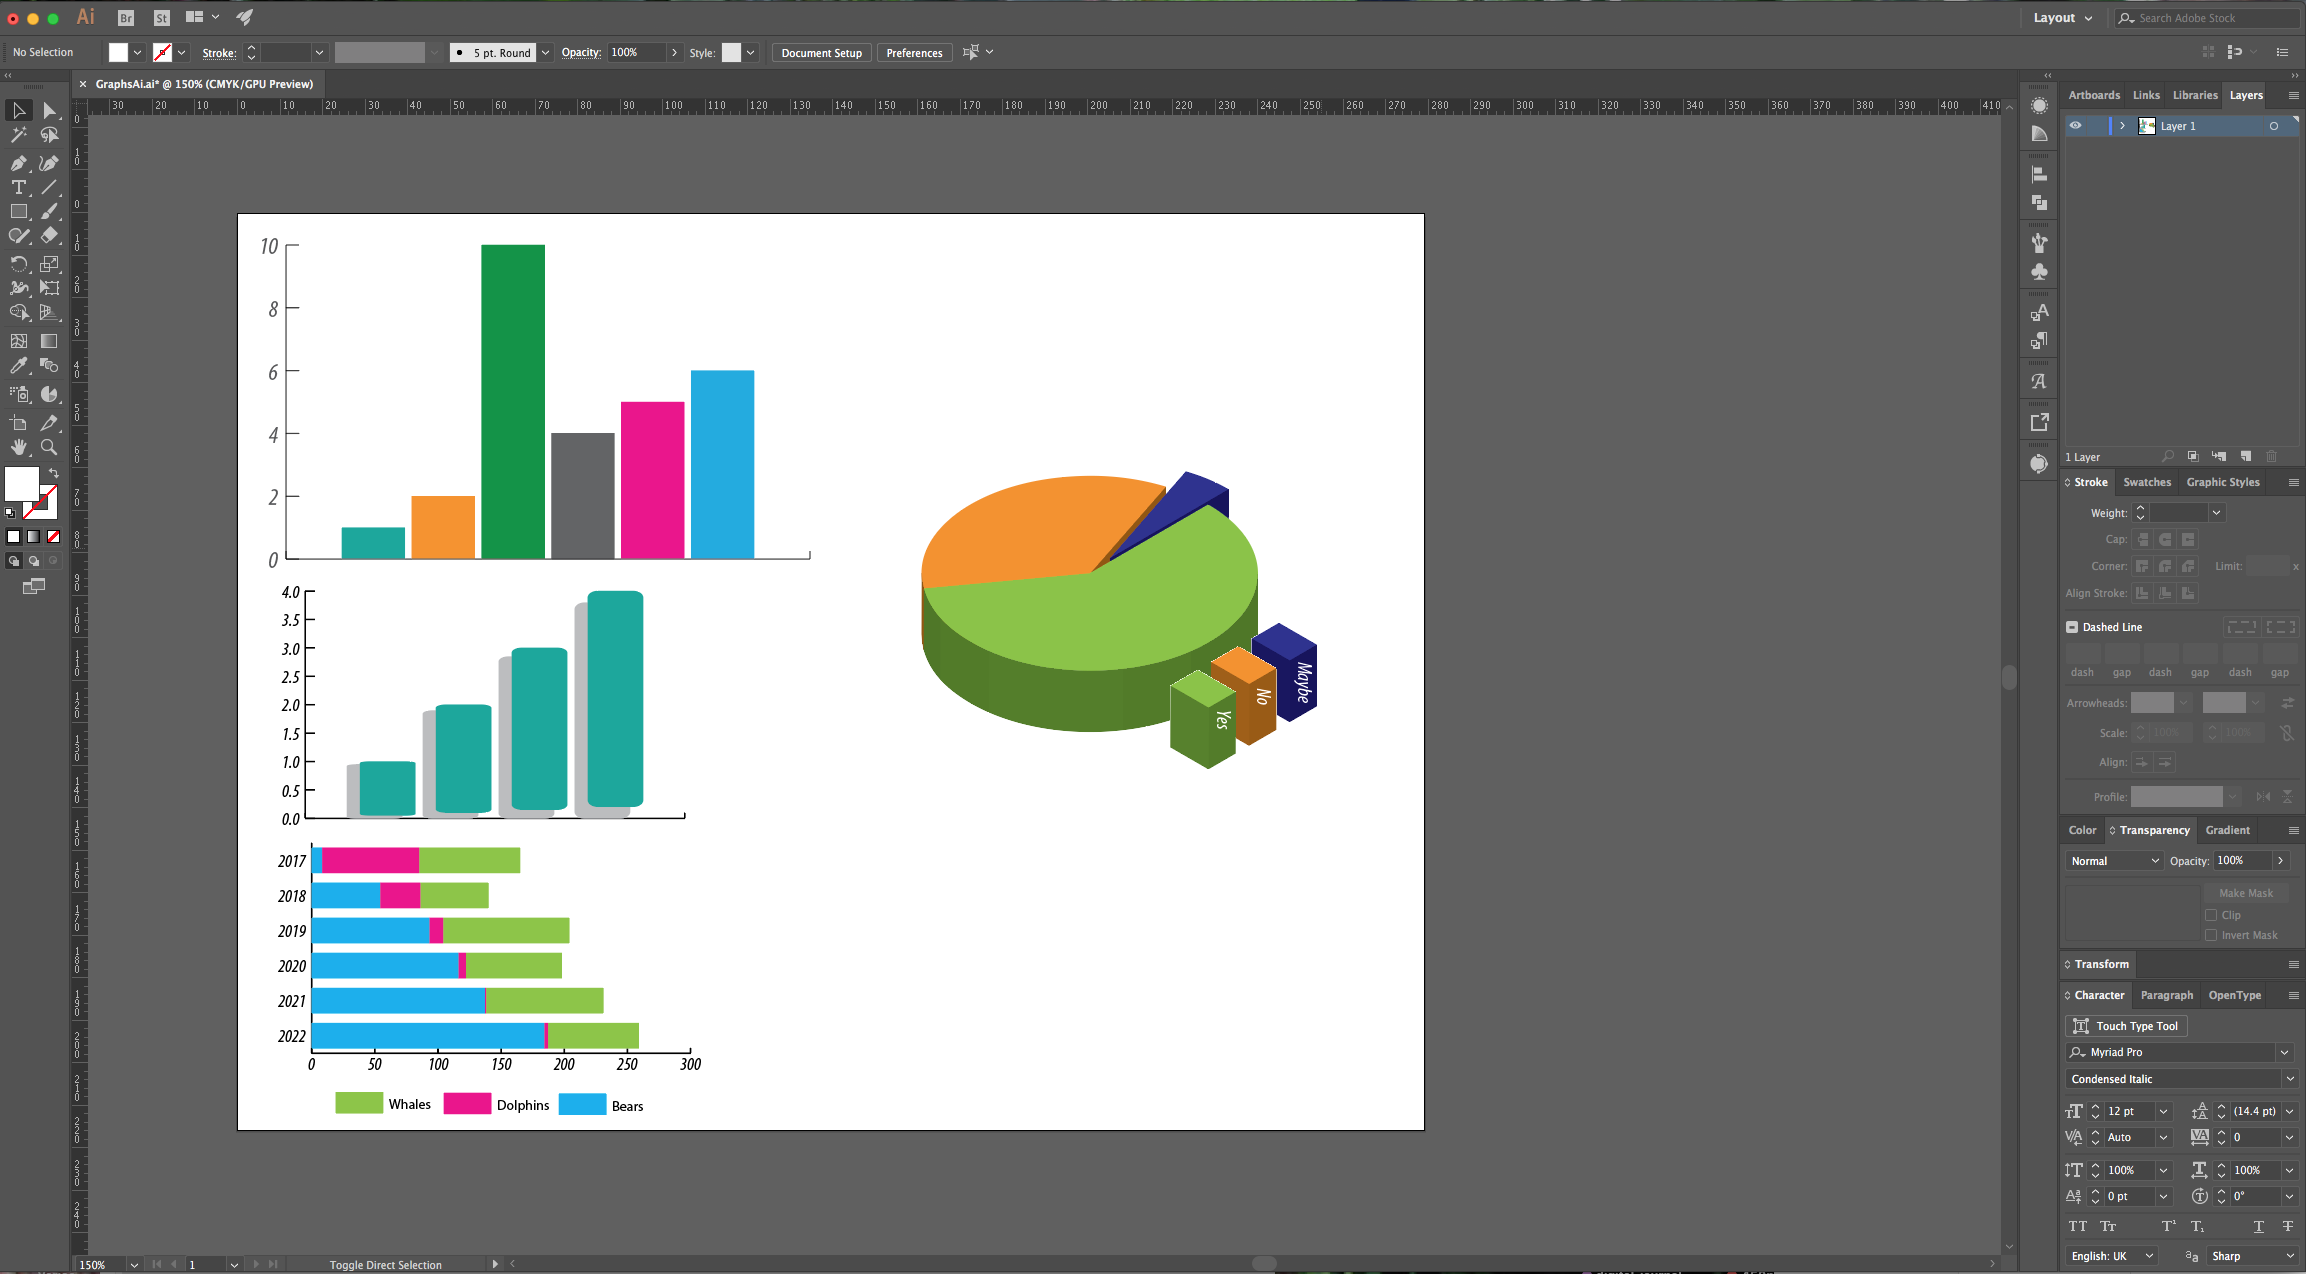
12 - In the “Appearance Panel” open the “Effects Menu” and go to 3D > Extrude & Bevel. We used the “Isometric Top” Position and clicked on the “More Options” button to bring out the “Surface” options and moved the “Light” position circle to adjust the lighting. You can change the color and rotate the “Labels” Text to fit it with the 3D look.

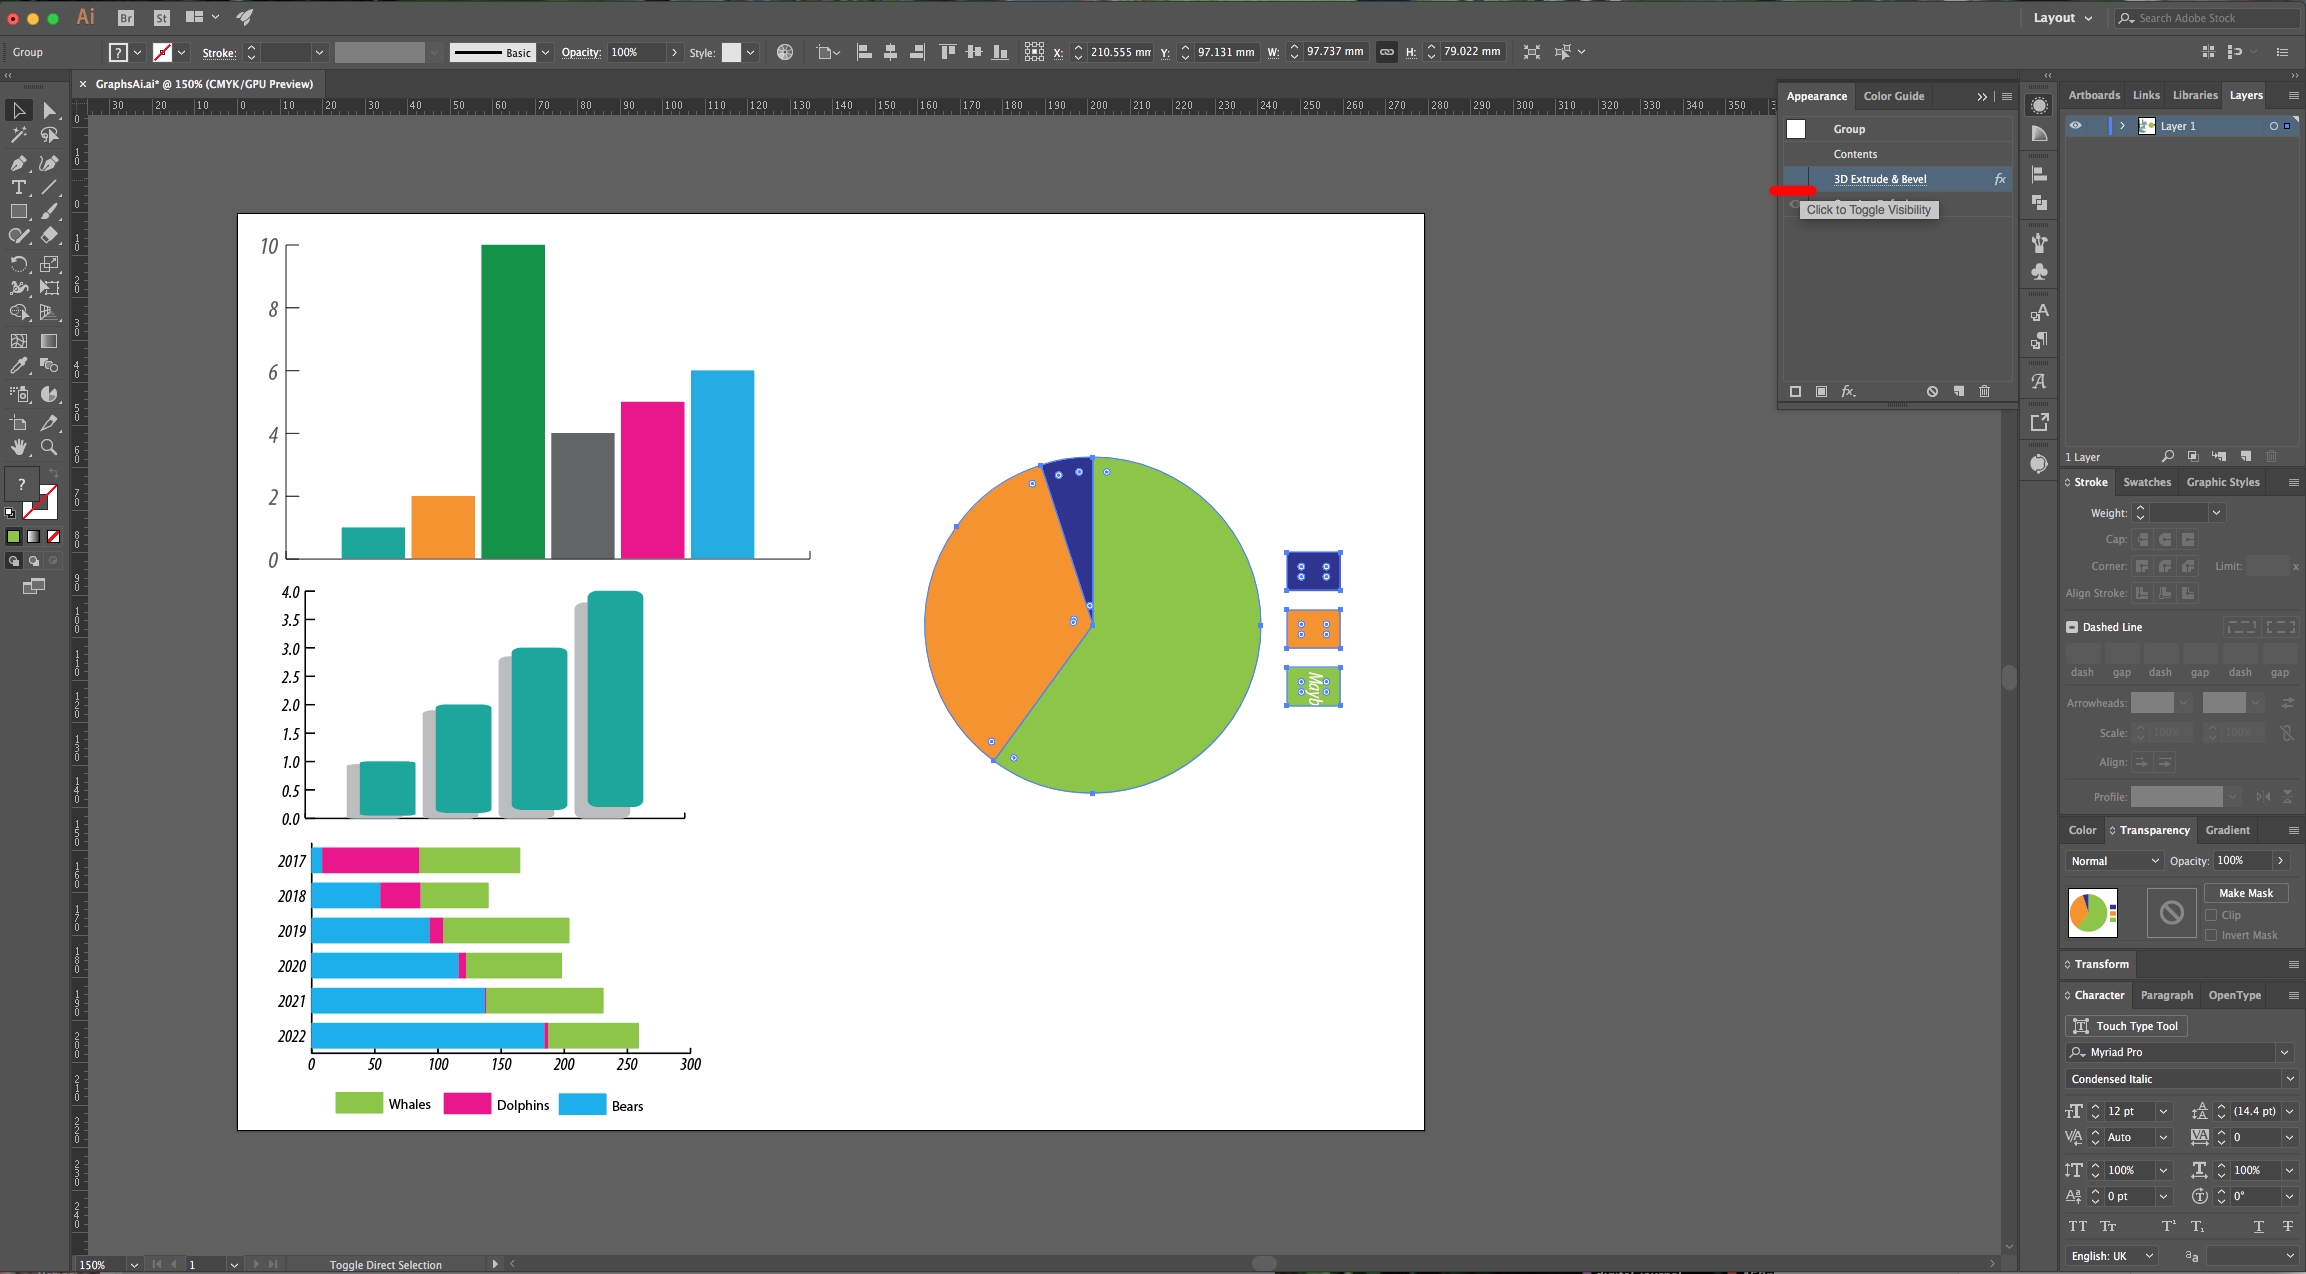
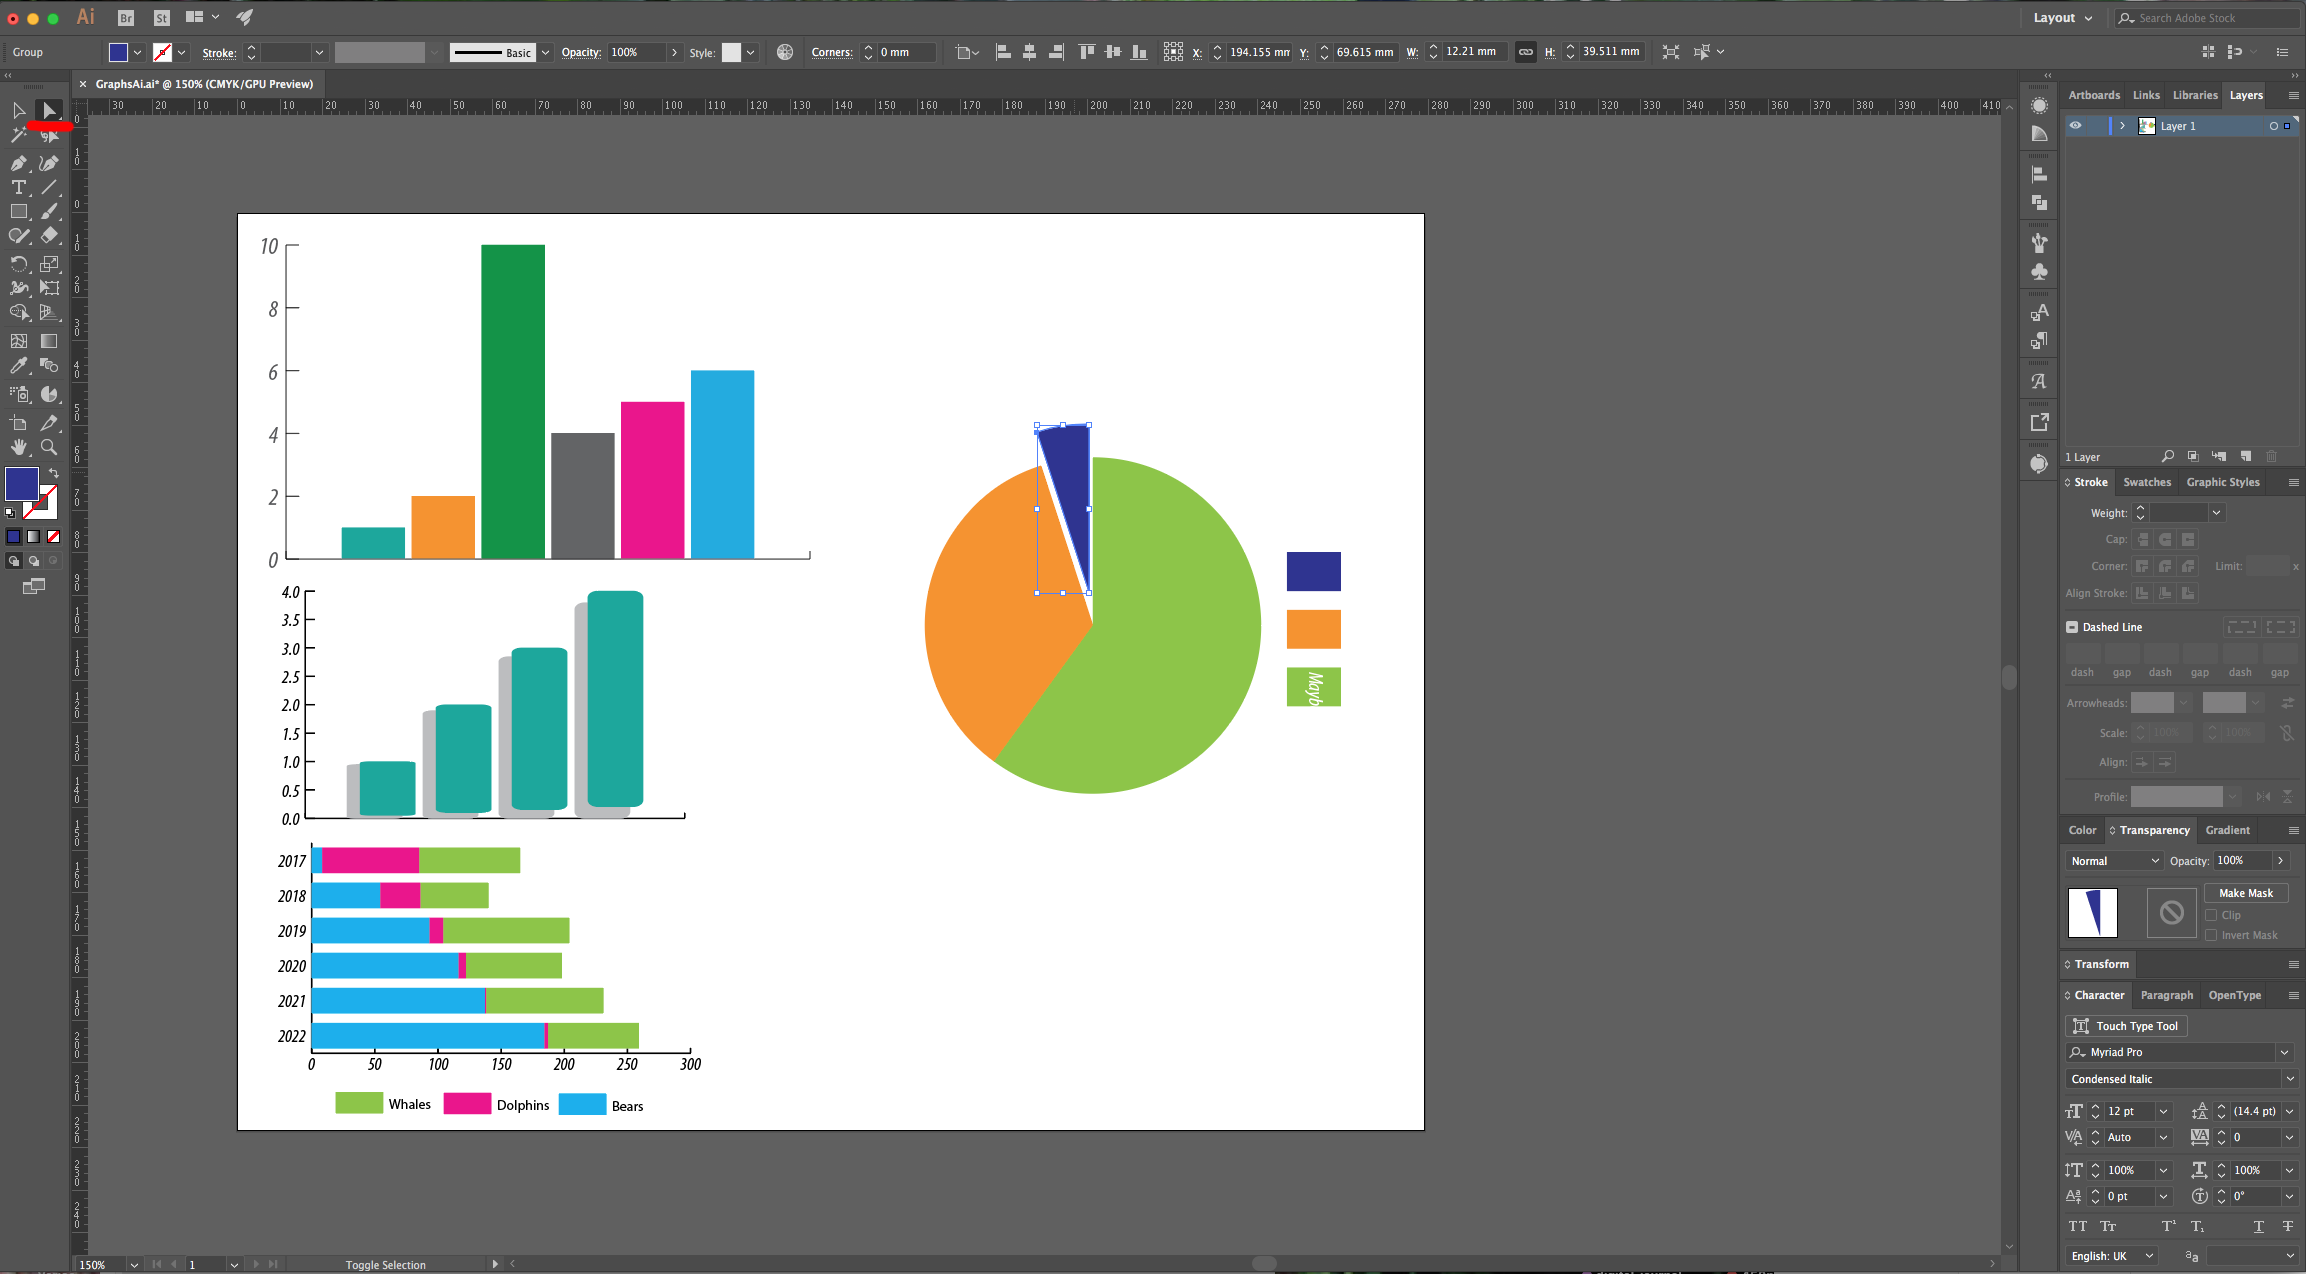
13 - To modify your “3D Pie Graph”, make sure it is selected, go to the “Appearance Panel” and “Turn-Off” the “3D Extrude & Bevel” visibility by clicking on the small eye icon to its left. Select the portion of the “Pie Graph” you want to modify (in our case move) with the “Direct Selection Tool” (A). Once you are done “Toggle” the Visibility back “On”.
14 - You may need to re-position your “Label” Text.
1 - In Illustrator, create a “New Document”.
2 - Select the “Column Graph Tool” (J), click on the top left of your document and input the desired “With” and “Height” of your “Graph”. Or, you can drag your cursor on your document, covering the area you wish to cover.
3 - A “Data” window will open, there you can input some numbers (click the “Tab” key to go to the next “Cell”). When you are finished, click the “Checkmark” icon on the top-right to create your “Chart”. You can click the “Red” button on the top-left to close the window.
4 - Use the “Direct Selection Tool” (A) to modify your “Graph”. You can select all your “Bars” and remove the “Stroke”, change the “Fill” and modify the “Font”.
5 - Right-click on top of your “Graph” and choose “Data” to re-open the window. You can change the values there and you should see the changes reflected in the “Graph”. If you double-click on the “Graph” icon in the “Toolbar” you will open a “Graph Type” Panel where you can modify some settings (this should be done before creating the Graph).
6 - To change the “Size” of the “Graph” use the “Scale Tool” (S) or go to Object > Transform > Scale and change the values there.
7 - To modify your “Graph” even further, right-click on top of it and choose “Ungroup”, and click “OK” on the Pop-up window. Just remember that you will no longer be able to access the “Data” and other features.
8 - You can modify the “Bars” appearance even further. Open the File with the “Design Vectors” you chose, select one of them a to “Copy” (Command/Control + C) and “Paste” (Command/Control +V) it onto your document. With it still selected, go to Object > Graph > Design, click on the “New Design” button give it a name and click “OK”. Then, go to Object > Graph > Column and select your new design.
9 - You can also use data imported from another file, just make sure it is placed inside a “Table” (Tab Separated) and saved as a .txt file. Create your “Graph” and in the “Data” window click on the “Import Data” button, then navigate to your file and select it. Once your data is in, you can change the “Cell Style” by clicking on the button on the tip-right menu. The “Labels” go on “Top” and to create the ones for the other side surround the word with “Quotation Marks” (in our case, the dates).
10 - You will notice that the “Labels” boxes are outside the space you considered when creating your “Graph”. Use the “Direct Selection Tool” (A) to move them. You can also double-click on your “Graph” to enter “Isolation Mode” and modify your vectors. Keep the “Alt/Option” key pressed while selecting one vector with a specific color and click once to select just that path, twice to select the other pieces of the “Graph” that have the same color and if you click a third time you will select the “Label” square also (Clicking a fourth time selects everything). Once you are done, click on the arrow on the top-left to exit “Isolation Mode”.
11 - To make a “3D Pie Graph”, select the “Pie Graph Tool”, input some data and use the “Quotation Marks” on your “Top Labels”. You can change the number of “Decimals” in your “Cell”. Change the colors of your “Pie” and “Ungroup” once to separate the “Text” from the “Paths”.
12 - In the “Appearance Panel” open the “Effects Menu” and go to 3D > Extrude & Bevel. We used the “Isometric Top” Position and clicked on the “More Options” button to bring out the “Surface” options and moved the “Light” position circle to adjust the lighting. You can change the color and rotate the “Labels” Text to fit it with the 3D look.
13 - To modify your “3D Pie Graph”, make sure it is selected, go to the “Appearance Panel” and “Turn-Off” the “3D Extrude & Bevel” visibility by clicking on the small eye icon to its left. Select the portion of the “Pie Graph” you want to modify (in our case move) with the “Direct Selection Tool” (A). Once you are done “Toggle” the Visibility back “On”.
14 - You may need to re-position your “Label” Text.
by @lornacane


