- By Leah Verona
- 5 Mins
- Canva Tutorials
How to Copy Style Format in Canva
In this beginner Canva tutorial, learn how to use the Copy Style tool.
In this tutorial, we’re going to talk about Canva’s Copy Style tool, where you can find it, and what it does. This powerful tool allows you to quickly copy the style of texts, the color of graphic elements, even photo filters. You are able to match anything on your document.
Here we have two designs of a sale post. We want to copy the style of our document on the left to our document on the right.

Step 1 - Copy the Text Style
The Copy Style tool copies the font style, size, color, alignment, and all text formatting. Select the text in your desired style or format. Take note of the formatting so we can compare later after we copy the text style.
The font that we used is a font duo called Ripon from Font Bundles. The font size is 65, and the font color is white. The text also has a Glitch effect with the following settings as shown in the next image.
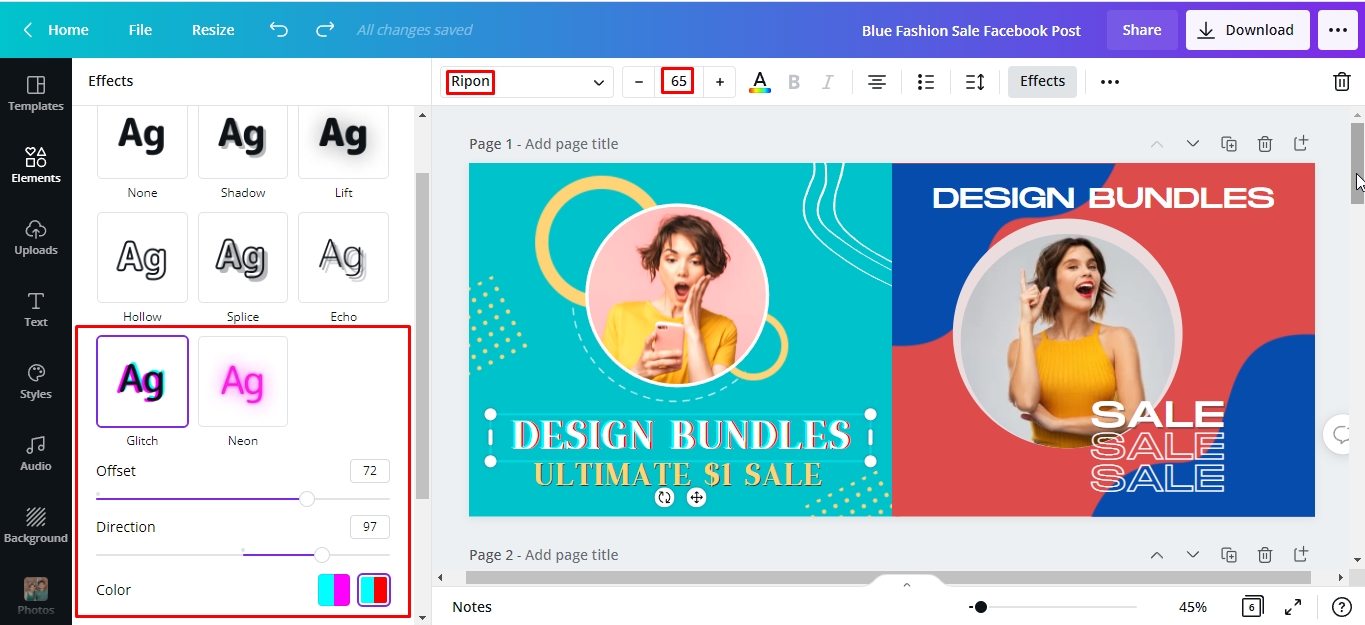
On the toolbar above, click the ellipsis (3 dots) for more > Copy style or the Paint Format roller icon.

Click the text you want to apply the copied formatting to. The font in this text is Monument from the Canva library. The font size is 48, font color is white and there is no style effect.

As quick as that, all text formatting of our first text was copied to our second text. This included the font, sizing, color, spacing, and even the glitch effect.

We did the same to the “SALE” text.

Step 2 - Copy the Element Style
In the same way as the text, Canva’s Copy Style tool also copies all the formatting in a graphic element. We will follow the same process as in Step 1. Select the element in your desired style > Copy Style button > click the element you want to apply the copied formatting to. Our red abstract design element was changed to sky blue and navy blue to yellow.

Step 3 - Copy the Image Style
You can also copy all of the adjustments made to your photo with the Copy Style tool. Our photo on the left side document shows the adjustments applied as seen in the image. The photo on the right doesn’t have any adjustment applied.
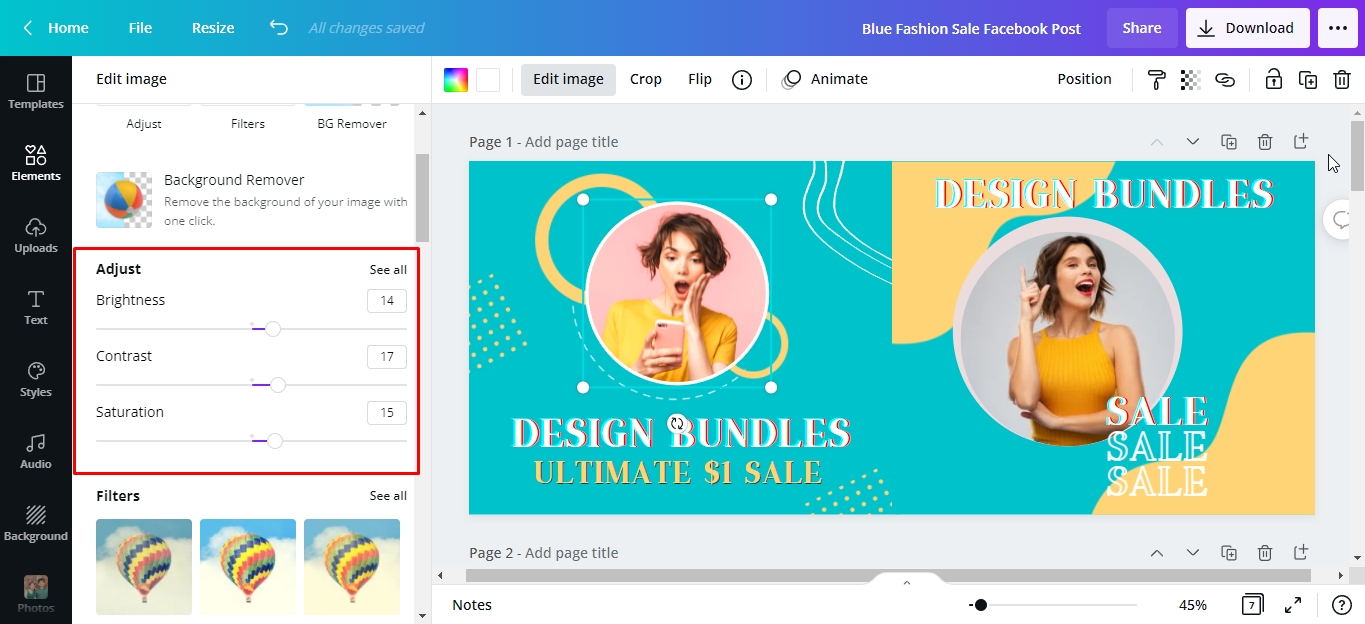
We will follow the same process in the previous steps by copying the styling attribute of one photo to another.

Here is the before and after, showcasing the Copy Style that was applied.

Now you know how to use this awesome tool in Canva. We hope that it will help you to make your designs cohesive and save you a lot of time.
If you liked this tutorial, make sure to check out our guides on copying elements from one design to another, using alternate font glyphs, and creating an email signature in Canva.
6 Related Canva Tutorials
Copying content from one Canva designto another enables you to move elements around and add the same elements to multiple designs.Ithelps to save time and keep your designs coherent, especially if you want to maintain your brand identity.Whatever your objective is in copying content from one design to ...
You’re planning on starting a new project and you need to use layer elements from another artwork. Don’t waste time duplicating and resize your canvas to get those layers or recreating elements from scratch. In this tutorial, we are going to use an Astrology svg and add a ...
Canva being an amazing online graphic design tool has finally rolled out its cool text effects feature. Text effects change the appearance of your text from boring to fabulous. All the effects are just in one spot so it’s super easy to try in just one click. In this ...
Sometimes we may have a photo that would look great with a different background. This could be a photo of yourself that you want to put on a plain background to use for a job, or you may want to add more interest to your photo by putting it on ...
Quickly print your notes in Canva documents, whether you are managing tasks, creating presentations, or using project plan templates. It's super easy to save notes and print in PDF formats using Canva's design tools and presentation ideas. In today’s free guide, we will show you how to easily print ...
For this tutorial, we will use some a Portrait of the person you want to apply the Mask to and the image of a Carnival Mask (It’s better if it has a neutral or transparent background) and maybe the image of a Mask to be used as reference.1 - ...

 All your Font Needs

