
How to Curve Text in DesignScape
Learn how to curve text in DesignScape with this beginner friendly tutorial.
For our tutorial today we will show you two ways to curve text in DesignScape. You can use either the Pen or the Shapes Tool to curve the text. DesignScape is a browser based alternative to Photoshop and Illustrator. While only available to Gold Plus Members, we do have a great 30-day free trial of DesignScape for you to try out.
Let’s begin by creating a new document in DesignScape. For this tutorial we will be using a bold serif font called Vintage Culture.
We have already imported our font into DesignScape so we are ready to begin.
Method 1 - Use the Shapes Tool to Curve Text
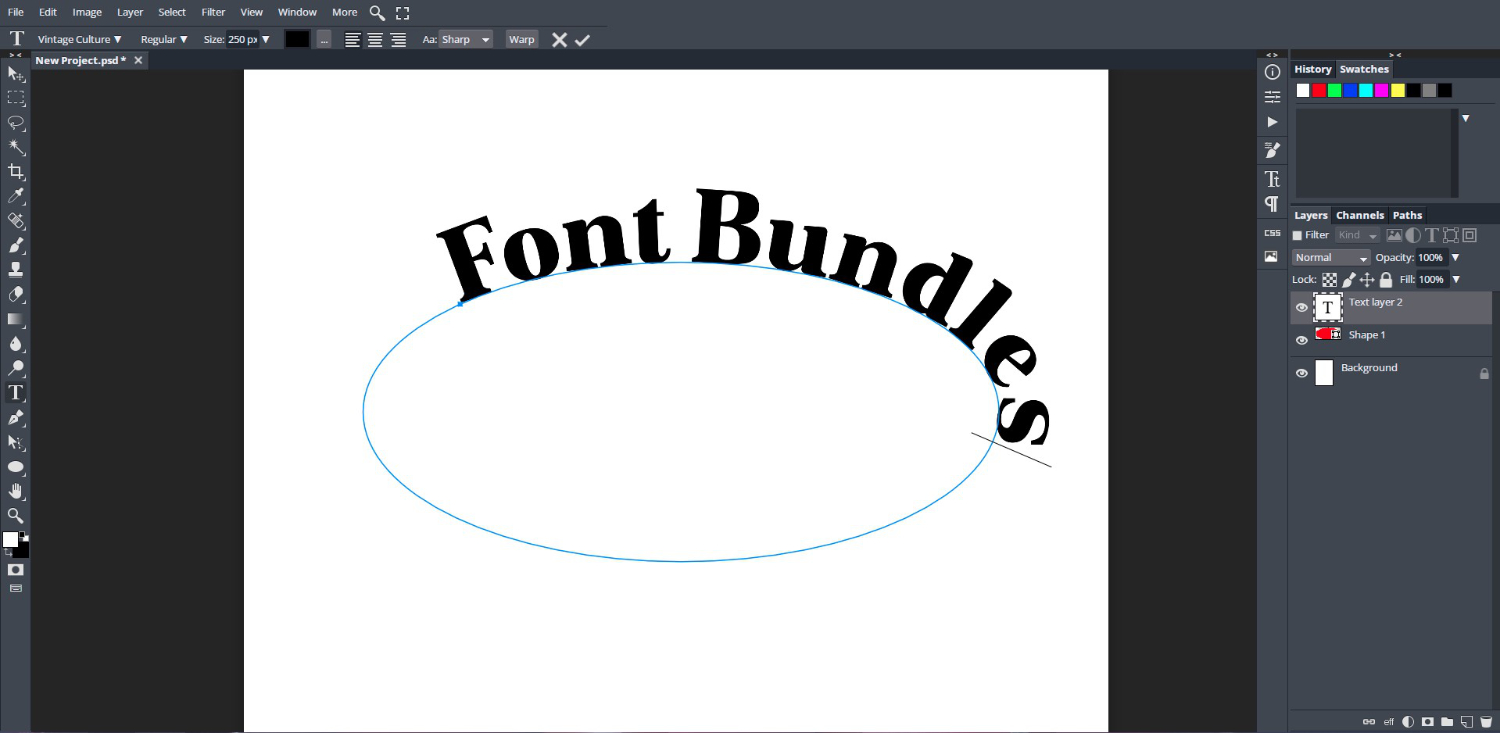
We will start off by creating a simple shape in DesignScape. We chose to use the Ellipse shape and selected it from the Shapes menu on the left side toolbar. Be sure to select Shape and remove the Fill and Stroke on the top toolbar.

Step 1 - Select the Type Tool
For both processes of curving text, we will be using the Type Tool. This can be found on the left side panel with a capital letter “T” icon. Click + hold your cursor over the text menu to open, then select the Type Tool.
At the top toolbar, choose your font from the Font Family and adjust the text size. The text size slider will only go to 150px but you can input a value in the box. We used 250px.

Step 2 - Type Text on Curved Shape
Now, position your cursor over the line of the shape and click once. You will enter text edit mode and will see a small blue crosshair with a circle appear. The circle is the end point of your text while the crosshair is the starting point. We will move these apart later.

You can now begin typing your text.
Step 3 - Adjust the Text Curve
We want to adjust the curve of the text so it sits in the middle. First we need to click on the Path Select tool in order to move the curved path. On the left side toolbar, just below the text tool, click and hold on the Select menu. Now click on Path Select.

The Path Select tool selects the path that the text is on and allows you to adjust the text curve. Click on the blue crosshair/circle and drag to the right. You will see that the circle separates from the crosshairs. We will place this at the end of our text.

Now click + drag the blue crosshair at the beginning of the text to the left. Be sure to keep your cursor above the shape line so the font stays above the line.
If you move your cursor below the shape line, the font will be placed inside the shape. The start point will then switch around and become the end point.

Step 4 - Use Direct Select to Edit the Shape
To edit the Ellipse shape that creates the text curve, we need to use the Direct Select tool. If you used the Move Tool, it would only adjust the shape and not the text curve as well. The Direct Select tool selects the shape, which is shown by the nodes on the sides and top.

When you hover your cursor over one of the sizing nodes, it will increase in size. You can then click + drag the center node around or move the handles. If you only see one handle for the node, click on the node itself to activate both handles.

You can go ahead and delete the Shape layer as it’s no longer needed.
Method 2 - Use the Pen Tool
The Pen Tool allows you to create your own shape. There are two options, the Pen Tool and the Free Pen. The first is more constrained while the second is freehand. We chose to use the Pen Tool for a more controlled curve.
Create a Curve for the Text
On the left hand side, click + hold on the Pen menu tool to open the options. Click on the Pen Tool to select it.
Now, click to place the first node then click + drag to place additional nodes. When you have created your line, press Enter on your keyboard.
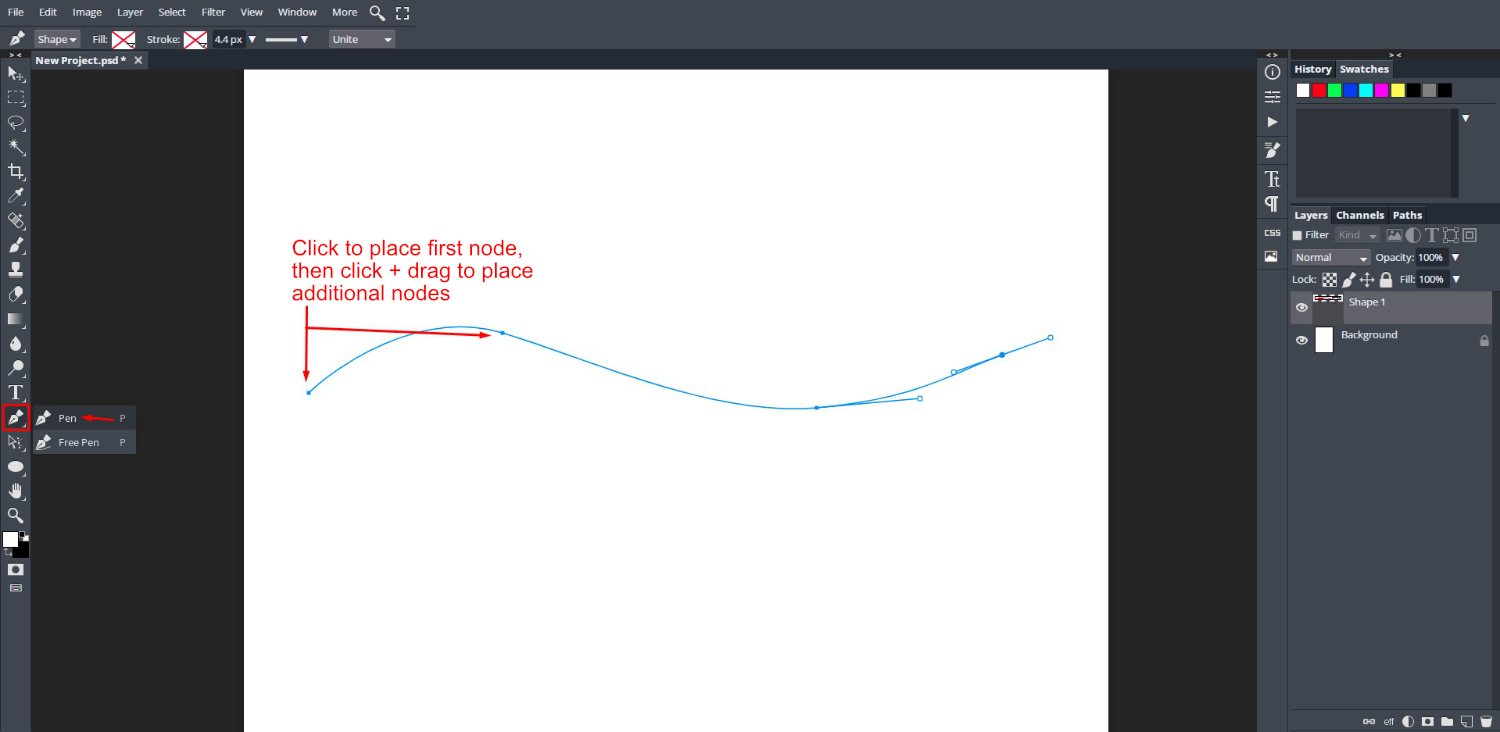
You can add more nodes by clicking once anywhere on the curve line. To delete a node, all you need to do is click once directly on the node while the Pen Tool is still selected.

When your curve is ready, you can add your text.
Add Text to the Curve
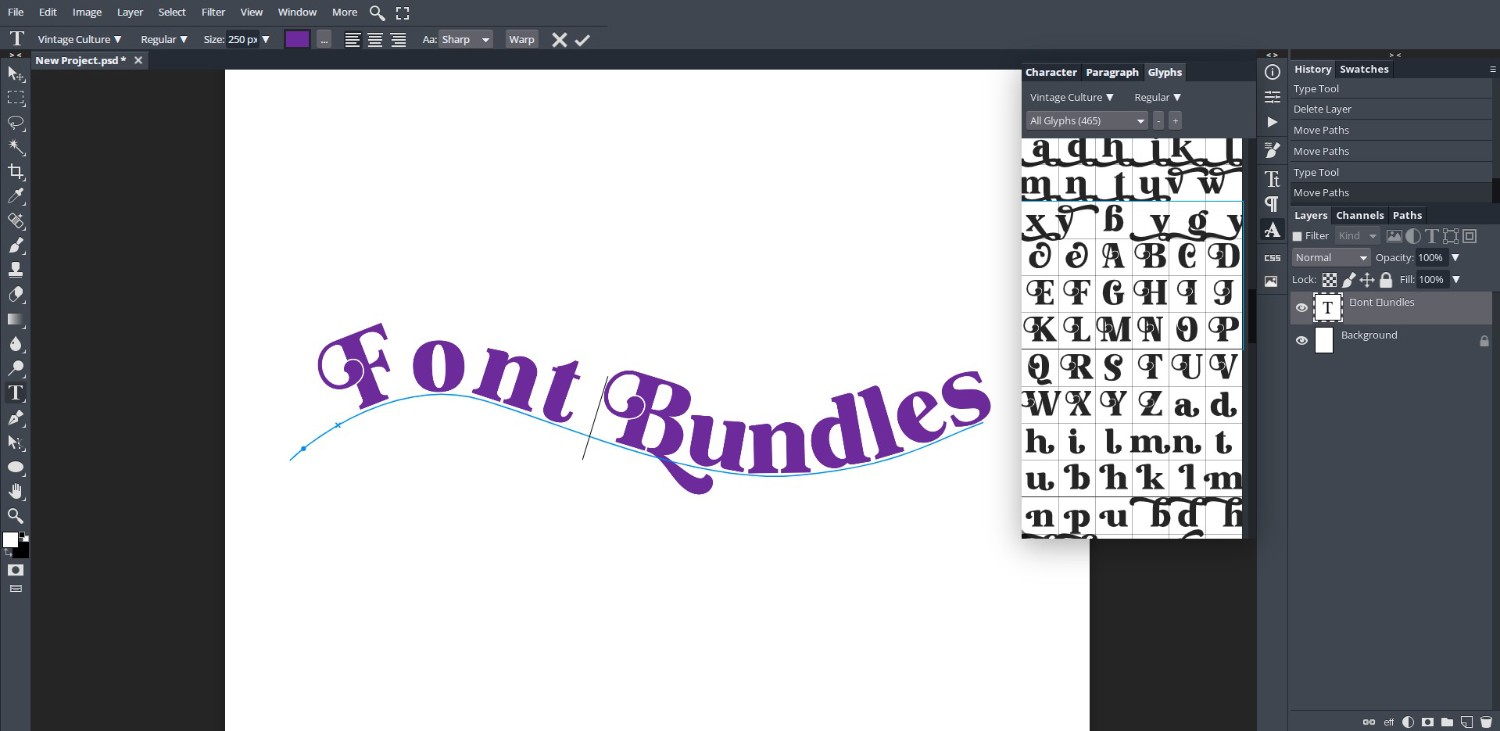
As we did with the first method, select the Type Tool then adjust your font and size. Now click on the curve line and start typing.
Once the text has been added, you can now delete the Shape layer if you want. It is no longer needed as the text has created its own curve.

Move Start and End Points
Now, moving the start and end points gets a little tricky here. You have to be careful how far you move the end point.
As before, make sure Path Select is active. Then click on the crosshair/circle but this time drag slowly to the left. The circle or end point will separate from the crosshair or start point.
Remember, where your cursor is positioned as you are dragging will determine if the text is above or below the line.

The line curve can also be edited by using the Direct Select tool.
You can edit your text further with font leading or by adding alternate glyphs in DesignScape. Keep in mind that the position of the text curve will change. So you may need to adjust the end and start points again.
From there on you can convert to a Smart Object, convert to a shape or rasterize depending on your design needs.
We hope that this tutorial on how to curve text in DesignScape has been helpful. We have more excellent tutorials for you to follow as you learn about the awesome possibilities of DesignScape.


