

By Design Bundles
SCAL Tutorials5 min
How to remove texture from rough fonts in SCAL4
*note- SCAL4 pro used.
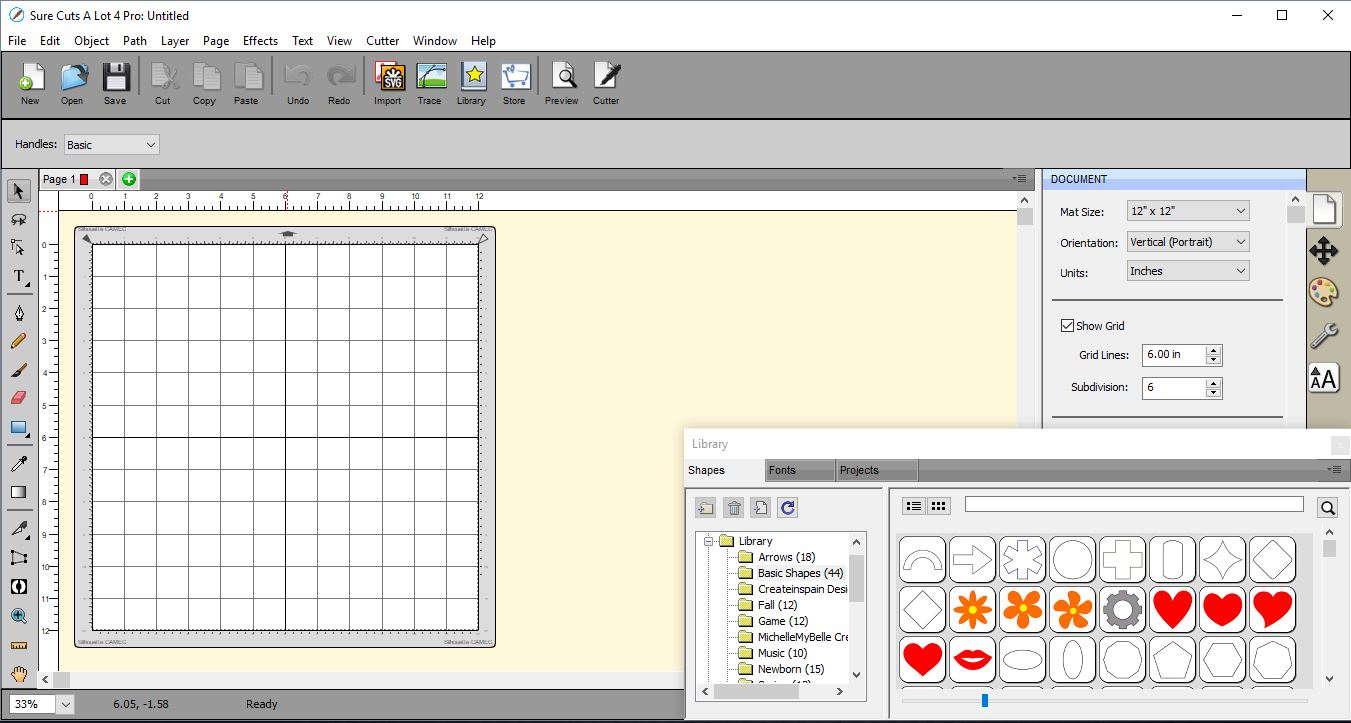
1- Open up the SCAL4 software.
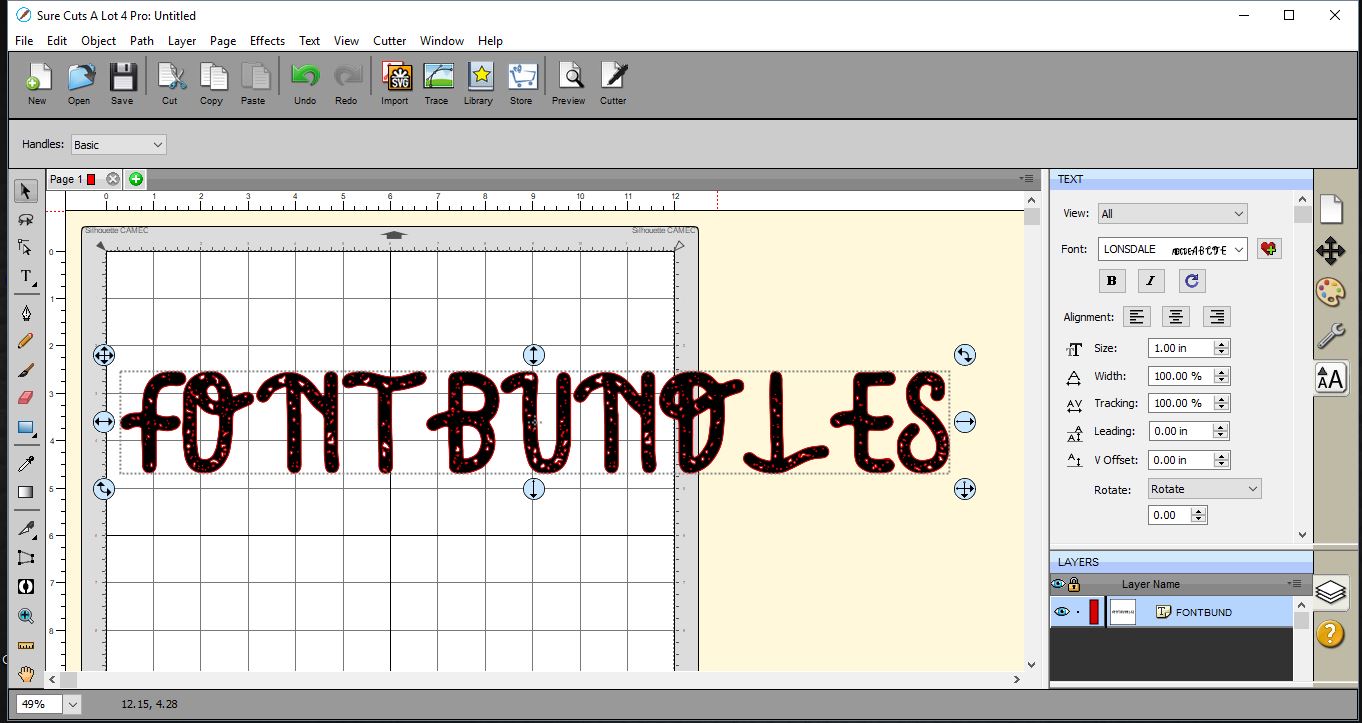
2- Type your text in the font you would like to use. This is a great font but with all the texture, a cutting machine will have an issue cutting all the tiny piece in the font. So we need to be able to remove those texture parts.
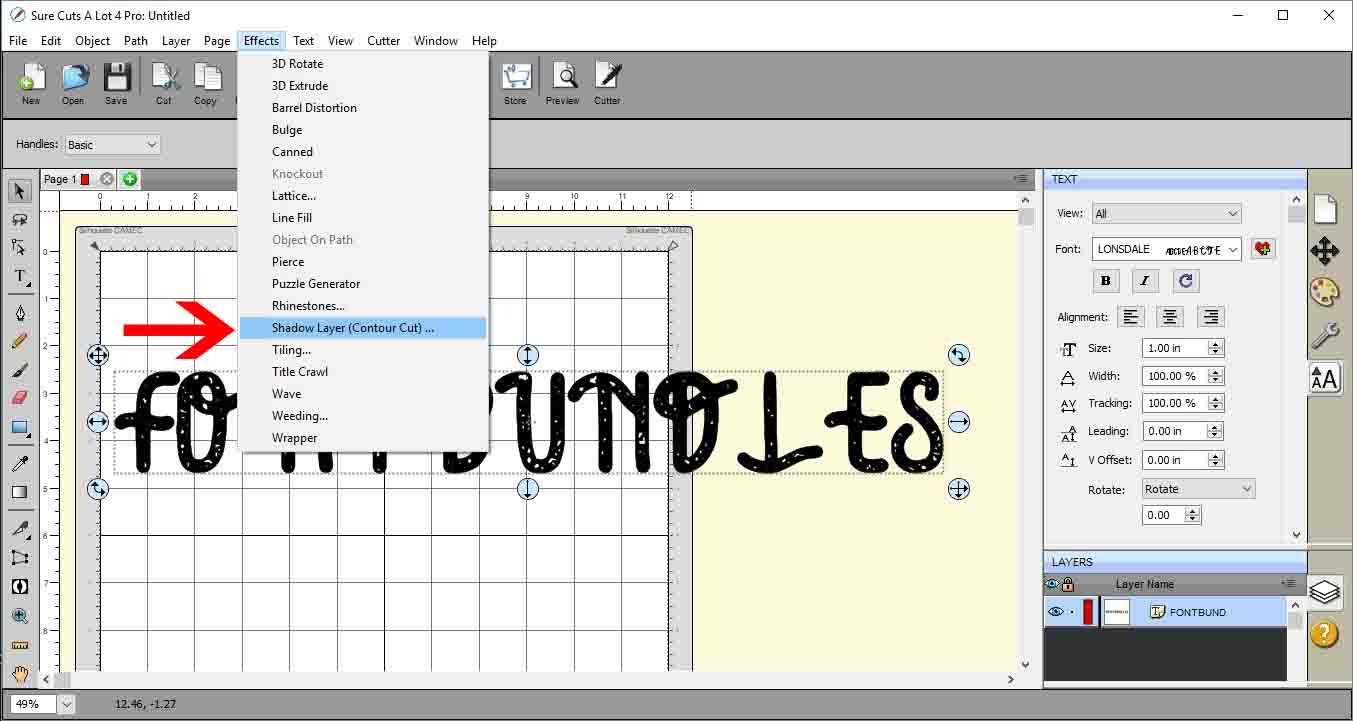
3- Select your text and go to effects then shadow layer.
4- A new window will appear.
5- We need to pretty much replicate the text so in the size select 0.010 inch. Then select black out shadow icon. Click OK.
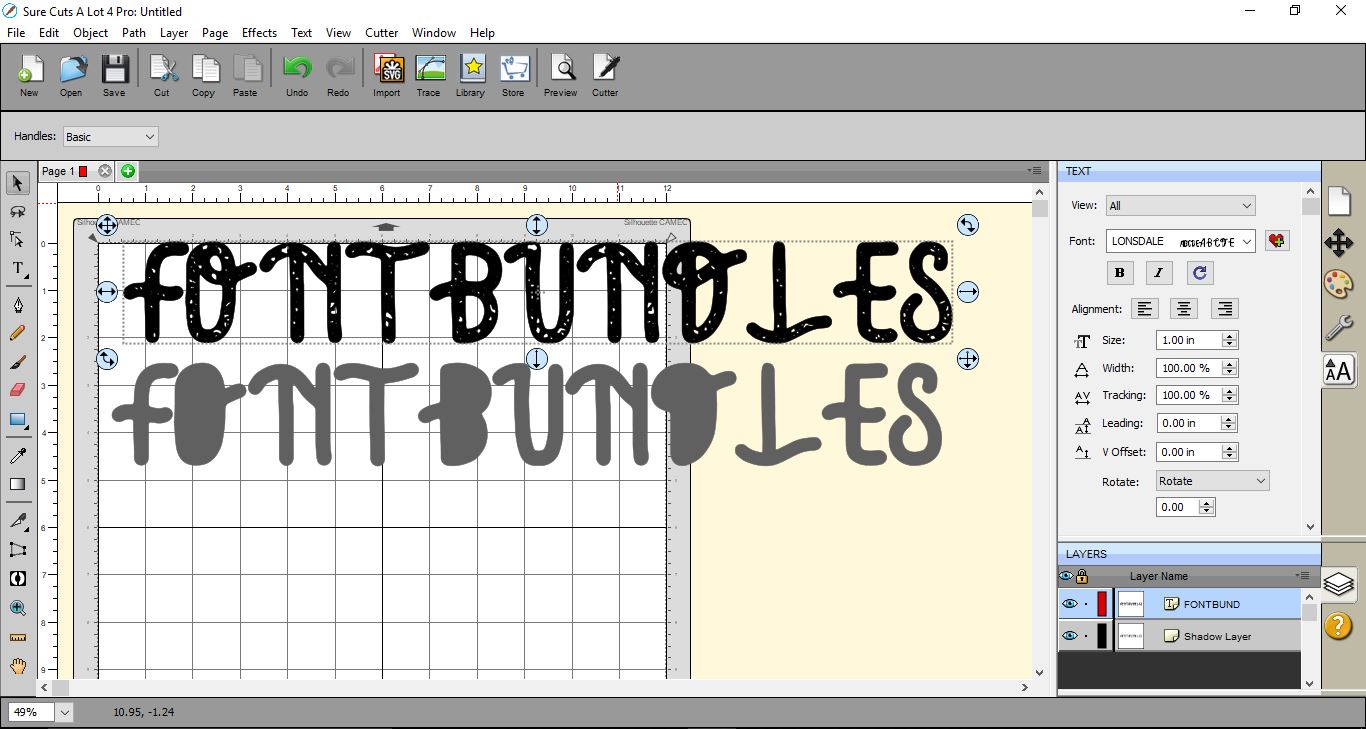
6- The shadow layer will be created. click and drag the original text off the shadow layer.
We now have a copy of the text but without the texture, the middles of the text are not there either.
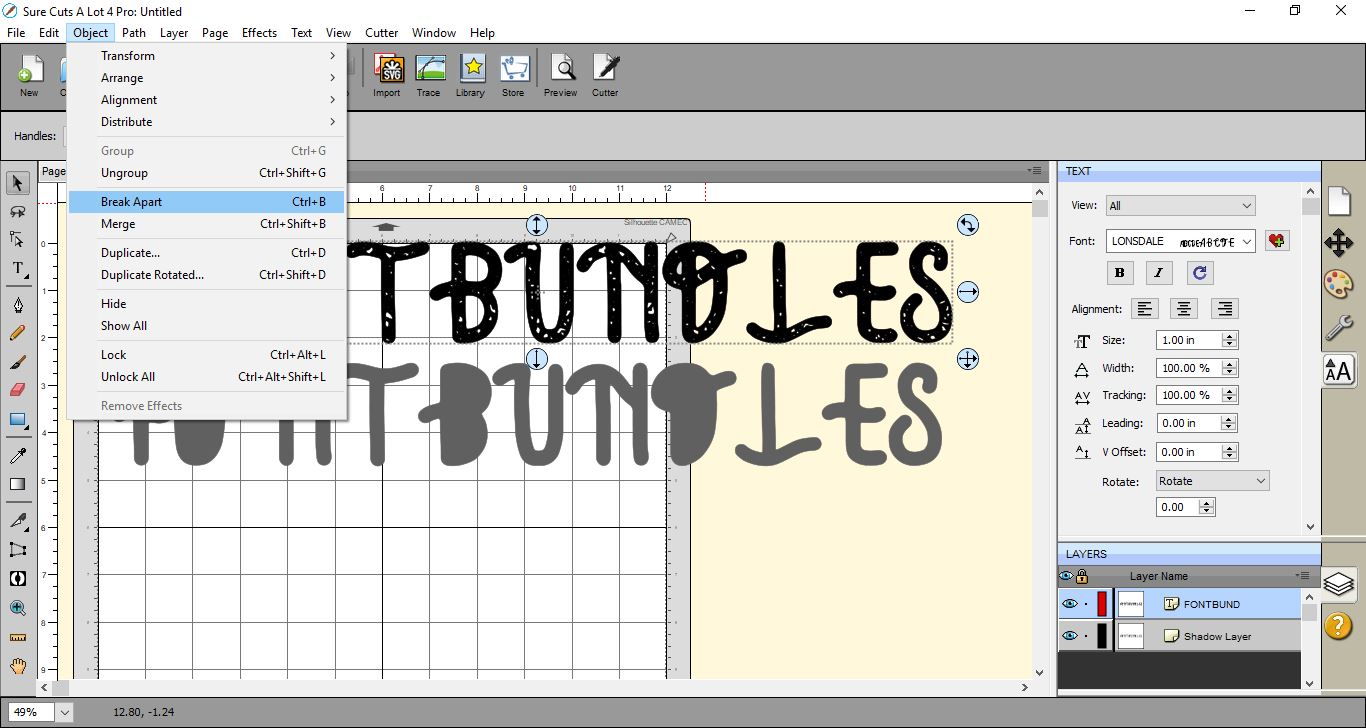
7- To fix the issue of the missing middles of the font select the original text then go to object, break apart.
8- This will break apart all parts of your text. The middles of the letters appear to disappear also, you but they will be located when you hover over the text with your arrow.
9- Select each of the parts of the text you want to use in your shadow layer and drag them down to the shadow layer. Place where they need to be located.
10- Select the original text again then right click and delete as we do not need it any more.
11- Select all the shadow layer and middles of letters together and go to object then merge.
12- The middles will cut out of your shadow layer leaving you with the same text as the original text but without any texture and small cut lines.
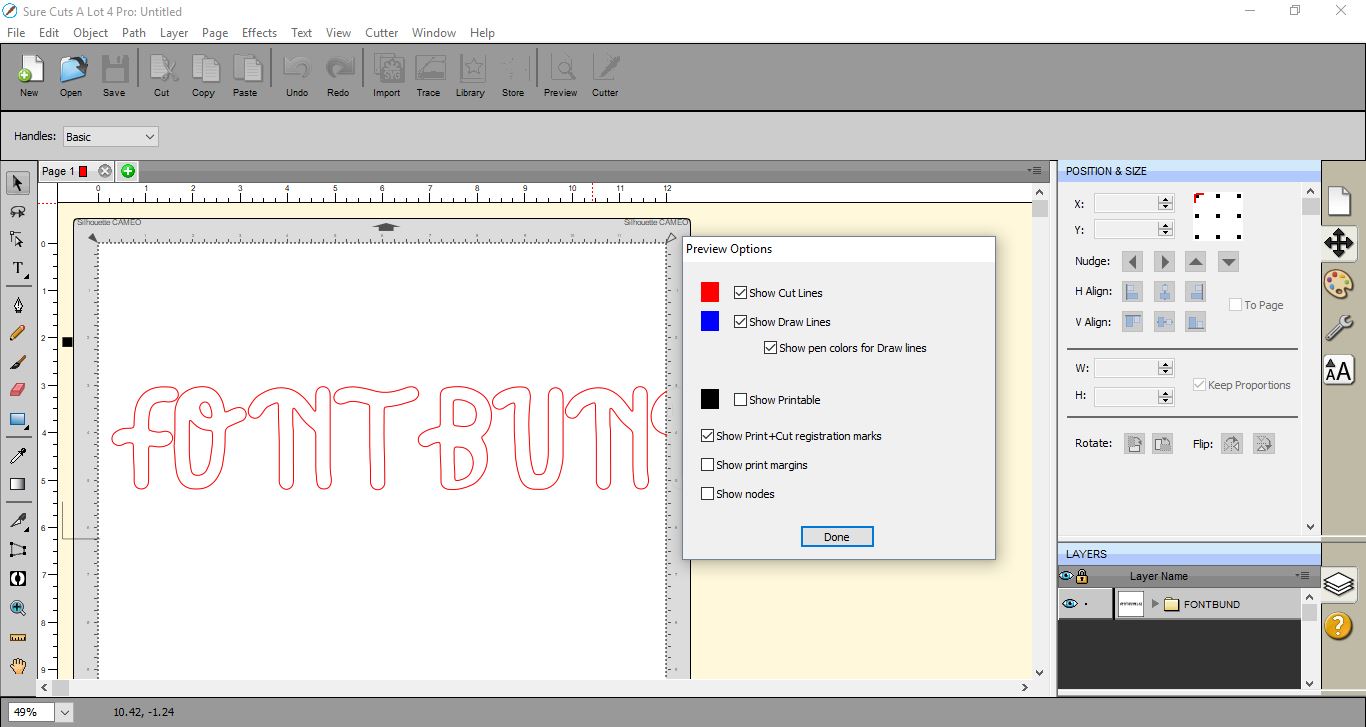
13- If you go to the preview screen you can see that the cut lines are for the text and there are no texture parts left to cut.
1- Open up the SCAL4 software.
2- Type your text in the font you would like to use. This is a great font but with all the texture, a cutting machine will have an issue cutting all the tiny piece in the font. So we need to be able to remove those texture parts.
3- Select your text and go to effects then shadow layer.
4- A new window will appear.
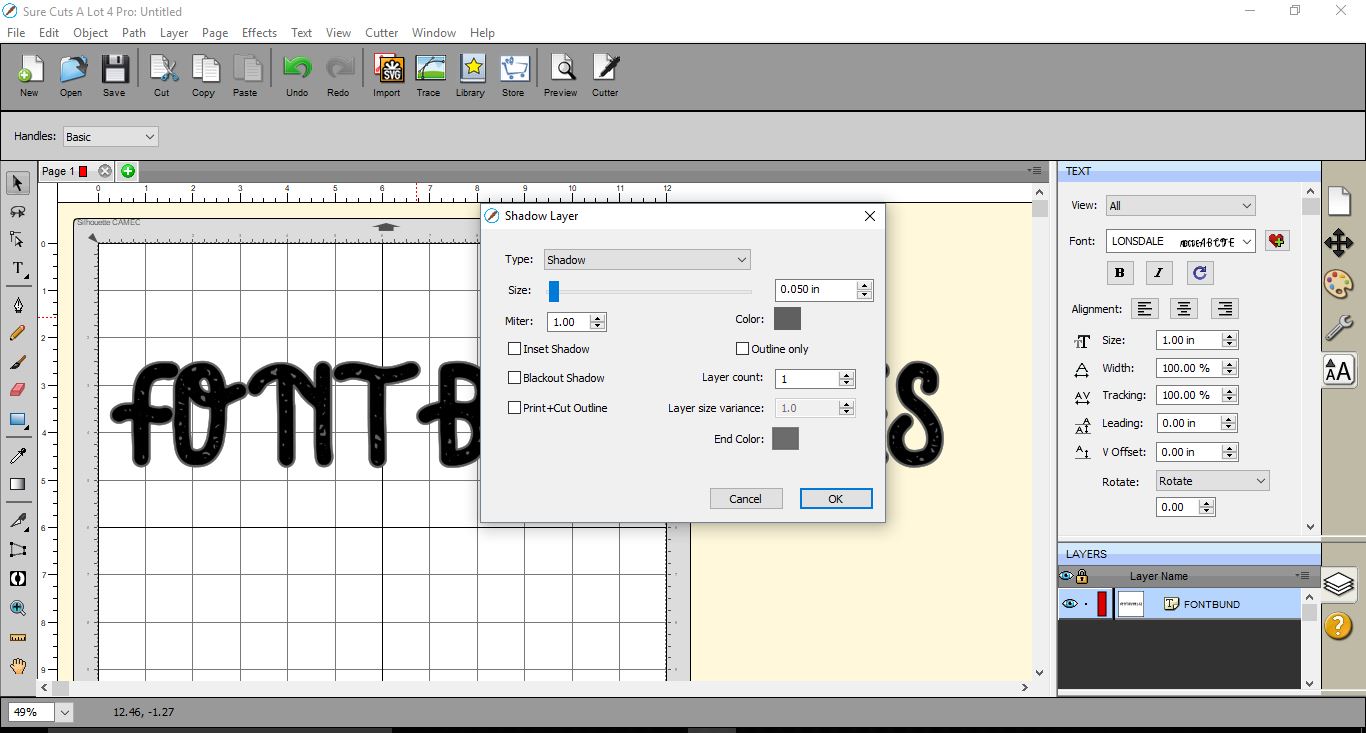
5- We need to pretty much replicate the text so in the size select 0.010 inch. Then select black out shadow icon. Click OK.
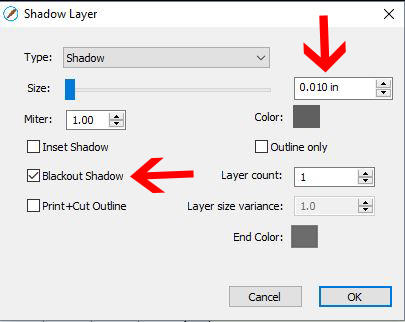
6- The shadow layer will be created. click and drag the original text off the shadow layer.
We now have a copy of the text but without the texture, the middles of the text are not there either.
7- To fix the issue of the missing middles of the font select the original text then go to object, break apart.
8- This will break apart all parts of your text. The middles of the letters appear to disappear also, you but they will be located when you hover over the text with your arrow.
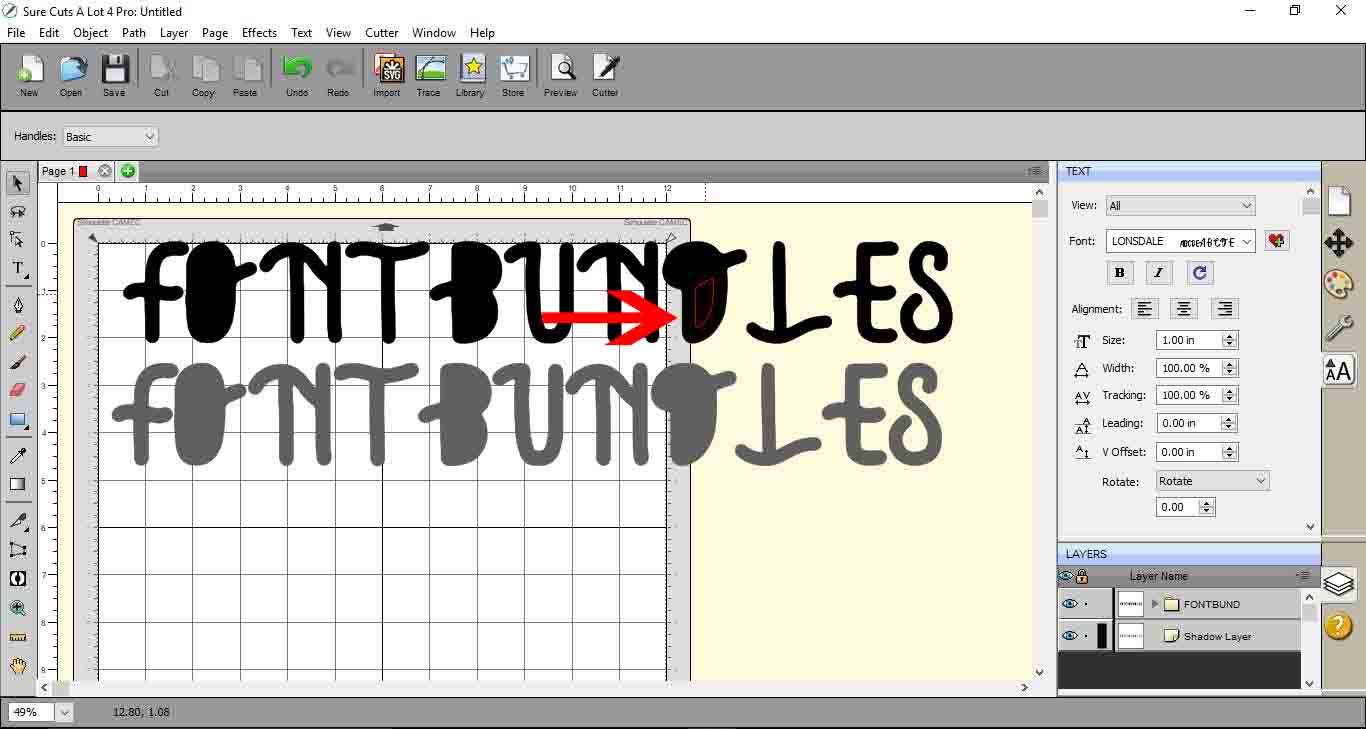
9- Select each of the parts of the text you want to use in your shadow layer and drag them down to the shadow layer. Place where they need to be located.
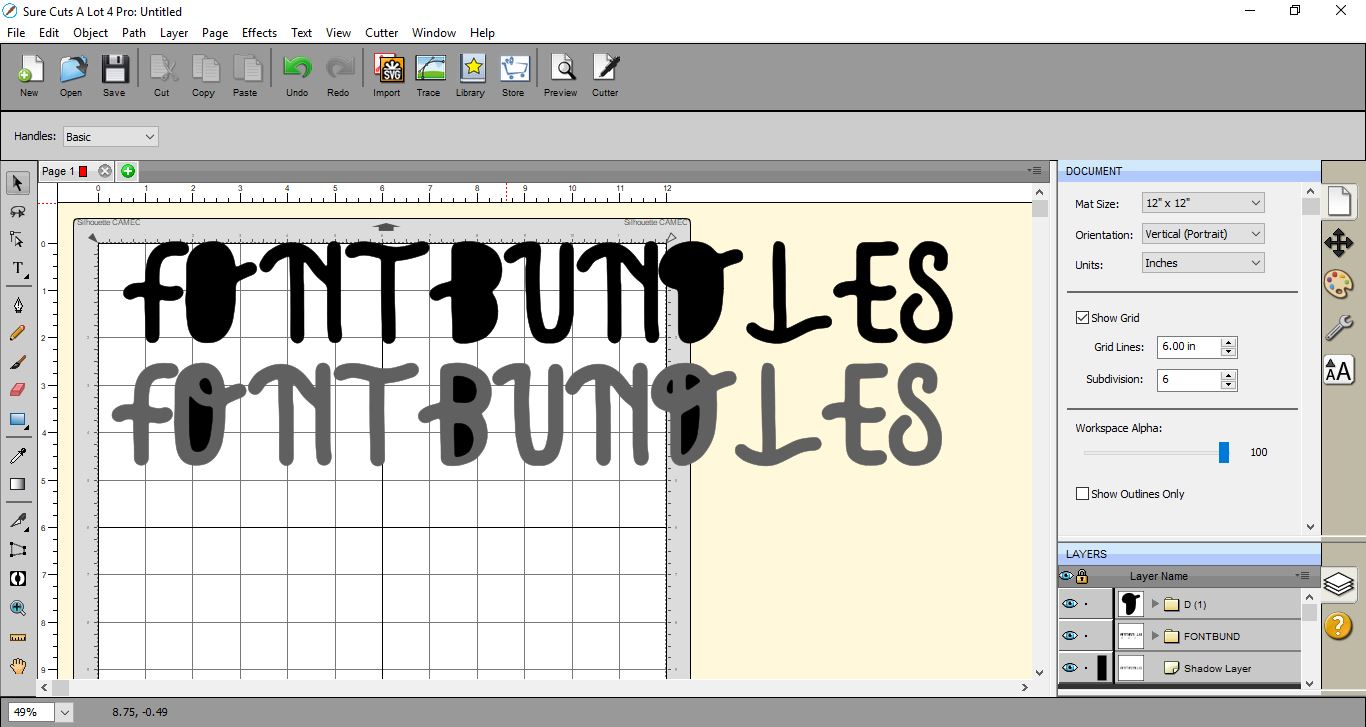
10- Select the original text again then right click and delete as we do not need it any more.
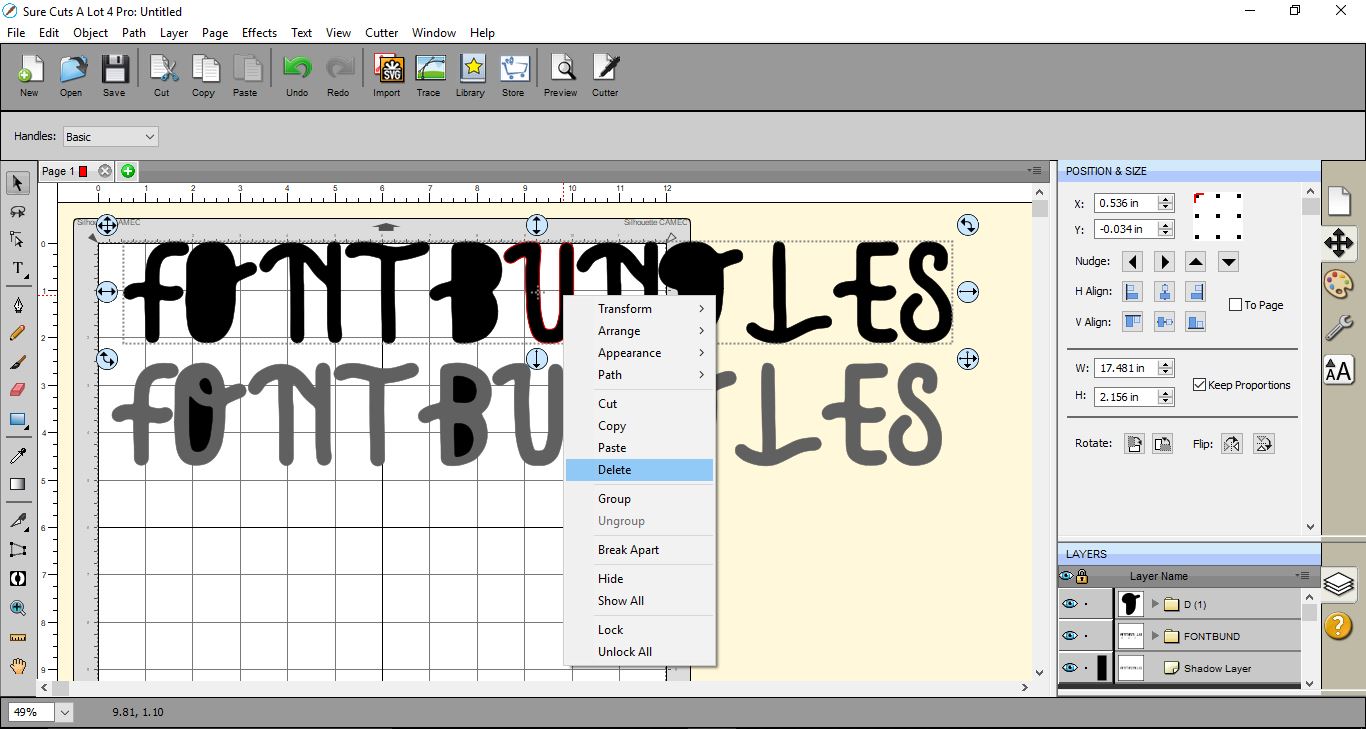
11- Select all the shadow layer and middles of letters together and go to object then merge.
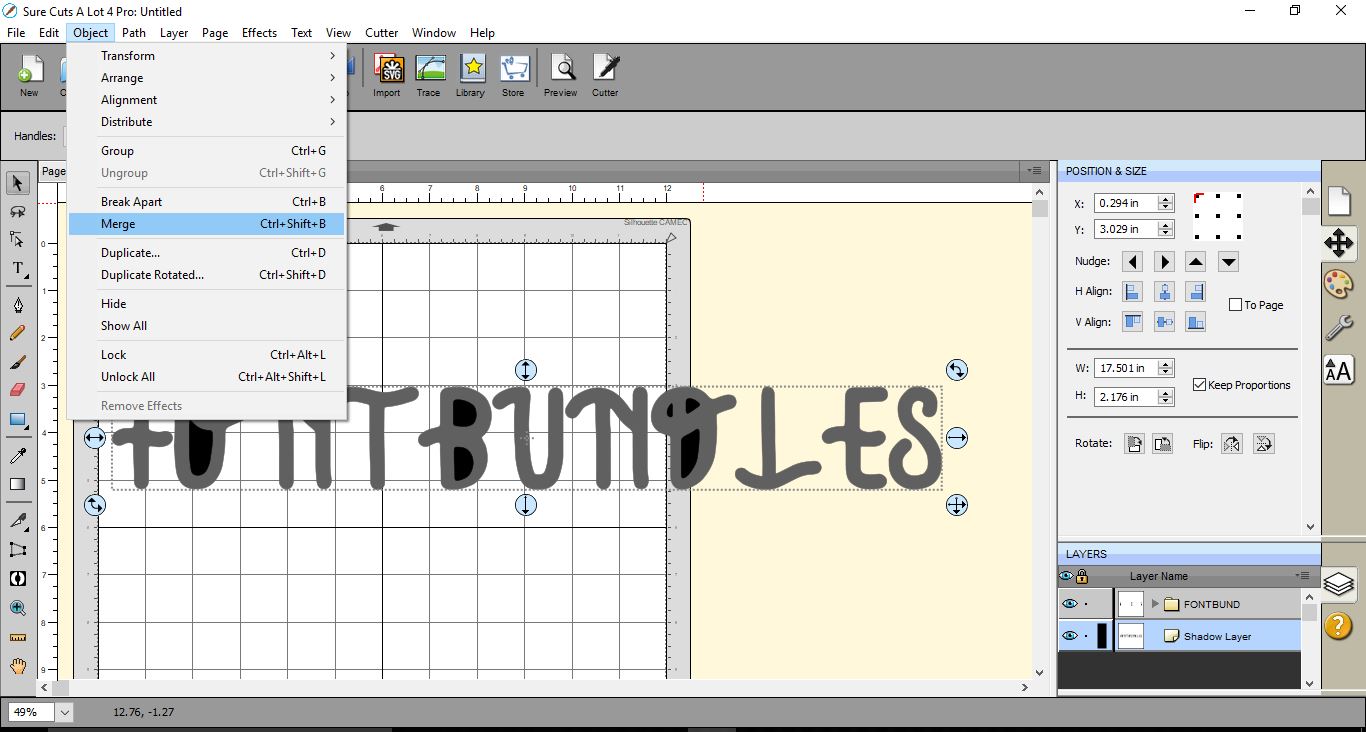
12- The middles will cut out of your shadow layer leaving you with the same text as the original text but without any texture and small cut lines.
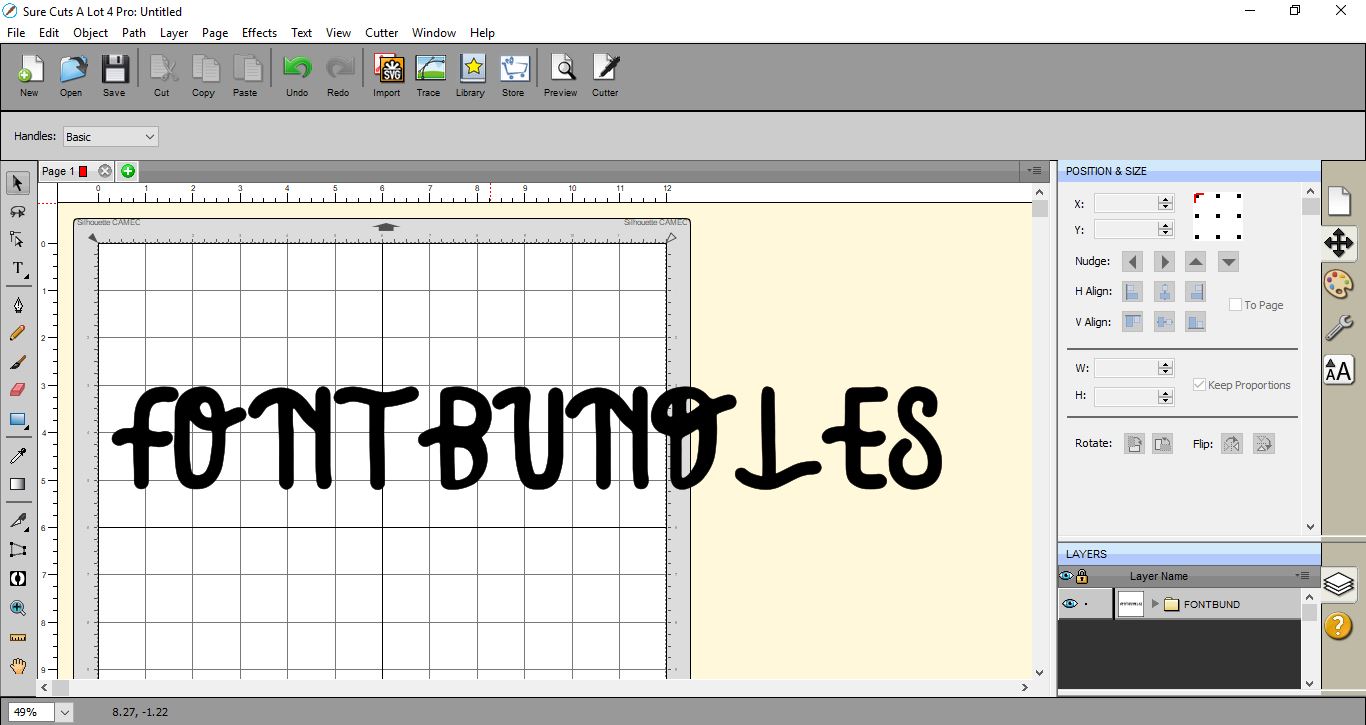
13- If you go to the preview screen you can see that the cut lines are for the text and there are no texture parts left to cut.
Related Tutorials
SCAL Tutorials
How to thicken fonts in SCAL4 for using the foil quill
Font Tutorials
How to Install Fonts on a Windows PC or Mac
Discover how to easily install your purchased fonts to your Windows PC or Mac
Illustrator Tutorials
How to Add Texture in Illustrator
In this tutorial we will show you how to add texture in Adobe Illustrator by using layer masks.
Illustrator Tutorials
Wood Texture in Illustrator
Learn how to make a wood texture in Illustrator with this tutorial.
Canva Tutorials
How to Use Your Purchased Fonts in Canva
In a few steps you'll be using your brand font, or any other custom font perfect for your project!
Affinity Tutorials
How to Add Fonts to Affinity Designer on iPad
Learn how to add fonts to the Affinity Designer app on iPad with this step by step tutorial.
