- By Nadine Spires
- 8 Mins
- DesignScape Tutorials
How to Use PAT Files in DesignScape
Discover how to upload and use PAT files in DesignScape with this step by step tutorial.
In this tutorial we will show you how to use PAT files in DesignScape. These files are usually included with purchased digital patterns and clipart that require programs like Photoshop to open. With DesignScape, an internet based alternative to Photoshop, you can open and use PAT files. Available to Gold Plus Members, DesignScape has everything you need to get creating.
Available to Gold Plus Members, there is no need to download any software. DesignScape saves you storage and can be accessed anywhere, at any time. Not a Gold Plus Member yet? Then sign up for a free 30 Day Gold Plus Membership Trial today!
During this tutorial we will be using a cute coffee shop vector pattern but we have a wonderful variety of seamless patterns to choose from.
We have already downloaded and unzipped our purchased file from Design Bundles.
Step 1 - Import PAT files into DesignScape
Let’s begin by starting a new project. We chose to use a dimension of 800 x 800 px for our canvas.
The great thing about using files in DesignScape, is that all you need to do is drag and drop them into the program. Go to where your PAT file is located, then drag and drop it into DesignScape.
You will get a notification asking if you want the file to load the next time you open DesignScape. Click Ok and DesignScape will then let you know the pattern has been added.
Step 2 - Add a Pattern Fill Layer
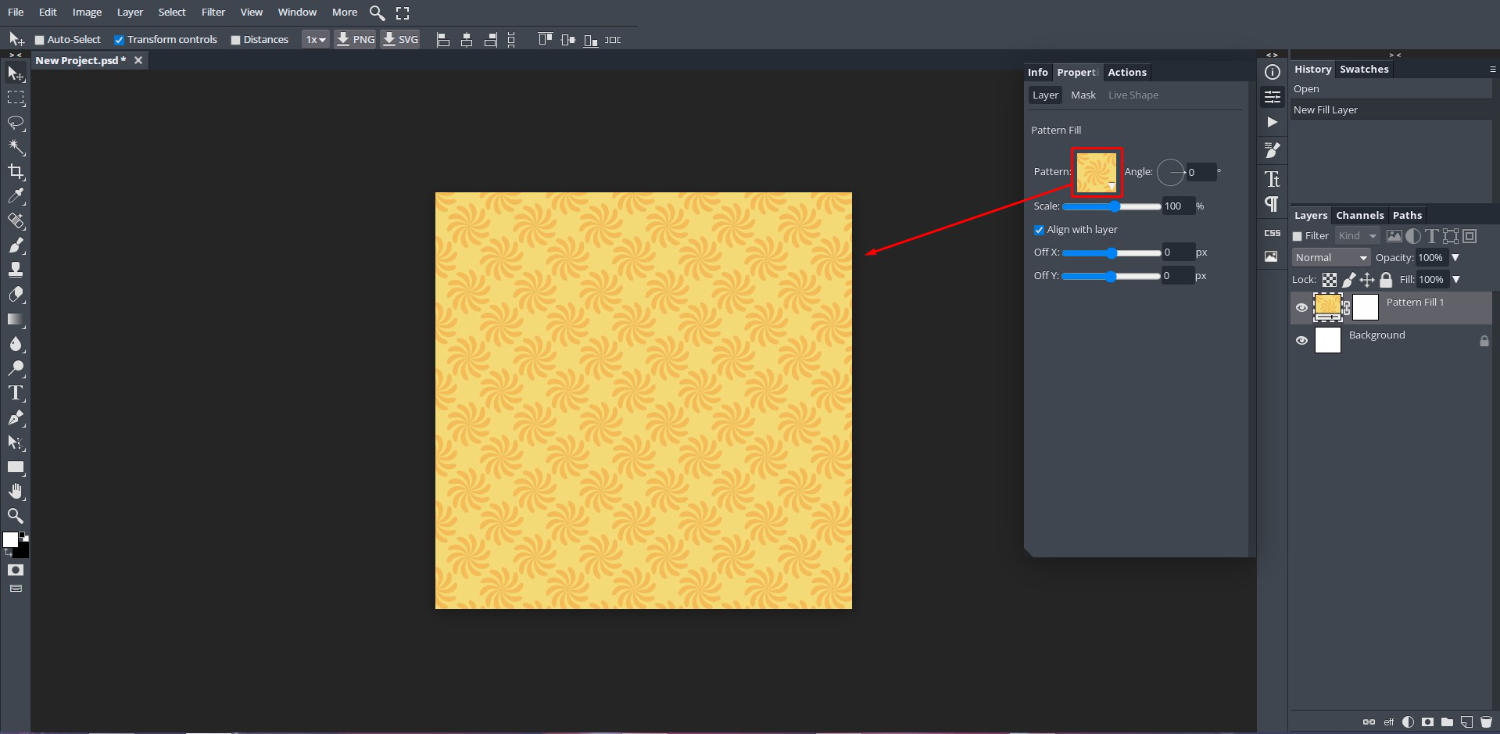
To use our newly loaded patterns, we need to add a Pattern Fill layer. This will then open up the panel for us to choose our pattern. Go to Layer > New Fill Layer > Pattern Fill.

By default the pattern fill will be the yellow one seen in the image below. The panel options will open on the right hand side and a new layer will be created.

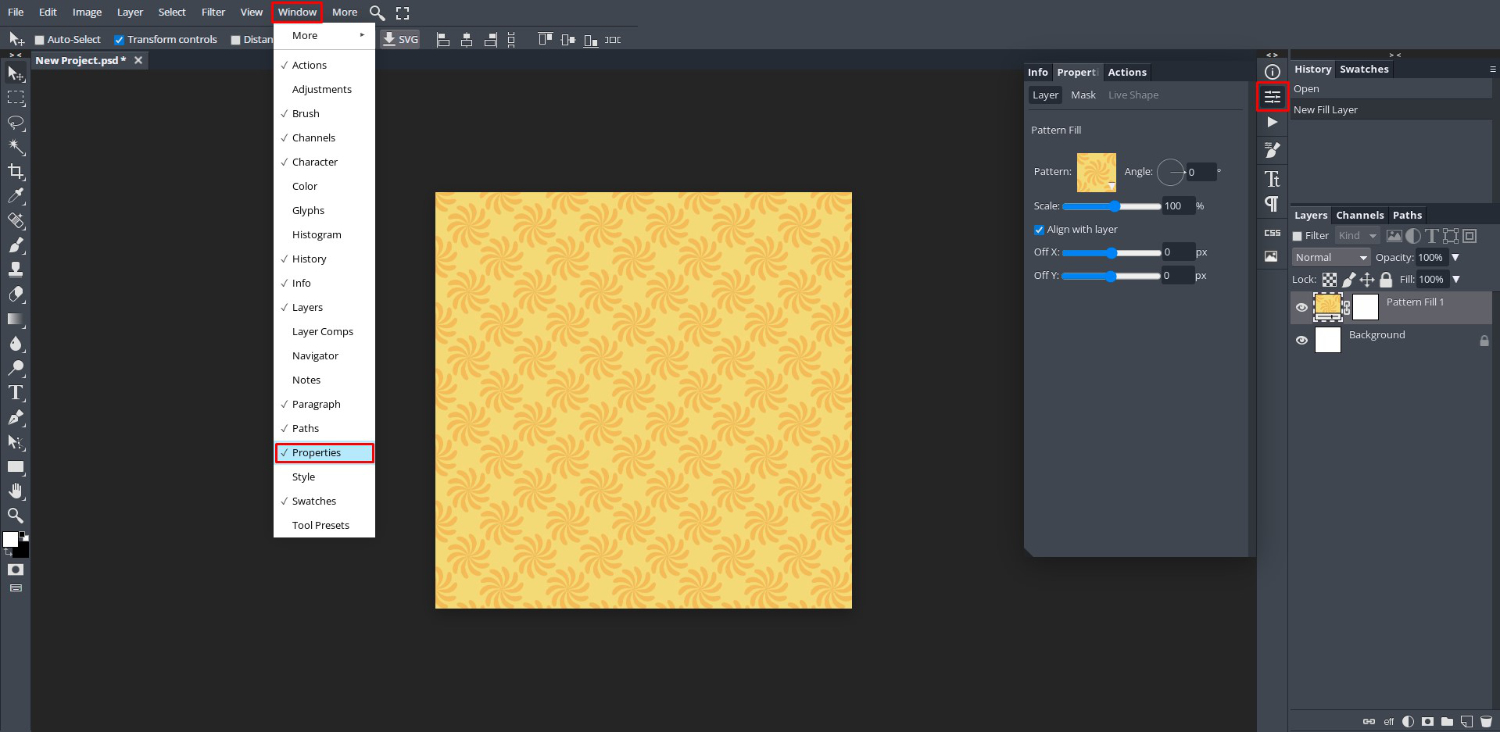
If you do not see the panel open, go to Window > Properties and make sure the Properties option is ticked. You will also be able to open the Properties panel on the right hand side.

Step 3 - Change Pattern Fill Properties
Within the Properties panel, next to Pattern, you will see a preview of the selected pattern with an arrow in the corner. Click on this arrow to open the drop down menu of patterns available. Here you will find the patterns we loaded earlier on.

The size, position and rotation can all be adjusted under the Properties panel.

Step 4 - Add a Background Color to Pattern
Many patterns come with a transparent background. This means we can add a background color of our choice. Since we want the color to be behind the pattern, we need to create a new layer above the Background layer.
Go to the Layers panel on the right hand side, click once on the Background layer to select it. At the bottom of the Layers panel click on New Layer, the icon looks a bit like a sticky note. A new layer will be created between the Background and Pattern Fill layers.
Next, click on the Color Picker on the lower left side to open the panel. Choose a color and click Ok. We chose a light yellow but you can use the HEX code fdfdd2.

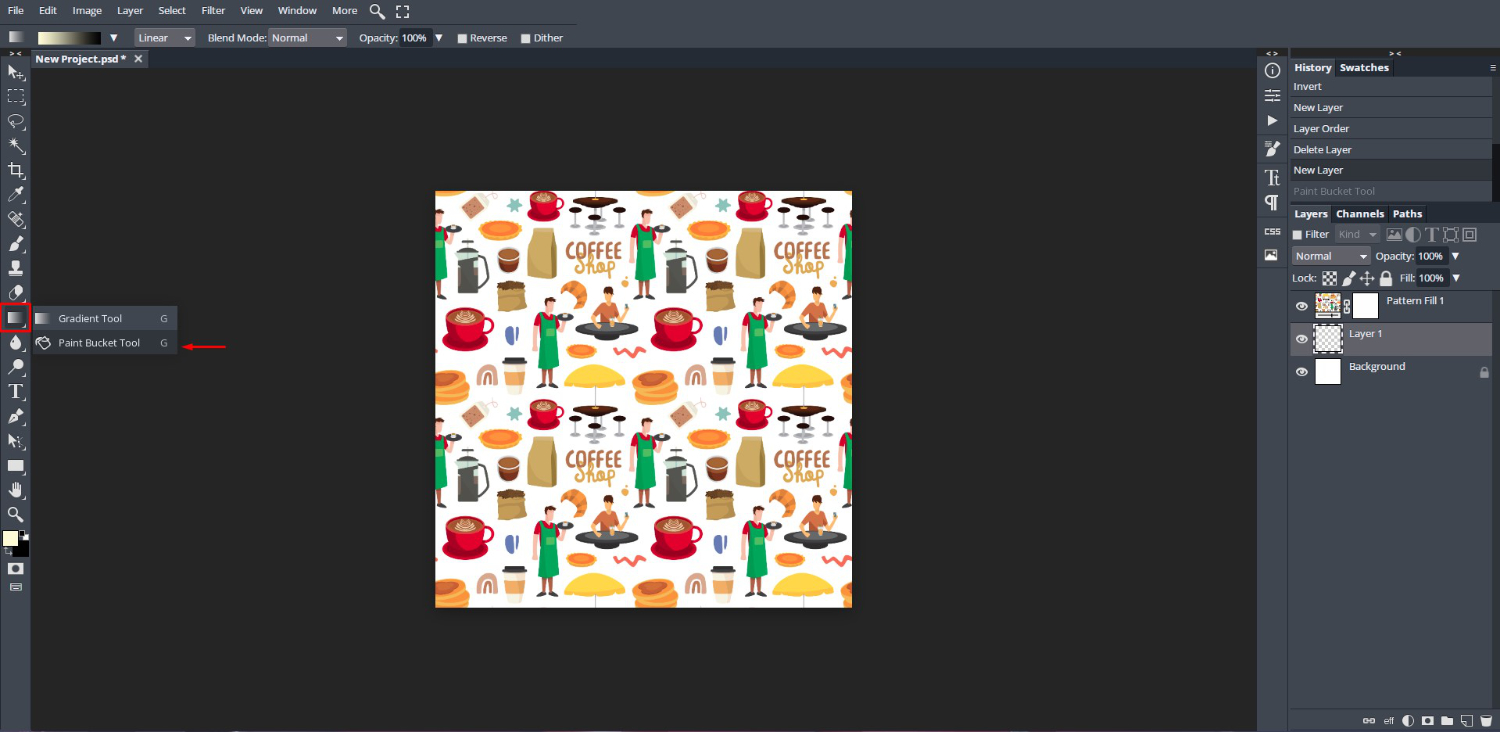
With this new layer still selected, go to the fill tool on the left side toolbar. It will be set by default to the Gradient Tool. Click and hold your mouse over this to open the options then choose the Paint Bucket Tool.

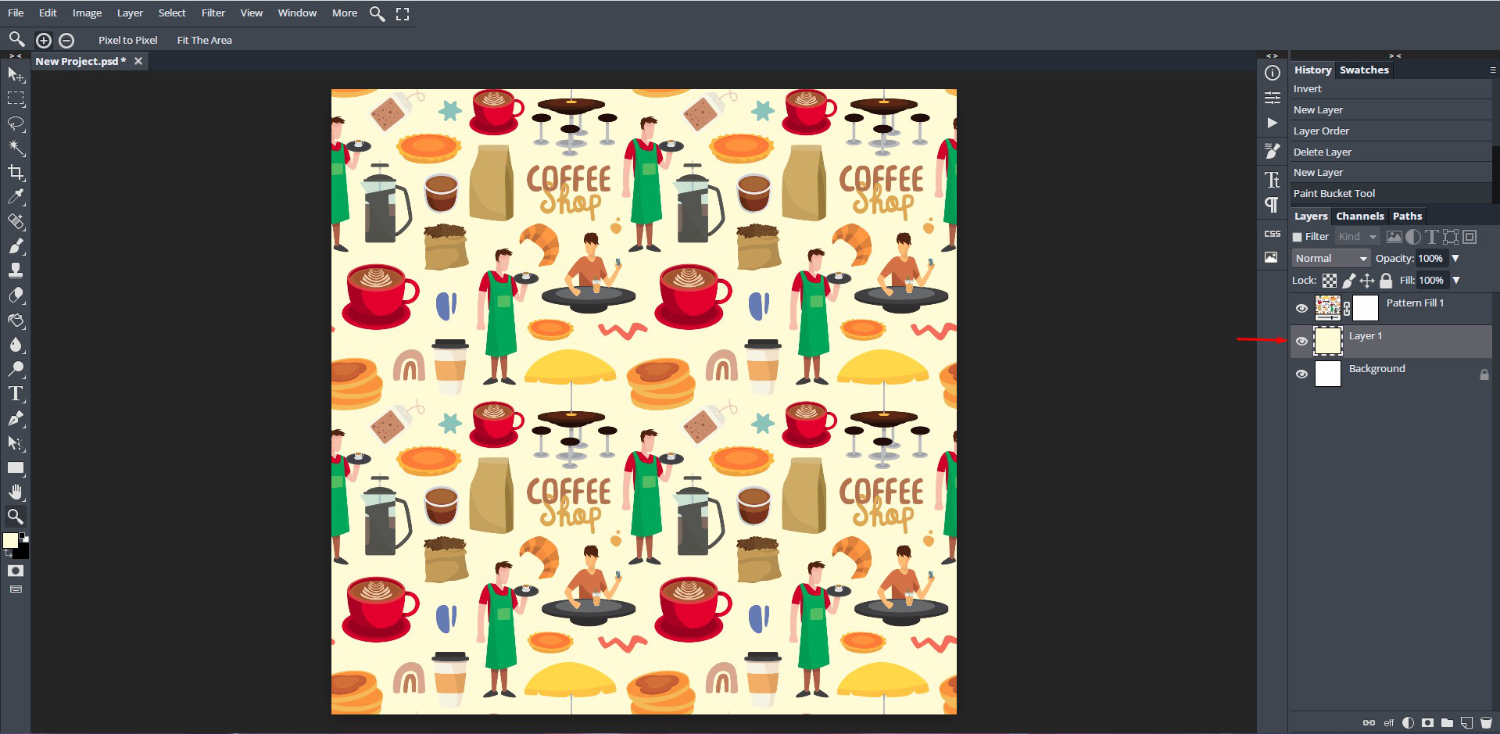
Go back to the pattern design and click anywhere to apply the fill. You will see the new layer change color under the Layers Panel. Since the color was added on a separate layer, it can be turned on/off or changed however you choose.

The final step is to save the design as a new file. You don’t want to overwrite the original in case you want to use it later on.
Now that you know how to use PAT files in DesignScape, you can happily create with all of your purchased patterns. DesignScape is such an intuitive program that you can even use smart object mockups to quickly and easily showcase your designs.
6 Related DesignScape Tutorials
1- Open Cricut Design Space and click on New Project.2- Click on the upload tool.3- You will see that on your upload screen the recent uploads appear. If you would like to find all uploads you can click on the view all icon.4- All the images you ...
1- Open Adobe Photoshop. I am using photoshop elements.(you do not need to full version ) Click on the open icon.2- Select your PSD file. Open it.3- In the layers tab, select all the layers you do not want to use in your 3D print file. Then delete ...
Some files downloaded from Design Bundles will come with an .EPS file extension, meaning Editable Postscript - this file type is designed for use in Vector Editing Software such as Adobe Illustrator.Adobe Illustrator is the Industry's leading Vector editing software. It's widespread usage in the professional market and backwards-compatibility ...
Sometimes when you purchase a product from Design Bundles, the file will come with an .AI file extension, meaning it is designed for use in the Adobe Illustrator software.Adobe Illustrator is the Industry's leading Vector editing software. It's widespread usage in the professional market and backwards-compatibility is unrivaled. It ...
Today we will show you how to use a SVG in Silhouette Studio. SVG stands for Scalable Vector Graphic. The format is a favorite for cut files as designs can be resized without losing detail. These files are widely used with Silhouette Studio and other cutting machines. You can edit ...
Did you know that you can use Silhouette Files in Cricut Design Space? In this quick and easy to follow tutorial we will guide you through the steps on how to do this.Before we begin make sure that you have unzipped your purchased files to your computer. 1- Open ...

 All your Font Needs


