
Speed Lines in Illustrator
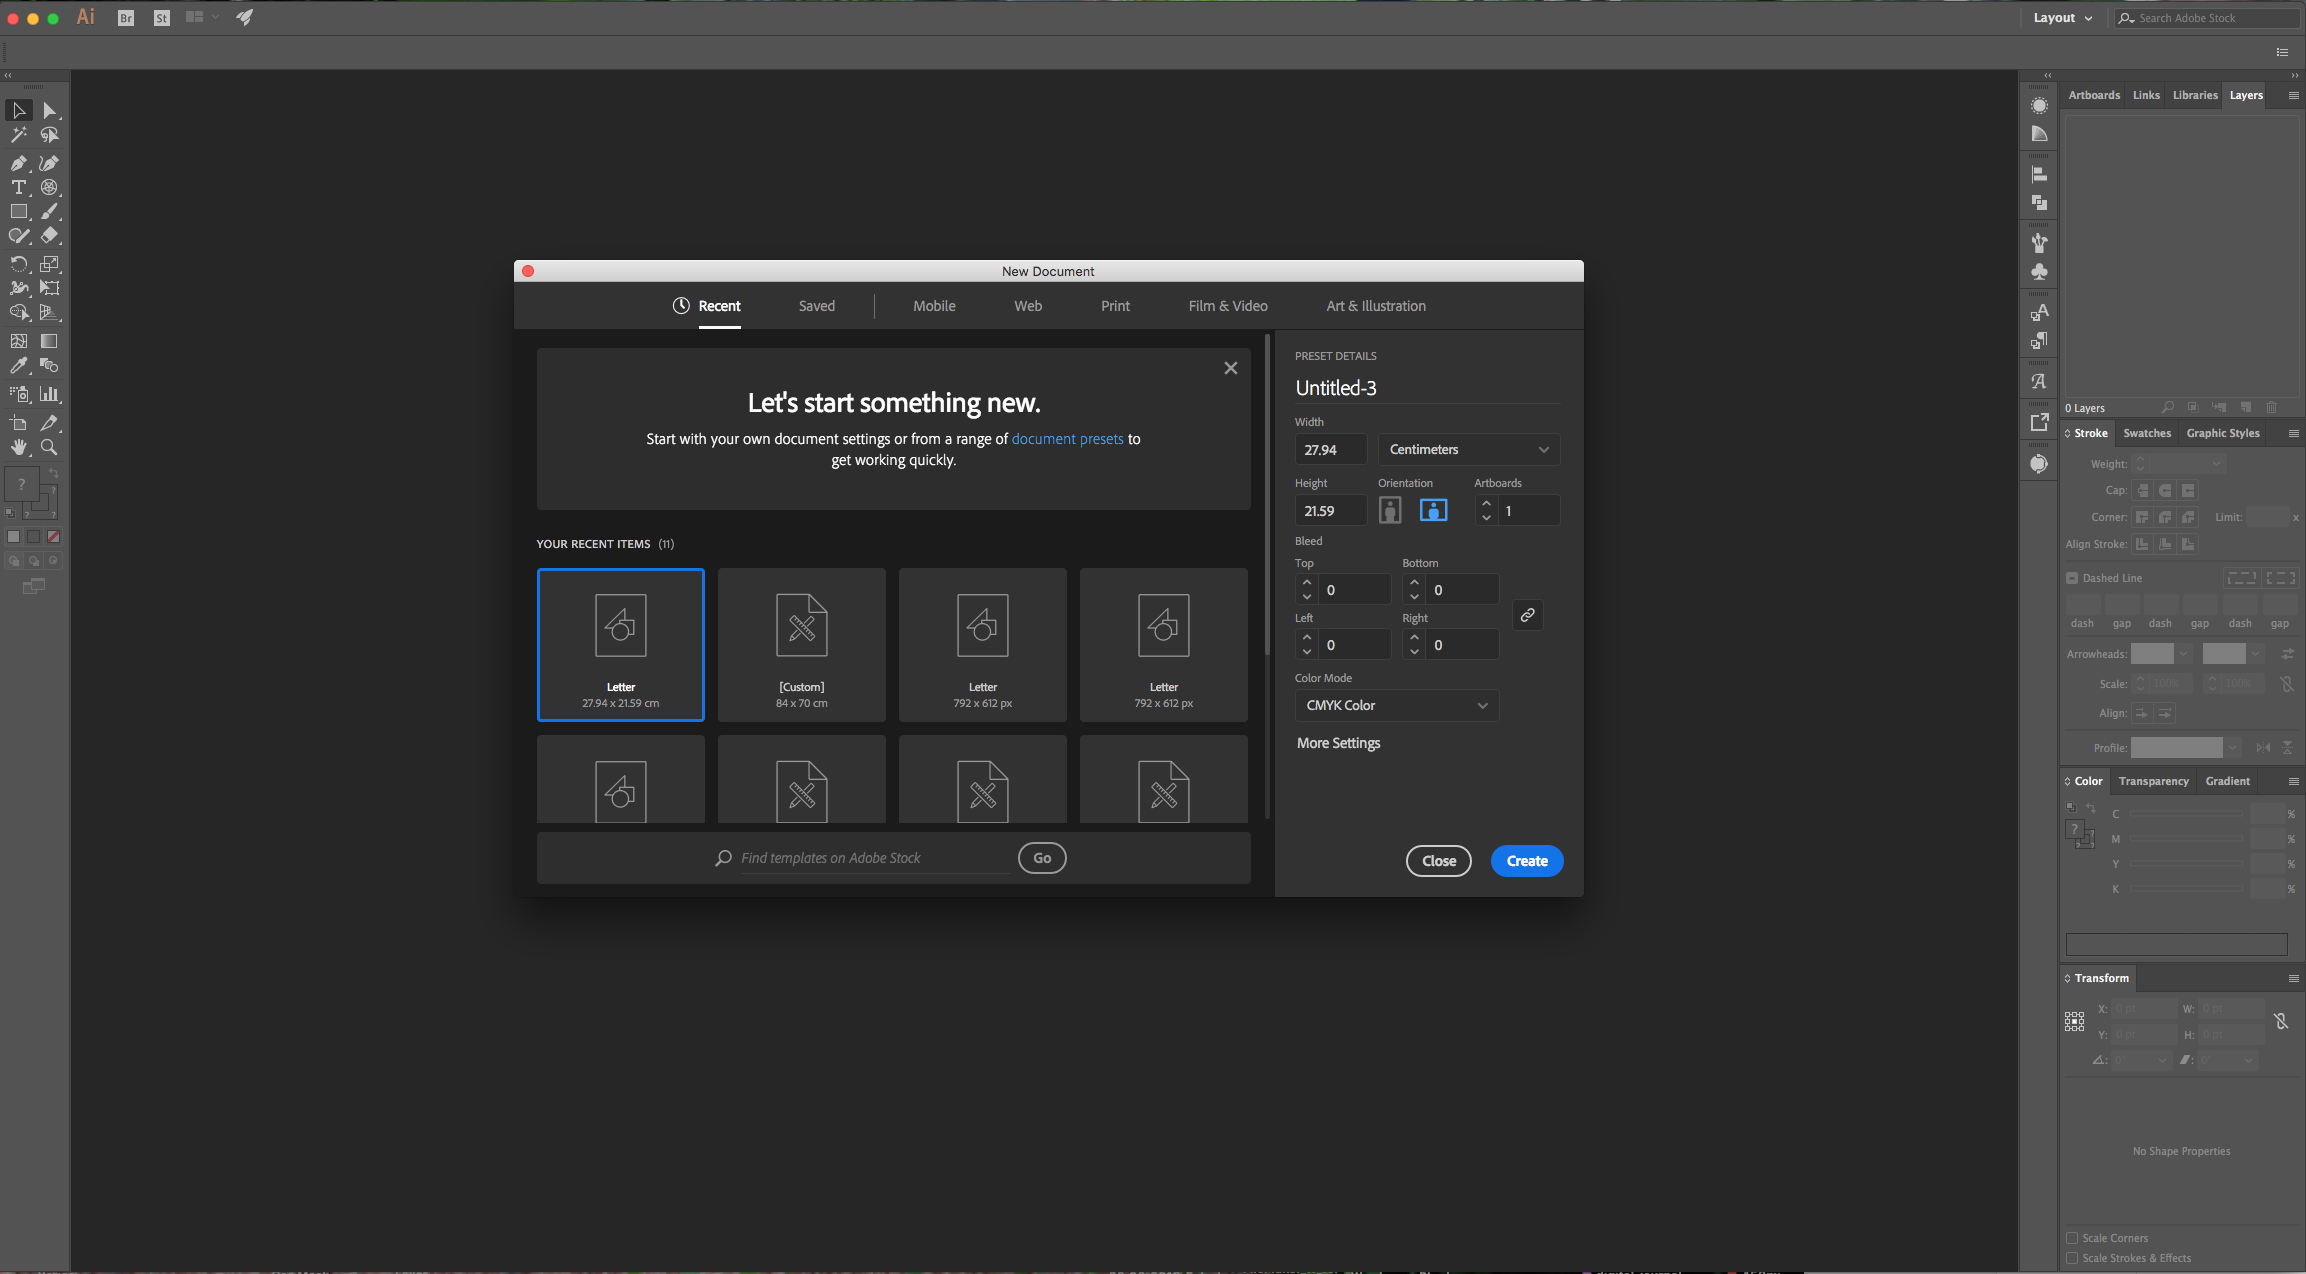
1 - In Illustrator, create a “New Document”.
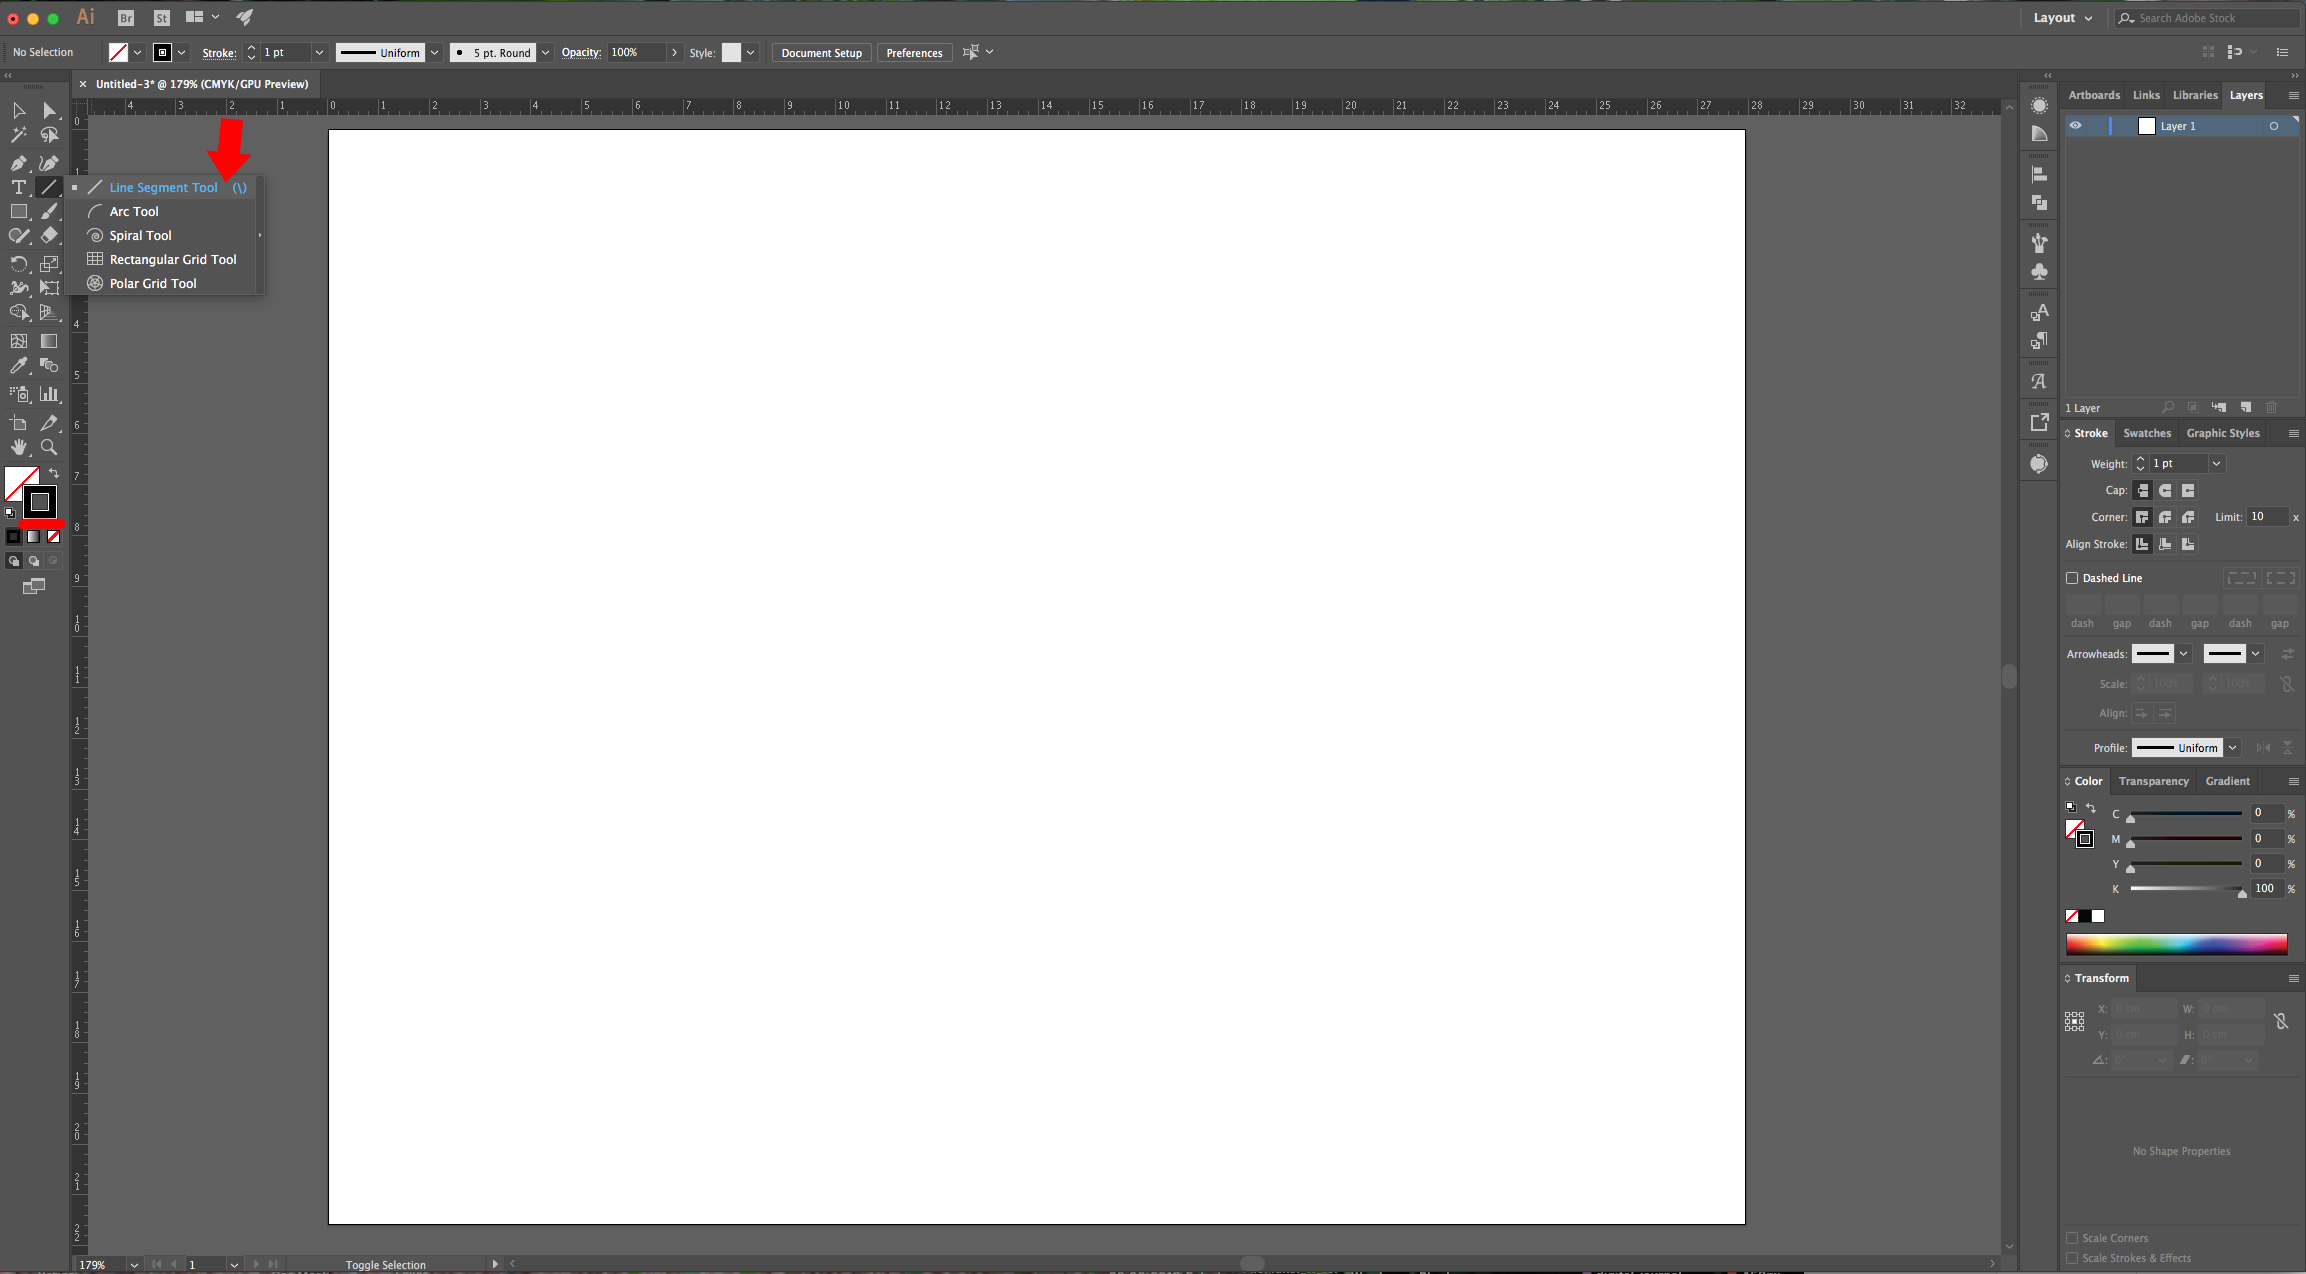
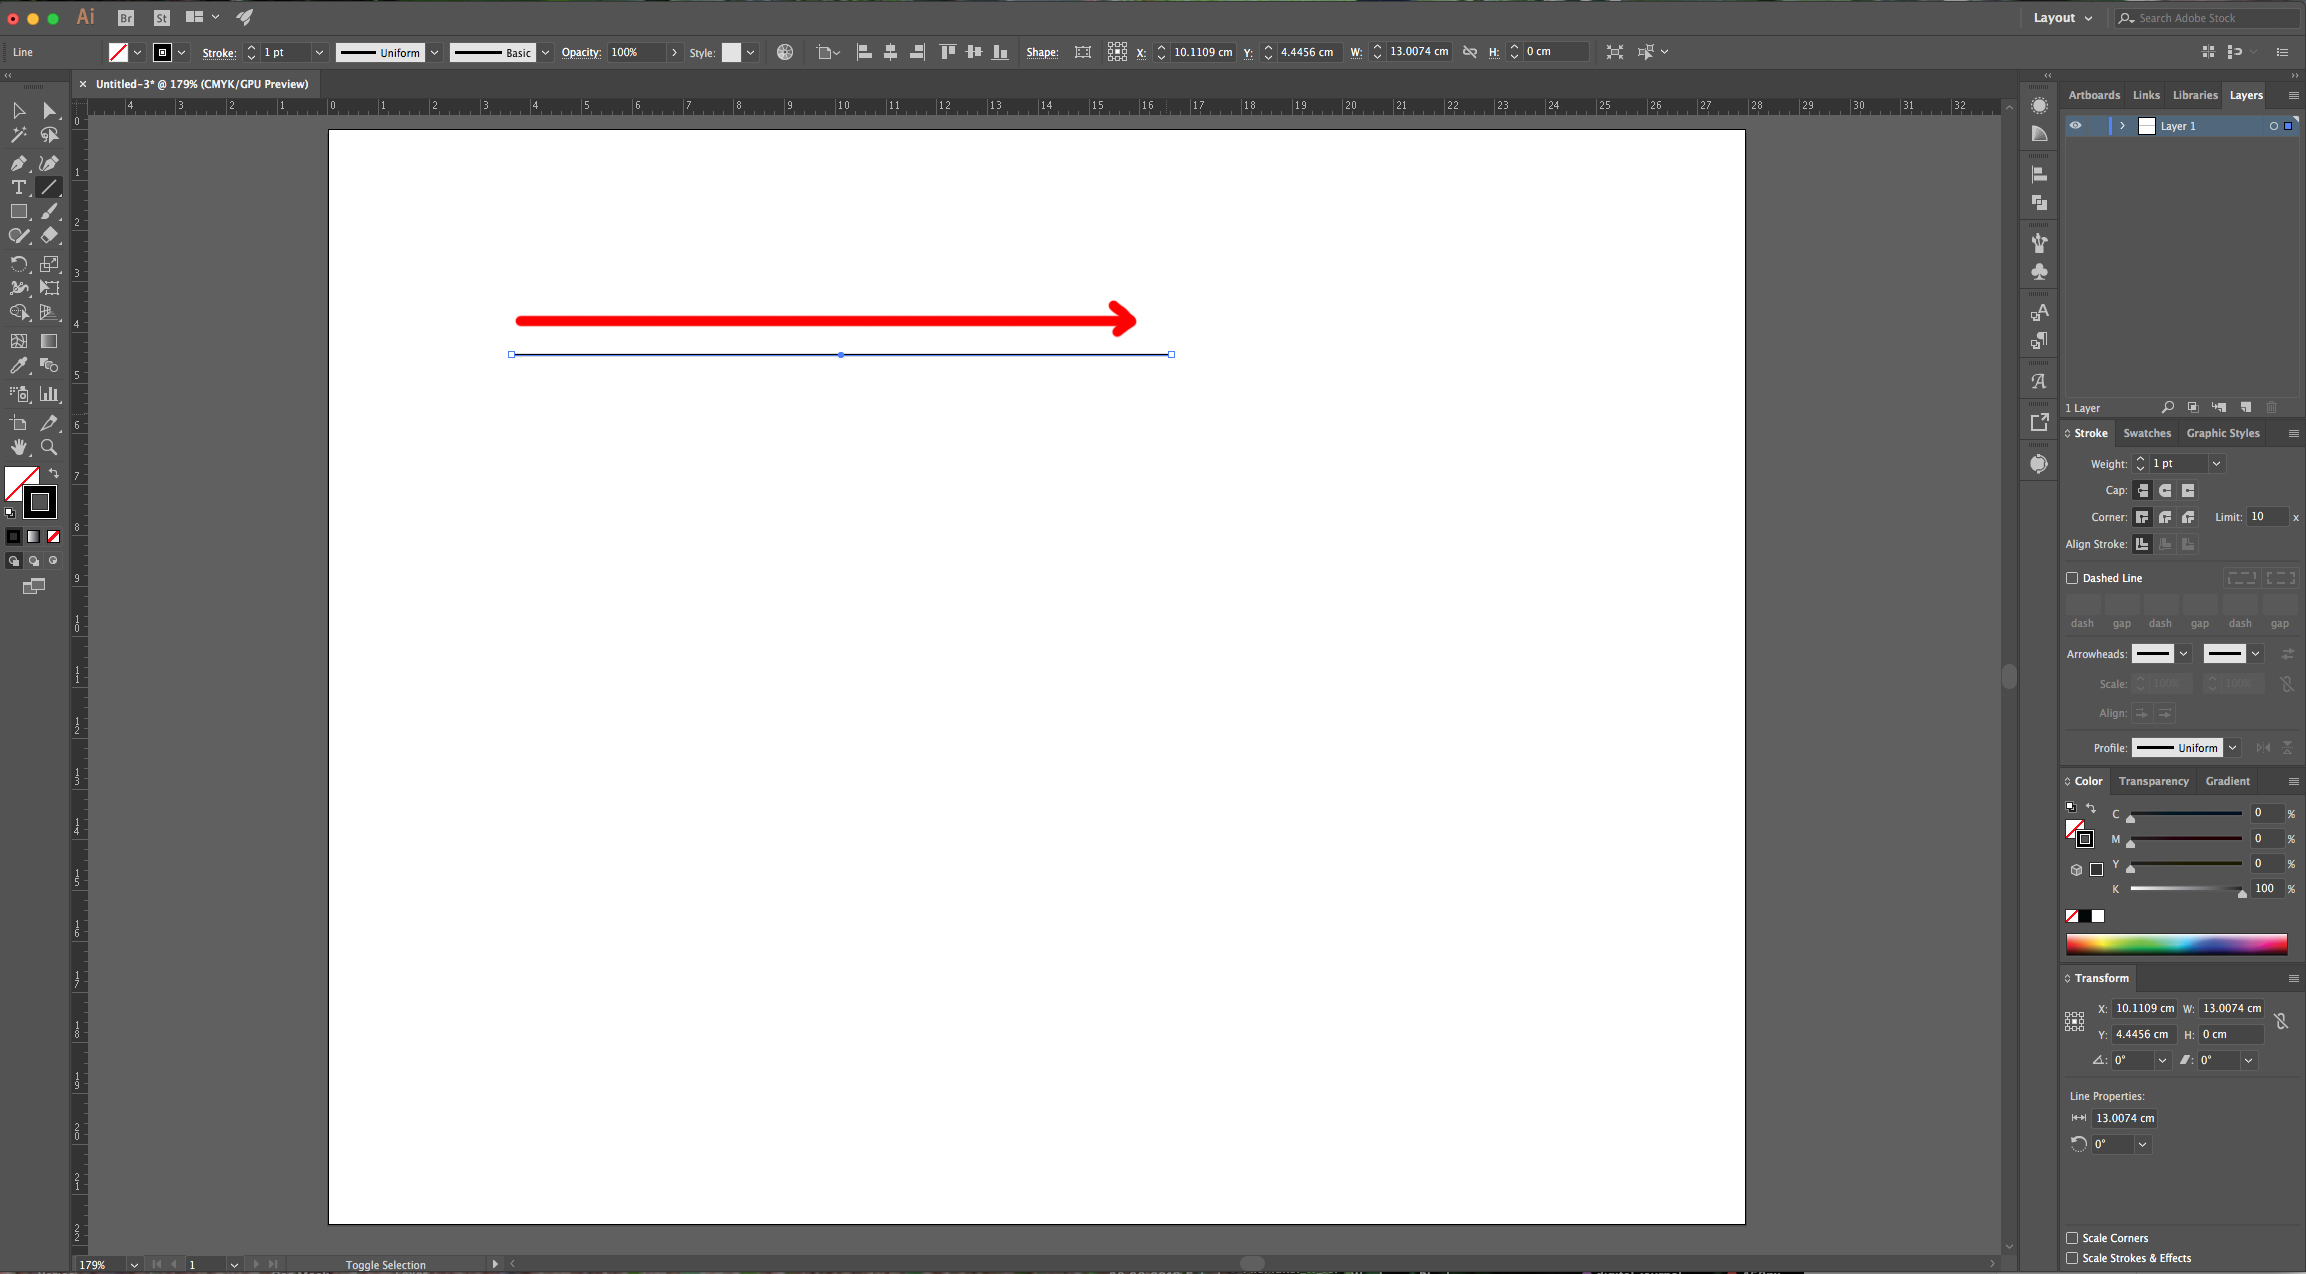
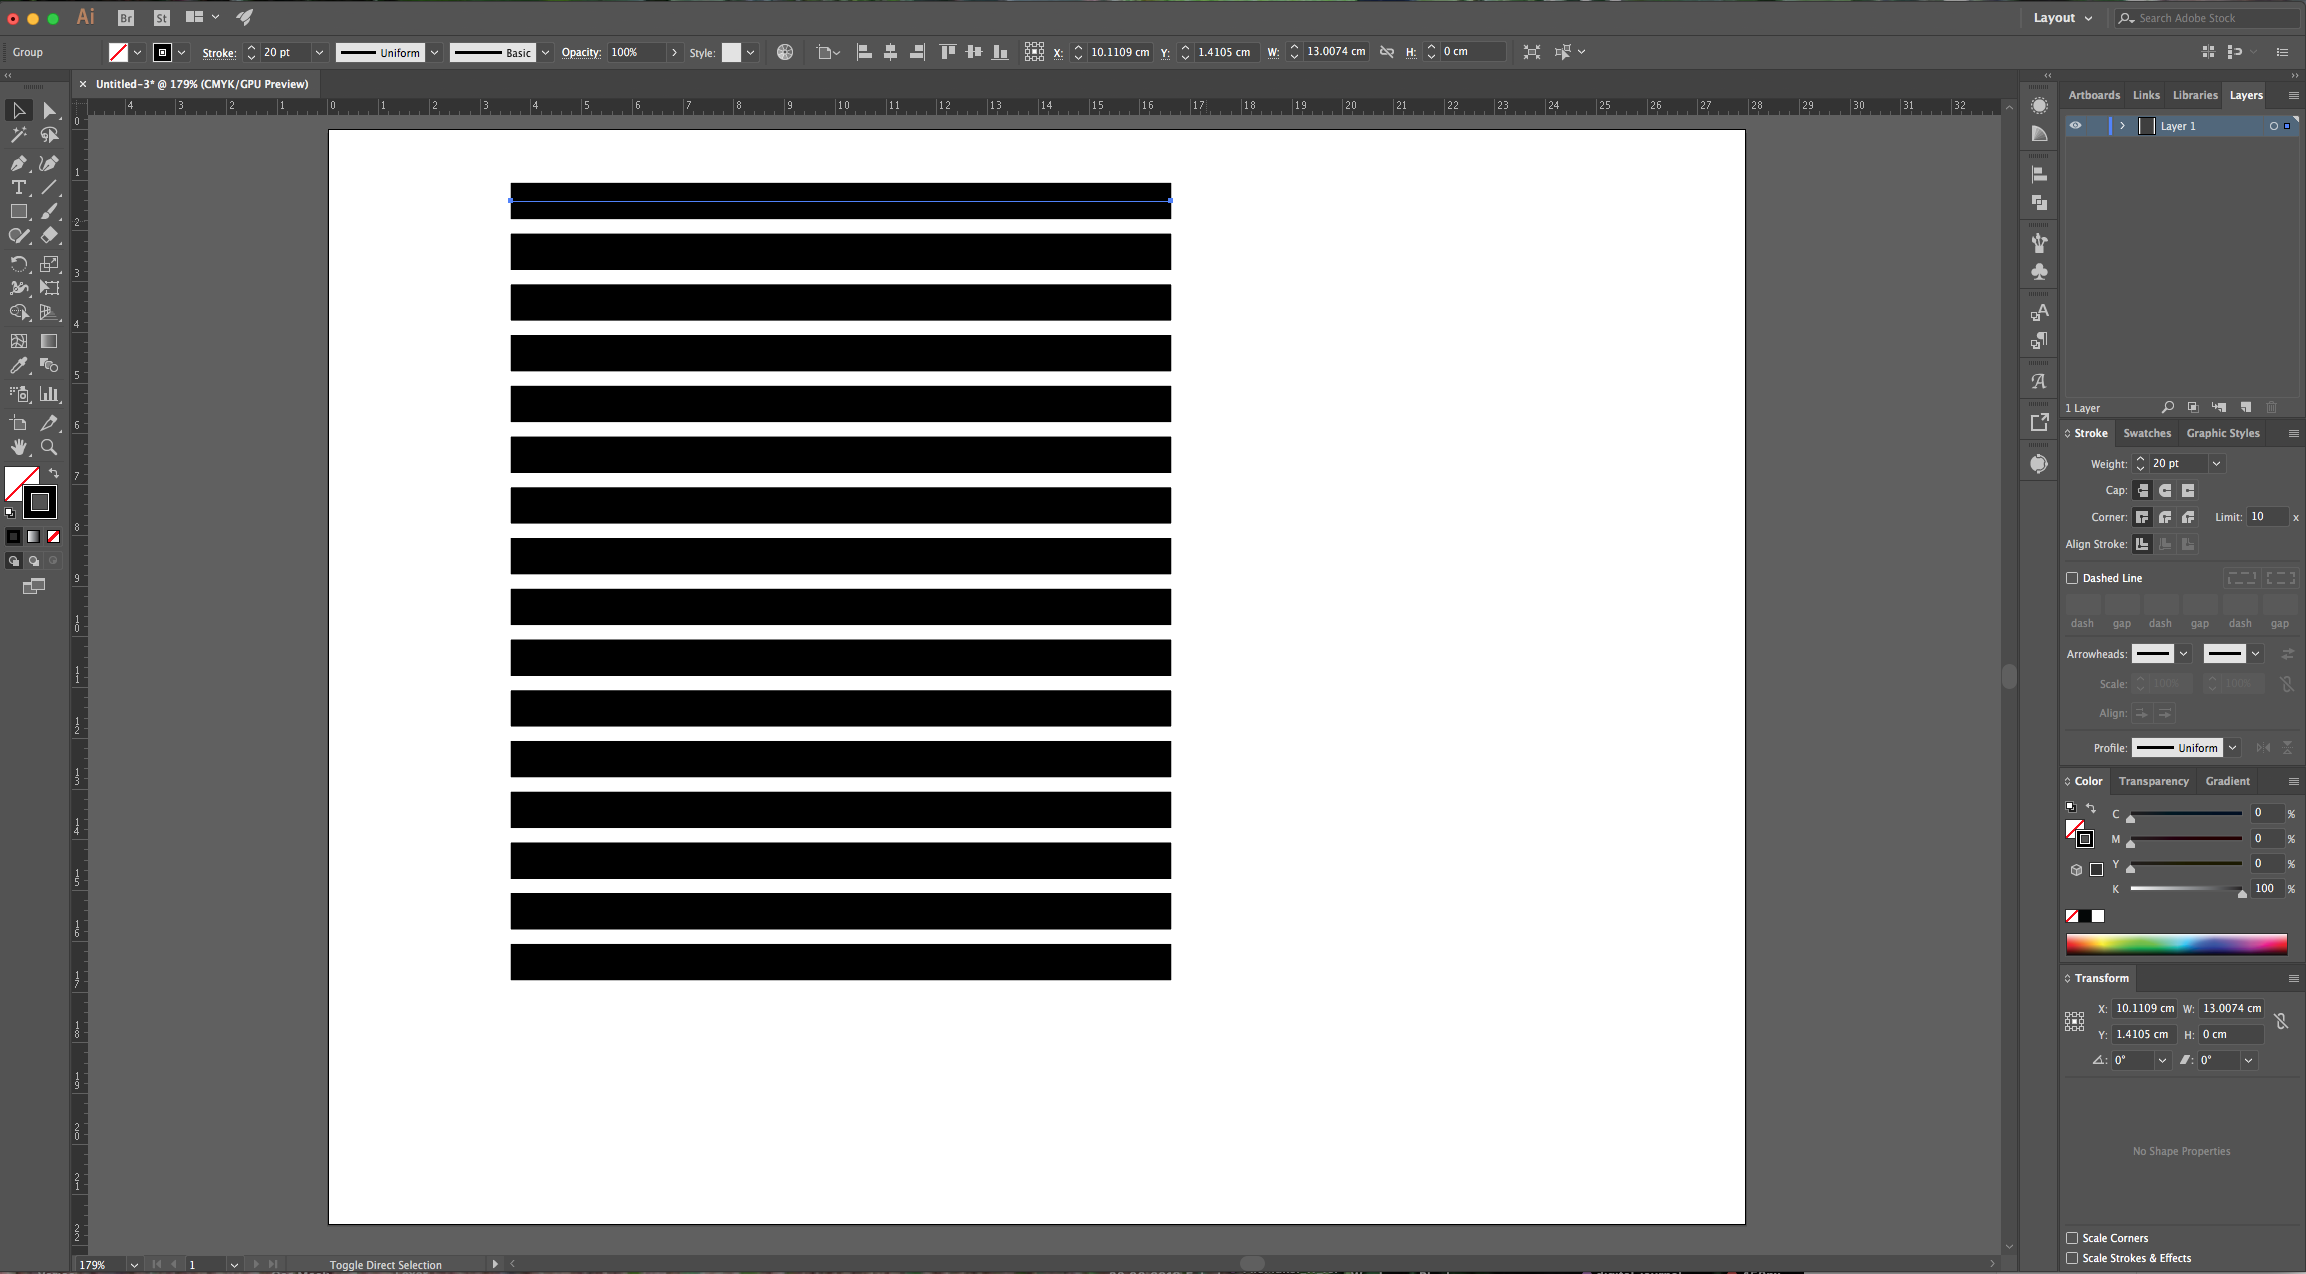
2 - Select the “Line Segment Tool” (\) and draw a 15 cm long line on the top part of your document. Hold the “Shift” key to make sure the line is straight, use Black as “Stroke” color.
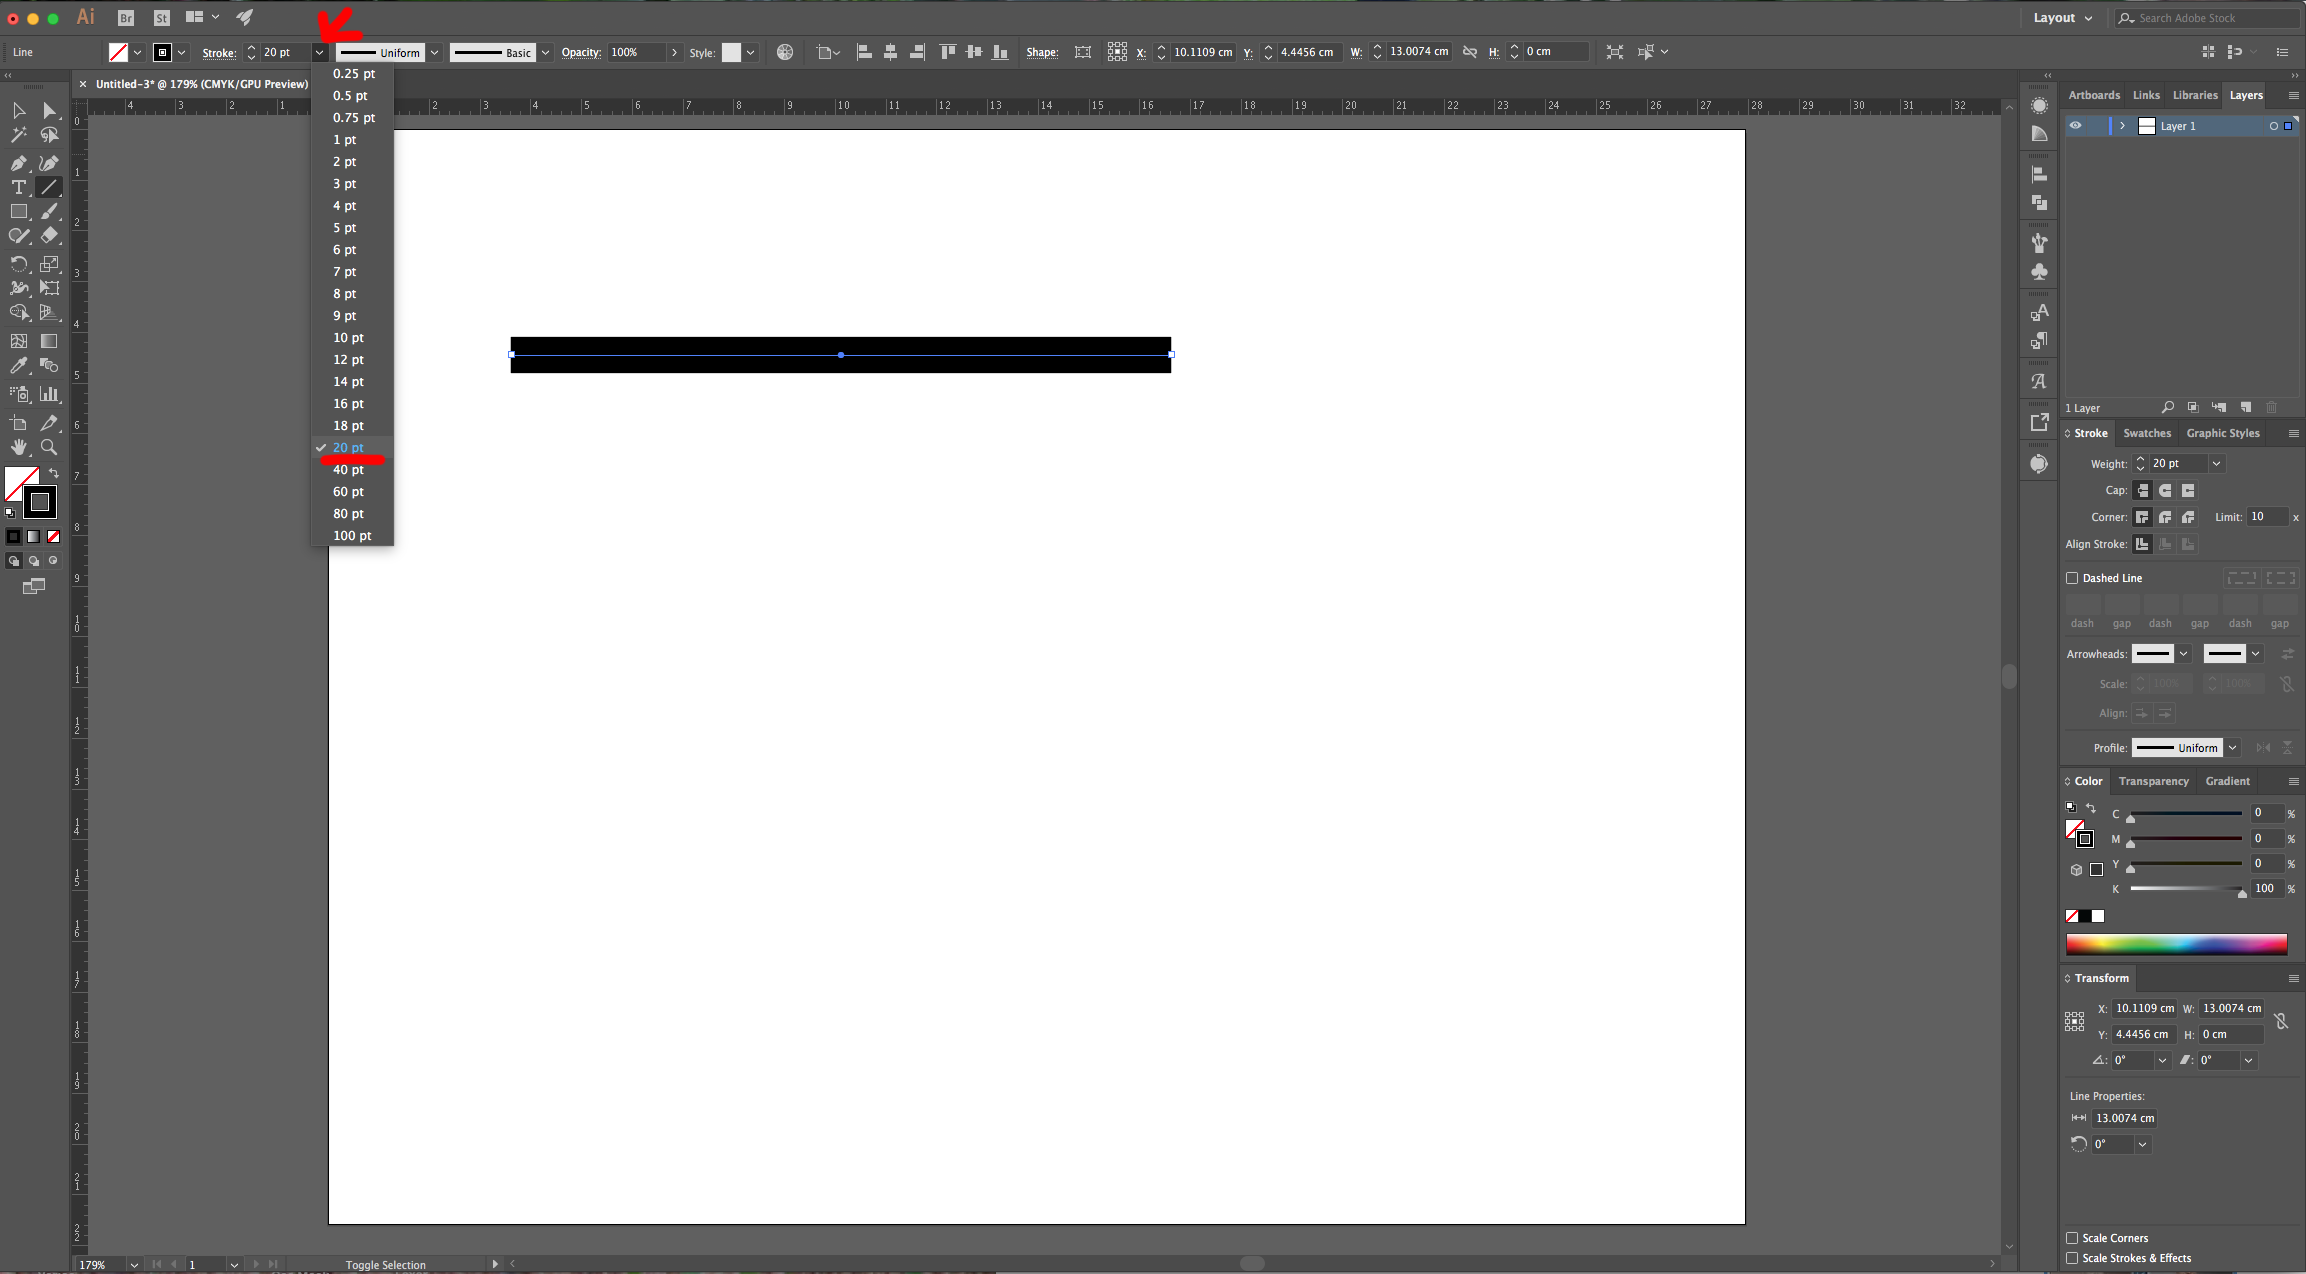
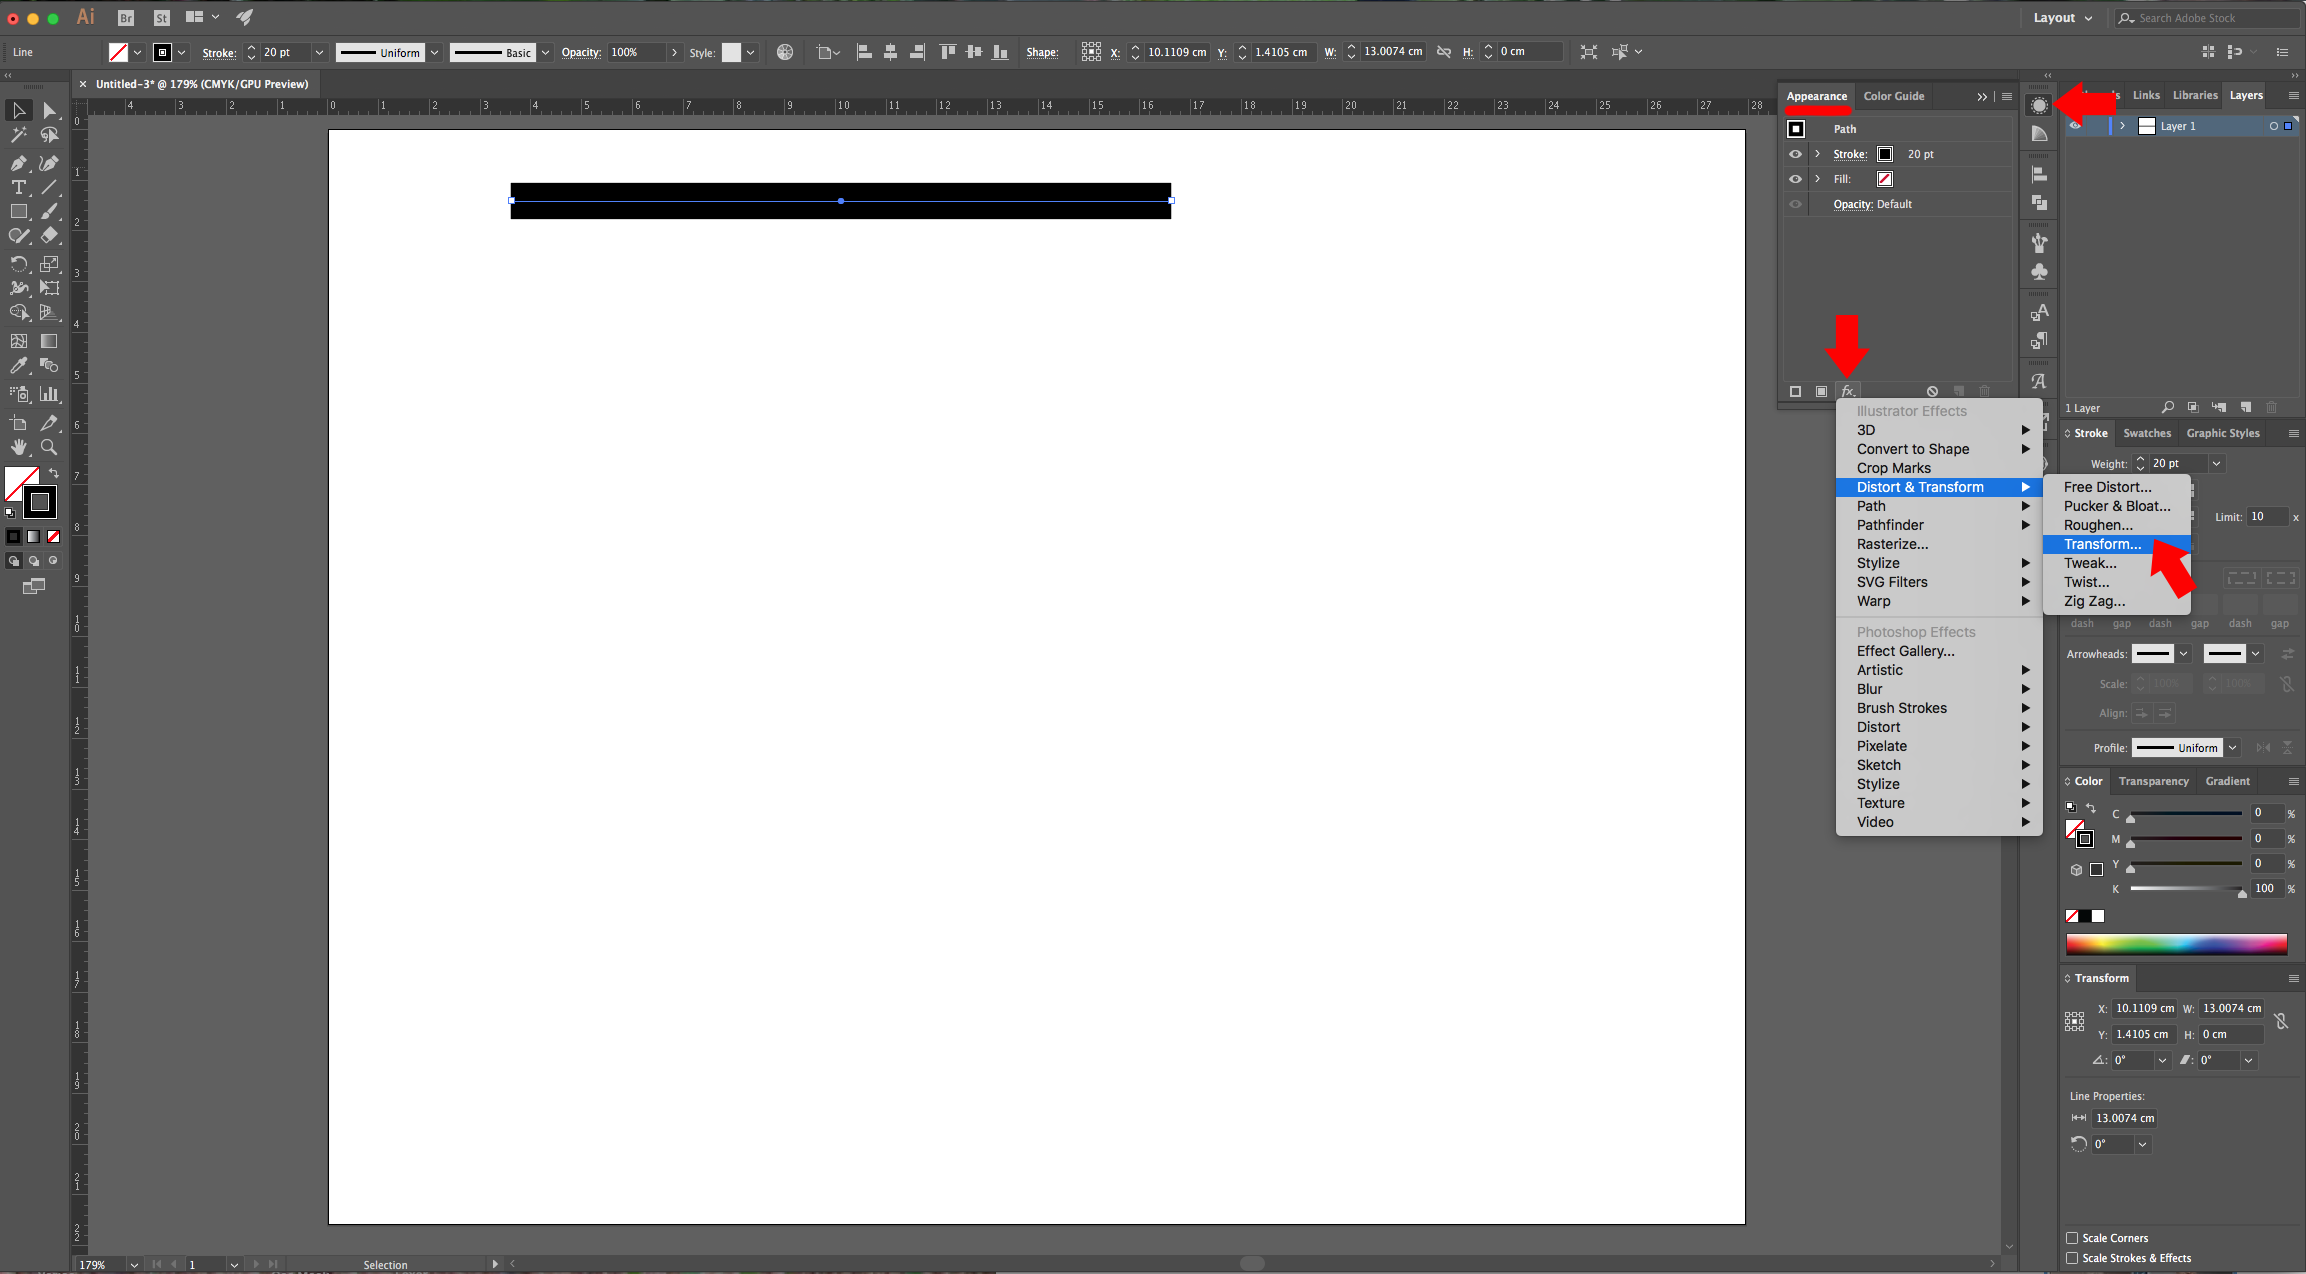
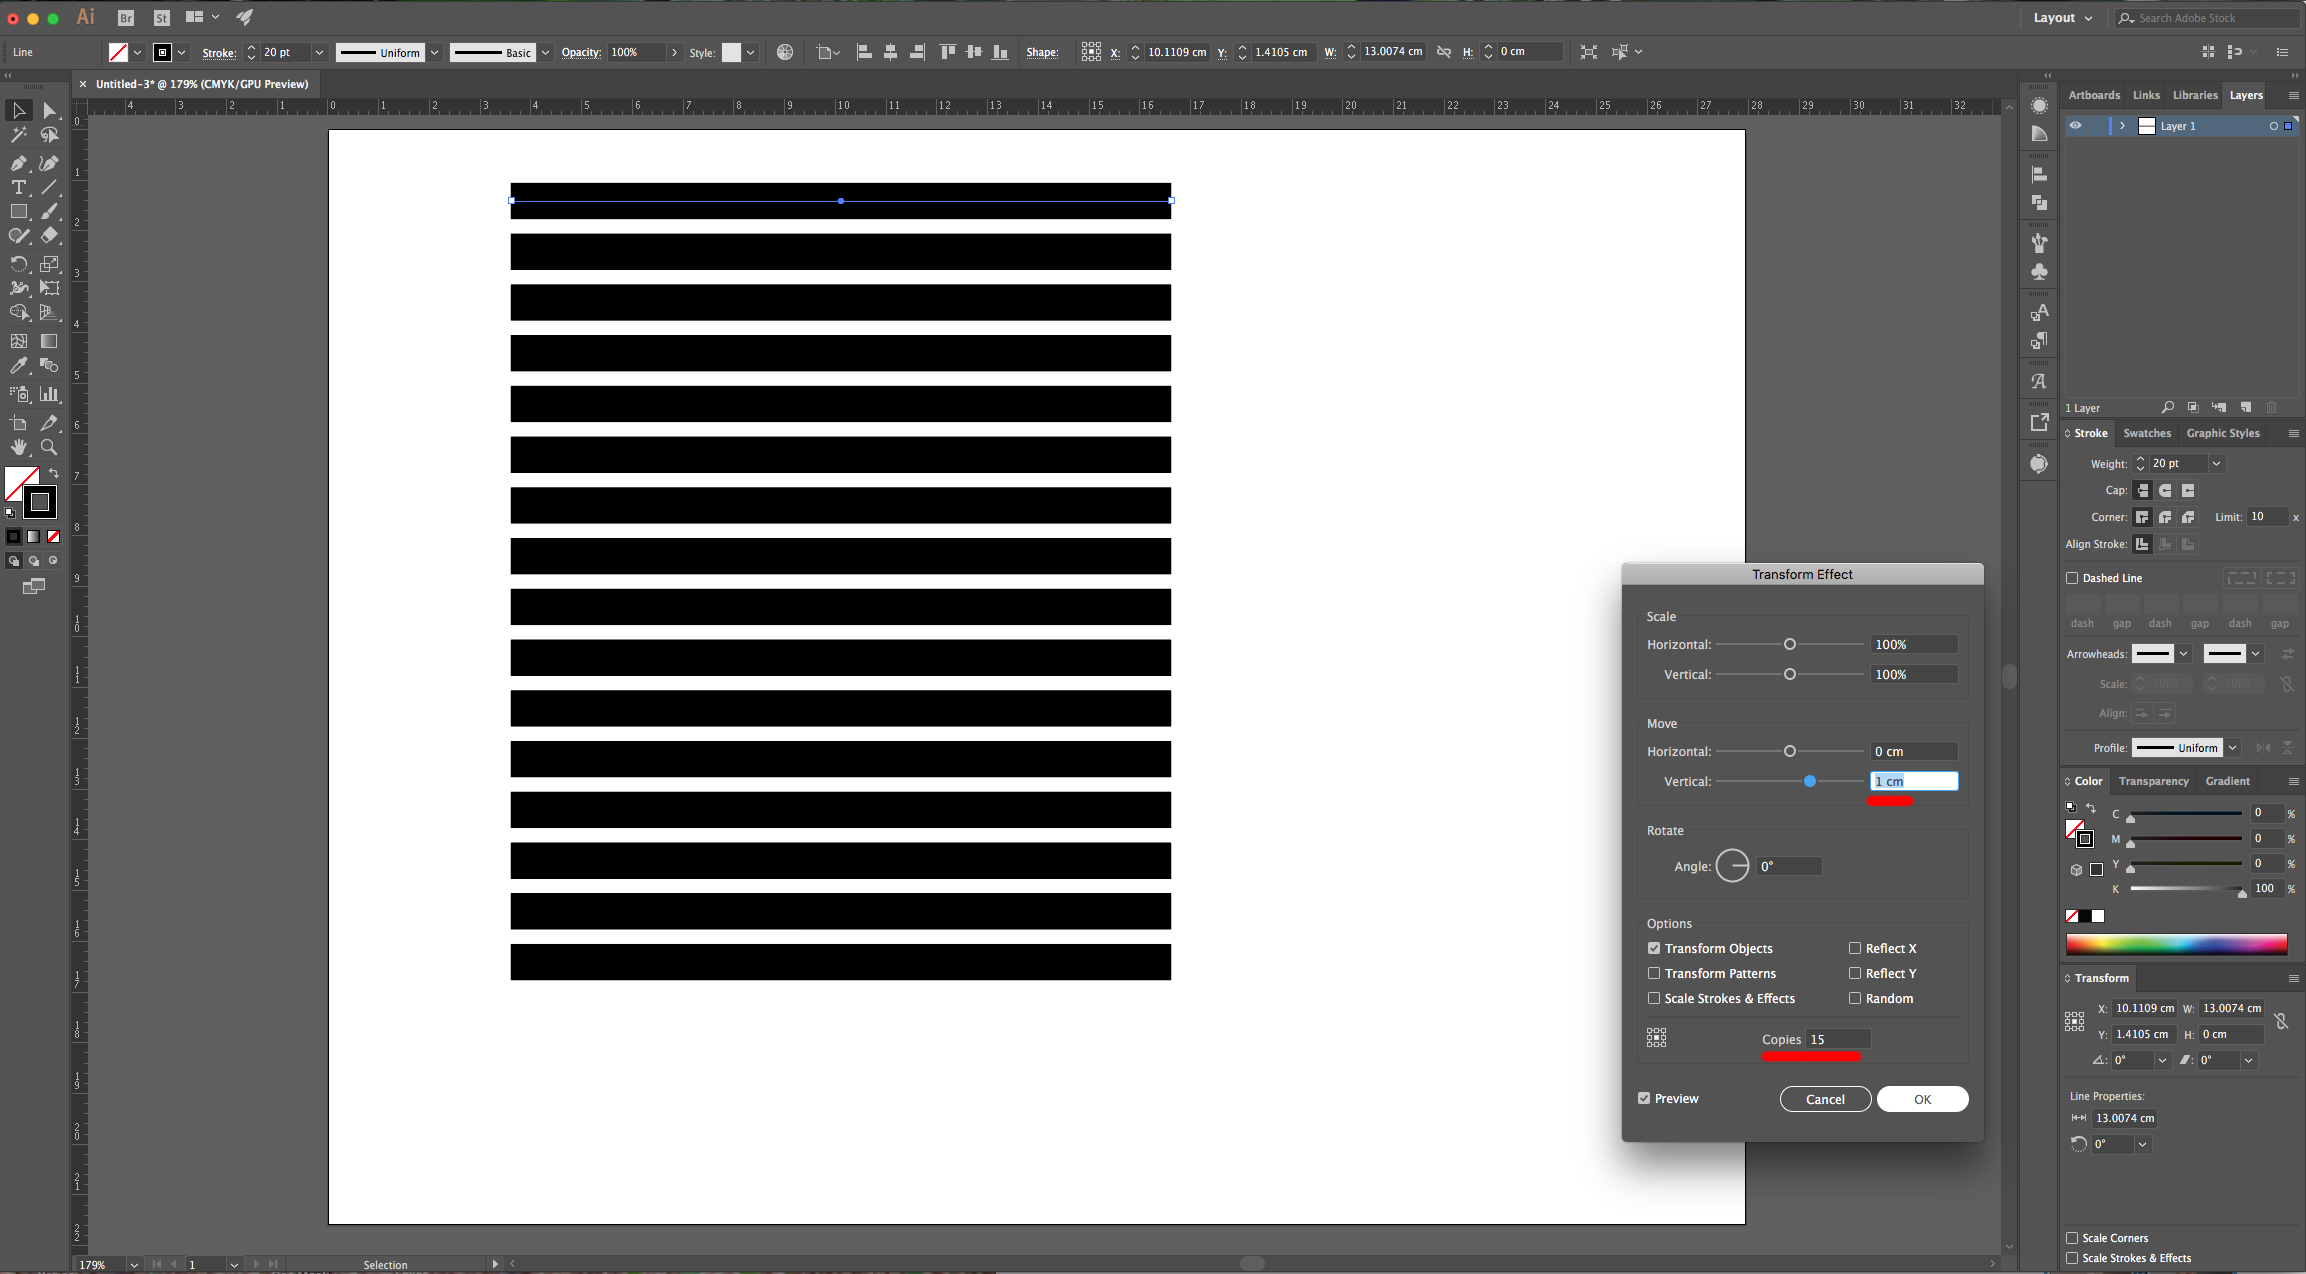
3 - Change the “Weight” to 20 pt, open the “Appearance Panel” and click on the “Effects Menu” at the bottom-left. Go to Distort & Transform > Transform… use 1cm as “Vertical” Move value and input the number 15 in the “Copies” section. Click “OK”.
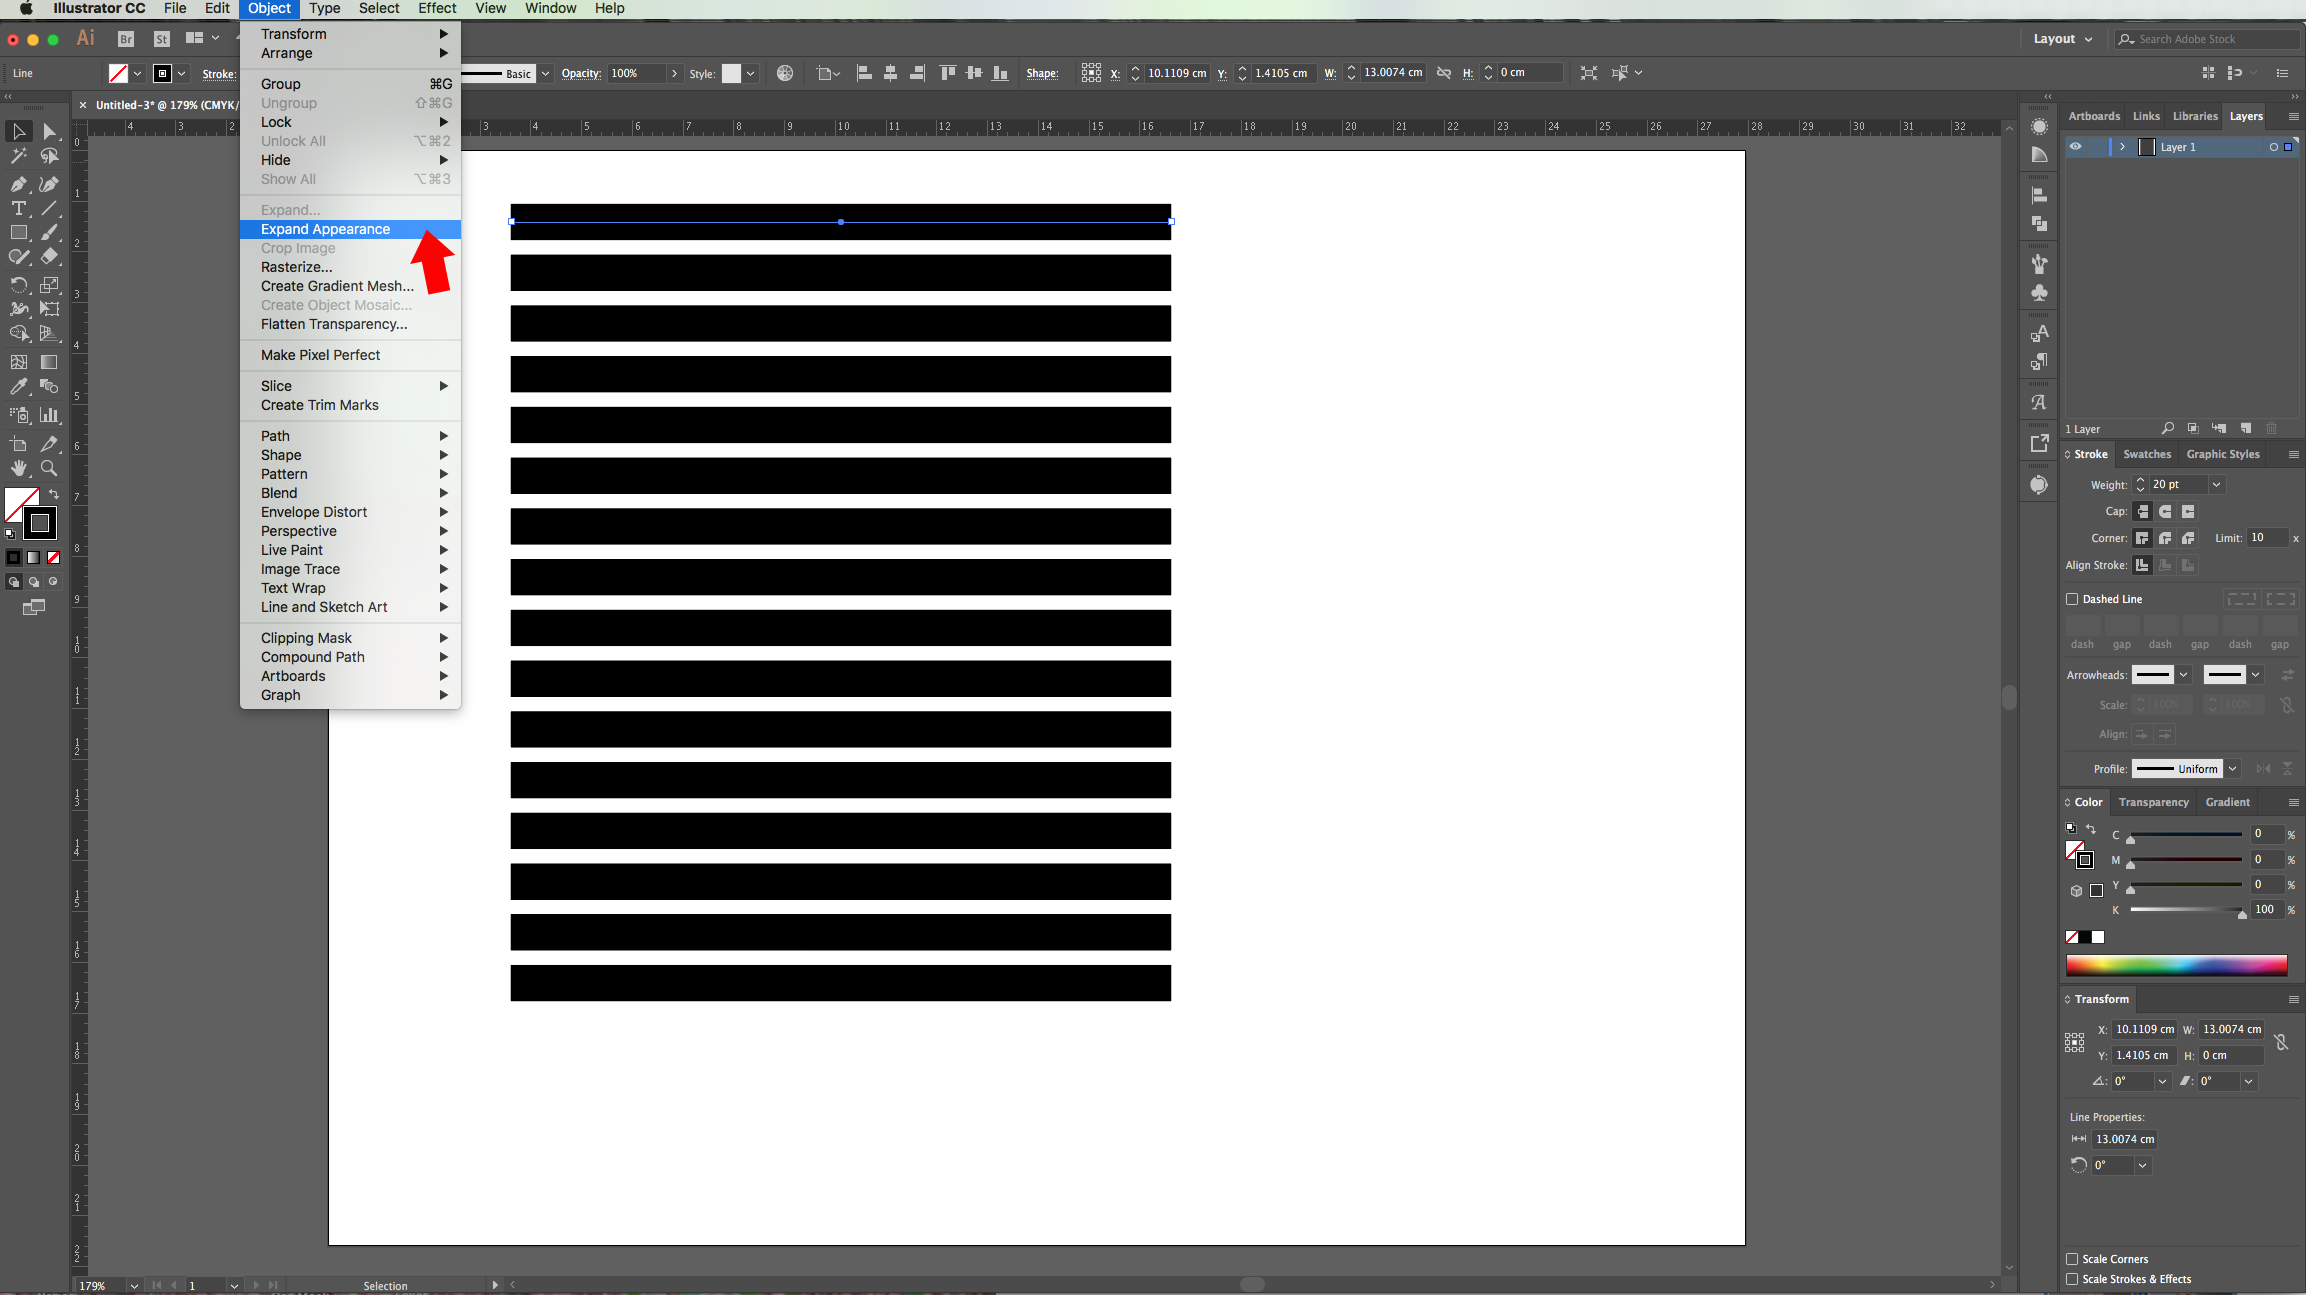
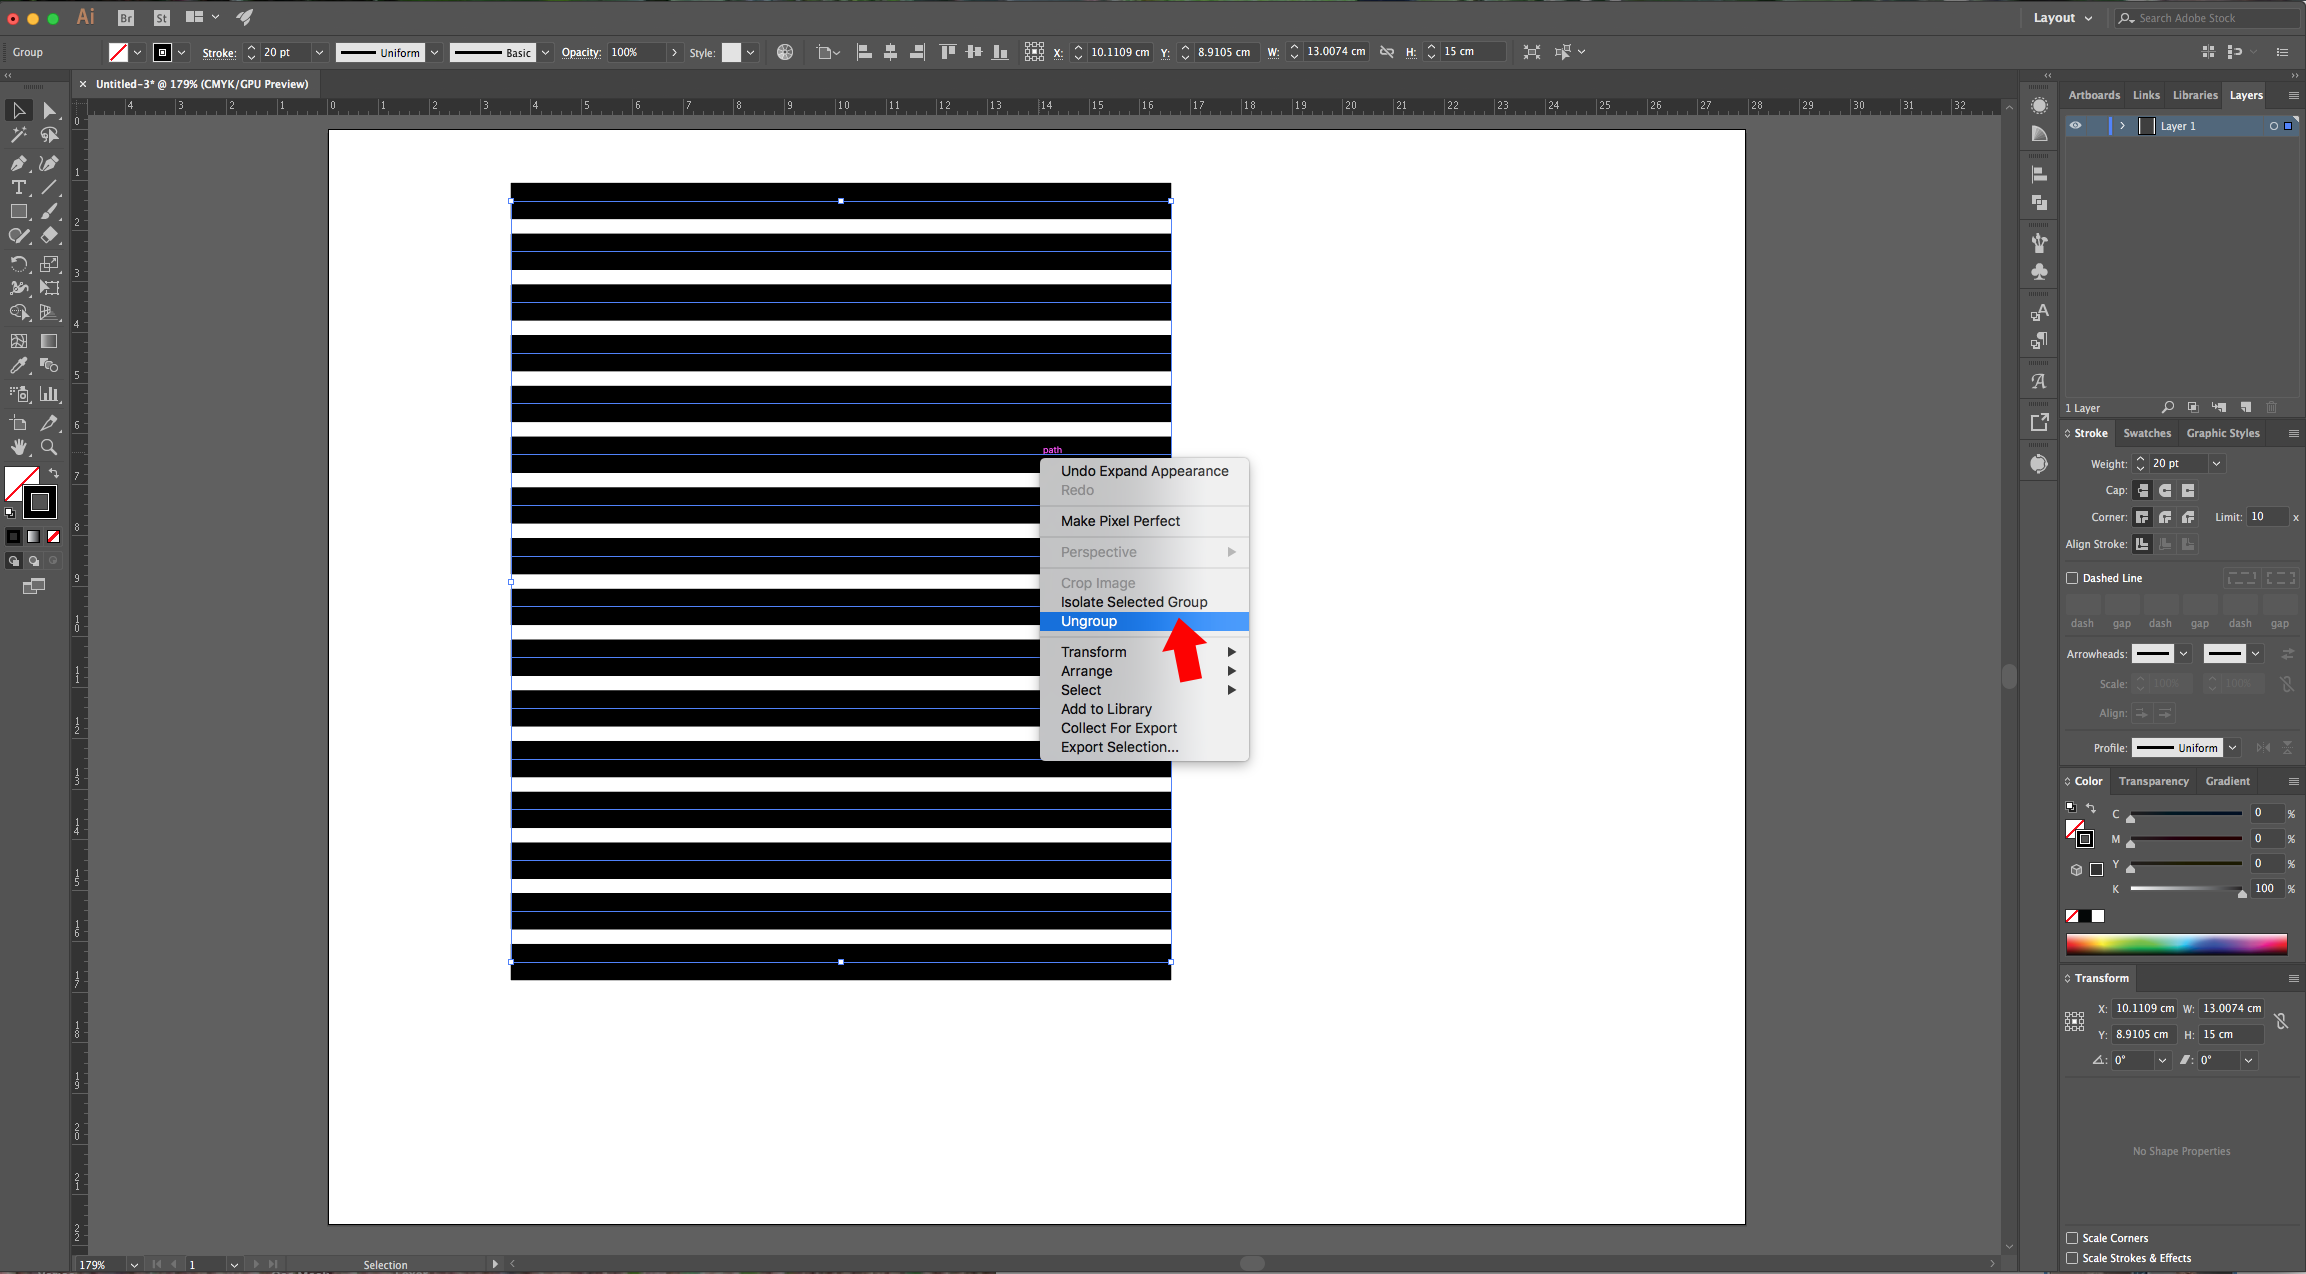
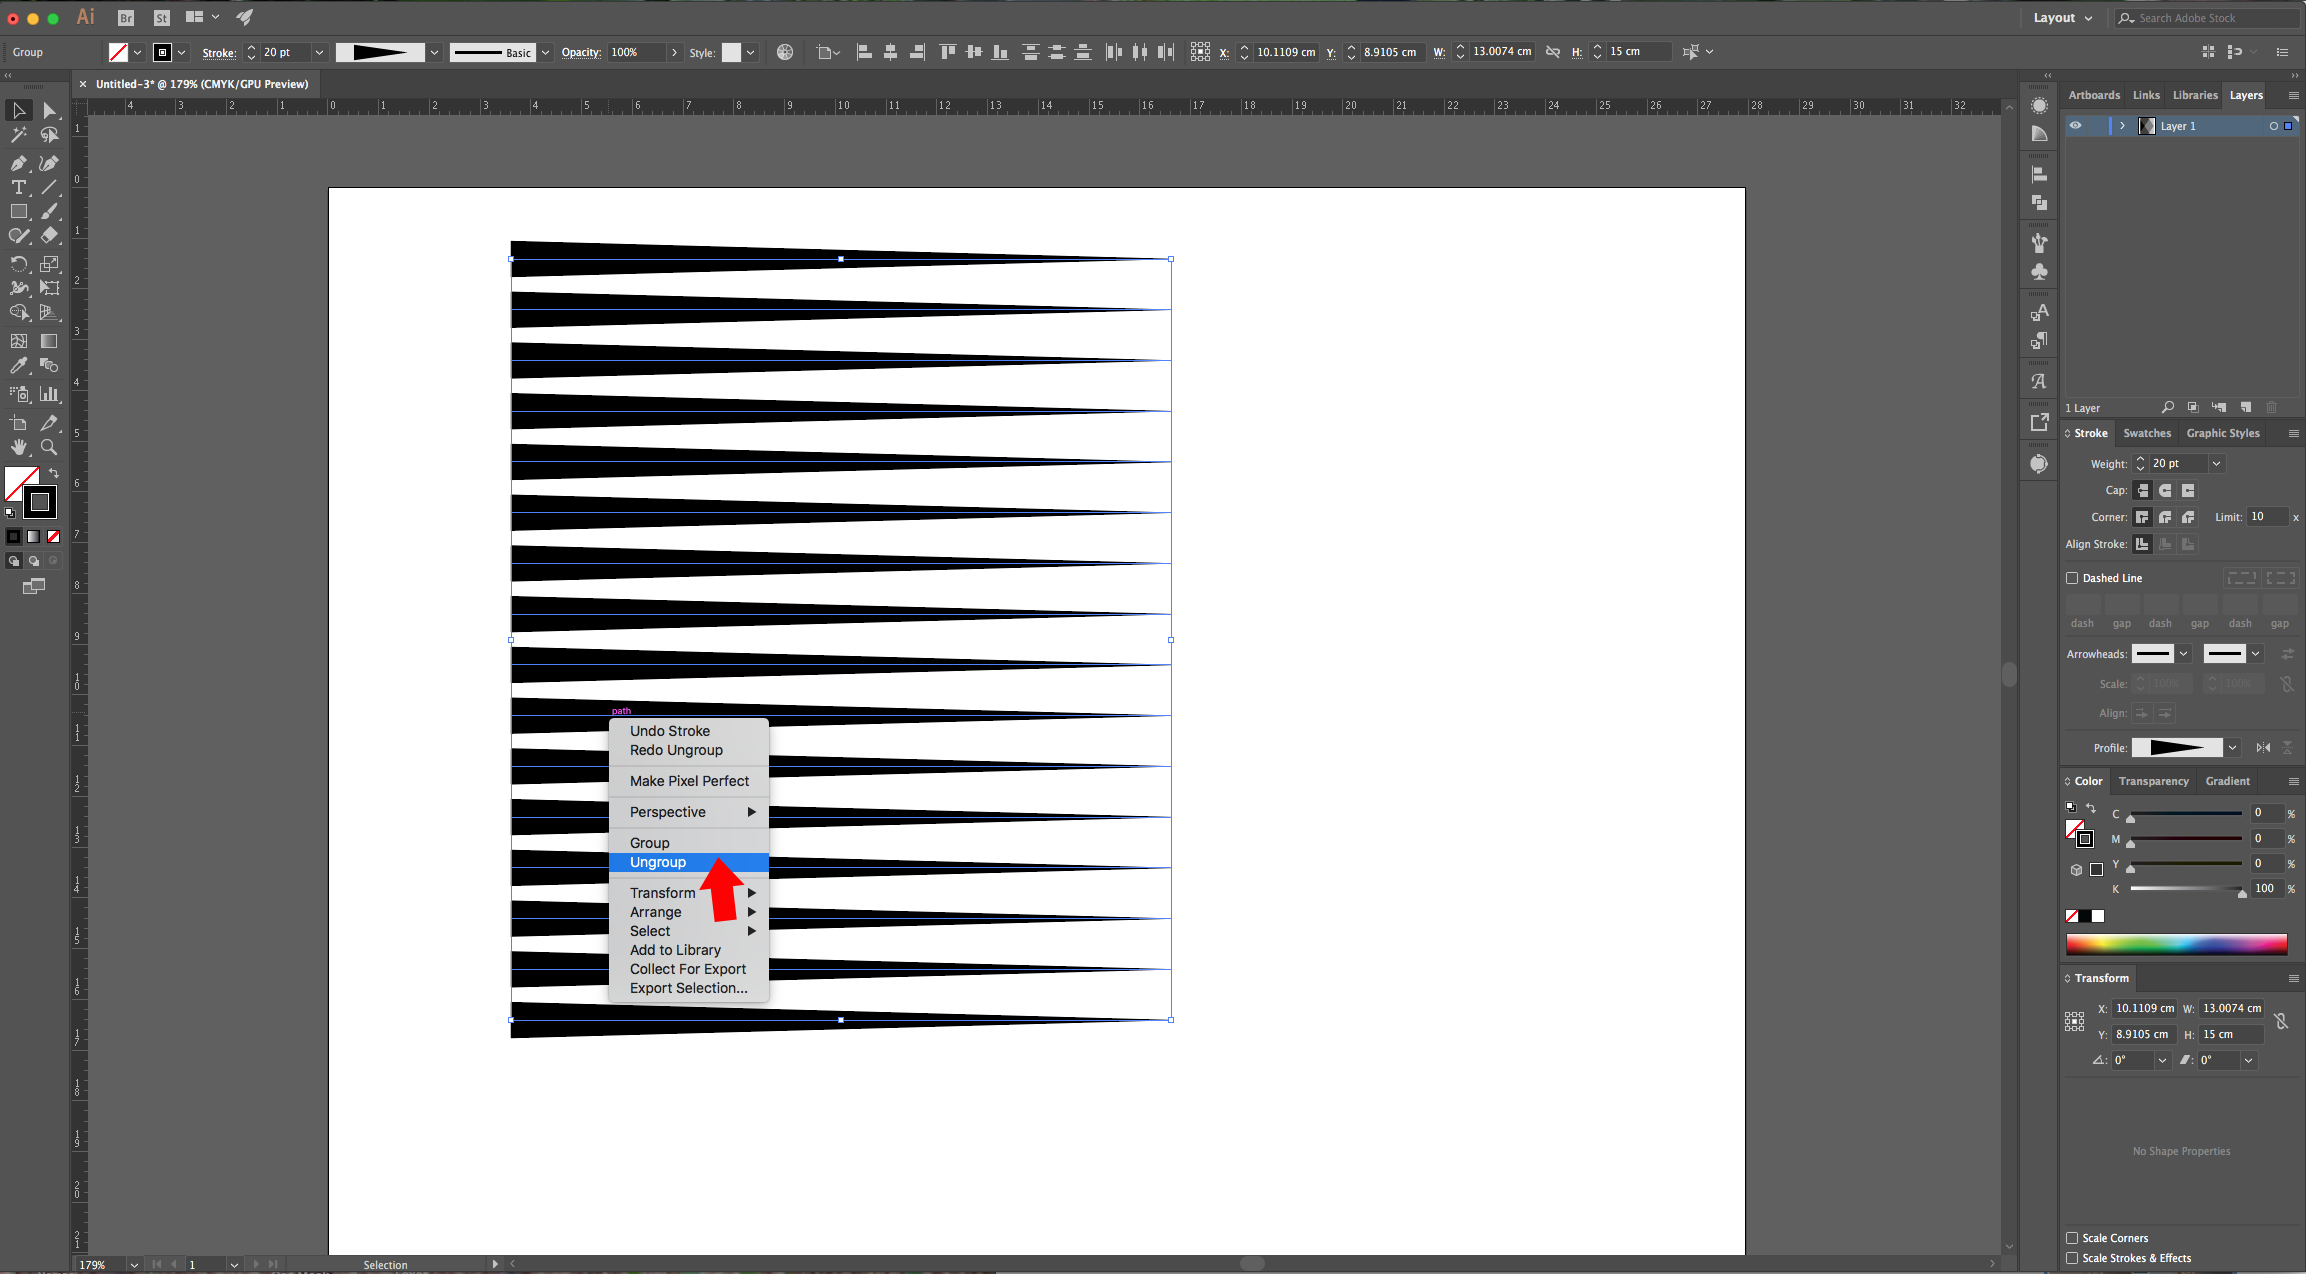
4 - Go to Object > Expand Appearance… then, right-click on top of the vectors and choose “Ungroup”.
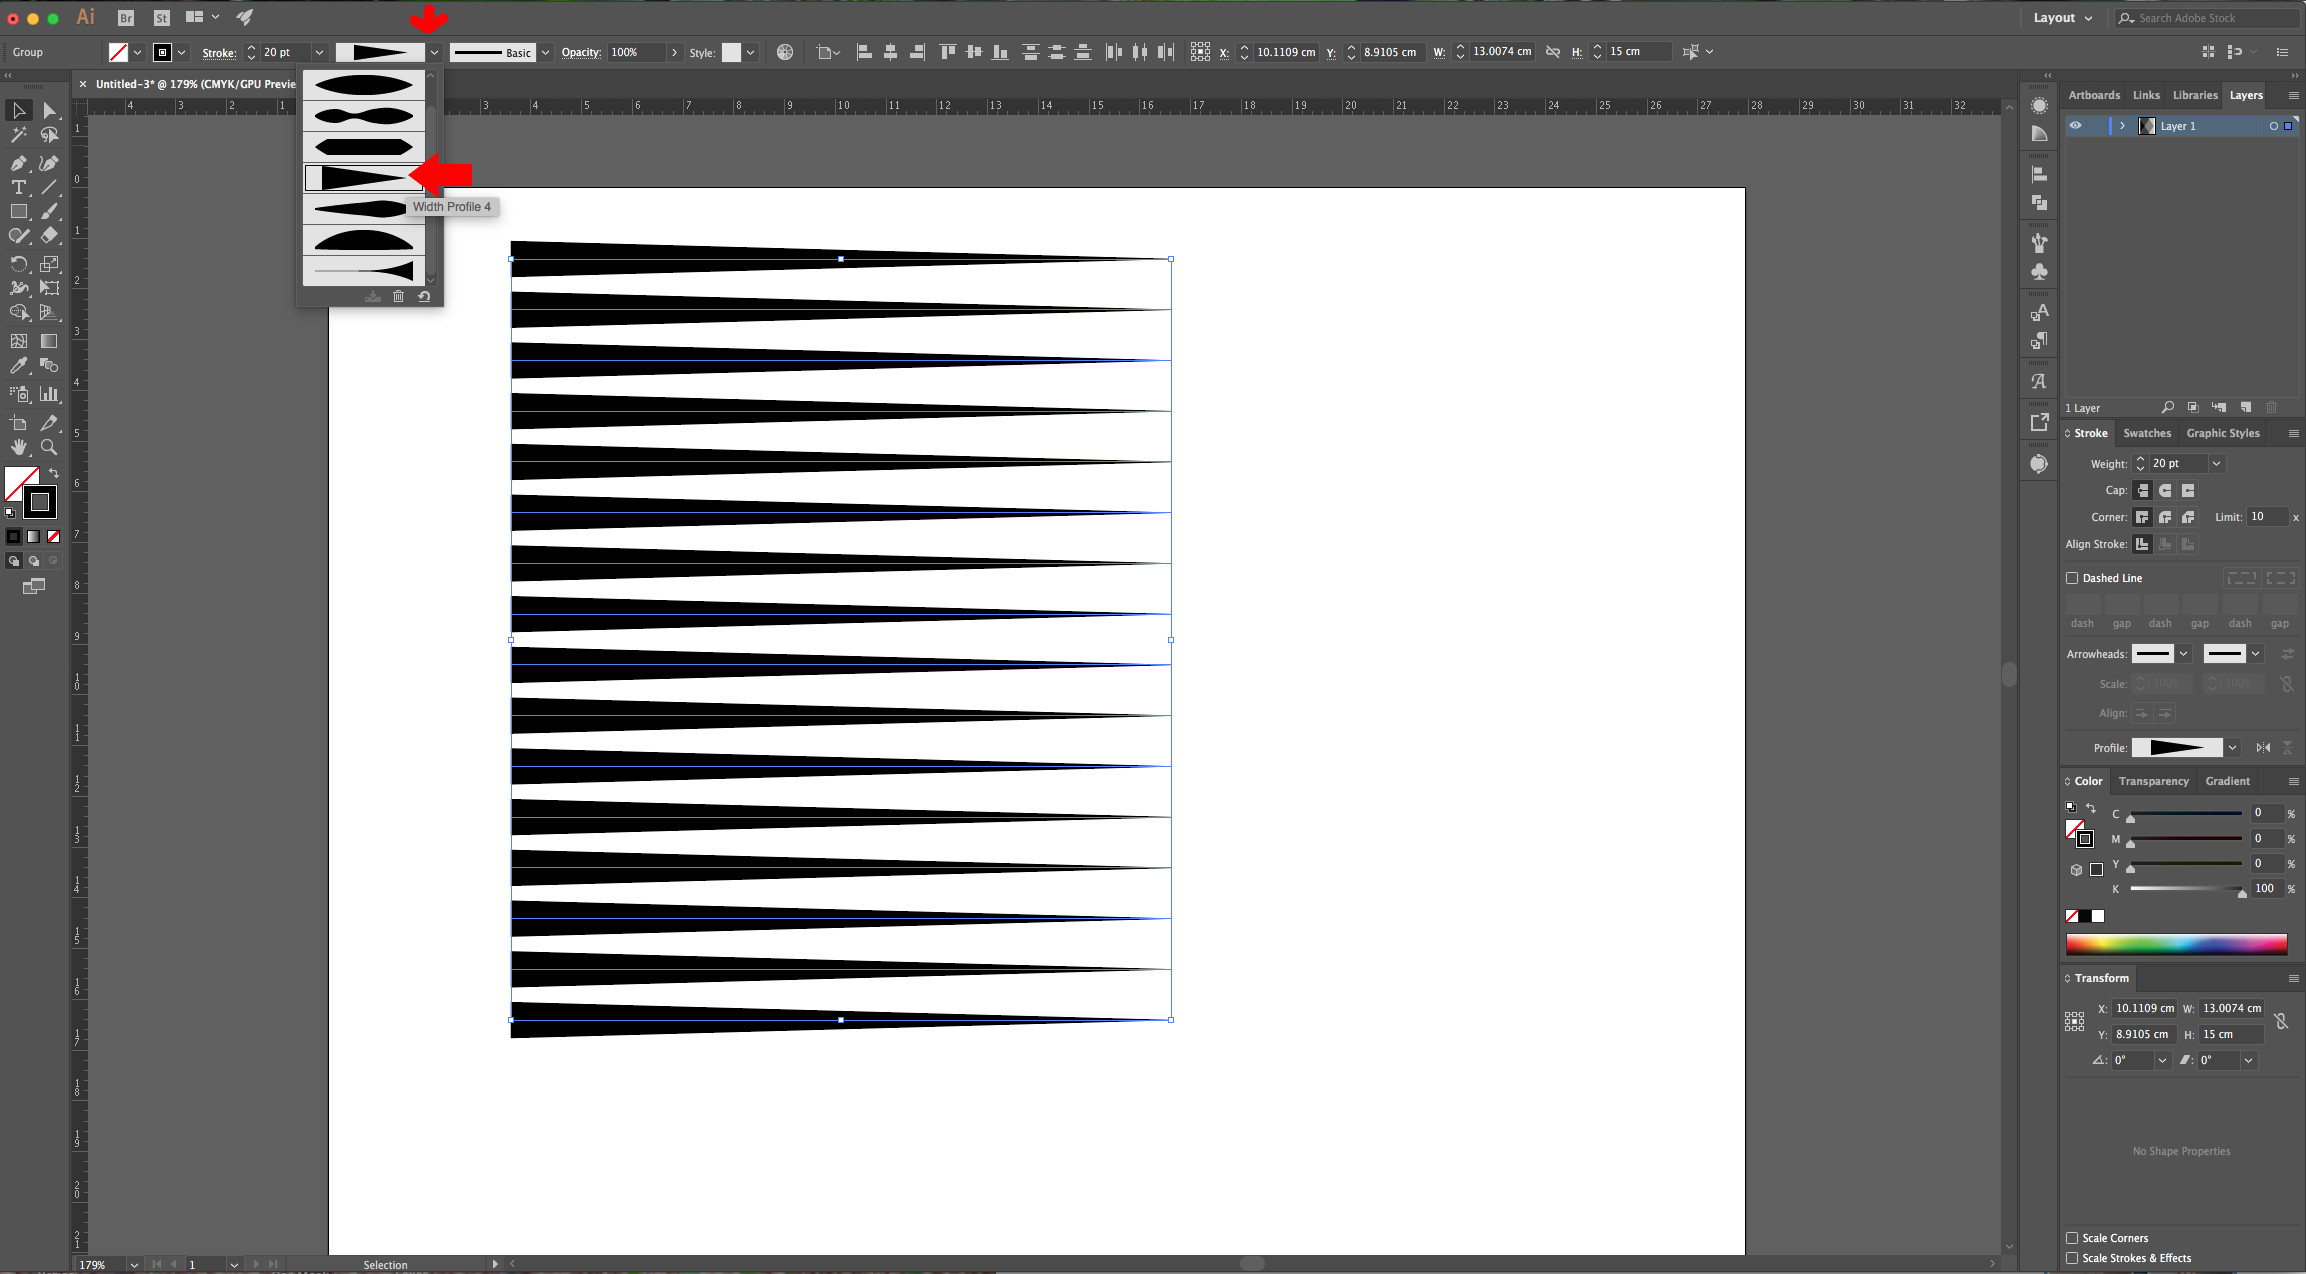
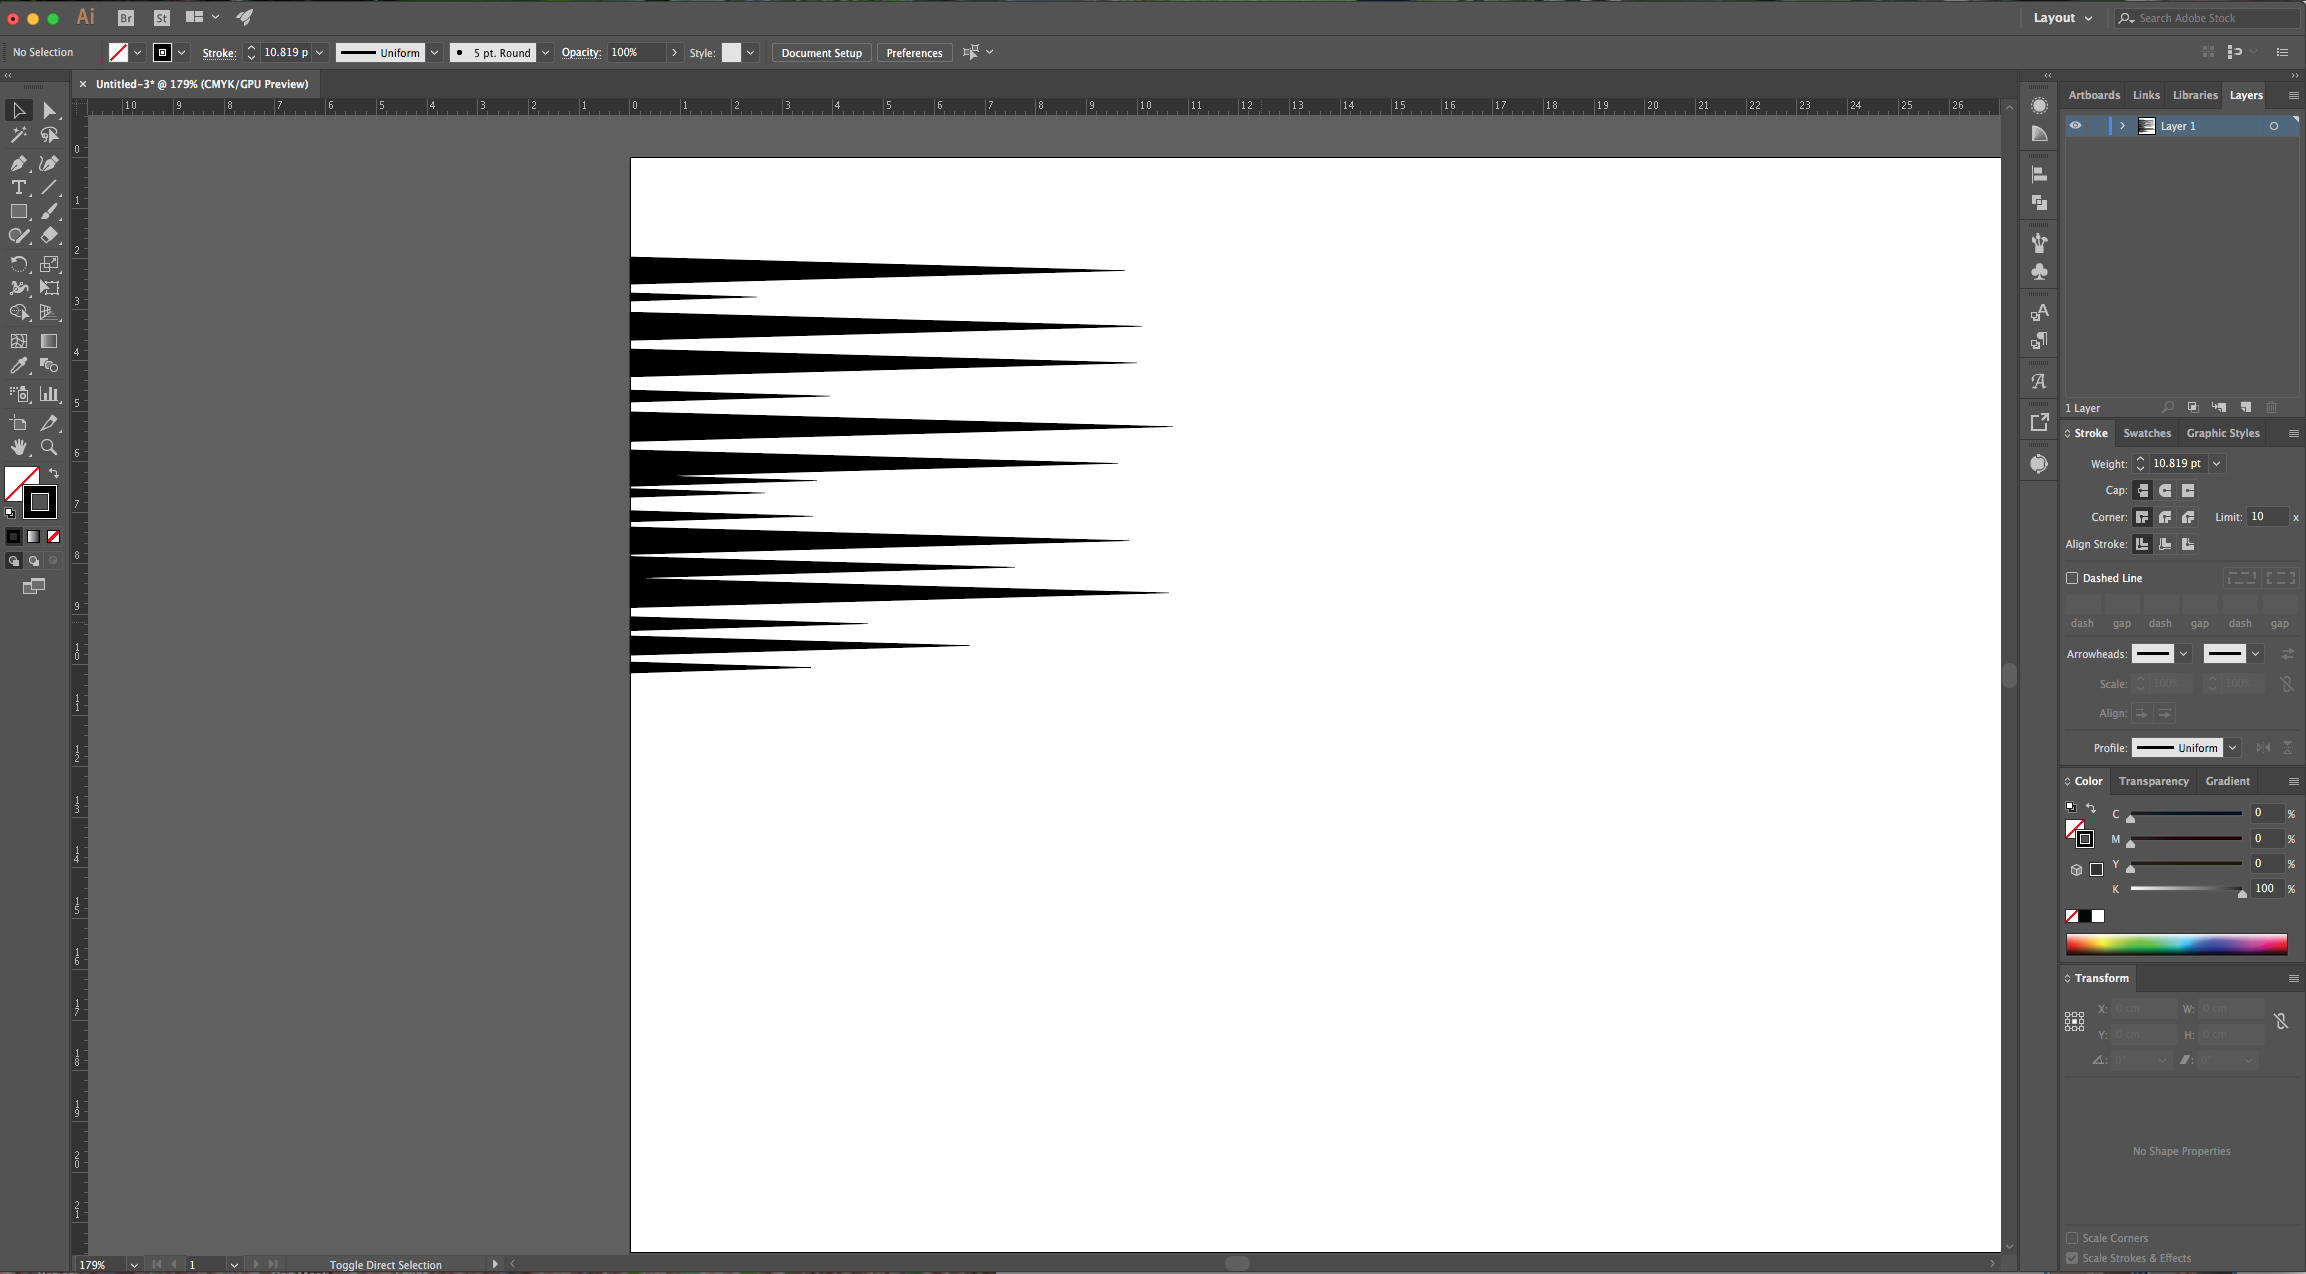
5 - With your lines selected, open the “Width Profile Presets Panel” and choose “Width Profile 4”. Right-click on top of the vectors and choose “Ungroup” again.
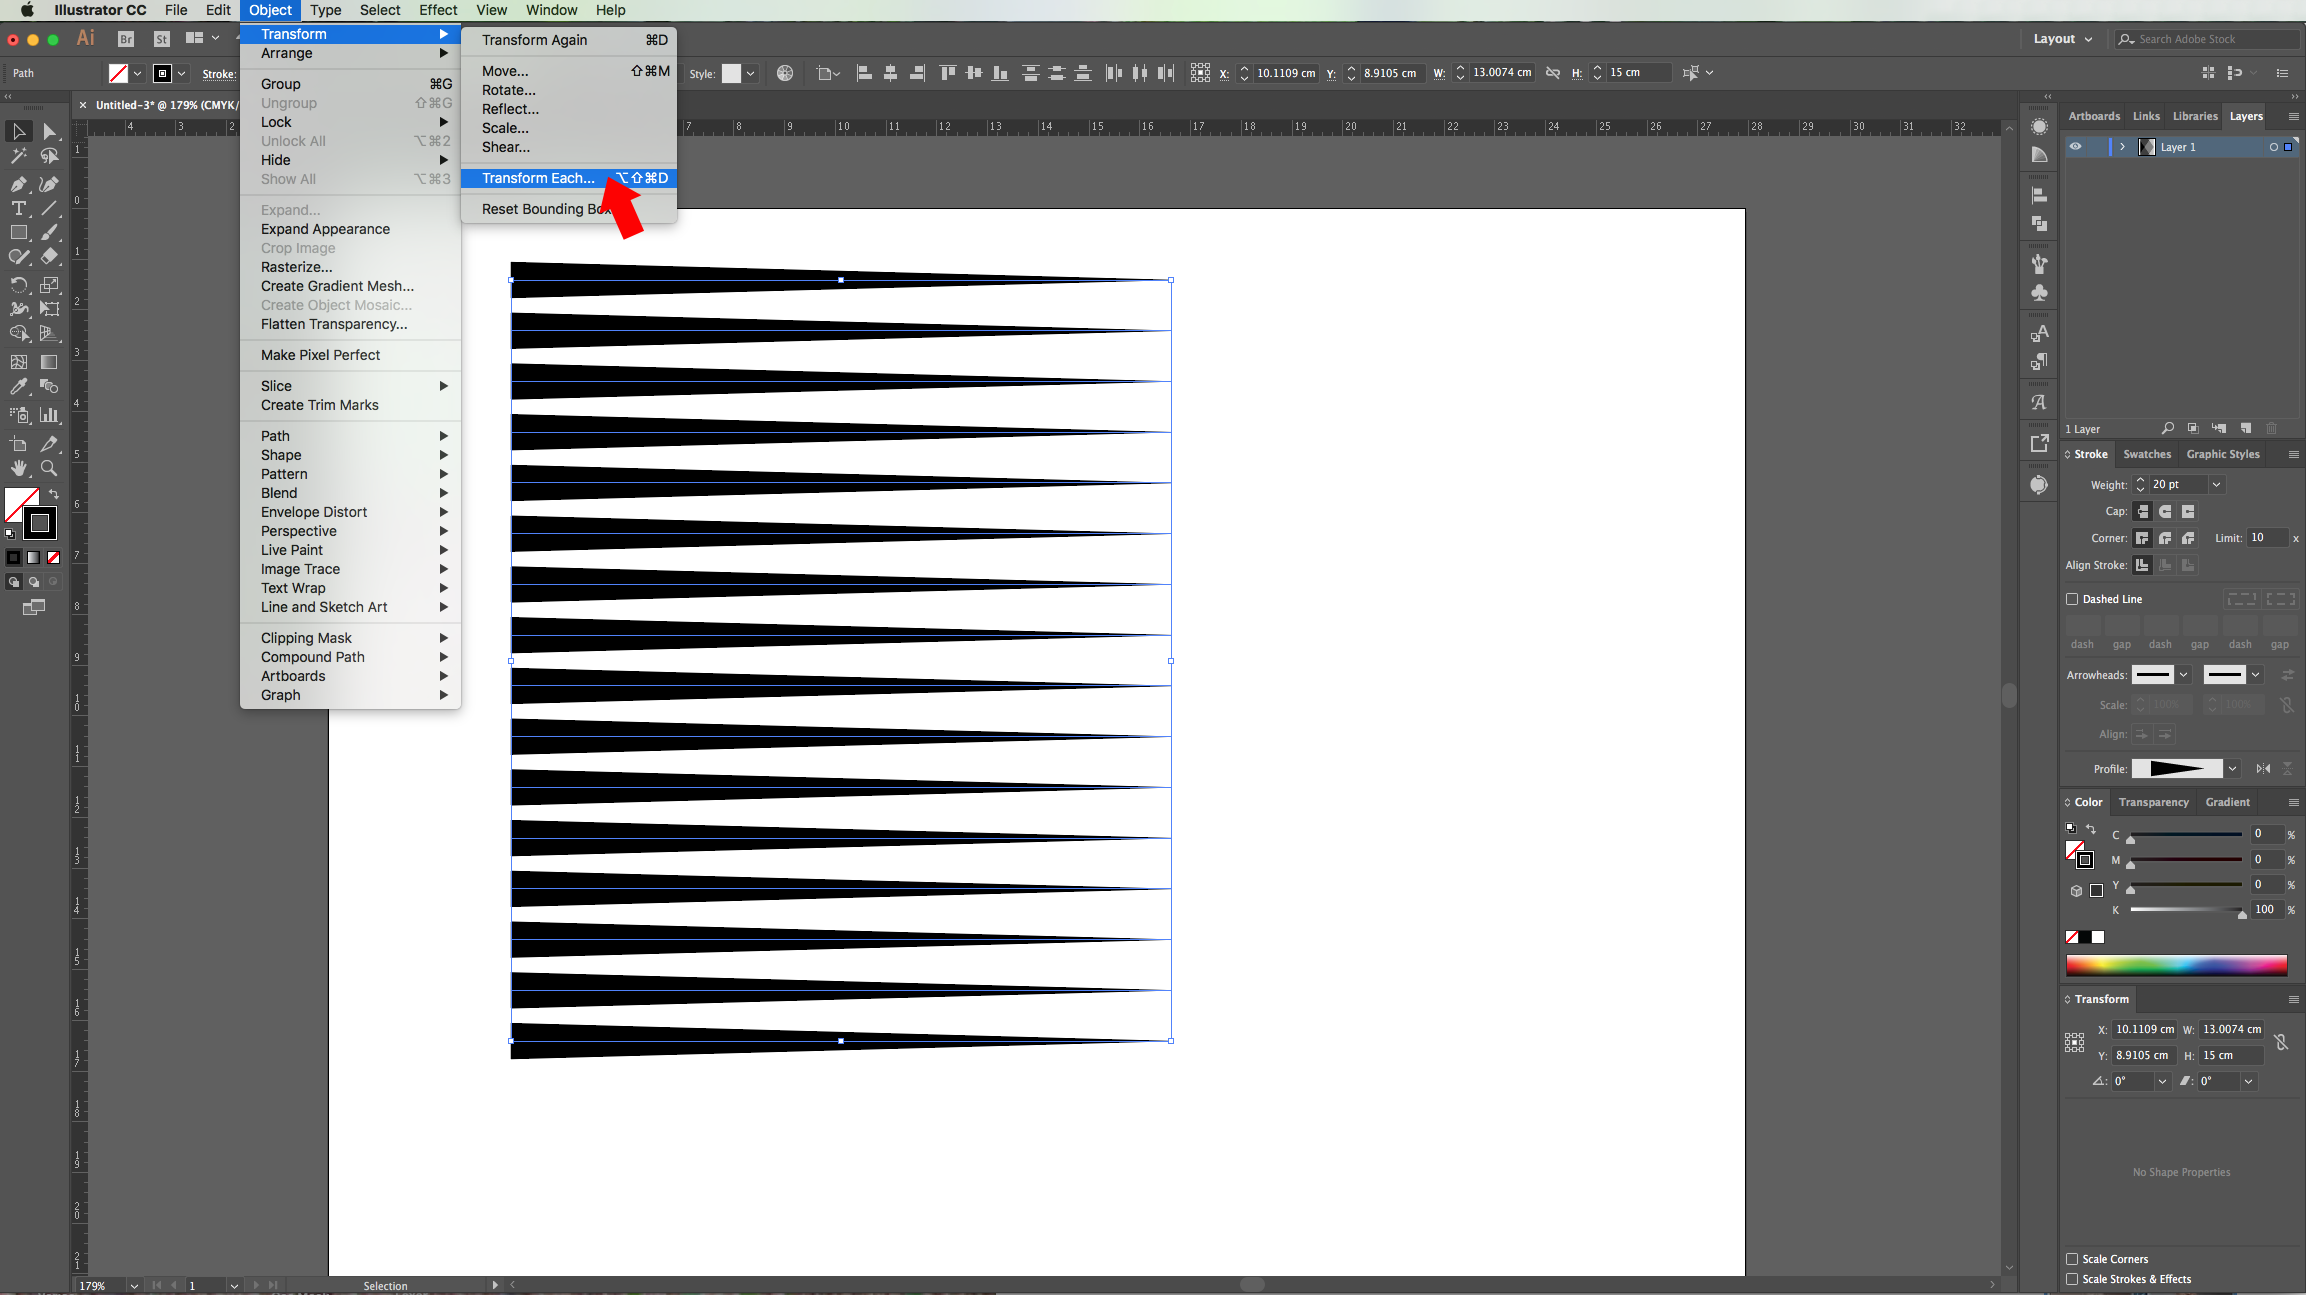
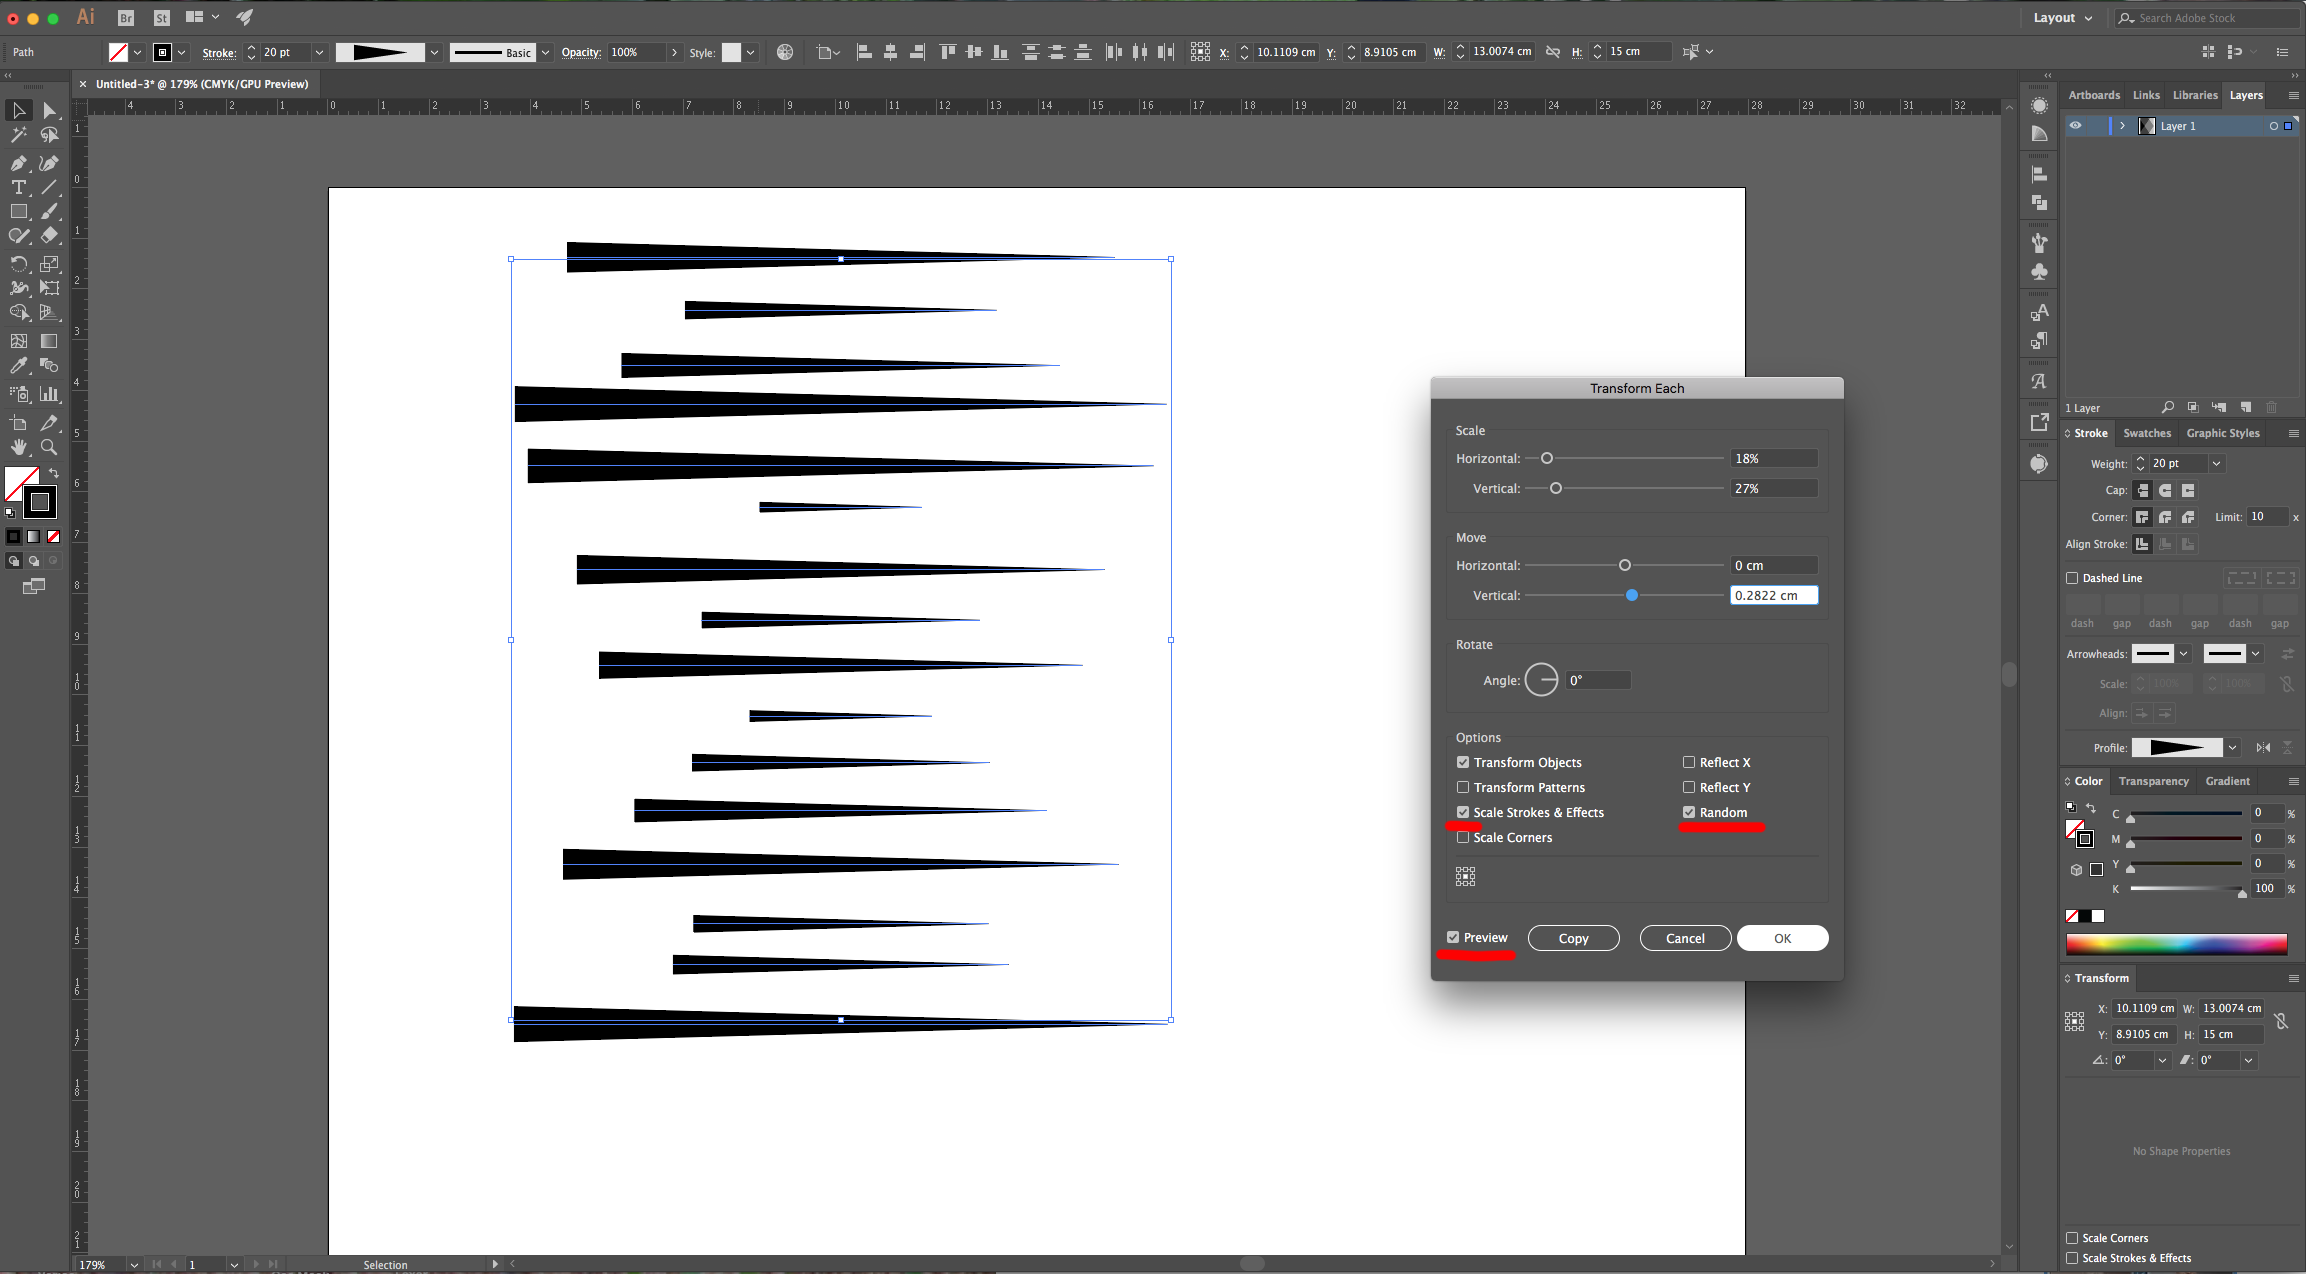
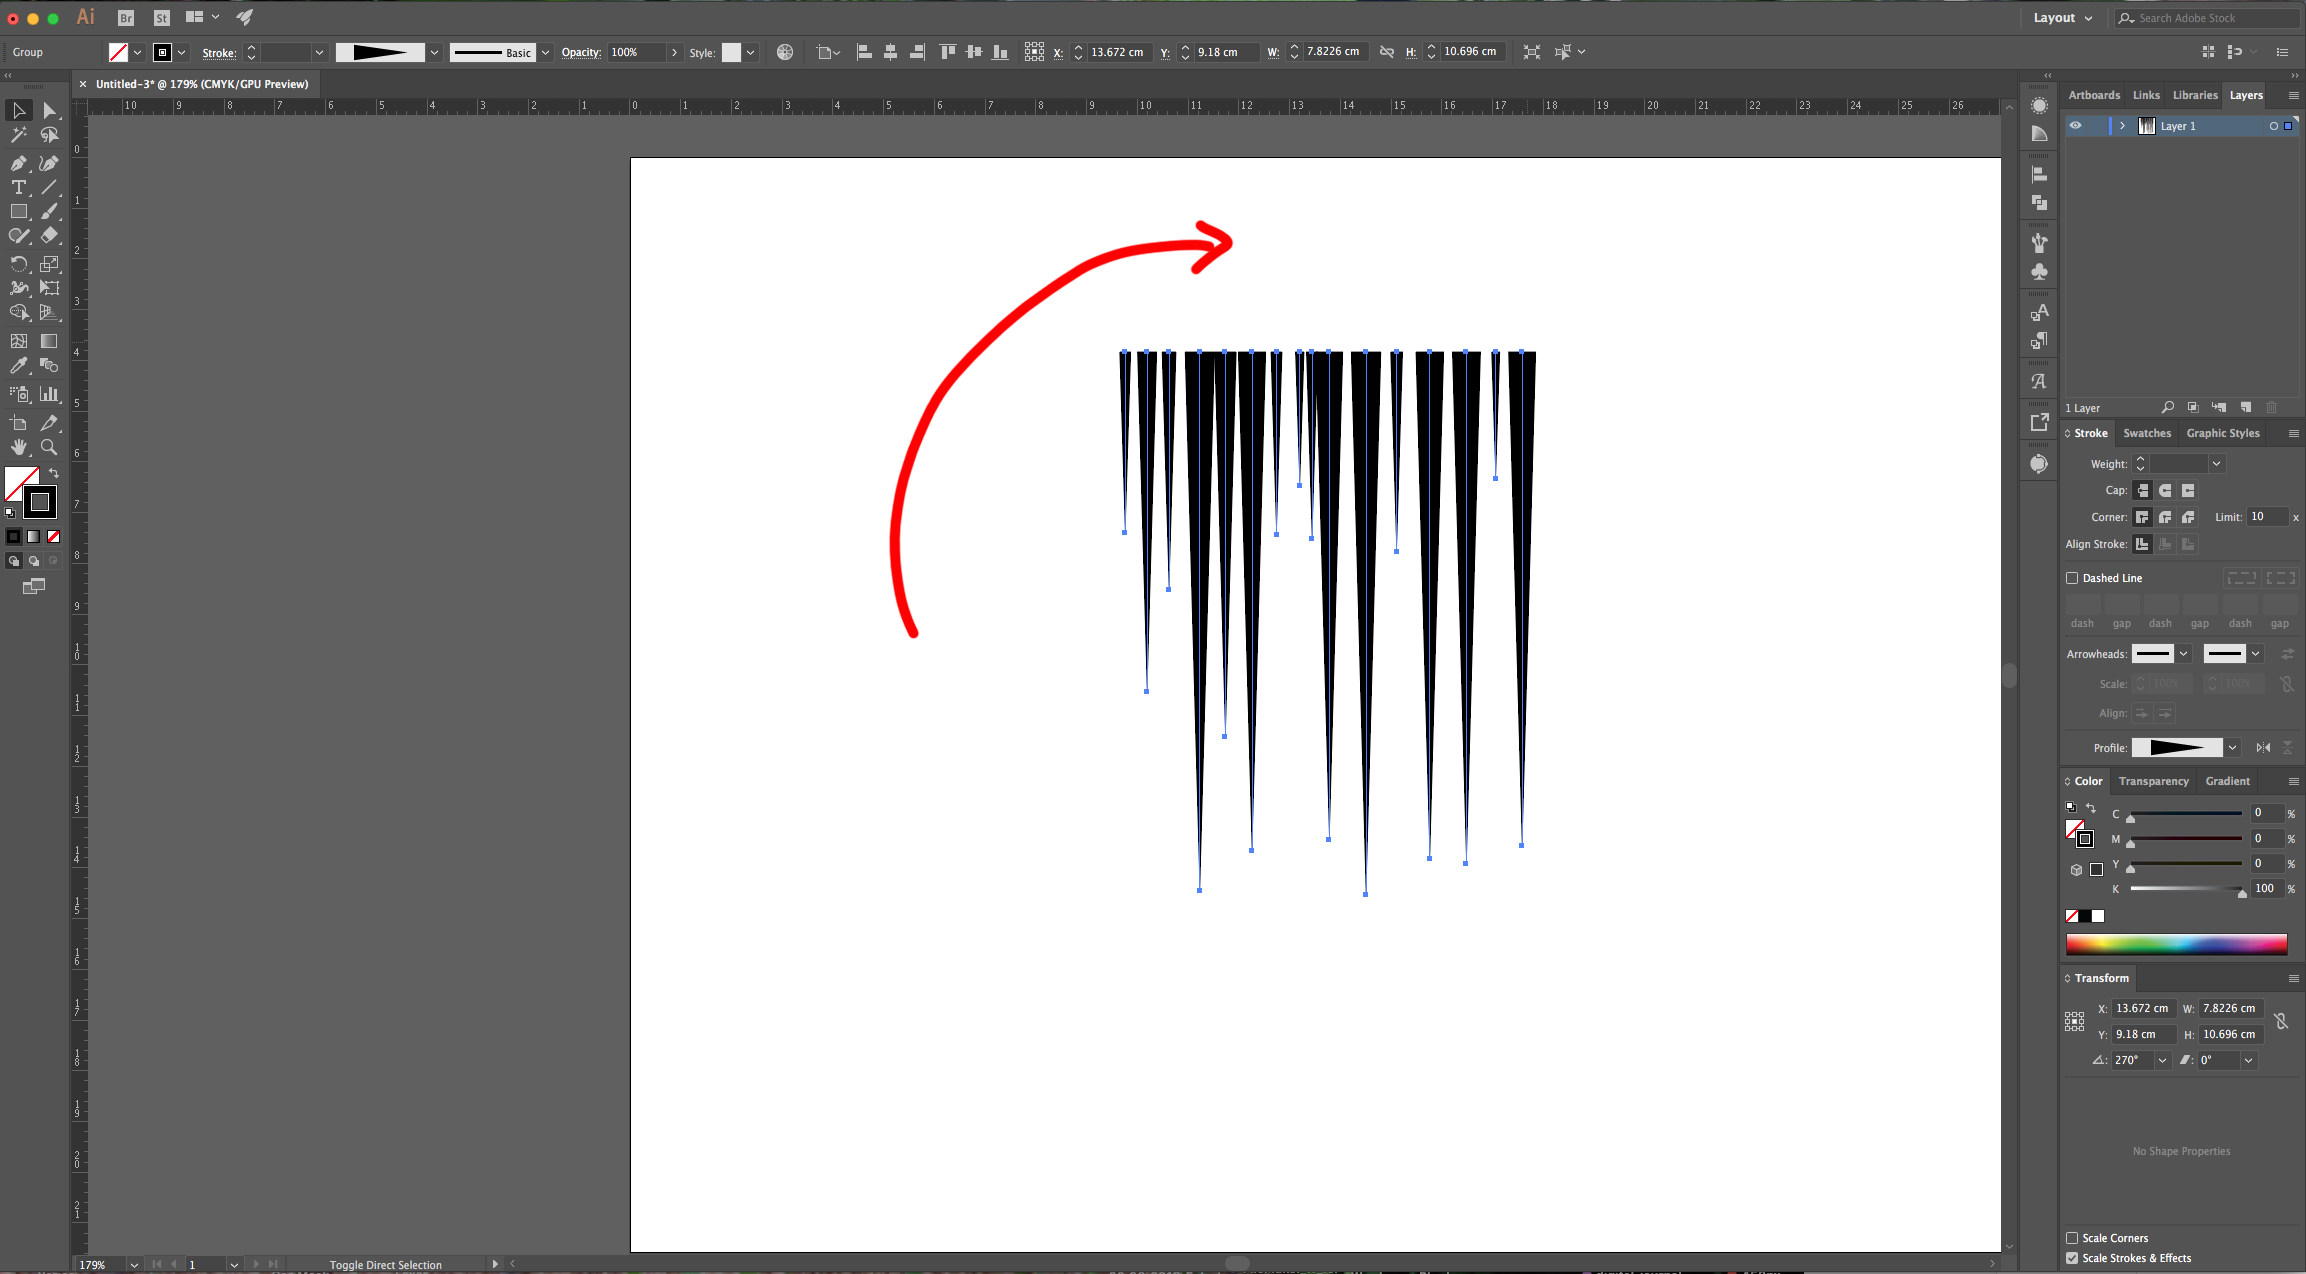
6 - Go to Object > Transform > Transform Each… check the “Preview”, “Transform Objects”, “Scale Strokes & Effects” and “Random” boxes and move the levers until you get a “Speed Lines” pattern that you like.
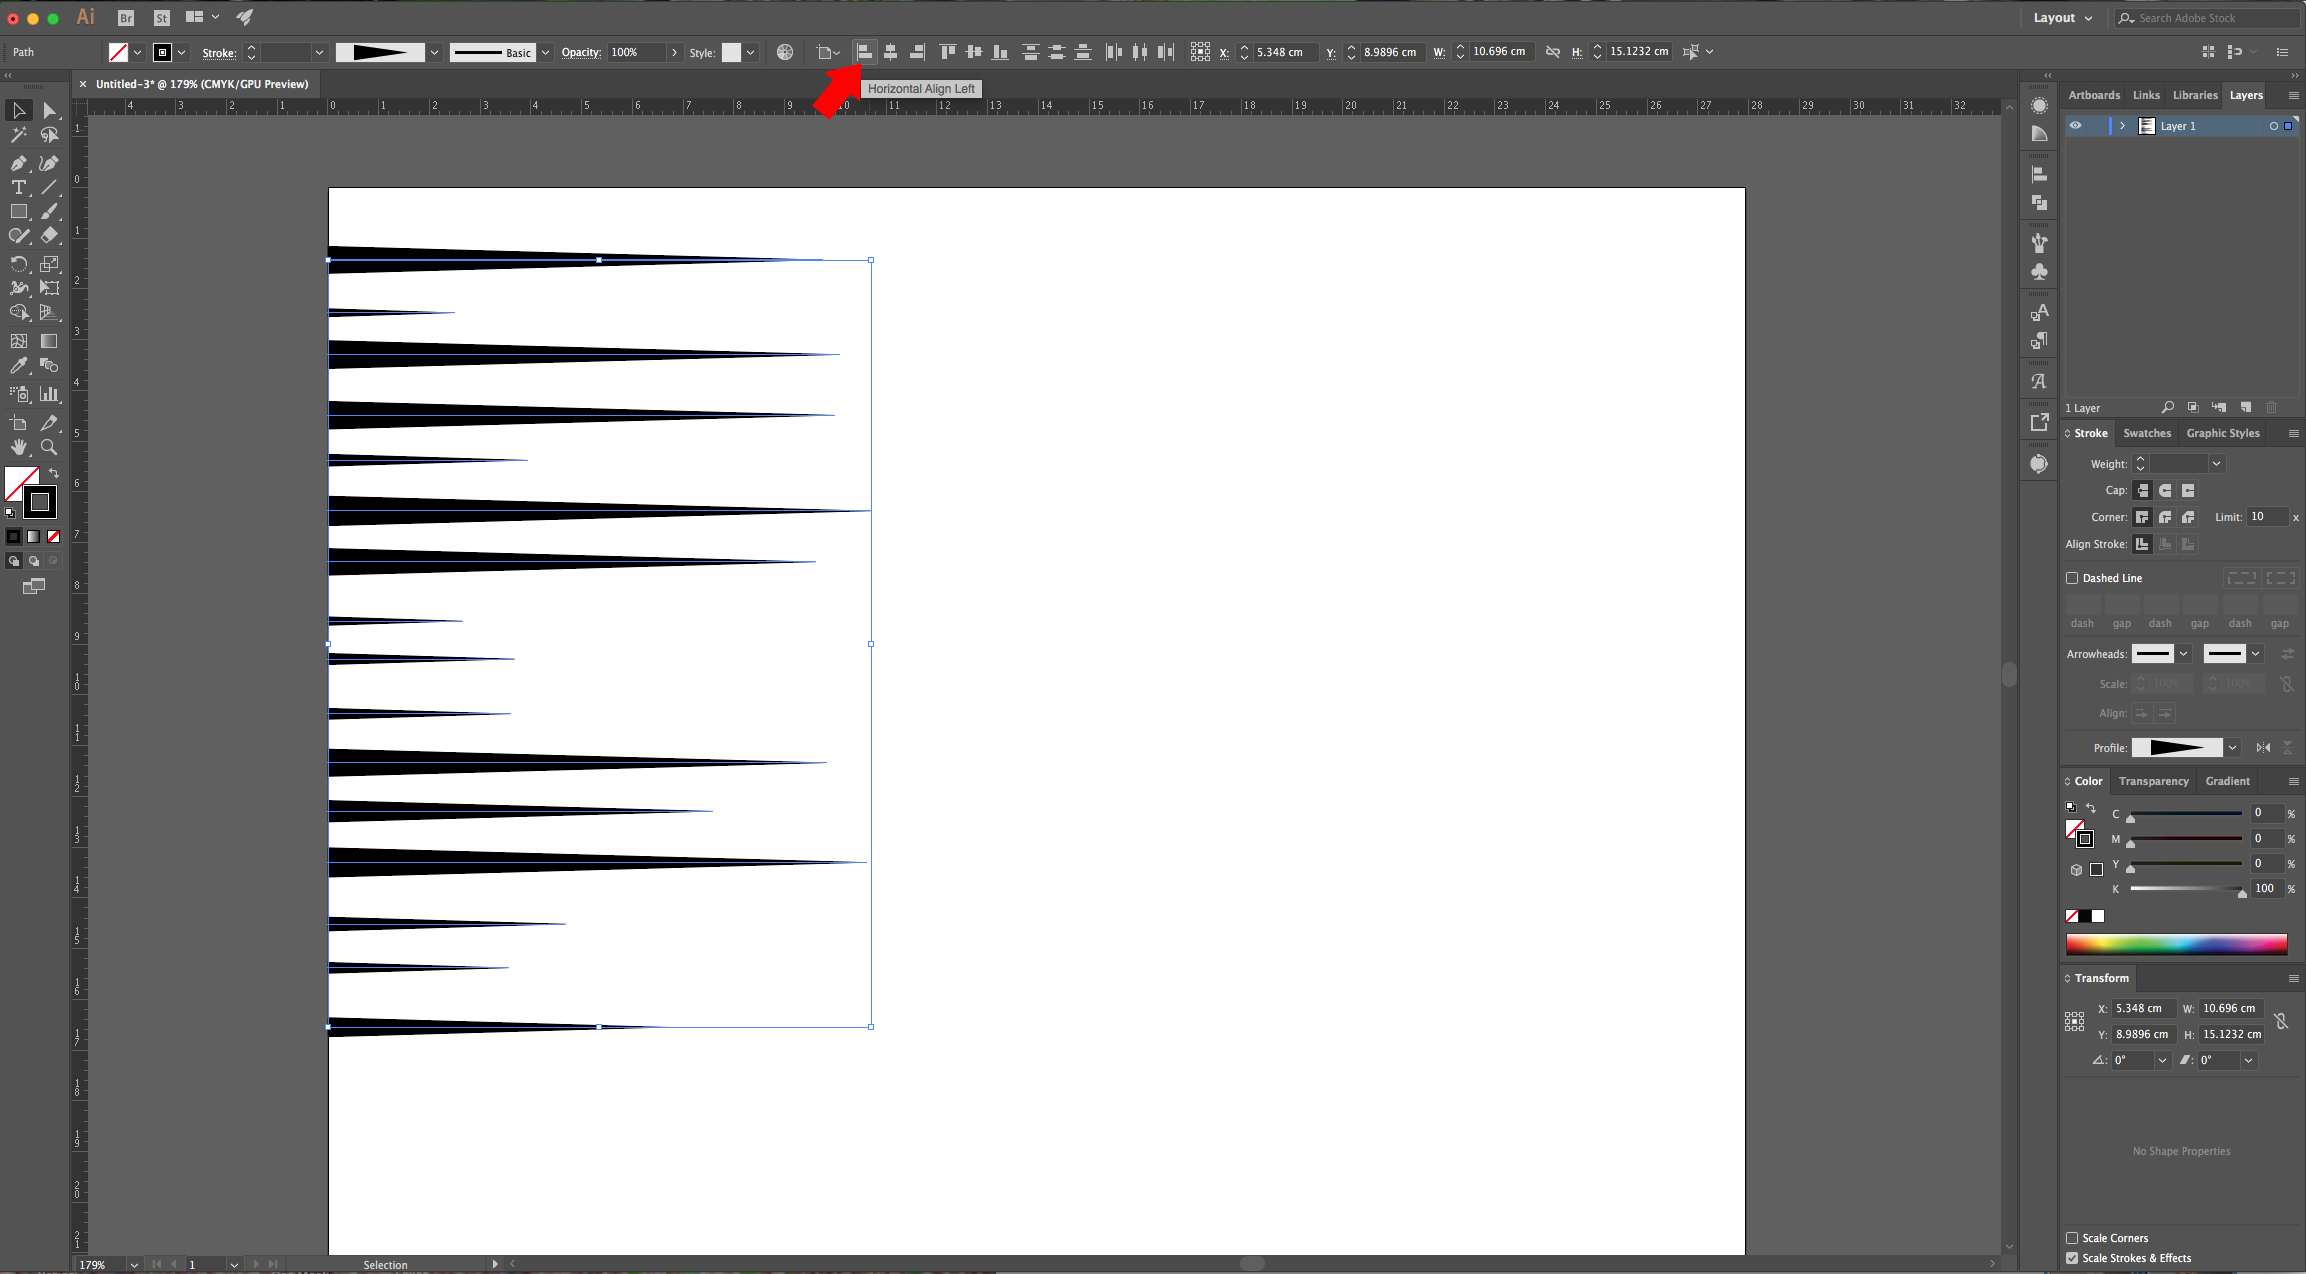
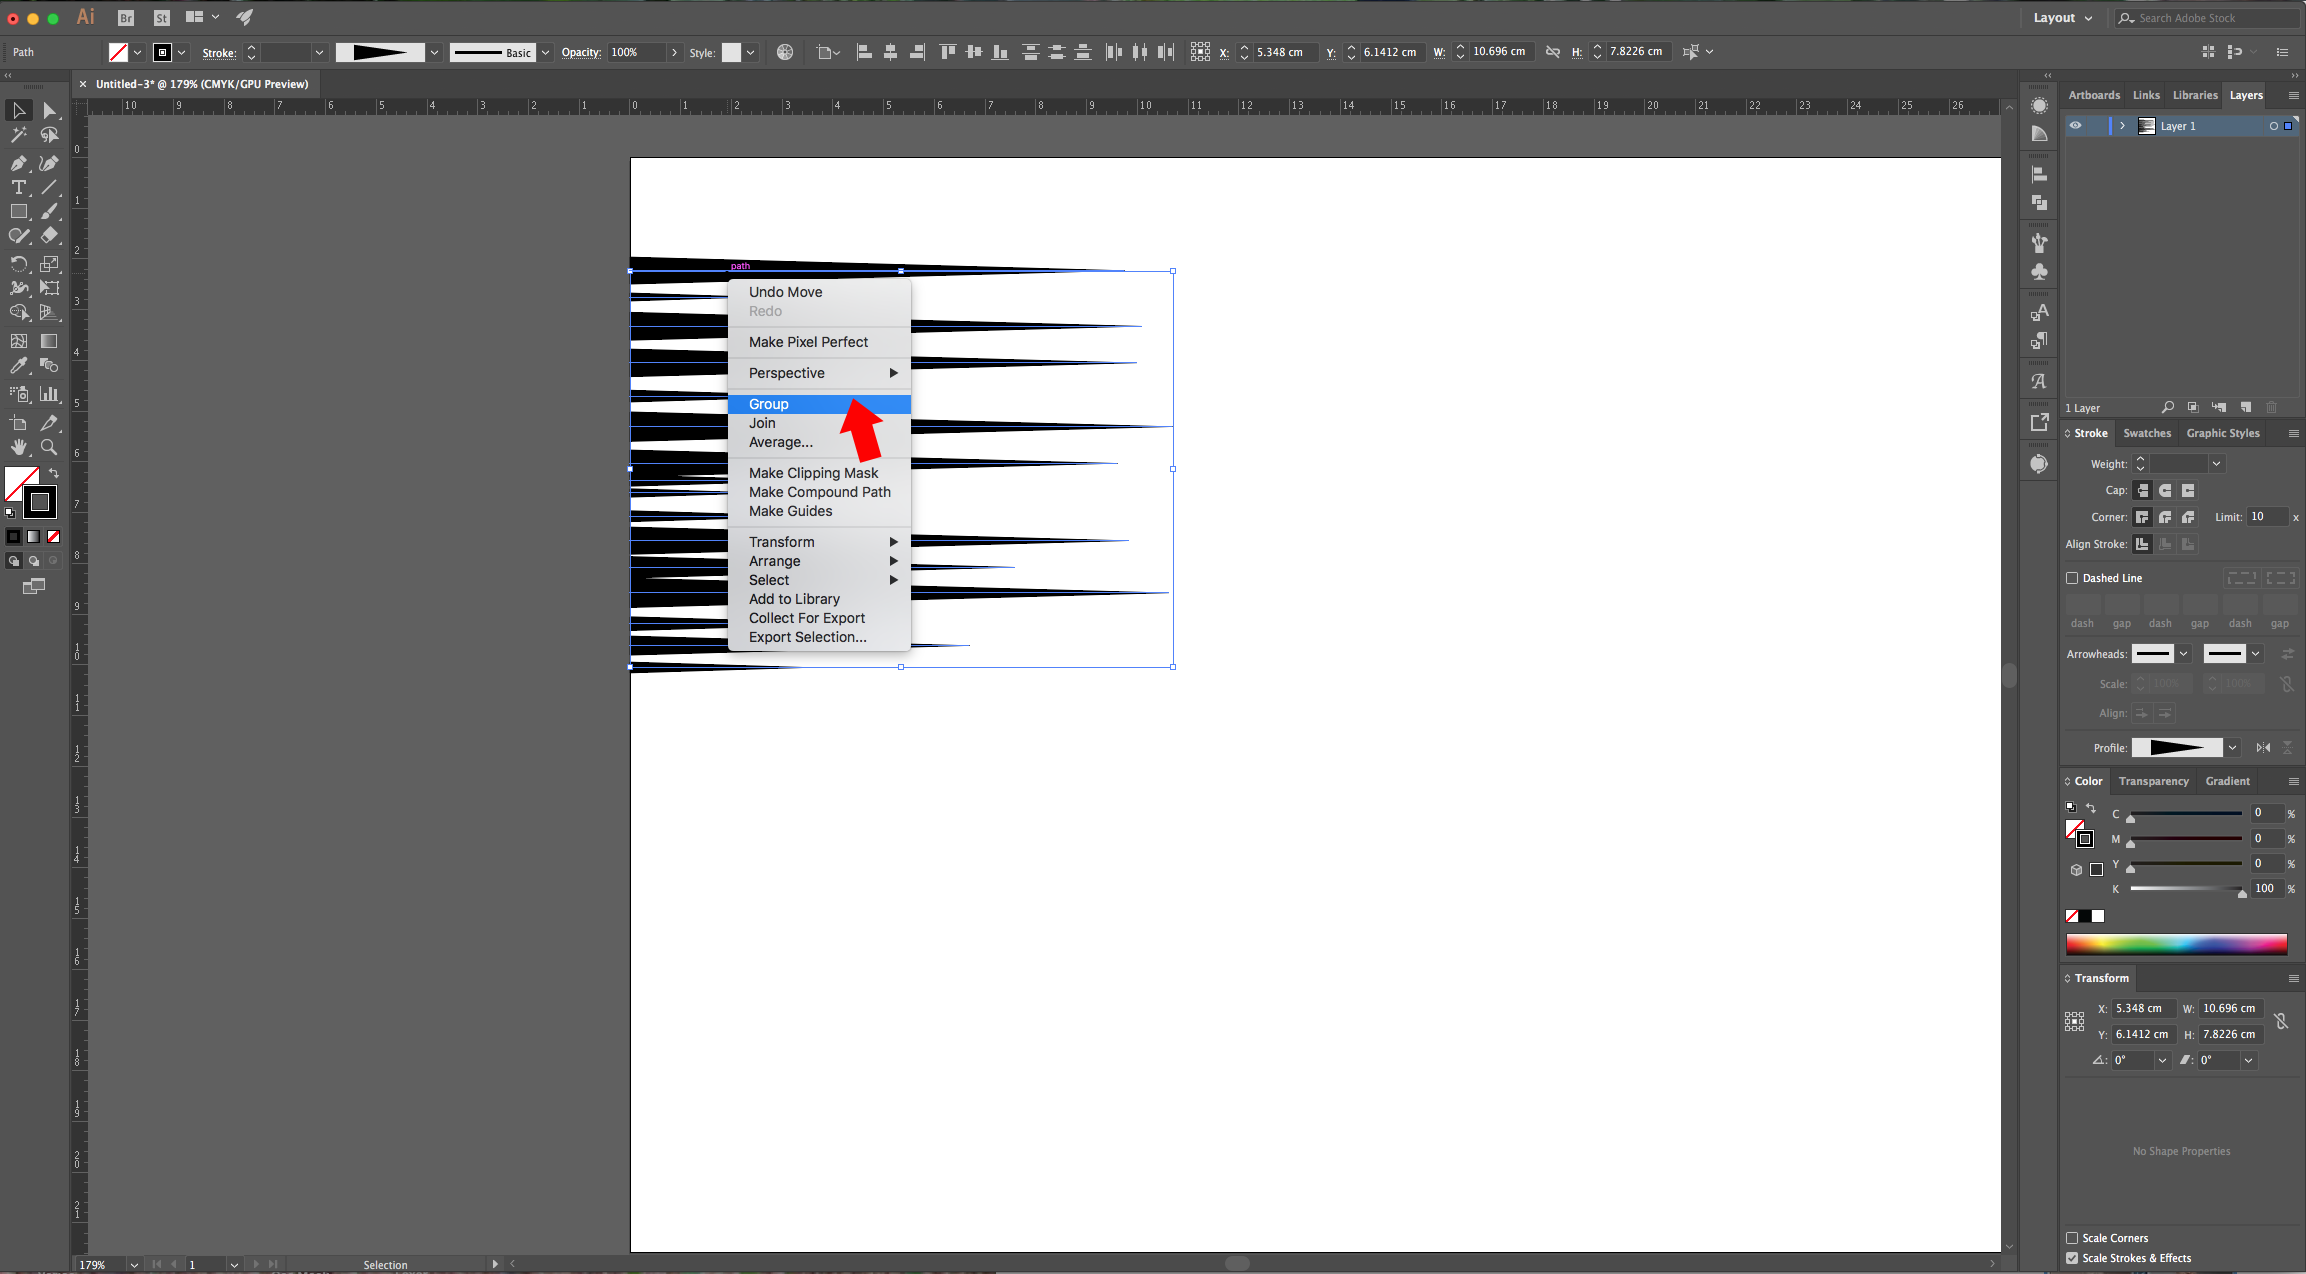
7 - Click “Horizontal Align Left” on the Top Menu to align your lines to the left, arrange them to get a more even separation. Then, select them all, right-click on top of them and choose “Group”. Rotate your vectors to the Right so they start at the top and the pointed sides face down.
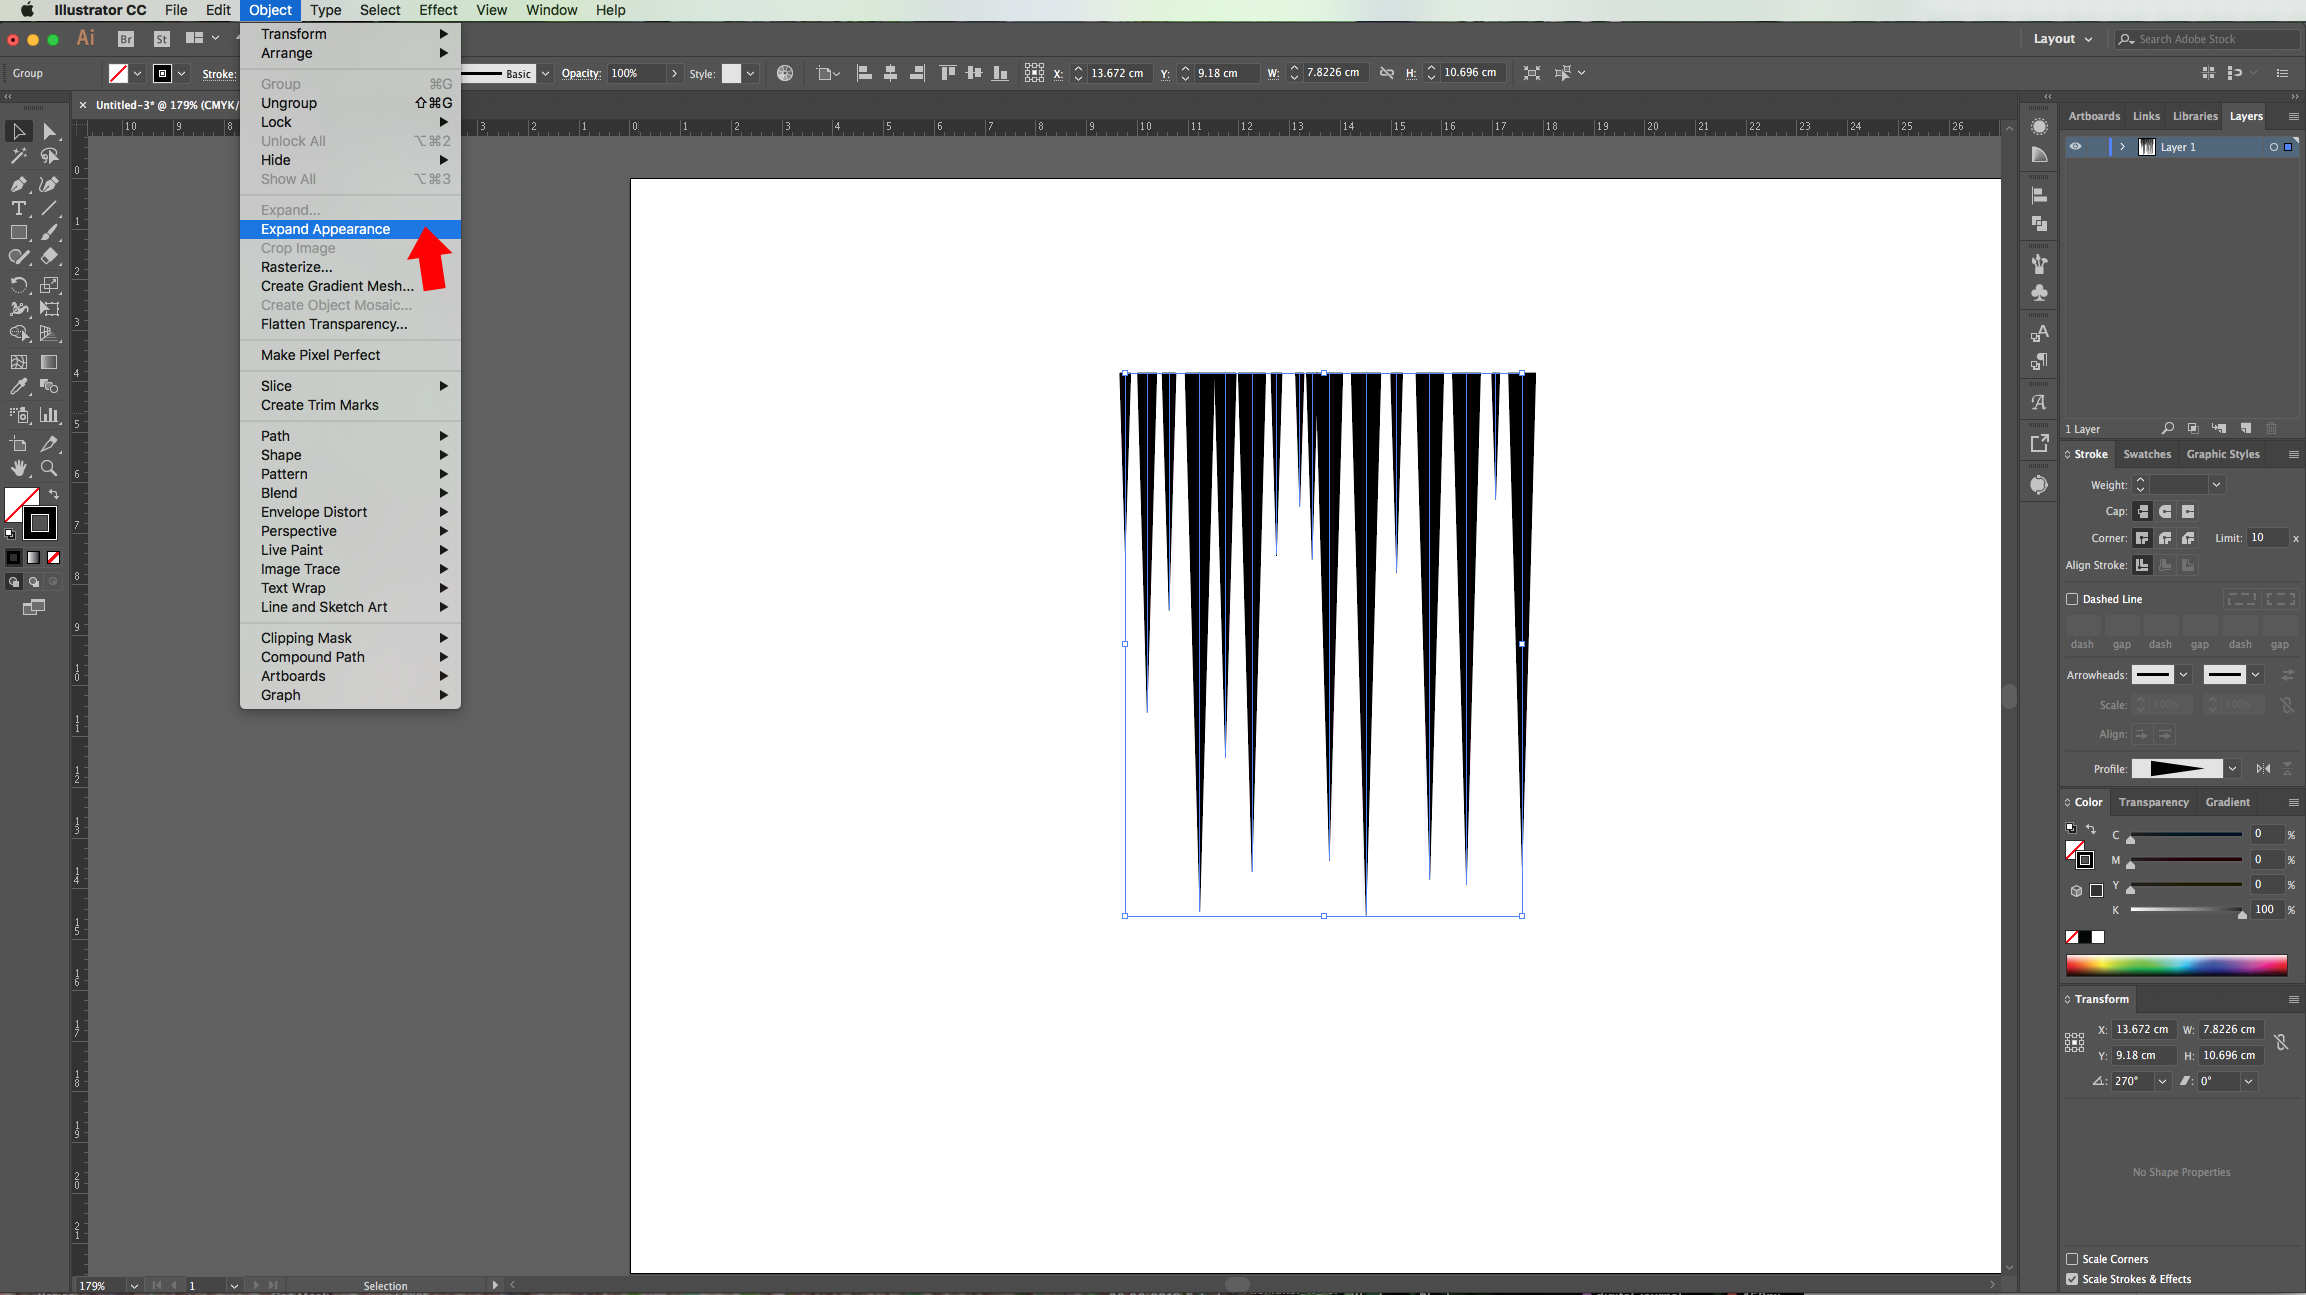
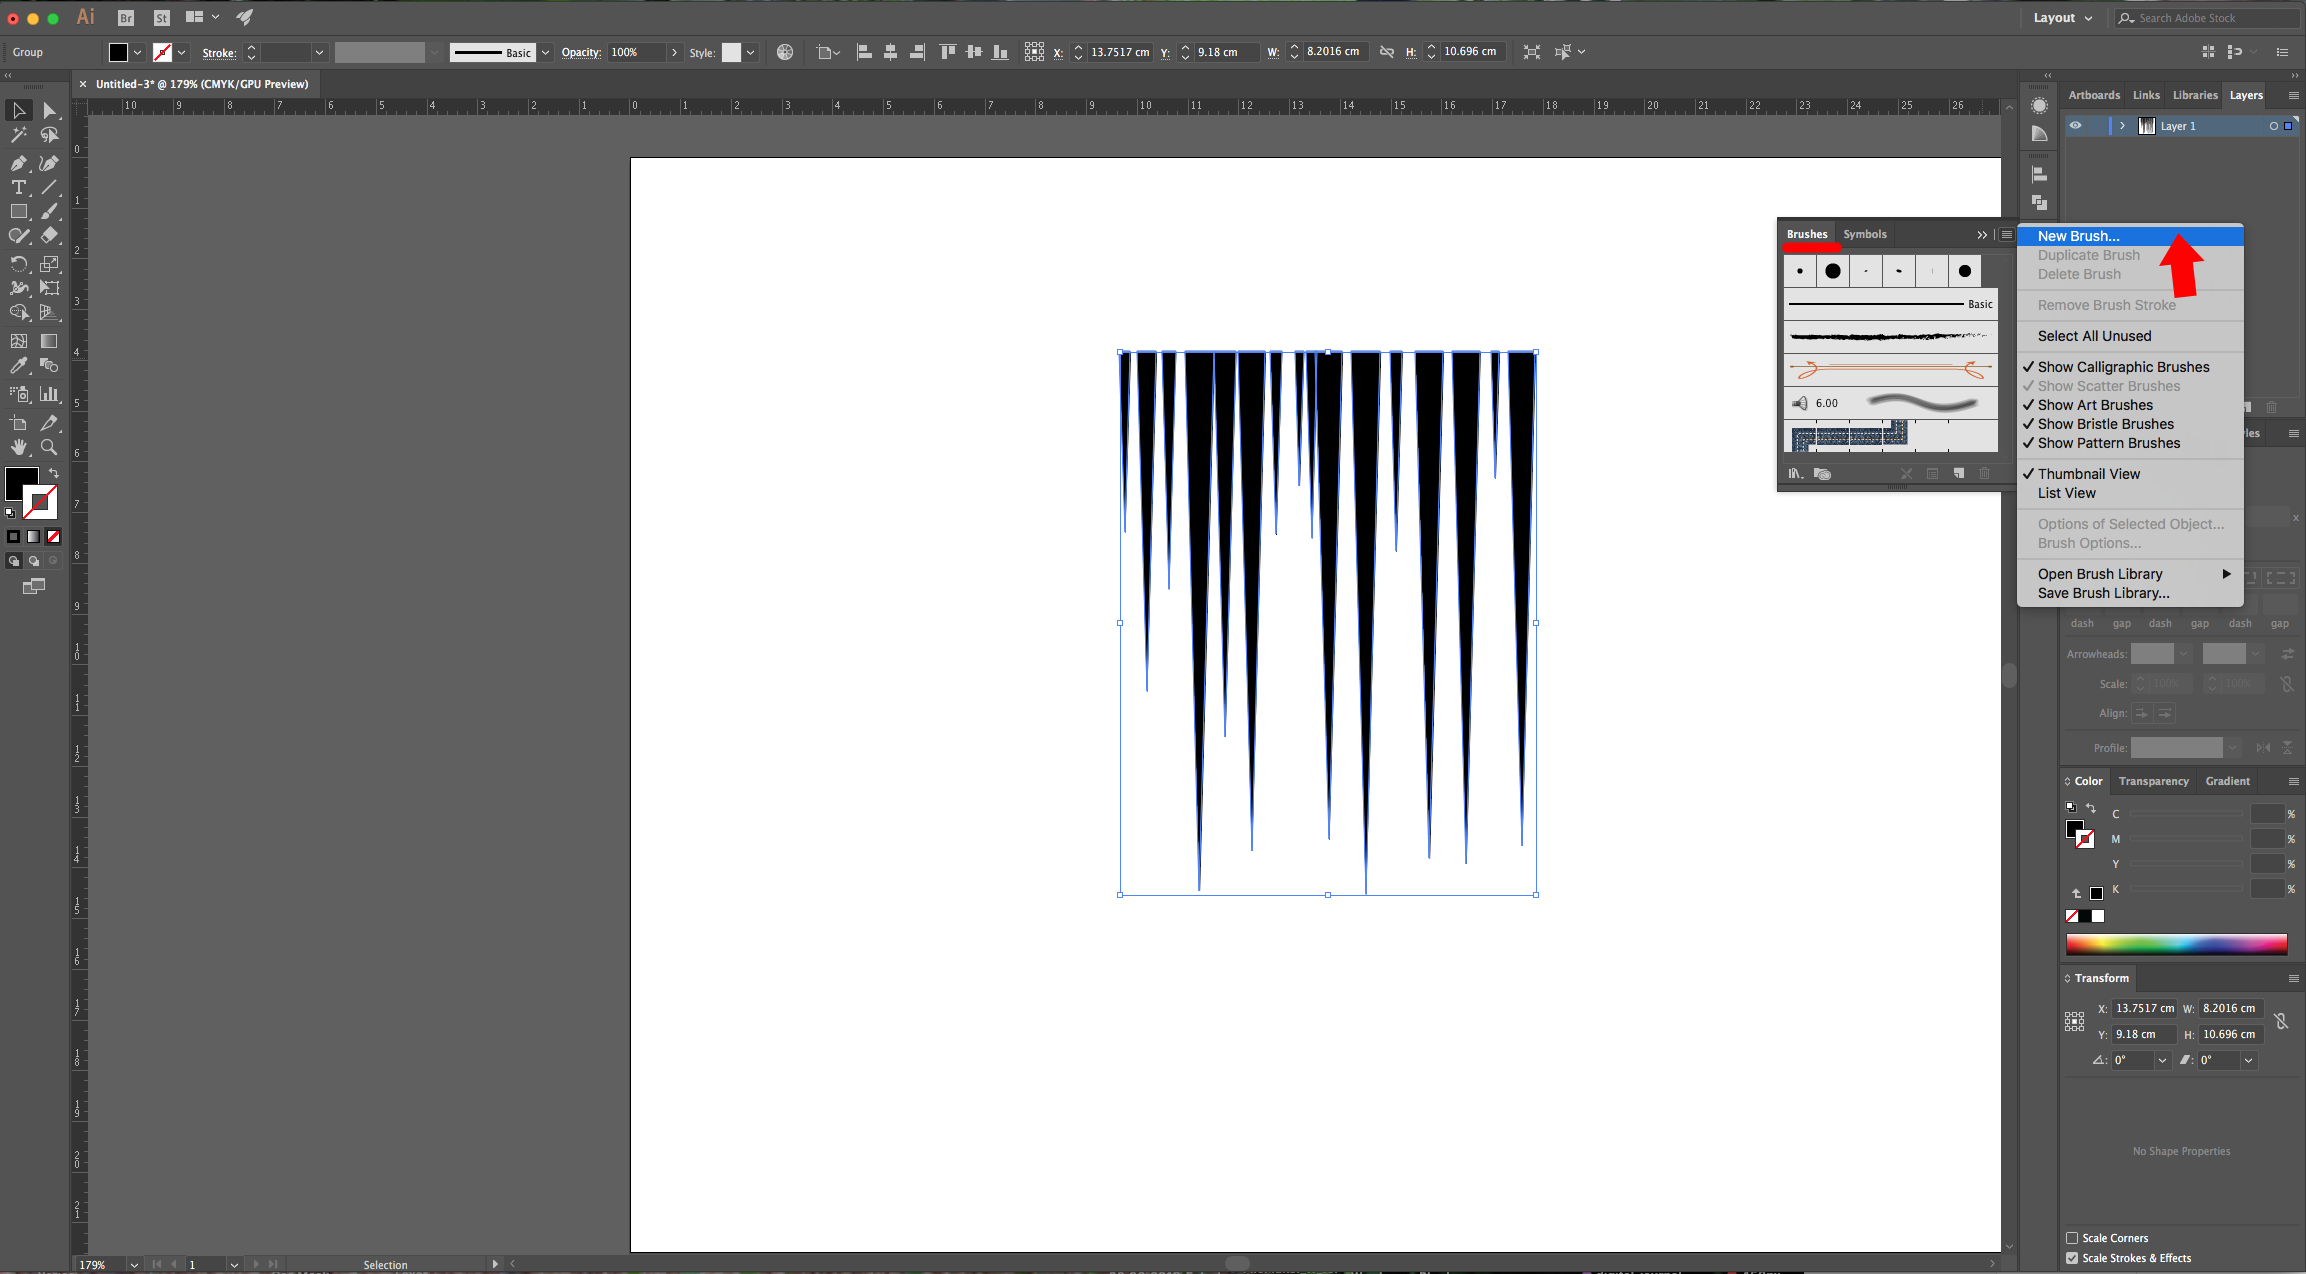
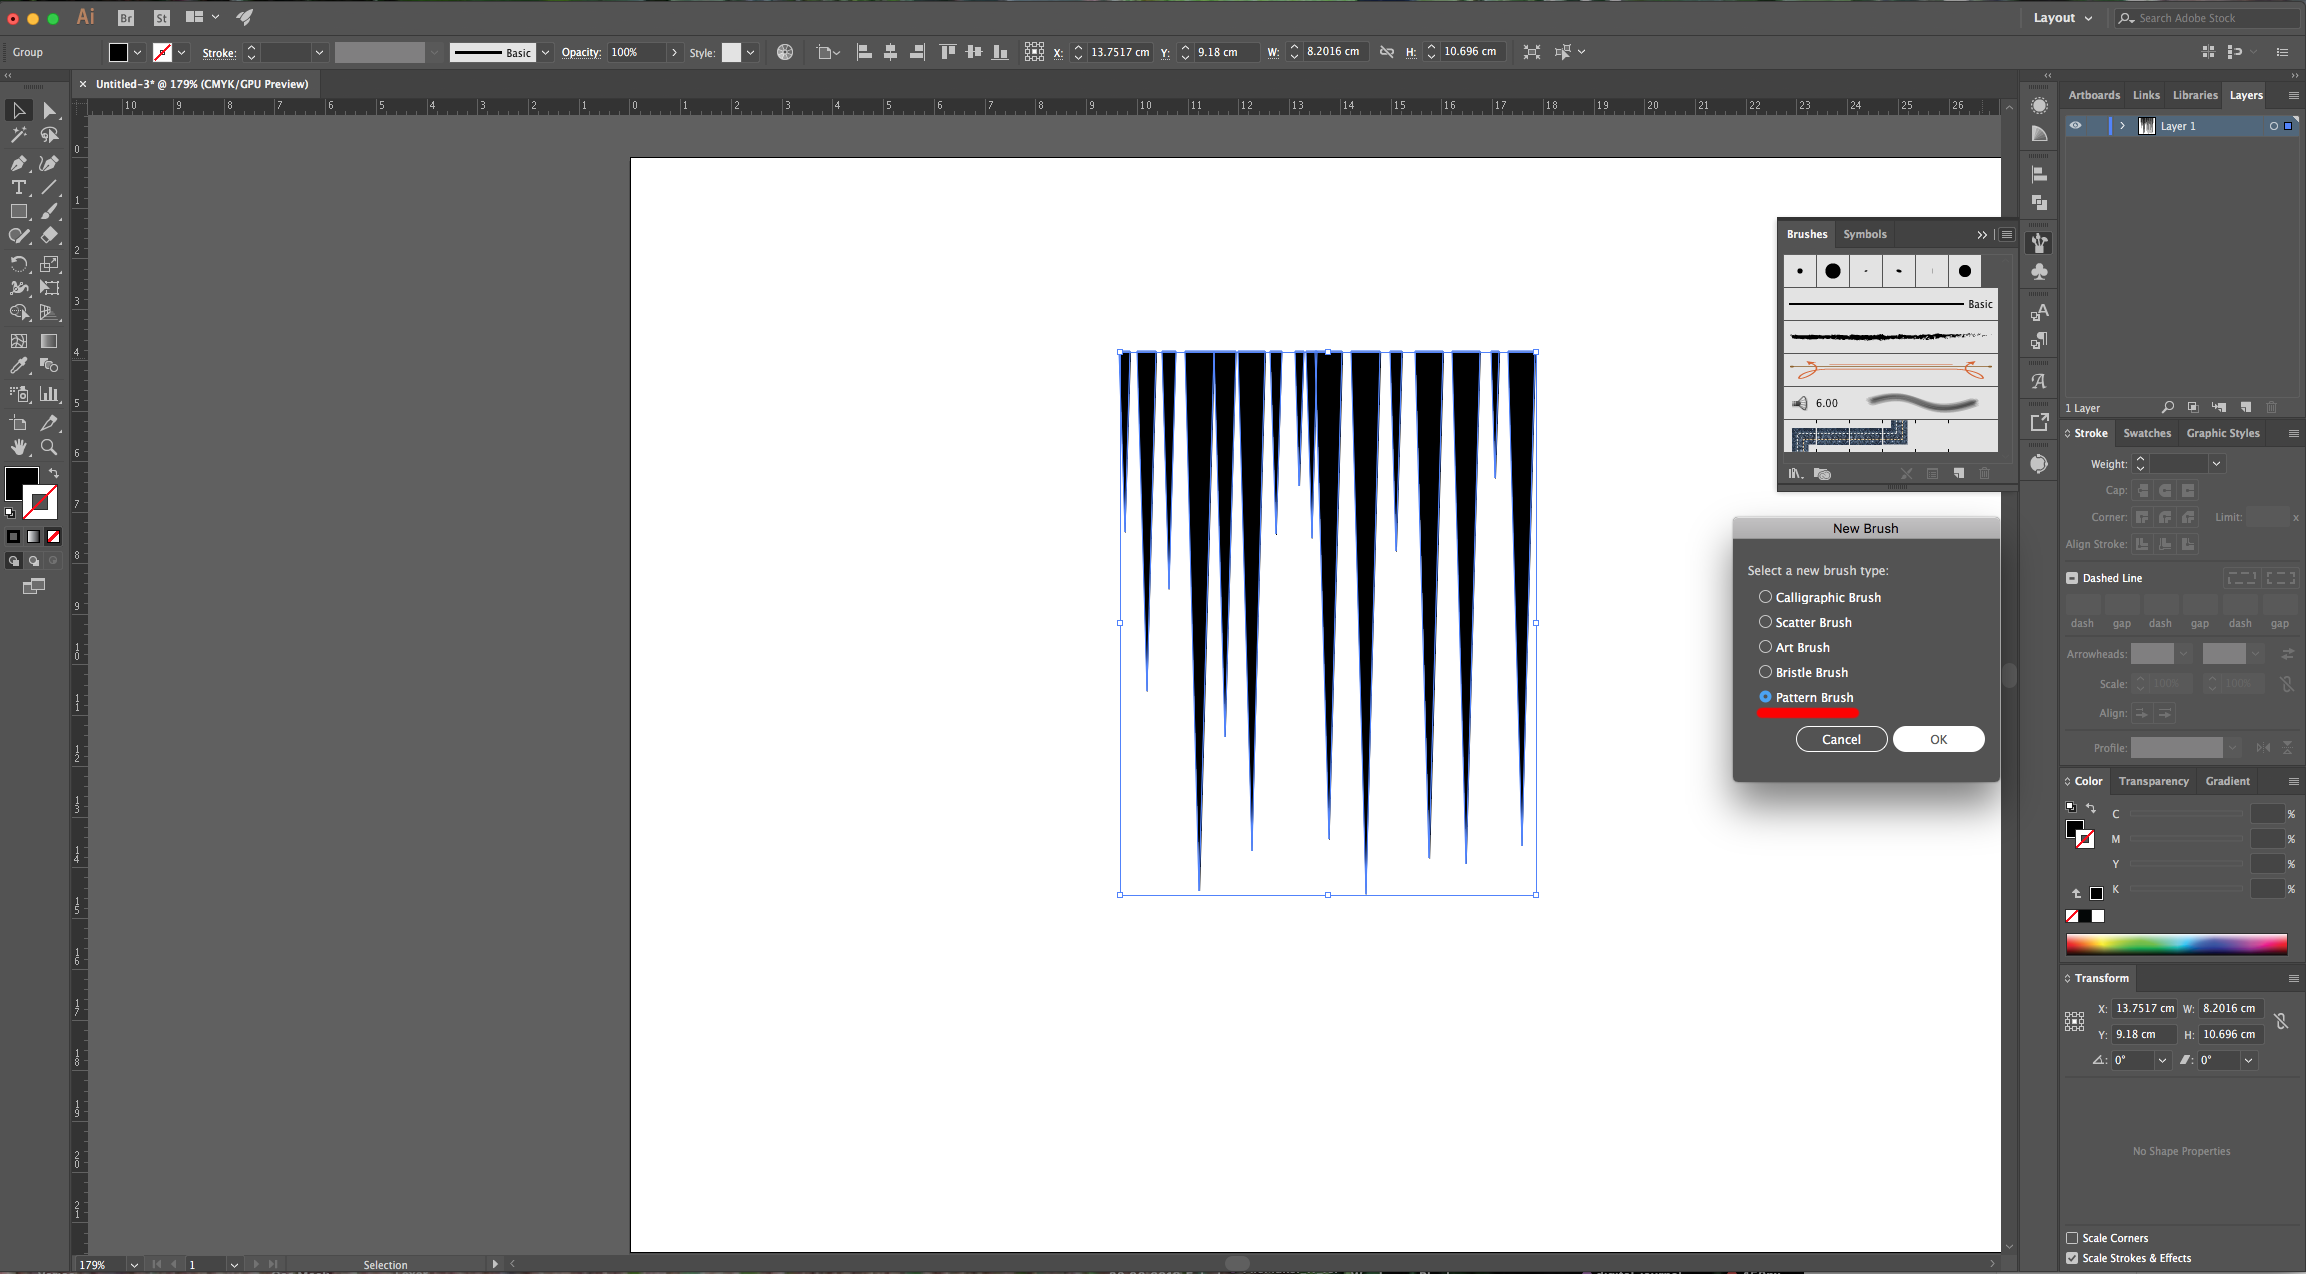
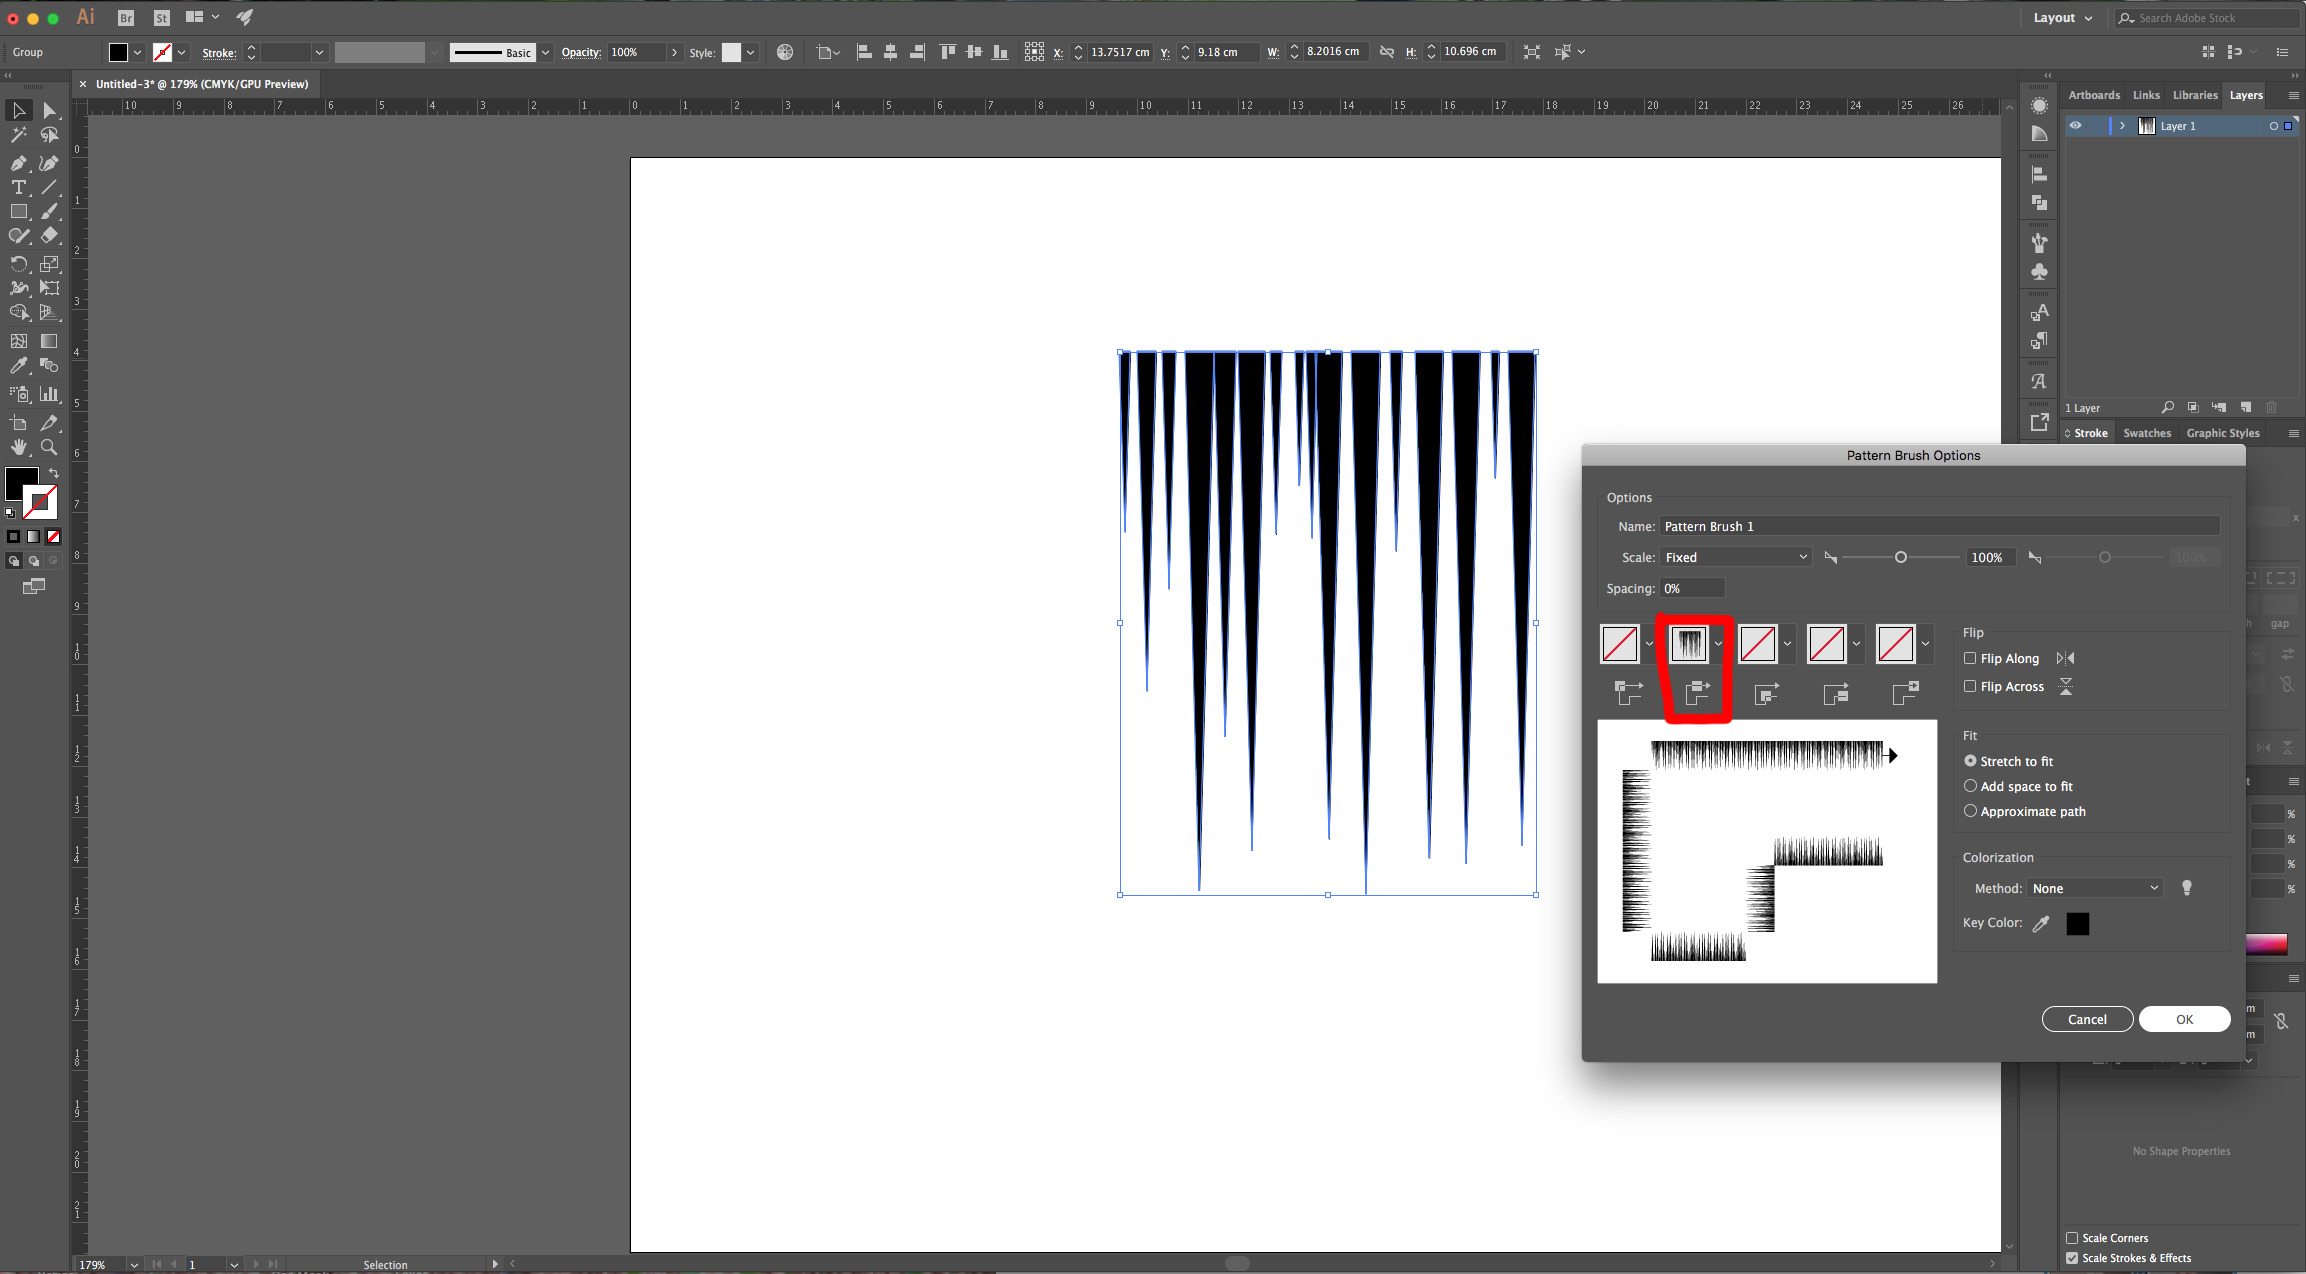
8 - Right-click on top of them and choose “Expand Appearance”. Open the “Brushes Panel” and drag the “Group” onto it or click on the small Menu icon on the Top-right and choose “New Brush”. Select “Pattern Brush” and assign the pattern to the second square leaving the other ones with “No Fill”. The size should be 100%.
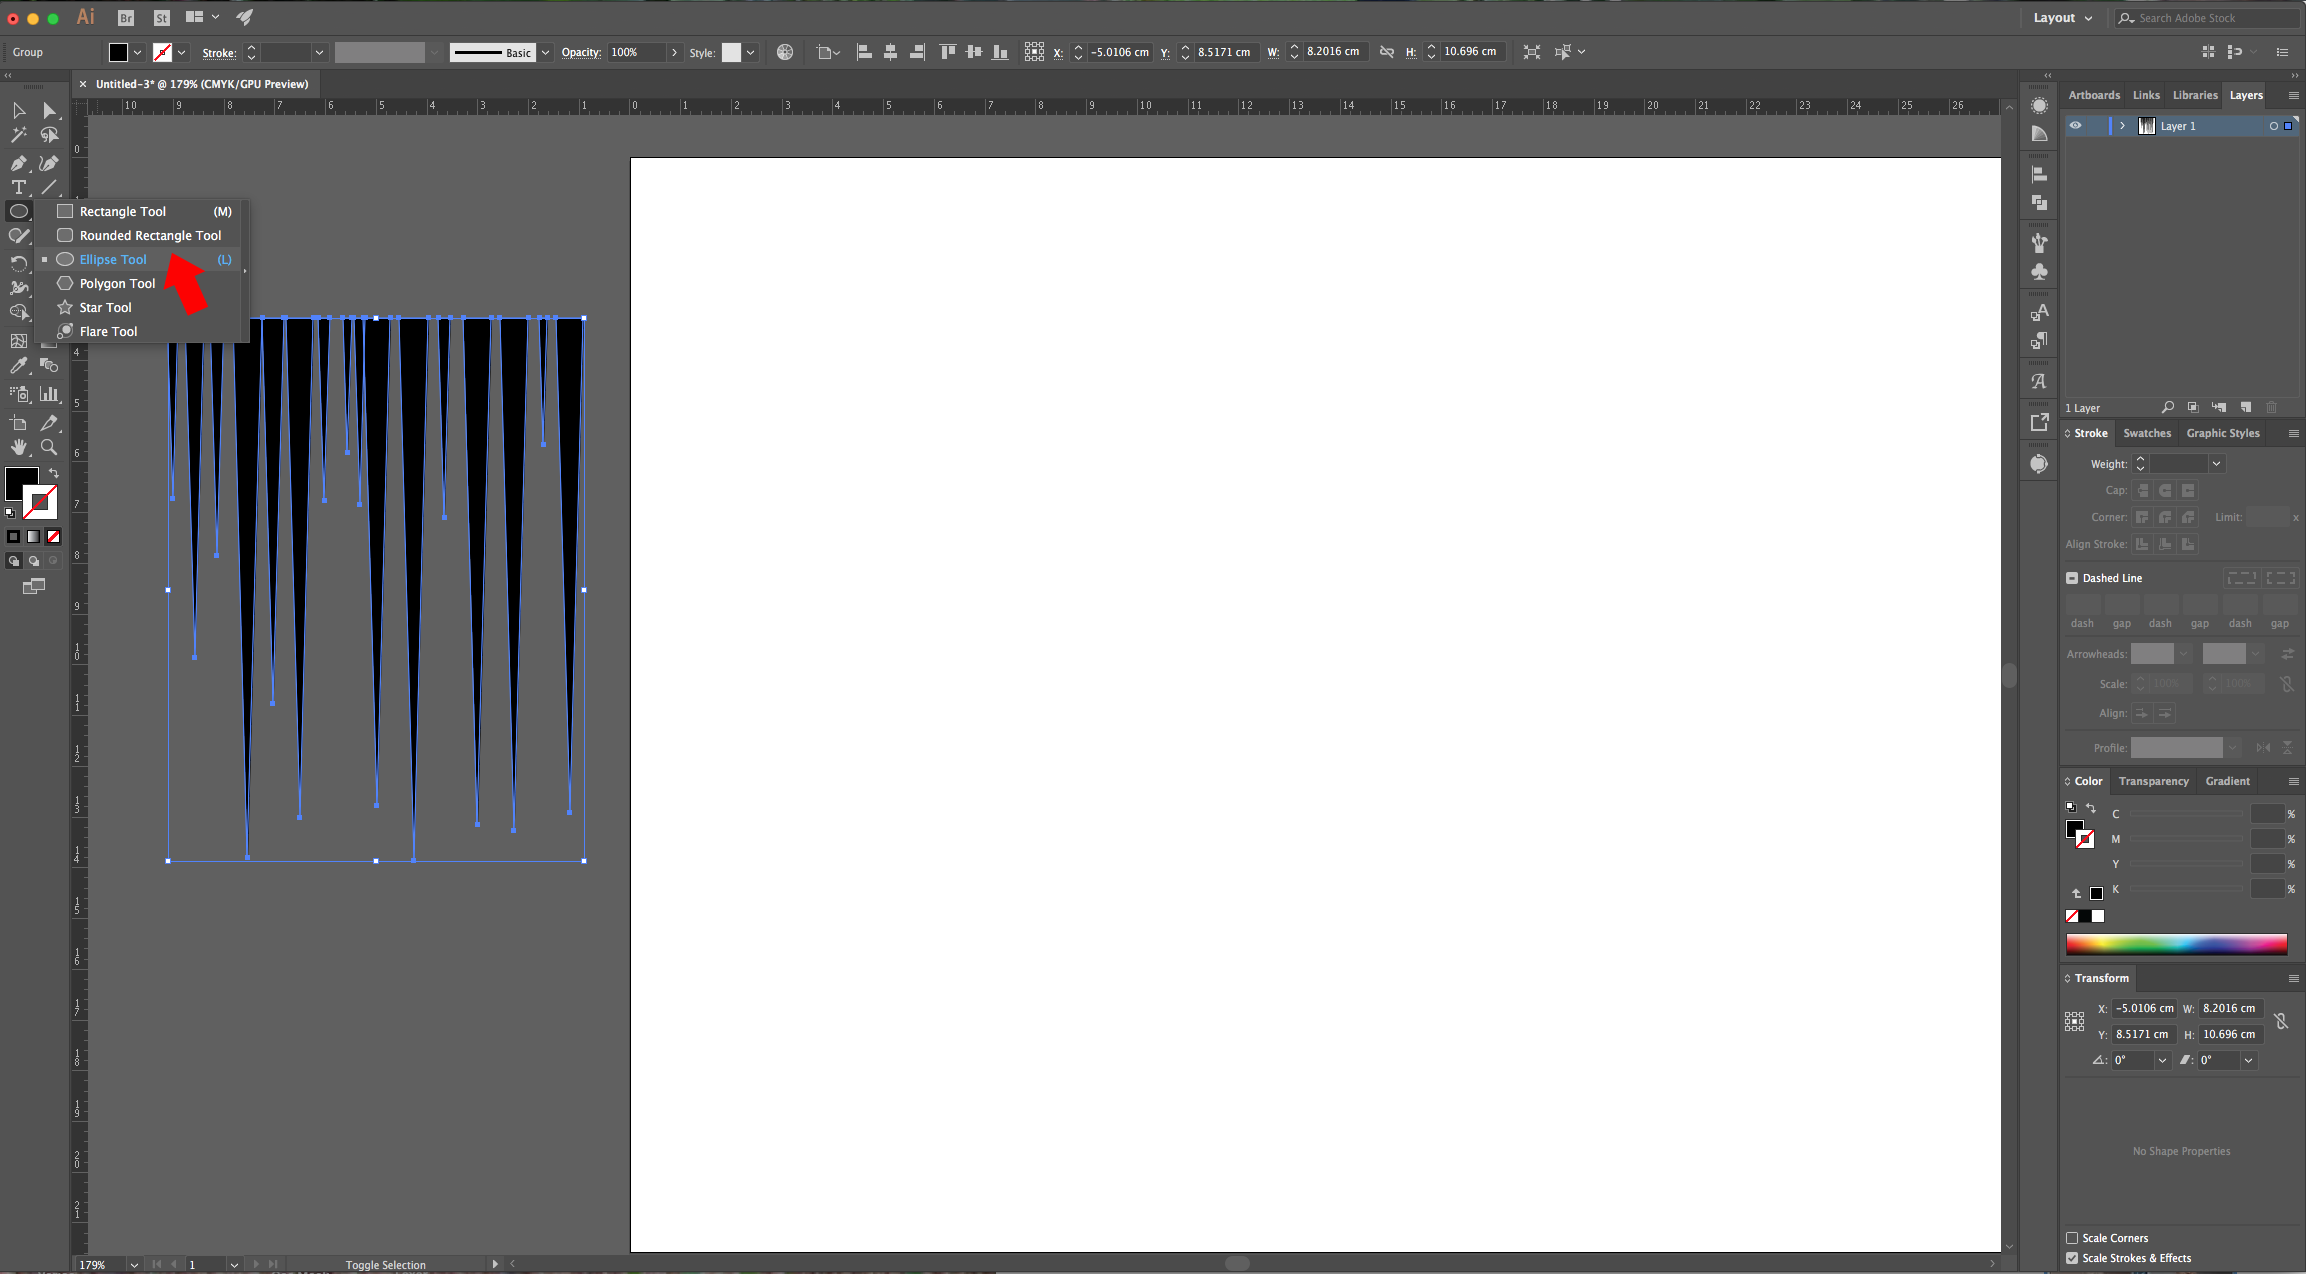
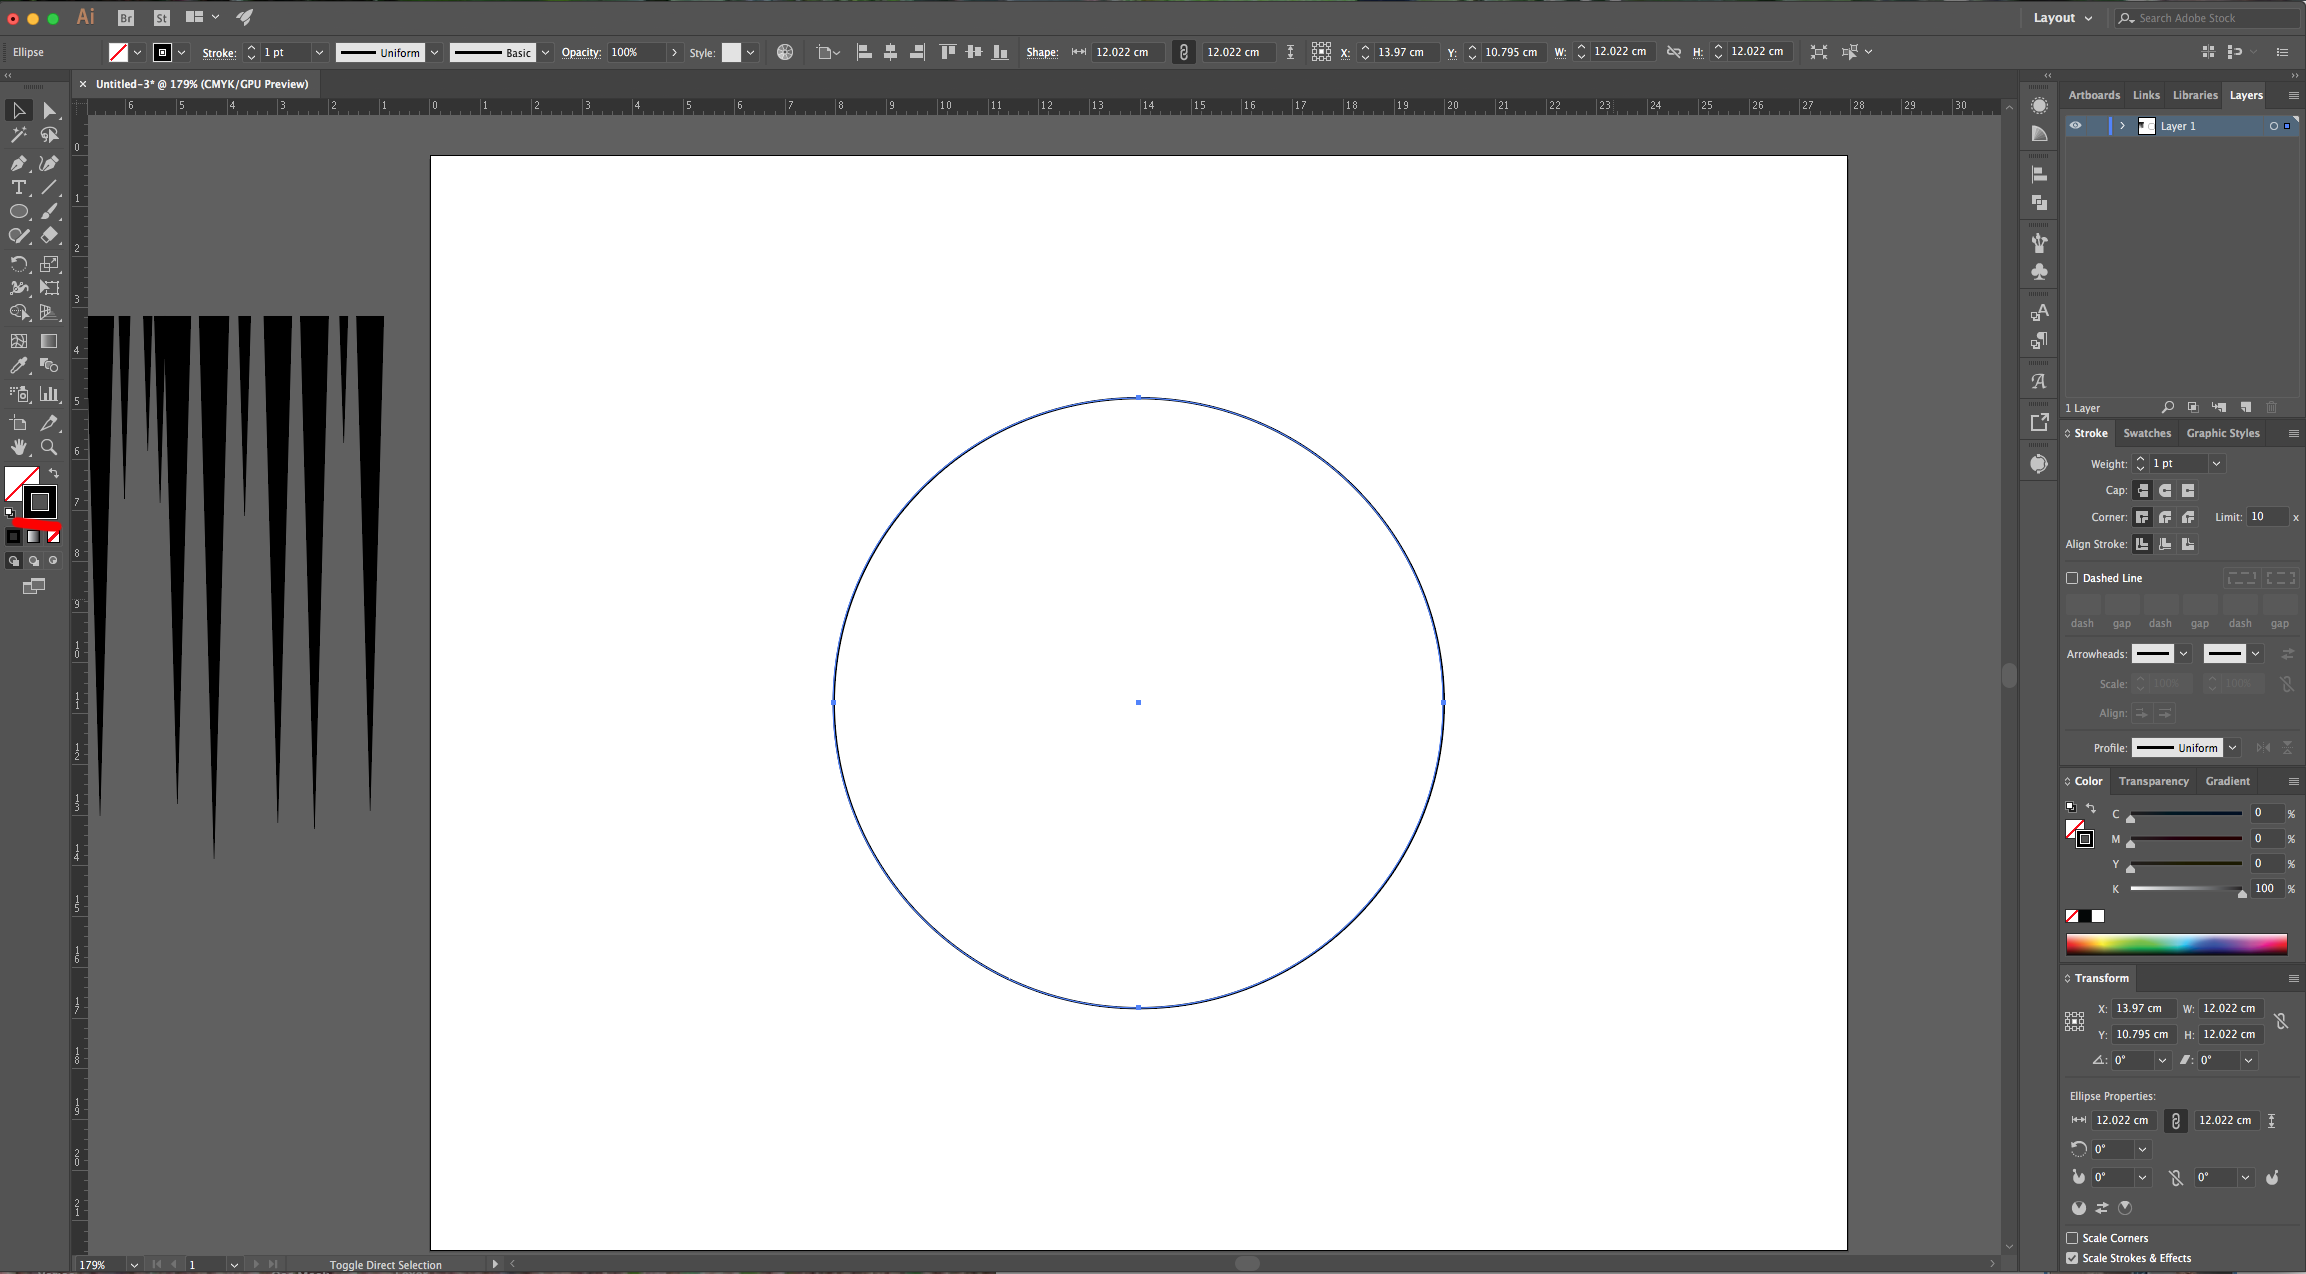
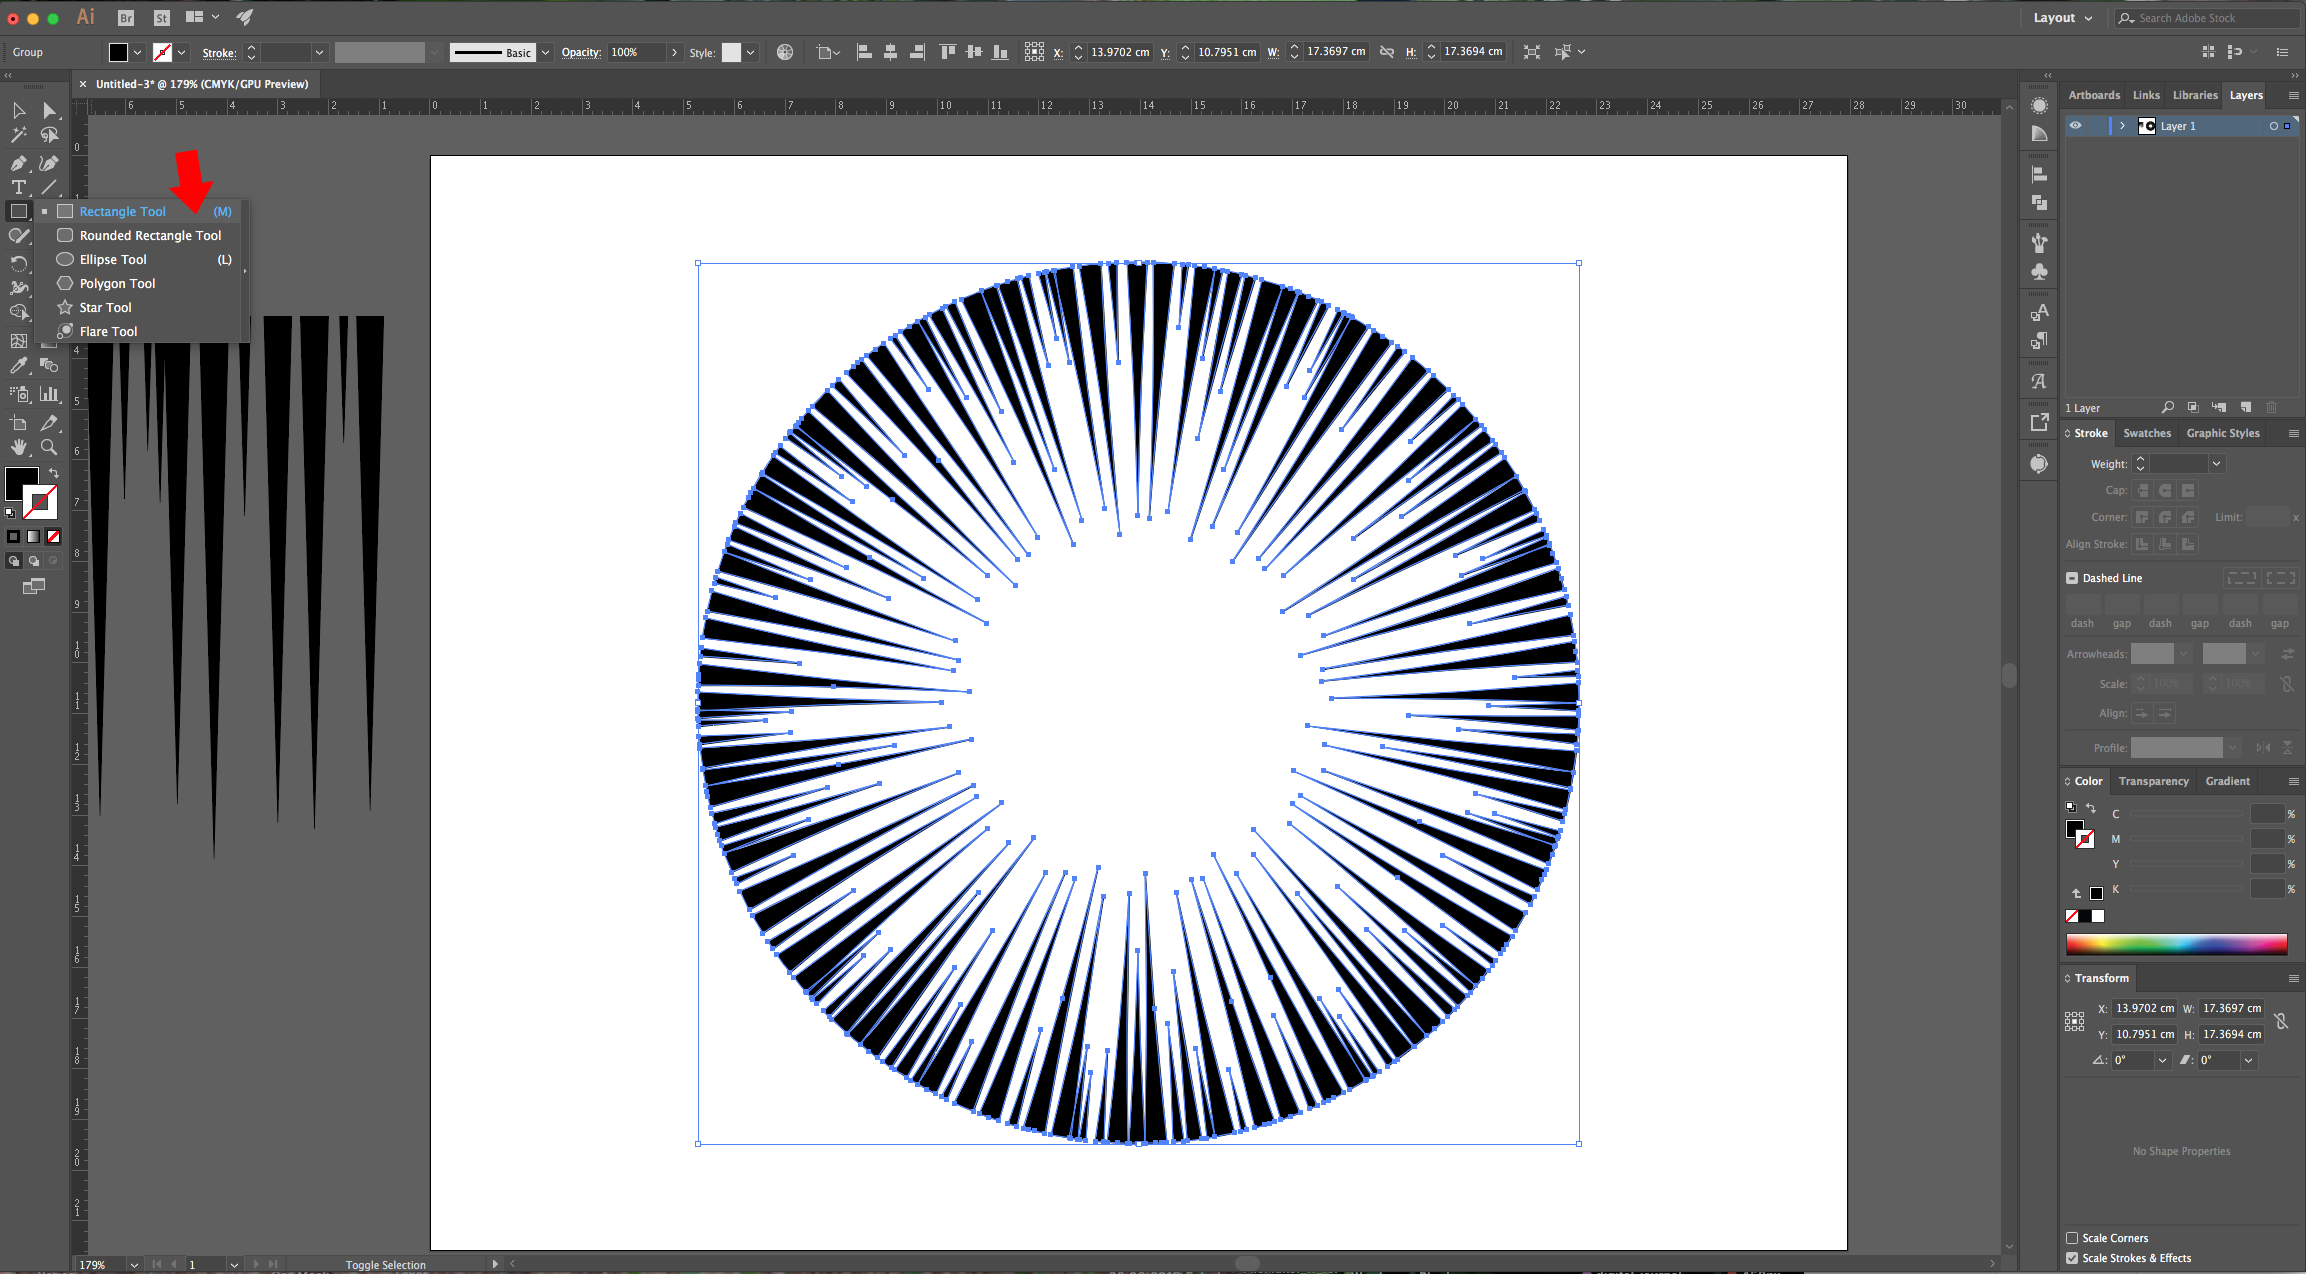
9 - Once your brush is saved, delete or drag your vectors out of the Canvas. Select the “Ellipse Tool” (L) and create a Circle inside your document (about 12 x 12 cm) with a Black “Stroke” and “No Fill”. Go to the “Brushes Panel” and select your “New Pattern Brush”.
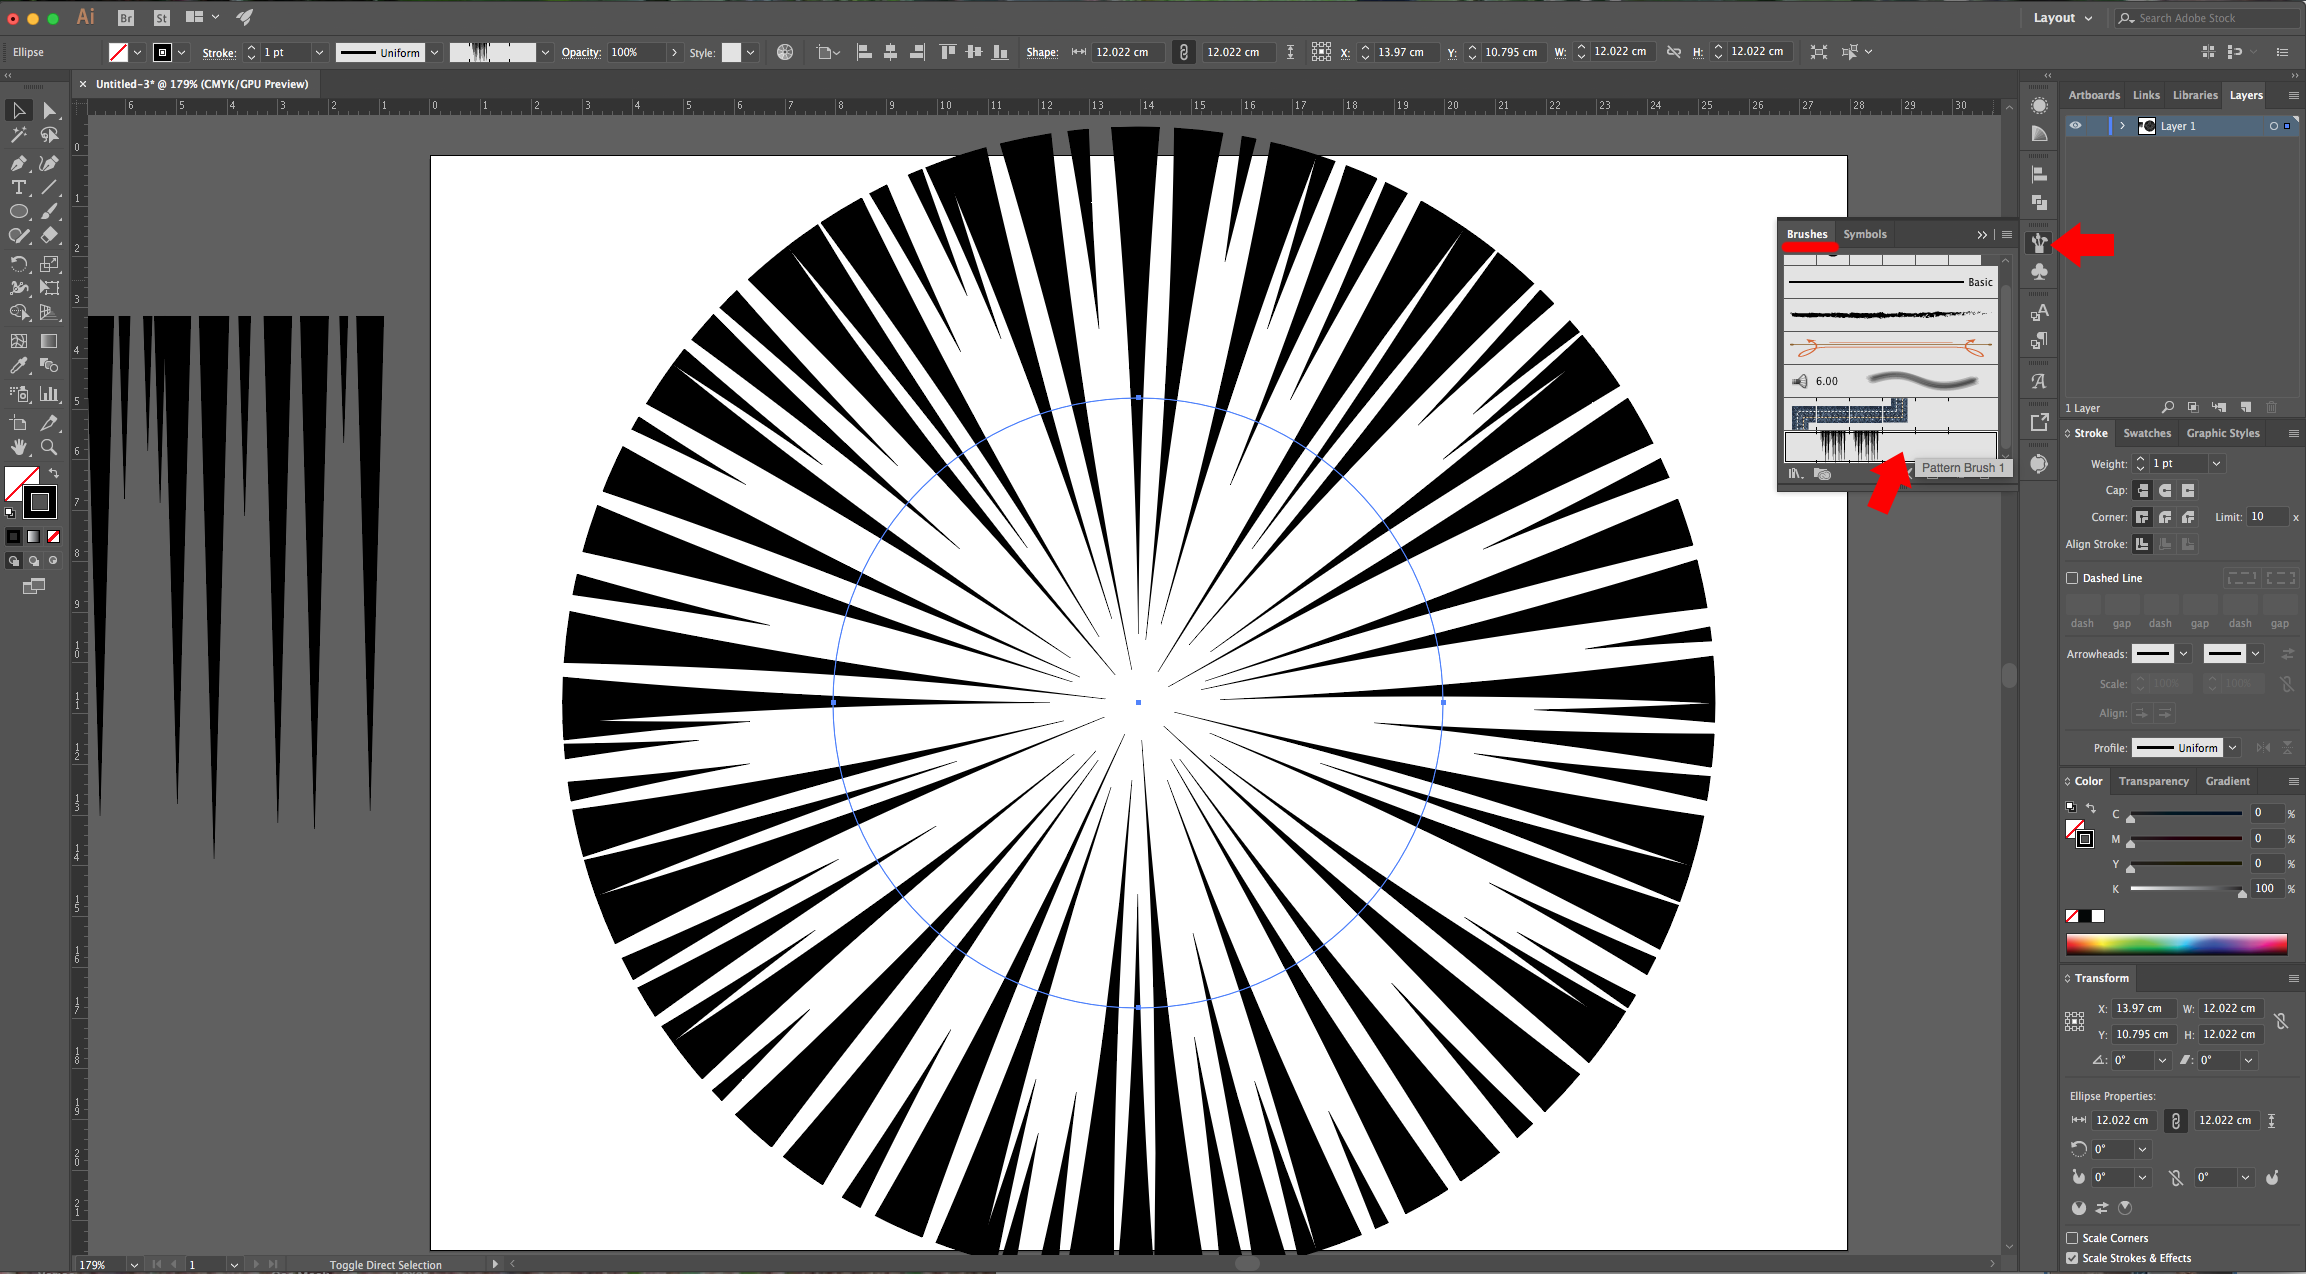
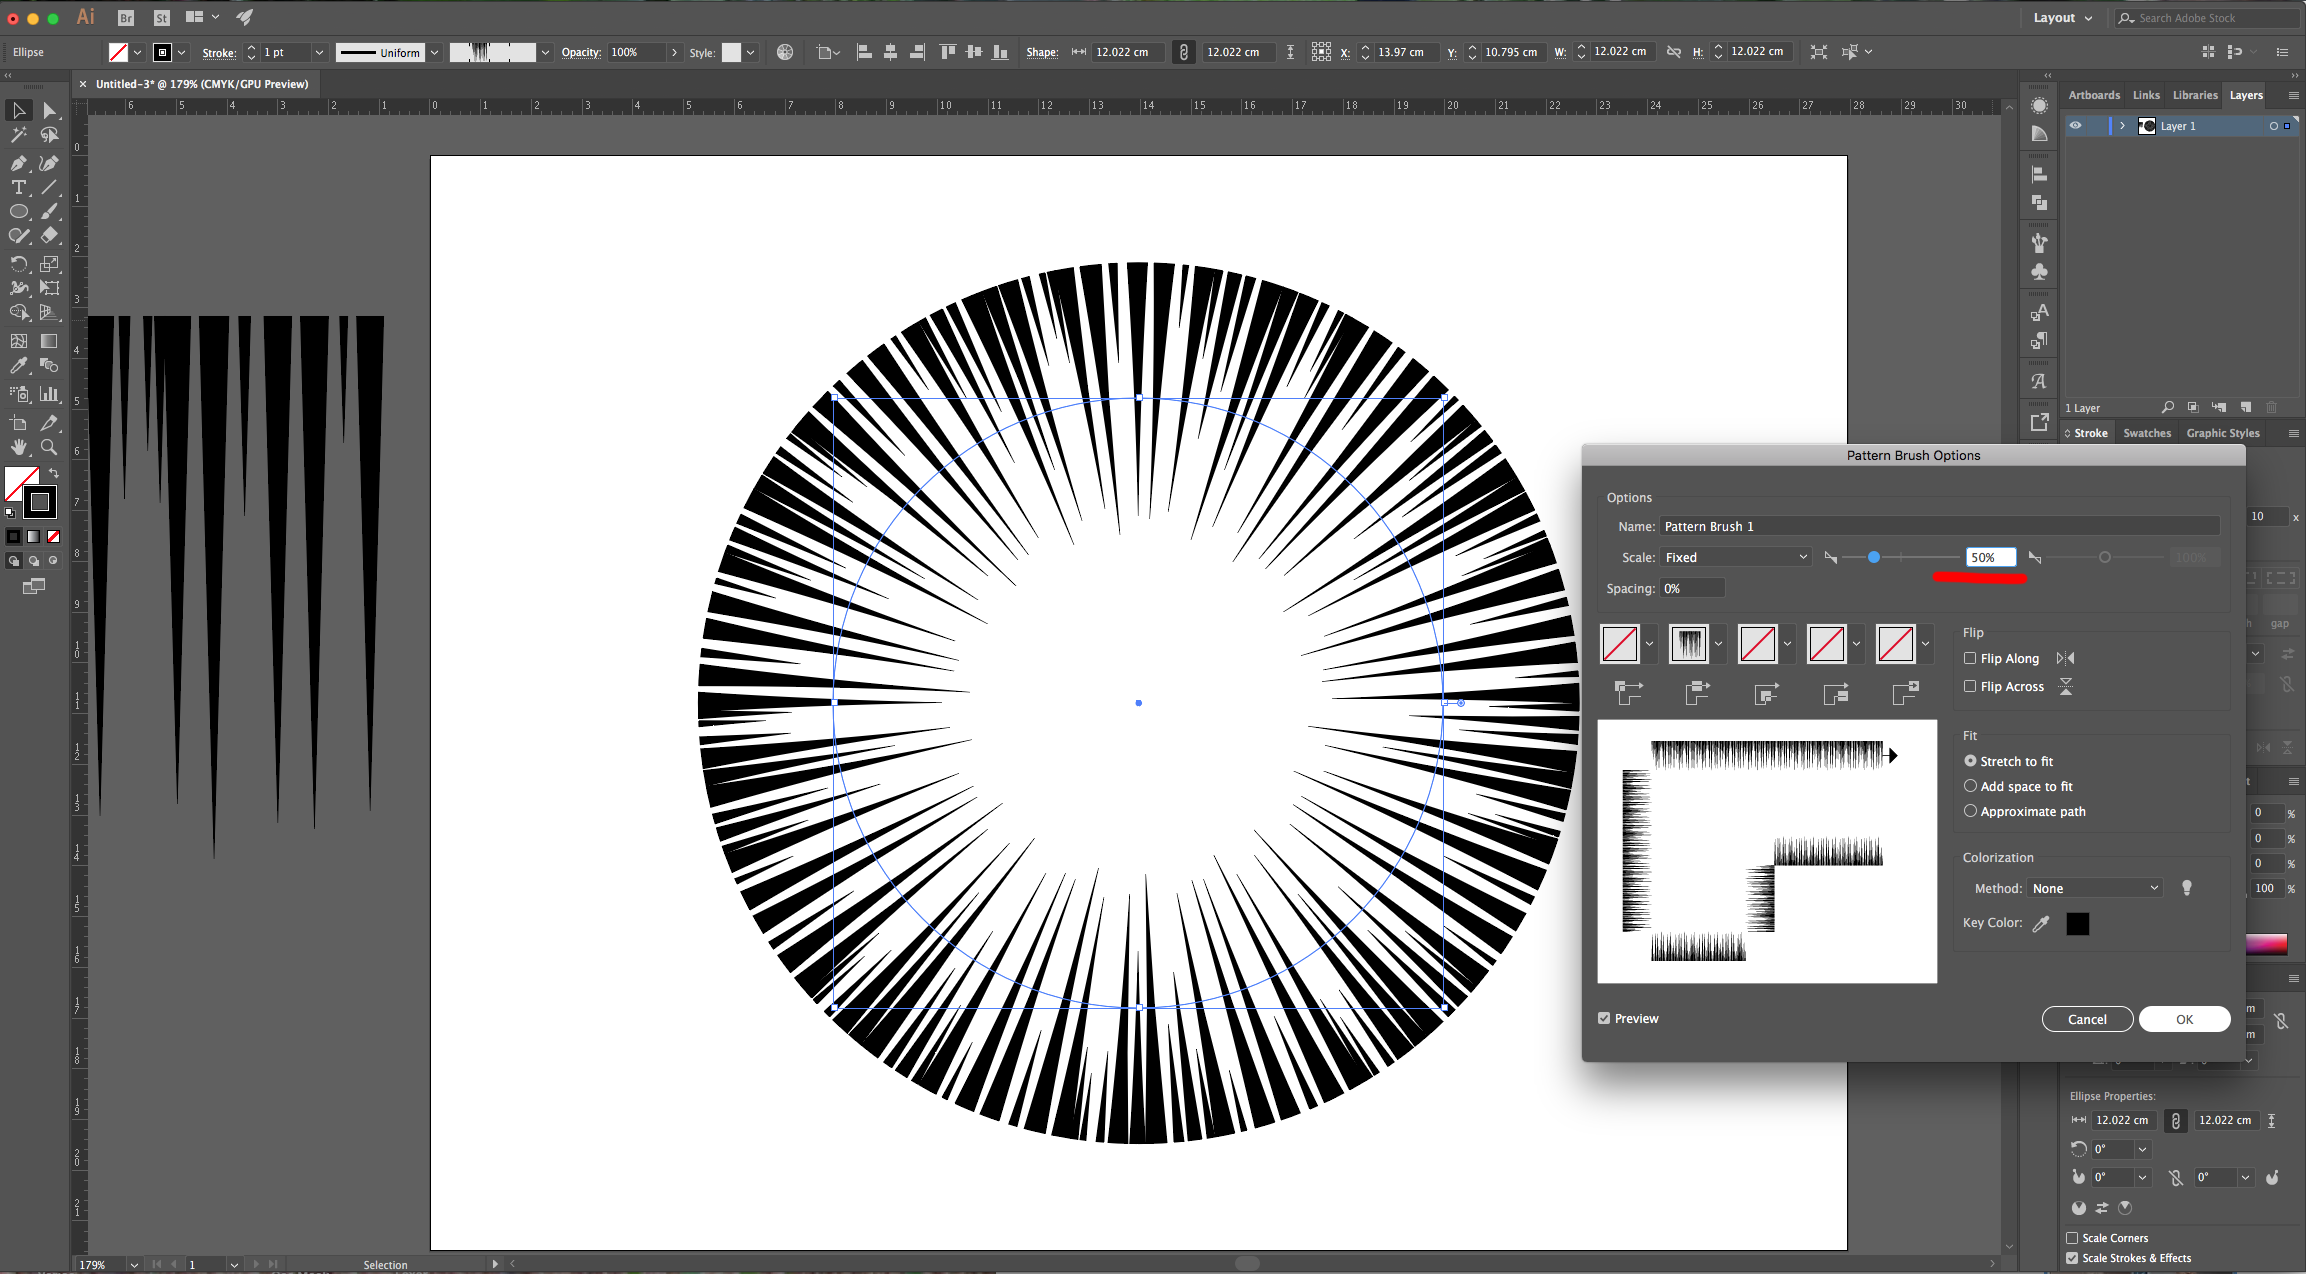
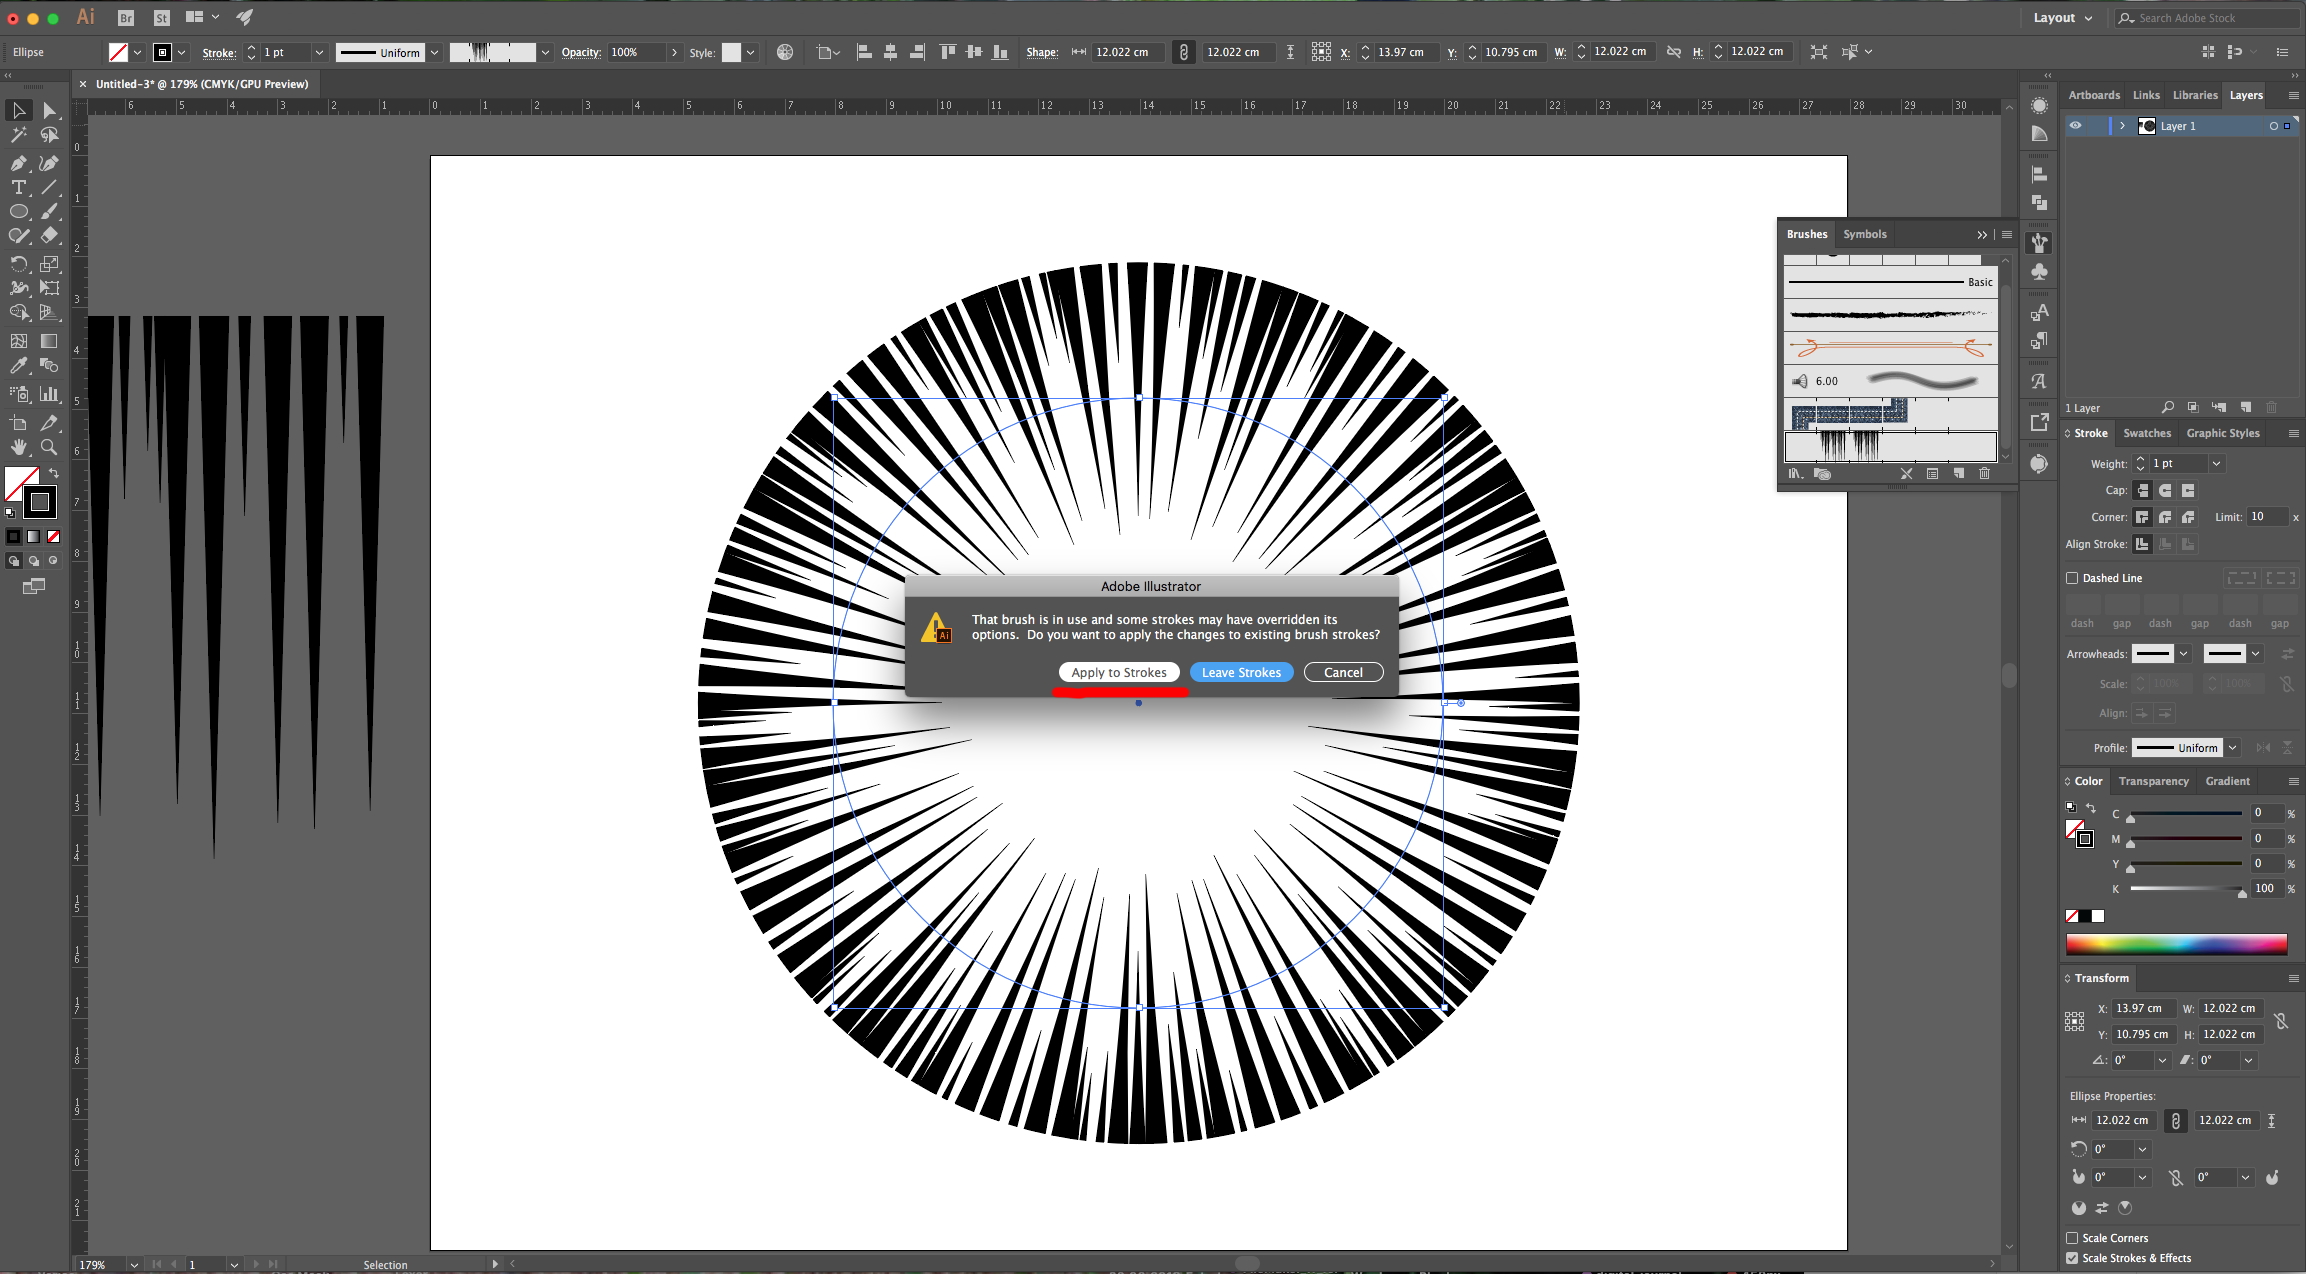
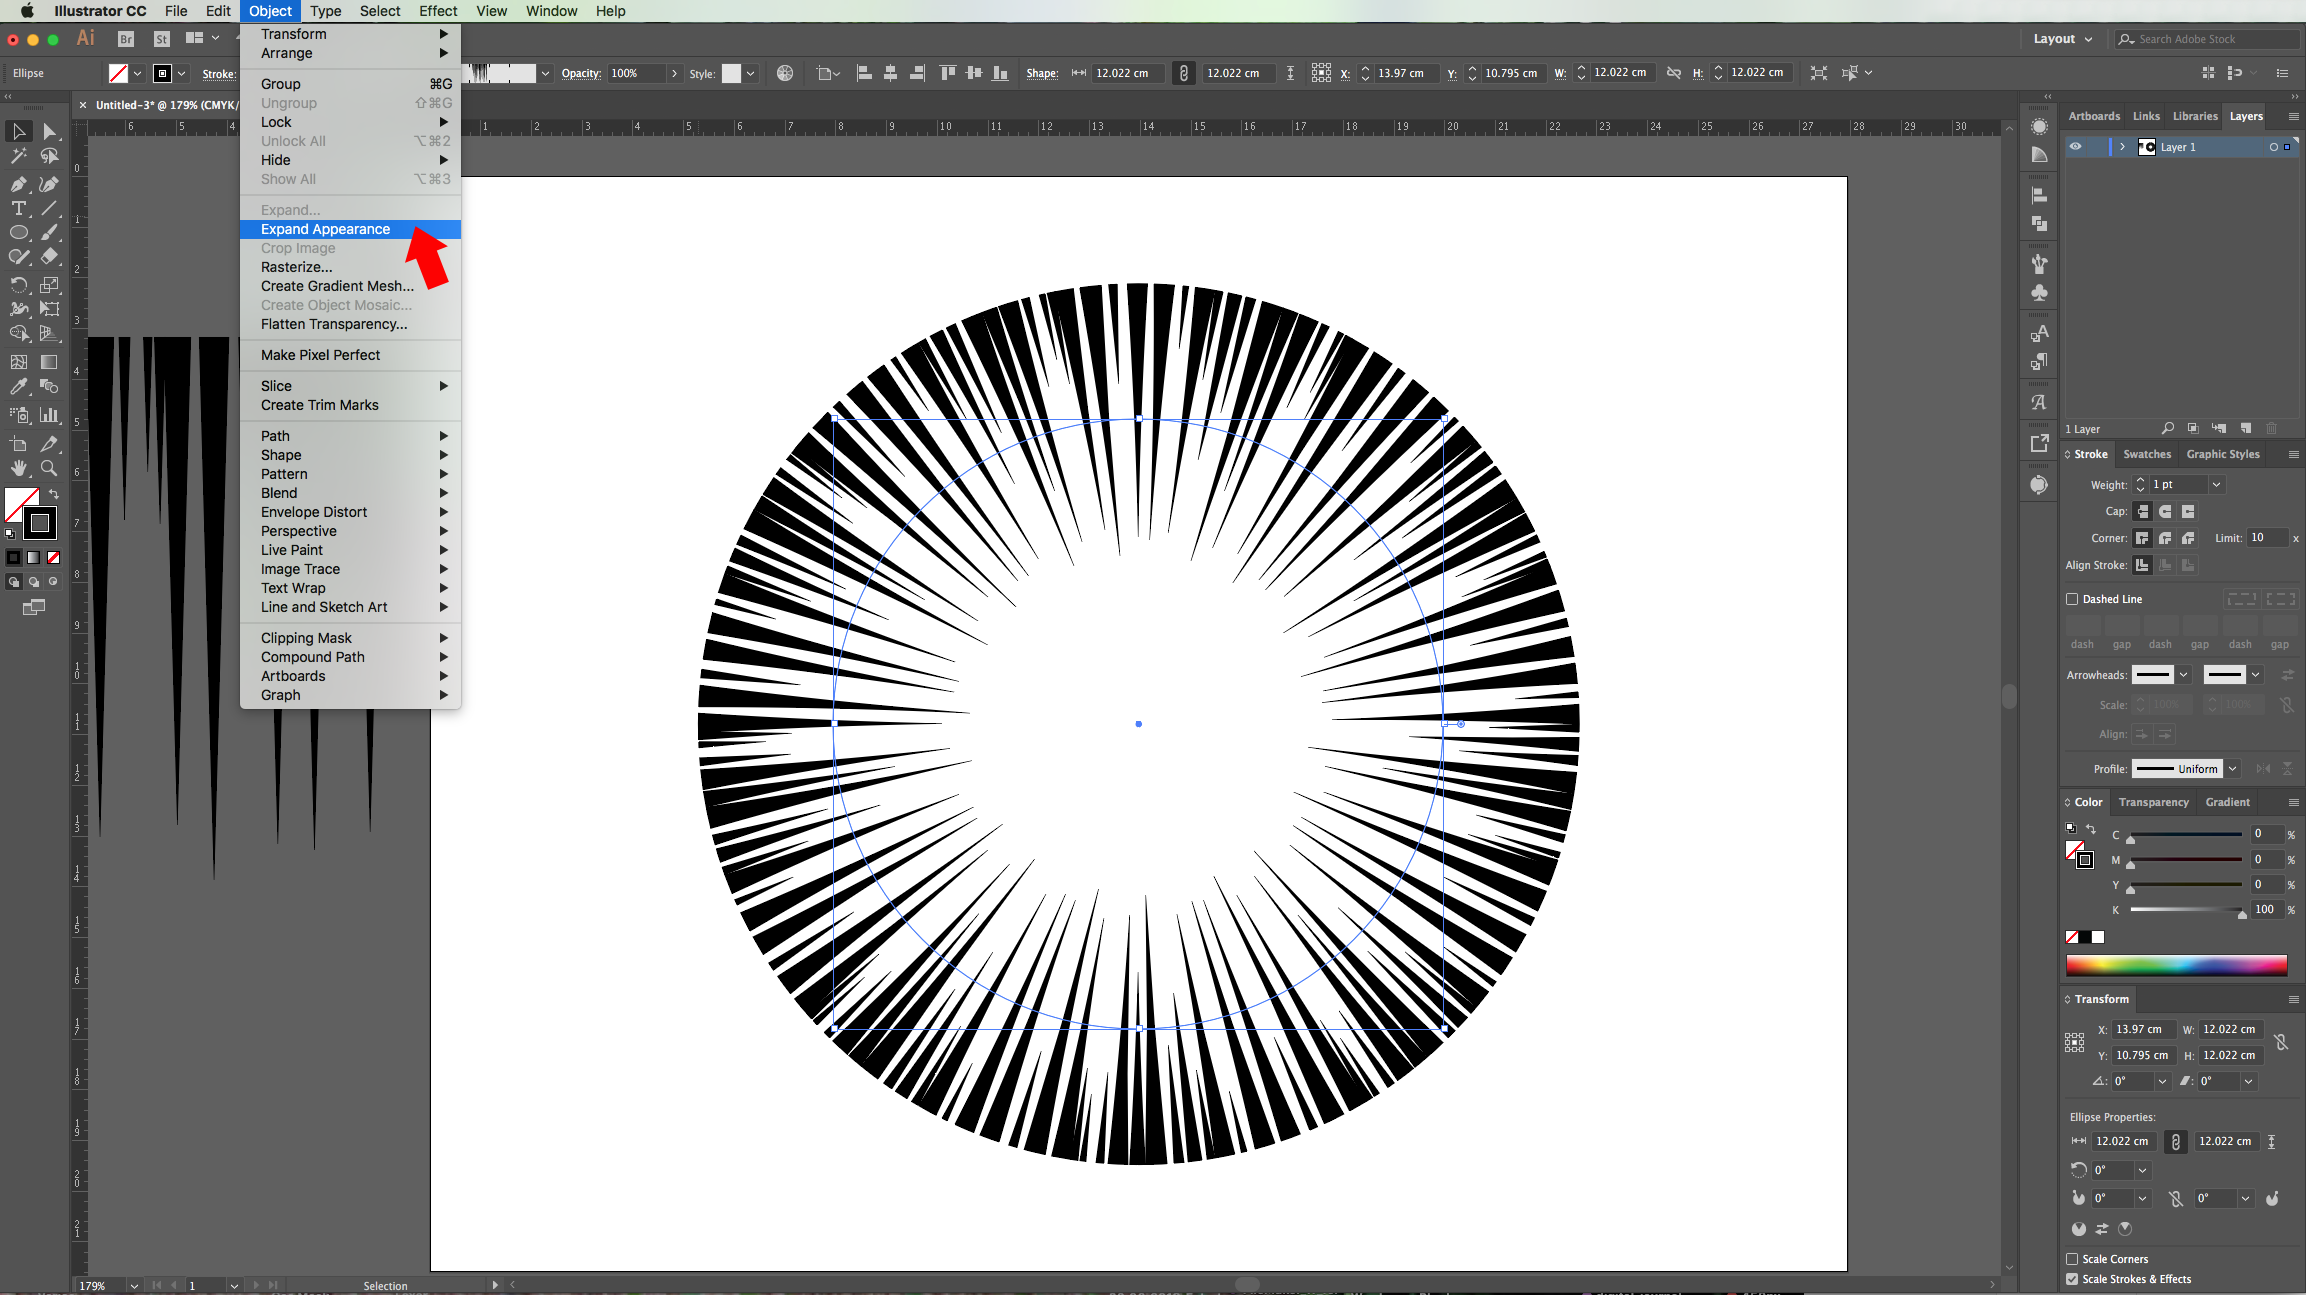
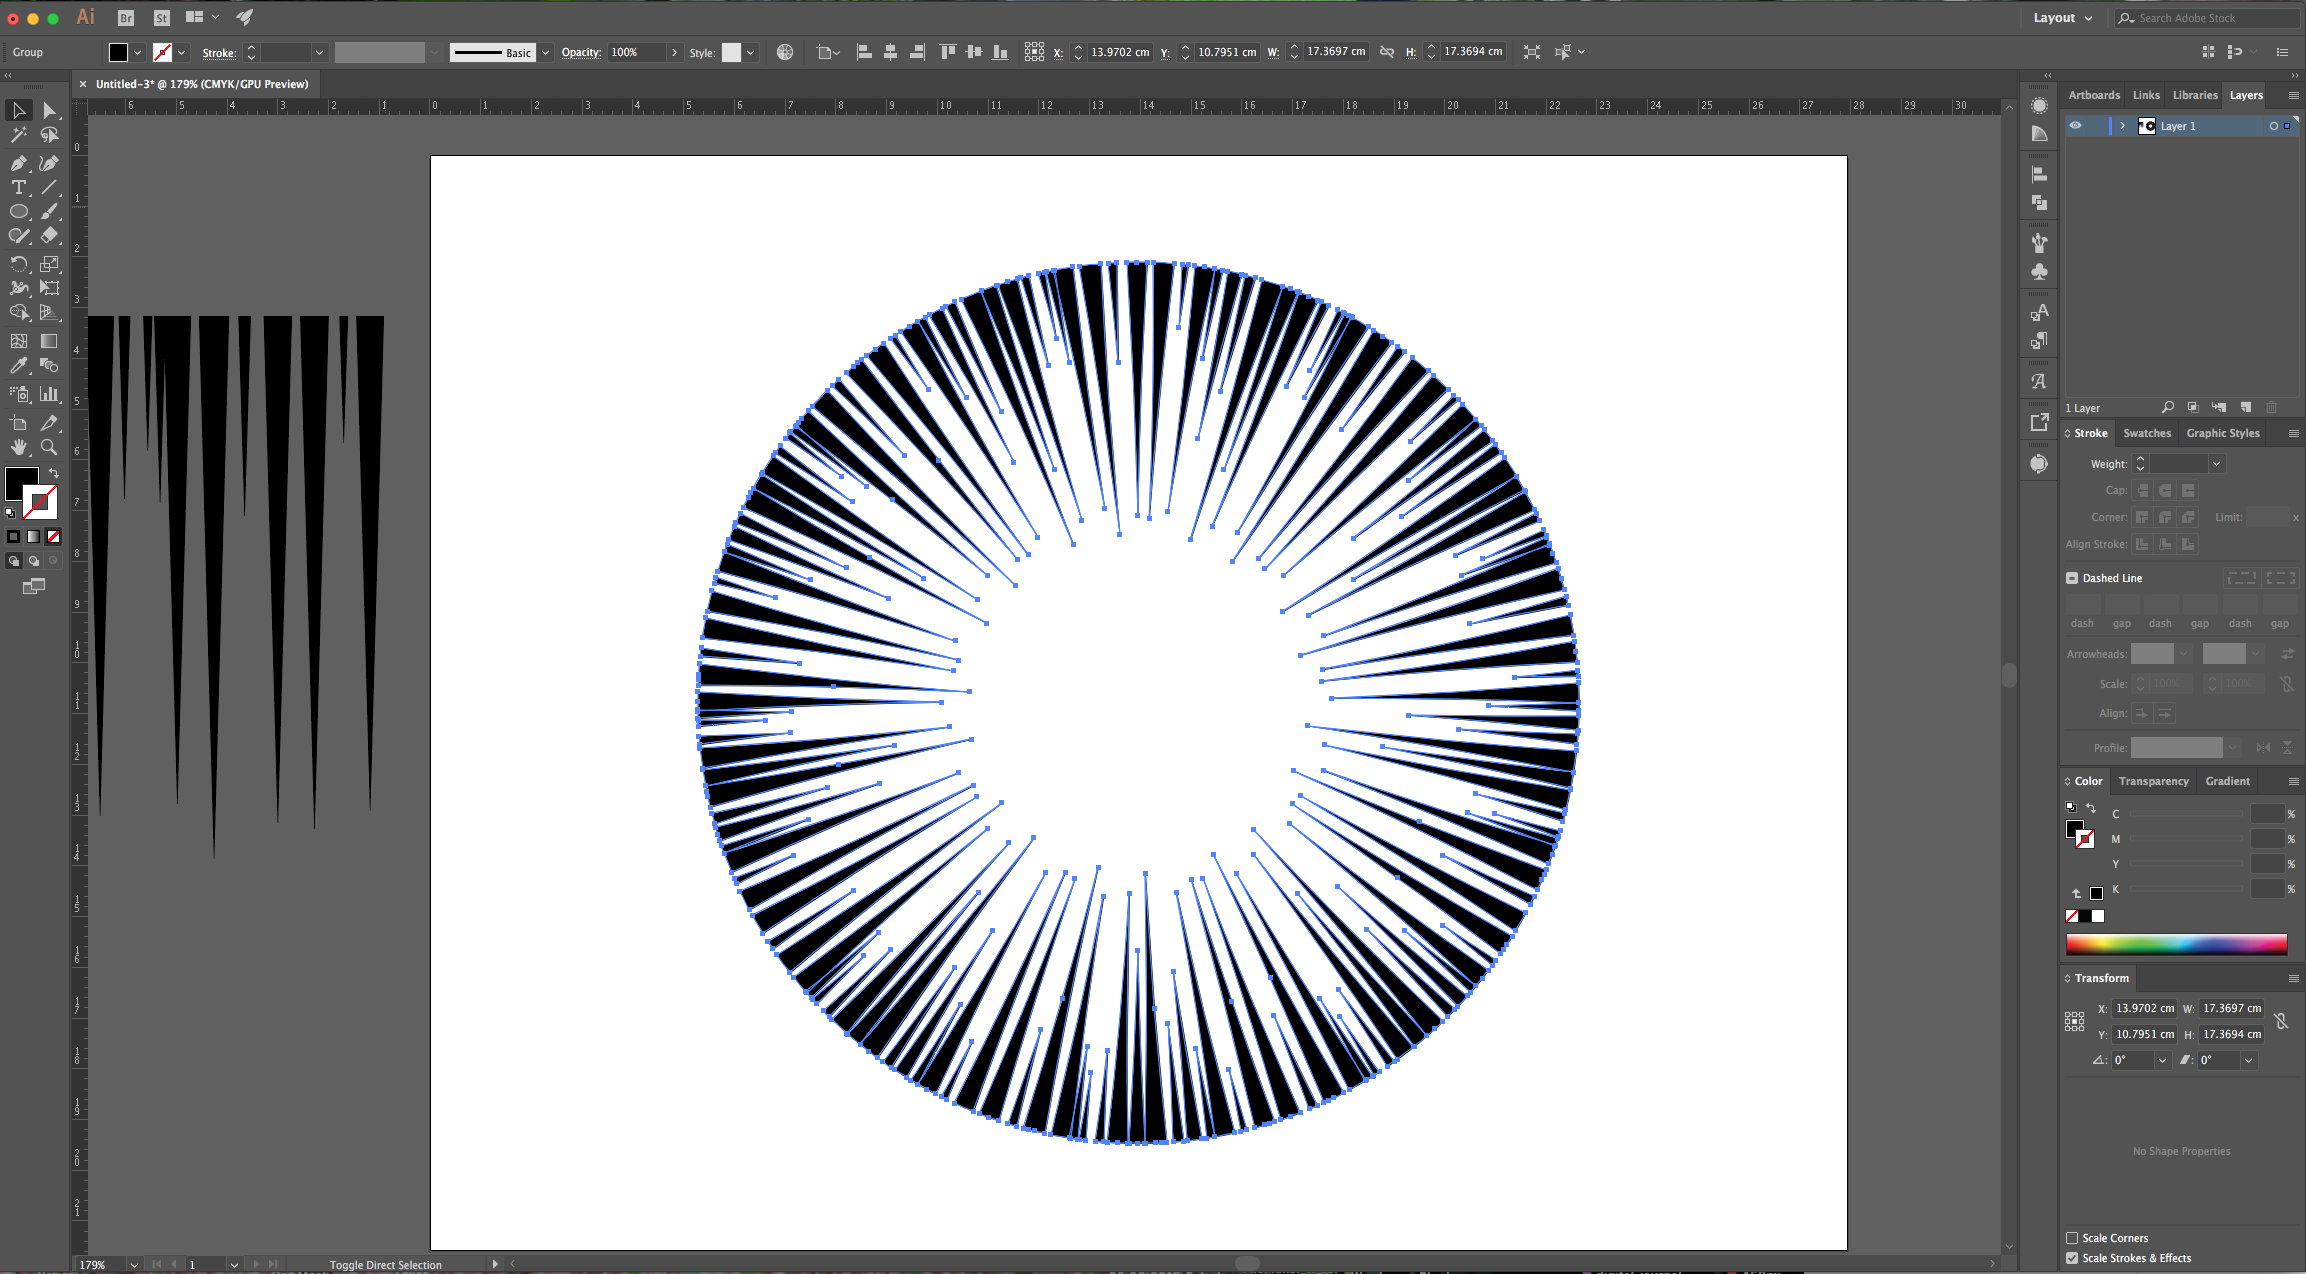
10 - If needed, double-click on the Brush Thumbnail and reduce its size to 50%. You will be asked if you want to “Apply to Strokes” or “Leave Strokes”, choose “Apply”, then go to Object > Expand Appearance…
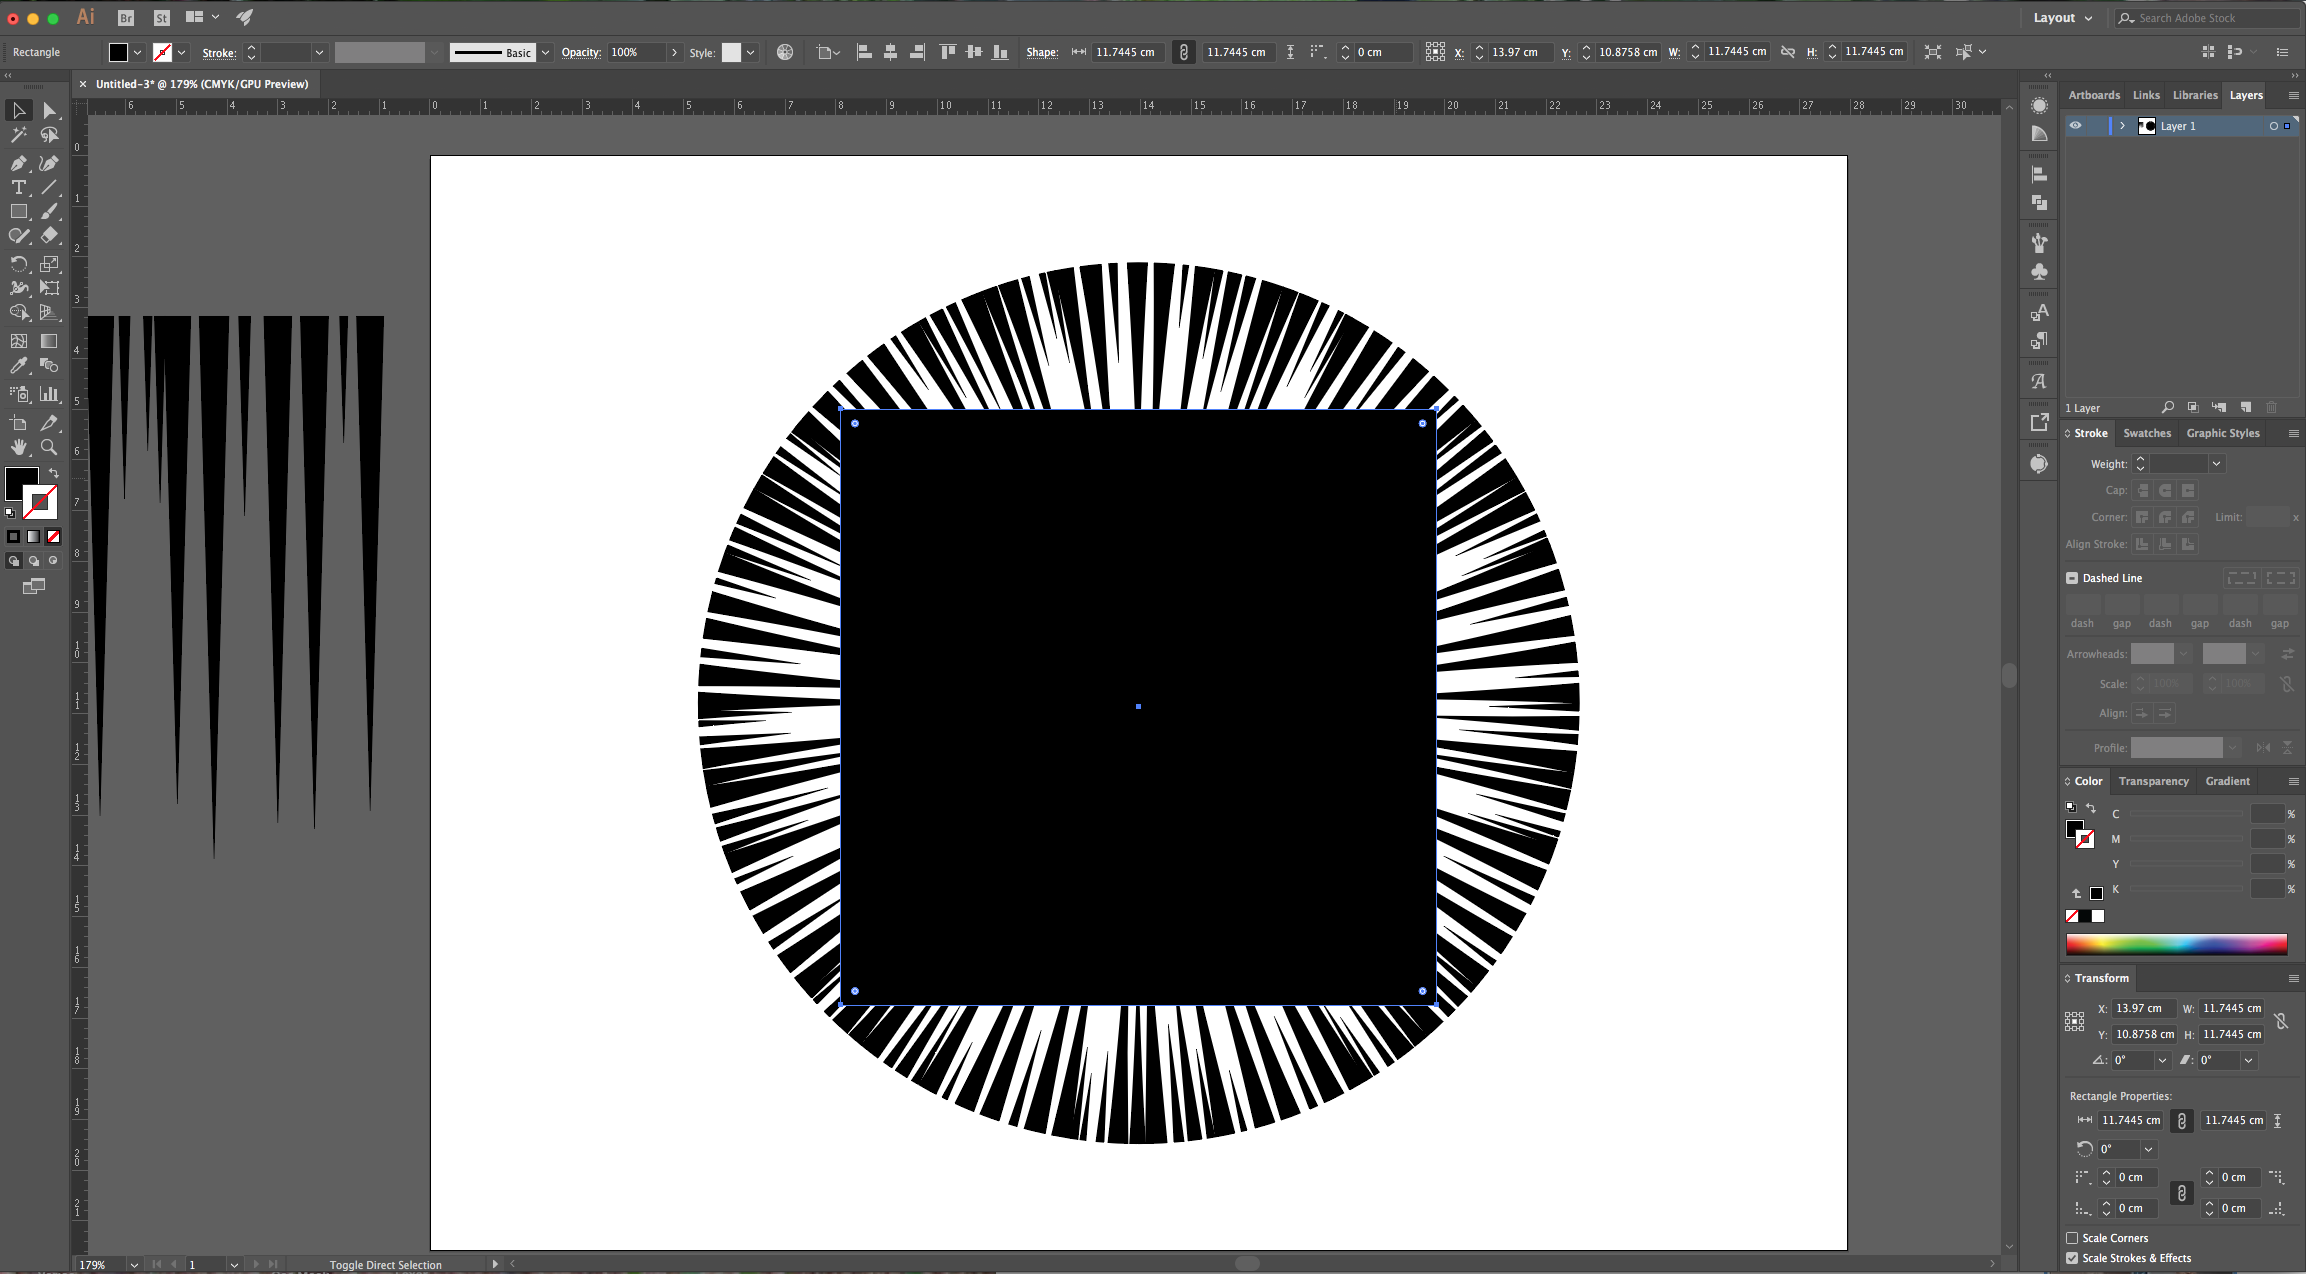
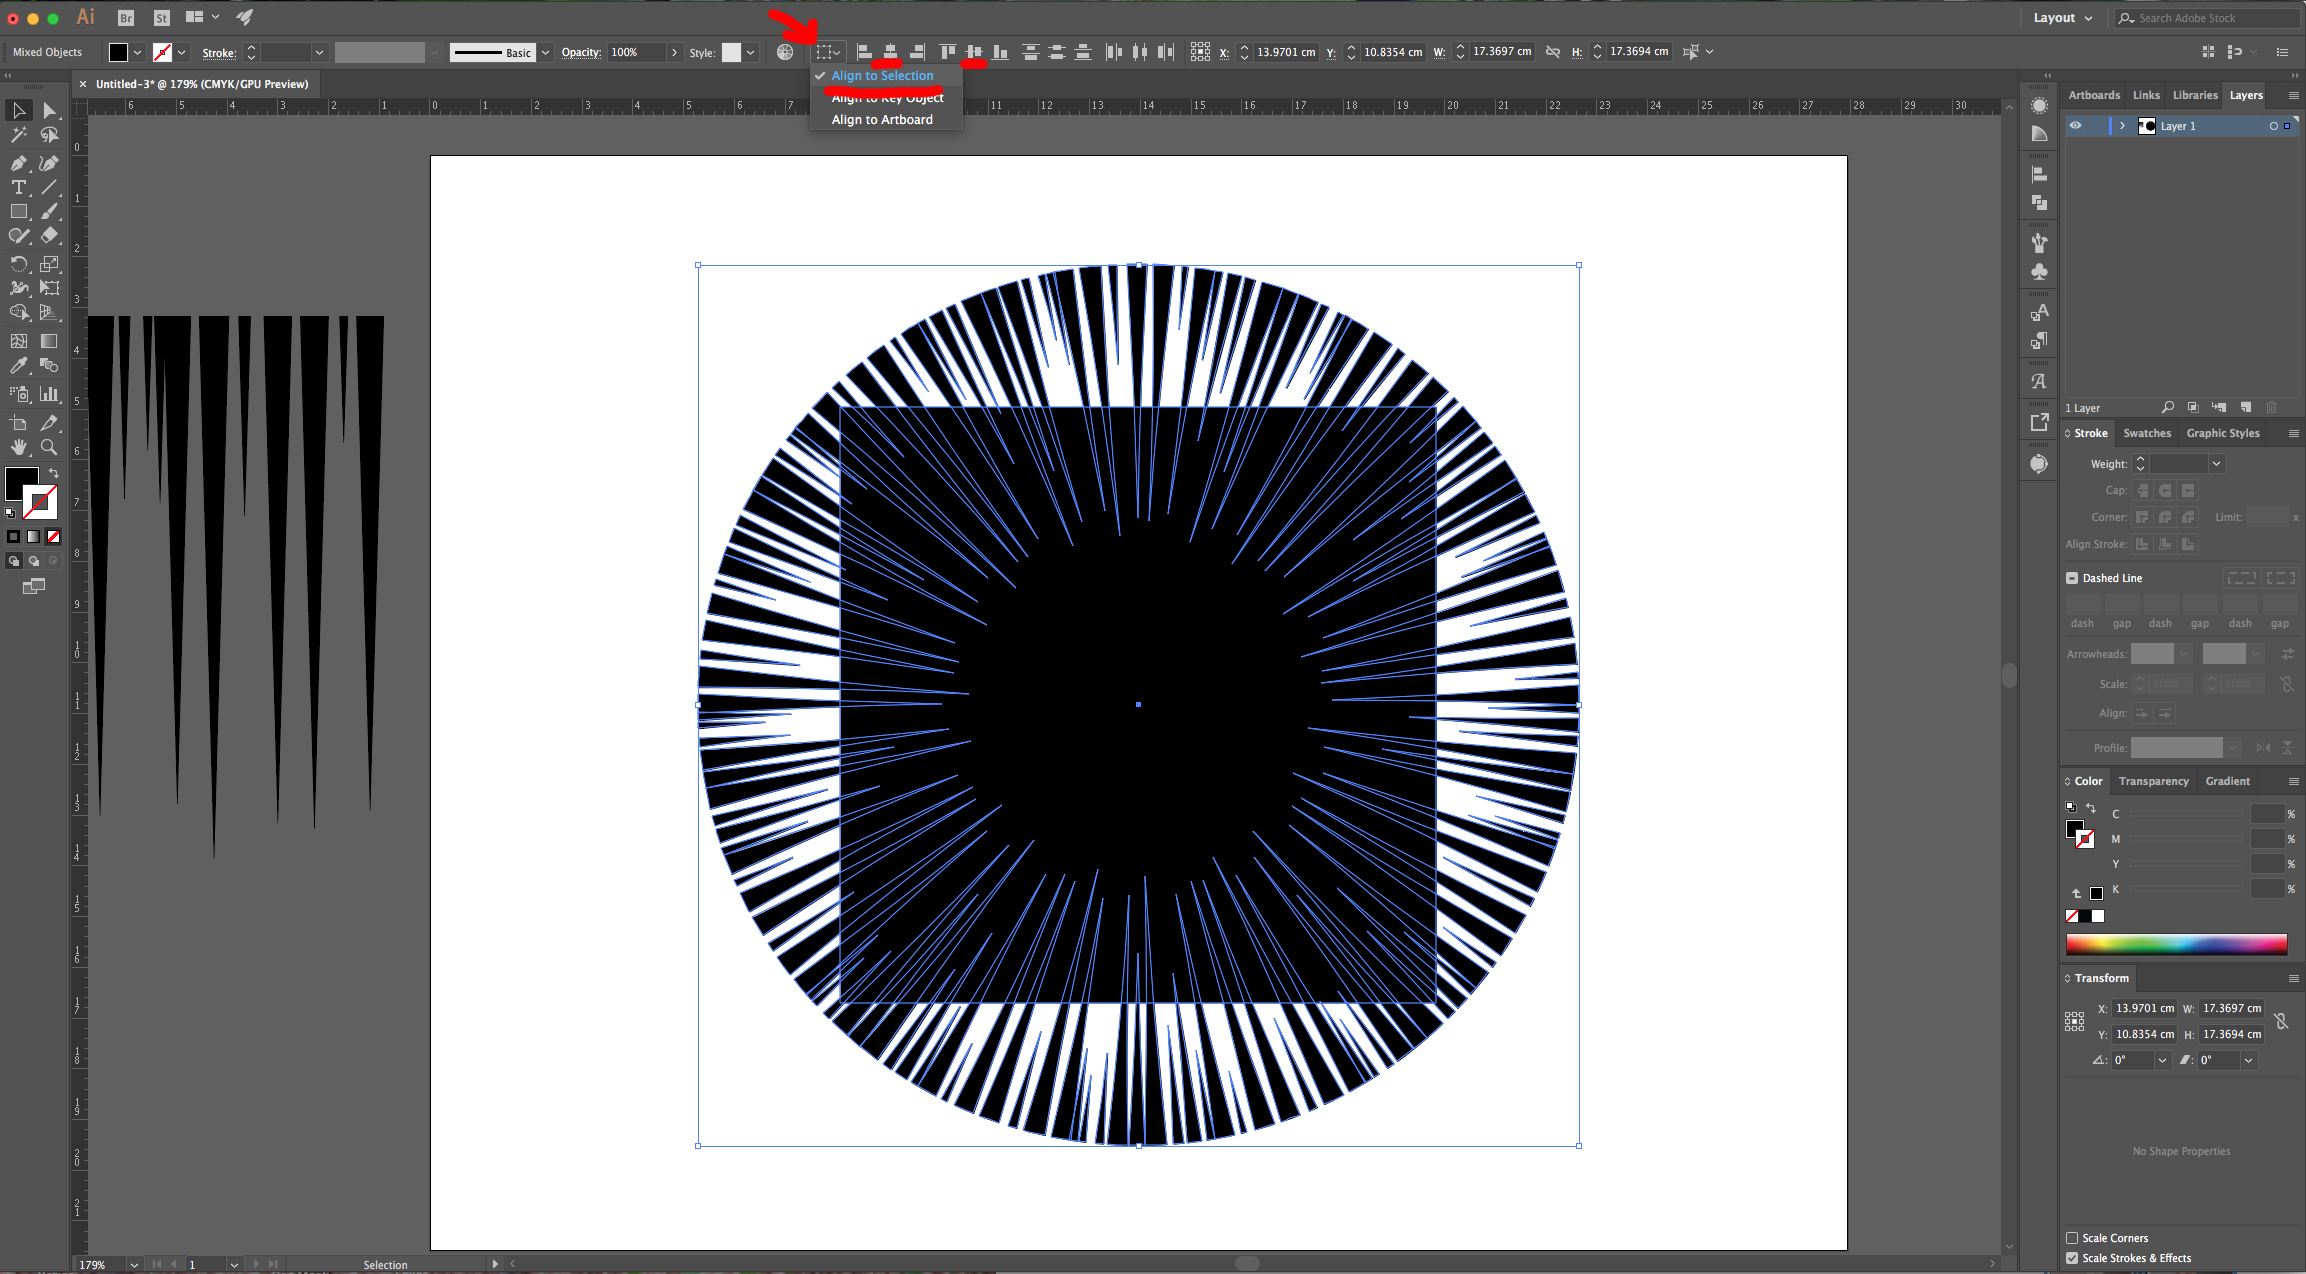
11 - Select the “Rectangle Tool” (R), draw a Square inside your Circle leaving some space between the edges. To center it, select both and use the “Horizontal and Vertical Align Center” options on your Top Menu making sure that “Align to Selection” is selected. Or use the same options in the “Align Panel”.
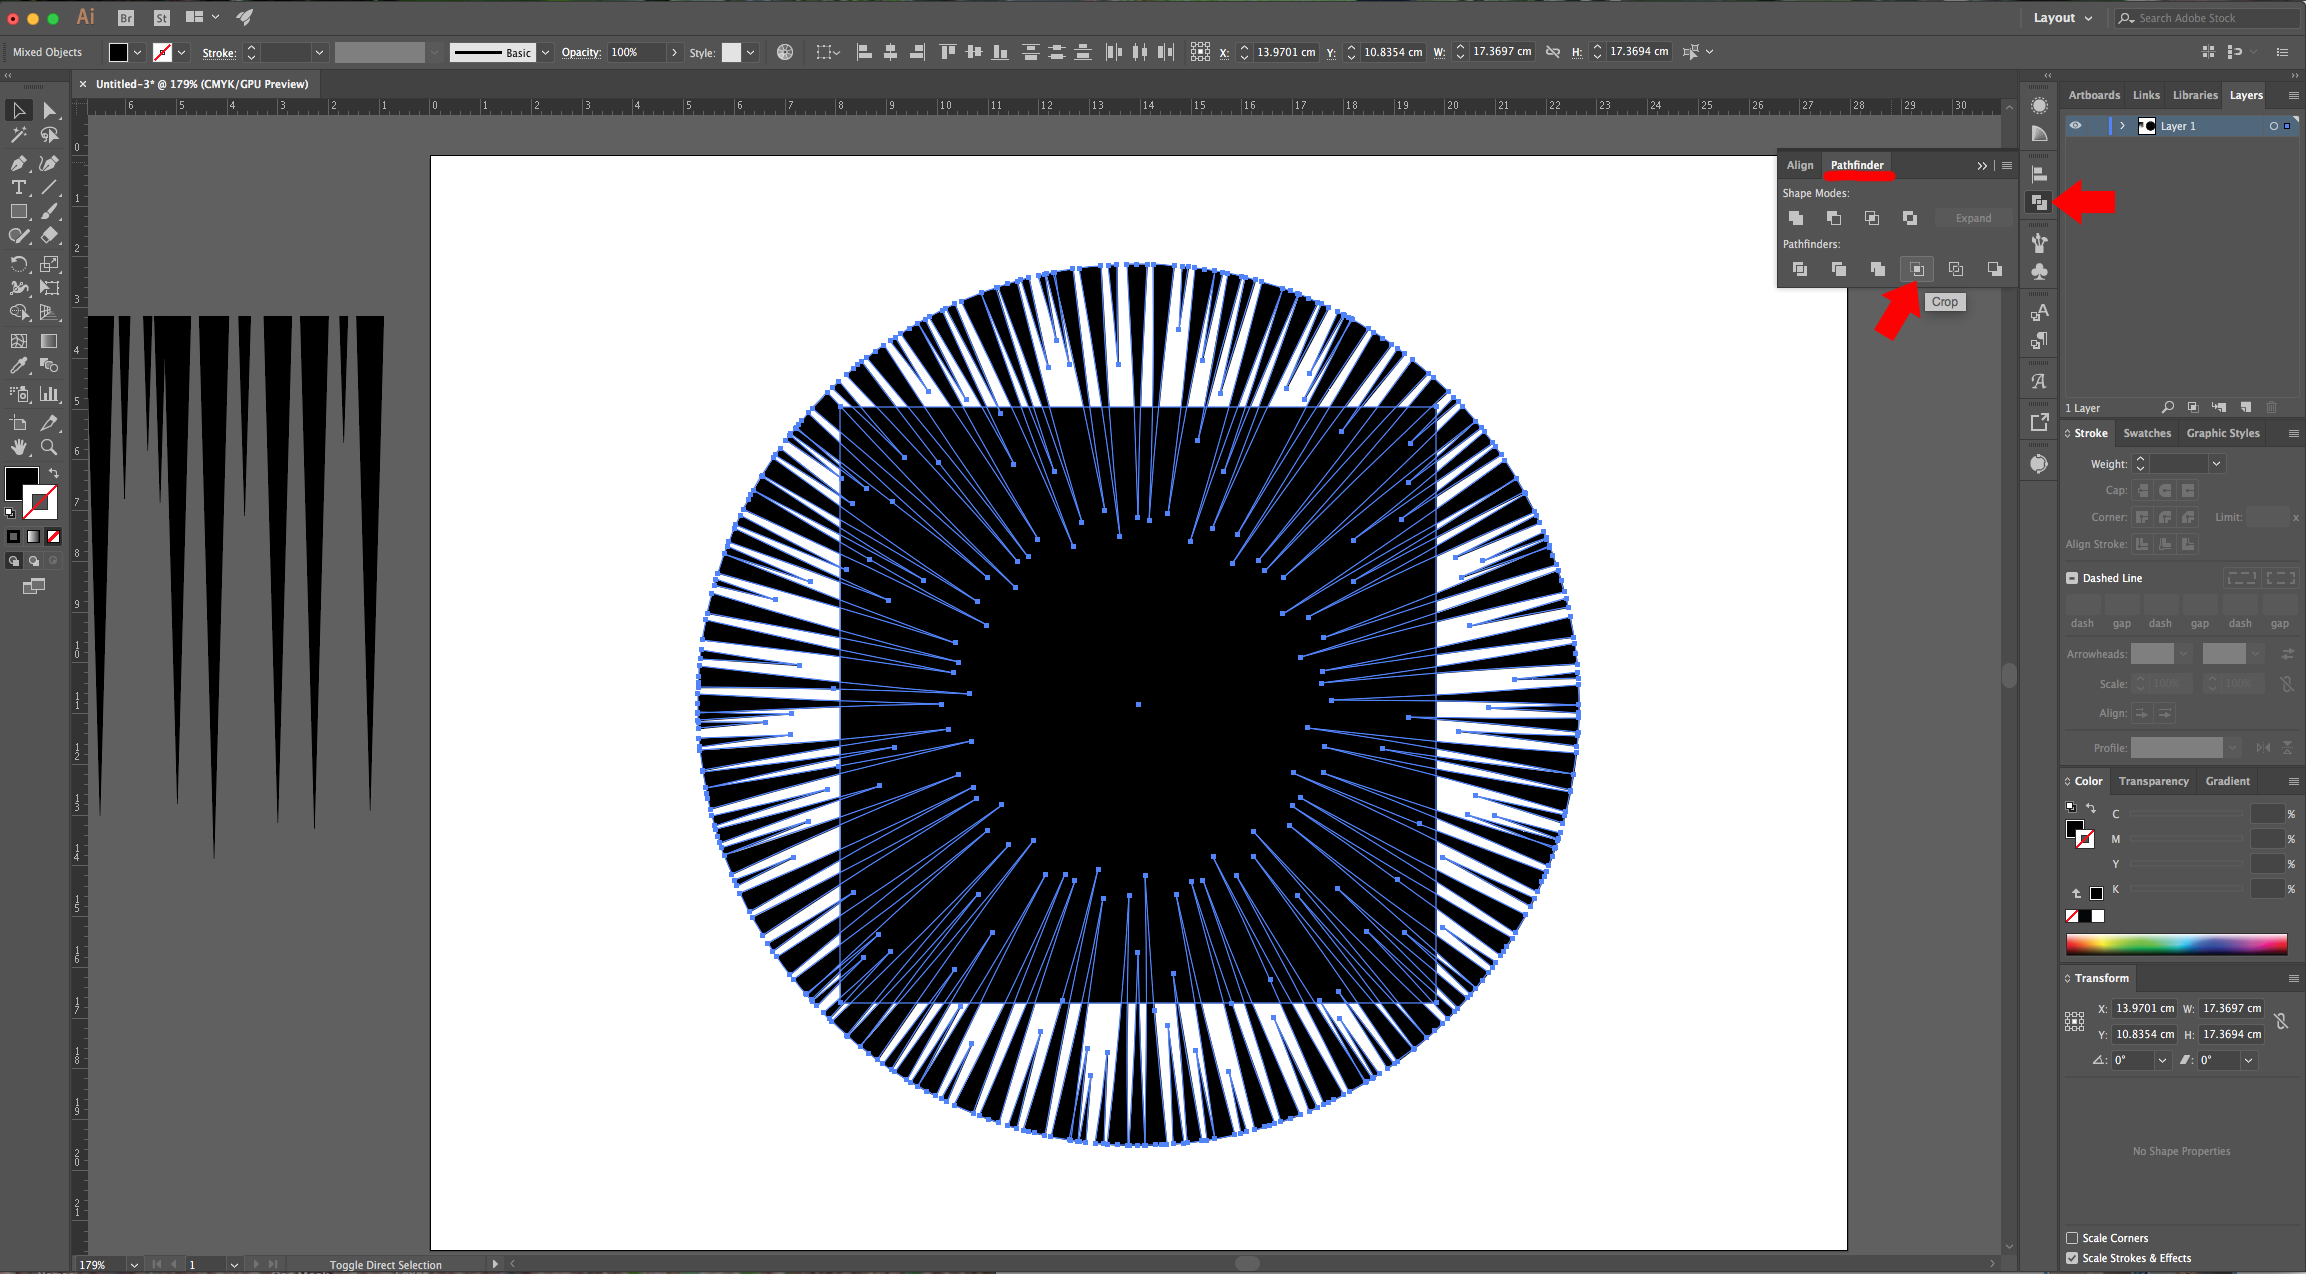
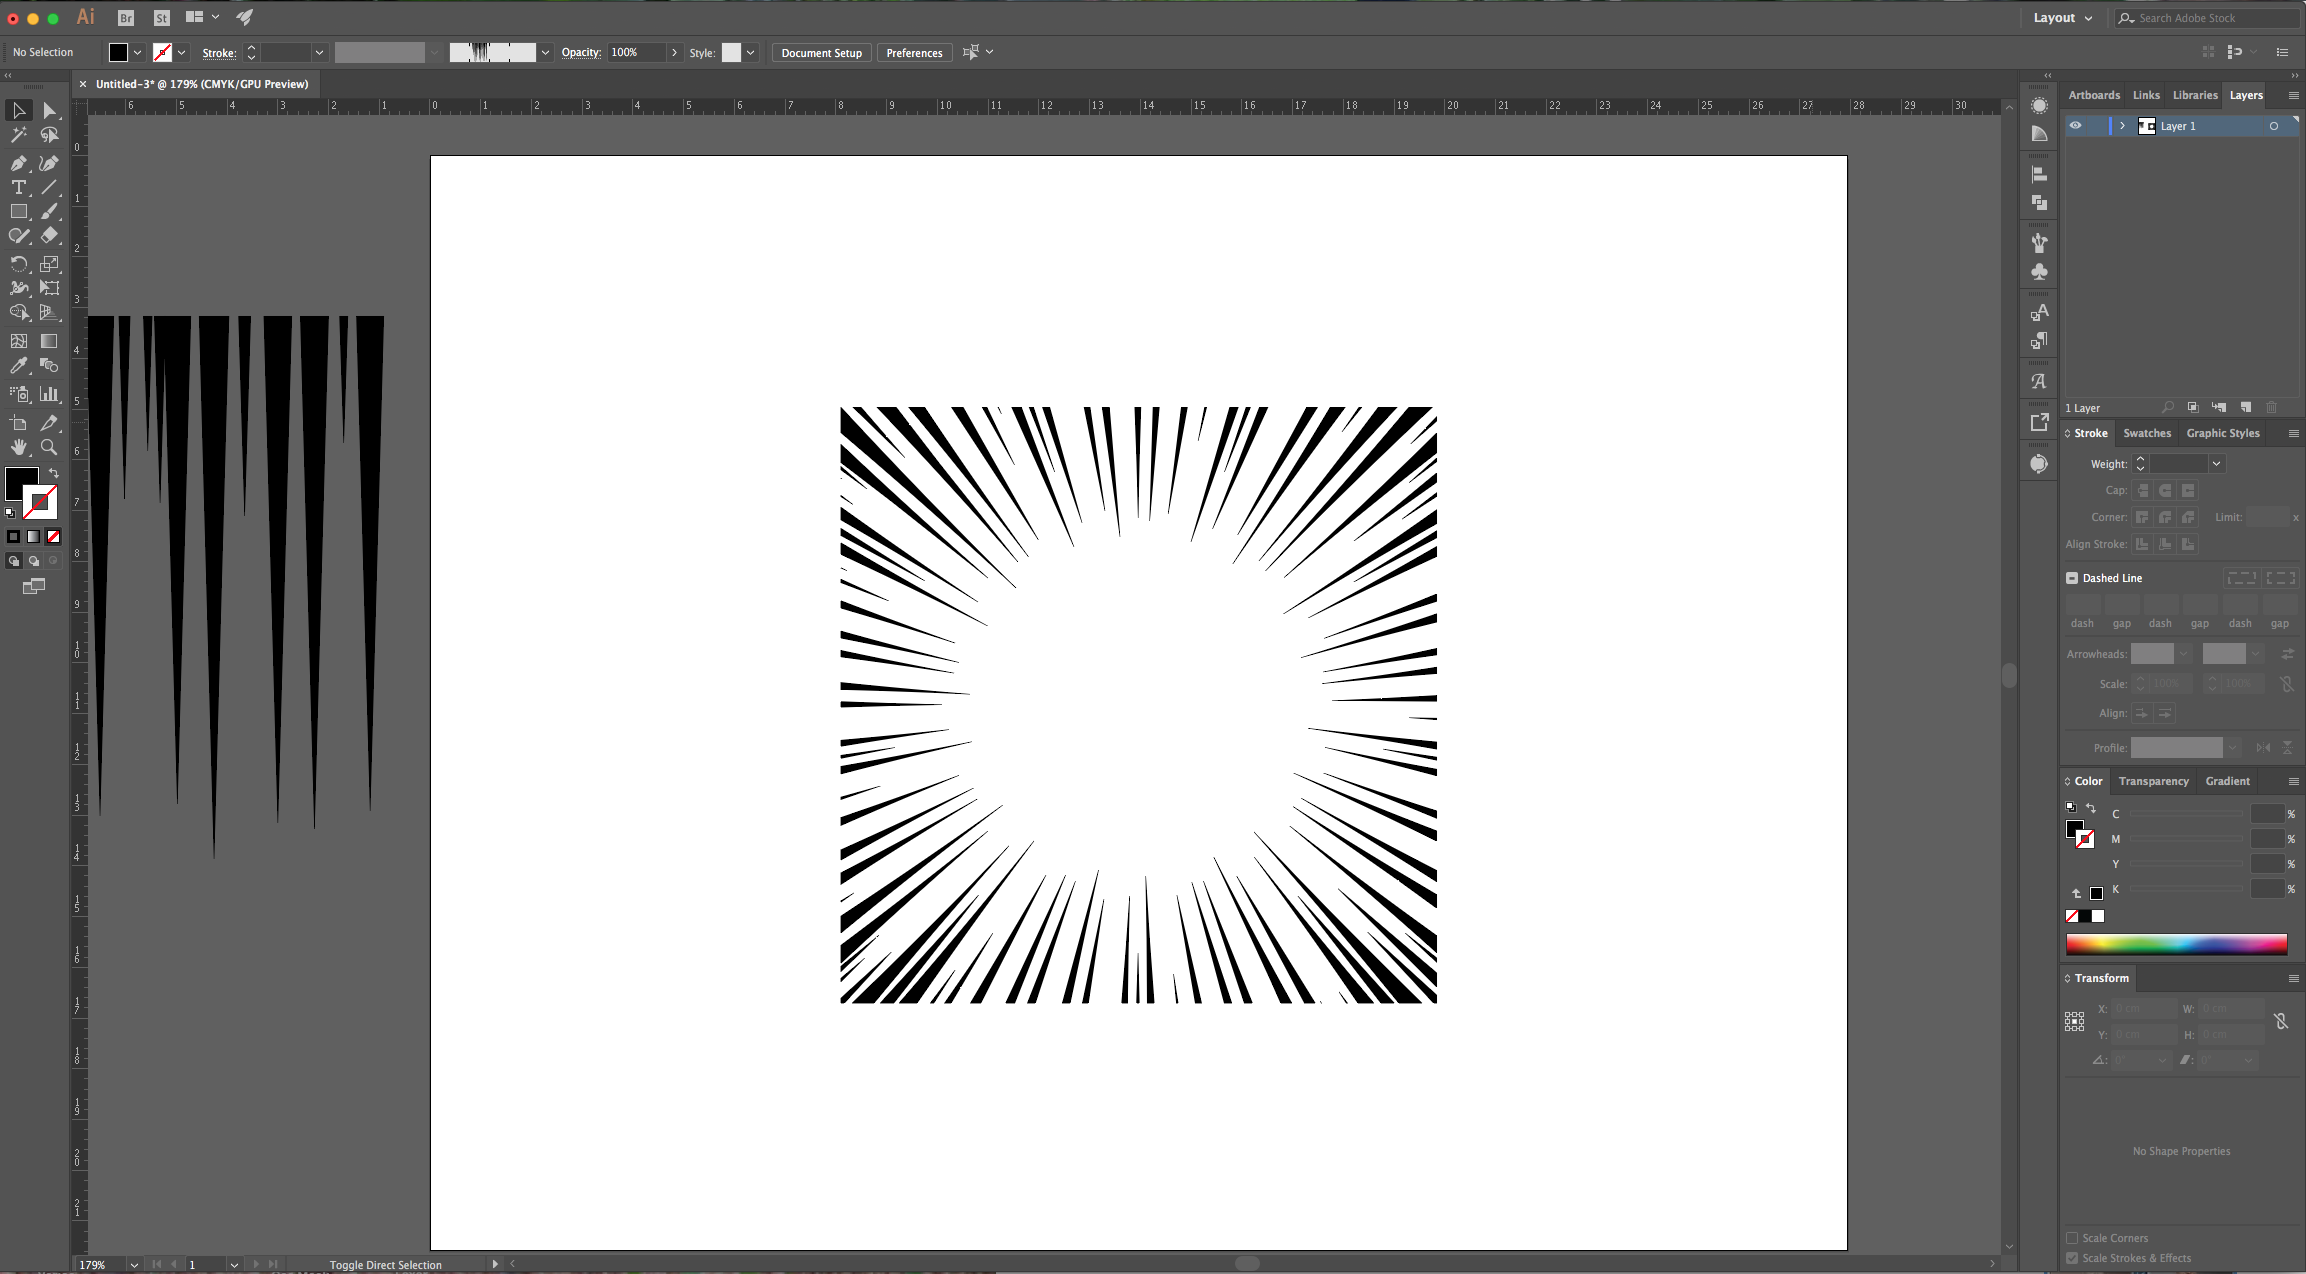
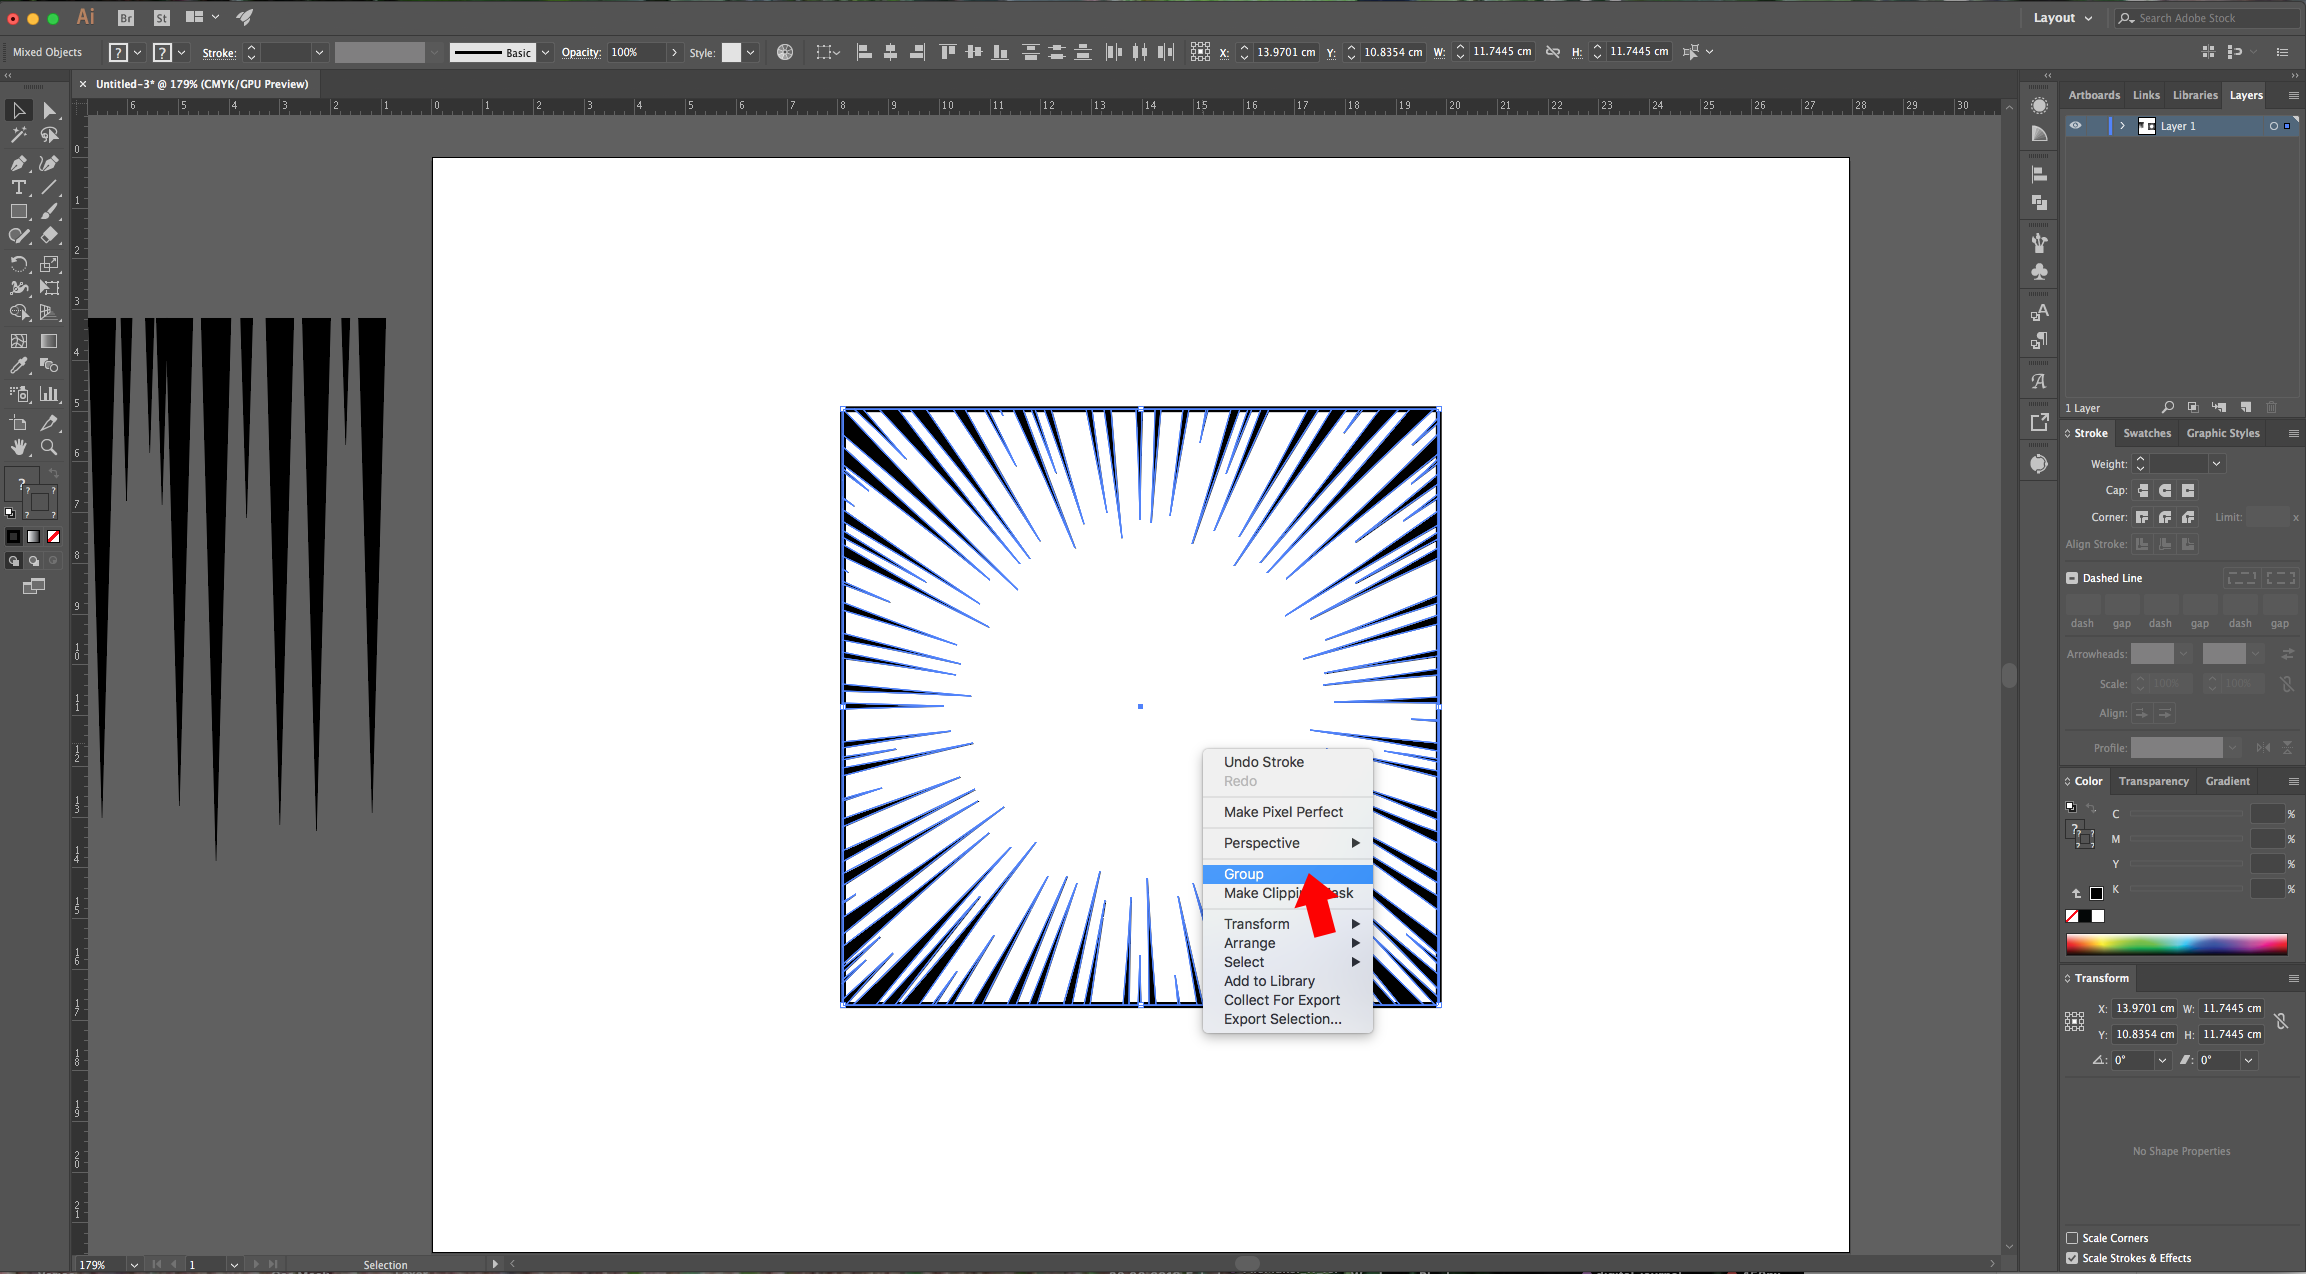
12 - Open the “Pathfinder Panel” and choose “Crop”. You should end up with a Square with the “Speed Lines” all around and forming the shape.
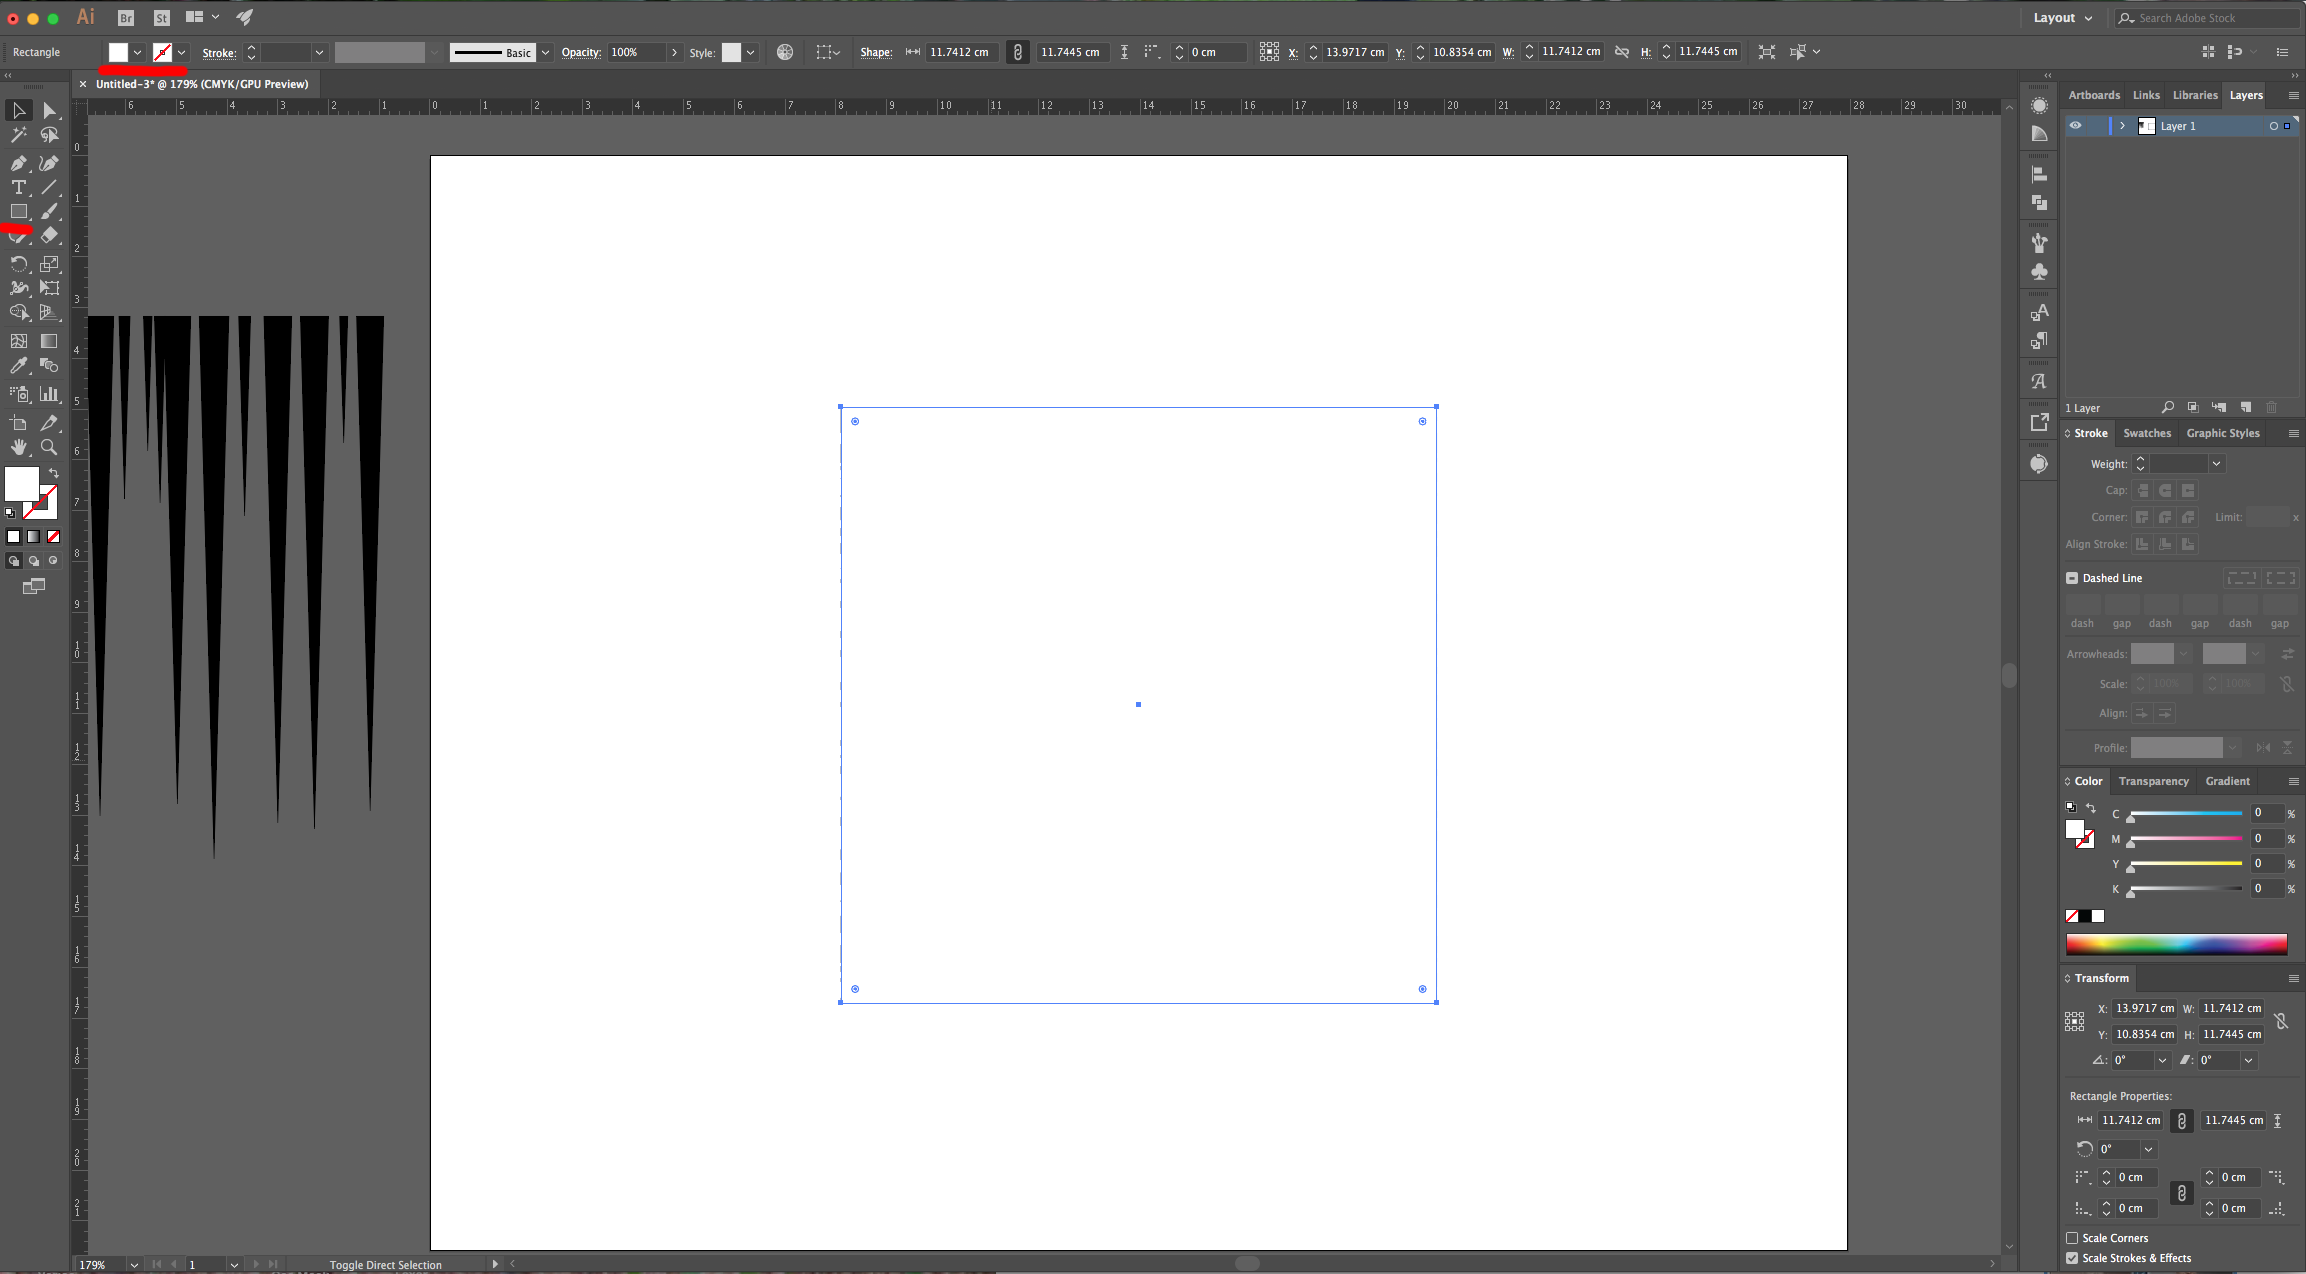
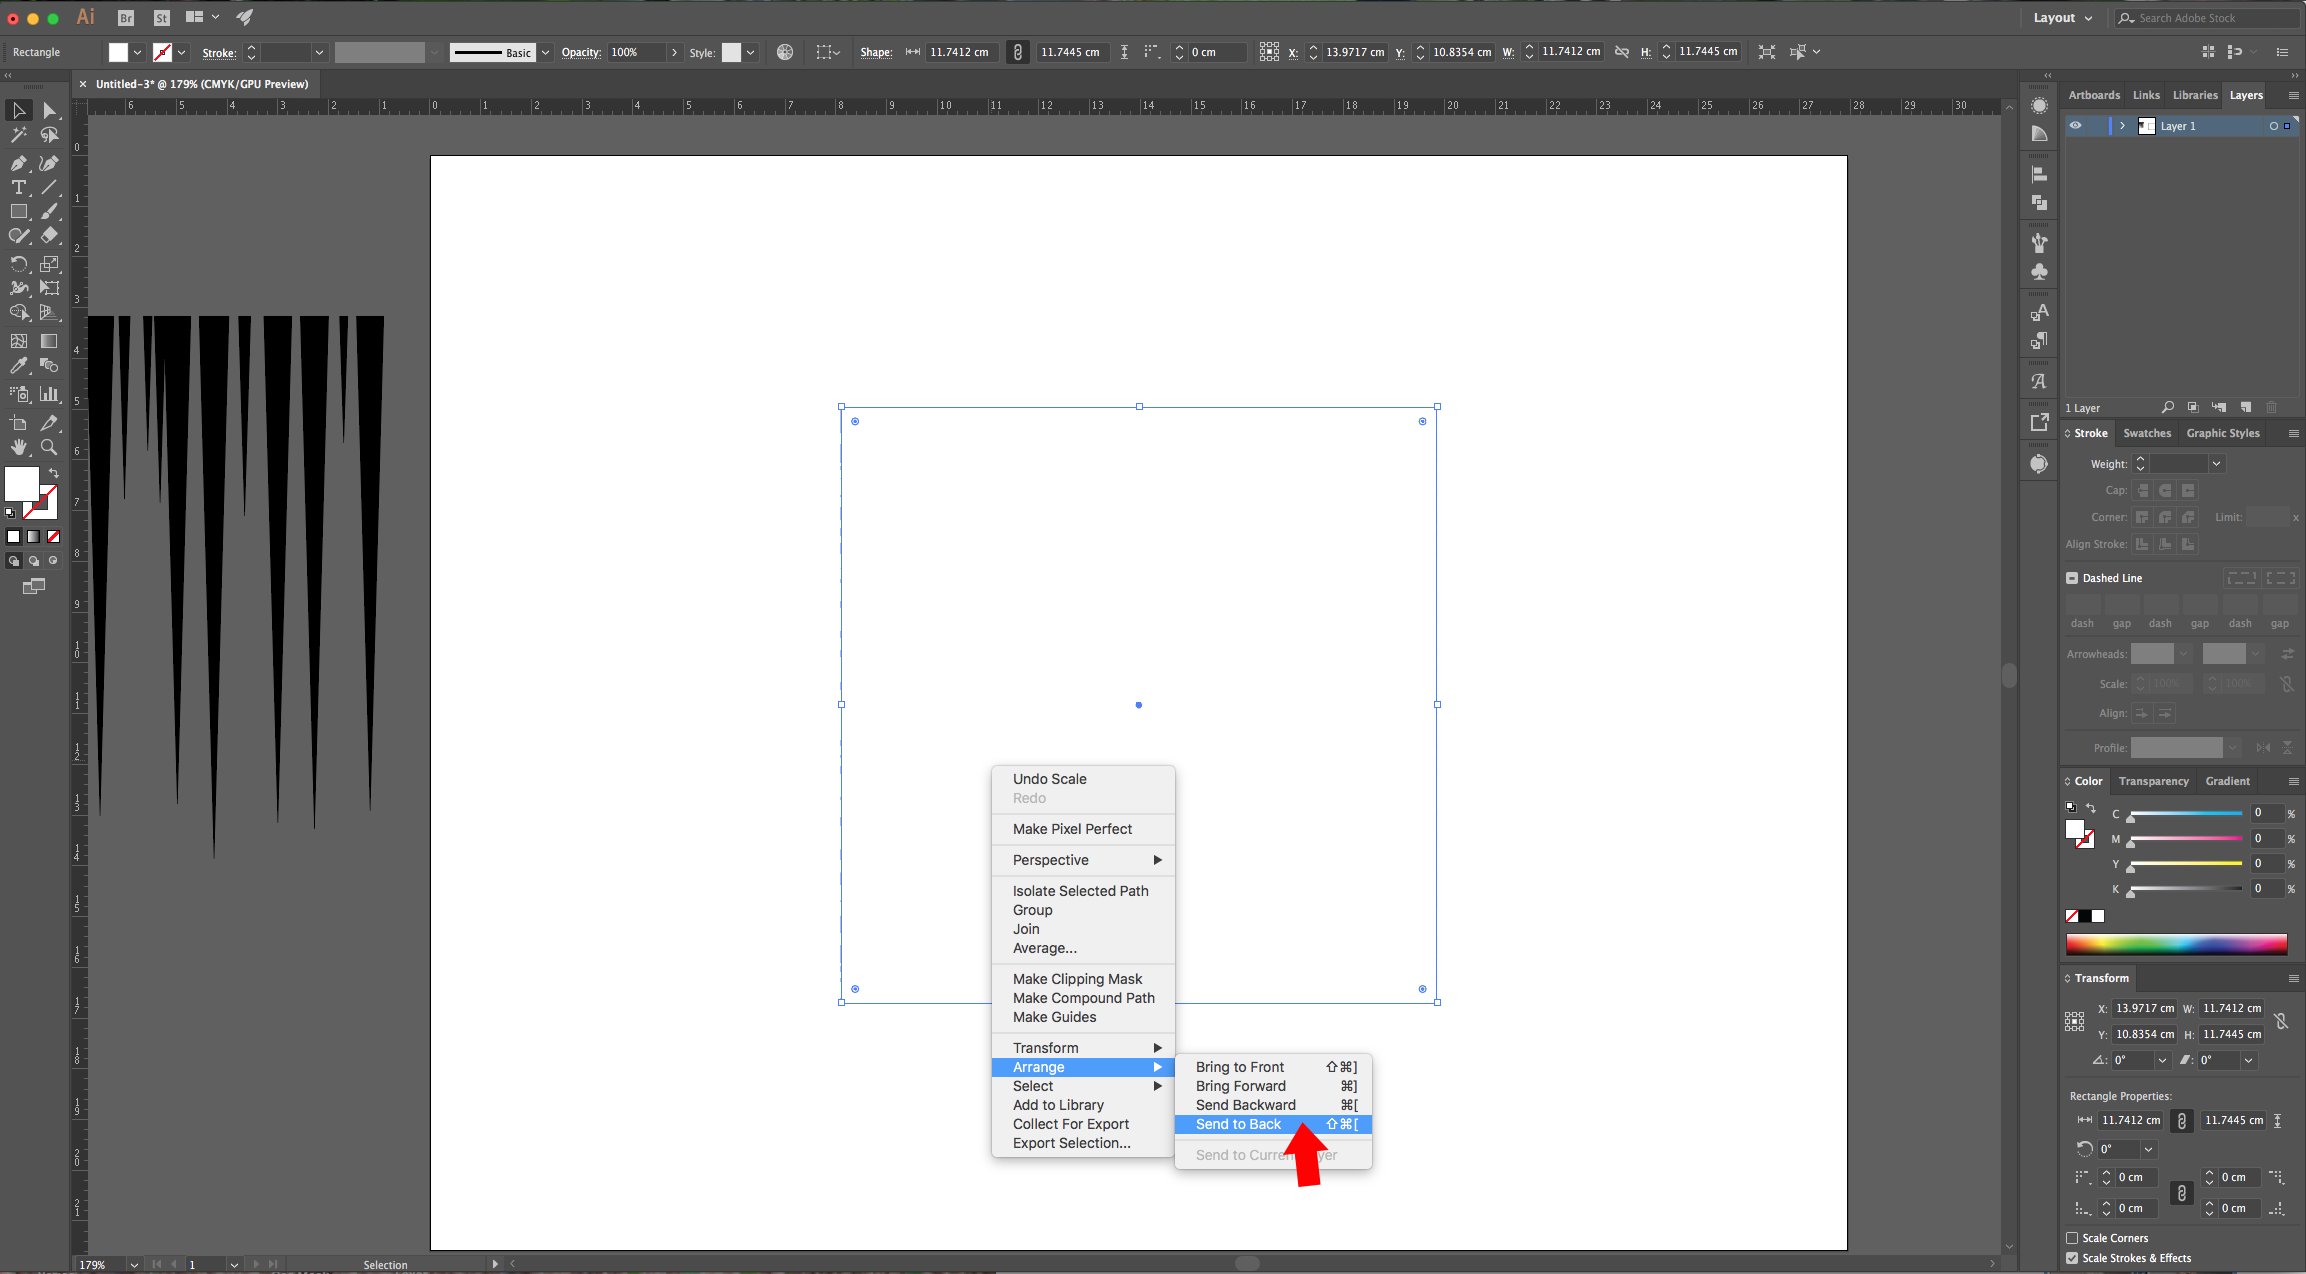
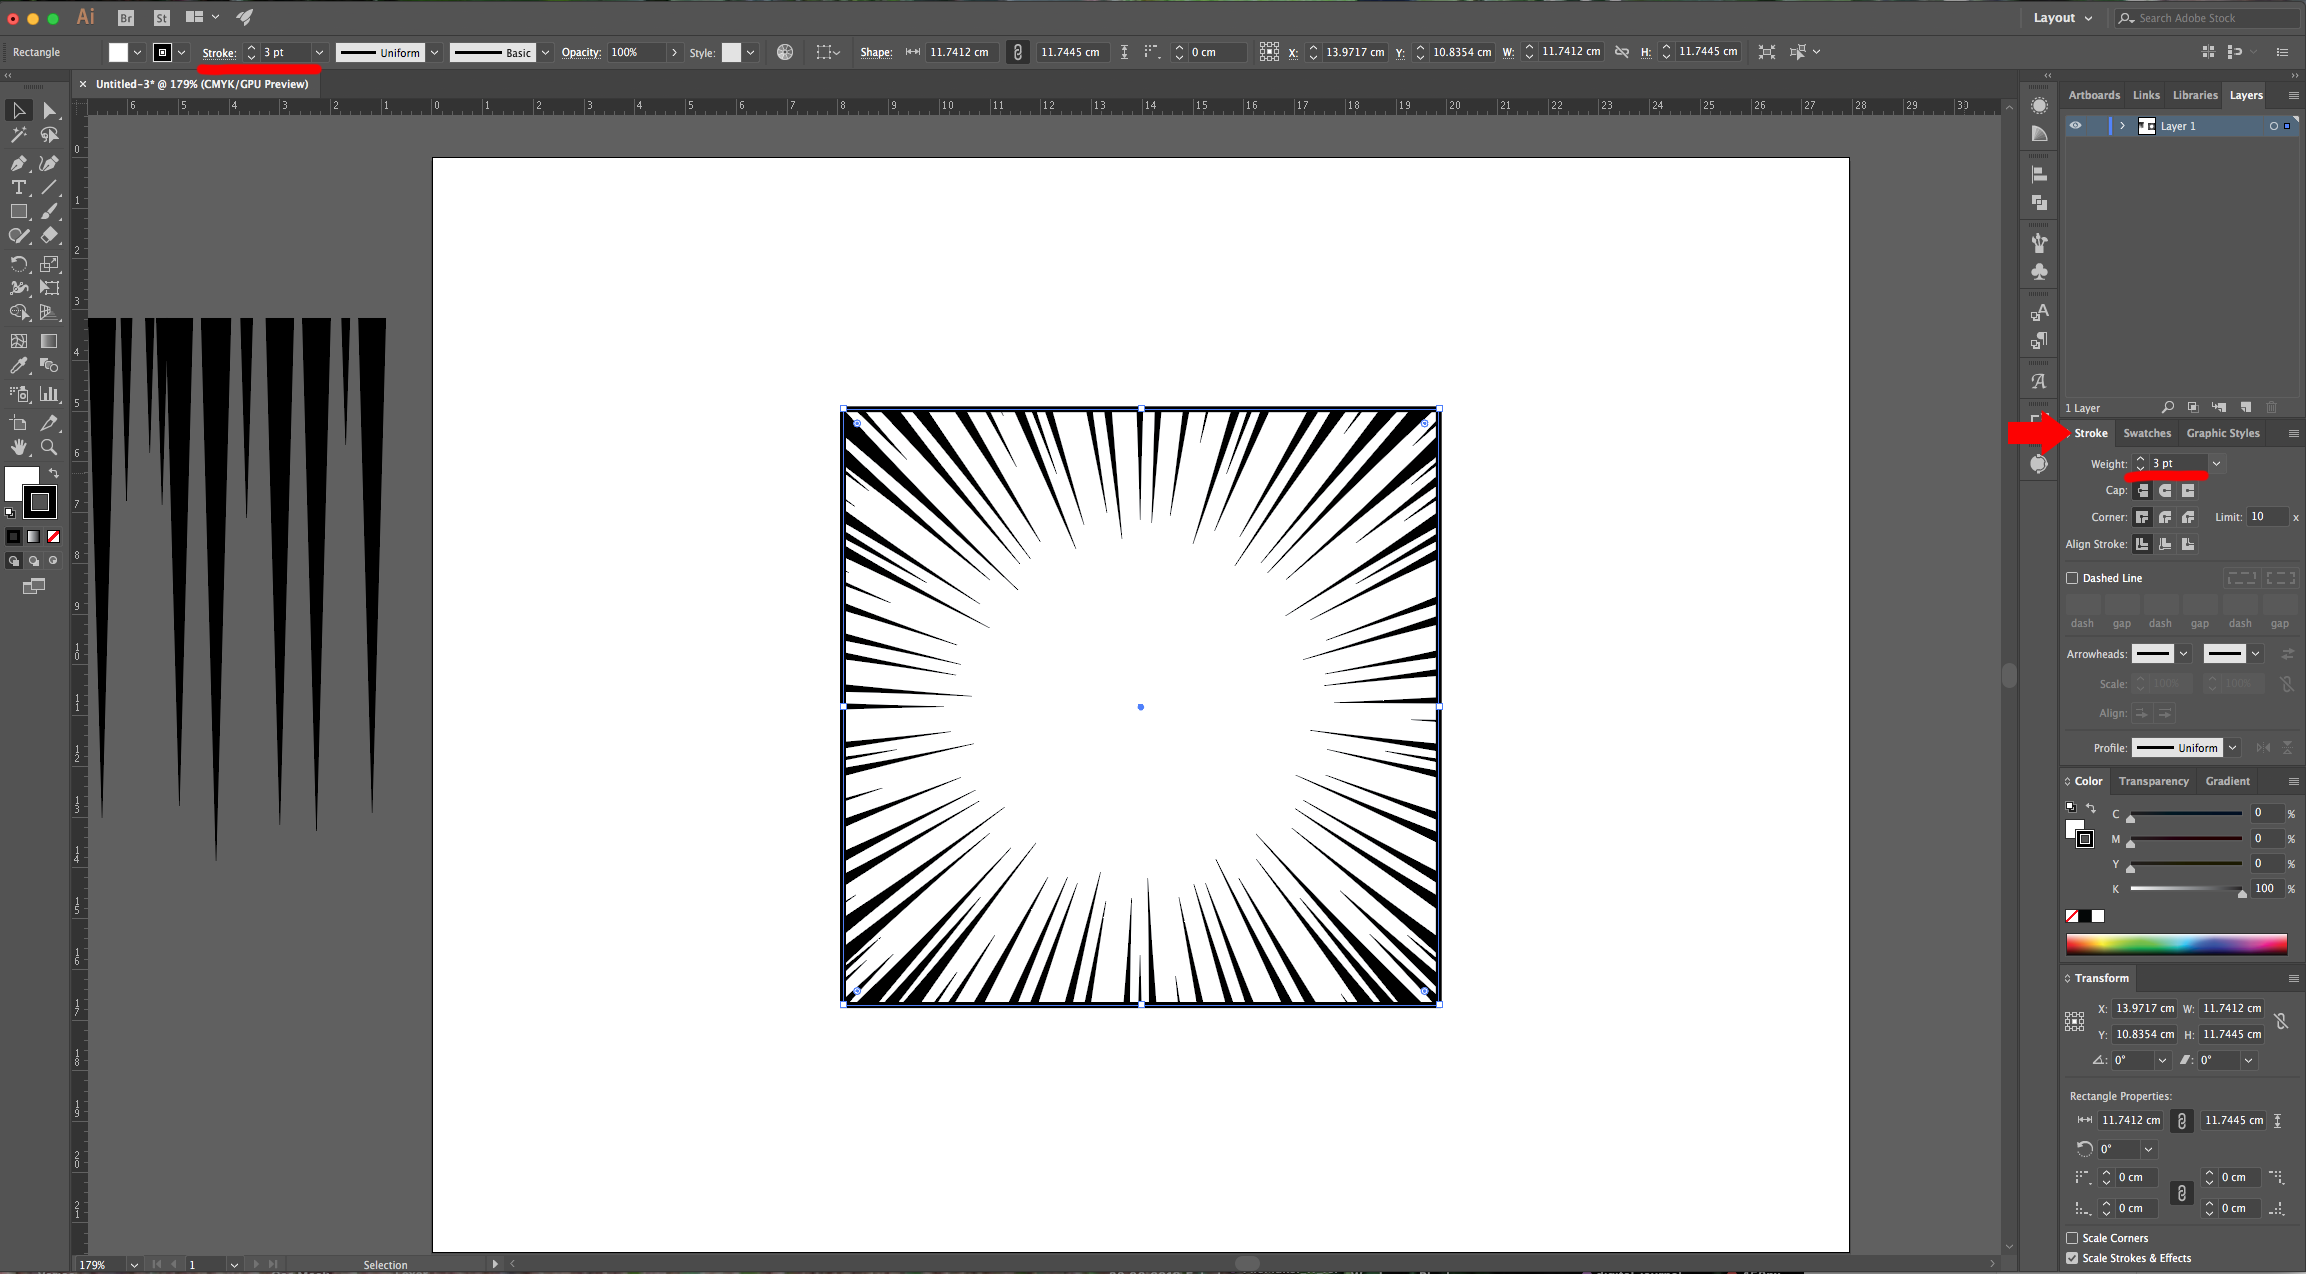
13 - Create a second Square, fill it with White and place it right on top of your other one. Right-click on top of it and choose Arrange > Send to Back… and change the “Stroke” Weight to 3 pt to create a Frame. Select everything, right-click on top and choose “Group”.
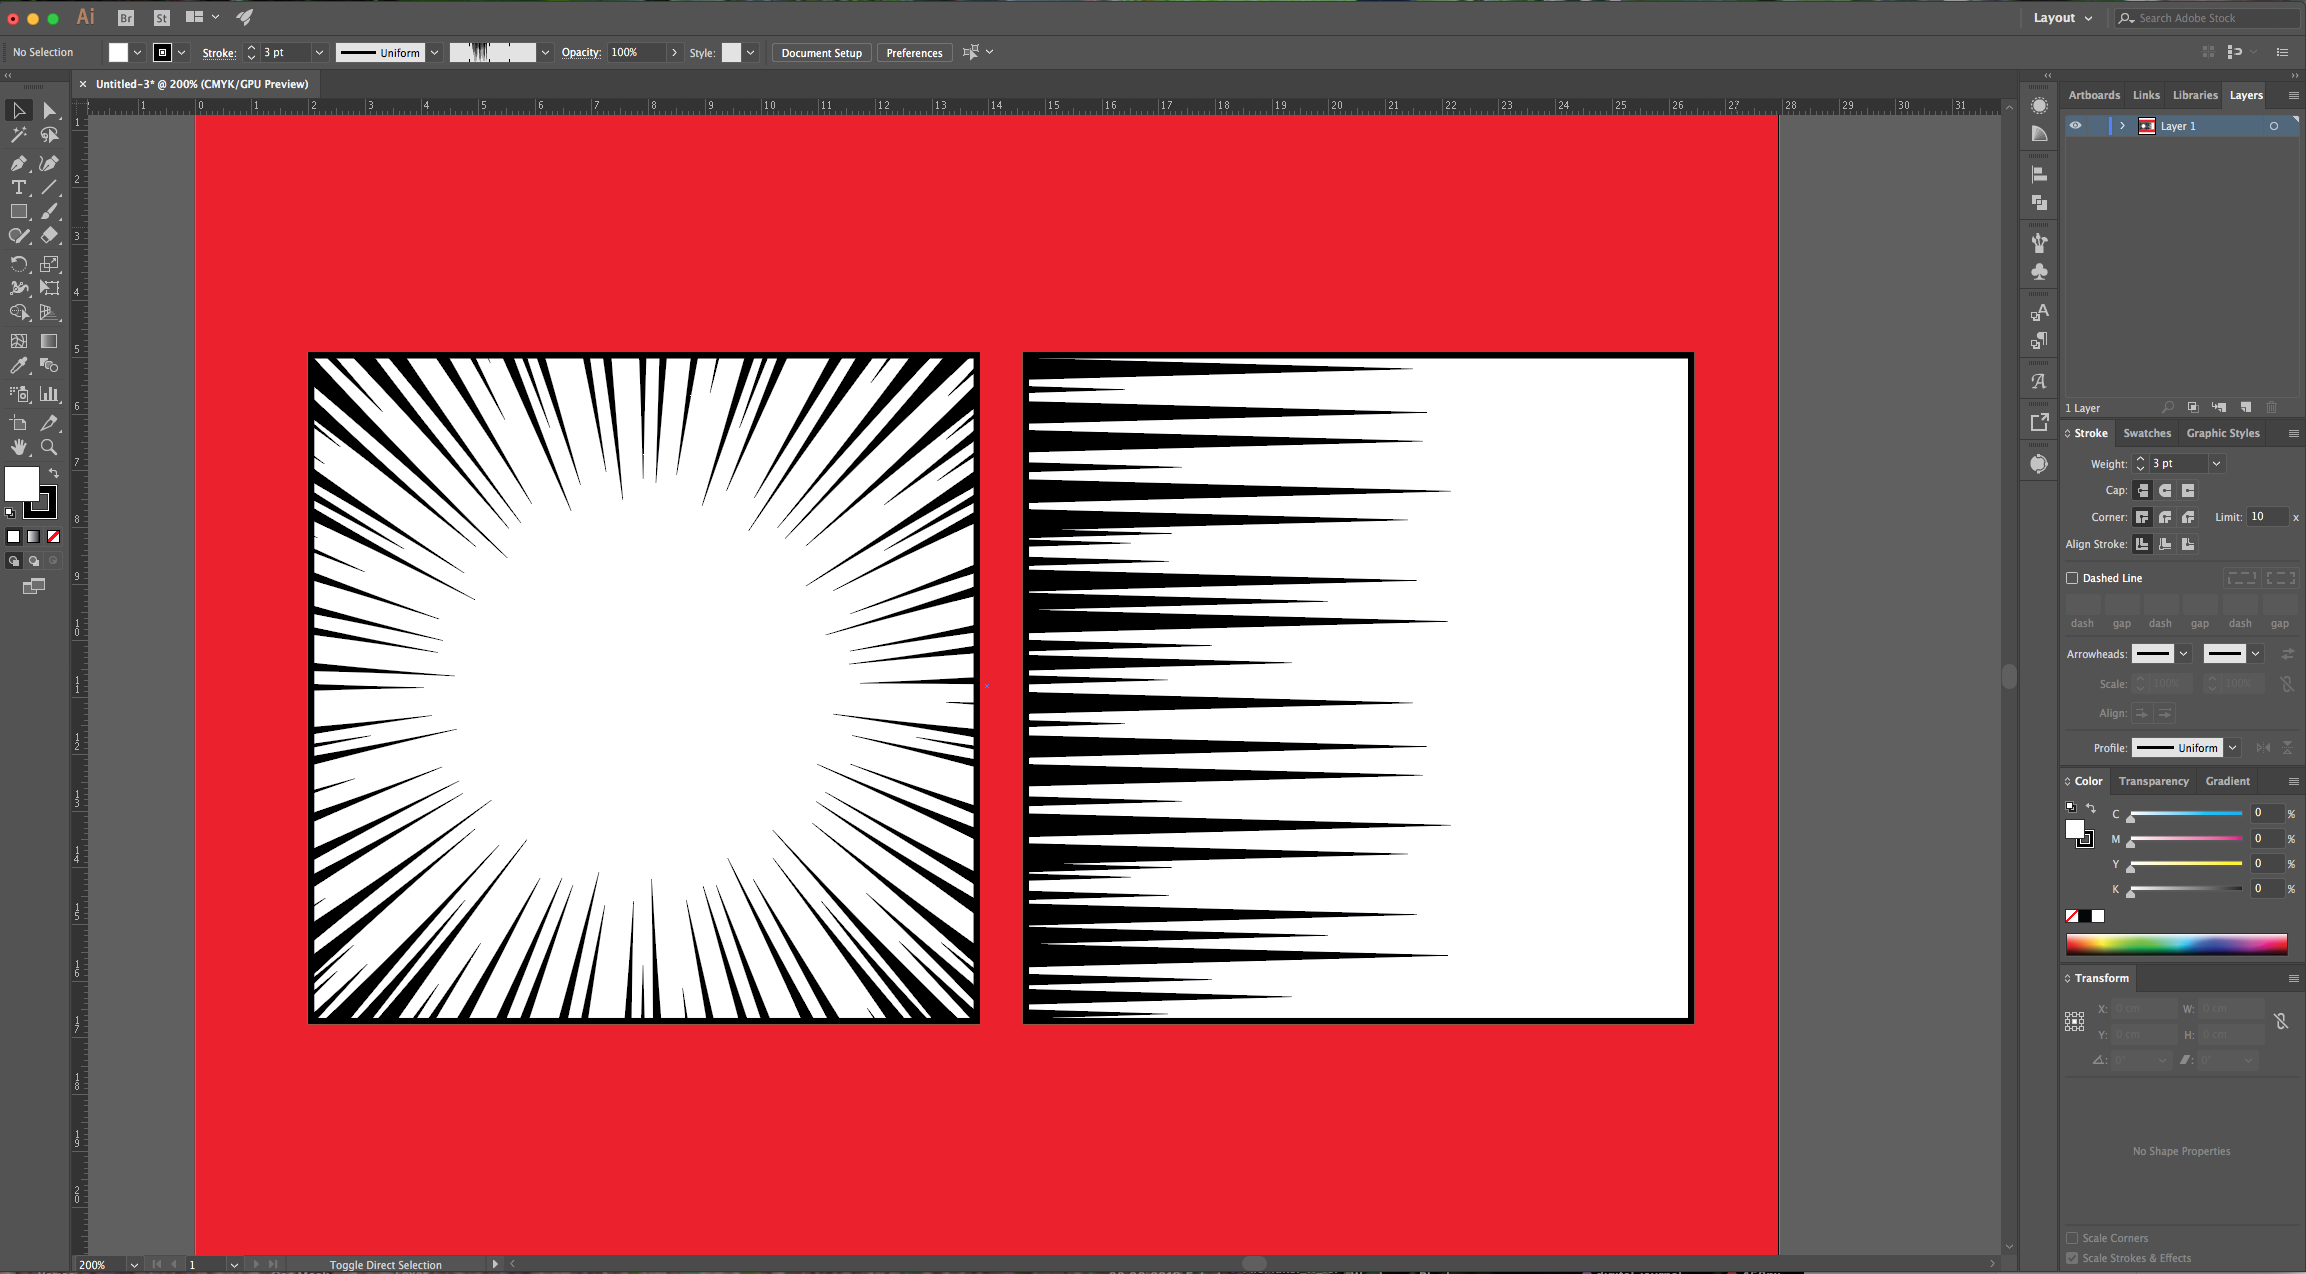
14 - You can add a colored “Background” and use this effect in your illustrations. Or just leave the “Horizontal Lines” for a different result.
2 - Select the “Line Segment Tool” (\) and draw a 15 cm long line on the top part of your document. Hold the “Shift” key to make sure the line is straight, use Black as “Stroke” color.
3 - Change the “Weight” to 20 pt, open the “Appearance Panel” and click on the “Effects Menu” at the bottom-left. Go to Distort & Transform > Transform… use 1cm as “Vertical” Move value and input the number 15 in the “Copies” section. Click “OK”.
4 - Go to Object > Expand Appearance… then, right-click on top of the vectors and choose “Ungroup”.
5 - With your lines selected, open the “Width Profile Presets Panel” and choose “Width Profile 4”. Right-click on top of the vectors and choose “Ungroup” again.
6 - Go to Object > Transform > Transform Each… check the “Preview”, “Transform Objects”, “Scale Strokes & Effects” and “Random” boxes and move the levers until you get a “Speed Lines” pattern that you like.
7 - Click “Horizontal Align Left” on the Top Menu to align your lines to the left, arrange them to get a more even separation. Then, select them all, right-click on top of them and choose “Group”. Rotate your vectors to the Right so they start at the top and the pointed sides face down.
8 - Right-click on top of them and choose “Expand Appearance”. Open the “Brushes Panel” and drag the “Group” onto it or click on the small Menu icon on the Top-right and choose “New Brush”. Select “Pattern Brush” and assign the pattern to the second square leaving the other ones with “No Fill”. The size should be 100%.
9 - Once your brush is saved, delete or drag your vectors out of the Canvas. Select the “Ellipse Tool” (L) and create a Circle inside your document (about 12 x 12 cm) with a Black “Stroke” and “No Fill”. Go to the “Brushes Panel” and select your “New Pattern Brush”.
10 - If needed, double-click on the Brush Thumbnail and reduce its size to 50%. You will be asked if you want to “Apply to Strokes” or “Leave Strokes”, choose “Apply”, then go to Object > Expand Appearance…
11 - Select the “Rectangle Tool” (R), draw a Square inside your Circle leaving some space between the edges. To center it, select both and use the “Horizontal and Vertical Align Center” options on your Top Menu making sure that “Align to Selection” is selected. Or use the same options in the “Align Panel”.
12 - Open the “Pathfinder Panel” and choose “Crop”. You should end up with a Square with the “Speed Lines” all around and forming the shape.
13 - Create a second Square, fill it with White and place it right on top of your other one. Right-click on top of it and choose Arrange > Send to Back… and change the “Stroke” Weight to 3 pt to create a Frame. Select everything, right-click on top and choose “Group”.
14 - You can add a colored “Background” and use this effect in your illustrations. Or just leave the “Horizontal Lines” for a different result.
by @lornacane


