
Spider Web in Illustrator
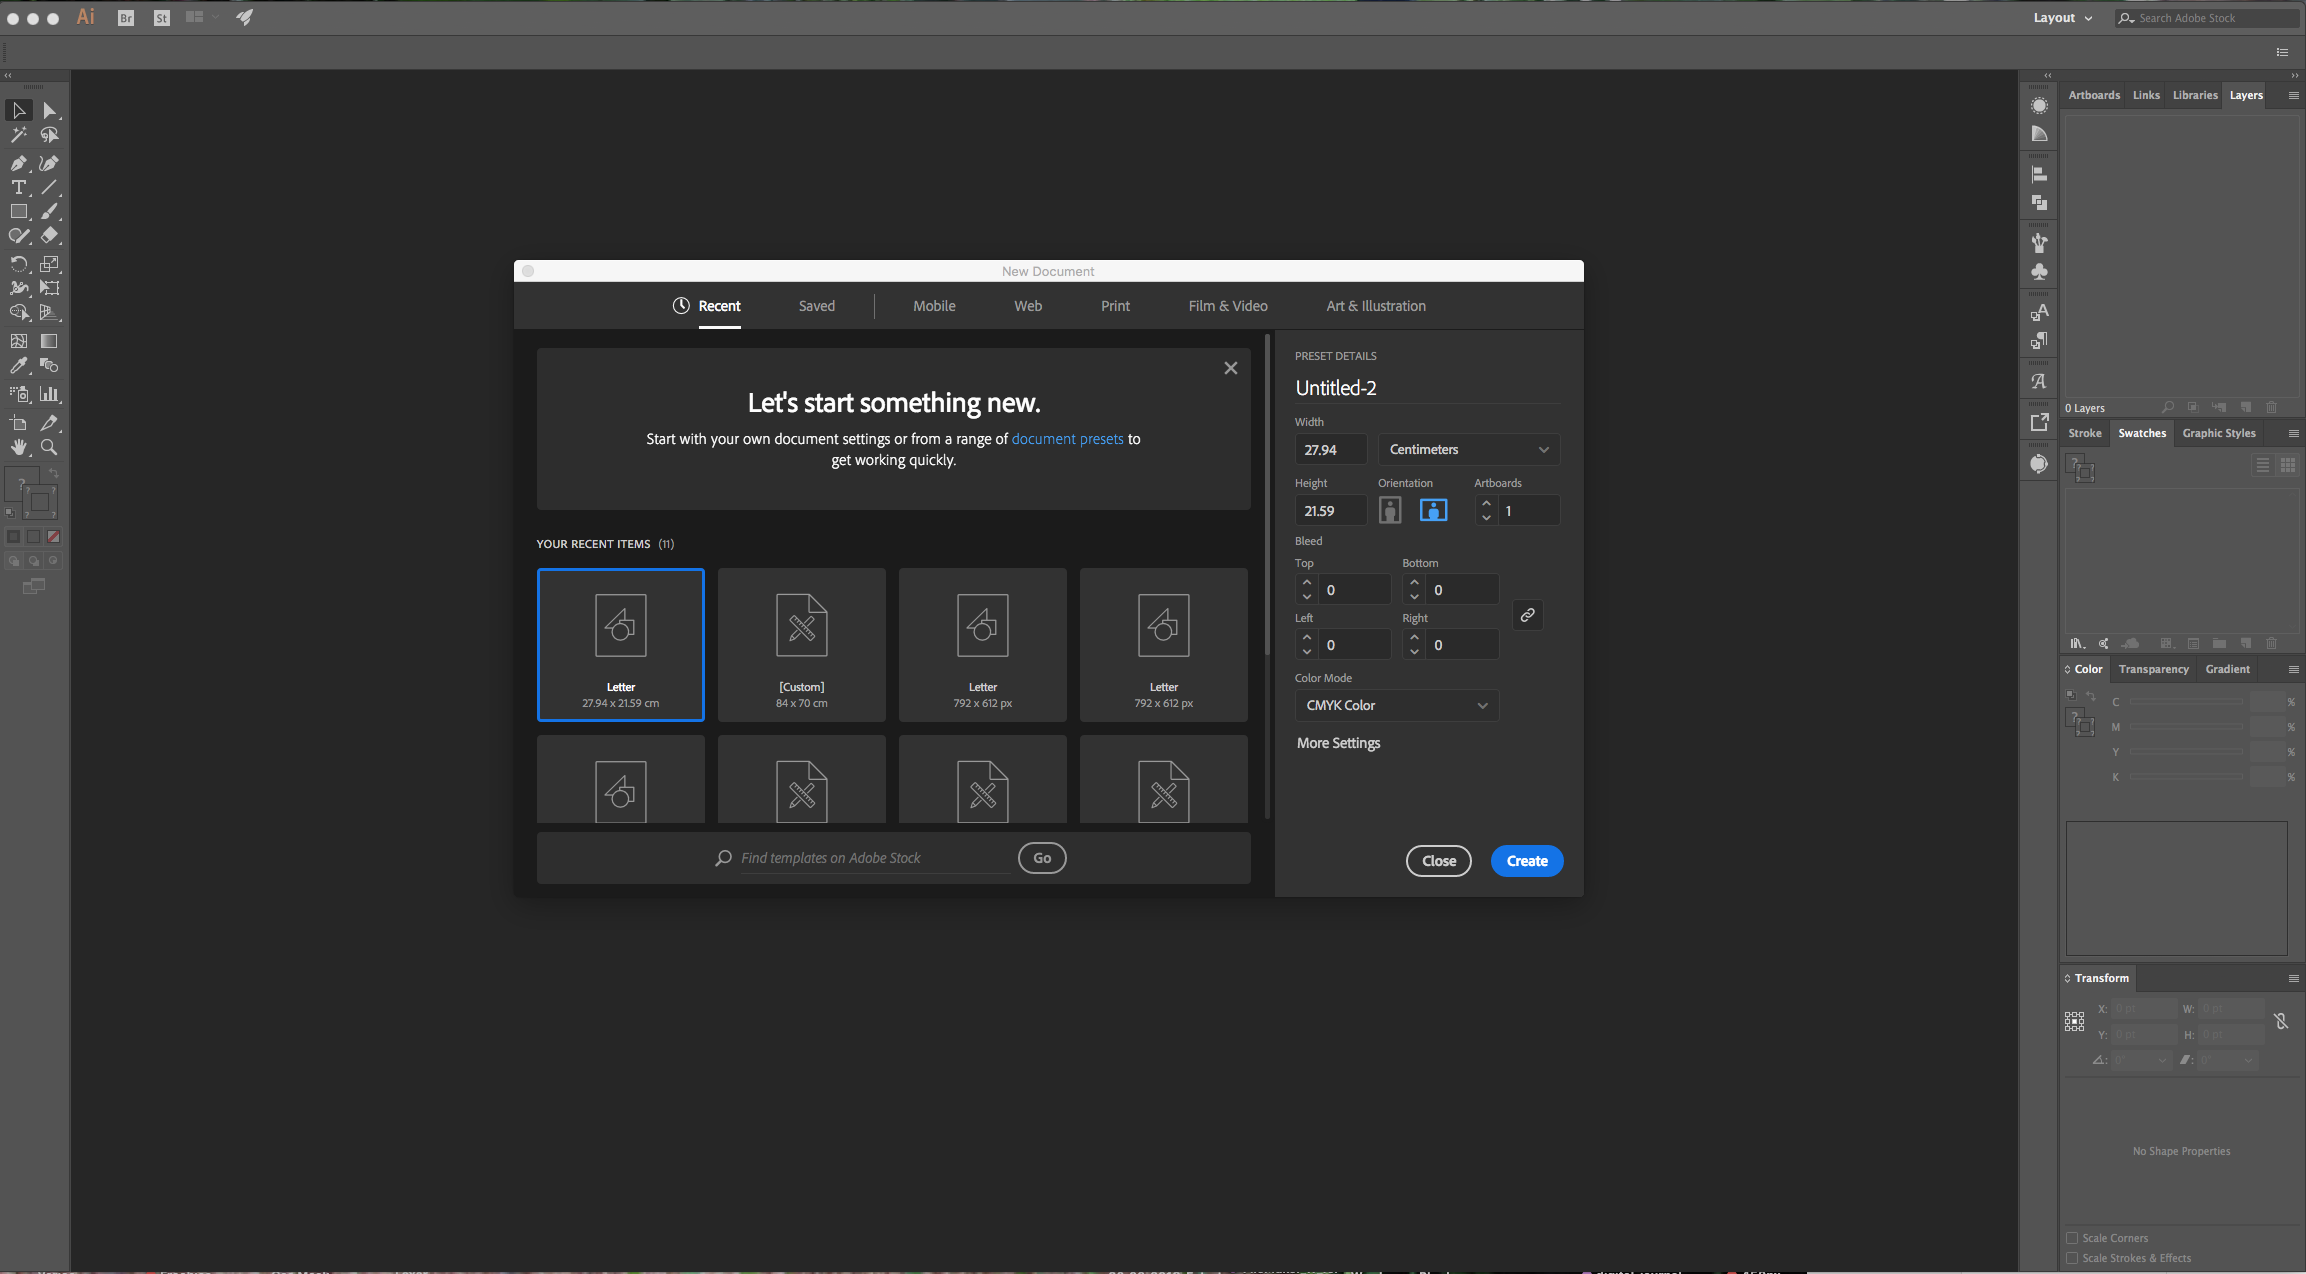
1 - In Illustrator, create a “New Document”.
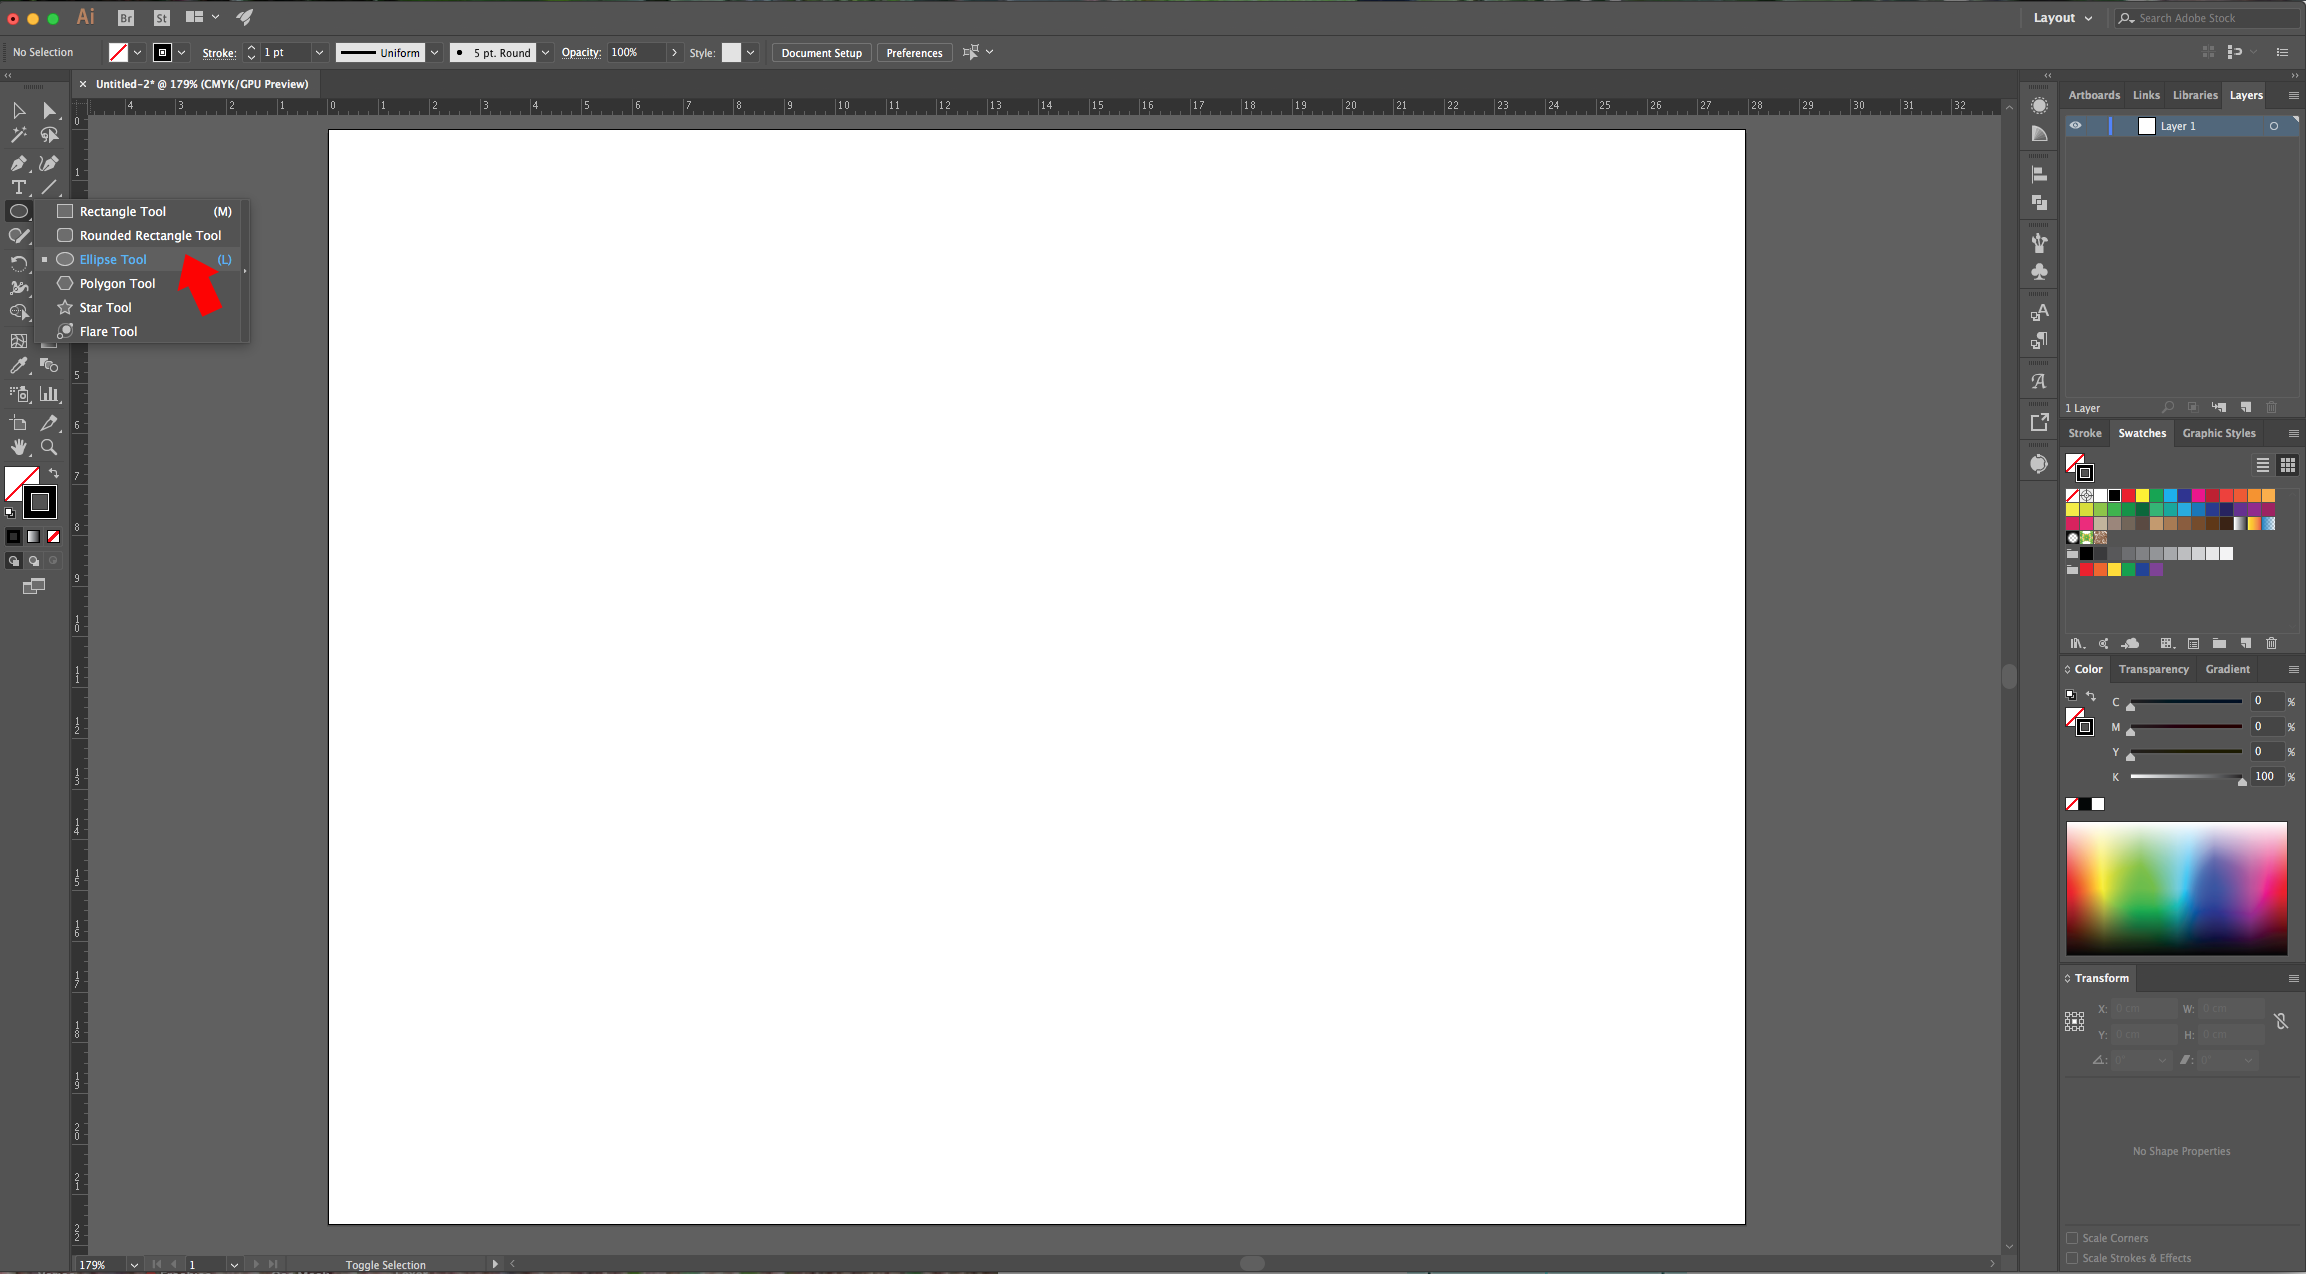
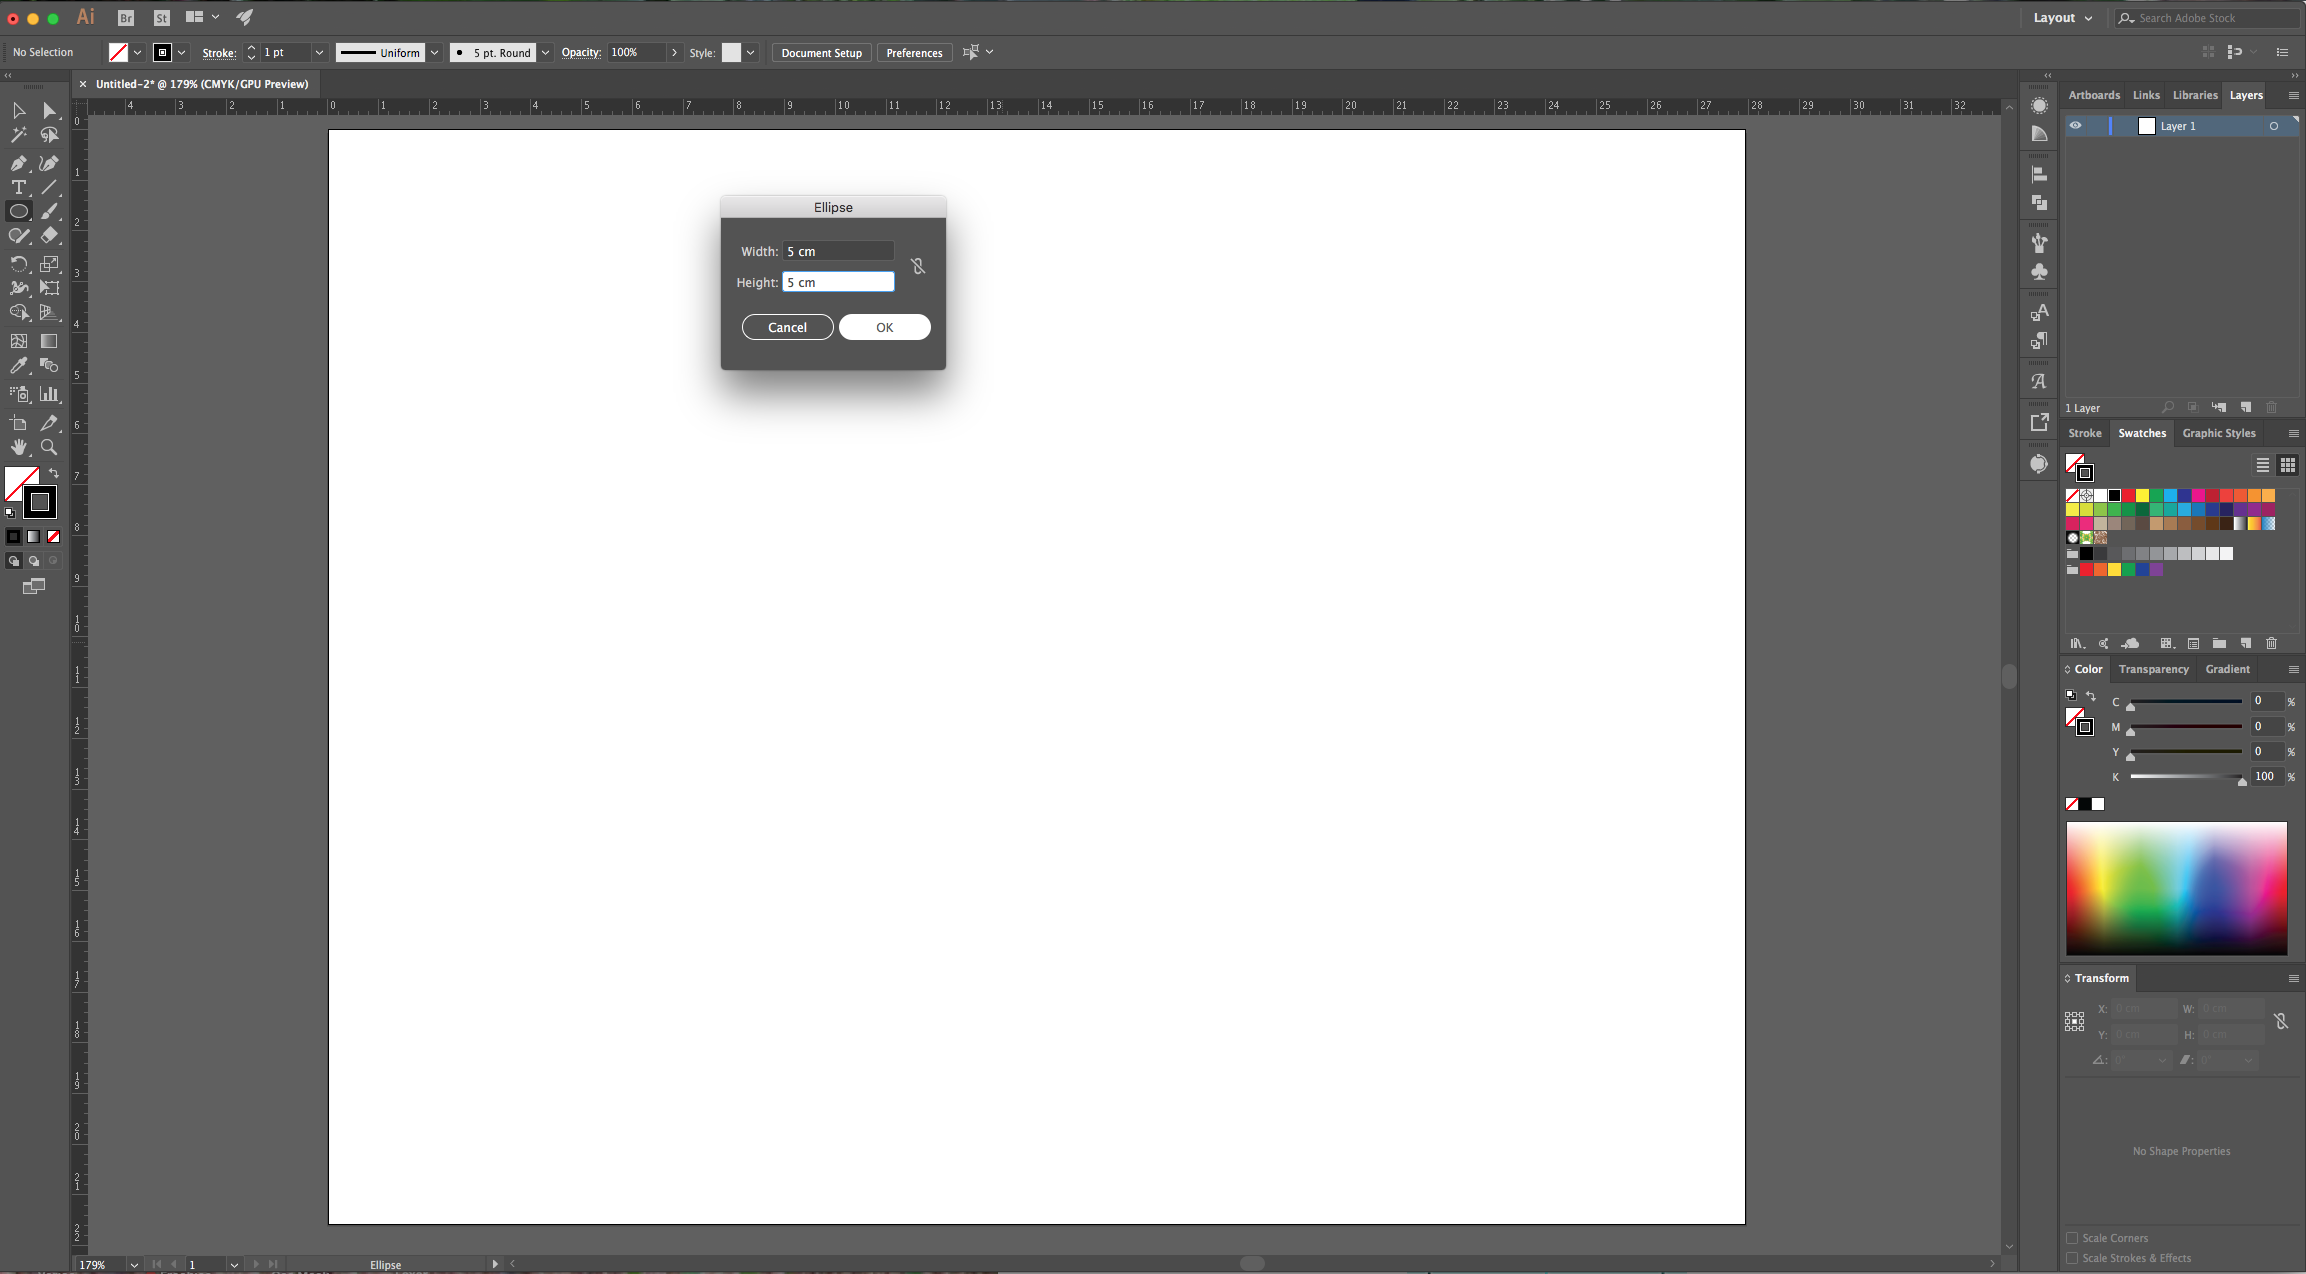
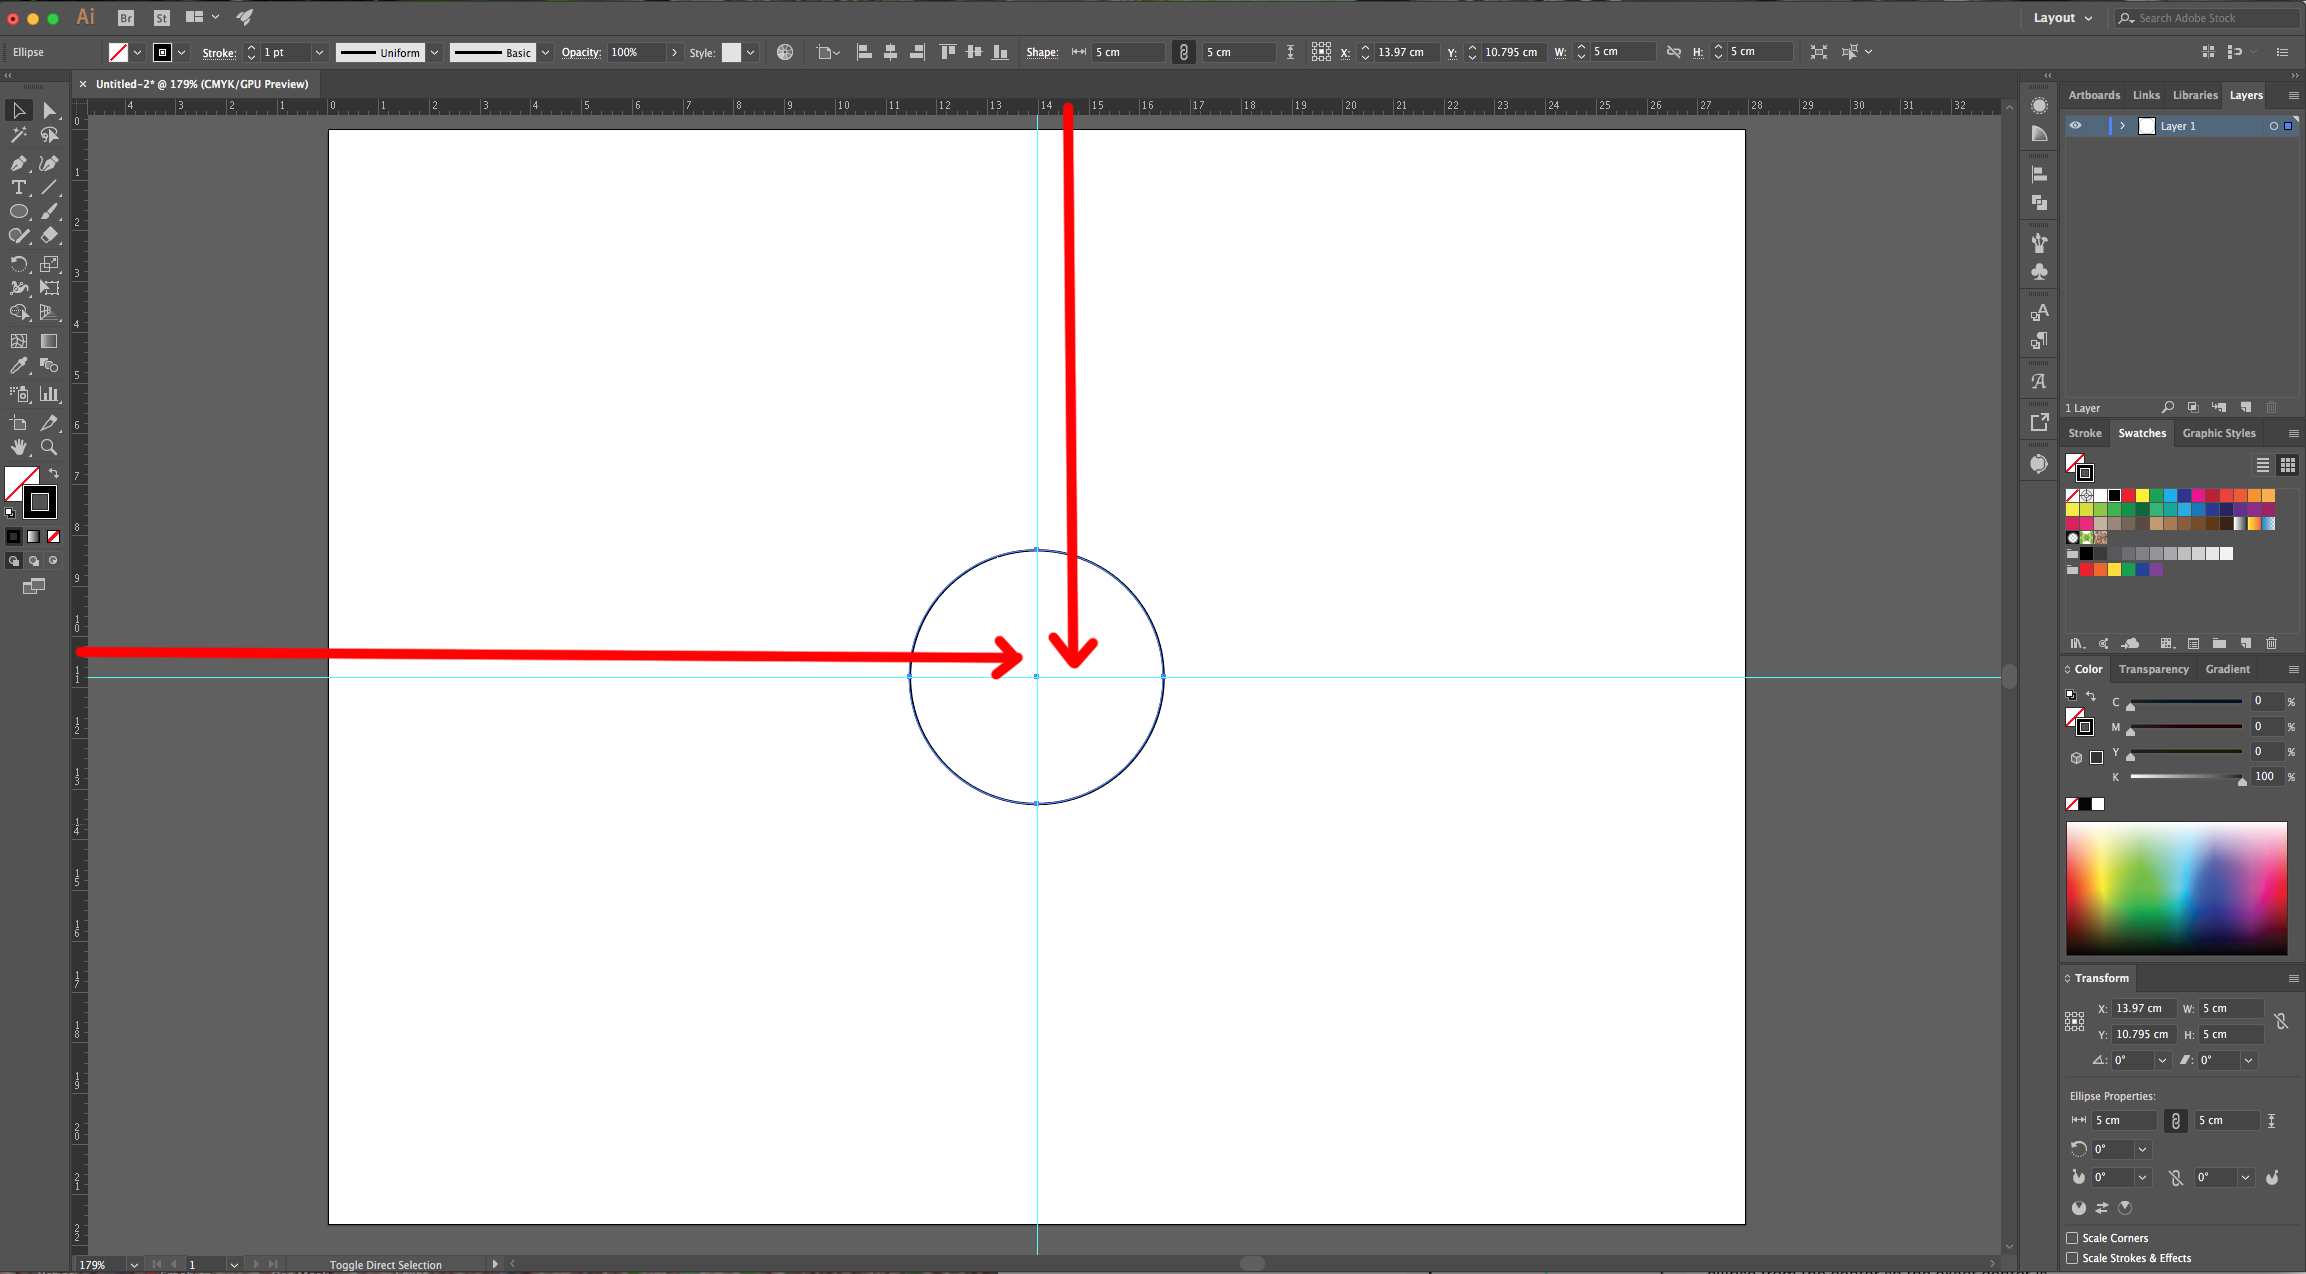
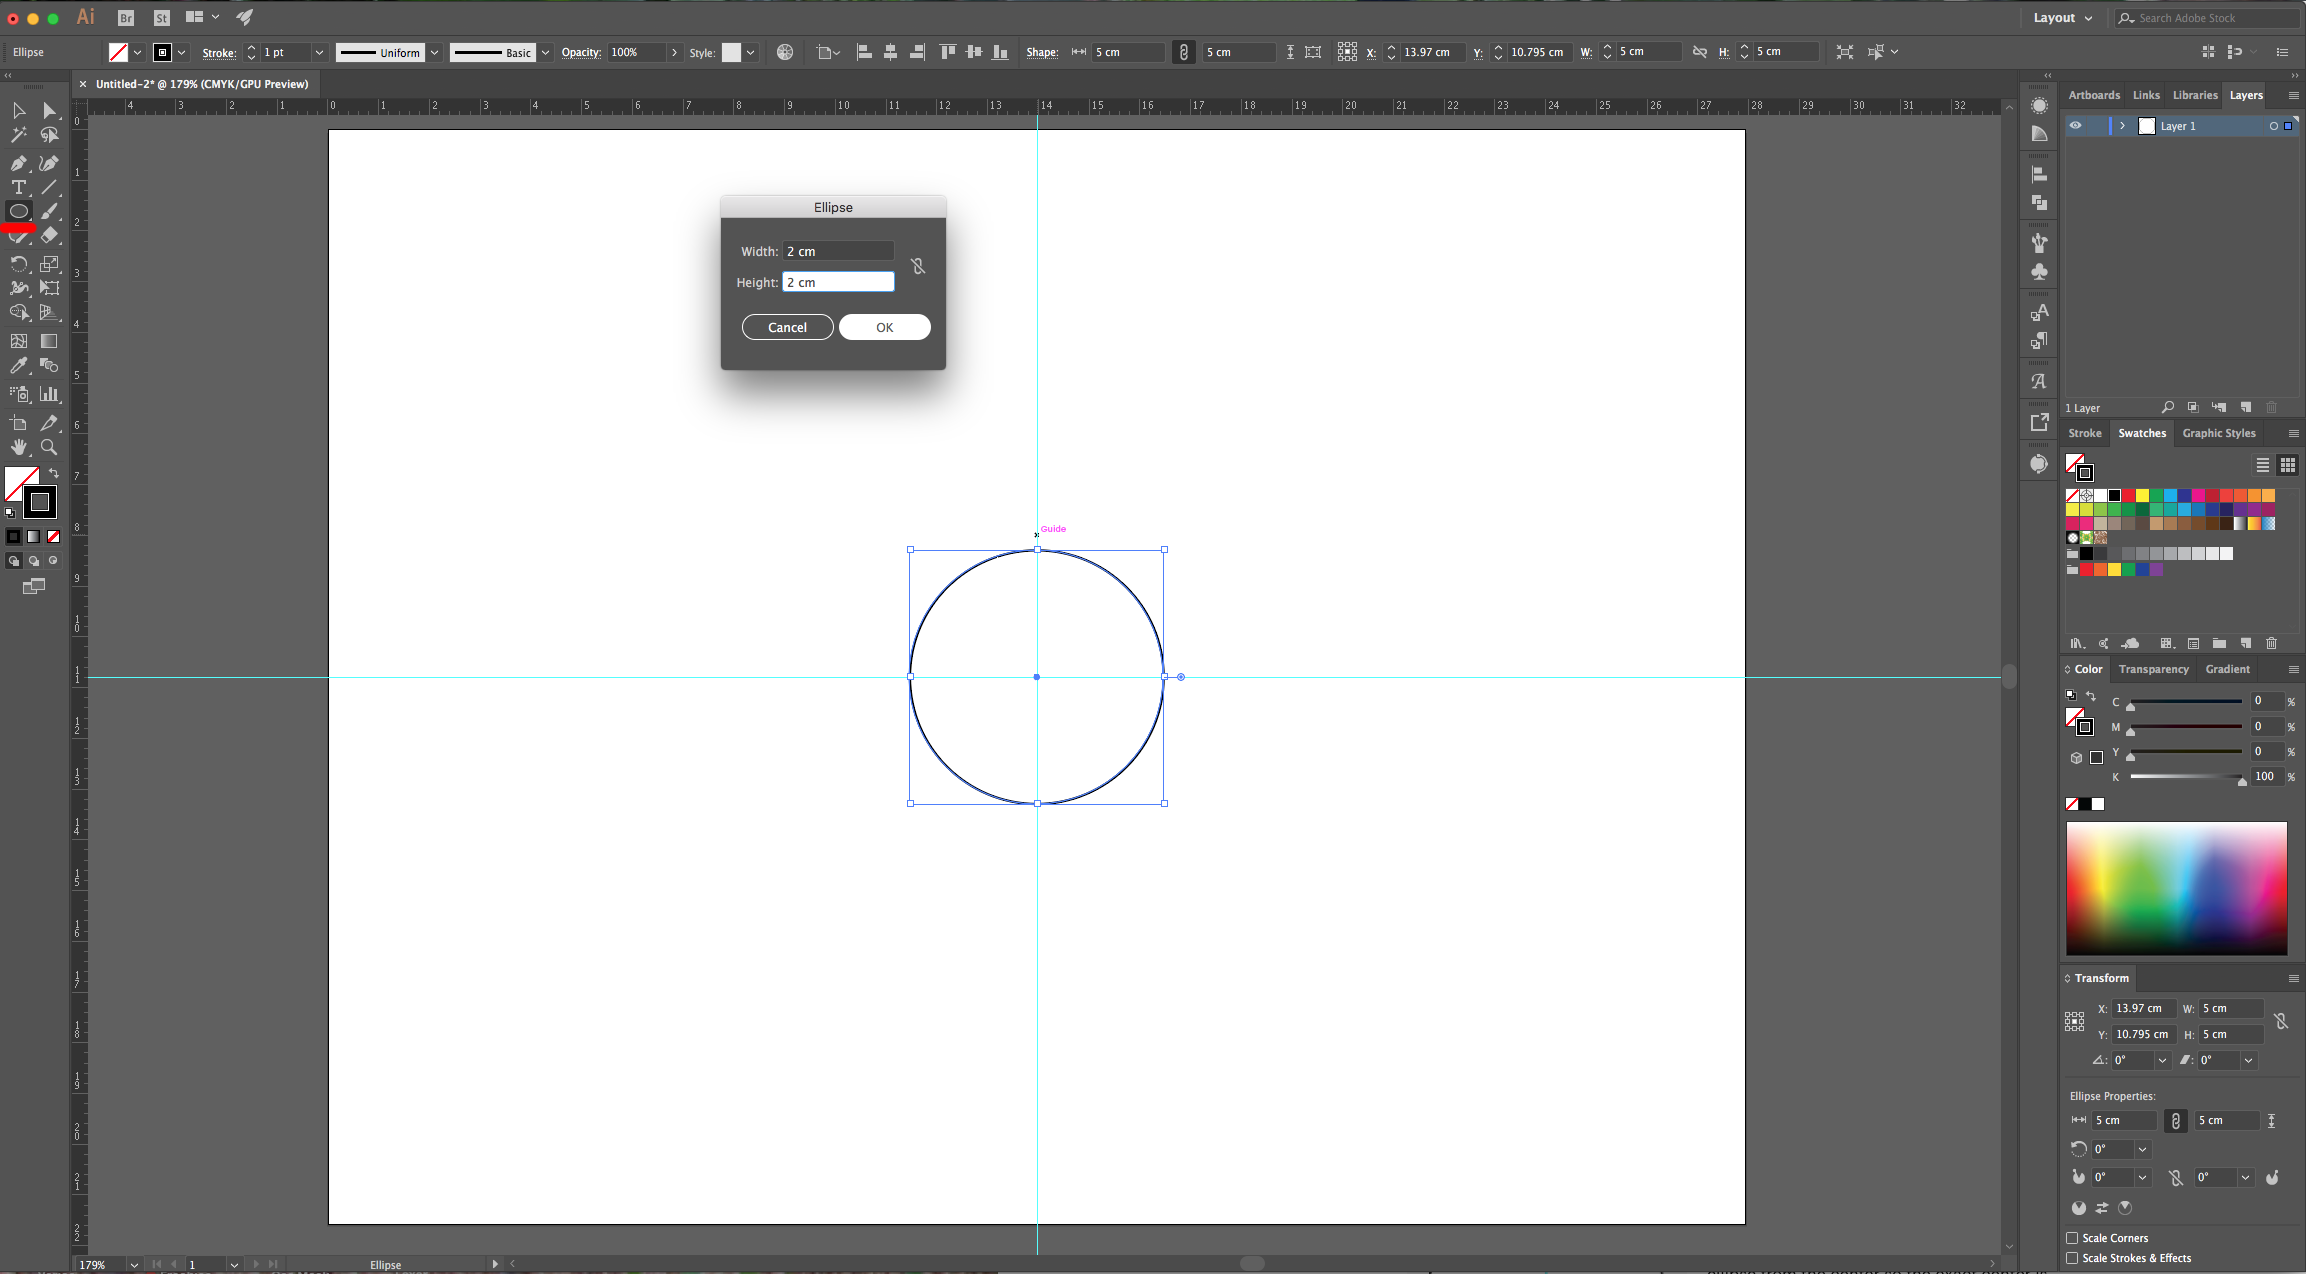
2 - Select the “Ellipse Tool” (L) and click inside of your “Canvas”. Input a “Width” and “Height” value of 5 cm and click “OK”.
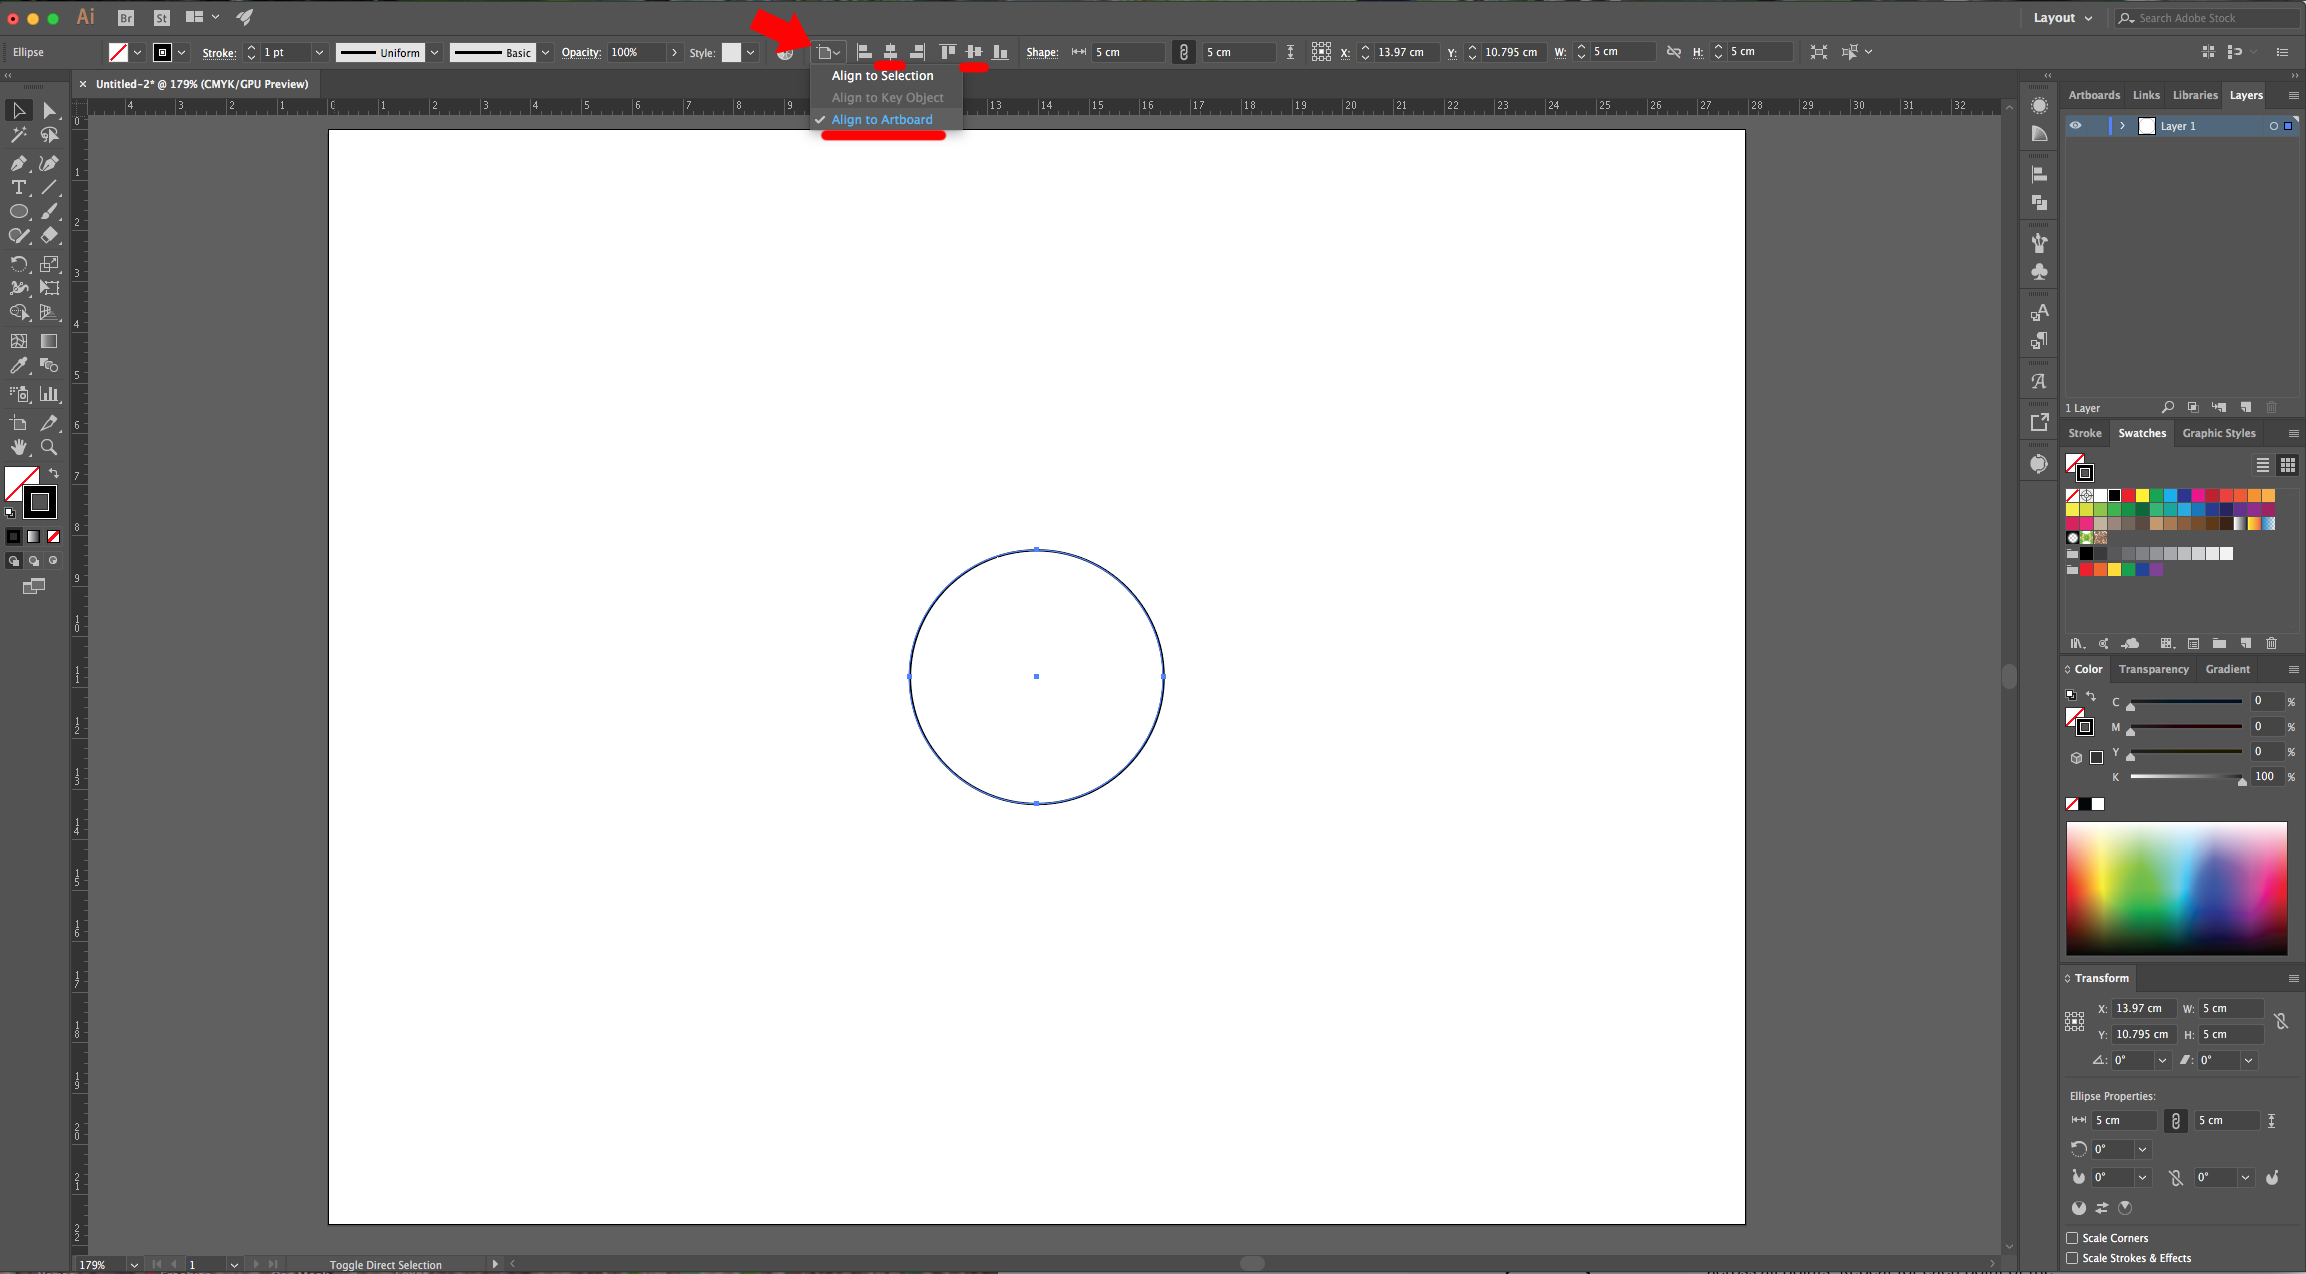
3 - Center it to using the “Horizontal and Vertical Align Center” options on your Top Menu and make sure that “Align to Artboard” is selected. Or use the same options in the “Align Panel”. Add “Horizontal and Vertical Guides” at the center of your circle by clicking and dragging from the Left and Top Rulers (to turn the rulers on/off use Command/Control + R).
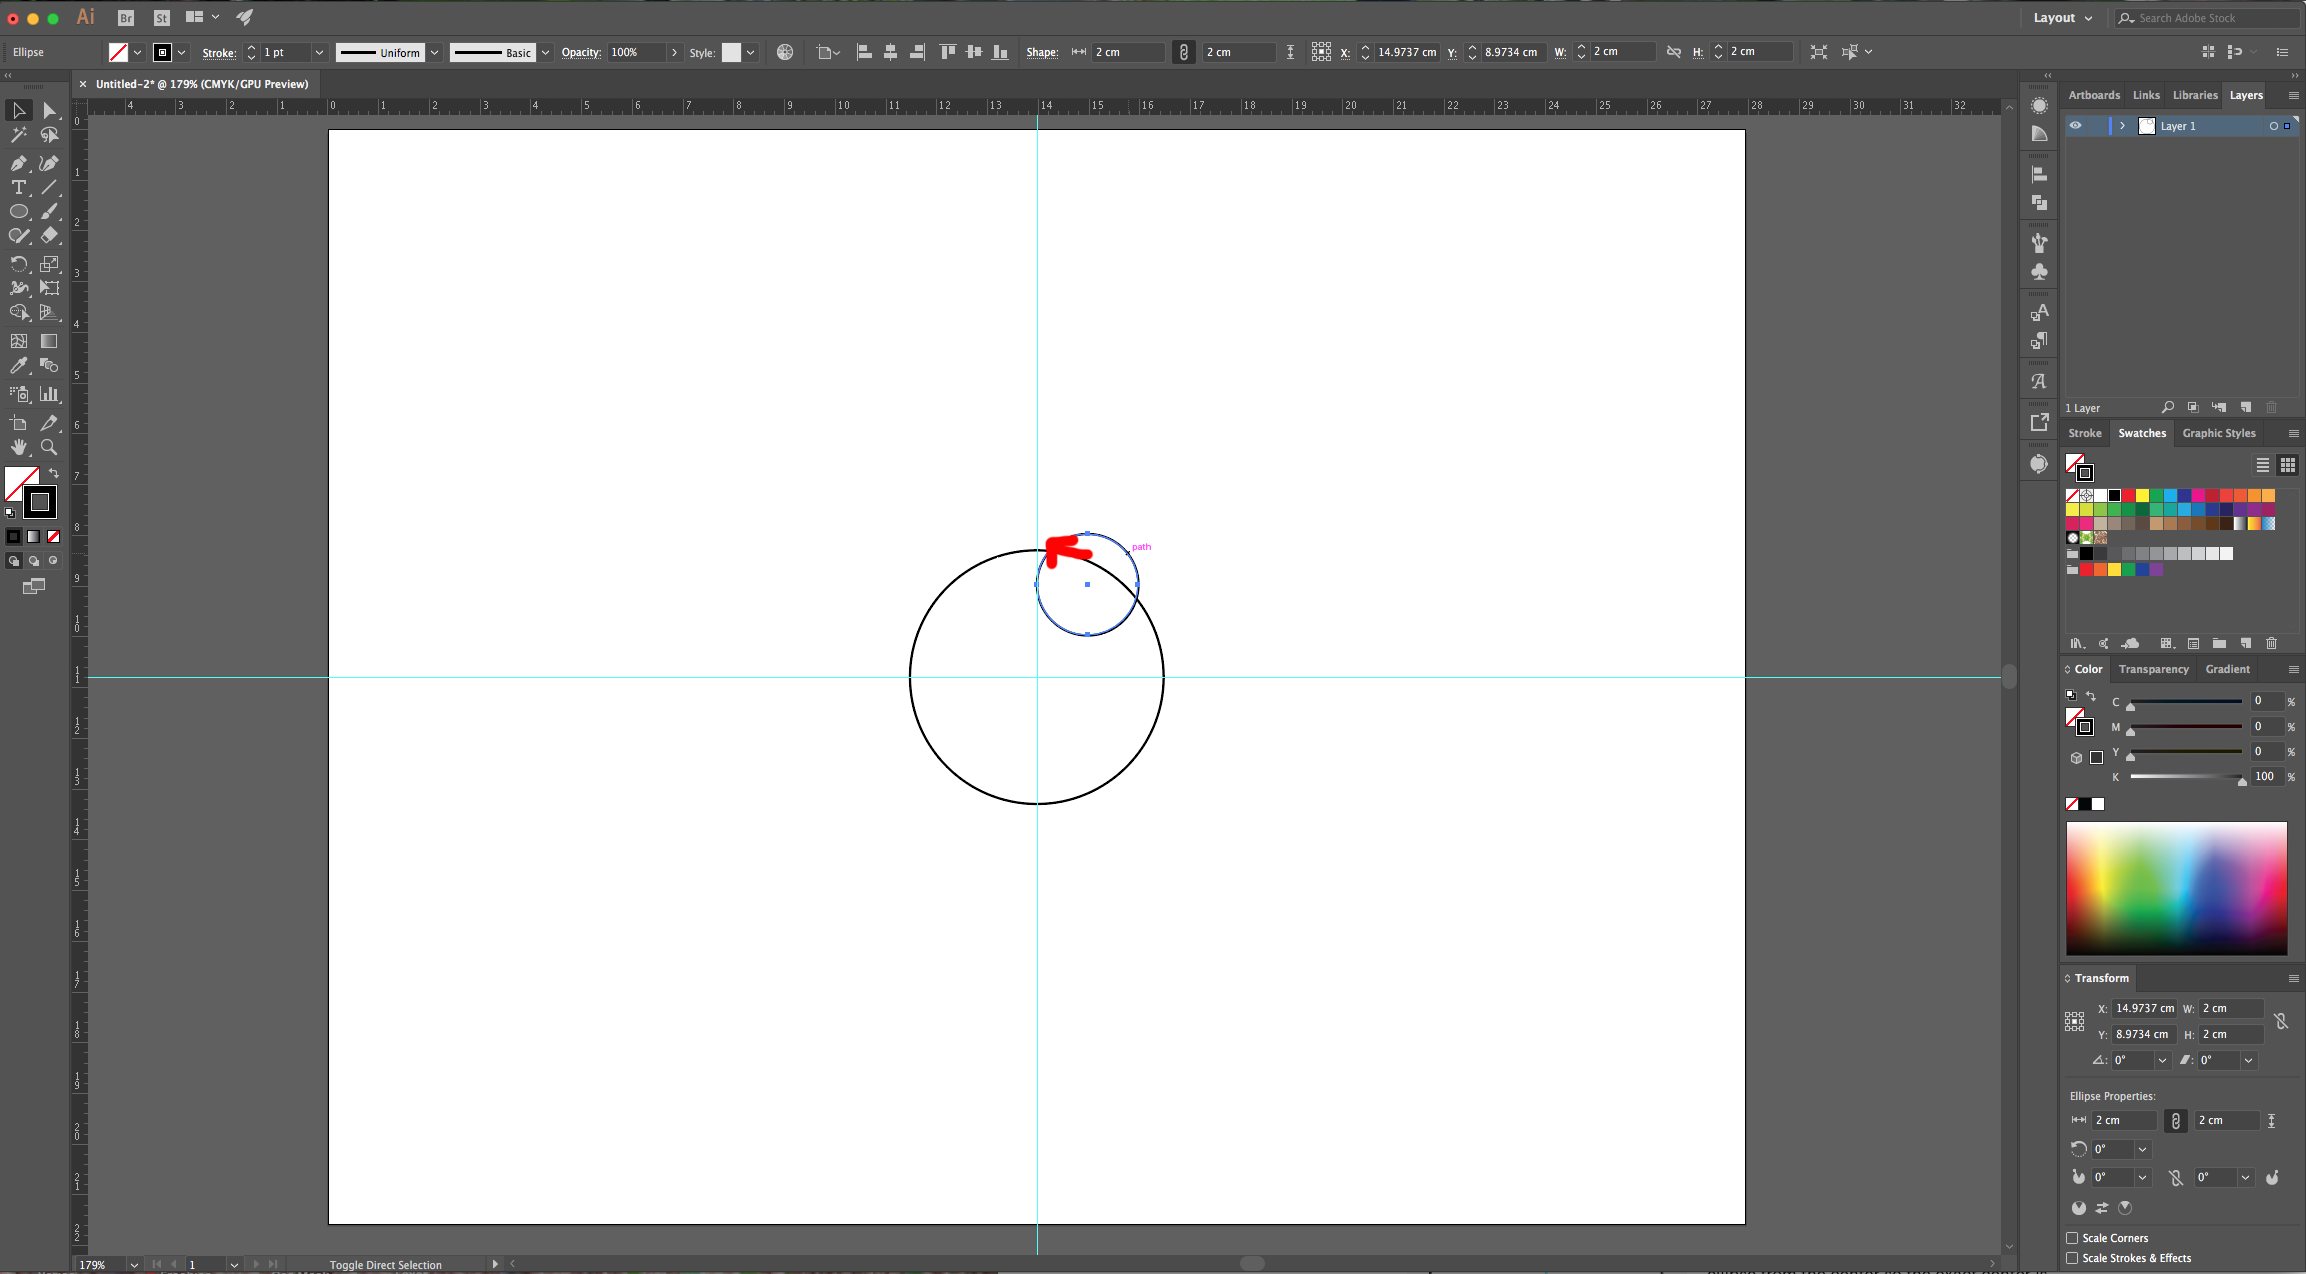
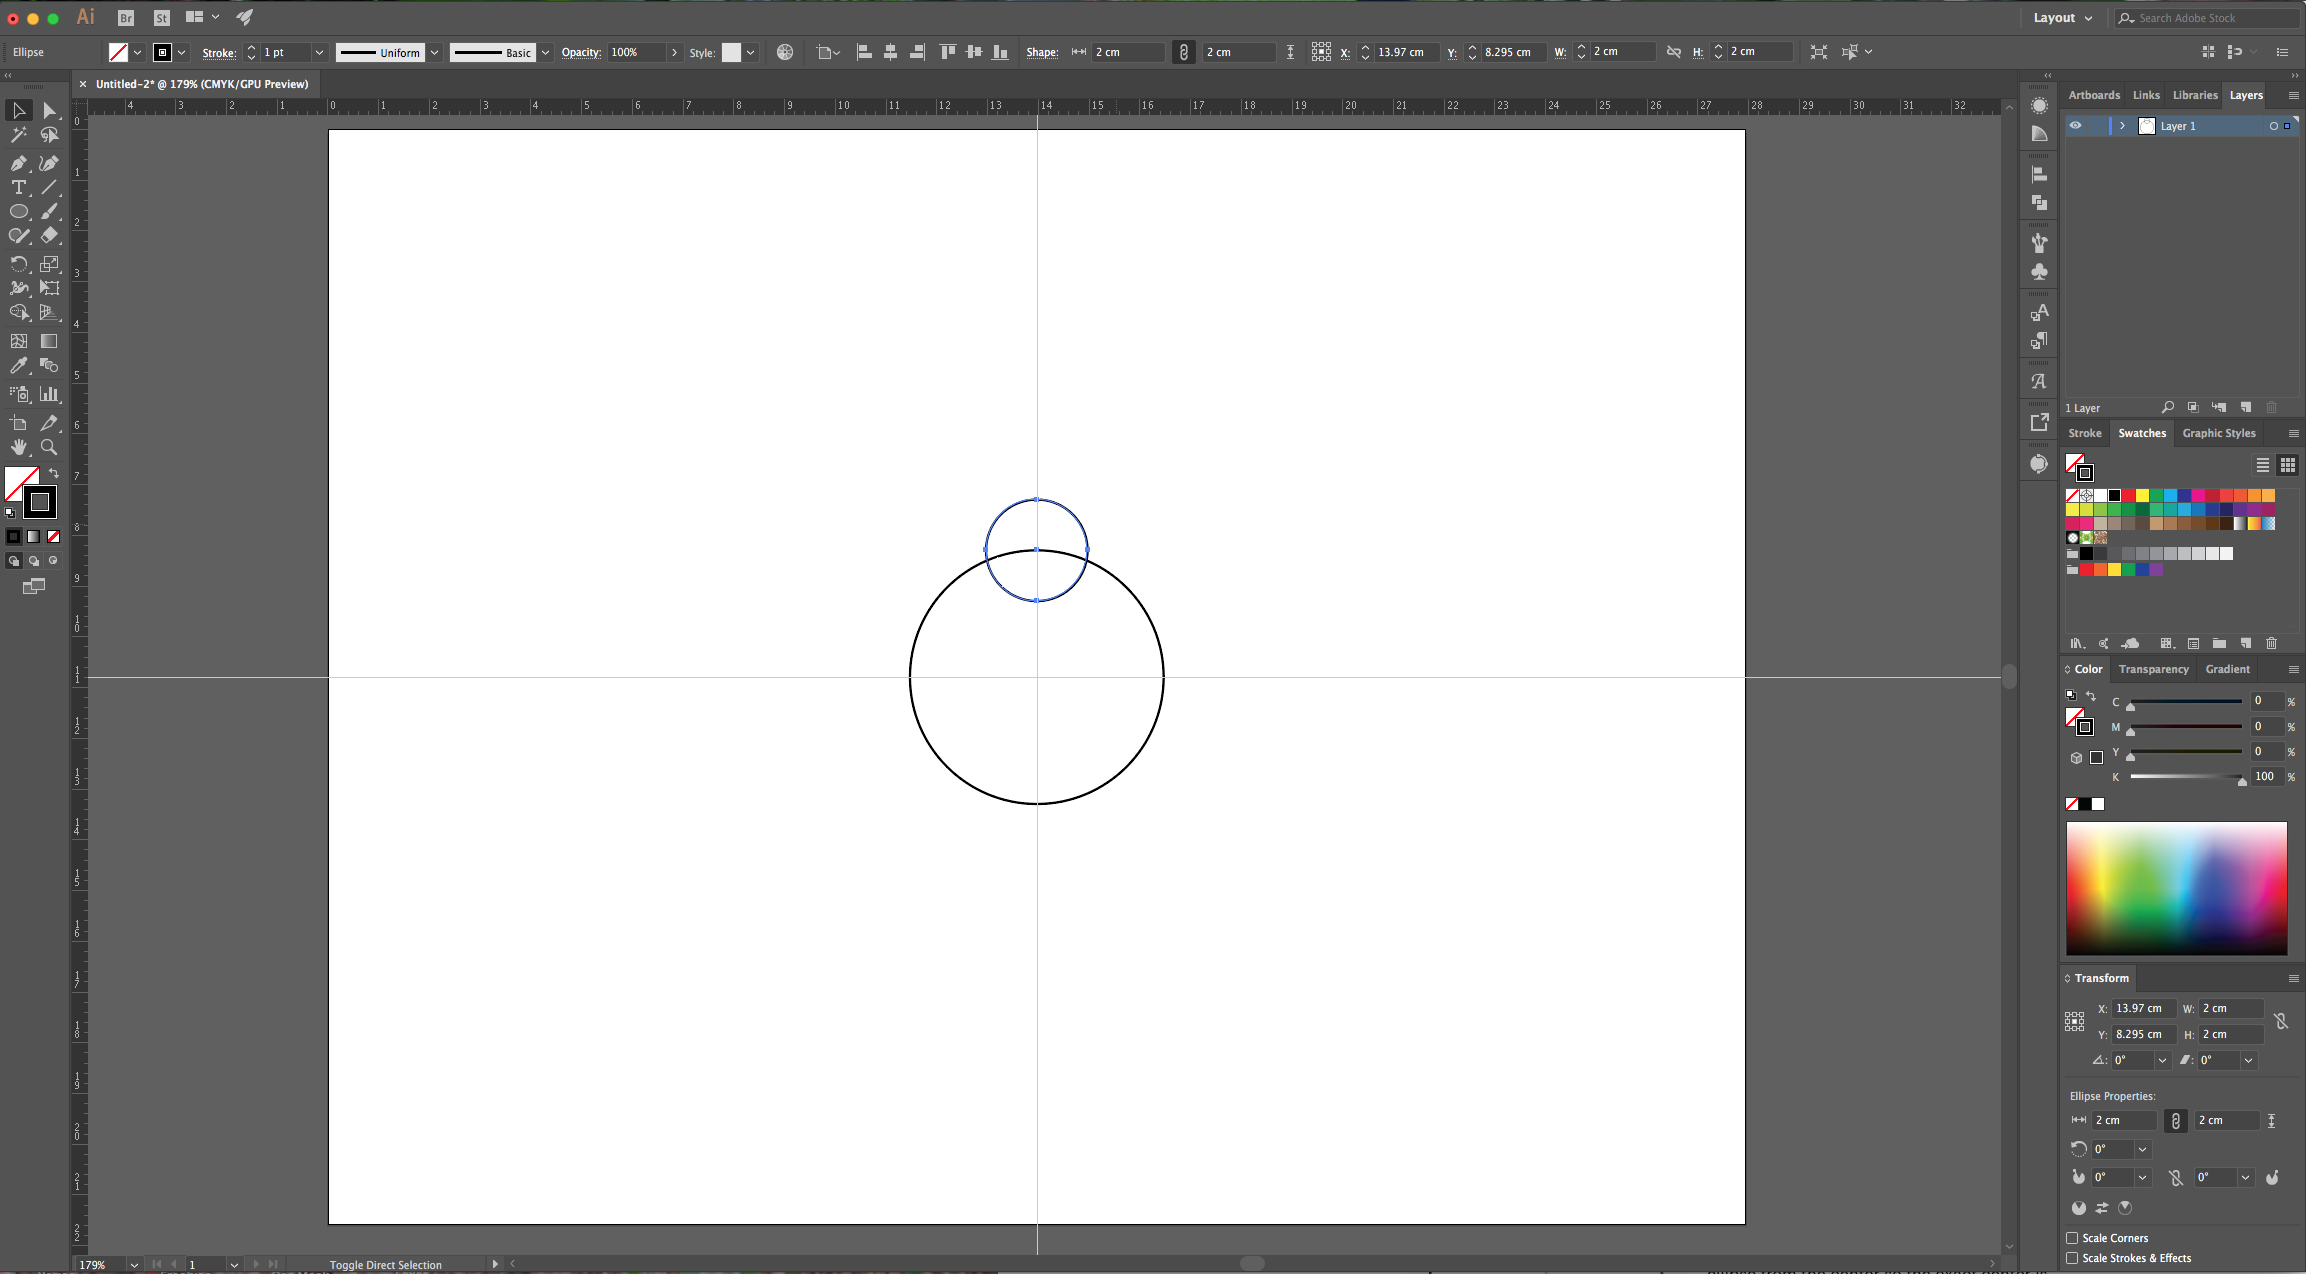
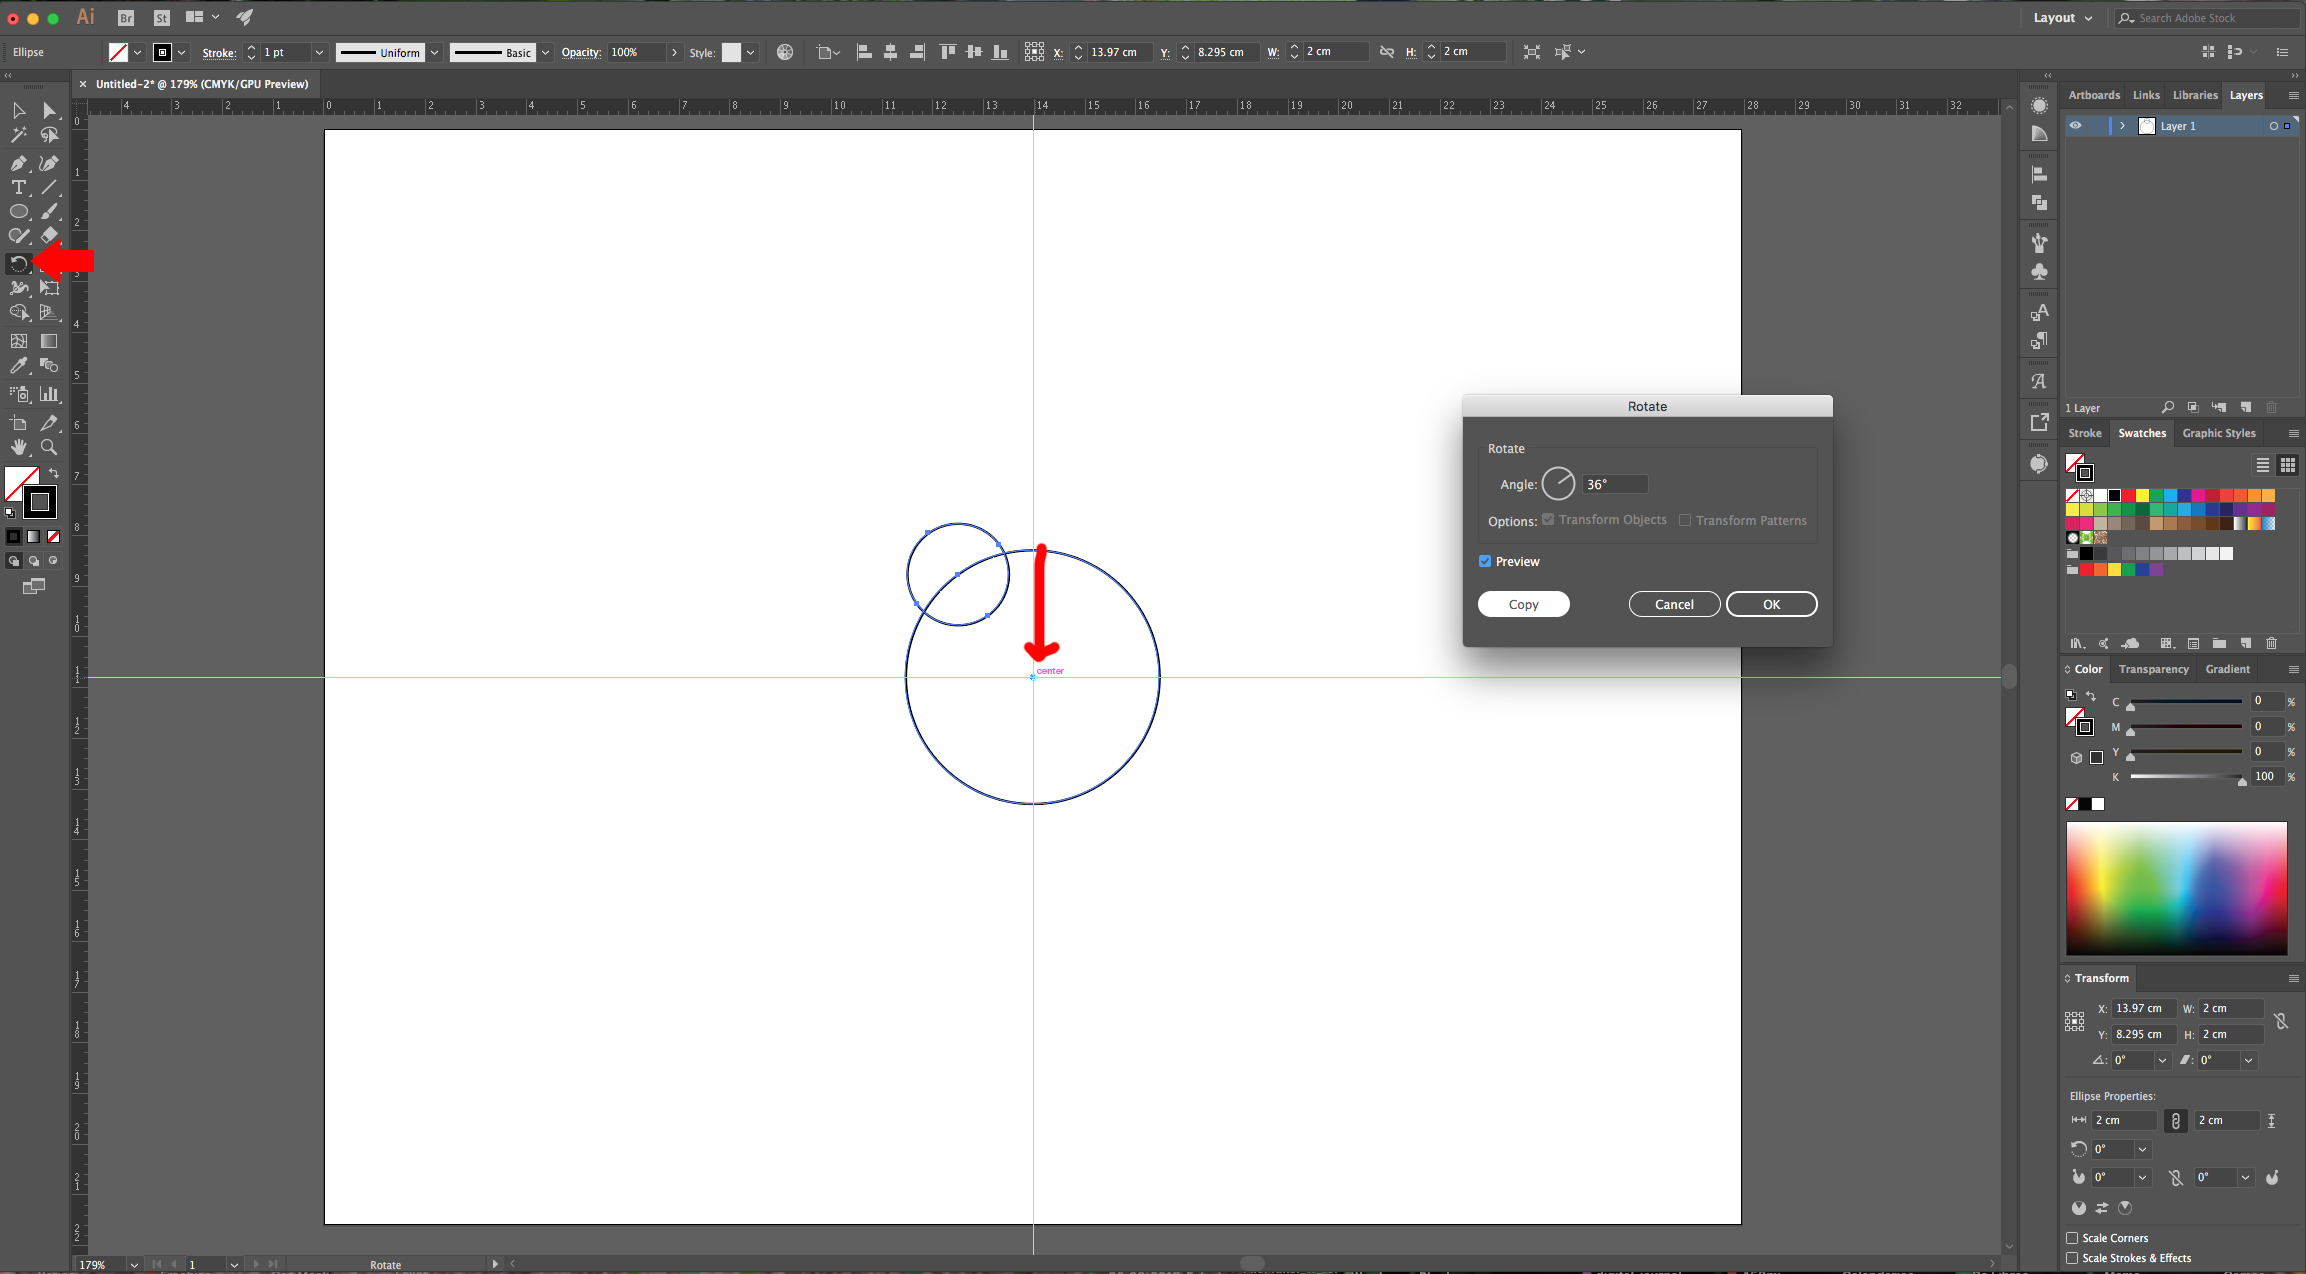
4 - Select the “Ellipse Tool” (L) again but this time input a “Width” and “Height” value of 2 cm and click “OK”. Place the second circle on the Top of the first one and make its center sit on the top-most “Anchor Point”
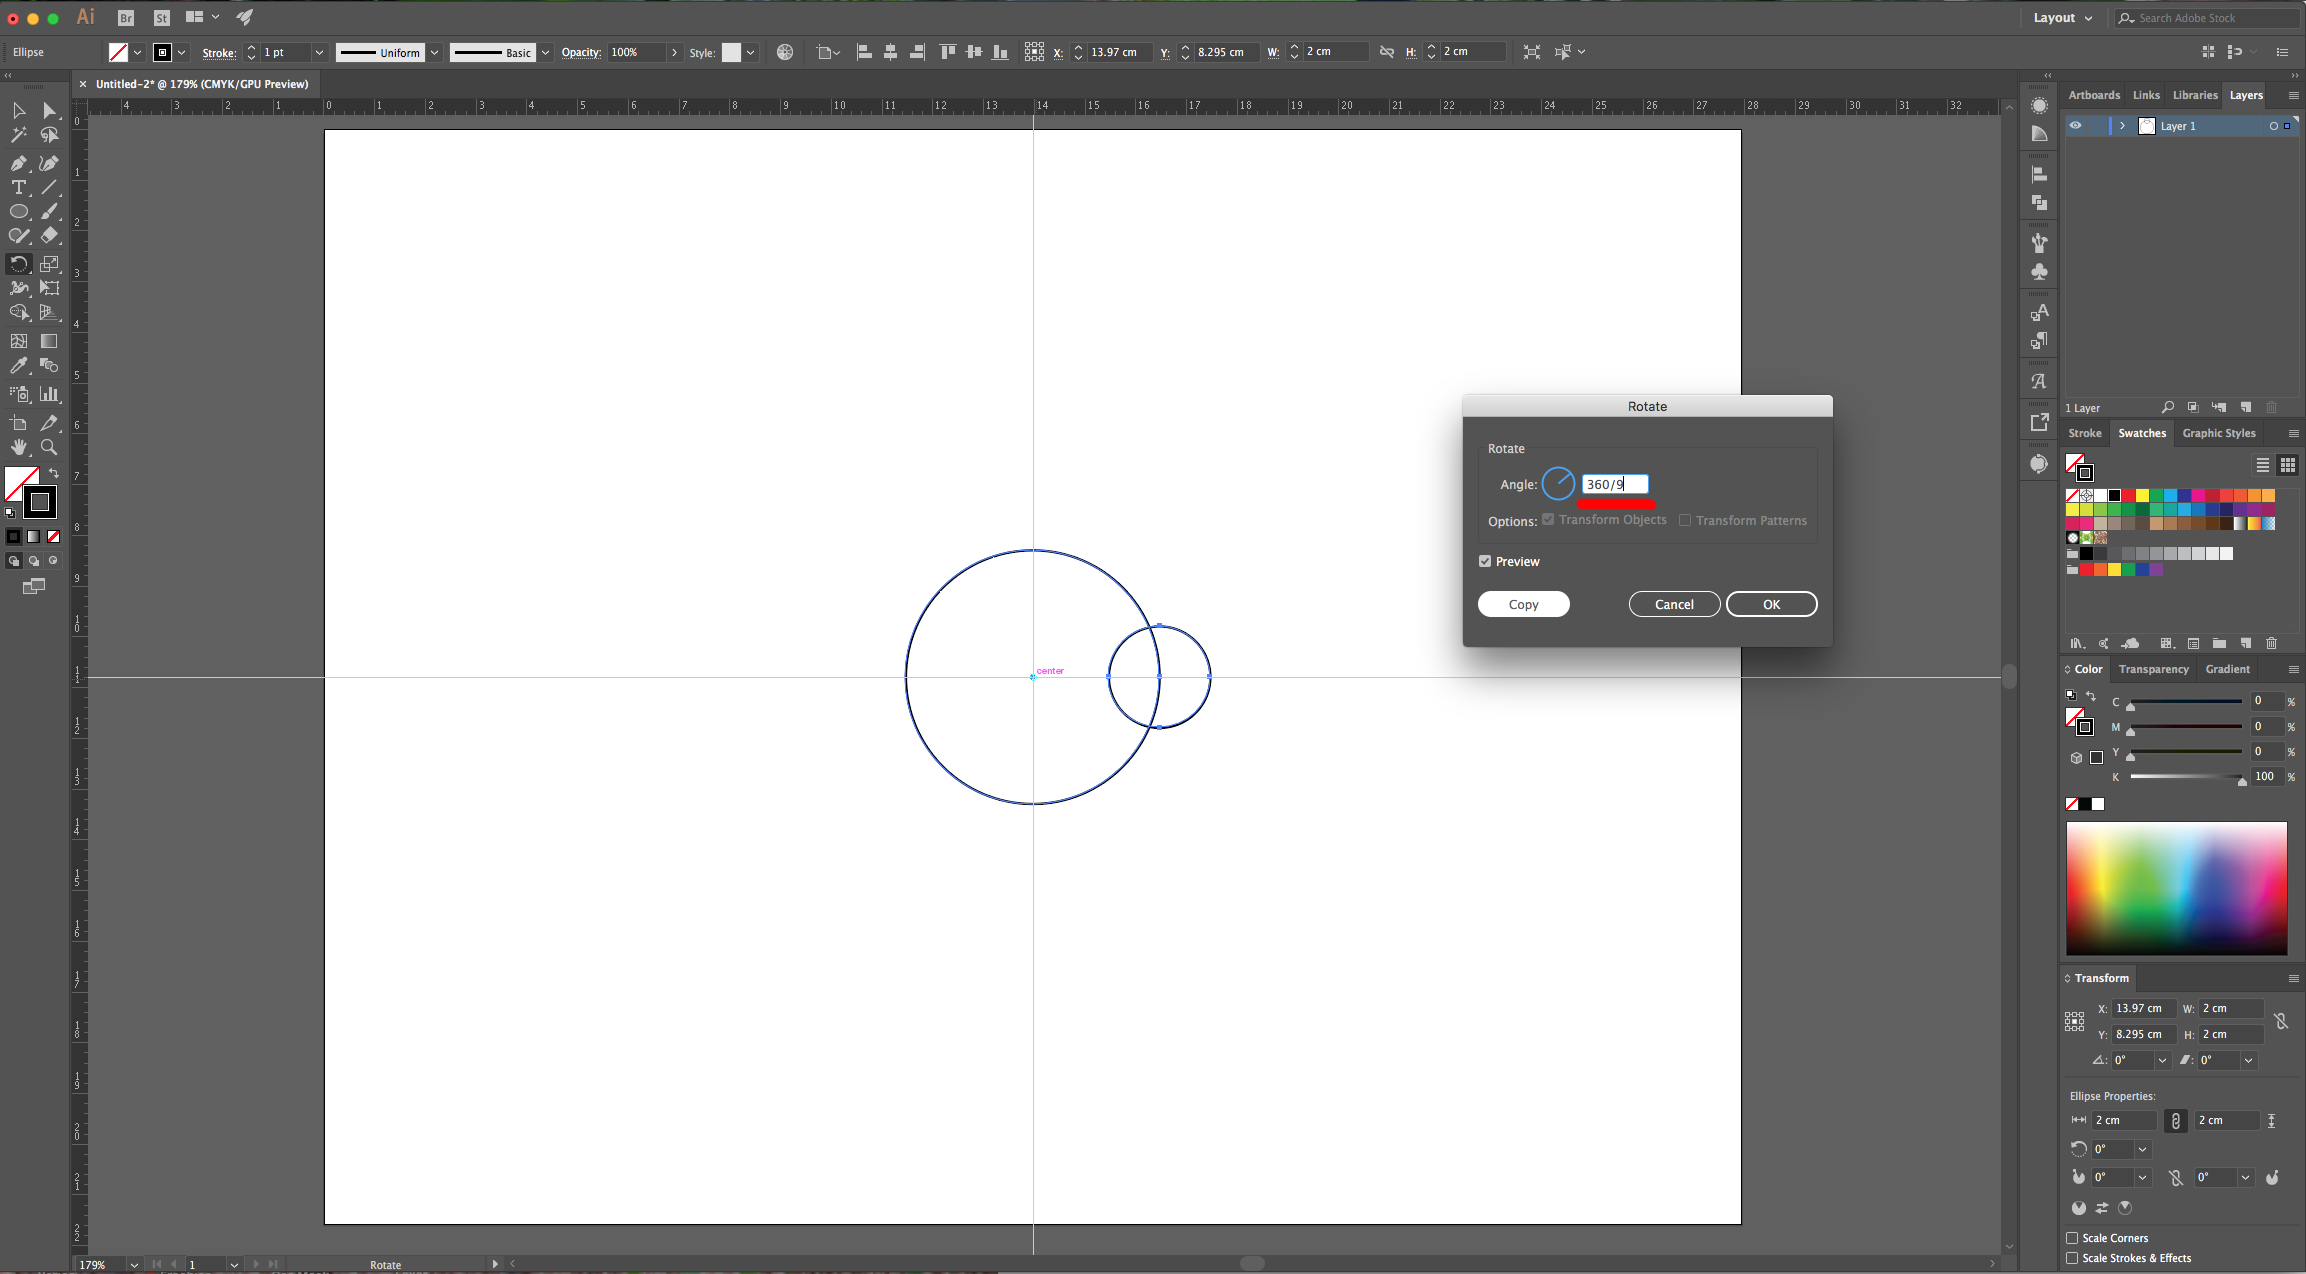
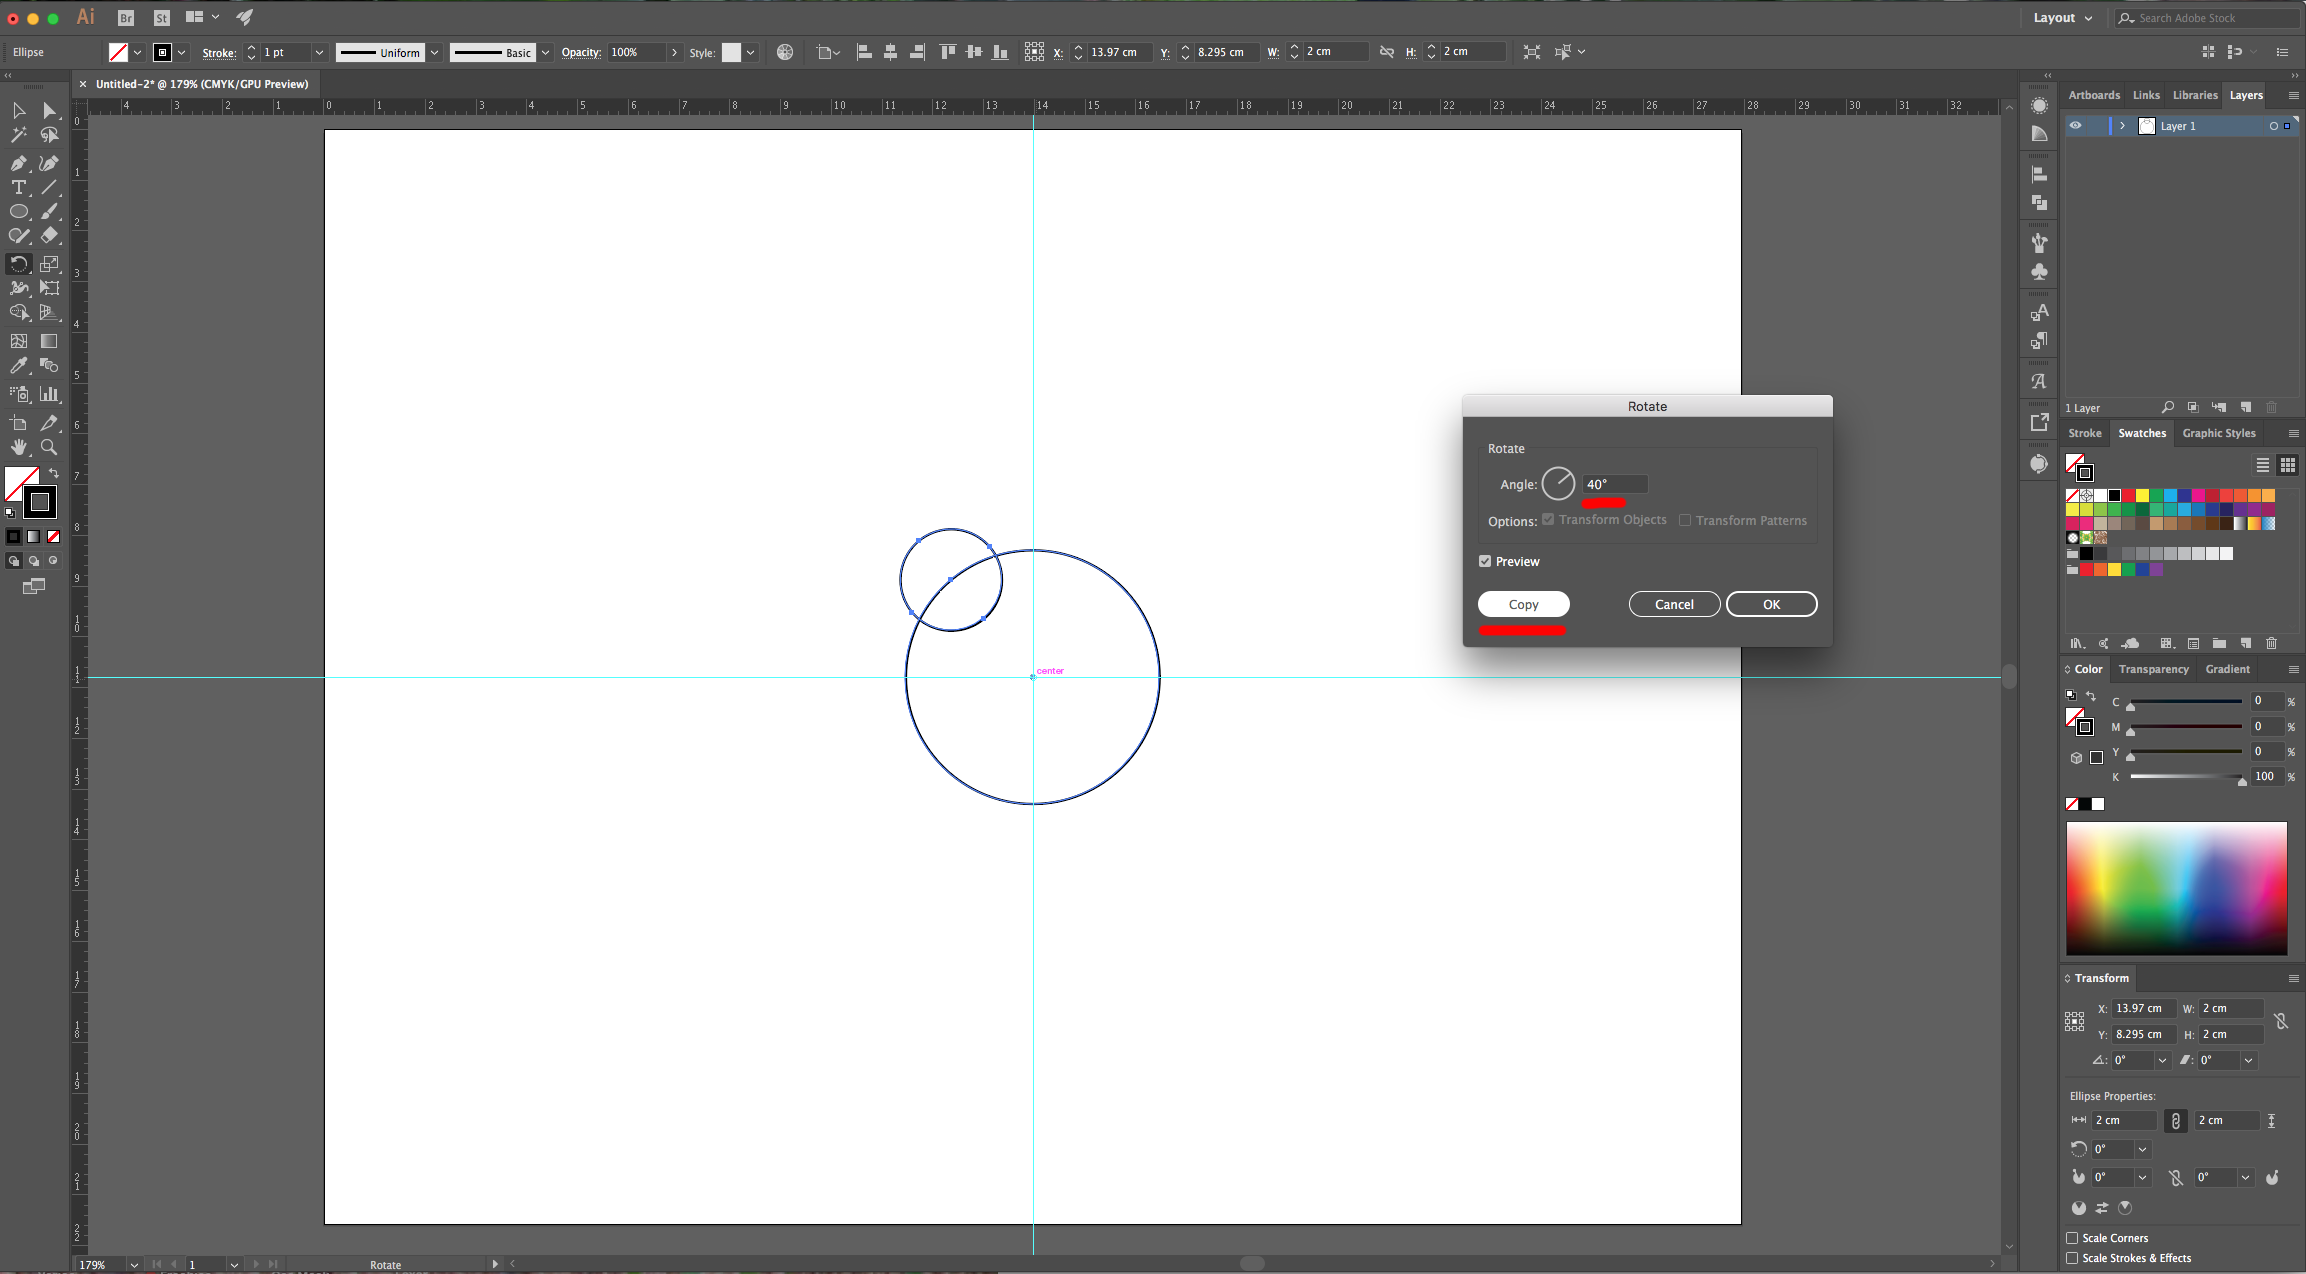
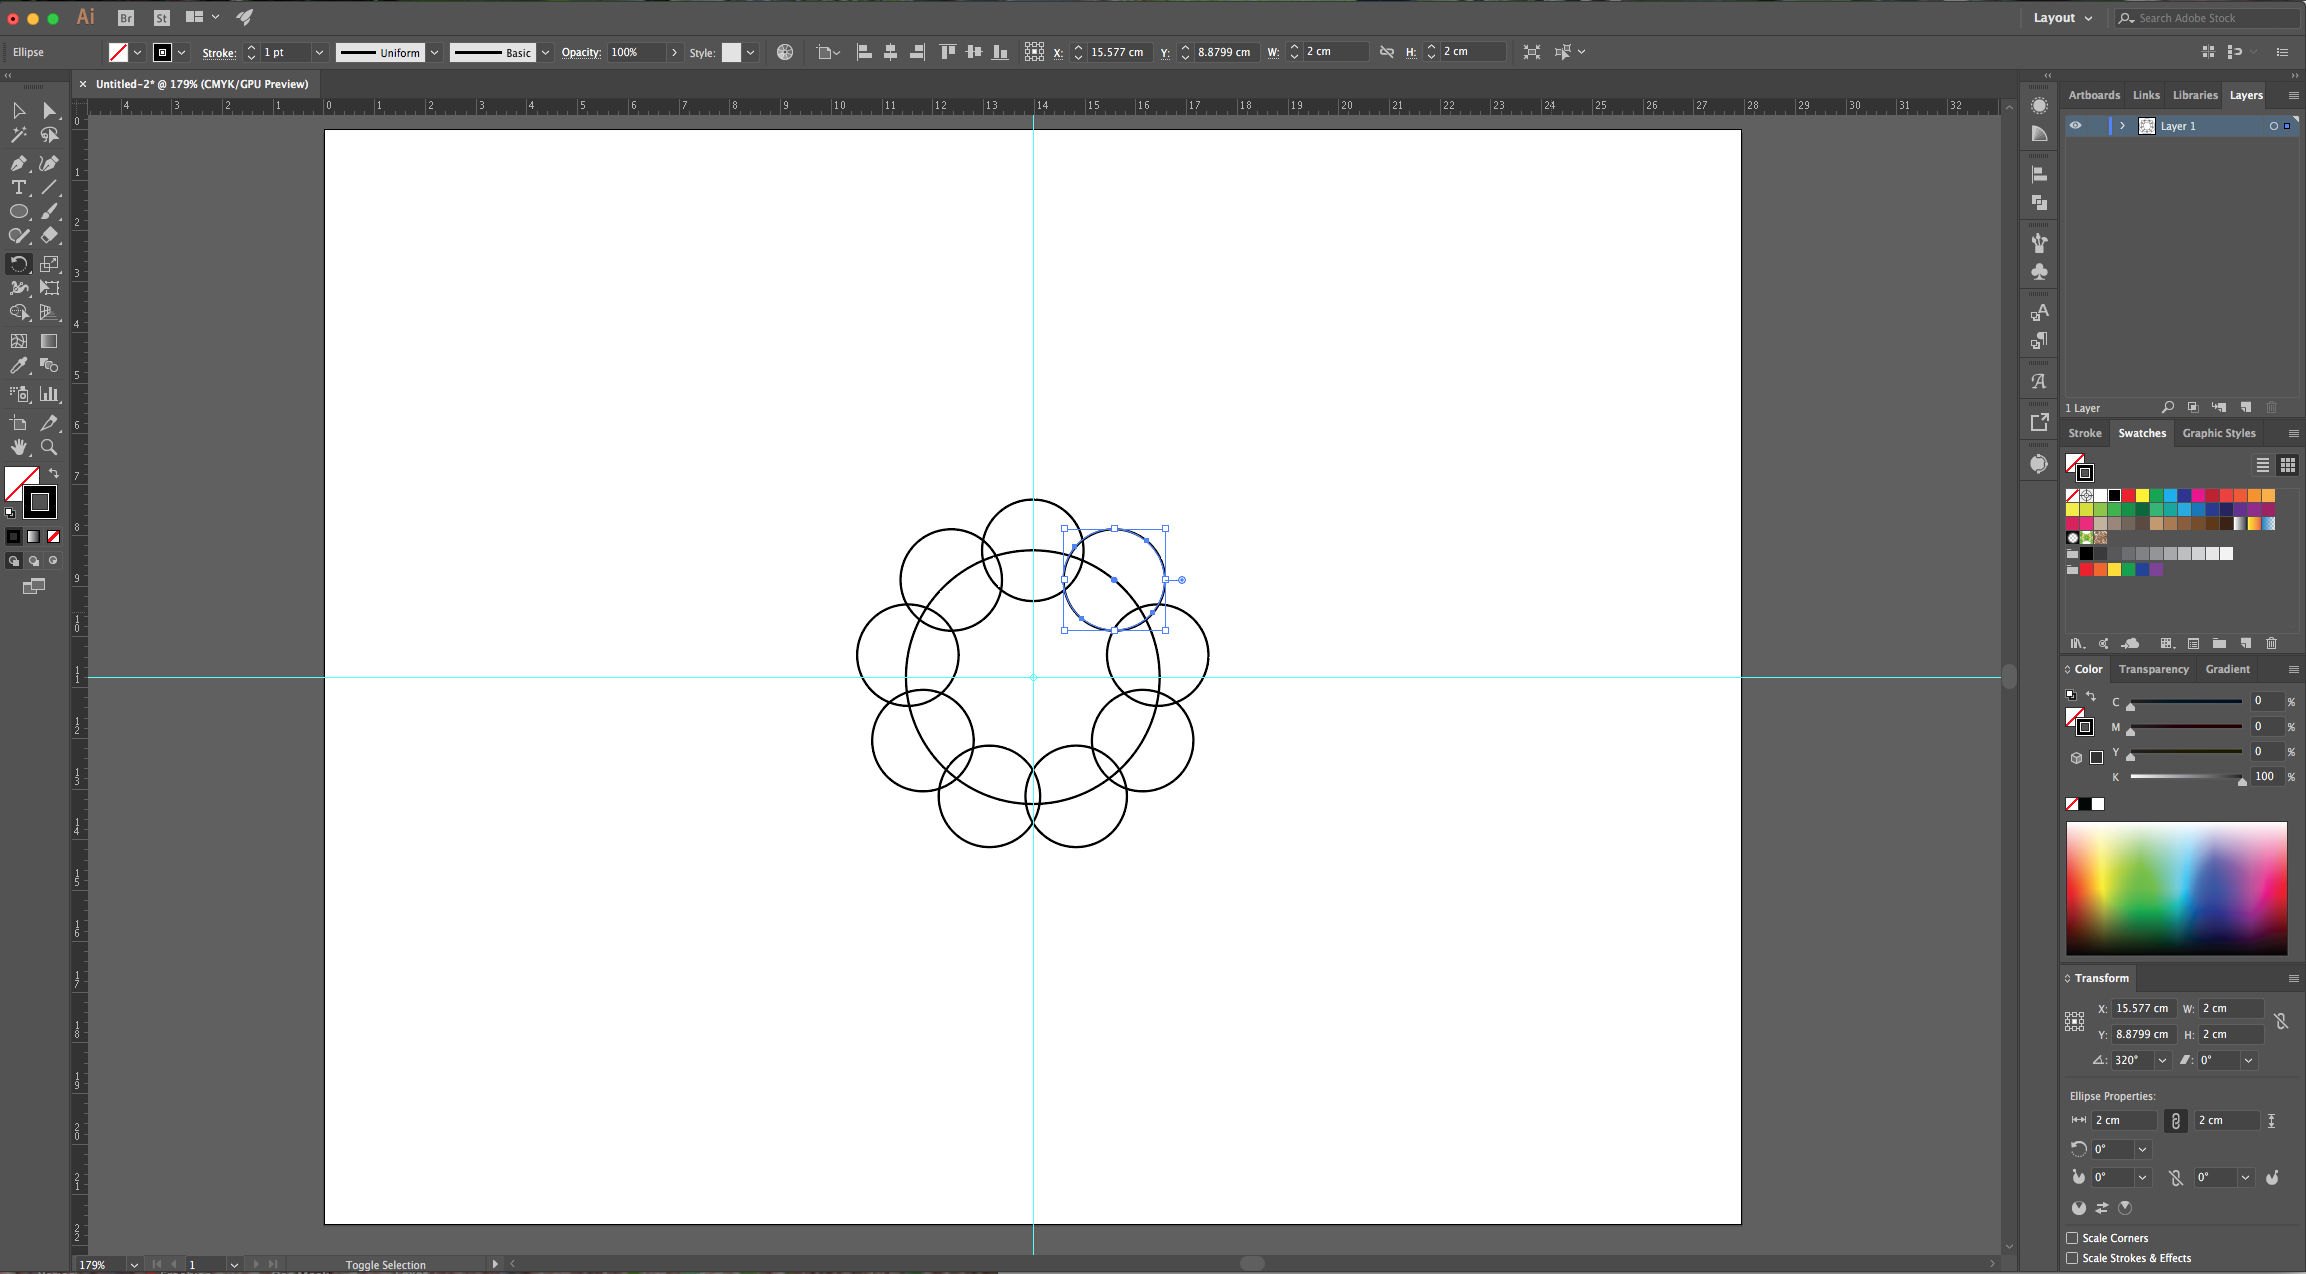
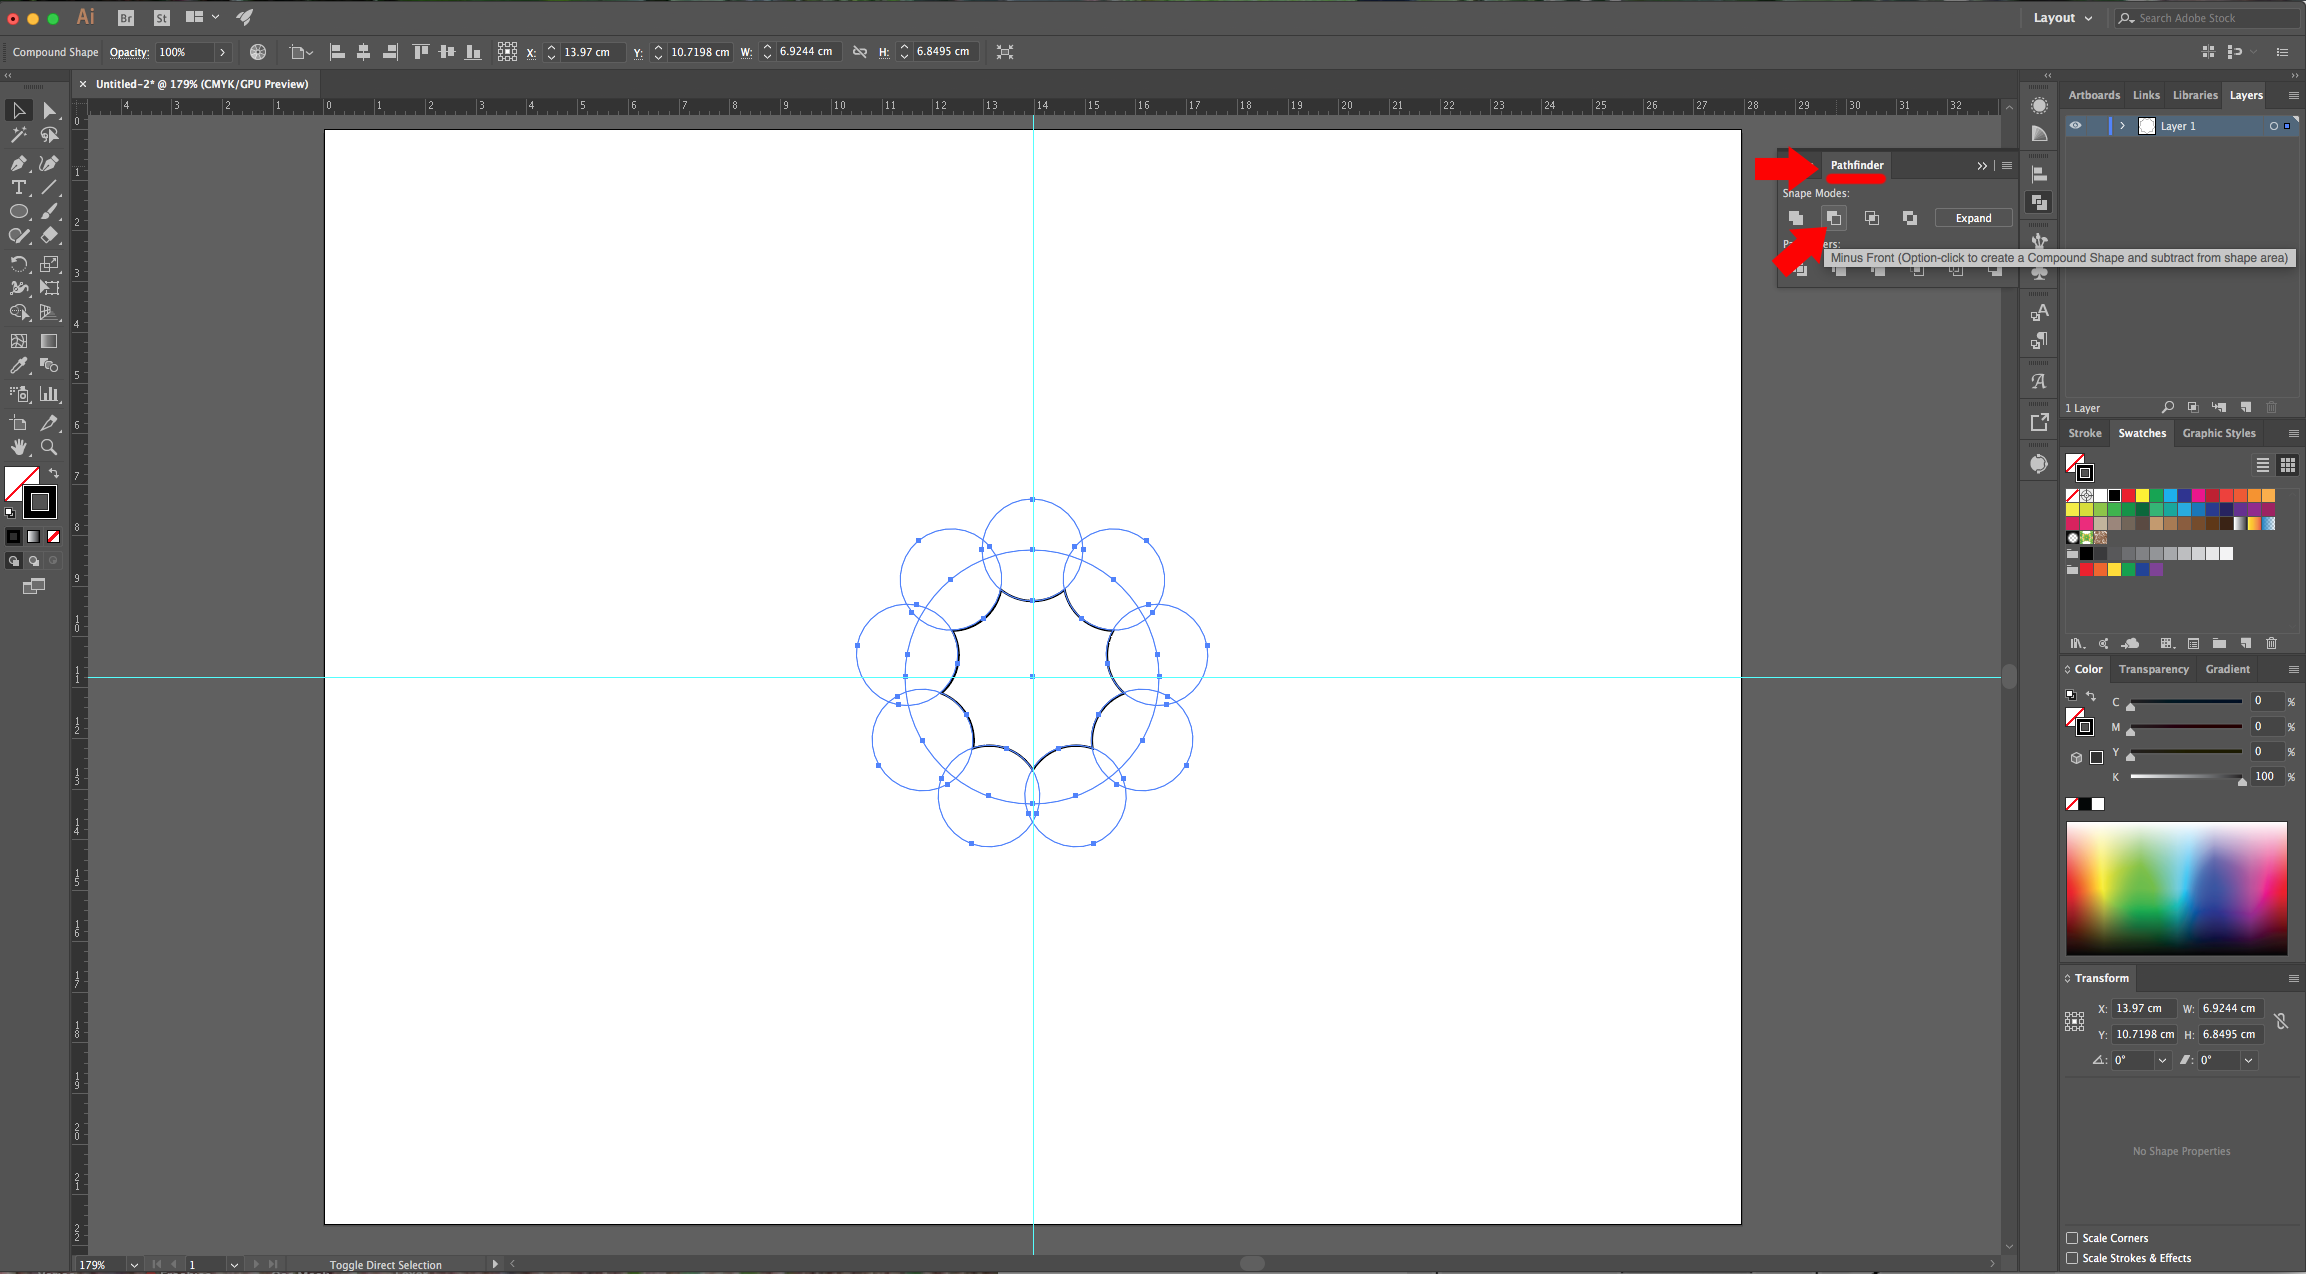
5 - Double-click on the “Rotate Tool” (R), click on the center of the smaller circle and drag it to the center of the bigger one. To calculate the “Angle” you will need, just input 360/number of instances of the small circle you want (we used 9 so it was 360/9) and Illustrator will automatically give you the right “Angle” (in our case 40°). Click “OK”. You should end up with nine small circles around the big one, slightly overlapping each other.
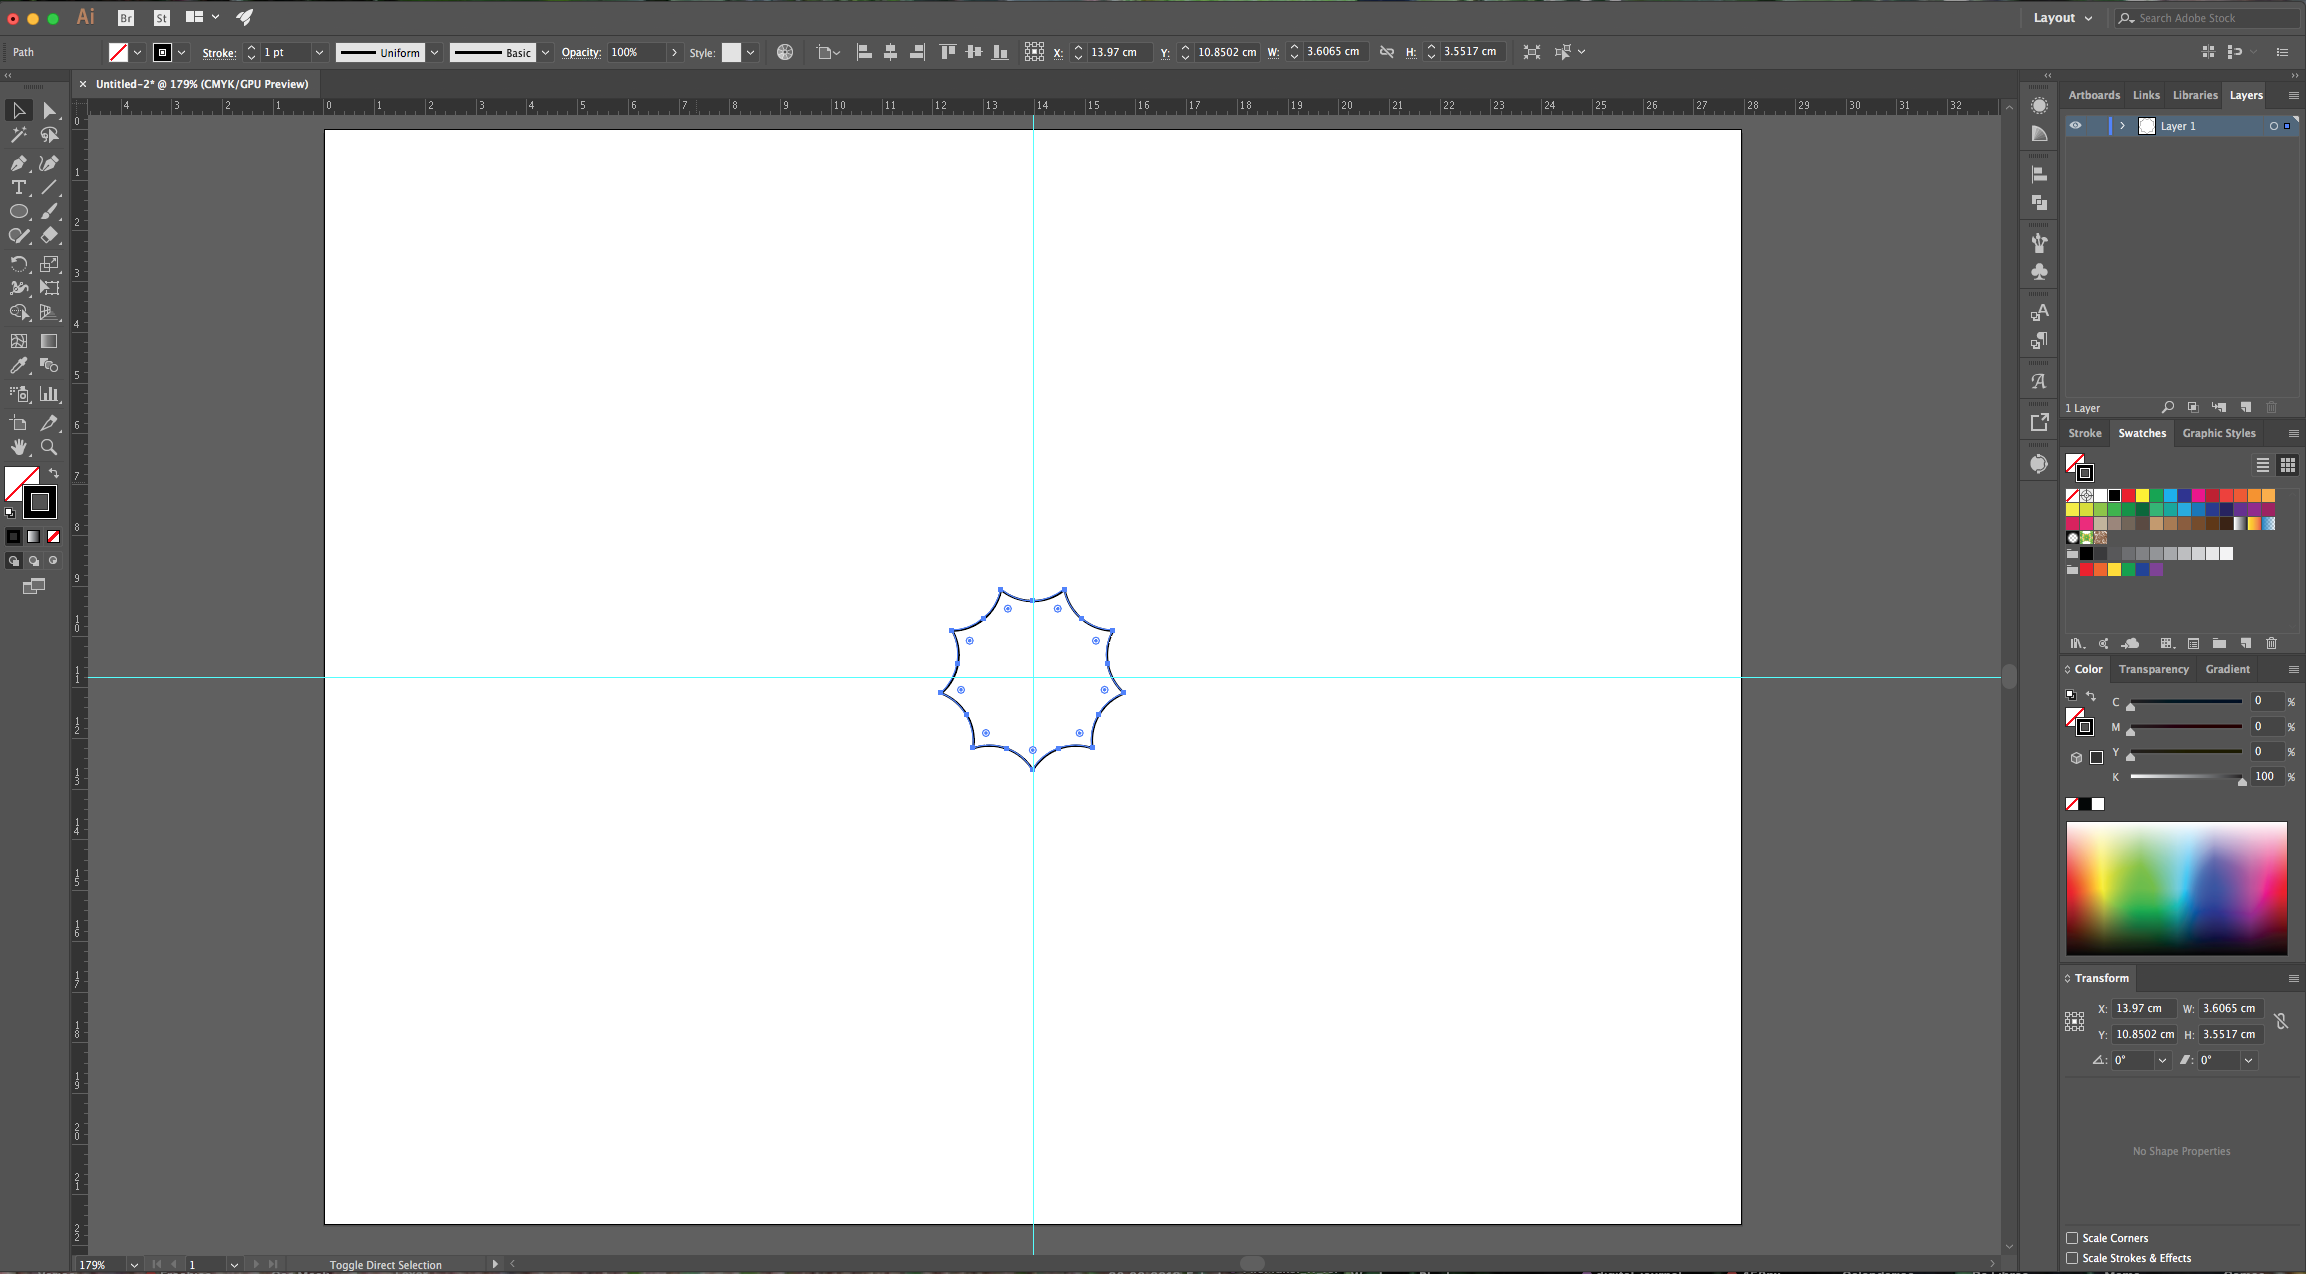
6 - Select everything, head to the “Appearance Panel” and choose “Minus Front” to delete the small circles. You should end with a star-like shape.
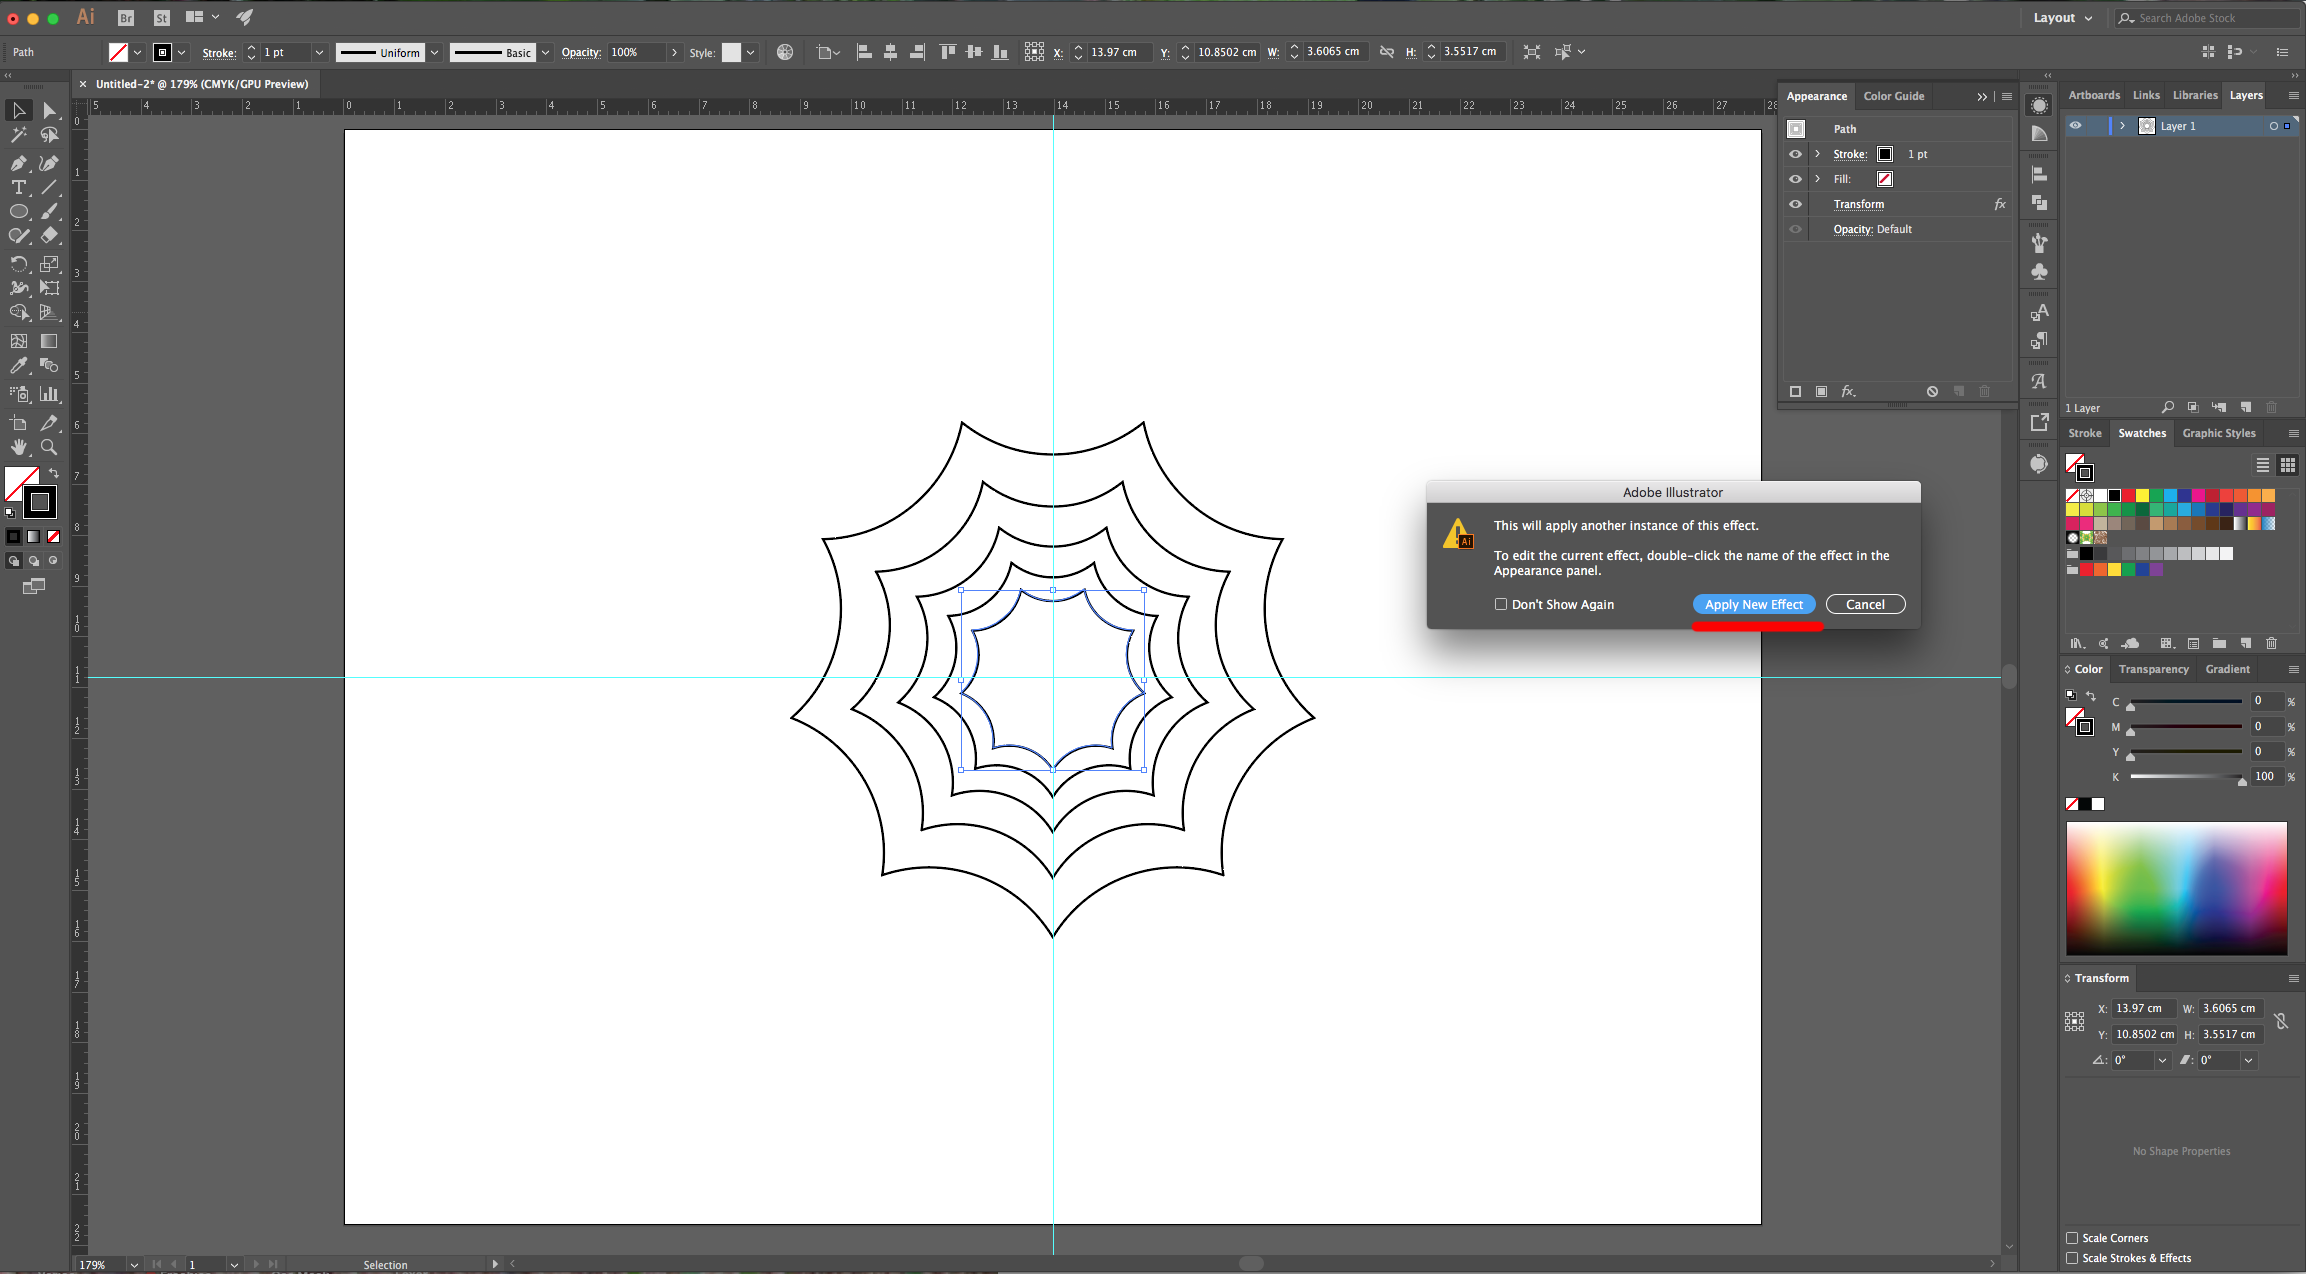
7 - With your shape still selected, go to the “Appearance Panel”, click on the “Effects Menu” at the bottom-left. Go to Distort & Transform > Transform… use a “Horizontal and Vertical Scale” of 130% with a 0° “Rotate” Angle and input the number 4 in the “Copies” section. Make sure the “Scale Strokes & Effects” is un-checked and click “OK”.
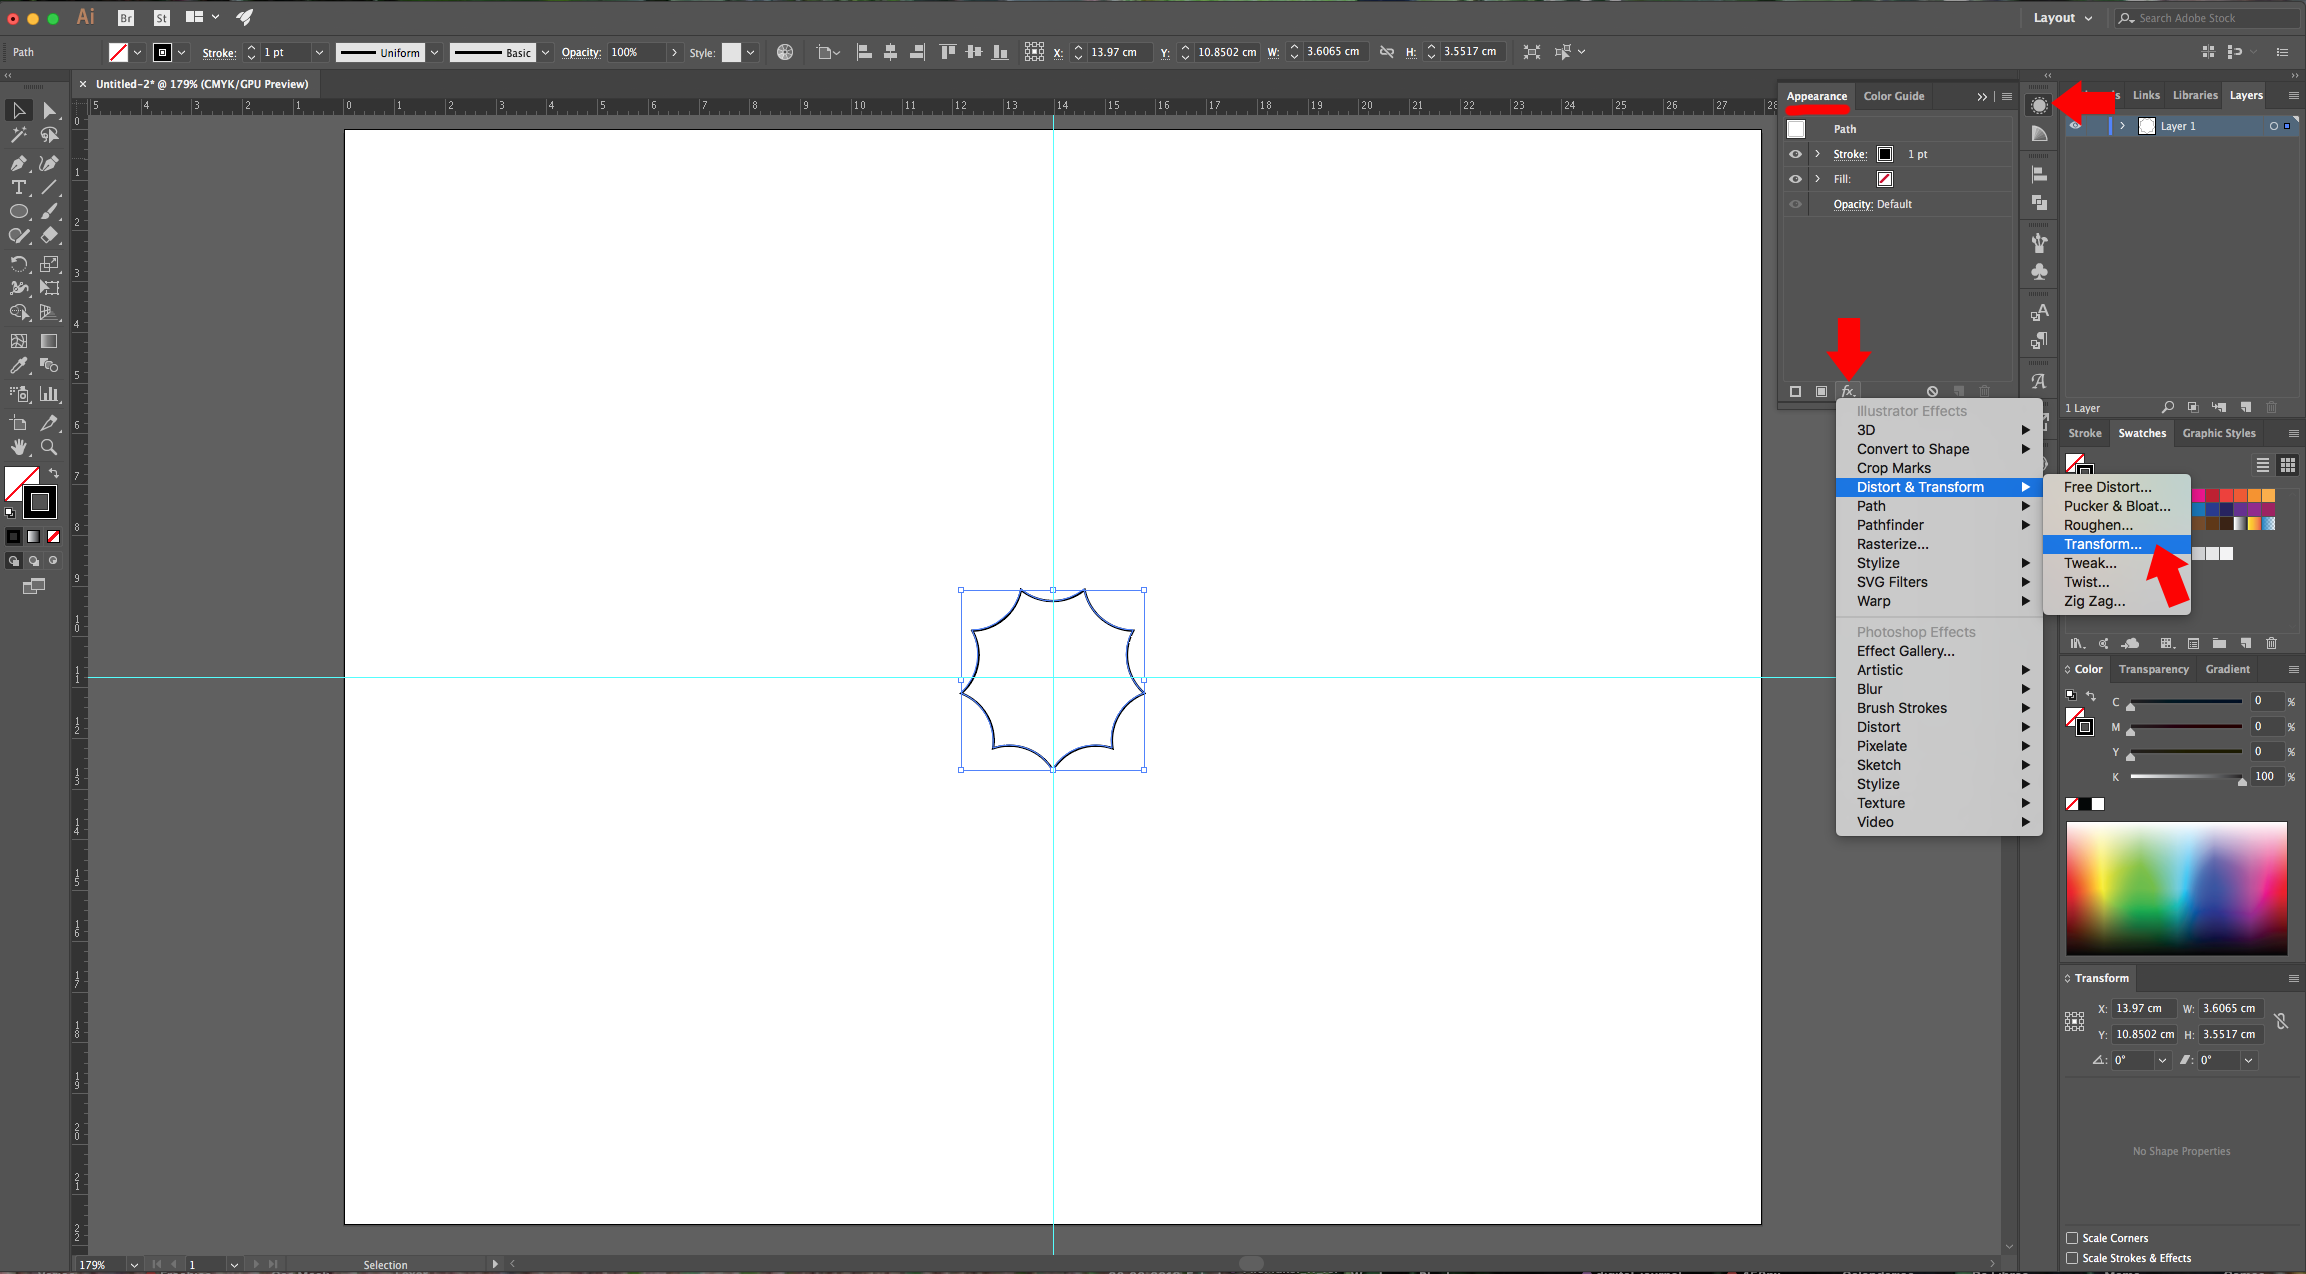

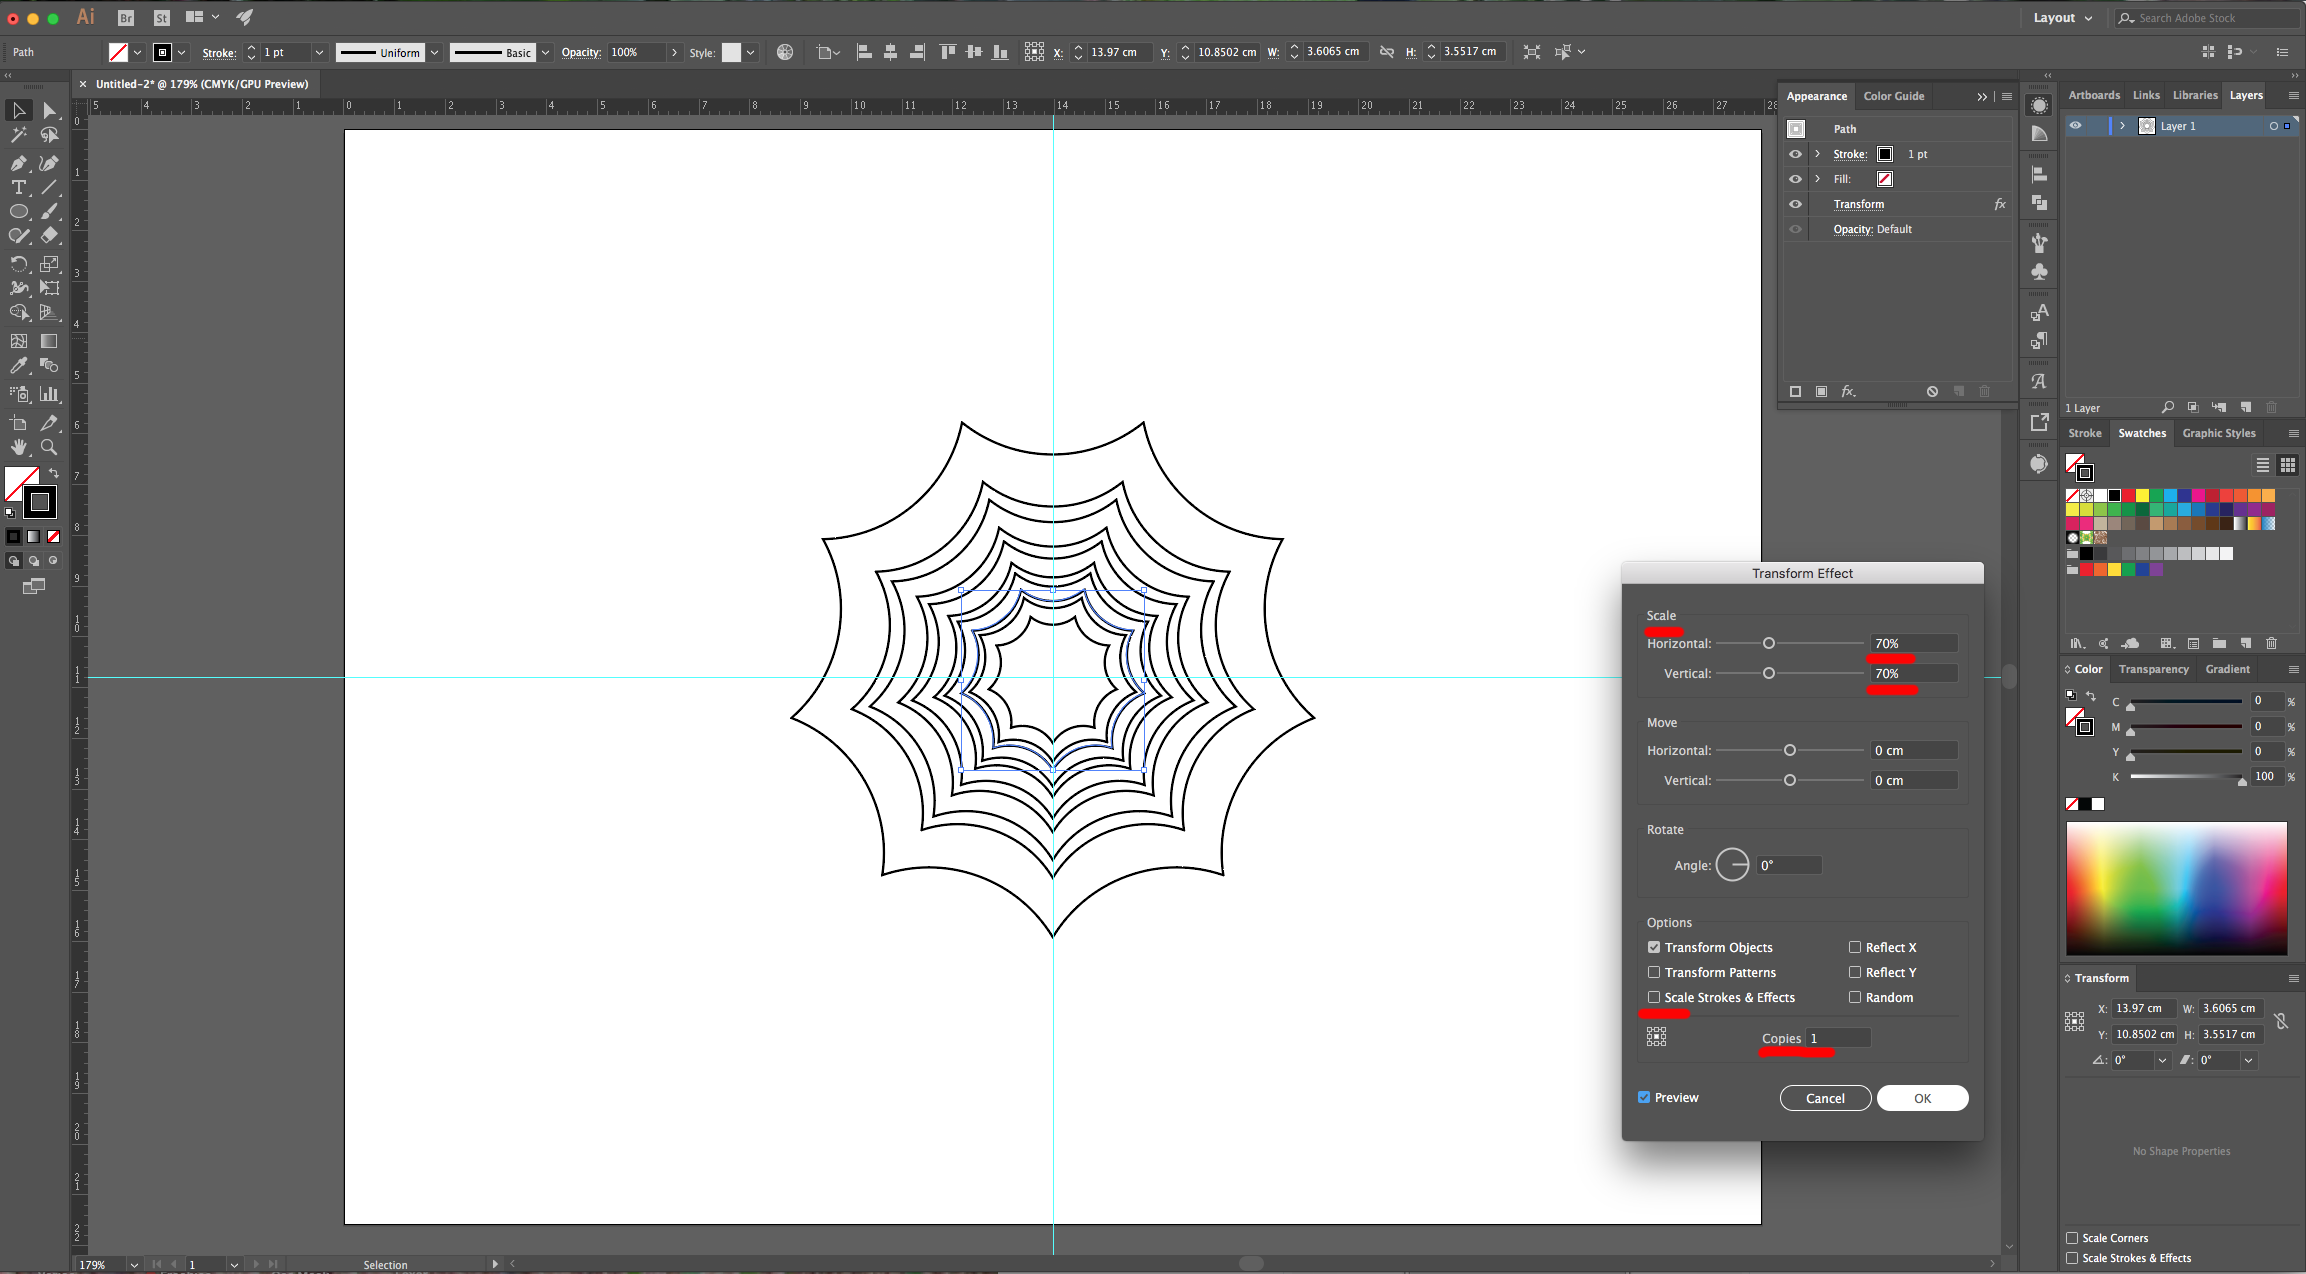
8 - Apply a second “Transform” Effect, click on the “Apply New Effect” if asked and this time use a “Horizontal and Vertical Scale” of 70% and just 1 “Copy”. Make sure the “Scale Strokes & Effects” is un-checked and click “OK”.
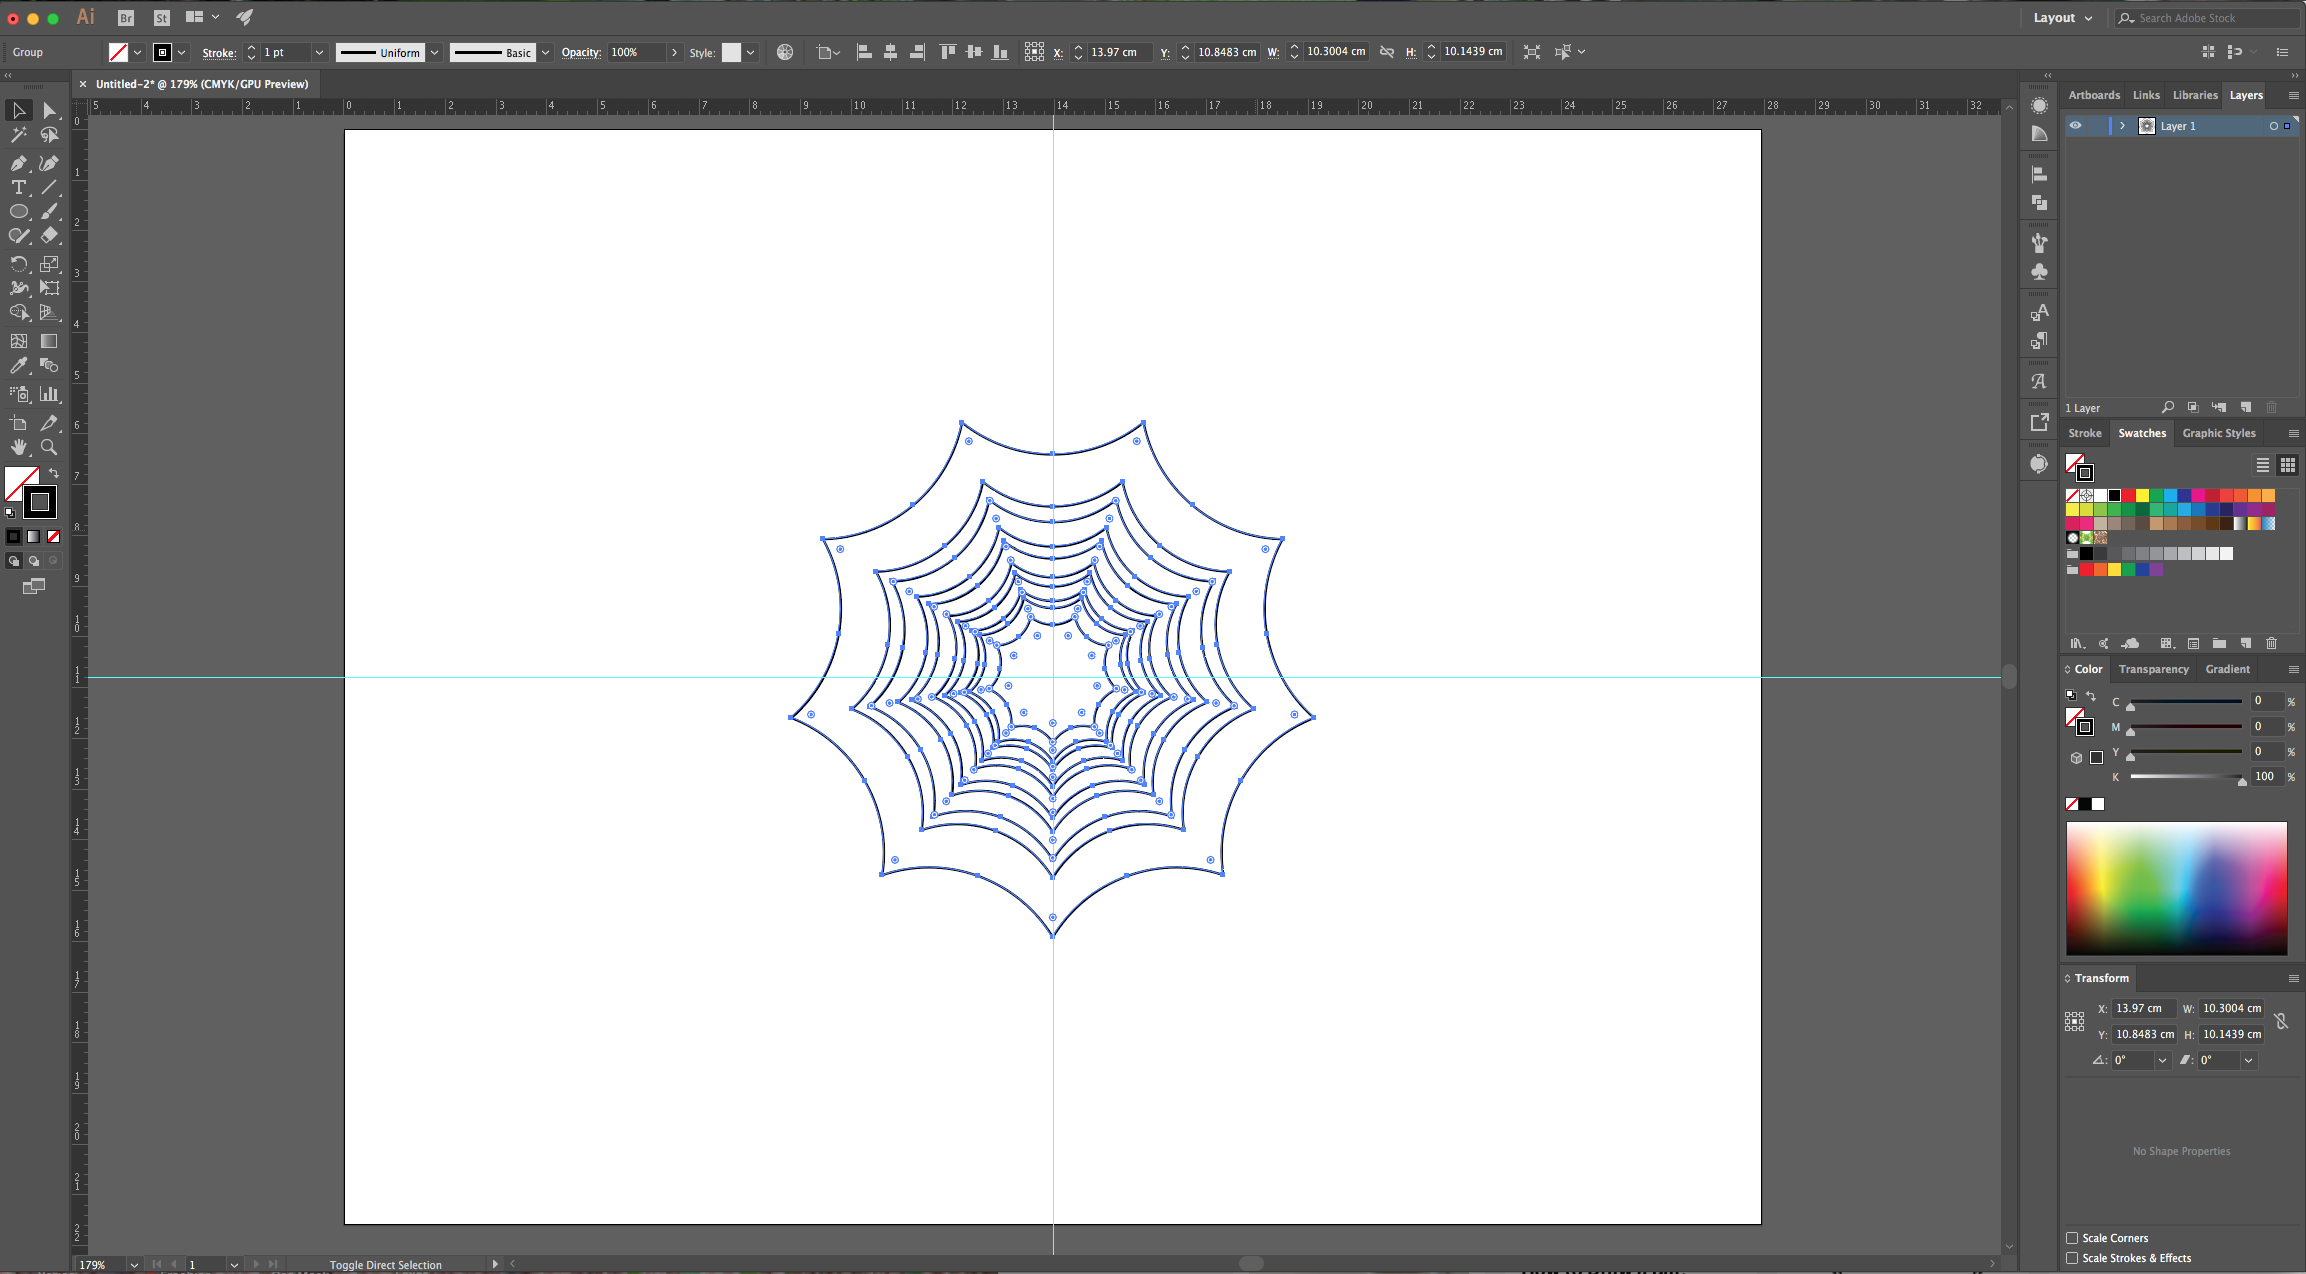
9 - Go to Object > Expand Appearance to release all the Shapes.

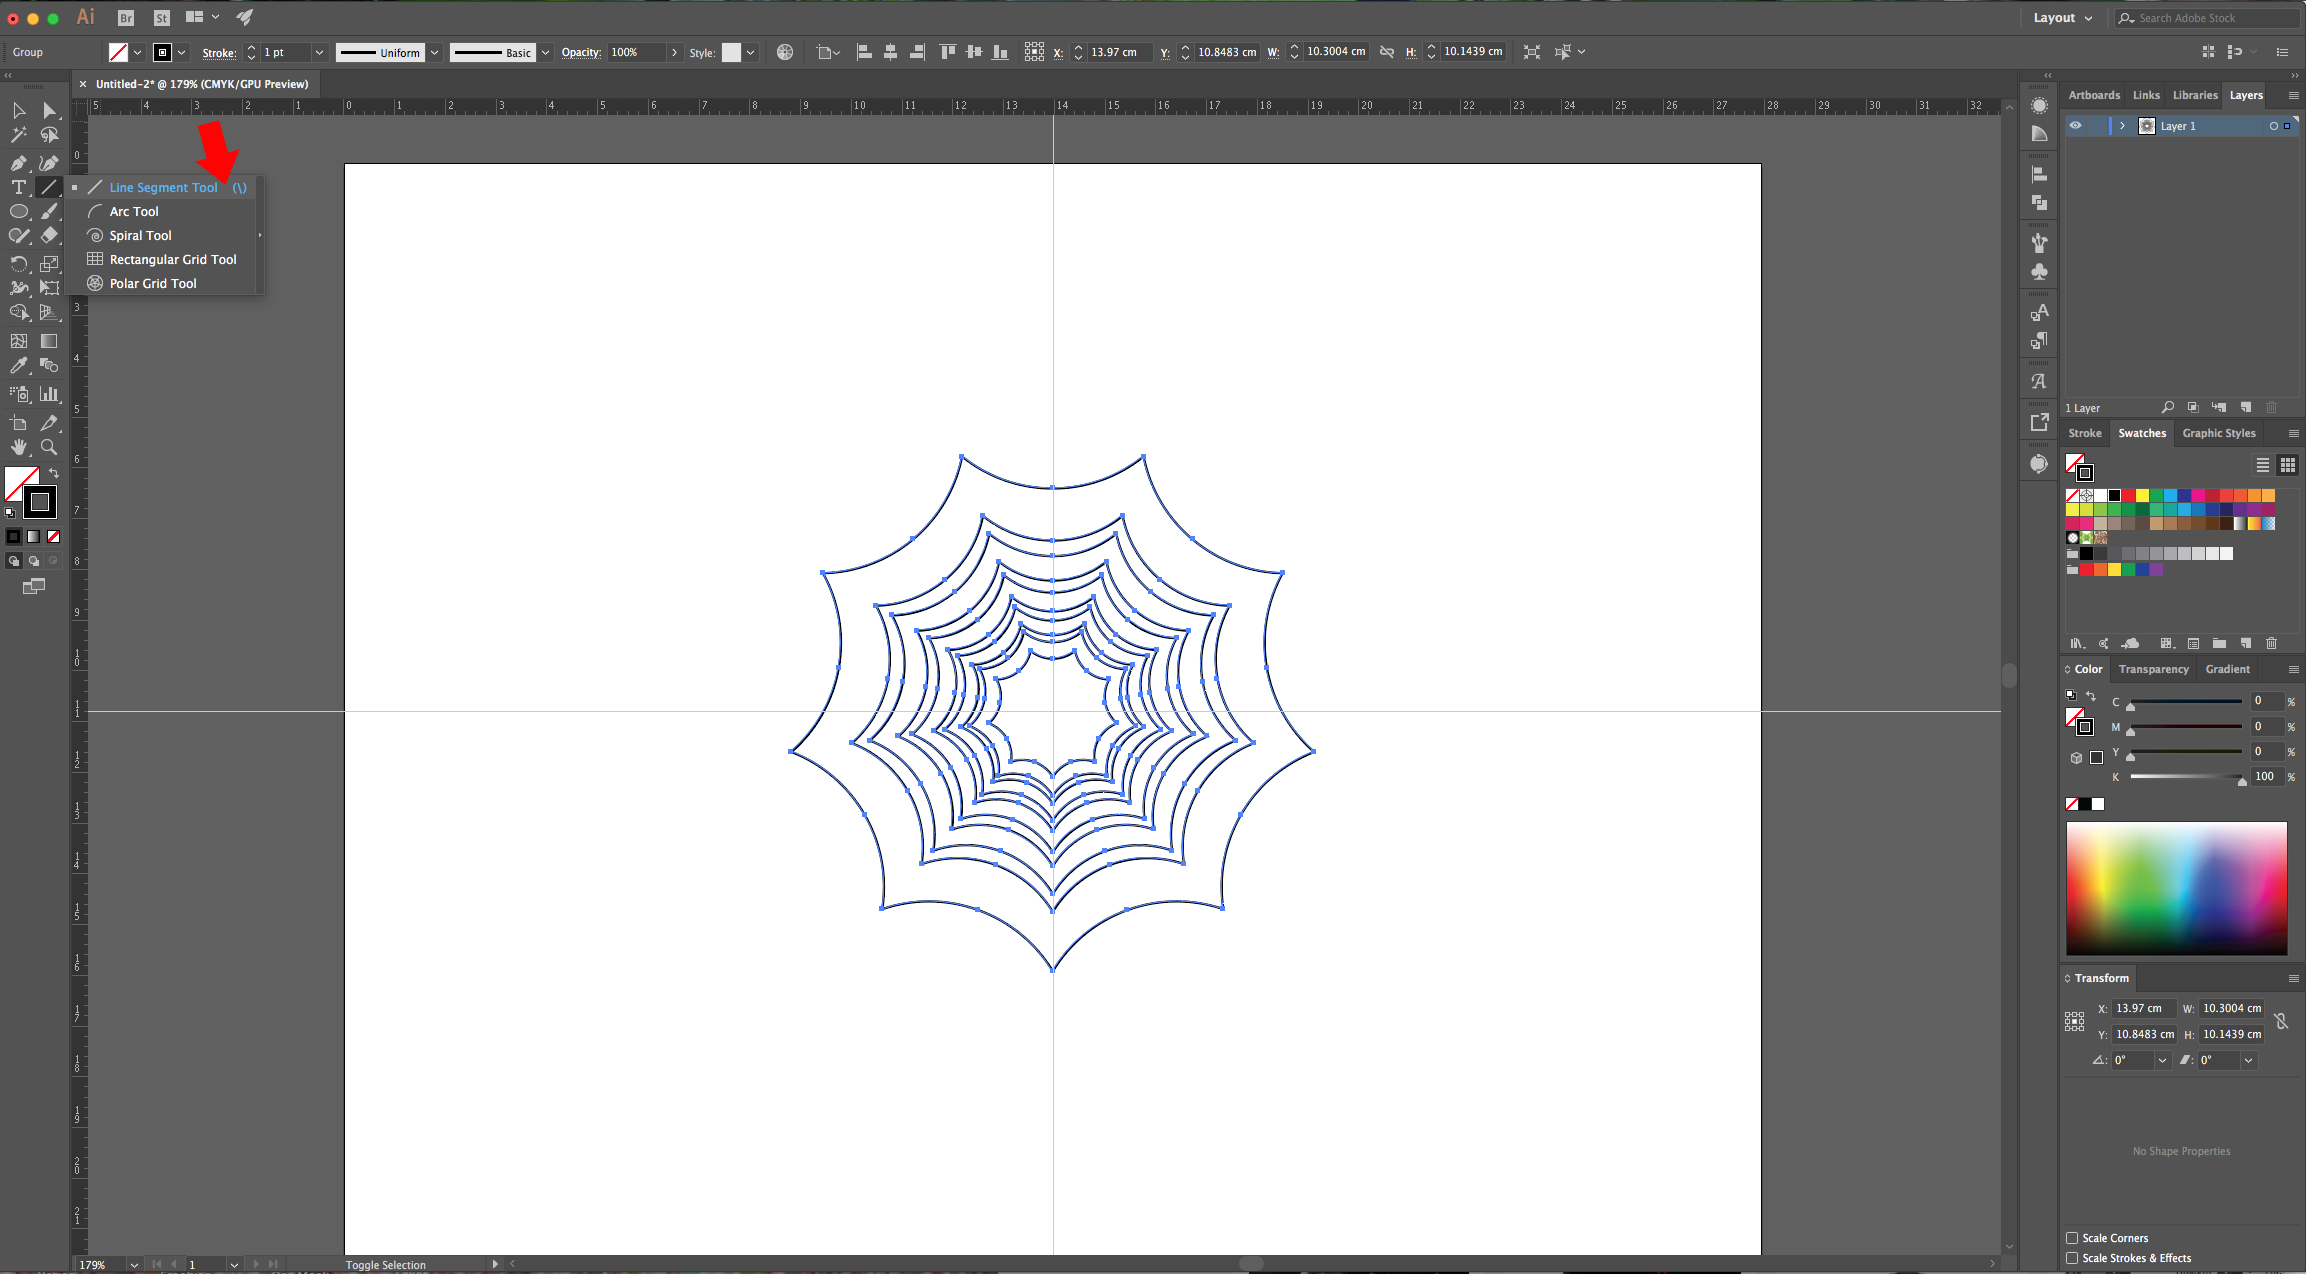
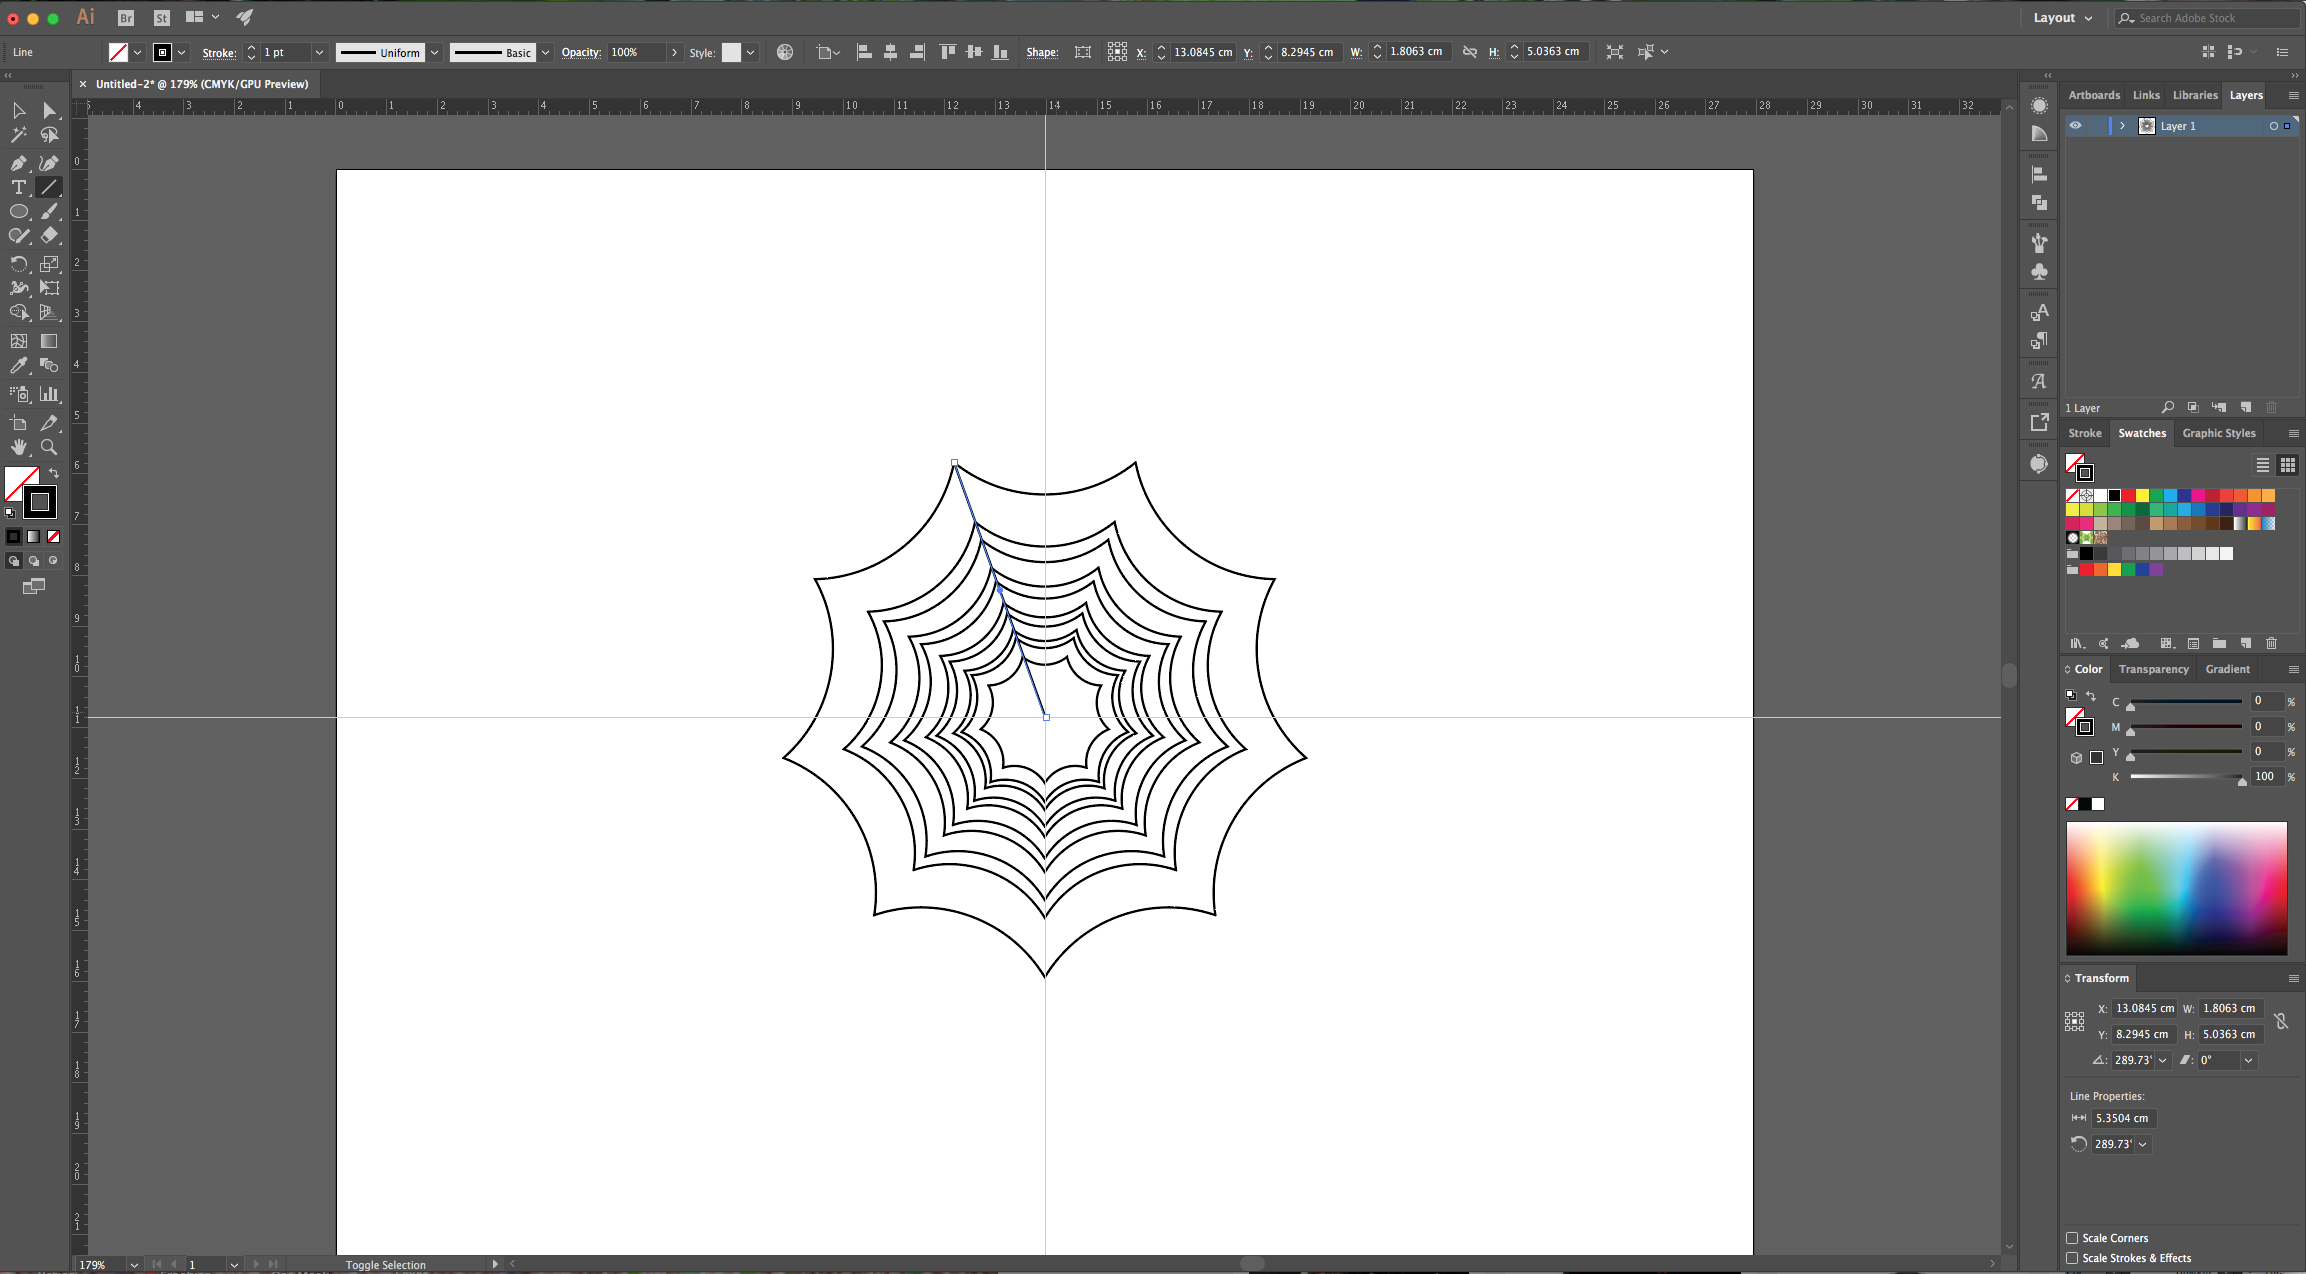
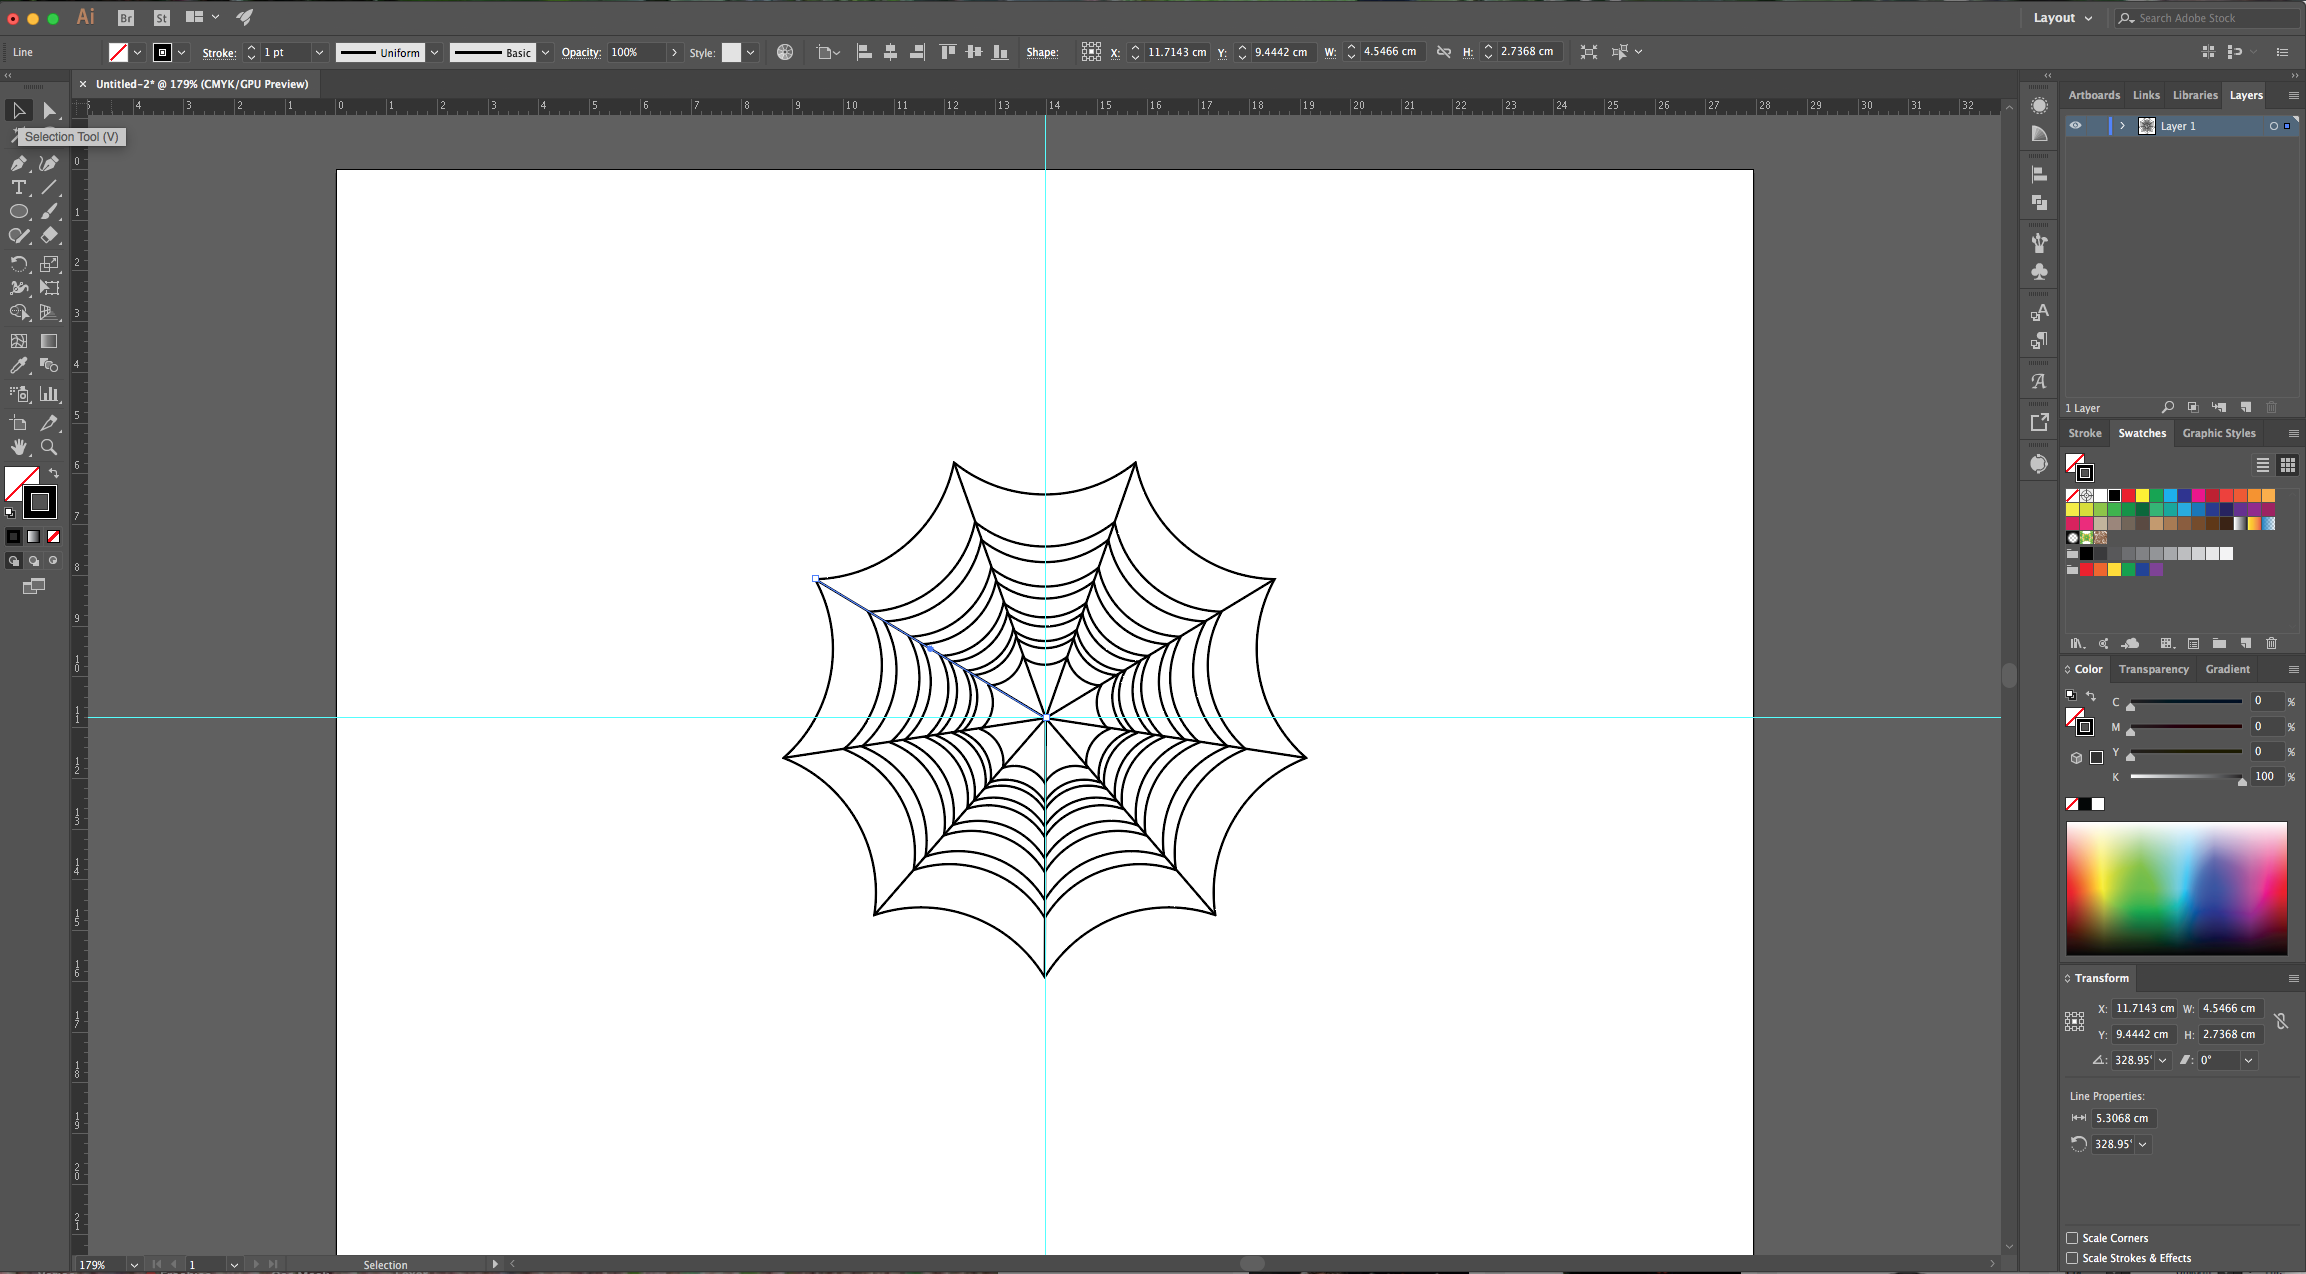
10 - Select the “Line Segment Tool” and draw a line from the center of the shapes to one of the corners (hold the “Alt/Option” key if you want). Repeat for every corner of the outer shape, always starting from the center.
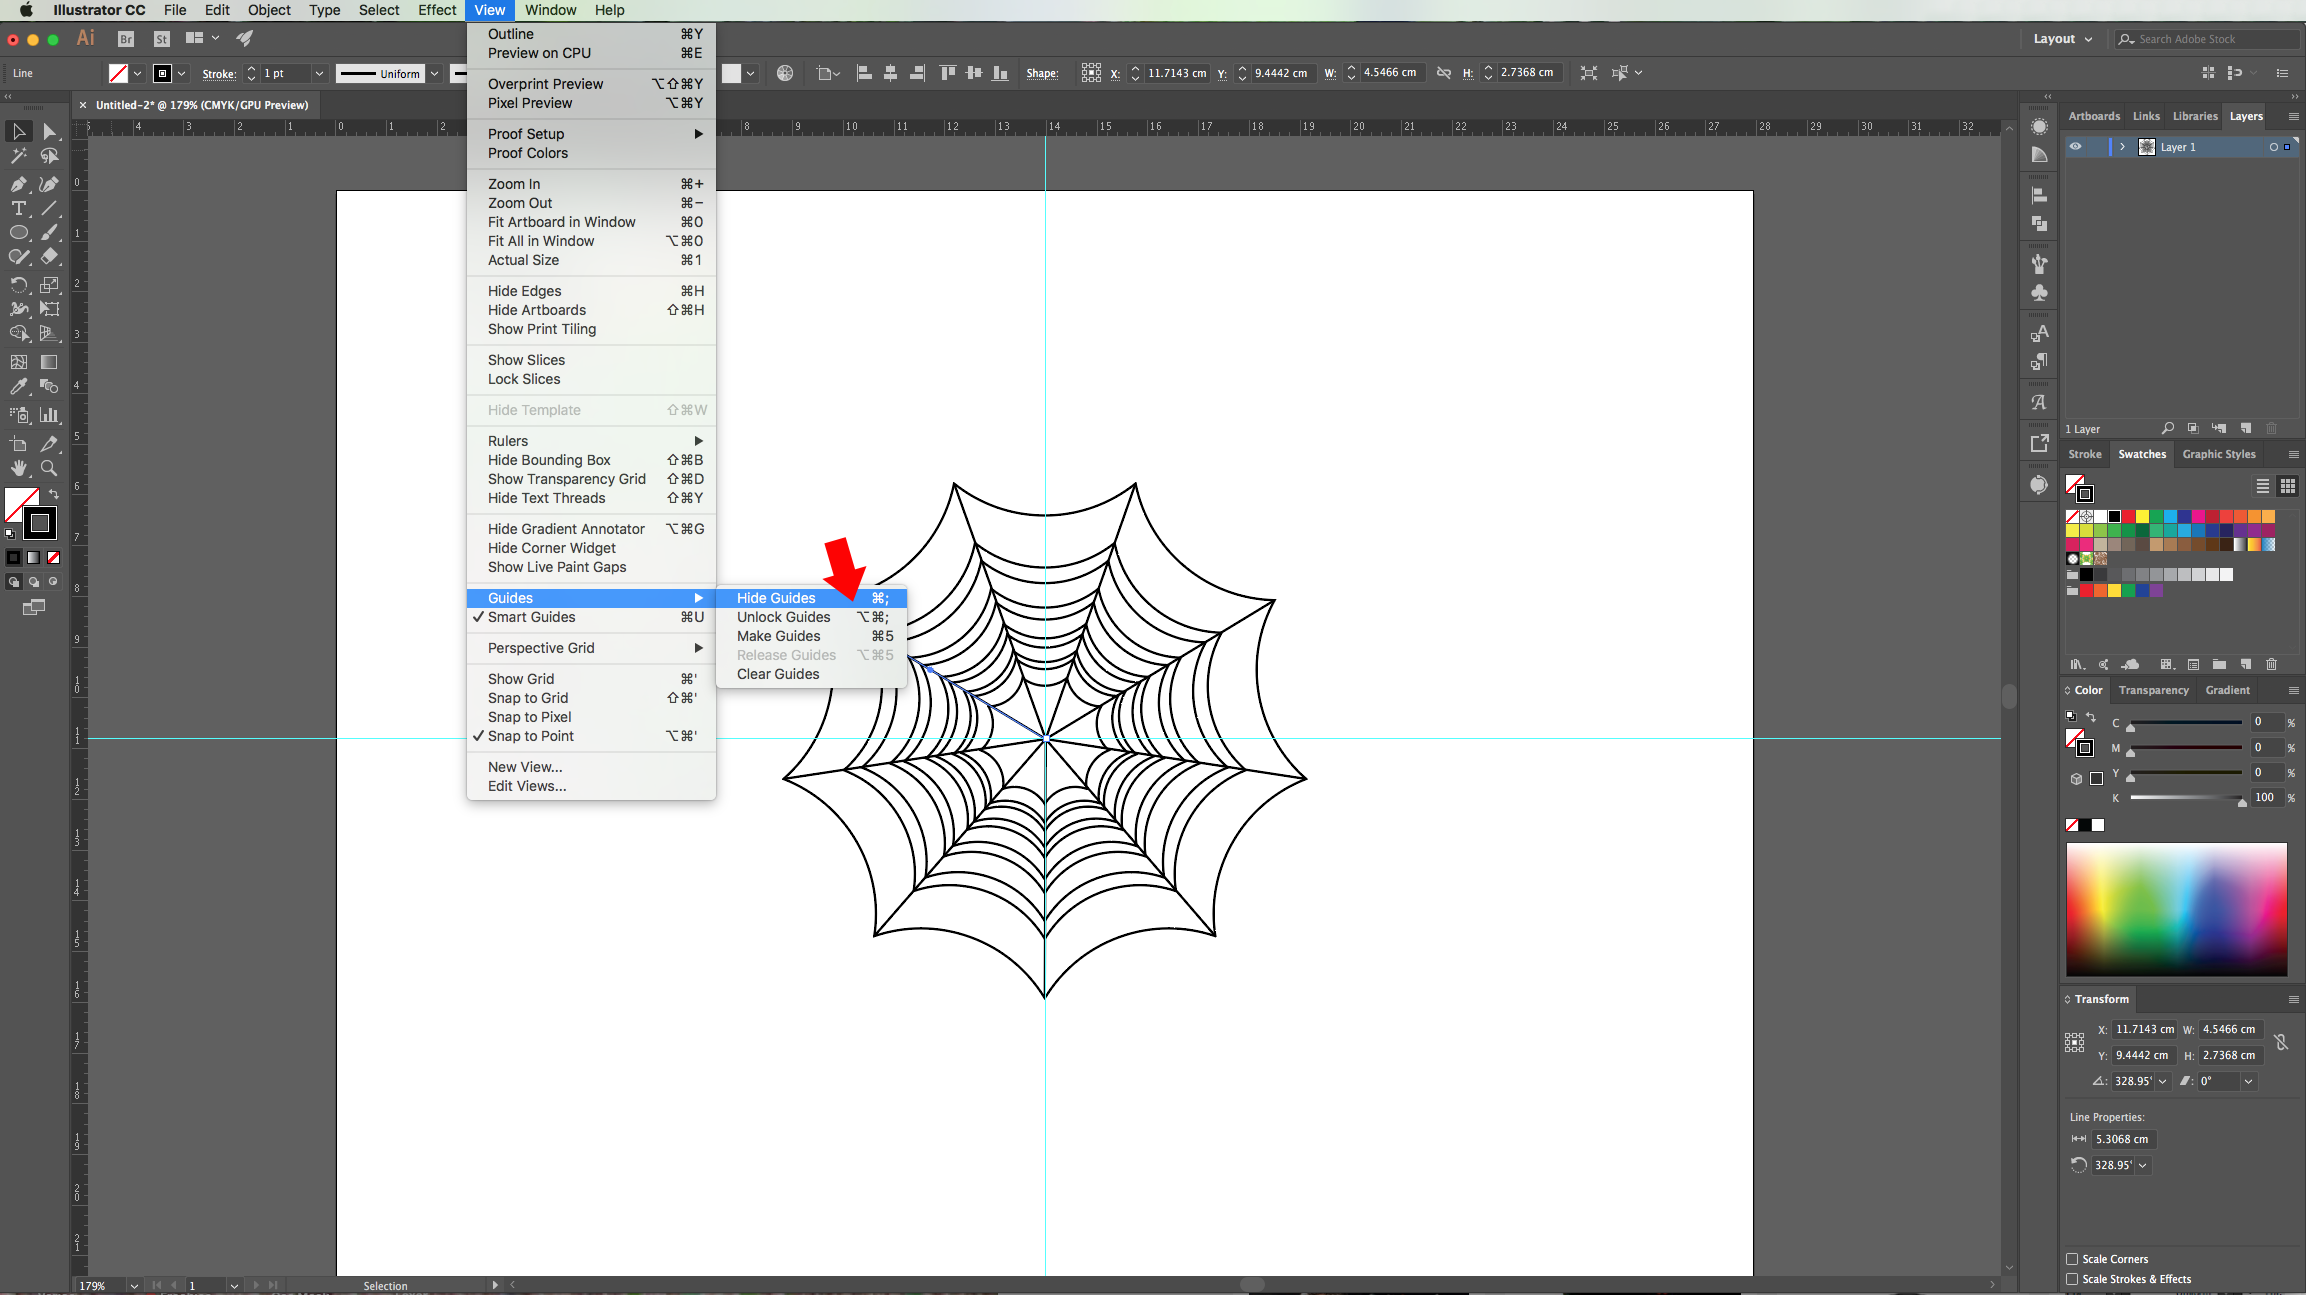
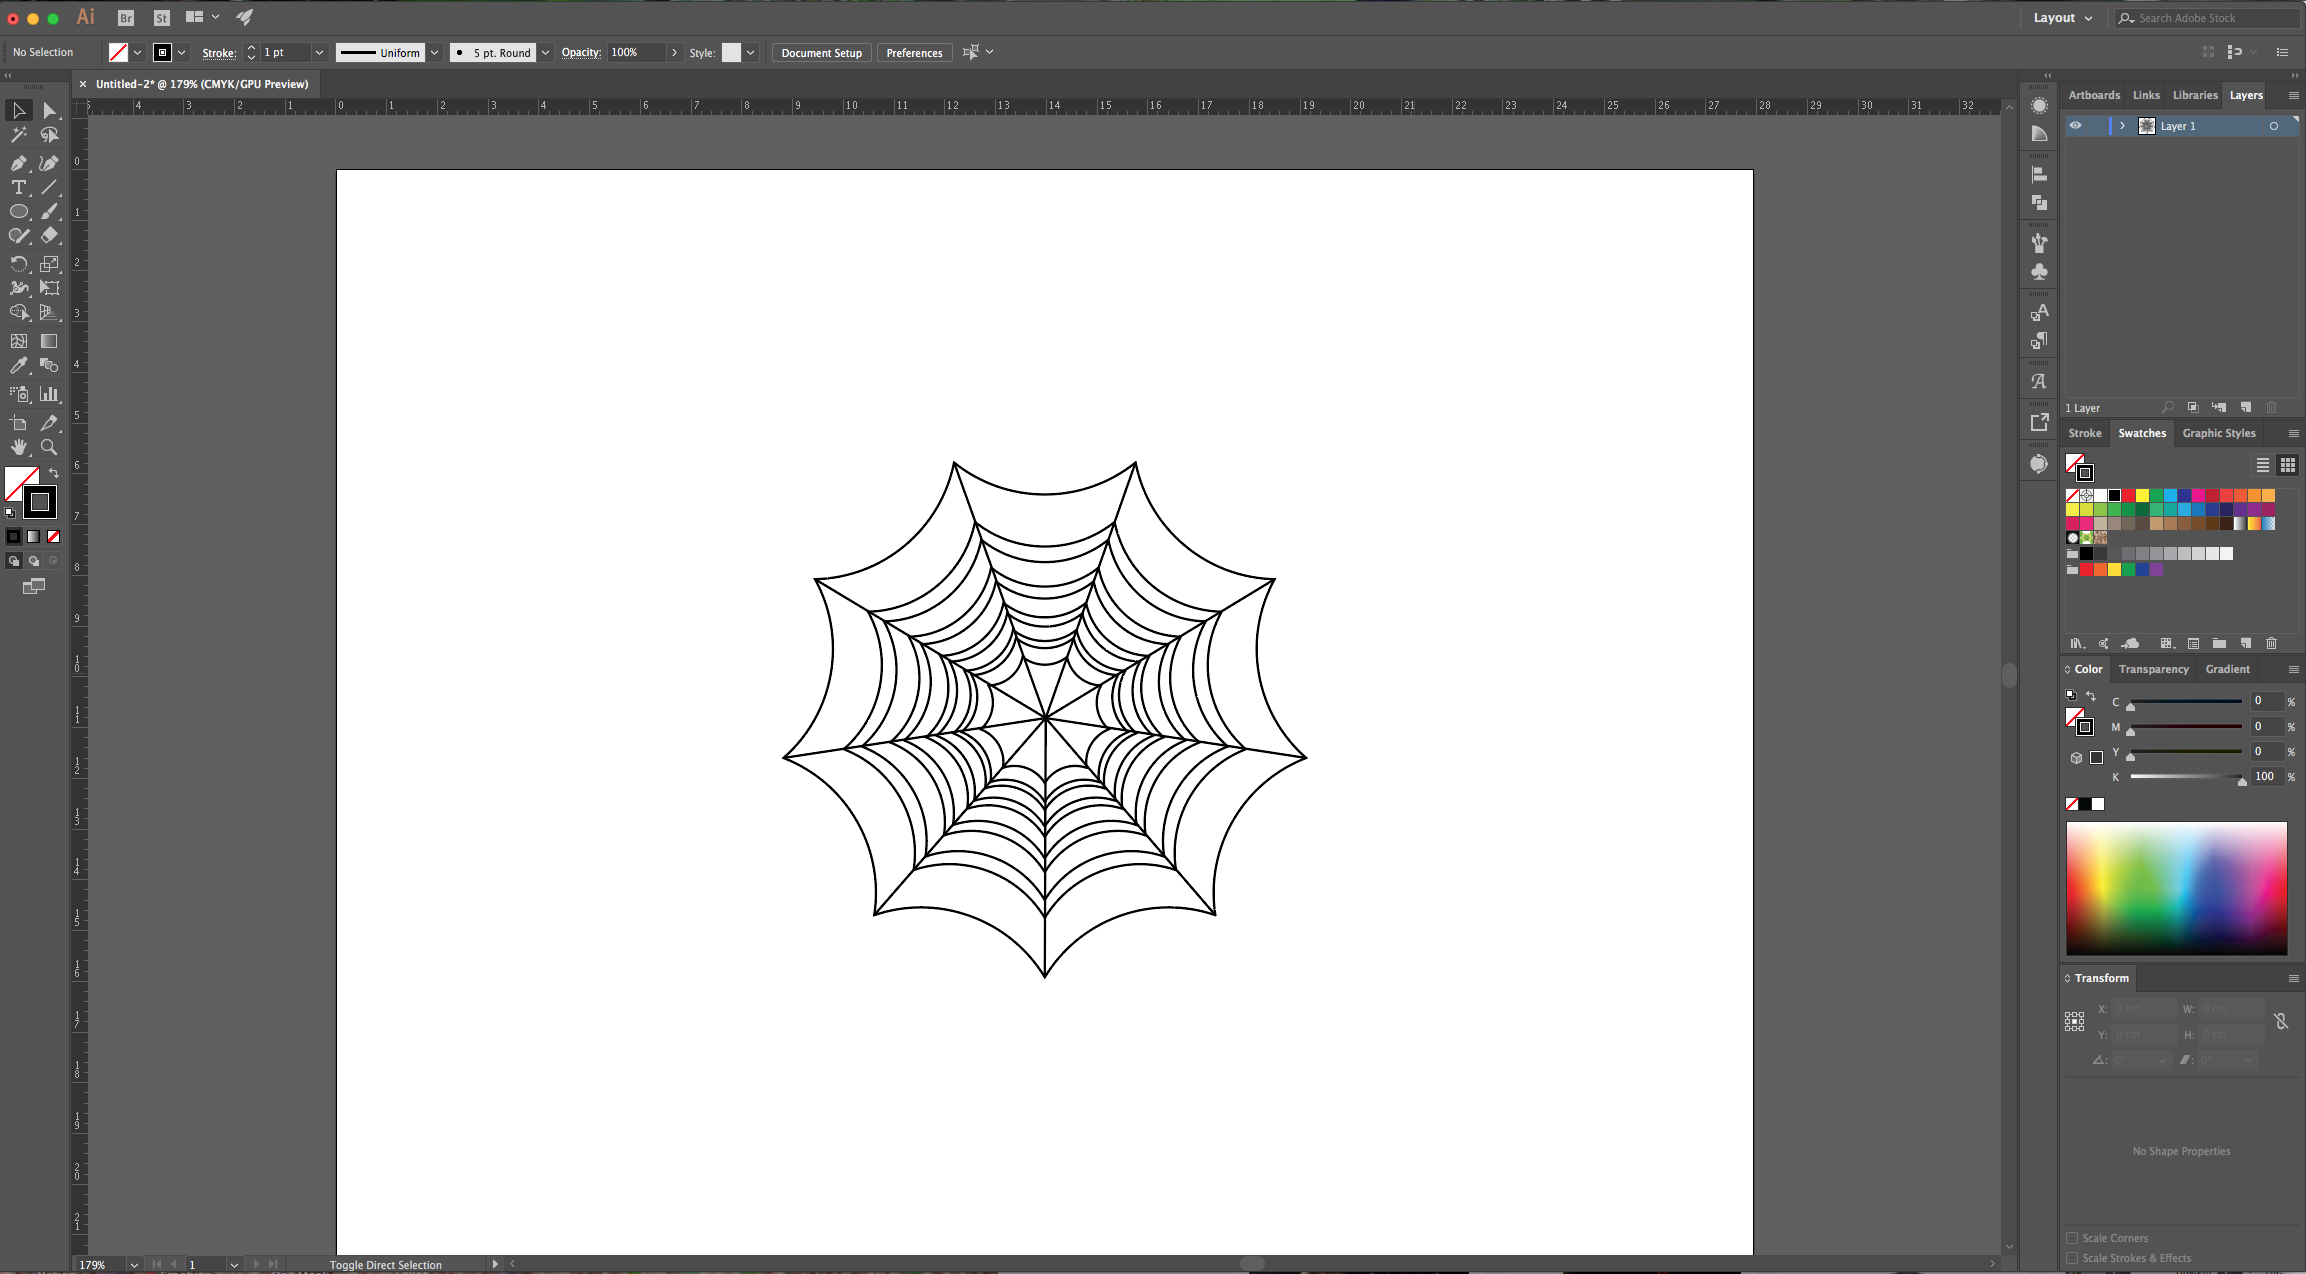
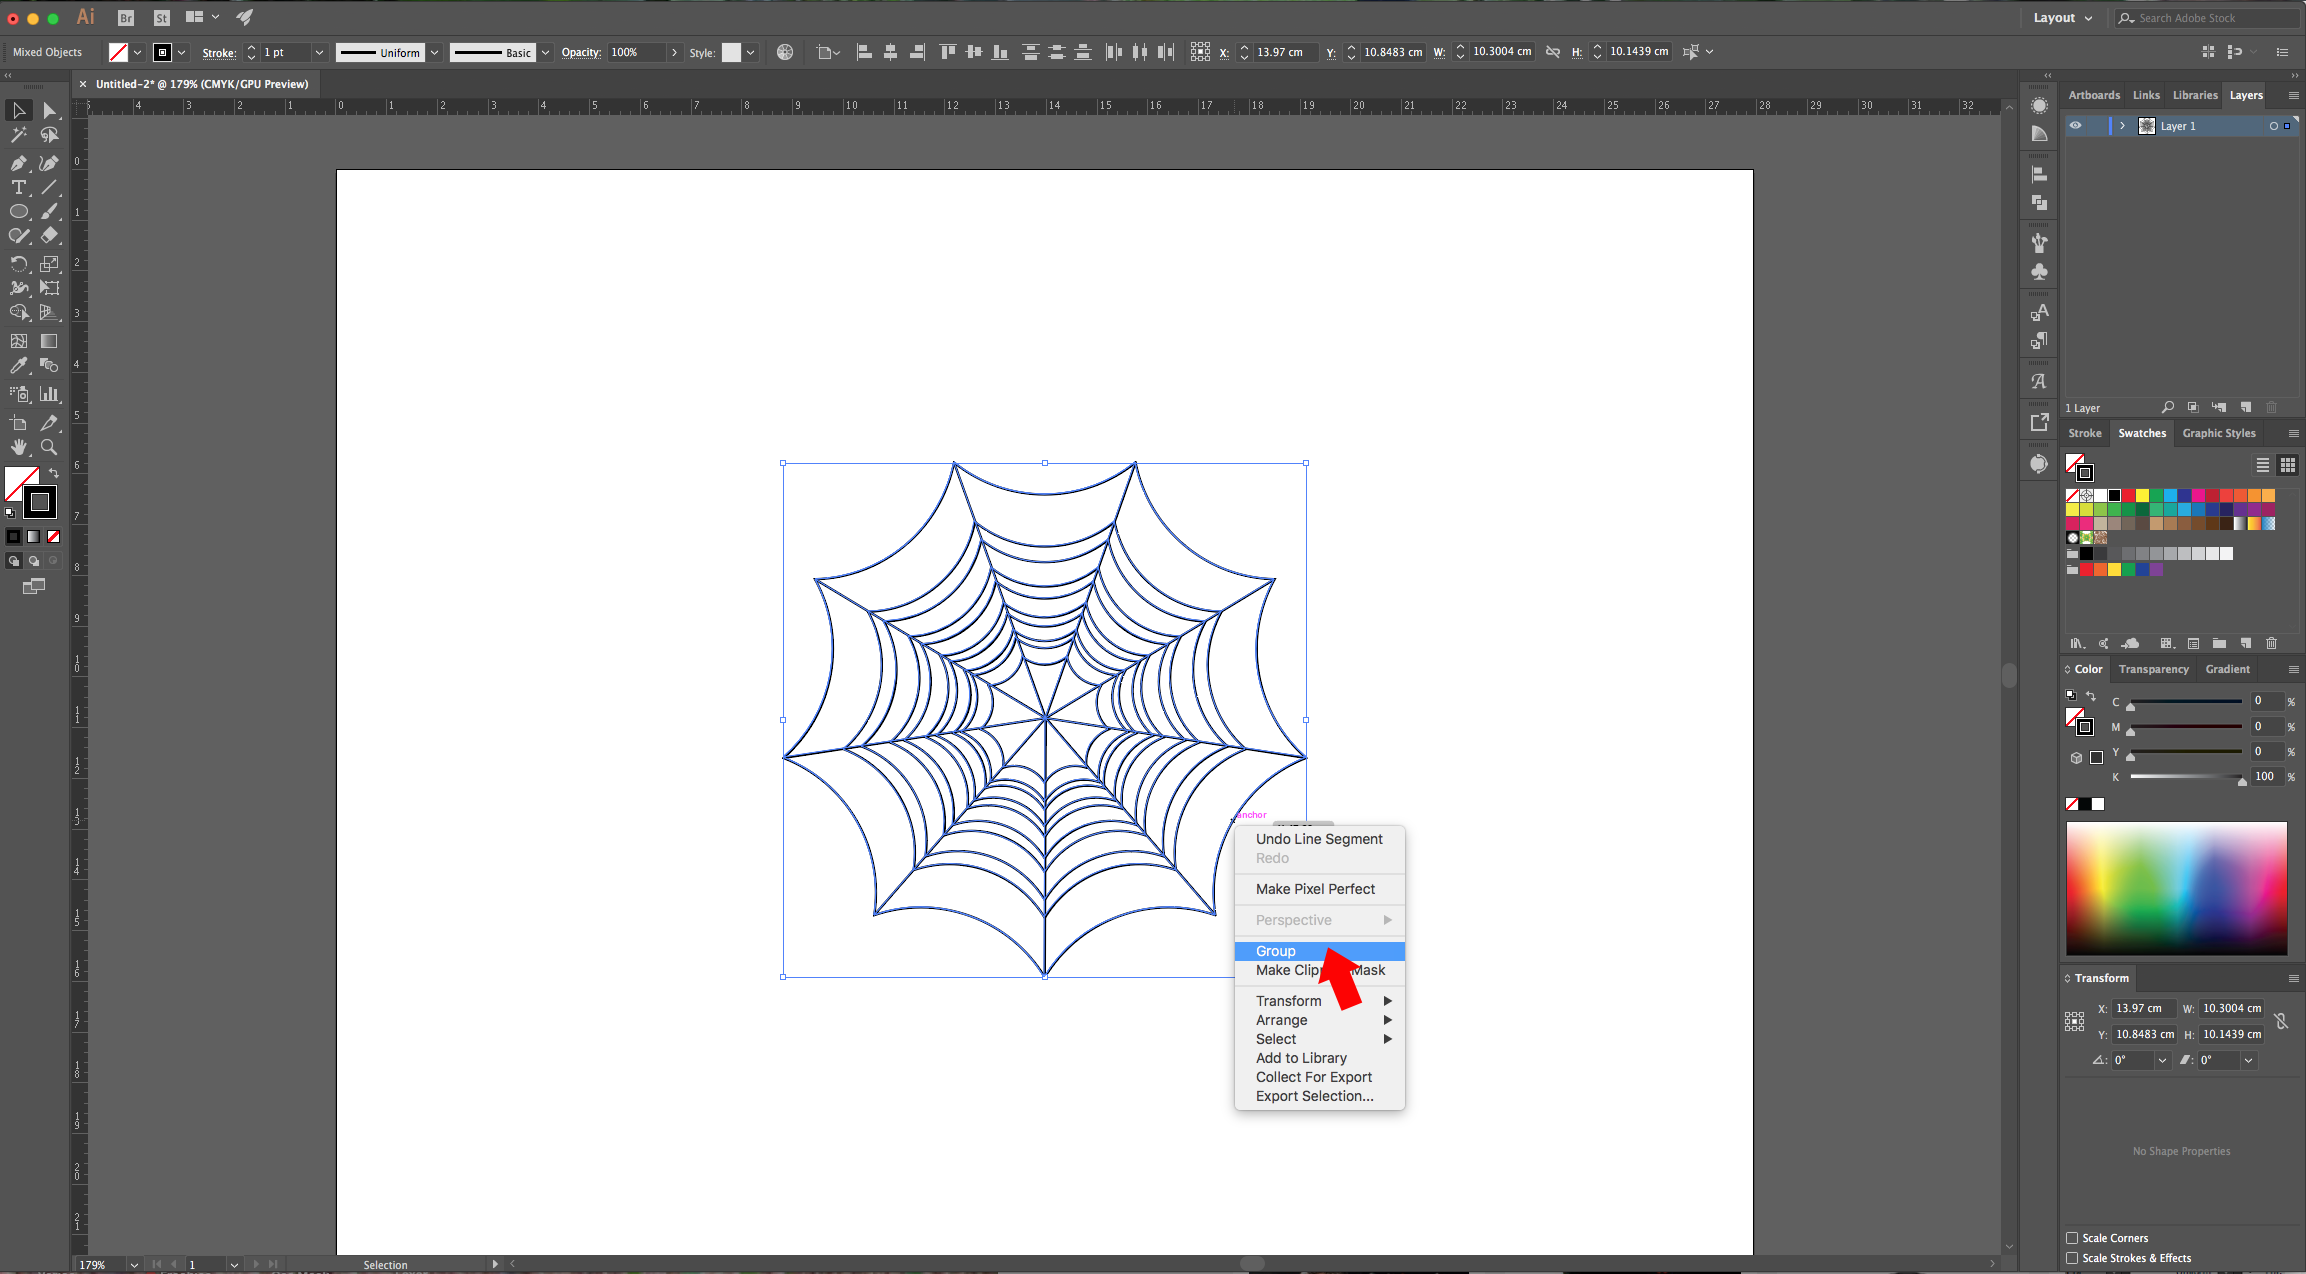
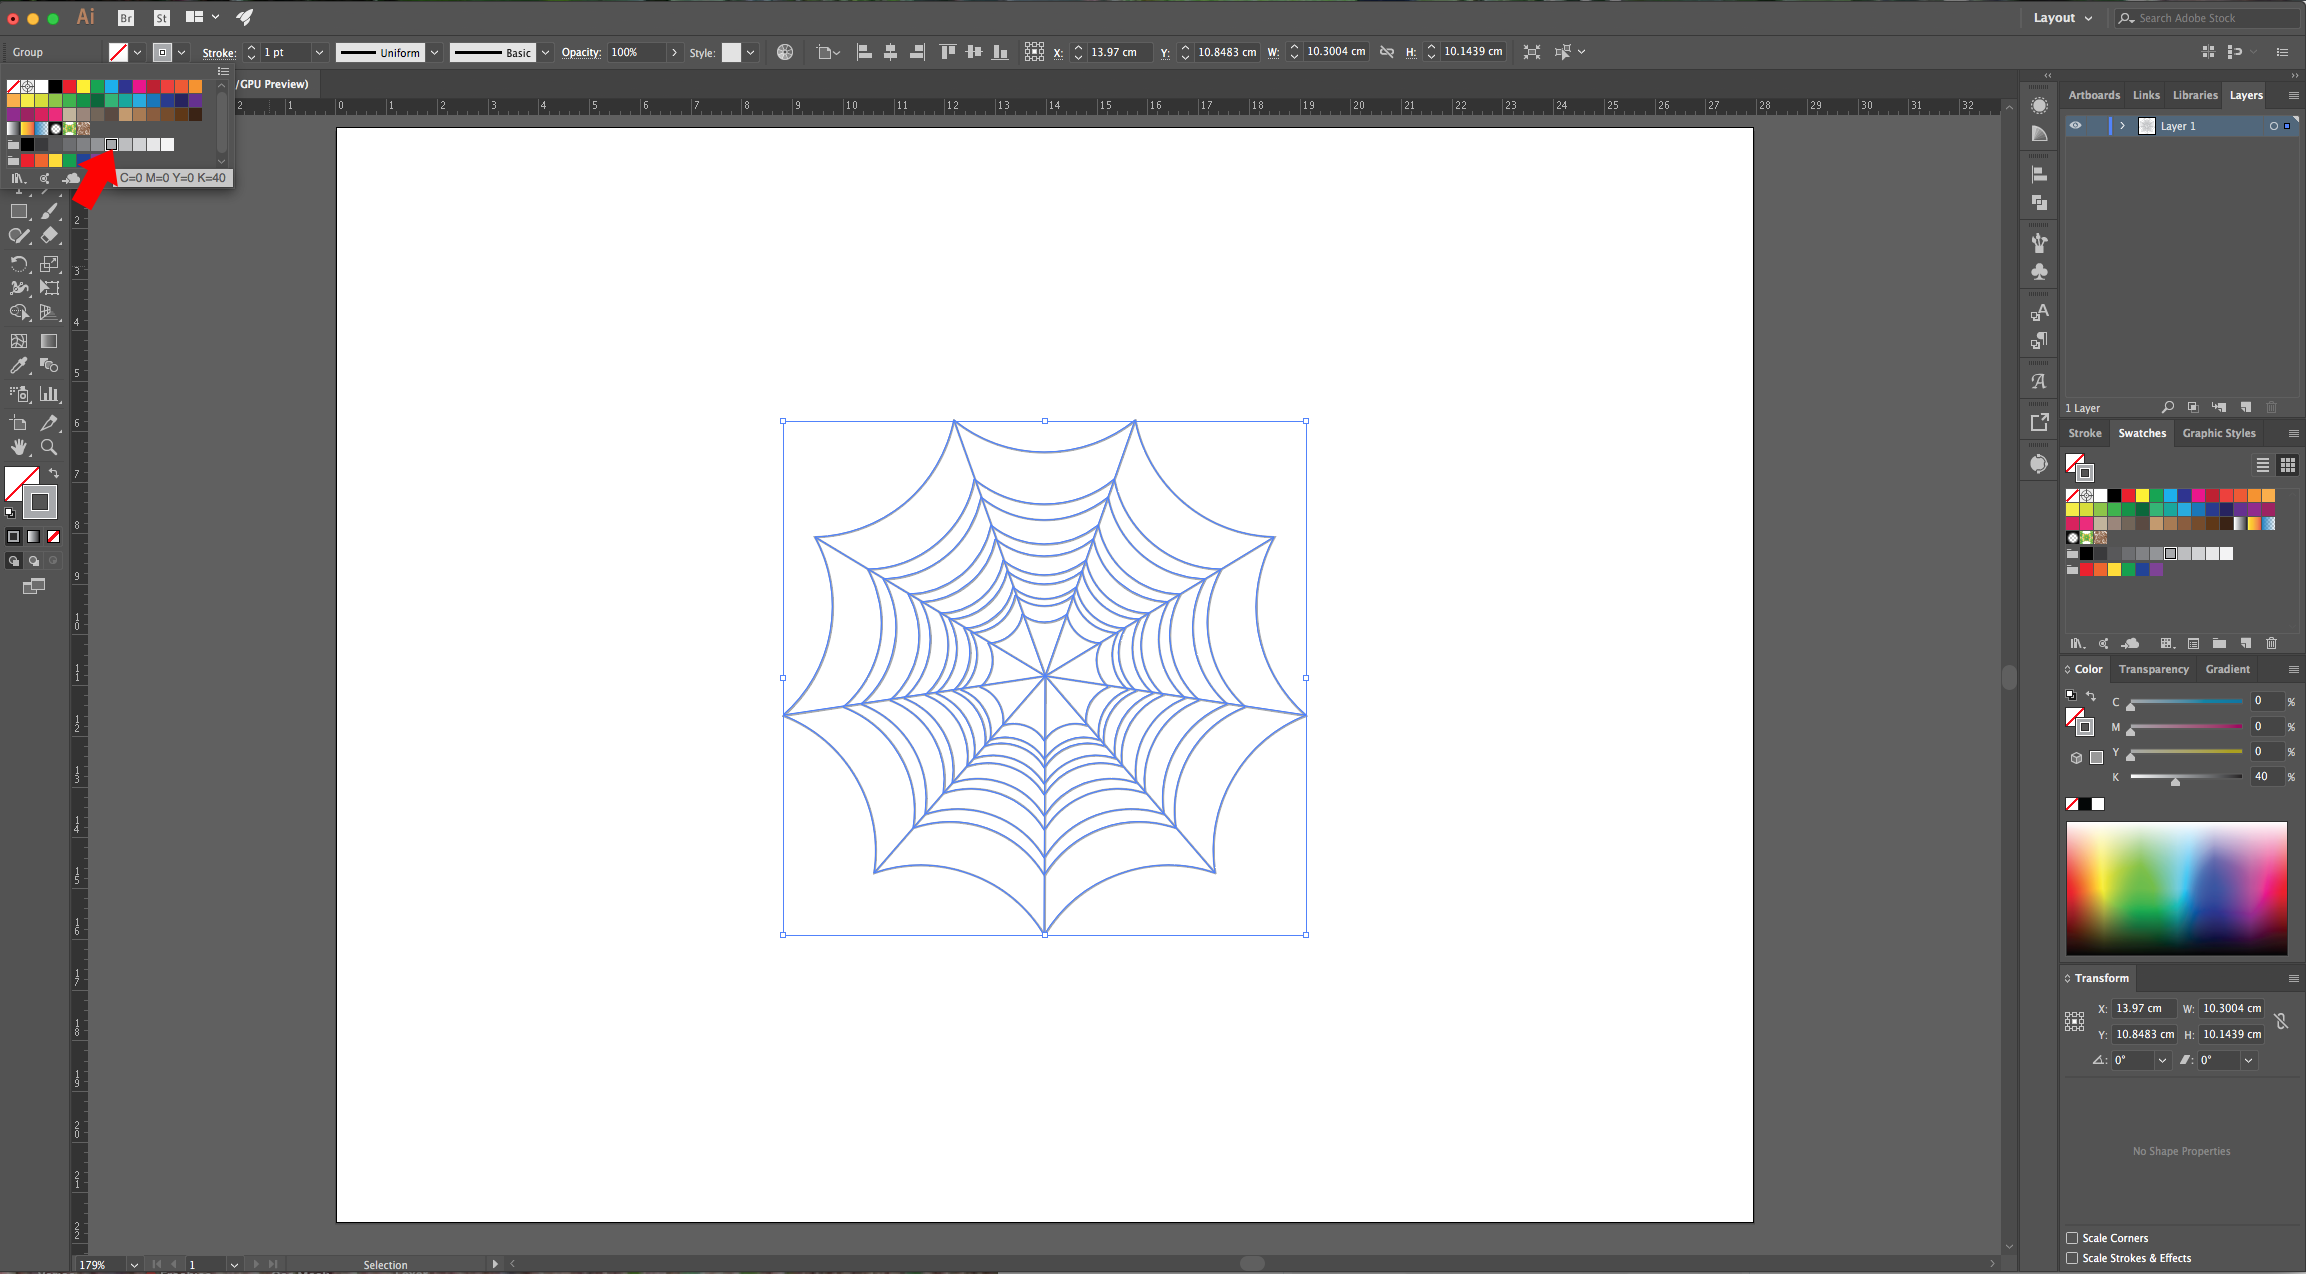
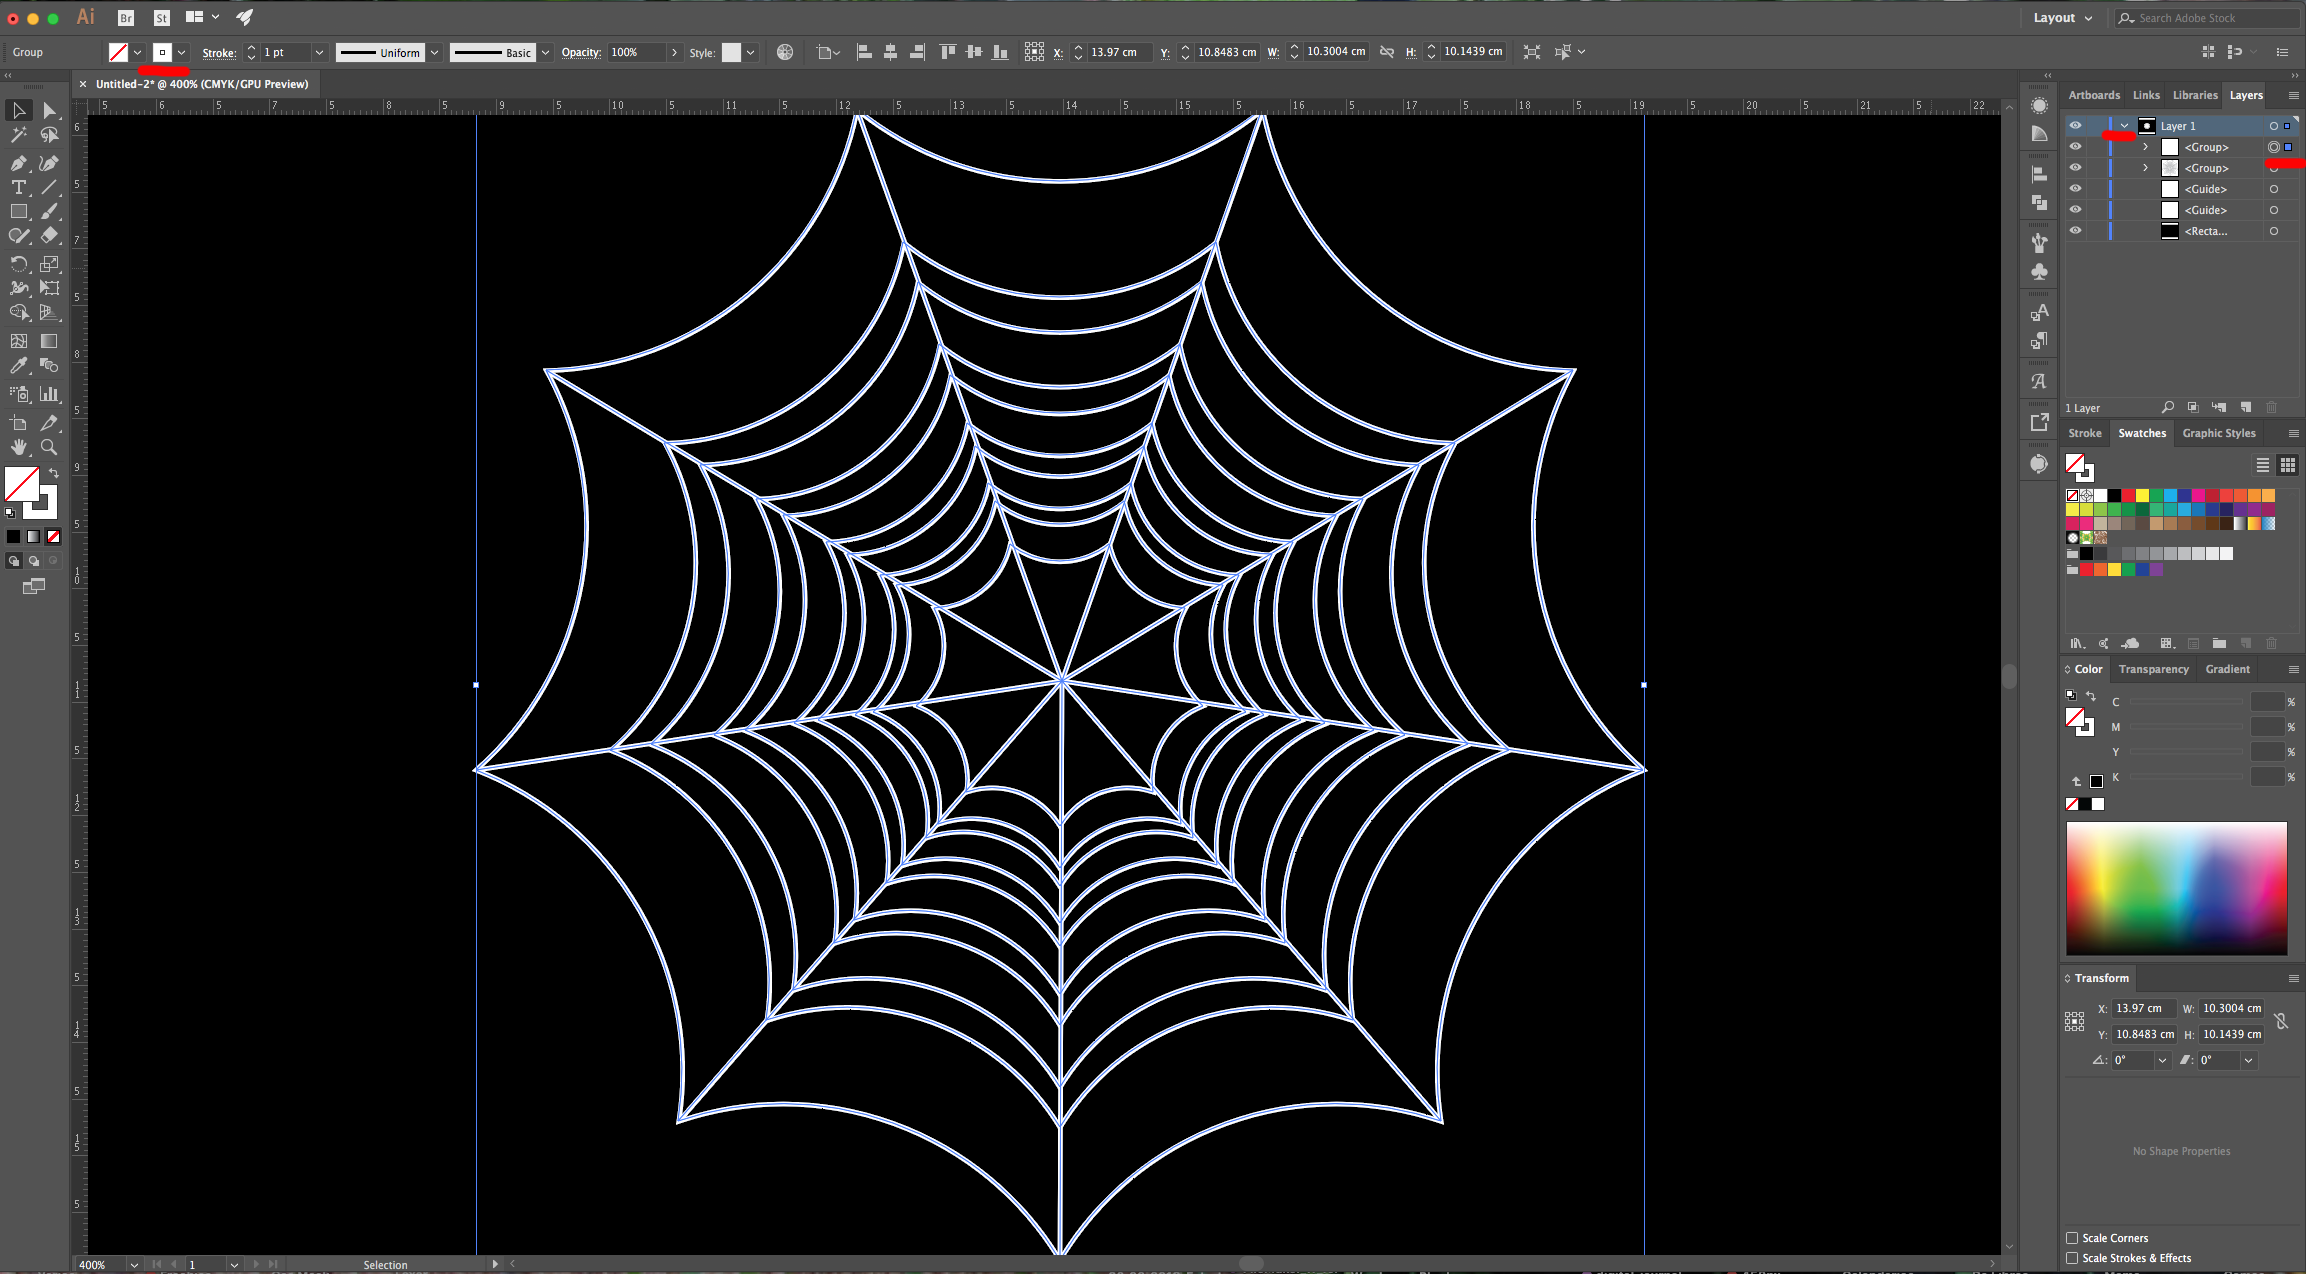
11 - You can “Hide” the “Guides” if you want by going to View > Guides > Hide Guides… (Command/Control + ;). Select everything, right-click on top, choose “Group” (Command/Control + G) and change the “Stroke” color to a Medium Grey.
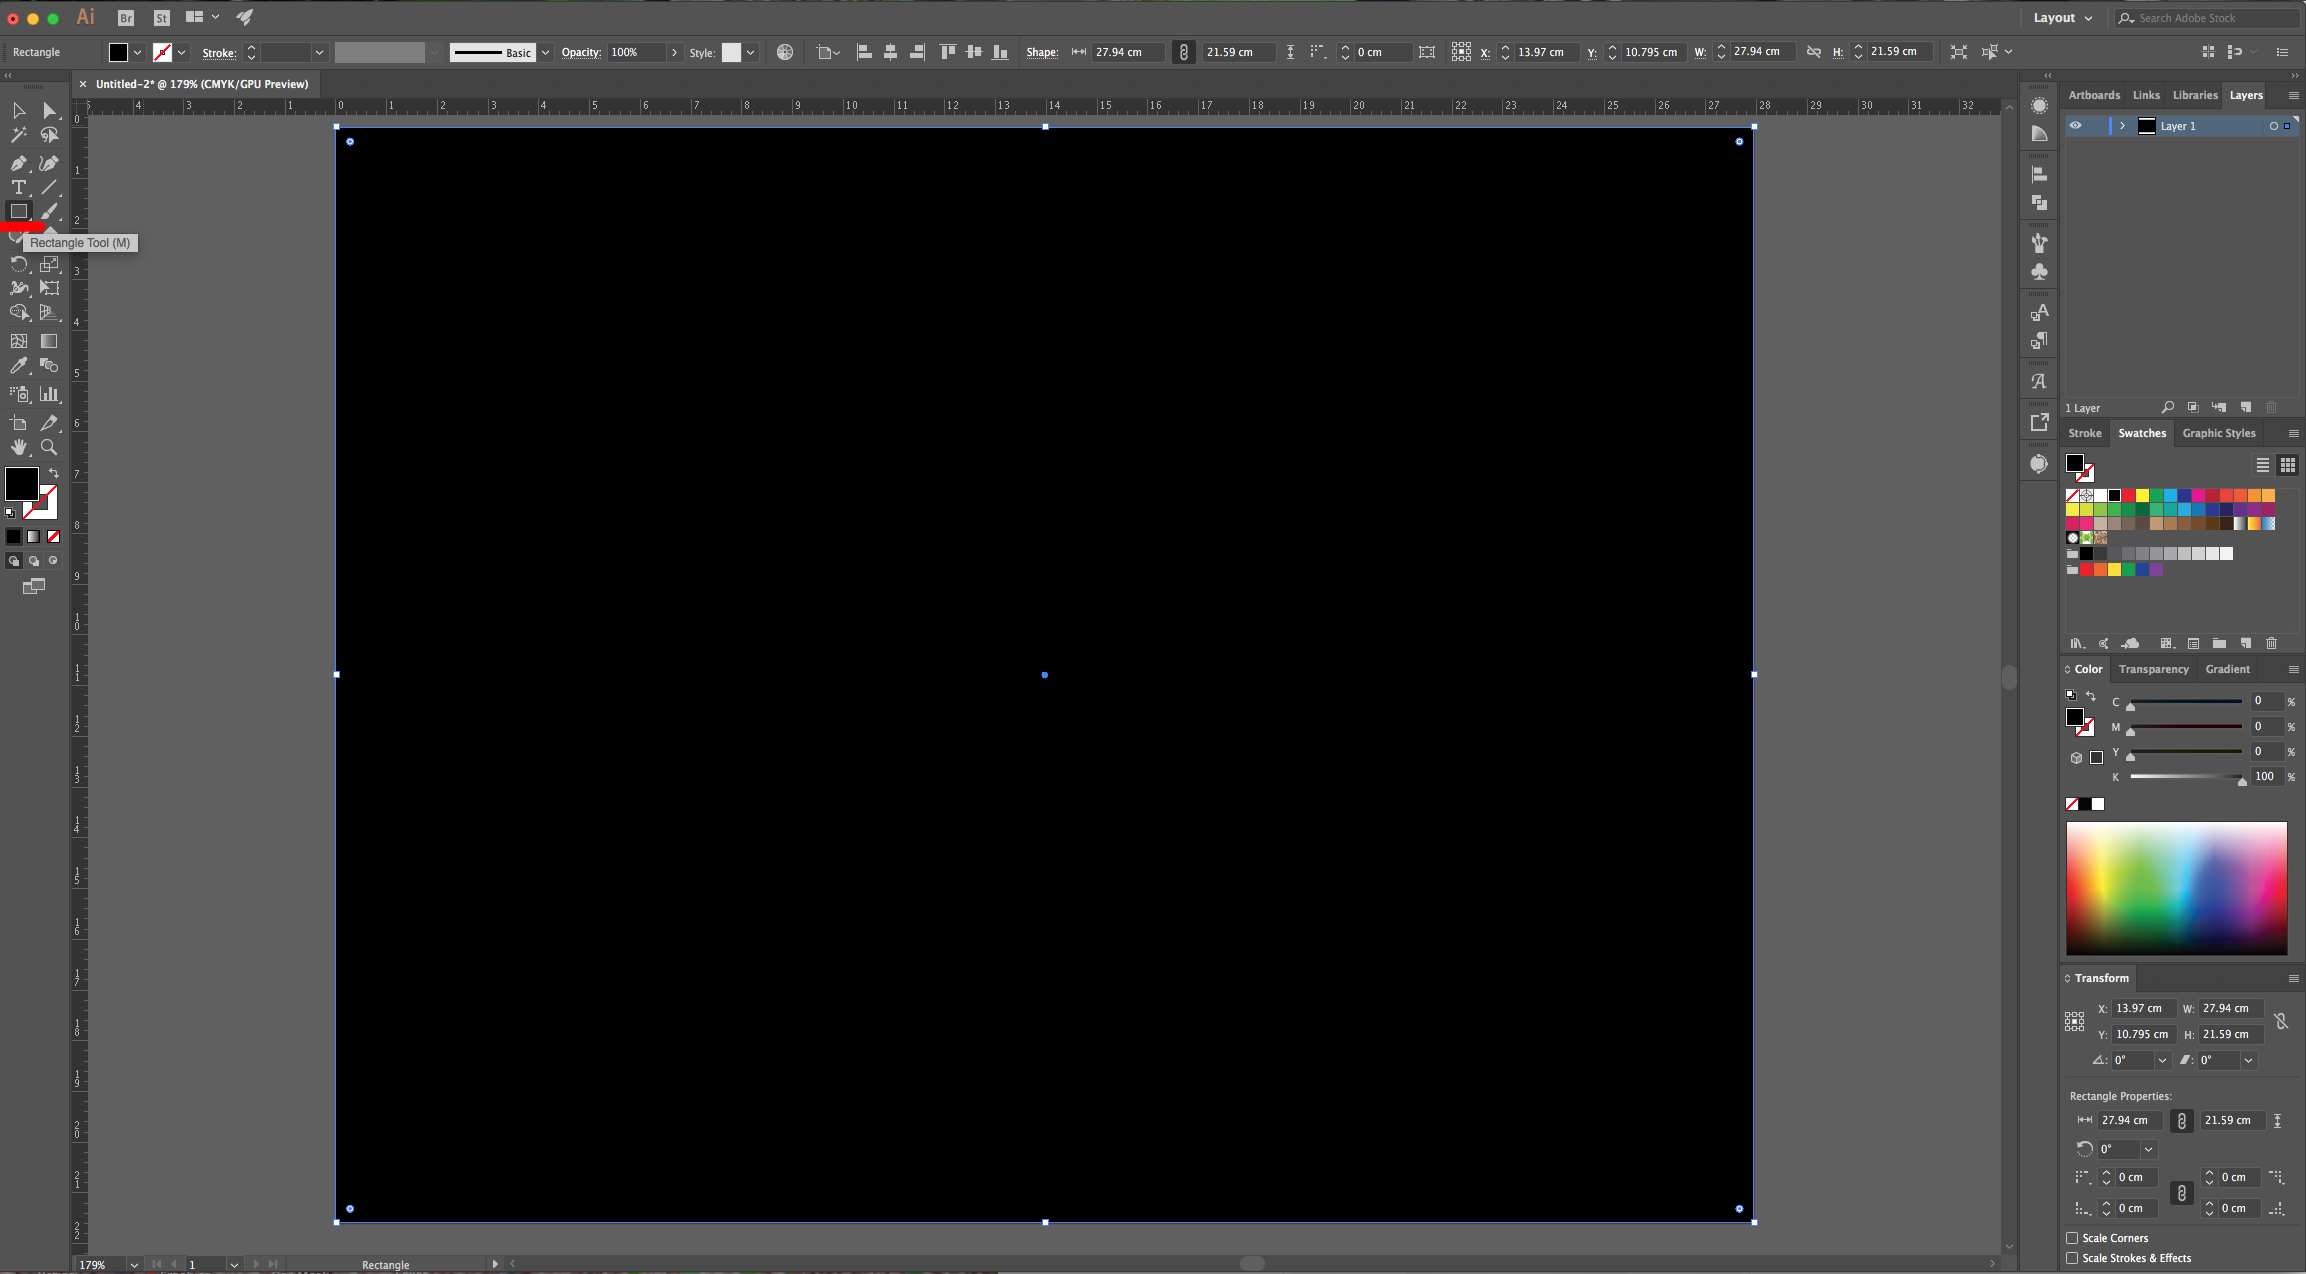
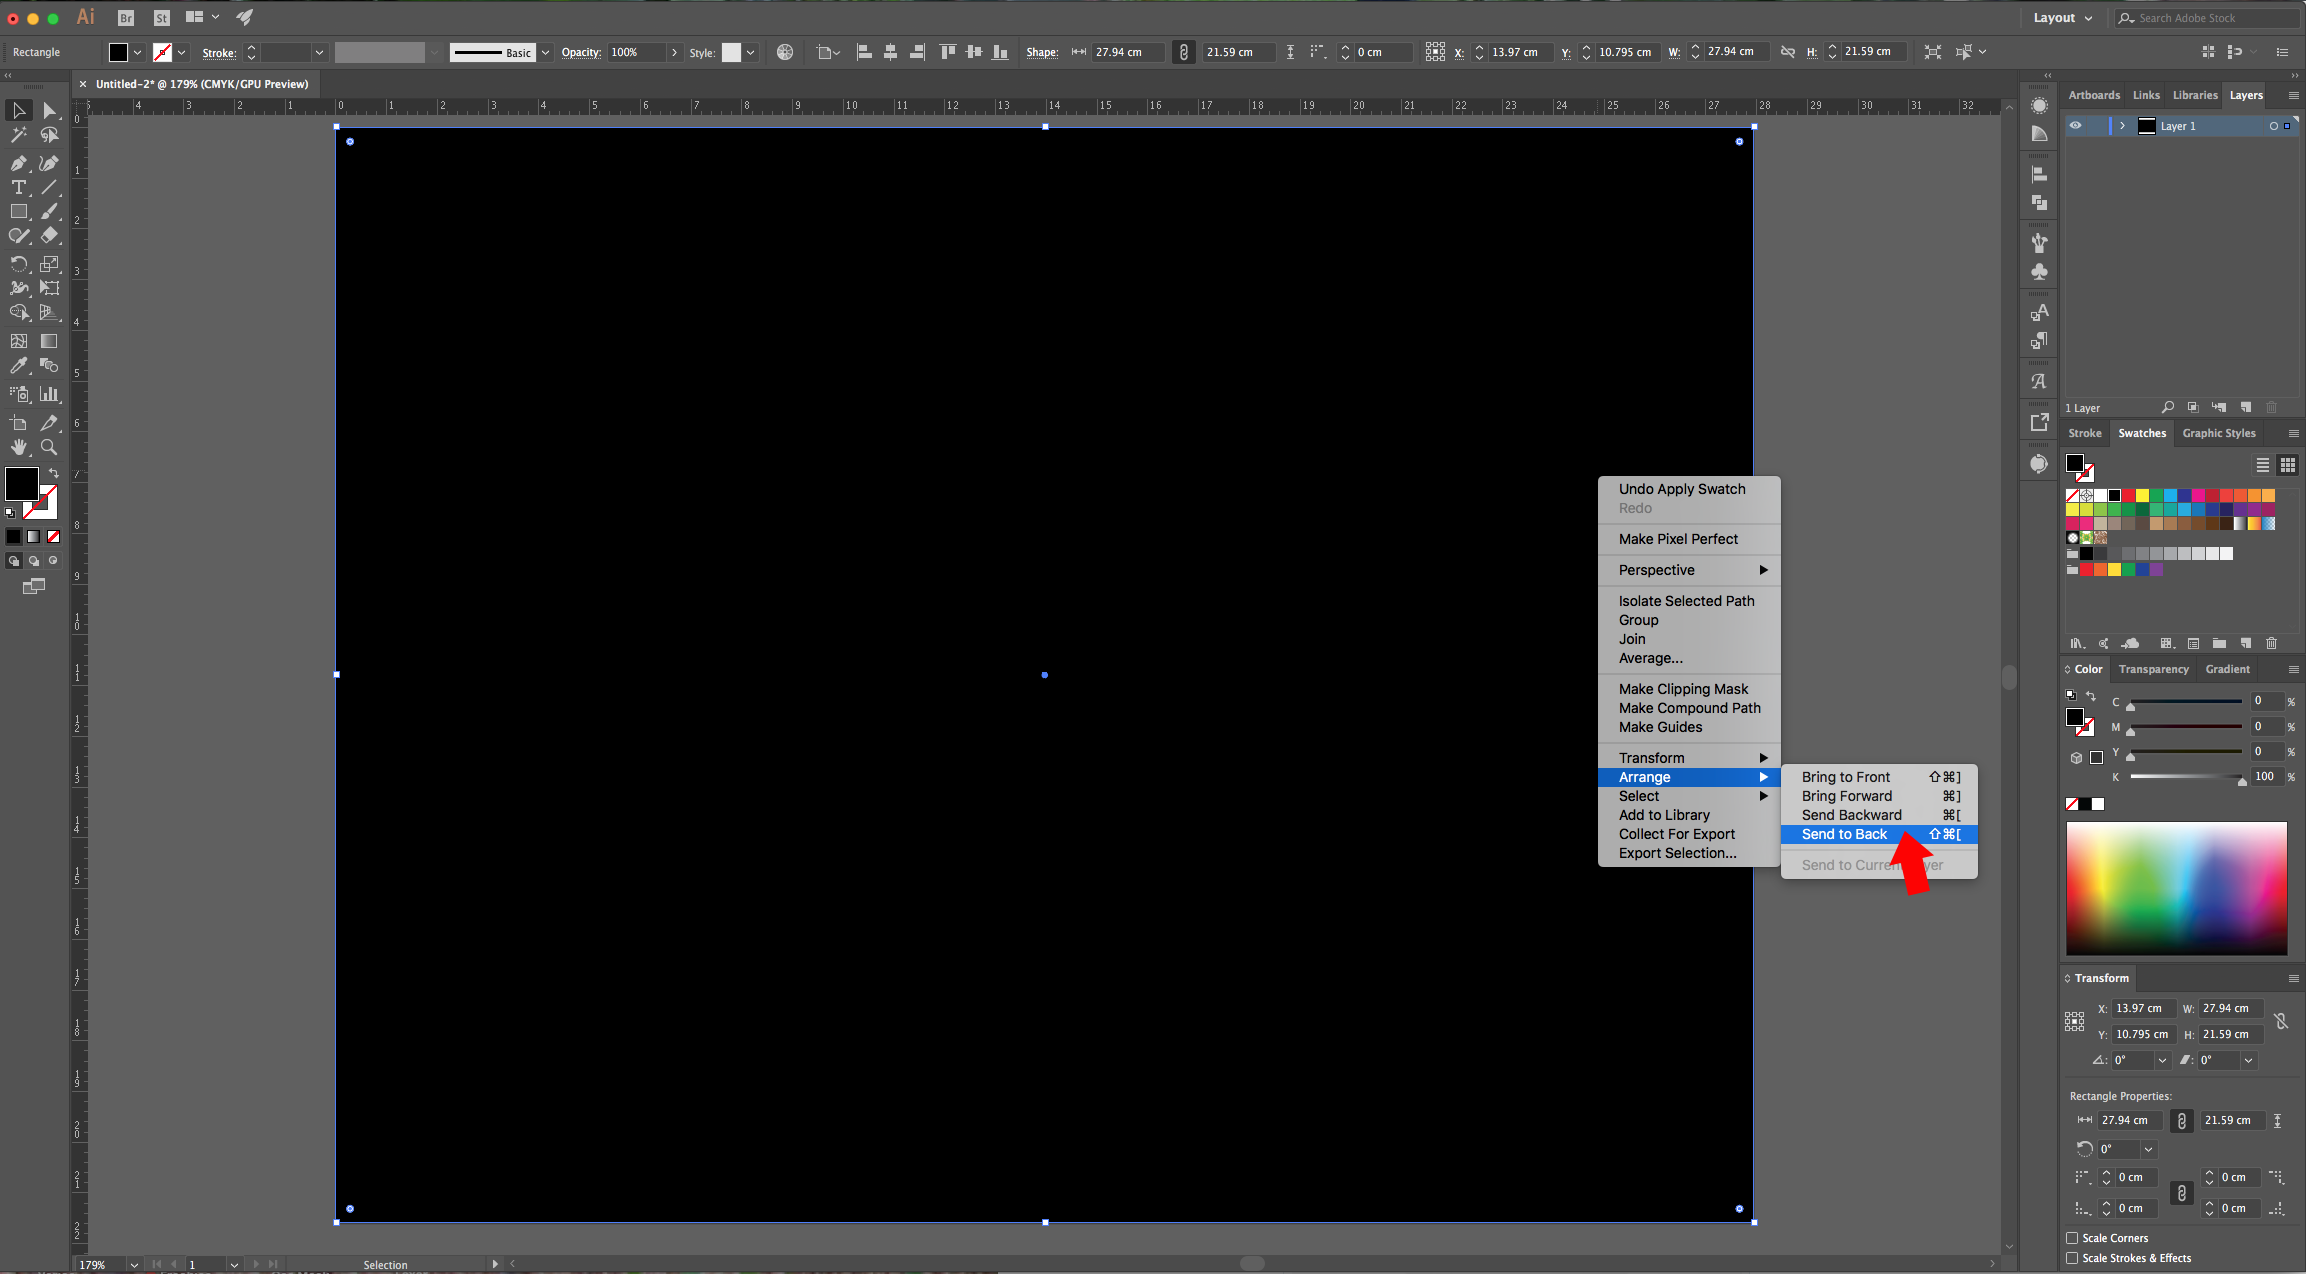
12 - Select the “Rectangle Tool” (M) and create a “Rectangle” covering your entire “Canvas”, fill it with a Black. Right-click on top of it and choose Arrange > Send to Back…
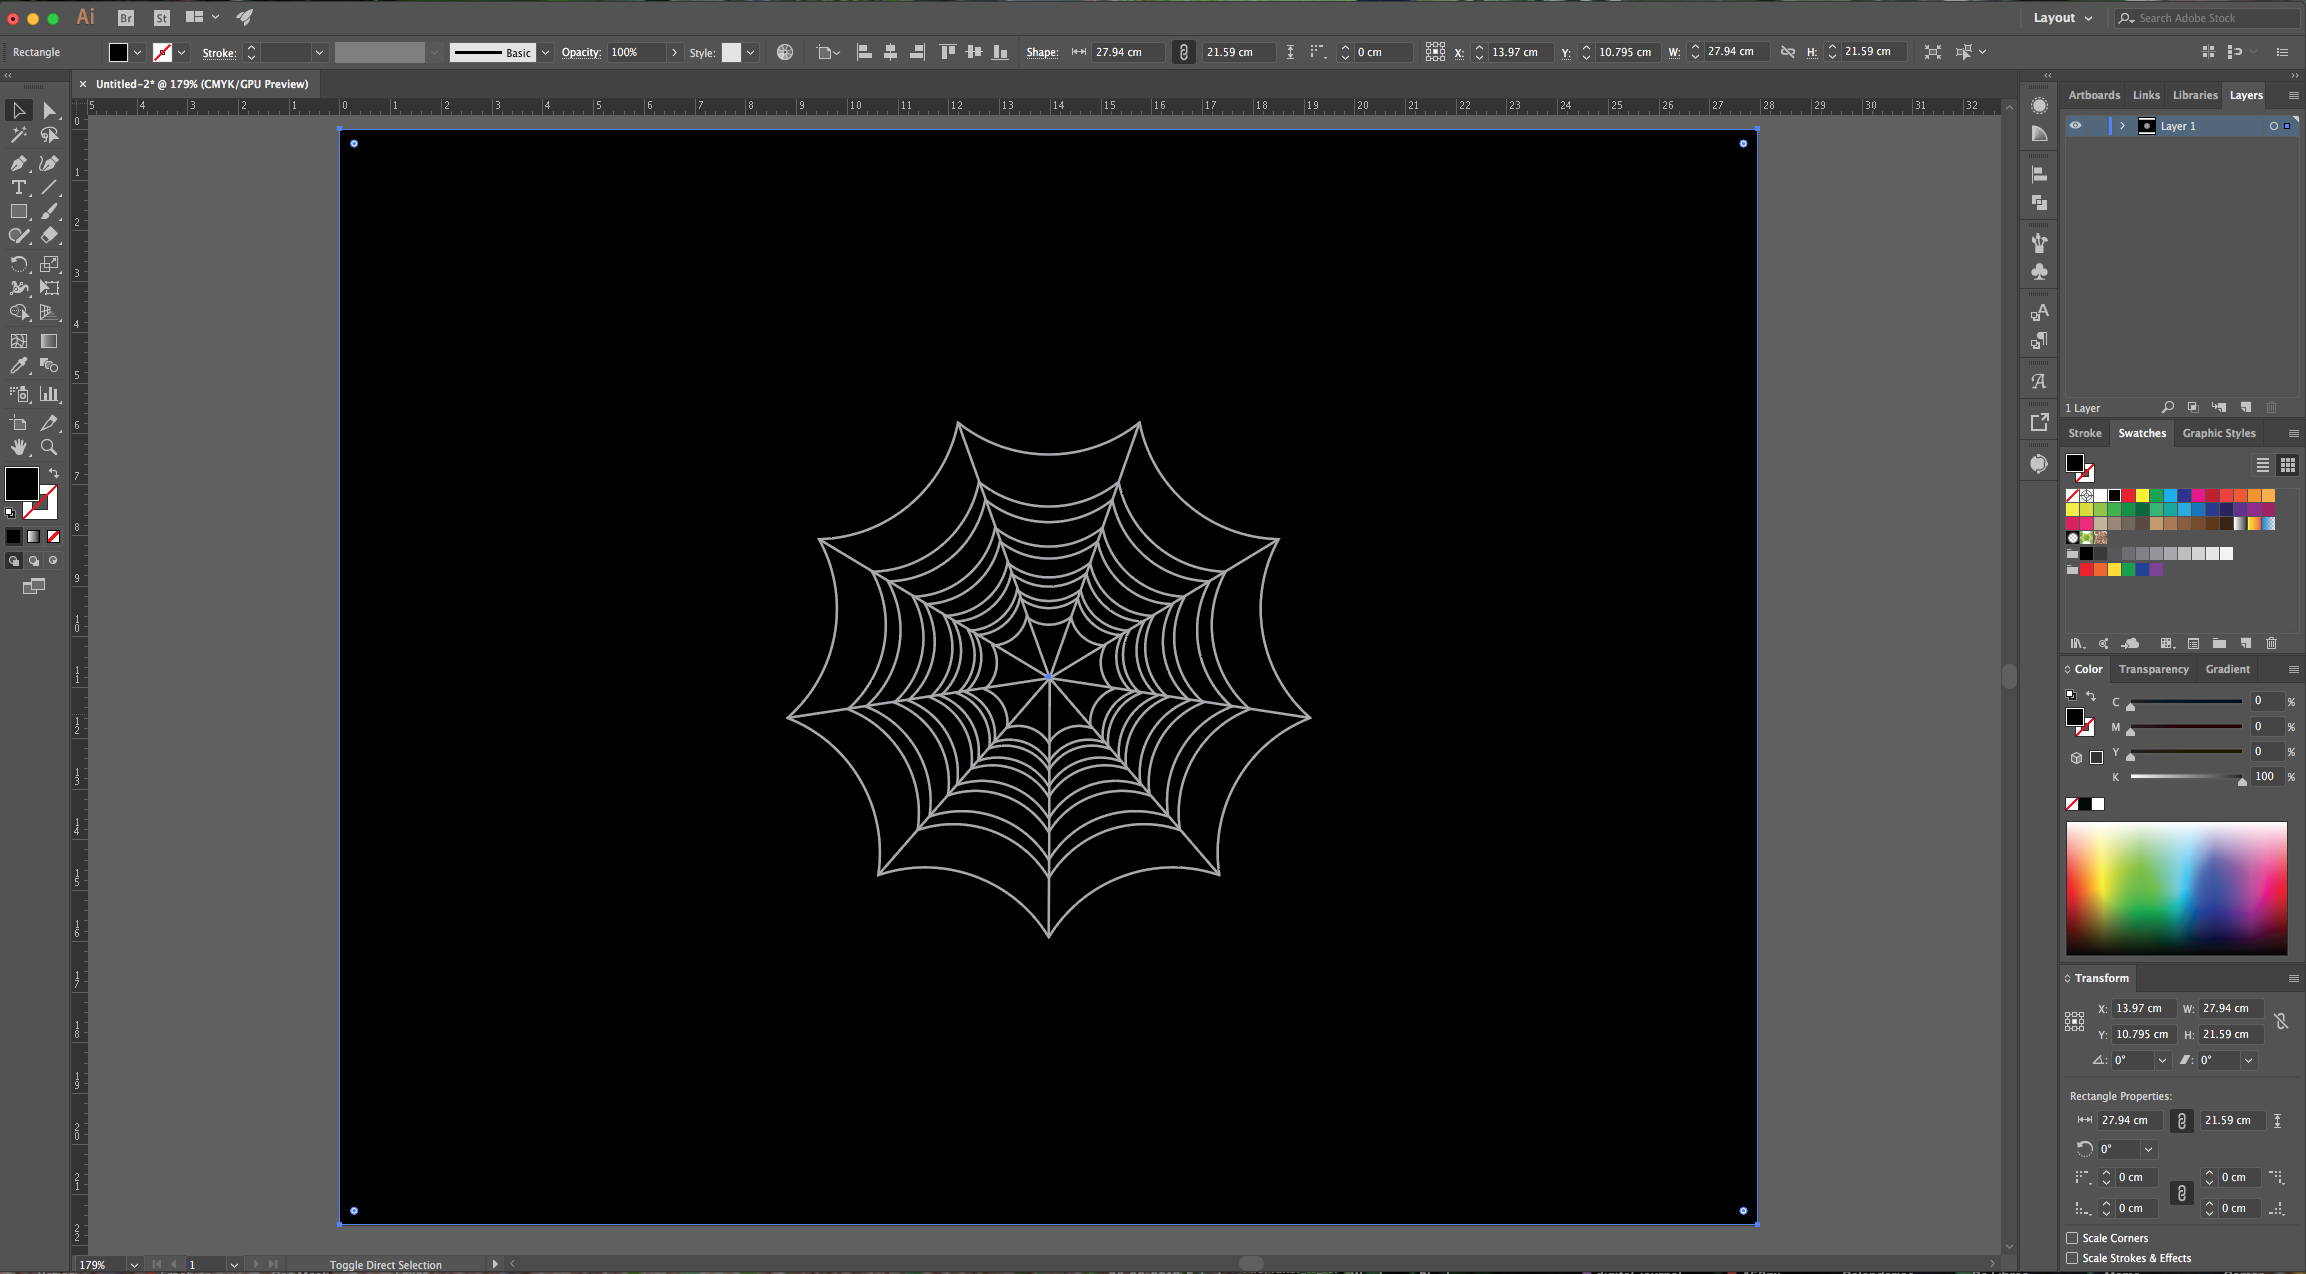
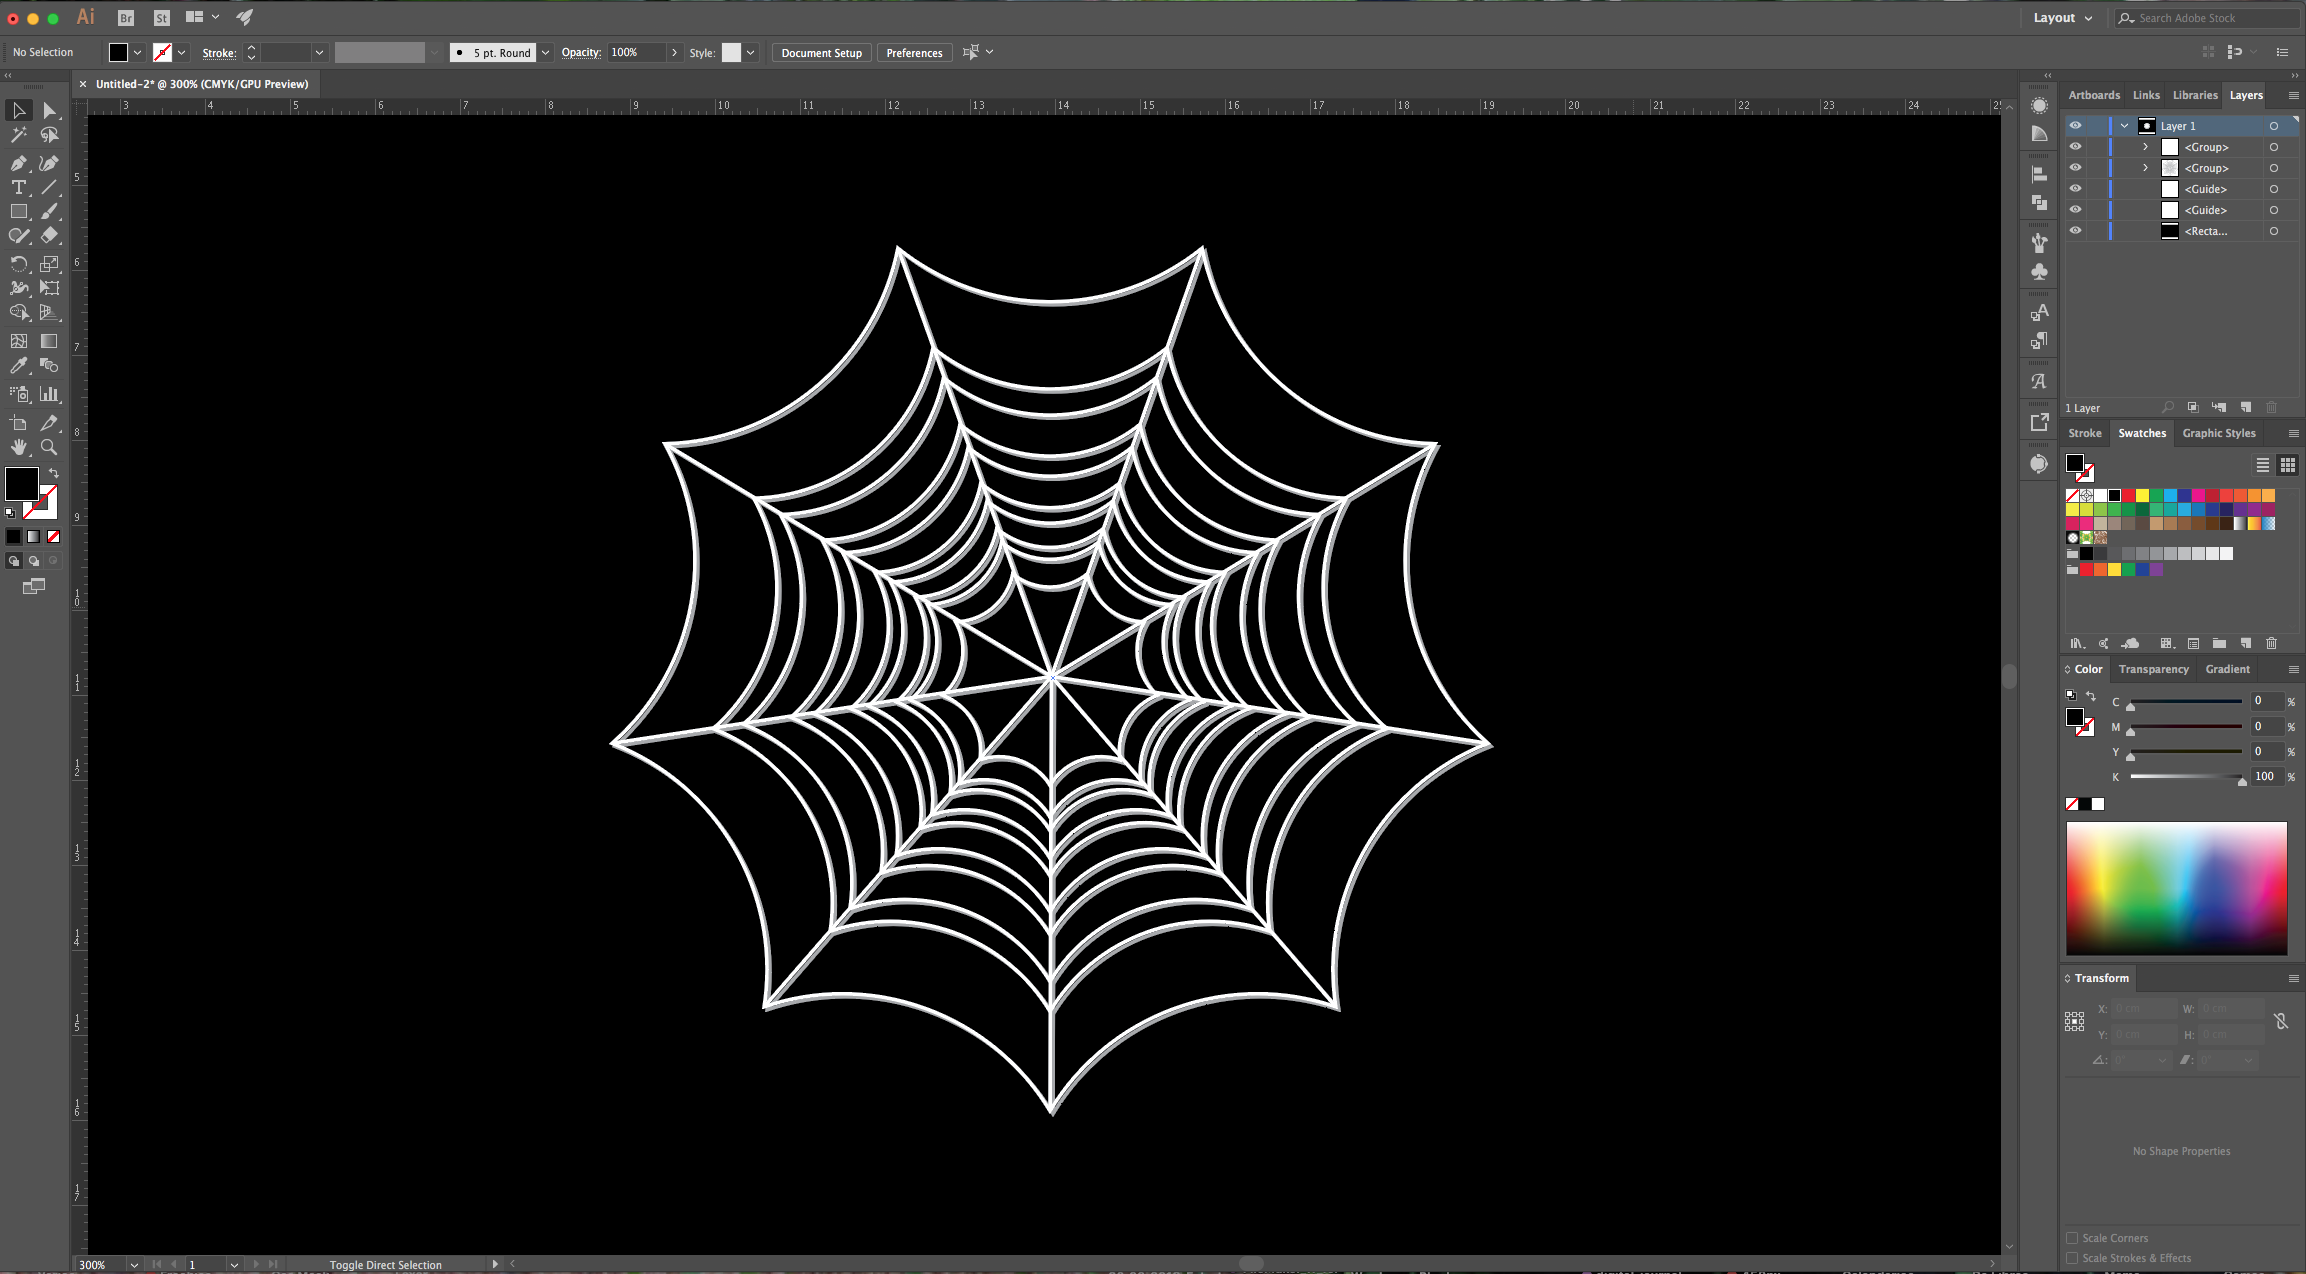
13 - “Copy” (Command/Control + C) and “Paste in Front” (Command/Control + F) your Spider Web, change the color to White and move it a couple of clicks Up and Left.
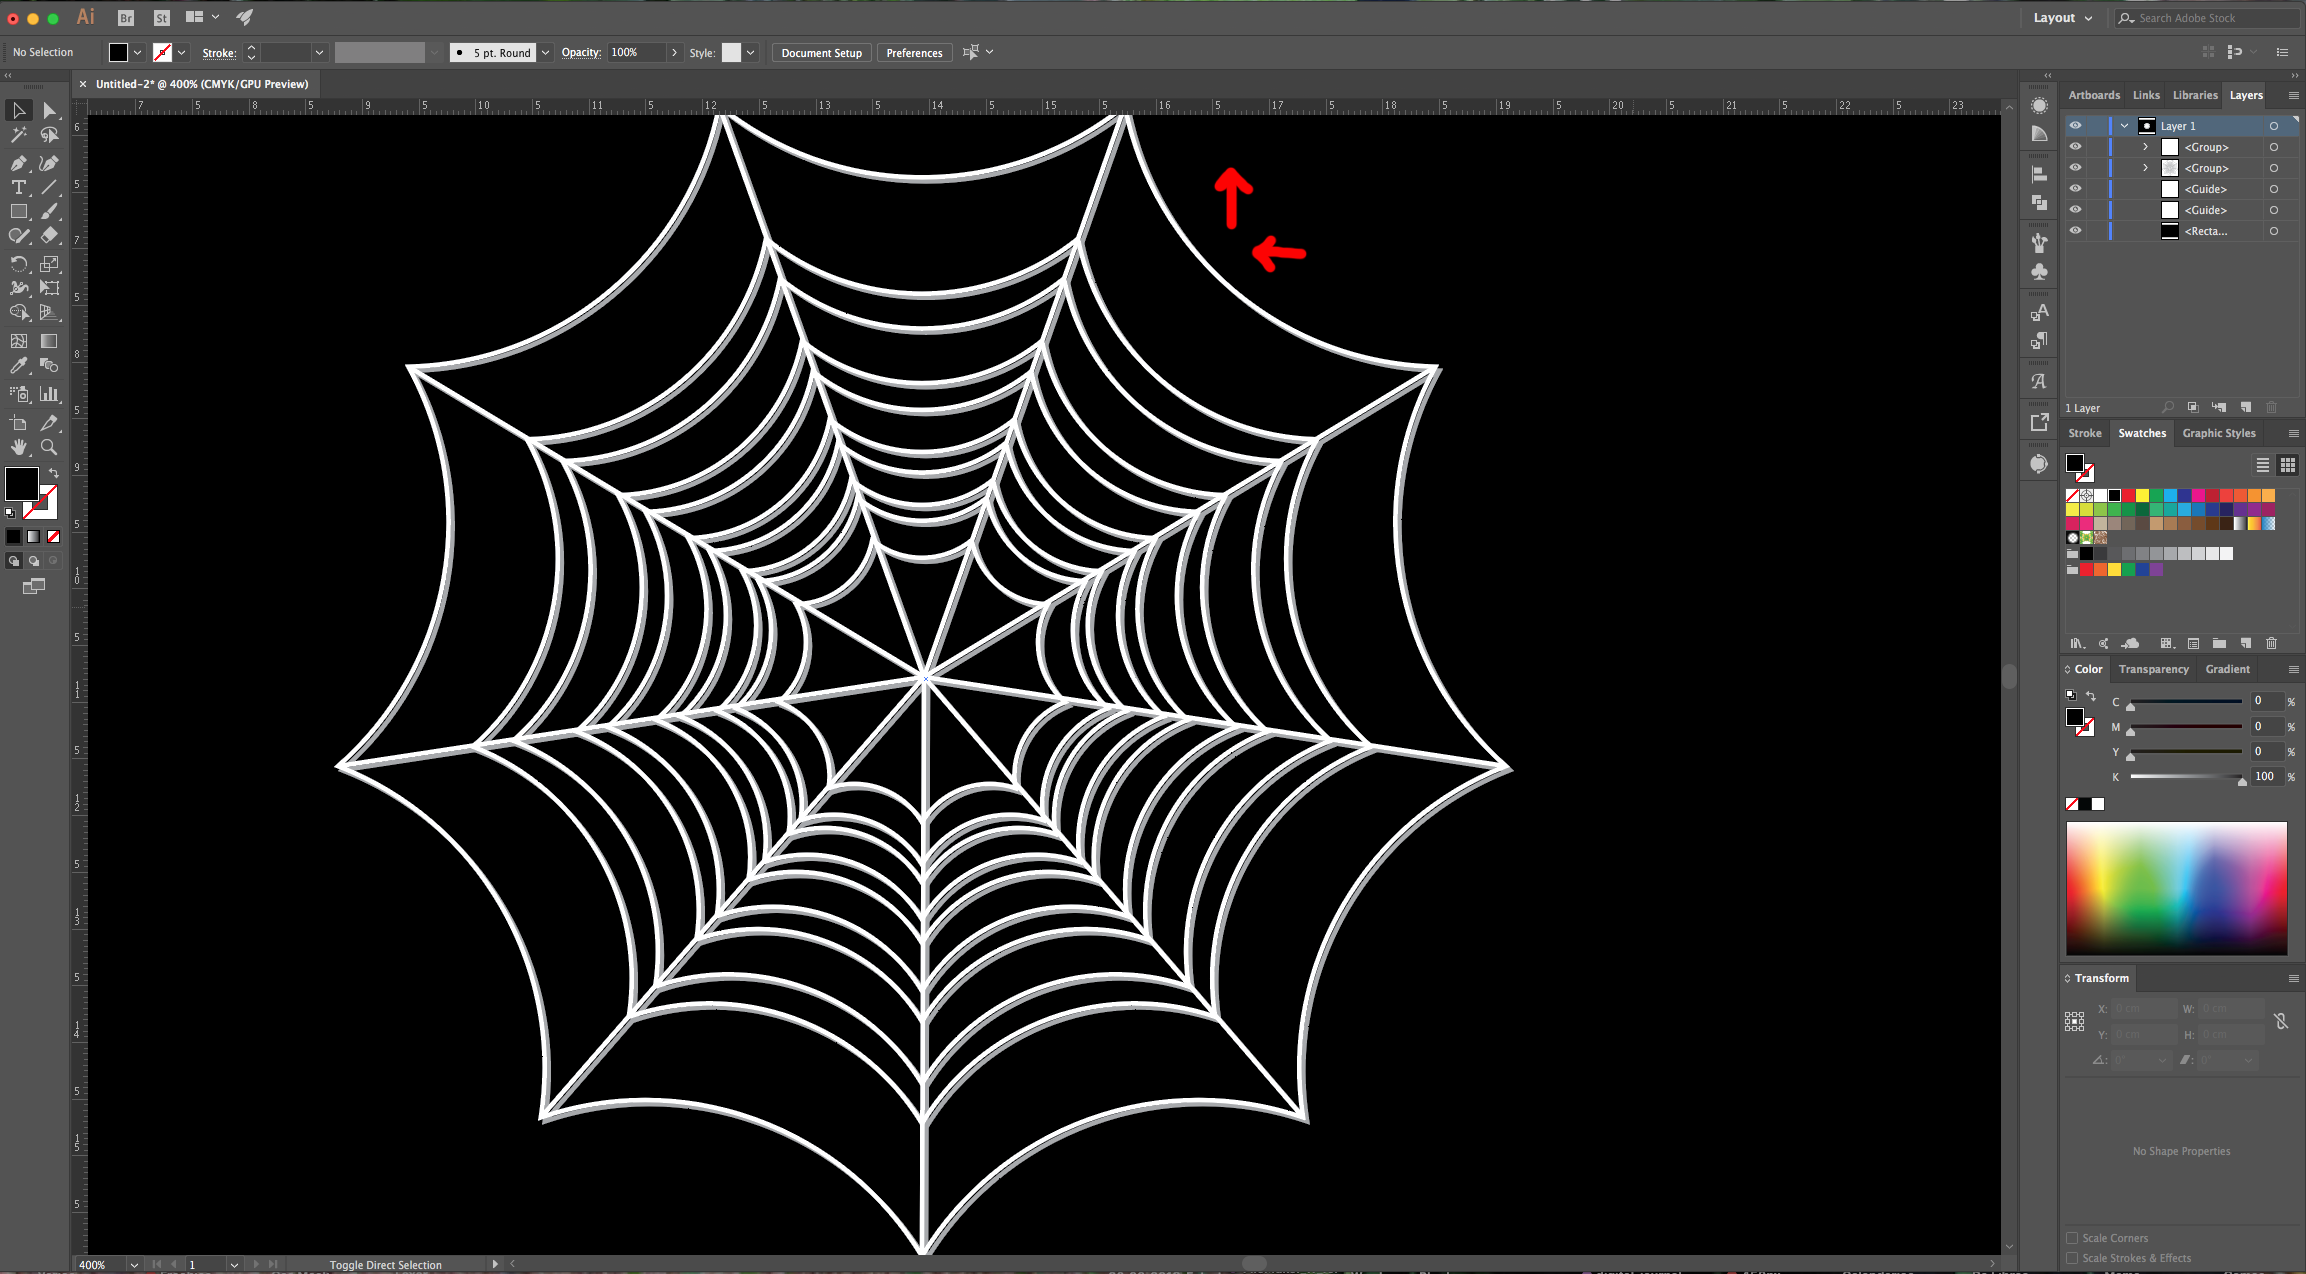
14 - Your image should be similar to this.
2 - Select the “Ellipse Tool” (L) and click inside of your “Canvas”. Input a “Width” and “Height” value of 5 cm and click “OK”.
3 - Center it to using the “Horizontal and Vertical Align Center” options on your Top Menu and make sure that “Align to Artboard” is selected. Or use the same options in the “Align Panel”. Add “Horizontal and Vertical Guides” at the center of your circle by clicking and dragging from the Left and Top Rulers (to turn the rulers on/off use Command/Control + R).
4 - Select the “Ellipse Tool” (L) again but this time input a “Width” and “Height” value of 2 cm and click “OK”. Place the second circle on the Top of the first one and make its center sit on the top-most “Anchor Point”
5 - Double-click on the “Rotate Tool” (R), click on the center of the smaller circle and drag it to the center of the bigger one. To calculate the “Angle” you will need, just input 360/number of instances of the small circle you want (we used 9 so it was 360/9) and Illustrator will automatically give you the right “Angle” (in our case 40°). Click “OK”. You should end up with nine small circles around the big one, slightly overlapping each other.
6 - Select everything, head to the “Appearance Panel” and choose “Minus Front” to delete the small circles. You should end with a star-like shape.
7 - With your shape still selected, go to the “Appearance Panel”, click on the “Effects Menu” at the bottom-left. Go to Distort & Transform > Transform… use a “Horizontal and Vertical Scale” of 130% with a 0° “Rotate” Angle and input the number 4 in the “Copies” section. Make sure the “Scale Strokes & Effects” is un-checked and click “OK”.
8 - Apply a second “Transform” Effect, click on the “Apply New Effect” if asked and this time use a “Horizontal and Vertical Scale” of 70% and just 1 “Copy”. Make sure the “Scale Strokes & Effects” is un-checked and click “OK”.
9 - Go to Object > Expand Appearance to release all the Shapes.
10 - Select the “Line Segment Tool” and draw a line from the center of the shapes to one of the corners (hold the “Alt/Option” key if you want). Repeat for every corner of the outer shape, always starting from the center.
11 - You can “Hide” the “Guides” if you want by going to View > Guides > Hide Guides… (Command/Control + ;). Select everything, right-click on top, choose “Group” (Command/Control + G) and change the “Stroke” color to a Medium Grey.
12 - Select the “Rectangle Tool” (M) and create a “Rectangle” covering your entire “Canvas”, fill it with a Black. Right-click on top of it and choose Arrange > Send to Back…
13 - “Copy” (Command/Control + C) and “Paste in Front” (Command/Control + F) your Spider Web, change the color to White and move it a couple of clicks Up and Left.
14 - Your image should be similar to this.
by @lornacane


