Vector Emoji Icon in Illustrator
For this tutorial you may want to get a reference image.
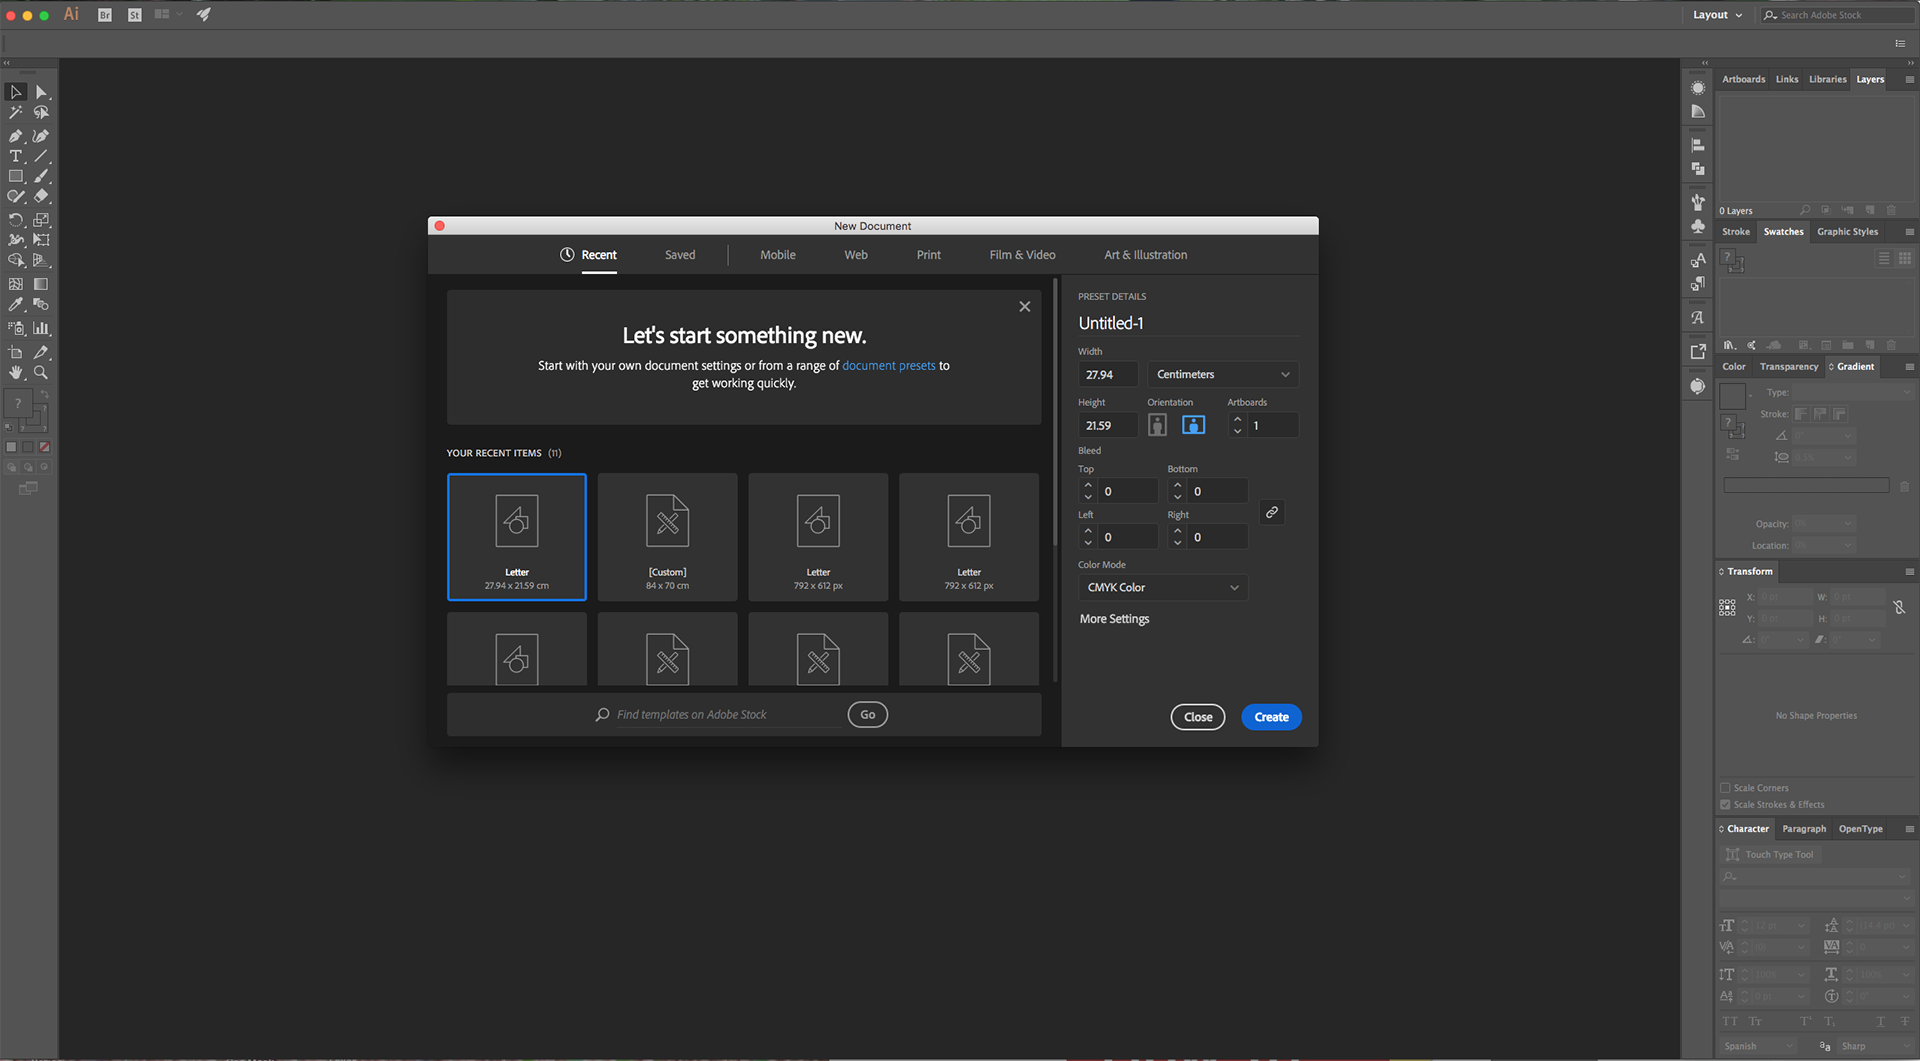
1 - In Illustrator, create a “New Document”.
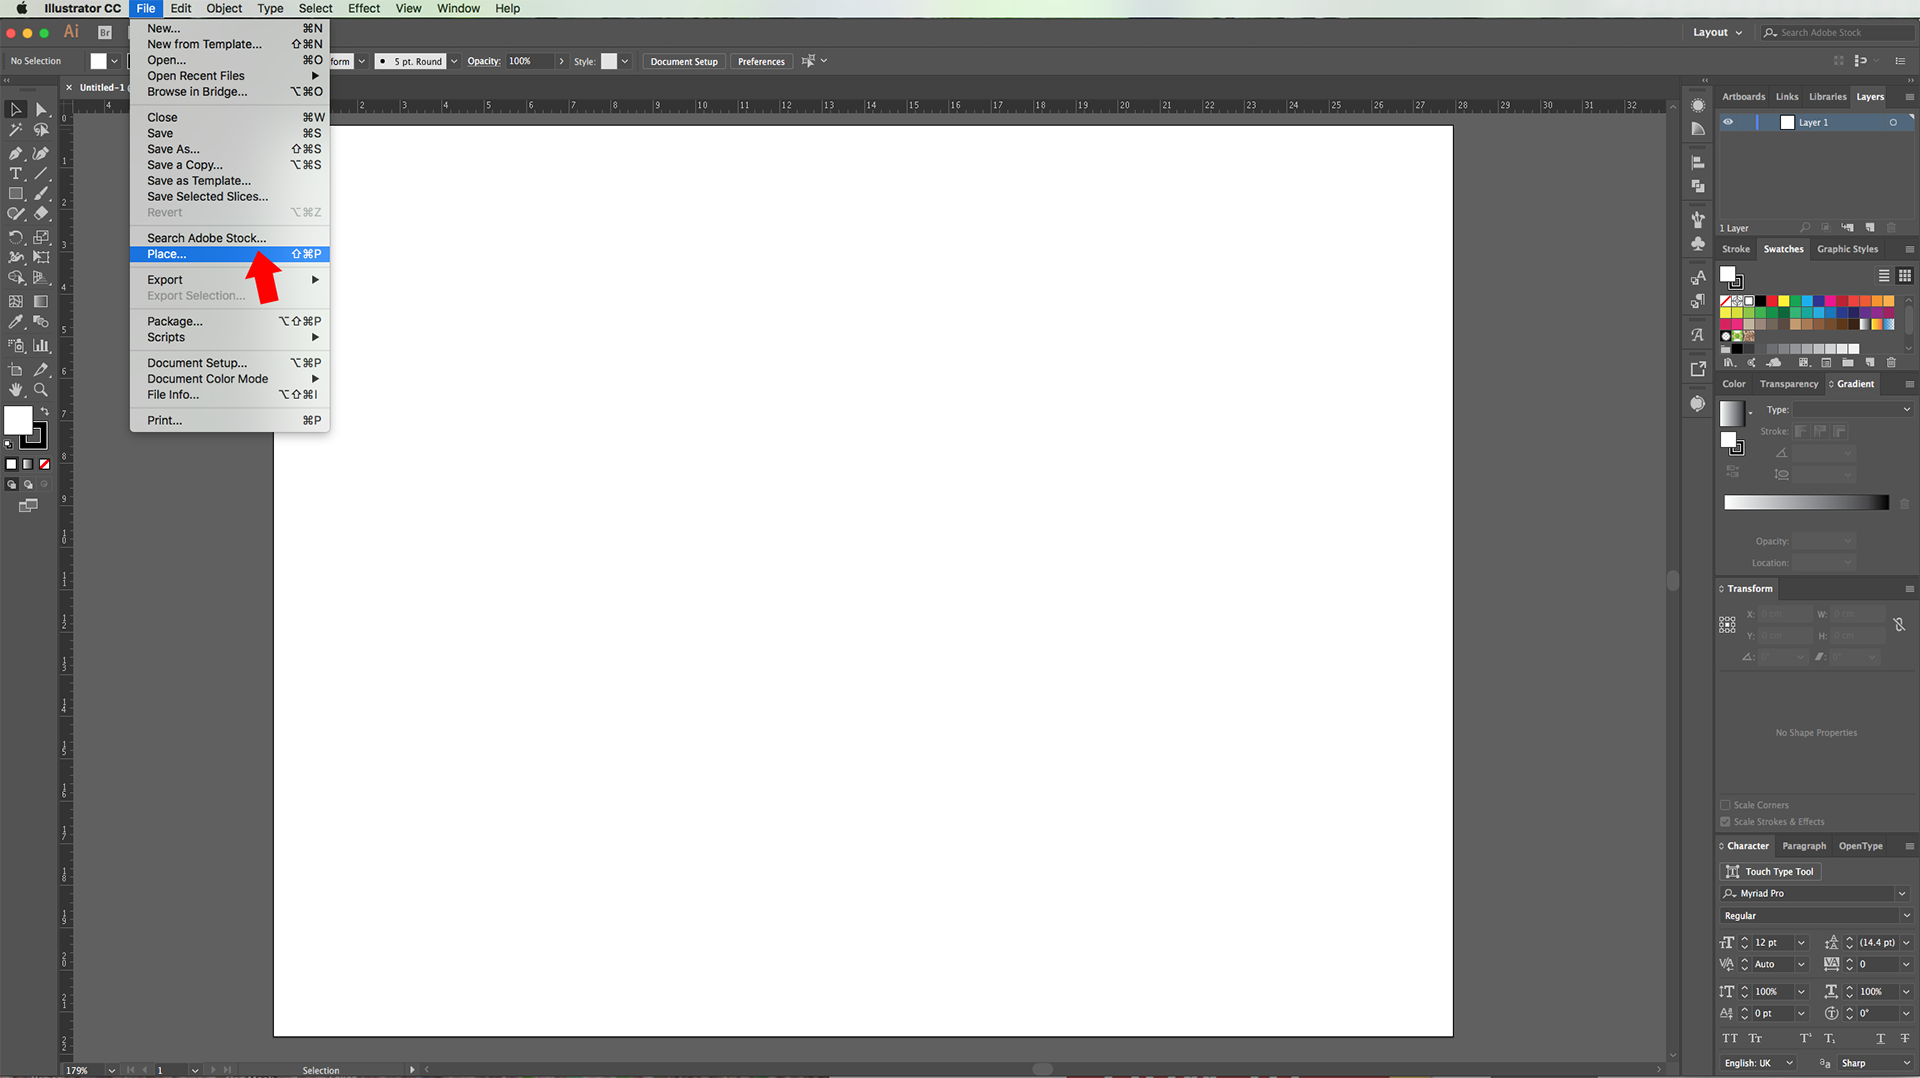
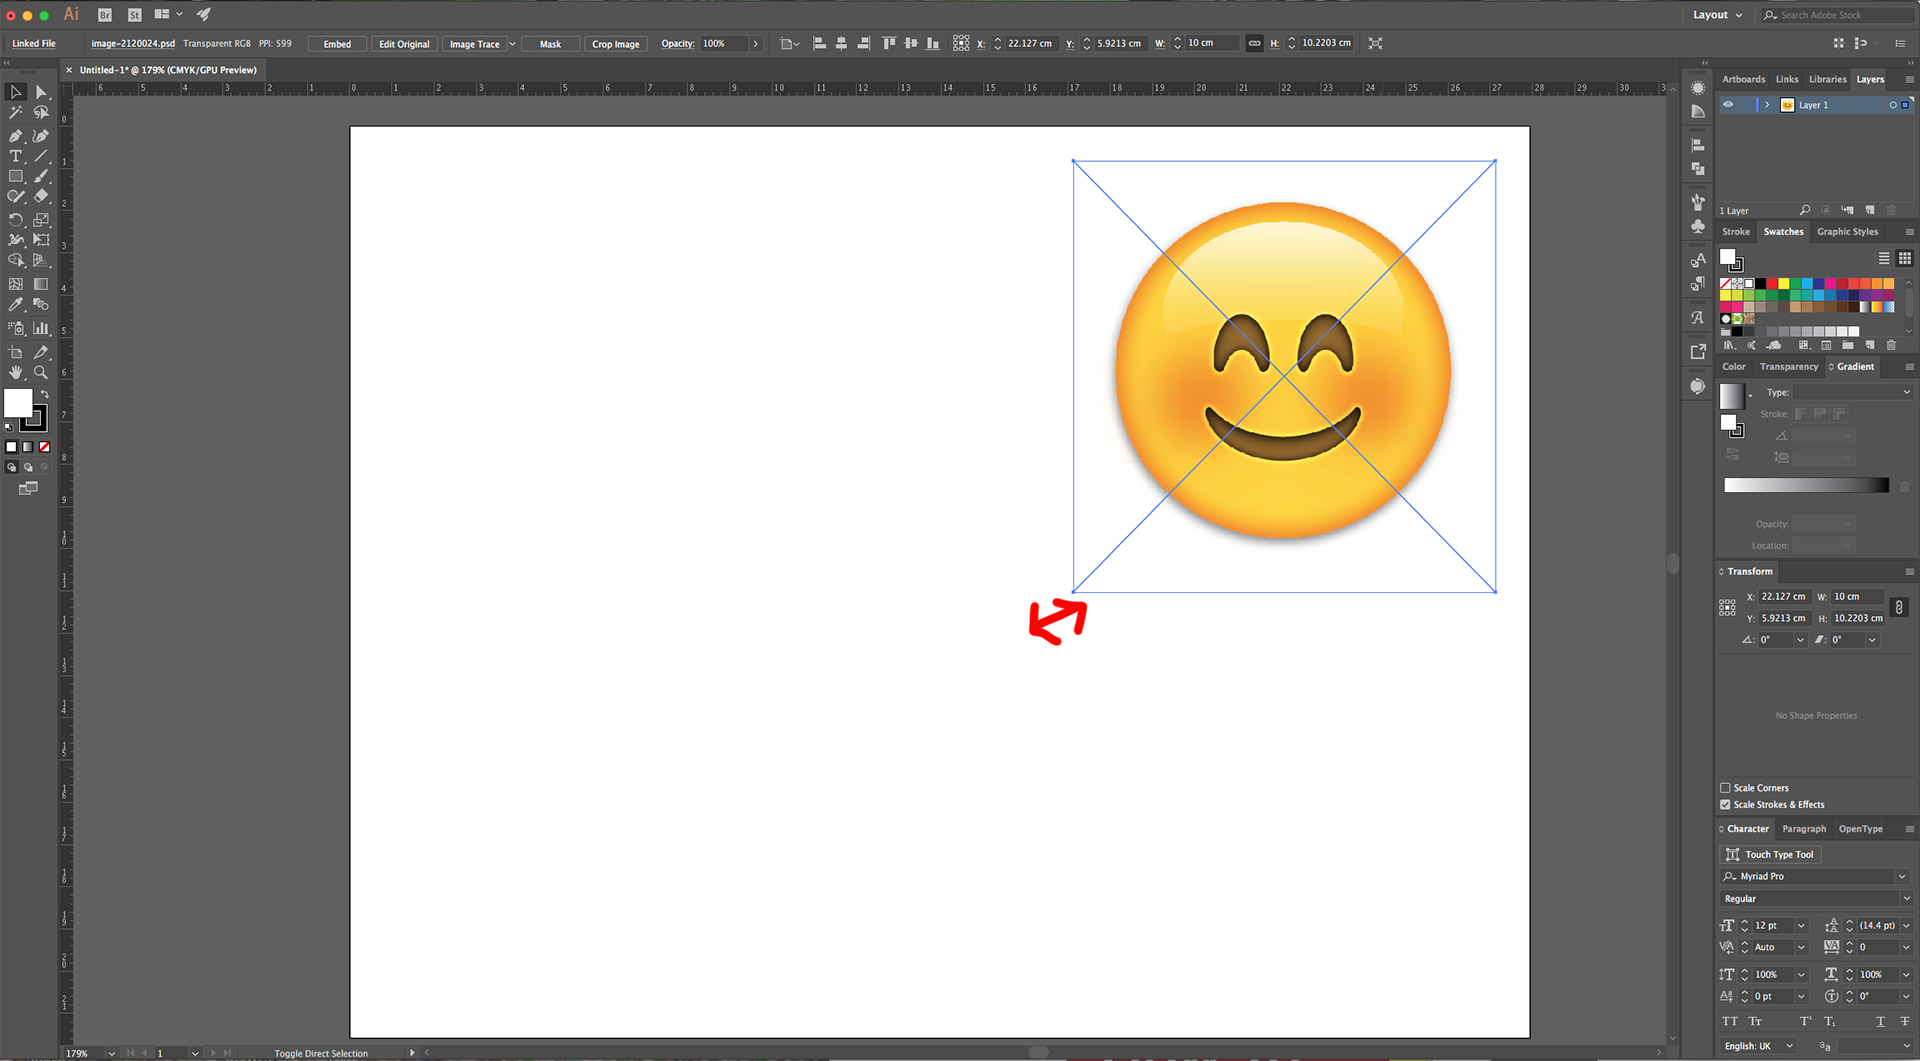
2 - Go to File > Place (Shift + Command/Control + P) and navigate to where the image/images you want to work with are saved. Select the one you wand and click “Place”. Resize it if needed.

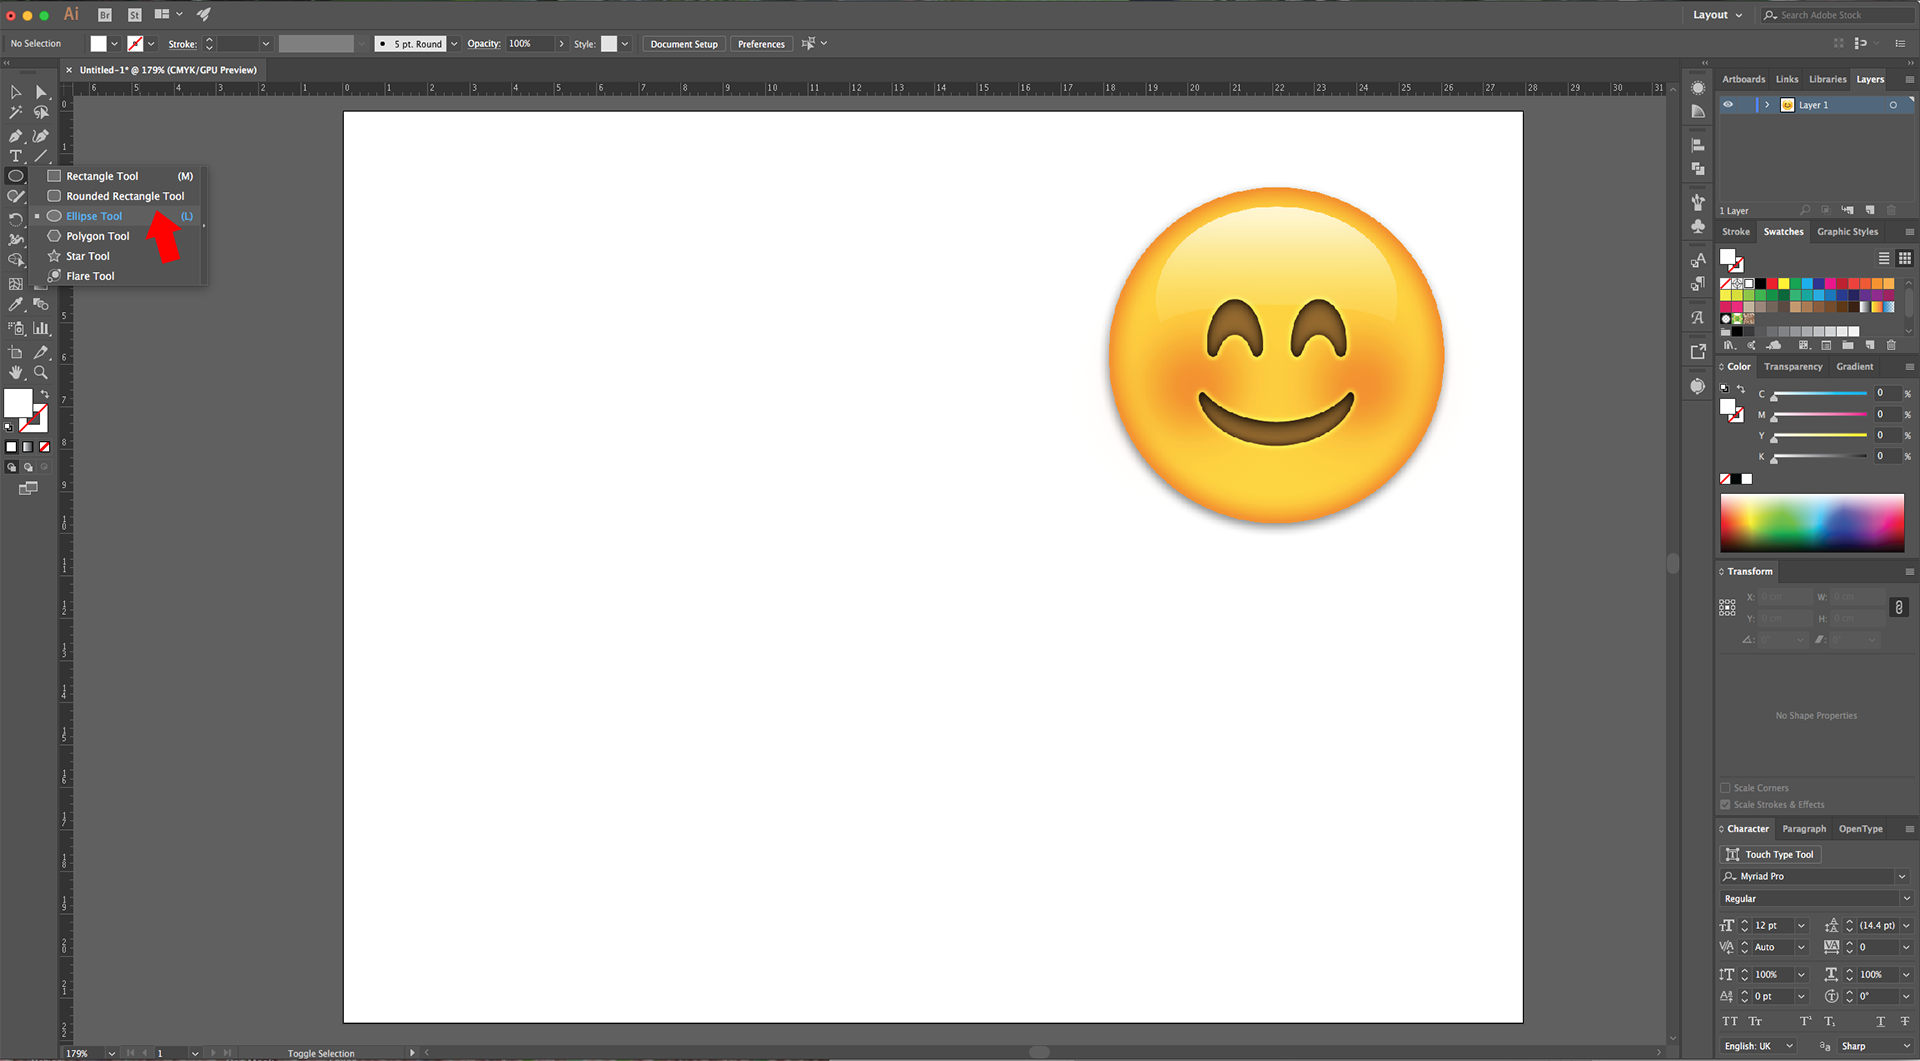
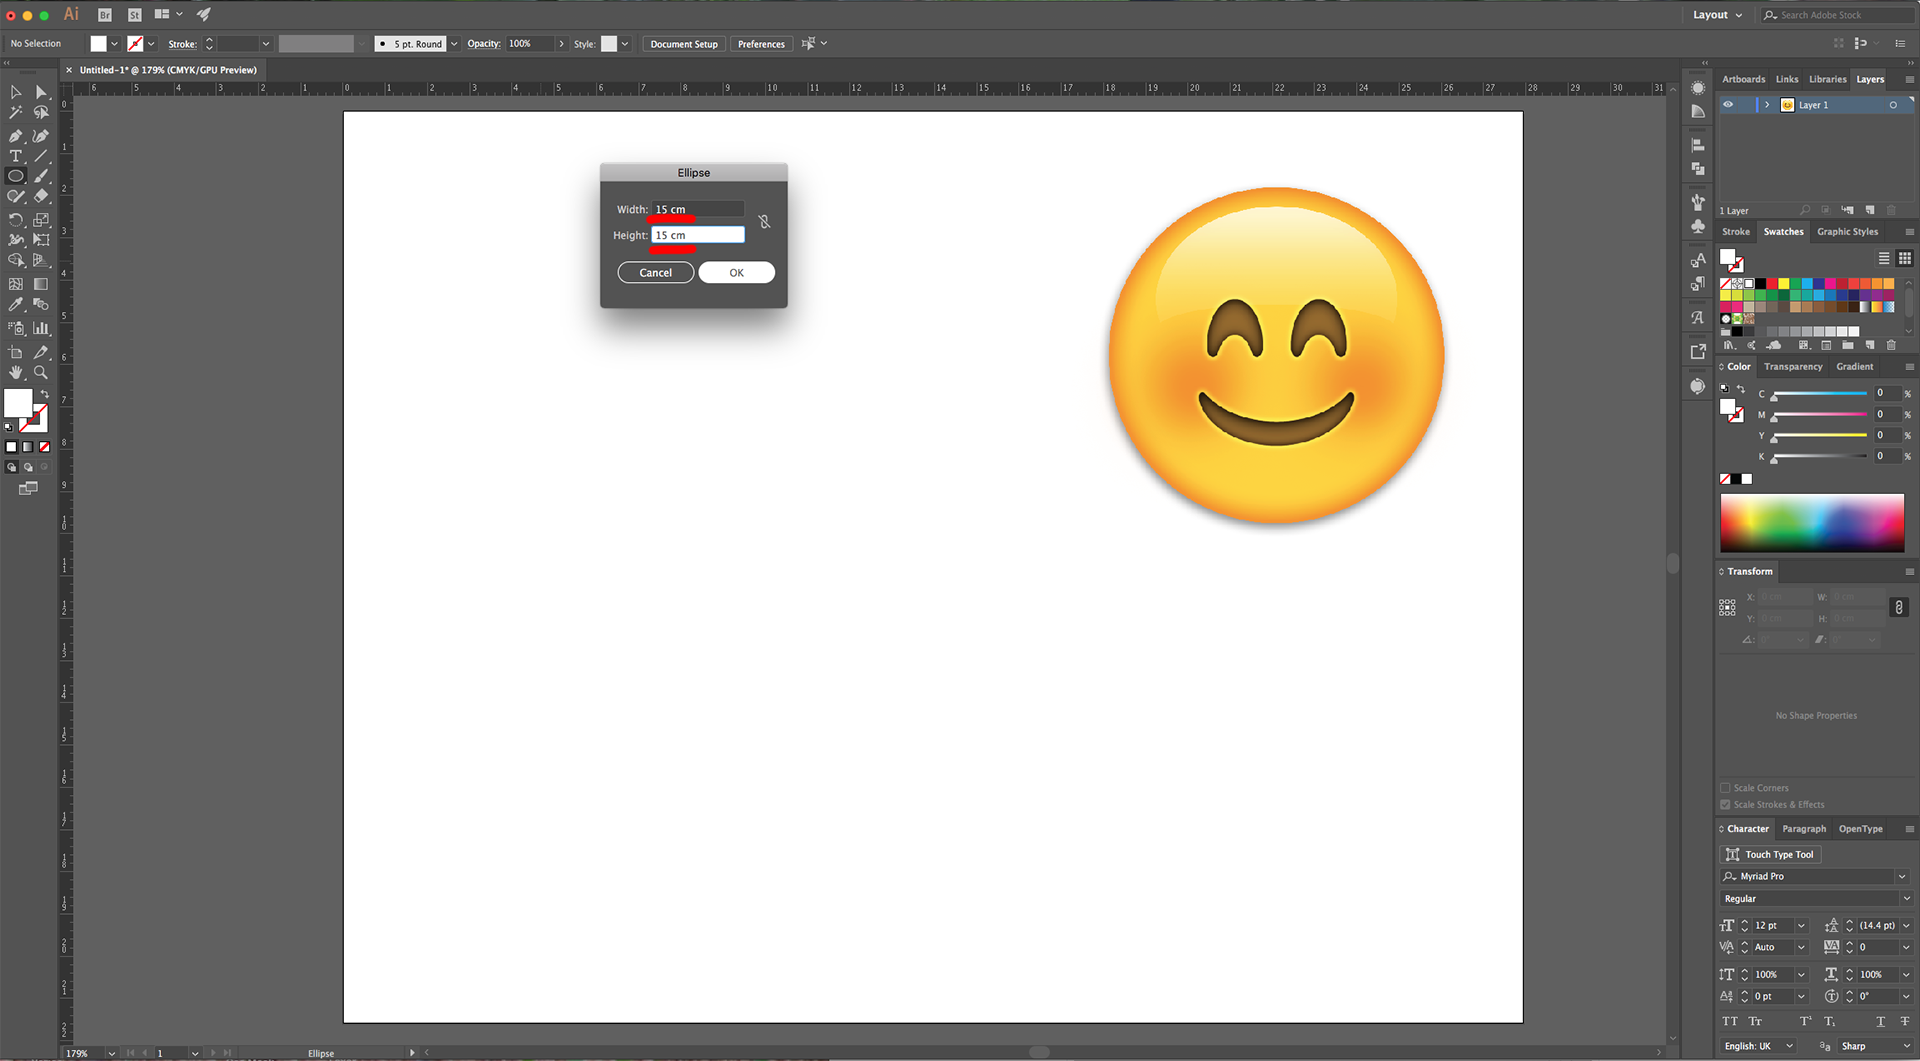
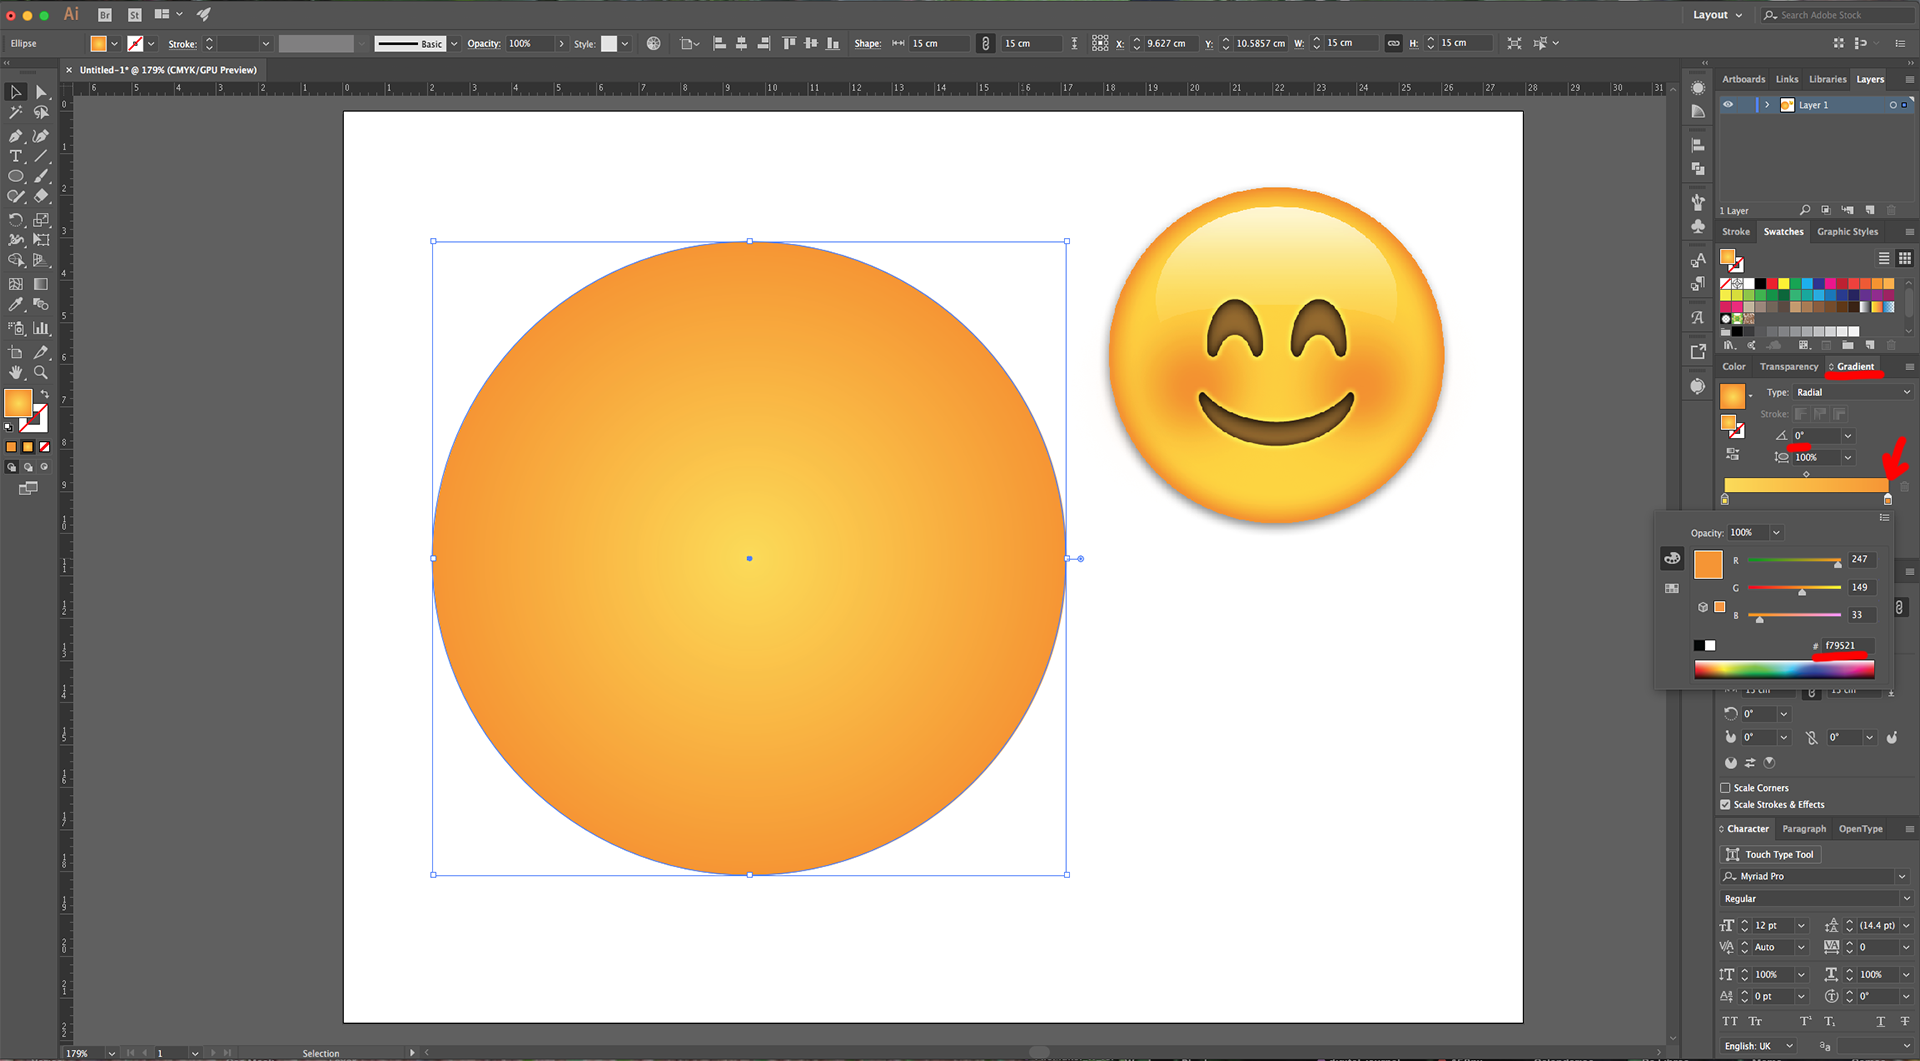
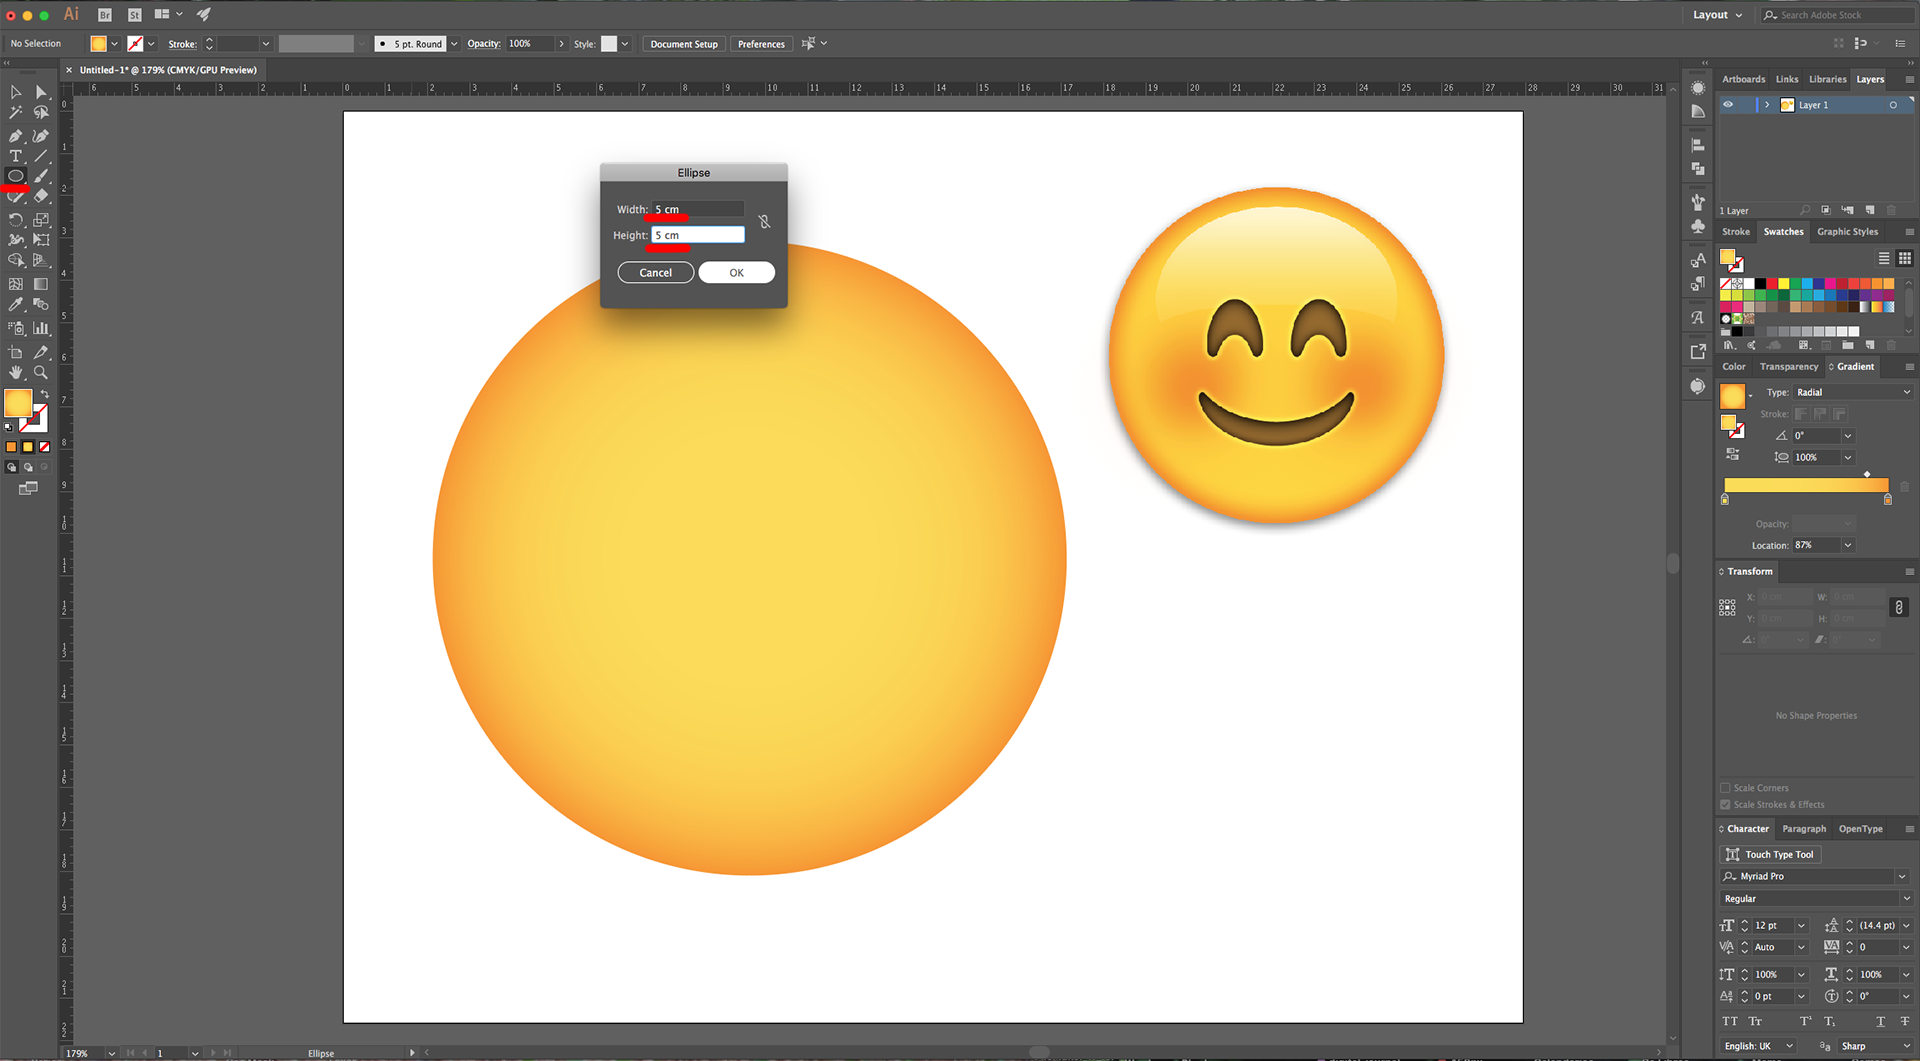
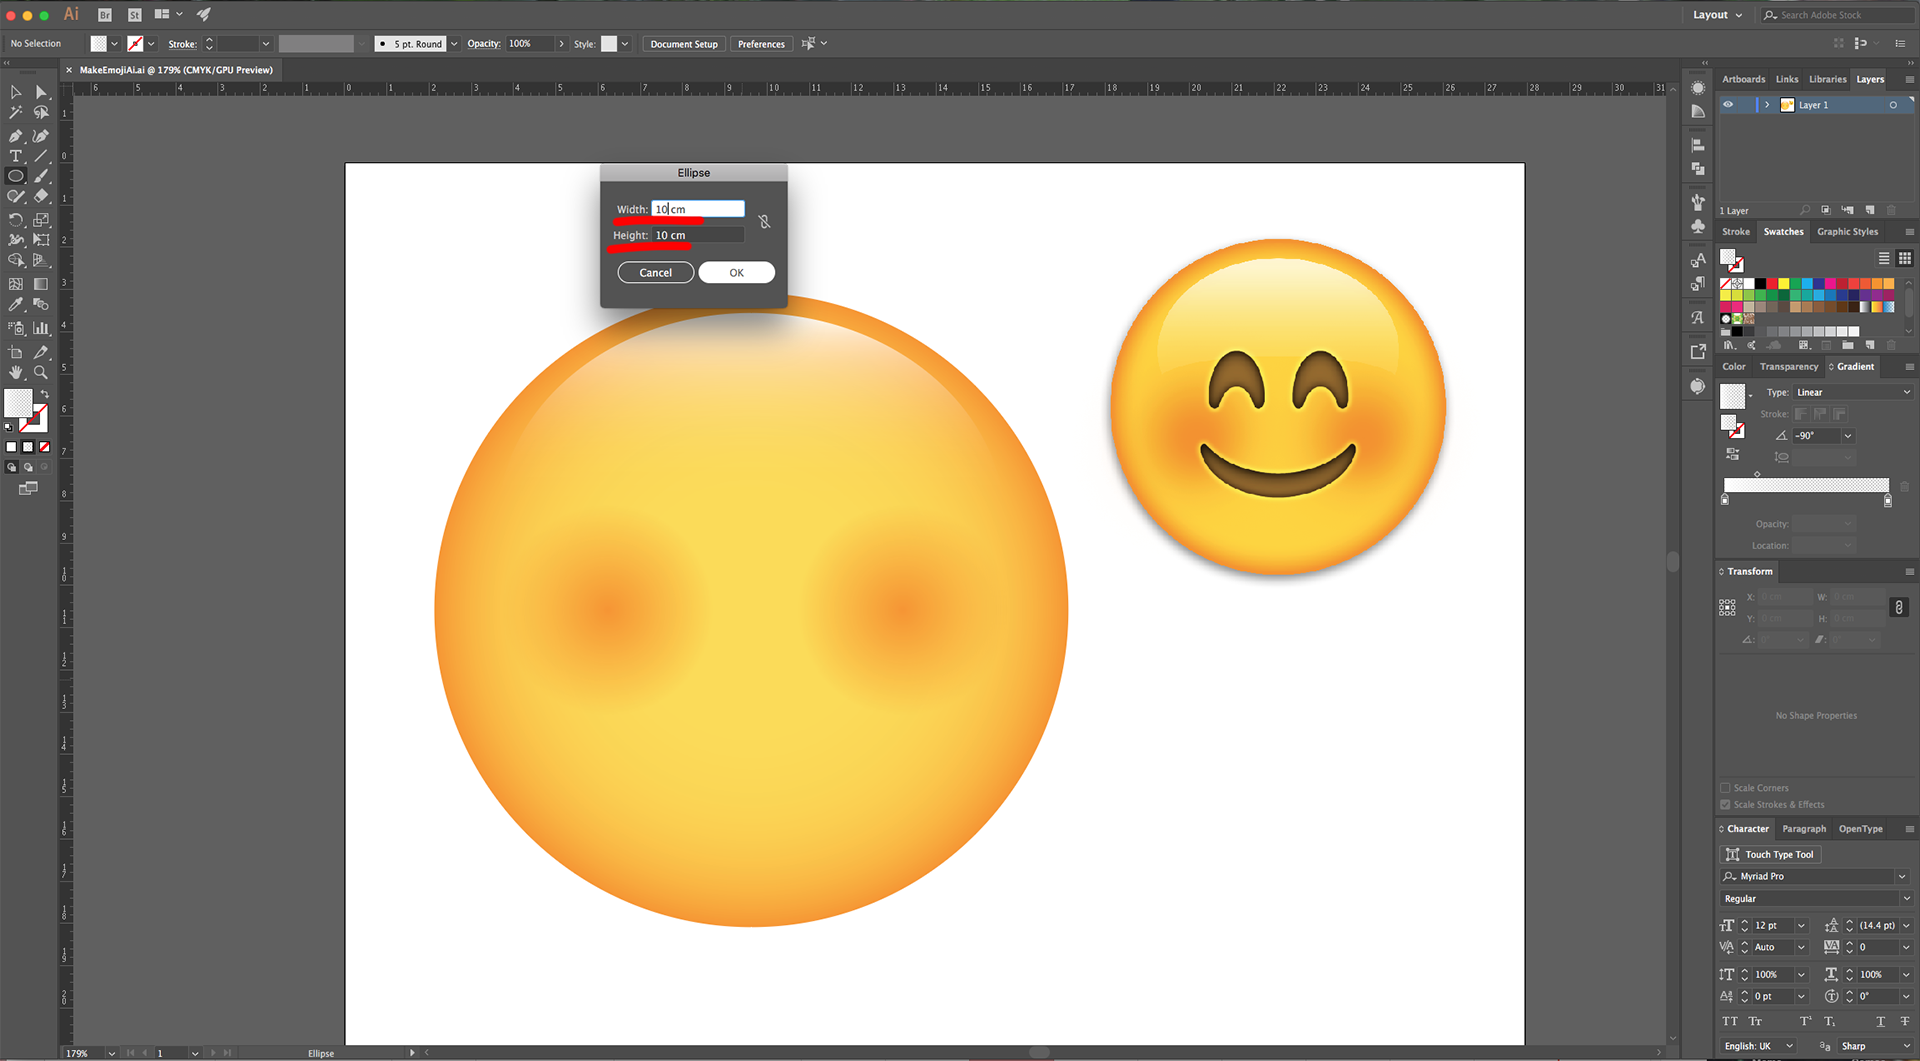
3 - Select the “Ellipse Tool” (L), click inside your Document and input a “Width” and “Height” of 15 cm.
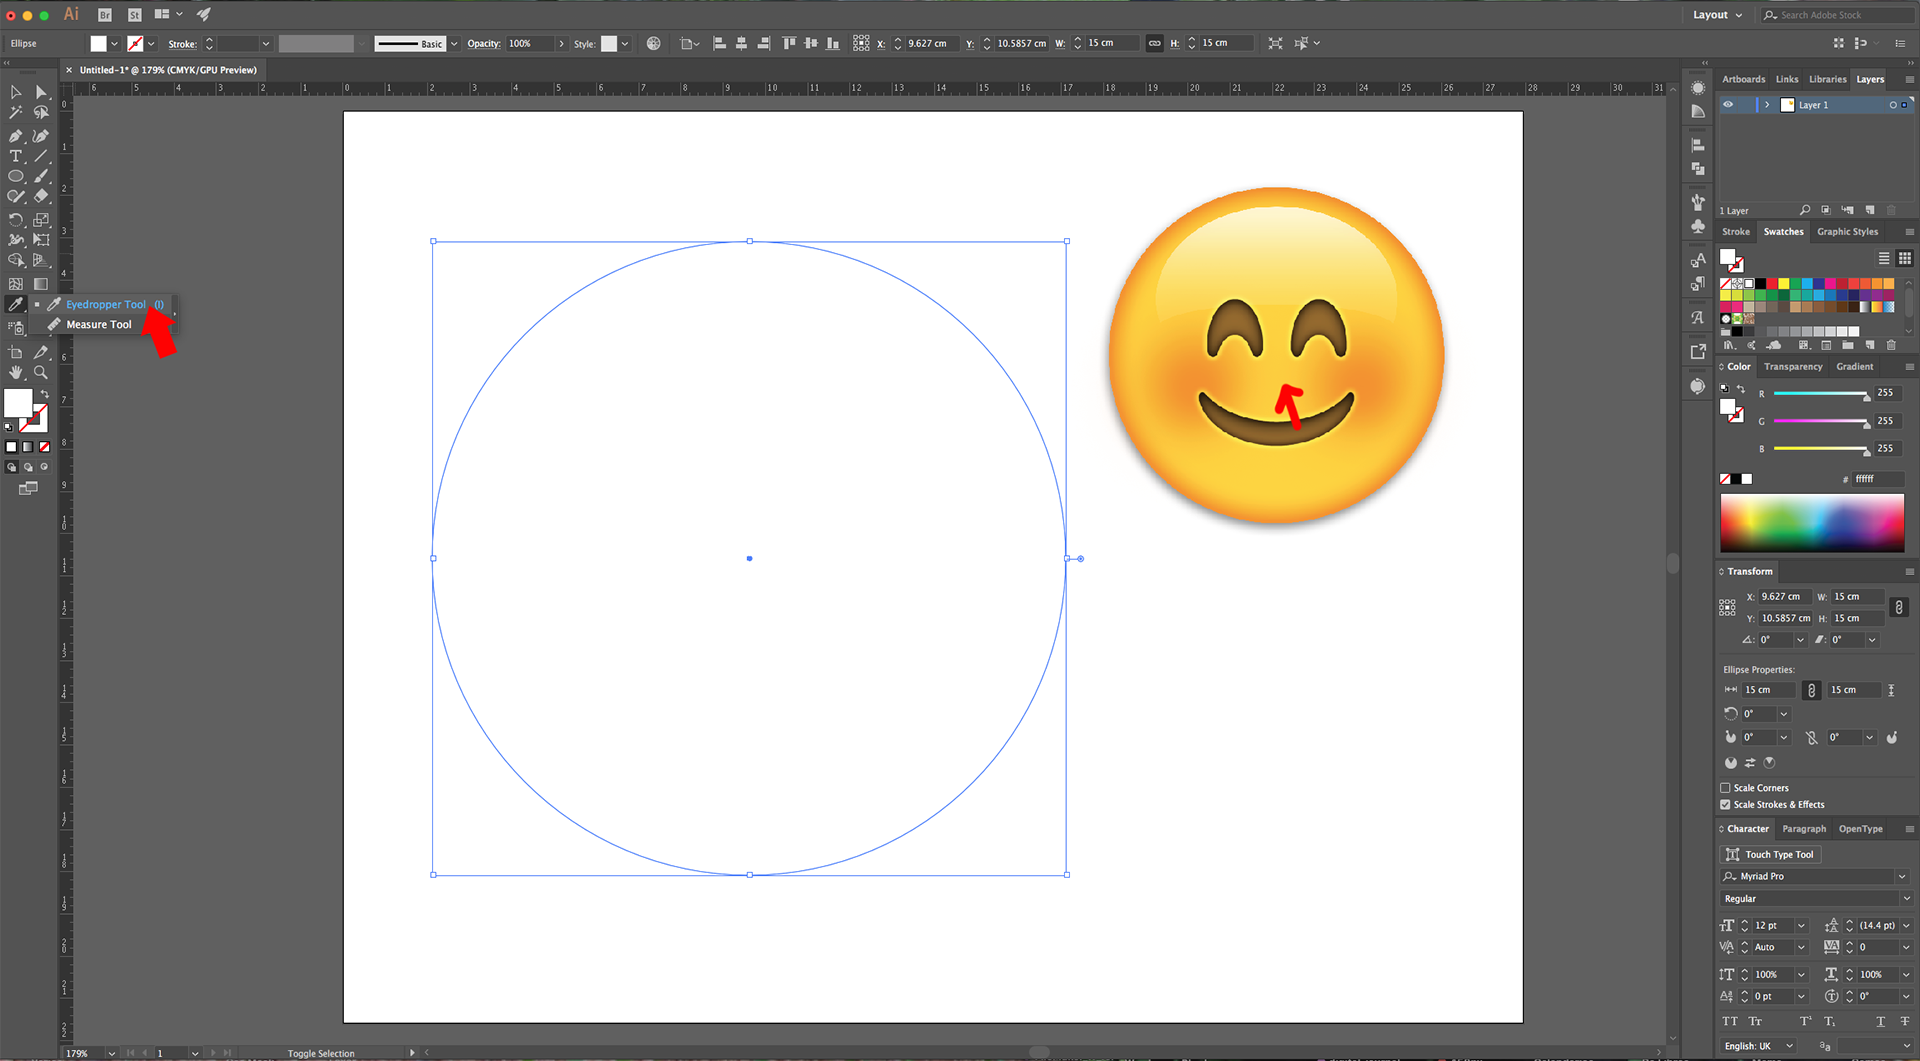
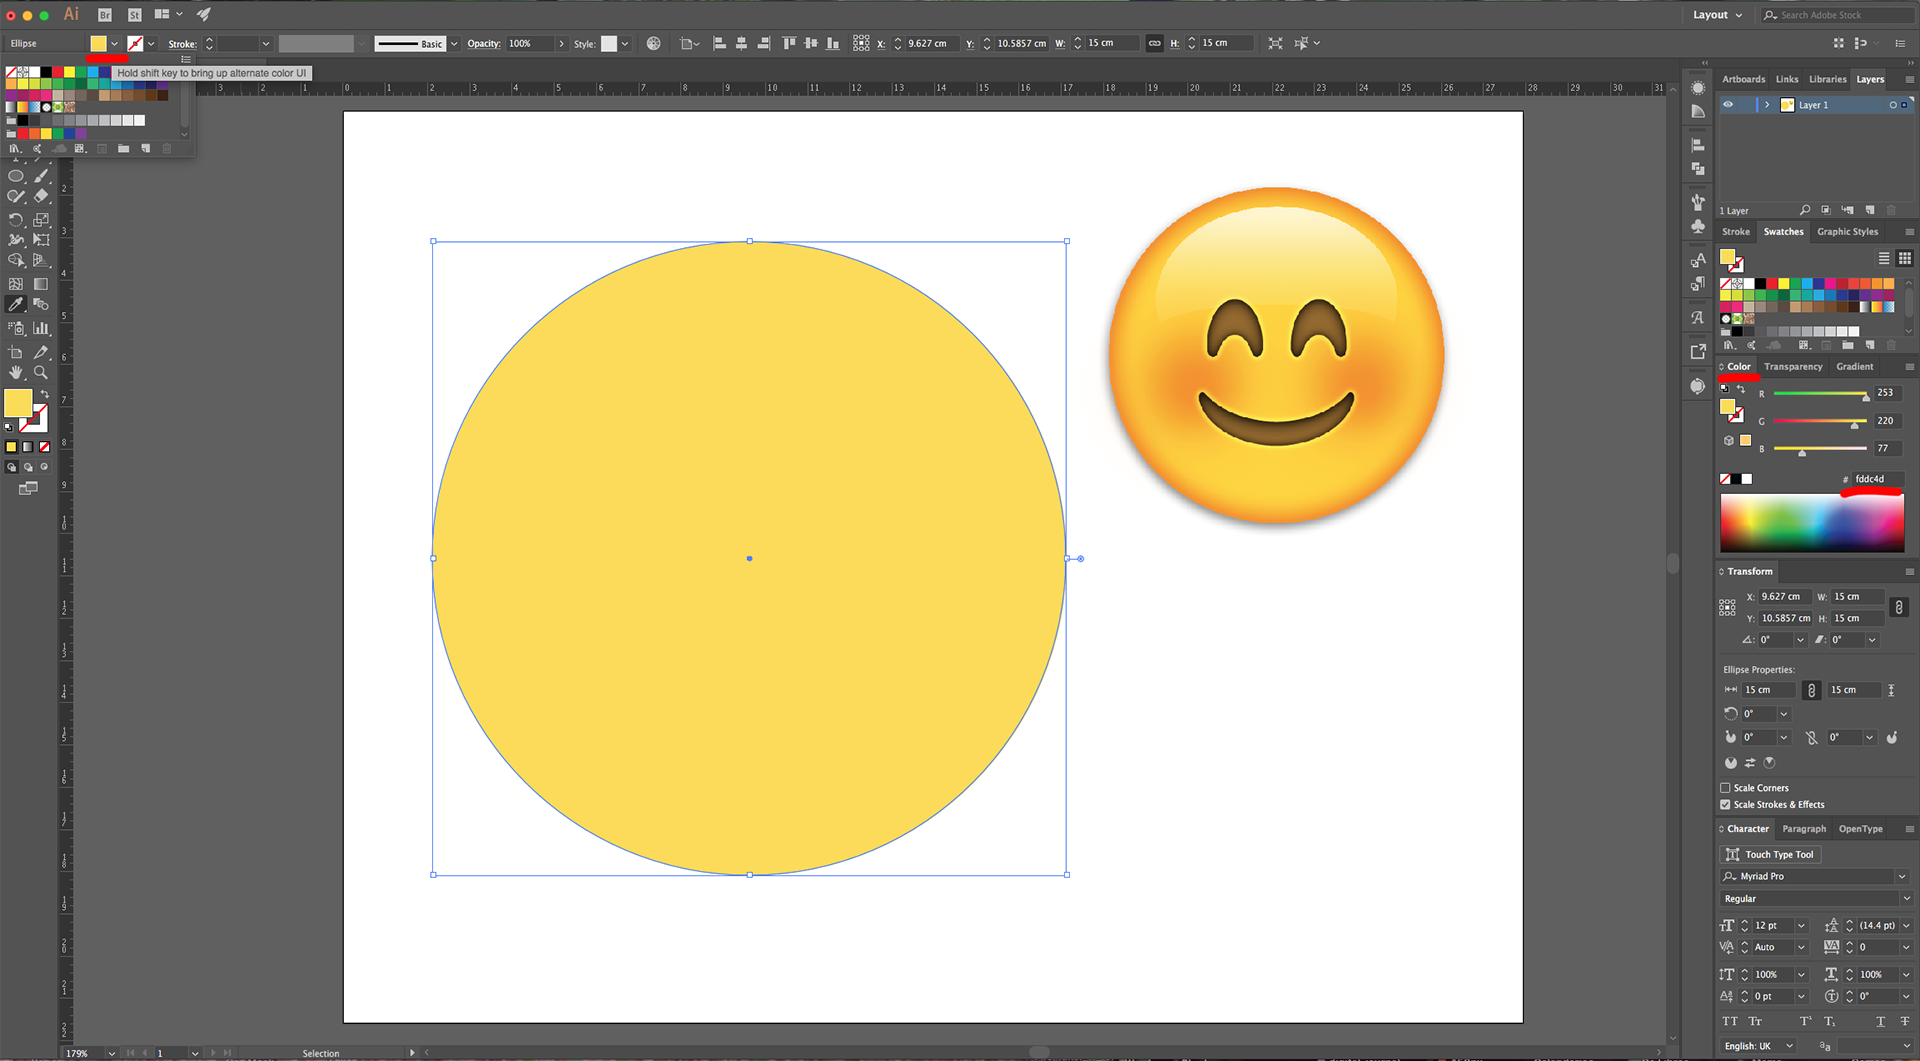
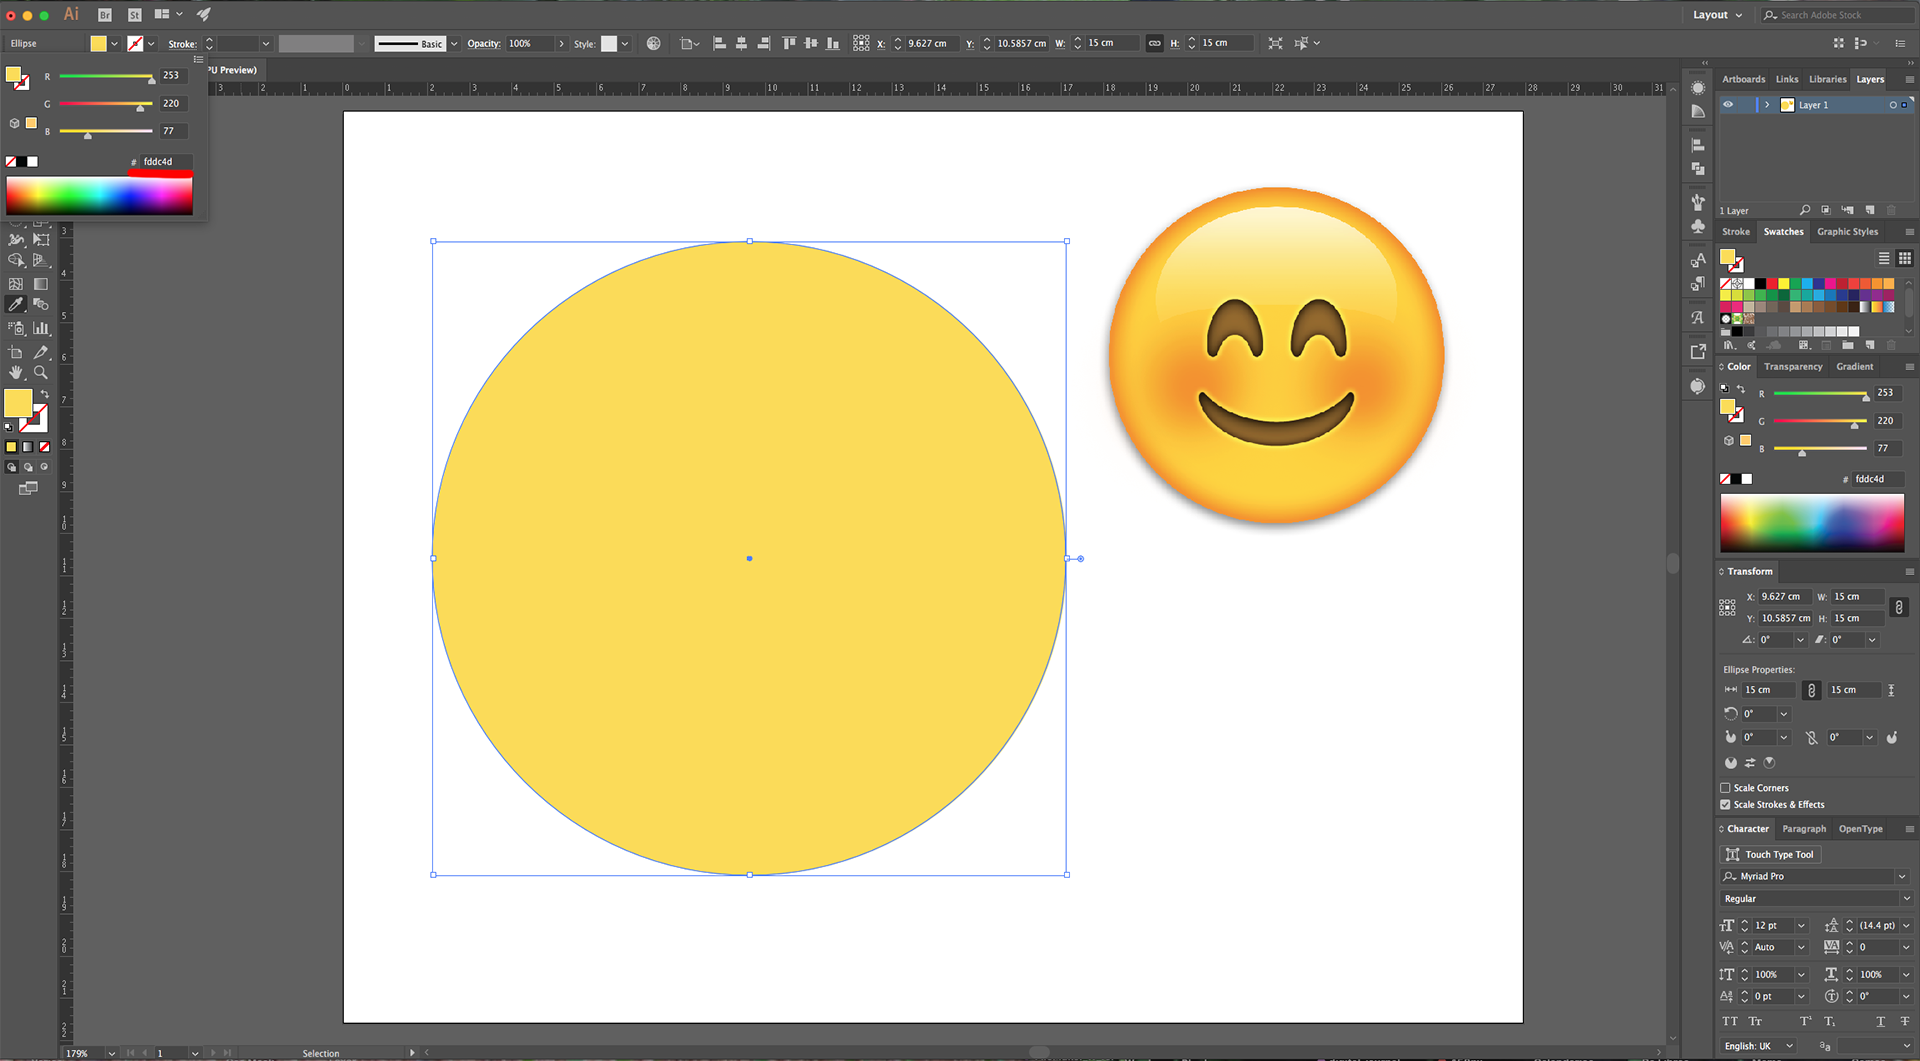
4 - Use the “Eyedropper Tool” (I) to select a Fill color from the reference image. Use a medium shade of yellow (we used #fdd4d).
5 - Change the “Fill” to a “Radial Gradient” from the Medium Yellow (#fdd4d) to Orange (#f79521). Move the “Location” of the Orange to 87%.

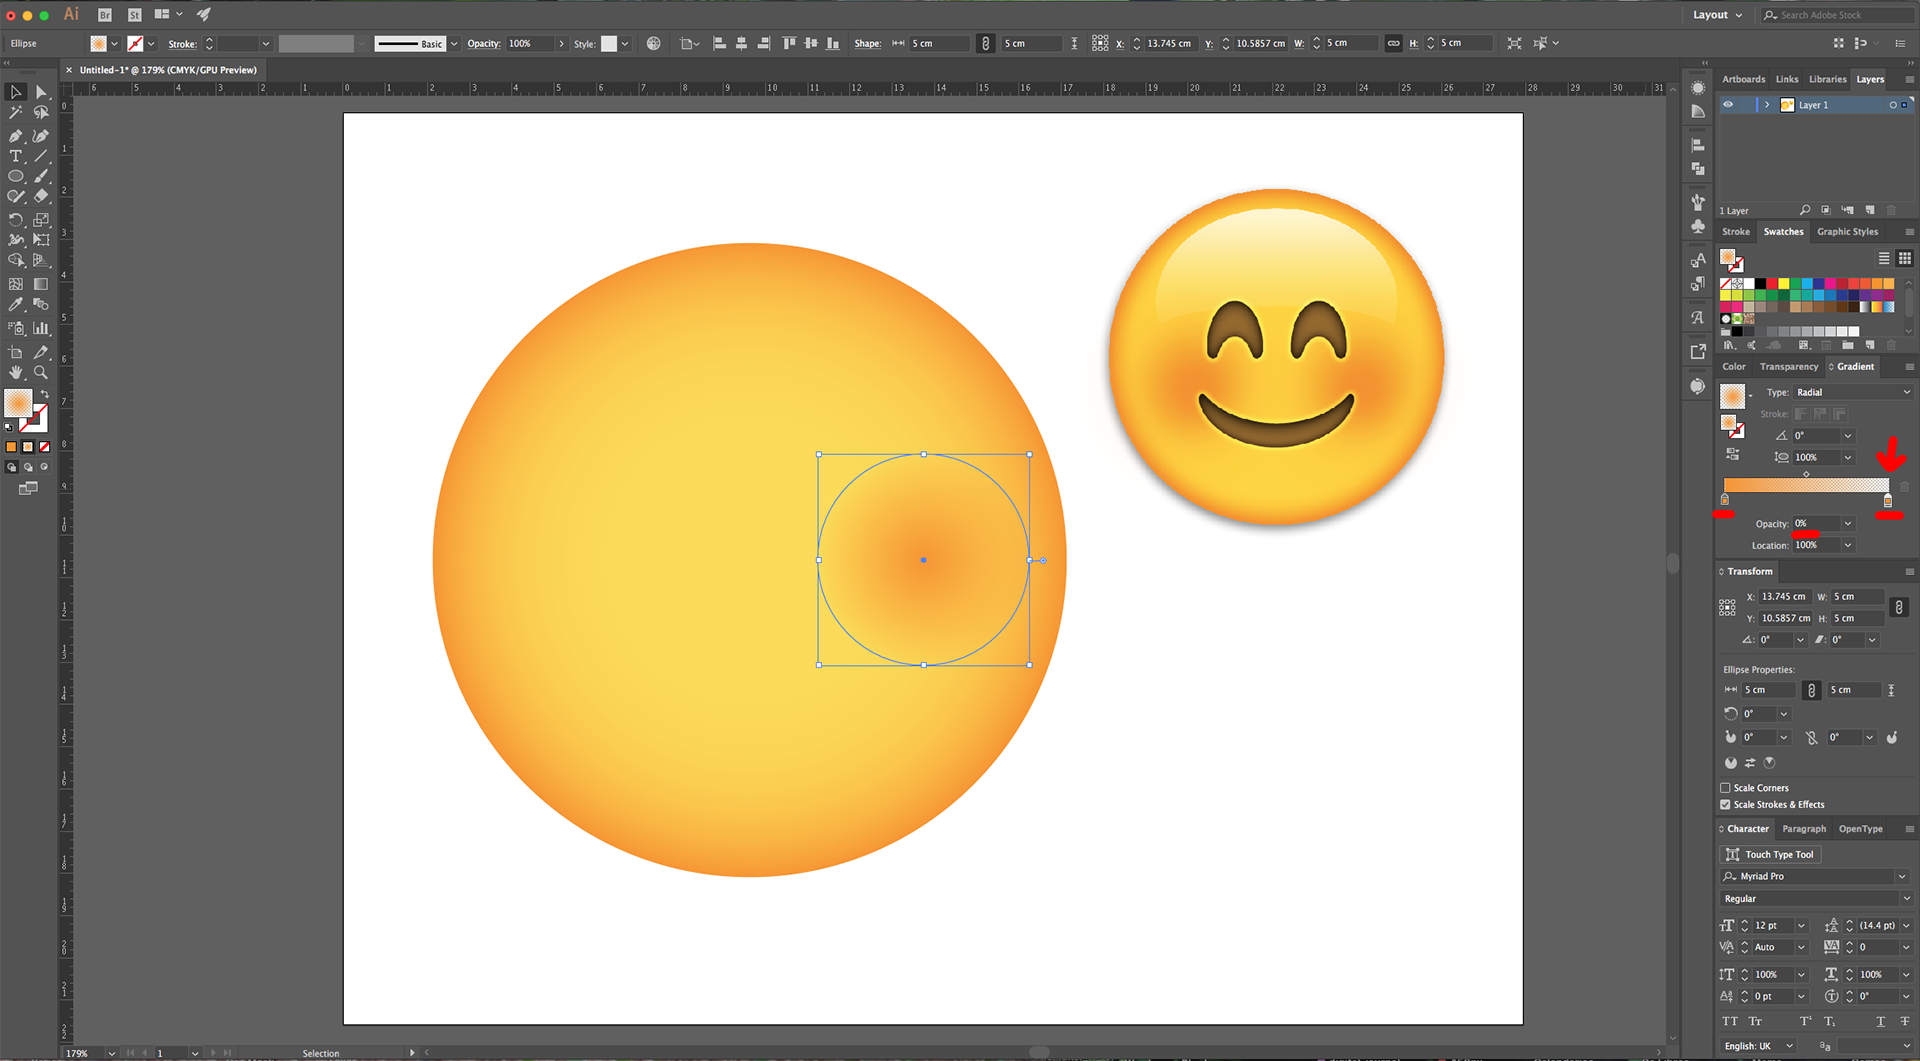
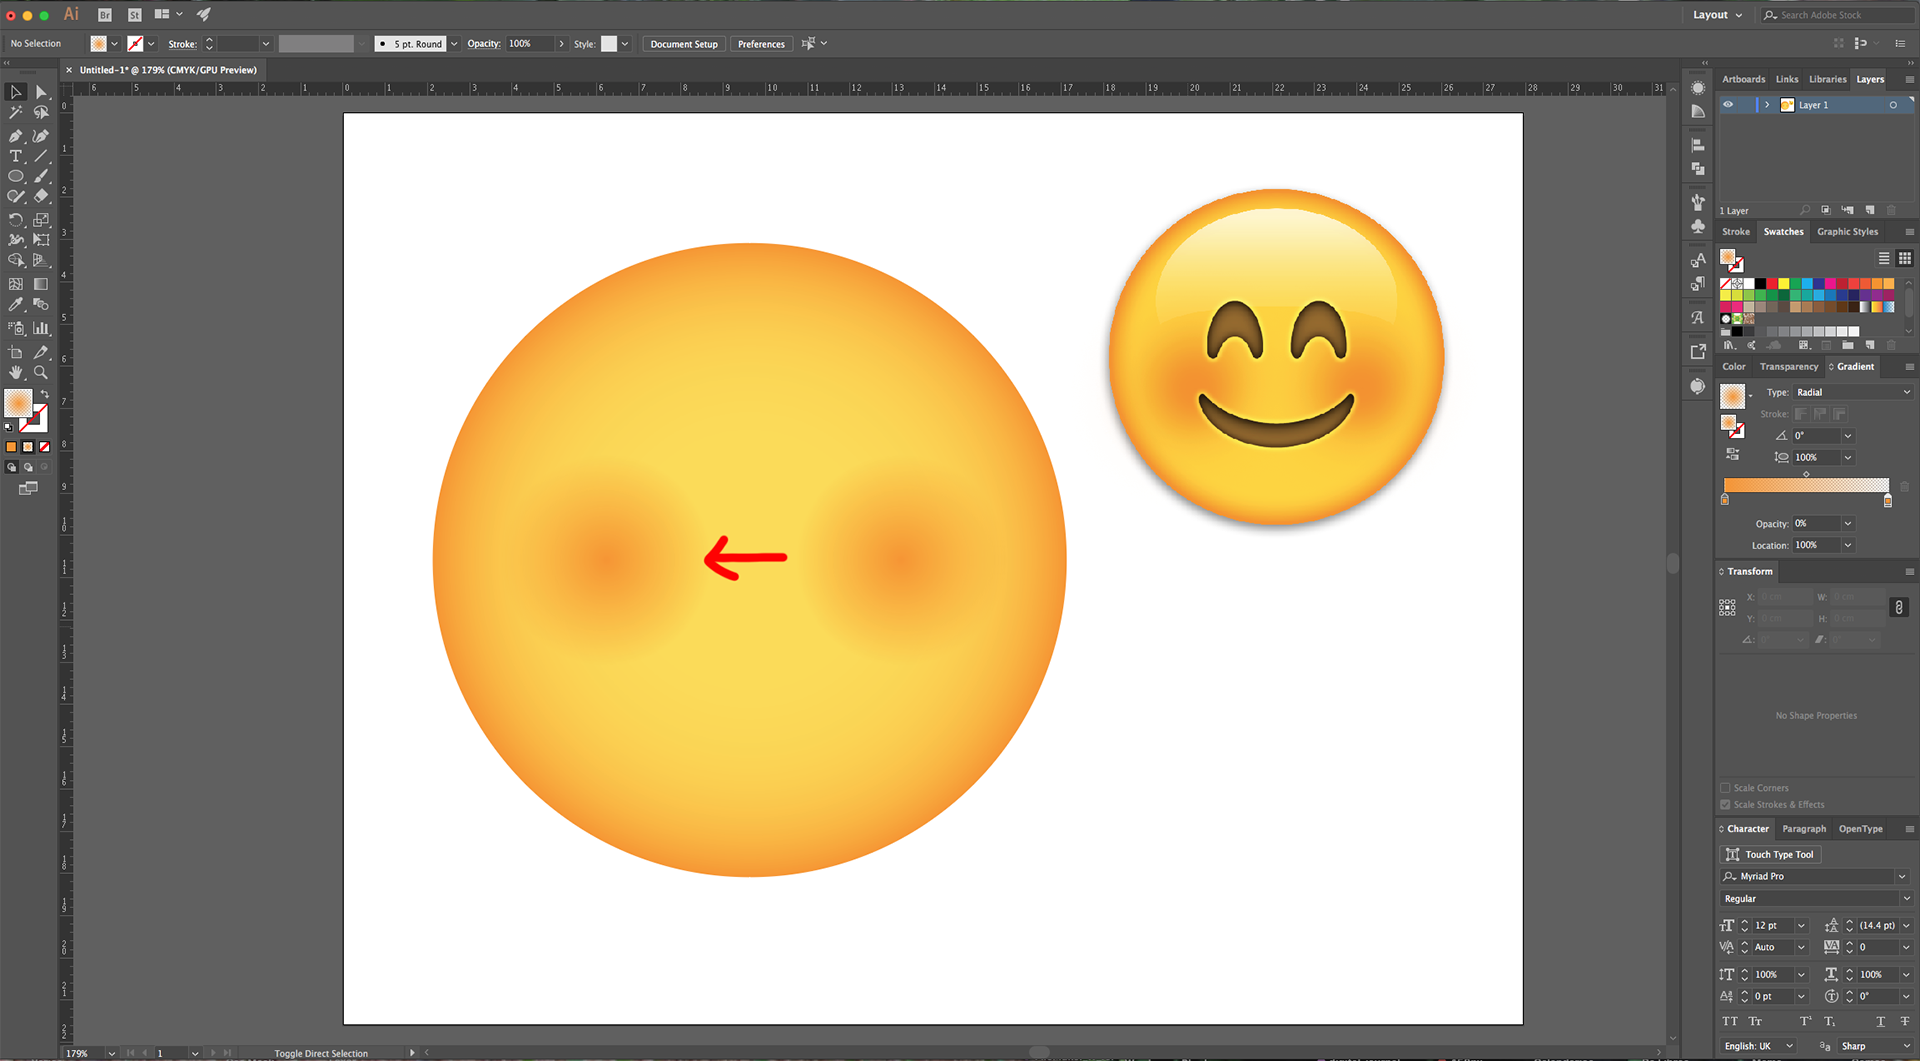
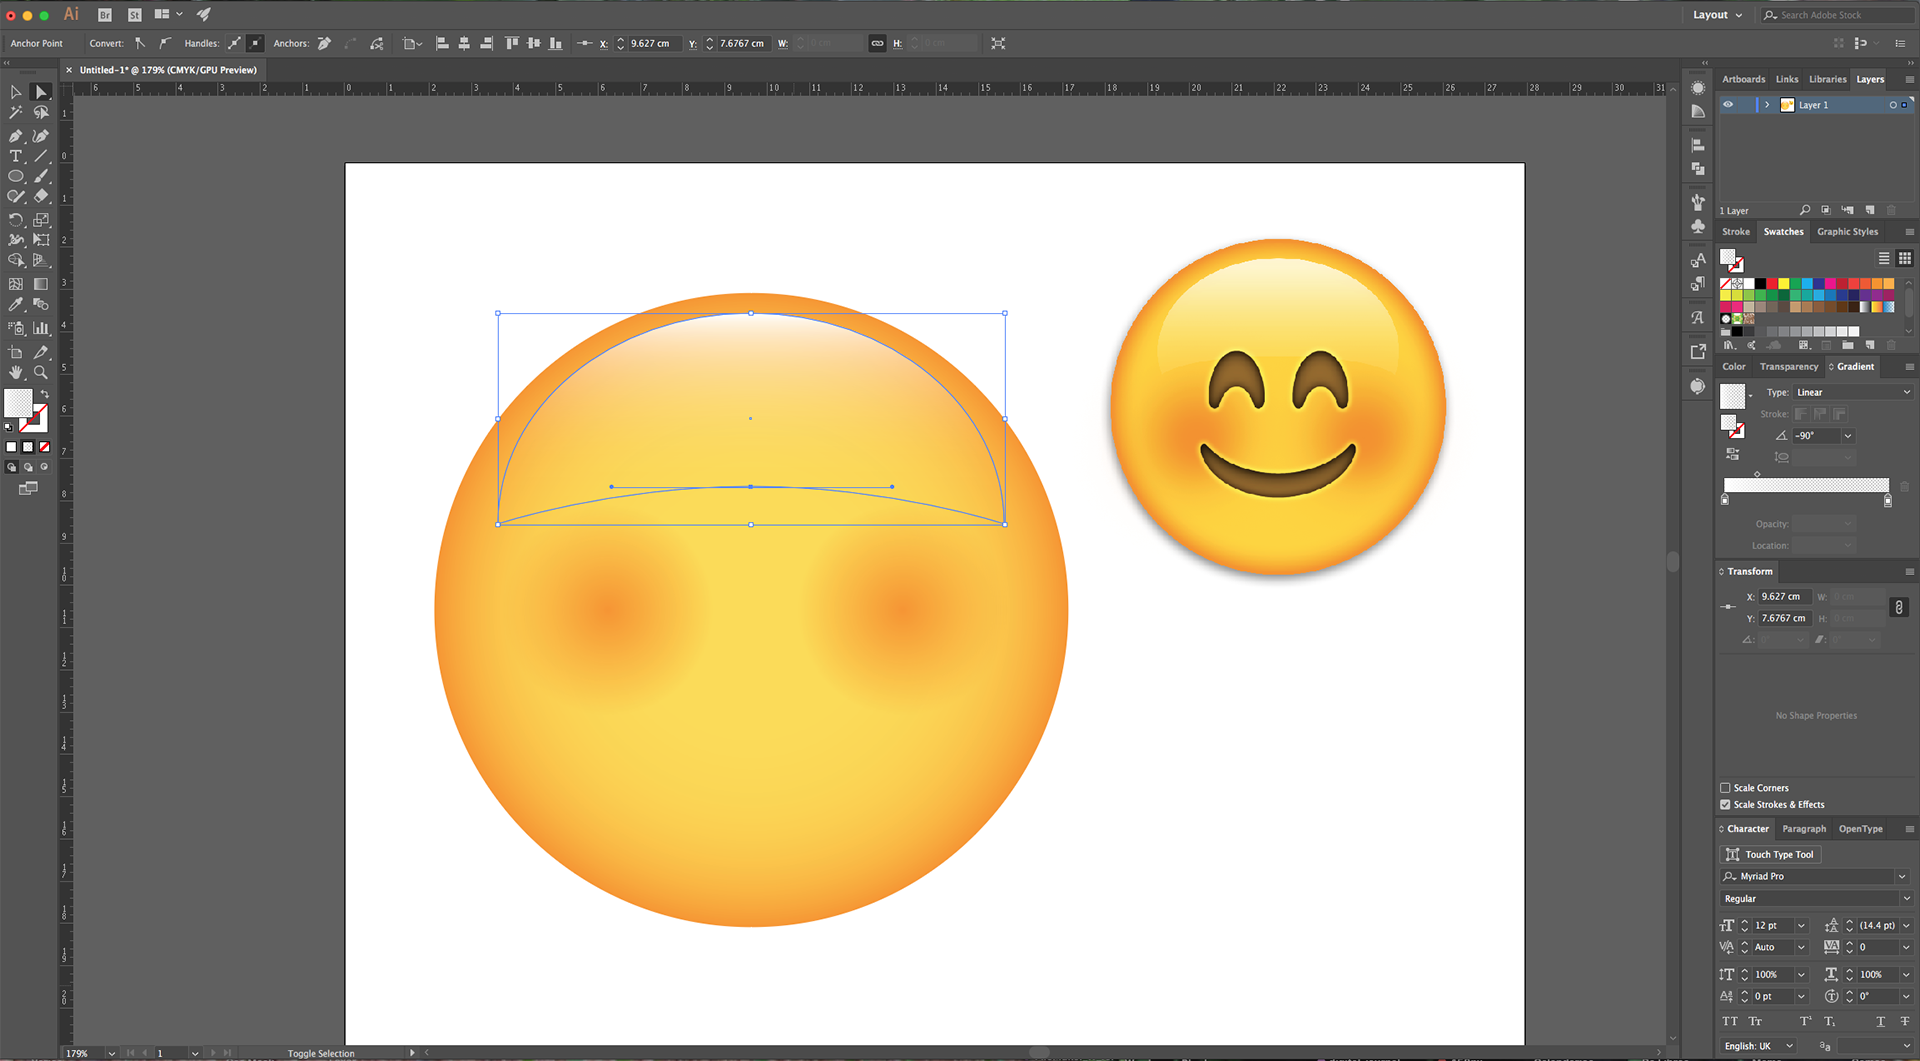
6 - Select the “Ellipse Tool” (L) again, click inside your Document and input a “Width” and “Height” of 5 cm. Fill it with a “Radial Gradient” from Orange (#f79521) with 100% “Opacity” to 0% “Opacity”. Place it on the Center-Right of the big circle and drag it to the Left while holding the “Option/Alt” and “Shift” keys to create a “Duplicate” in the other side of the “Face”.
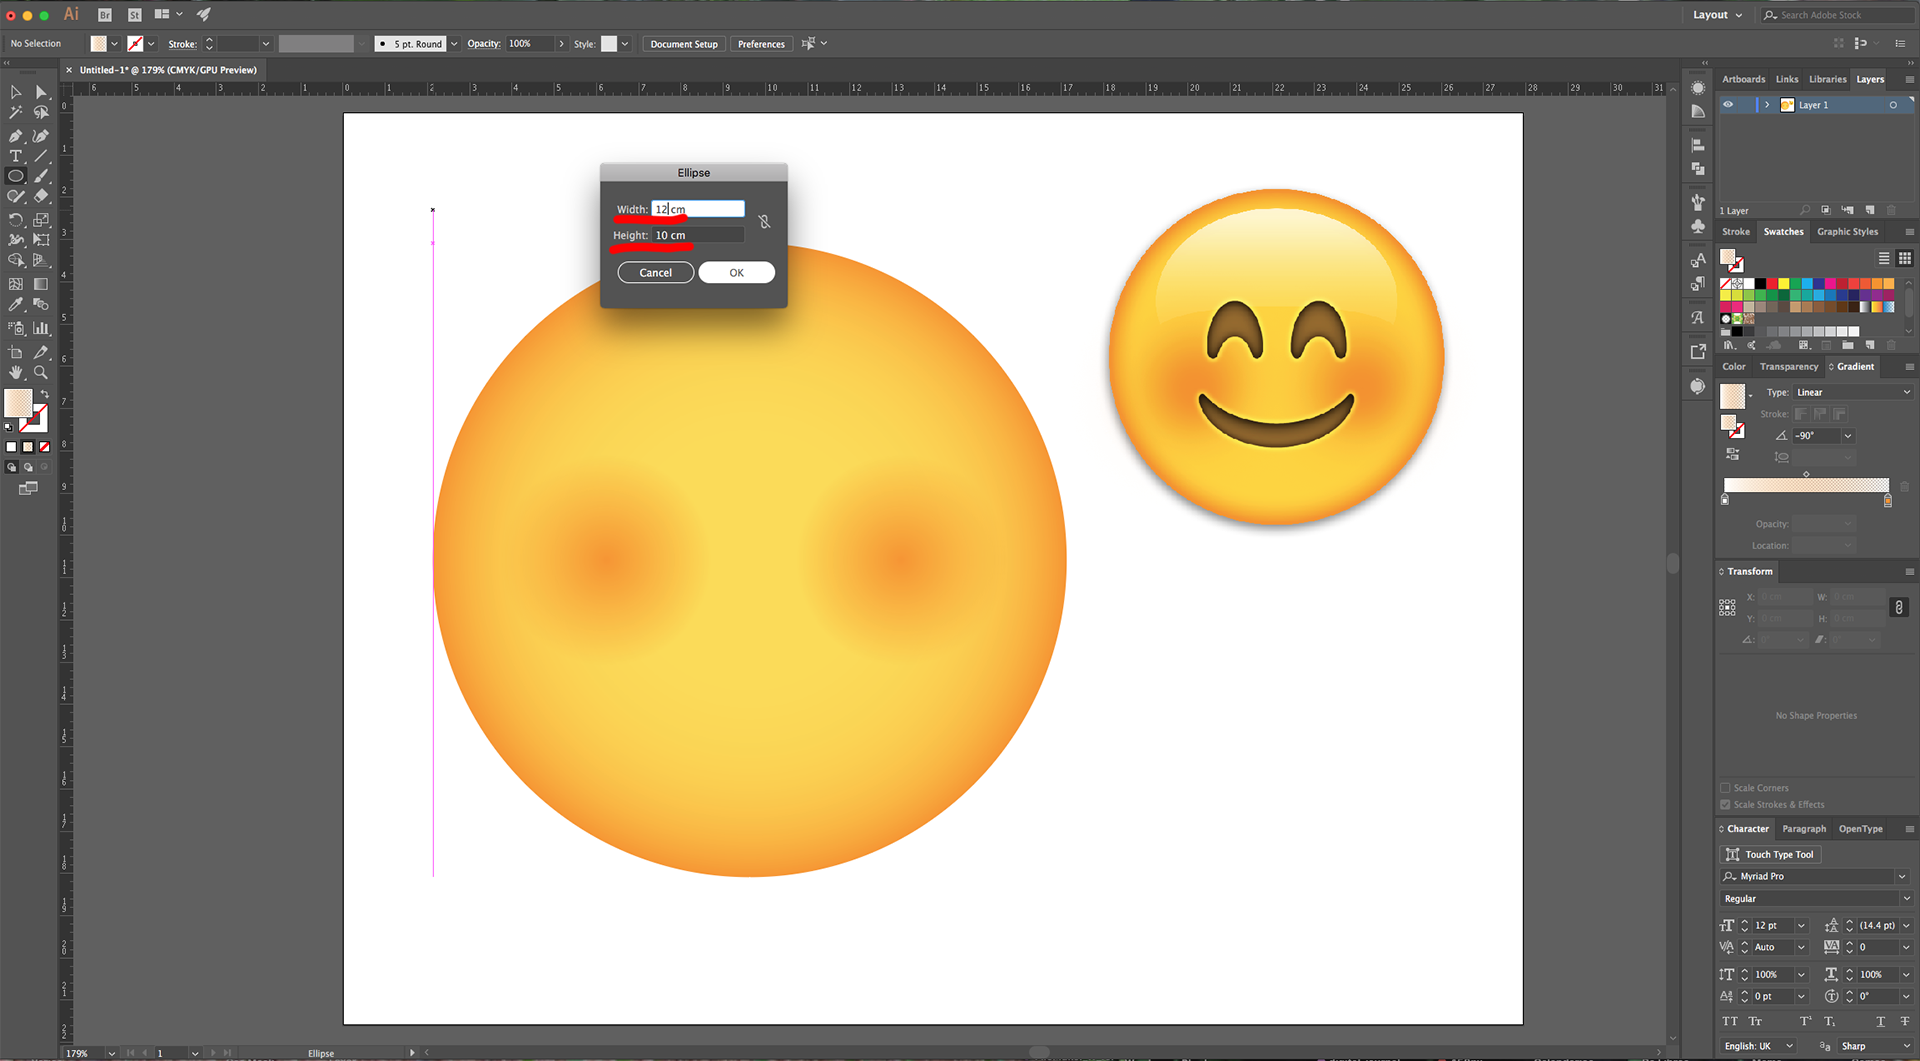
7 - Create another “Ellipse” (L), but this time give it a “Width” of 12 cm and a “Height” of 10 cm. Fill it a “Linear Gradient” with a -90° Angle, going from White (#ffffff) with 100% “Opacity” to 0% “Opacity”. Place the “Middle Point” location at 20%.

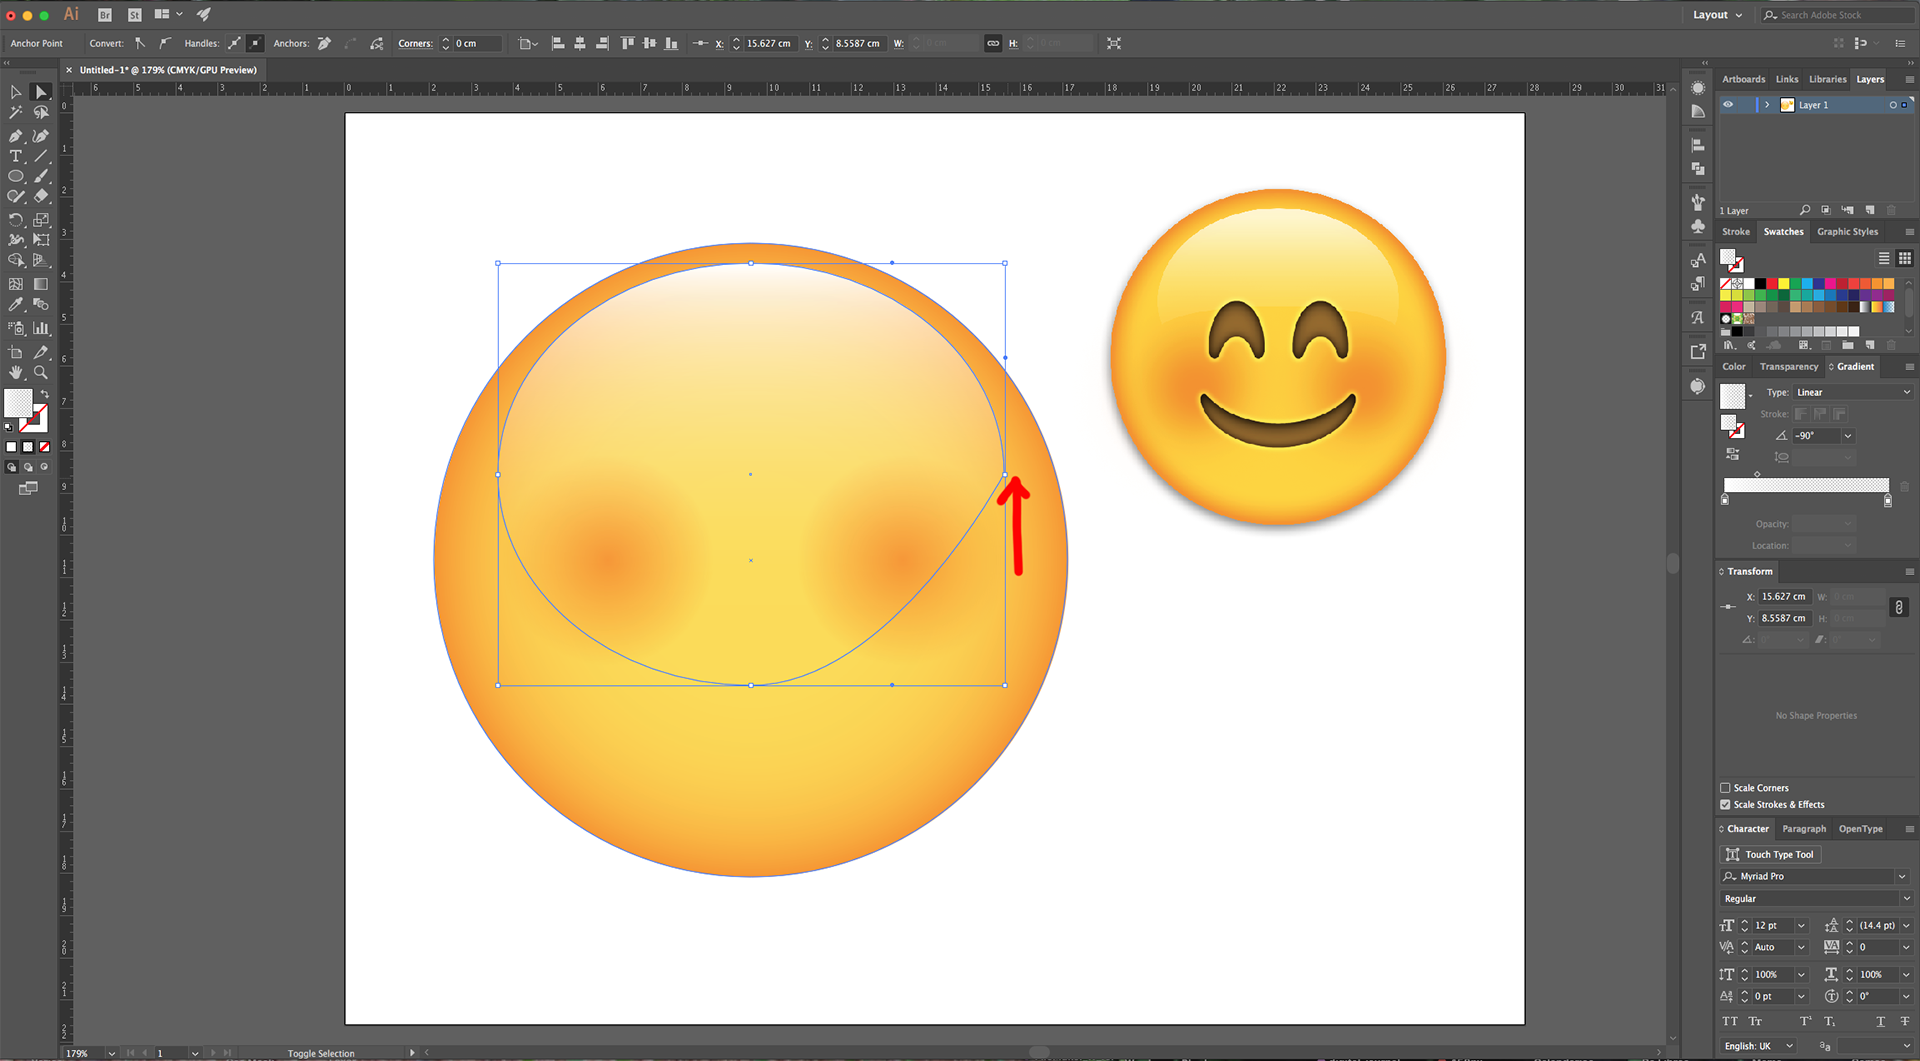
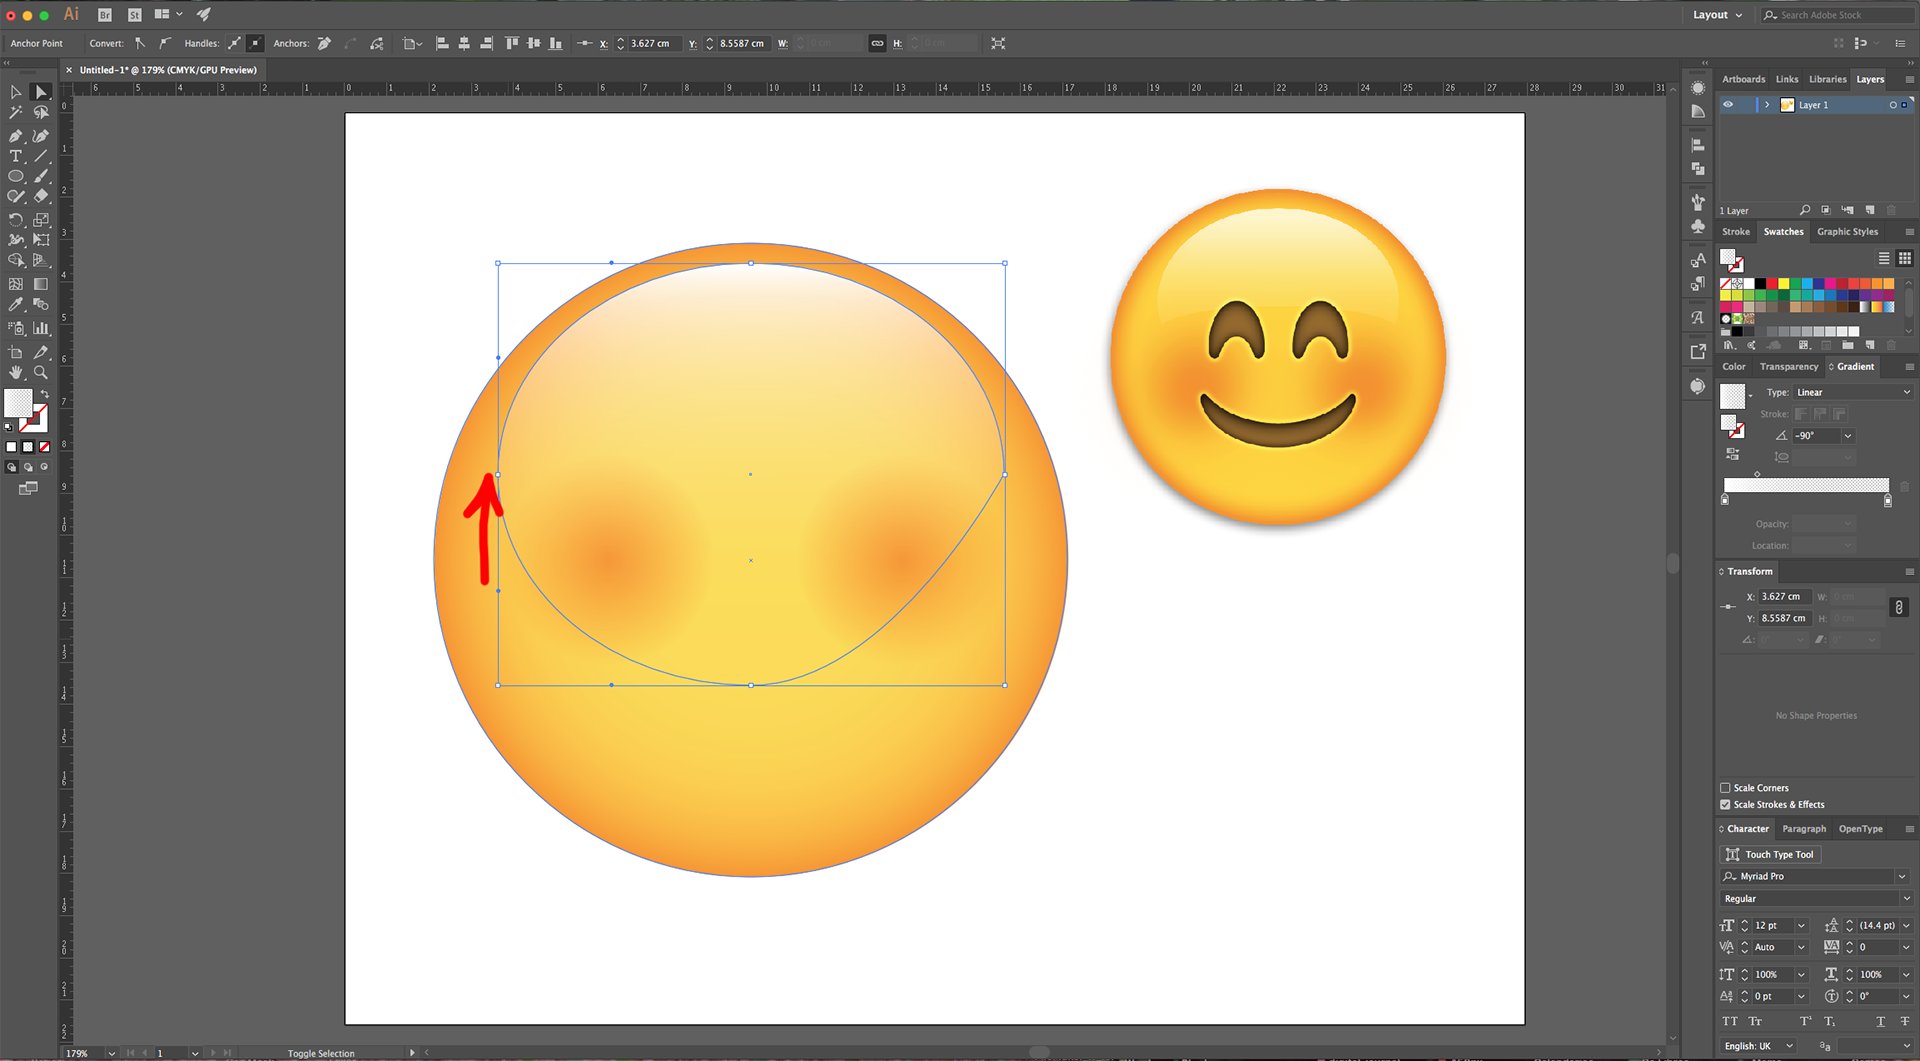
8 - Use the “Direct Selection Tool” (A) to click on the Right-most “Anchor Point”, move the bottom “Handle” up while holding the “Shift” key. Repeat on the Left side.


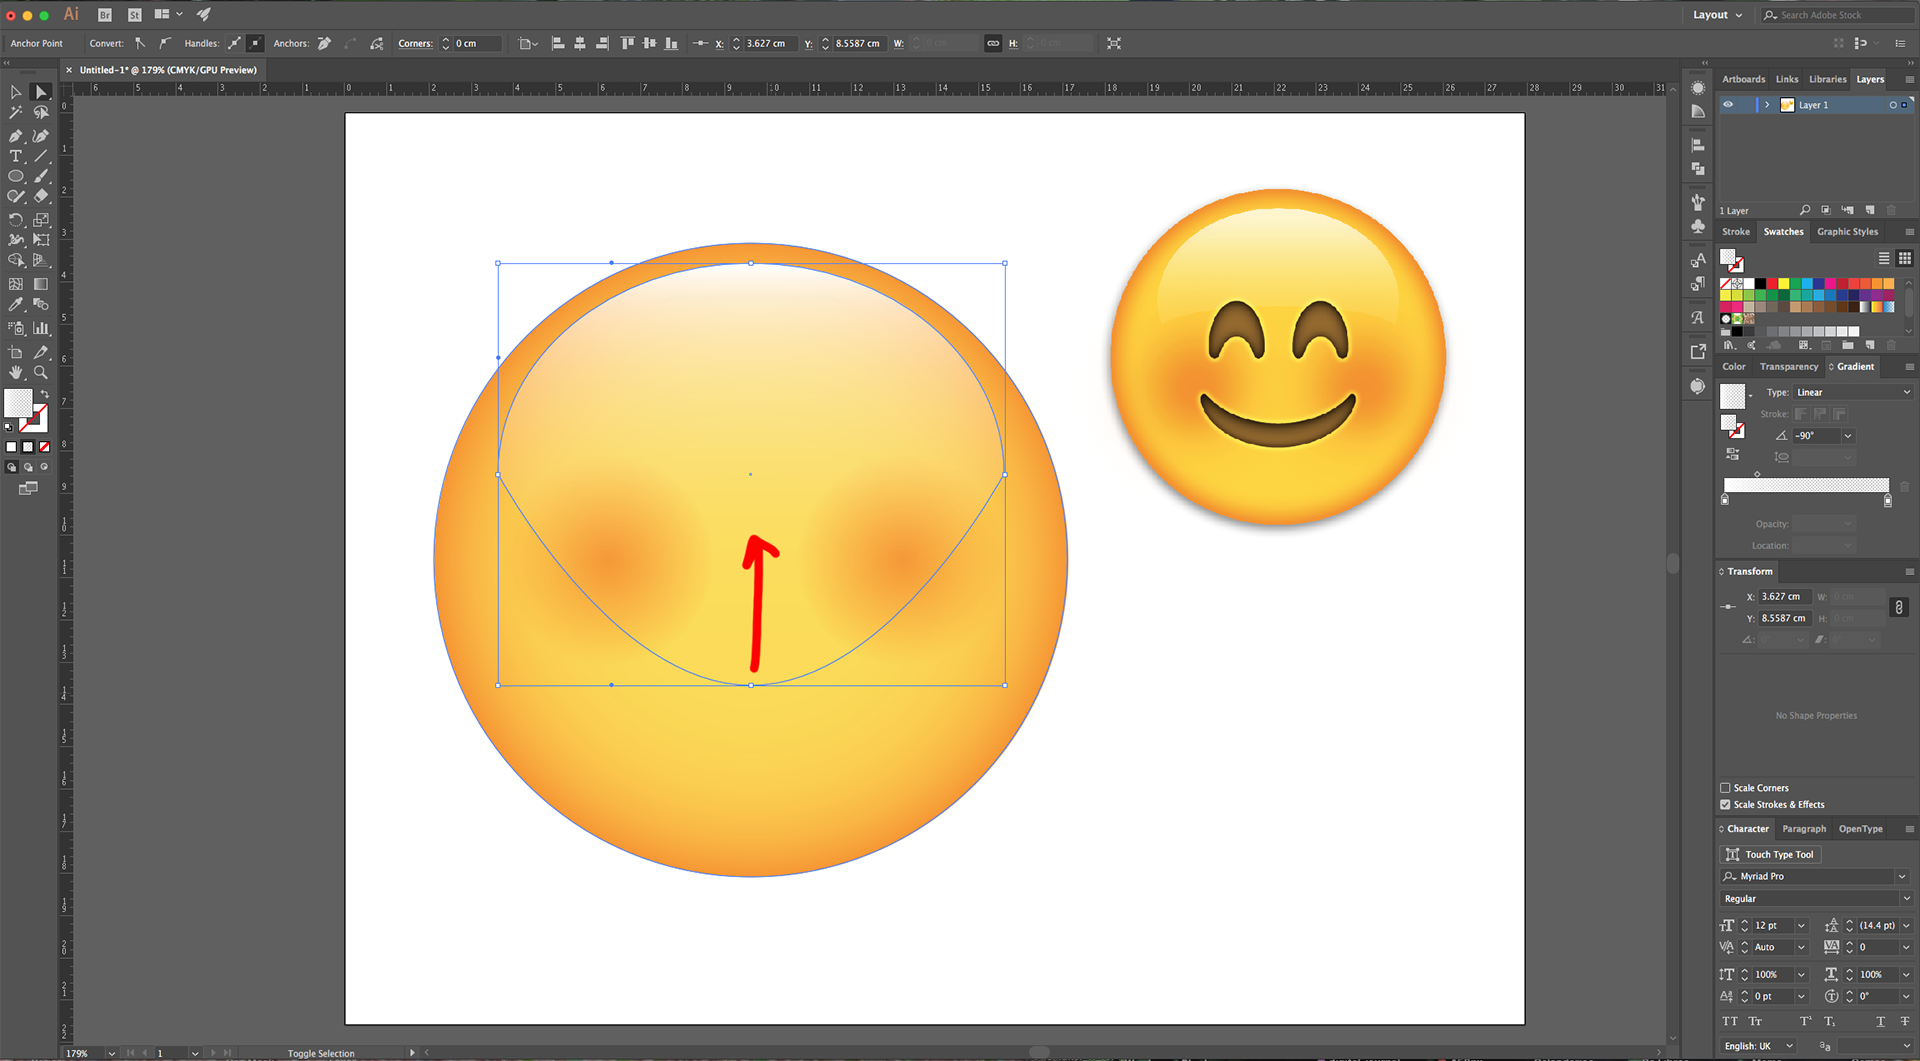
9 - Then, select the bottom “Anchor Point” and pull it up till about 1 cm above the bottom line.

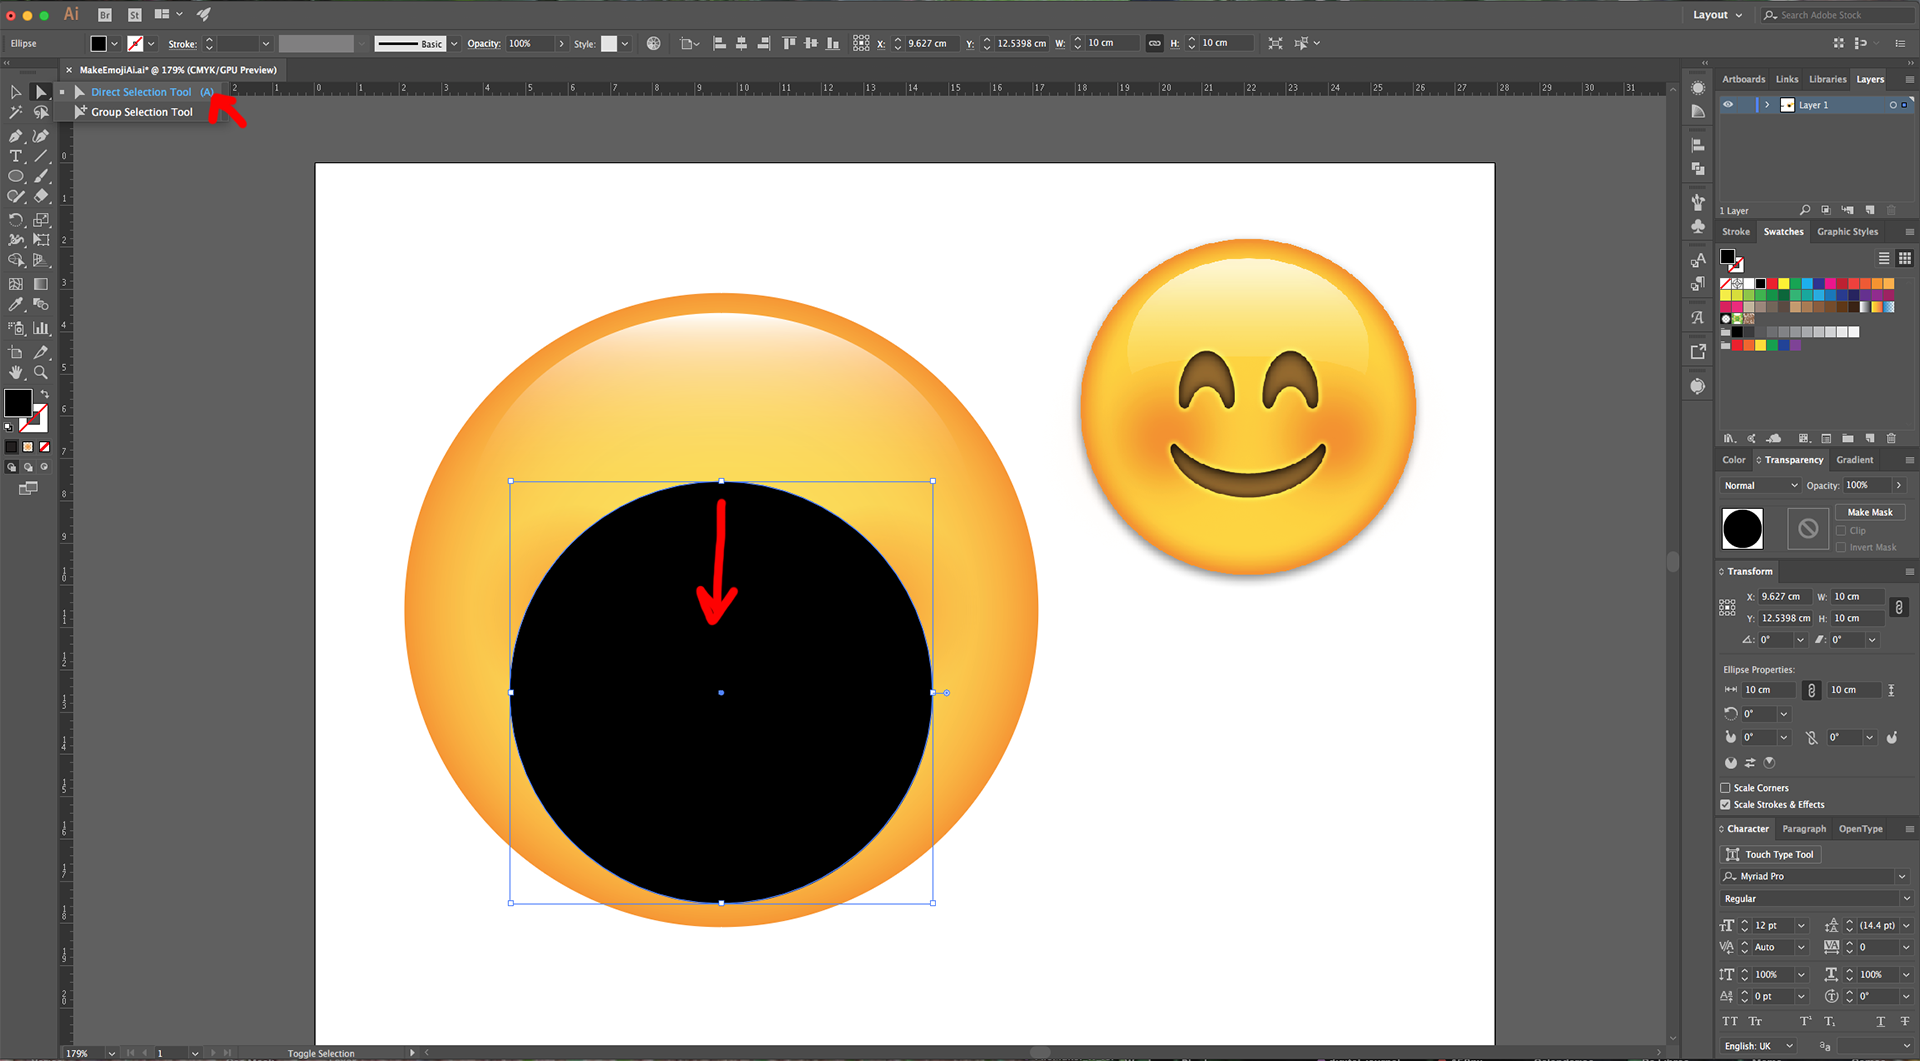
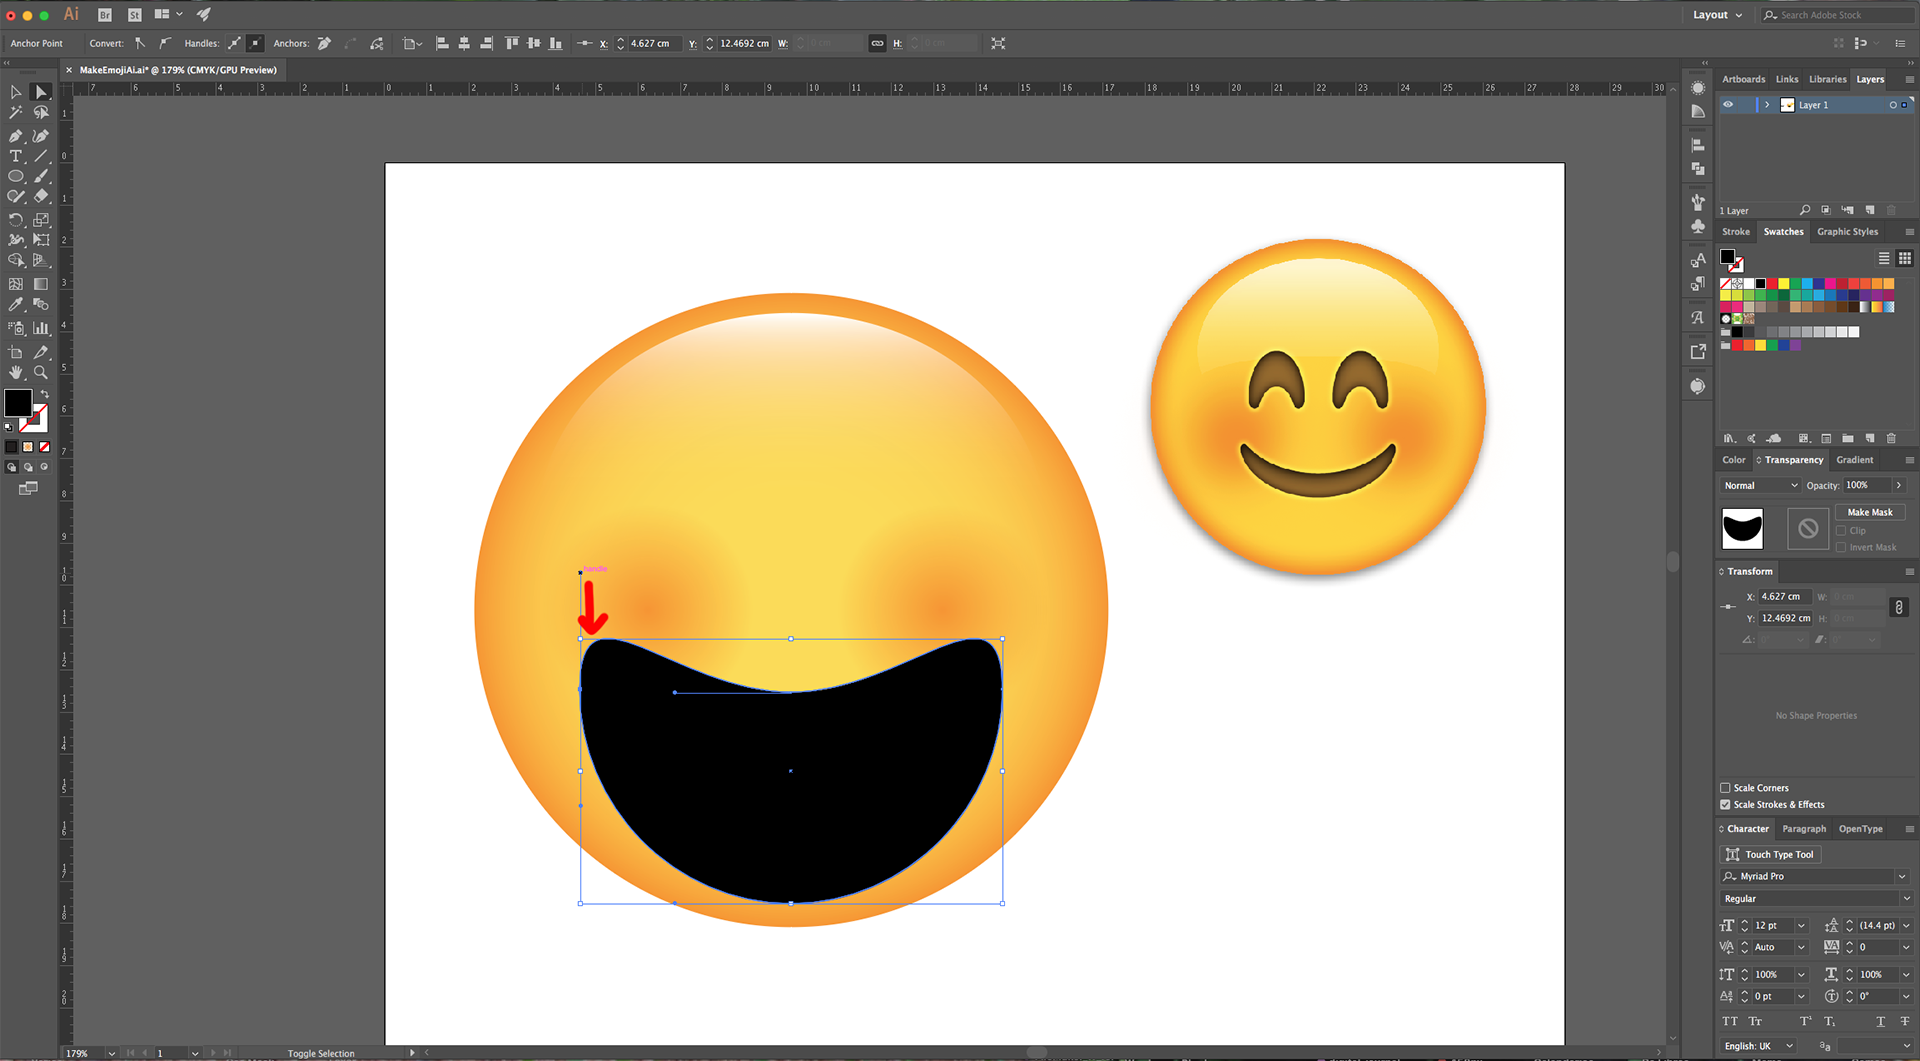
10 - Select the “Ellipse Tool” (L), click inside your Document and input a “Width” and “Height” of 10 cm. Fill it with Black.

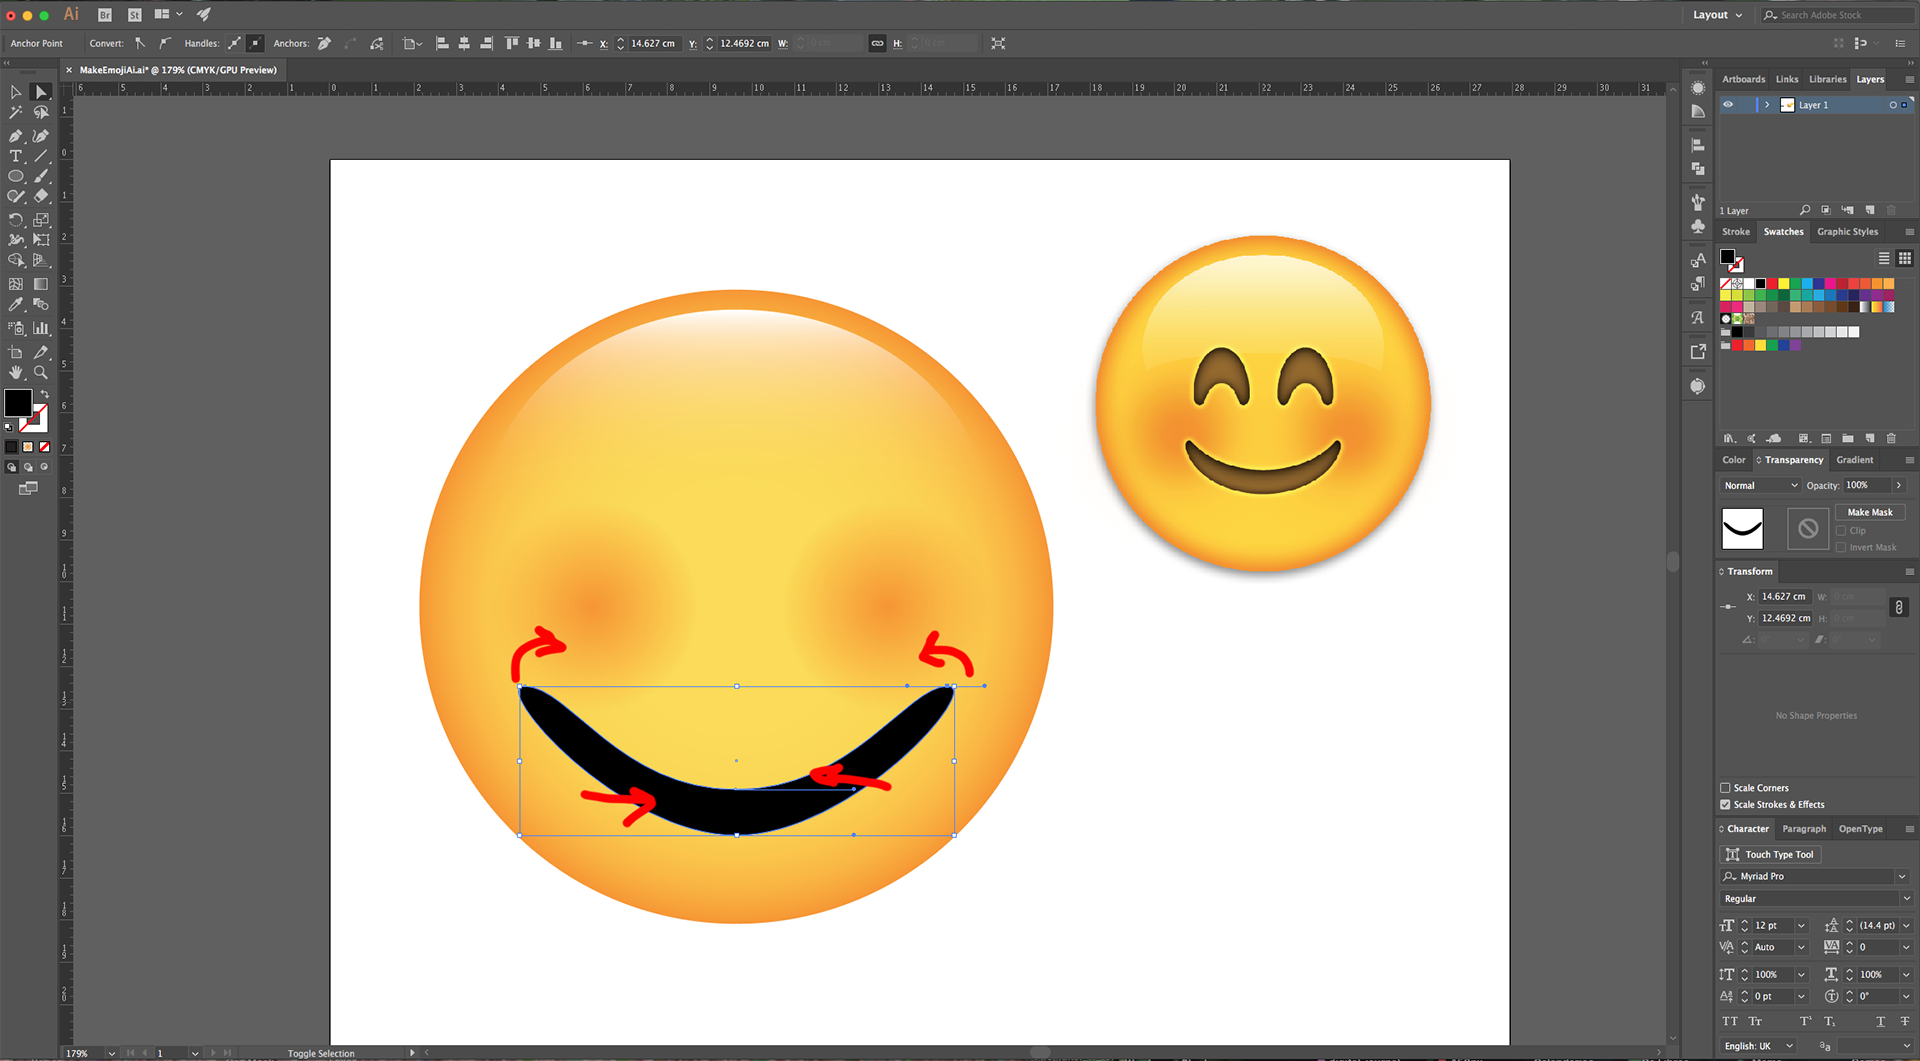
11 - Use the “Direct Selection Tool” (A) to click on the Top-most “Anchor Point”, move it down while holding the “Shift” key.
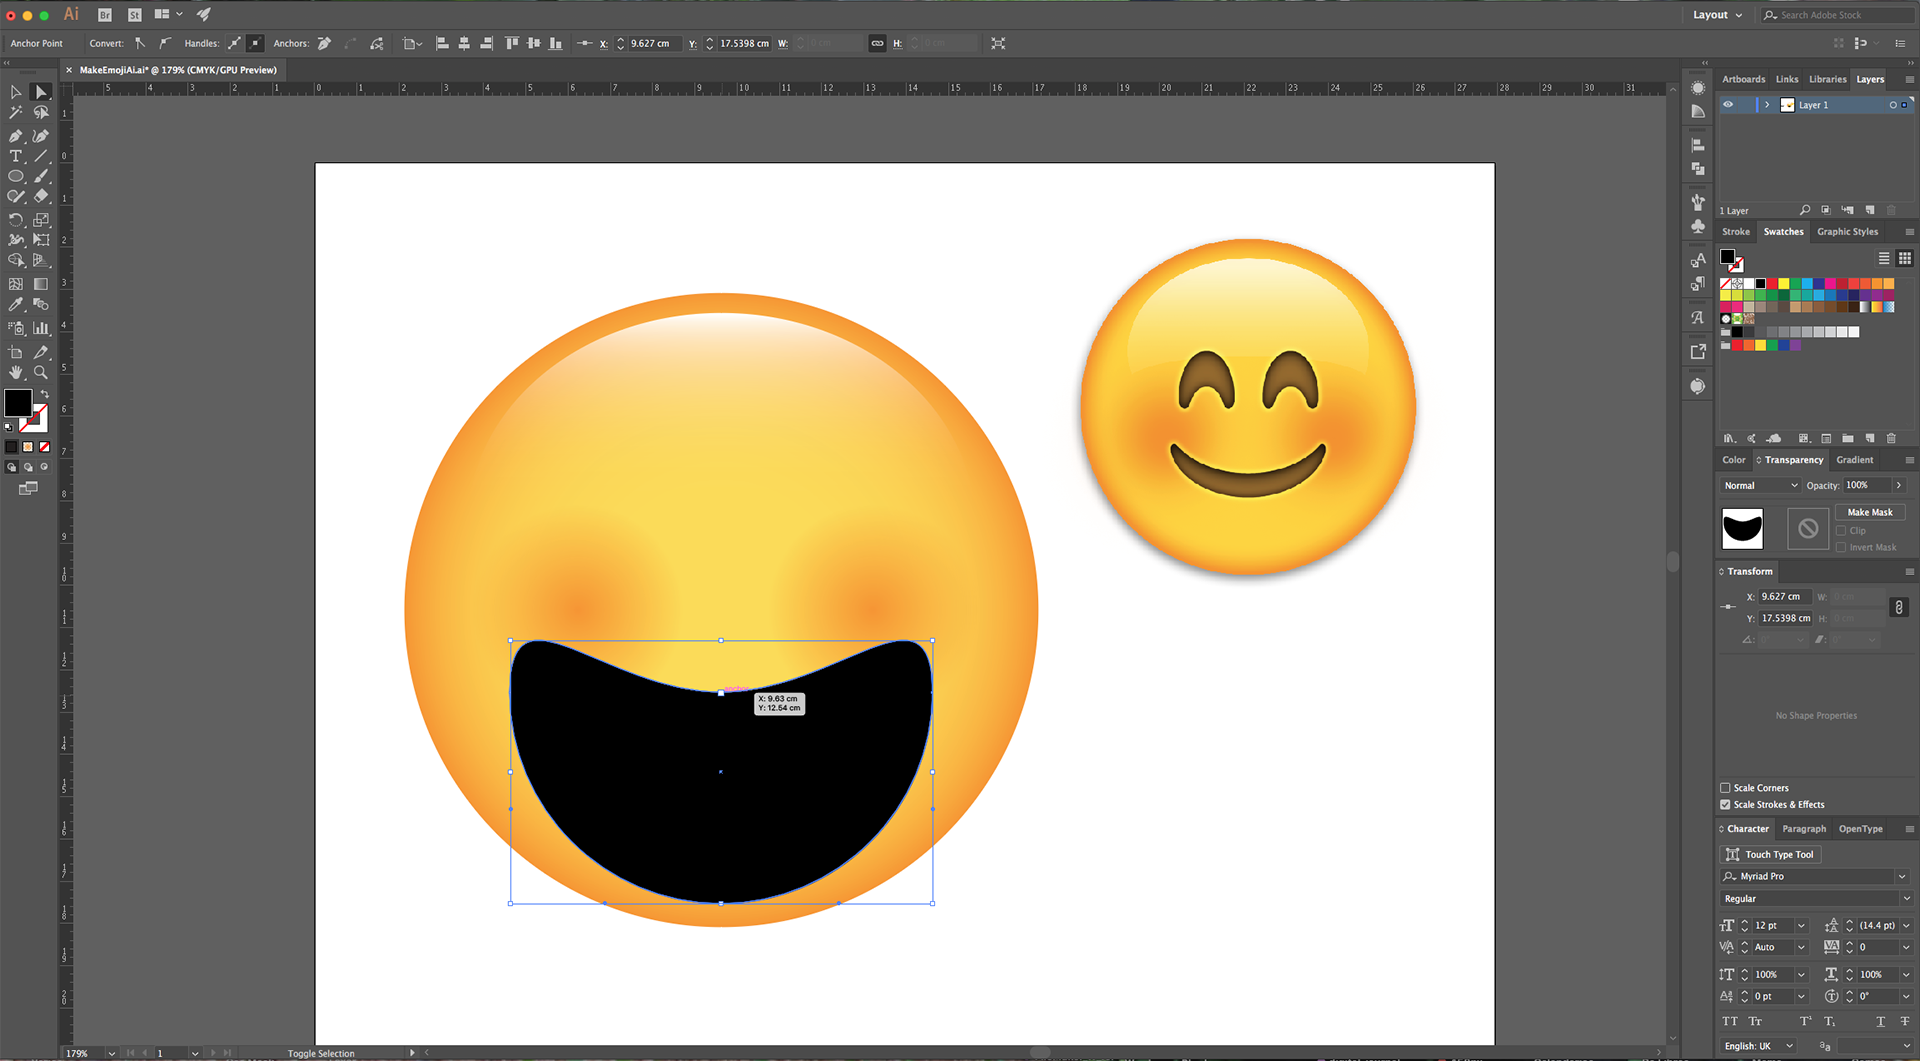
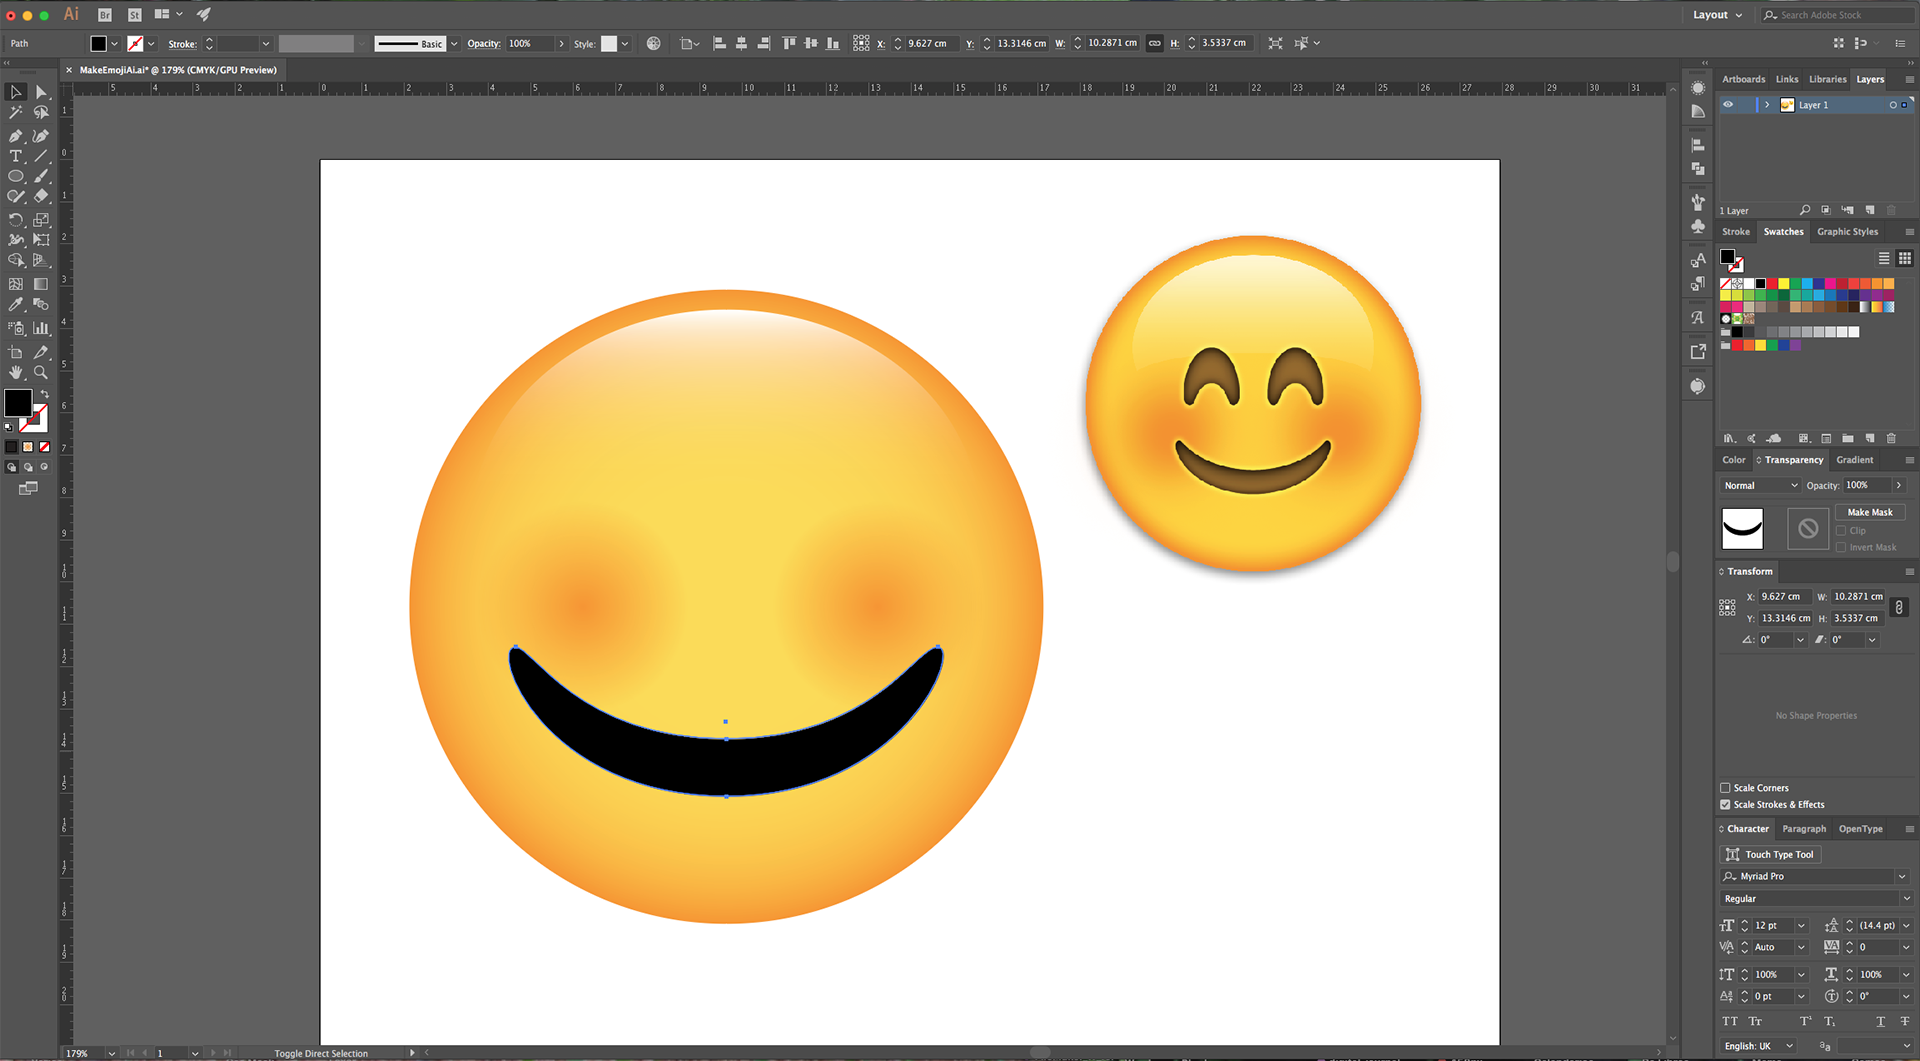
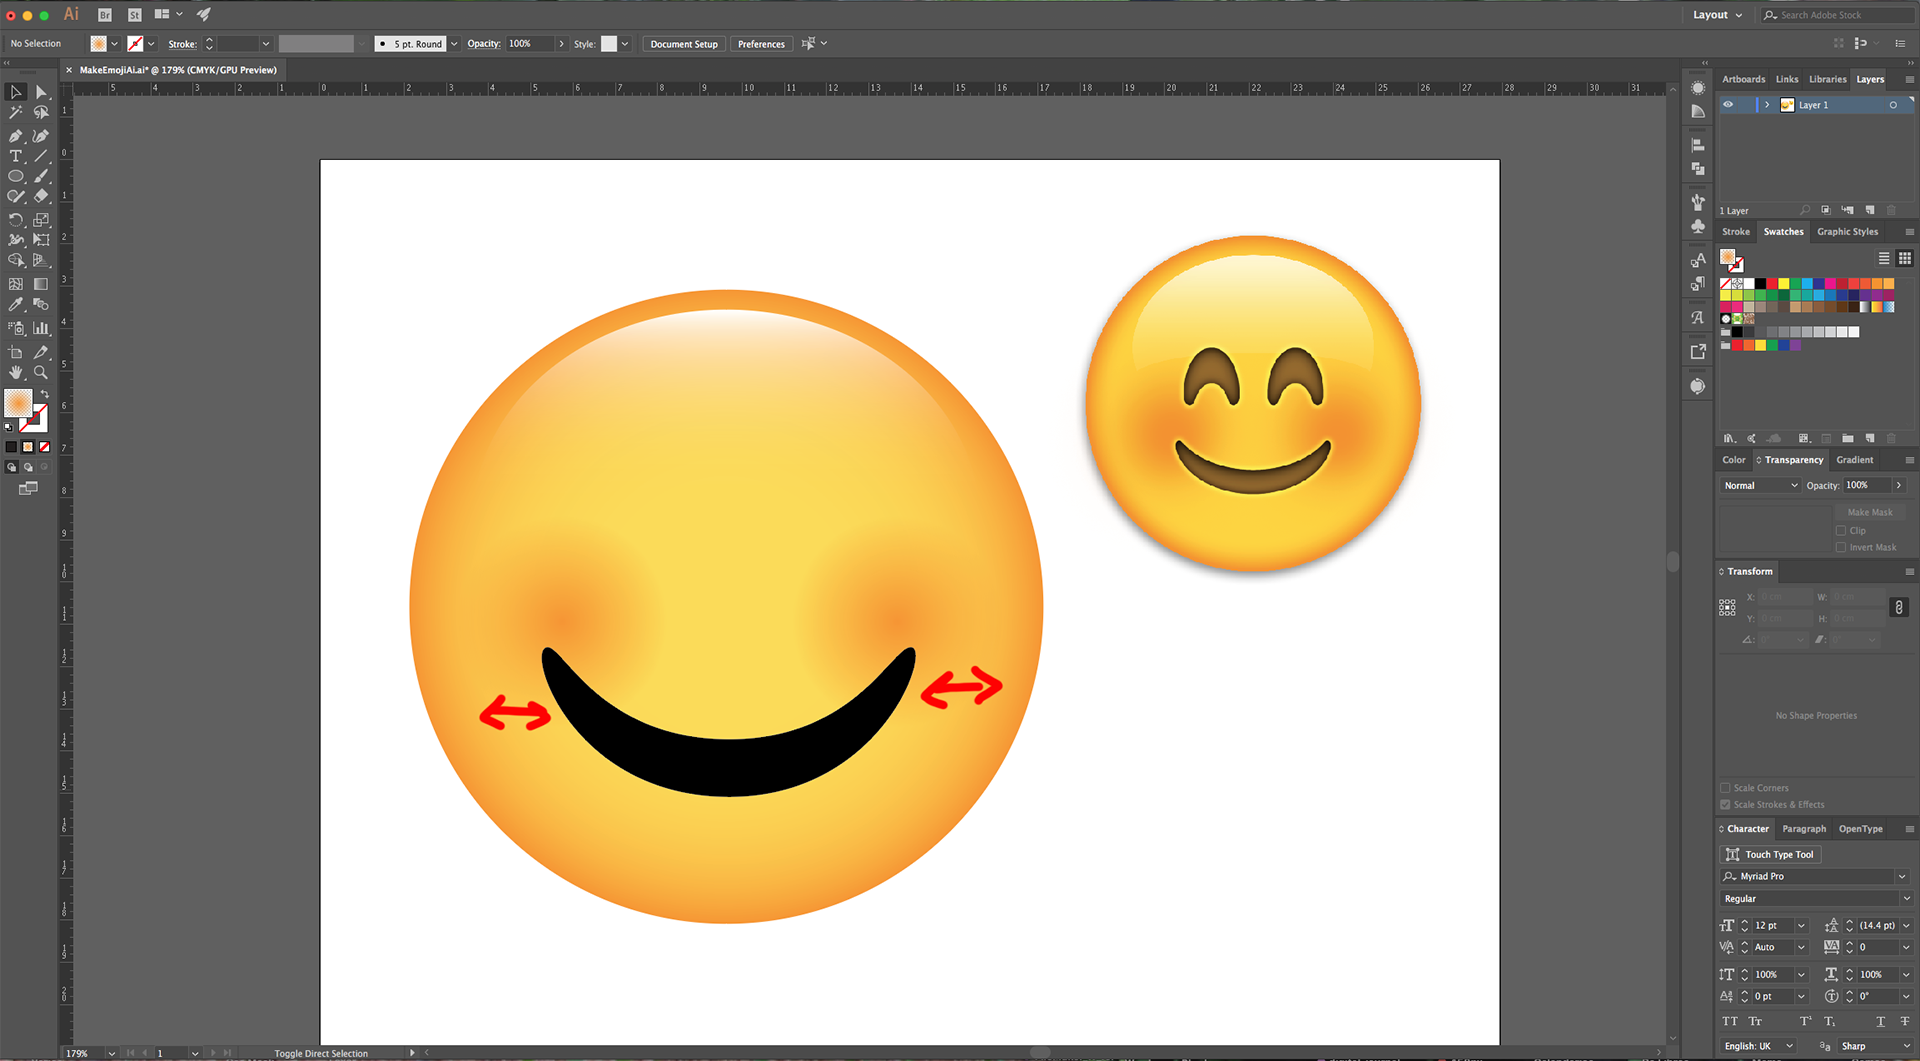
12 - Select one of the Side “Anchor Points”, move the top “Handle” down while holding the “Shift” key and the bottom “Handle” up. Repeat on the other side. Keep adjusting the “Anchor Points” until you get a shape like the Emoji’s mouth.
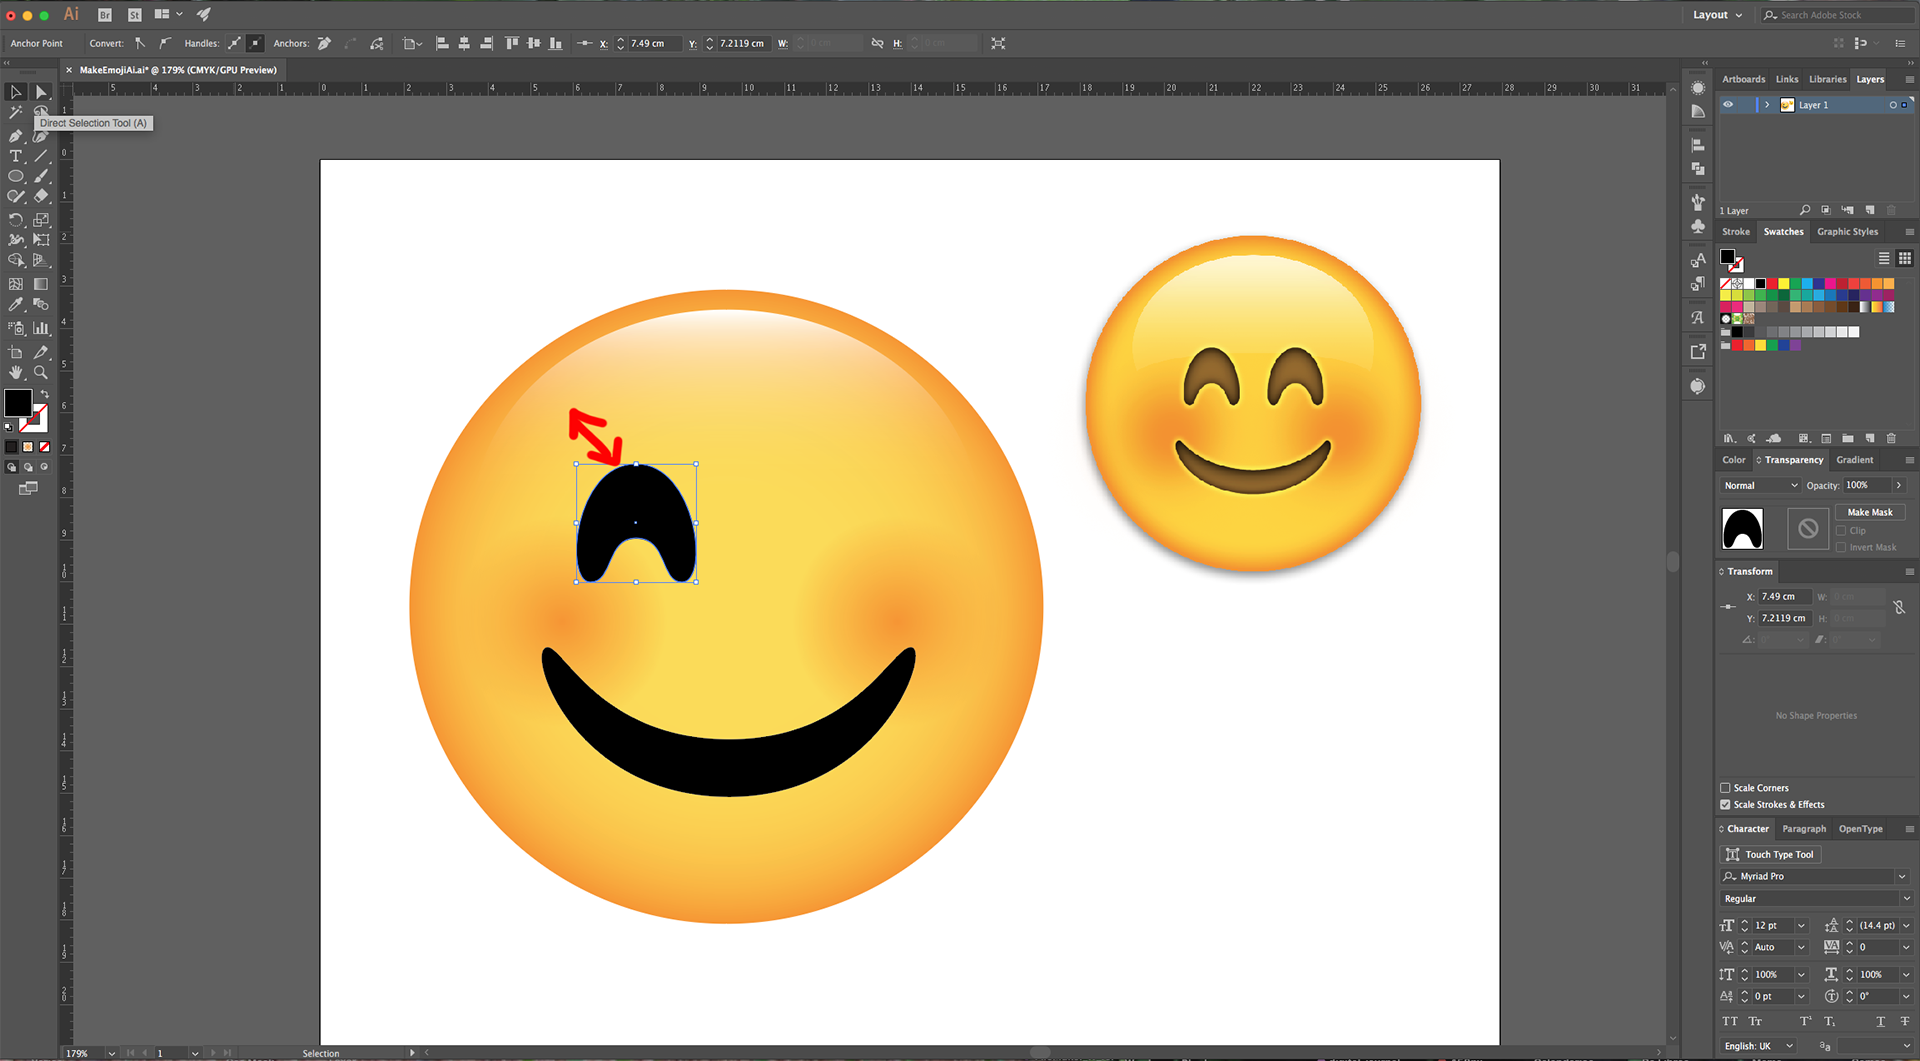
13 - Adjust the “Mouth” and the “Cheeks” so they match the reference image.
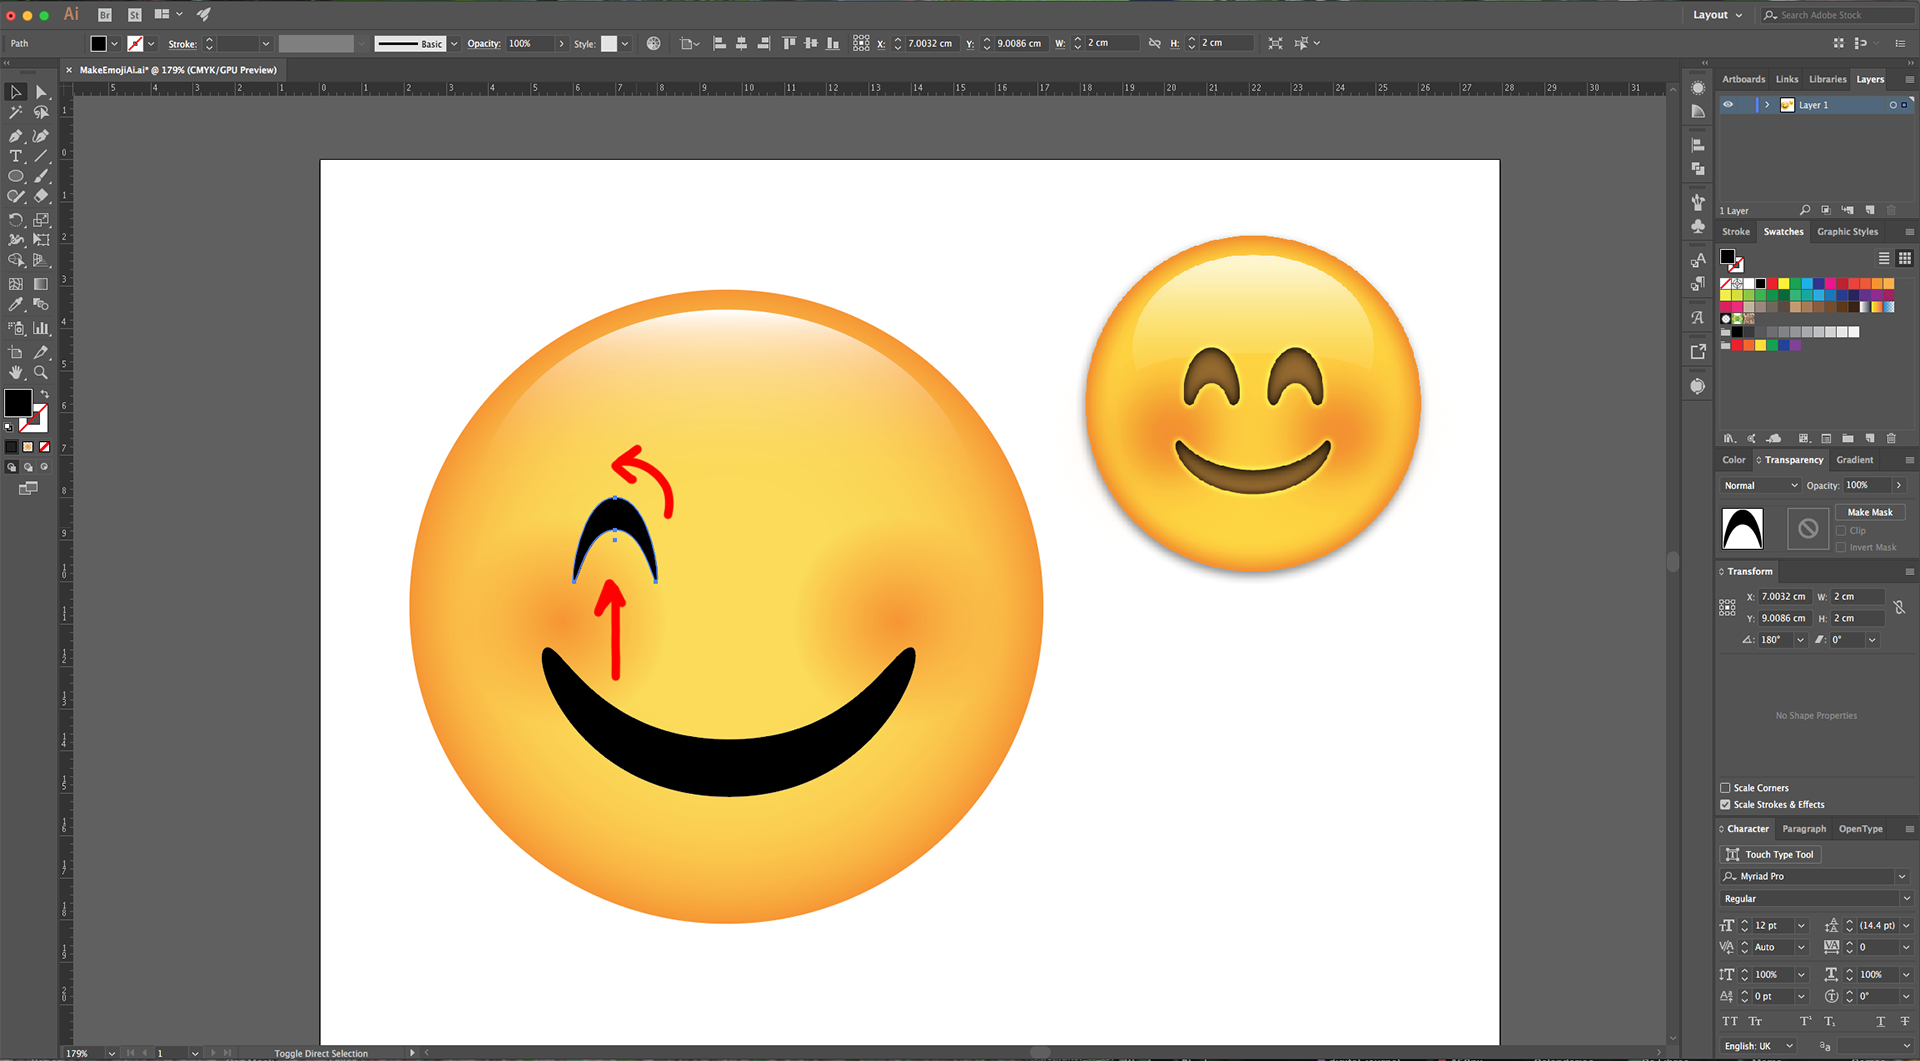
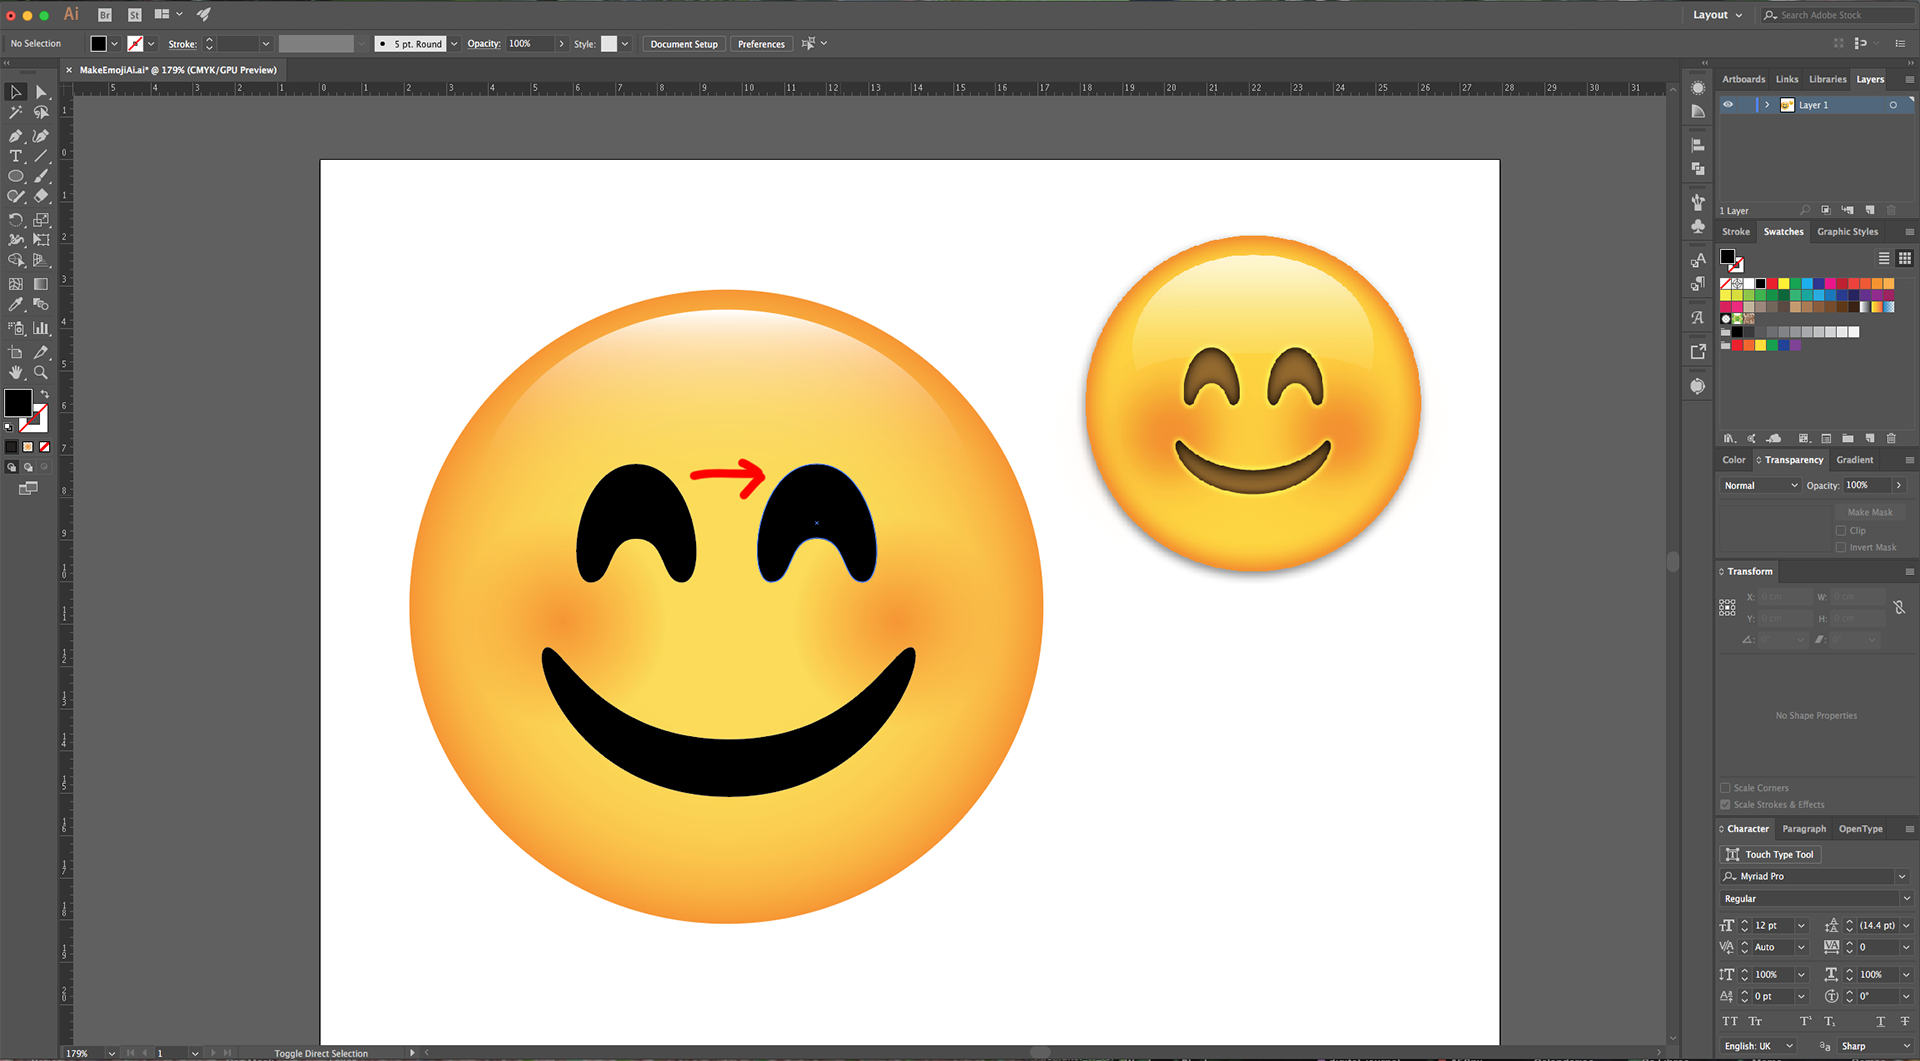
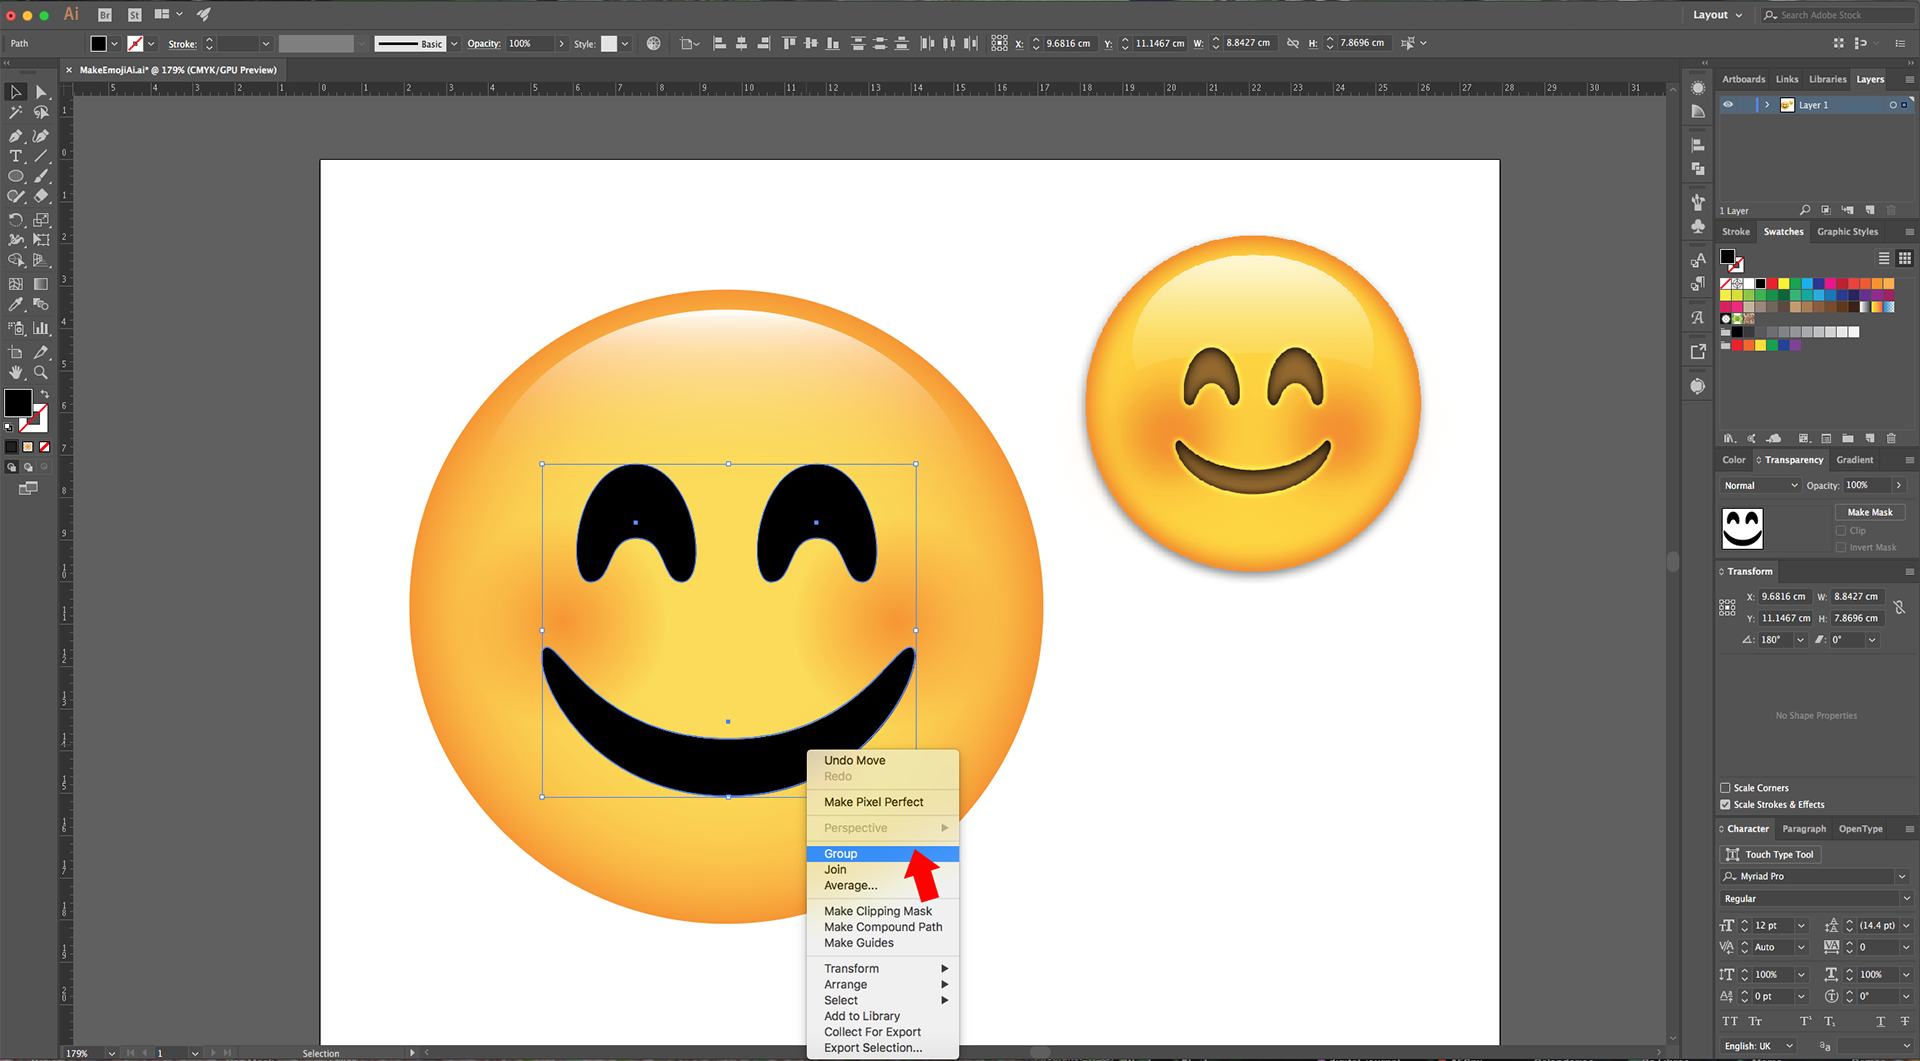
14 - Duplicate the “Mouth” (Command/Control + C) and (Command/Control + V). Rotate it and squeeze it to create an “Eye” shape. Adjust the bottoms using the “Direct Selection Tool” (A) to make the points rounder. Resize it if needed.

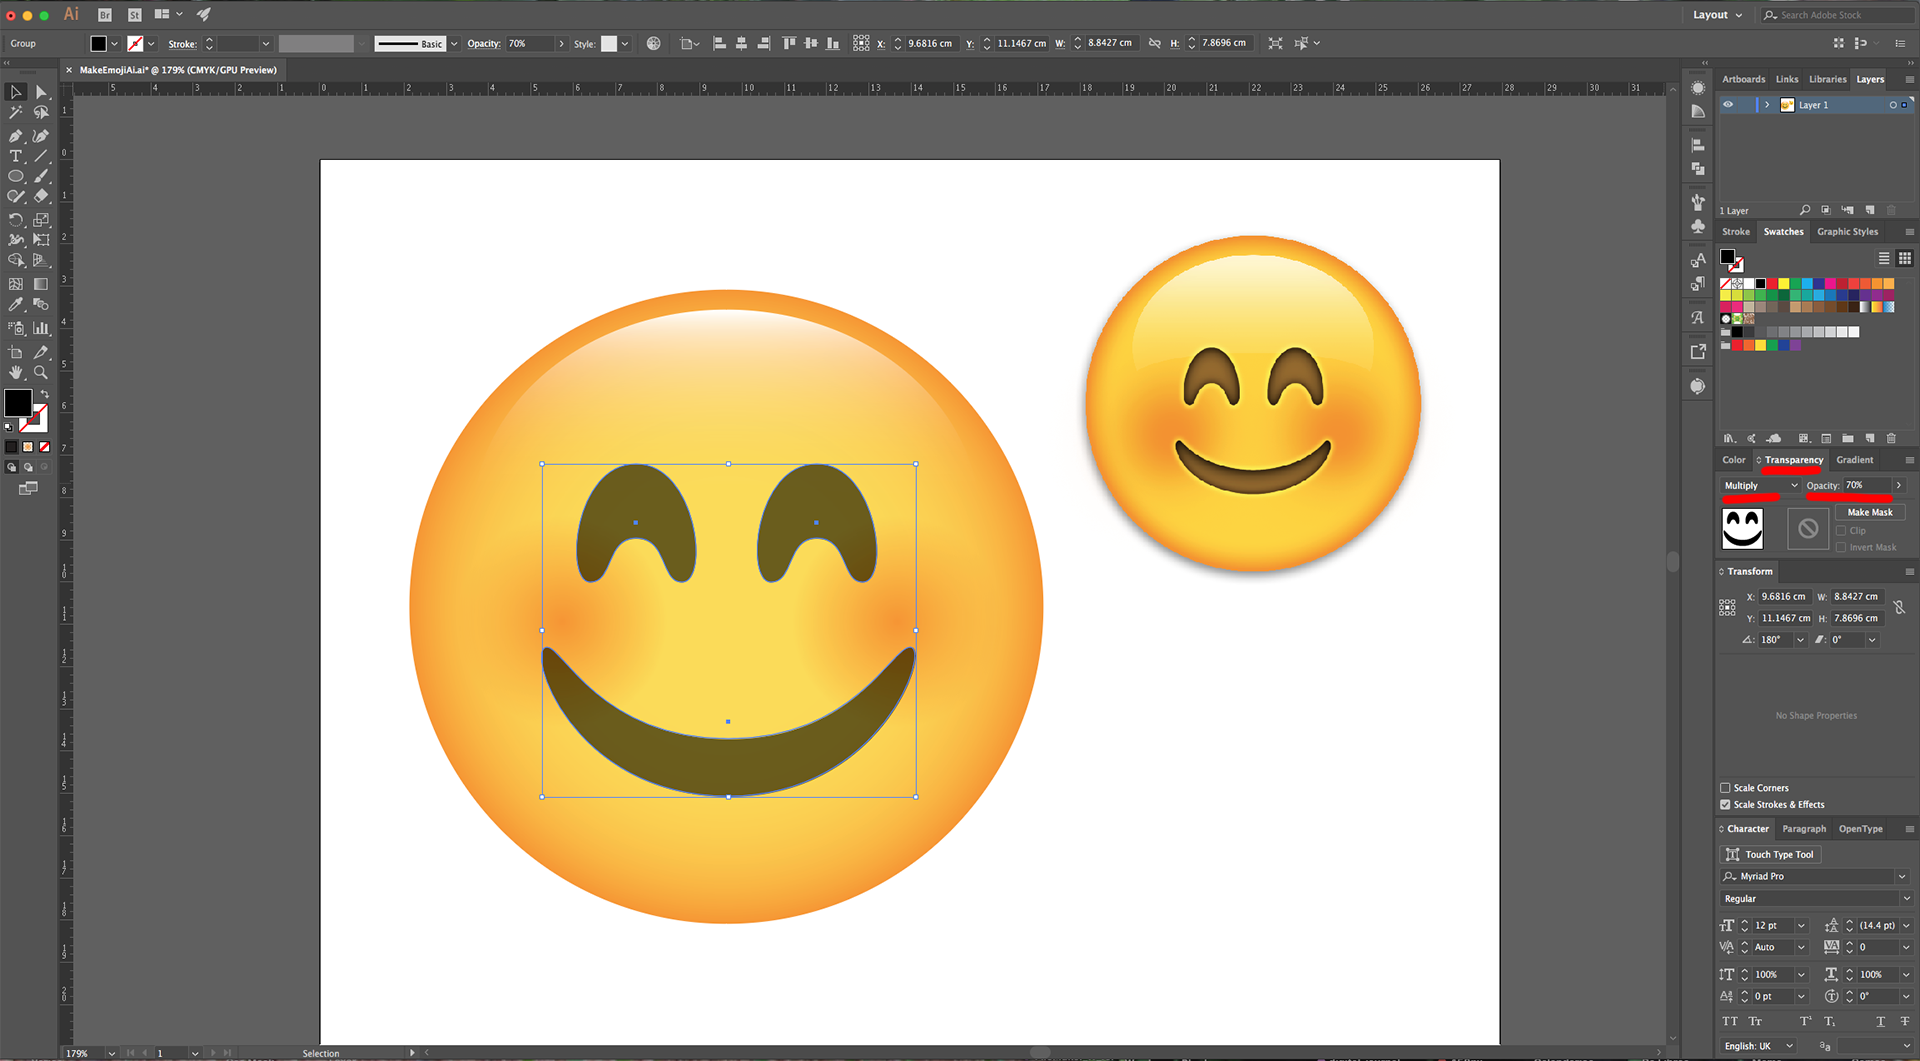
15 - Drag it to the other side while holding the “Option/Alt” and “Shift” keys to create a “Duplicate” in the other side of the “Face”. Once the “Eyes” and “Mouth” are placed properly, select the, (“Shift” key), right-click on top and choose “Group”.
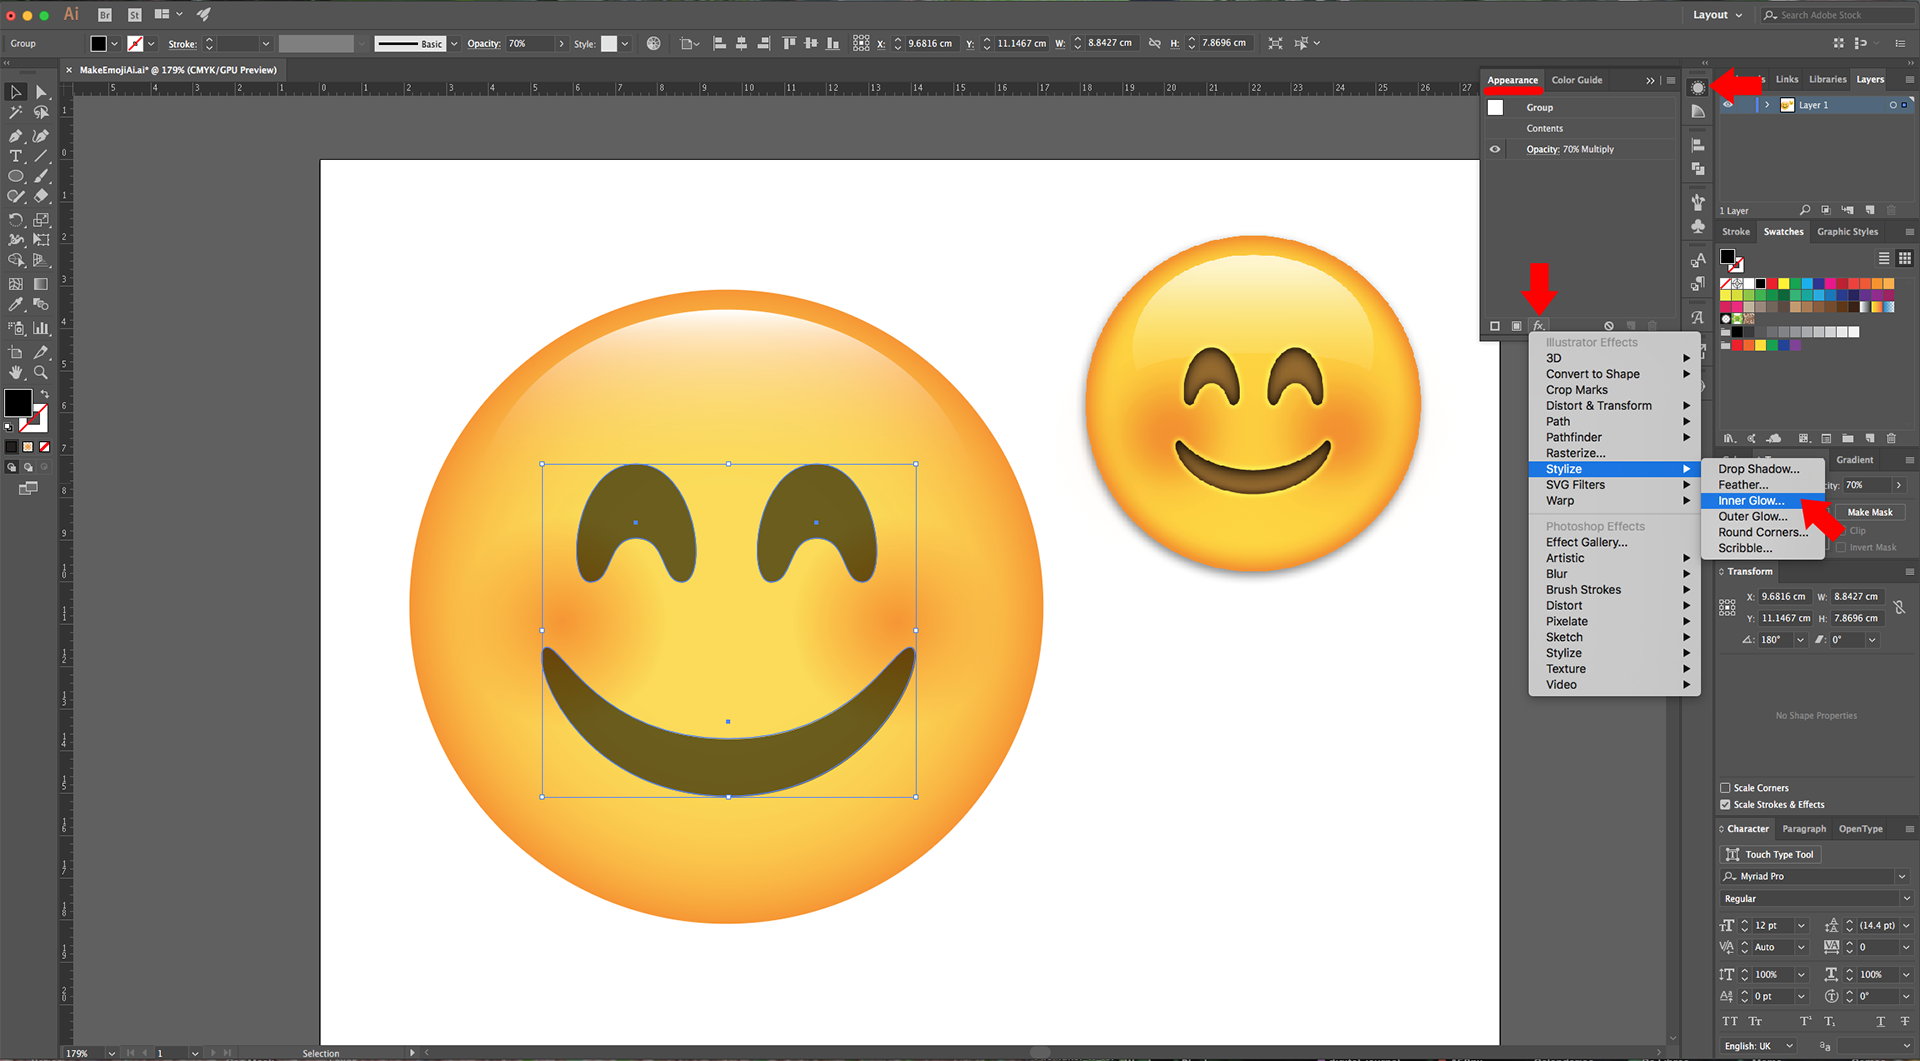
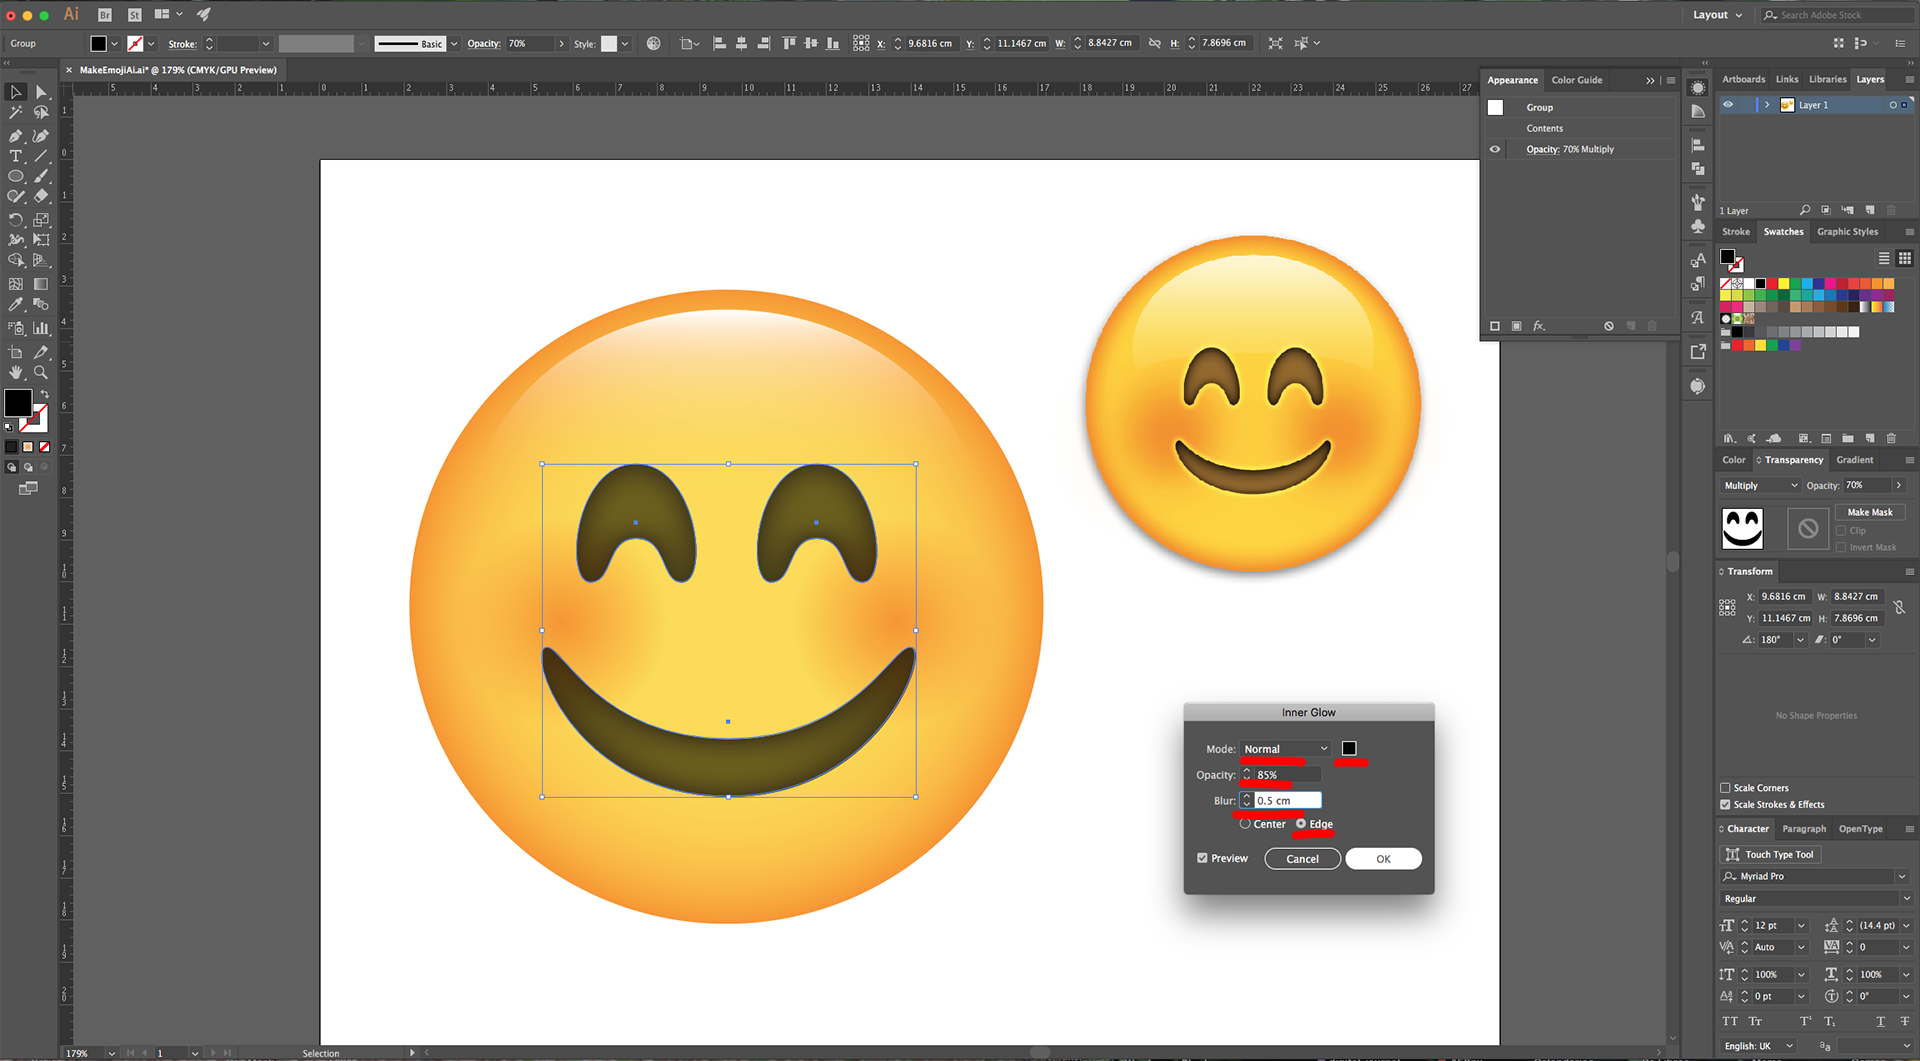
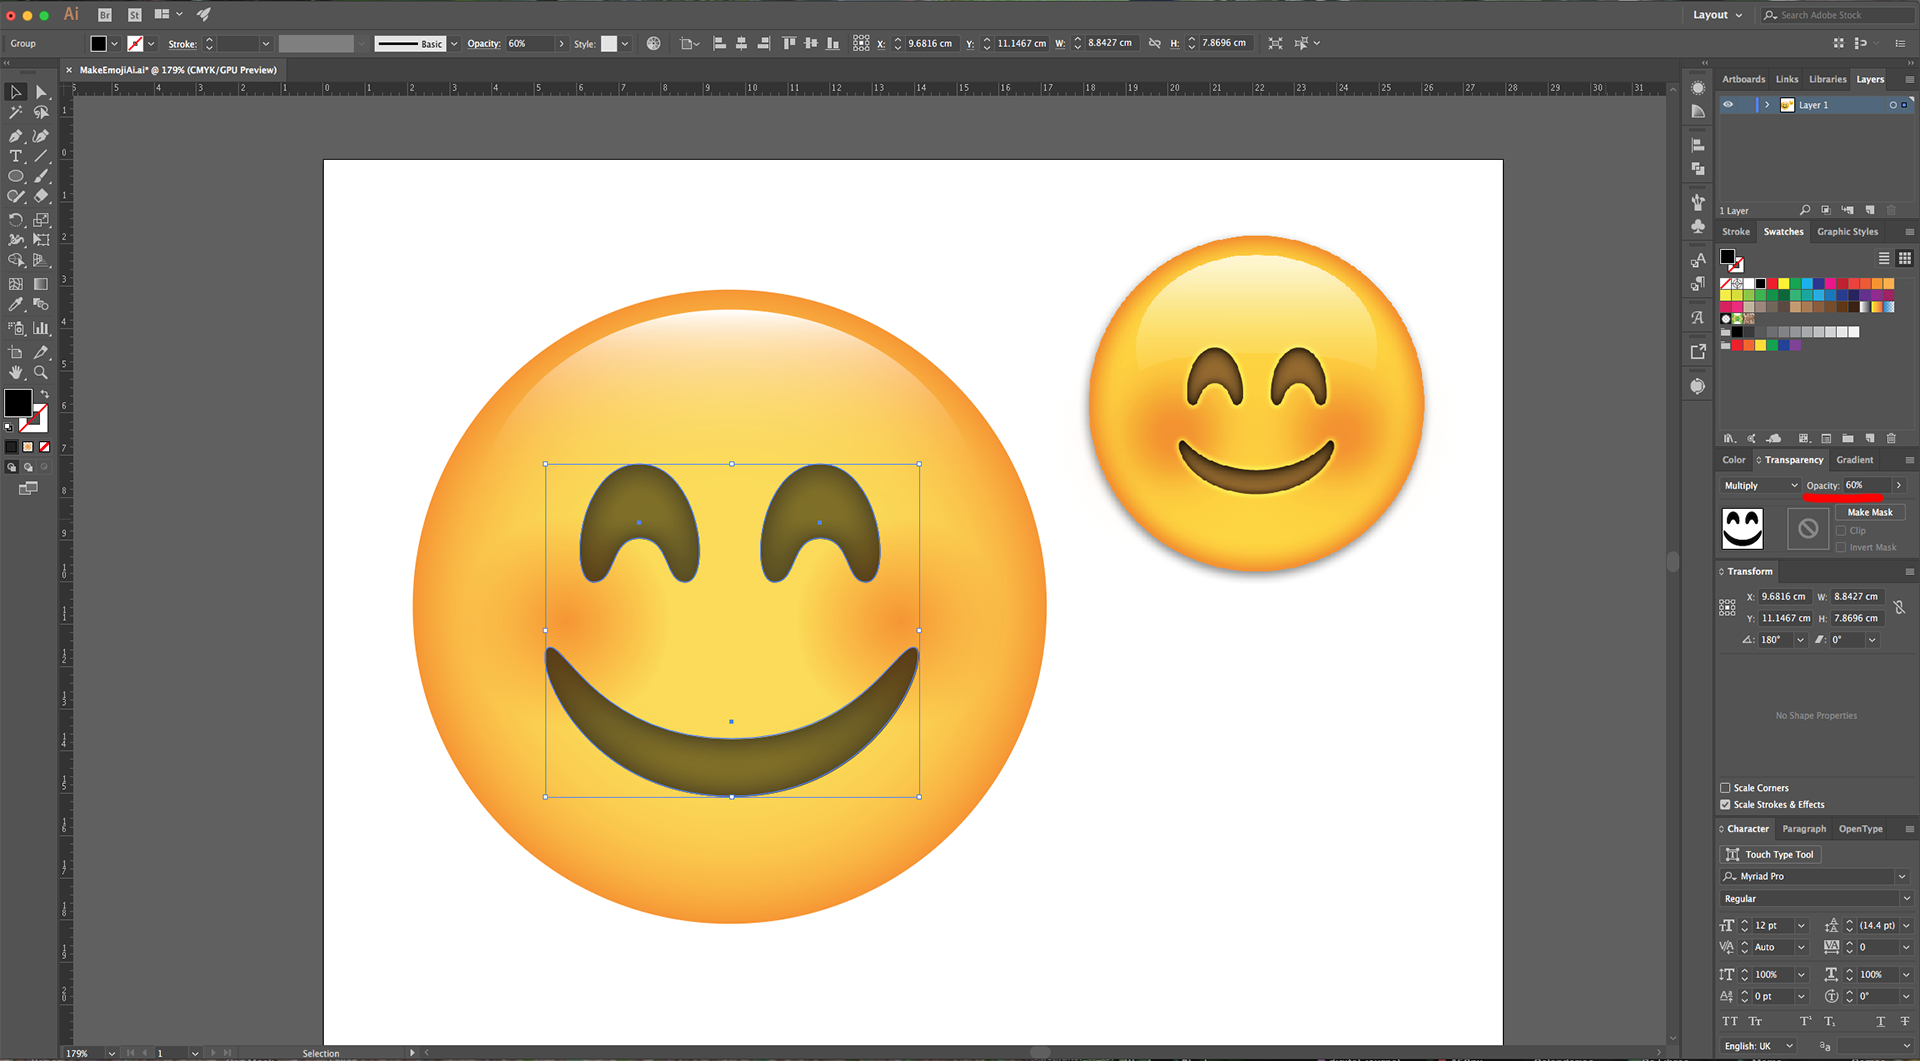
16 - In the “Transparency Panel” lower the “Opacity” to 70%.
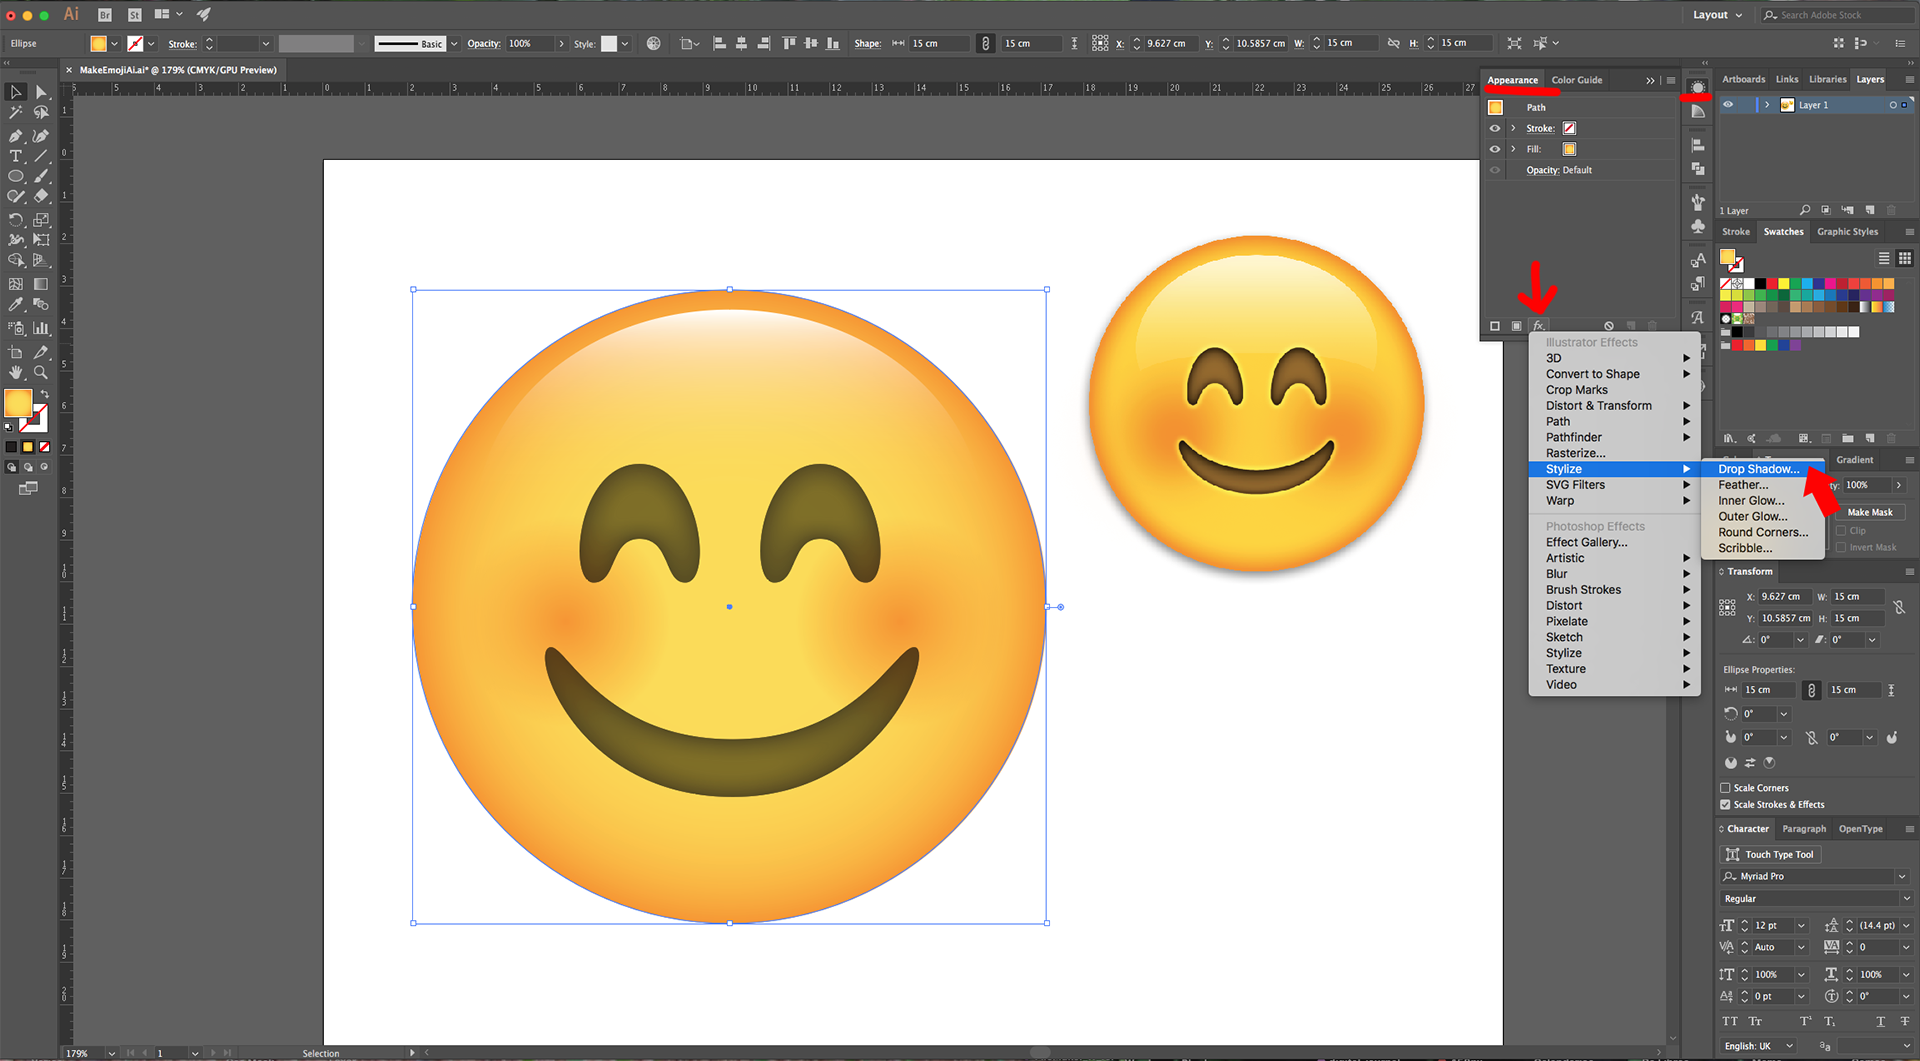
17 - Head to the “Appearance Panel”, click on the “Effects Menu” on the Bottom-Left side of the panel and navigate to Stylize > Inner Glow… use Normal Mode, Color #000000, Opacity 85%, Blur 0.5 cm and click the “Edge” button. Change the “Blending Mode” to “Multiply” and the “Opacity” to 60%.
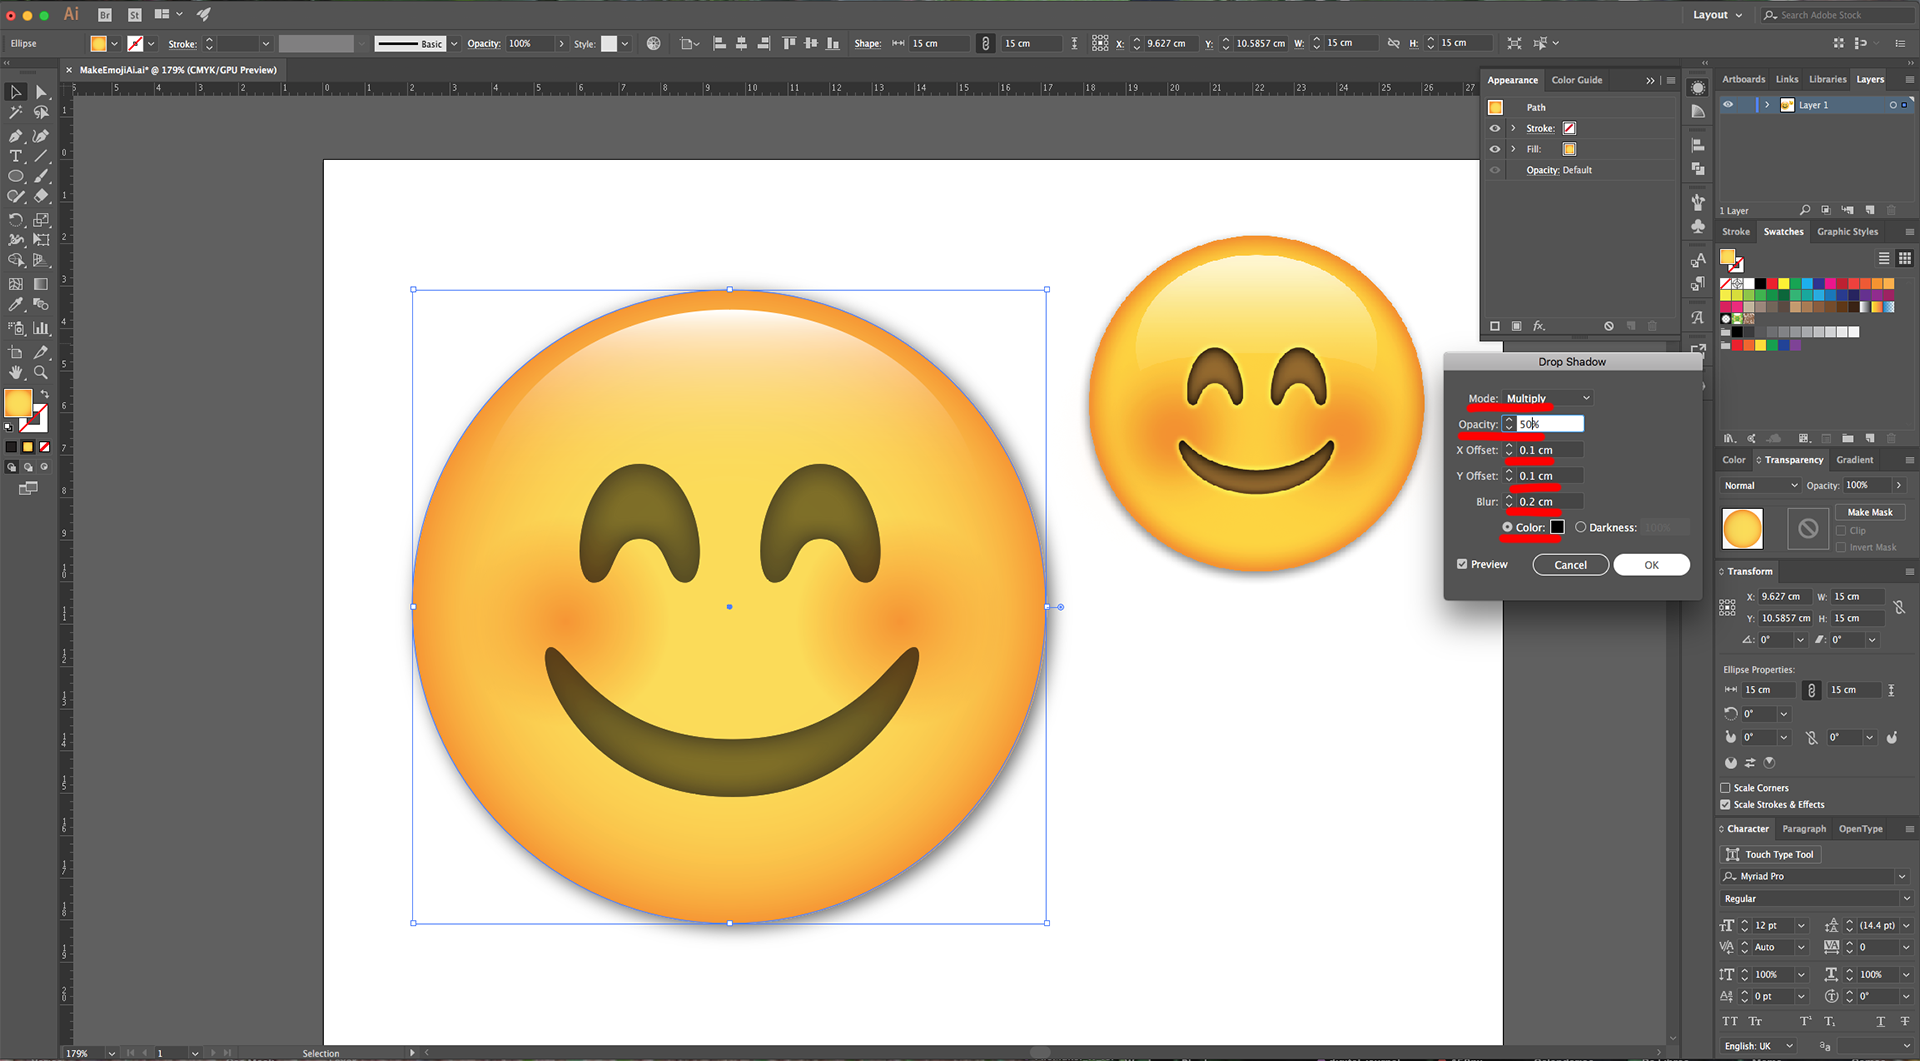
18 - Select the larger circle and head to the “Appearance Panel”, click on the “Effects Menu” on the Bottom-Left side of the panel and navigate to Stylize > Drop Shadow… use Multiply, Color #000000, Opacity 50%, X and Y Offset 0.1 cm and Blur 0.2 cm.
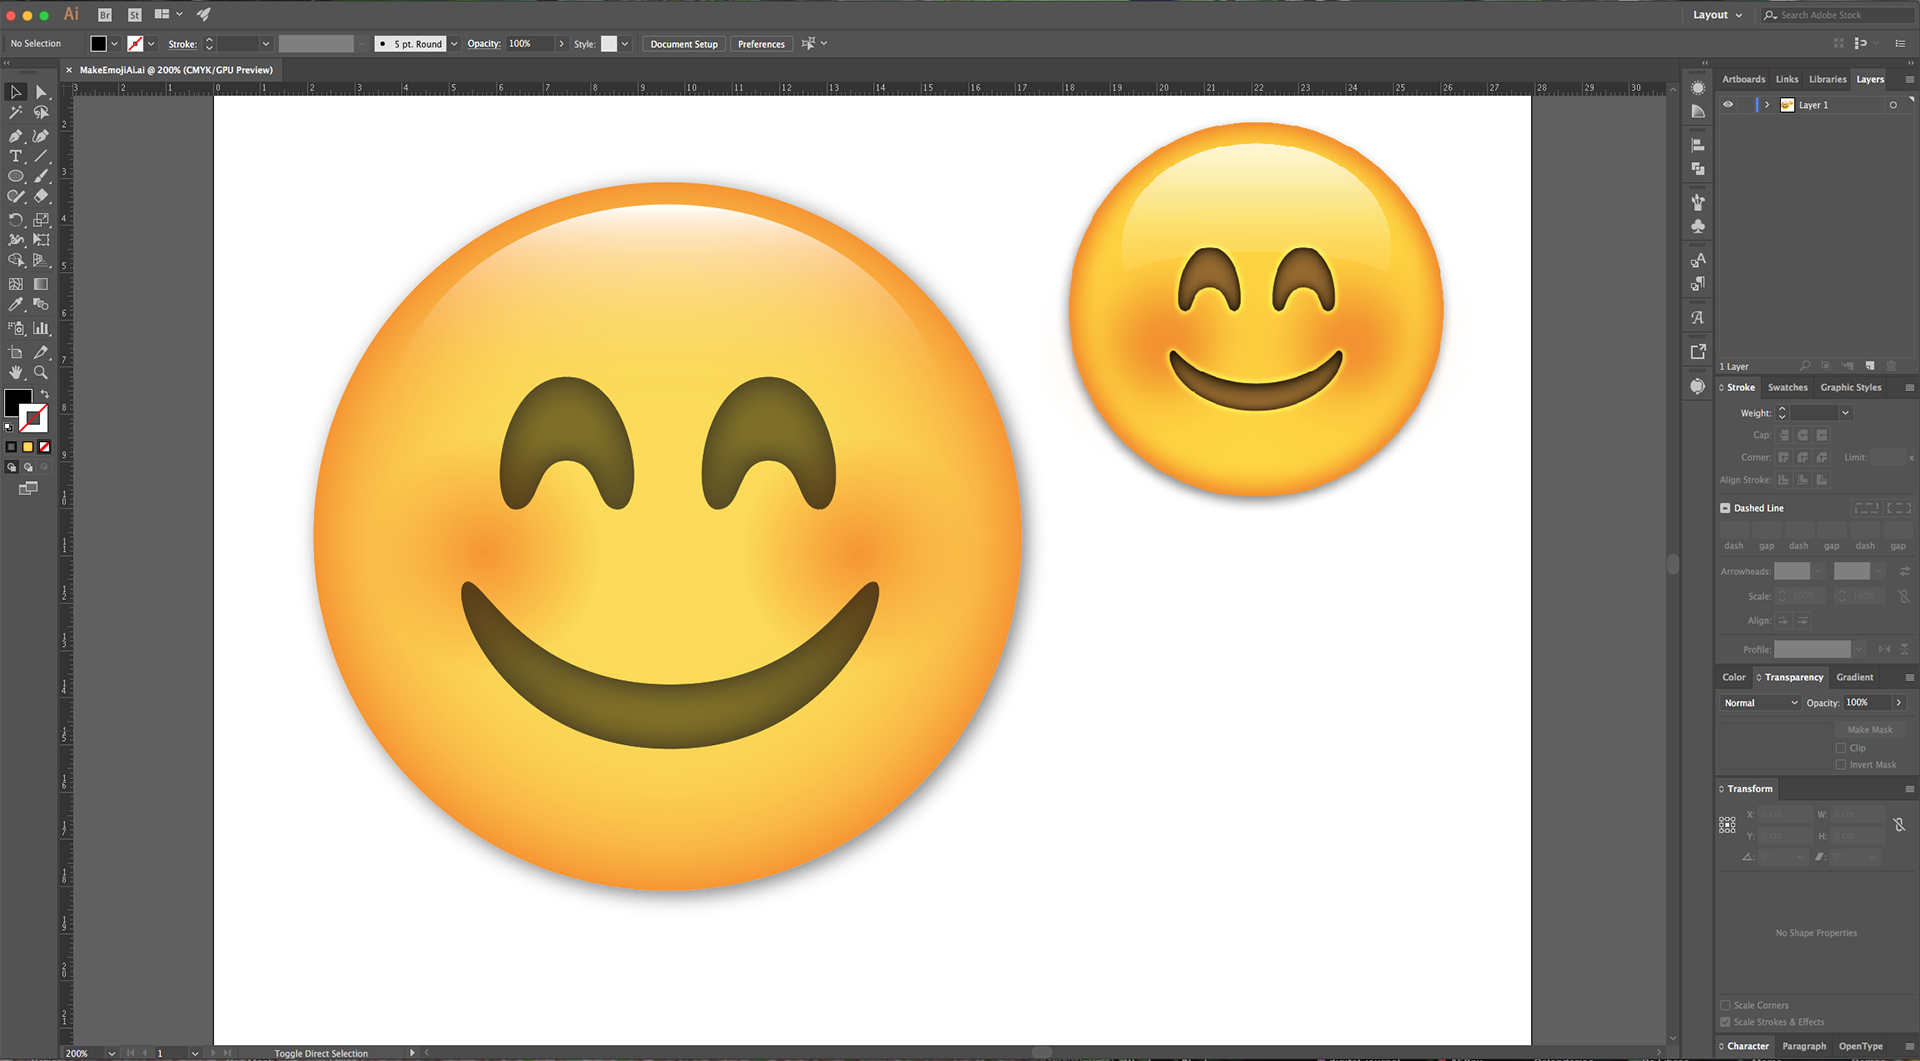
19 - Check it out.
1 - In Illustrator, create a “New Document”.
2 - Go to File > Place (Shift + Command/Control + P) and navigate to where the image/images you want to work with are saved. Select the one you wand and click “Place”. Resize it if needed.
3 - Select the “Ellipse Tool” (L), click inside your Document and input a “Width” and “Height” of 15 cm.
4 - Use the “Eyedropper Tool” (I) to select a Fill color from the reference image. Use a medium shade of yellow (we used #fdd4d).
5 - Change the “Fill” to a “Radial Gradient” from the Medium Yellow (#fdd4d) to Orange (#f79521). Move the “Location” of the Orange to 87%.
6 - Select the “Ellipse Tool” (L) again, click inside your Document and input a “Width” and “Height” of 5 cm. Fill it with a “Radial Gradient” from Orange (#f79521) with 100% “Opacity” to 0% “Opacity”. Place it on the Center-Right of the big circle and drag it to the Left while holding the “Option/Alt” and “Shift” keys to create a “Duplicate” in the other side of the “Face”.
7 - Create another “Ellipse” (L), but this time give it a “Width” of 12 cm and a “Height” of 10 cm. Fill it a “Linear Gradient” with a -90° Angle, going from White (#ffffff) with 100% “Opacity” to 0% “Opacity”. Place the “Middle Point” location at 20%.
8 - Use the “Direct Selection Tool” (A) to click on the Right-most “Anchor Point”, move the bottom “Handle” up while holding the “Shift” key. Repeat on the Left side.
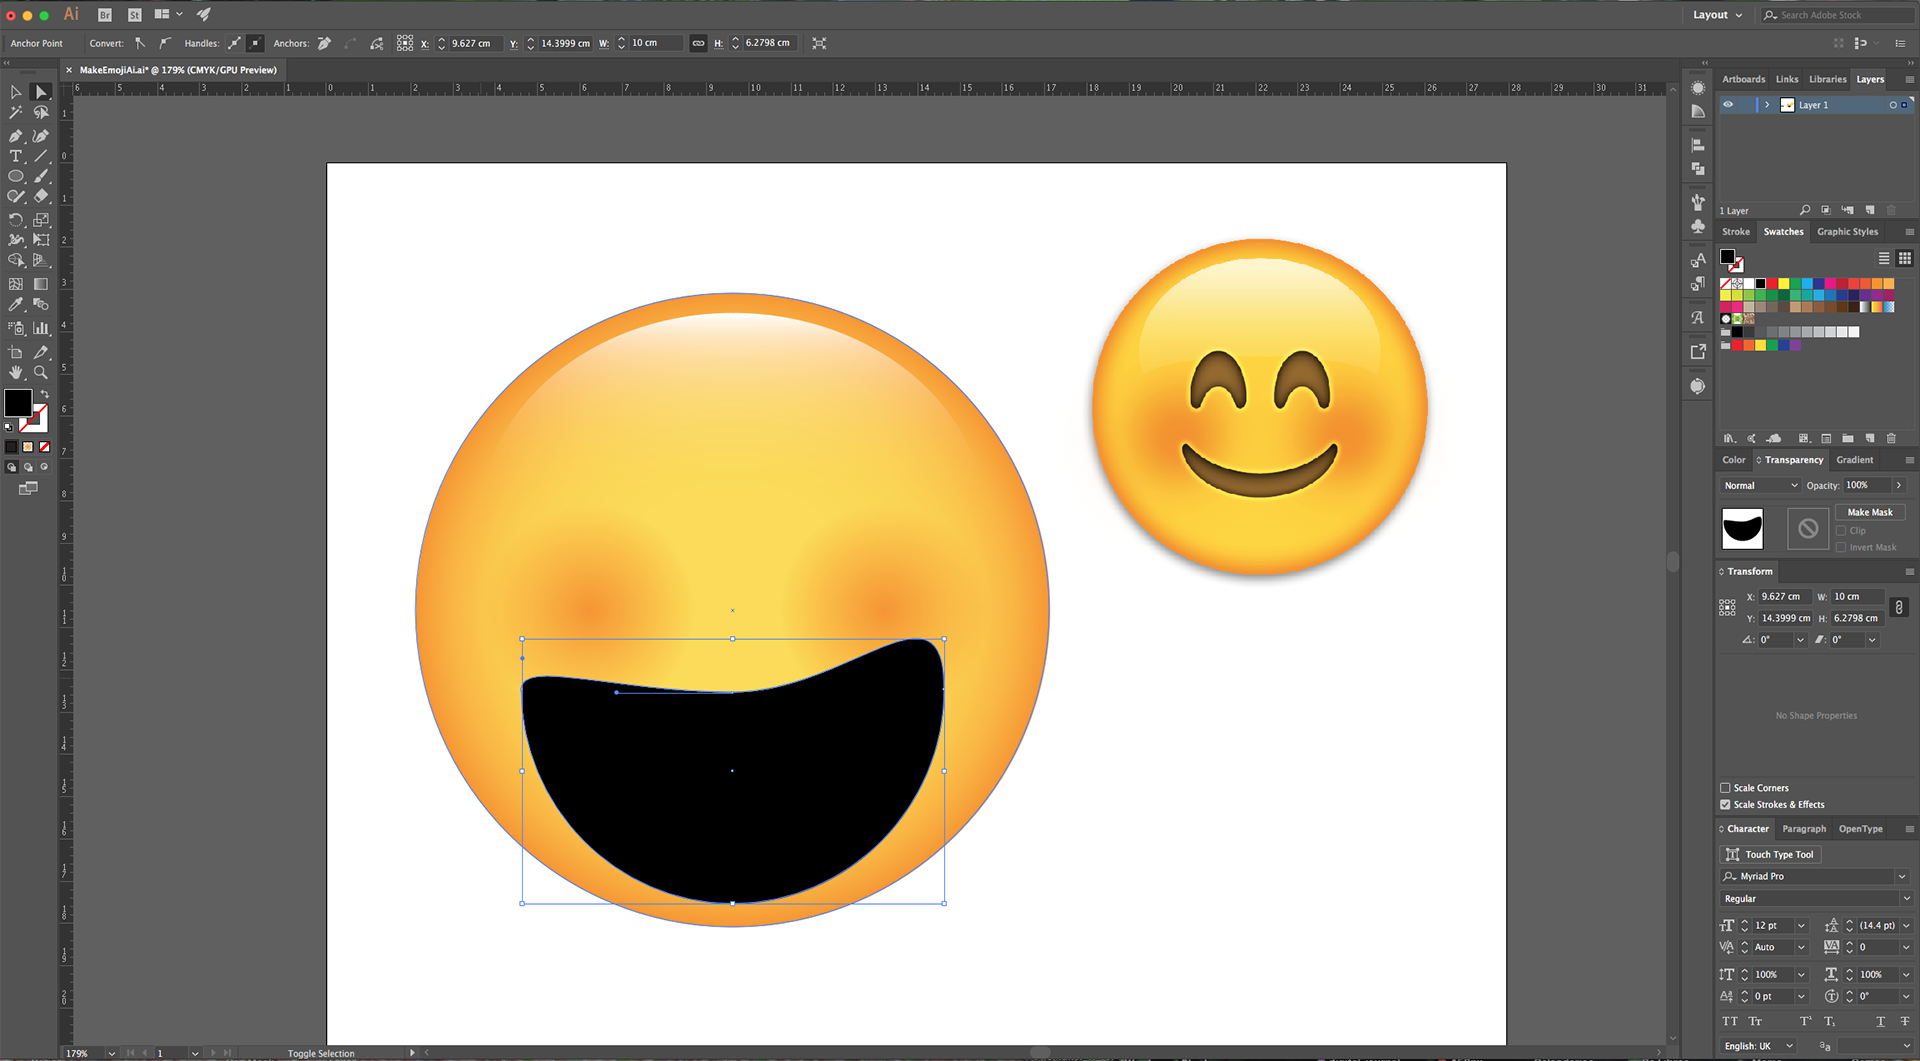
9 - Then, select the bottom “Anchor Point” and pull it up till about 1 cm above the bottom line.
10 - Select the “Ellipse Tool” (L), click inside your Document and input a “Width” and “Height” of 10 cm. Fill it with Black.
11 - Use the “Direct Selection Tool” (A) to click on the Top-most “Anchor Point”, move it down while holding the “Shift” key.
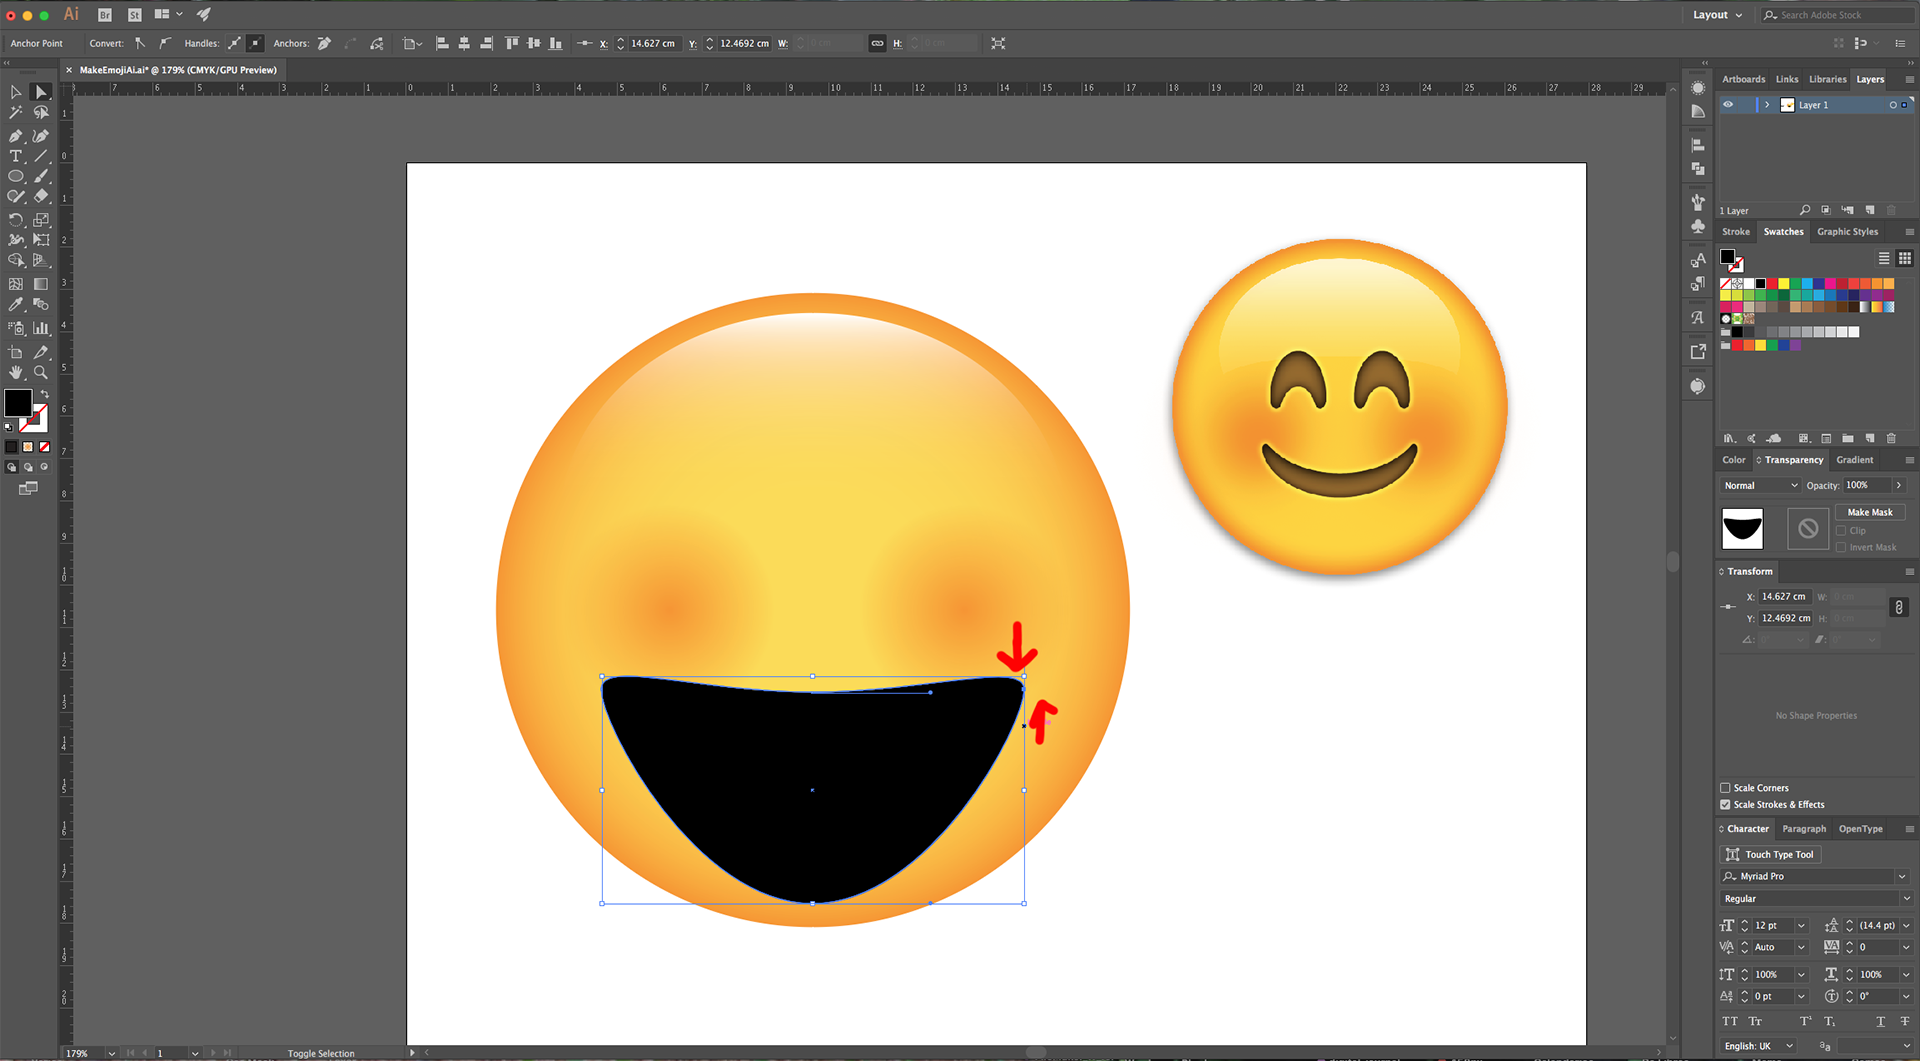
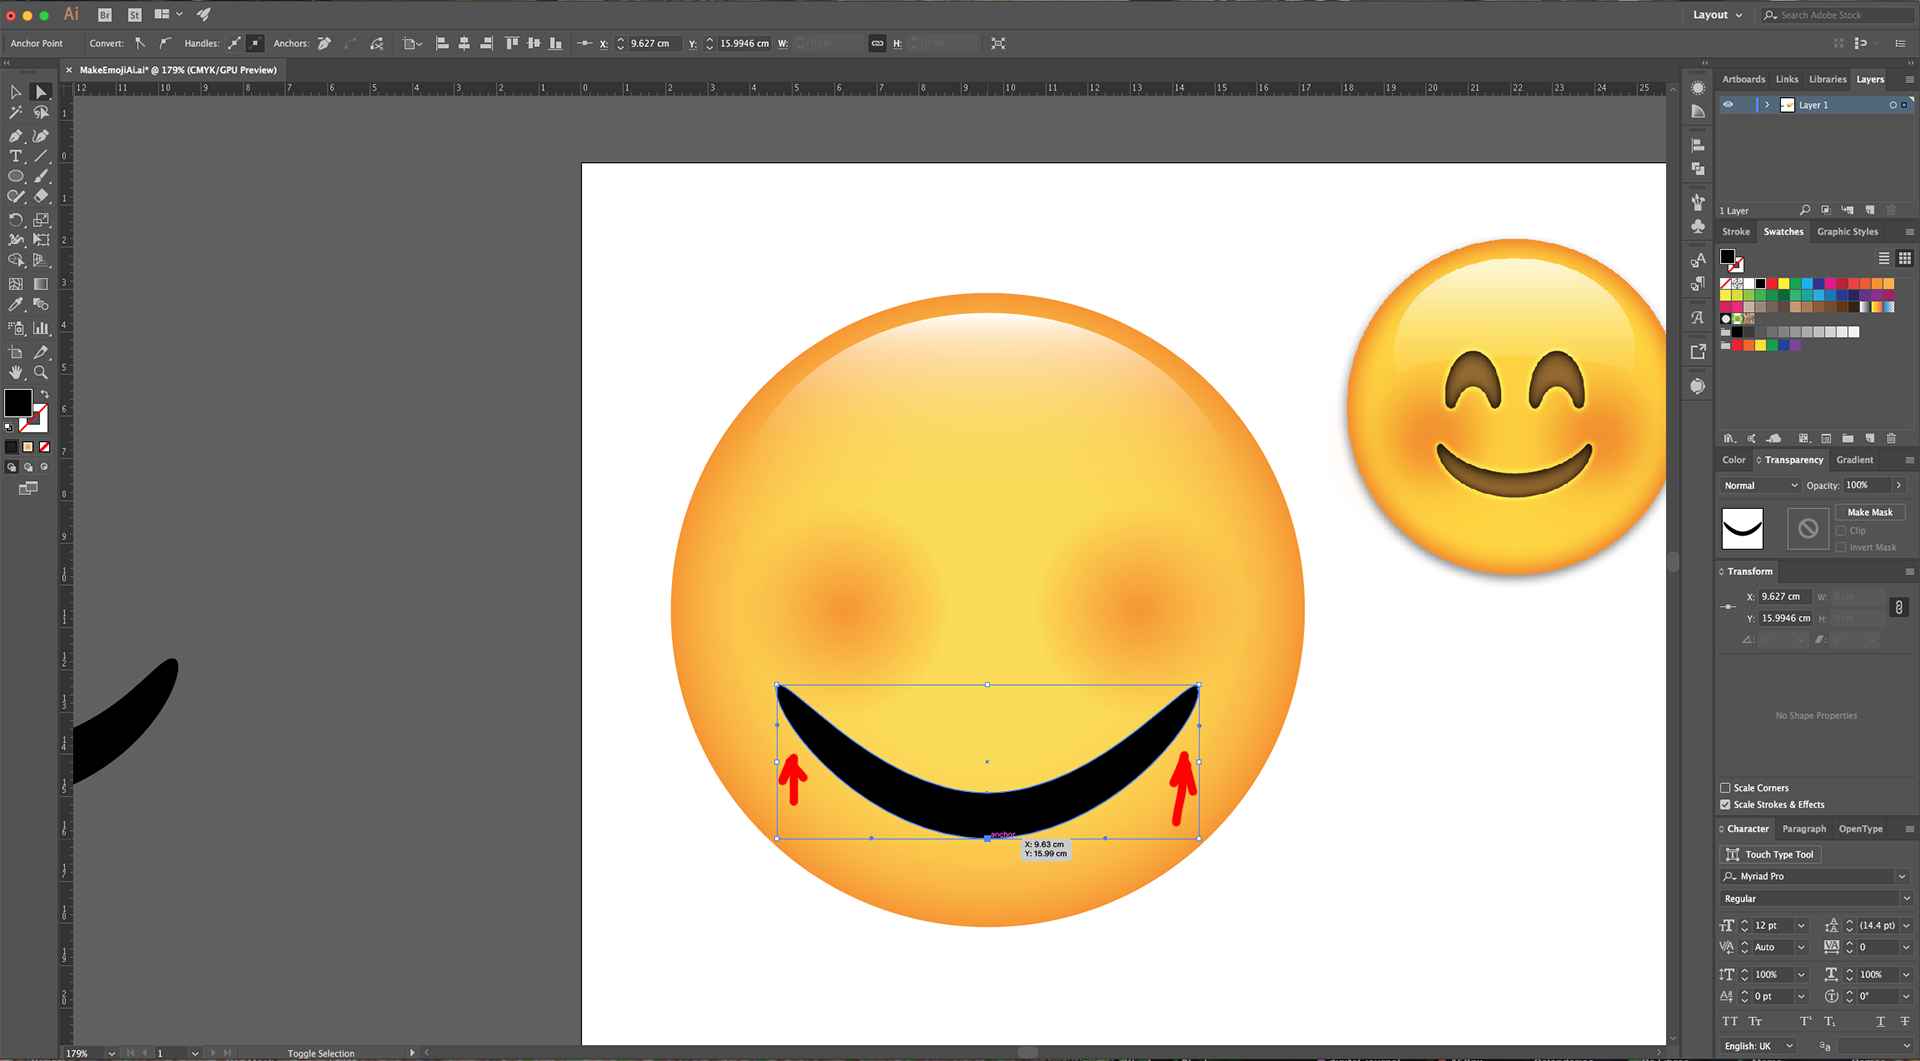
12 - Select one of the Side “Anchor Points”, move the top “Handle” down while holding the “Shift” key and the bottom “Handle” up. Repeat on the other side. Keep adjusting the “Anchor Points” until you get a shape like the Emoji’s mouth.
13 - Adjust the “Mouth” and the “Cheeks” so they match the reference image.
14 - Duplicate the “Mouth” (Command/Control + C) and (Command/Control + V). Rotate it and squeeze it to create an “Eye” shape. Adjust the bottoms using the “Direct Selection Tool” (A) to make the points rounder. Resize it if needed.
15 - Drag it to the other side while holding the “Option/Alt” and “Shift” keys to create a “Duplicate” in the other side of the “Face”. Once the “Eyes” and “Mouth” are placed properly, select the, (“Shift” key), right-click on top and choose “Group”.
16 - In the “Transparency Panel” lower the “Opacity” to 70%.
17 - Head to the “Appearance Panel”, click on the “Effects Menu” on the Bottom-Left side of the panel and navigate to Stylize > Inner Glow… use Normal Mode, Color #000000, Opacity 85%, Blur 0.5 cm and click the “Edge” button. Change the “Blending Mode” to “Multiply” and the “Opacity” to 60%.
18 - Select the larger circle and head to the “Appearance Panel”, click on the “Effects Menu” on the Bottom-Left side of the panel and navigate to Stylize > Drop Shadow… use Multiply, Color #000000, Opacity 50%, X and Y Offset 0.1 cm and Blur 0.2 cm.
19 - Check it out.
by @lornacane


