
Flat Vector Diamonds in Illustrator
Learn how to create a simple flat vector Diamond in Illustrator.
Today, we will learn how to create quite popular yet simple flat-style vector diamonds and/or gems in Illustrator. We will achieve this with some basic shapes and a simple color palette. We are going to create two basic views of the vector diamonds, a look from the top and one from the side. Then, you can use your creations on some cool projects!

Vector Diamond Side View
First, we will make the look from the side.
Step 1 - Add Guides to Mark the Center of Your Diamond
Start by creating a new document. Then, add two guides by clicking and dragging from the top and left rulers. Place them at a distance of about 7 cm to create an intersection to be used as the center.
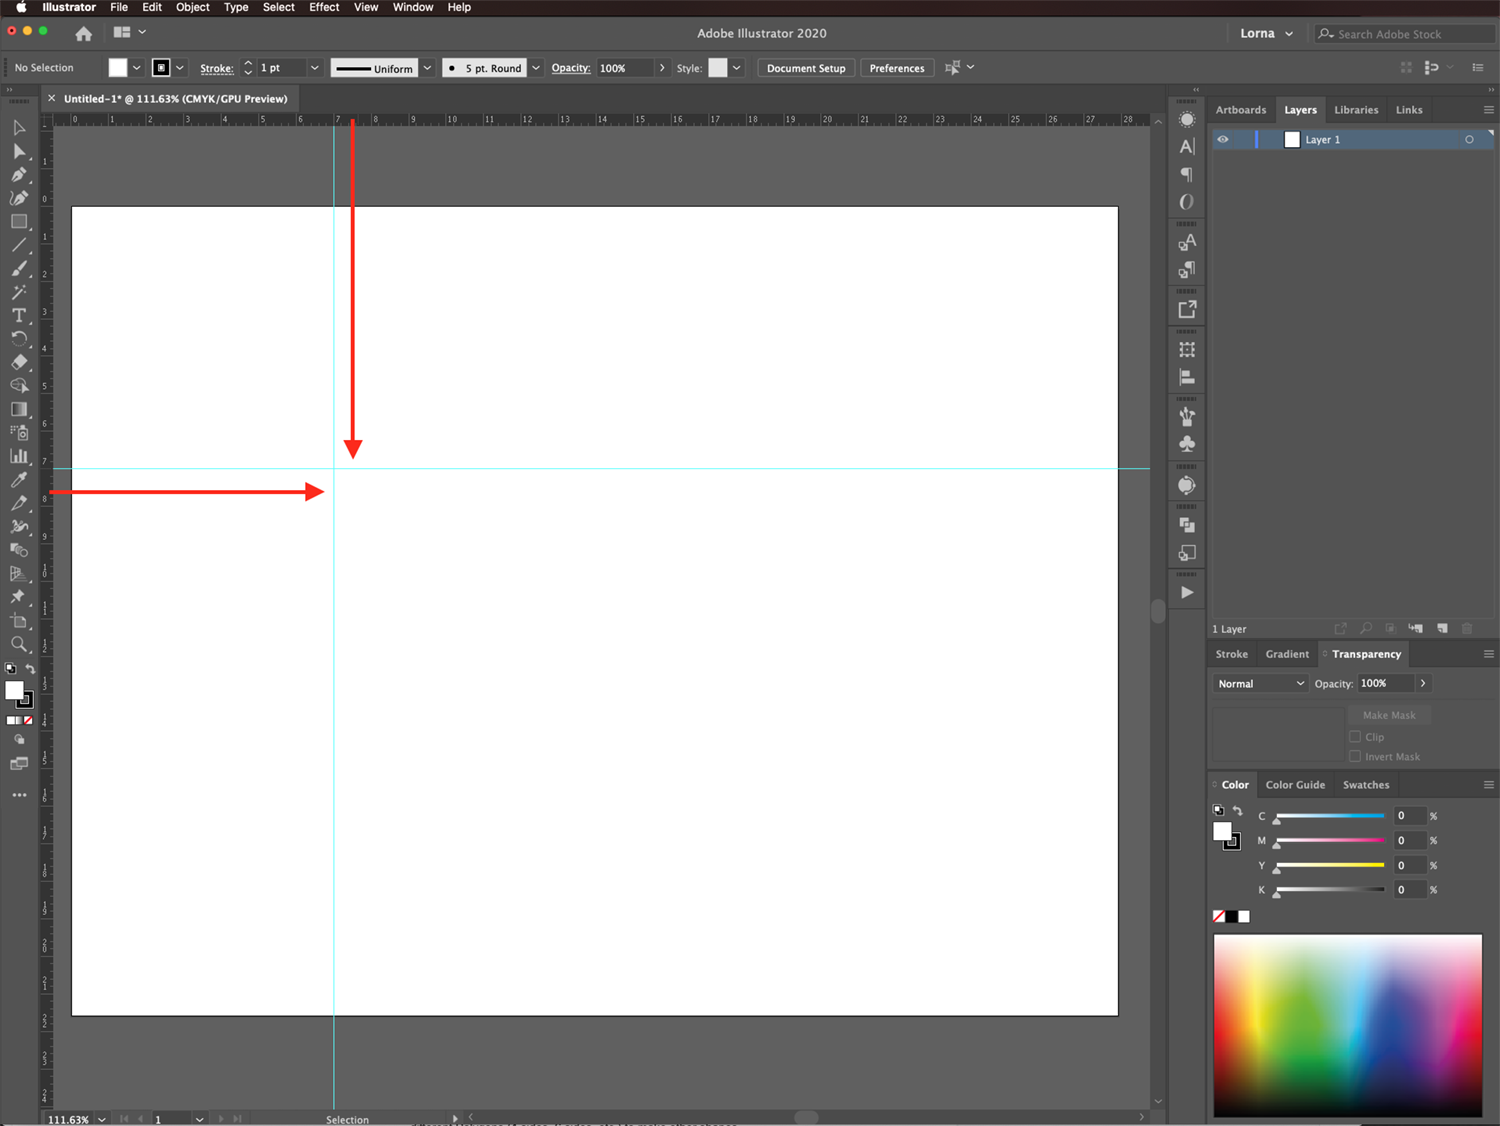
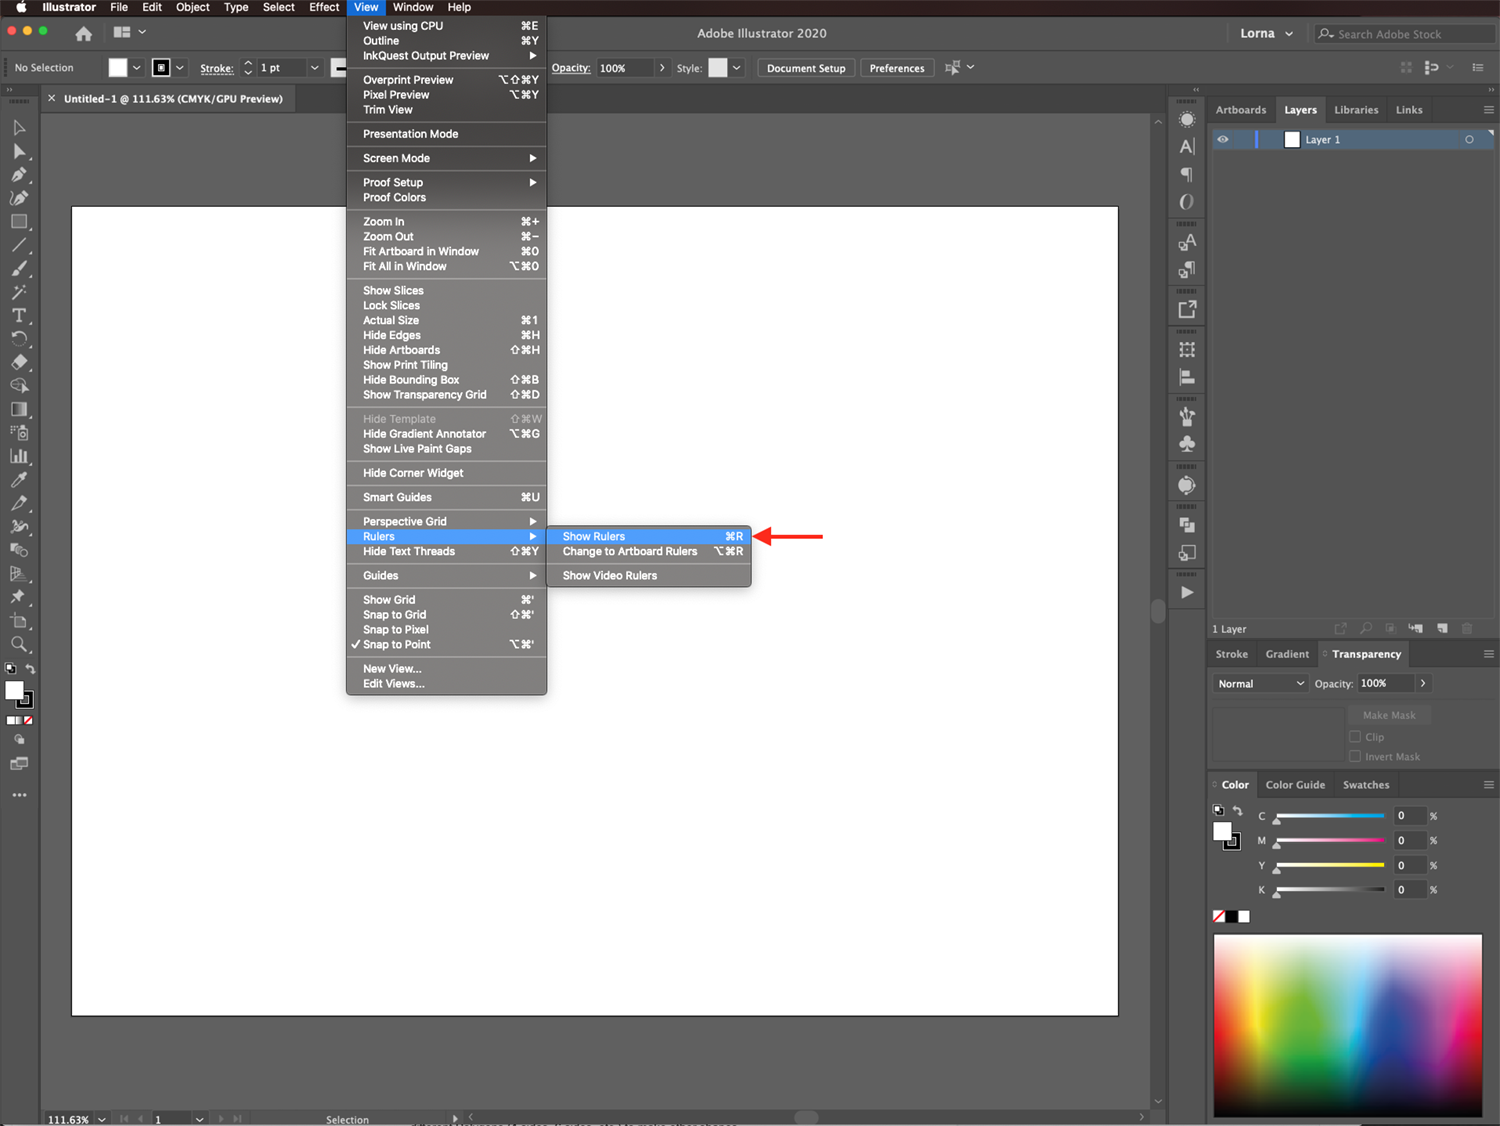
If the page Rulers are not enabled, turn them on with Command/Control + R.
Step 2 - Add the Color Palette
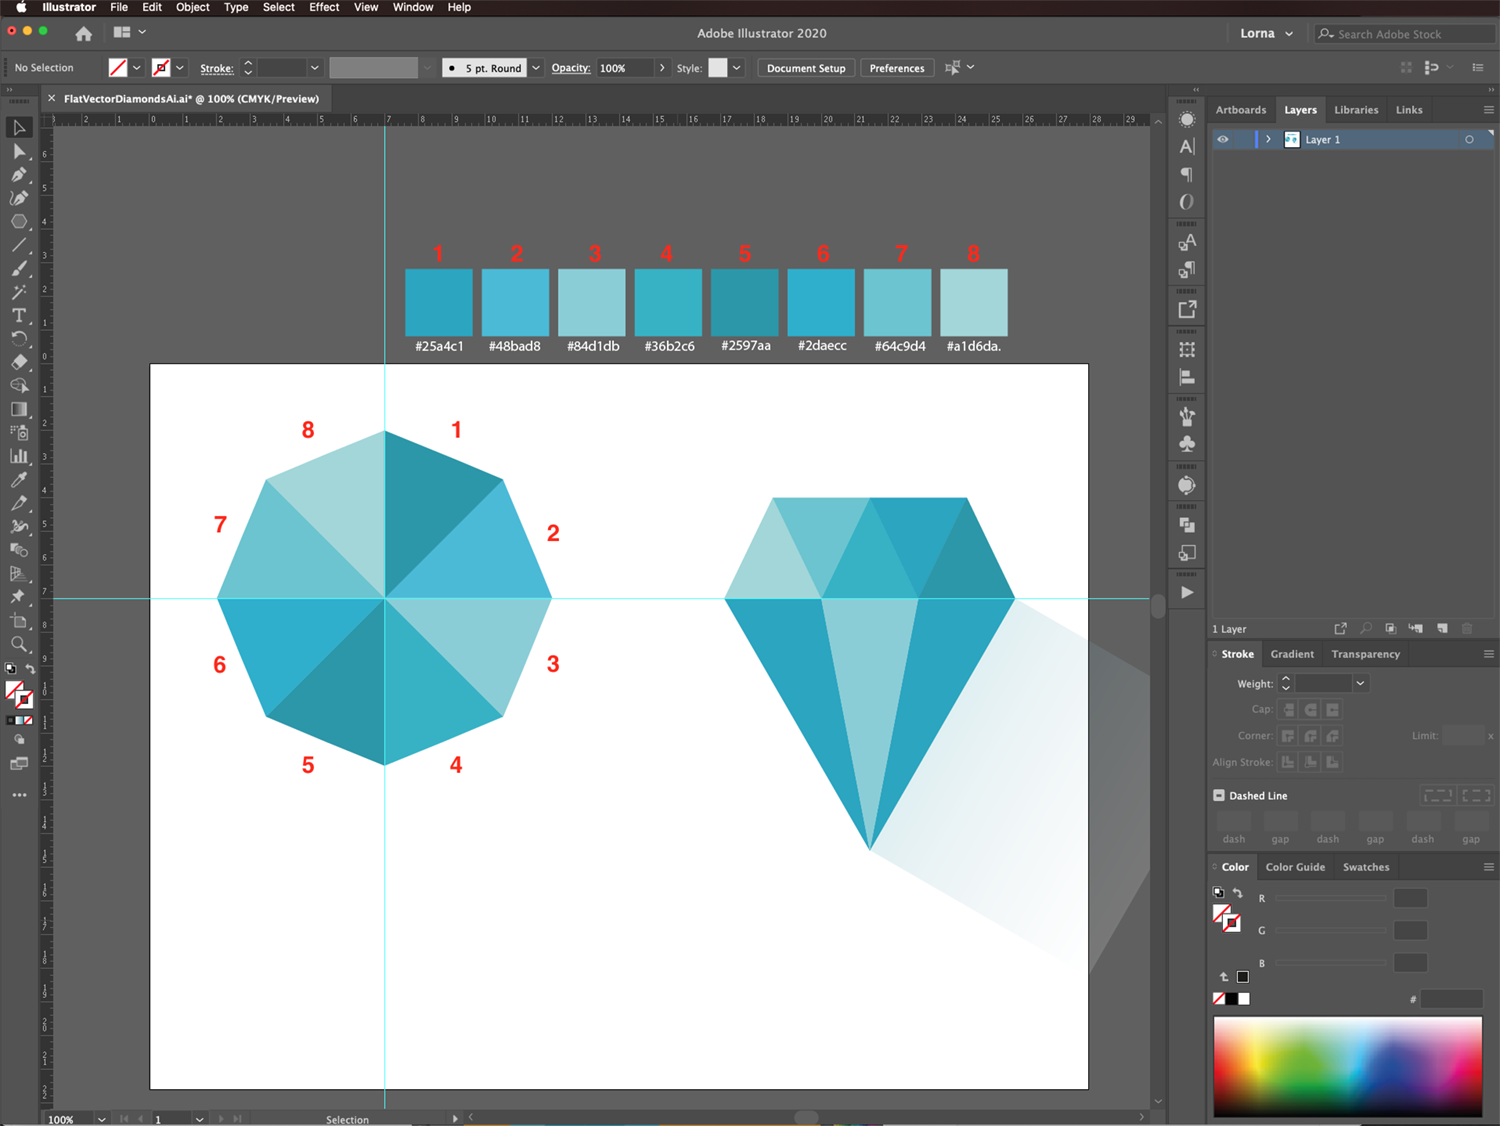
We will need multiple shades of the same color to fill the different facets of our Illustrator diamond. We chose 8 shades of blue: 1. #25a4c1, 2. #48bad8, 3. #84d1db, 4. #36b2c6, 5. #2597aa, 6. #2daecc, 7. #64c9d4 and 8. #a1d6da.

Step 3 - Add the Base Triangle
We need to create a triangle using the Polygon tool using the following values:
Radius 5 cm, Sides 3. The resulting shape should be an equilateral triangle.
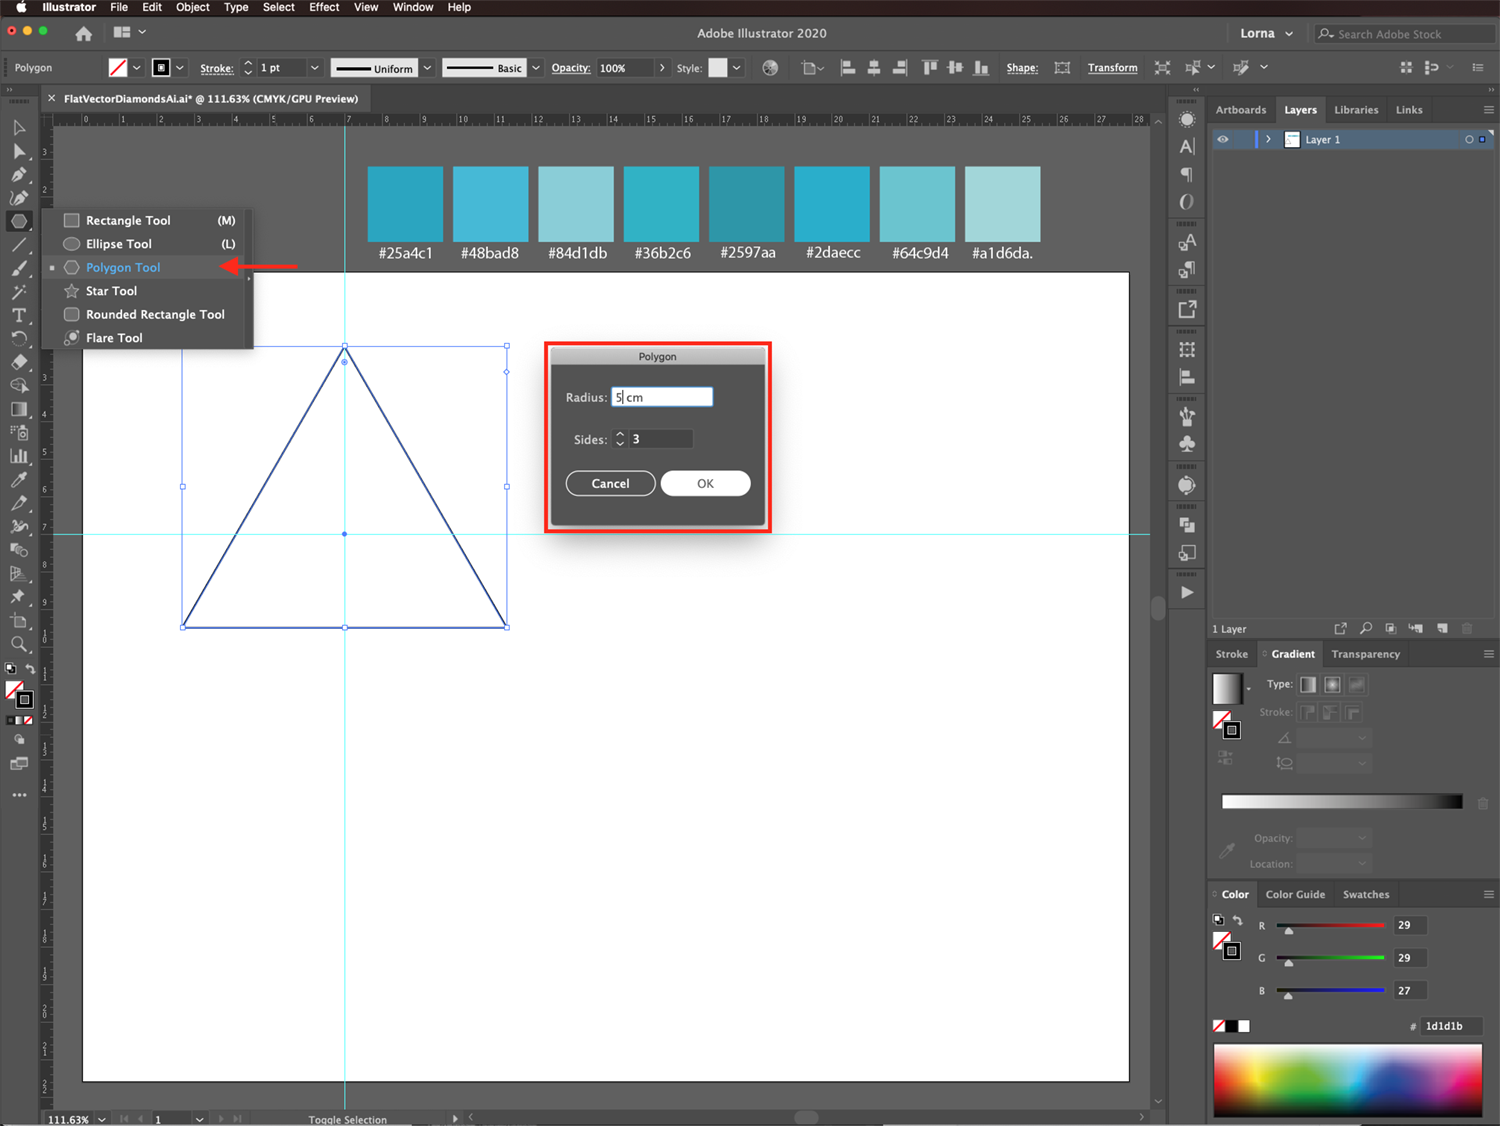
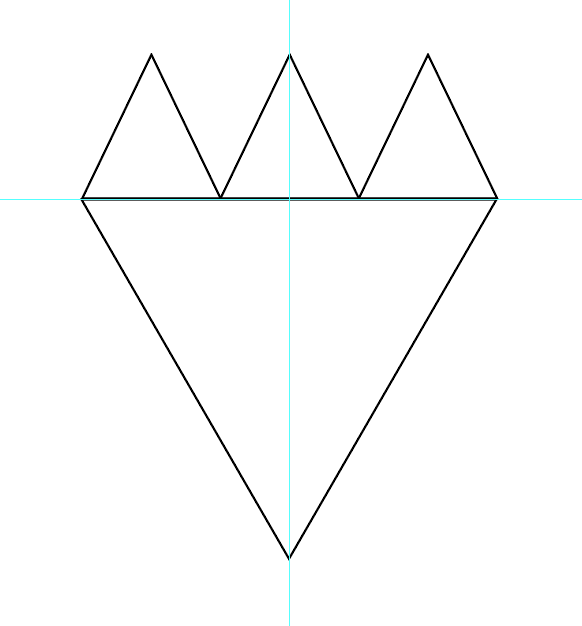
Rotate your triangle until the point is facing down, and it is centered with the vertical guide. The base should touch the horizontal guide.

Step 4 - Create the Top of the Diamond
Now, to create the top portion of the diamond, first select the base triangle and click on the Transform panel in the top menu to check its width and height measurements and write them down. In our case, the width is 8.6603 cm, and the height is 7.5 cm.
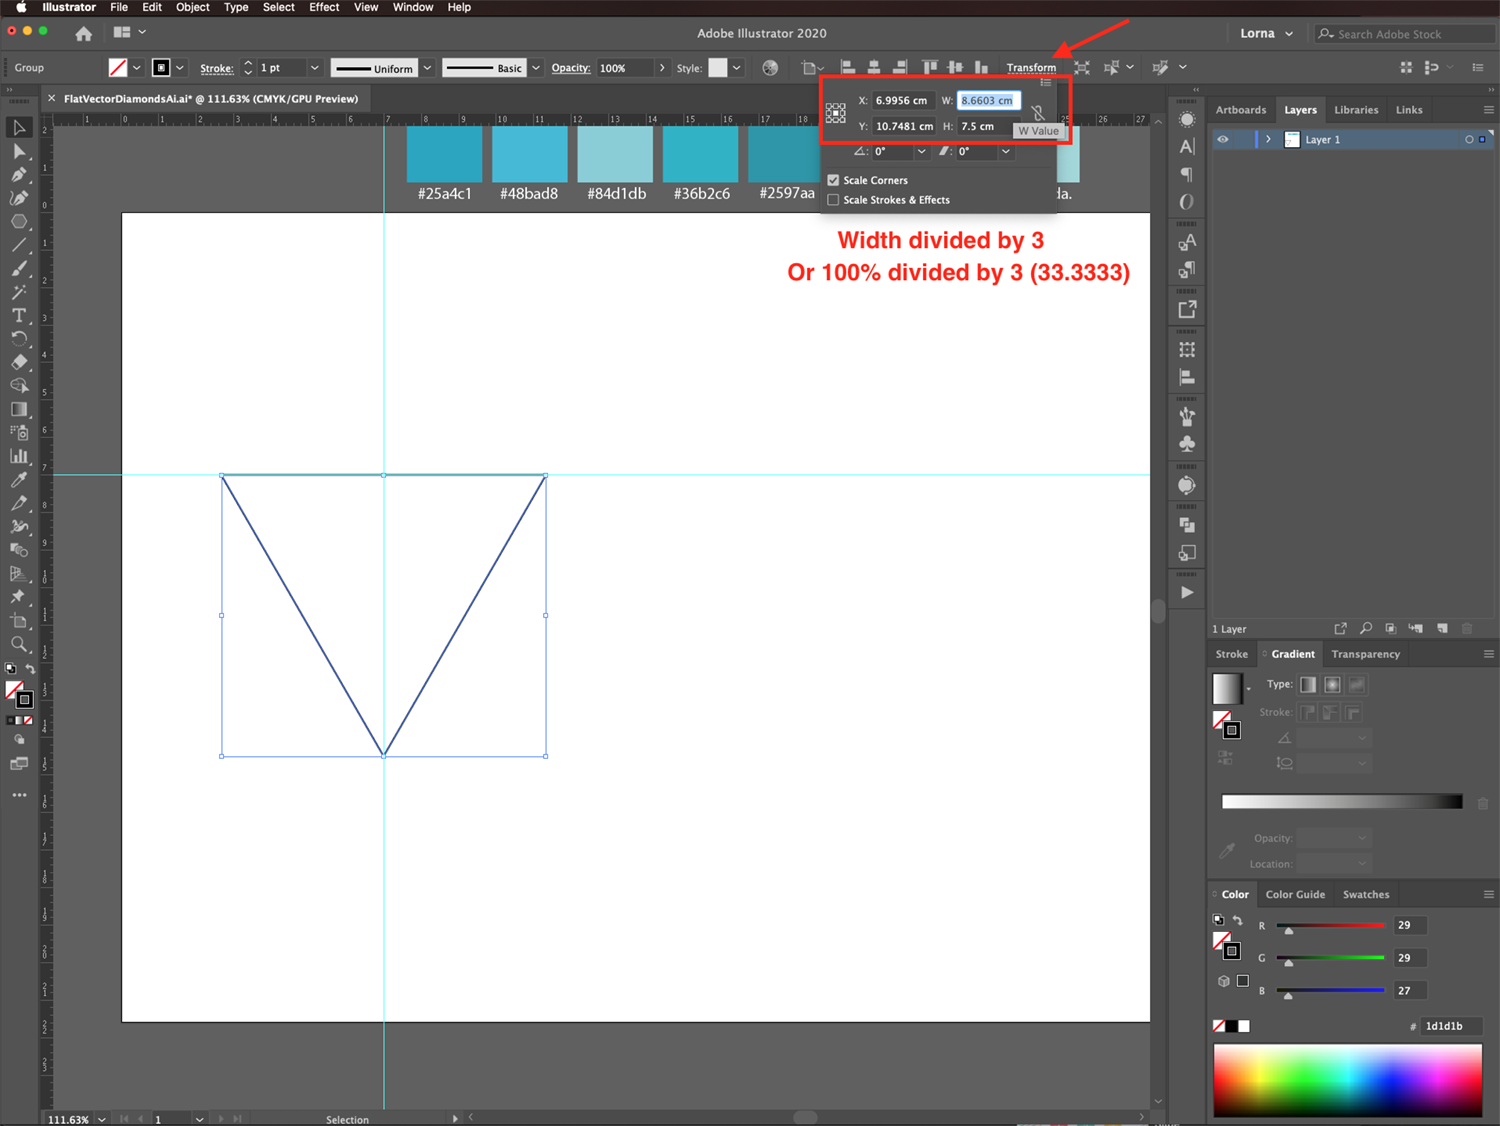
We are going to add 3 smaller sections to the top so we need to divide the width value, or 100% (of the width) by 3 to use as our scale factor. In our case, the width was 2.8867 cm or 33.3333%.
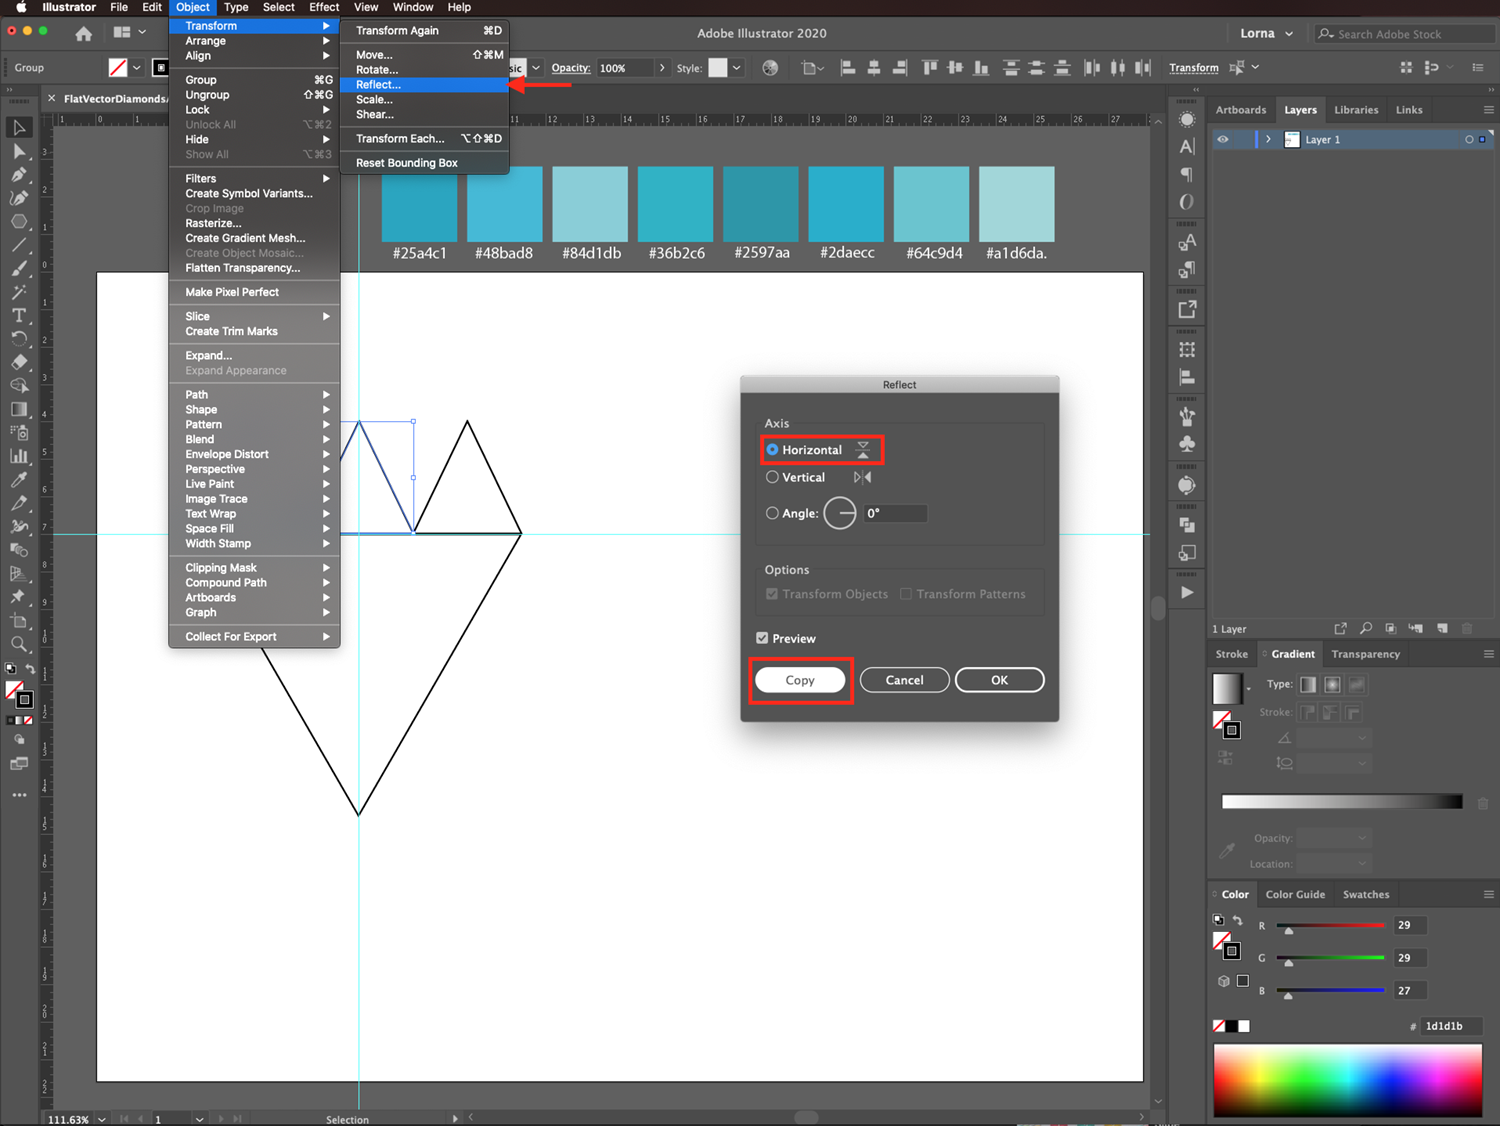
With the base triangle still selected, go to Object > Transform > Transform Each and set the Horizontal Scale value to 33.3333% and the Vertical Scale to 40%. Check the Reflect Y box and set the reference point to the top-left corner on the reference point locator on the Transform Each panel. Click Copy instead of ok to apply the changes to a duplicate path and leave the original one as it is.
This triangle should be aligned to the left corner of the base triangle.
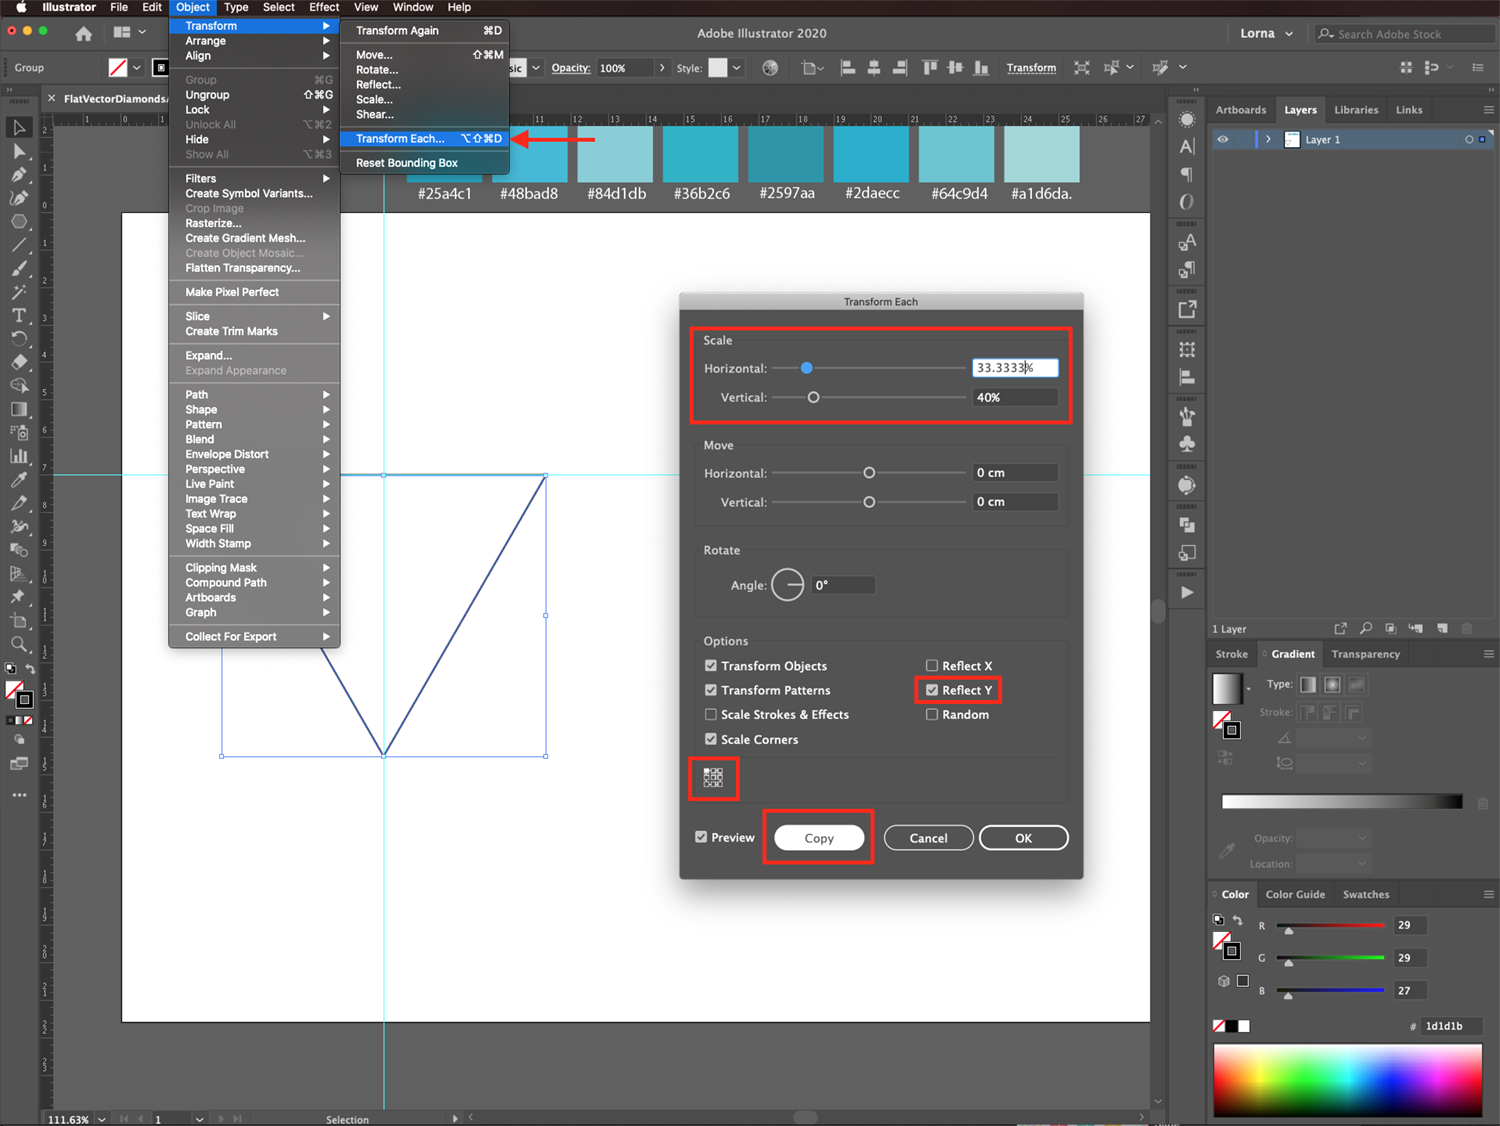
Check the measurements of the resulting triangle and write them down. In our case, the width is 2.8867 cm, and the height is 3 cm.
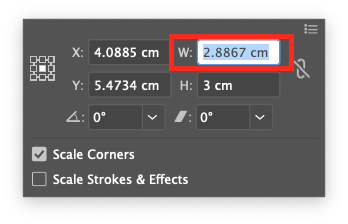
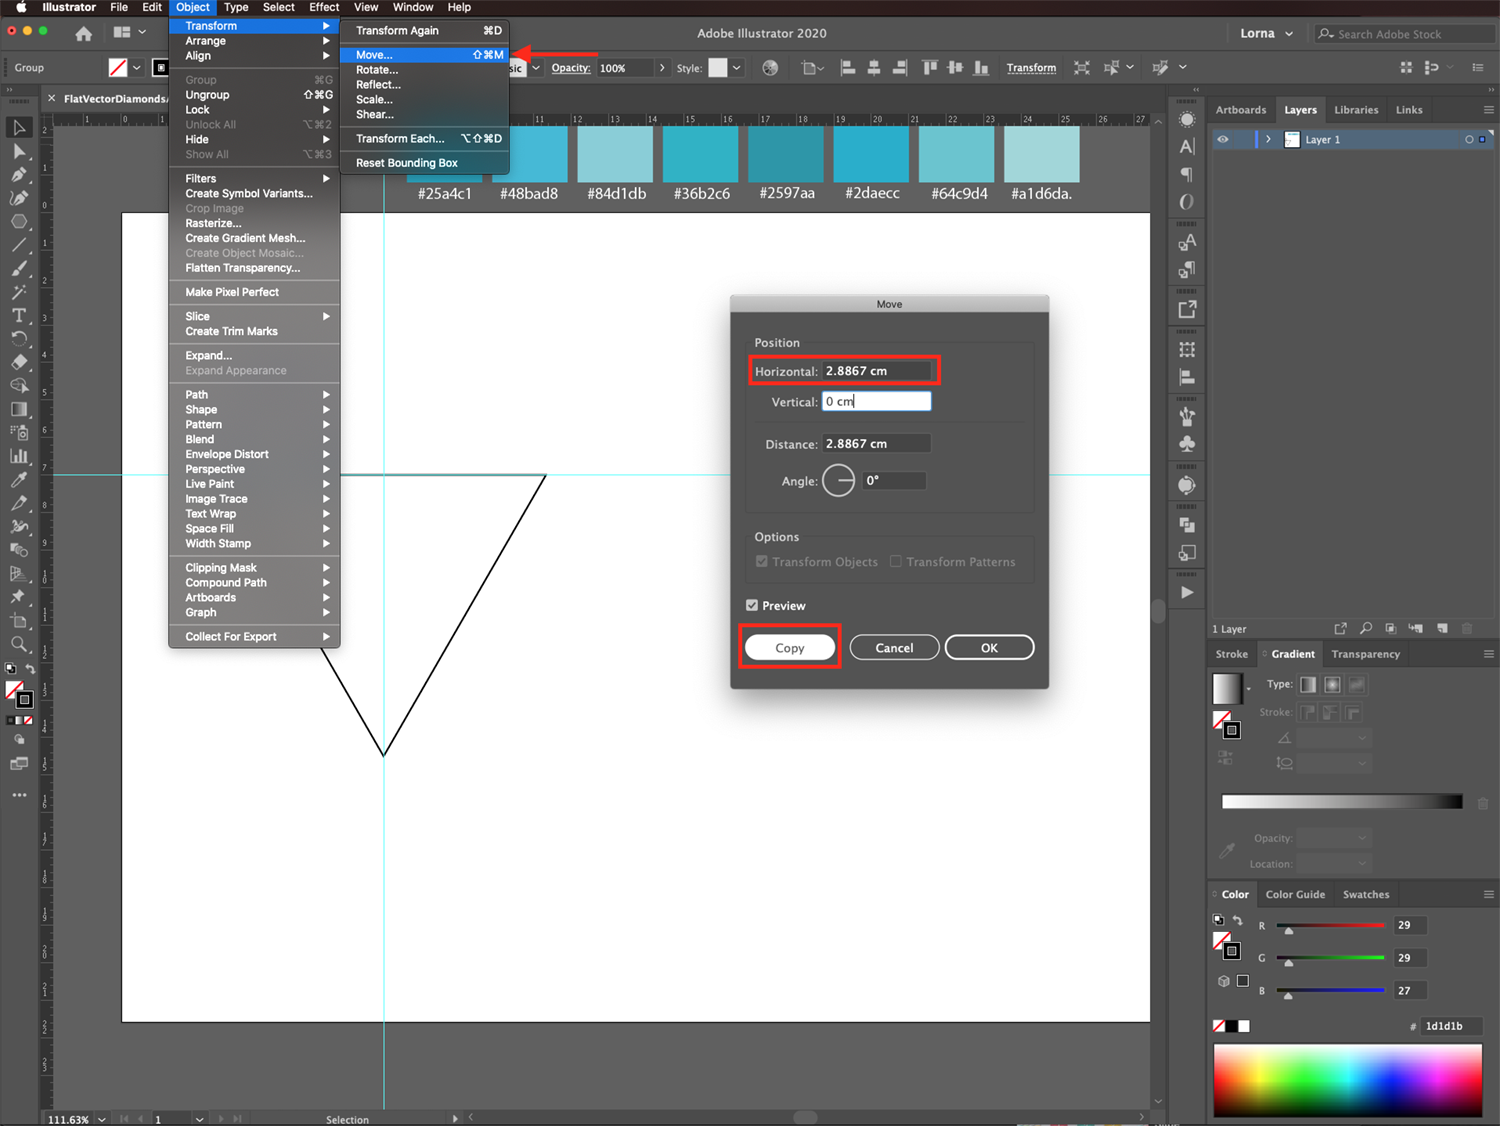
With the small triangle selected, go to Object > Transform > Move and use the previously noted width value (2.8867 cm) as the Horizontal Position. Again, click Copy instead of ok to apply the changes to a duplicate path and leave the original one as it is.
This triangle should be centered with the vertical guide and start exactly where the previous one ended.
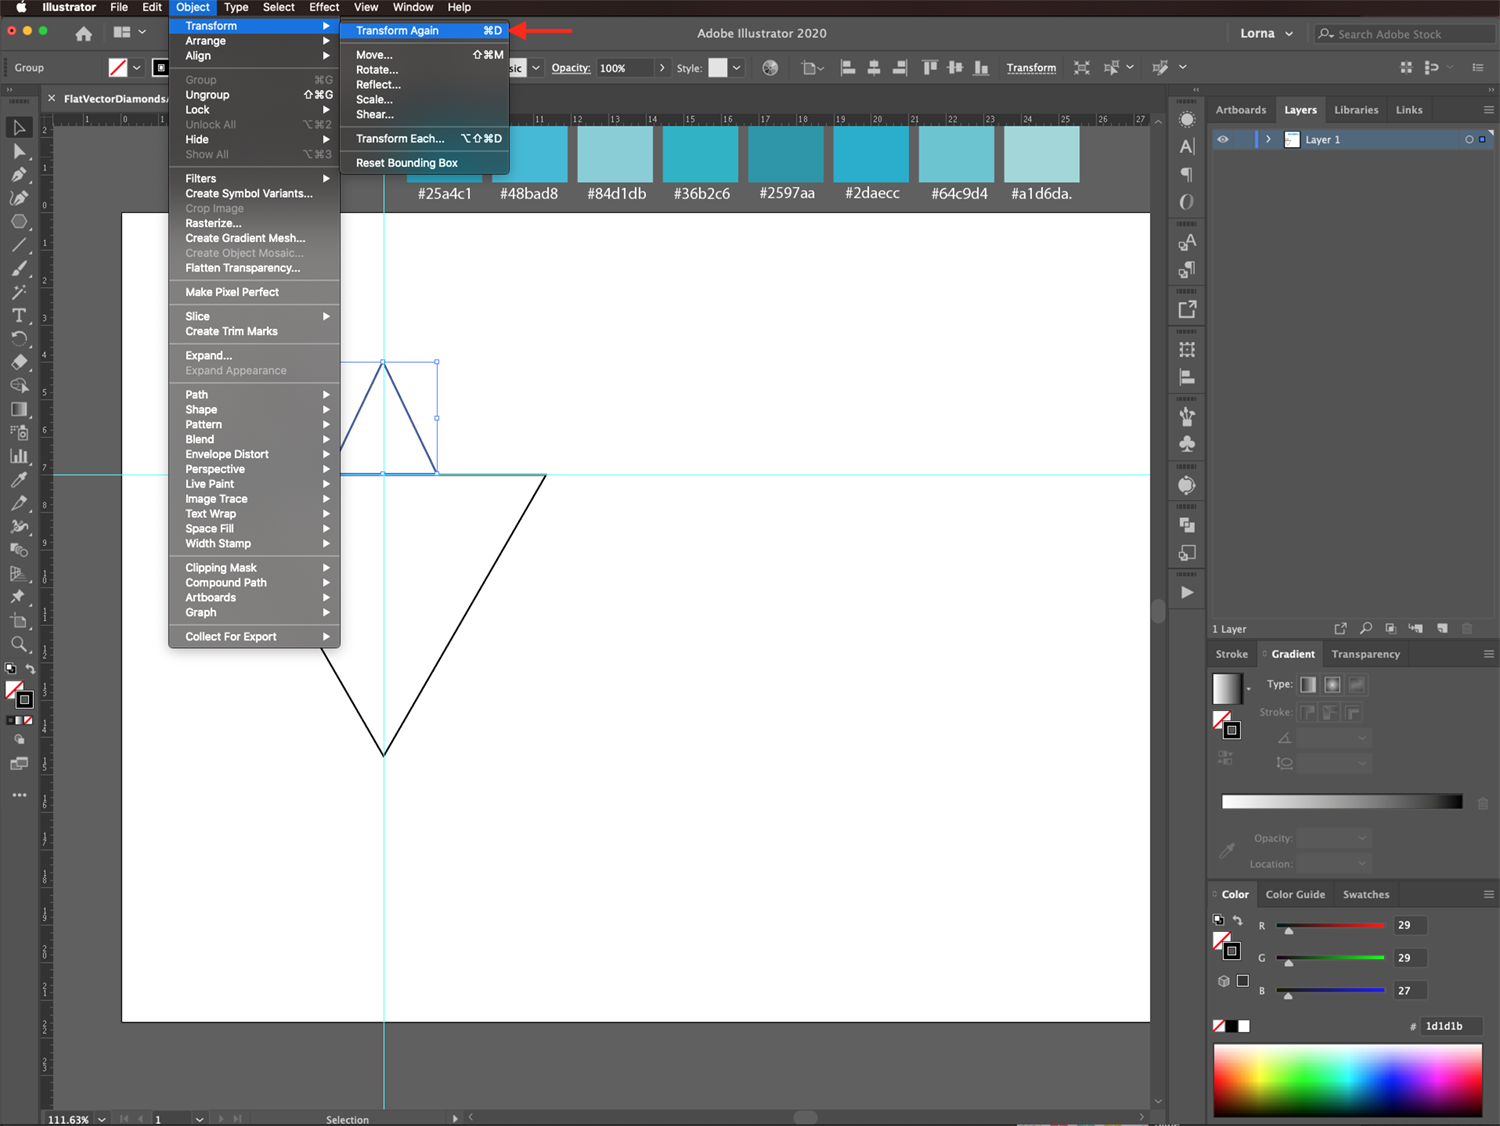
Then, go to Object > Transform > Transform Again (Command/Control + D) to create a third small triangle on top of the one at the base.
This one should coincide with the right corner of the base triangle.
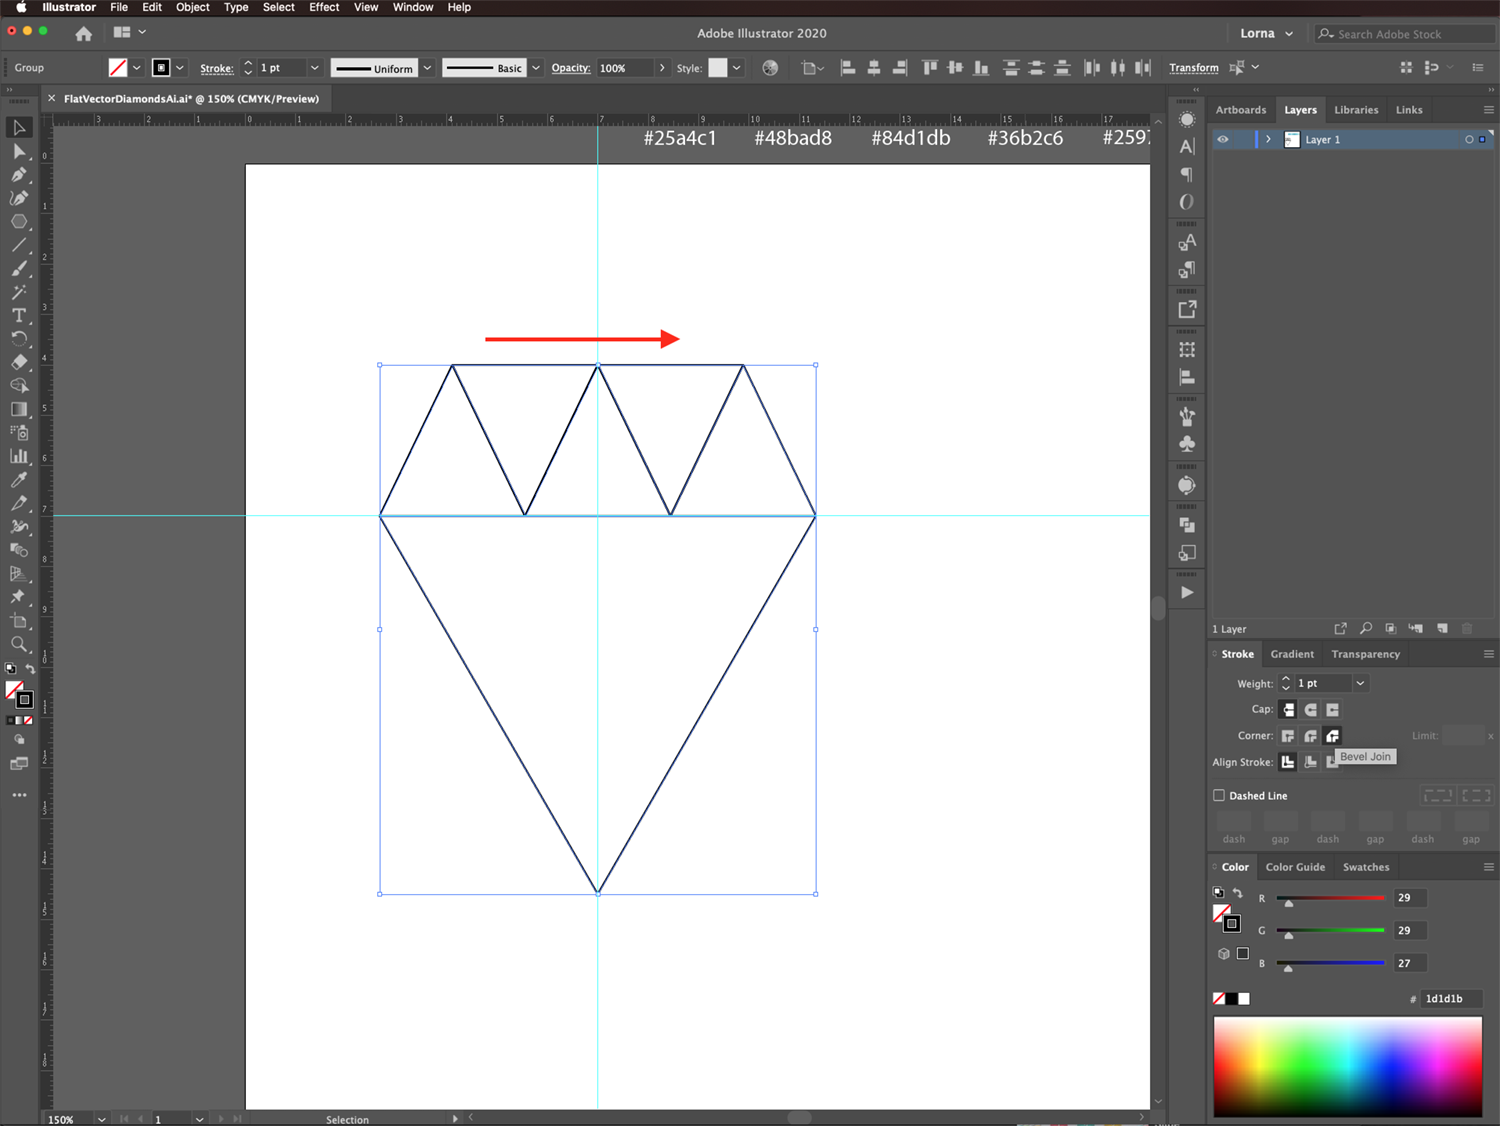
You should now have three small triangles perfectly aligned with the base of the bigger one and whose bottom corners touch each other slightly. If they are a bit offset, select them and adjust their position.
To complete the top portion, select two of the small triangles (Shift key), go to Object > Transform > Reflect, and select the Horizontal Axis. Click Copy instead of Ok.
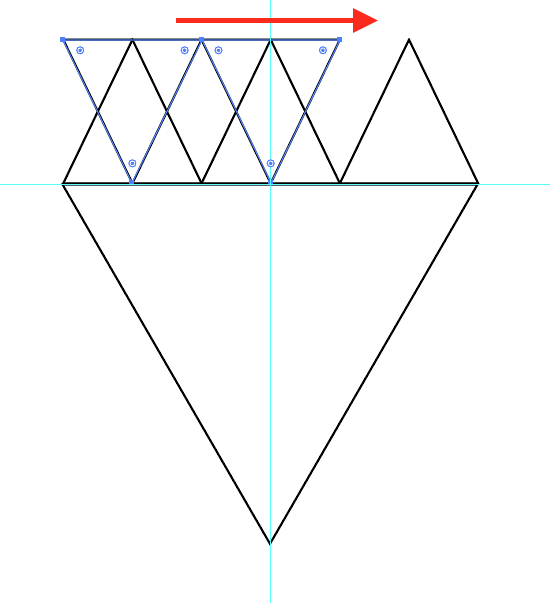
Select the 2 rotated triangles and move them to the right so they fit in the empty wedges created by the 3 bottom ones.
Step 5 - Create the Bottom of the Diamond
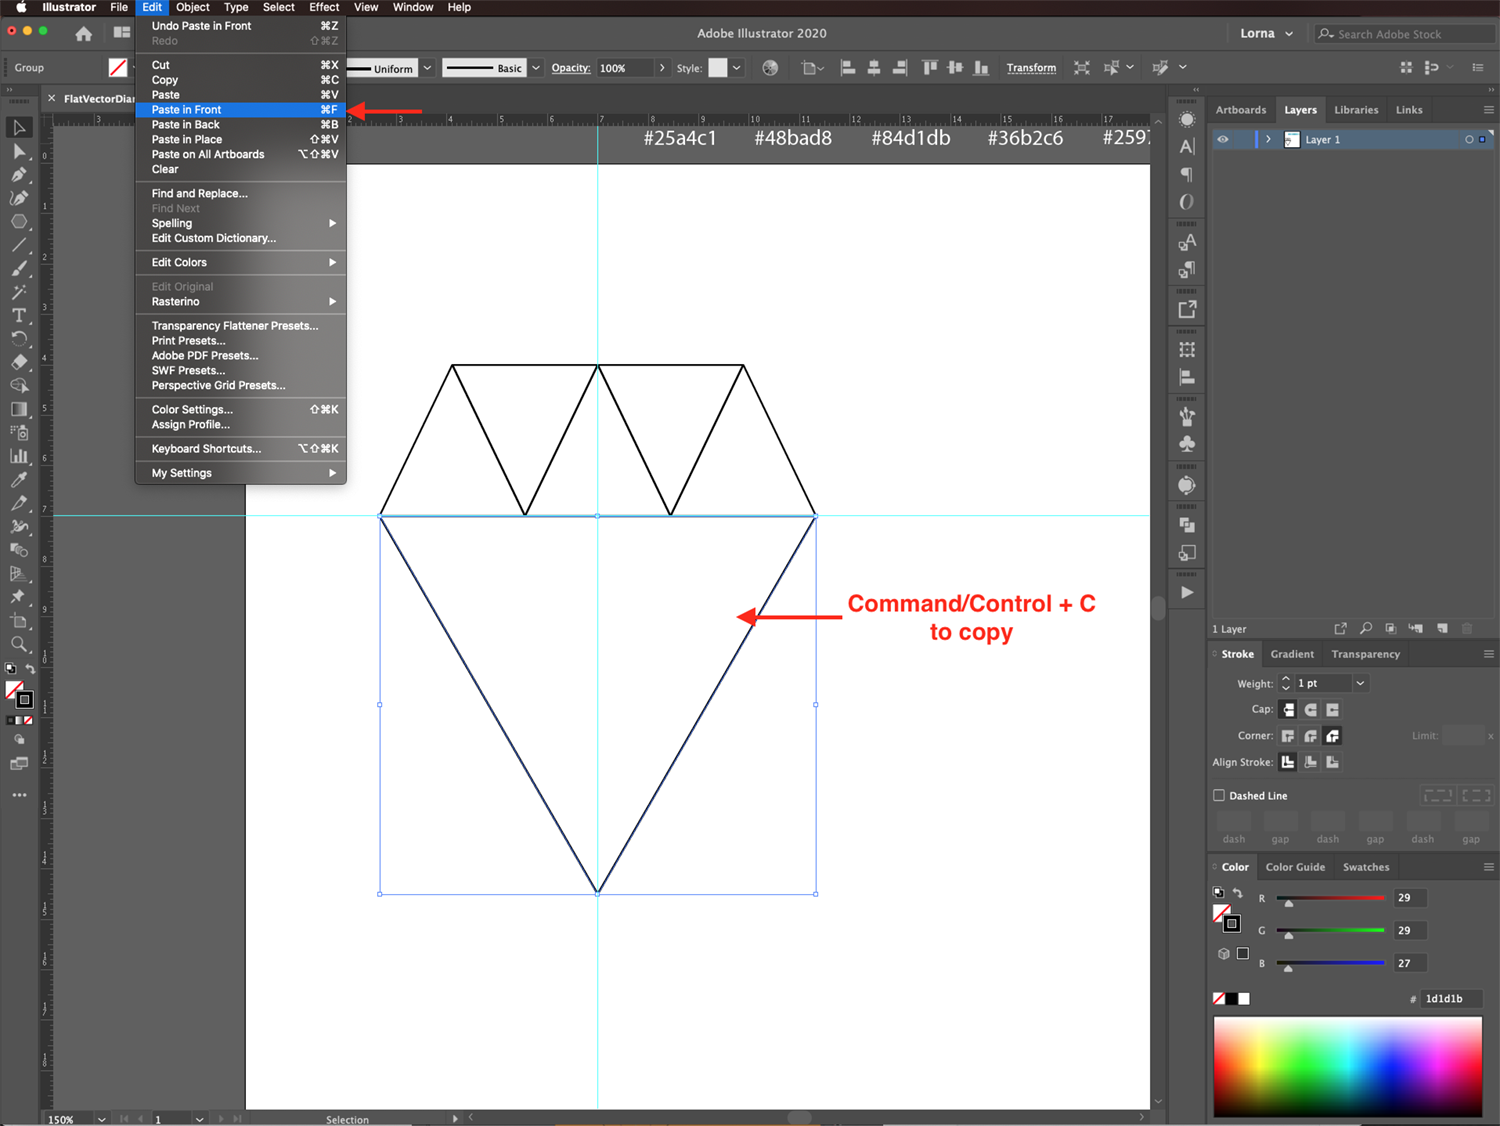
Copy (Command/Control + C) and Paste in Front (Command/Control + F) the base triangle.
Click on the Transform panel in the top menu to change the width value to match the size of the base of the small triangles (2.8865 cm).

Select all the bottom portions of the diamond, head to the Pathfinder panel, and choose Divide to separate your selection into 3 standalone triangles.
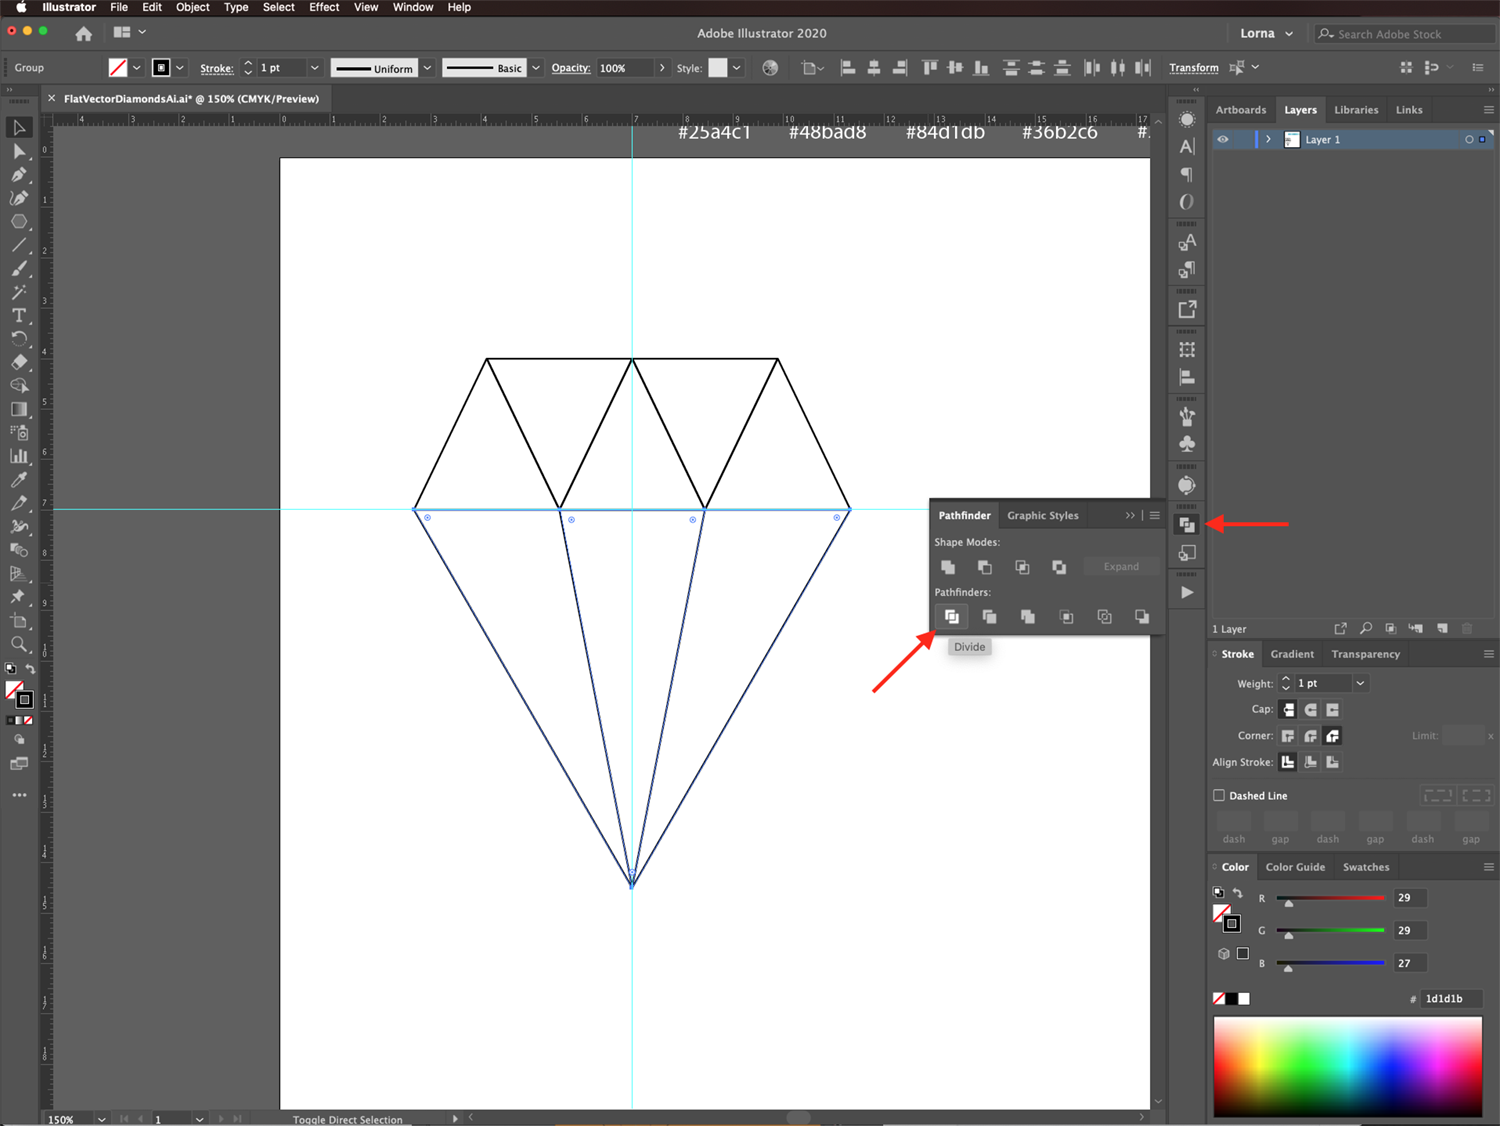
Right-click on top of the resulting shapes and choose Ungroup to further separate the diamond base pieces.

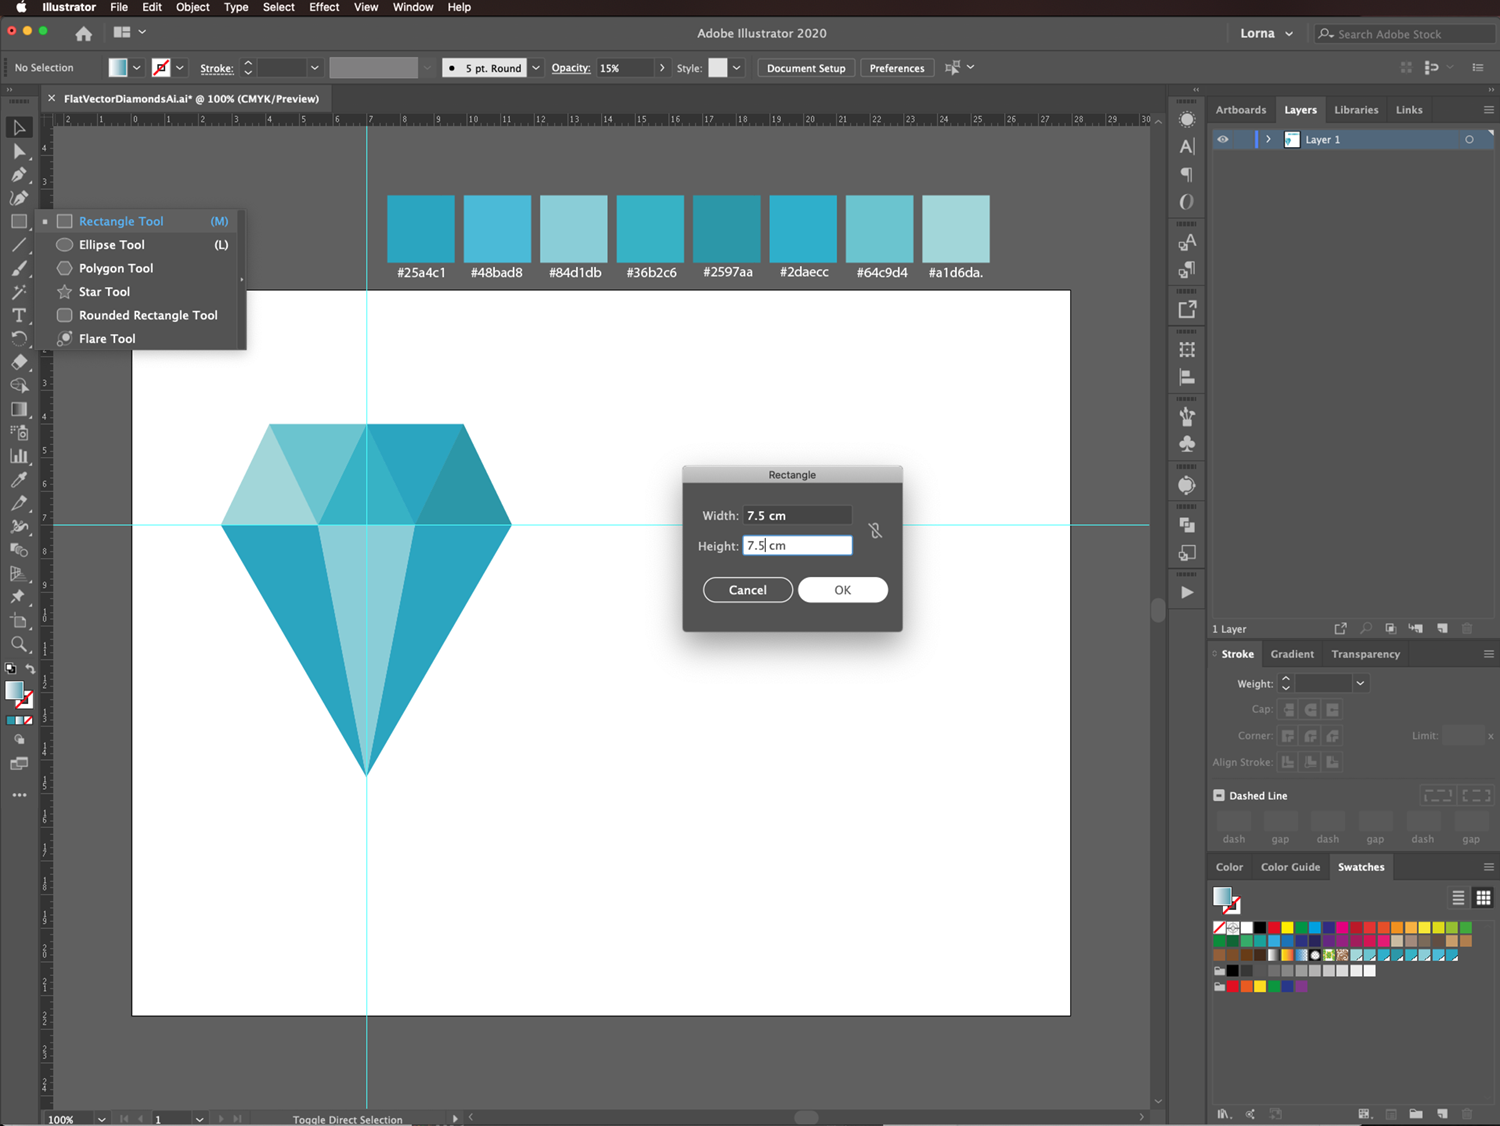
Step 6 - Color the Diamond
Fill the different portions of your Illustrator diamond with shades from your palette. We used the following starting from the top left triangle and going clockwise: #1ad6da, #64c9d4, #36b2c6, #25a4c1, #2597aa, #25a4c1, #36b2c6 and #25a4c1.

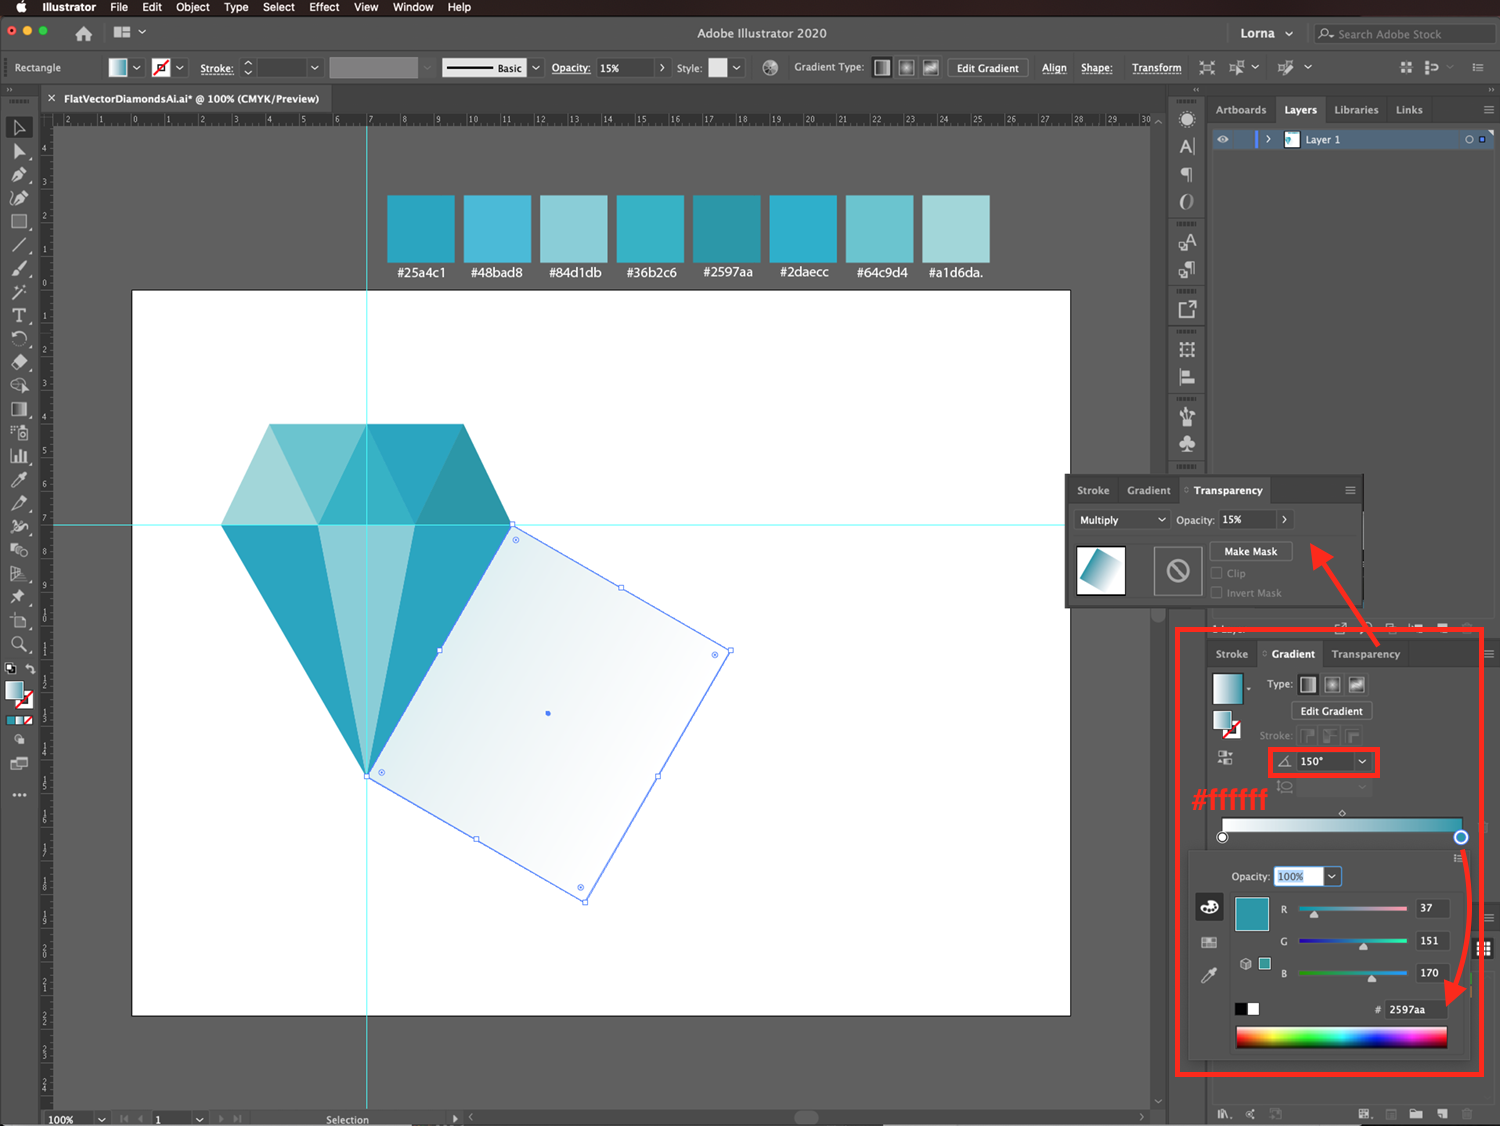
Step 7 - Add a Shadow to the Diamond
First, select everything and Group it together (Command/Control + G).

Then, select the Rectangle tool (M) and click inside the canvas. Create a square using the height measurement of the original base triangle (7.5 cm).
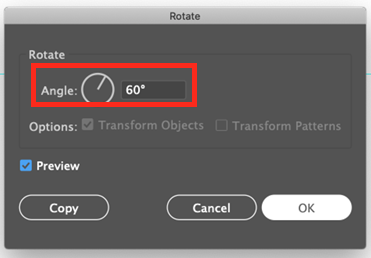
To adjust the angle of the shadow, with the square still selected, double-click on top of the Rotate tool (R) thumbnail to open the Rotate panel and use a 60° Angle.
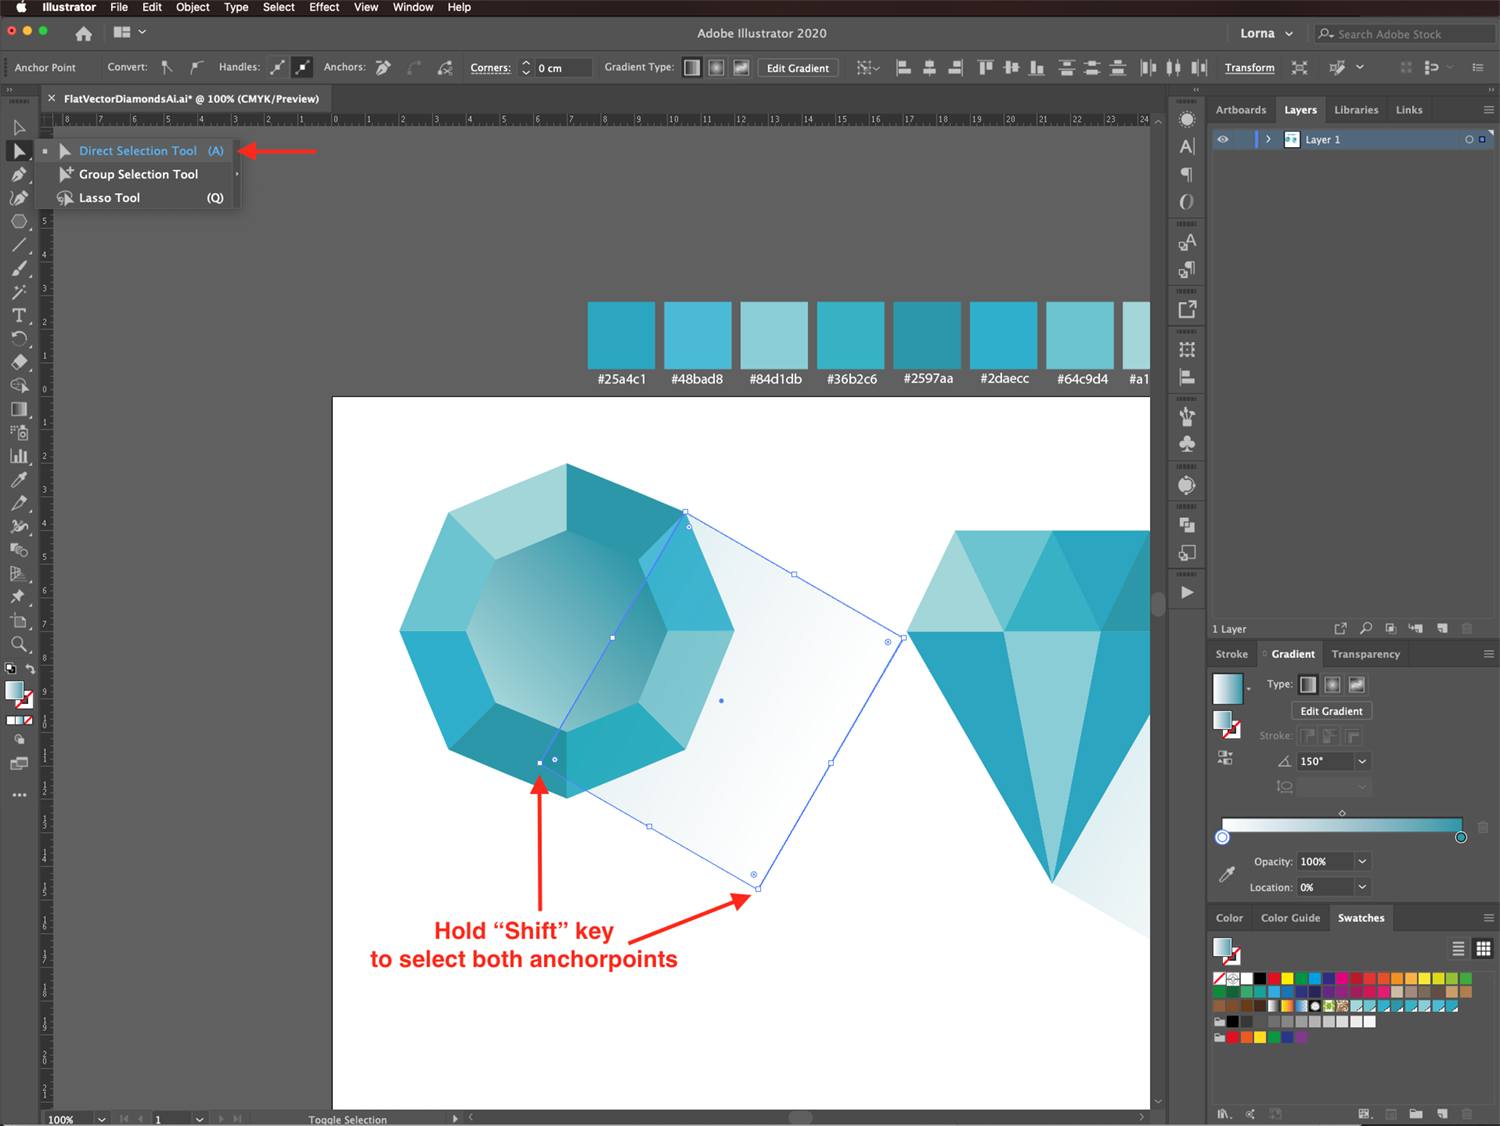
Move the rotated square so it touches the side of the Illustrator diamond. Use the Direct Selection tool (A) to select the bottom anchor points and fix its size if needed. For example, the height may be shorter, so you will need to pull them down to fix it.
Then, change its fill to a Linear Gradient starting from #ffffff (white) to one of the dark shades from your palette (#2597aa) with a 150° Angle.
Finally, in the Transparency panel, change the Blending Mode to Multiply and lower the Opacity to 15%.
Vector Diamond Top View
Now, let’s make the diamond from the top.
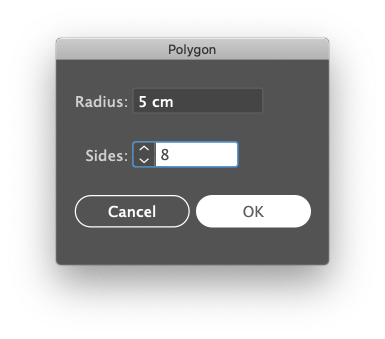
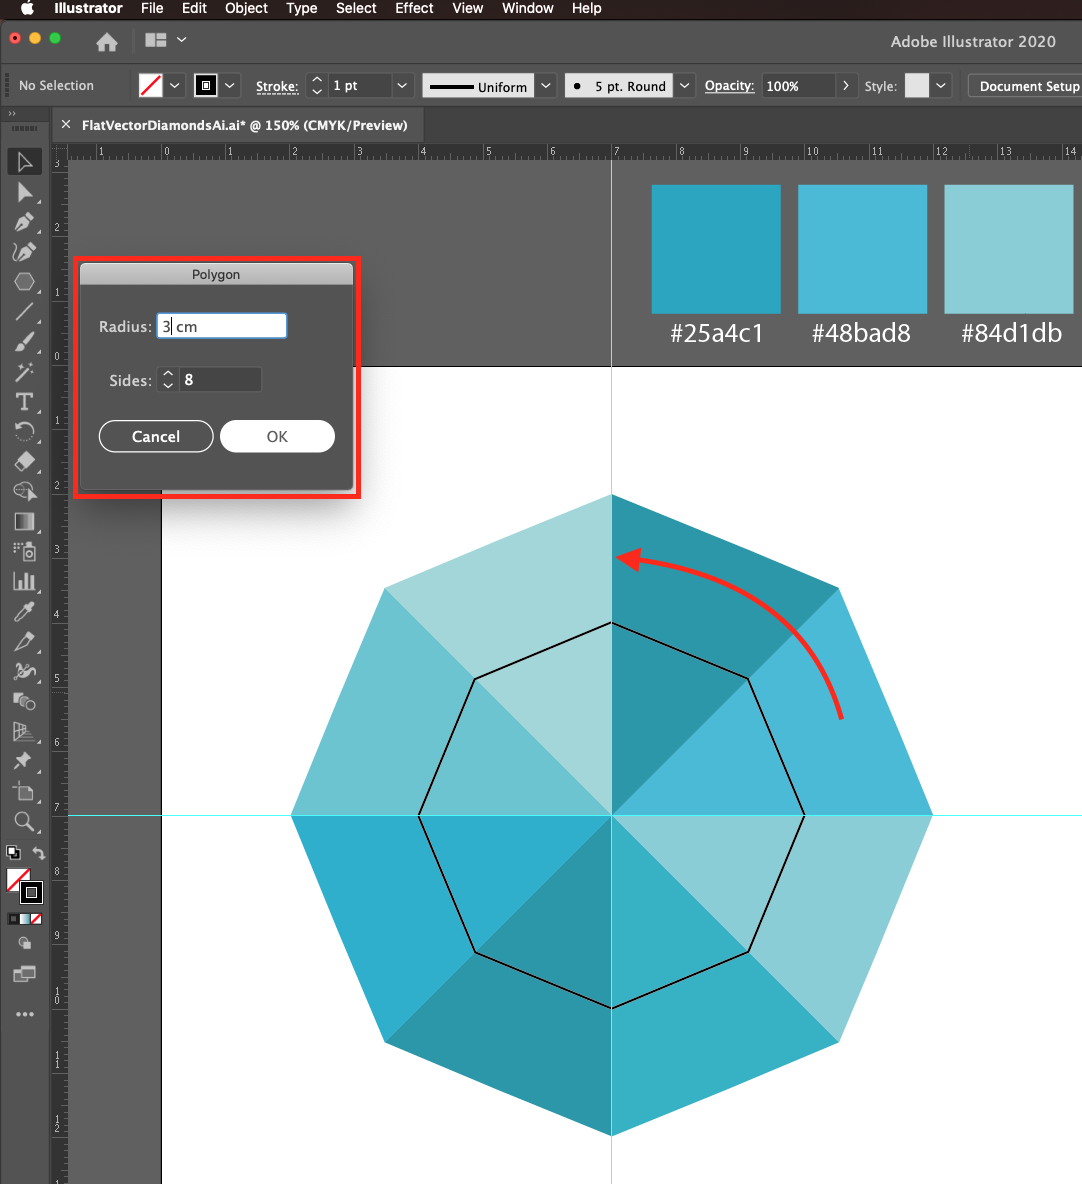
Step 1 - Create a Polygon
Now, we will create another Illustrator diamond, but this time the view will be from the top. Move the side view diamond so you can use the guides for this one too.
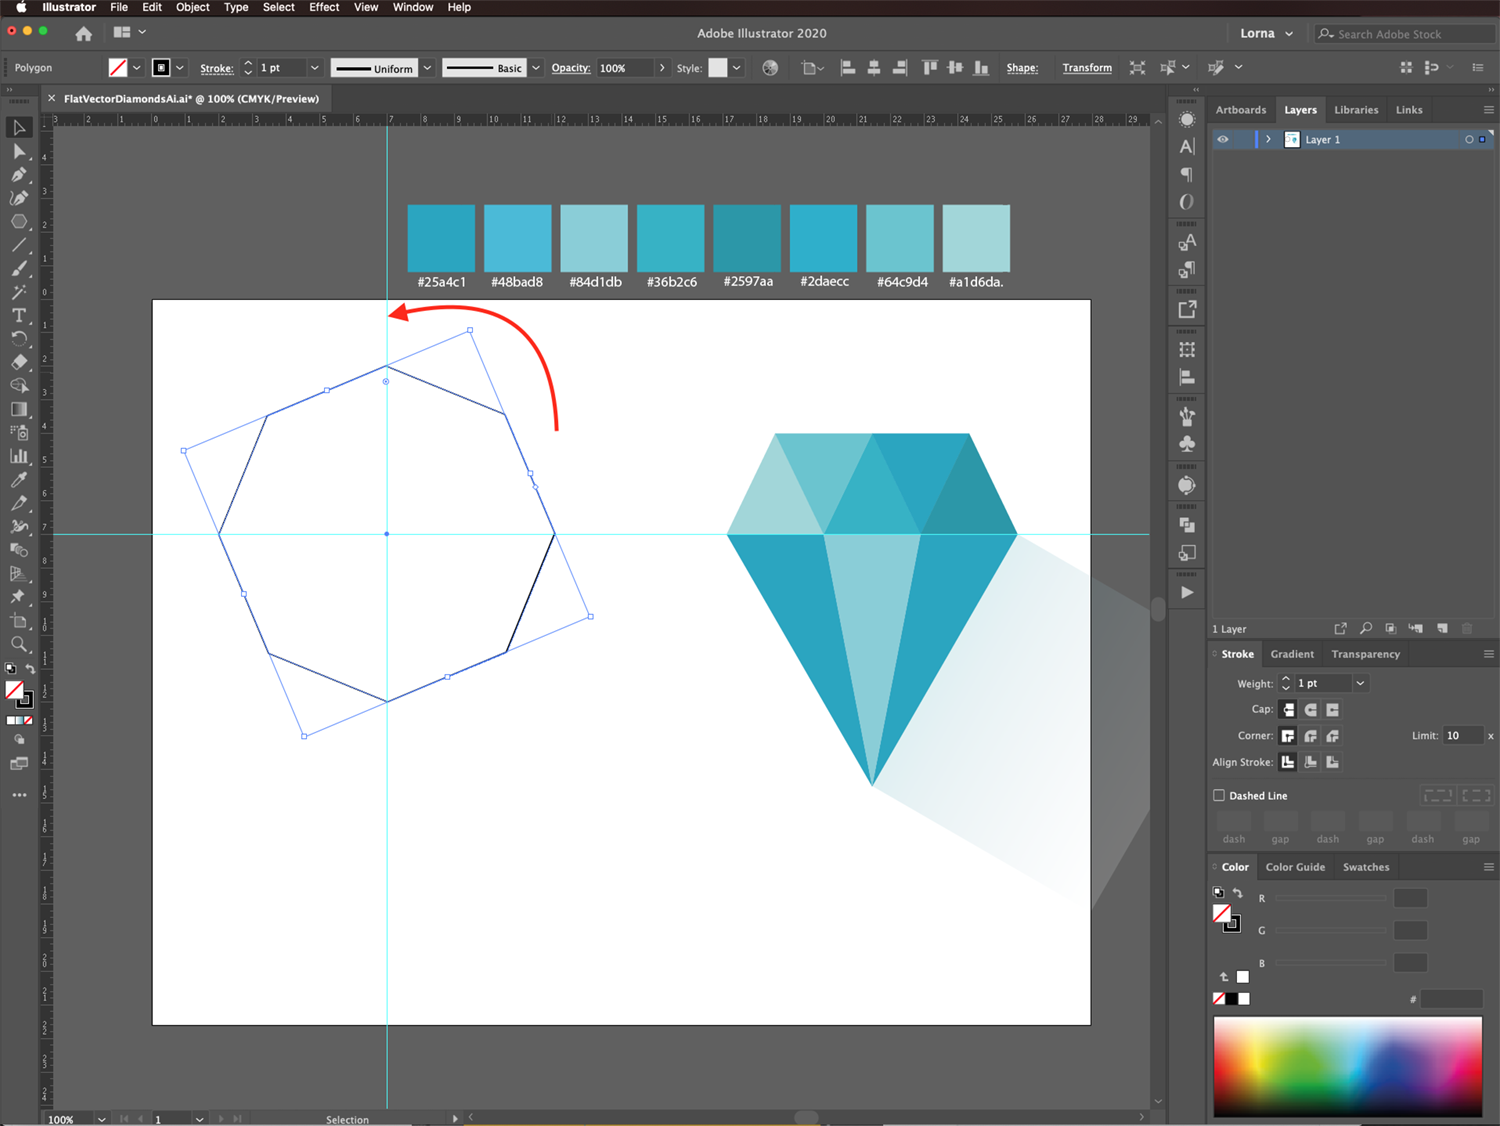
Select the Polygon tool again and click inside your canvas to create another shape. Use the same Radius value as before (5 cm) but increase the number of Sides to 8.
Place it in the center of the intersecting guides and rotate it so one of its corners is on top of the vertical guide.
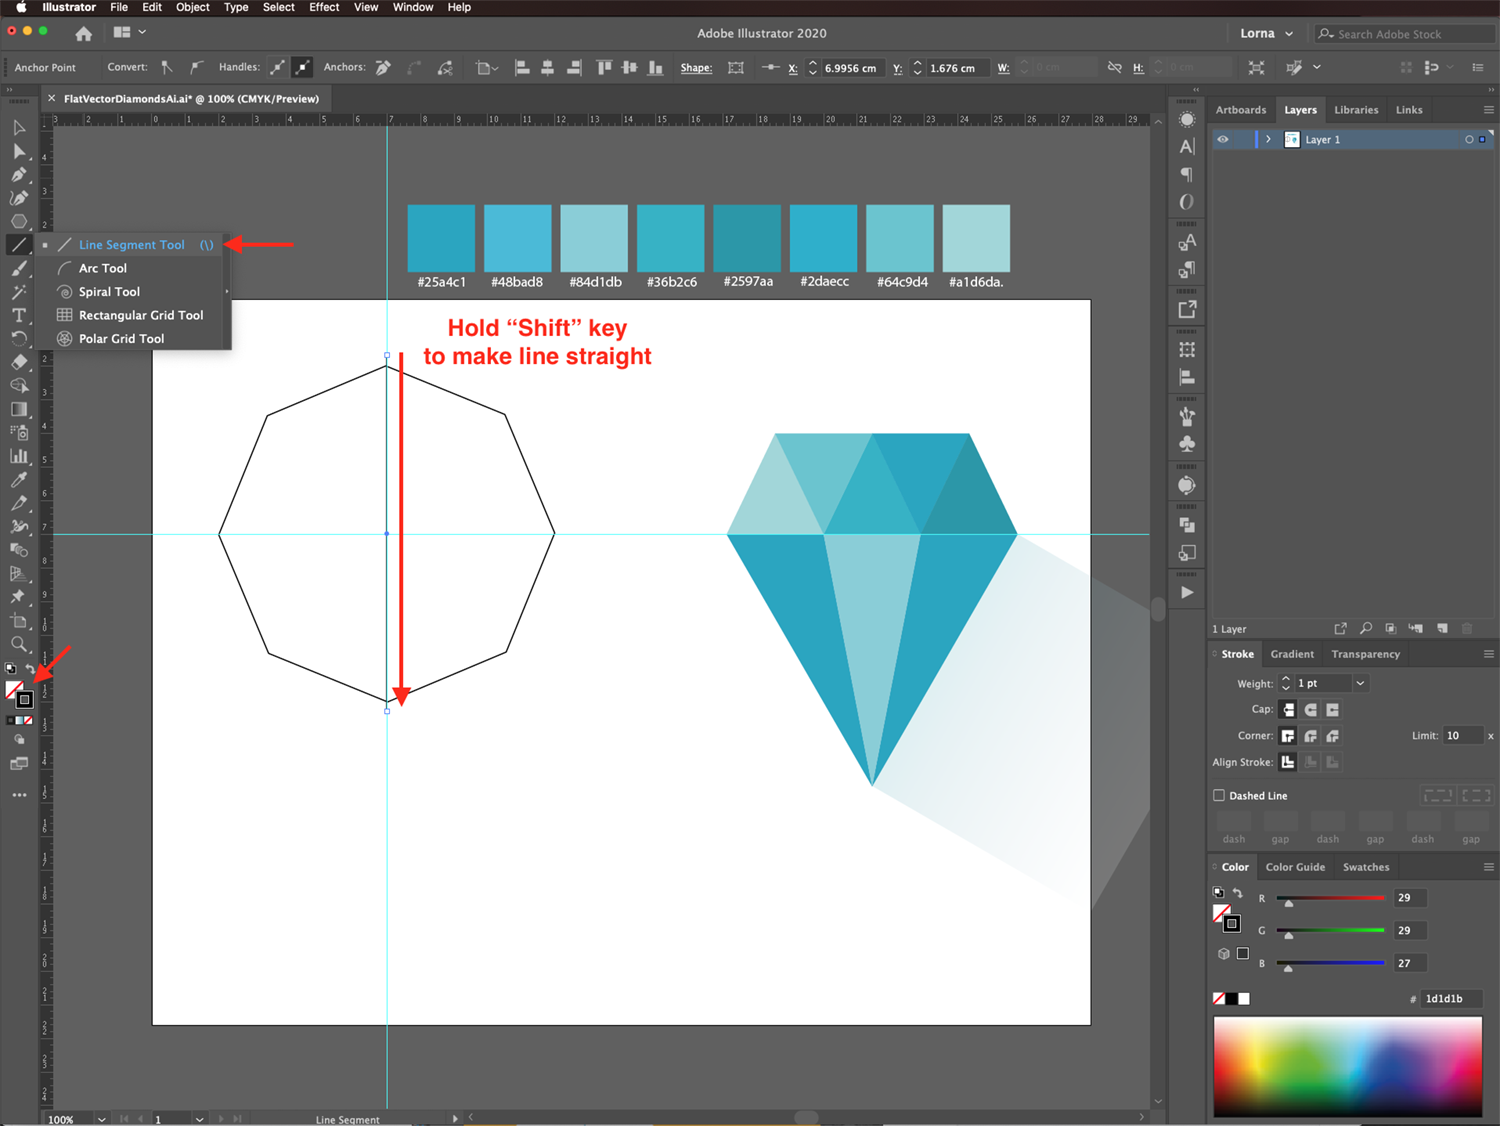
Step 2 - Create the Facets
Use the Line Segment tool (\) to draw a straight line on top of the vertical guide. It should be a bit longer than the octagon you made before. To make sure you are going straight and at the correct angle, hold the Shift key while making the line.
Keep the line selected and use the Rotate tool (R) to make a Copy with a 45° Angle.
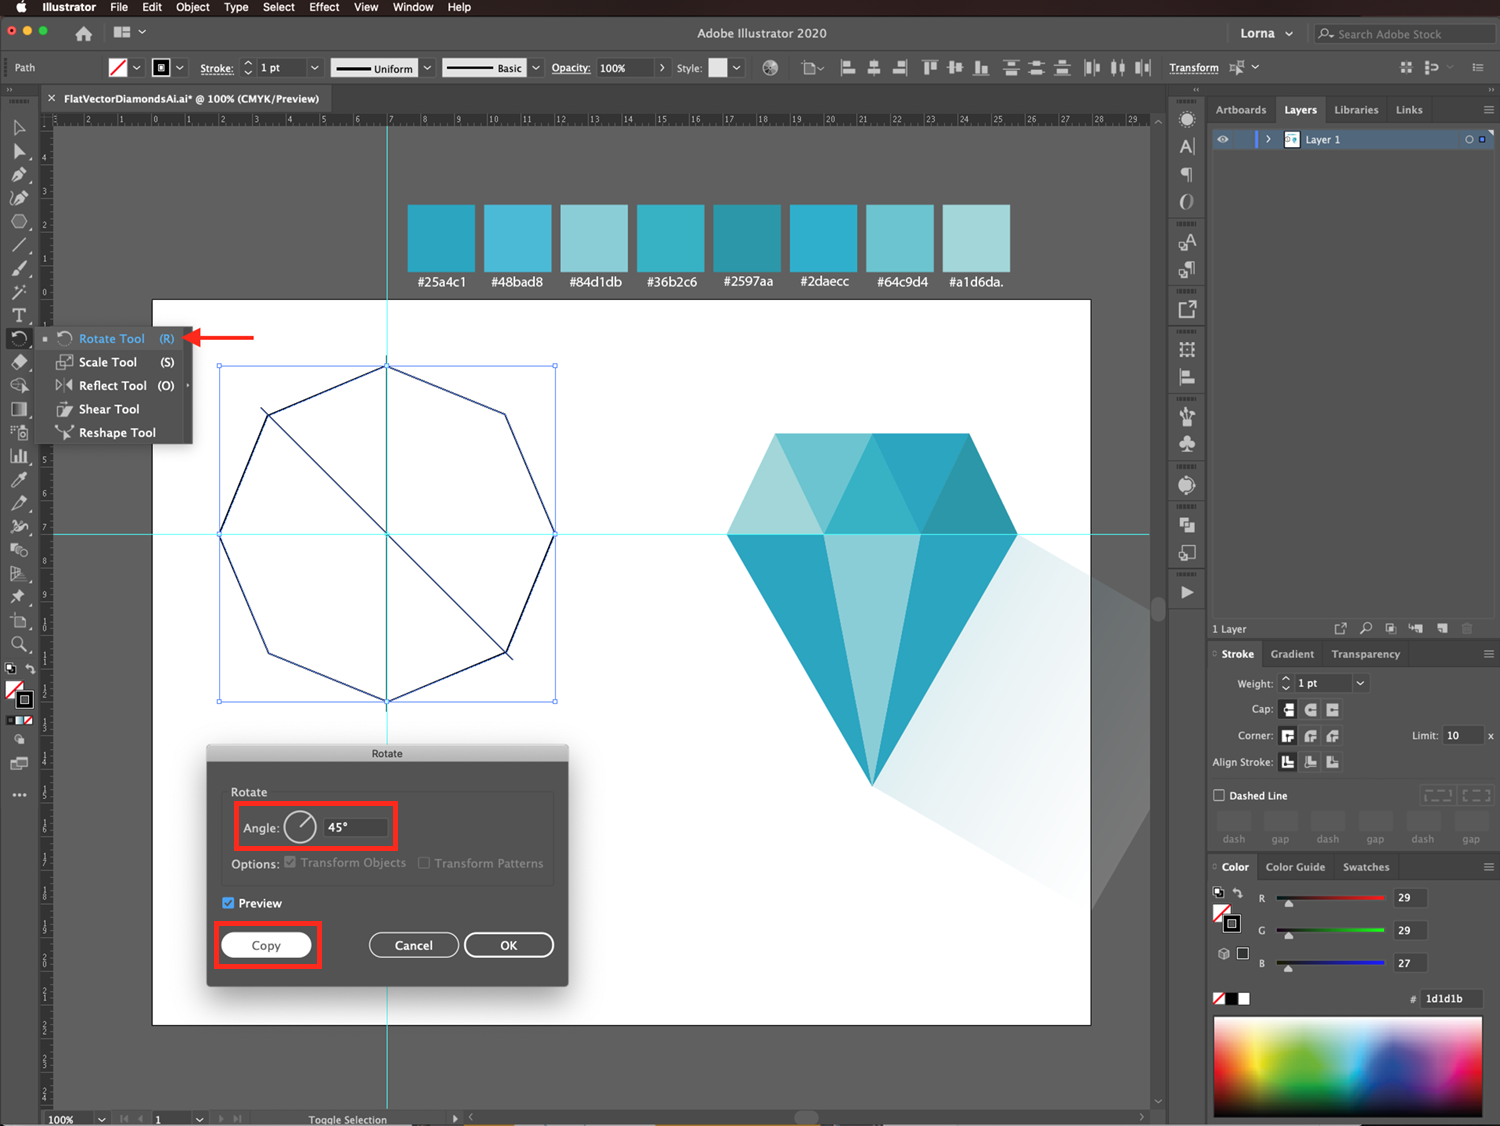
Then use the Reflect tool (O) to make another Copy with a Horizontal reflection.
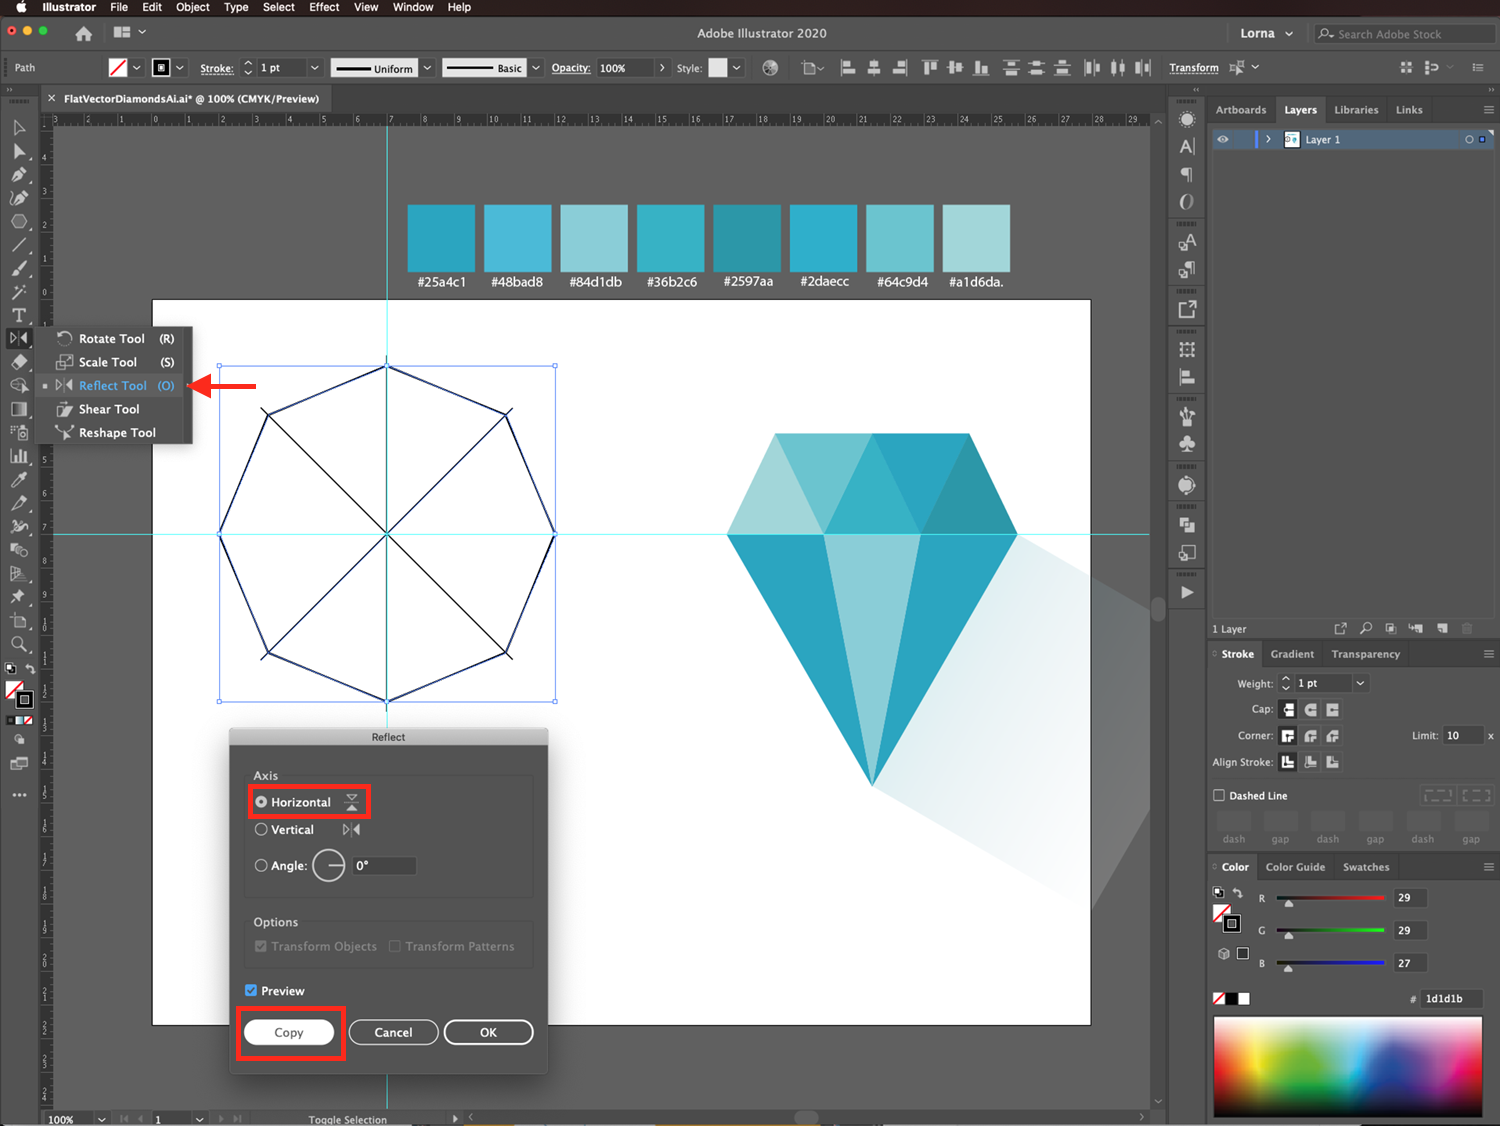
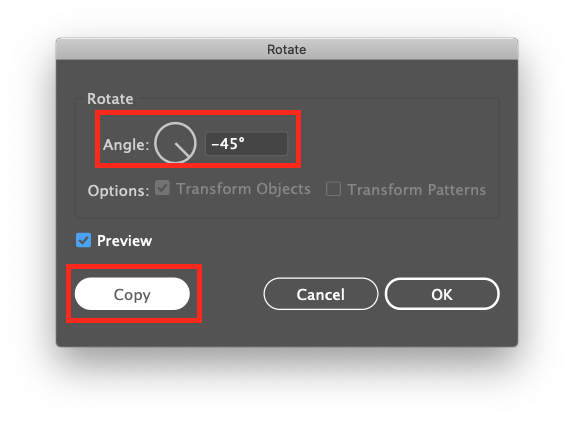
Finally make a fourth line, this time, with a -45° Rotate Angle.
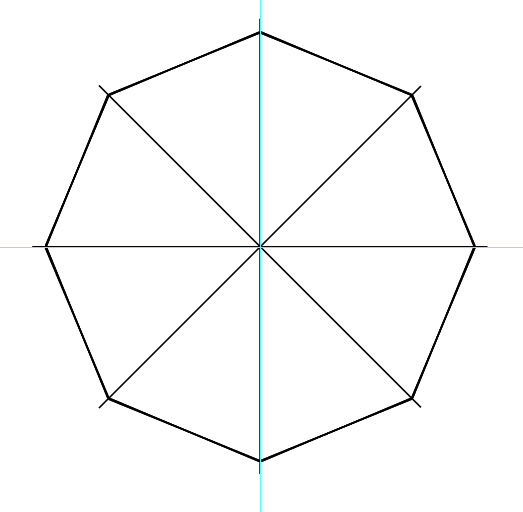
You should end up with your octagon divided into 8 slices.
When you are done, select the lines and octagon, head to the Pathfinder panel again, and choose Divide to separate your selection. Then right-click on top of your shape and choose Ungroup.
Step 3 - Color the Diamond
Fill the different portions of your Illustrator diamond with shades from your palette. We used the following starting from the top right wedge and going clockwise: 1. #25a4c1, 2. #48bad8, 3. #84d1db, 4. #36b2c6, 5. #2597aa, 6. #2daecc, 7. #64c9d4 and 8. #a1d6da.
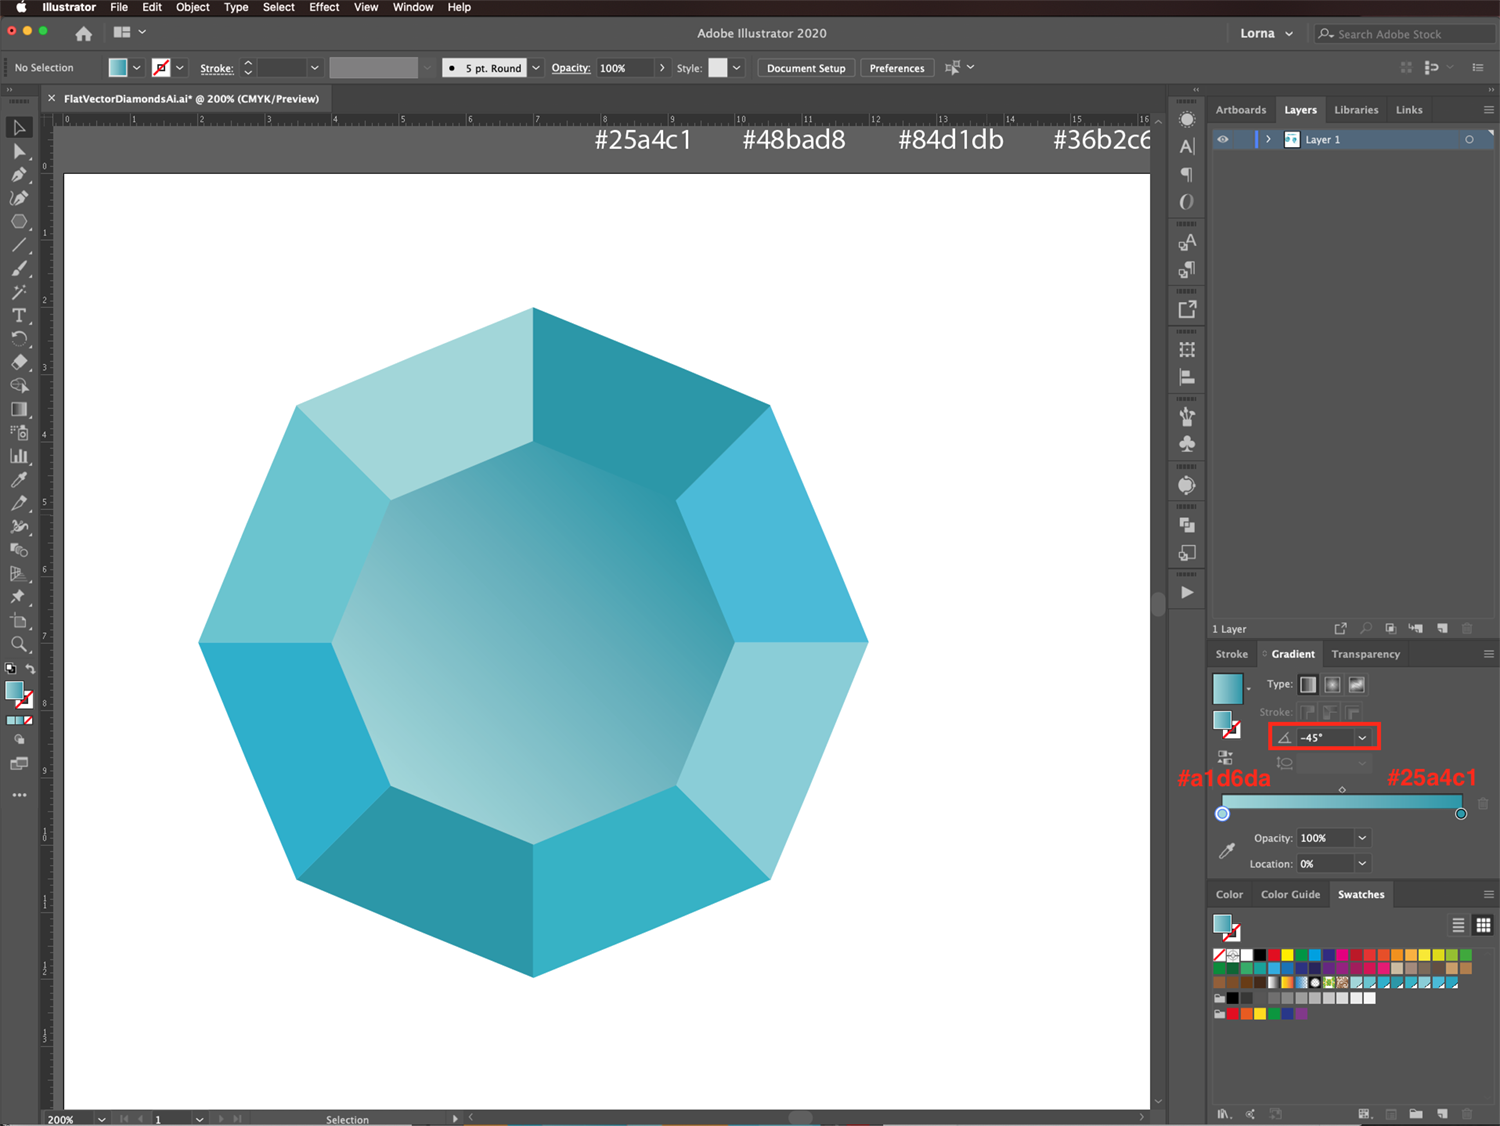
Step 4 - Add the Flat Diamond Top
Create a second octagon with a 3 cm Radius. Rotate this one so one of its corners is on top of the vertical guide too, and make sure it’s placed on top of the original one and in the center of the intersecting guides.
Fill it with a Radial Gradient going from #a1d6da to #25a4c1 with a -45° Angle. Select everything and group it together (Command/Control + G).
Step 5 - Add a Shadow to the Diamond
Copy the linear shadow from your side view Illustrator diamond and adapt it to your new one using the Direct Selection tool (A).

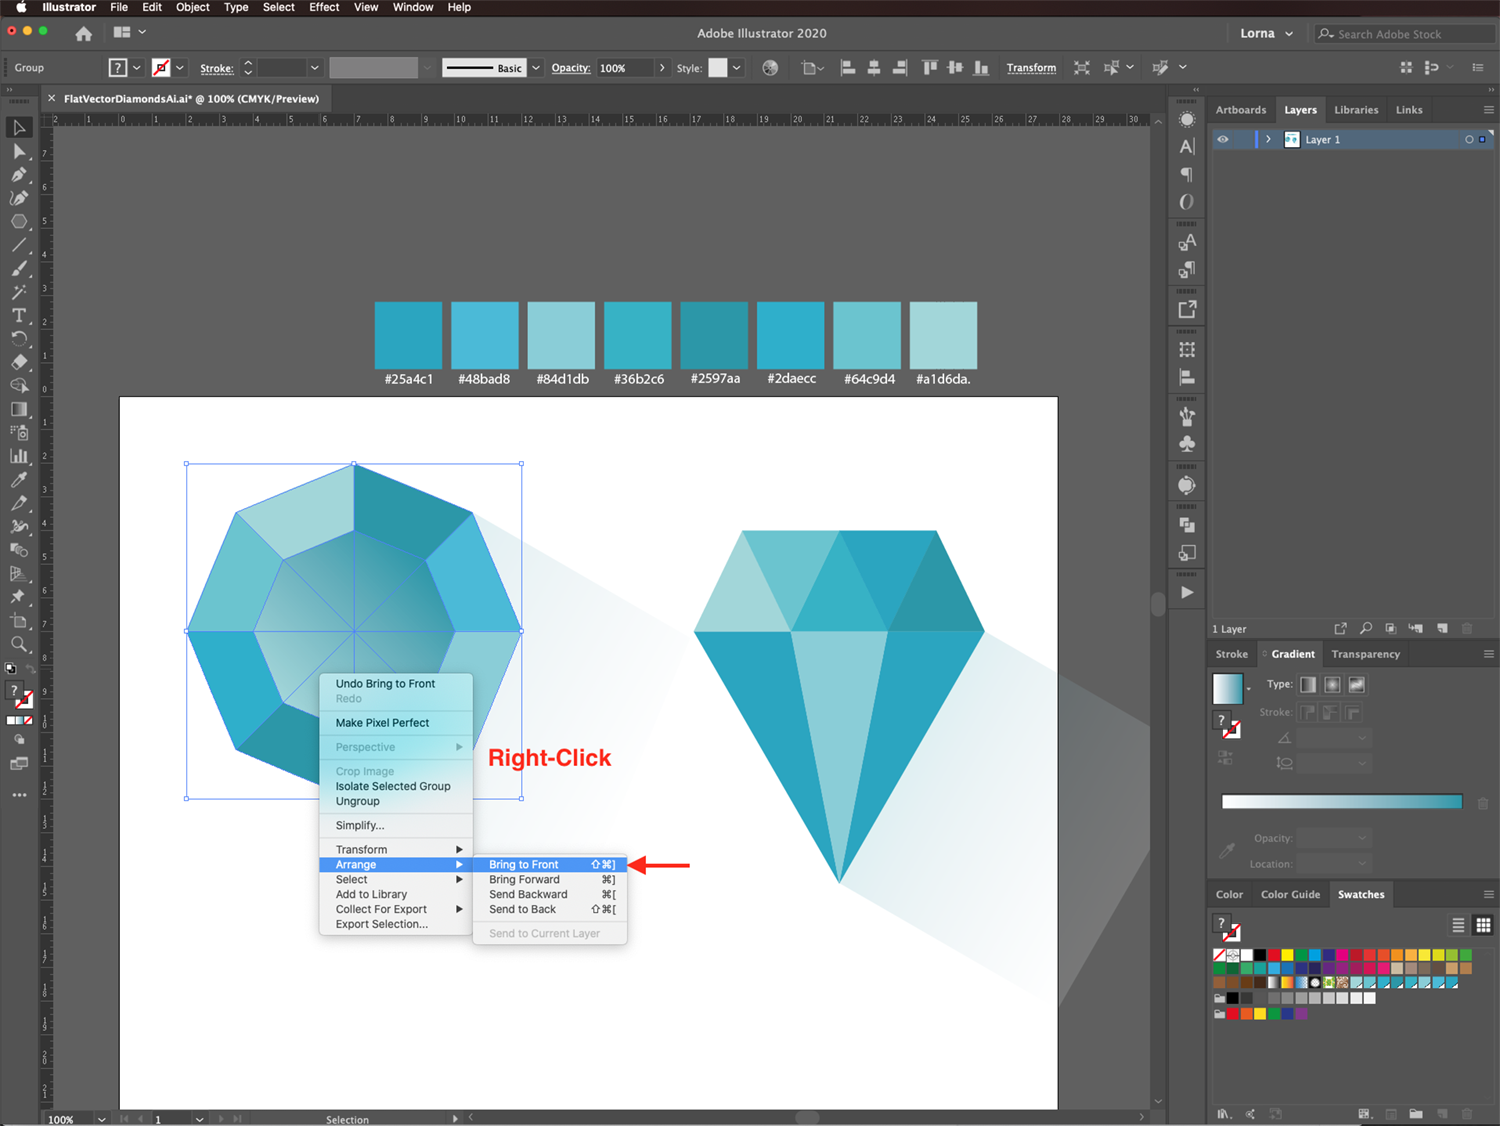
When you are done, select the top view diamond, right-click on top of it and choose Arrange > Bring to Front to place it on top of the shadow.
If you want, you can hide your guides if using Command/Control + ;.
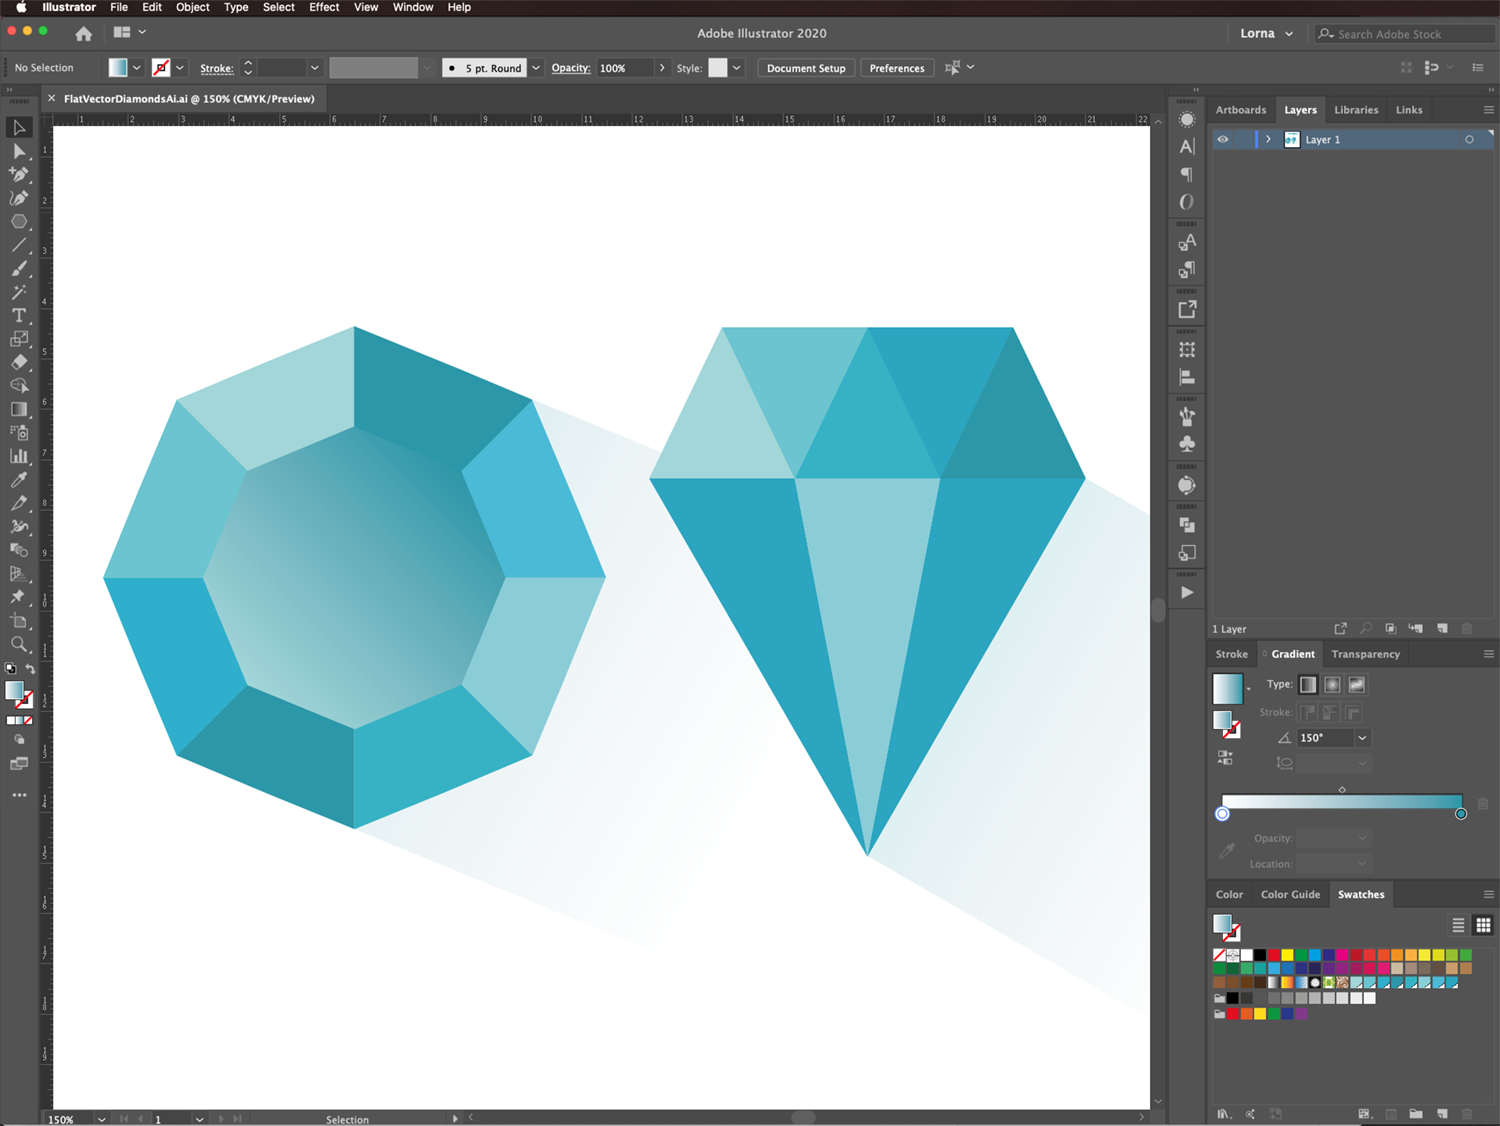
Your Illustrator diamonds should look similar to these. You can use different color palettes to create different types of gems, like red for rubies and green for emeralds, etc. You can also use different polygons (4 sides, 6 sides, etc.) To make other shapes.
If you liked this tutorial, you might also enjoy creating a circle infographic, making an awareness ribbon, and making a flat character in Illustrator.


