
Vector Notebook in Illustrator
1 - In Illustrator, create a “New Document”.

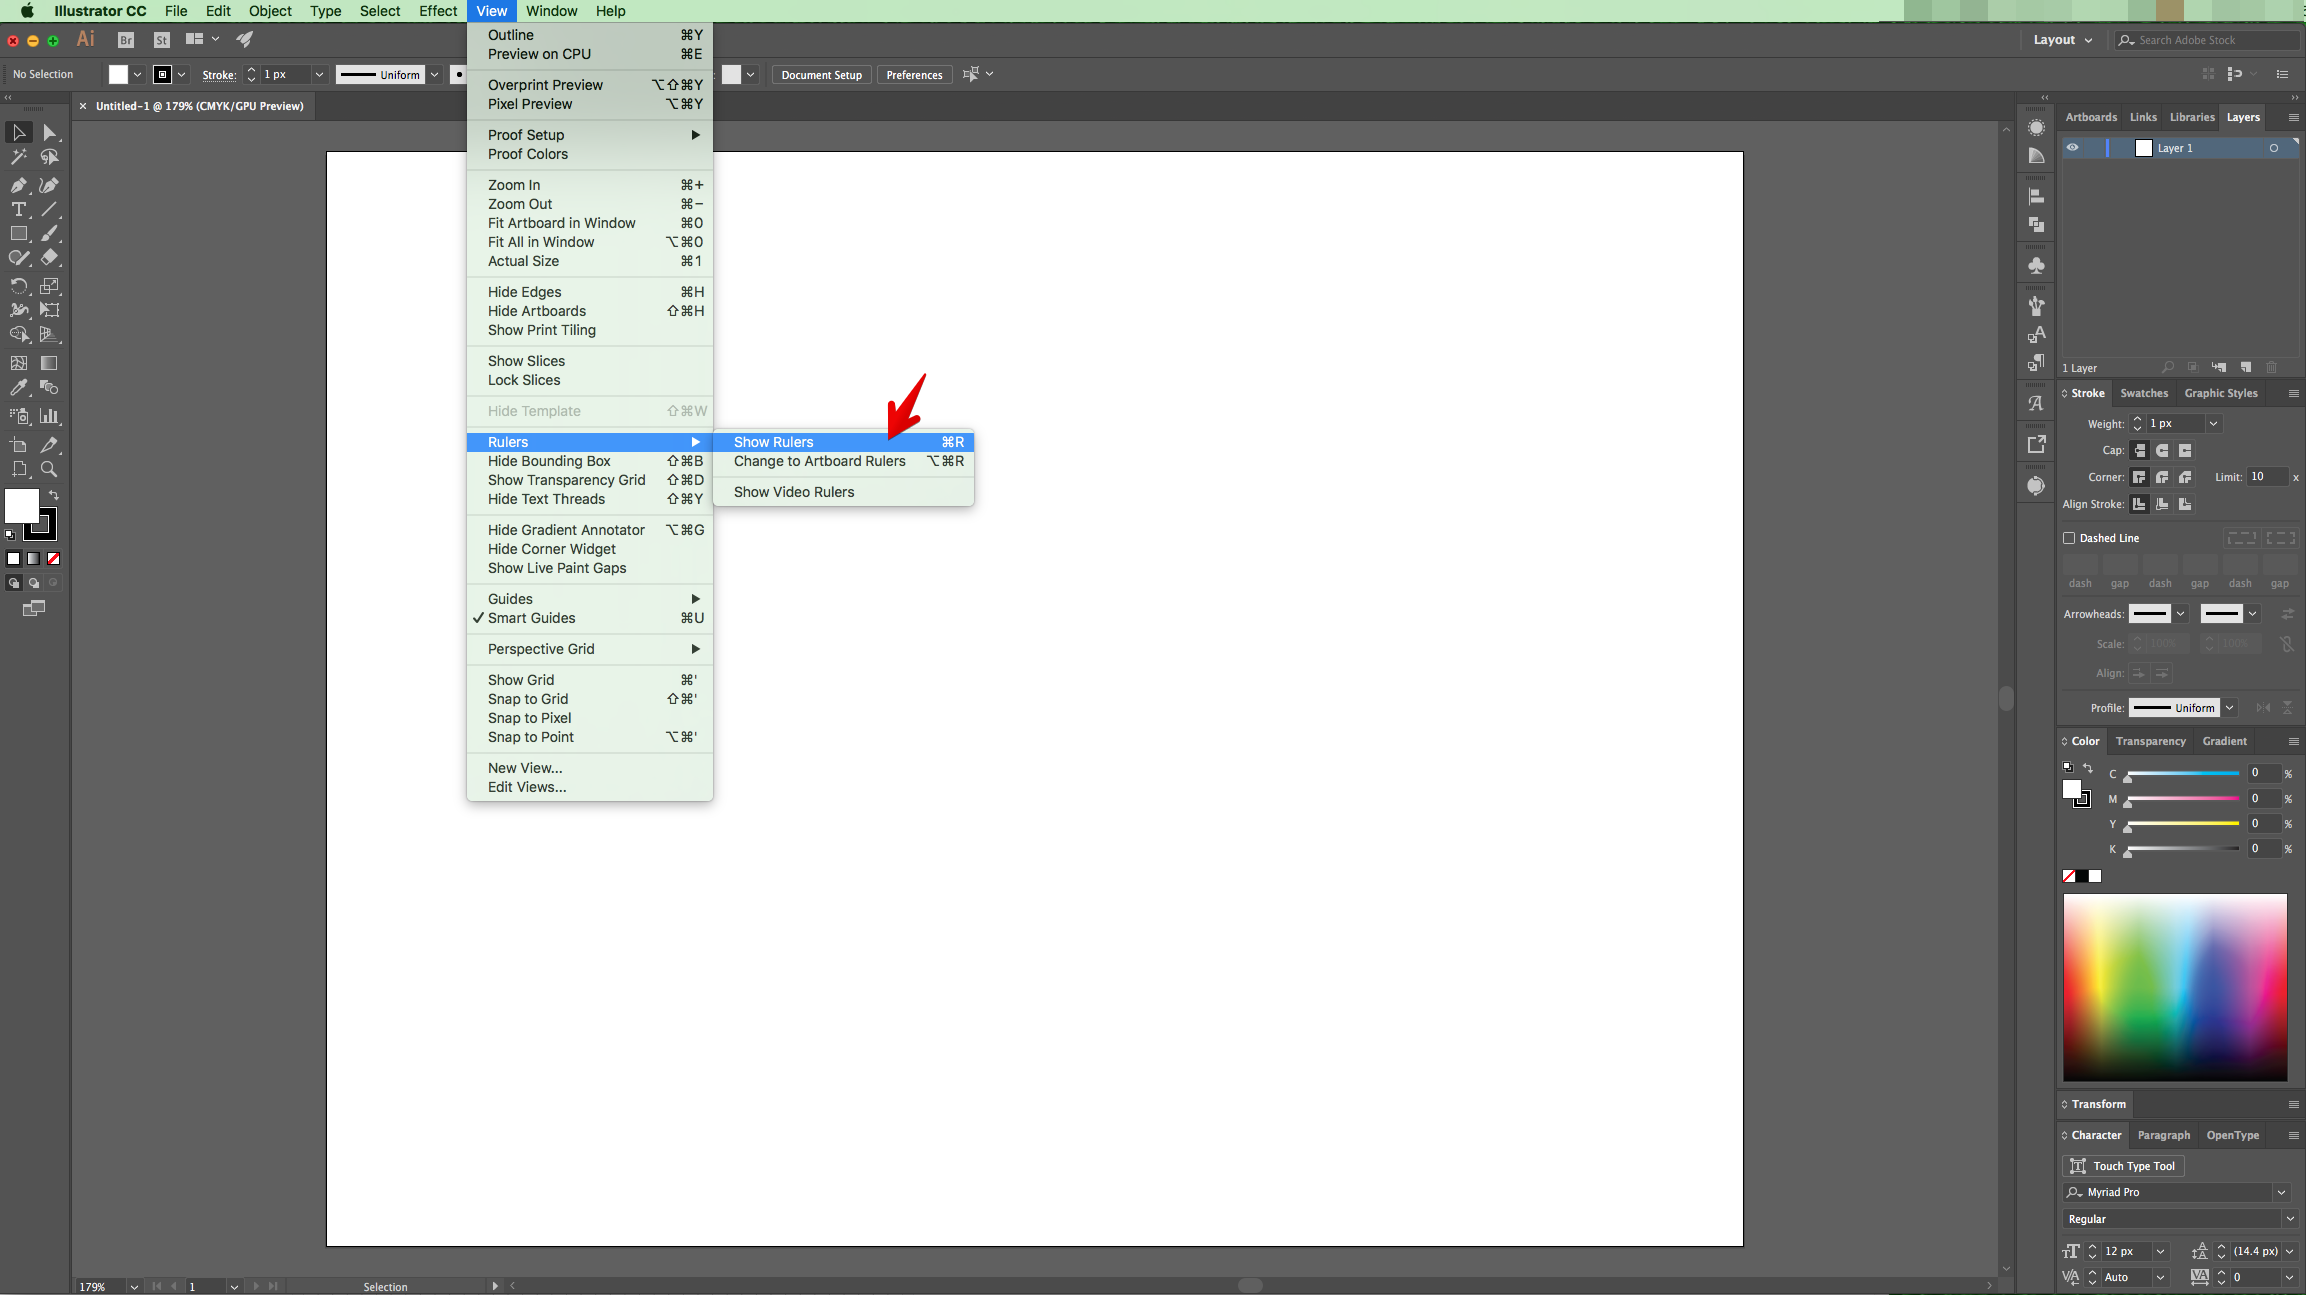
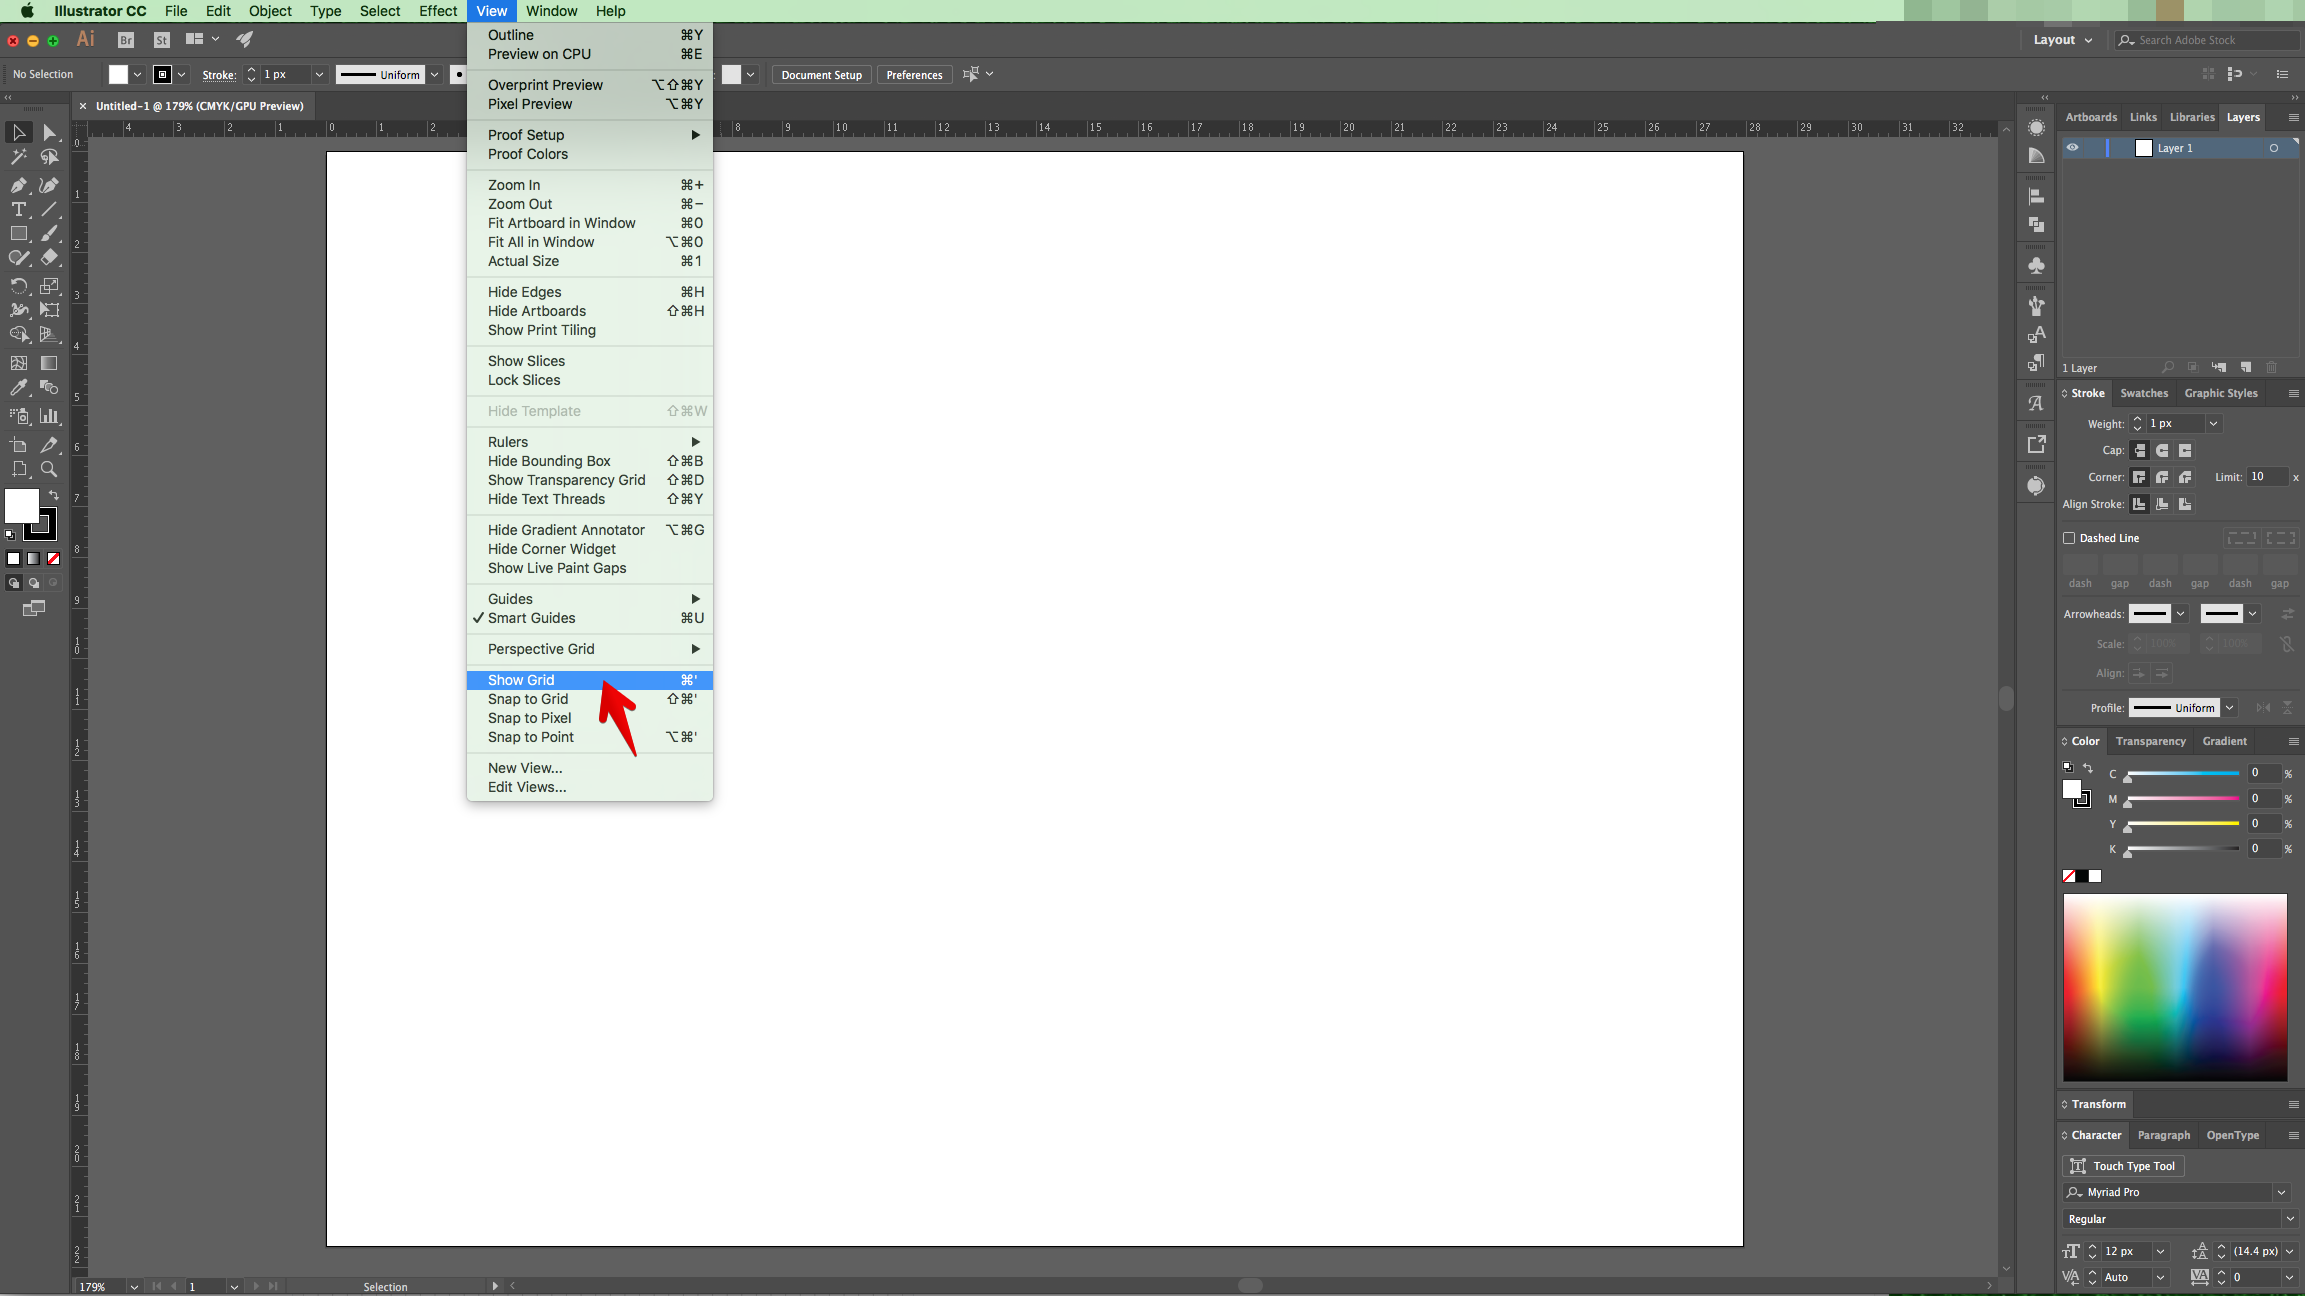
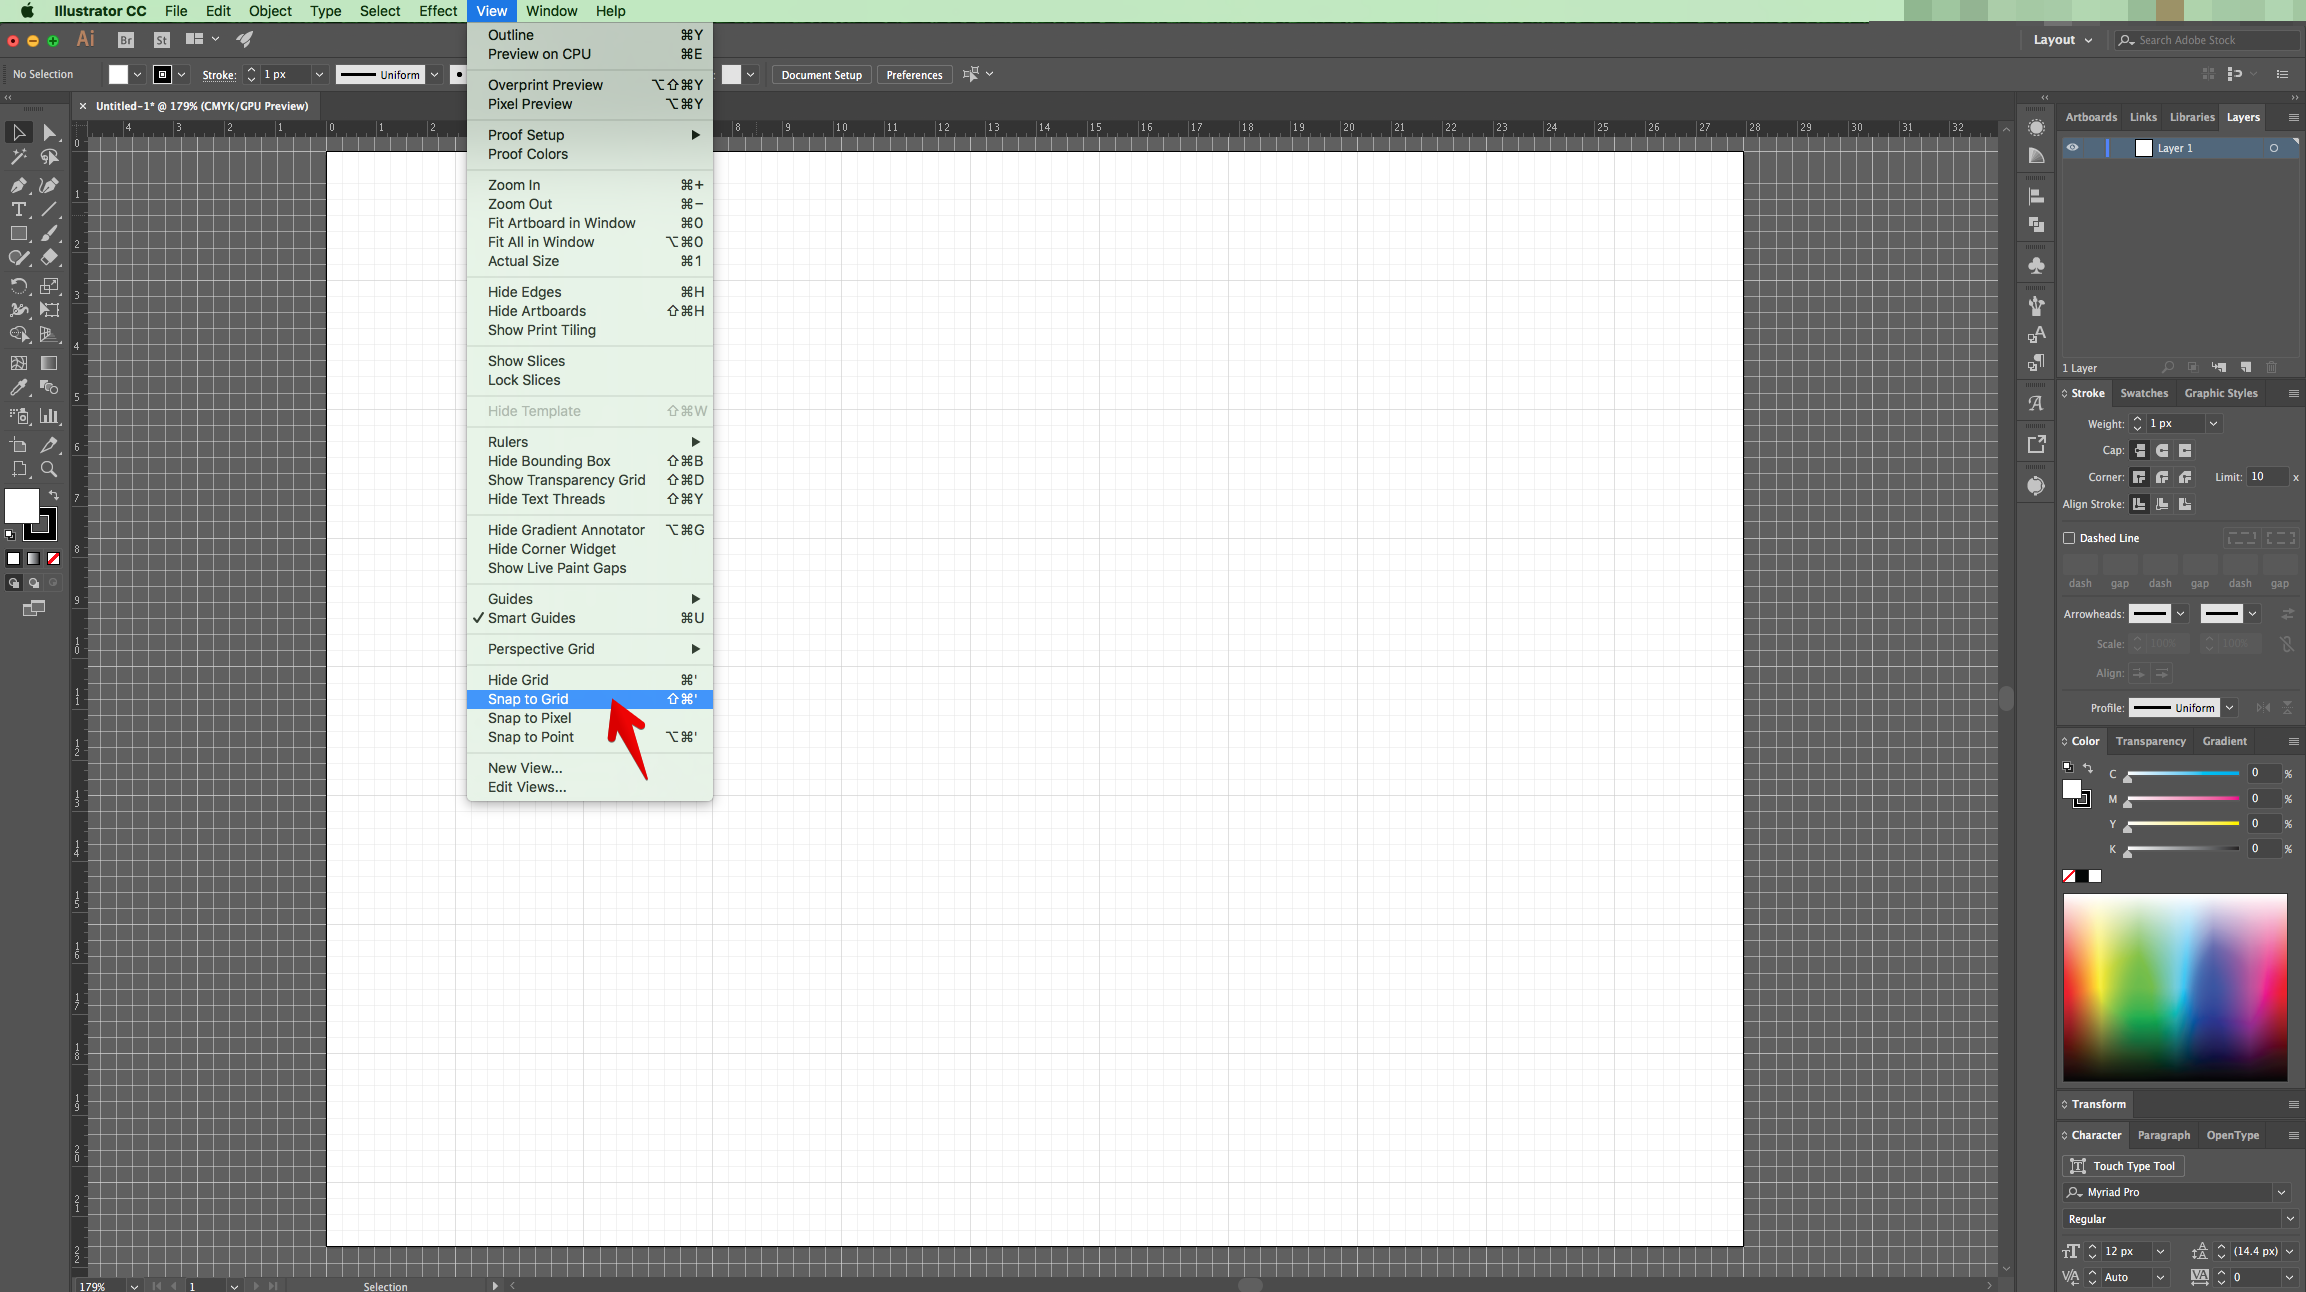
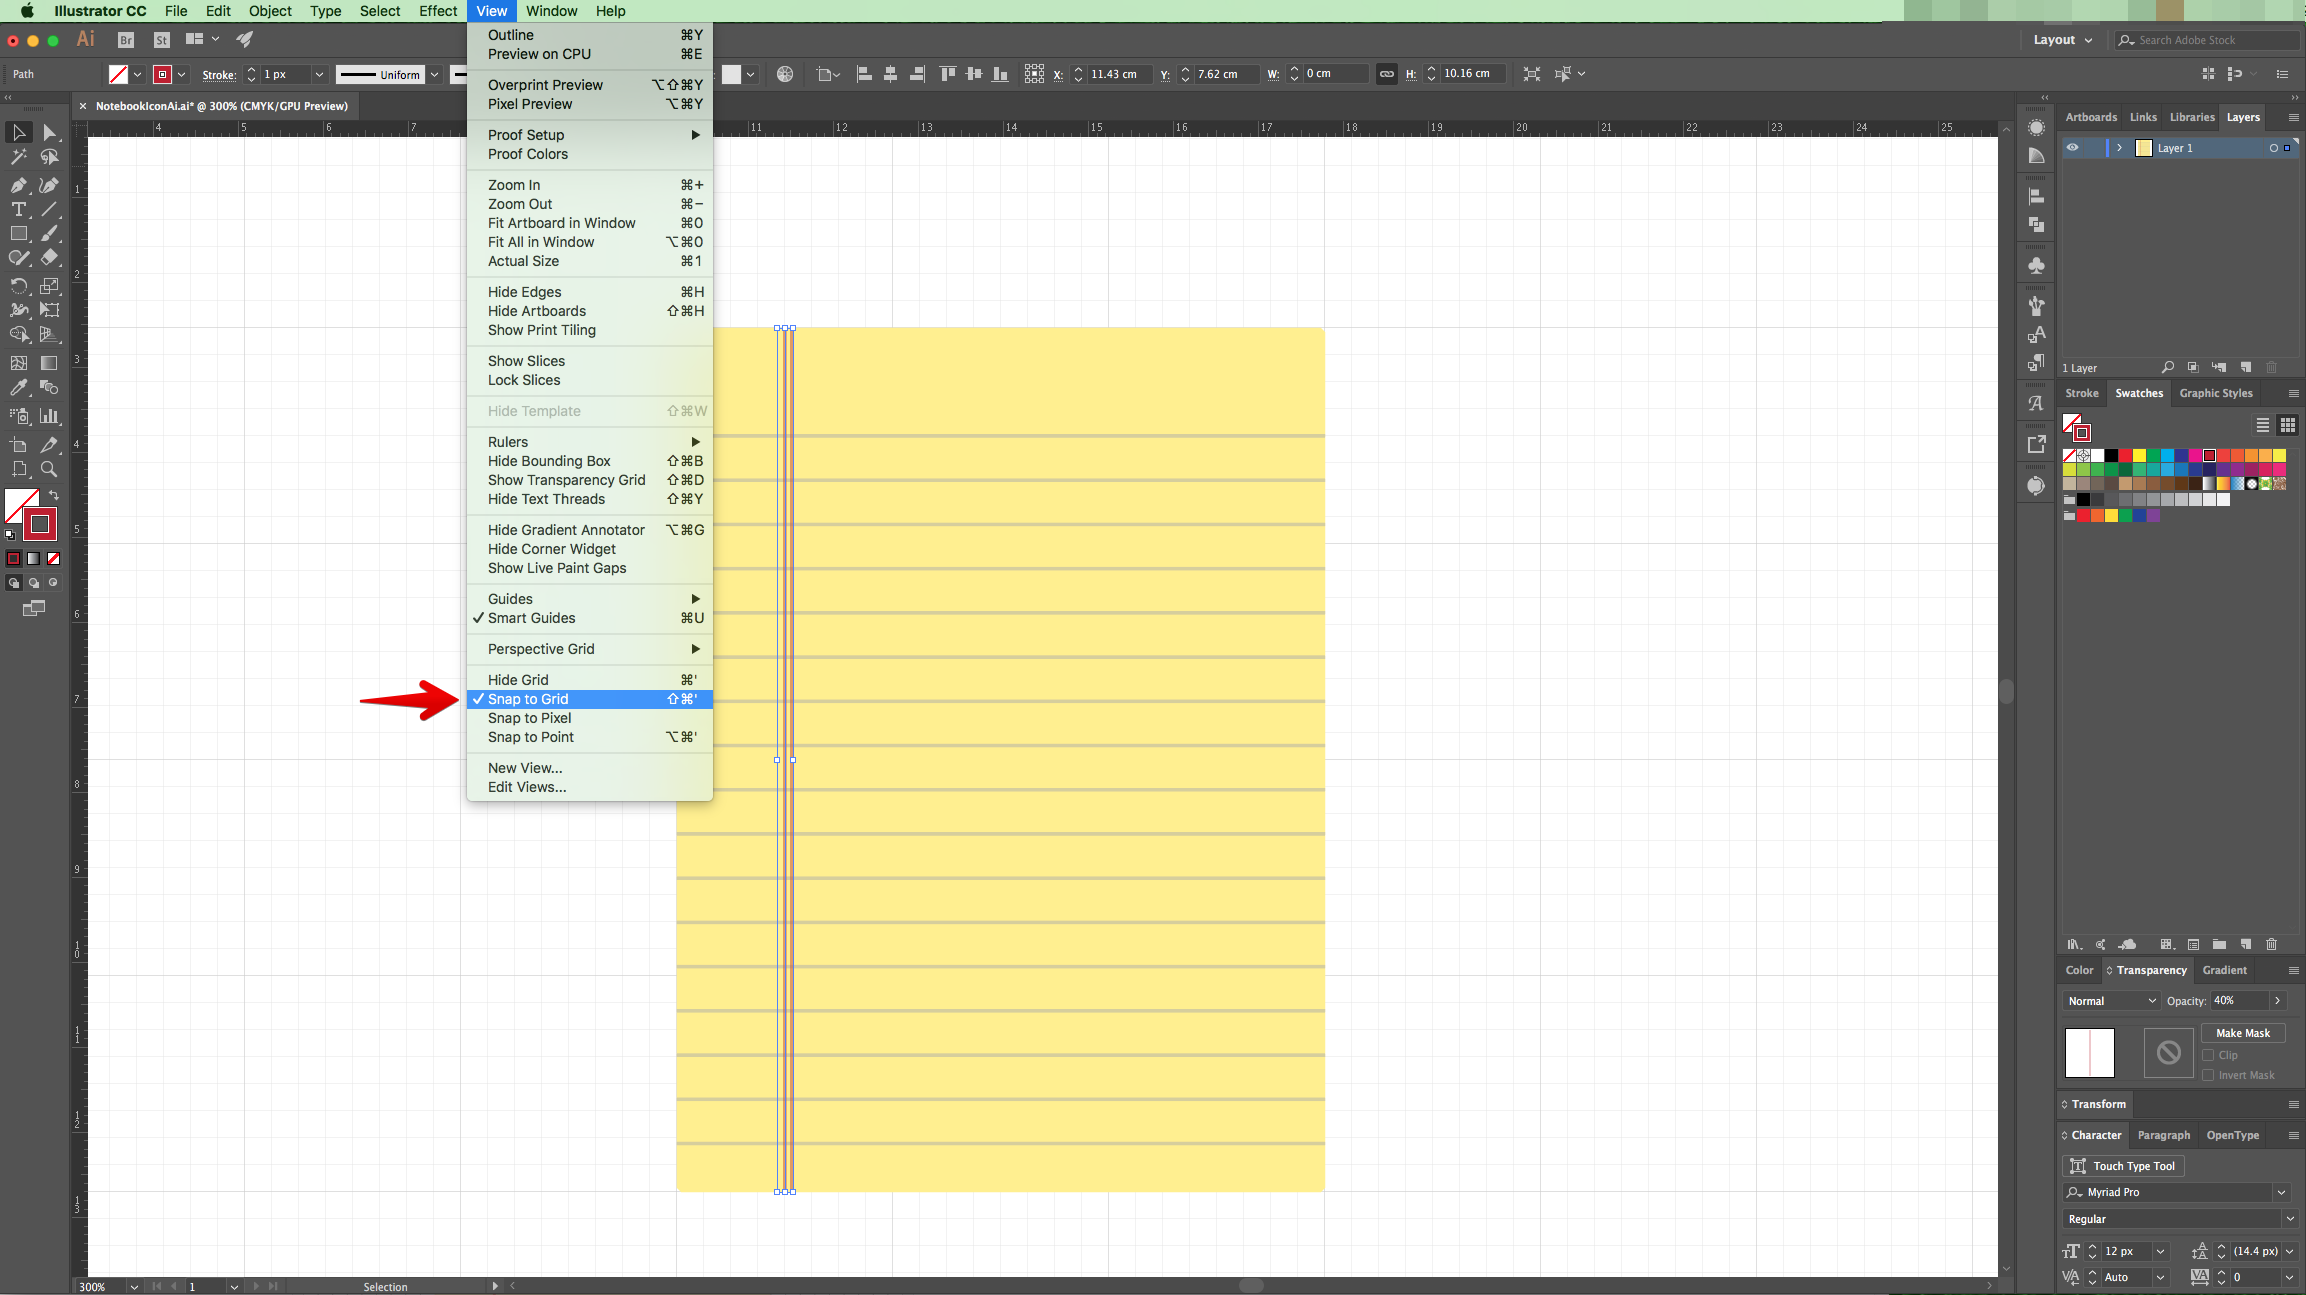
2 - If the “Rulers” are not enabled, go to View > Rulers > Show Rulers (Command/Control + R) to turn them ON. Also, bring out the “Grid” (View > Show Grid) and enable “Snap to Grid” (View > Snap to Grid).
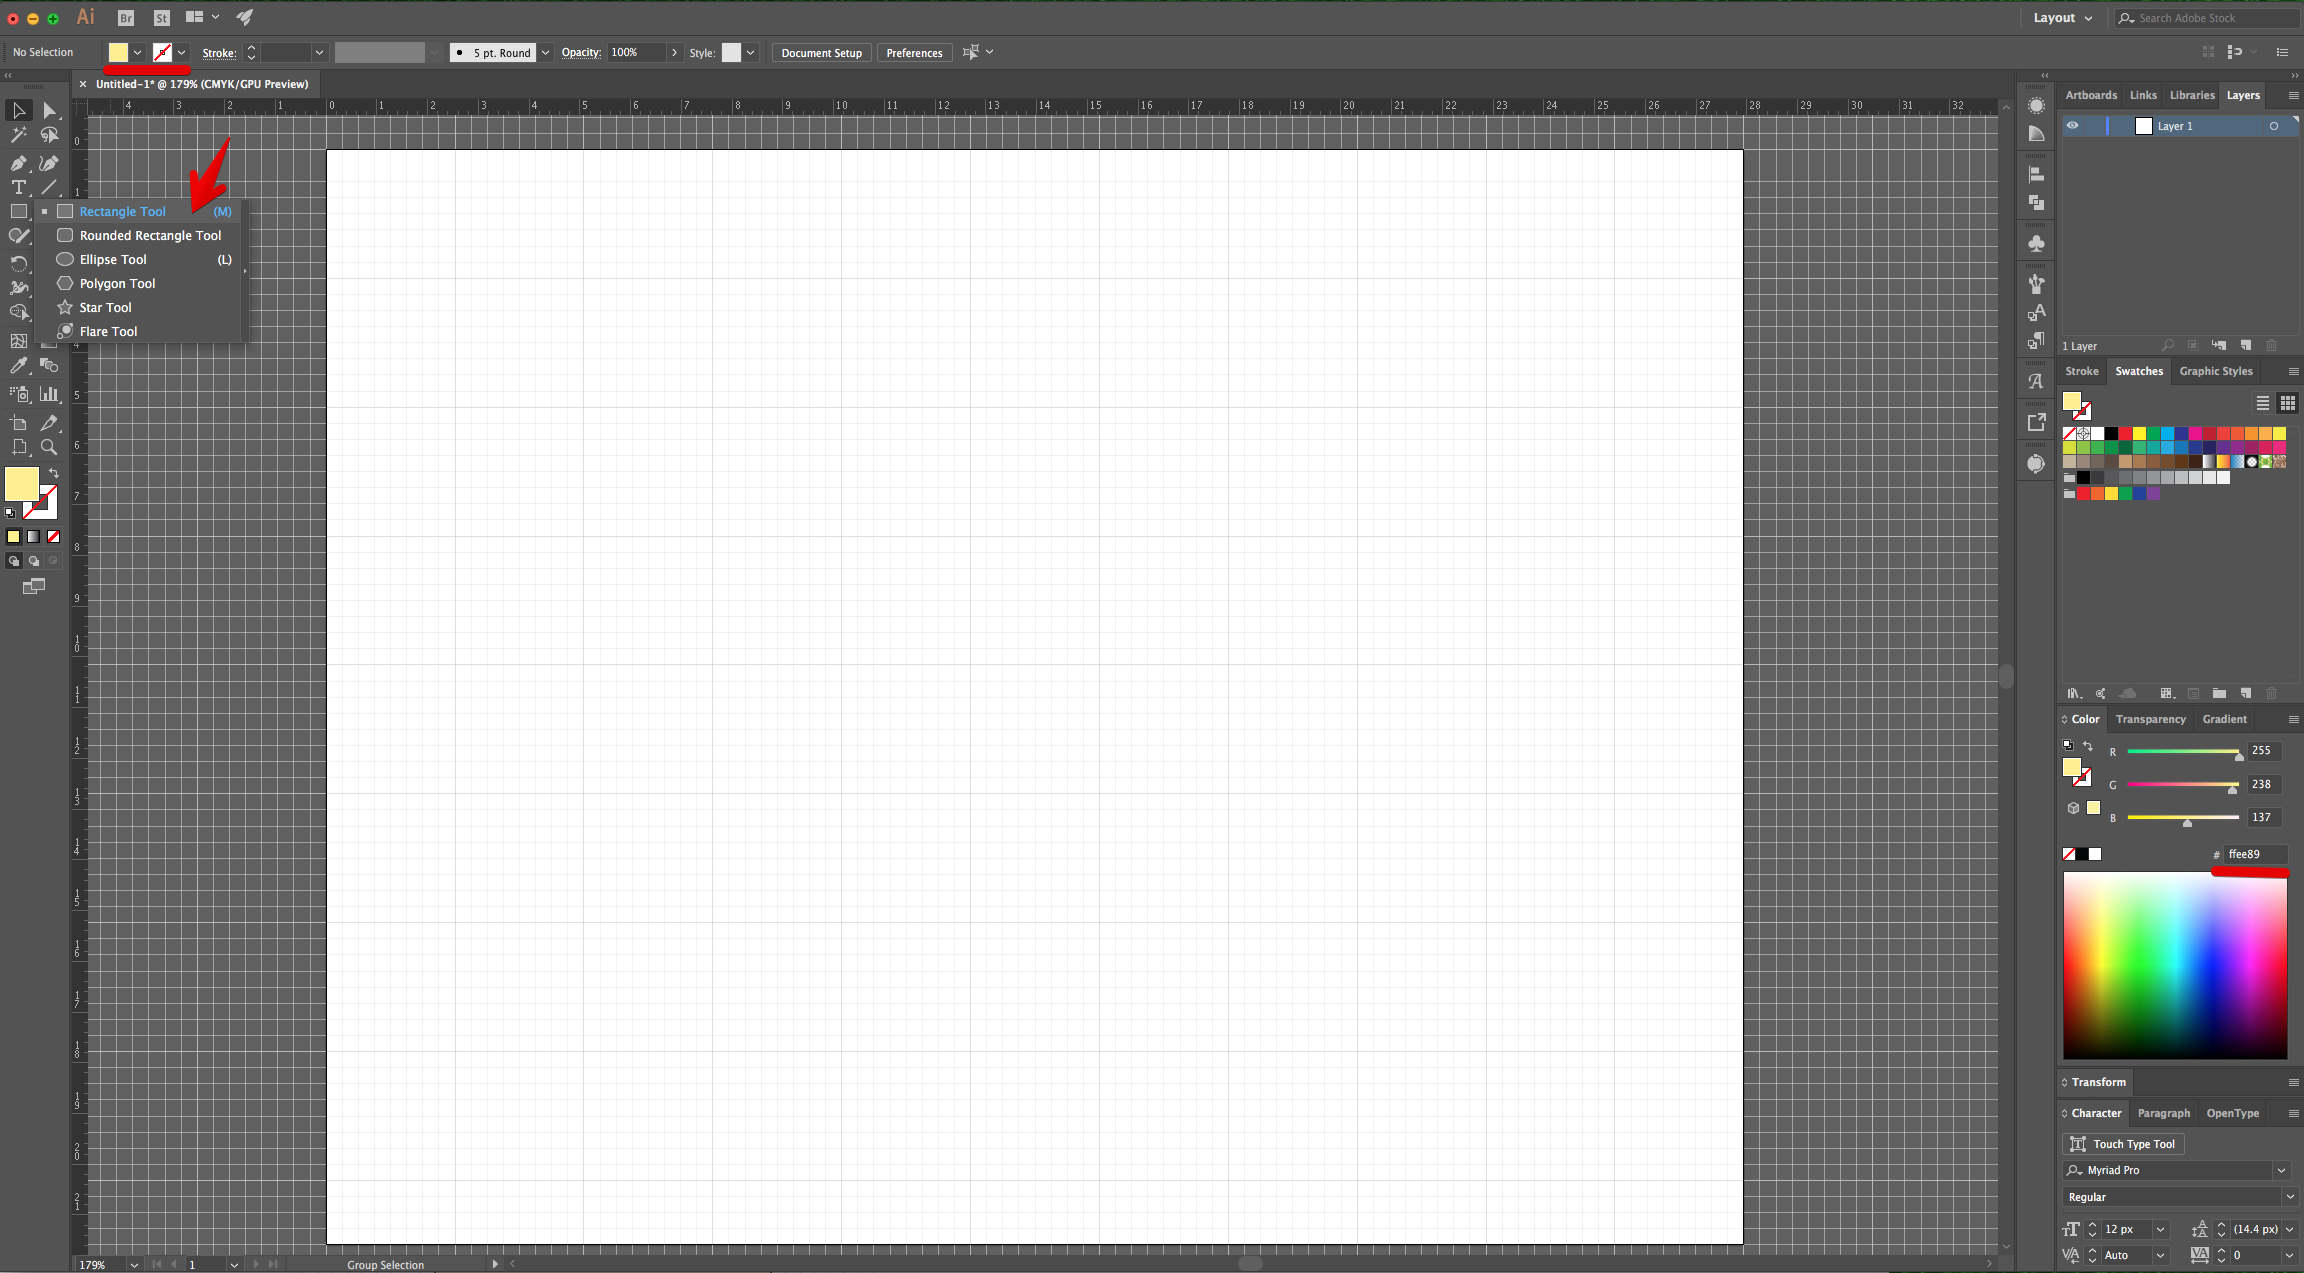
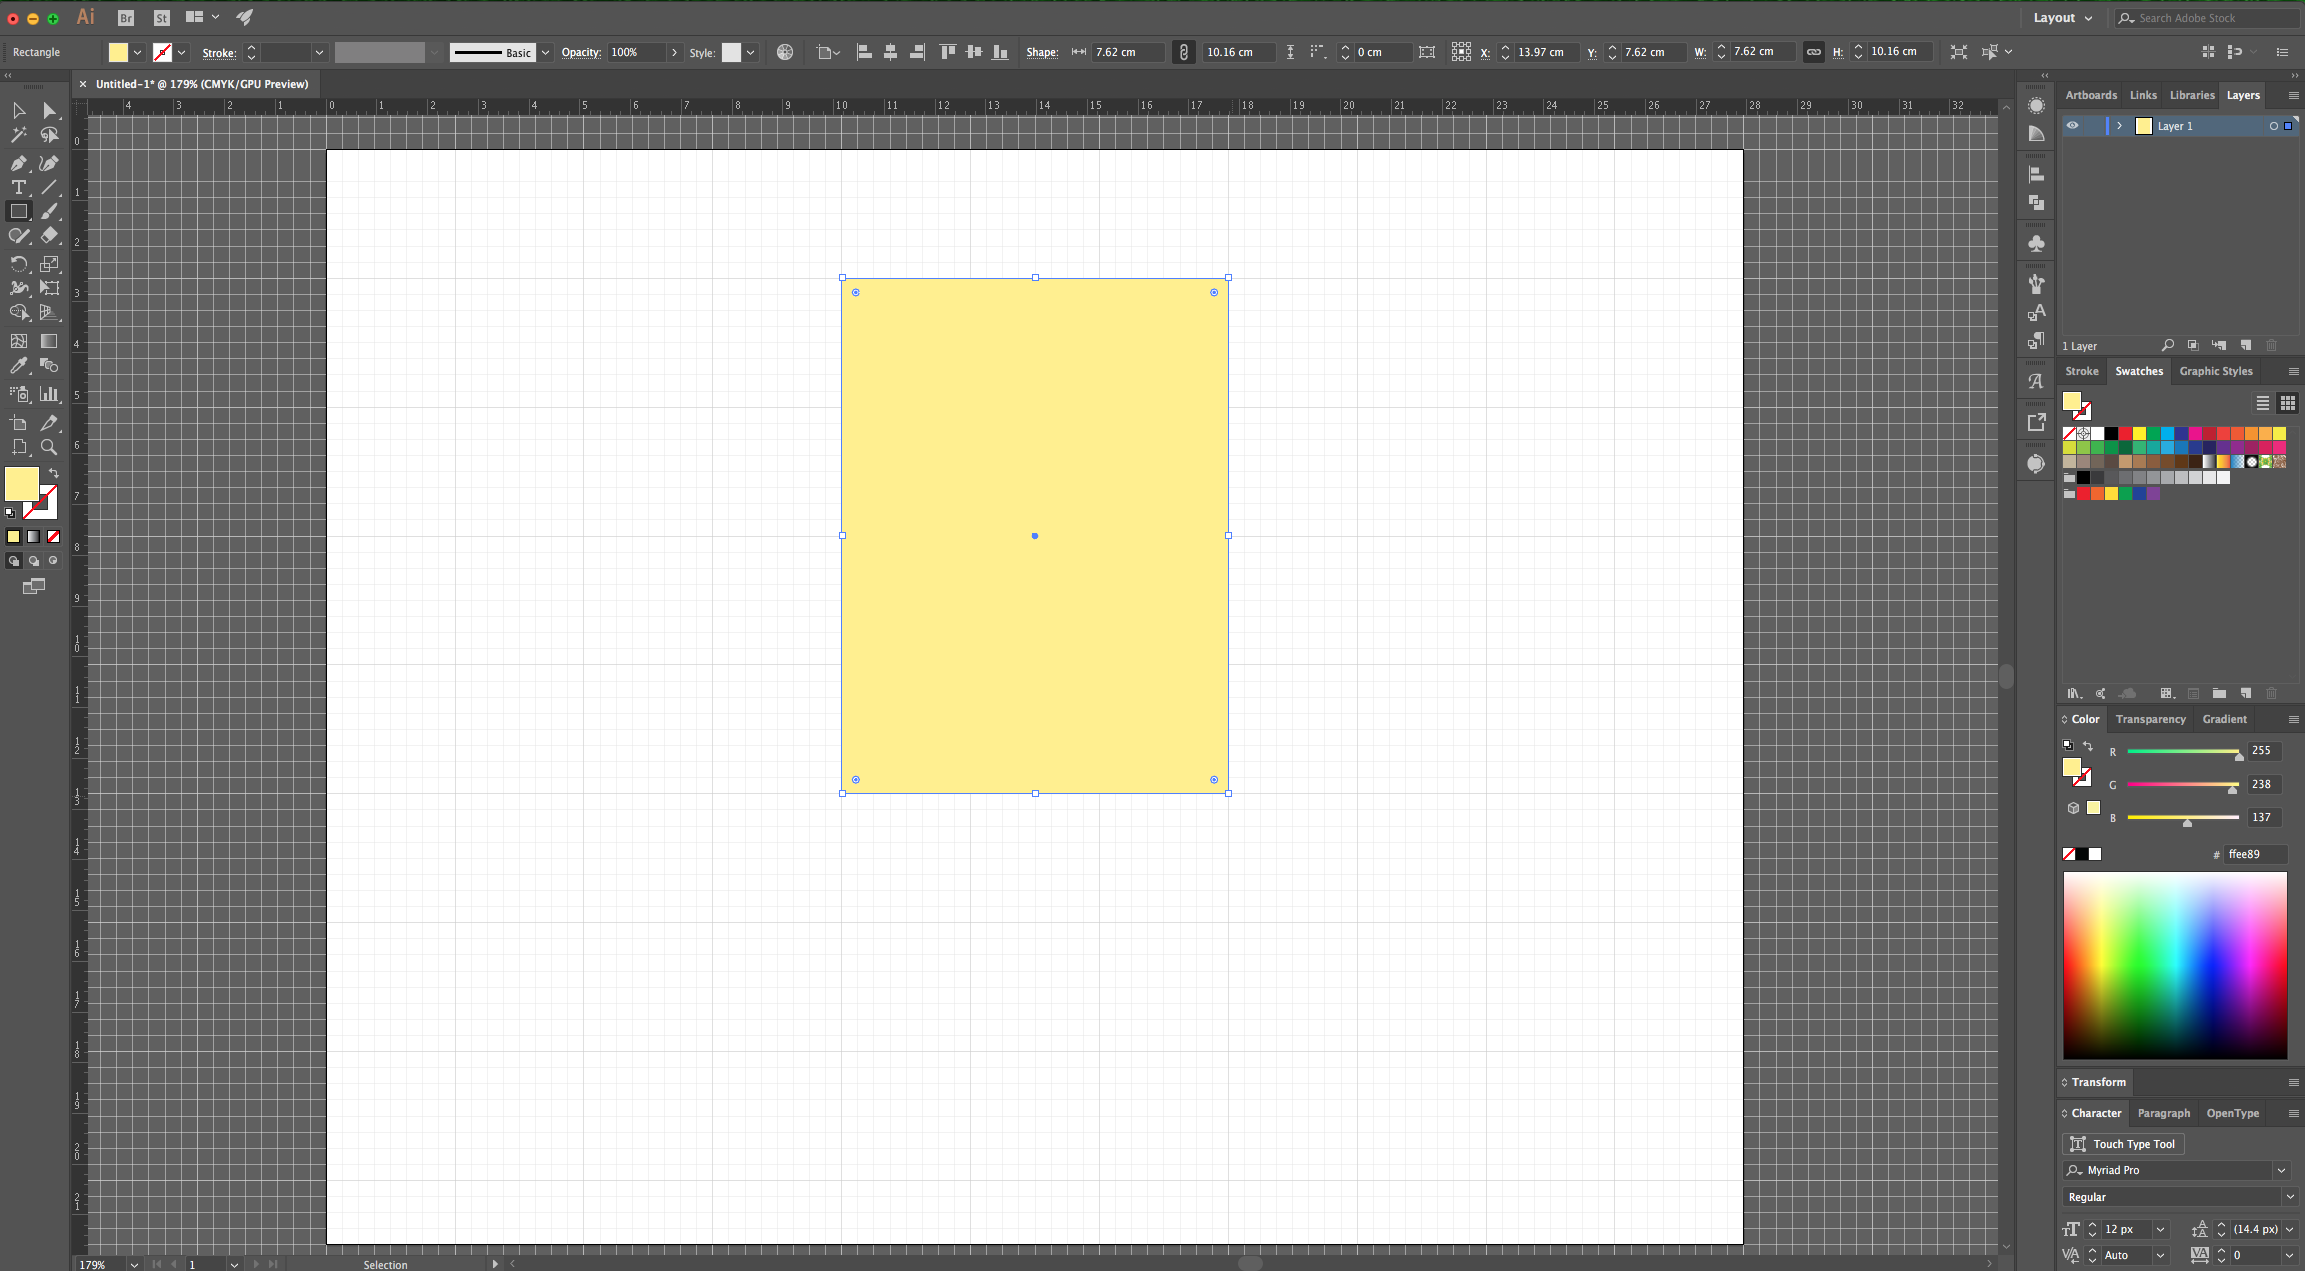
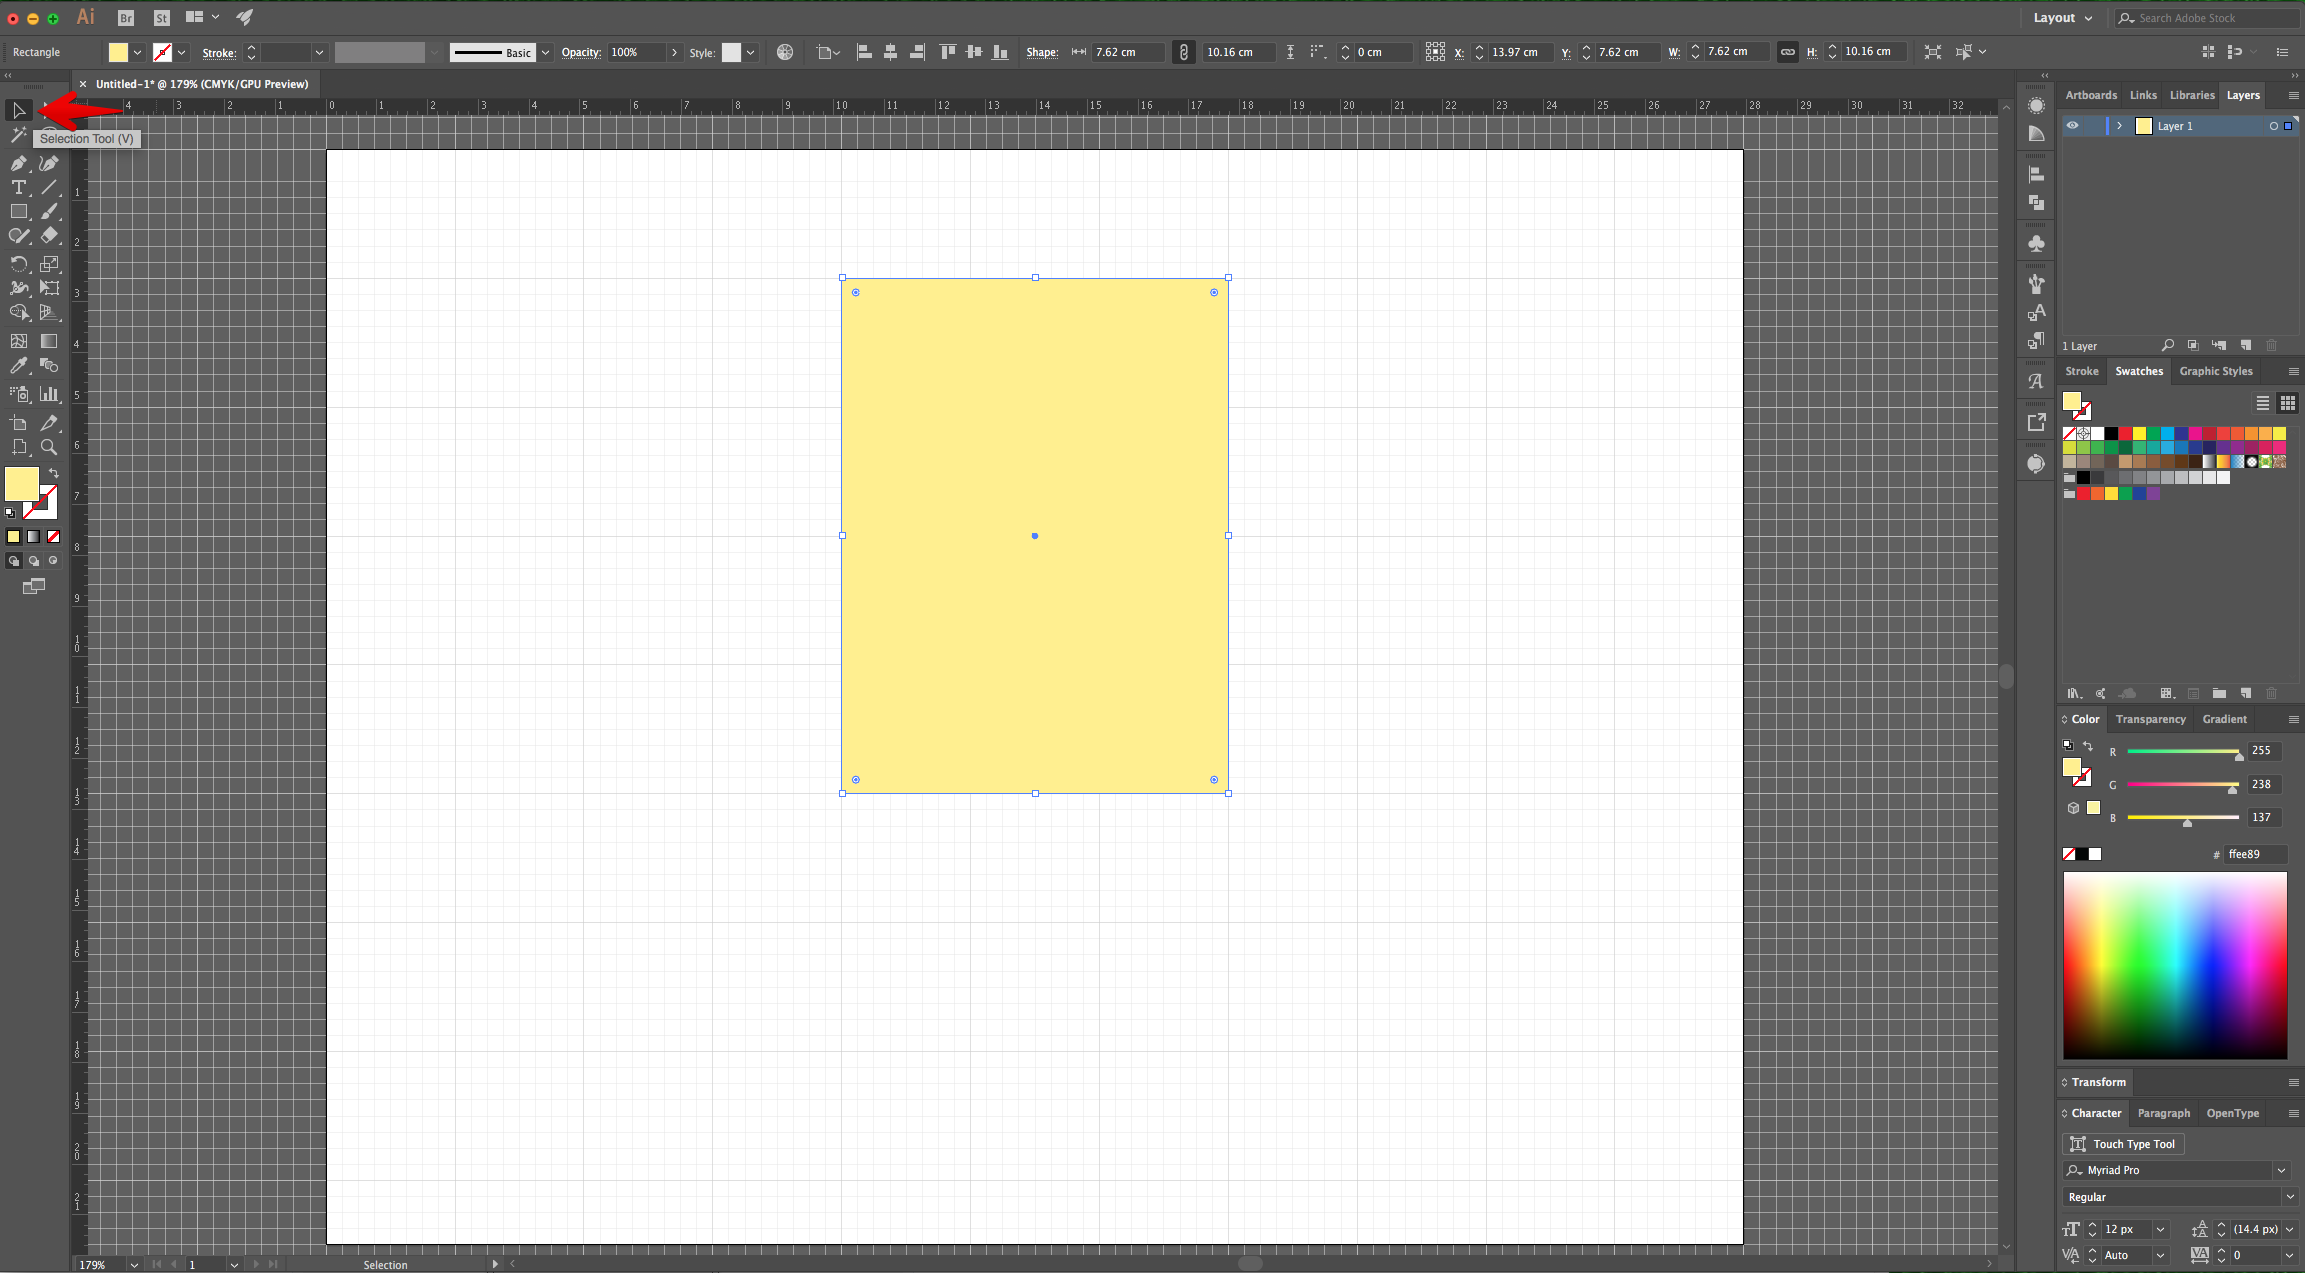
3 - Use the “Rectangle Tool” (M), click and drag down and right inside the “Canvas” to create a “Rectangular” shape (about 3 x 4 Grid quadrants). Fill it with a Yellow shade (#ff3389).
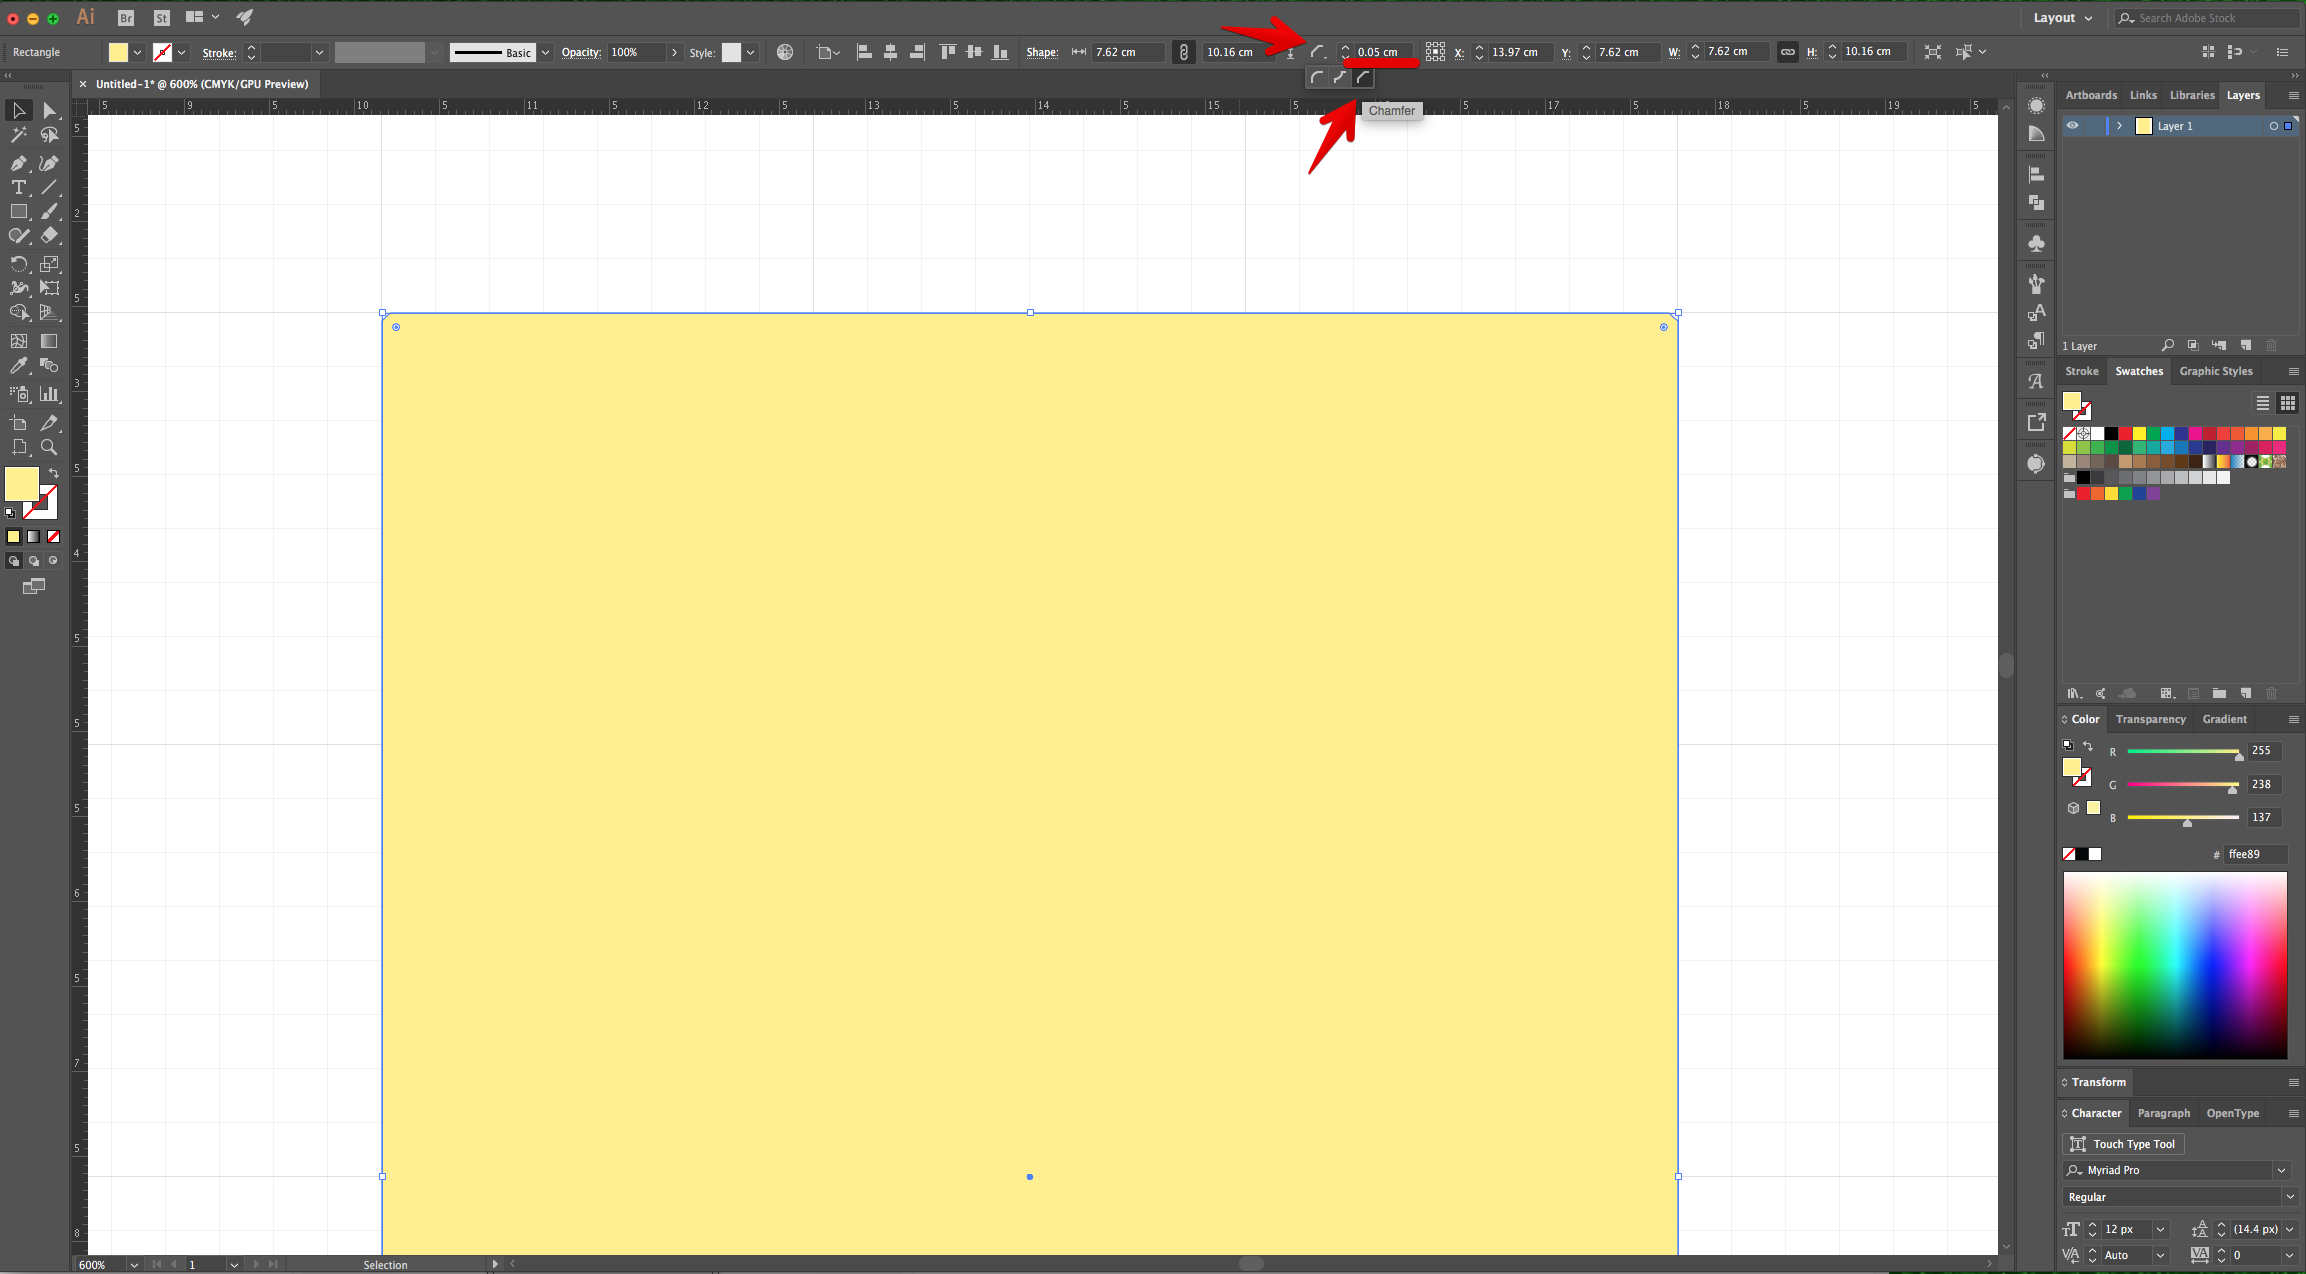
4 - Make sure the shape is selected and change the shape of the “Corners” to “Chamfer” of 0.05 cm.
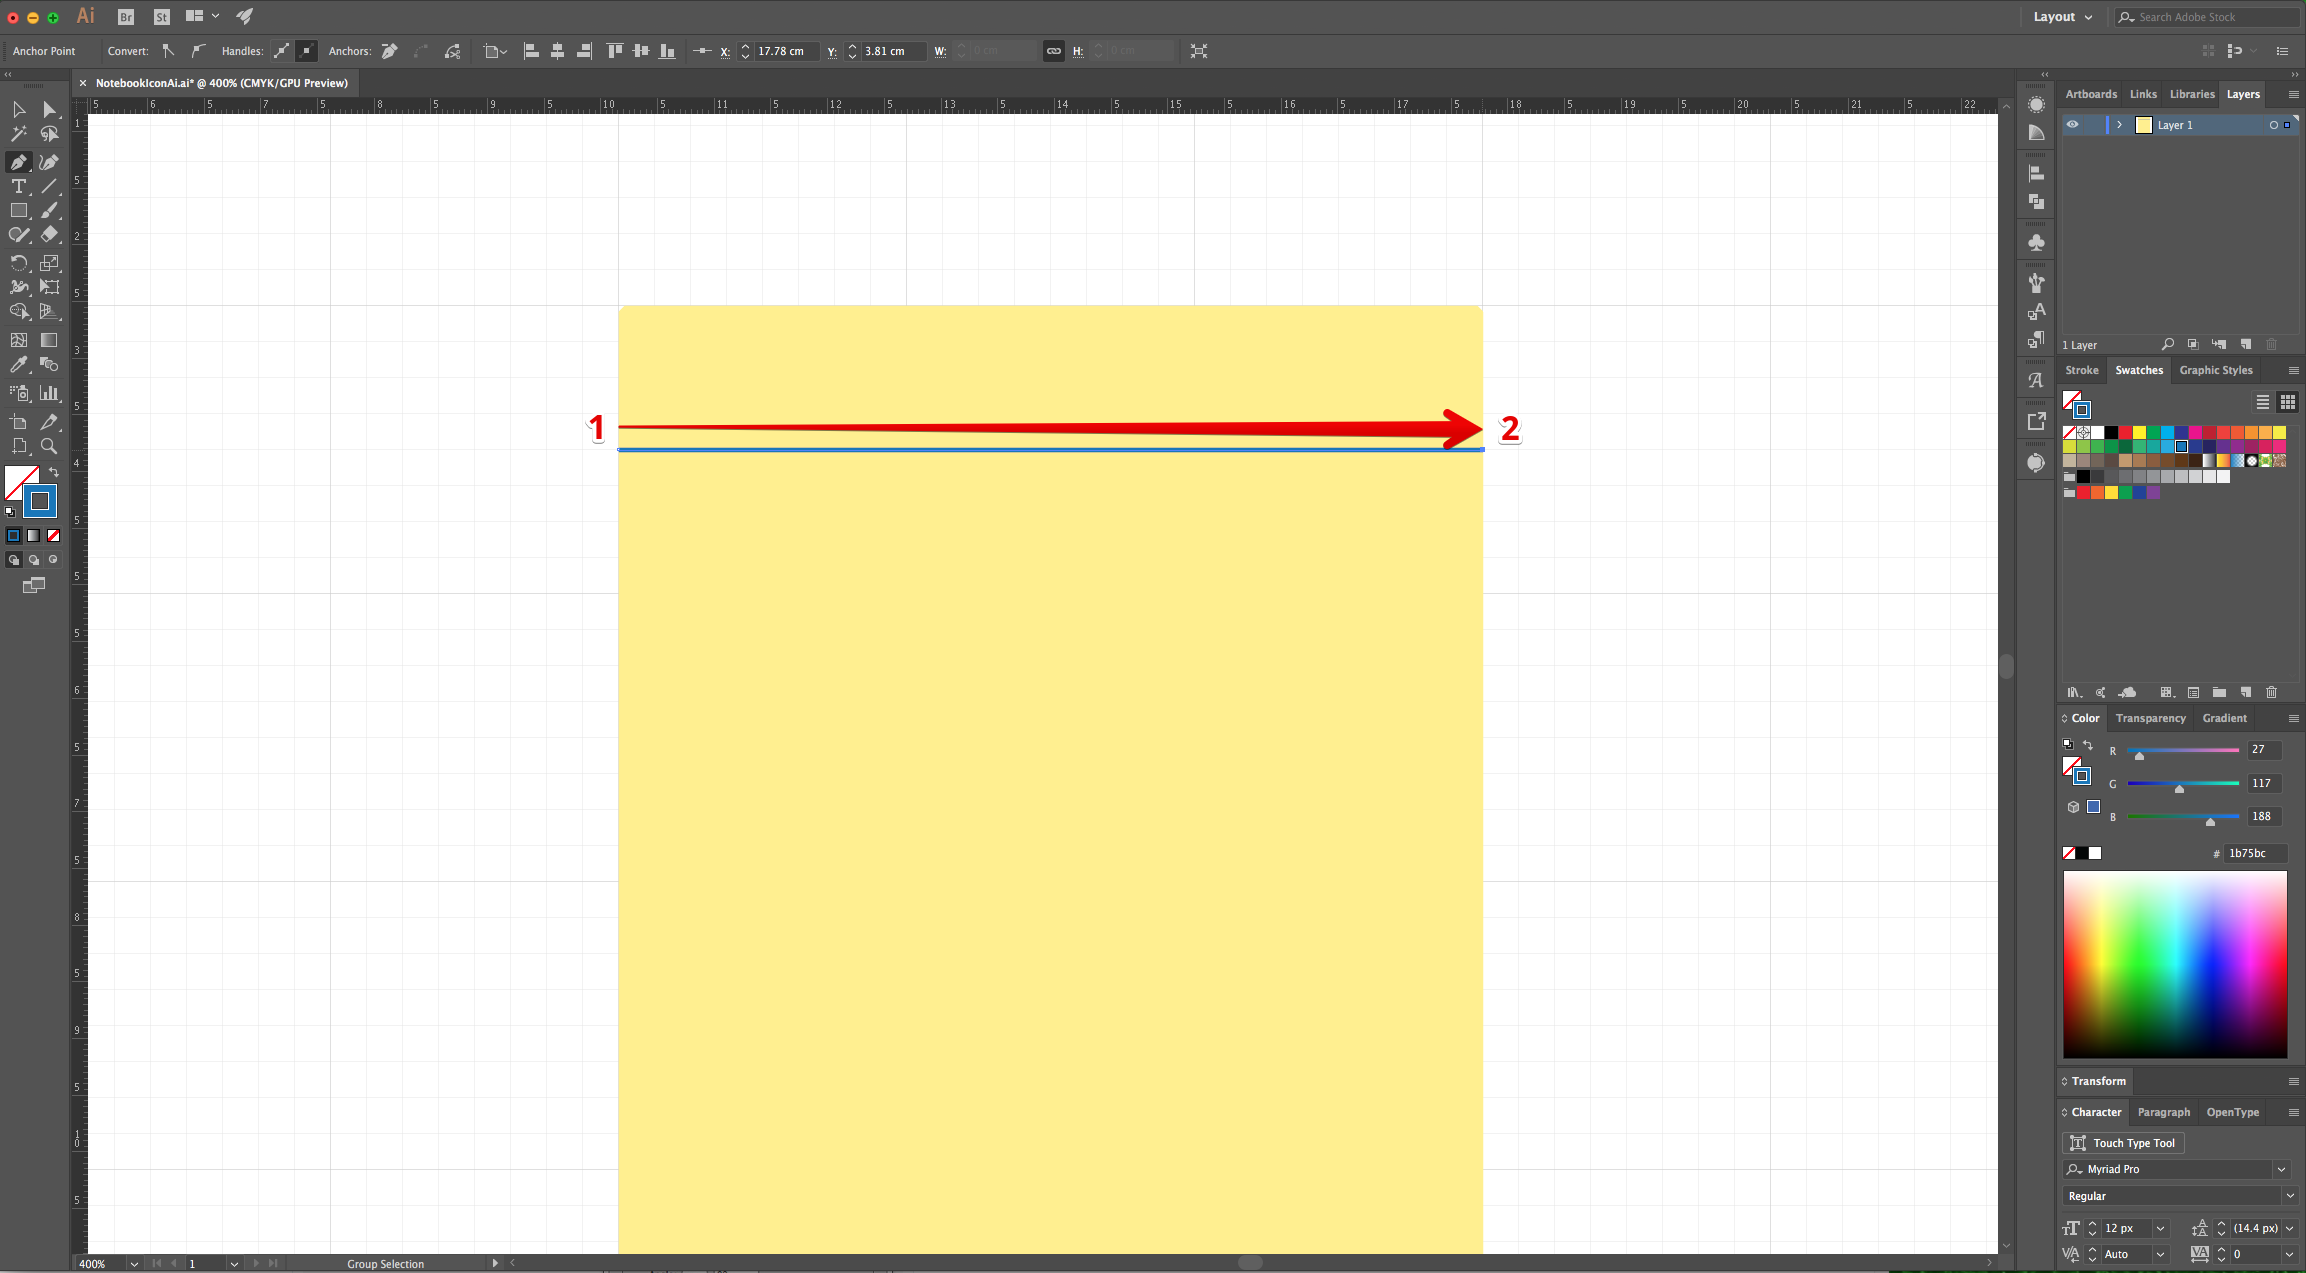
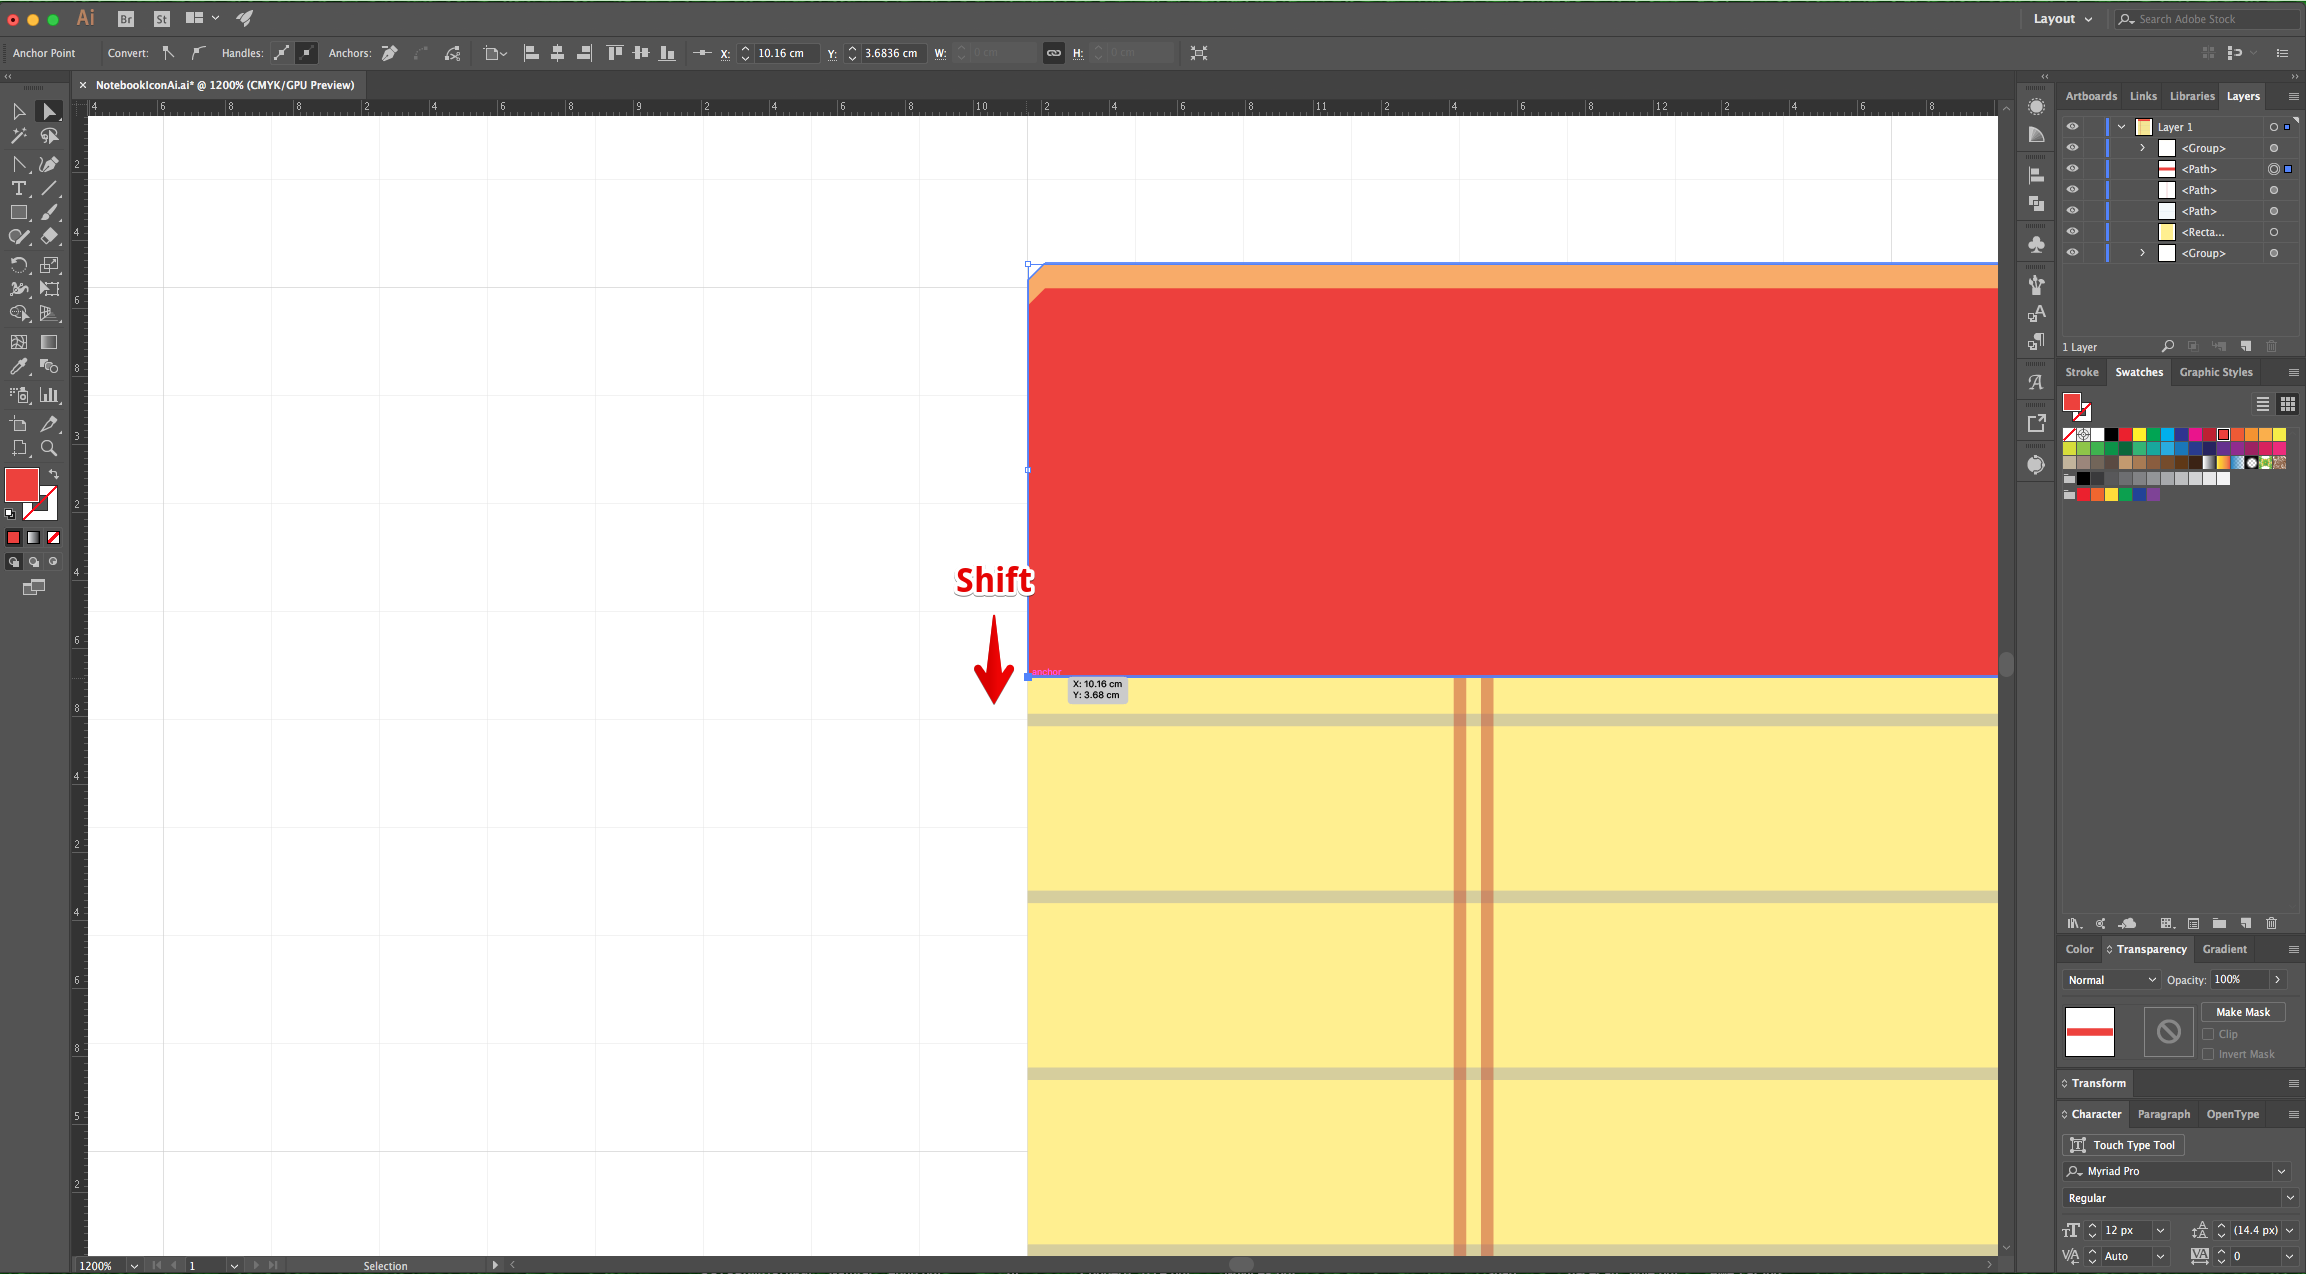
5 - Use the “Pen Tool” (P) to draw a Blue (#1b75bc) horizontal line covering the entire length of your shape. Make sure its straight by holding the “Shift” key while drawing it and place it at about 2 cm from the top of the rectangle.
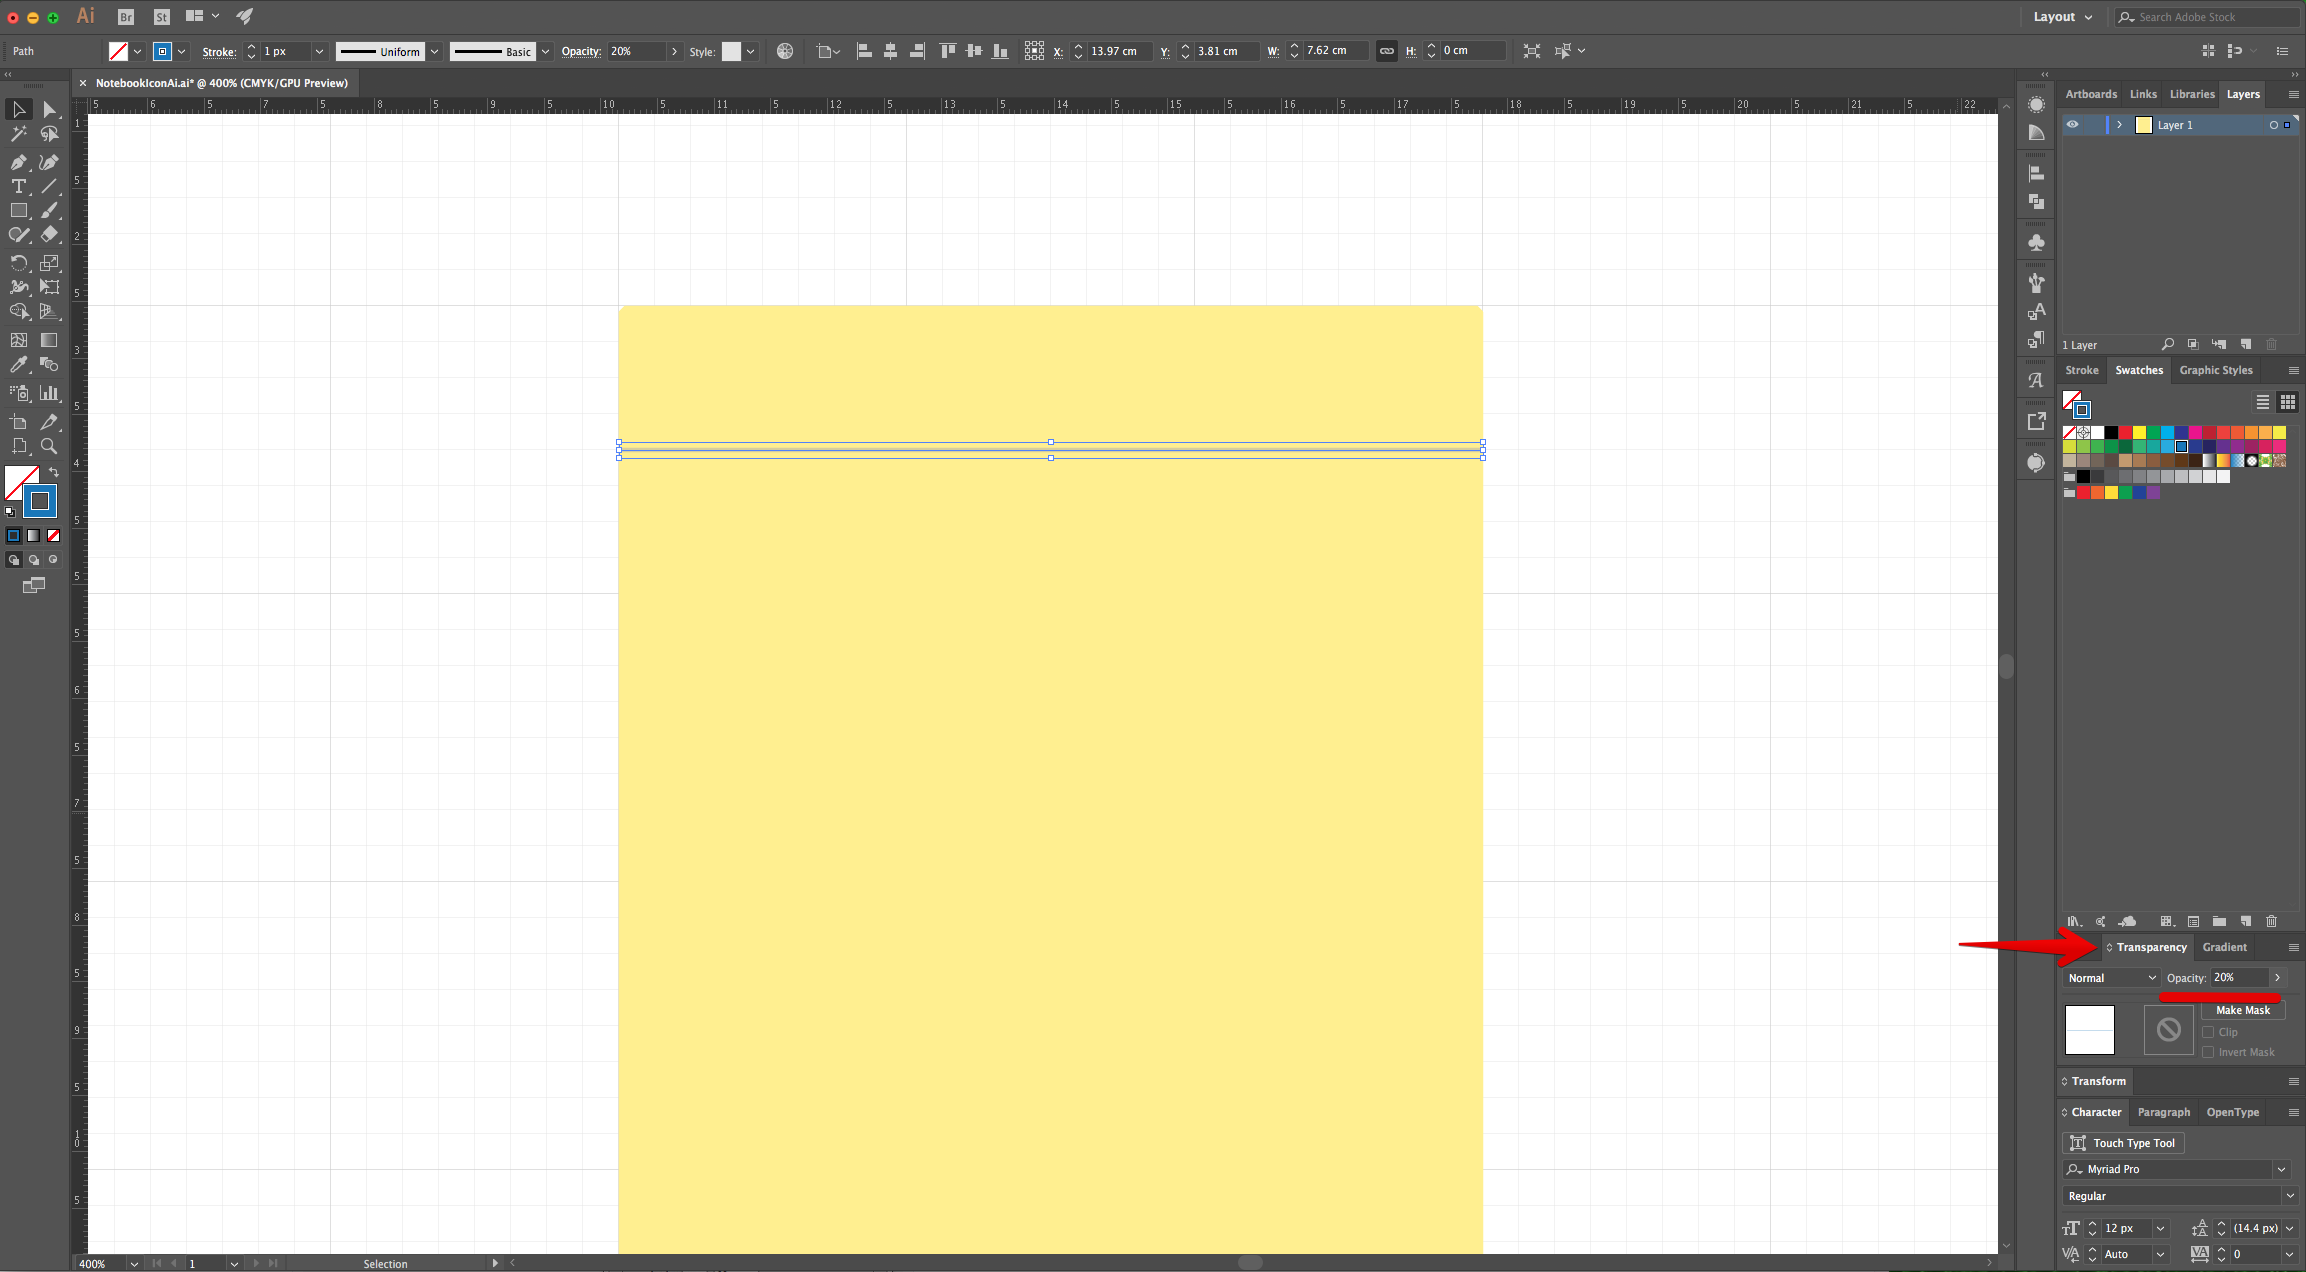
6 - In the “Transparency Panel” change the “Opacity” to 20%.
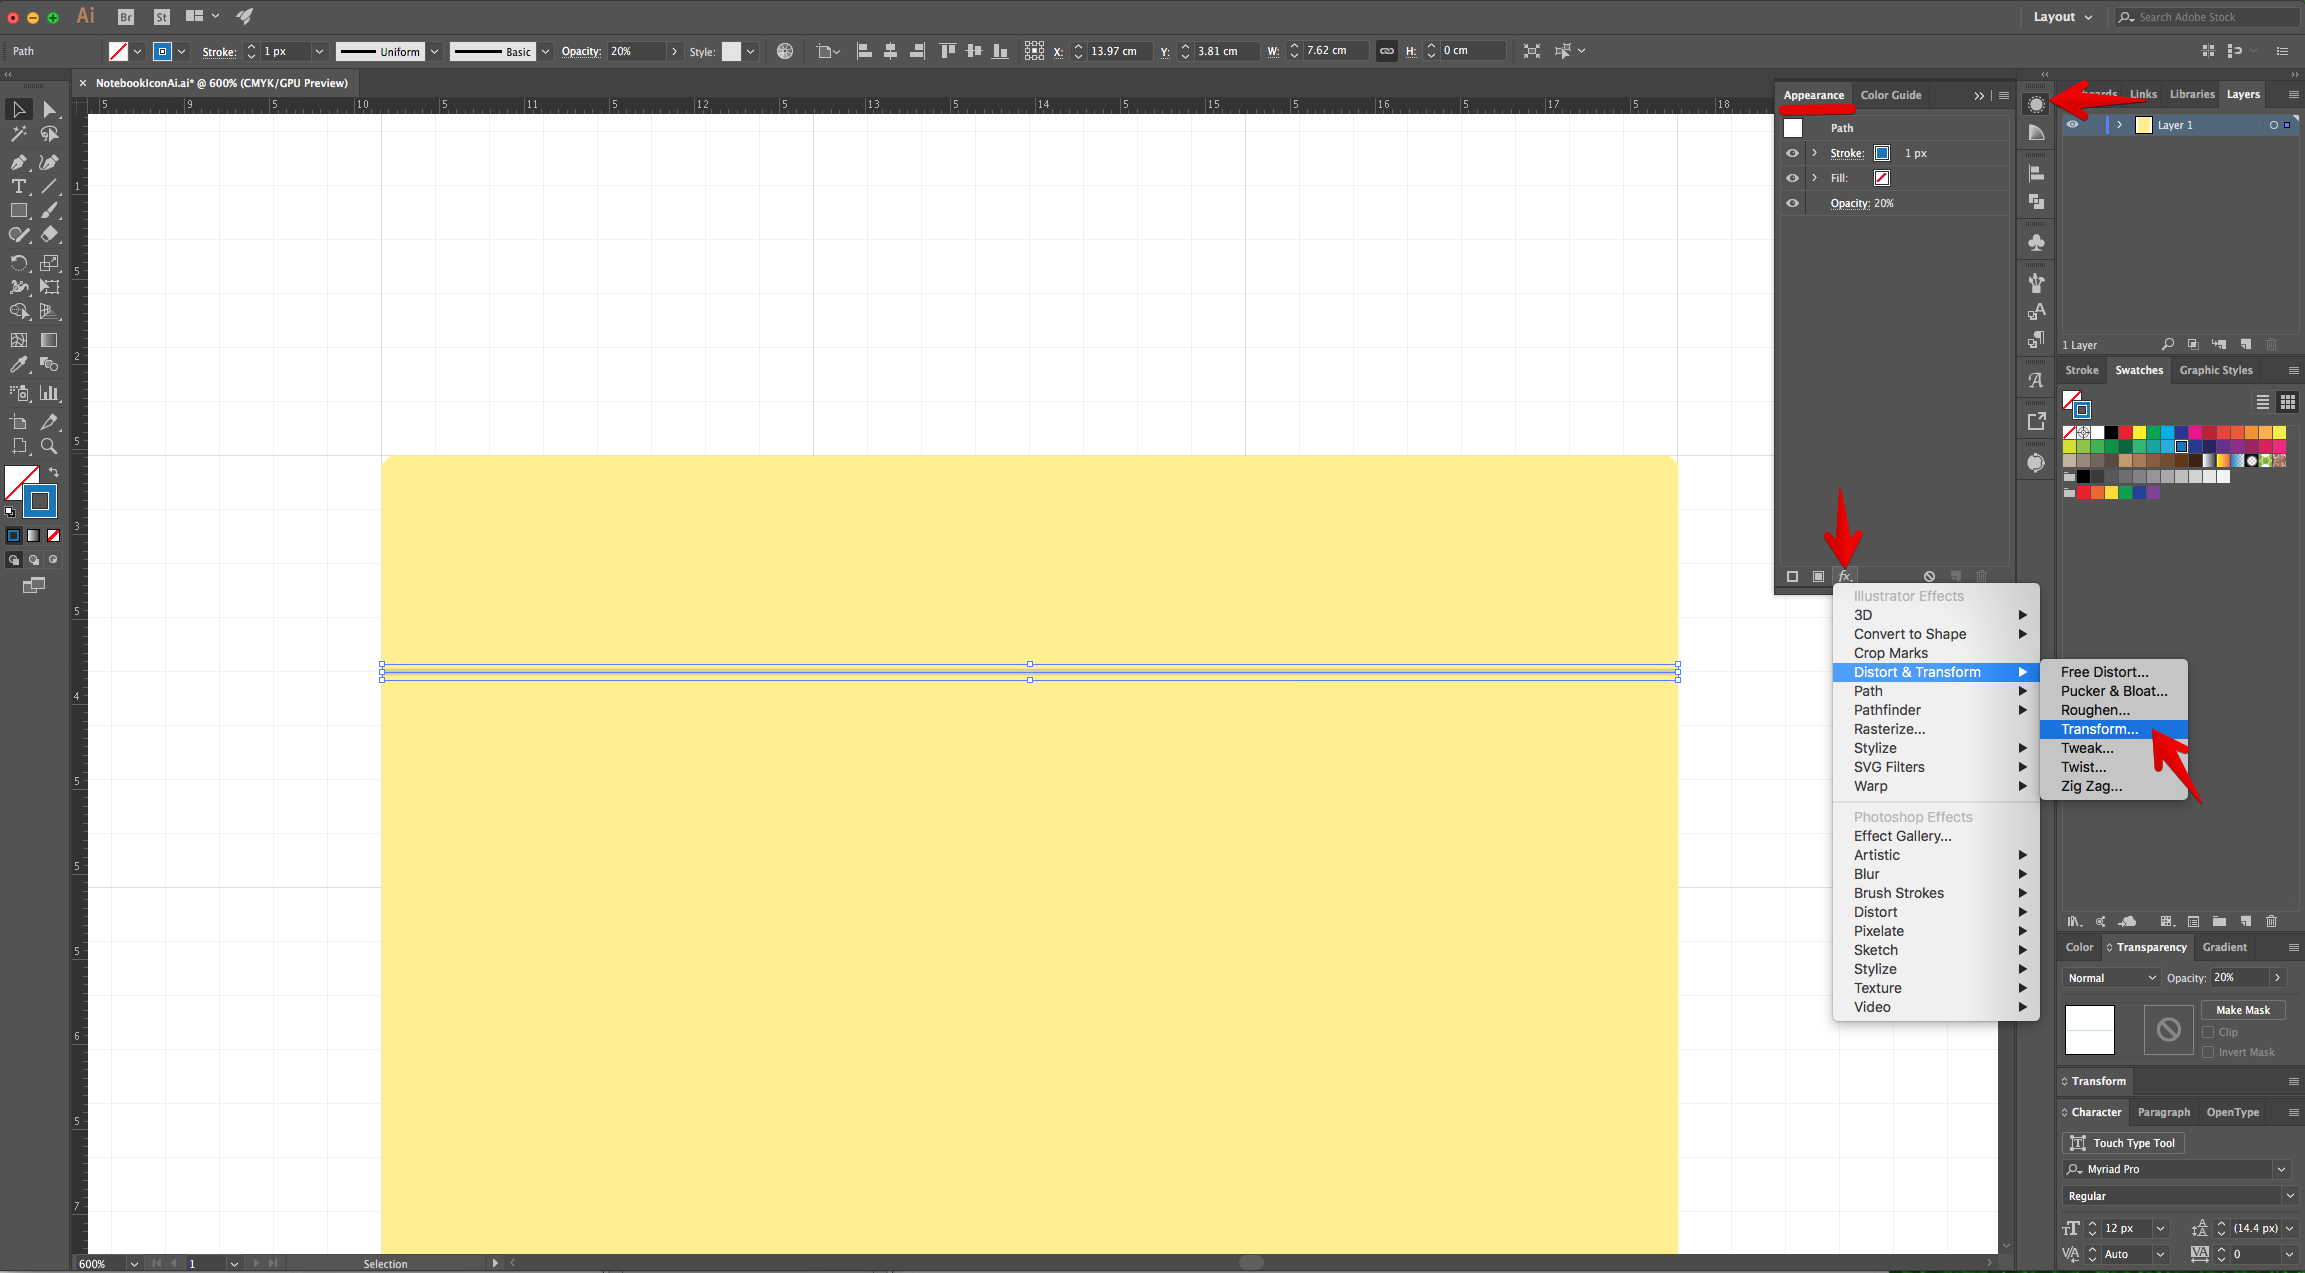
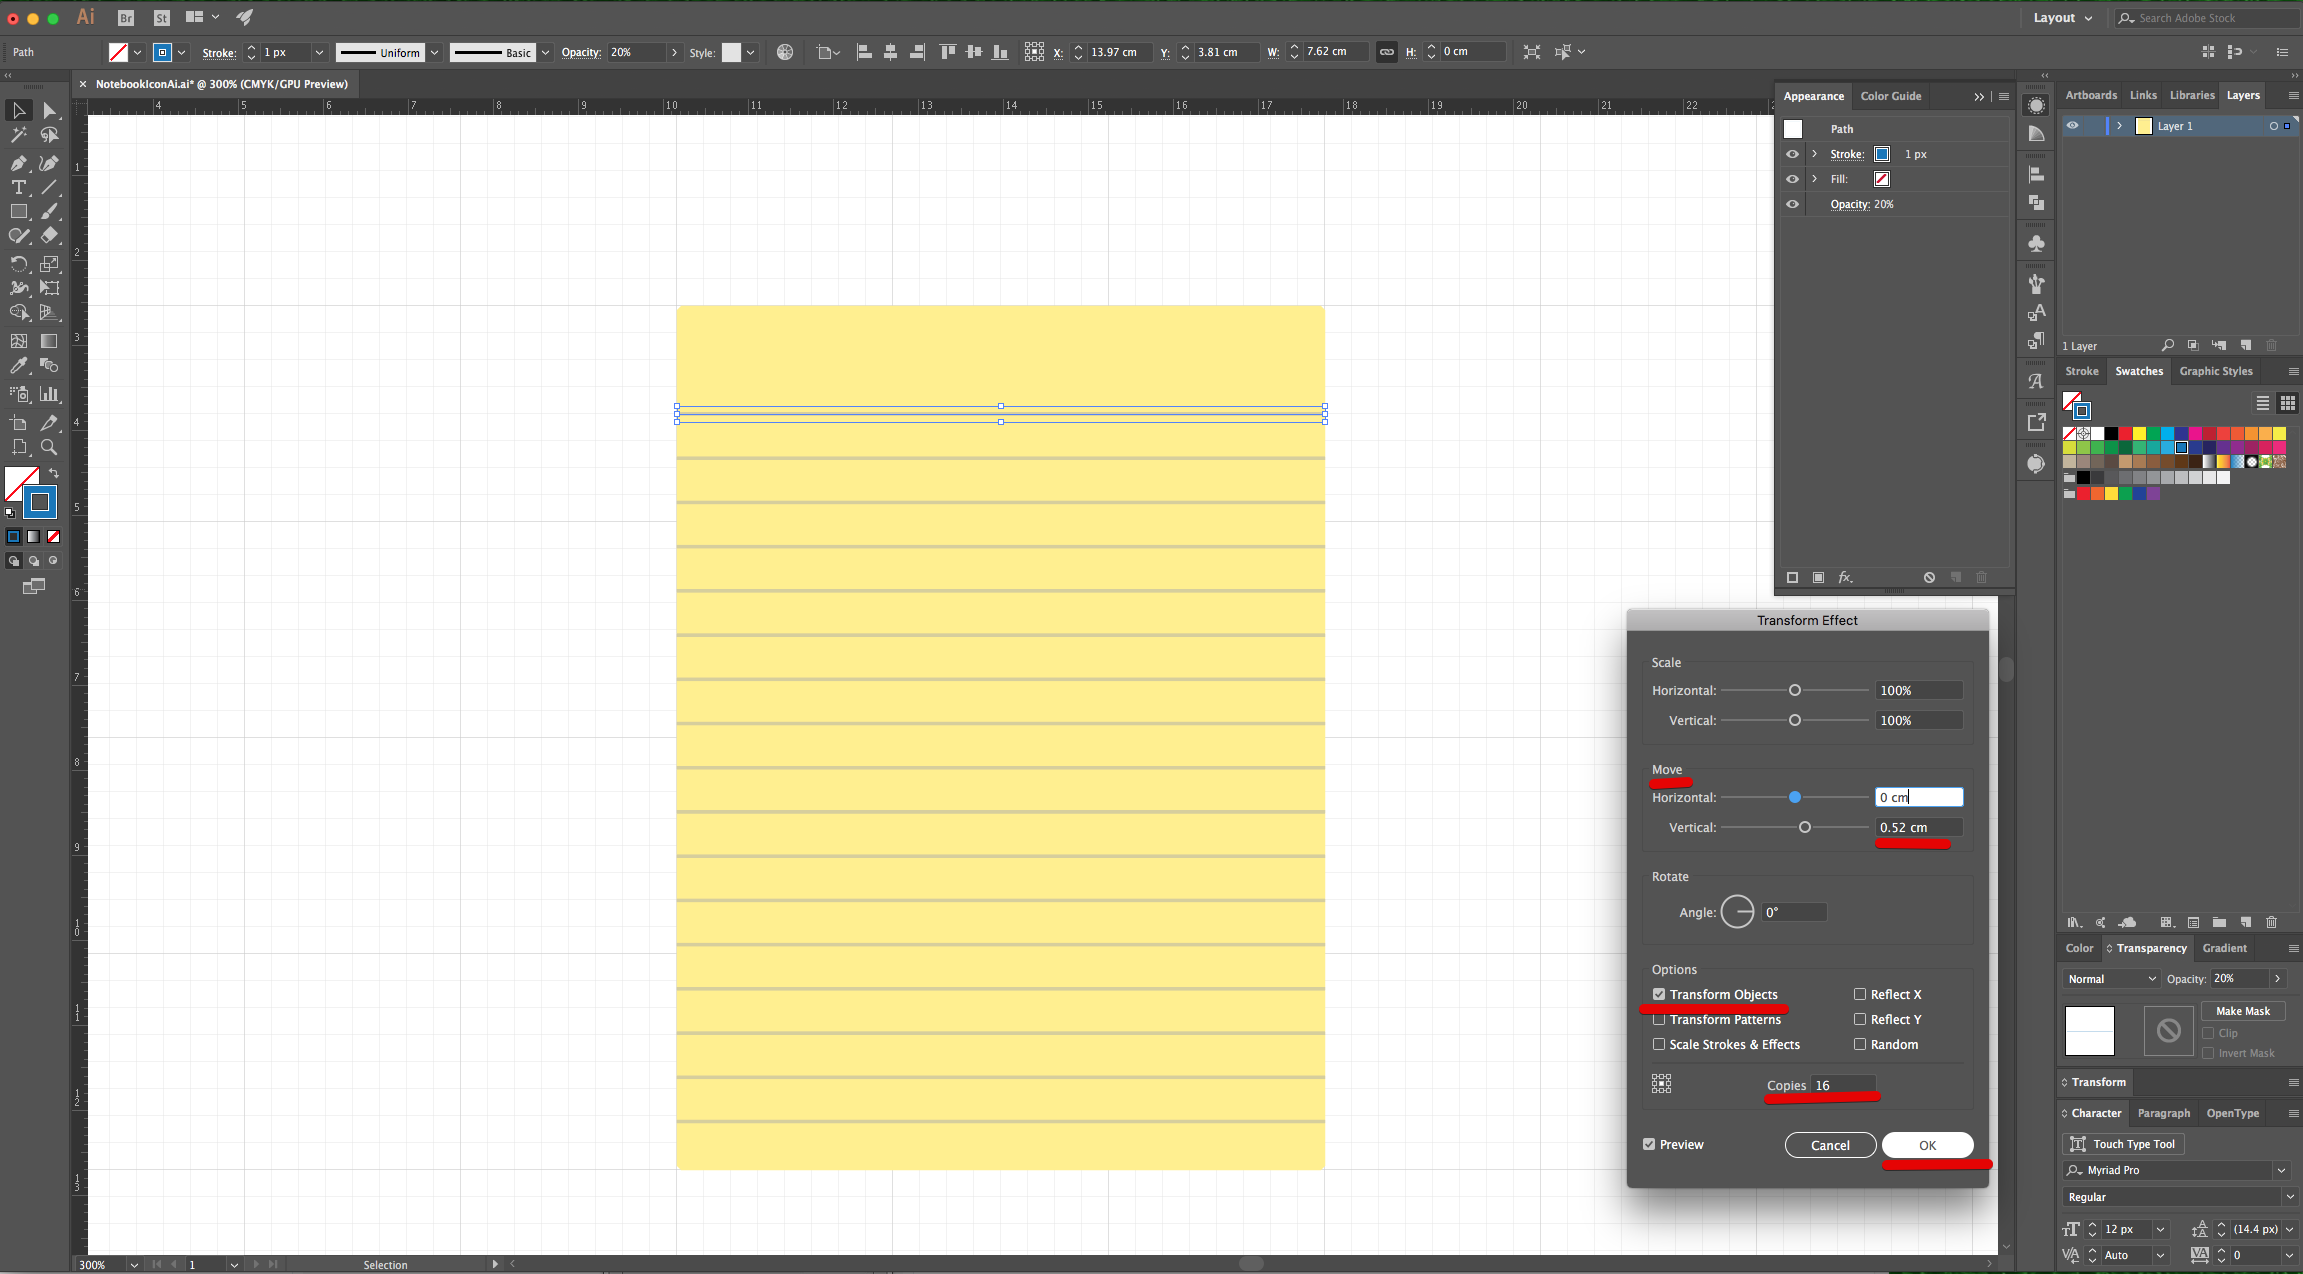
7 - With it still selected, head to the “Appearance Panel”, click on the “Effects” Menu at the bottom and navigate to Distort & Transform > Transform, use a “Vertical Move” of 0.52 cm, make sure that only the “Transform Objects” box is checked and make 16 “Copies” then, click “OK.
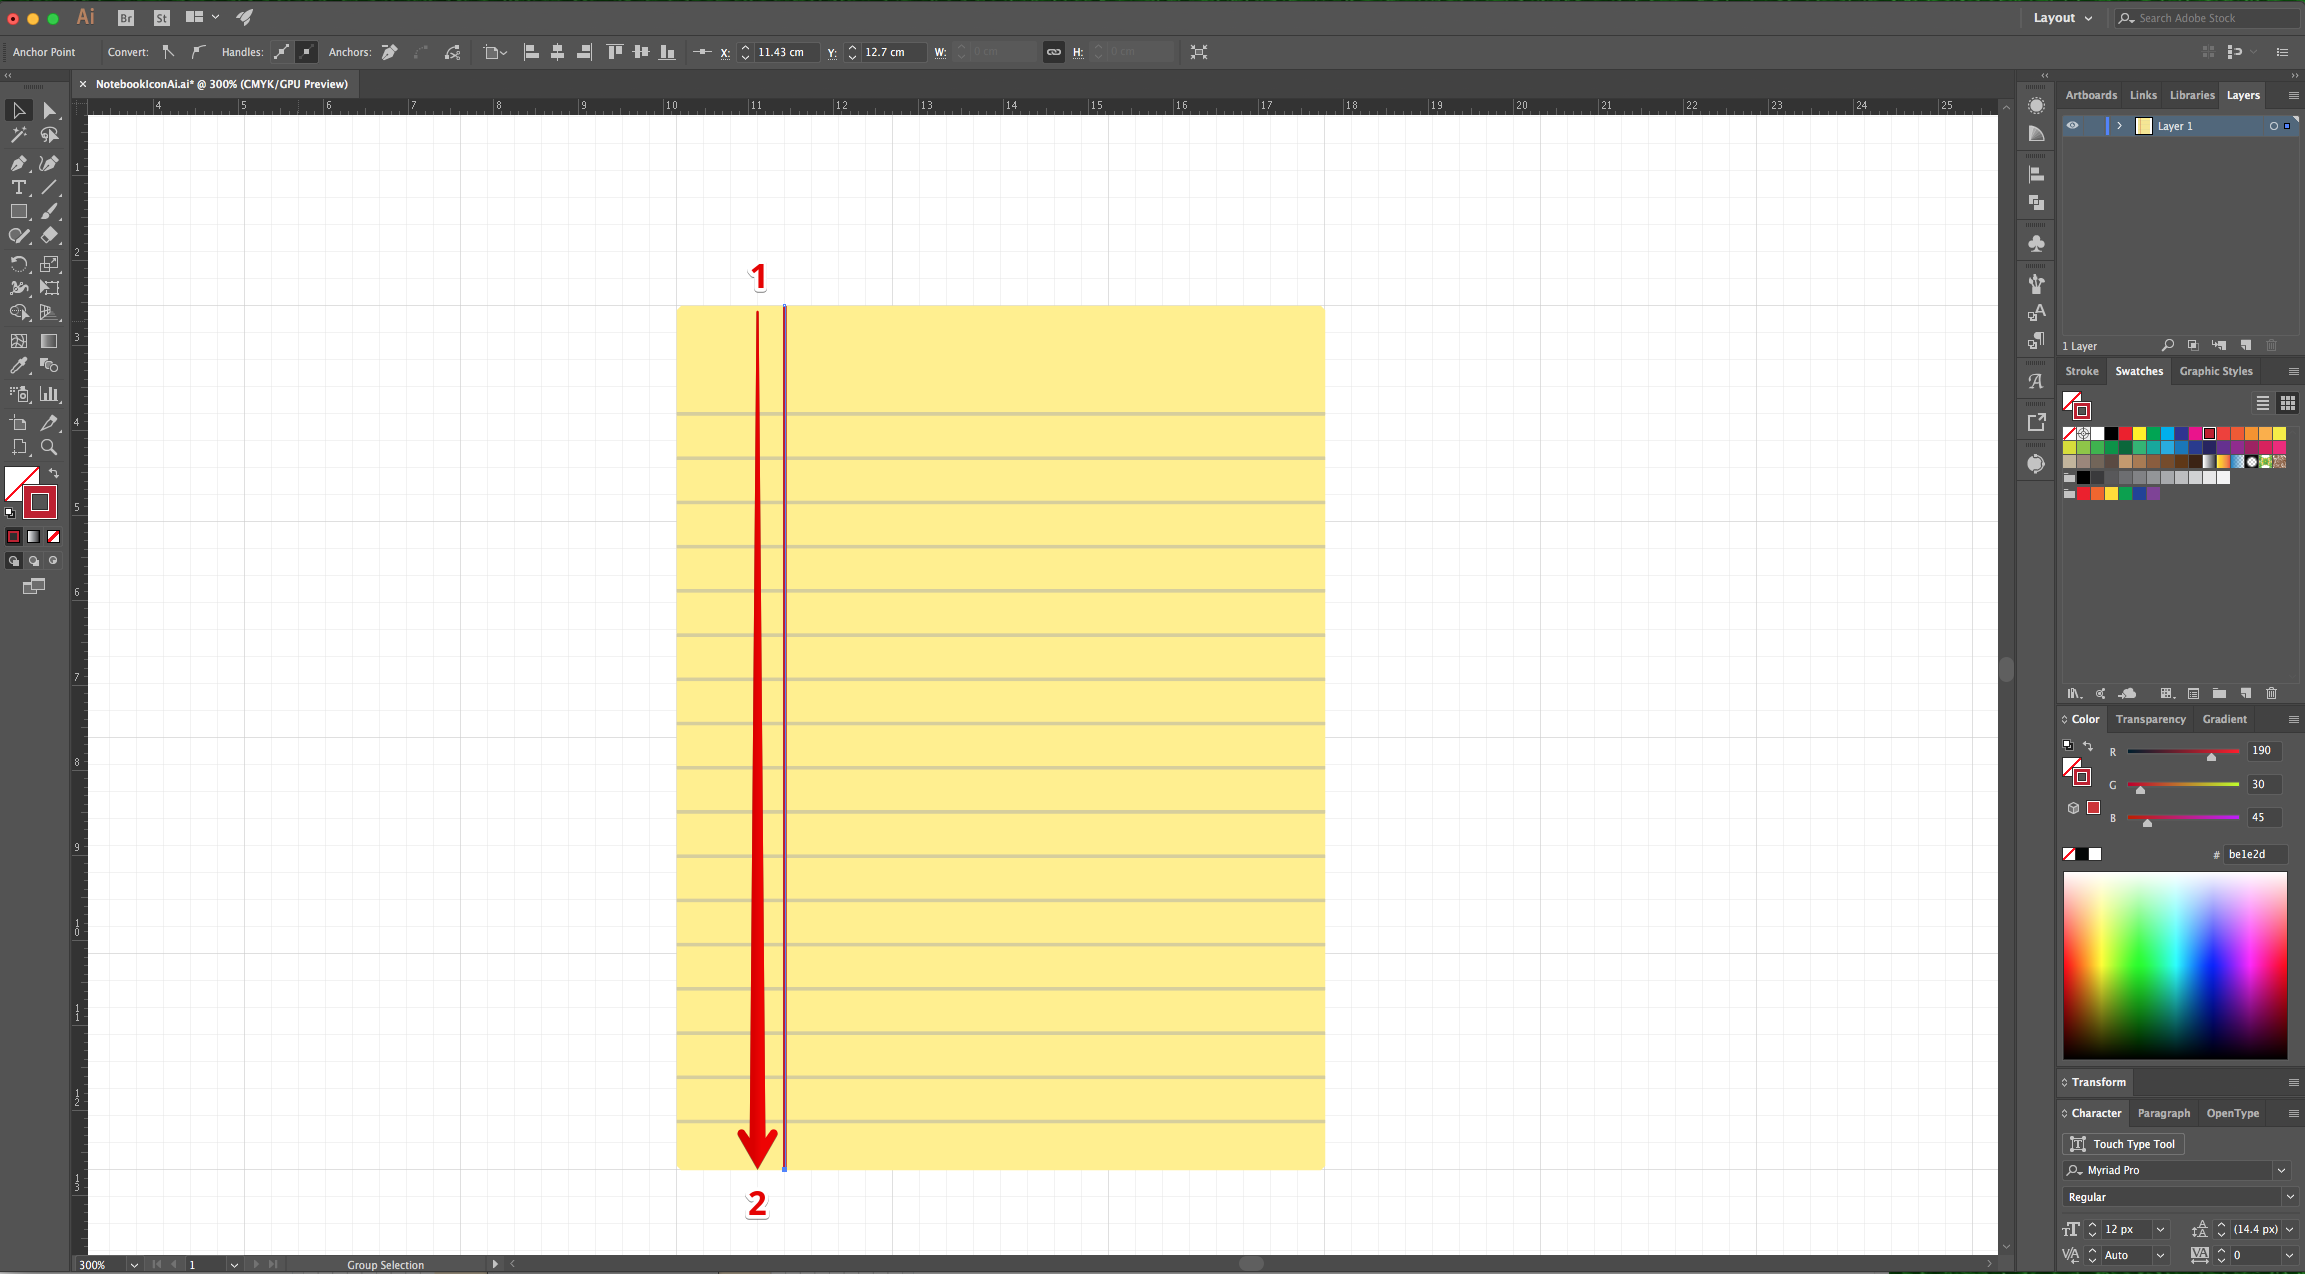
8 - Now, use the “Pen Tool” (P) again to draw a Red (#b1e2d) vertical line from top to bottom of the shape. Make sure its straight by holding the “Shift” key while drawing it and place it at about 2 cm from the left of the rectangle.

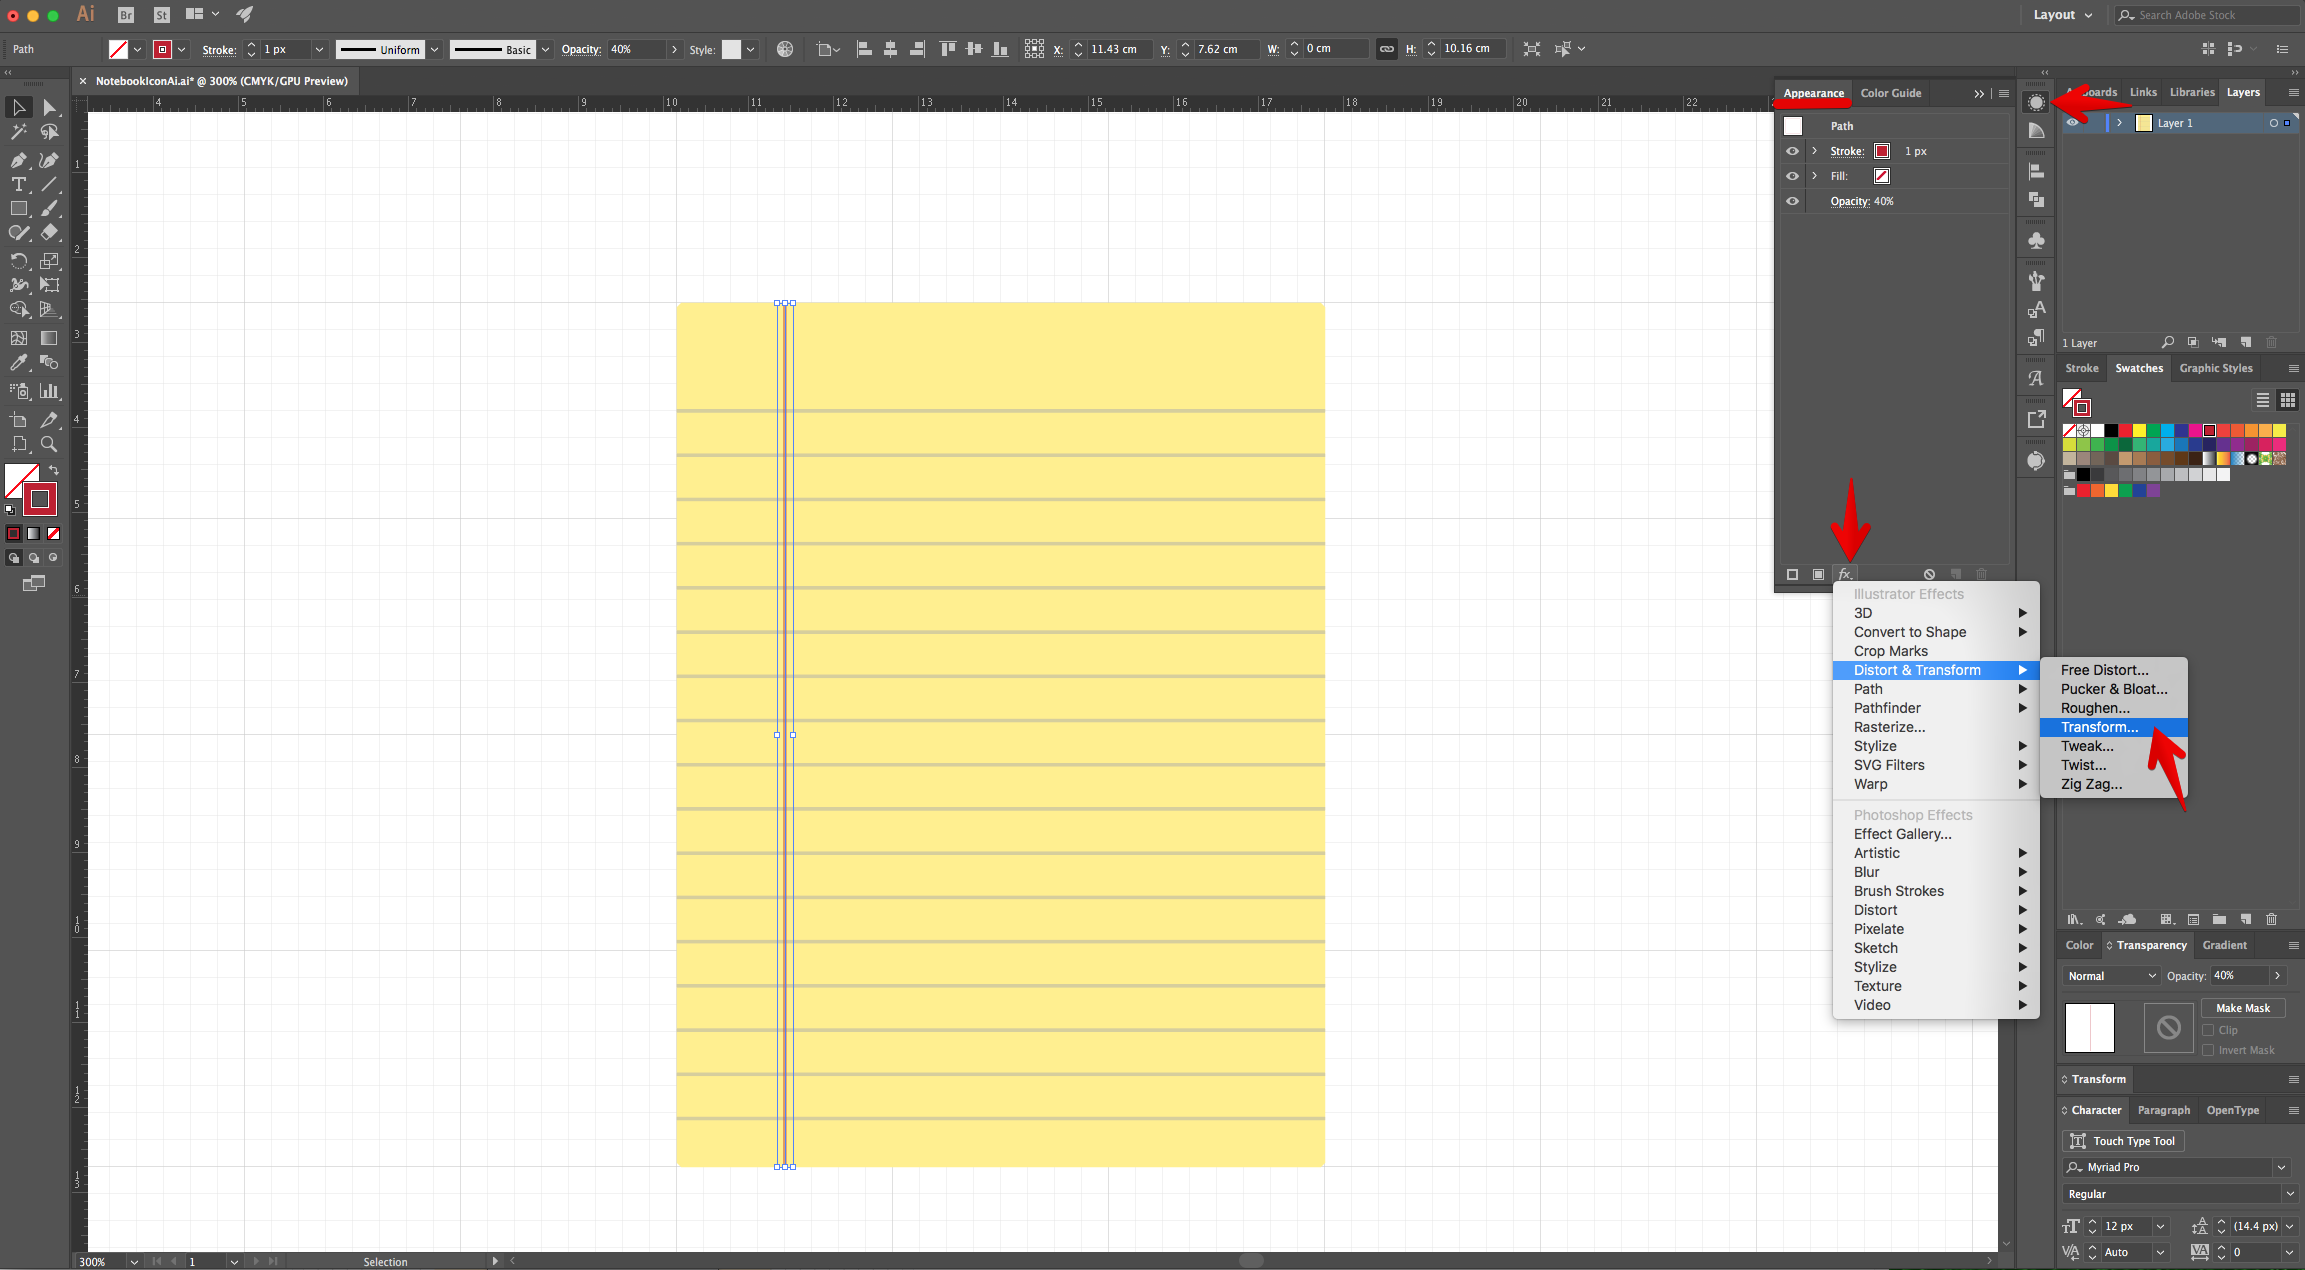
9 - In the “Transparency Panel” change the “Opacity” to 40%.

10 - With it still selected, head to the “Appearance Panel”, click on the “Effects” Menu at the bottom and navigate to Distort & Transform > Transform, use a “Horizontal Move” of 0.08 cm, make sure that only the “Transform Objects” box is checked and make 1 “Copy” then, click “OK.

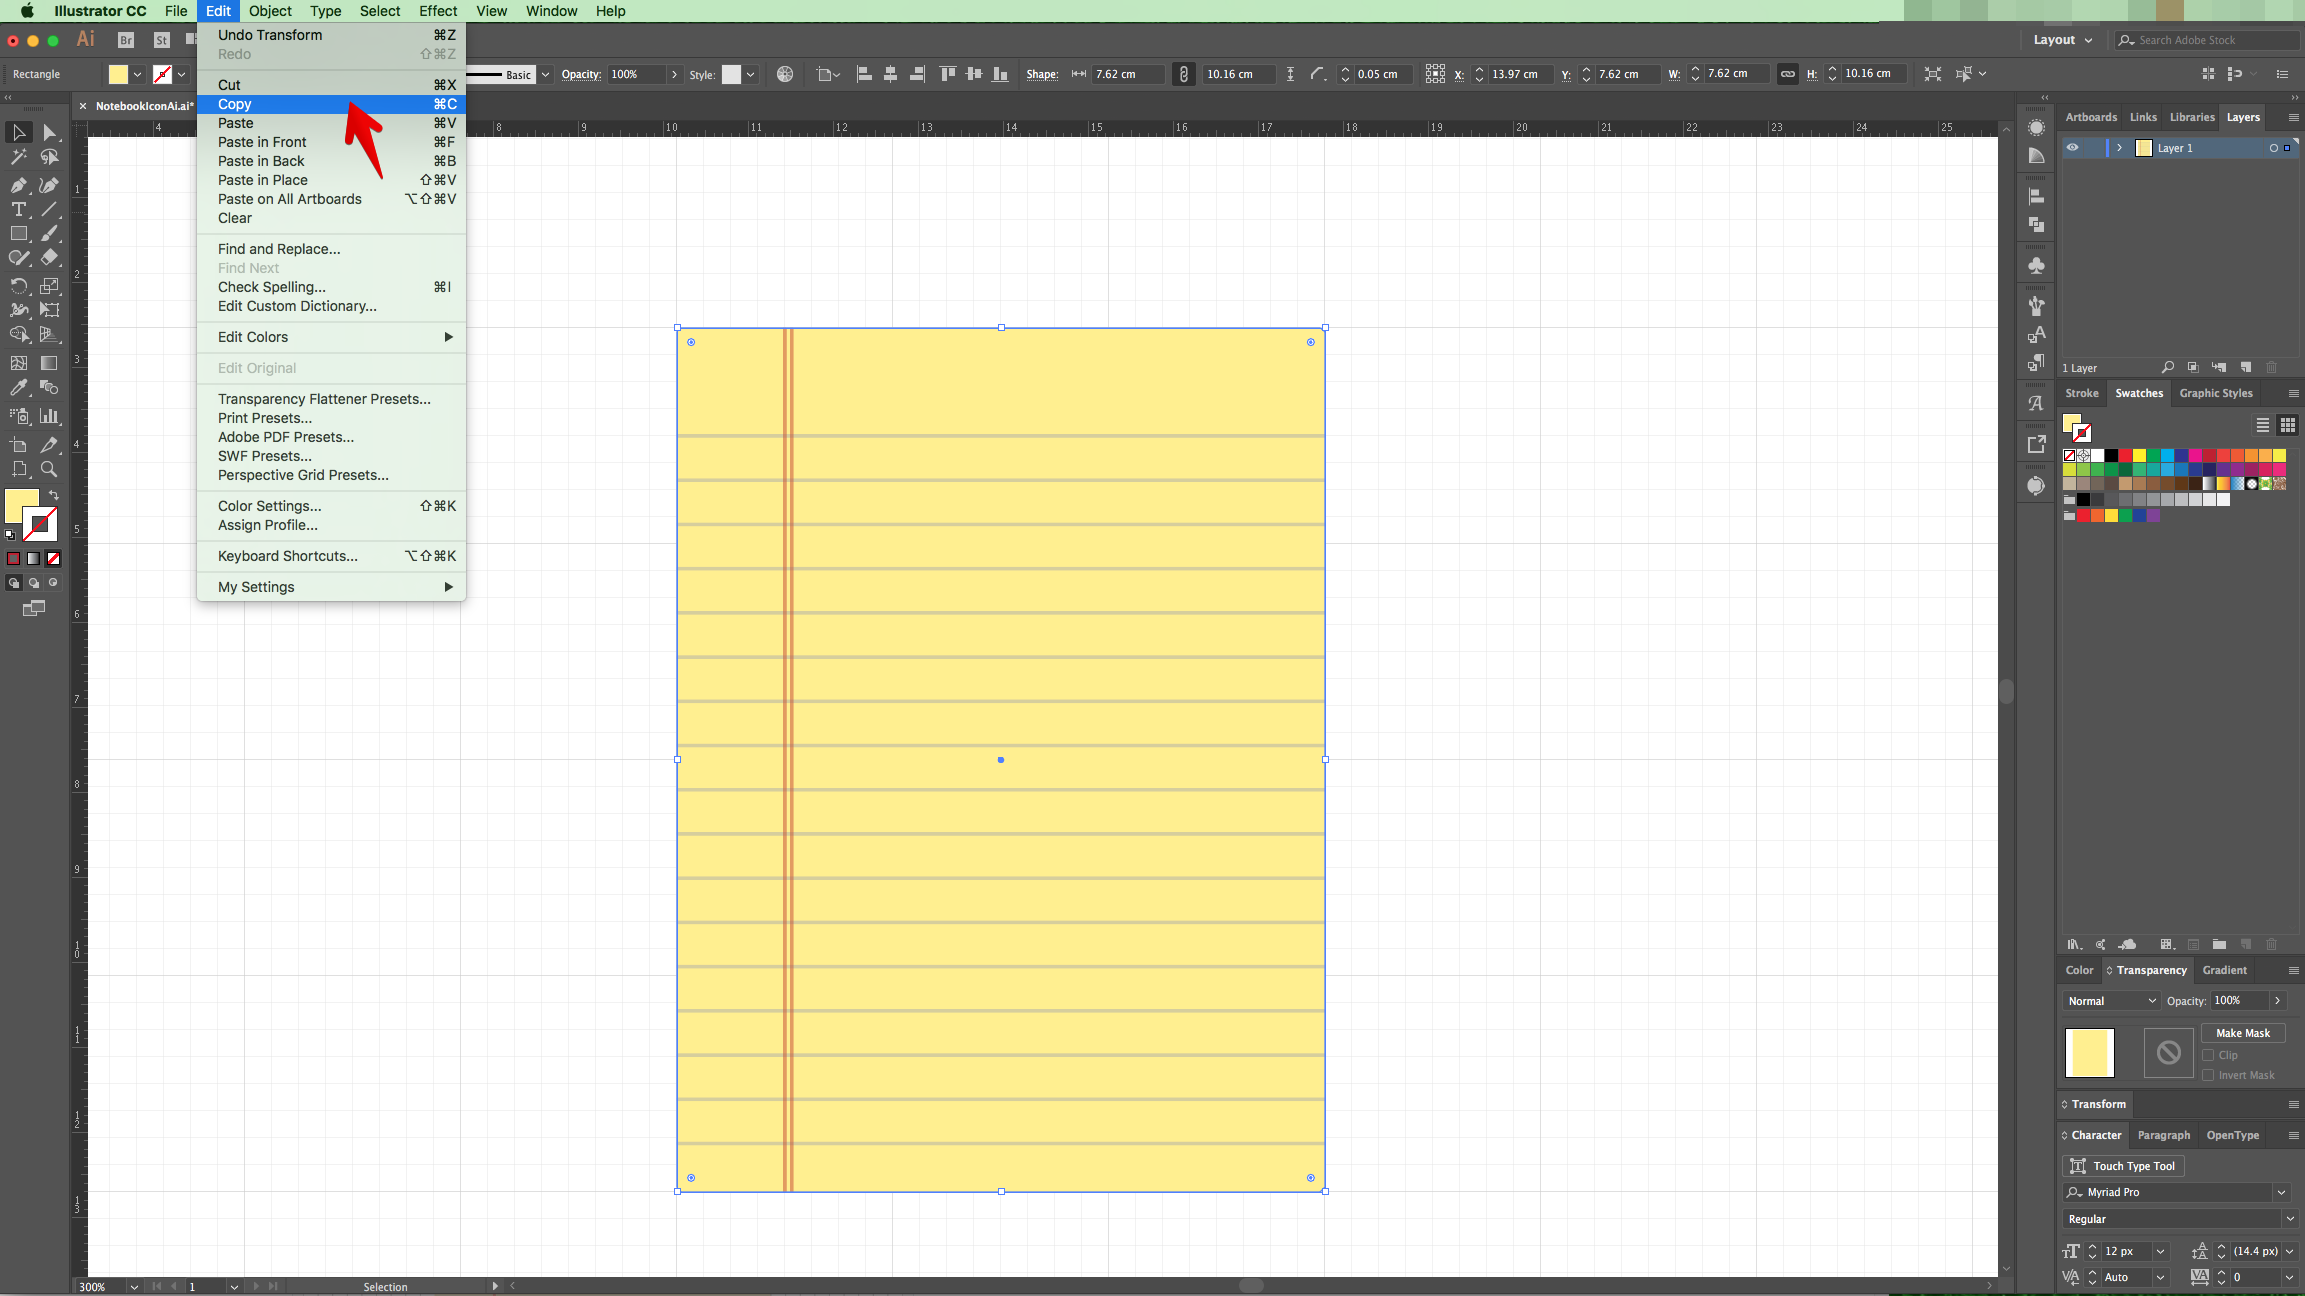
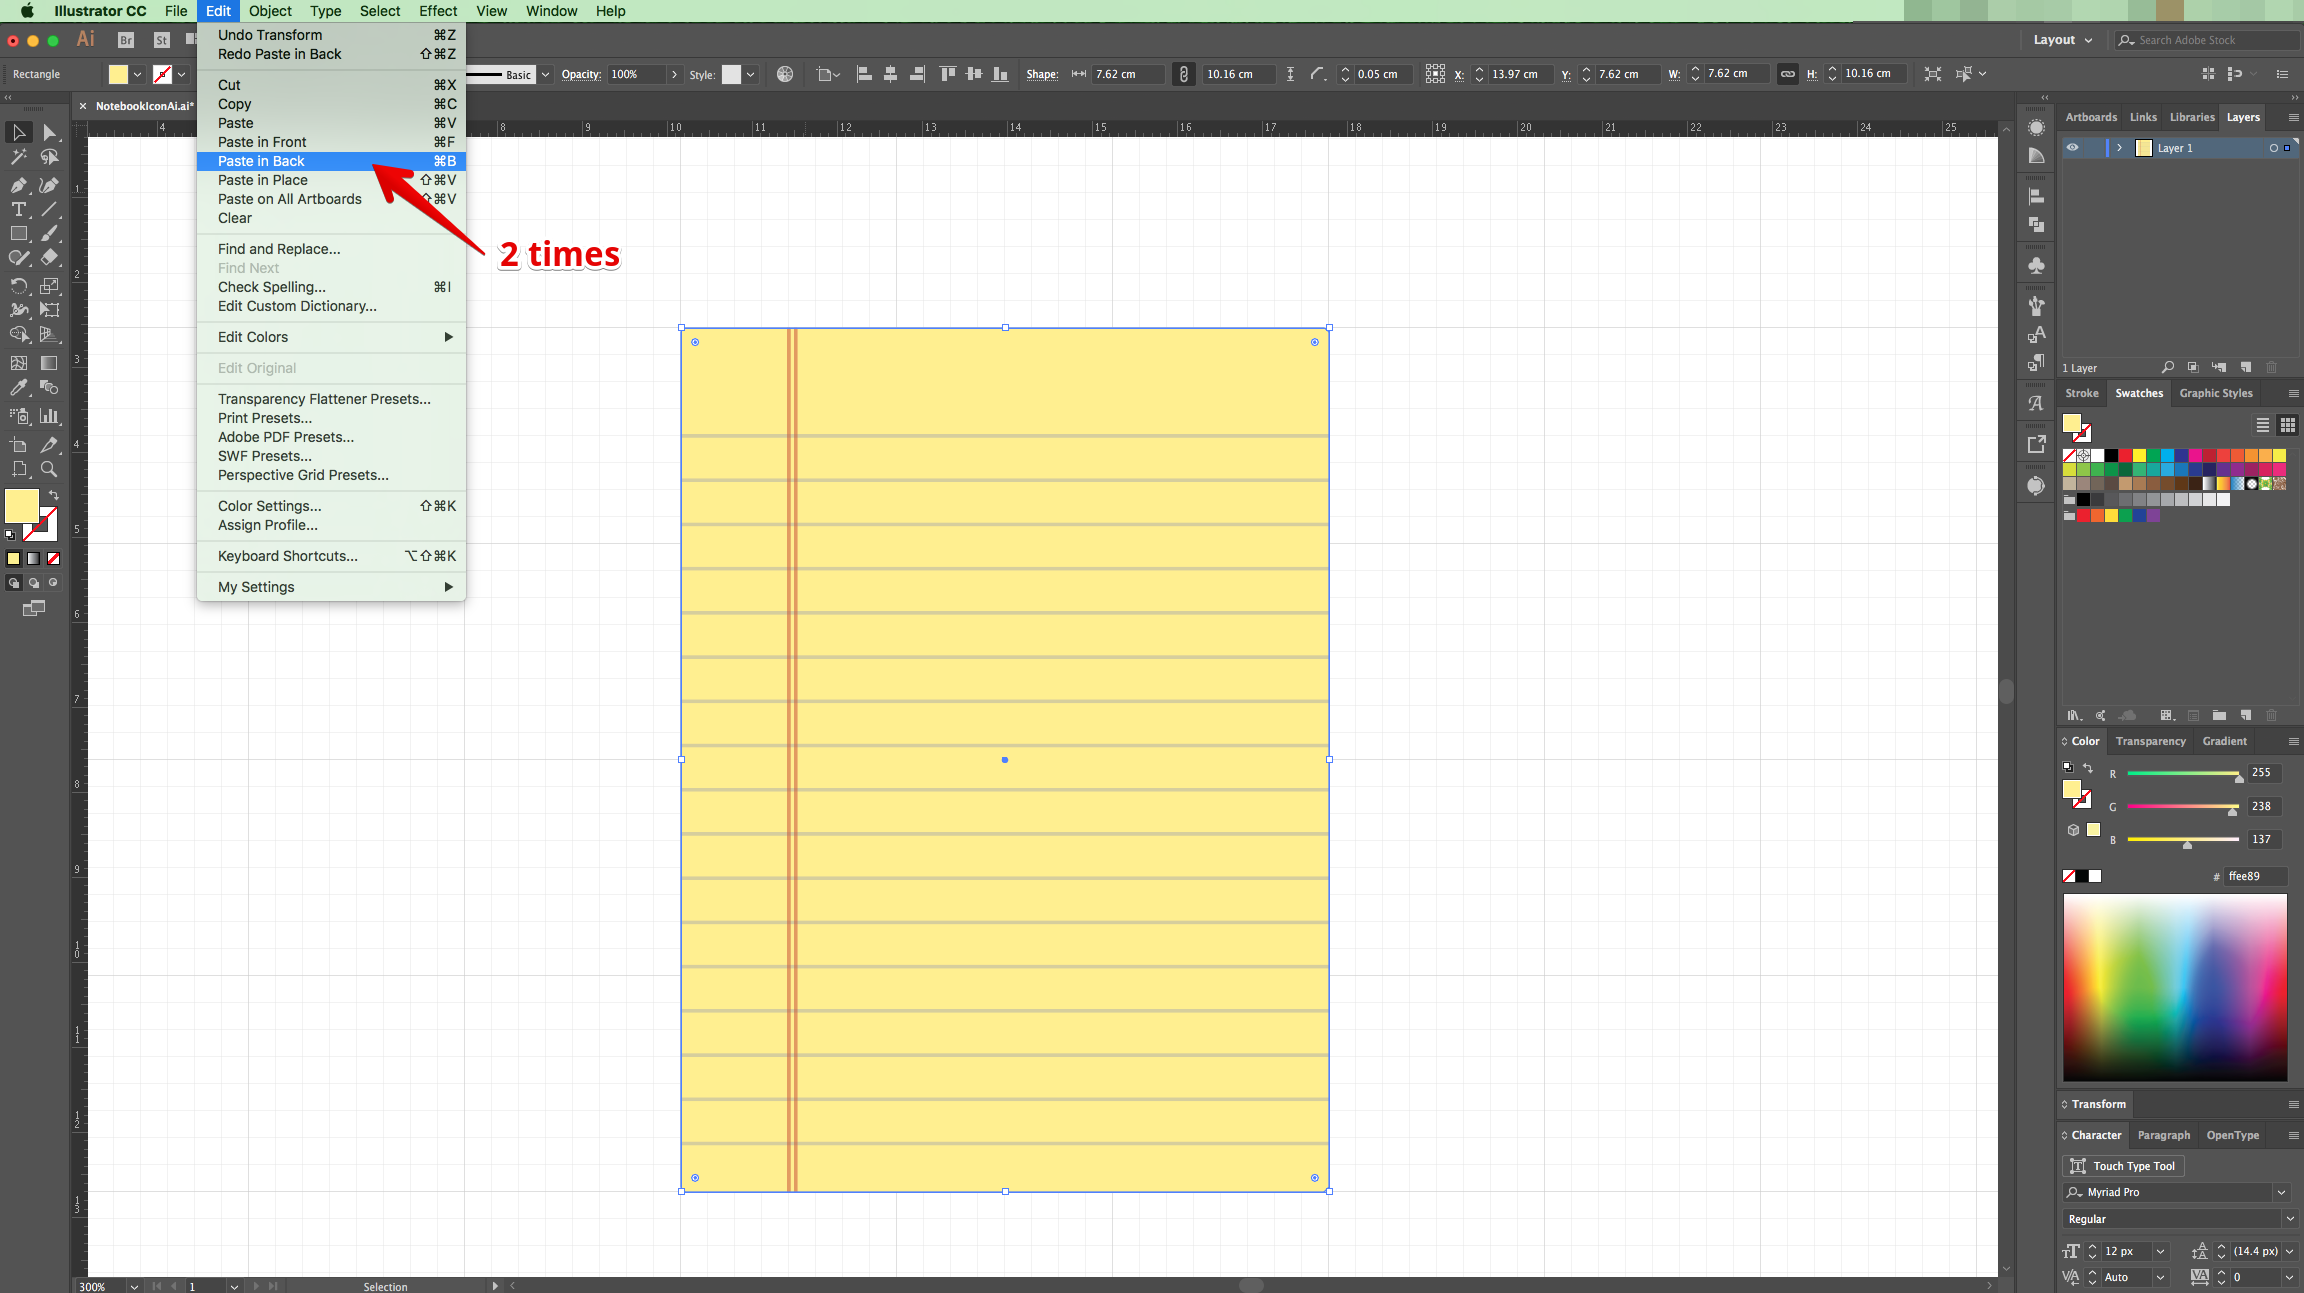
11 - Disable “Snap to Grid” (Shift + Command/Control + ‘), make a “Copy” of the Rectangle (Command/Control + C) and “Paste in Back” (Command/Control + B) two times.
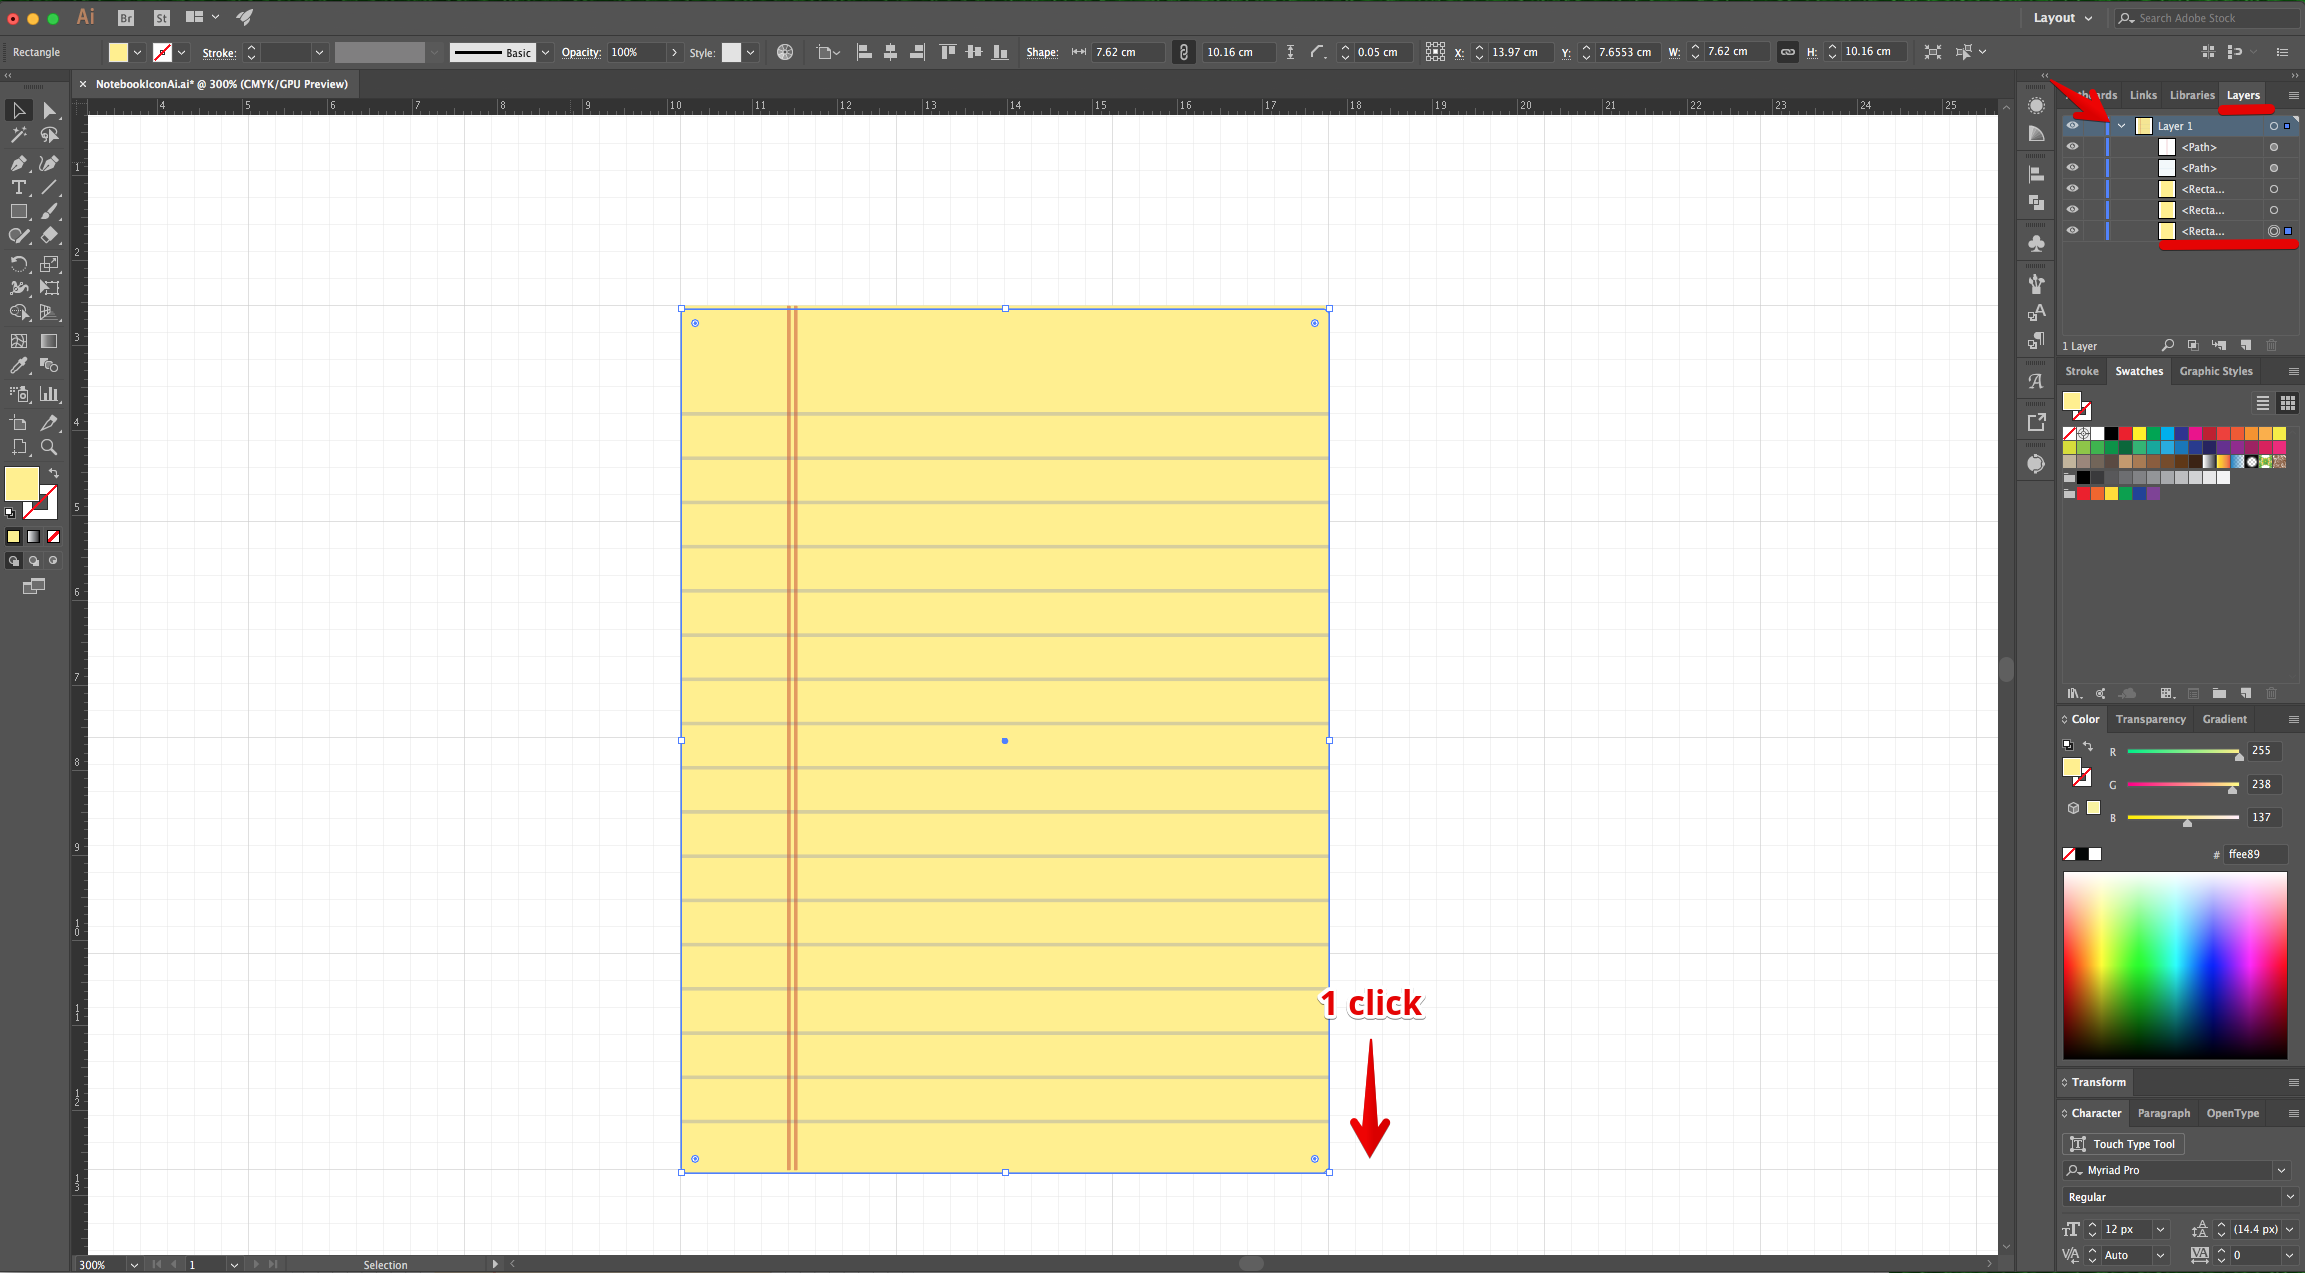
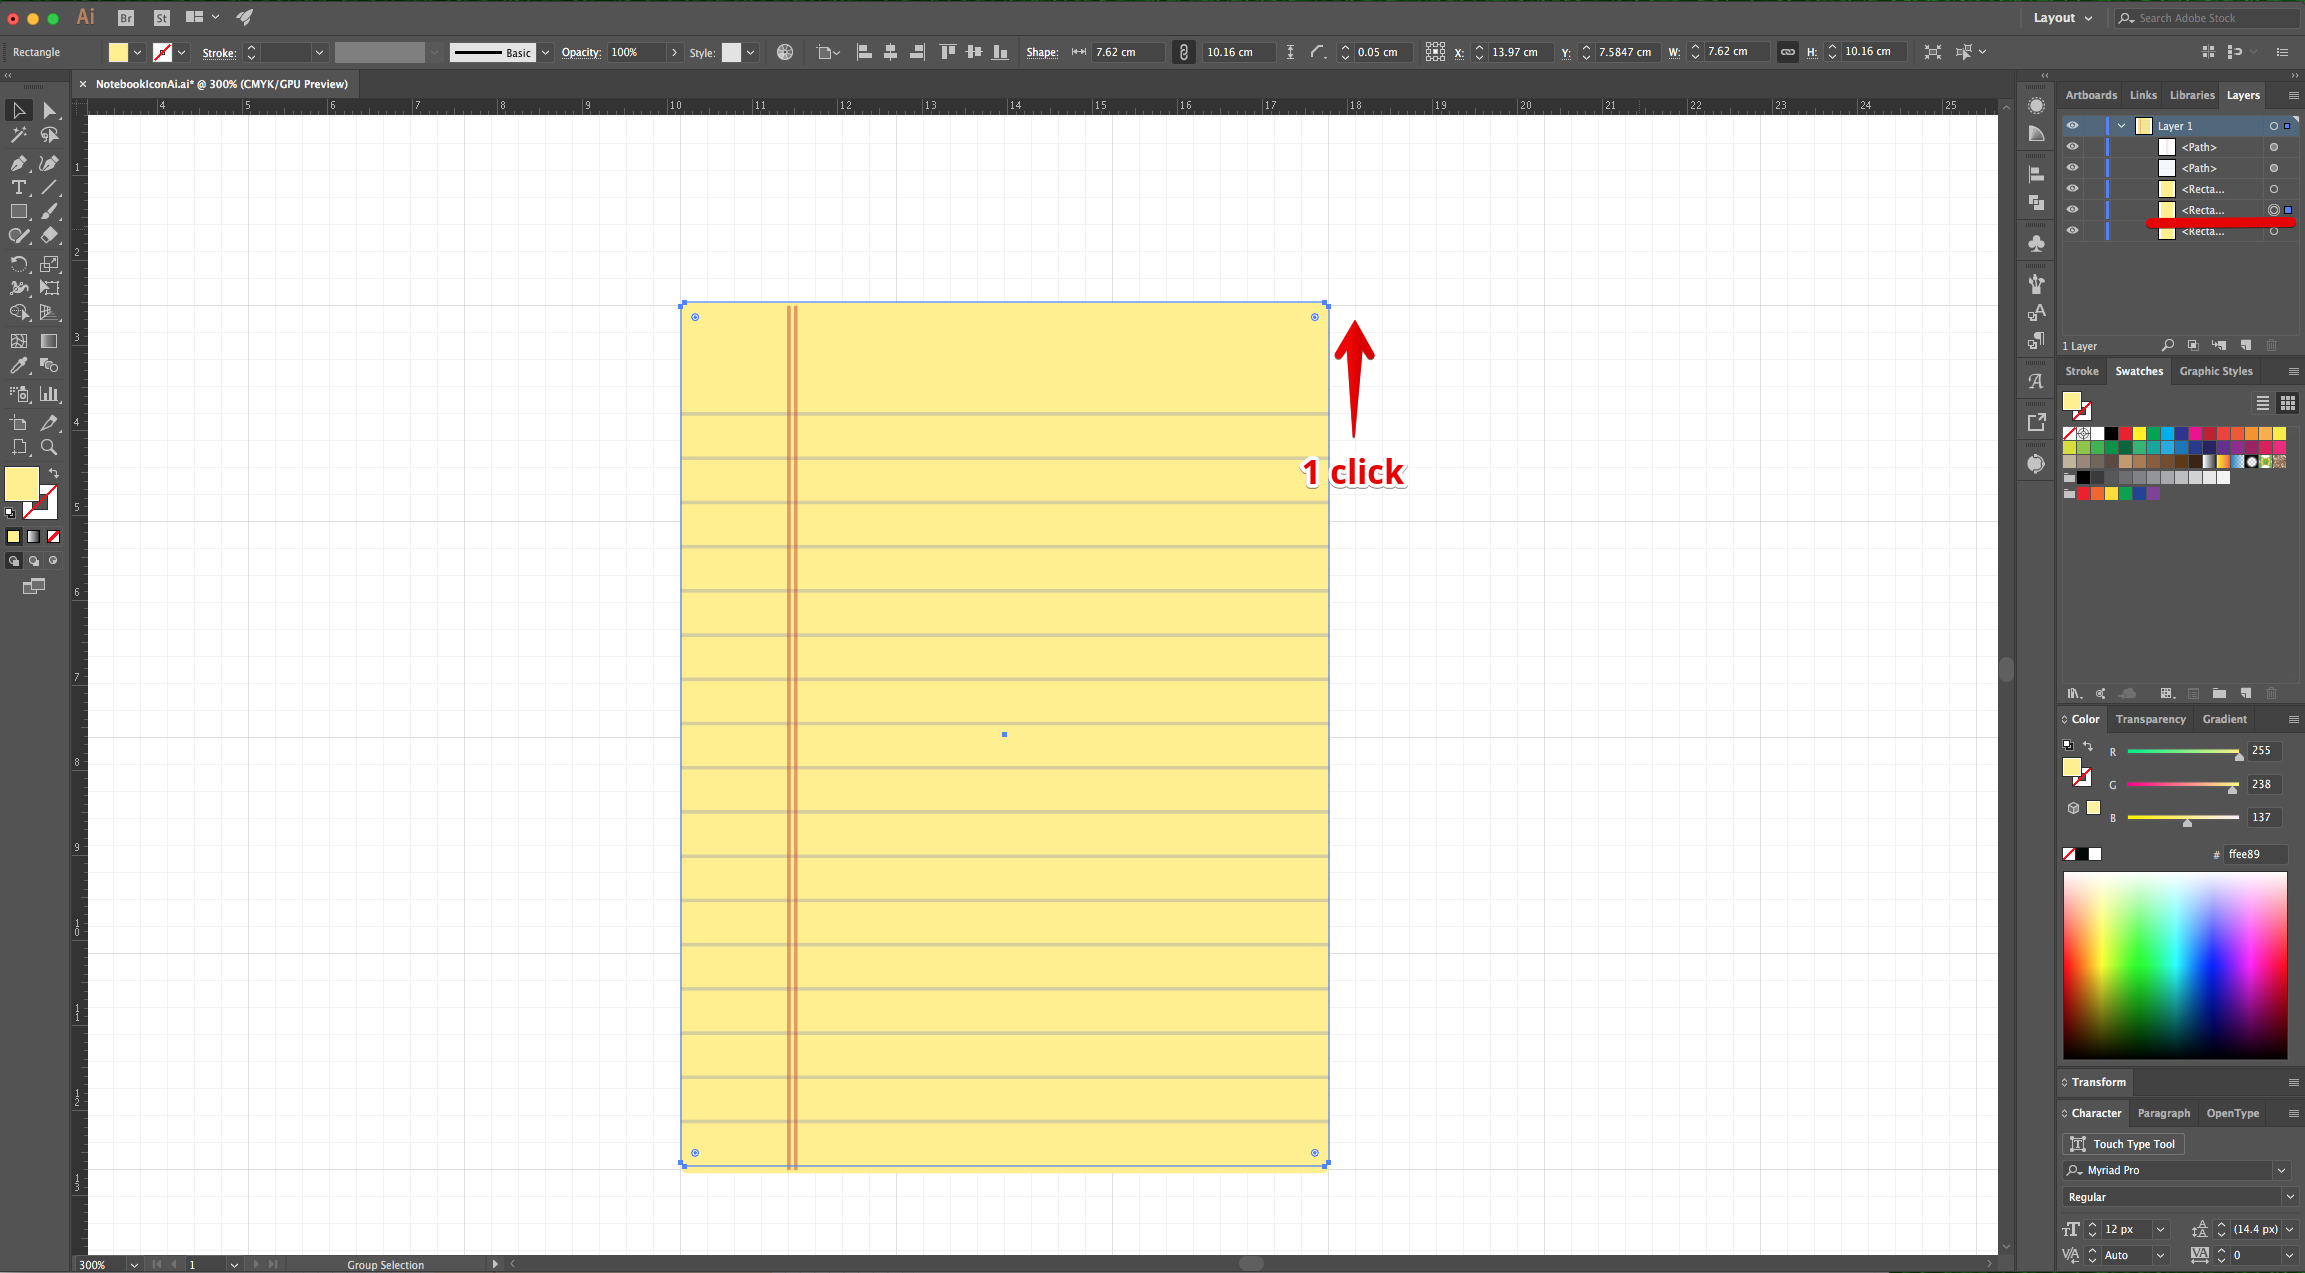
12 - Move the bottom copy down, one click using the “Arrow Keys” and the one just on top of it, one click Up.
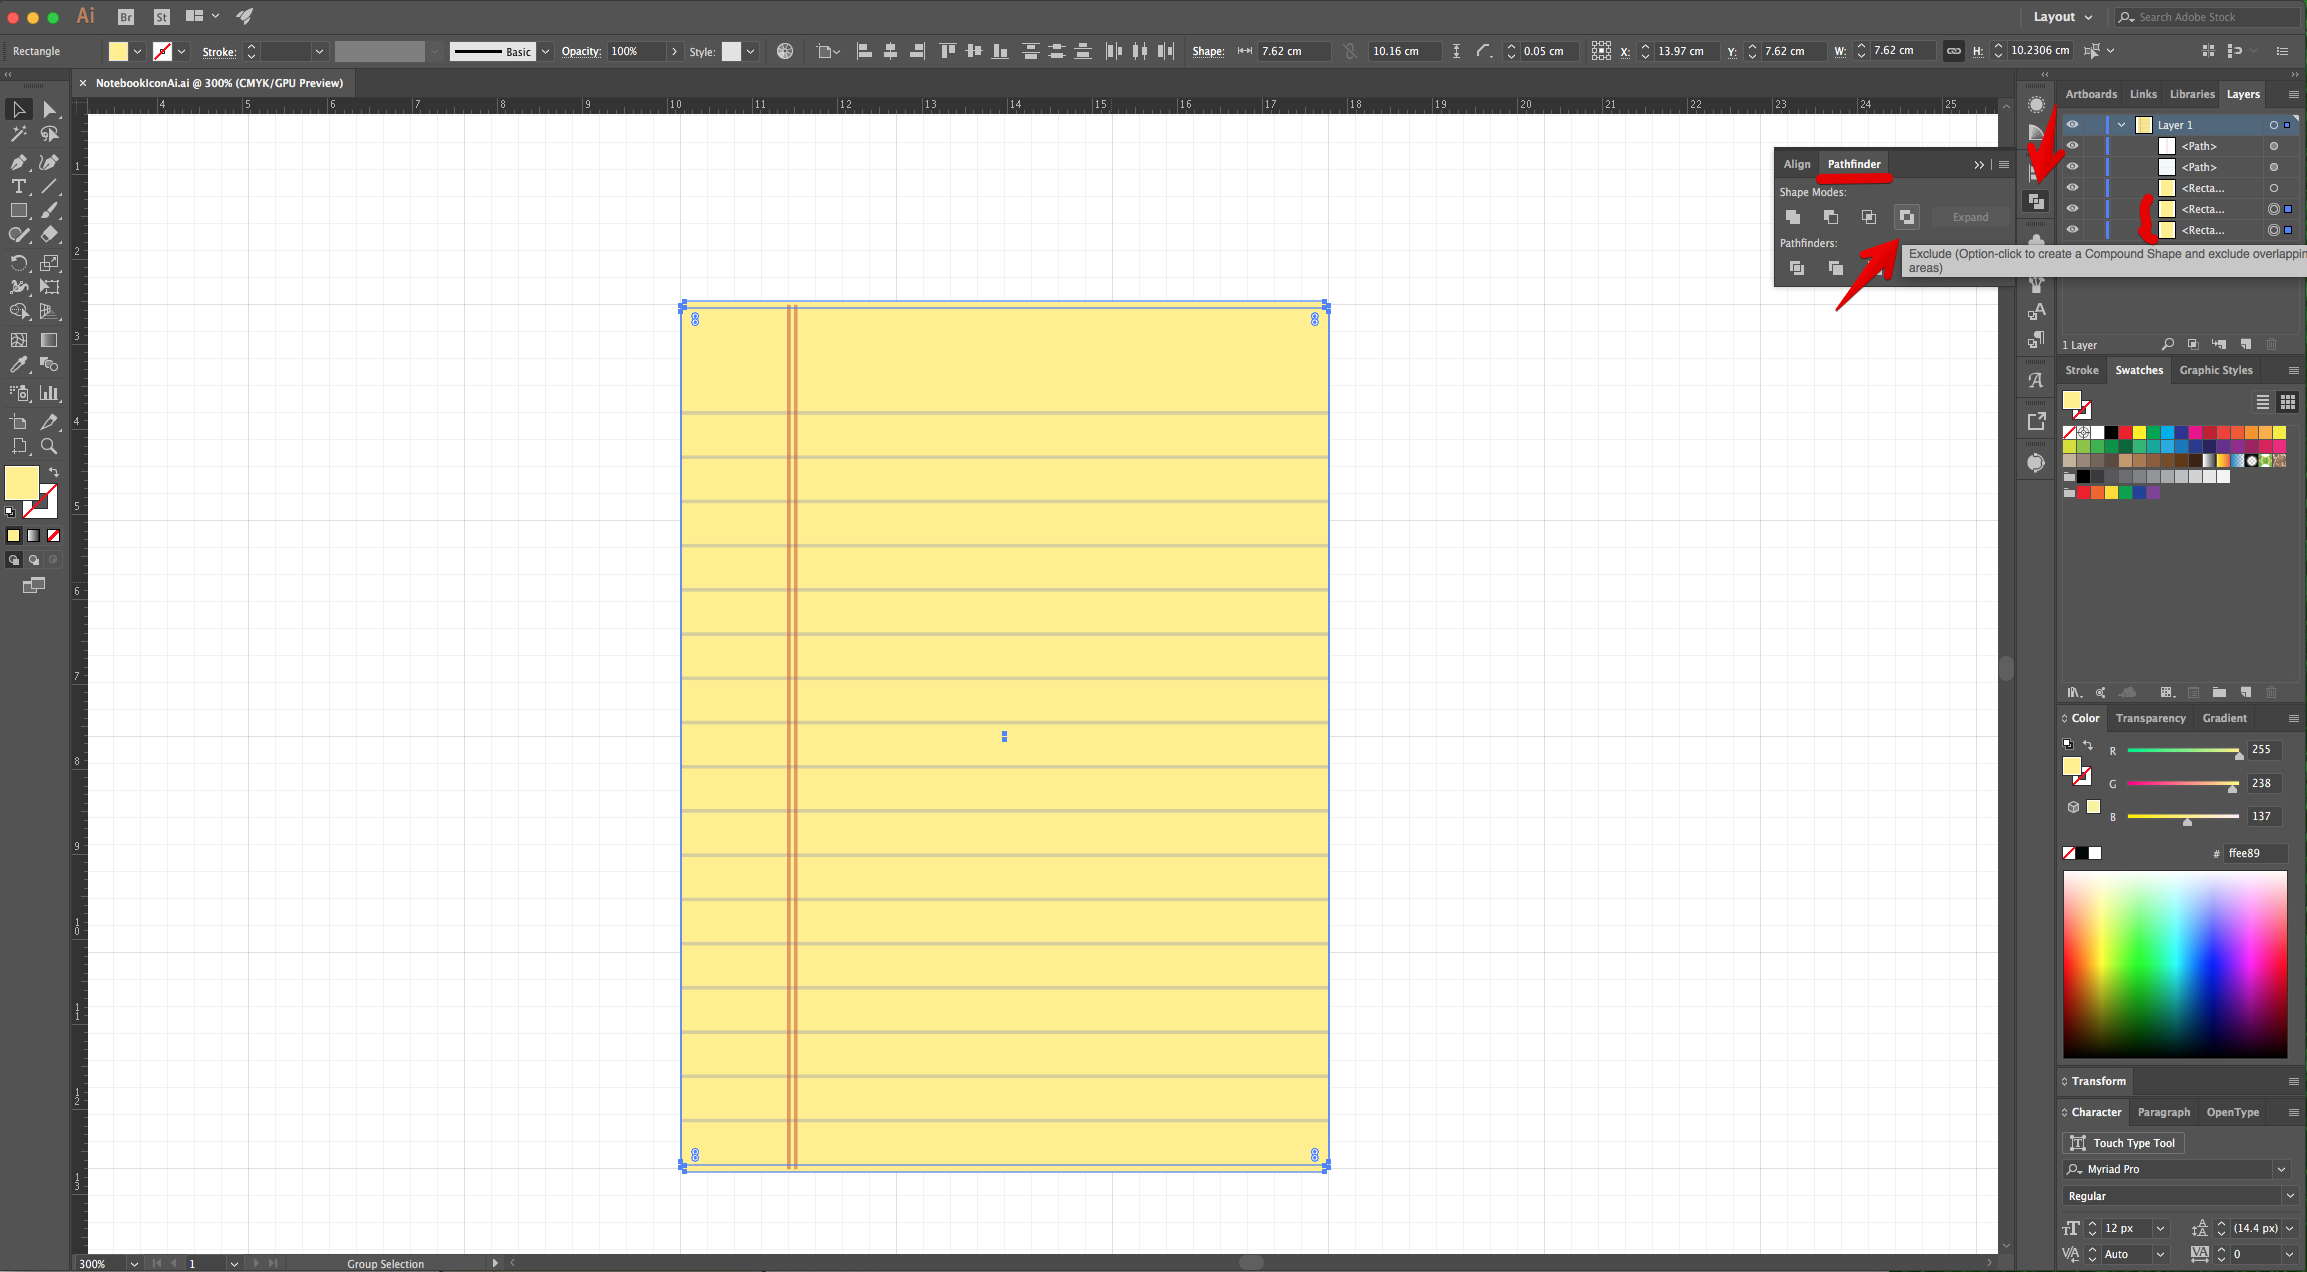
13 - Select both copies, head to the “Pathfinder Panel” and choose “Exclude”.
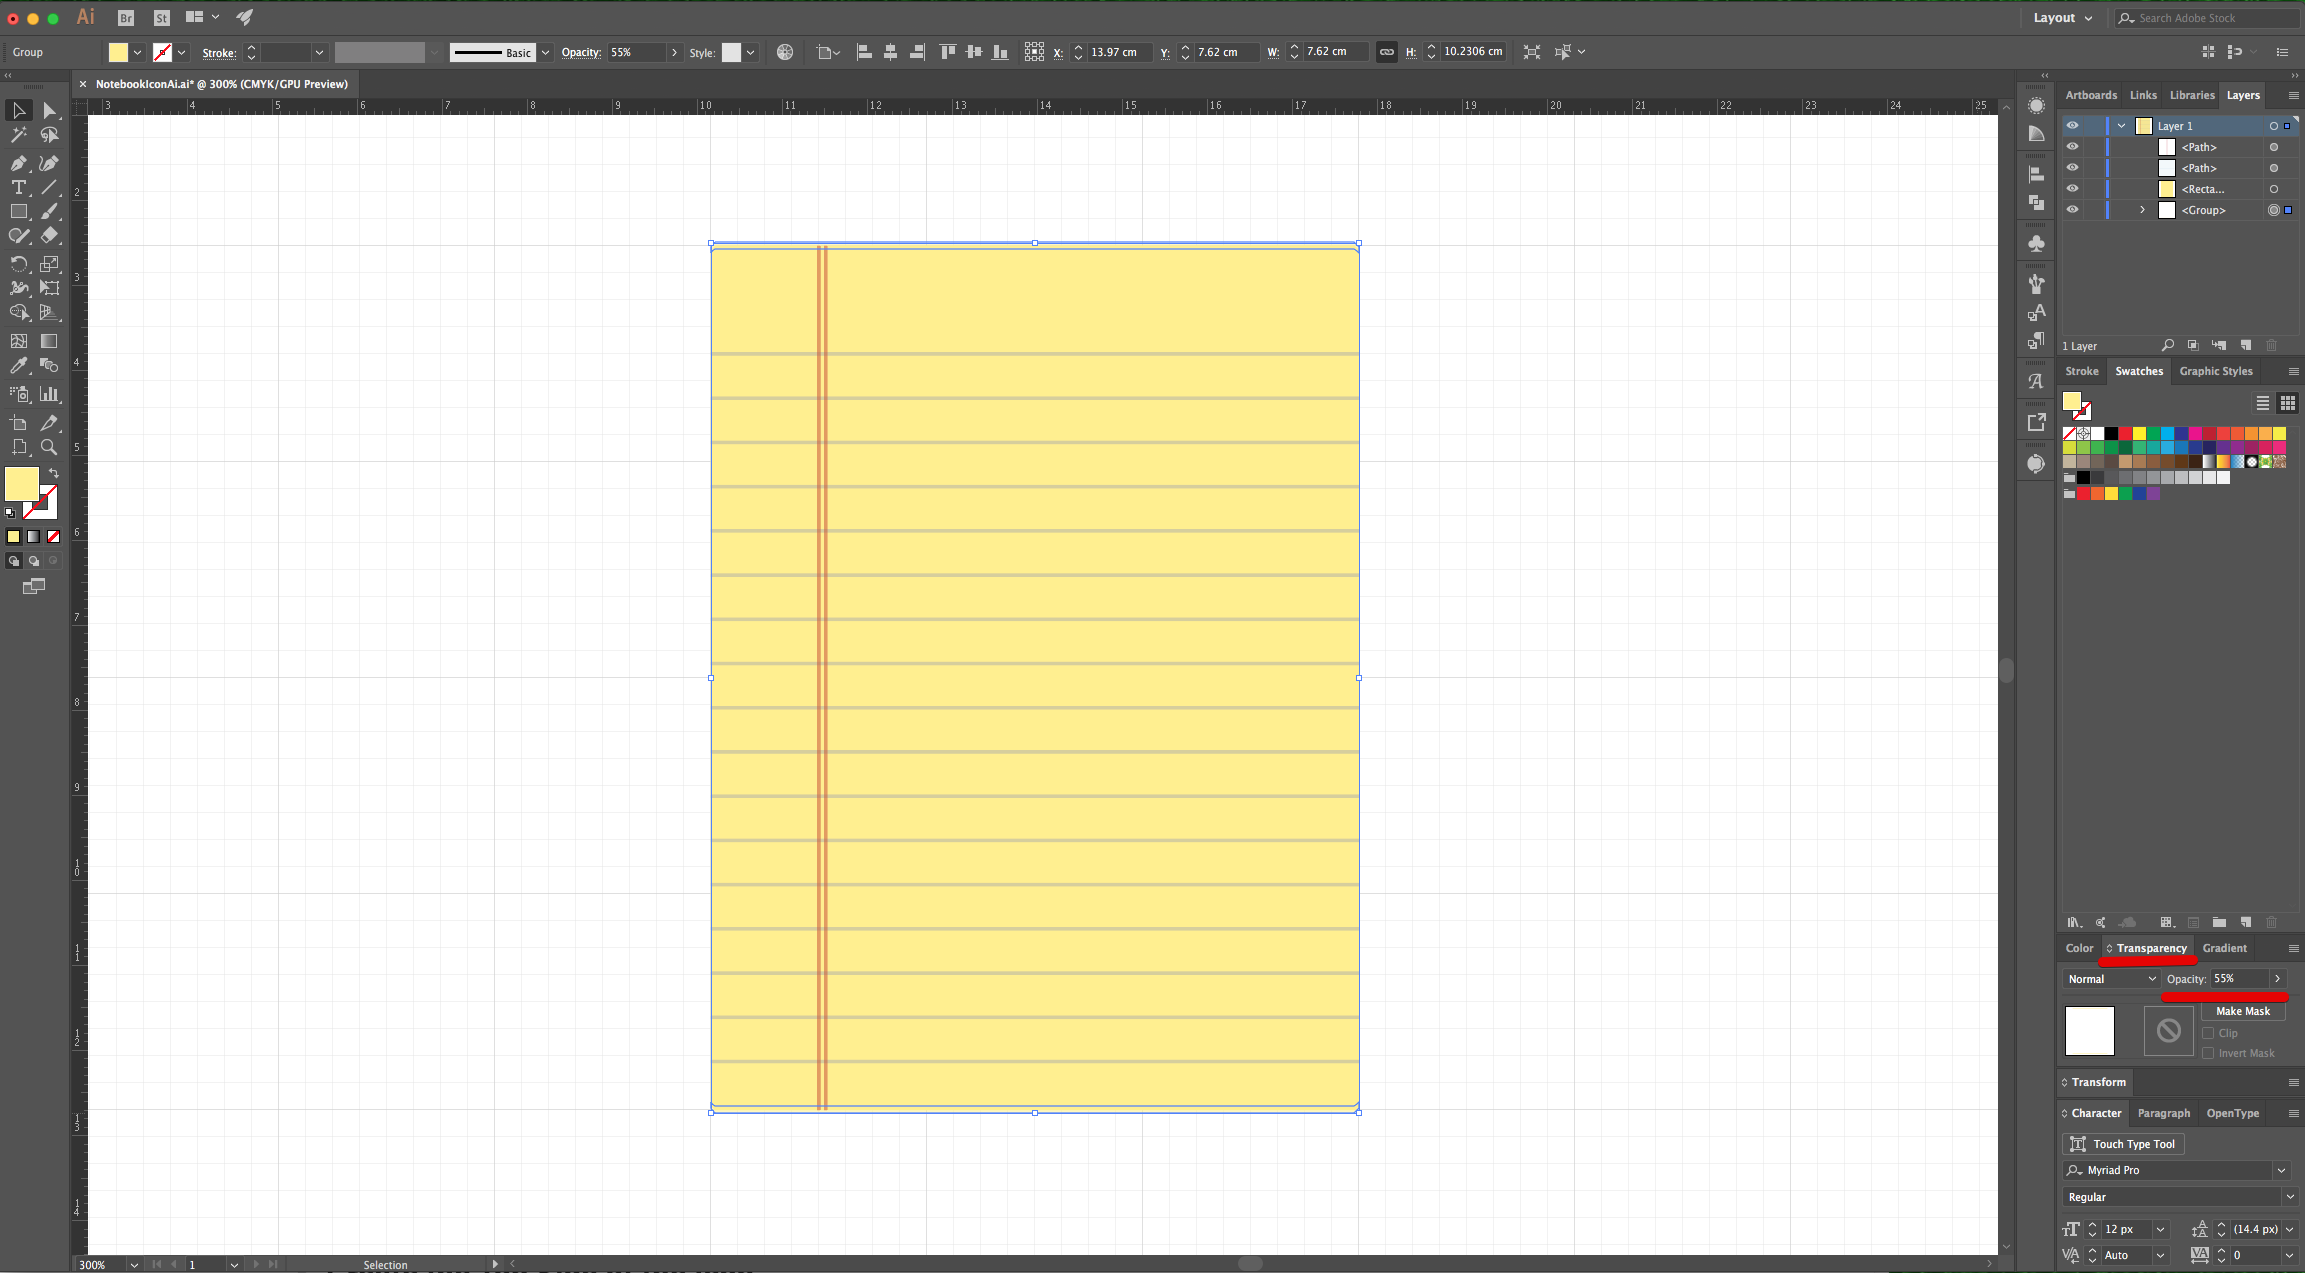
14 - In the “Transparency Panel” change the “Opacity” to 55%.
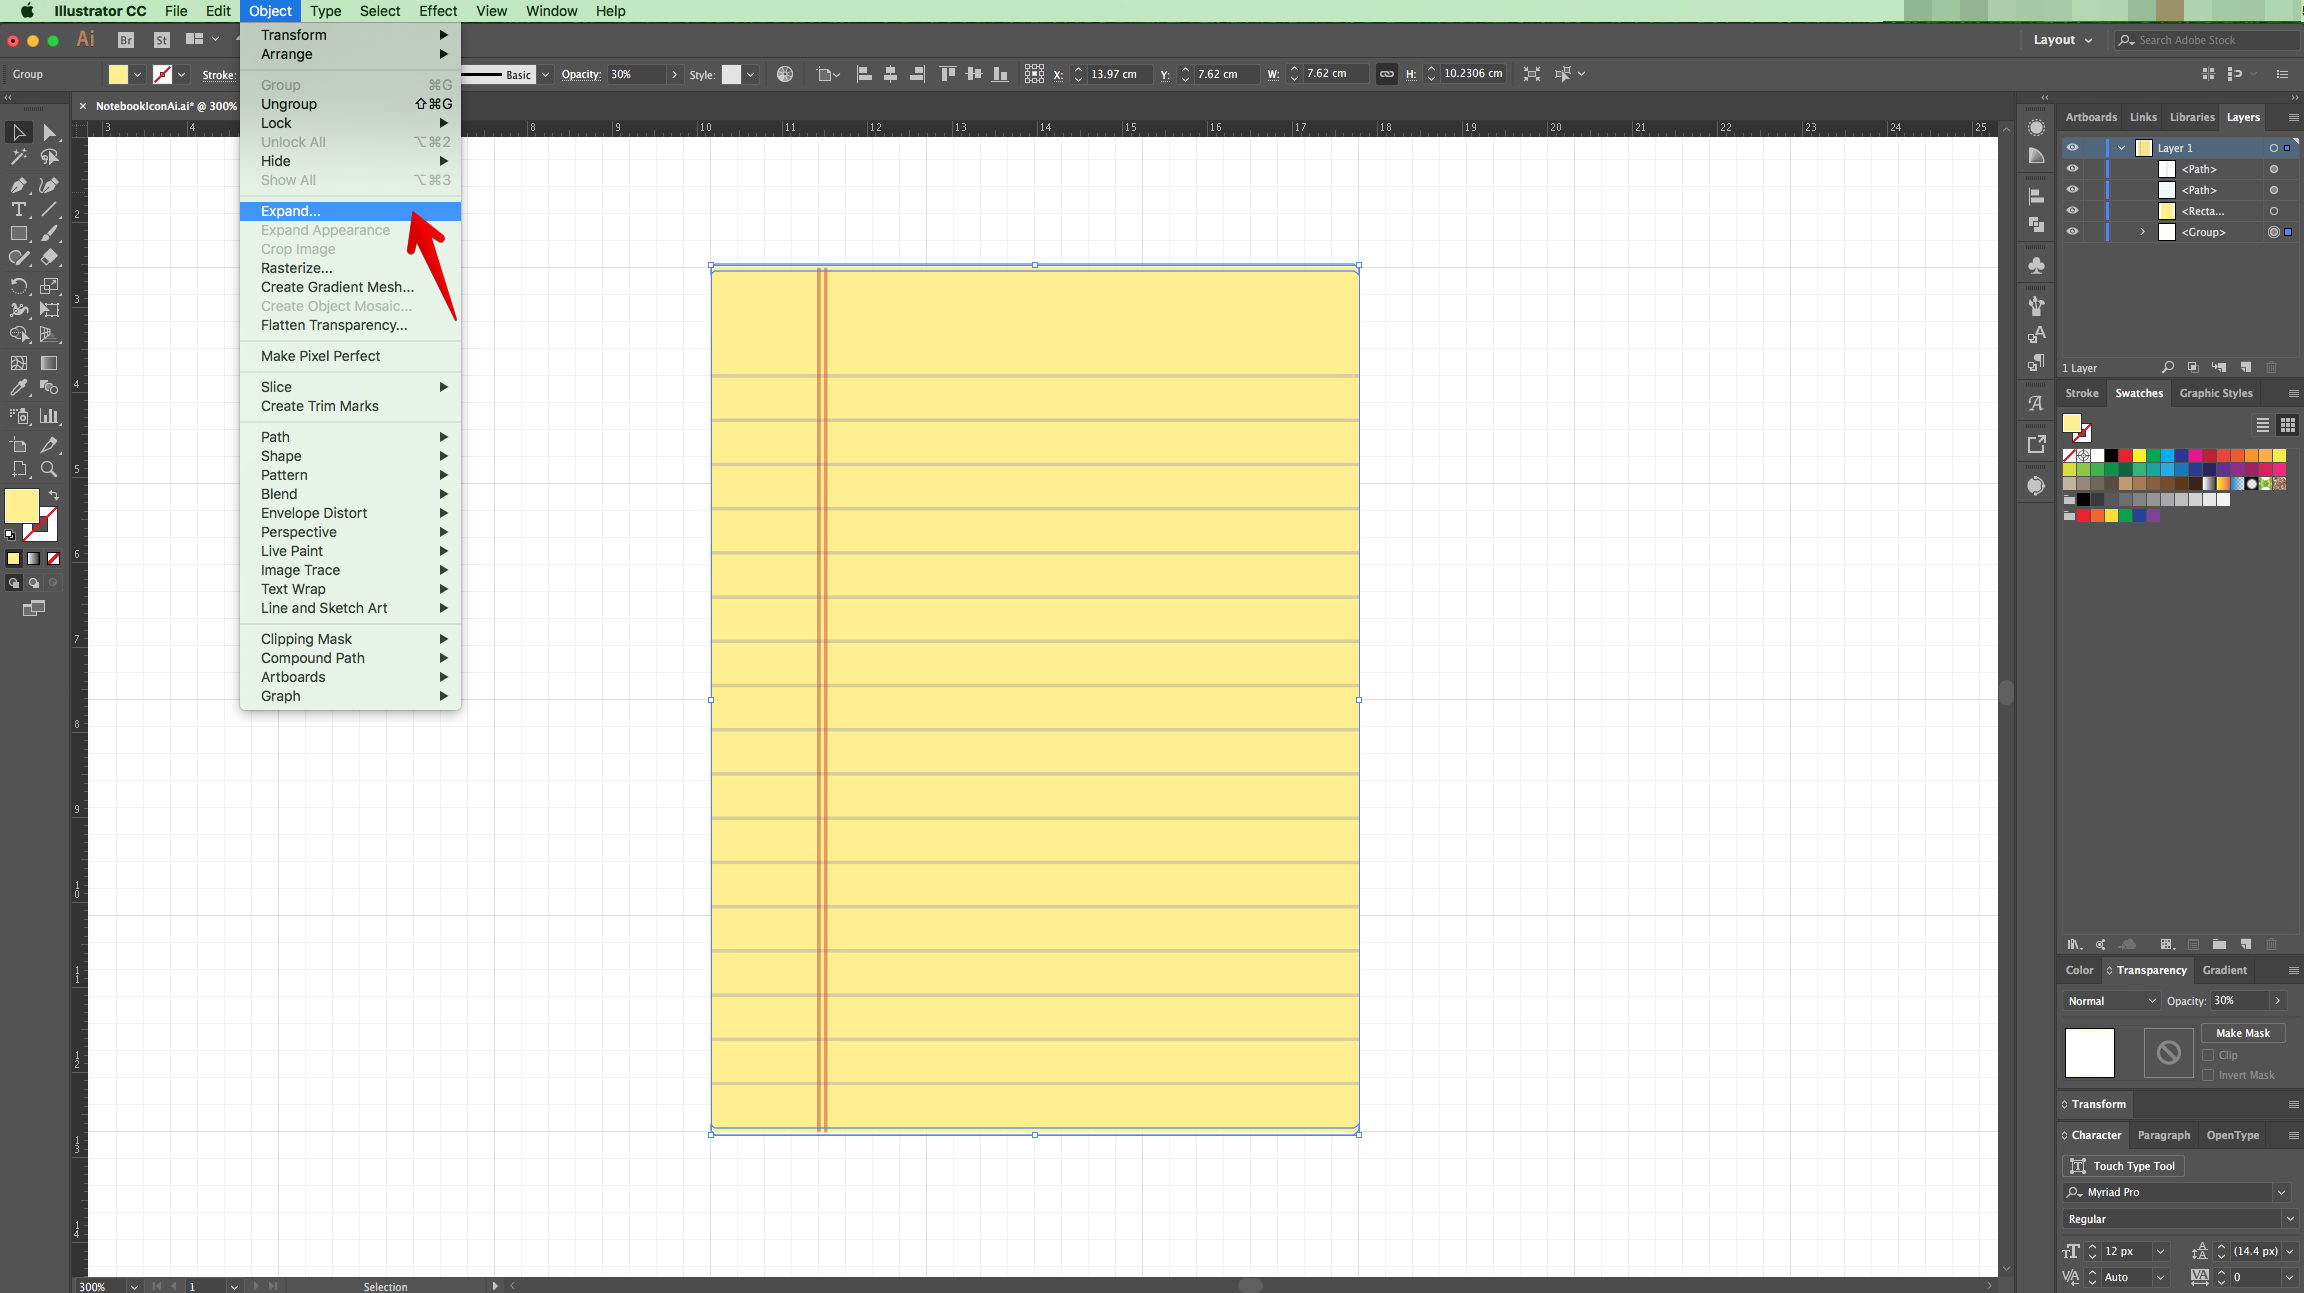
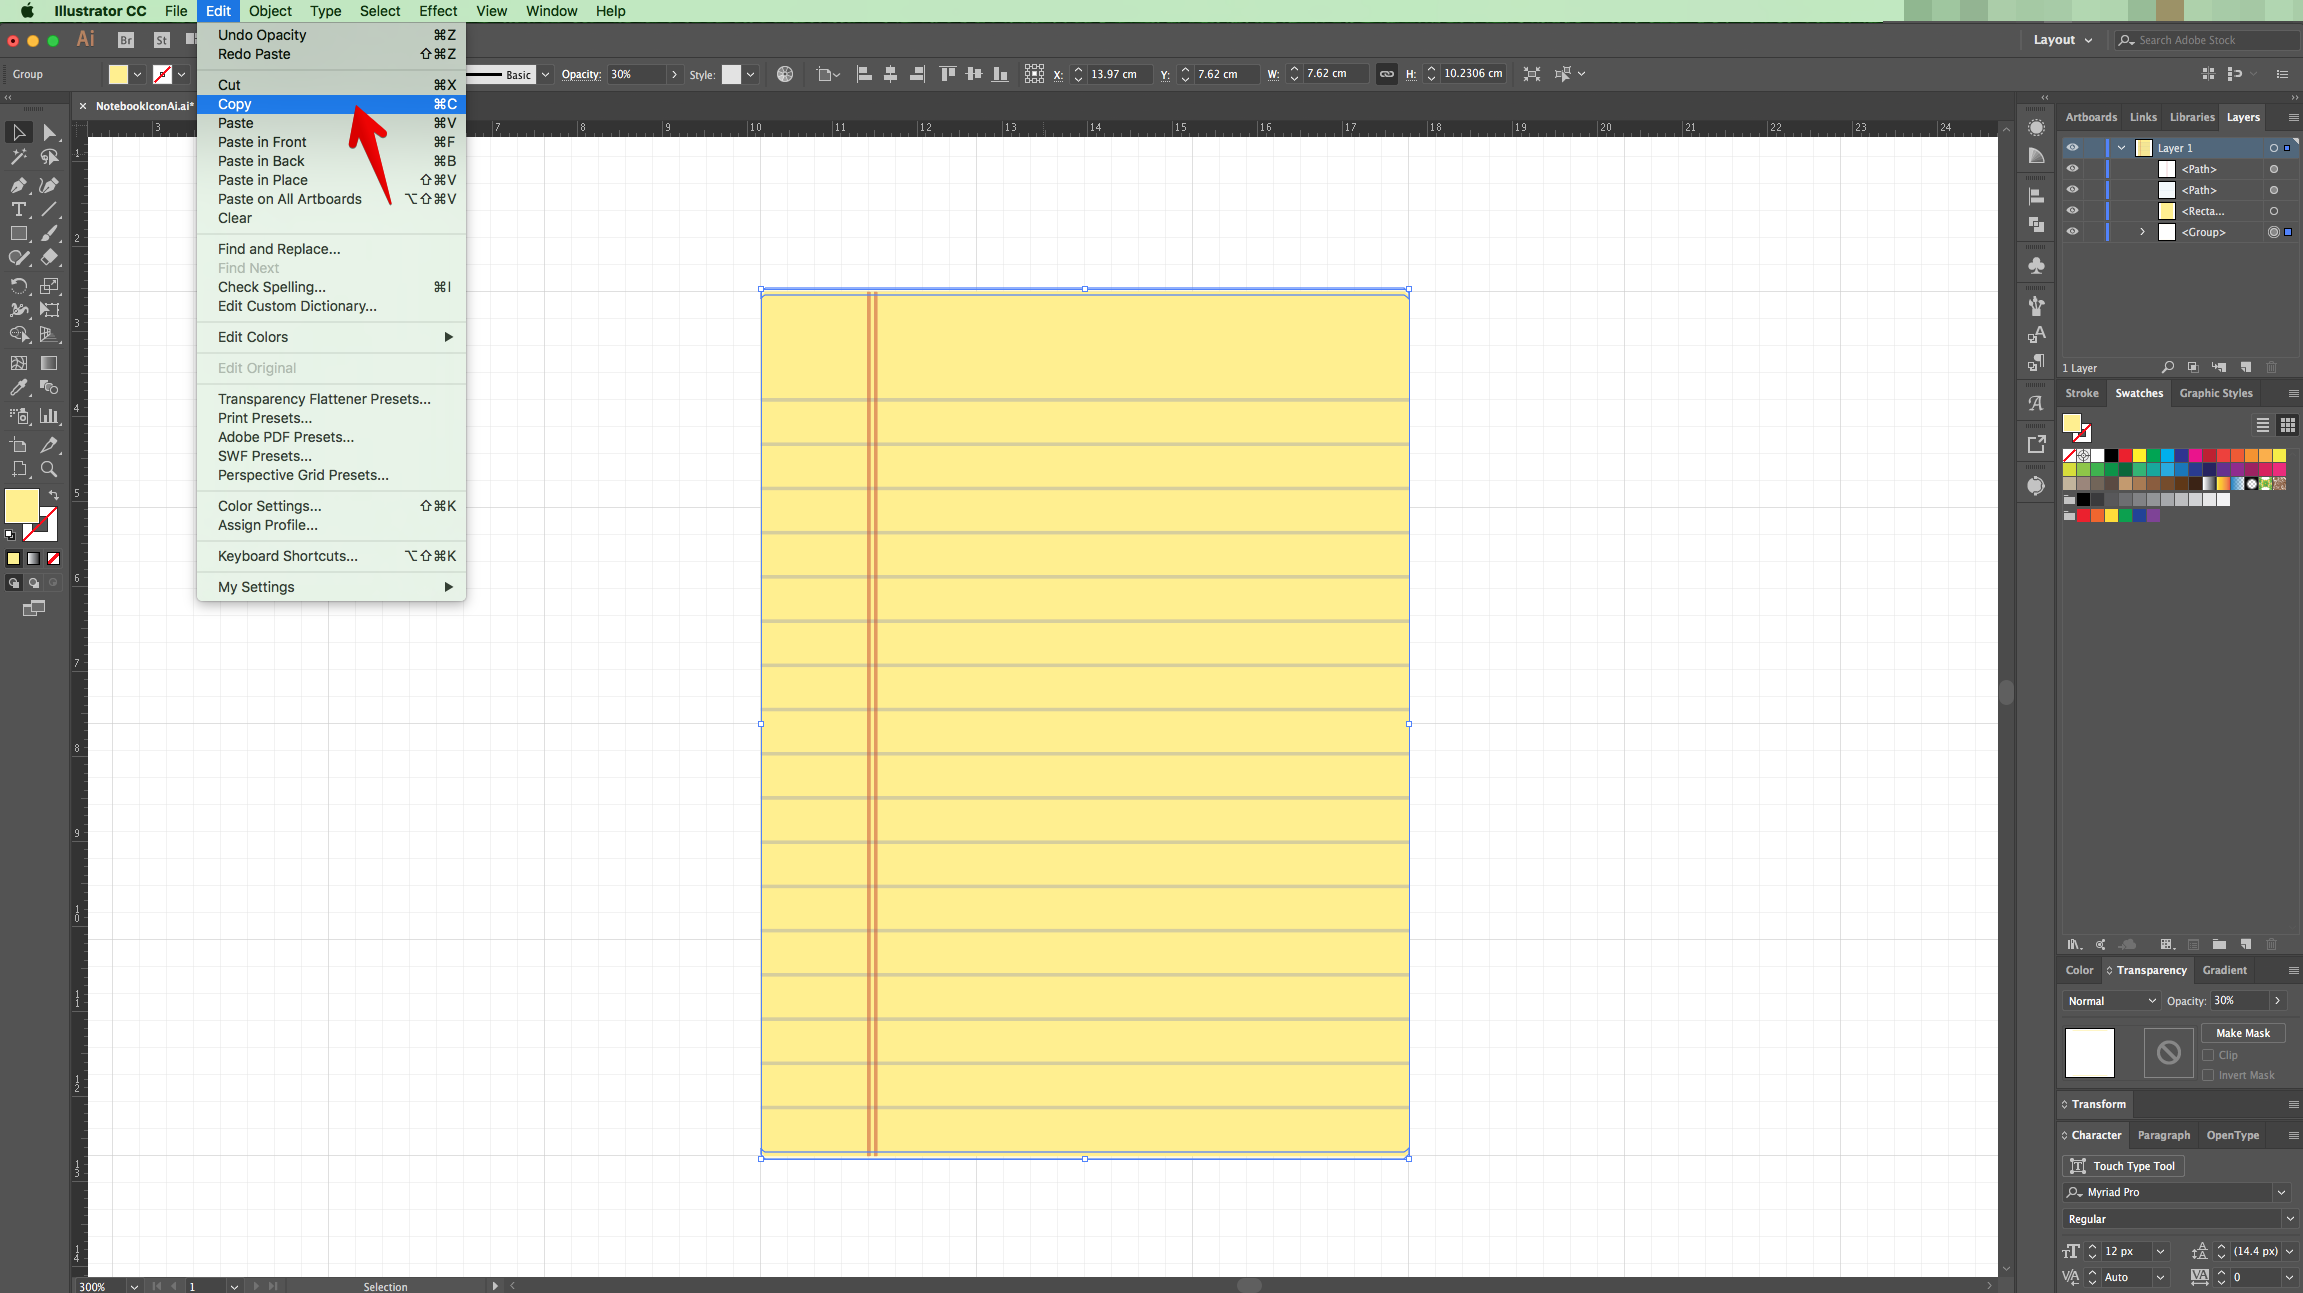
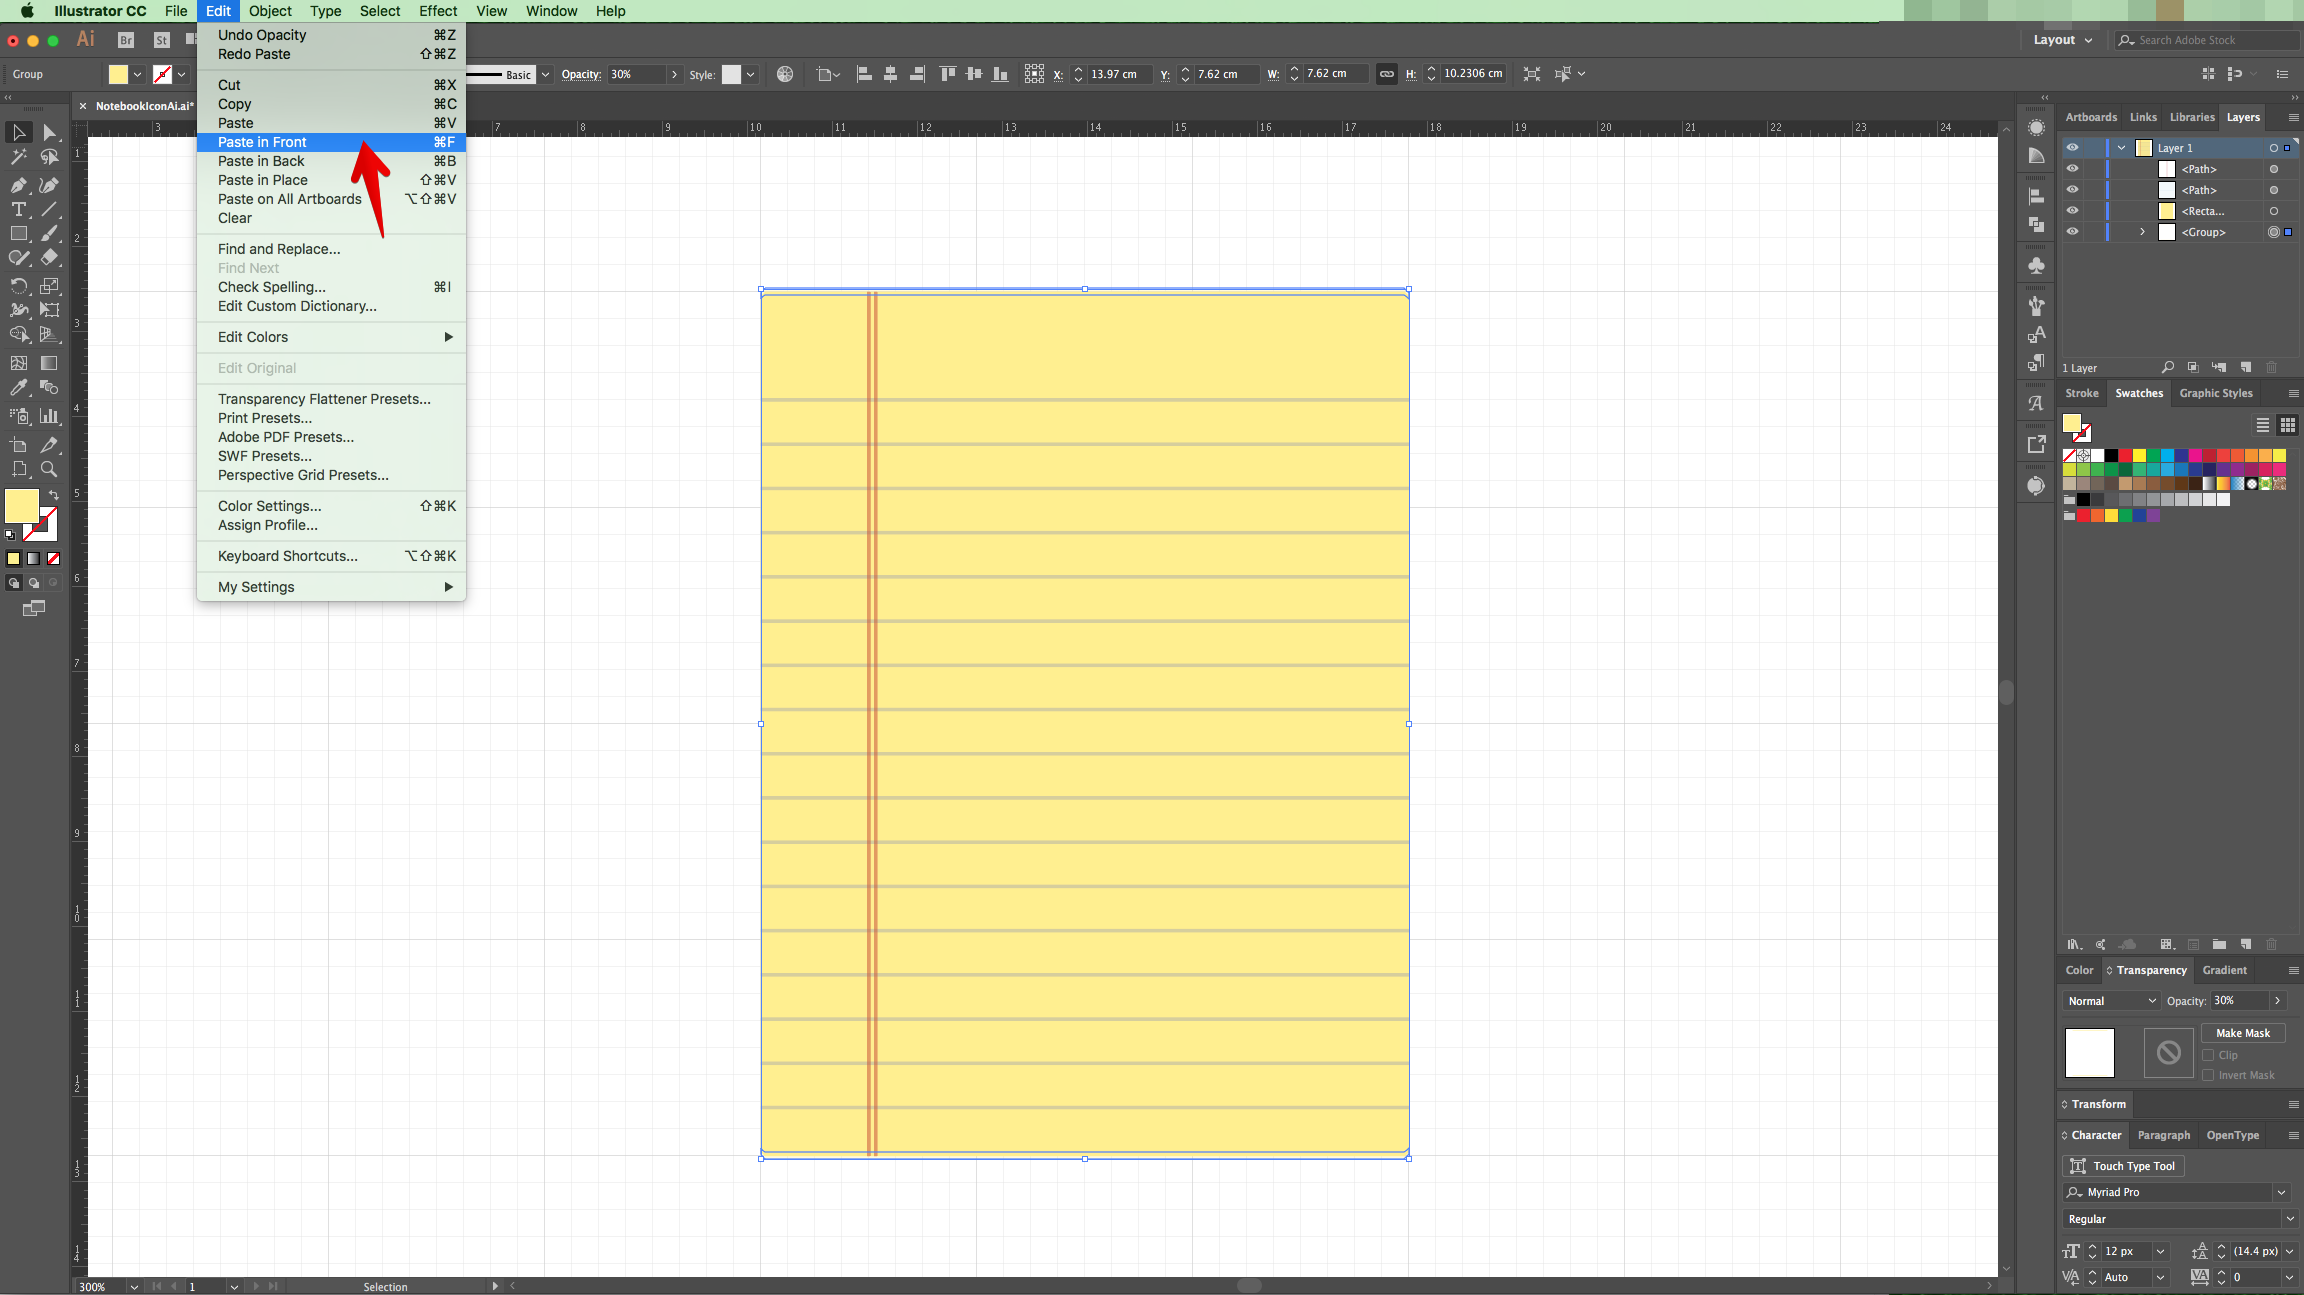
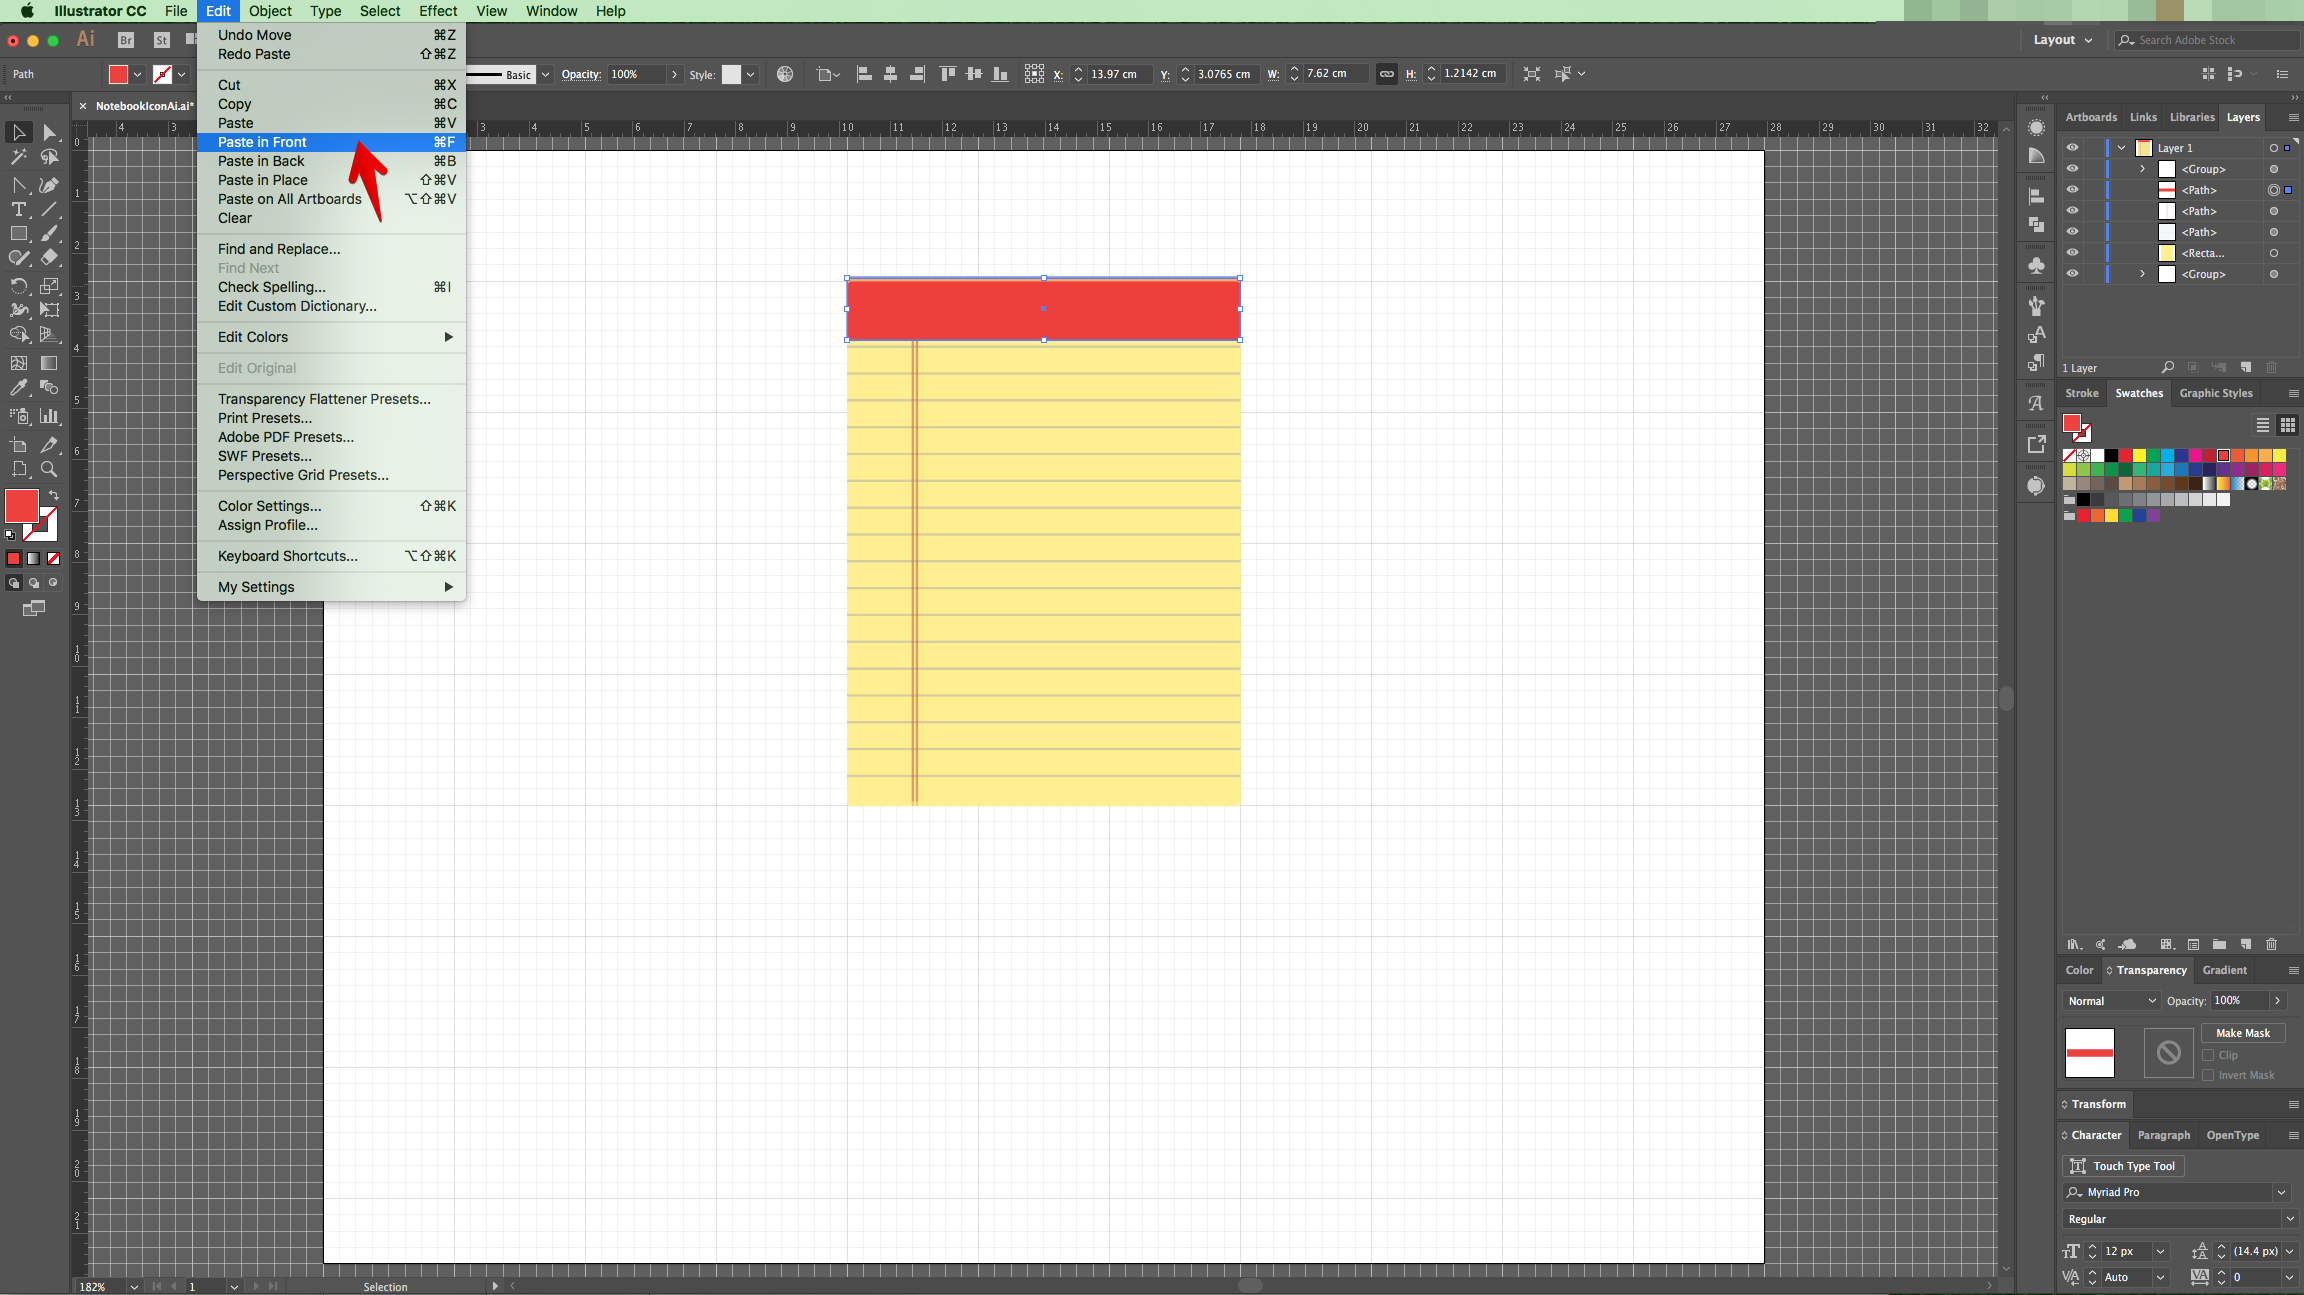
15 - Go to Object > Expand. Make a “Copy” (Command/Control + C) and “Paste in Front” (Command/Control + F).
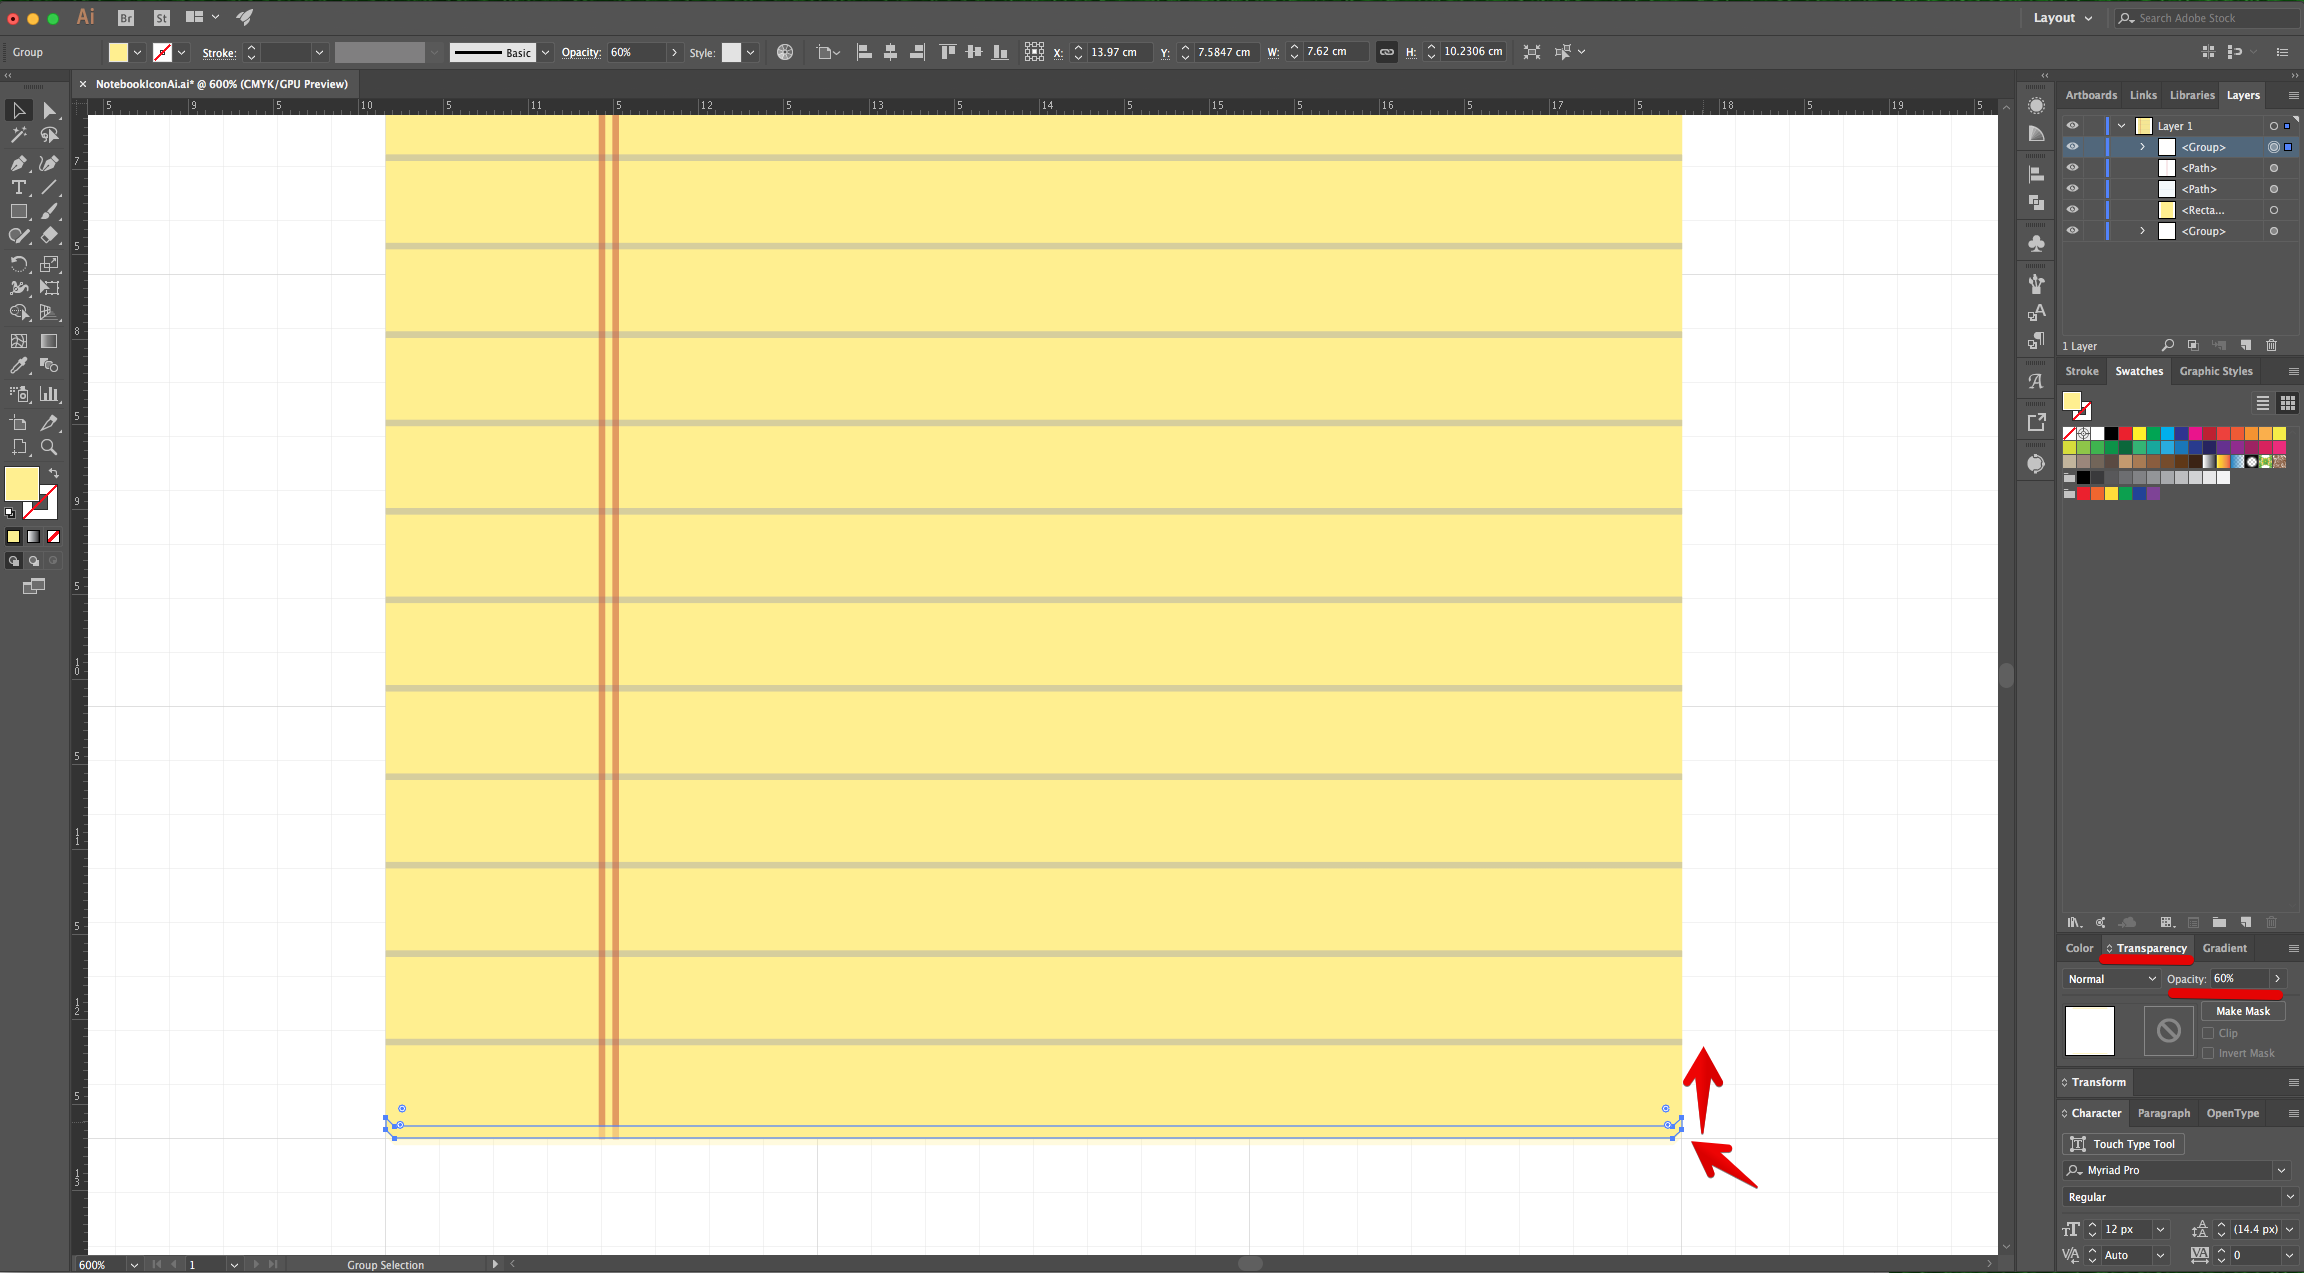
16 - Change the “Opacity” to 60% and move it up a bit so the bottom is aligned with the original rectangle.
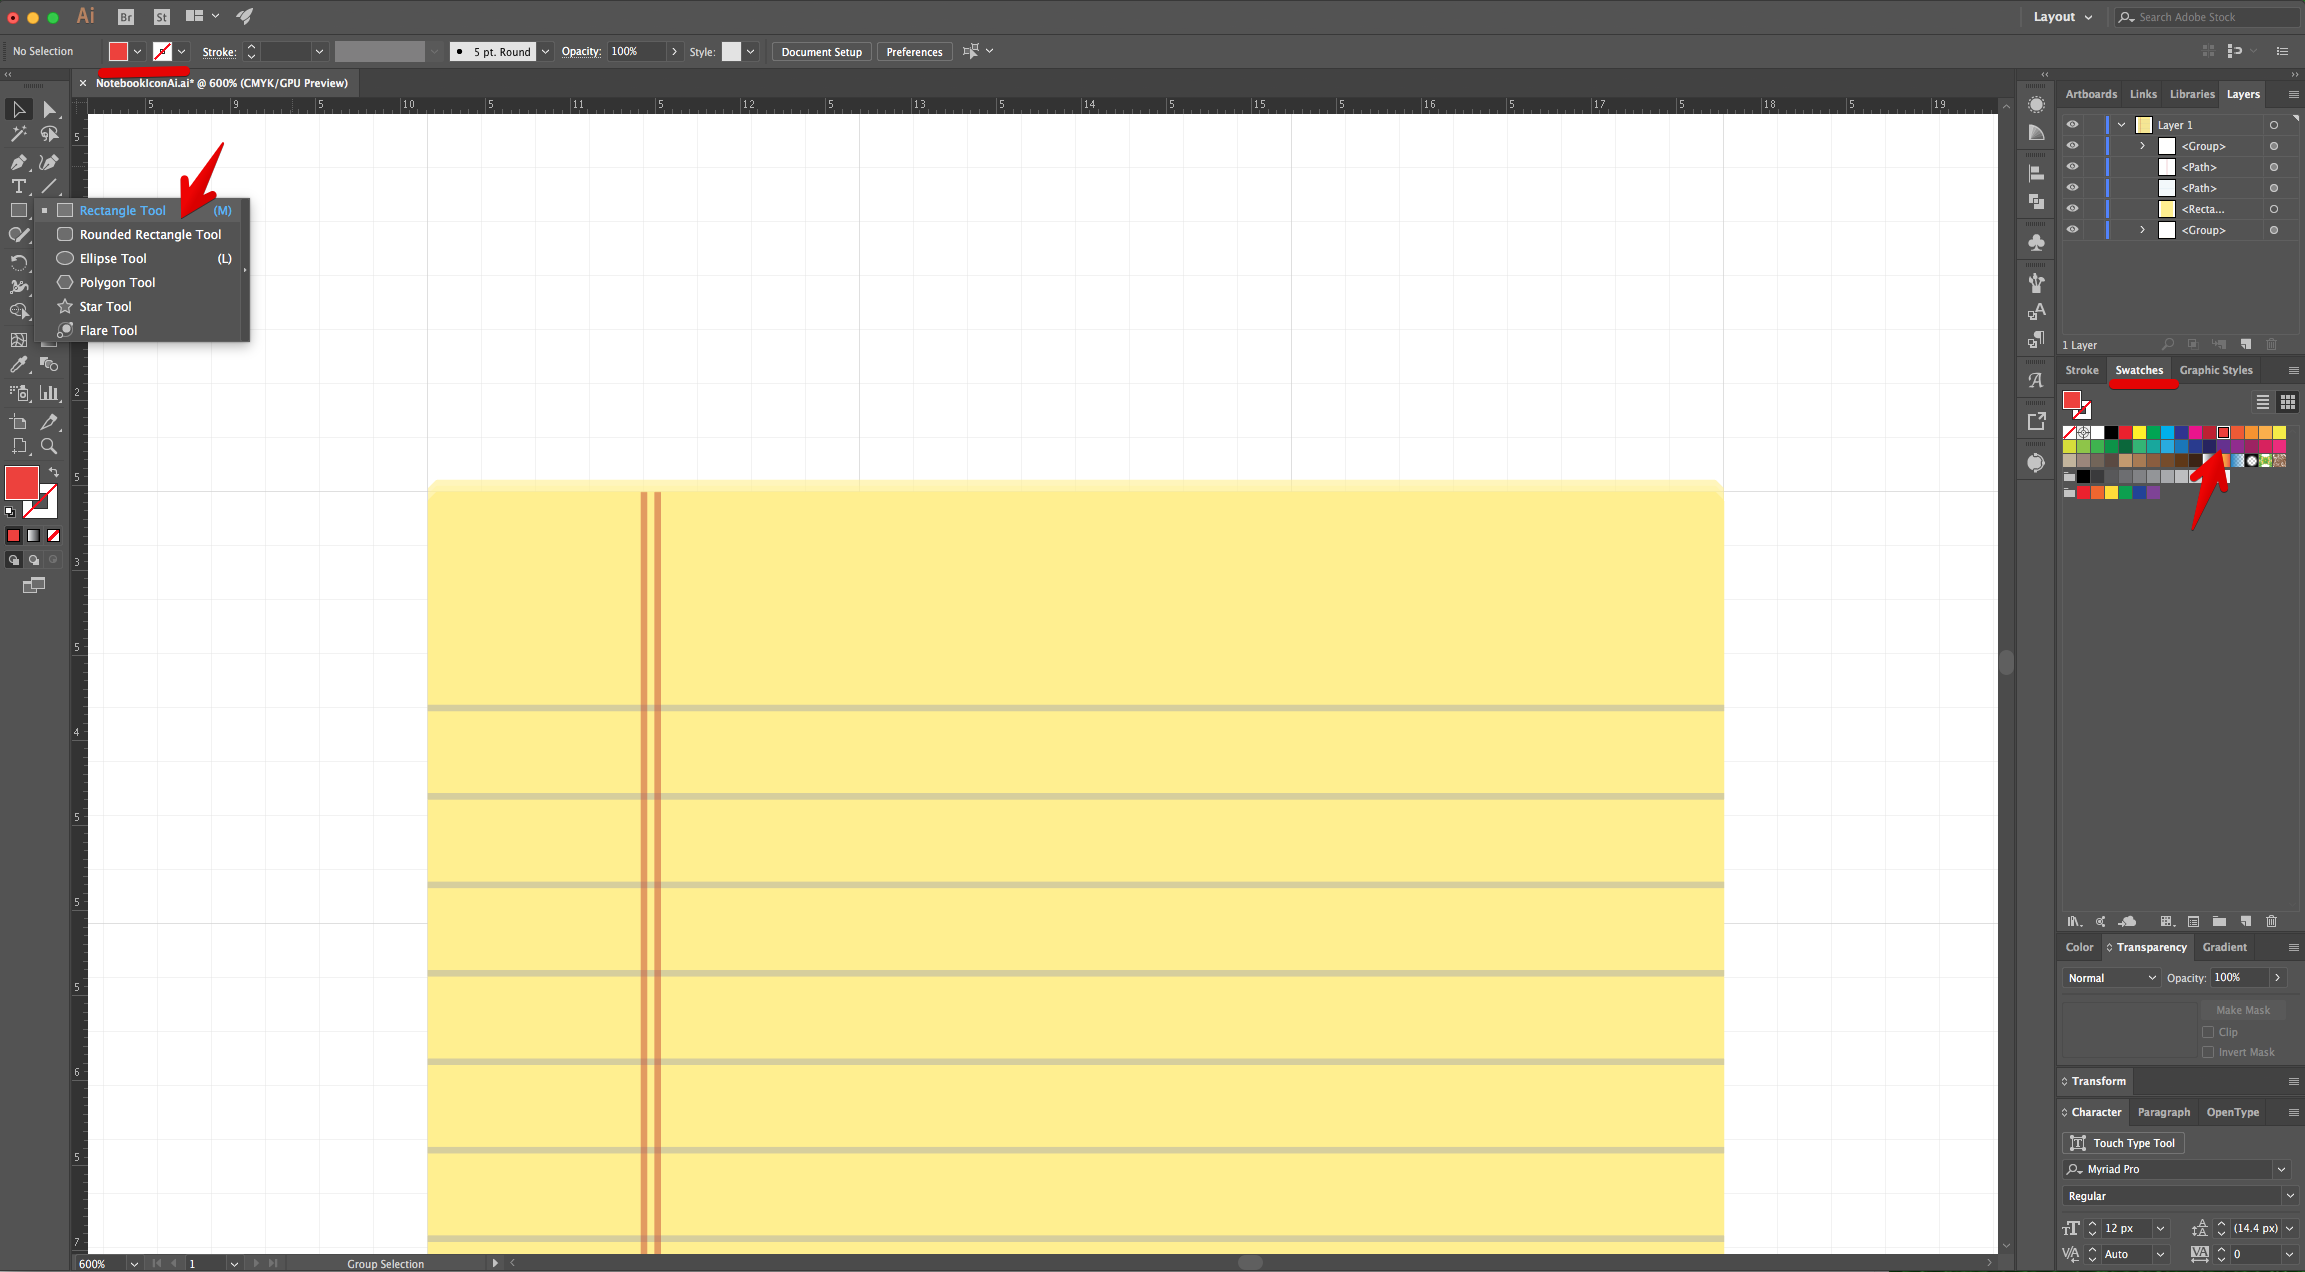
17 - Use the “Rectangle Tool” (M), to create a rectangle that covers the top portion of the “Notebook” from side to side. It should end just a couple of mm top of the first “Blue” line. Fill it with a Red shade from the “Swatches Panel”.

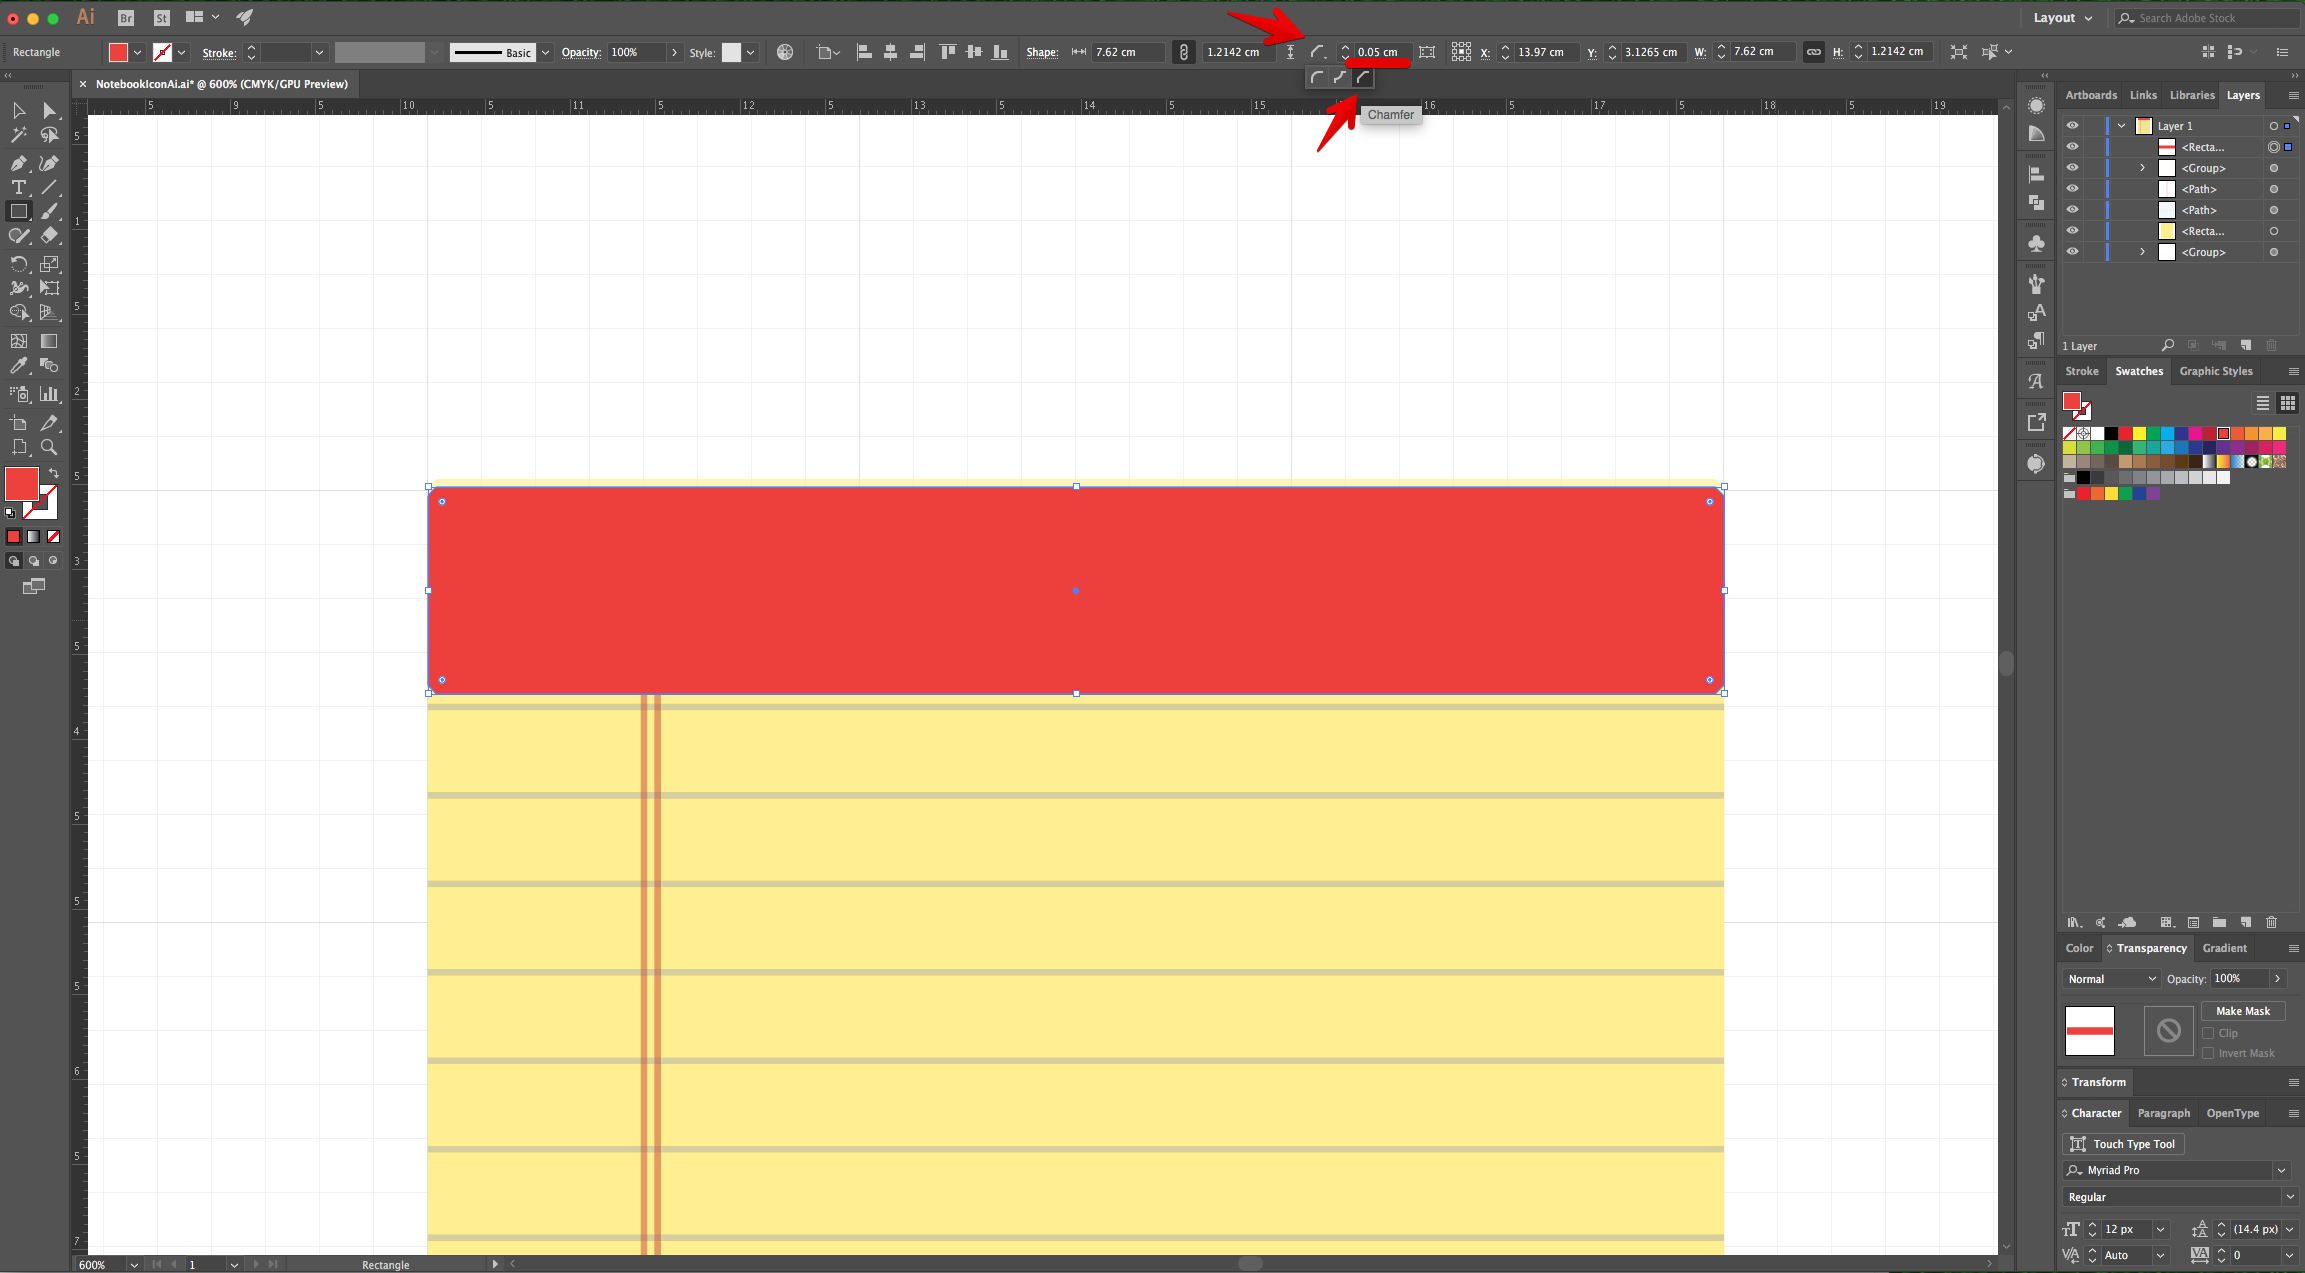
18 - Change the shape of the “Corners” to “Chamfer” of 0.05 cm. and move it down in the “Layers Panel” making sure it is positioned under the “Group” that has the 60% “Opacity”.

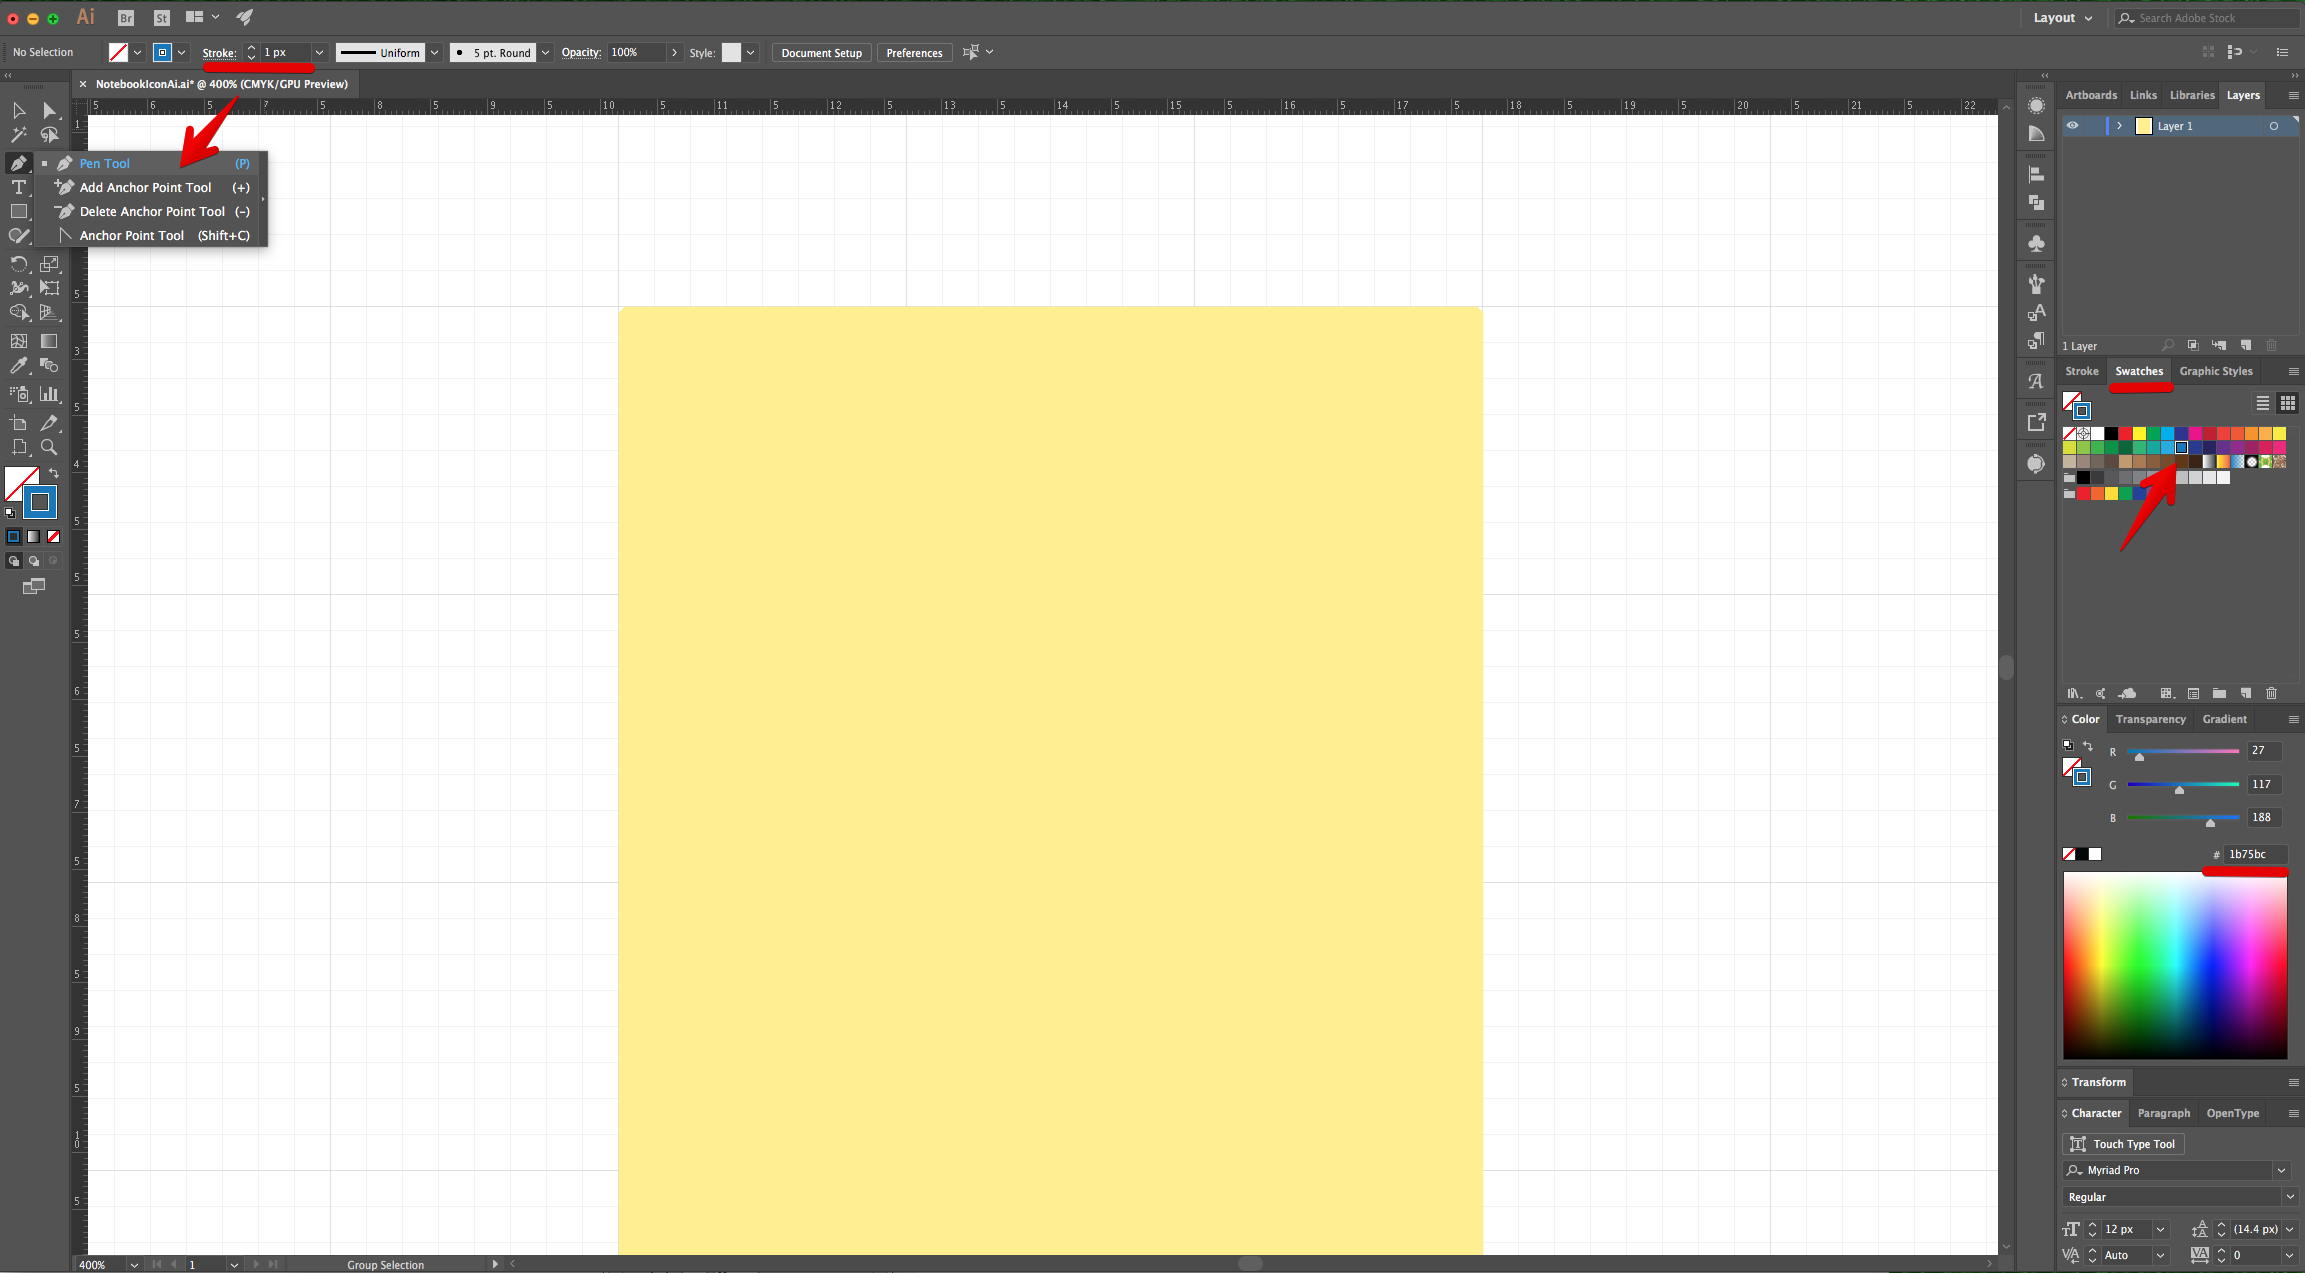
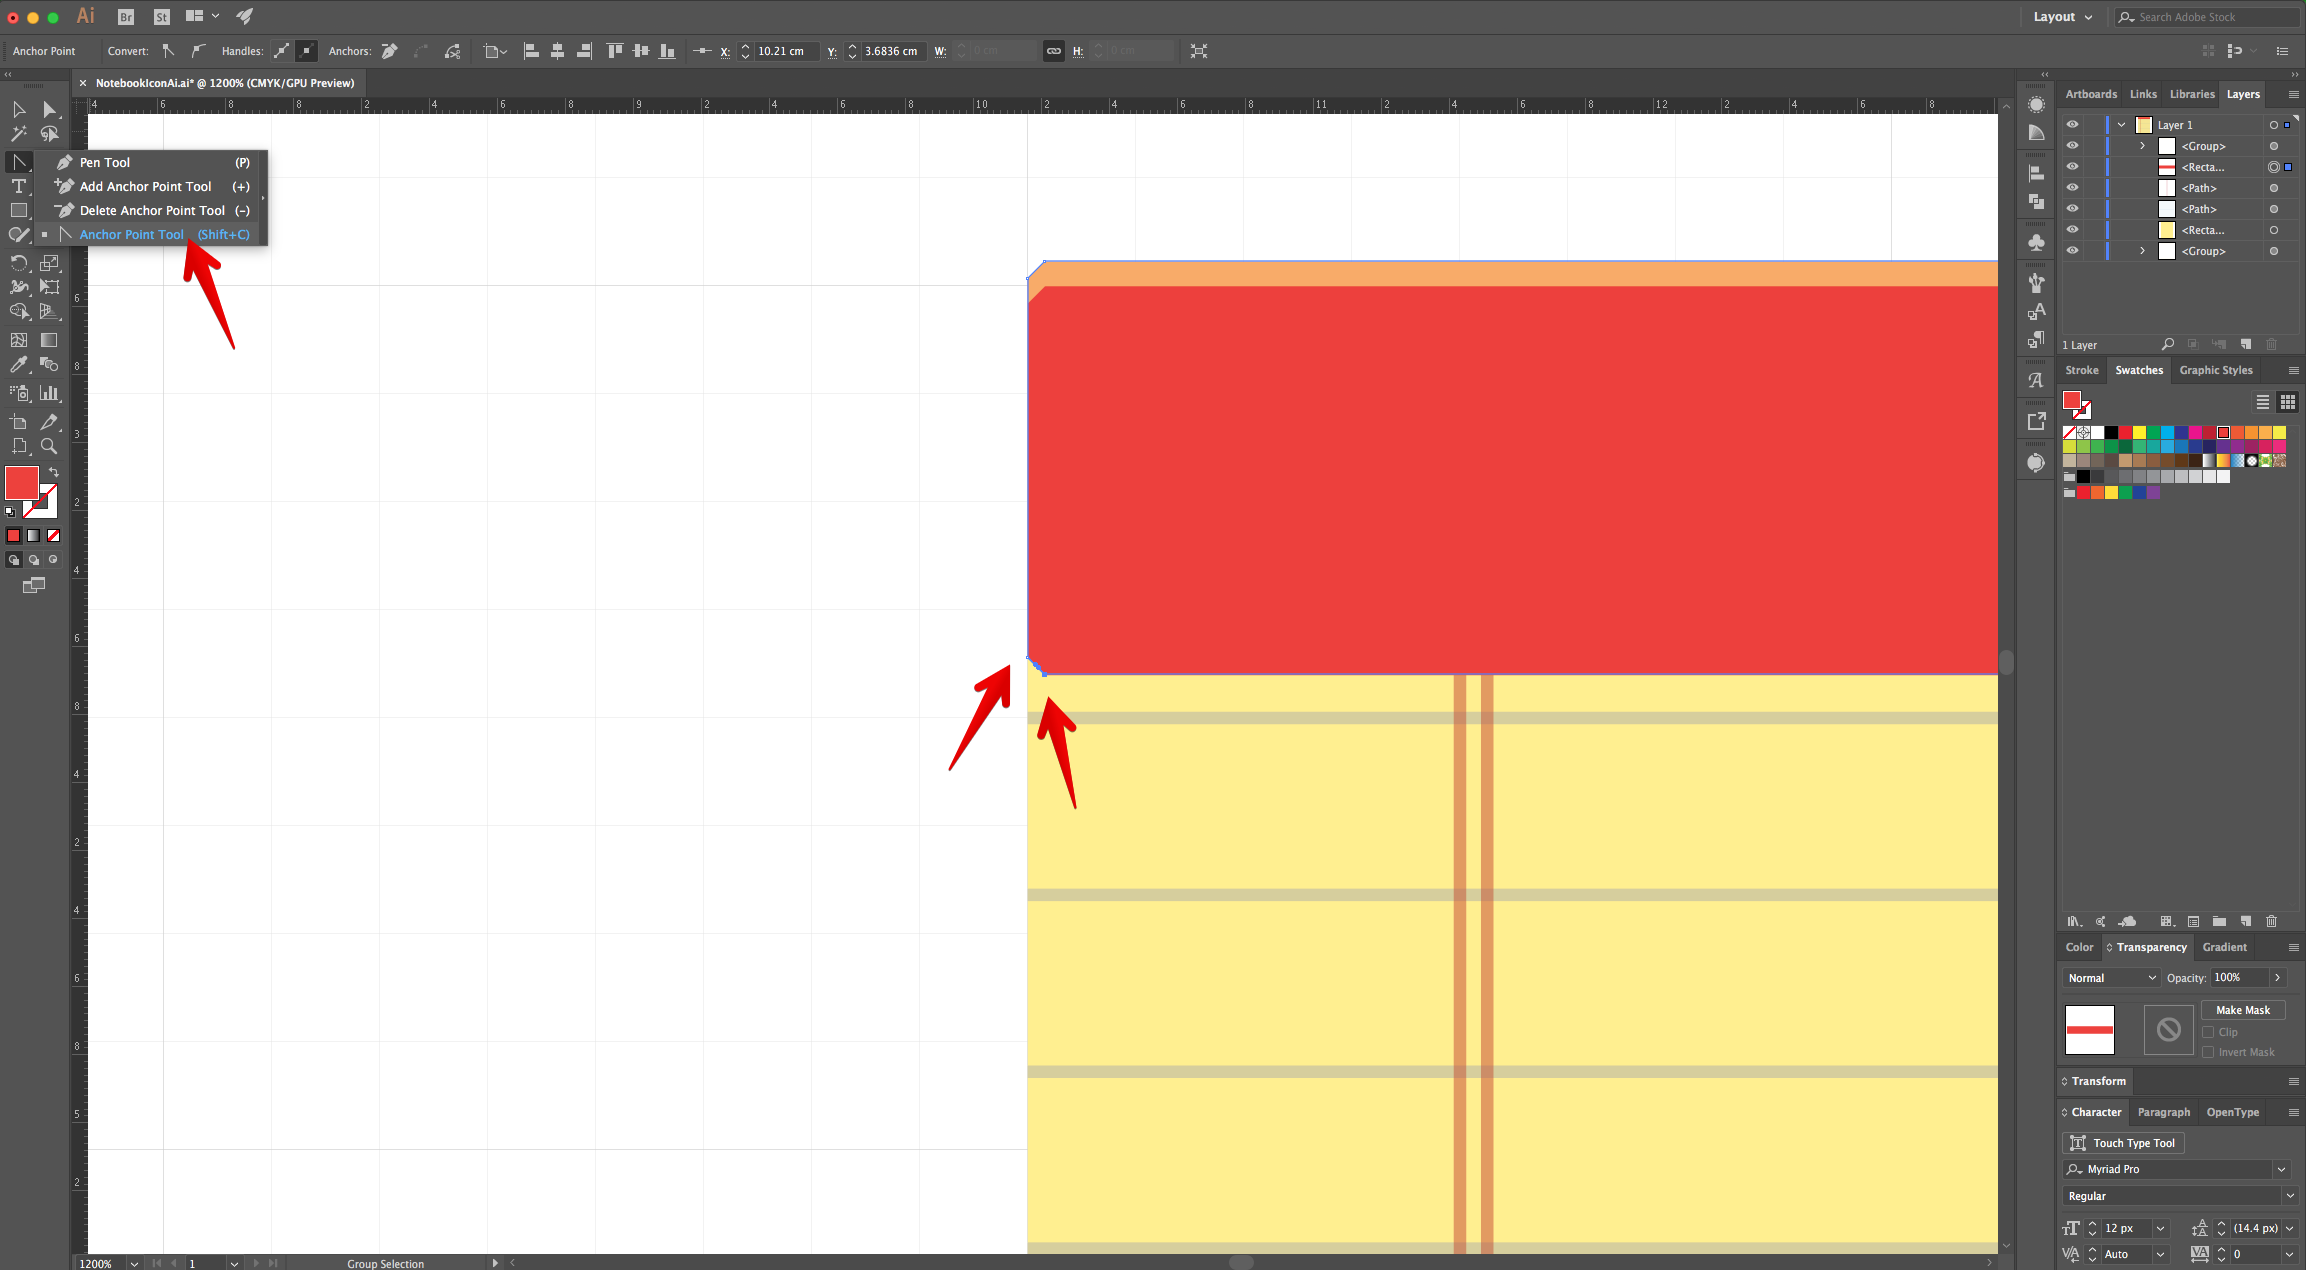
19 - Use the “Anchor Point Tool” (Shift + C) to select the bottom “Anchor Points” created by the “Chamfer” corners, click both and then drag the Top one down using the “Direct Selection Tool” (A) while holding the “Shift” key to make a straight line. Repeat with the other side of the Rectangle.

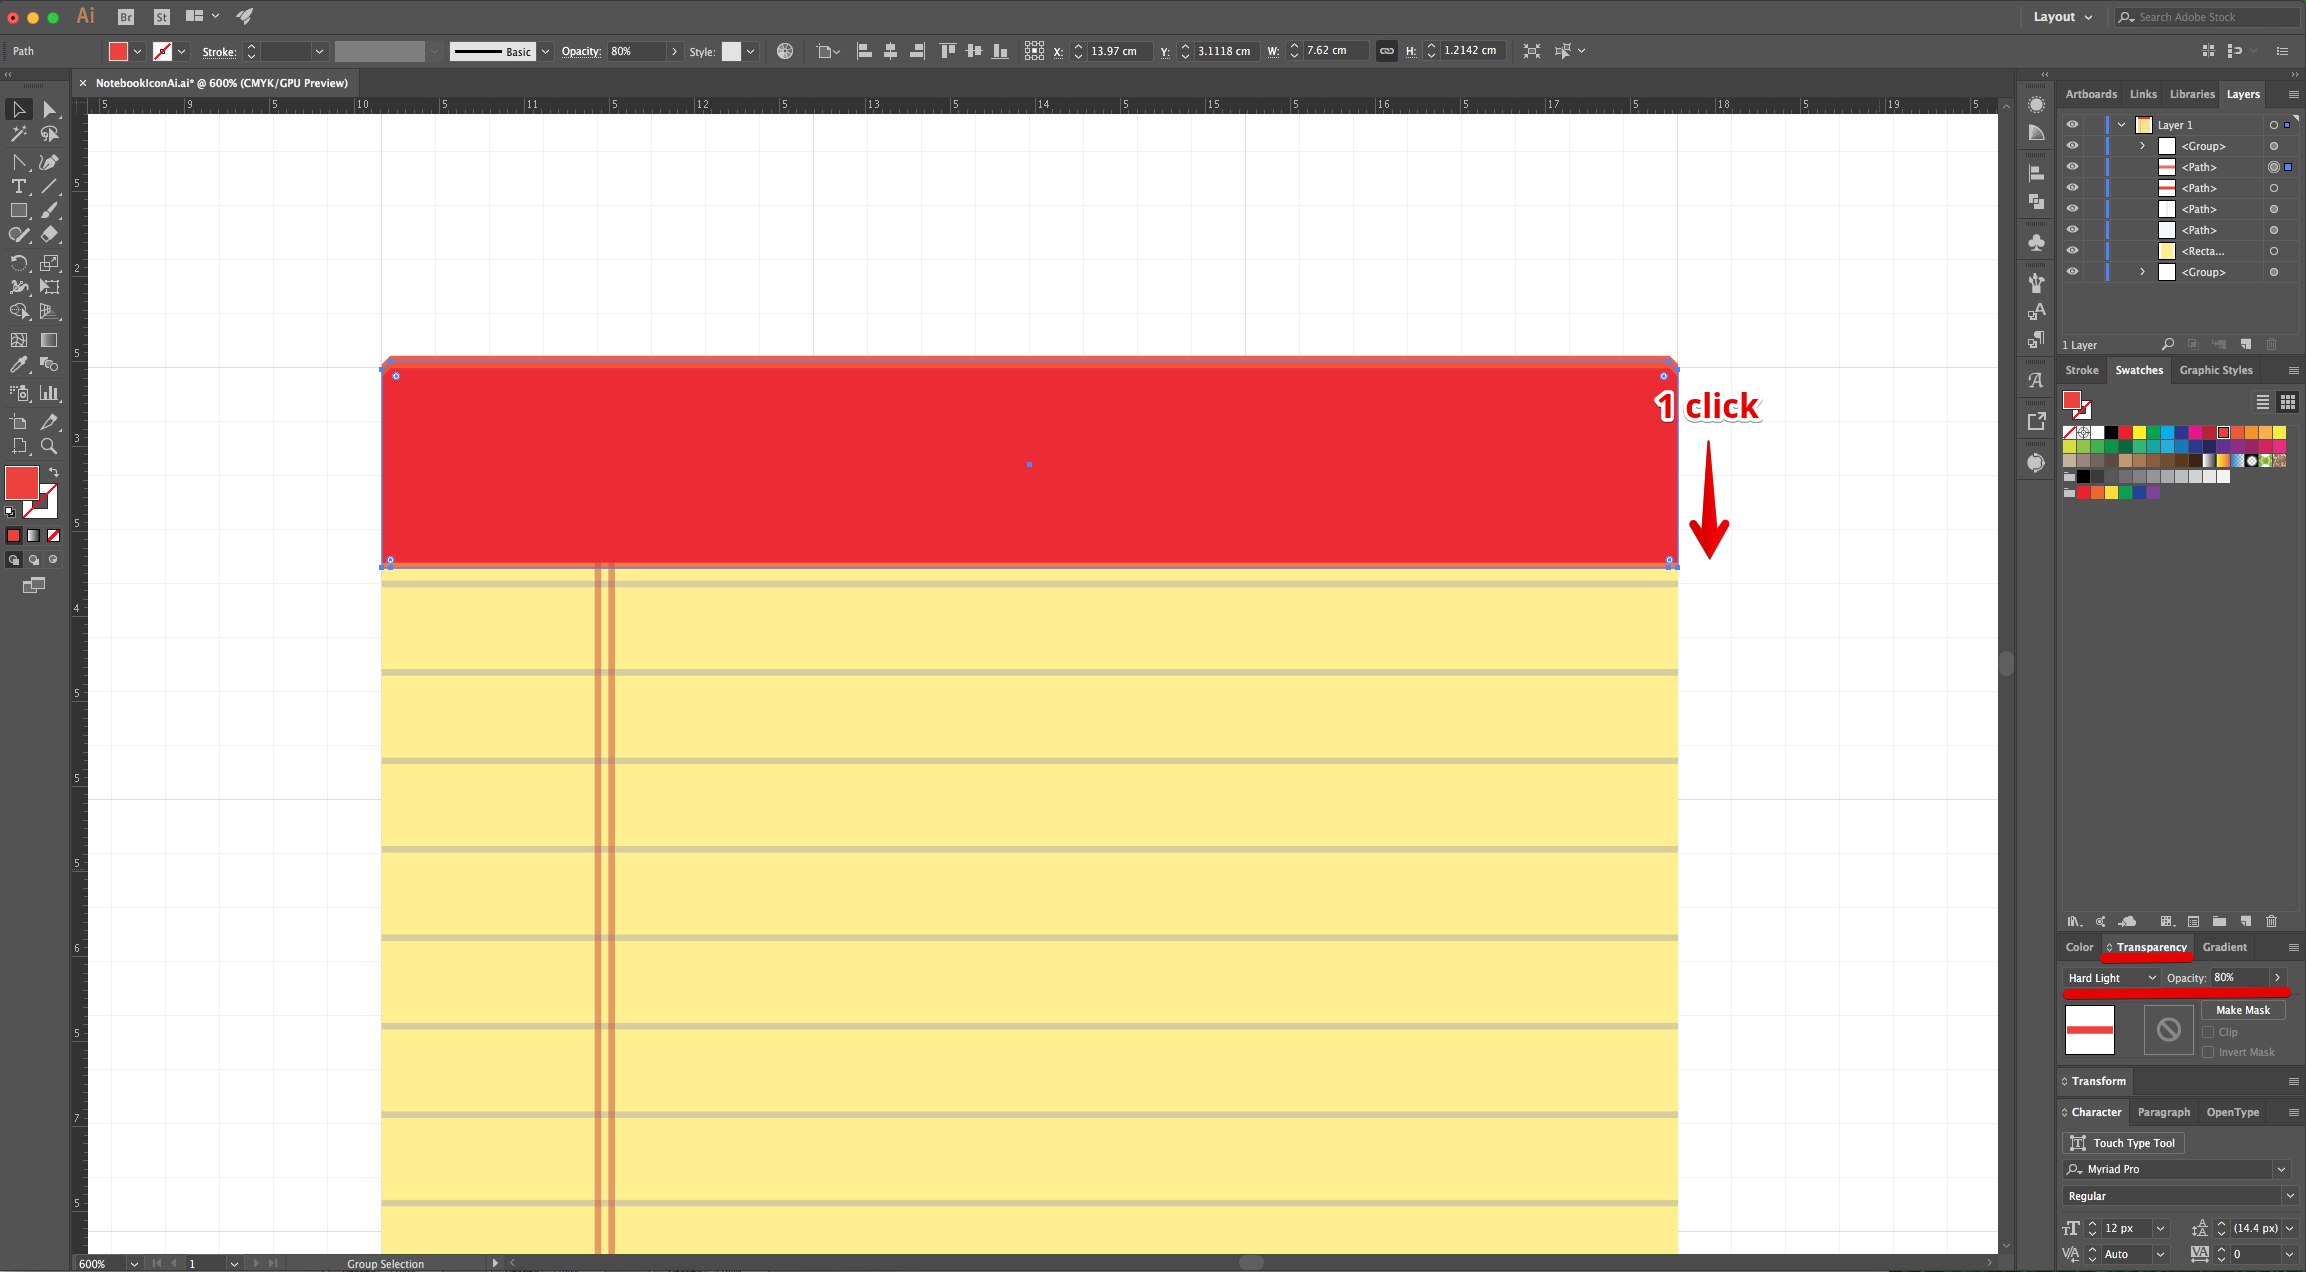
20 - Make a “Copy” (Command/Control + C) and “Paste in Front” (Command/Control + F). In the “Transparency Panel” change the “Blending Mode” to “Hard Light” and the “Opacity” to 80% and move it down one click.
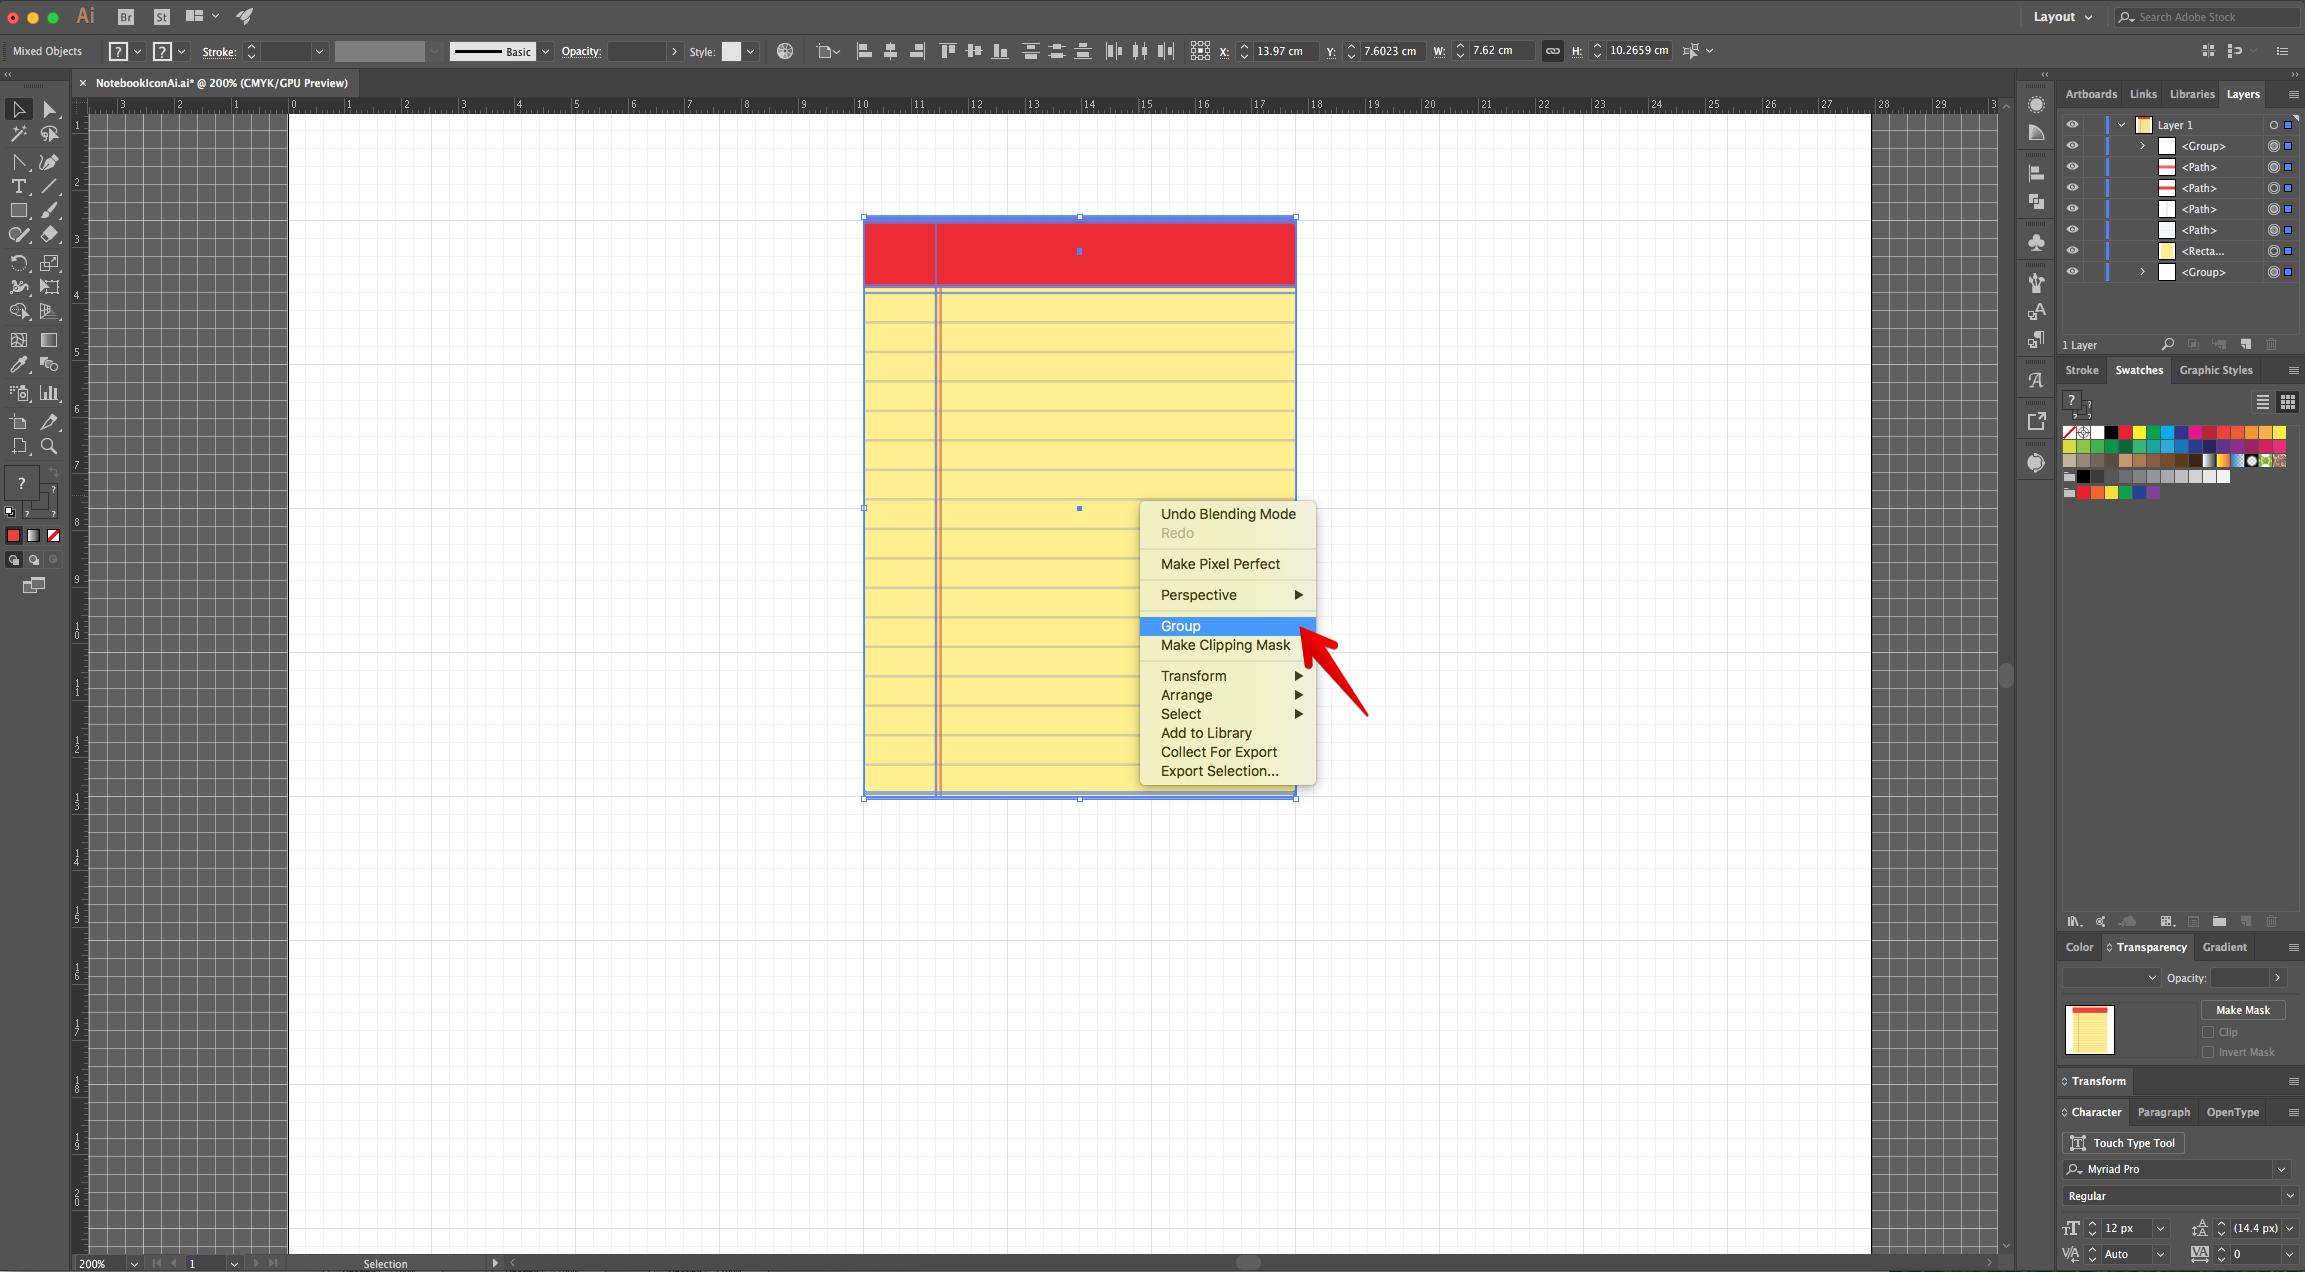
21 - Select everything, right-click on top and choose “Group”.
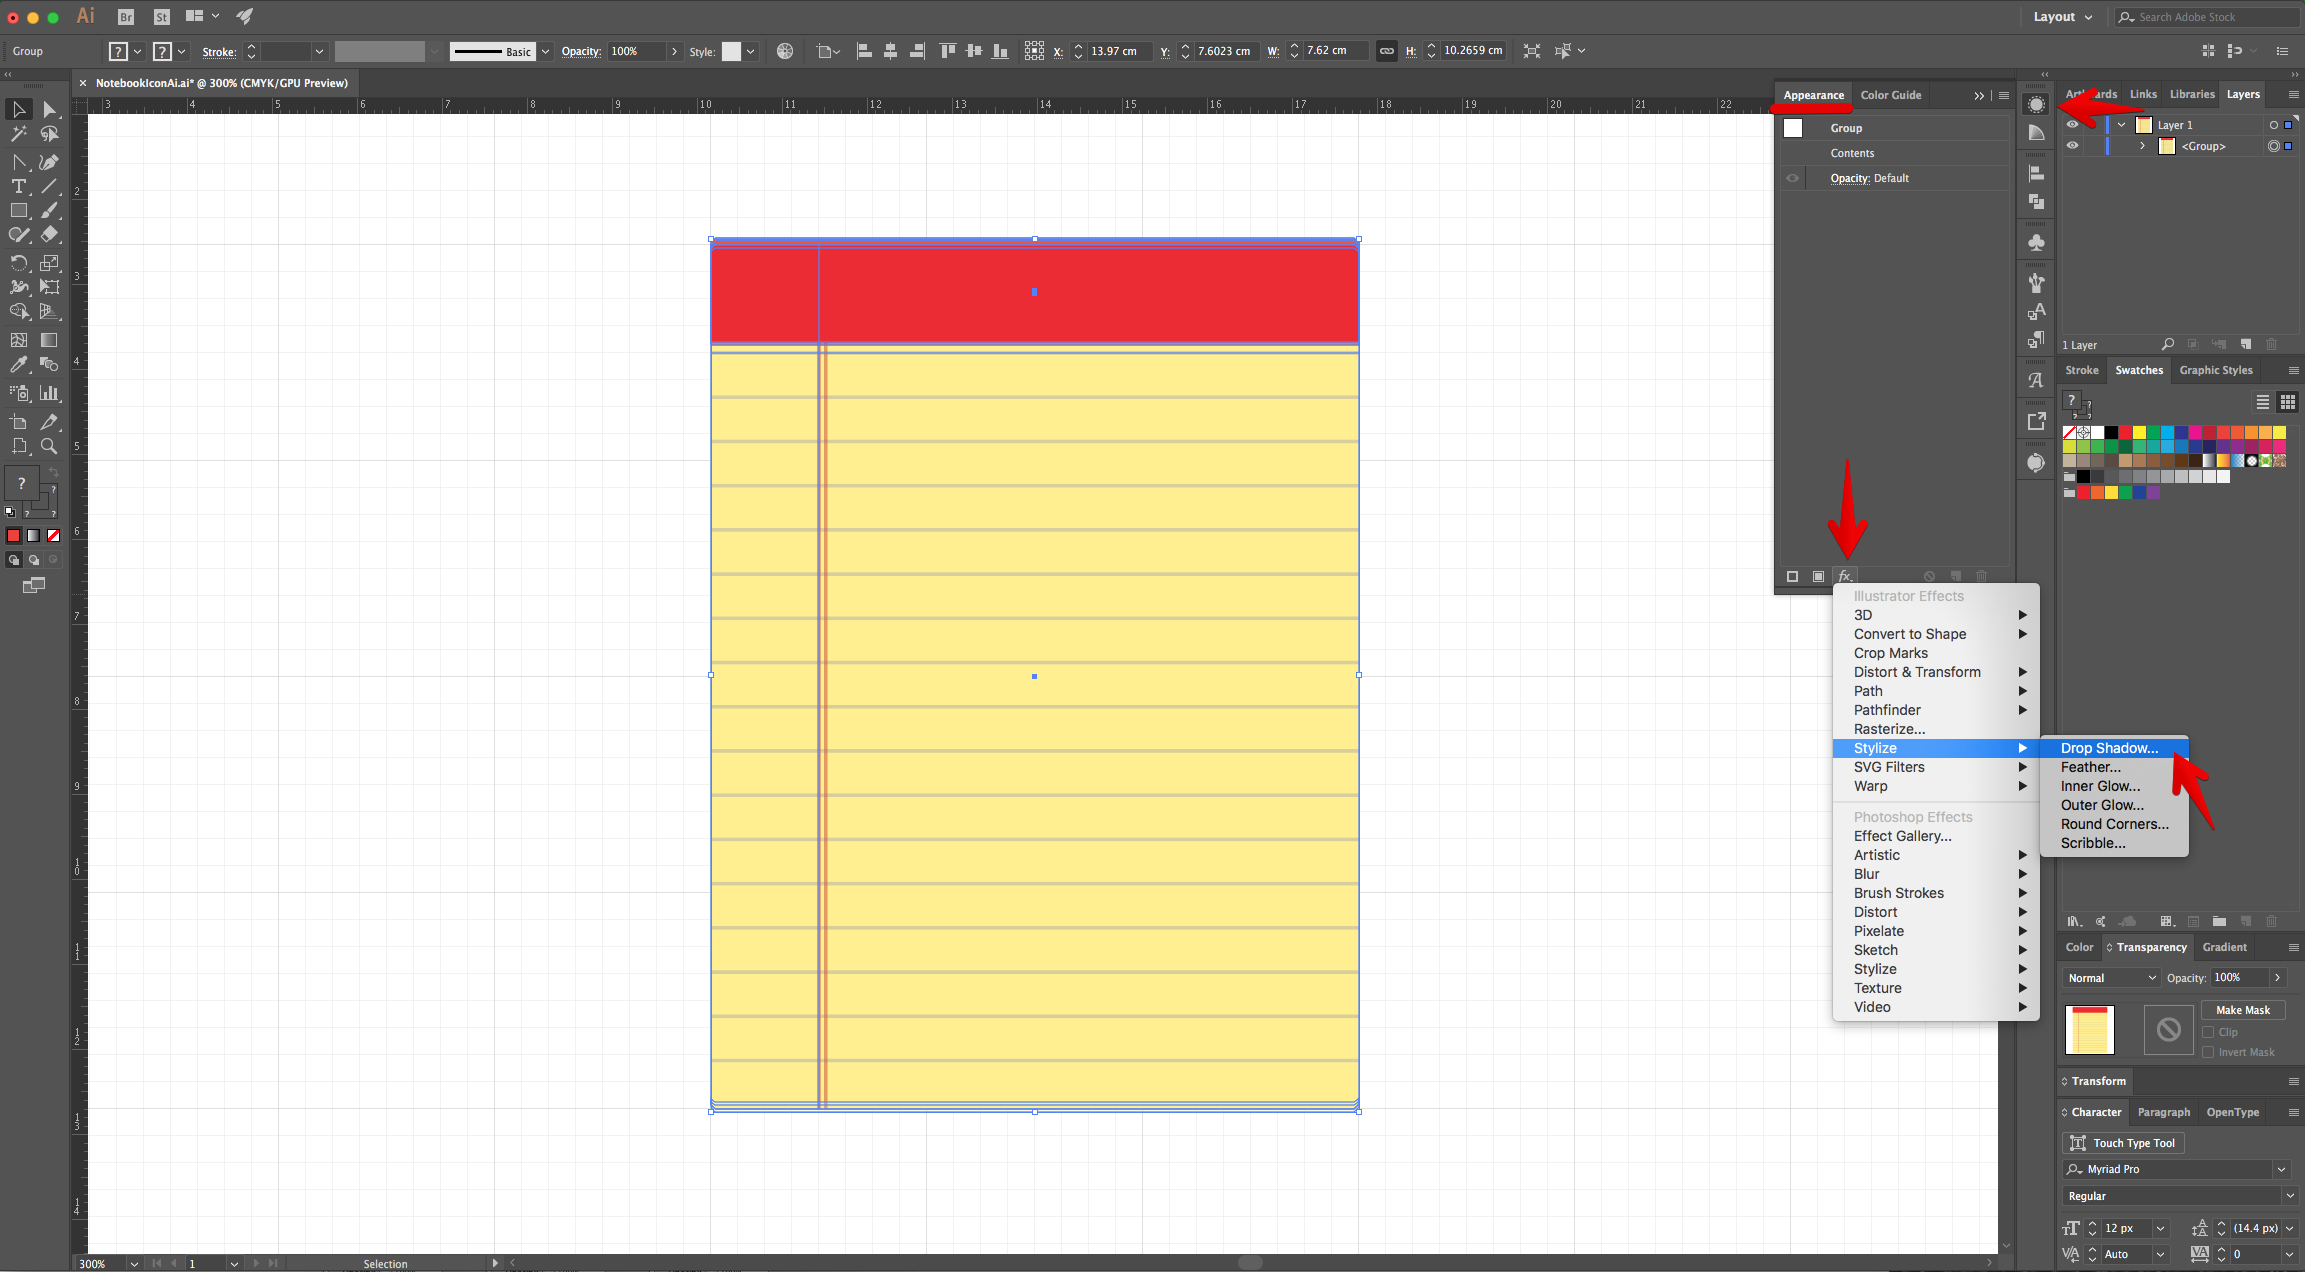
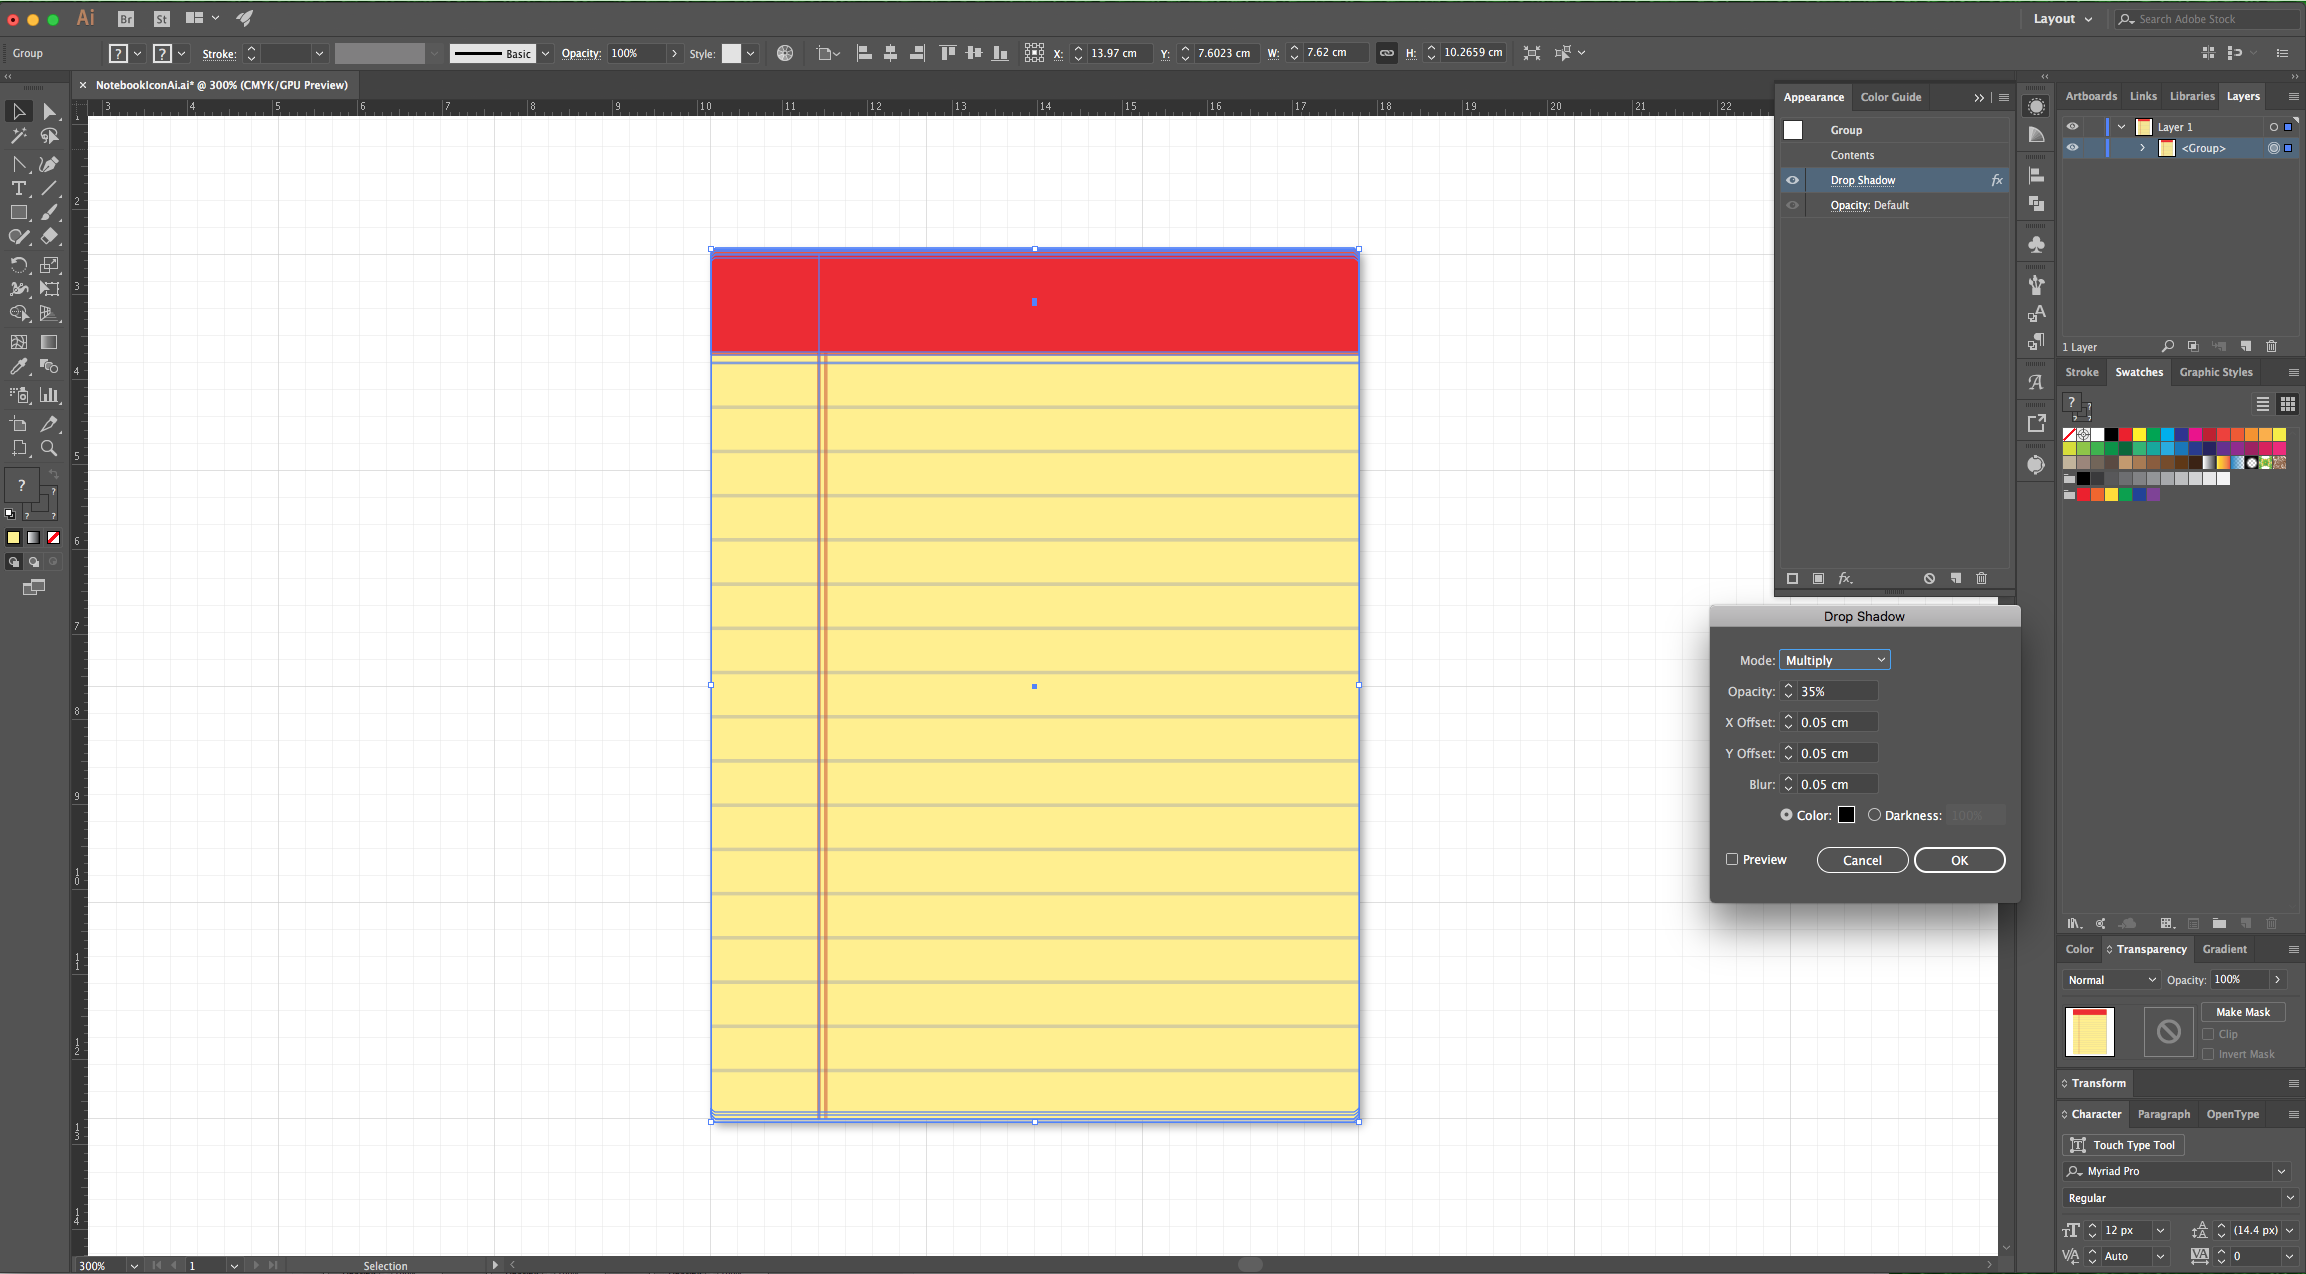
22 - Head to the “Appearance Panel”, click on the “Effects” Menu at the bottom and navigate to Stylize > Drop Shadow, use a value of 0.05 cm in all the options (leave the rest as default), then click “OK.
23 - Check out your Artwork!

2 - If the “Rulers” are not enabled, go to View > Rulers > Show Rulers (Command/Control + R) to turn them ON. Also, bring out the “Grid” (View > Show Grid) and enable “Snap to Grid” (View > Snap to Grid).
3 - Use the “Rectangle Tool” (M), click and drag down and right inside the “Canvas” to create a “Rectangular” shape (about 3 x 4 Grid quadrants). Fill it with a Yellow shade (#ff3389).
4 - Make sure the shape is selected and change the shape of the “Corners” to “Chamfer” of 0.05 cm.
5 - Use the “Pen Tool” (P) to draw a Blue (#1b75bc) horizontal line covering the entire length of your shape. Make sure its straight by holding the “Shift” key while drawing it and place it at about 2 cm from the top of the rectangle.
6 - In the “Transparency Panel” change the “Opacity” to 20%.
7 - With it still selected, head to the “Appearance Panel”, click on the “Effects” Menu at the bottom and navigate to Distort & Transform > Transform, use a “Vertical Move” of 0.52 cm, make sure that only the “Transform Objects” box is checked and make 16 “Copies” then, click “OK.
8 - Now, use the “Pen Tool” (P) again to draw a Red (#b1e2d) vertical line from top to bottom of the shape. Make sure its straight by holding the “Shift” key while drawing it and place it at about 2 cm from the left of the rectangle.
9 - In the “Transparency Panel” change the “Opacity” to 40%.
10 - With it still selected, head to the “Appearance Panel”, click on the “Effects” Menu at the bottom and navigate to Distort & Transform > Transform, use a “Horizontal Move” of 0.08 cm, make sure that only the “Transform Objects” box is checked and make 1 “Copy” then, click “OK.
11 - Disable “Snap to Grid” (Shift + Command/Control + ‘), make a “Copy” of the Rectangle (Command/Control + C) and “Paste in Back” (Command/Control + B) two times.
12 - Move the bottom copy down, one click using the “Arrow Keys” and the one just on top of it, one click Up.
13 - Select both copies, head to the “Pathfinder Panel” and choose “Exclude”.
14 - In the “Transparency Panel” change the “Opacity” to 55%.
15 - Go to Object > Expand. Make a “Copy” (Command/Control + C) and “Paste in Front” (Command/Control + F).
16 - Change the “Opacity” to 60% and move it up a bit so the bottom is aligned with the original rectangle.
17 - Use the “Rectangle Tool” (M), to create a rectangle that covers the top portion of the “Notebook” from side to side. It should end just a couple of mm top of the first “Blue” line. Fill it with a Red shade from the “Swatches Panel”.
18 - Change the shape of the “Corners” to “Chamfer” of 0.05 cm. and move it down in the “Layers Panel” making sure it is positioned under the “Group” that has the 60% “Opacity”.
19 - Use the “Anchor Point Tool” (Shift + C) to select the bottom “Anchor Points” created by the “Chamfer” corners, click both and then drag the Top one down using the “Direct Selection Tool” (A) while holding the “Shift” key to make a straight line. Repeat with the other side of the Rectangle.
20 - Make a “Copy” (Command/Control + C) and “Paste in Front” (Command/Control + F). In the “Transparency Panel” change the “Blending Mode” to “Hard Light” and the “Opacity” to 80% and move it down one click.
21 - Select everything, right-click on top and choose “Group”.
22 - Head to the “Appearance Panel”, click on the “Effects” Menu at the bottom and navigate to Stylize > Drop Shadow, use a value of 0.05 cm in all the options (leave the rest as default), then click “OK.
23 - Check out your Artwork!
by @lornacane


