
Vector Snowflakes in Illustrator
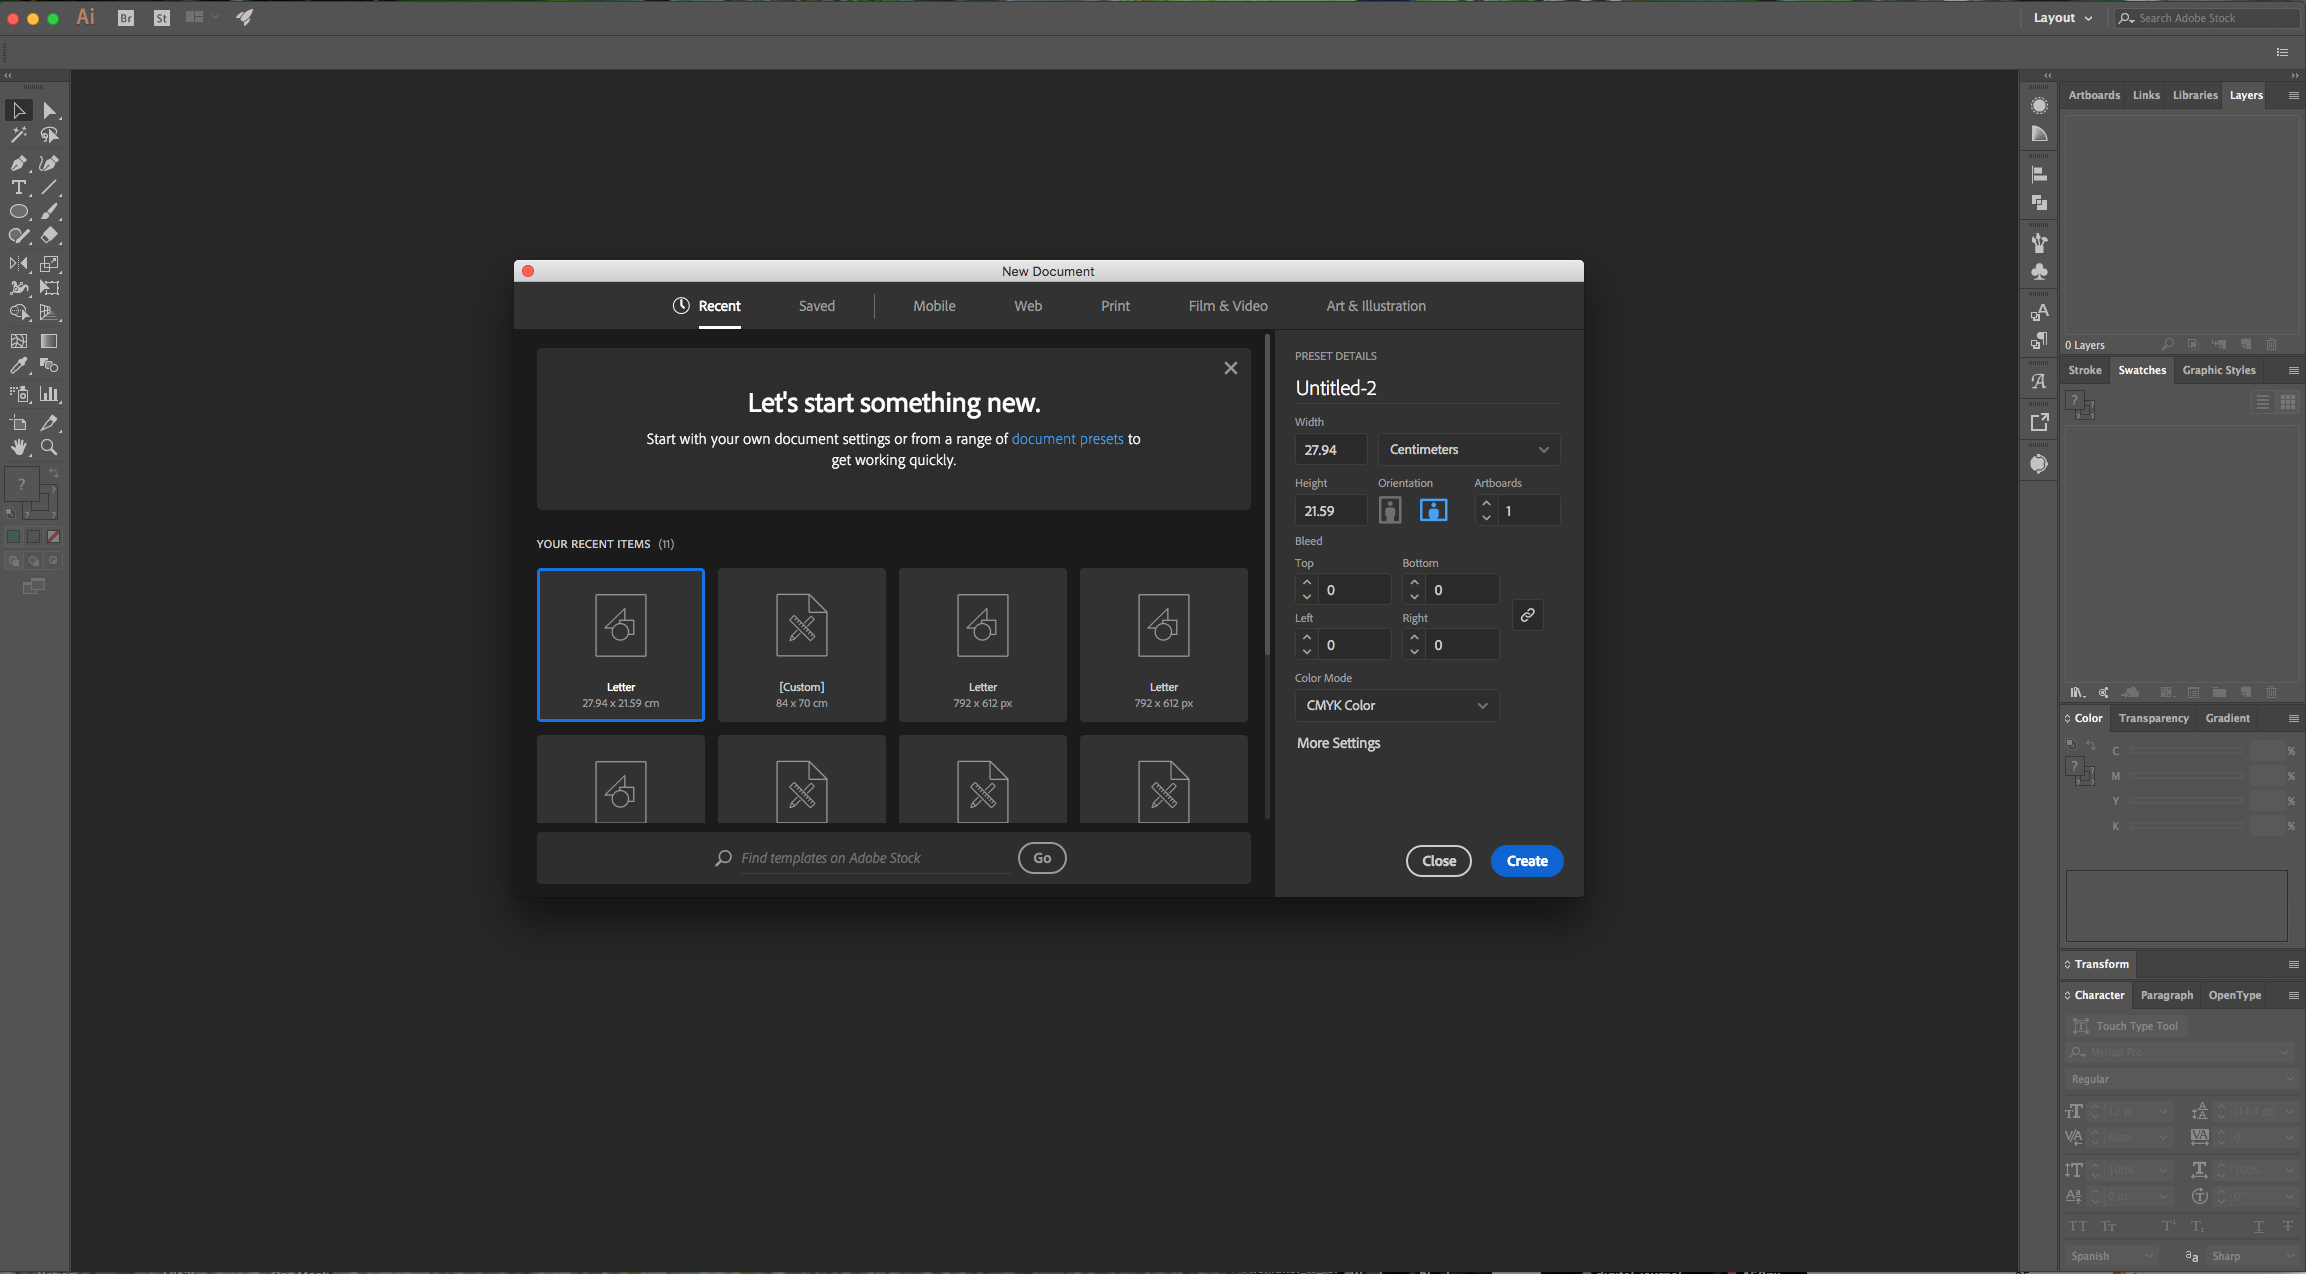
1 - In Illustrator, create a “New Document”.
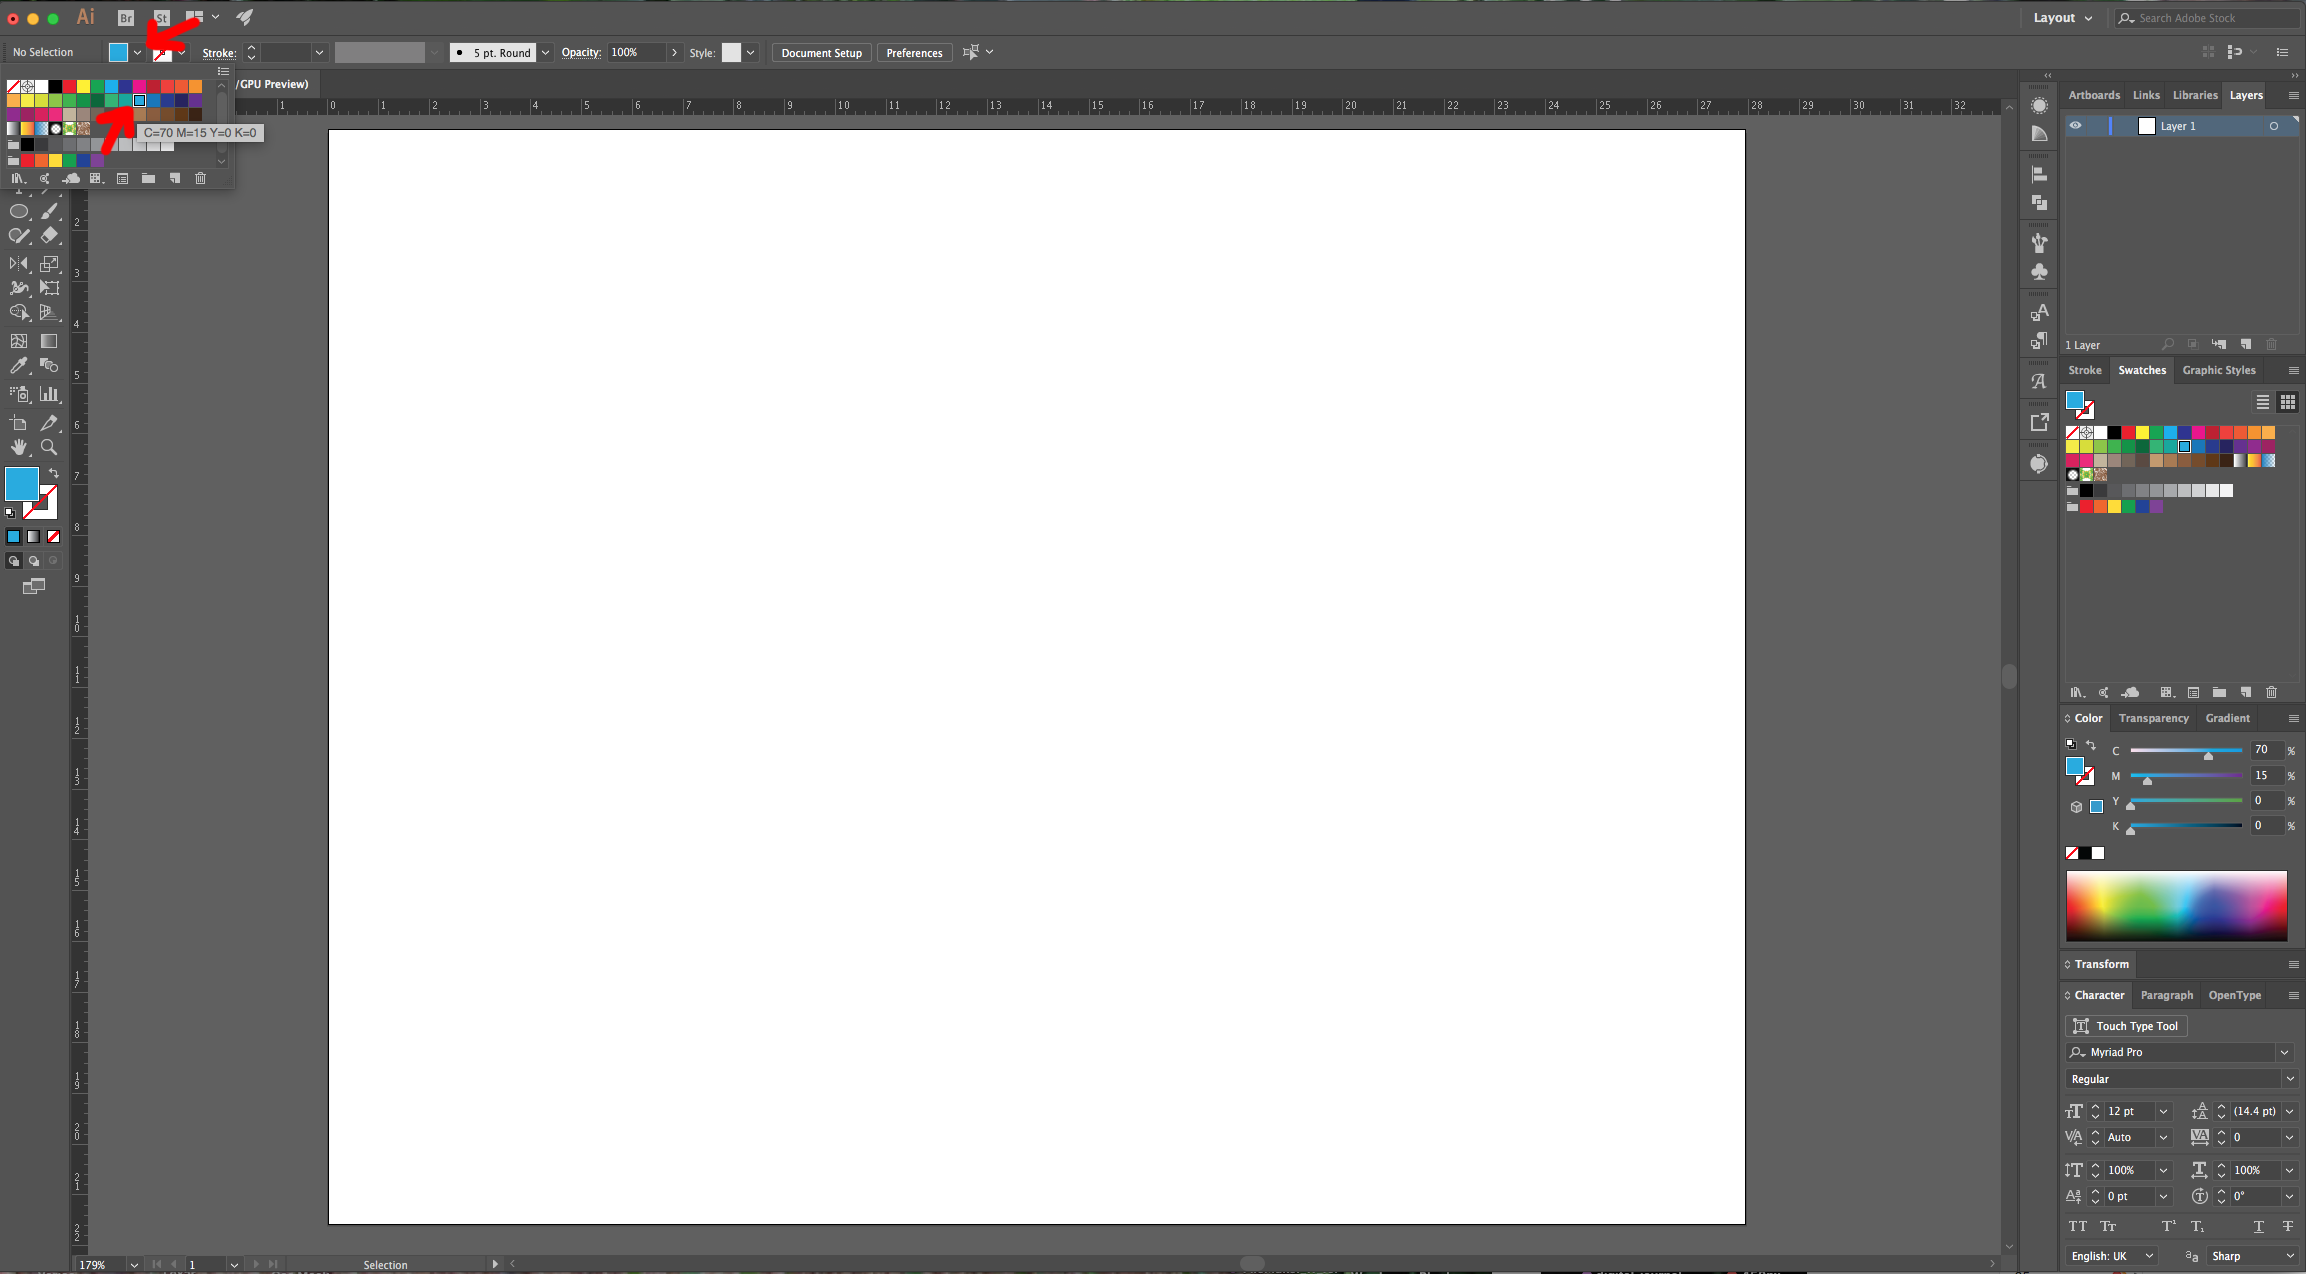
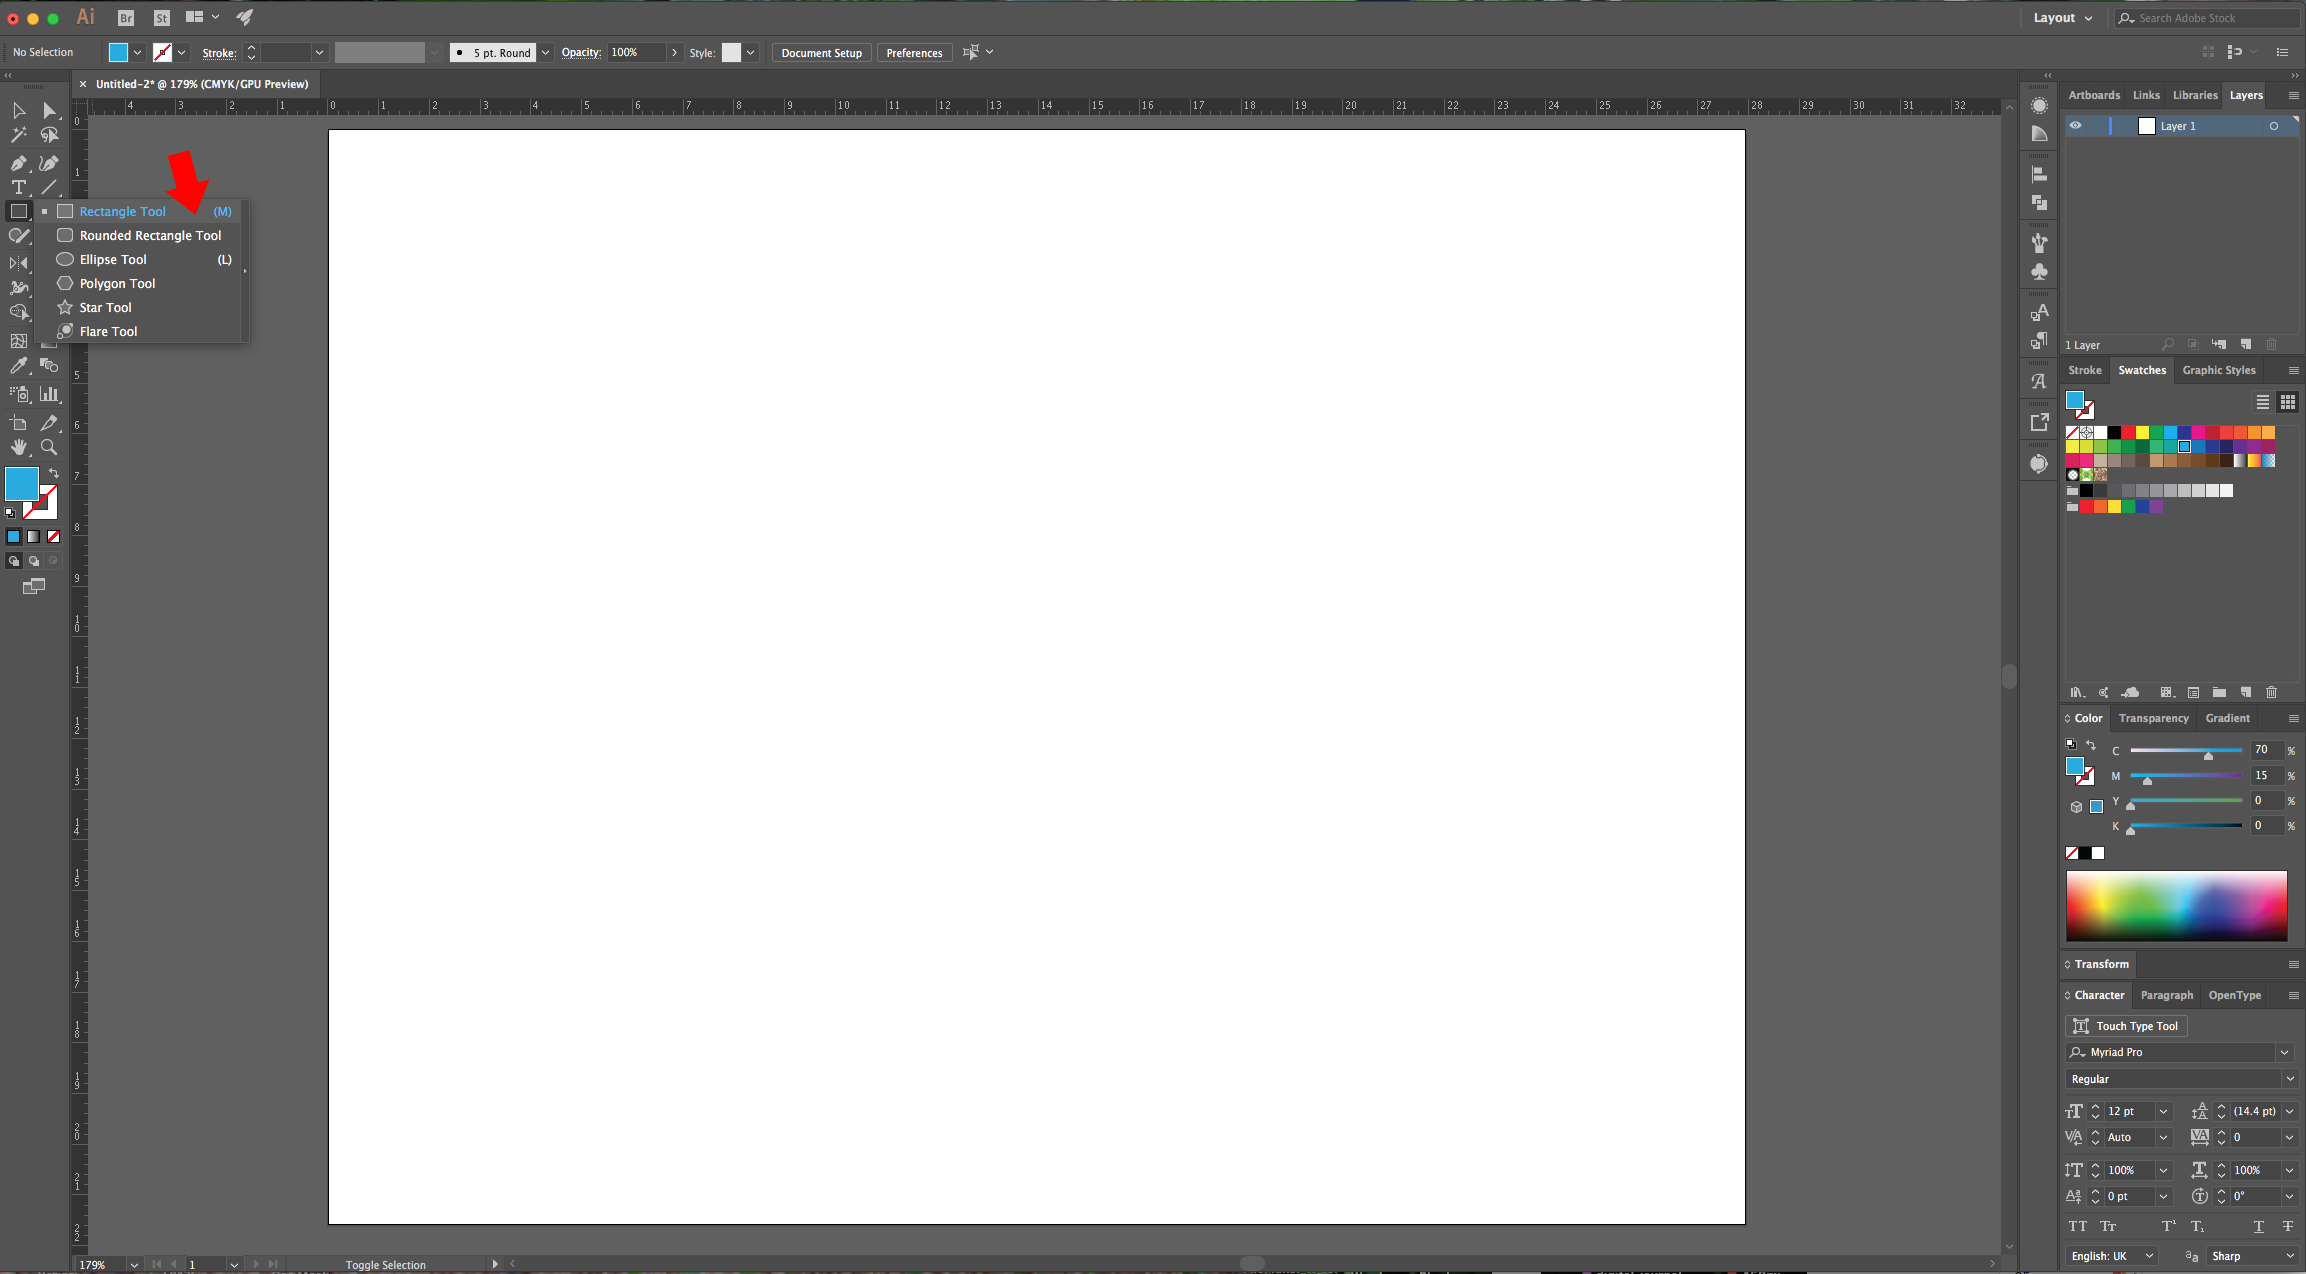
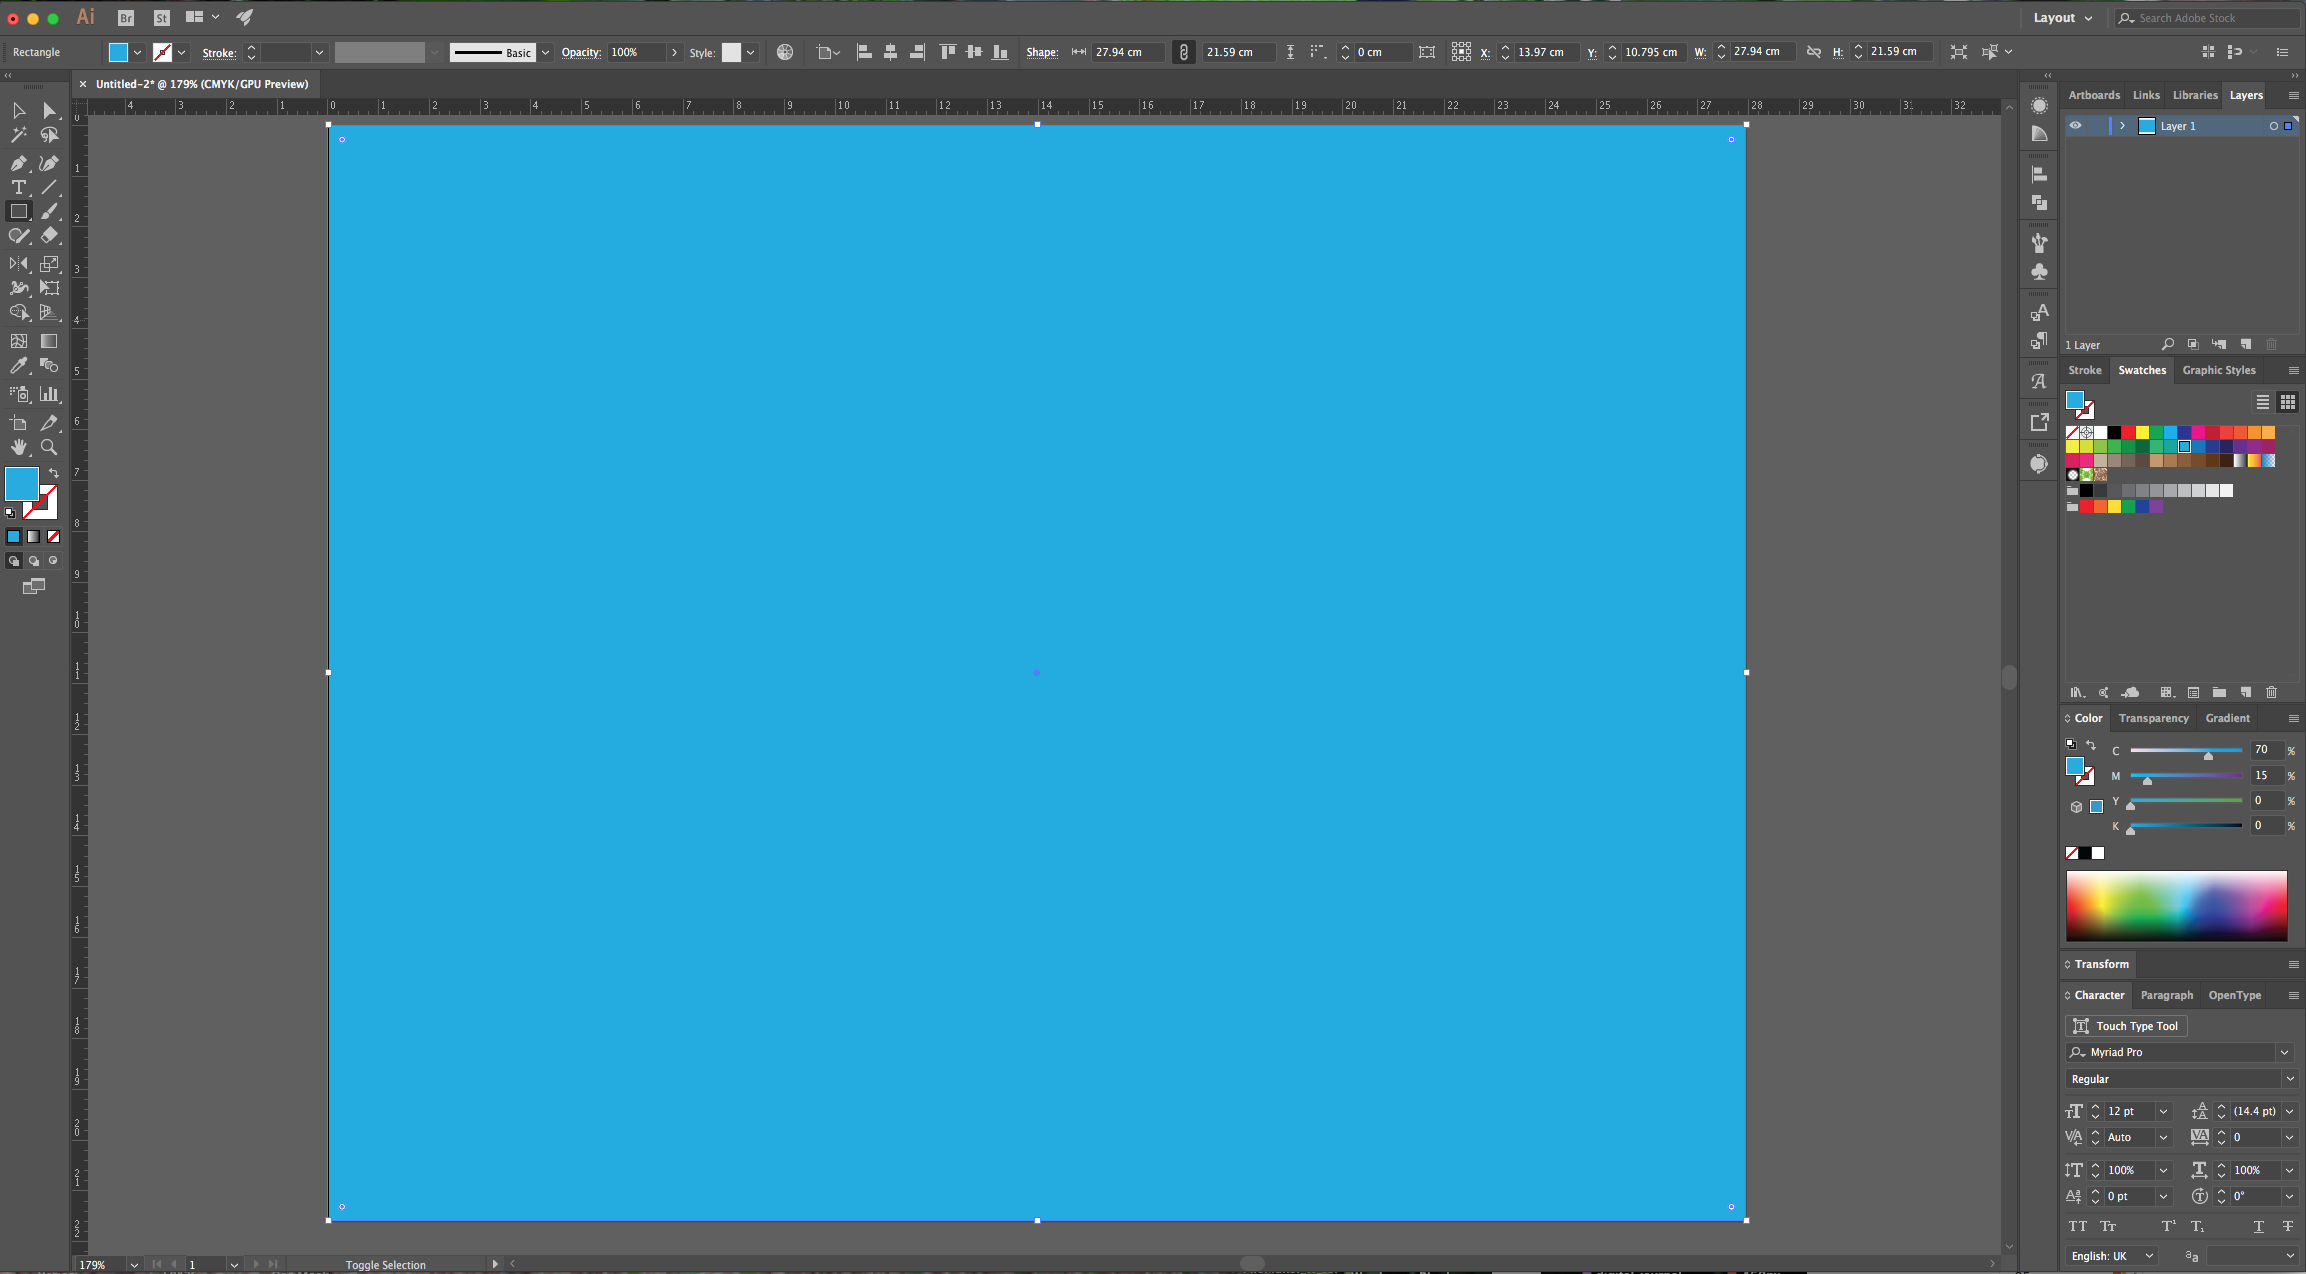
2 - Select the “Rectangle Tool” (M), choose a Medium Blue shade from the “Swatches Panel” and create a Rectangle that covers the entire Canvas.
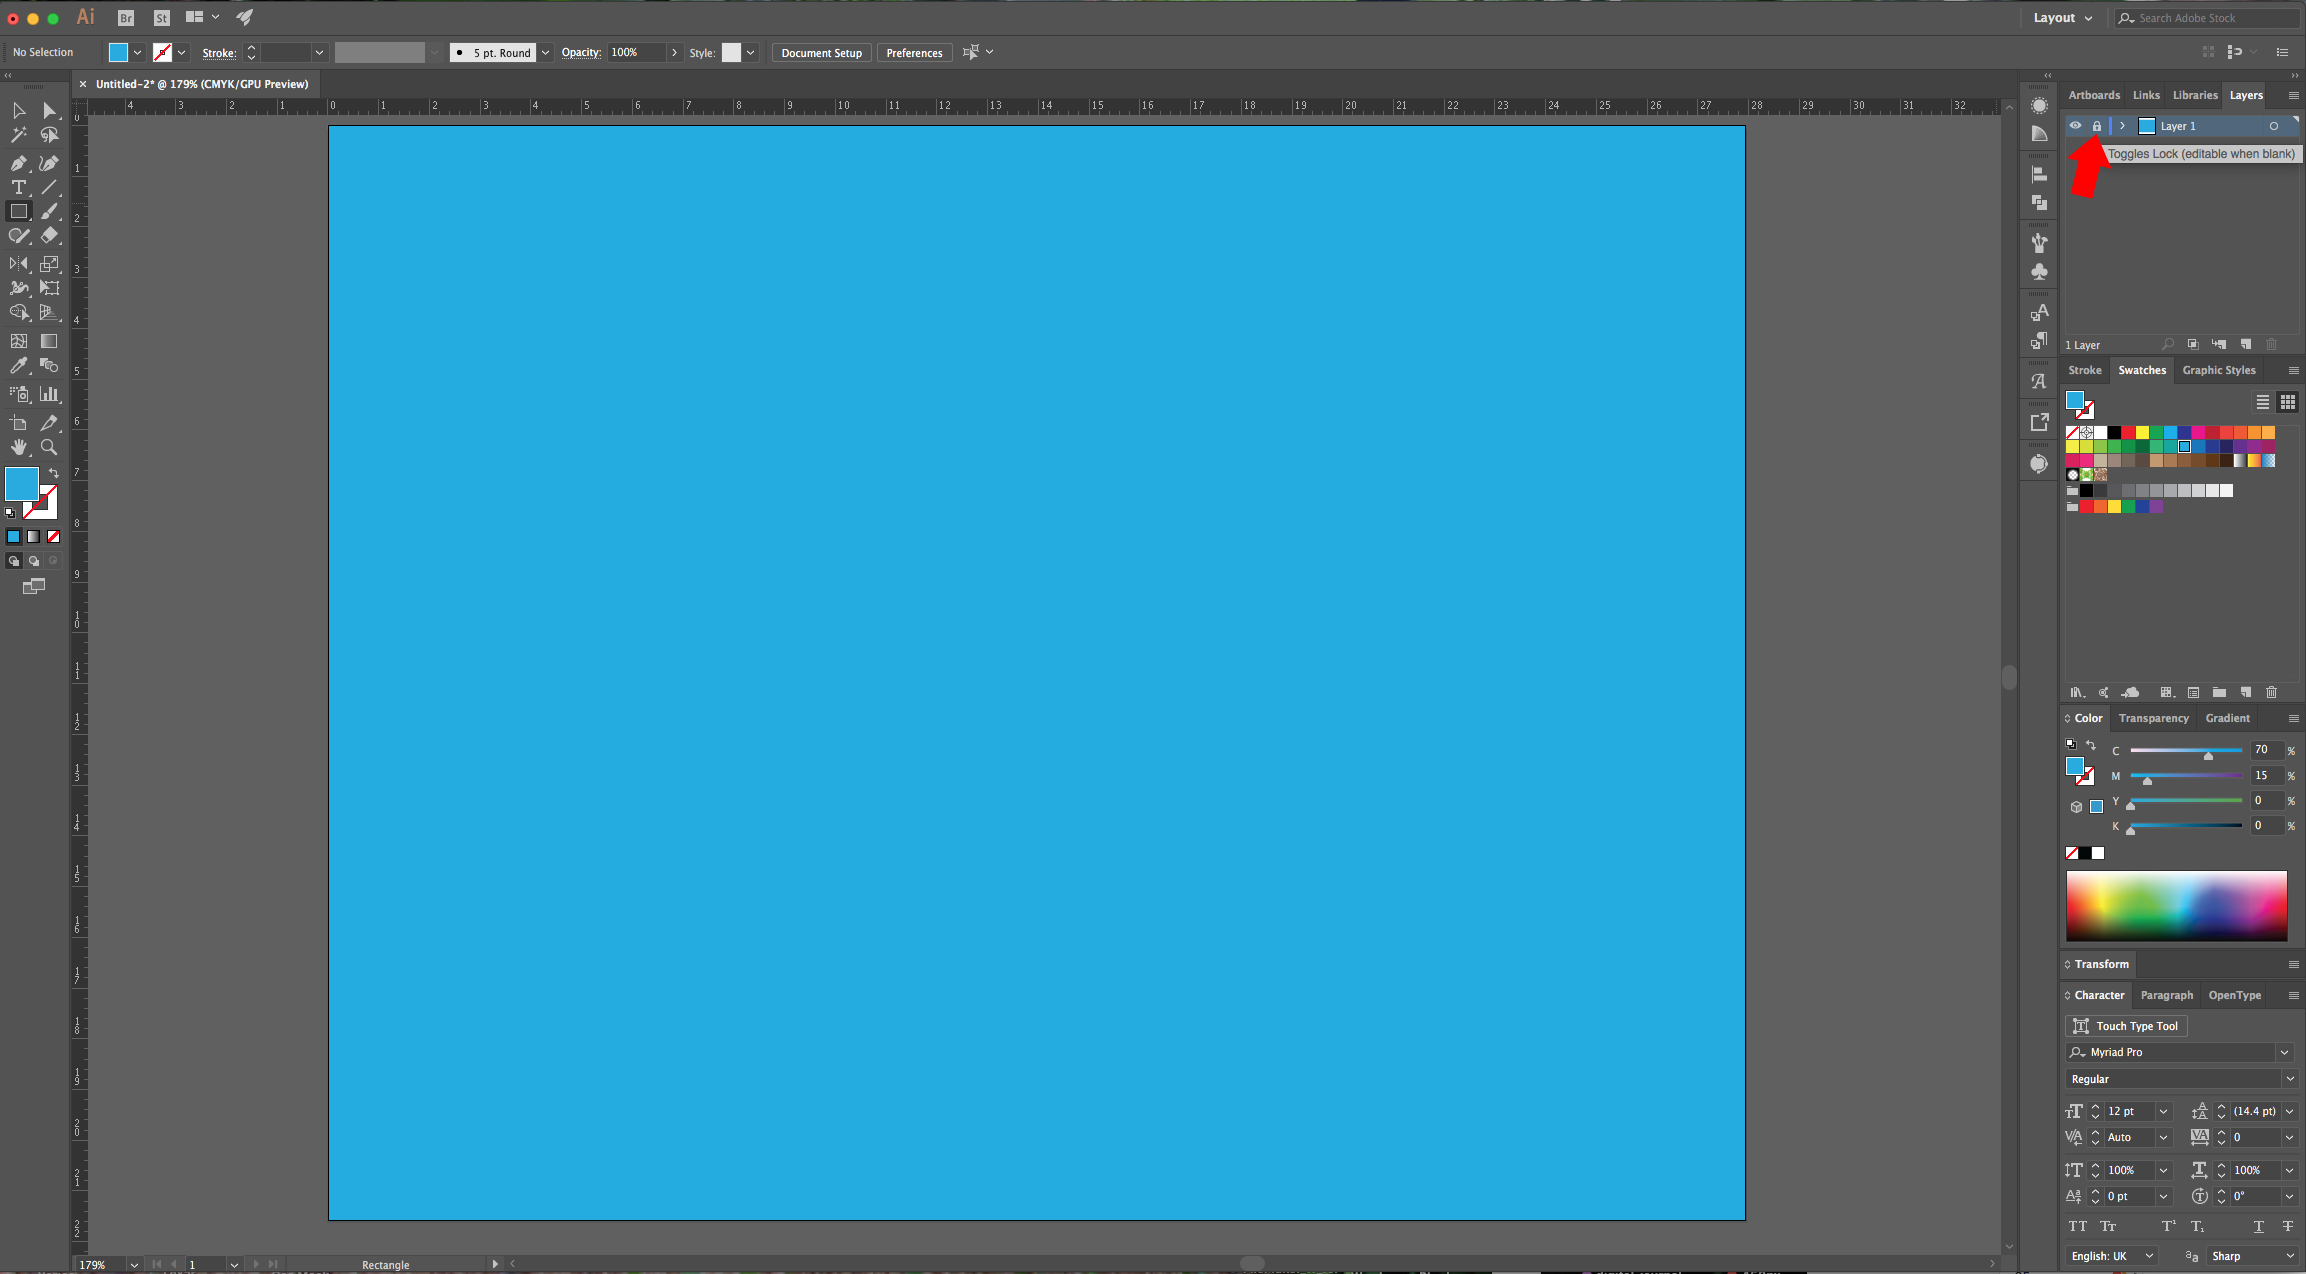
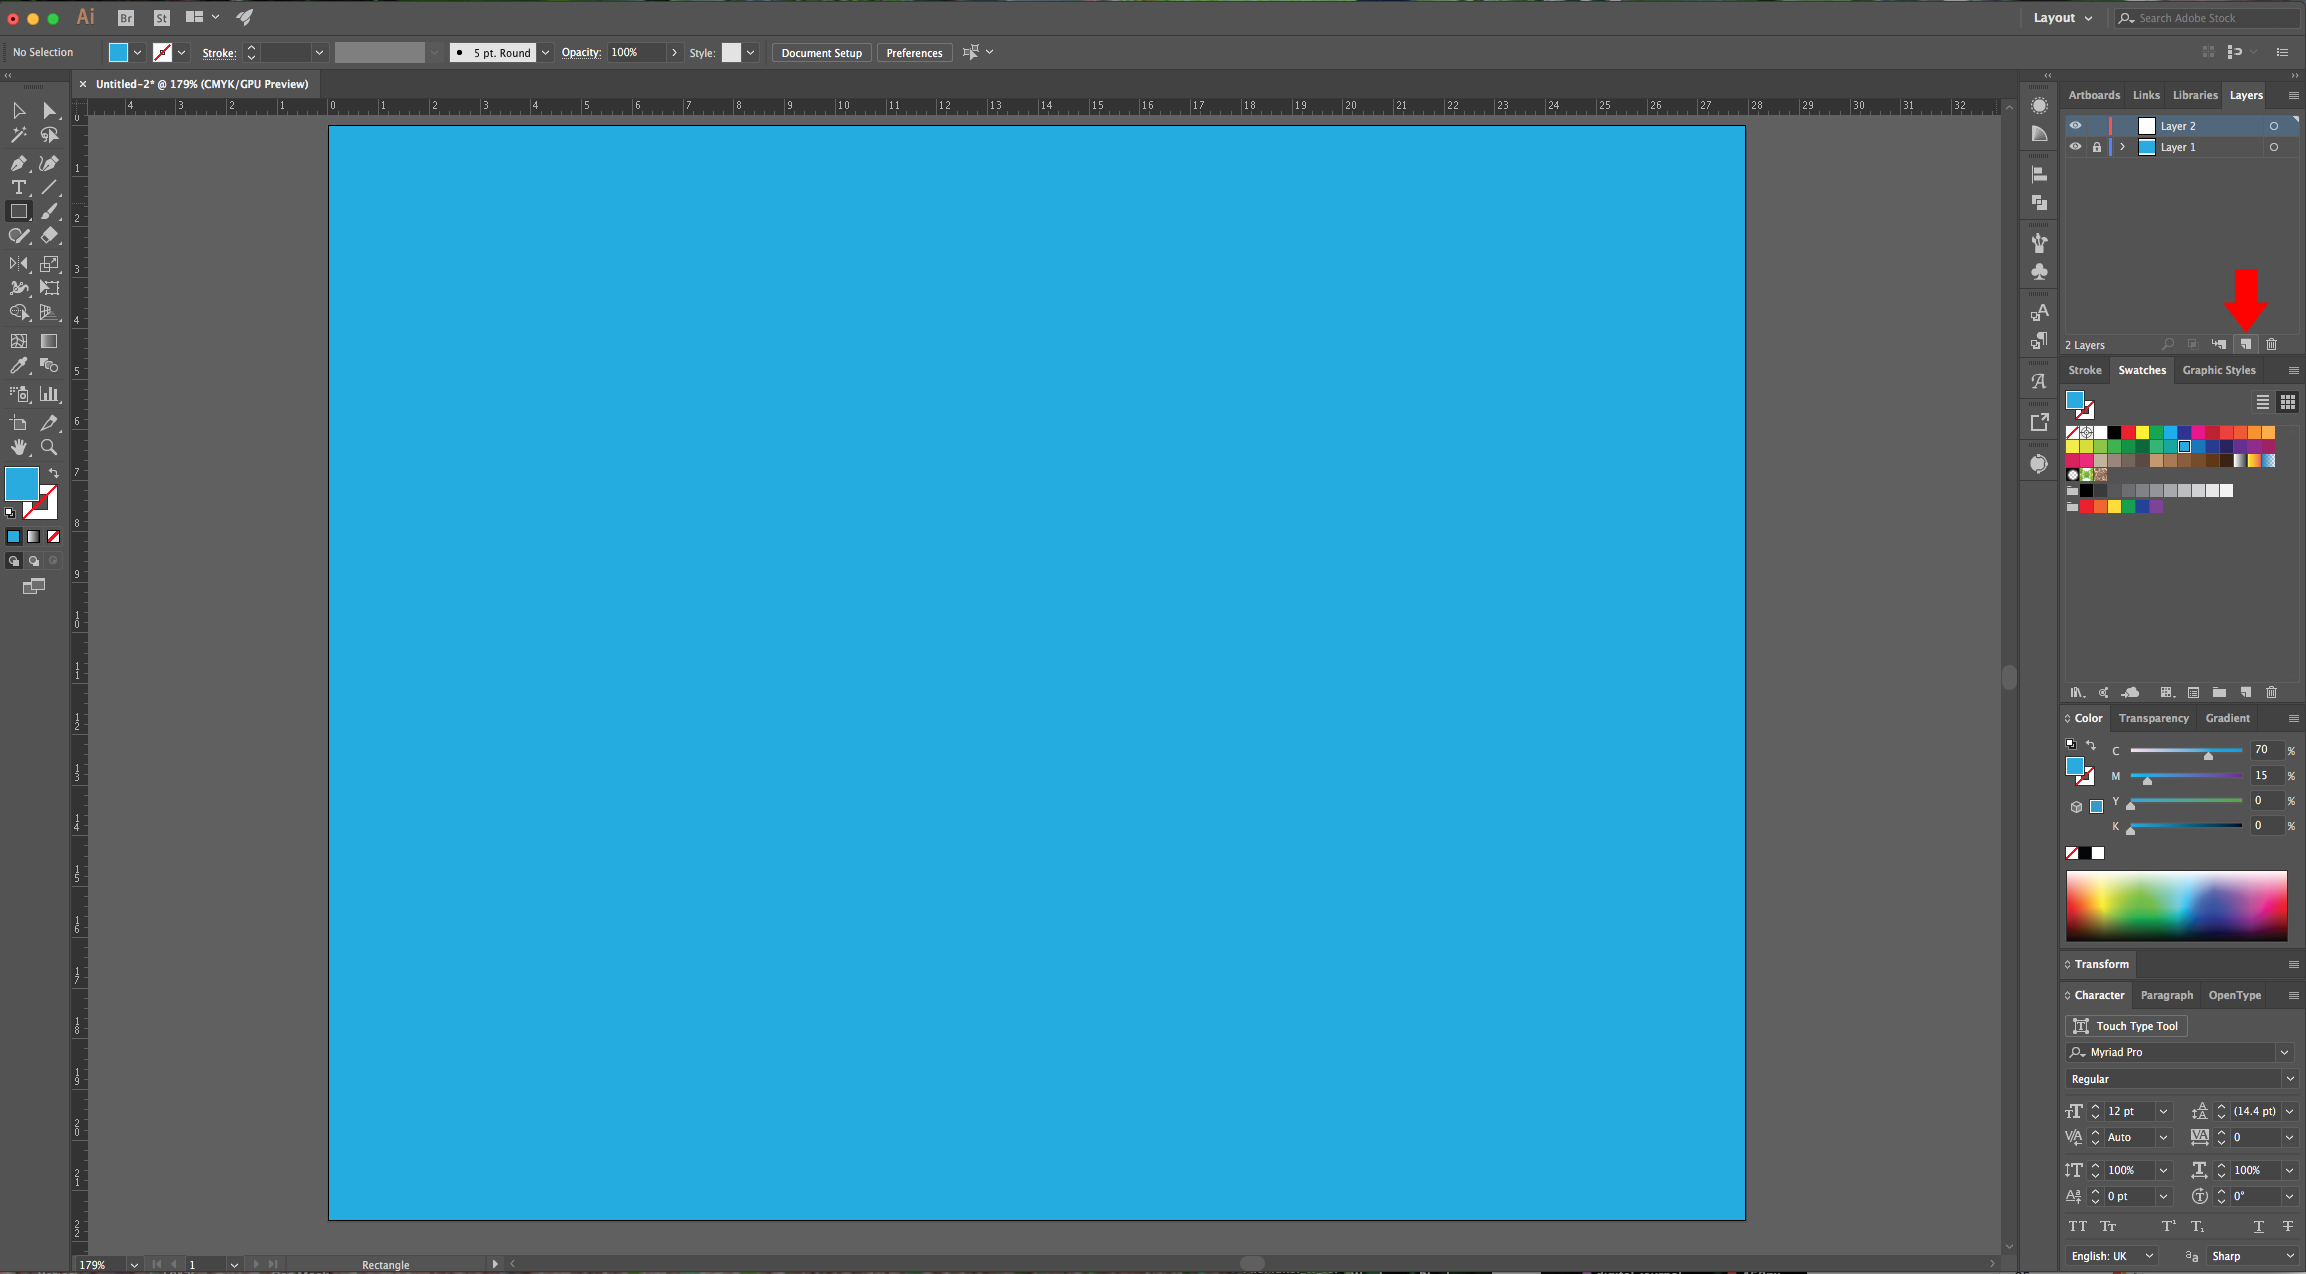
3 - “Lock” it using the small “Padlock” icon on the left side of its Thumbnail and then create a “New Layer” by clicking on the small button at the bottom of the “Layers Panel”.
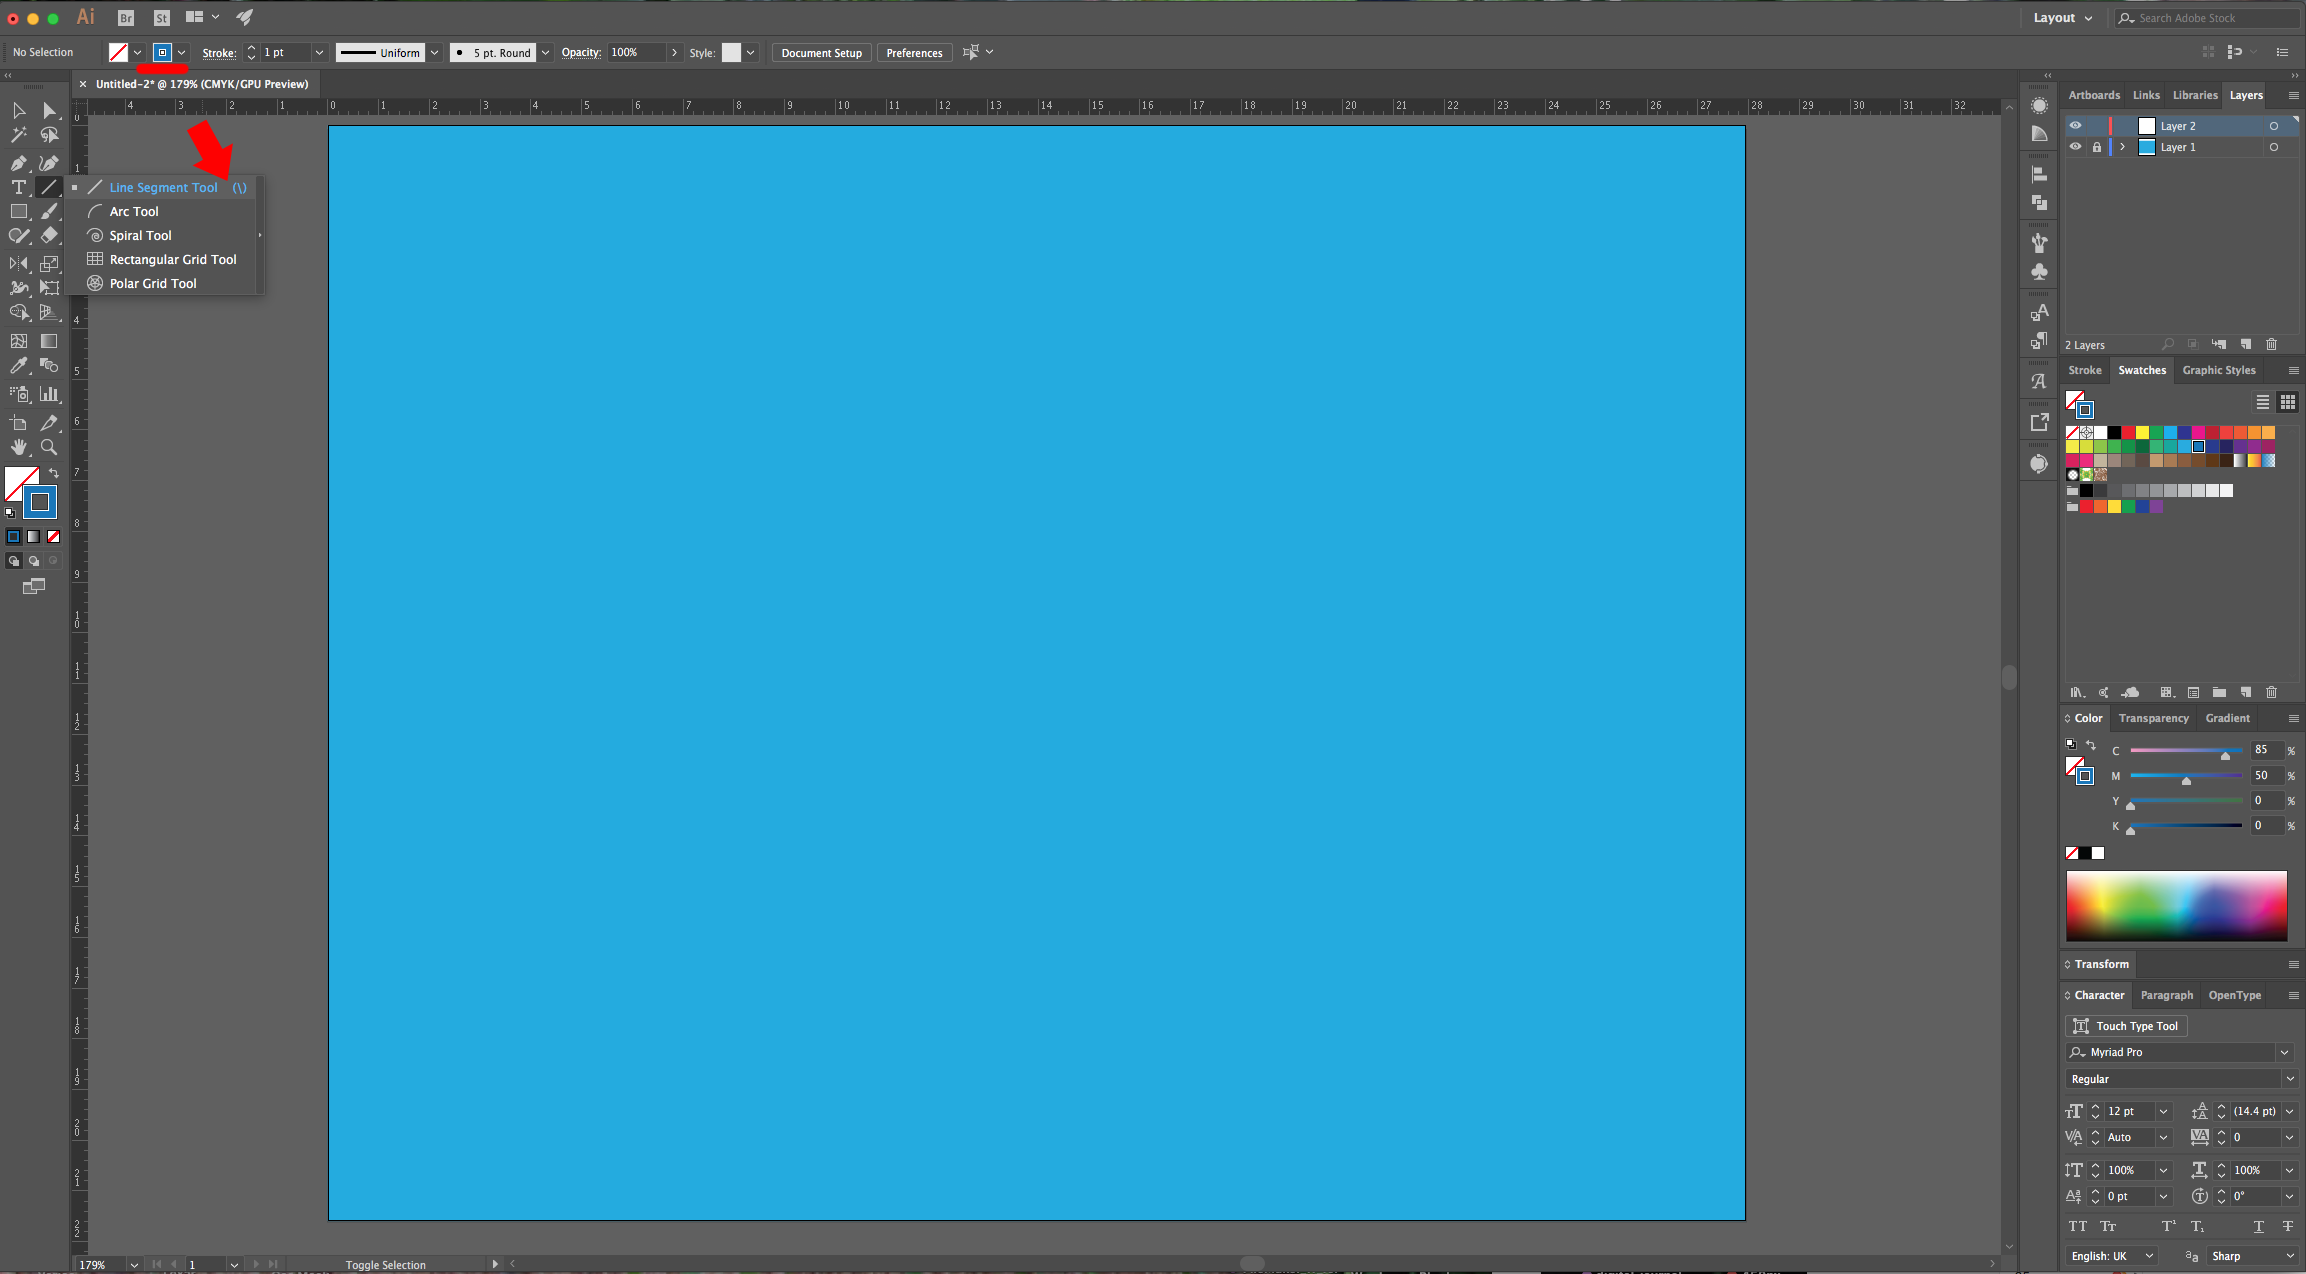
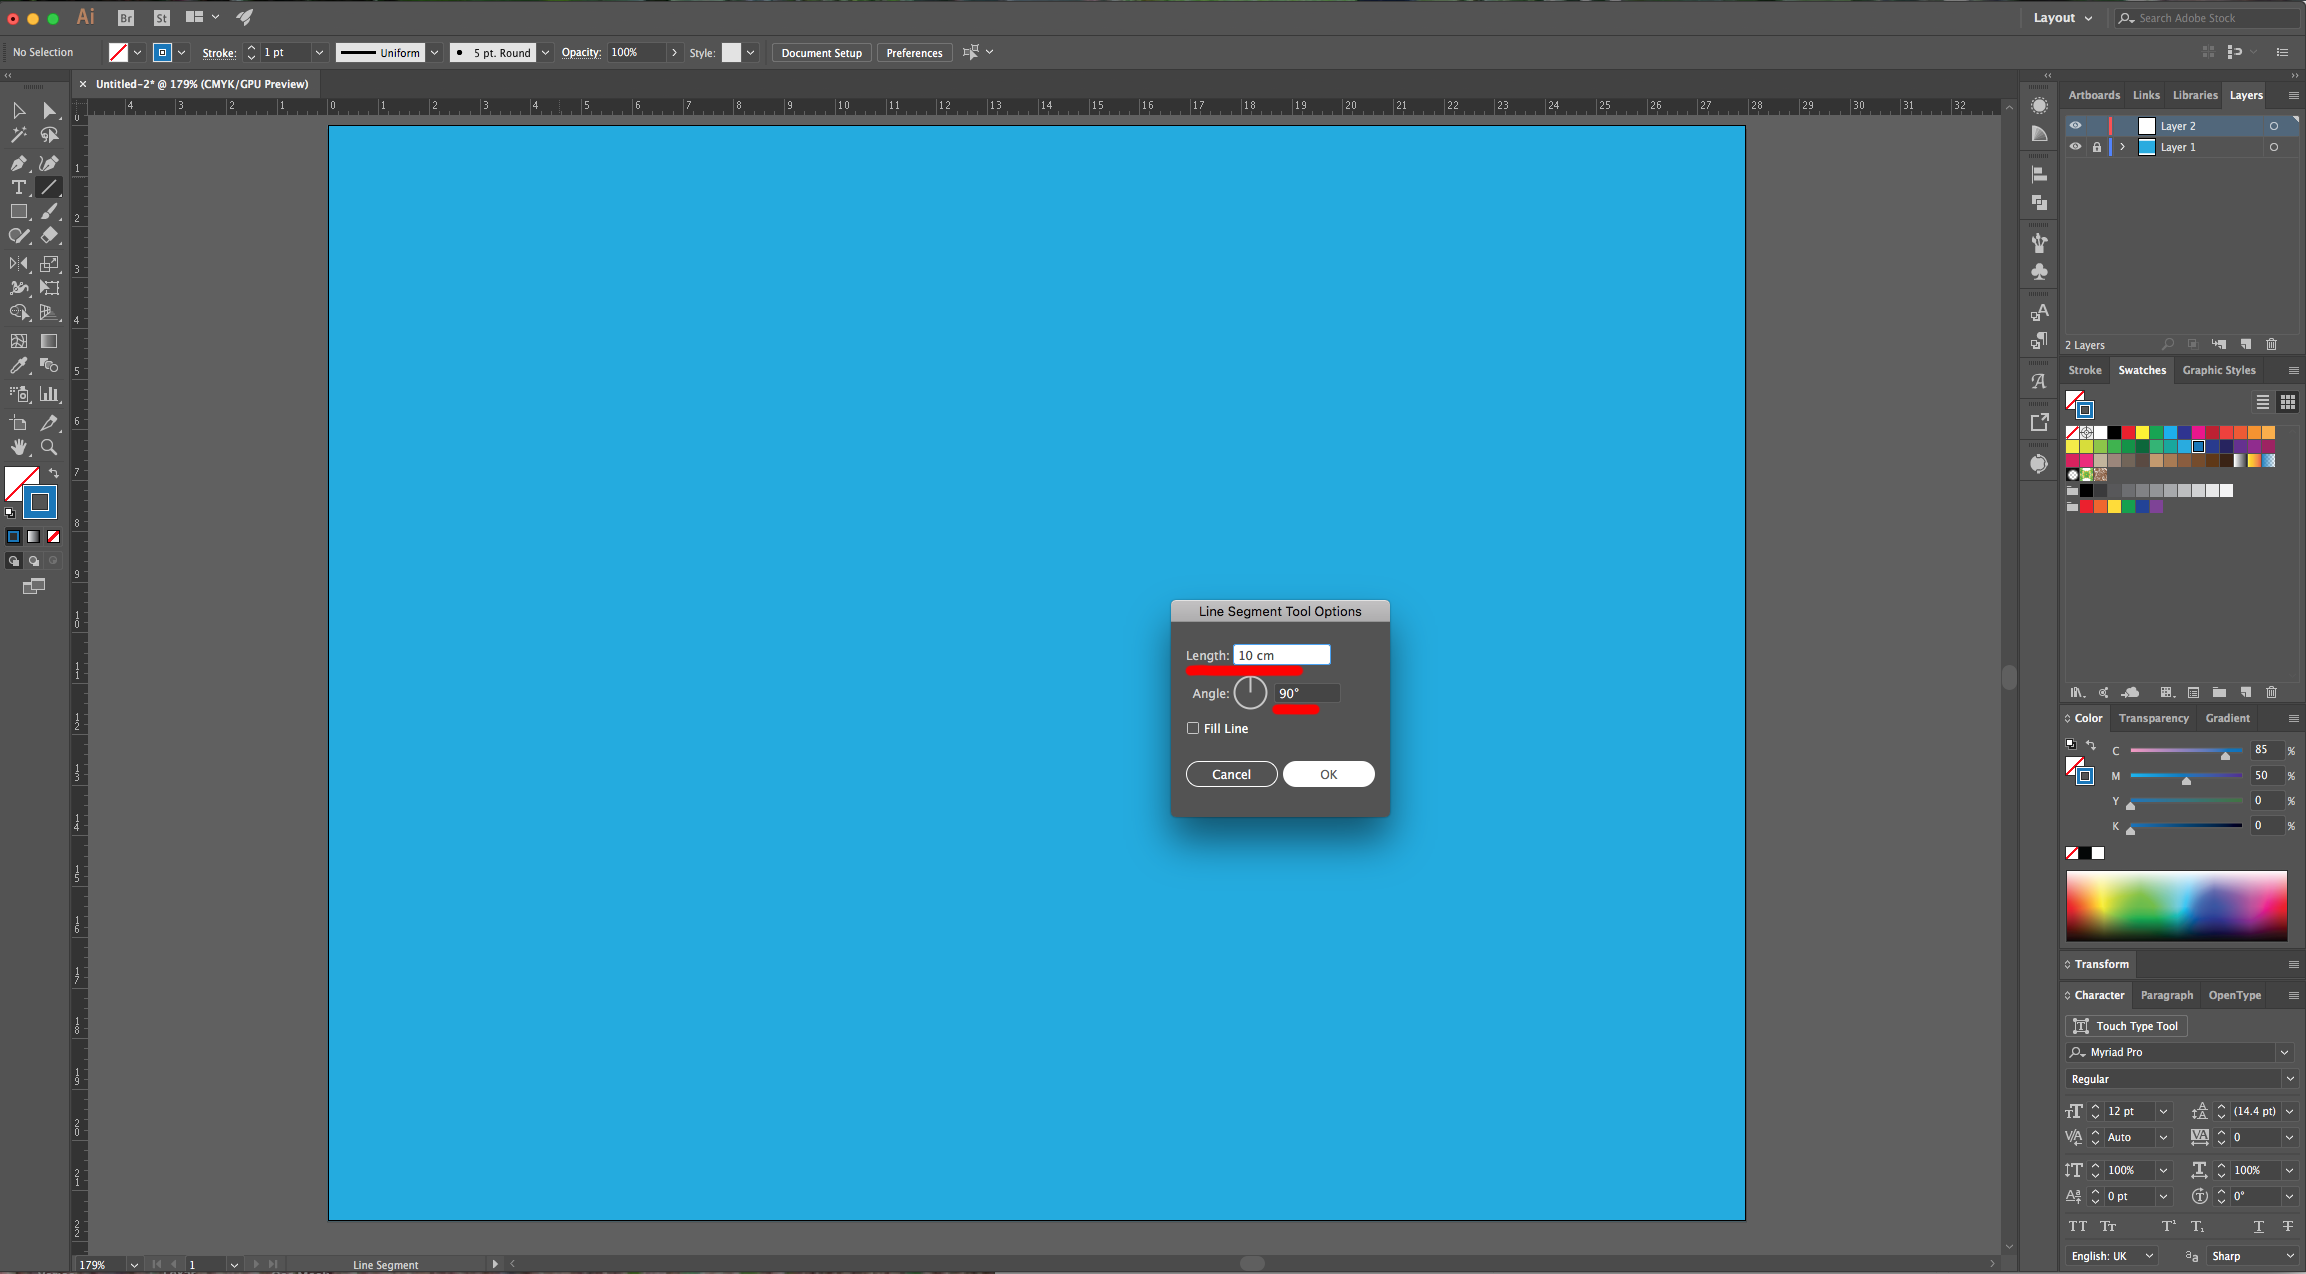
4 - Select the “Line Segment Tool” (\), use a Dark Blue as “Stroke” color and click inside your document. Use a 10 cm “Length” value and a 90° Angle.
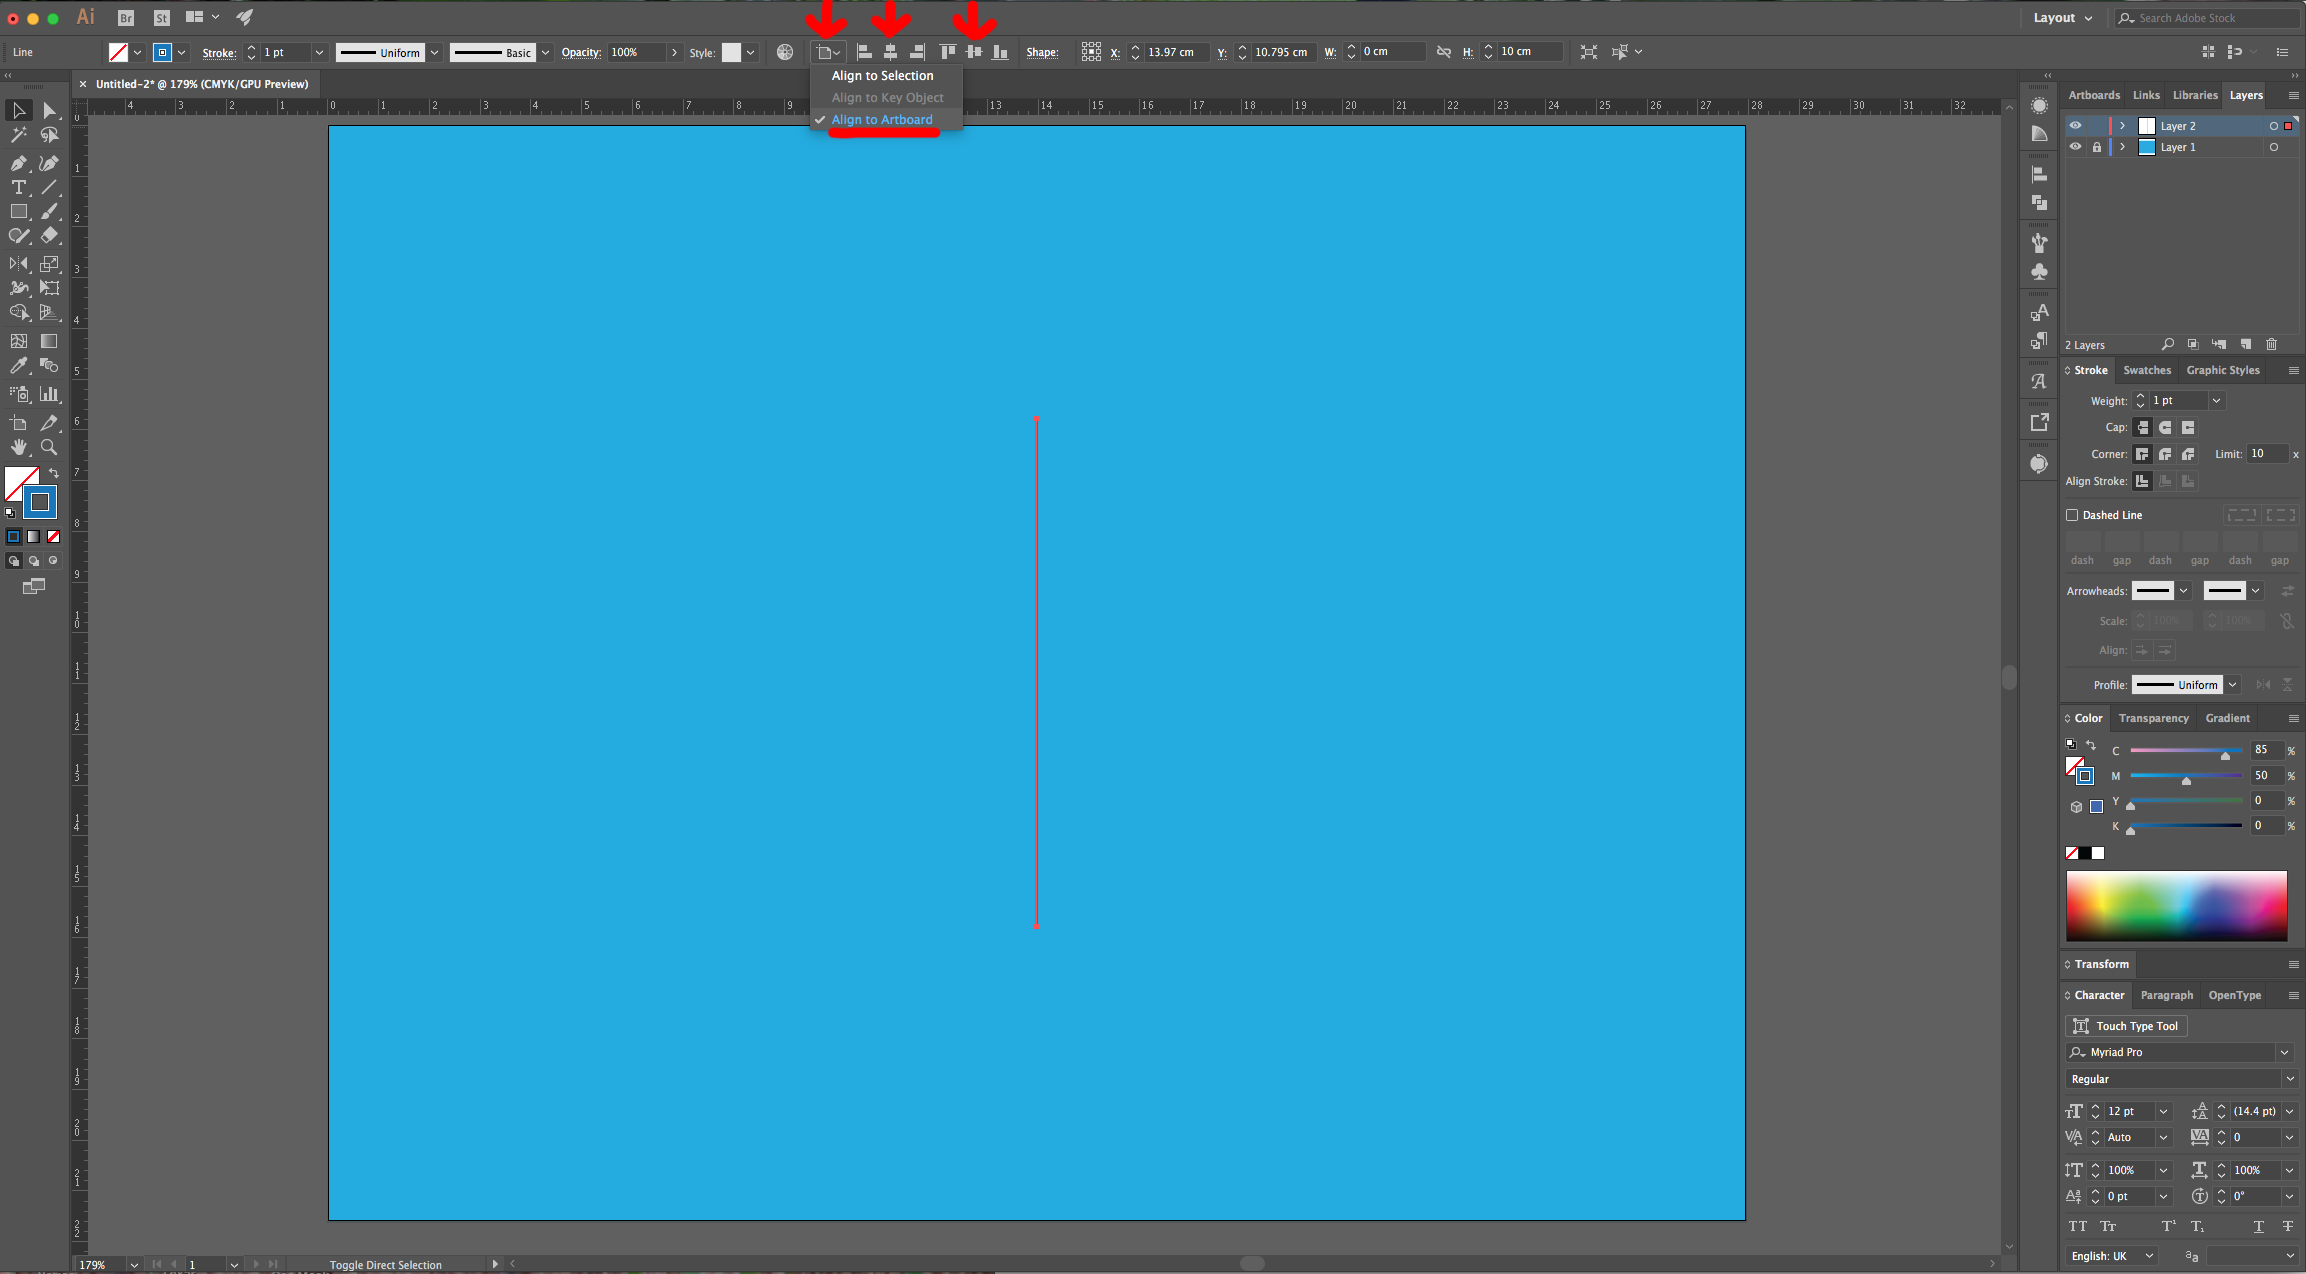
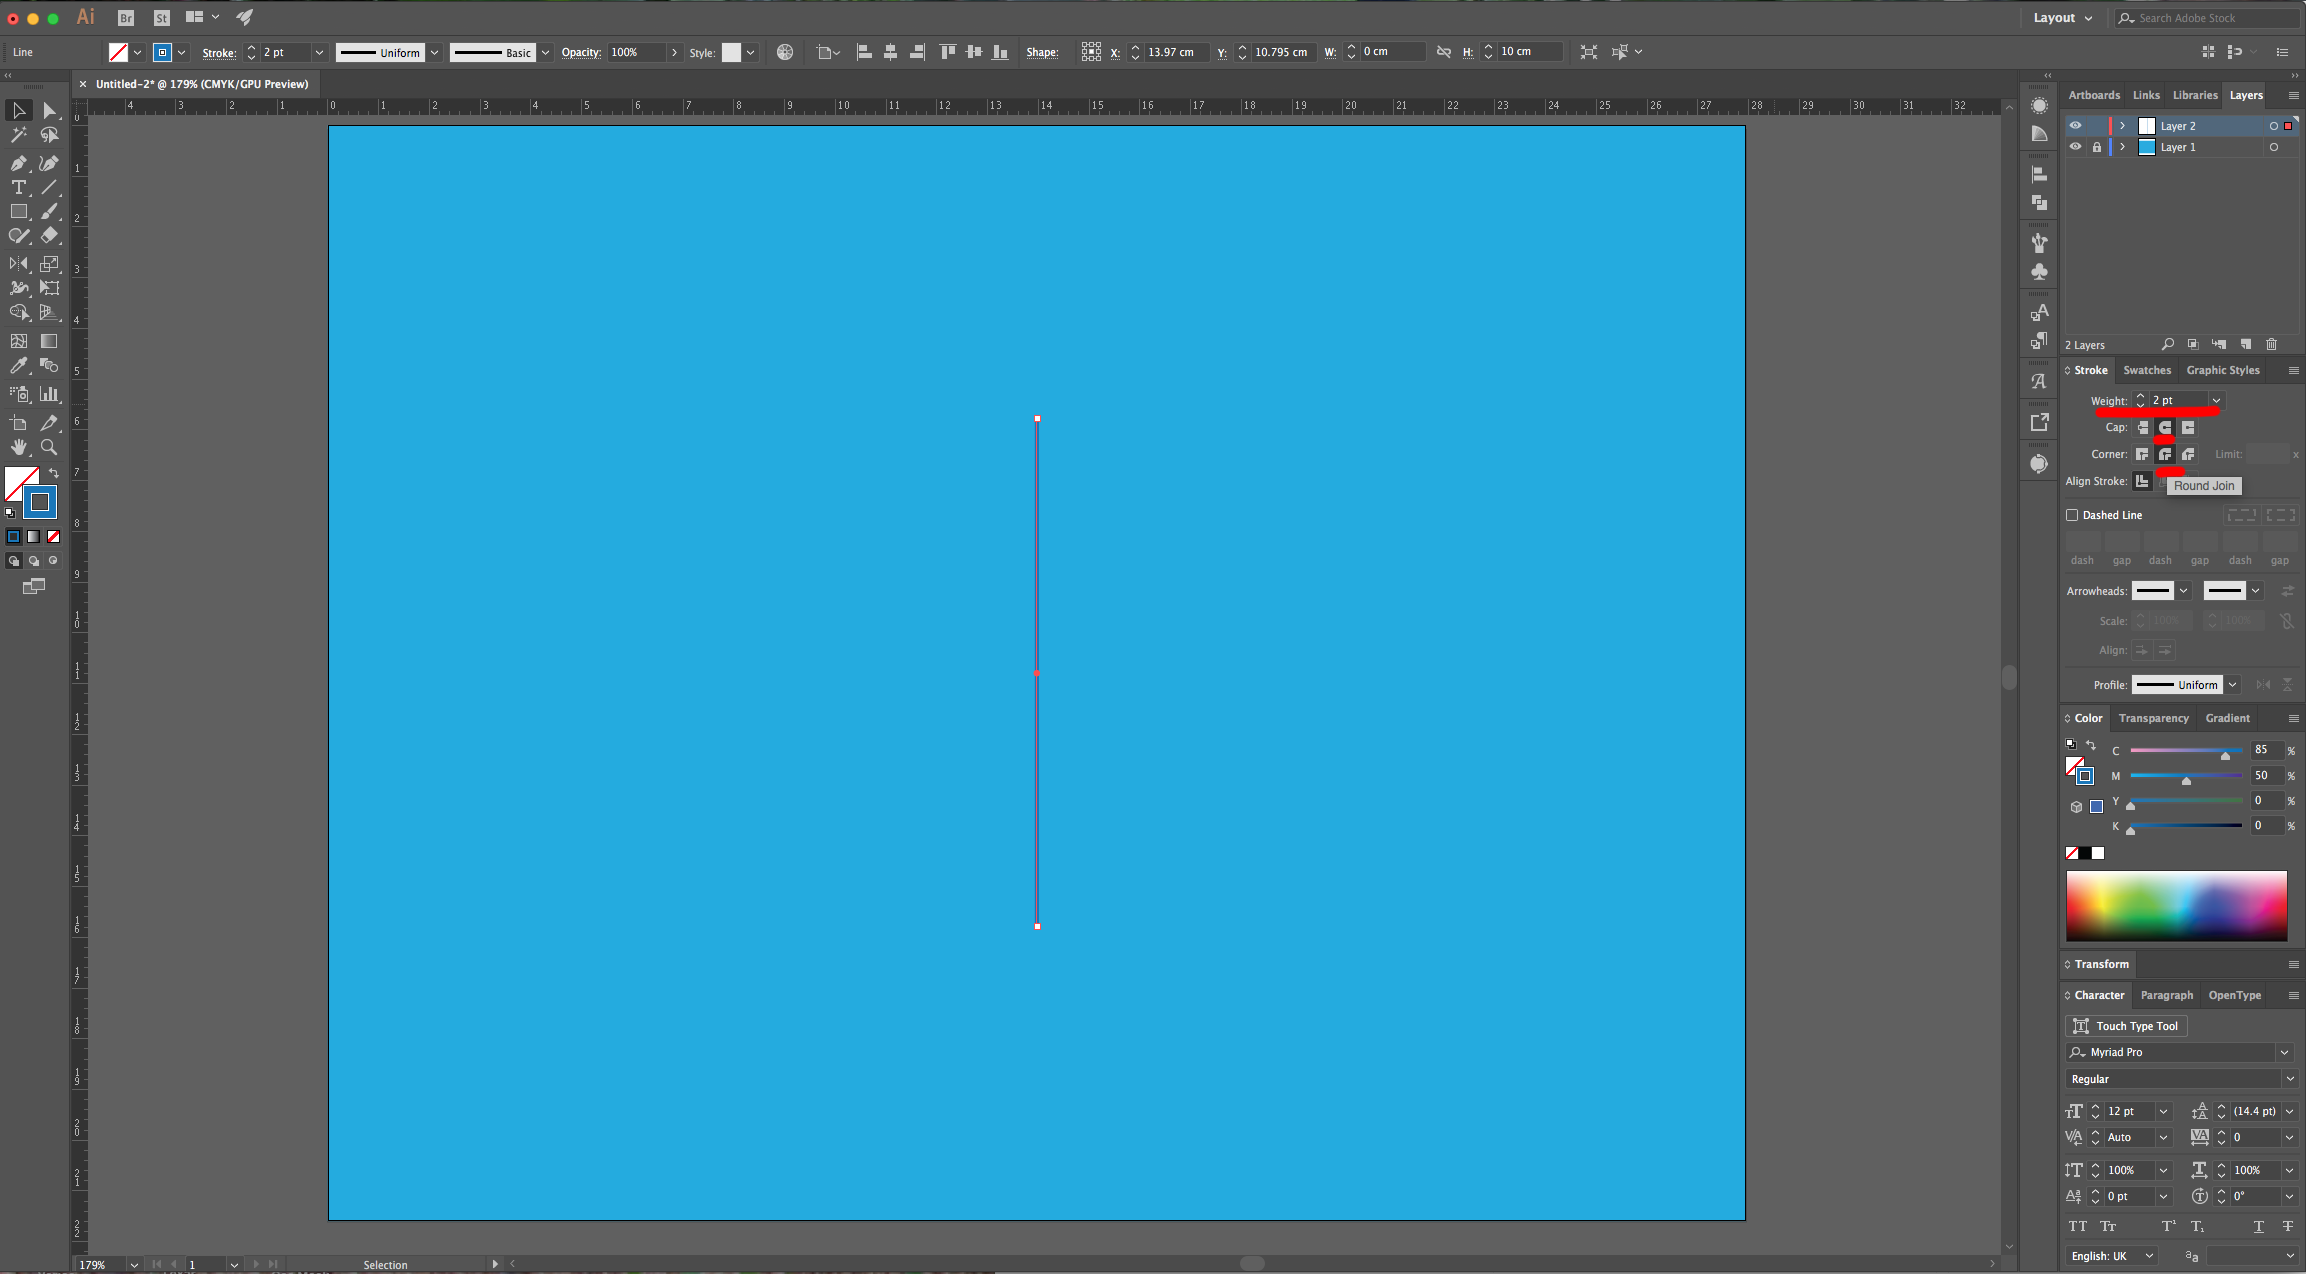
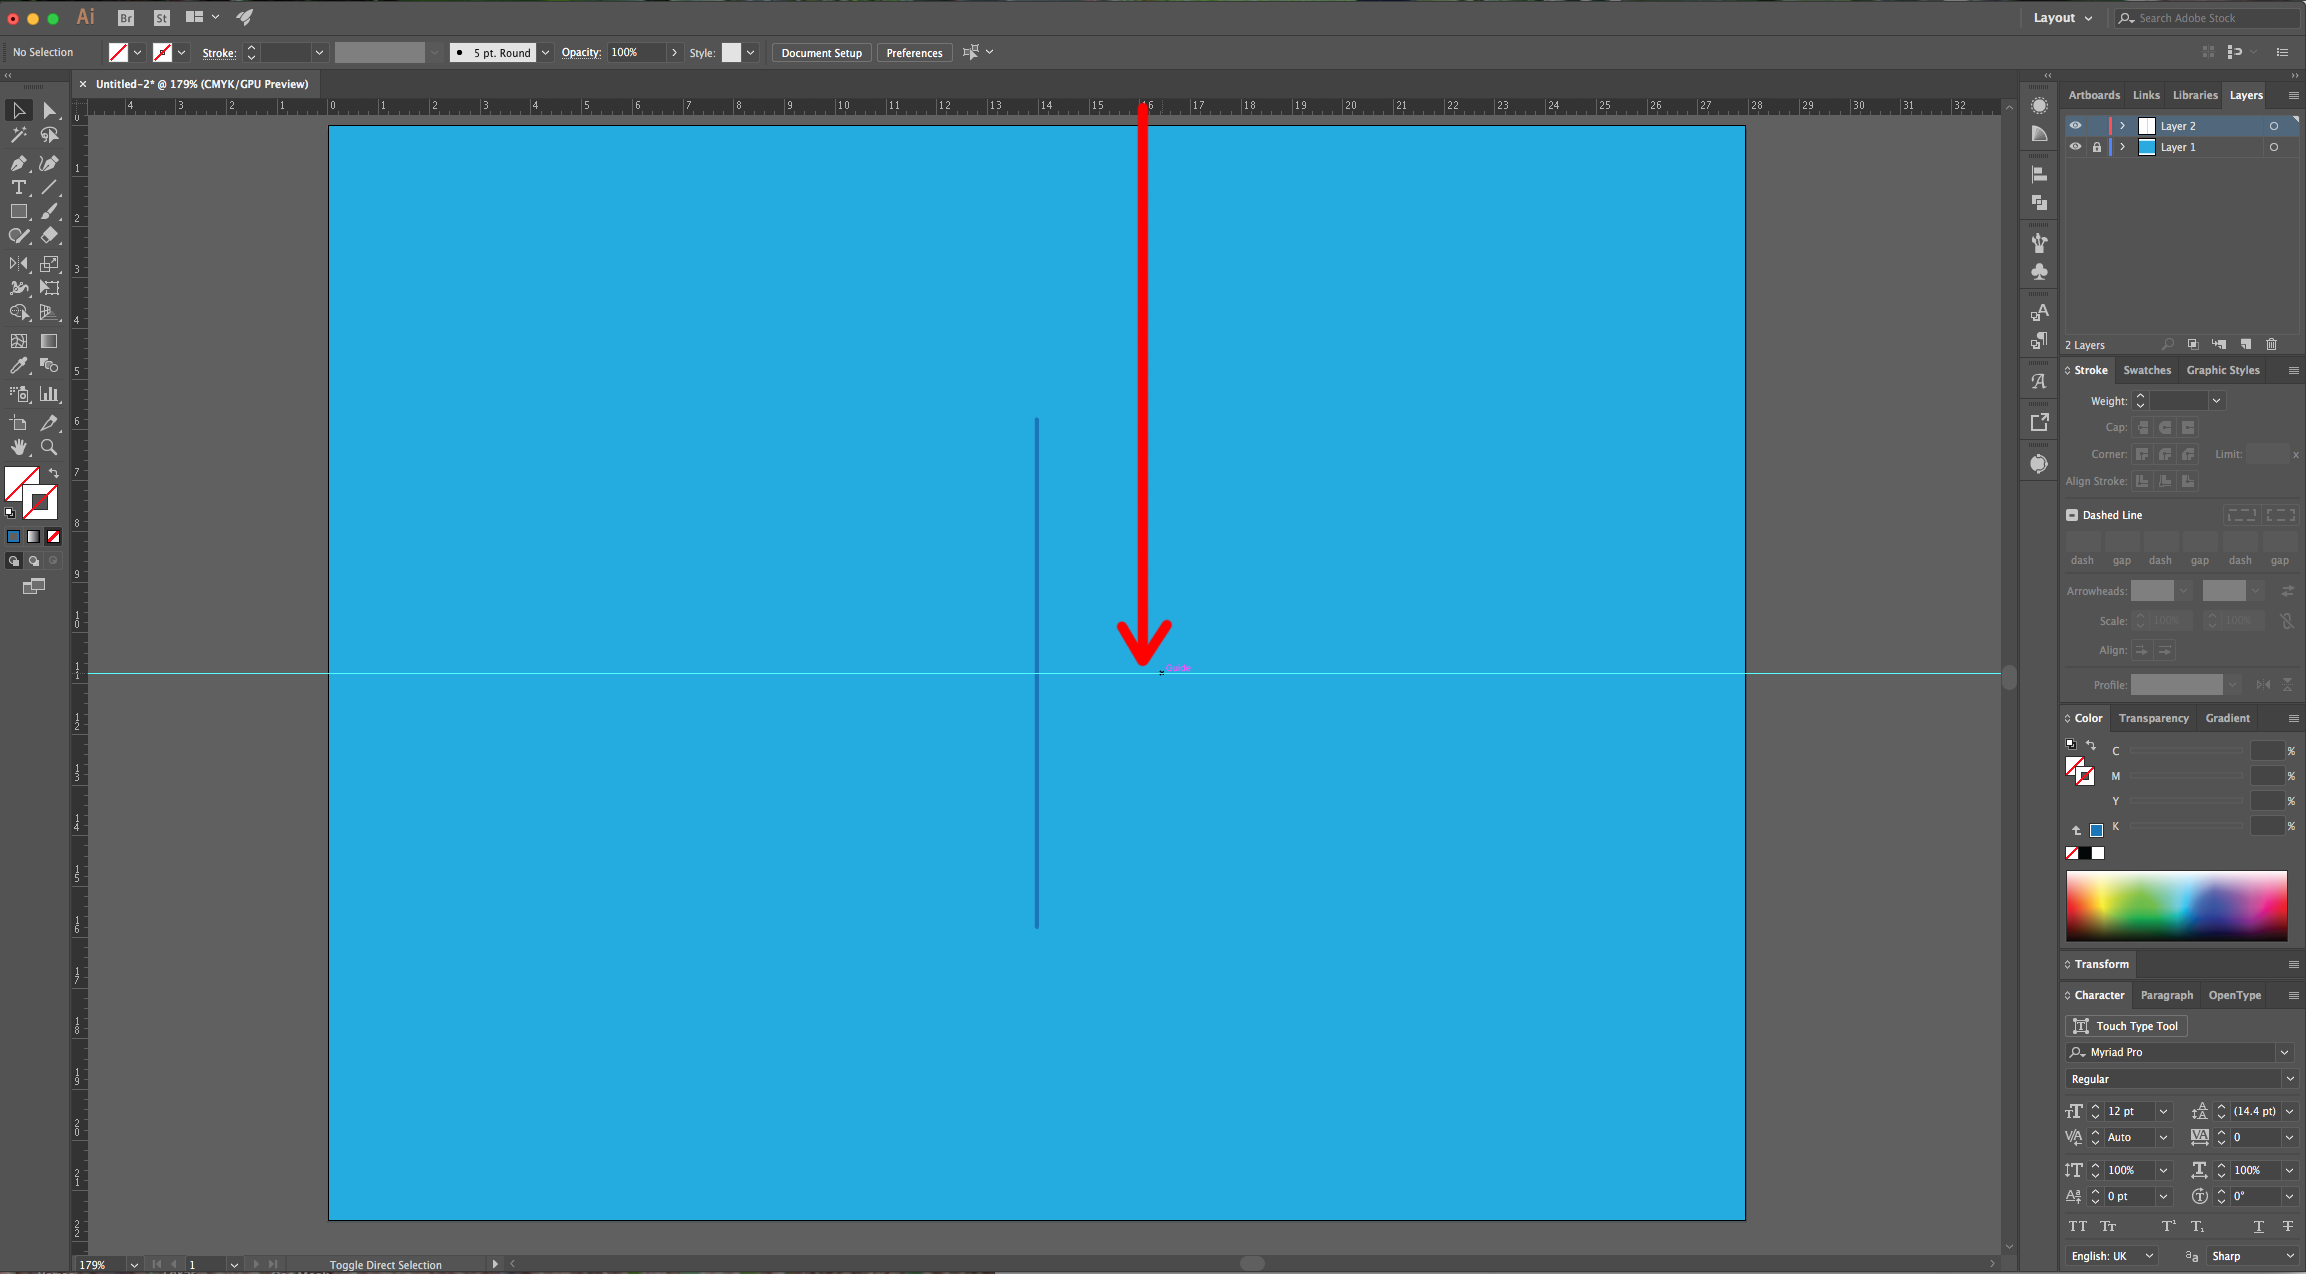
5 - Center it using the “Horizontal and Vertical Align Center” options on your Top Menu and make sure that “Align to Artboard” is selected. Or use the same options in the “Align Panel”. Change the “Stroke Weight” to 2 pt and make its “Cap” and “Corner” “Round”. Place a “Guide” in the center of your line (click and drag from the Top Ruler to the center).
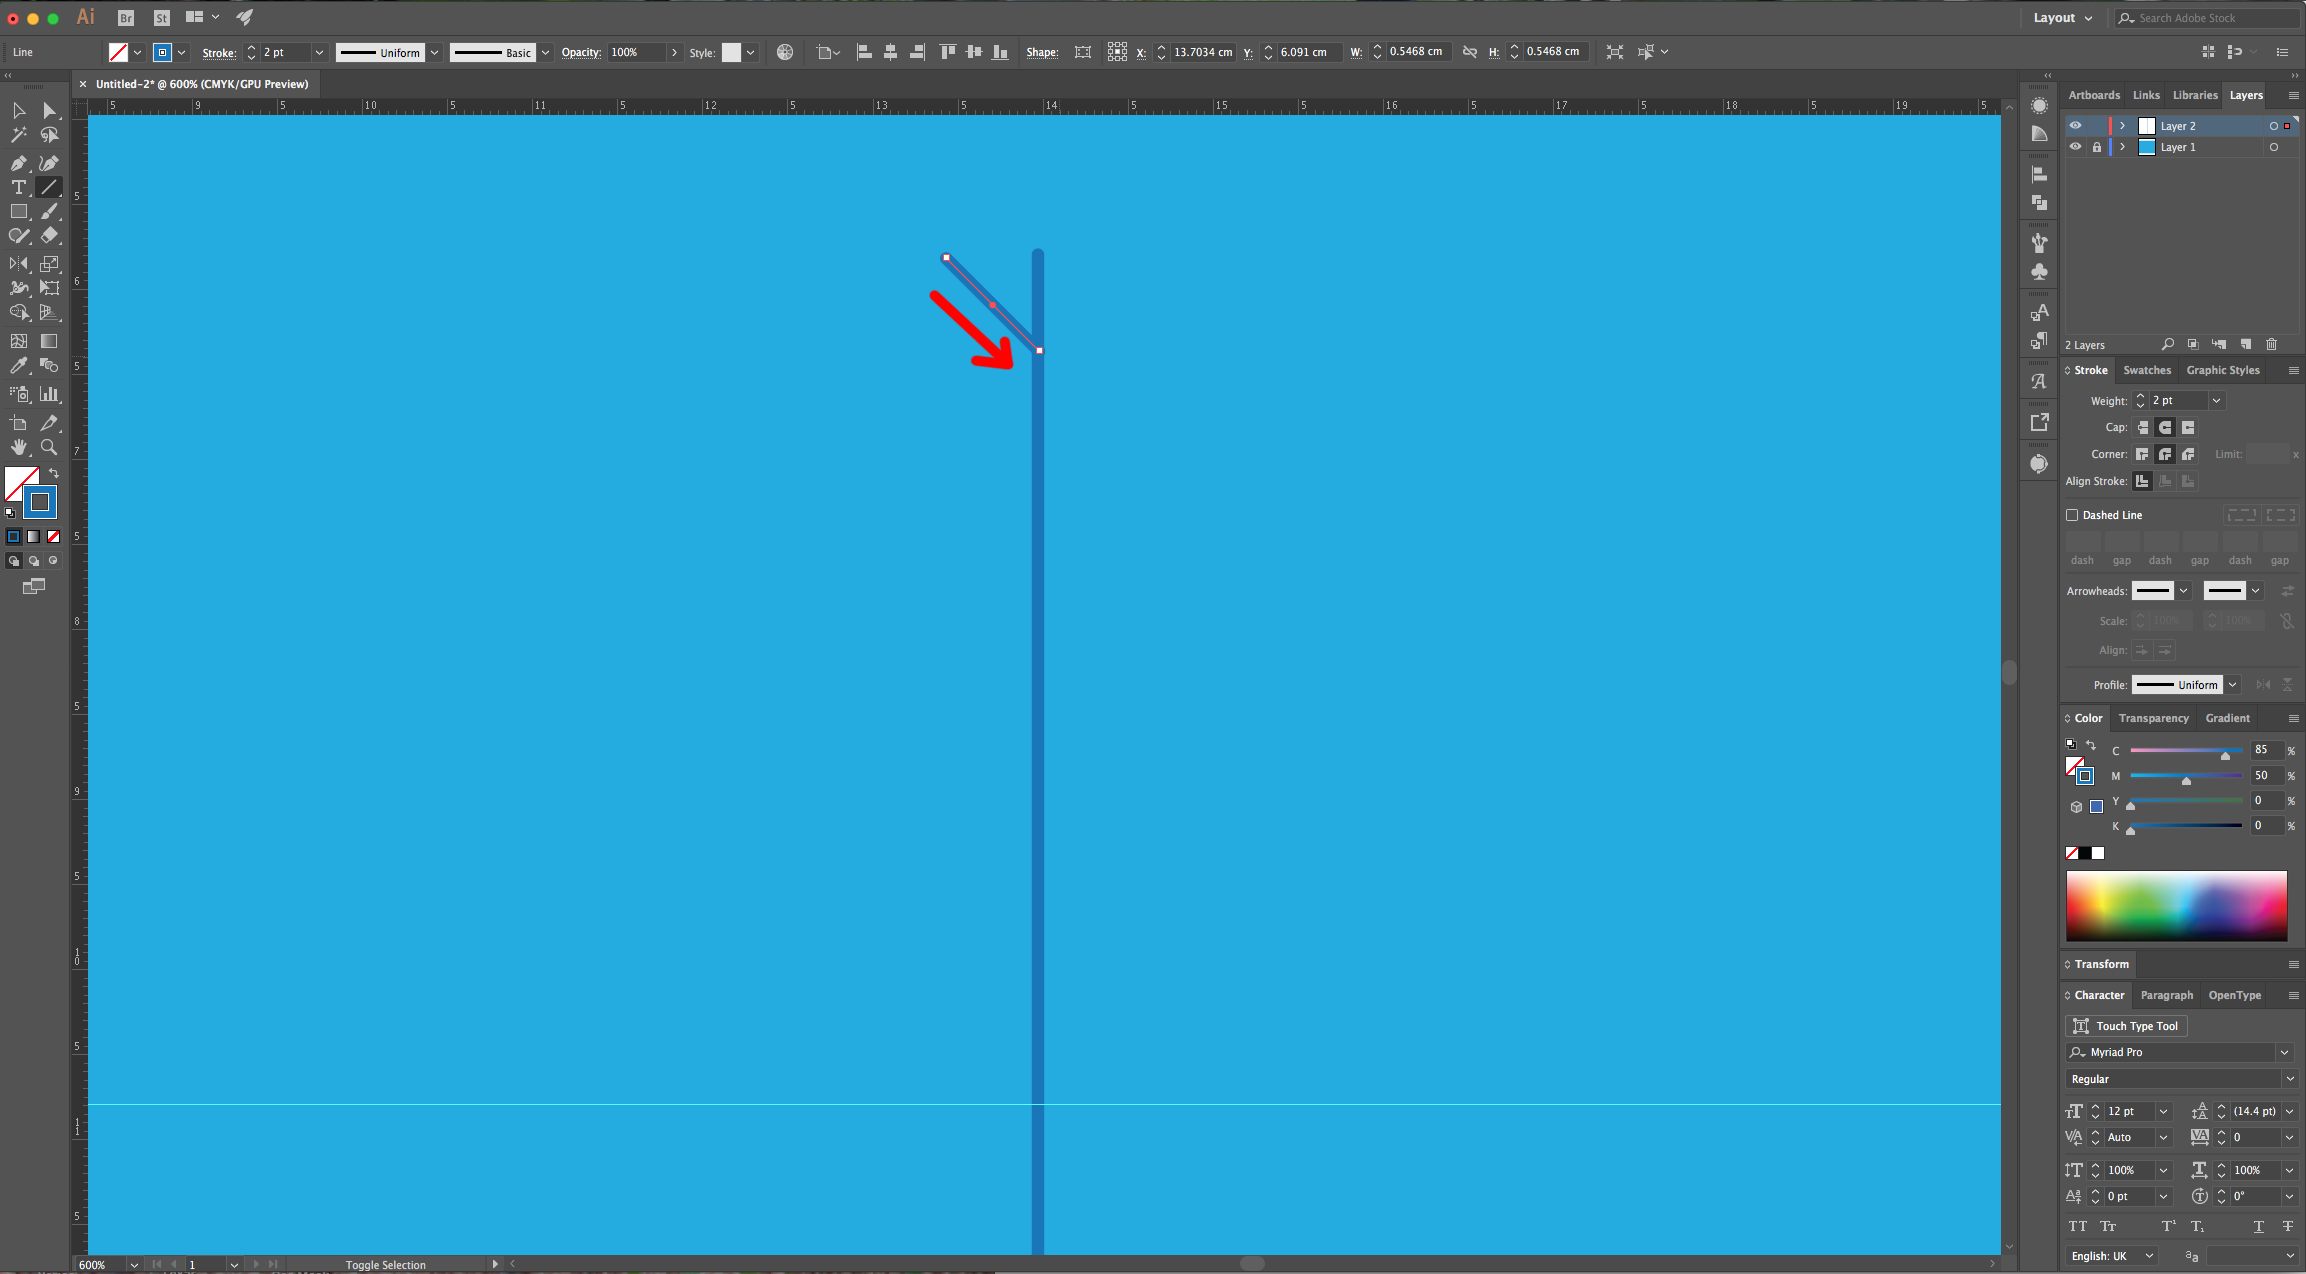
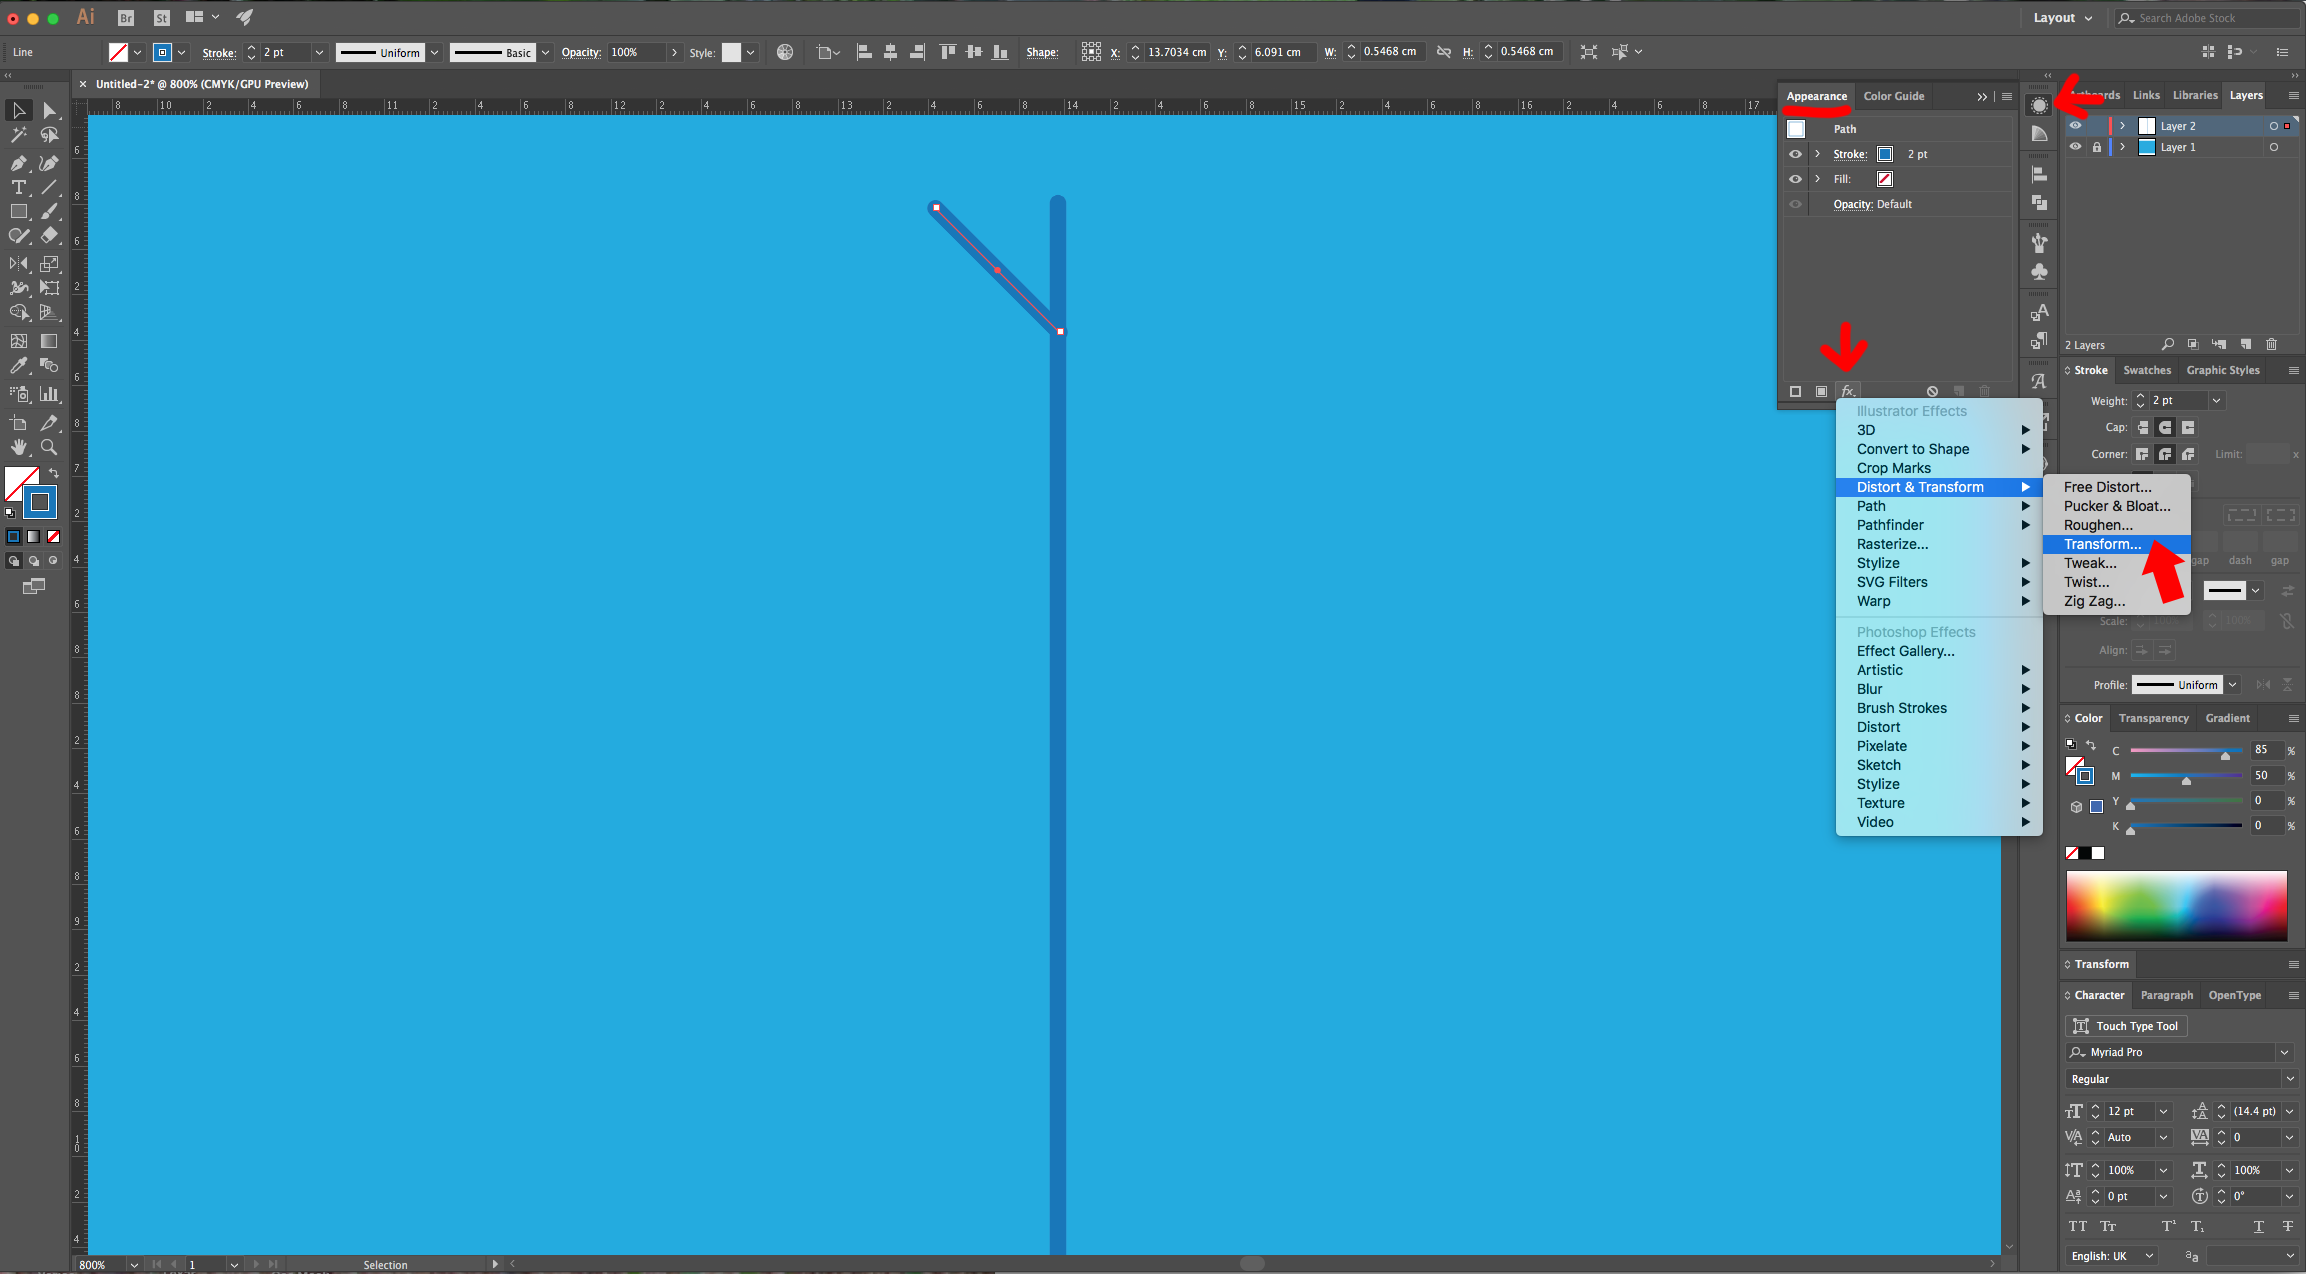
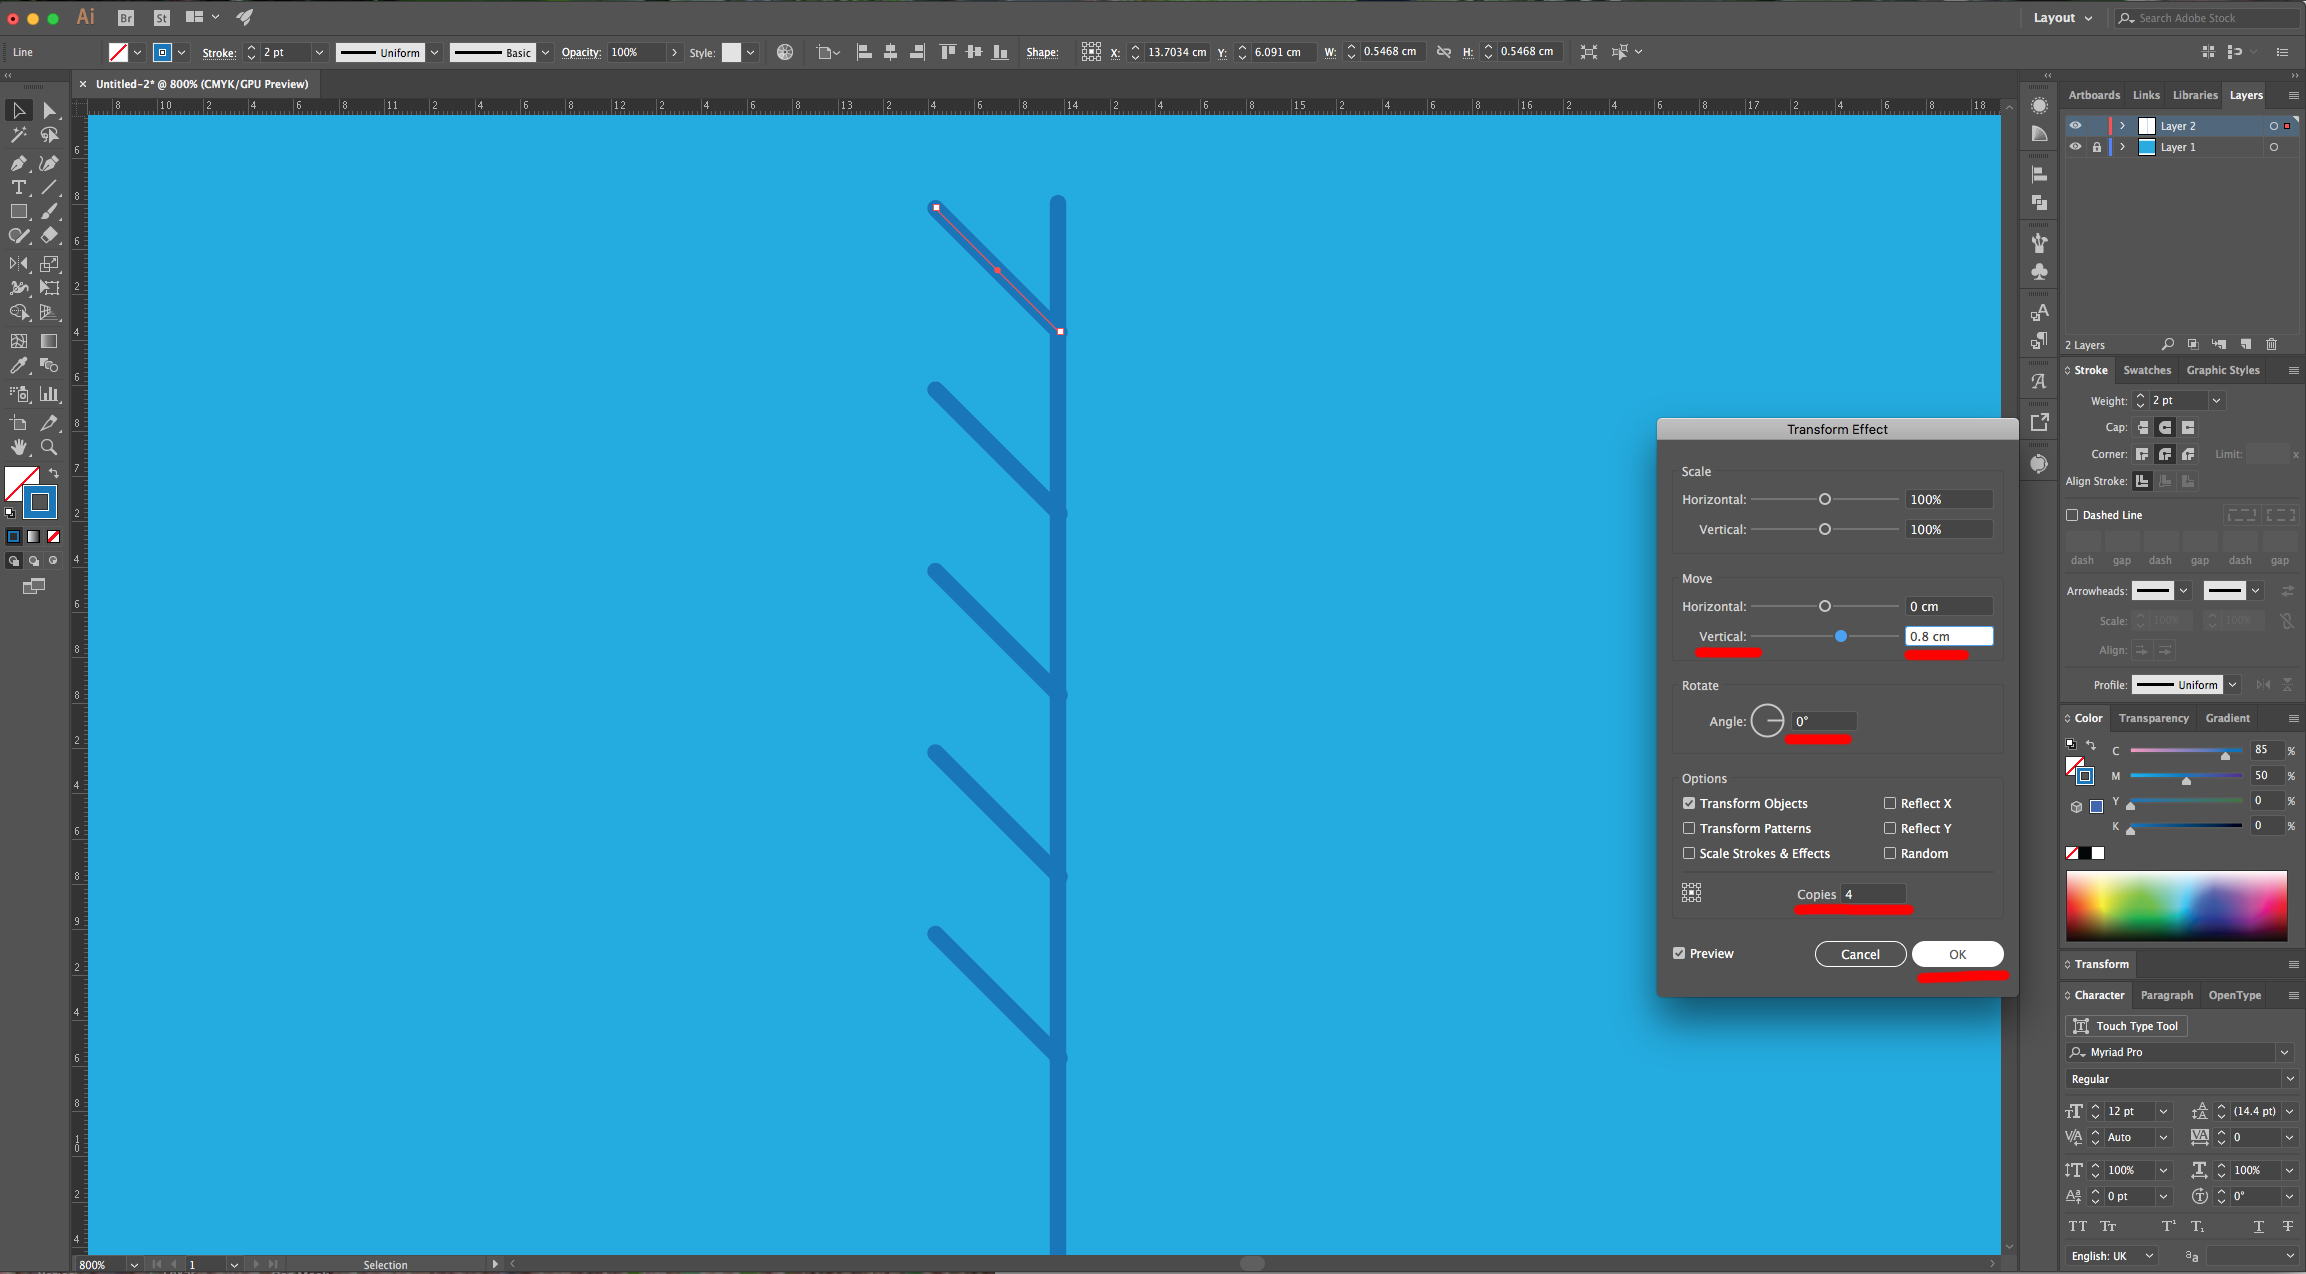
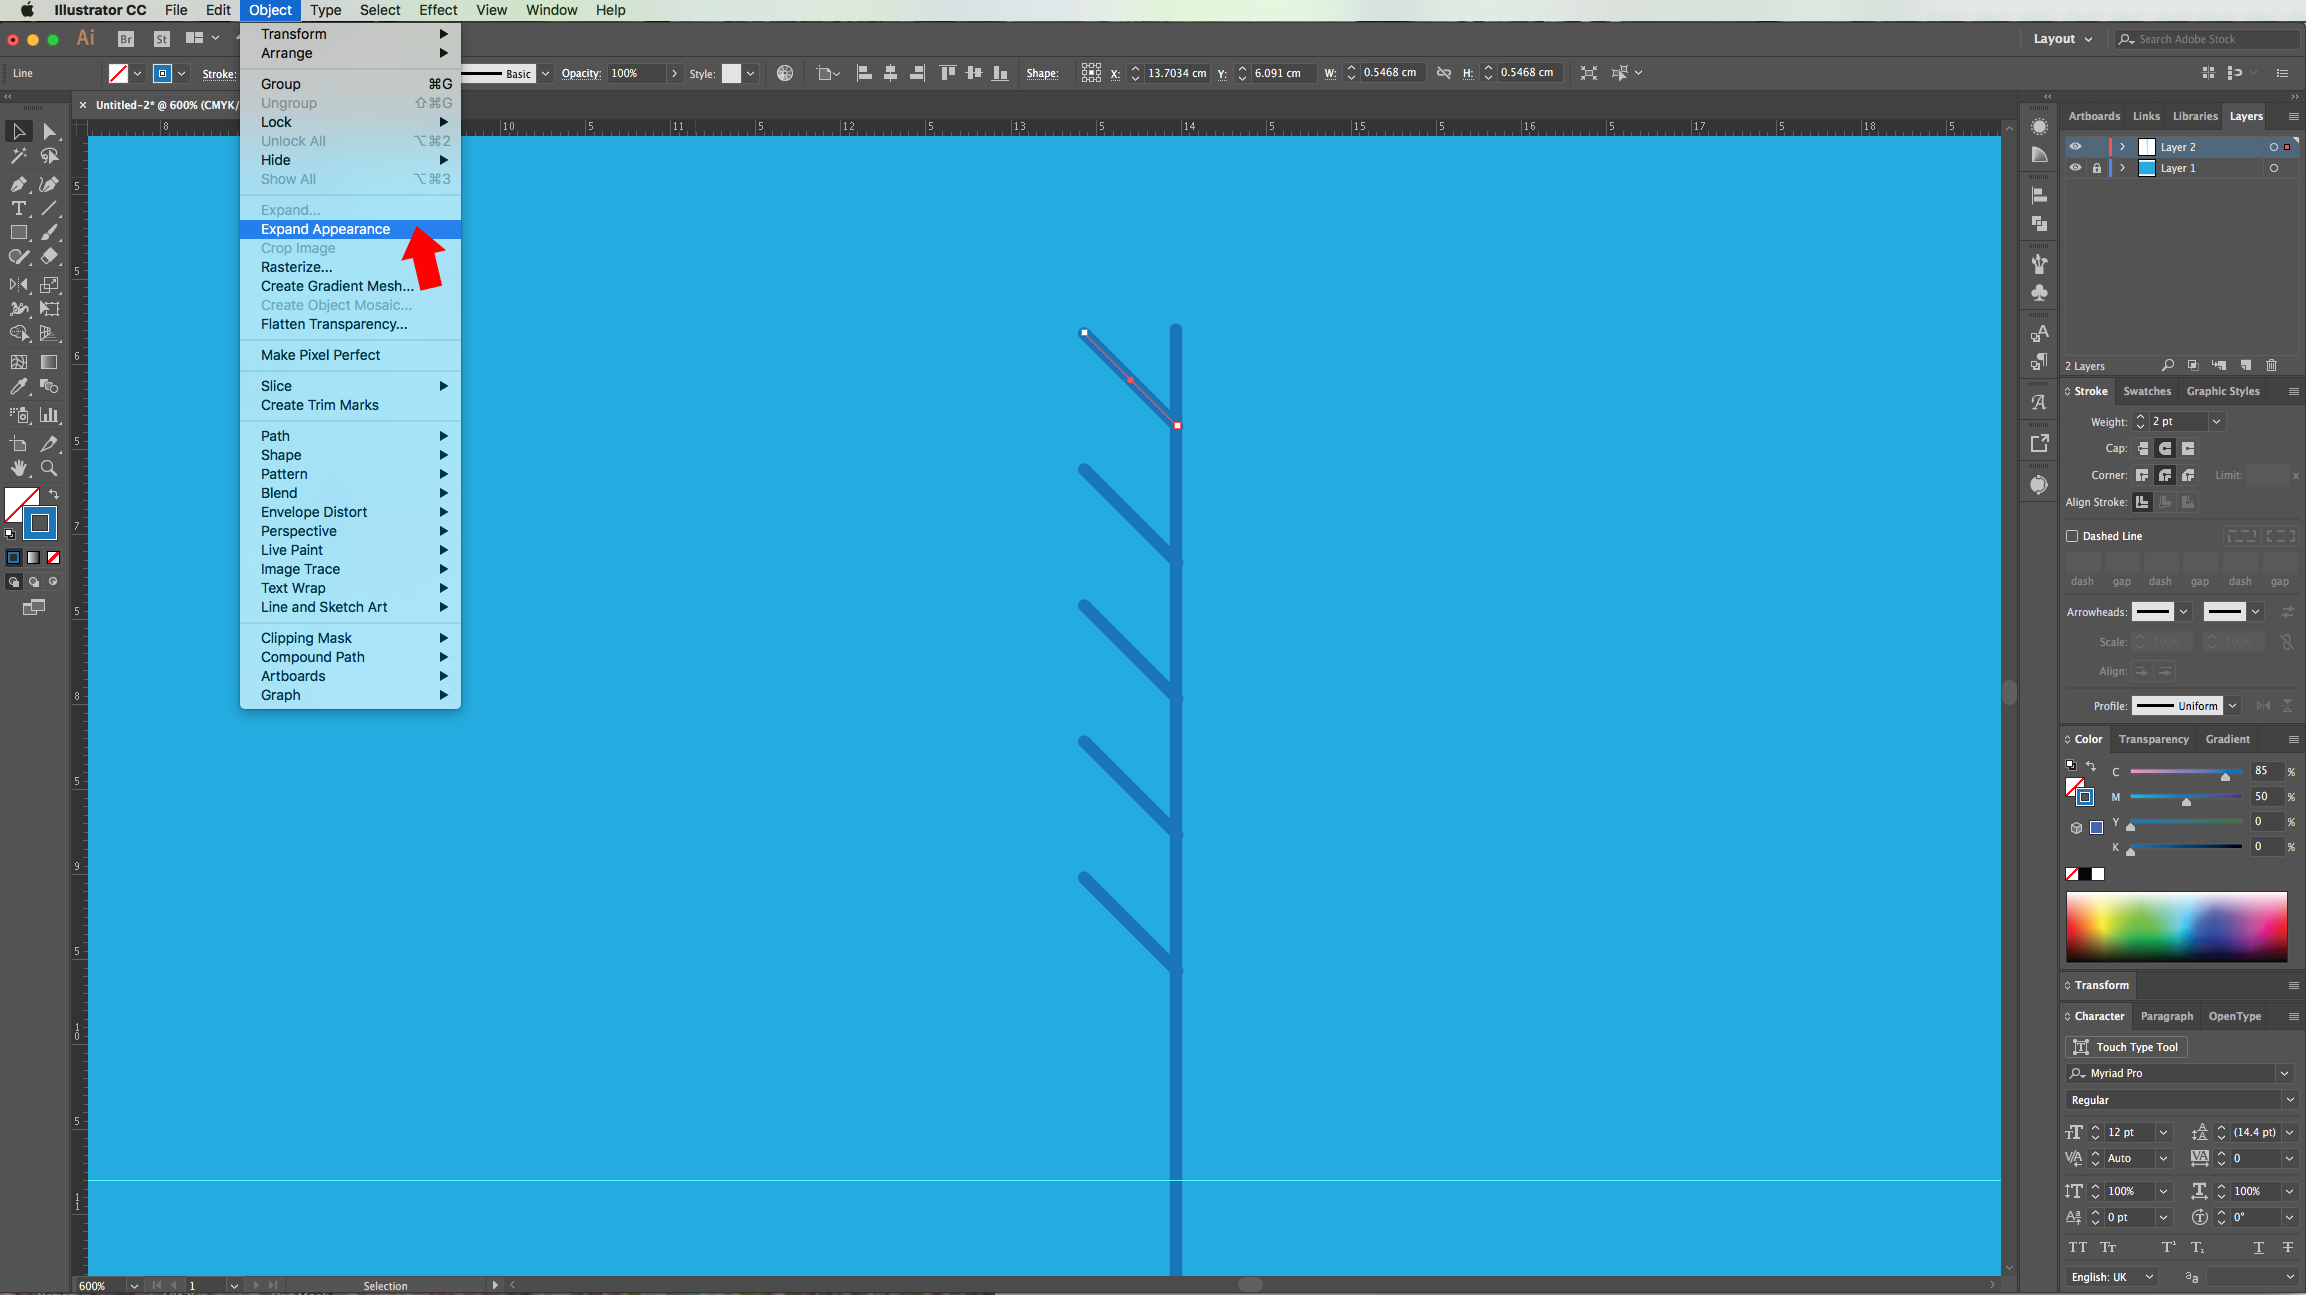
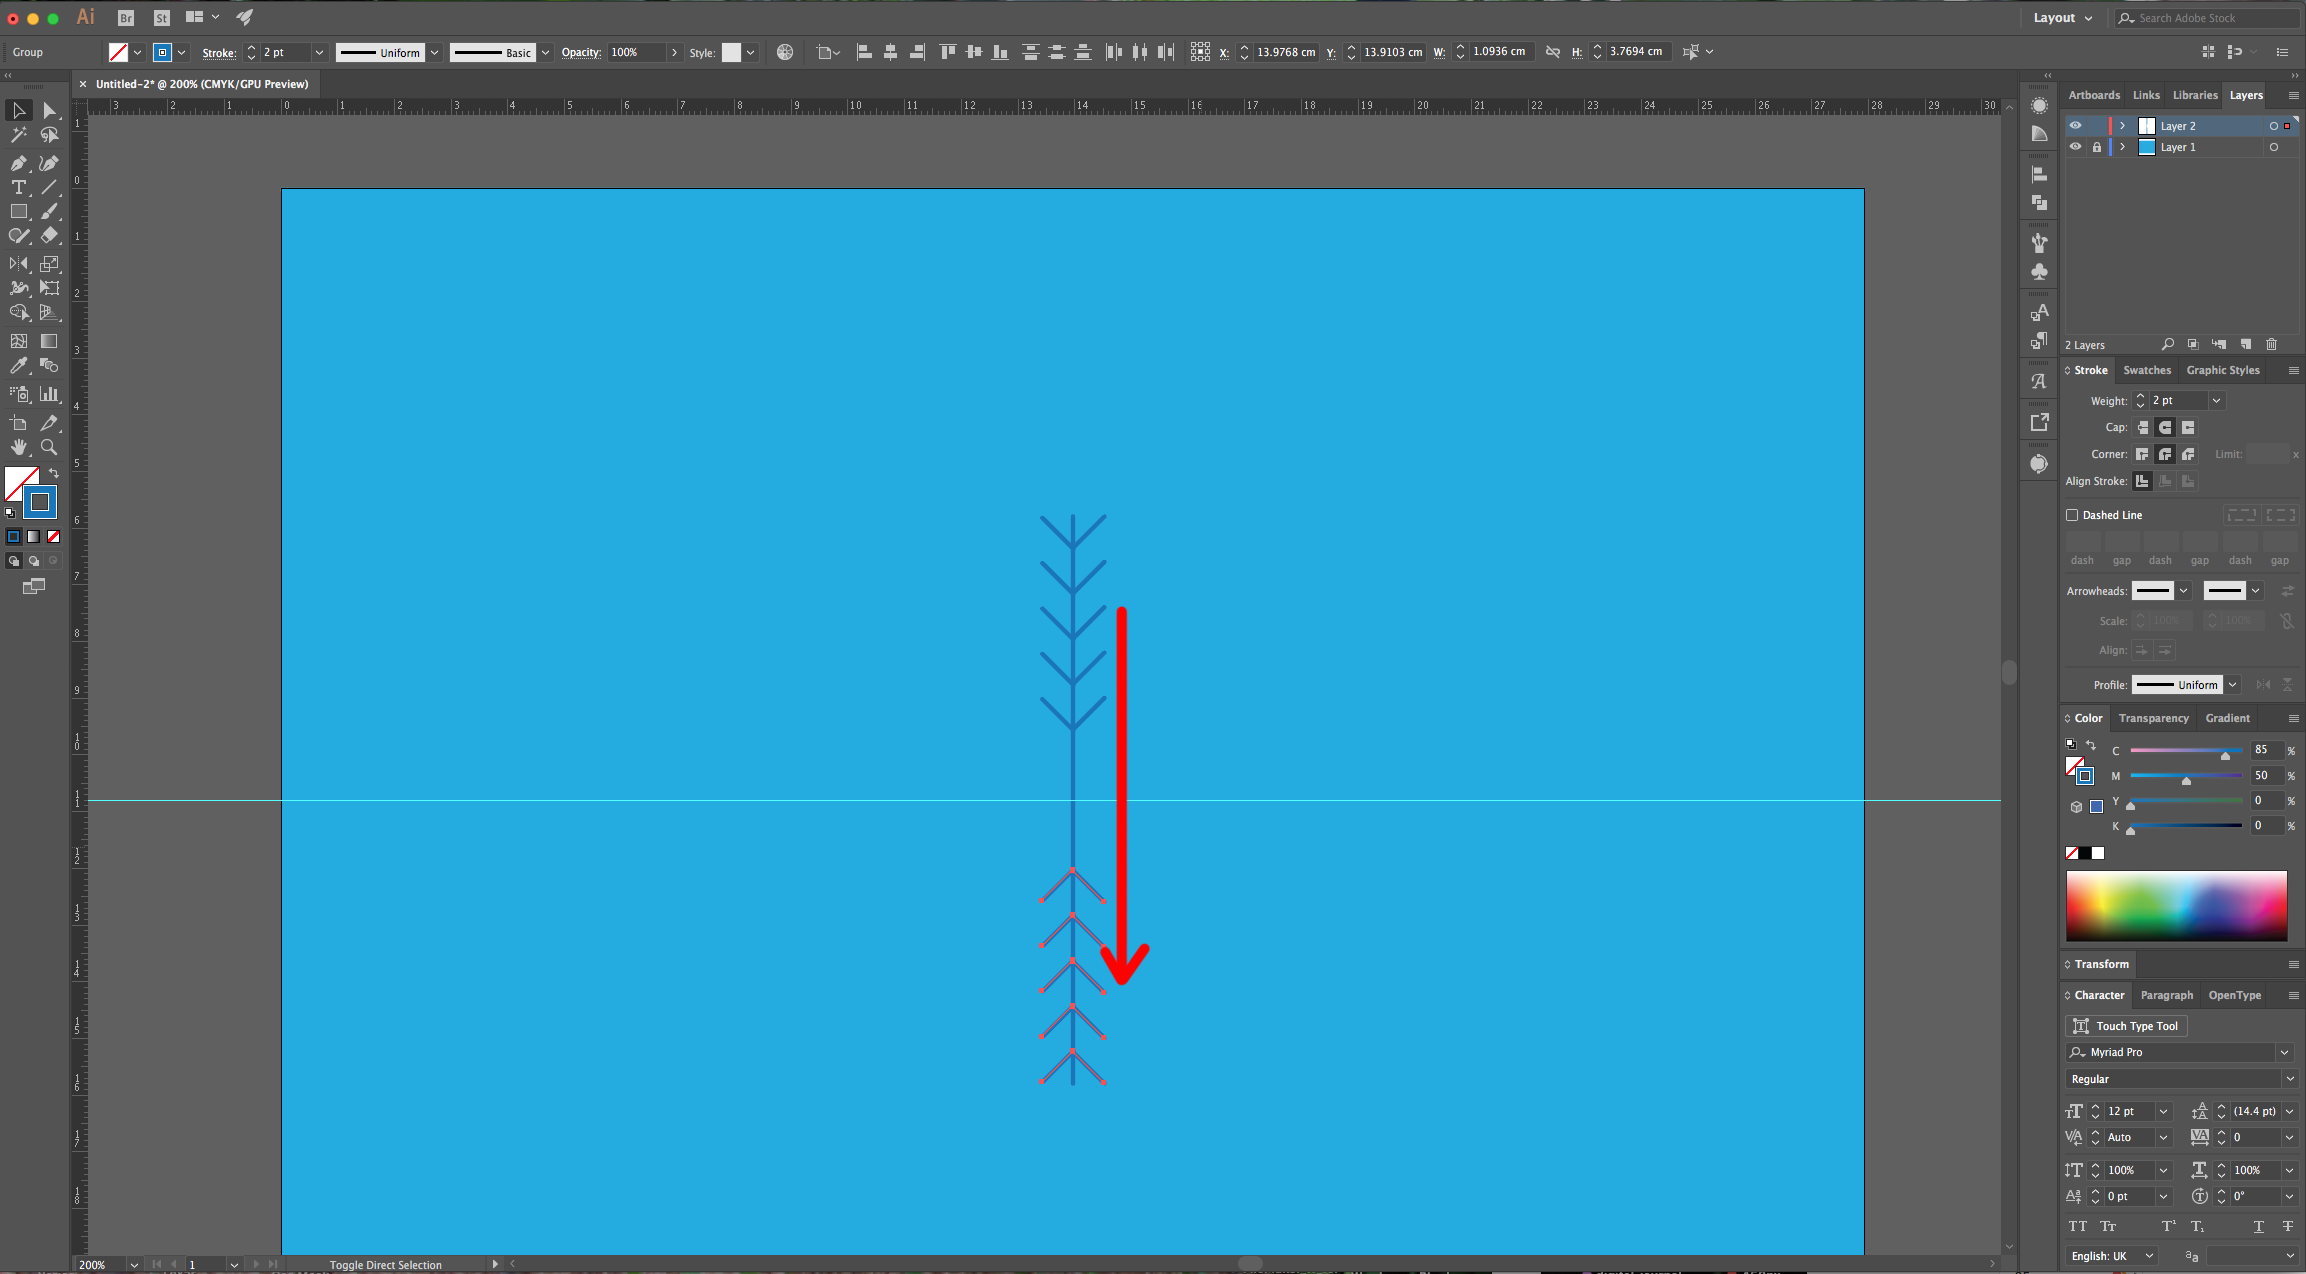
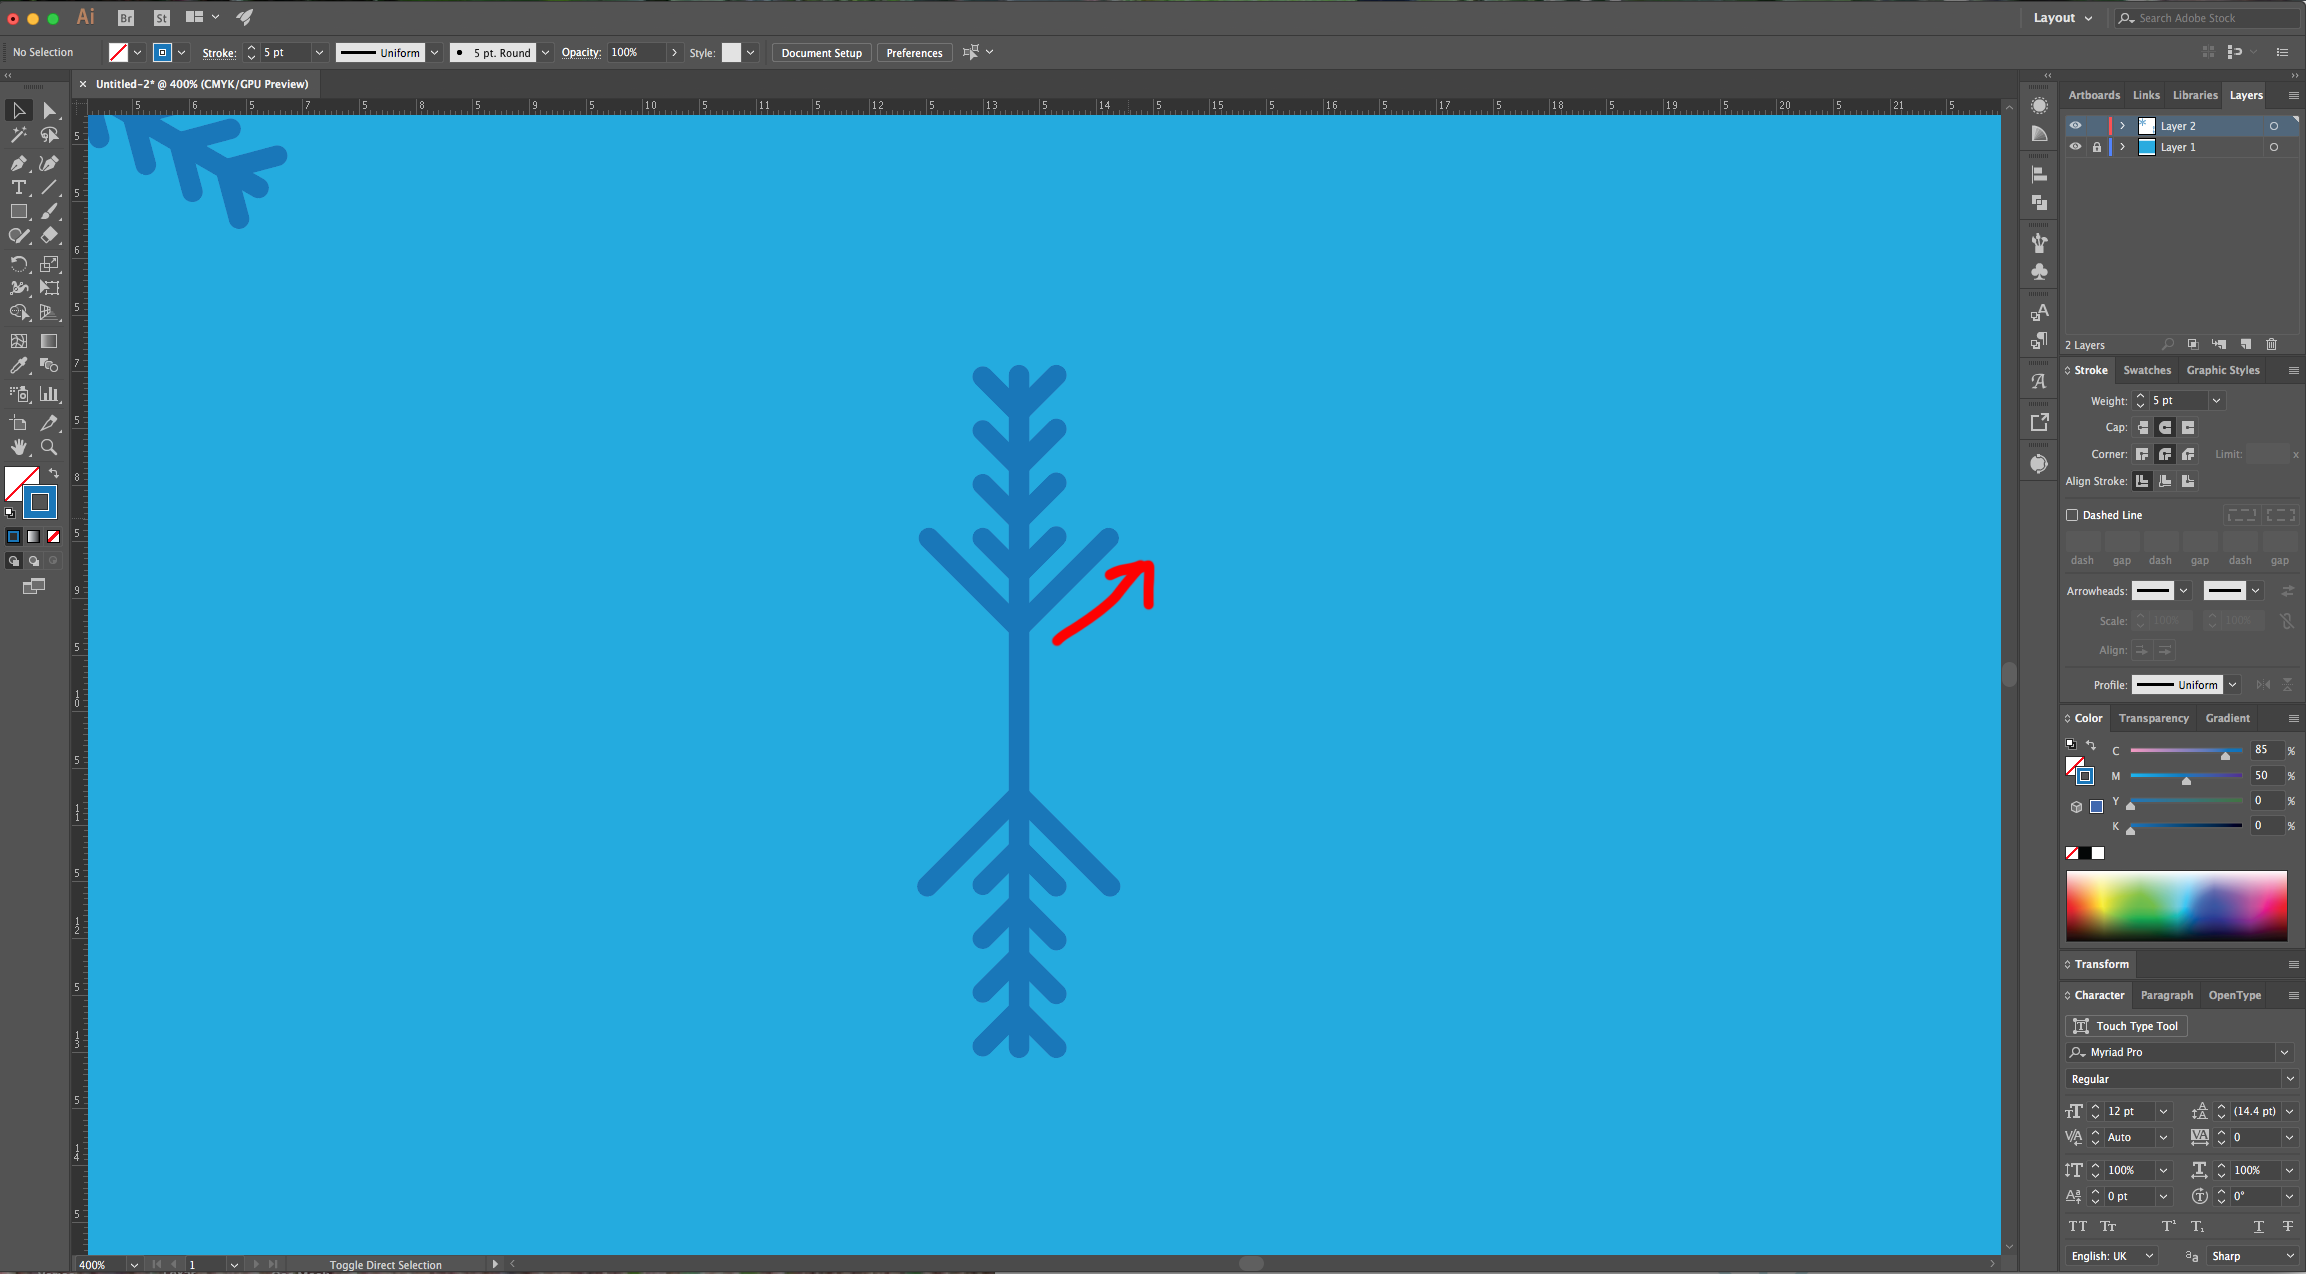
6 - Zoom in on the top of the line and add a shorter one from about 1 cm to its left. Drag down and right while holding the “Shift” key so it will be straight and in a descending angle. Head to the “Appearance Panel”, click on the “Effects Menu” on the Bottom-Left side of the panel and navigate to Distort and Transform > Transform… Use a “Vertical Move” of 0.8 cm a 0° Angle and make 4 “Copies”. Go to Object > Expand Appearance.
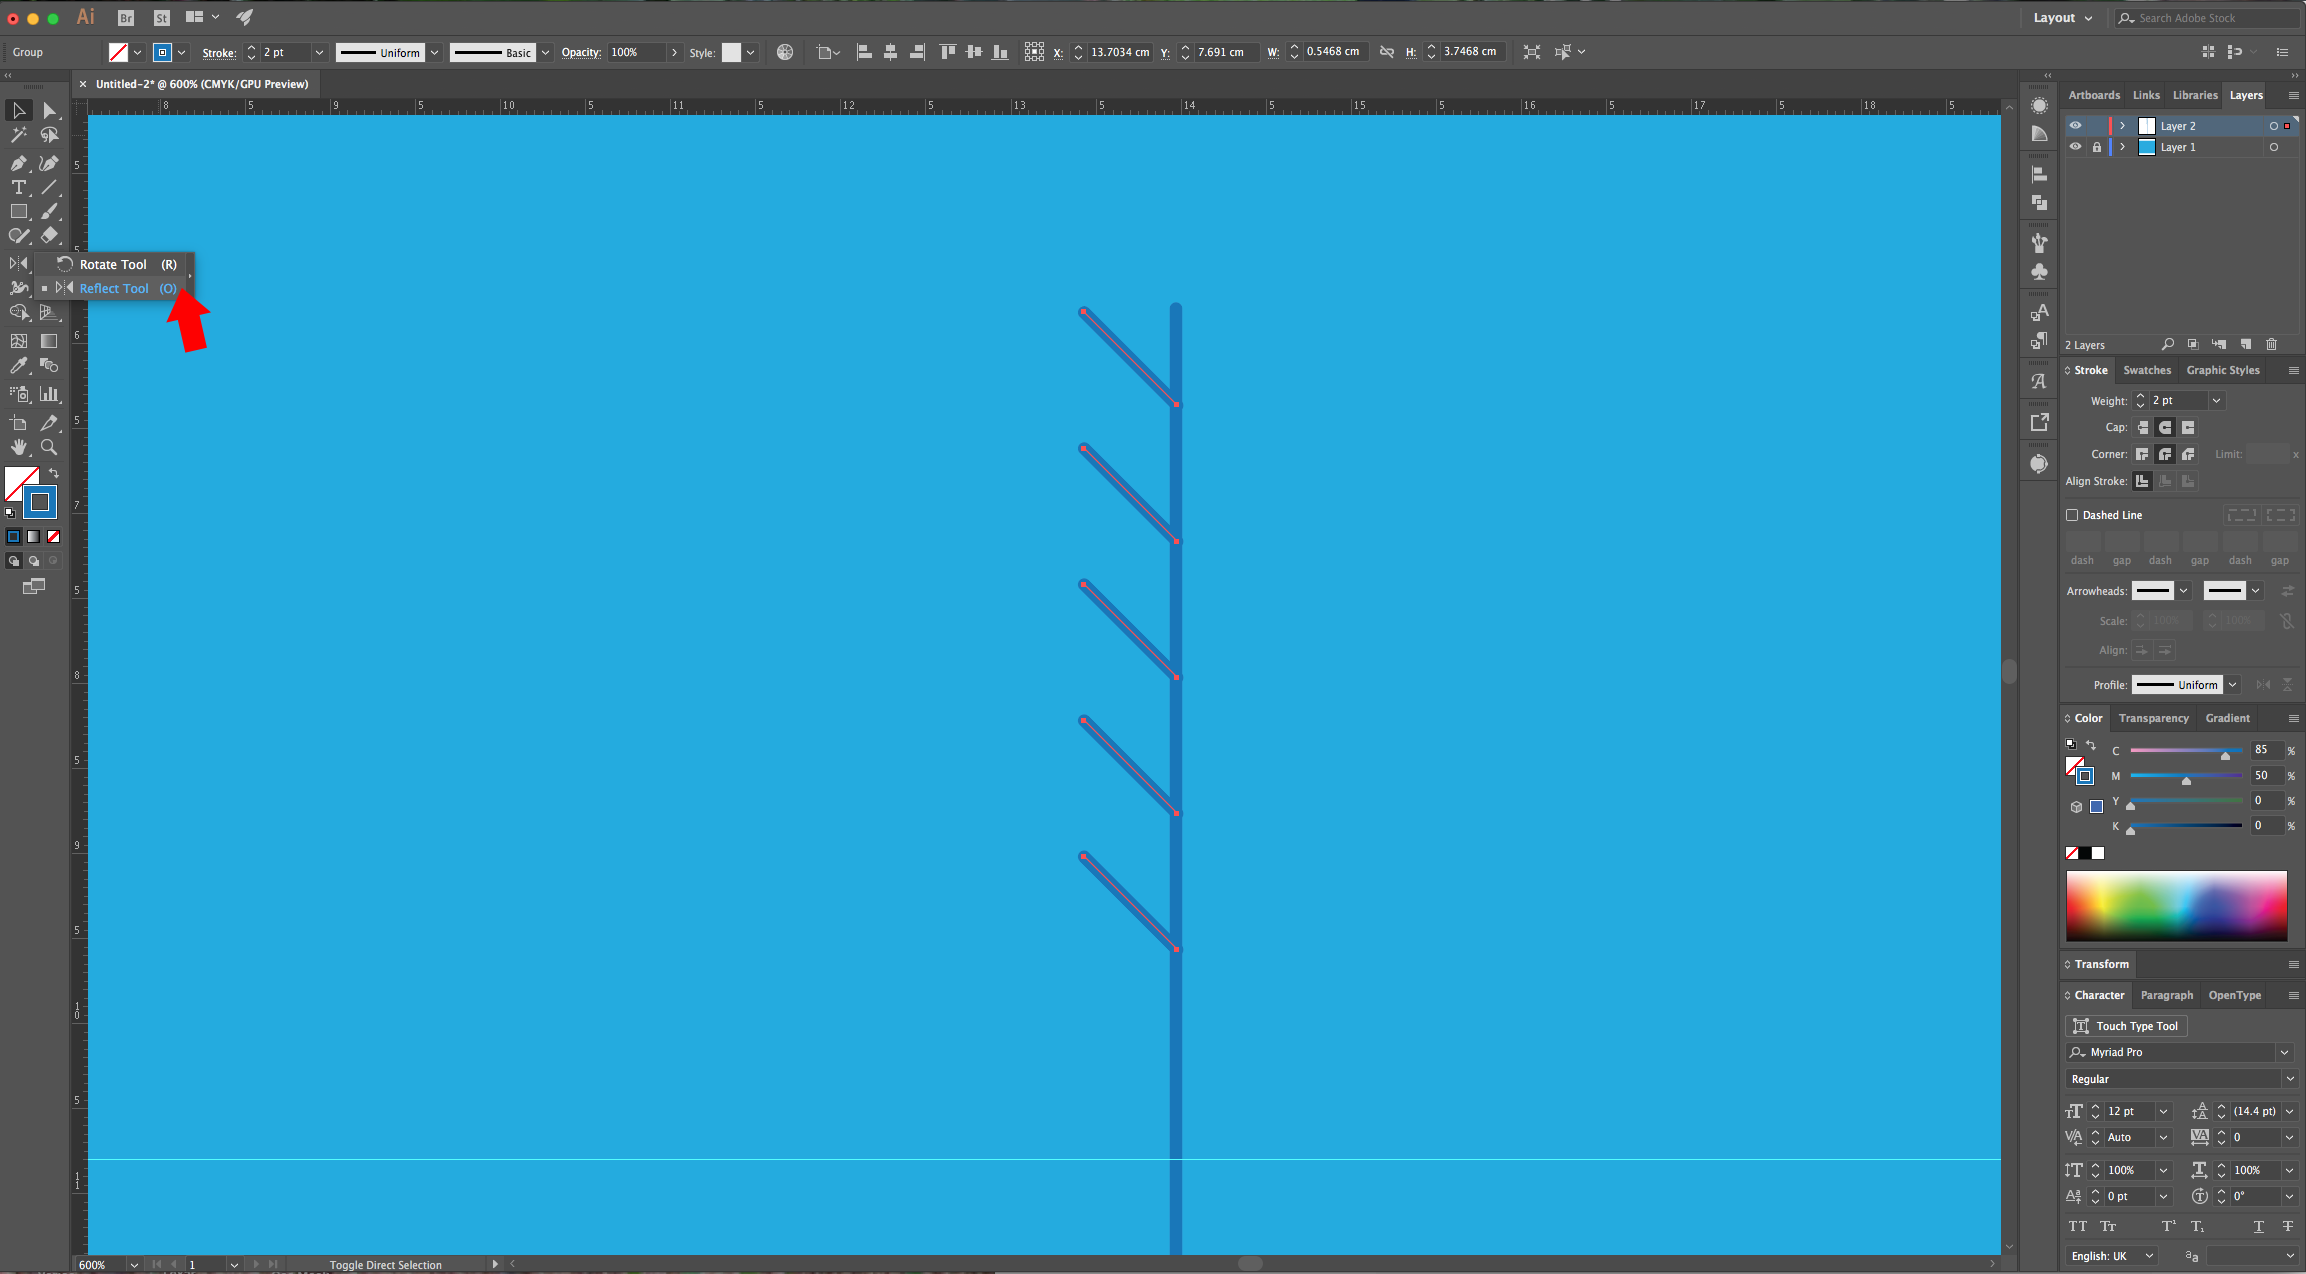
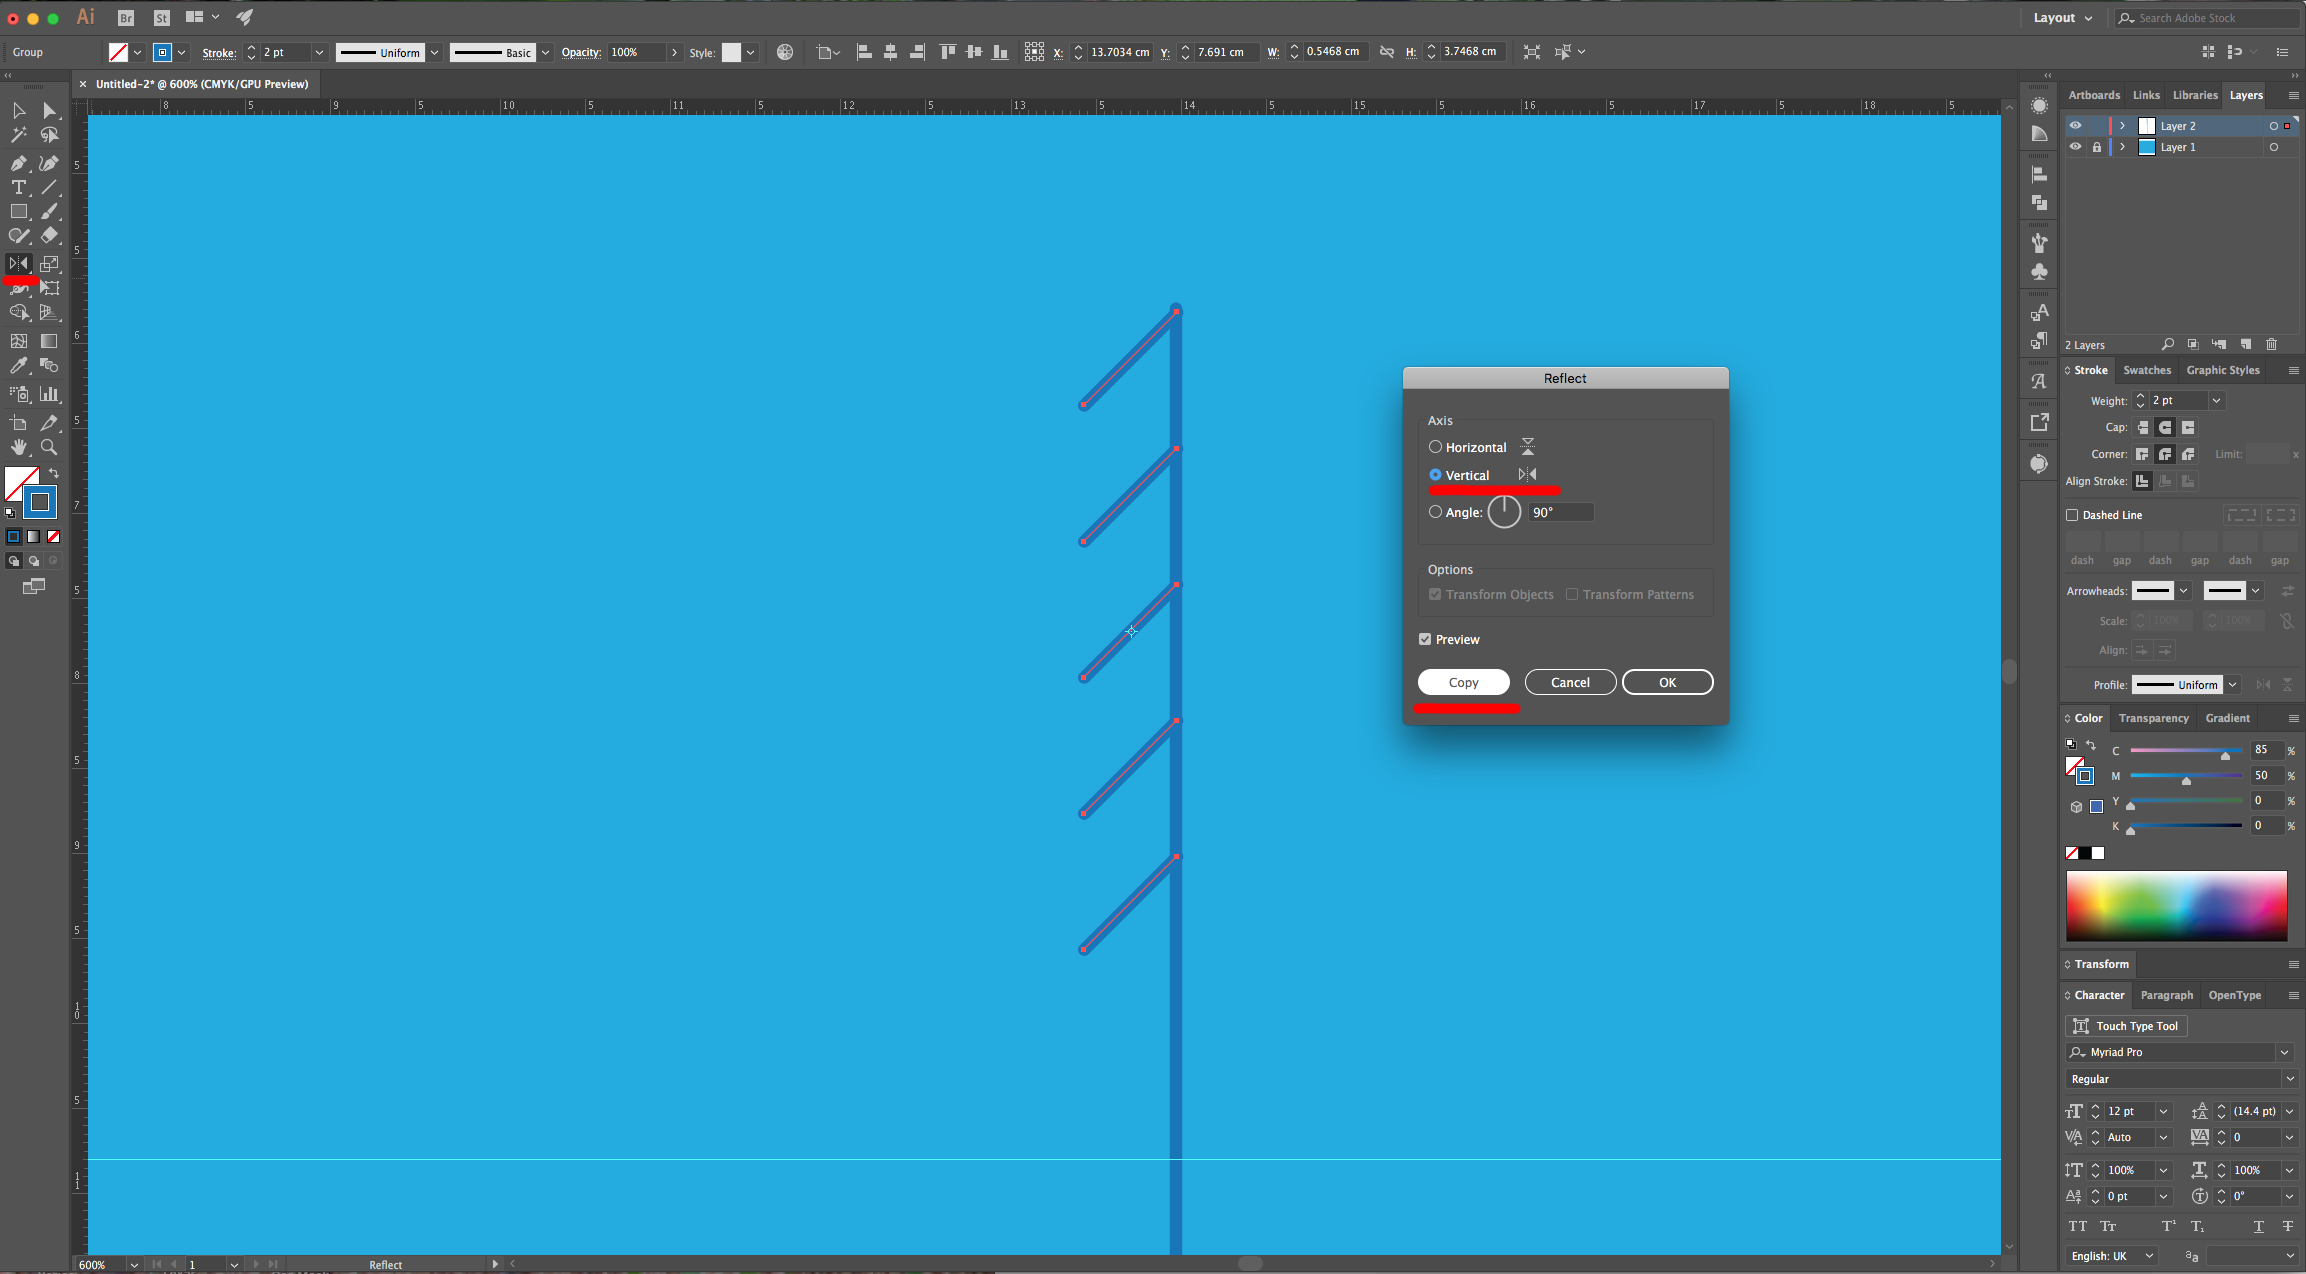
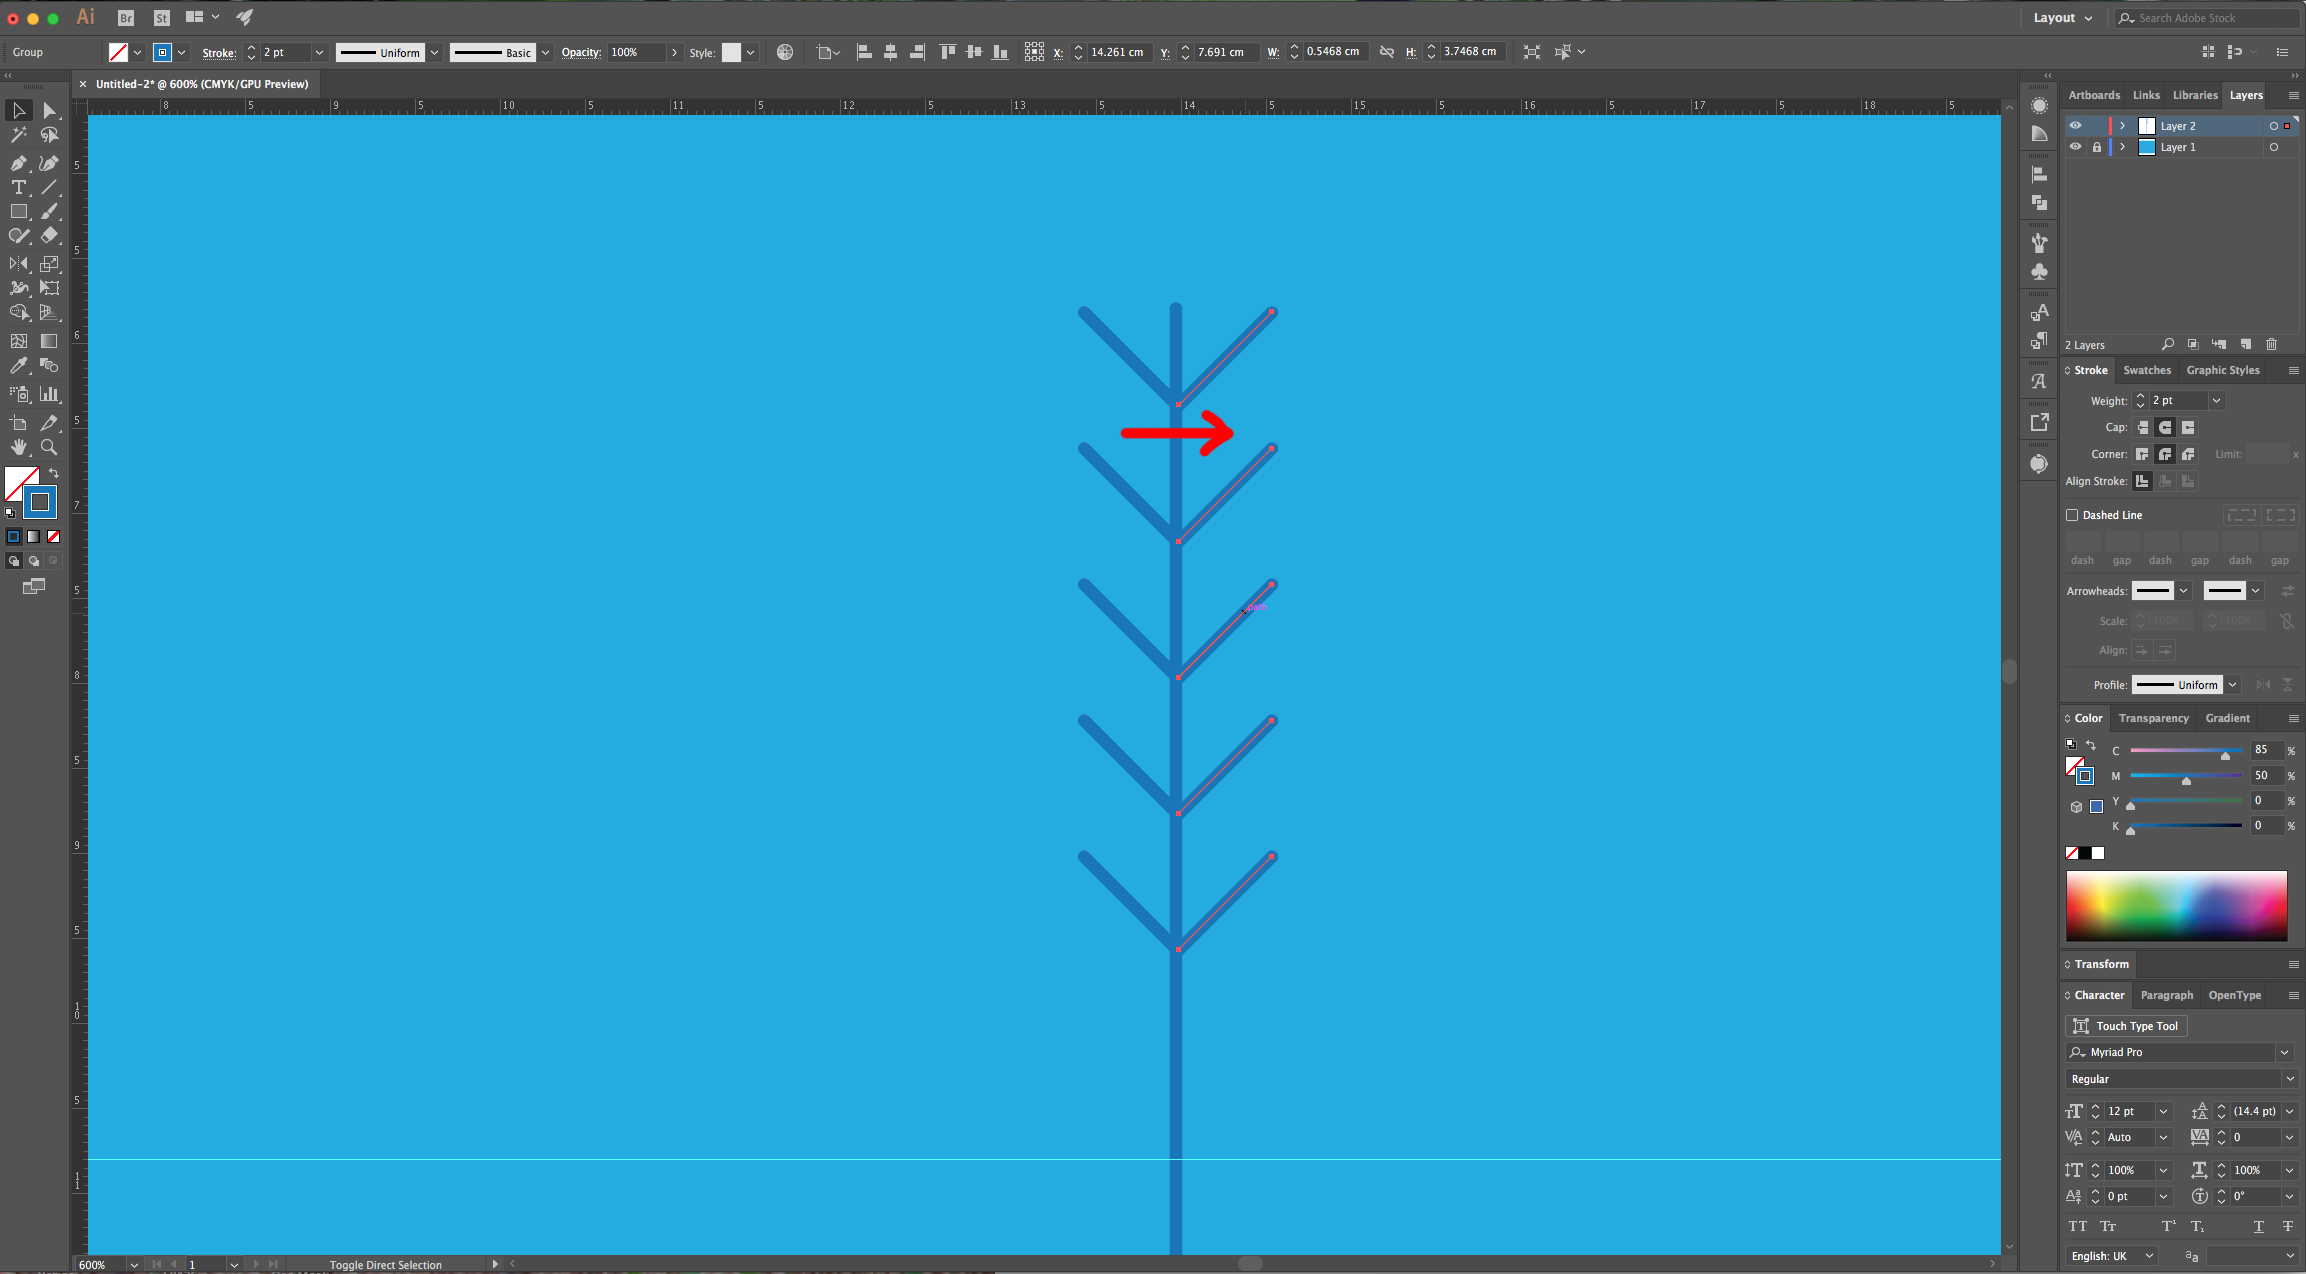
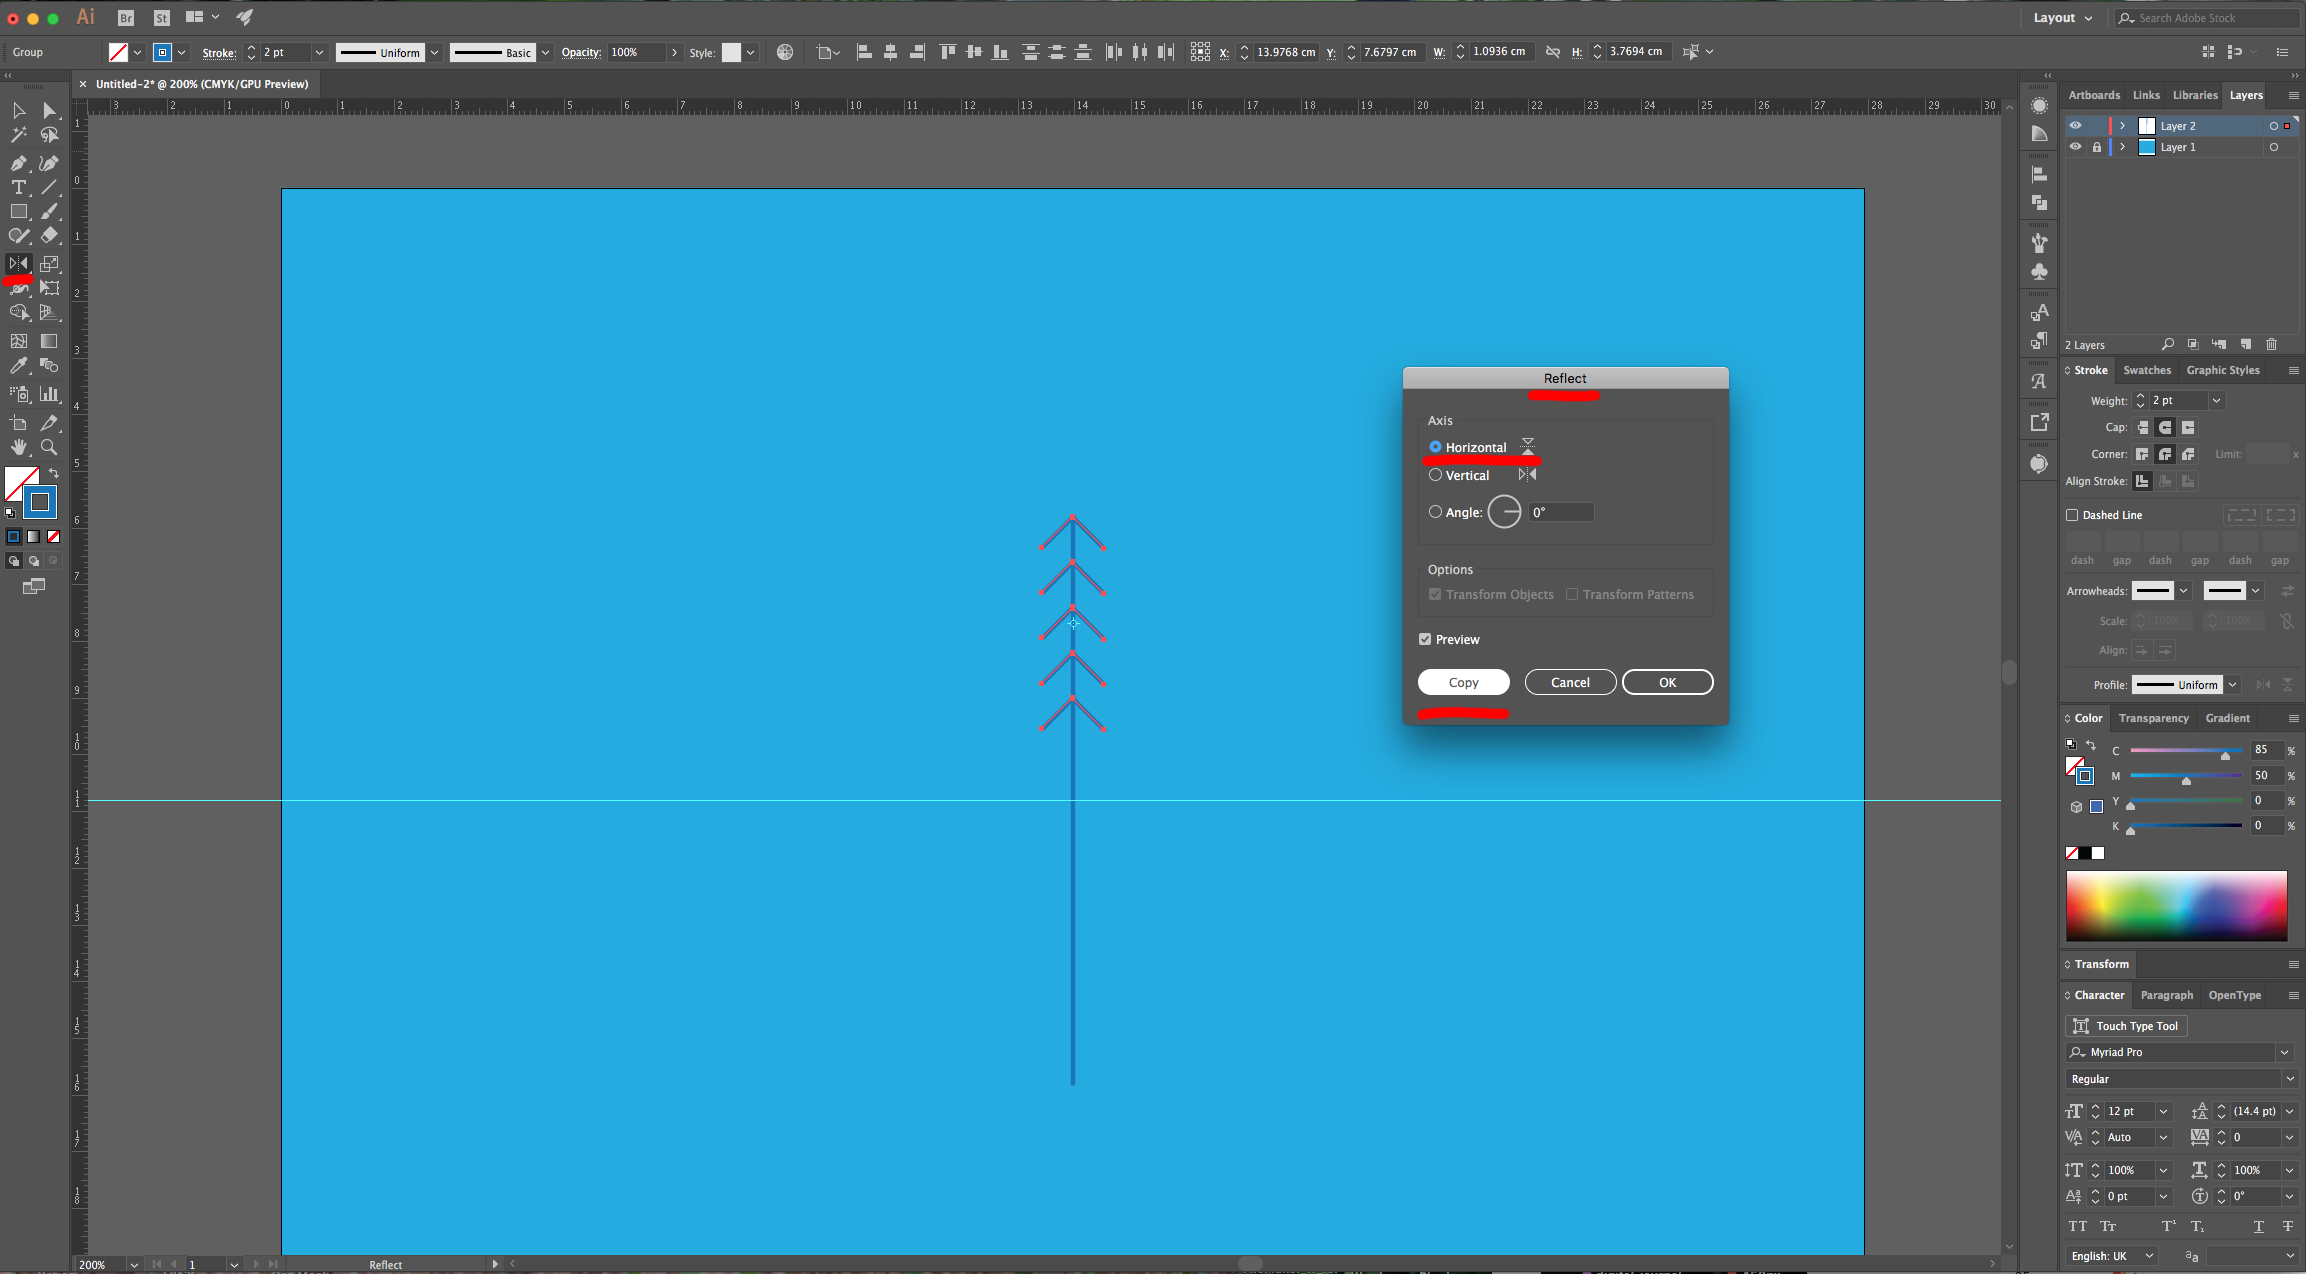
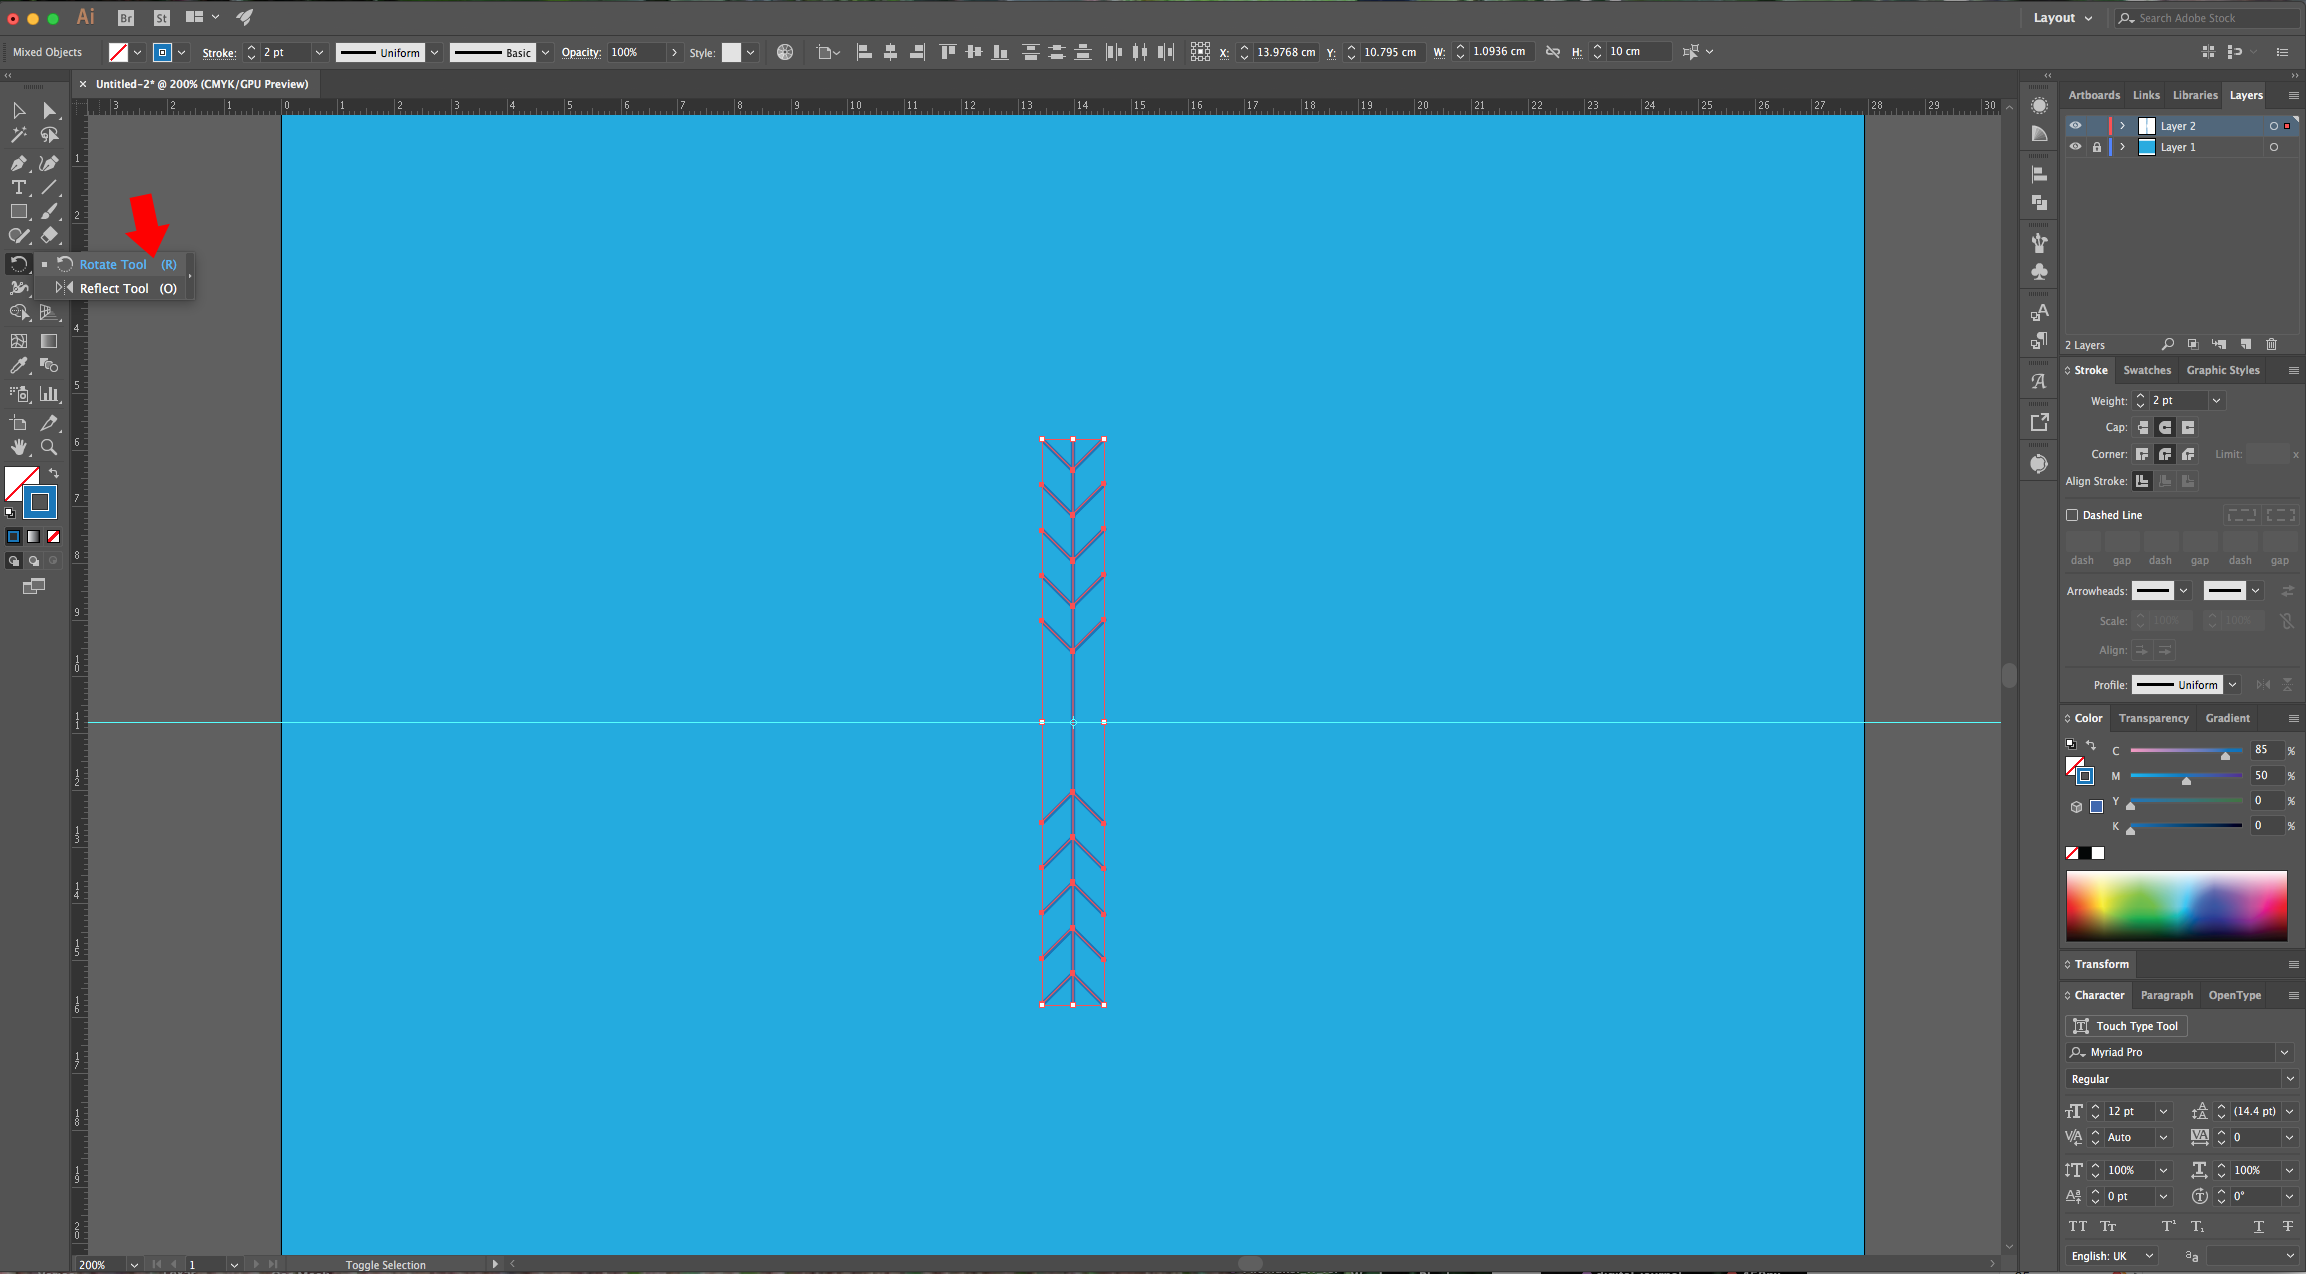
7 - Select the “Reflect Tool” (O), choose a “Vertical Axis” and a 90° Angle. Click “Copy” instead of “OK”. Then, move your lines to the right side of the Vertical Line while holding the “Shift” key to keep a straight line. Select both sides and use the “Reflect Tool” (O) again, but this time use a “Horizontal Axis” and a 0° Angle. Click “Copy” instead of “OK”. Move your resulting selection down to the bottom of the Vertical line using the “Shift” key.
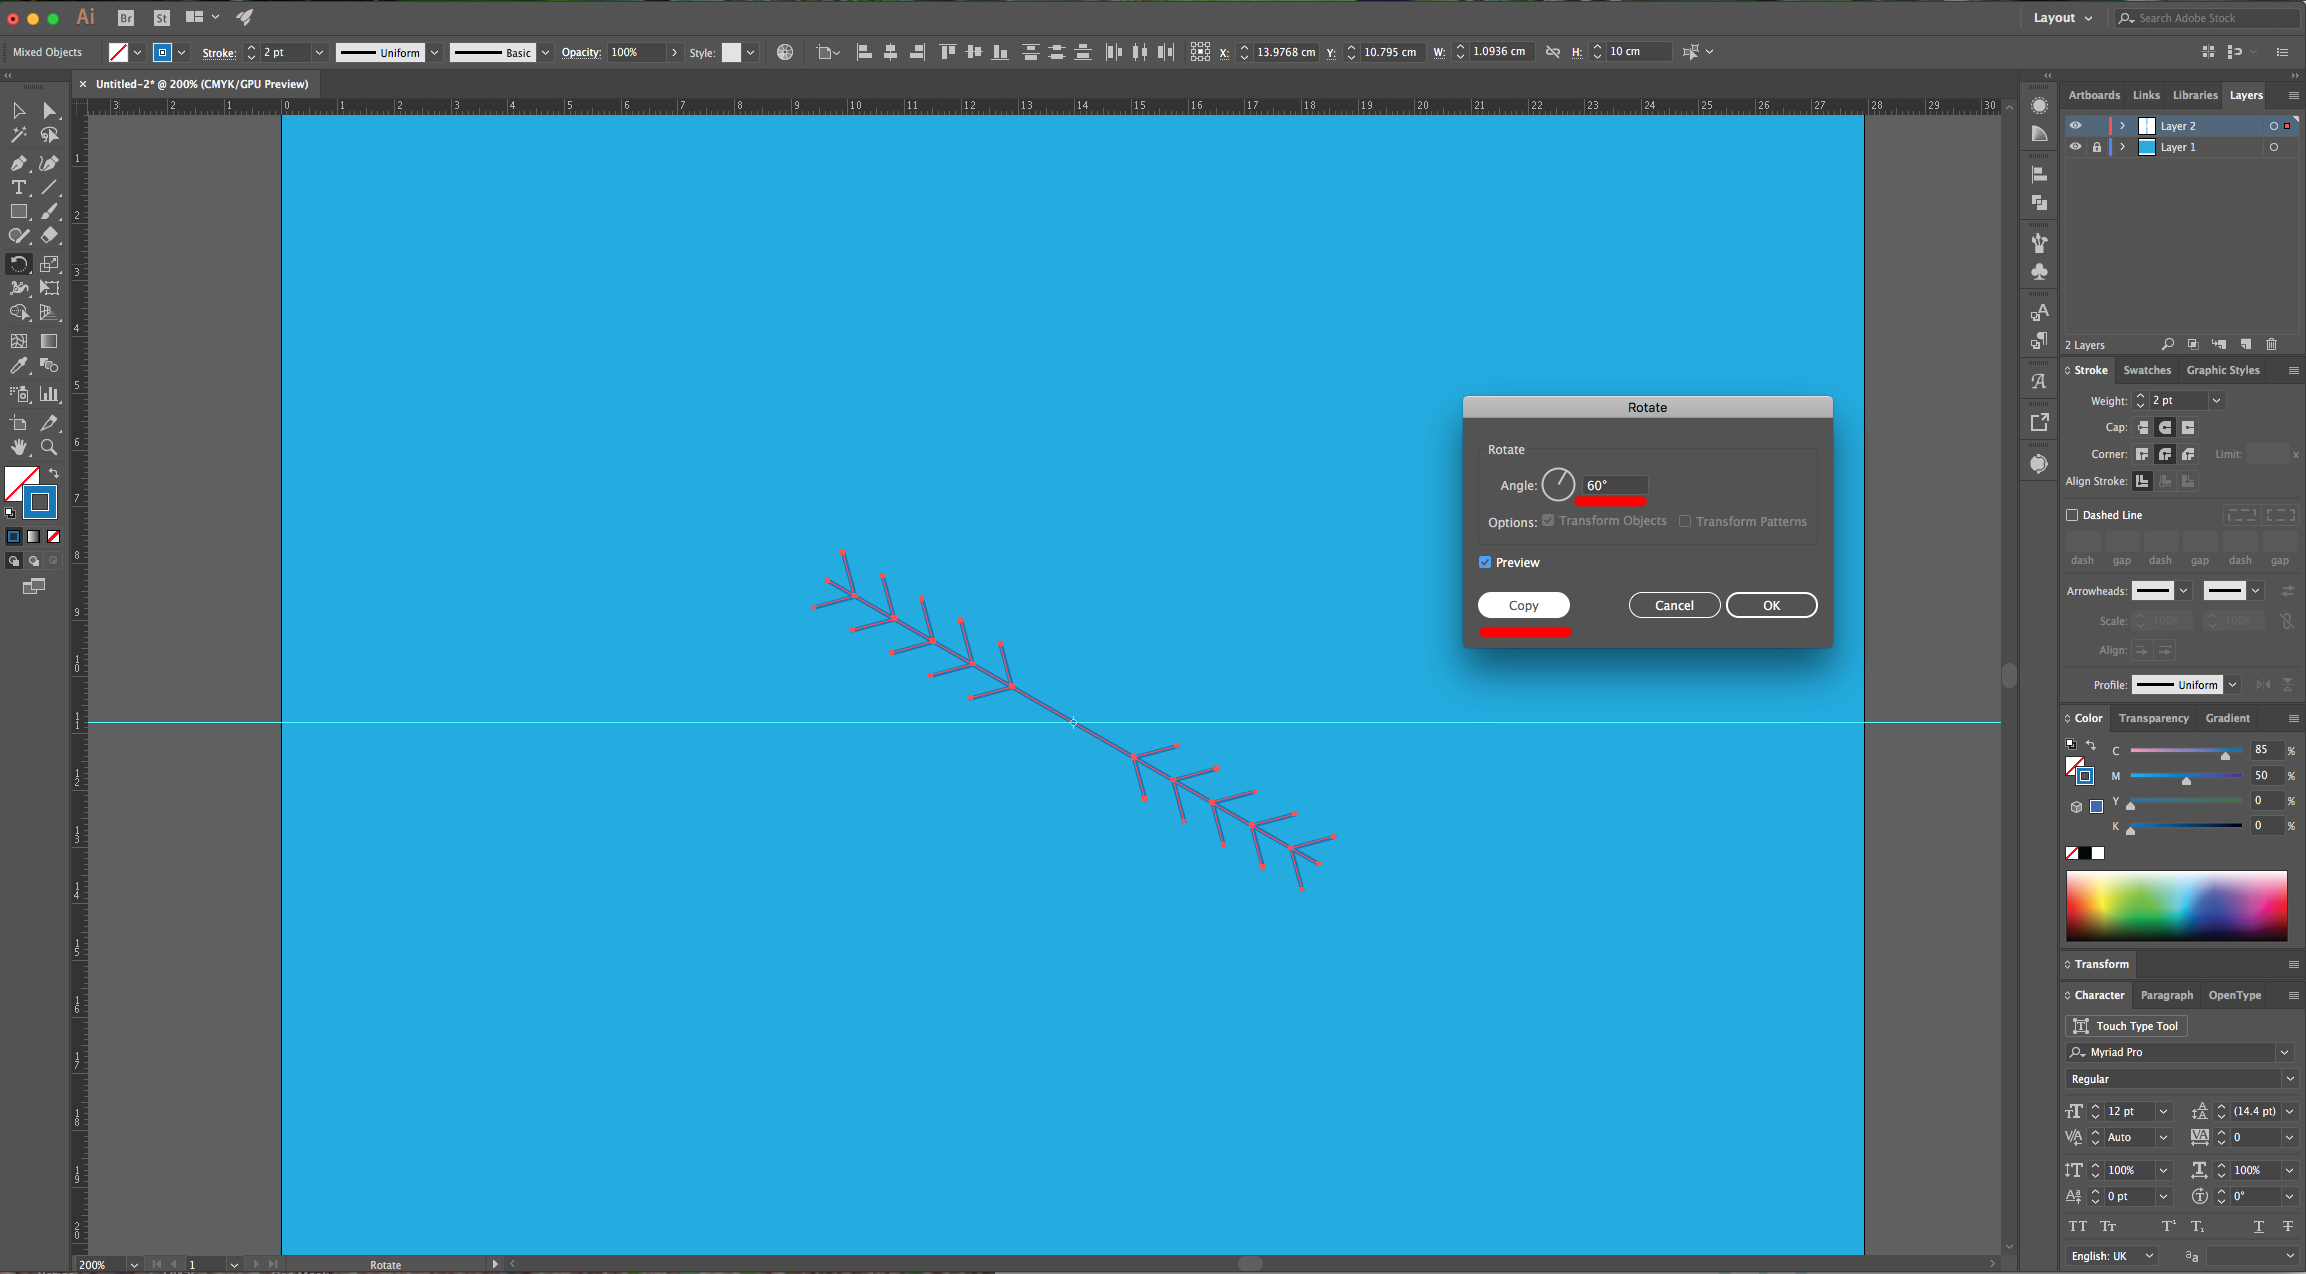
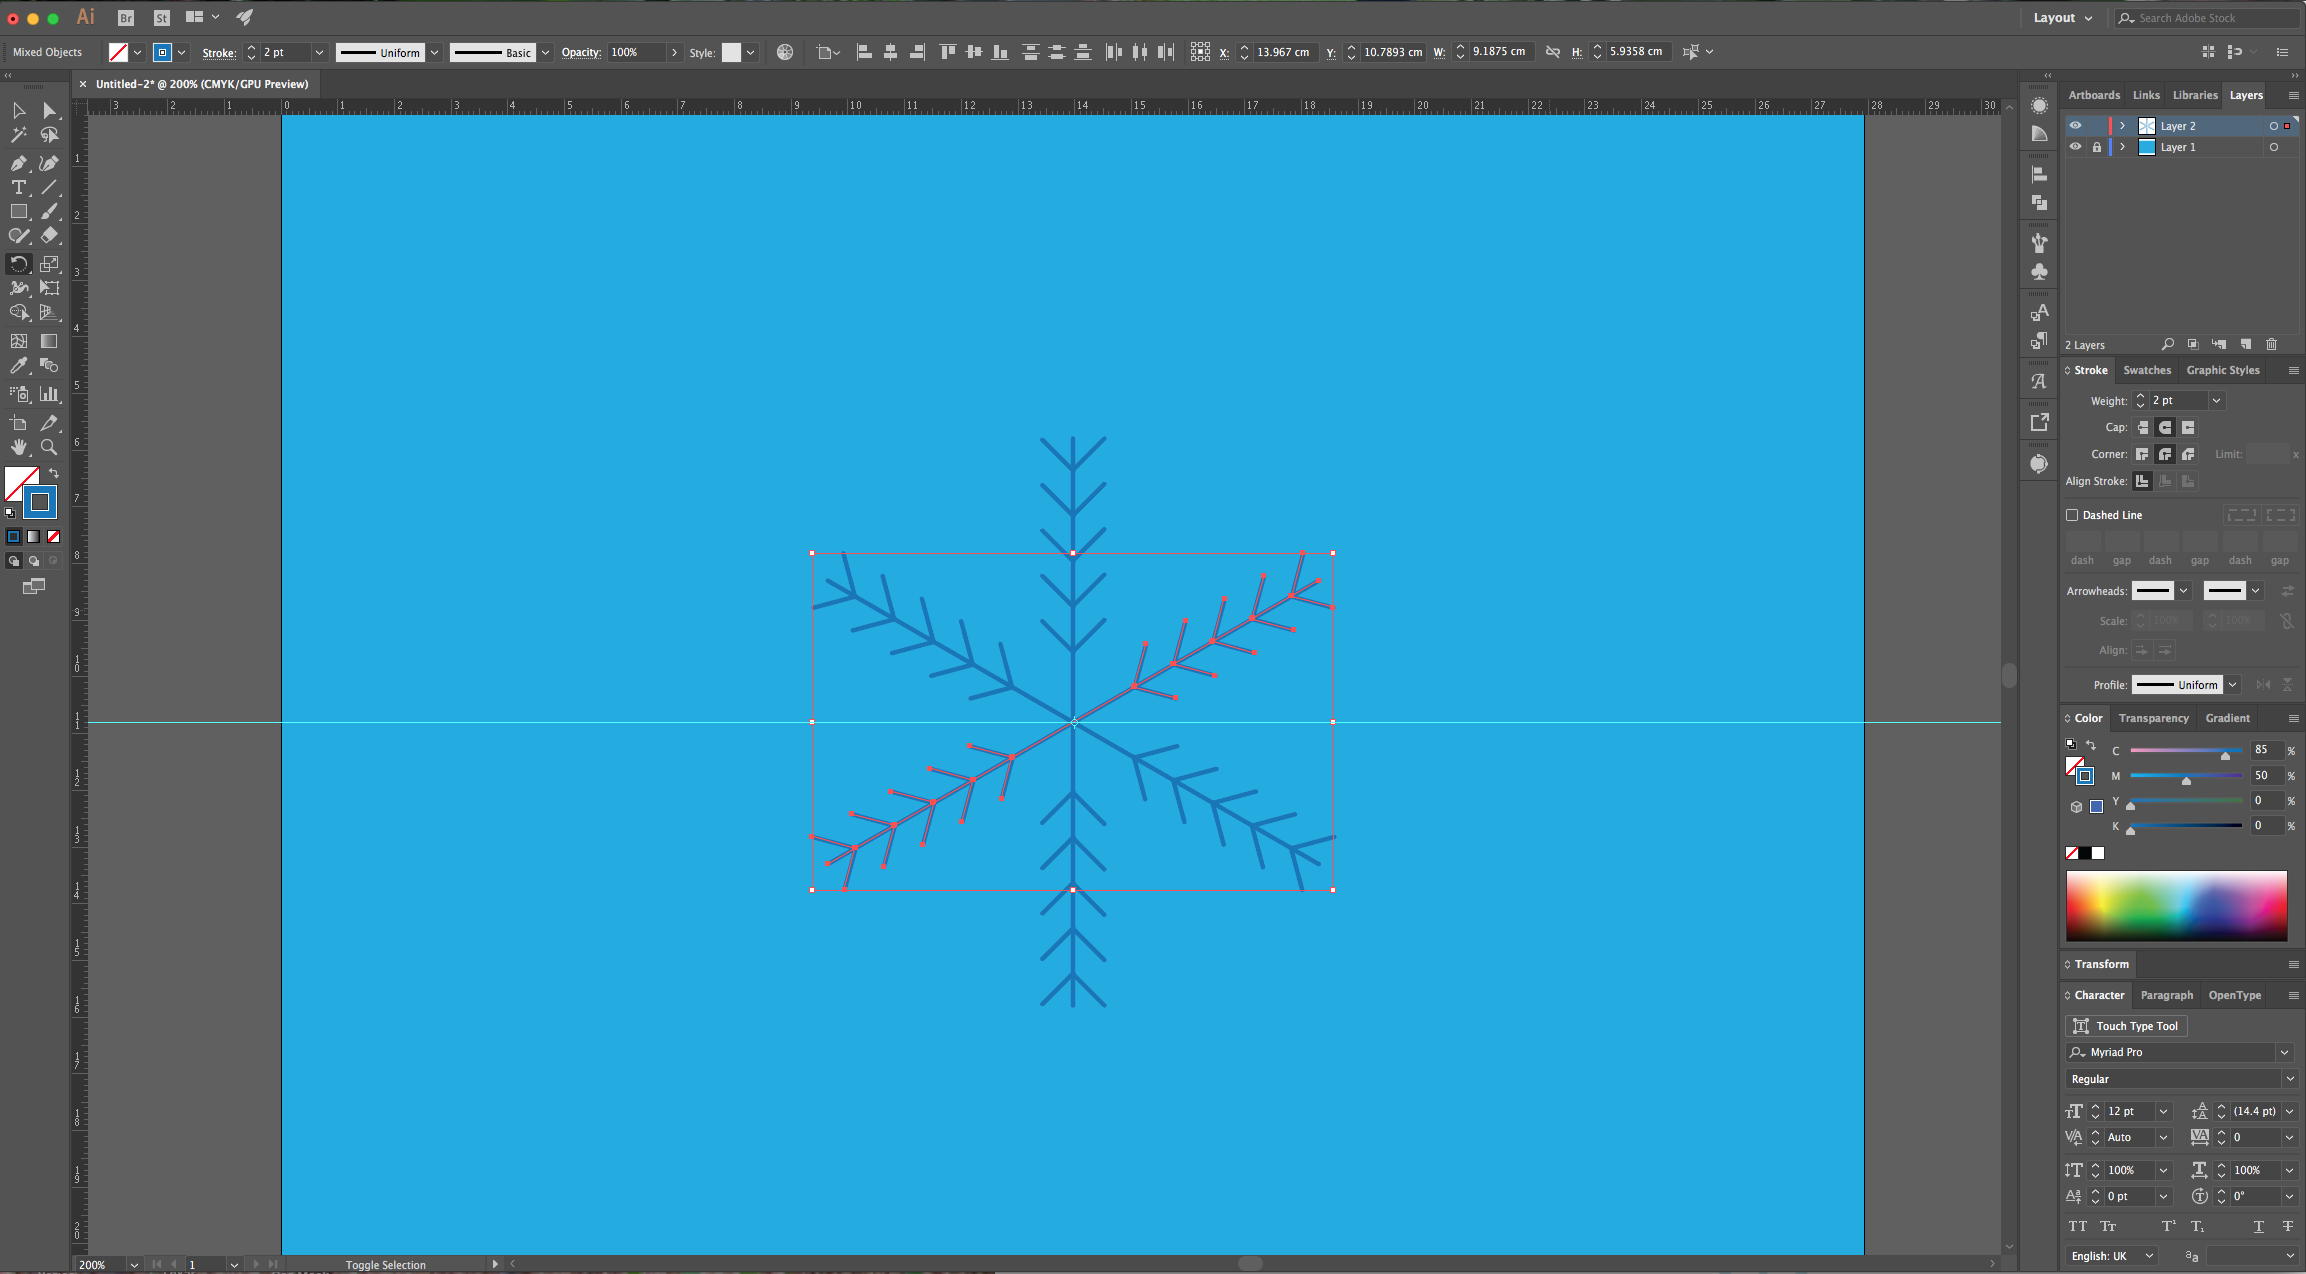
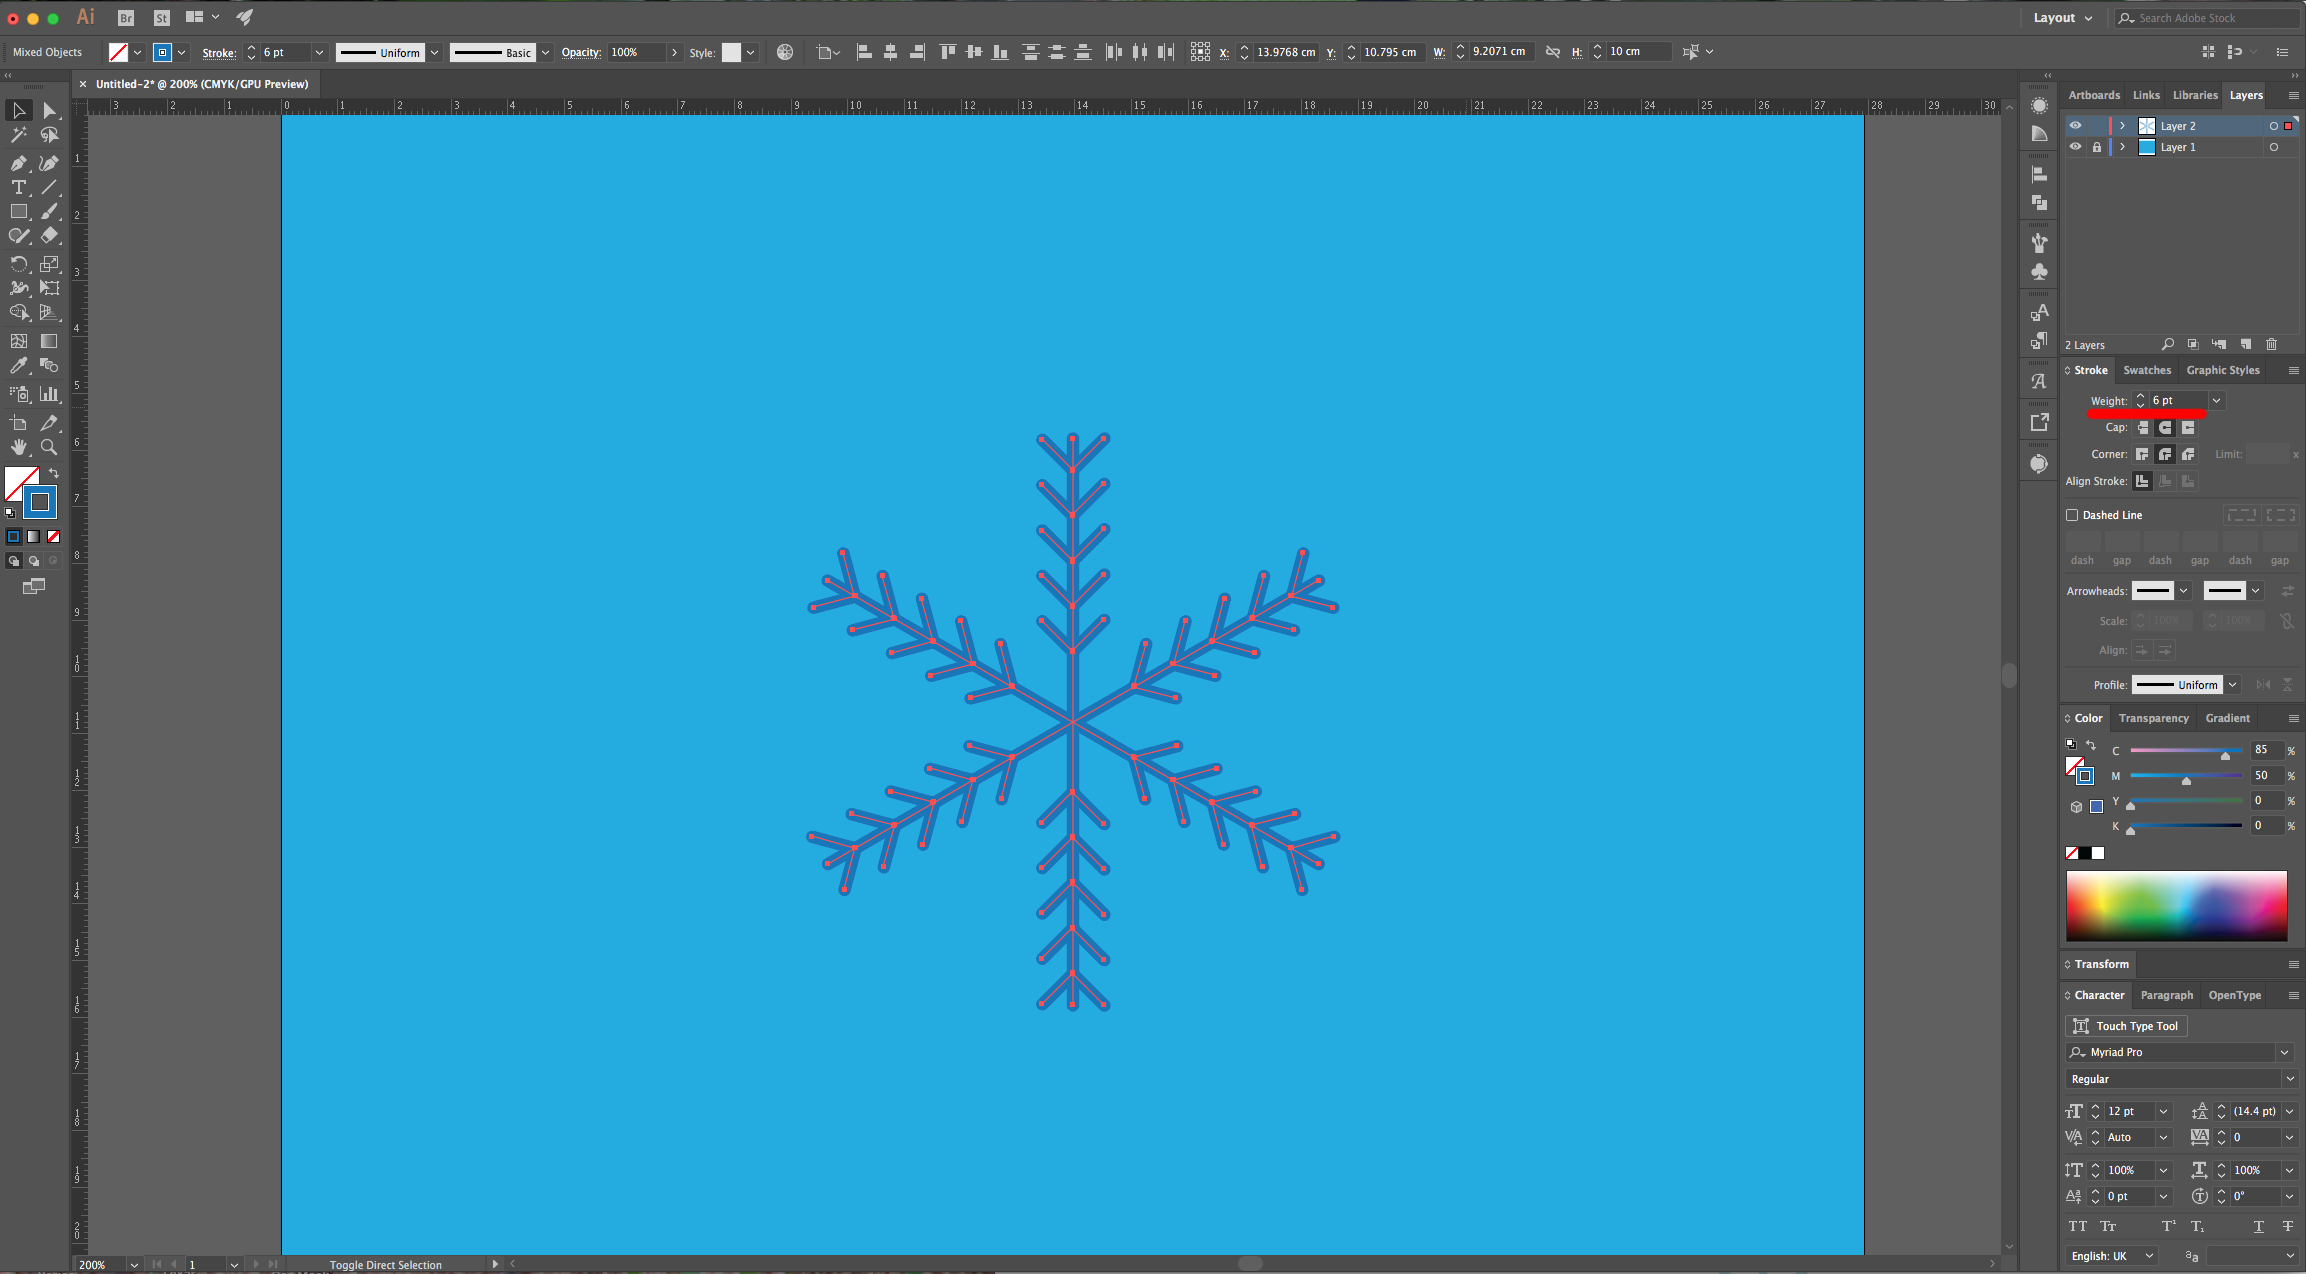
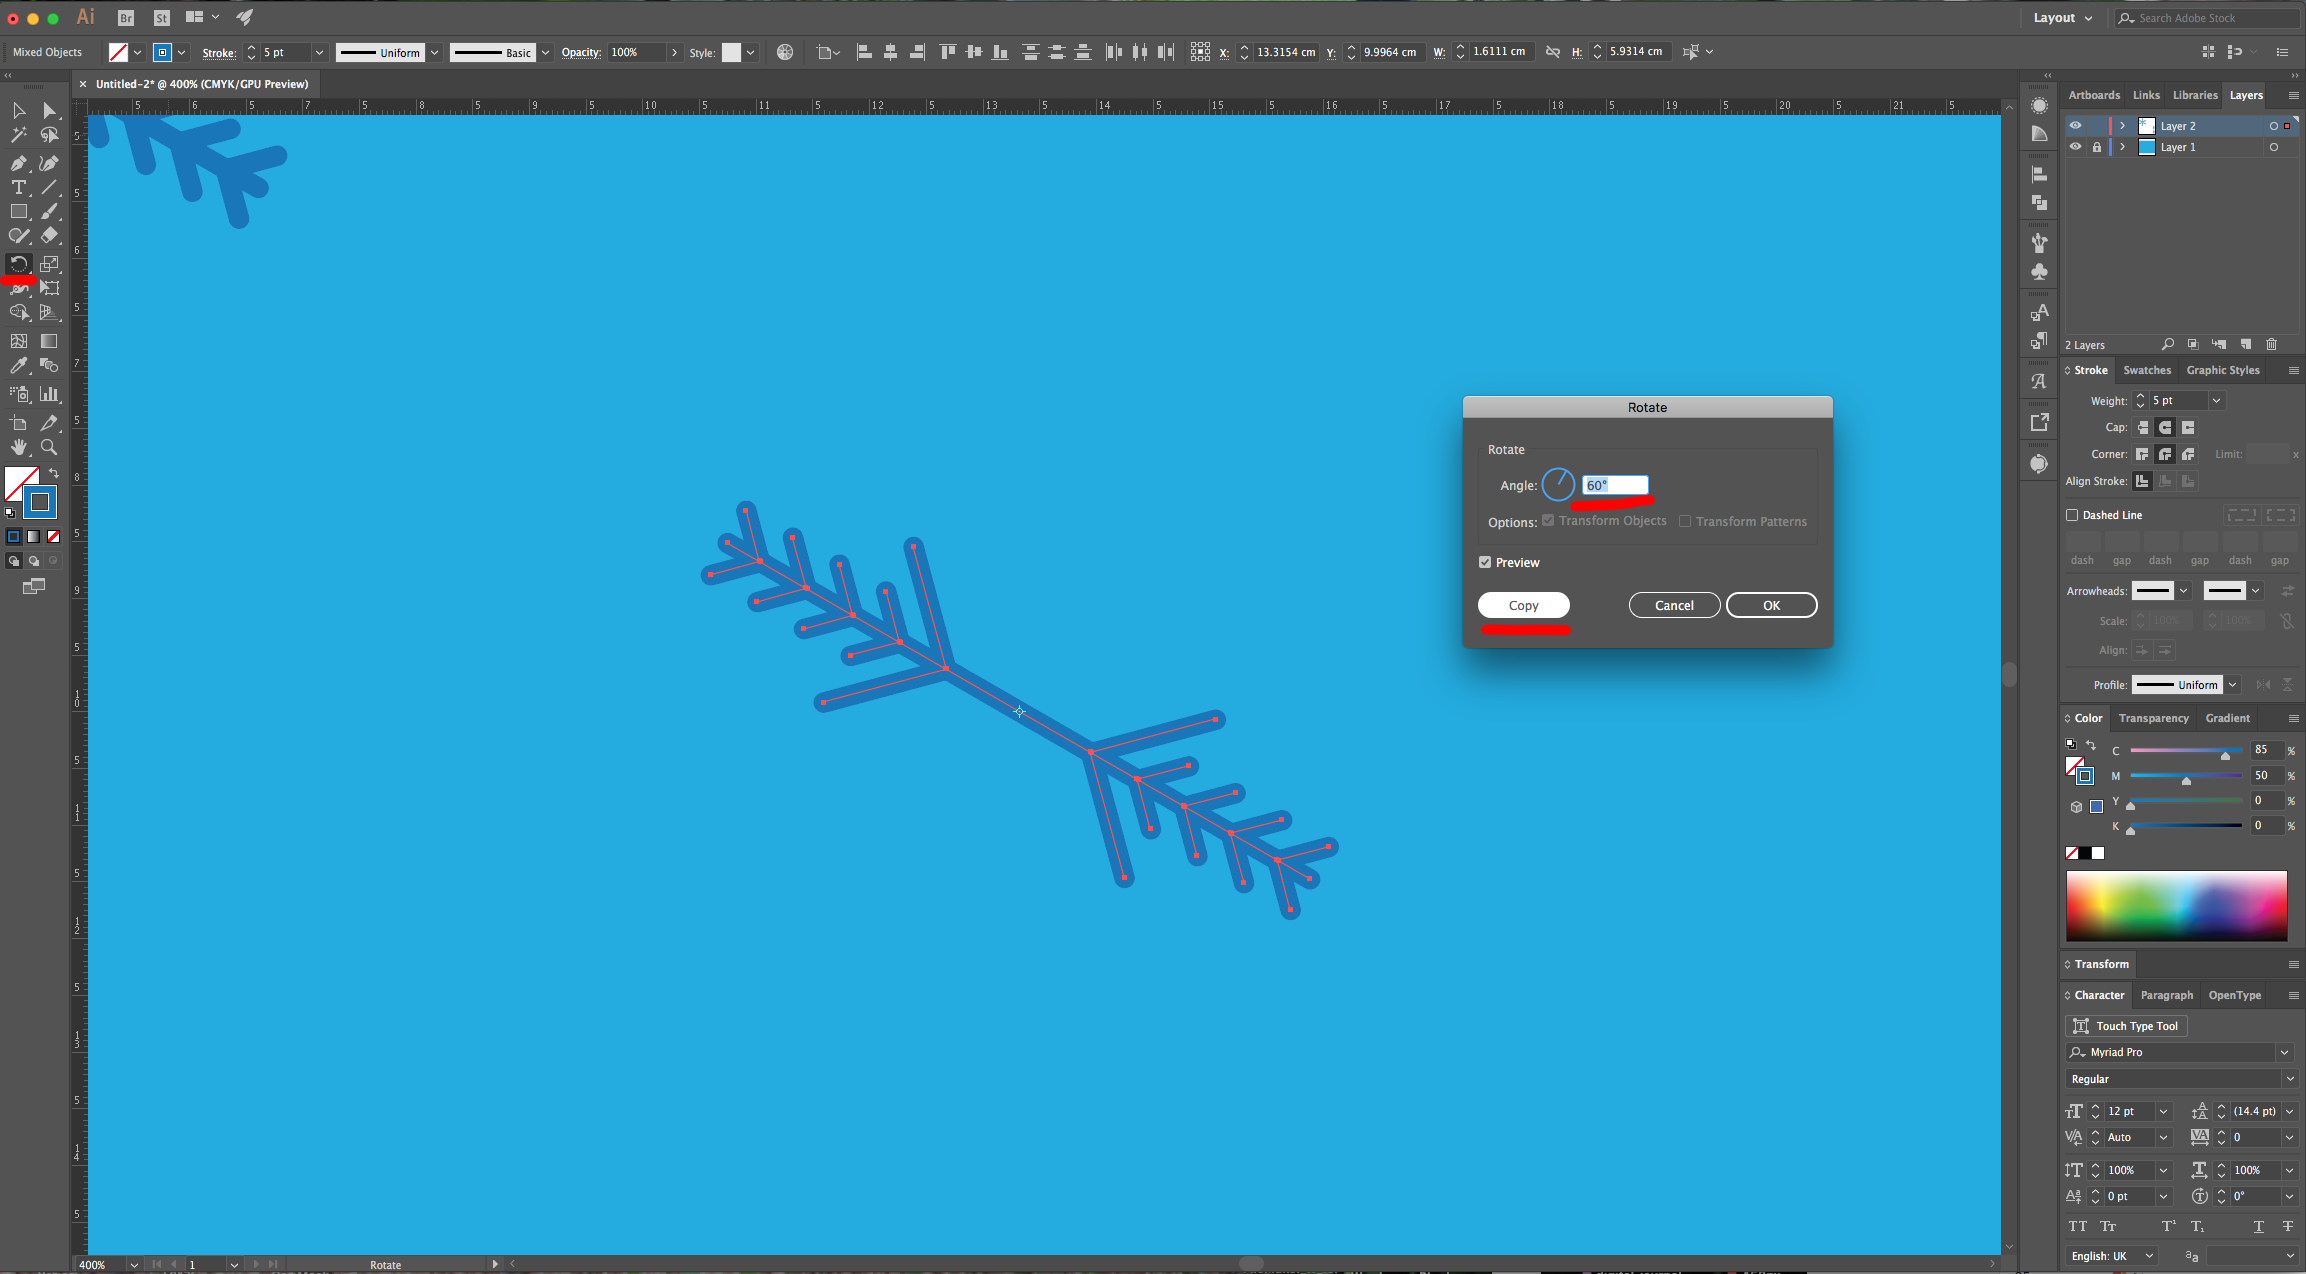
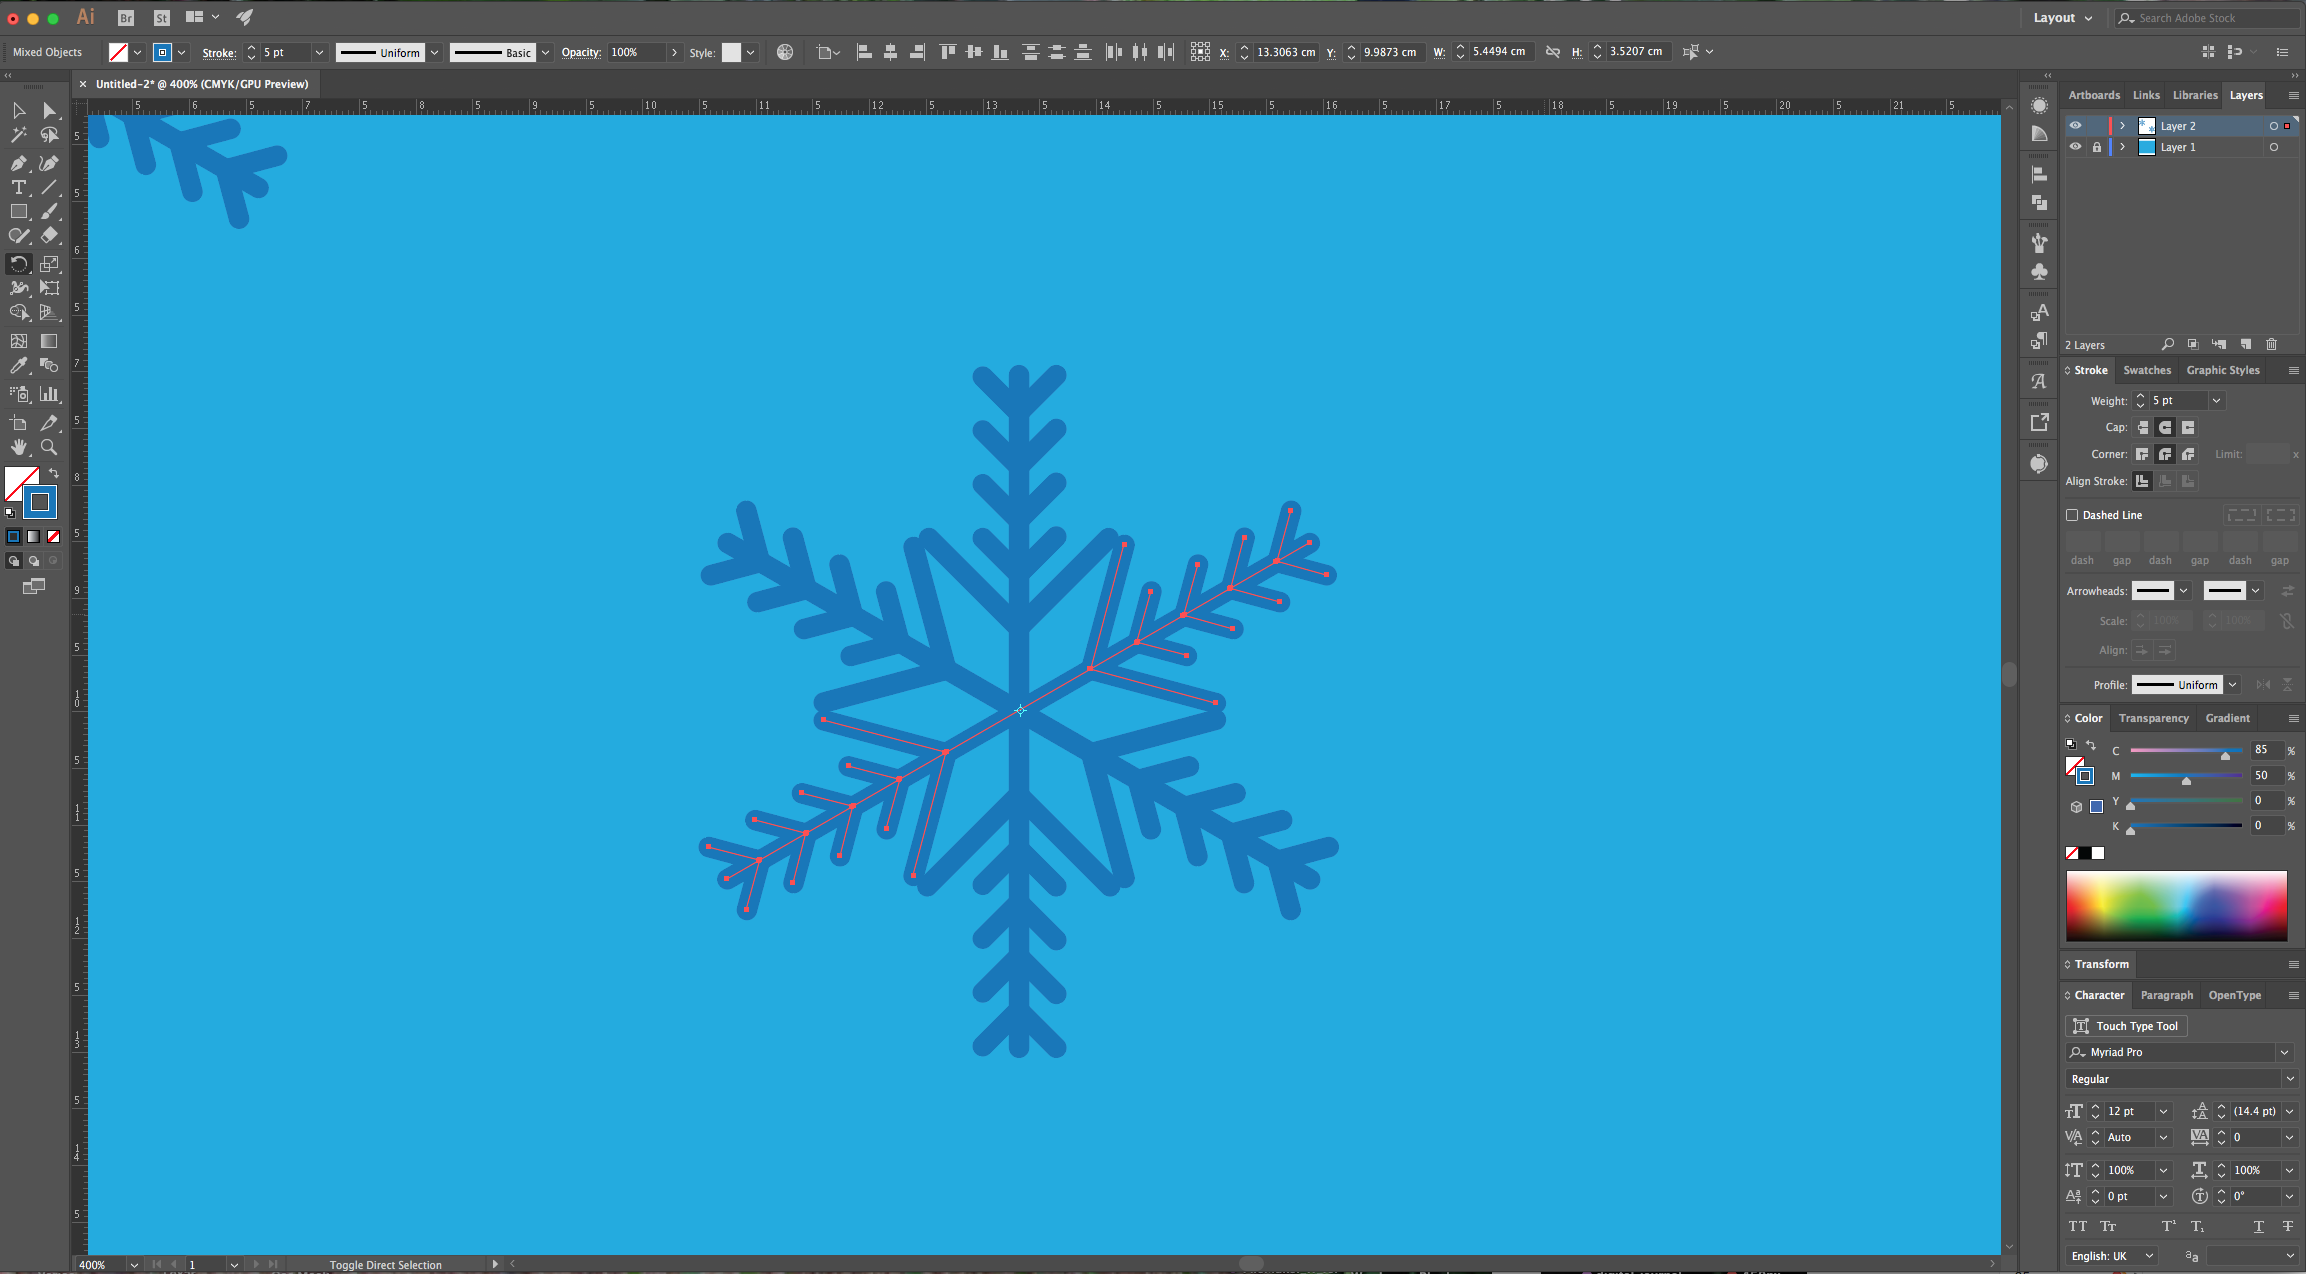
8 - Select everything (except the “Background”) and use the “Rotate Tool” (R) with a 60° Angle. Click “Copy” instead of “OK”. Repeat one more time using a -60° Angle. Change the “Stroke Weight” to 6 pt and keep its “Cap” and “Corner” “Round”.
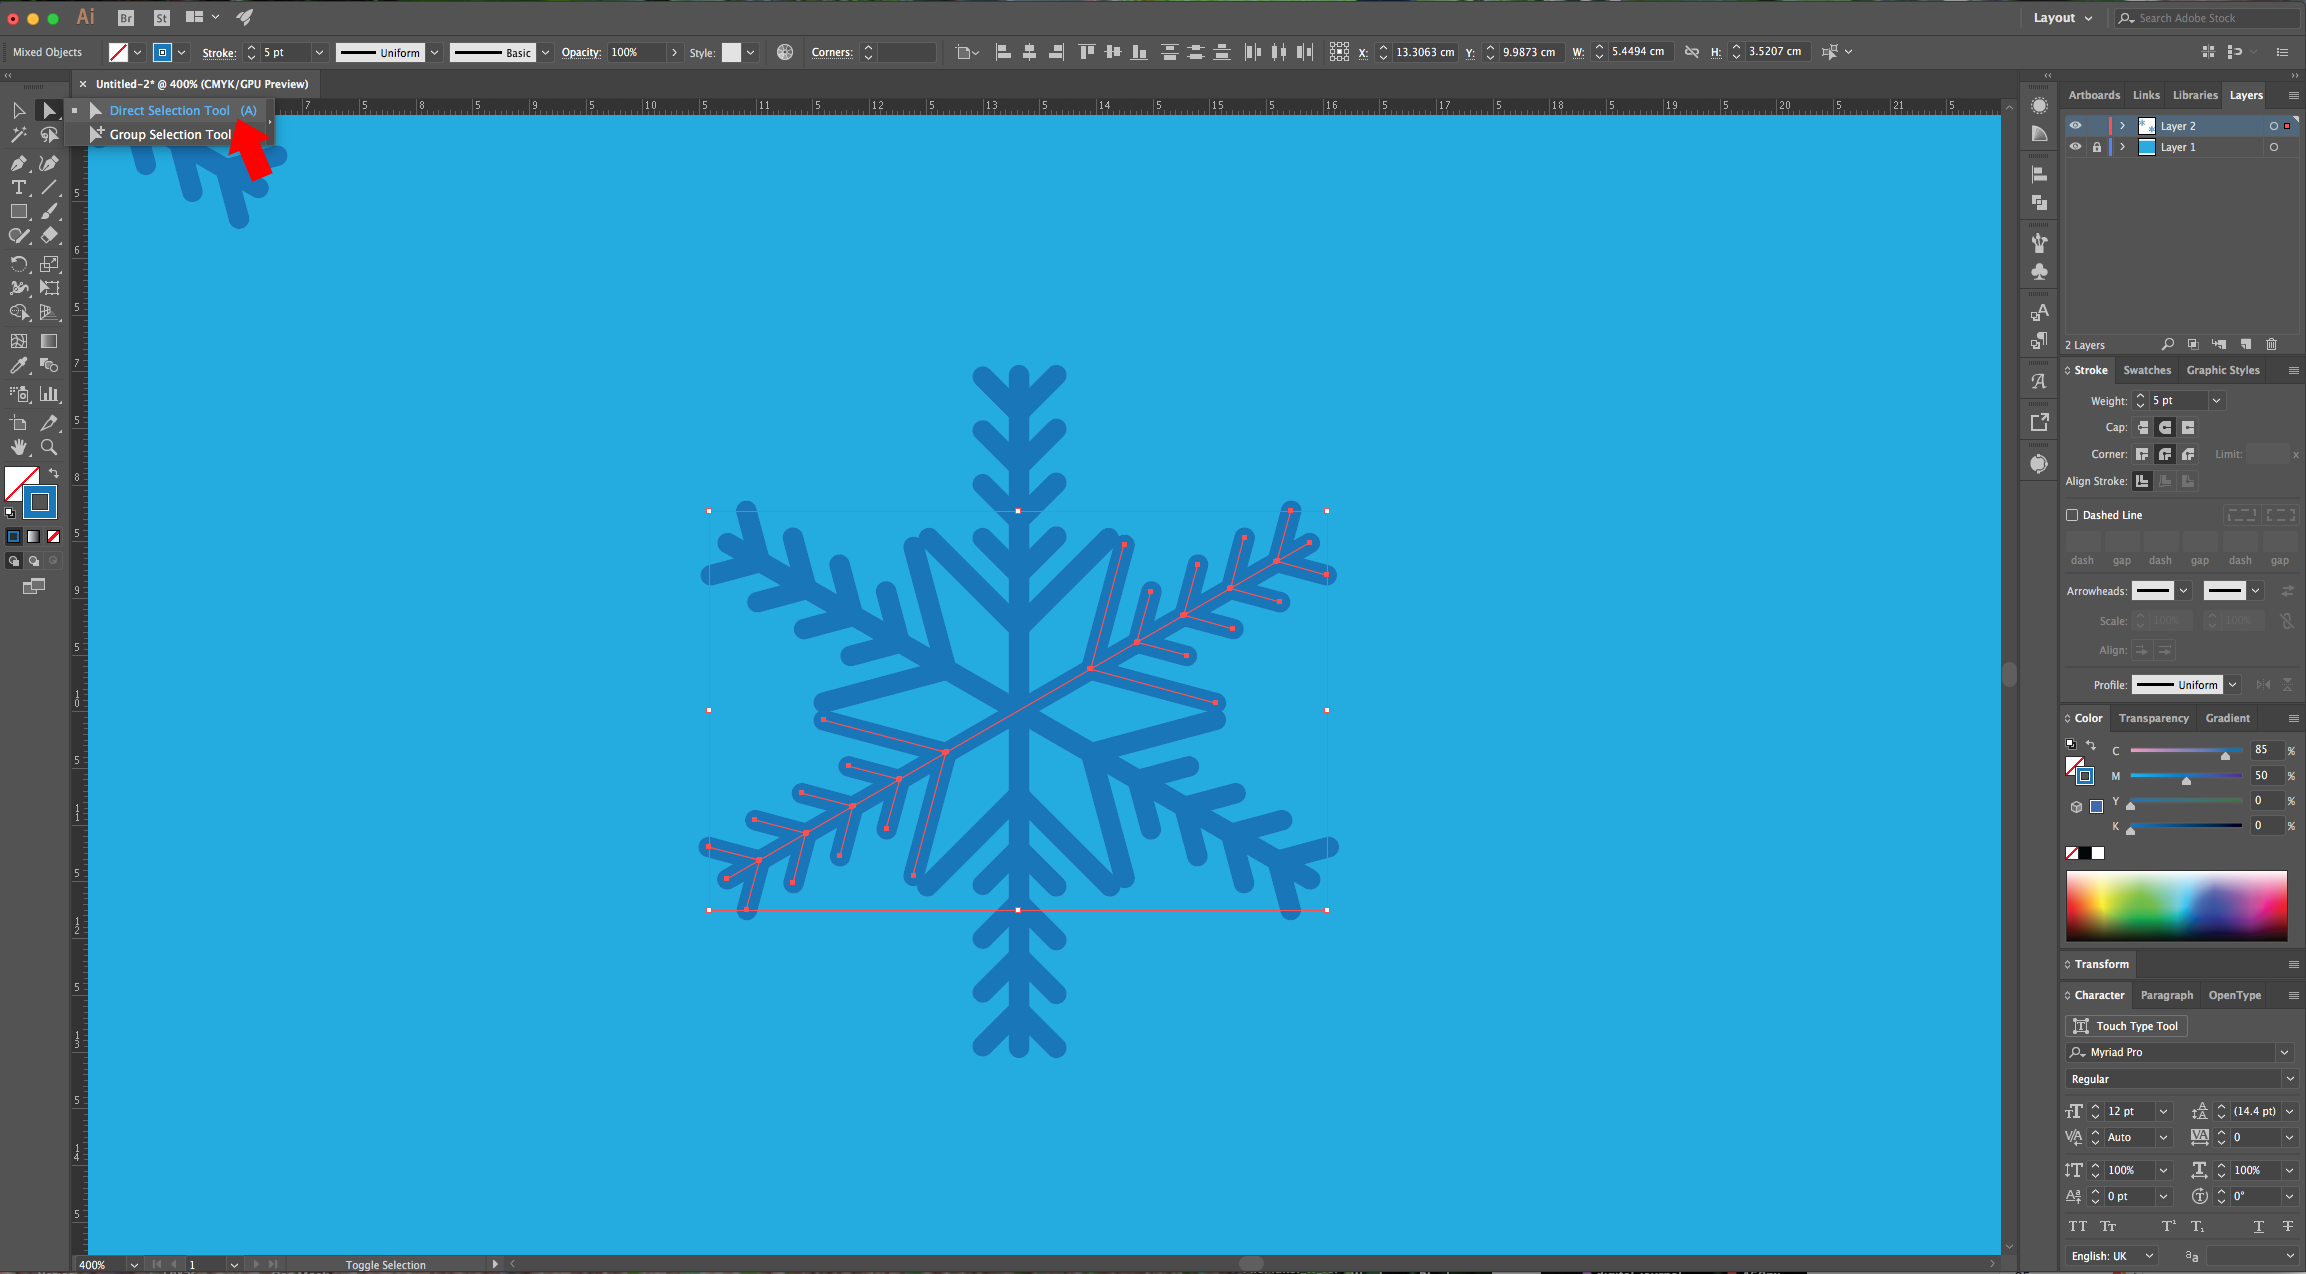
9 - To create other kind of “Snowflake”, repeat Steps 4 to 7 then, use the “Direct Selection Tool” (A) to select one of the “Anchor Points” of the bottom diagonal lines and elongate it until it reaches the next one. Hold the “Shift” key while doing this to maintain the angle and repeat with the other 3 lines so they are all the same length. Select everything (except the “Background”) and use the “Rotate Tool” (R) with a 60° Angle. Click “Copy” instead of “OK”. Repeat one more time using a -60° Angle.
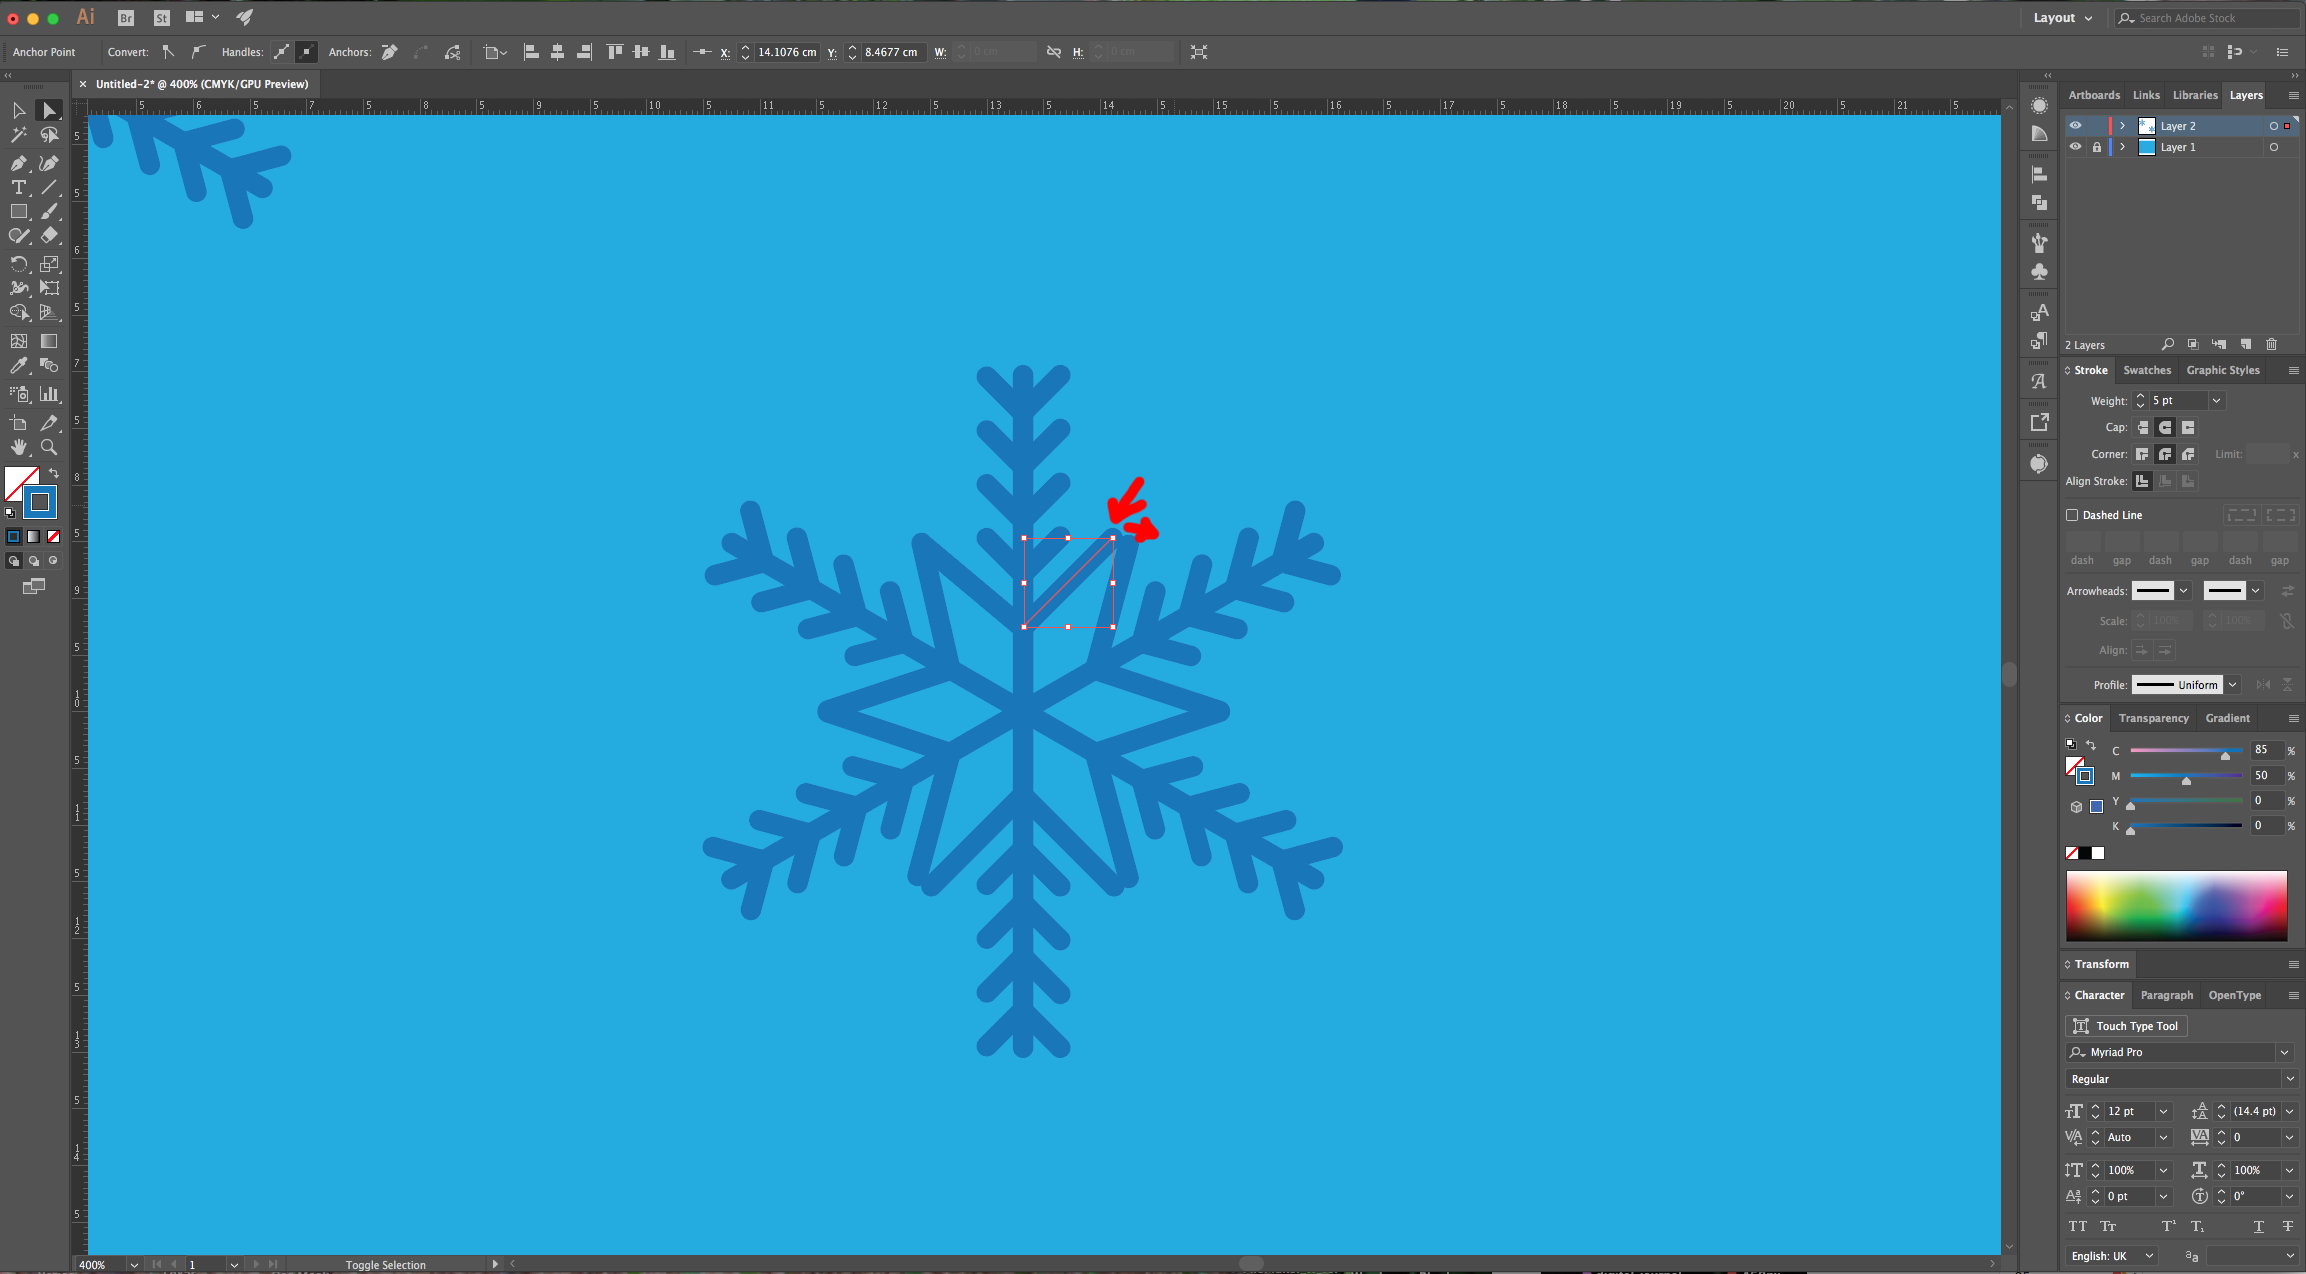
10 - Use the “Direct Selection Tool” (A) to select the long “Anchor Points” and use the “Arrow Keys” to move them. The idea is to make them sit at the same spot so they form the tip of a star. Repeat with the other corners.
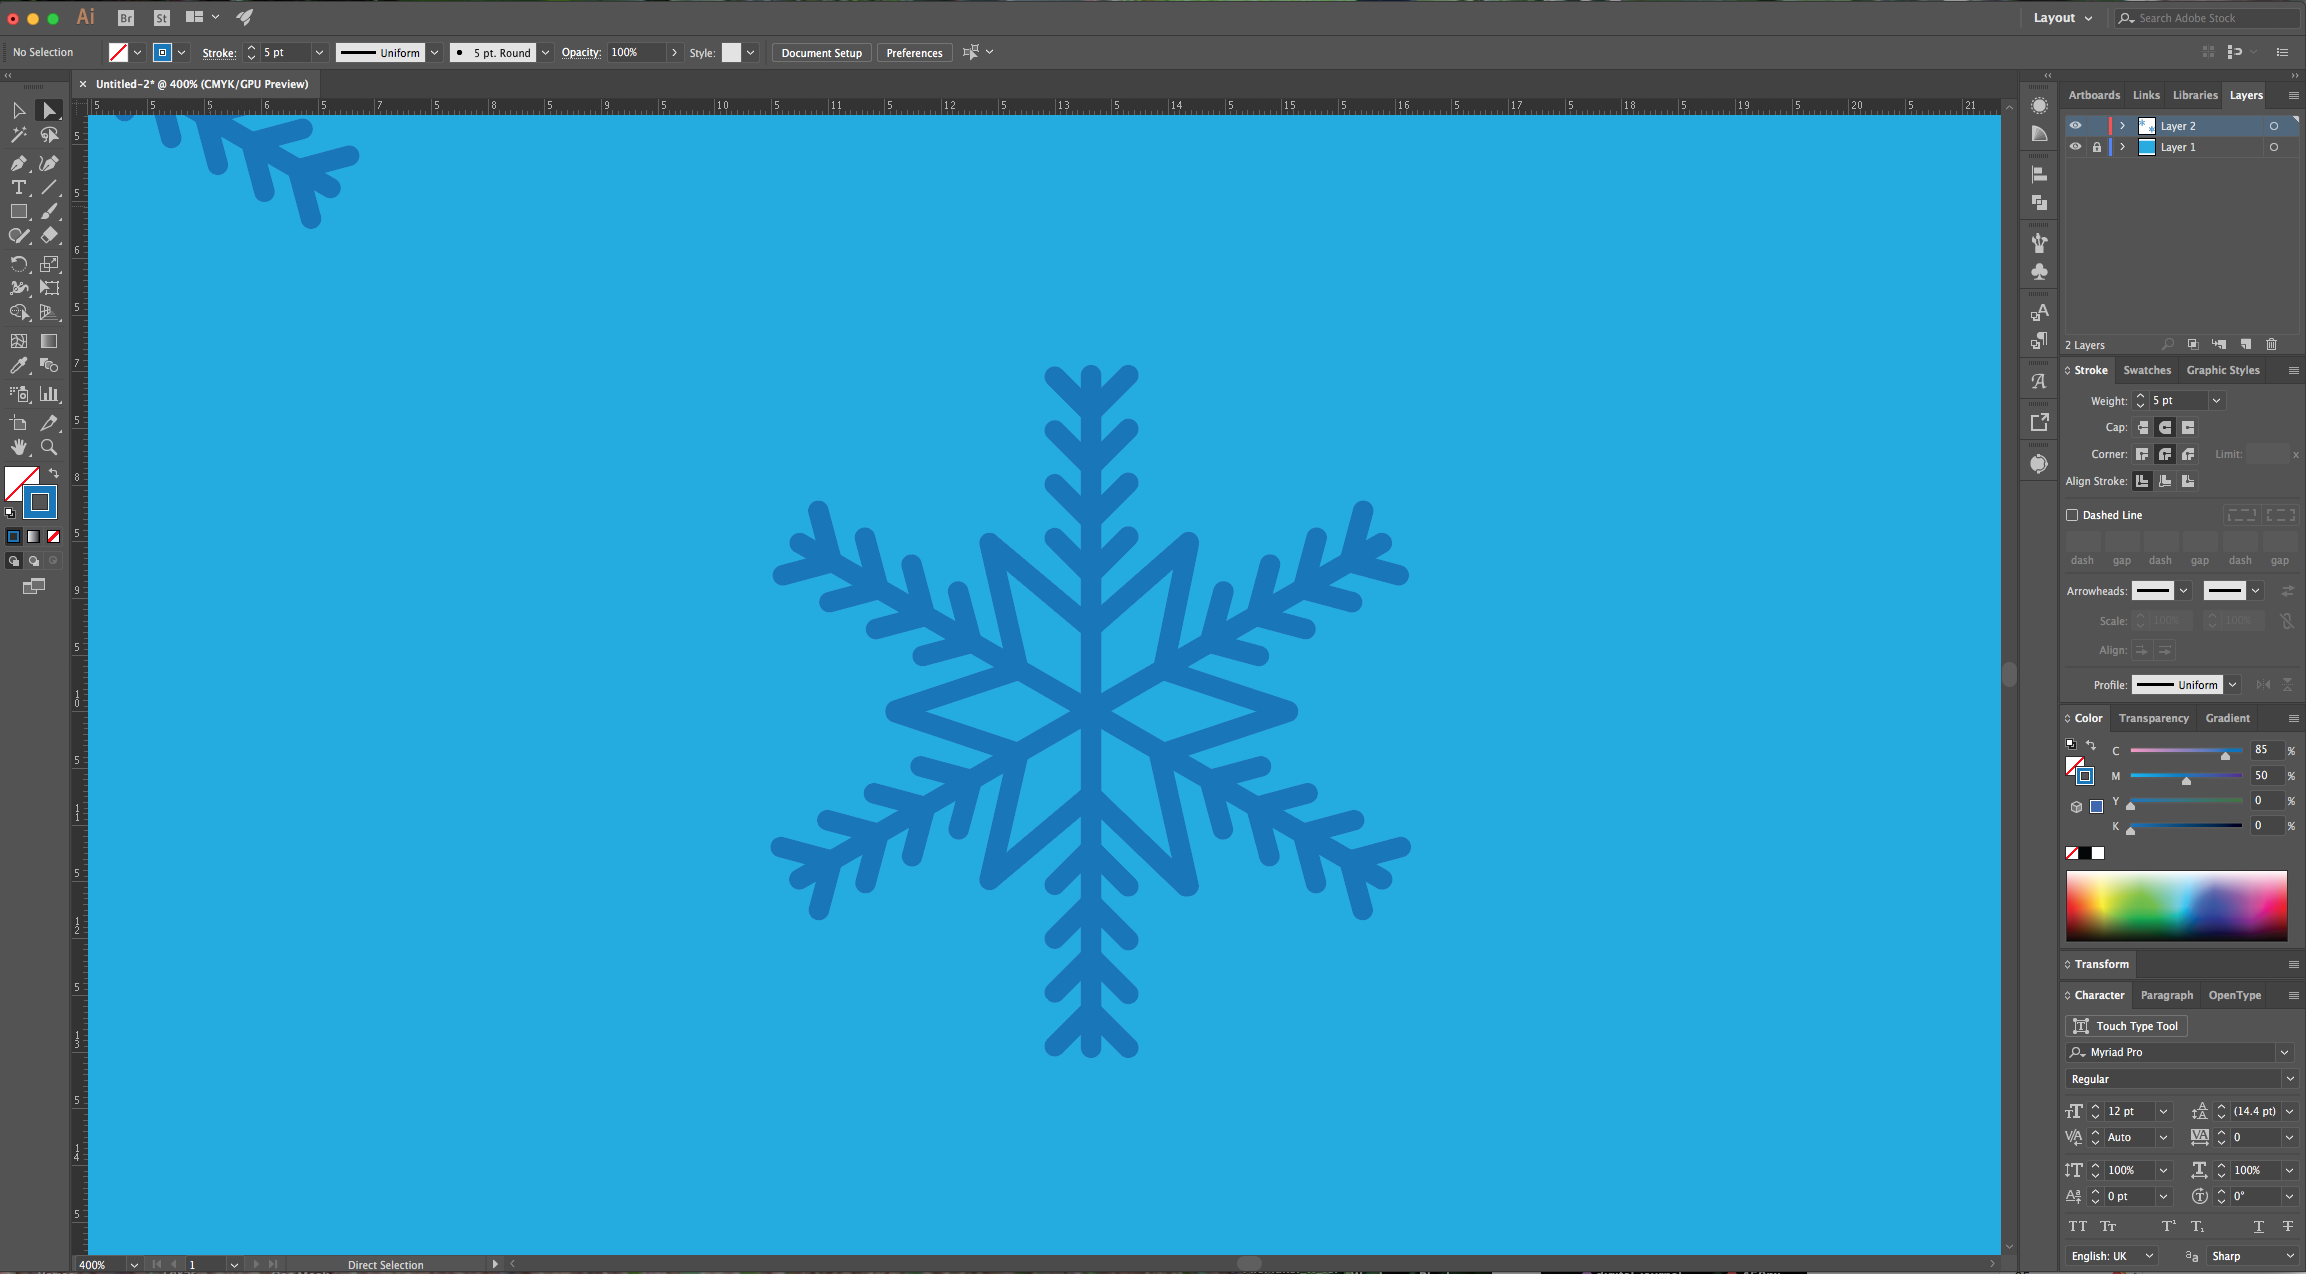
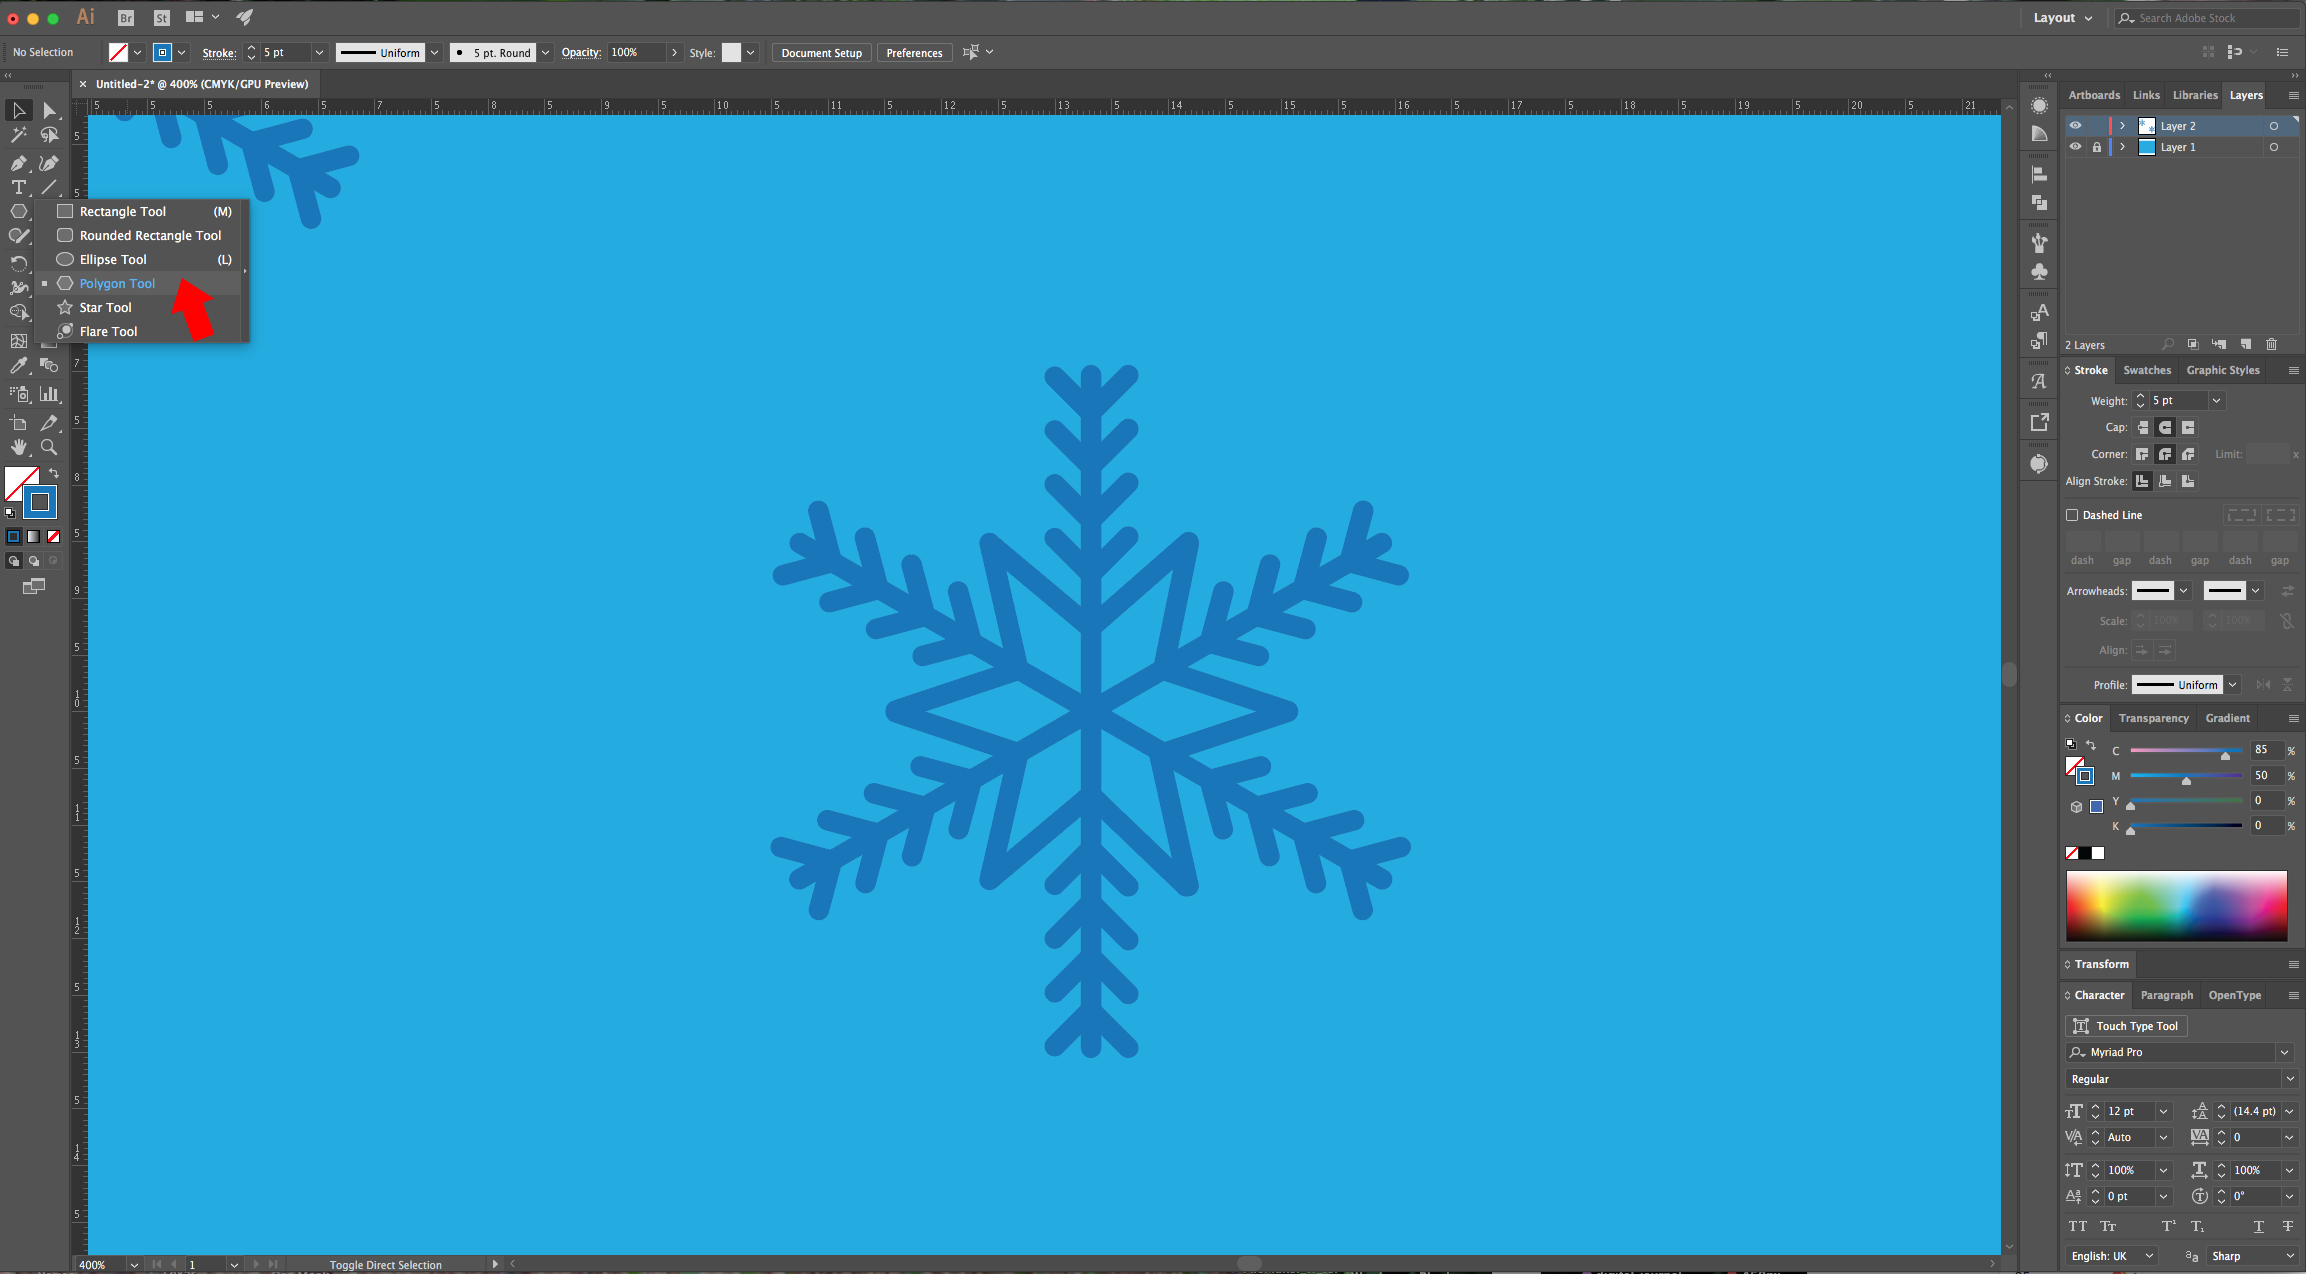
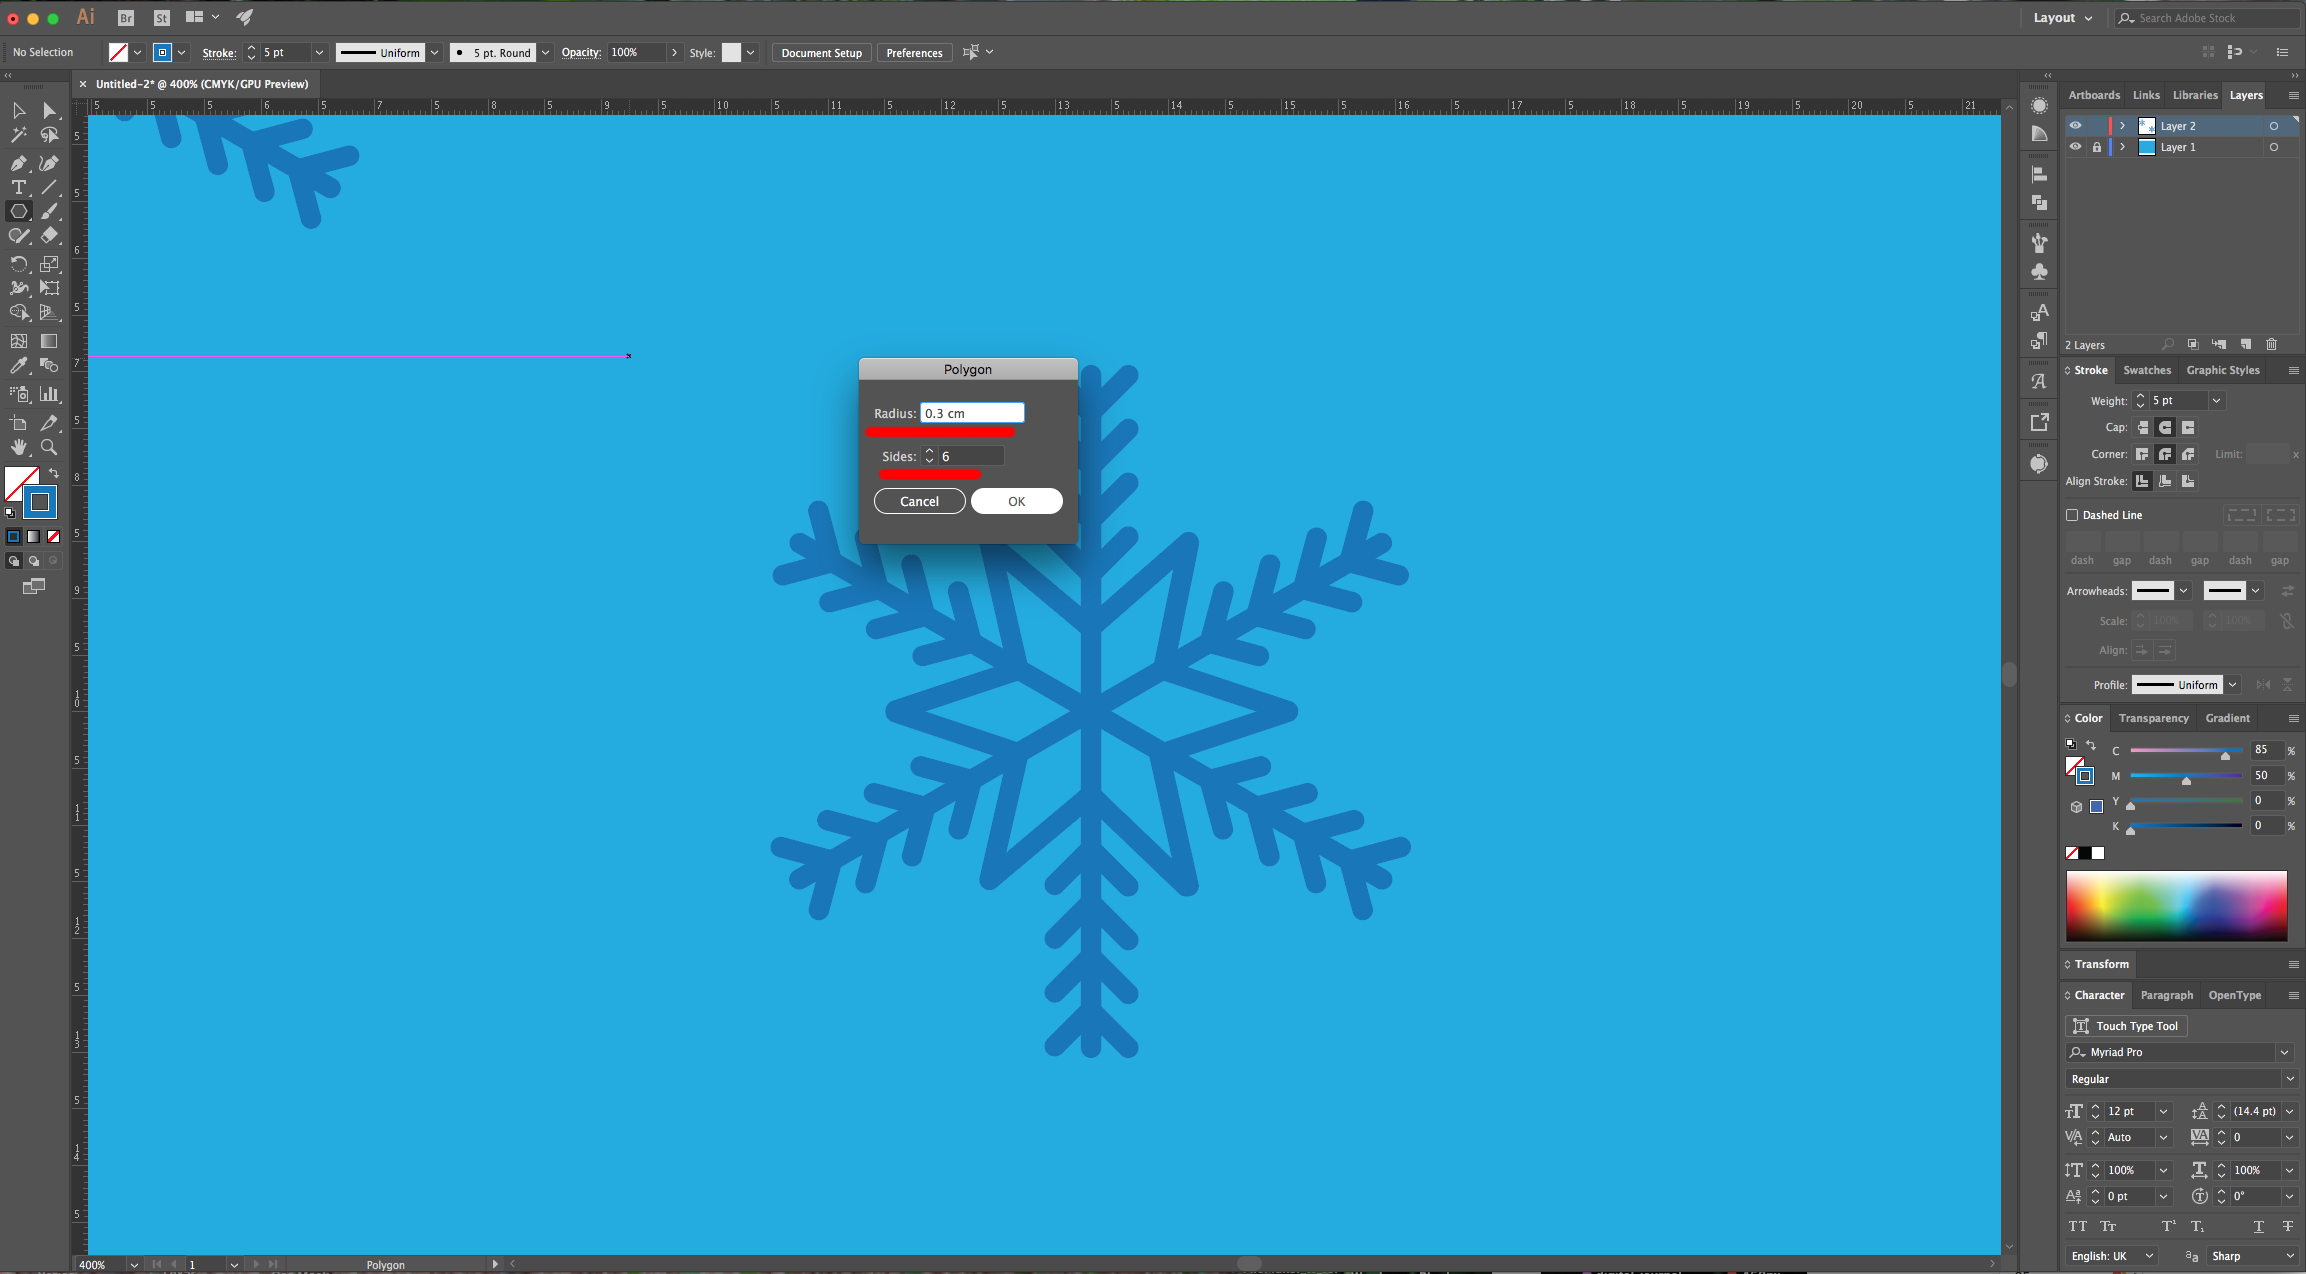
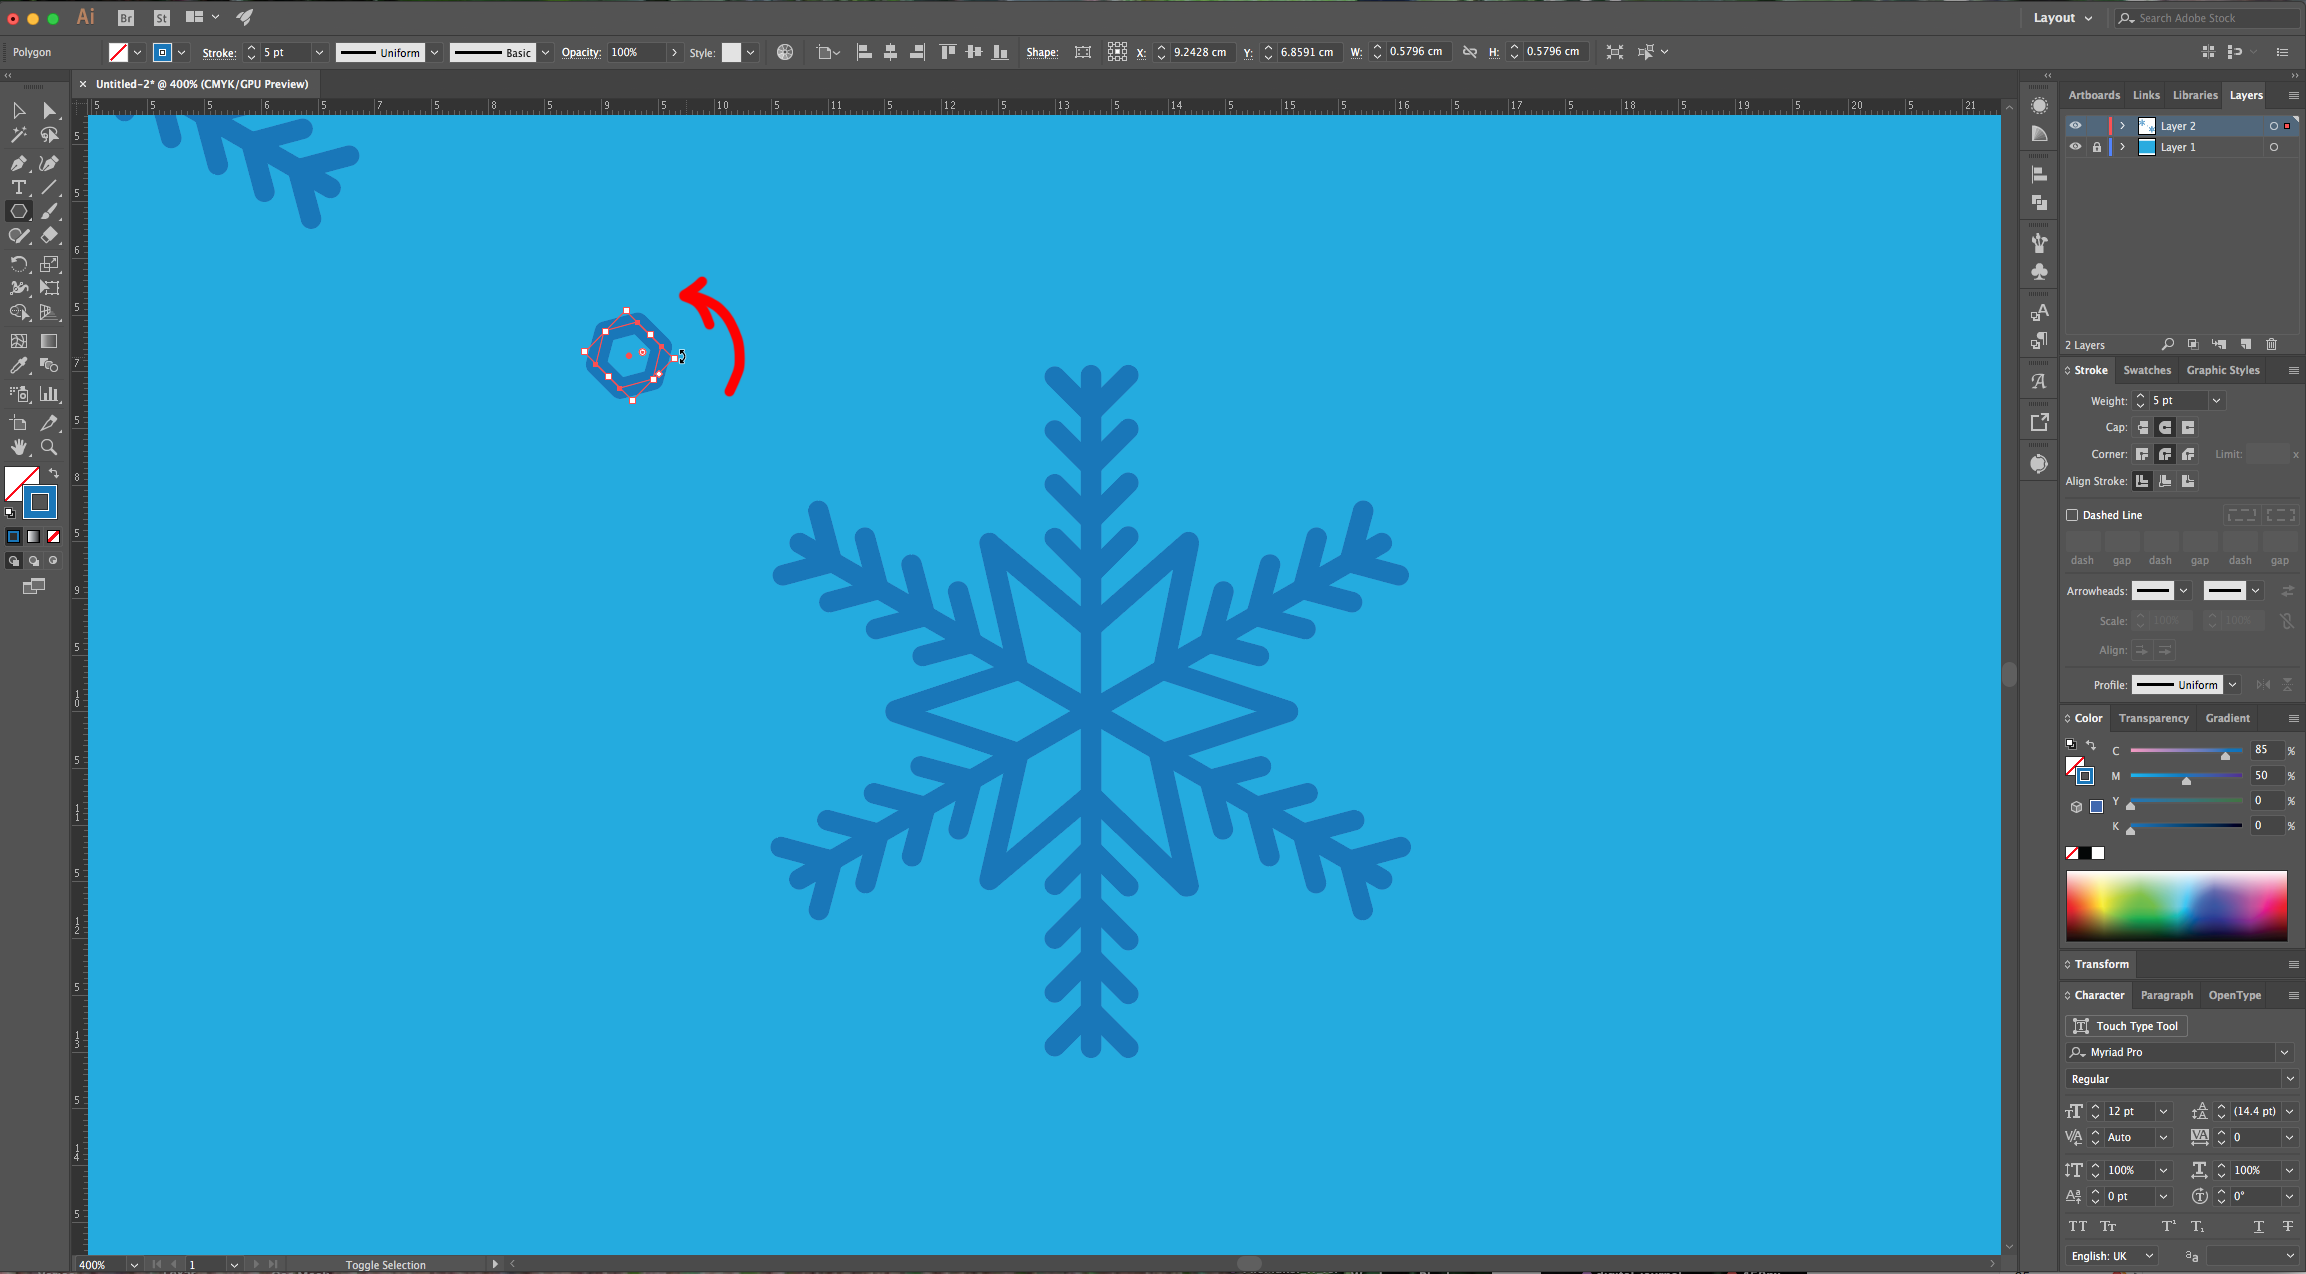
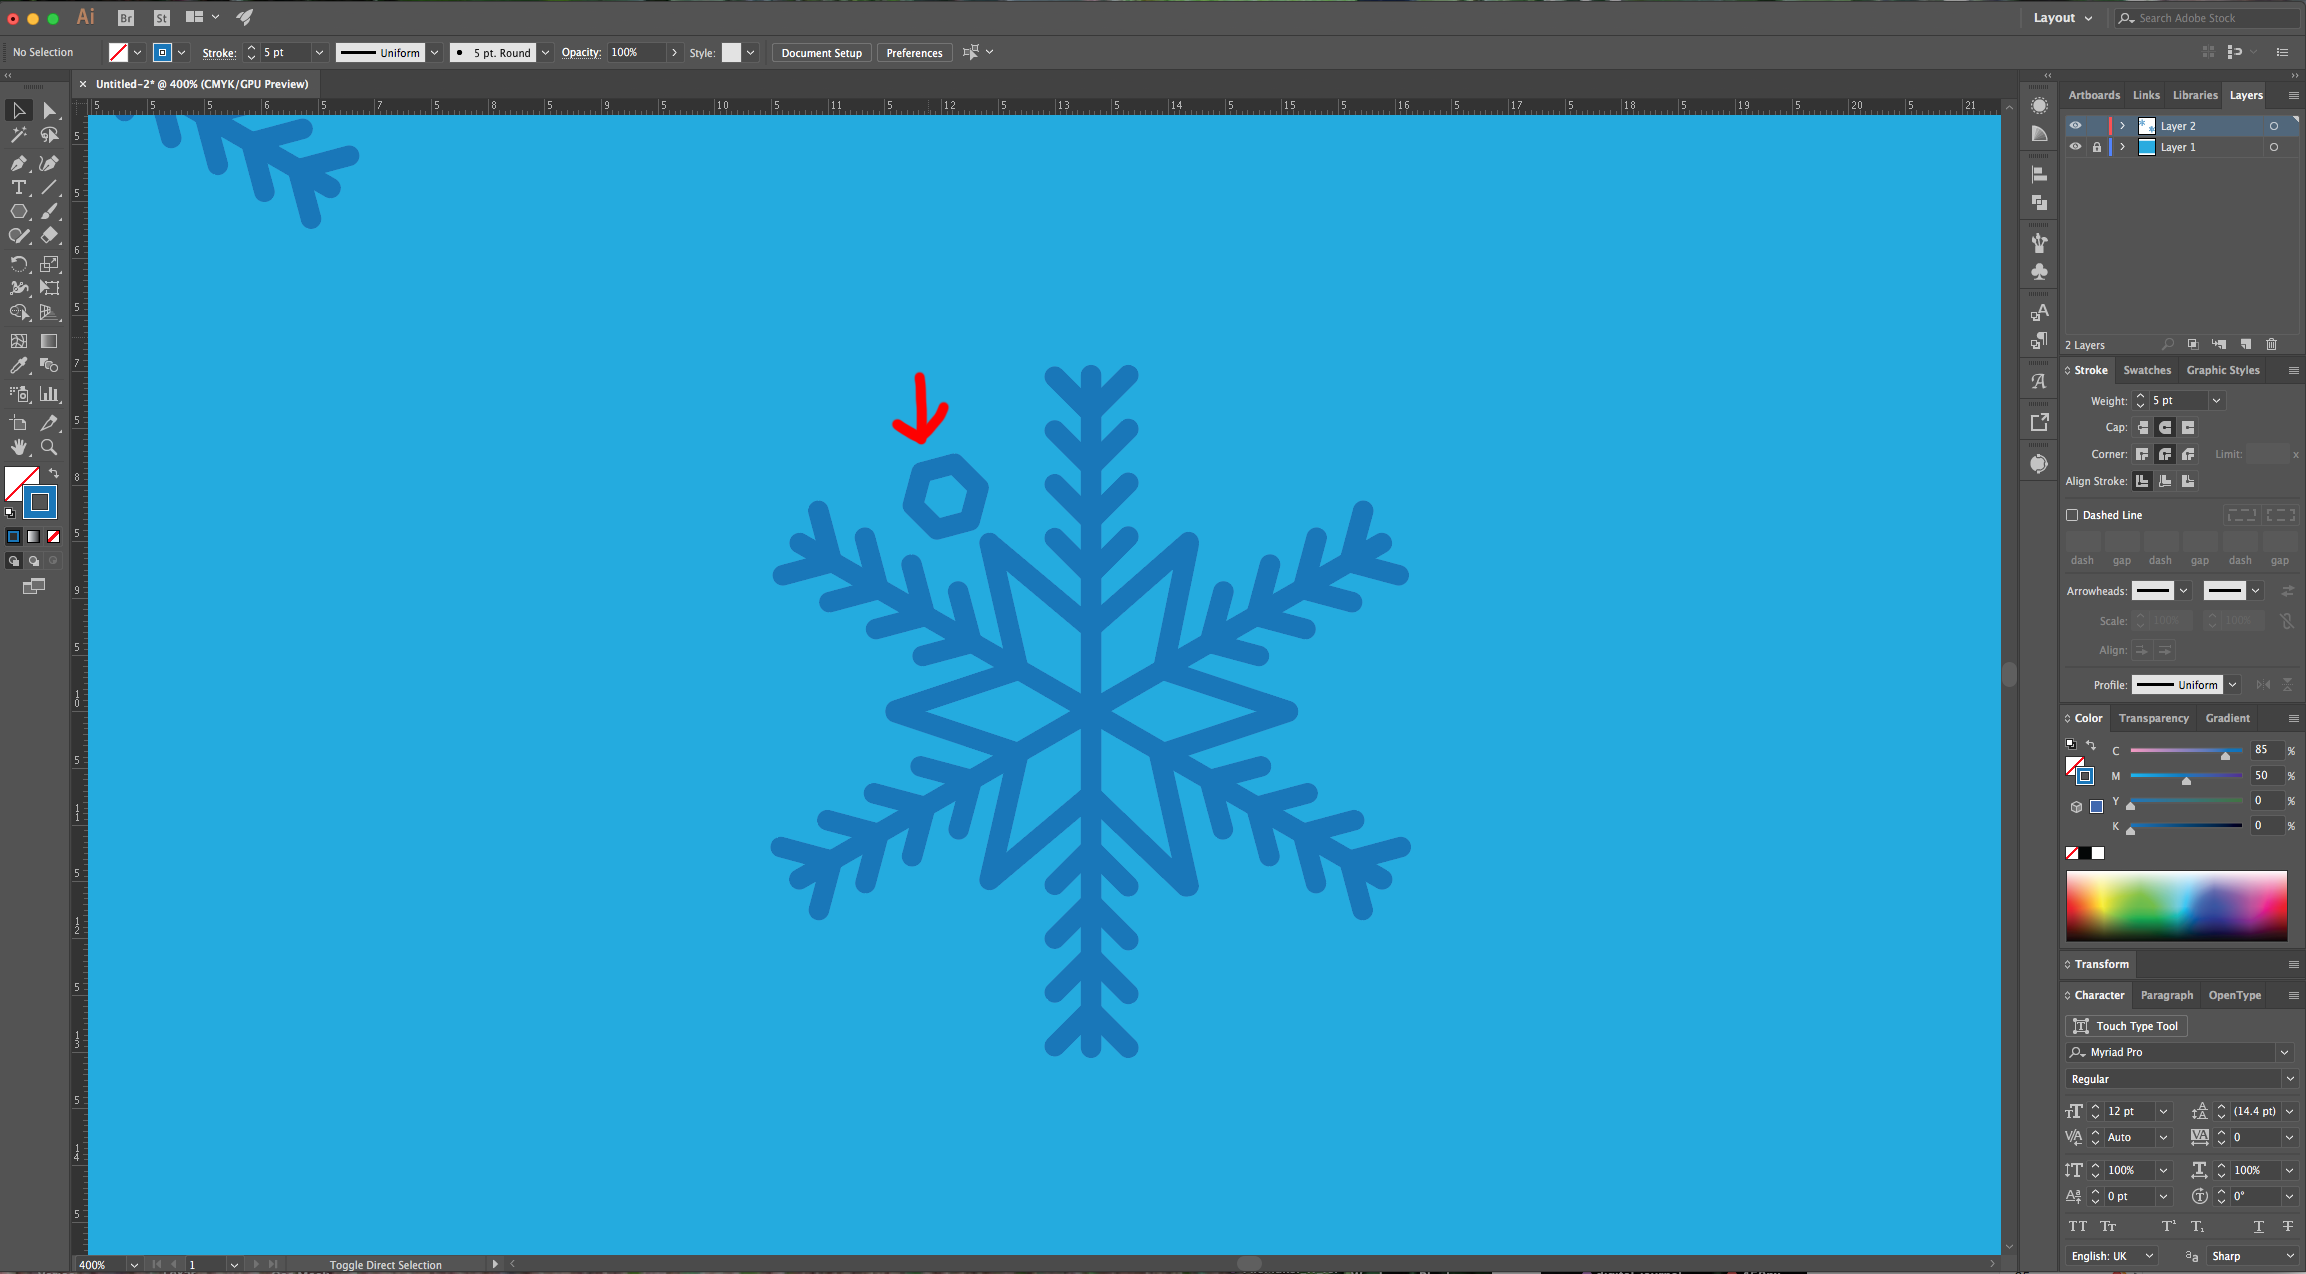
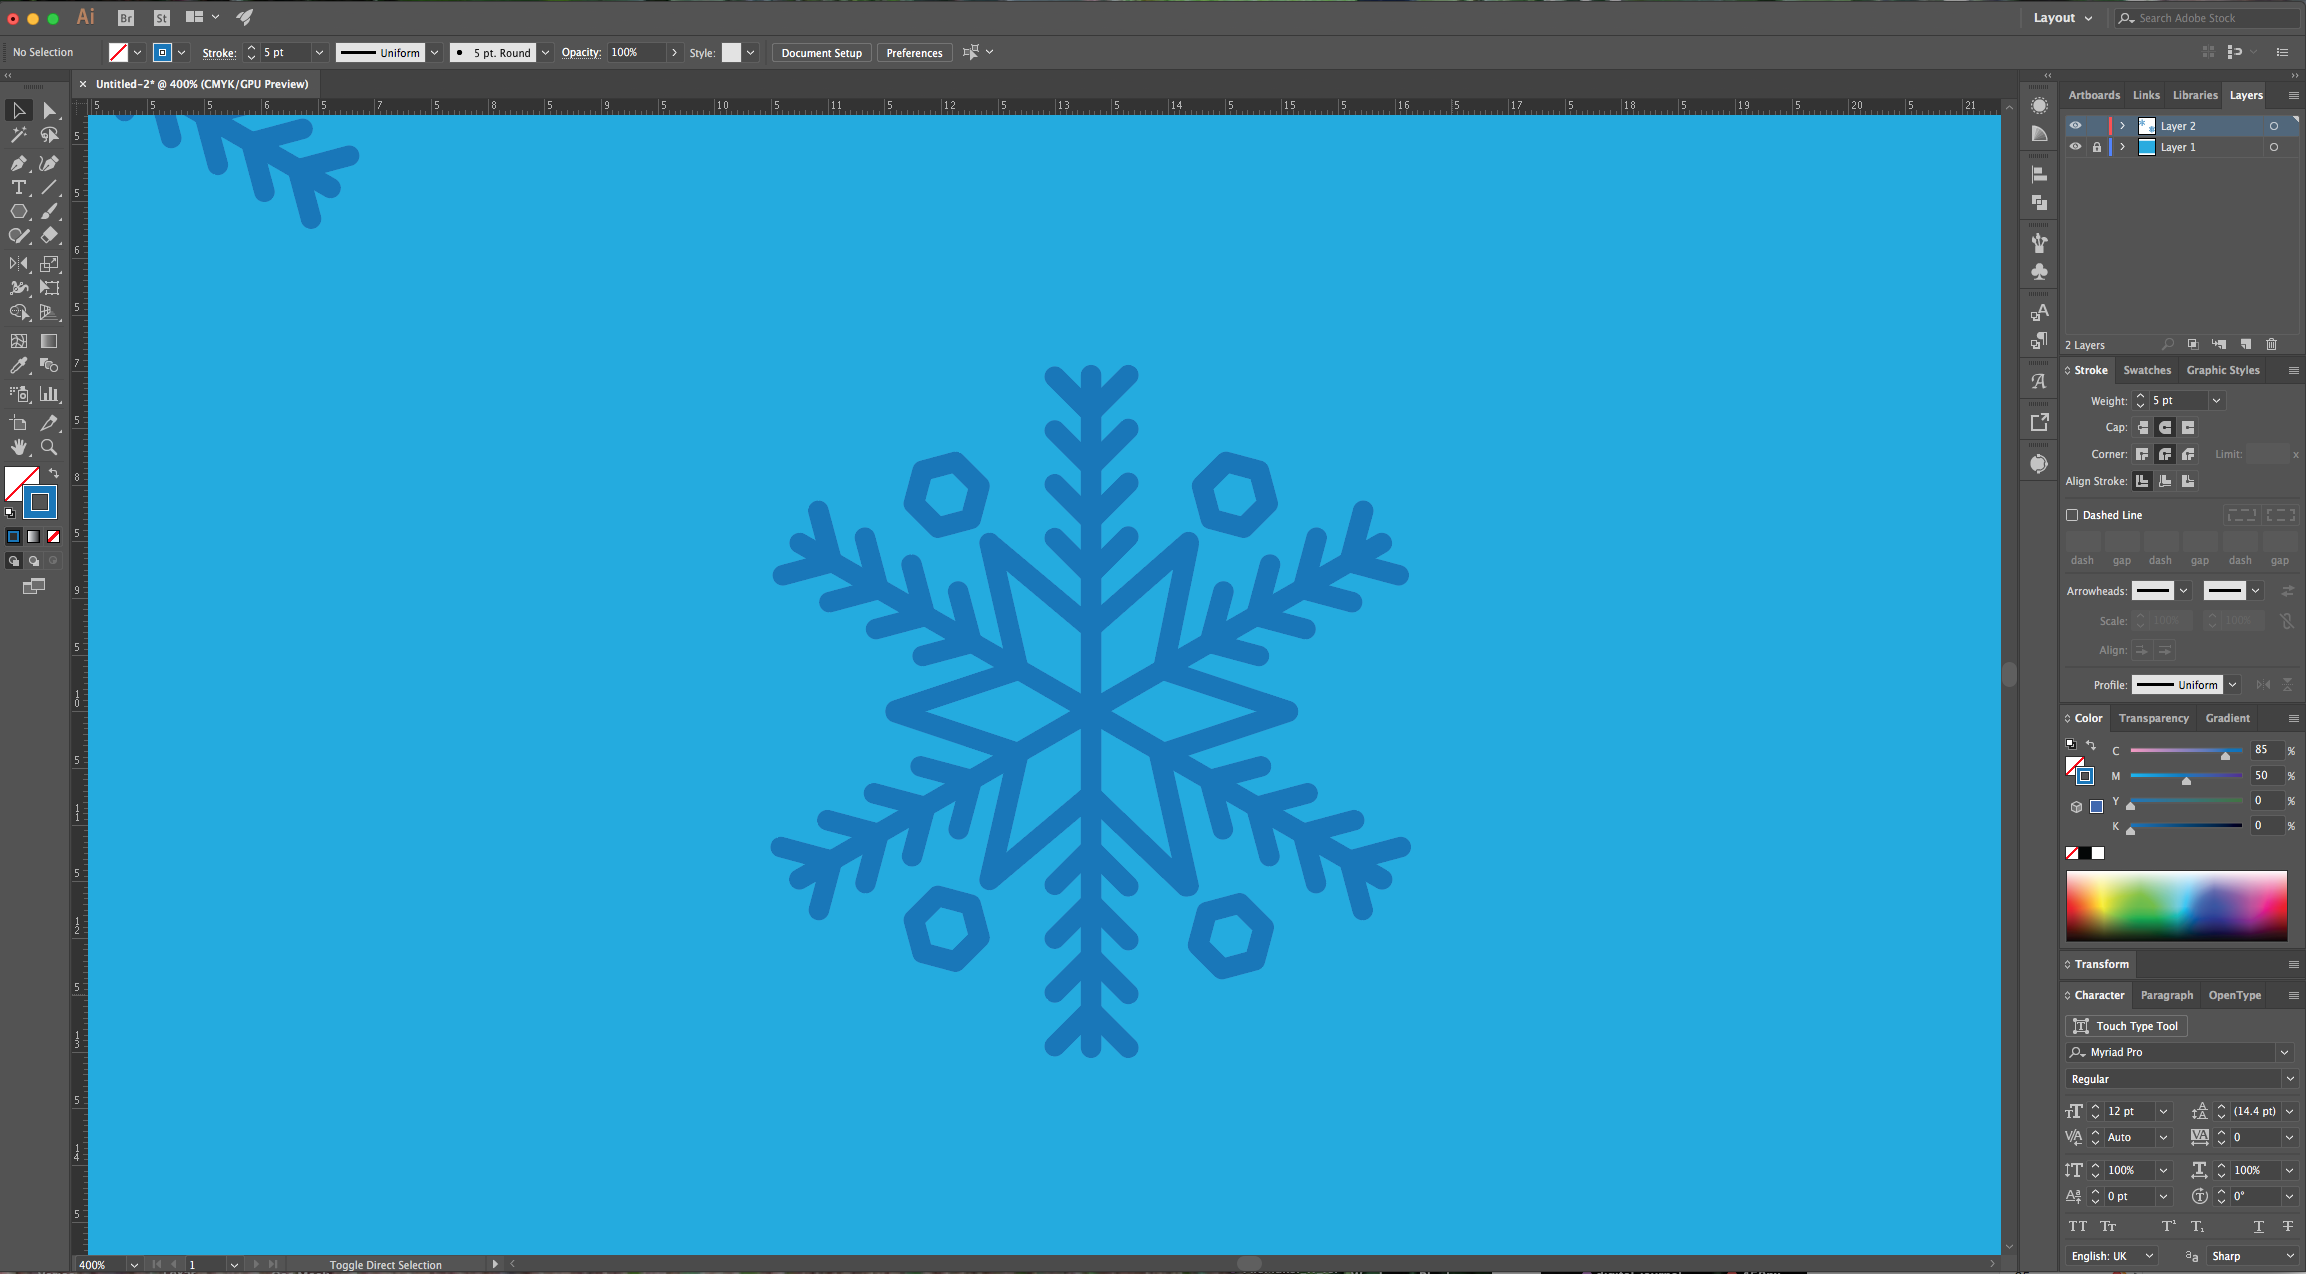
11 - Select the “Polygon Tool”, click inside your Canvas and input a 0.3 value for “Radius” and 6 “Sides”. Rotate your “Polygon” so one of the corners coincides with the tip of the Star and place it close to it and between two sides of the snowflake.
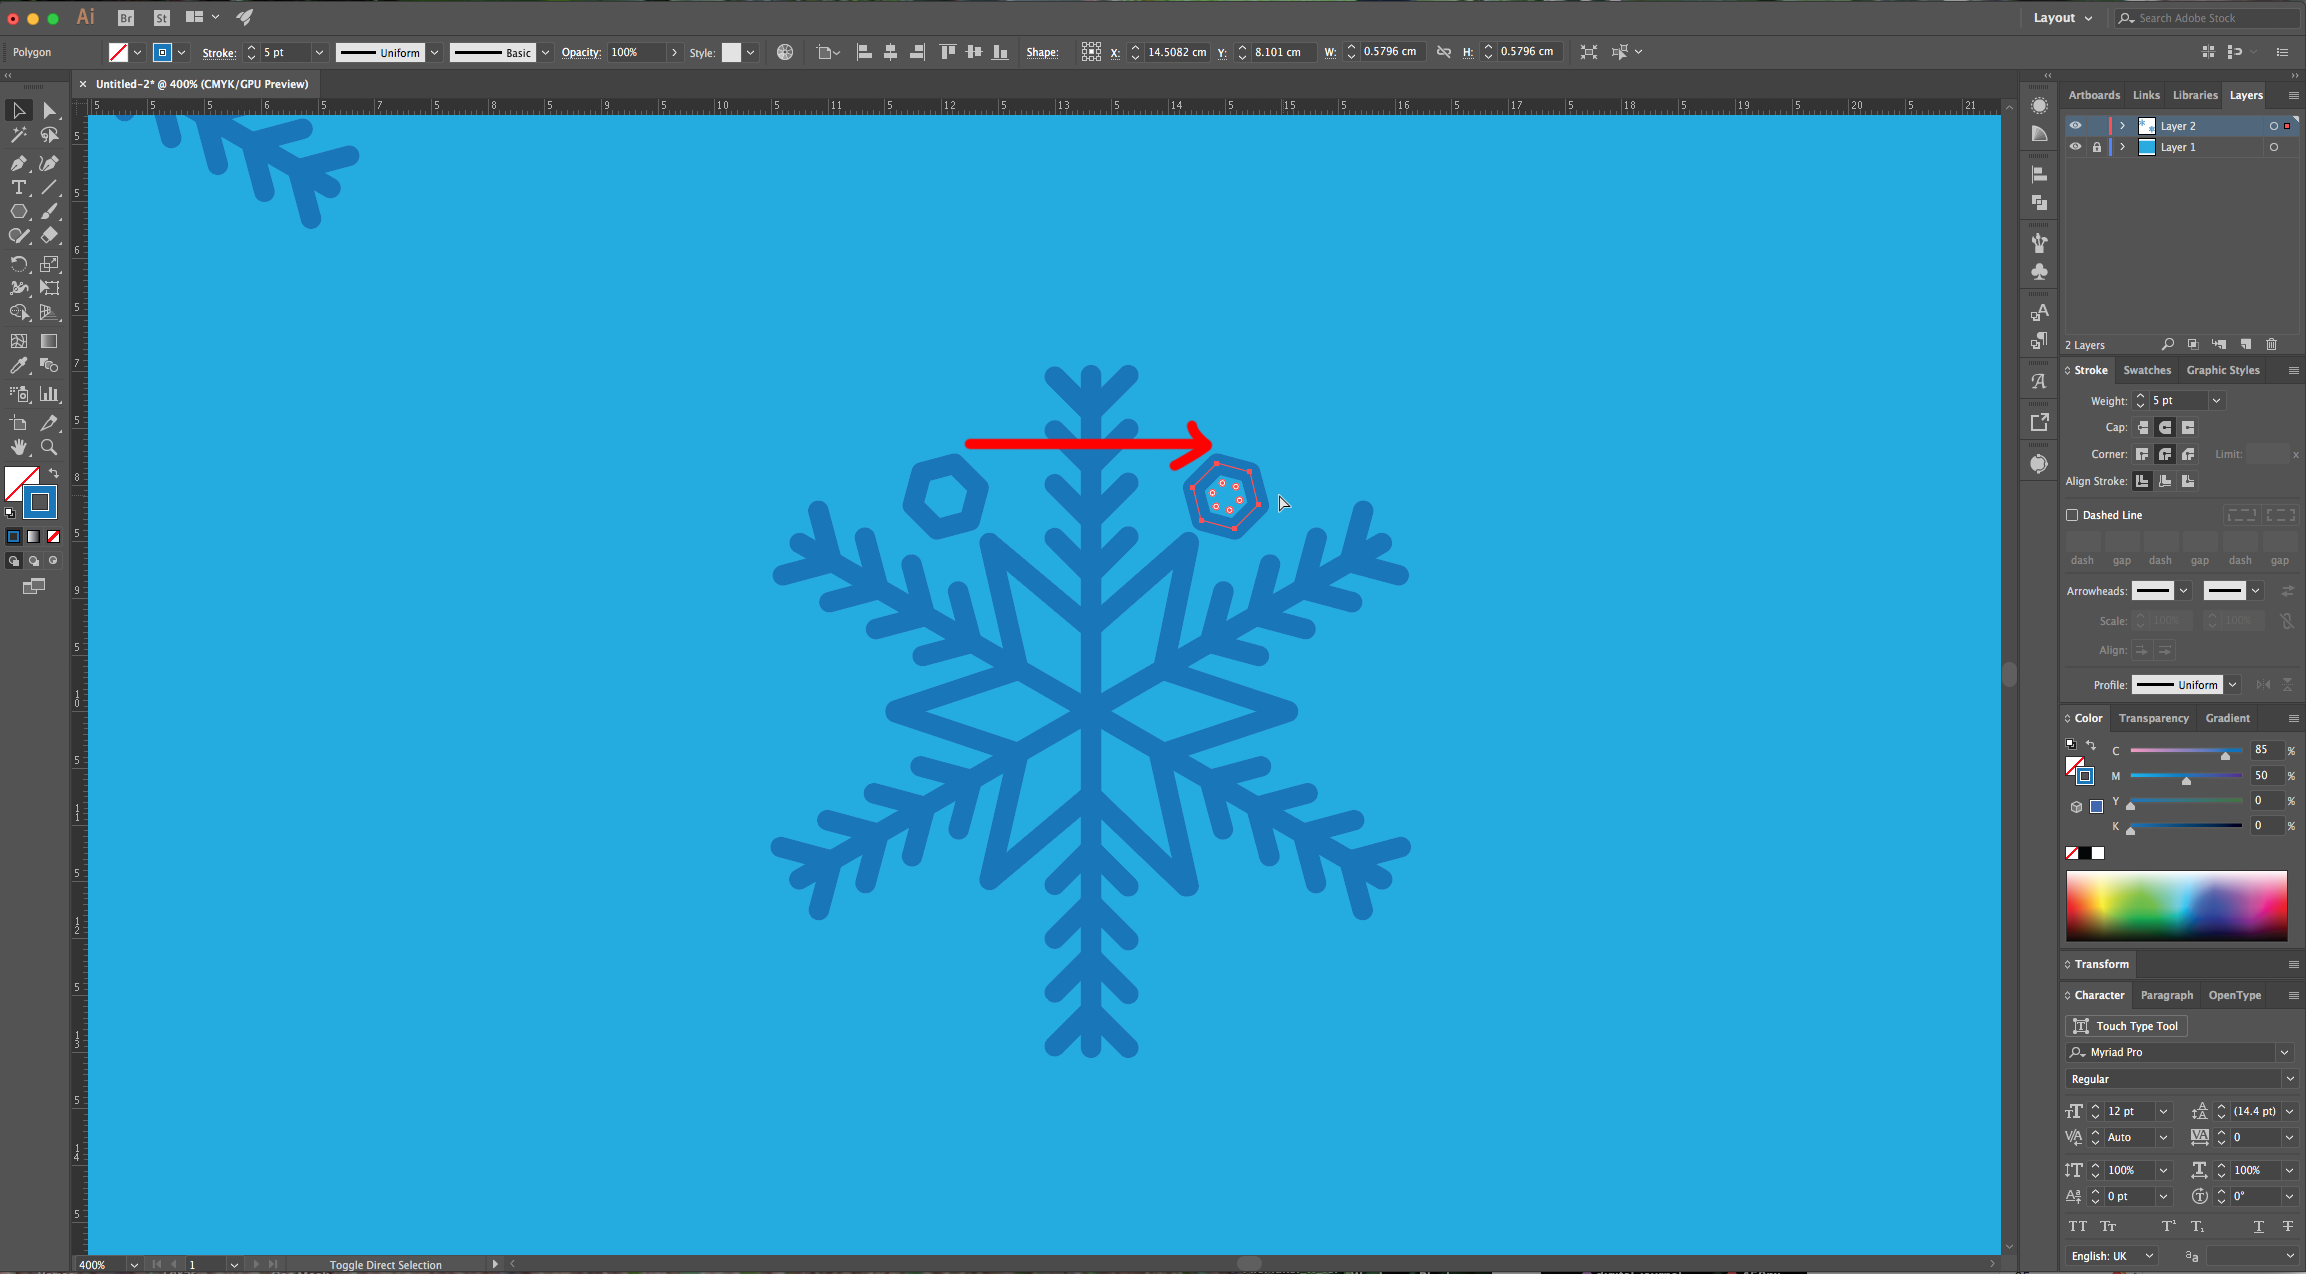
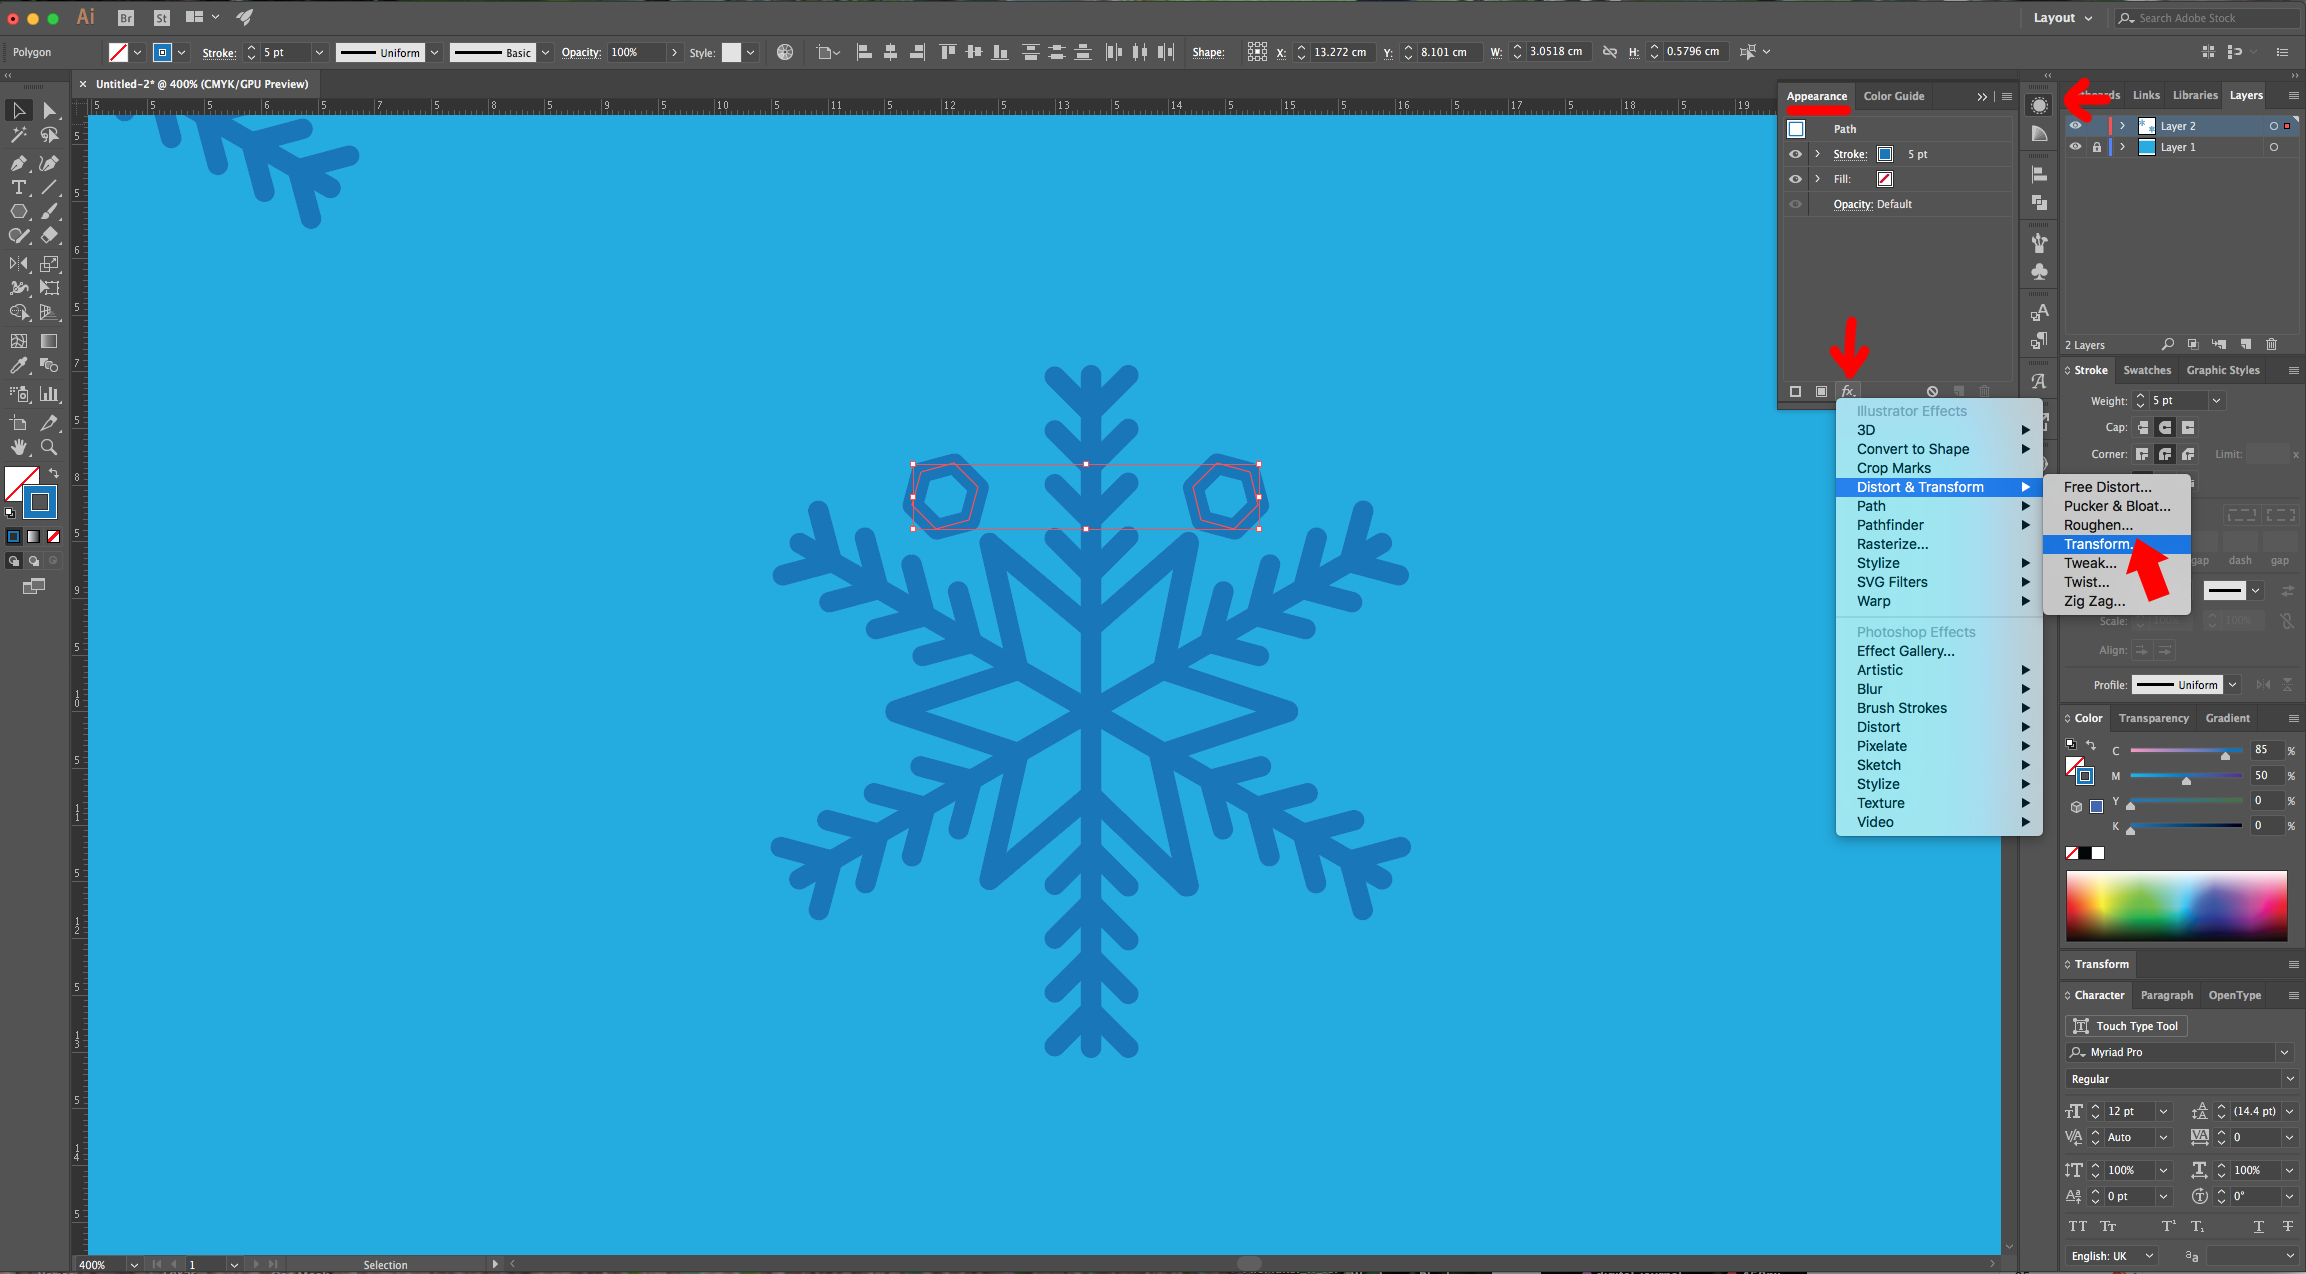
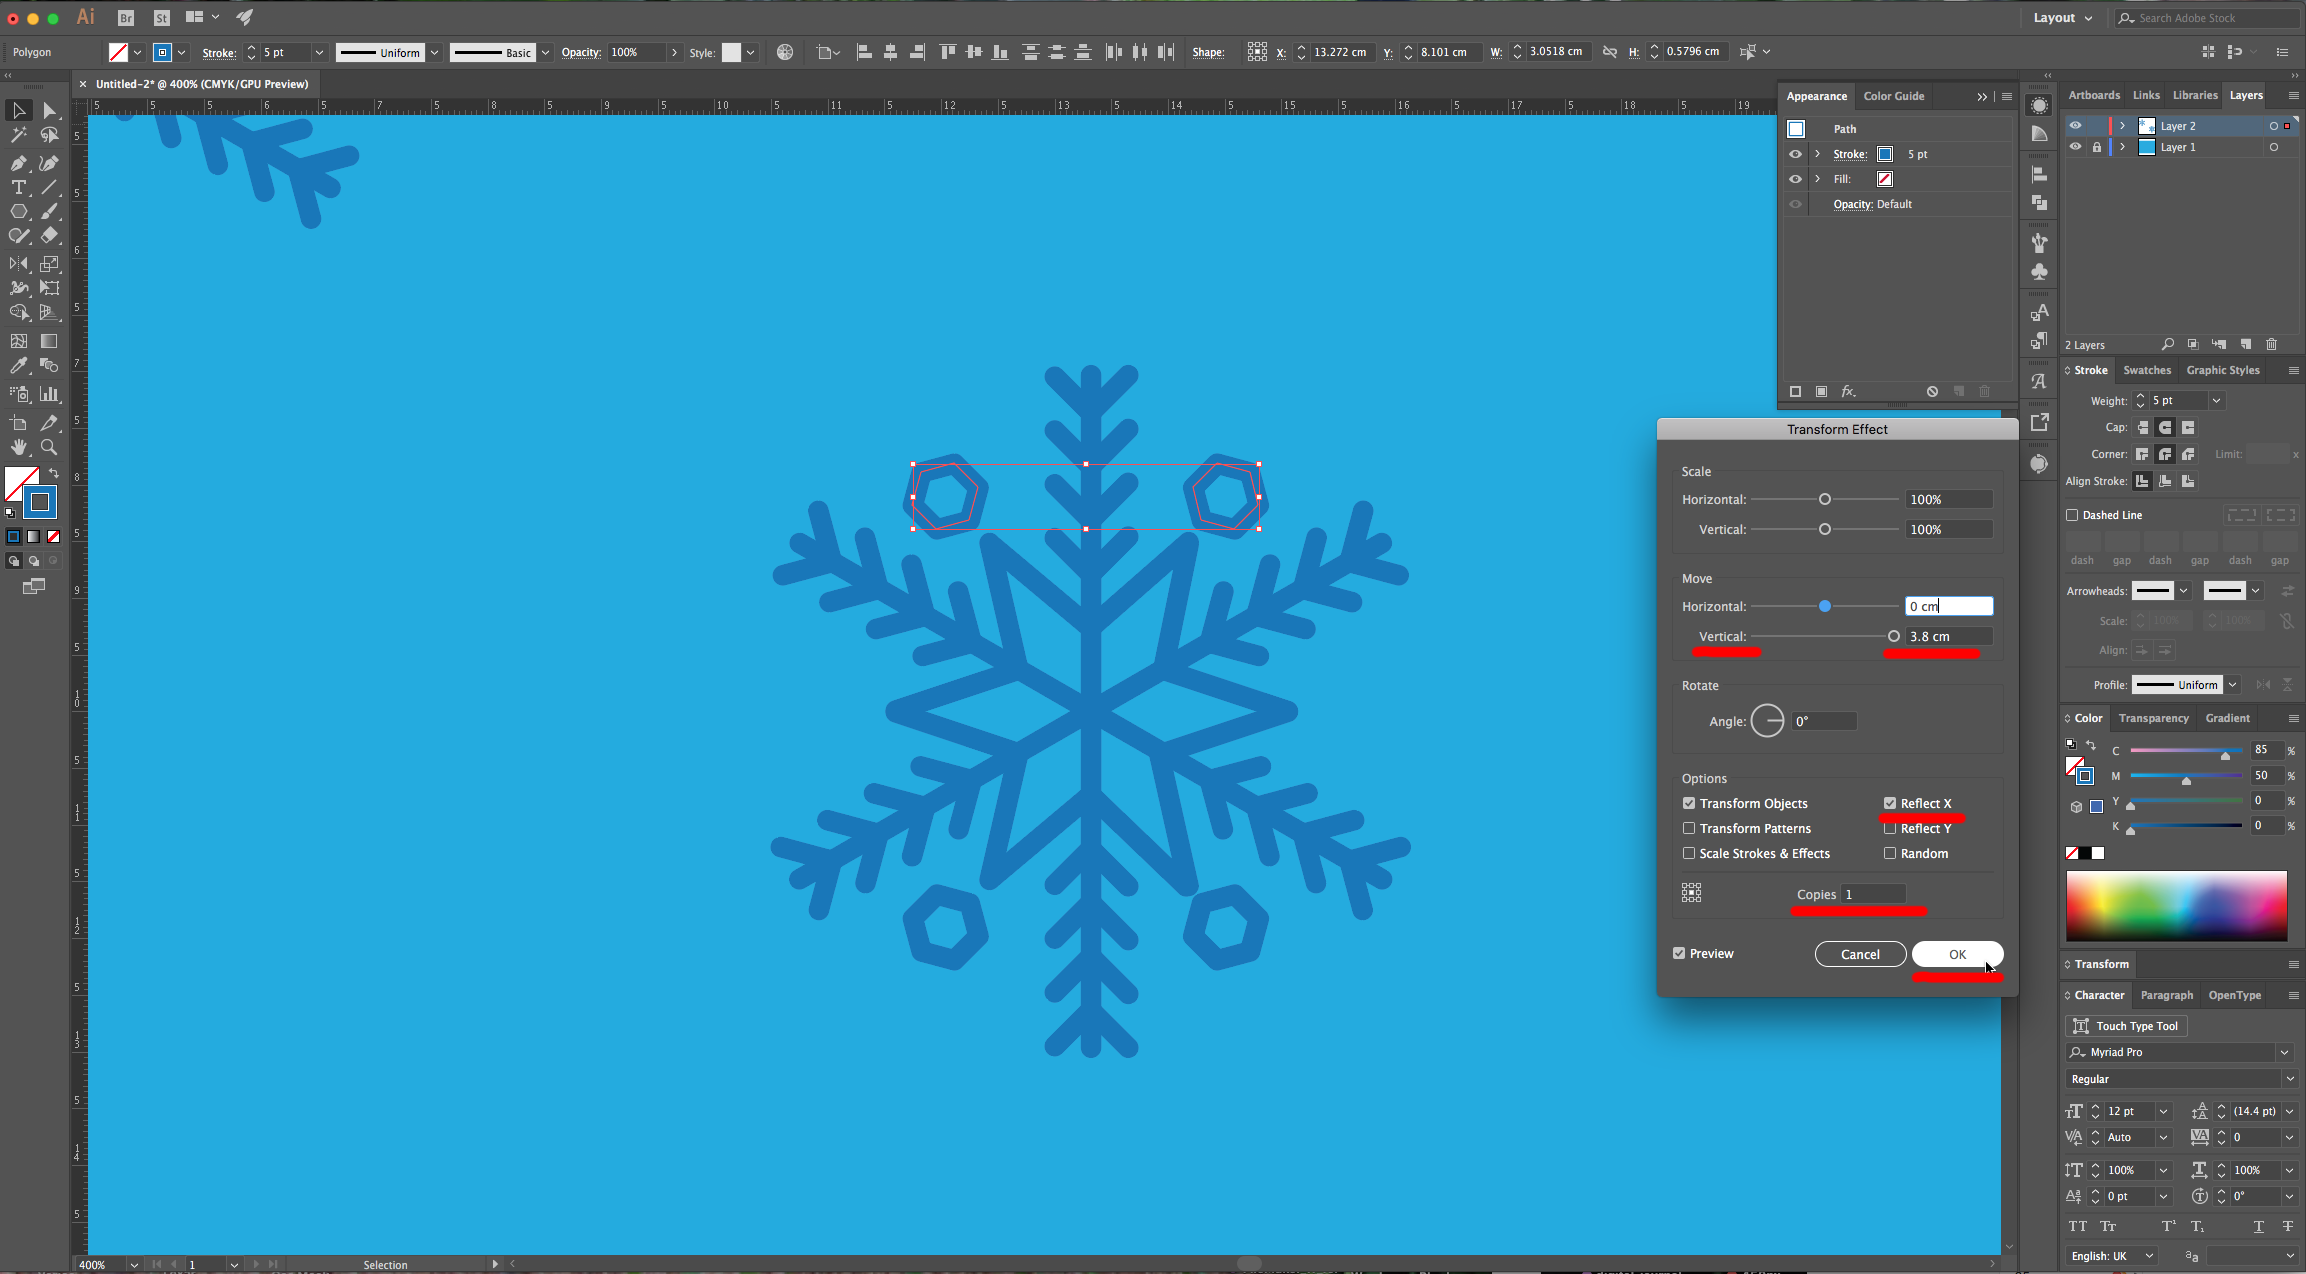
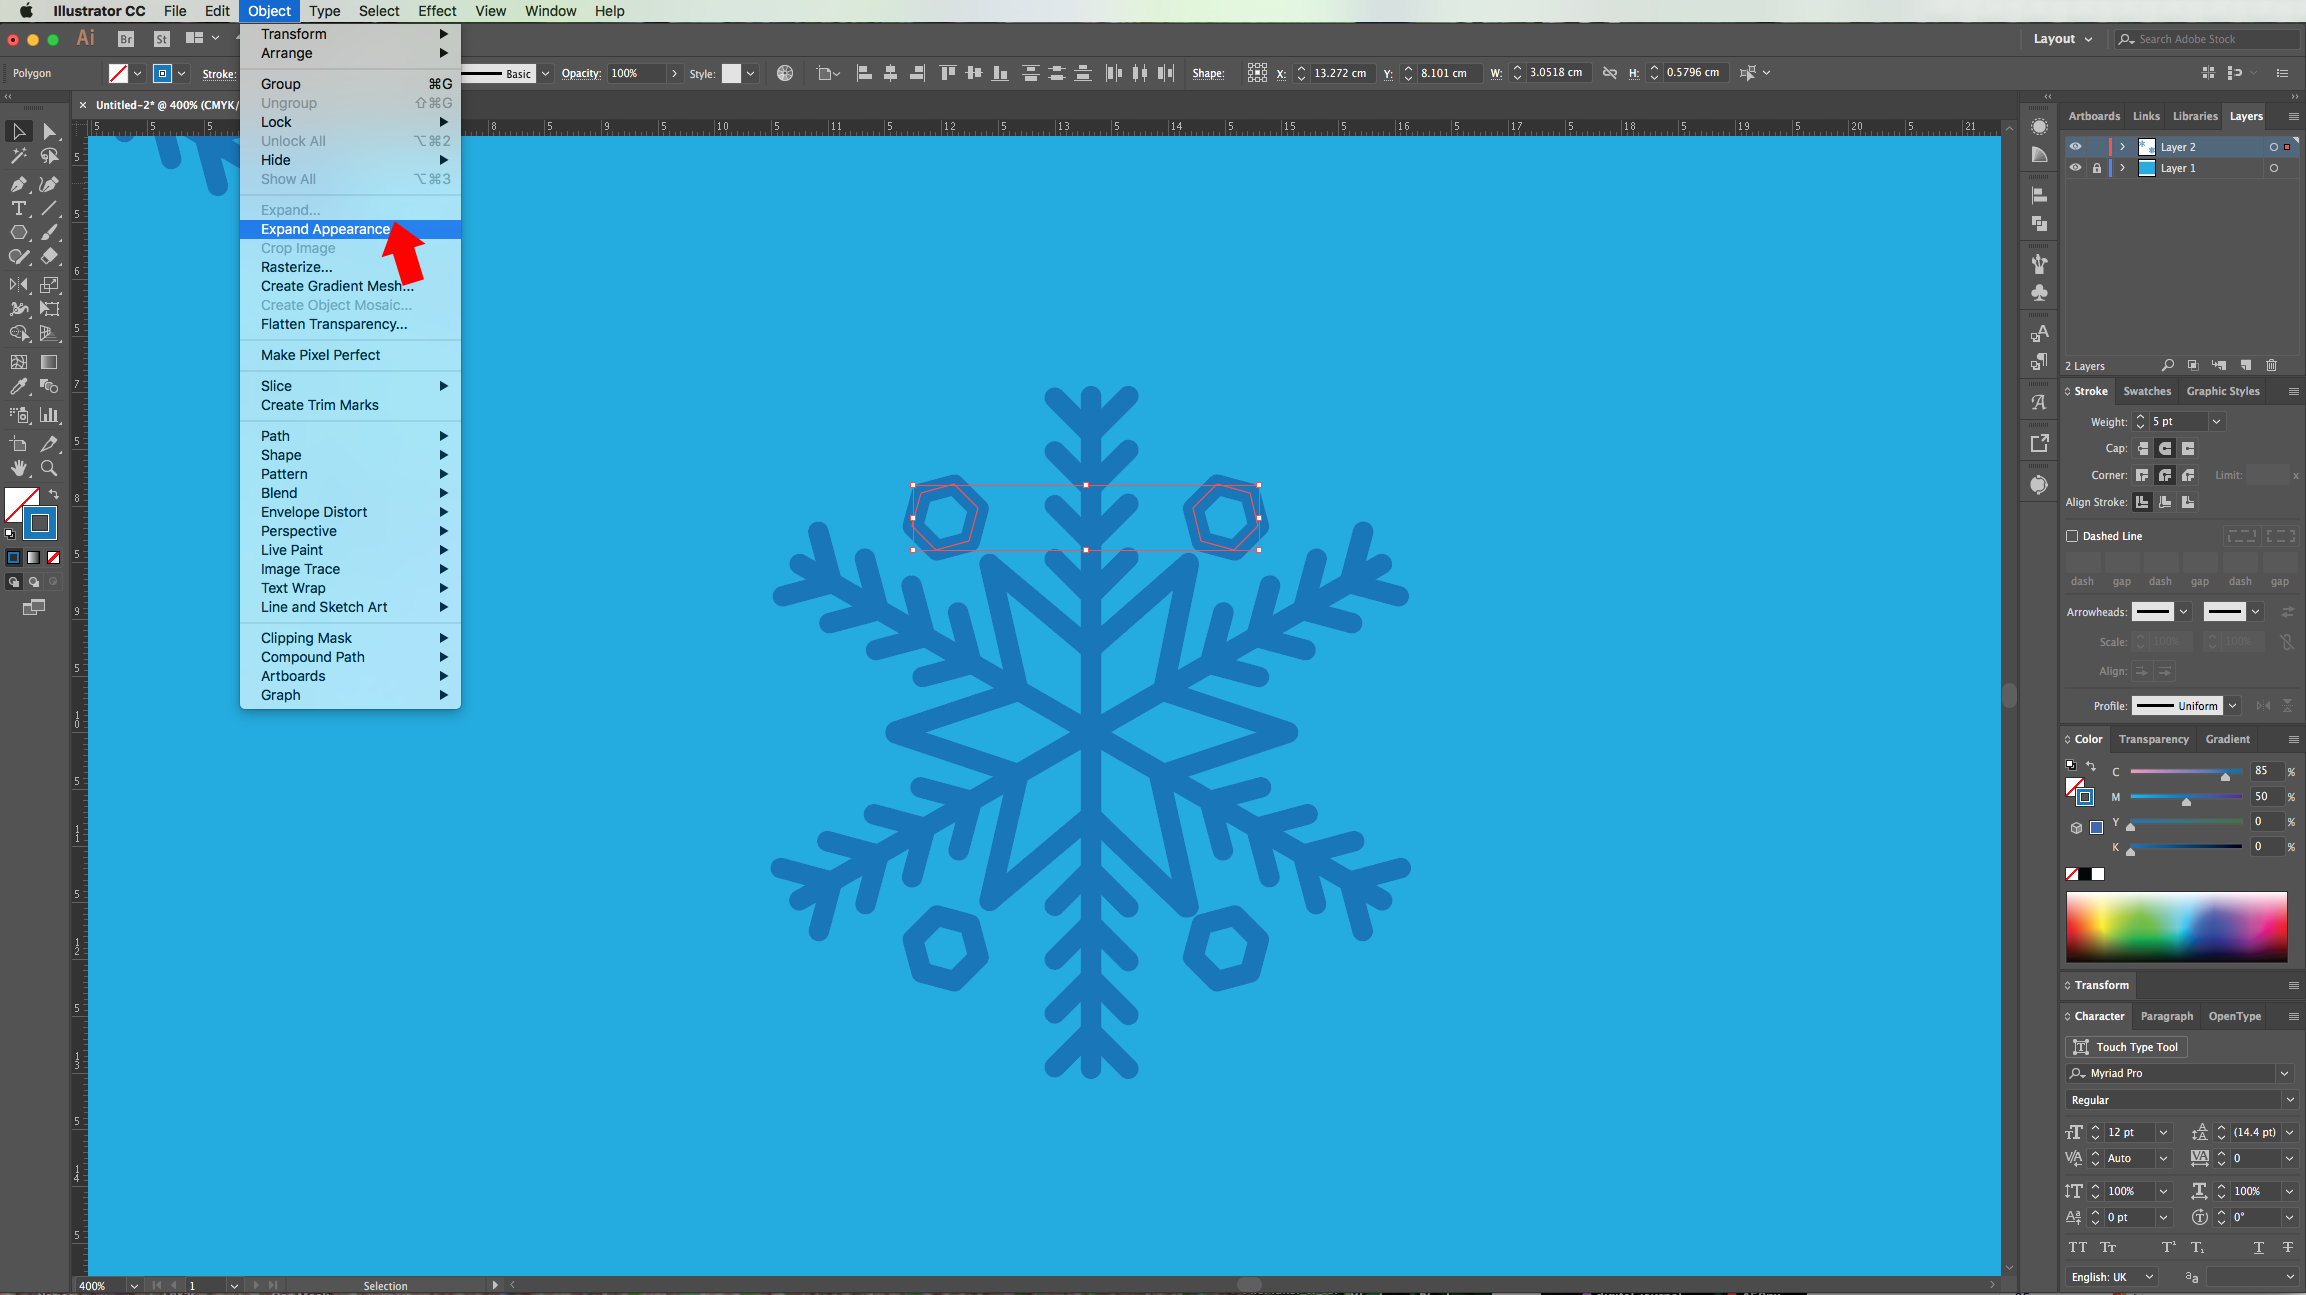
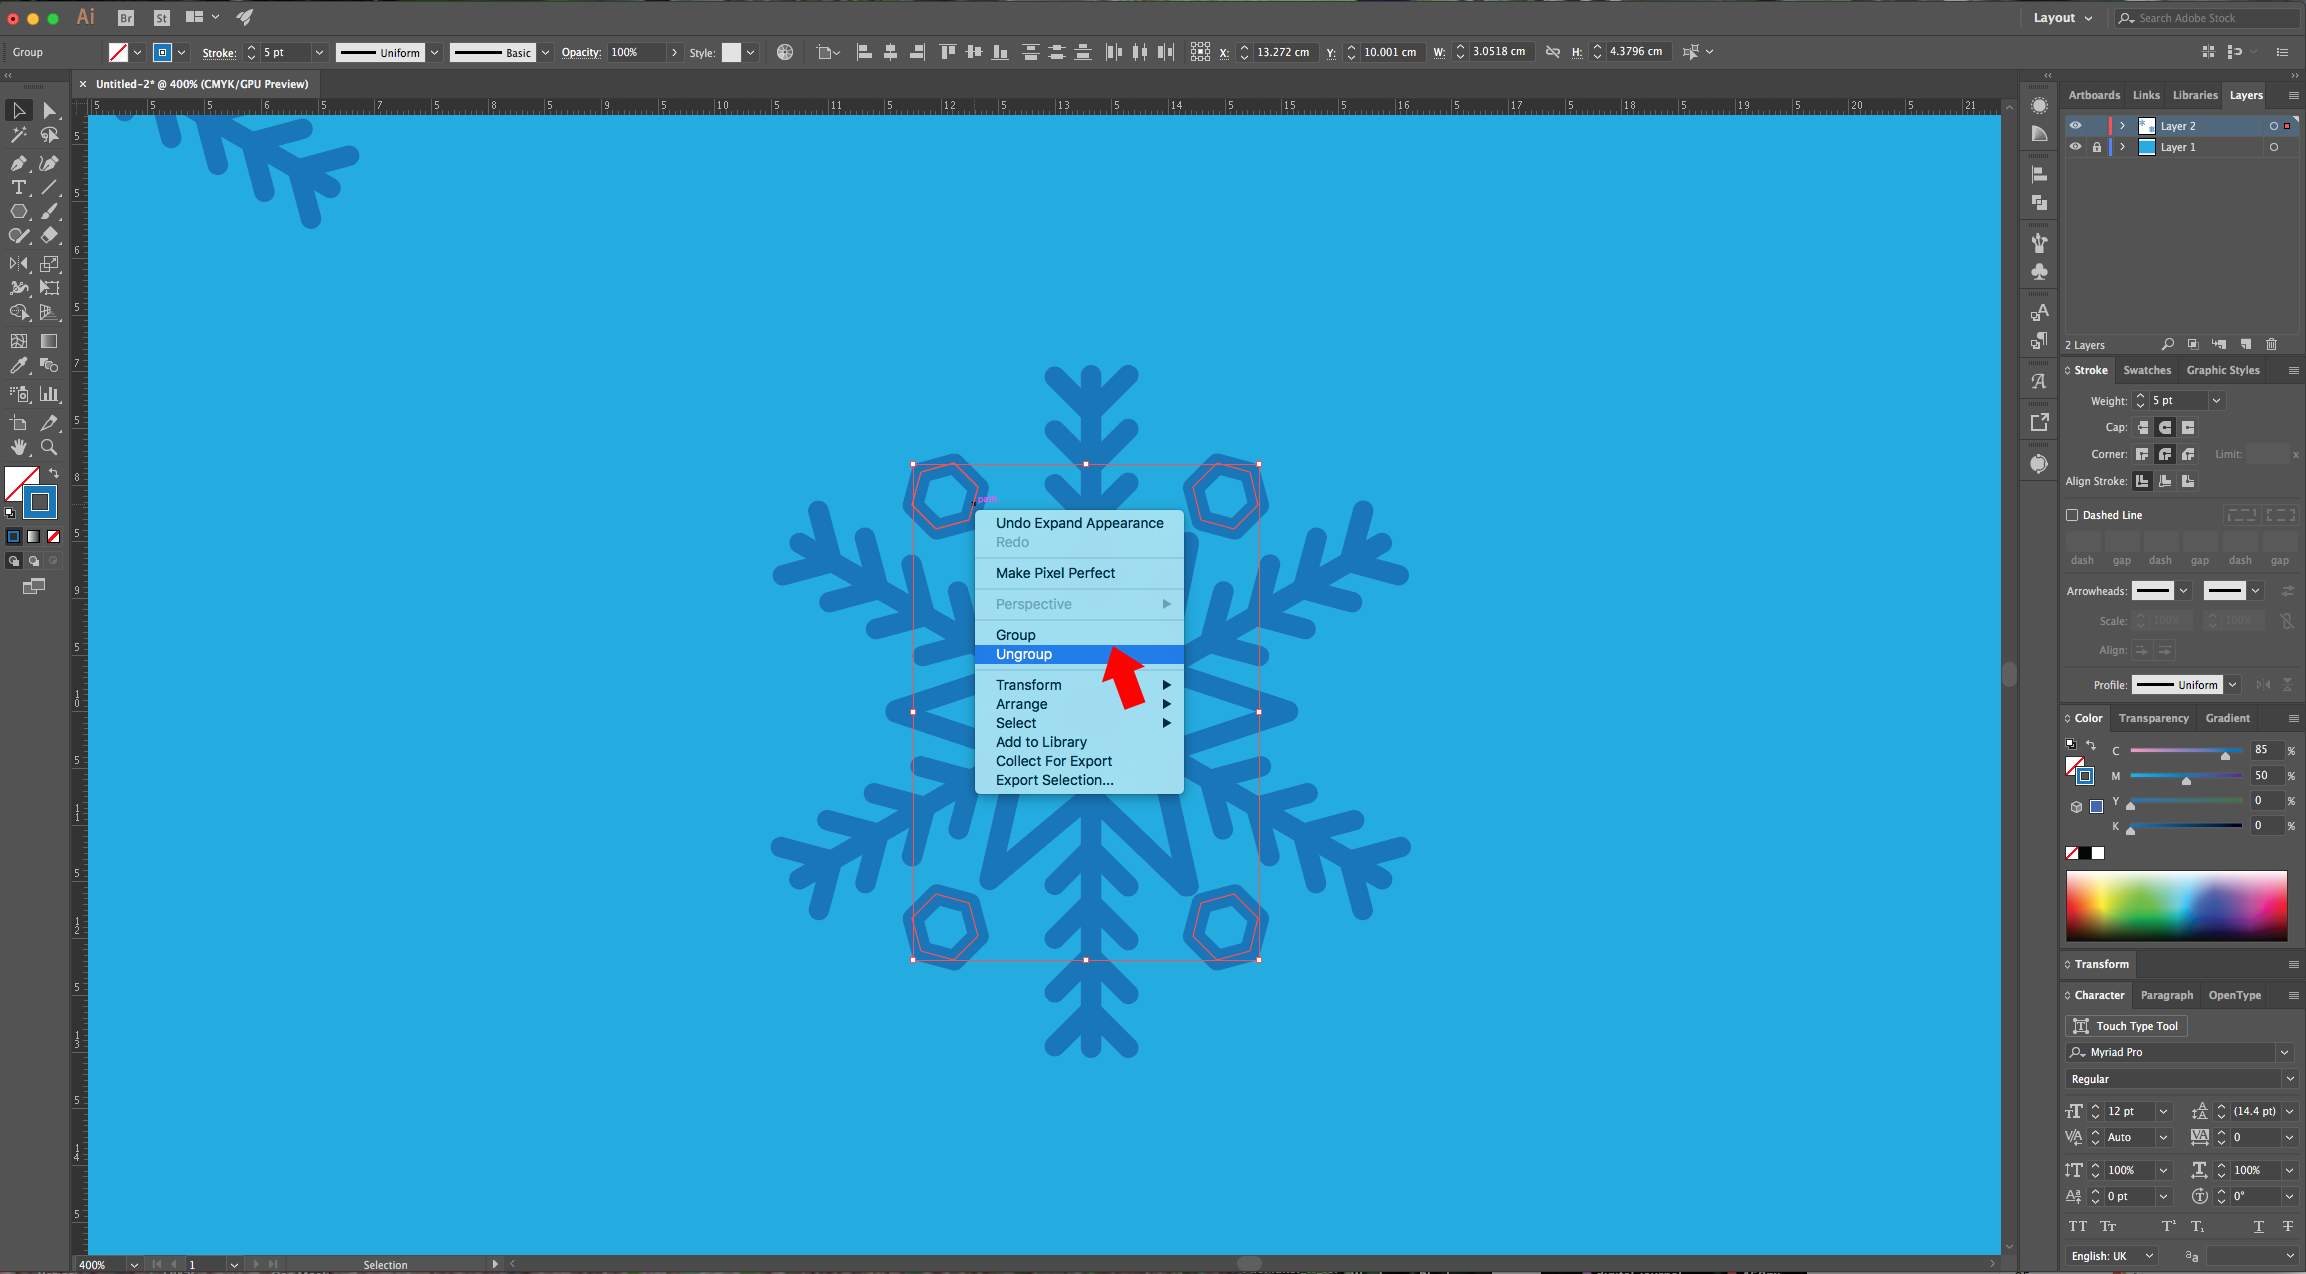
12 - Hold the “Shift” and “Alt/Option” keys and drag the Polygon to the other side to duplicate it. Rotate it and place it just like the first one. Select both, head to the “Appearance Panel”, click on the “Effects Menu” on the Bottom-Left side of the panel and navigate to Distort and Transform > Transform… Use a “Vertical Move” of 8.8 cm a 0° Angle, check the “Reflect Y” box and make 1 “Copy”. Go to Object > Expand Appearance. Right-click on top and choose “Ungroup”.
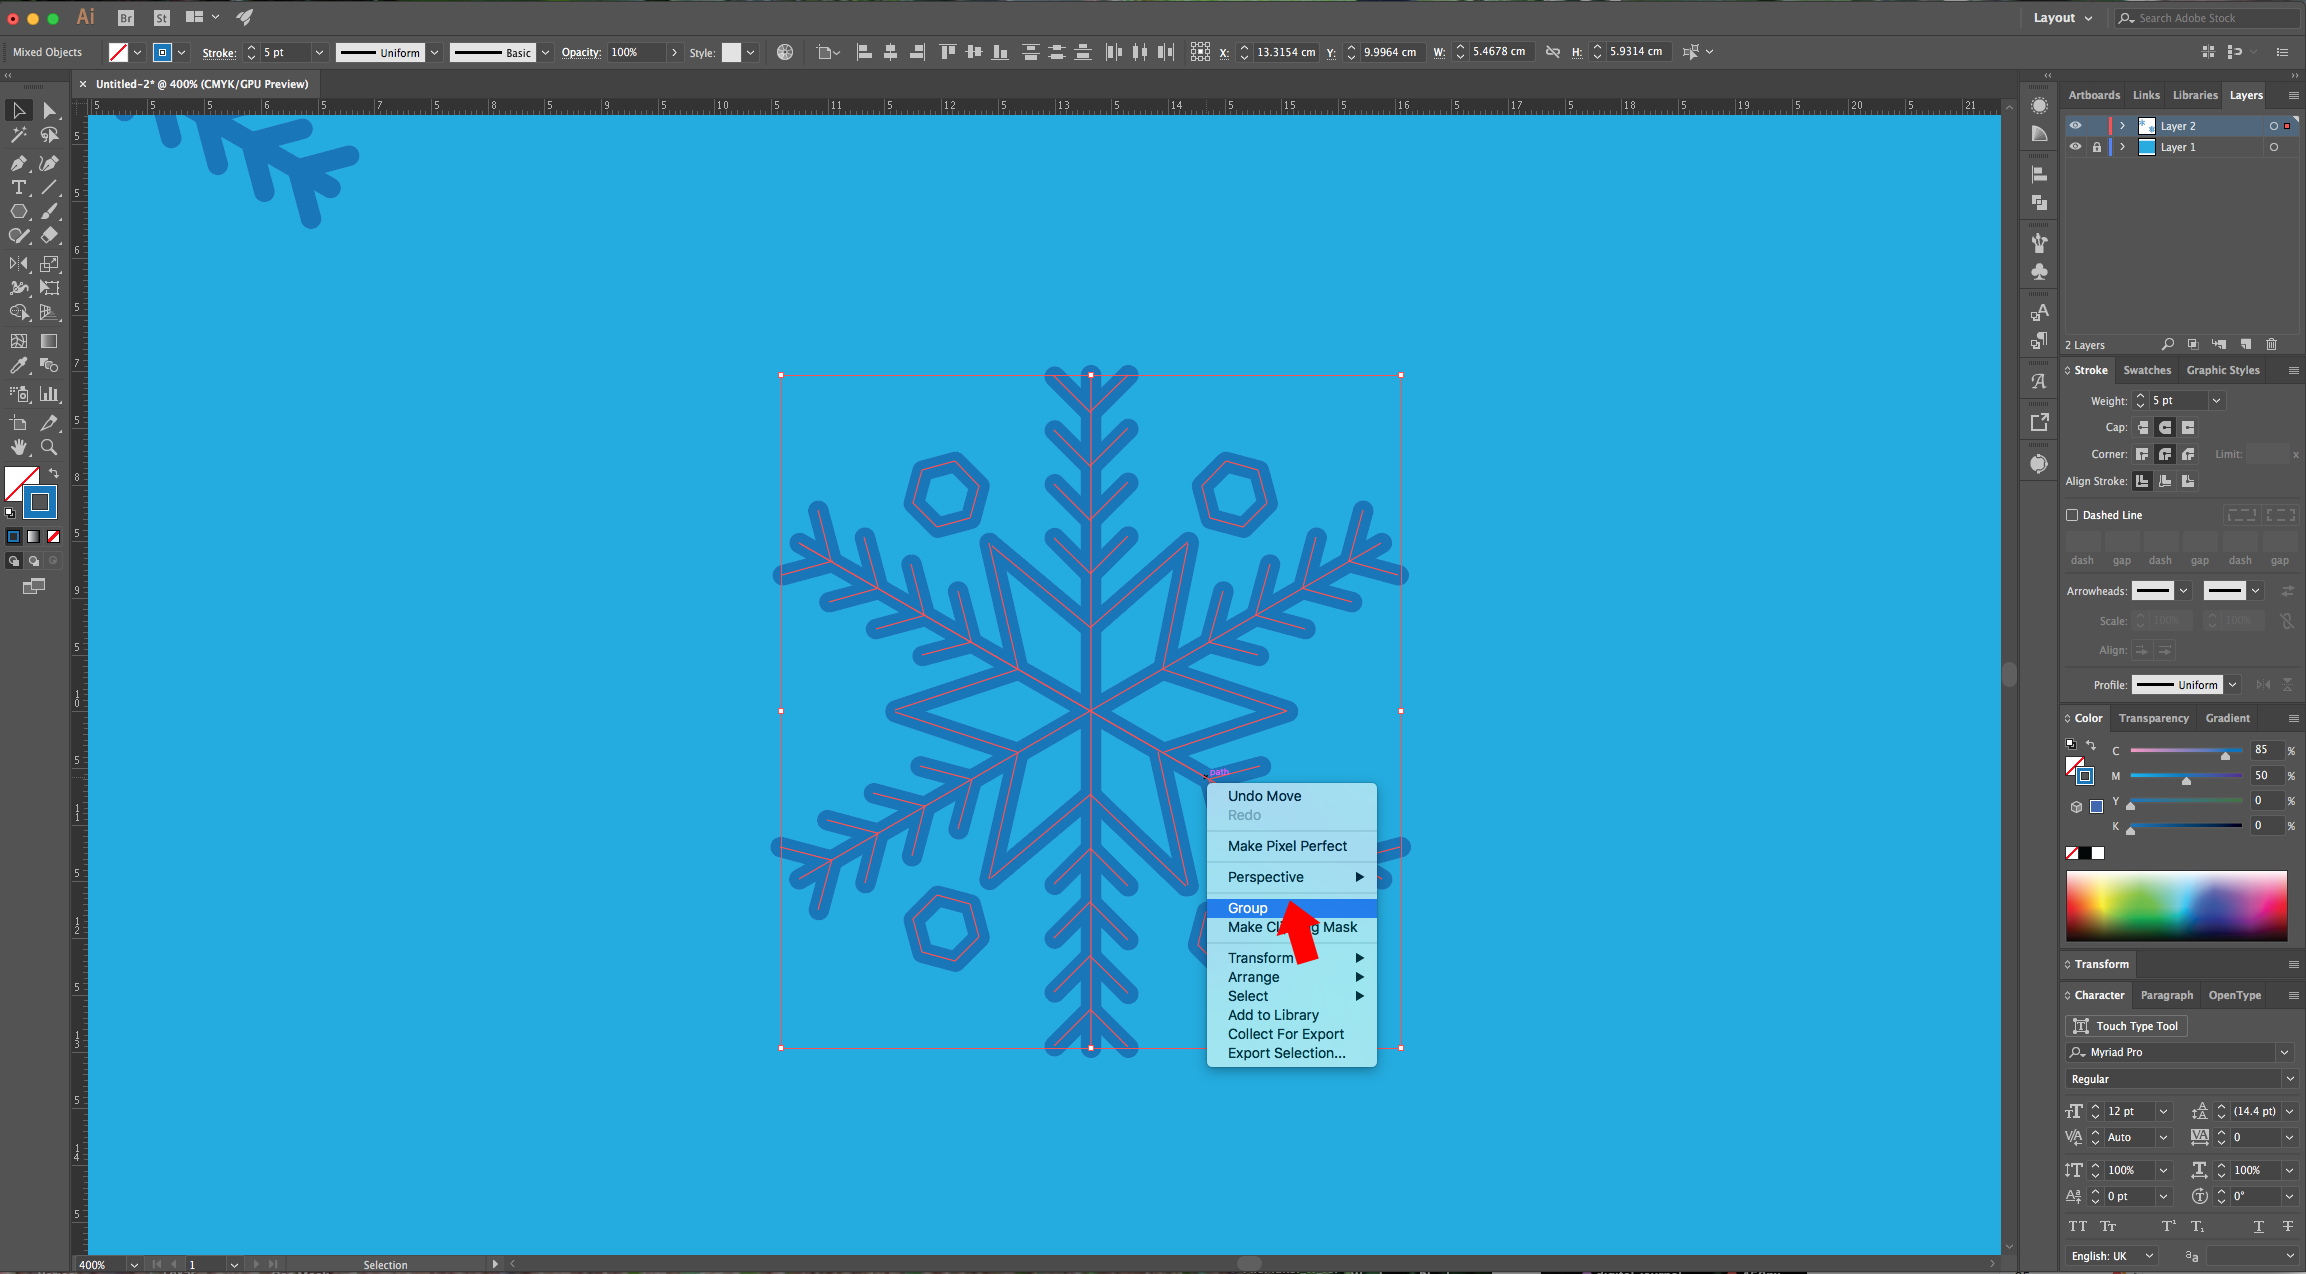
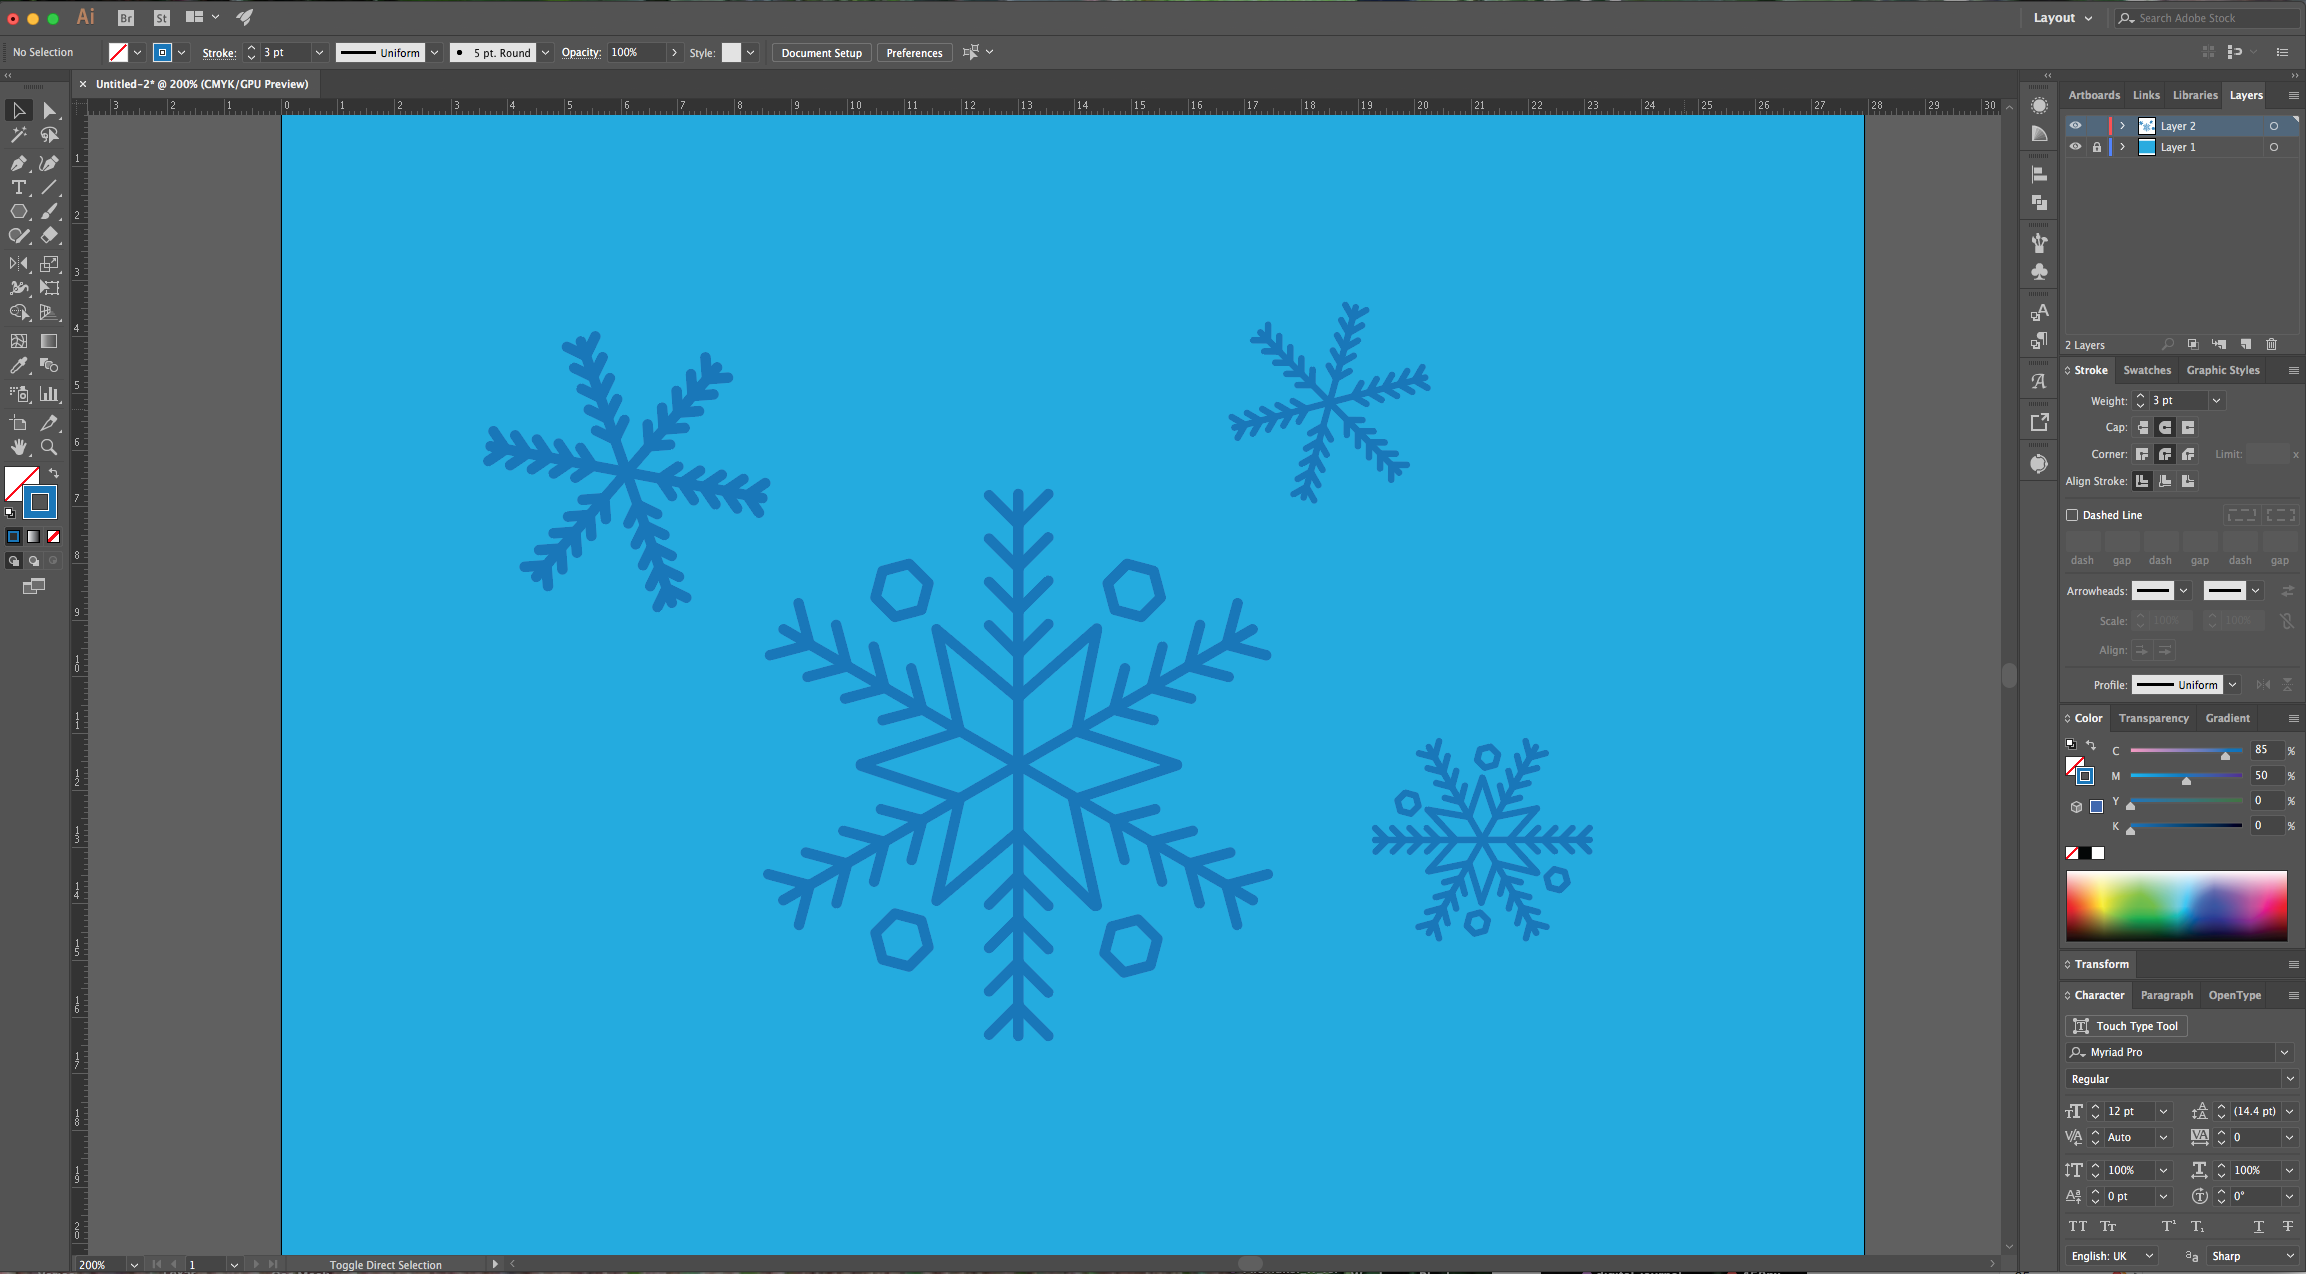
13 - Fix the placement of the “Polygons” if needed. Select everything (except the “Background”), right-click on top and choose “Group”. You can “Copy” (Command/Control + C) and “Paste” (Command/Control + V) the “Snowflakes”, resize and/or rotate them.
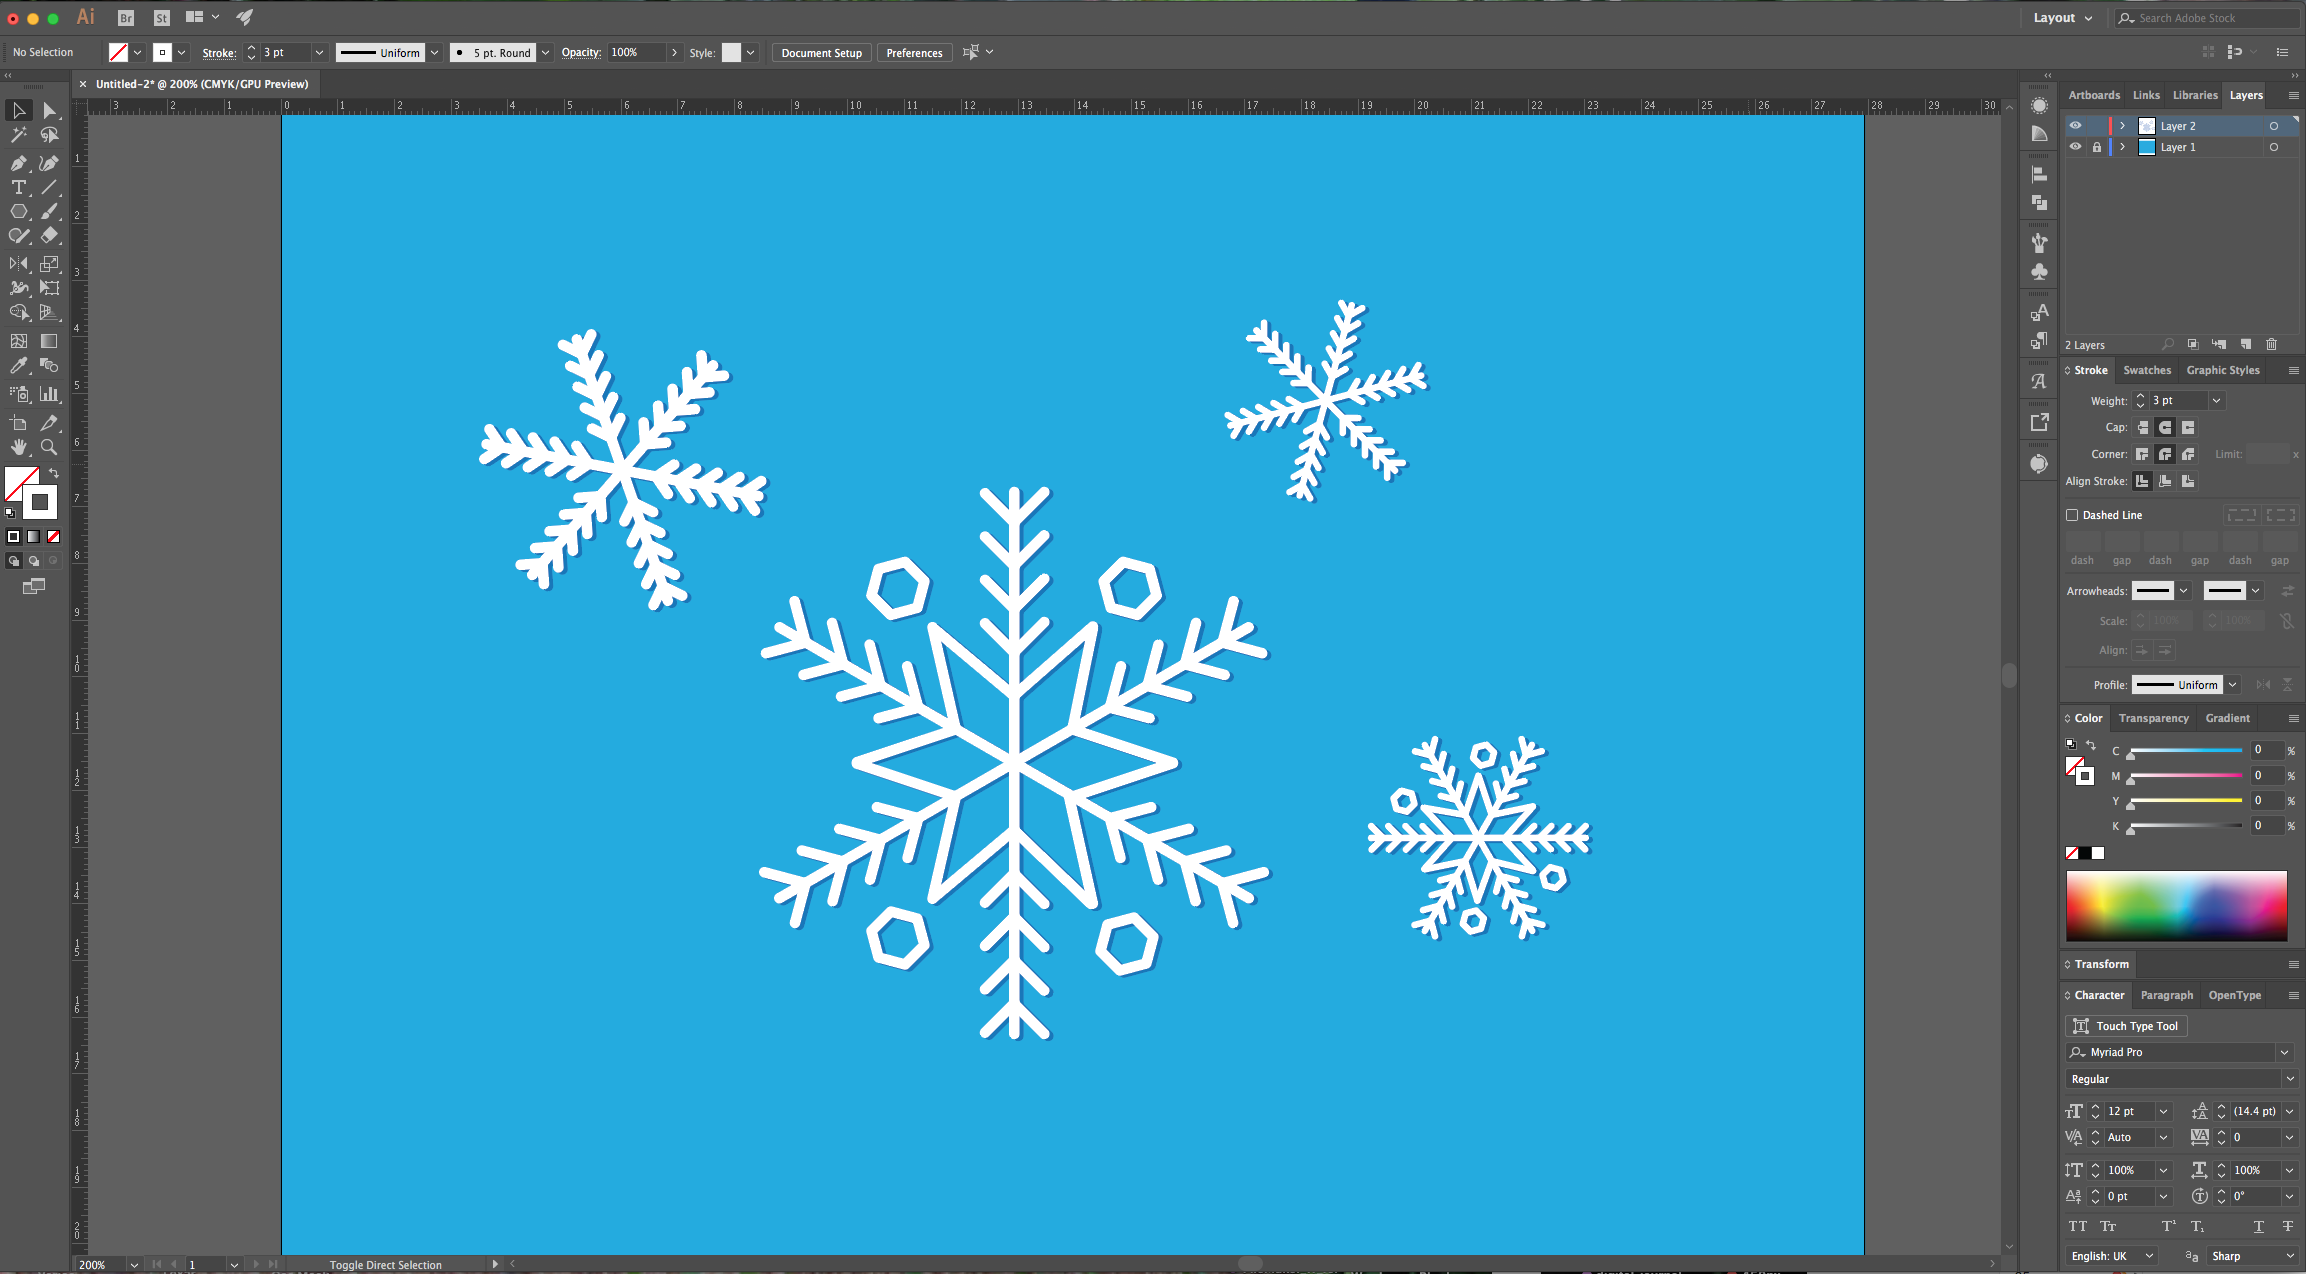
14 - You can also make a “Copy” (Command/Control + C) and “Paste in Front” (Command/Control + F) change the “Fill” color to White and move them a few clicks Up and Left to create a shadow.
2 - Select the “Rectangle Tool” (M), choose a Medium Blue shade from the “Swatches Panel” and create a Rectangle that covers the entire Canvas.
3 - “Lock” it using the small “Padlock” icon on the left side of its Thumbnail and then create a “New Layer” by clicking on the small button at the bottom of the “Layers Panel”.
4 - Select the “Line Segment Tool” (\), use a Dark Blue as “Stroke” color and click inside your document. Use a 10 cm “Length” value and a 90° Angle.
5 - Center it using the “Horizontal and Vertical Align Center” options on your Top Menu and make sure that “Align to Artboard” is selected. Or use the same options in the “Align Panel”. Change the “Stroke Weight” to 2 pt and make its “Cap” and “Corner” “Round”. Place a “Guide” in the center of your line (click and drag from the Top Ruler to the center).
6 - Zoom in on the top of the line and add a shorter one from about 1 cm to its left. Drag down and right while holding the “Shift” key so it will be straight and in a descending angle. Head to the “Appearance Panel”, click on the “Effects Menu” on the Bottom-Left side of the panel and navigate to Distort and Transform > Transform… Use a “Vertical Move” of 0.8 cm a 0° Angle and make 4 “Copies”. Go to Object > Expand Appearance.
7 - Select the “Reflect Tool” (O), choose a “Vertical Axis” and a 90° Angle. Click “Copy” instead of “OK”. Then, move your lines to the right side of the Vertical Line while holding the “Shift” key to keep a straight line. Select both sides and use the “Reflect Tool” (O) again, but this time use a “Horizontal Axis” and a 0° Angle. Click “Copy” instead of “OK”. Move your resulting selection down to the bottom of the Vertical line using the “Shift” key.
8 - Select everything (except the “Background”) and use the “Rotate Tool” (R) with a 60° Angle. Click “Copy” instead of “OK”. Repeat one more time using a -60° Angle. Change the “Stroke Weight” to 6 pt and keep its “Cap” and “Corner” “Round”.
9 - To create other kind of “Snowflake”, repeat Steps 4 to 7 then, use the “Direct Selection Tool” (A) to select one of the “Anchor Points” of the bottom diagonal lines and elongate it until it reaches the next one. Hold the “Shift” key while doing this to maintain the angle and repeat with the other 3 lines so they are all the same length. Select everything (except the “Background”) and use the “Rotate Tool” (R) with a 60° Angle. Click “Copy” instead of “OK”. Repeat one more time using a -60° Angle.
10 - Use the “Direct Selection Tool” (A) to select the long “Anchor Points” and use the “Arrow Keys” to move them. The idea is to make them sit at the same spot so they form the tip of a star. Repeat with the other corners.
11 - Select the “Polygon Tool”, click inside your Canvas and input a 0.3 value for “Radius” and 6 “Sides”. Rotate your “Polygon” so one of the corners coincides with the tip of the Star and place it close to it and between two sides of the snowflake.
12 - Hold the “Shift” and “Alt/Option” keys and drag the Polygon to the other side to duplicate it. Rotate it and place it just like the first one. Select both, head to the “Appearance Panel”, click on the “Effects Menu” on the Bottom-Left side of the panel and navigate to Distort and Transform > Transform… Use a “Vertical Move” of 8.8 cm a 0° Angle, check the “Reflect Y” box and make 1 “Copy”. Go to Object > Expand Appearance. Right-click on top and choose “Ungroup”.
13 - Fix the placement of the “Polygons” if needed. Select everything (except the “Background”), right-click on top and choose “Group”. You can “Copy” (Command/Control + C) and “Paste” (Command/Control + V) the “Snowflakes”, resize and/or rotate them.
14 - You can also make a “Copy” (Command/Control + C) and “Paste in Front” (Command/Control + F) change the “Fill” color to White and move them a few clicks Up and Left to create a shadow.
by @lornacane


