
Vector Water Drops in Illustrator
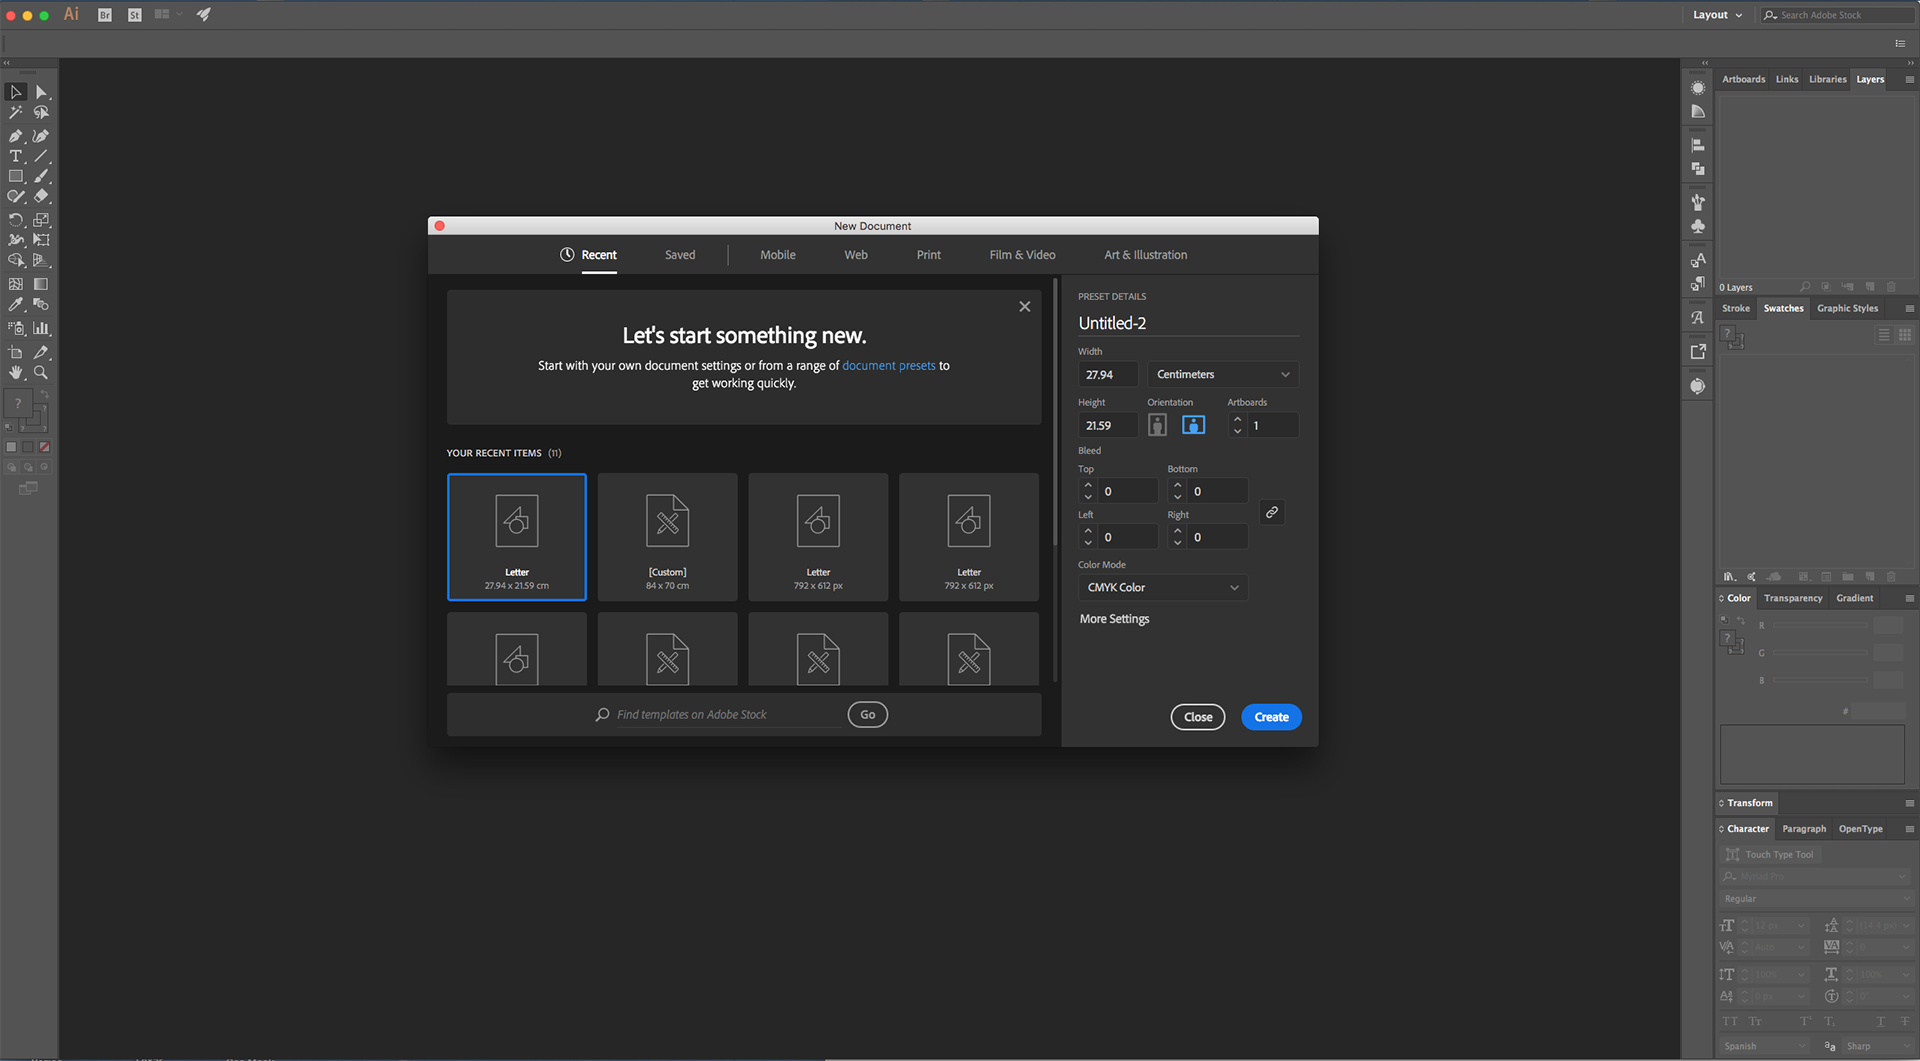
1 - In Illustrator, create a “New Document”.
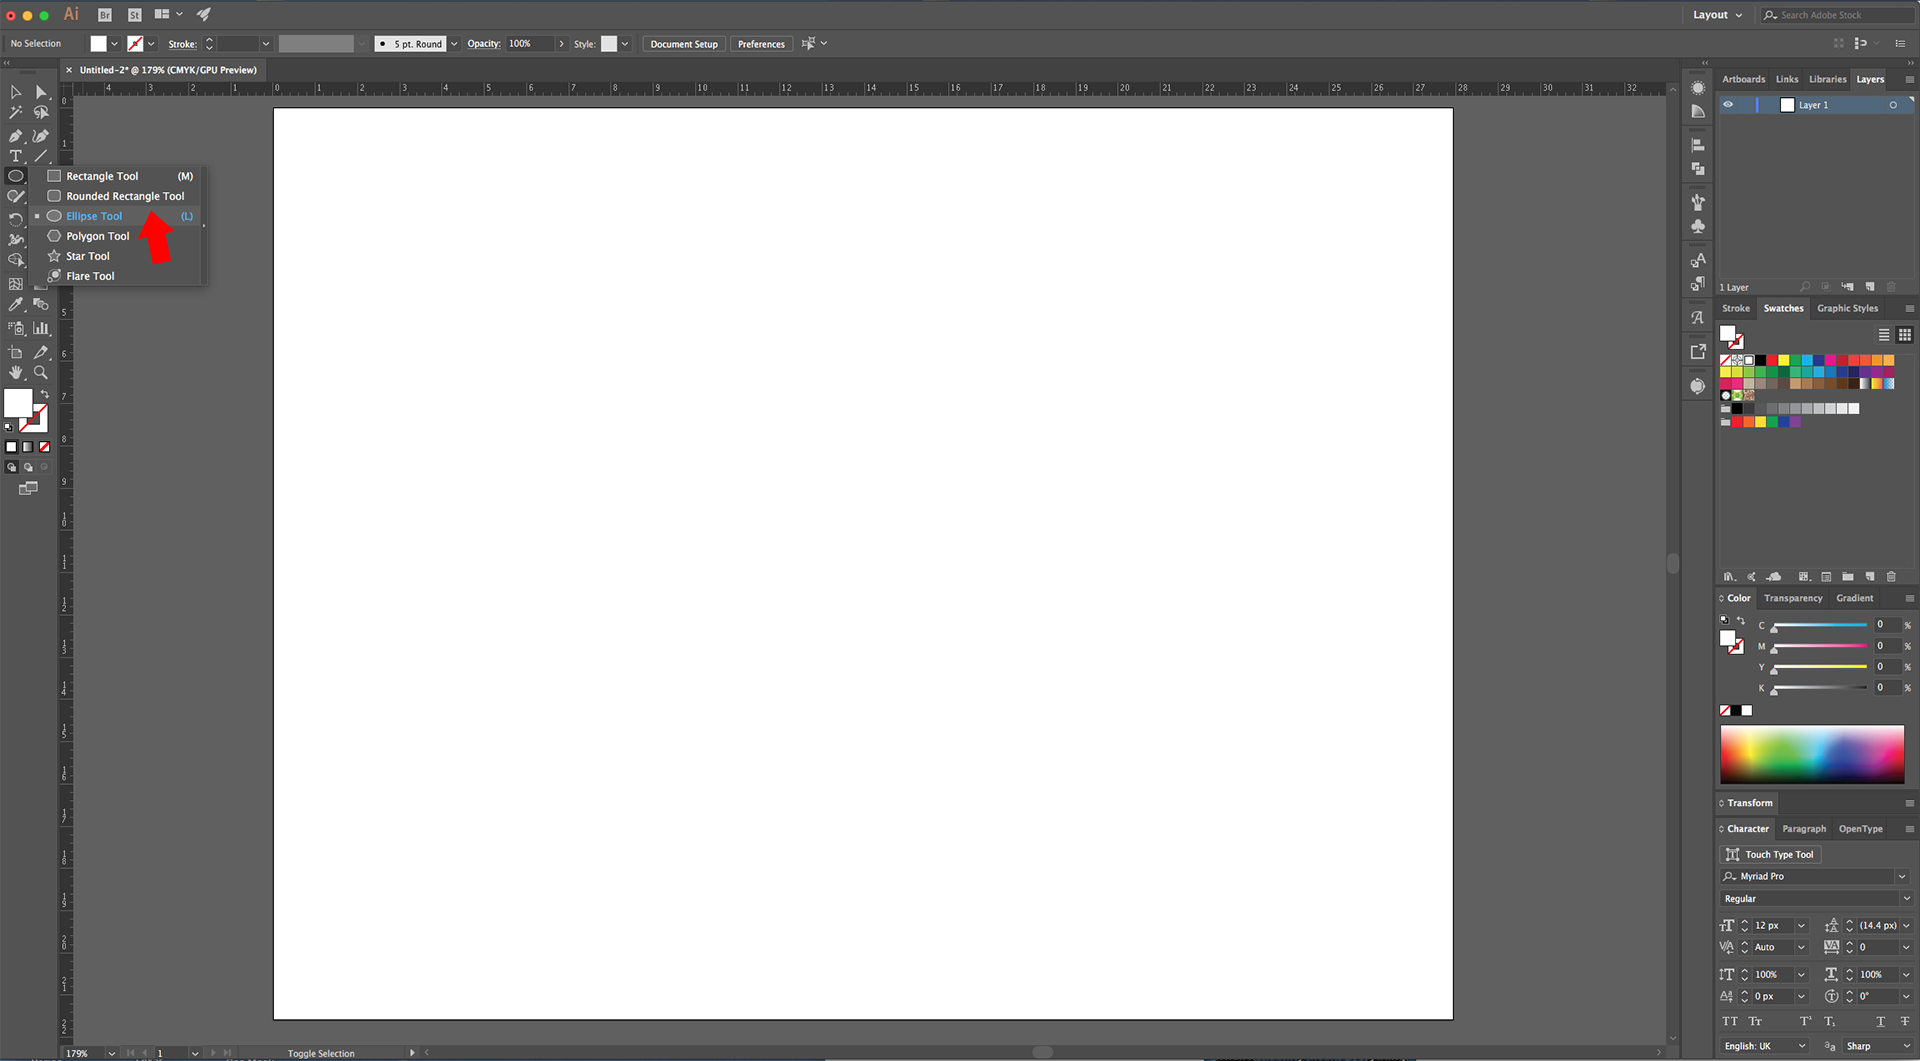
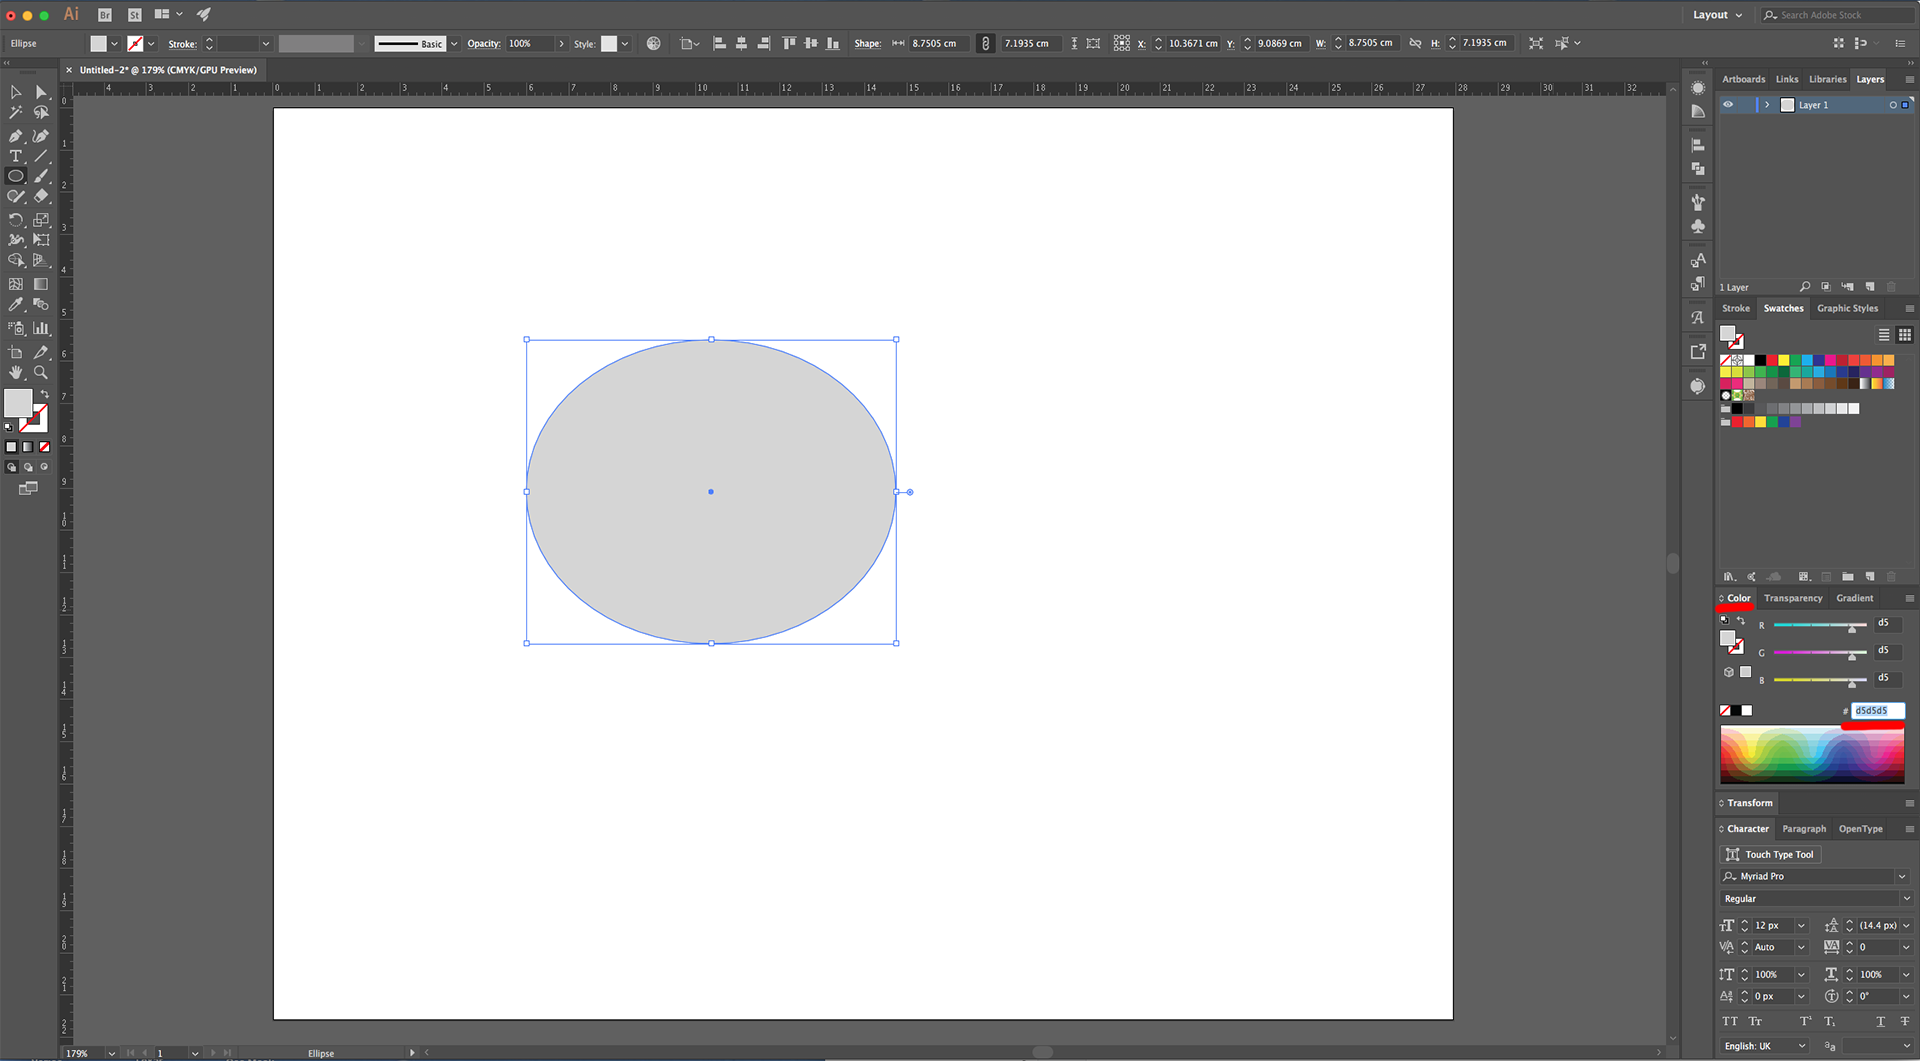
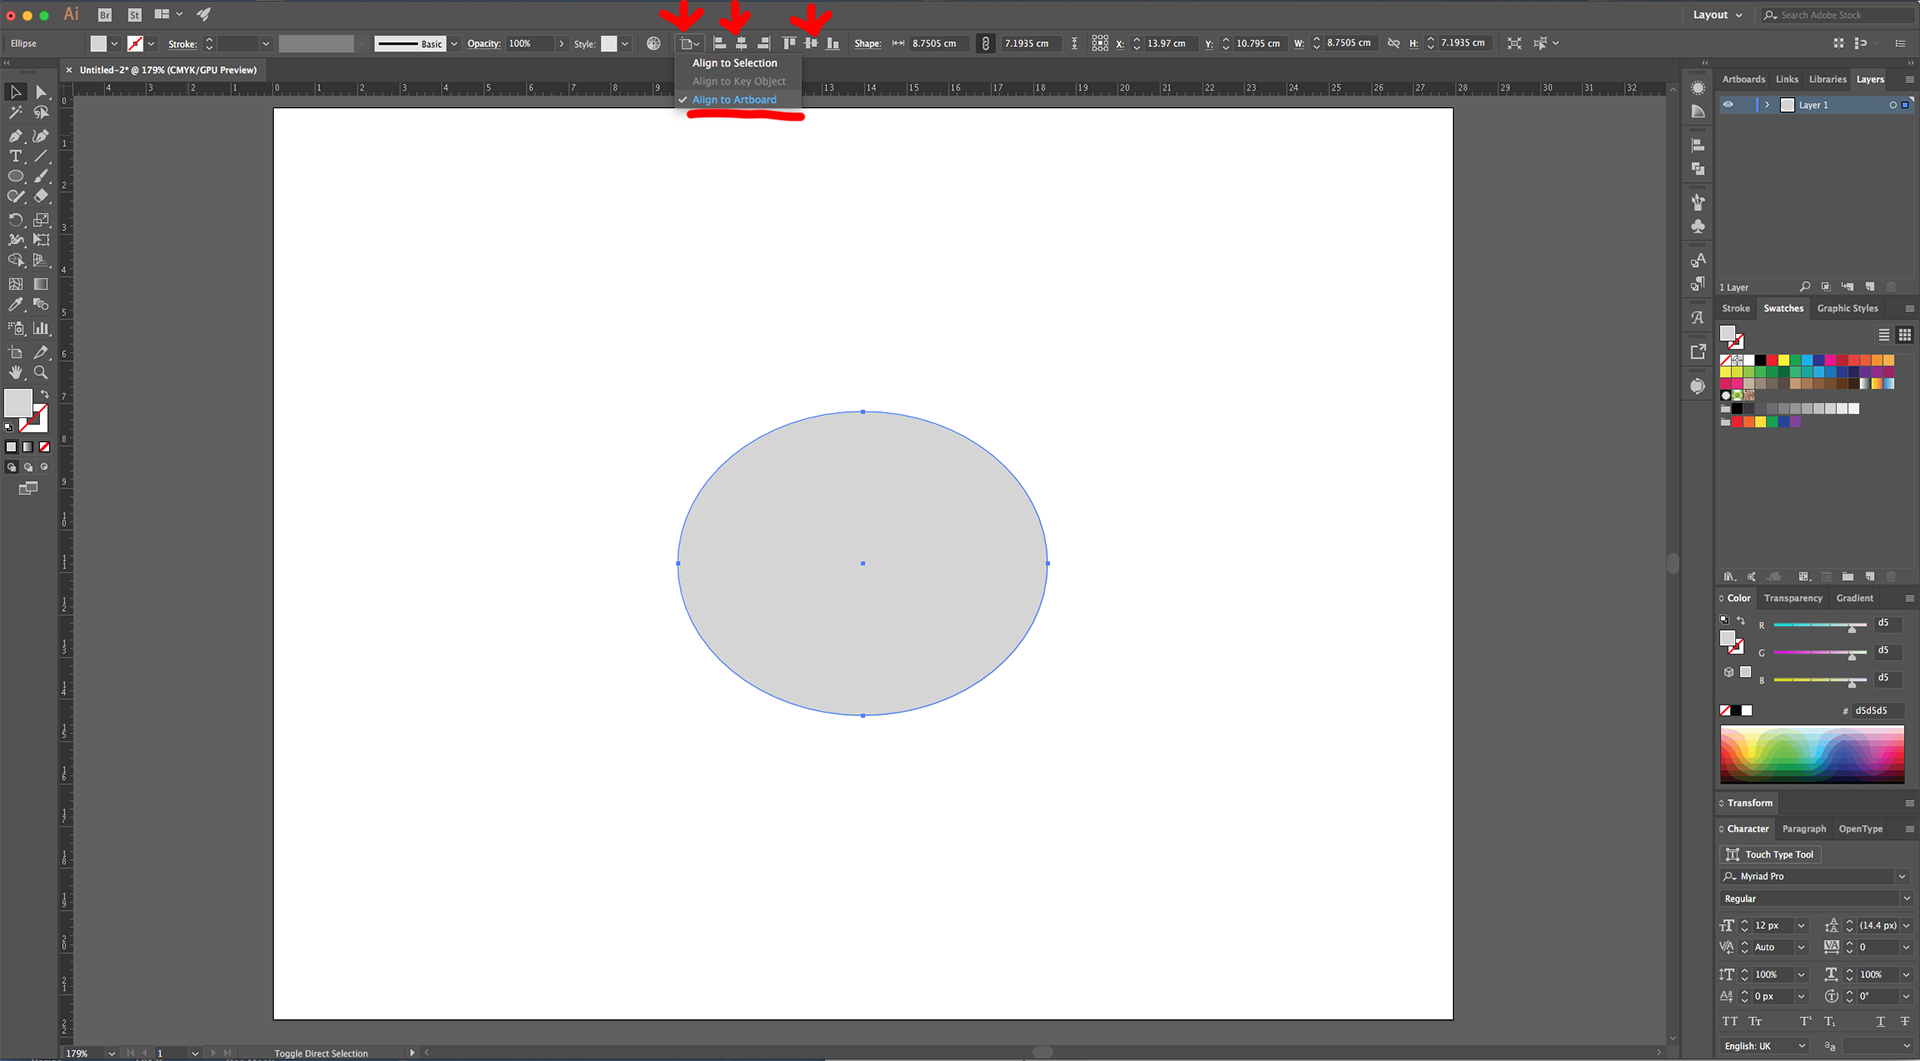
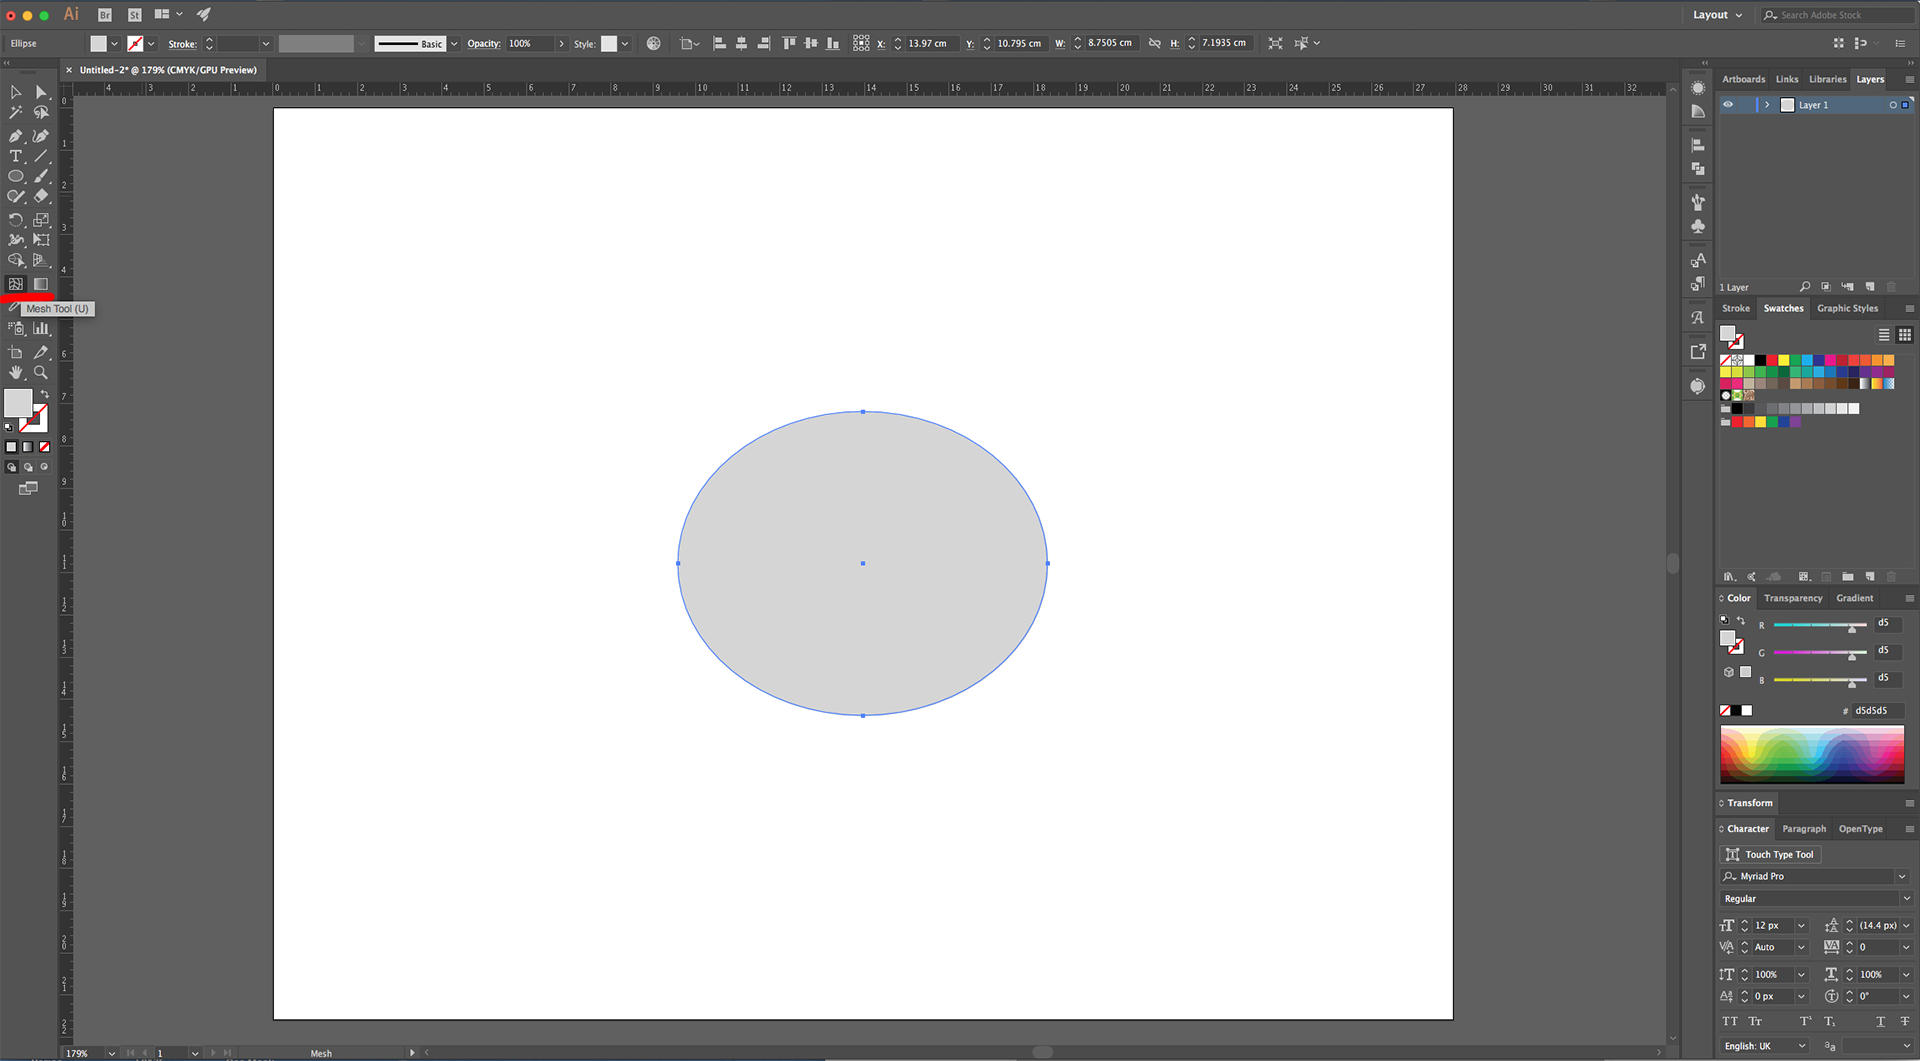
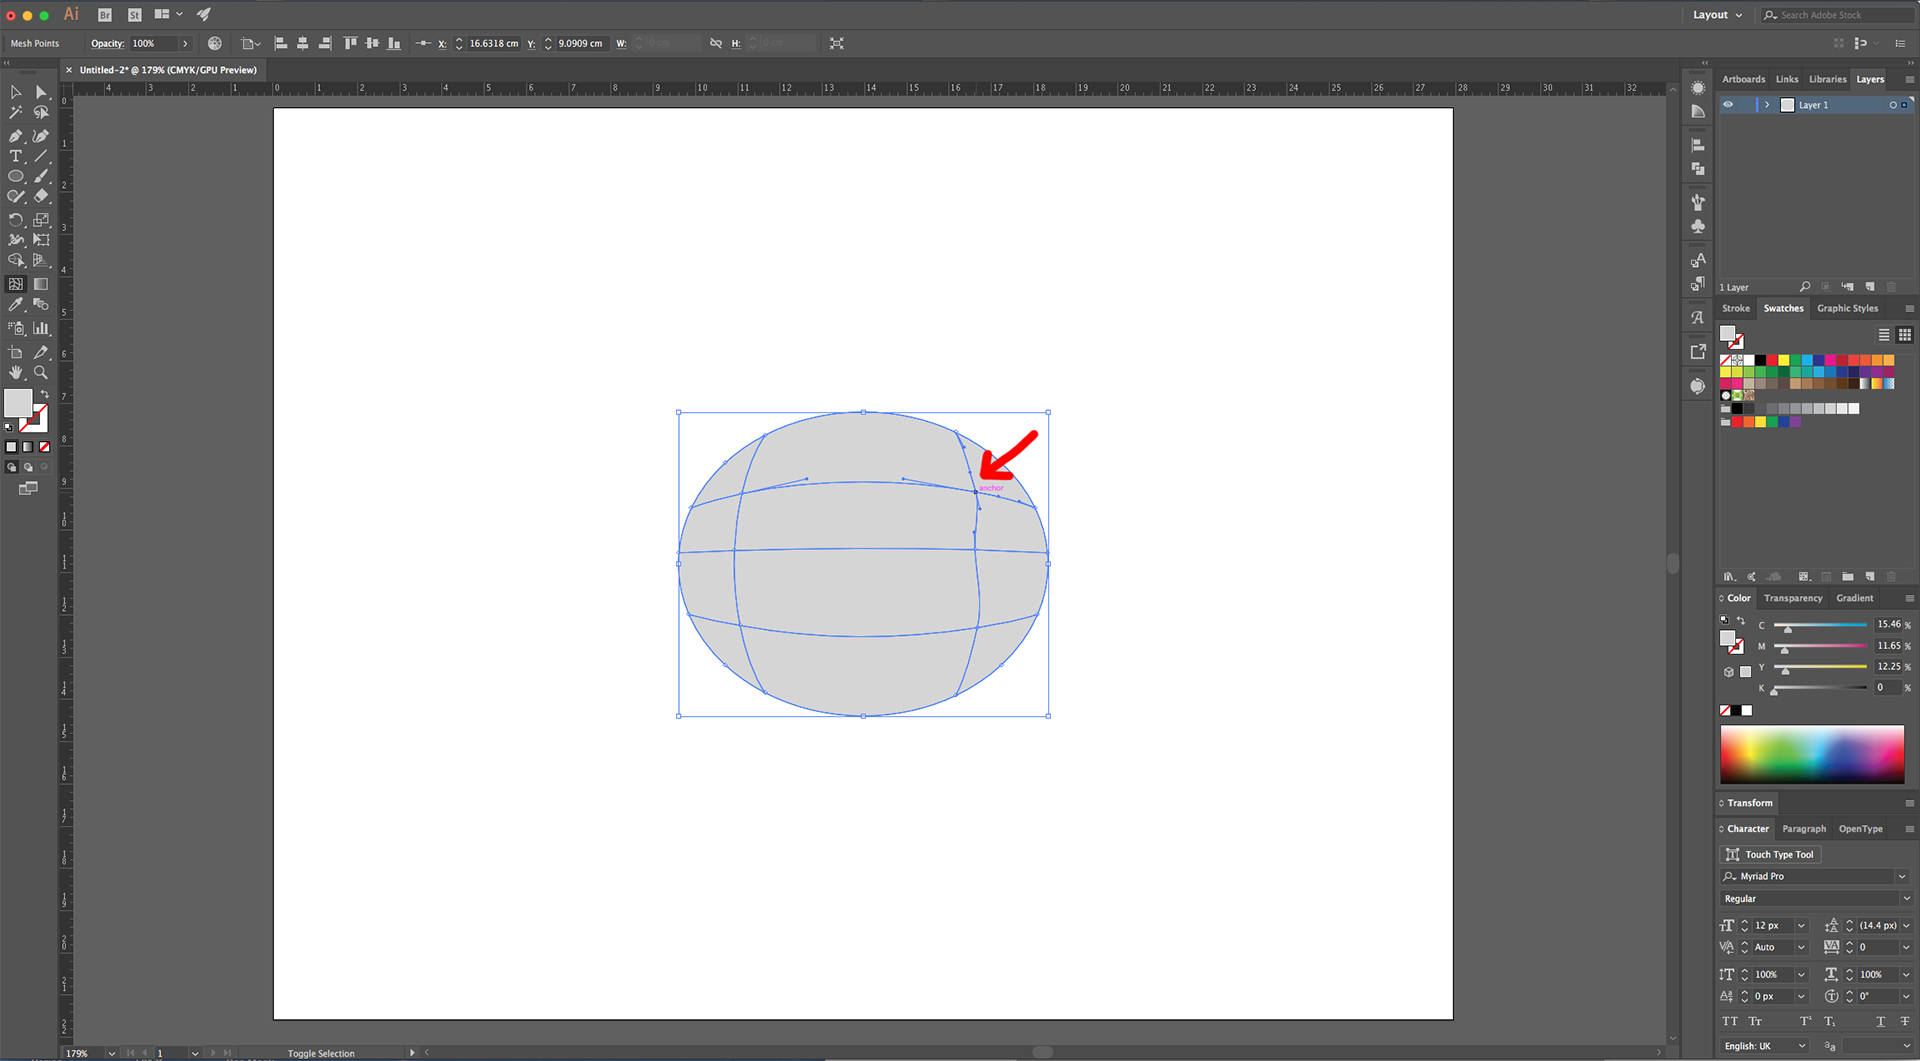
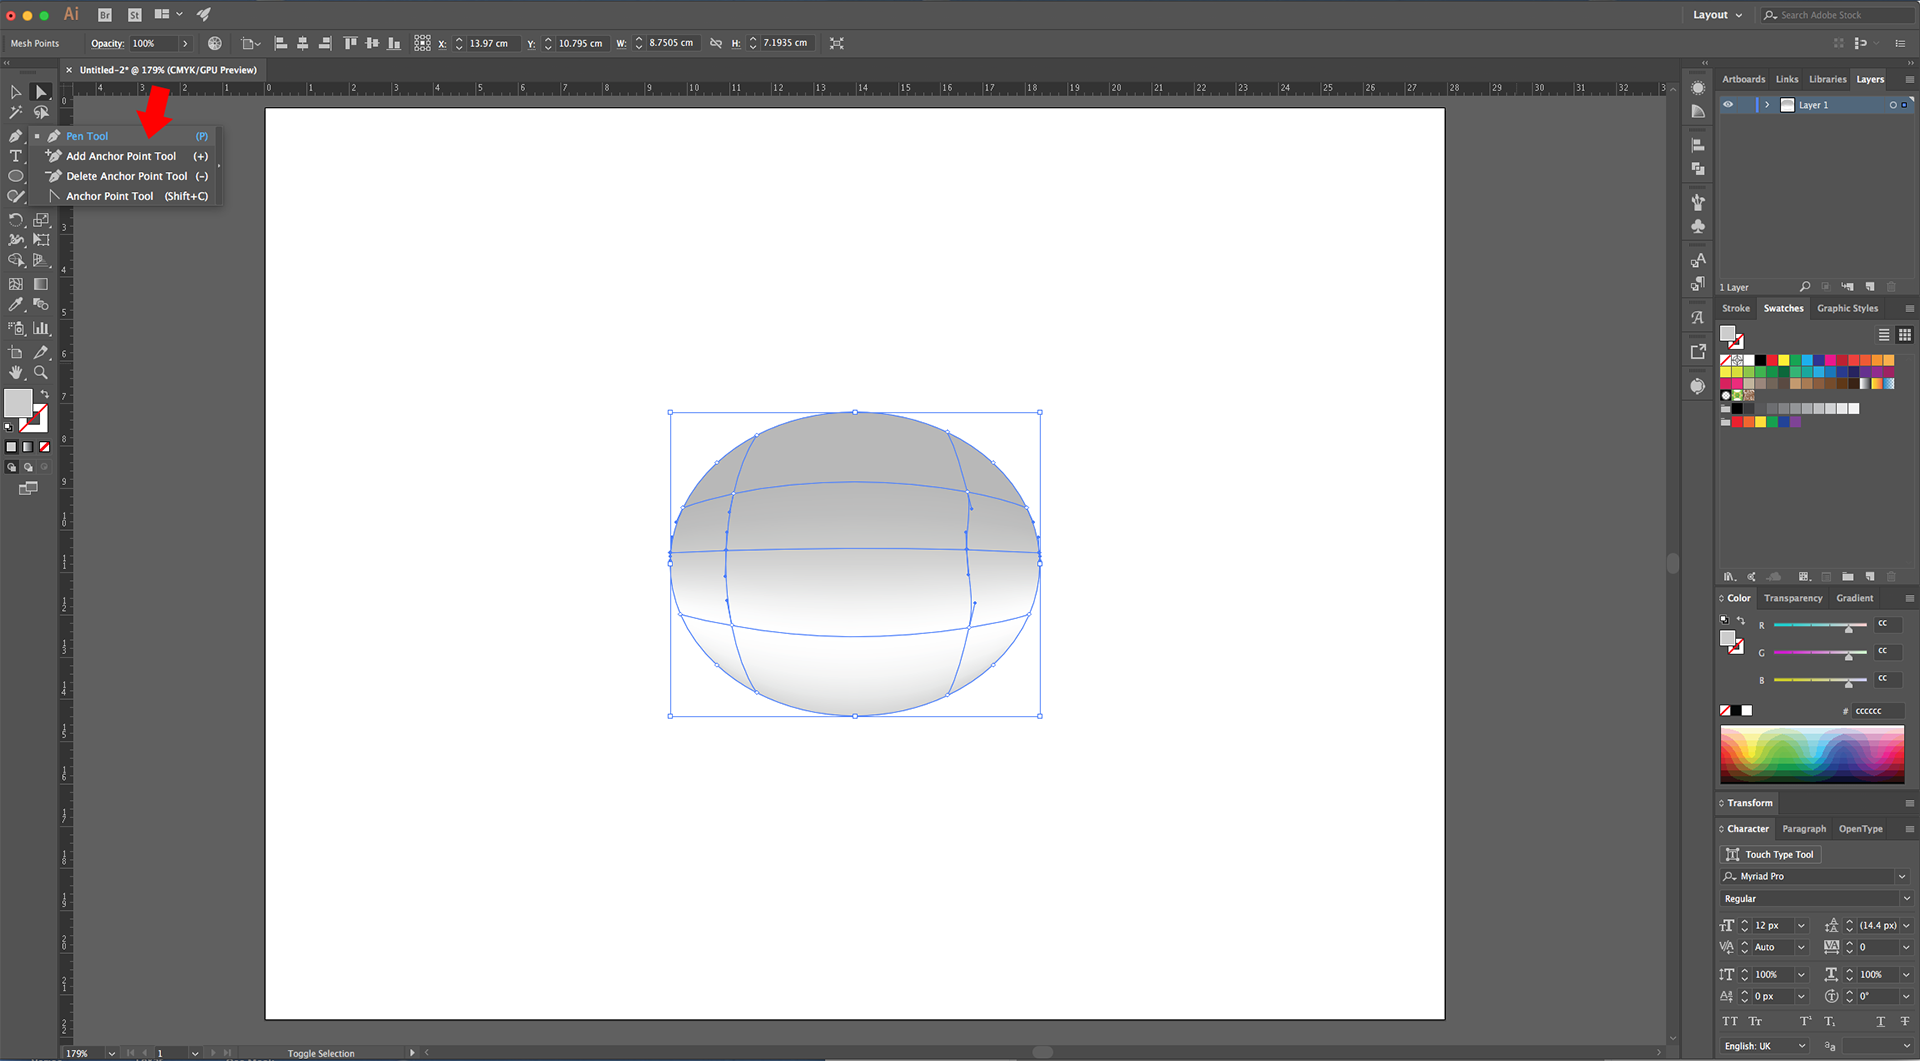
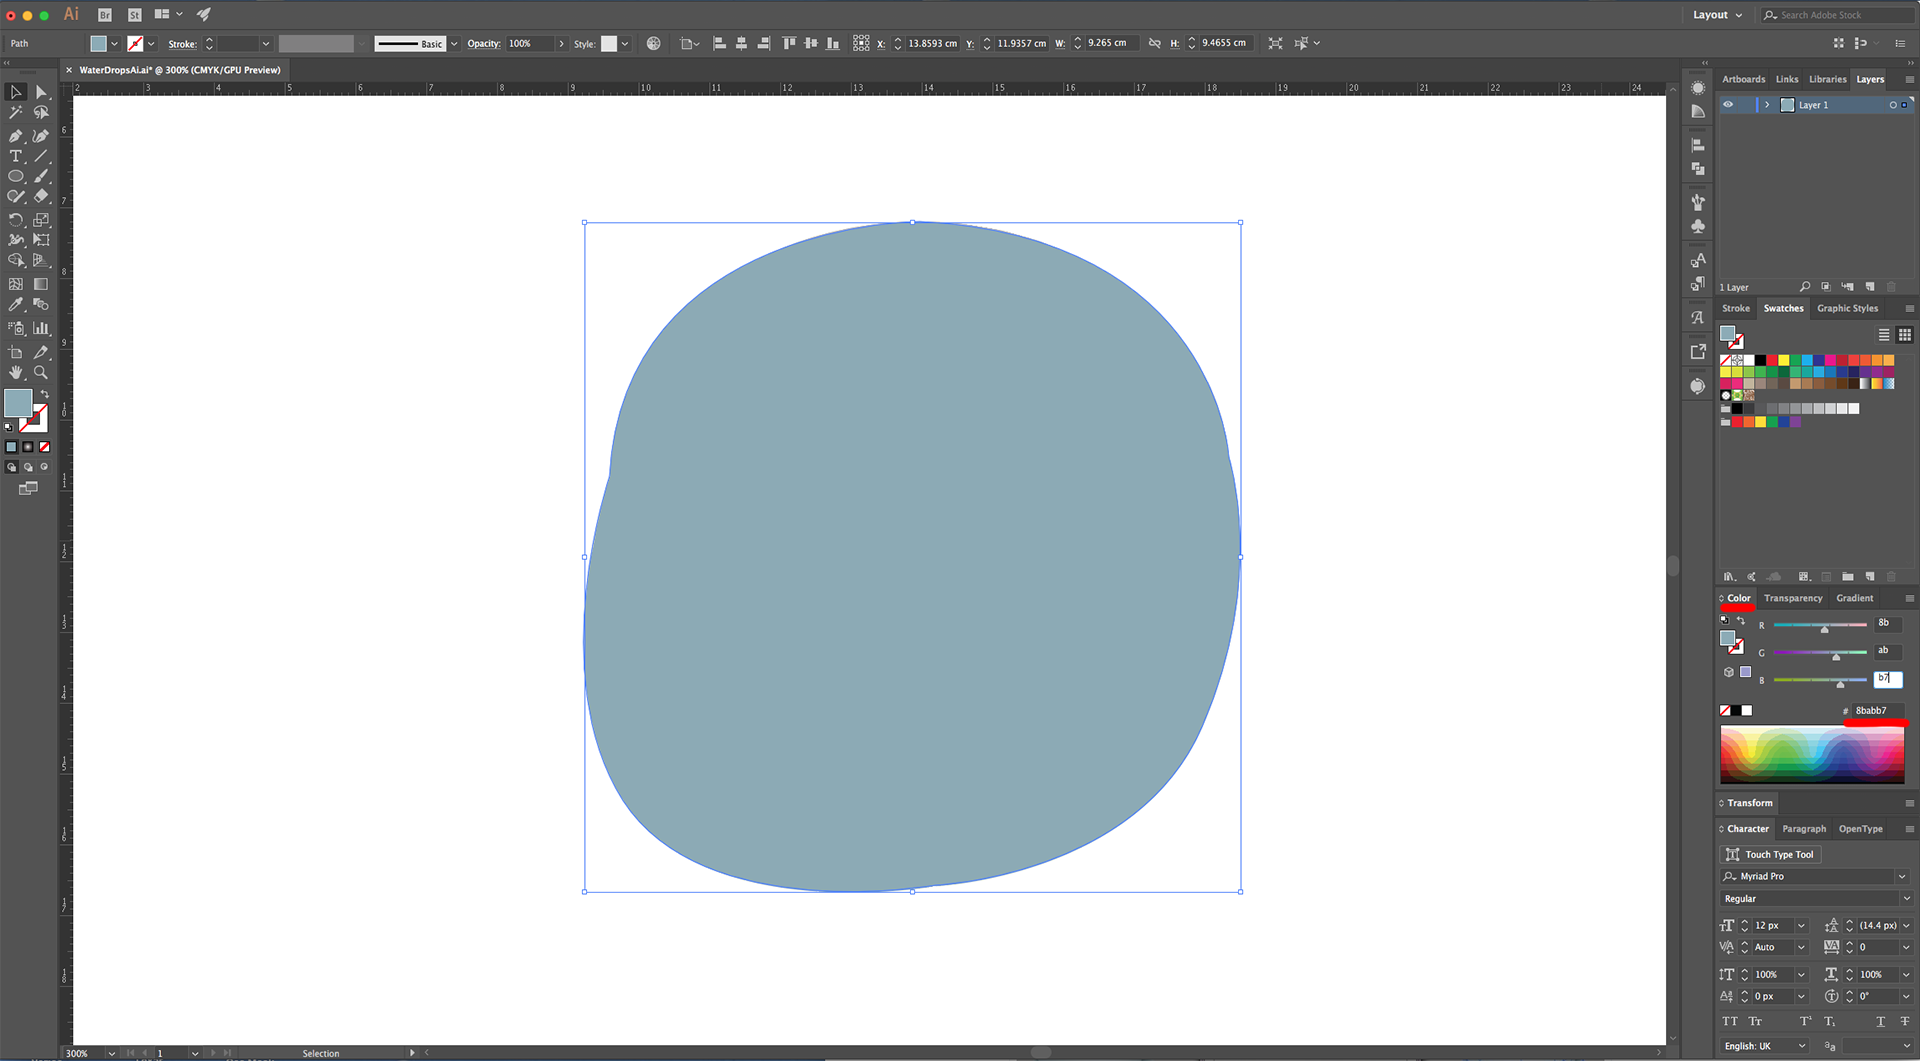
2 - Select the “Ellipse Tool” (L) and draw an Oval measuring roughly 9 x 7 cm and fill it with a Medium Grey (we used # d5d5d5). Center it using the “Horizontal and Vertical Align Center” options on your Top Menu and make sure that “Align to Artboard” is selected. Or use the same options in the “Align Panel”.
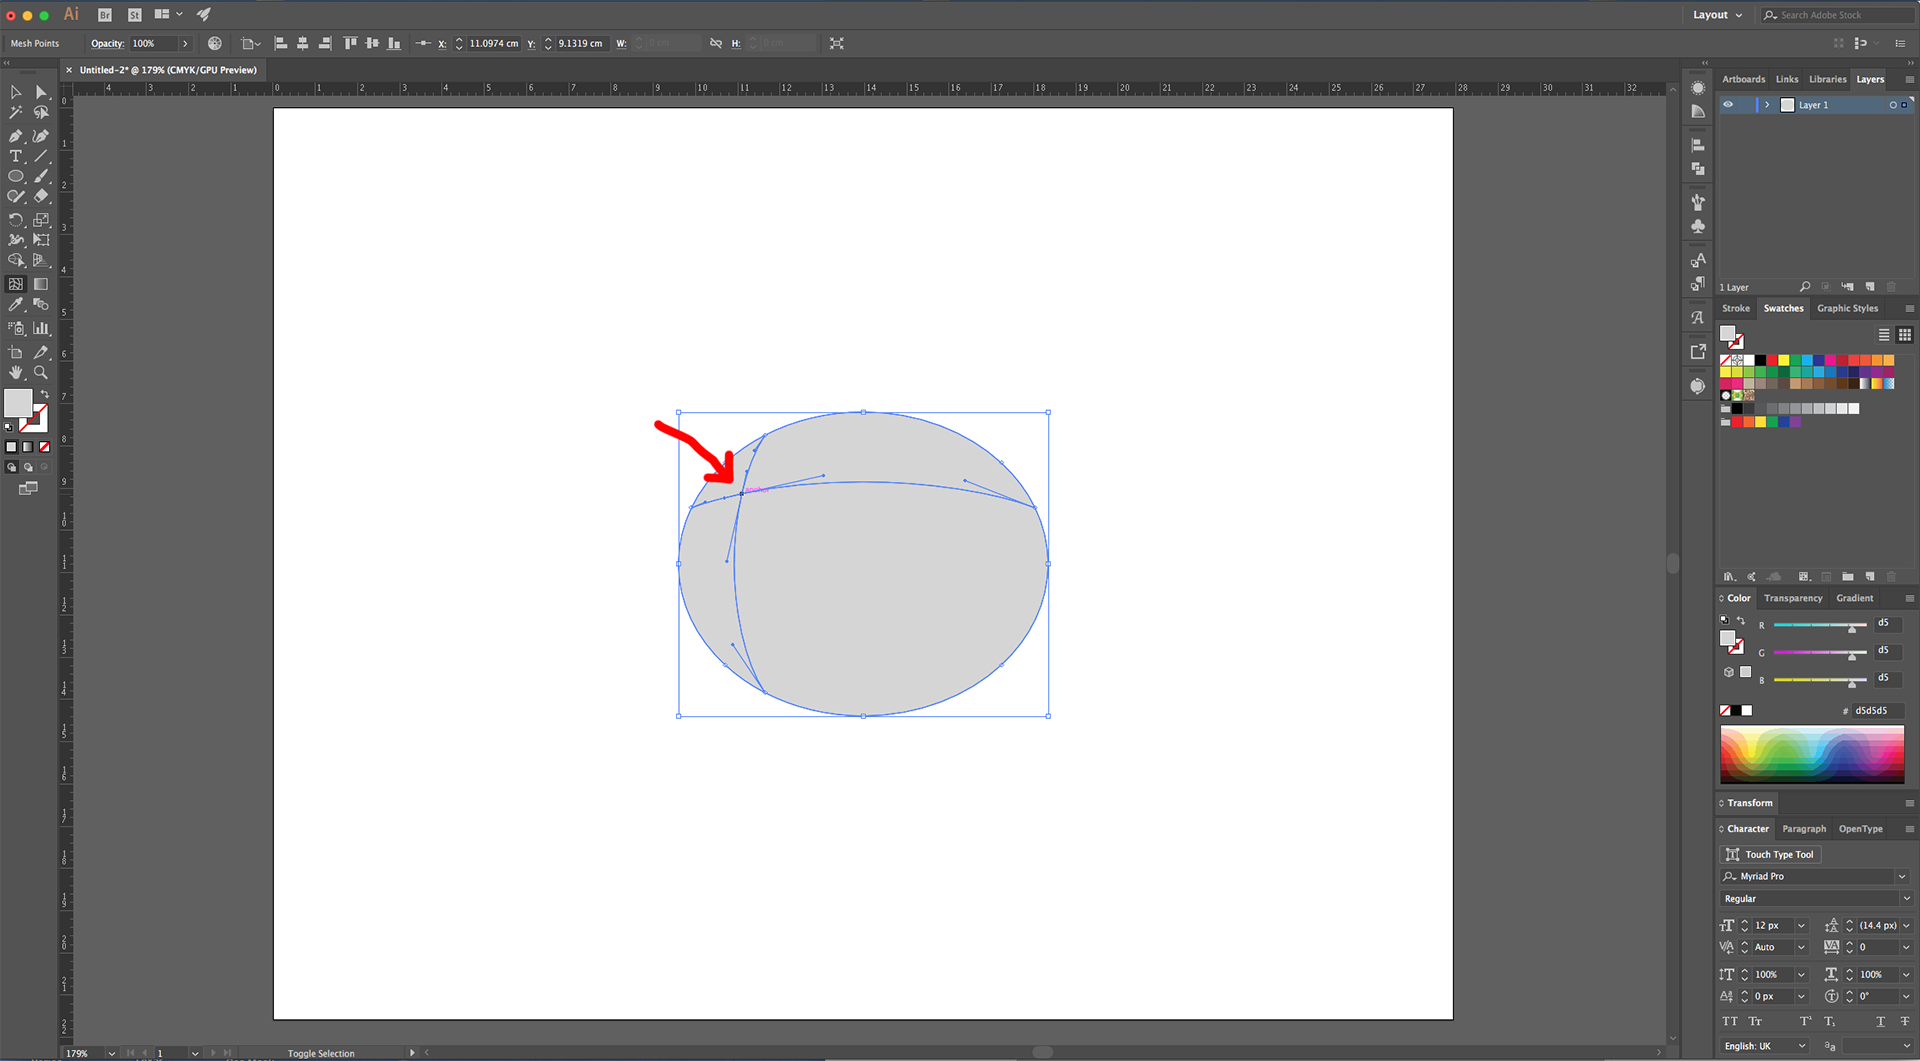
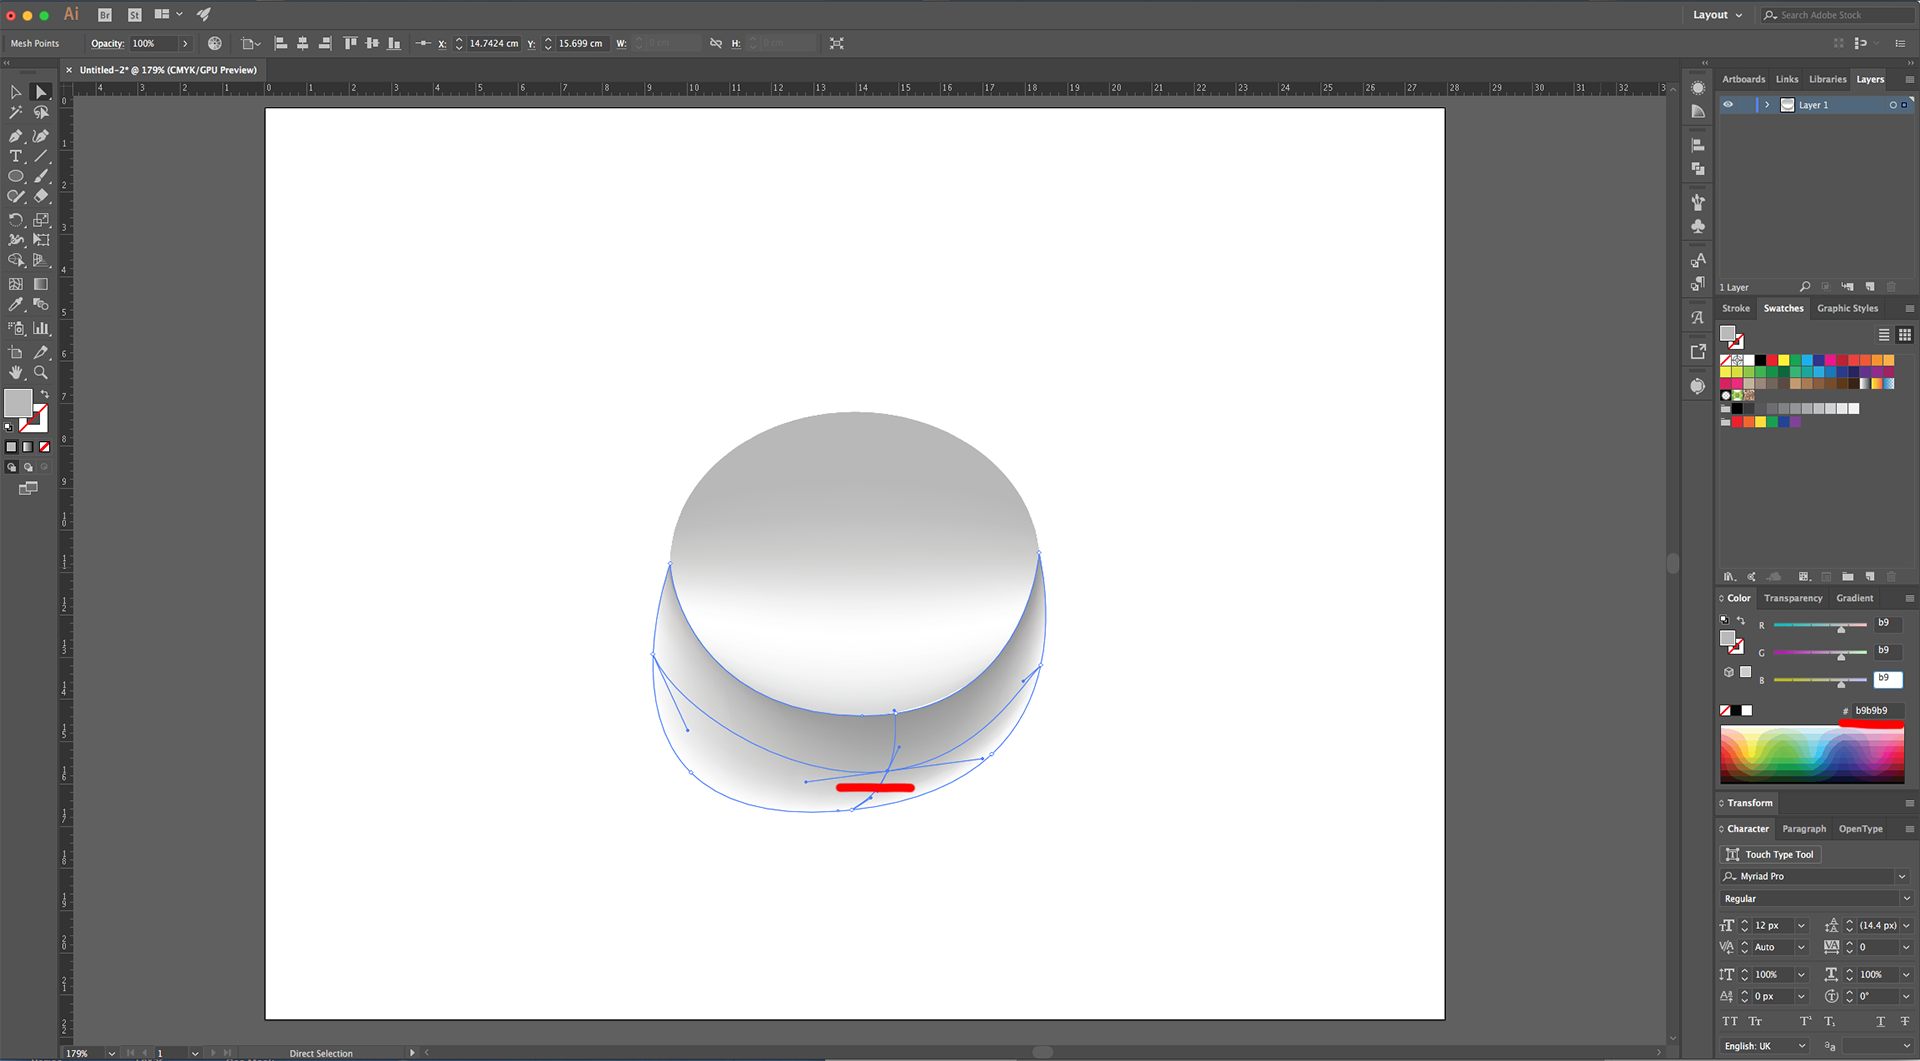
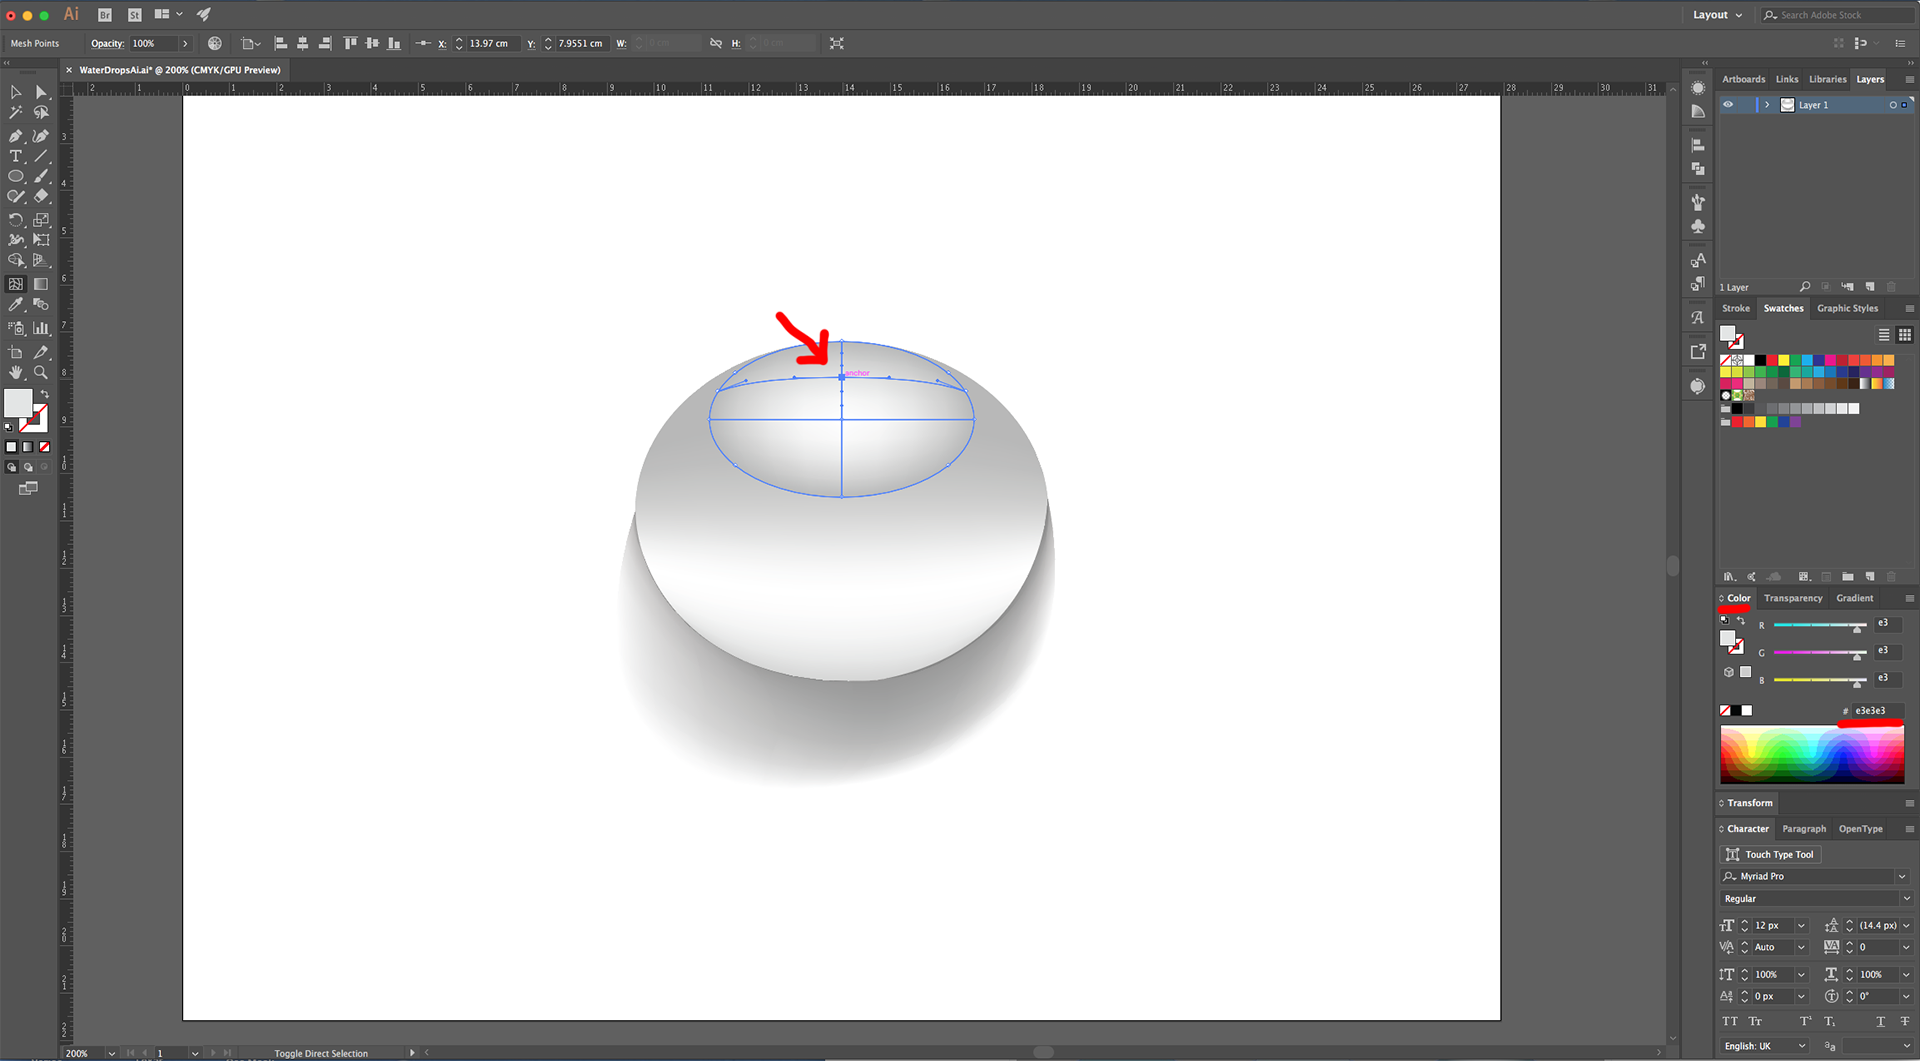
3 - With it still selected, use the “Mesh Tool” (U) to click at about ¼ from the Top-Left of the Oval to create a “Mesh Point”. Repeat at about the same distance from the Bottom-Left to create another “Mesh Point”. Create a third one just a bit above the Center-Left (between the previous ones). Repeat everything on the Right side of the Oval.
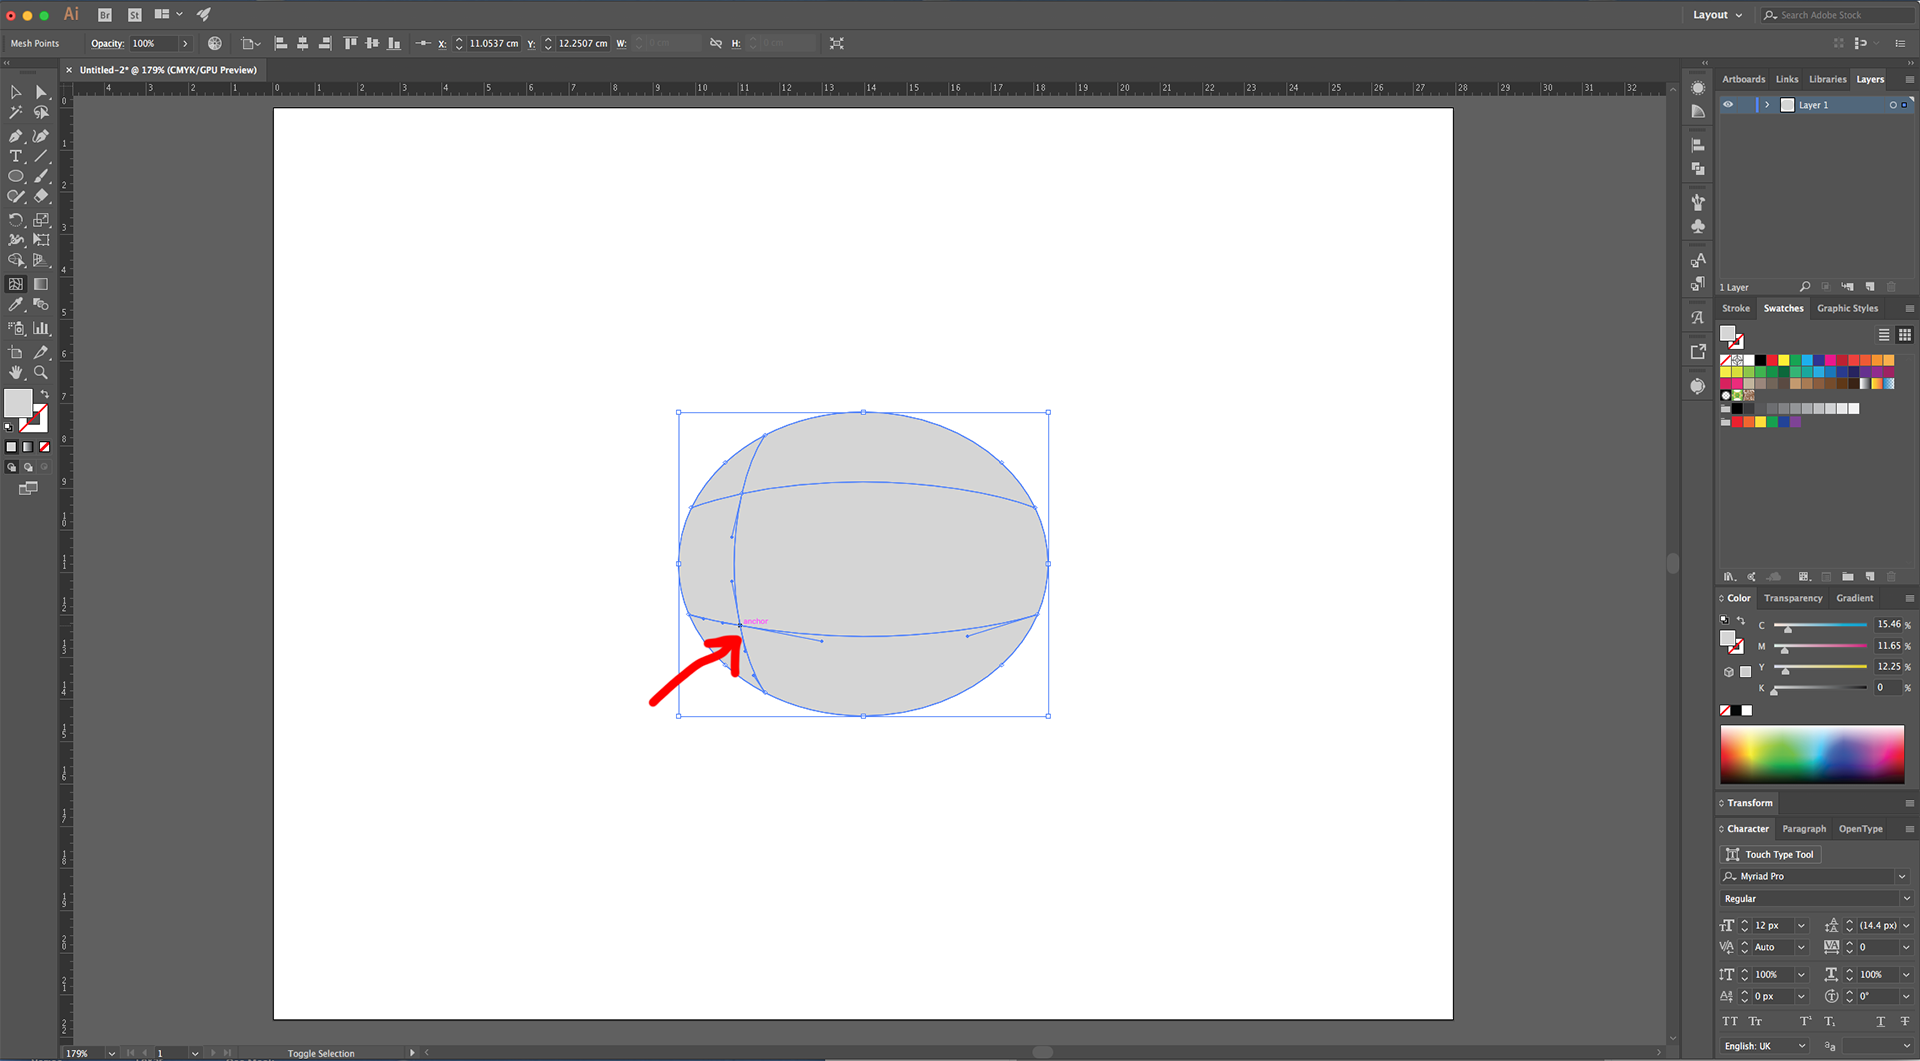
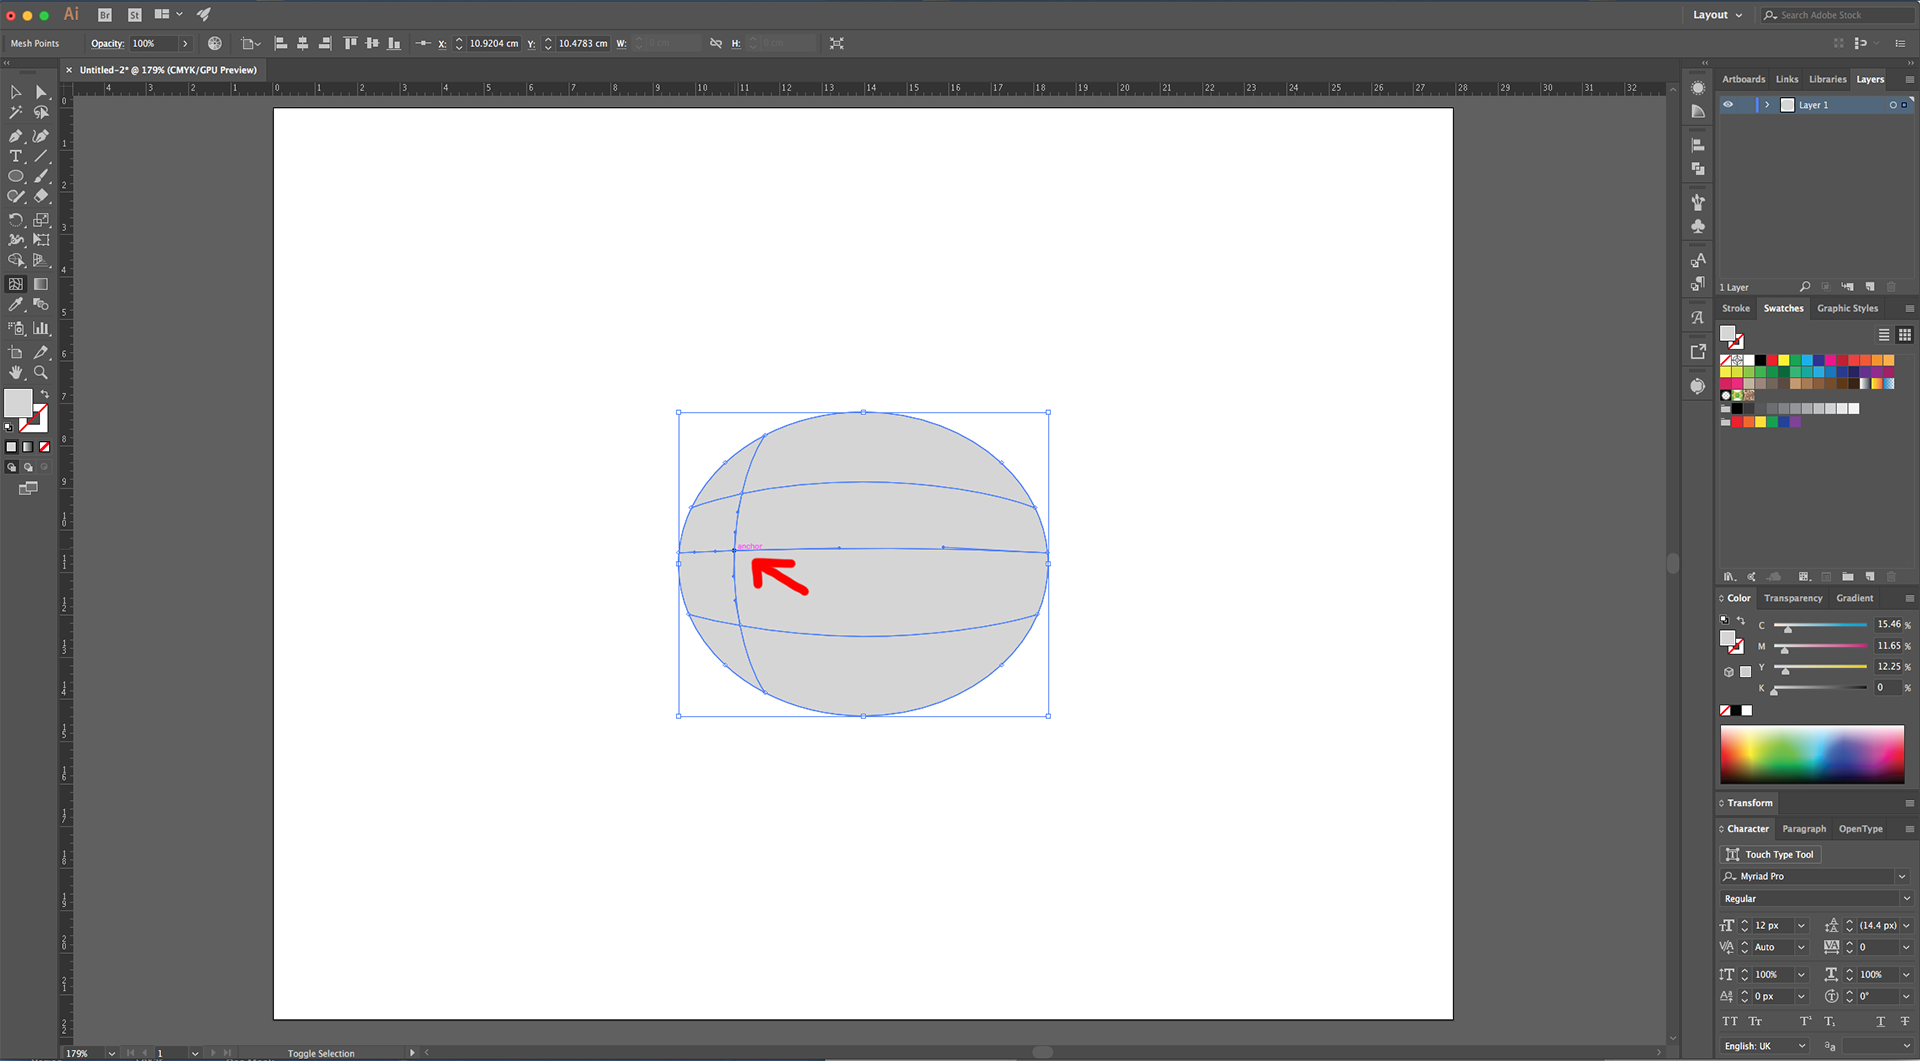
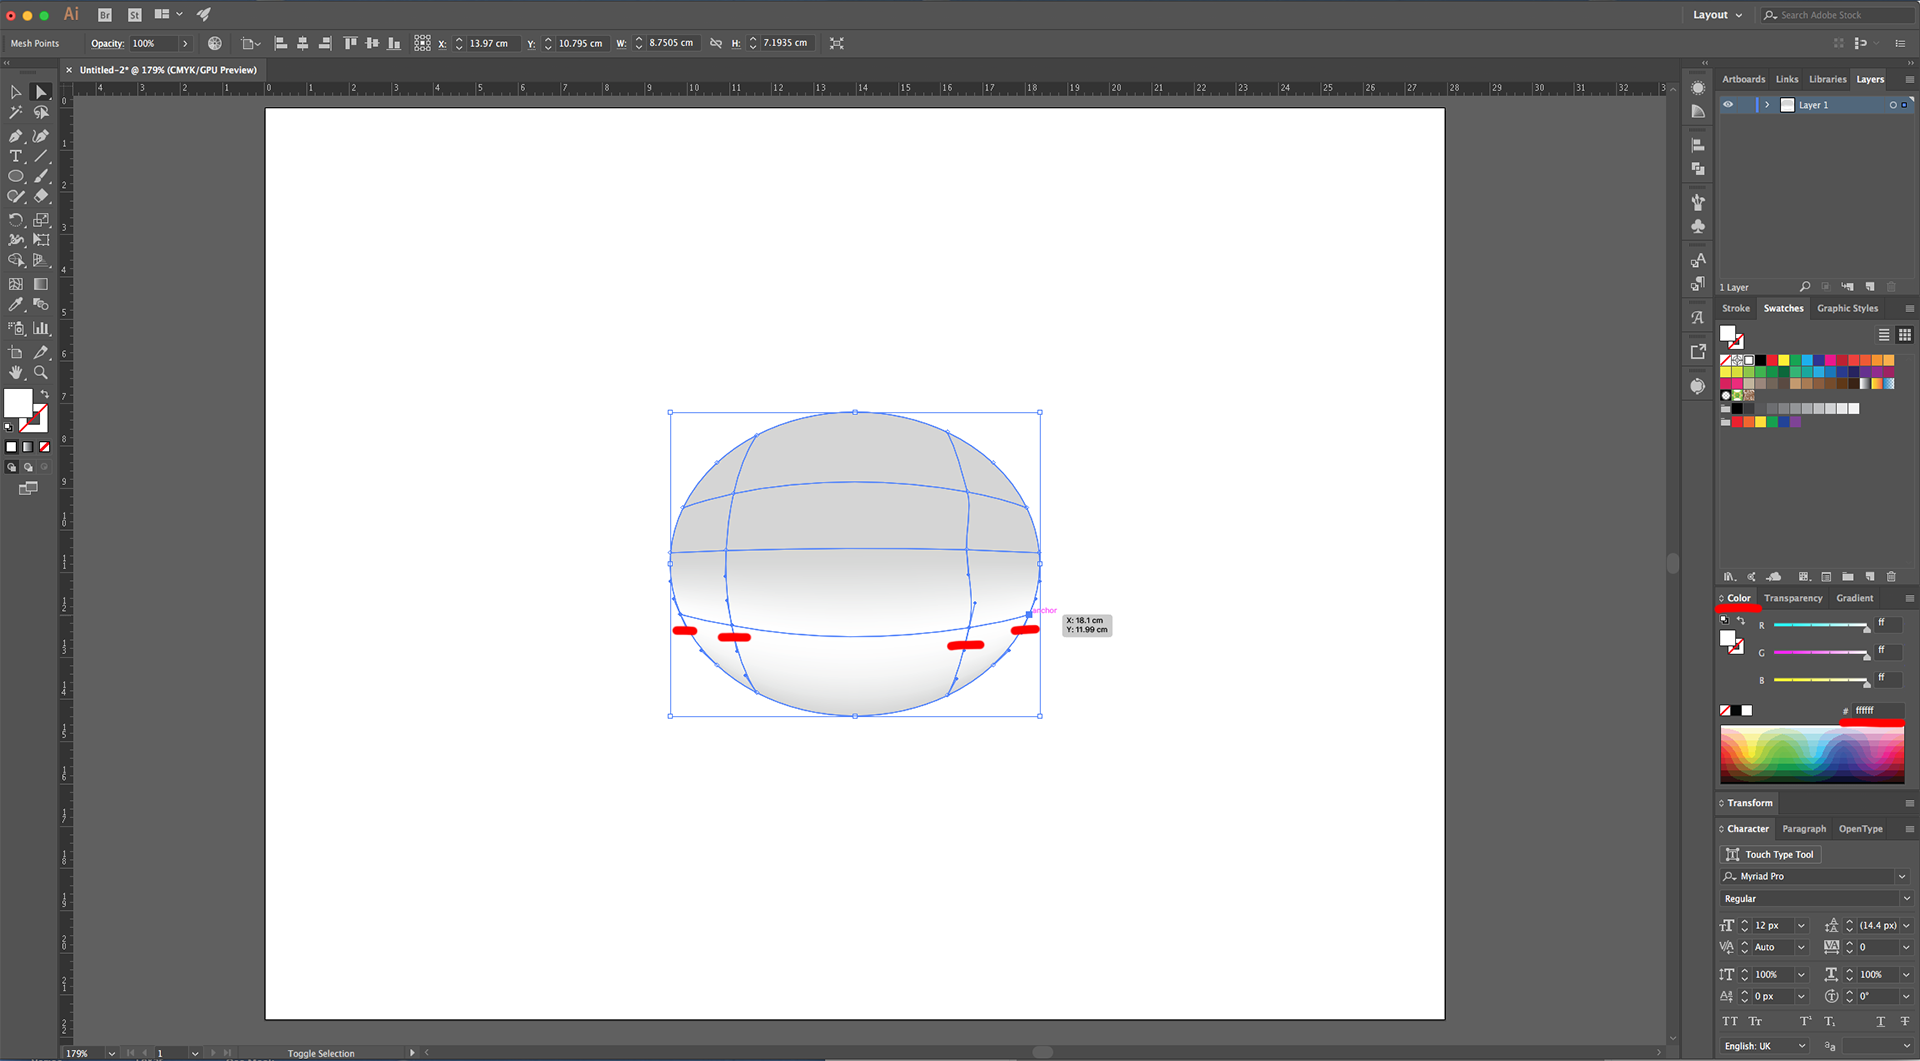
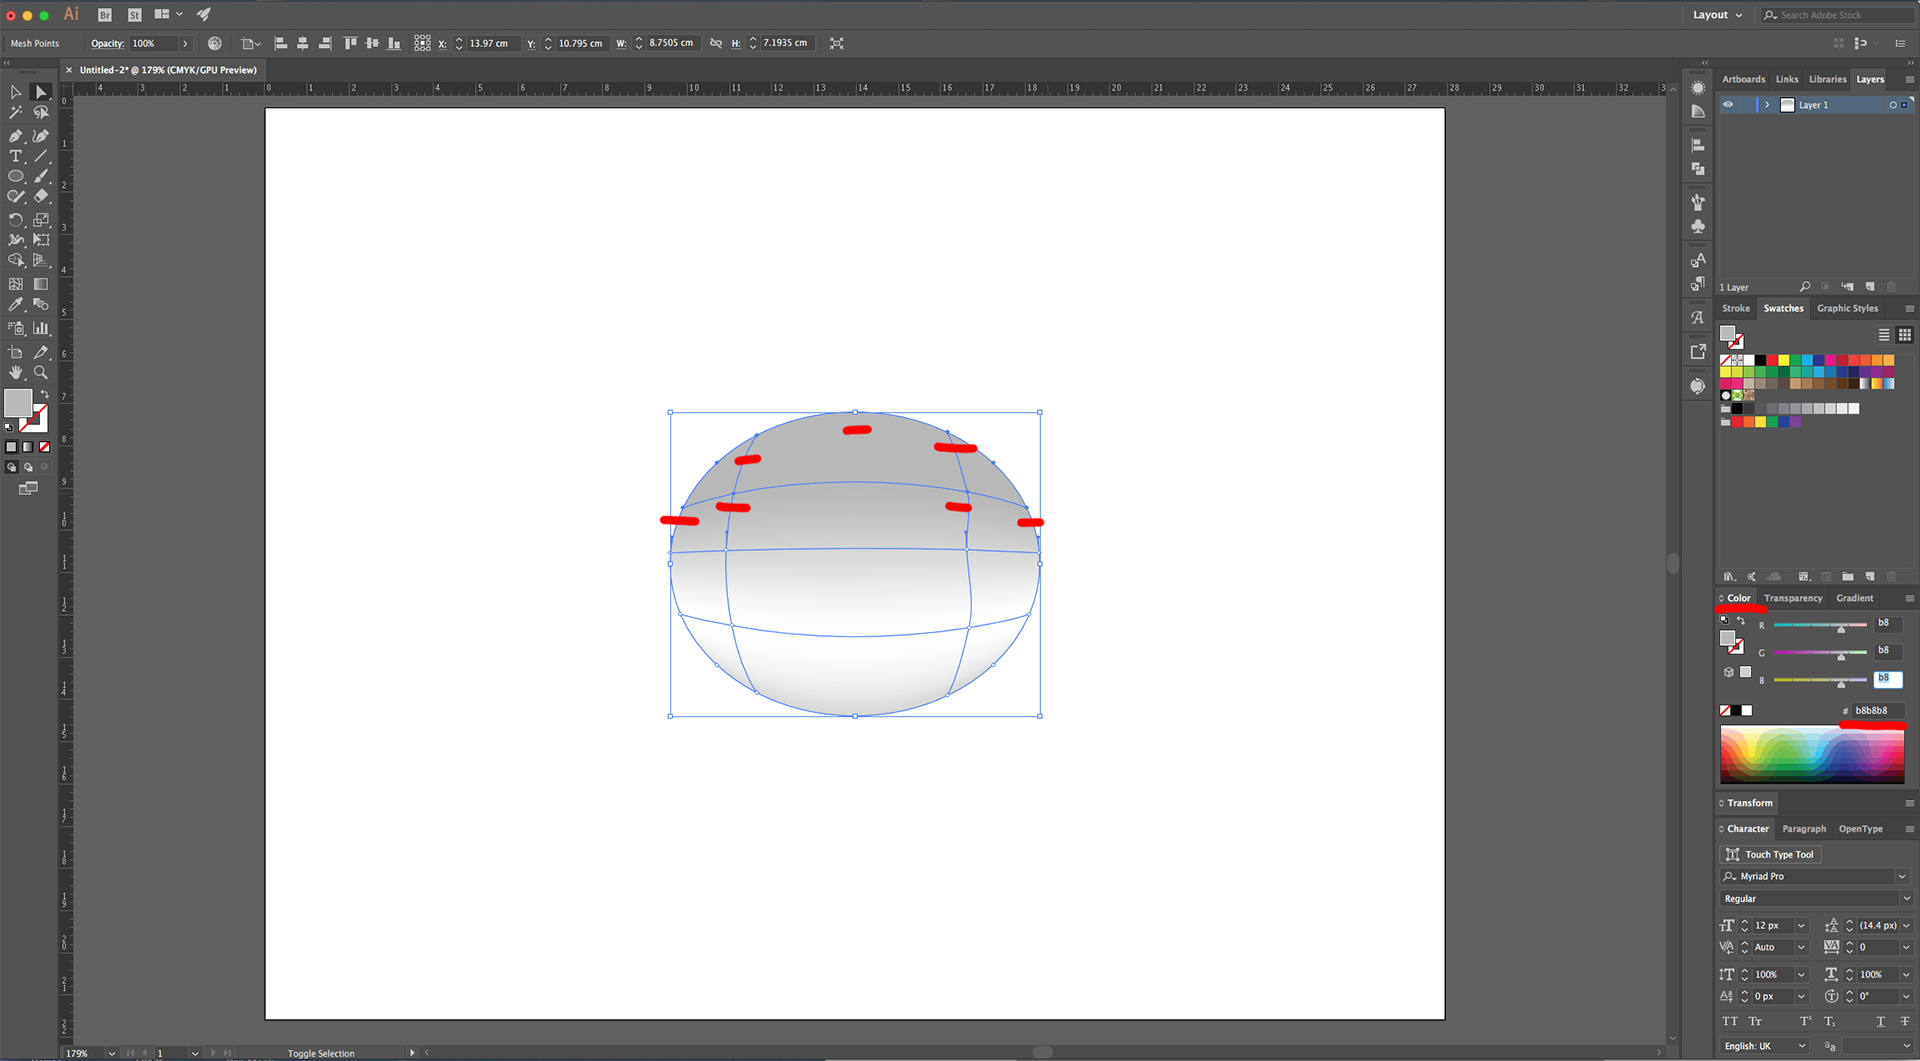
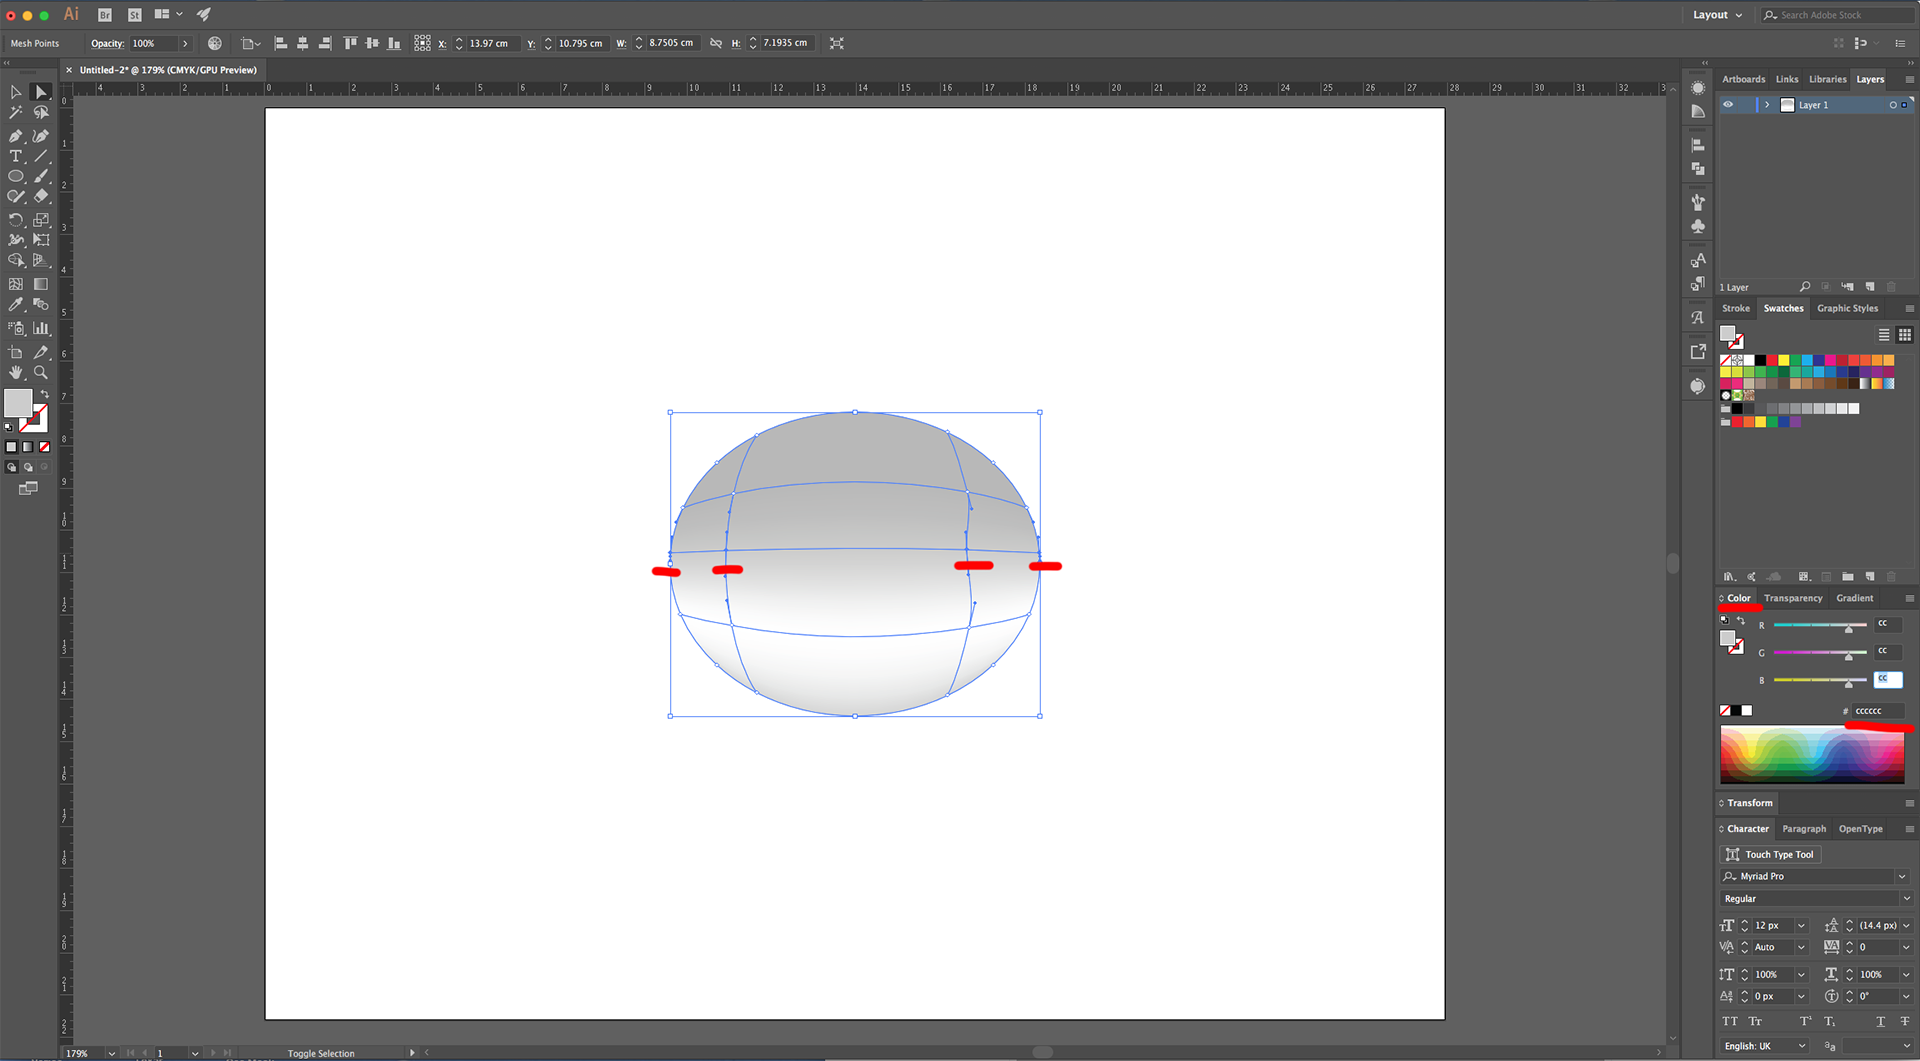
4 - Using the “Direct Selection Tool” (A), select all the “Mesh Points” in the second line starting from the bottom (count the outside stroke). Change their Fill color to White (#ffffff). Now, select the ones in the top and second from top lines and change their Fill color with a slightly darker shade of Grey (#b8b8b8). Finally, select the ones in the center line and change the Fill to another shade of Grey (#cccccc).
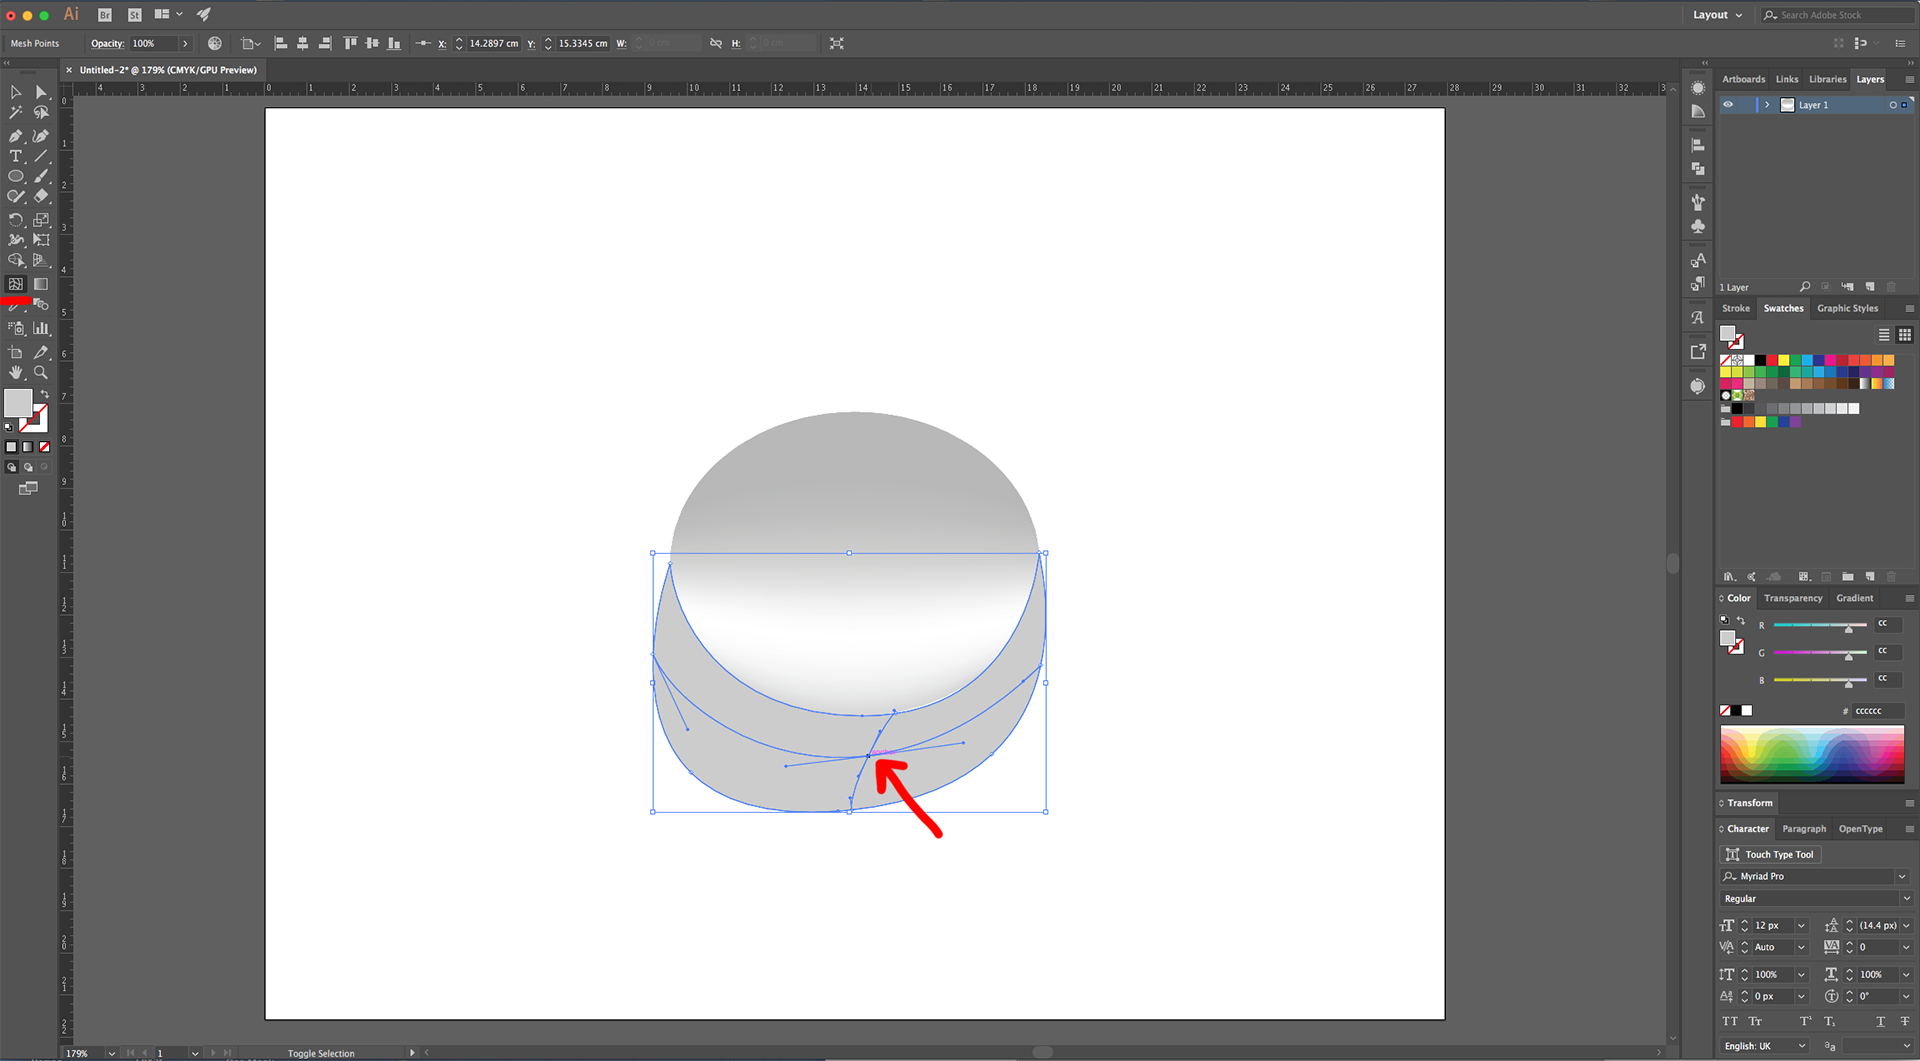
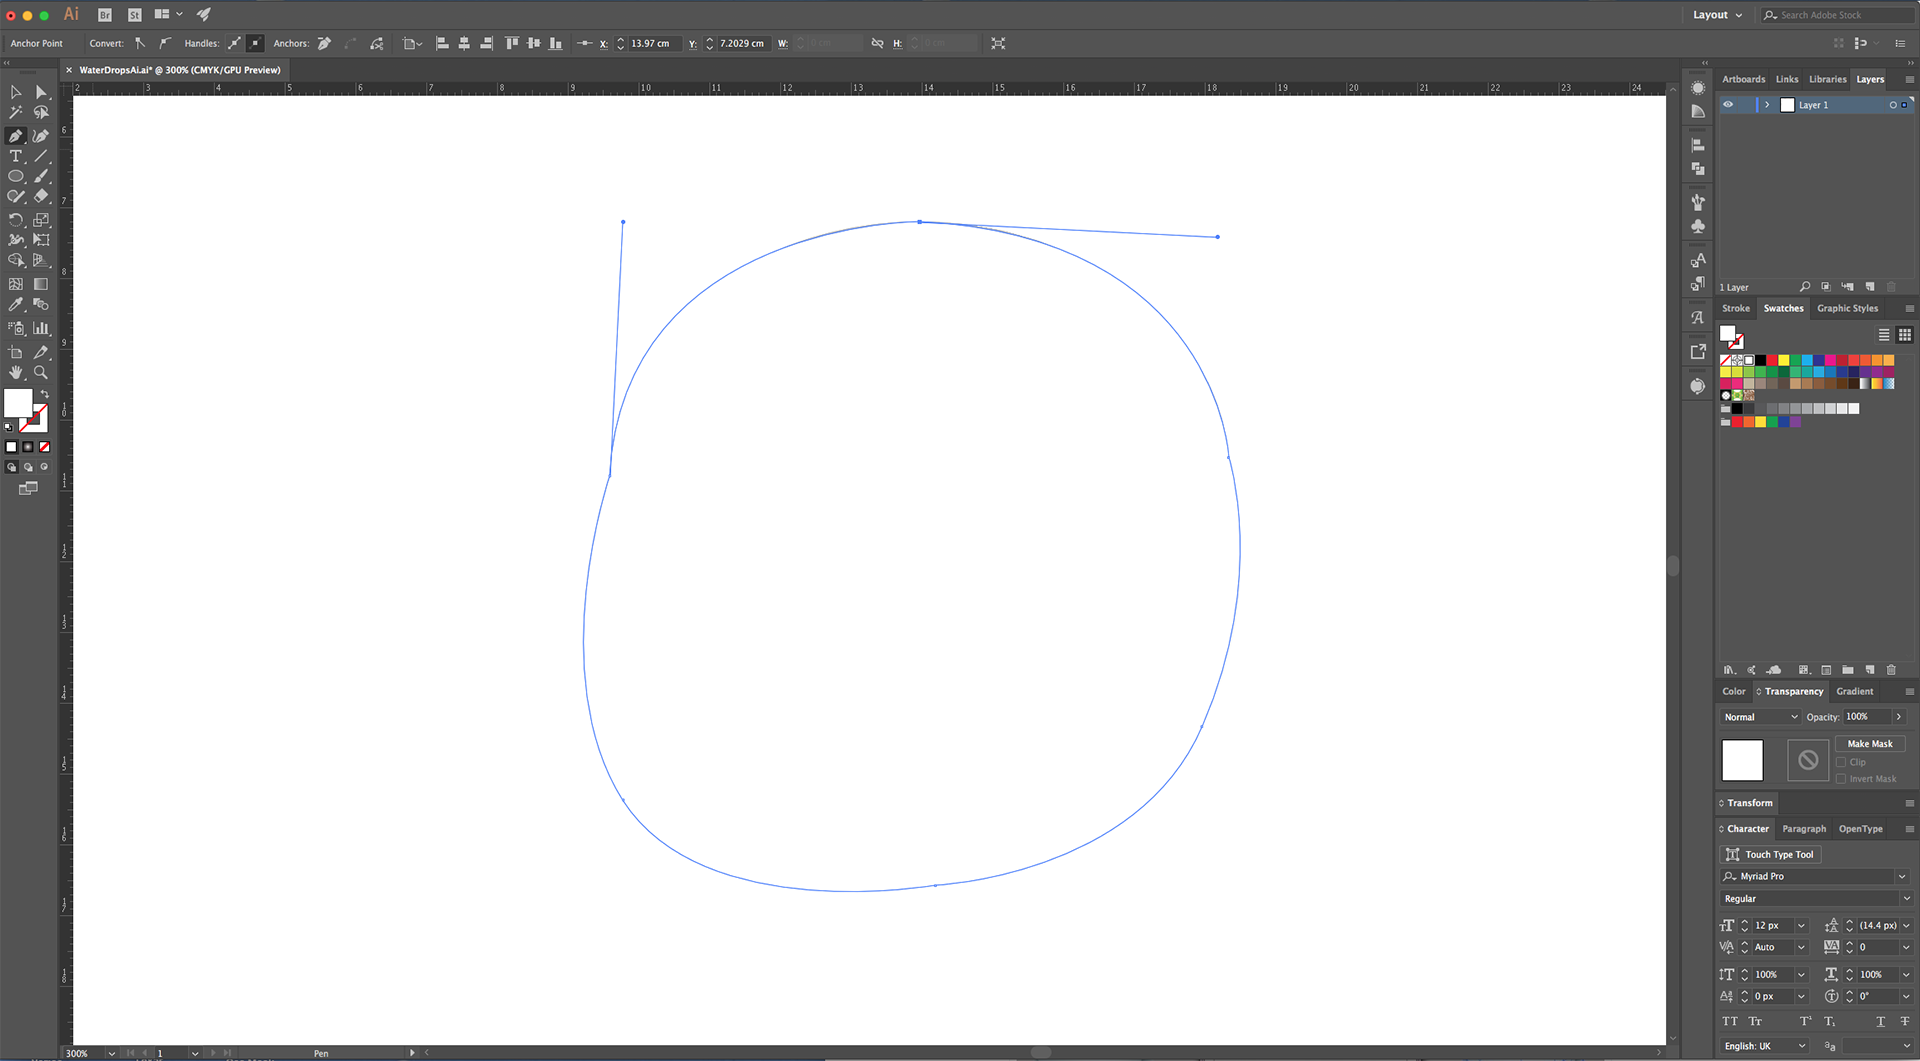
5 - Use the “Pen Tool” (P) to create a Crescent Moon shape under the Oval. You should start near the Center-Left of the Oval and end back at the same point remembering to leave the same space between the Shape and the Oval.
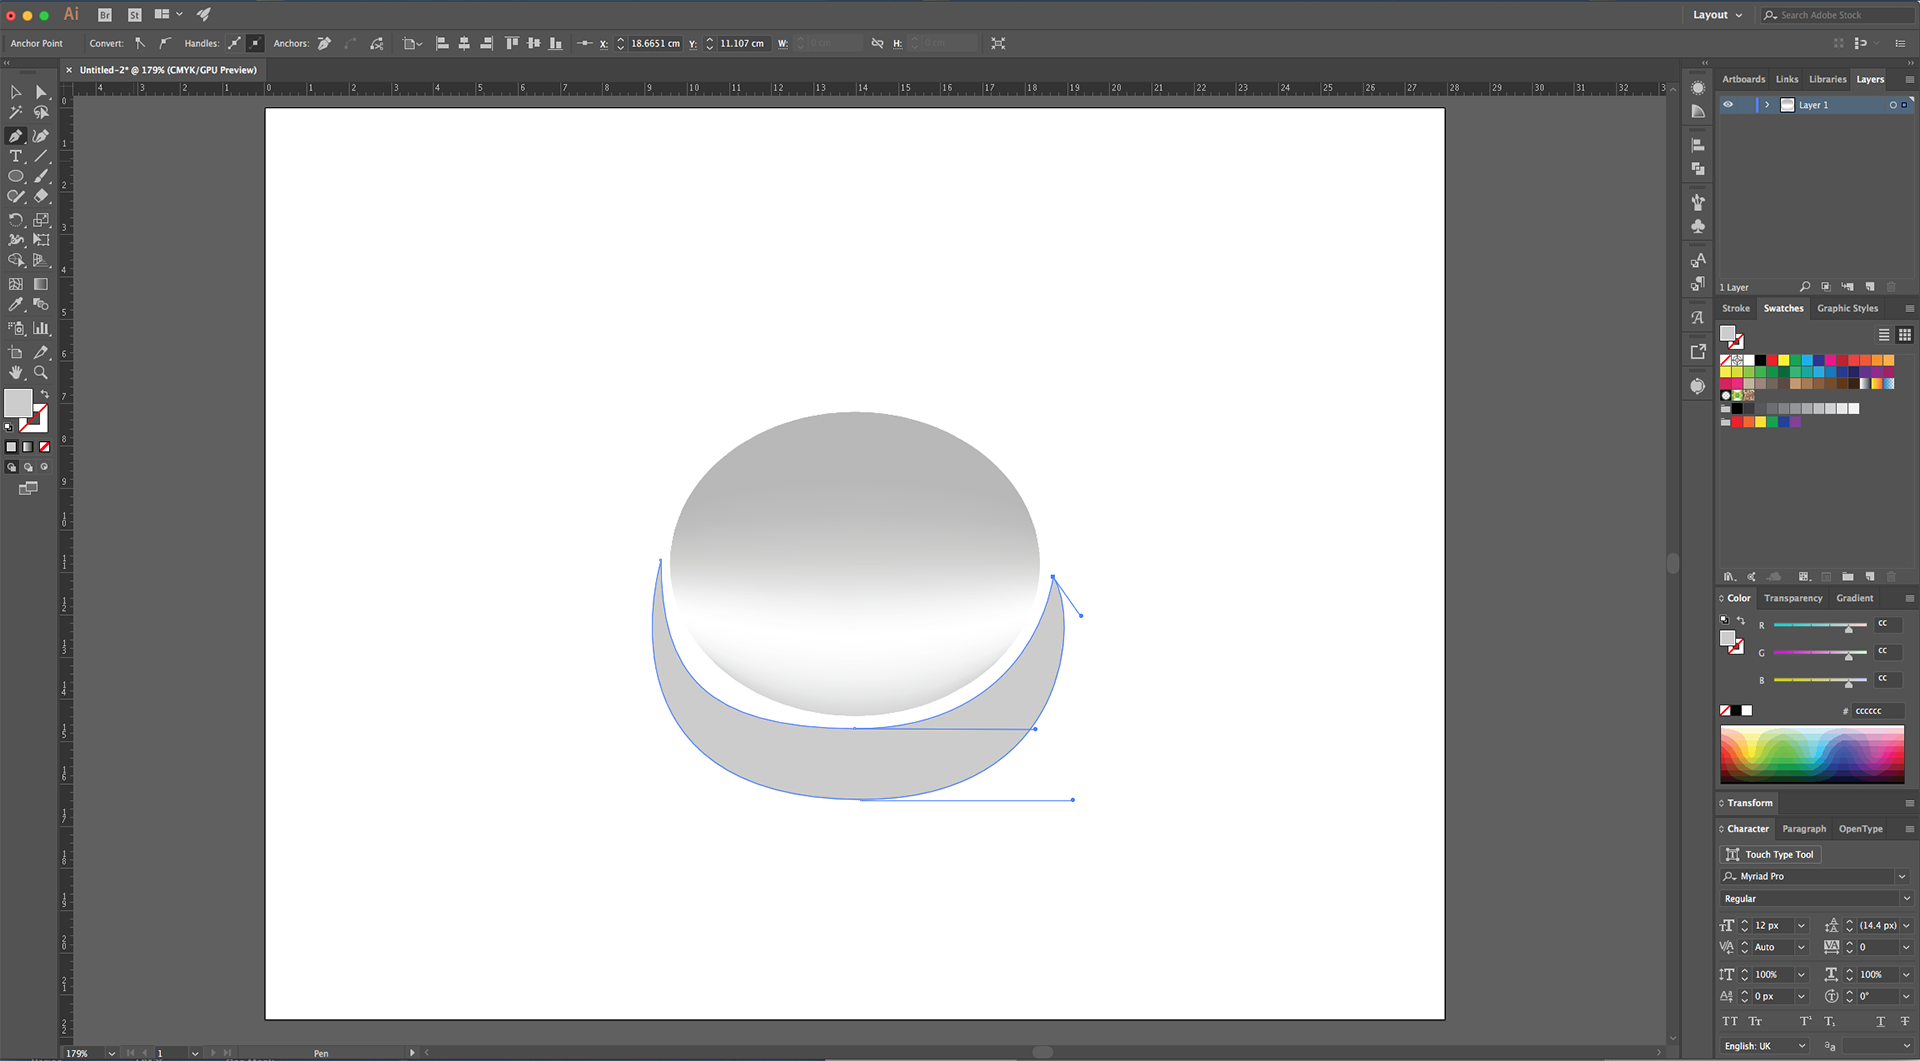
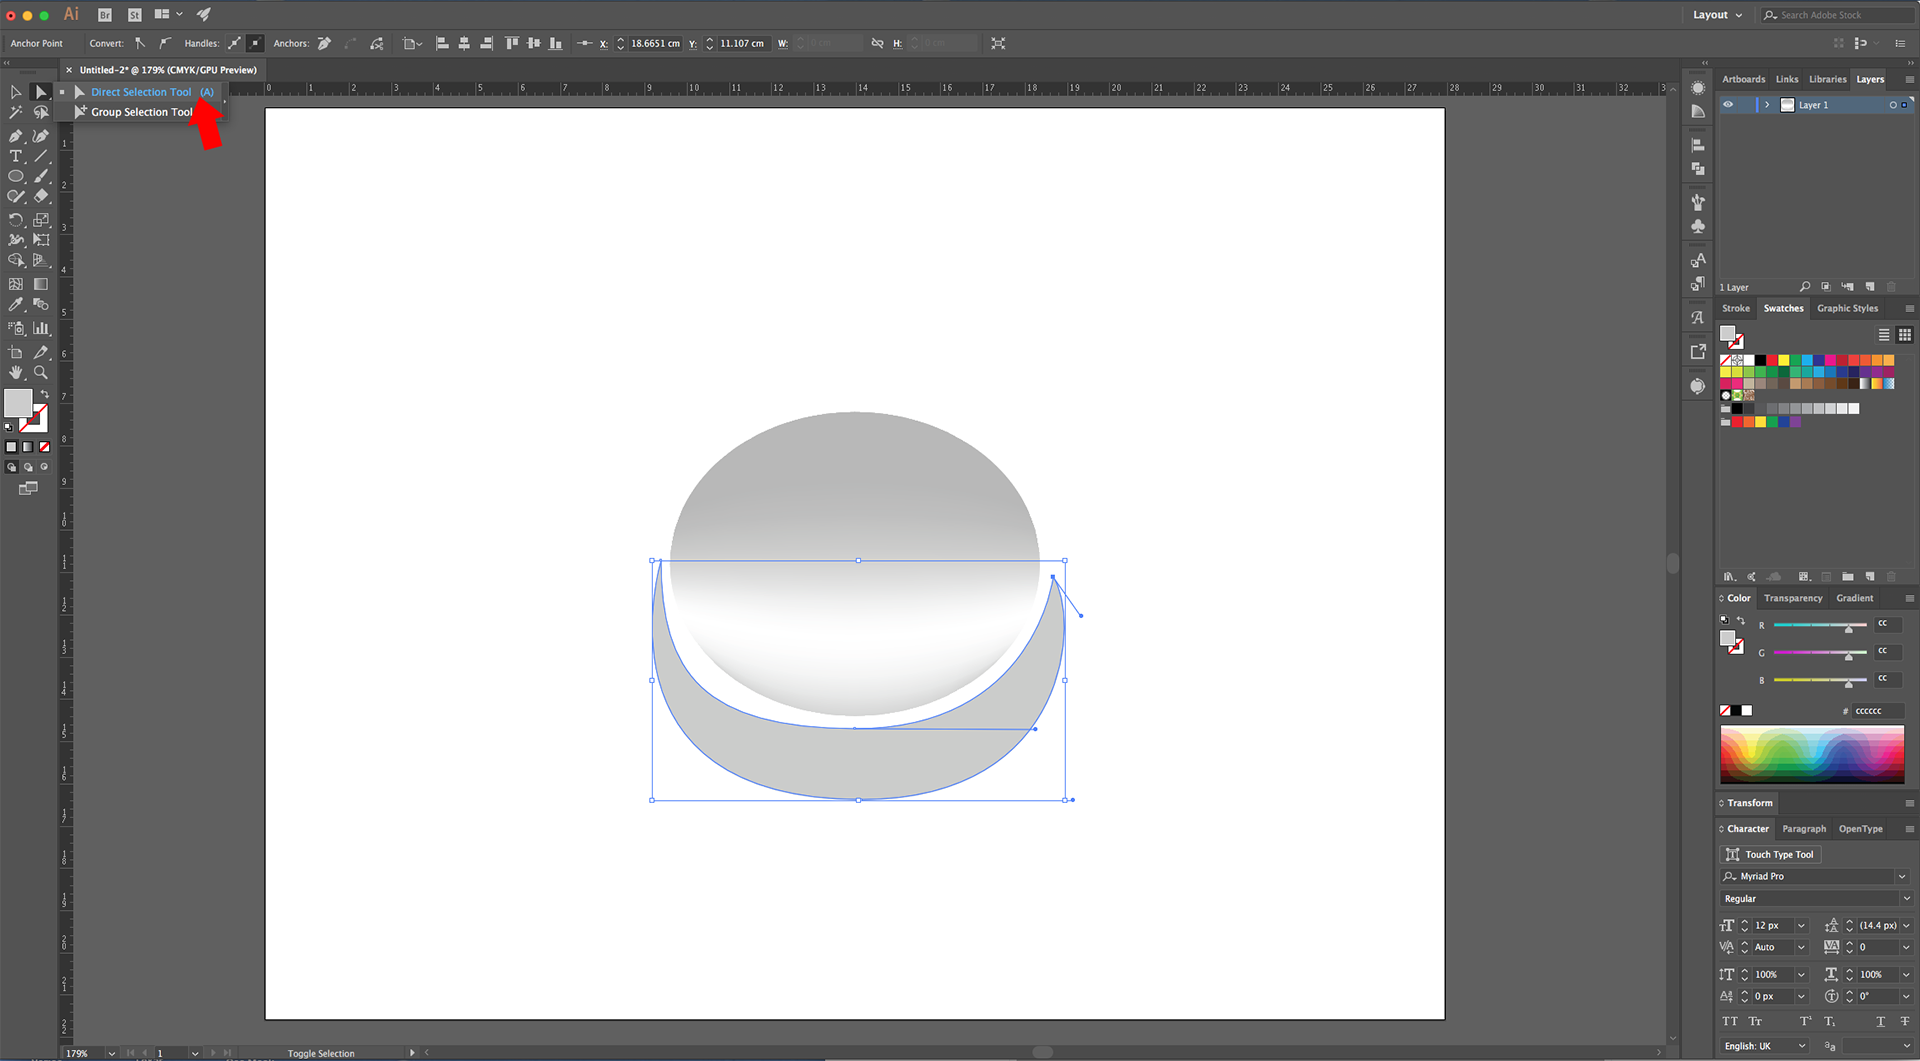
6 - Use the “Direct Selection Tool” (A) to modify the shape and move the top part so it touches the lower portion of the Oval. Do the same with the sides and make the Left side a bit larger than the Right.
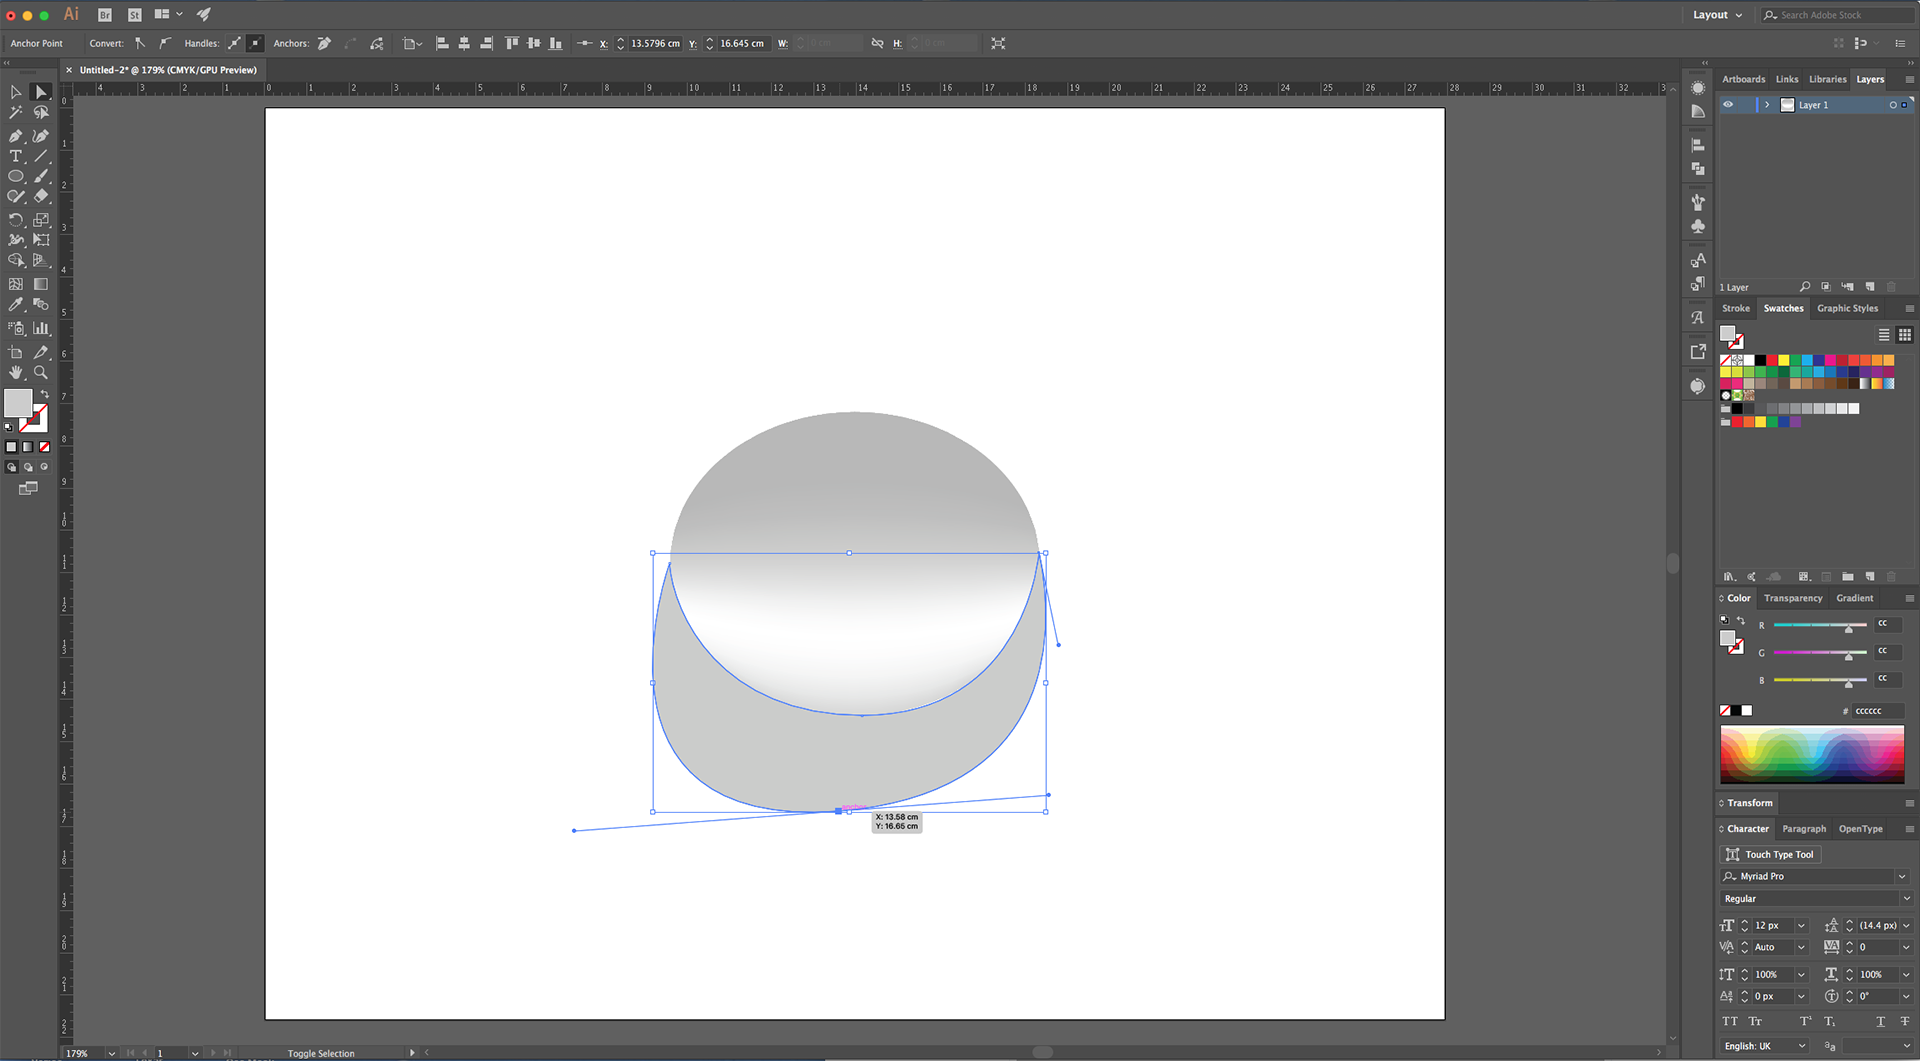
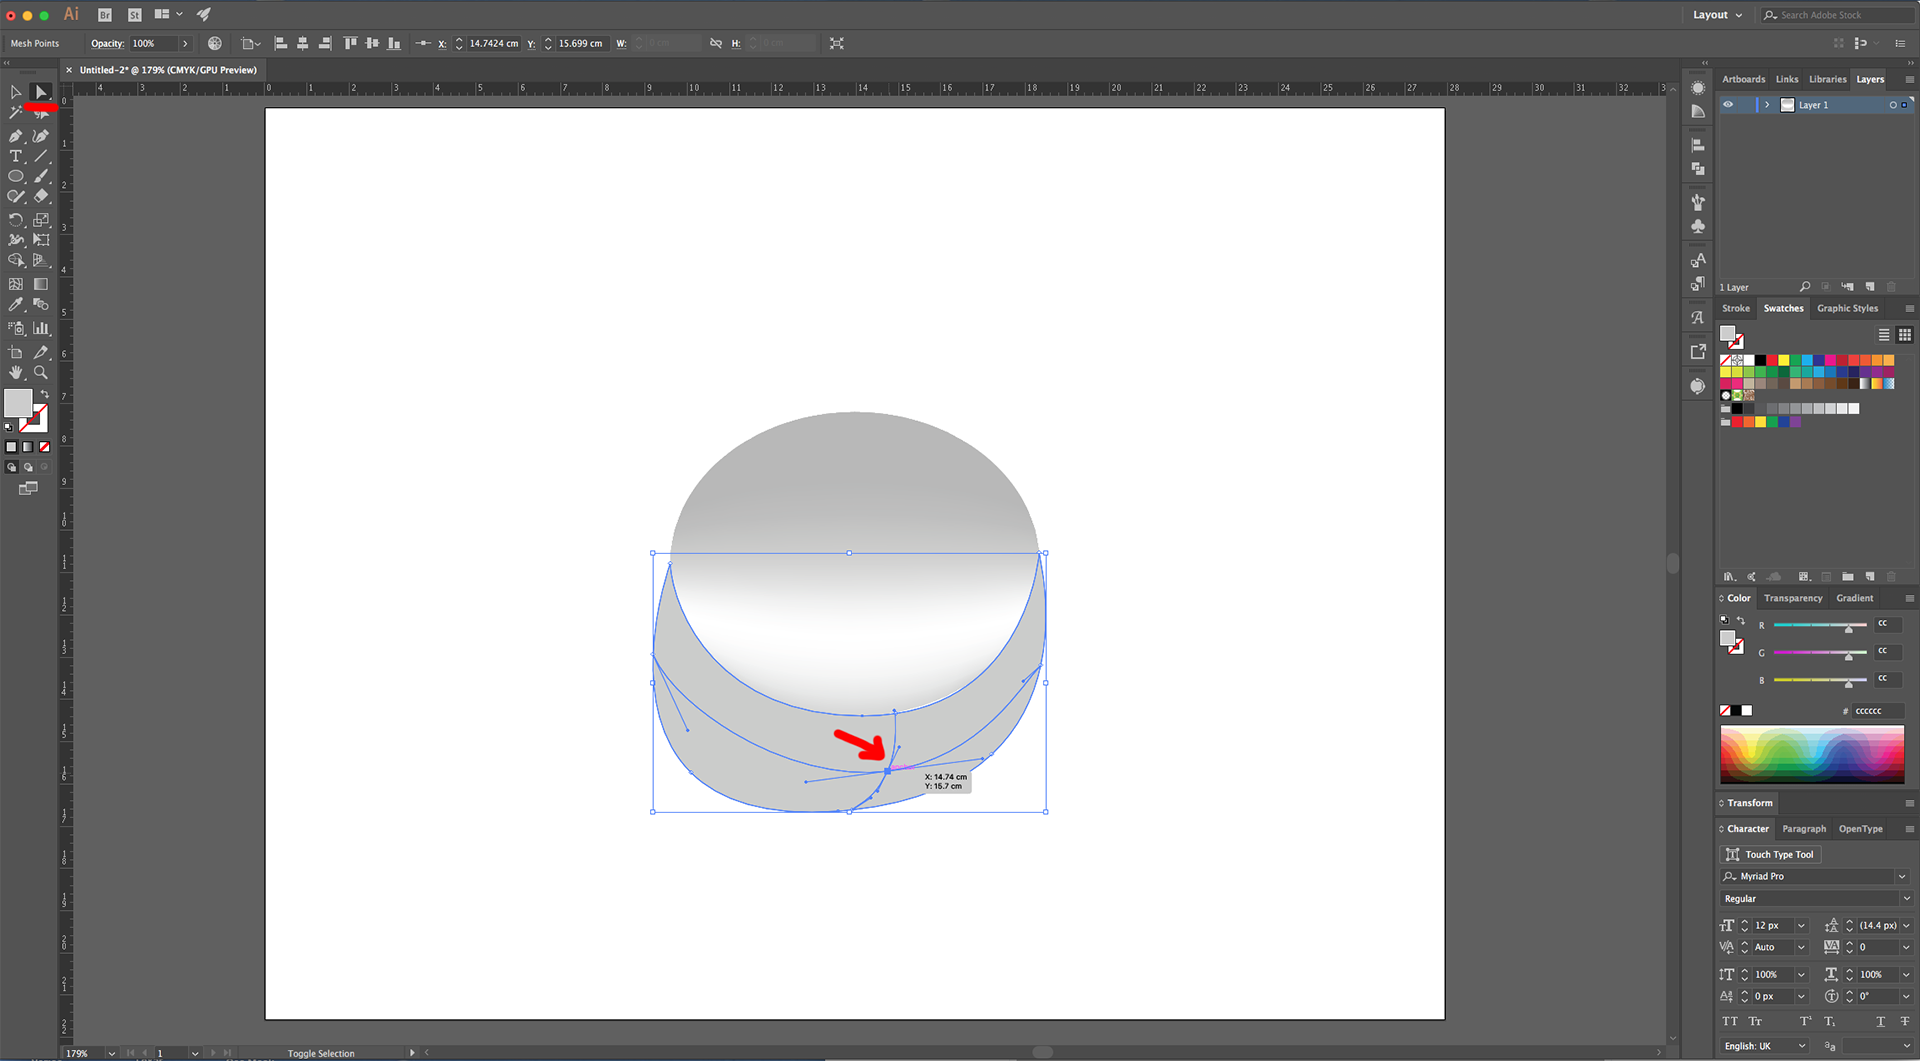
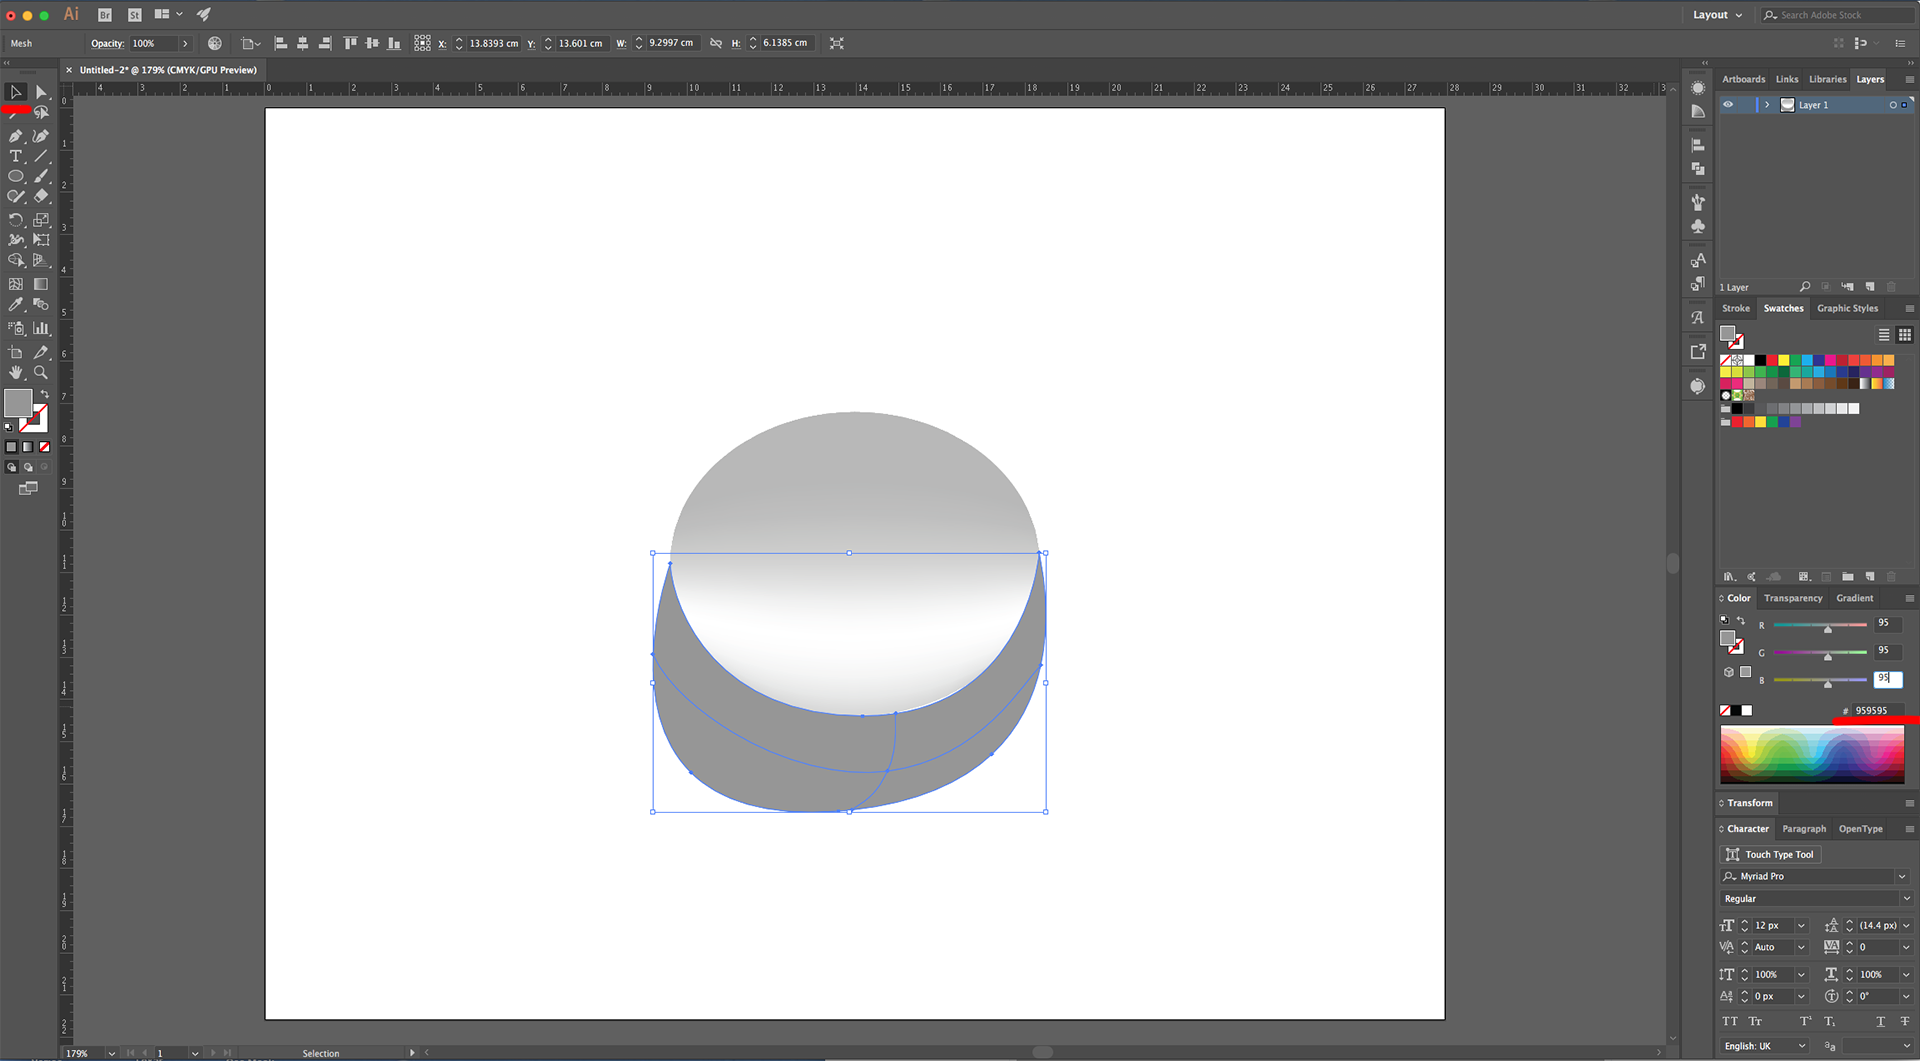
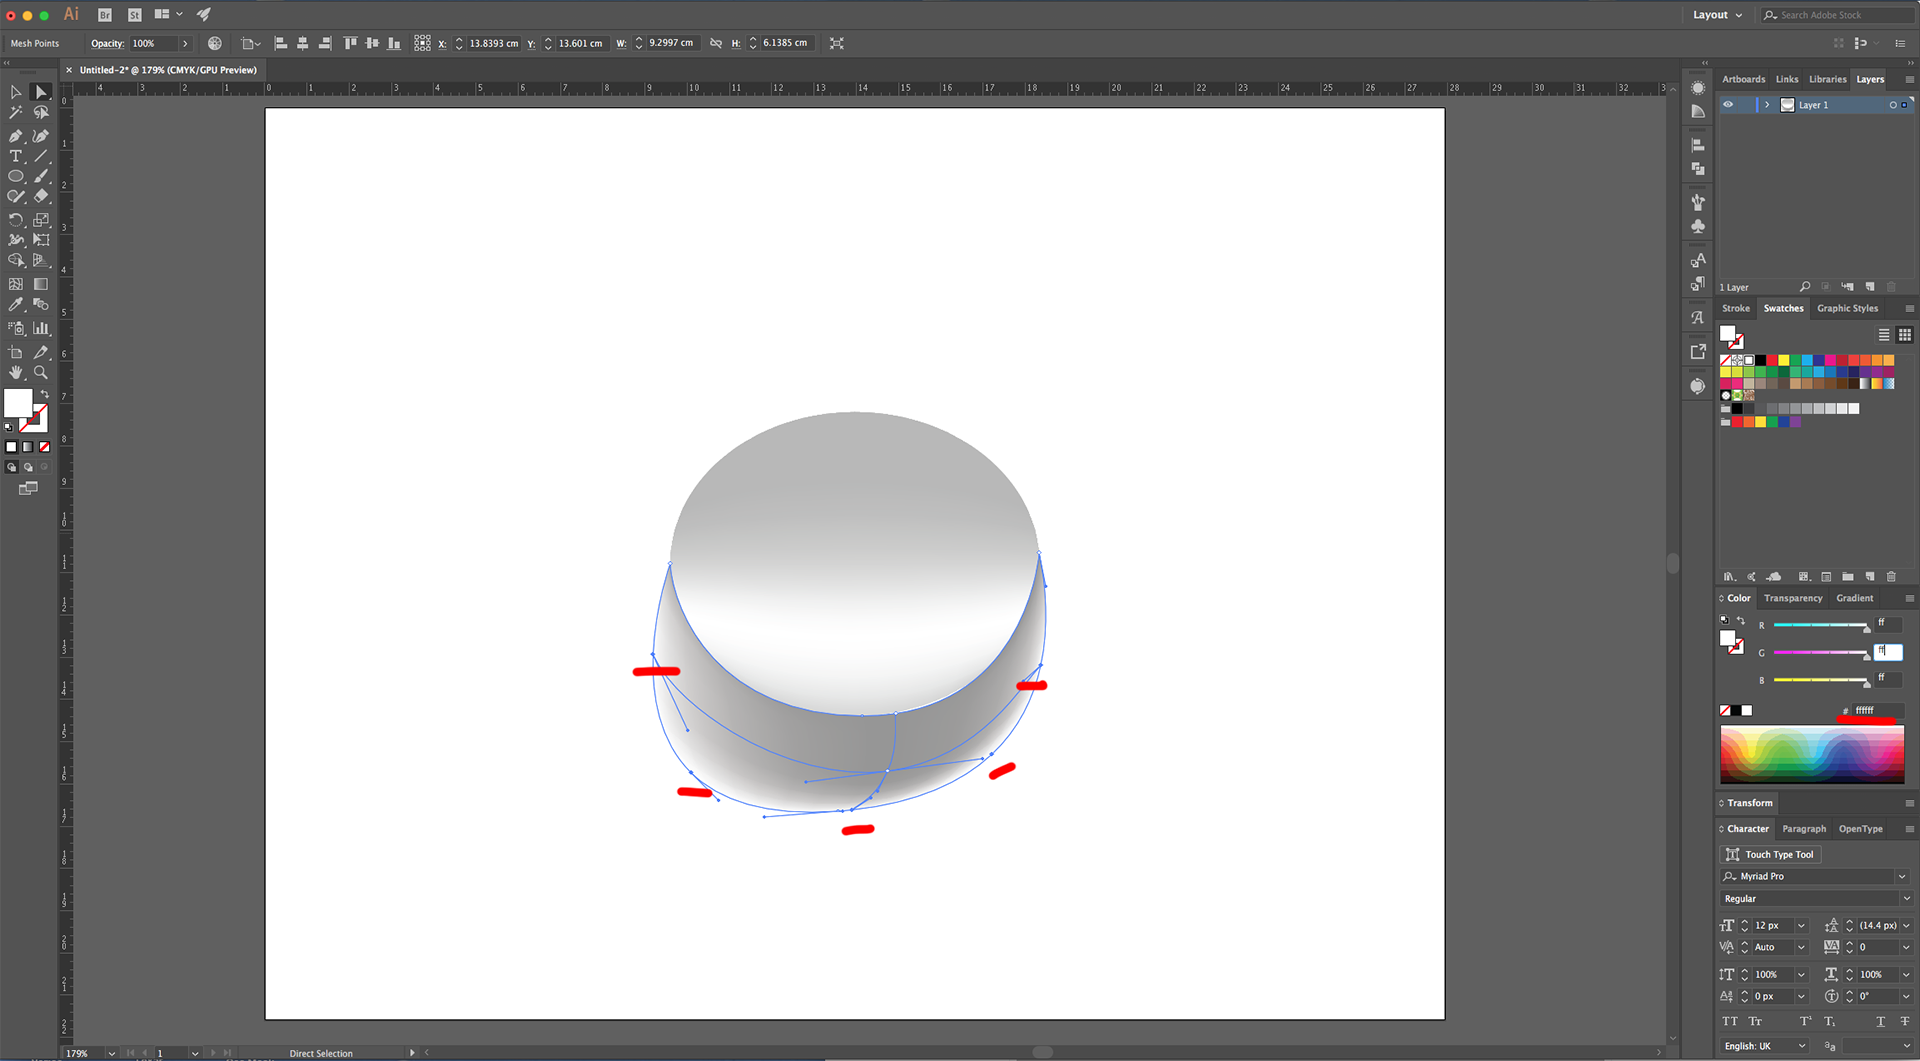
7 - Use the “Mesh Tool” (U) to click near the Center and create a “Mesh Point”. Select just that “Mesh Point” with the “Direct Selection Tool” (A) and move it Down and Right a bit. Change the Fill color to a Darker Grey (#959595), then select the bottom “Mesh Points” and fill them with White (#ffffff). Finally, select the “Mesh Point” you created at the Center and change the shade of Grey to #b9b9b9.
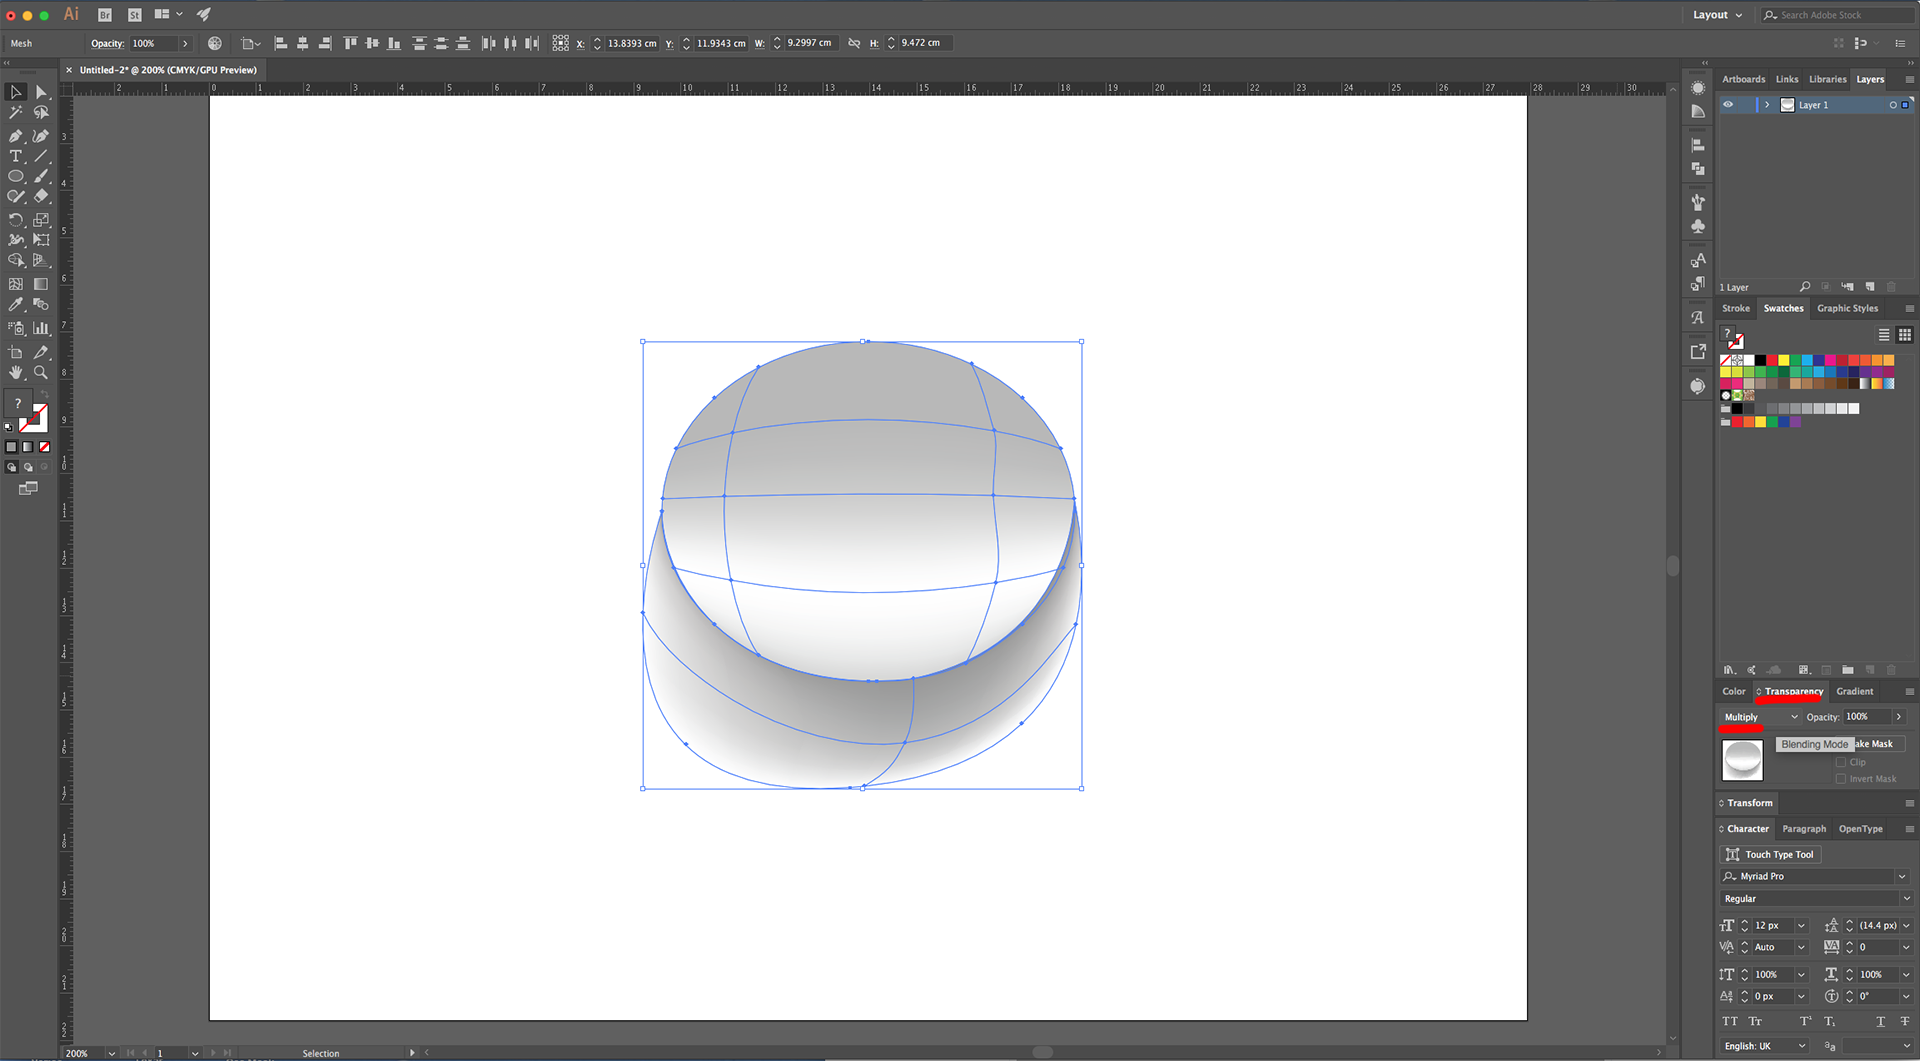
8 - Select both Shapes, head to the “Transparency Panel” and change their “Blending Mode” to “Multiply”.
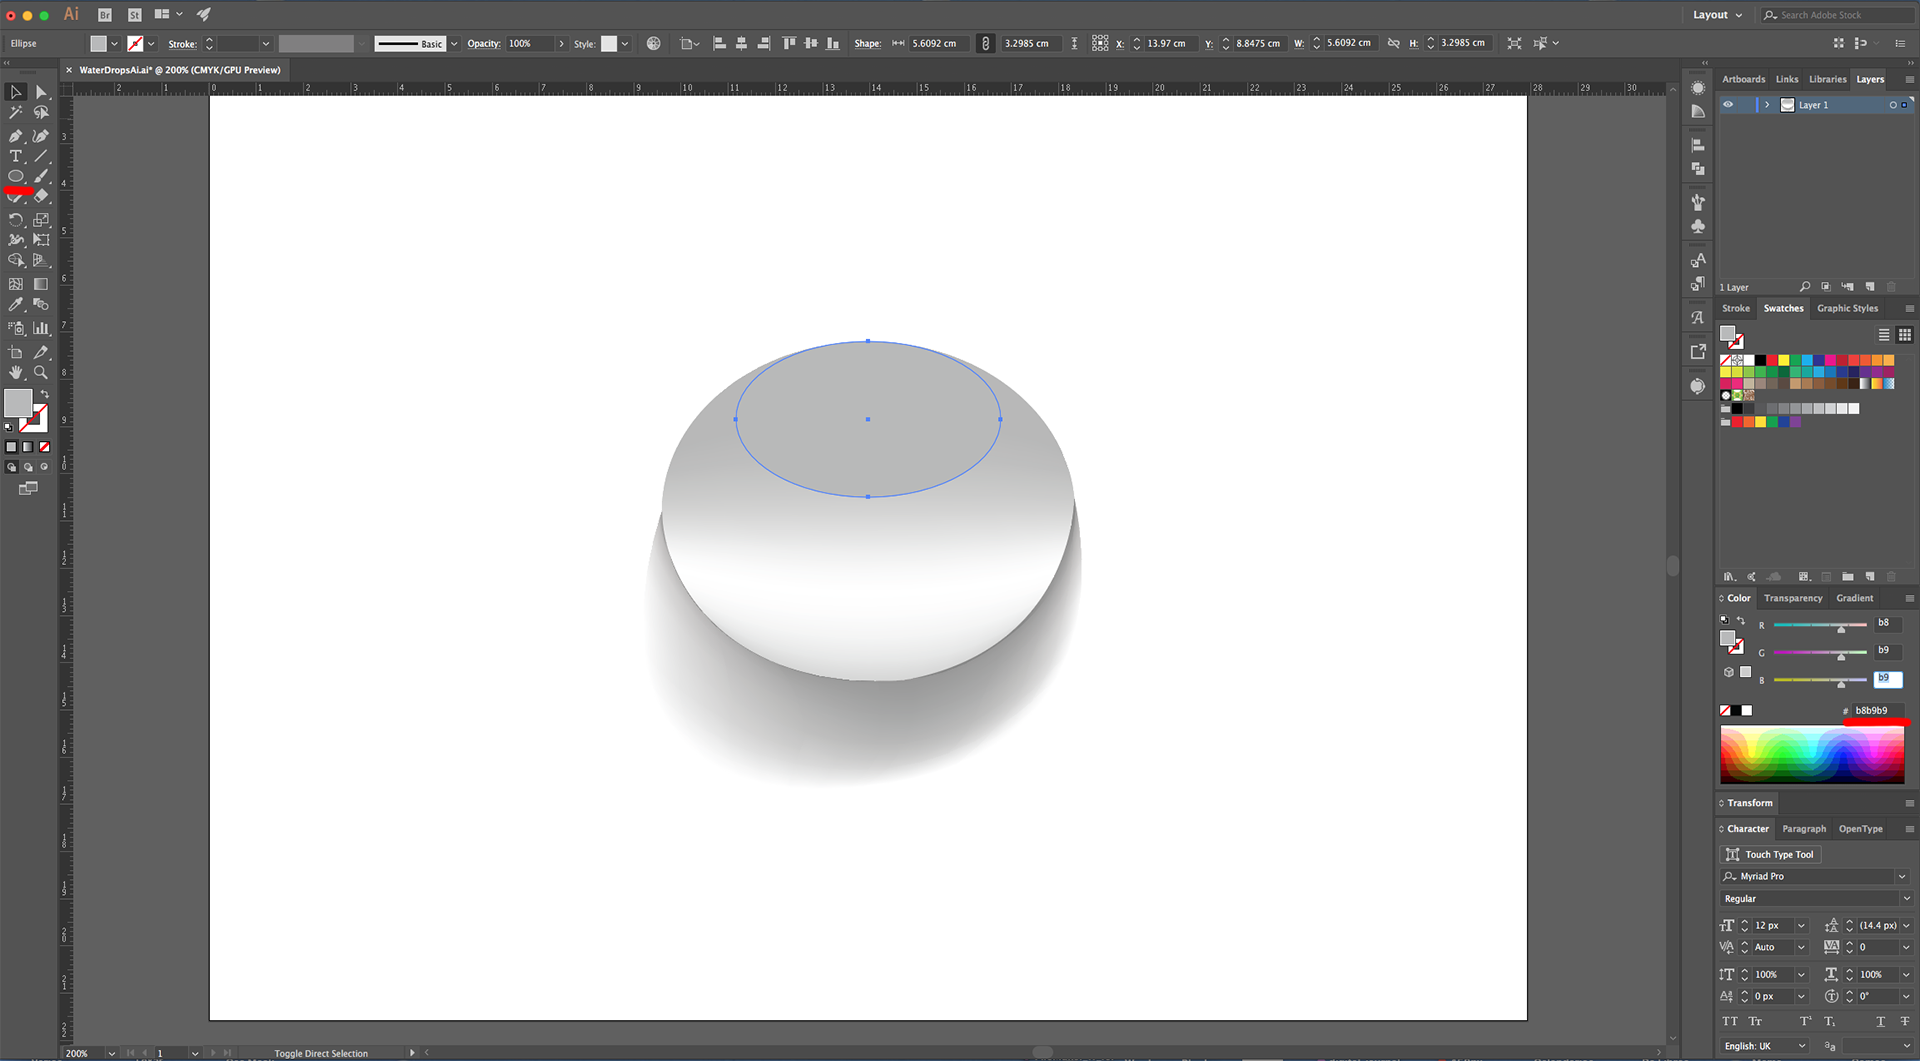
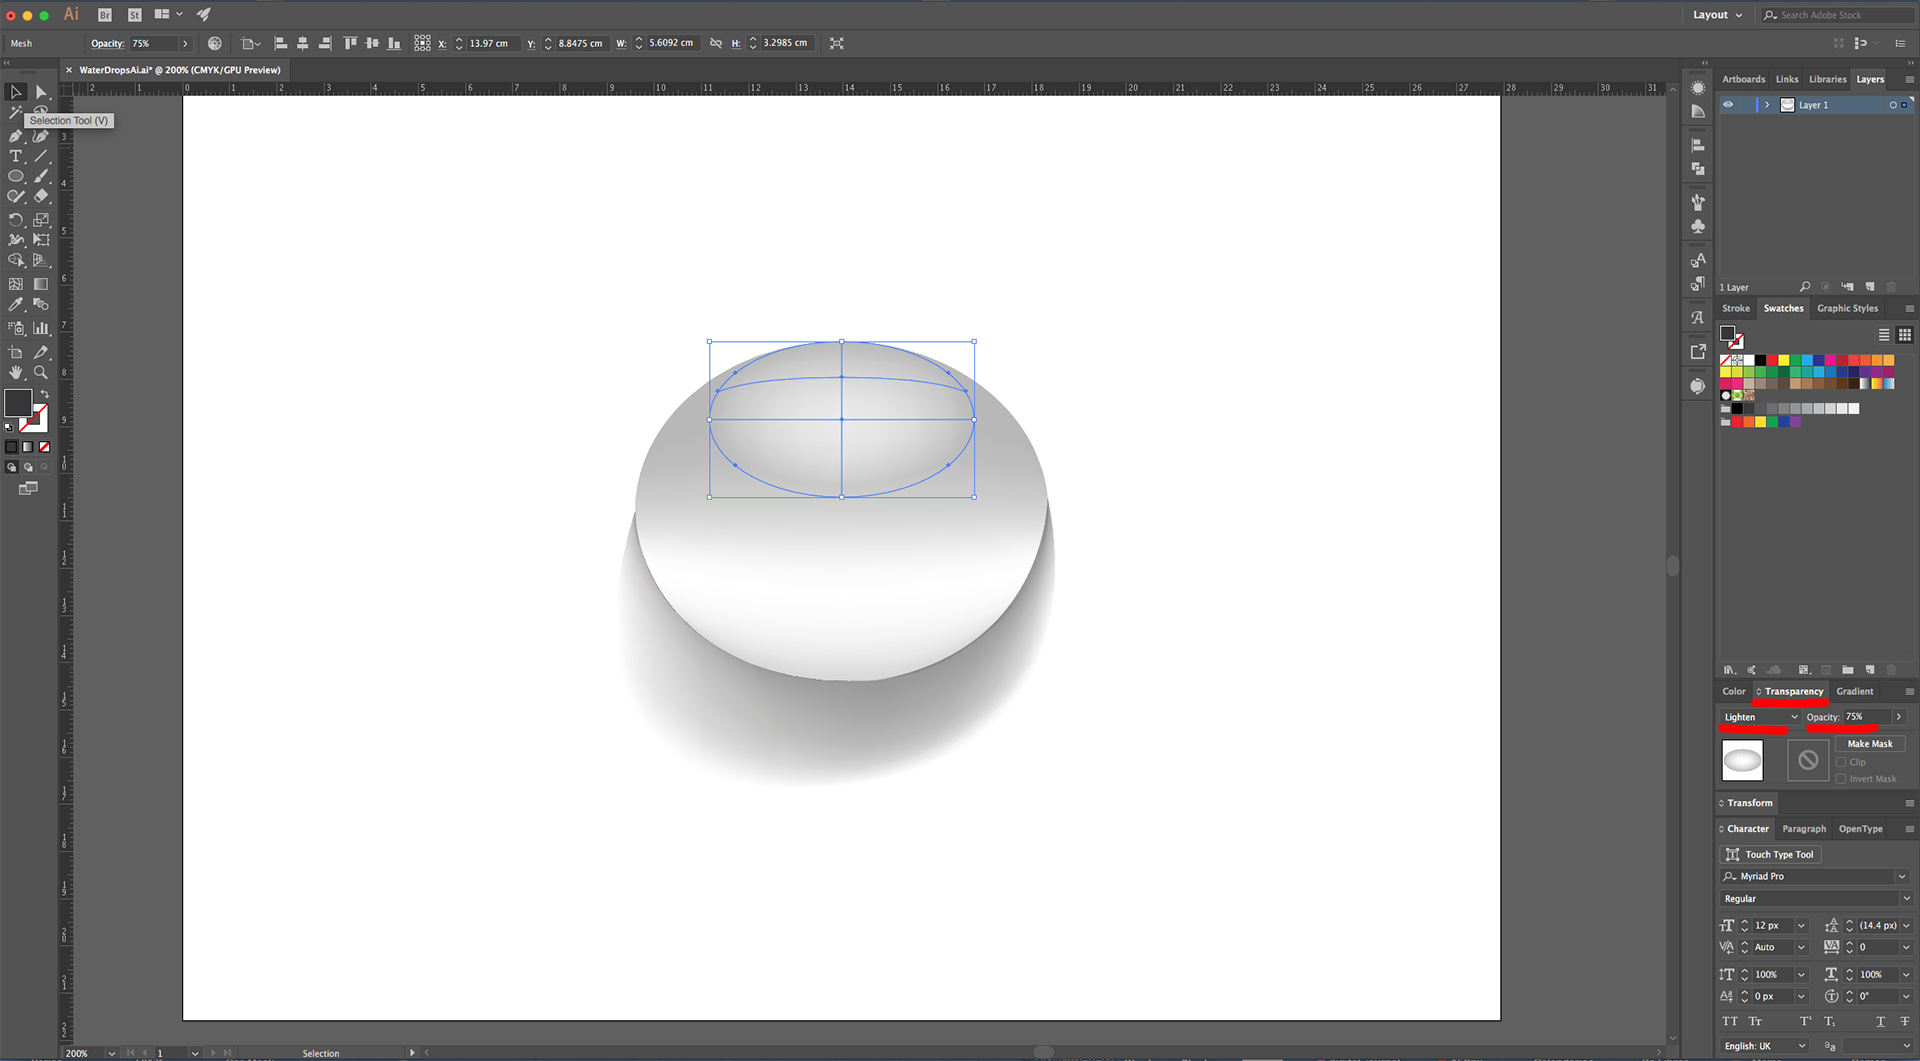
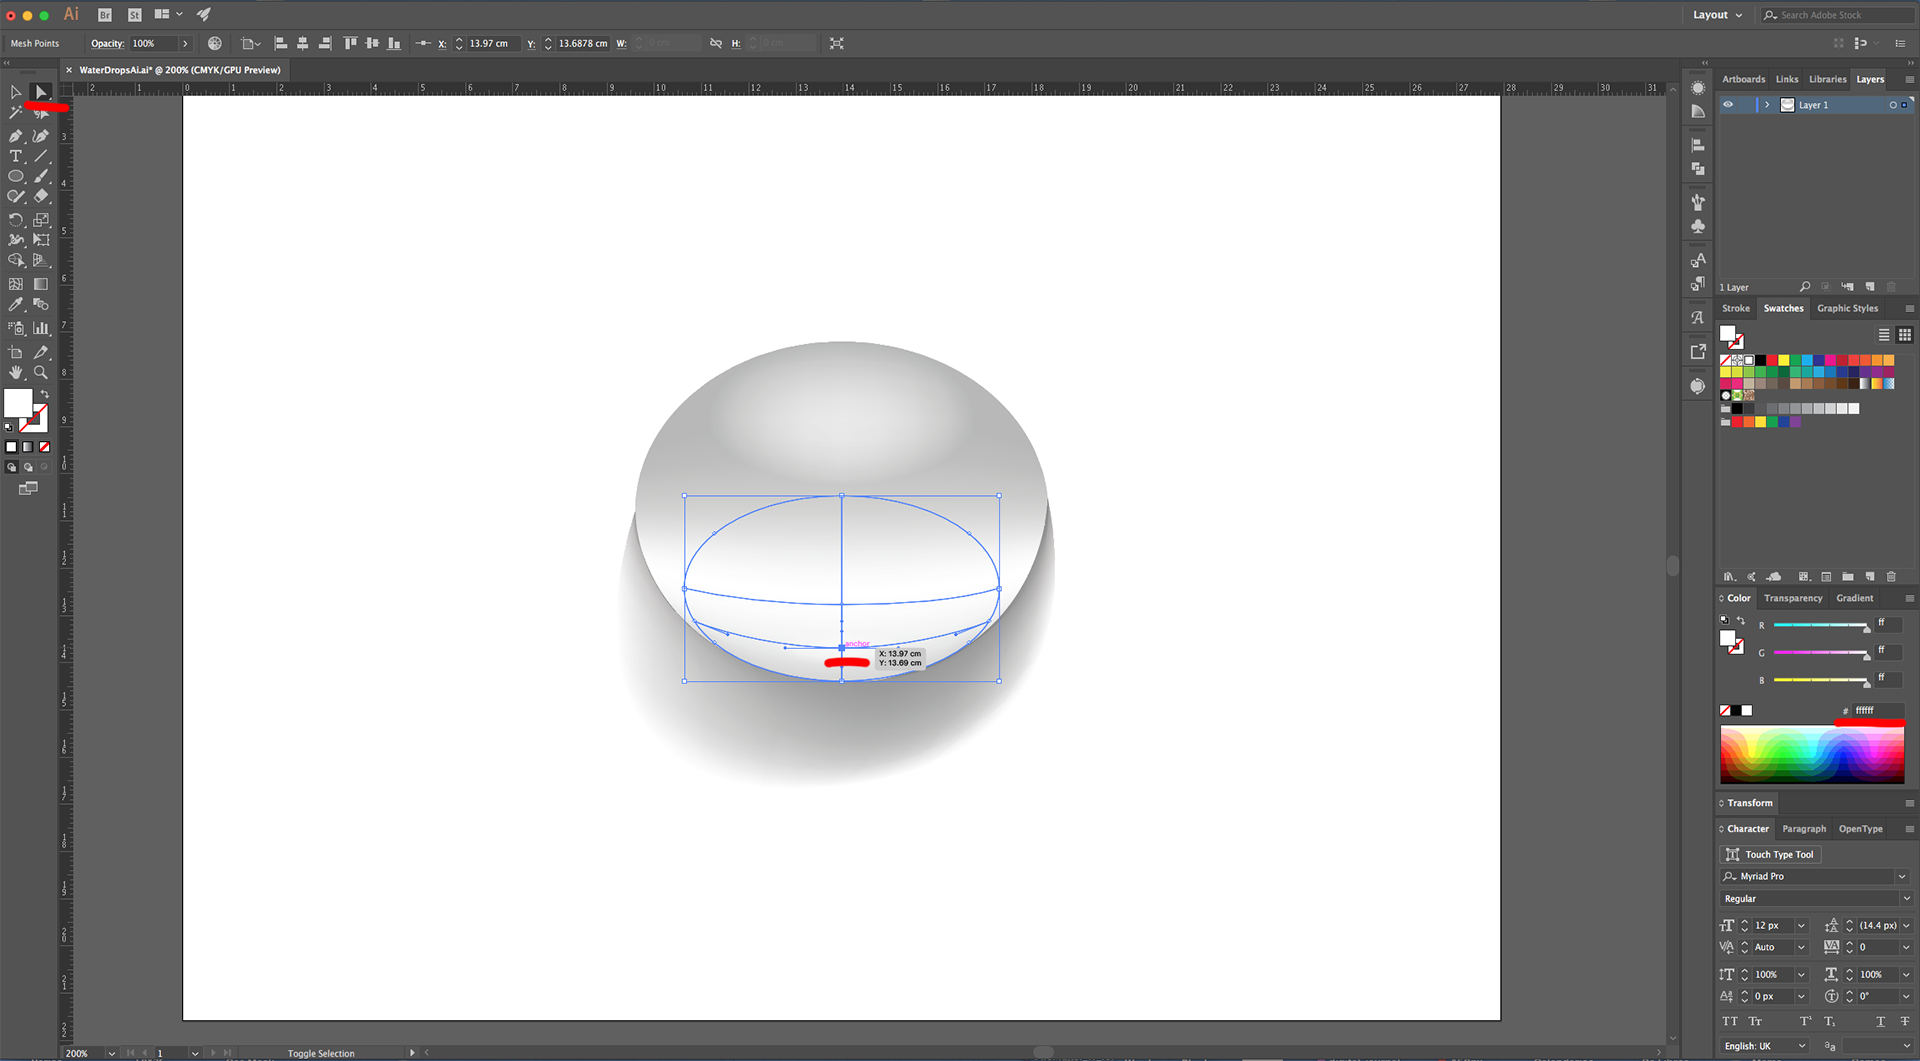
9 - Create a smaller Oval shape (about 5.5 x cm) and place it on the Top part of the bigger one. Use the “Mesh Tool” (U) to click at the Center and create a “Mesh Point” Fill it with White (#ffffff). Create a second one between this one and the Top of the Oval, Fill it with #e3e3e3. Then, select the entire Oval and change its “Blending Mode” to “Lighten” and its “Opacity” to 75%.
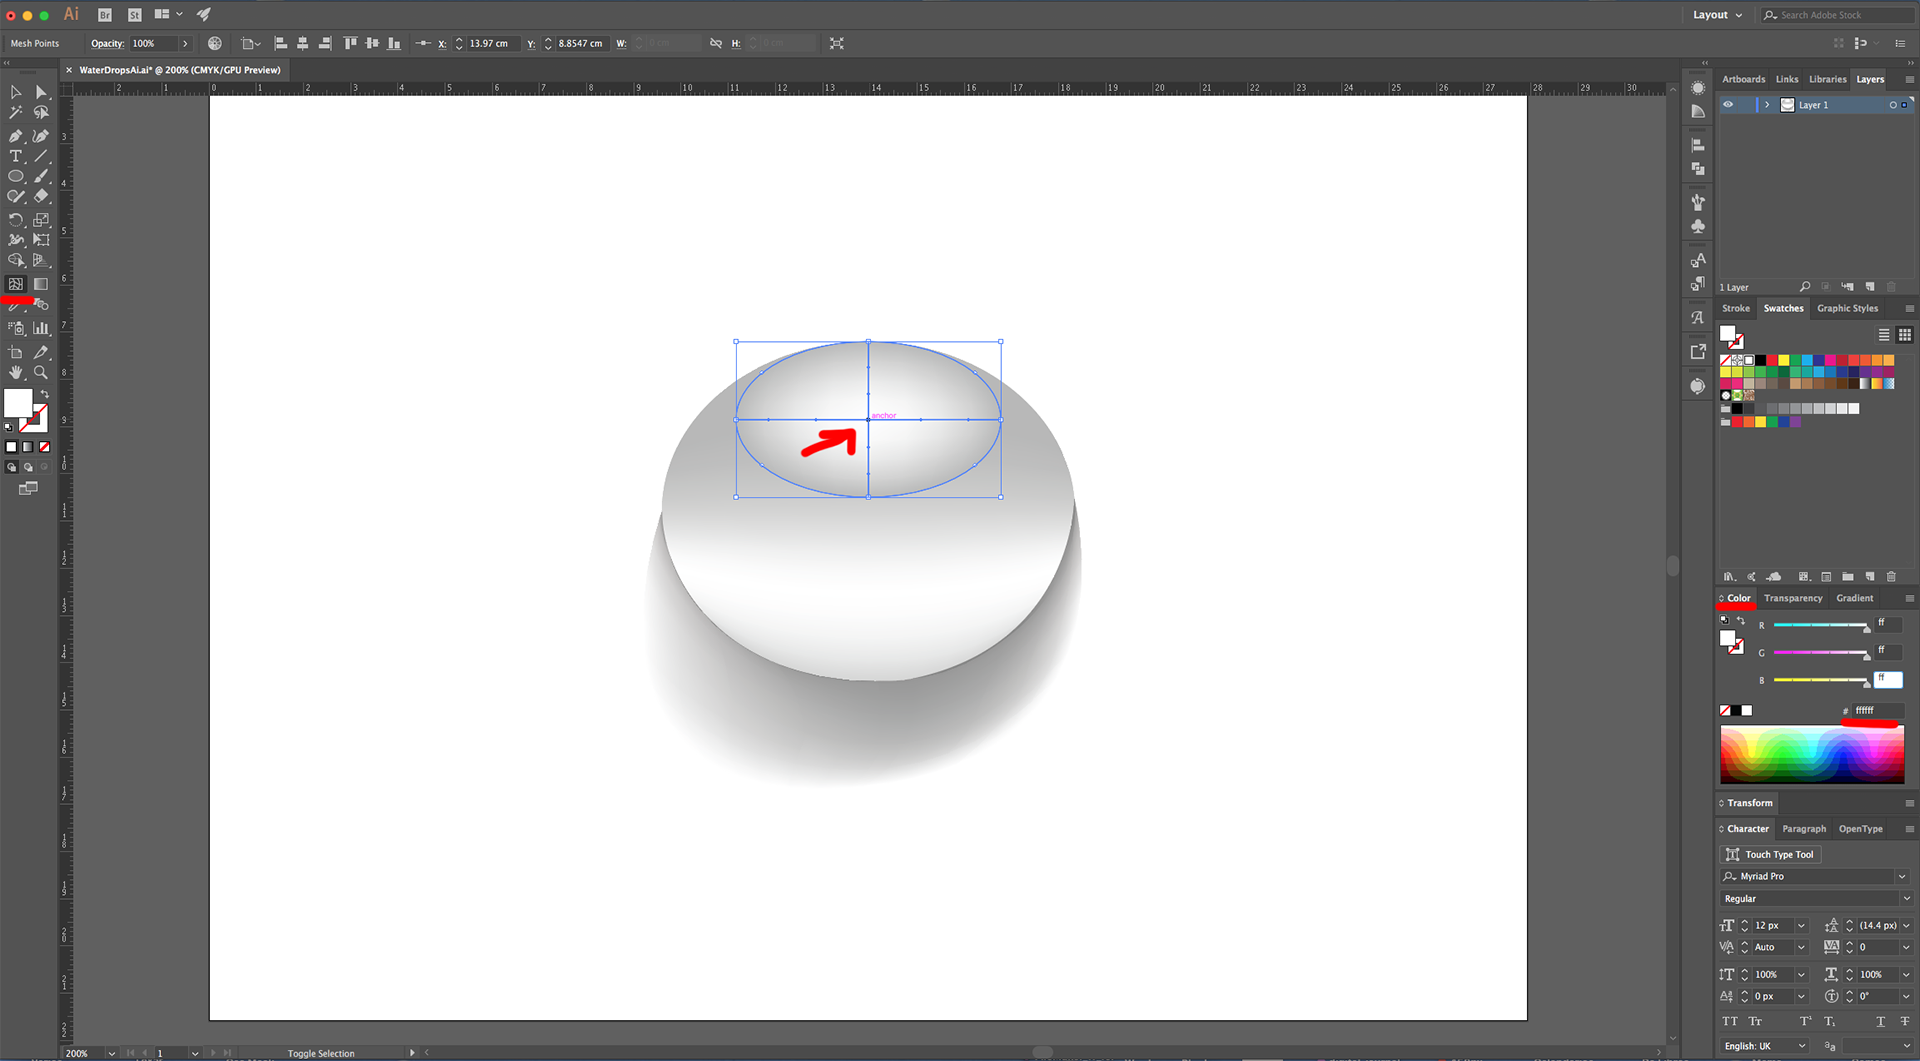
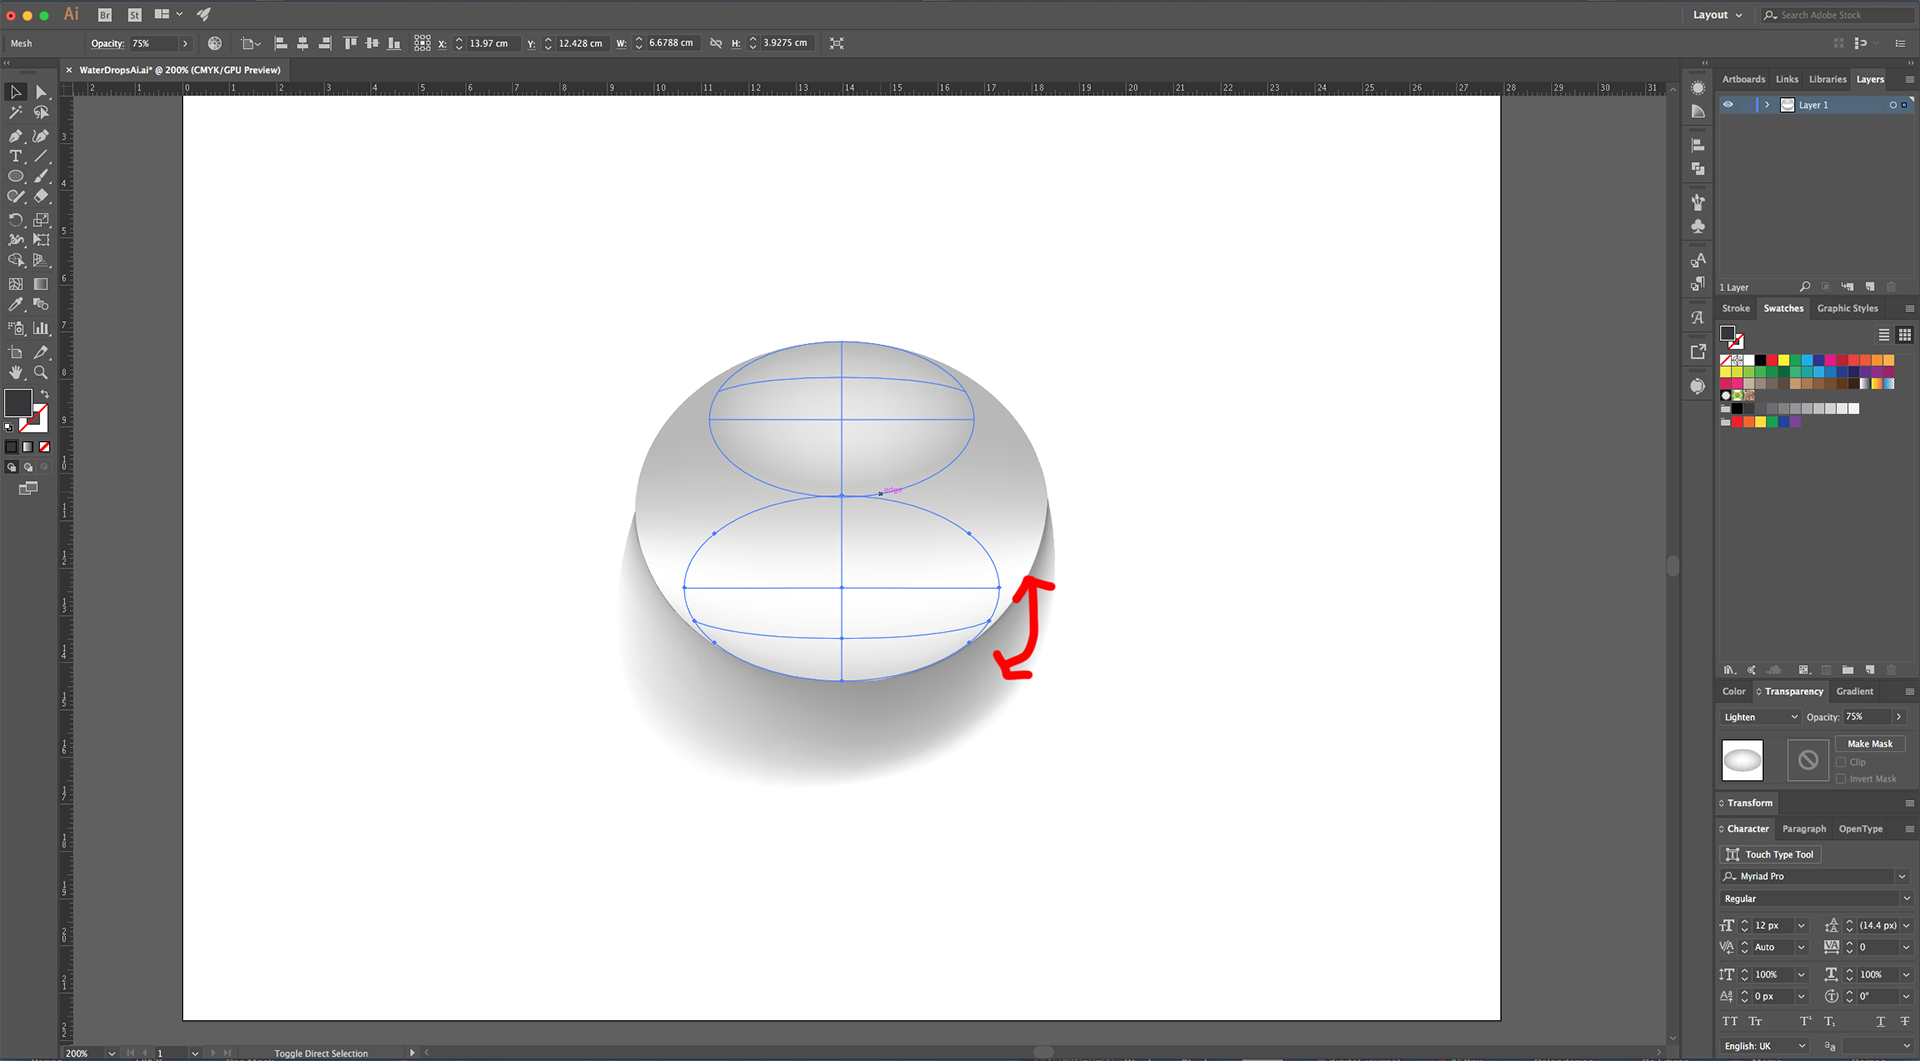
10 - Drag the Oval down while holding the “Shift” and “Alt/Option” keys to duplicate it and move it in a straight line. Make it a bit bigger and make sure it covers the Bottom part of the original Oval shape. Then, rotate it 180°.
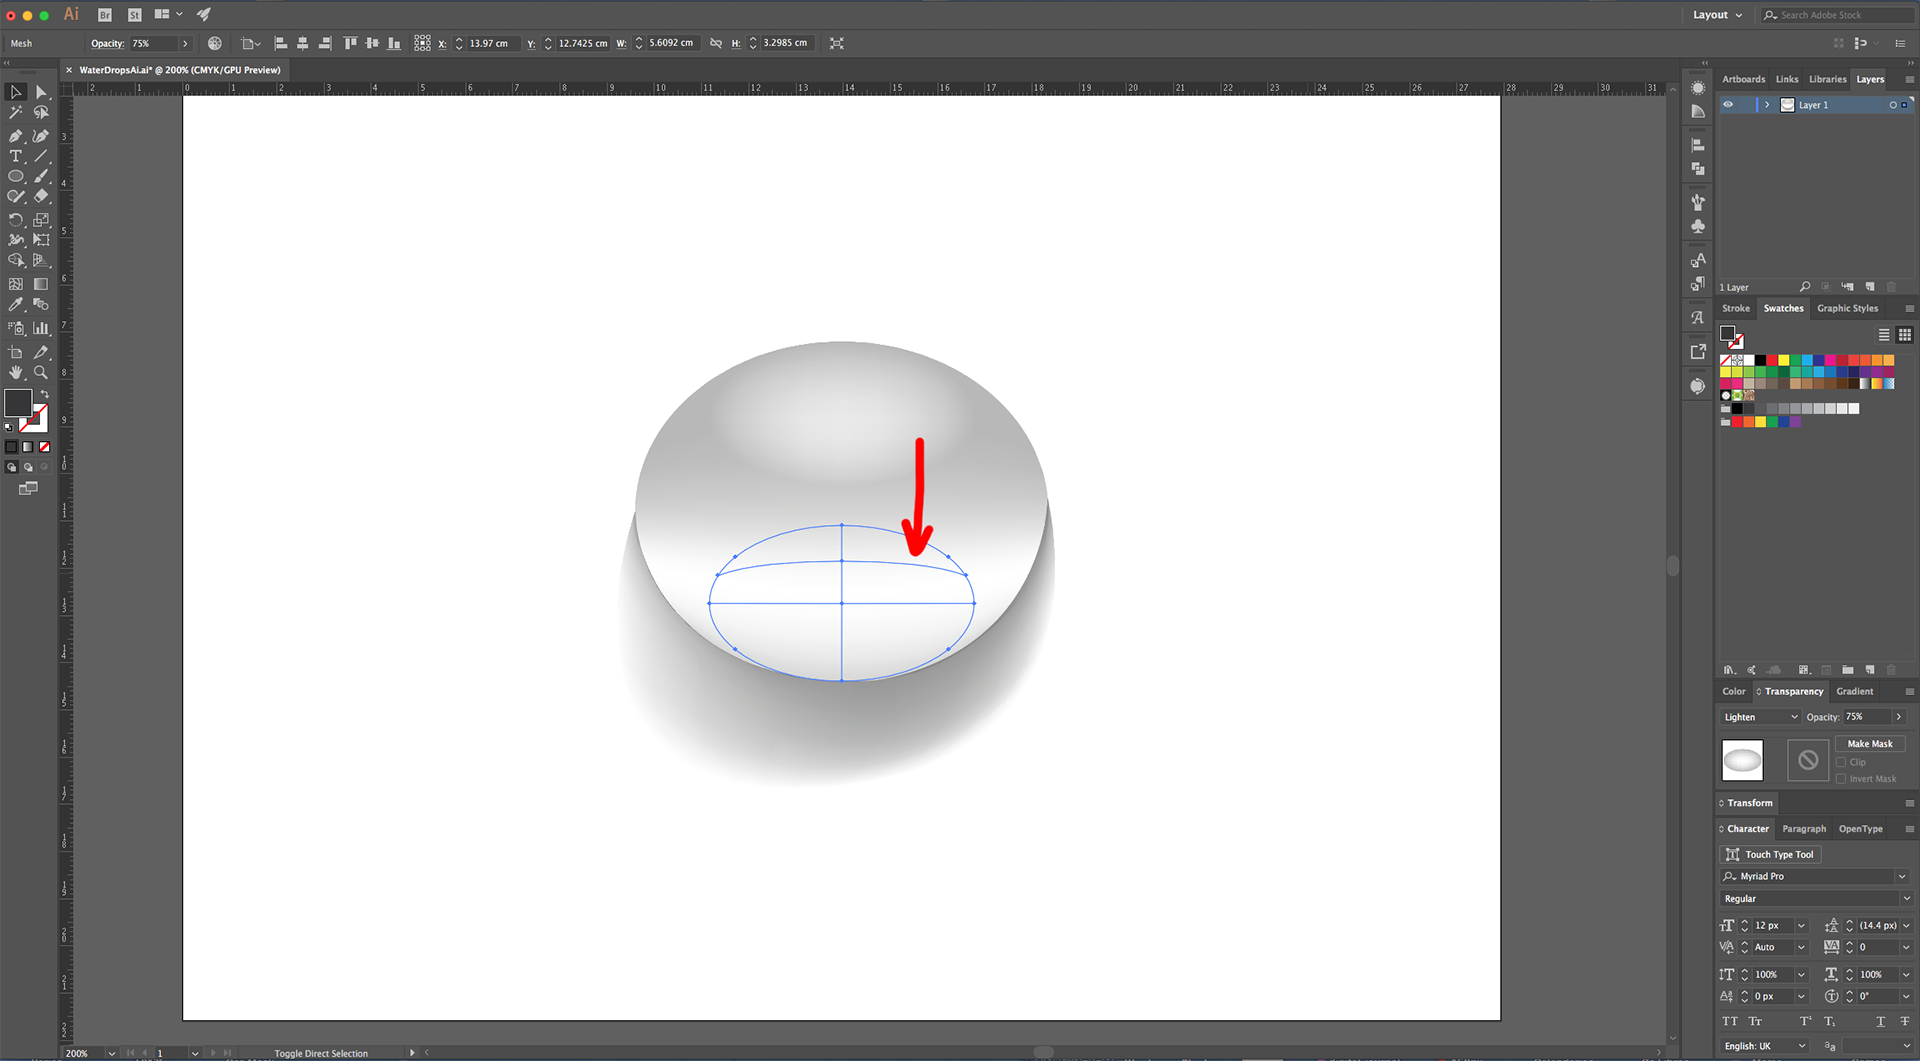
11 - Use the “Direct Selection Tool” (A) to select the “Mesh Point” that is second from the Bottom-Center and make its Fill color White (#ffffff). Then, select the one on top of it (third from the bottom) and make its Fill color #e3e3e3.

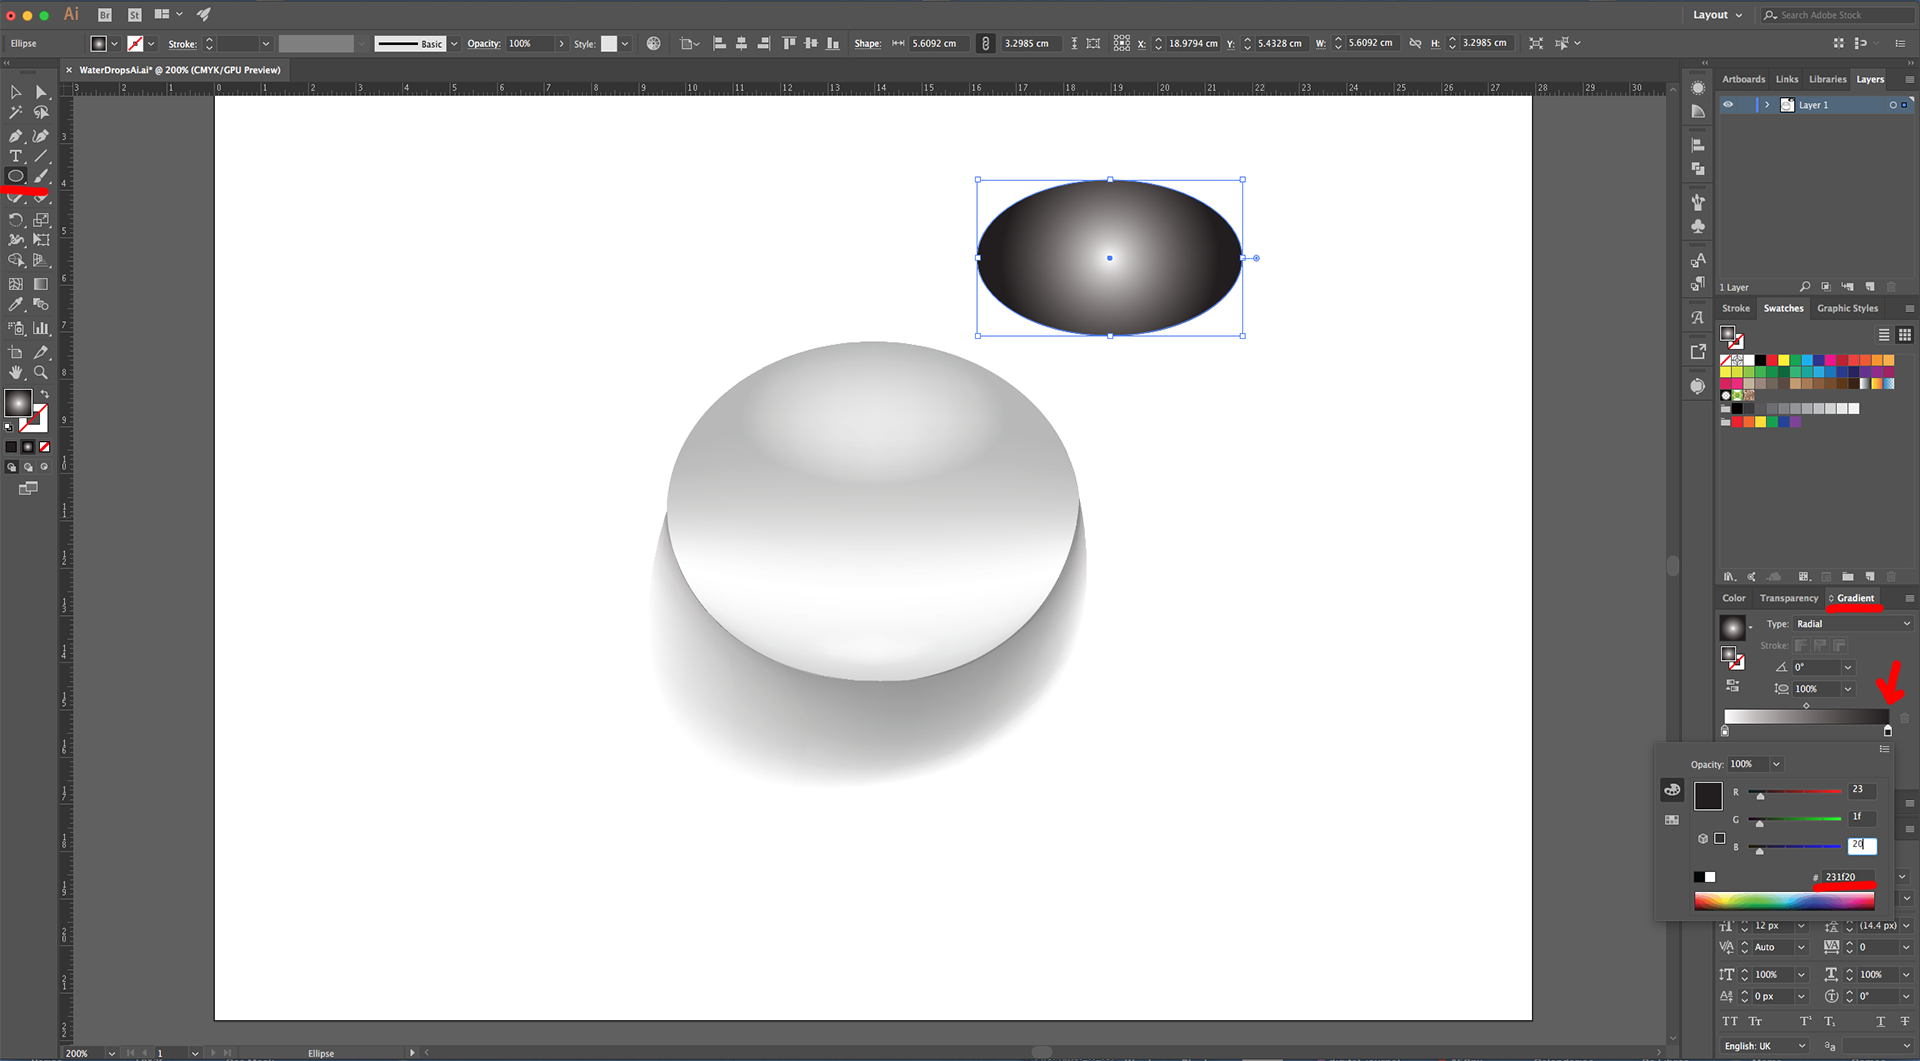
12 - Create another Oval (aprox. 5.5 x 3 cm), fill it with a “Radial Gradient” from White to a very Dark Grey (#231f20) and a 59% “Aspect Ratio”.

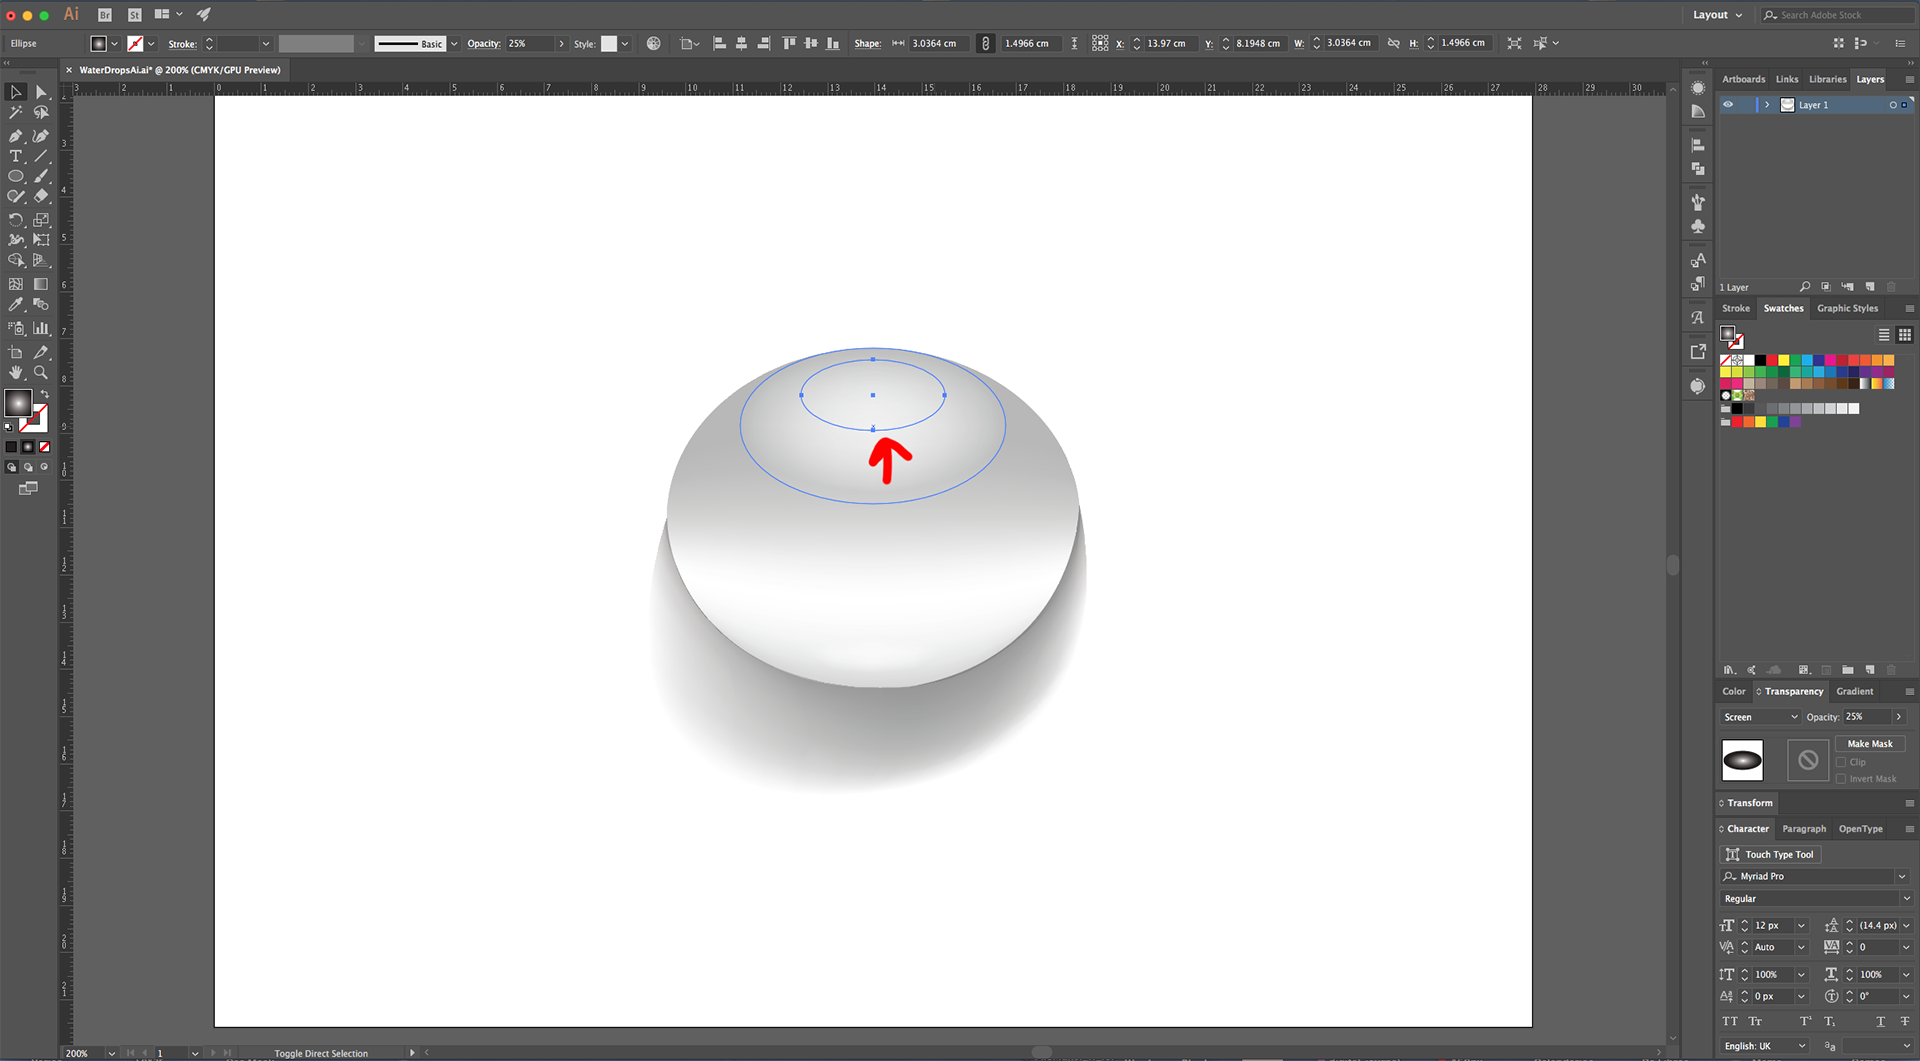
13 - “Copy” (Command/Control + C) and “Paste in Front” (Command/Control + F) this Oval, make its smaller (2.5 x 1.5 cm aprox.). Then, select both and change their “Blending Mode” to “Screen” and its “Opacity” to 25%. Place them on the Top-Center of the original Oval shape.

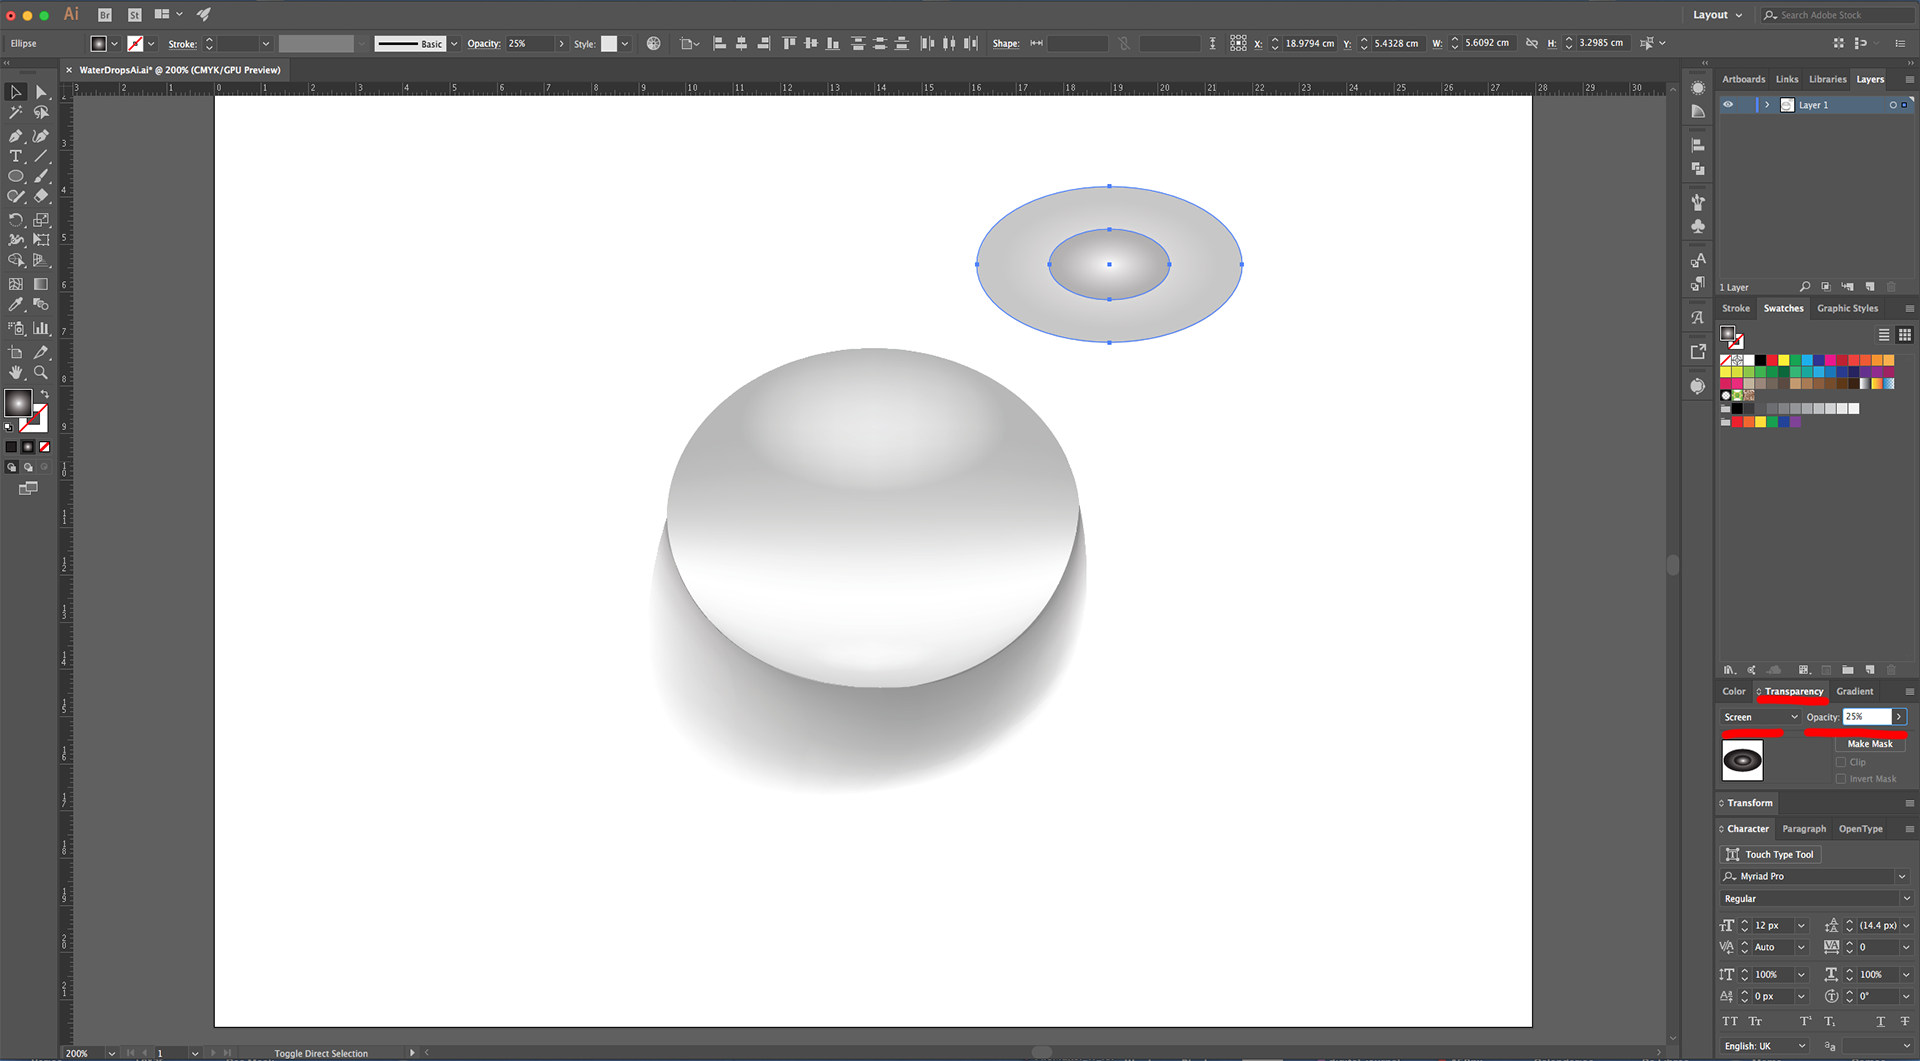
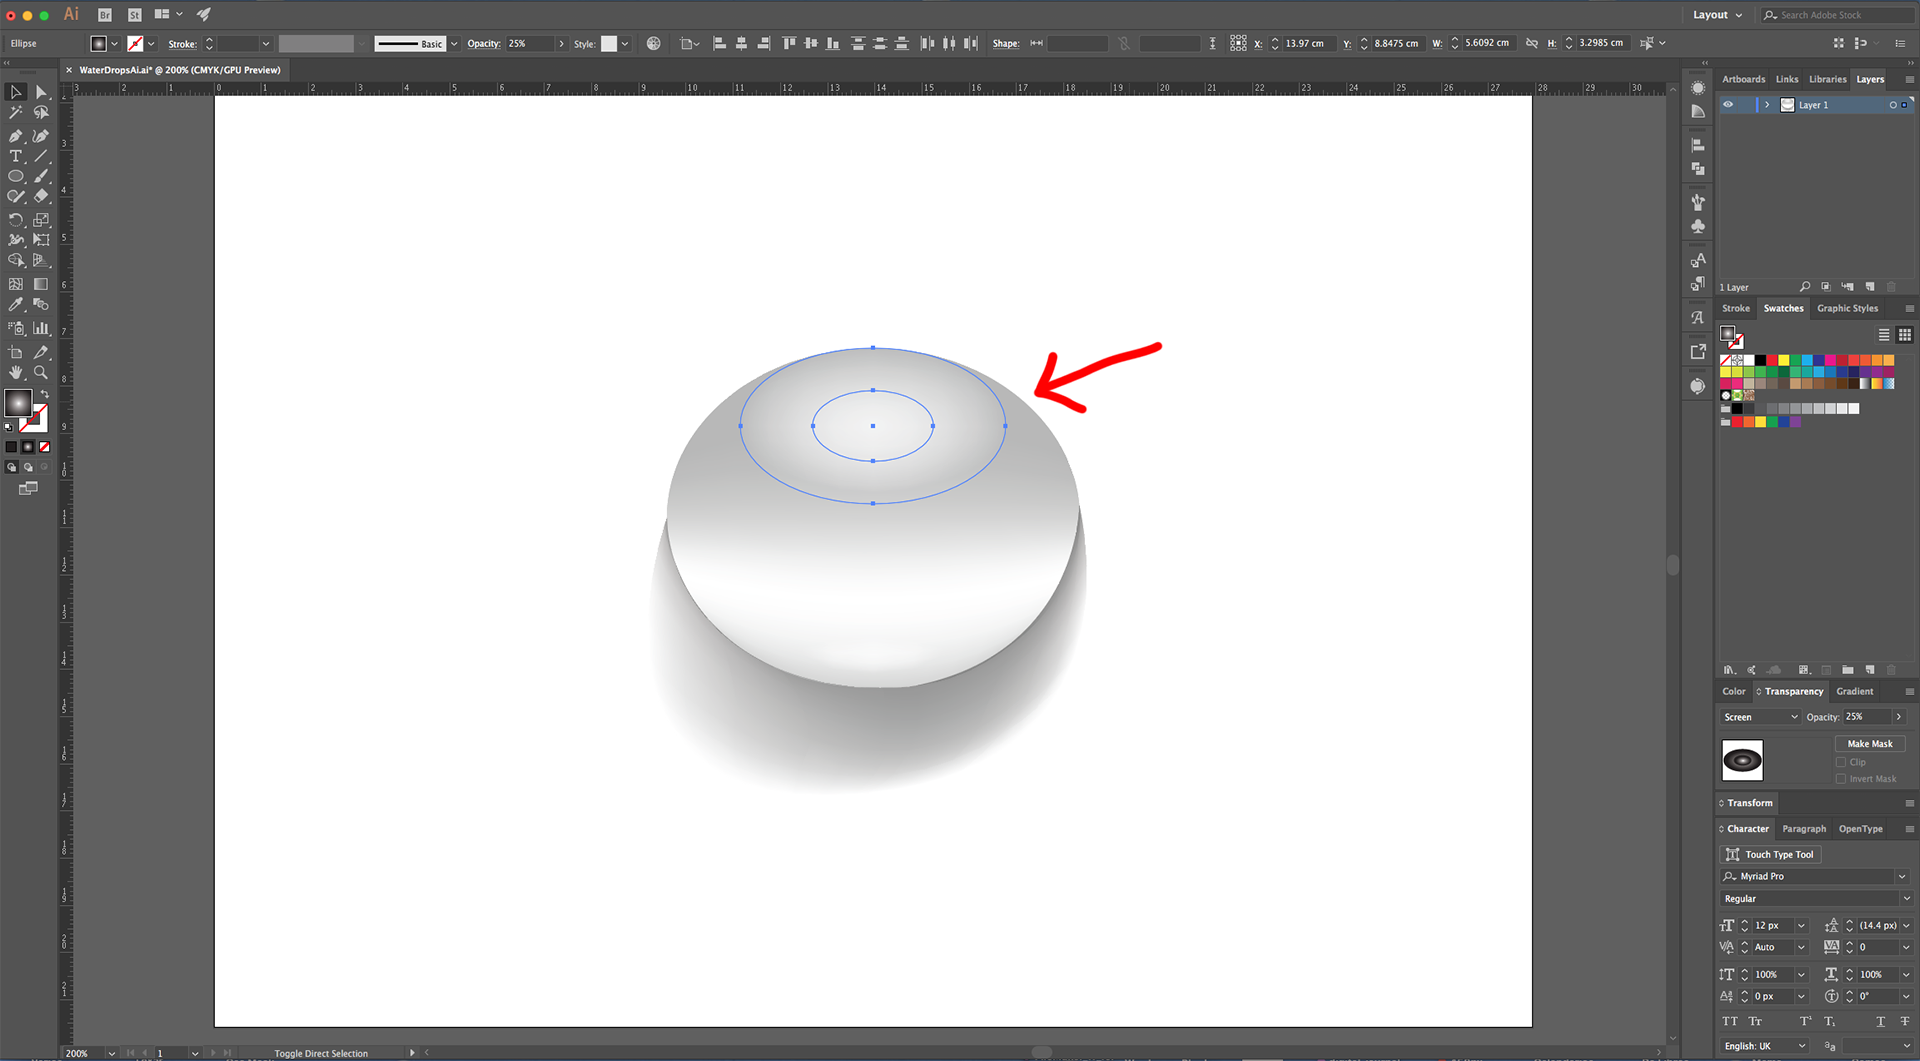
14 - Move the smaller Oval “Up” a bit so its upper part is about 5 mm from the Top.
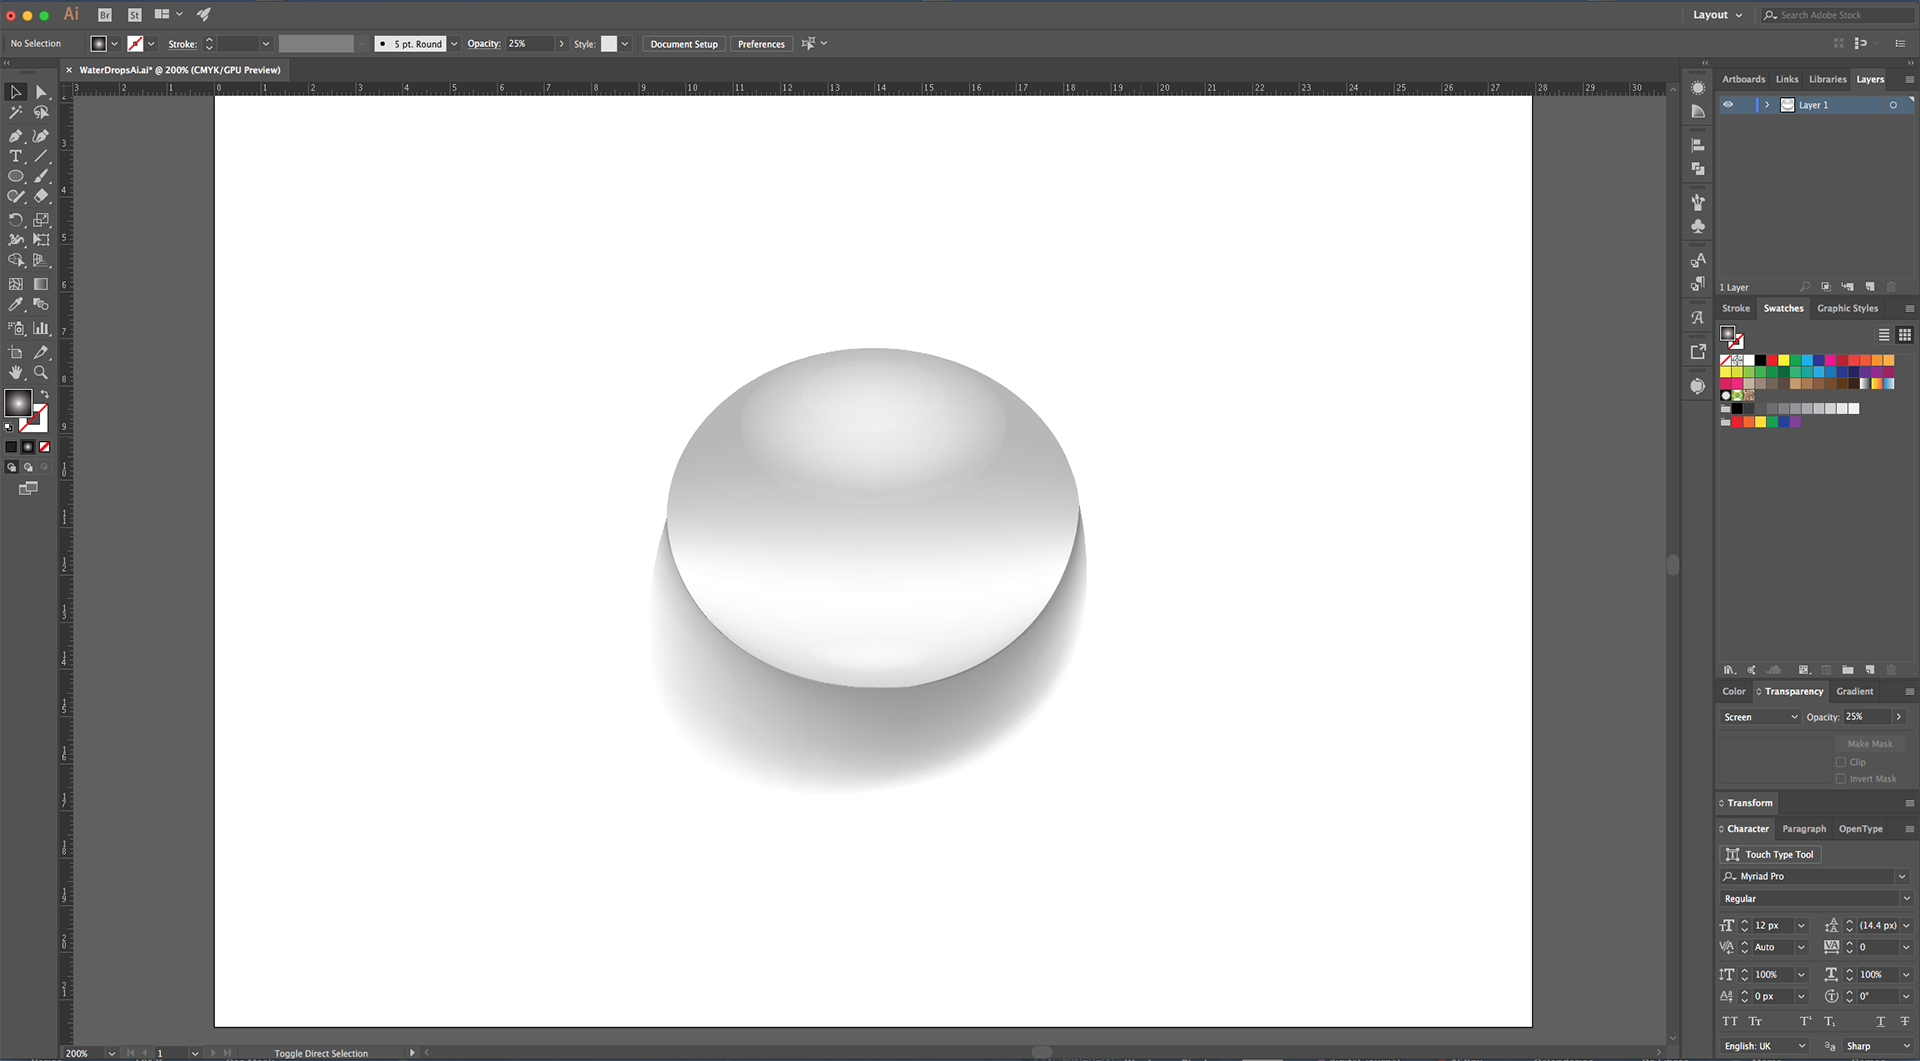
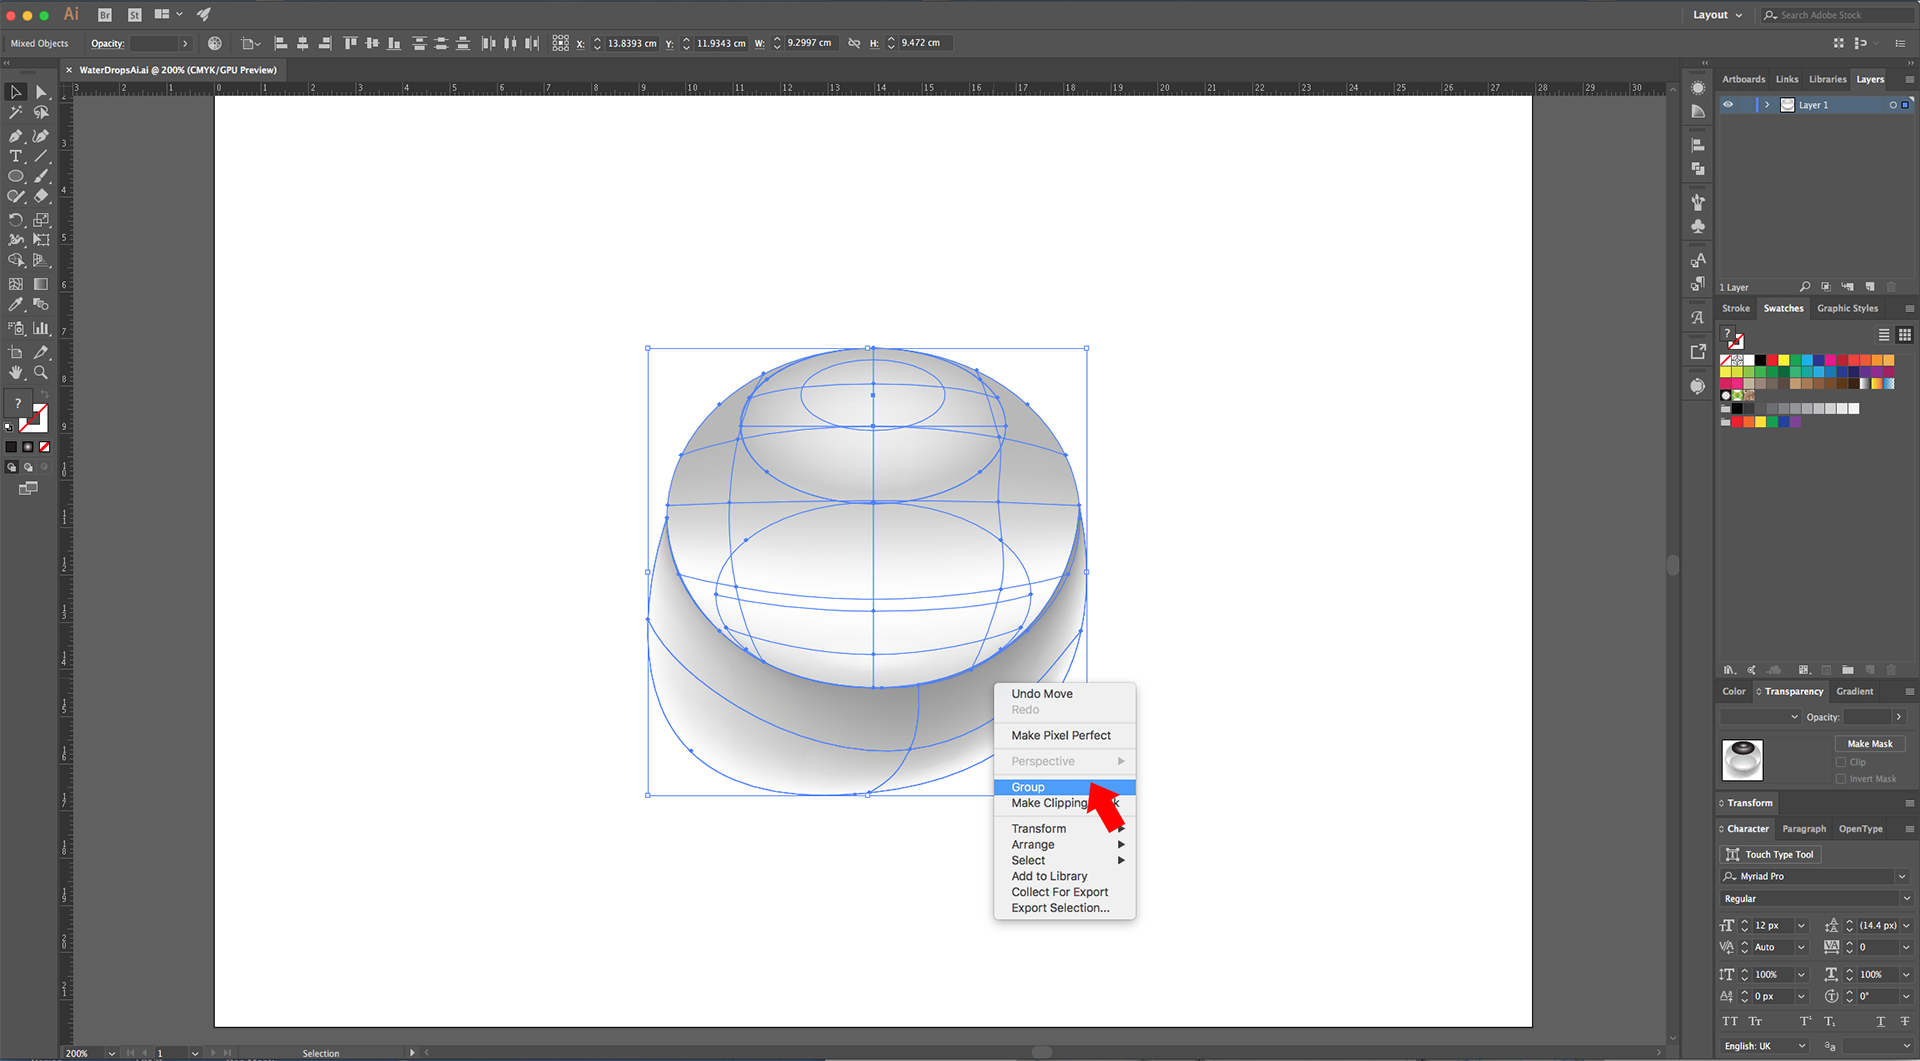
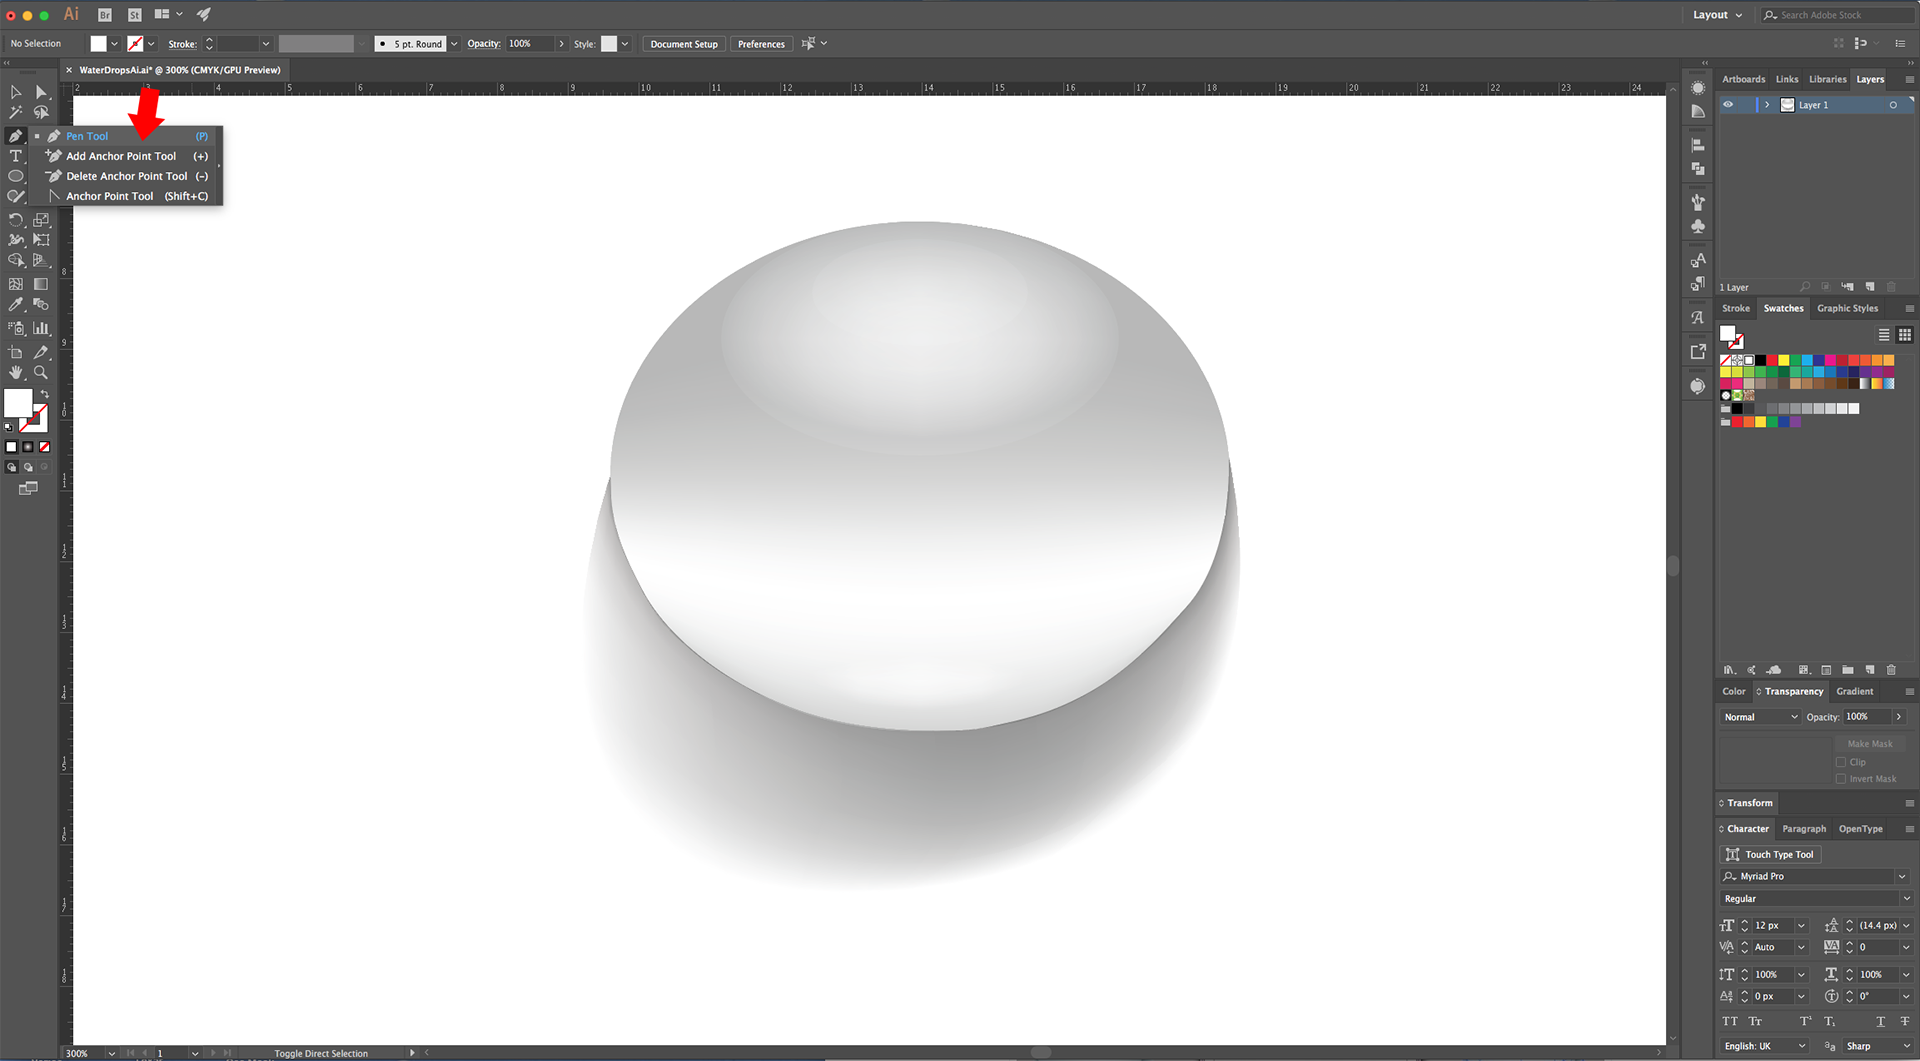
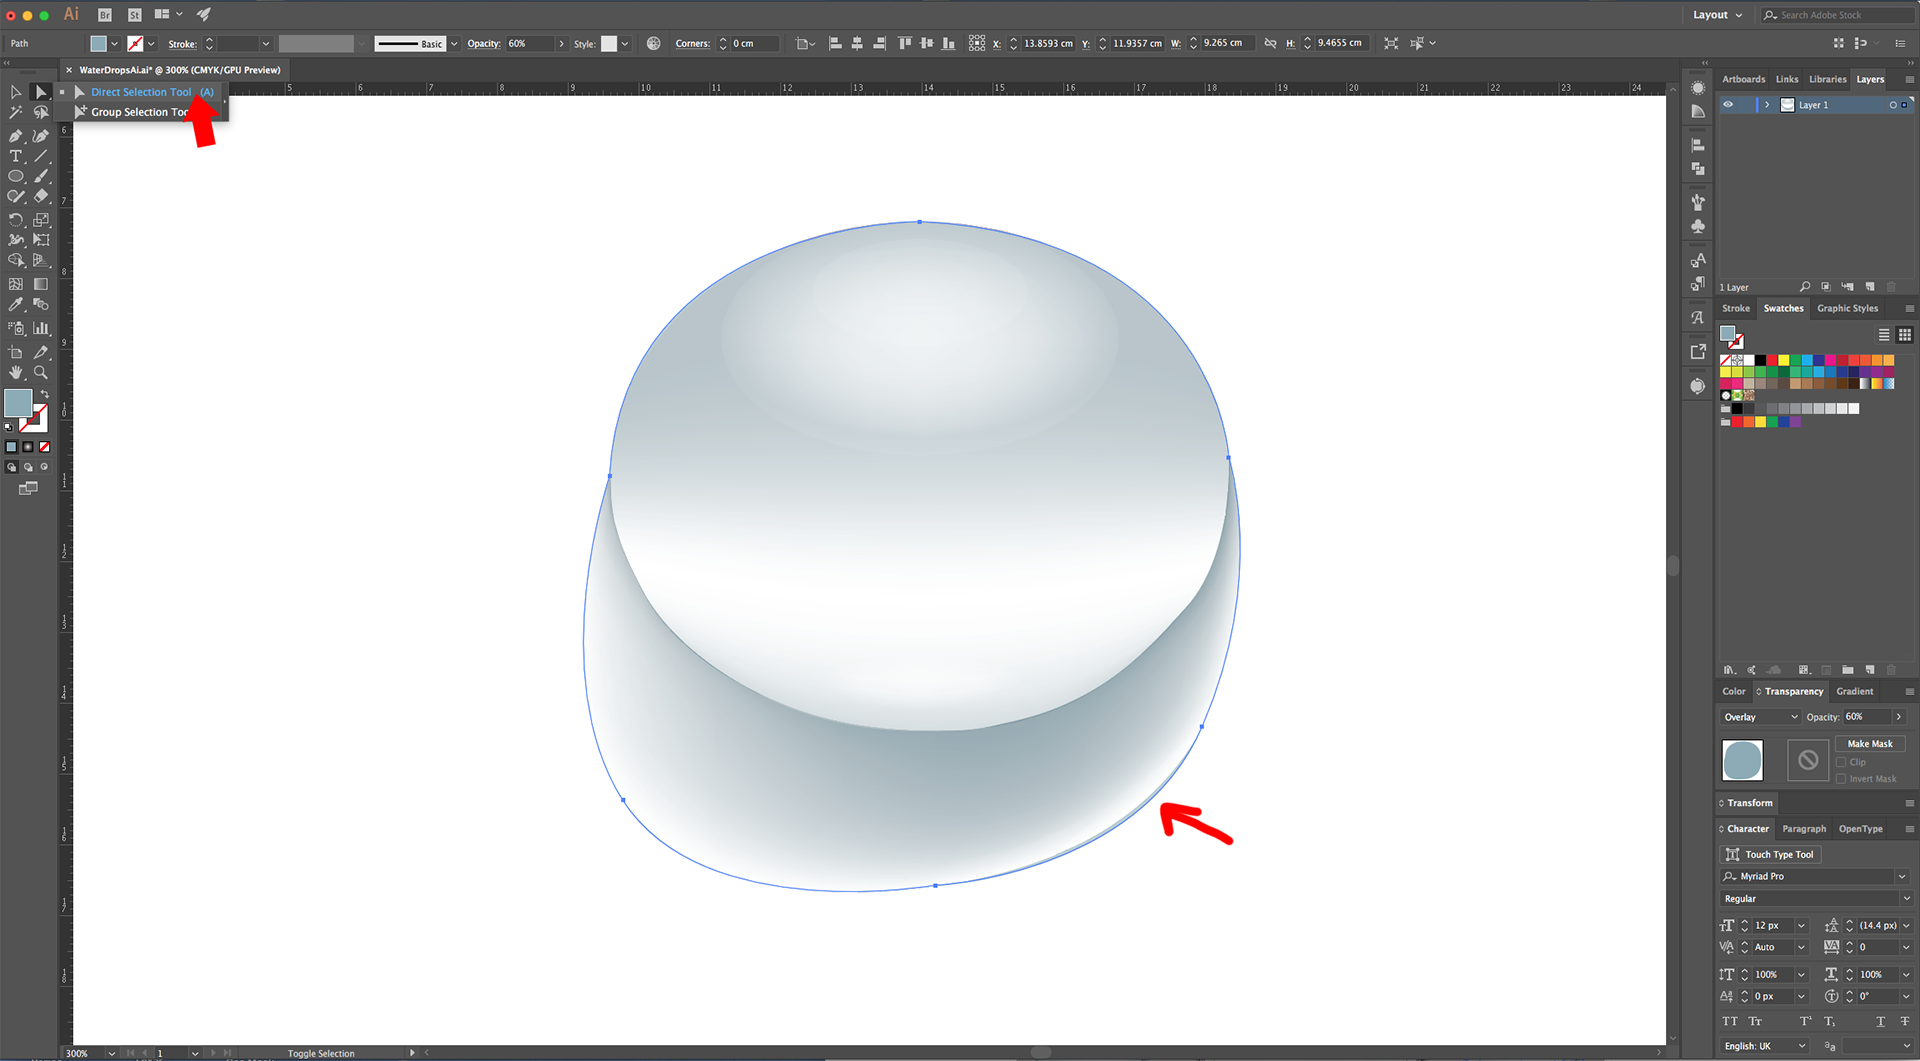
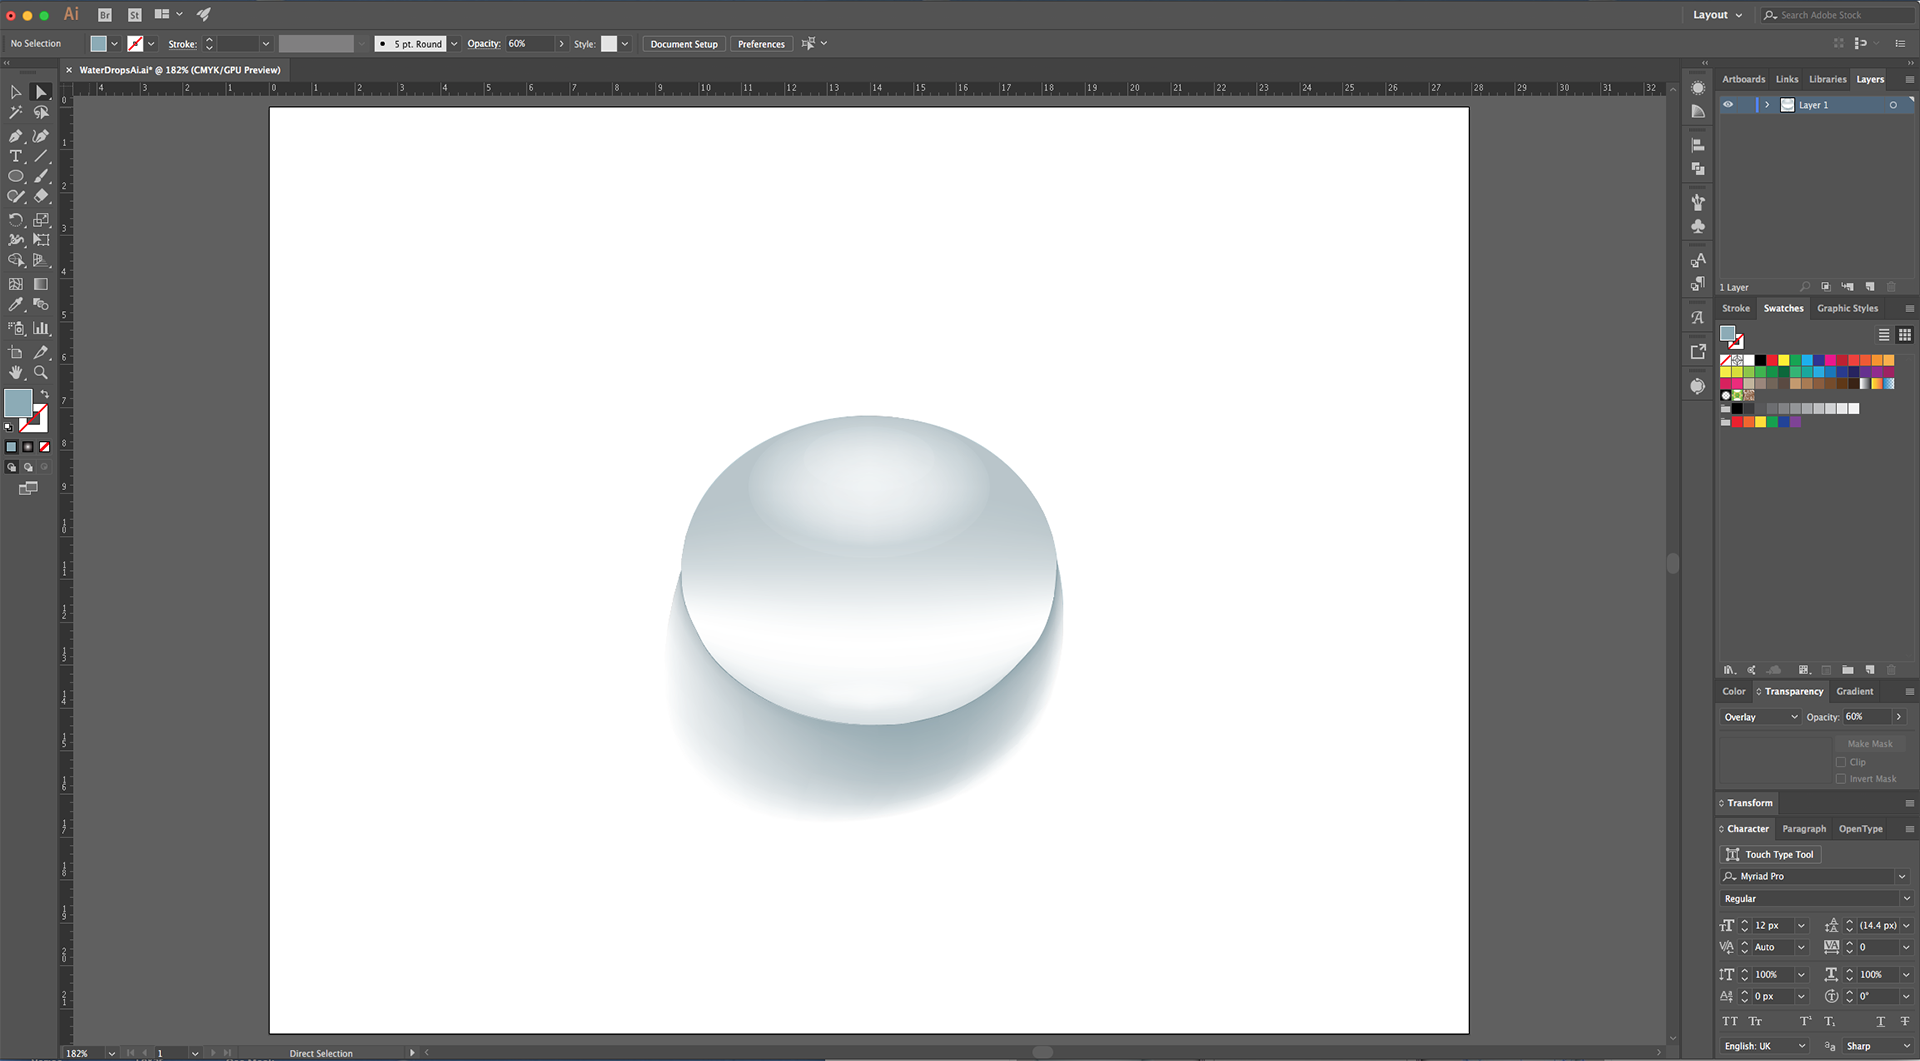
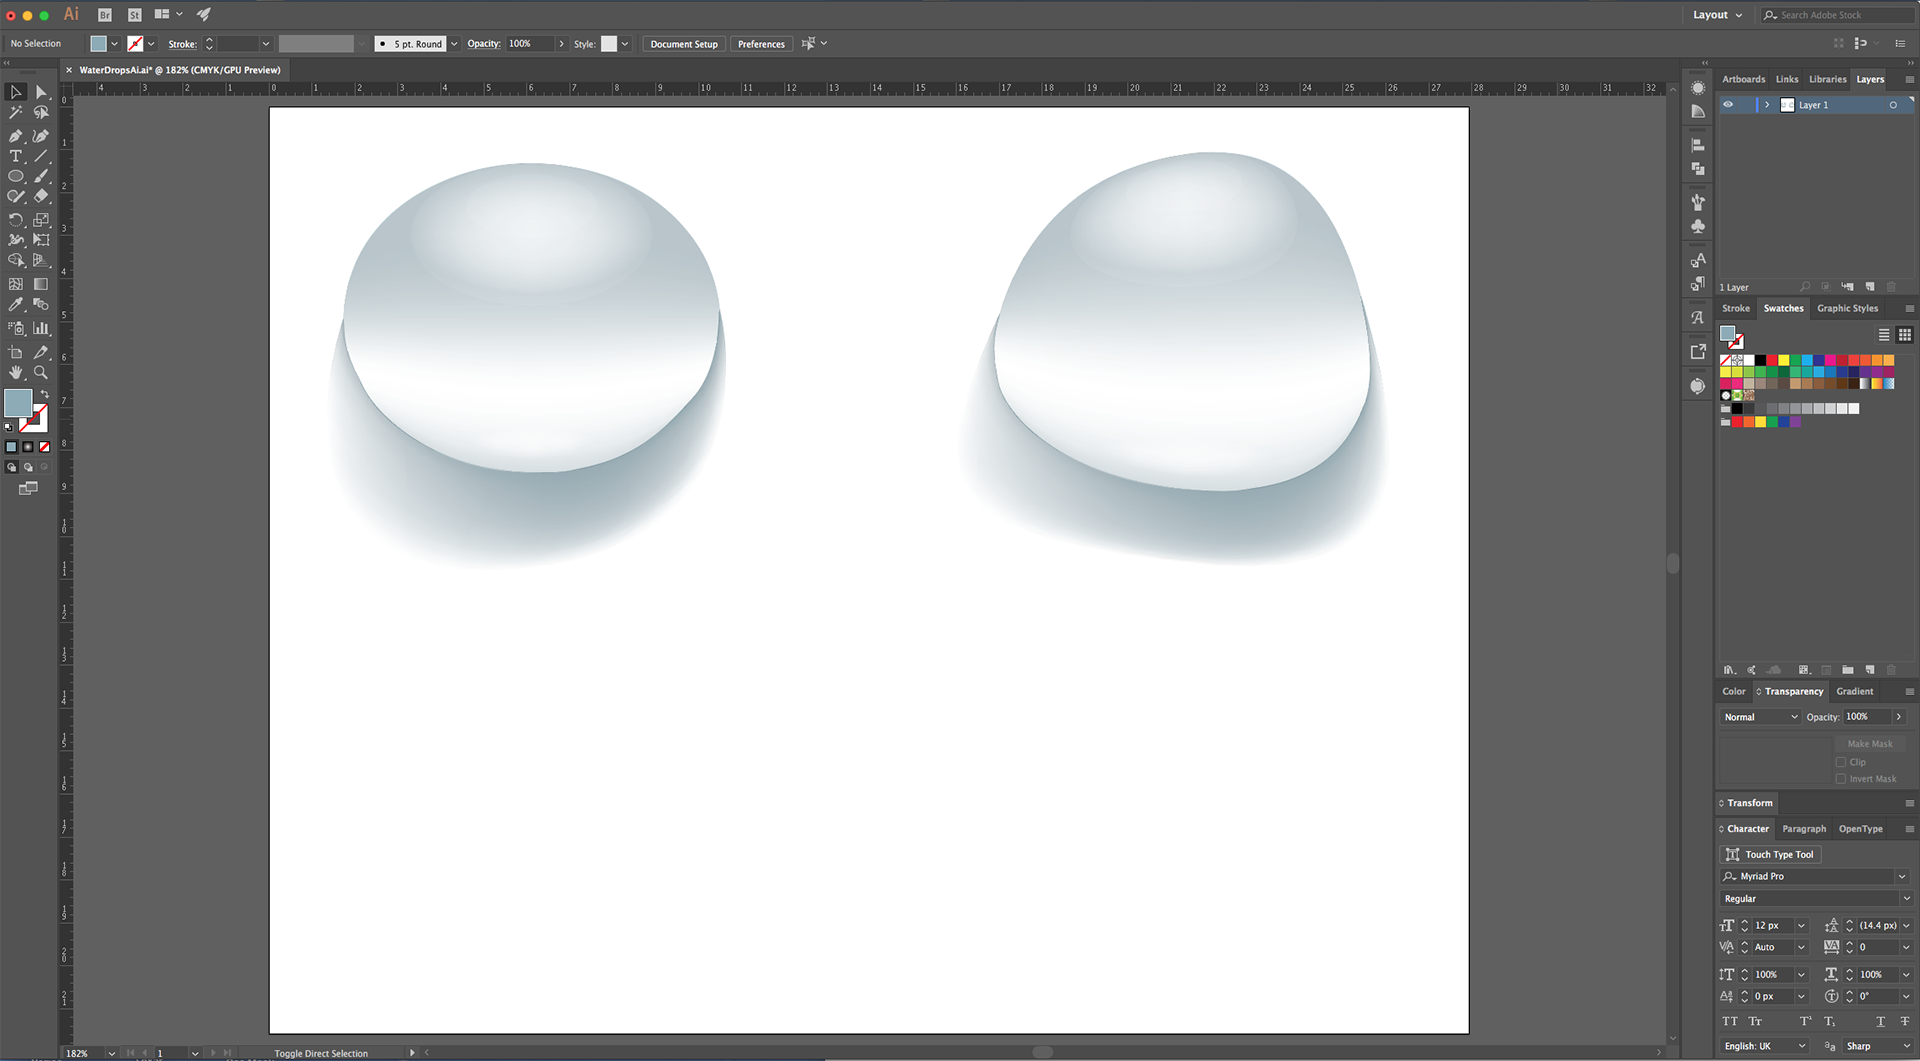
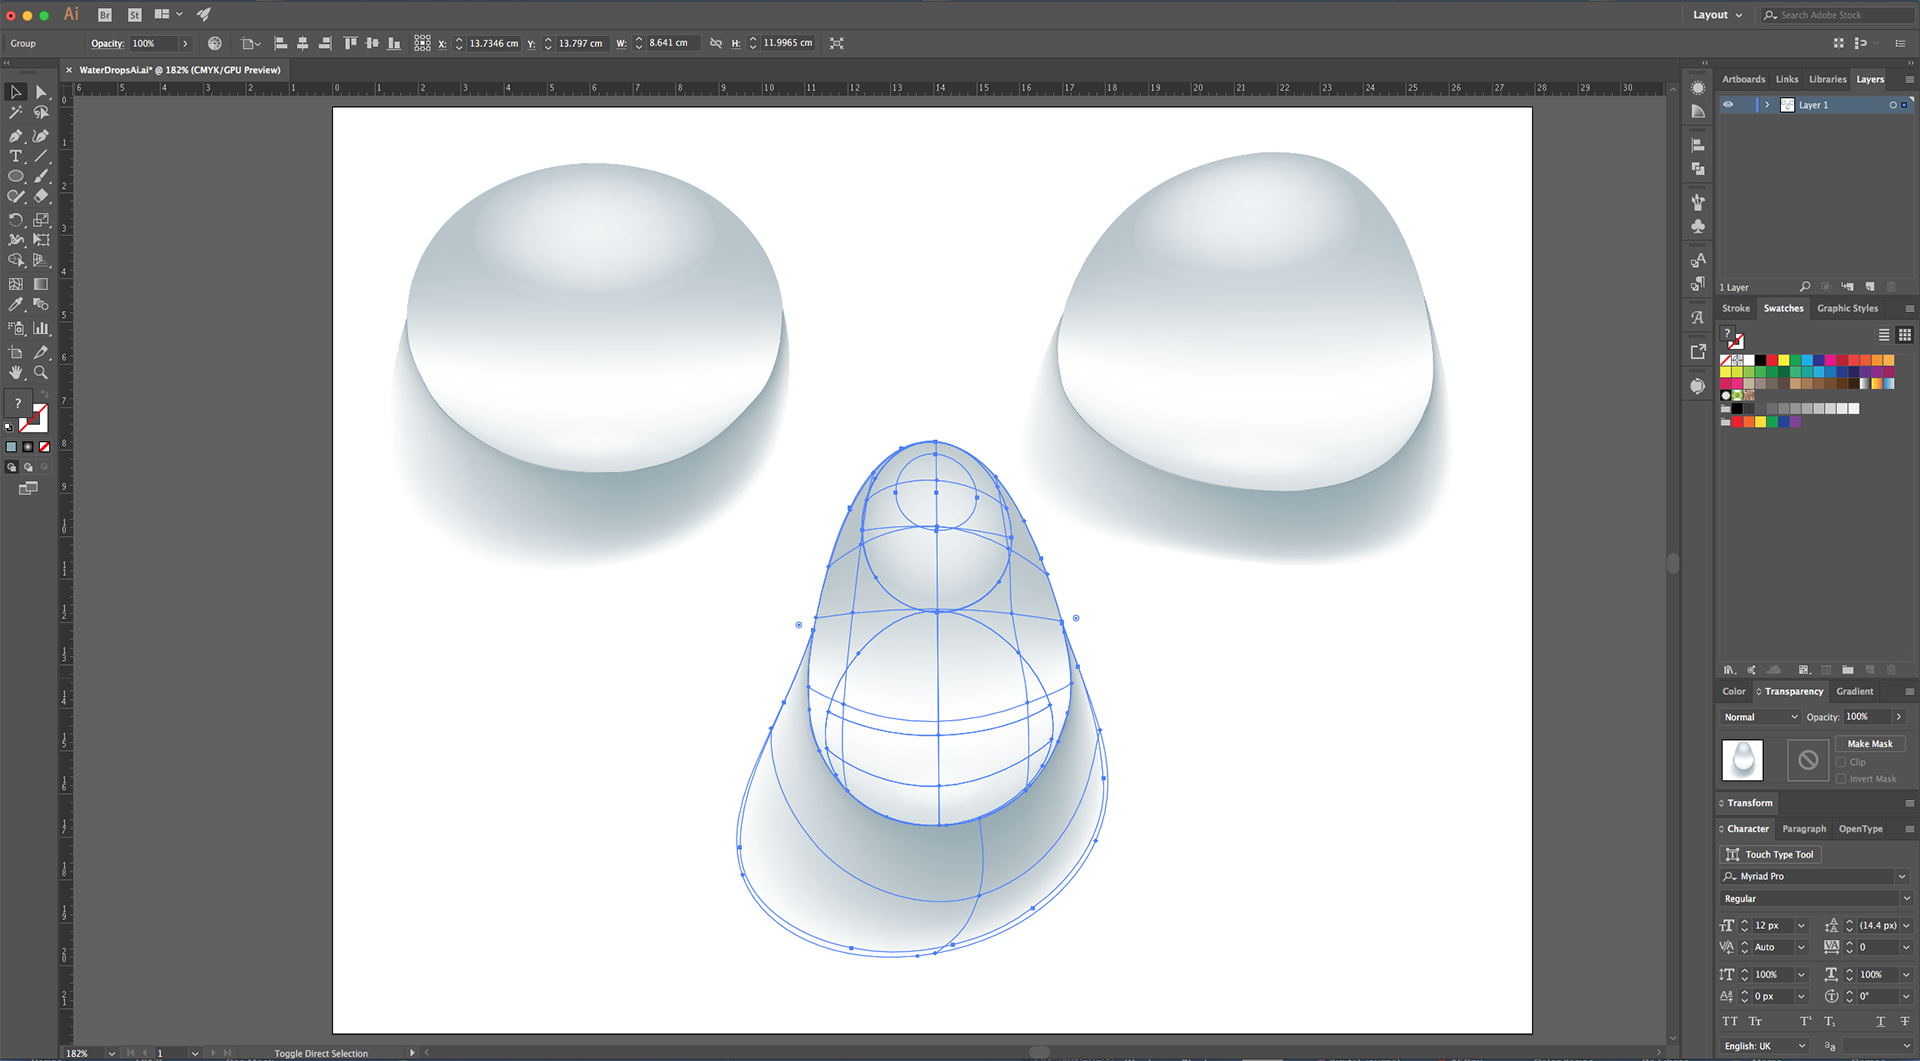
15 - Select everything, right-click on top and choose “Group” (Command/Control + G). Then, use the “Pen Tool” (P) to draw a Vector following the Shape of the Drop and Shadow.
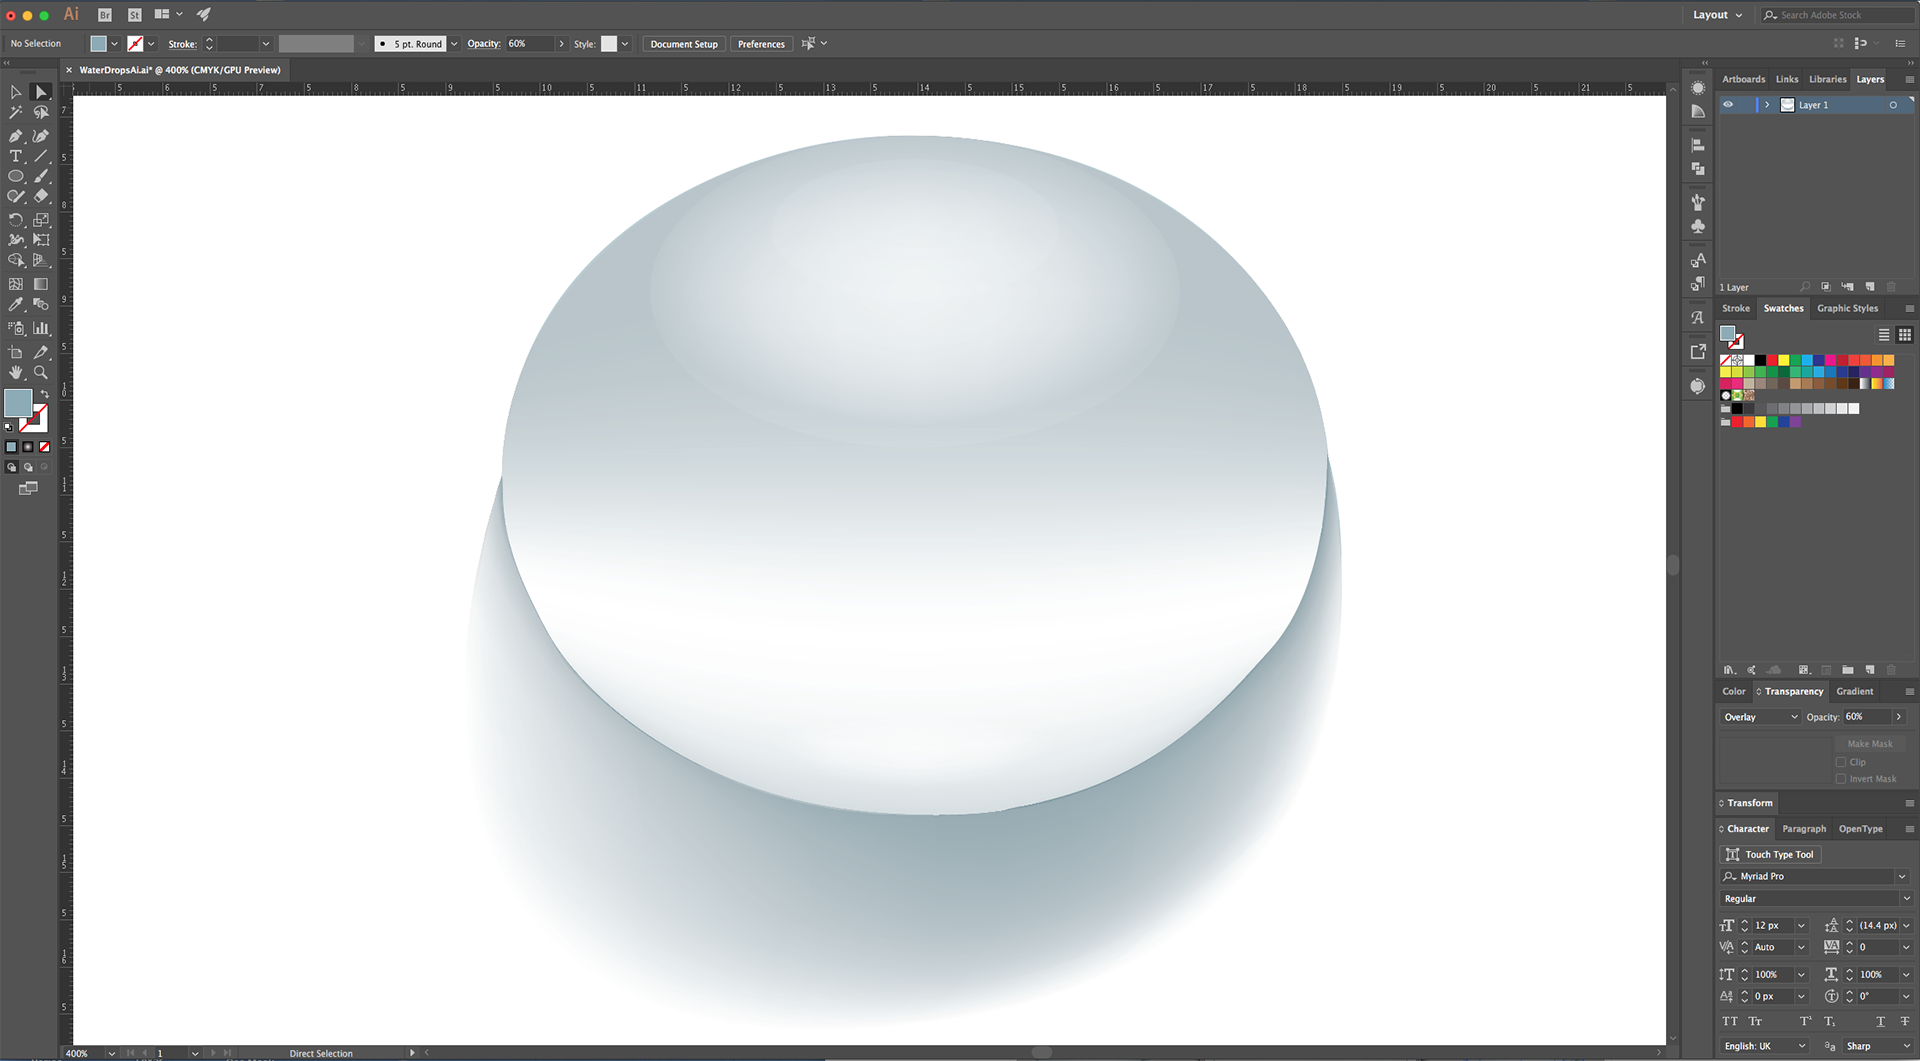
16 - Fill the Shape with a medium Blue (#8babb7) and change its “Blending Mode” to “Overlay” and its “Opacity” to 60%.

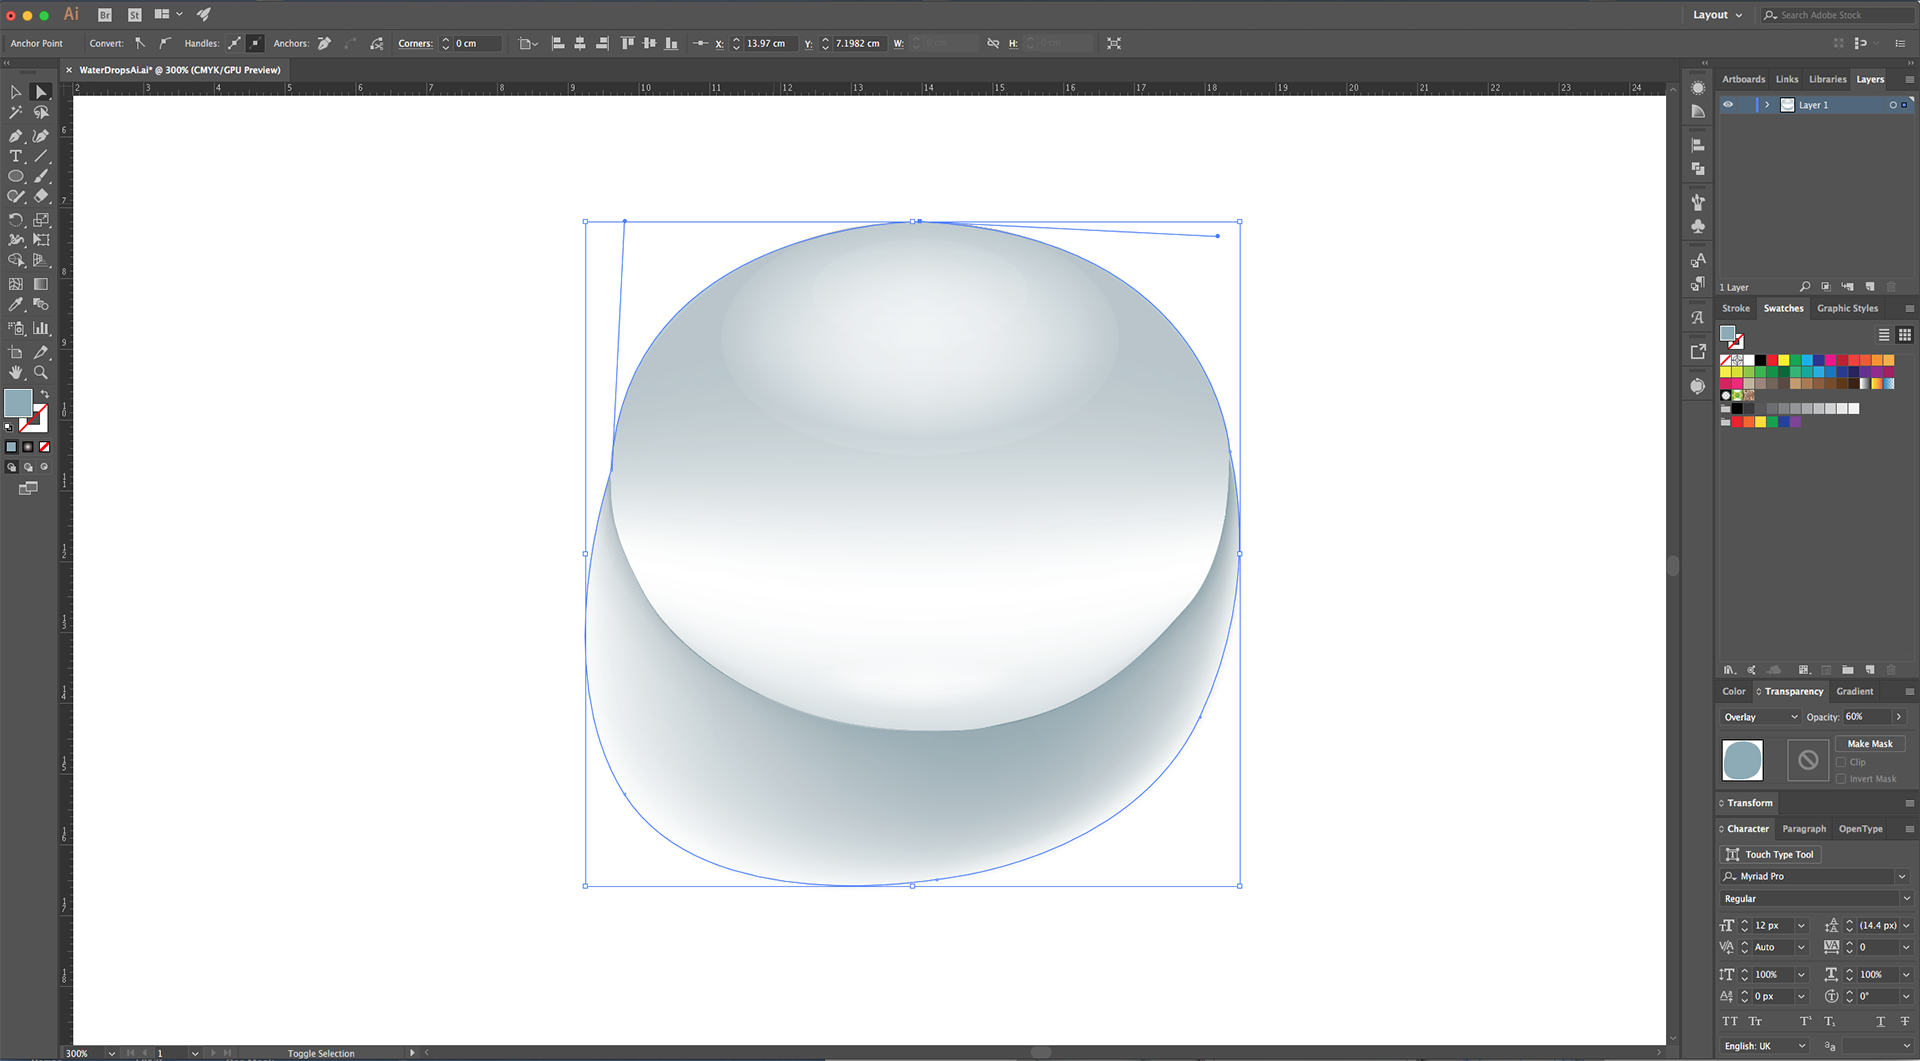
17 - Use the “Direct Selection Tool” (A) to fix the parts of the Shape that don’t coincide properly with the Drop.
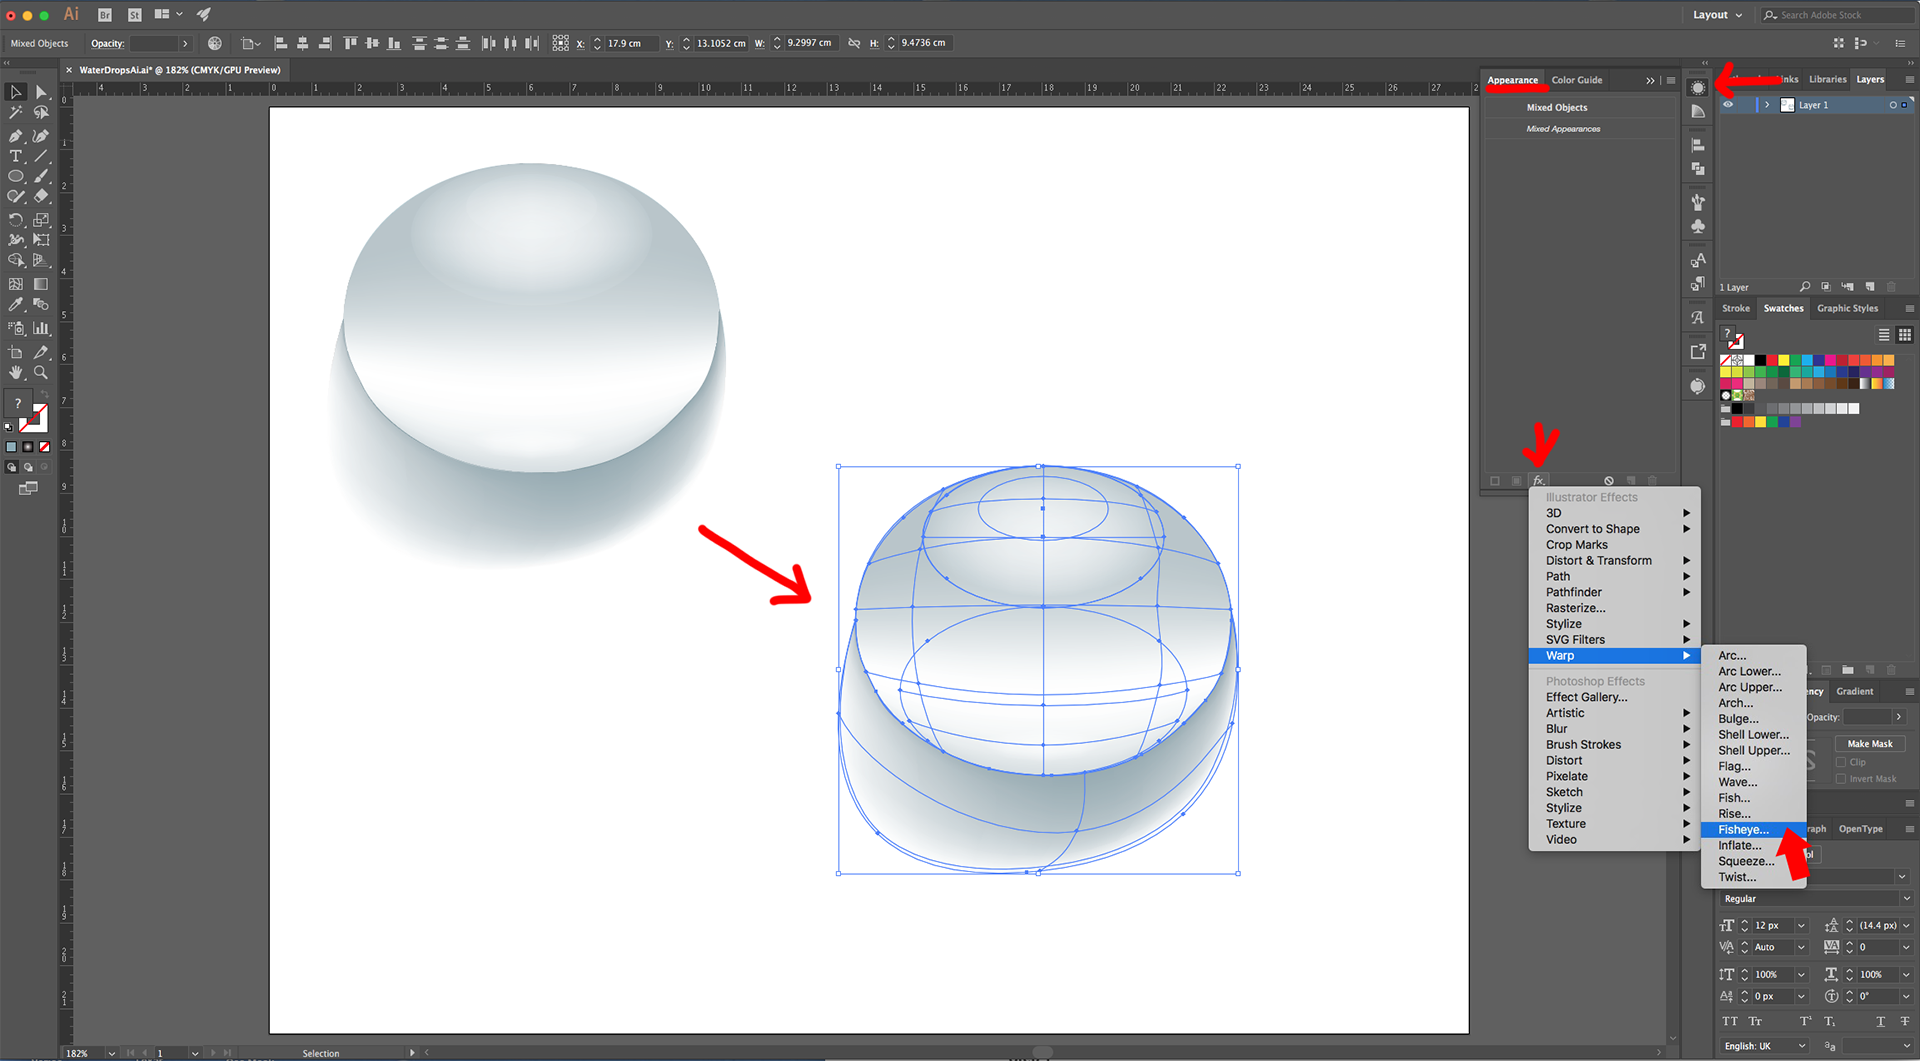
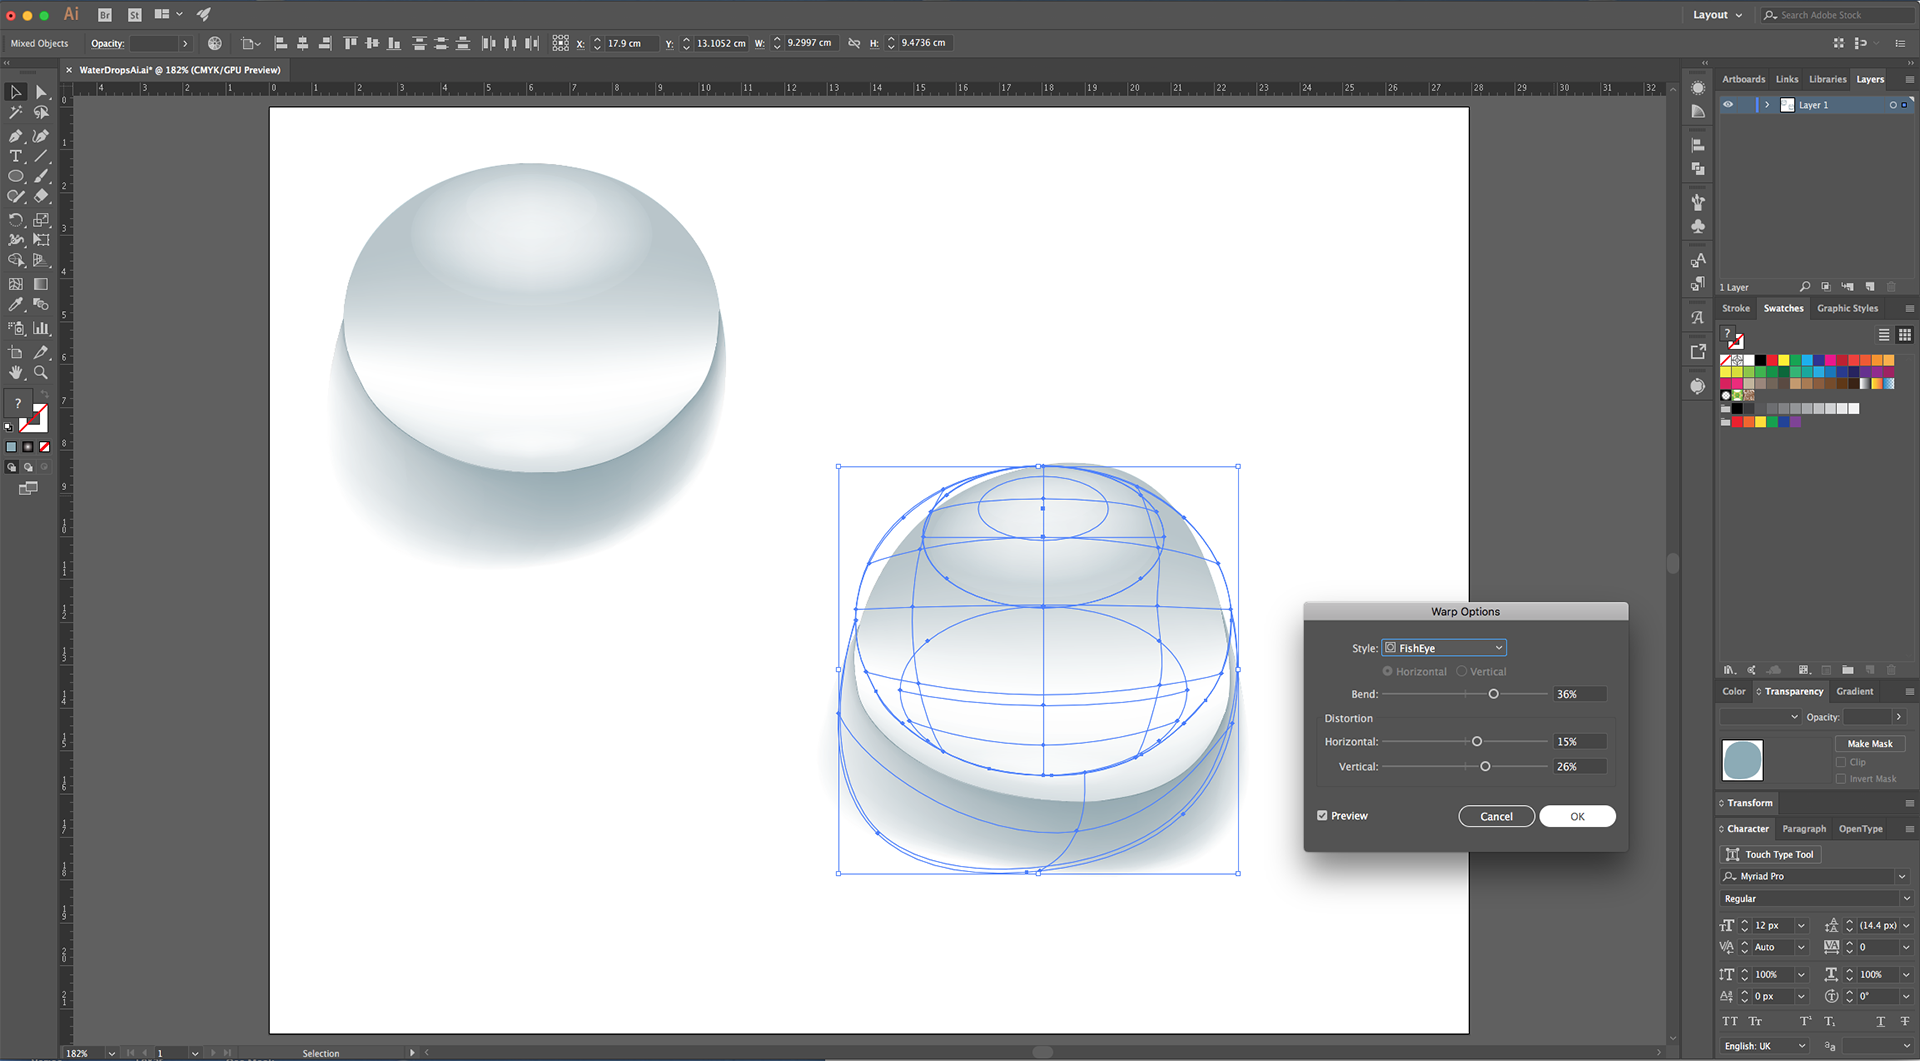
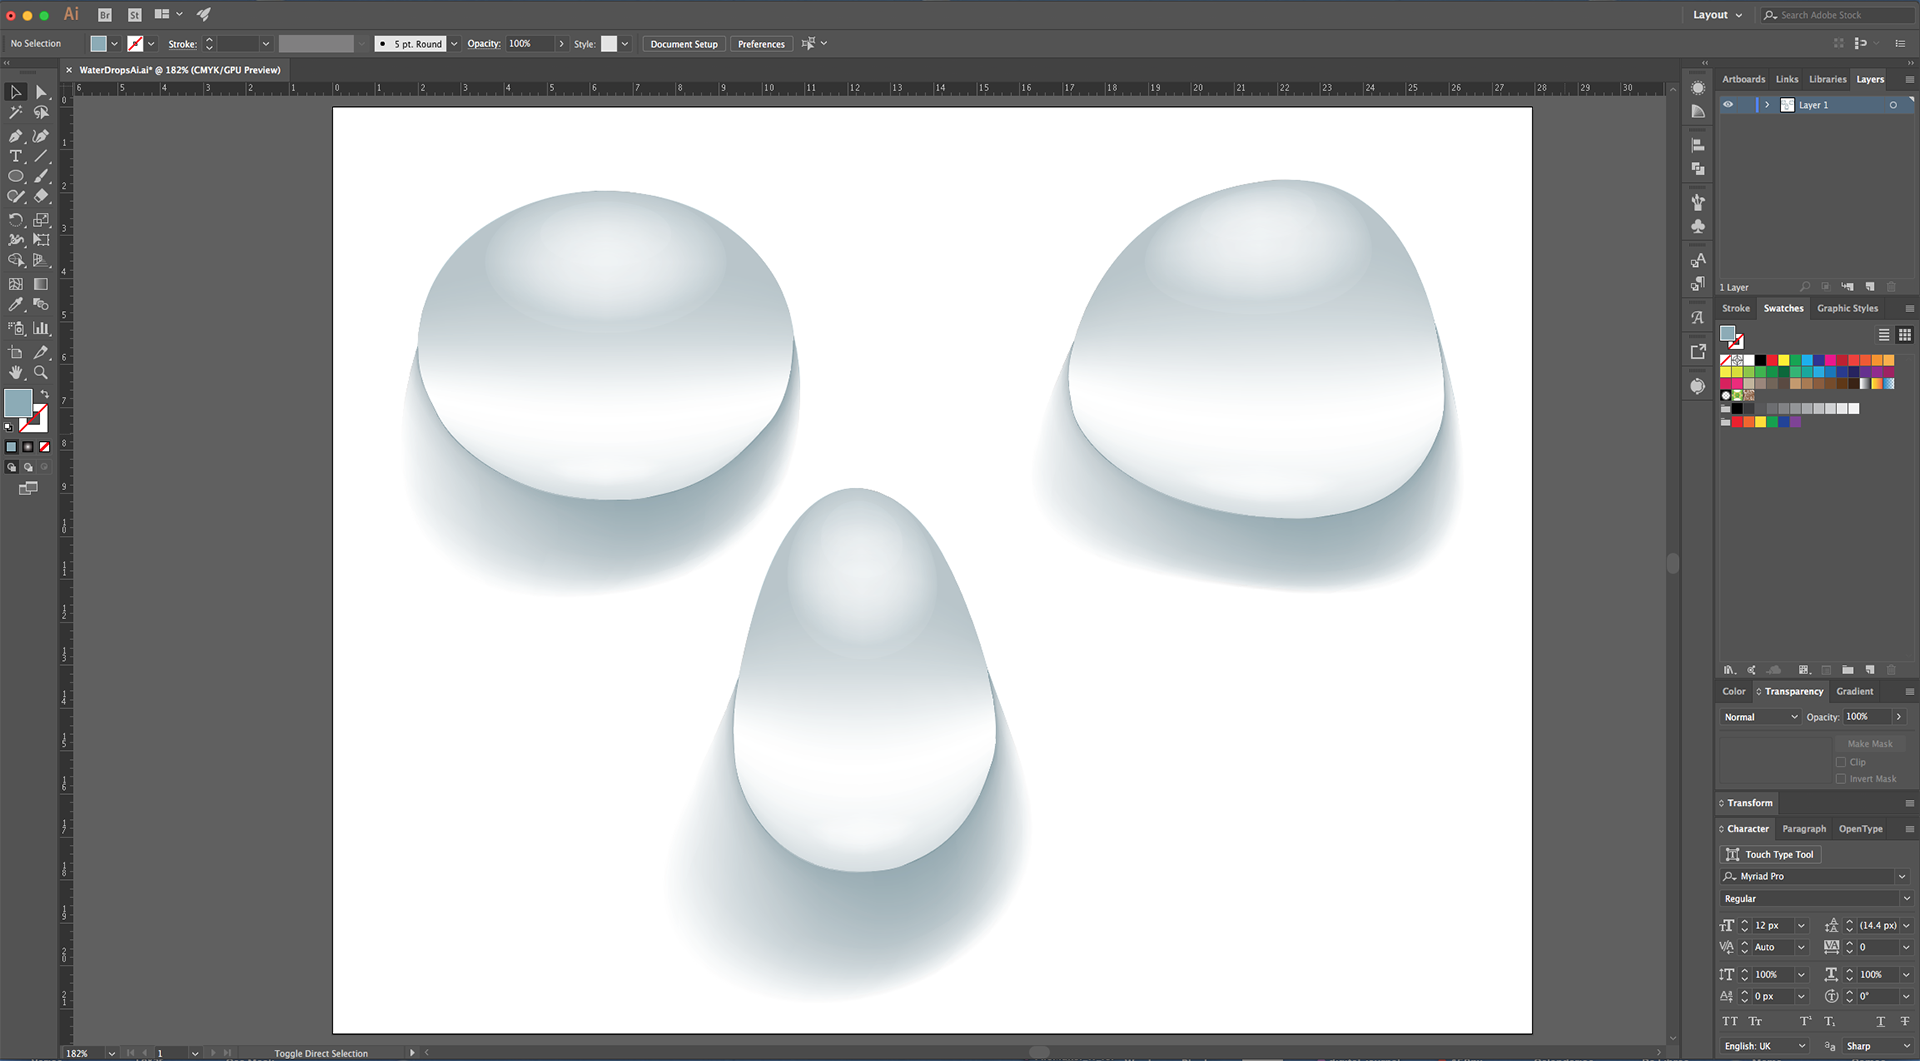
18 - Create a Duplicate of the Drop, head to the “Appearance Panel”, click on the “Effects Menu” on the Bottom-Left side of the panel and navigate to Warp > Fish Eye… Play around with the values until you achieve a nice and realistic deformation.
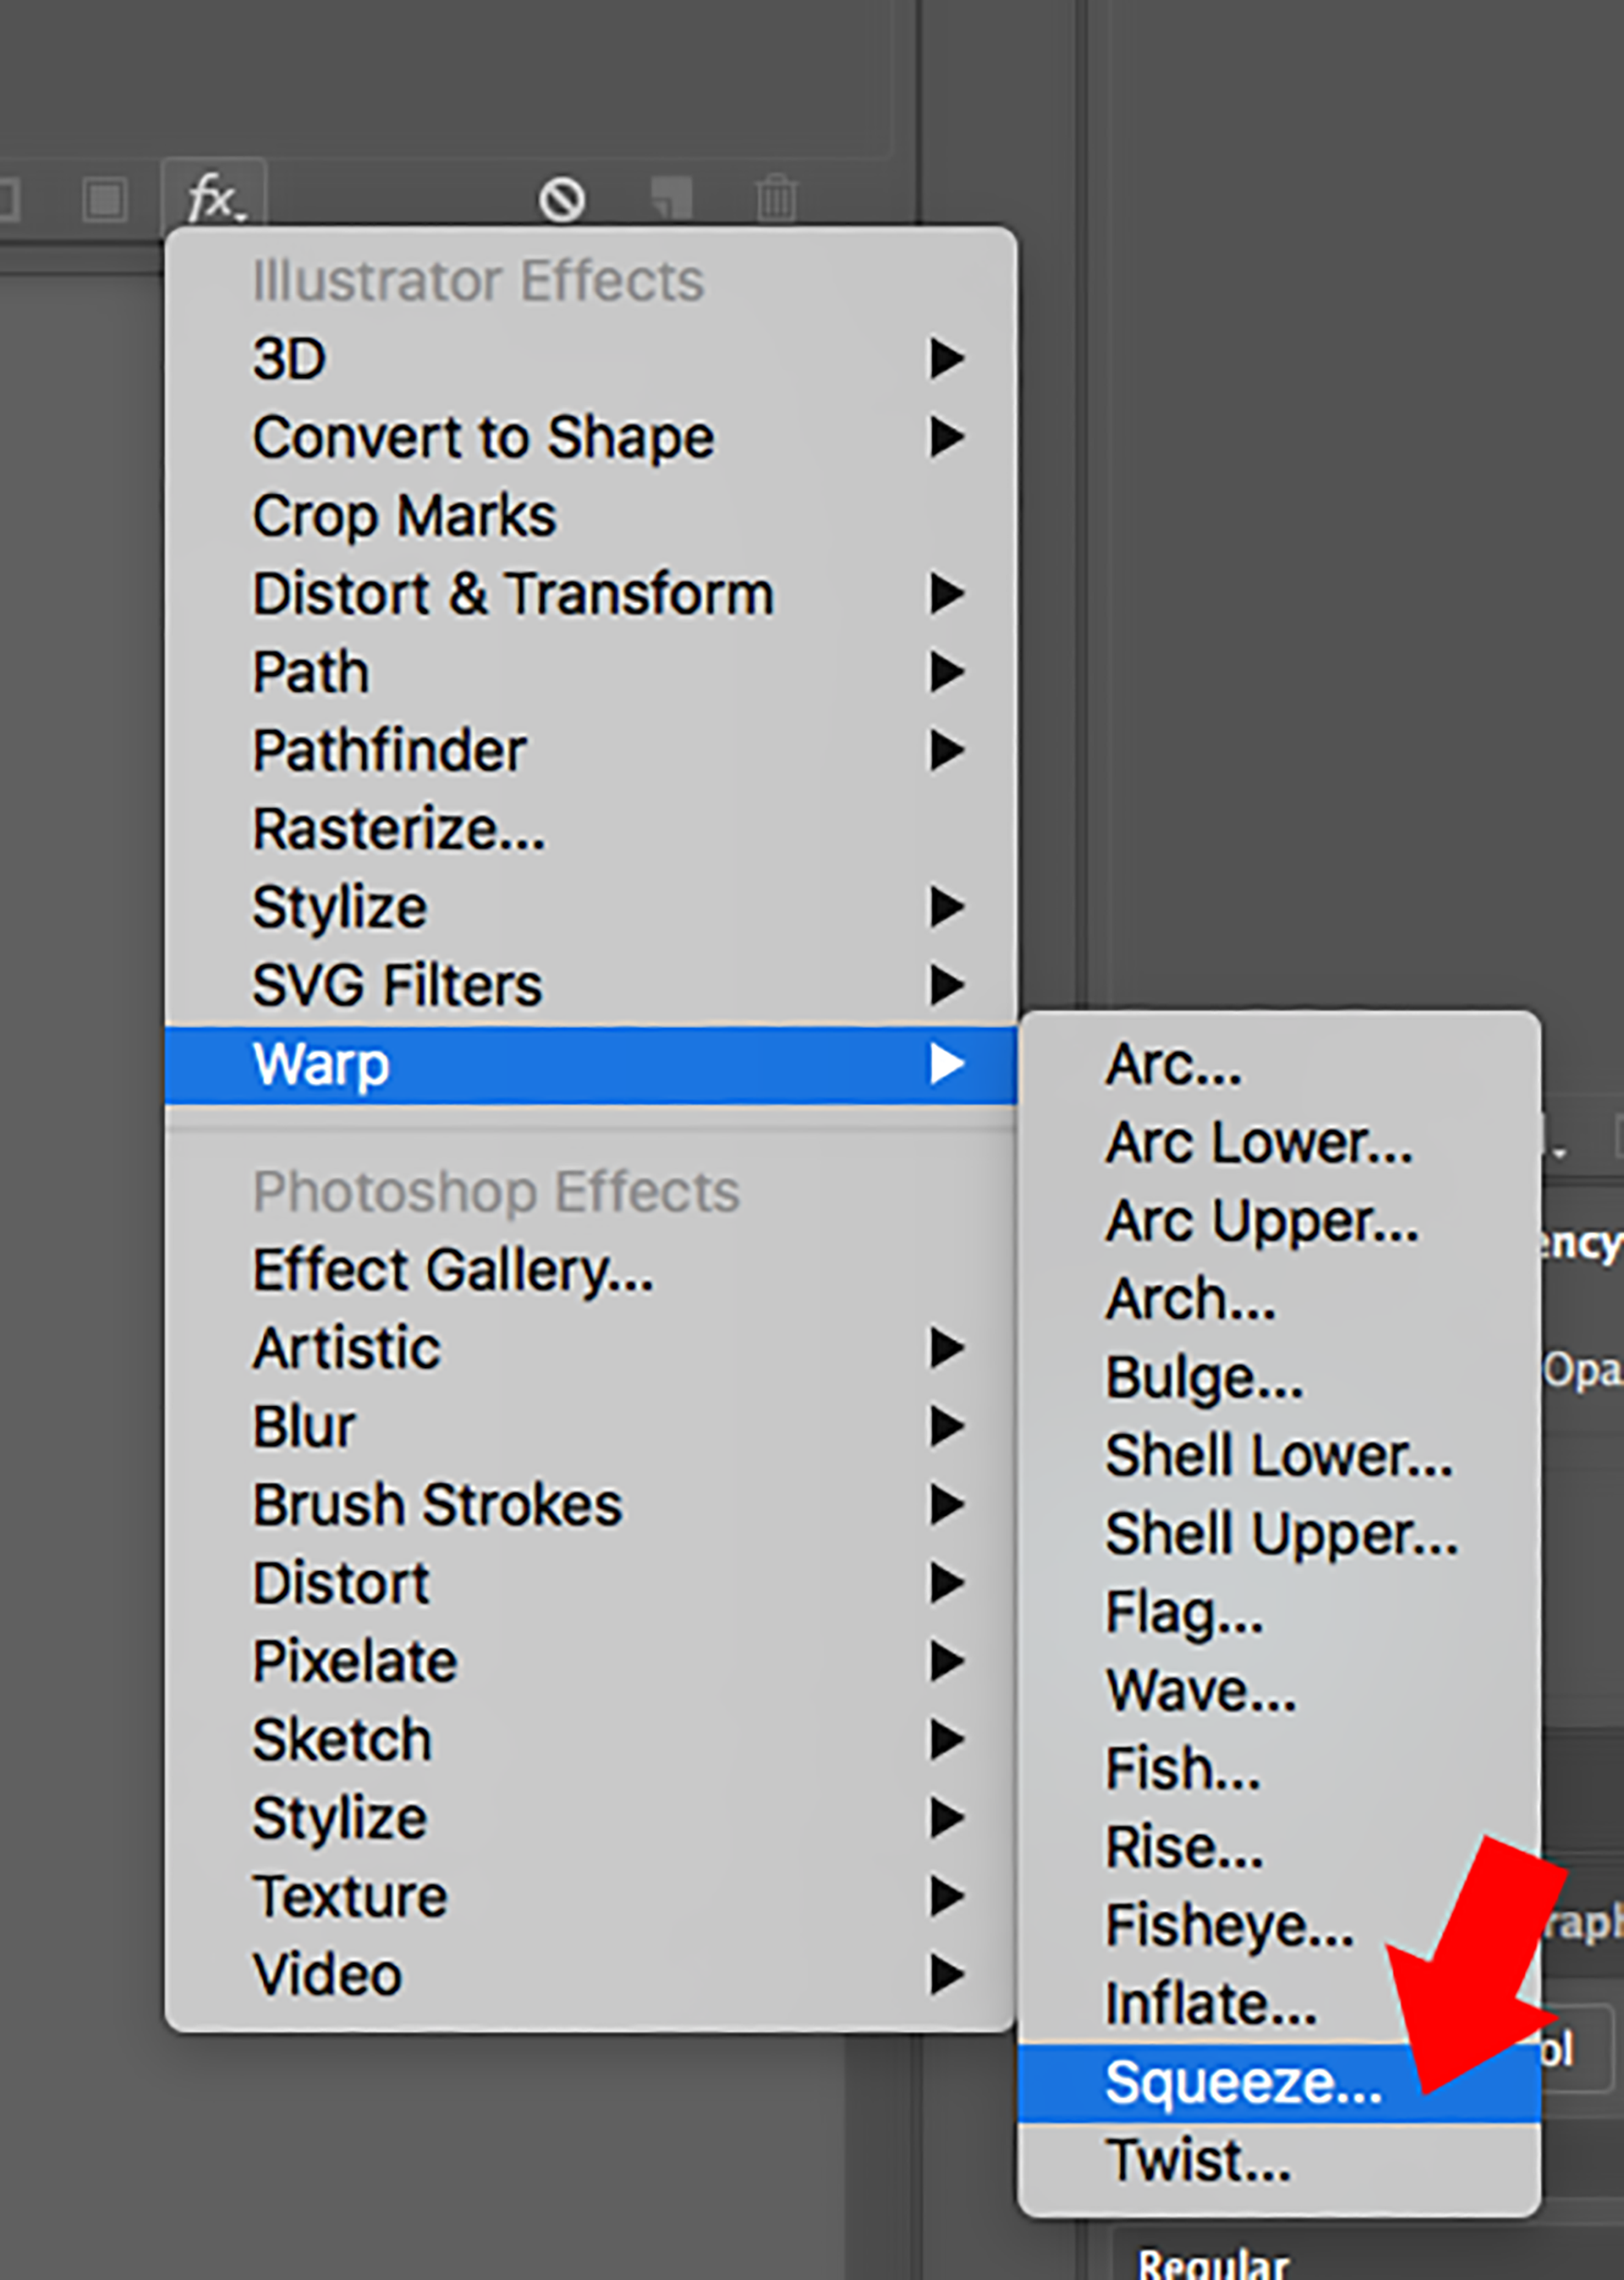
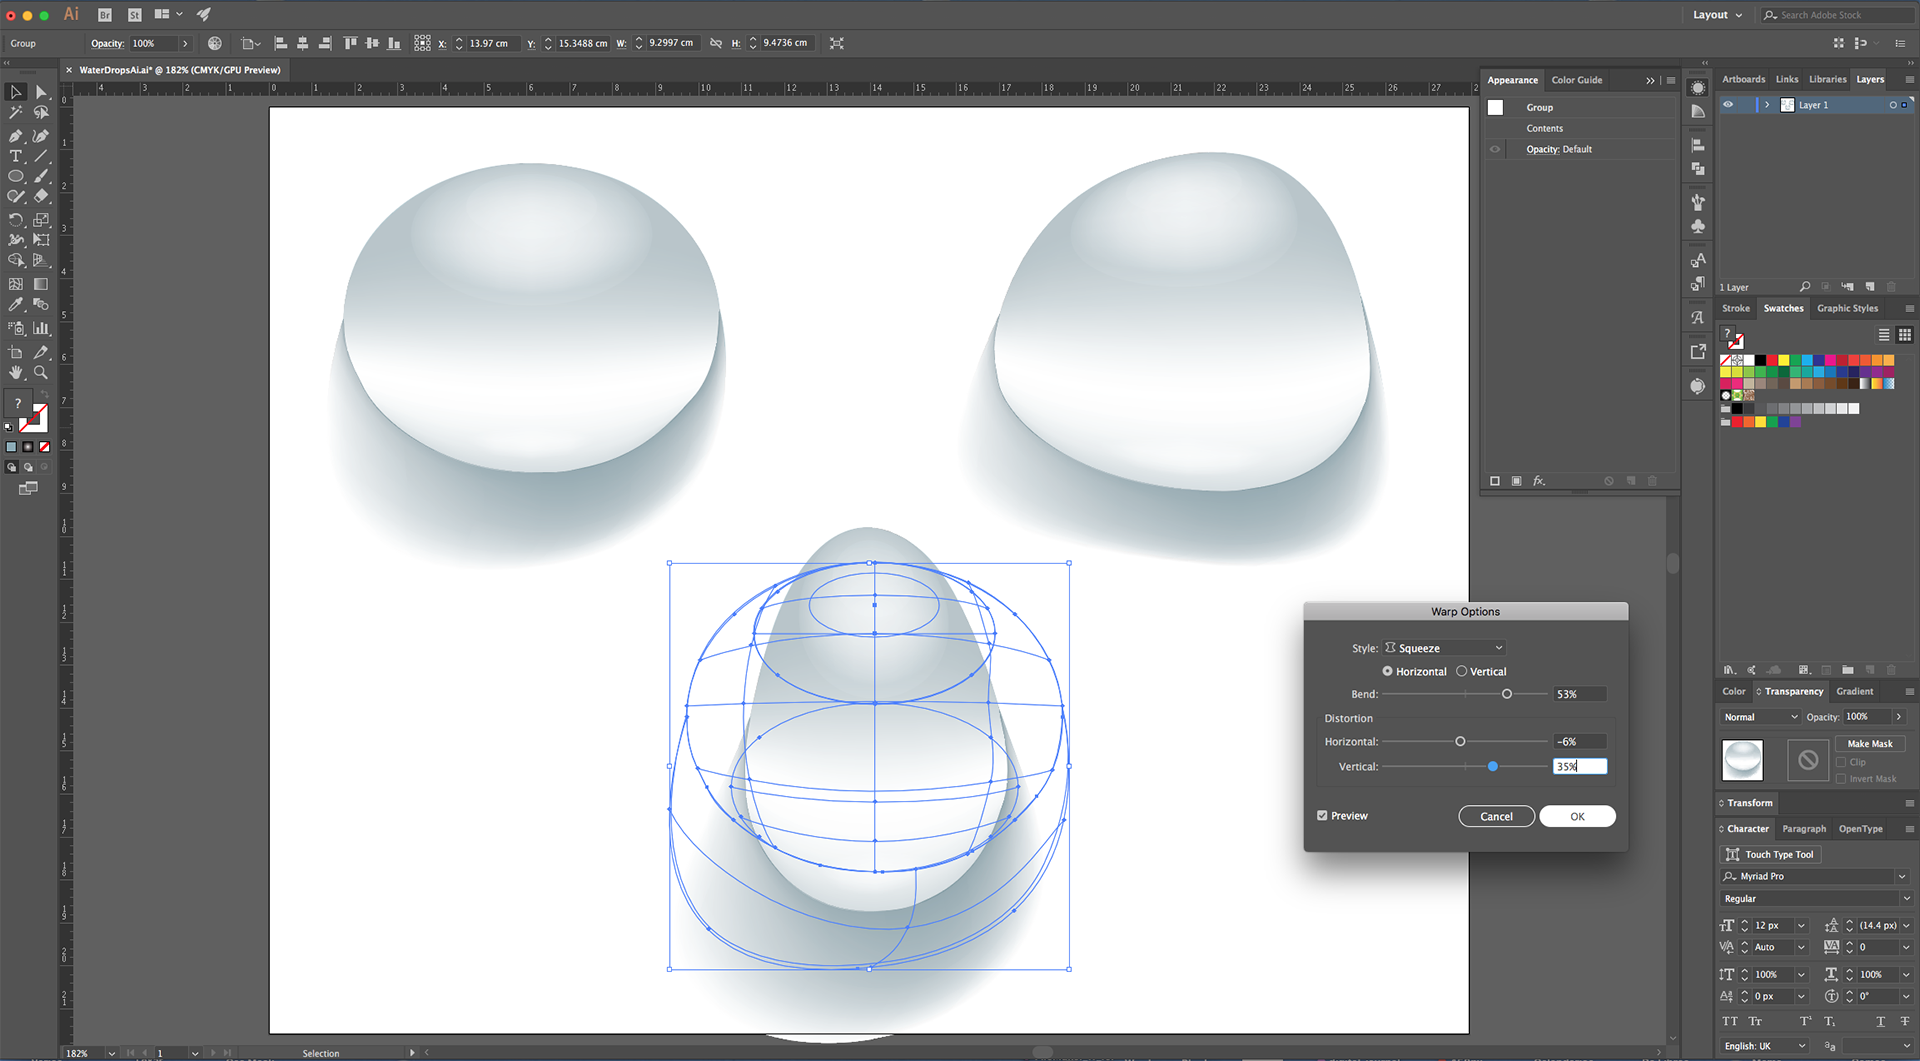
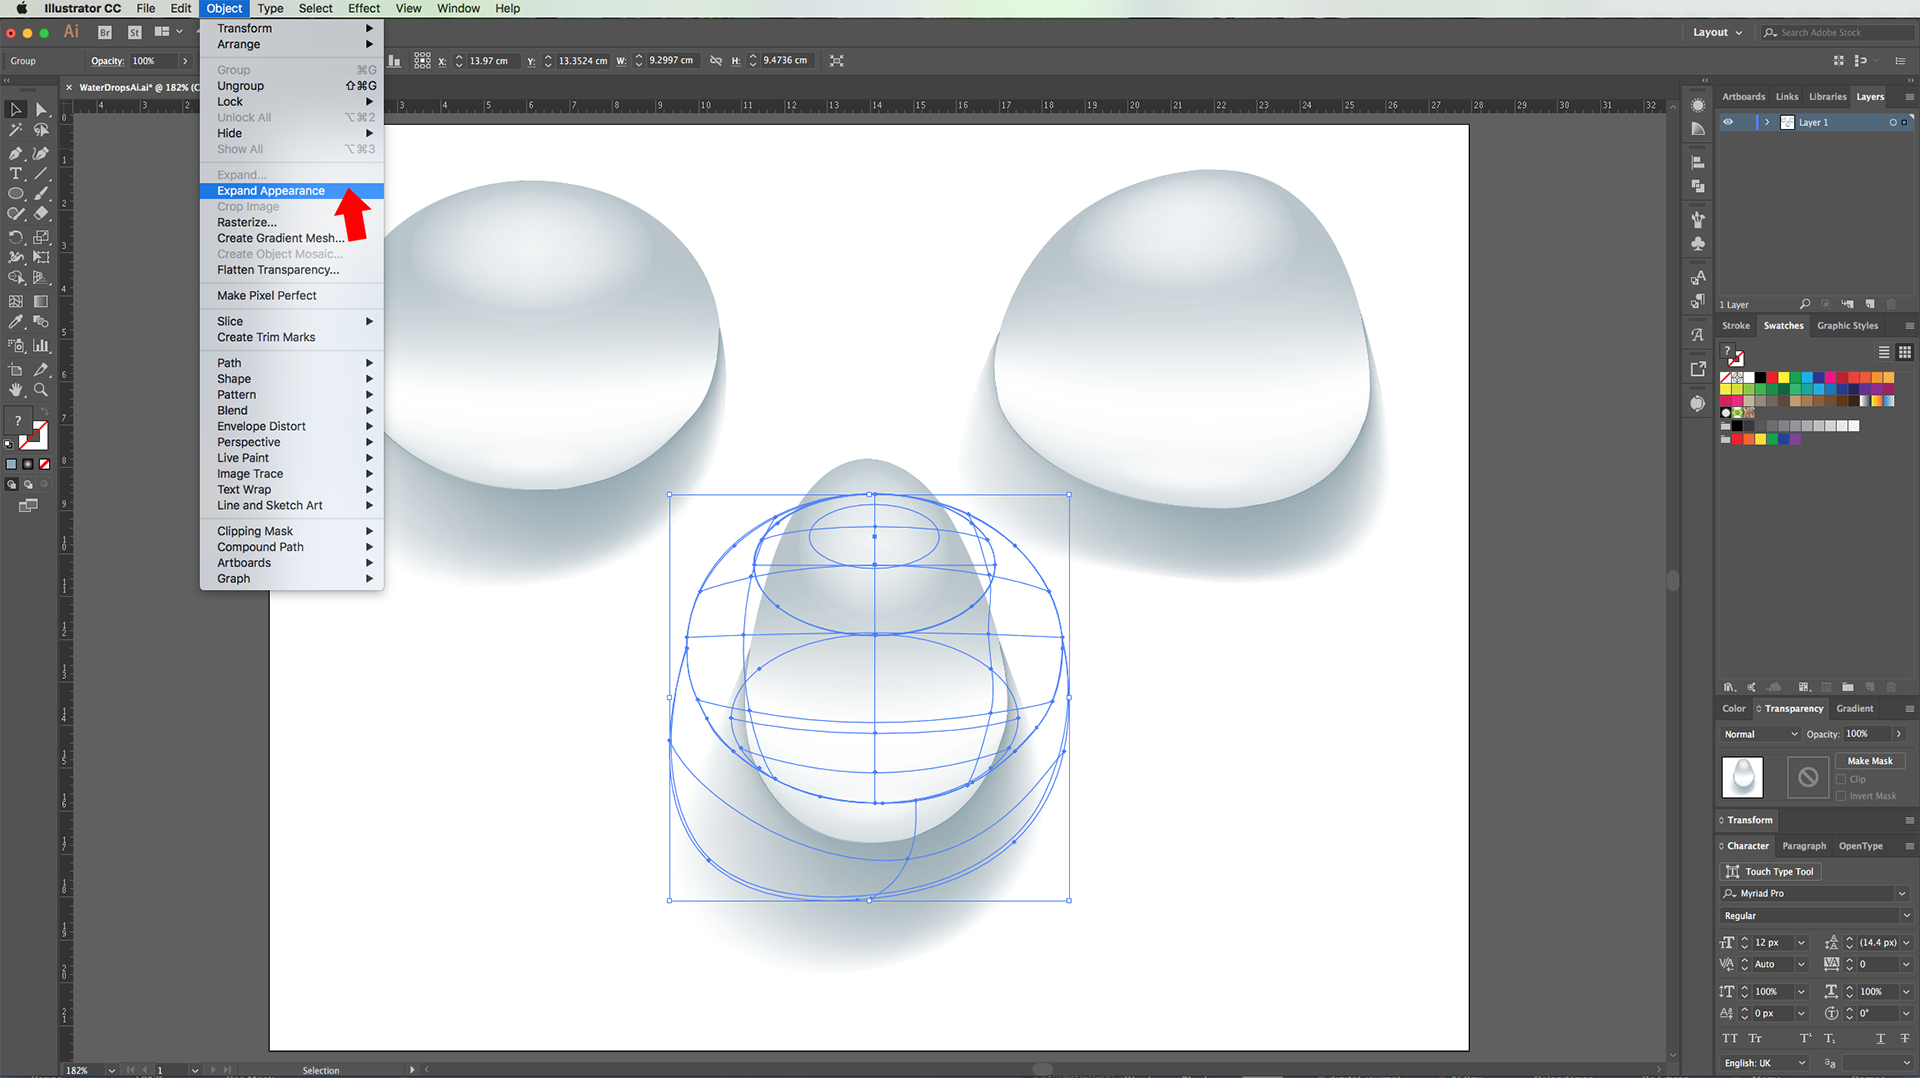
19 - You can use Warp > Squeeze also to get different results. Then, go to Object > Expand Appearance.
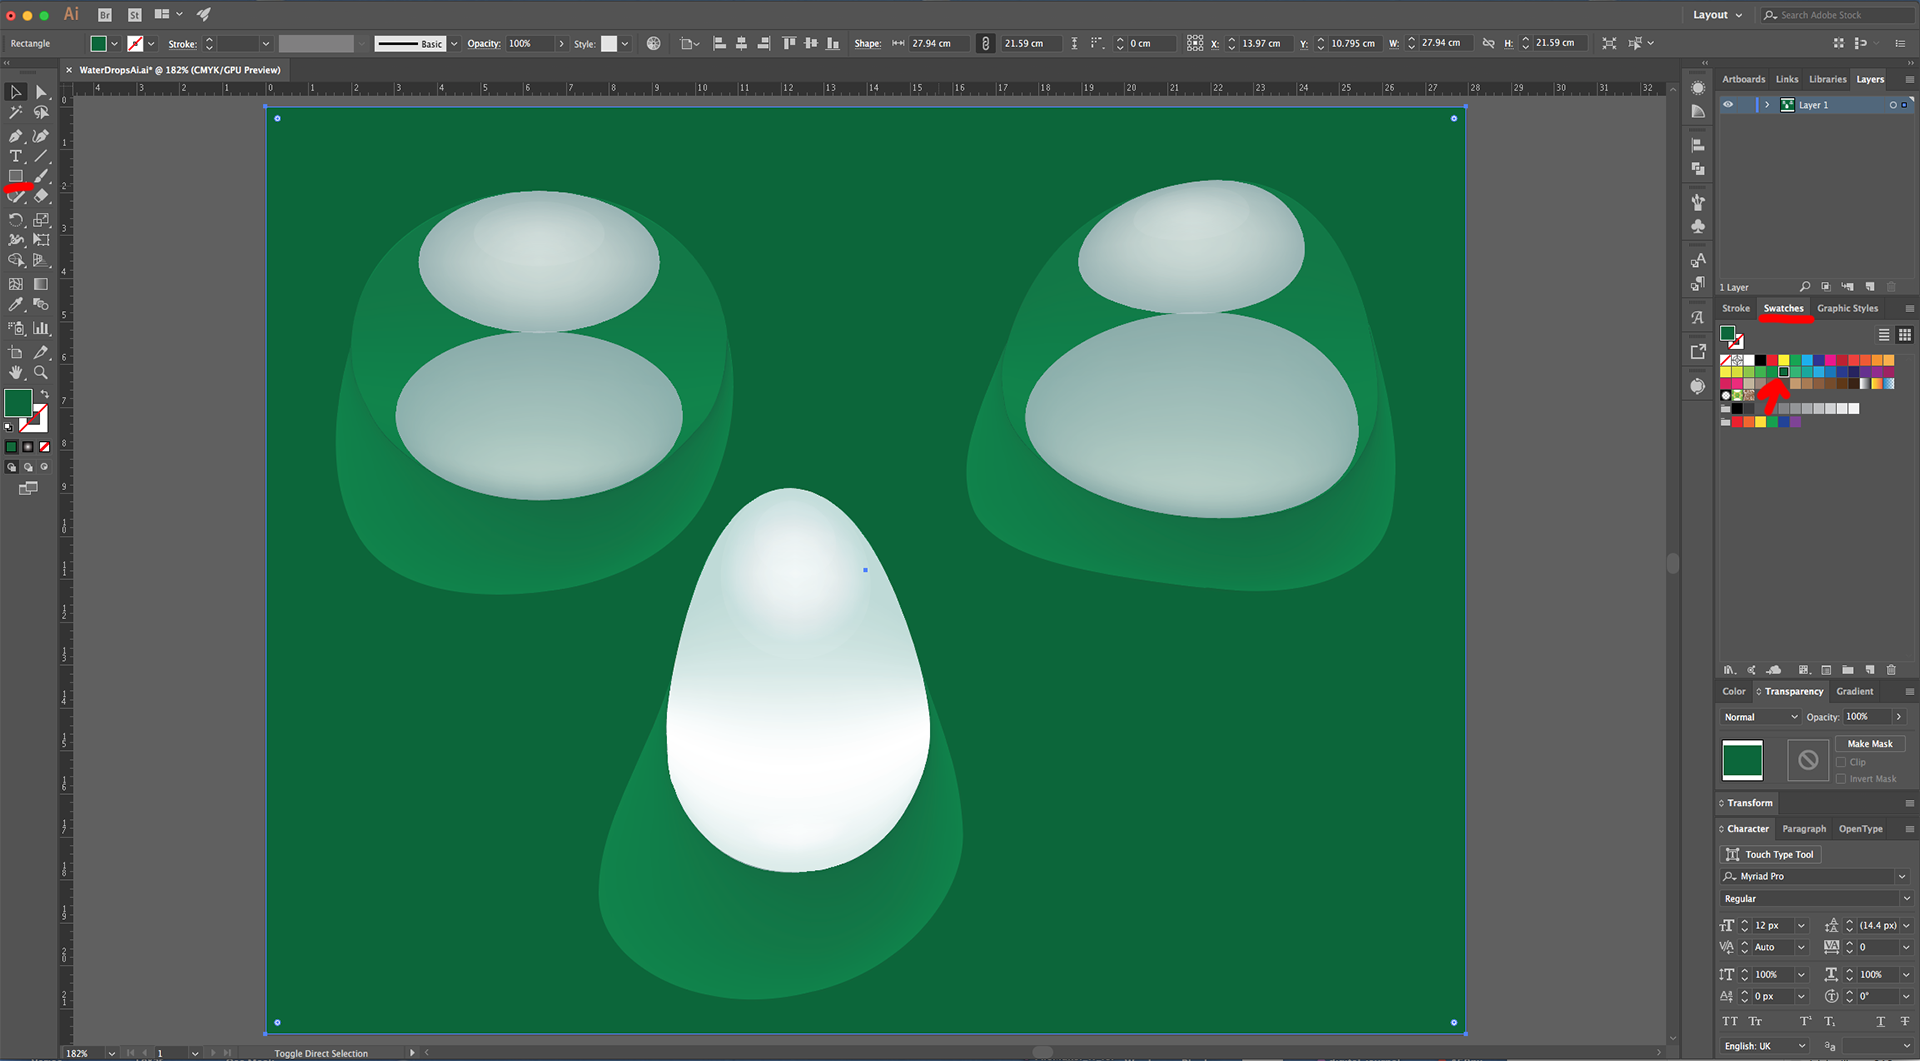
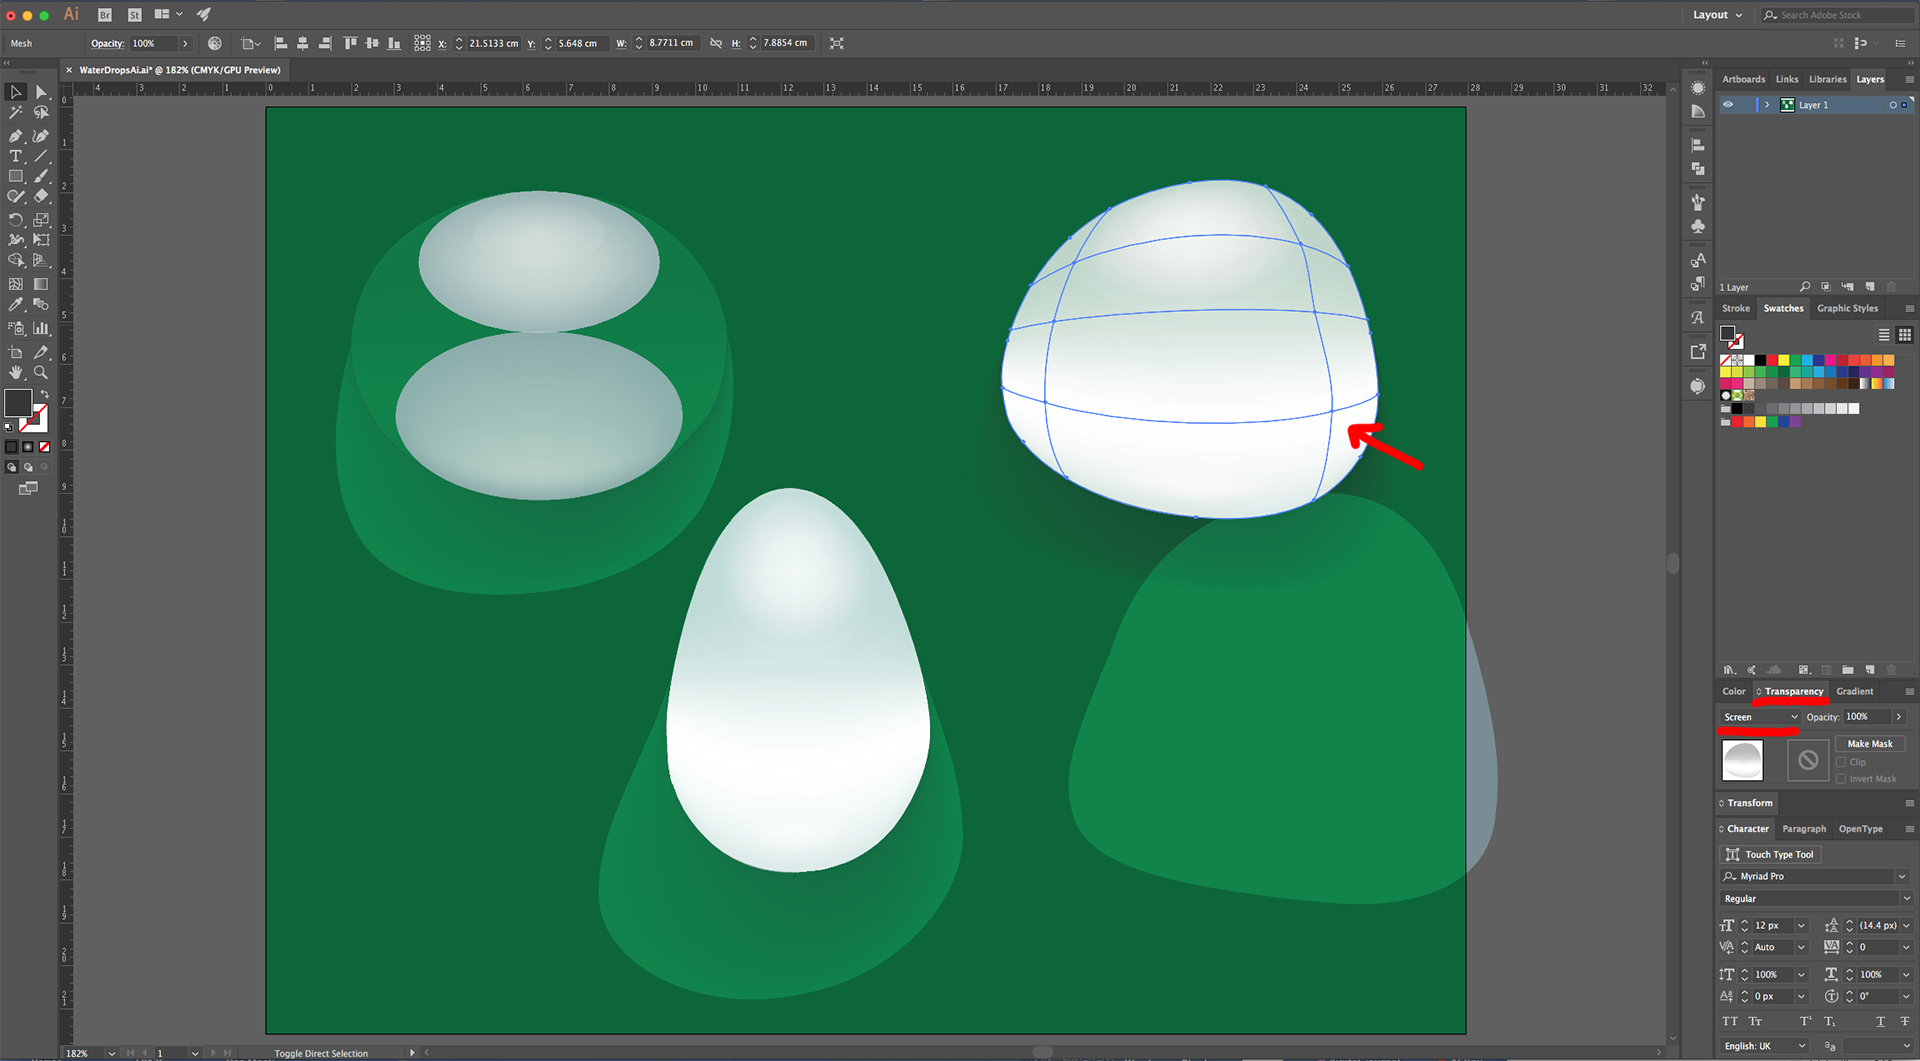
20 - You can add a “Background” to your Artwork. You may need to change the “Blending Mode” of the Drops to “Screen”.
21 - Check it out.
2 - Select the “Ellipse Tool” (L) and draw an Oval measuring roughly 9 x 7 cm and fill it with a Medium Grey (we used # d5d5d5). Center it using the “Horizontal and Vertical Align Center” options on your Top Menu and make sure that “Align to Artboard” is selected. Or use the same options in the “Align Panel”.
3 - With it still selected, use the “Mesh Tool” (U) to click at about ¼ from the Top-Left of the Oval to create a “Mesh Point”. Repeat at about the same distance from the Bottom-Left to create another “Mesh Point”. Create a third one just a bit above the Center-Left (between the previous ones). Repeat everything on the Right side of the Oval.
4 - Using the “Direct Selection Tool” (A), select all the “Mesh Points” in the second line starting from the bottom (count the outside stroke). Change their Fill color to White (#ffffff). Now, select the ones in the top and second from top lines and change their Fill color with a slightly darker shade of Grey (#b8b8b8). Finally, select the ones in the center line and change the Fill to another shade of Grey (#cccccc).
5 - Use the “Pen Tool” (P) to create a Crescent Moon shape under the Oval. You should start near the Center-Left of the Oval and end back at the same point remembering to leave the same space between the Shape and the Oval.
6 - Use the “Direct Selection Tool” (A) to modify the shape and move the top part so it touches the lower portion of the Oval. Do the same with the sides and make the Left side a bit larger than the Right.
7 - Use the “Mesh Tool” (U) to click near the Center and create a “Mesh Point”. Select just that “Mesh Point” with the “Direct Selection Tool” (A) and move it Down and Right a bit. Change the Fill color to a Darker Grey (#959595), then select the bottom “Mesh Points” and fill them with White (#ffffff). Finally, select the “Mesh Point” you created at the Center and change the shade of Grey to #b9b9b9.
8 - Select both Shapes, head to the “Transparency Panel” and change their “Blending Mode” to “Multiply”.
9 - Create a smaller Oval shape (about 5.5 x cm) and place it on the Top part of the bigger one. Use the “Mesh Tool” (U) to click at the Center and create a “Mesh Point” Fill it with White (#ffffff). Create a second one between this one and the Top of the Oval, Fill it with #e3e3e3. Then, select the entire Oval and change its “Blending Mode” to “Lighten” and its “Opacity” to 75%.
10 - Drag the Oval down while holding the “Shift” and “Alt/Option” keys to duplicate it and move it in a straight line. Make it a bit bigger and make sure it covers the Bottom part of the original Oval shape. Then, rotate it 180°.
11 - Use the “Direct Selection Tool” (A) to select the “Mesh Point” that is second from the Bottom-Center and make its Fill color White (#ffffff). Then, select the one on top of it (third from the bottom) and make its Fill color #e3e3e3.
12 - Create another Oval (aprox. 5.5 x 3 cm), fill it with a “Radial Gradient” from White to a very Dark Grey (#231f20) and a 59% “Aspect Ratio”.
13 - “Copy” (Command/Control + C) and “Paste in Front” (Command/Control + F) this Oval, make its smaller (2.5 x 1.5 cm aprox.). Then, select both and change their “Blending Mode” to “Screen” and its “Opacity” to 25%. Place them on the Top-Center of the original Oval shape.
14 - Move the smaller Oval “Up” a bit so its upper part is about 5 mm from the Top.
15 - Select everything, right-click on top and choose “Group” (Command/Control + G). Then, use the “Pen Tool” (P) to draw a Vector following the Shape of the Drop and Shadow.
16 - Fill the Shape with a medium Blue (#8babb7) and change its “Blending Mode” to “Overlay” and its “Opacity” to 60%.
17 - Use the “Direct Selection Tool” (A) to fix the parts of the Shape that don’t coincide properly with the Drop.
18 - Create a Duplicate of the Drop, head to the “Appearance Panel”, click on the “Effects Menu” on the Bottom-Left side of the panel and navigate to Warp > Fish Eye… Play around with the values until you achieve a nice and realistic deformation.
19 - You can use Warp > Squeeze also to get different results. Then, go to Object > Expand Appearance.
20 - You can add a “Background” to your Artwork. You may need to change the “Blending Mode” of the Drops to “Screen”.
21 - Check it out.
by @lornacane


