
How to Make a Wavy Line Pattern in Illustrator
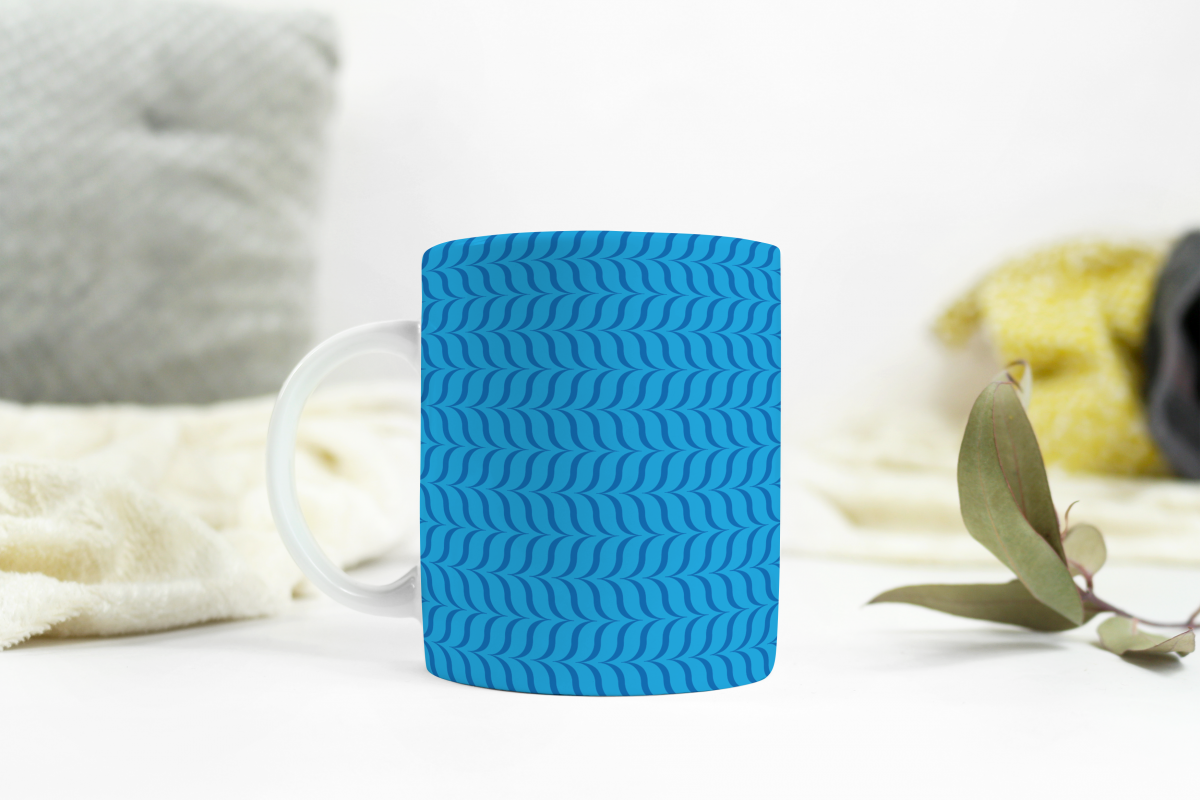
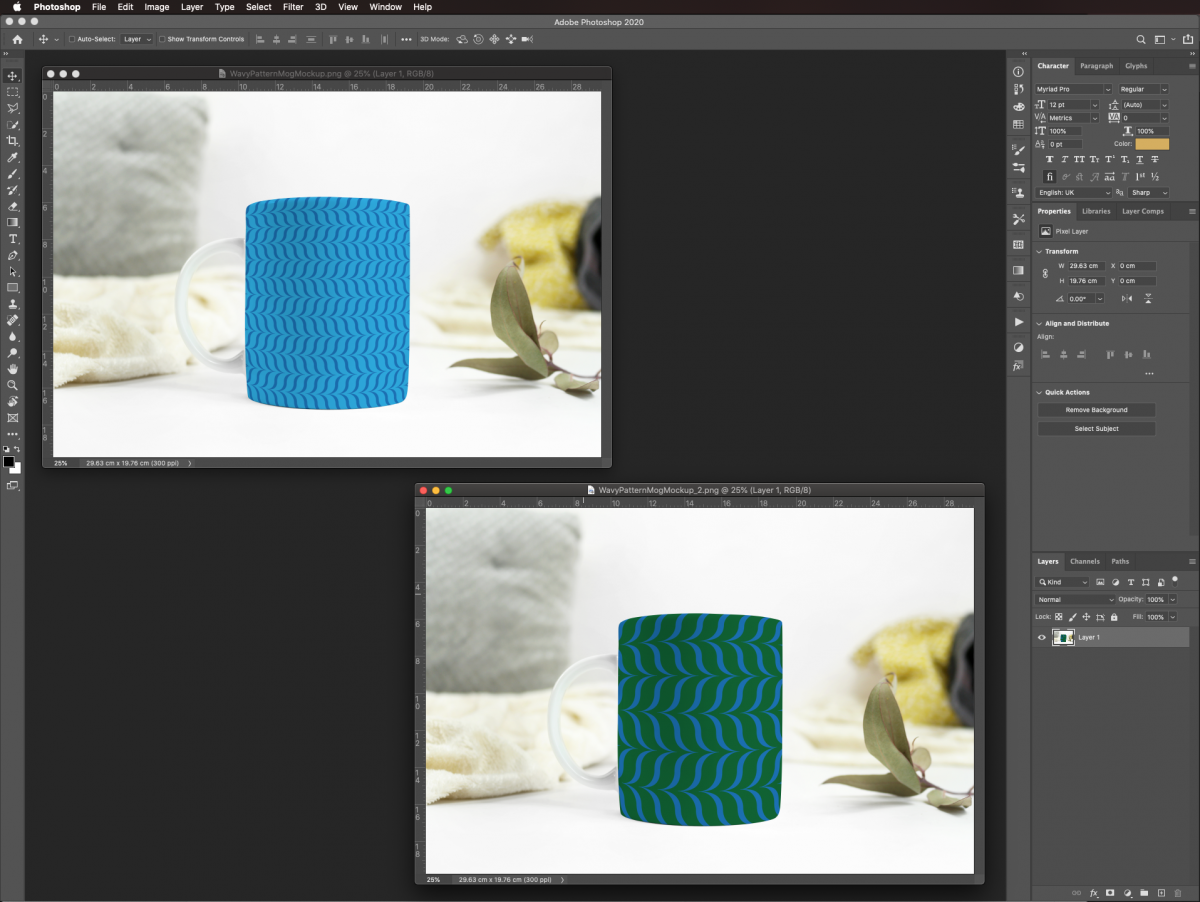
Wavy line patterns can easily be created with some basic shapes in Illustrator. These designs work well as seamless patterns for backgrounds or wallpaper. They can also be used for projects such as mugs, cushion covers and so much more.
Up next, we will show you how to make a wavy line pattern in Illustrator. You can also follow our great tutorial on making seamless patterns for your future projects.
Once in Illustrator, create a new document to get started.
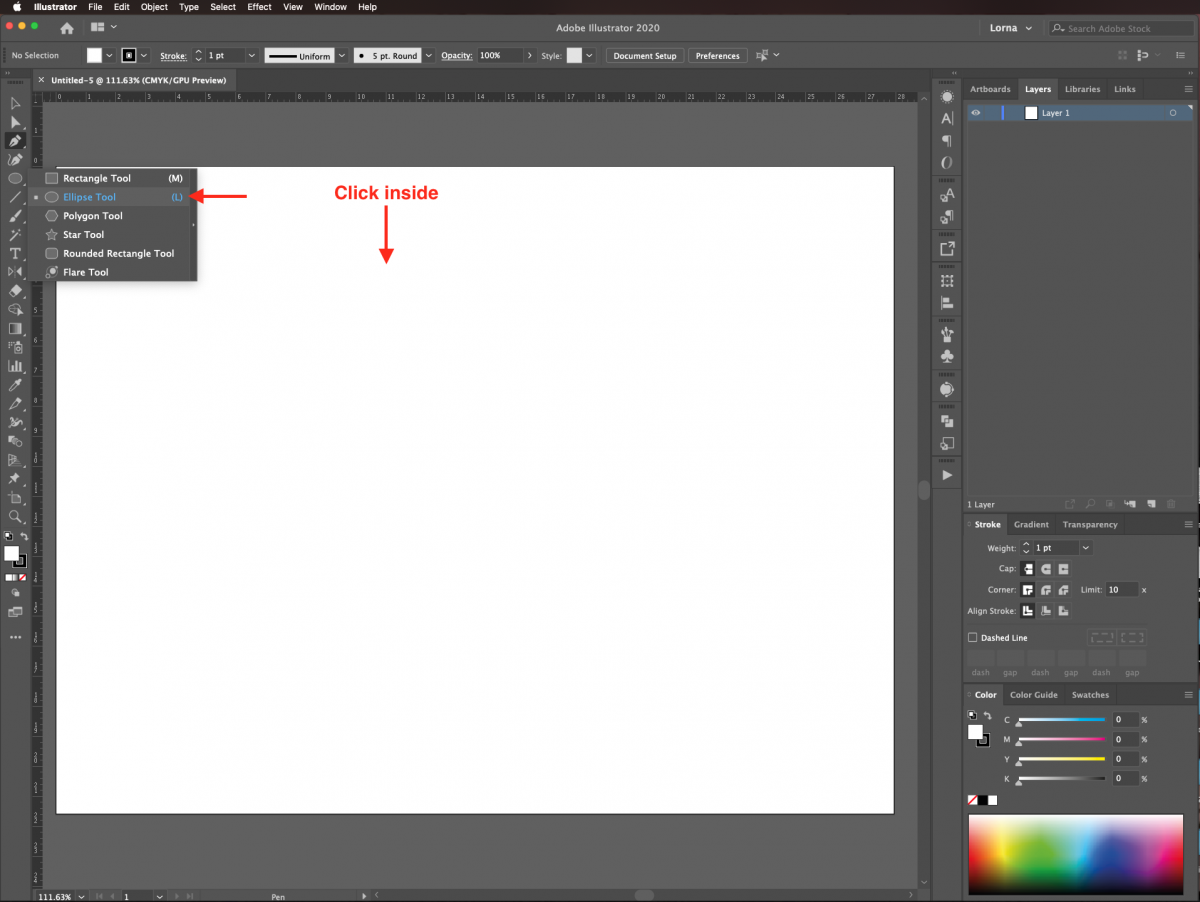
We will begin by creating a basic shape for our pattern. Select the Ellipse tool (L) and click inside of your canvas to bring up the dialog box.
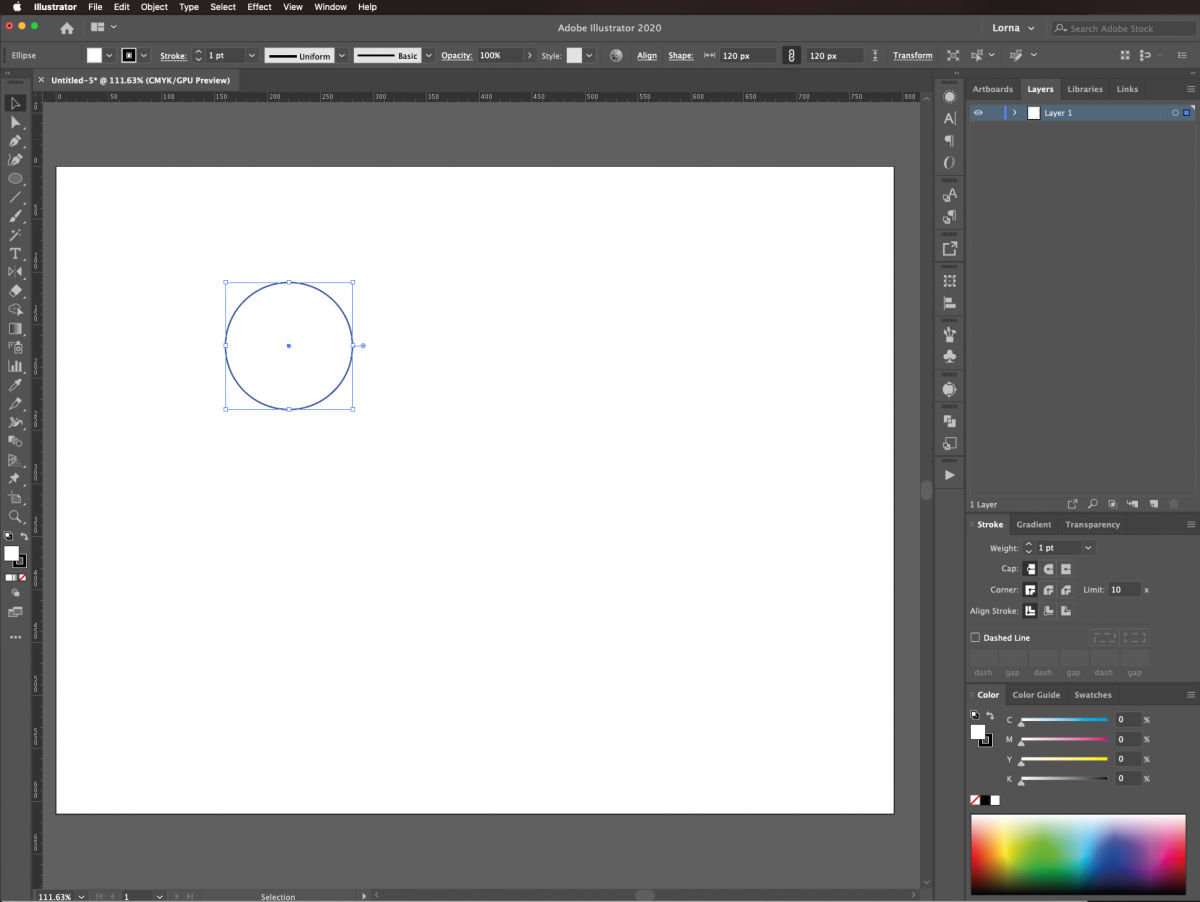
Input a Width and Height of 120 px. Set the Stroke color to black and Fill to none. The selected shape with adjusted Width and Height will be added to your canvas.
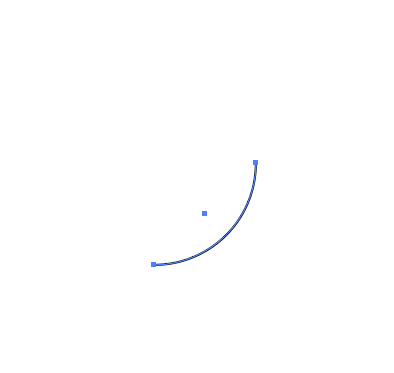
Use the Direct Selection tool (A) while pressing the Shift key to select both the top and left Anchor Points.
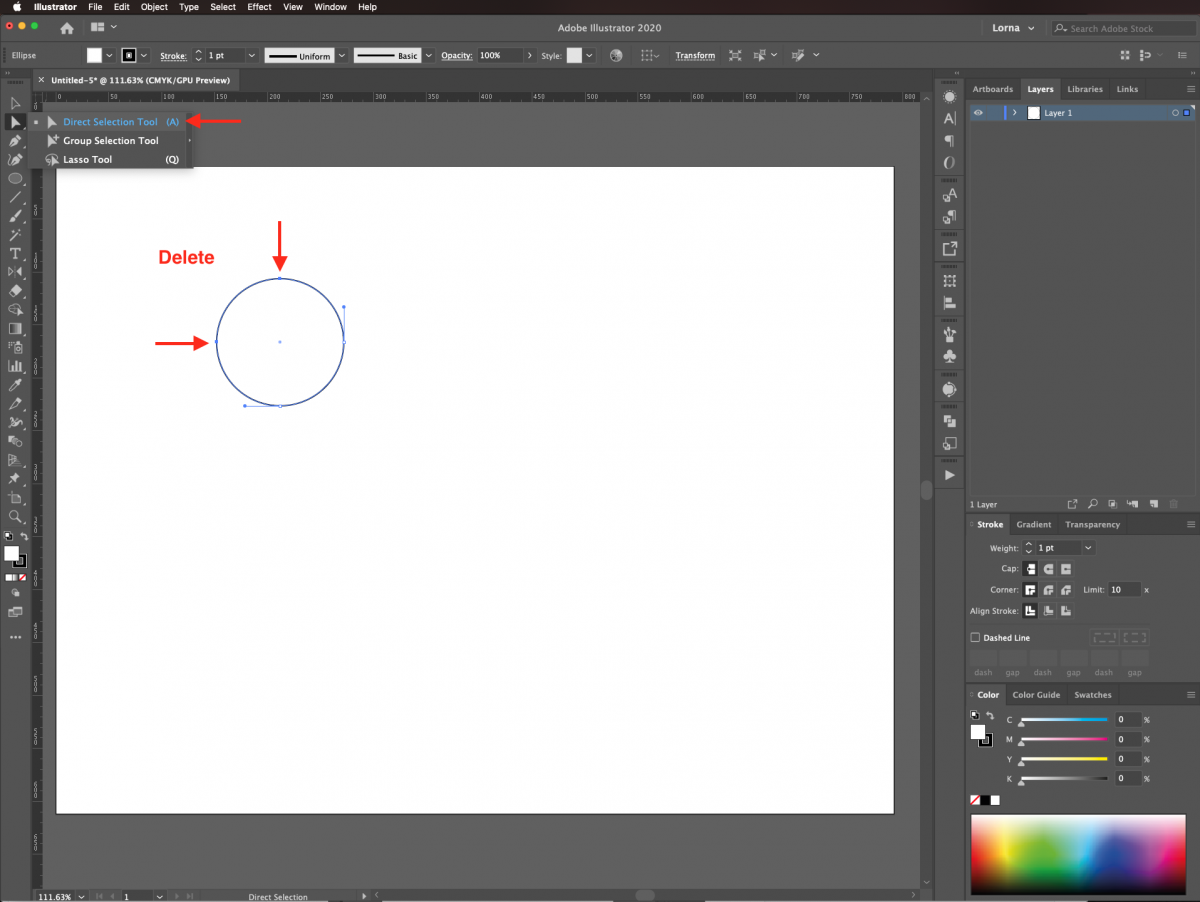
Then, hit Delete to erase them. You should end up with the bottom-right quarter of a circle.
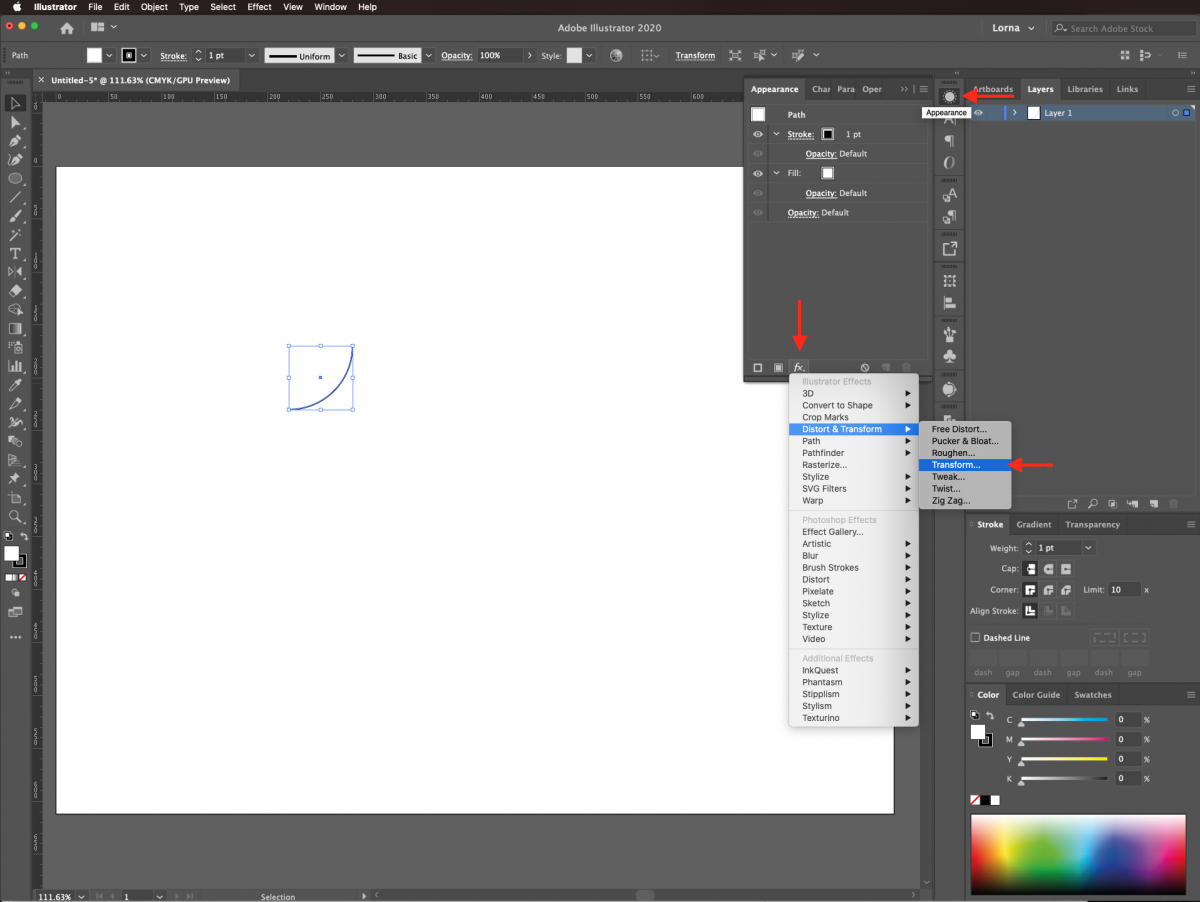
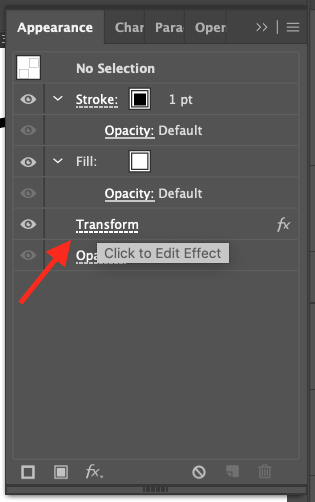
Another curved path needs to be added to create a wavy shape. Without deselecting the path, go to the Appearance panel. Click on the Effects menu on the bottom-left side and navigate to Distort & Transform > Transform.
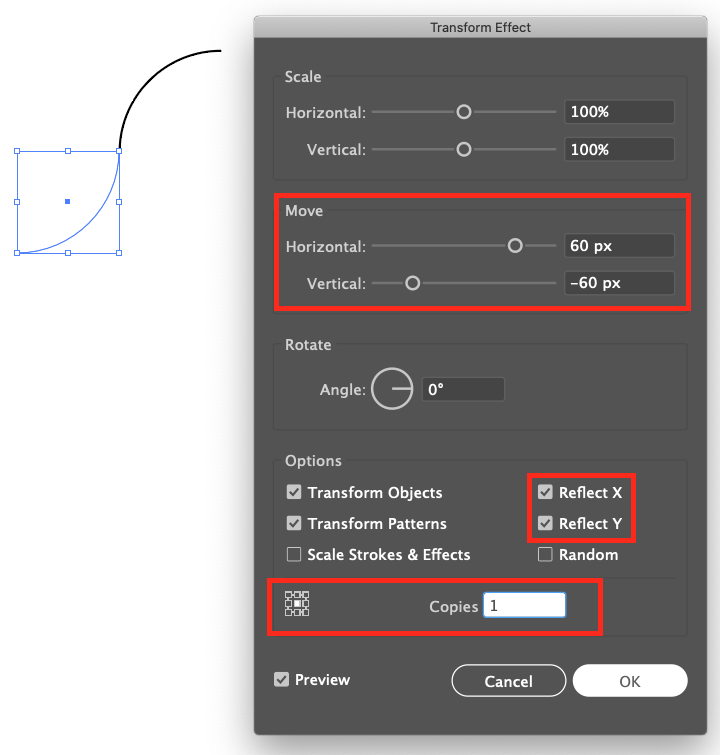
Use a Horizontal Move of 60 px and a Vertical Move of -60 px. Check the Reflect X and Y boxes. Be sure that the amount of Copies is set to one, then click Ok.
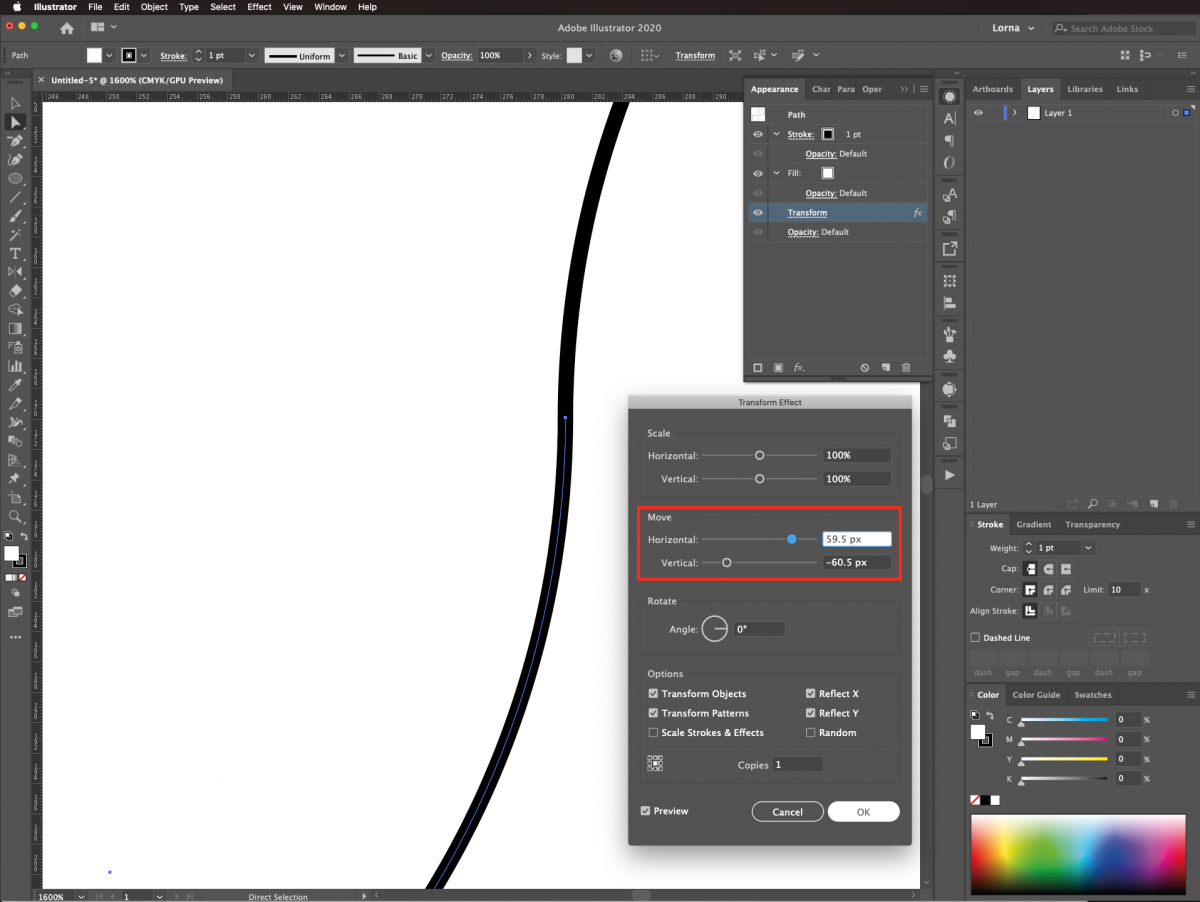
Make sure that the ends of the two shapes coincide. If not, double-click the Transform setting in the Appearance panel to correct the Horizontal and Vertical Move values.
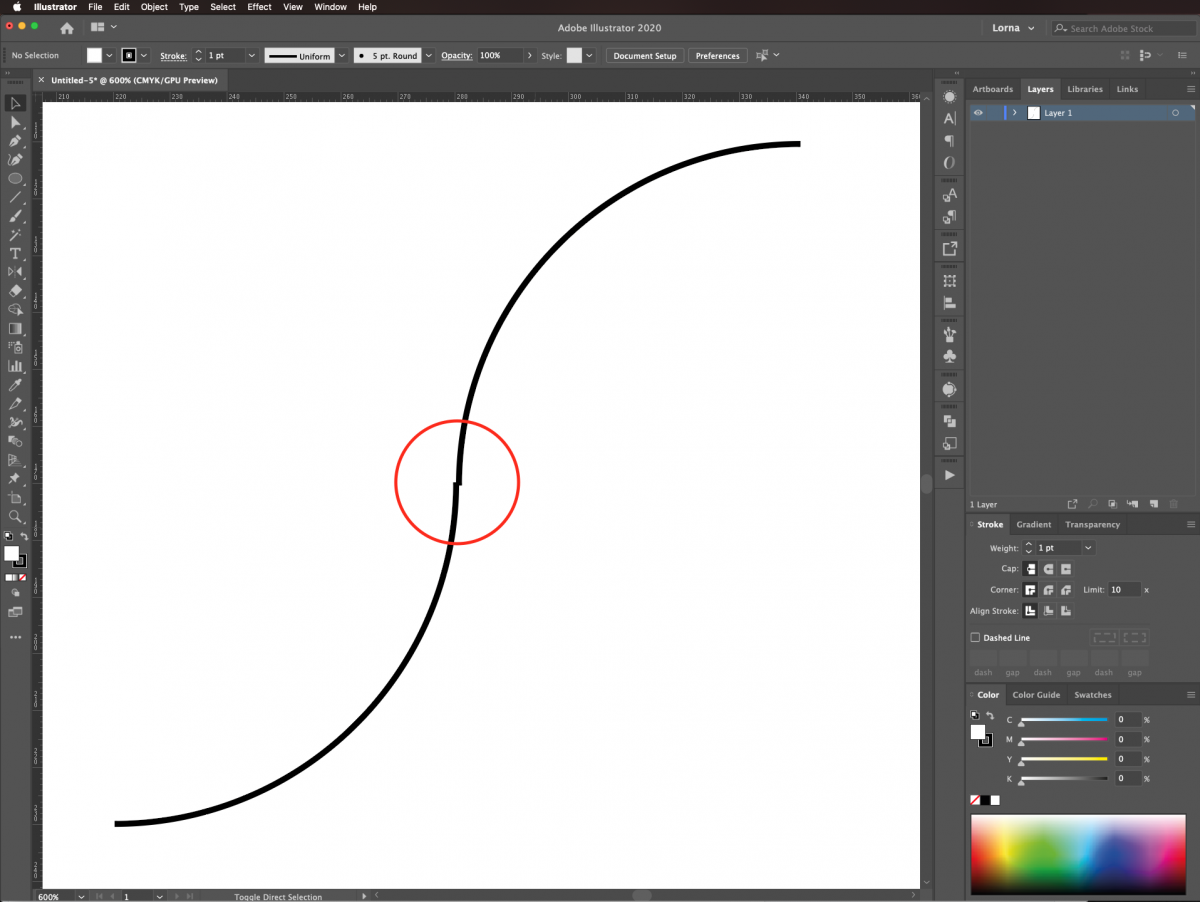
We changed the first (horizontal) to 59.5 px and the second (vertical) to 60.5 px.
Next, we want to turn the paths into a shape. Do this by going to Object > Expand Appearance.
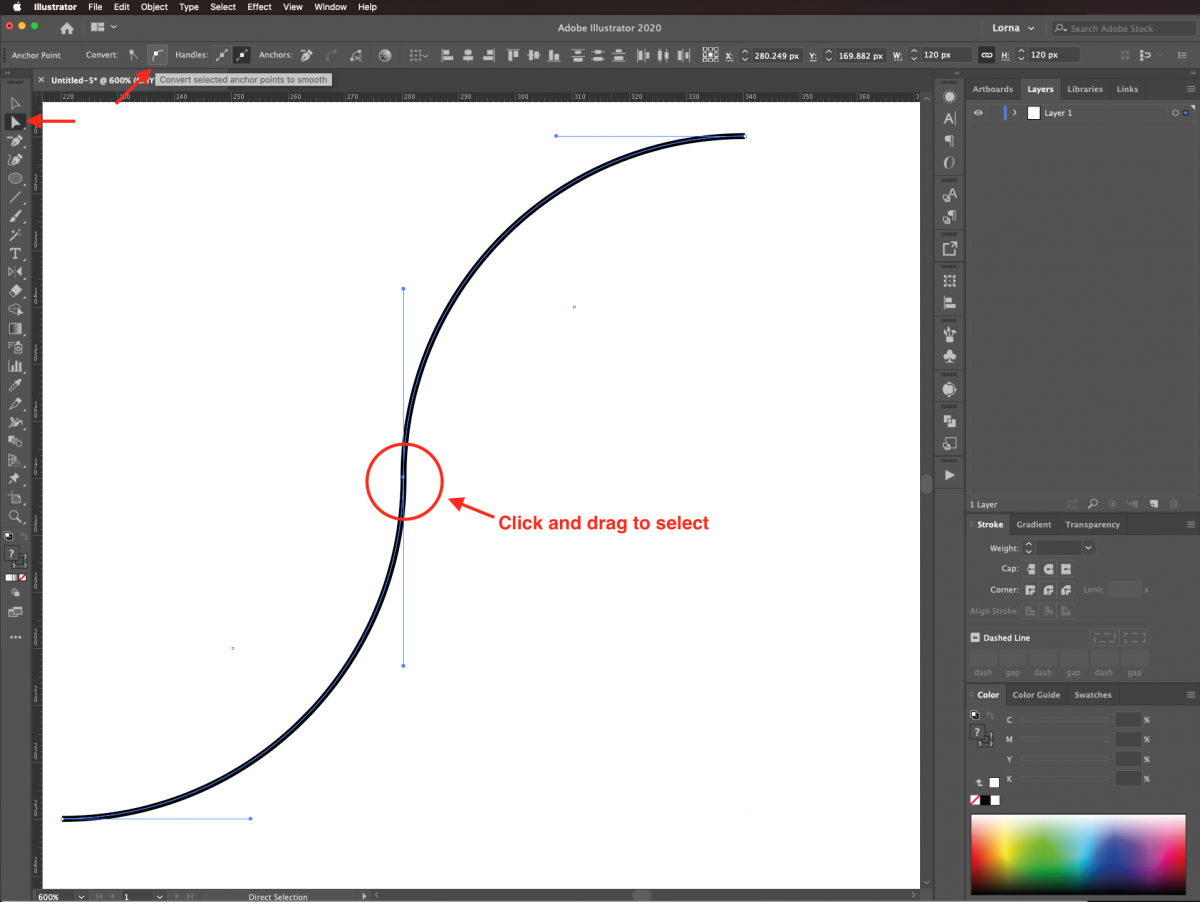
Finally, with the Direct Selection tool (A) click near the center of the path then drag on top of it to select all the possible anchor points. Click on the Convert Selected Anchor Points to Smooth button on the left side of the top menu.
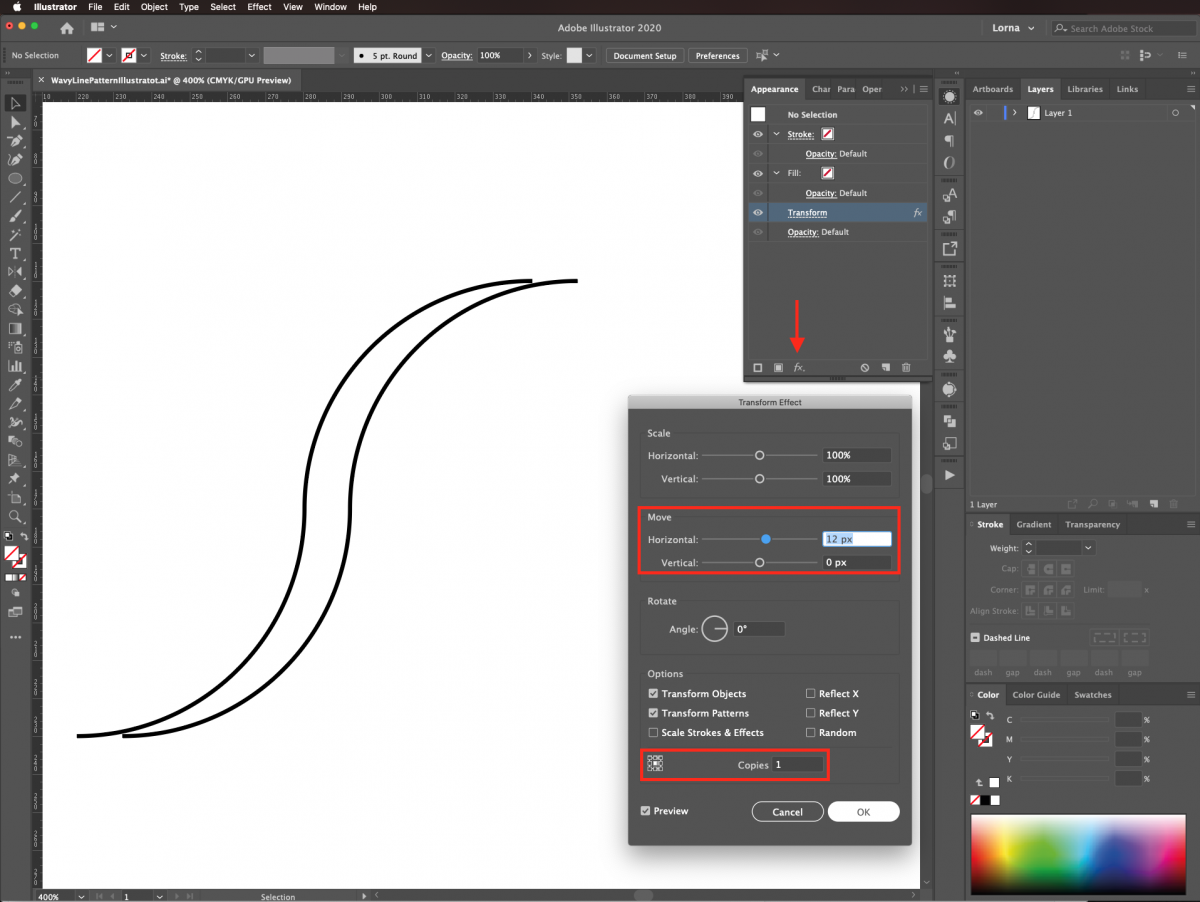
We need to turn the wavy path into a closed shape. Go back to the Appearance panel. Then apply another instance of Distort & Transform > Transform. But this time use a Horizontal Move of 12 px, uncheck the Reflect X and Y boxes, and set Copies as one. Once again go to Object > Expand Appearance.
Join everything together and close the shape with the Direct Selection tool (A). Select the one End Point on the top left of the first wave. While holding Shift, pull the point out until it is placed over the one top left of the second wave. The Shift key helps to keep the angle consistent.
Repeat this with the bottom End Points to close the shape.
Select the Direct Selection tool (A) again. Click near the tip of the path then drag on top to select all the possible anchor points. Join them together by going to Object > Path > Join (Command/Control + J). Do the same with the other end of the wave.
Finally, select all your paths with the Selection tool (V) and join the entire shape together (Command/Control + J).
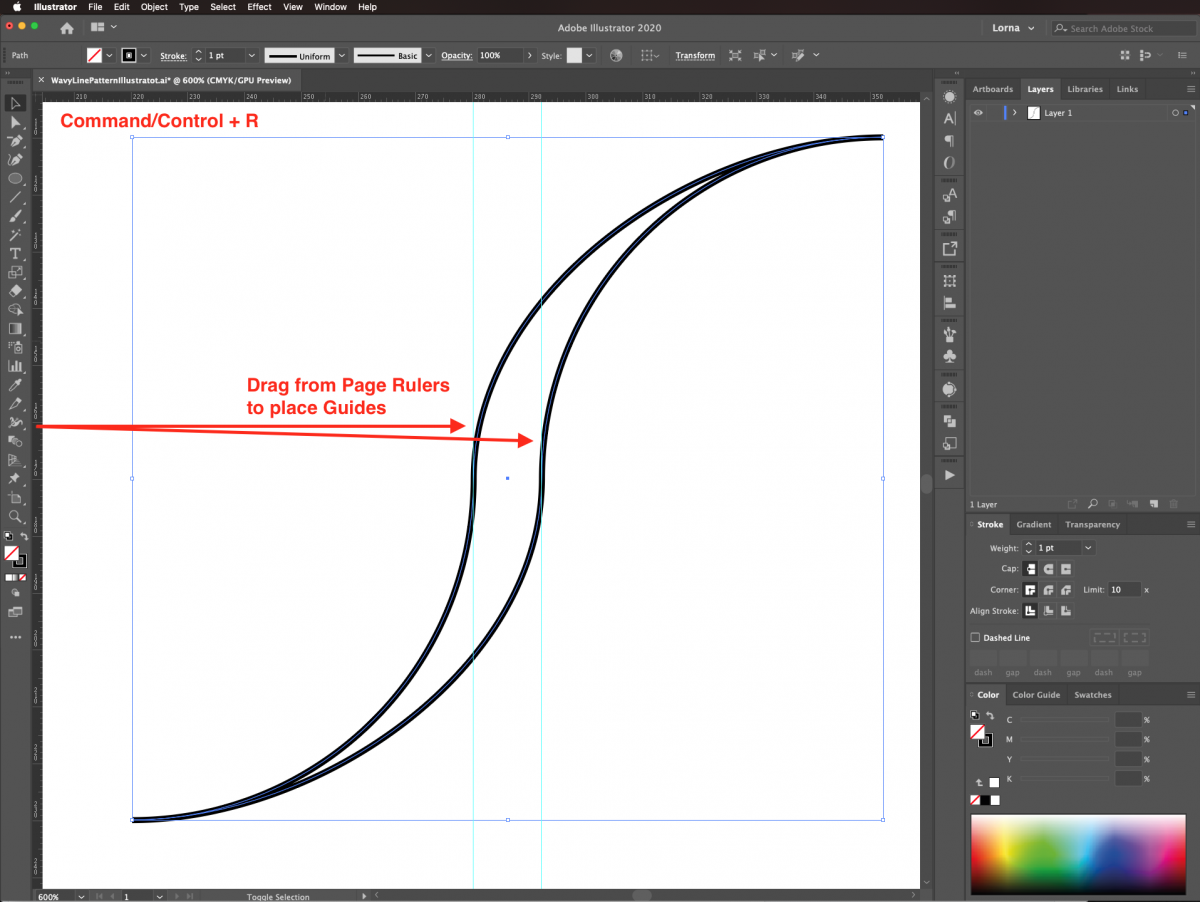
We need to adjust some Anchor Points to create a more uniform looking wave. Add a vertical Guide on top of each side of the body of the wavy shape. Click and drag from the page ruler on the left side of the canvas. To bring out the Page Rulers use Command/Control + R.
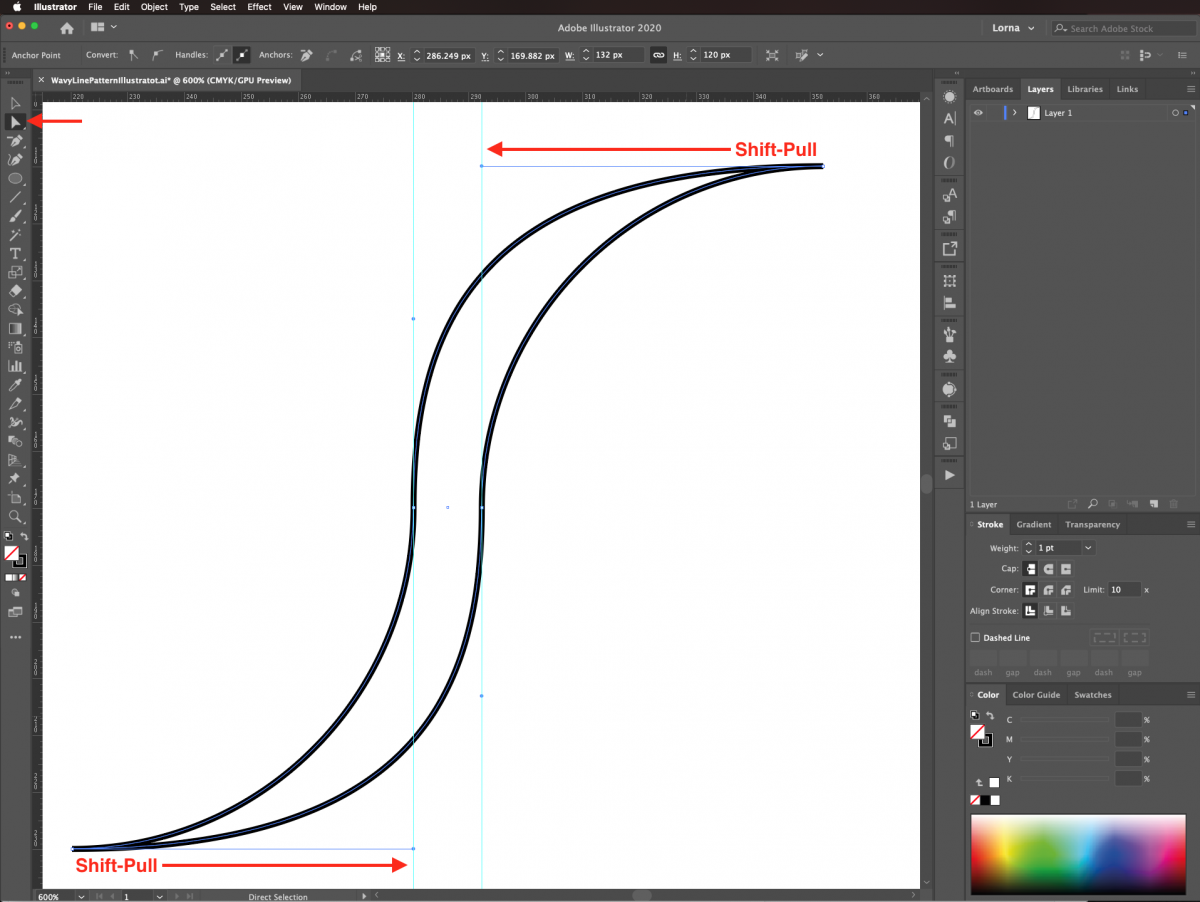
Use the Direct Selection tool (A) to click on the top End Point. Then, pull the left-hand handle (while holding the Shift key) until you reach the guide on the right side of the body. The idea is to make the top curve a bit larger. Repeat with the one at the bottom left. Pull the point to the right until you reach the guide on the left side of the body.
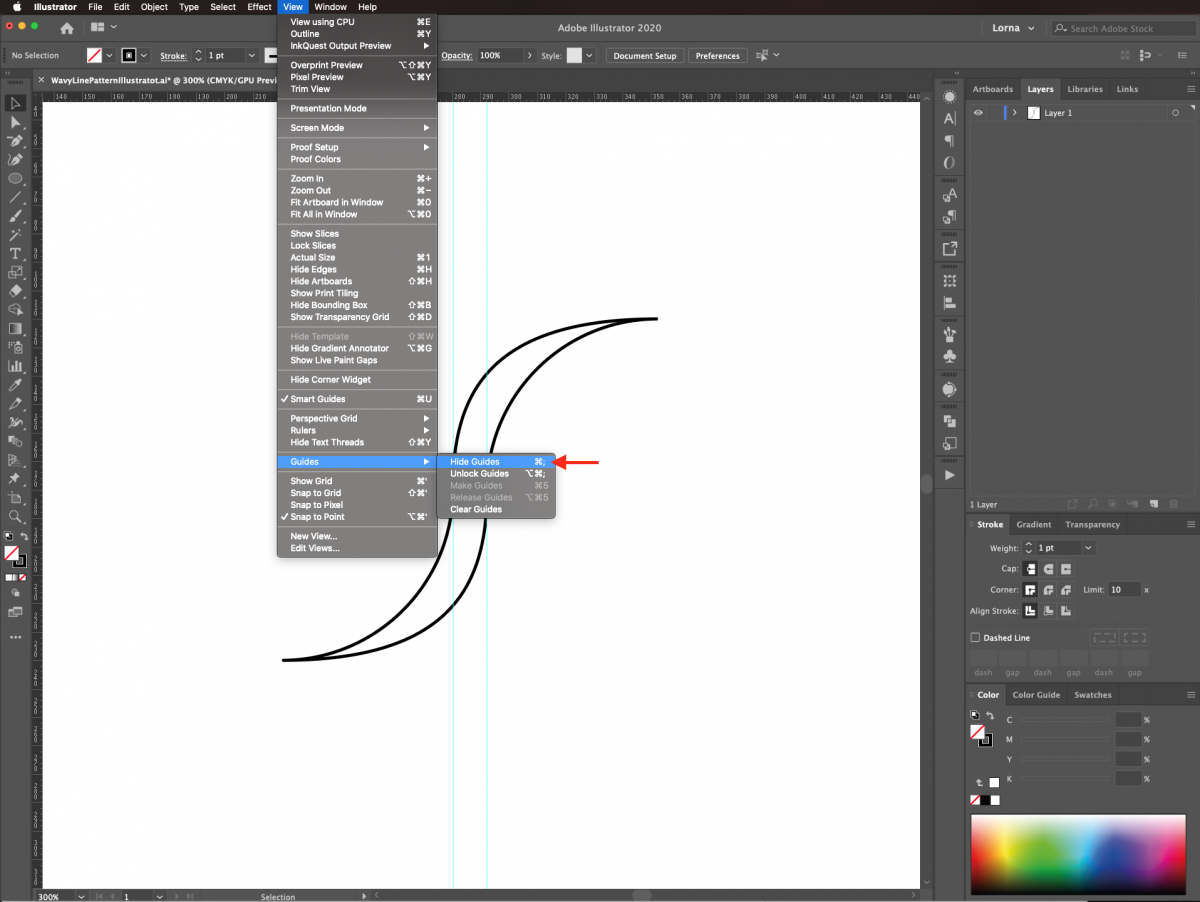
You can hide the Guides since they are no longer needed. Go to View > Guides > Hide Guides (Command/Control + ;).
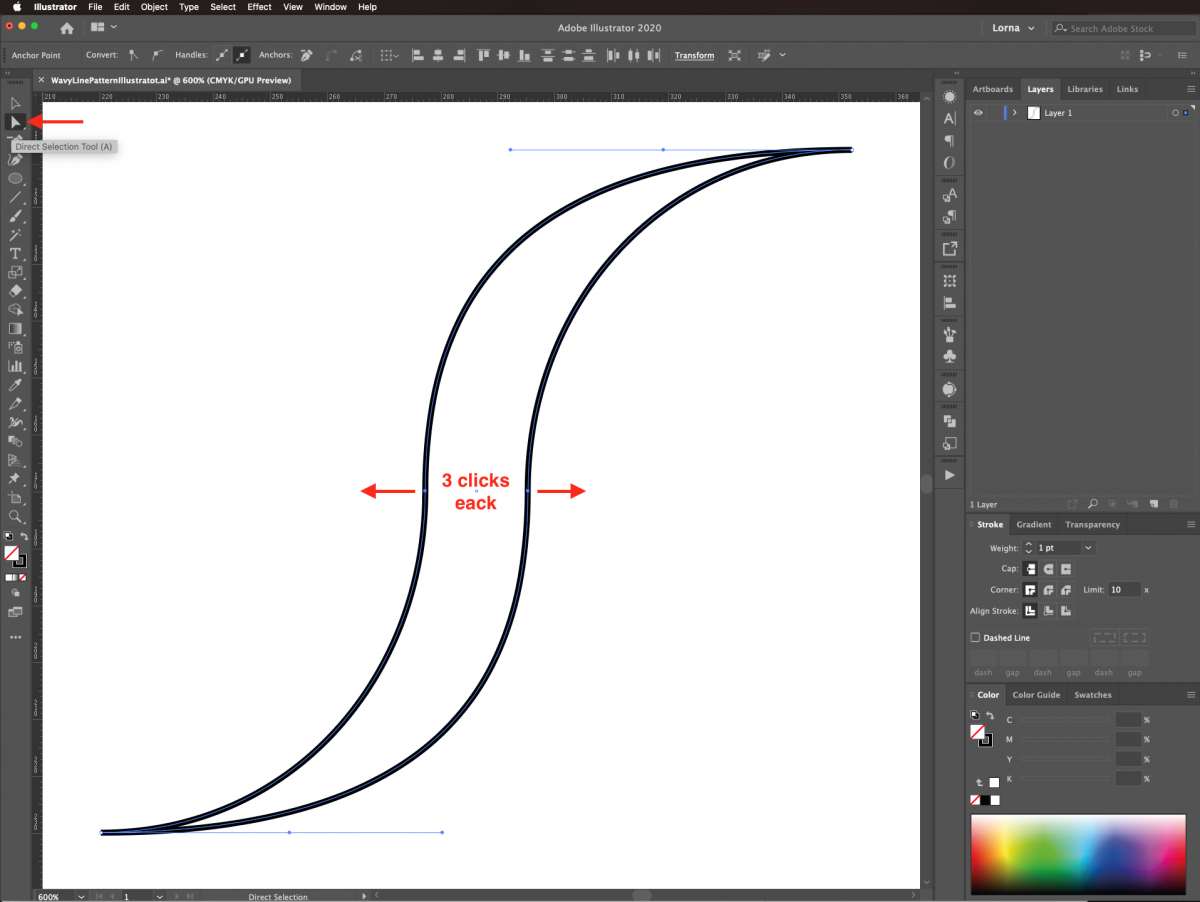
Now, select one of the center Anchor Points and move it a few clicks out using the arrow keys. Do the same with the one on the opposite side to make the inside of the shape larger.
We need to create another instance of the wavy shape. This needs to be placed on top of the original one. It also needs to be a reflected copy so the final composite shape looks similar to a bracket.
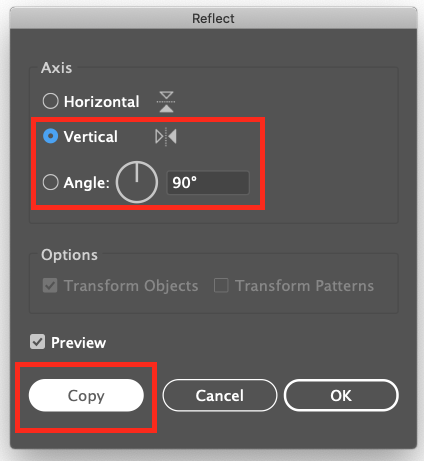
First, go to Object > Transform > Reflect to create the reflected copy. Choose Vertical Axis then click Copy instead of Ok in the Reflect panel.
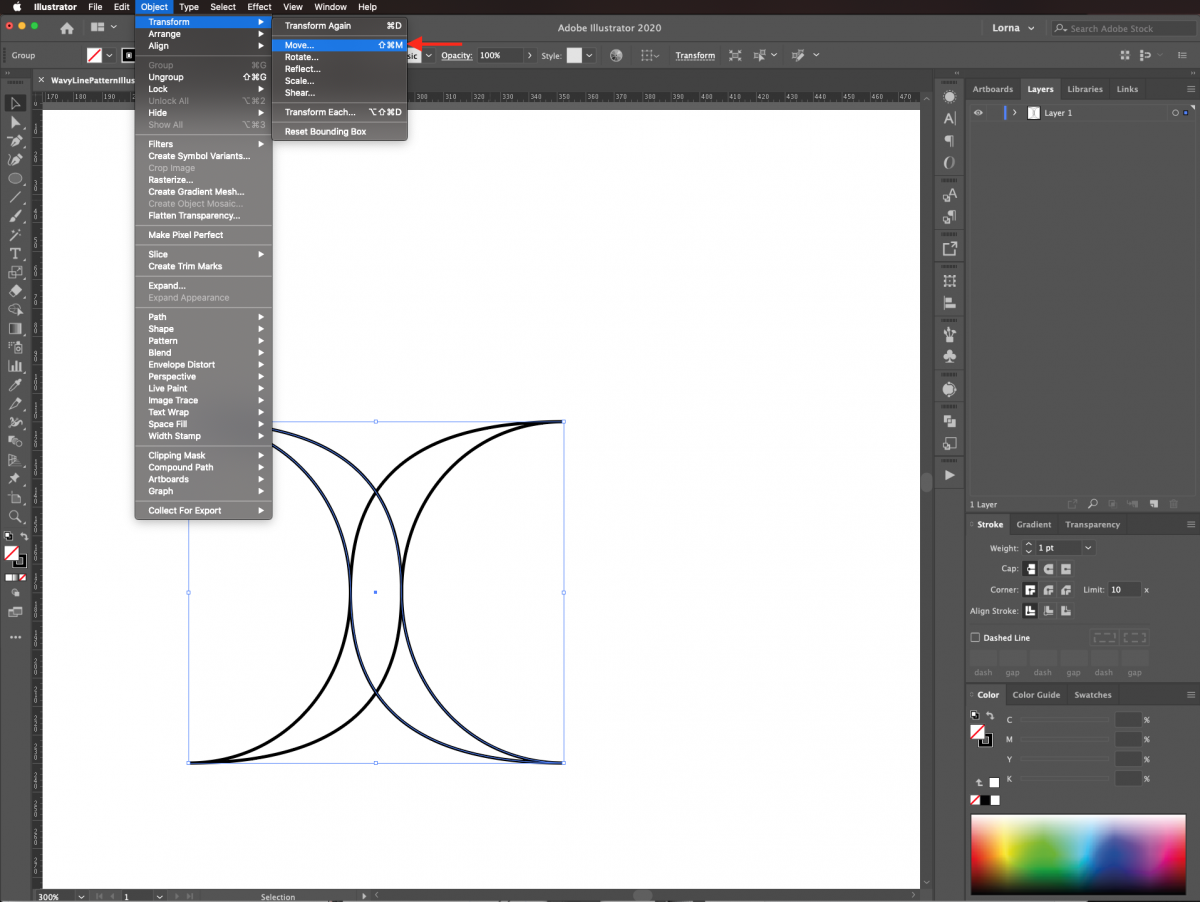
Click again on Object, select Transform > Move to flip the copy.
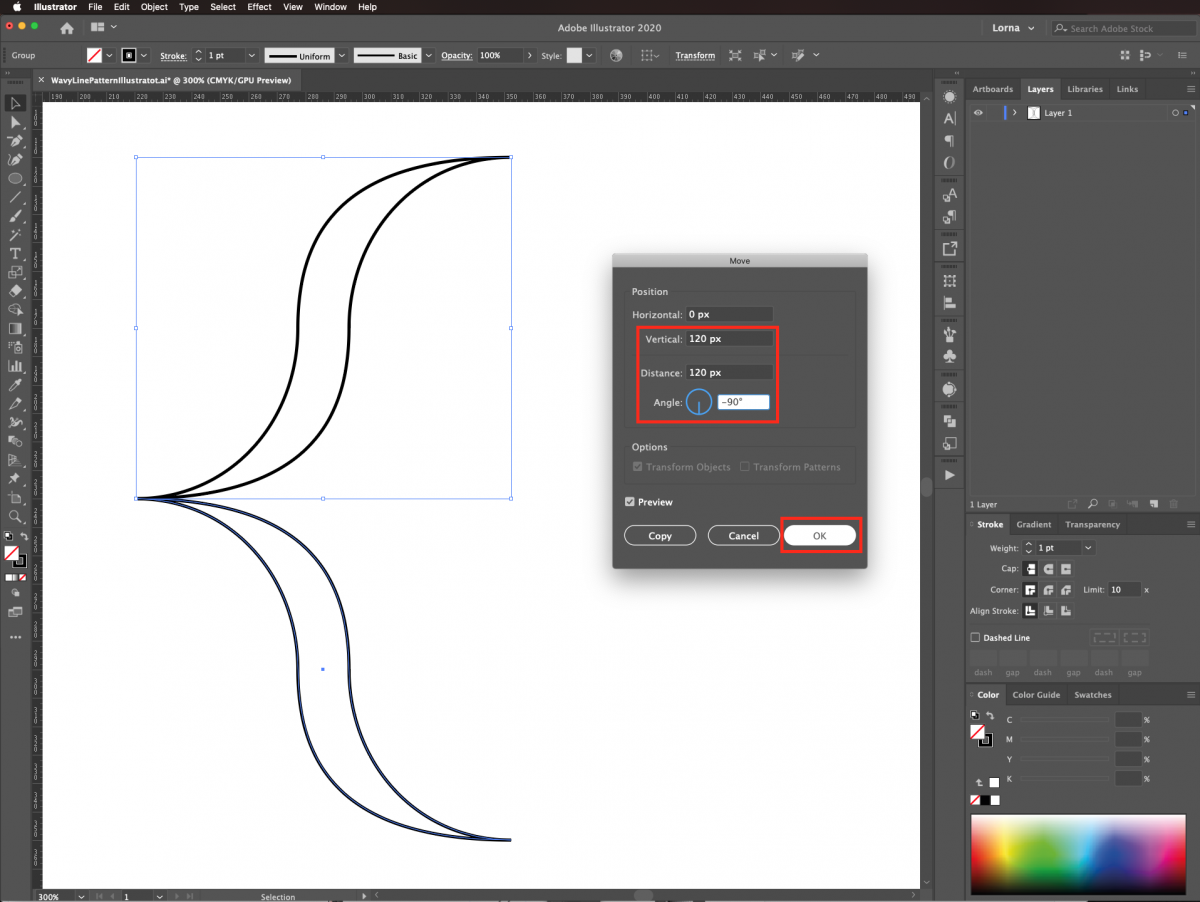
Under the Move panel, use a Vertical Distance of 120 px with a -90° Angle then click Ok.
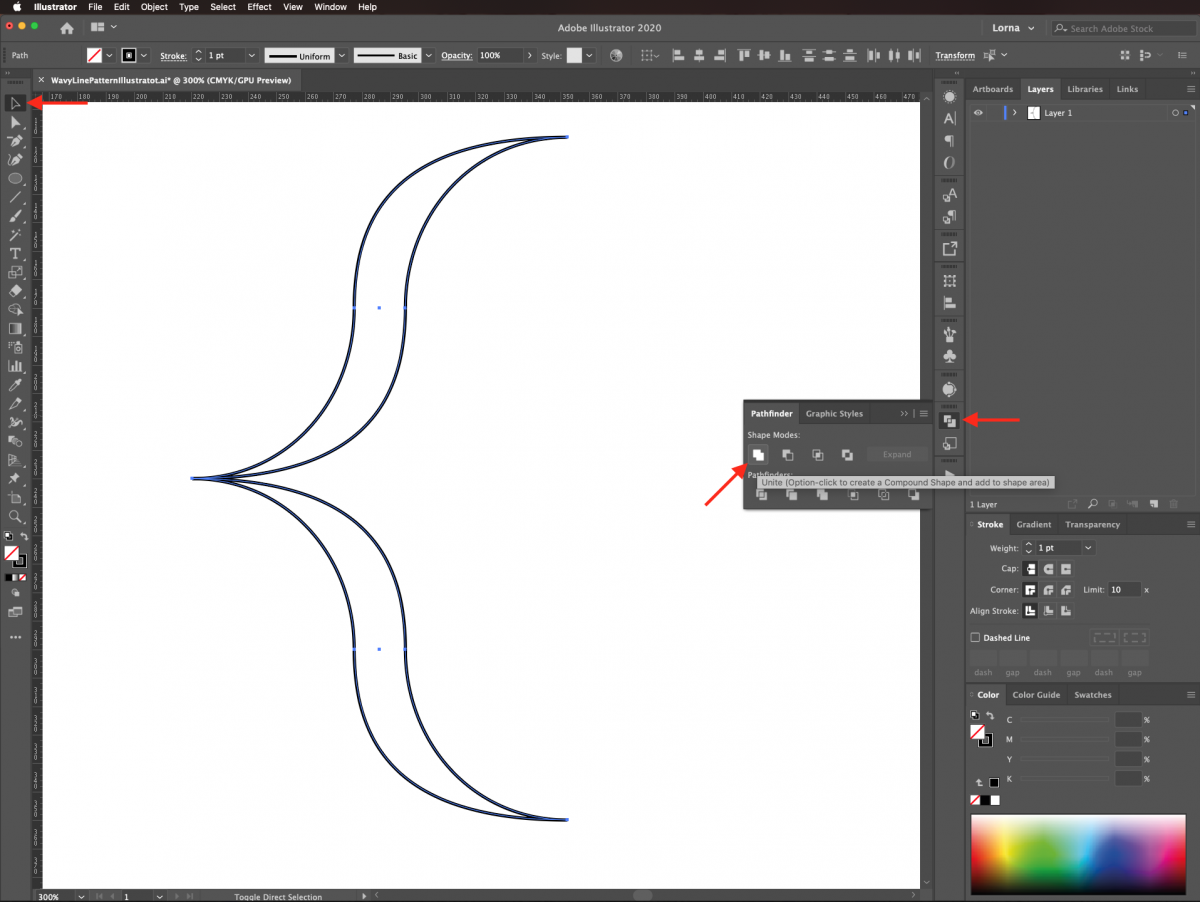
The shapes need to be merged as one and adjusted. Select both shapes, go to the Pathfinder panel and choose Unite to create a single shape.
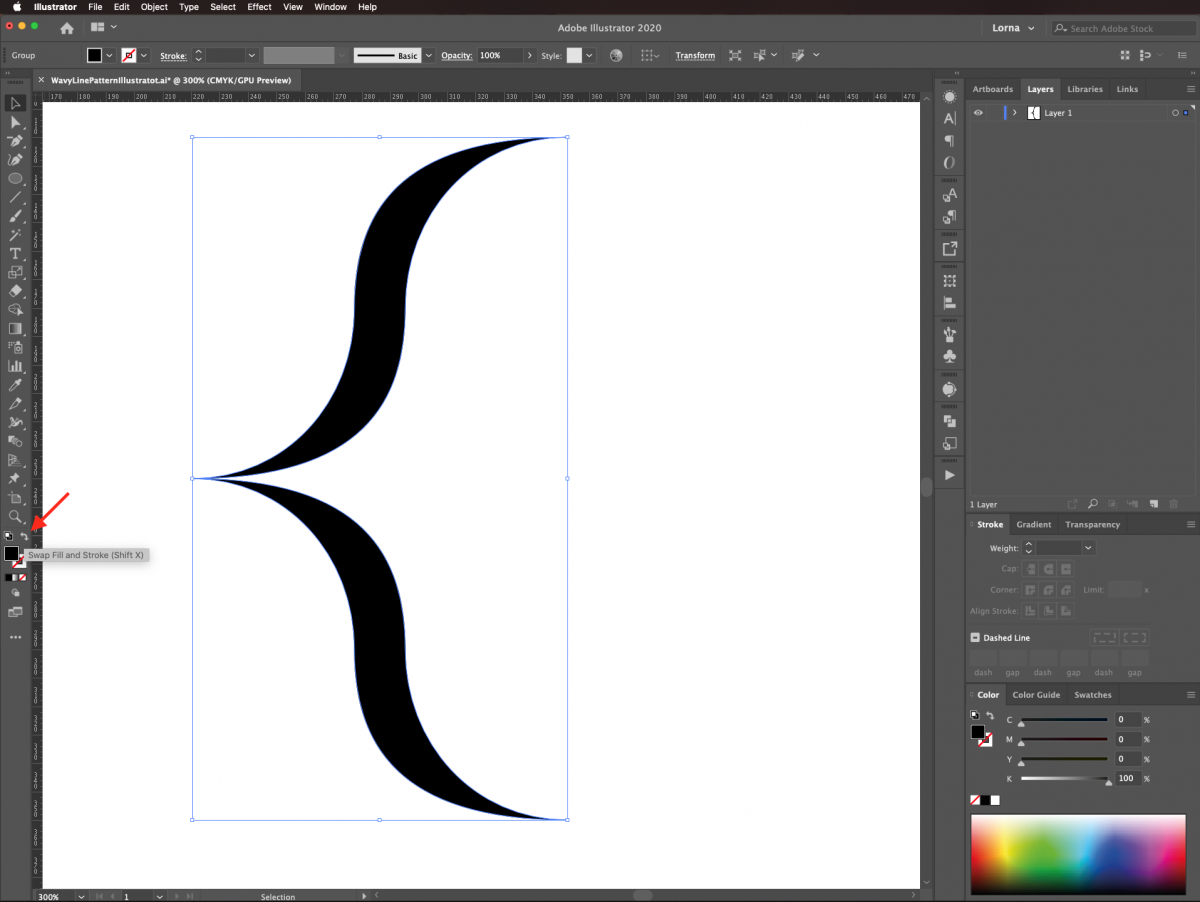
Finally, click on the Swap Fill and Stroke icon (Shift + X) on the toolbar to make the Fill black.
Now that we have our basic shape, let’s create the pattern.
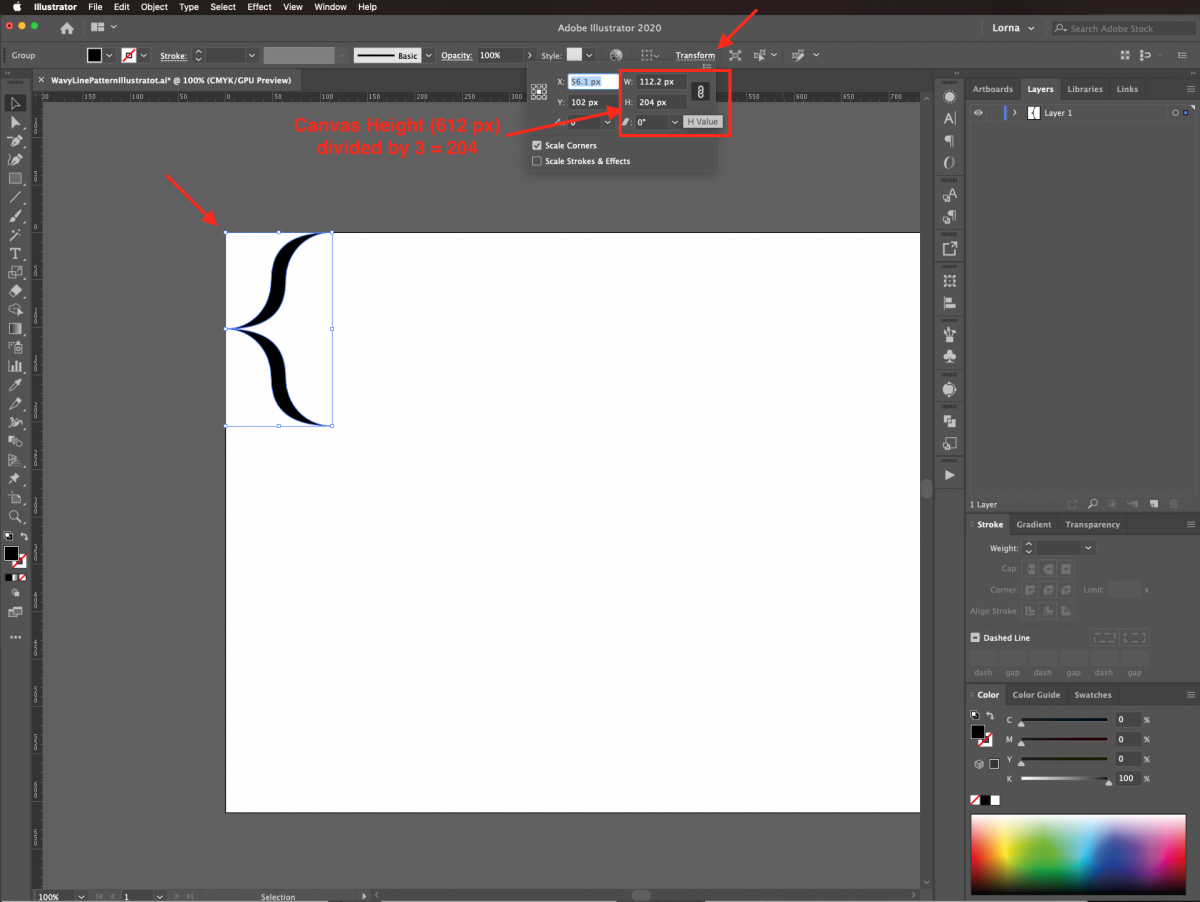
Move the shape to the top left corner of the canvas and resize it if needed. We calculated the new Height for our shape by dividing the canvas height of 612 px by 3. This gave the result of 204 px.
You can use the Transform panel in the top menu to input the new Height value. Make sure that the small chain icon is selected to maintain its proportions.
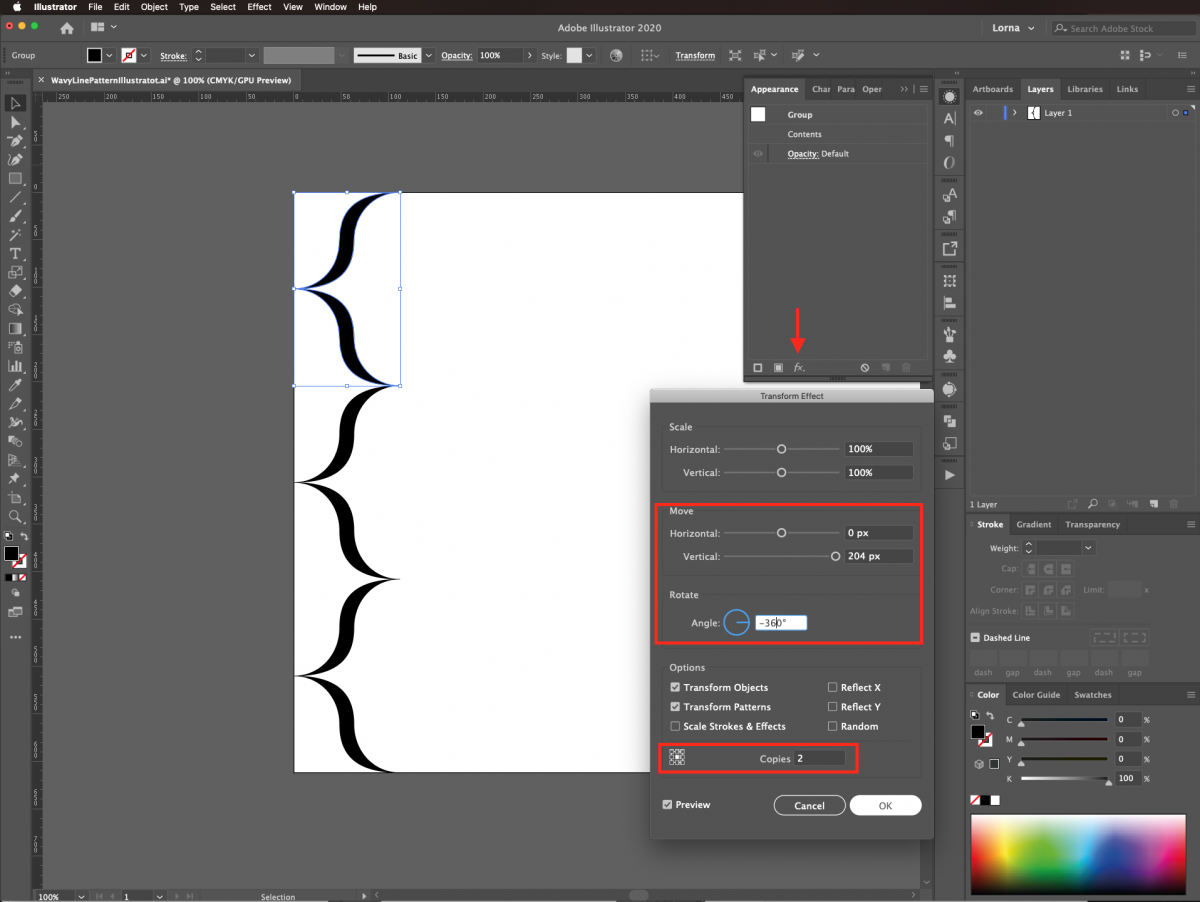
We need to cover the entire height of the canvas with copies of the wavy shape. In this case, we already know that three copies are needed.
Go to the Appearance panel, click on the Effects menu and navigate to Distort & Transform > Transform. In the popup panel, use a Vertical Move of 204 px, and set Copies to two.
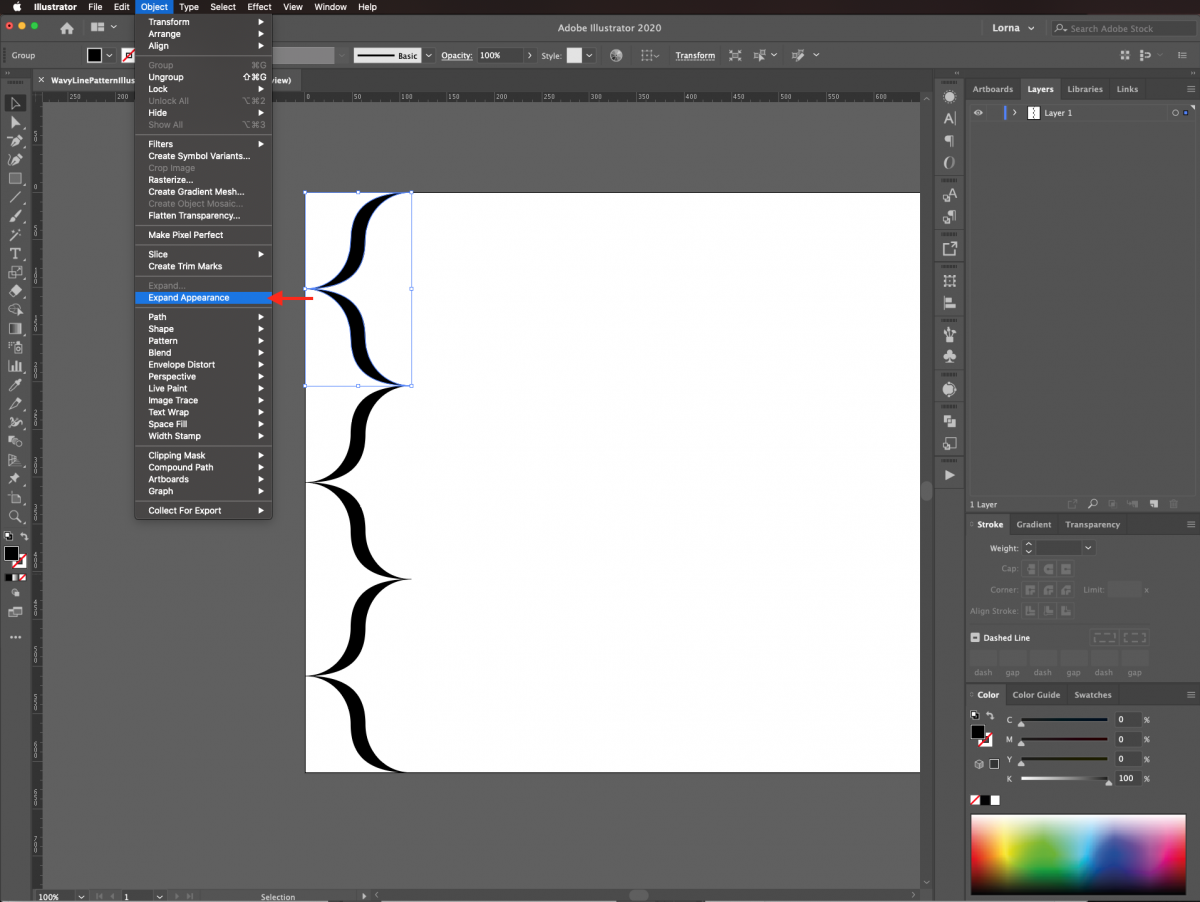
Then go to Object > Expand Appearance.
We are going to create the edges of the pattern keeping in mind we want it to be seamless. Hold the Shift + Option/Alt keys while dragging to the left to create the duplicate. Place some of the duplicate’s shape outside the canvas.
Group them together using Command/Control + G or right click and select Group.
Using the Shift + Option/Alt keys again, drag all the way to the opposite edge of the canvas to create another duplicate.
Make sure that the place where they are “cut” by the edge of the canvas coincides. When you align one next to the other the transition is seamless. In our case, we made sure that the tip of the right-hand bracket was aligned with the edge of the canvas on both sides.
Here you can also change the Fill color if you want. We used a medium blue from the Swatches panel.
To fill the whole canvas and complete the pattern, we need to have an accurate measurement of the distance between shapes. To do this, use the Measure tool. Our measurement was 57.328 px.
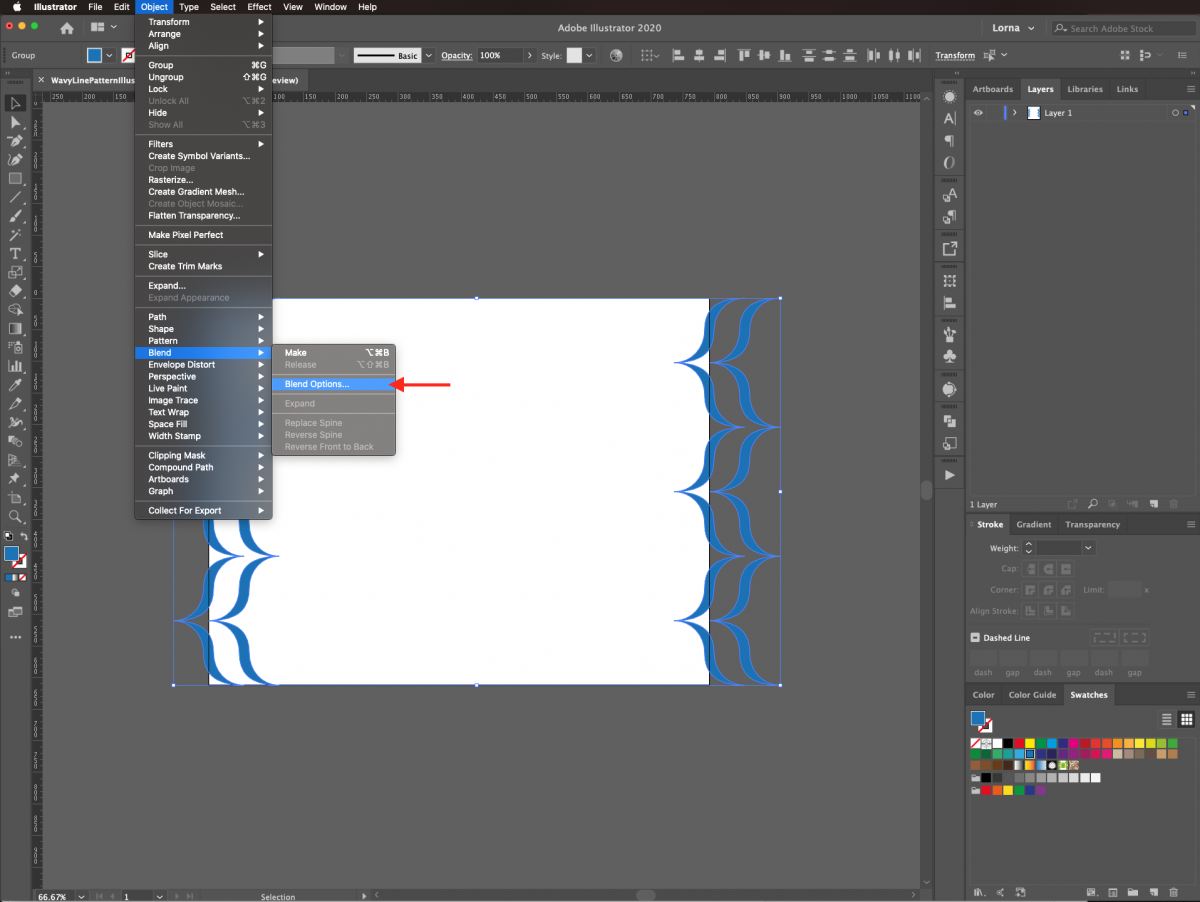
Then, select both sides (Shift key) and go to Object > Blend > Blend Options.
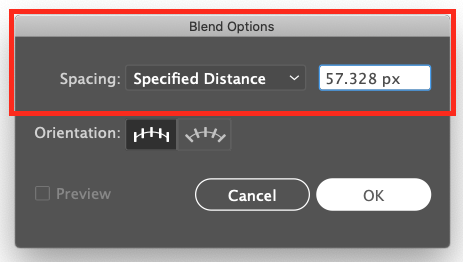
Use Specified Distance as your Spacing choice and input the measurement you took before (57.328 px).
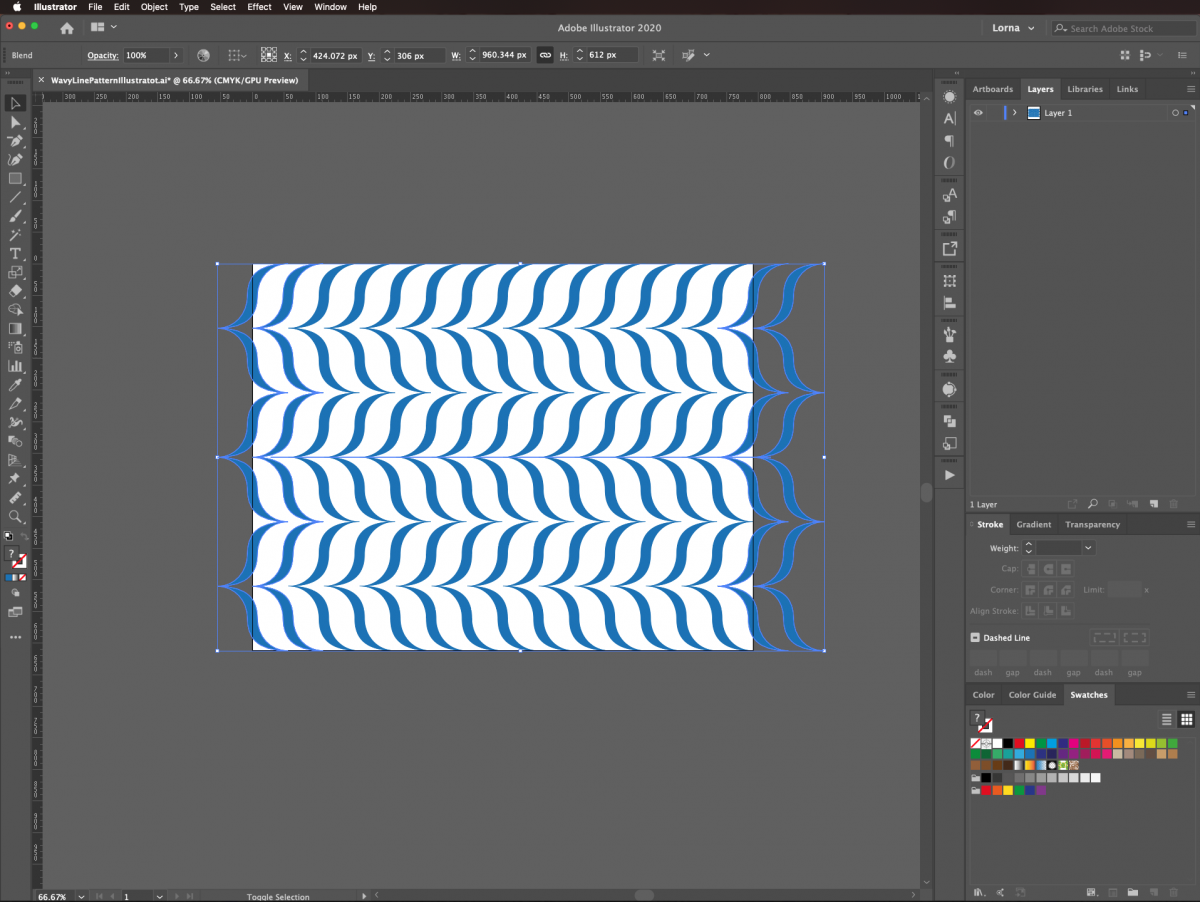
Then go to Object > Blend > Make to apply the blend to your selection.
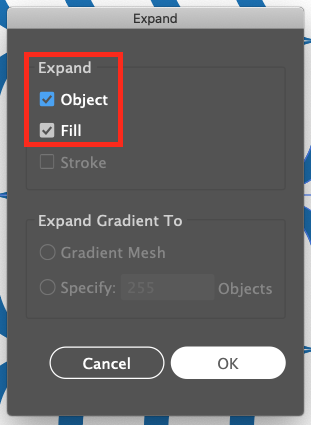
To convert the blended objects into shapes, go to Object > Expand. Be sure that the Fill and Stroke boxes are checked on the Expand panel.
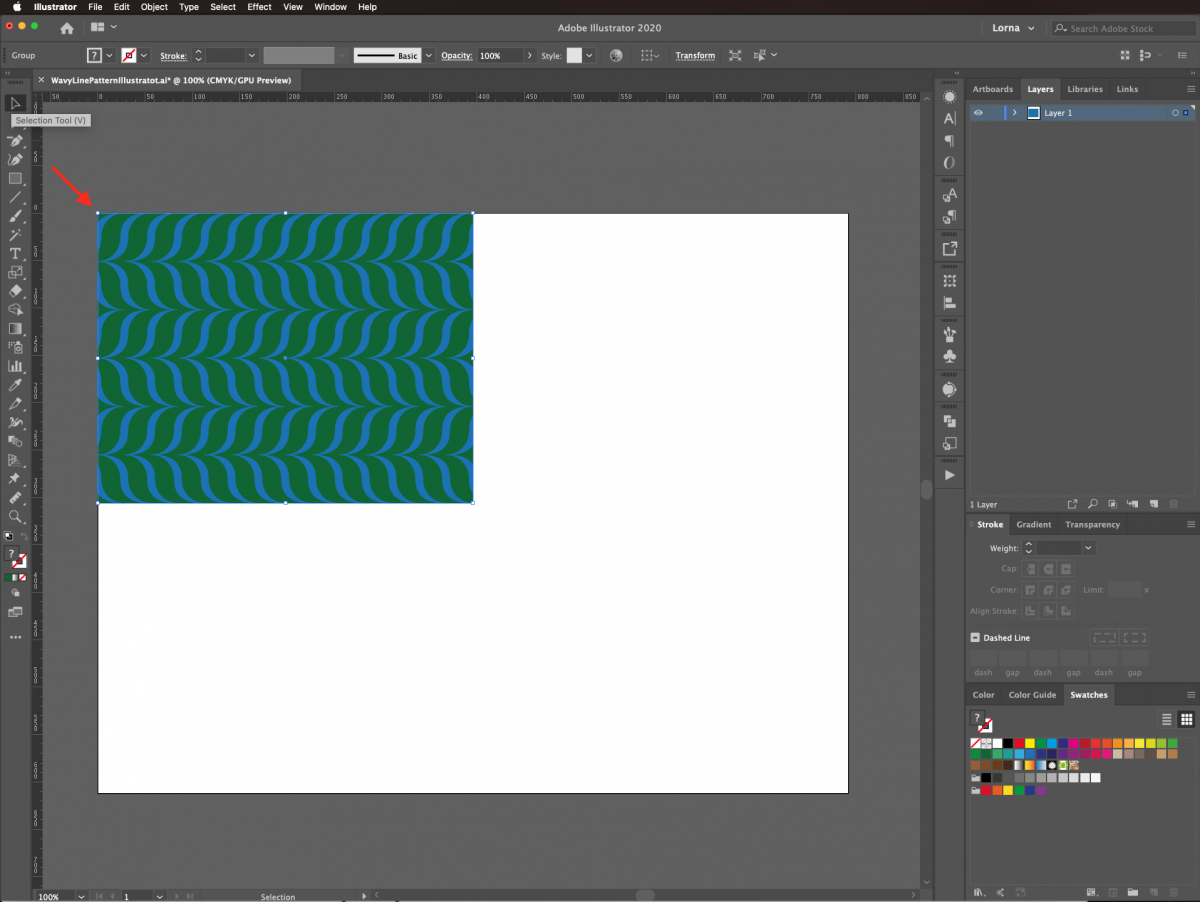
We no longer want the portions that extend outside of the canvas. To remove these, select the Rectangle tool (R). Create a rectangle that covers the entire canvas. The fill and stroke colors should be set to None.
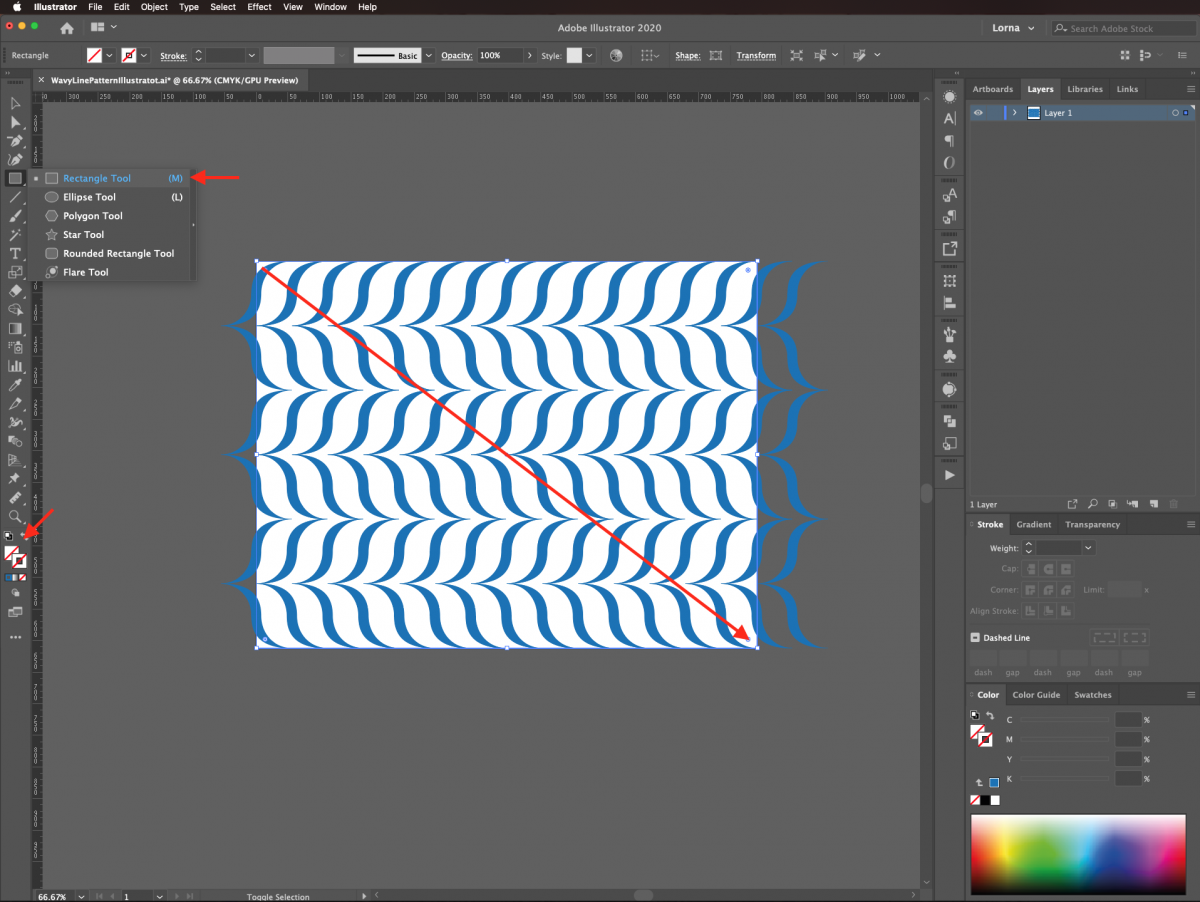
Select all the layers and go to Object > Clipping Mask > Make. You can also right-click on top and choose Make Clipping Mask.
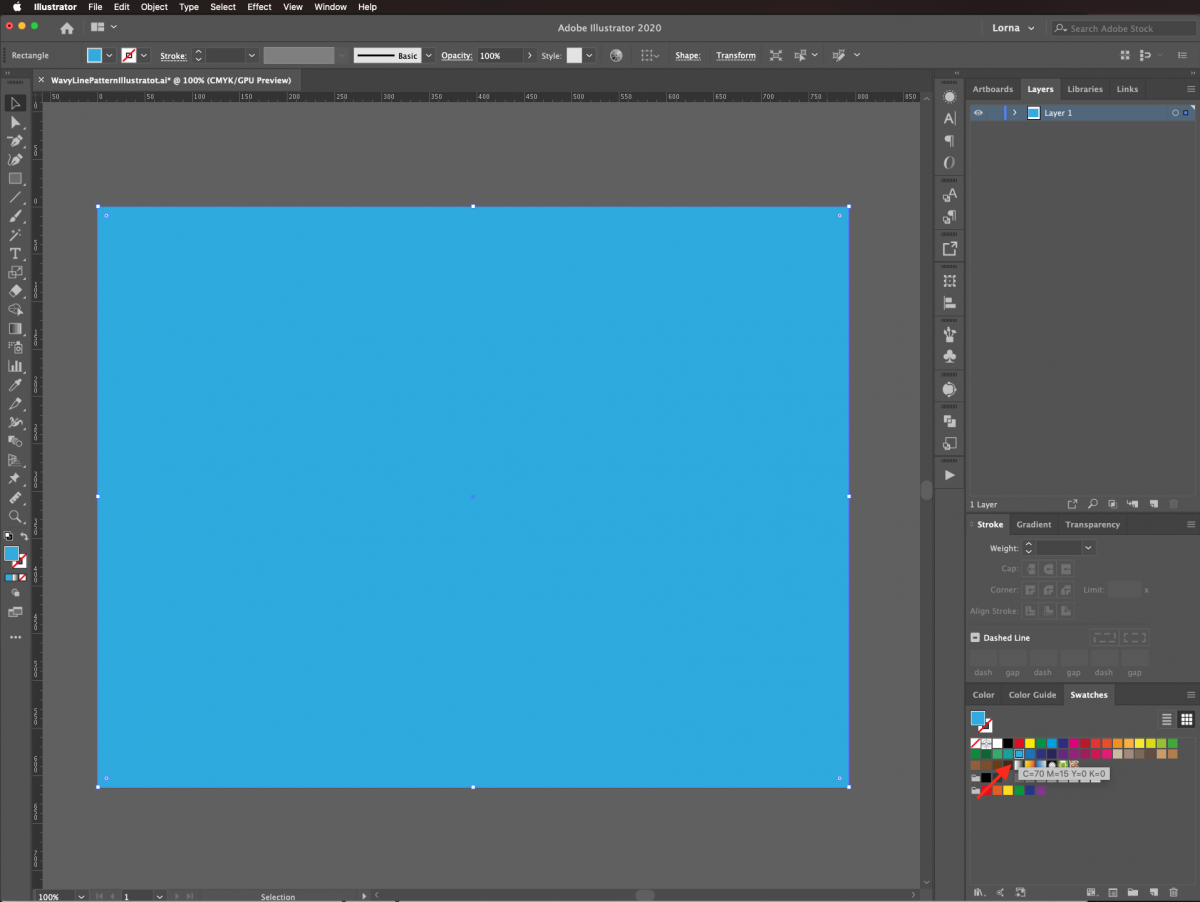
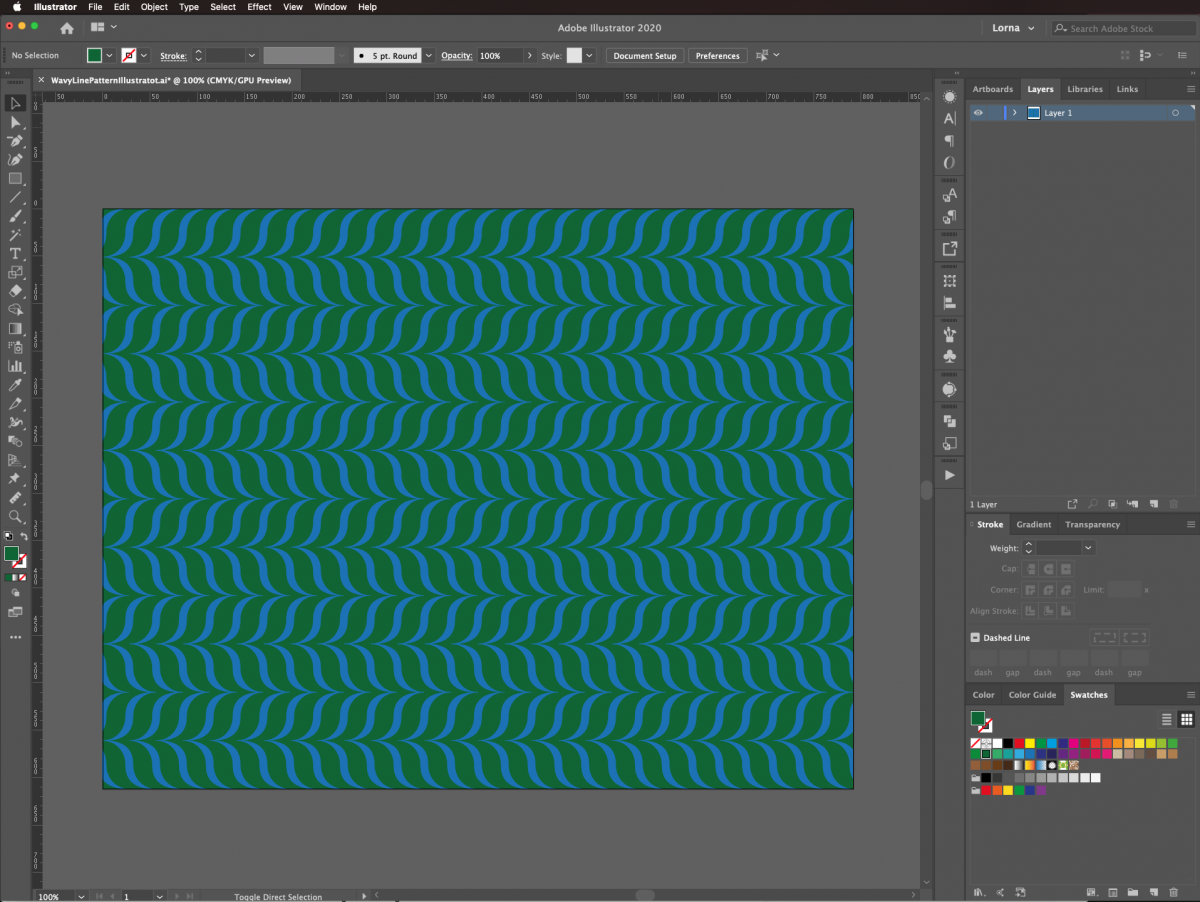
For this step, you may want to add a background color to the pattern. Create another rectangle similar to the prior one. Fill it with the color of your choice.
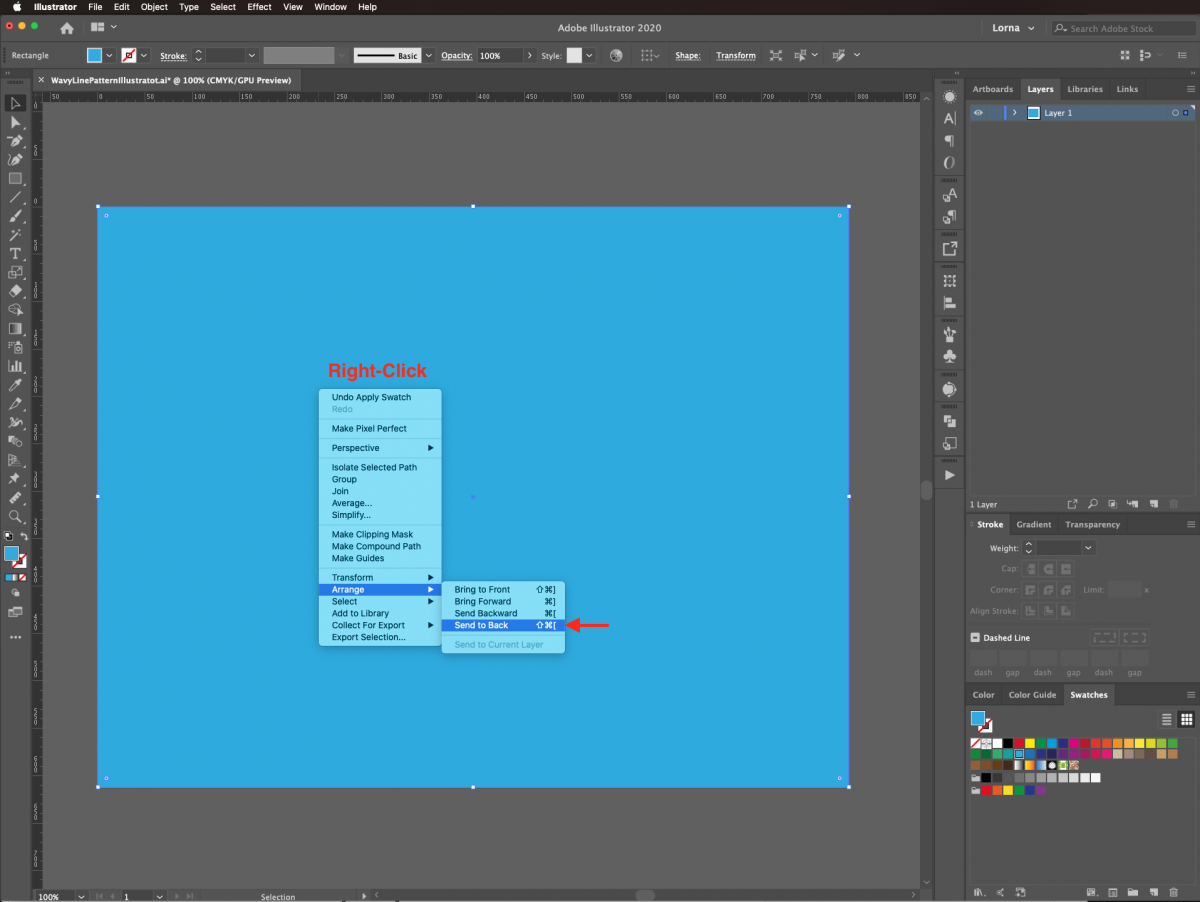
Then, right-click on top of it and choose to Arrange > Send to Back.
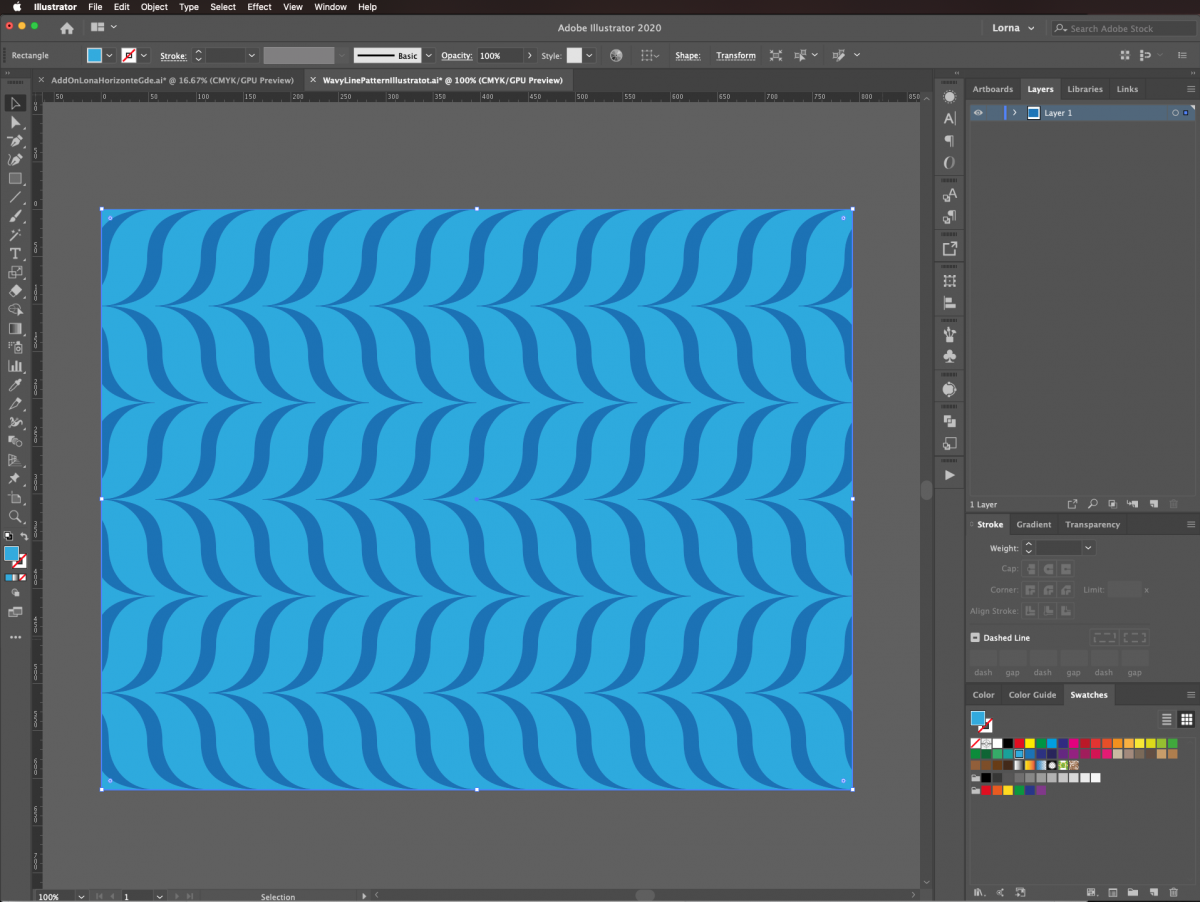
If you want, you can change the color of the pattern and/or the background to create more contrast.
Once the pattern is complete, you will want to check that it is seamless. We can do this by selecting the pattern then double-click on top of the Scale tool (S) in the toolbar.
Use a Uniform 50% Scale value and click Ok.
Place the tile on a corner of the canvas. To better see if the pattern is seamless we will be making duplicates and repositioning them.
With the pattern selected, duplicate it three times. Place the duplicates in the other quadrants of your document. They should tile perfectly to create a seamless pattern.
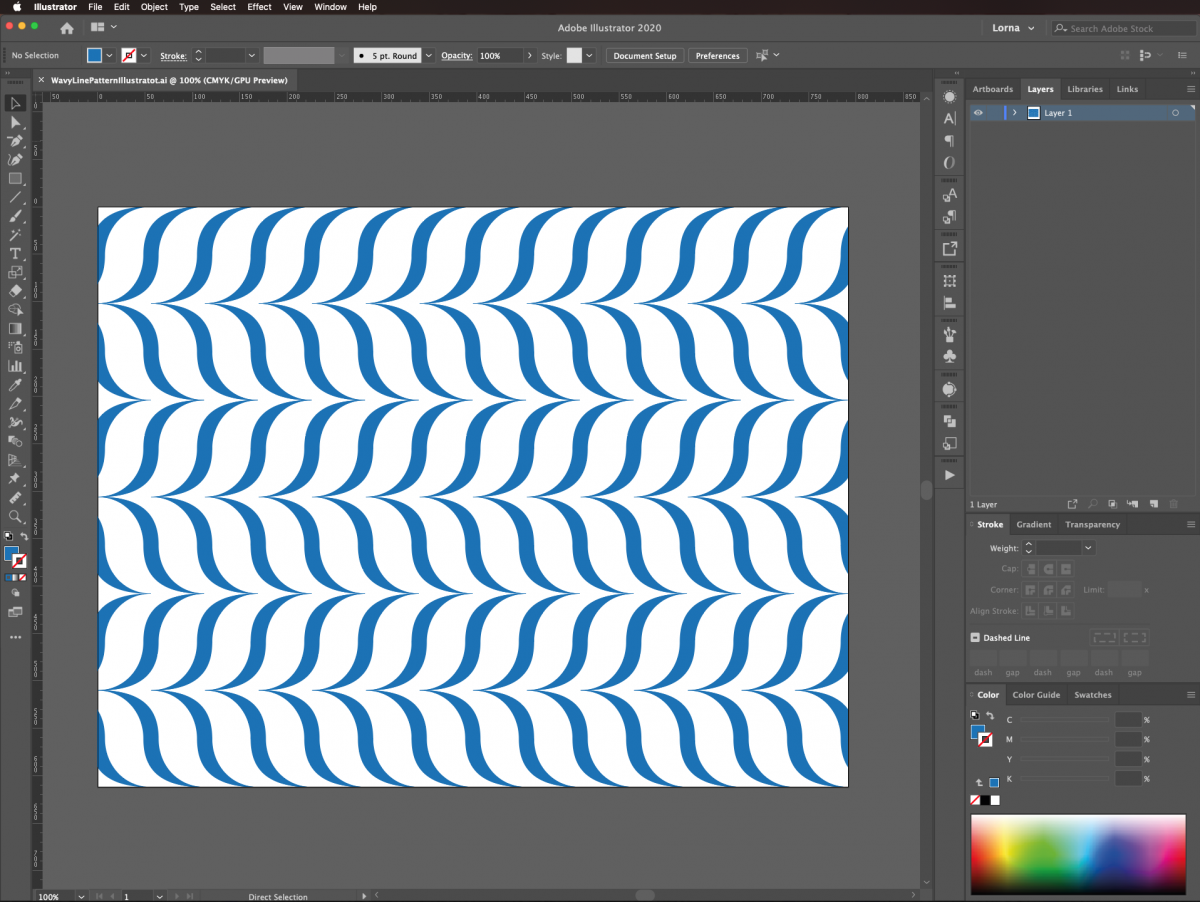
Your pattern is now complete. You can add it to various projects or as backgrounds.
If you liked this tutorial, you can check out our other ones like using the recolor artwork tool and making a paper cut effect in Illustrator.
Up next, we will show you how to make a wavy line pattern in Illustrator. You can also follow our great tutorial on making seamless patterns for your future projects.
Once in Illustrator, create a new document to get started.
Step 1 - Make a curved path
We will begin by creating a basic shape for our pattern. Select the Ellipse tool (L) and click inside of your canvas to bring up the dialog box.
Input a Width and Height of 120 px. Set the Stroke color to black and Fill to none. The selected shape with adjusted Width and Height will be added to your canvas.
Use the Direct Selection tool (A) while pressing the Shift key to select both the top and left Anchor Points.
Then, hit Delete to erase them. You should end up with the bottom-right quarter of a circle.
Step 2 - Turn the curved path into a wave
Another curved path needs to be added to create a wavy shape. Without deselecting the path, go to the Appearance panel. Click on the Effects menu on the bottom-left side and navigate to Distort & Transform > Transform.
Use a Horizontal Move of 60 px and a Vertical Move of -60 px. Check the Reflect X and Y boxes. Be sure that the amount of Copies is set to one, then click Ok.
Make sure that the ends of the two shapes coincide. If not, double-click the Transform setting in the Appearance panel to correct the Horizontal and Vertical Move values.
We changed the first (horizontal) to 59.5 px and the second (vertical) to 60.5 px.
Next, we want to turn the paths into a shape. Do this by going to Object > Expand Appearance.
Finally, with the Direct Selection tool (A) click near the center of the path then drag on top of it to select all the possible anchor points. Click on the Convert Selected Anchor Points to Smooth button on the left side of the top menu.
Step 3 - Duplicate the wavy path
We need to turn the wavy path into a closed shape. Go back to the Appearance panel. Then apply another instance of Distort & Transform > Transform. But this time use a Horizontal Move of 12 px, uncheck the Reflect X and Y boxes, and set Copies as one. Once again go to Object > Expand Appearance.
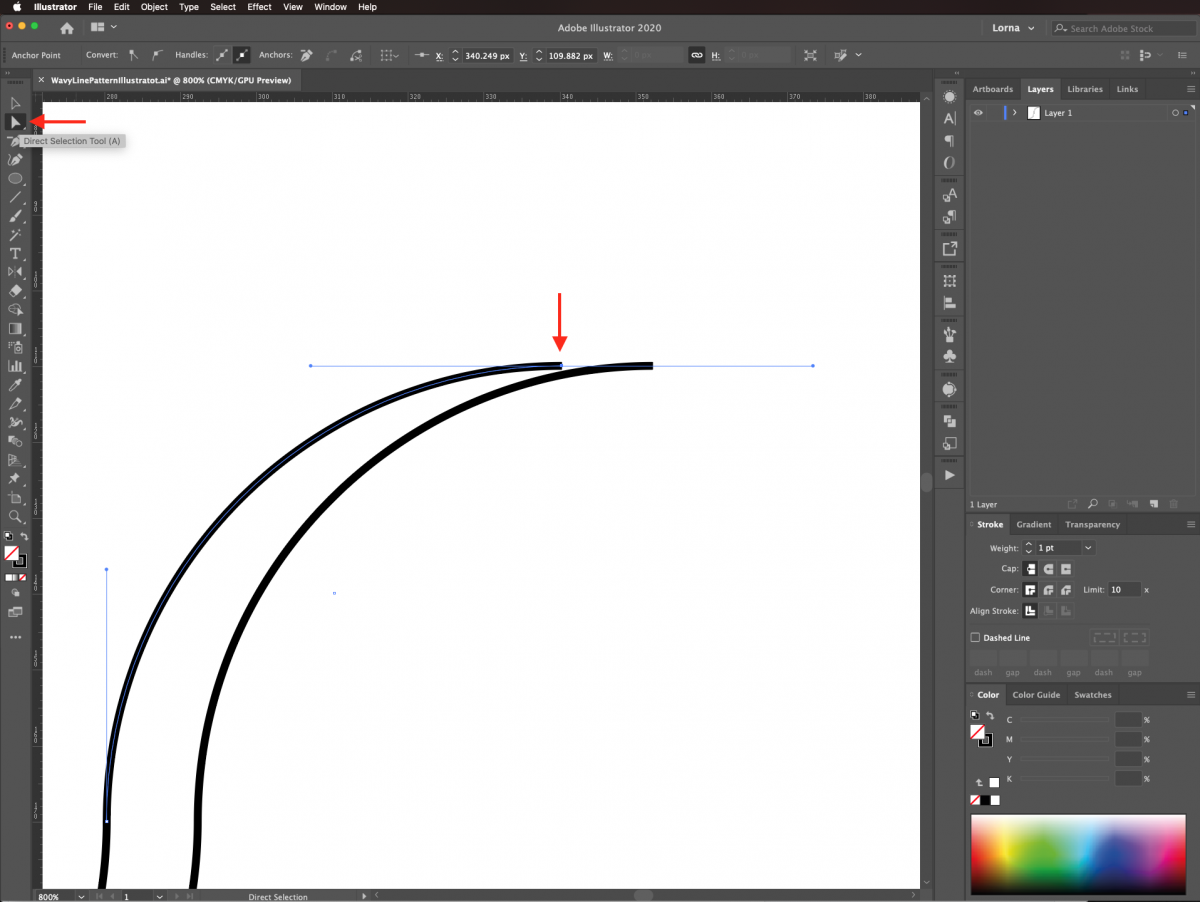
Step 4 - Join the wavy paths together
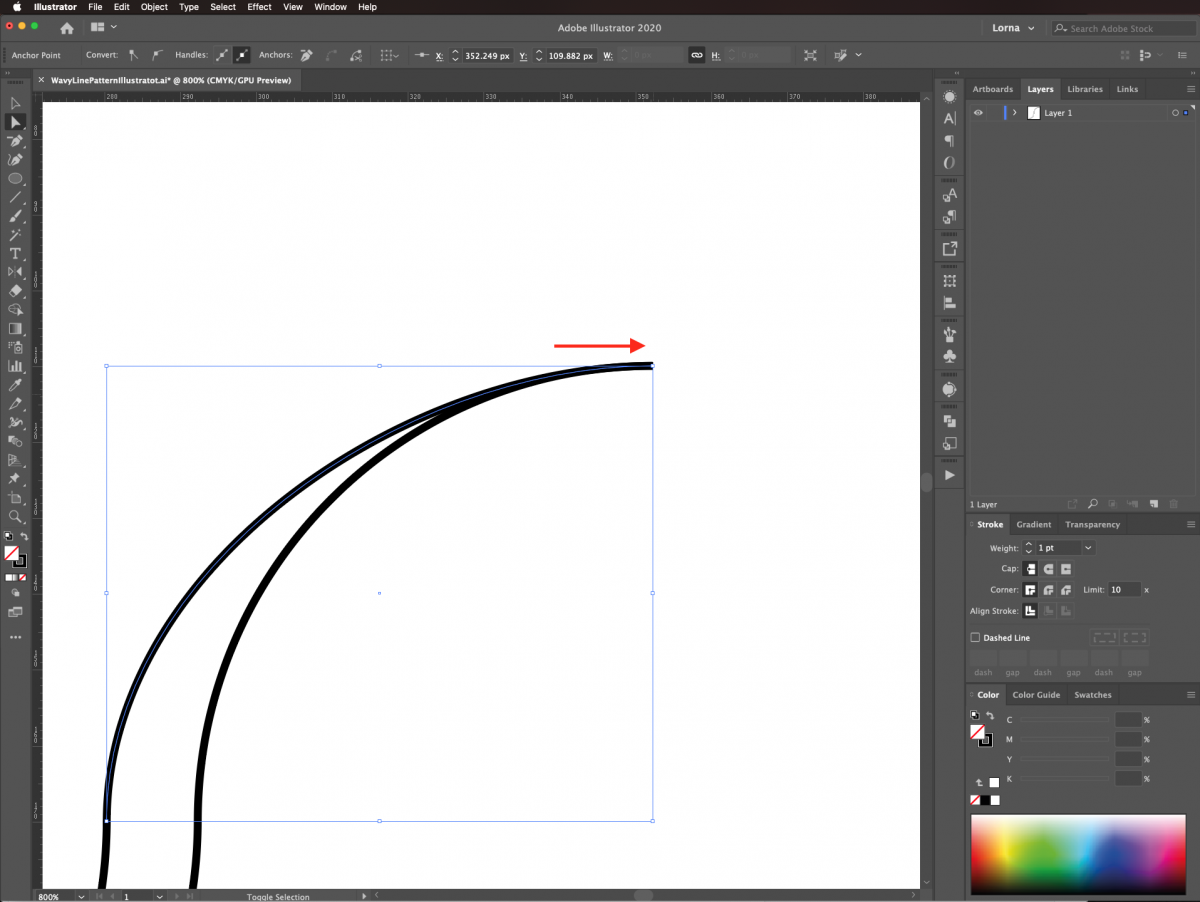
Join everything together and close the shape with the Direct Selection tool (A). Select the one End Point on the top left of the first wave. While holding Shift, pull the point out until it is placed over the one top left of the second wave. The Shift key helps to keep the angle consistent.
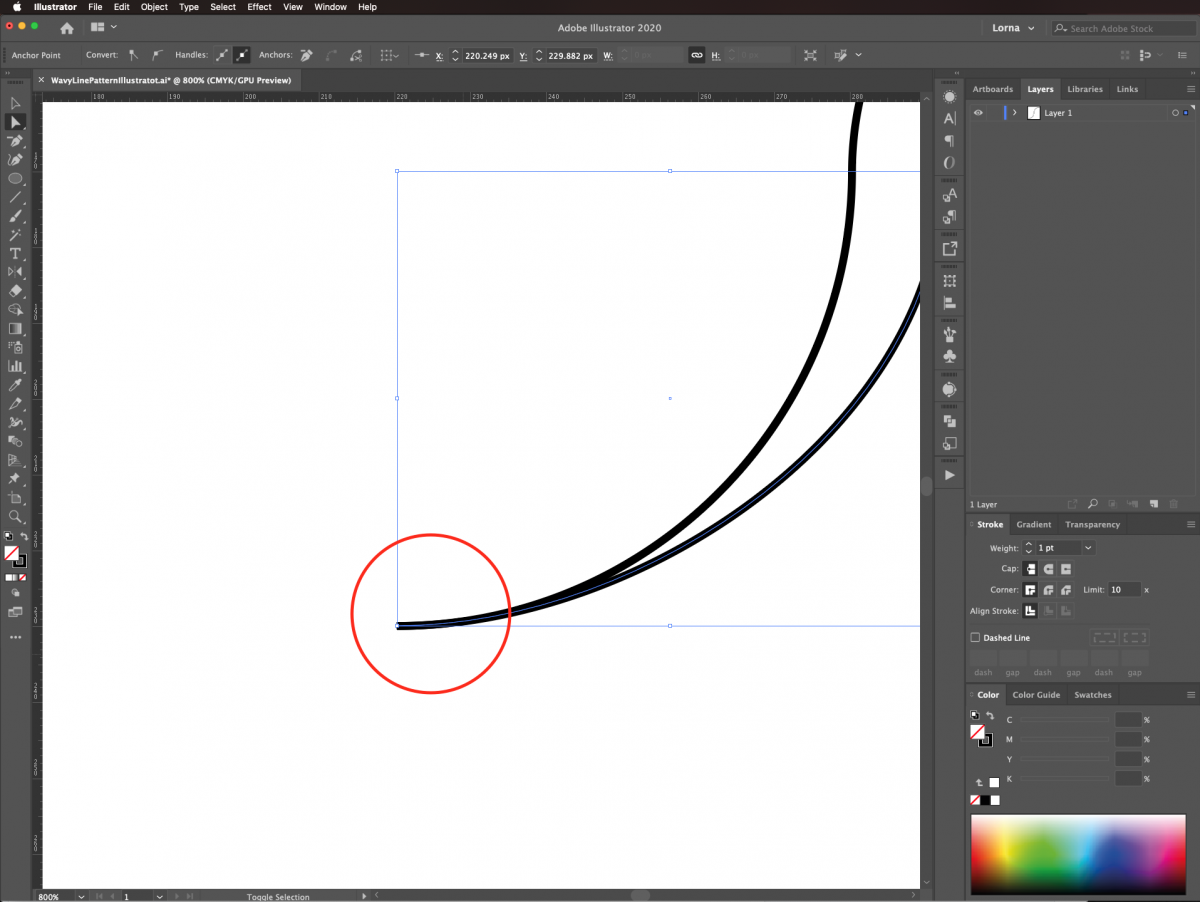
Repeat this with the bottom End Points to close the shape.
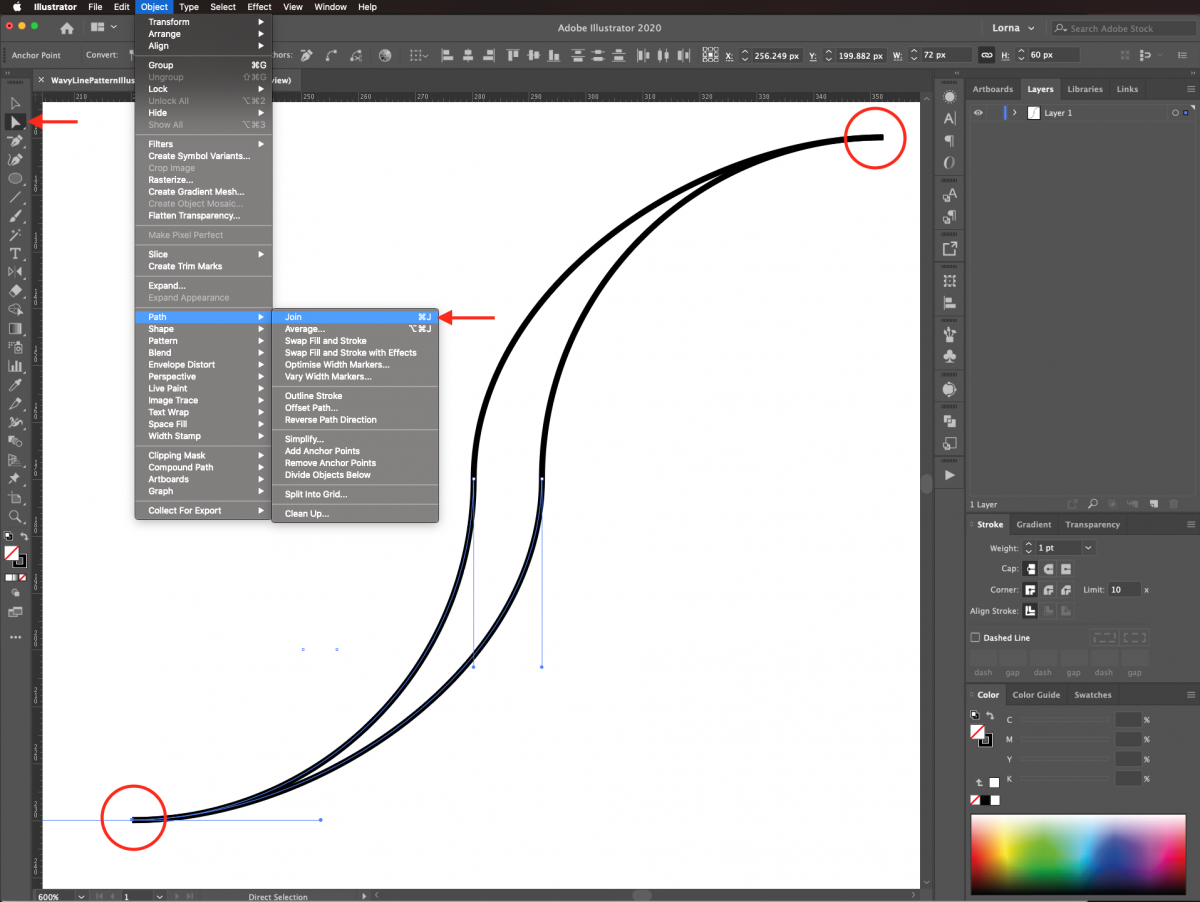
Select the Direct Selection tool (A) again. Click near the tip of the path then drag on top to select all the possible anchor points. Join them together by going to Object > Path > Join (Command/Control + J). Do the same with the other end of the wave.
Finally, select all your paths with the Selection tool (V) and join the entire shape together (Command/Control + J).
Step 5 - Adjust the wavy shape
We need to adjust some Anchor Points to create a more uniform looking wave. Add a vertical Guide on top of each side of the body of the wavy shape. Click and drag from the page ruler on the left side of the canvas. To bring out the Page Rulers use Command/Control + R.
Use the Direct Selection tool (A) to click on the top End Point. Then, pull the left-hand handle (while holding the Shift key) until you reach the guide on the right side of the body. The idea is to make the top curve a bit larger. Repeat with the one at the bottom left. Pull the point to the right until you reach the guide on the left side of the body.
You can hide the Guides since they are no longer needed. Go to View > Guides > Hide Guides (Command/Control + ;).
Now, select one of the center Anchor Points and move it a few clicks out using the arrow keys. Do the same with the one on the opposite side to make the inside of the shape larger.
Step 6 - Create a reflected copy of the wavy shape
We need to create another instance of the wavy shape. This needs to be placed on top of the original one. It also needs to be a reflected copy so the final composite shape looks similar to a bracket.
First, go to Object > Transform > Reflect to create the reflected copy. Choose Vertical Axis then click Copy instead of Ok in the Reflect panel.
Click again on Object, select Transform > Move to flip the copy.
Under the Move panel, use a Vertical Distance of 120 px with a -90° Angle then click Ok.
Step 7 - Merge and adjust the shapes
The shapes need to be merged as one and adjusted. Select both shapes, go to the Pathfinder panel and choose Unite to create a single shape.
Finally, click on the Swap Fill and Stroke icon (Shift + X) on the toolbar to make the Fill black.
Now that we have our basic shape, let’s create the pattern.
Move the shape to the top left corner of the canvas and resize it if needed. We calculated the new Height for our shape by dividing the canvas height of 612 px by 3. This gave the result of 204 px.
You can use the Transform panel in the top menu to input the new Height value. Make sure that the small chain icon is selected to maintain its proportions.
Step 8 - Cover the height of the canvas
We need to cover the entire height of the canvas with copies of the wavy shape. In this case, we already know that three copies are needed.
Go to the Appearance panel, click on the Effects menu and navigate to Distort & Transform > Transform. In the popup panel, use a Vertical Move of 204 px, and set Copies to two.
Then go to Object > Expand Appearance.
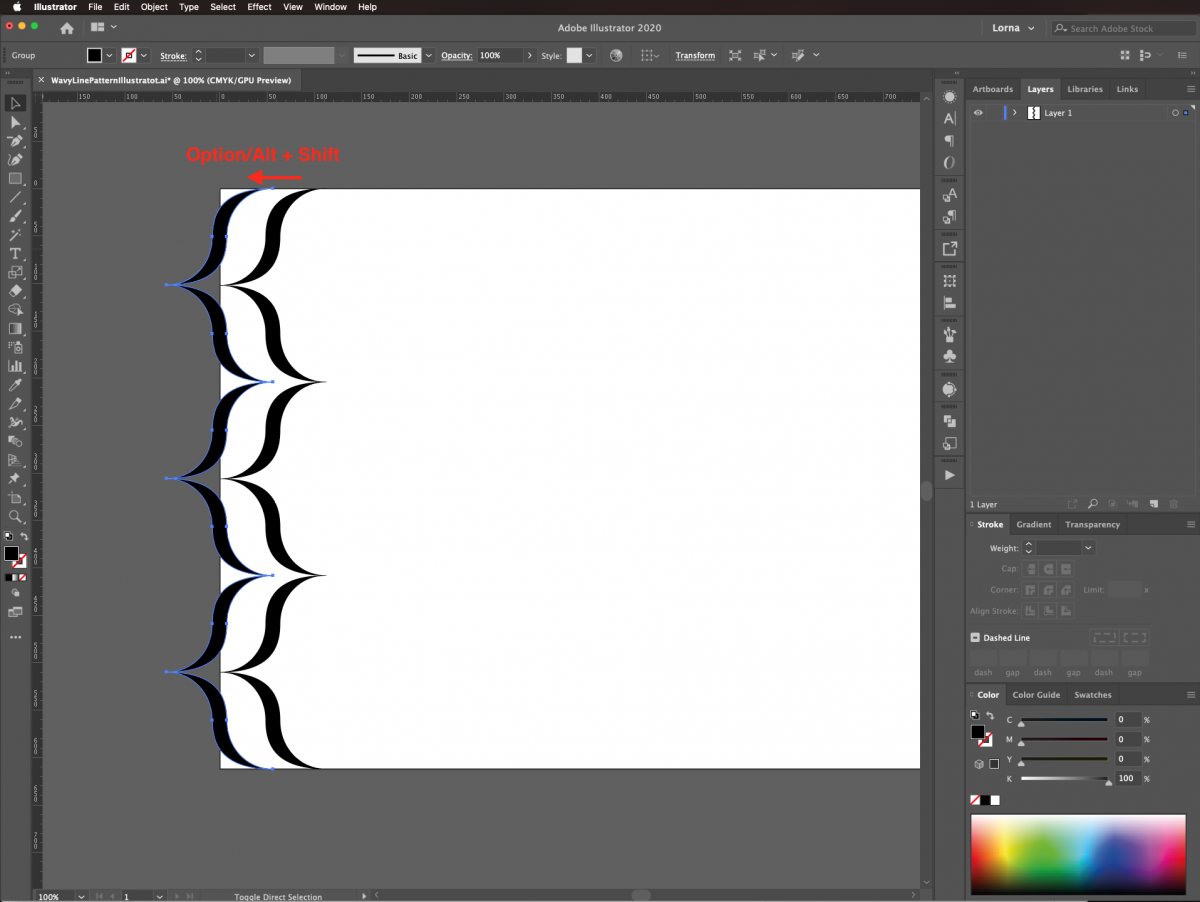
We are going to create the edges of the pattern keeping in mind we want it to be seamless. Hold the Shift + Option/Alt keys while dragging to the left to create the duplicate. Place some of the duplicate’s shape outside the canvas.
Group them together using Command/Control + G or right click and select Group.
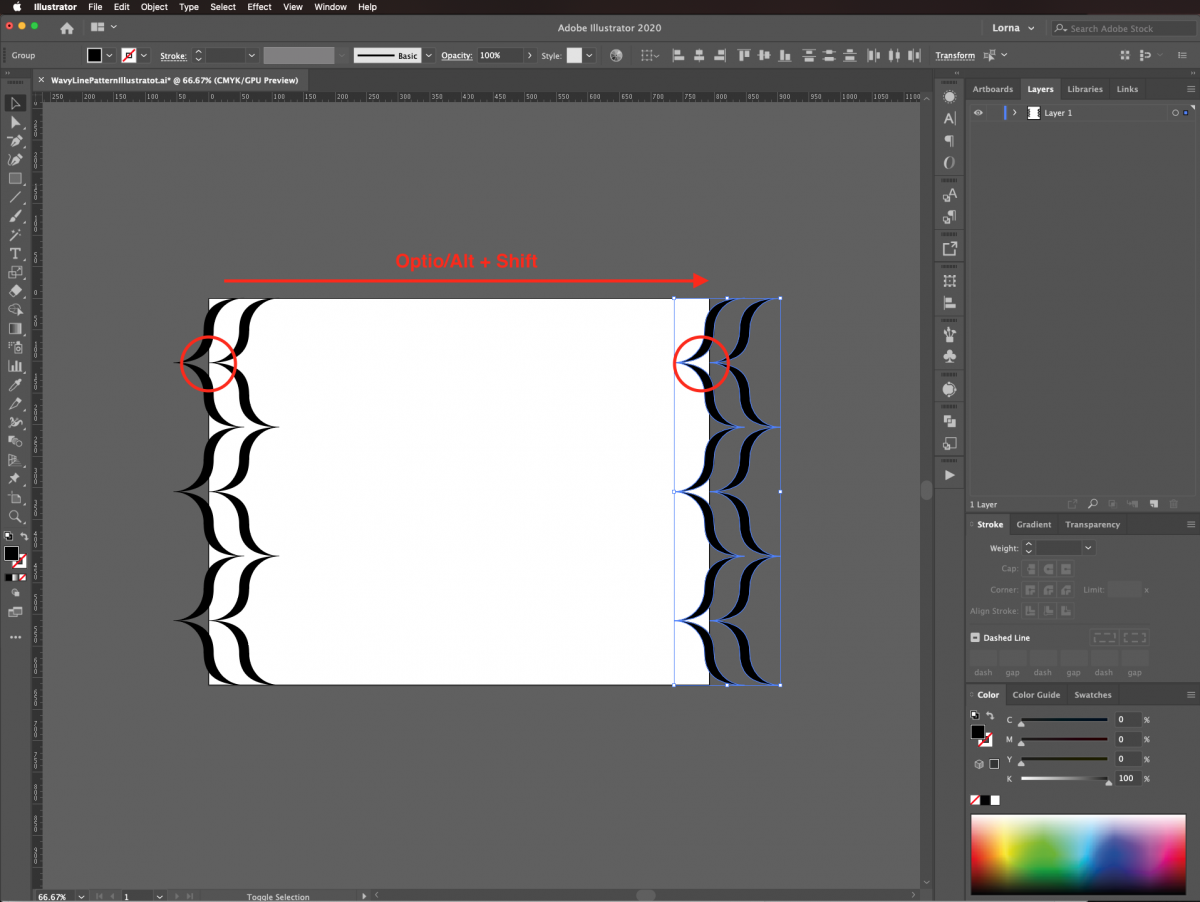
Using the Shift + Option/Alt keys again, drag all the way to the opposite edge of the canvas to create another duplicate.
Make sure that the place where they are “cut” by the edge of the canvas coincides. When you align one next to the other the transition is seamless. In our case, we made sure that the tip of the right-hand bracket was aligned with the edge of the canvas on both sides.
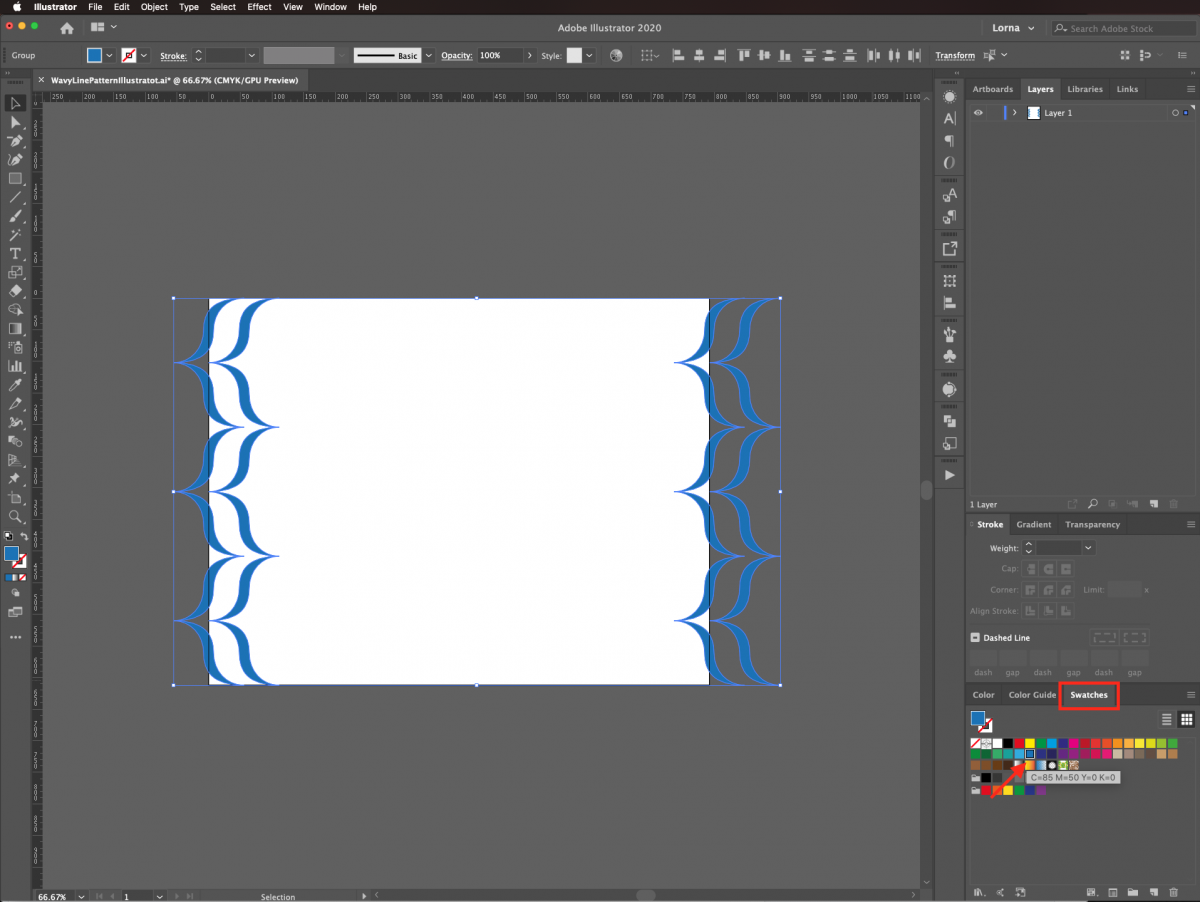
Here you can also change the Fill color if you want. We used a medium blue from the Swatches panel.
Step 9 - Fill the canvas with the pattern
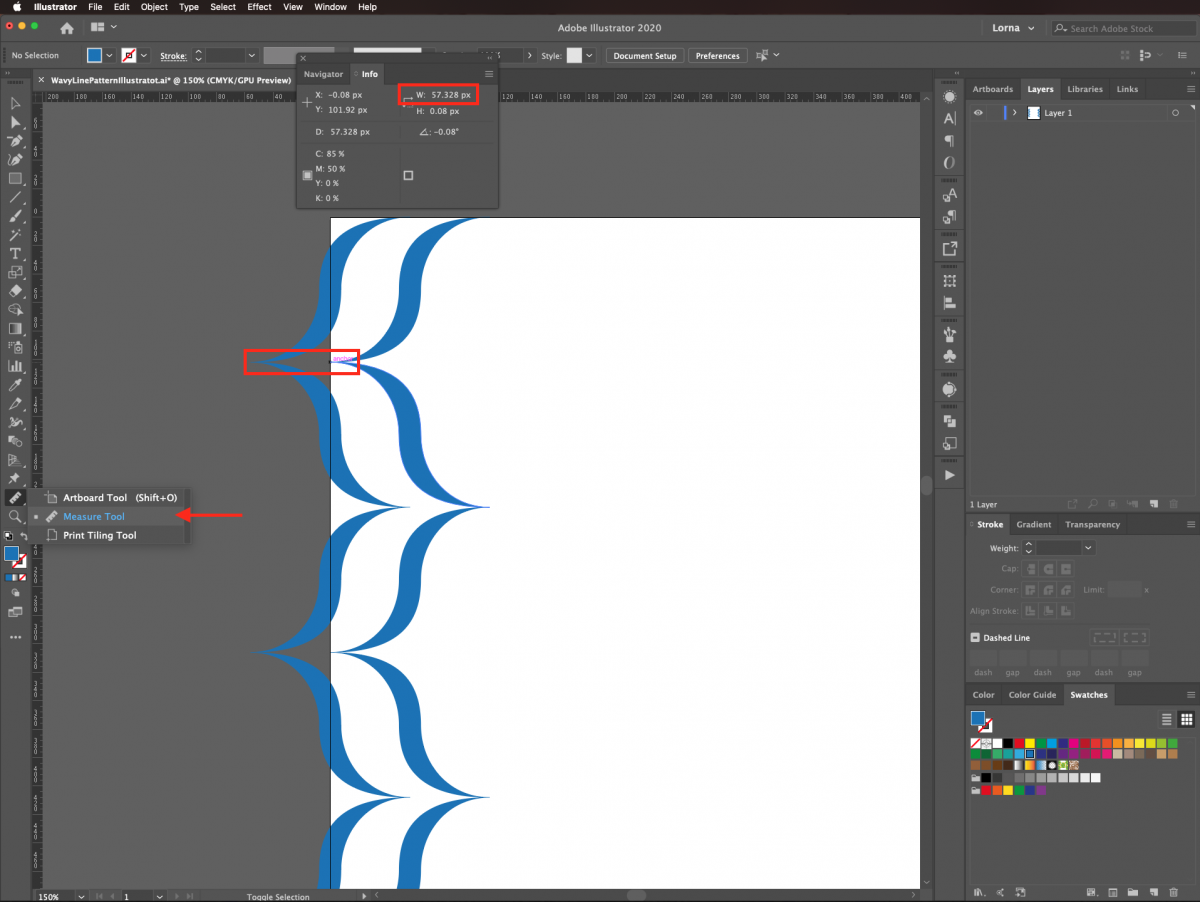
To fill the whole canvas and complete the pattern, we need to have an accurate measurement of the distance between shapes. To do this, use the Measure tool. Our measurement was 57.328 px.
Then, select both sides (Shift key) and go to Object > Blend > Blend Options.
Use Specified Distance as your Spacing choice and input the measurement you took before (57.328 px).
Then go to Object > Blend > Make to apply the blend to your selection.
To convert the blended objects into shapes, go to Object > Expand. Be sure that the Fill and Stroke boxes are checked on the Expand panel.
Step 10 - Create a pattern tile with a clipping mask
We no longer want the portions that extend outside of the canvas. To remove these, select the Rectangle tool (R). Create a rectangle that covers the entire canvas. The fill and stroke colors should be set to None.
Select all the layers and go to Object > Clipping Mask > Make. You can also right-click on top and choose Make Clipping Mask.
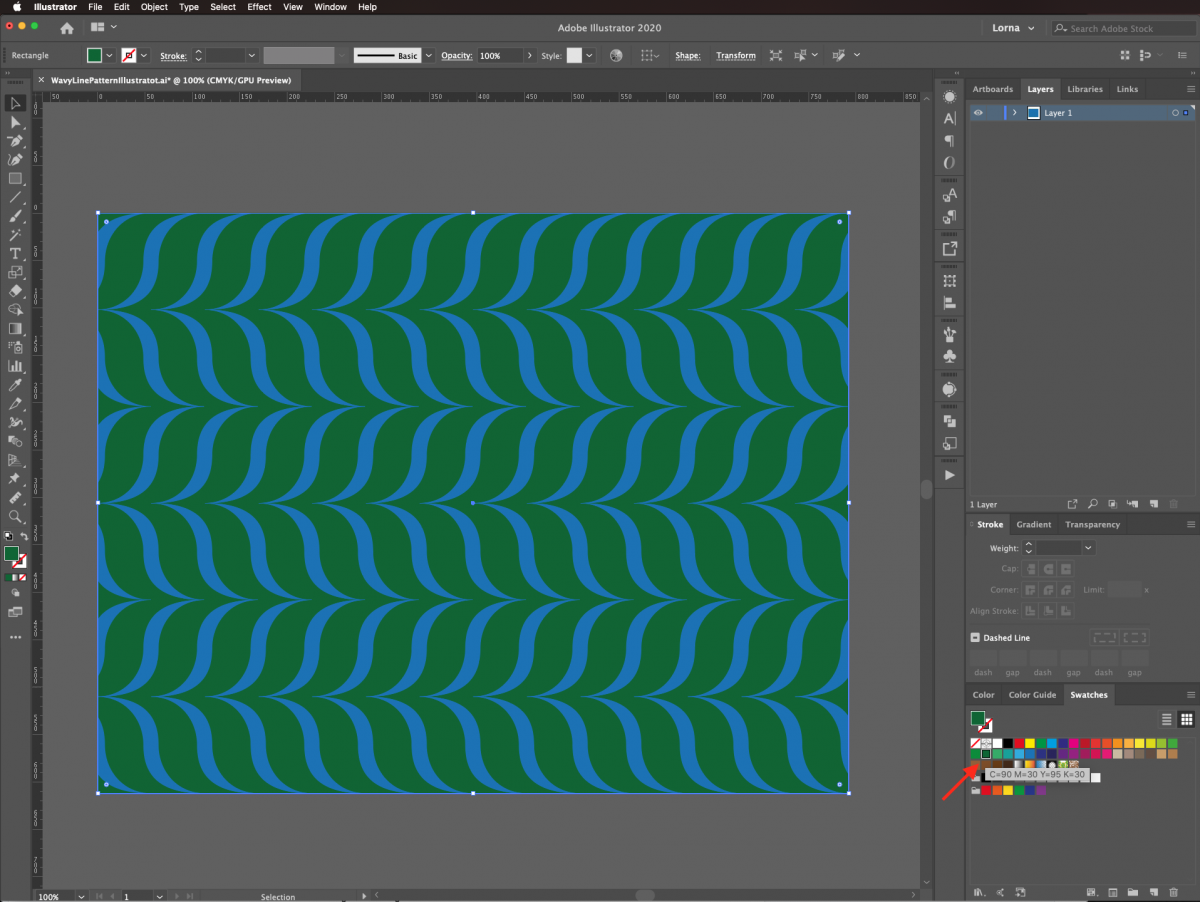
Step 11 - Add a background color
For this step, you may want to add a background color to the pattern. Create another rectangle similar to the prior one. Fill it with the color of your choice.
Then, right-click on top of it and choose to Arrange > Send to Back.
If you want, you can change the color of the pattern and/or the background to create more contrast.
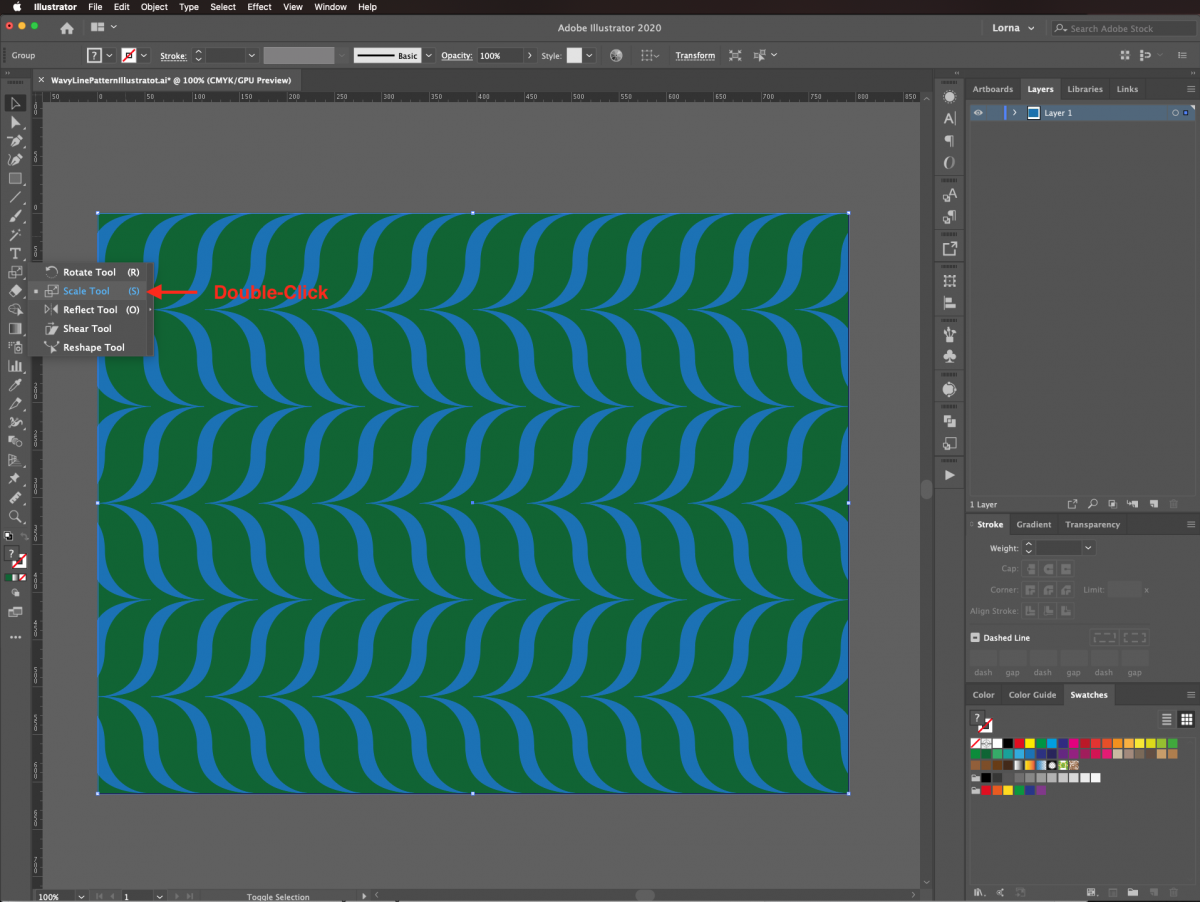
Step 12 - Check that the pattern is seamless
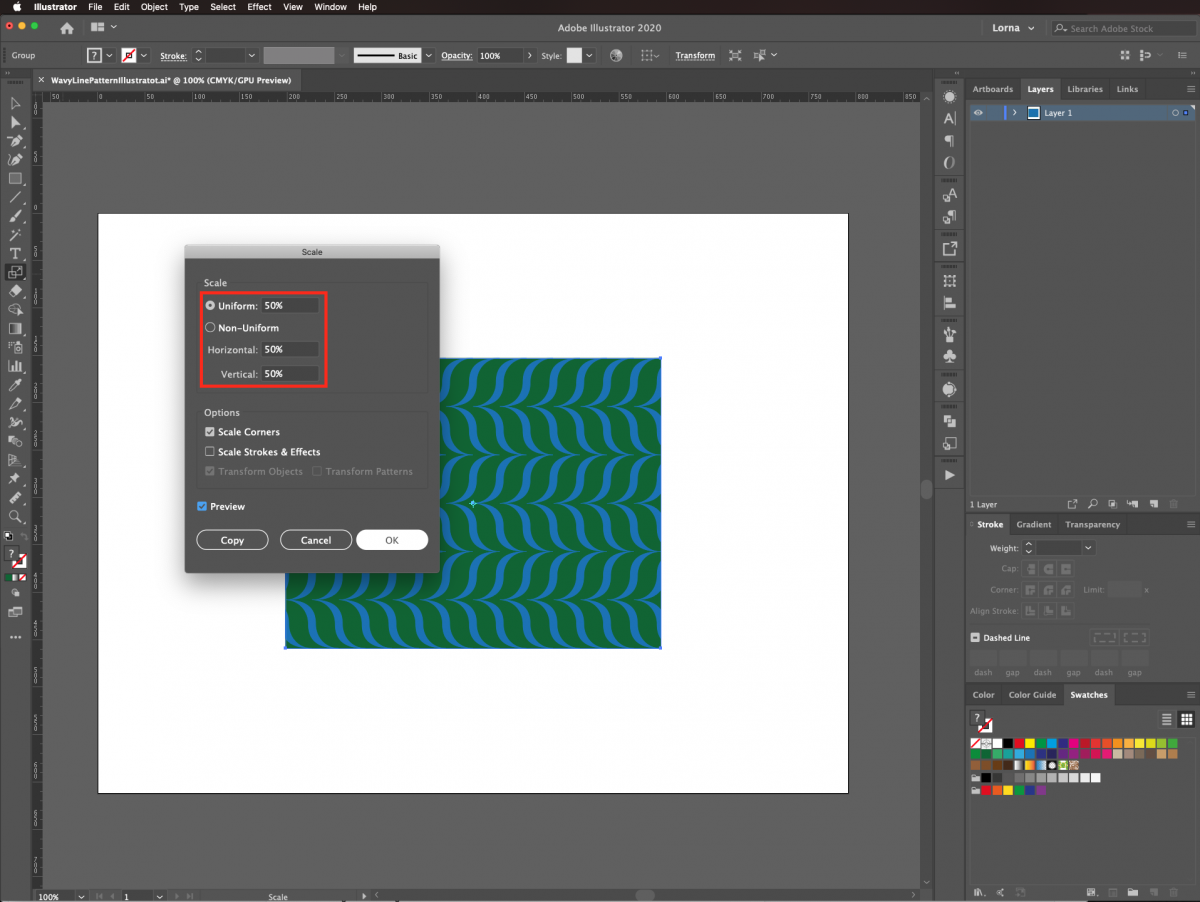
Once the pattern is complete, you will want to check that it is seamless. We can do this by selecting the pattern then double-click on top of the Scale tool (S) in the toolbar.
Use a Uniform 50% Scale value and click Ok.
Place the tile on a corner of the canvas. To better see if the pattern is seamless we will be making duplicates and repositioning them.
With the pattern selected, duplicate it three times. Place the duplicates in the other quadrants of your document. They should tile perfectly to create a seamless pattern.
Your pattern is now complete. You can add it to various projects or as backgrounds.
If you liked this tutorial, you can check out our other ones like using the recolor artwork tool and making a paper cut effect in Illustrator.


