
How to Make Line Art Illustration in Illustrator
In this tutorial we will be making a line art illustration in Adobe Illustrator. These illustrations are perfect designs for t shirts, tote bags and so much more. Create them for mementos of all your favorite places or holidays!
Check out our Illustrator tutorial section for more great tips!

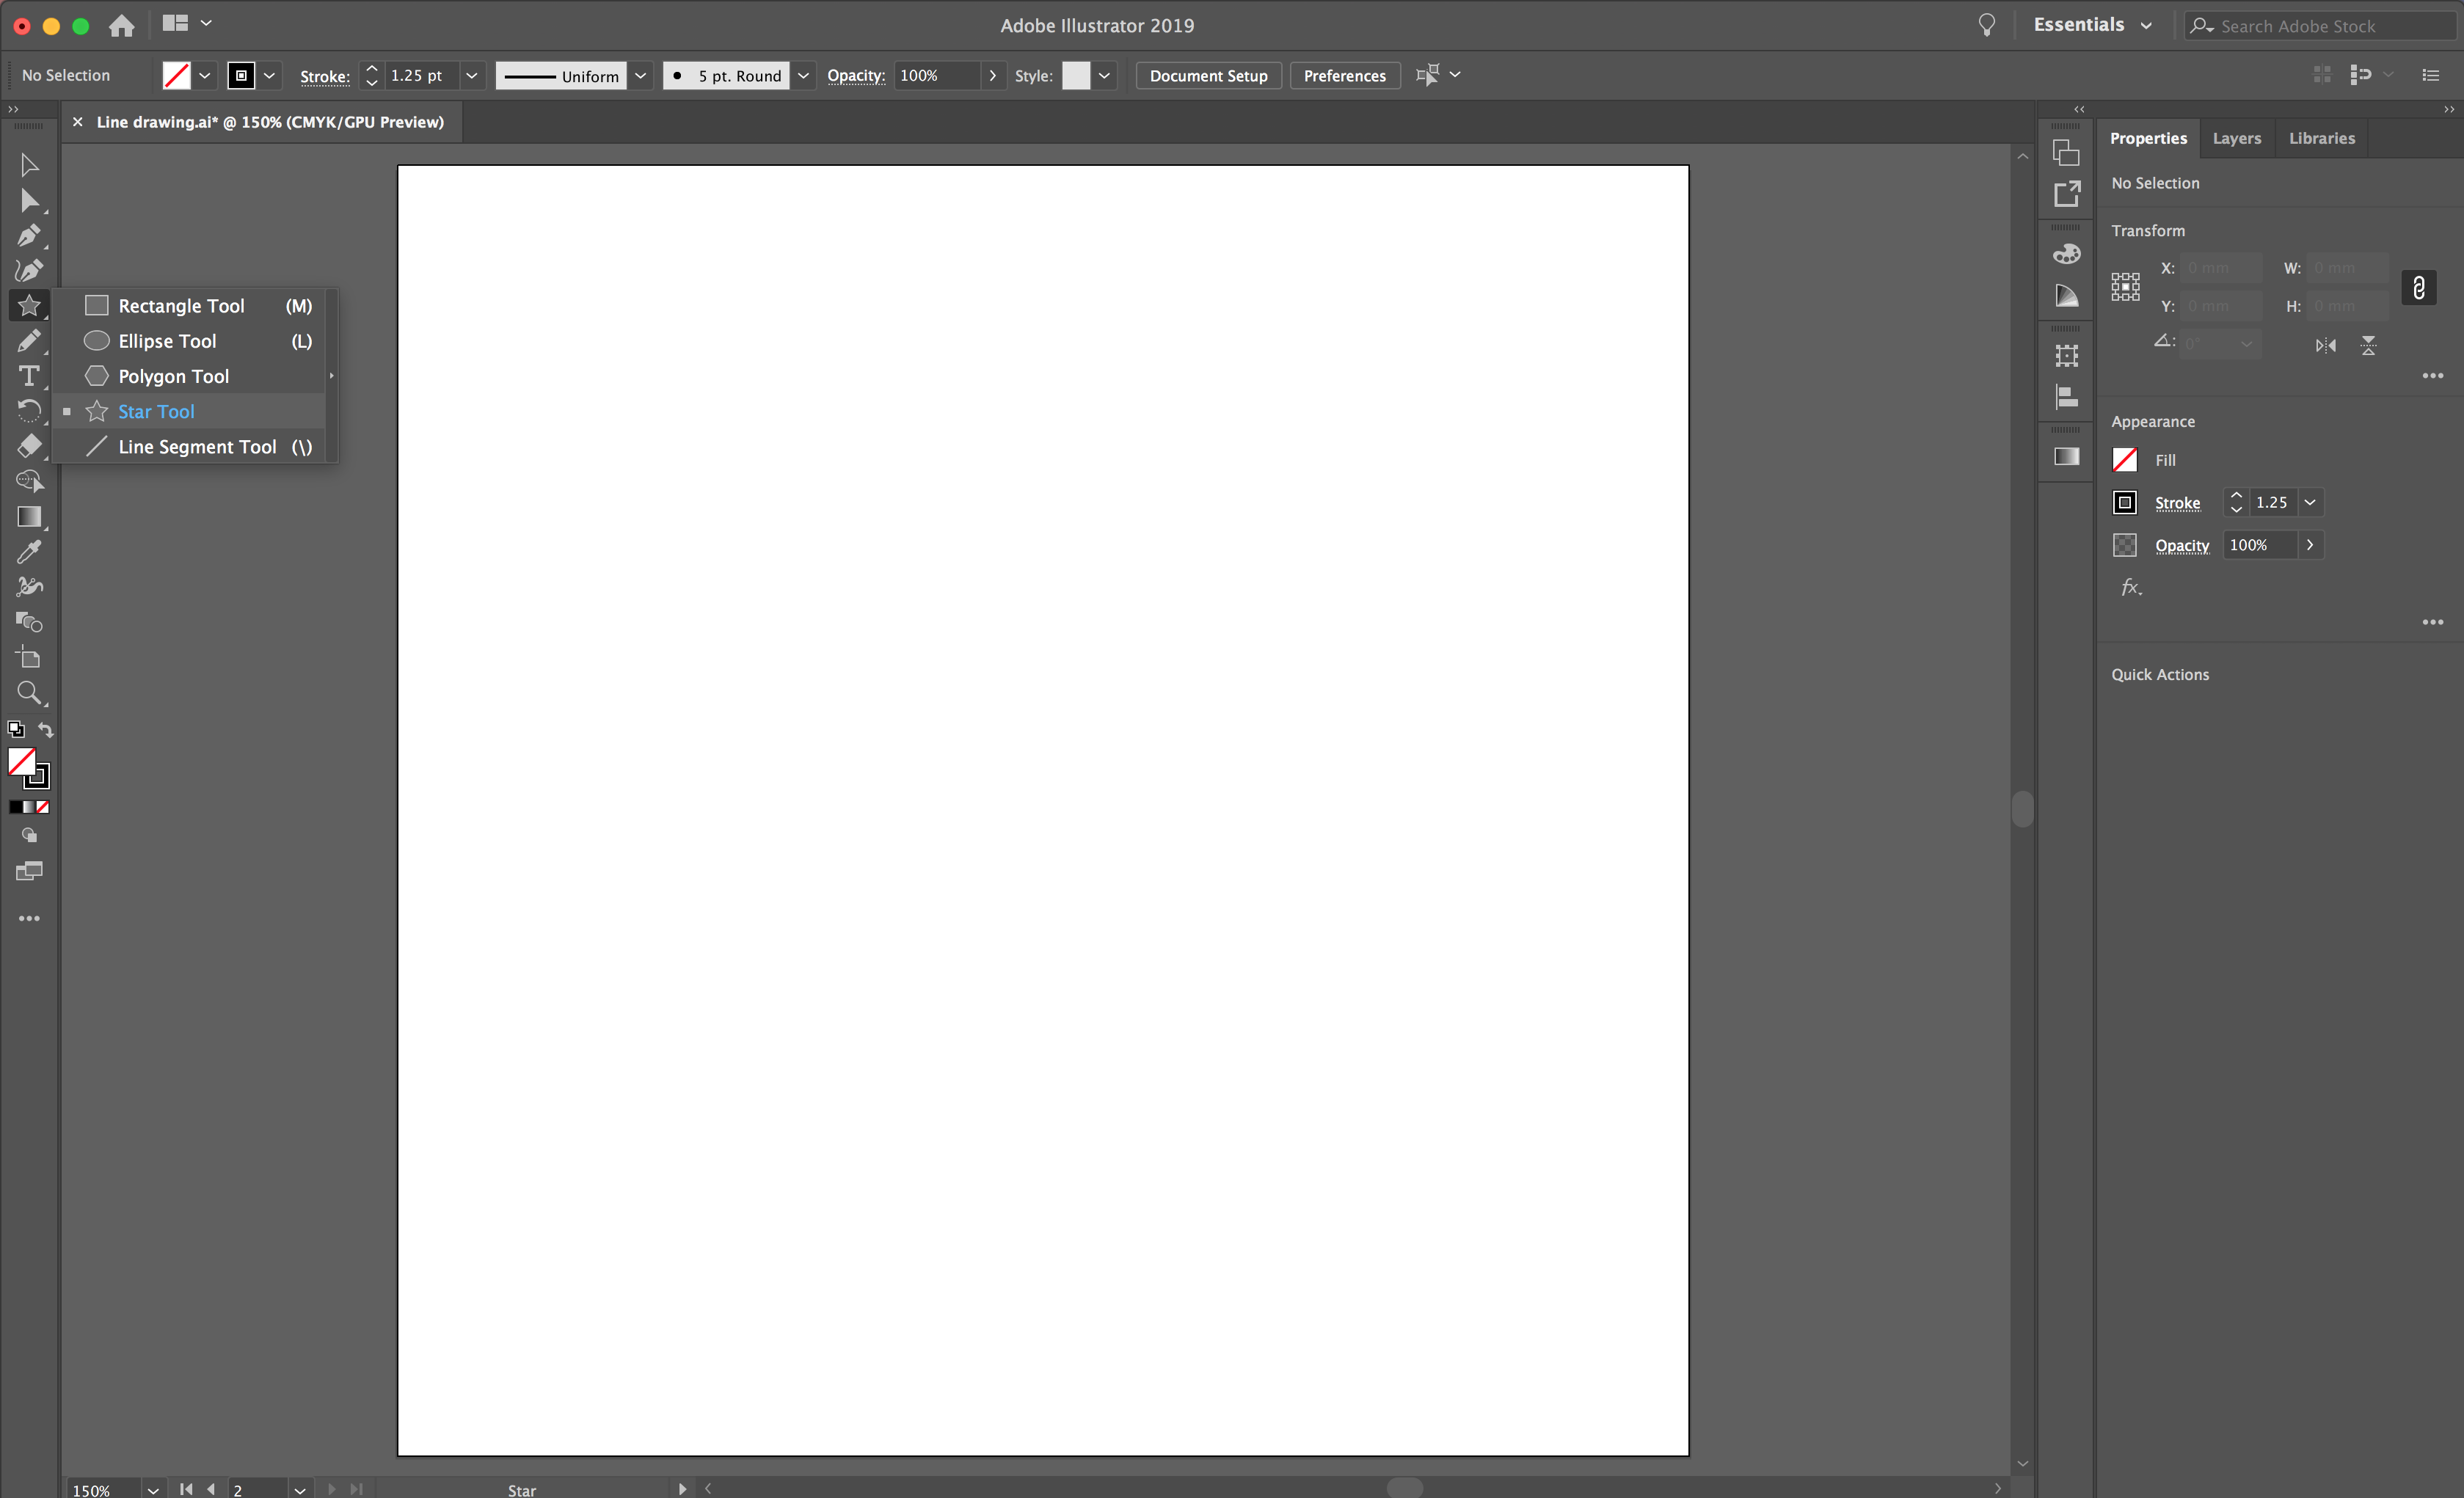
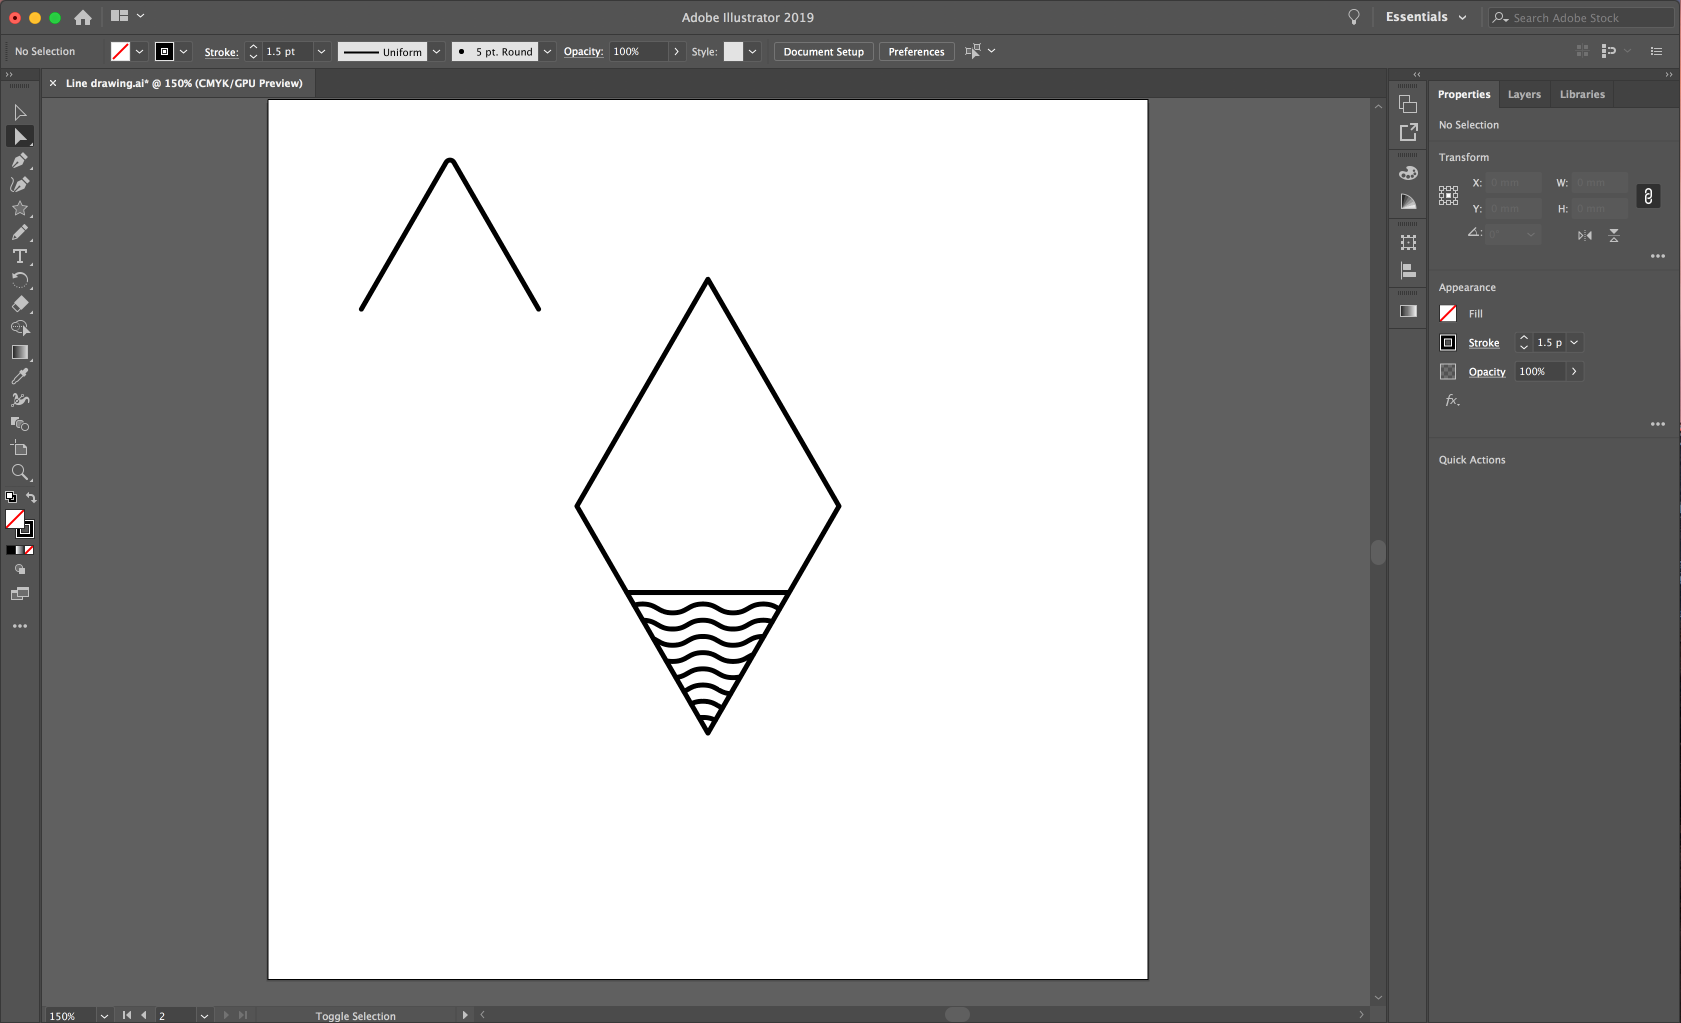
Once you have created your new document, select the Star tool from your left toolbar and click on your artboard.
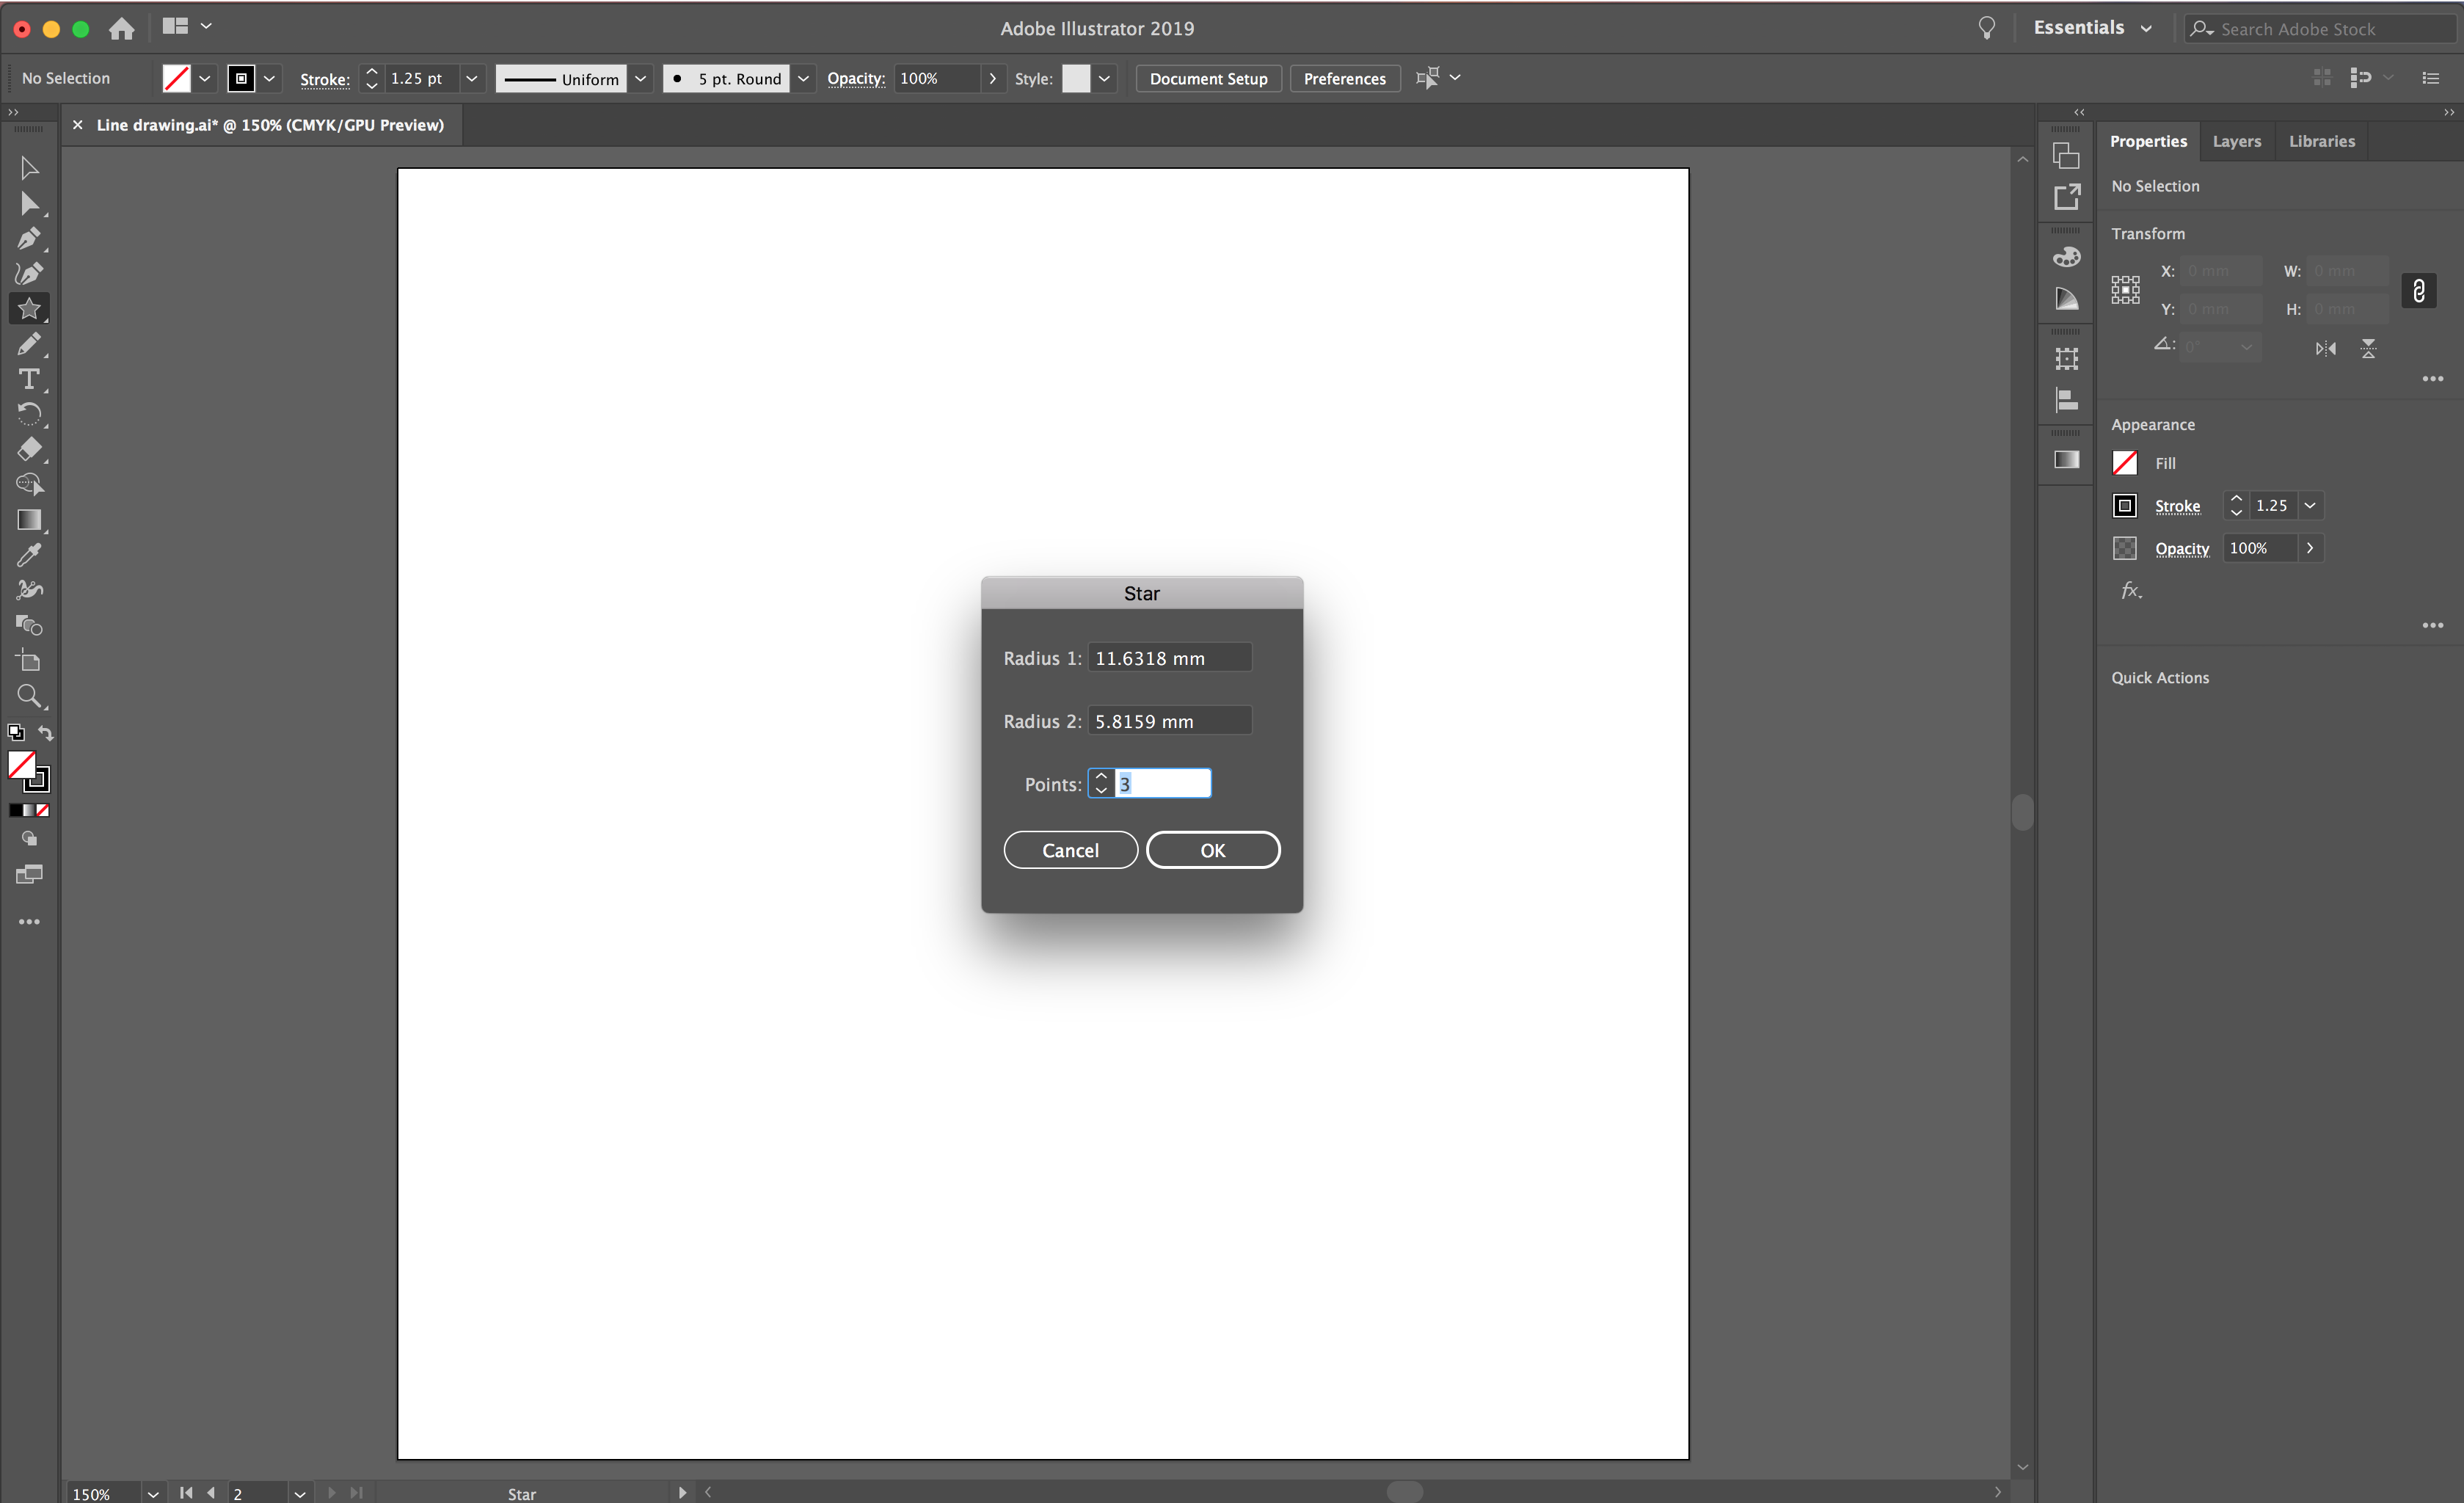
This will bring up the star settings. Change the number of points to 3 to create a triangle and select OK.
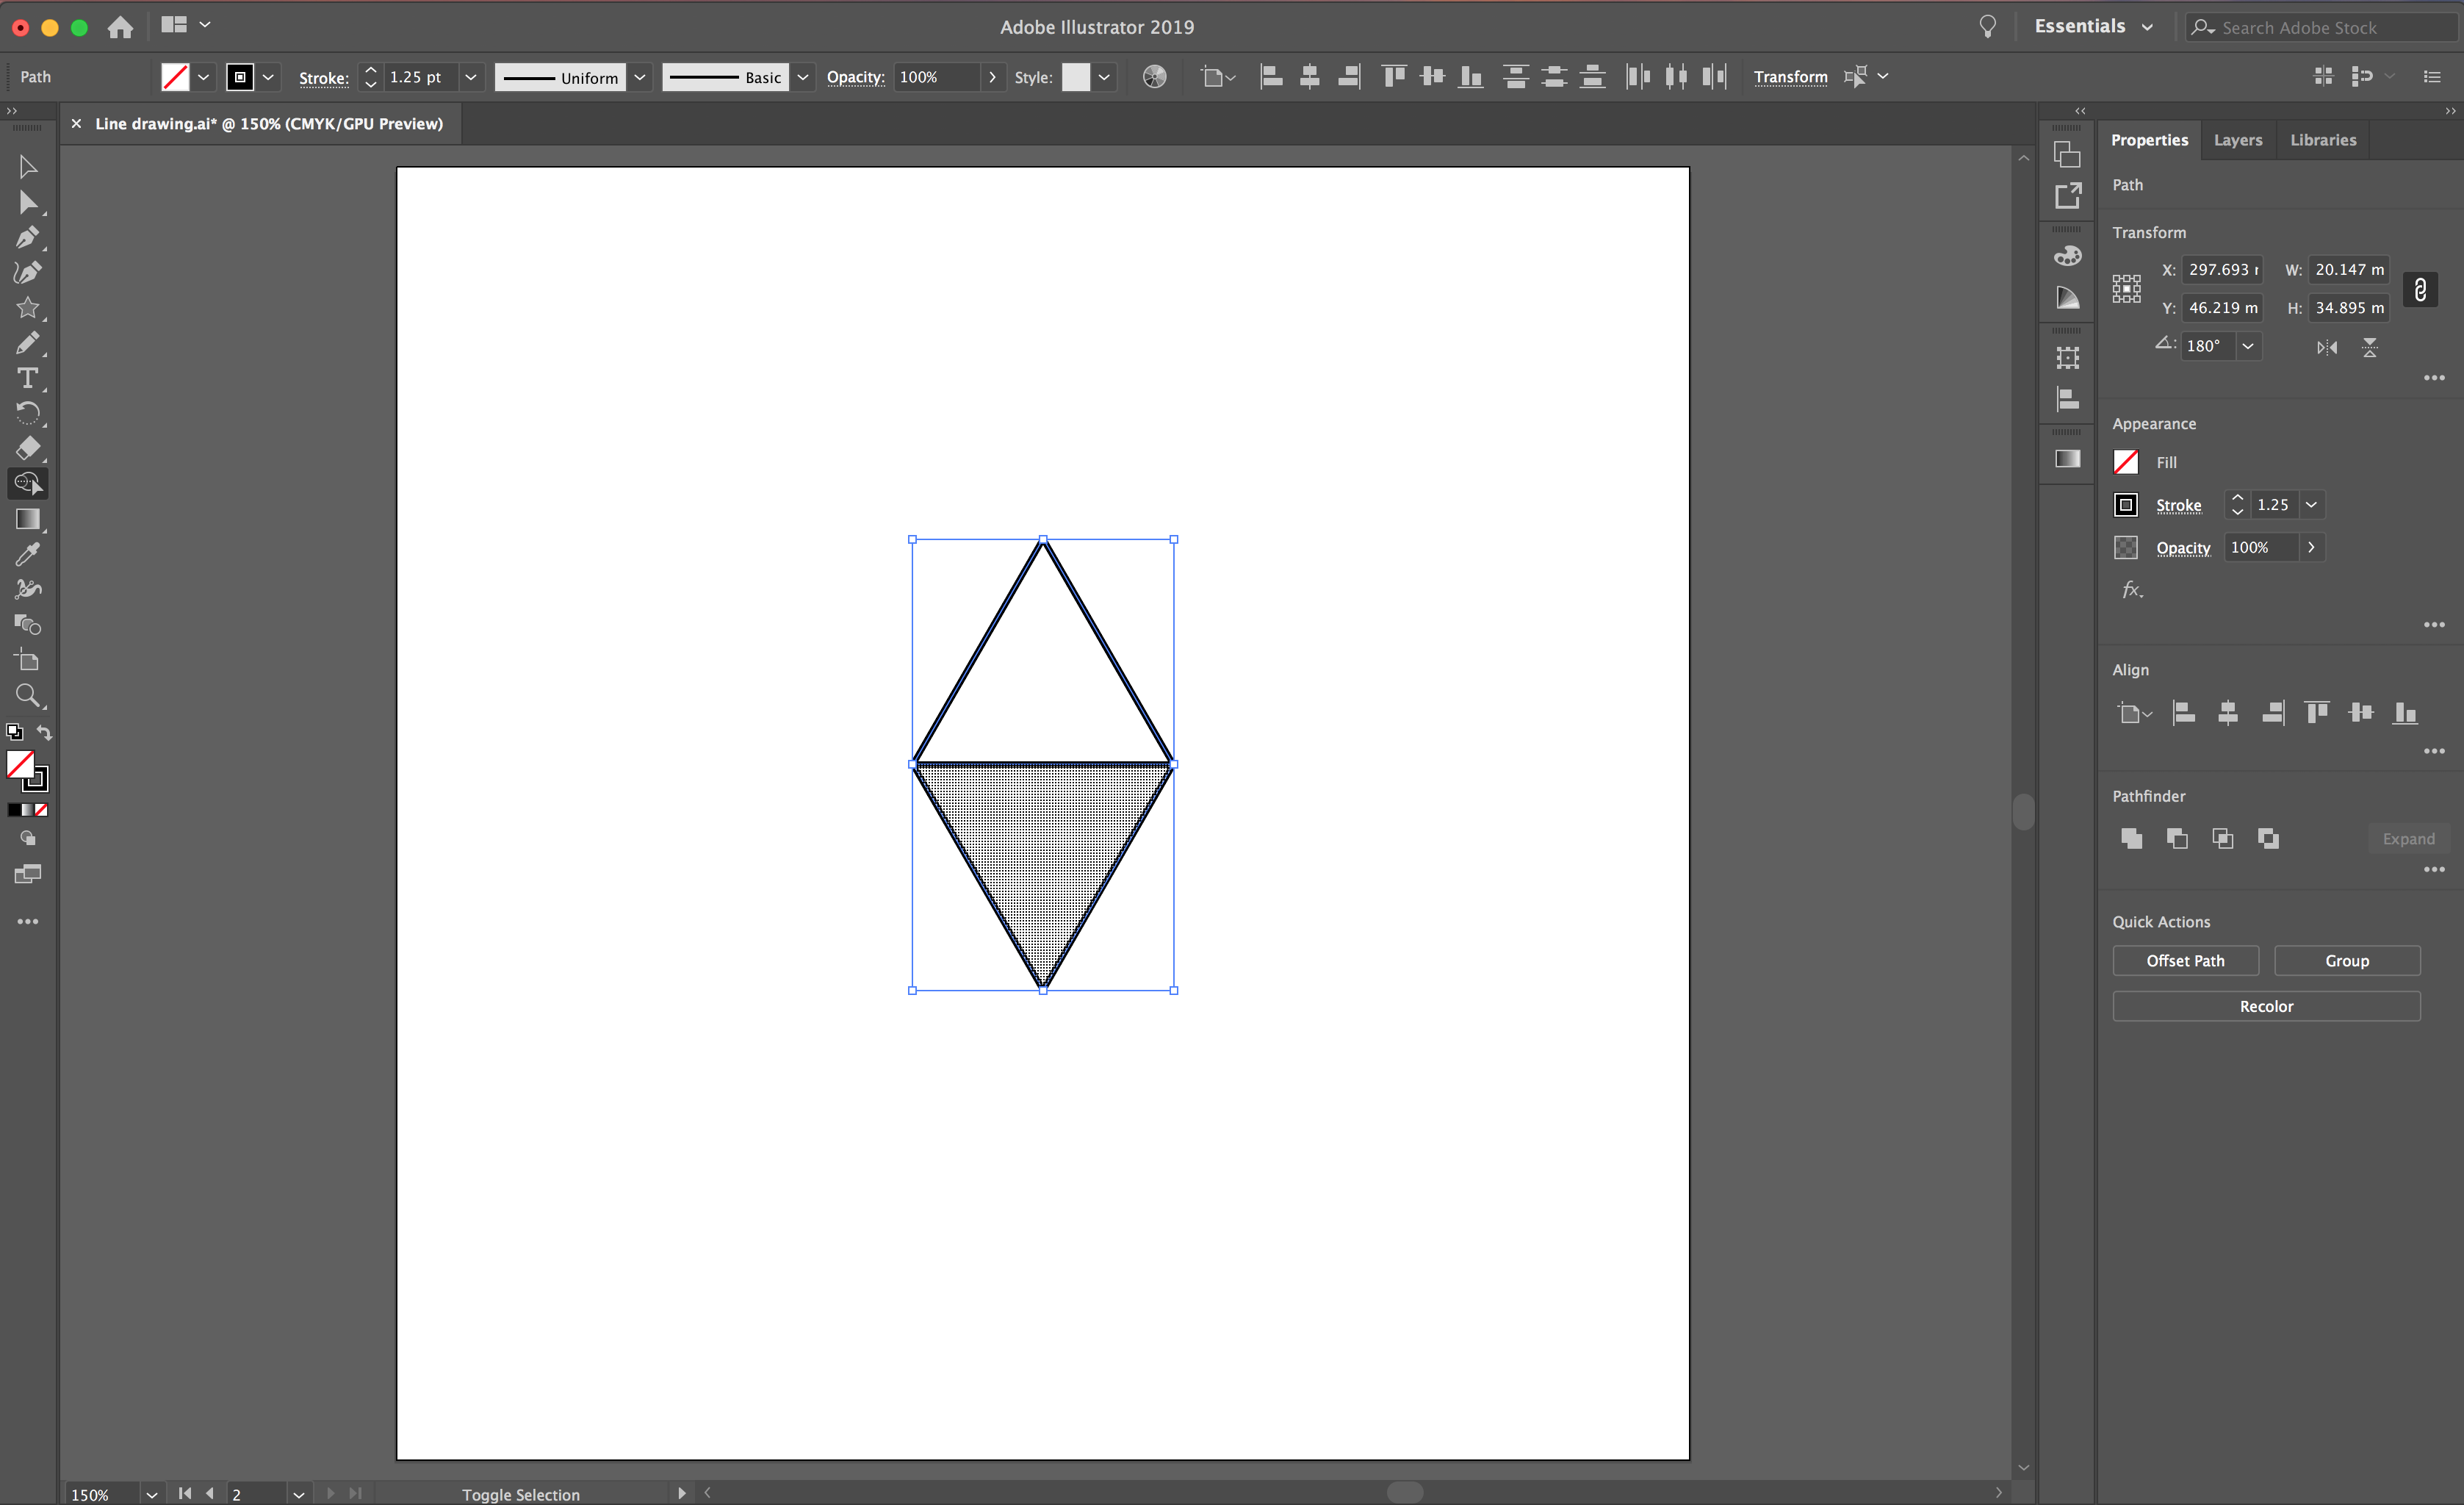
Then, copy and paste (CTRL + C > CTRL + V) your triangle so you have 2 on your artboard. Rotate one of your triangles and position them together to form a diamond shape. Using the Selection Tool (black arrow) highlight both of your shapes and select the Shape Builder Tool. You will notice the shapes grey out as you hover over. Click and drag from one triangle to the other to form the two shapes into one.
If you need more detailed information, follow our tutorial on using the Shape builder tool.
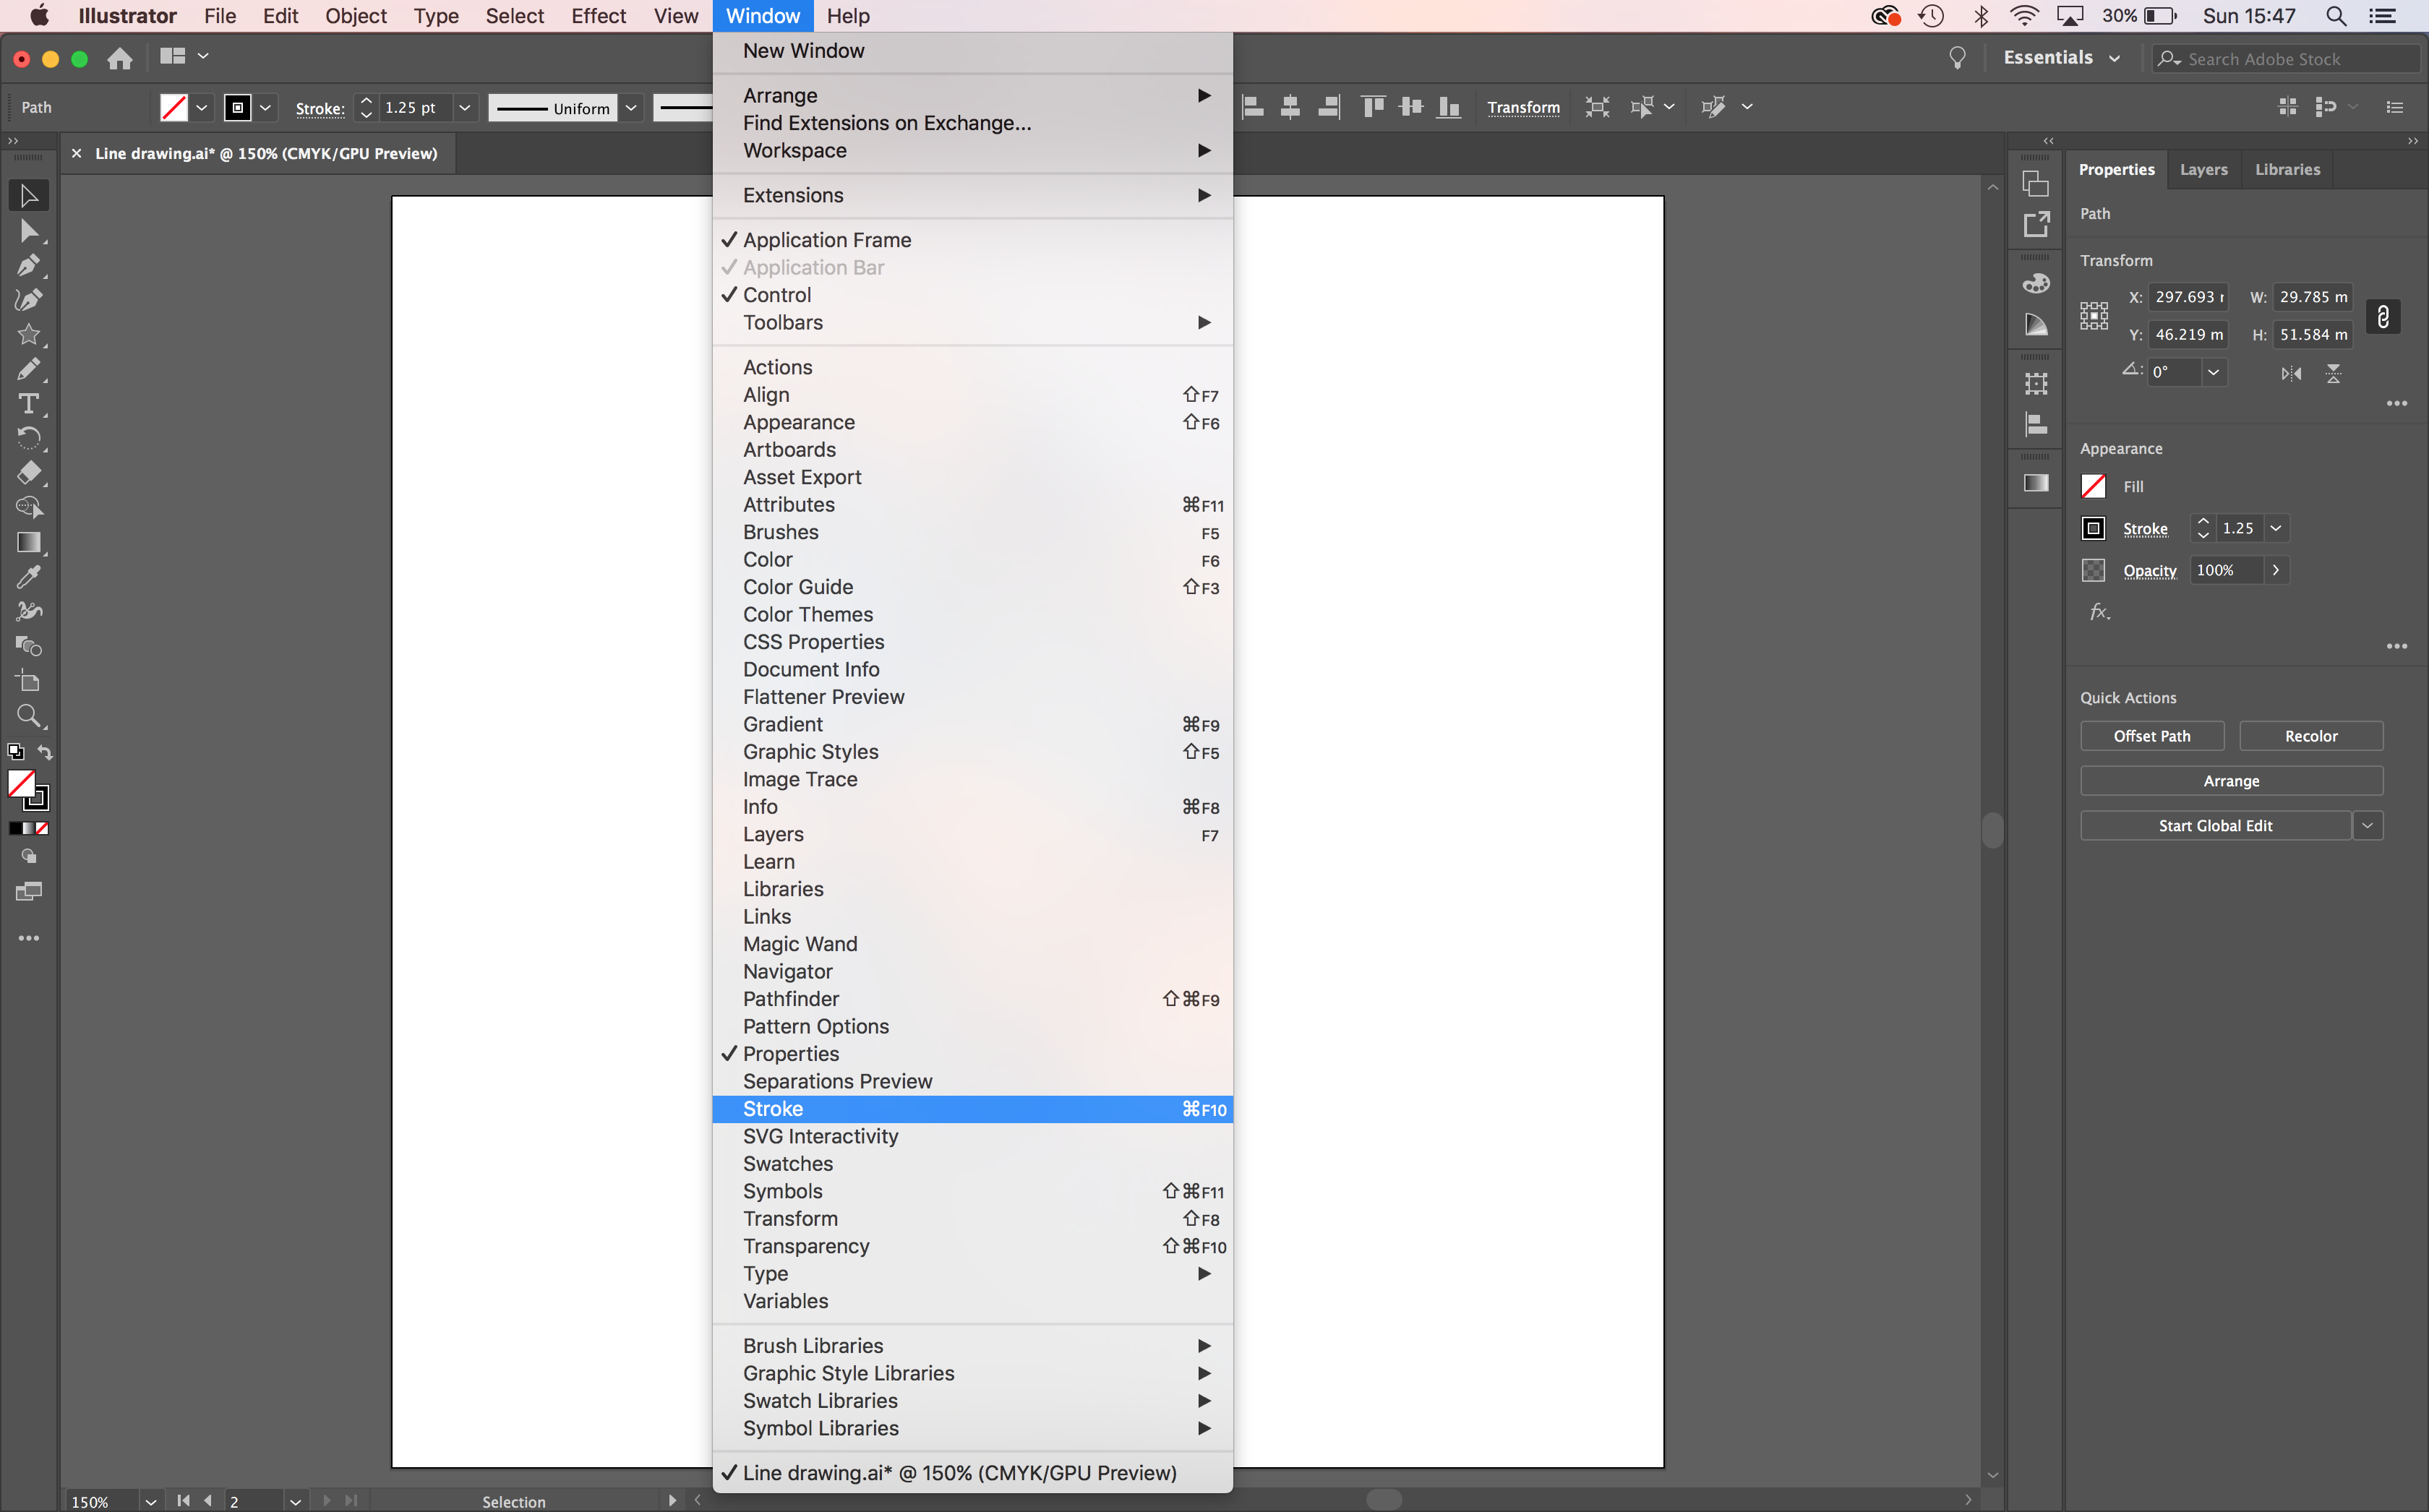
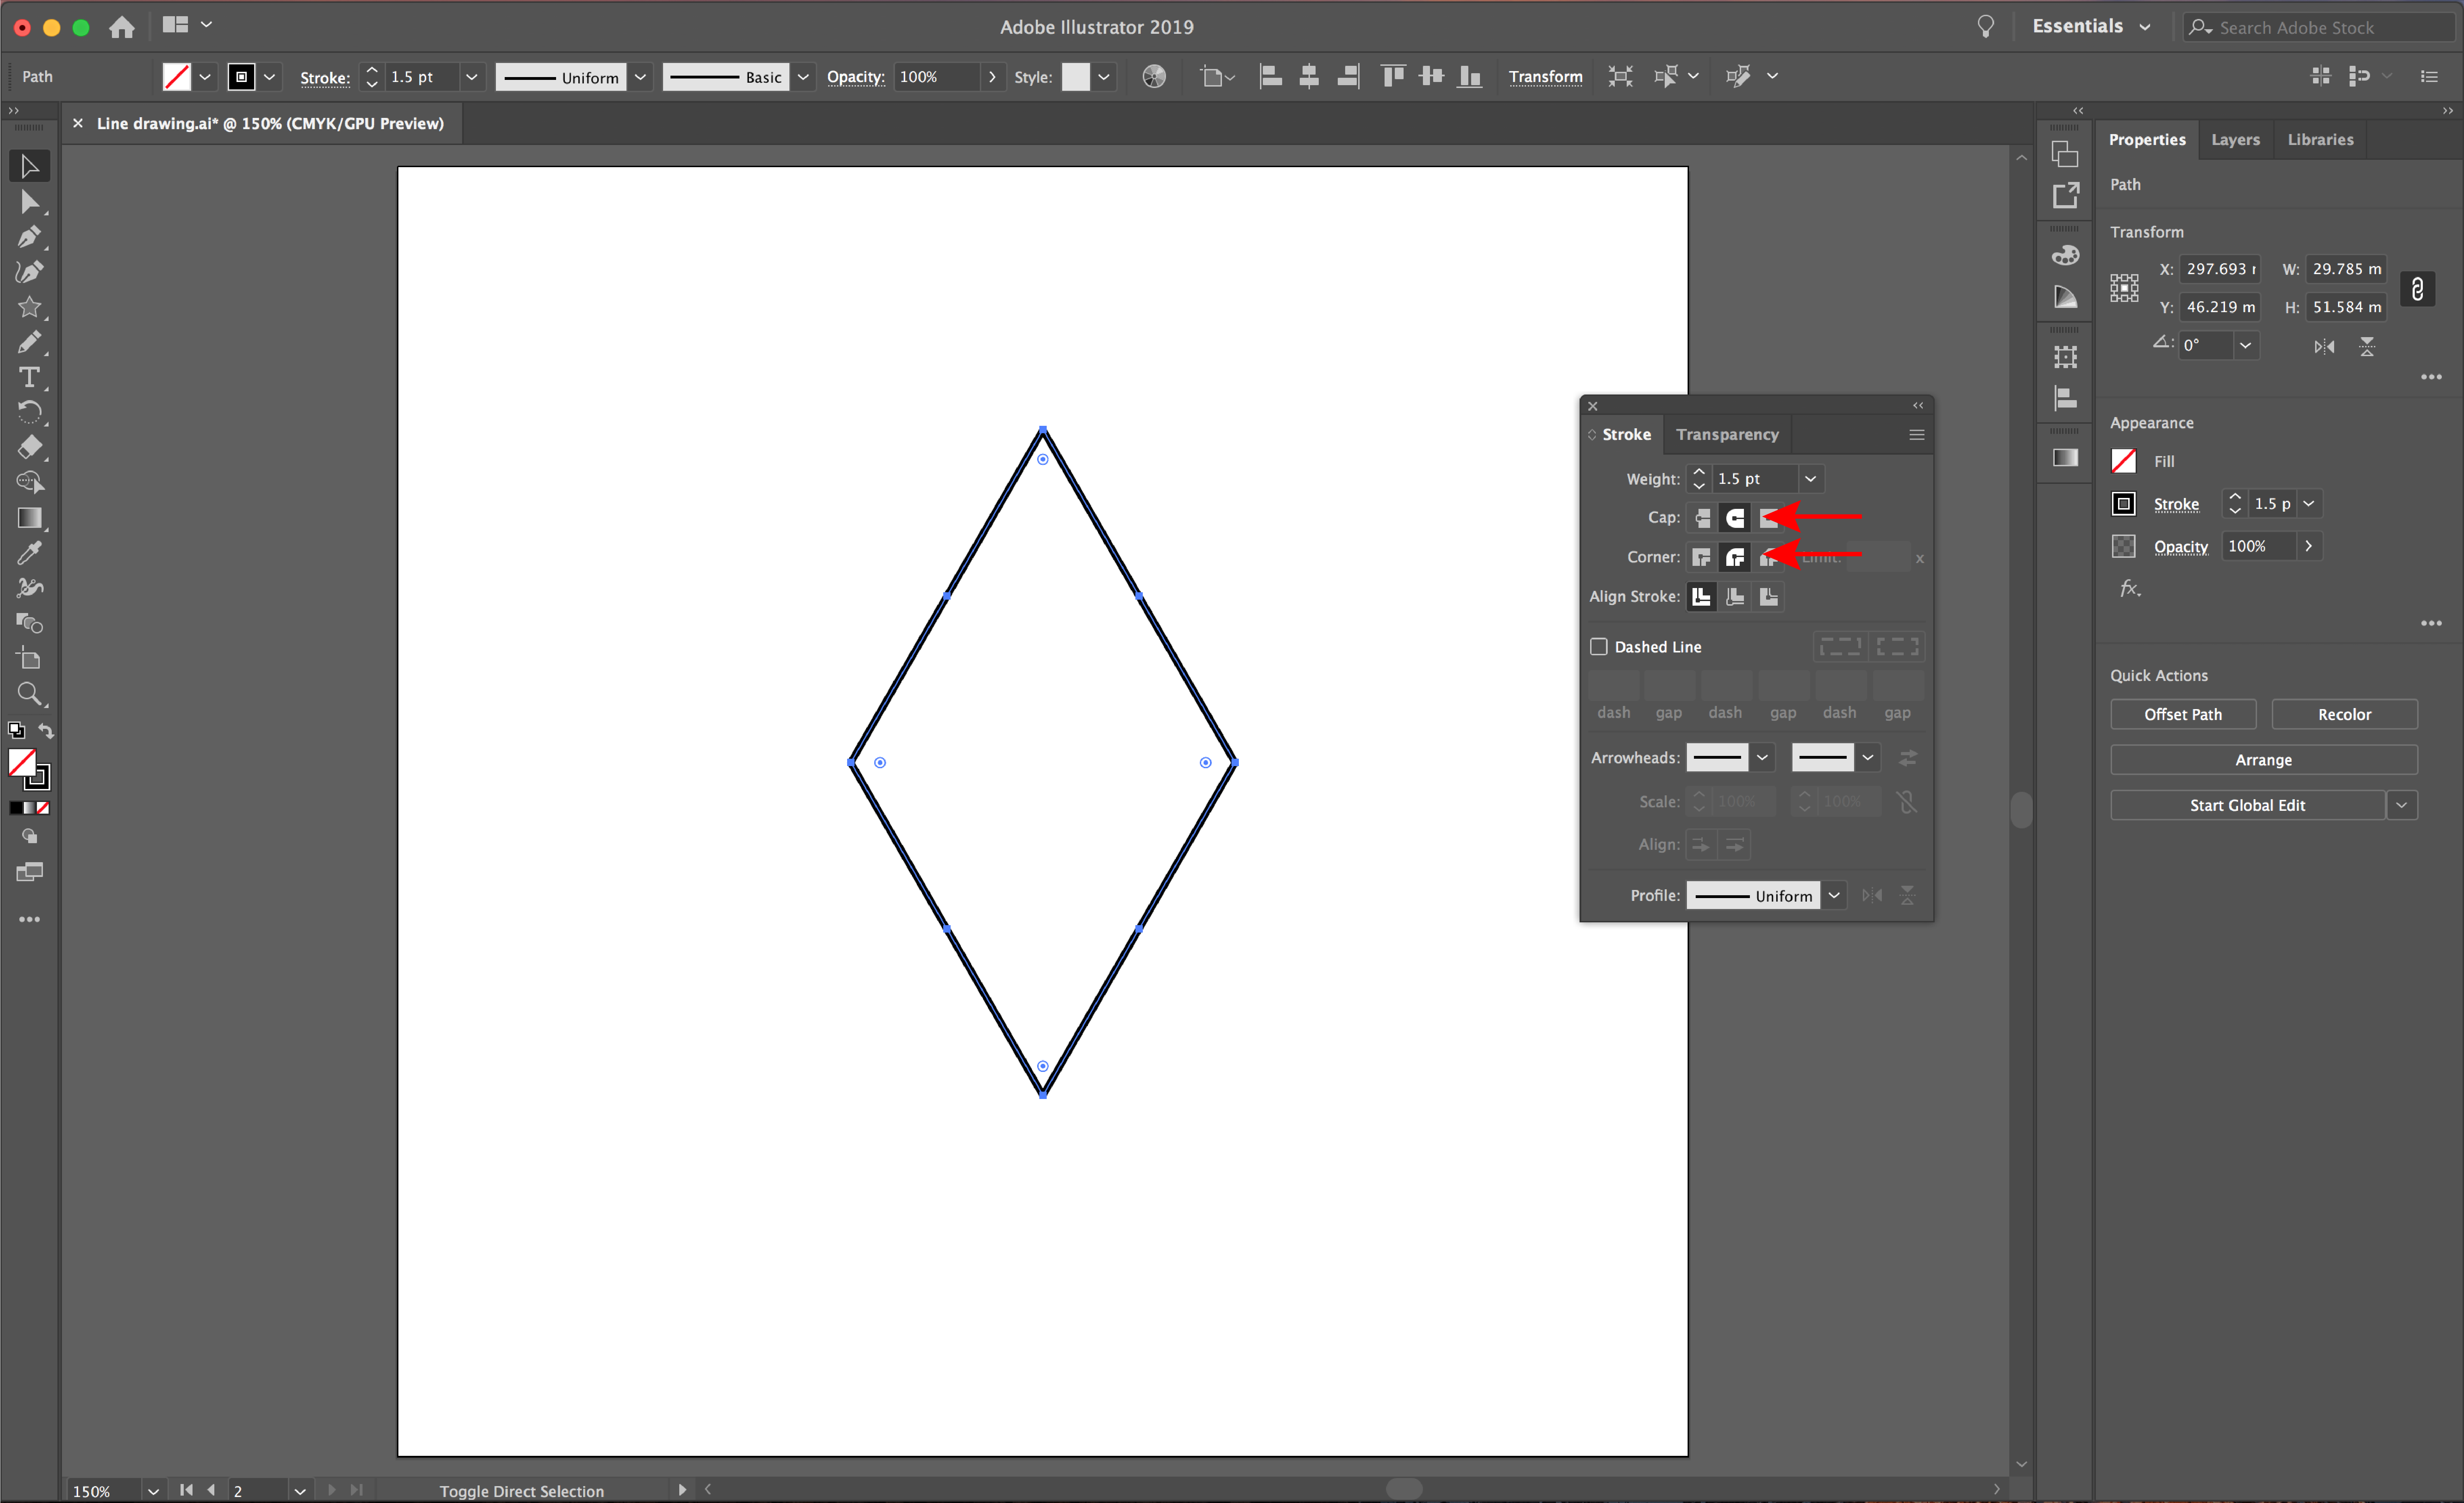
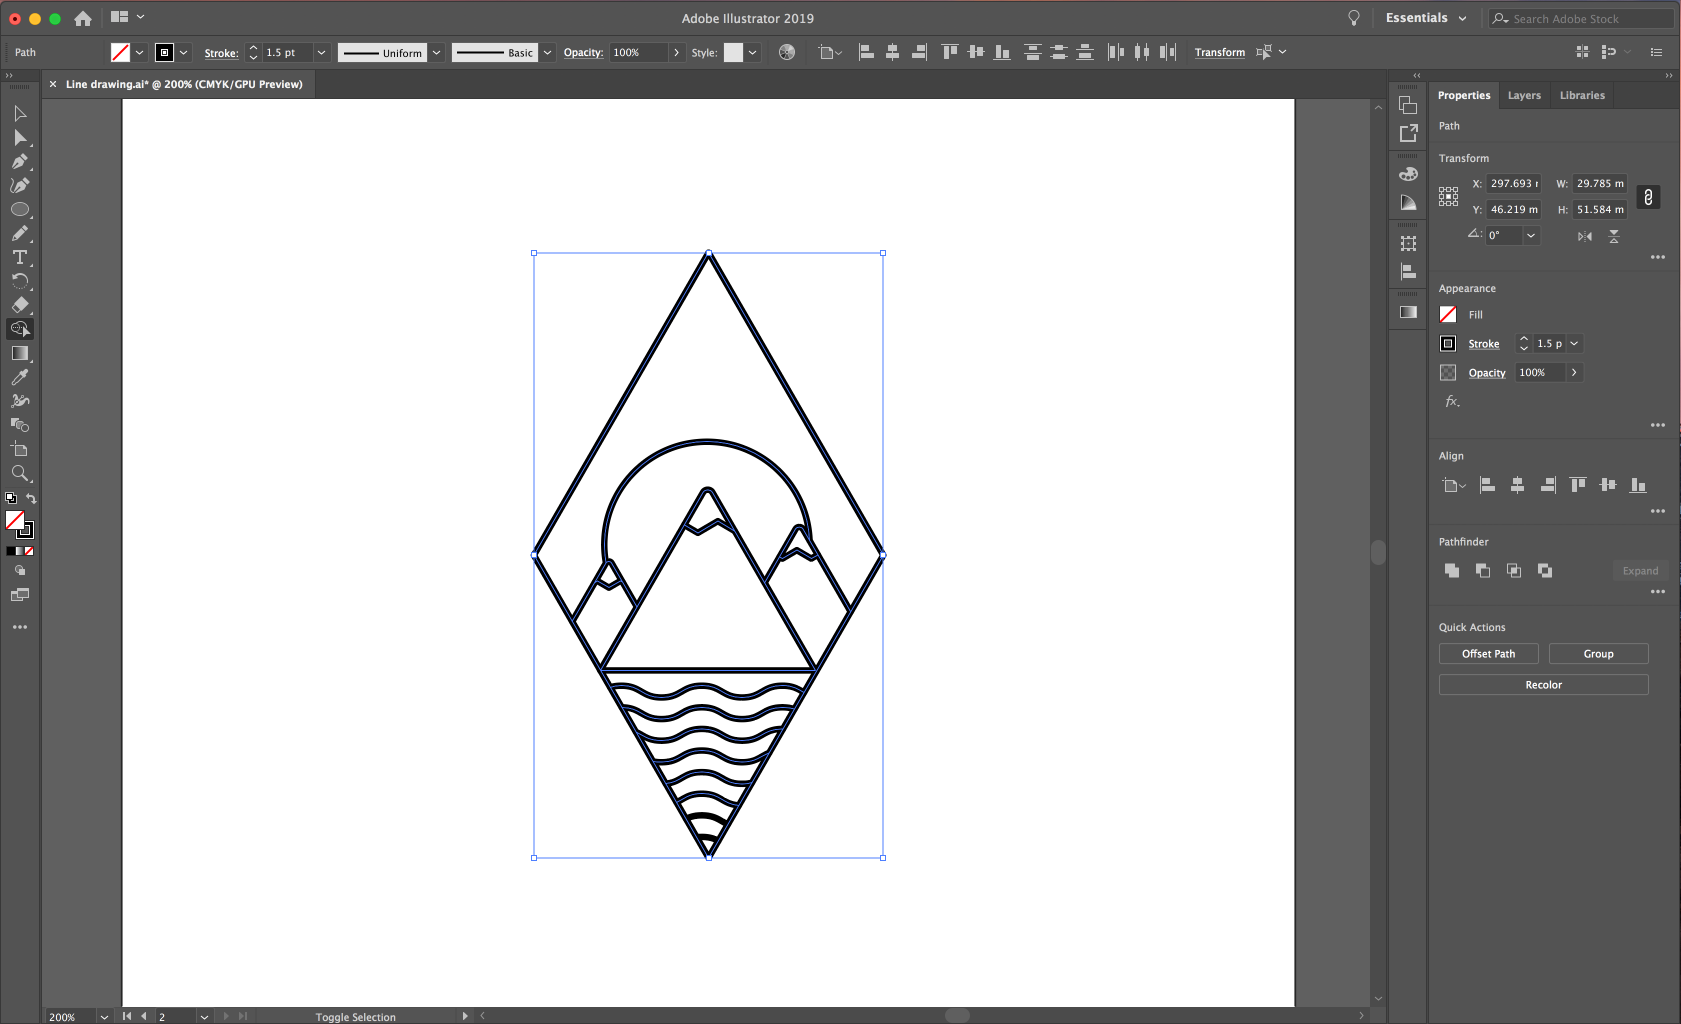
When you are happy with your diamond, you can change the style of the line in the Stroke panel. Open this panel by selecting Window > Stroke.
You can now select your diamond and change your settings as you need. I want to have softened corners so I have selected a rounded cap and rounded corners with a 1.5 stroke.
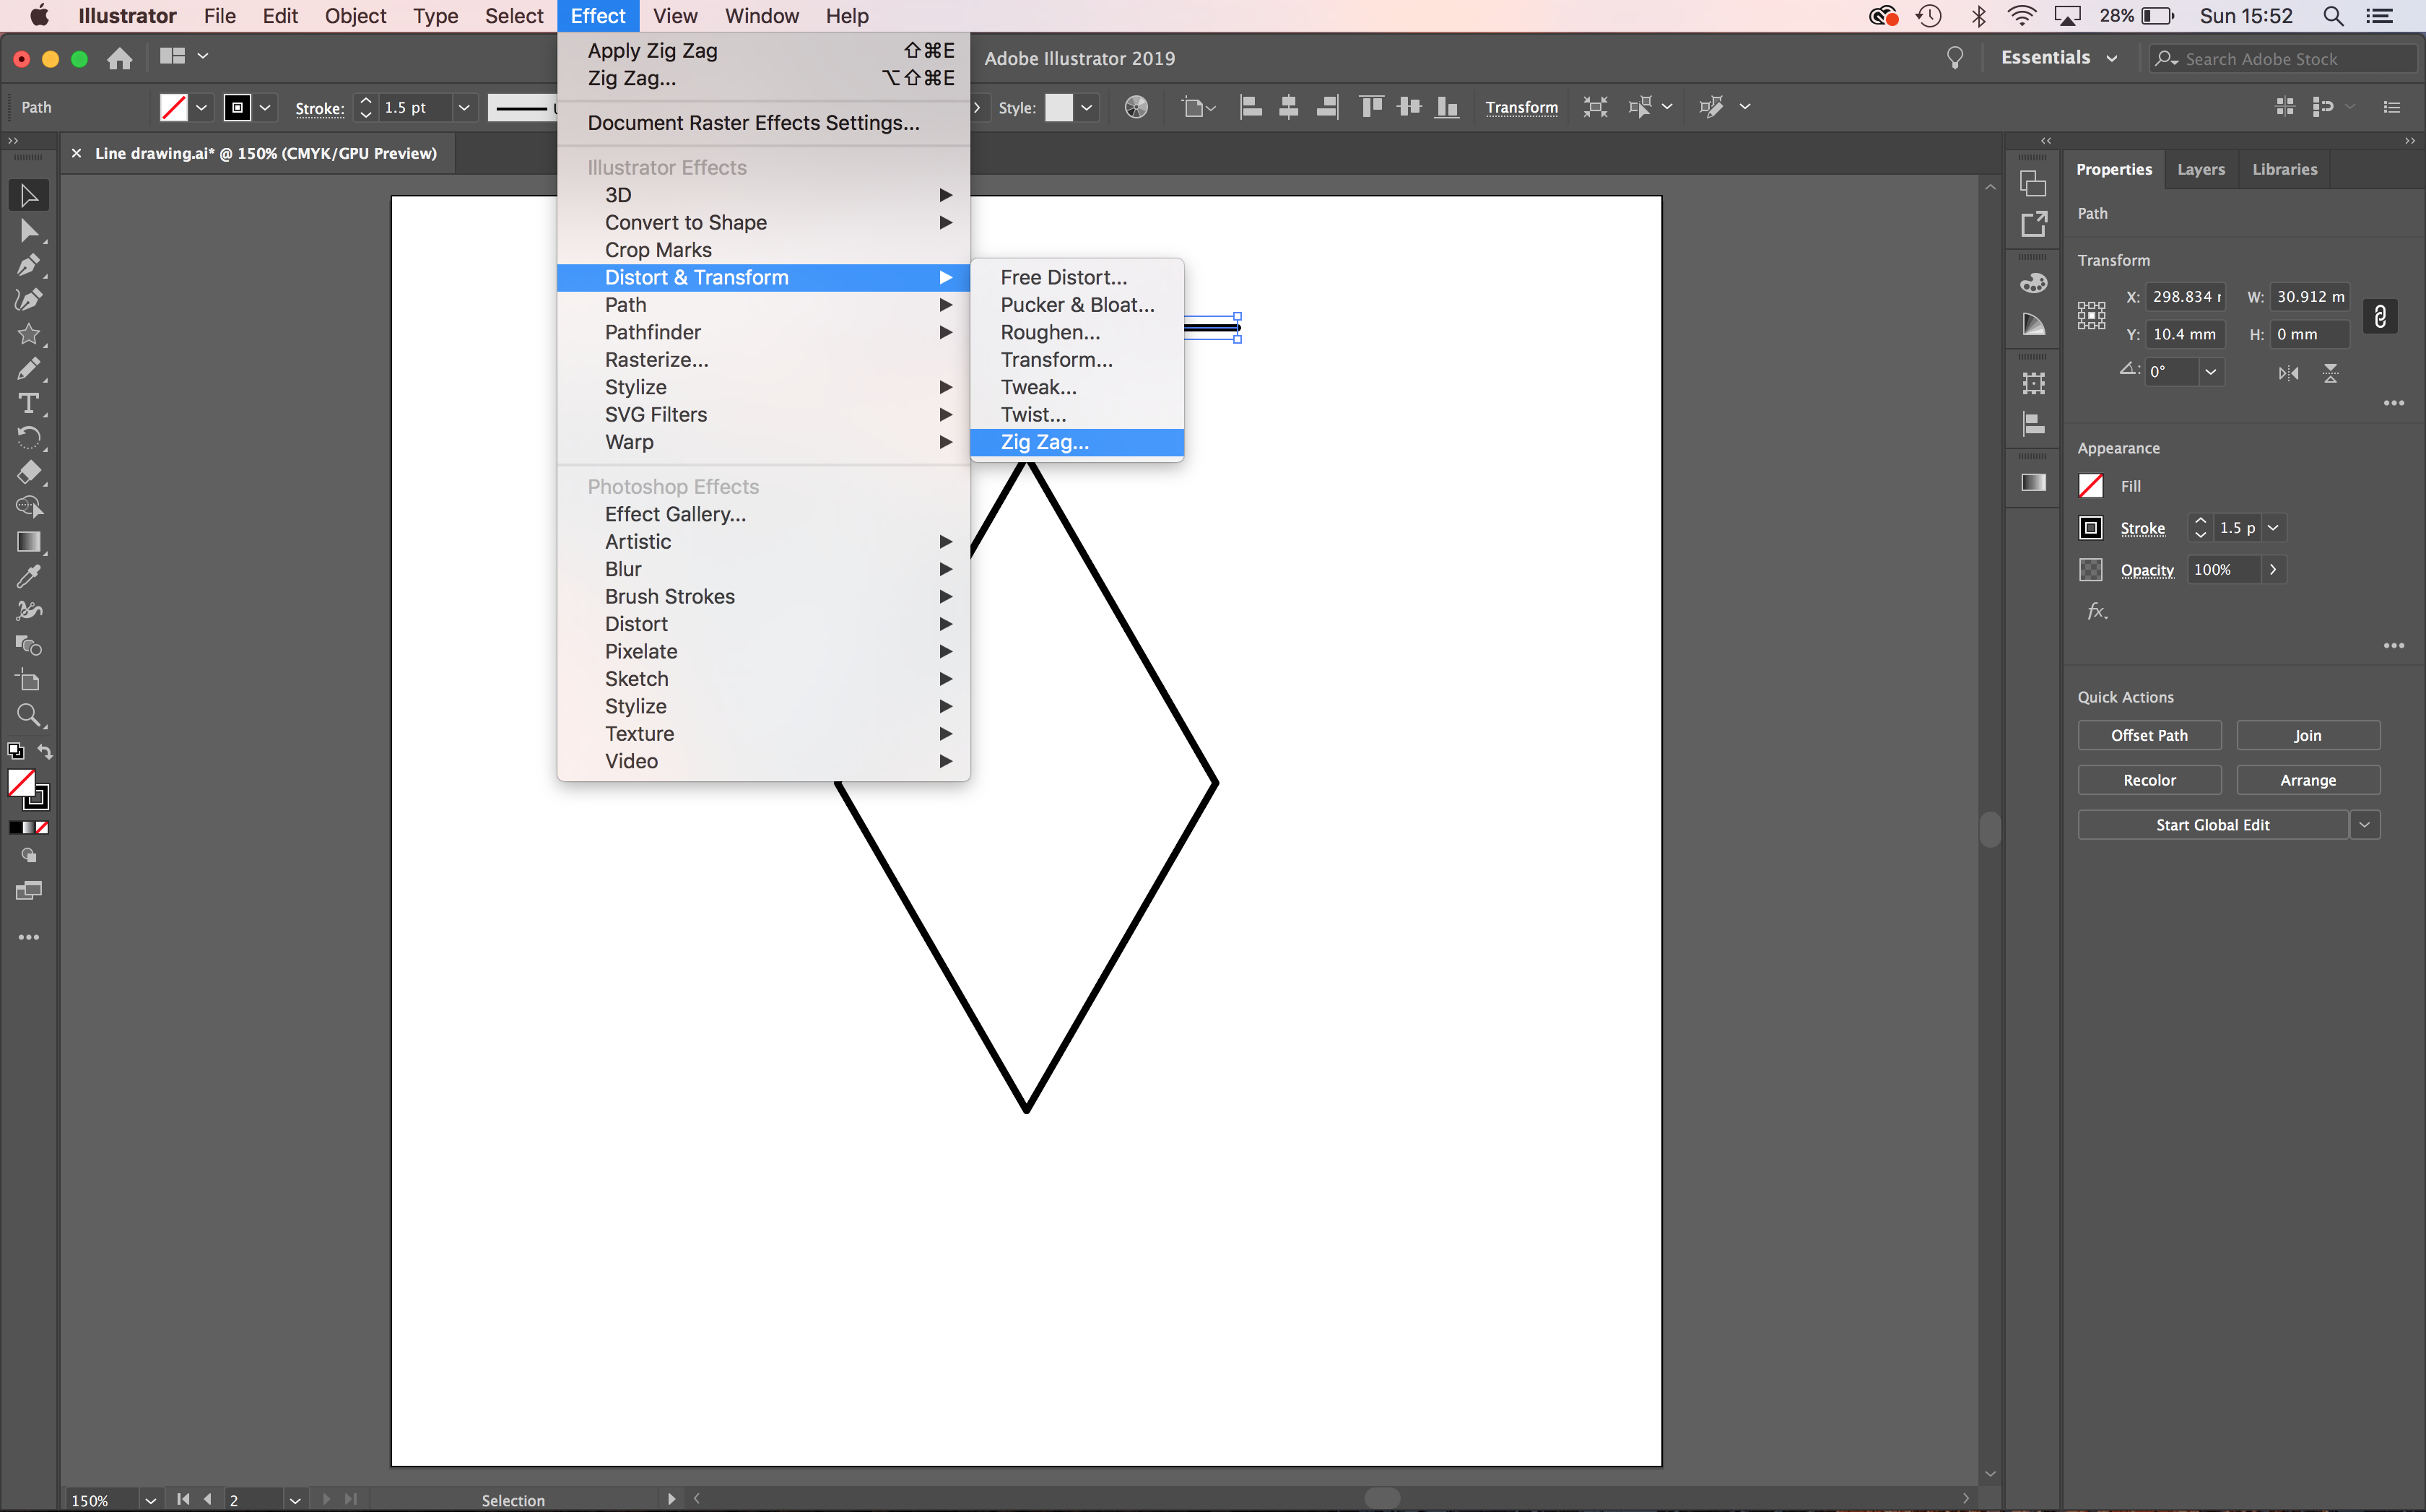
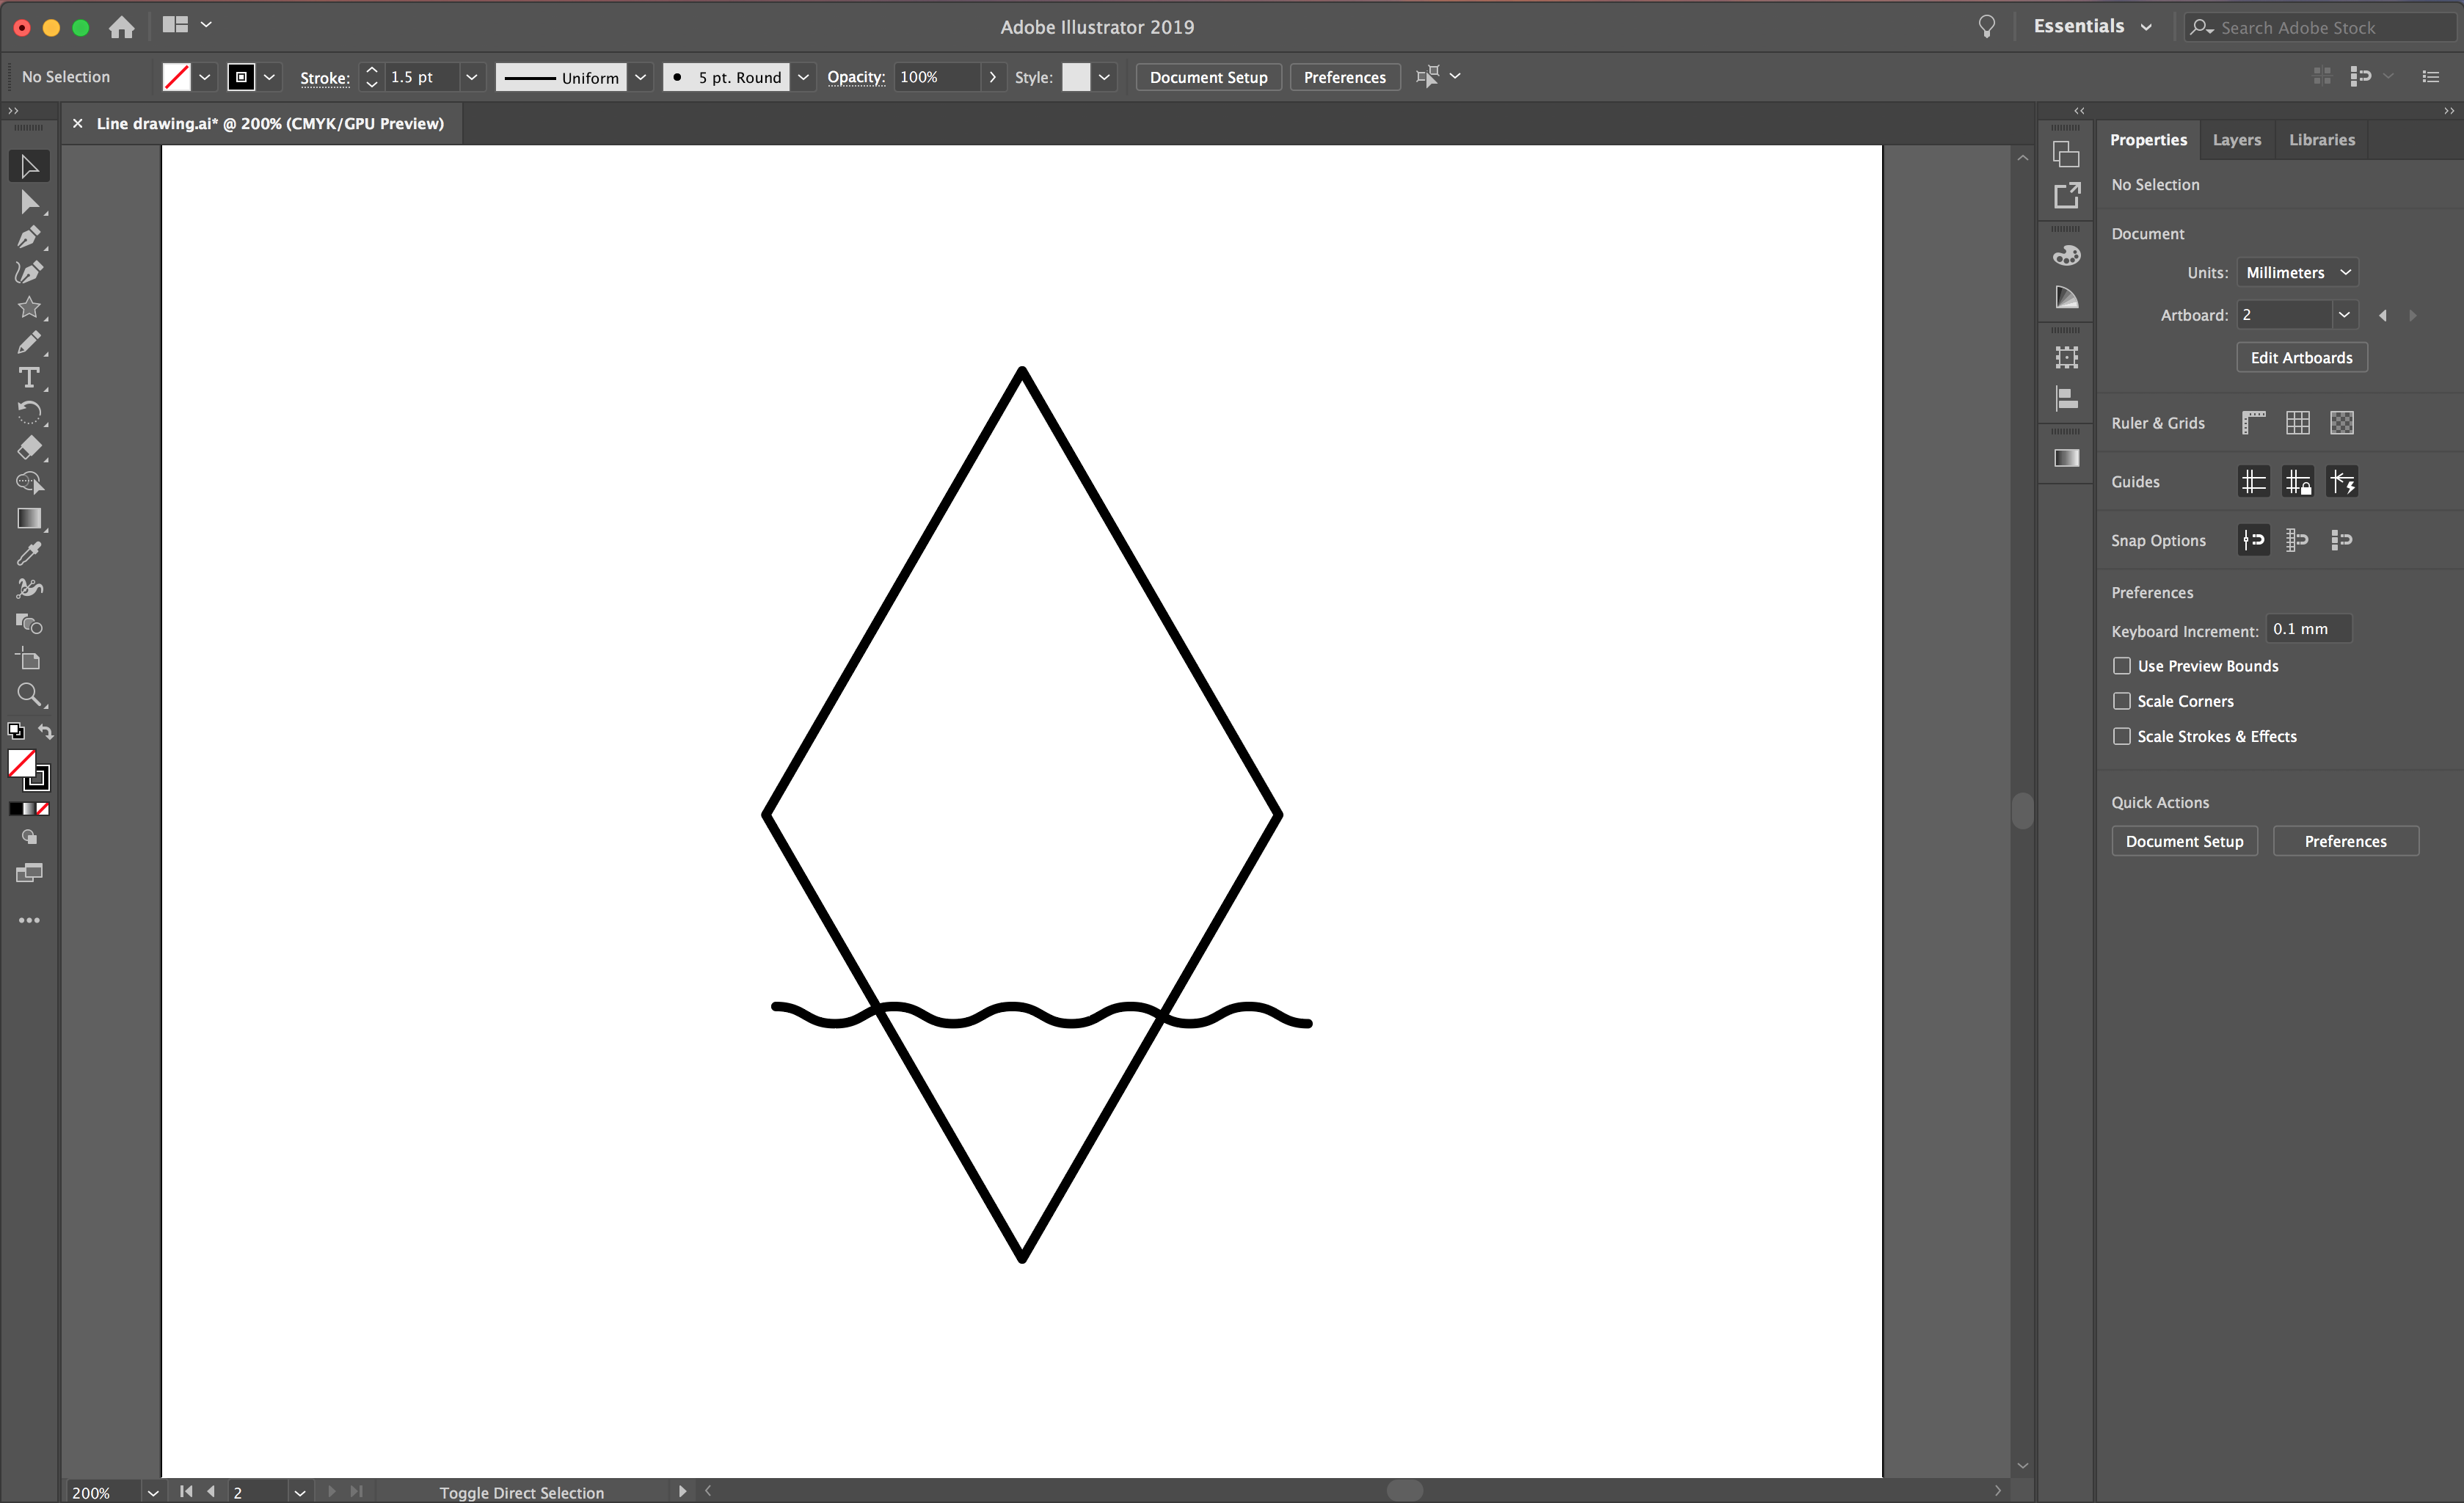
To draw your wavy line, select your Pen tool and draw a straight horizontal line by clicking one point and then holding shift before clicking your second node. Now, to add the waves, select Effect > Distort and Transform > Zig Zag.
We have a fun tutorial on creating a wavy line in illustrator for you to follow if you want.
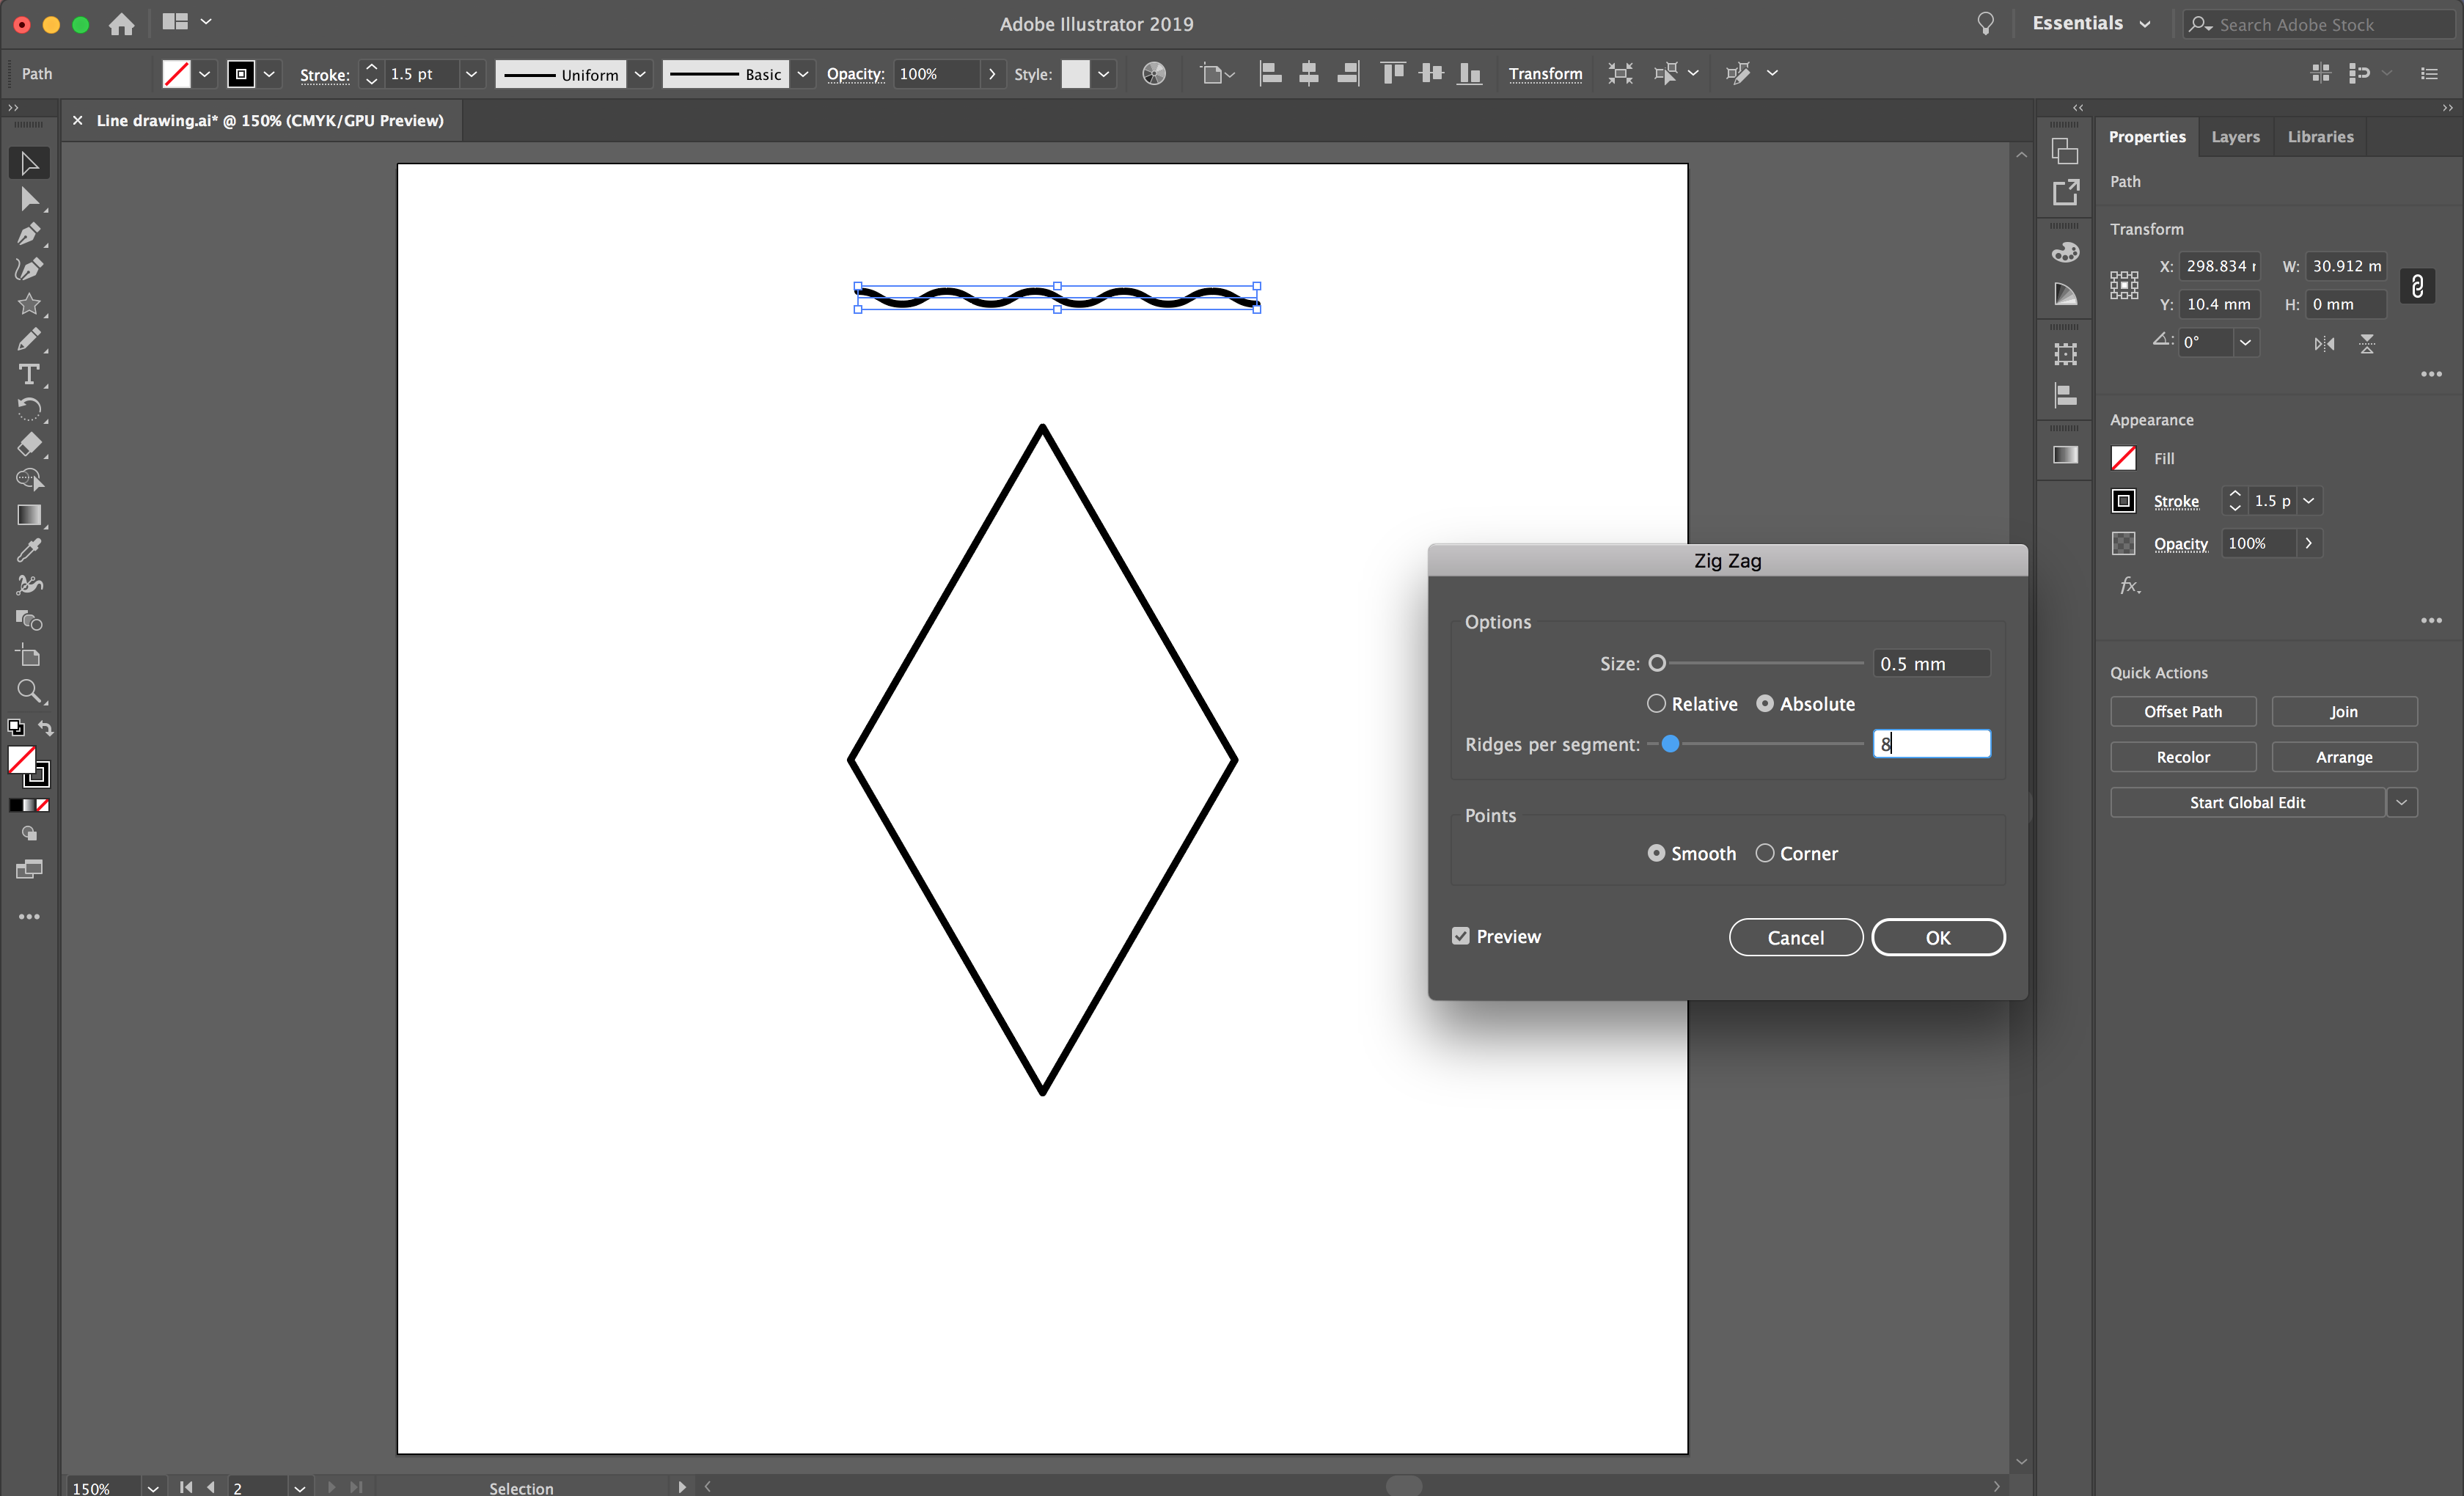
In the Zig Zag settings, select preview so you can see the changes to your design. Select smooth to achieve the soft waves and play with the settings until you are happy with the waves. See the screenshot below for the settings I used.
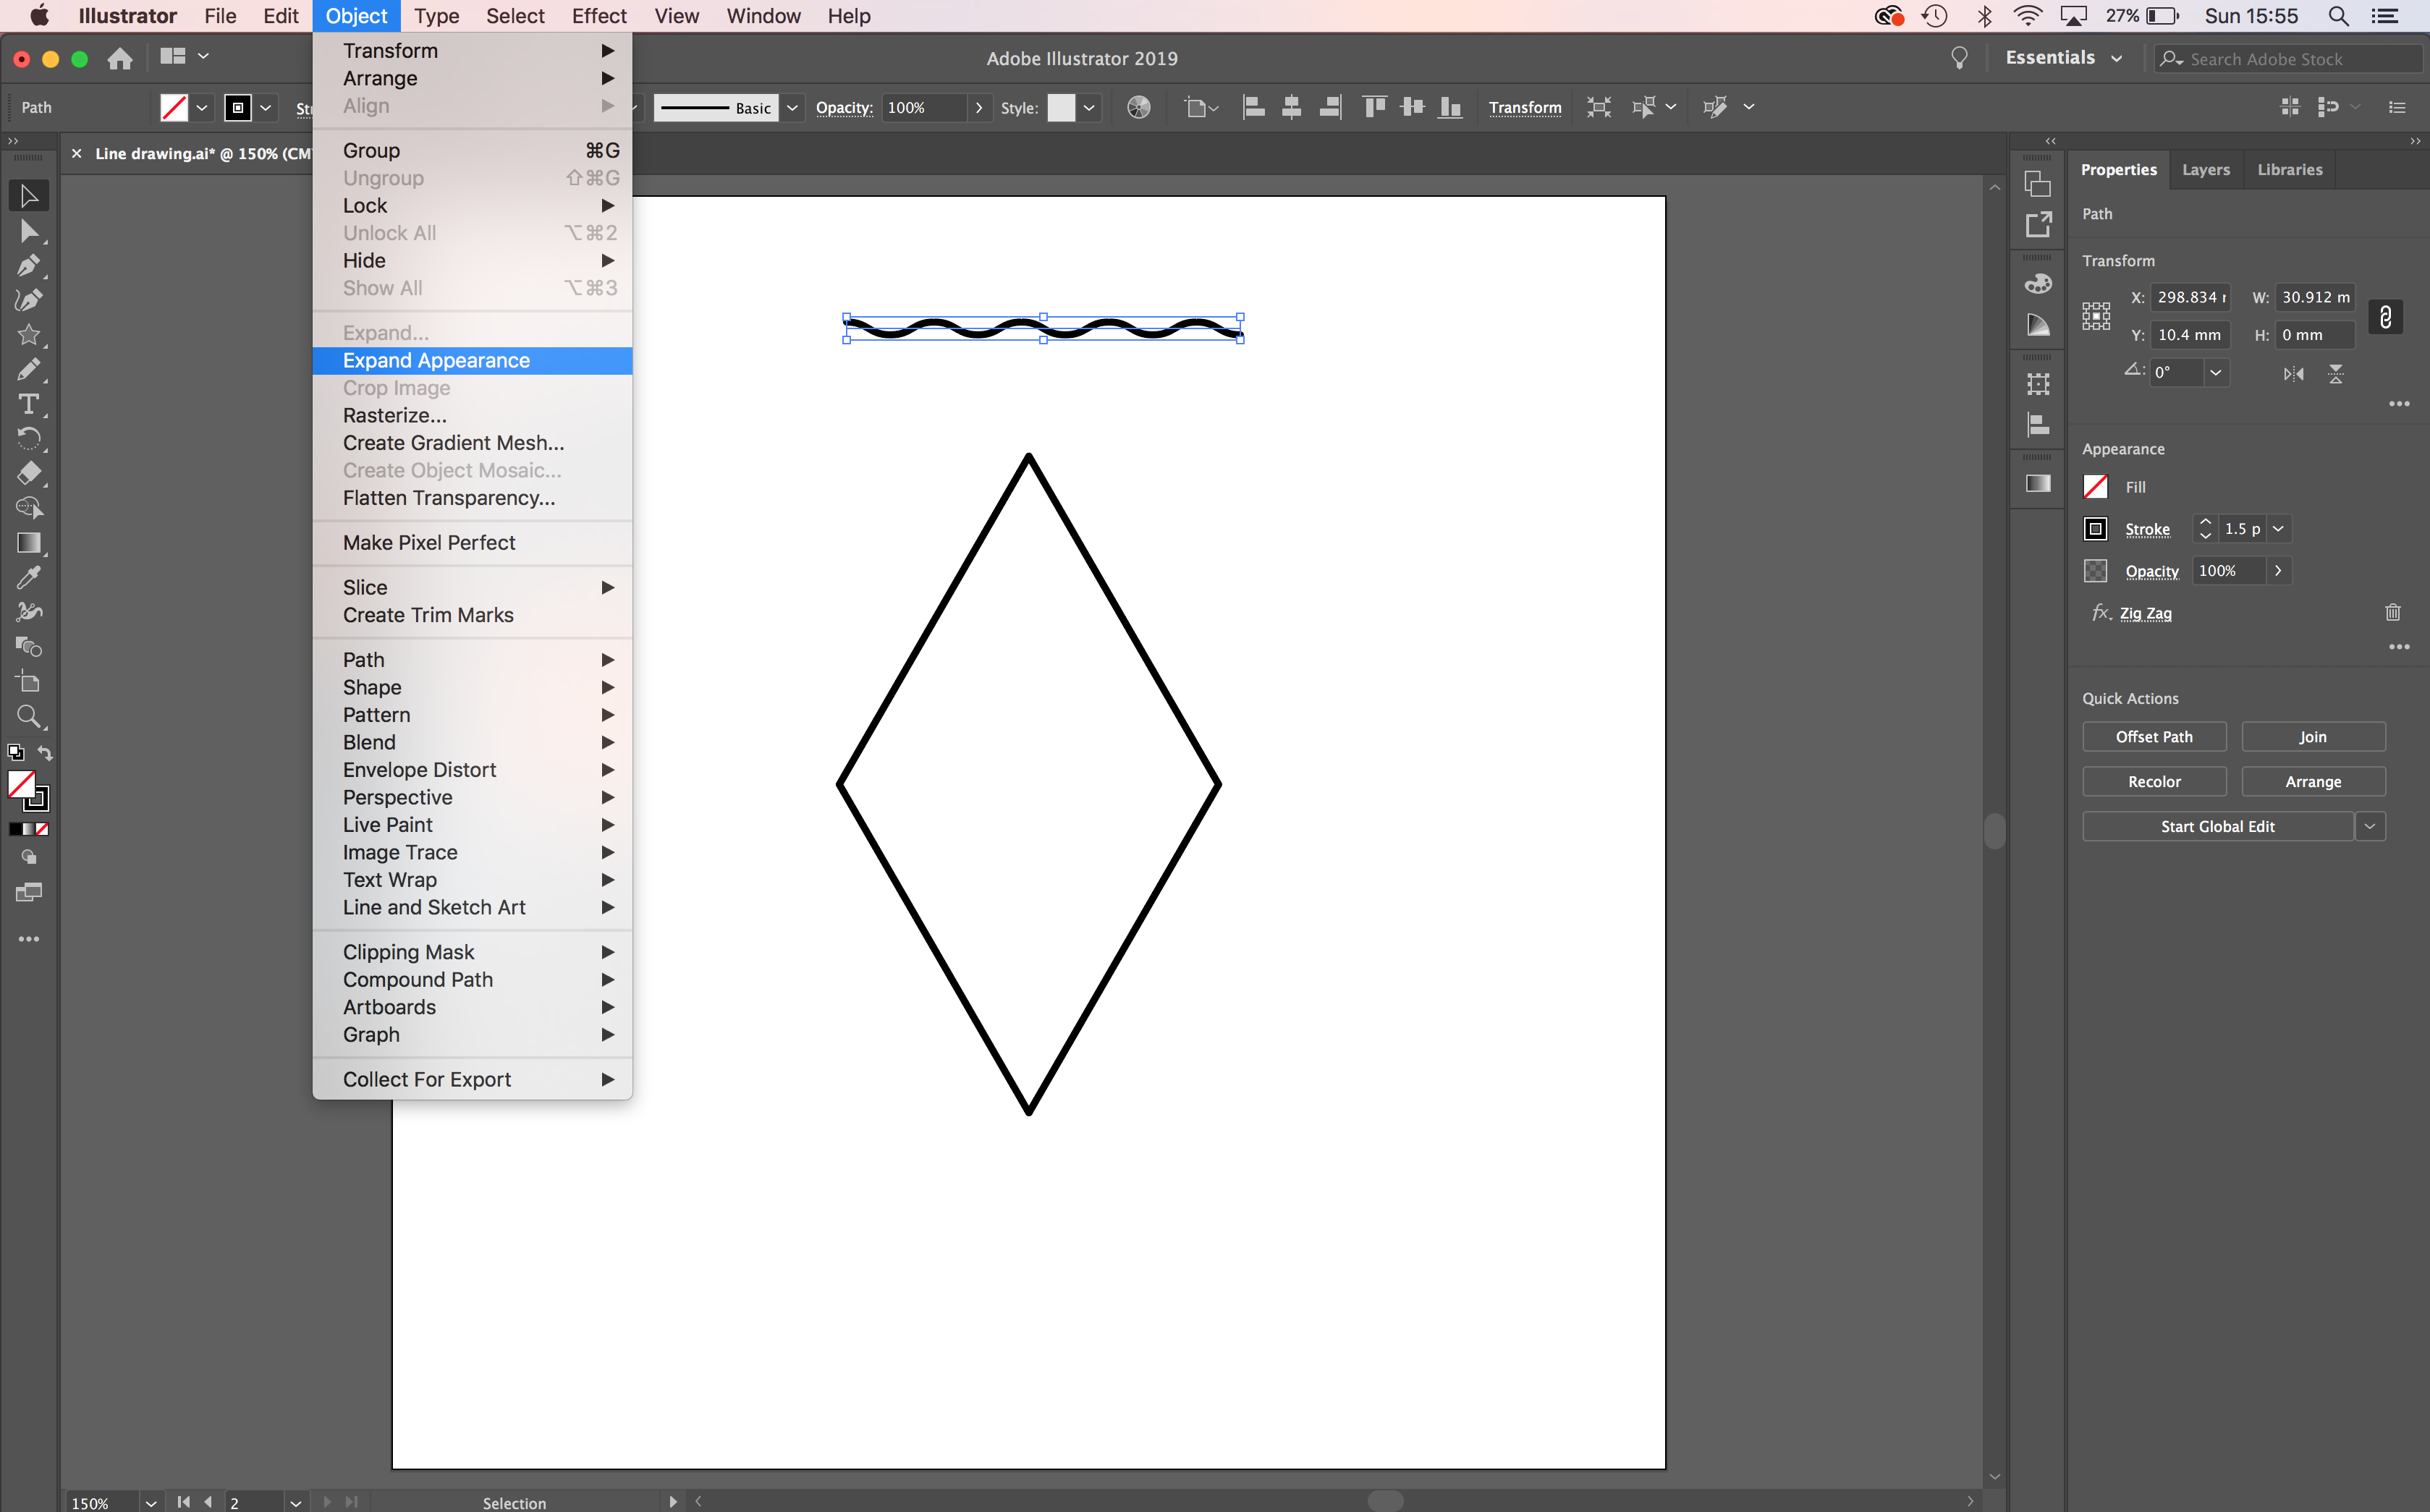
Select OK in the menu, then select Object > Expand Appearance to change your path to the waves.
Now, position your wave approximately half way down the second half of the diamond. Then select the wavy line and while dragging it down, hold Shift + Option + Command. This will create a duplicate.
When you have created a duplicate, press Command + D to add more with equal spacing.
To remove the excess lines overlapping the outer diamond shape, highlight all of your design and select the Shape Builder Tool again. This time we will hold down Command on your keyboard. You will see a minus symbol appear next to your cursor, this will remove any excess paths instead of joining shapes. With Command held, drag your cursor over the lines you want to remove.
Finally, draw a line using your Pen tool to create a straight line to divide the waves and the mountains.
Draw another triangle using the Star tool as we did in Step 1. Next, select the Direct Selection Tool to click and remove the bottom side of the triangle. With the Direct Selection Tool active, select and hold the small blue circle that sits below the top node of the triangle. You can drag this circle to change the point to a rounded edge. I’m just going to soften this a tiny bit for the peak of the mountain.

Position your triangle to create a mountain within your diamond design. Copy and paste 2 more then resize and position them beside the other.

When you are happy with your layout of the mountains, select the whole design. Using the Shape Builder Tool again, hold Command to remove lines that overlap the diamond and also inside your mountains to create some in front of the other.
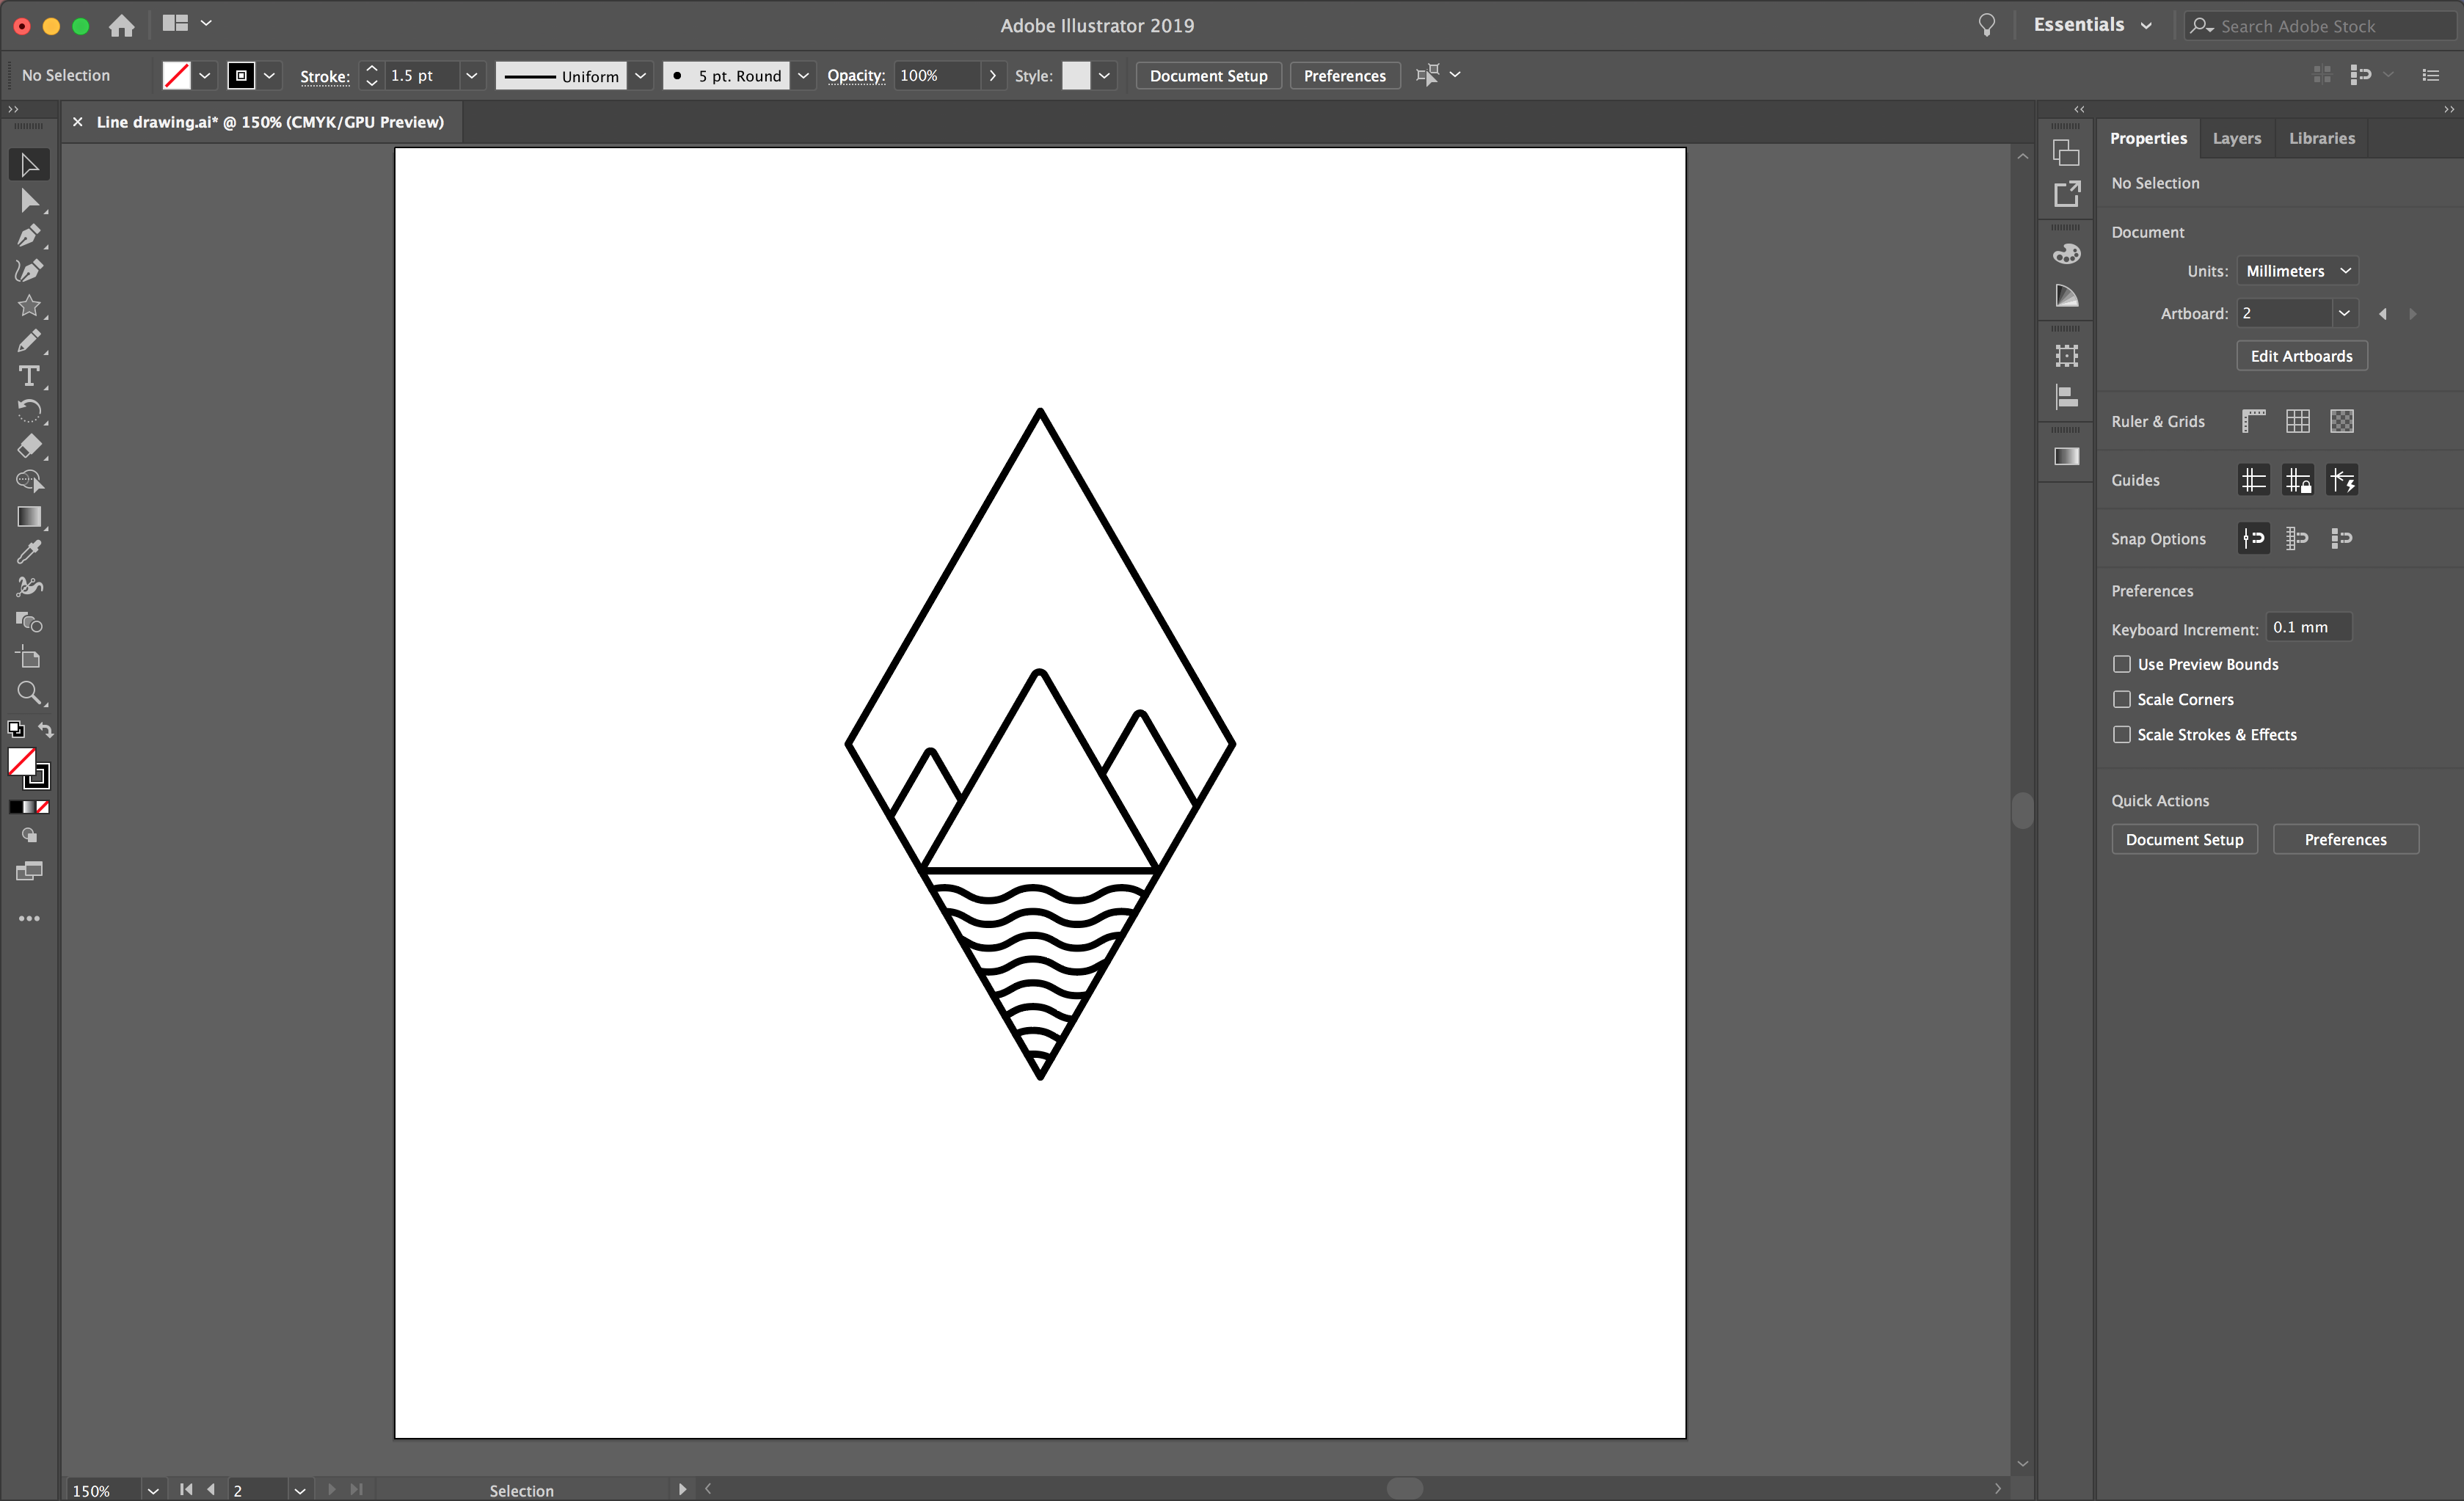
We can now add a small detail to look like snow on the mountains. We will do this in the same way that we created the waves, by turning off the smooth setting. Start by using the pen tool to draw a straight line, then select Effect > Distort and Transform > Zig Zag. Amend your settings to create small Zig Zags on your line. When you are happy select OK, then select Object > Expand Appearance.
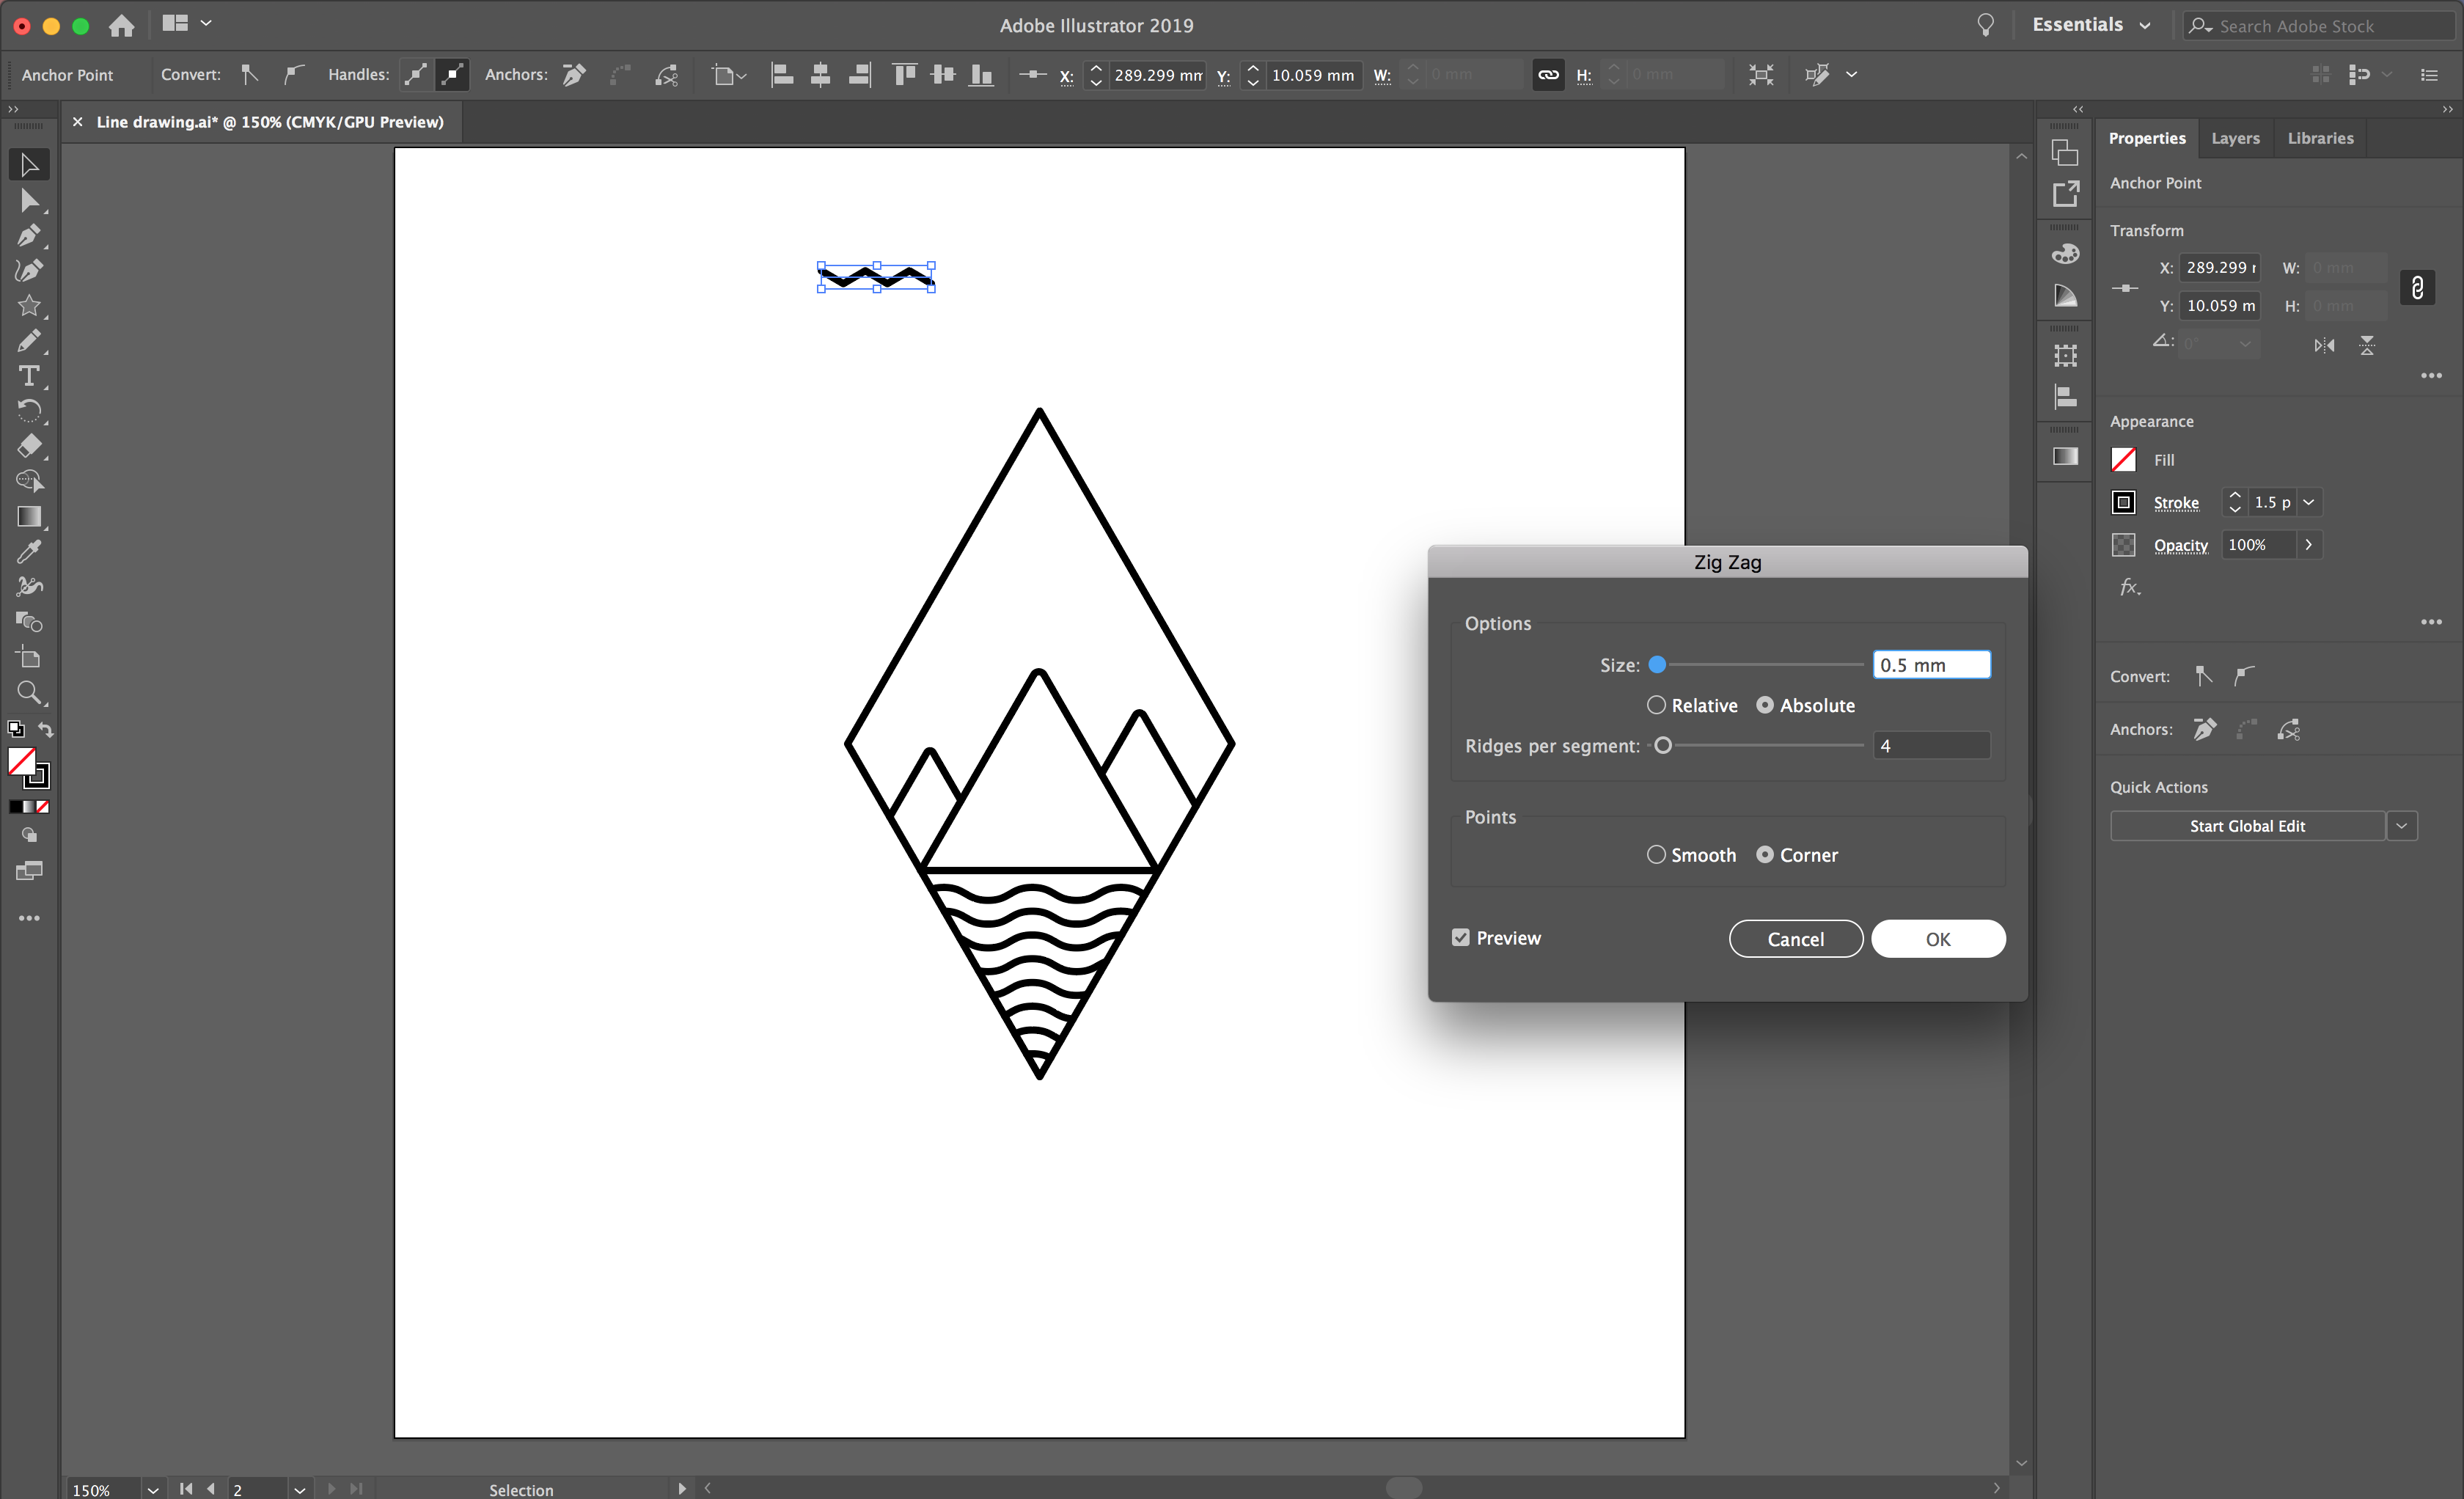
Now, position and resize your zig zags to form the peak of the mountain. When you are happy, highlight your design. Use the Shape Builder tool and hold Command to remove the excess lines.
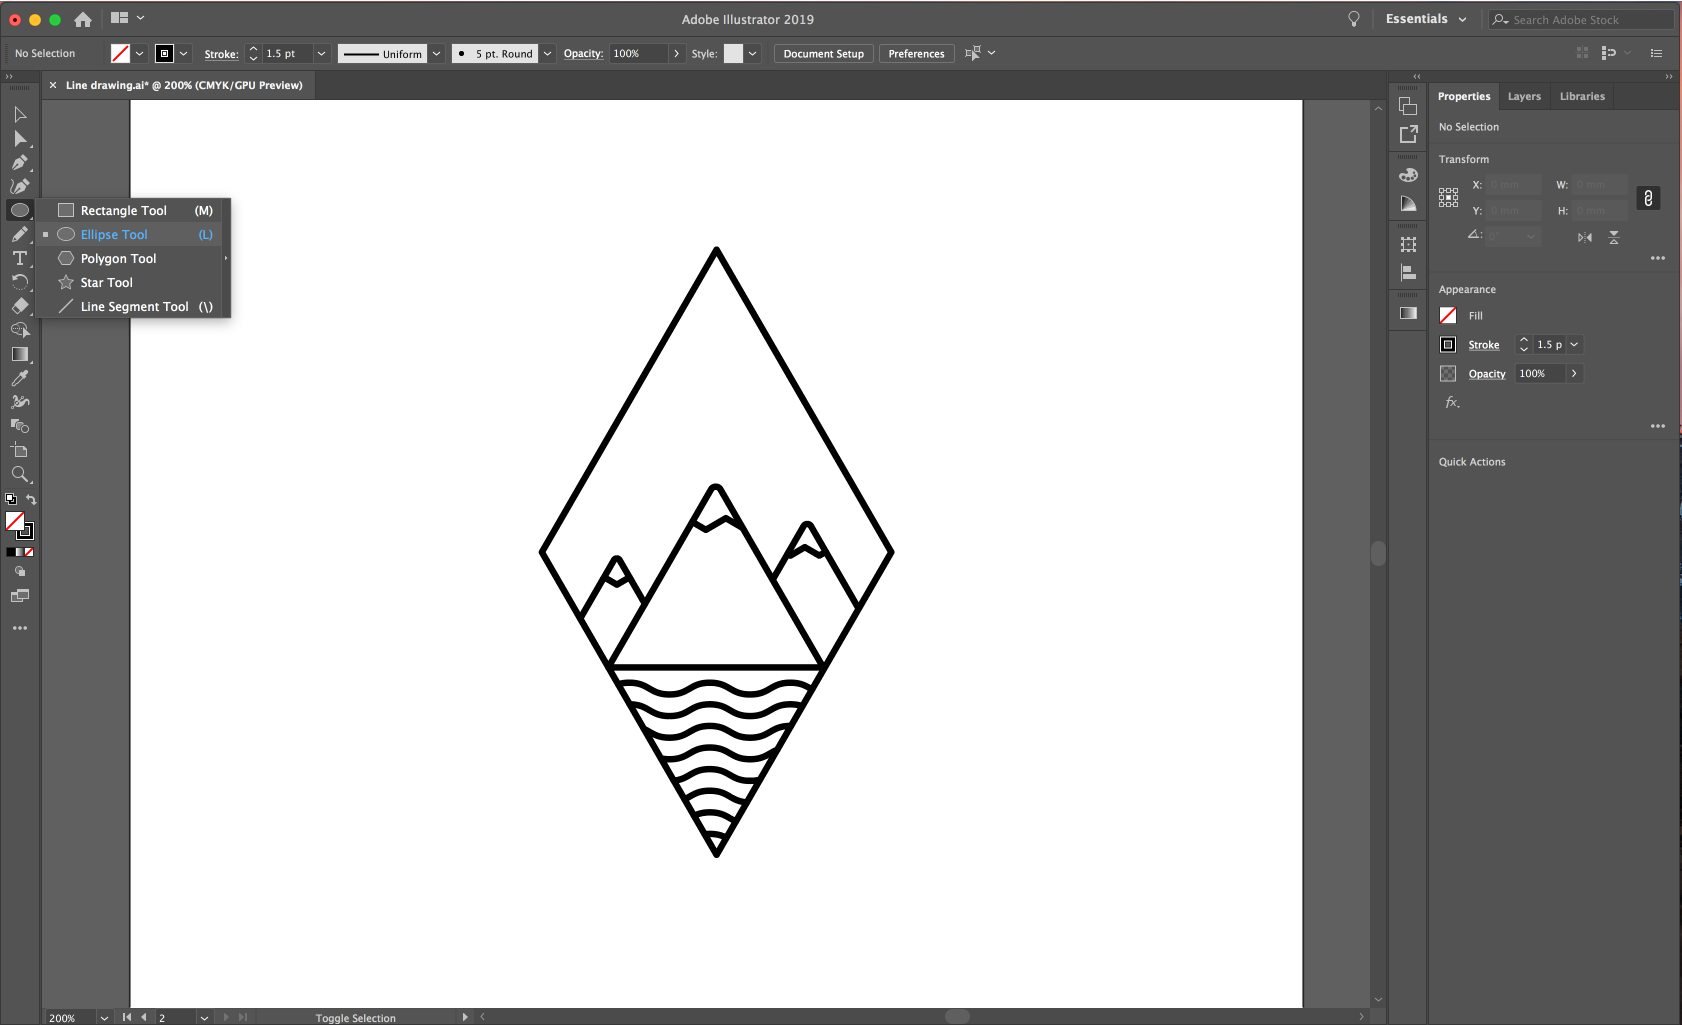
Select the Ellipse tool from your left toolbar and draw a circle roughly center to your diamond. When you are done, you can again highlight your design and use the Shape Builder Tool. Hold down Command to remove the unwanted lines.
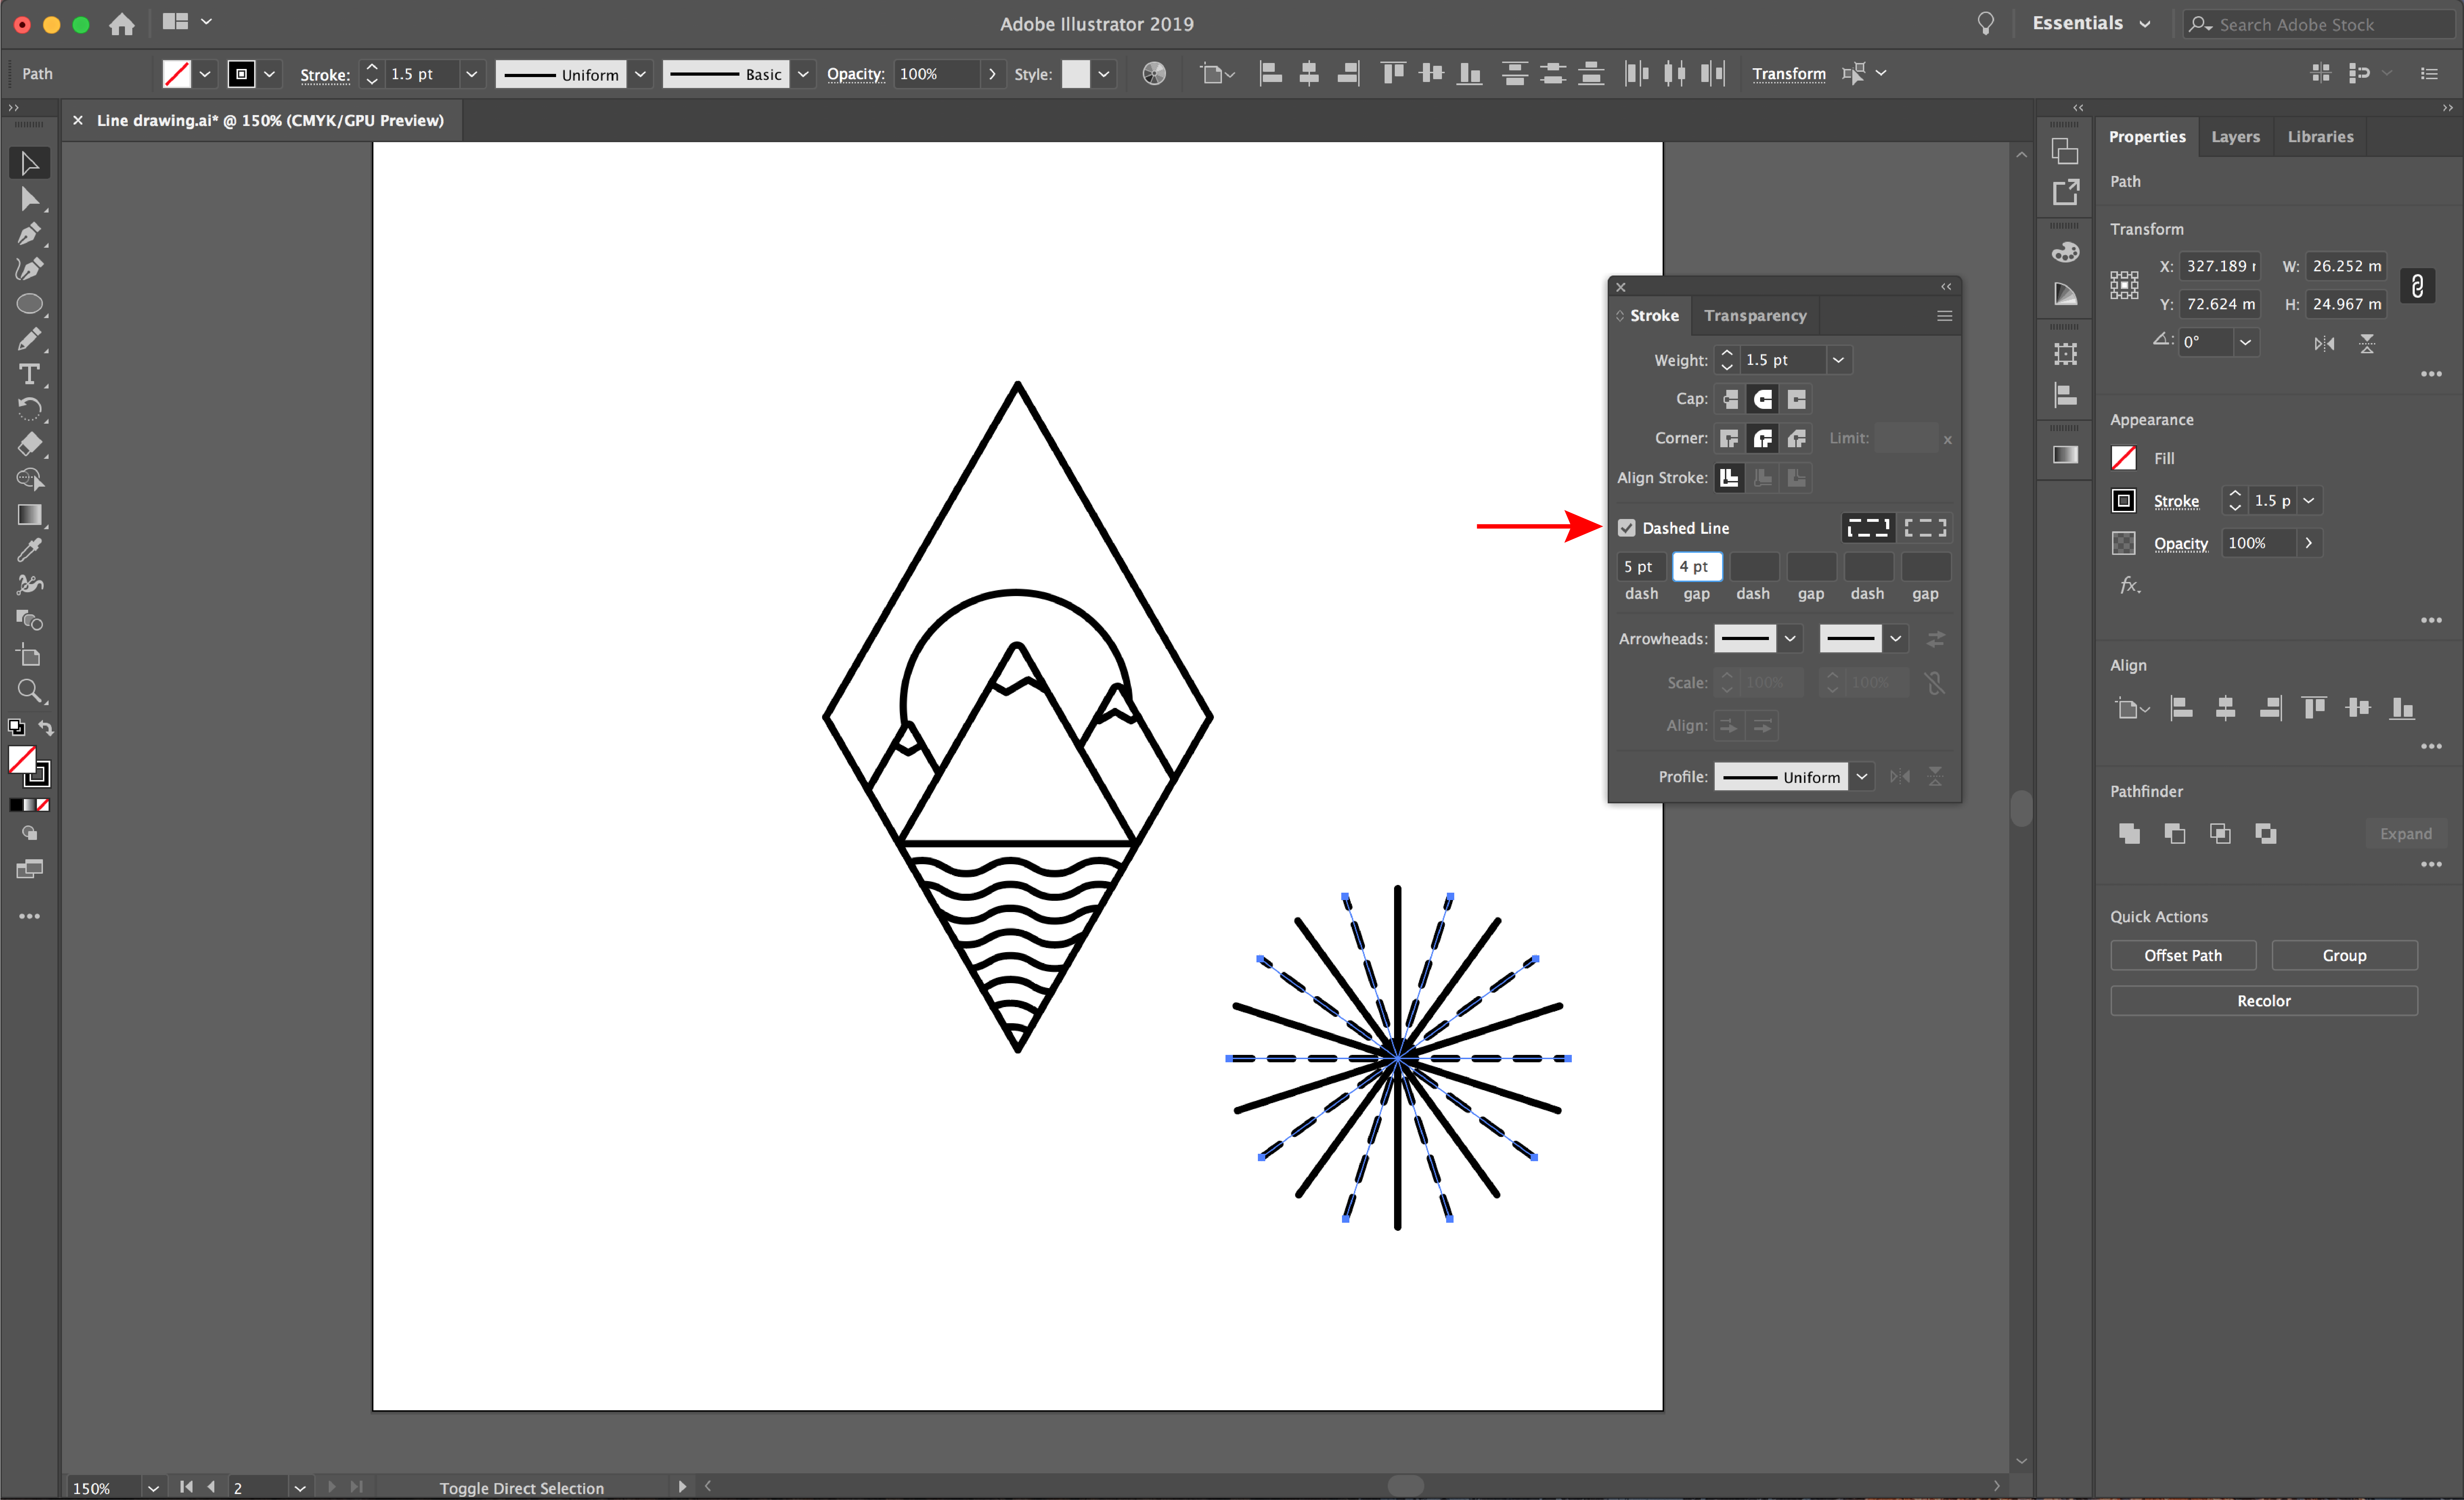
We are now going to create the sunburst effect. Start by drawing a straight line with the Pen tool, this can be either horizontal or vertical. Then select the Rotate tool from your left toolbar. While holding Command, click in the center of the line. This will set the pivot point when rotating.
Go to the rotate settings then in the angle box you need to enter 360 divided by the amount of lines you want to create. I am going to enter ‘360/20’, then select Copy. This will create an extra line in your design. Press Command + D on your keyboard to duplicate until you complete the circle.

To create the effect of a broken sunburst line, select every other line and open up your stroke panel again. Select Dashed Line and enter the spacing you would like. I am adding a 5pt dash with a 4pt gap.
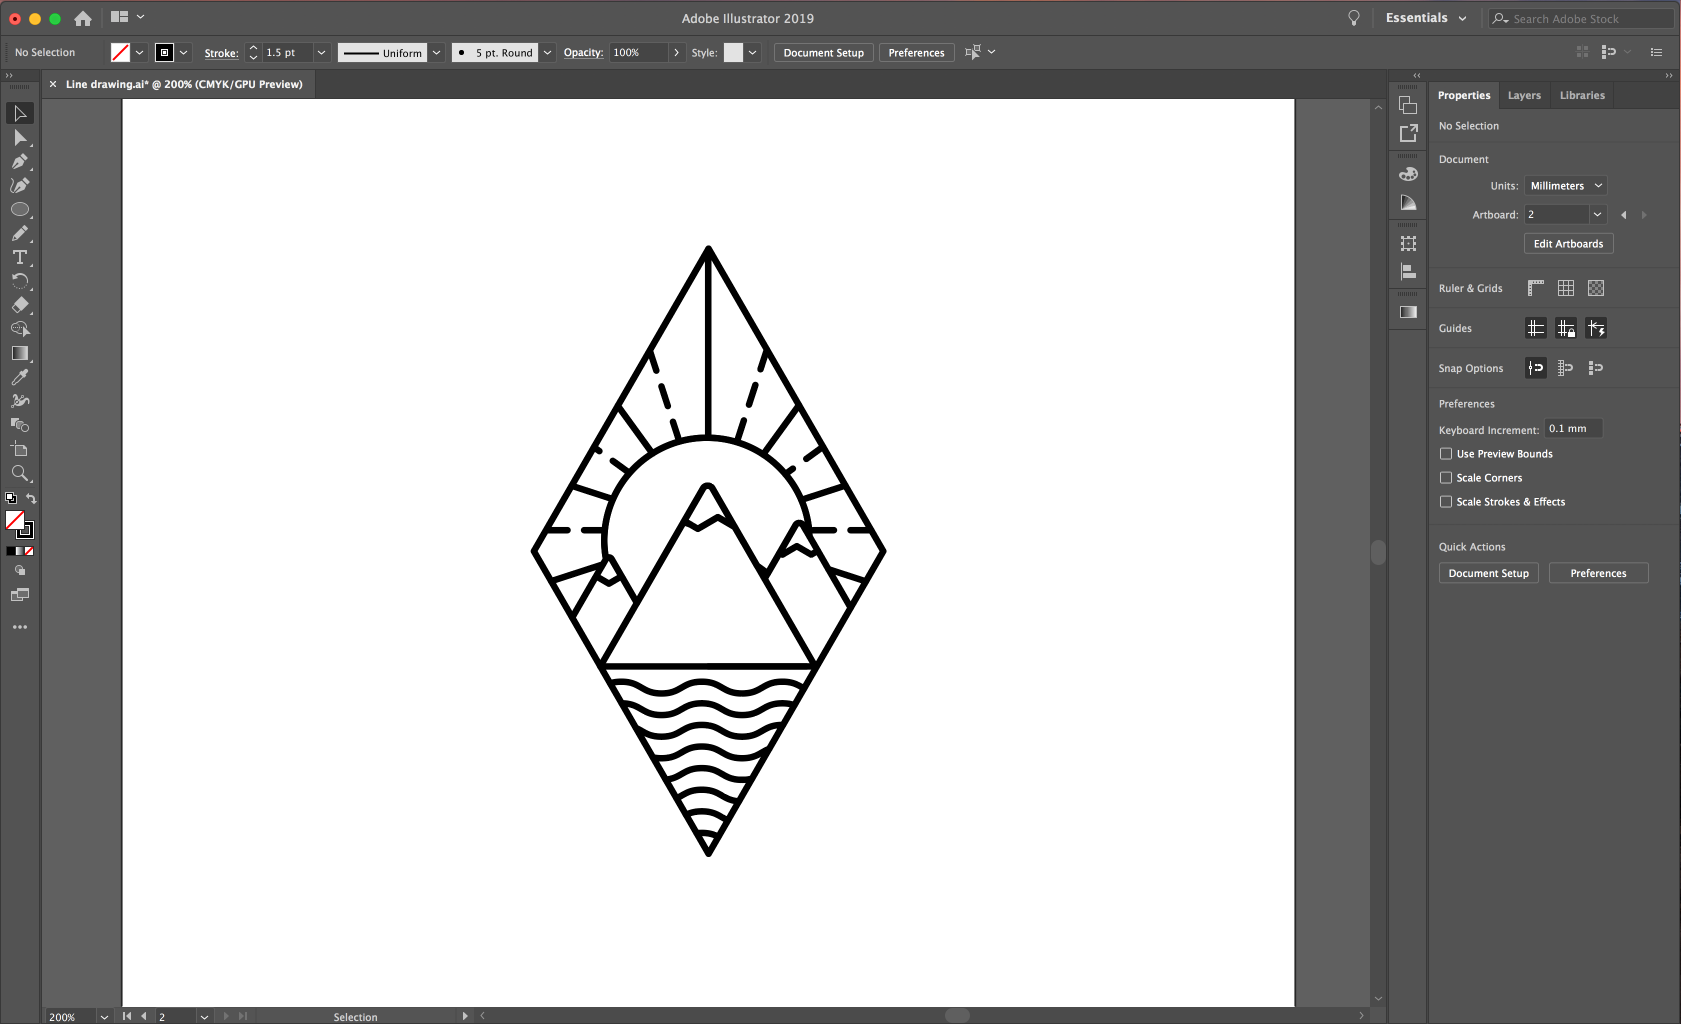
When ready, select all of your lines then resize and position where you would like these to sit within your design. Select all of your design then use the Shape Builder Tool. Press Command to remove sections of the paths you don't need.
There, you have your finished design! If you enjoyed this tutorial you might like to learn how to create SVGs, or how to use the recolor artwork tool in Illustrator.
Check out our Illustrator tutorial section for more great tips!
Step 1 - Create a new document and draw your diamond outline
Once you have created your new document, select the Star tool from your left toolbar and click on your artboard.
This will bring up the star settings. Change the number of points to 3 to create a triangle and select OK.
Then, copy and paste (CTRL + C > CTRL + V) your triangle so you have 2 on your artboard. Rotate one of your triangles and position them together to form a diamond shape. Using the Selection Tool (black arrow) highlight both of your shapes and select the Shape Builder Tool. You will notice the shapes grey out as you hover over. Click and drag from one triangle to the other to form the two shapes into one.
If you need more detailed information, follow our tutorial on using the Shape builder tool.
When you are happy with your diamond, you can change the style of the line in the Stroke panel. Open this panel by selecting Window > Stroke.
You can now select your diamond and change your settings as you need. I want to have softened corners so I have selected a rounded cap and rounded corners with a 1.5 stroke.
Step 2 - Use the Pen tool to draw waves inside the diamond
To draw your wavy line, select your Pen tool and draw a straight horizontal line by clicking one point and then holding shift before clicking your second node. Now, to add the waves, select Effect > Distort and Transform > Zig Zag.
We have a fun tutorial on creating a wavy line in illustrator for you to follow if you want.
In the Zig Zag settings, select preview so you can see the changes to your design. Select smooth to achieve the soft waves and play with the settings until you are happy with the waves. See the screenshot below for the settings I used.
Select OK in the menu, then select Object > Expand Appearance to change your path to the waves.
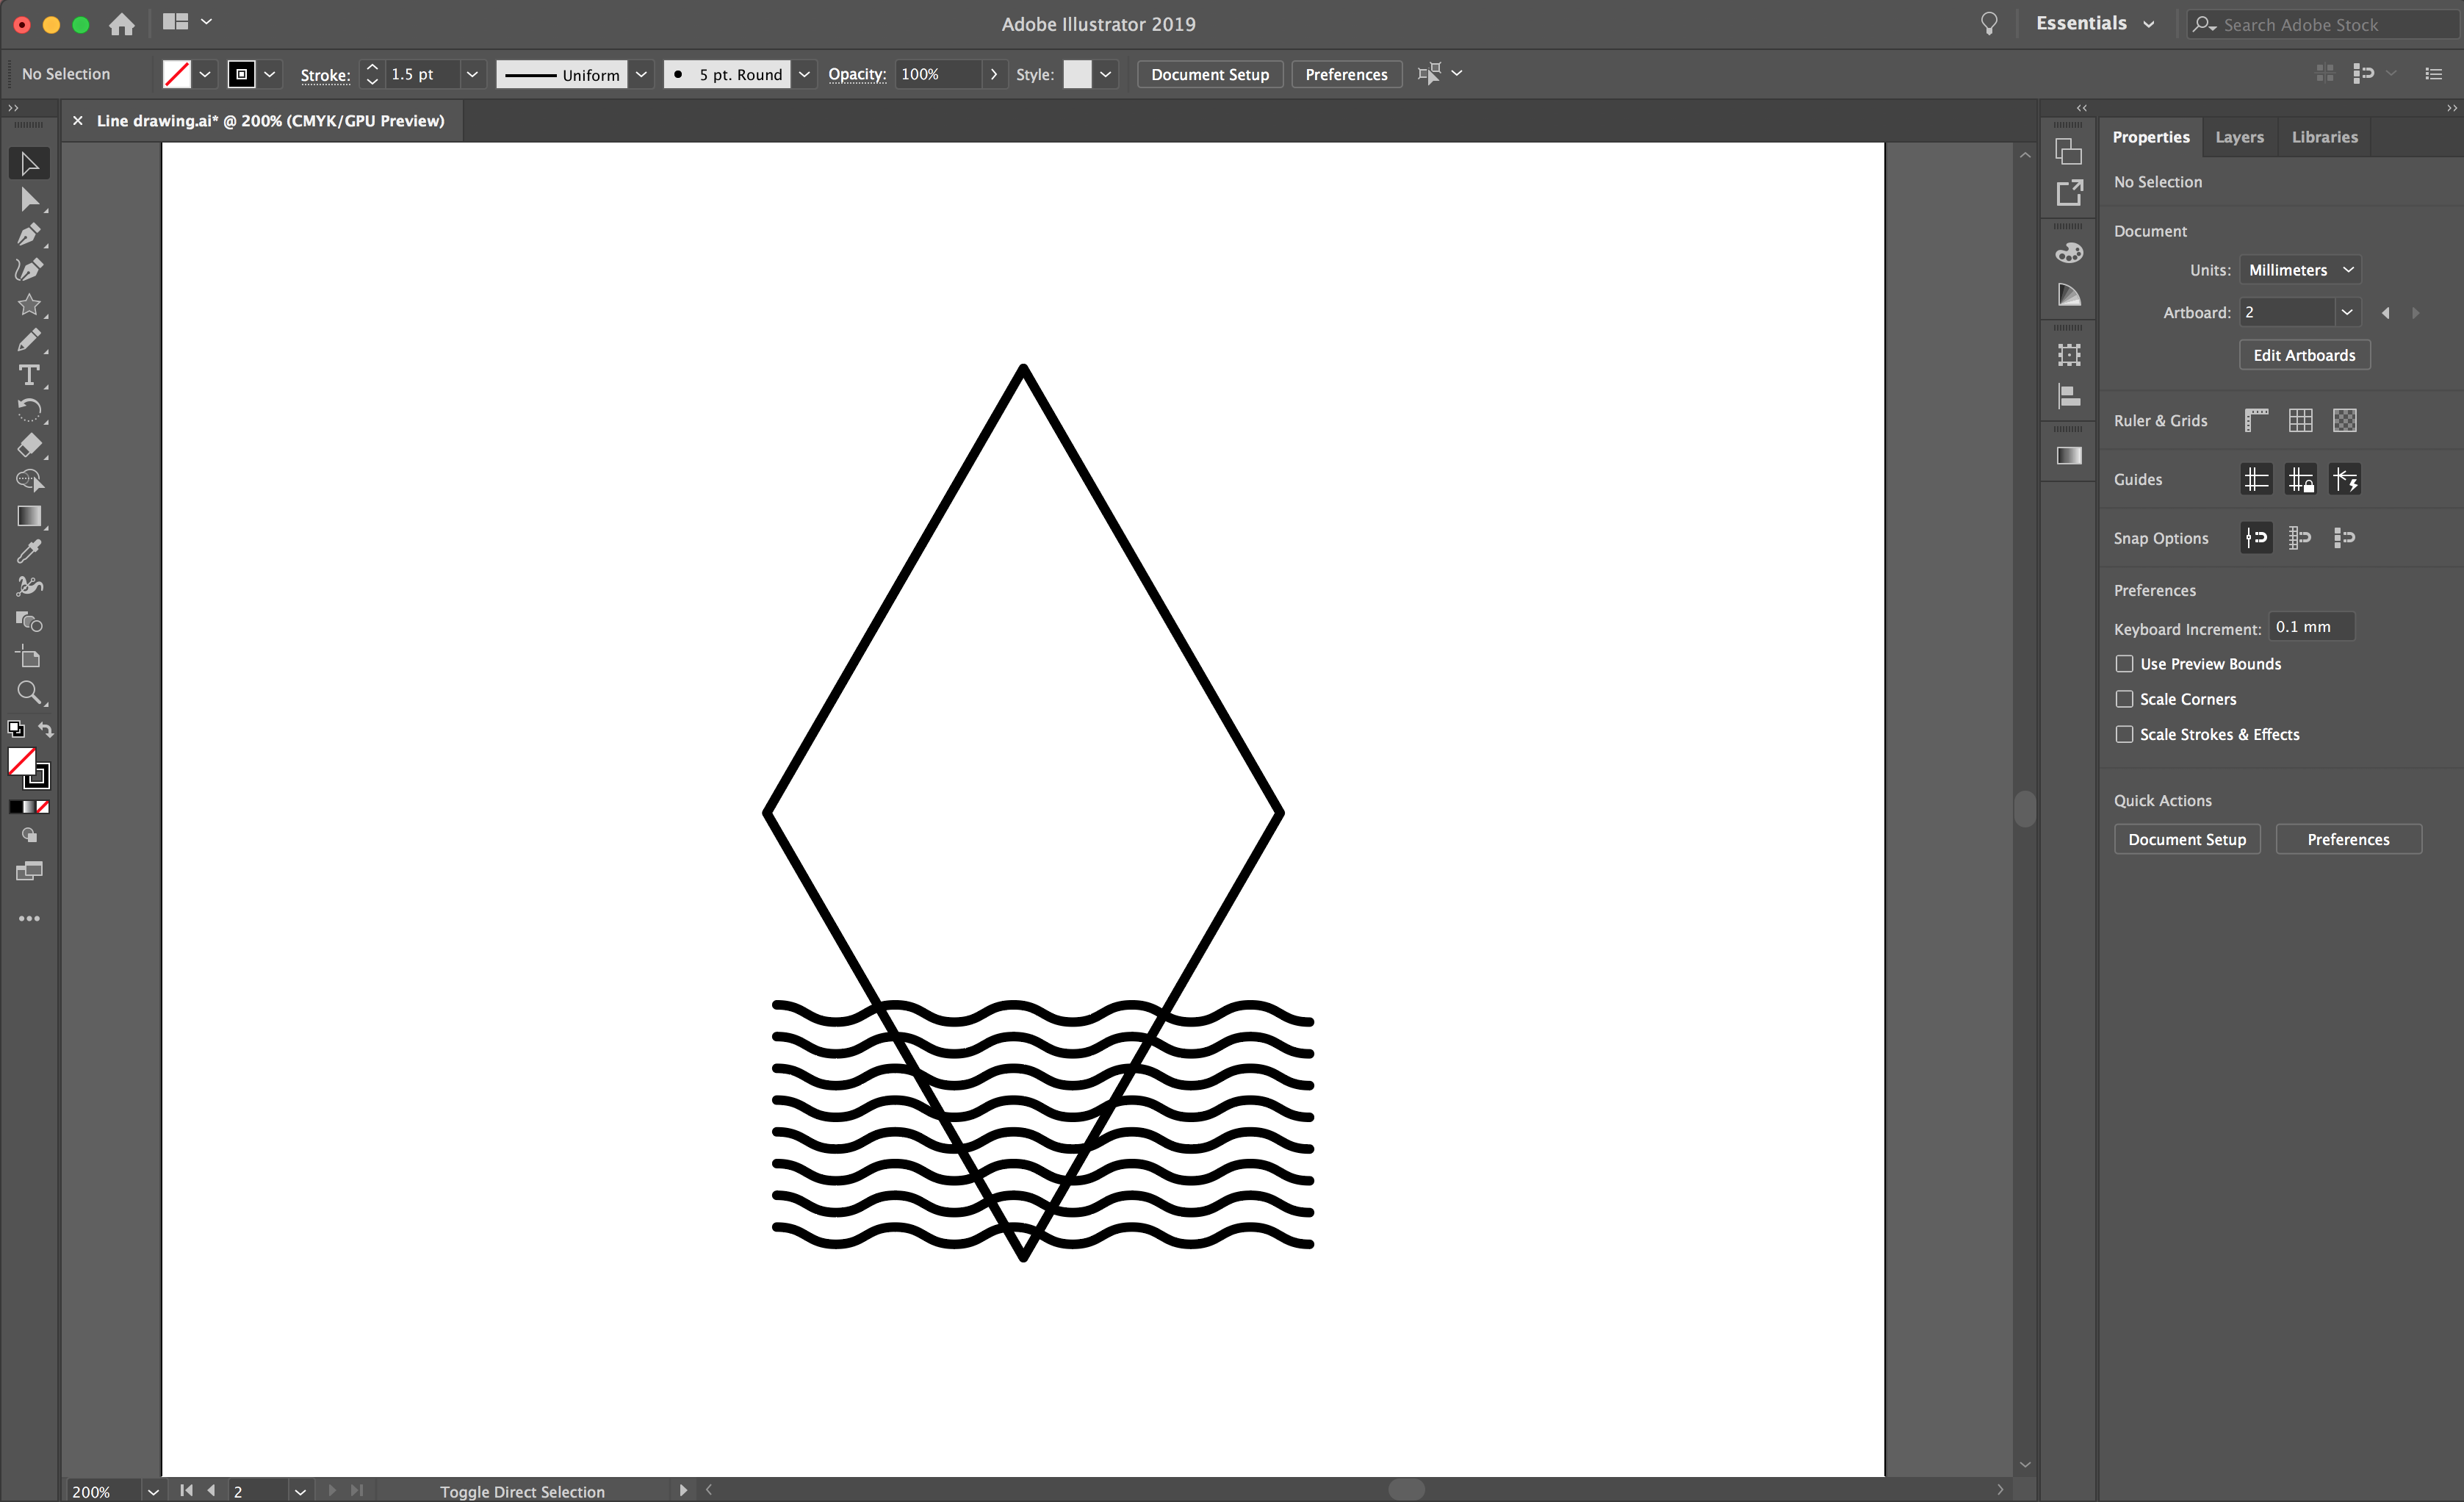
Now, position your wave approximately half way down the second half of the diamond. Then select the wavy line and while dragging it down, hold Shift + Option + Command. This will create a duplicate.
When you have created a duplicate, press Command + D to add more with equal spacing.
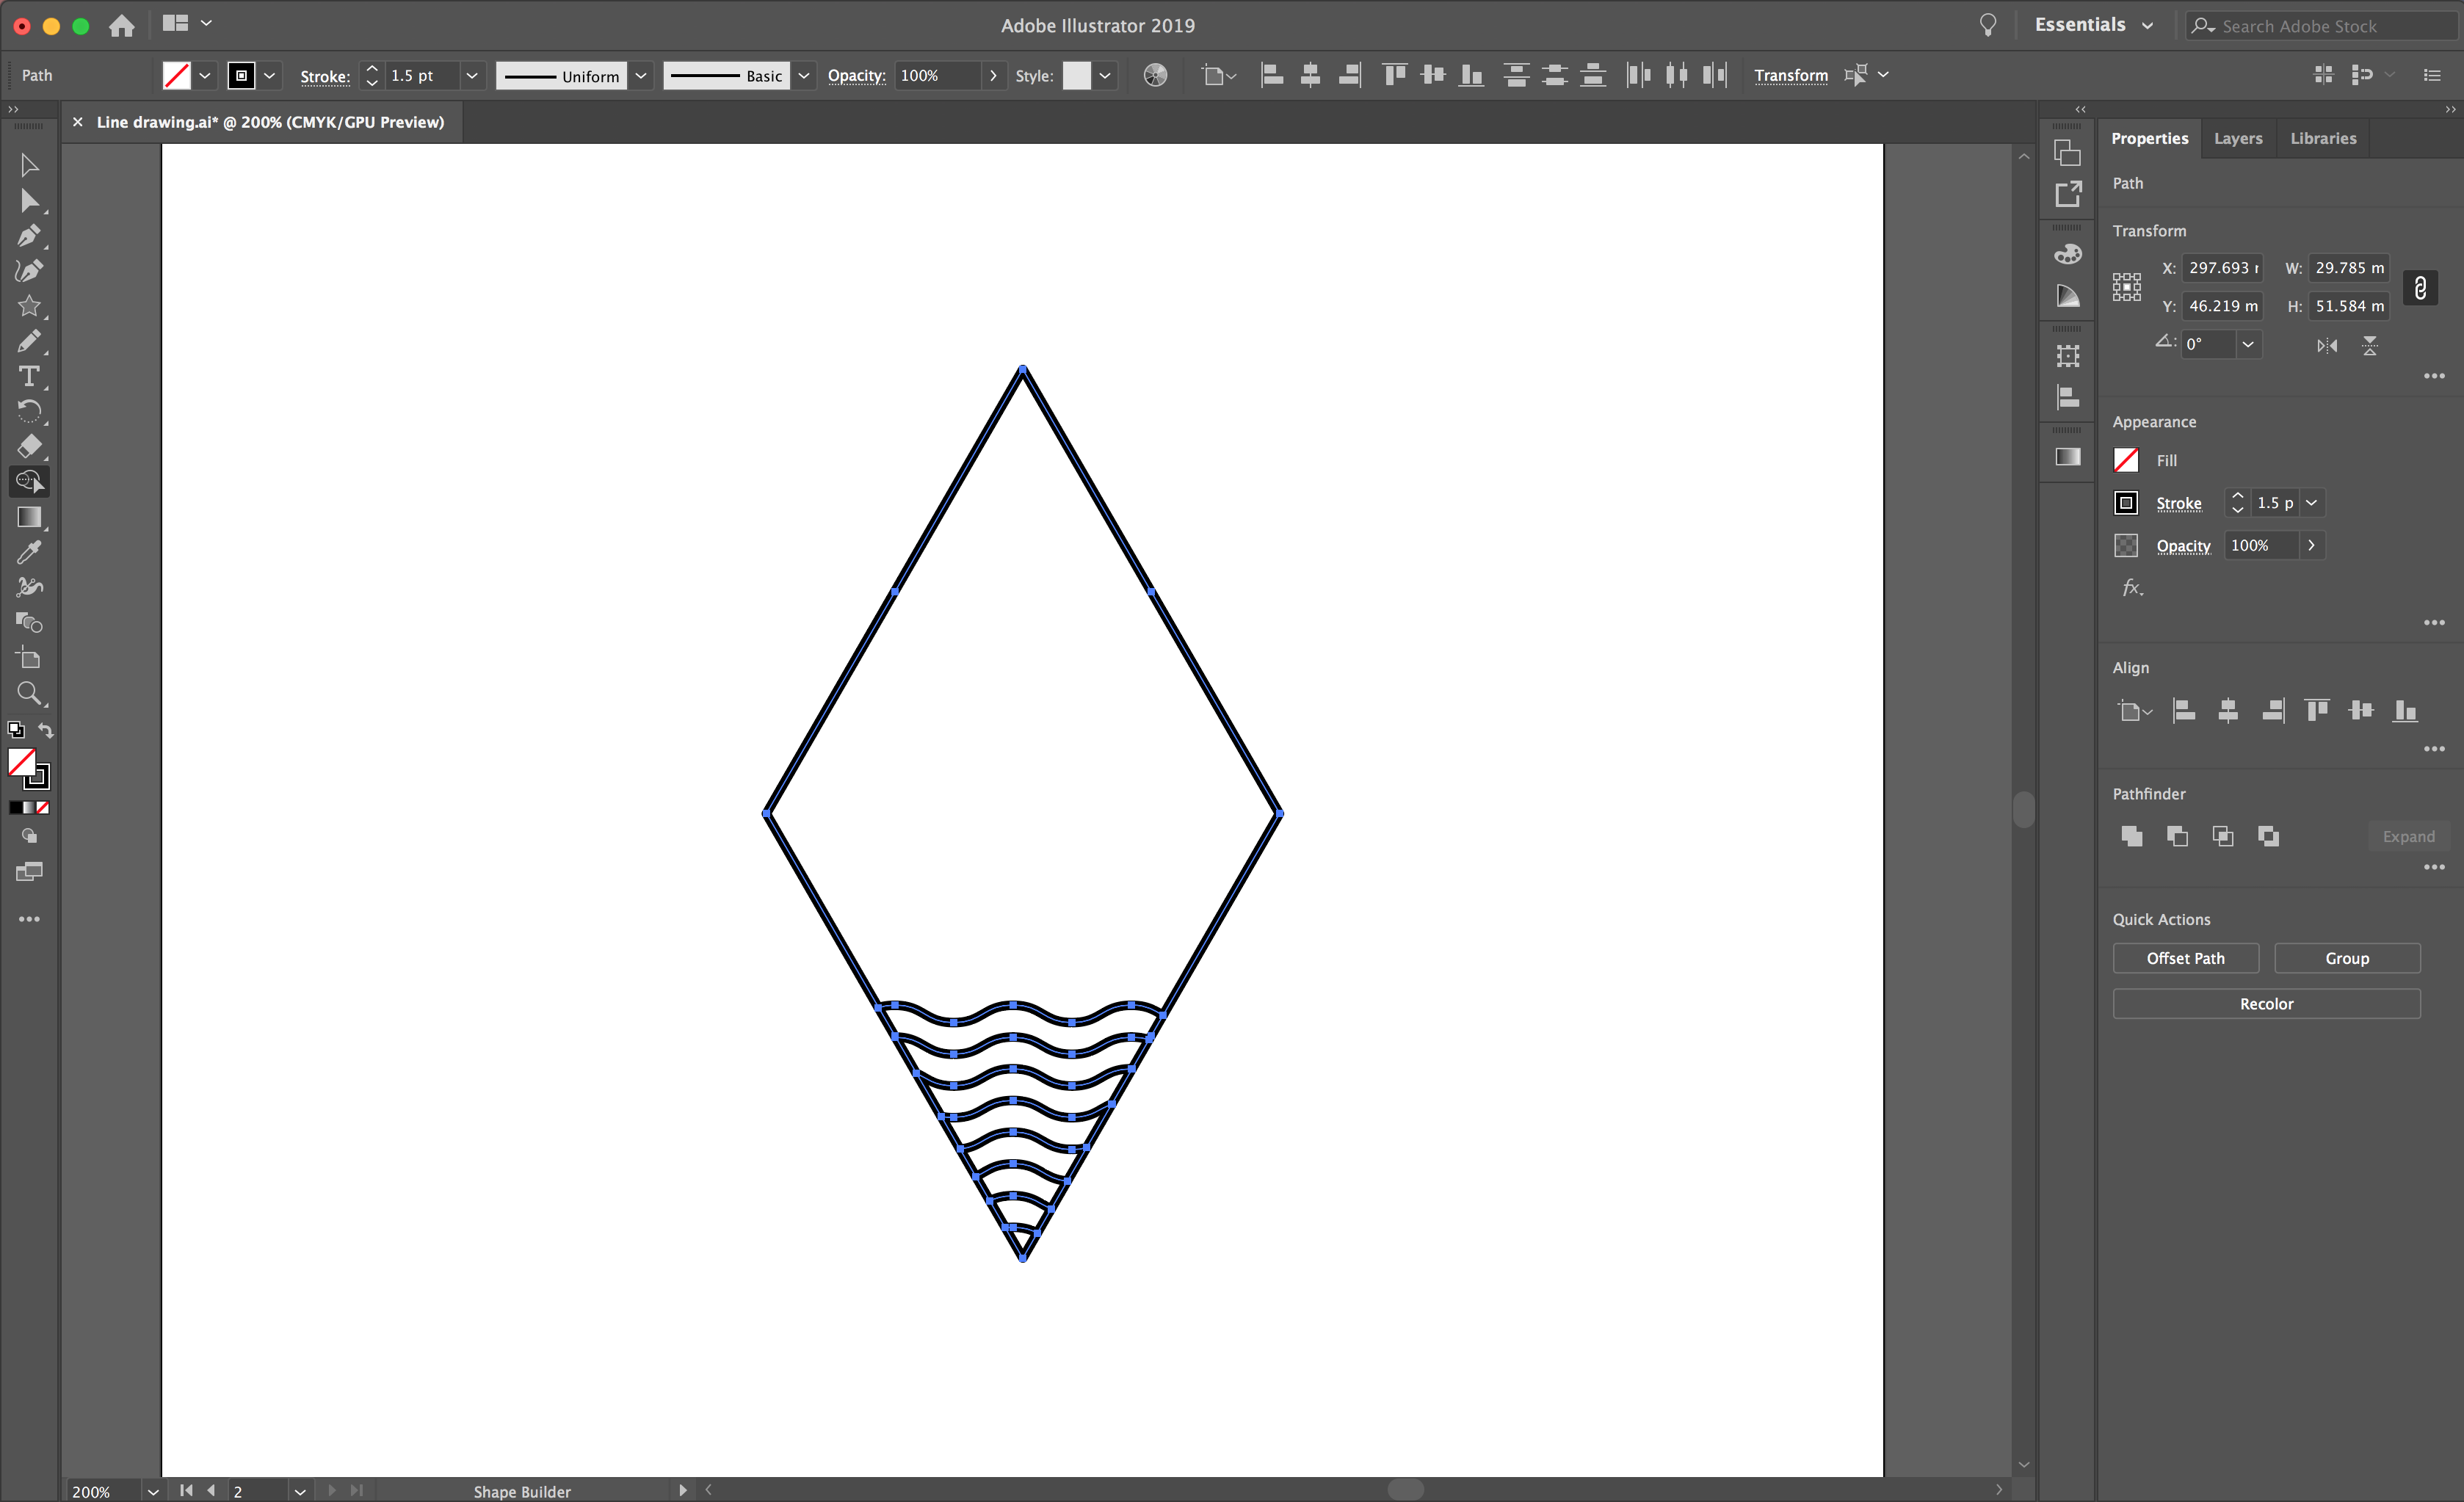
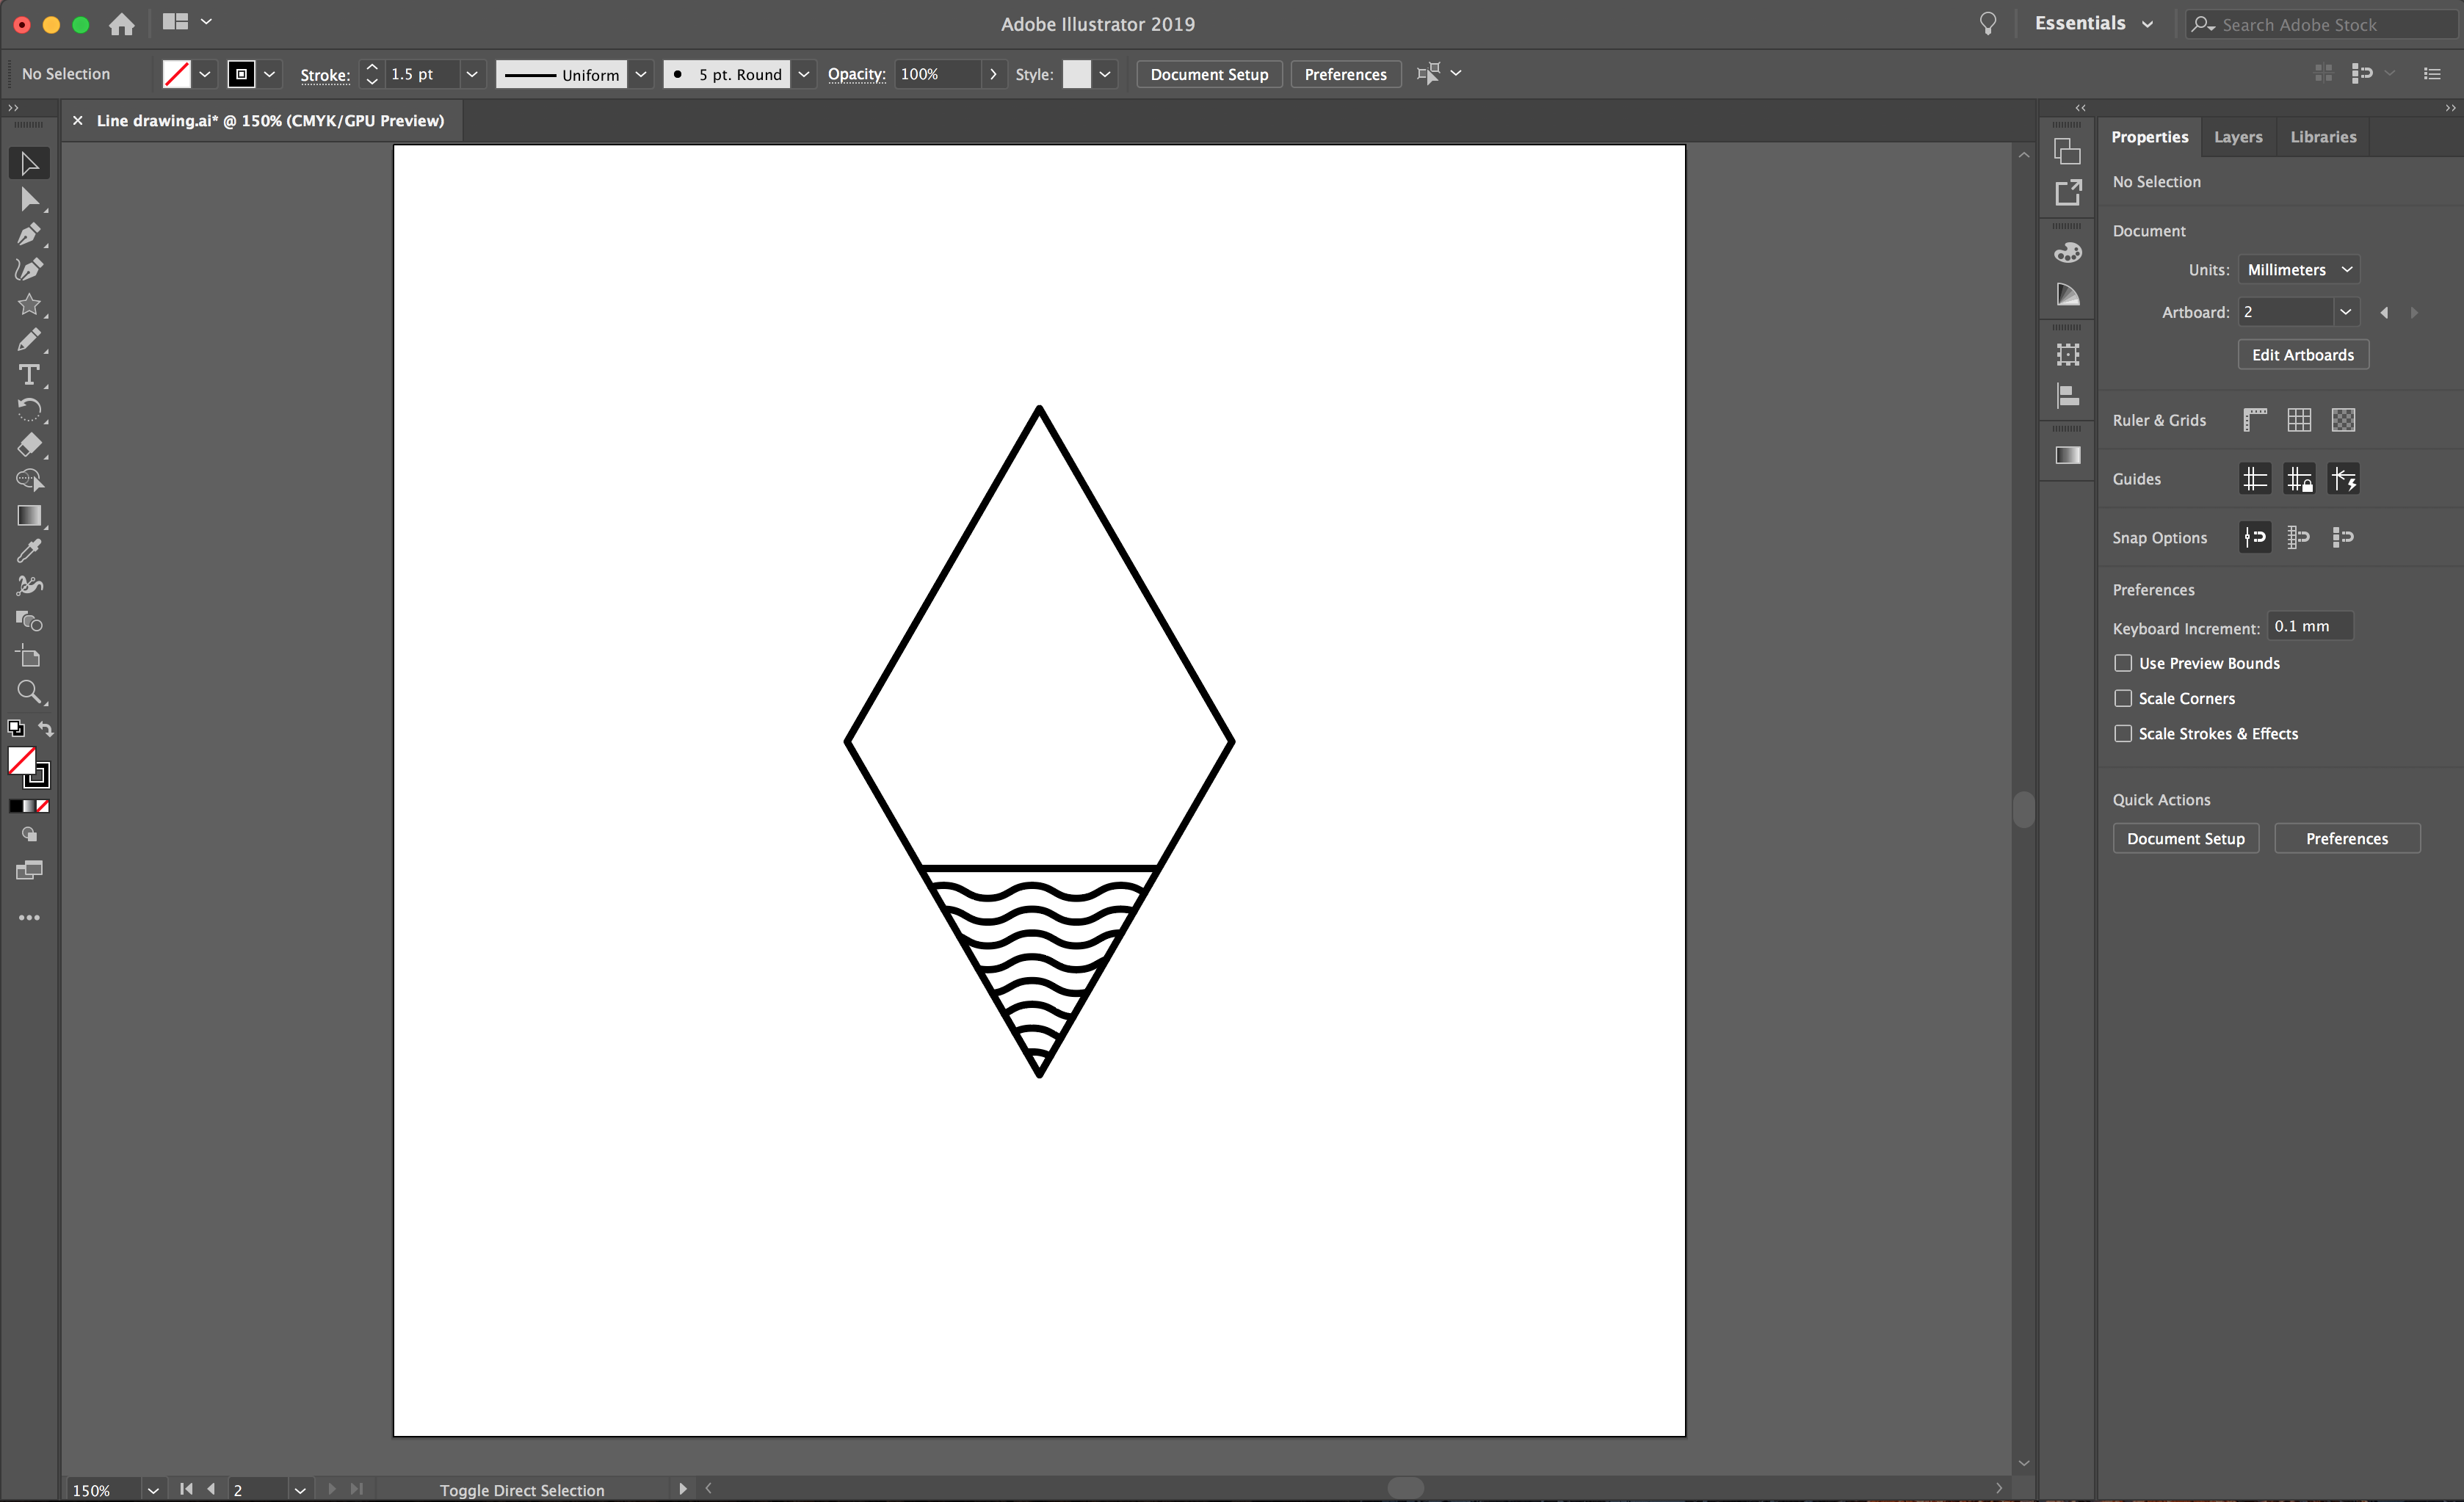
To remove the excess lines overlapping the outer diamond shape, highlight all of your design and select the Shape Builder Tool again. This time we will hold down Command on your keyboard. You will see a minus symbol appear next to your cursor, this will remove any excess paths instead of joining shapes. With Command held, drag your cursor over the lines you want to remove.
Finally, draw a line using your Pen tool to create a straight line to divide the waves and the mountains.
Step 3 - Draw 3 more triangles to create the mountains
Draw another triangle using the Star tool as we did in Step 1. Next, select the Direct Selection Tool to click and remove the bottom side of the triangle. With the Direct Selection Tool active, select and hold the small blue circle that sits below the top node of the triangle. You can drag this circle to change the point to a rounded edge. I’m just going to soften this a tiny bit for the peak of the mountain.
Position your triangle to create a mountain within your diamond design. Copy and paste 2 more then resize and position them beside the other.
When you are happy with your layout of the mountains, select the whole design. Using the Shape Builder Tool again, hold Command to remove lines that overlap the diamond and also inside your mountains to create some in front of the other.
We can now add a small detail to look like snow on the mountains. We will do this in the same way that we created the waves, by turning off the smooth setting. Start by using the pen tool to draw a straight line, then select Effect > Distort and Transform > Zig Zag. Amend your settings to create small Zig Zags on your line. When you are happy select OK, then select Object > Expand Appearance.
Now, position and resize your zig zags to form the peak of the mountain. When you are happy, highlight your design. Use the Shape Builder tool and hold Command to remove the excess lines.
Step 4 - Draw the sun to complete your design
Select the Ellipse tool from your left toolbar and draw a circle roughly center to your diamond. When you are done, you can again highlight your design and use the Shape Builder Tool. Hold down Command to remove the unwanted lines.
We are now going to create the sunburst effect. Start by drawing a straight line with the Pen tool, this can be either horizontal or vertical. Then select the Rotate tool from your left toolbar. While holding Command, click in the center of the line. This will set the pivot point when rotating.
Go to the rotate settings then in the angle box you need to enter 360 divided by the amount of lines you want to create. I am going to enter ‘360/20’, then select Copy. This will create an extra line in your design. Press Command + D on your keyboard to duplicate until you complete the circle.
To create the effect of a broken sunburst line, select every other line and open up your stroke panel again. Select Dashed Line and enter the spacing you would like. I am adding a 5pt dash with a 4pt gap.
When ready, select all of your lines then resize and position where you would like these to sit within your design. Select all of your design then use the Shape Builder Tool. Press Command to remove sections of the paths you don't need.
There, you have your finished design! If you enjoyed this tutorial you might like to learn how to create SVGs, or how to use the recolor artwork tool in Illustrator.


